Ship_Right
-
Posts
49 -
Joined
-
Last visited
-
 Jond reacted to a post in a topic:
HMS Erebus by Ship_Right - OcCre - Scale 1:75
Jond reacted to a post in a topic:
HMS Erebus by Ship_Right - OcCre - Scale 1:75
-
Ship_Right reacted to a post in a topic:
HMS Erebus by Ship_Right - OcCre - Scale 1:75
-
Ship_Right reacted to a post in a topic:
HMS Erebus by clearway - OcCre - 1/75 scale - bashed
-
clearway reacted to a post in a topic:
HMS Erebus by Ship_Right - OcCre - Scale 1:75
-
SiriusVoyager reacted to a post in a topic:
HMS Erebus by Ship_Right - OcCre - Scale 1:75
-
ccoyle reacted to a post in a topic:
HMS Erebus by Ship_Right - OcCre - Scale 1:75
-
 Just to reassure everyone who visits this build log: I've been away from the shipyard for a few weeks (except for spray painting some metal parts with etching primer, ready for a coat of paint) to complete some home projects that needed my attention, plus a week at "the cottage", a place we rent every year at Sauble Beach where the ice cream is delicious and the sunsets over Lake Huron are legendary. Davit construction will resume in due course, but it may be another month or two before I have anything to show. Thanks for checking in ...
- 72 replies
-
- 4
-
-
- Arctic Exploration
- Erebus
- (and 1 more)
-
Jond reacted to a post in a topic:
HMS Erebus by Ship_Right - OcCre - Scale 1:75
-
clearway reacted to a post in a topic:
HMS Erebus by Ship_Right - OcCre - Scale 1:75
-
eatcrow2 reacted to a post in a topic:
HMS Erebus by Ship_Right - OcCre - Scale 1:75
-
Thanks everyone for all your comments and likes. On the subject of curved davits .... Here's how I am making curved davits without laminating. Took me a while to get them to the point where the results were acceptable. I have no 2 x 2 material, but lots of spare 2 x 5 limewood so I cut strips of 2 x 2 off the 2 x 5. I made a form in the shape that conforms to the drawings in Matthew Betts book, with clamps bent from aluminum electrical wire holders. Soaked the pieces for 24 hours before working them, and applied the heat from the outside of the curve. Lack of patience is the enemy ... I also created a form for completed pieces because they needed to be held in shape while they cooled and dried. This allowed me to make two a day. Before removing them I marked the start and end points and the point where I wanted the mounting pin. I had a fairly high reject rate, especially at first, with the wood giving way at the apex of the curve. Might have got away with this once painted but I decided to persevere - the attempts for perfection getting in the way of production as usual. Here is one of the early ones with its pivot pin inserted. I will post photos of them installed once I get them on the ship.


- 72 replies
-
- 3
-
-
- Arctic Exploration
- Erebus
- (and 1 more)
-
Ship_Right reacted to a post in a topic:
HMS Erebus by clearway - OcCre - 1/75 scale - bashed
-
clearway reacted to a post in a topic:
HMS Erebus by Ship_Right - OcCre - Scale 1:75
-
Keith Black reacted to a post in a topic:
HMS Erebus by clearway - OcCre - 1/75 scale - bashed
-
Everything looks sooo good .... what is your source for the eyebolts? They're not part of the kit are they?
-
ccoyle reacted to a post in a topic:
HMS Erebus by Ship_Right - OcCre - Scale 1:75
-
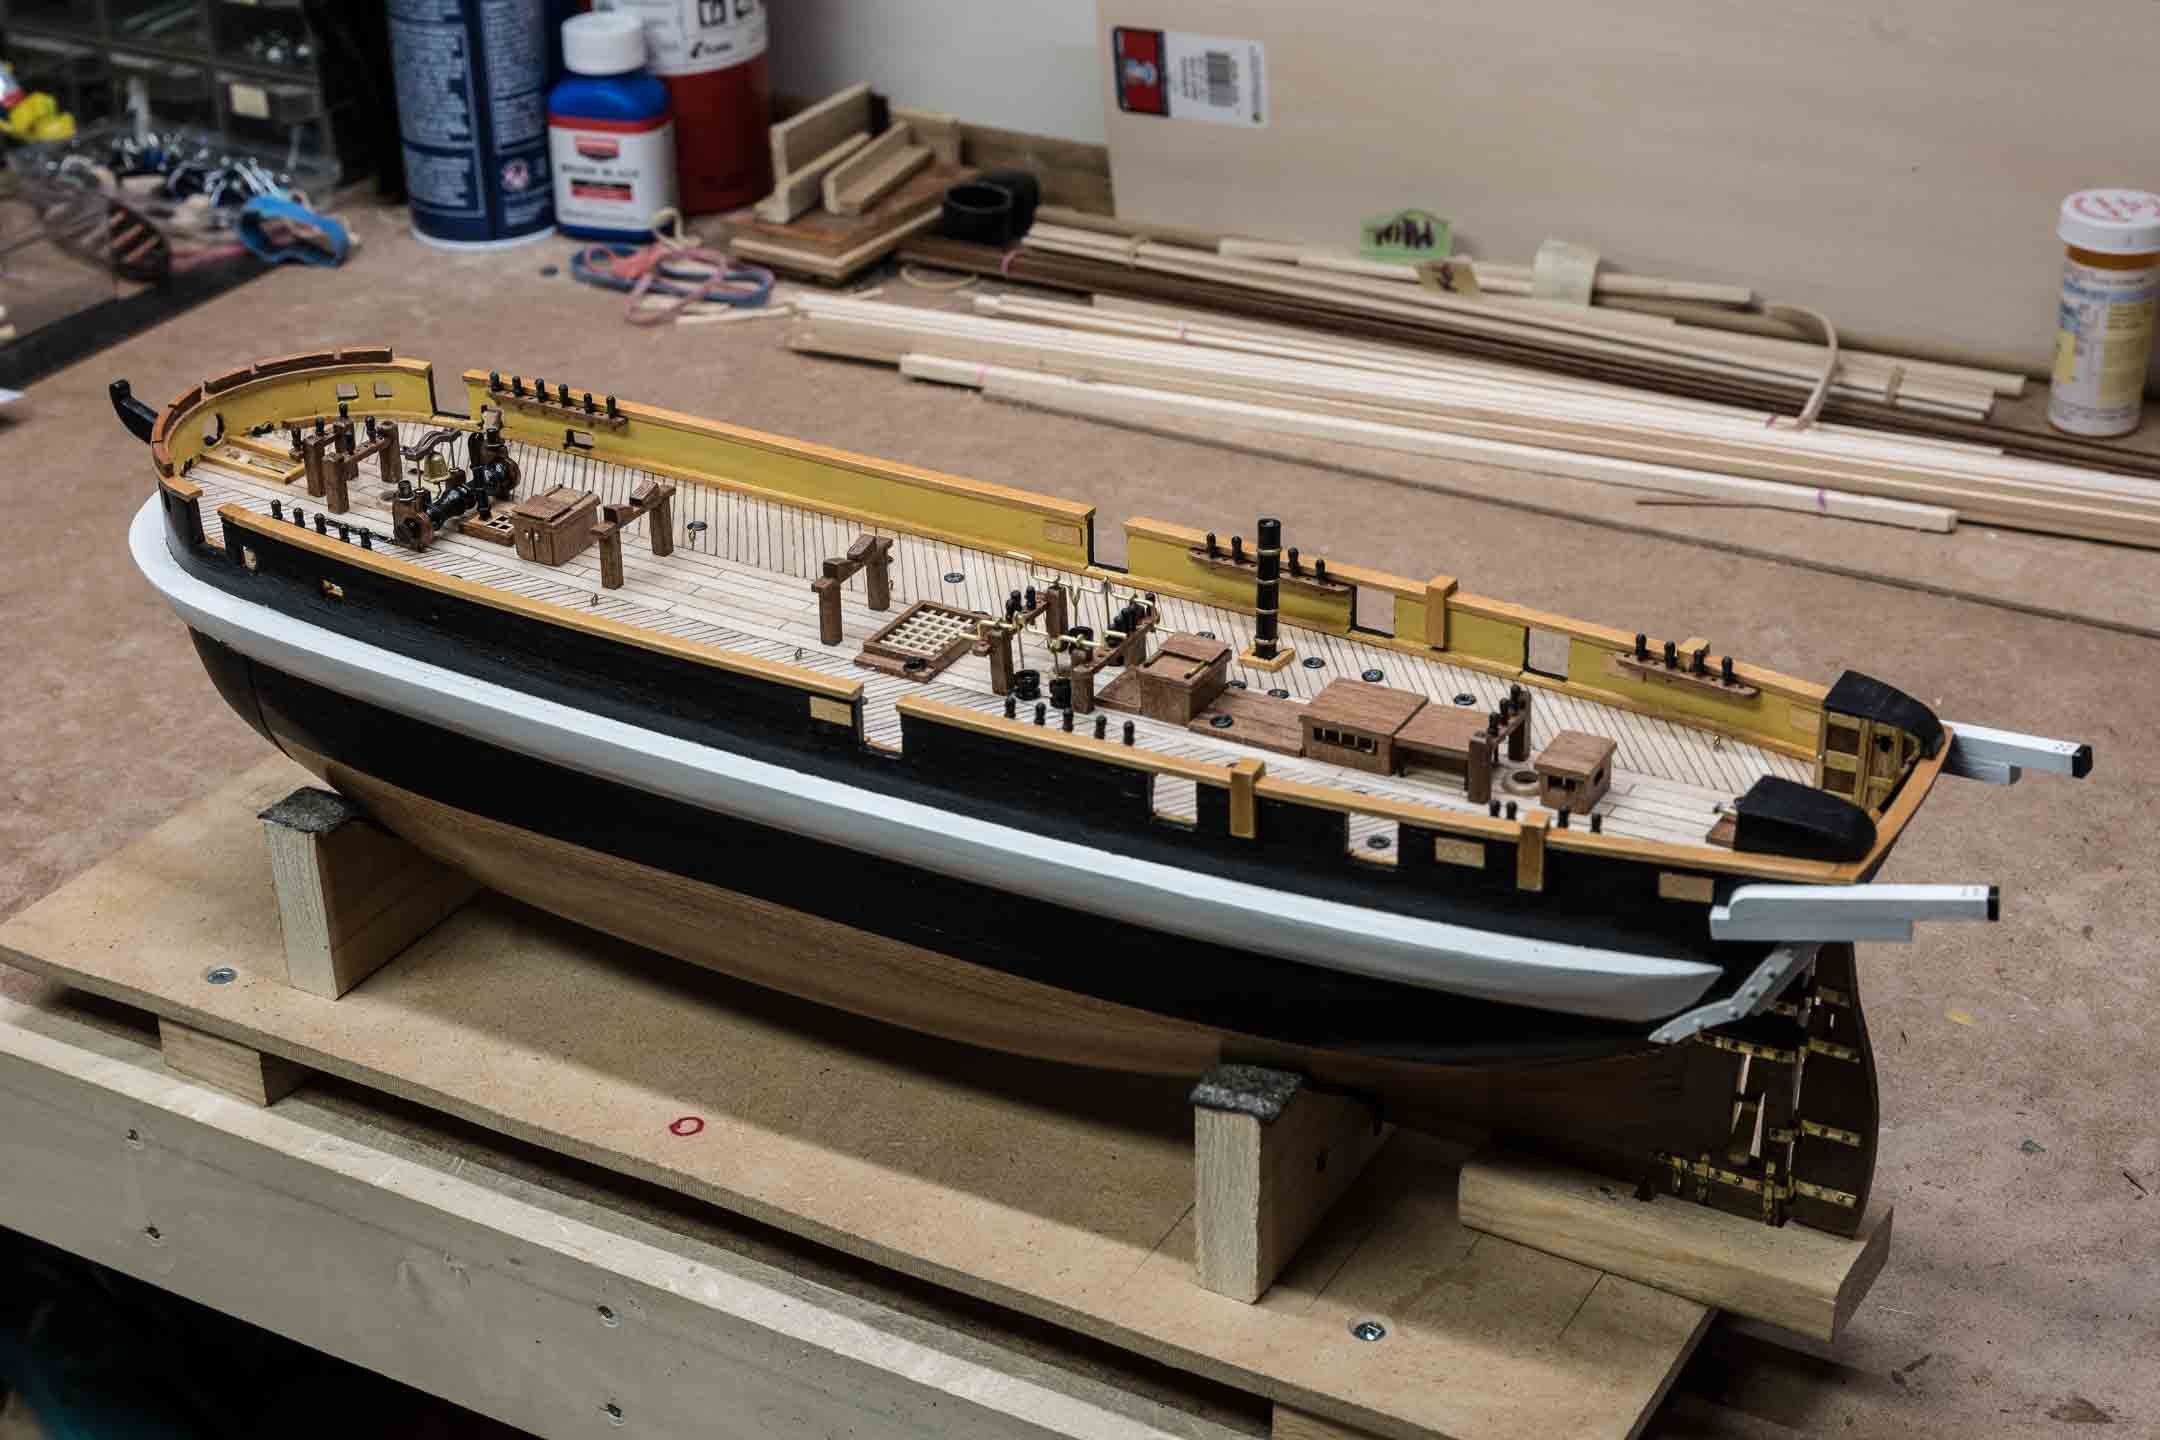
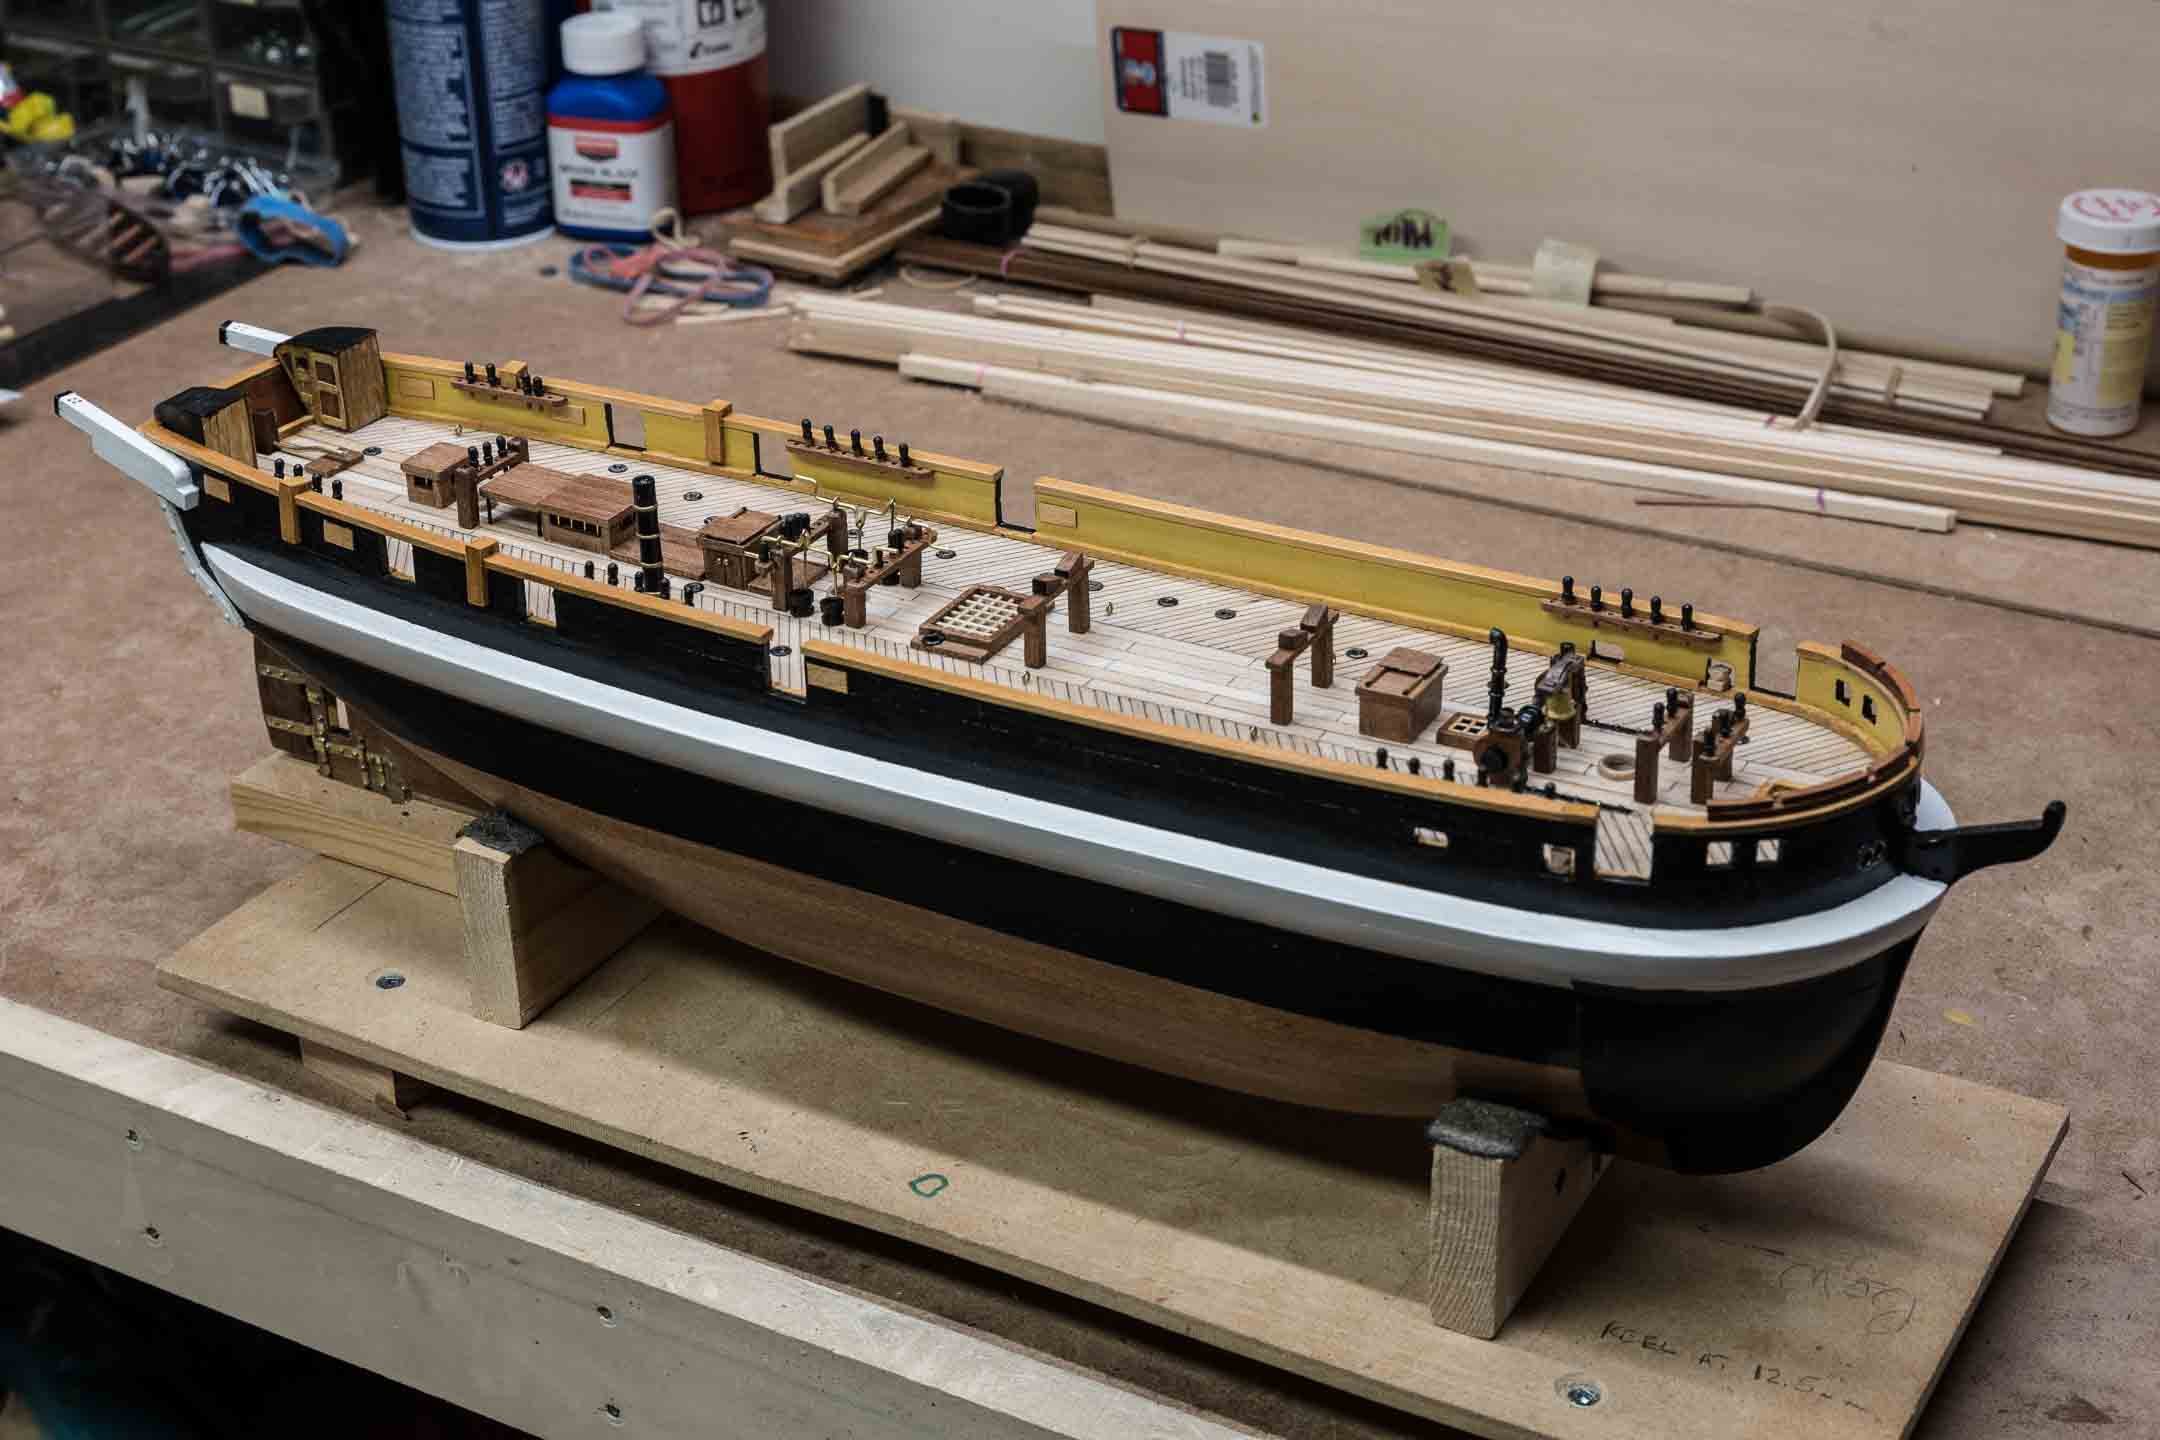
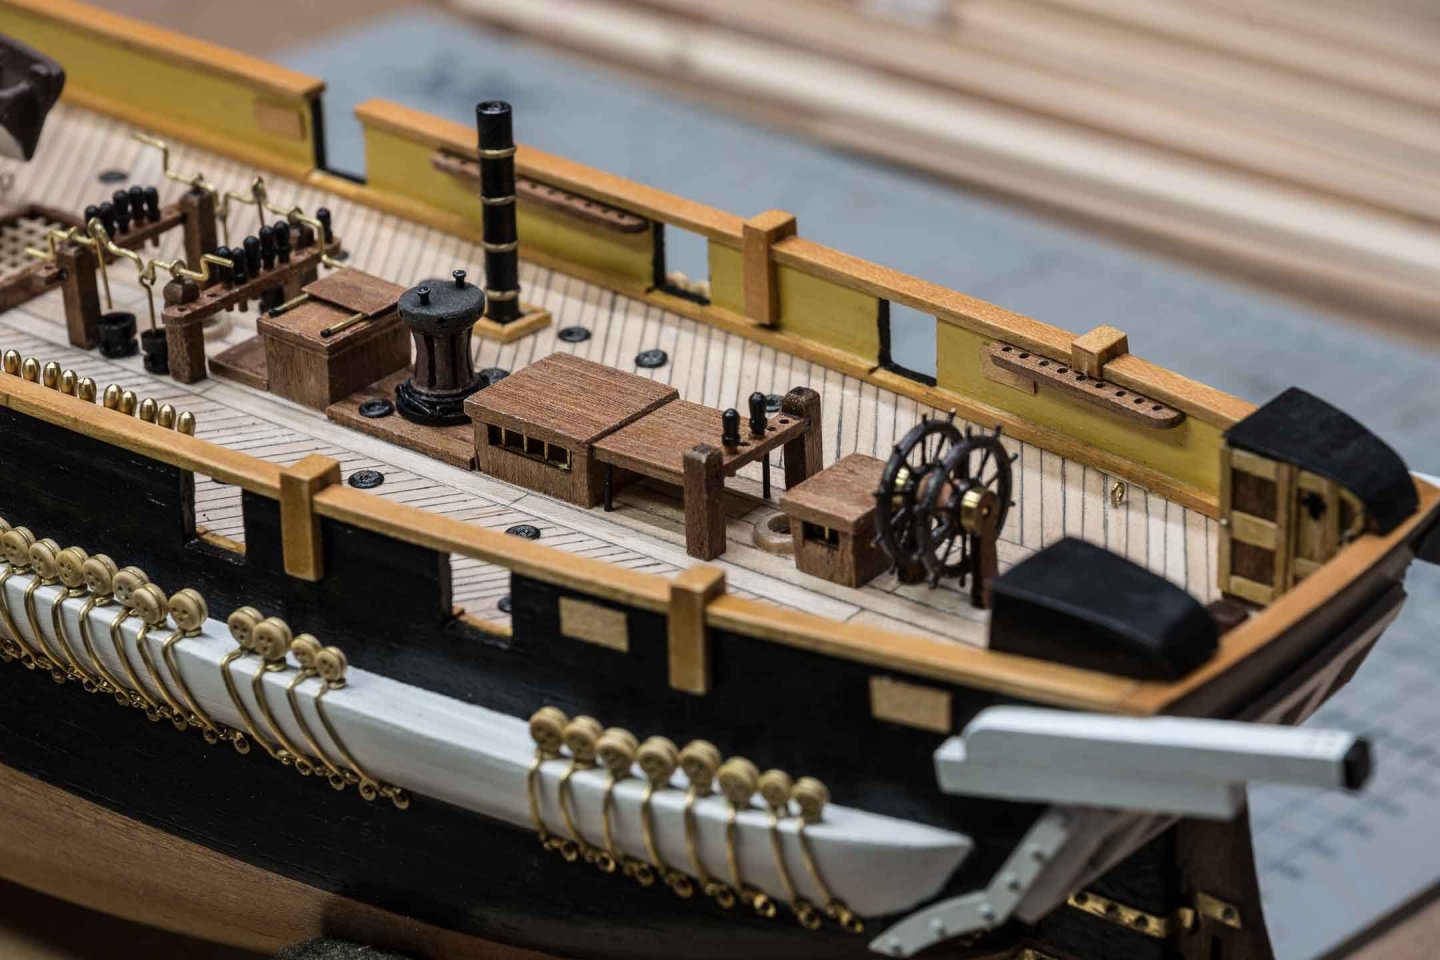
Thanks everyone for all your comments. Nothing new to report until now. There must be a better way to do the chain plates! After the first 20 I thought I should be getting good at making the brass wire parts ... but not so. It's interesting that the pictures in the OcCre instructions (and I have come to realize that they are pictures, not the photos that they appear to be) show loops at each end of the brass wire on some pictures, and no loops at the bottom end in others. Doesn't show an alternate method of fastening them though - just pins. I couldn't get them straight, consistent lengths to the bends. Ah well if I ever build another one I will invent a new approach 😬 This photo shows my version of the capstan, and the Caldercraft 10-spoke wheels installed (but not yet cabled to the rudder). On this - as on all the metal components - I am having difficulty making paint stick, even with metal primer applied. It seems ok , but if I rub my finger over it it flakes off. Is this because water-based acrylic paints are just not as sticky as the ones that fume off and give you headaches? Oh for the good old days .... I did find some brass belaying pins at a "local" supplier (Montreal - only 500 km away). I had already ordered 10 mm ones before the discussion above suggested 8mm might be more appropriate, but these ones do fit in the holes I have already drilled. They are made by Dekam in Italy, distributed in Canada by UDISCO - found them on eBay. Size is not 100% consistent but it looks like any given batch is the same.

- 72 replies
-
- 2
-
-
- Arctic Exploration
- Erebus
- (and 1 more)
-
Do you know what the correct size is Keith? I found some 10 mm brass ones, the OcCre ones are 10 mm long. My best guess from the plans is 6 - 8 mm, but I don't know how accurate the drawings are for something that small.
-
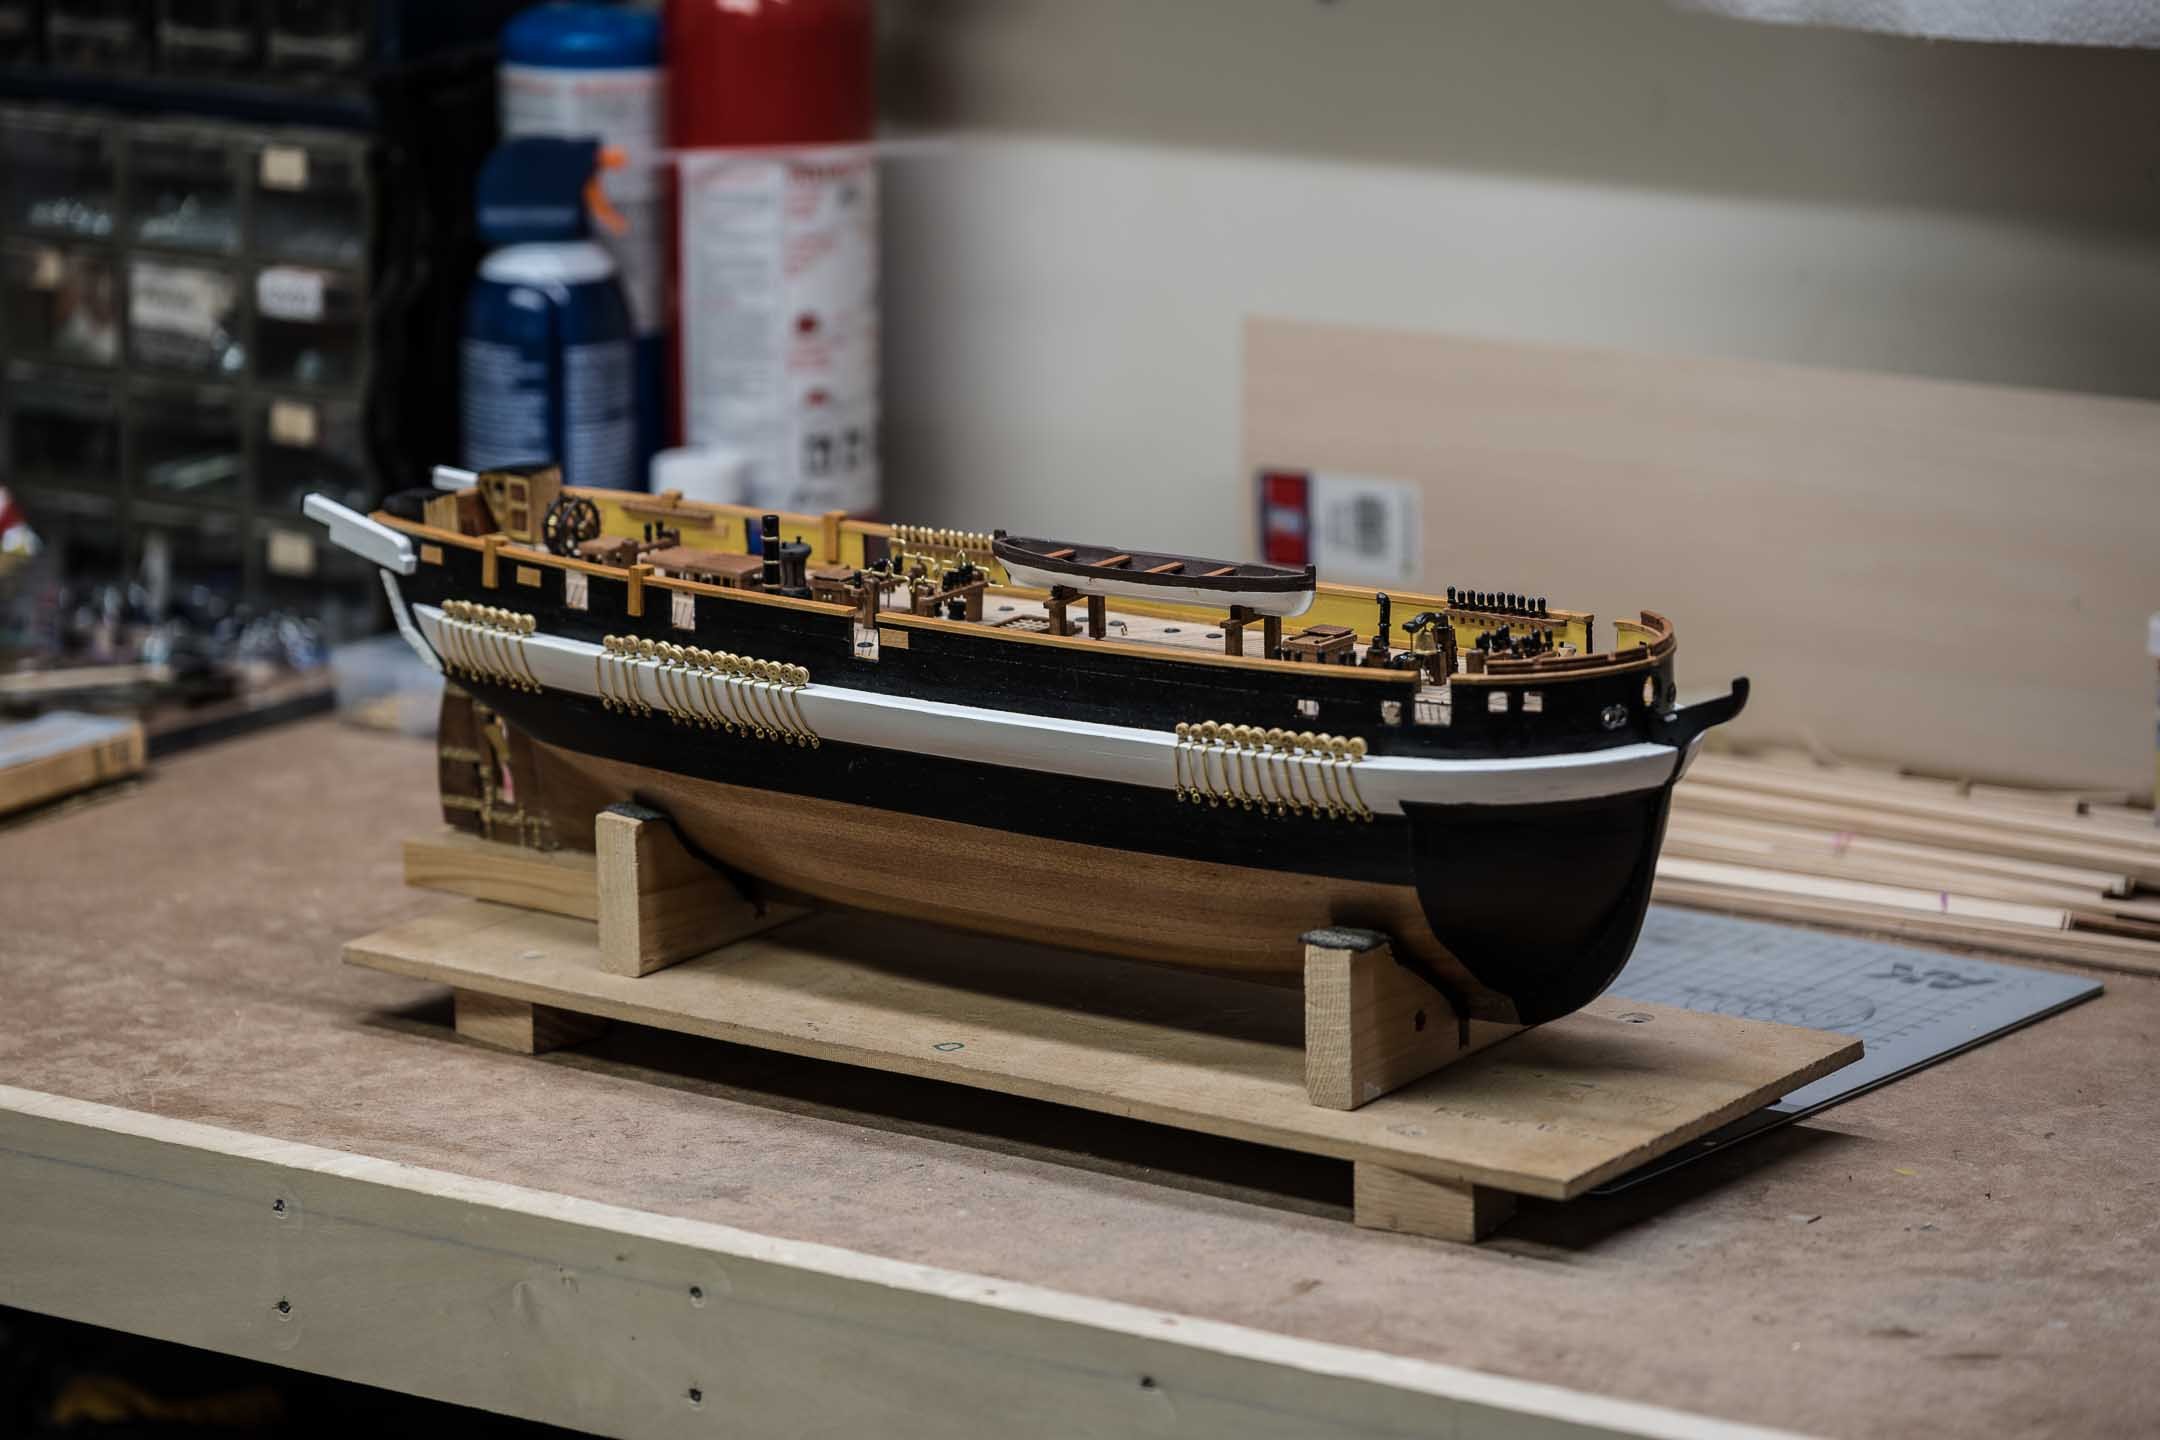
I had never looked at your Terror build, Keith, just the Erebus - Wow! So much good information and tips. Had I looked at it earlier in my build I probably would not have understood a lot of it, and since this is my first ship build I would likely have been overwhelmed! Your capstan looks great, and is along the lines of what I was thinking of attempting. Where did you get your silver-coloured belaying pins - or are they from the kit but painted that way? Just a follow up on the stern davits - as you can see in the photos I went with straight davits, no tapering, no joins. I'm happy with the result, it looks mechanically correct to me.
-
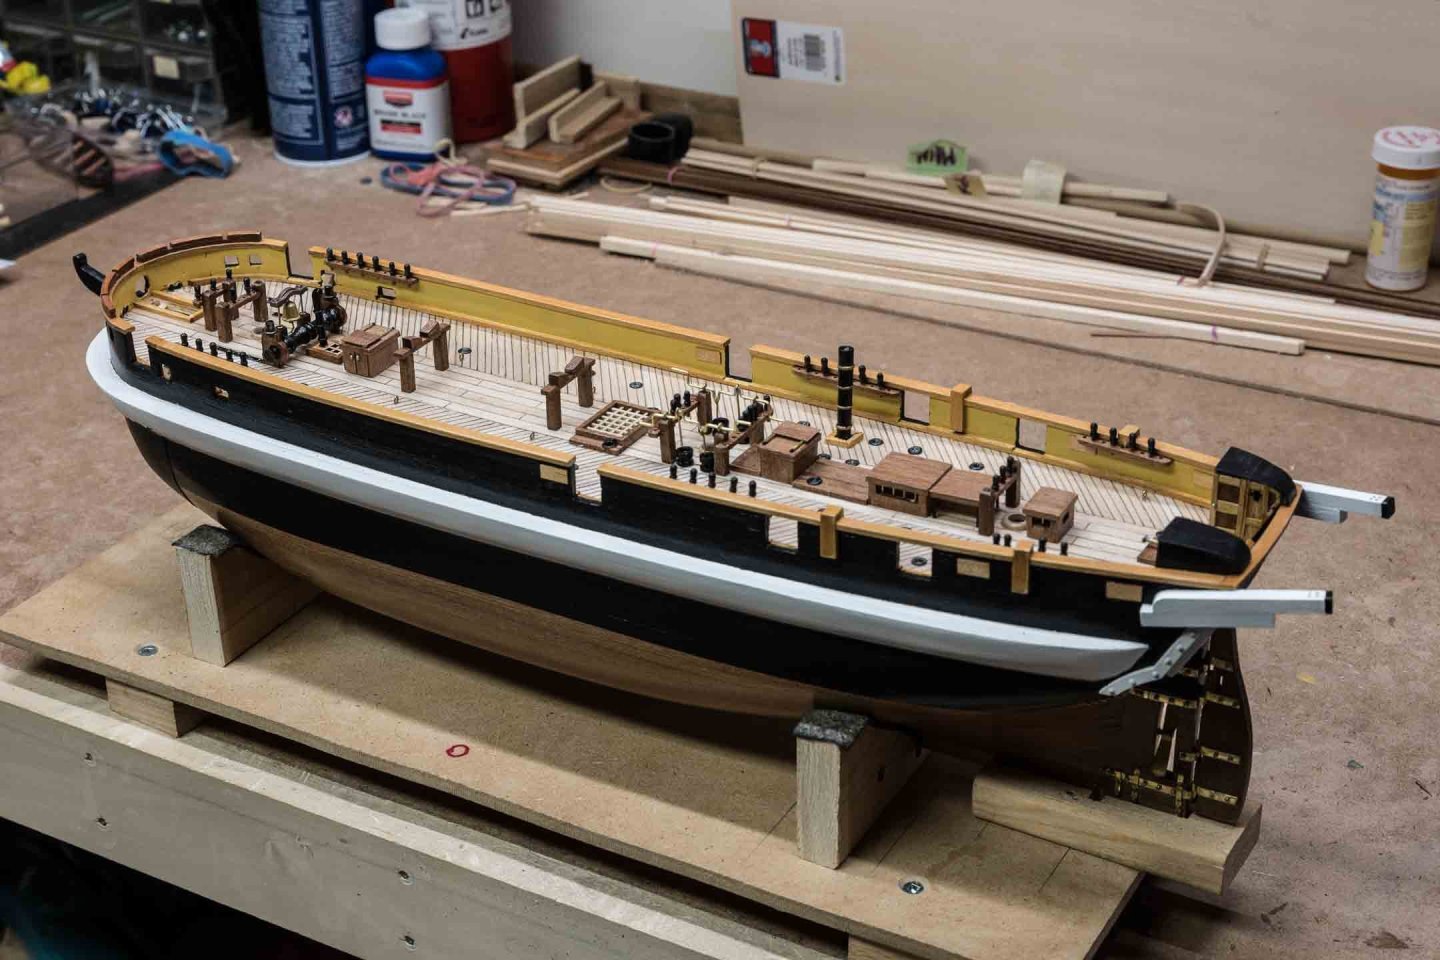
I am working through all the deck furniture components. Most have gone well, but bending the pump handles gave me some trouble. The piece that drops from the handle into the pump is too short at the location that is at top dead centre. I am not trying to modify these, just going with the kit. I did purchase two Caldercraft 10-spoke wheels which I have assembled and am just about to paint. They are not yet installed so don't show up on the attached photos. I am trying to decide what to do about the capstan. Looking at the ship drawings I believe the height of the one supplied is about right, but the diameter is small and the top is shaped improperly. I won't go too far with this, but I am wondering whether I can just beef up the top, and possibly use 2x3's instead of 2x2's for the barrel to give it a little more diameter. I have just finished planning where to put the bottoms of the chain plates so the angles are correct - OcCre keeps it a secret. I worked it out by scale drawing the plates with respect to the tops of the masts, following down where the shrouds will go when they are rigged. We'll see how the installation goes ...

- 72 replies
-
- 6
-
-
- Arctic Exploration
- Erebus
- (and 1 more)
-
Kudos to OcCre! I contacted them through their website regarding the missing Sapelli strips, and on their instruction filled out an on-line warranty form. I received 3 replacement strips by Canada Post within two weeks. This was an amazing response, for which I have thanked them. (In fact I may only have been short one strip, because their list of materials had an error in the length of one of the components.)
- 72 replies
-
- 2
-
-
- Arctic Exploration
- Erebus
- (and 1 more)
-
This makes more sense to me than putting a joint in them Keith.
- 72 replies
-
- 1
-
-
- Arctic Exploration
- Erebus
- (and 1 more)
-
Thank you for your praise Jon. I didn't find the aluminum too difficult in the end - I made a jig to make marking the pieces for cutting a little faster. I did make a mistake with the layout. The pieces closest to the bow should have been shorter (I made them "full length") which left some tiny triangles further aft. Not a big deal. The glue worked out ok as far as I can tell - nothing's fallen off yet!
- 72 replies
-
- 1
-
-
- Arctic Exploration
- Erebus
- (and 1 more)
-
Another decision to be made - the stern davits ... The kit calls for a compound angle so the davits point almost horizontally away from the stern, and parallel to the ship's fore-aft axis. I found drawings in the original ship plans section in Matthew's book that show them as straight in all directions. This means they point towards the ship's fore-aft axis, and point slightly skyward. This makes sense from a structural point of view, because not having joints in them gives them more strength. I can't see any reason to make them change direction - but perhaps there is some reason from a sea-going point of view? I'm getting conflicting signals from all the different sources (even some of the pictures of the models in Matthew's book suggest both simple and compound joints, but the camera angles distort things too. My impulse at the moment is to go with the simple, straight davits...
-
 Ship_Right reacted to a post in a topic:
HMS Erebus by Ship_Right - OcCre - Scale 1:75
Ship_Right reacted to a post in a topic:
HMS Erebus by Ship_Right - OcCre - Scale 1:75
-
Just ran into a problem: There is not enough 2x4 Sapelli wood in the kit to make all the parts that call for it. I only have one length of Sapelli 2x4x400 mm. The parts list calls for a total of 822 mm. Have written to OcCre to see what they can do about it - I've never seen Sapelli wood in my local hobby stores in Canada, otherwise I would just buy some and swallow the extra cost.
-
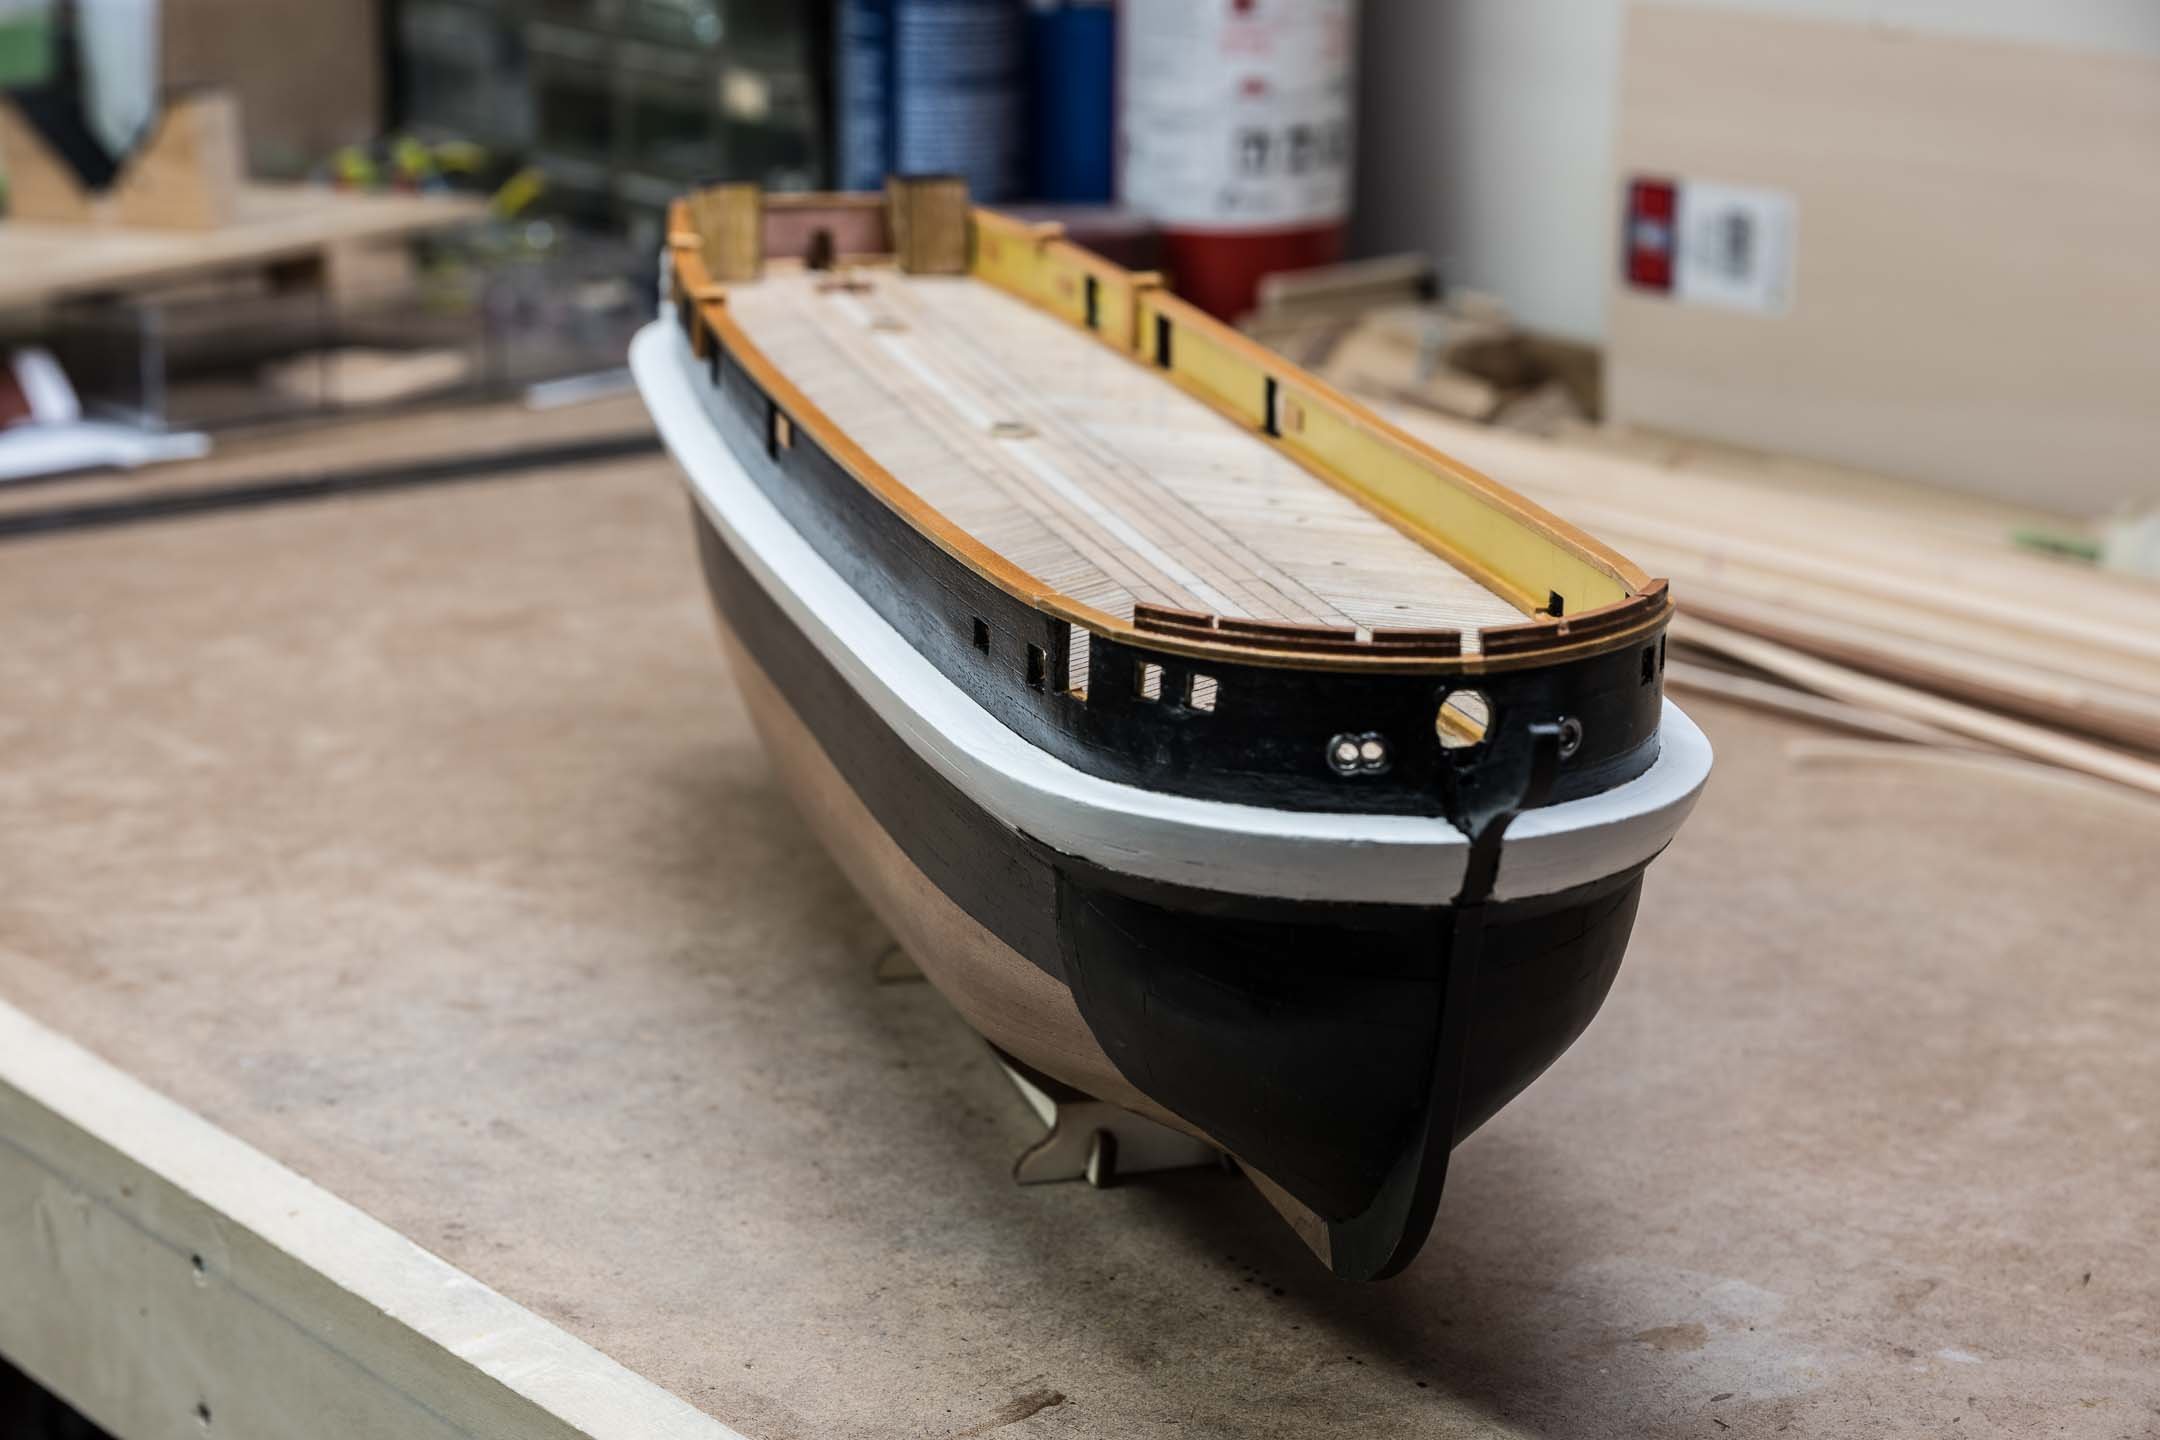
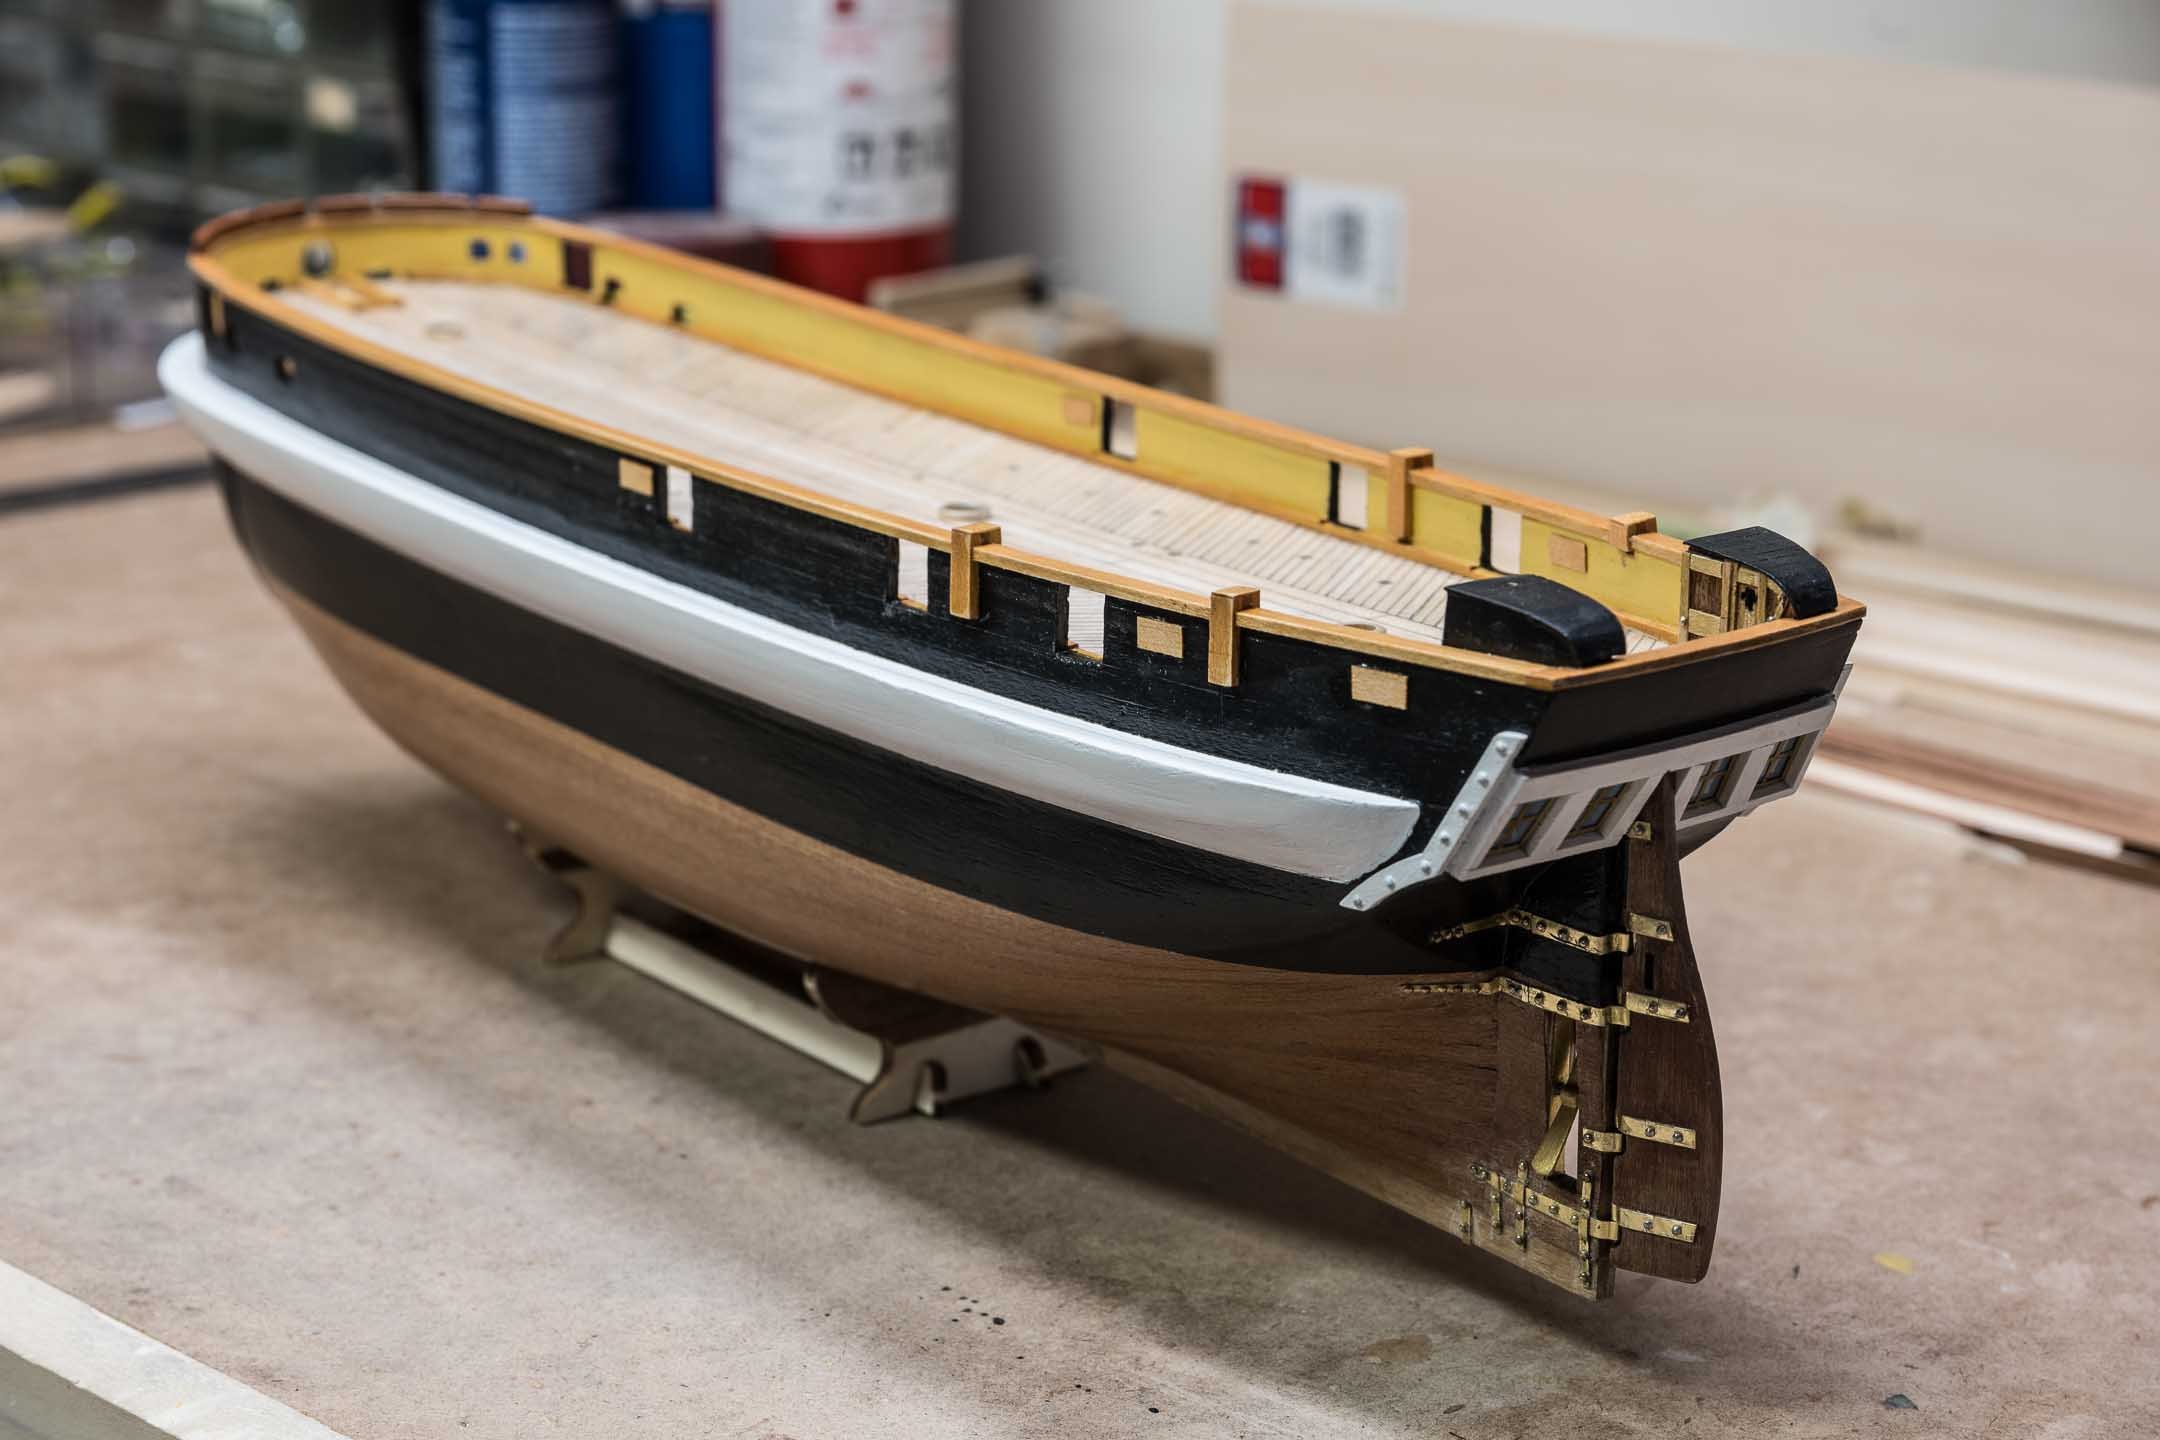
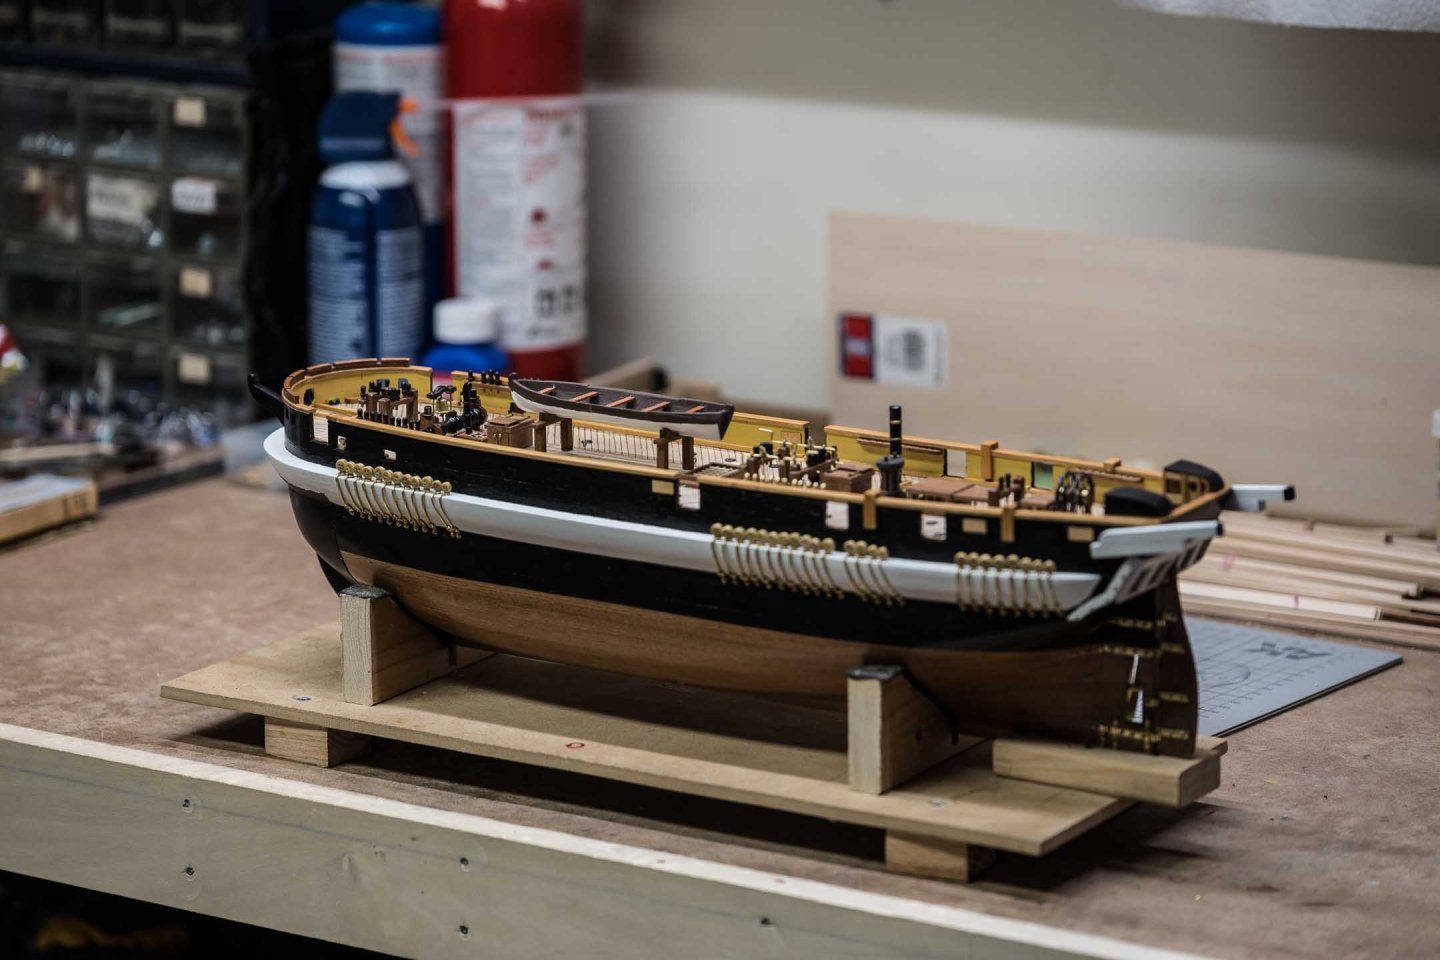
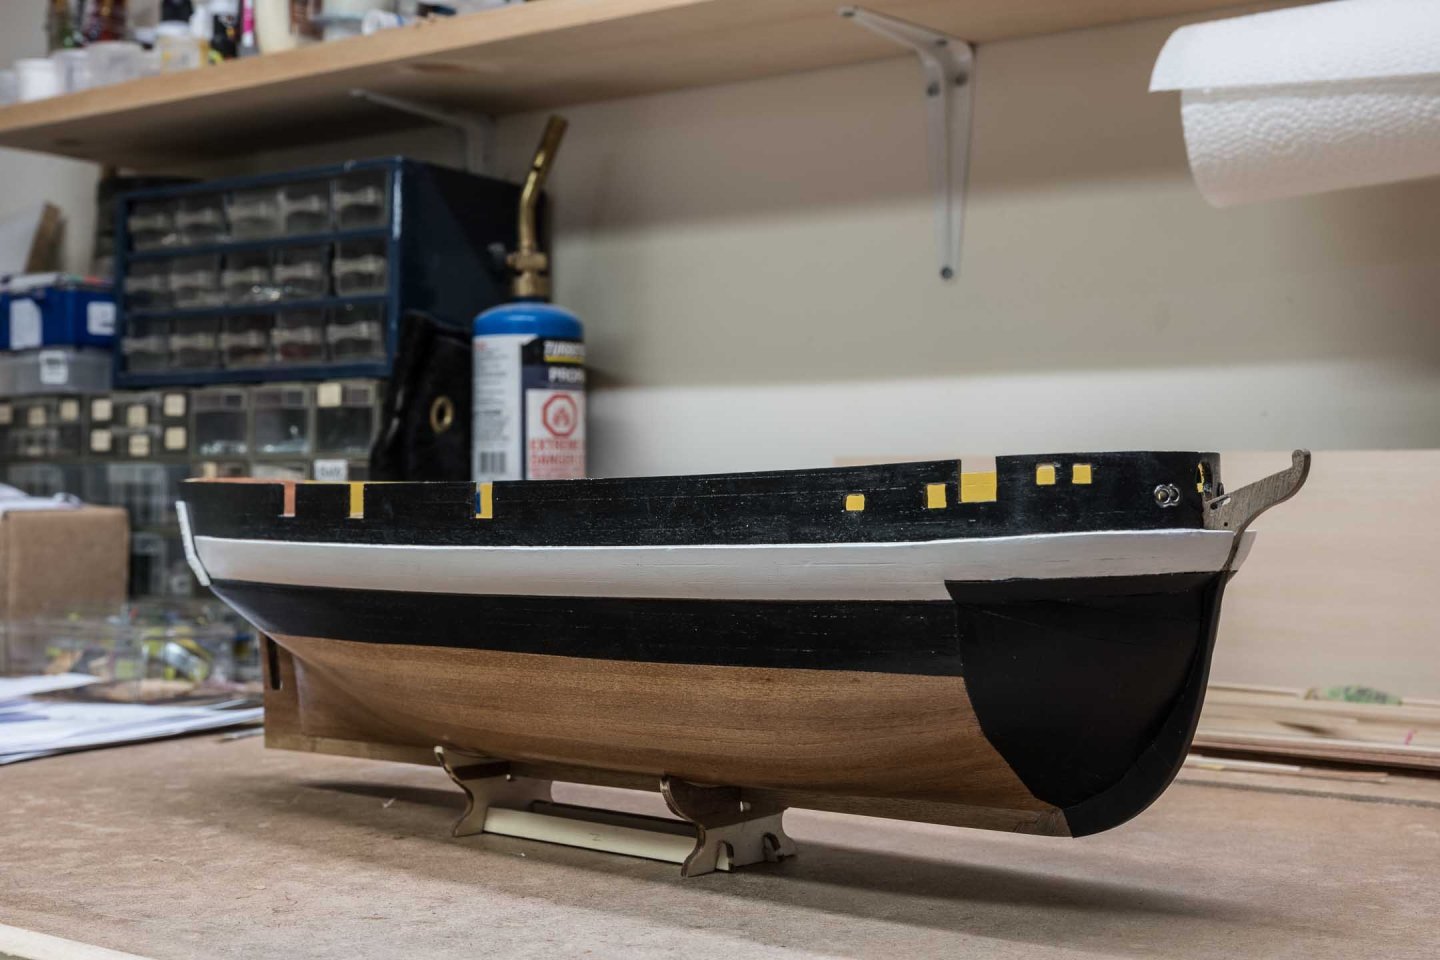
Today I arrived at a point where I believe the hull to be finished. From now on, the work is for deck fittings, davits, pumps, etc etc. It's an arbitrary milestone but gives me a sense of satisfaction. The "ironwork" around the rudder drove me crazy and I think there is a fair amount of skin from my glued fingers and thumbs still buried in the varnish. I was also disappointed that the rudder movement is so limited. On my model the pintels are very slightly off-centre, and the rudder will only turn in one direction - and not very far at that. The model design is a limiting factor here. There are 12 panels glued to the inside and outside of the hull towards the stern whose purpose I have yet to discover. I have not found a reference in Betts' book. The kit calls for 5 of them, and when I questioned OcCre they agreed it should call for 12 - three each on the deck side and the outside, port and starbord. Anyone know what they are? When I asked OcCre where to place them, they gave me a vertical dimension (2mm below the taff rails) but said to estimate the horizontal placement from the drawings. So I did. Of course, Murphy was on hand, and when I came to install the 4 pillars on the bulwarks two of them interfered. I was able to pry them off with minimal damage and install the pillars in the proper places.


- 72 replies
-
- 4
-
-
- Arctic Exploration
- Erebus
- (and 1 more)
-
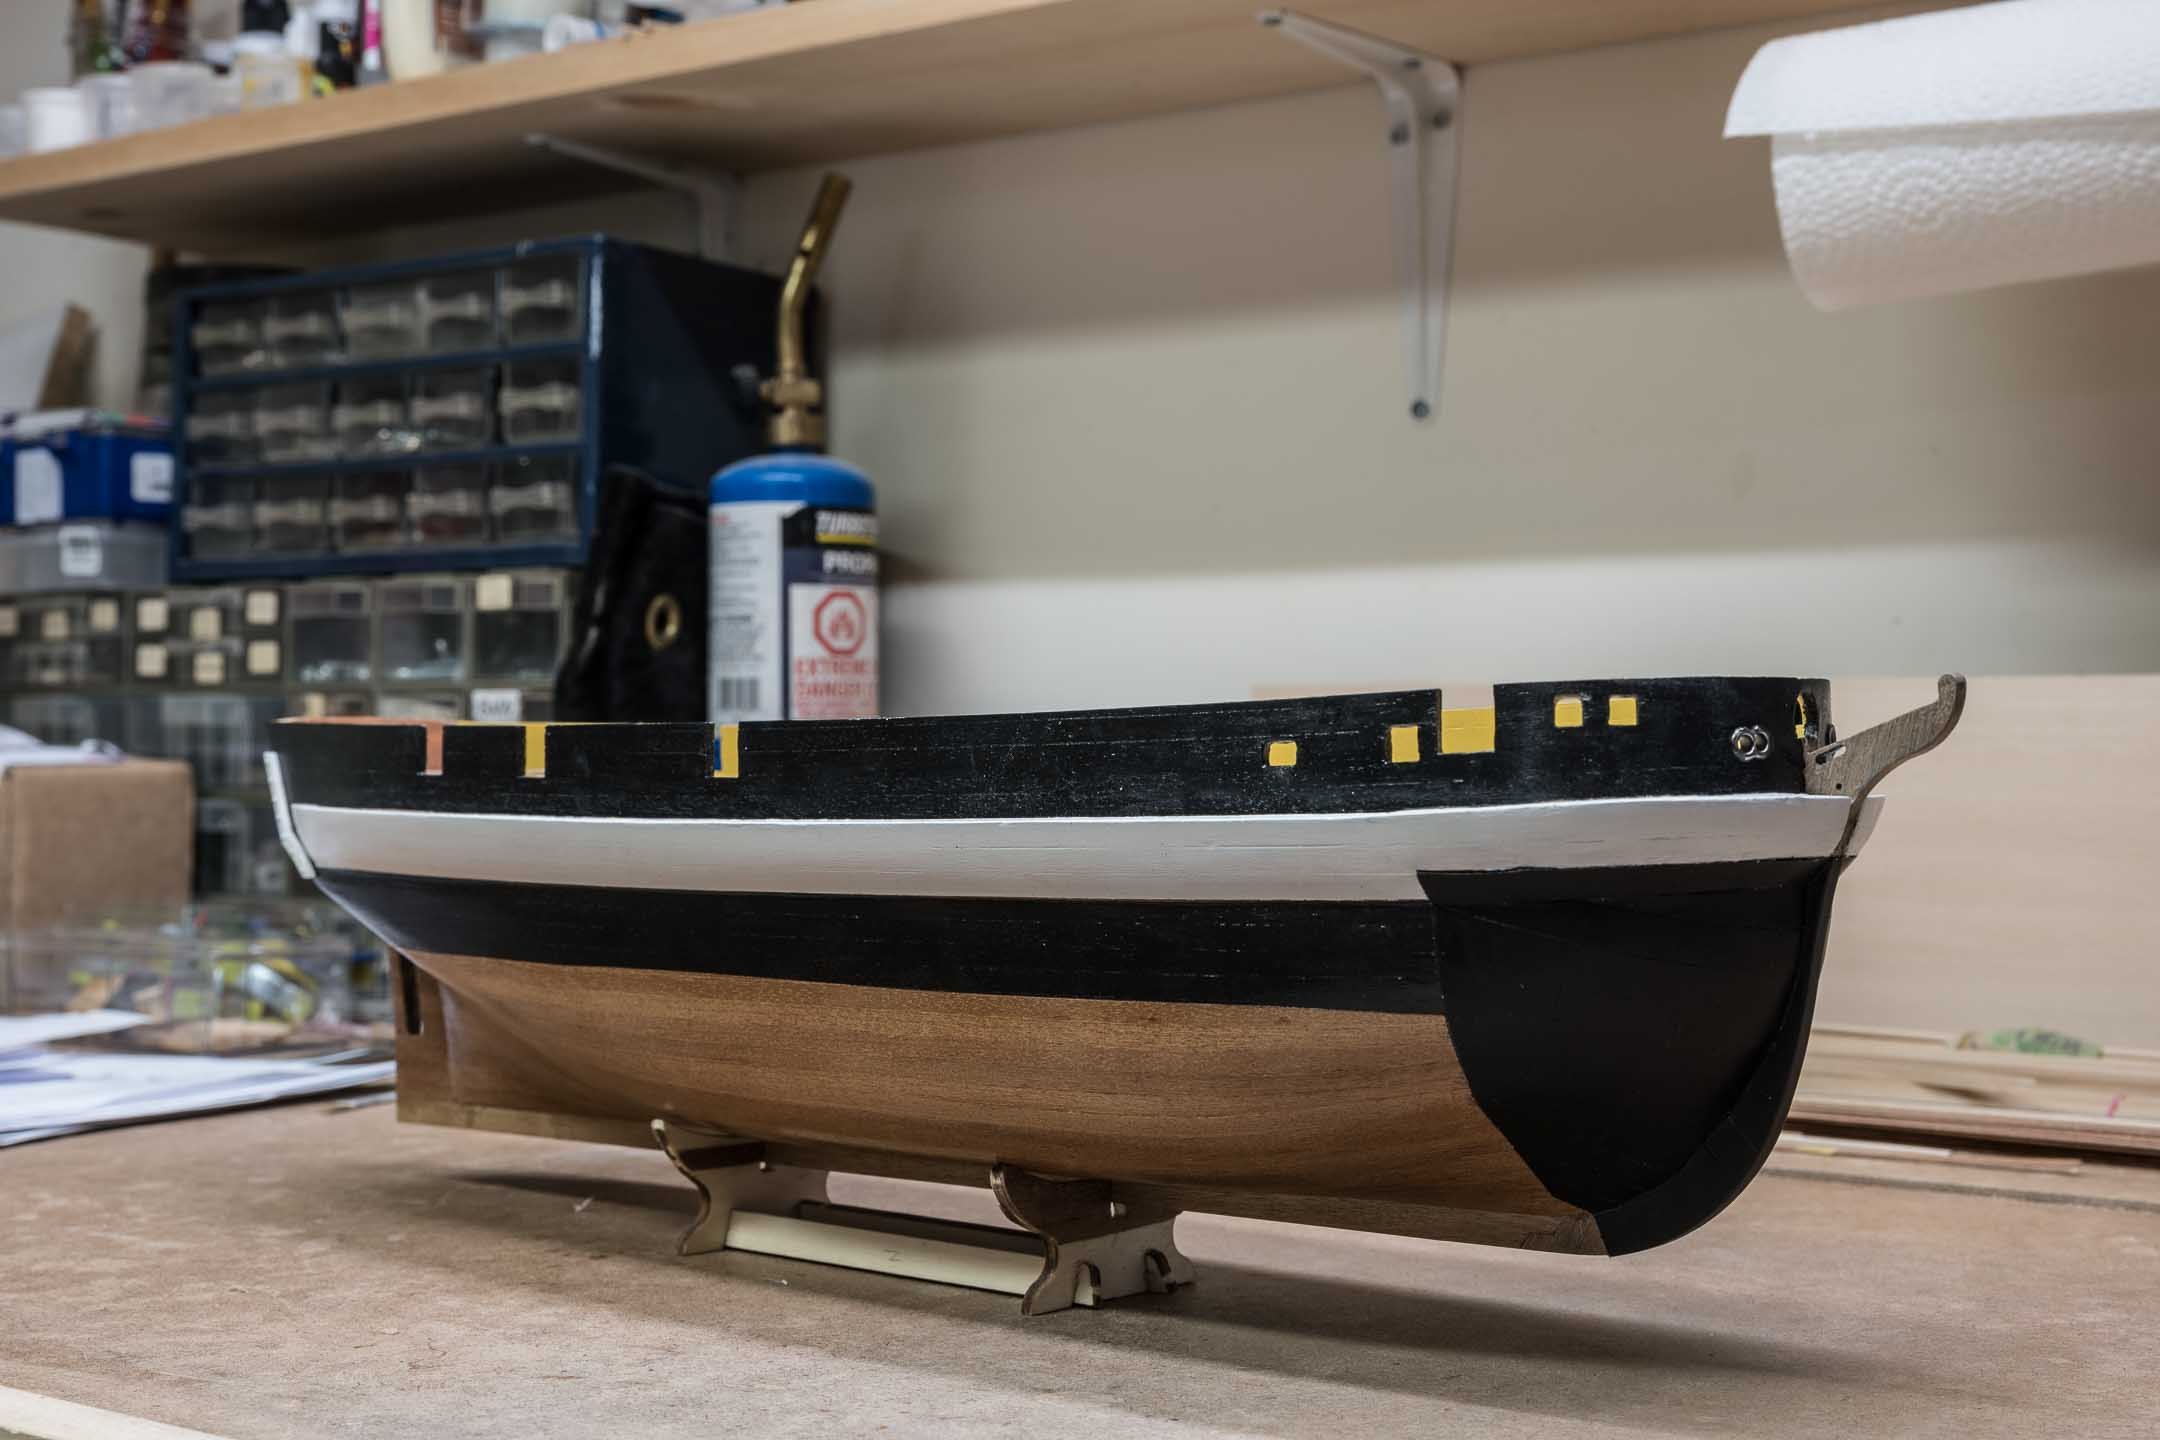
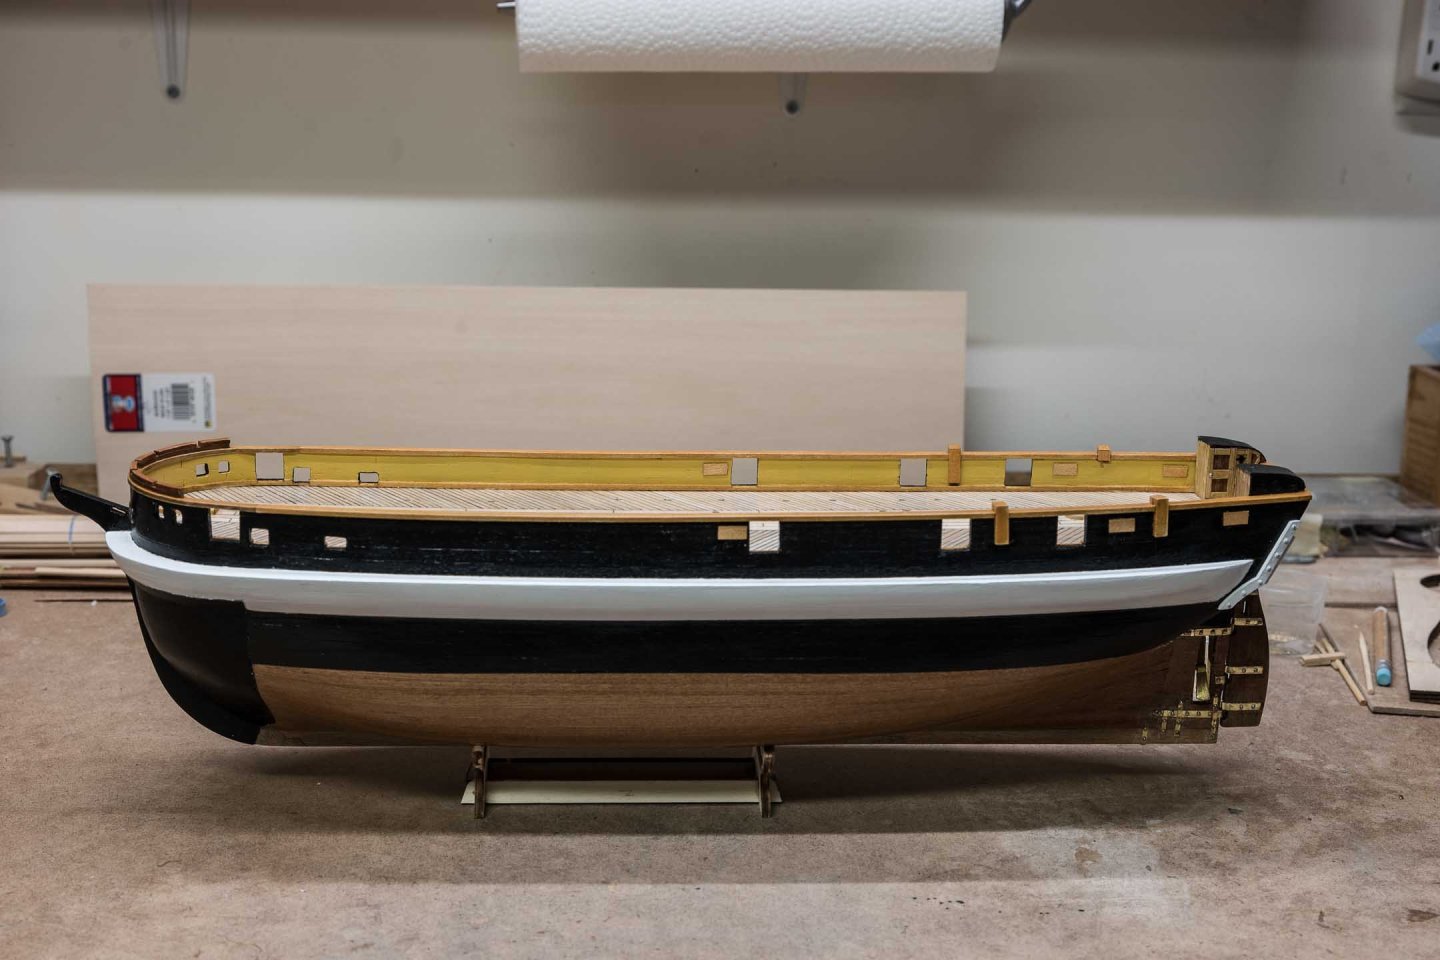
Reinforcement complete, and I painted the hull black down to the waterline. The reinforcement is a matt black, while the rest is satin. Not as much difference as I would have liked, and you can't really tell from the photo. Still - time to move along.
- 72 replies
-
- 4
-
-
- Arctic Exploration
- Erebus
- (and 1 more)
-
Well the Aluminum Black experiment is over. After I had let it sit overnight, I rubbed my finger across the surface and most of the black finish rubbed off. Possible that a varnish over the top would have worked, but I decided that I preferred to have a more durable base. I did find a bottle of "Metal Primer" at a local store (who had previously told me they didn't have any 🙂), so now I am brushing that on and painting. Will post photos when finished.