Nightdive
-
Posts
39 -
Joined
2 Followers

Recent Profile Visitors
1,228 profile views


-
 Nightdive reacted to a post in a topic:
HM Armed Cutter Sherbourne 1763 by Nick 843 - Vanguard Models - 1:64
Nightdive reacted to a post in a topic:
HM Armed Cutter Sherbourne 1763 by Nick 843 - Vanguard Models - 1:64
-
Nightdive reacted to a post in a topic:
His Britannic Majesty's Cutter Sherbourne 1763 by Paul White - Vanguard Models - 1:64
-
Nightdive reacted to a post in a topic:
HM Cutter Sherbourne 1763 by Bomber_County - Vanguard Models - 1/64 - First Build
-
Nightdive reacted to a post in a topic:
HM Armed Cutter Sherbourne by Zvr - FINISHED - Vanguard Models - 1:64
-
Nightdive reacted to a post in a topic:
HM Brig Badger by ERS Rich - Caldercraft - 1/64
-
Nightdive reacted to a post in a topic:
San Bartolome 1584 by Kevin - Ships of Pavel Nikitin - 1/48 - Jan 2026
-
Nightdive reacted to a post in a topic:
Chris Watton and Vanguard Models news and updates Volume 2
-
Nightdive reacted to a post in a topic:
HM Armed Cutter Sherbourne 1763 by Nick 843 - Vanguard Models - 1:64
-
Nightdive reacted to a post in a topic:
HM Brig Badger by ERS Rich - Caldercraft - 1/64
-
Nick 843 reacted to a post in a topic:
HM Armed Cutter Sherbourne 1763 by Nightdive - Vanguard Models - 1:64 - First Build
-
Zvr reacted to a post in a topic:
HM Armed Cutter Sherbourne 1763 by Nightdive - Vanguard Models - 1:64 - First Build
-
AJohnson reacted to a post in a topic:
HM Armed Cutter Sherbourne 1763 by Nightdive - Vanguard Models - 1:64 - First Build
-
 Bomber_County reacted to a post in a topic:
HM Cutter Sherbourne 1763 by Bomber_County - Vanguard Models - 1/64 - First Build
Bomber_County reacted to a post in a topic:
HM Cutter Sherbourne 1763 by Bomber_County - Vanguard Models - 1/64 - First Build
-
Paul White reacted to a post in a topic:
HM Armed Cutter Sherbourne 1763 by Nightdive - Vanguard Models - 1:64 - First Build
-
 I'm in the same boat! I've been airbrushing parts for my Sherbourne in a small wet room connected to my porch, but now even the faucet in there is frozen solid.
- 35 replies
-
- 1
-
-
- Sherbourne
- Vanguard Models
- (and 1 more)
-
palmerit reacted to a post in a topic:
HM Armed Cutter Sherbourne 1763 by Nightdive - Vanguard Models - 1:64 - First Build
-
Desertanimal reacted to a post in a topic:
HM Armed Cutter Sherbourne 1763 by Nightdive - Vanguard Models - 1:64 - First Build
-
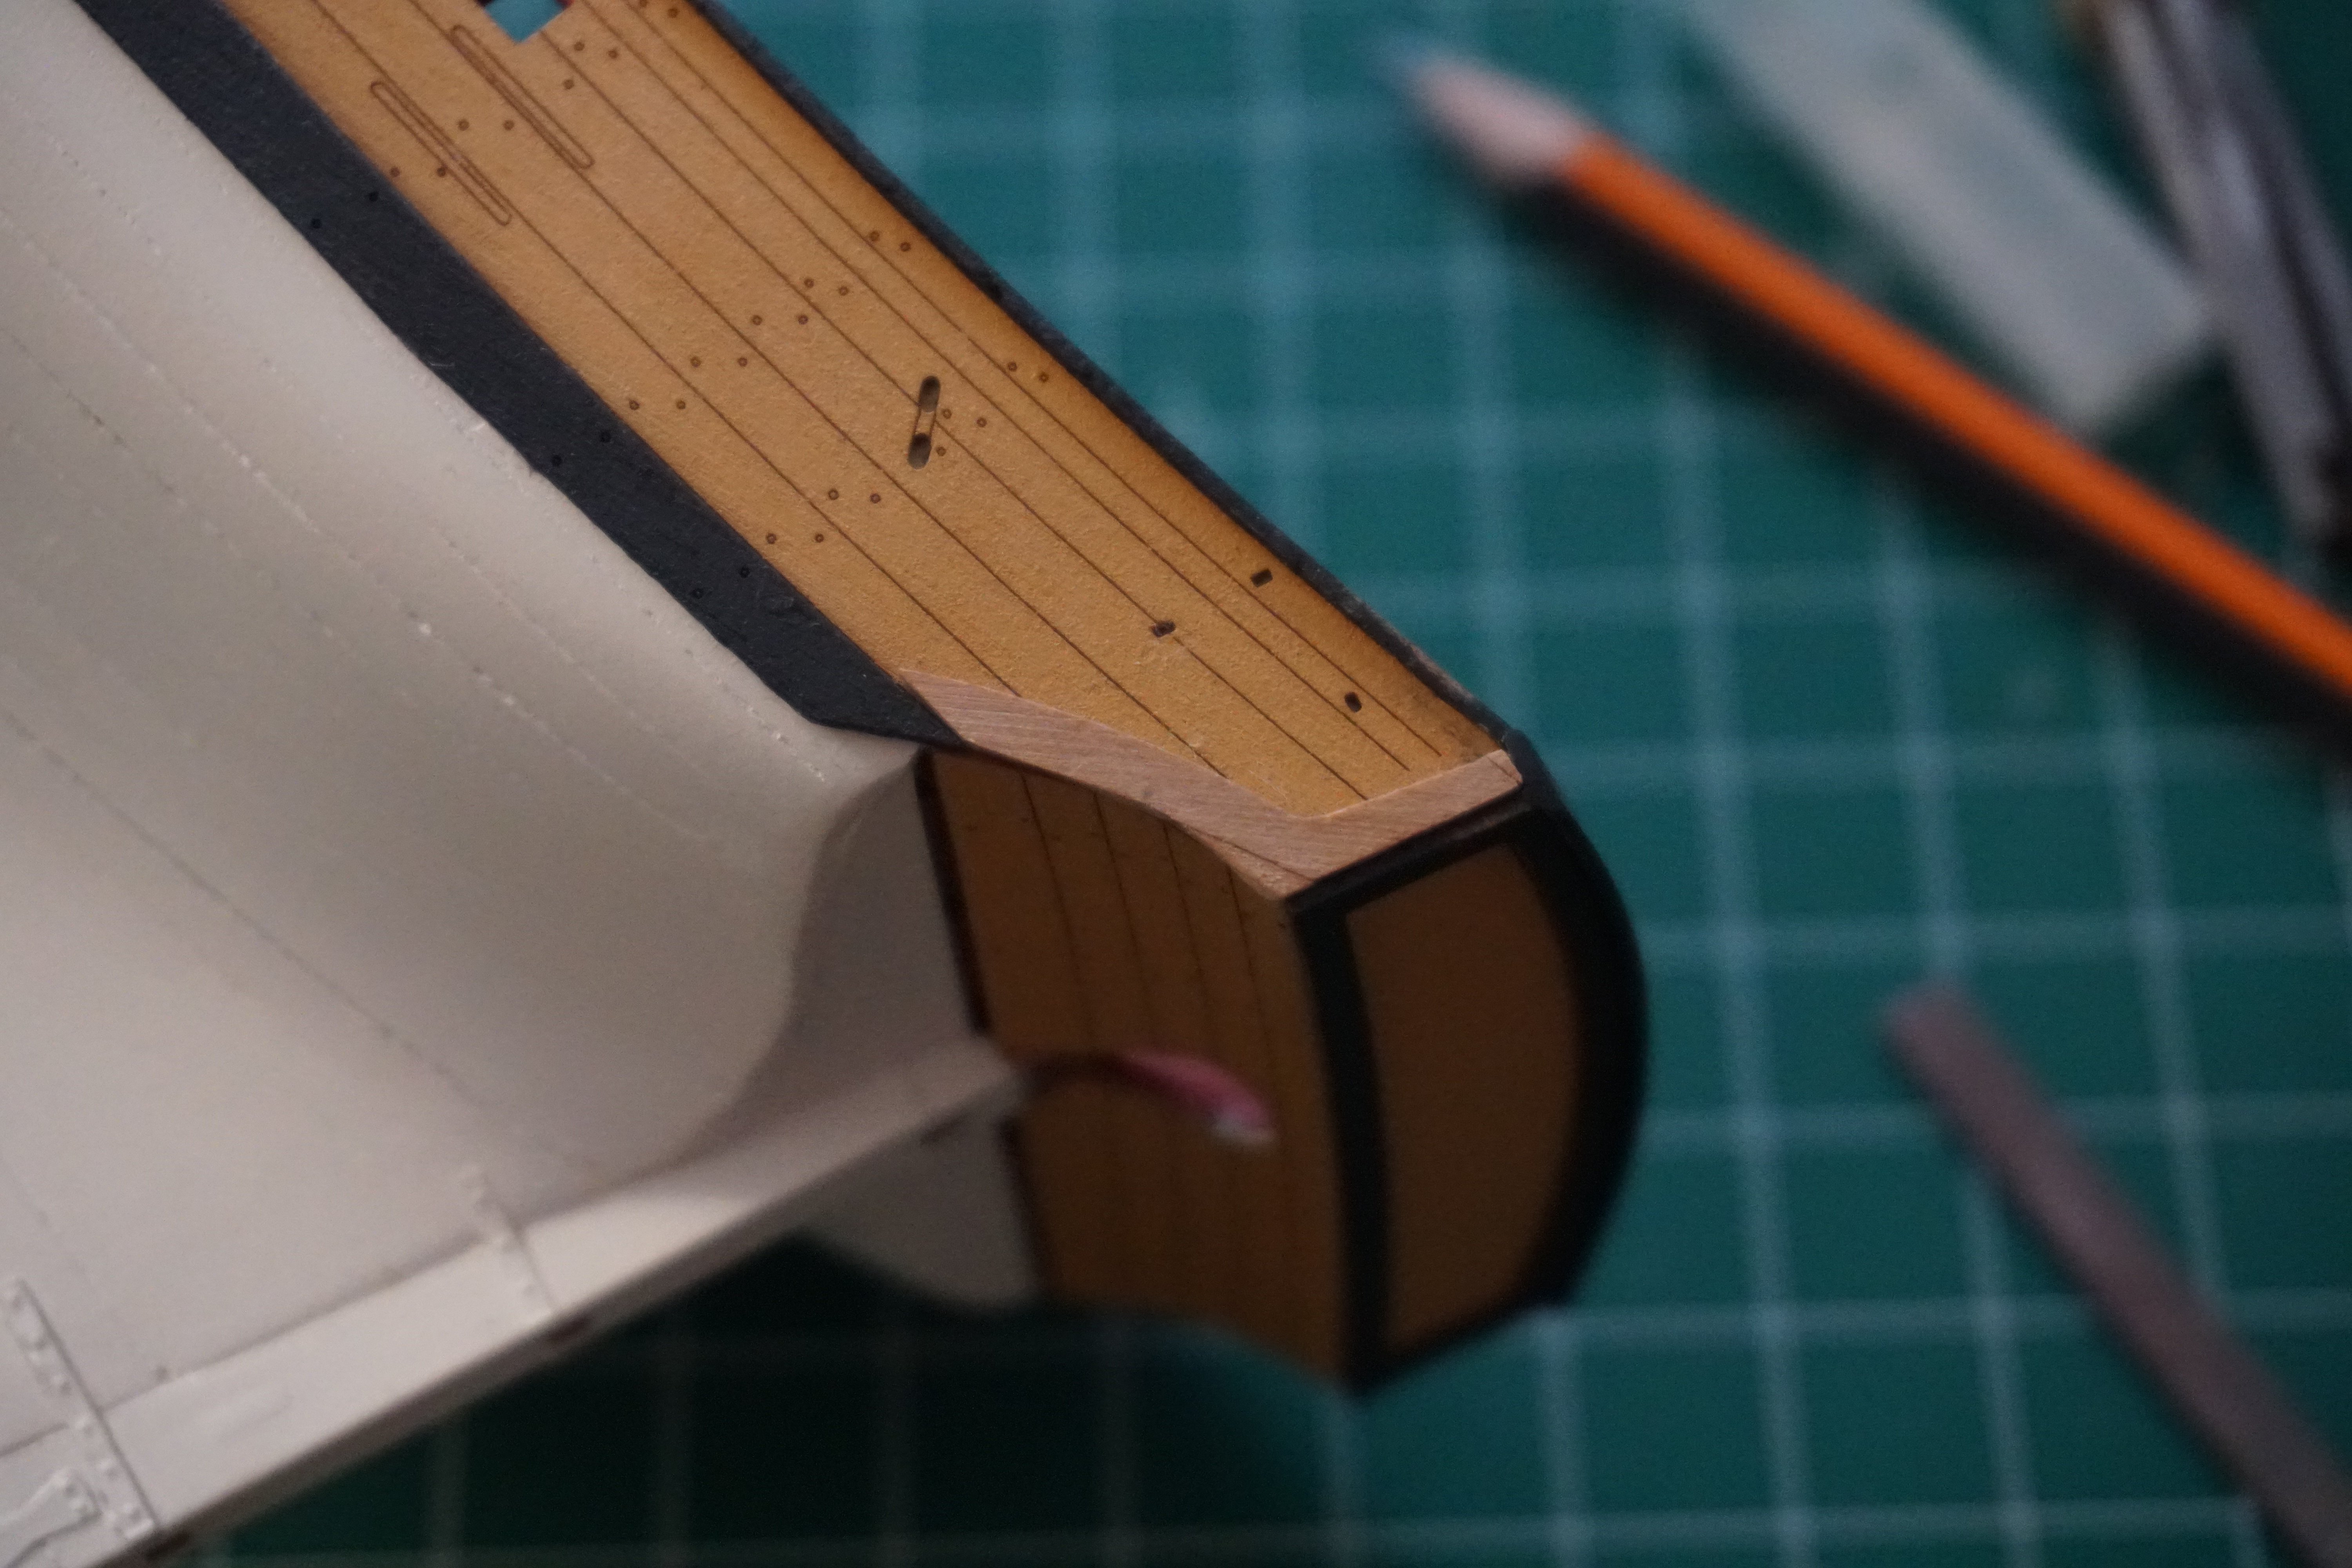
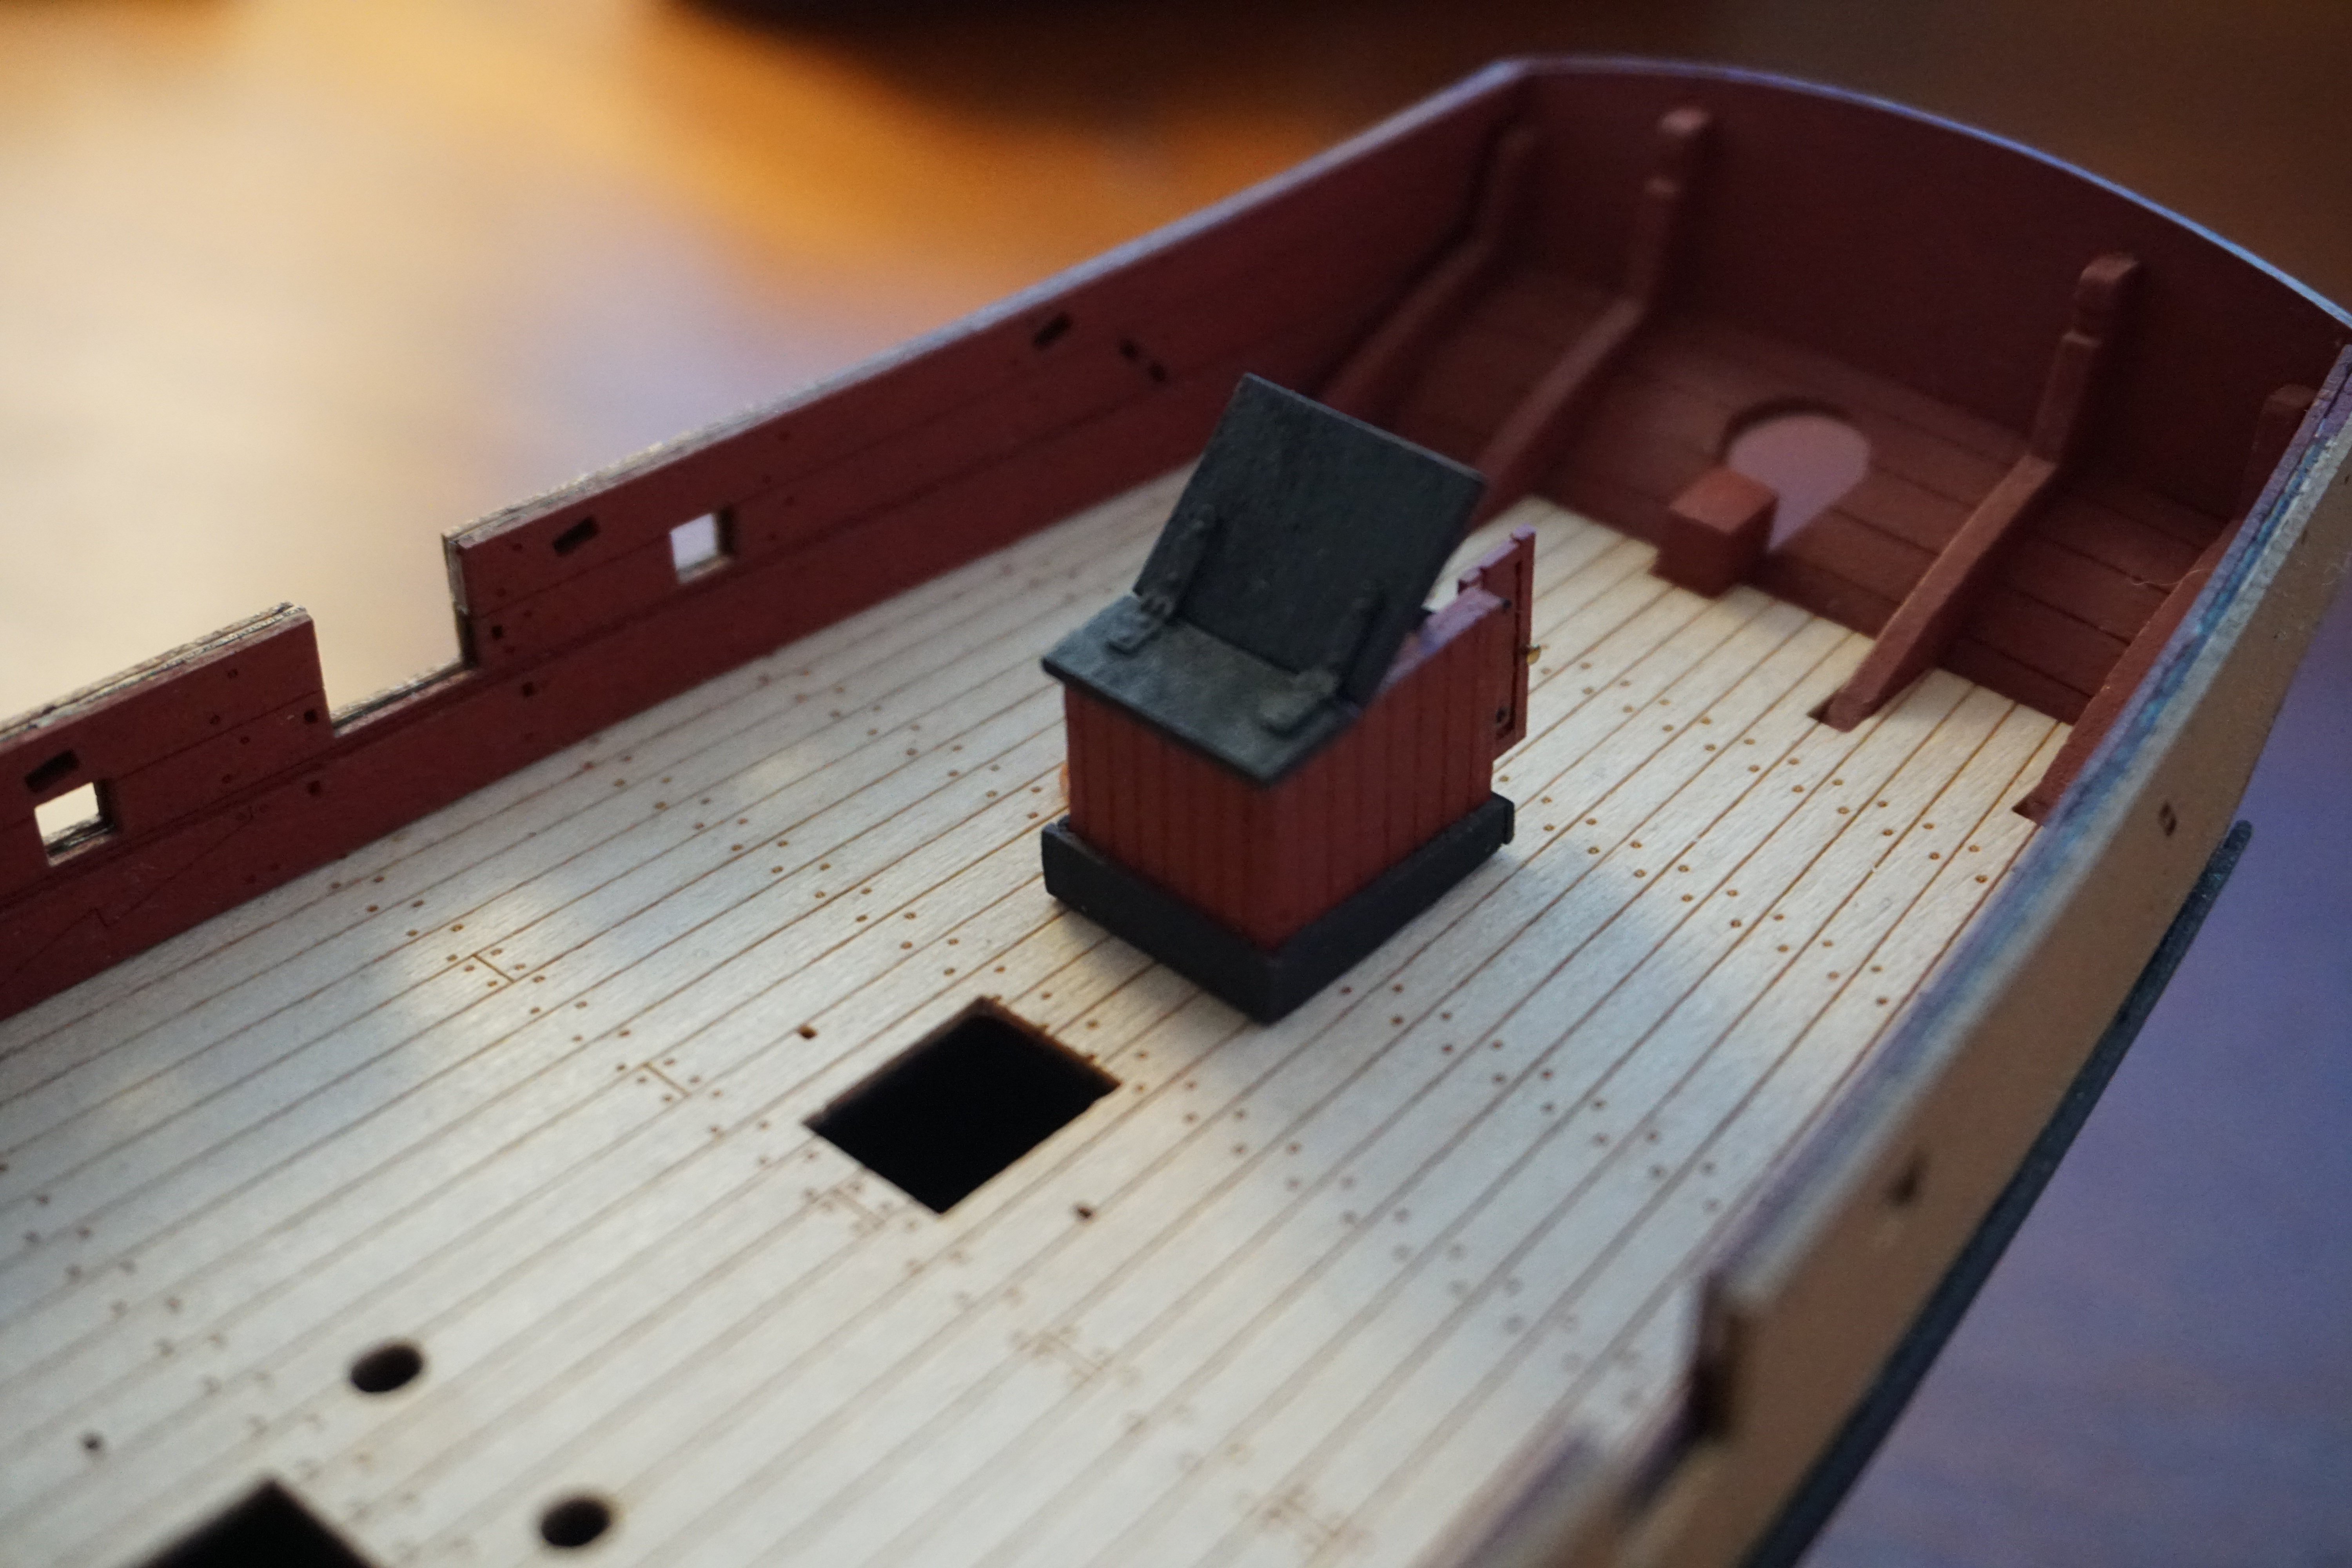
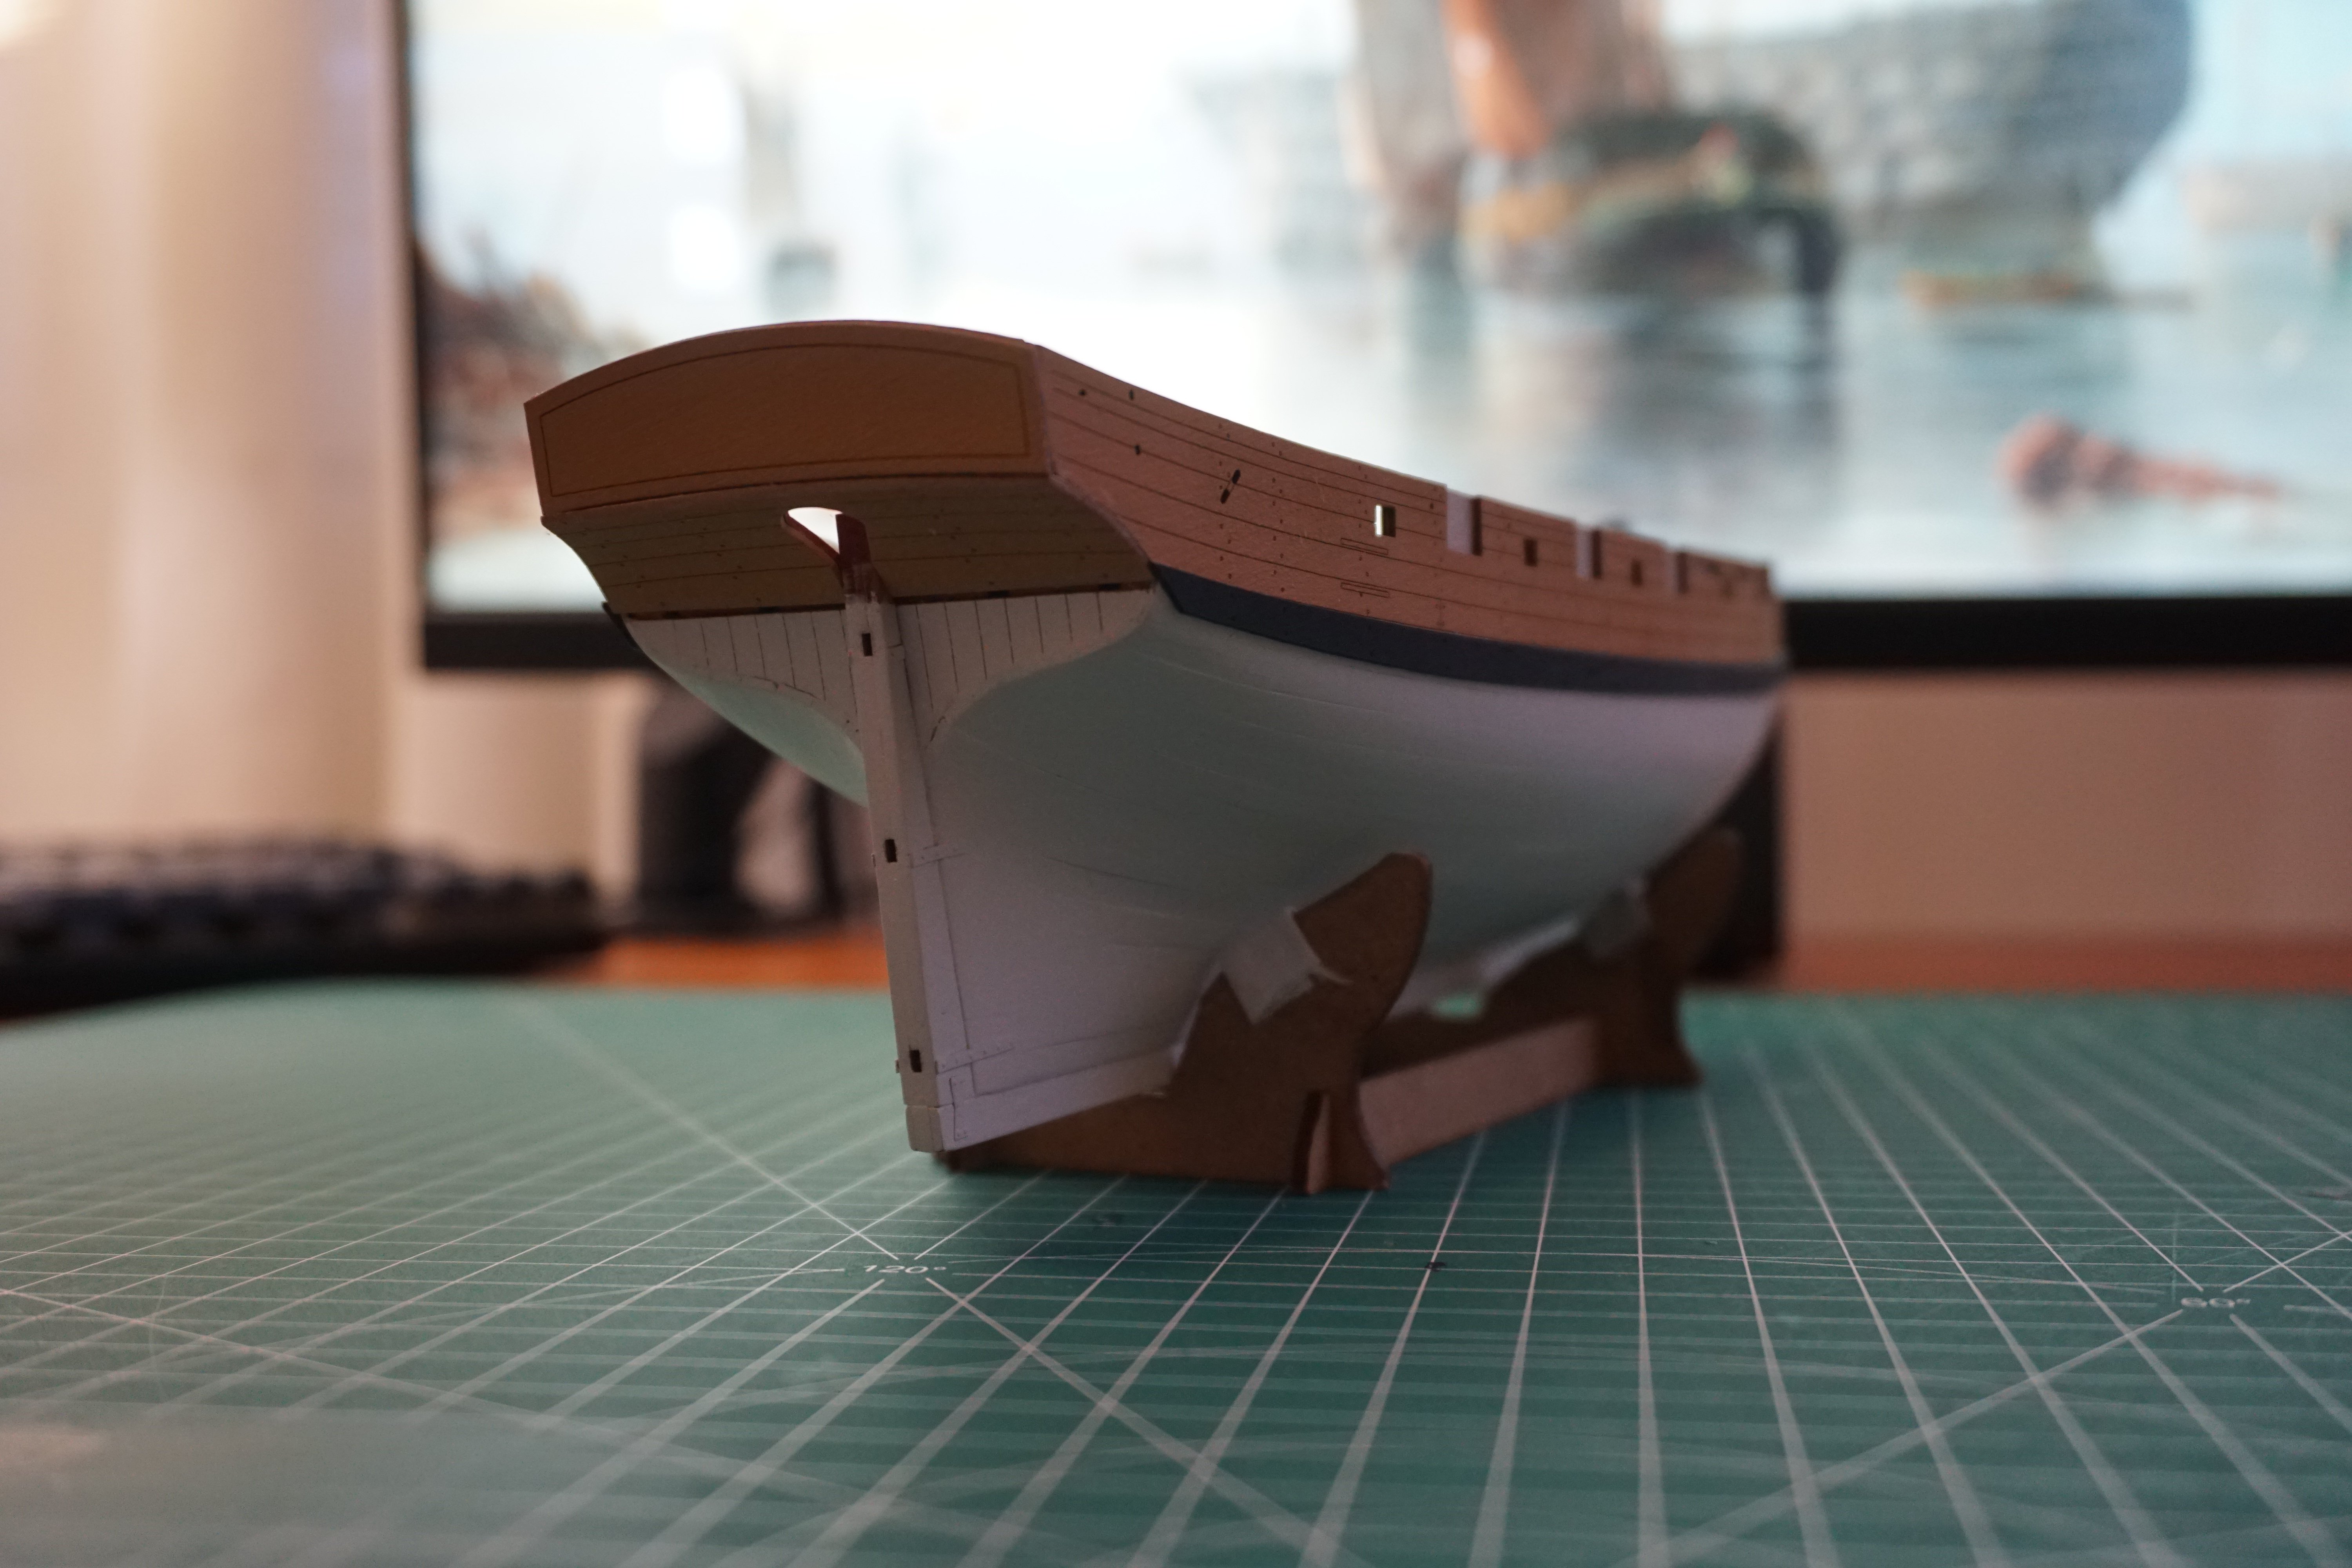
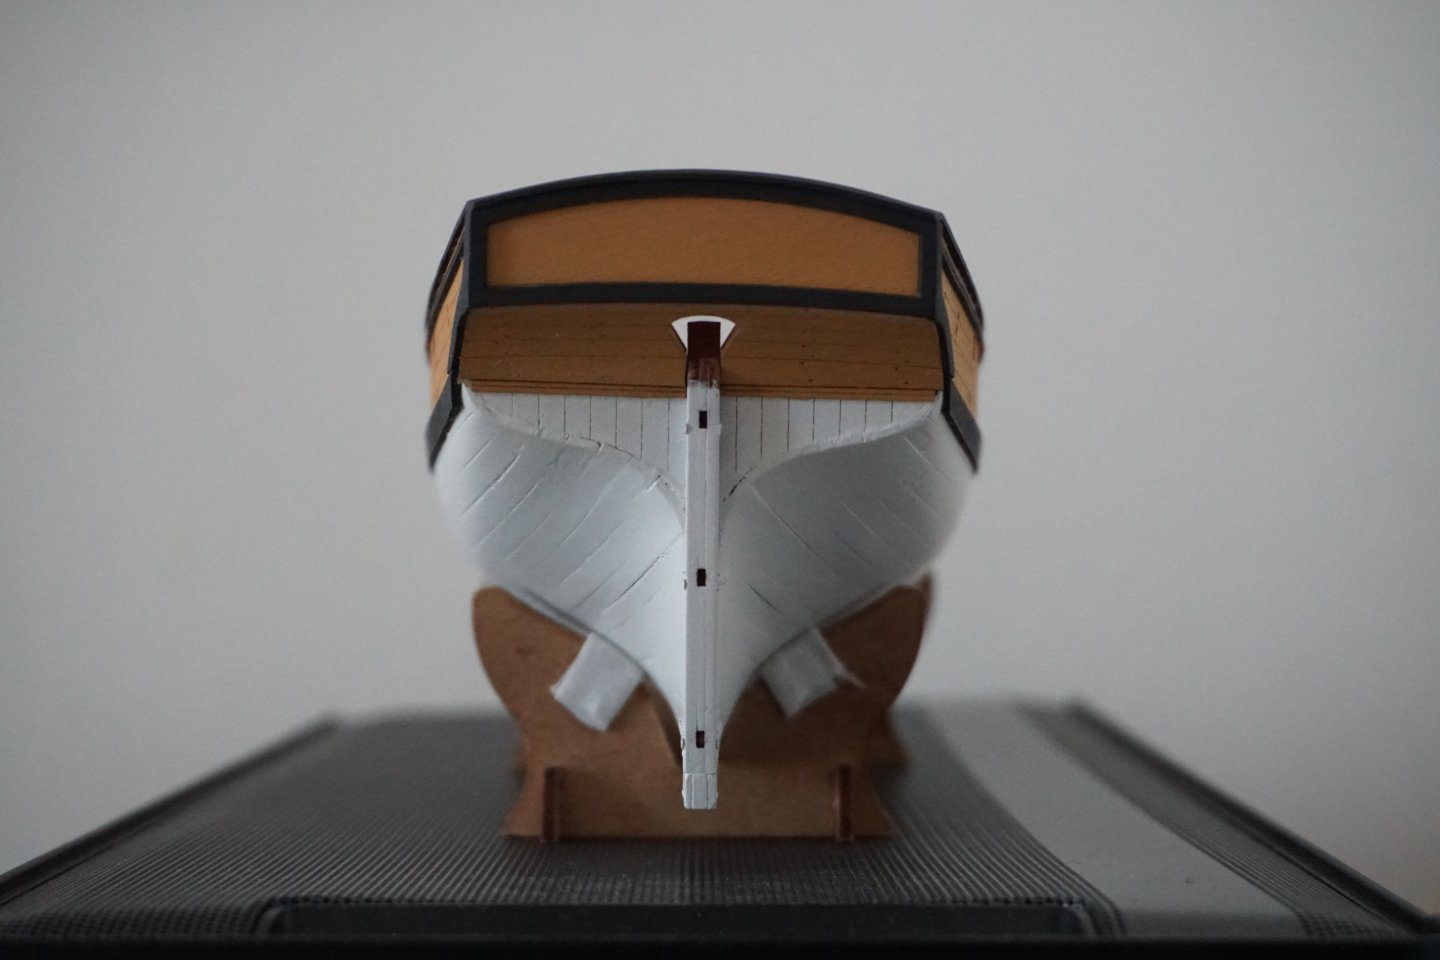
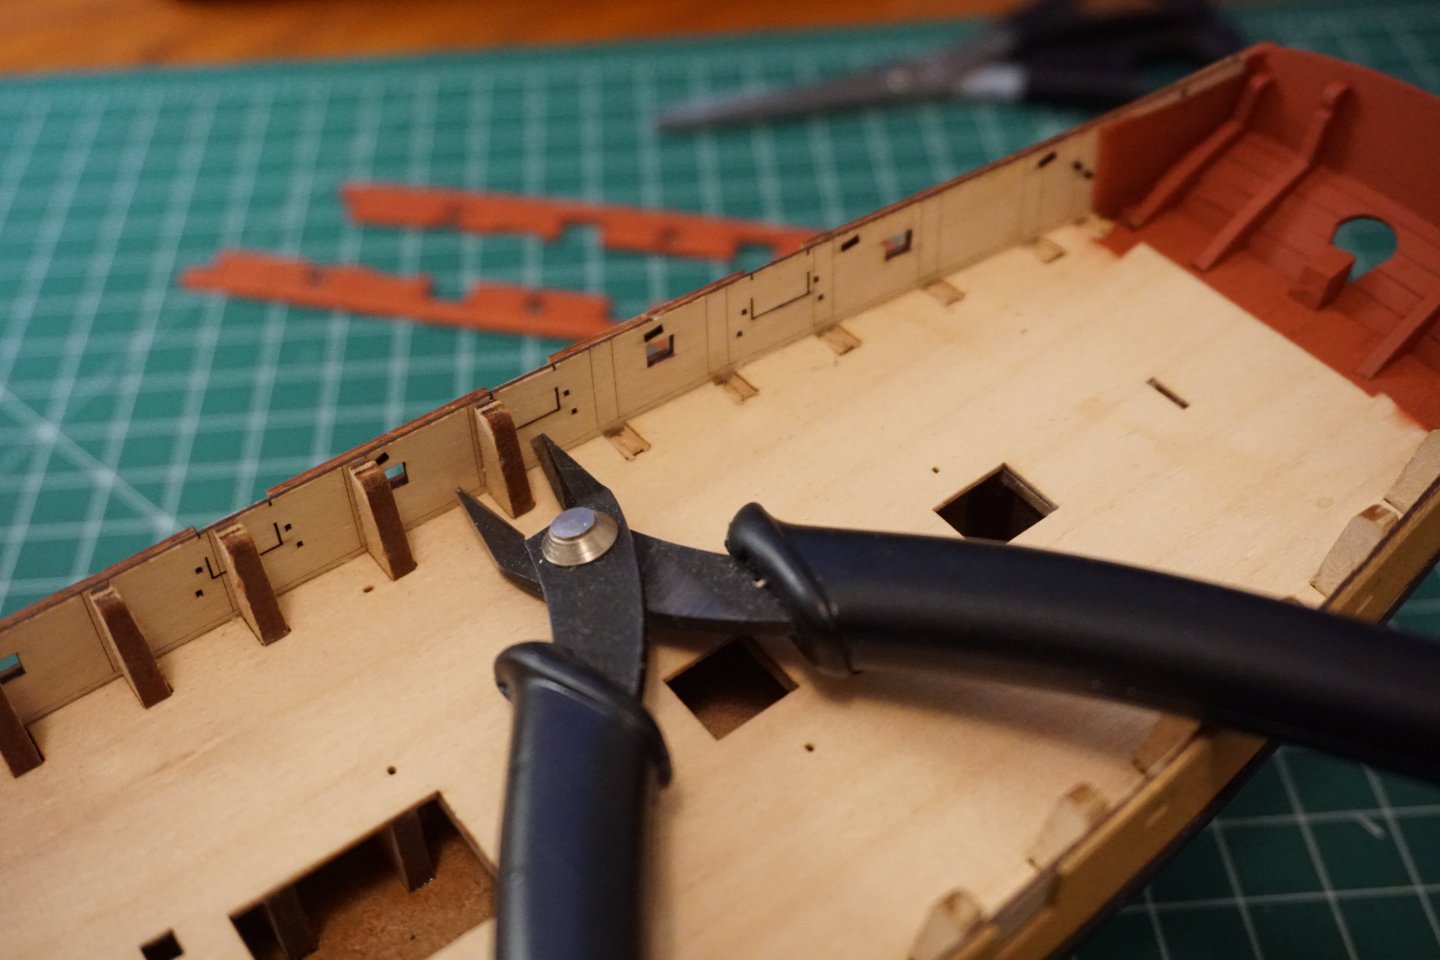
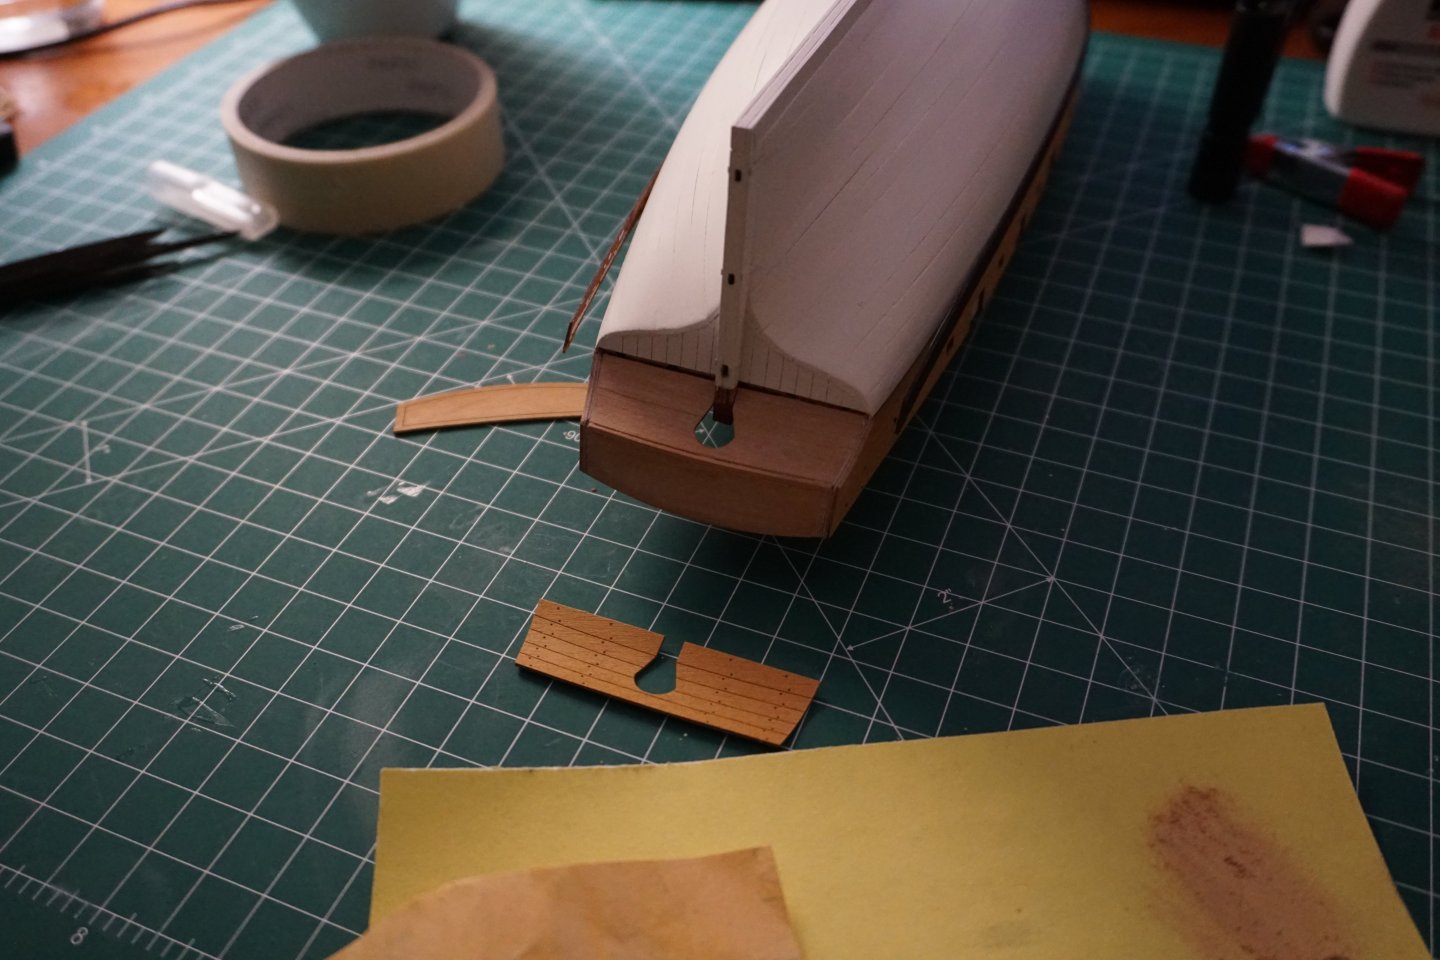
The side timbers turned out to be relatively easy to fix. The sides aren't exactly identical anymore, but hopefully it'll be hard to tell since they can't be seen at the same time. The stern is now nearly finished, but I might return to it later if I decide to build a rudder coat. At which point should the model be varnished? I assume before any rope work, but before or after installing guns and other smaller parts? I have AK Interactive's matt varnish as recommended by the manual.


- 68 replies
-
- 6
-
-
- First build
- Cutter
- (and 2 more)
-
Pitan reacted to a post in a topic:
HM Armed Cutter Sherbourne 1763 by Nightdive - Vanguard Models - 1:64 - First Build
-
Geordie Tyne reacted to a post in a topic:
HM Armed Cutter Sherbourne 1763 by Nightdive - Vanguard Models - 1:64 - First Build
-
muratx reacted to a post in a topic:
HM Armed Cutter Sherbourne 1763 by Nightdive - Vanguard Models - 1:64 - First Build
-
Good to know, I'll need to check out that part of your build log again. I'll try adding two small extra bits of wood to mine first, the seam might not be too visible in a black part.
-
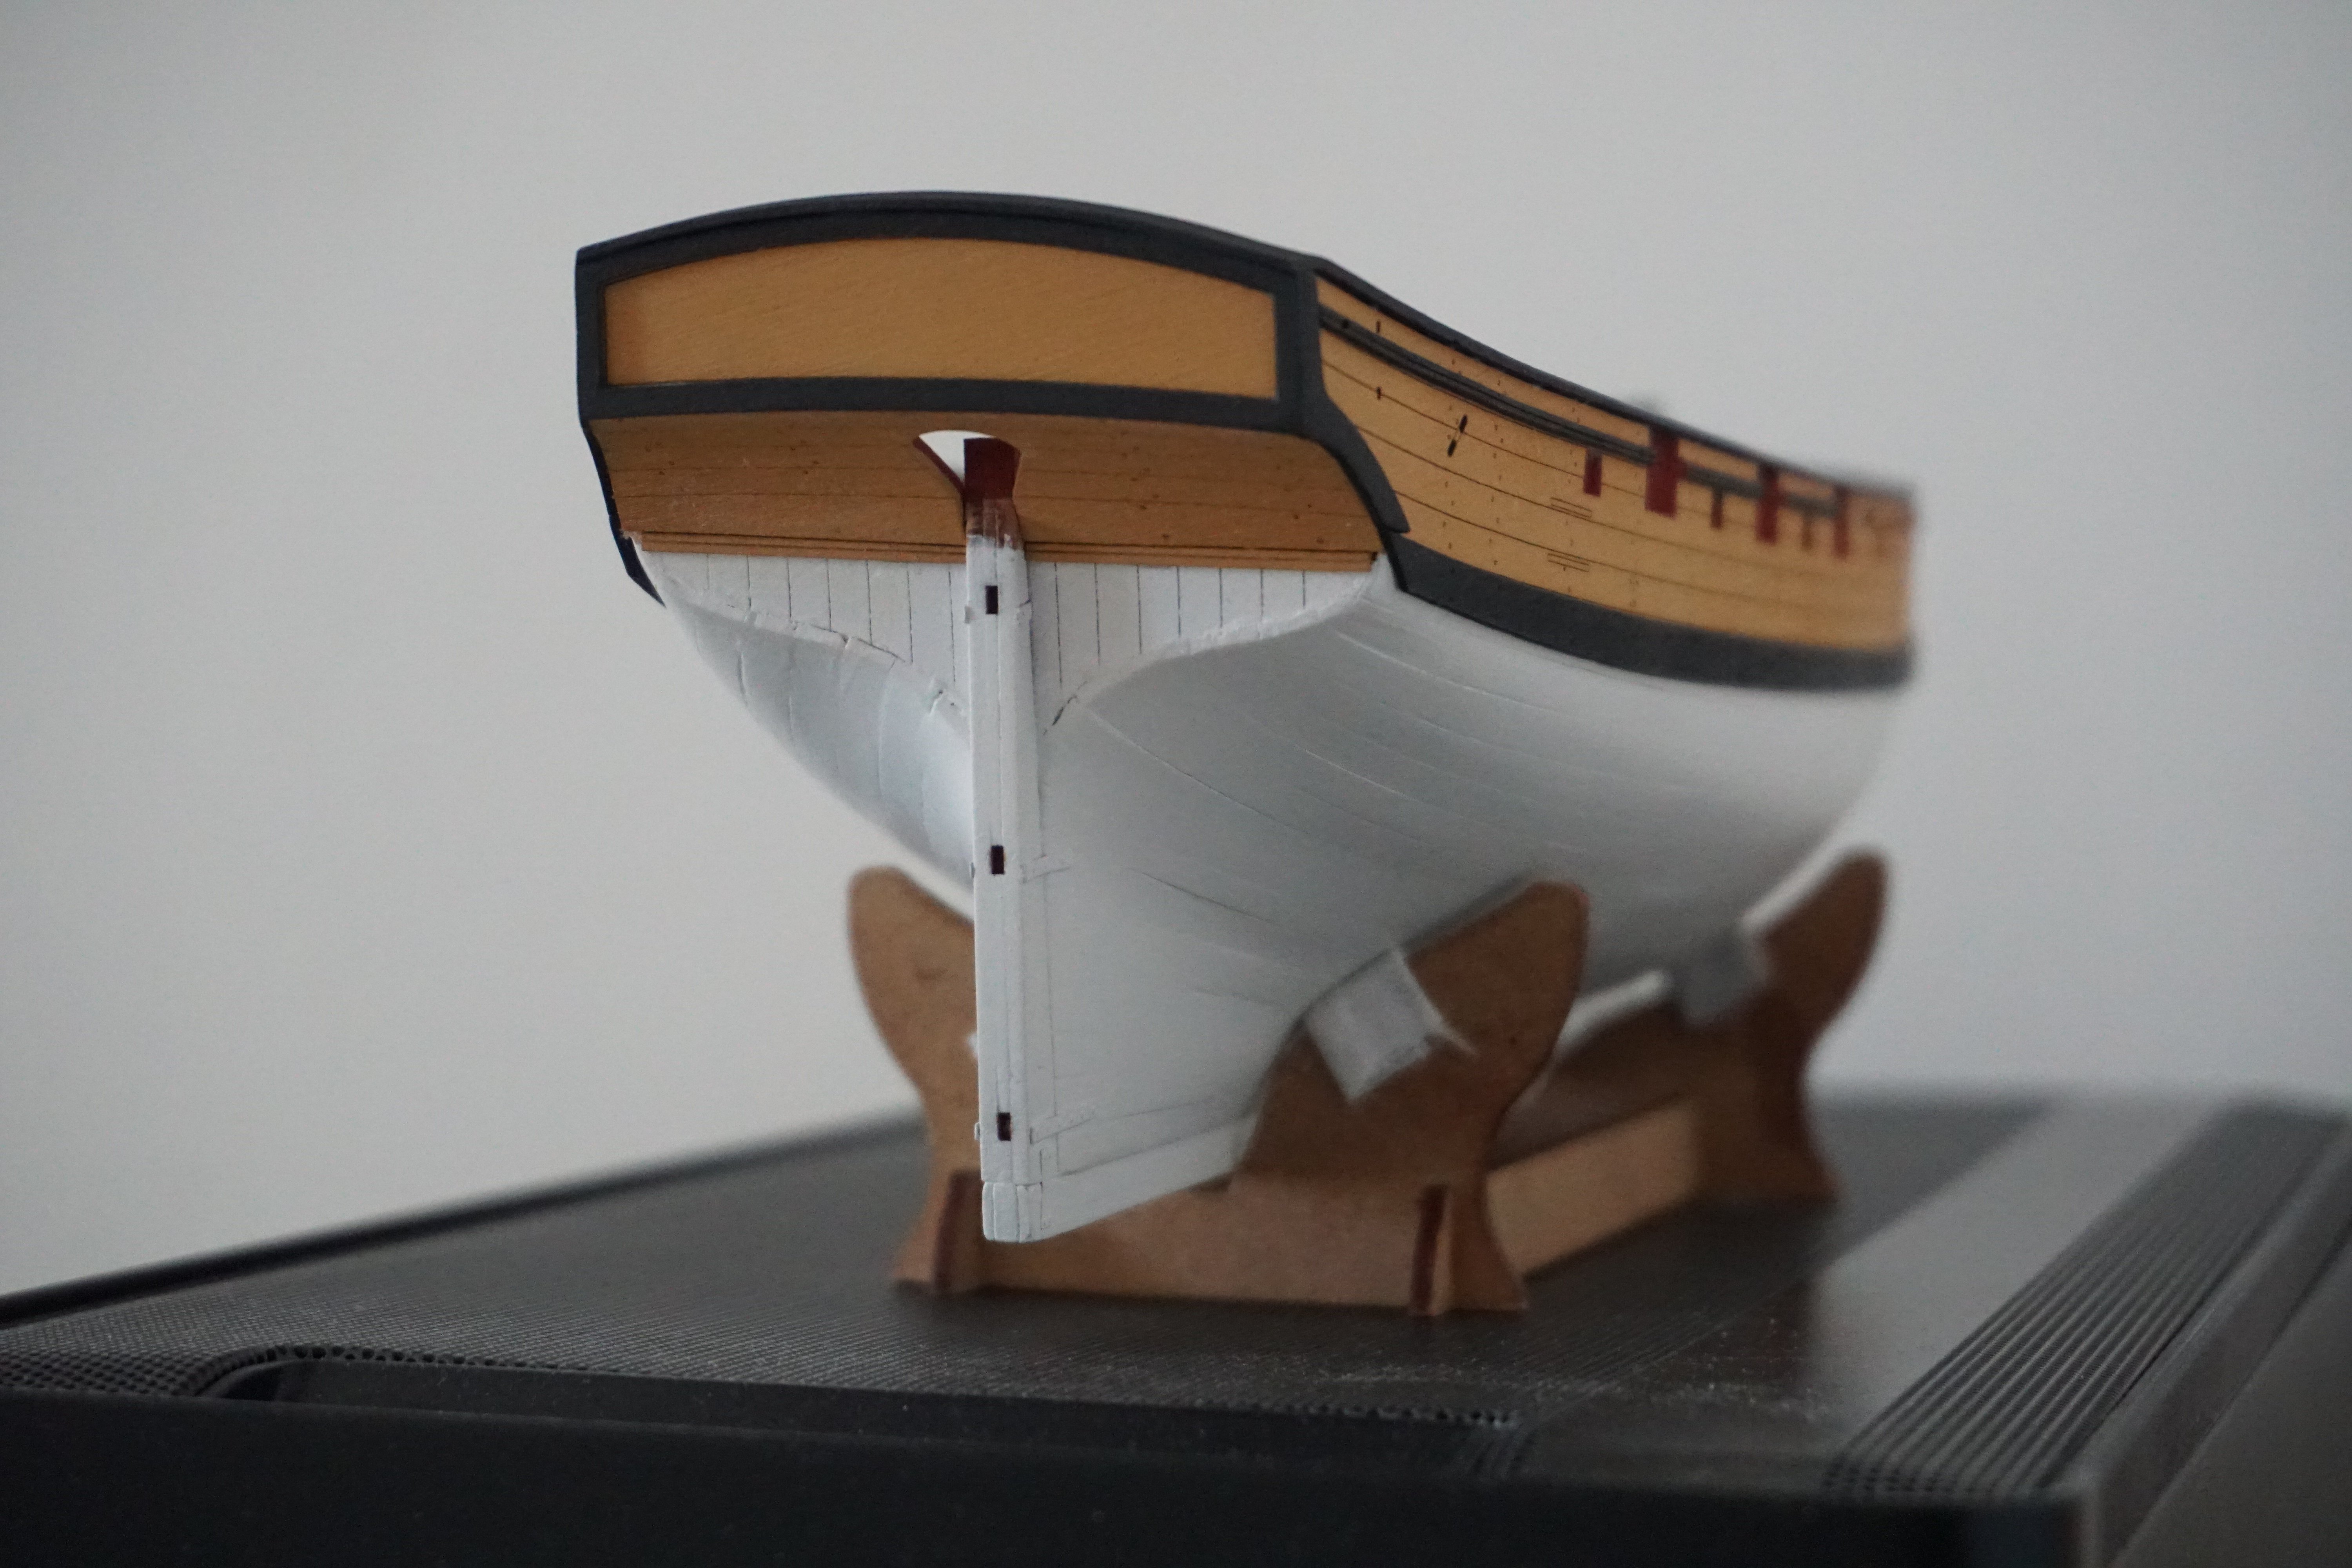
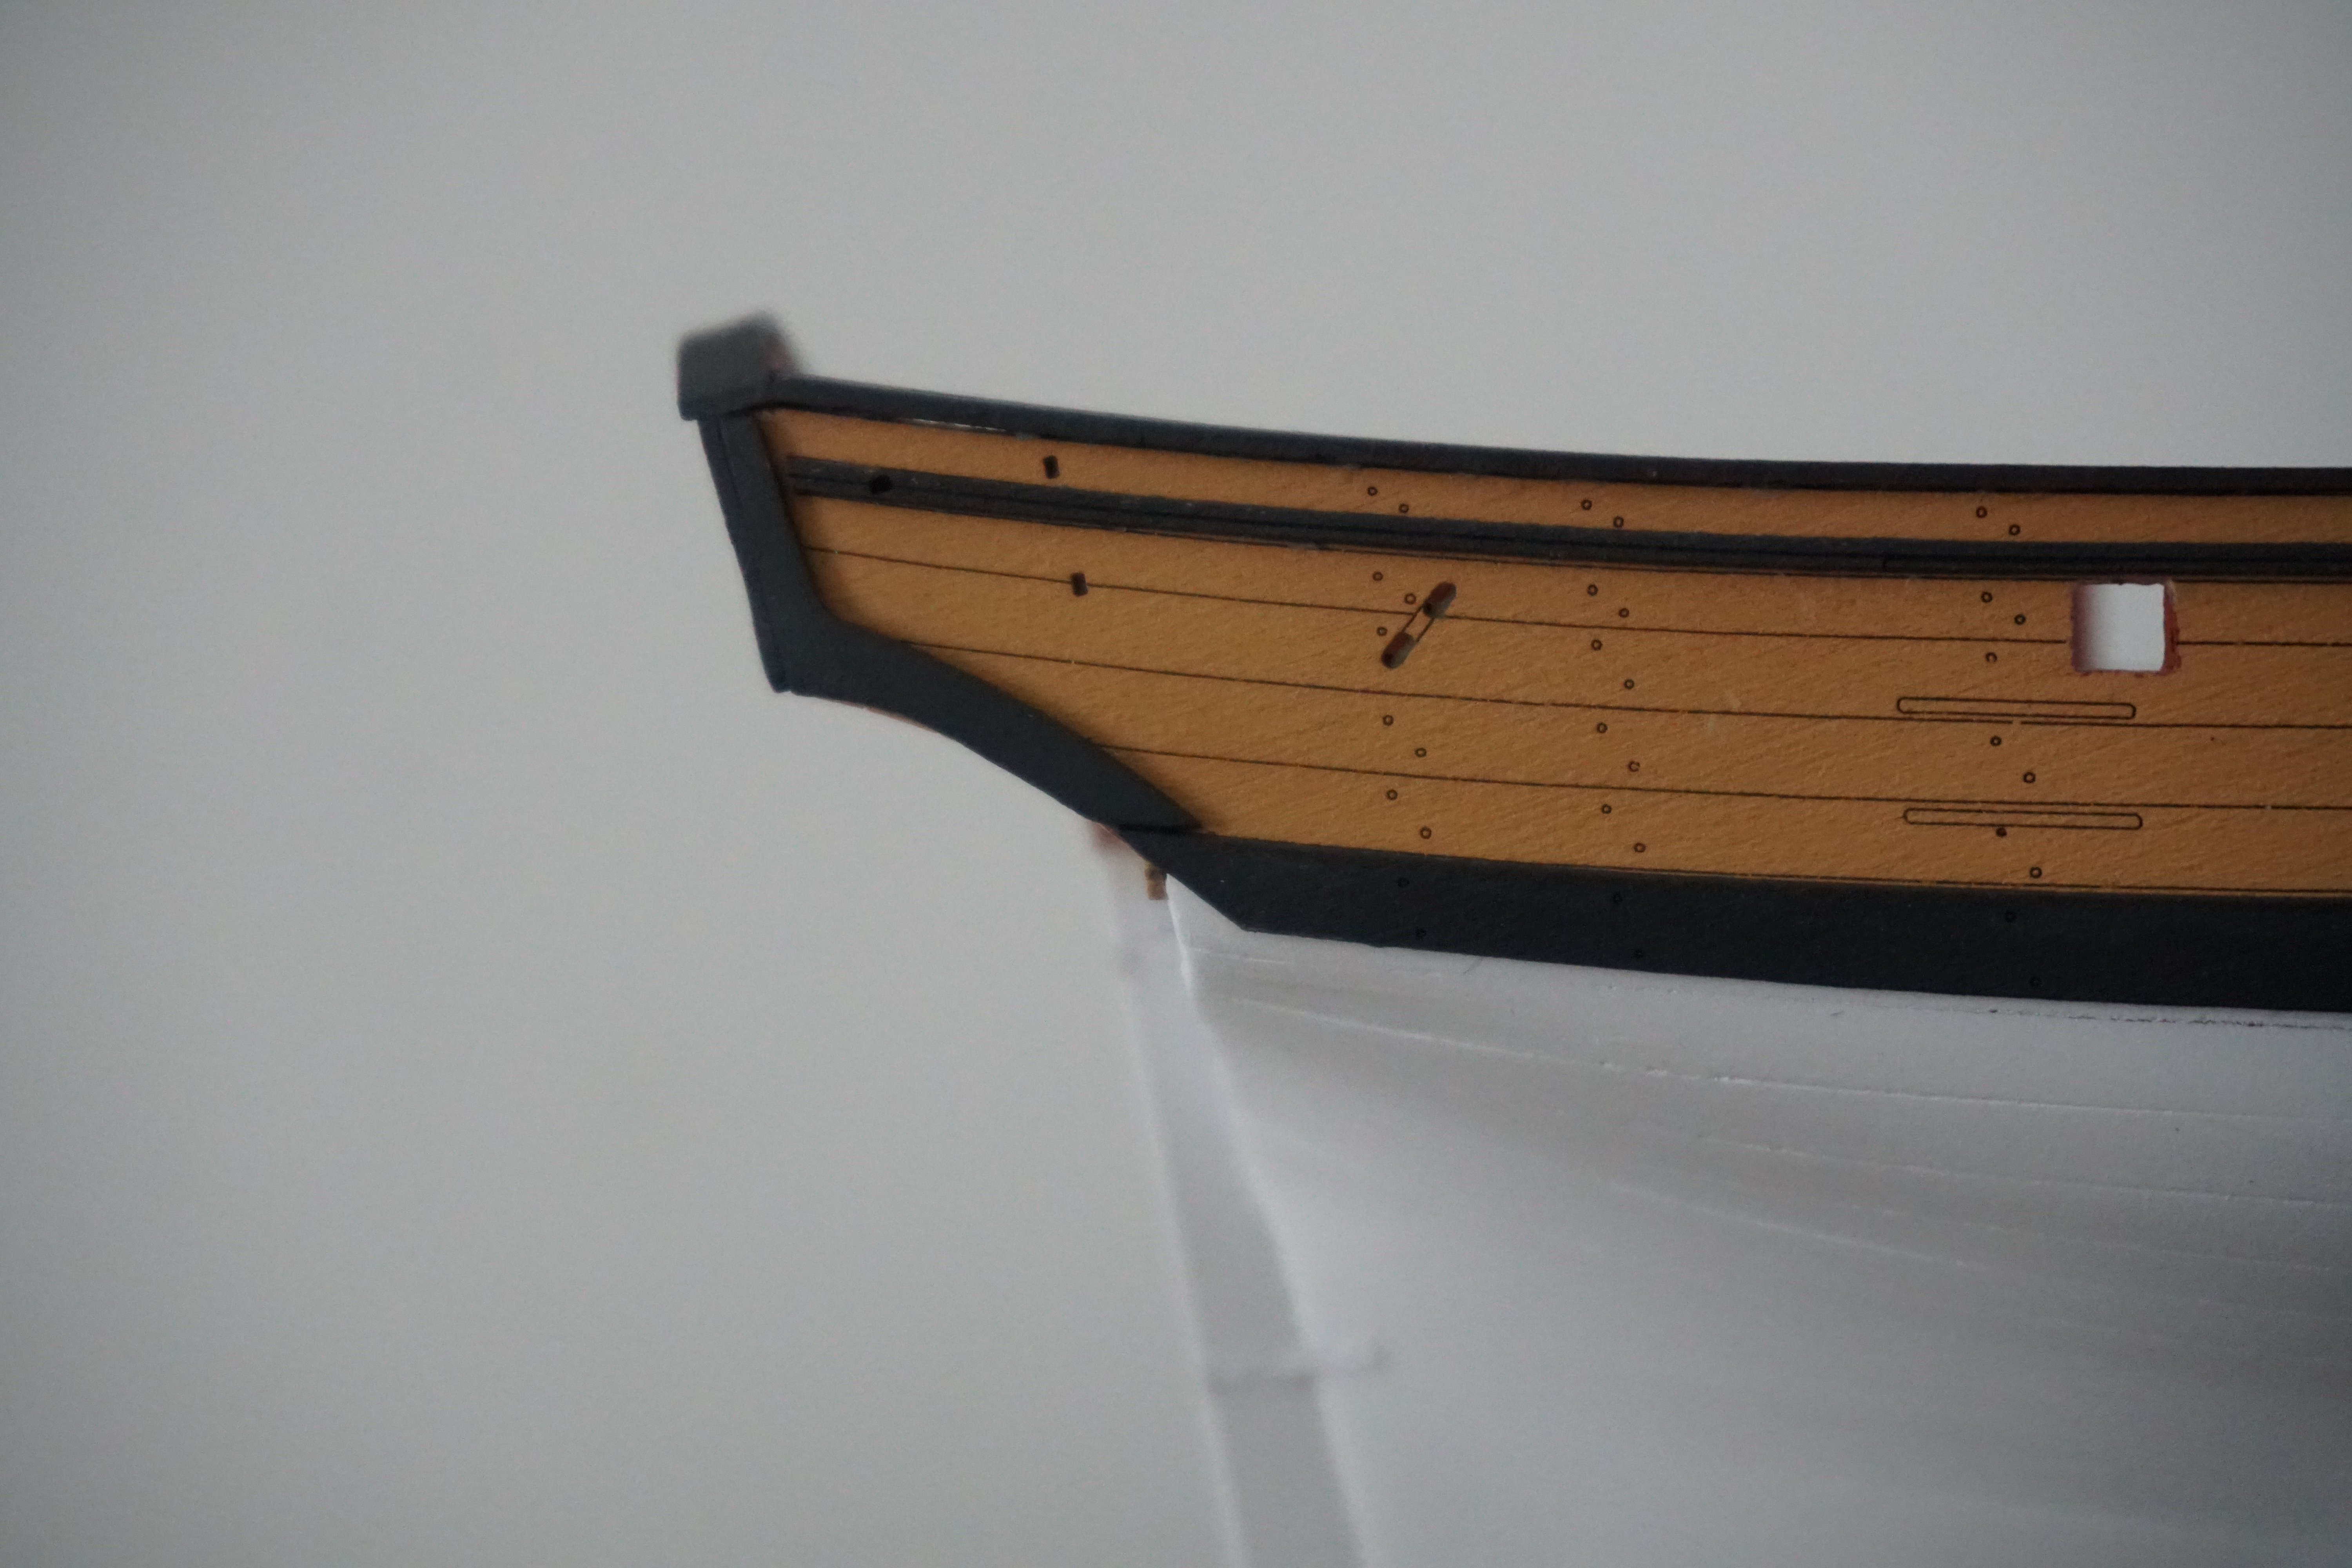
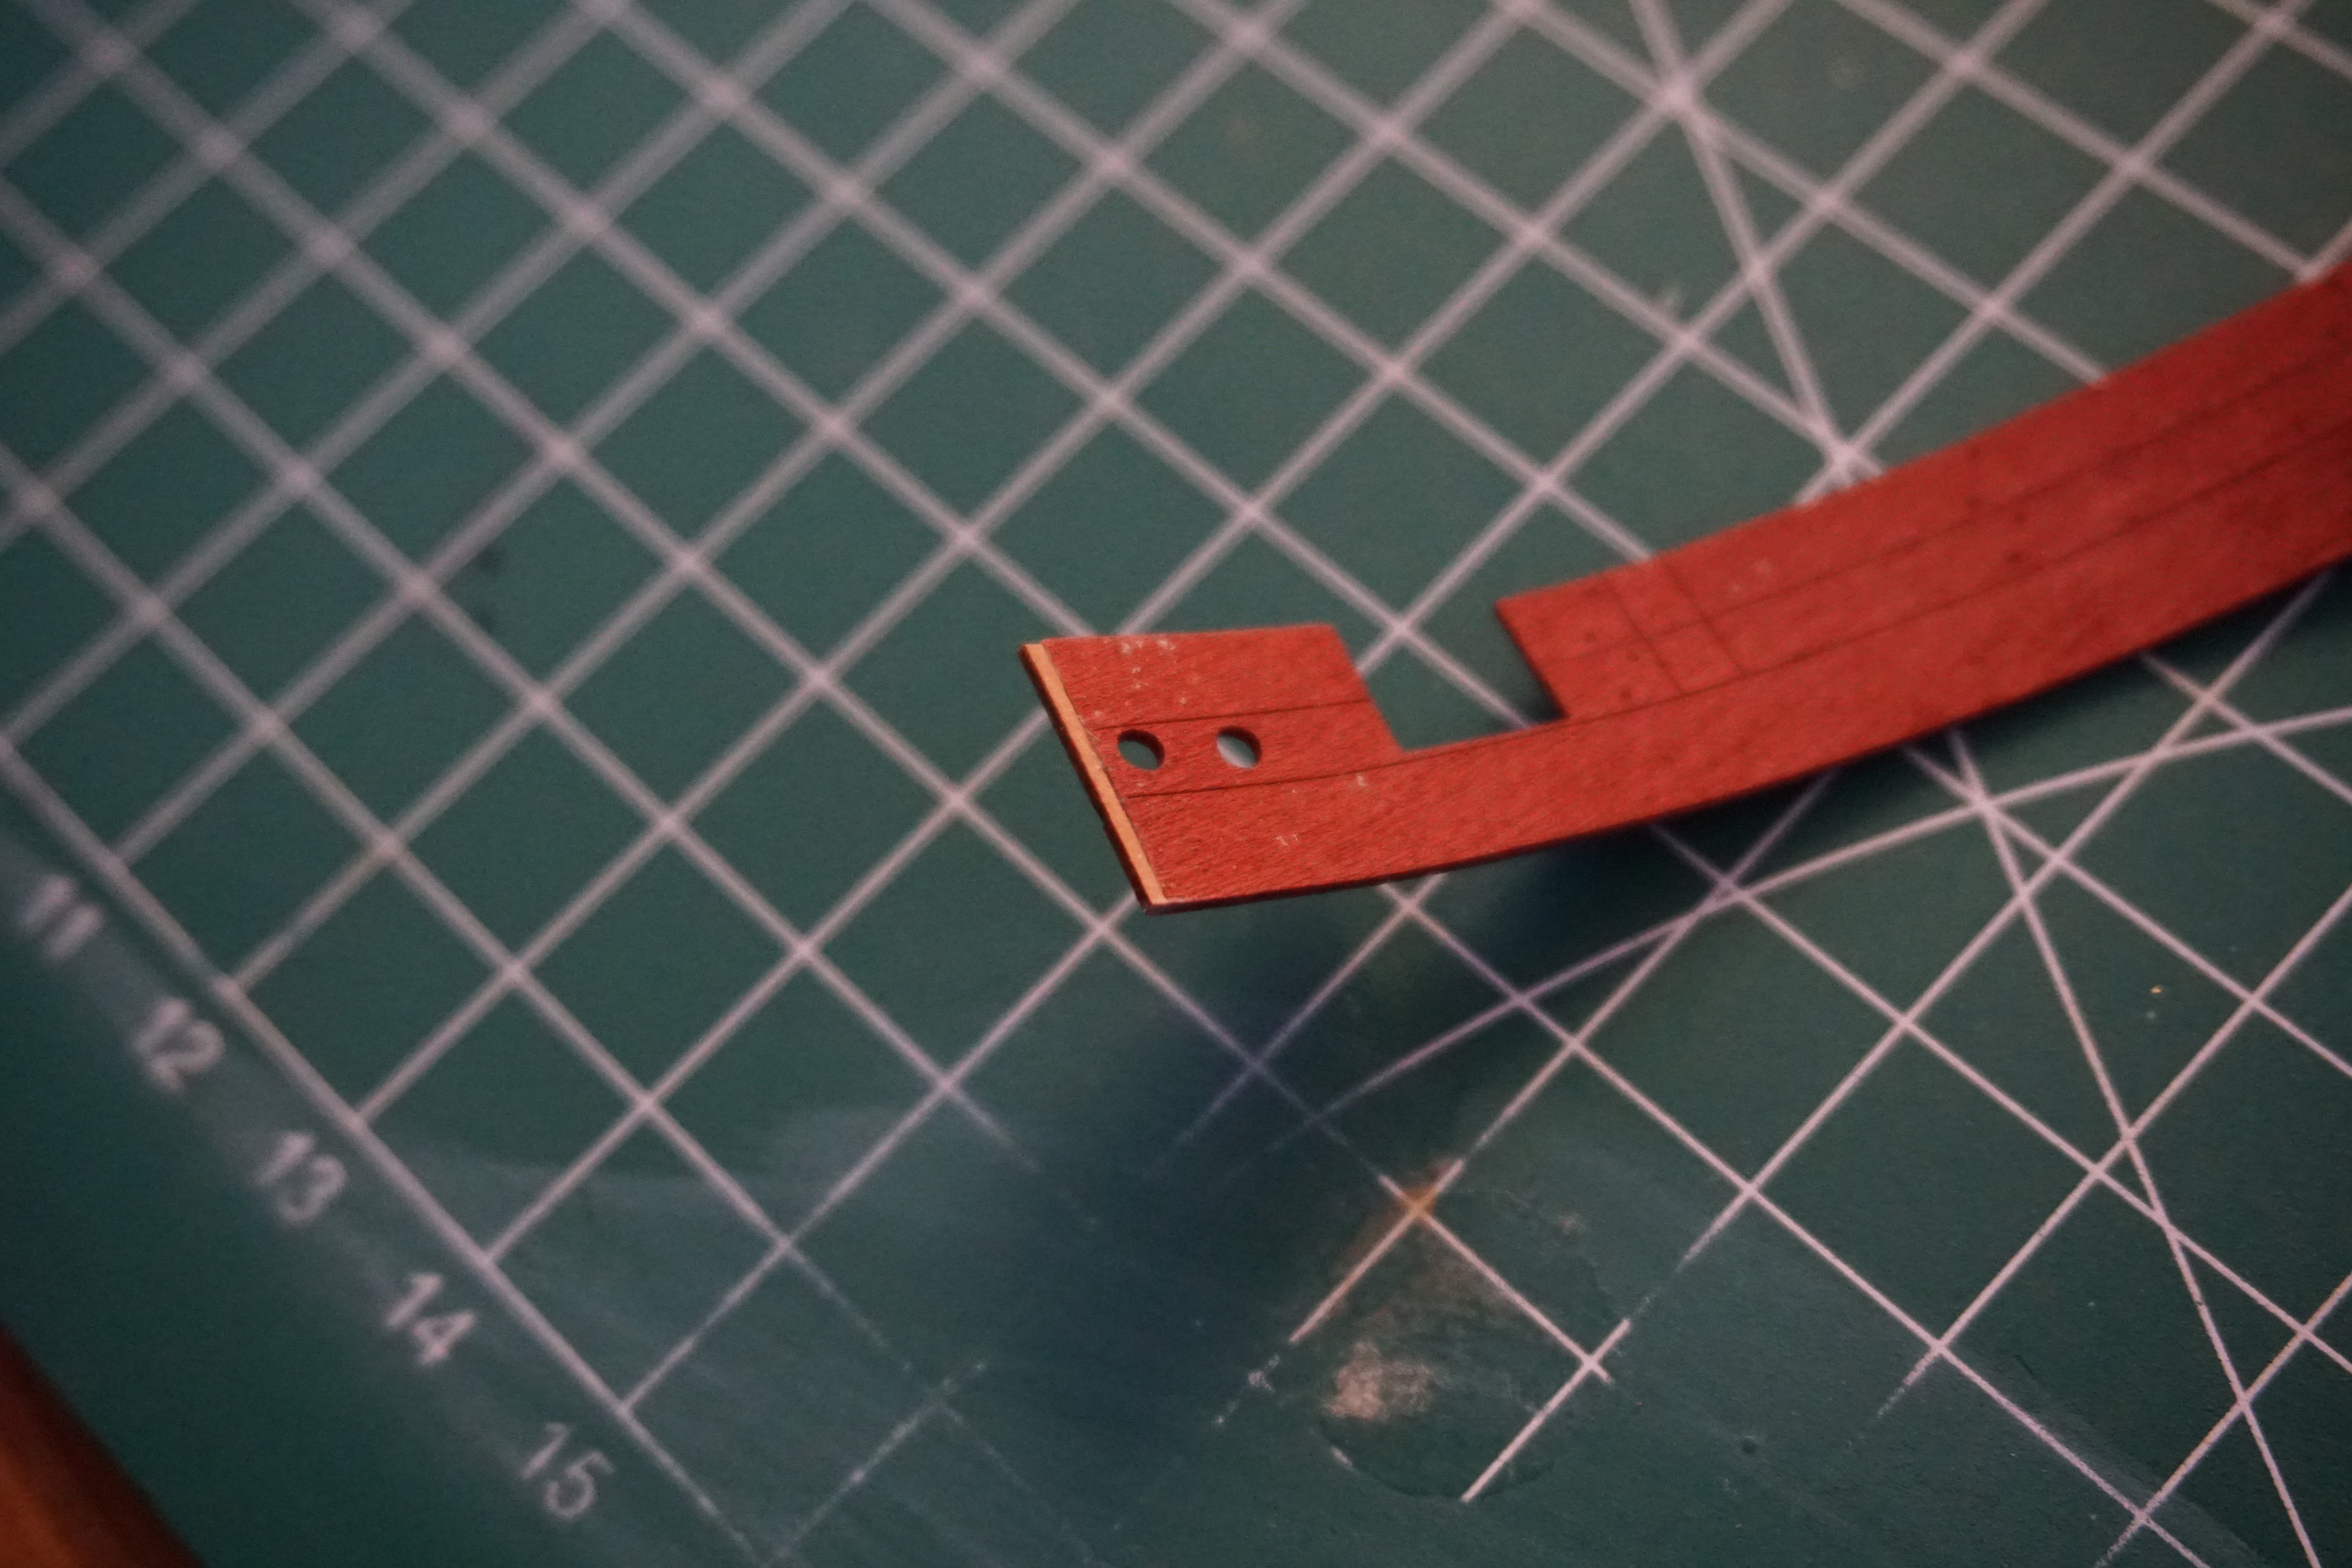
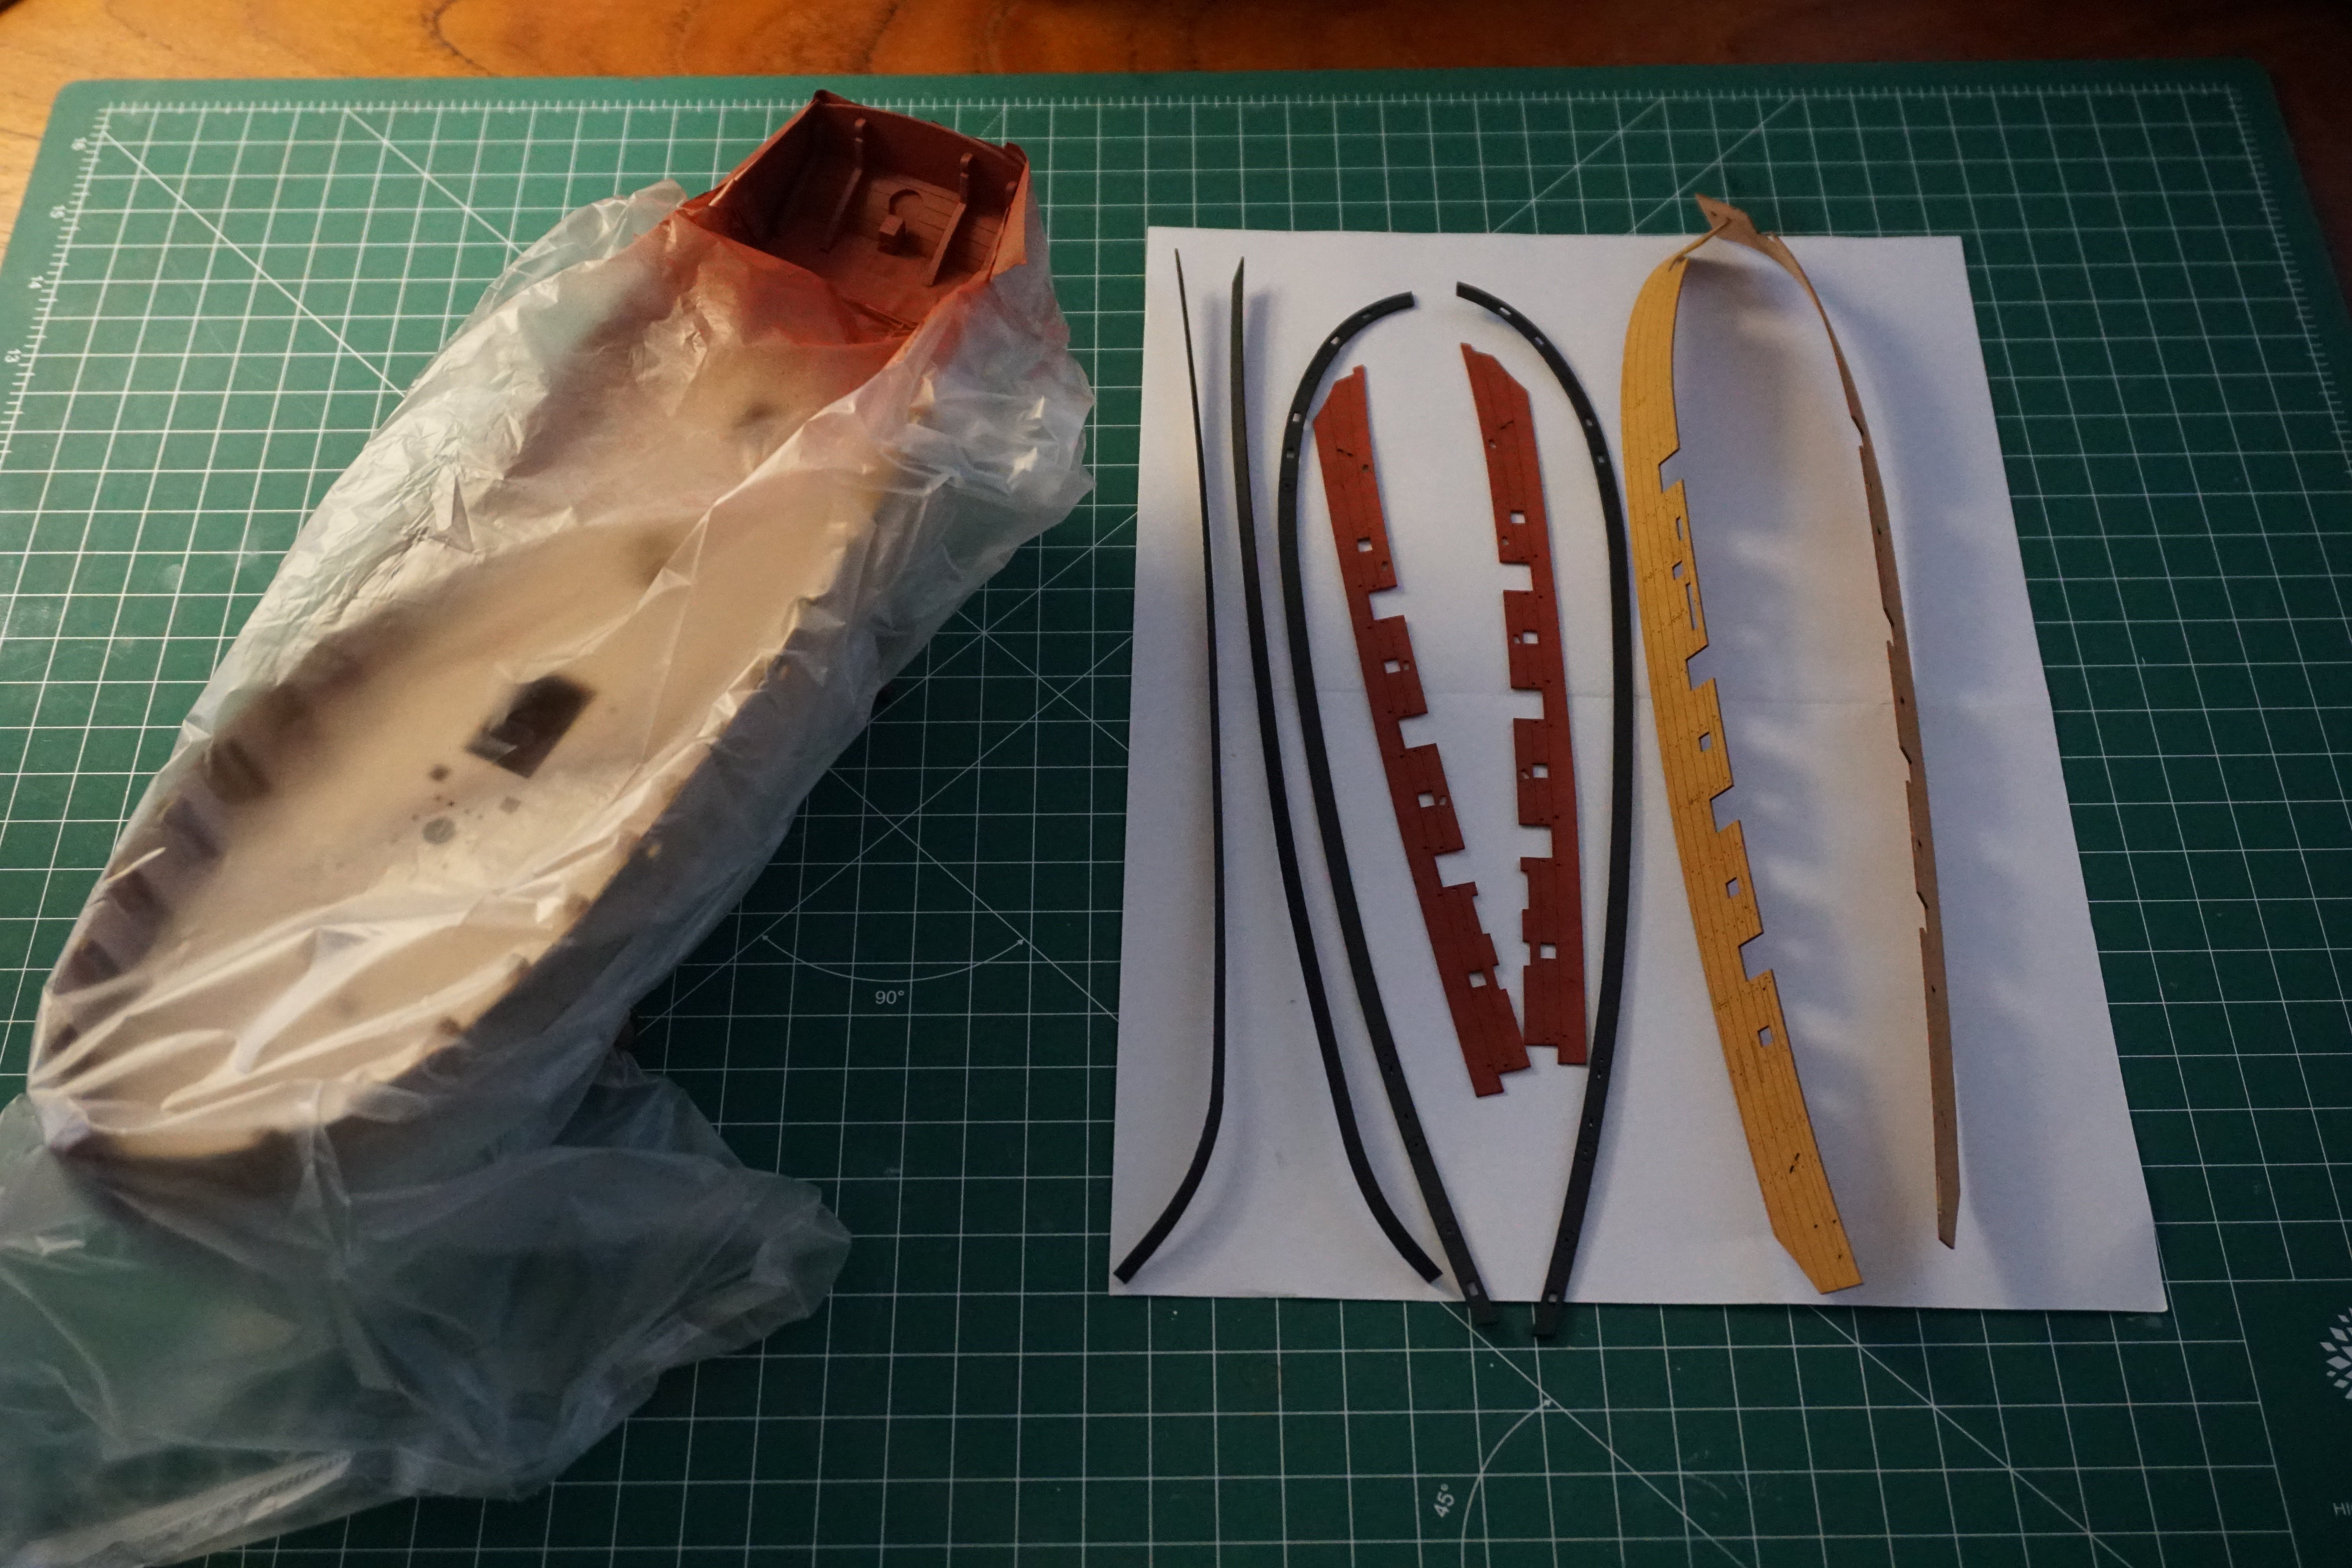
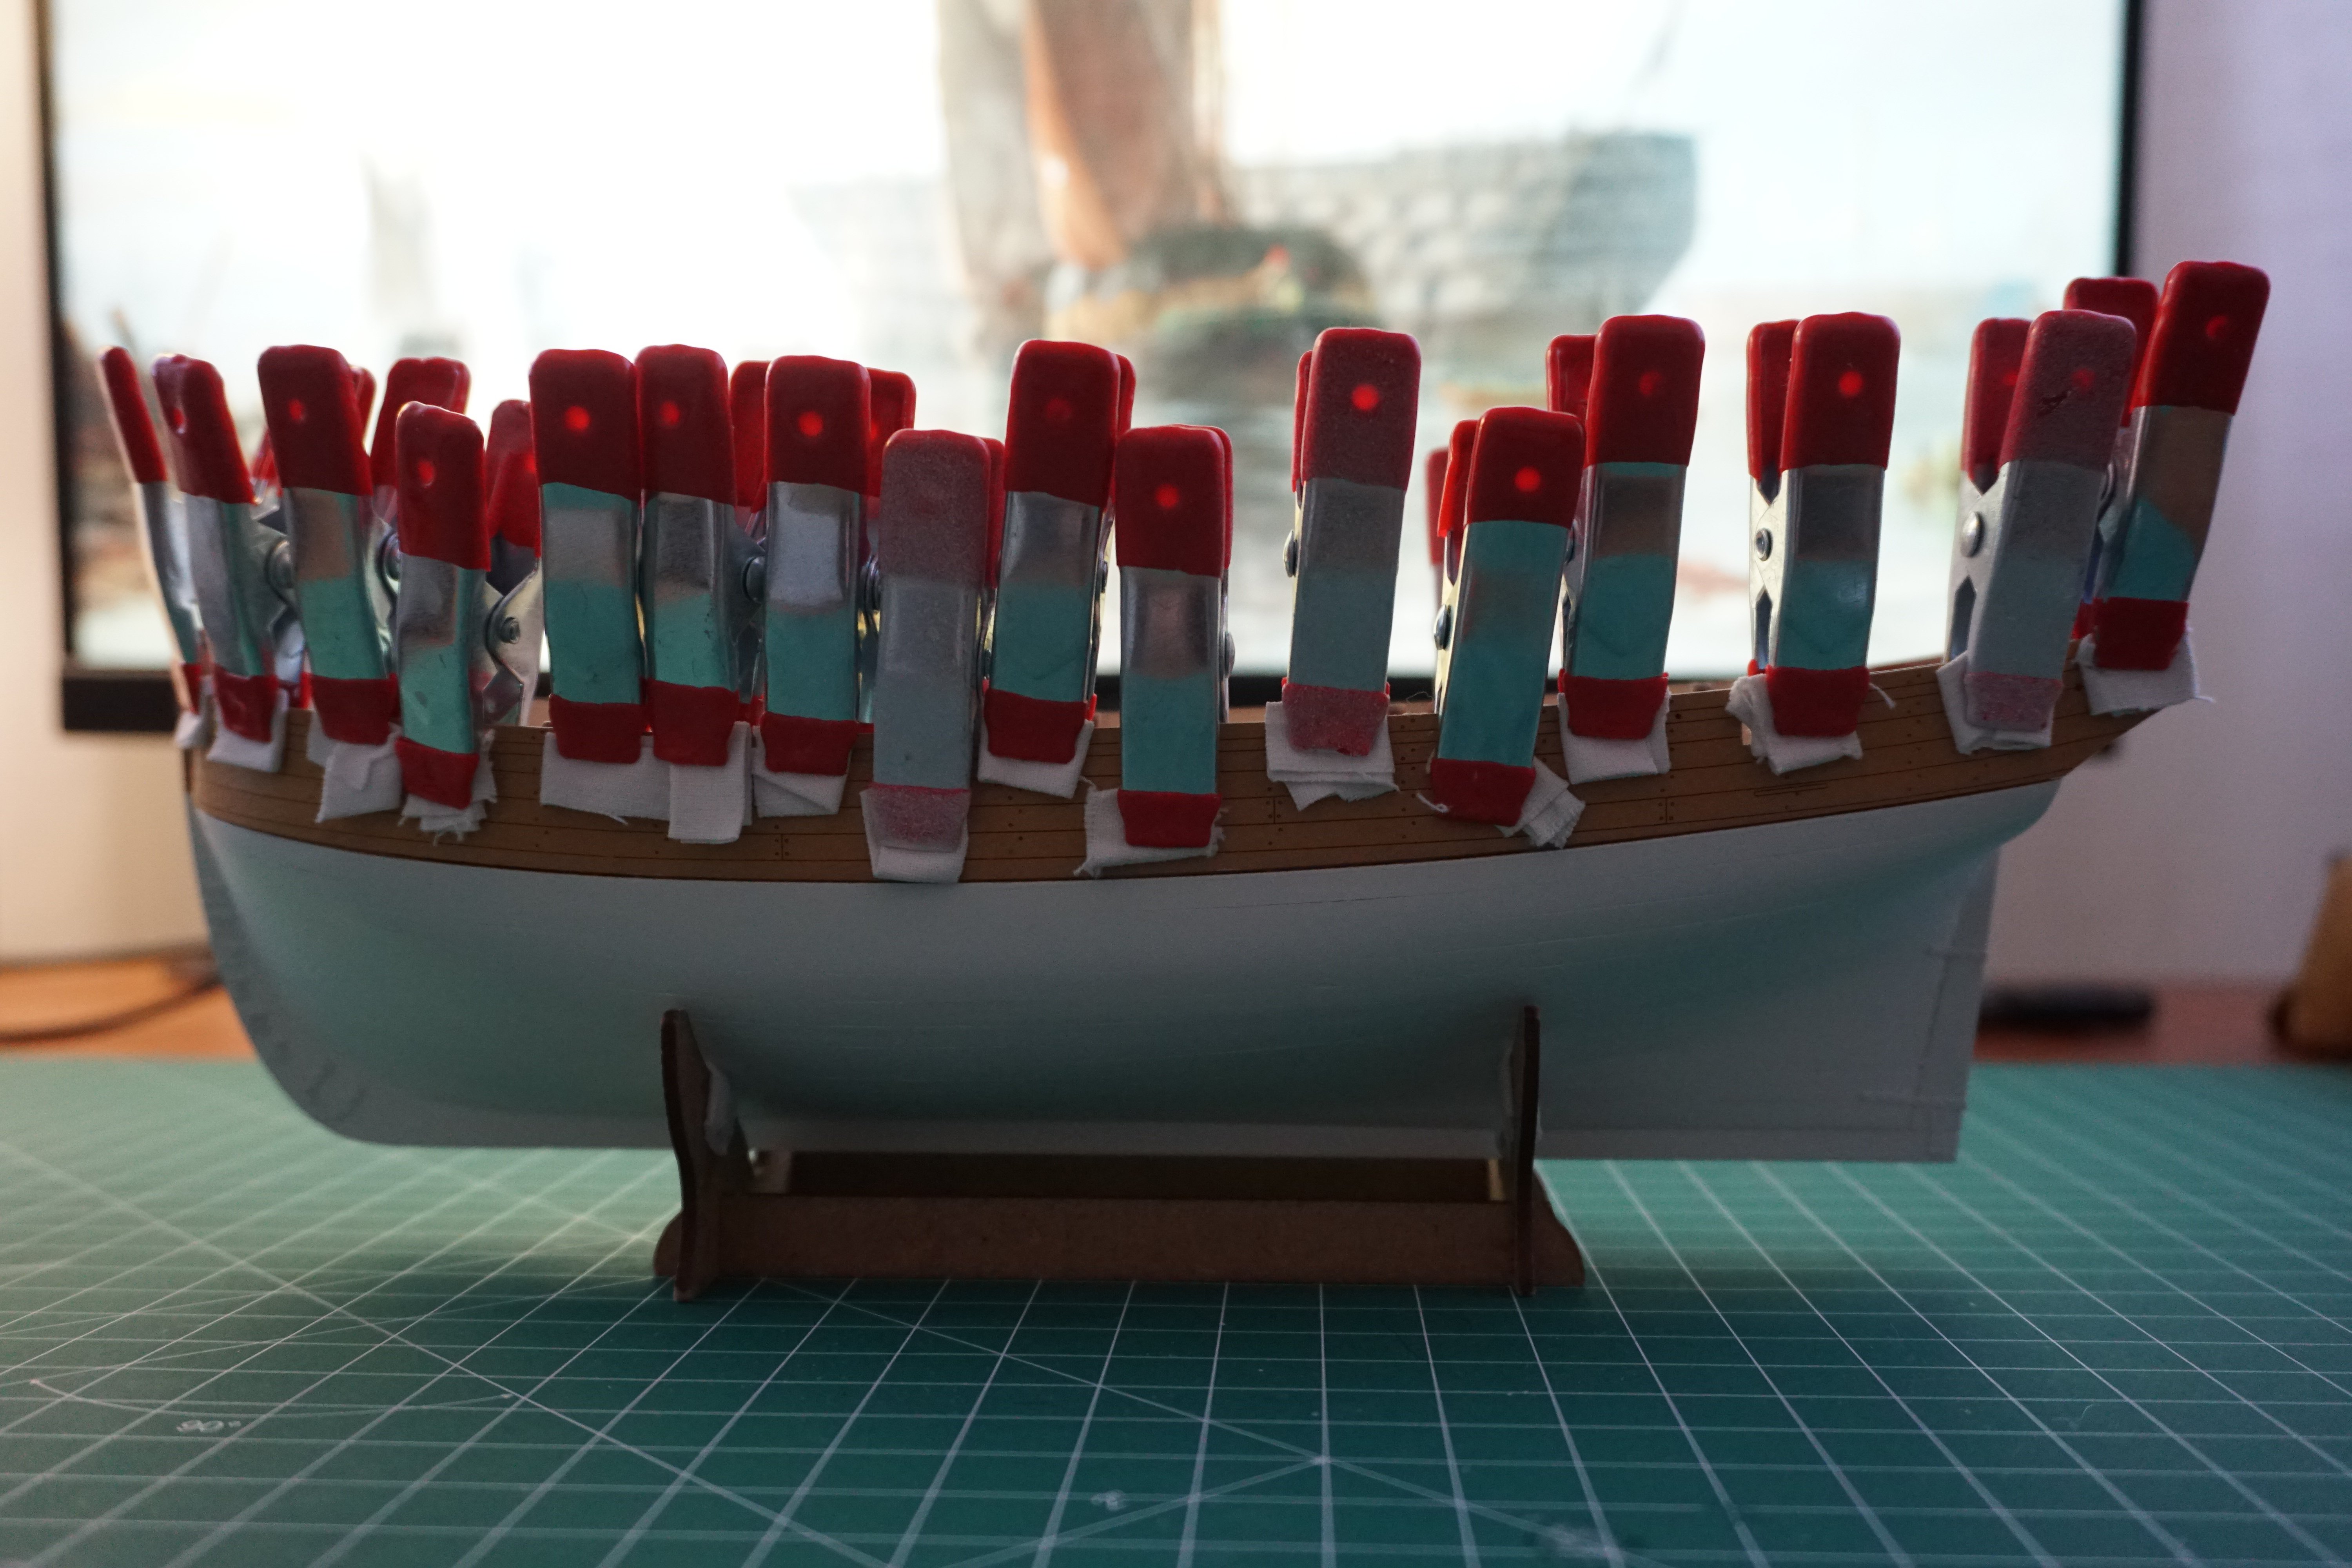
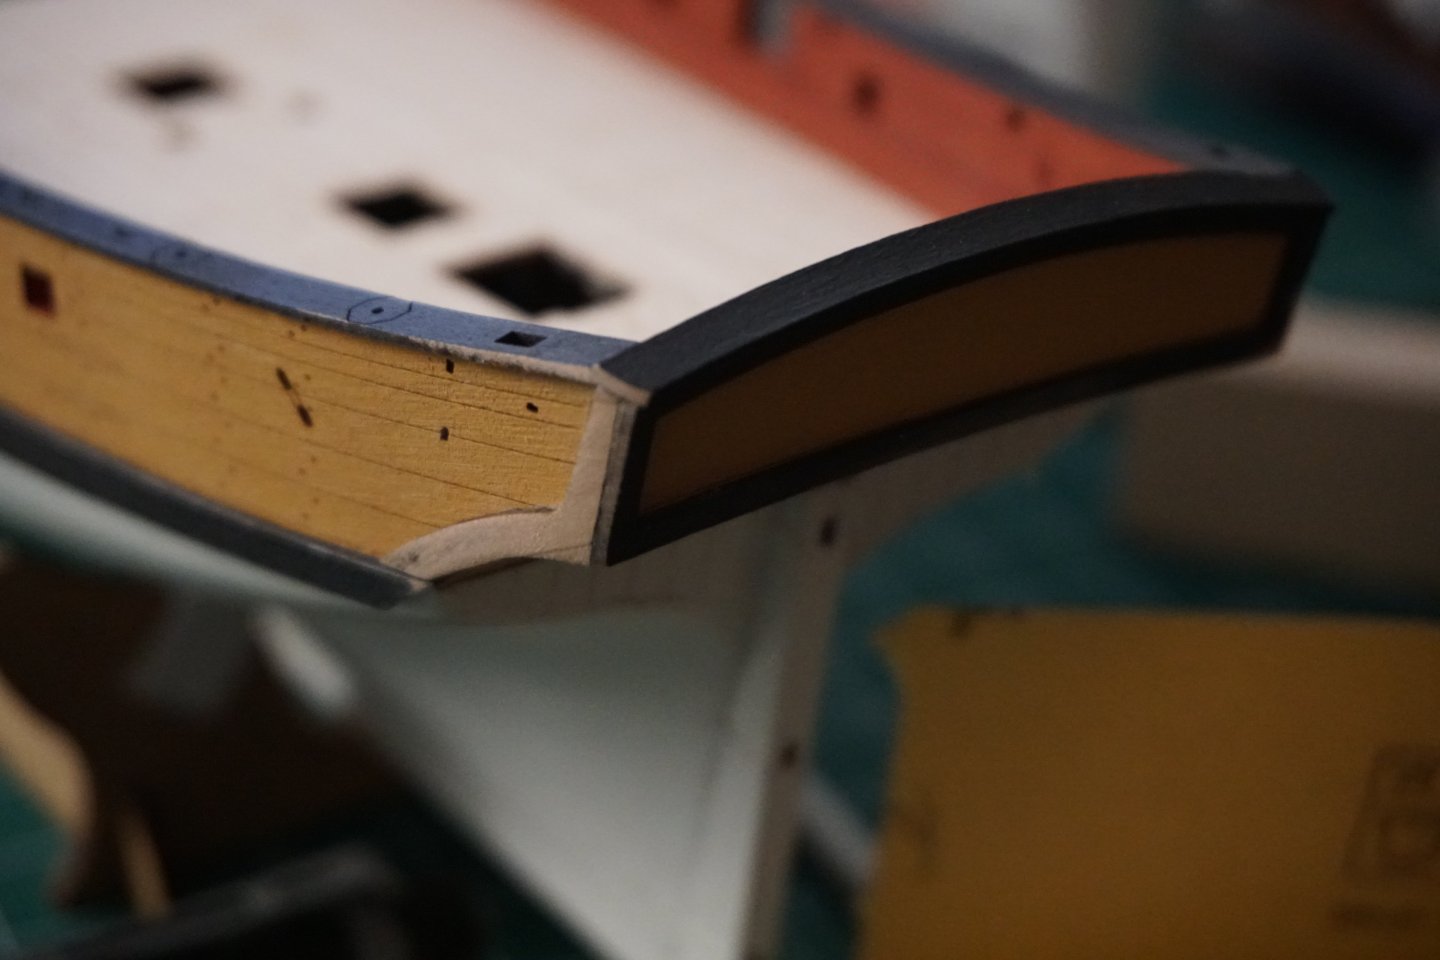
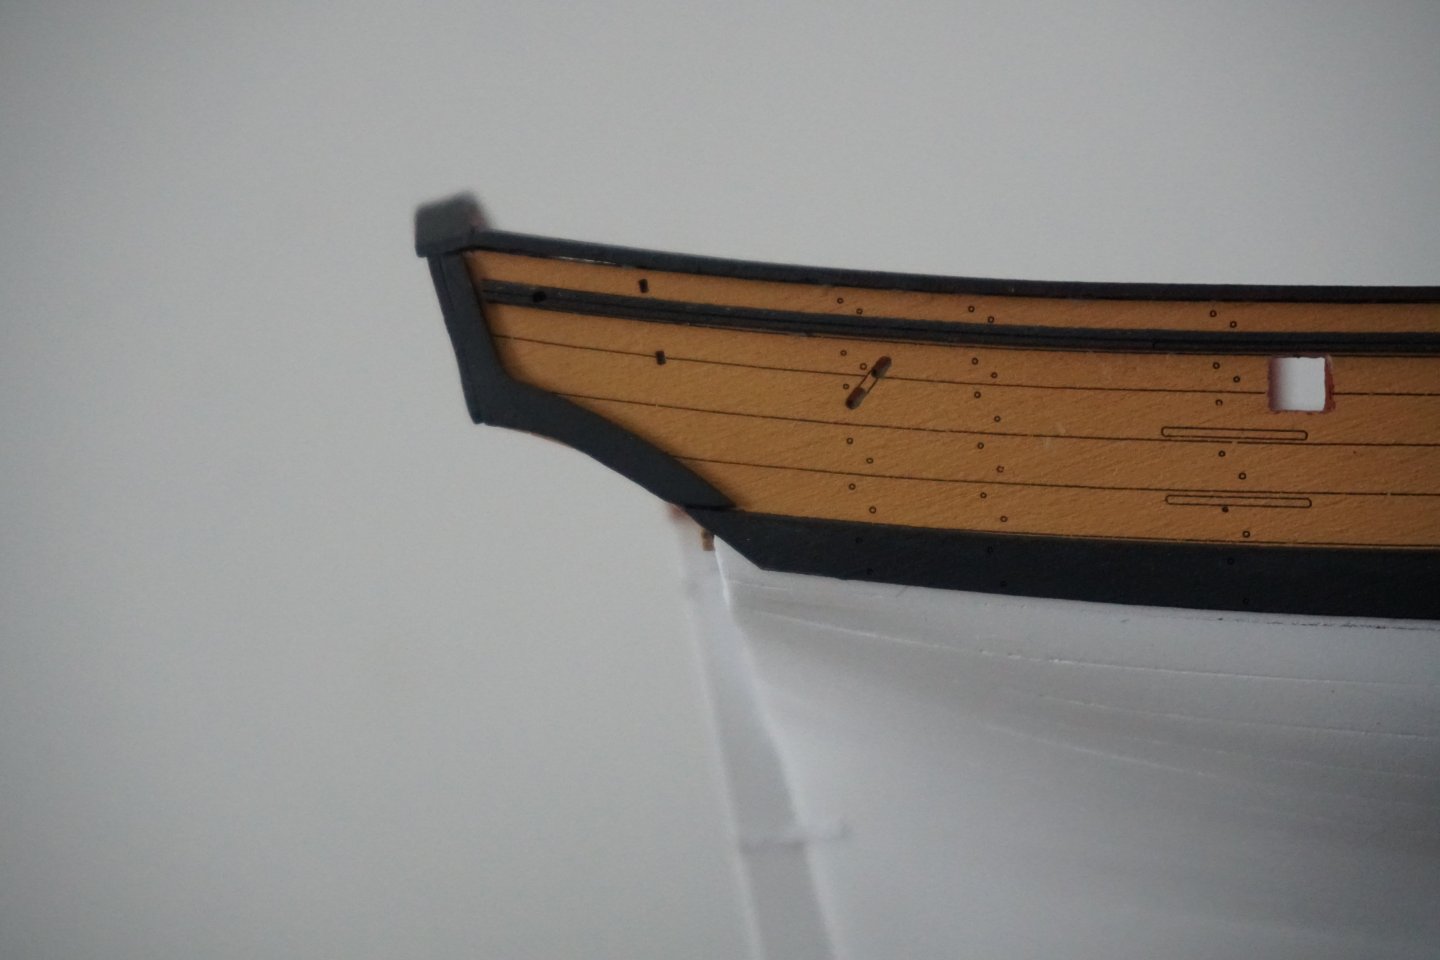
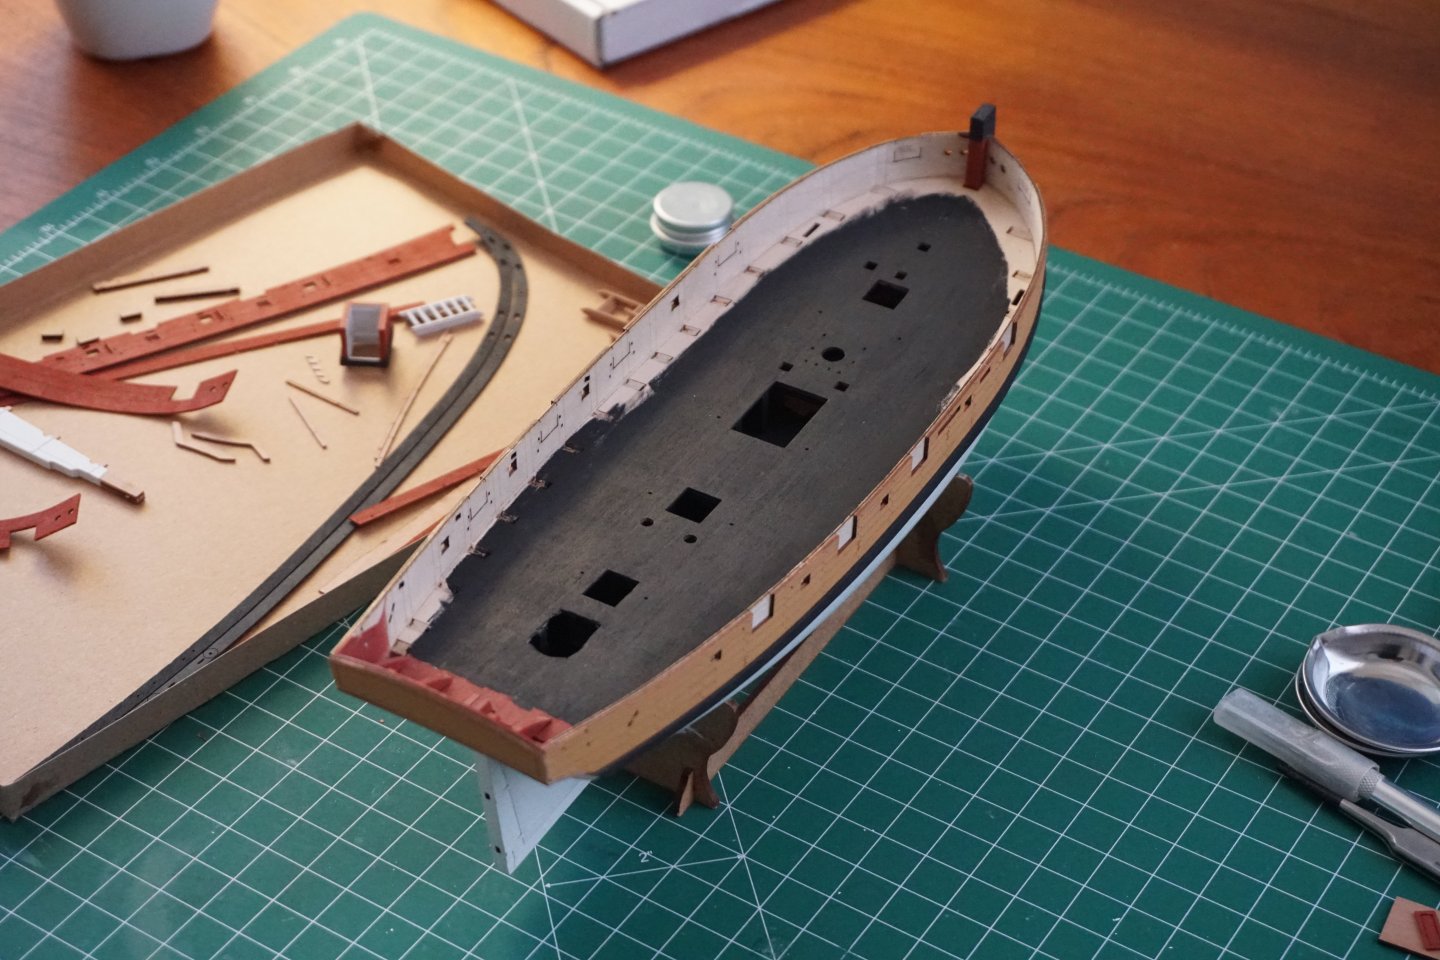
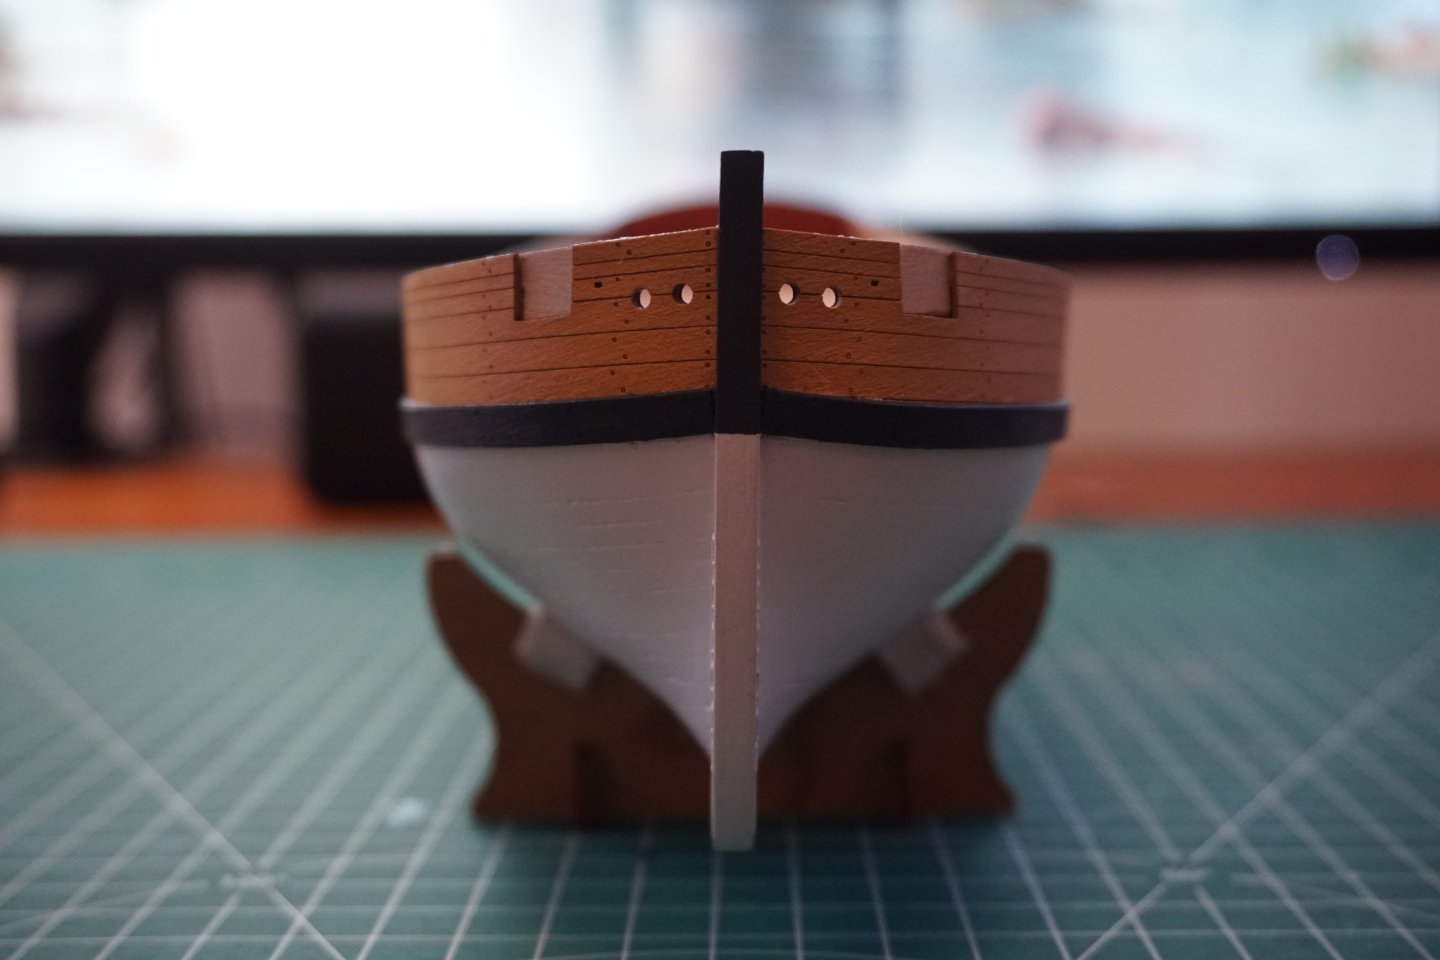
Happy new year to you too! Gunwales are now installed and gunports painted. I filed and re-painted them multiple times to make the laminated structure of the sides less obvious. No masking was needed when using a tiny brush and painting from the inside of the ship. I ran into some issues with the side timbers and transom rail, highlighted in red. There's probably something wrong with my counter installation, or it might just be that all the small deviations over the course of the build are catching up with me on these last few parts. I can probably sand the counter to fit the transom rail, but side timbers need to be modifed or new ones cut from scratch.


- 68 replies
-
- 7
-
-
- First build
- Cutter
- (and 2 more)
-
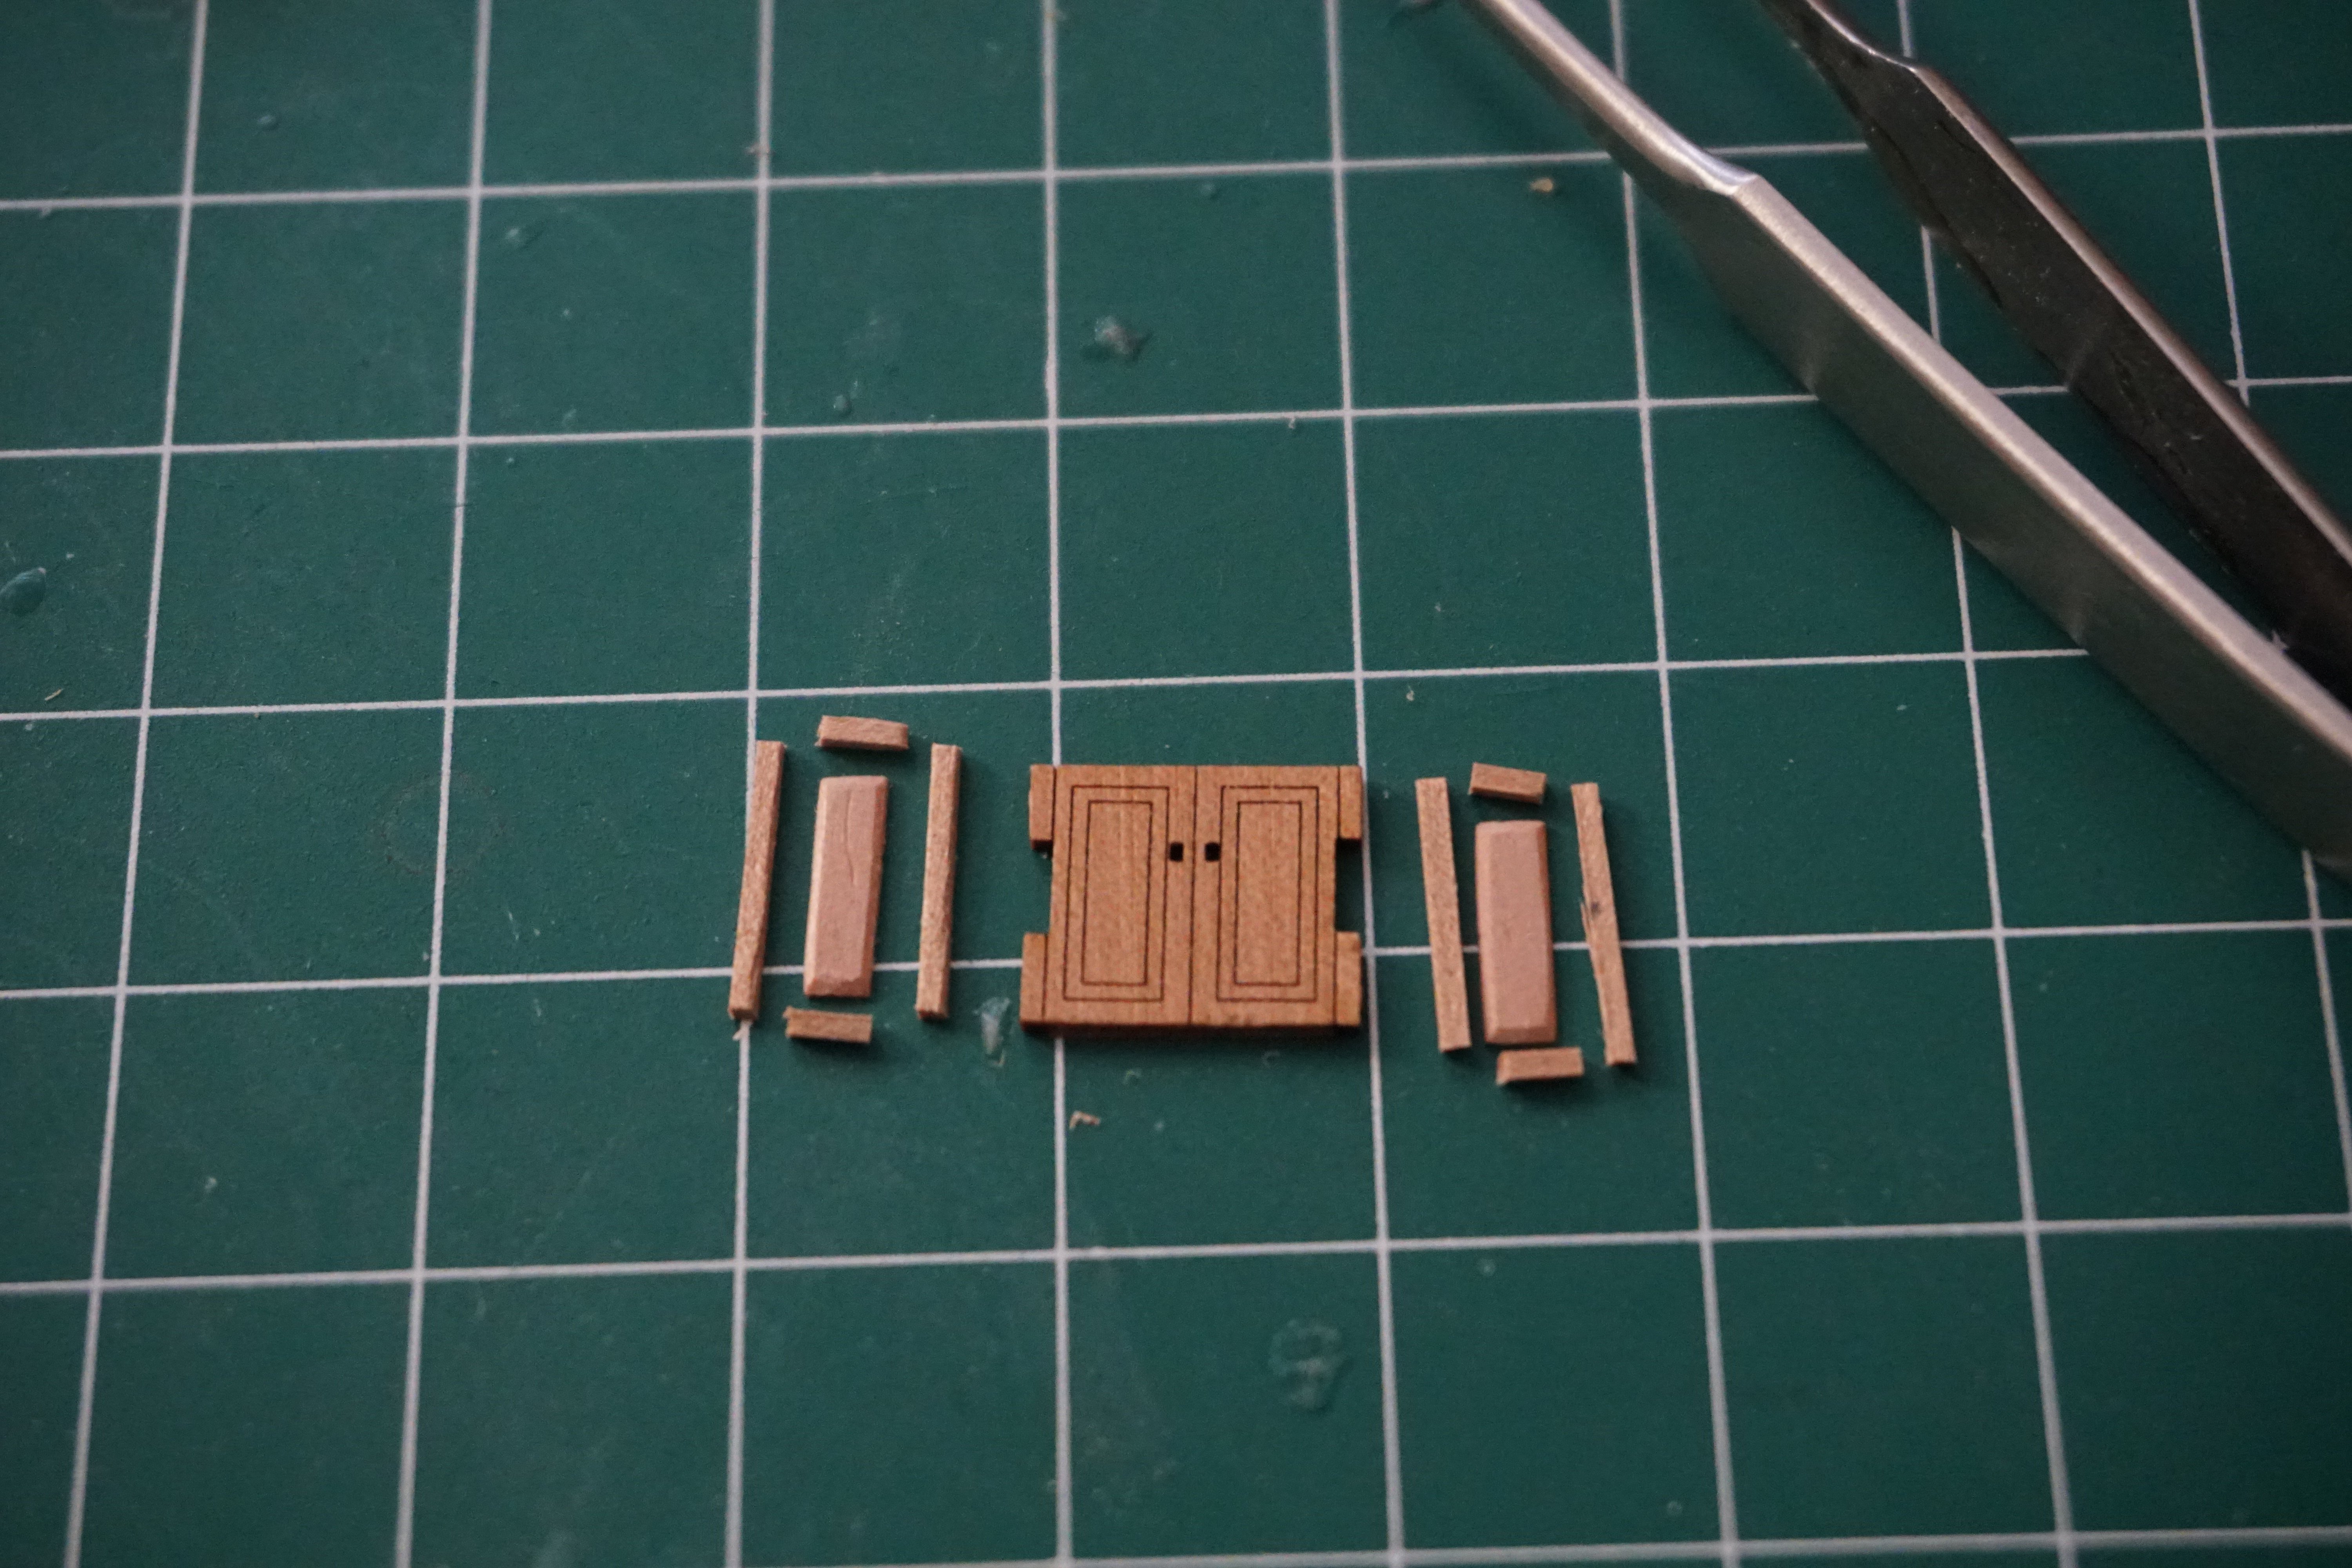
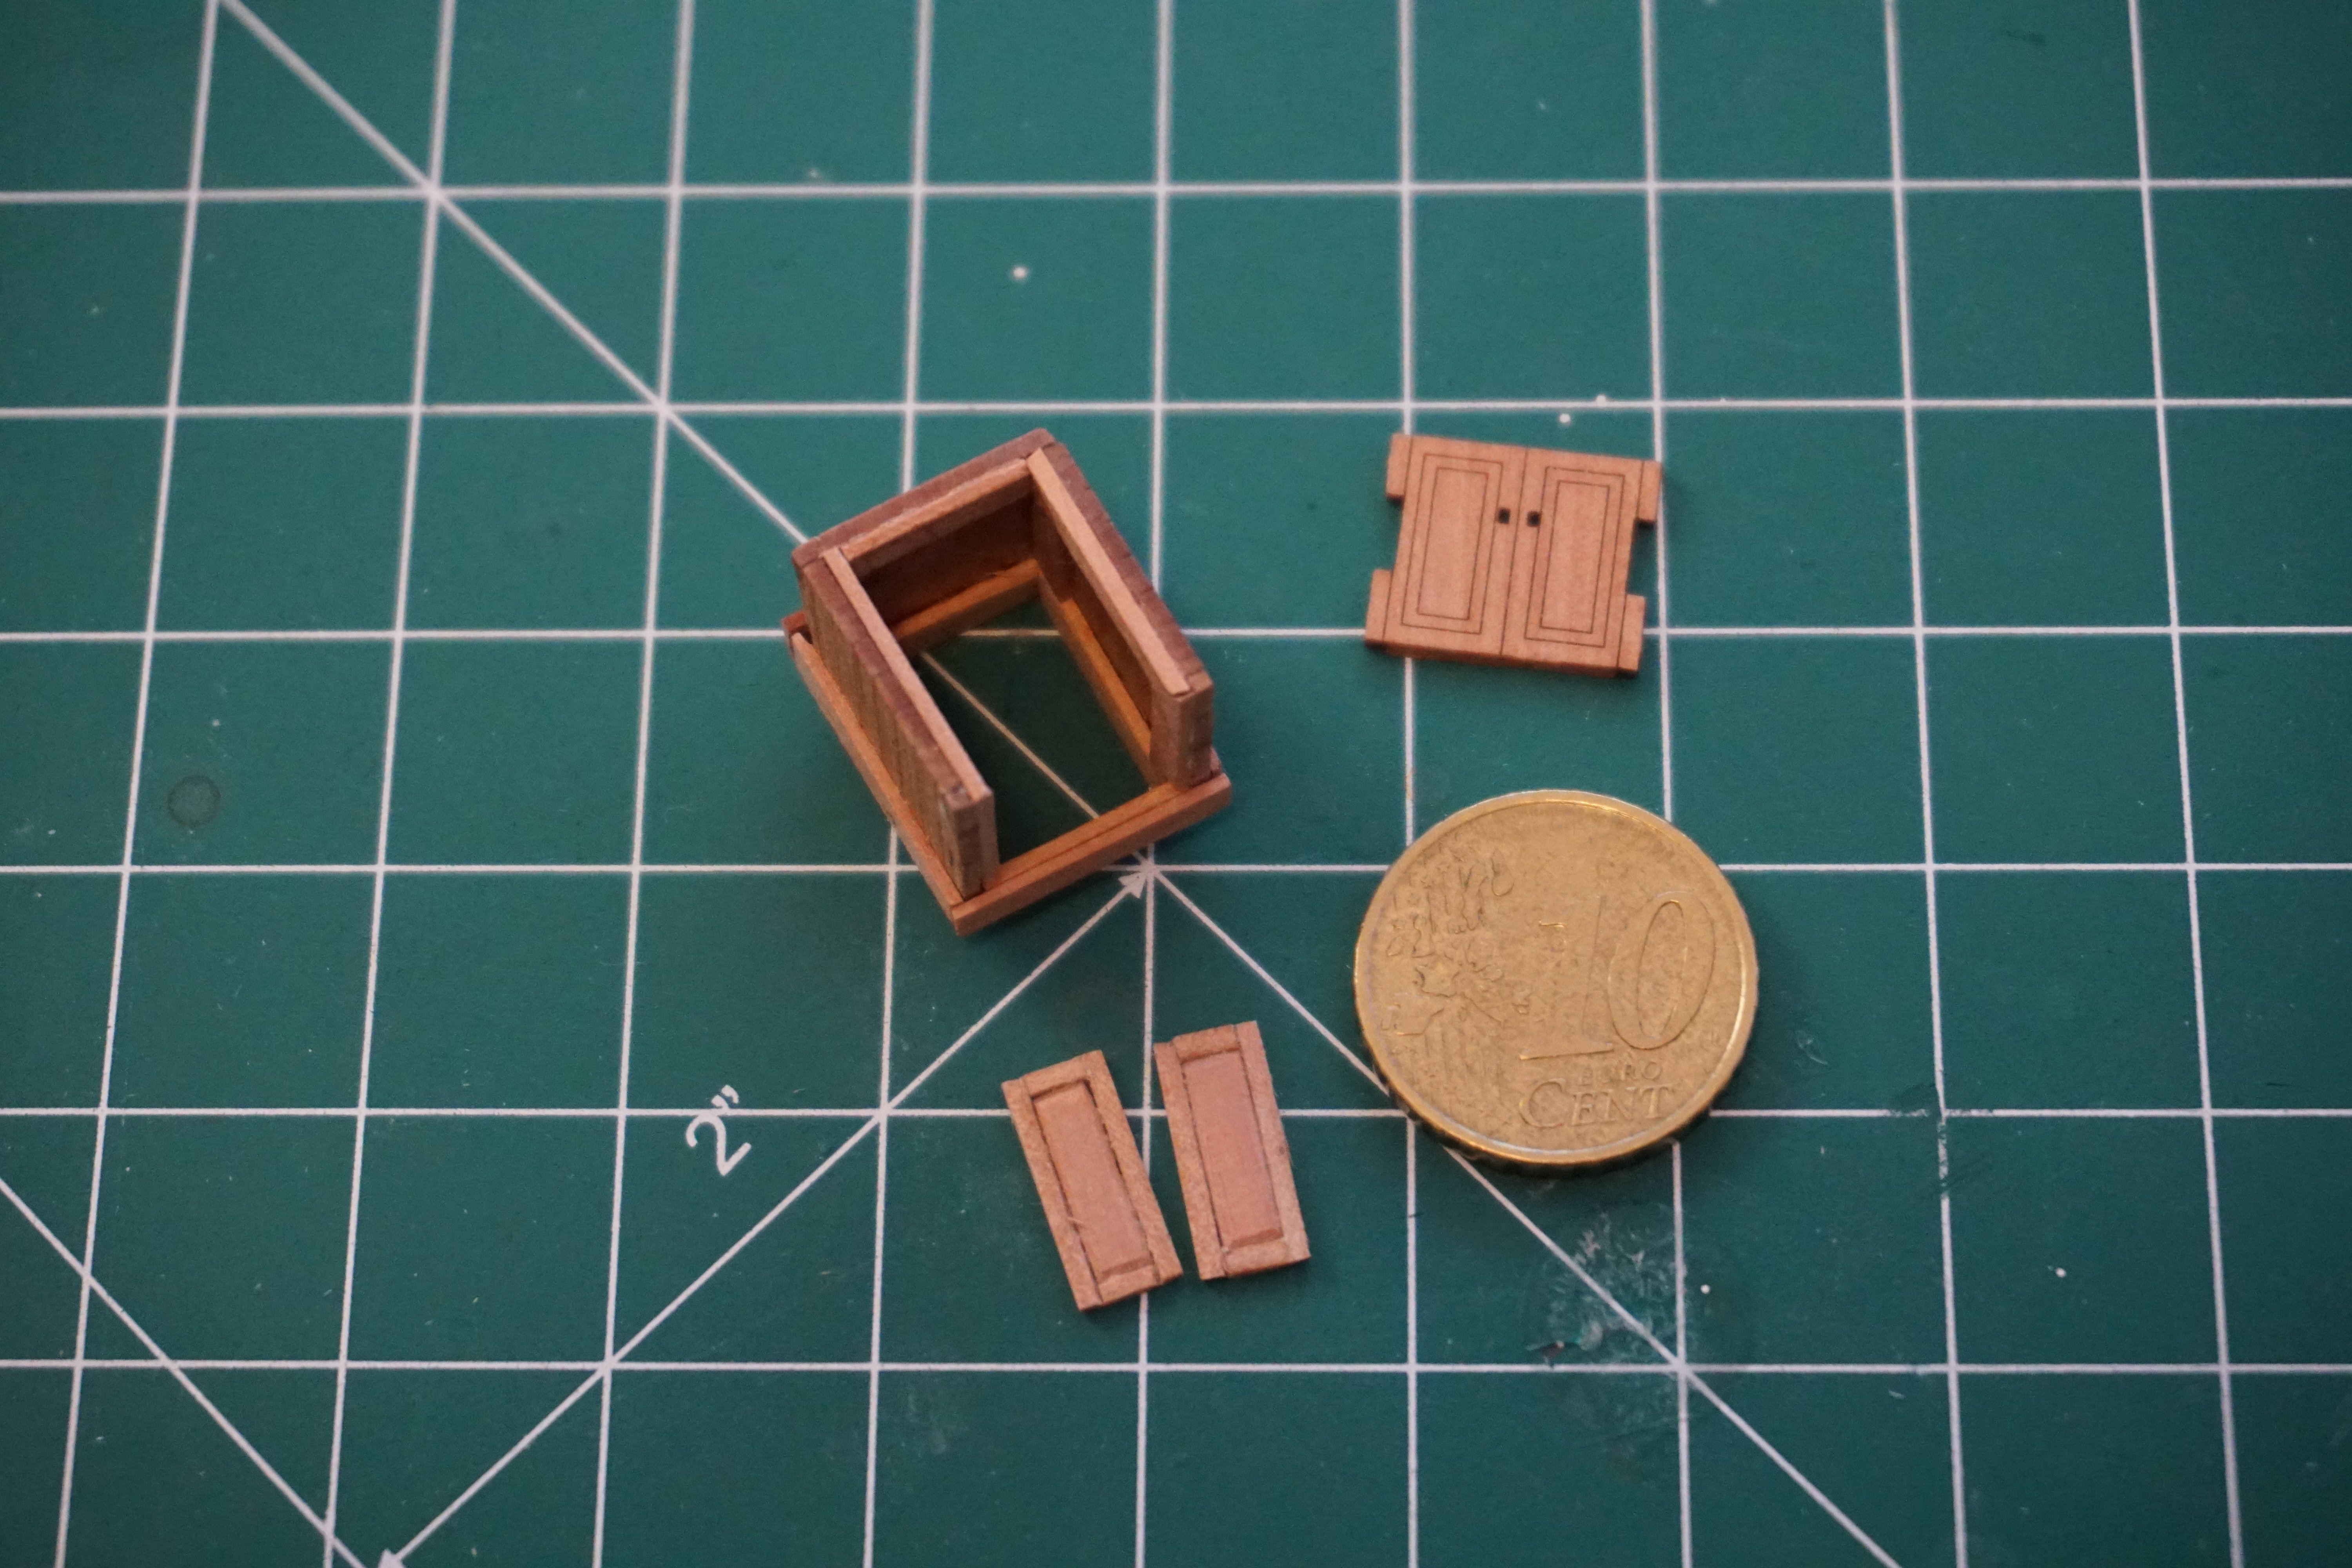
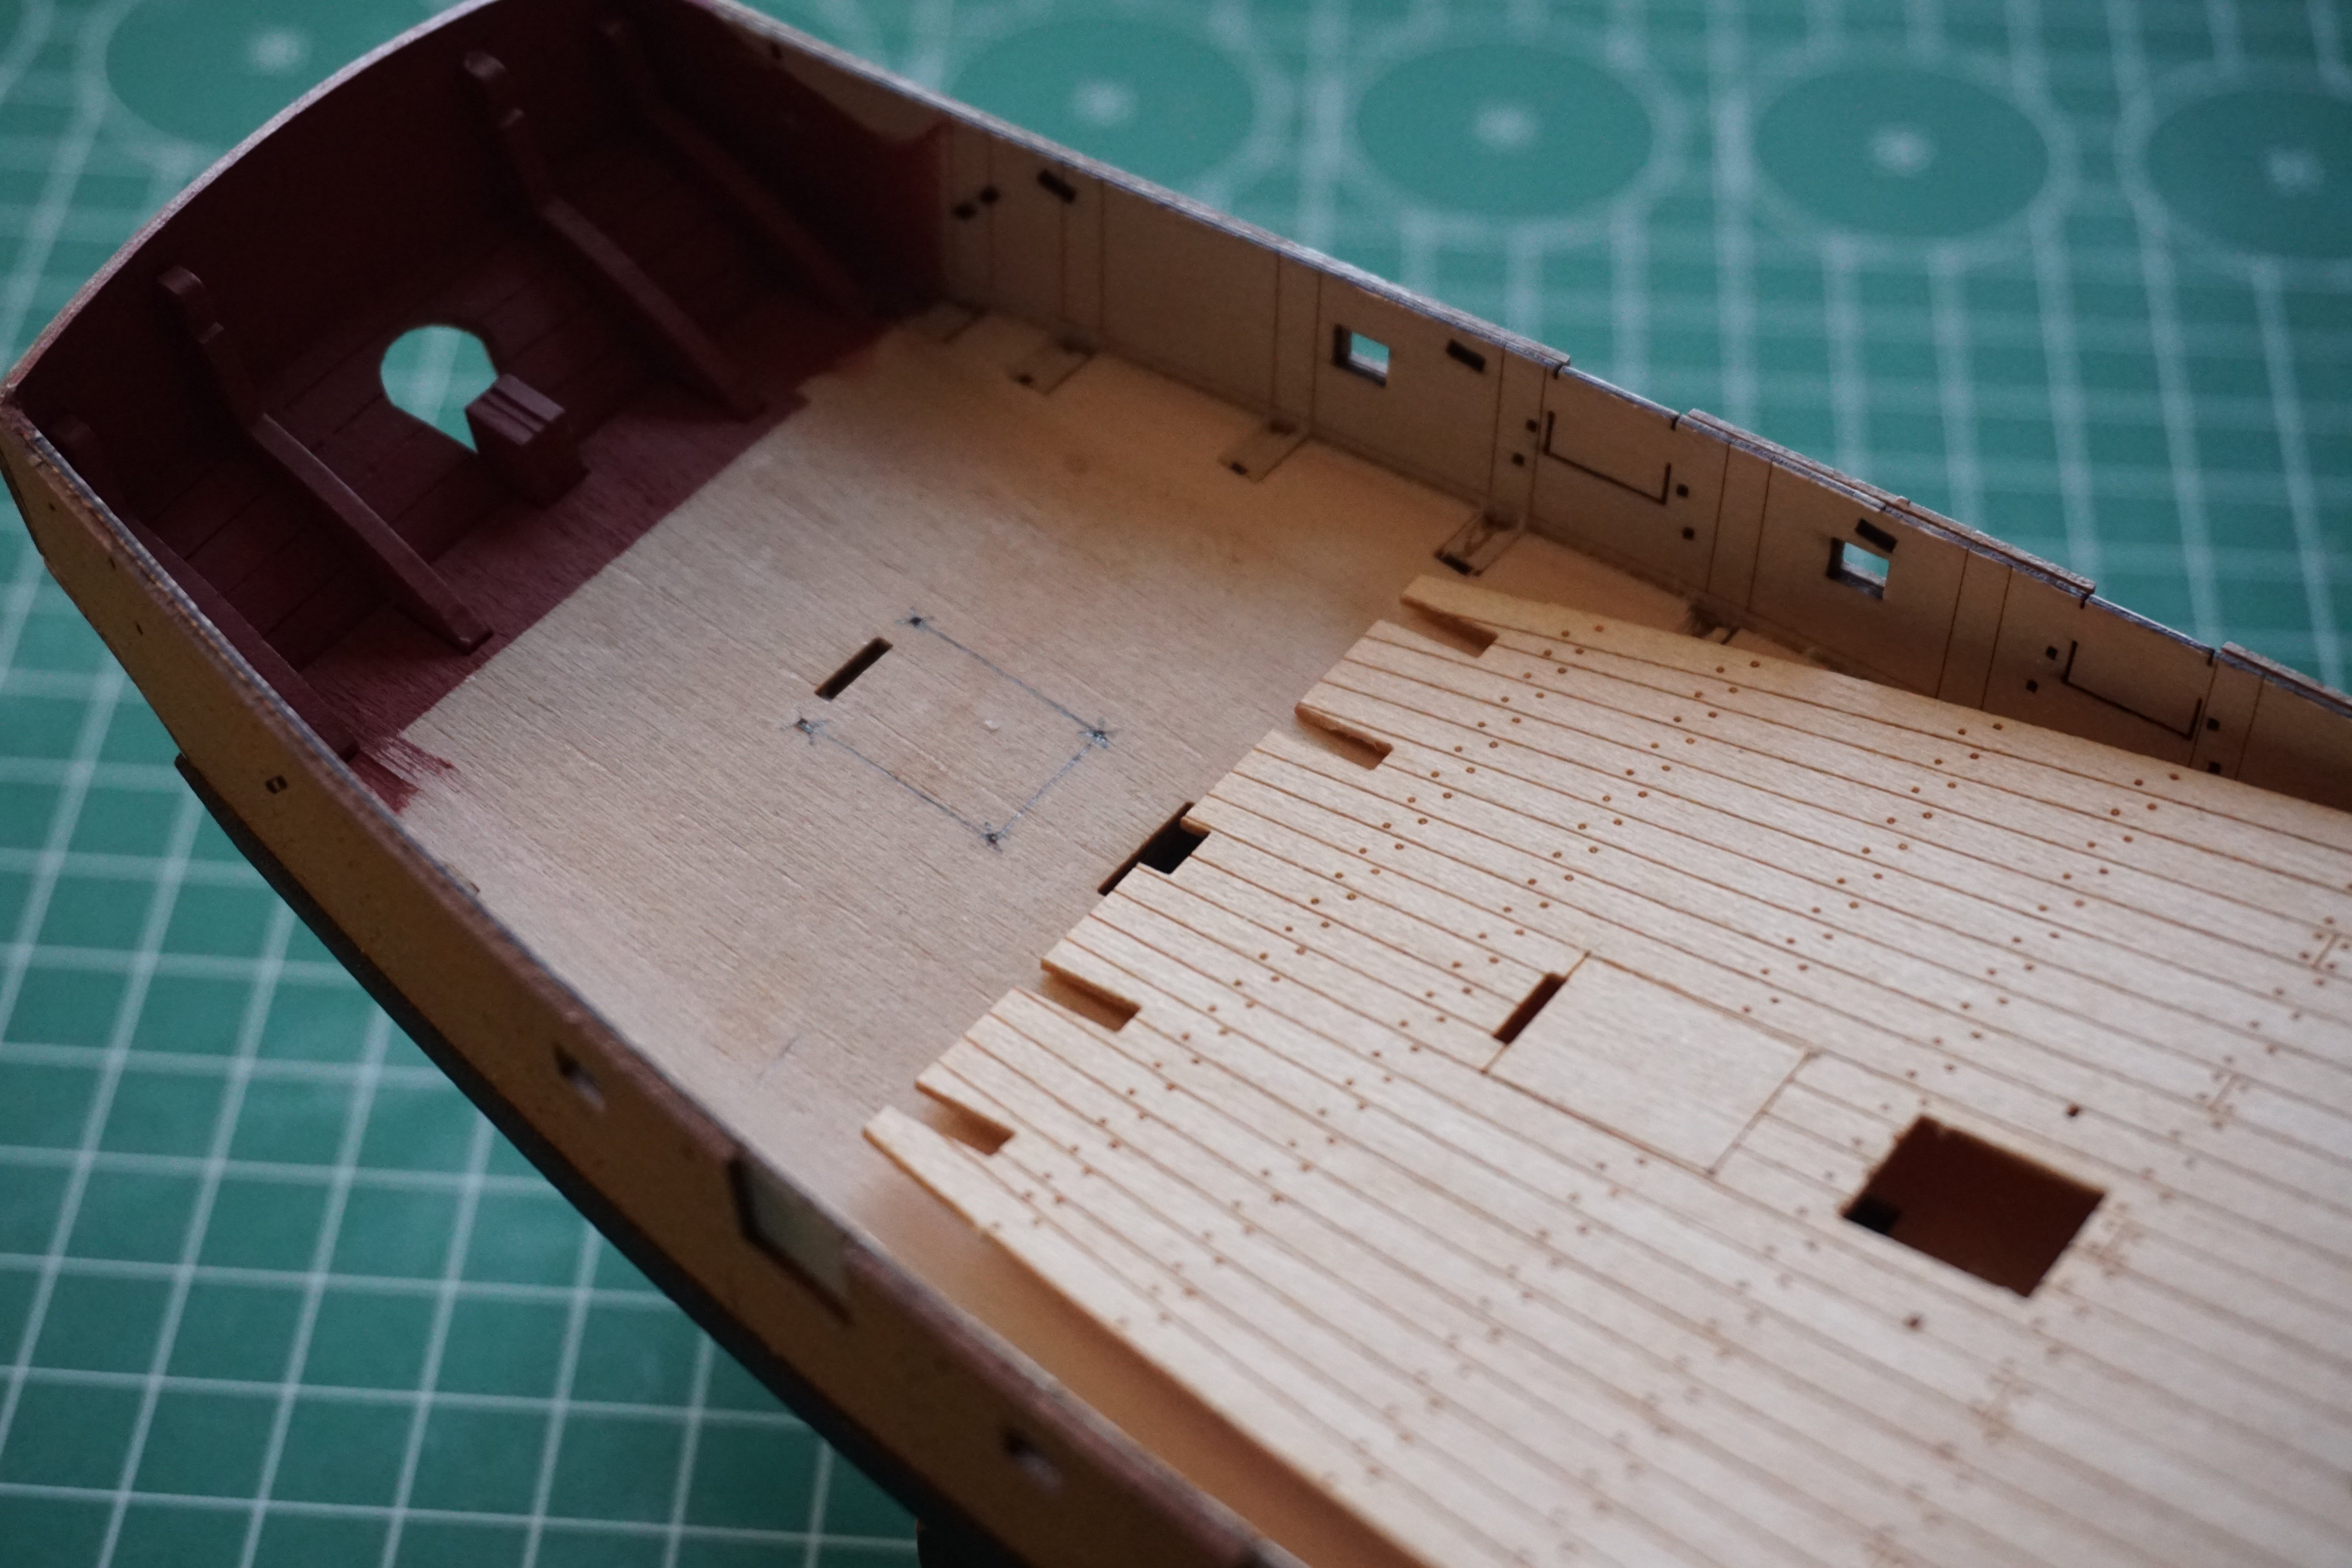
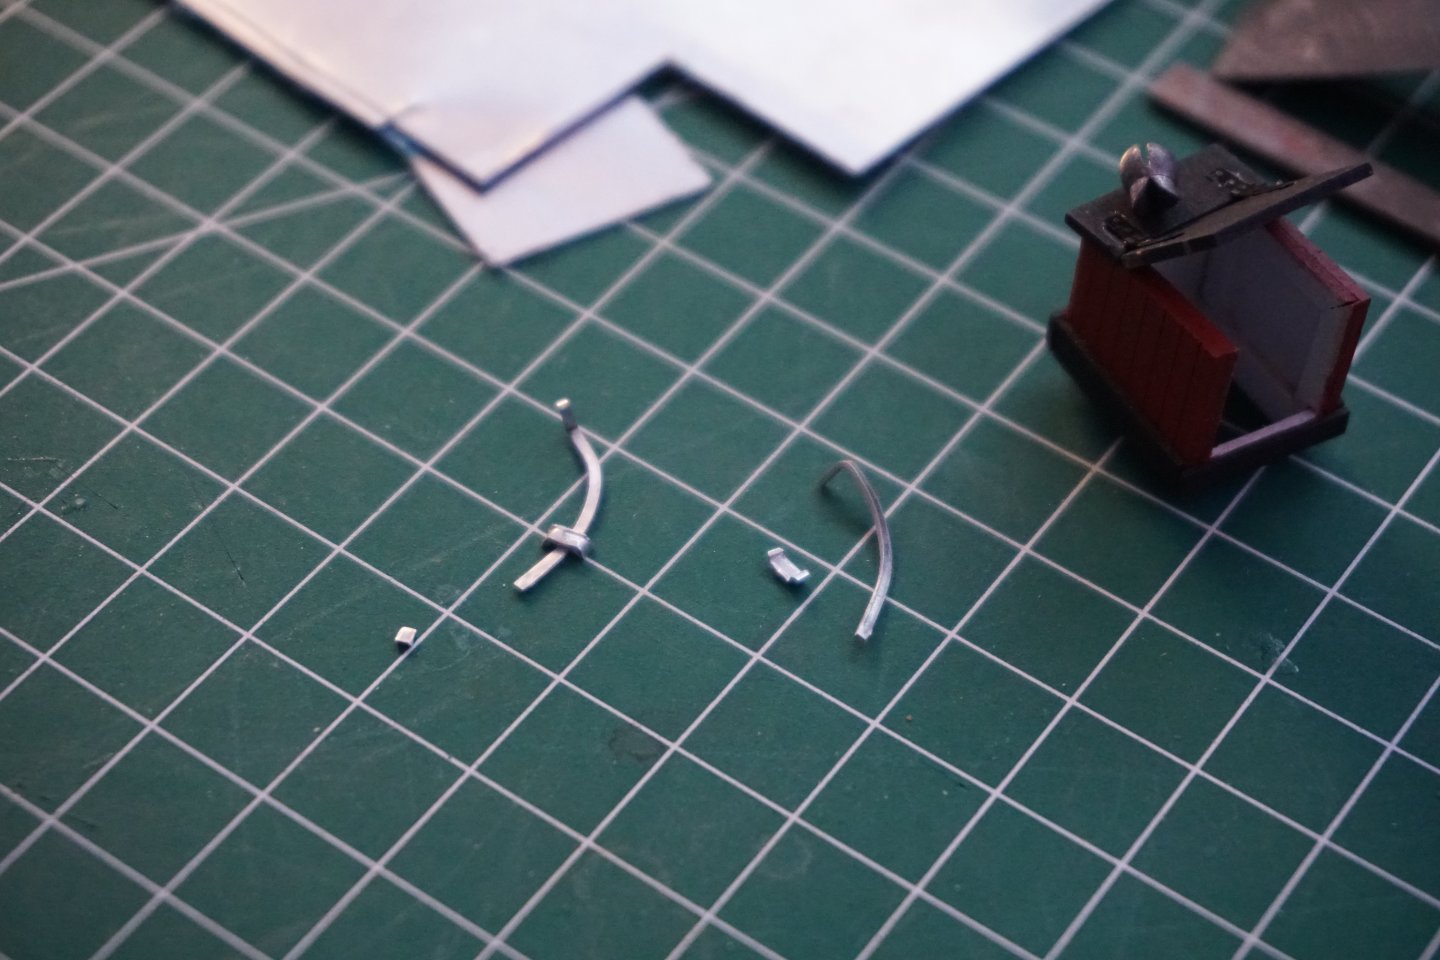
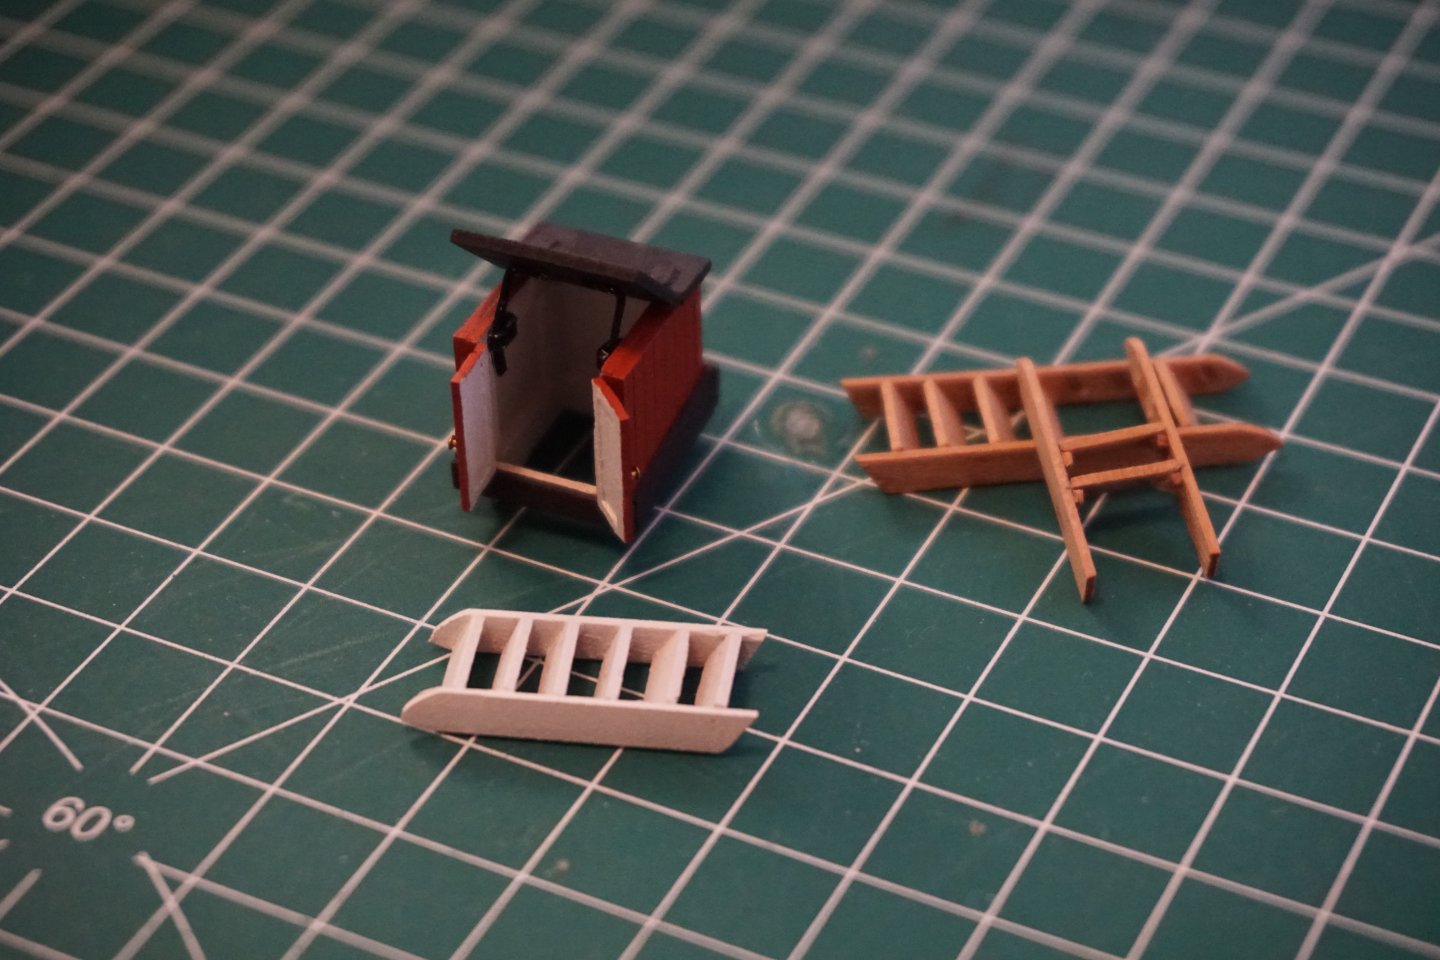
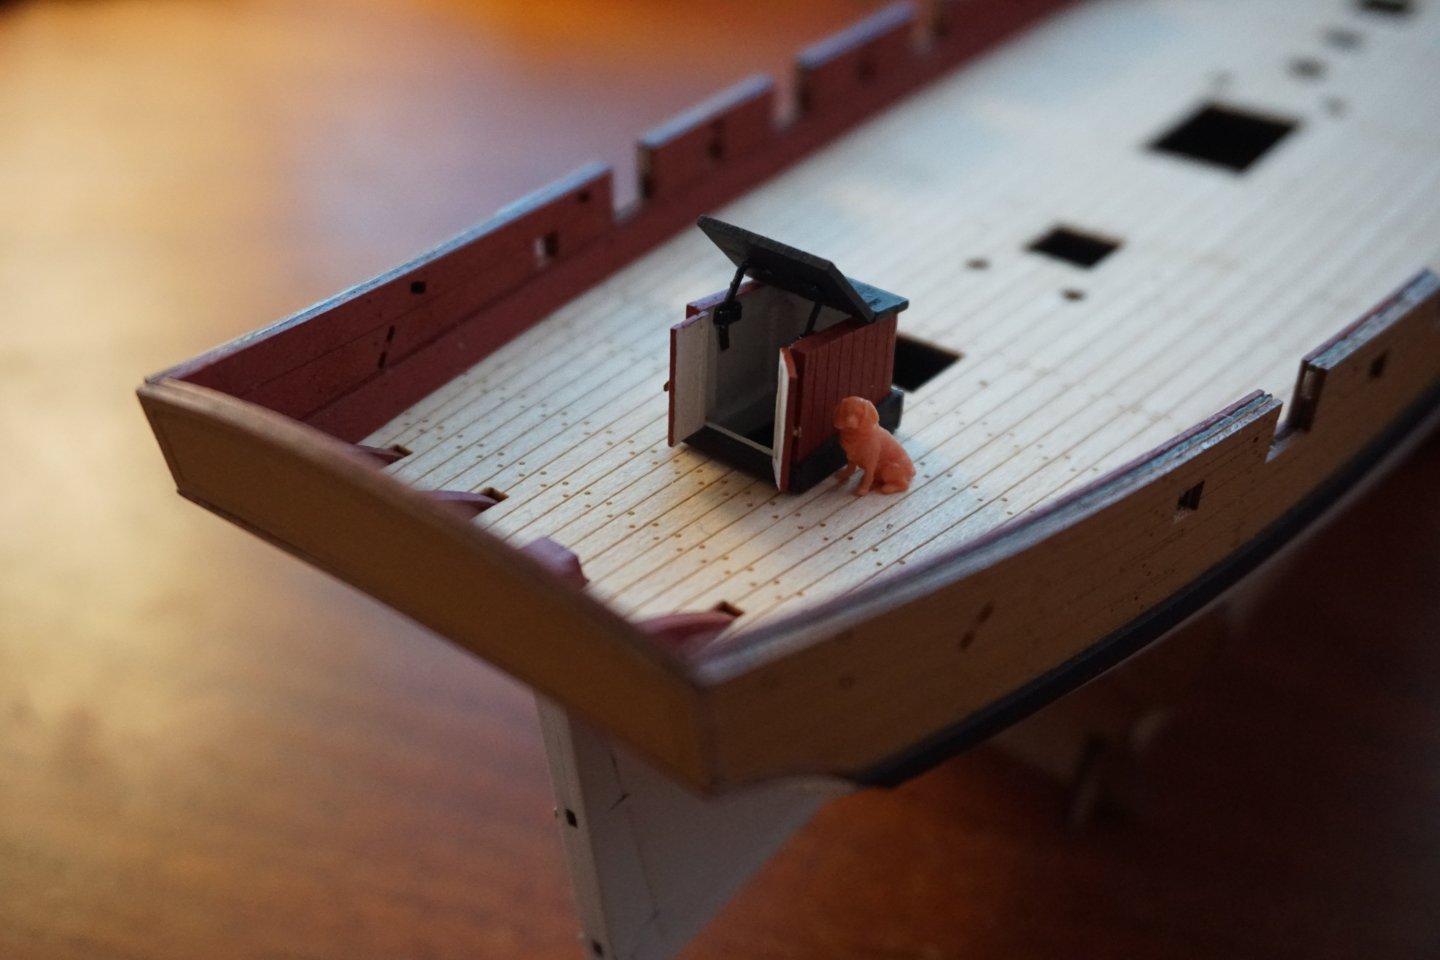
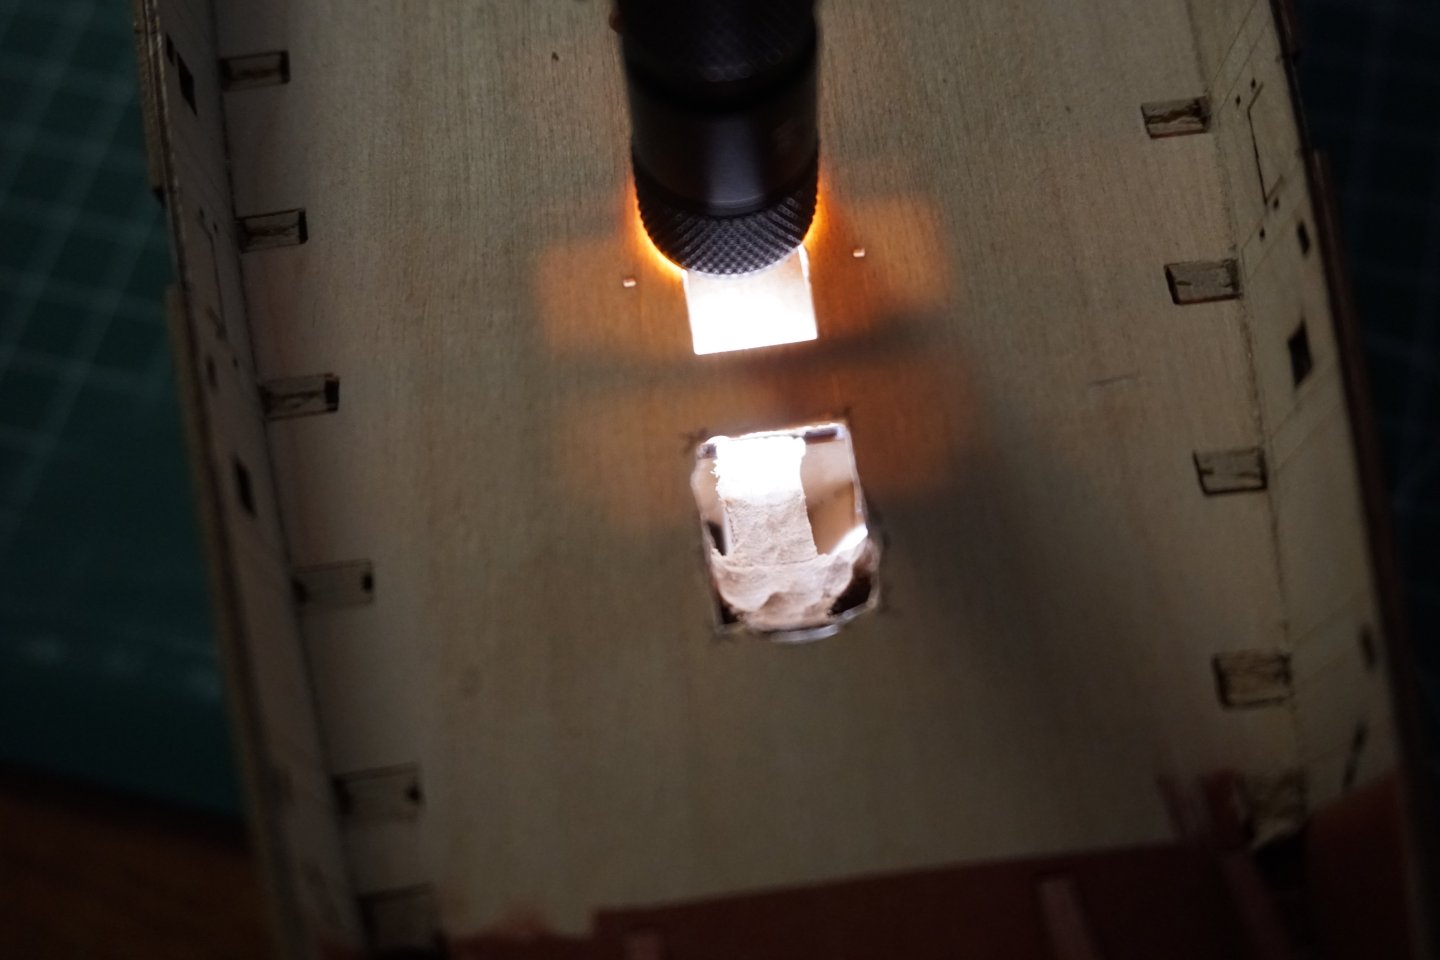
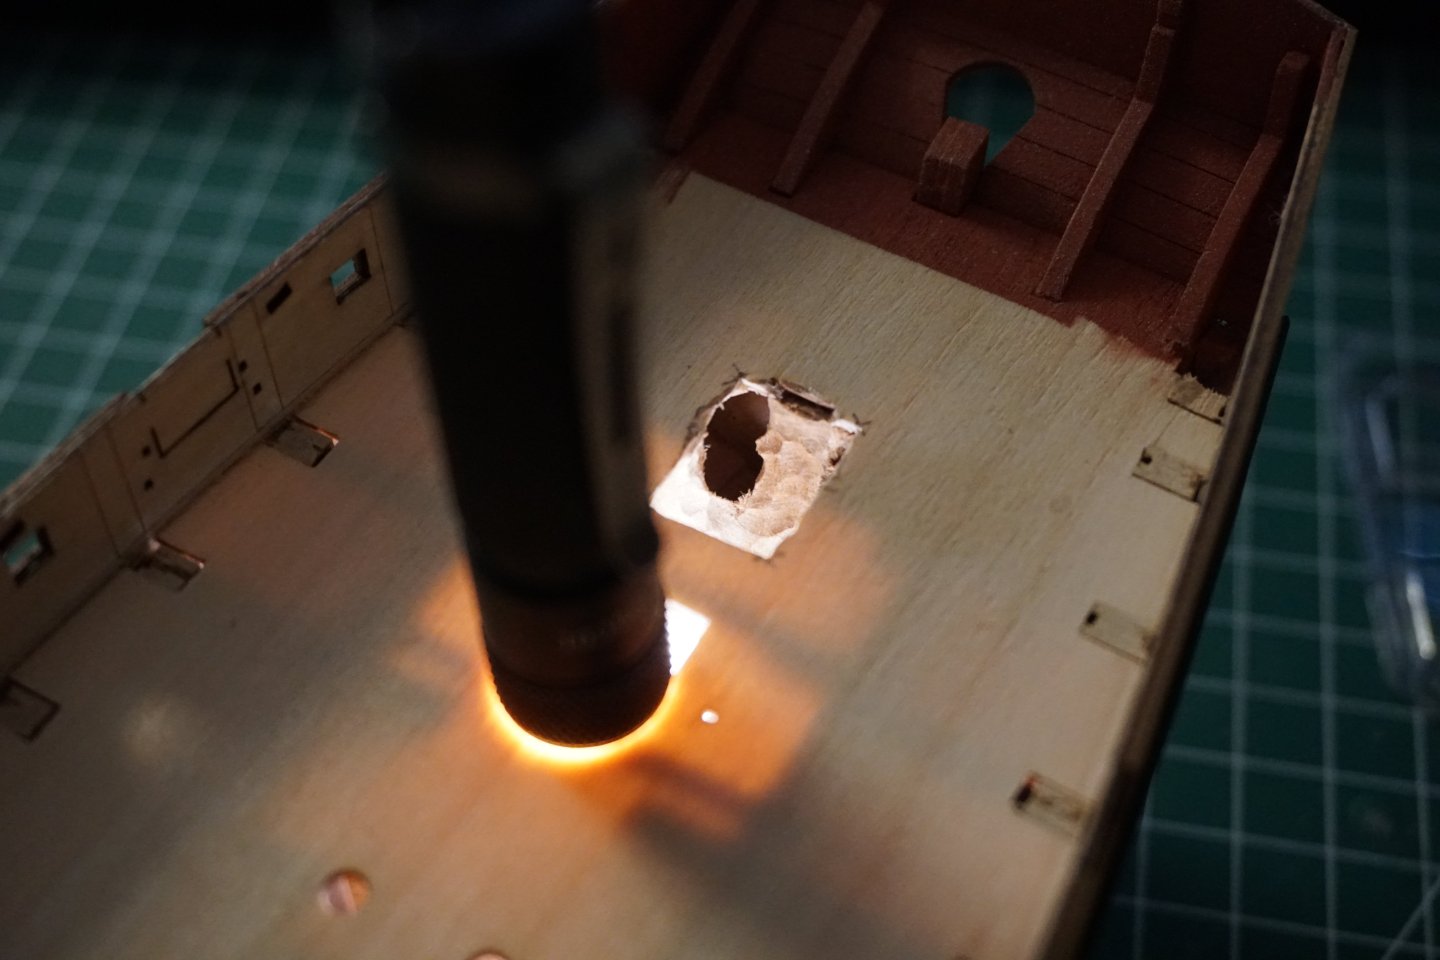
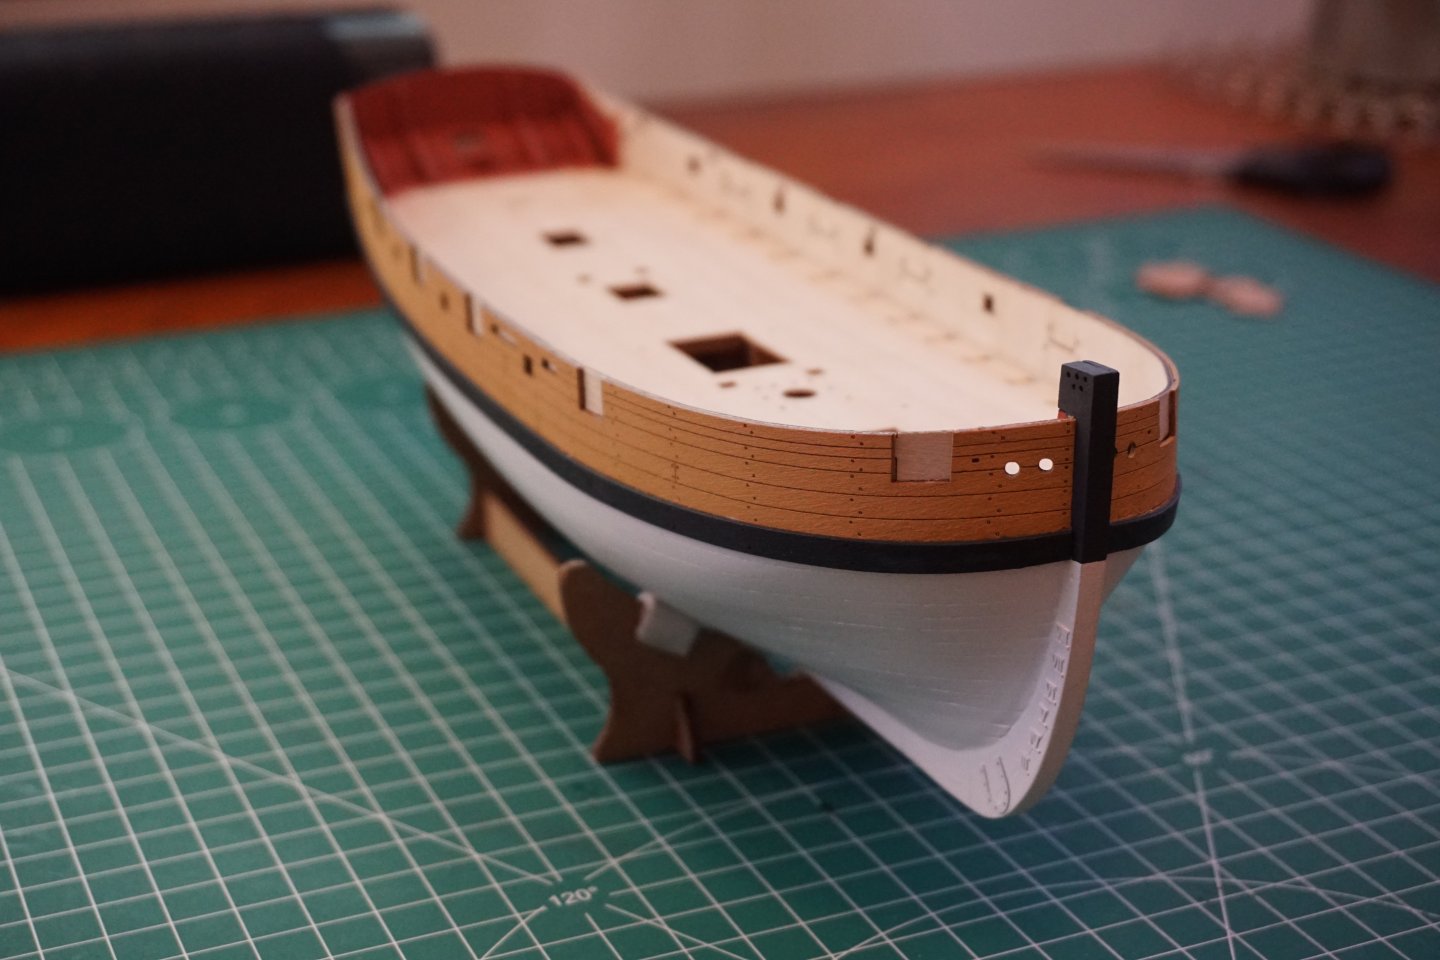
I've made some good progress since my last update. Before gluing the deck on I performed some experiments with LED lights, and light was shining through even when both decks were in place. A layer of black paint seems to block it. I also painted the visible parts of the interior black. Fitting the inner bulwarks and spirketting on was fairly straightforward, but I had to add a small extension piece to one of them. I built the hatch stays out of 0.5 mm aluminium sheet. I sanded it down to 0.3 mm after cutting the pieces. They were very tricky to install, but I think that the end result looks nice. I used brass pins for door handles and PE-21 hinges from the 0.2 mm PE sheet. There are only six of them and the manual says that they are "not in use", but I assume that they were originally intented for the port lids. I might try to fake those eight missing hinges with paint. The ladder was copied from the kit ladder and took me three tries to get right. I look forward to continuing this project next year. Many interesting phases of the build remain ahead. Merry Christmas everyone!


- 68 replies
-
- 18
-
-
- First build
- Cutter
- (and 2 more)
-
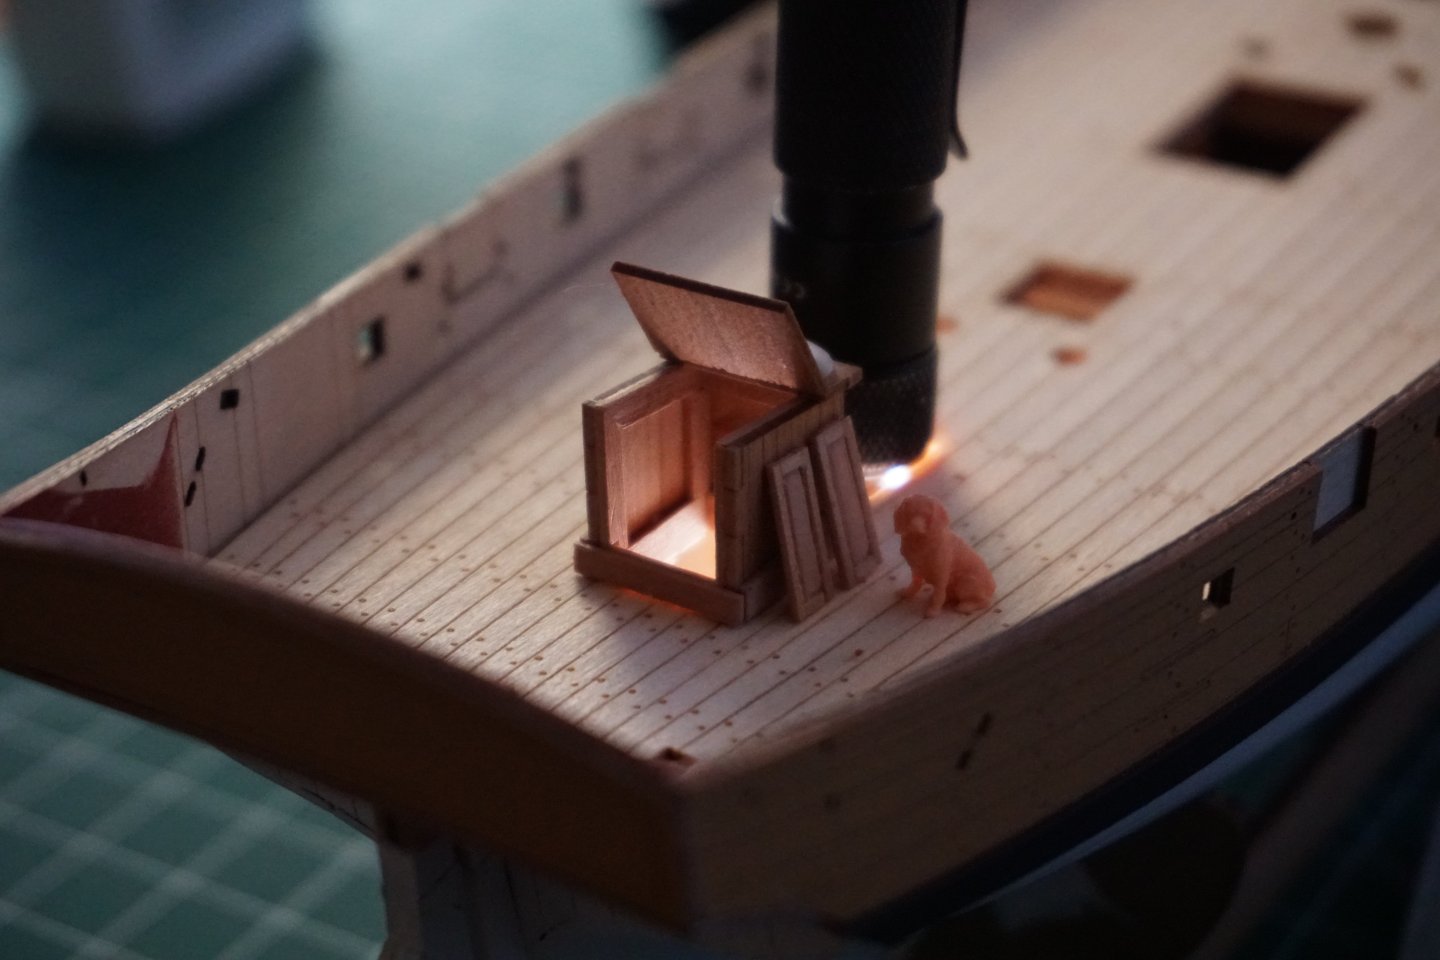
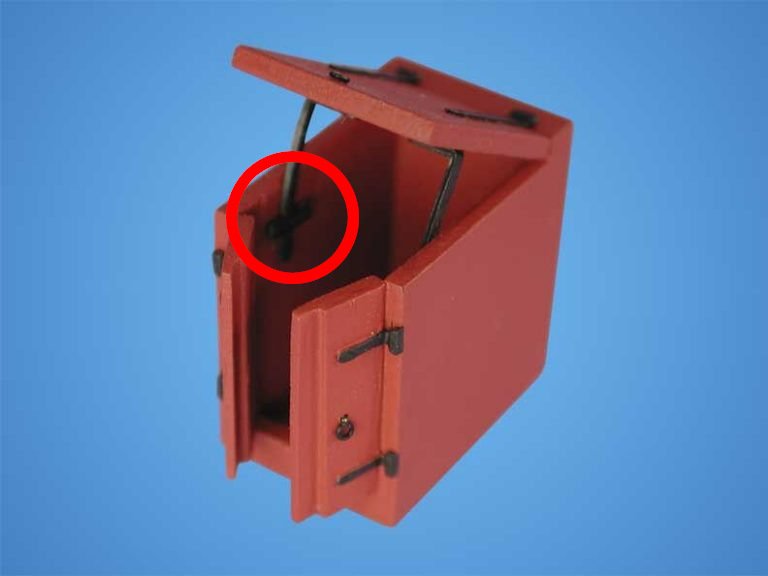
The companionway is almost ready for paint. I also found a better way to make its footprint slightly larger. I'd greatly appreciate any opinions on the hatch stay that Caldercraft's HMS Pickle has. I'm considering replicating it for the Sherbourne. Is it based on something real, or just model designer's imagination? The part circled in red is also a bit of a mystery to me. I think that the vertical iron has a tooth that catches on the horizontal piece when the hatch is open, but I'm not sure. I haven't been able to find any close-up photos in build logs.


- 68 replies
-
- 8
-
-
- First build
- Cutter
- (and 2 more)
-
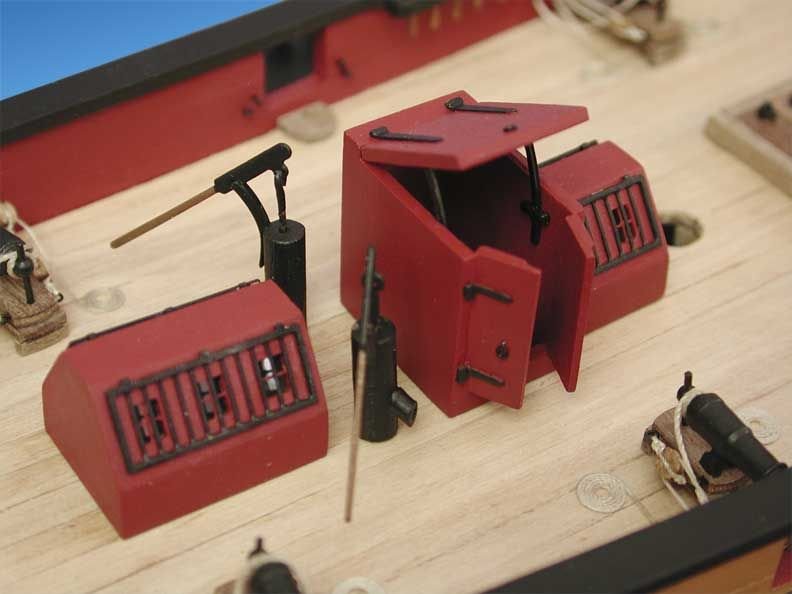
Thanks for stopping by! Those round things are just thumb tacks with the white plastic bit removed.
-
Does anyone happen to have information about the hold-open device that the Pickle's companionway has? Is it based on a real 18th century example, and how is it supposed to work? I can't figure out the part circled in red, all of the images that I could find are too blurry. Maybe there's a tooth on the rod that catches on the horizontal bar? I'm currently thinking of replicating this for my Sherbourne.


-
Companionway progress. The laser-etched area is slightly larger than the companionway, so I'll have to add a small board to cover it.

- 68 replies
-
- 8
-
-
- First build
- Cutter
- (and 2 more)
-
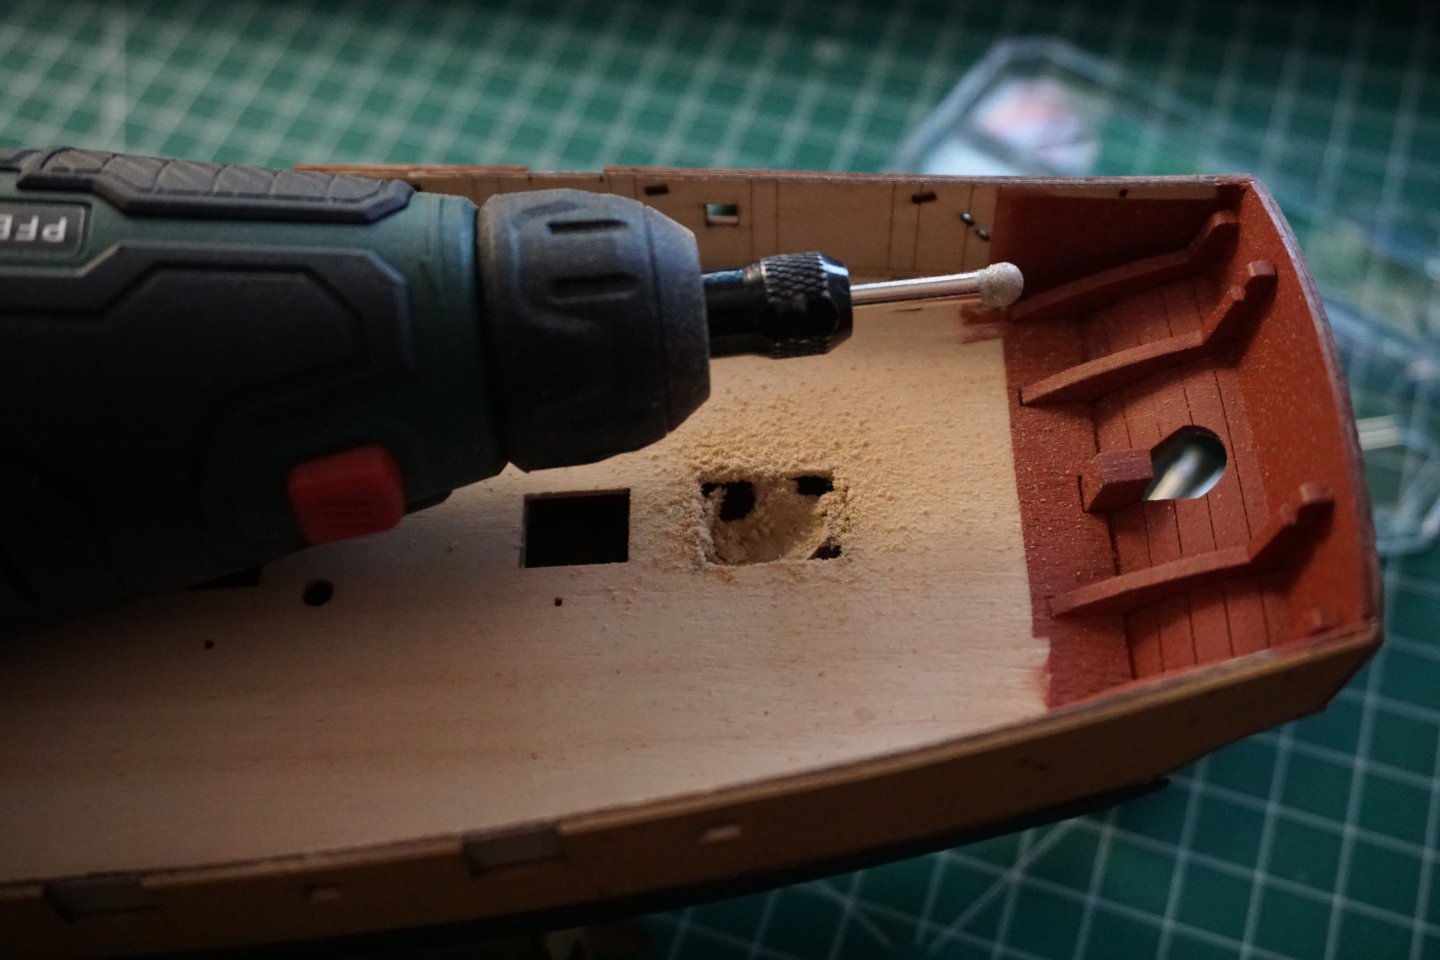
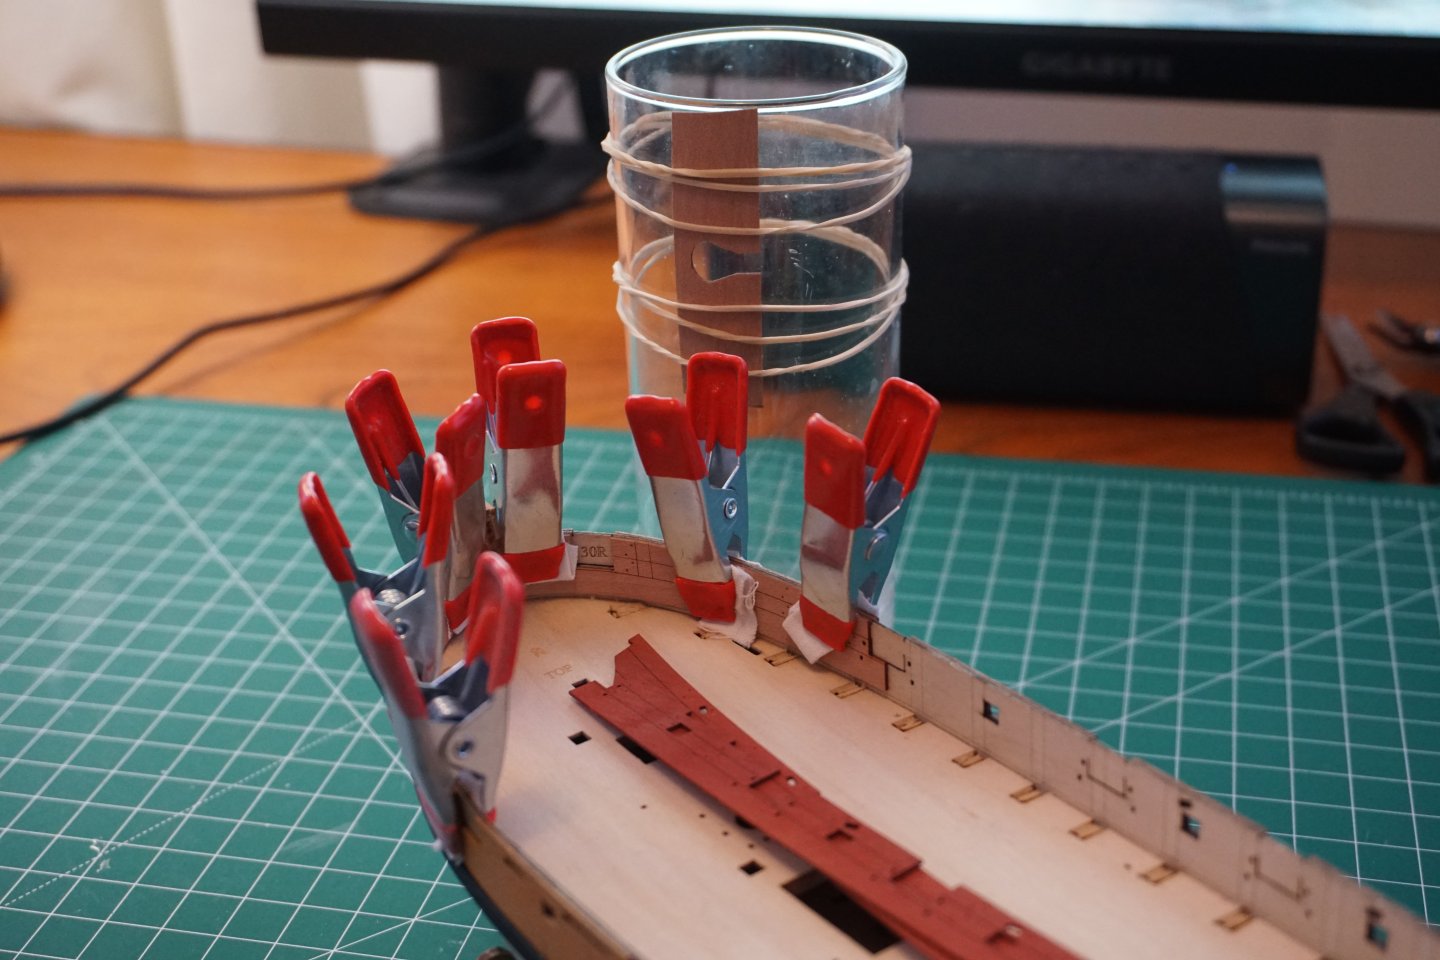
I keep finding small errors in my photos that I hadn't noticed in real life! This time it was the port-side wale that was a little too low. I re-attached the entire thing and it's better now. Getting the wales on properly was a struggle for me, and I'd recommend shaping them with steam until they're a perfect fit. I only bent mine in one direction before putting the paint on. That's probably deep enough. I could have just drilled down, but I opened the front as well, so that some light from the LEDs might shine into the companionway. I'll paint the interior black, if building the open companionway works out.

- 68 replies
-
- 8
-
-
- First build
- Cutter
- (and 2 more)
-
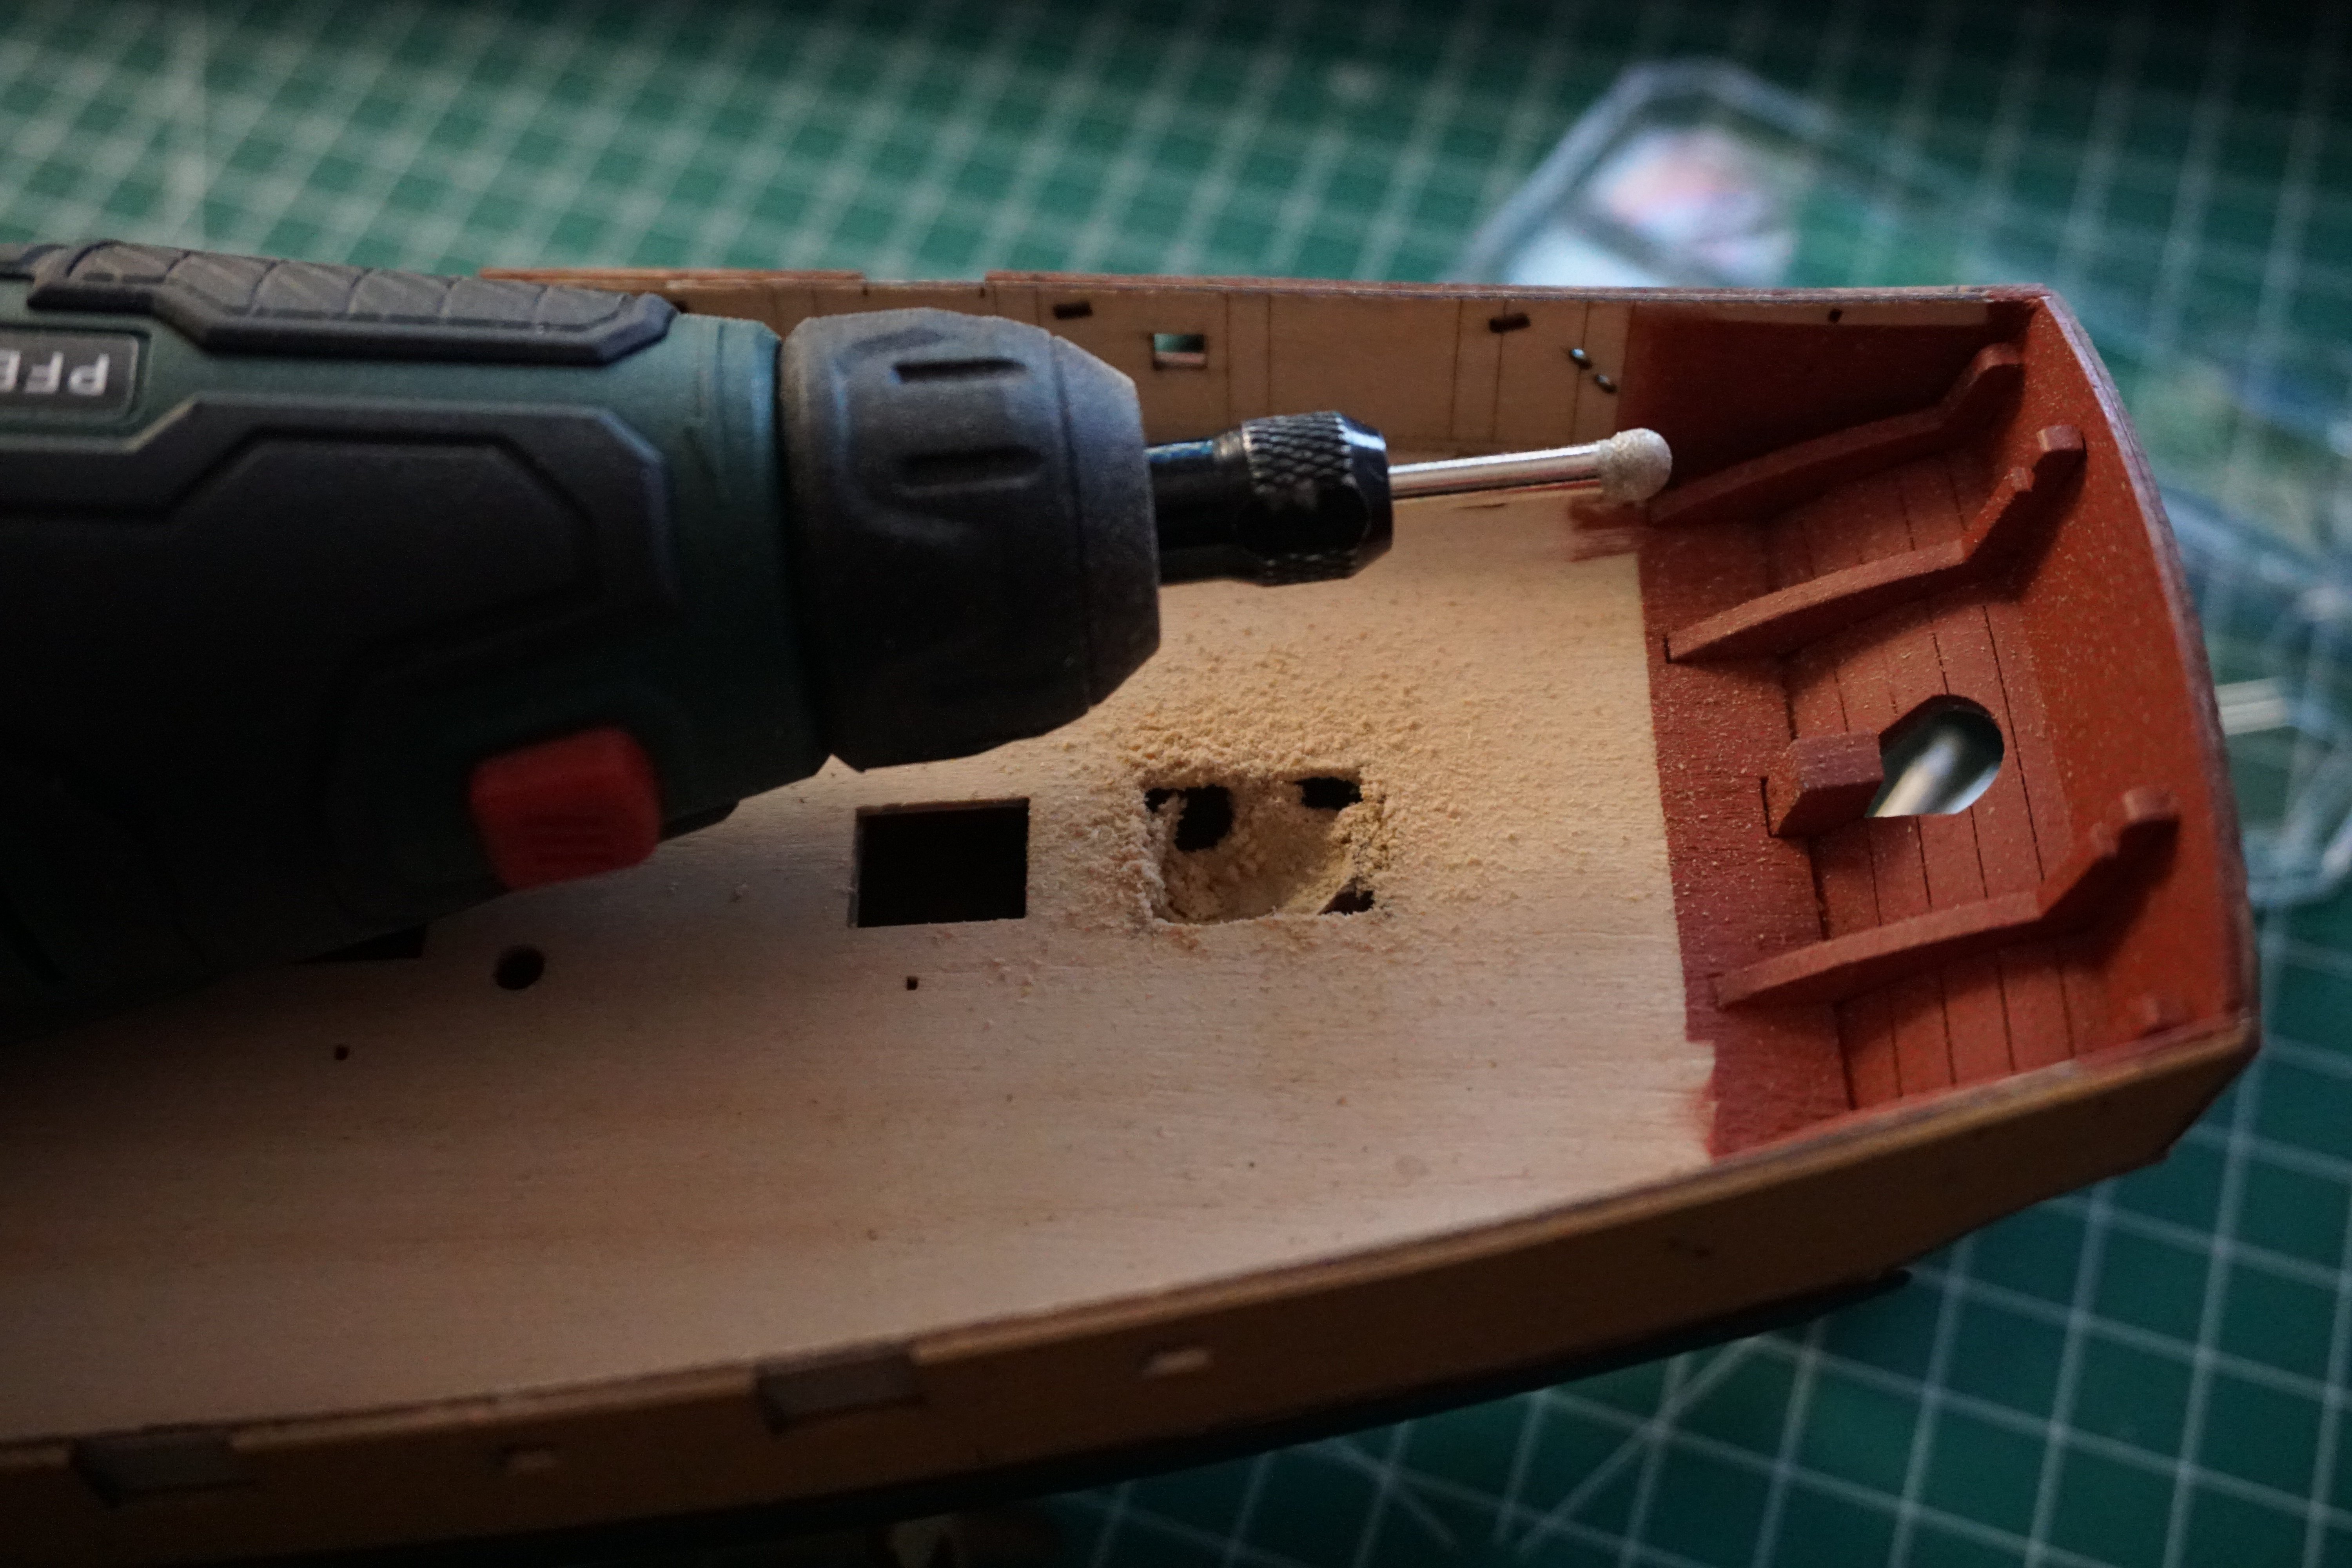
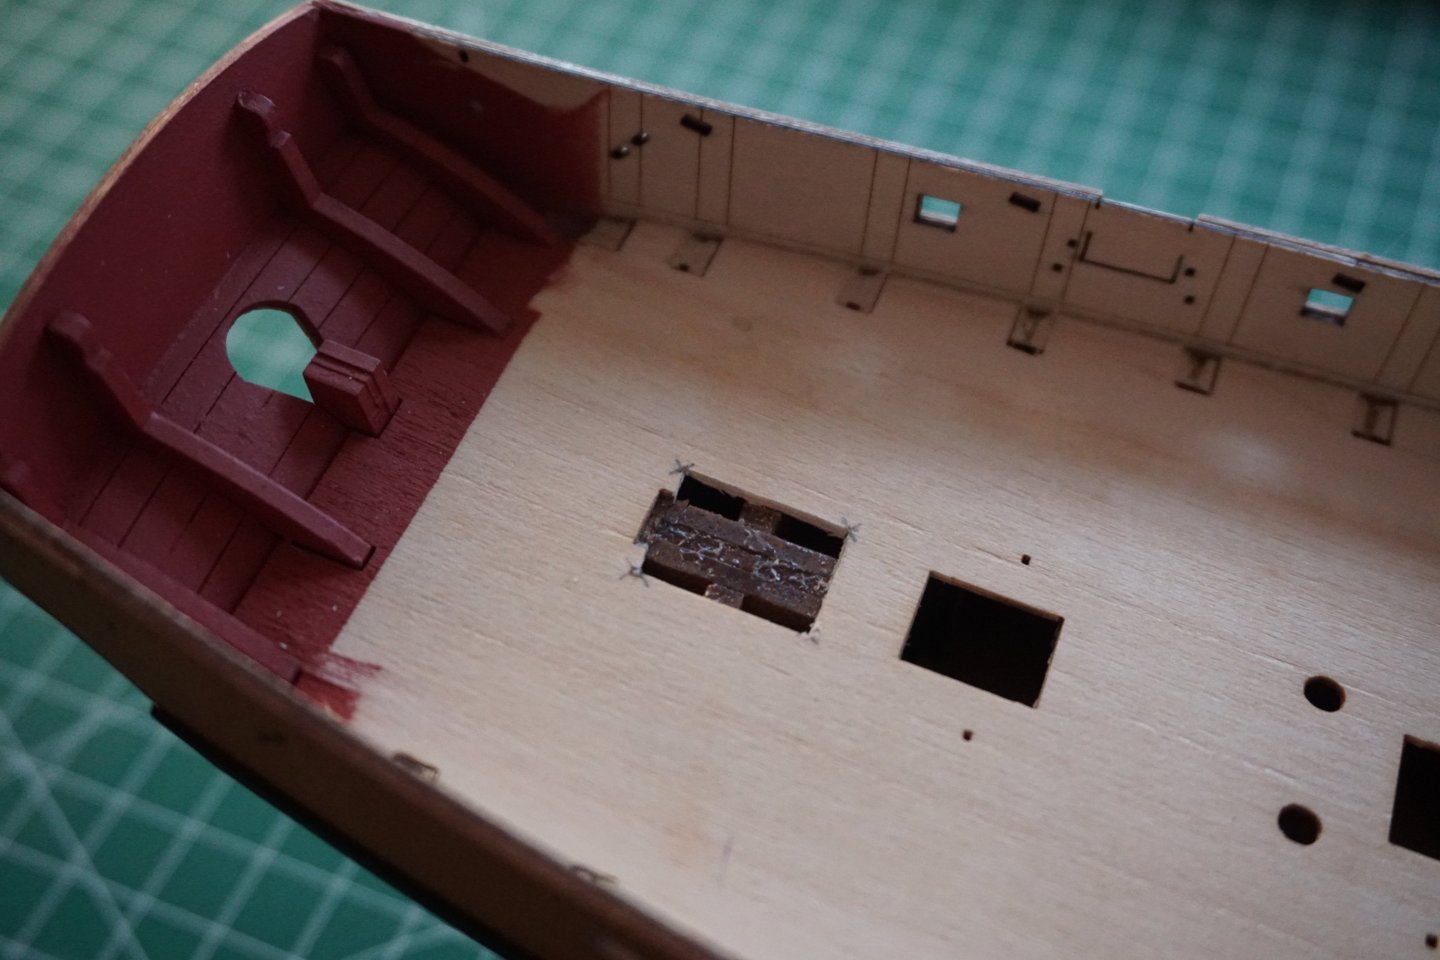
Before I glue the deck on, I'd like to explore the possibility of opening the companionway, as it could be a fun little project. Maybe the doors only, or the roof as well. There seems to be a lot of wood underneath it, but maybe that could be removed with Dremel engraving bits to make room for a ladder.

- 68 replies
-
- 7
-
-
- First build
- Cutter
- (and 2 more)
-
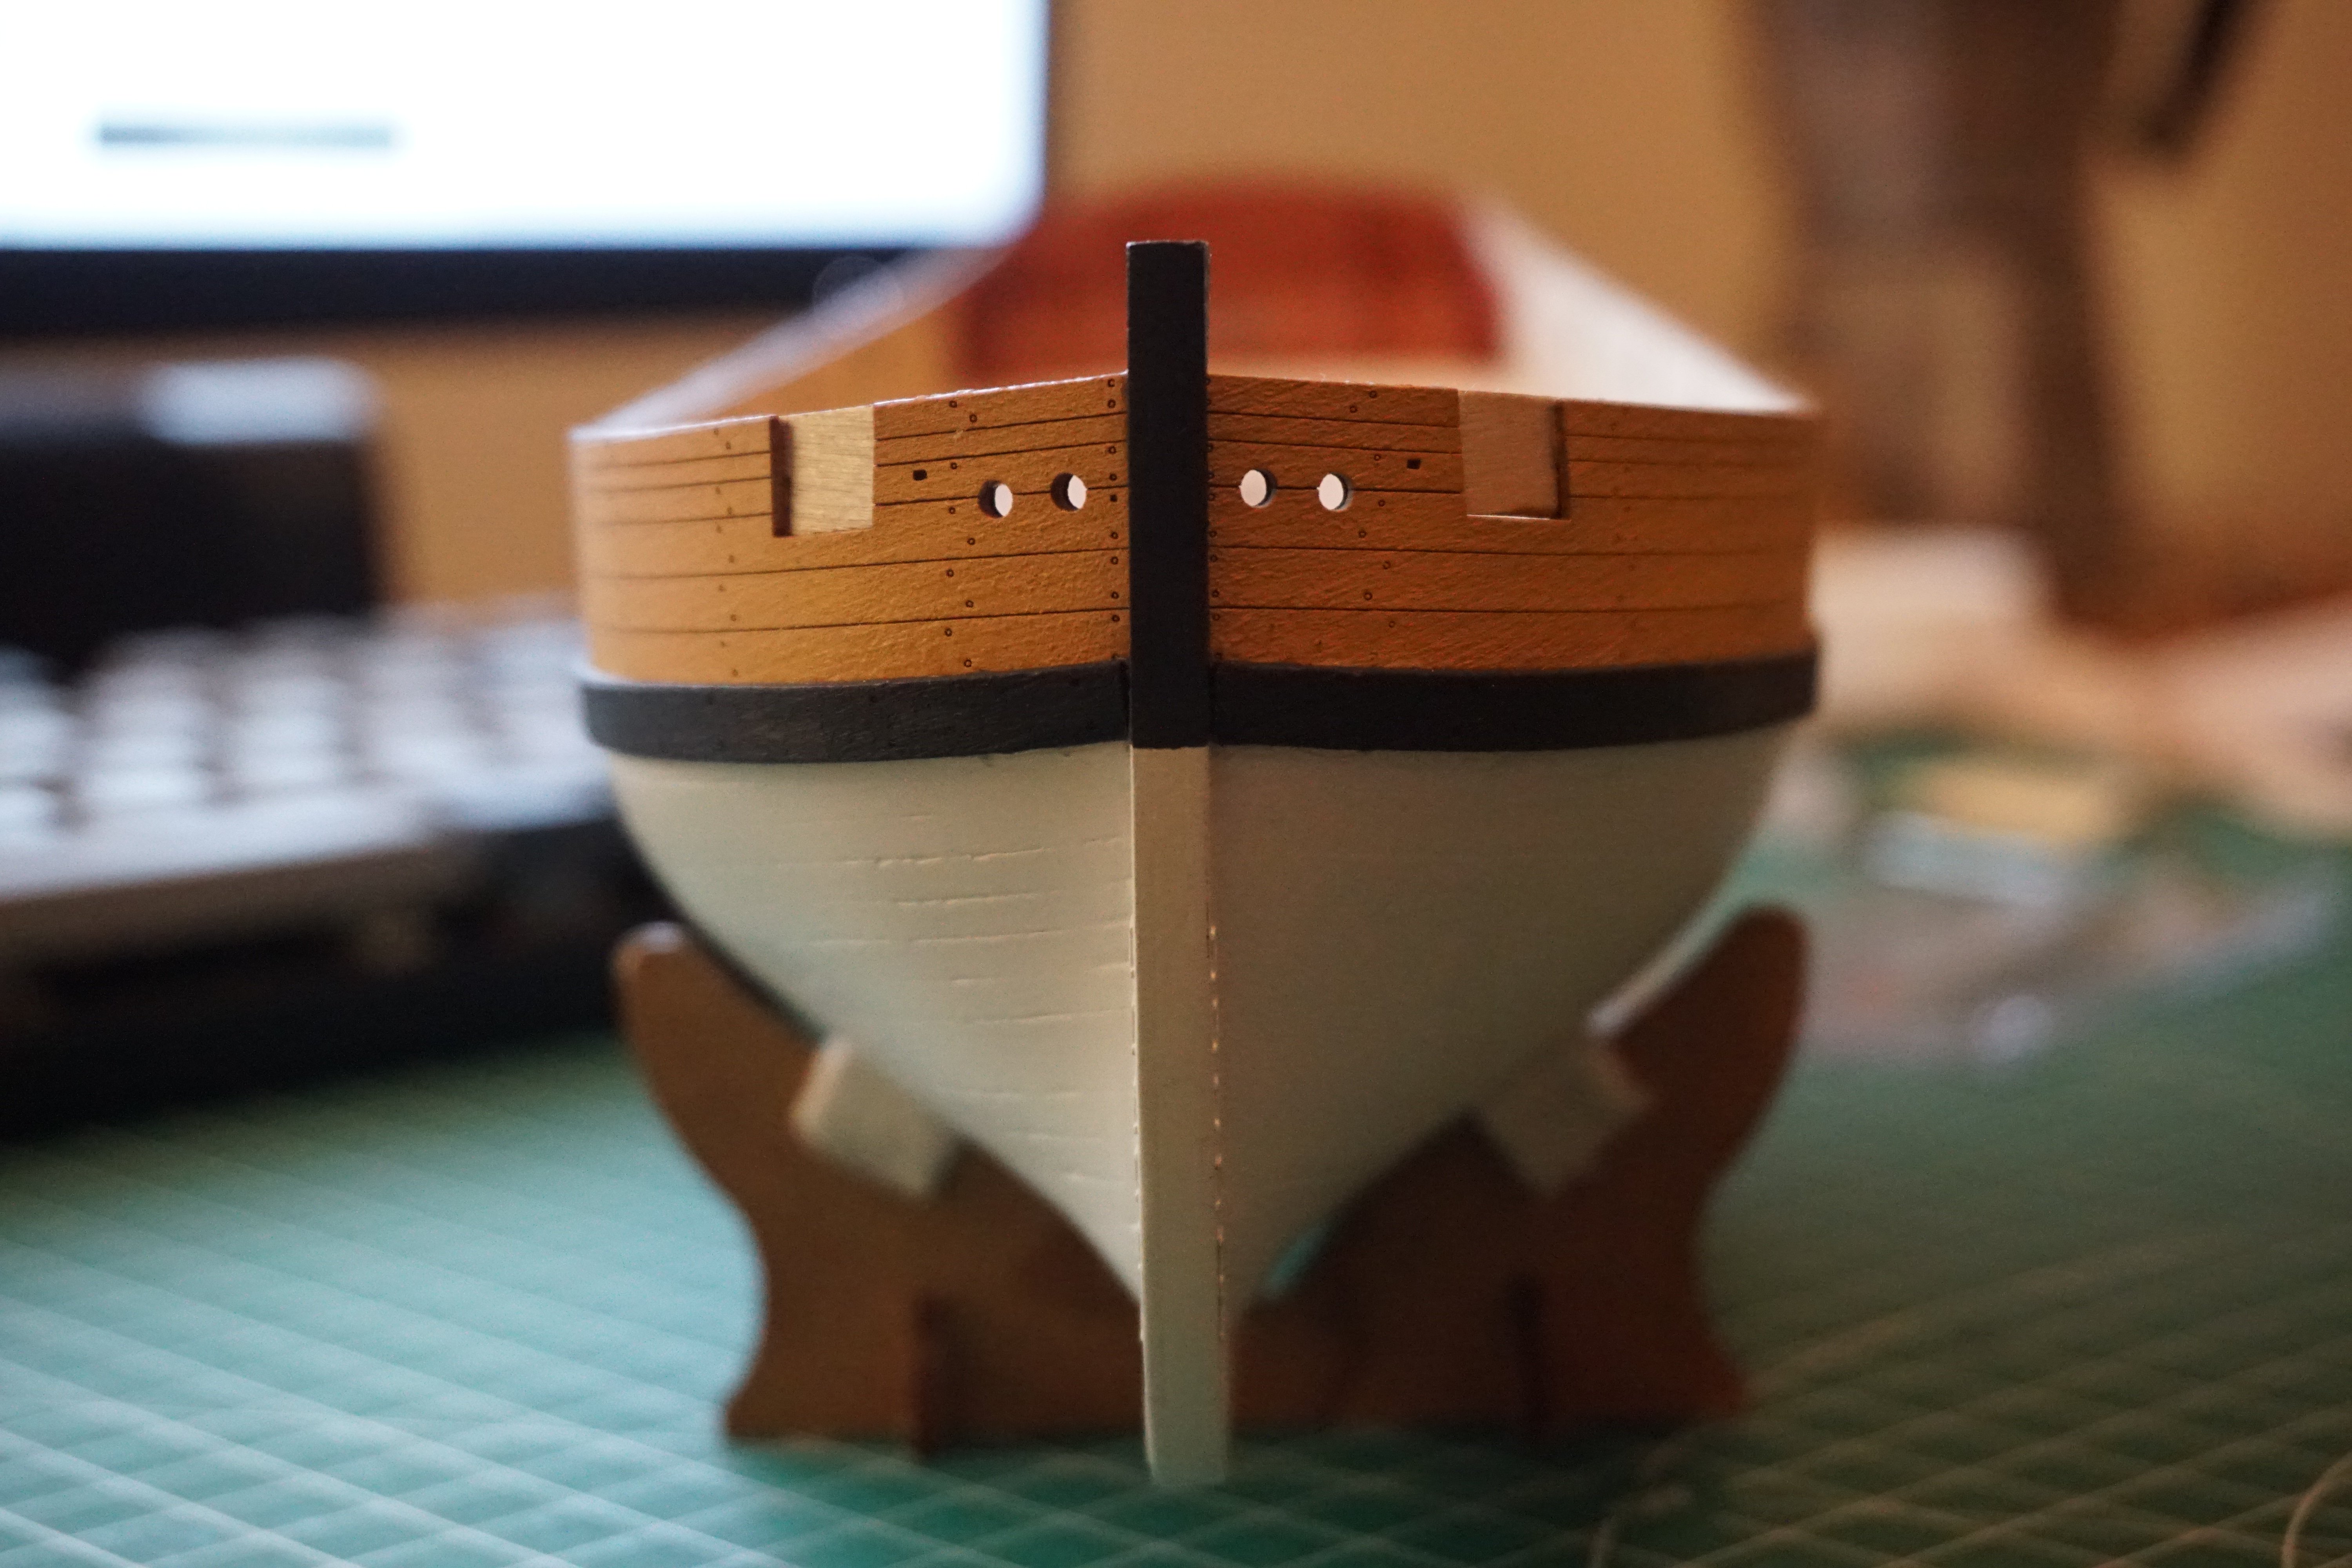
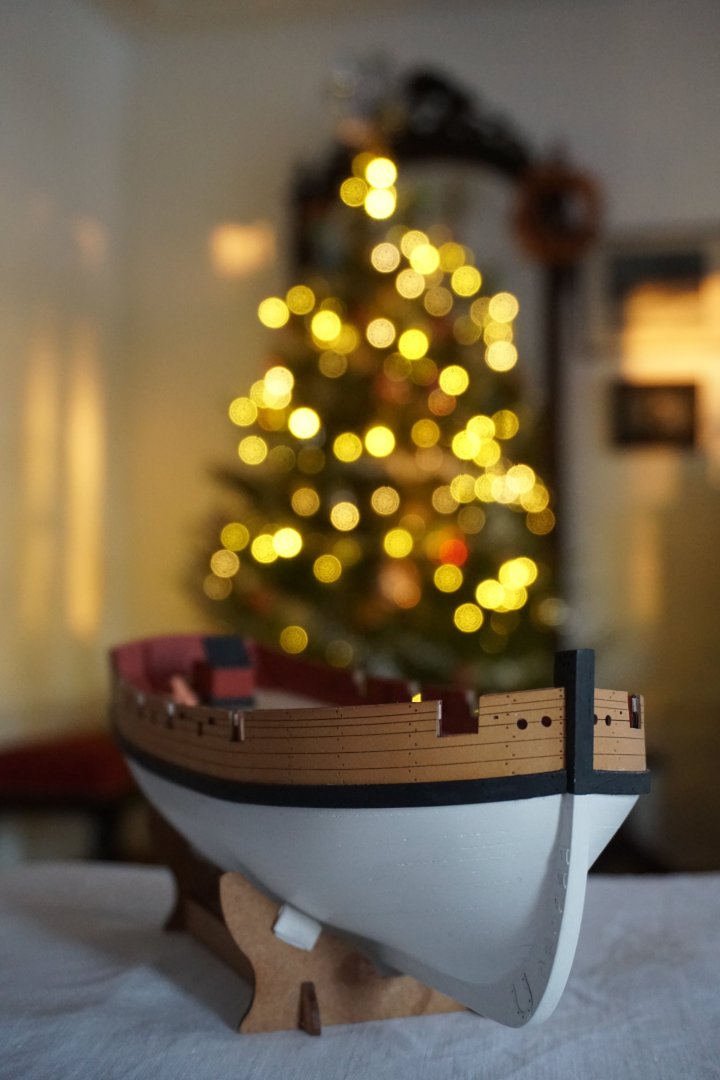
I'm finally back to modeling. The yellow ochre turned out to be a little darker than I'd expected, but I think that it still looks great. I deviated from the manual and attached the wales early, but then I realized that they make trimming excess wood from the stern and lower counter very difficult. Luckily I had only used CA, so the ends detached easily. I painted the prow by hand after this contemporary model. The other side is red, but I might change that before I put the bulwarks and spirketting on.


- 68 replies
-
- 7
-
-
- First build
- Cutter
- (and 2 more)
-
50th anniversary of the sinking.