
Roach Boi
-
Posts
34 -
Joined
-
Last visited
1 Follower

-
 king derelict reacted to a post in a topic:
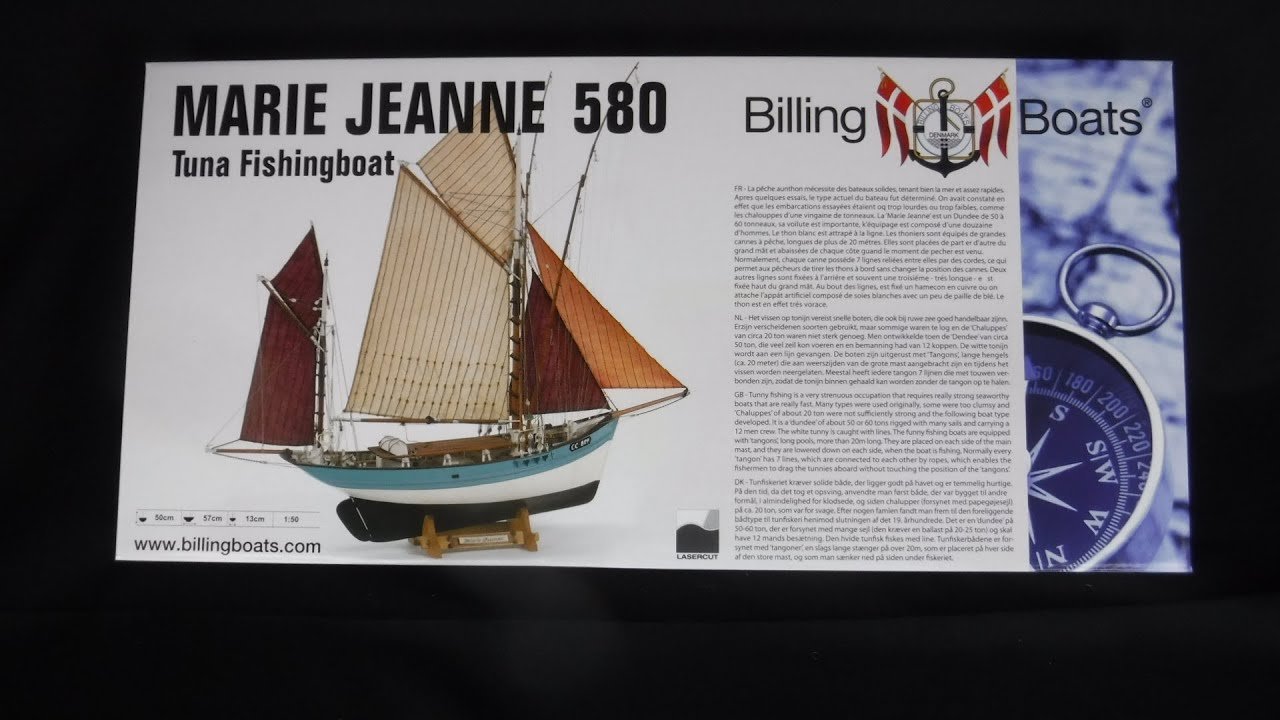
Marie Jeanne 580 by Roach Boi - Billing Boats - 1:50
king derelict reacted to a post in a topic:
Marie Jeanne 580 by Roach Boi - Billing Boats - 1:50
-
king derelict reacted to a post in a topic:
Marie Jeanne 580 by Roach Boi - Billing Boats - 1:50
-
 Roach Boi reacted to a post in a topic:
Marie Jeanne 580 by Roach Boi - Billing Boats - 1:50
Roach Boi reacted to a post in a topic:
Marie Jeanne 580 by Roach Boi - Billing Boats - 1:50
-
TOM G reacted to a post in a topic:
Marie Jeanne 580 by Roach Boi - Billing Boats - 1:50
-
JacquesCousteau reacted to a post in a topic:
Marie Jeanne 580 by Roach Boi - Billing Boats - 1:50
-
yvesvidal reacted to a post in a topic:
Marie Jeanne 580 by Roach Boi - Billing Boats - 1:50
-
Mirabell61 reacted to a post in a topic:
Marie Jeanne 580 by Roach Boi - Billing Boats - 1:50
-
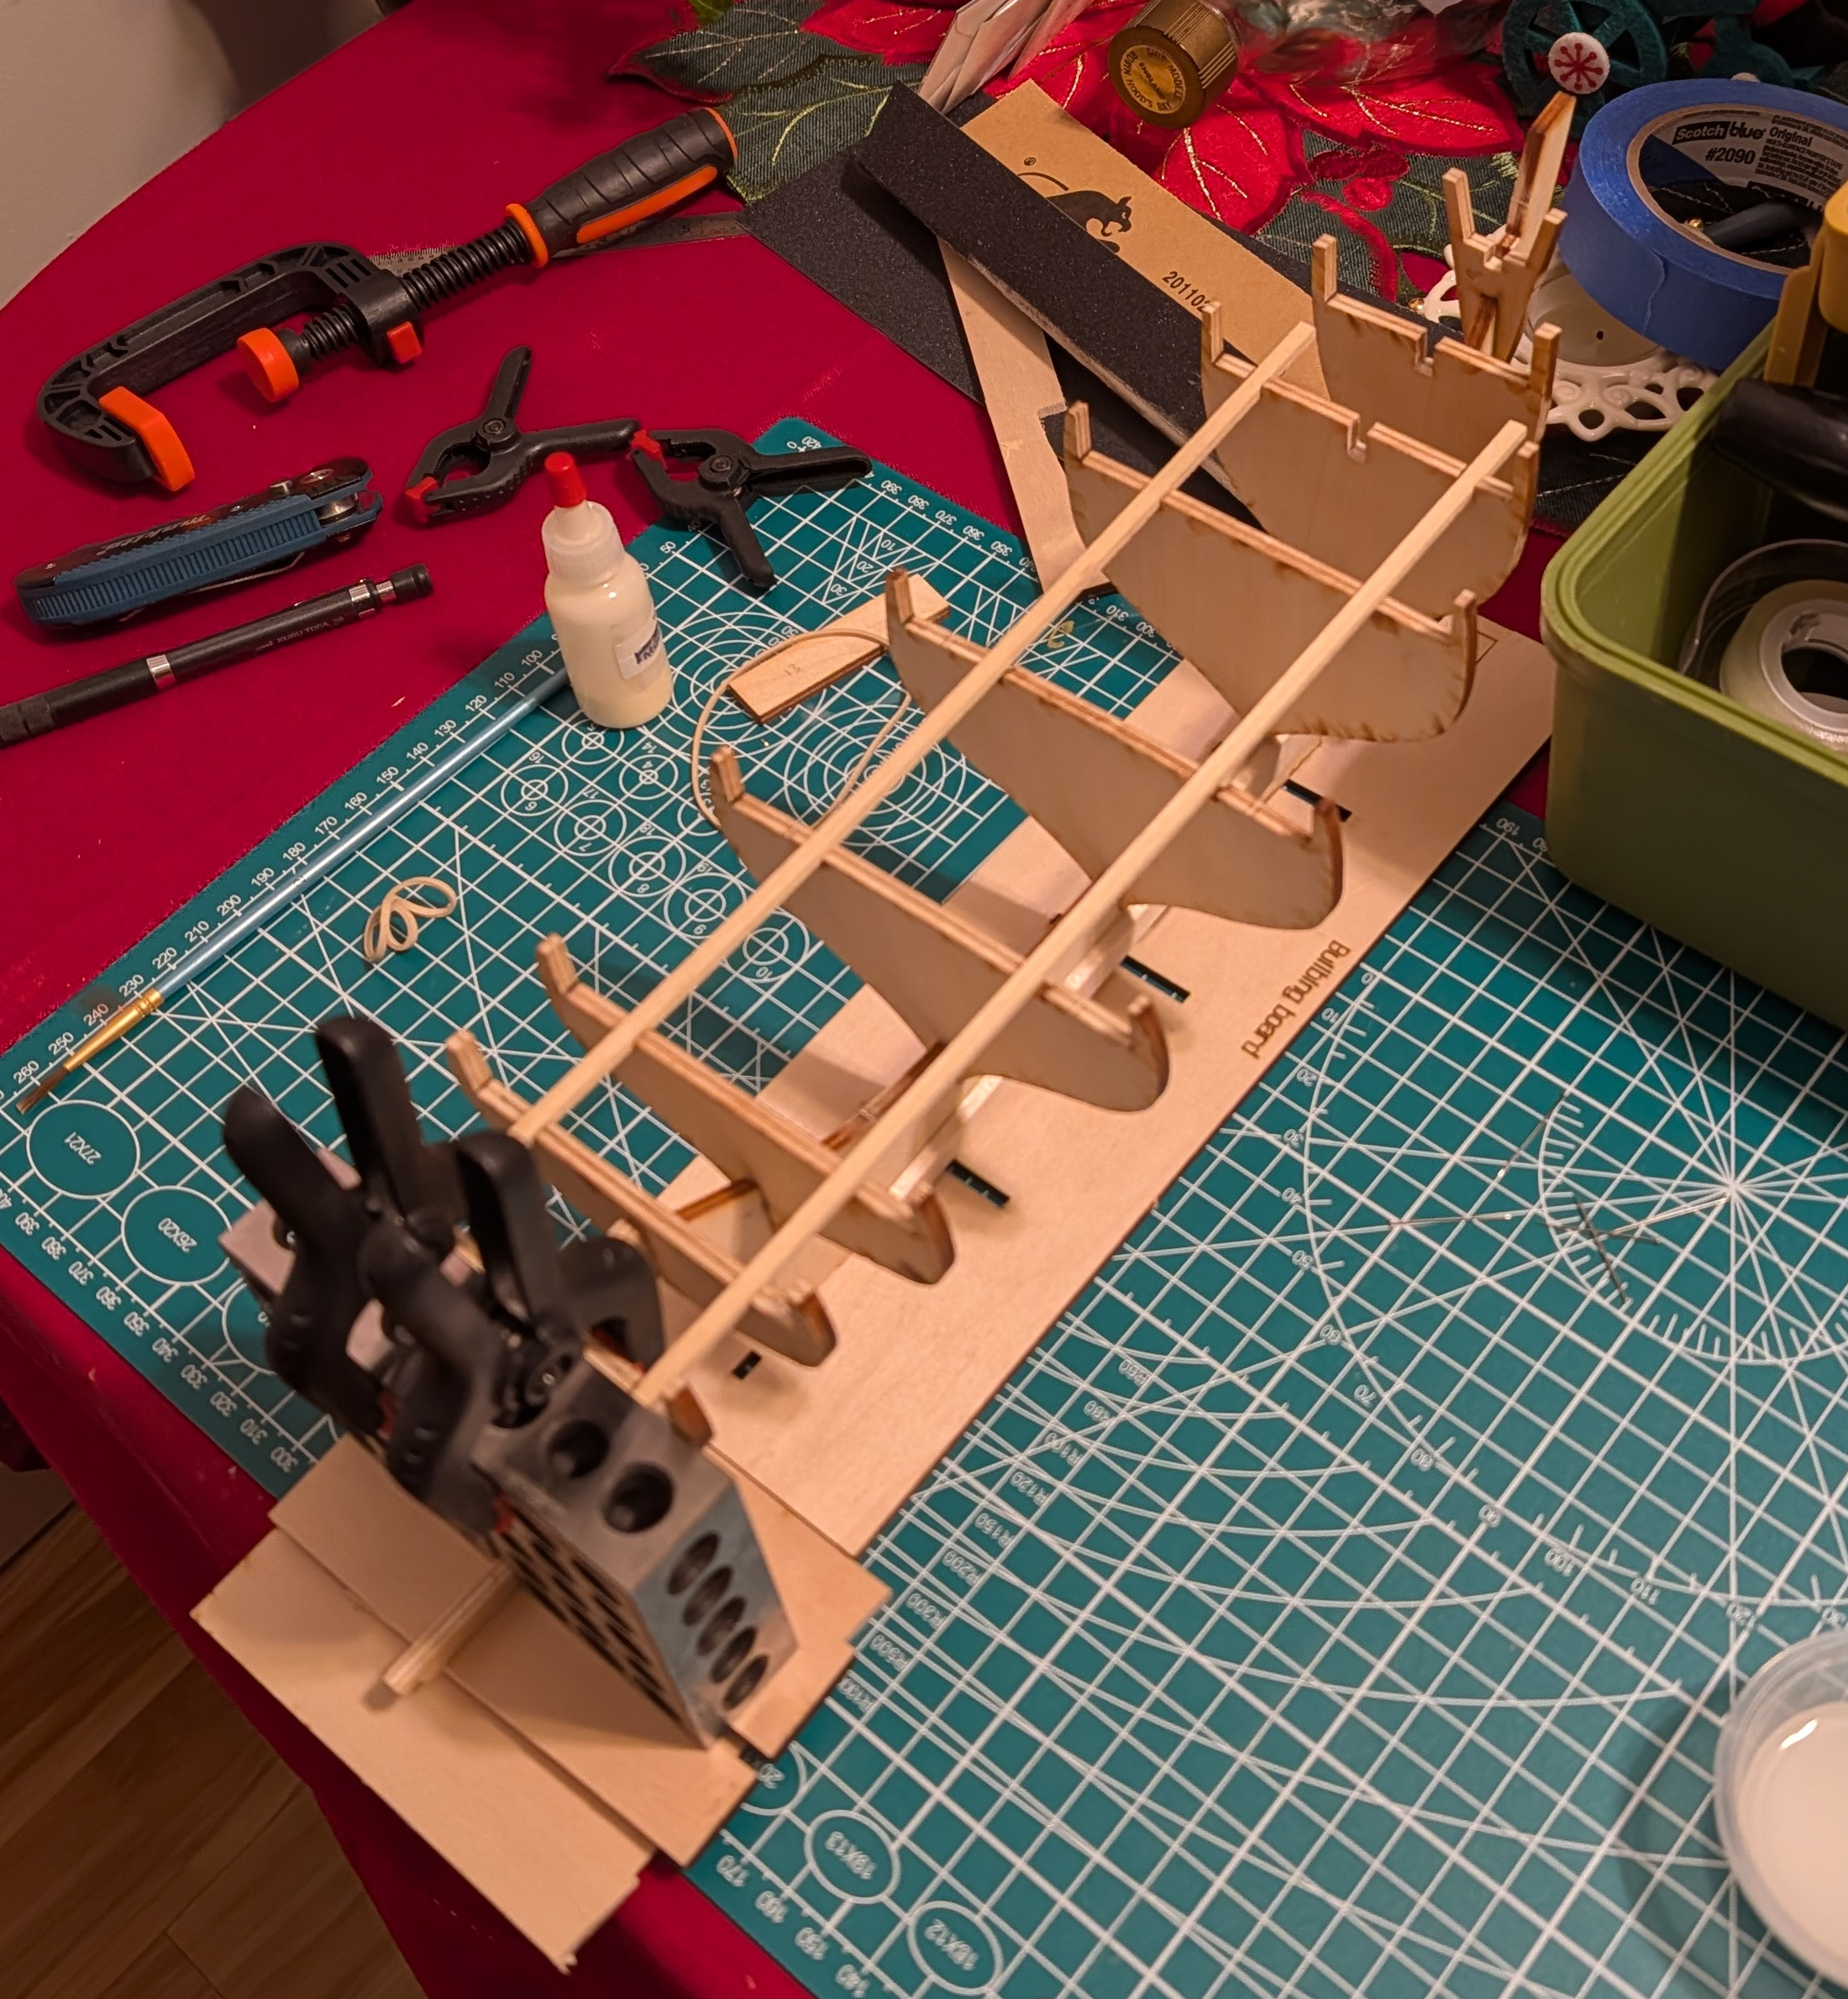
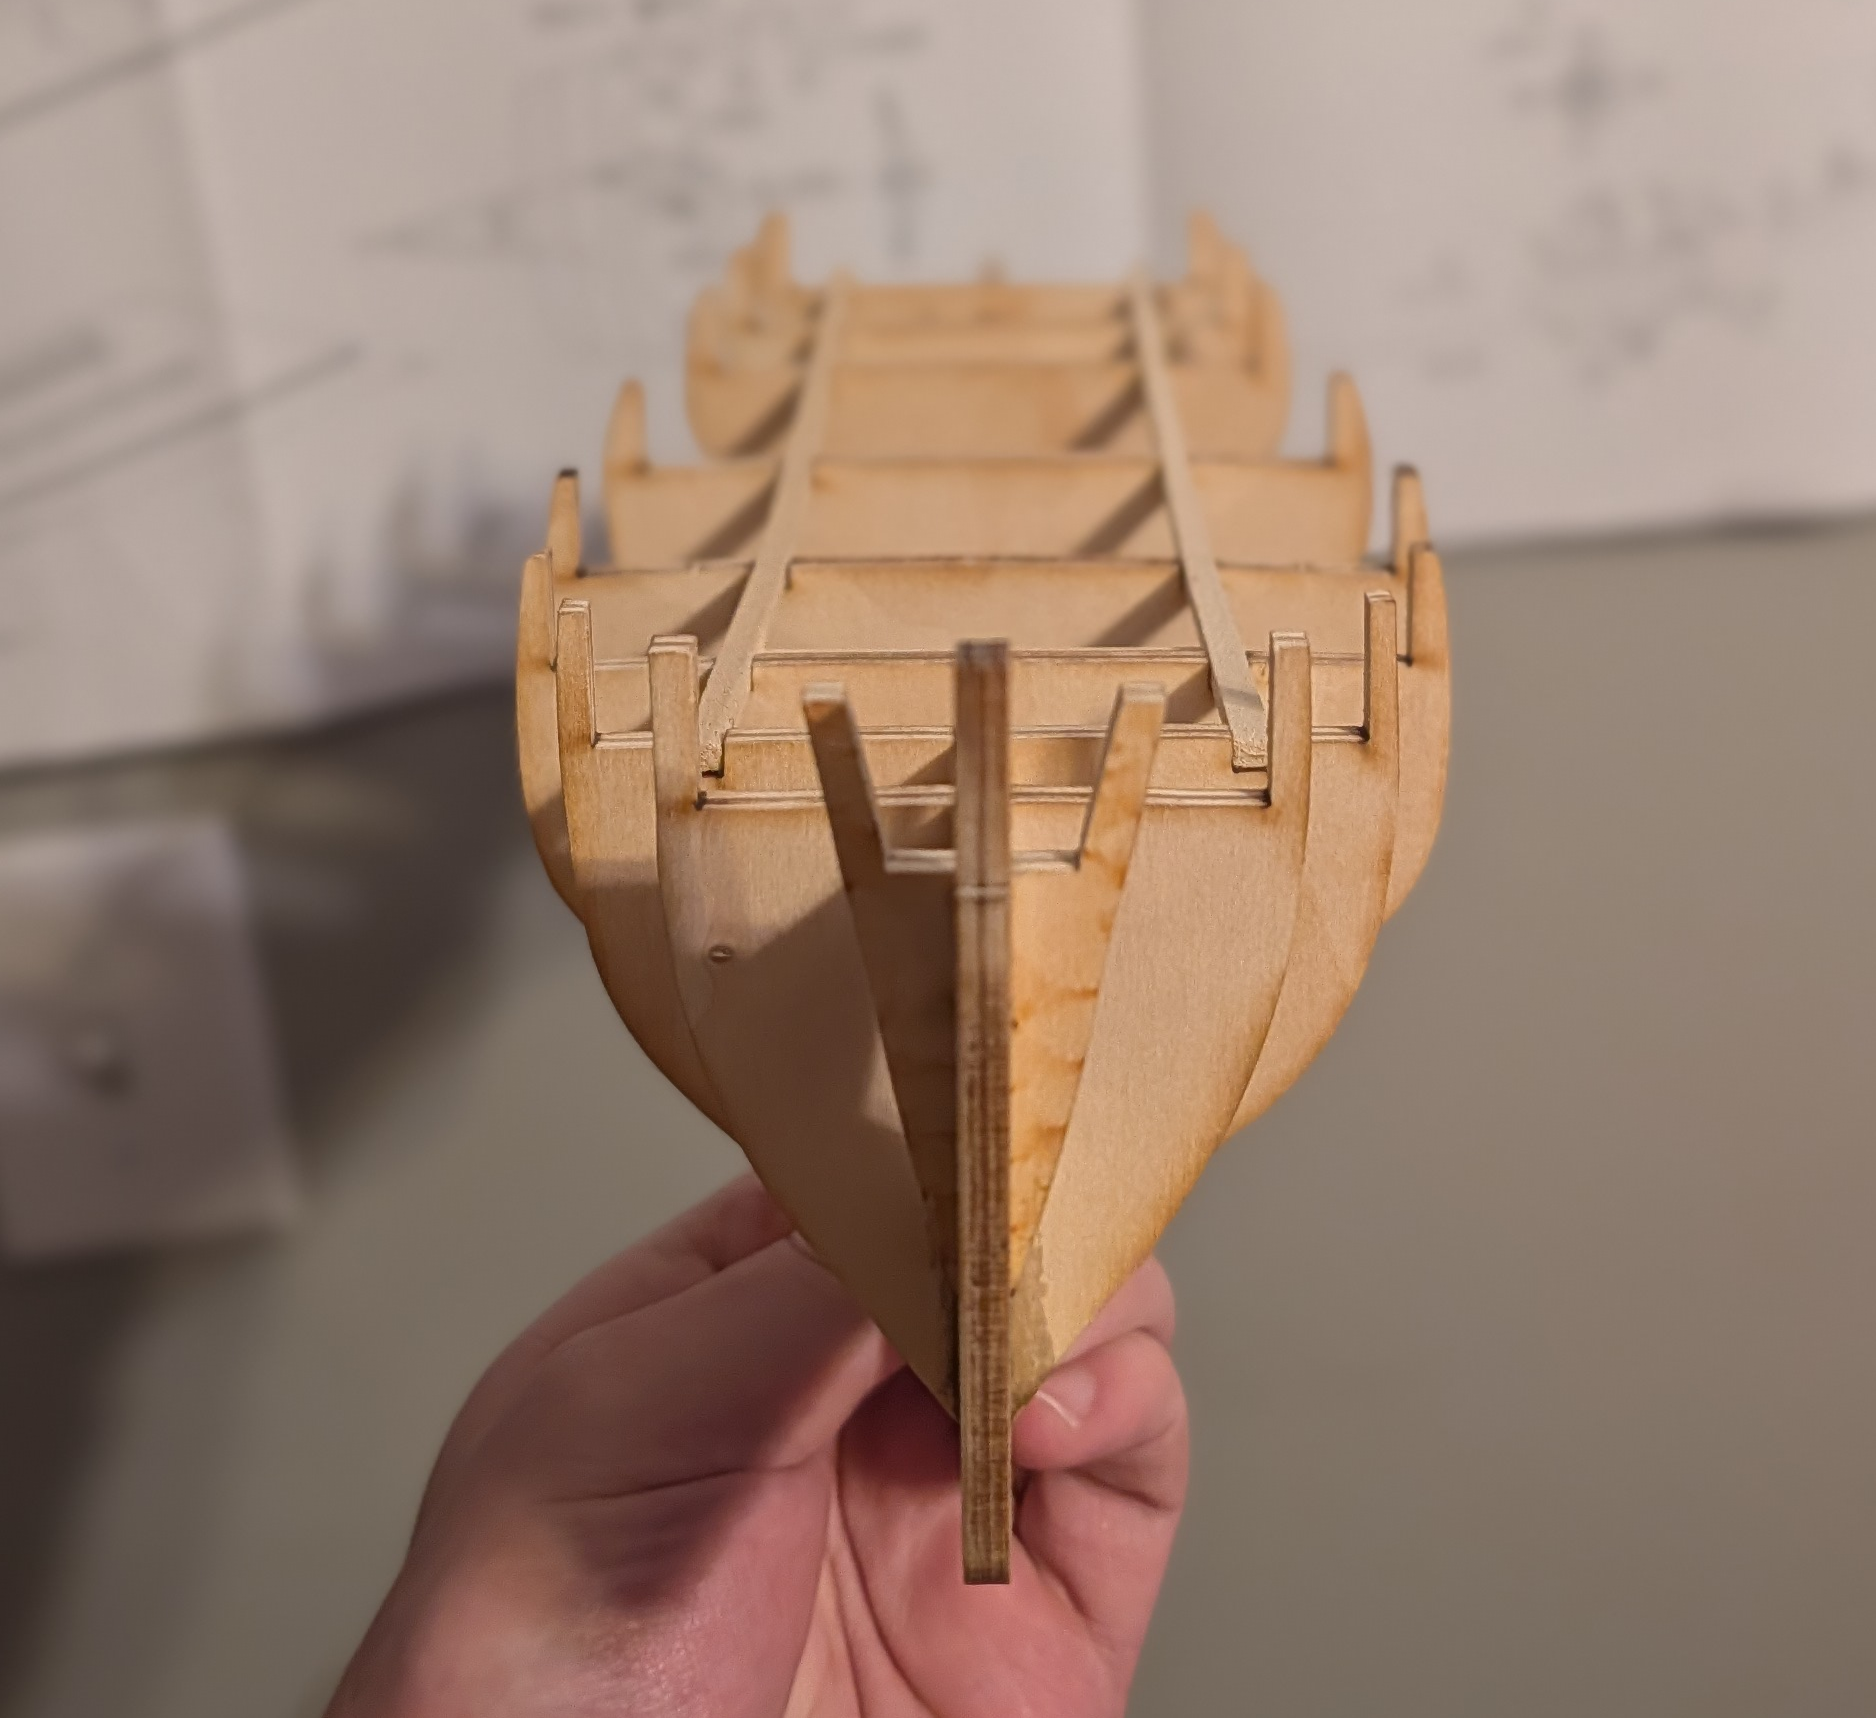
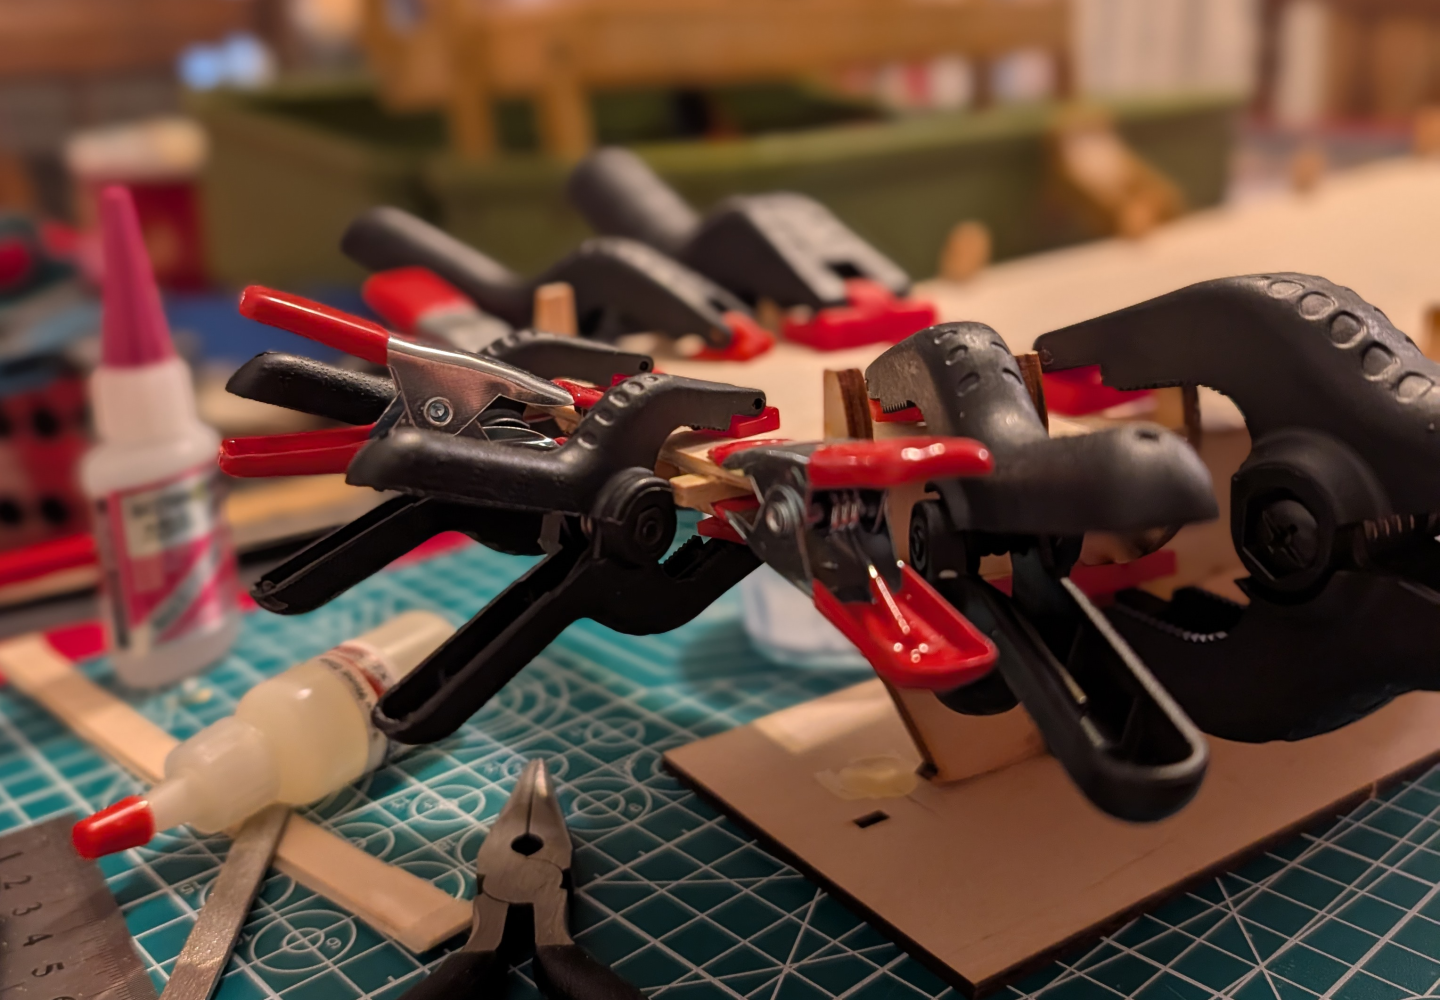
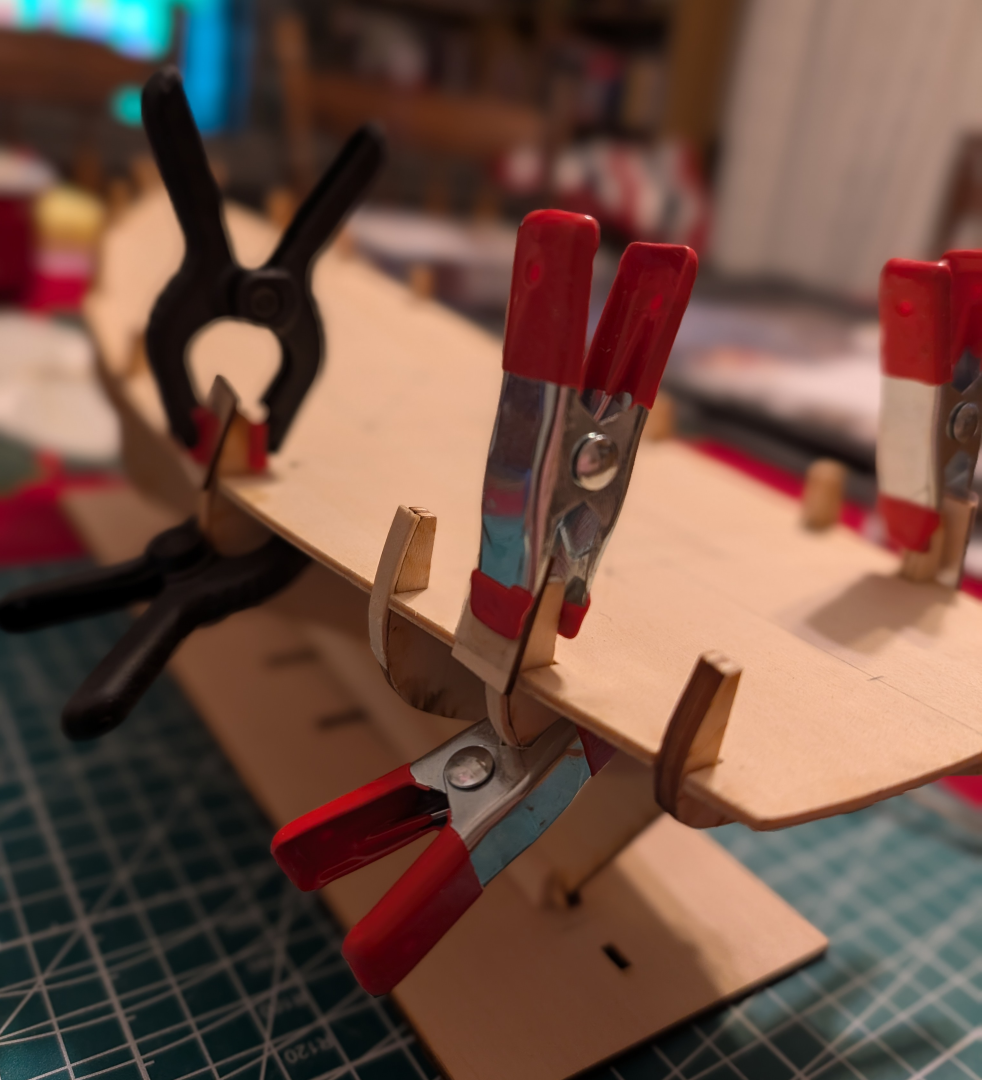
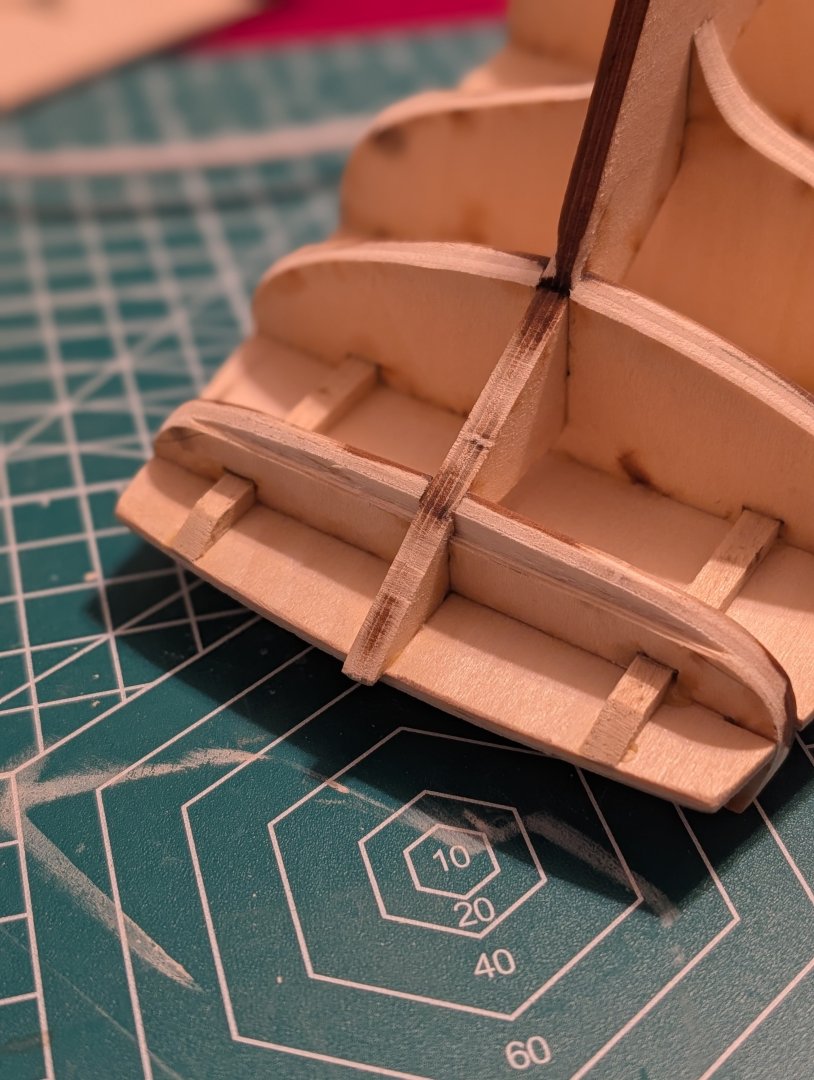
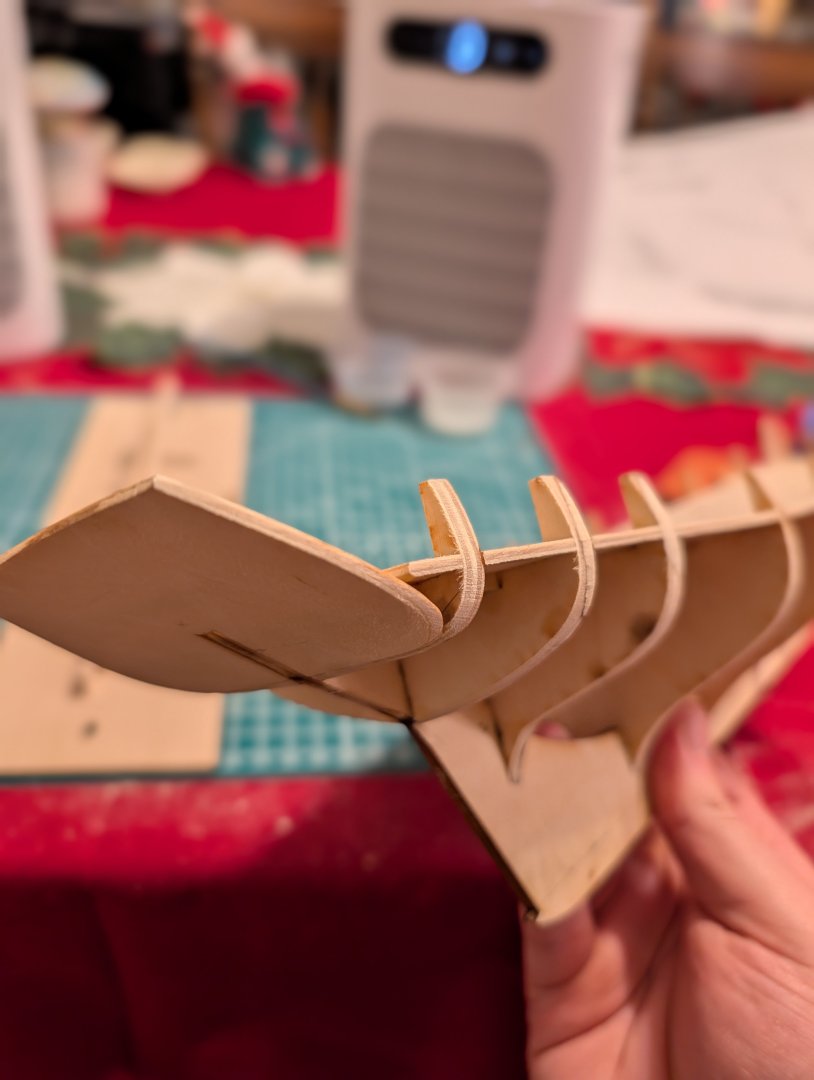
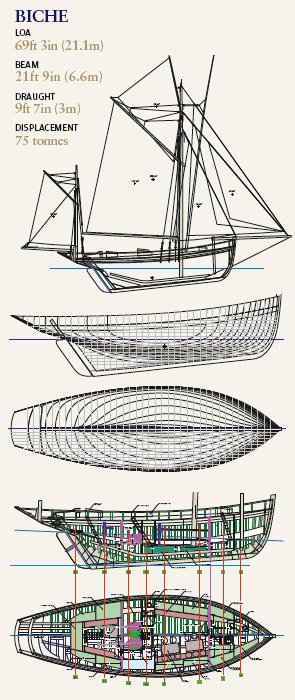
 Alright next step in the build was the false deck. This was the first time I've installed a false deck so it took a bit of time for me (as with most of this hobby). I dry fitted the thing a handful of times and beveled the slots that the ribs went into, they needed to be angled with the ribs if that makes sense. I had to take a decent amount off the very front slot of the deck so it would sit flush against the keel. Here's what it looked like after I glued it down. I used pins on most of the deck to get the curvature from the top of the ribs. Not sure what this feature is called but I'm assuming its to keep the water flowing off to the sides of the deck. I used a lot of clamps in the back to make sure it sat on the rails and ribs instead of pins. After the deck was dry I noticed that some of the ribs were missing a few mm from either side of the deck (not protruding far enough out of the false deck). I added some scrap 1x5mm strips left over from another kit and wetted them and bent them to the sides. I figured they would get 'faired' out in the next step. At this point I started fairing the hull which took some time. I had to run to the hardware store to get some 120grit sandpaper because all I had was 240 and was not doing the trick. This took me about a week before I felt like it was good enough for planking and honestly burnt me out a little bit. The bow took forever to sand down and the very first rib needed so much taken off. I also measured and drew out some lines on the keel where the planks should stop from the drawing. That also made me realize I needed to take more off the front rib. I started to dry fit the transom and noticed that I had to make a rabbet (yea?) in the last rib to get the thing to fit correctly. I also beveled the rails I left long to help keep the transom aligned and give it some more support. After the transom was installed I faired the hull a bit more with it included to help get the shape. Anyways that's about where I'm at right now. I've also been having fun doing some research about these type of Dundee fishing boats and I've been finding a lot of info on one called 'Le Biche'. I guess its the last working tuna boat of this style from the period, this is a good article on it: https://www.classicboat.co.uk/articles/restoration/biche-back-from-the-brink/ Included was this nice photo that helped me fair the hull a bit and get a better understanding of what shape it should take: That's all for now, I'm currently struggling to put on the deck rails so more to come. o7
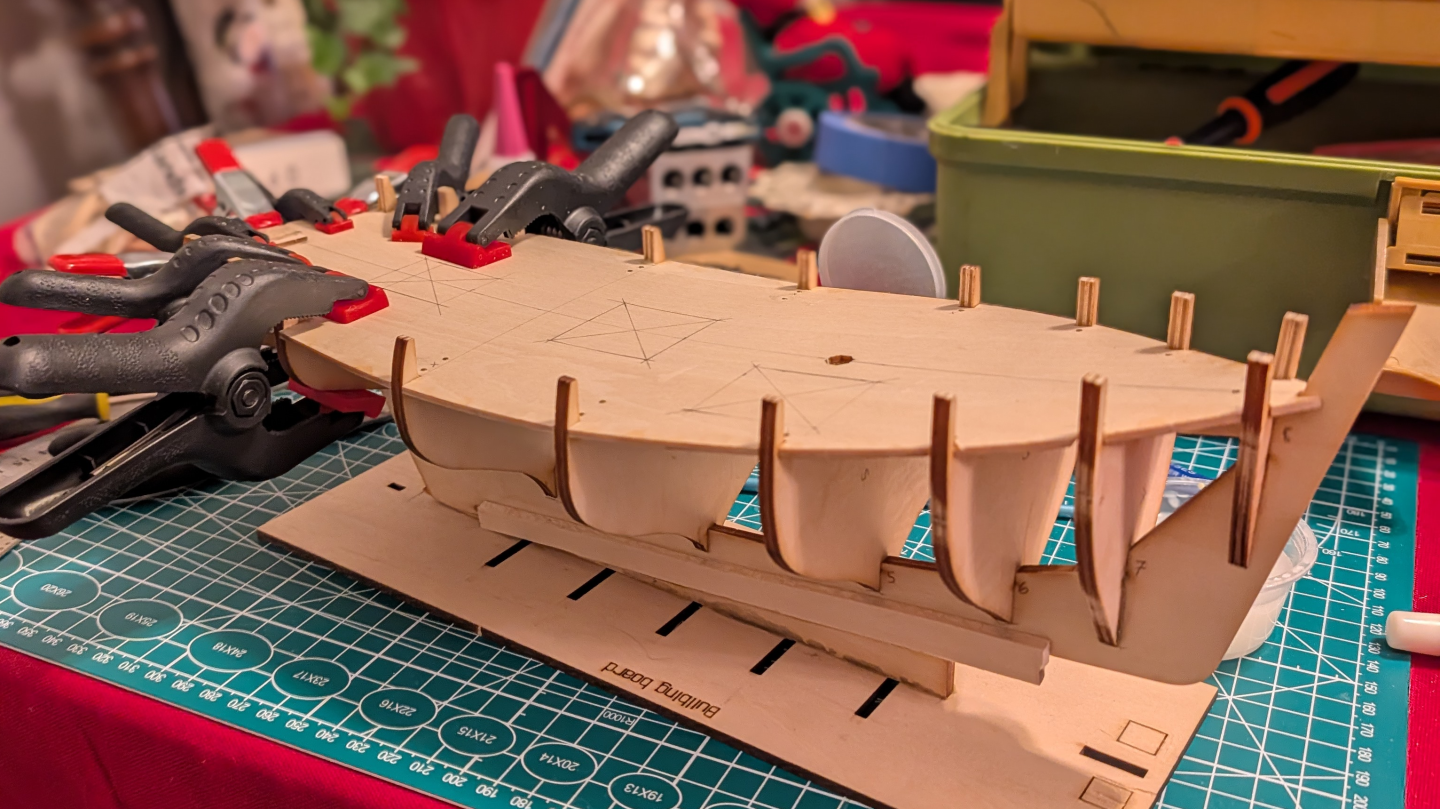

- 3 replies
-
- 5
-
-
- billing boats
- marie jeanne
- (and 1 more)
-
Roach Boi reacted to a post in a topic:
Marie Jeanne 580 by Roach Boi - Billing Boats - 1:50
-
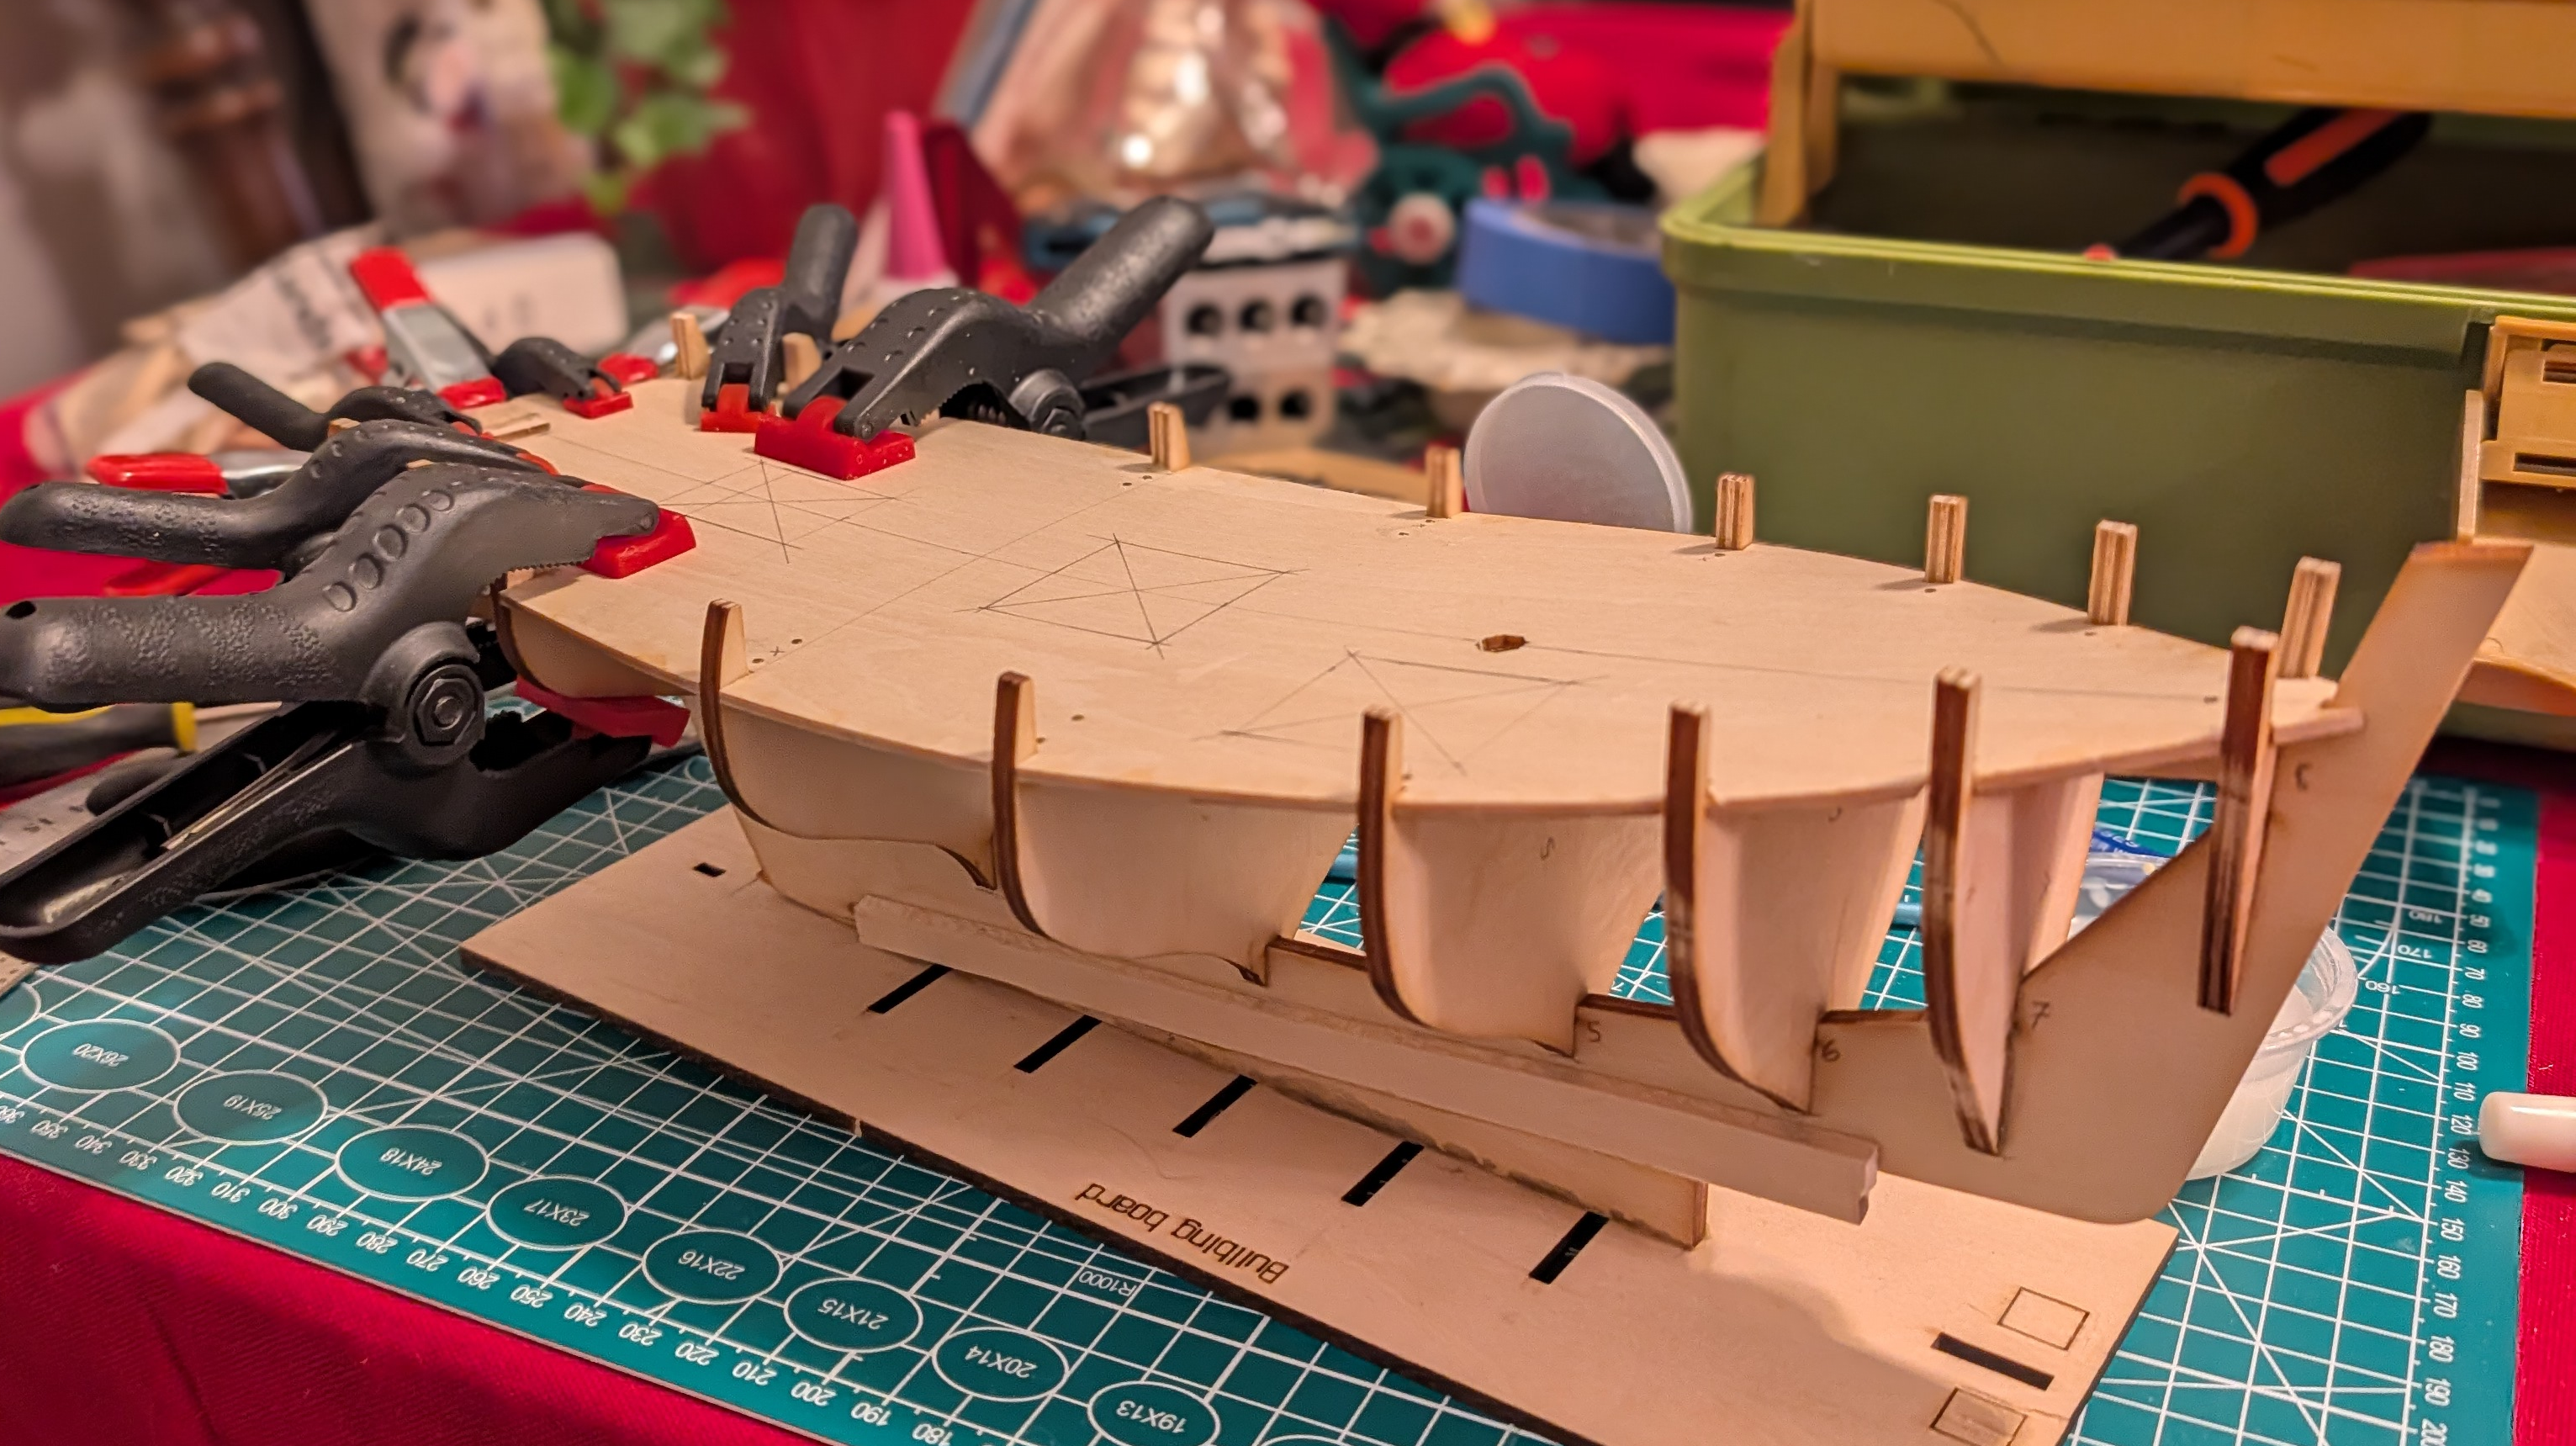
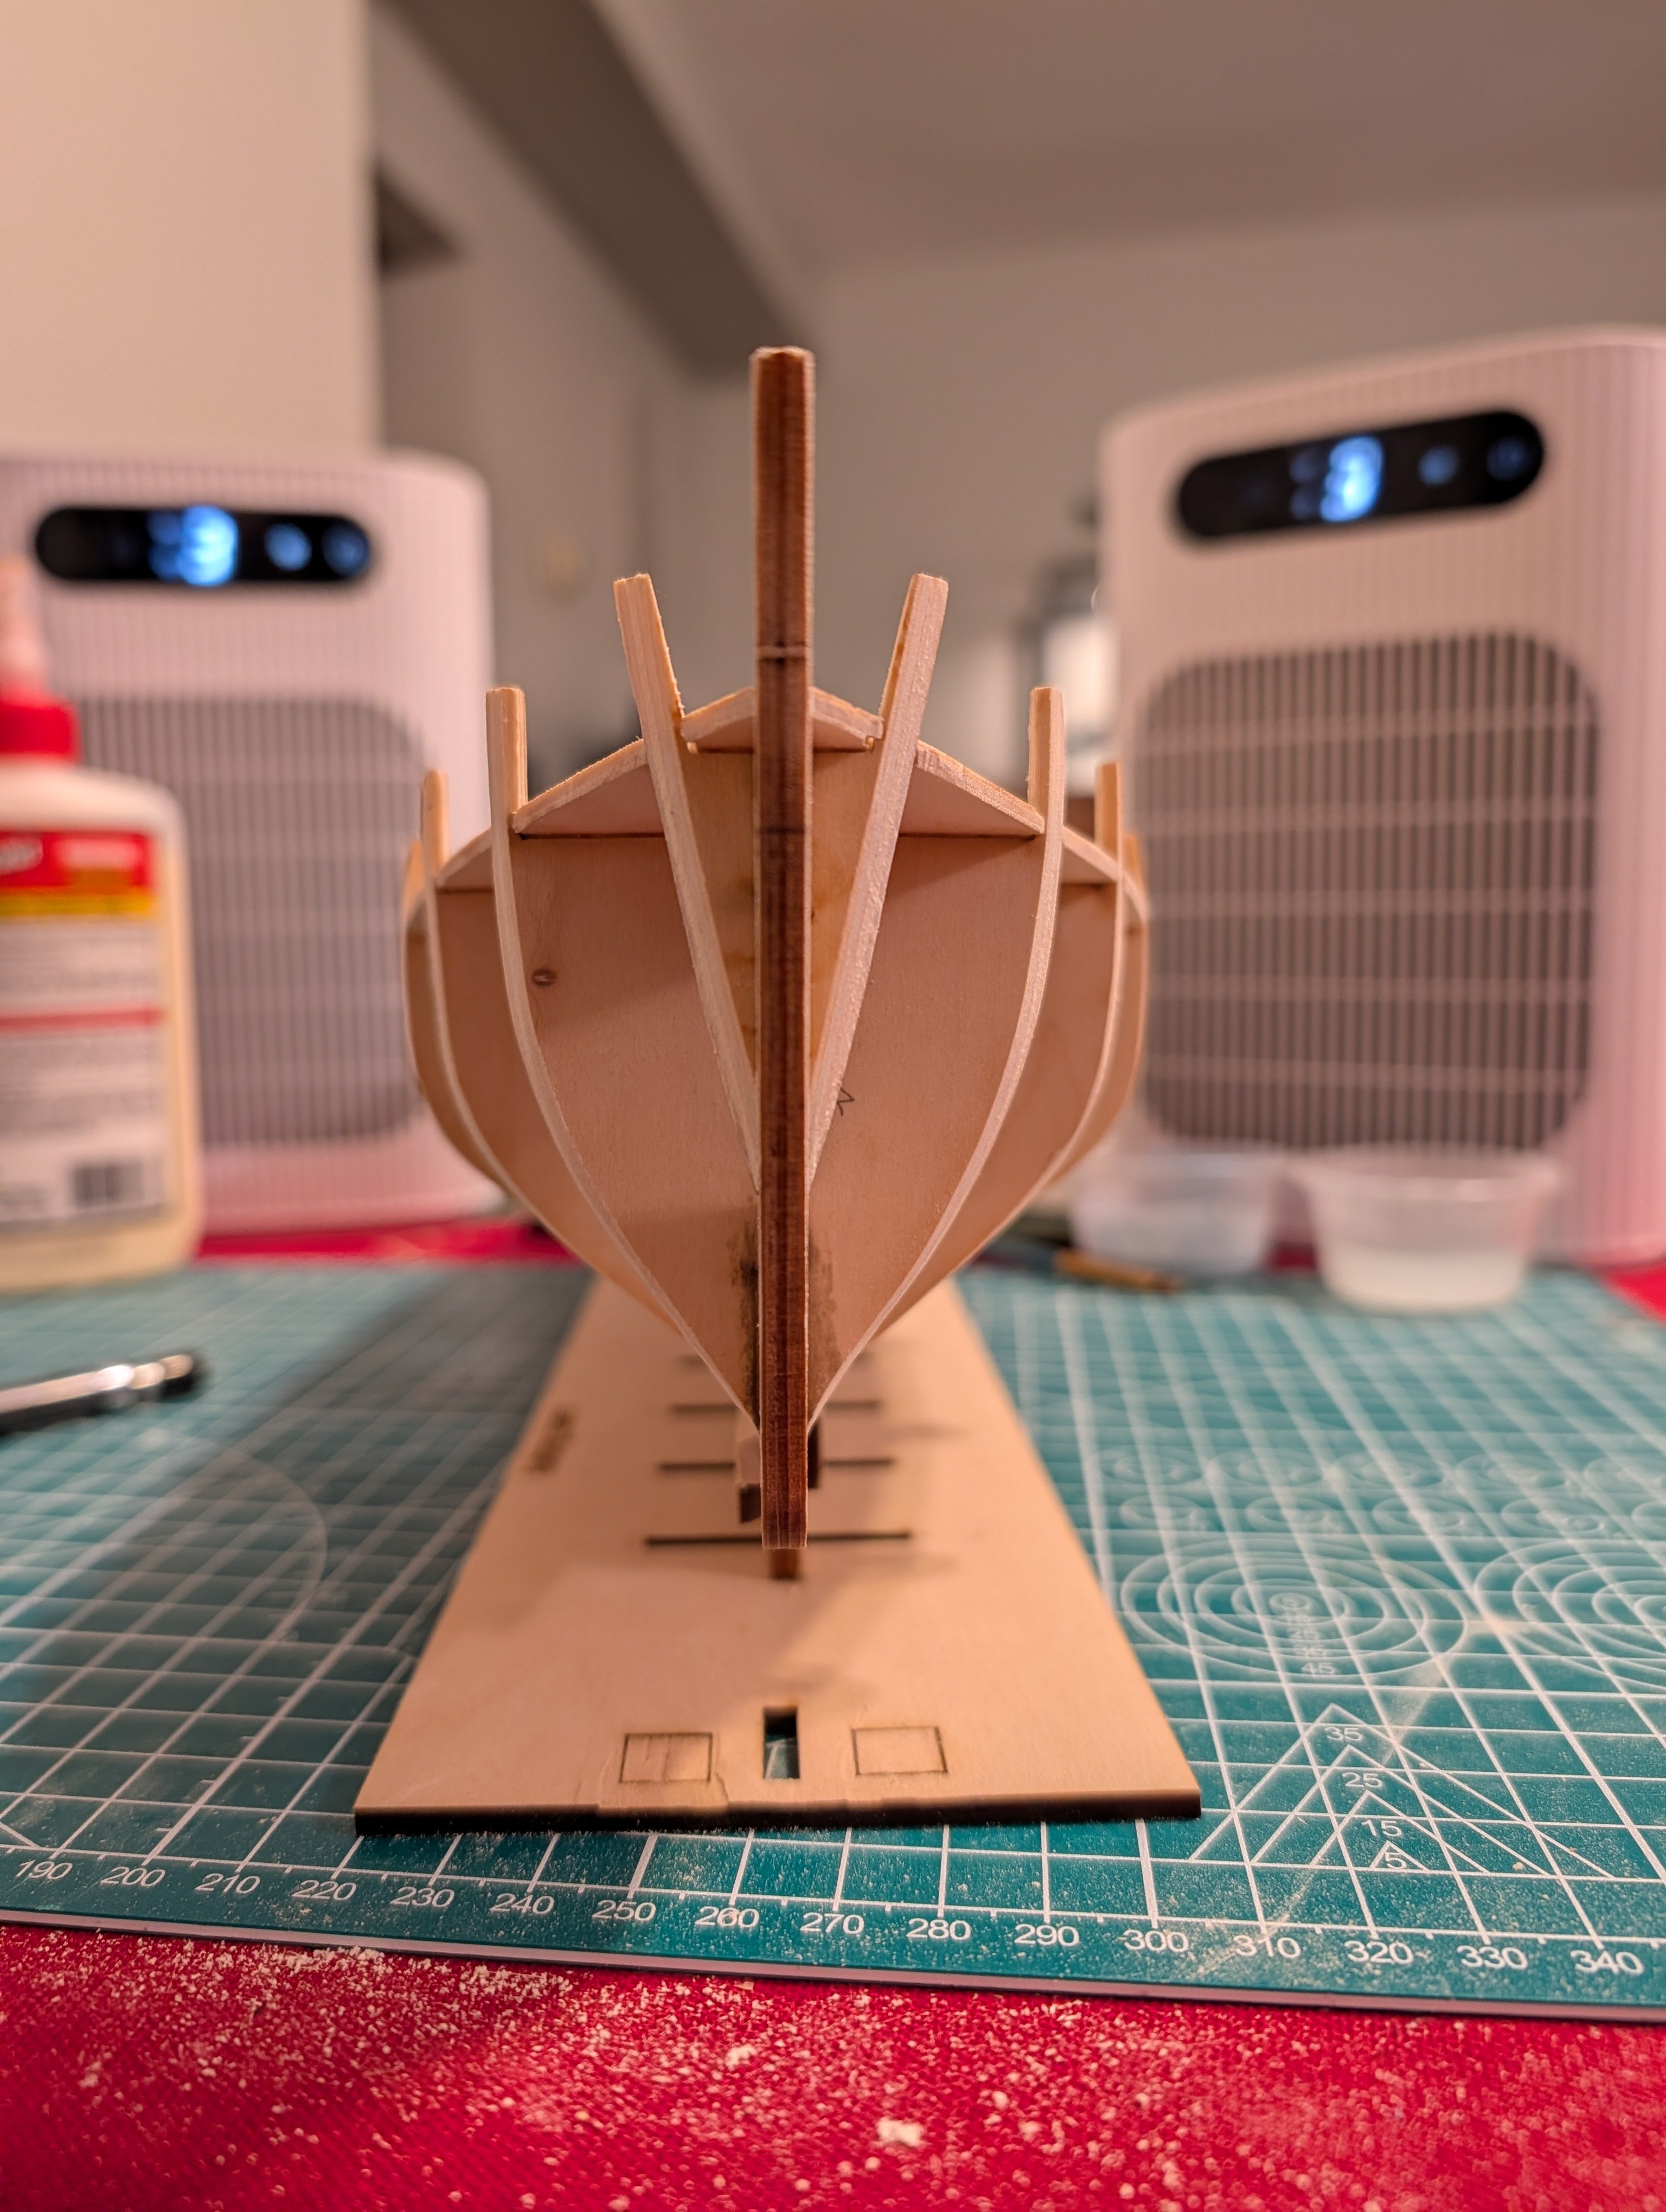
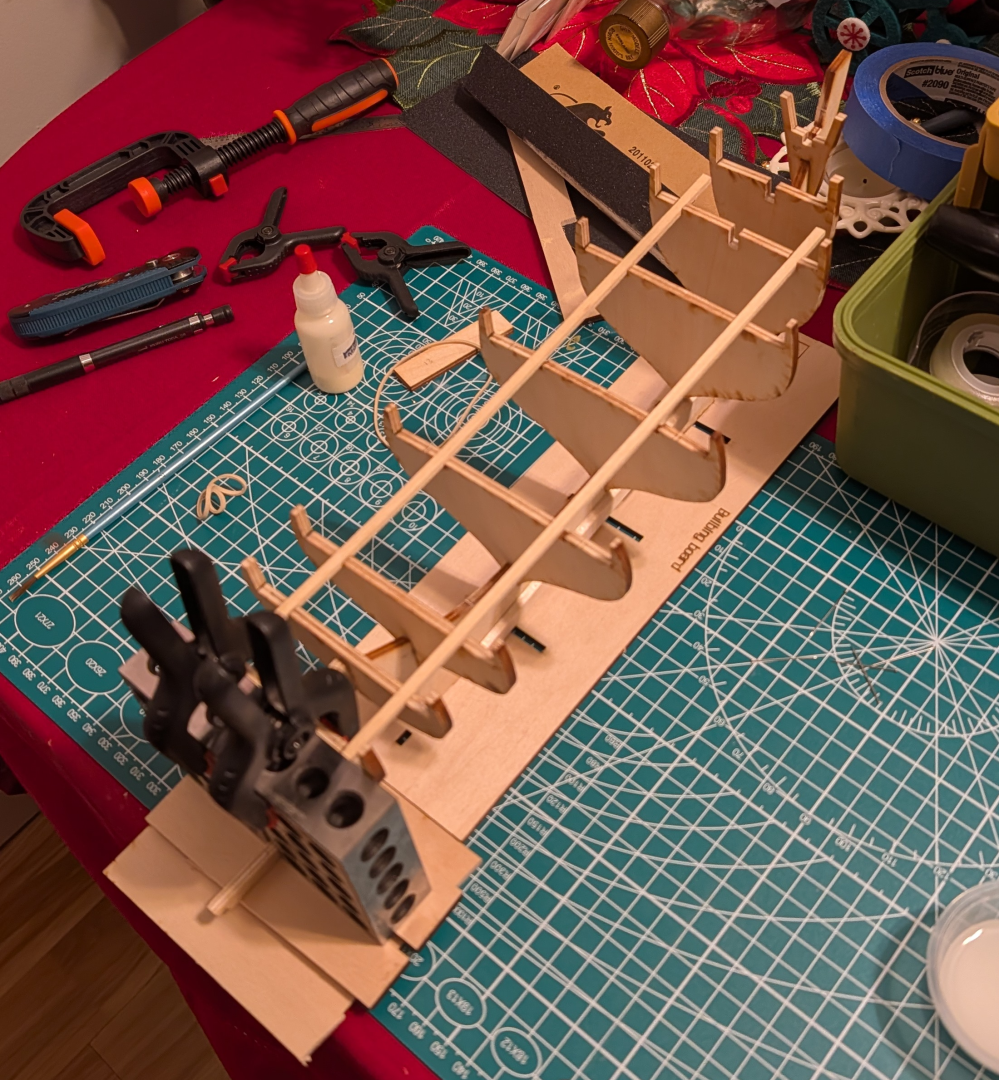
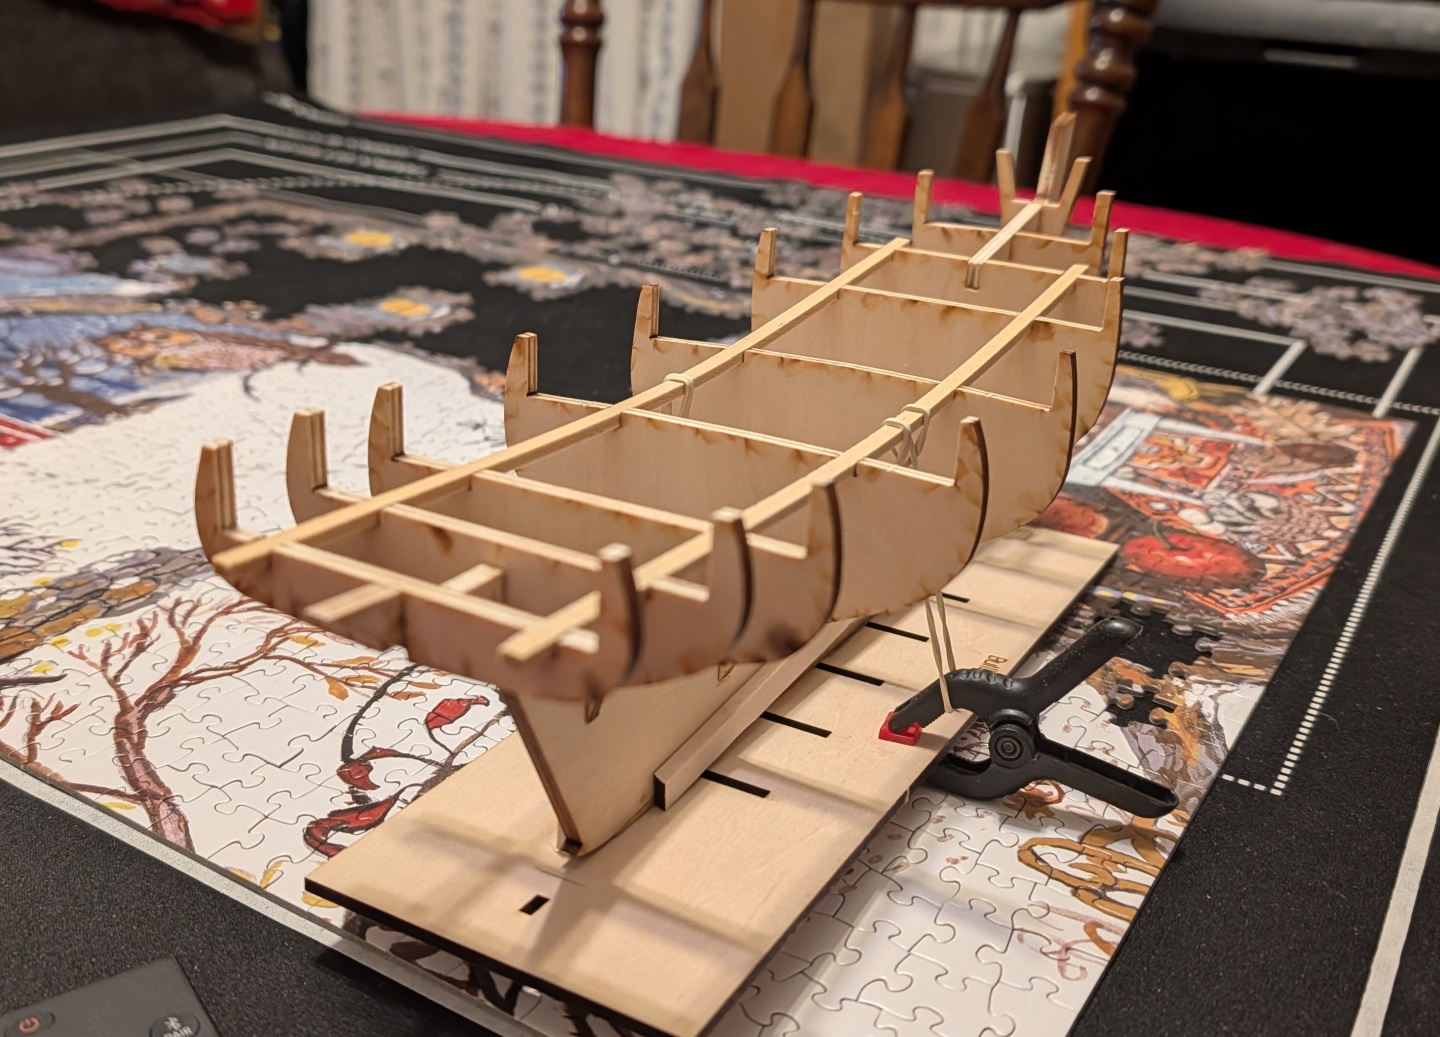
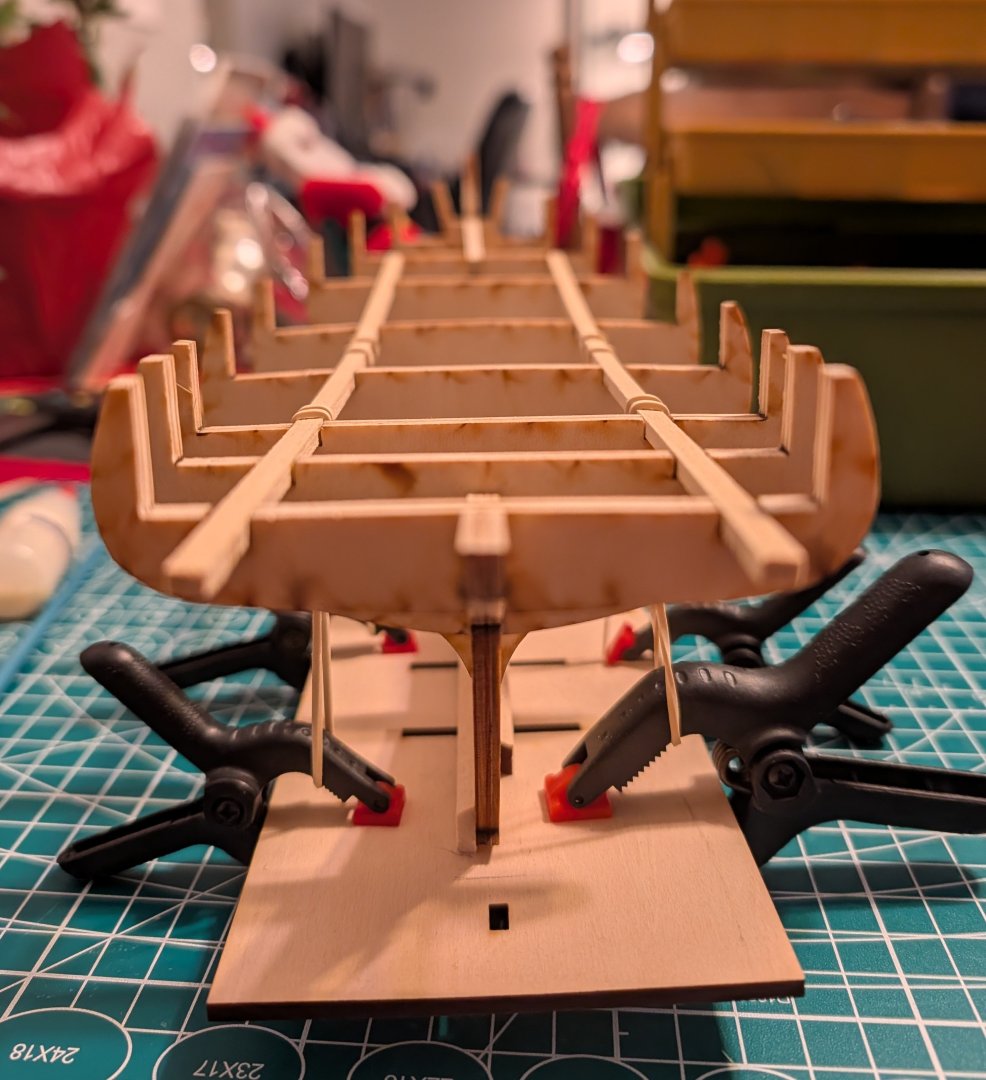
Here we are, my first build log on this site! I received this kit at a Christmas gift and I've had my eye on it for awhile. Not sure what drew my attention to this boat but I find its design really interesting and I love the enormous tuna rods that come off the side. I'm an experienced modeler but relatively new to the wooden ship hobby so follow along if you're interested in how I try to tackle this beast of a kit. I'm going to be working on this alongside the lobstersmack which I have on hold for now but I want to make a log for this kit specifically because of the limited logs I've found of the billing boats version of this French tuna boat. I'm a bit ahead in the build already at the time of writing this but I've been taking some photos along the way. The first step was to build a base with some scrap wood to fit the helling (heeling?) for the keel. I used the bulbing board from my Model Shipways Dory along with some scrap pieces of wood I broke apart to afix the keel in place to help angle the ribs correctly. I squared this triangle helling with some machinists blocks and sandpaper before gluing it to the bulbing board, I did the same to the bottom of the keel to make sure everything sat nice and square to the board. After this I began installing the ribs as shown. I used my two machinists blocks on either side of the rib to keep it square to the keel while gluing (I was a bit further along in this photo but wanted to show how I did it anyways). The trickiest part was getting the ribs to sit evenly from side to side (port to starboard?). As they were slightly loose to the keel so it allowed some play. I just eyeballed this knowing my blocks were the same height and that the rib should be equally high on both sides of the keel. After this I added the two support rails for the ribs. I presoaked these and fitted them before gluing. I left the rails long in the back in anticipation of the transom, I figured they could add some extra structural integrity to the stern of the ship. Also, I was test fitting the false deck during the installation of these rails as to make sure the alignment was correct when I glued them in. The front support rail that spans the first 3 ribs at the bow needed some sanding to get it fitted. It protruded too far upwards into the deck than I liked and needed to take a few mm off the front and bottom of this piece to get it to sit right. Here's some more photos of the build at this stage: Anyways let me know what you think! Hopefully I'm doing this build log post correctly. Its time for this sailor to retire to bed, more updates tomorrow!


- 3 replies
-
- 7
-
-
- billing boats
- marie jeanne
- (and 1 more)
-
Roach Boi reacted to a post in a topic:
New Shipwright Reporting for Duty
-
Roach Boi reacted to a post in a topic:
New Shipwright Reporting for Duty
-
Roach Boi reacted to a post in a topic:
New Shipwright Reporting for Duty
-
Roach Boi reacted to a post in a topic:
New Shipwright Reporting for Duty
-
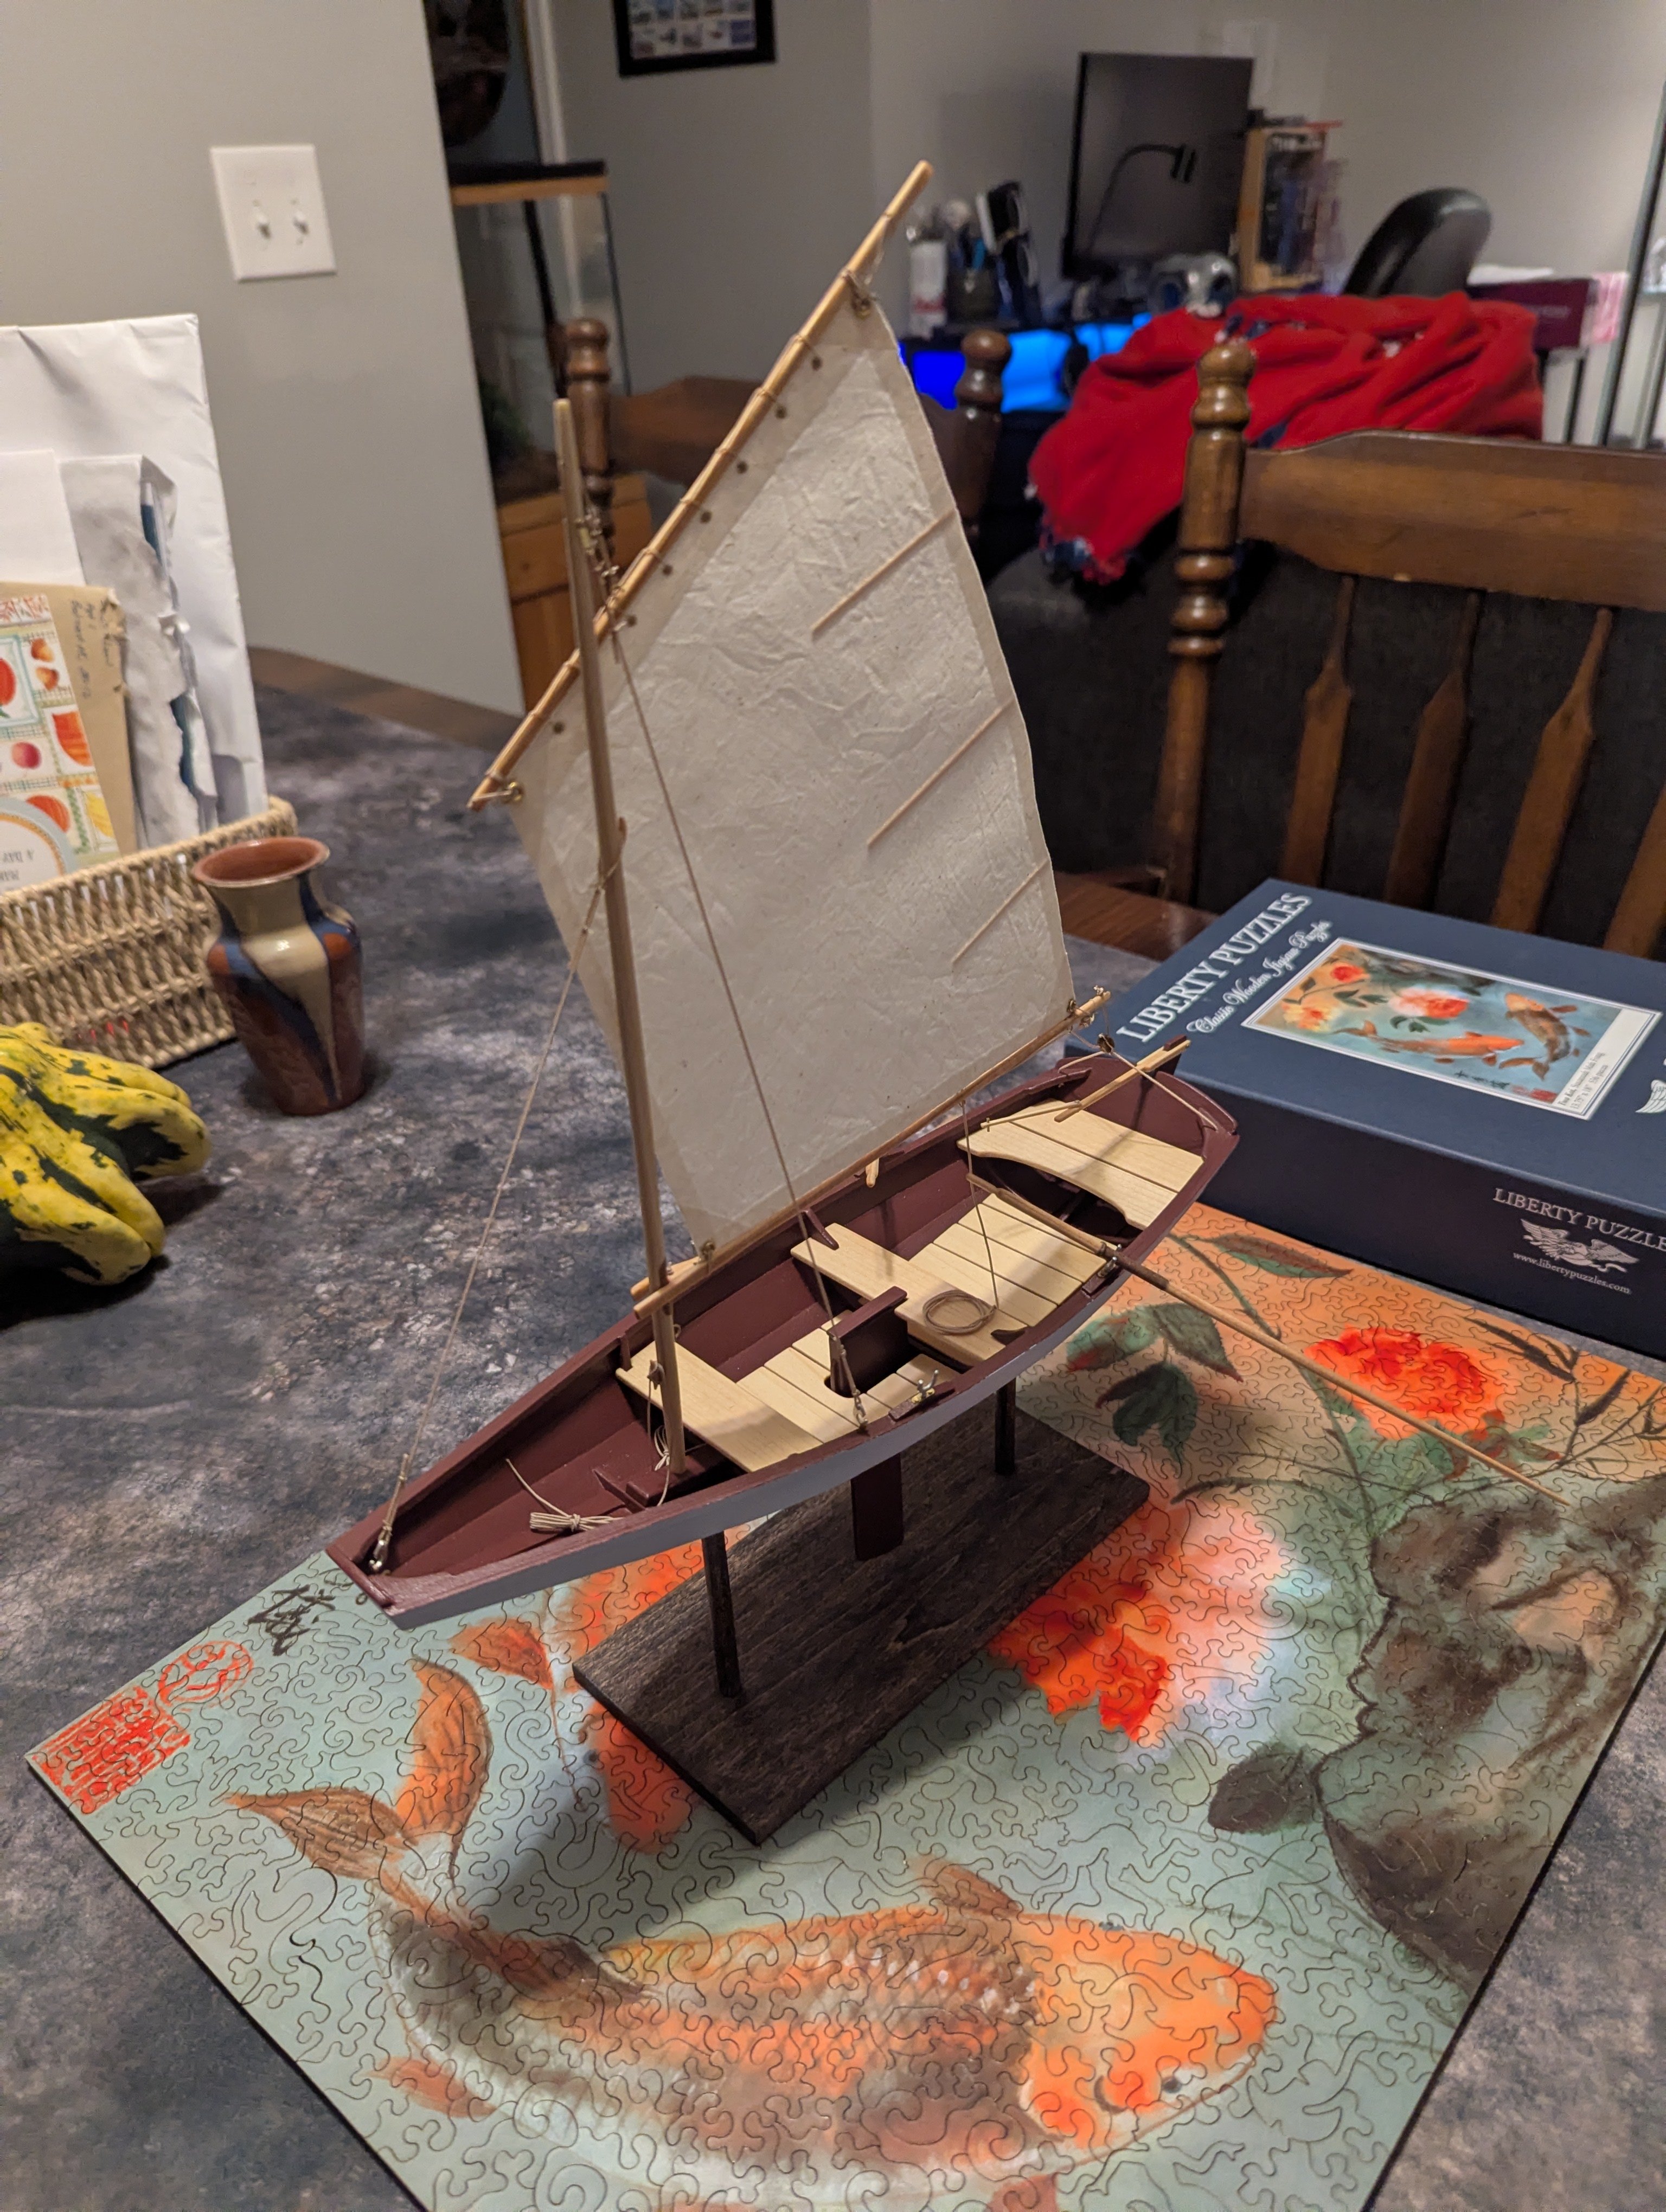
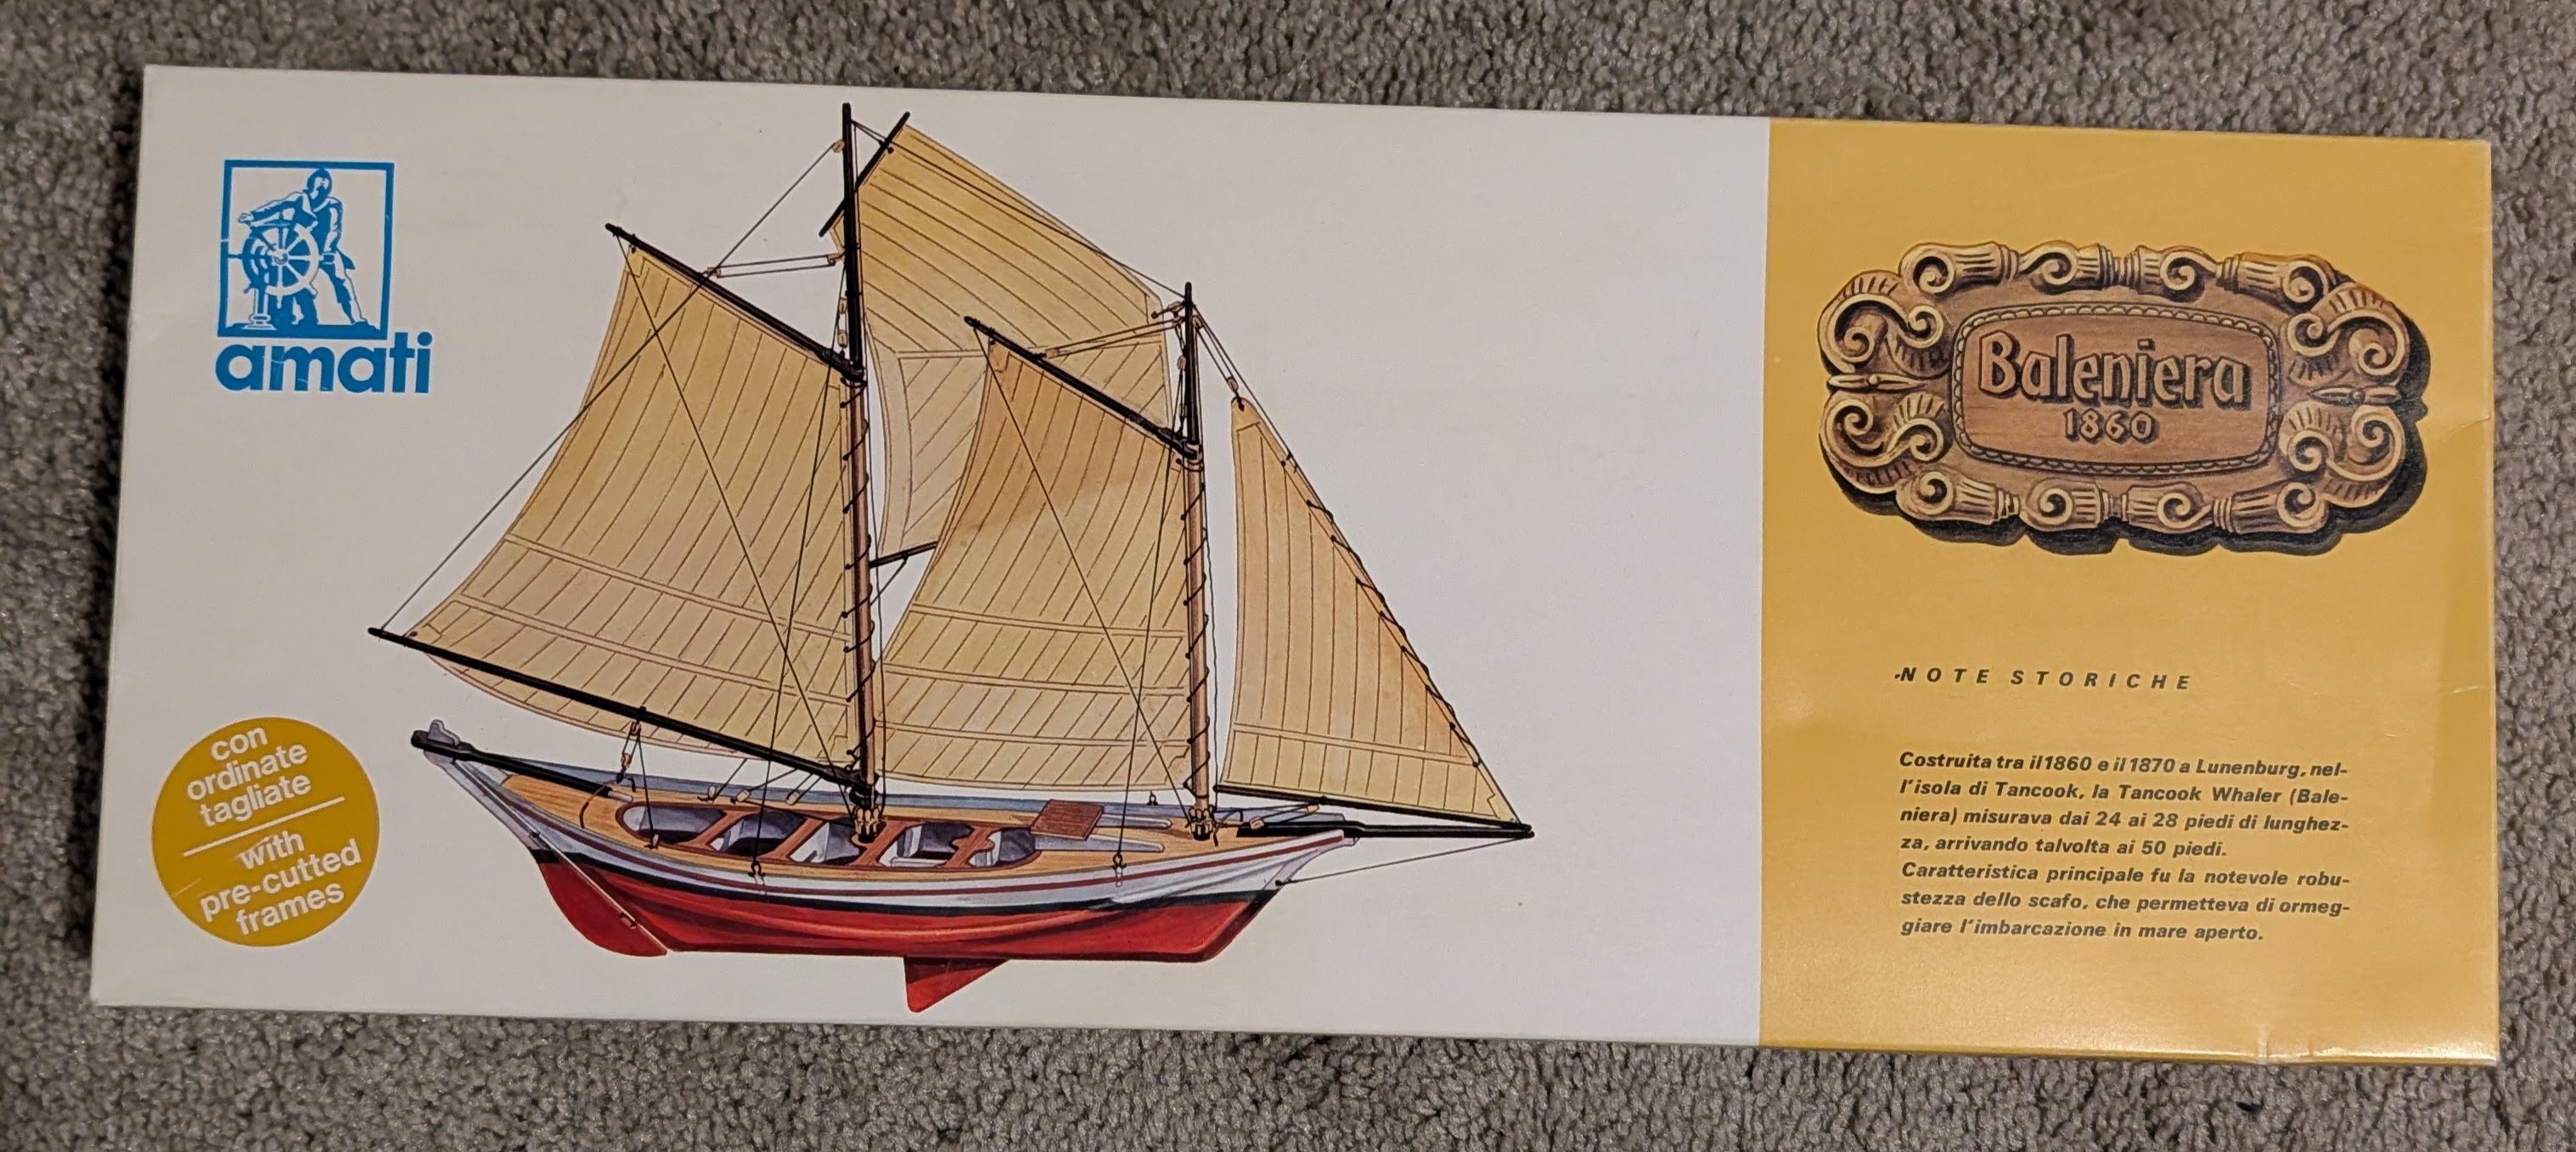
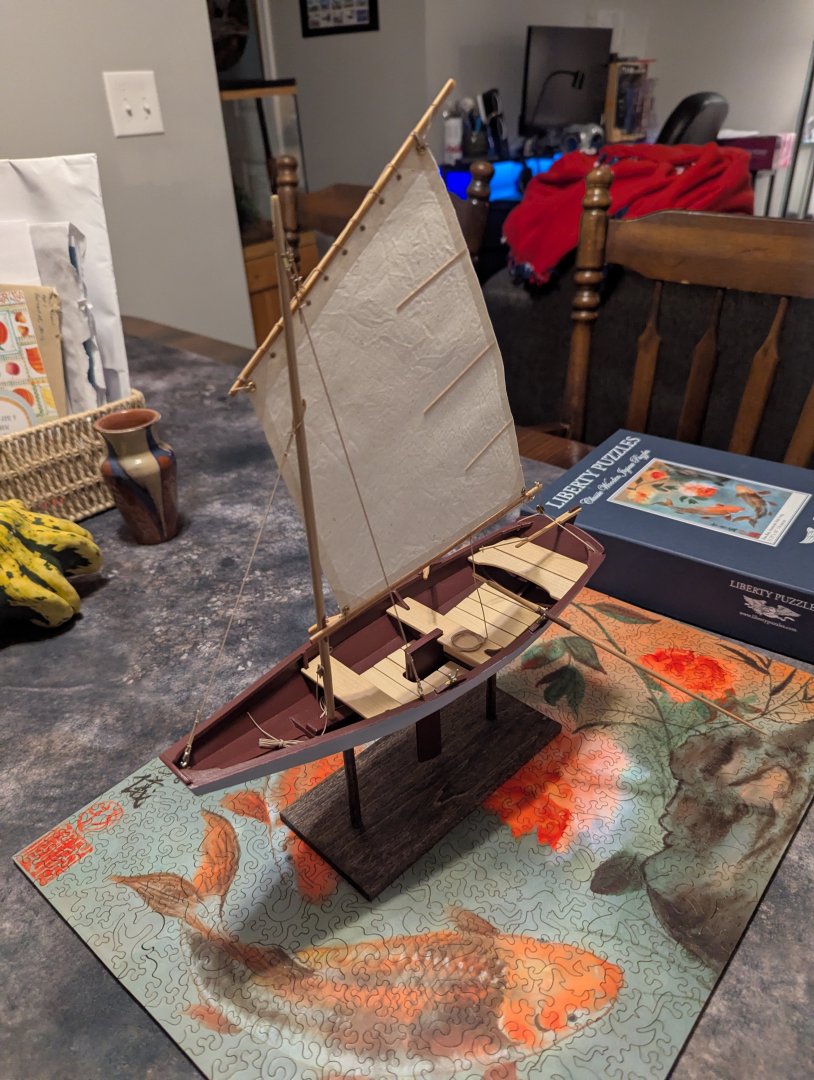
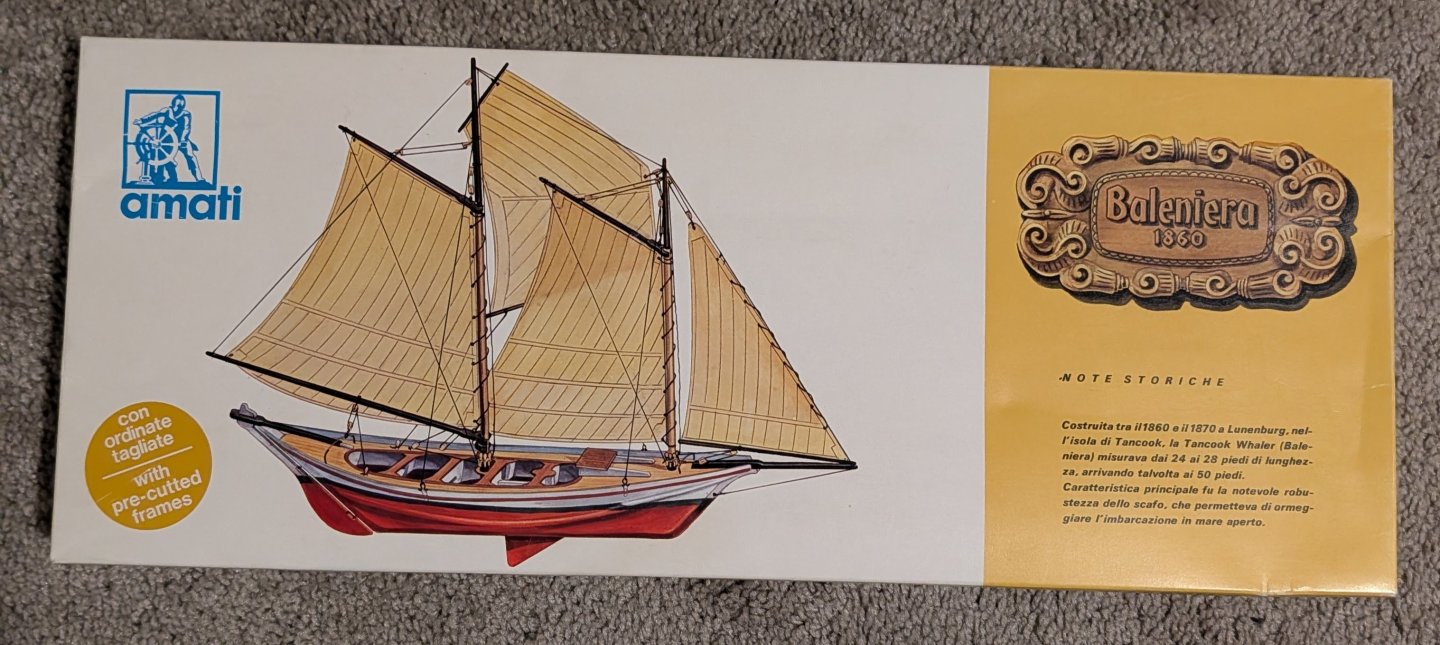
Greetings fellow shipwrights, After lurking as a guest here these past couple of months, I've decided to contribute my work to this forum as well! I'm somewhat new to blogs but its been tricky to find detailed info on this hobby in other places on the internet and even more so people who appreciate the craftmanship of this fascinating hobby, so here I am. This all started when one day I was browsing a local hobby shop and found an old Amati wooden model ship collecting dust in the corner. I was absolutely fascinated by the fact that this kit was wood, cloth and string and wanted to give it a go. After bringing it home and doing some research I found that this was a kit from the 1970's and also that I did not have the knowledge or skills to build it based on the (lack of) instructions. So I got the model shipways 3 kit combo of the dory, pram and lobster smack to try and teach myself this hobby in hopes that I could breathe some life into this old kit without messing it up. So far I've built the Dory and the Norwegian sailing pram and begun work on the lobster smack. I had some trouble getting the keel to be straight so I decided to take a break from the lobster smack to start on my first real boat kit, Billing Boats Marie Jeanne 580. Its been a blast so far and I think I'm going to do a noobie build log of it. This hobby has definitely tested my patience but I seriously love the challenge and history I'm getting out of it so I'm excited to keep building and share my progress! Cheers, - Roach P.S. Attached are some photos of the pram I finished and the Amati kit that got me here!

- 12 replies
-
- 10
-