HOLIDAY DONATION DRIVE - SUPPORT MSW - DO YOUR PART TO KEEP THIS GREAT FORUM GOING! (89 donations so far out of 49,000 members - C'mon guys!)
×

vths
-
Posts
144 -
Joined
-
Last visited
Content Type
Profiles
Forums
Gallery
Events
Everything posted by vths
-
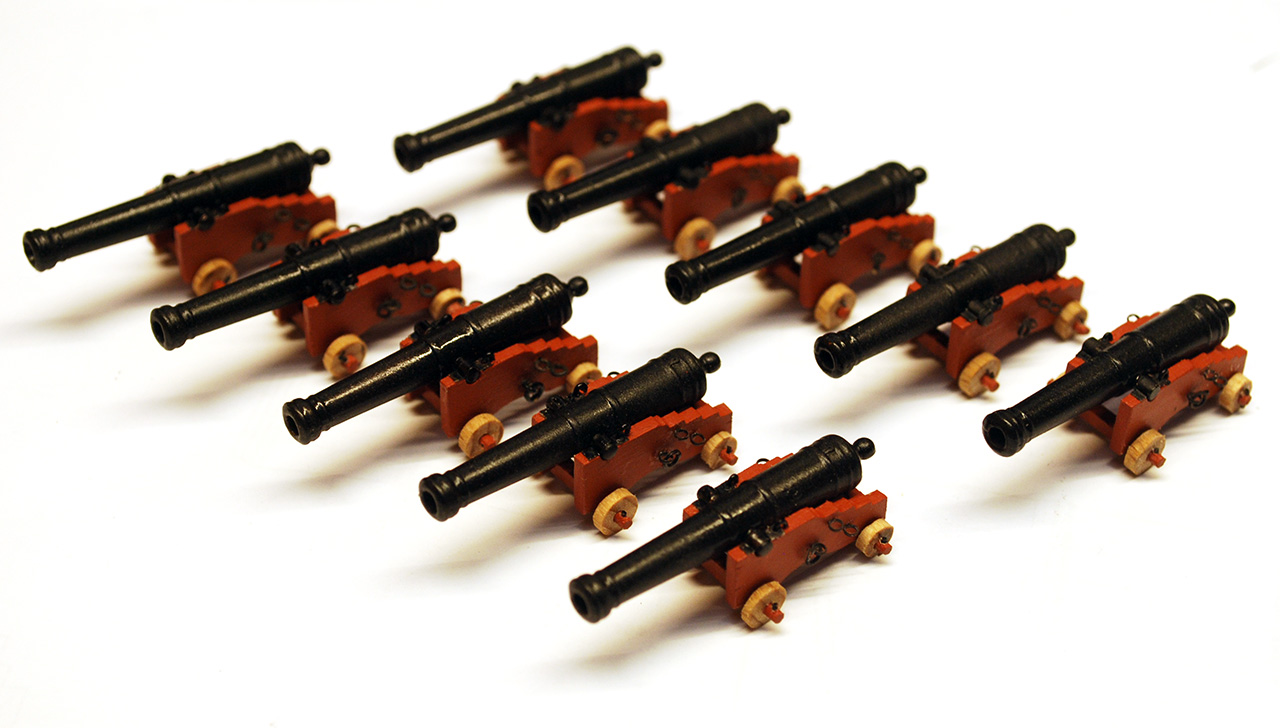
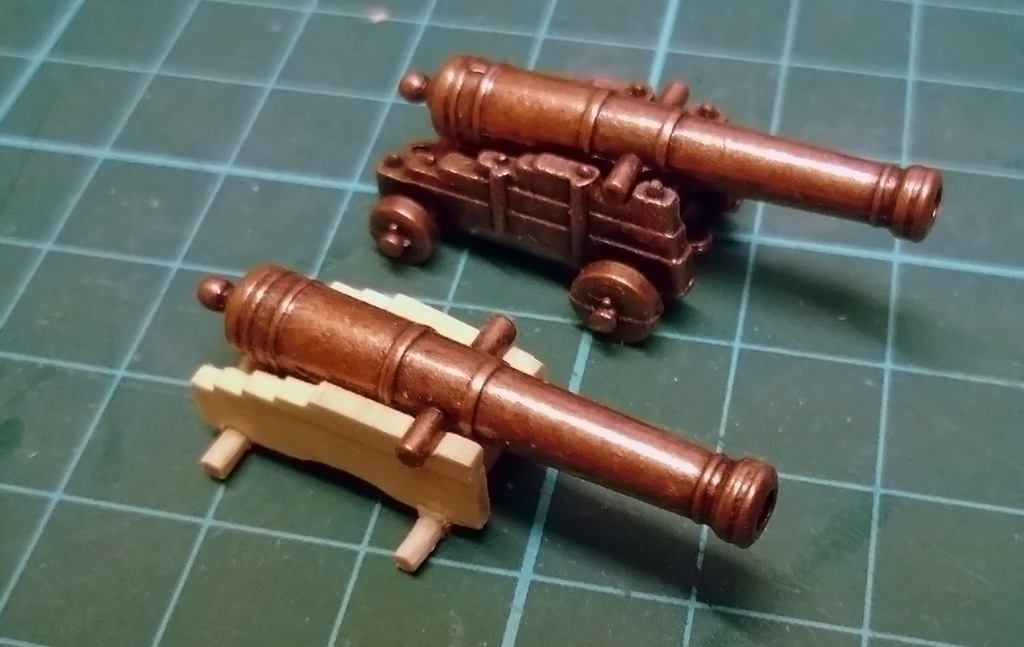
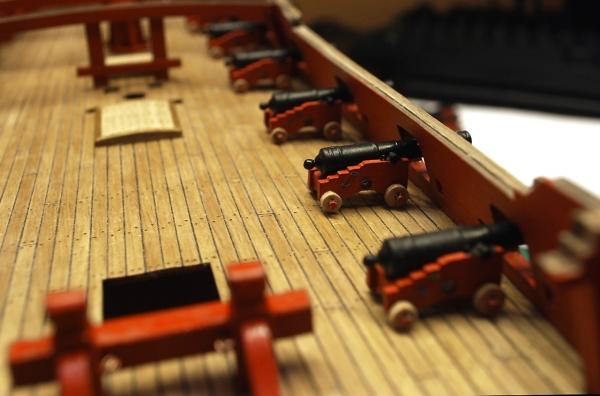
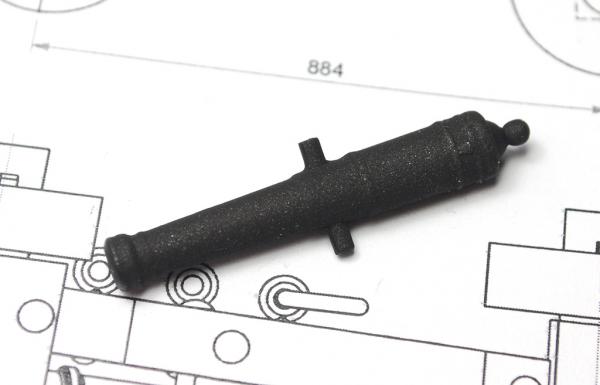
 Just finished the first batch of 10 sixpounders for the covered parts of the gun deck, so I've made also a few pictures of them. Looks like its decorating time now and doing whatever can be and has to be done before covering the deck.
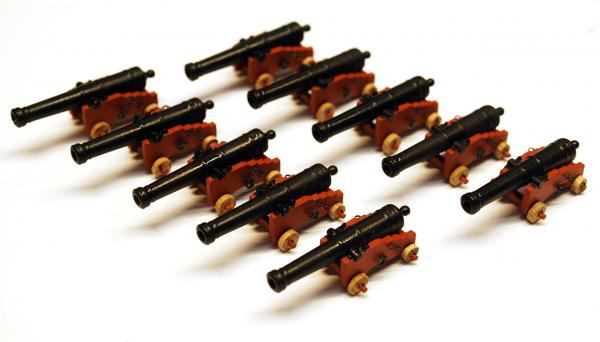

- 218 replies
-
- 3
-

-
- victory models
- fly
- (and 1 more)
-
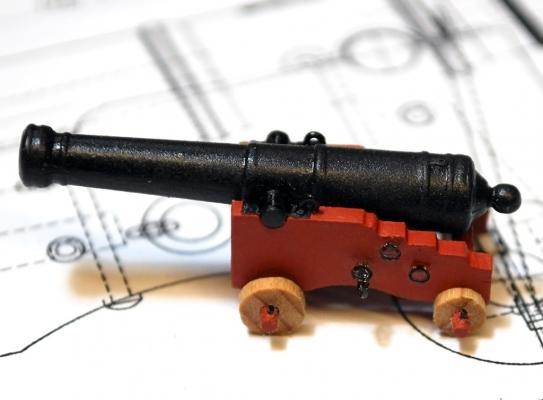
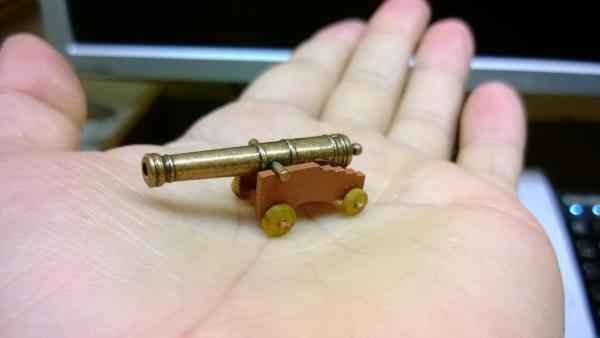
Thanks Alistair, I was also worried about the size of the cannon, but there were many types and those supplied are only a tad bigger than armstrong's sixpounder, so what the hell
-
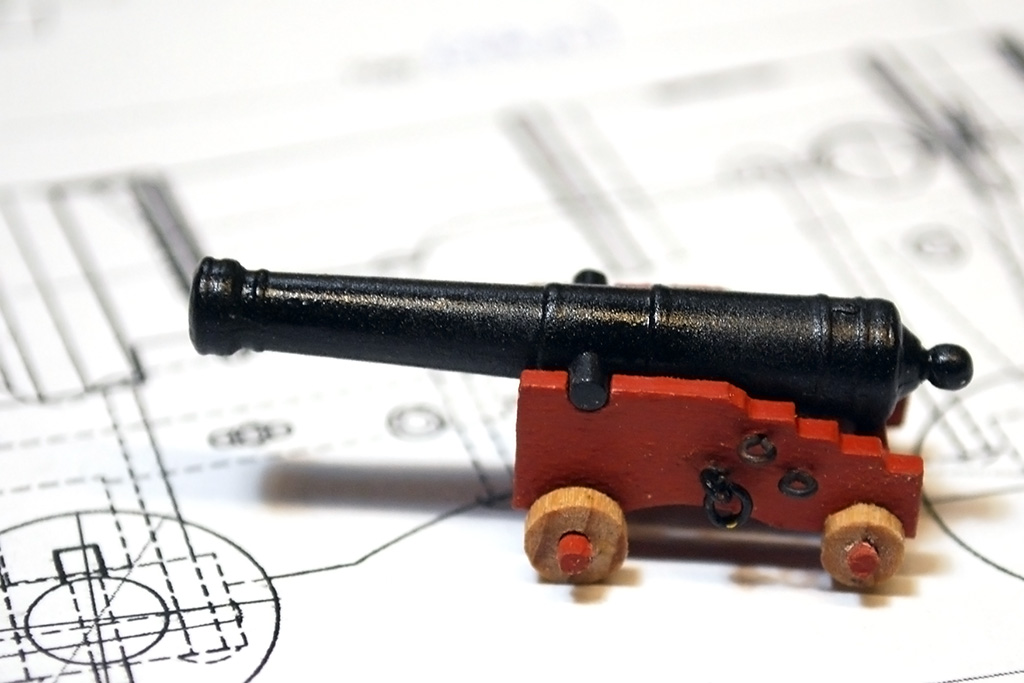
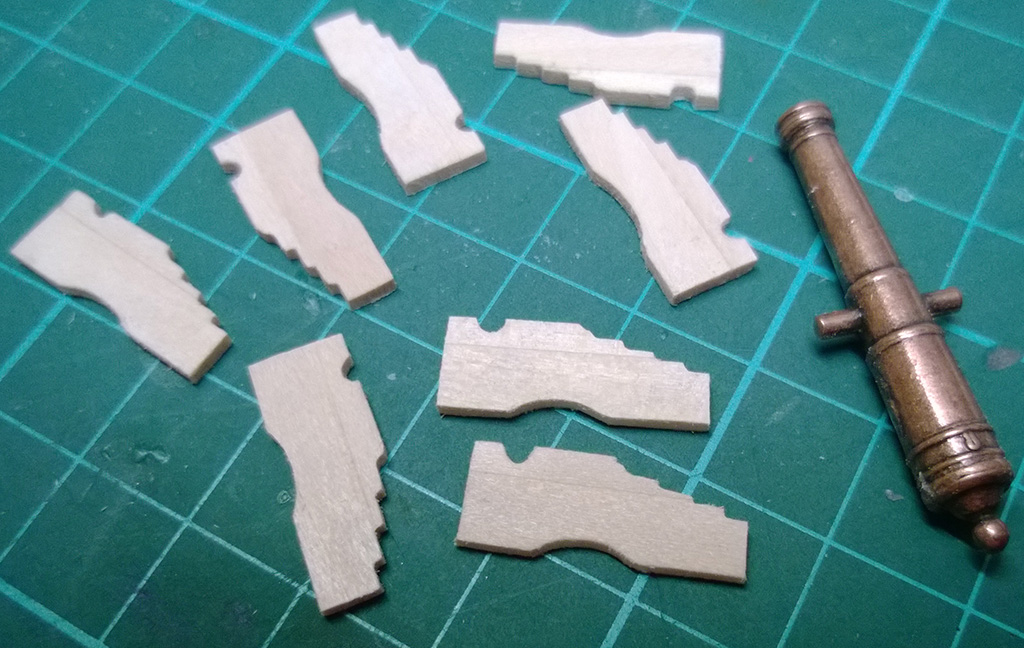
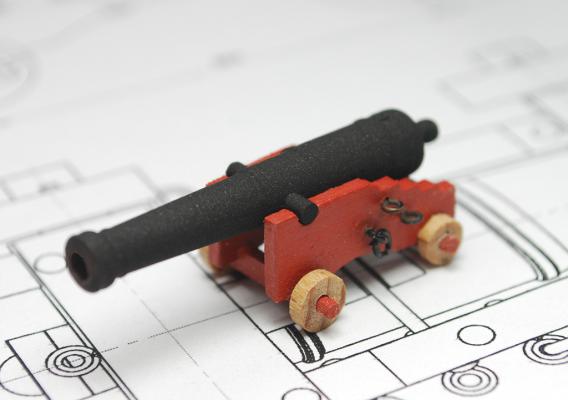
I finally finished the prototype. There are new photoetched eyes which are much more to scale, pins in axles and capsquares made of copper foil and .5mm copper wire. I think that'll do for now.

- 218 replies
-
- 4
-
-
- victory models
- fly
- (and 1 more)
-
Thanks guys. Definitely, capsquares are planned, I just need to figure out what they will be made of and how. There will also be pins in the axles as a little cherry on the top
-
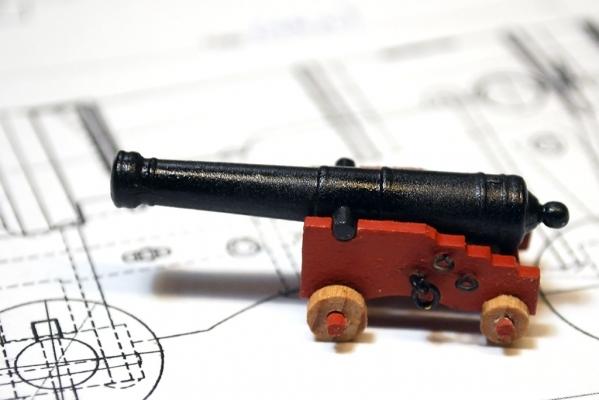
Thanks, today I was experimenting with matt and semi-matt varnish and I finally chose to apply diluted semi-matt Nelson. The guns finally look as I wanted to.
- 218 replies
-
- 5
-
-
- victory models
- fly
- (and 1 more)
-
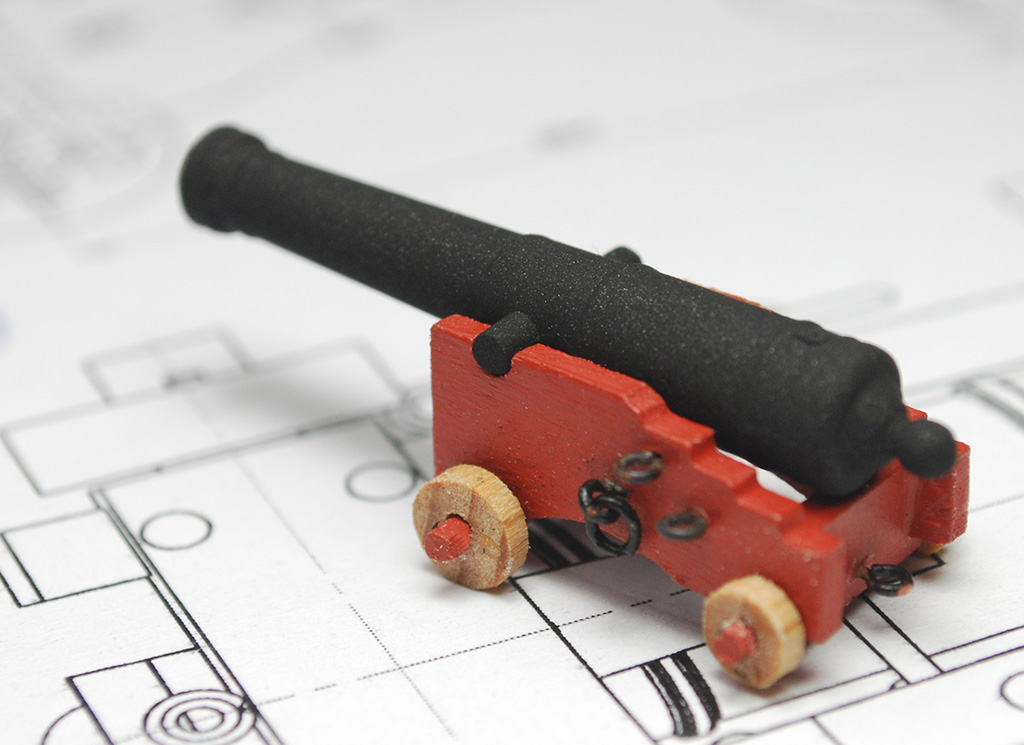
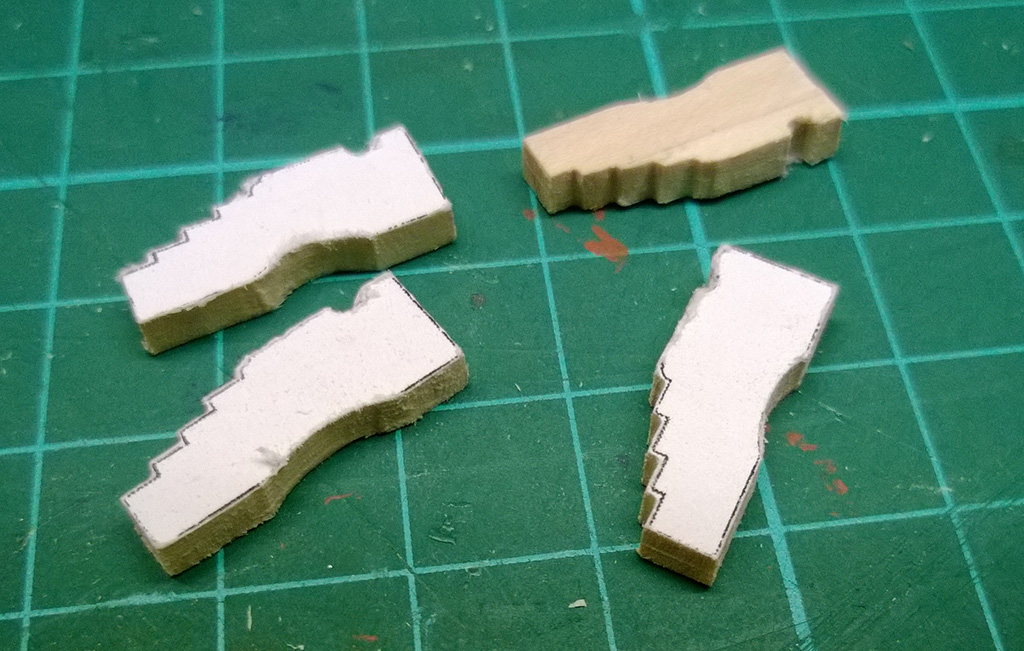
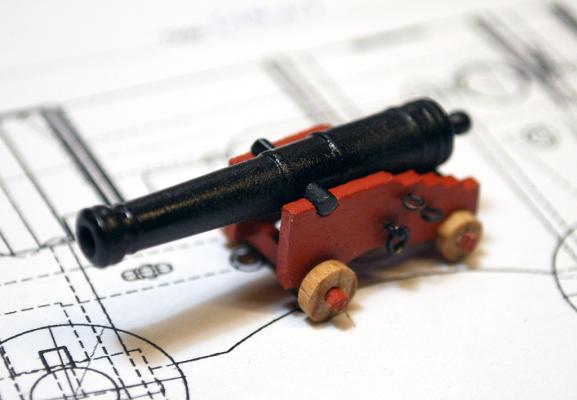
Made some progress, but also a few mistakes. I bought small poles made of oak which are much better to create wheels - I only have to cut them and make a hole in the middle. Then there are blackened metal eyes, but the blackening does not last, so I've ordered some eyes with black patina to replace the present ones. The new ones should also be more up to scale. And then the guns. At first, their trunnions had to be shortened, because they were overlapping the carriages. Then I cleaned them with petrol, used metal primer and then a mixture of Tamyia Flat Black and Metallic Grey. It is finally shaping up.

- 218 replies
-
- 3
-
-
- victory models
- fly
- (and 1 more)
-
You have a point there, B.E. I will see what can be done about that, but now there are some carriages and cannons to do. Now I'm creating the wheels (5 and 4.5 mm in diameter) using 5mm planks, which is a tedious job, but it has to be done.
- 218 replies
-
- 3
-
-
- victory models
- fly
- (and 1 more)
-
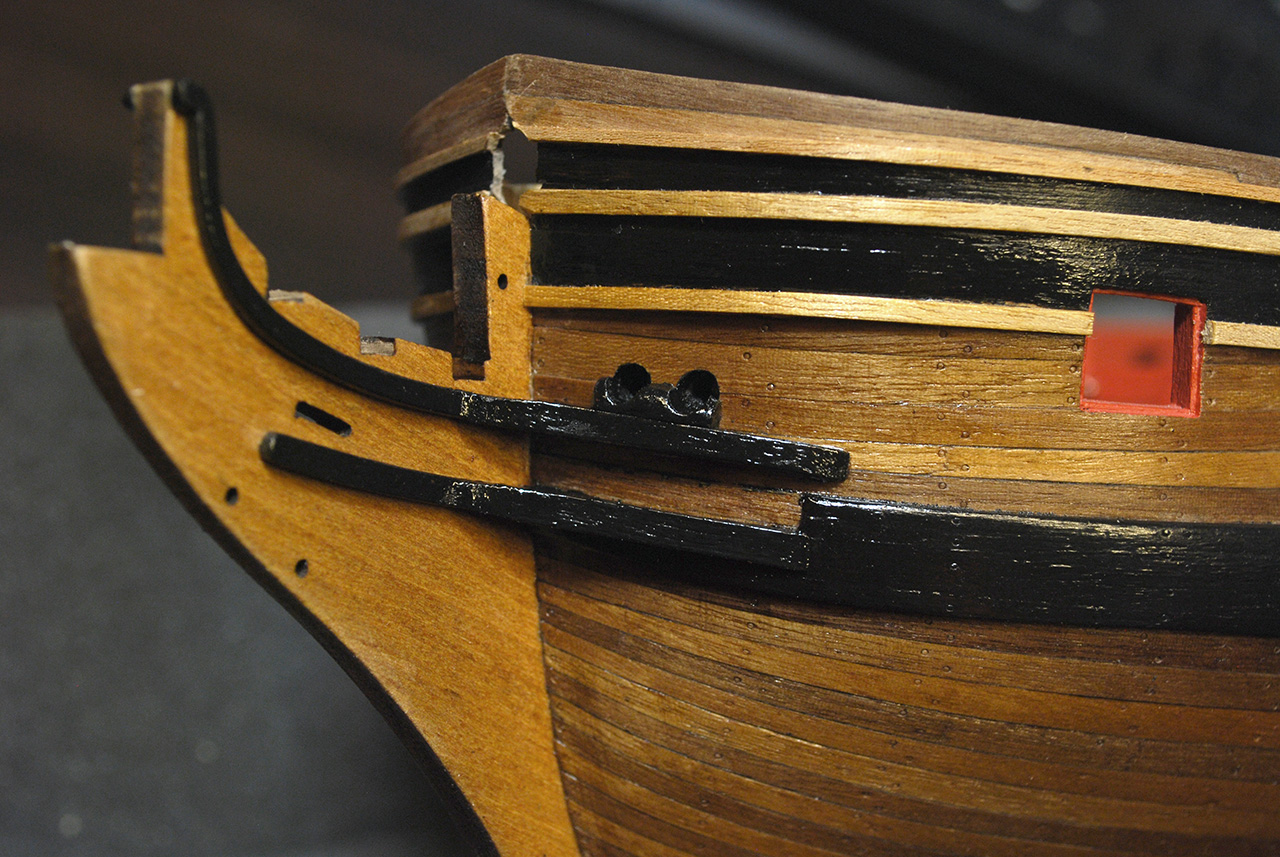
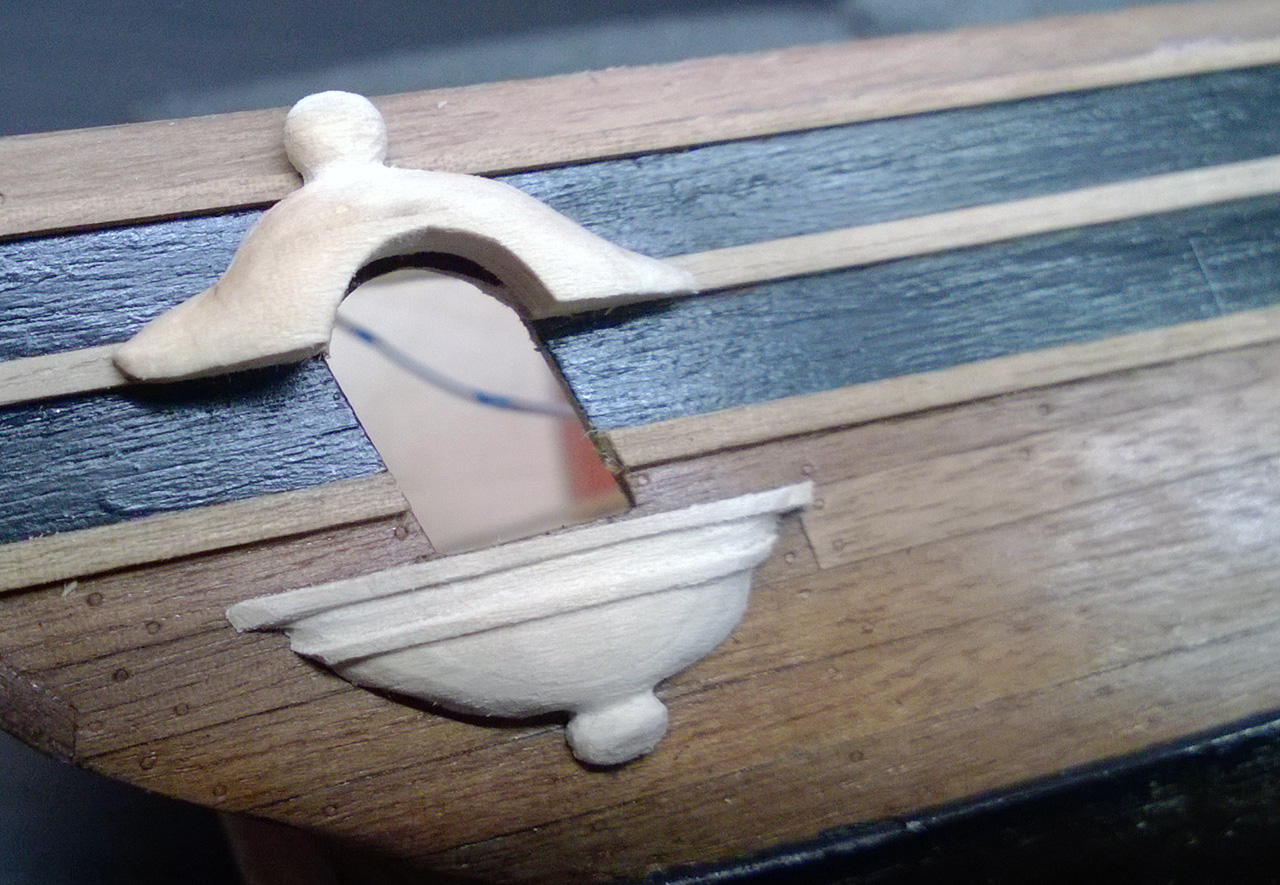
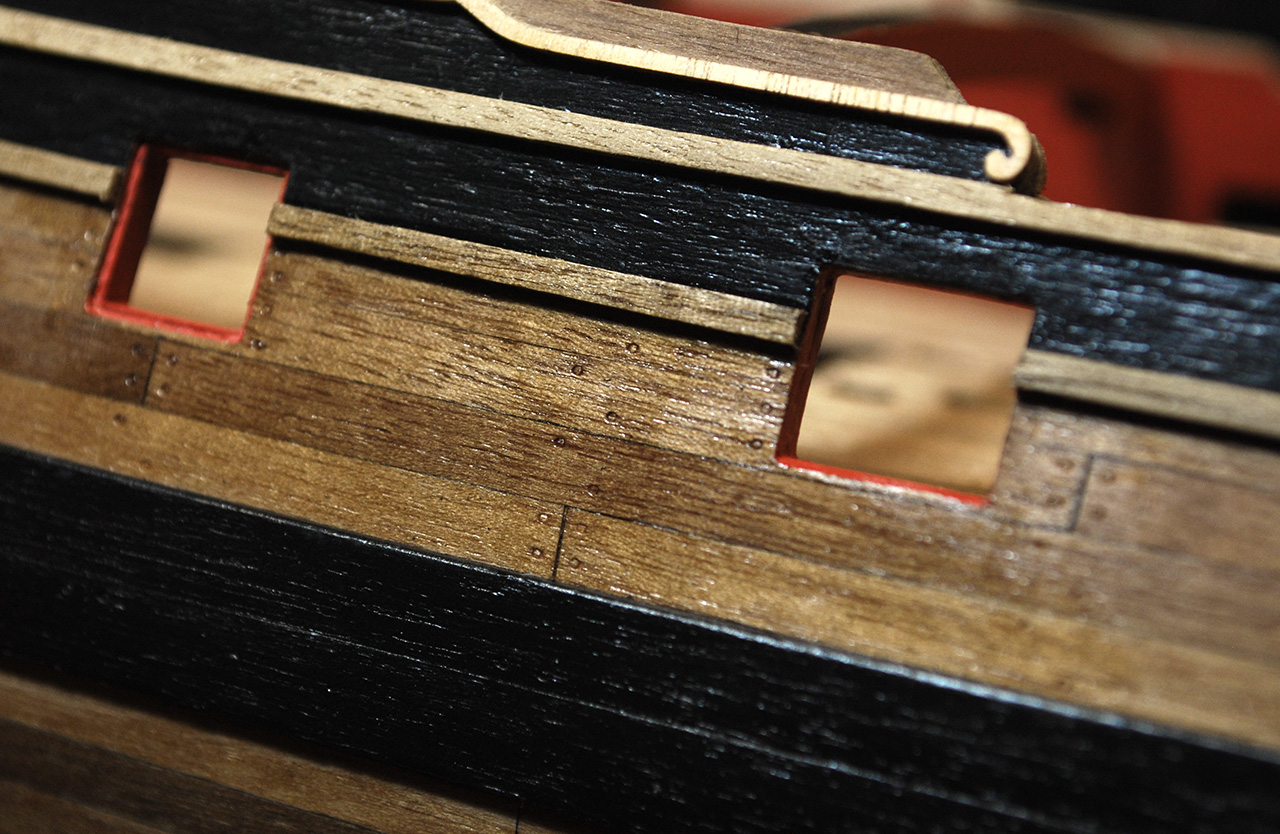
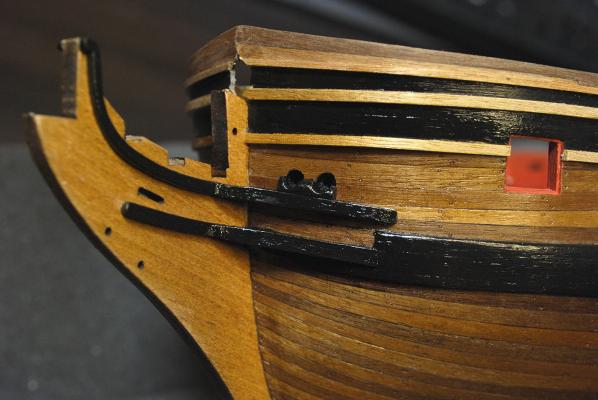
Thanks guys. That cut out wale is according to the plans in the kit. Don't know about Pegasus, but in this case it has to be like that, otherwise I would not be able to attach decoration - it would have to sit both on the wale and on the plank above. Those black supports (or whathever they are called) ale placed according to the original plan of the Fly, so I had no choice and I hope it will look good once I finish the decoration.
-
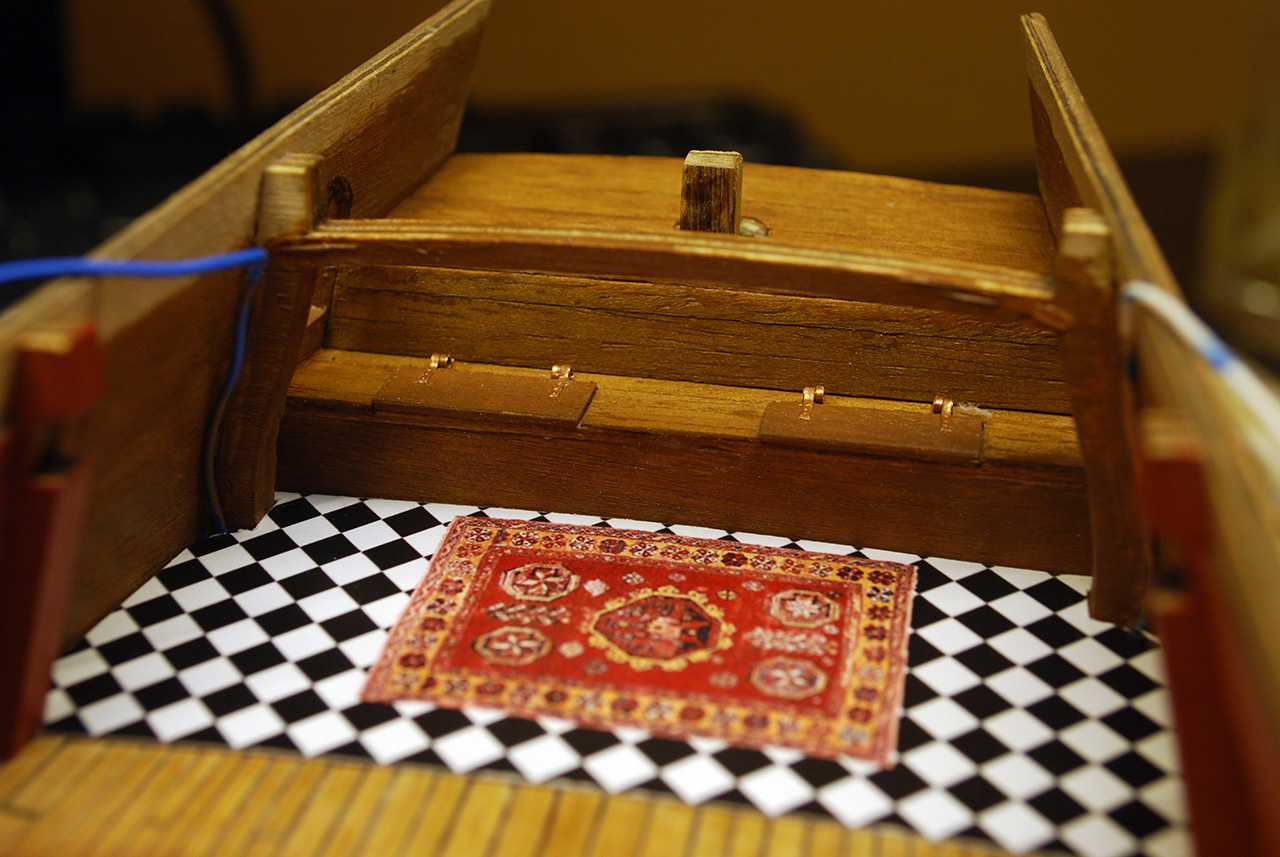
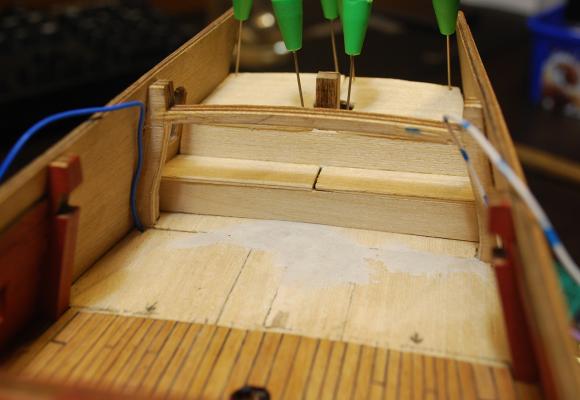
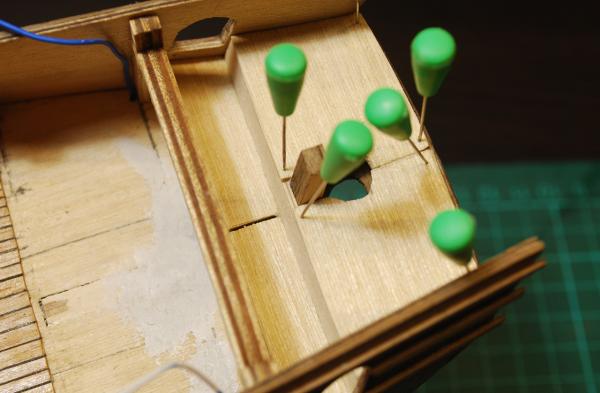
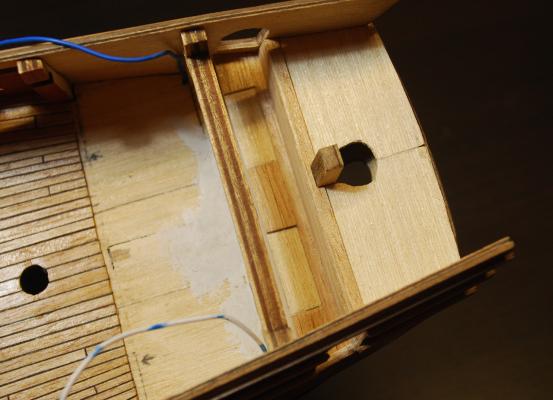
Thanks, B.E. I want to fit the cabin only with a few more chairs, possibly some other piece of furniture and a bit of details like swords, compass, etc. Just to show something lying on the table. There will be no partitions, the view inside the cabin through the windows is limited anyway. So far I'm very satisfied with the carriages. They are light, up to the right scale and as you said, they will be easy to fit out as well as attach to the deck.
-
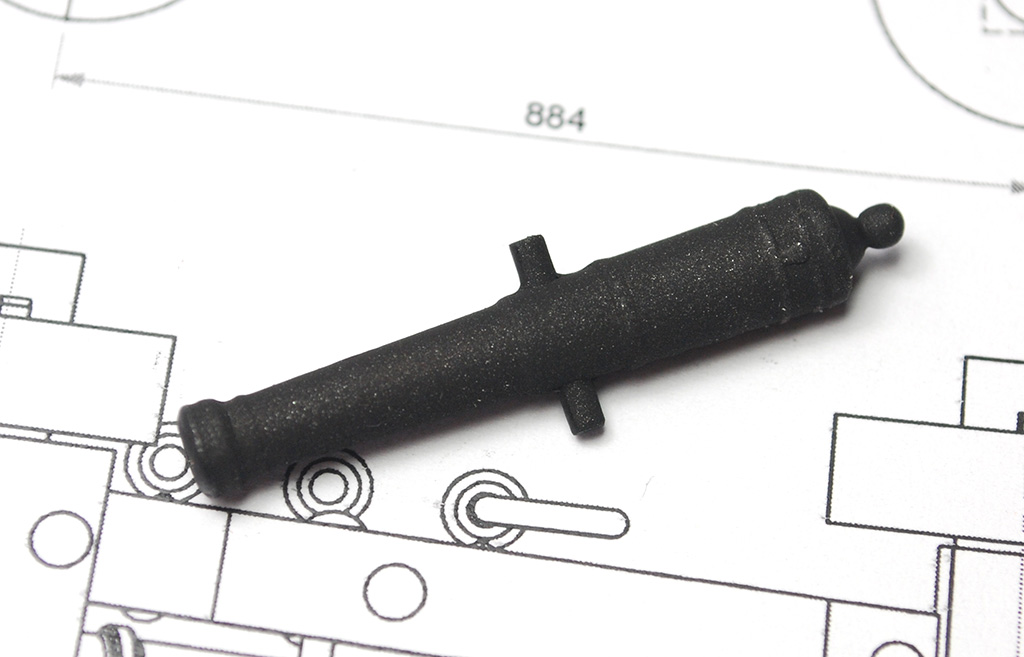
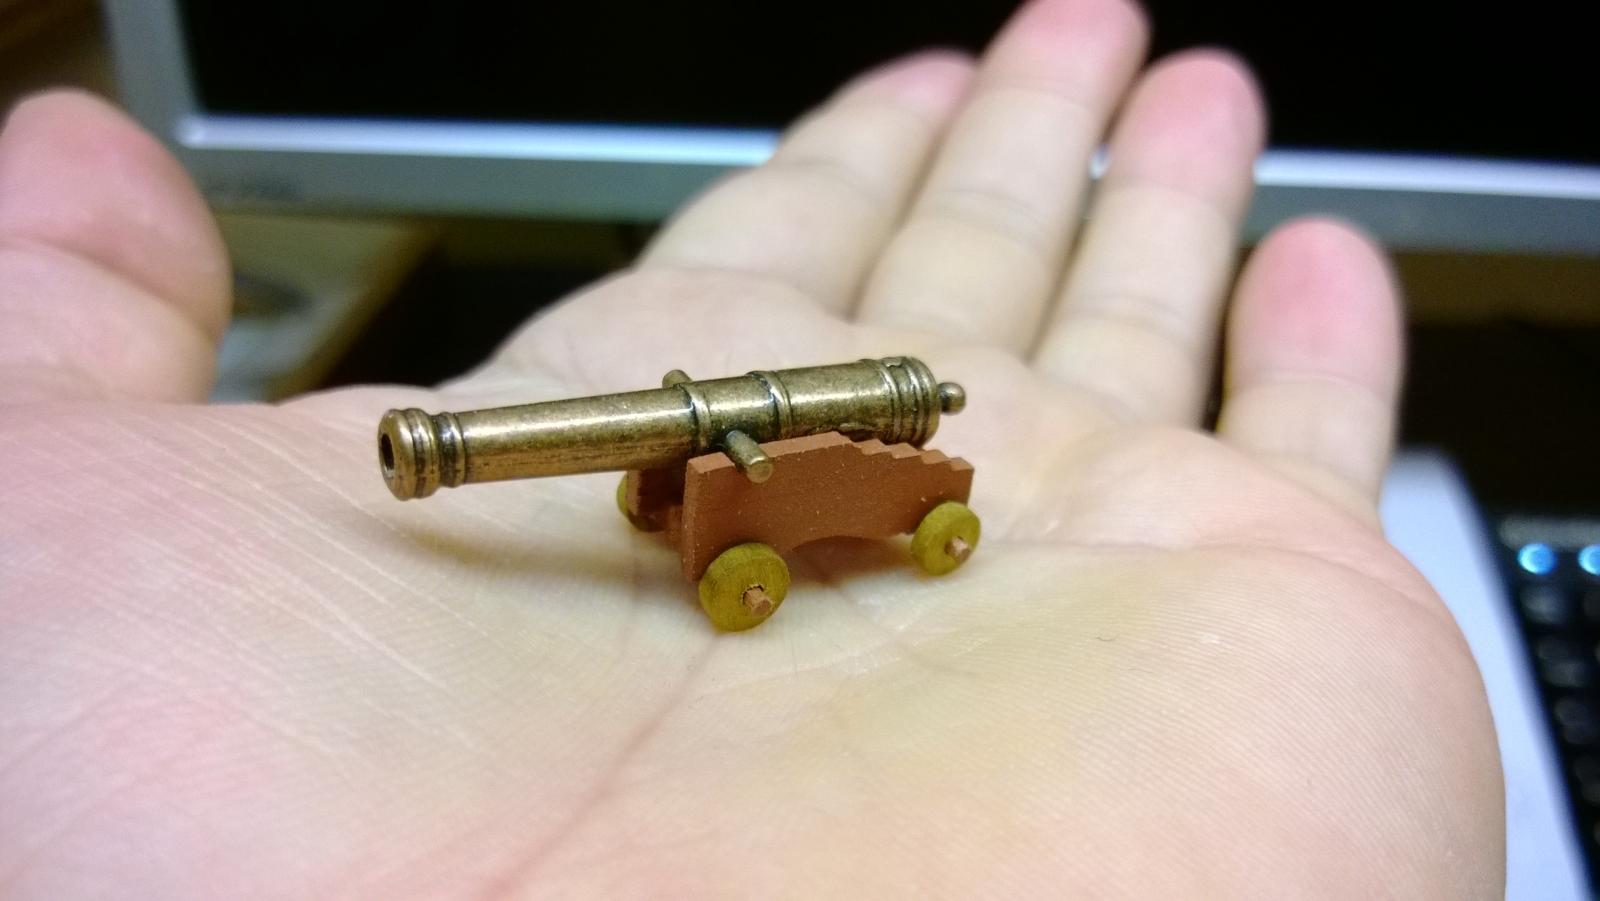
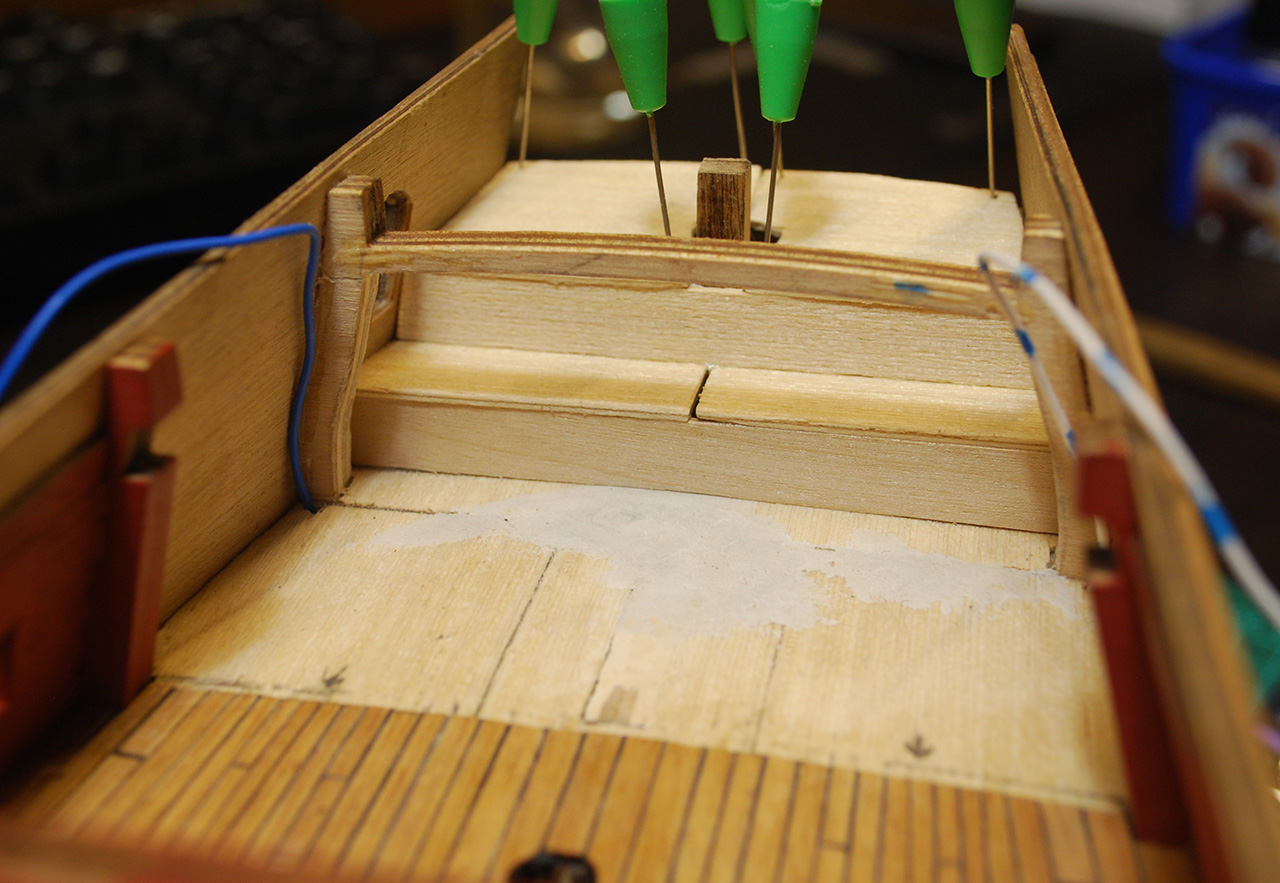
Since I have to place a few guns before covering the gun deck and the carriages in the kit are clearly oversized, I decided to make some of my own before finishing the captain's cabin. I used 1.5mm thick lime, printer, plans of 6pounder armstrong gun, milling machine, but mostly small files. Now it is time to make the wheels.

- 218 replies
-
- 1
-
-
- victory models
- fly
- (and 1 more)
-
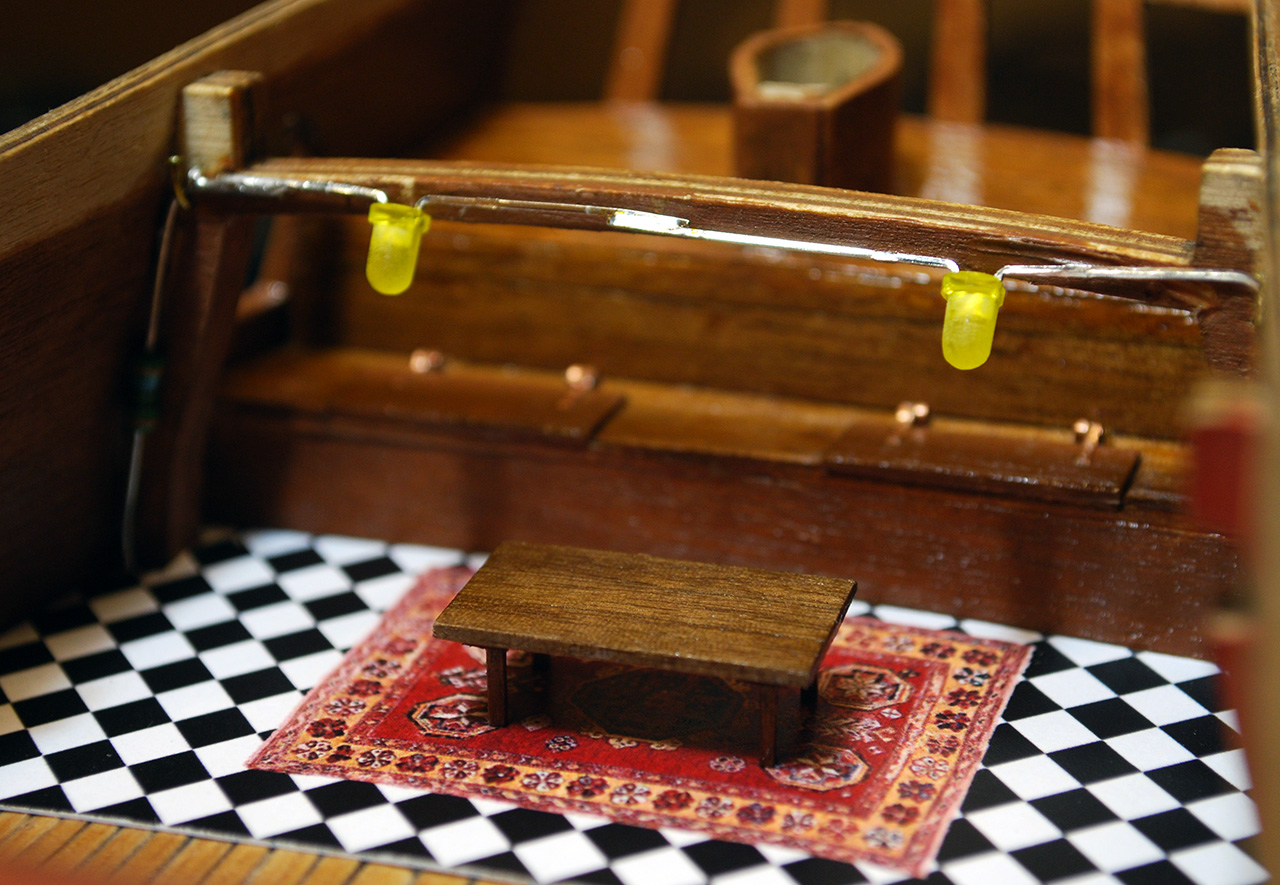
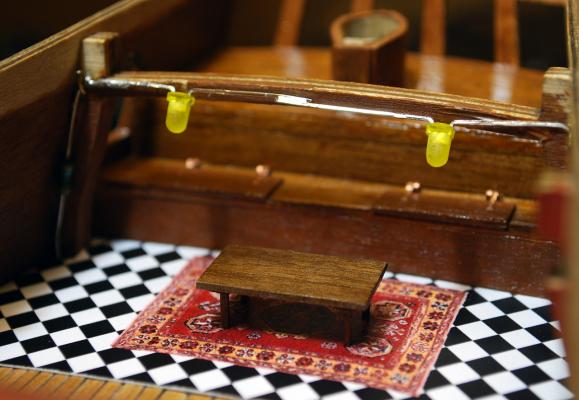
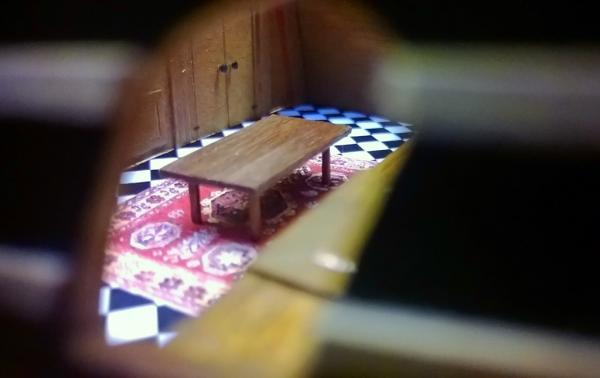
A few more photos with table, LEDs and varnished interior.

- 218 replies
-
- 4
-
-
- victory models
- fly
- (and 1 more)
-
Got a few new pictures of the cabin. I need to finish it, as well as some of the guns, because the gun deck will be covered soon.

- 218 replies
-
- 5
-
-
- victory models
- fly
- (and 1 more)
-
Cheers, Alistair. The part of the wale needs to be removed, cause there is a piece of decoration to be placed, just check the plans. I understand that you are too far to mend the stern in order to create the cabin, but don't worry, you have another gems like the lovely stove and gun carriages and I'm sure there are more to follow.
-
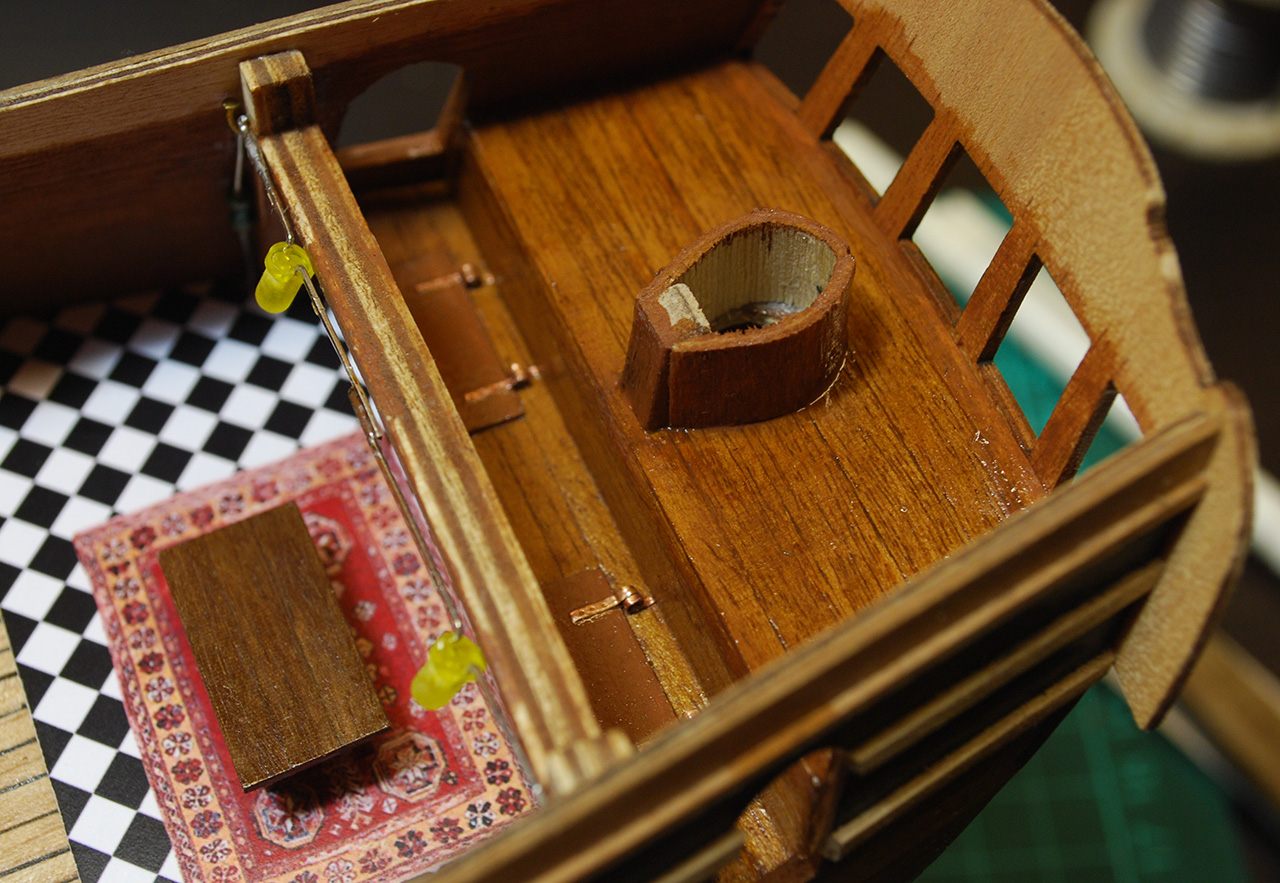
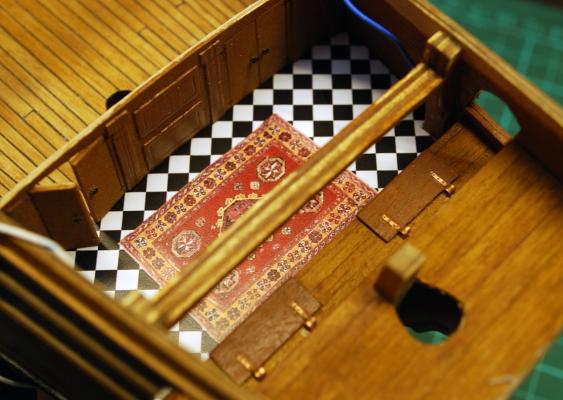
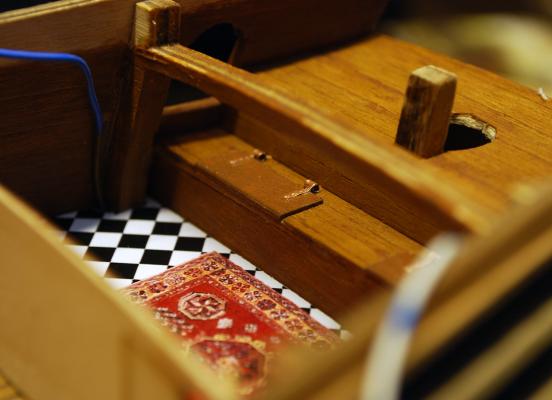
Finishing details and preparing the captain's cabin for my decorating experiments.
- 218 replies
-
- 1
-
-
- victory models
- fly
- (and 1 more)
-
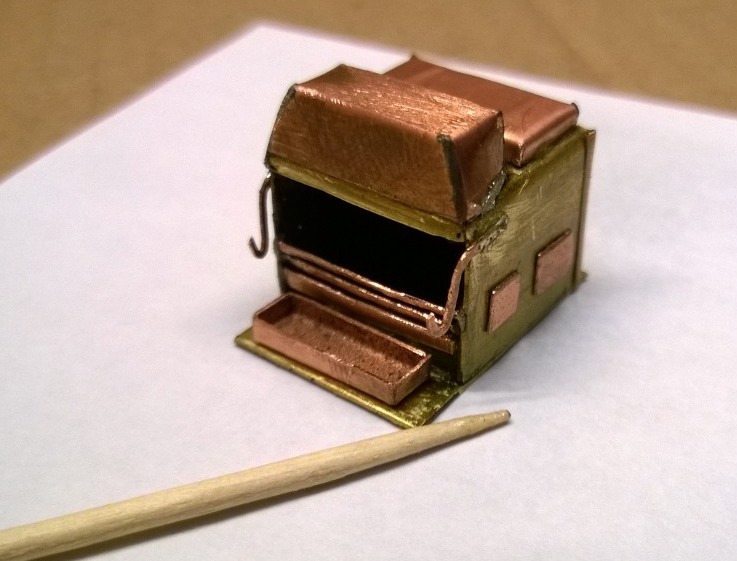
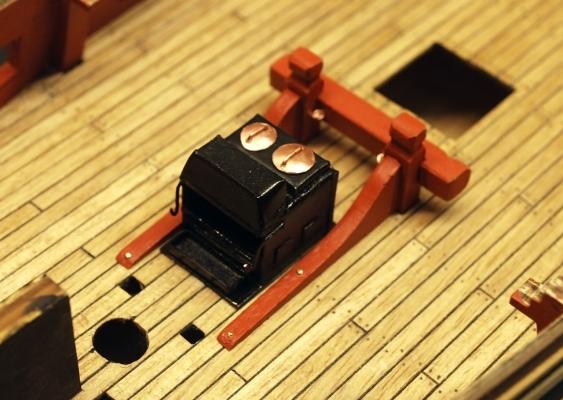
Thanks Alistair, yours is still much better looking, as well as the capstan. I had no patience to work on the stove that hard, since it's black and almost won't be visible under the deck. I'm going to unleash the preserved energy on the captain's cabin, even though Doris is giving us tough lessons with her Royal Caroline fittings, those really took the wind out of my Fly's sails, if she had any. Just check the latest posts: http://modelforum.cz/viewtopic.php?f=177&t=68385&start=675
-
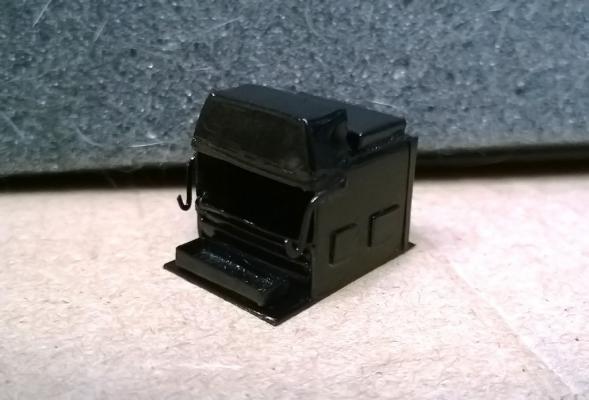
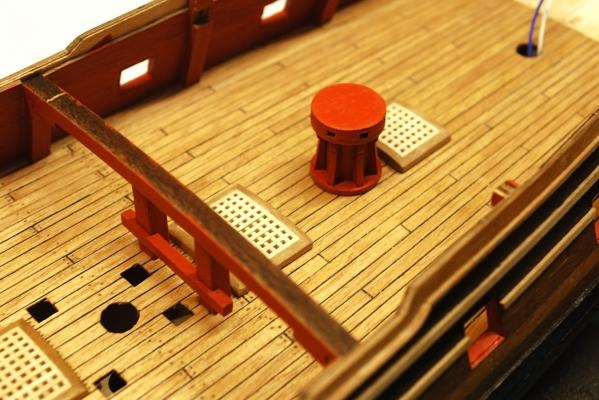
Hey folks, long time no see. Recently I've been playing with somewhat larger planks and plasterboards, but now I've found time for my little Swan. I've made the stove over, since it was ugly and shabby. Now it is a bit less ugly. Here it sits between the standards of the riding bit which has its crosspiece "held" by hooks. Lower part of the capstan in place. I chose not to alter it in any way, because it will be hidden anyway.

- 218 replies
-
- 3
-
-
- victory models
- fly
- (and 1 more)
-
Hi Lawrence, these are simple modelling pins and they are available in most Czech model shops. If you google "modelling pins" you'll probably find a shop that offers them (for example http://balsacabin.webs.com/accothers.html ) but you're probably looking for a Greek shop.
-
Andy> I agree, if the plans of the Fly are the best I can get, than anything with scrollwork should do just fine. Thanks for the info about the opening, I'm glad that I do not have to widen it, 'cause a bulkhead is in the way. This already looks more Flyish
- 218 replies
-
- 3
-
-
- victory models
- fly
- (and 1 more)
-
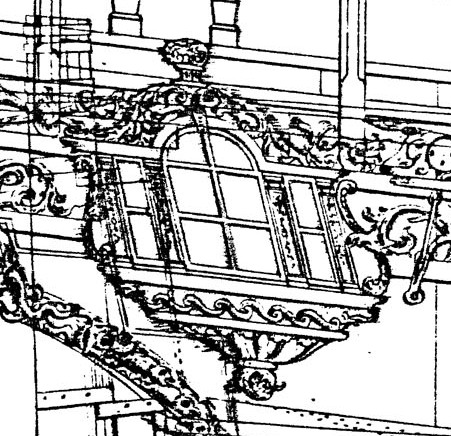
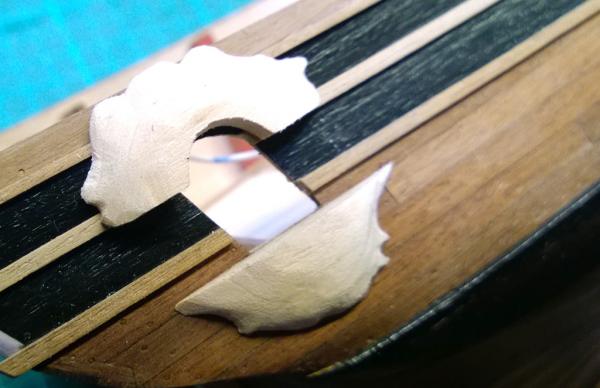
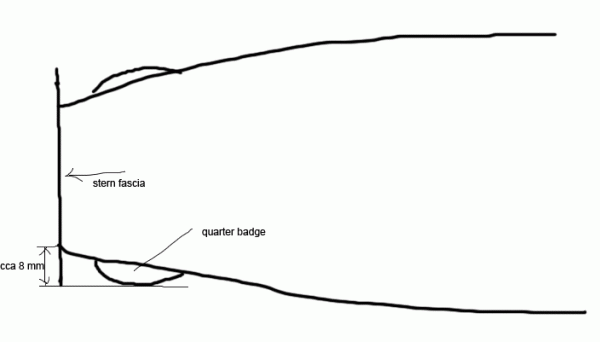
I'll definitely try, but I really have no idea what that damn plan of Fly represents. I see nothing but some indefinite curves and it is even not clear, where the upper part of the quarter badge starts and ends. You have some fine fish on it, but I presume these are reserved for Pegasus. I'll try to do the homework and research some more. Anyway, Watton's plans for the quarter badges refer more to HMS Pegasus, Fly has even different shape, so I will have to mend them.

-
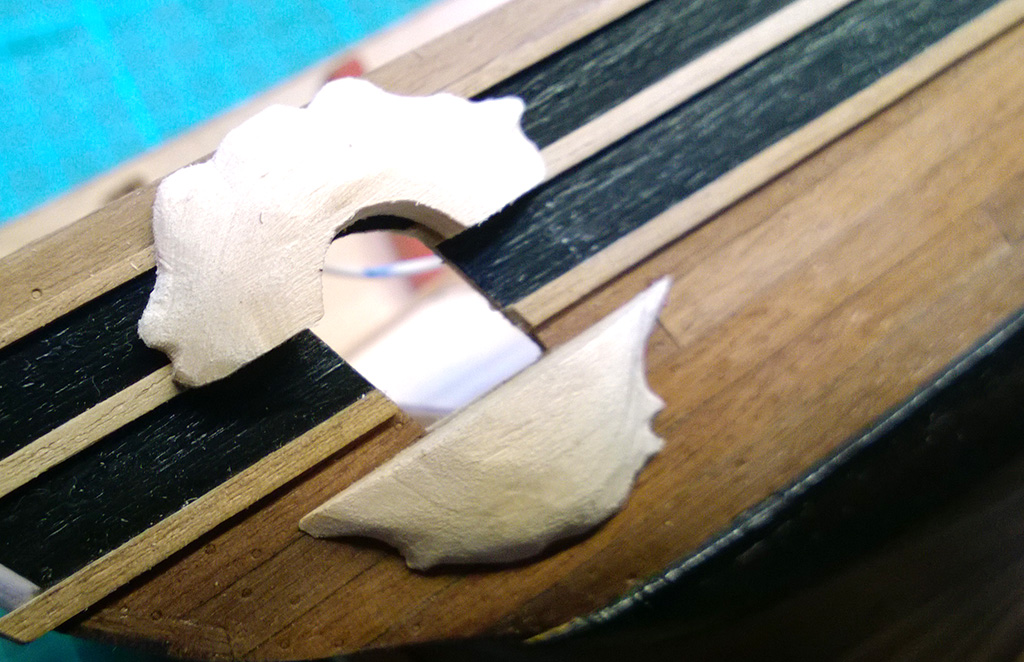
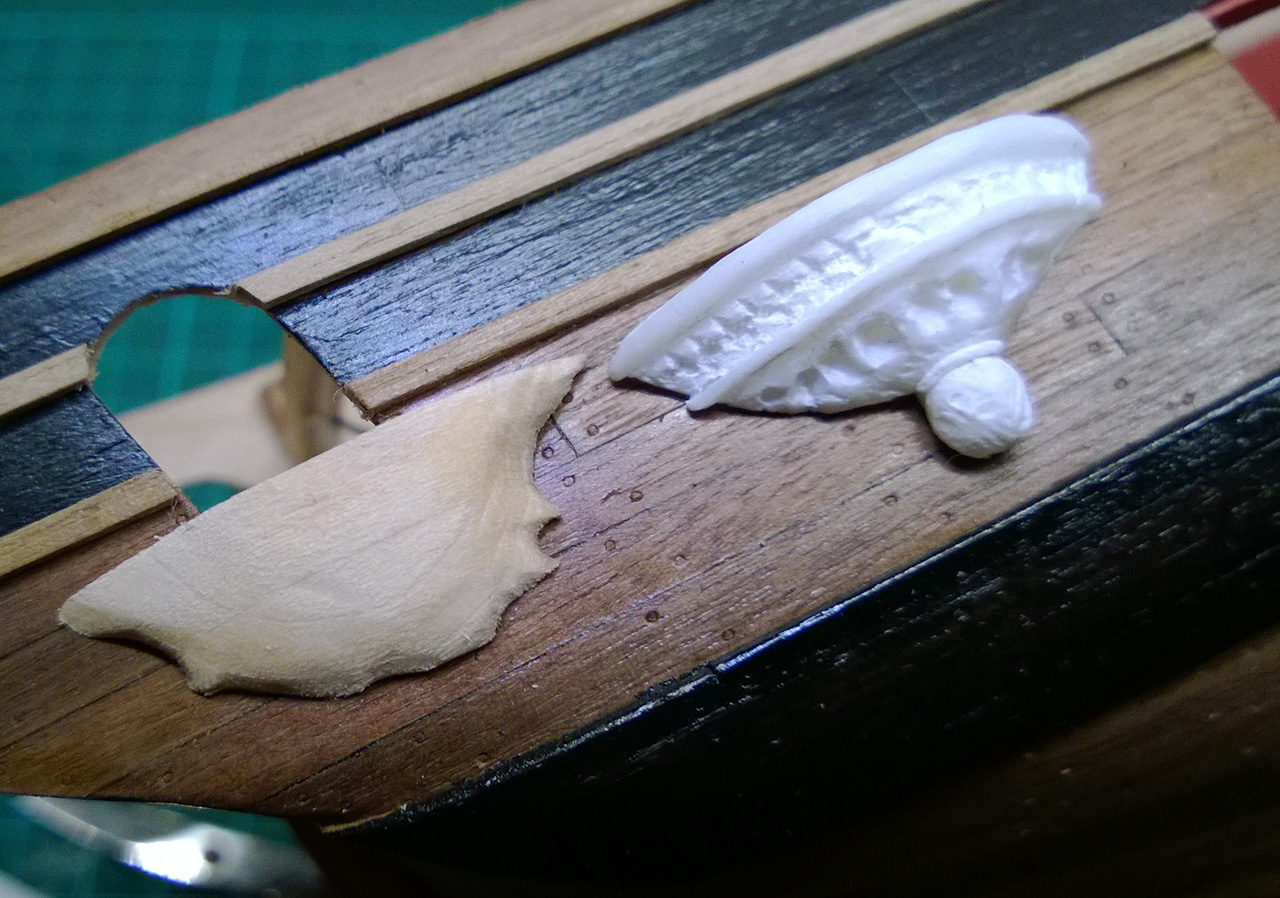
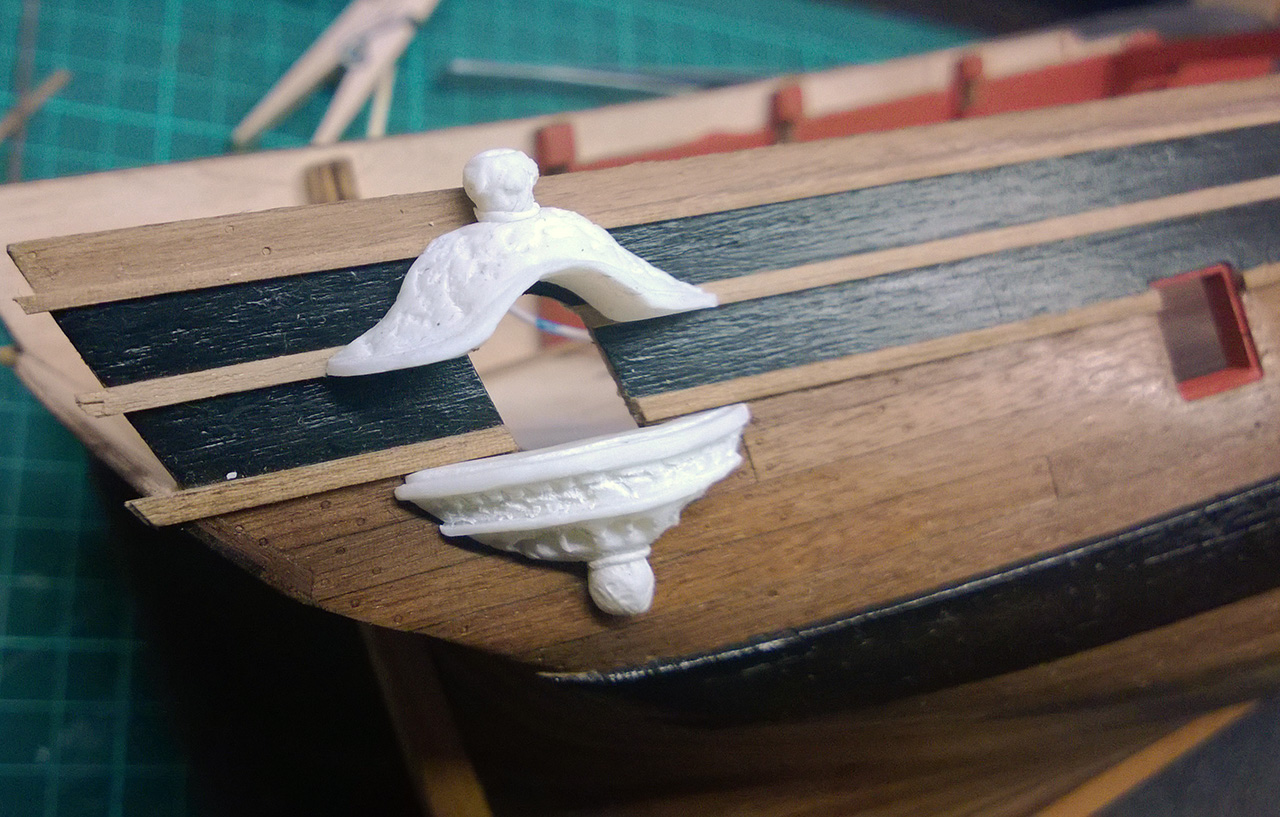
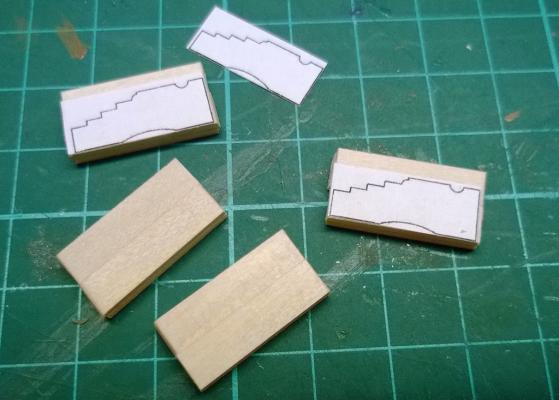
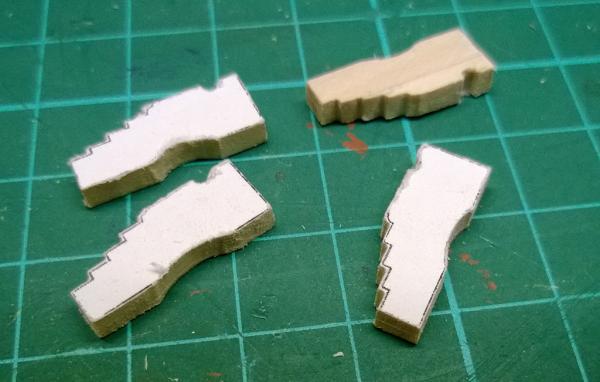
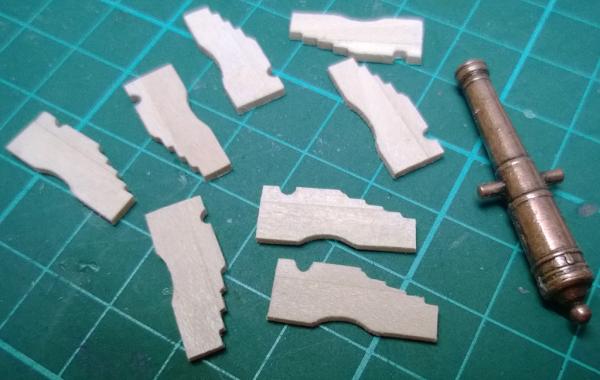
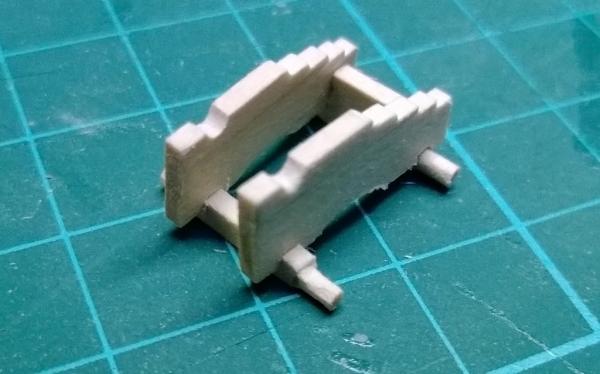
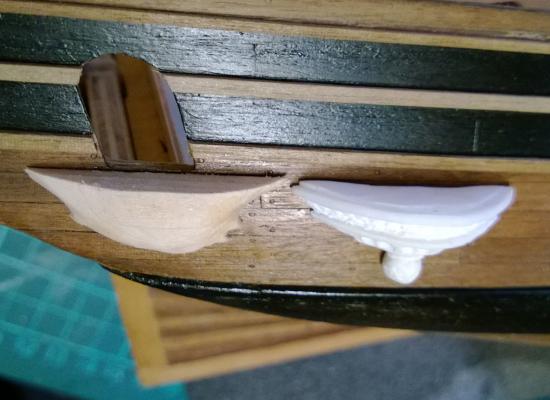
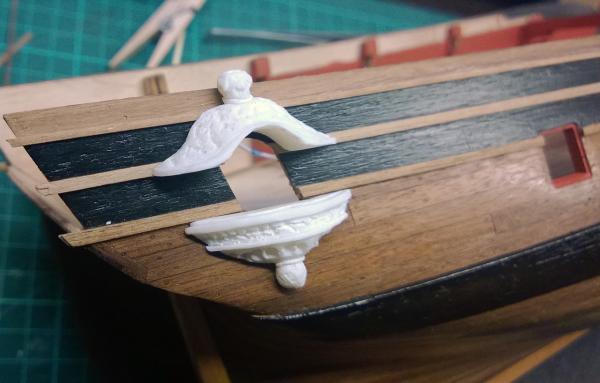
Thanks Andy, I forgot that you have also made your own quarter badges and they look great. I will dump those white plastic pieces and use wooden ones. One of the lower parts is finished and now it is 4.5 mm thick and there will be no problem to make it thinner if necessary.

-
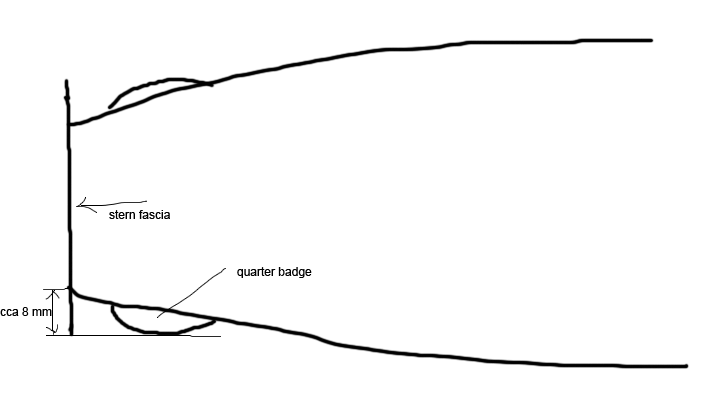
Thanks alot guys for the info. The pieces are about 8 mm at their thickest point and I was wondering, whether that is not too much, but I found nothing on this topic. Then perhaps instead of clay I will simply use a piece of wood, with a maximum of 5 mm you say? B.E.> Antscherl speaks about the lower piece of the badge, but what about the top part? Should that be a bit more "massive" or the same? By the "stern piece" you mean the stern fascia plywood part with five windows? This one protrudes about 8 mm from the ship side, but in the narrowest point of the ship, so if I'm getting this right, it should be like this. In such case the badge should be no more than 3 mm thick. And my last question, what about the window itself? The badge has one big window and two narrow at its sides. Should there be appropriate openings in the main hull for all of these (as you can see, now I have just the one big) or not?
-
Thanks guys. Now I have a real challenge in front of me - creating the quarter badges (Alistair, thanks again for the plans). The supplied cast metal pieces are not great, so I decided to make my own. The first attempt includes modurit, which is a kind of clay that is hardened in an oven or boiling water. Now I have to decide whether it is good enough and then it will be necessary to create windows. Those will be simply made of thin wooden strips.
- 218 replies
-
- 1
-
-
- victory models
- fly
- (and 1 more)
-
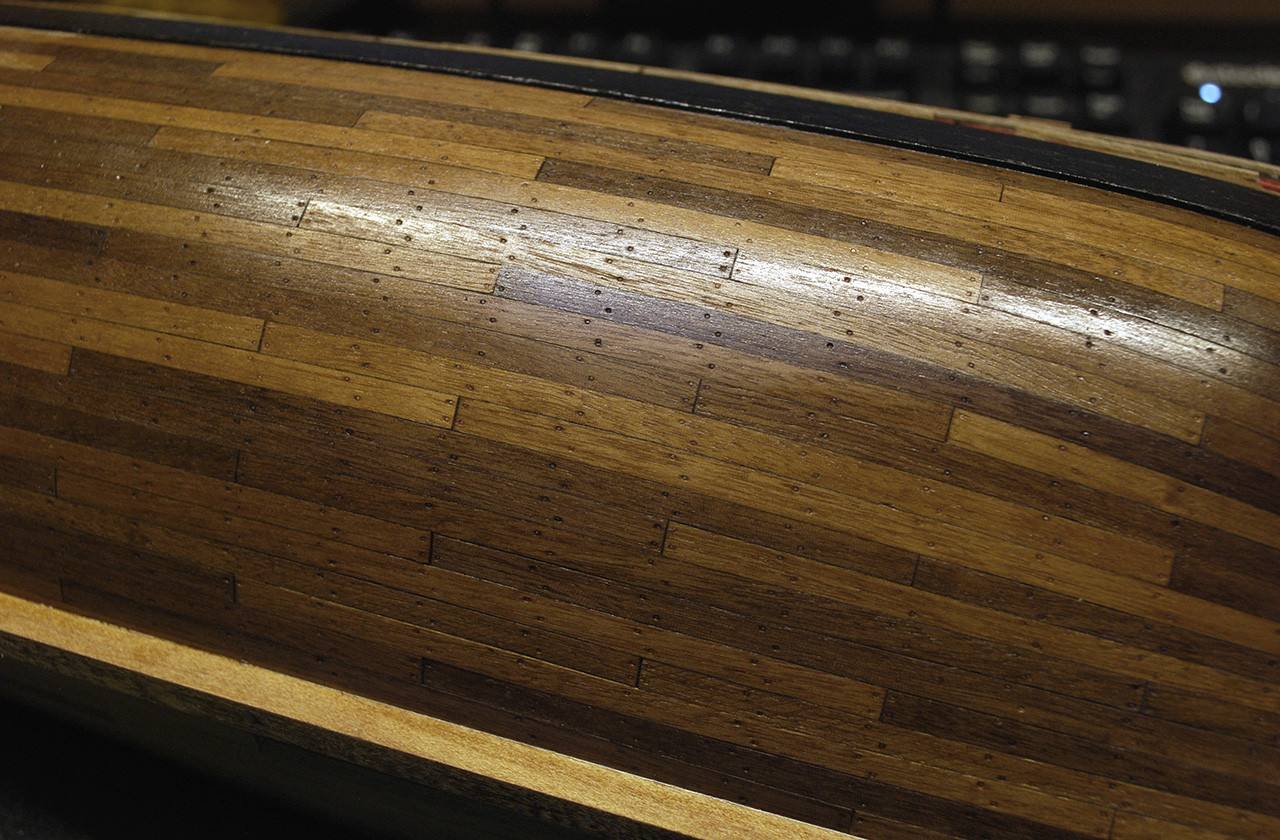
A small update that I'm putting here with sore index finger, too many treenails and just one side of the hull is done.

- 218 replies
-
- 3
-
-
- victory models
- fly
- (and 1 more)
-
miketherock, BE: Looks like a lot of painting and an opportunity to experiment. Thanks. Anyway, almost finished the topsides, so now it's time to treenail the hull. A gentle press of a sharpened needle and a coat of clear varnish seems to do the job just fine, but I will have to create a template to place those nails evenly.

- 218 replies
-
- 3
-
-
- victory models
- fly
- (and 1 more)
-
Thanks B.E., black topsides seem reasonable, at least the hull won't look like a Christmas tree (or some medieval ships . Then I will probably go for ochre decorations, but are the brass pieces possible to paint well with water-based Jotika Admiralty Paints? I don't want to see the paint peeling off.