HOLIDAY DONATION DRIVE - SUPPORT MSW - DO YOUR PART TO KEEP THIS GREAT FORUM GOING! (Only 13 donations so far - C'mon guys!)
×


Jerry
-
Posts
1,753 -
Joined
-
Last visited
Content Type
Profiles
Forums
Gallery
Events
Everything posted by Jerry
-
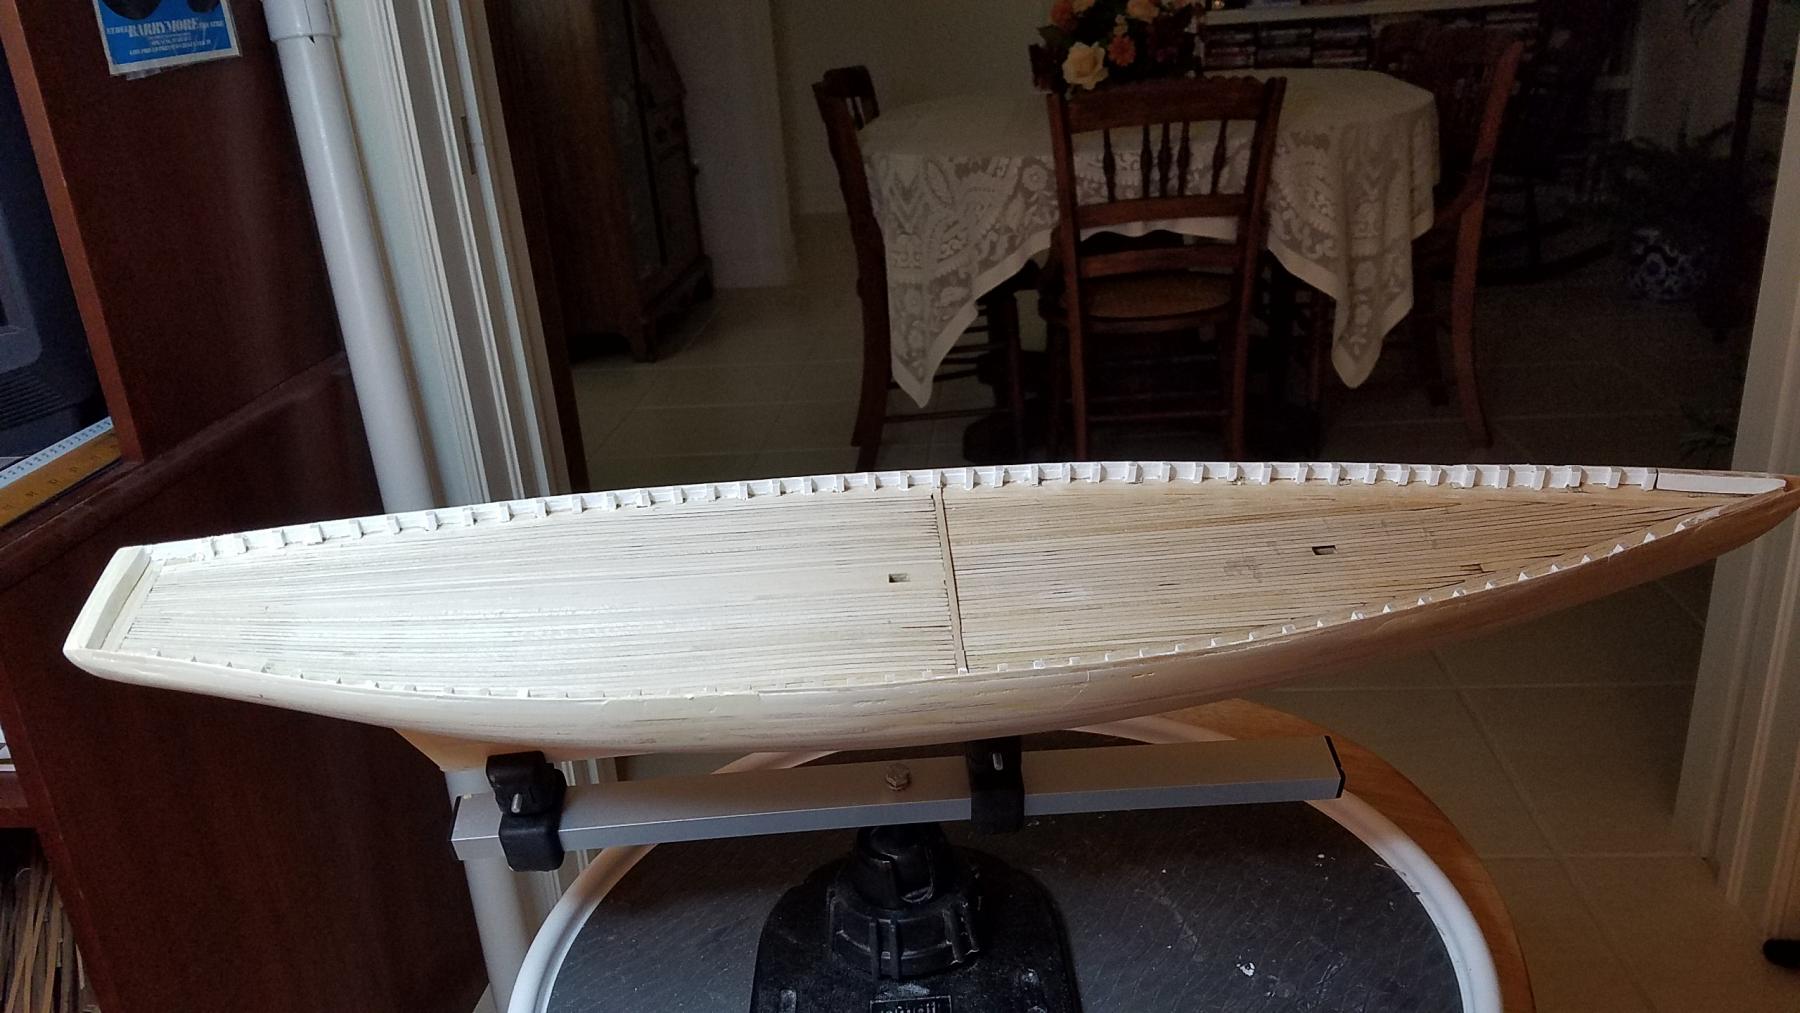
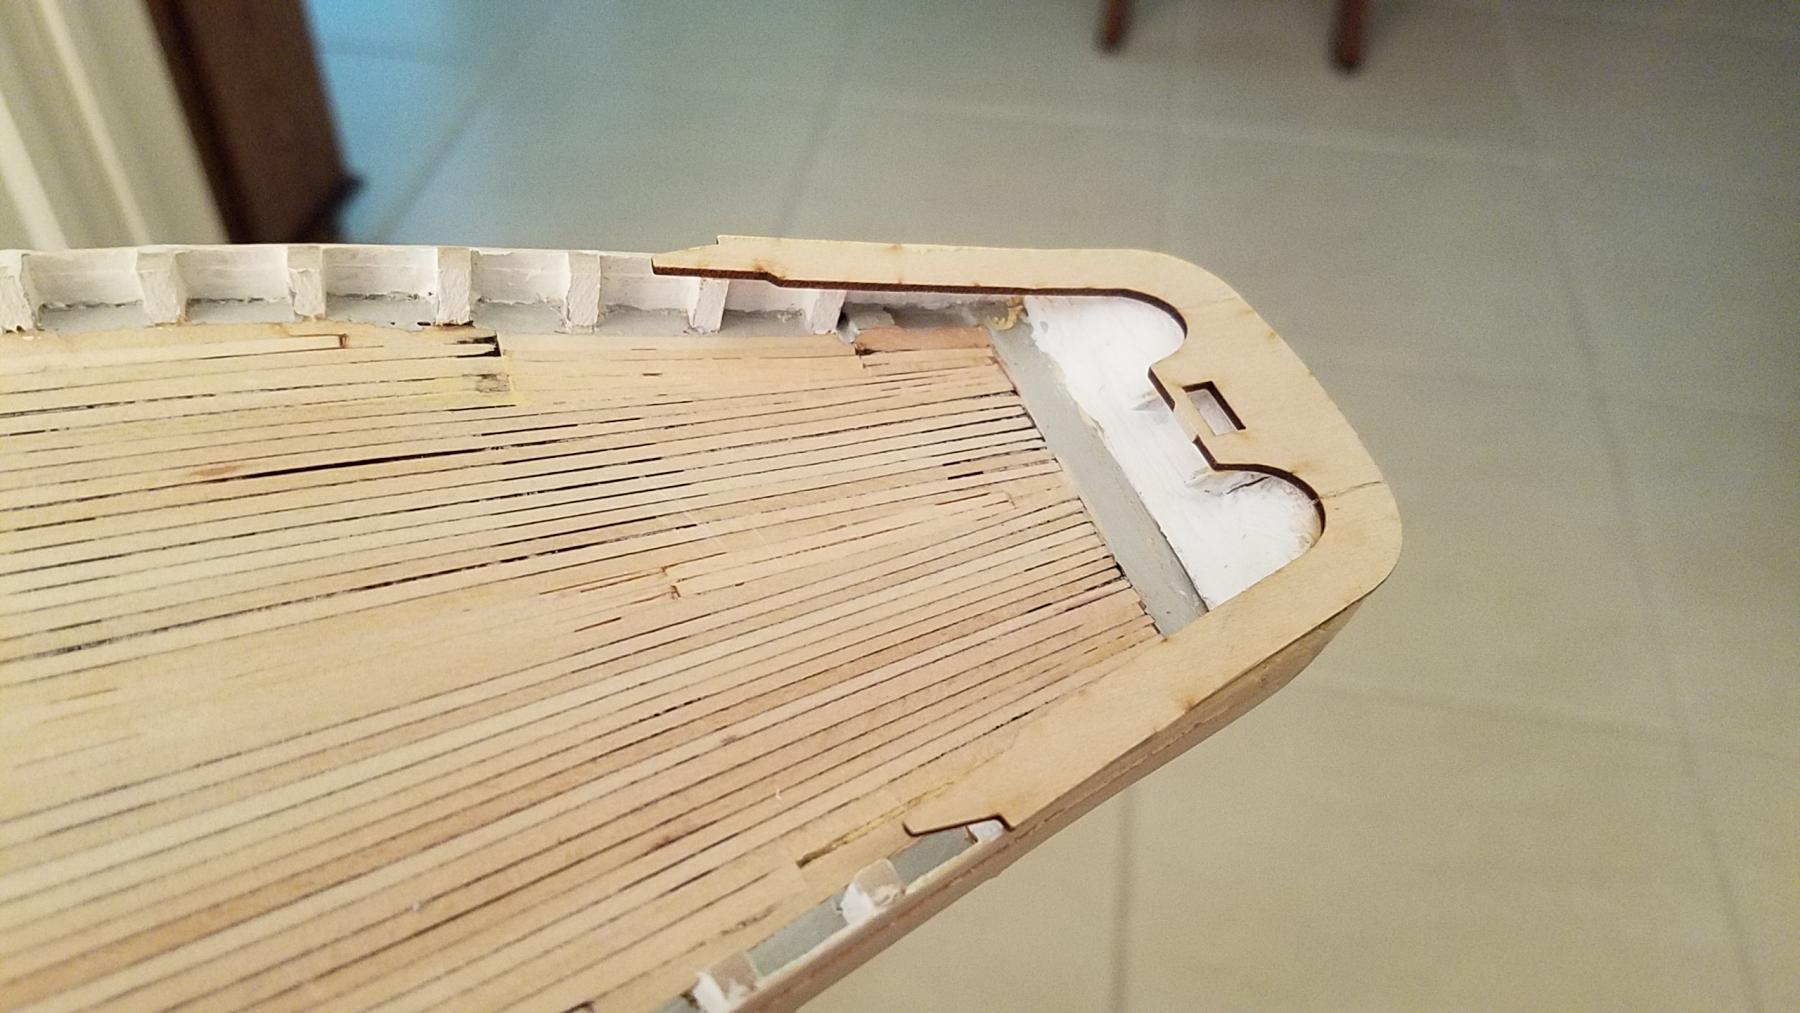
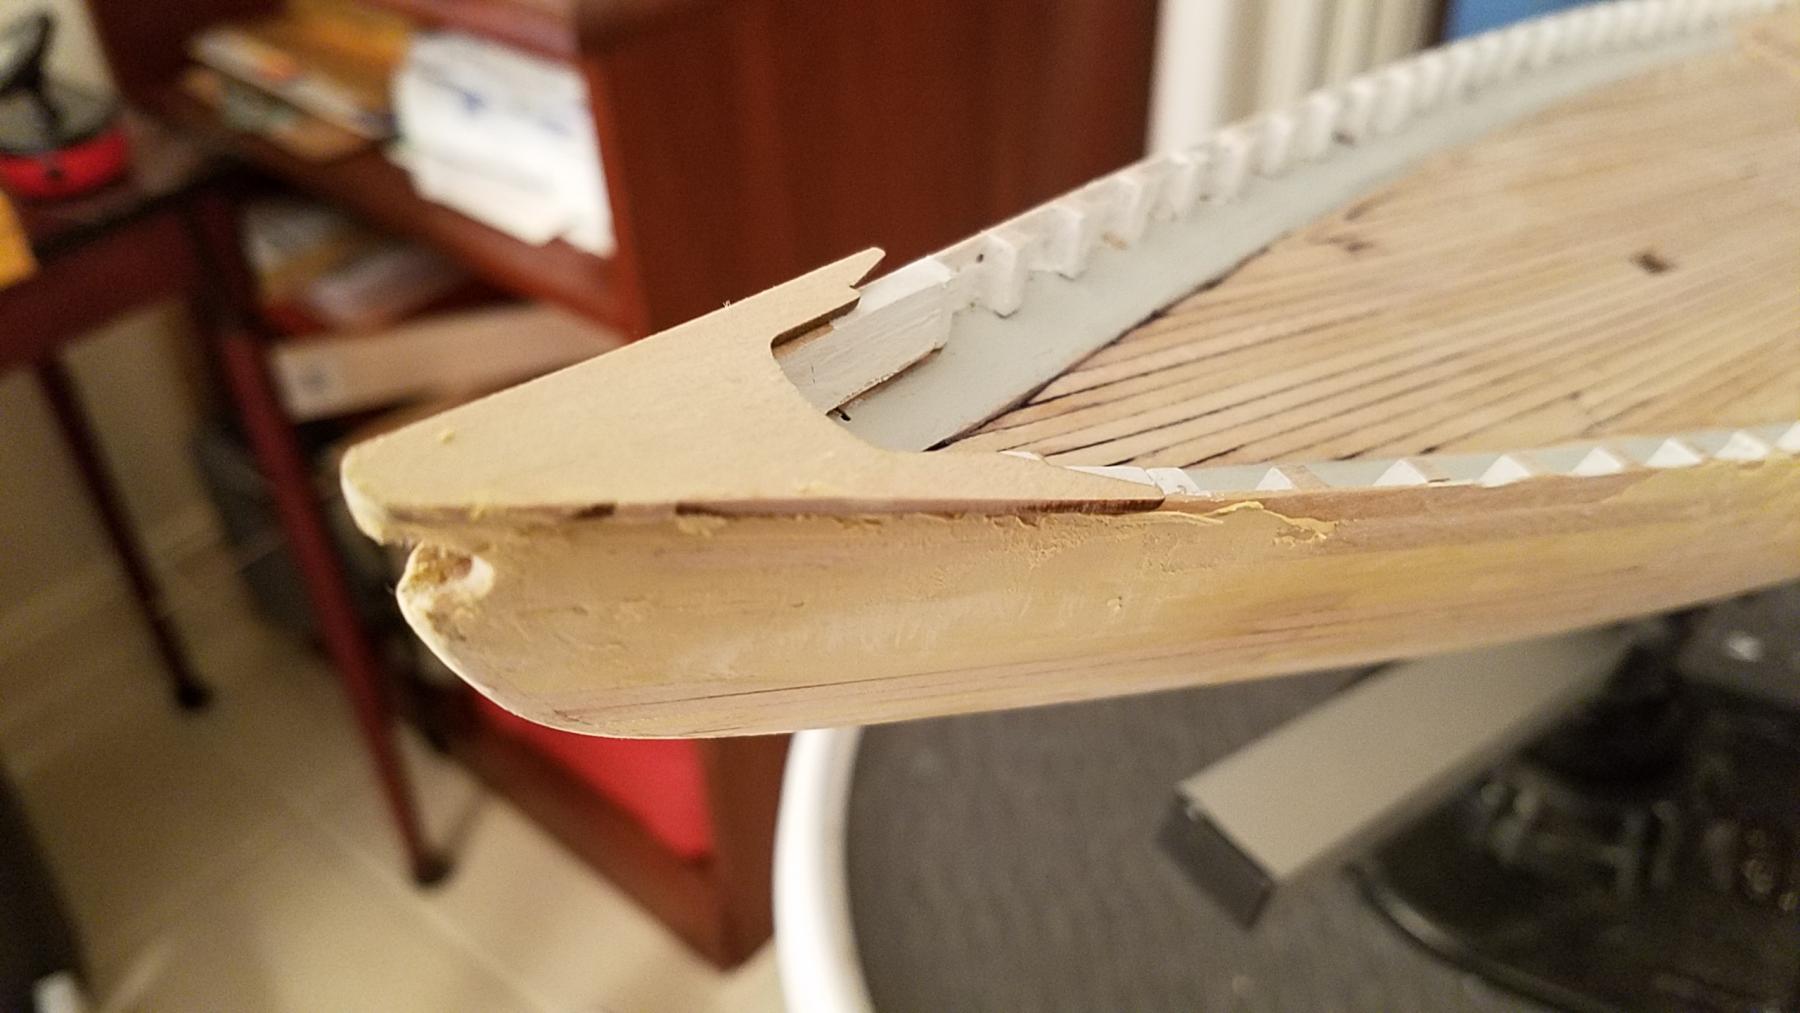
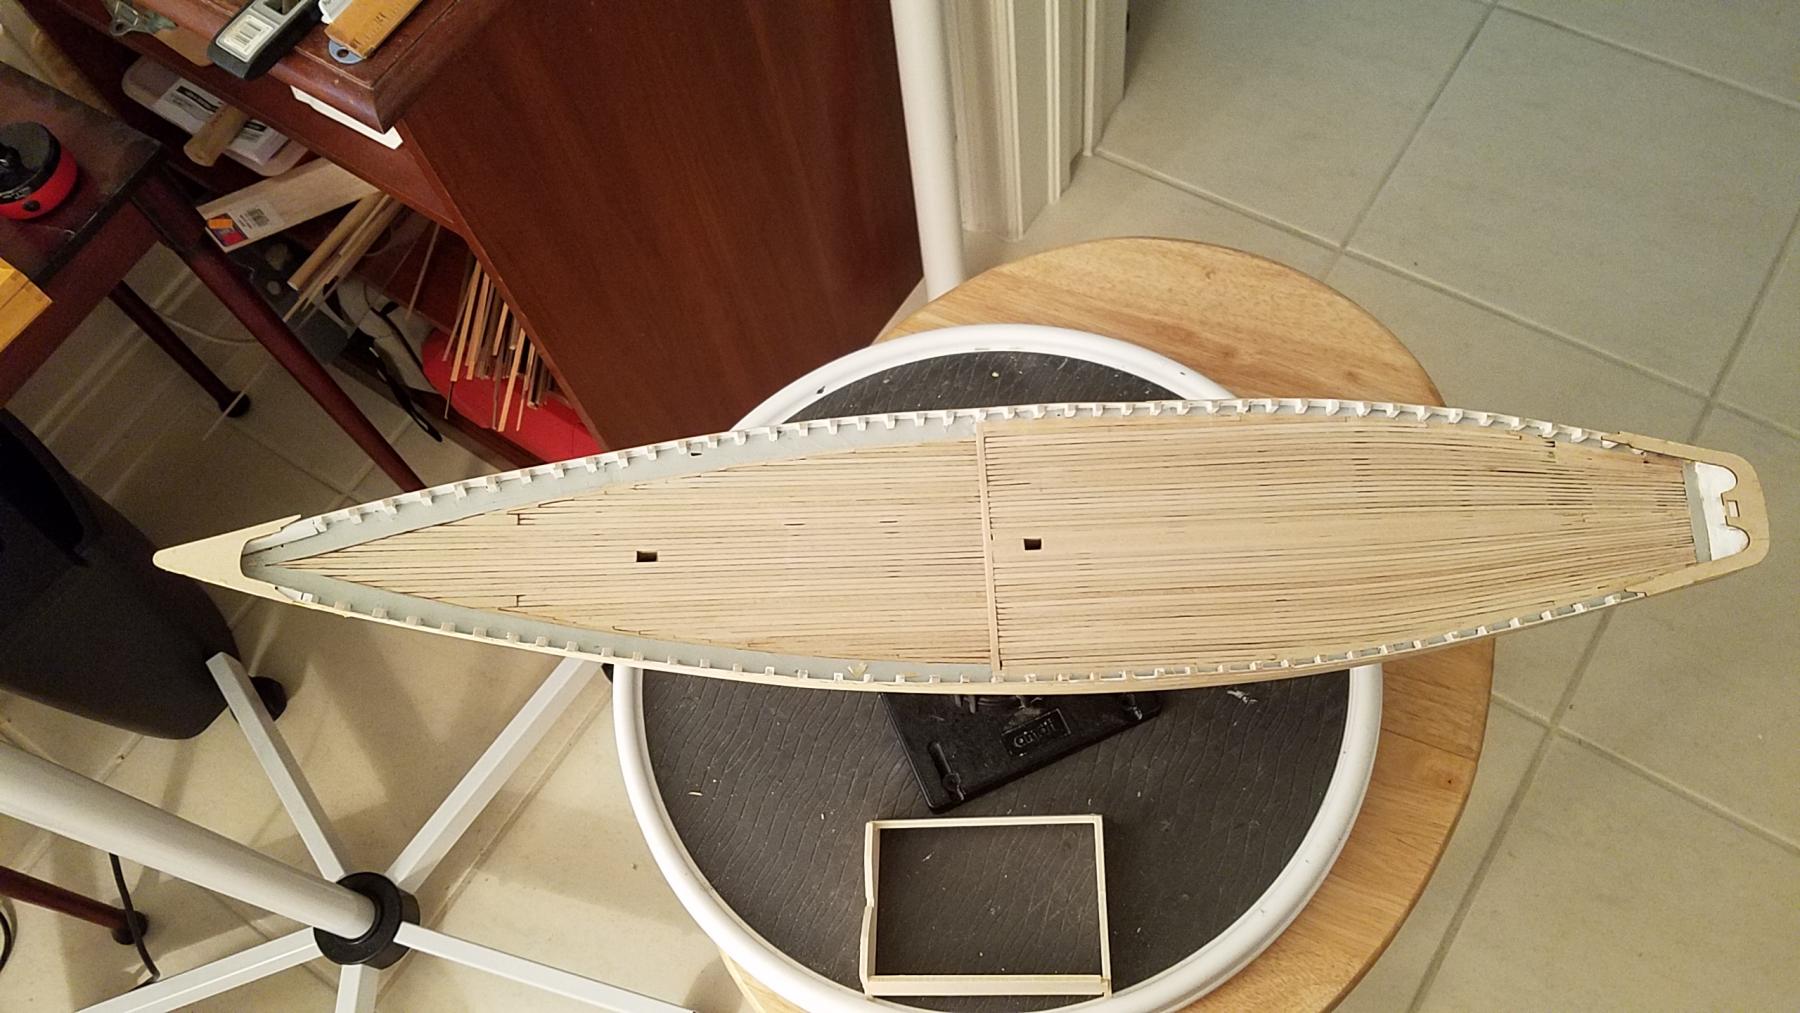
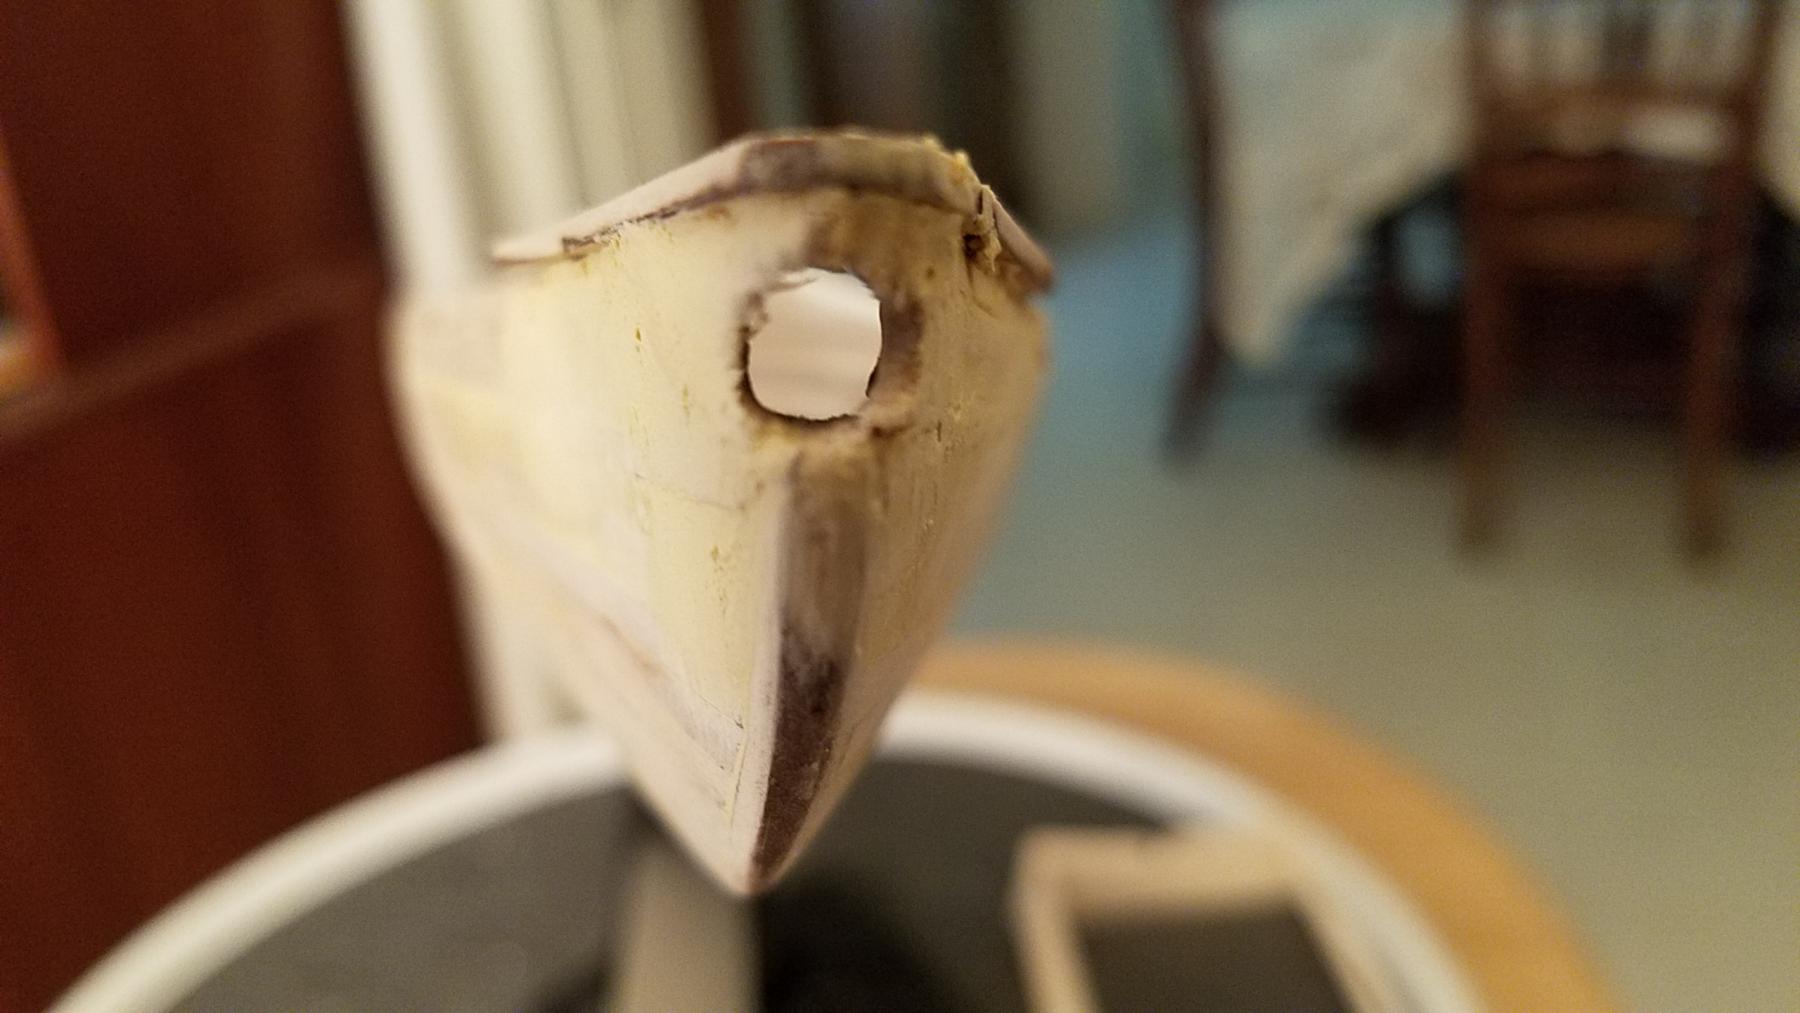
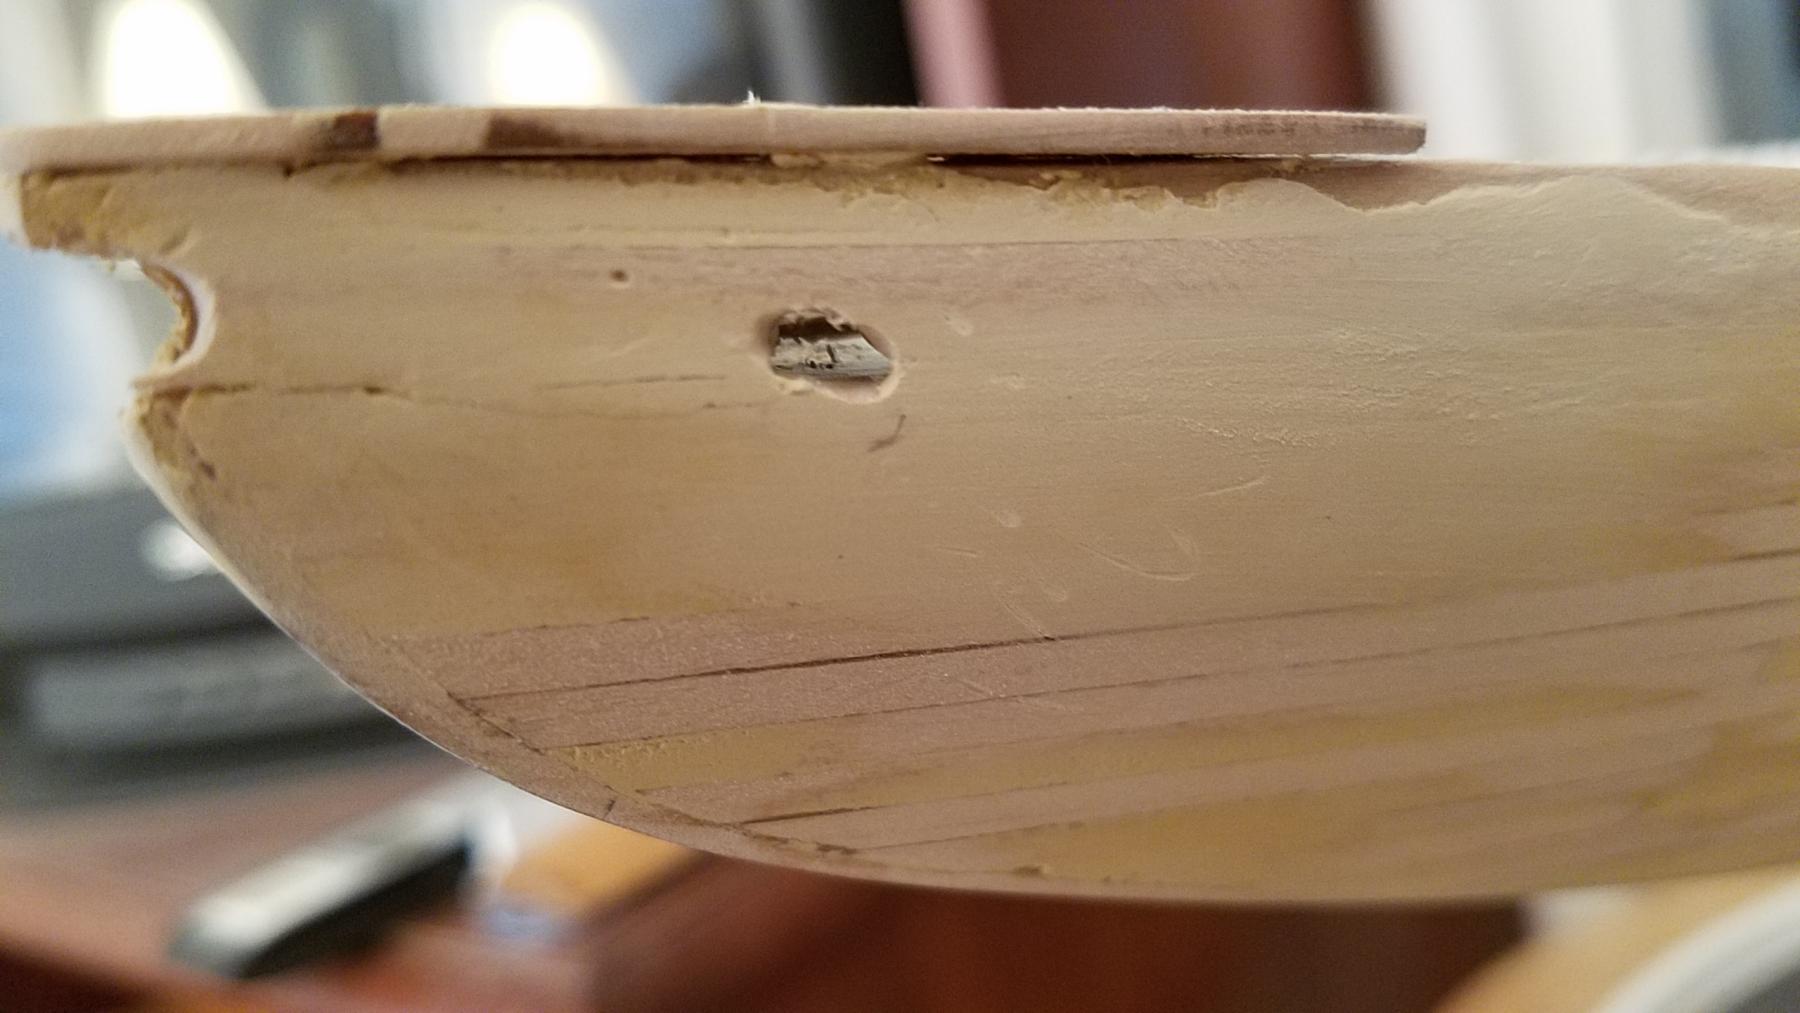
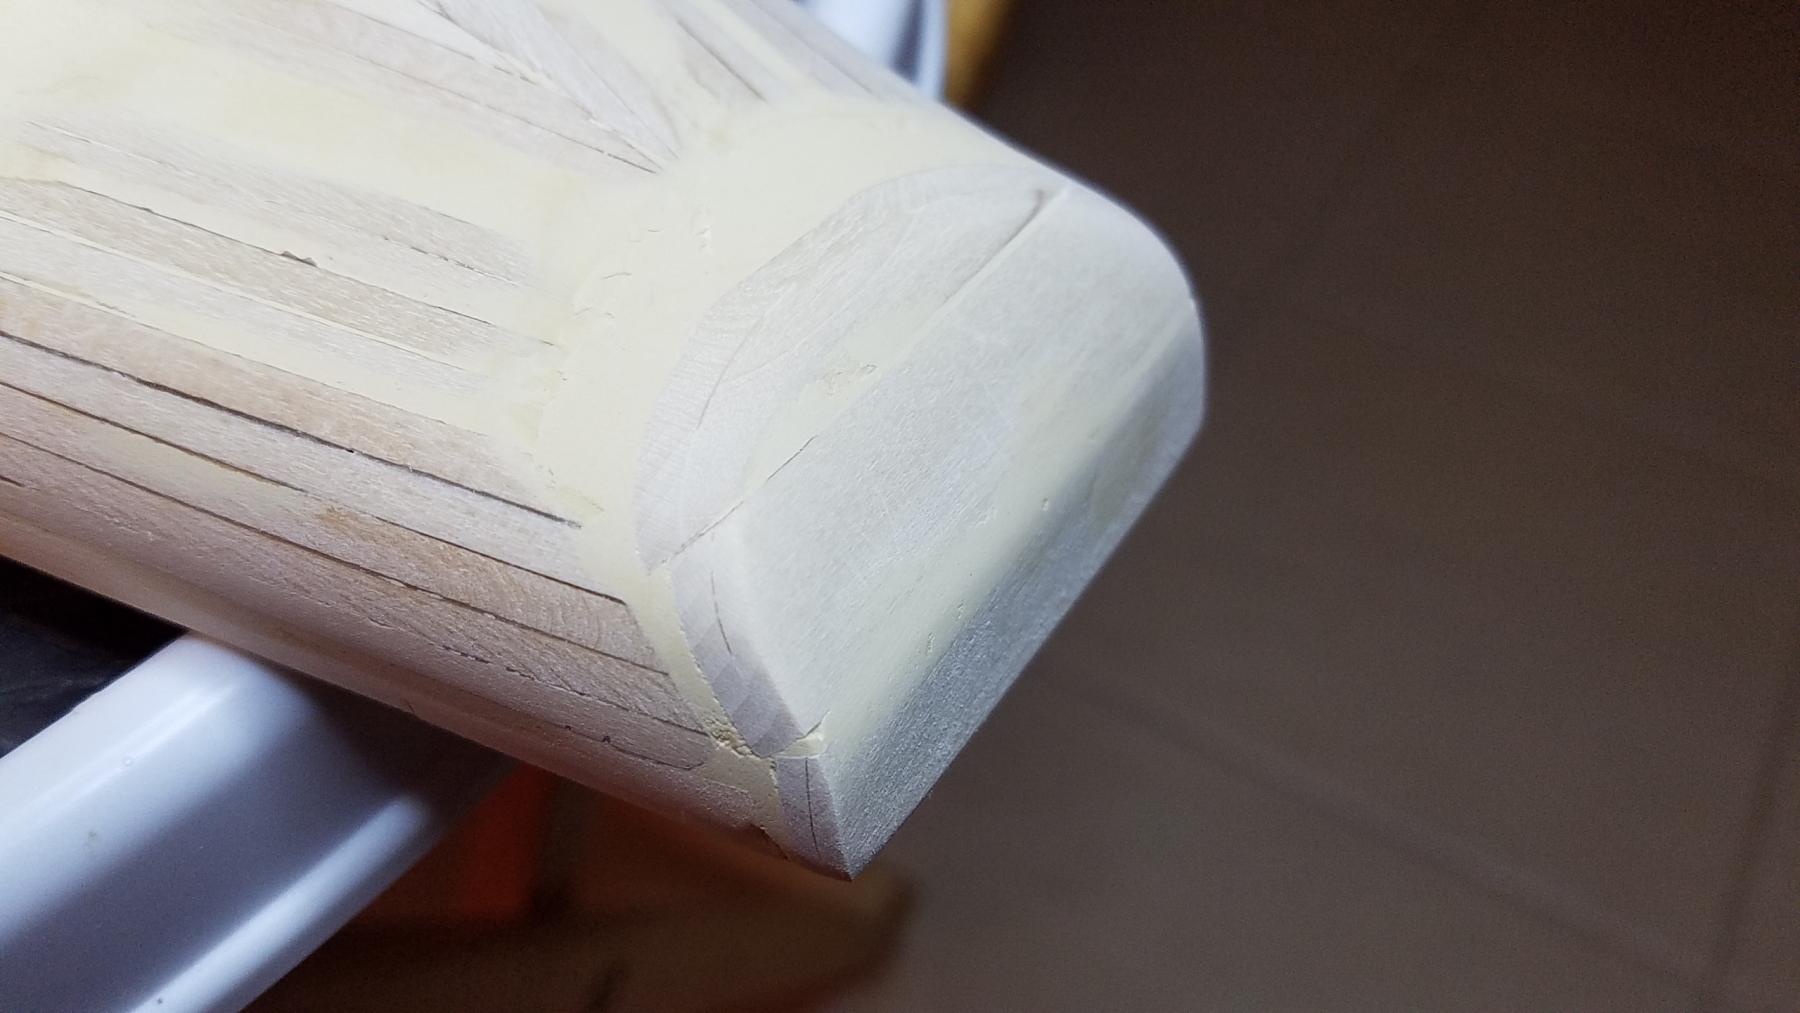
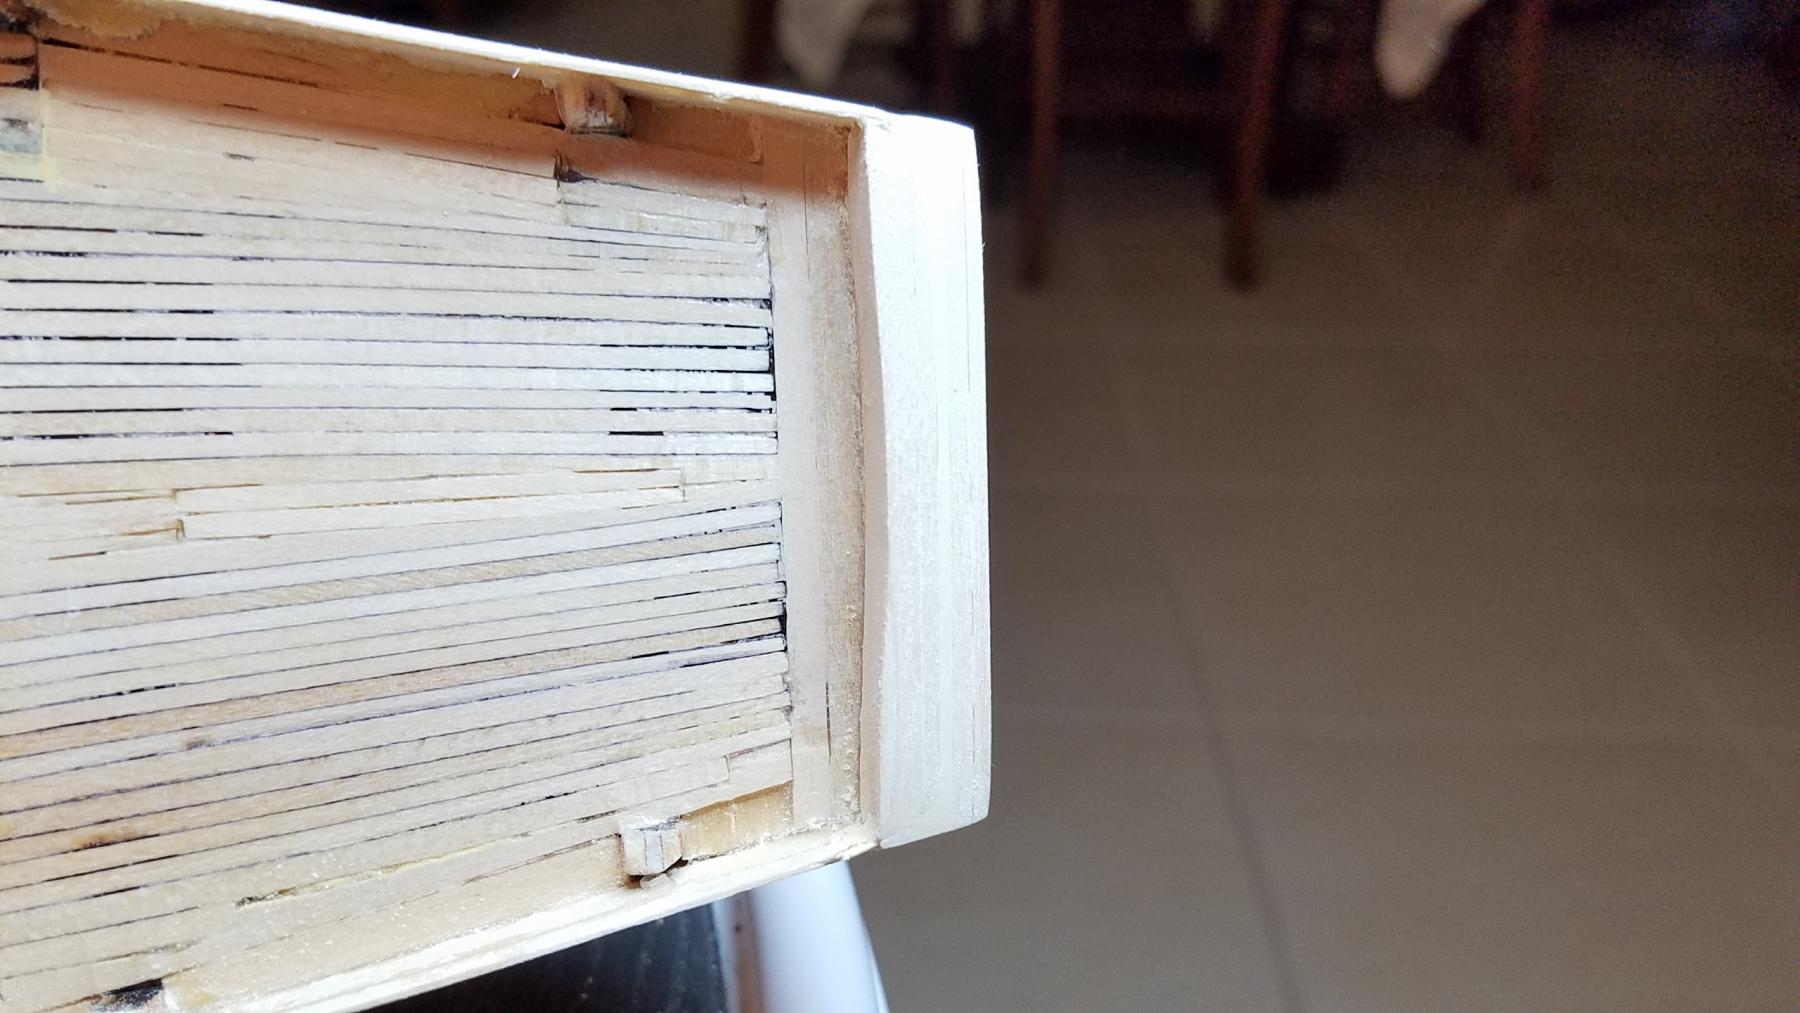
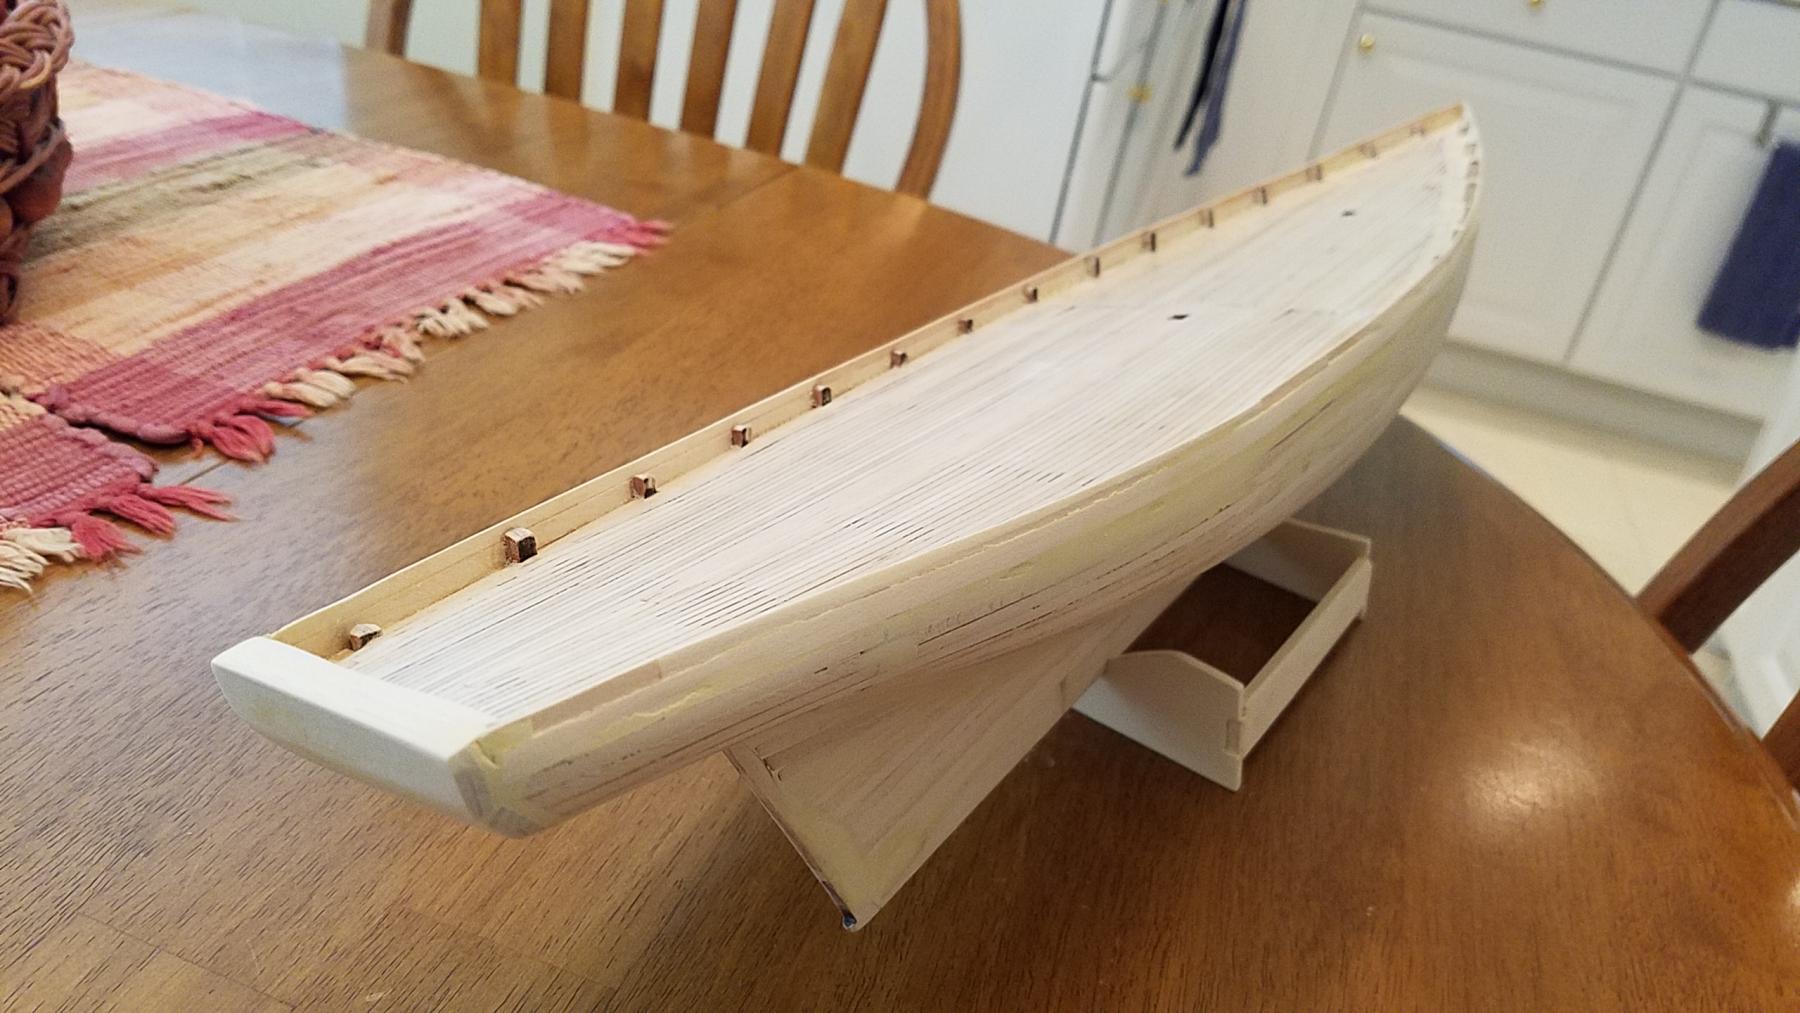
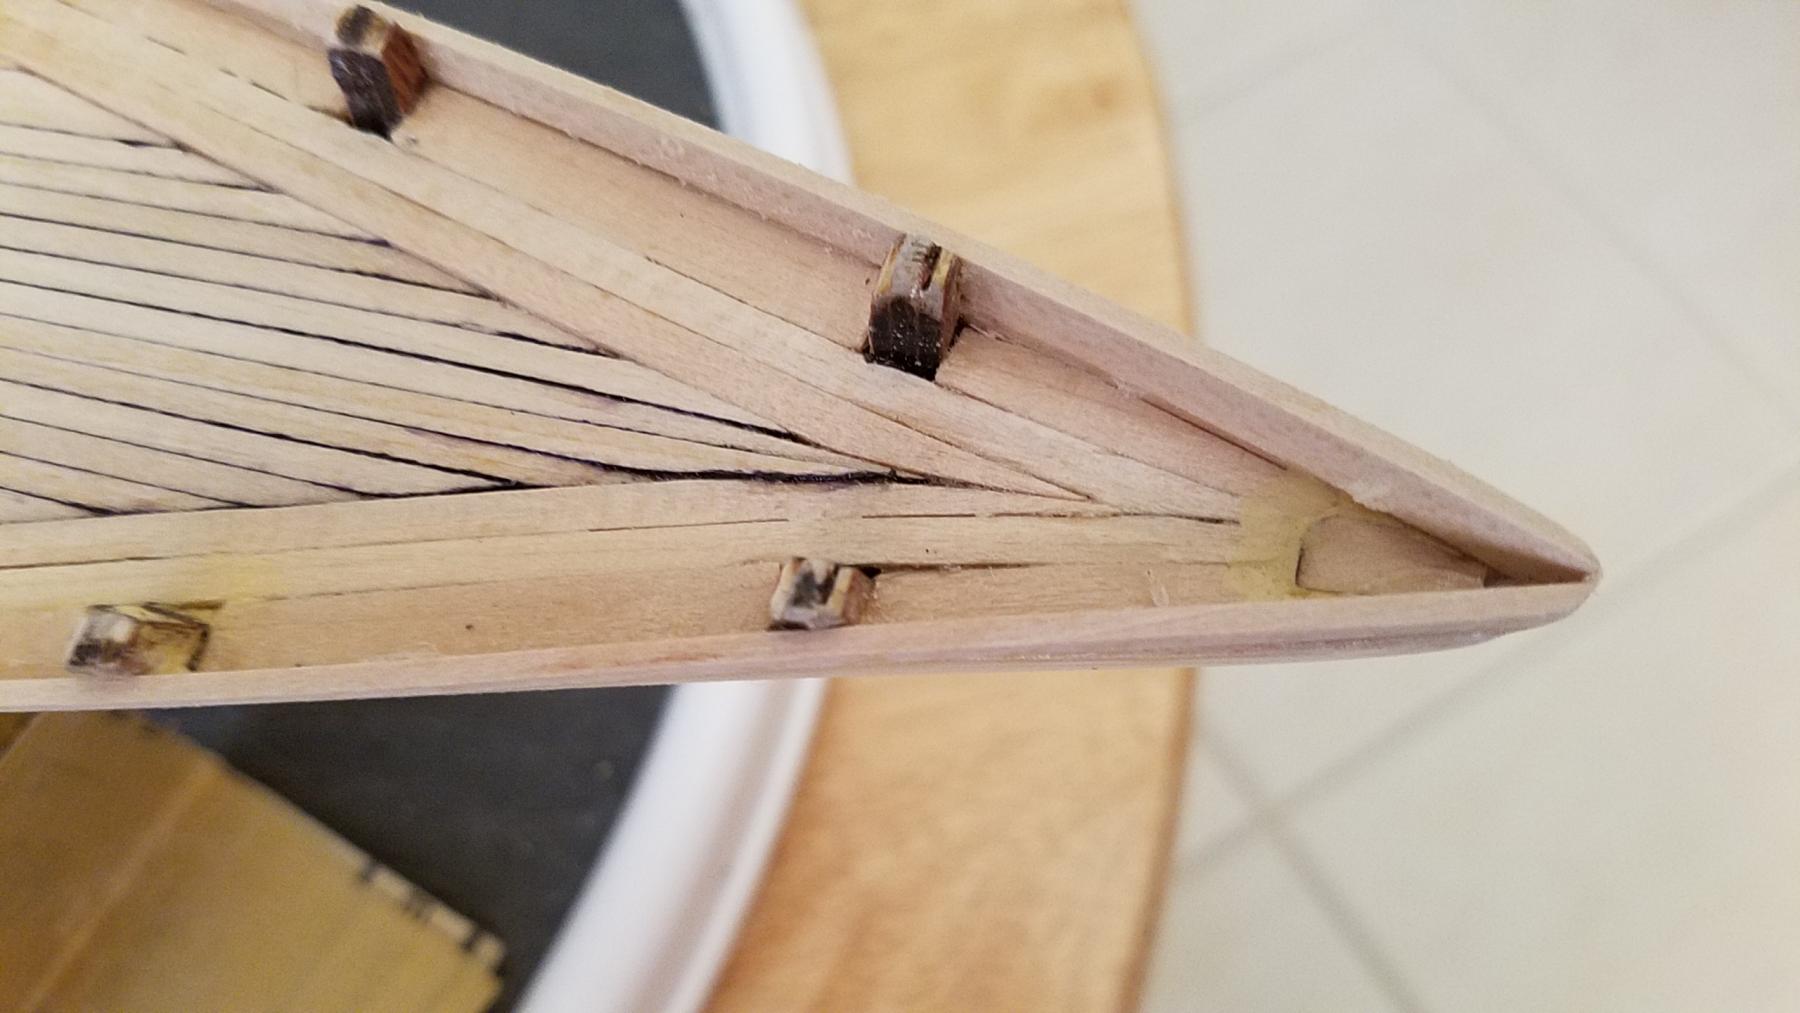
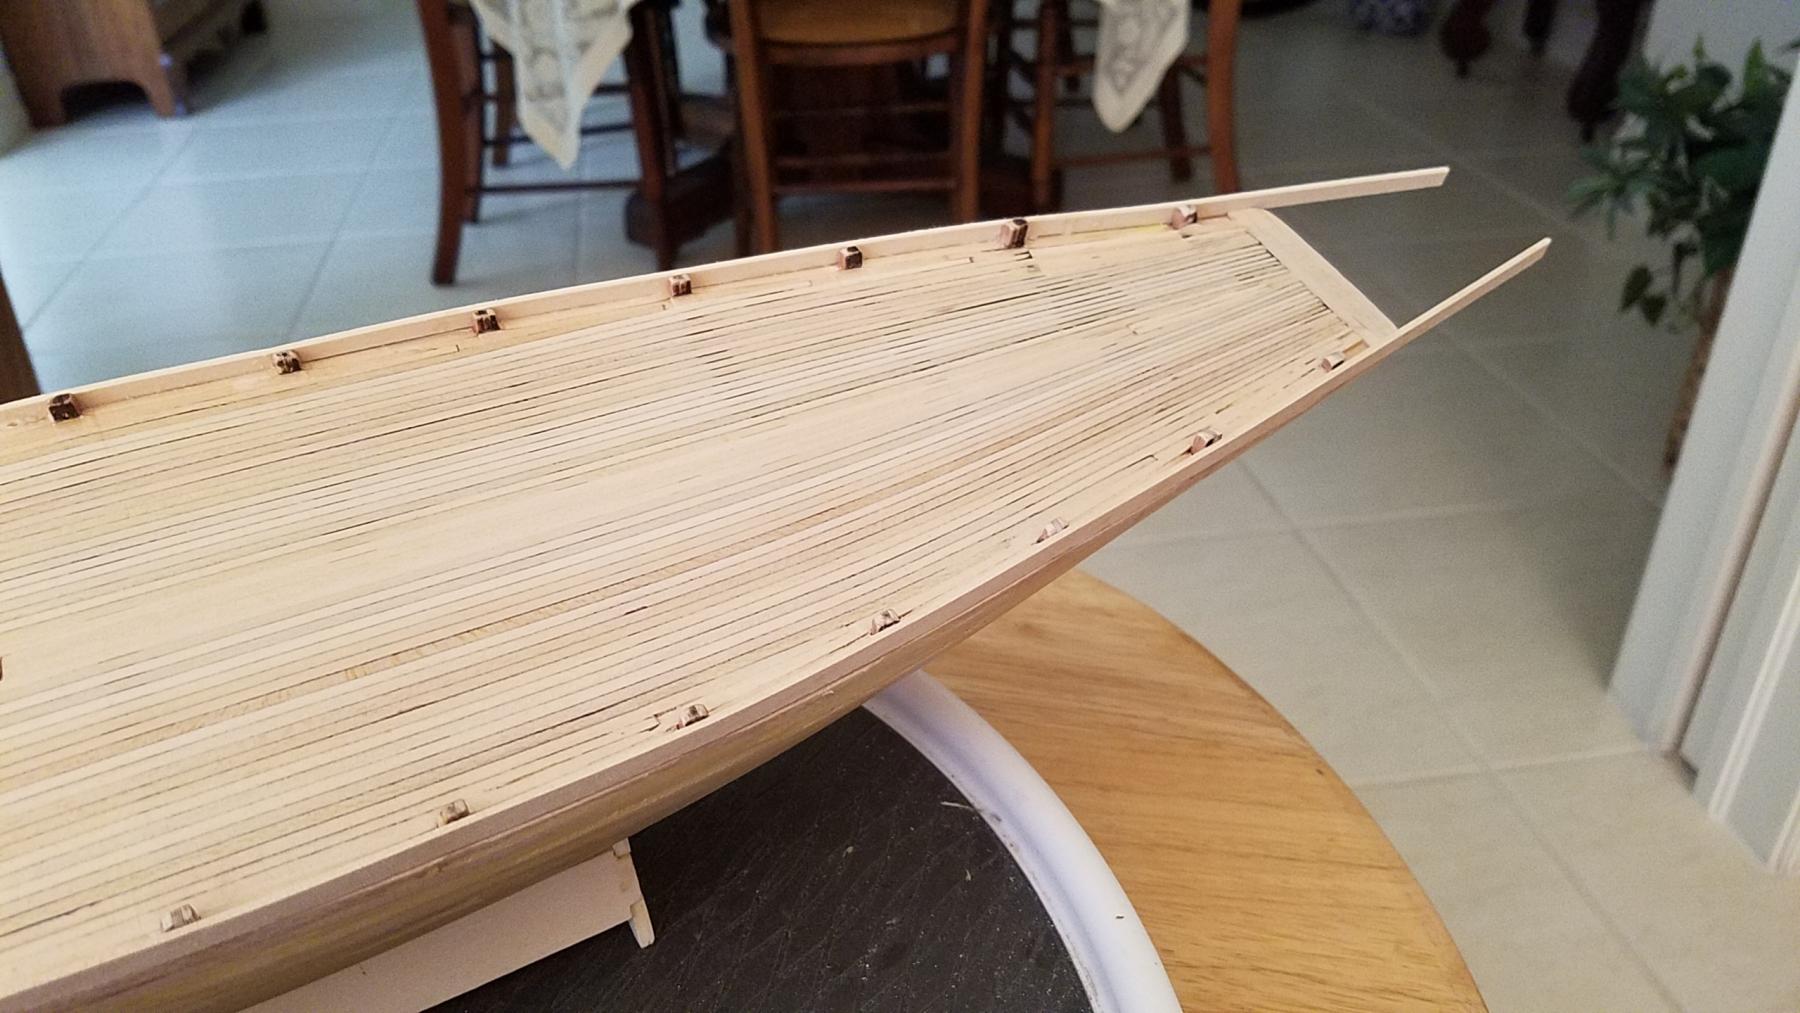
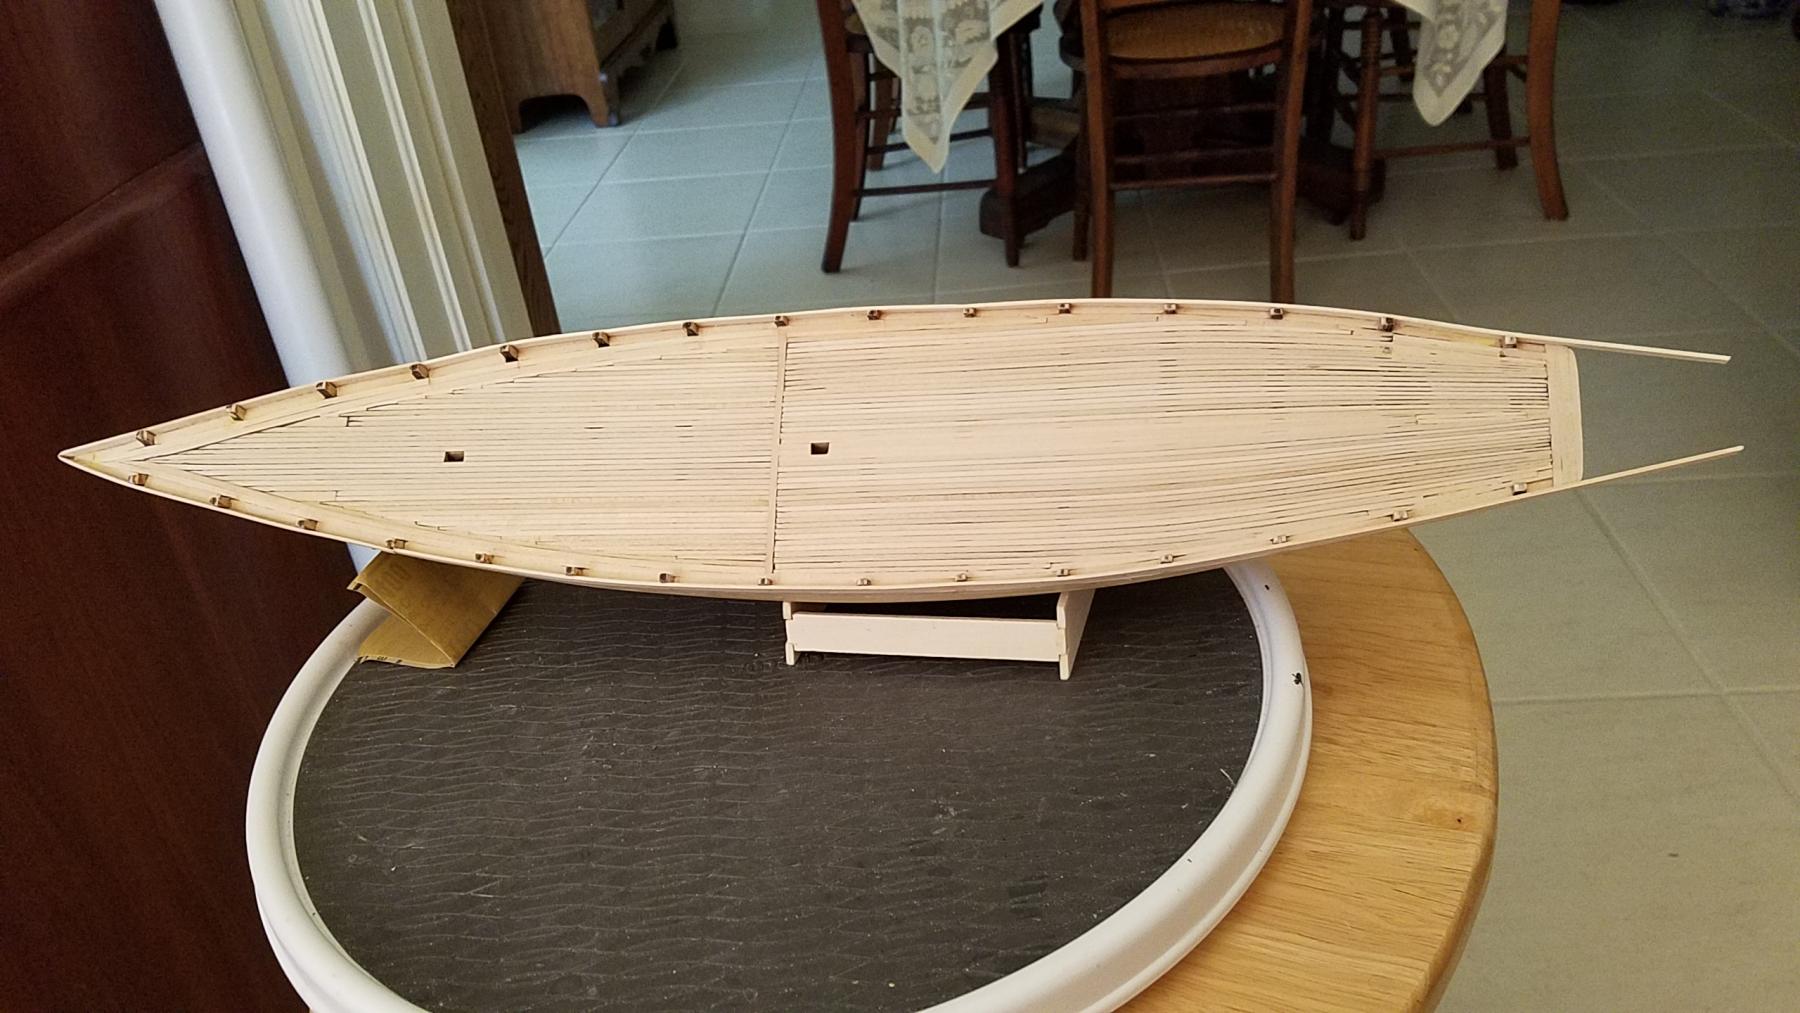
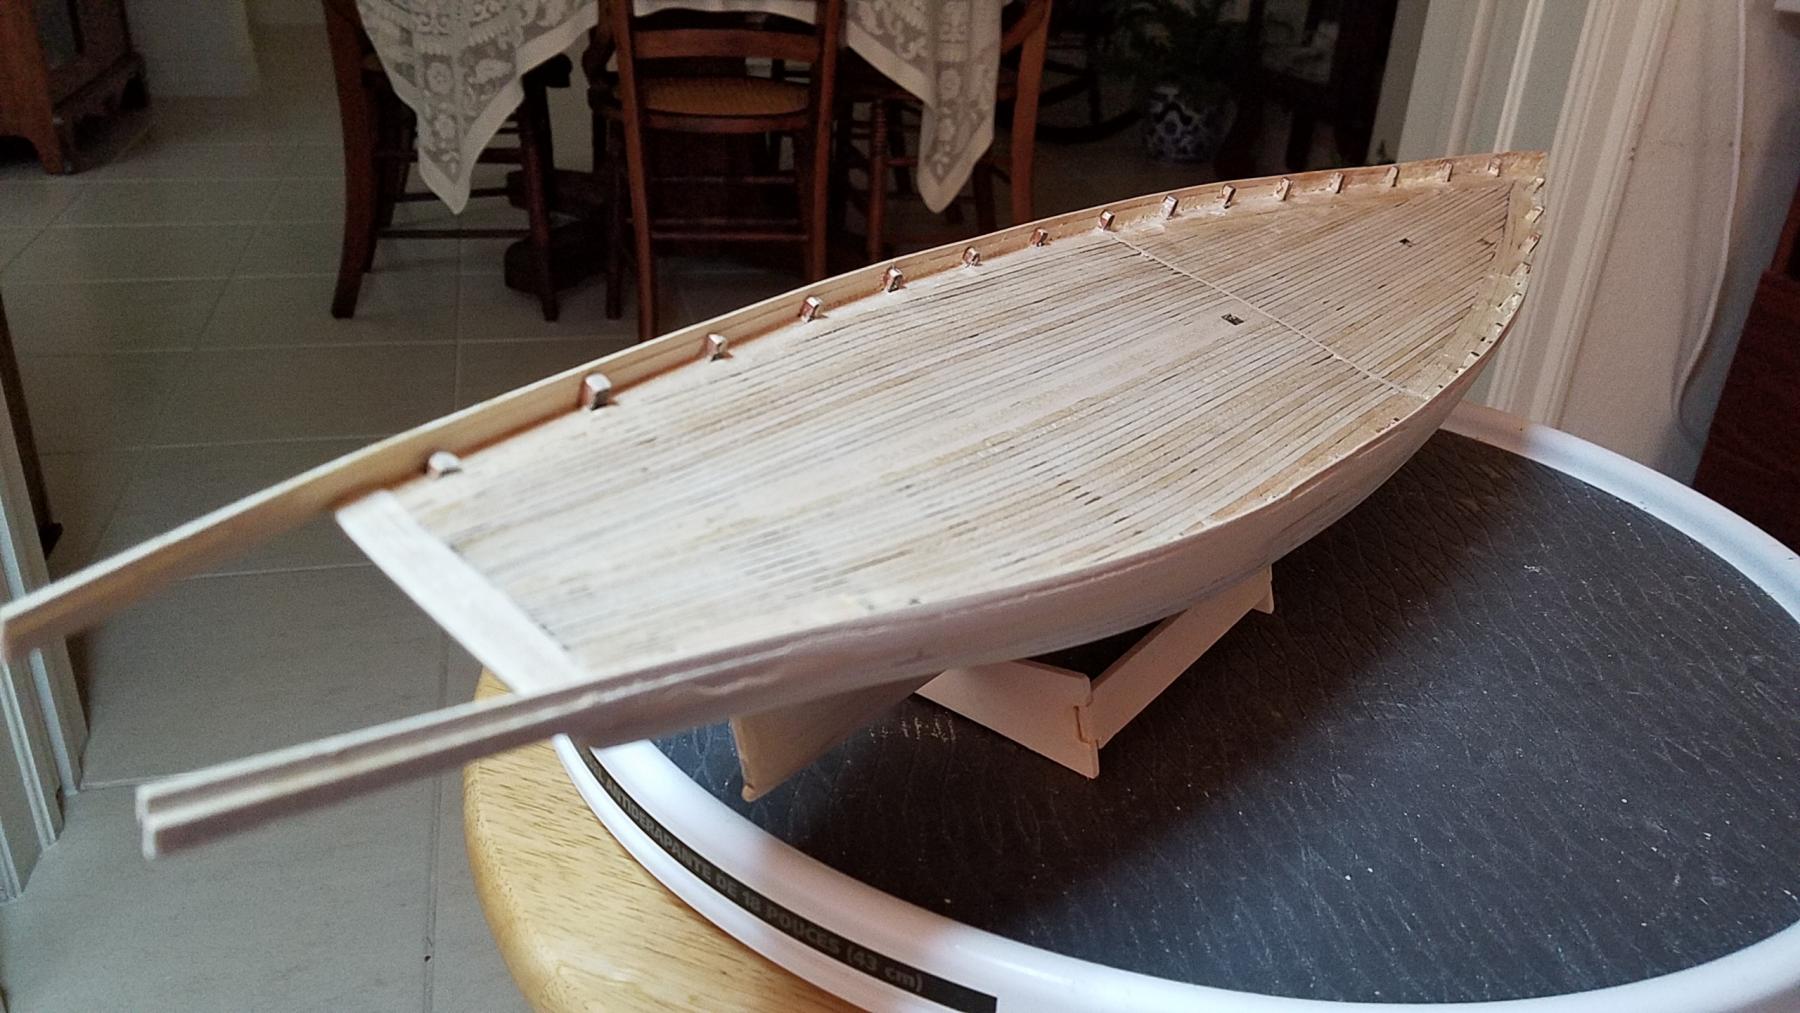
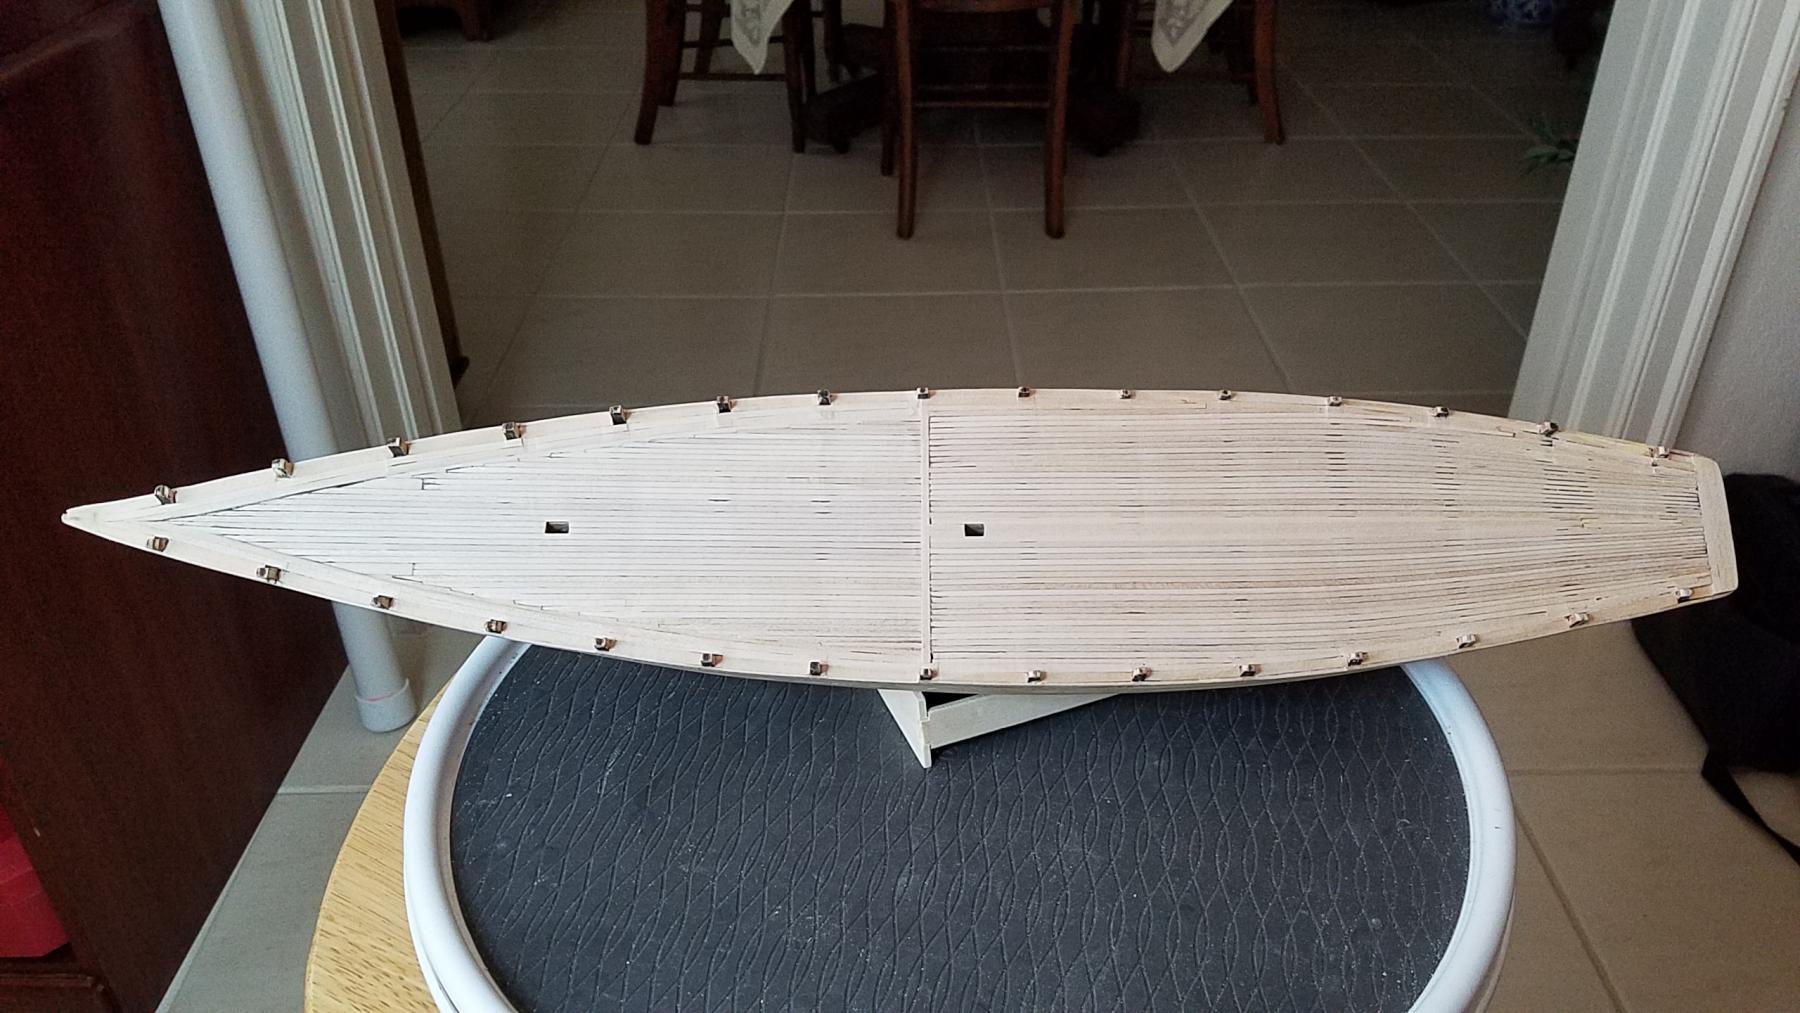
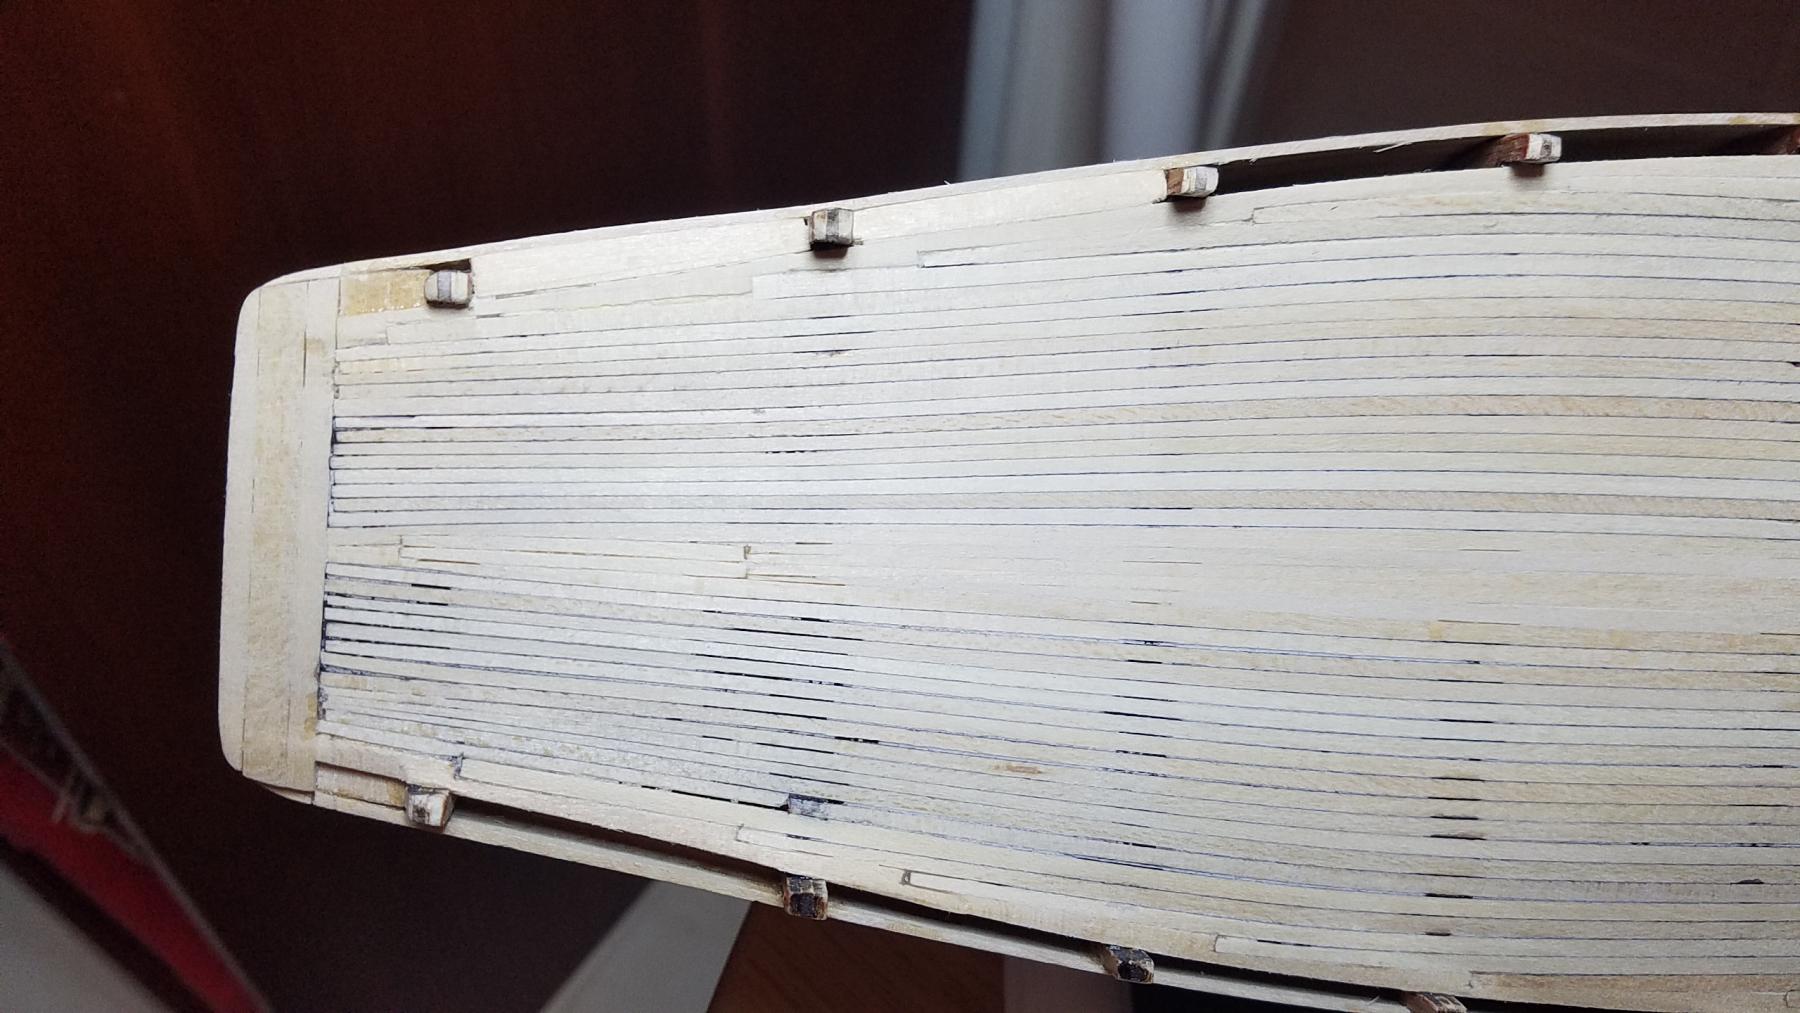
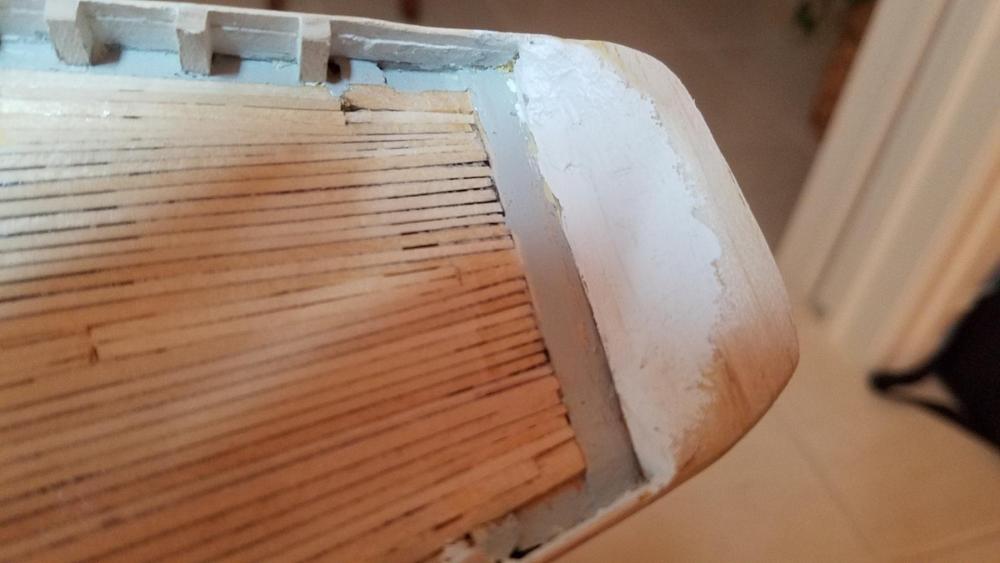
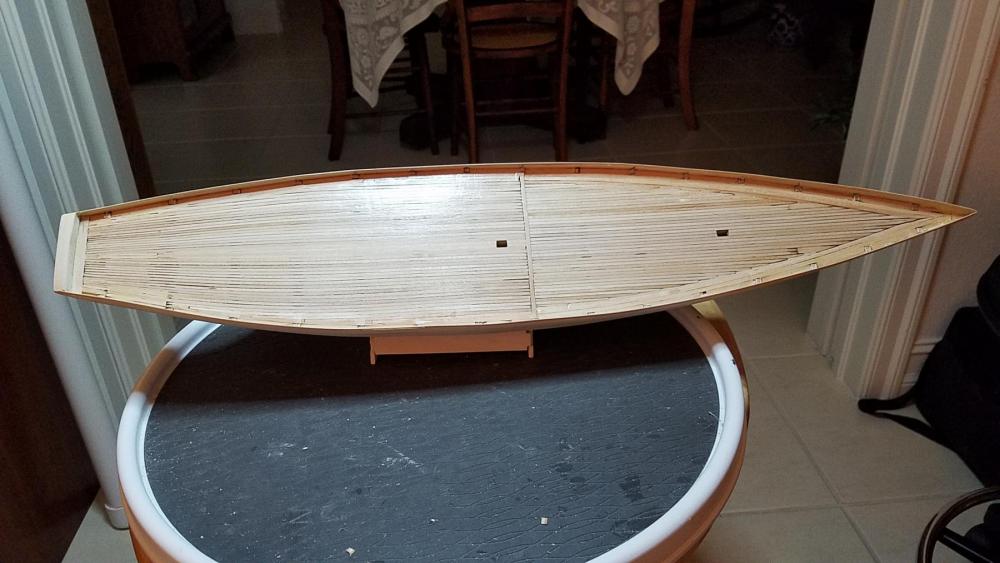
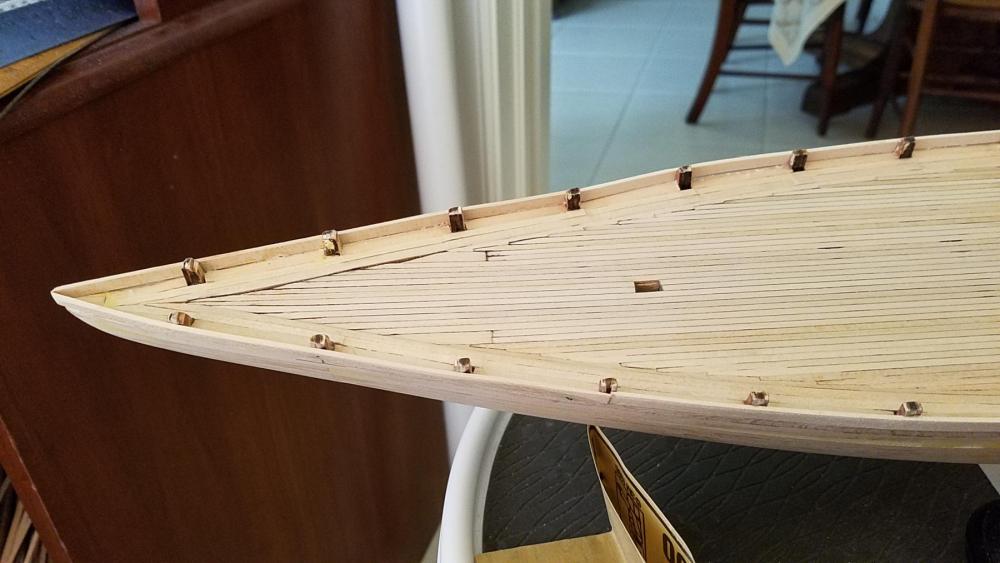
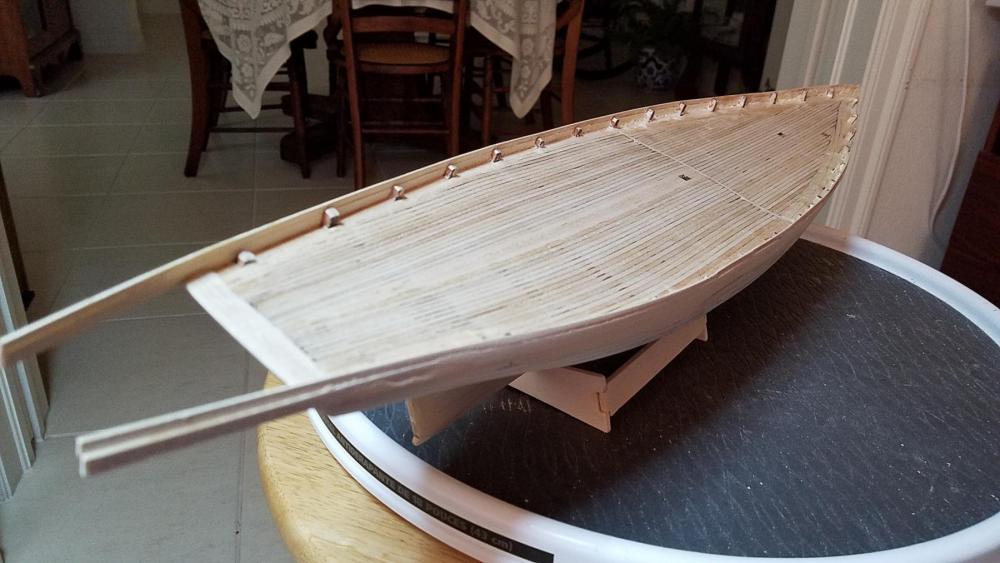
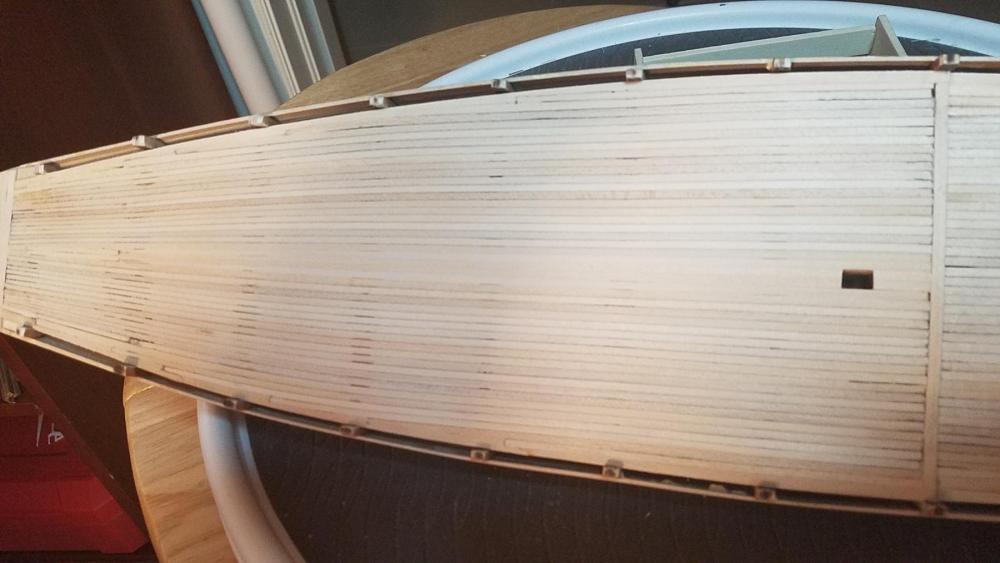
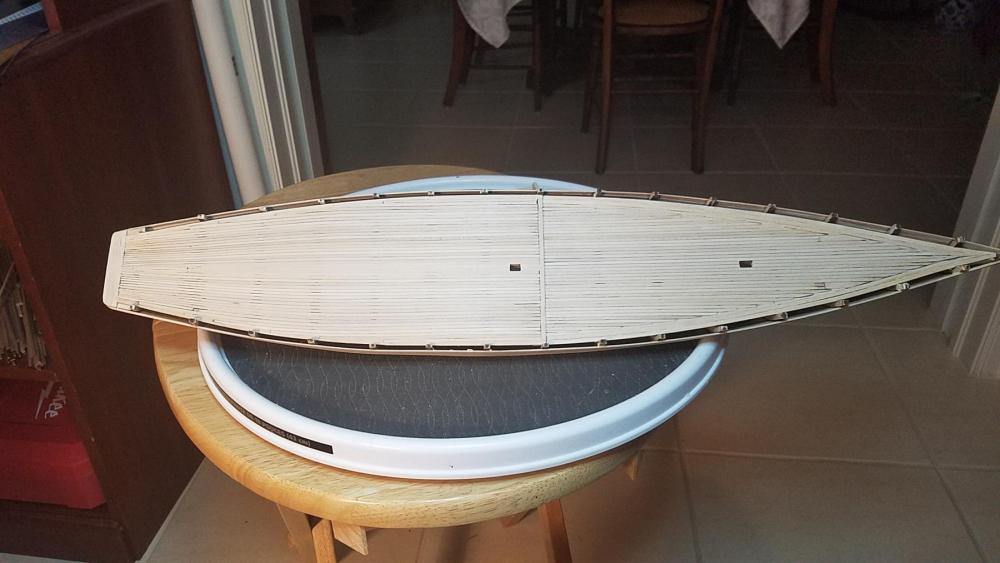
Good afternoon everyone and a happy Monday. More progress to report: The bow and transom cap rails have been fitted and glued into place. The bow has been "carved" to provide the opening for the bowsprit, the hawser holes have been roughed in and the waterways and bulwarks have been painted. The next step is to add the gunwale caps and finally paint the hull. As you may remember I have been building this model with the aid of Bob Hart's practicum which so far I have found to be excellent. Most of the time (about 95%) I have stuck to Bob's directions as they have been well written and are very explanatory. However, occasionally I have found it necessary to wander into my own brain and do some things of my own. For example I have chosen not to remove some of the planking on the port and starboard sides of the bow to make way for a "scrap" block of wood from which one is supposed to carve out a 1/4" hole for the bowsprit. I have decided to cut the 1/4" hole out of the existing planking which I have found (so far) to be rigid enough to support the bowsprit. I have used plenty of Elmer's wood filler and will use some more before the first coat of paint is applied. I also constructed the transom differently than the practicum suggests; I did not strip away and replace any planking but merely carved out the transom from a piece of balsa wood. I don't see any unusual abuse happening in the future in the area of the transom and so I feel safe in the way with the material I have chosen With the exception of a couple of quick look at the kit's plans for reference only, I have not used the plans or the direction manual at all. Now that doesn't mean I won't in the future as there is much detail starting with the deck furniture which happens after the hull is painted.. I have added some more pictures as to where I am and hope to have more progress during the week. I wish you all a great evening. Best, Jerry


-
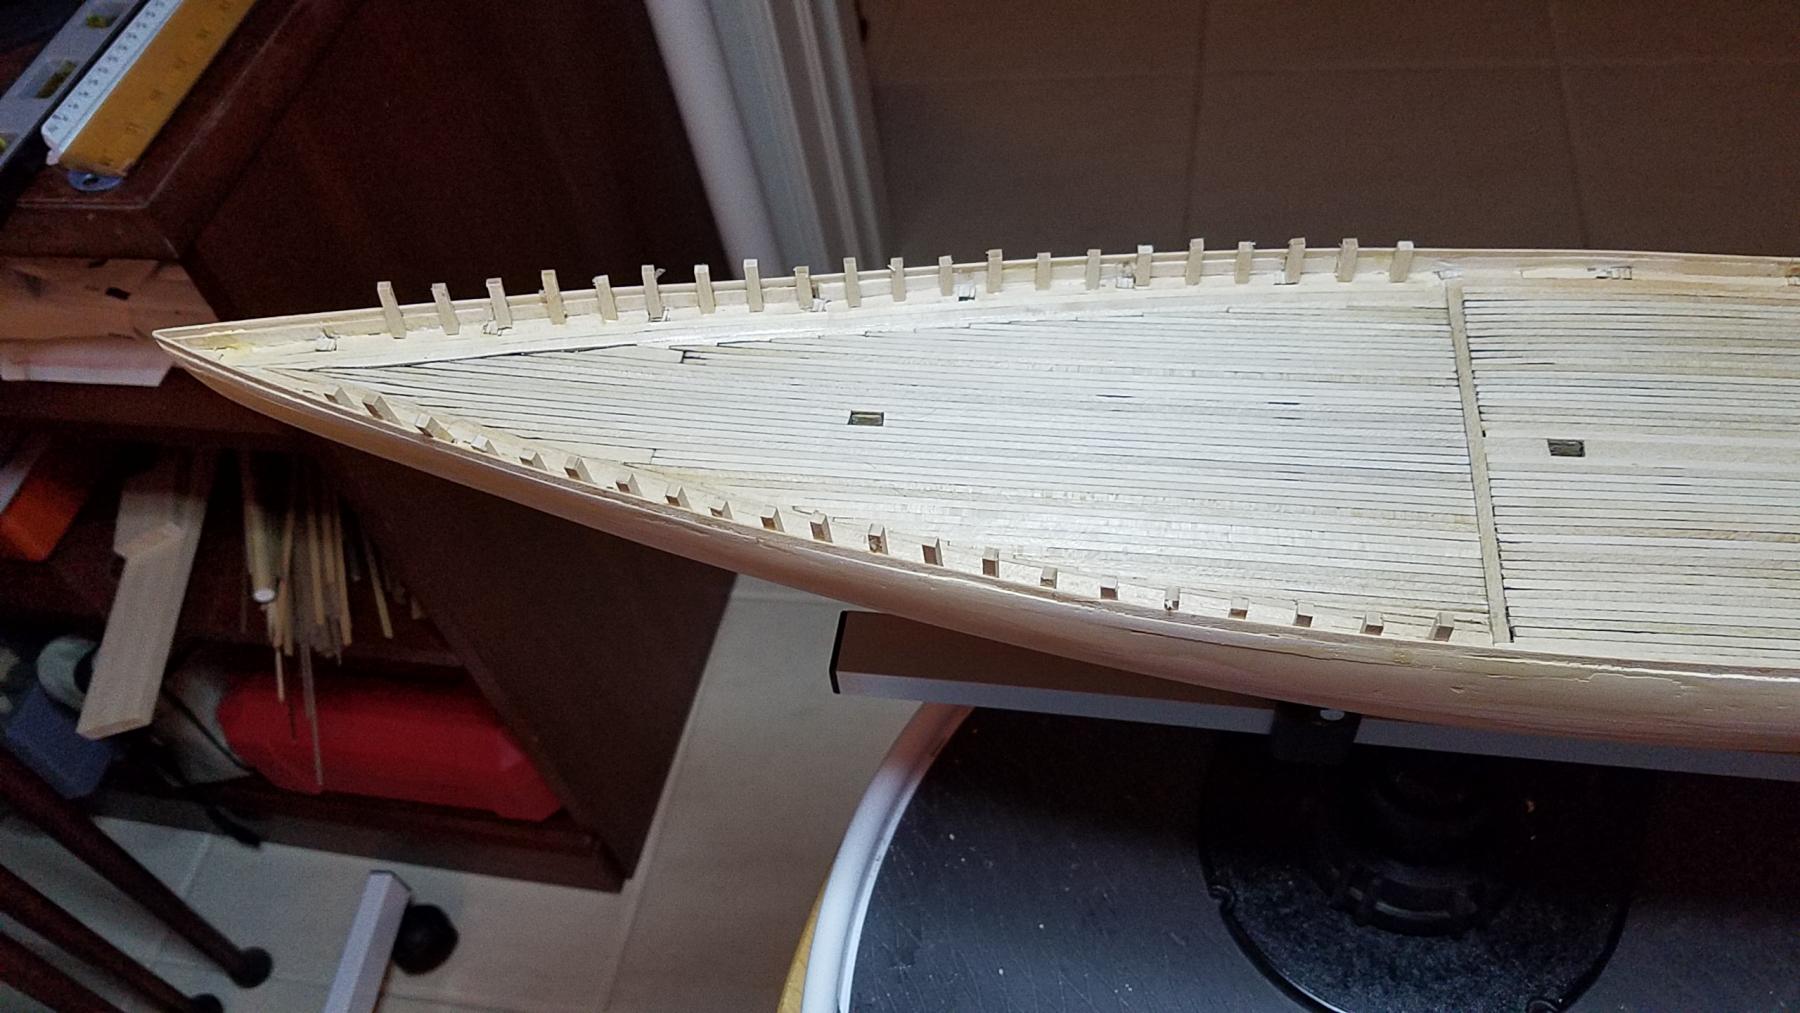
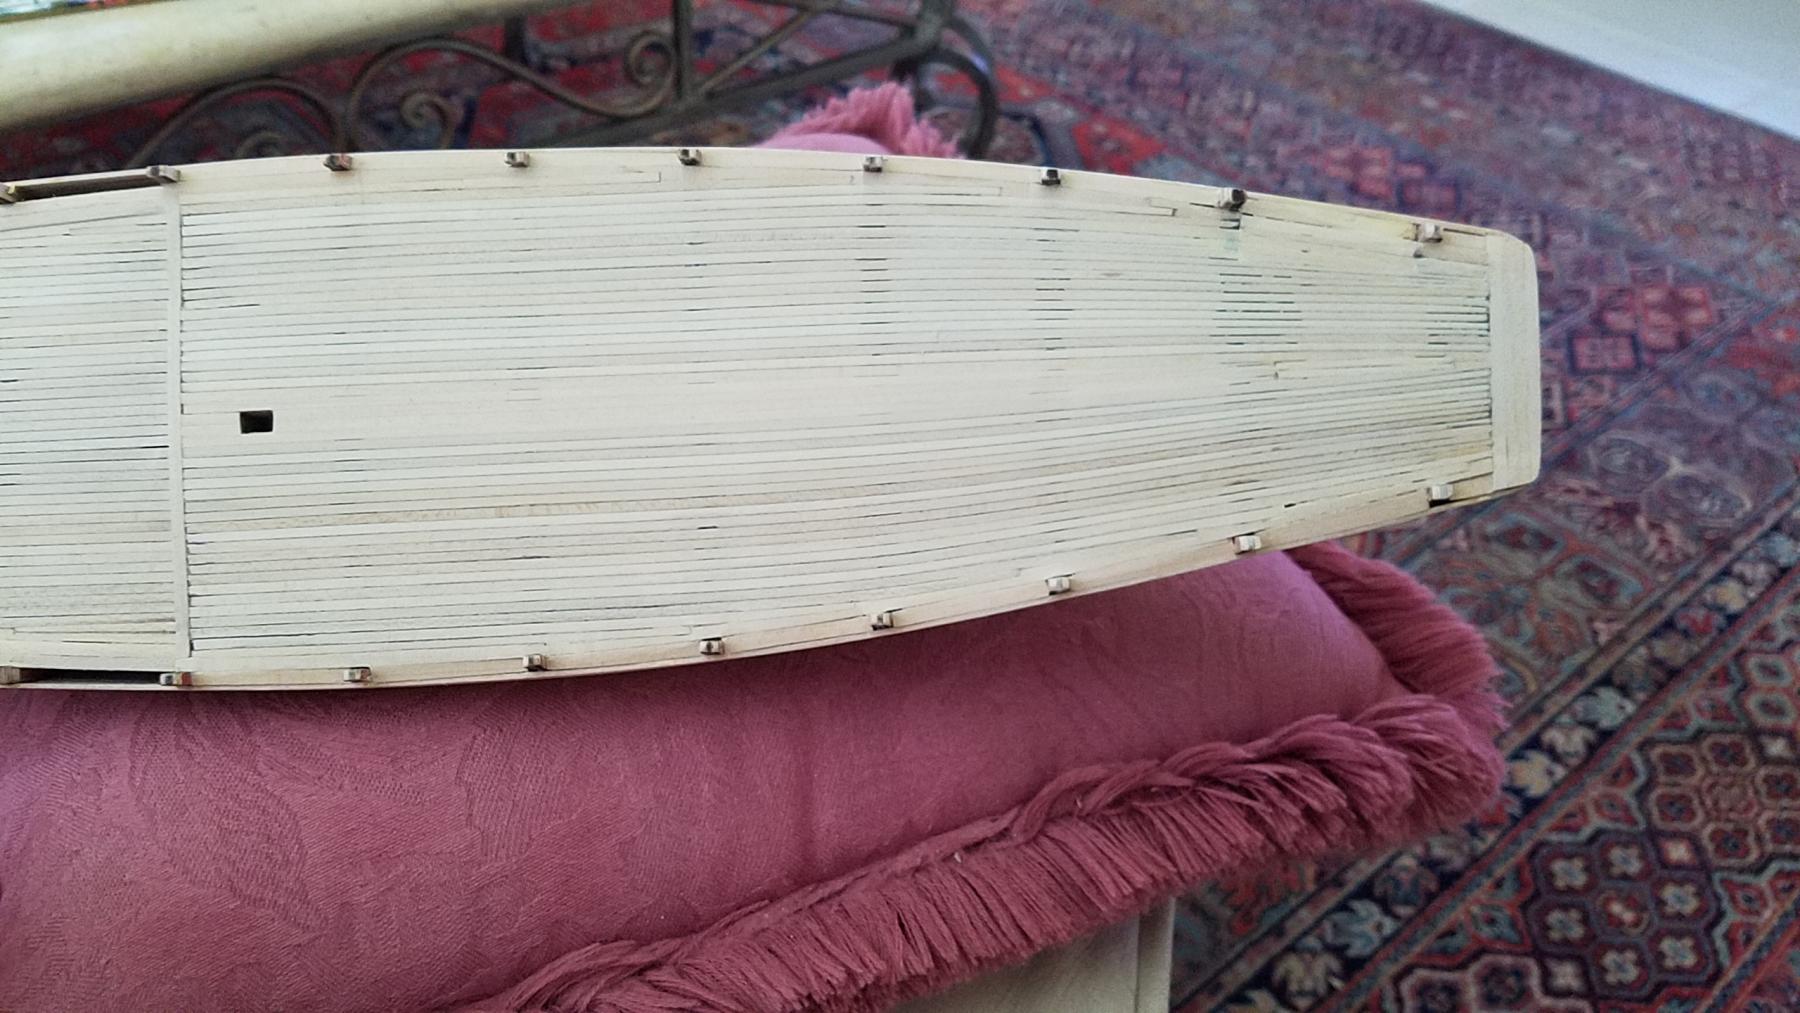
Good morning Lawrence.. Nice to hear from you again and to receive a welcome word or two. Thanks for your remarks regarding the timbers. I do agree that the addition of these parts makes the hull look more realistic but another good thing is the additional support the bulwarks get. The bulwarks were very flimsy until the addition of the false timbers. Now it's painting time. The waterways will be painted gray and the timbers and bulwarks white. So, it's off to the paint booth (fictional of course) and we'll see what happens. Charlene says hello back to you guys and sends her best. Jerry
-
Hello Dr. Per.. Long time no see. Hope all is well... Thanks for the compliment and I hope you have a great evening. Best, Jerry
-
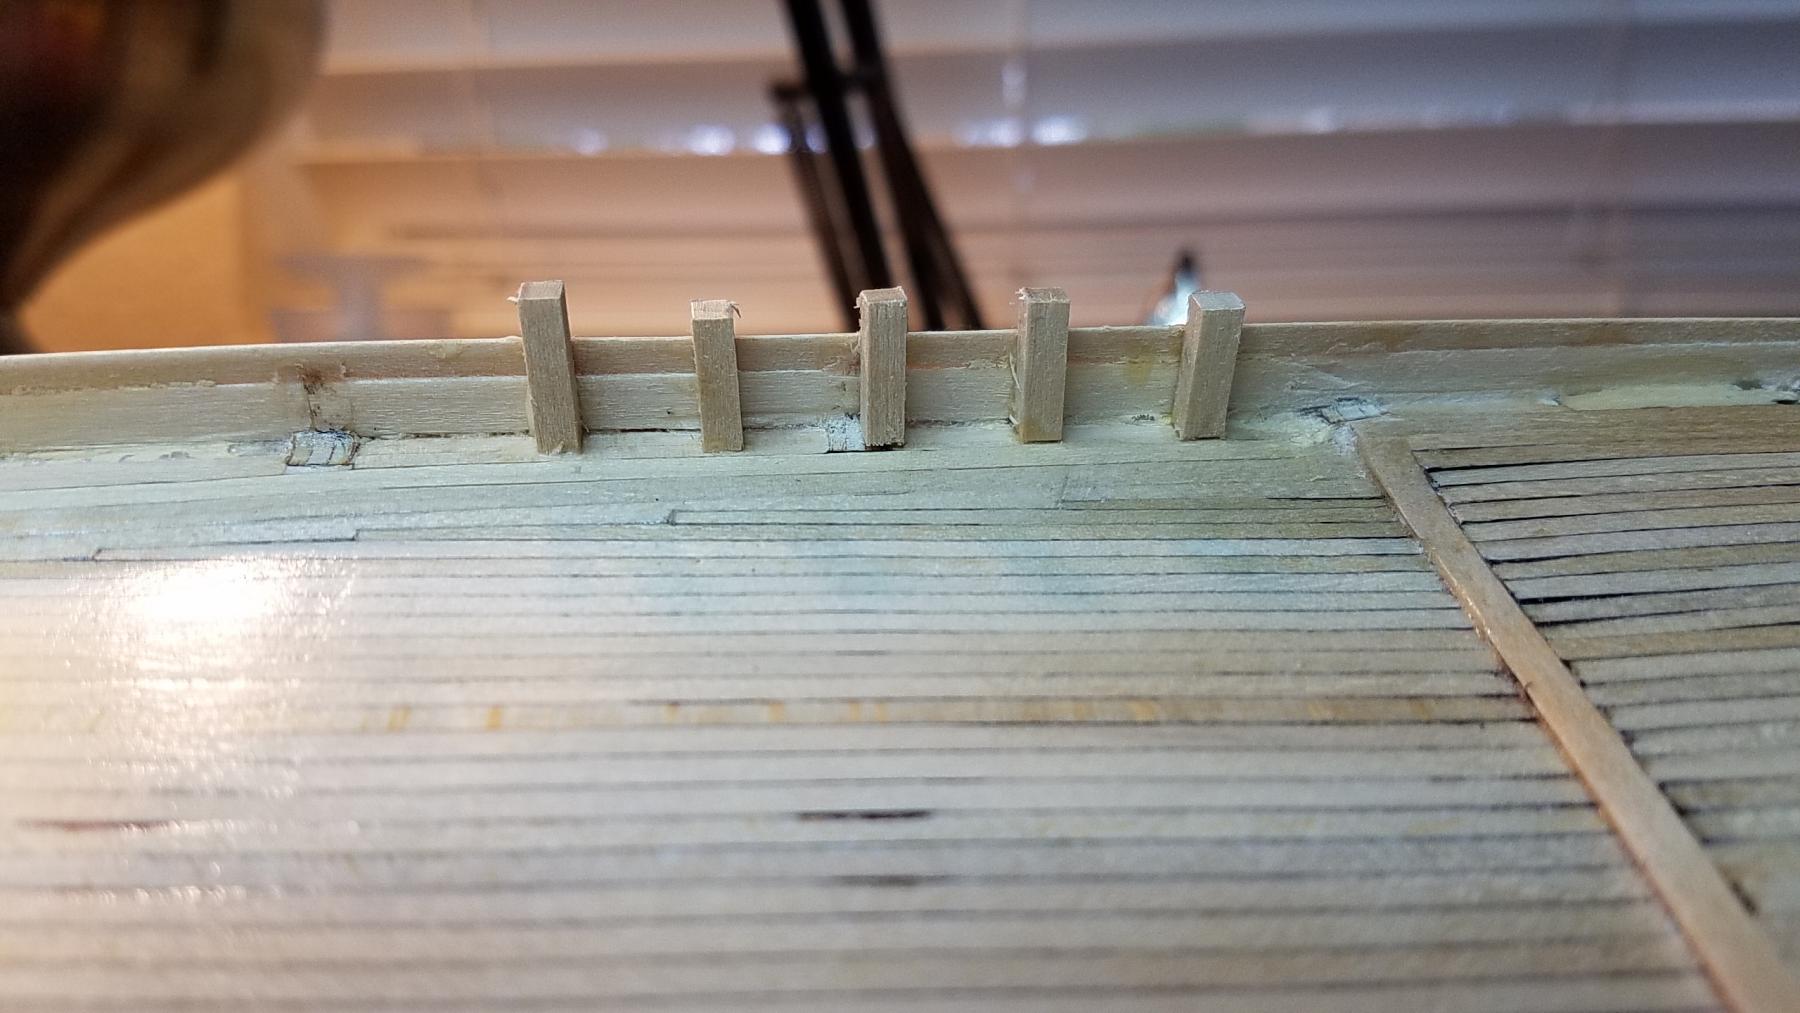
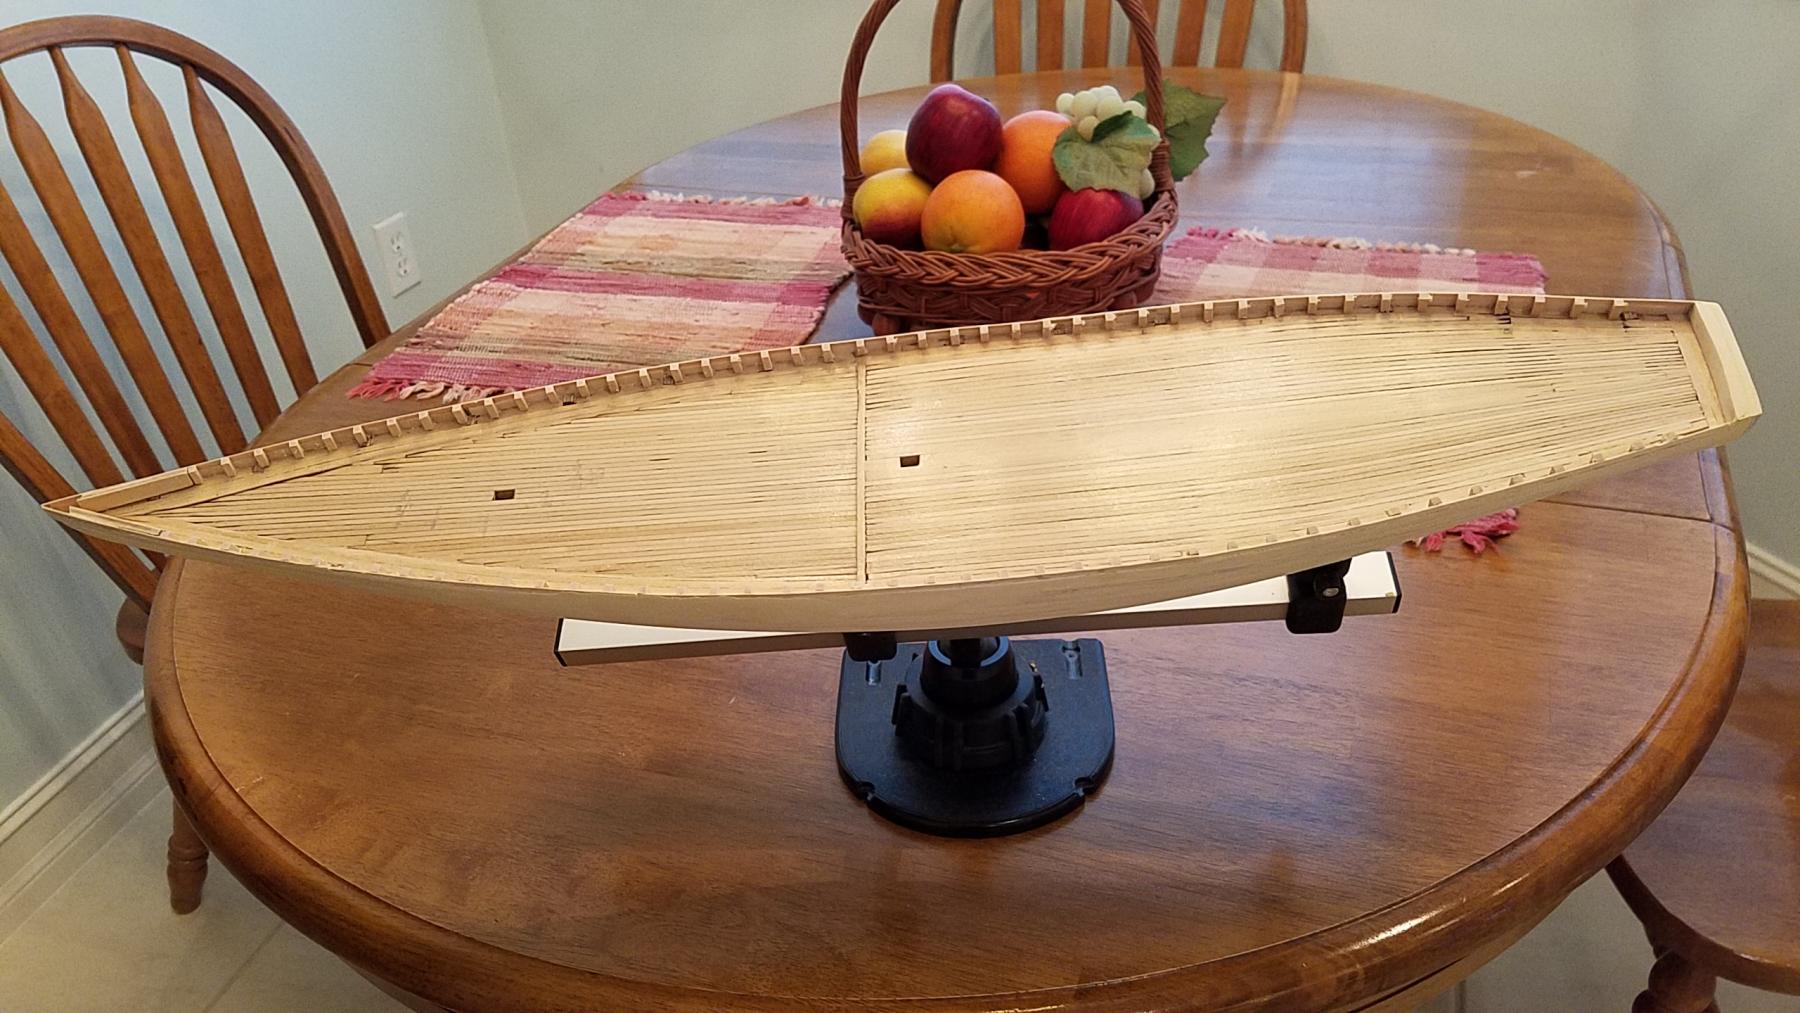
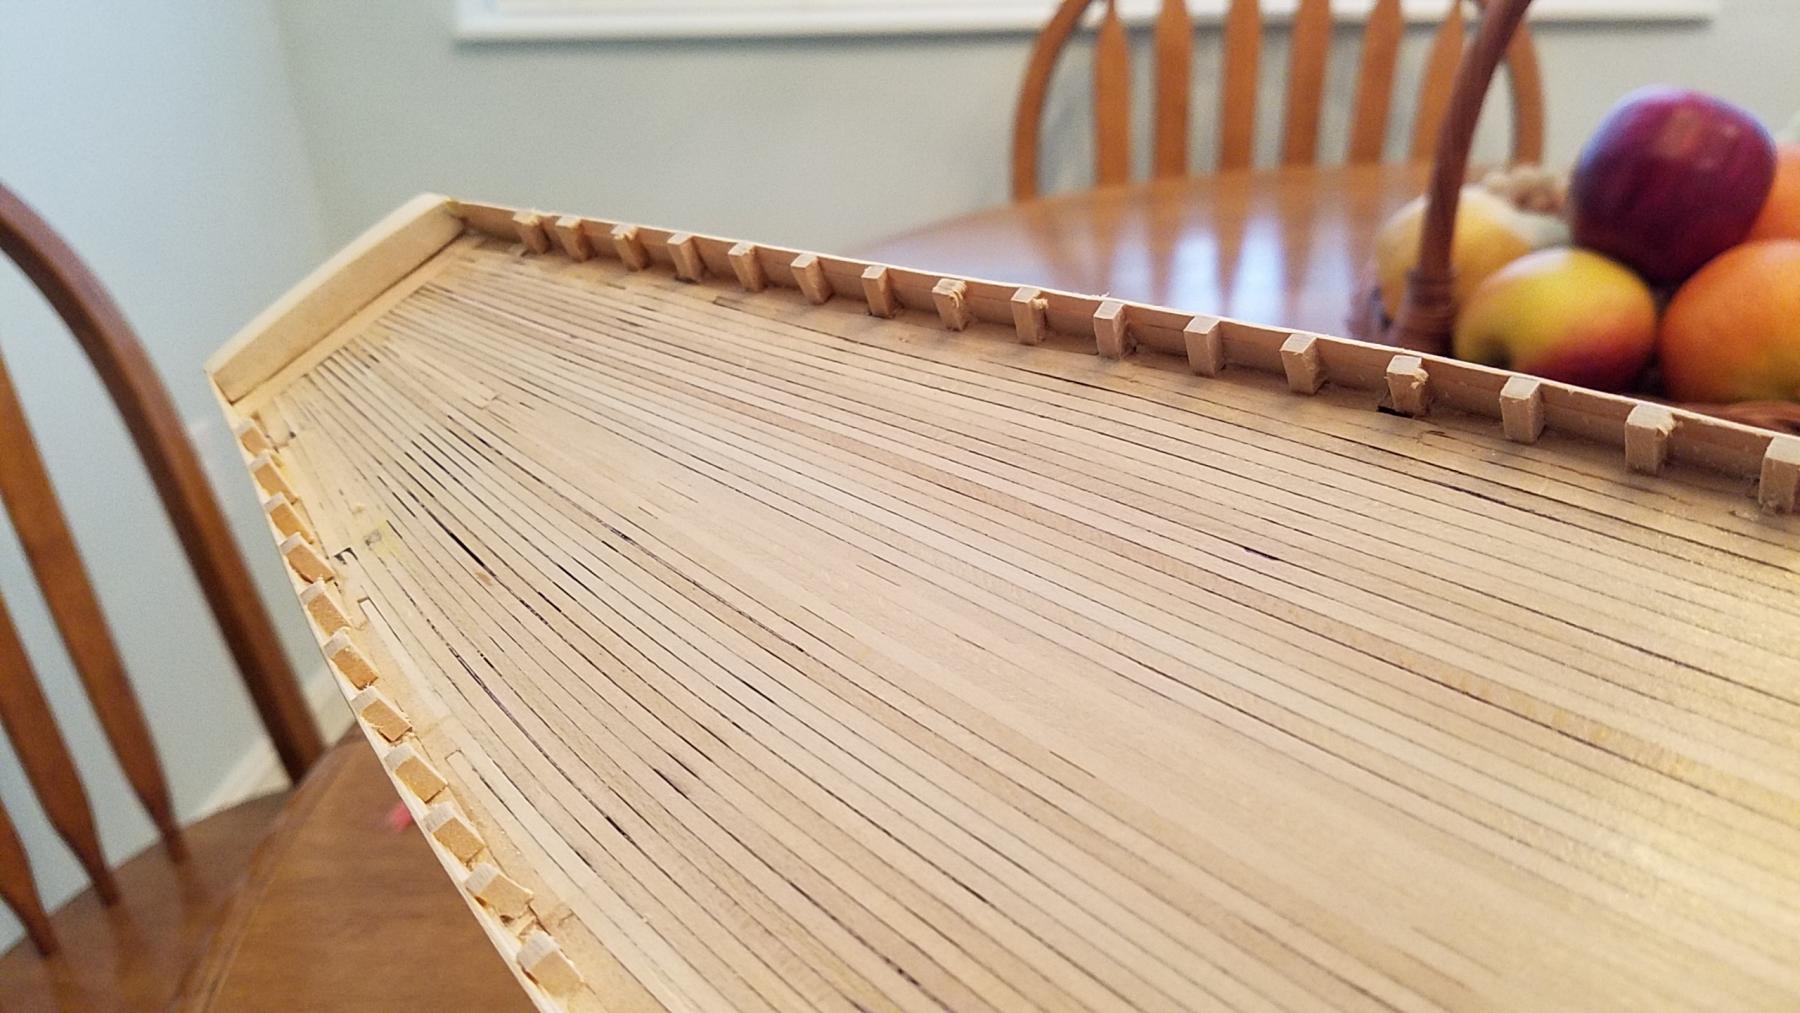
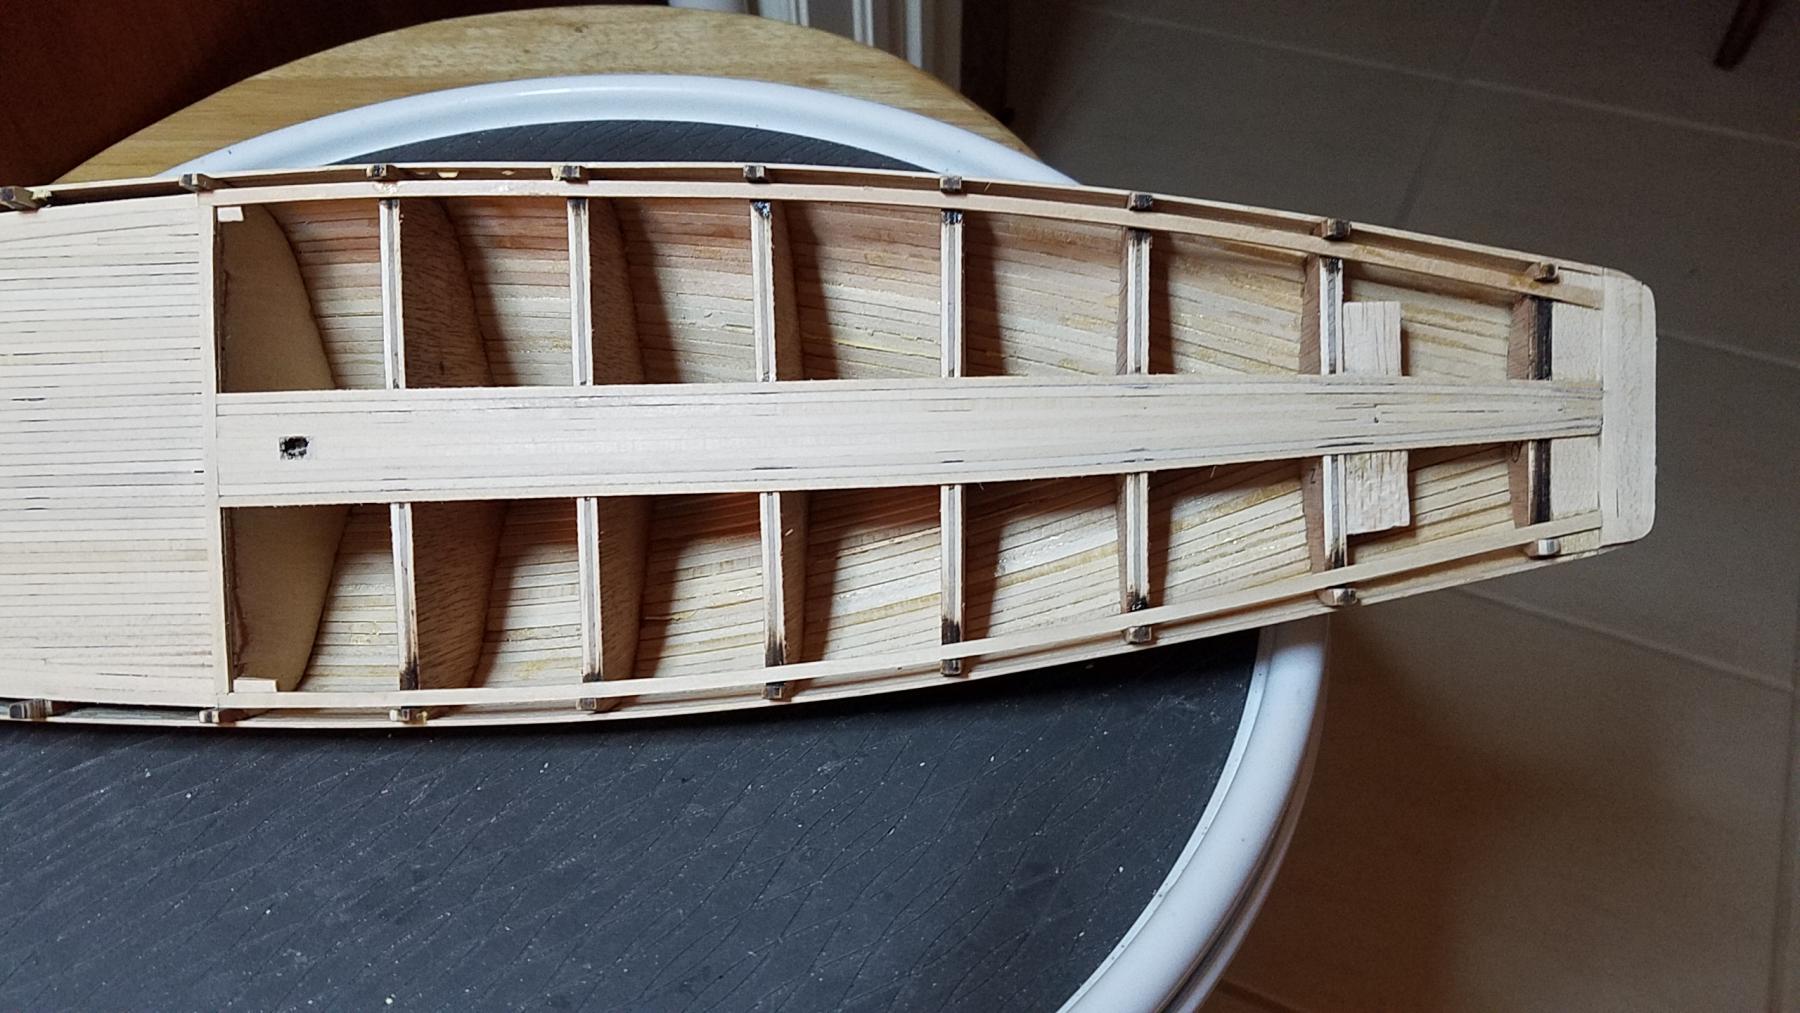
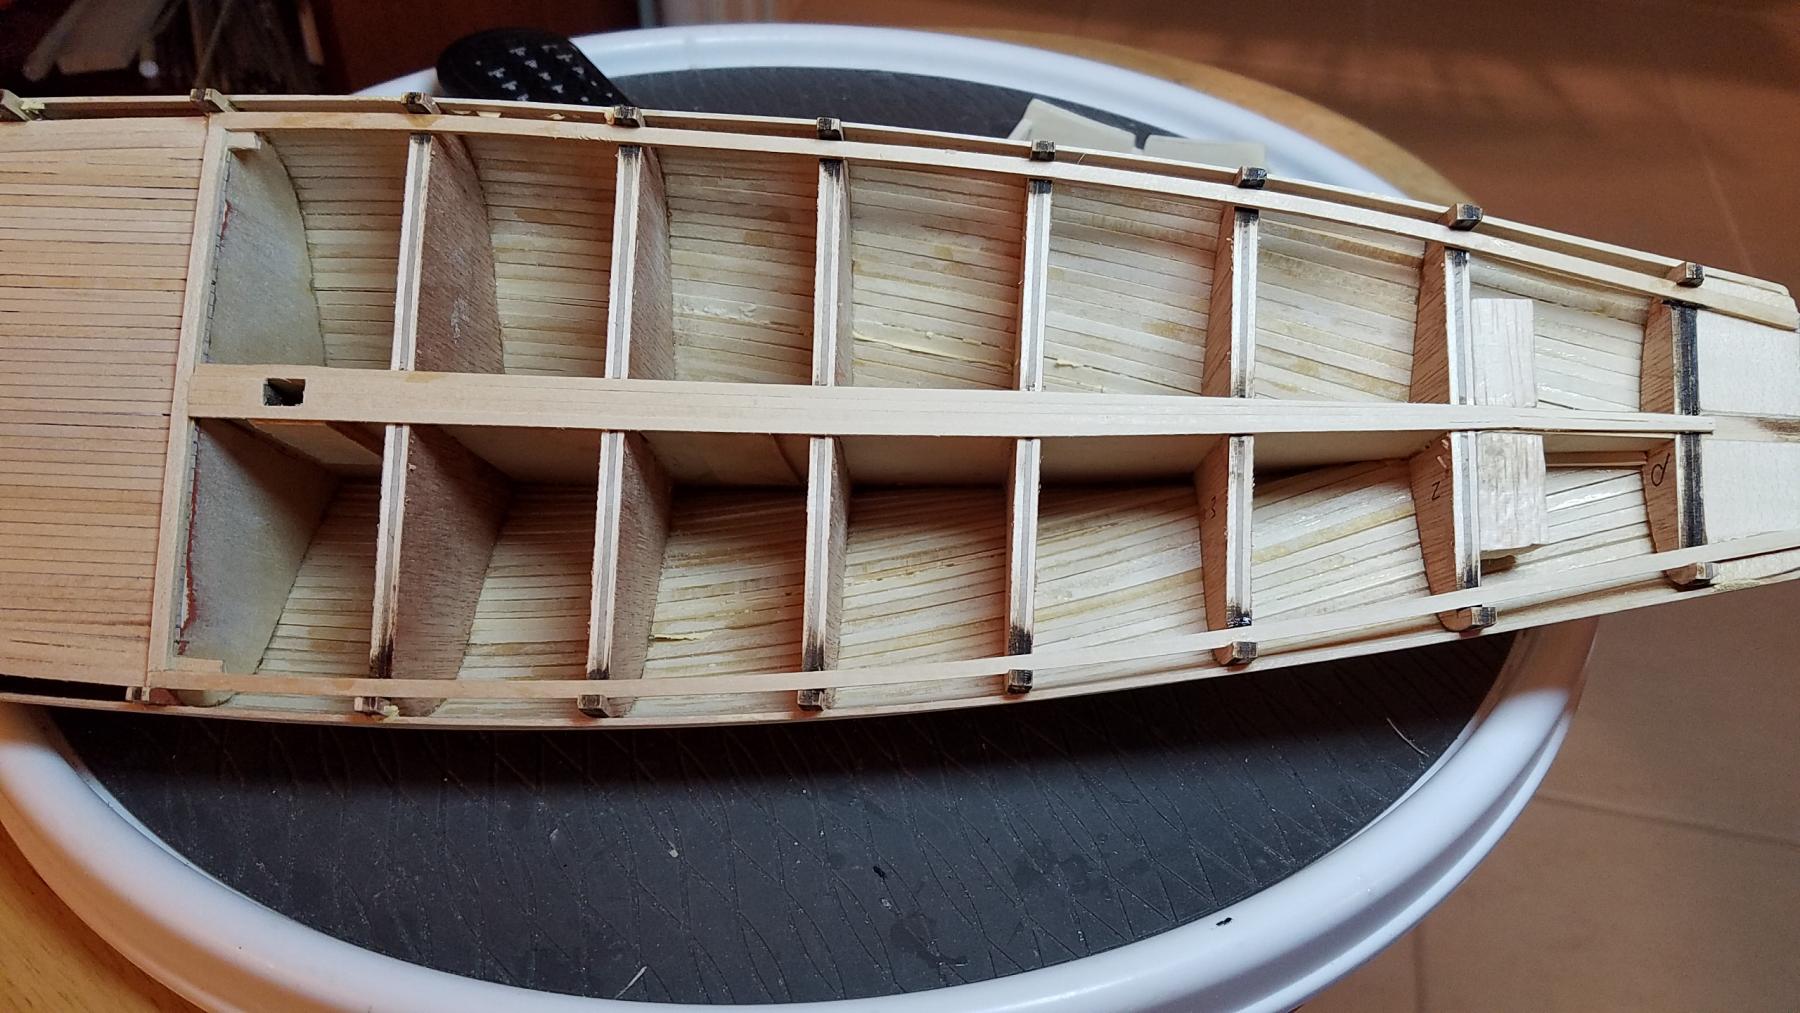
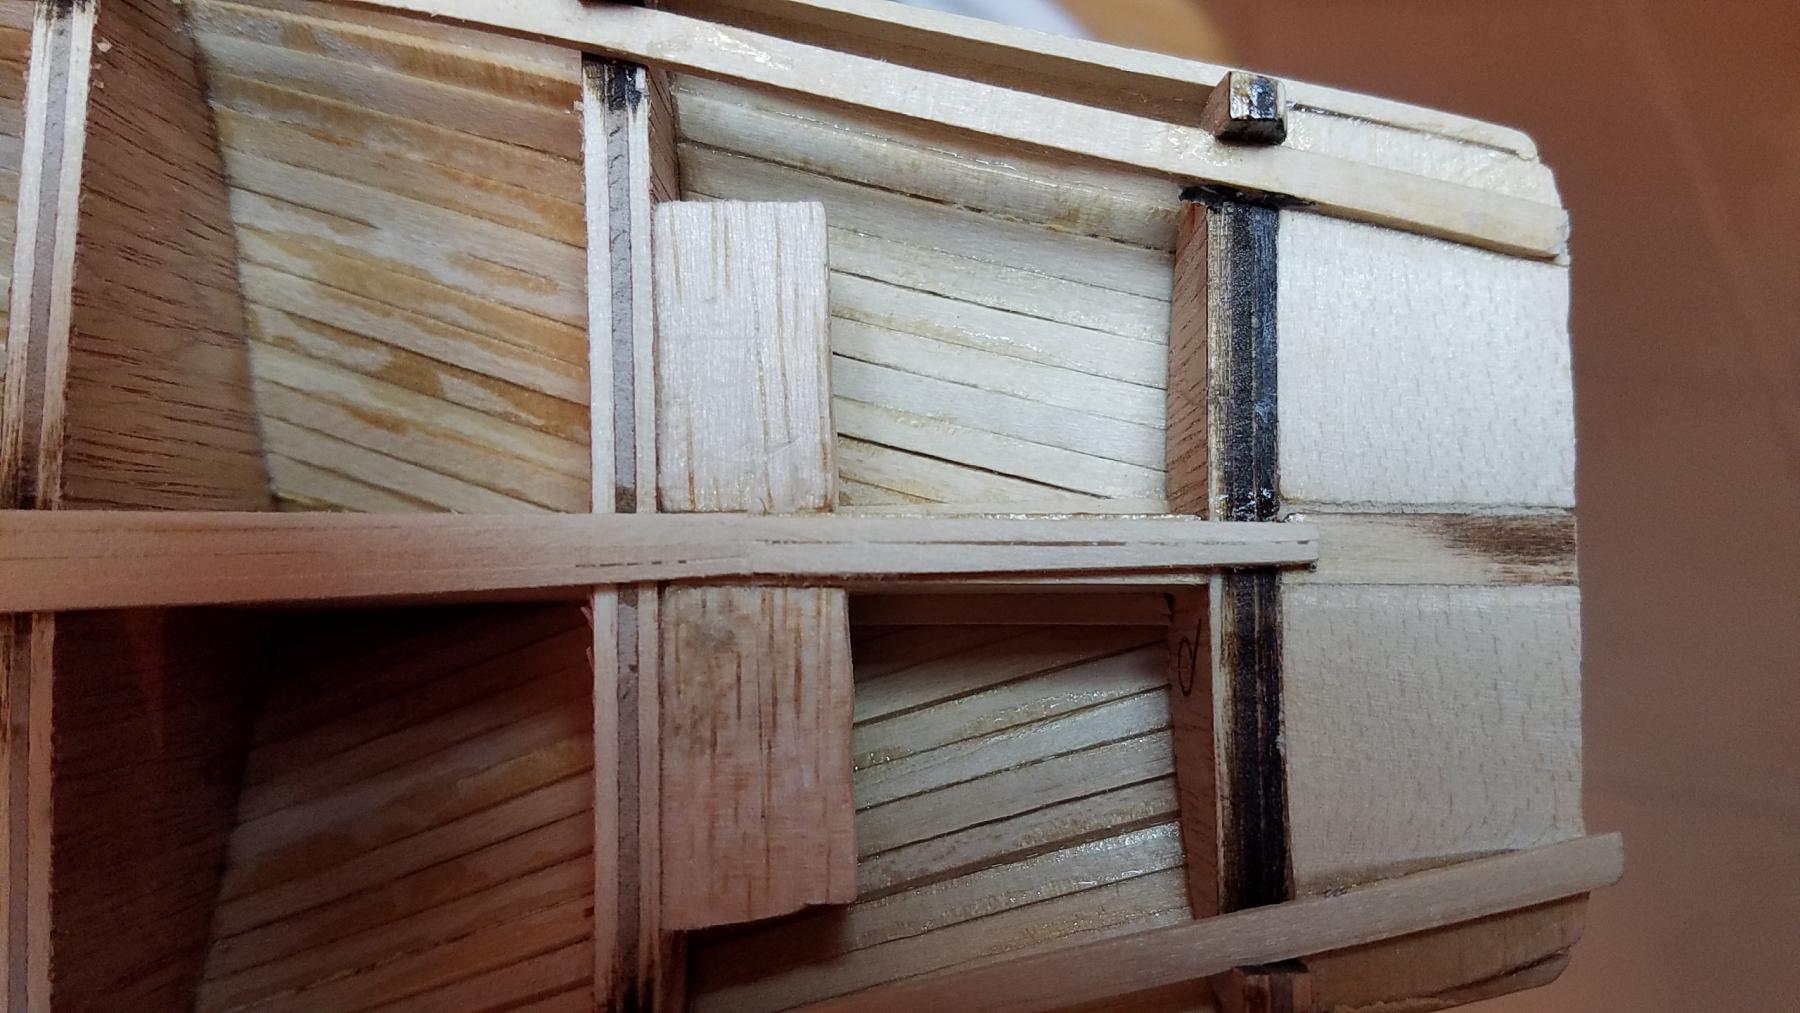
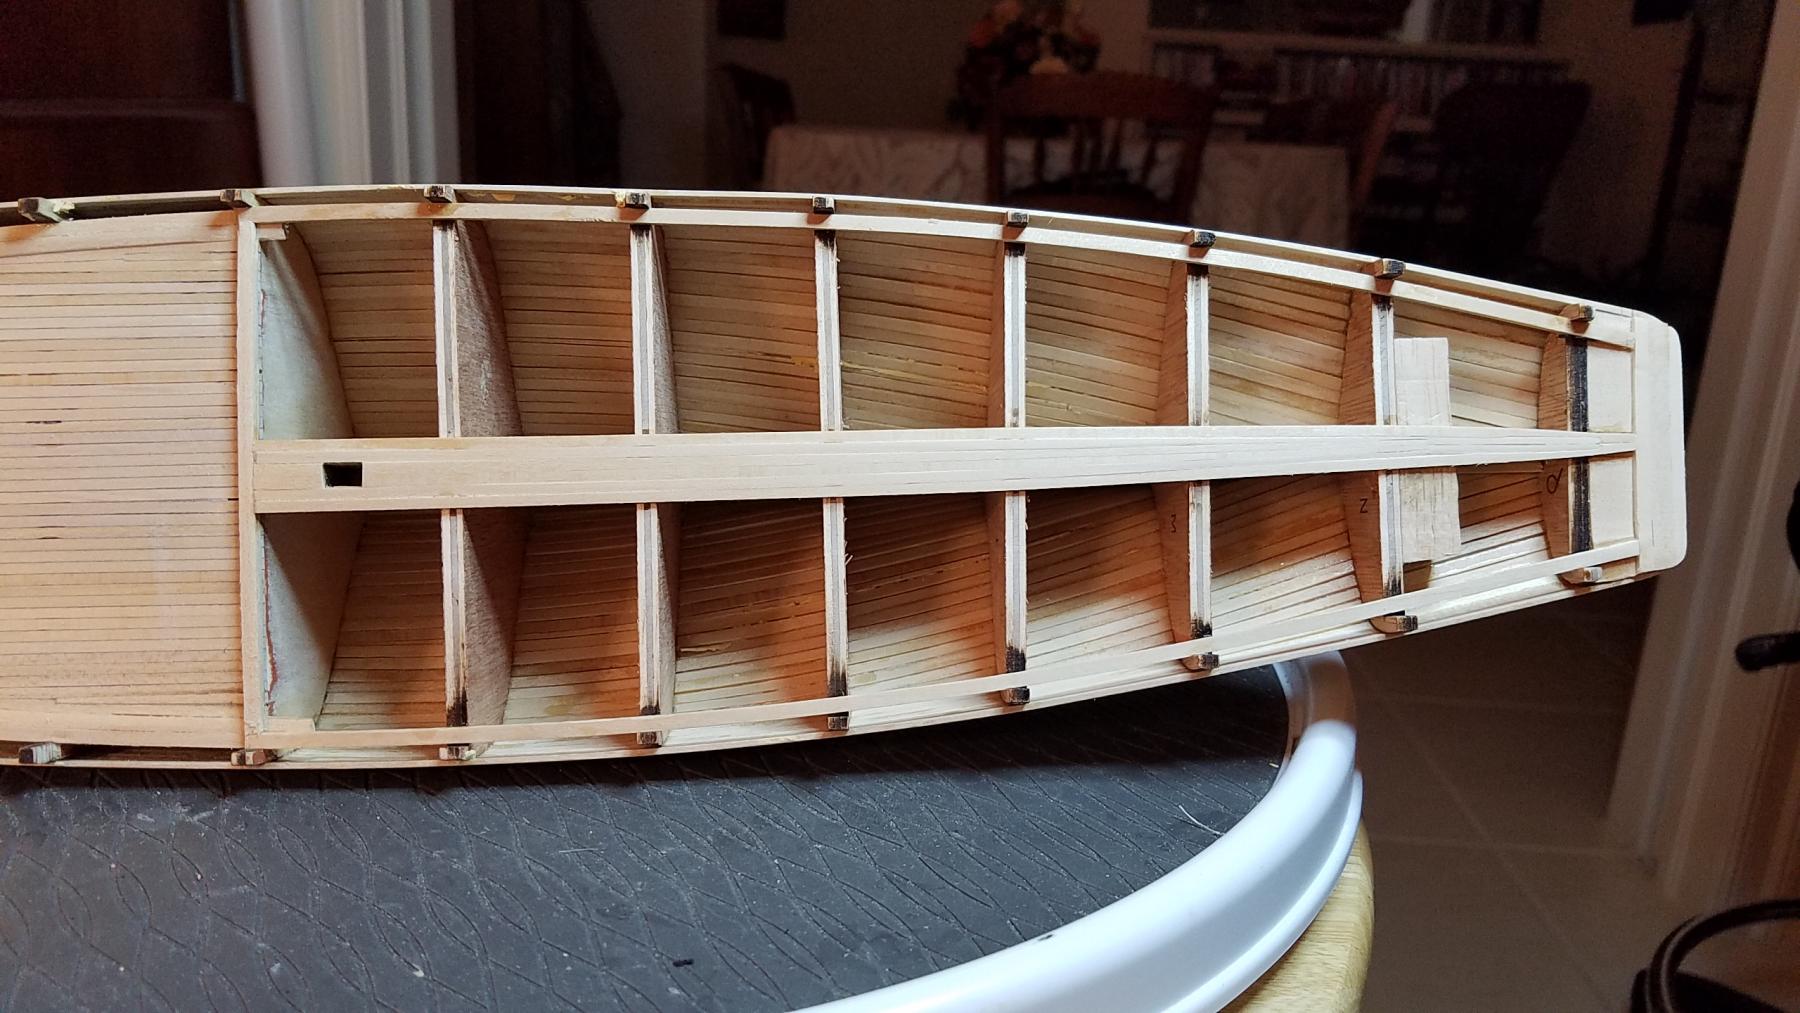
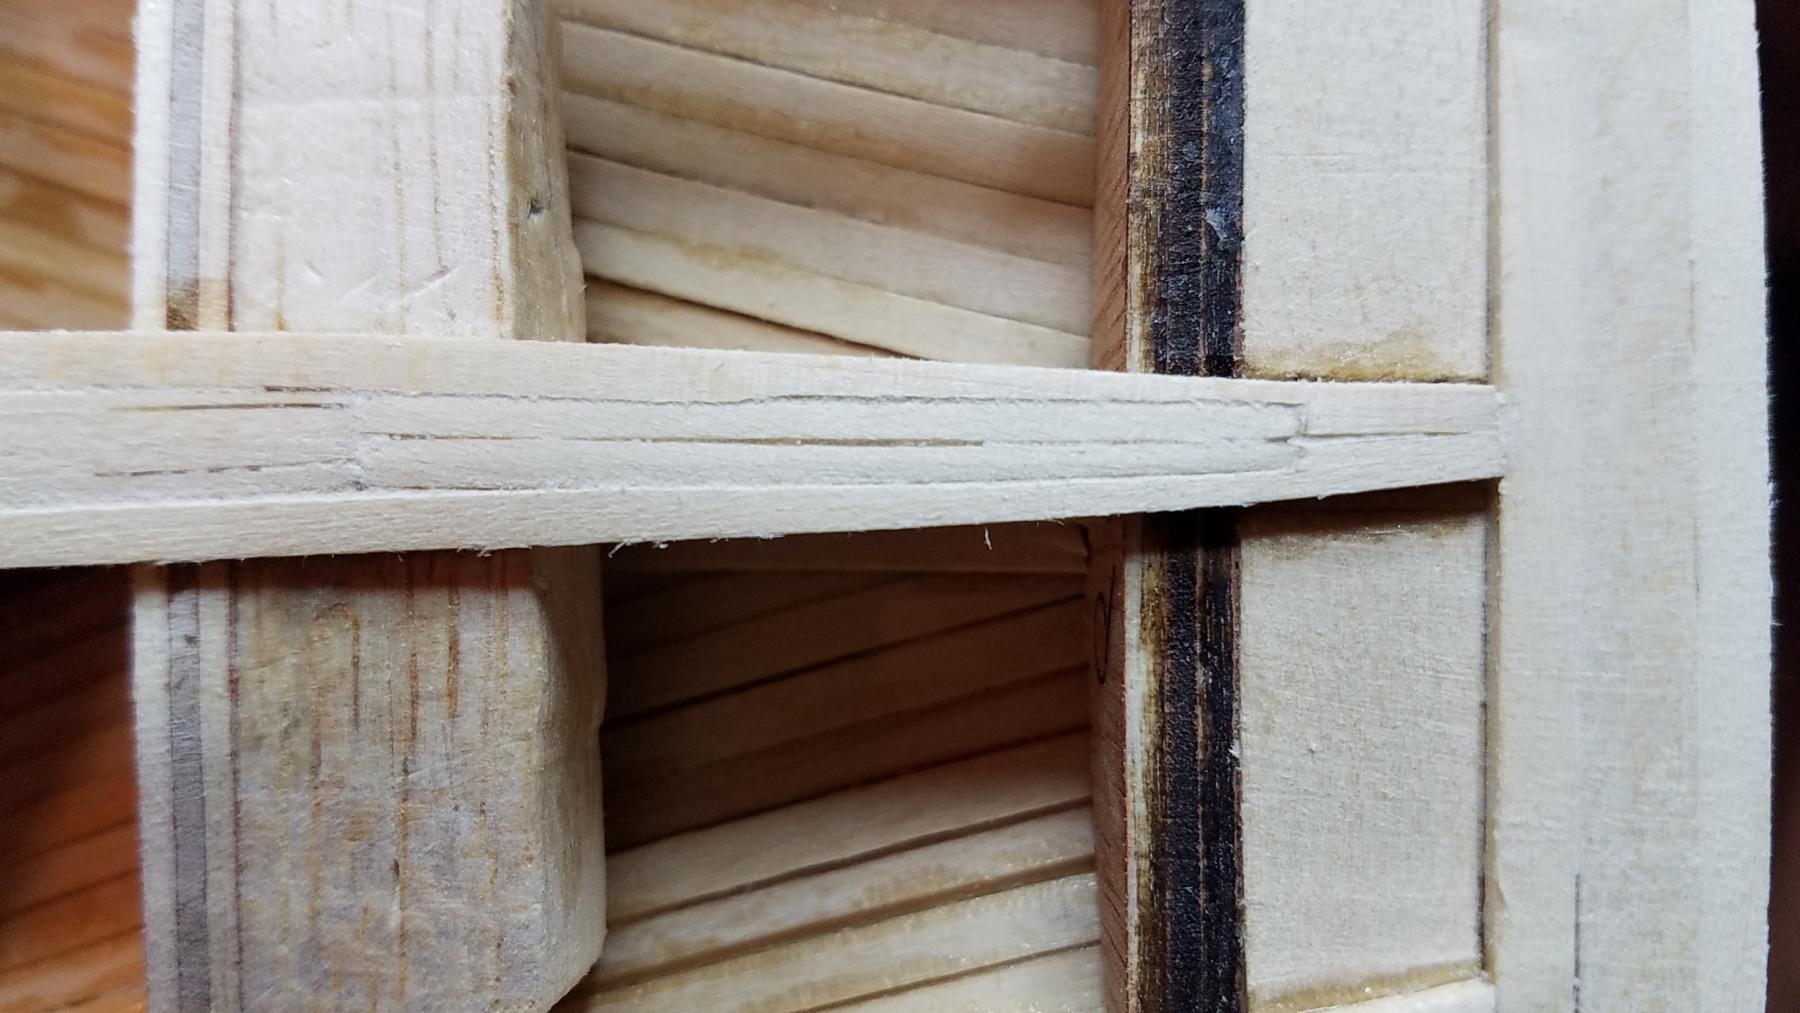
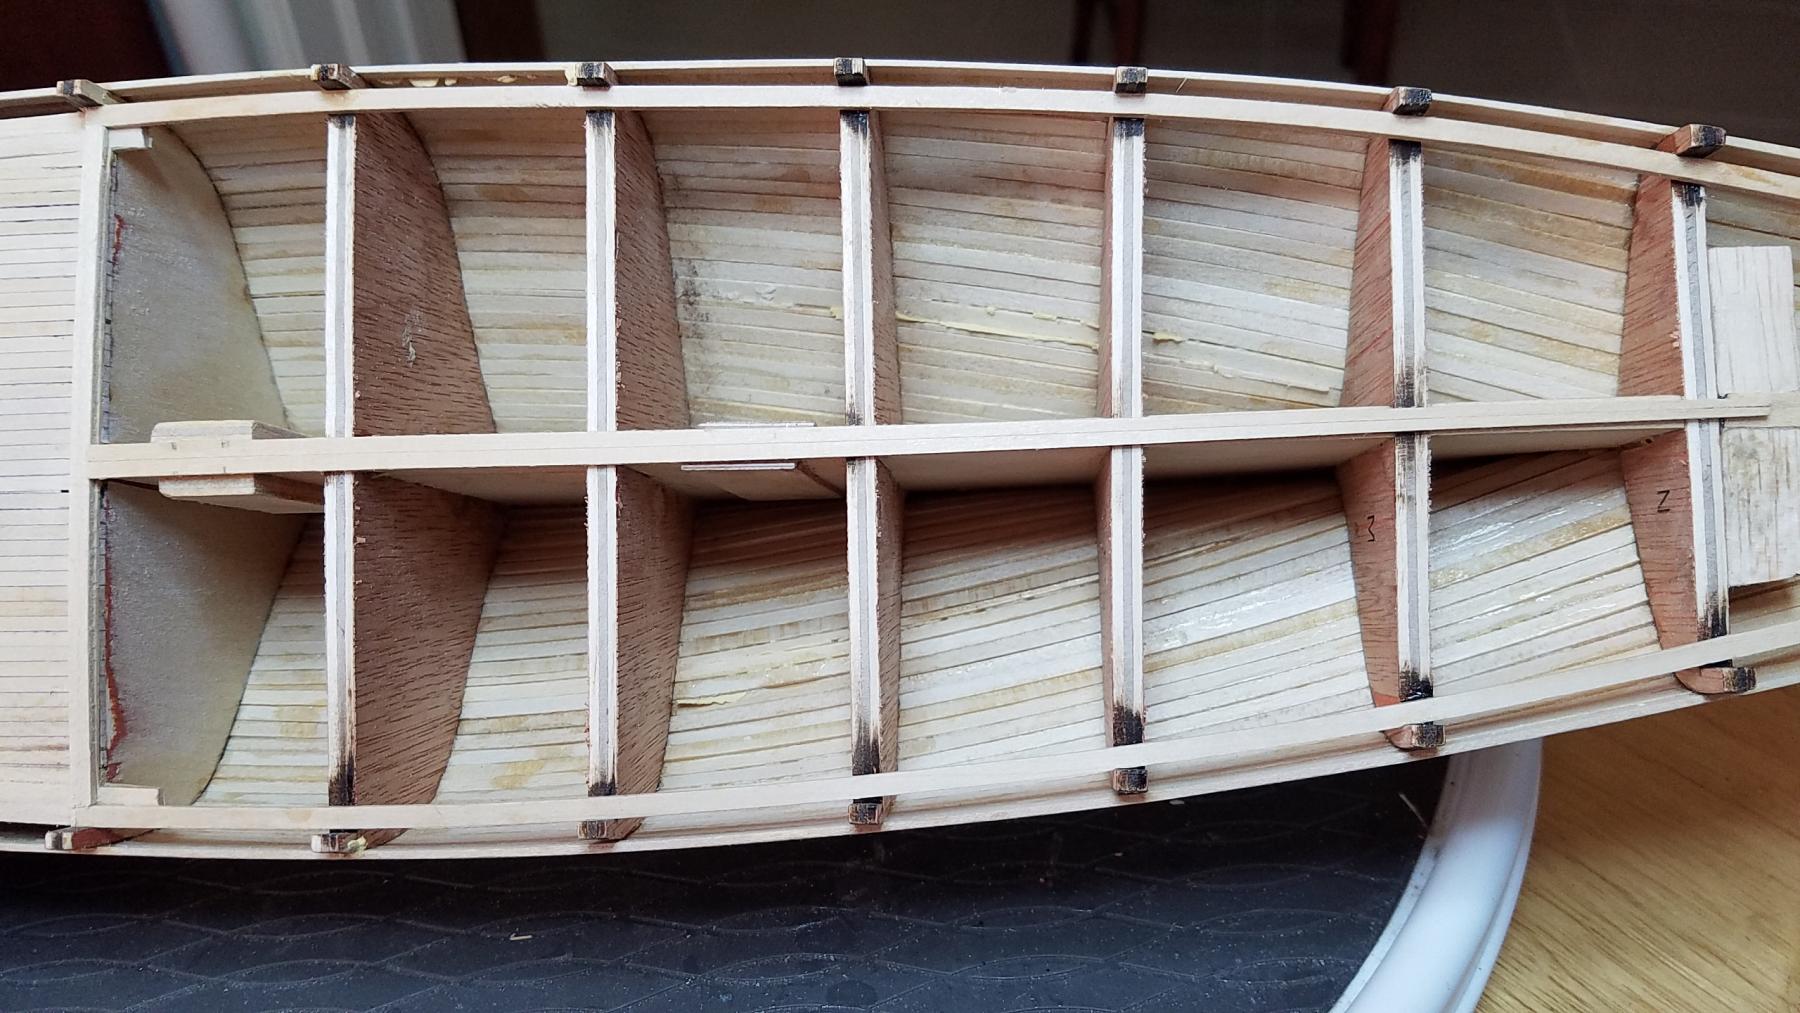
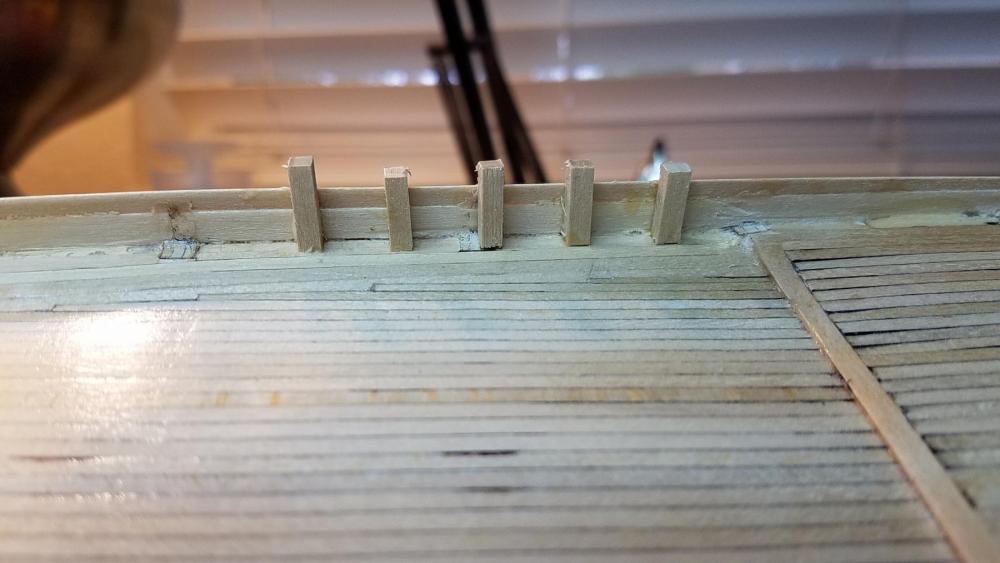
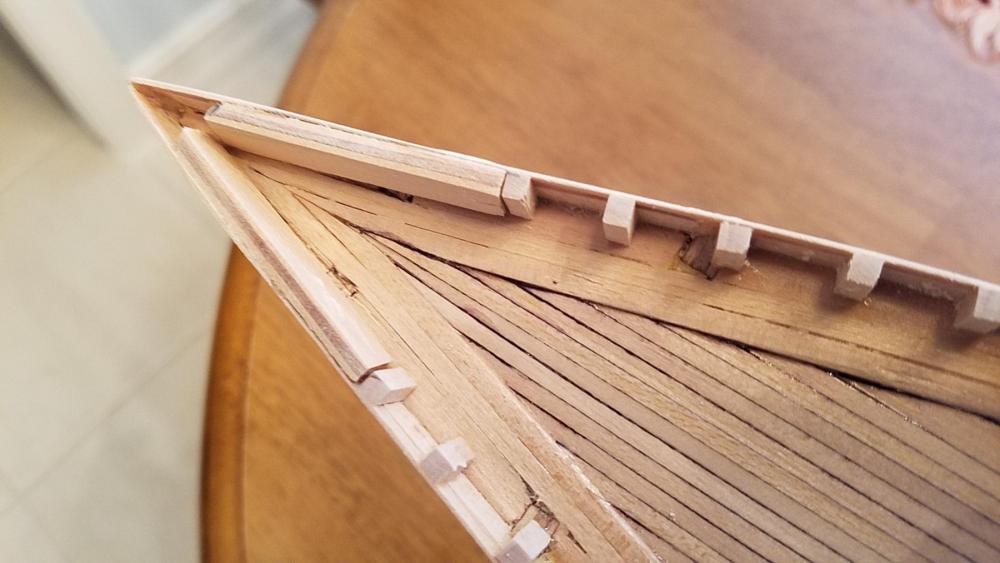
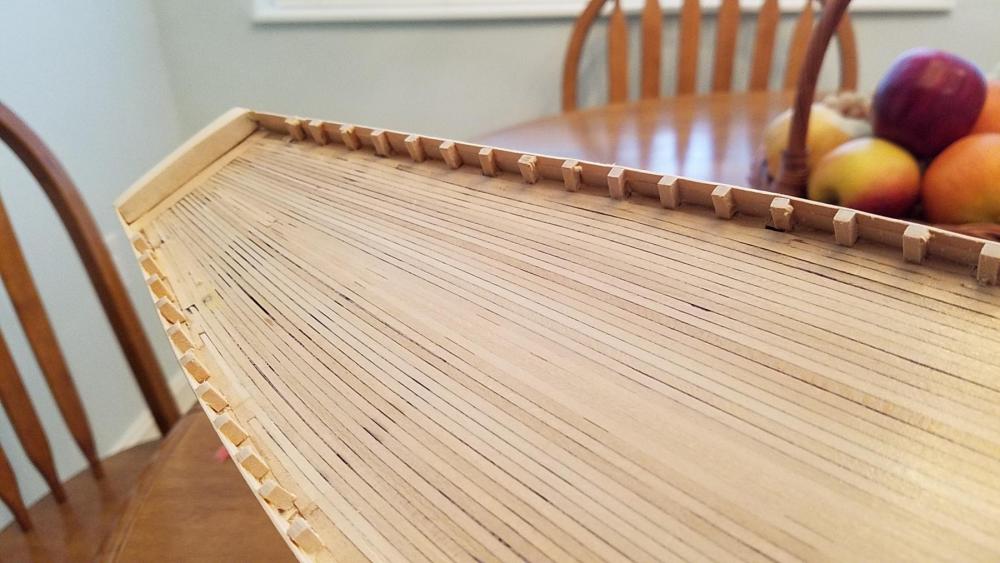
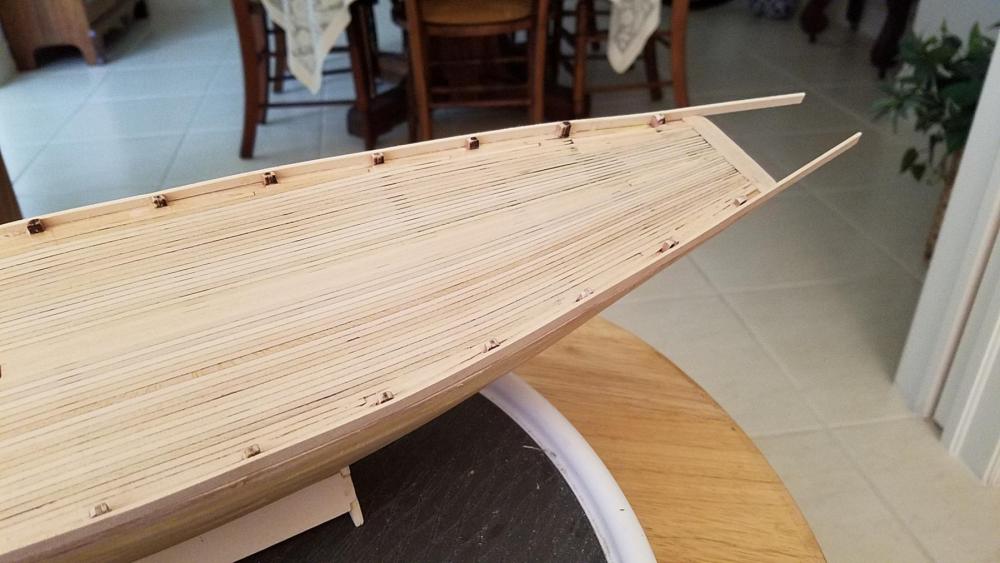
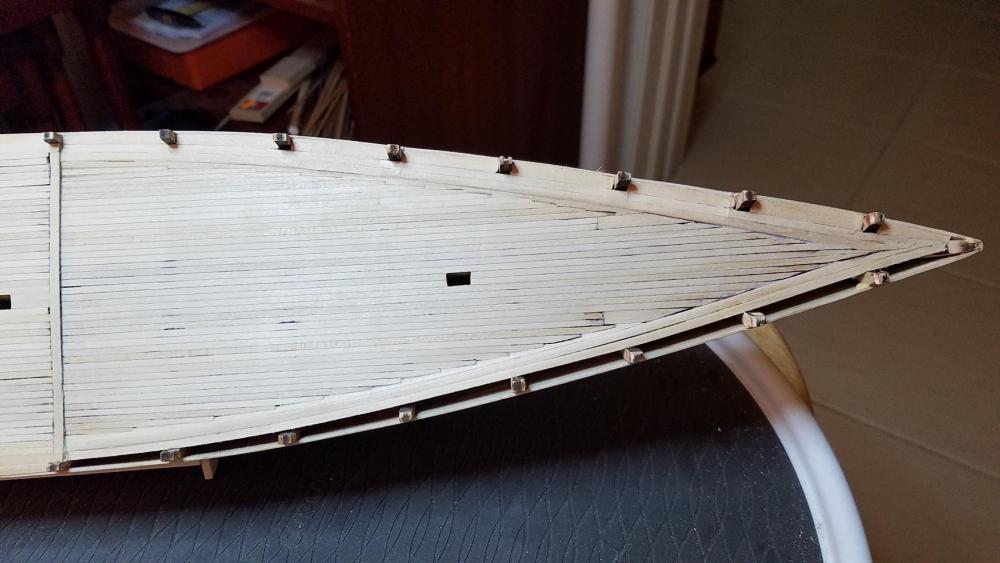
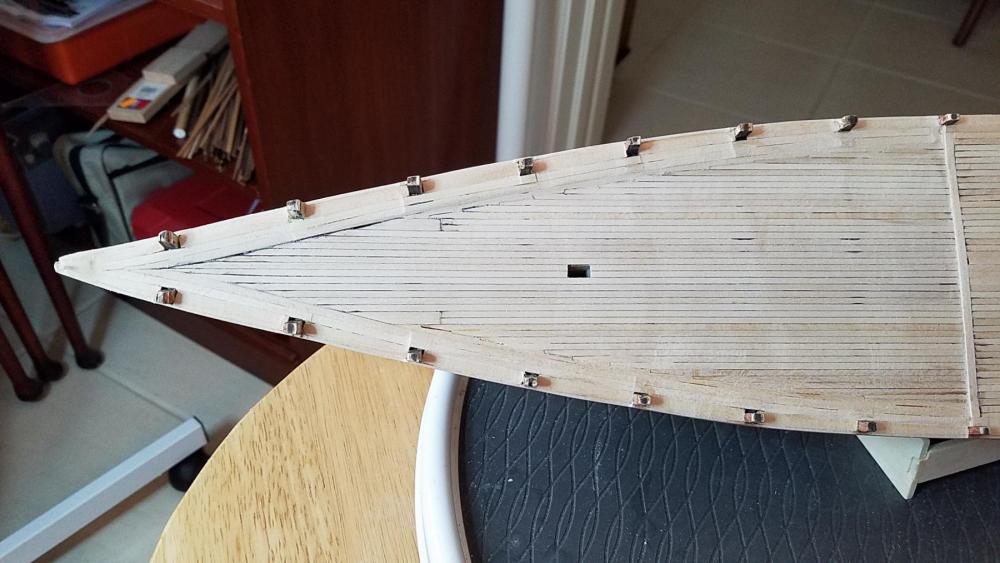
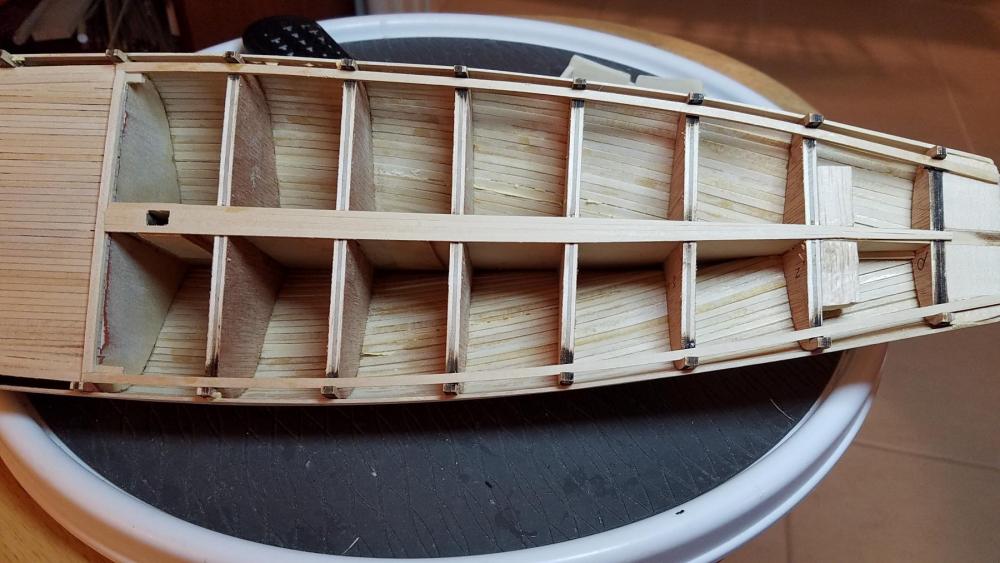
Hello Everyone. Another day in the dry dock and some more work completed. Today we have finished installing and finishing all of the false timbers. It looks like this Bluenose is coming along and will be sent to the paint shop as the hull is ready for painting. Here are the final pictures of the false timbers installed and trimmed to proper size ready for capping when the time comes. Hope everyone is having a great day. Best, Jerry


-
Good afternoon everyone.. I have removed all the frame toppings , refinished the deck with another coat of varnish and am ready to install the false timber tops. It may appear that the old frame tops are still present but they are not. There's a color difference that gives that impression. When the waterways and false timbers are painted gray and white, there no longer will be any trace of the old plywood bulkhead tops. The false timbers have been cut and I am now looking forward to gluing them in place. Hope evryone has a great day. Best, Jerry
-
Hello Lawrence. Thank you for being such a great cheer leader; I appreciate your comments. I will start adding the false timbers tomorrow and that should take me to the painting of the hull sometime by the end of the week. It's getting really exciting as the model is really taking shape. hp[e you have had a very nice weekend and my best to Bernadette. Jerryy
-
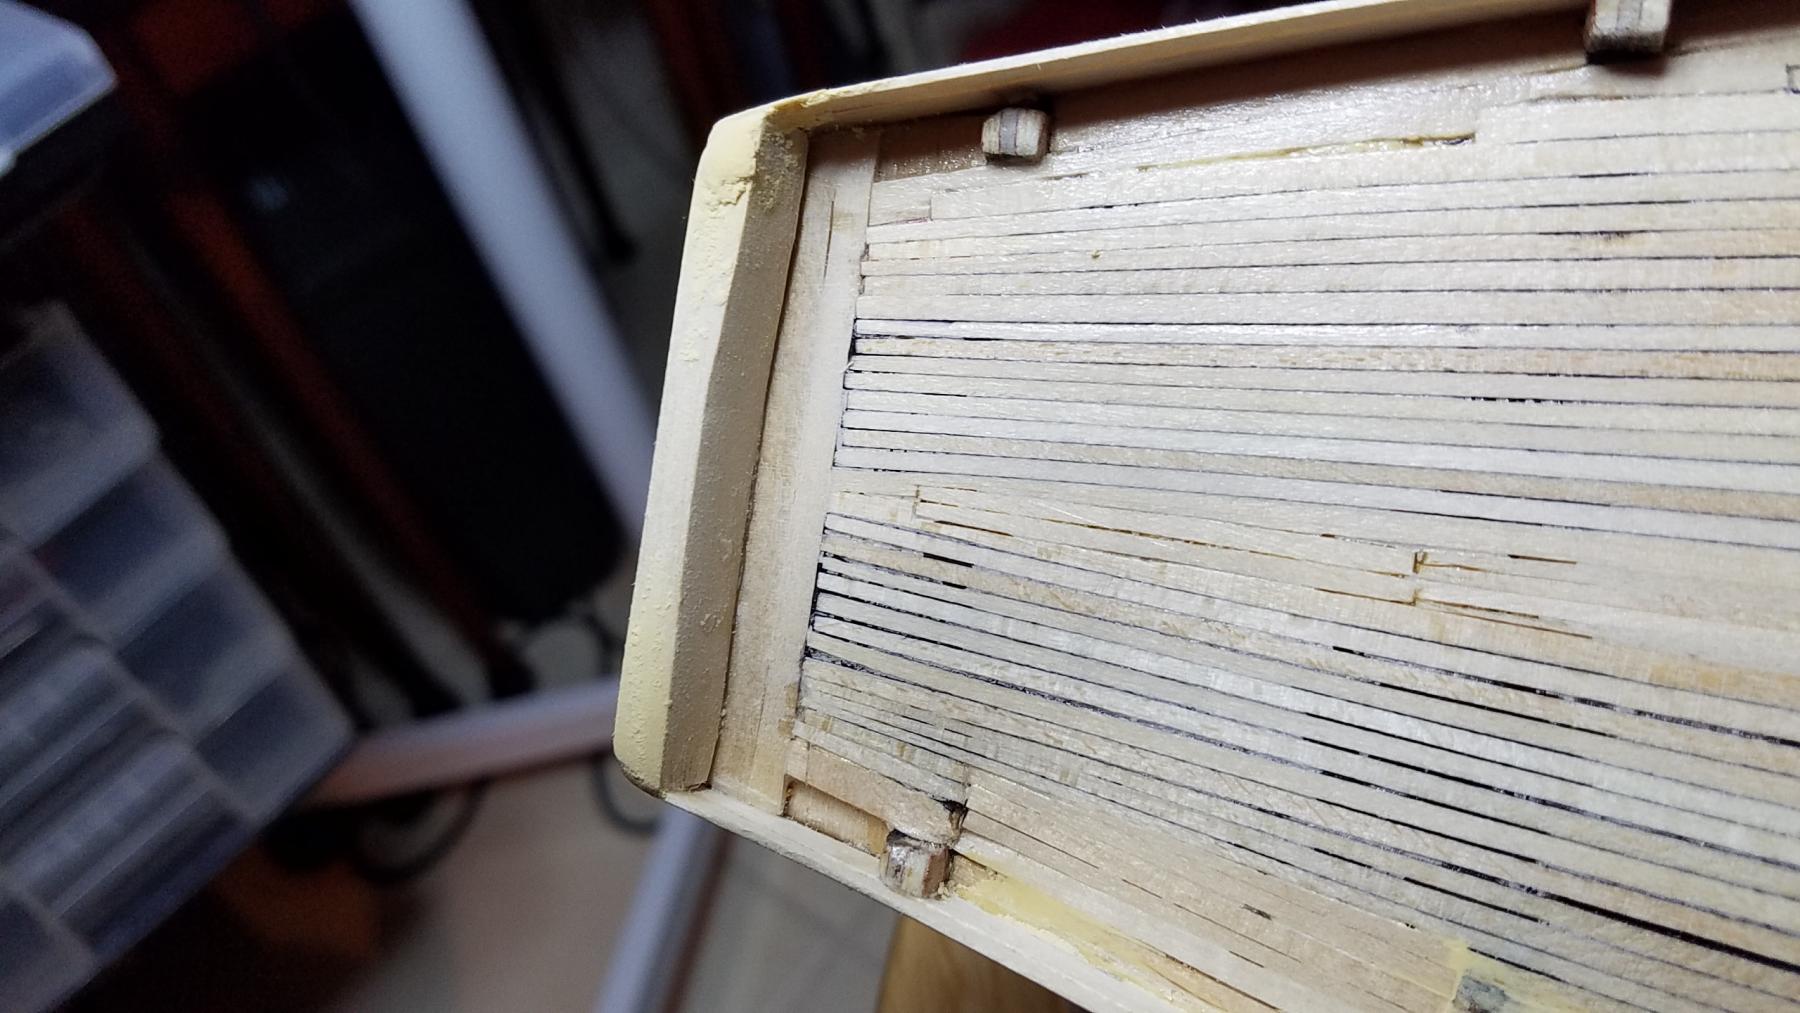
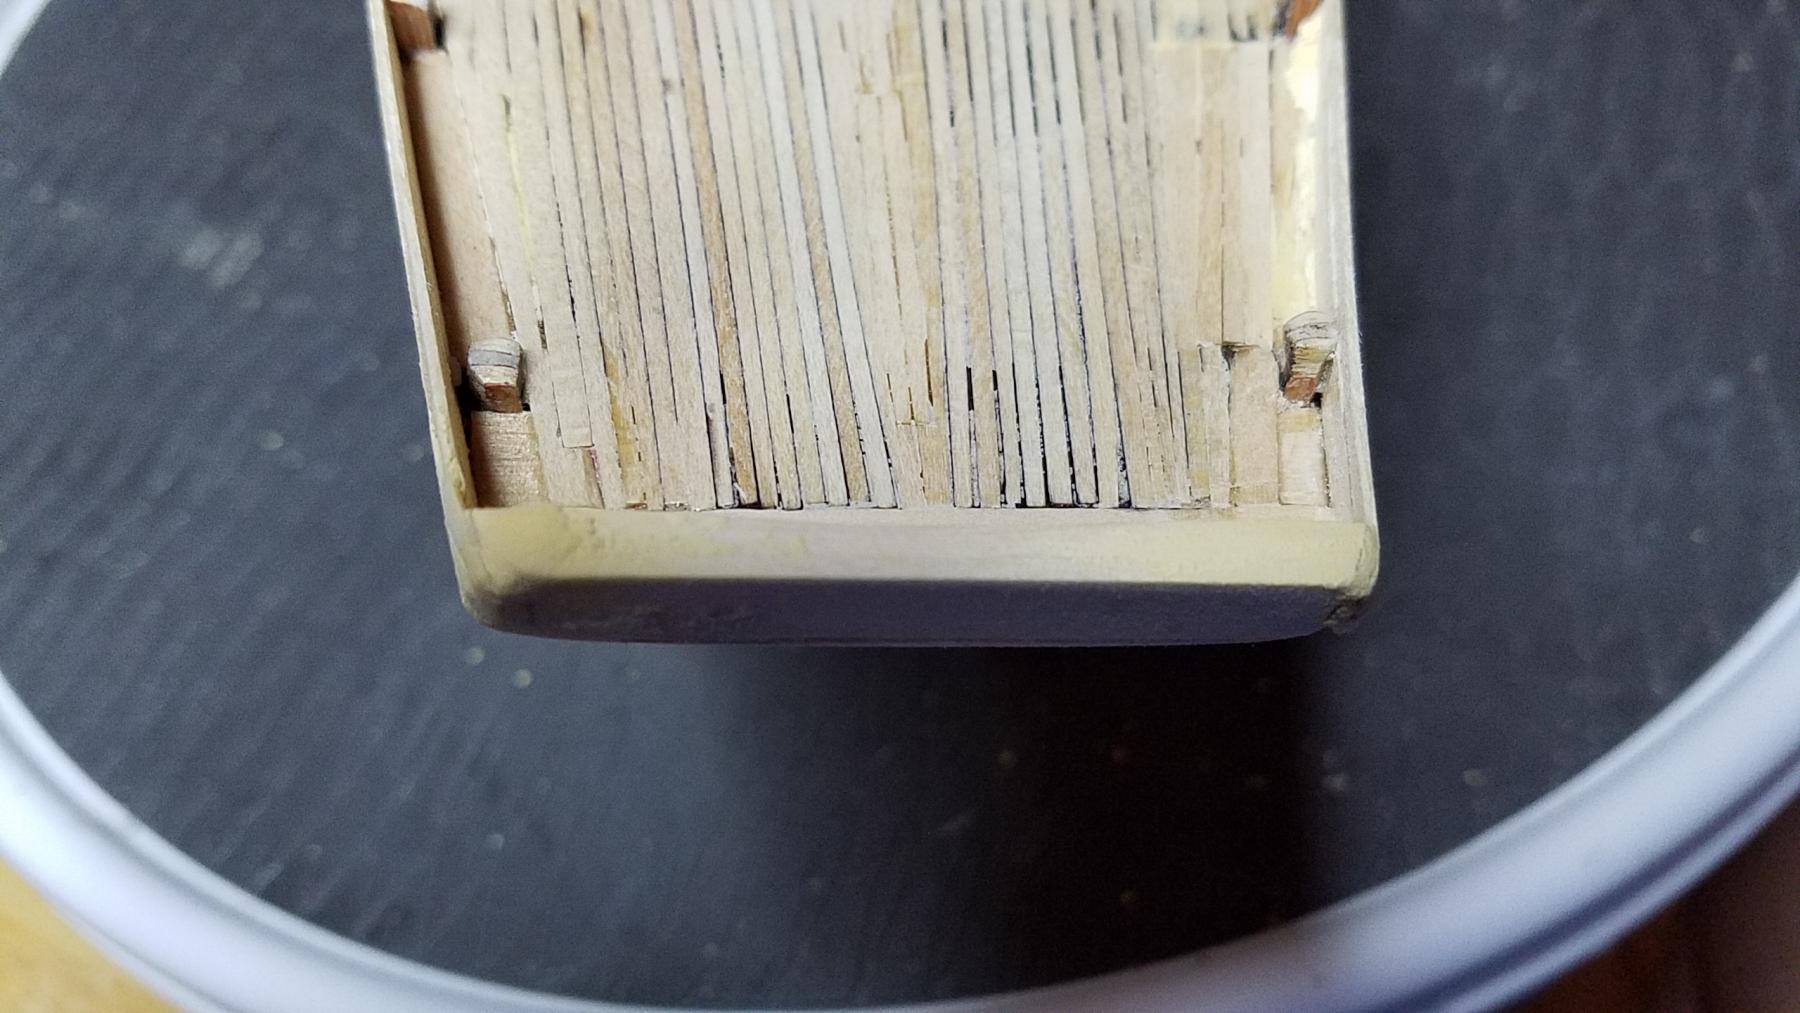
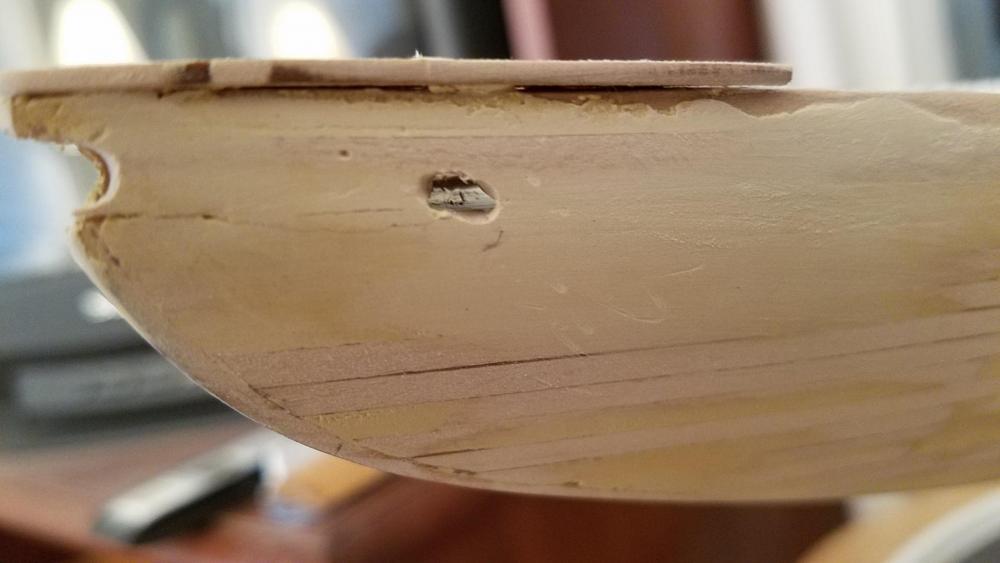
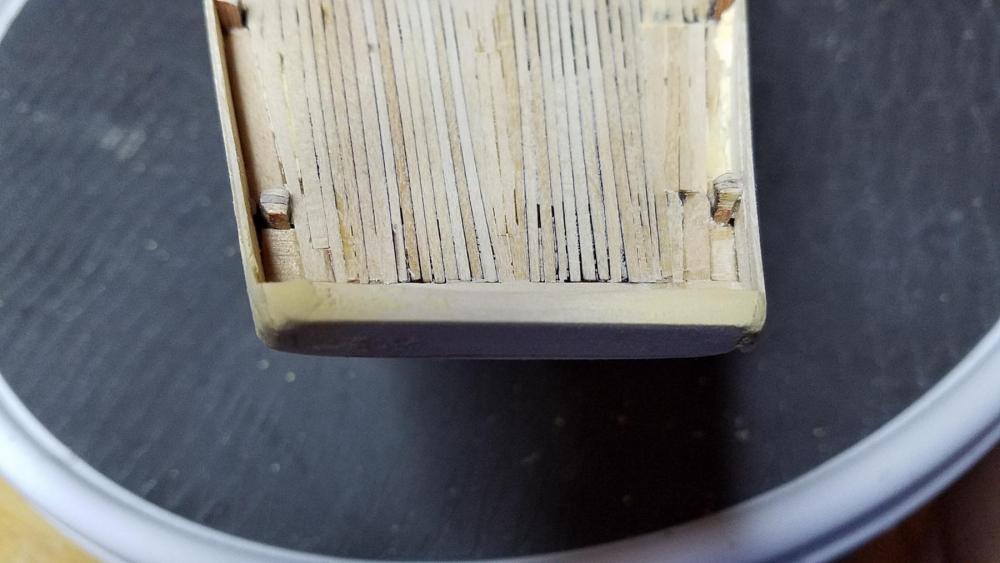
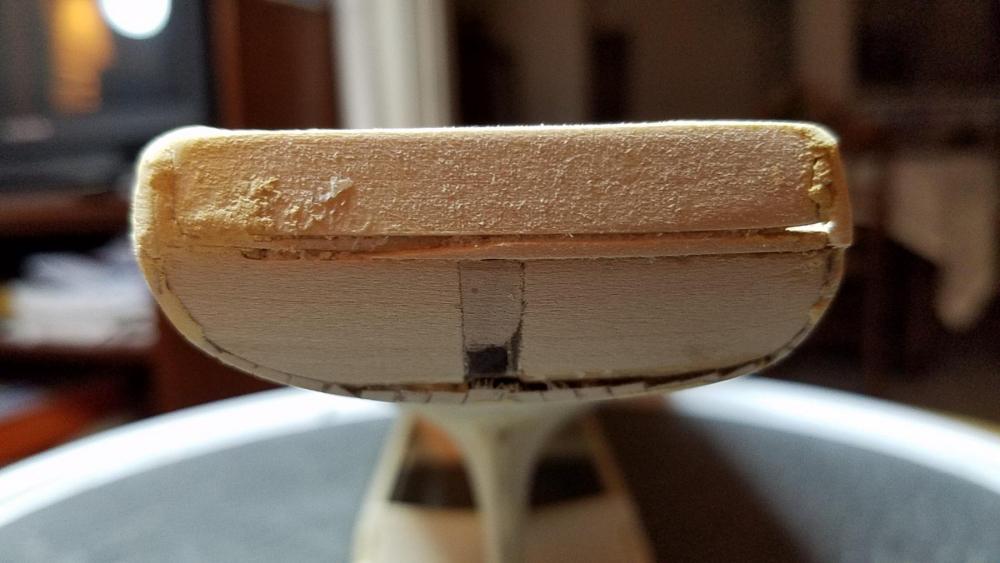
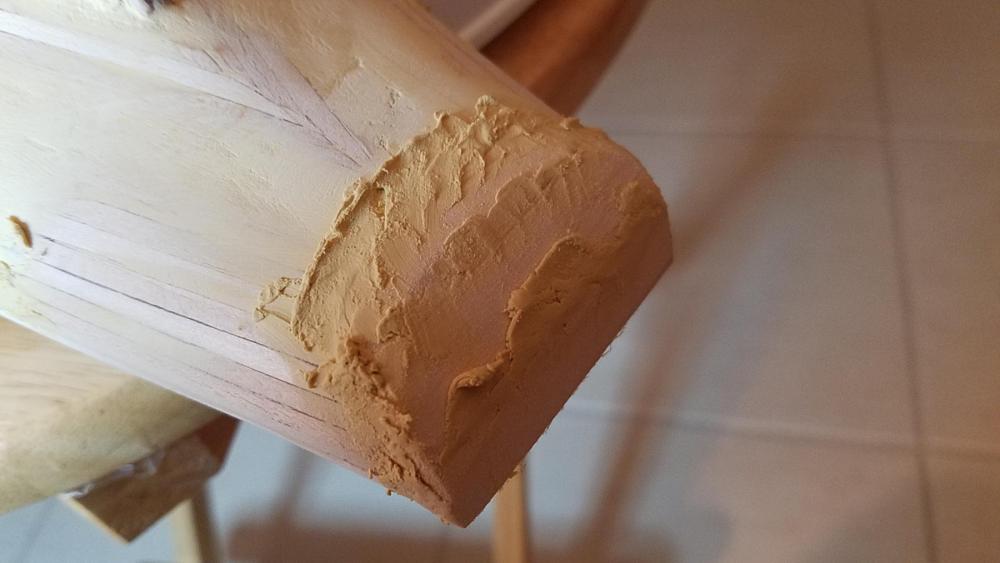
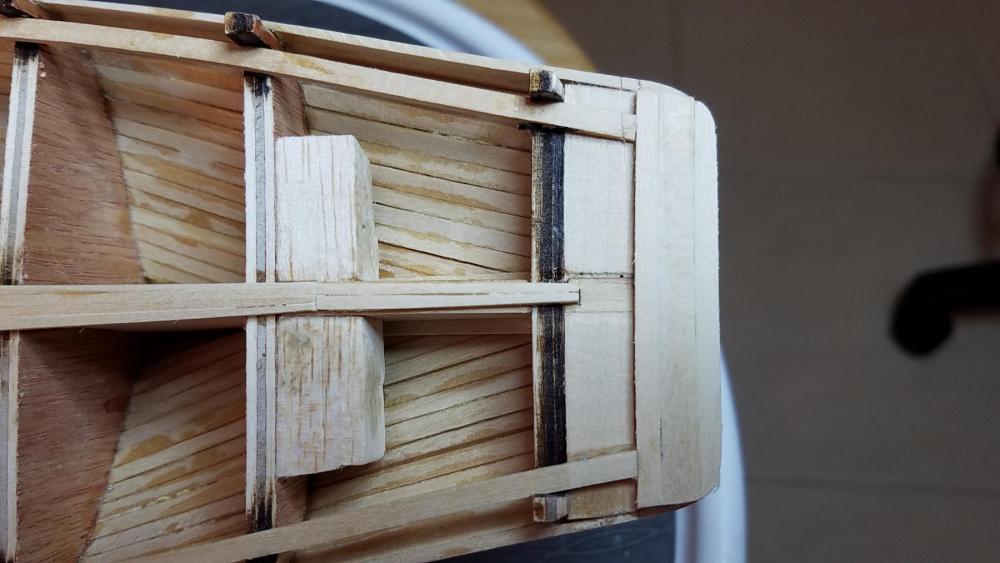
Good afternoon everyone.. I'm sure the next phase of construction, being so repetitive, will not be aas enjoyable as the past work. Making and gluing in place 110 false timber frames doesn't seem like a lot of fun but it does get the hull ready for the deck furniture, and I always enjoy that part of the build. Although I have filled and sanded quite a bit, I'm positive there will be more to do along those lines before the hull is given any coats of finish. The model seems very smooth at this point but there are still some uneven places, some tiny crevices and other ugly bumps to repair and smooth out. I haven't decided if I'm going to brush paint or spray the finish........although, I'm leaning toward the latter. On any event, here are some more photos of the new transom which is the latest place to be almost completed, Best, Jerry


-
Hello Lawrence,,, Thanks for dropping by. I need to hook up with you on skype one of these days and see how you guys are doing. I appreciate your kind words and have been making slow progress with Bluenose. I'll catch up with you soon and in the meanwhile please give my best regards to Bernadette, Jerry
-
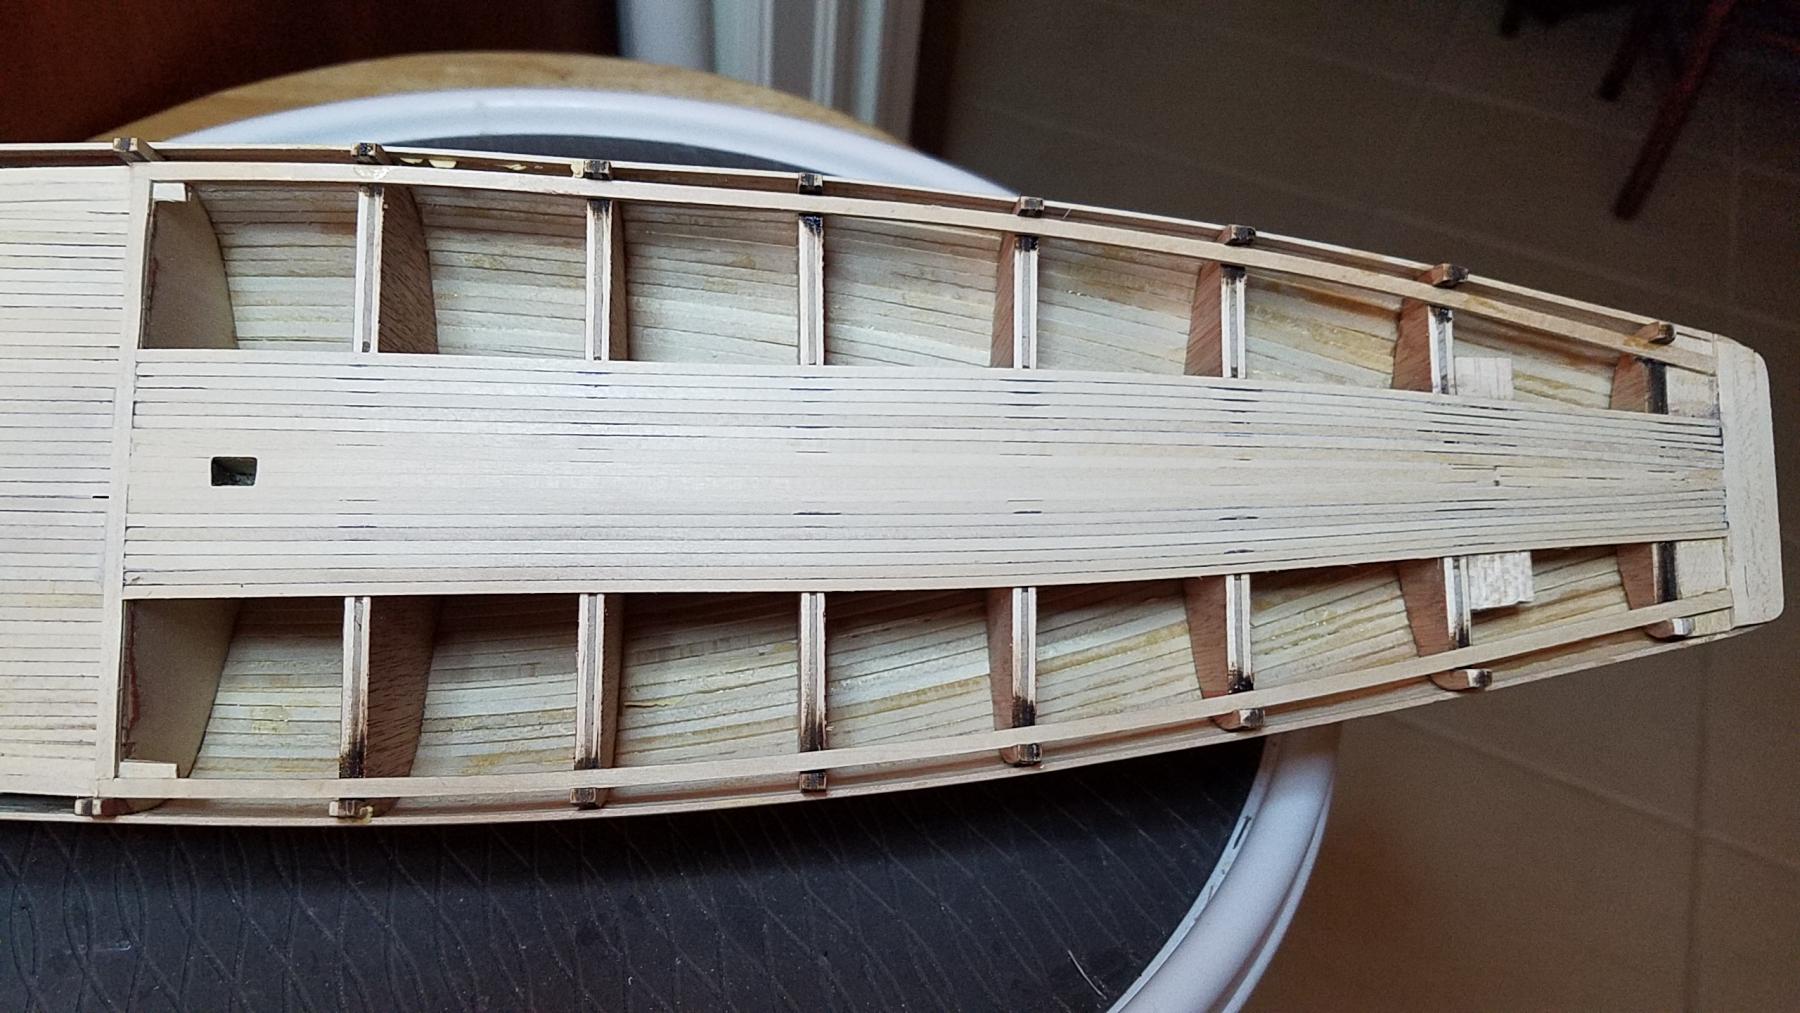
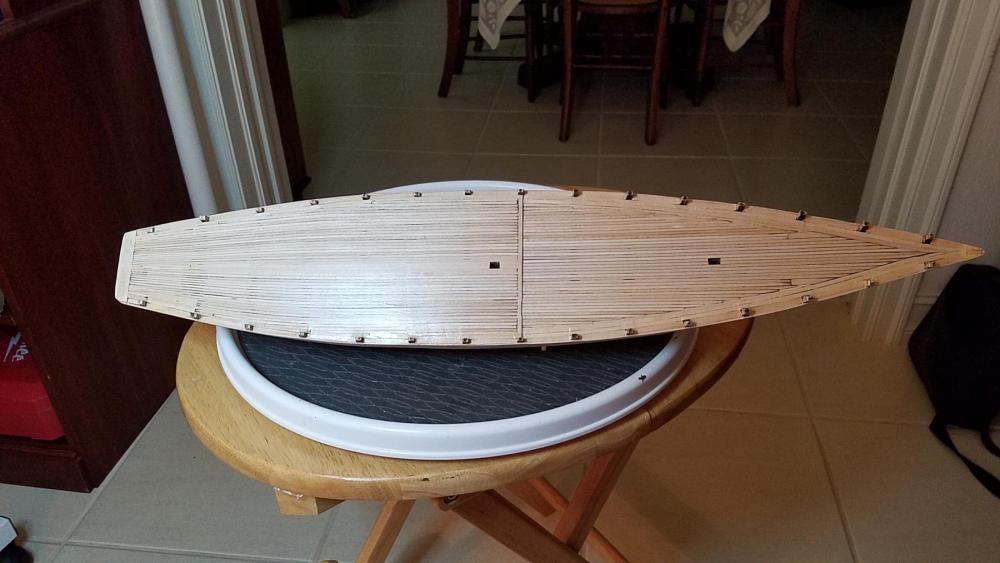
Hello Everyone.. Well, we're now into August and modelling Bluenose is moving along. The deck is completed and varnished and the extension planks are in place. The stern will be worked on next but in the meantime here are some additional photos of this Bluenose as it sits today. Best to all, Jerry


-
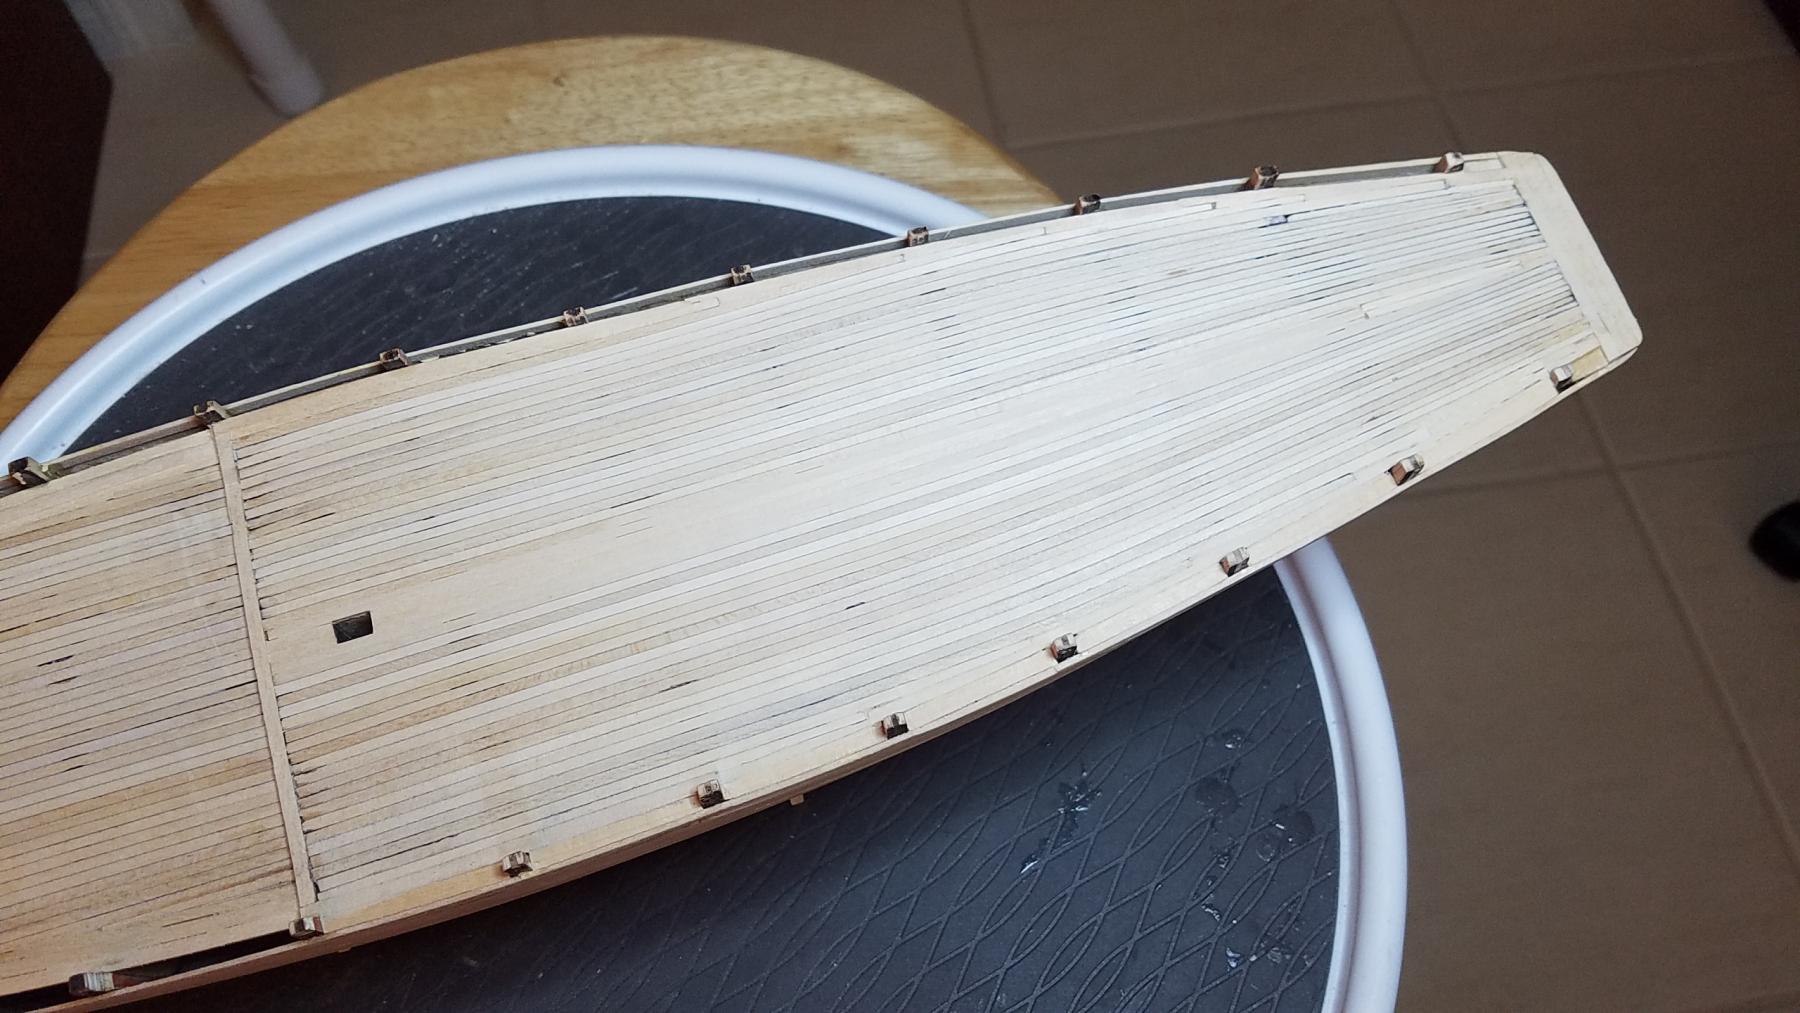
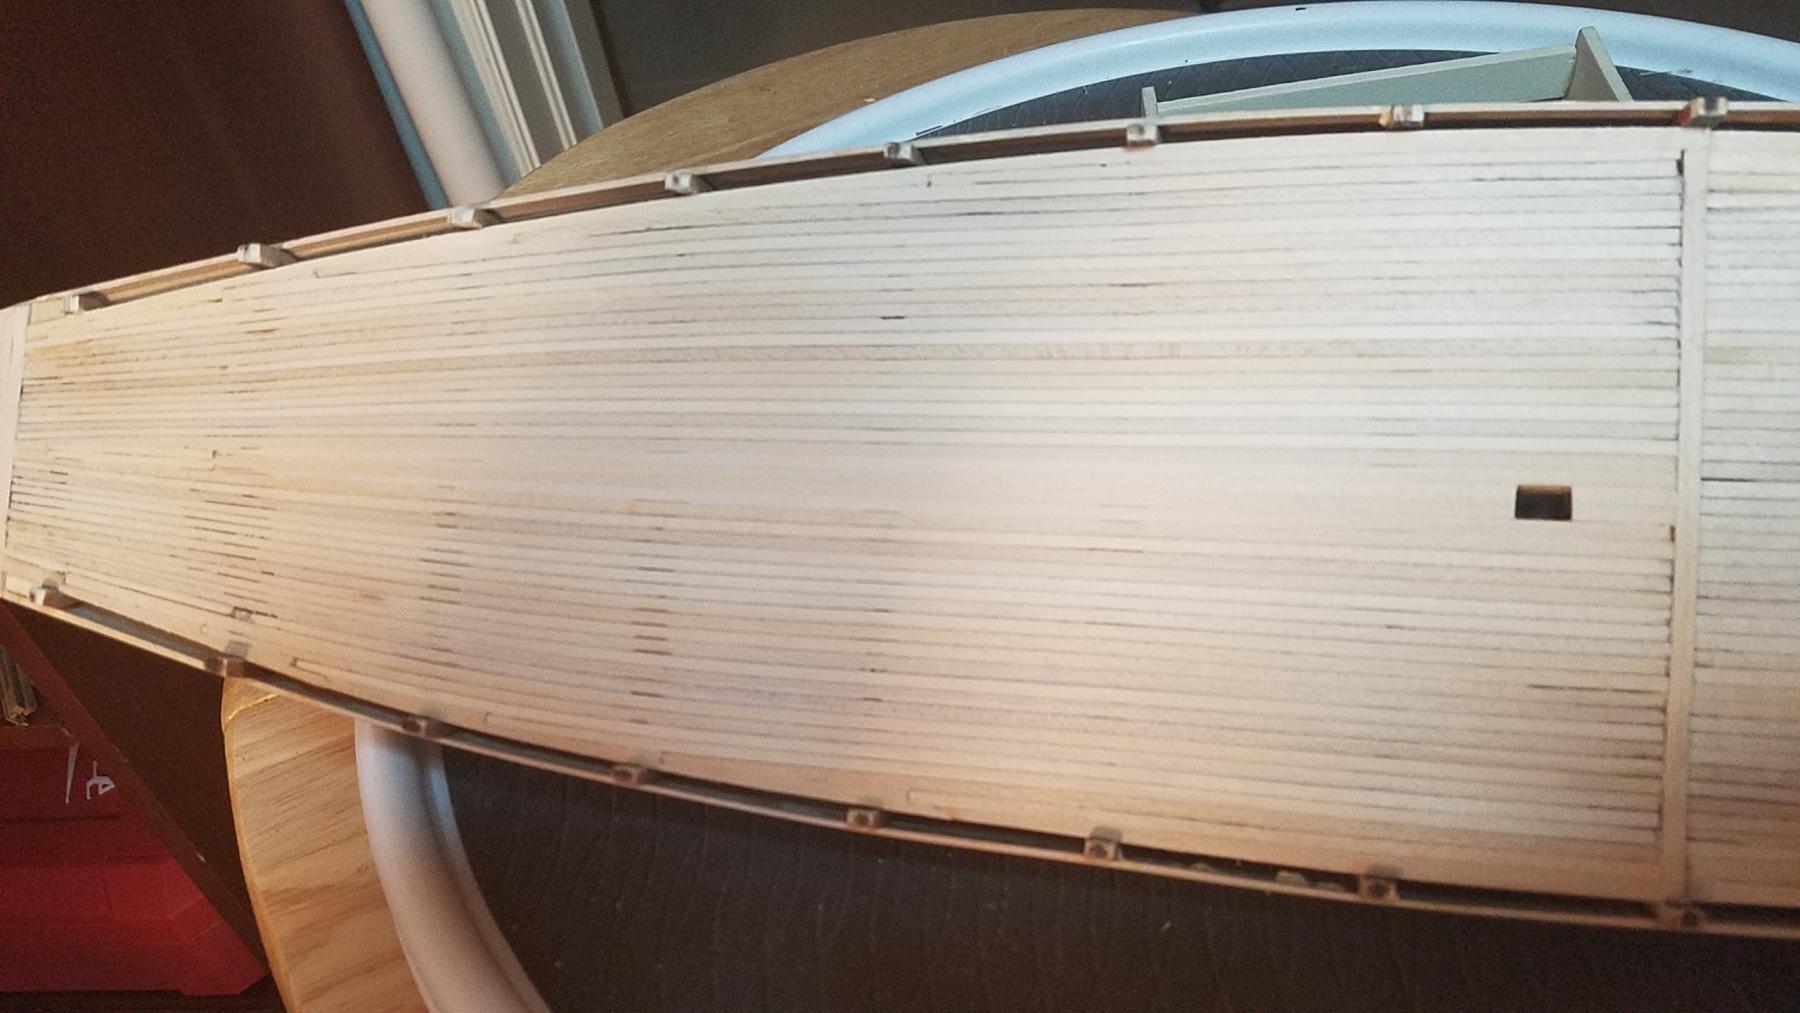
Good evening everyone.. I'm very happy to say that I have completed all of the deck planking and waterway fills. The next step will be a good medium and fine sanding followed by a few coats of varnish. I did have some unexpected situations but I chalk it up to every day ship model building. The most serious problem occurred when on the starboard side of the aft deck, while placing a waterway fill, I actually poked my finger right through the thin deck planking. I decided to cut out a square section of the decking and replace the stripping somehow. I decided to build a "bridge" from one side of the opening to the other using some planking. This became the bed for the new deck planking which I tapered to fit the pattern and glued in place. It actually doesn't look too bad, if I say so myself, but close observation will easily spot it. Hopefully some deck furniture will cover all or part of it. Here are the latest pictures before the varnishing. Hope everyone is enjoying a great weekend. Best, Jerry


-
Hello Popeye, The Practicum recommends artist lead #2 to do the caulking as there will be no bleed as there is with a marker pen. I tried it and I didn't like it. As I said in a couple of my previous logs, I like the very slight bleed I get with the black marker as it helps create a deck "in service" after sanding the surface properly. There definitely some "dark" spots around he deck but I'm sure the decks were not lily white when they were at sea. These dark spots occur especially where CA cement comes in contact with the marker ink. My solution: I don't glue the planking strips to one another, just to the bulkheads and the deck still seems solid. Oh well, I'm s certain someone will find fault with my reasoning but that's what makes individualism. Never tried the crayon routine and I guess I never will after reading your opinion. Have a wonderful evening.. Best, Jerry
-
Hi Elijah.. Many thanks for the visit and compliment. I'll be finishing the deck after completing the waterways fill-ins. This has proven to be a time consuming process as every opening is slightly different than each other. I'm using some stripping left over from the HMS Victory kit which is more than wide enough, and as mentioned, each piece needs to be custom fit. here's what it looks like so far. Best, Jerry


-
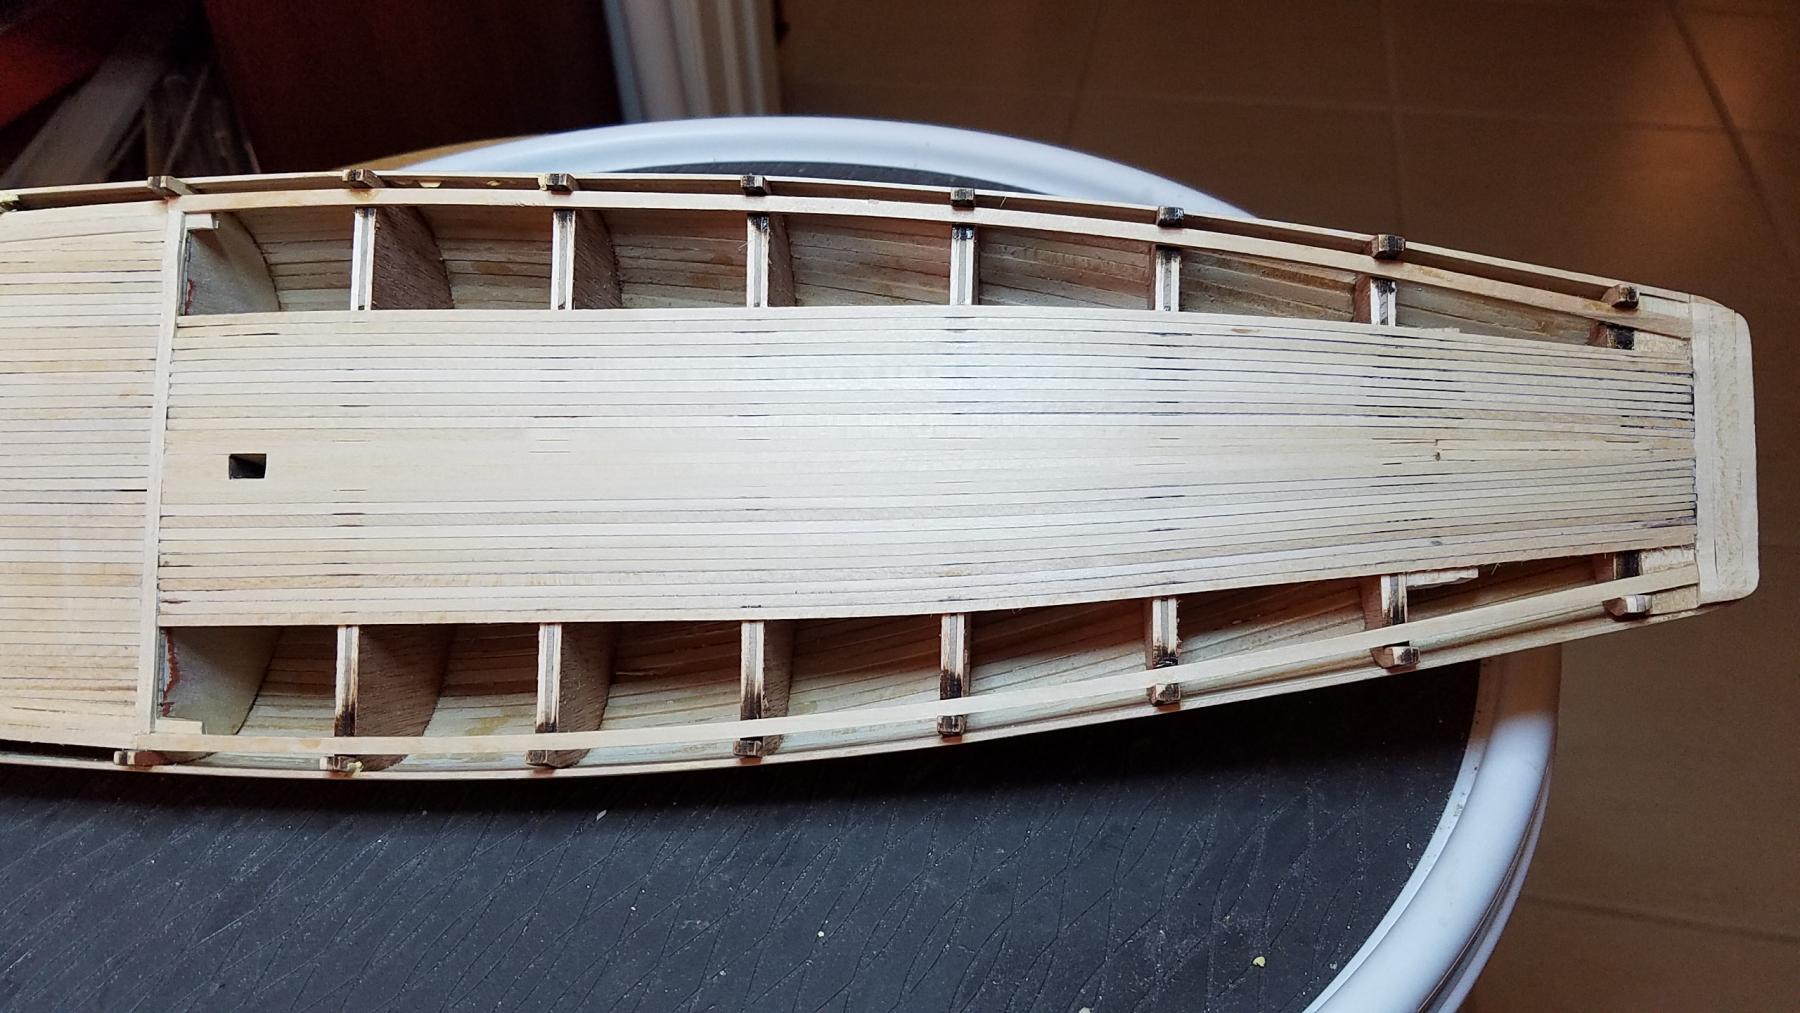
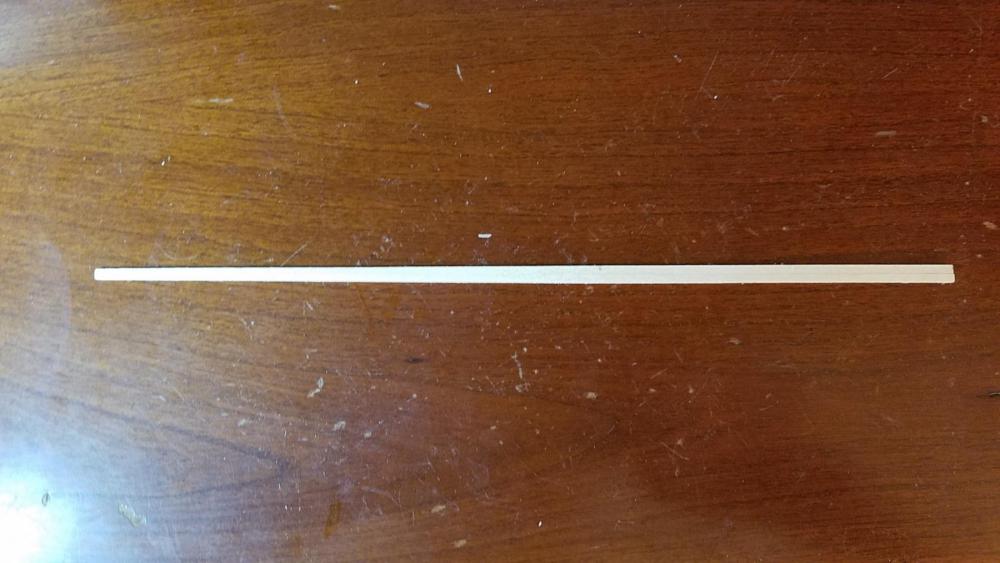
Hello Everybody.. My house guest likes Naples because he decided to stay a little longer and that's OK with me. But he agreed that I could spend a couple of hours completing the aft deck. So, I did and the deck is ready for a coat of varnish before proceeding further. I didn't run out of deck planking as several others did because I was very conservative with my trimming etc. In fact I have a lot of half size strips which will be available if called for later for some other part of the build. So here's a couple of photos showing the deck completed before preliminary finishing with a coat of varnish. Have a nice week everyone. Best, Jerry
-
Hi Popeye.. I have a house guest for the next few days so my time on the log will be limited. But for your information I plan to sand the deck only since, by using a black marking pen for caulking effect, will darken the surface a bit and make the deck look older. I used the same technique on Victory. Take care and be good. Jerry
-
Hello Dave, You are so right; many thanks for the visit to my log. This was a great learning experience and I know I could do a much better job in the future. I'm winding down on the deck planking and I only have 3 more planks to go. However, according to Bob Hart's practicum there's supposed to be 7 planks on each side of the aft deck (the final ones to the outboard) that get nibbing. For some reason I ended up with 6 on each side. I probably went too far along the deck before doing a nib. Well, it's still looks okay to me but it could have been a better job. I'm going to fill in some of the plank seams when I give the outer hull another coat of wood filler and then sand the heck out of it. Whenever I get mad at the admiral I like to sand my boat (it lets me let off some steam). But I must admit Charlene has been pretty good lately so I have no ulterior motive this time. Have a nice weekend Dave and take care. Best, Jerry
-
Hello Popeye.. Having been through the sate of matrimony more than once I feel strongly for you and strongly suggest that you hold onto your skin. I forgot about your Half Moon so I guess that is ahead in line of the Bluenose. I think you will really enjoy building the Half Moon and then the Bluenose since they are definitely two very different types of construction. In fact, and although others claim the Bluenose an easier build, I wholeheartedly disagree. So far I have found the Bluenose much more "delicate." If you review the attached pictures of the progress of the planking of the aft deck, you will surely see the difficulty I have had (especially with my first crack at nibbing). I purposely used the word "crack" since I caused a few in the nibbing strake as I progressed. These damages were repairable but have definitely subtracted from the cleanliness of the build. To replace the nibbing strake at this stage would be a disaster so I shall live with my mistakes. The lesson here is beware of the delicateness of the nibbing strake and the deck planks in general. I hope to do better with the final planking of the port side of the deck. Hope you are doing well and have a terrific day, Regards, Jerry


-
Hi Popeye, So get with it man and start that Bluenose. I hope to get back to work in a day or so. We had a nice trip and I'm raring to go again. I'll be seeing the eye doctor on Tuesday and look forward to a good report. Thanks for the nice words and regards from the Admiral. Best, Jerry
-
Hello Lawrence.. It looks like the weather in Canada has been having you guys sweat a bit. Good thing that you do have A/C. Good to hear from you. So now I'm back home again and feeling much better and look forward to working on the Bluenose. Please stay in touch. Best, Jerry
-
Hey Joshua..Have fun in the Canadian Rockies. Been there and loved it. Hope you make it to Lake Louise. We were there several years ago and I had to wear my sheepskin jacket in July. No bull!!! Best, J erry
-
Hello Everyone.. One more post today as we are leaving for a short, one week holiday tomorrow. So, since I won't be building or posting for awhile i thought it would be okay to attach some pictures that will bring my progress on Bluenose up to date. My next notes will hopefully appear the week after next. I have placed the center planks on the aft deck and when I return I'll be tapering and adding the planks that will approach the nibbing strake. So far, so good; I haven't had any finger cuts or worse. My doctor gave me an okay to go away for one week so the admiral and I are definitely taking advantage of that. We'll be on a cruise ship tomorrow afternoon in Puerto Rico and spend the week sweating in the Caribbean. Hopefully, I'll make it throught he week and see everyone in a week or so, Best, Jerry


-
Hello Joshua.. Your visit is much appreciated. After checking your site I see every reason that you will do a great job with your PdN. Many thanks ffor your compliment and please stop by again. Best, Jerry
-
Good morning, Rob.. Thanks so much for your kind words. I hope that what I have posted will help you navigate through your build of Bluenose and that you have a wonderful experience doing so. This is definitely a very different kit than those I have tackled in the past and therefore a great learning experience. The nibbing surely could have been better but I did learn a lot and I will try and do a better job on the aft deck. I am actually looking forward to prove it. By the way I hope you received the information about the Amati keel holder I posted for you. Best, Jerry
-
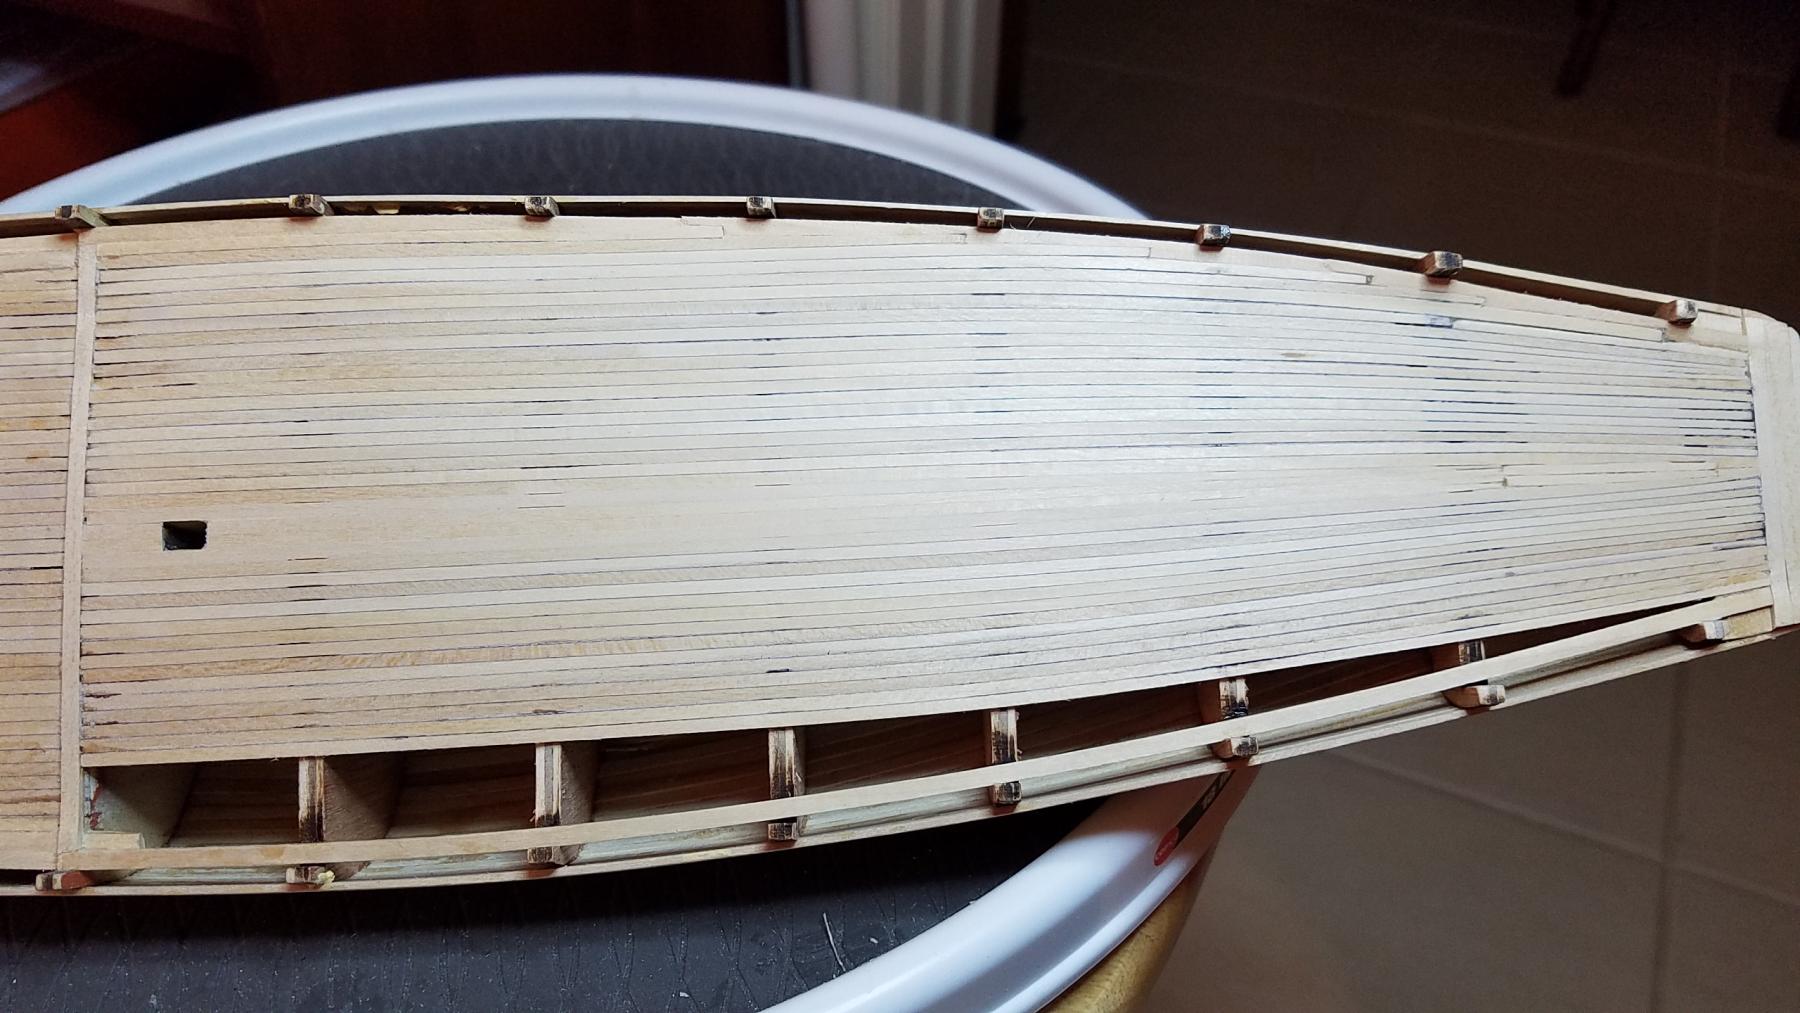
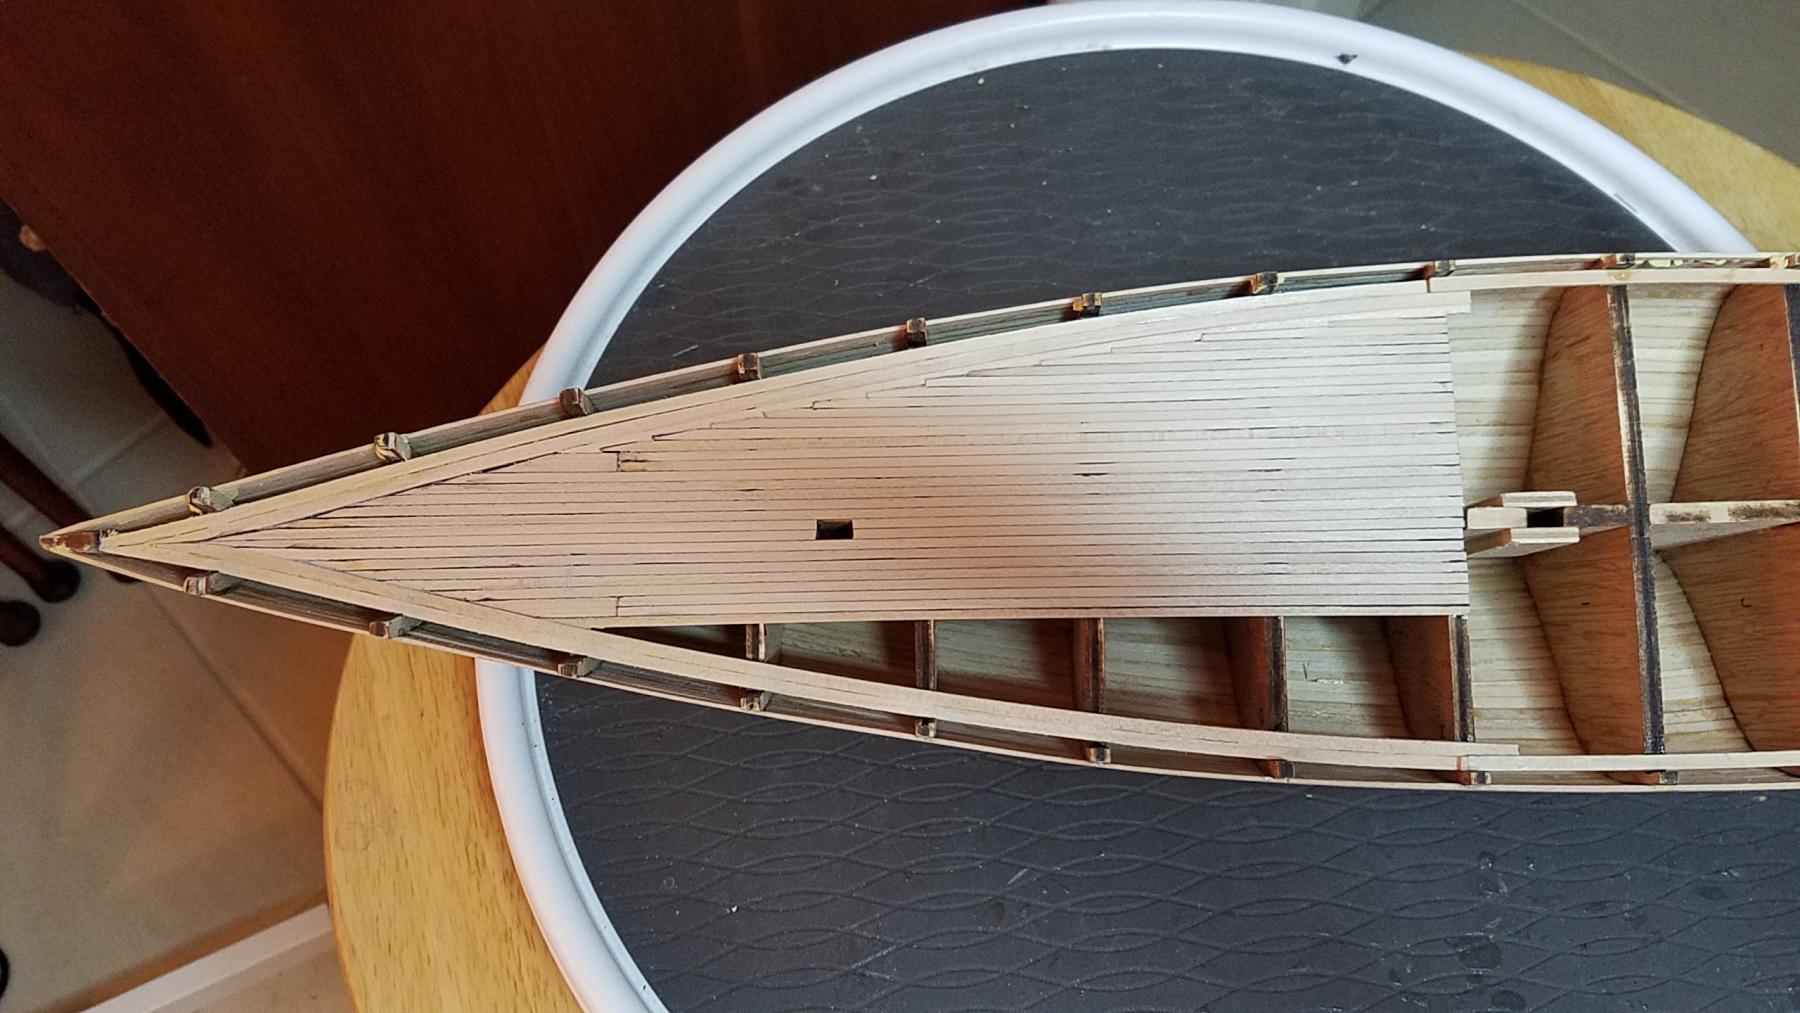
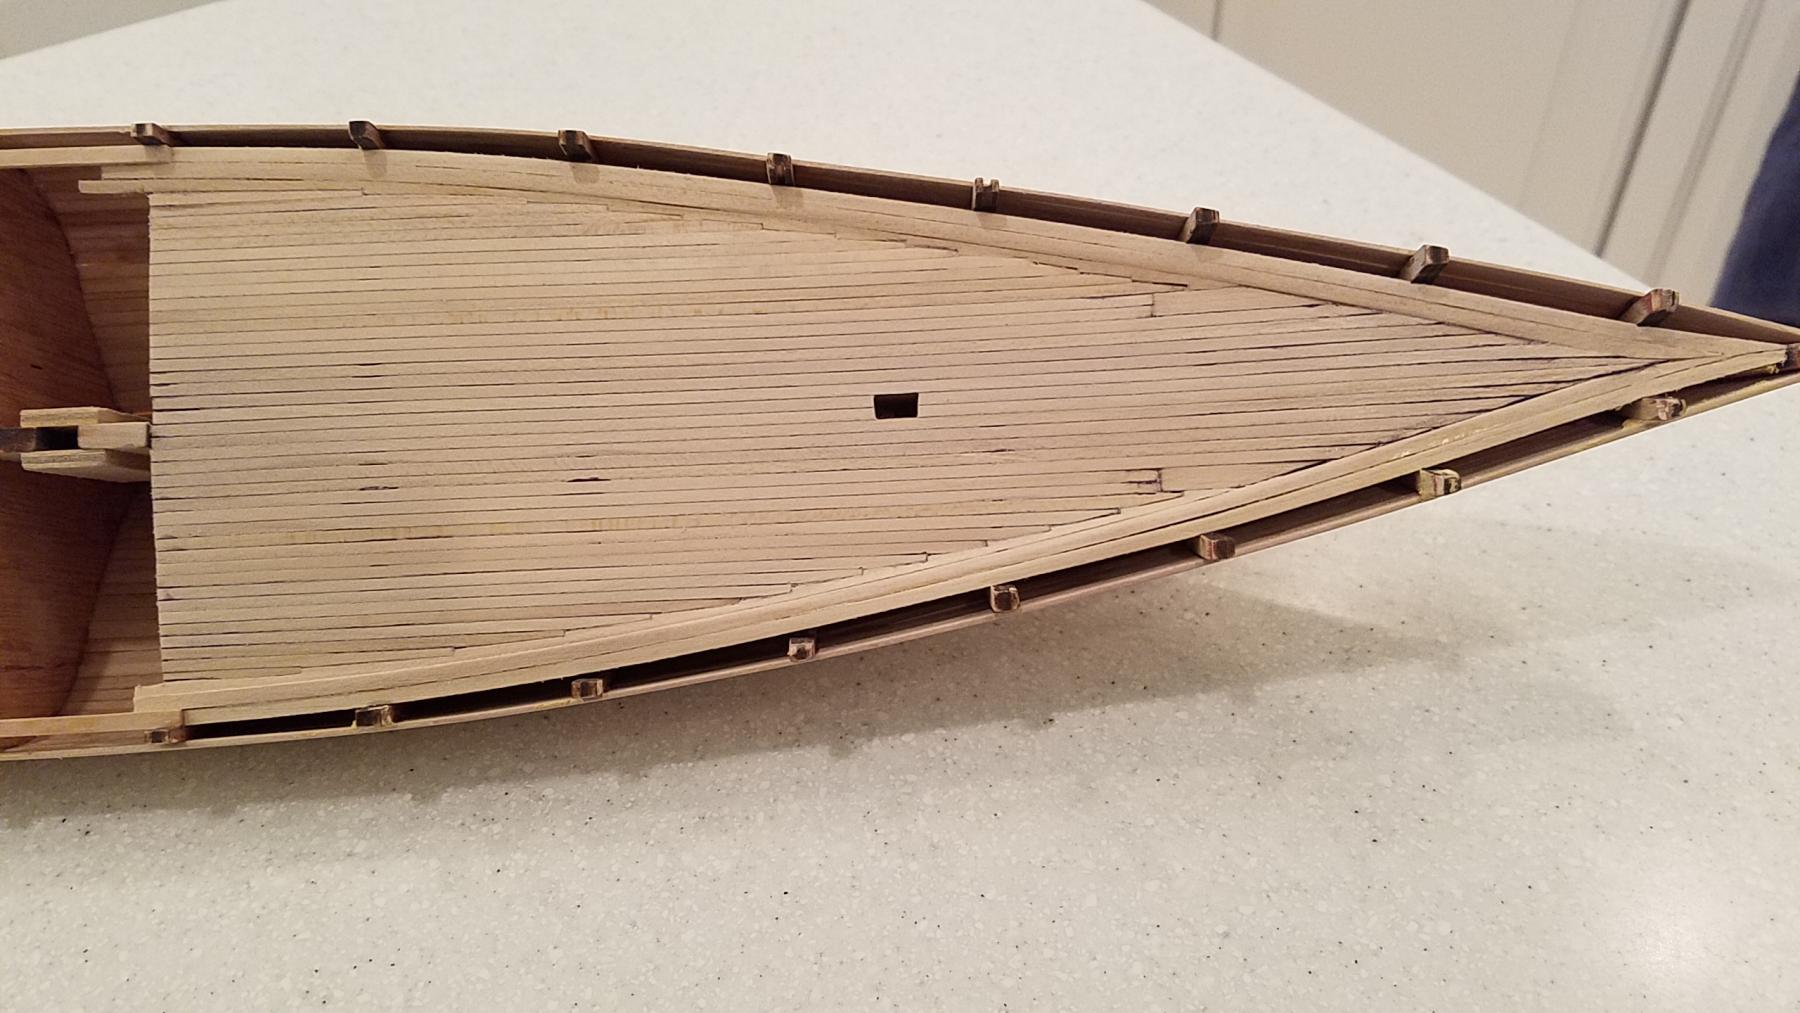
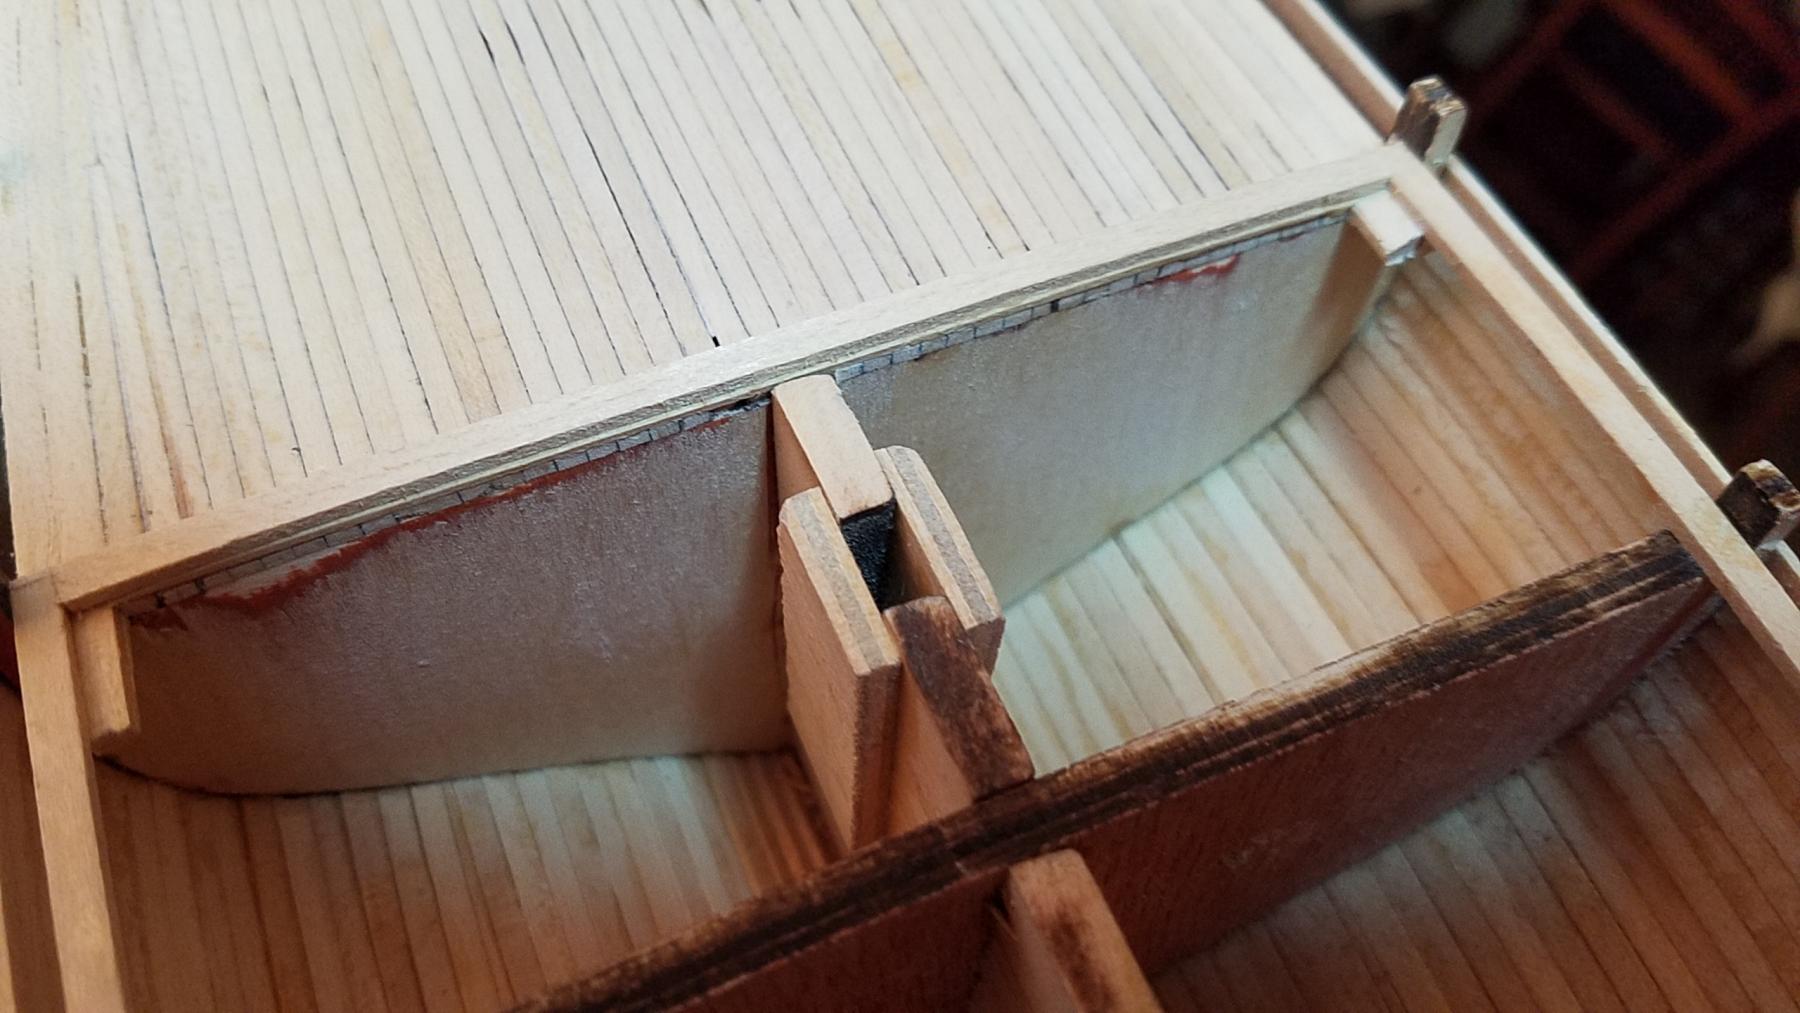
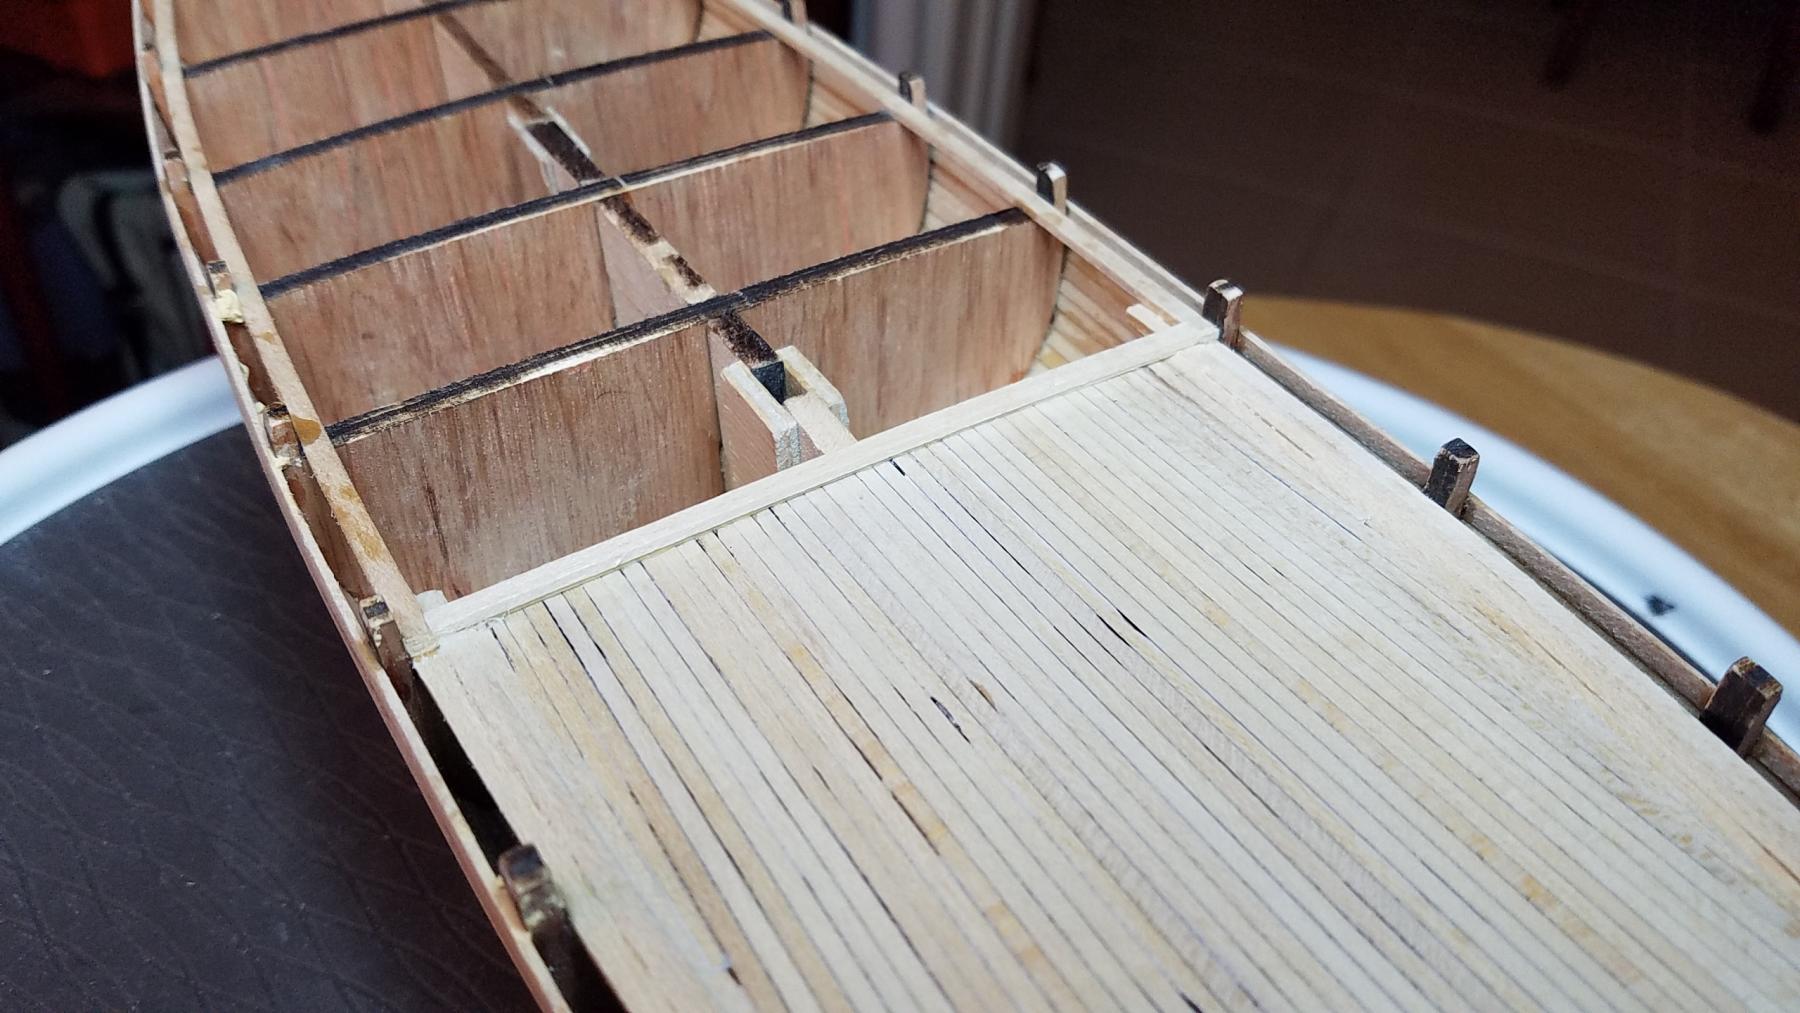
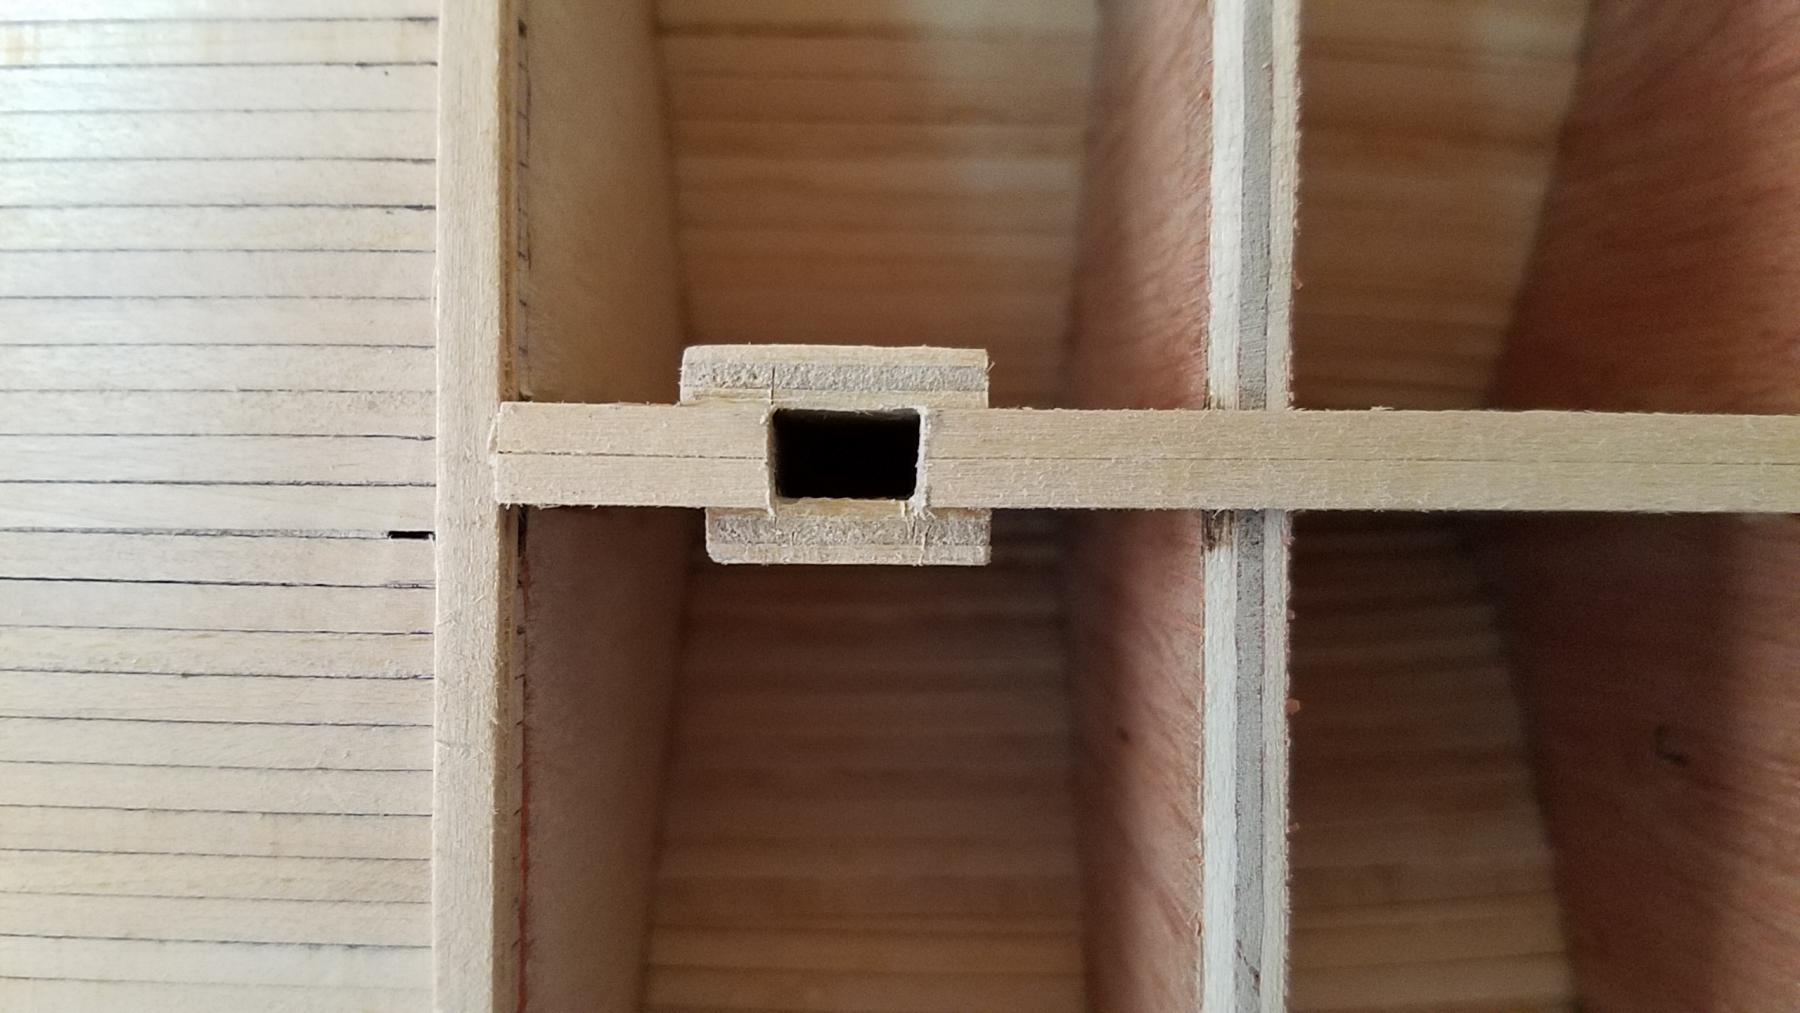
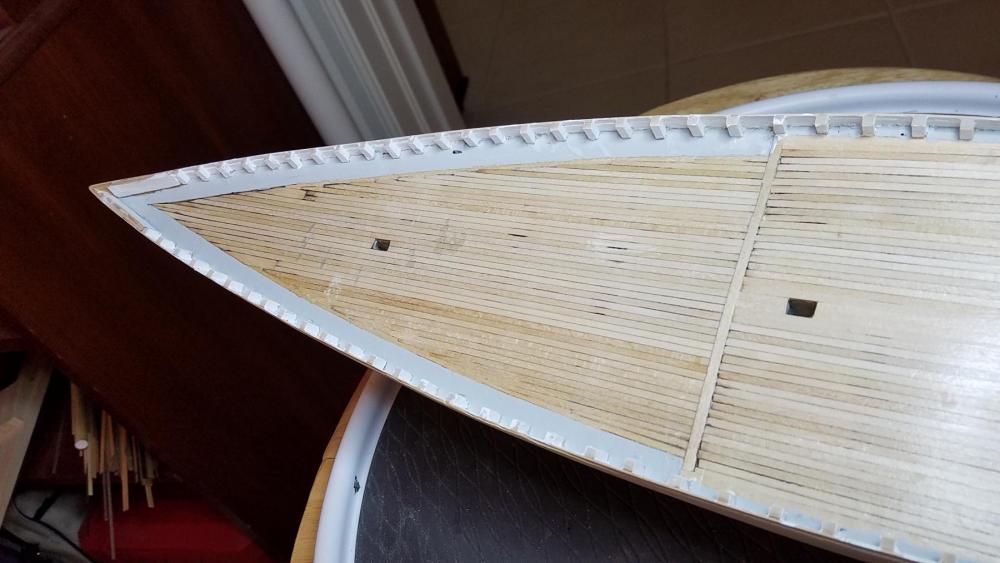
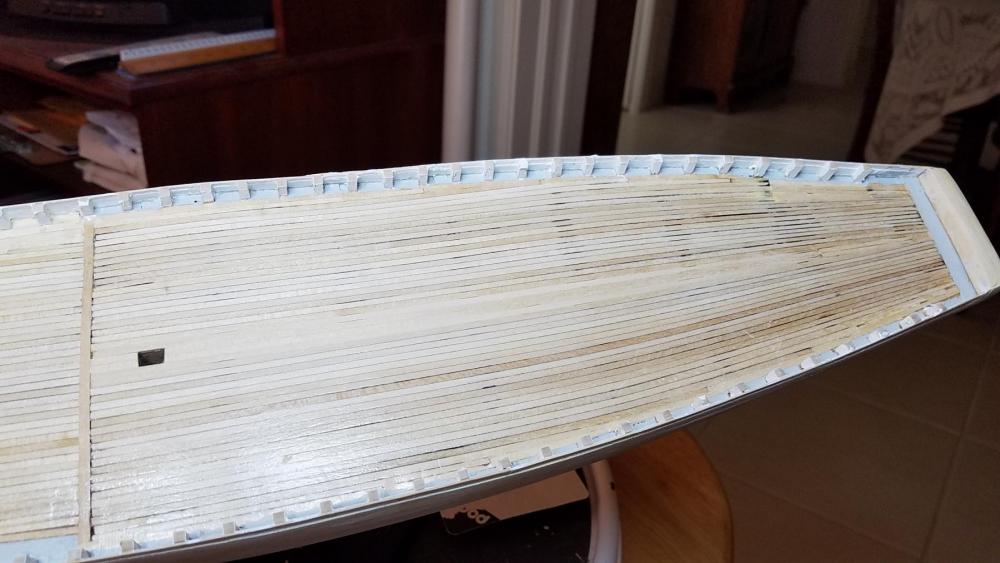
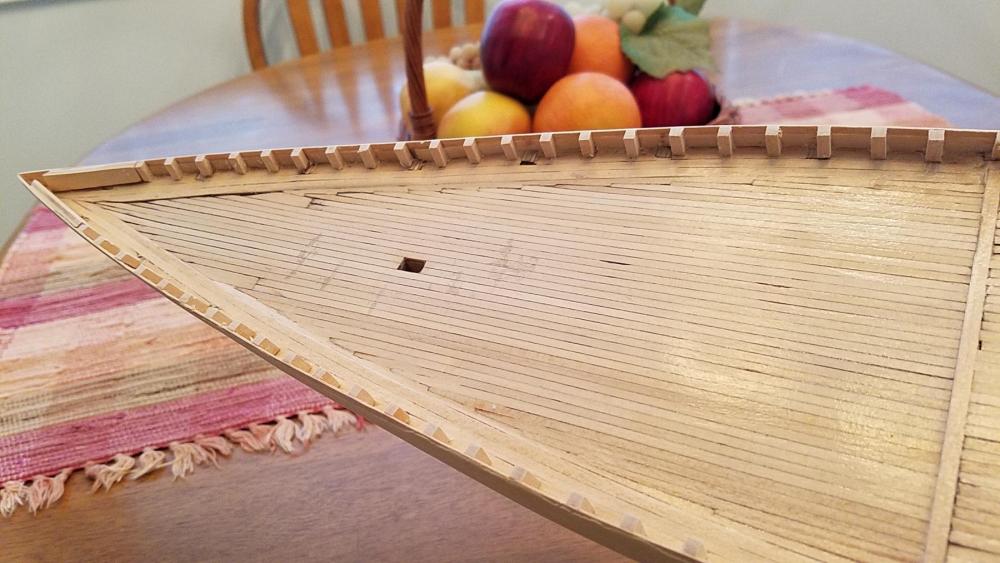
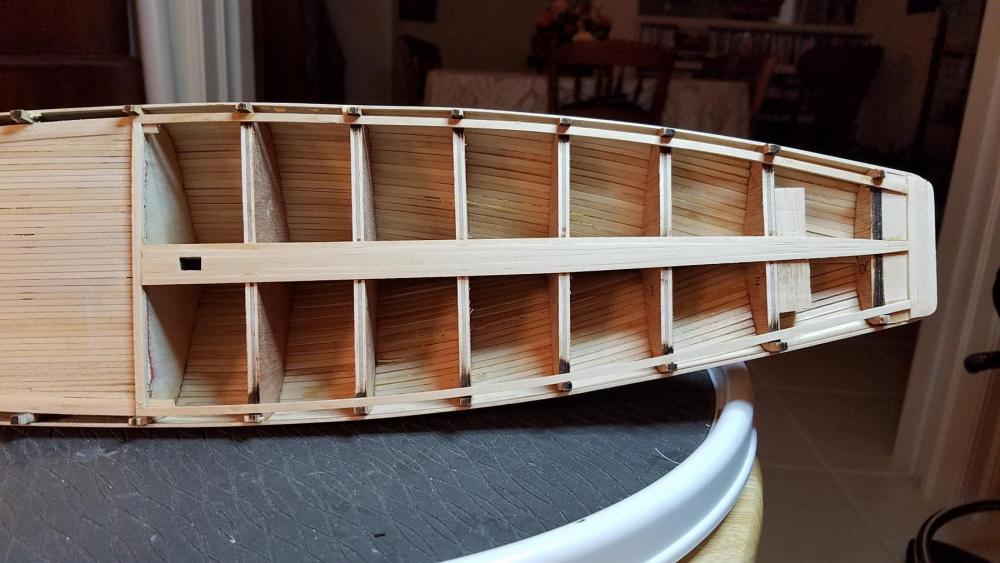
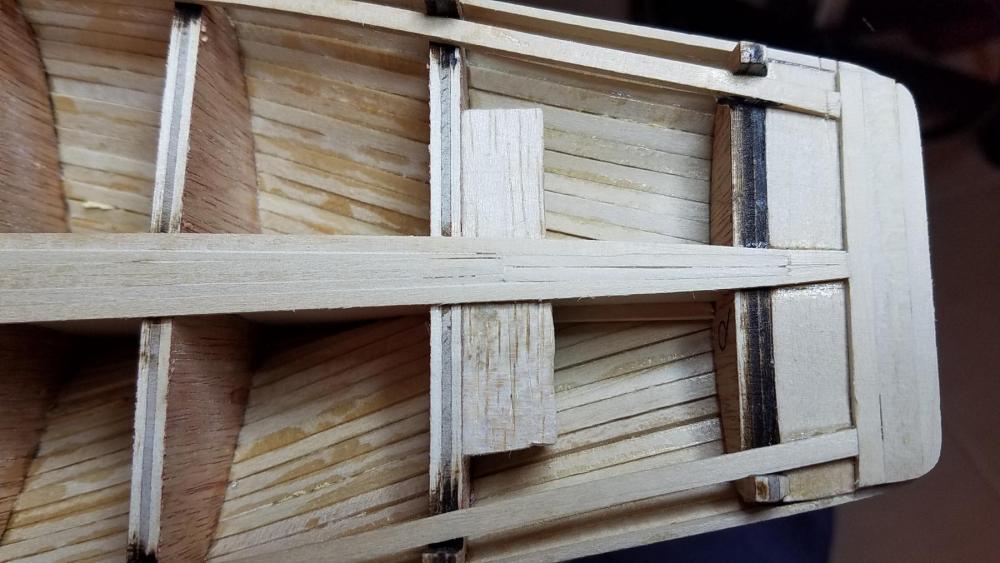
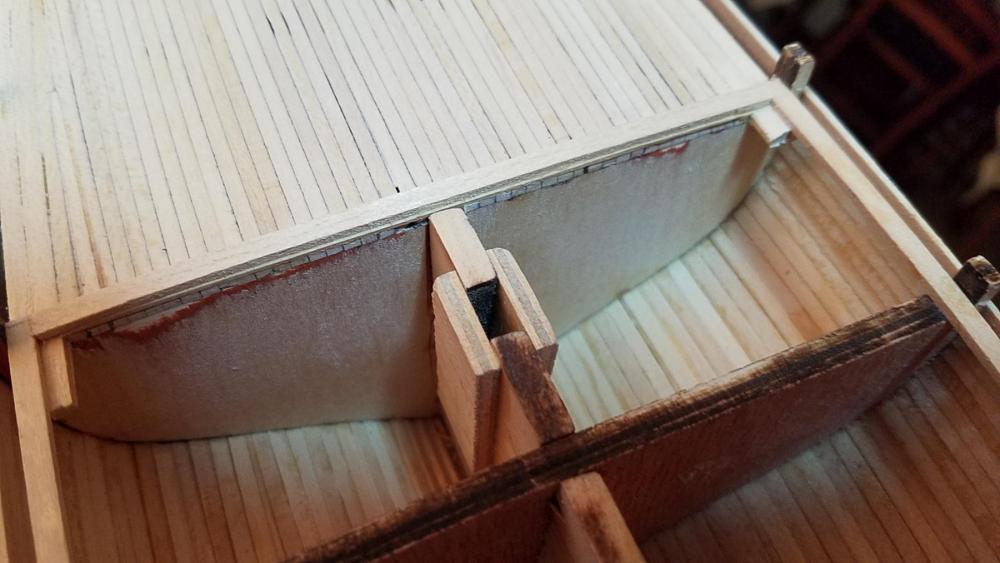
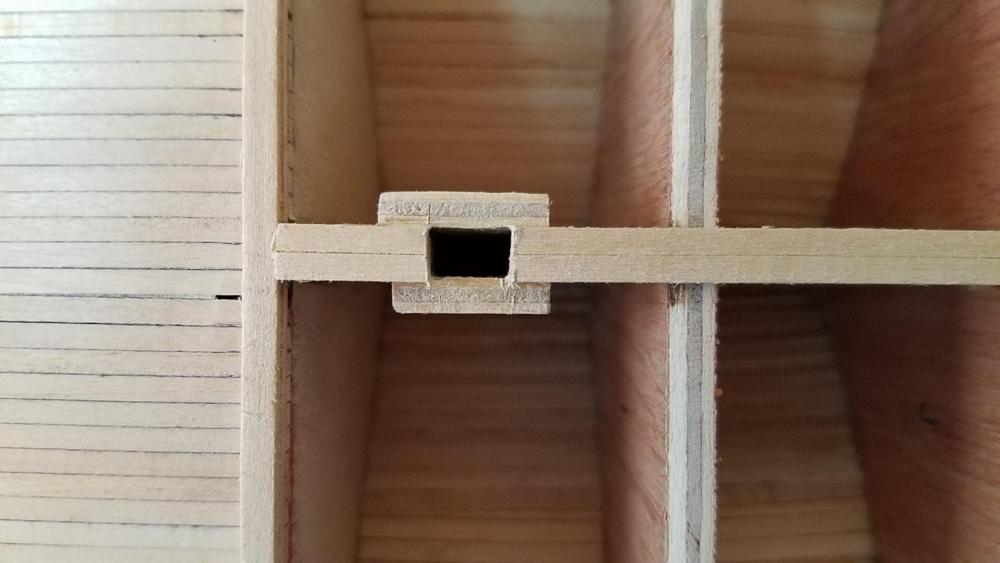
Good afternoon everyone... I'm happy to say that I have completed the planking of the fore deck. I will admit that this phase of the build has not turned out to be a thing of beauty but I did learn a lot and if and when I need to do nibbing again I'm sure I'll do a better job; starting, hopefully, with the aft deck. The deck planking of the Bluenose is very different from any other model I have built and Bob Hart mentions this in his practicum Most decks are planked without the necessity of tapering the strips until one reached the outer dimensions of the deck. With this build, when doing the aft deck, the tapering begins with the laying of the very first pair of planks. So with this type of process and with more nibbing to come I really appreciate the detail of this build. So here are some pictures that bring my construction to completion of the fore deck planking, construction and placing of the "great beam" and the first pair of planks for the aft deck which have been cut to allow for the main mast tenon. I felt it would be easier to work with these two planks if I glued them together first. This made it easier to center them over the keel. Hope everyone has a great evening. Best, Jerry


-
Good morning, Brian. Thank you so much for your words of encouragement and good advice. Looks like a good night's sleep was very helpful because I feel much better about things this morning, I have decided to continue with the nibbing planking as is and try and improve my work as I move along. A little bit of a "dirty" deck isn't the worst thing in the world. My admiral has also been very kind as she also has suggested that I stop "whining" and move along. So, in the daylight of a new day I'll be off and running again and am thankful for all the support given to me. I wish you a very happy 4th of July and much success. Jerry
-
Hi Rob, I sincerely appreciate your kind words regarding my build but at this point I can't agree with you. I have run into a process (nibbing) which is driving me nuts and which has proven my lesser skill. I will try and do better as I continue on but I must admit I do not enjoy this phase of the build. The clamp or ship holder is made by an Italian firm, Amati . It's called the Amati Keel Klamper and is sold by several ship model suppliers. I have seen it priced between $65 and $80. Just google Amati Keel Klamper and you'll find it. Best, Jerry