HOLIDAY DONATION DRIVE - SUPPORT MSW - DO YOUR PART TO KEEP THIS GREAT FORUM GOING! (Only 13 donations so far - C'mon guys!)
×


Jerry
-
Posts
1,753 -
Joined
-
Last visited
Content Type
Profiles
Forums
Gallery
Events
Everything posted by Jerry
-
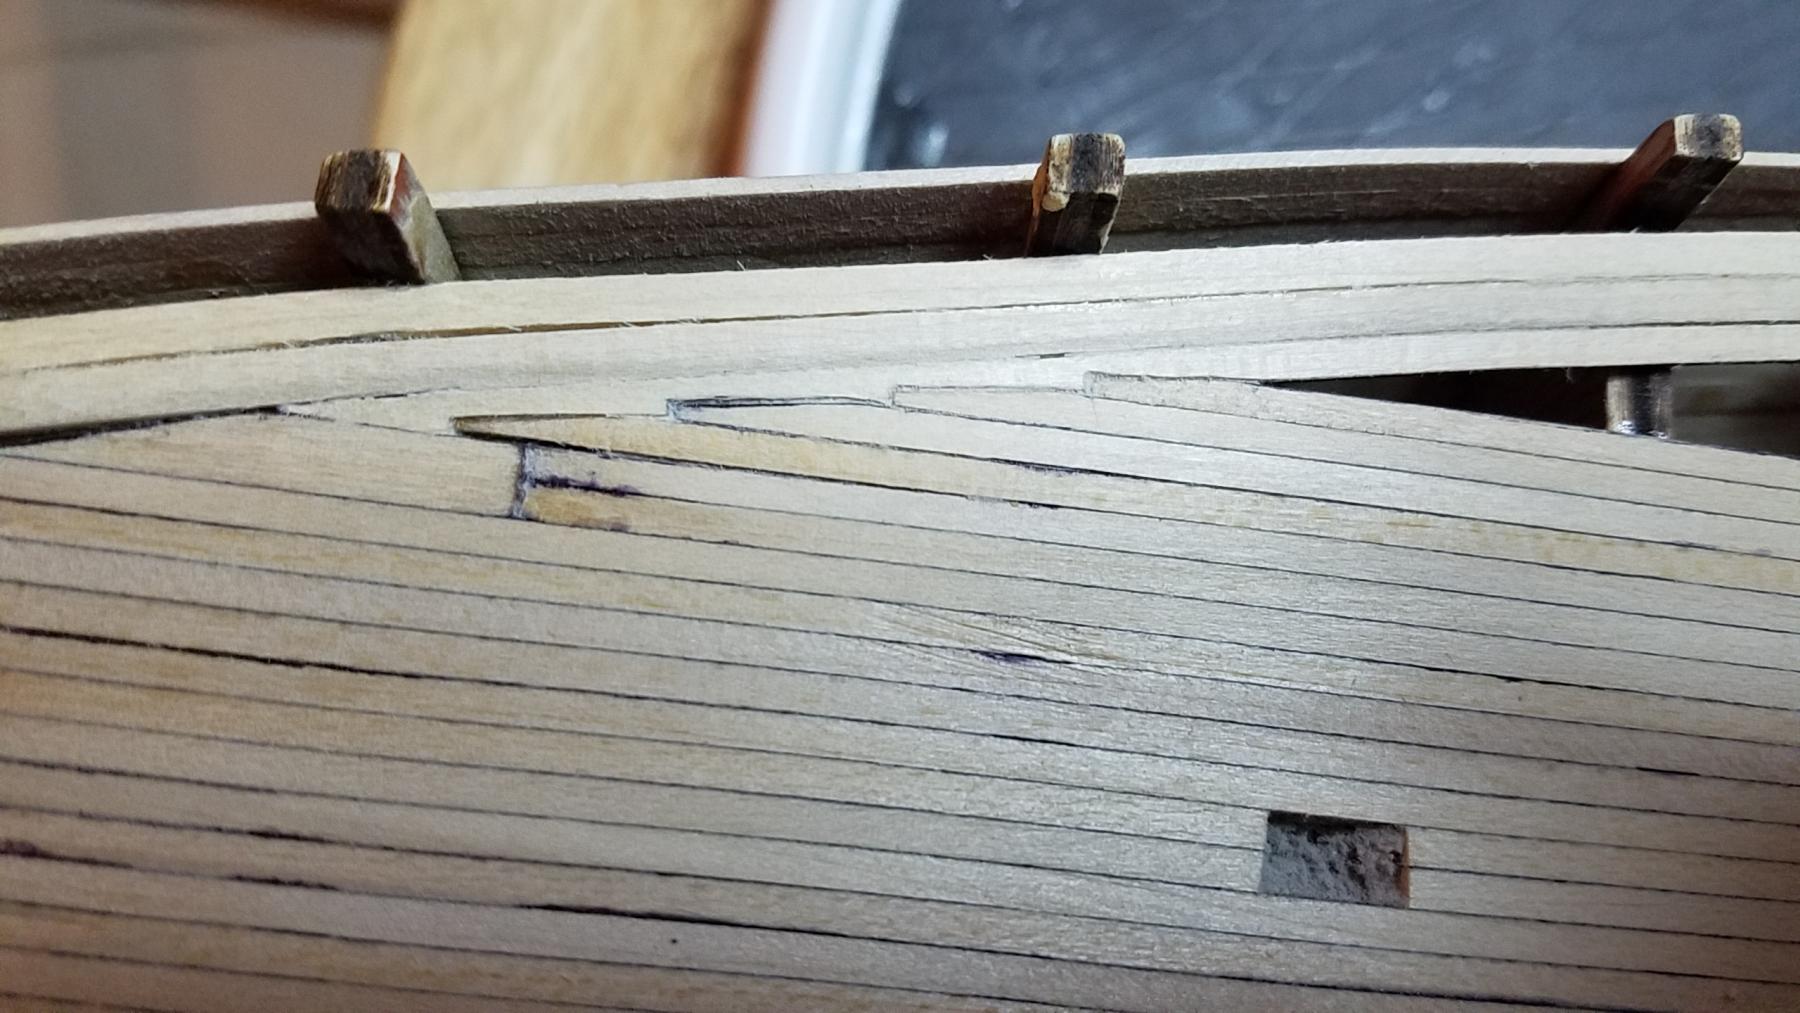
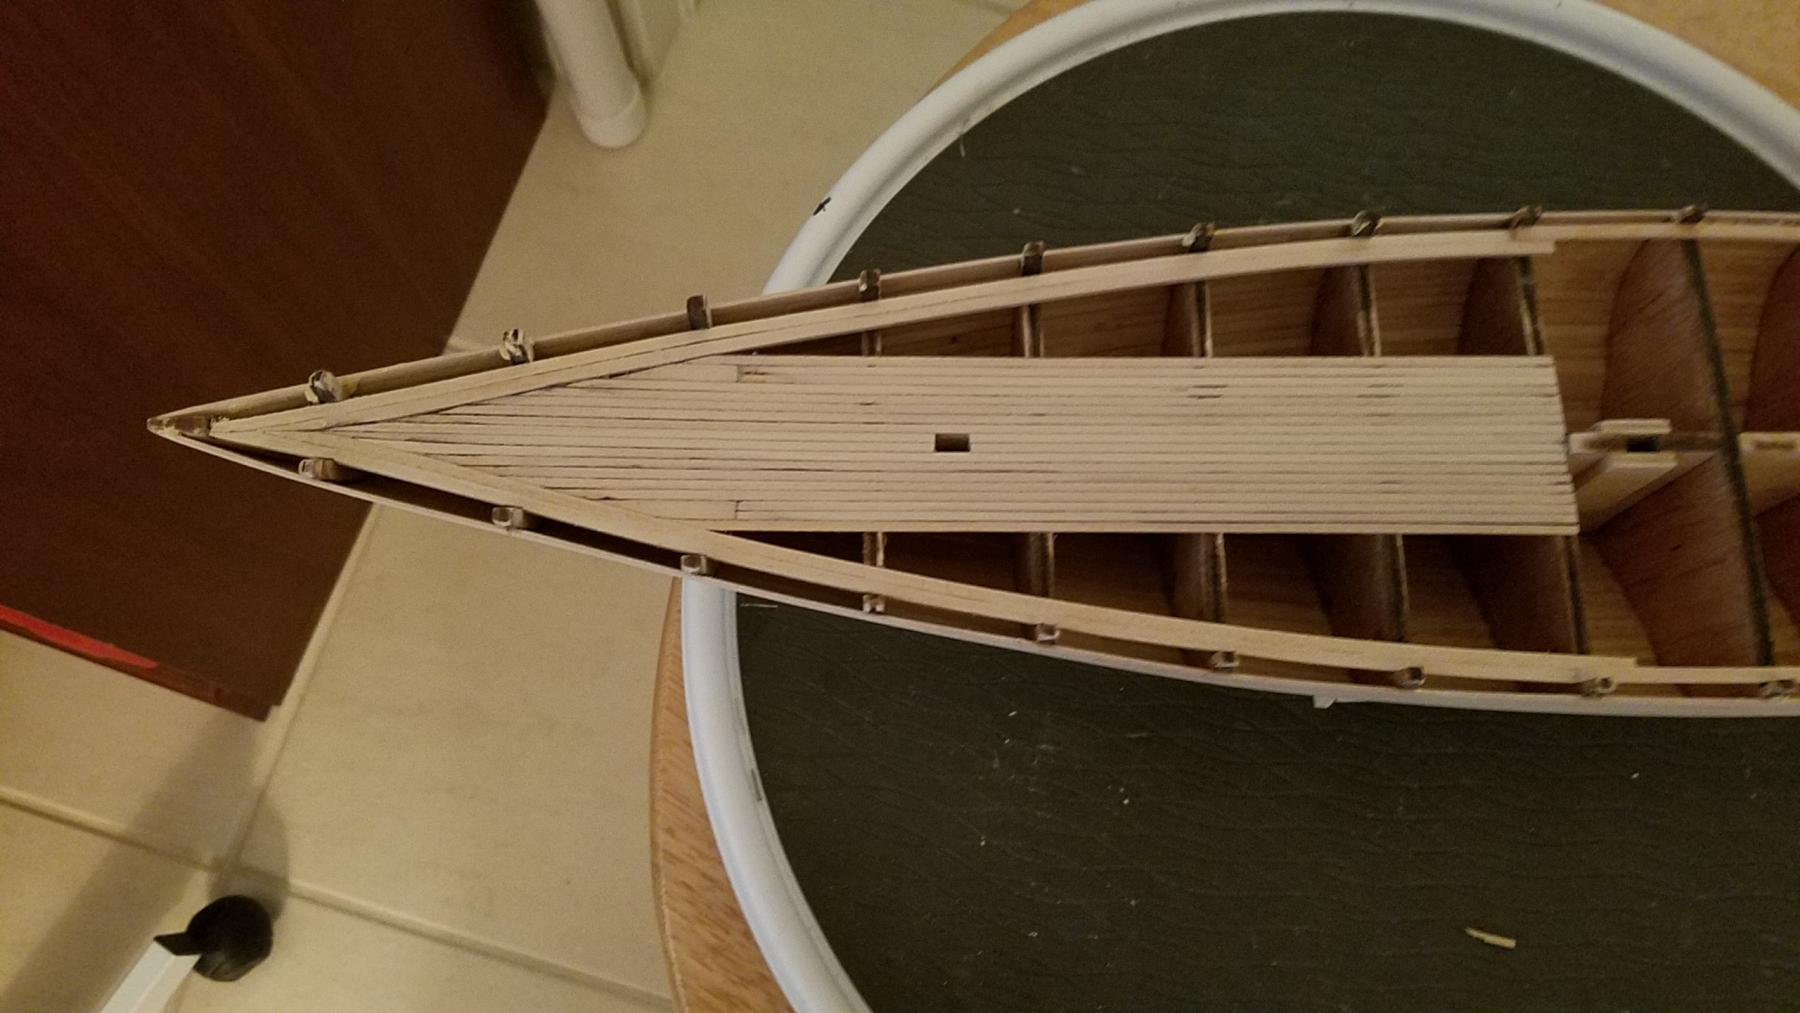
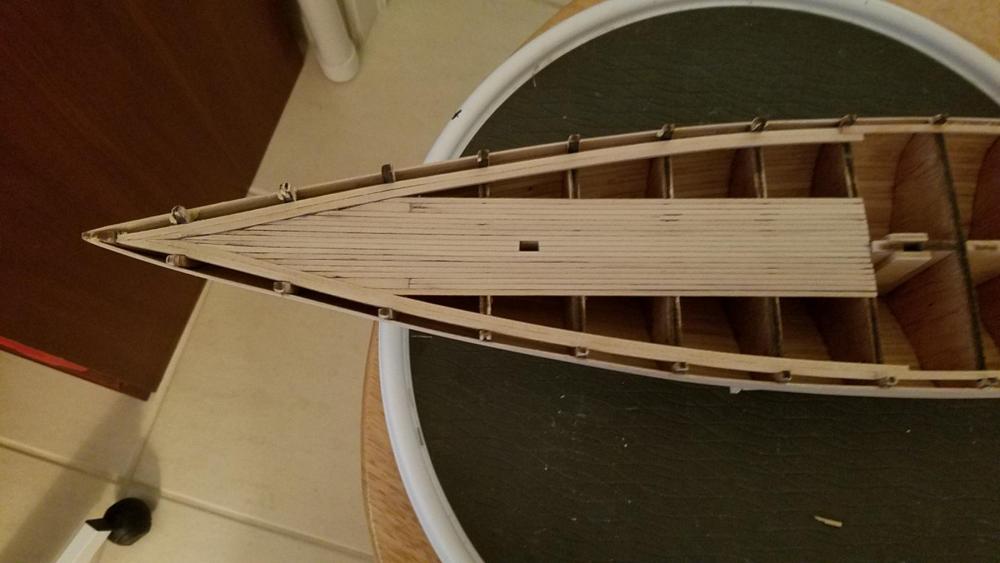
Hello Dave.. Many thanks for your visit and your good advice. I did read elsewhere that one should not be wasteful with the deck planking as the supply was not overly generous. However, I have begun the nibbing and have not done a very good job so far. I have attached a picture to show what I mean. I followed the practicum carefully but I find it difficult in any event. I will probably rip out what I have done so far and start over again or I may just continue on from where I left off and chalk it up to a learning experience. My patience is beginning to run out. In any event, I will guard the deck strips with my life. Thanks again for taking the time to write to me. Best, Jerry

-
Good morning, Lawrence... The sweet lines you have referred to are growing. It's now time to begin the nibbing. Since I have never done this procedure before I am a little nervous about it but I'm sure I'll figure it out. So here's the latest pics as to where this Bluenose stands. I hope you have a great weekend as we celebrate our Fourth of July Holiday. Charlene joins me in sending our best regards to Bernadette. Jerry
-
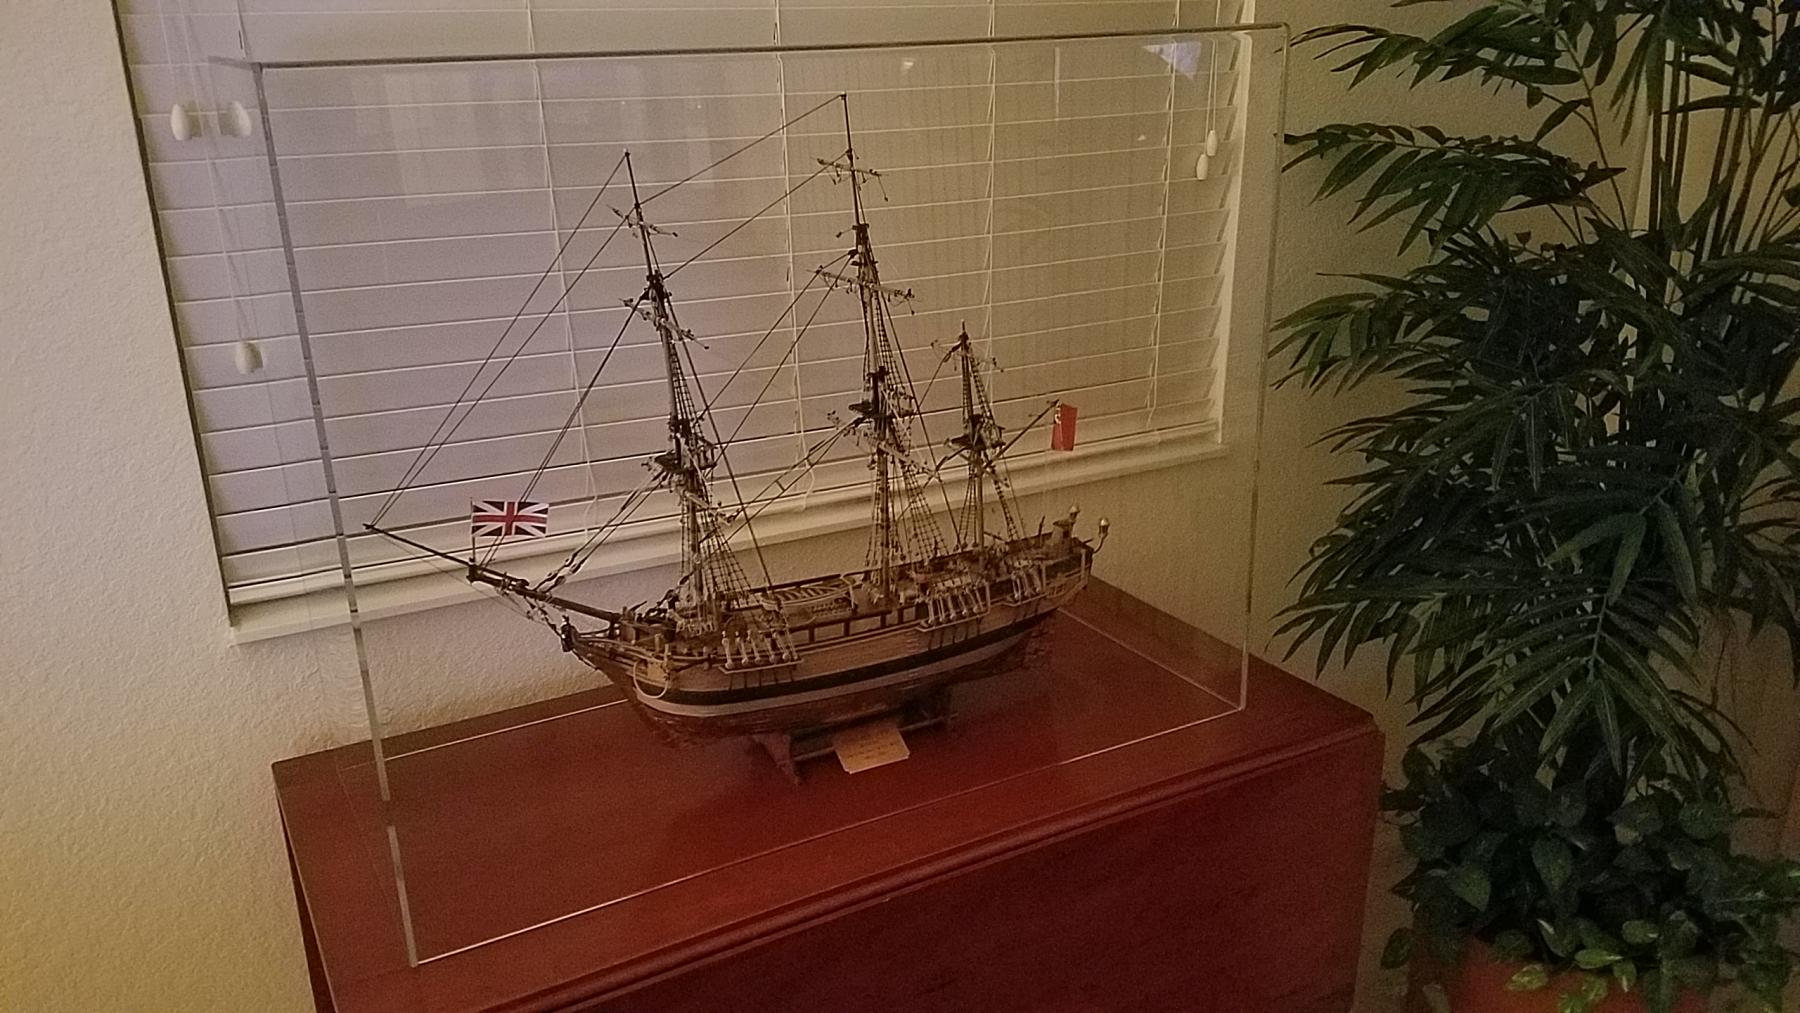
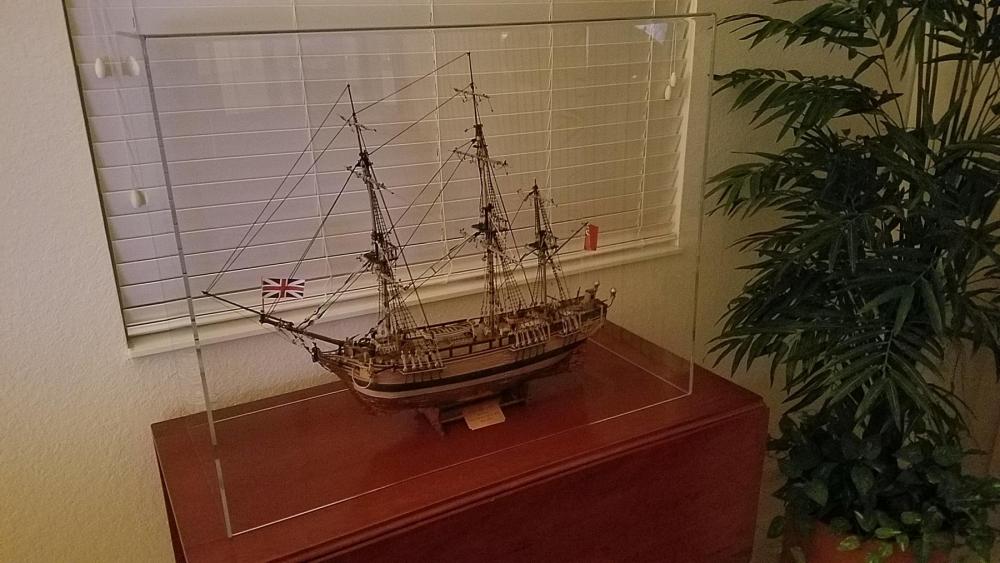
Hello again everyone.. It took a long time but we finally received the display case from our manufacturer and our Bounty is happily on display in our living room. She proudly sits on the other side of the narrows from HMS Victory vying for the most attention. This will close out our joint effort in the building oh the HMS Bounty. Best to everyone.. Charlene and Jerry
-
Hello Popeye.. How are you doing? Before I forget,Olive Oil said to say hello and wish you the best. She's still running around but hasn't begun her new kit of La Nina yet. I've made a little more progress on the fore deck and so far so good. I think my method of "caulking" will be okay. I'll post some more pictures a little bit later in the procedure. I think your method is a very good one as long as you keep the "coloring" on the edges. By using a marker pen the broad surface of the felt tip offers a nice bed to slide on the edge of the plank. Later on, when doing the 4 step method on the quarter desk I'll also coat one end of the plank too. So have a great weekend in beautiful New Hampshire and I'll talk to you later. Best, Jerry
-
Thank you Popeye and Lawrence... Today I decided to veer from Bob Hart's practicum and go out on my own a bit. I started to plank the fore deck the way I like to do it even though I am conflicting with the practicum's directions. In particular I am speaking about the method to create the look of caulking. Bob Hart says don't use ink on the edge of your planks because it'll bleed through due to the nature of basswood. He uses a black soft pencil lead which to me is too time consuming and offers very little to a caulking look. I have always used a black, soft, felt edge marking pen which I realize is a permanent ink and could cause some bleeding. However, it is quicker more authentic looking and with care causes very little bleeding. In the past I have taken advantage of the bleeding to create an older looking deck by blending the "bleed" into the surface with some very fine sandpaper. All of the other Bluenose sites I have seen have followed Hart's advice and the decks are beautiful but with all respect, look like they were just bleached or that the ship has never been to sea. I like a deck that looks used and that has been in service for a while so I prefer my method. I haven't progessed very far yet but I have attached a picture which should give one an idea of what I'm talking about. What do you think? Best, Jerry

-
Hey Dave... Many thanks for your nice words. I just got through looking at your log and your work is absolutely stunning. I'm concerned about the nibbibg as I have never done that before so I hope I don't screw that up. I know your log is going to be very helpful. Talk to you soon. Jerry
-
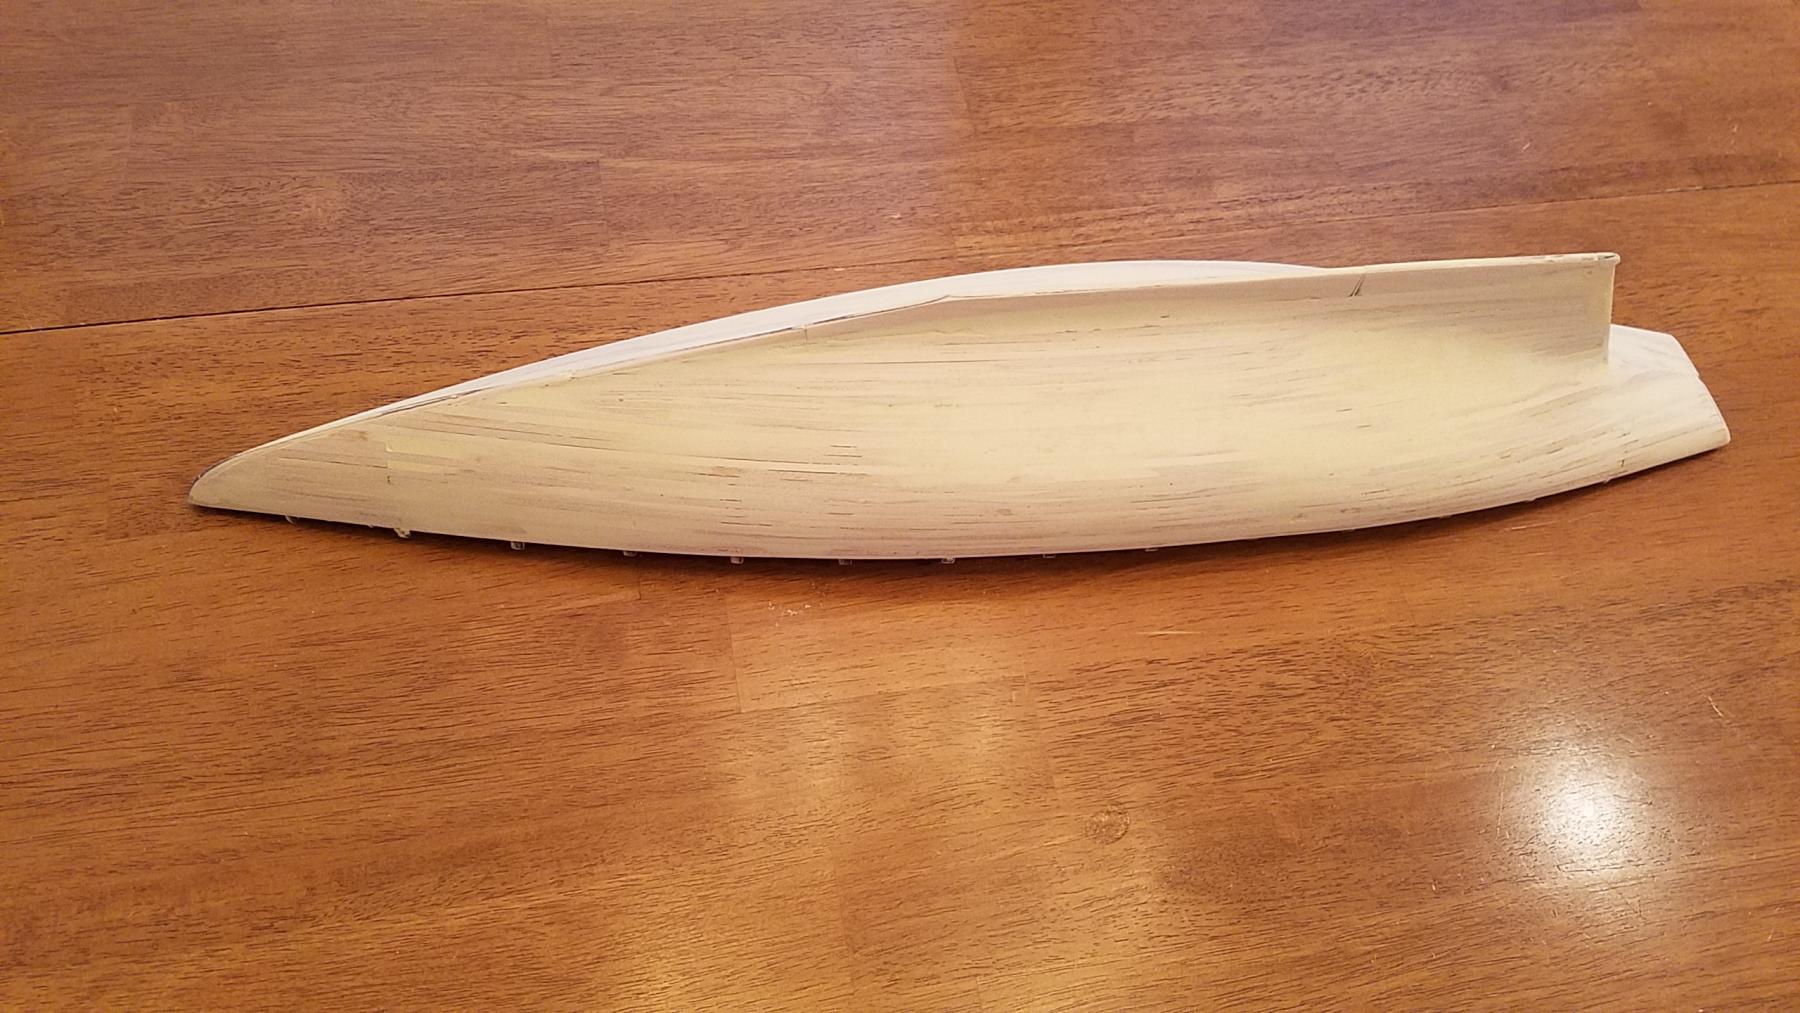
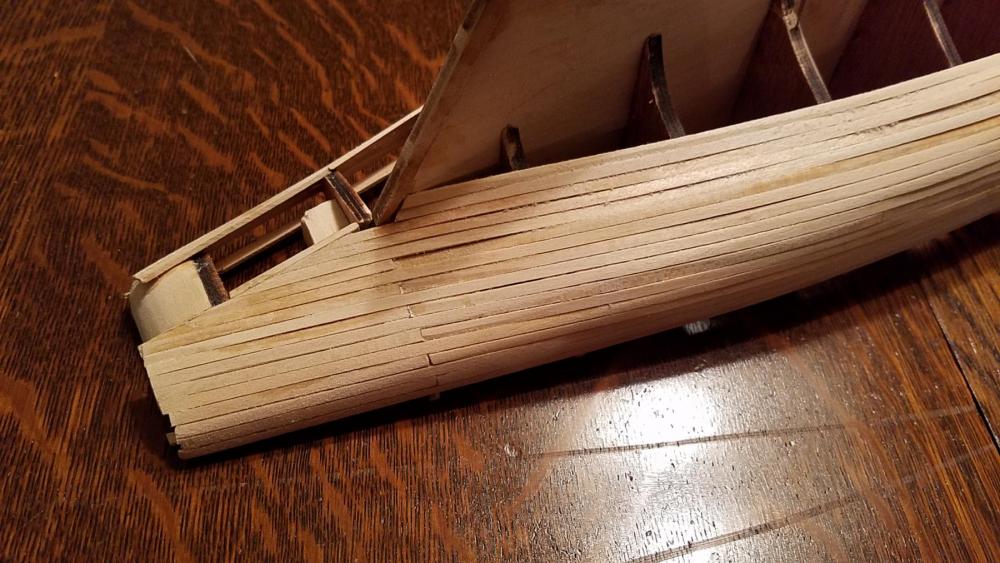
Hello Joshua.. Nice of you to make the visit to my log. And thanks for the compliment regarding the planking. Truthfully while I'm glad the hull is finished i must say that this hull was much easier to plank then the ones I built before, Most of the planks were able to fit without any tapering because of the type of bow and those that had to be tapered were done with some easy sanding. I never used a knife on any of the planks except to cut them to size. Good luck with your planking and if you have any questions please let me know if I can be of assistance. Best, Jerry.
-
Hello everyone... As I mentioned above, I planned to have had the hull wood filled and sanded by today. I used most of the 4 oz bottle of Elmer's wood filler to do the job and believe me the hull didn't look pretty. My admiral let out a slight shriek when she saw the hull coated with wood filler and I assured her that after the final sanding it would look like a model ship again; and it does. I wish she would pay less attention to my project and get going with hers' which, as mentioned earlier, is La NIna by Artesania Latina. Anyway, I'm ready to move on which I think means planking the deck. Onward!! Best, Jerry


-
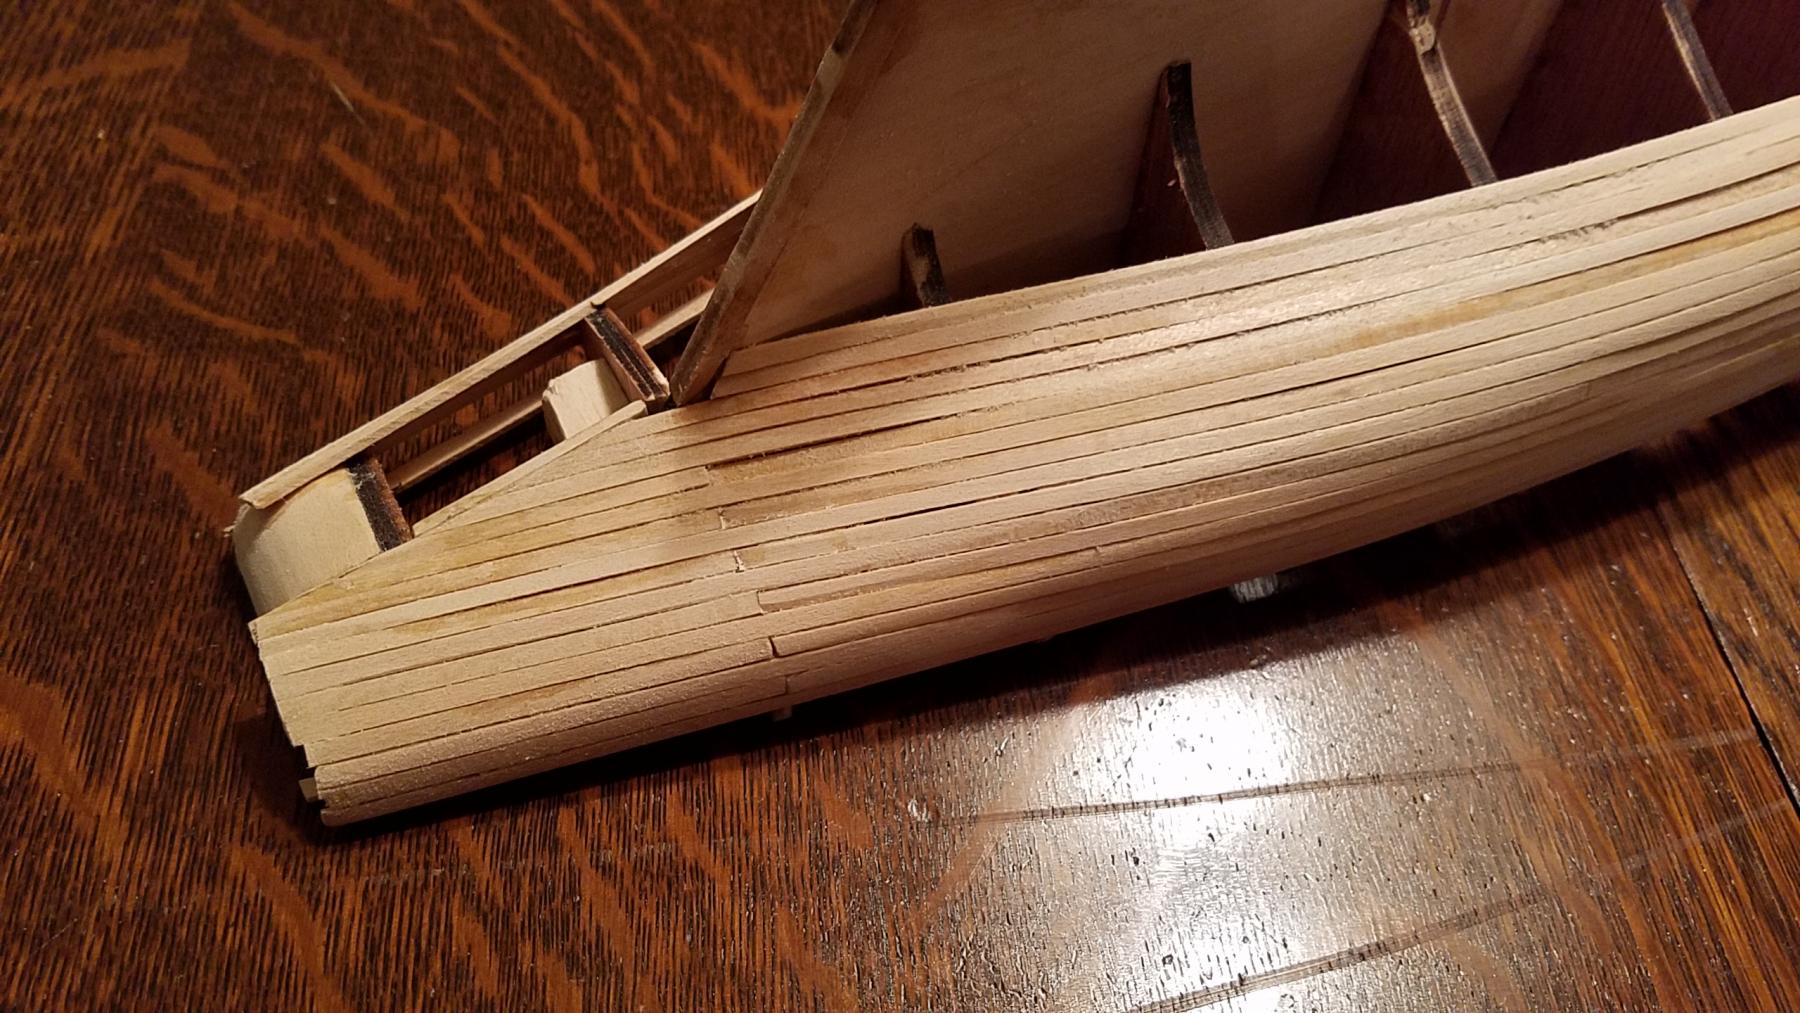
Good Afternoon everyone.. Another, day, another dollar... Very good progress made today; the hull is planked and ready for good ol' Elmer's Wood filler. I'll apply that tomorrow and let it dry overnight so Wednesday is final sanding of the hull day.; Hope all is well with everyone else. Best, Jerry

-
Hello Popeye... Thanks for the good word...I did get a little more done on the planking and will pictures later because my server isn't handling mail right now. Have a great evening.. Jerry P.S. Here are the pictures I promised...

-
Hello Dave.. Thanks for looking in and for your compliment. Hope all is well with you. Best, Jerry
-
Hello Brian... I sincerely appreciate the time you have taken to write to my log and to express your thoughts regarding Bob Hunt's practicum and method of construction. I shouldn't have said what I said about not looking at the kit's plans and directions because I really did when I first opened the box. As you may know, Brian. I have built several model ships before and I have always scrutinized the plans and directions. What I should have said is that while I haven't looked at the plans and directions since starting the build, I certainly plan to use them as I get in to the details. Constructing the hull is really old hat and as you said everyone has their own way of doing things. I am enjoying Bob's practicum, especially the pictures (there are over 500 of them) since they have answered some of the questions I have had so far. Thanks again for pointing out your feelings. I too, very rarely will entirely use CA to entirely plank a hull. It has depended on the type of model I'm building as to what cements I use. In building the Victory, Half Moon and Bounty, I found it useful to use white glue on the first layer of planking which was held in place with pins. These aforementioned projects were all double planked so the pin holes in the first layer were covered by a second layer of planking or copper plating. I always use CA for the second layer or when adhering the copper plates. I am using CA on the current model (only one layer of planking) and in spite of messy fingers, it has worked out fine so far. I have followed Bob's suggestion to wipe off any excess CA with a paper towel as I proceed and any mess left is easily sanded off the surface of the wood. I will admit that I am a heavy CA user usually and maybe that's why my admiral thinks I may be drinking too much. She's about to start building the Nina so maybe we'll both get high together from all the CA use in the room. Again, thank you so much for writing to me and voicing your opinion s. I hope you will continue to follow my build. Best, Jerry
-
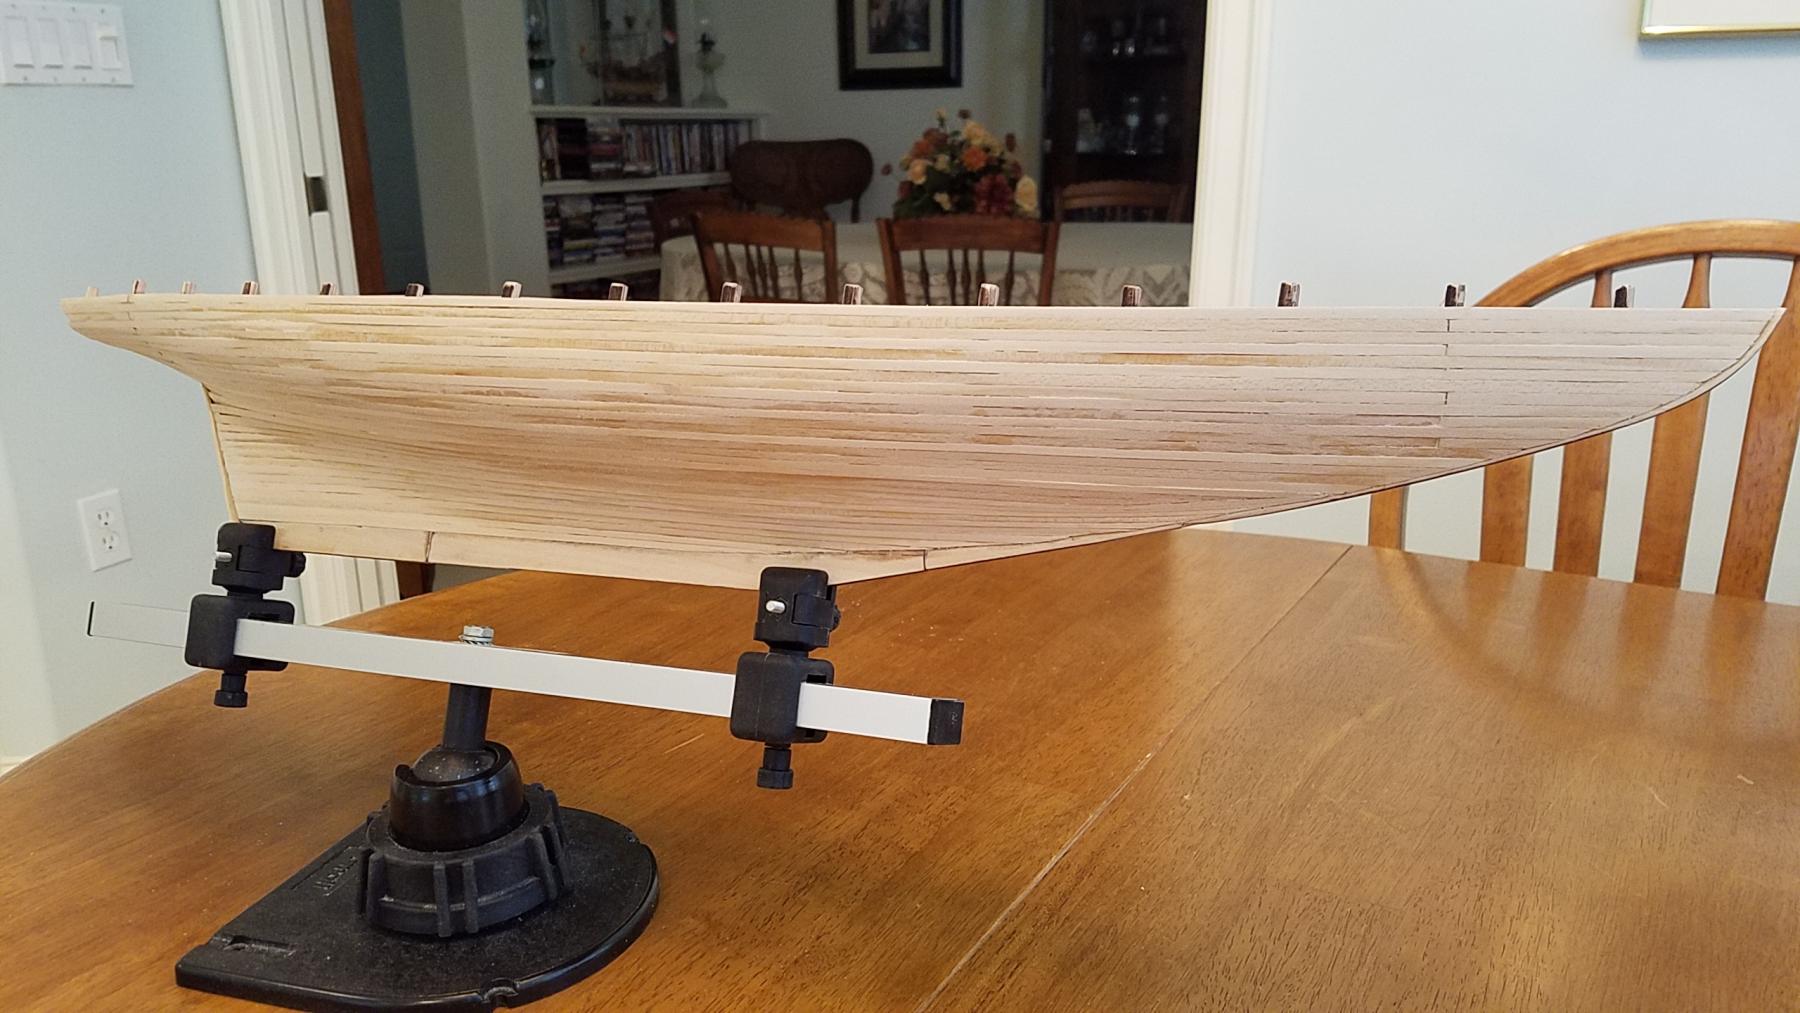
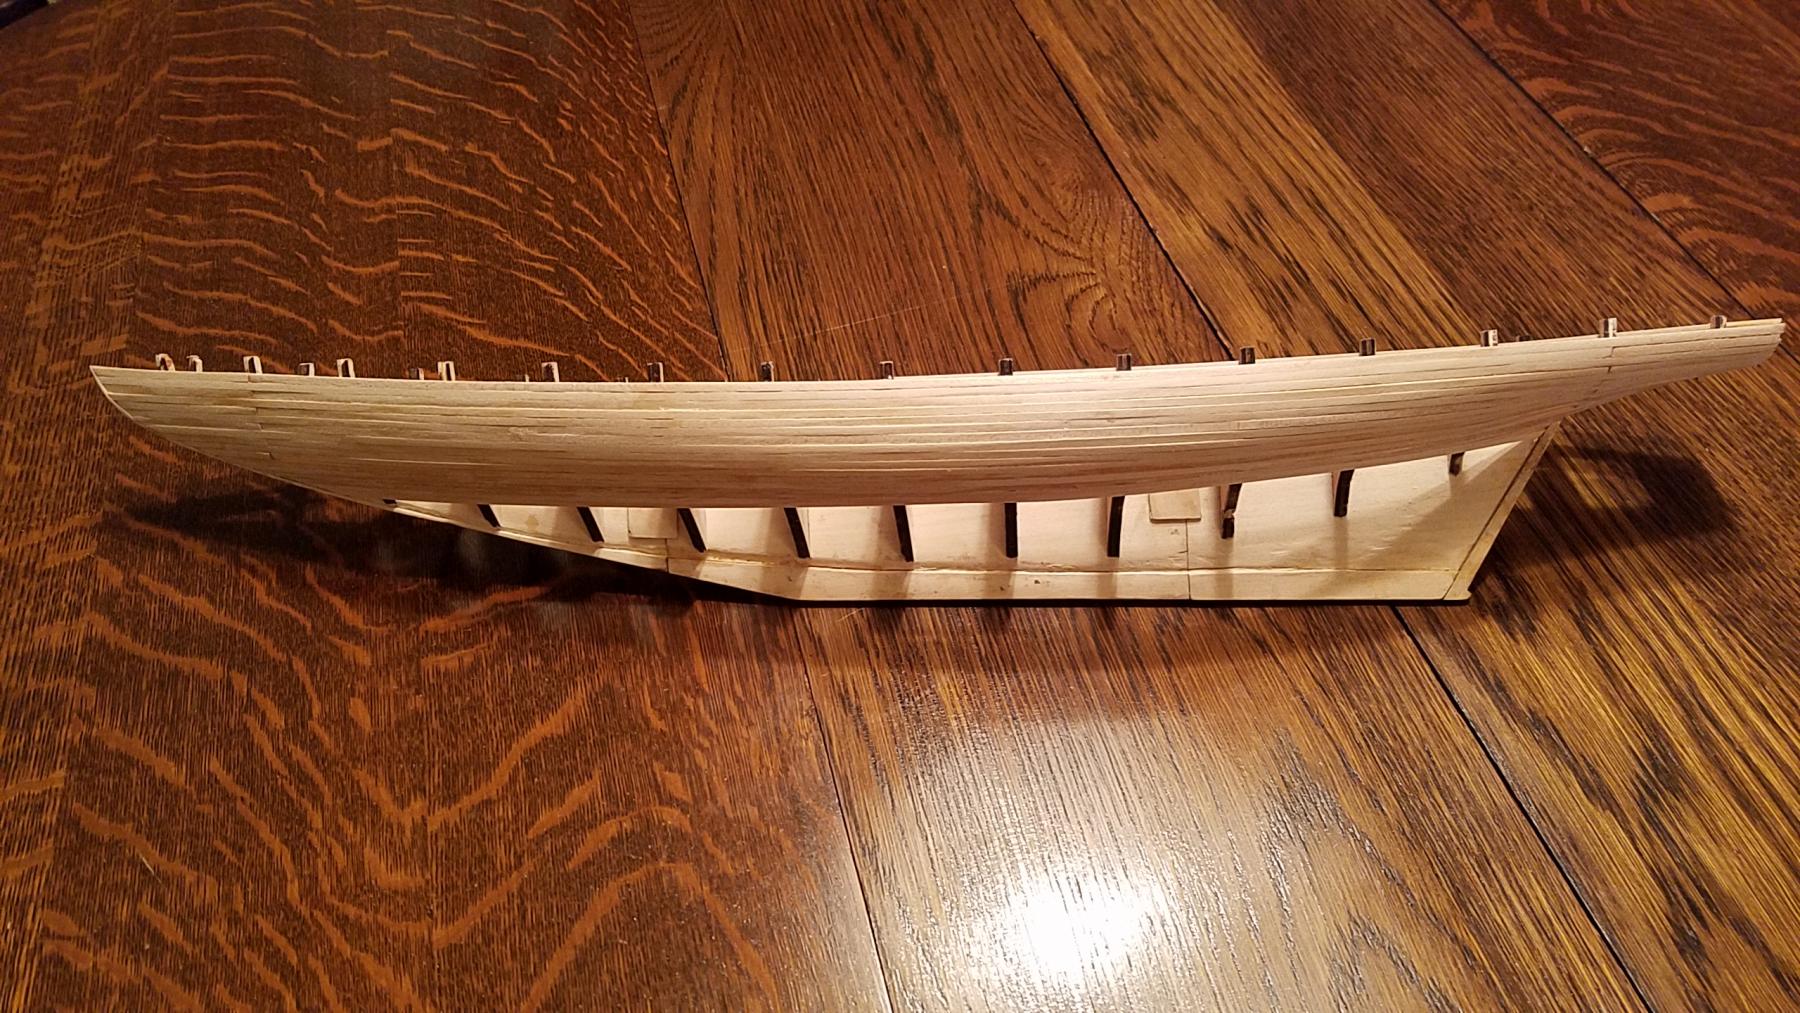
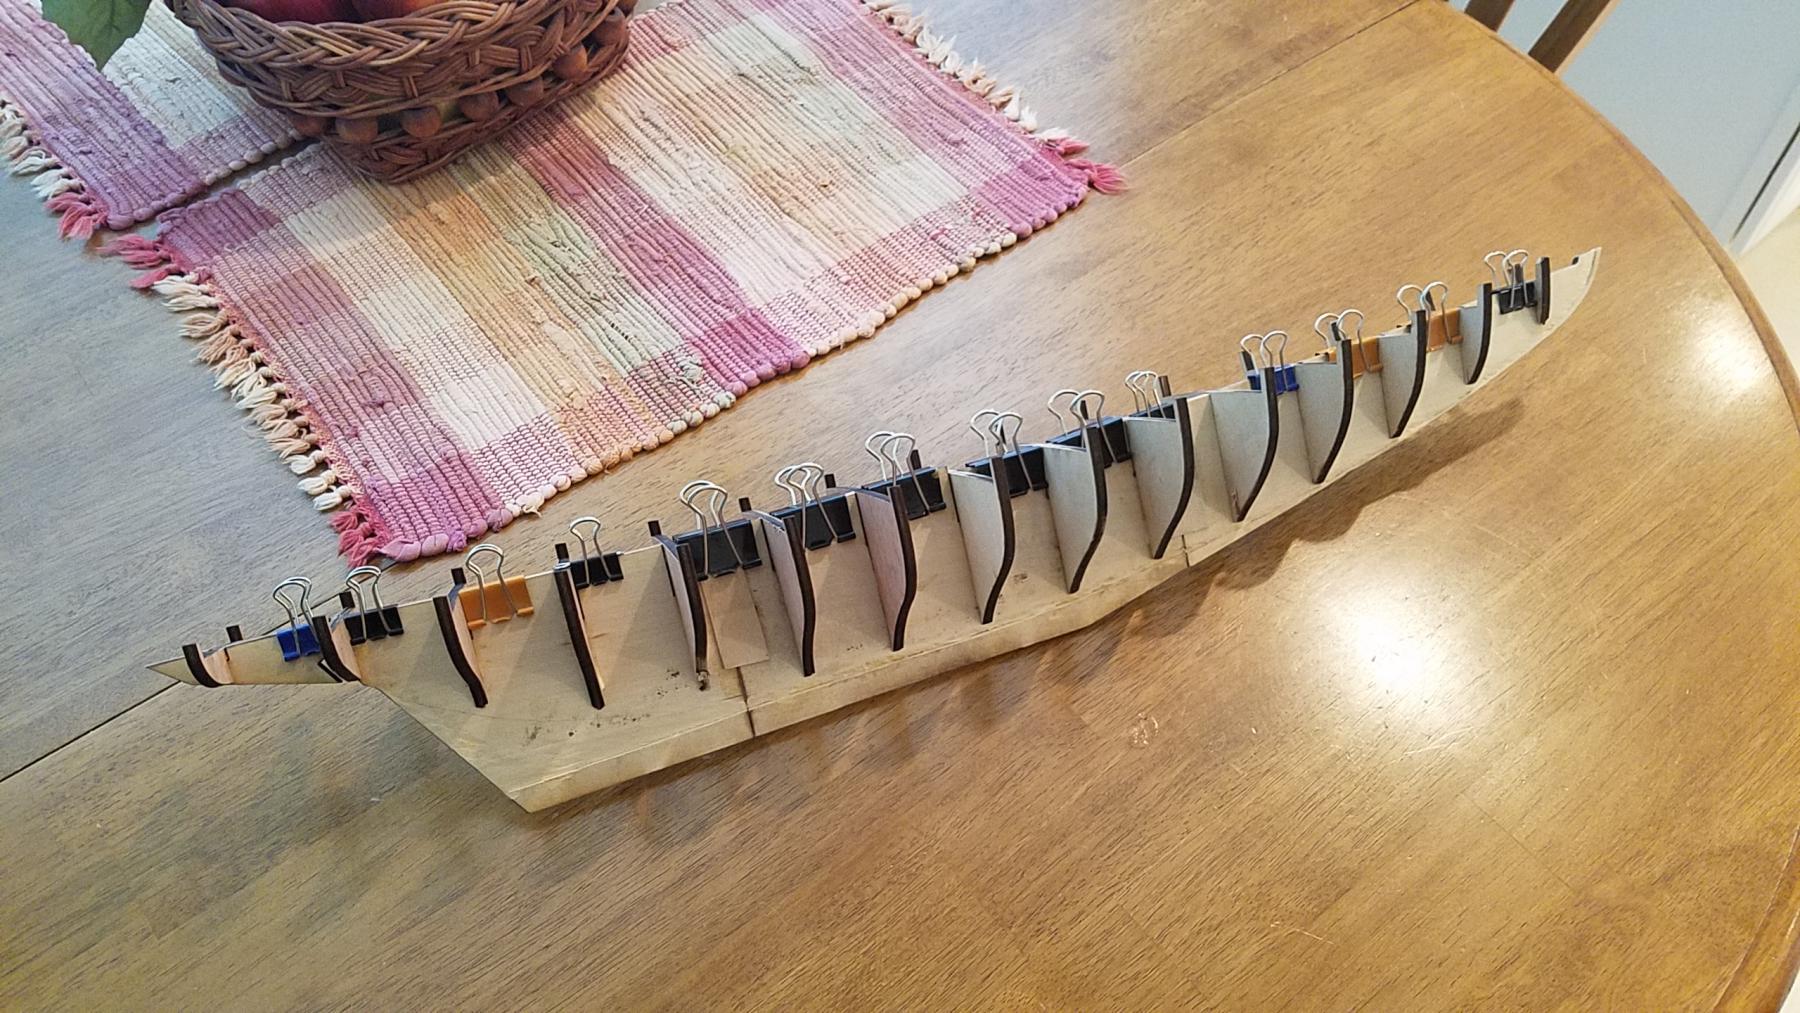
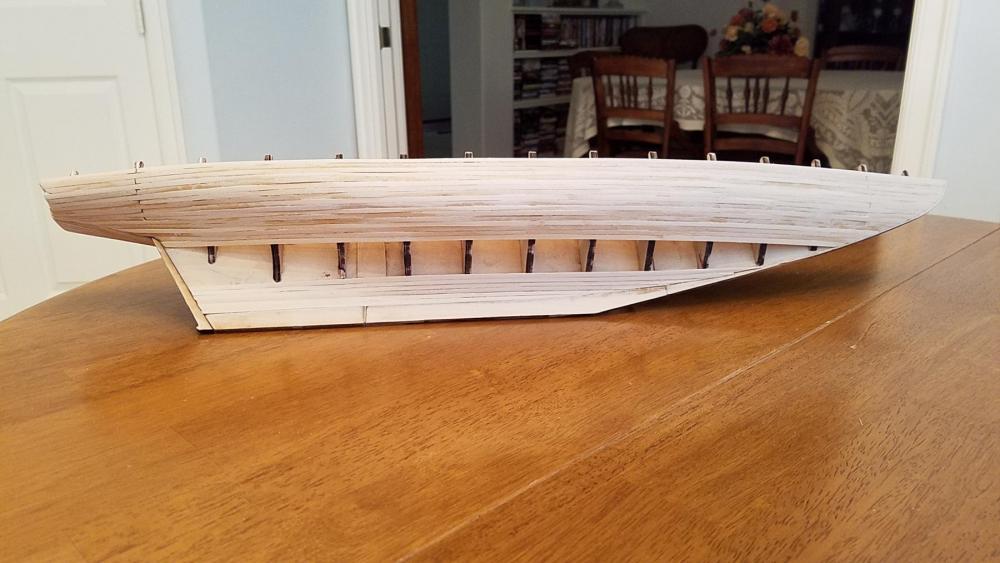
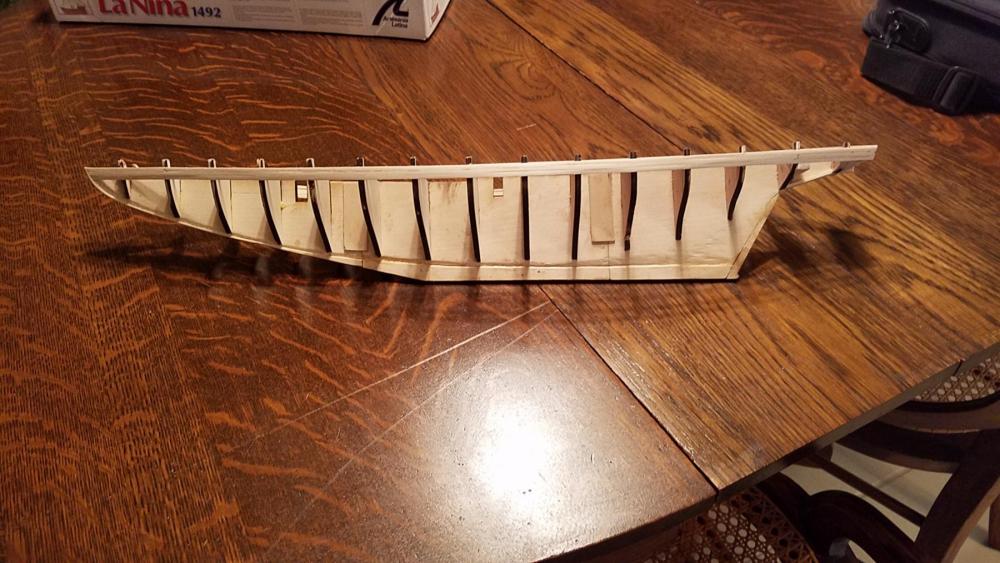
Hello Popeye.. Charlene is a stubborn woman; that's why she made Admiral. LOL.. I have no idea if she plans to do a log. I believe she's skeptical but who knows? I did fair the bulkheads a little bit where it was needed. Most of the center section didn't really require it. I have now completed the planking from the gunnels down and will soon start planking from the keel up. This planking will require some tapering at times but after all the models I have done I think it'll be a piece of cake. I'm following Bob Hunt's practicum for this build. I haven;t even opened the kit's instruction manual as the practicum suggests to avoid the plans and kit directions unless specifically called out. Here's another picture as to where I'm at right now. Have a great day. Jerry
-
Good morning, everyone, We've made a bit more progress in the planking phase of the hull. It's very raw and obviously good old Elmer's wood filler will come in handy in a few days. The port side is ready to begin the planking from the keel up to meet the planks that were placed from the gunnels down. This next stage will require tapering which was not necessary so far. More to follow... Best, Jerry

-
Good afternoon friends.. A little more progress today; reference waterways installed so we're ready to begin planking the hull. The waterways establish the beginning point of the top plank. Thanks for looking in. Best, Jerry
-
Thanks for the visit, Dave. Truthfully, I'm so happy that I'm not going to try and trim the bulkhead extensions,, Plywood....UGH! I think Bob's method makes sense and I'm looking forward to more progress on my build. Talk to you soon. Jerry
-
Hello Dave. You are absolutely right. I have learned so much from my fellow modelers' logs on this site. It would have been virtually impossible for me to have completed the Victory without the help of several others who I met on MSW. With respect to the practicum and deviating from its instructions, so far I have stuck to it like instant glue. The only times I have strayed was when the practicum suggests that you do so by referring to the kit's instructions or plans. Thanks for mentioning Bob Herman's log; I have been looking at it from time to time and have found it useful too. I'm about to start planking the hull and am still trying to decide whether or not I'm going to do a second layer. I have never built a plank on bulkhead model with just one layer of planking before. Your model is coming along beautifully and I'm looking forward to reaching the point where you are already at. Have a great weekend, Jerry
- 245 replies
-
- 2
-

-
- bluenose
- model shipways
- (and 1 more)
-
Hi Grant.. Yeah, you're absolutely right, it was definitely more bad luck. But upon reading several logs dedicated to the Bluenose kit by Model Shipways, i have learned that many others have run into the same broken keel at the same point. There is a definite kit design flaw. Come back again. Regards, Jerry
-
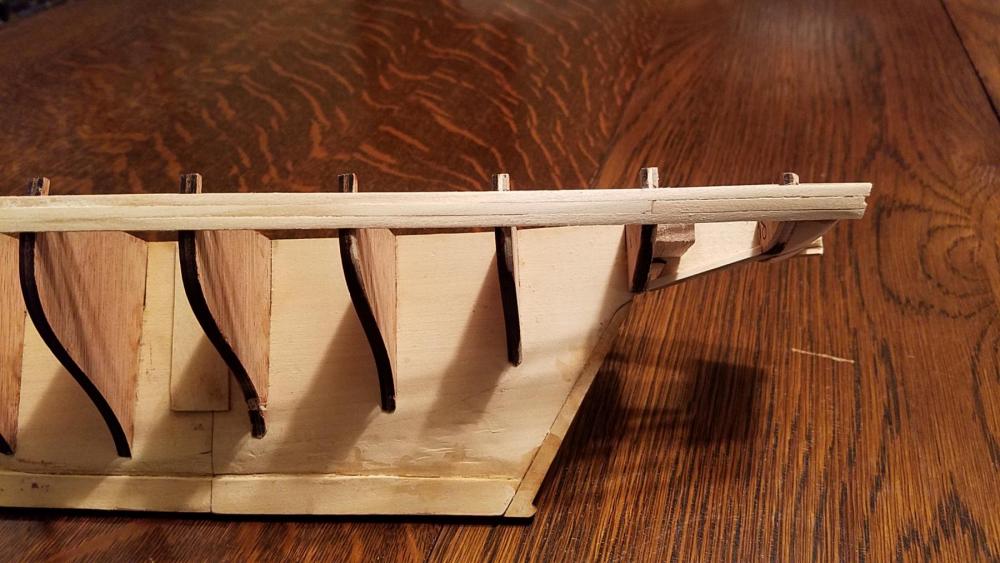
Hello Lawrence.. I'm beginning to think that the envelope has been lost in the mail but will eventually show up. And as I mentioned, if it doesn't I'll send you another, Thanks for the encouragement regarding Bluenose. I'm really enjoying this build so far and I learned today a different method on how to handle the bulkhead extensions. I'm not going to trim them but remove them entirely and replace them eventually with false stanchions. The practicum I have advises construction that way. I hope you guys have a wonderful trip and we'll talk when you return. My best to you. Jerry
-
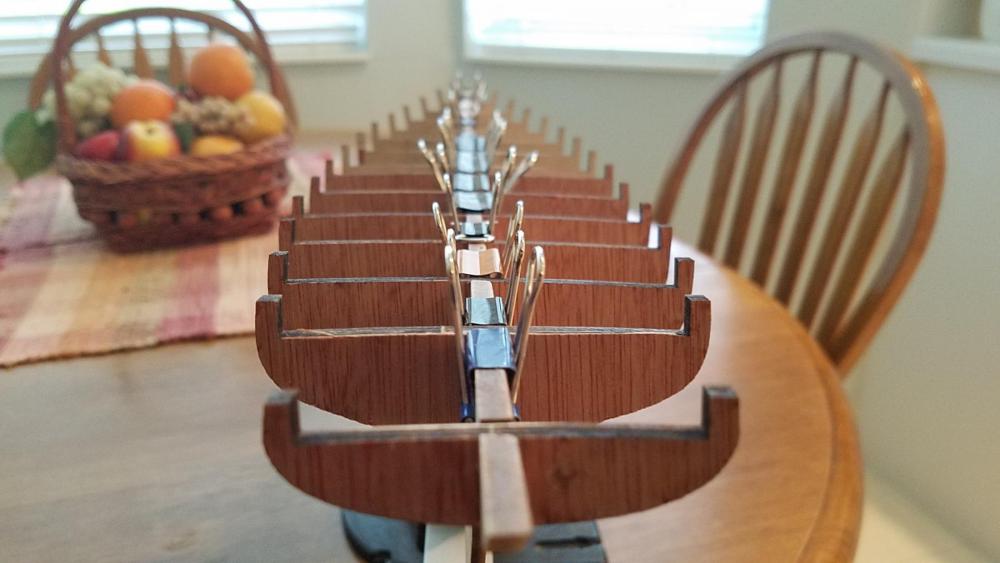
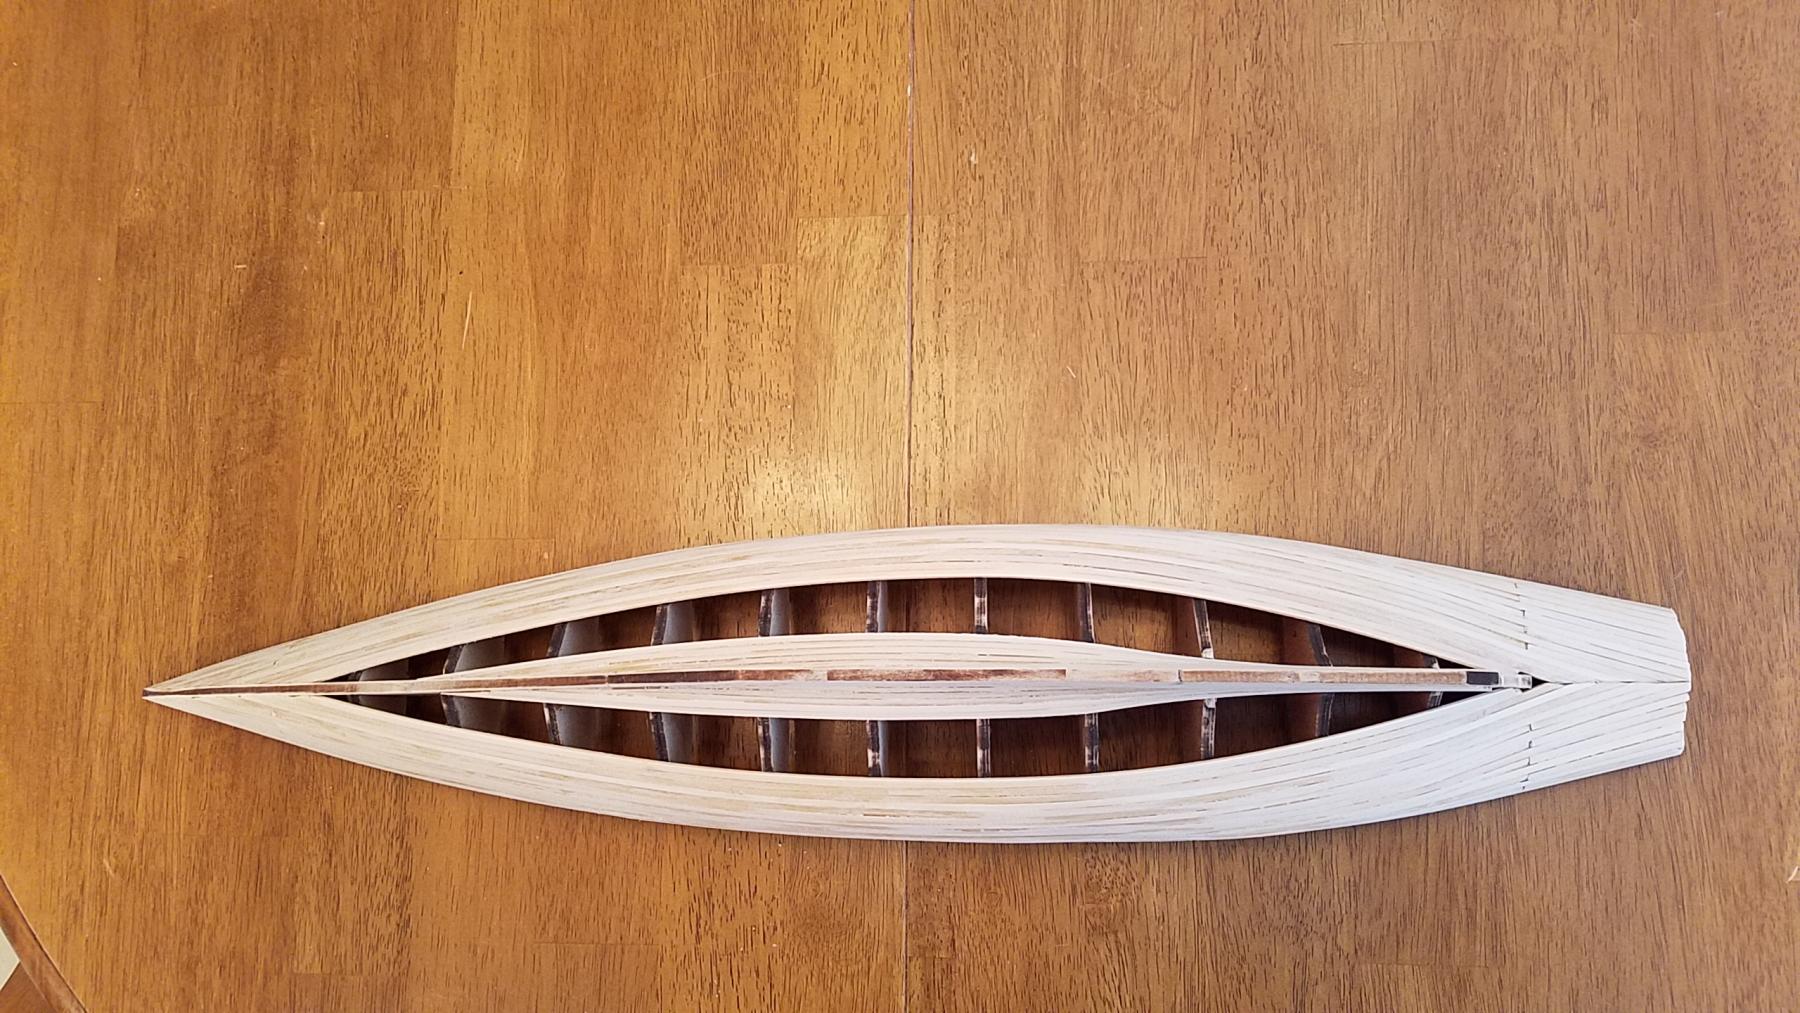
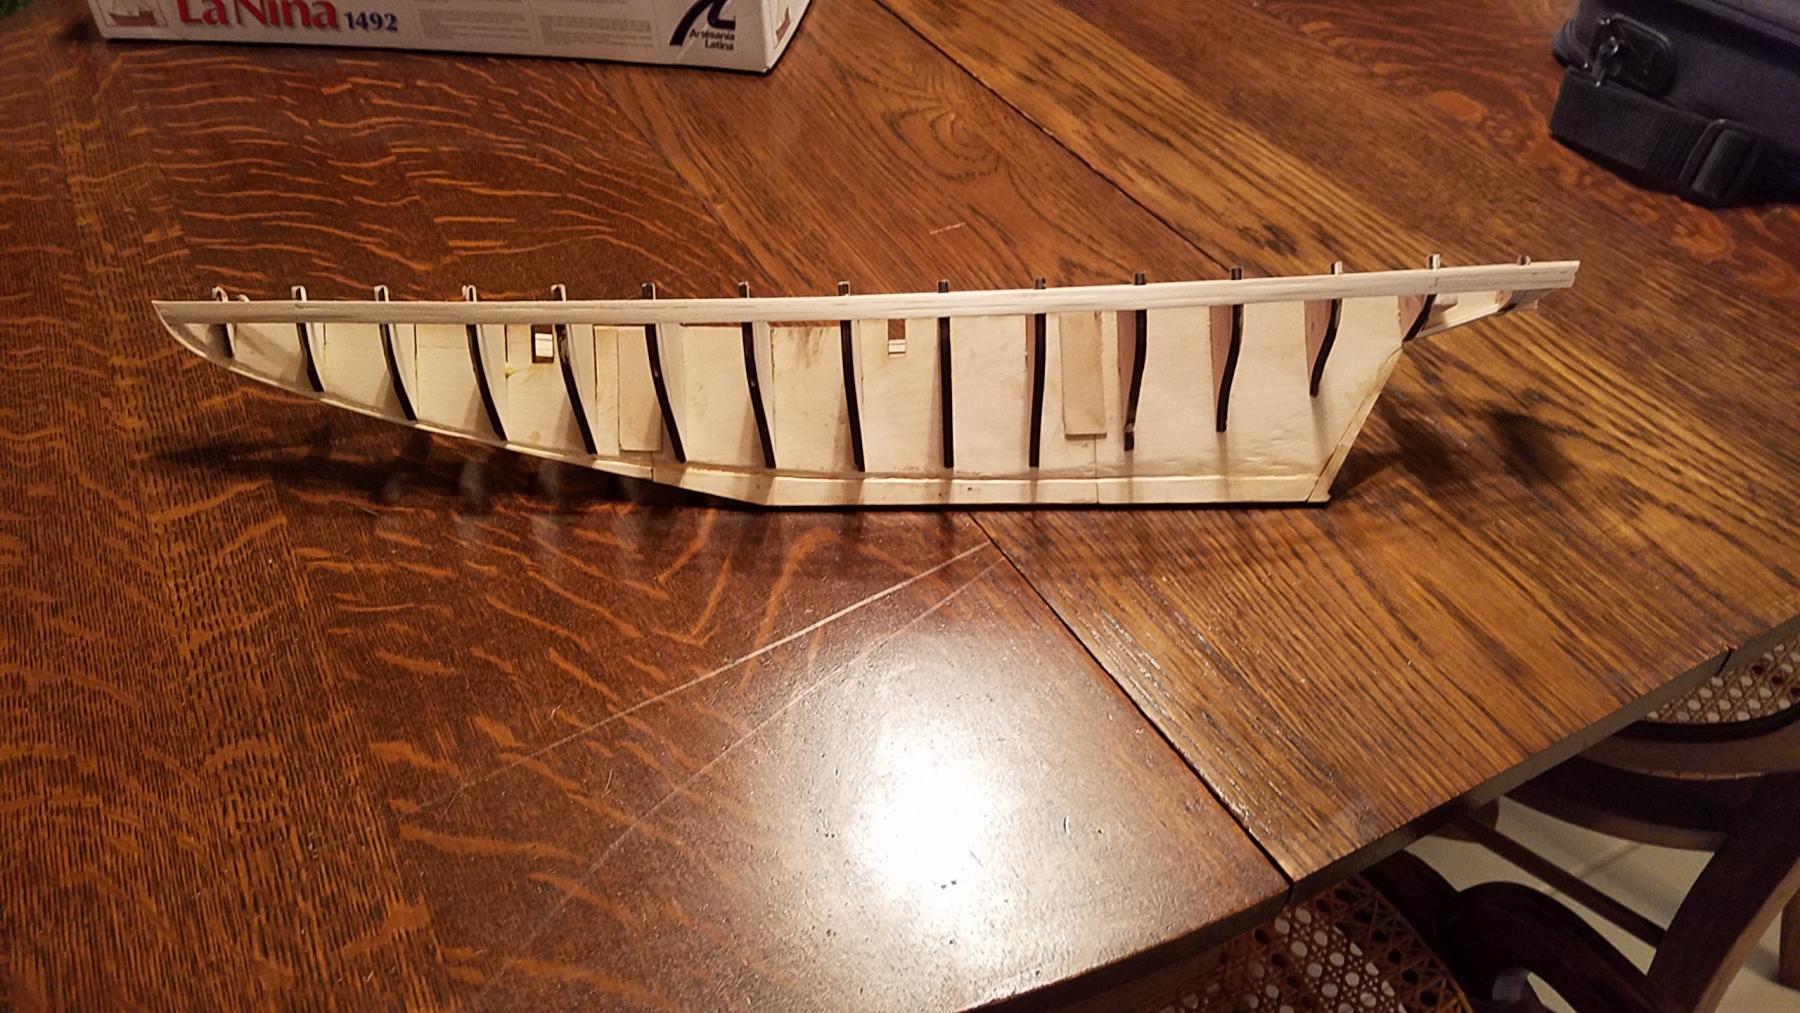
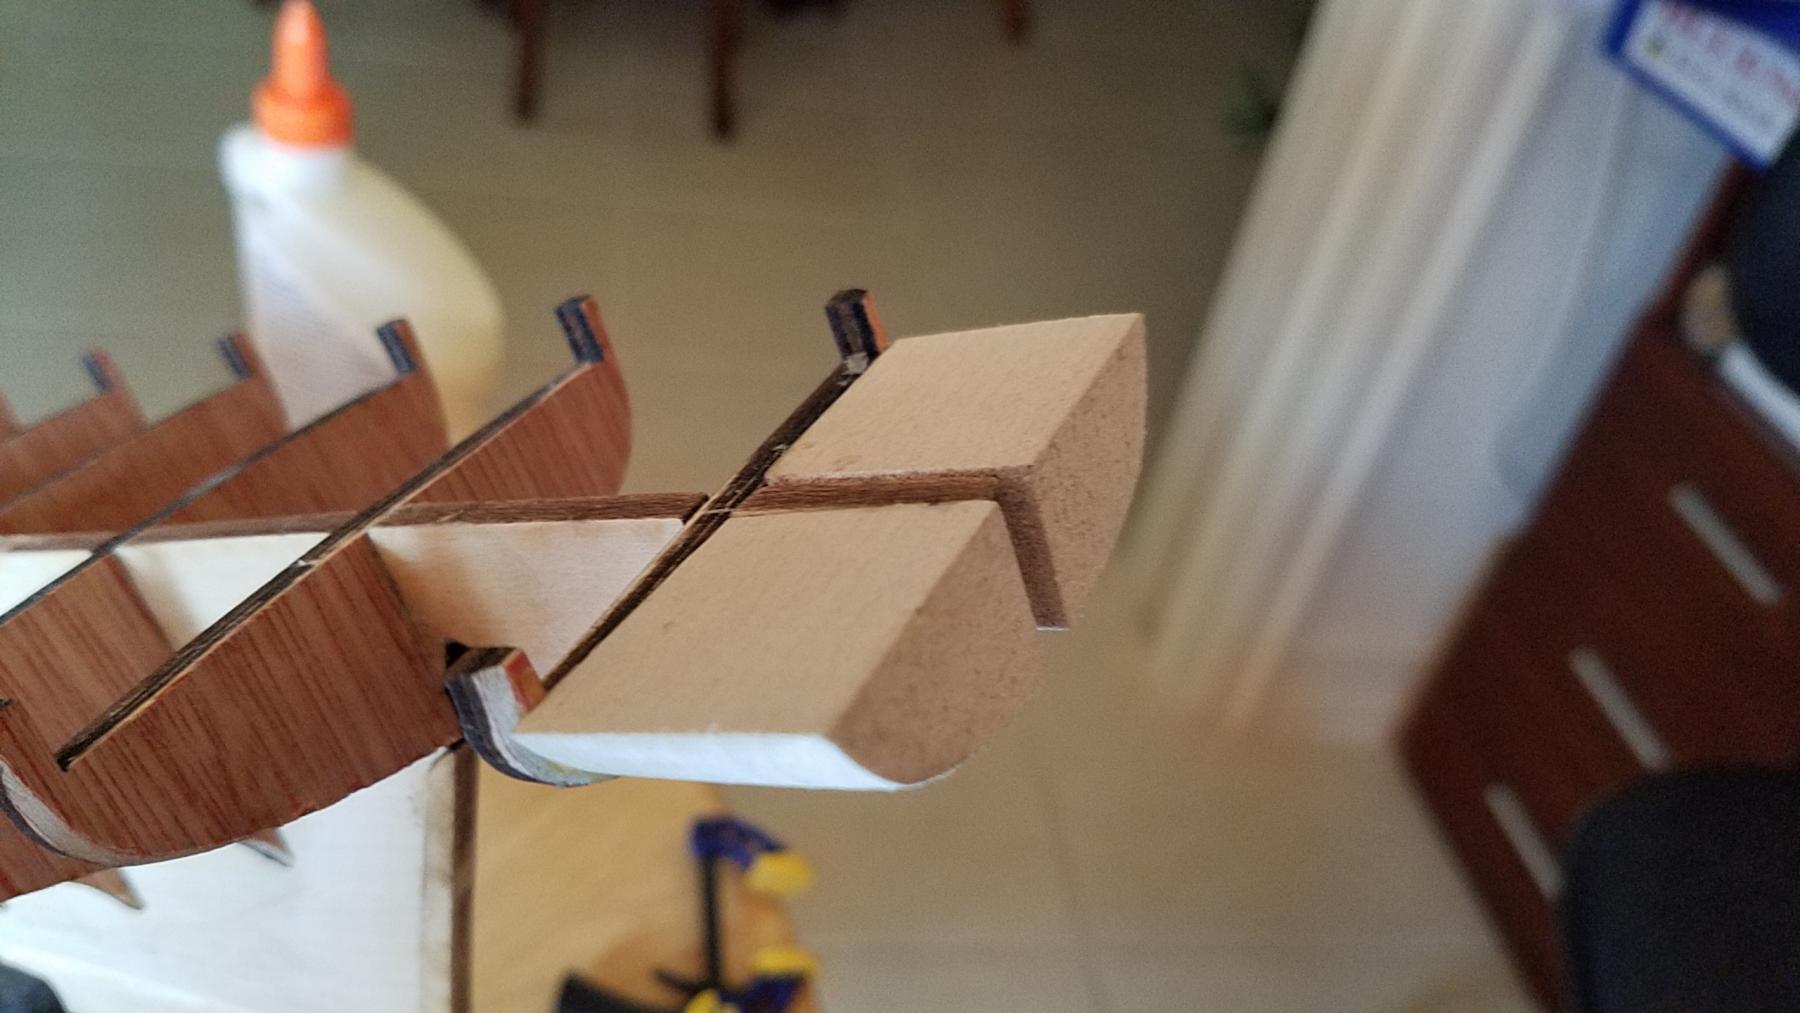
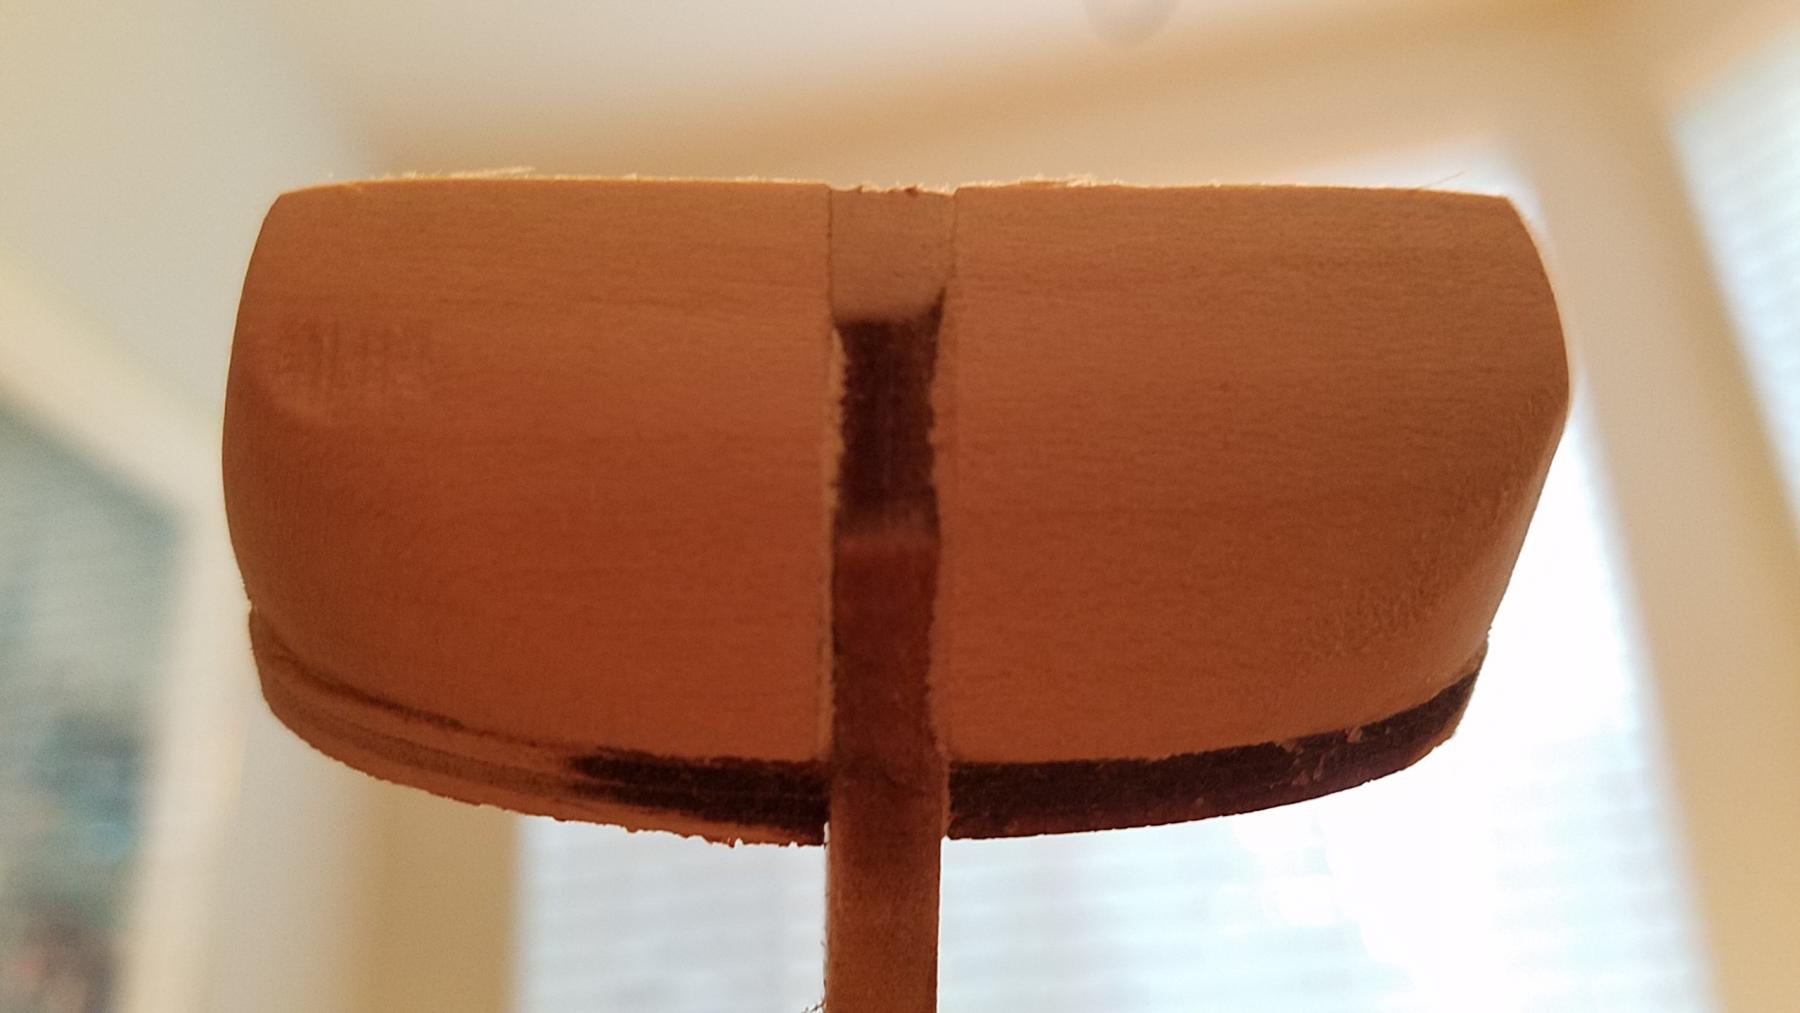
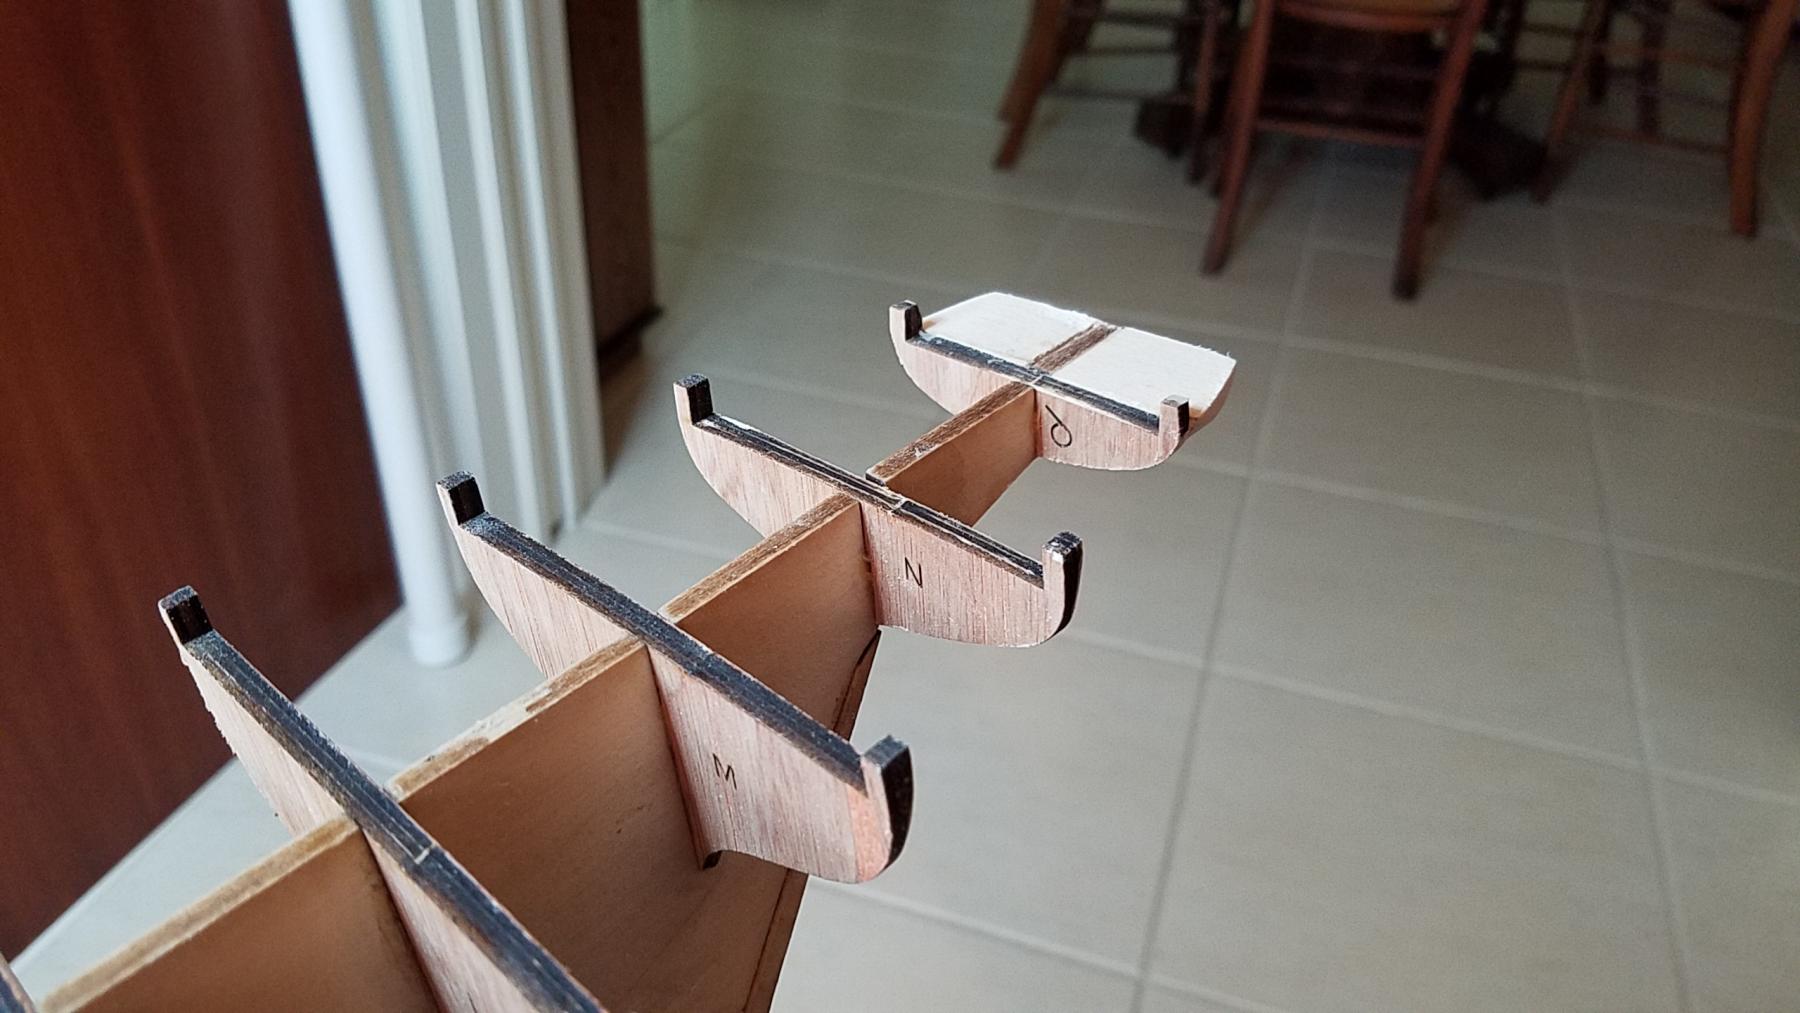
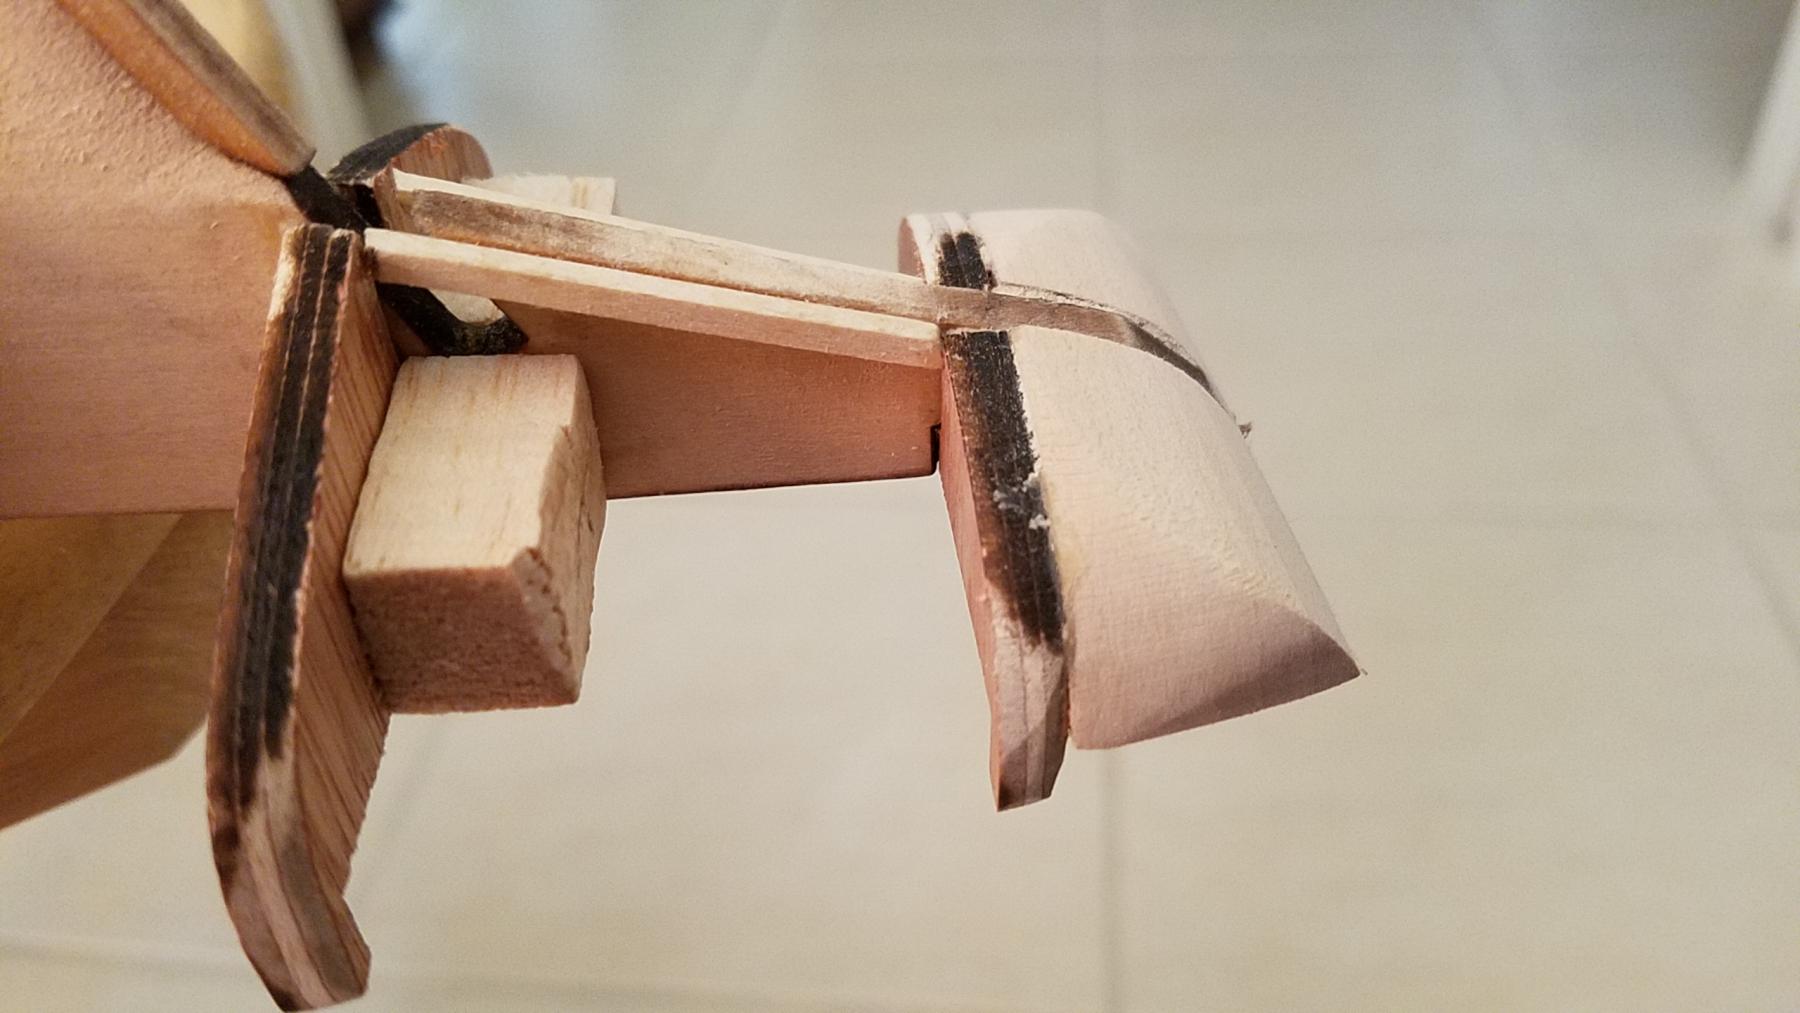
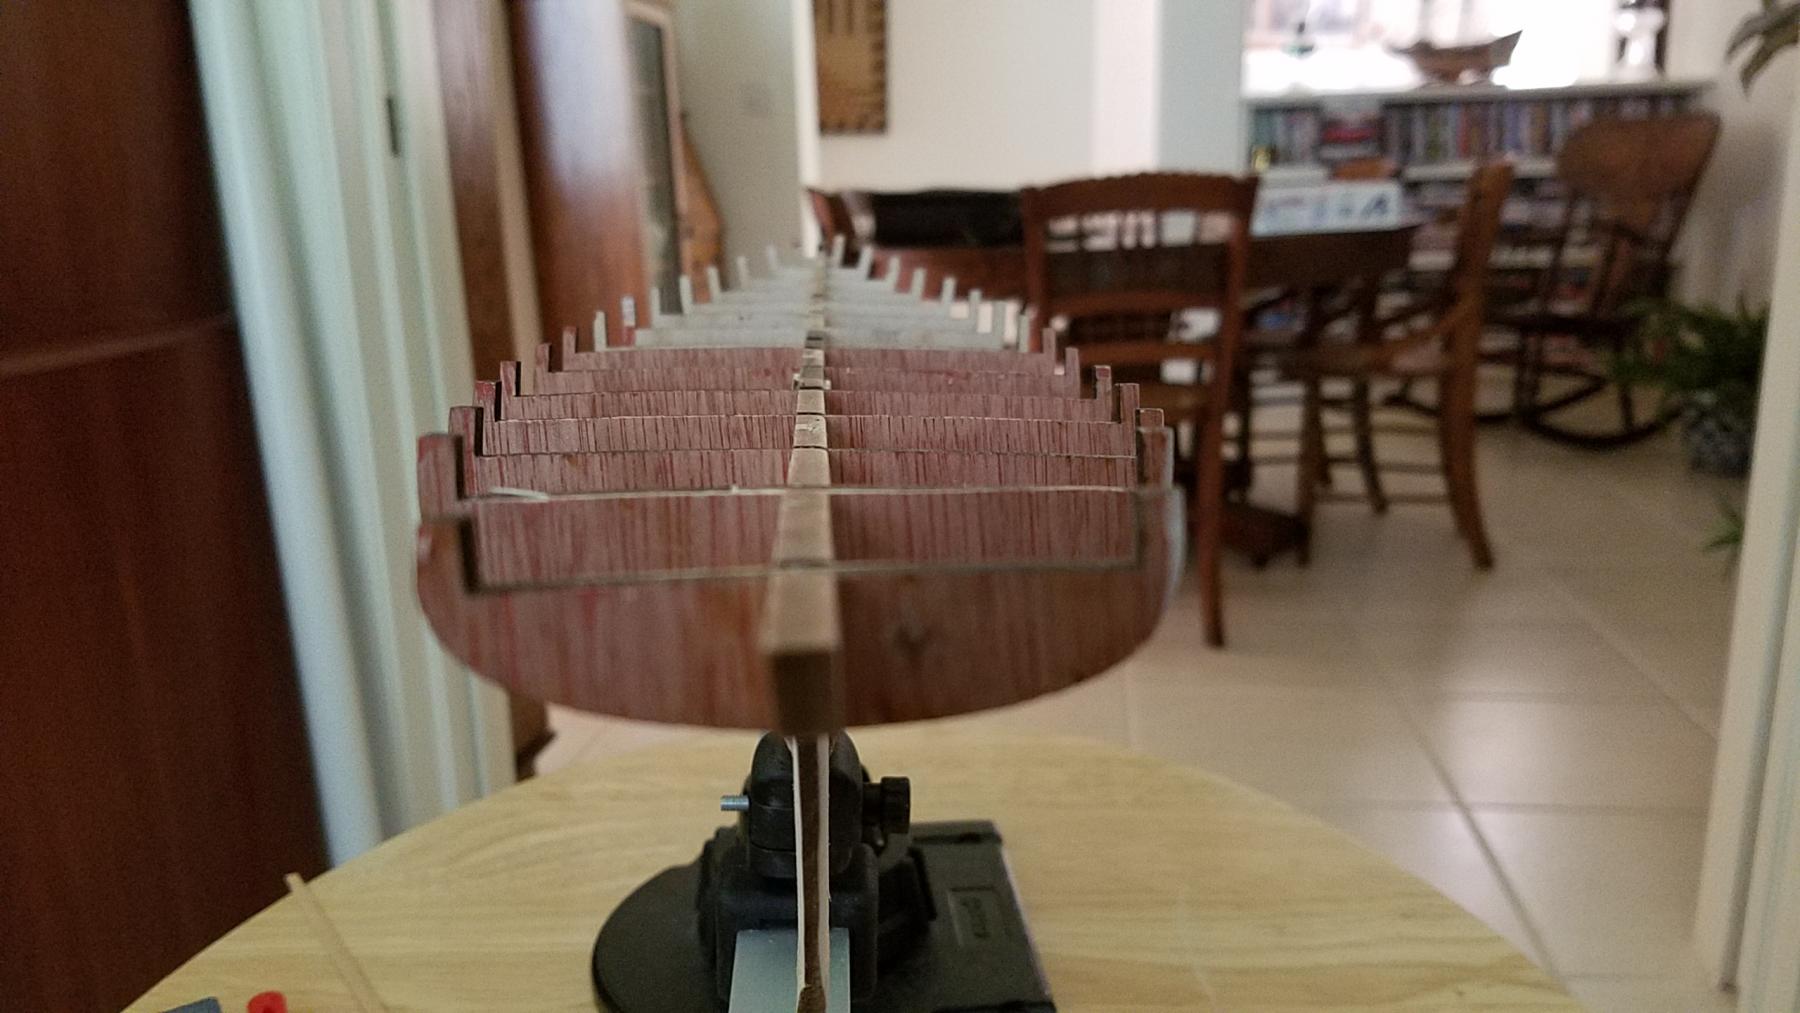
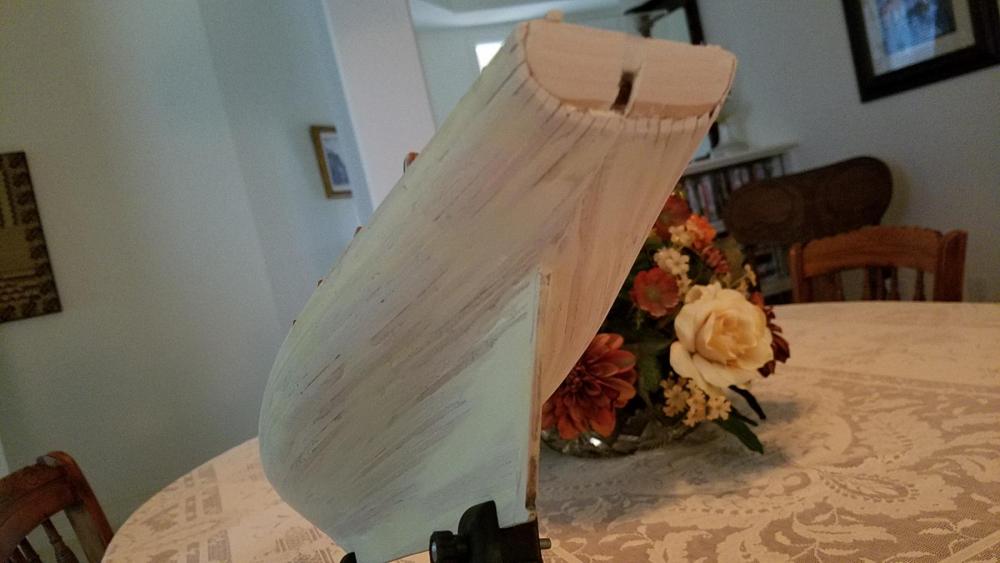
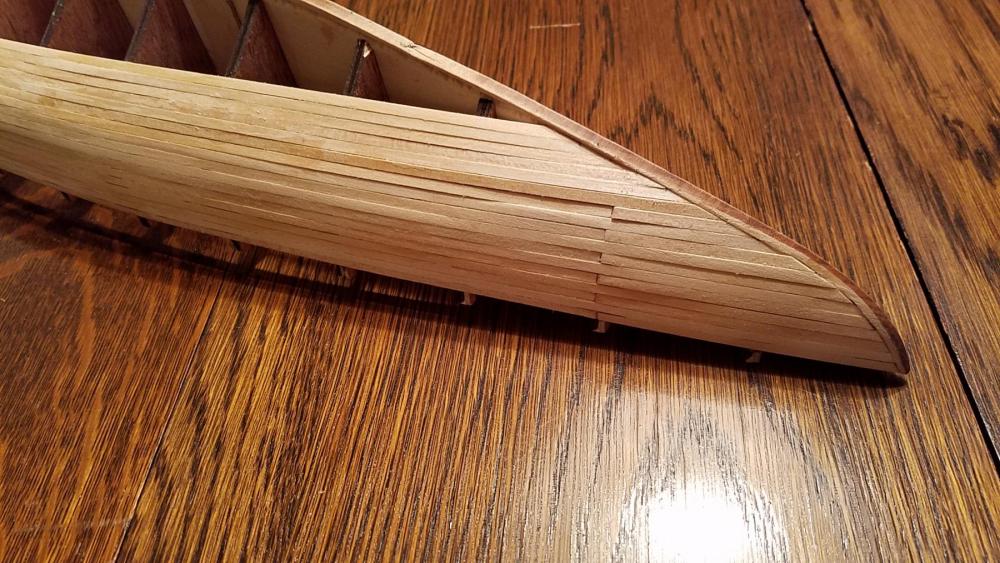
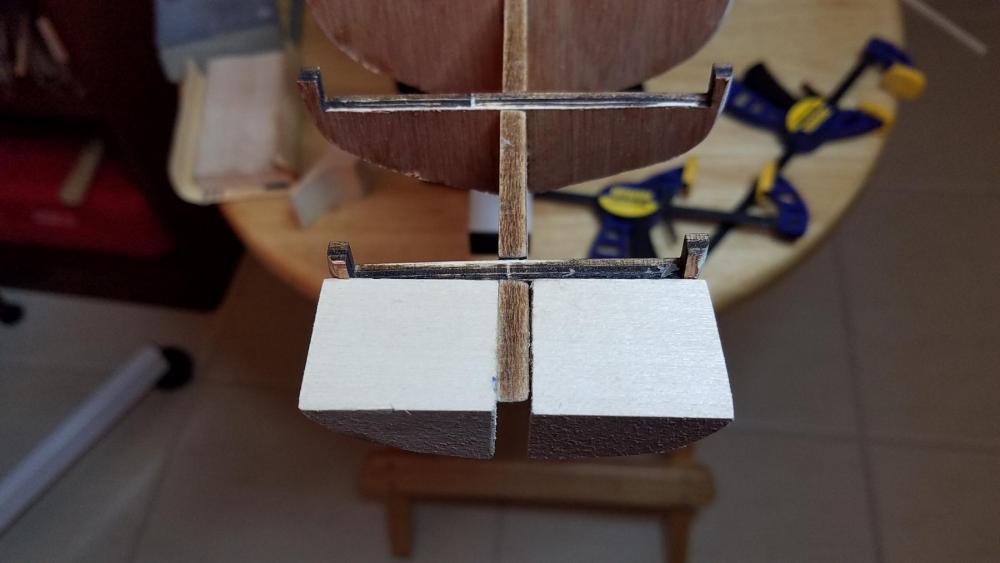
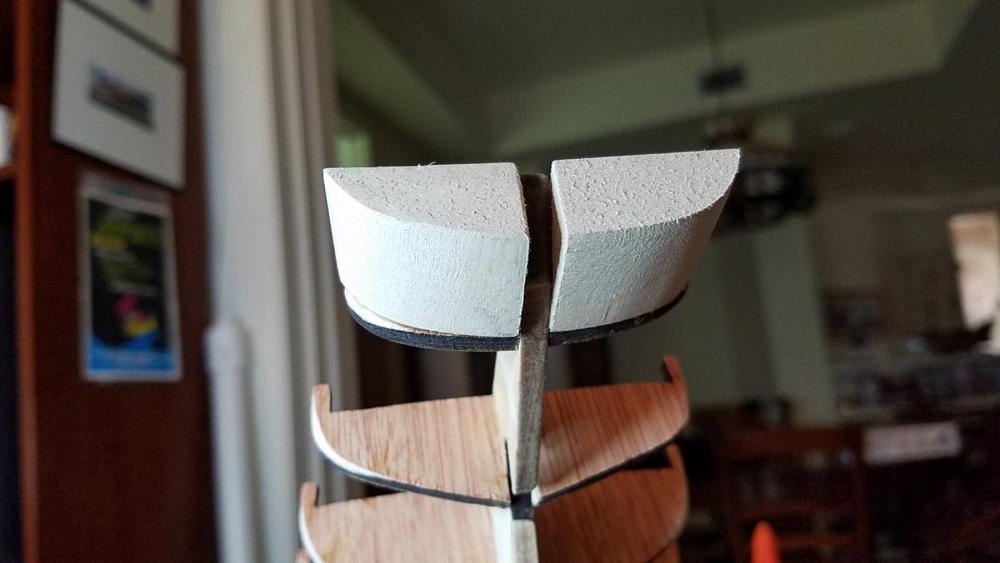
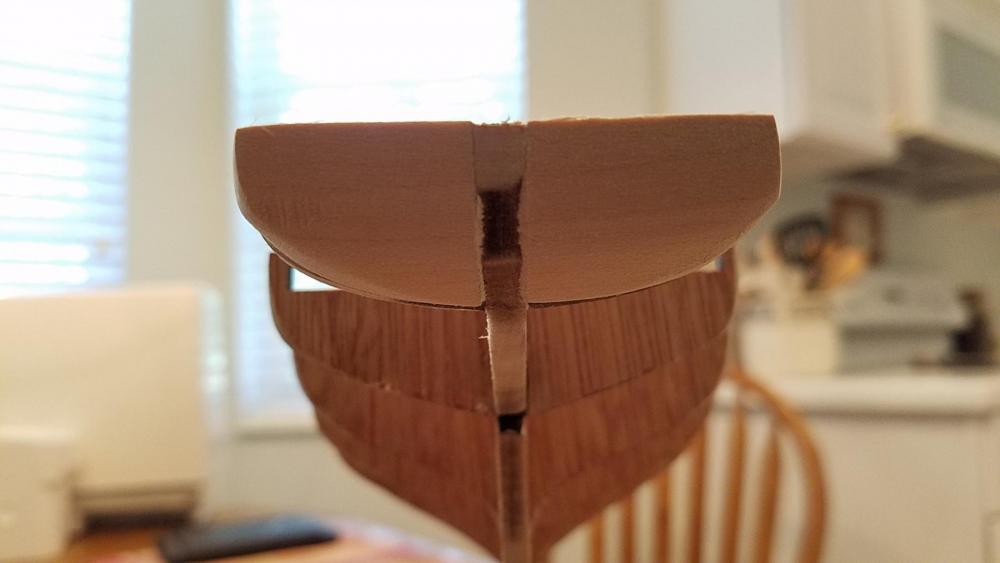
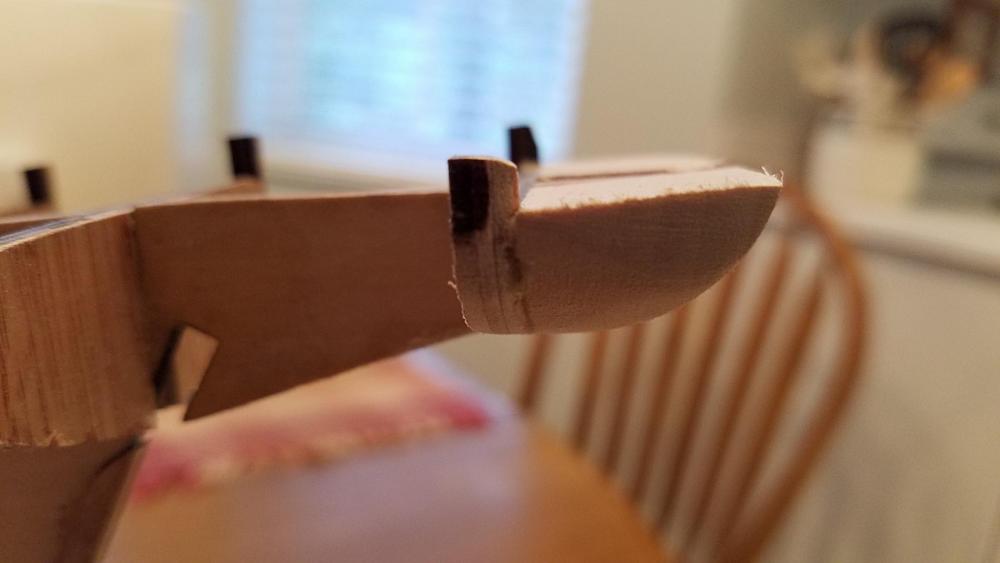
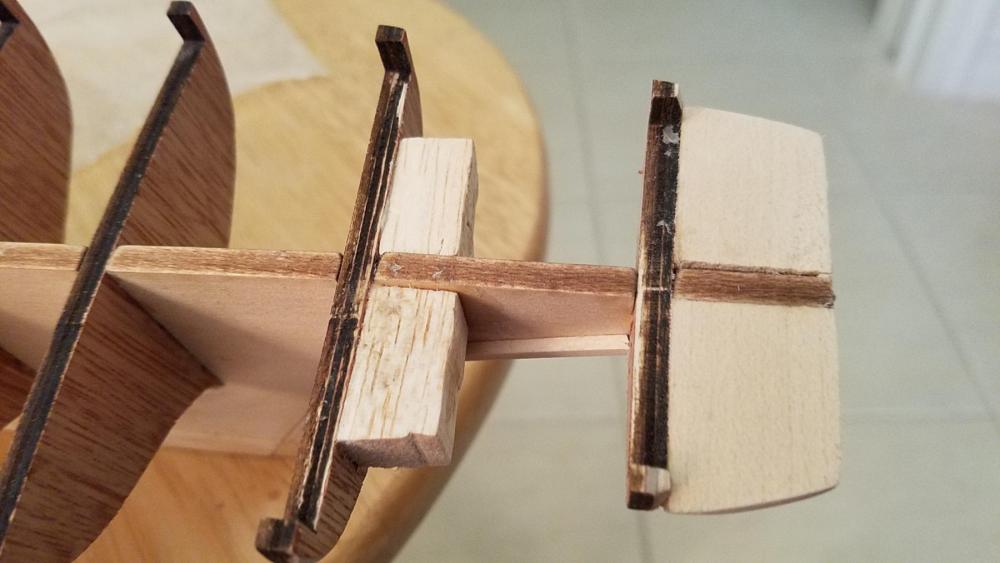
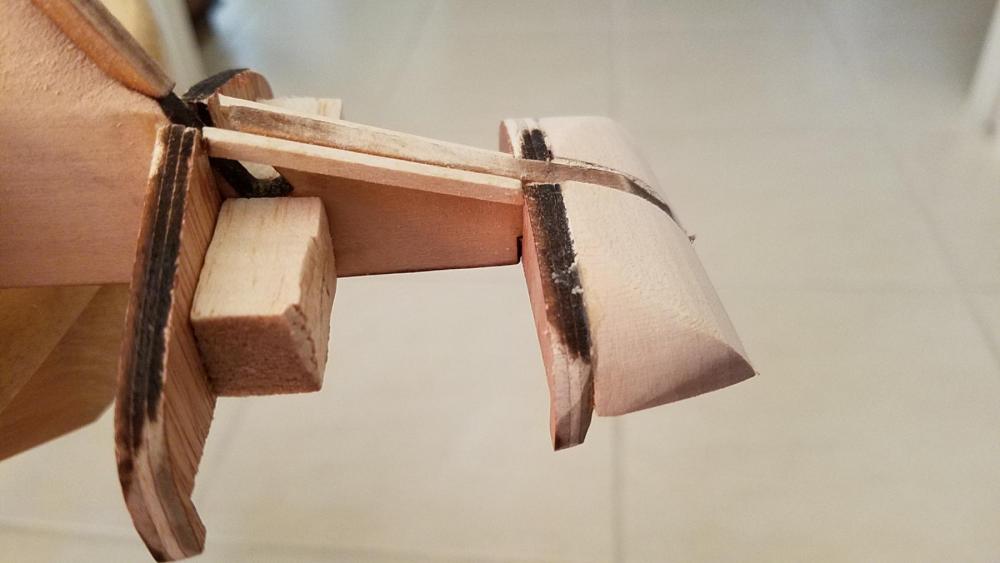
Good afternoon everyone... Well, disaster has struck once more. I was very proud of the glue joint that I made when repairing the broken off tail section. Everything seemed perfect and I was able to attach the tail block and work on it with knife, Dremel and sanding block. I couldn't believe that the broken keel was okay and sure enough I was right. During the application of the Horn Timbers I must have put too much pressure on the second from last bulkhead and it and the last bulkhead, including the tail block, landed in my lap. Never to be discouraged by a minor or major mishap, like a severed piece of keel section, I glued the section back to the main keel but this time I was able to reinforce the repair with a couple of balsa blocks. I really believe that this will do the trick, but who knows. We'll see later. So I have now completed the basic assembly which means the planking is almost upon me. Here are the latest pictures. Best to all, Jerry


-
Hi Lawrence.. I can't imagine what's happened to the envelope. Perhaps I should send you another package? What do you think? Thanks for your nice remarks Best to Bernadette, Jerry
-
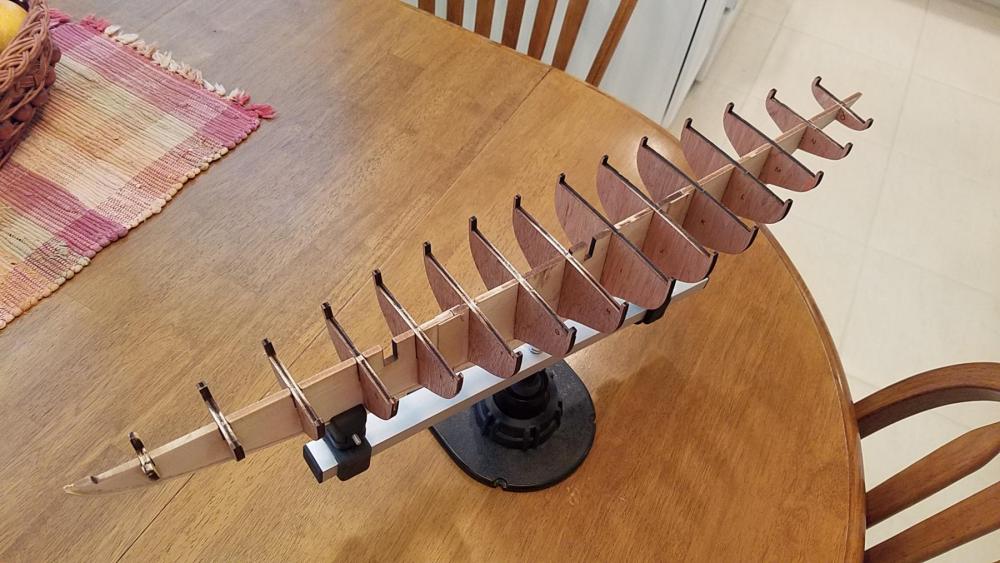
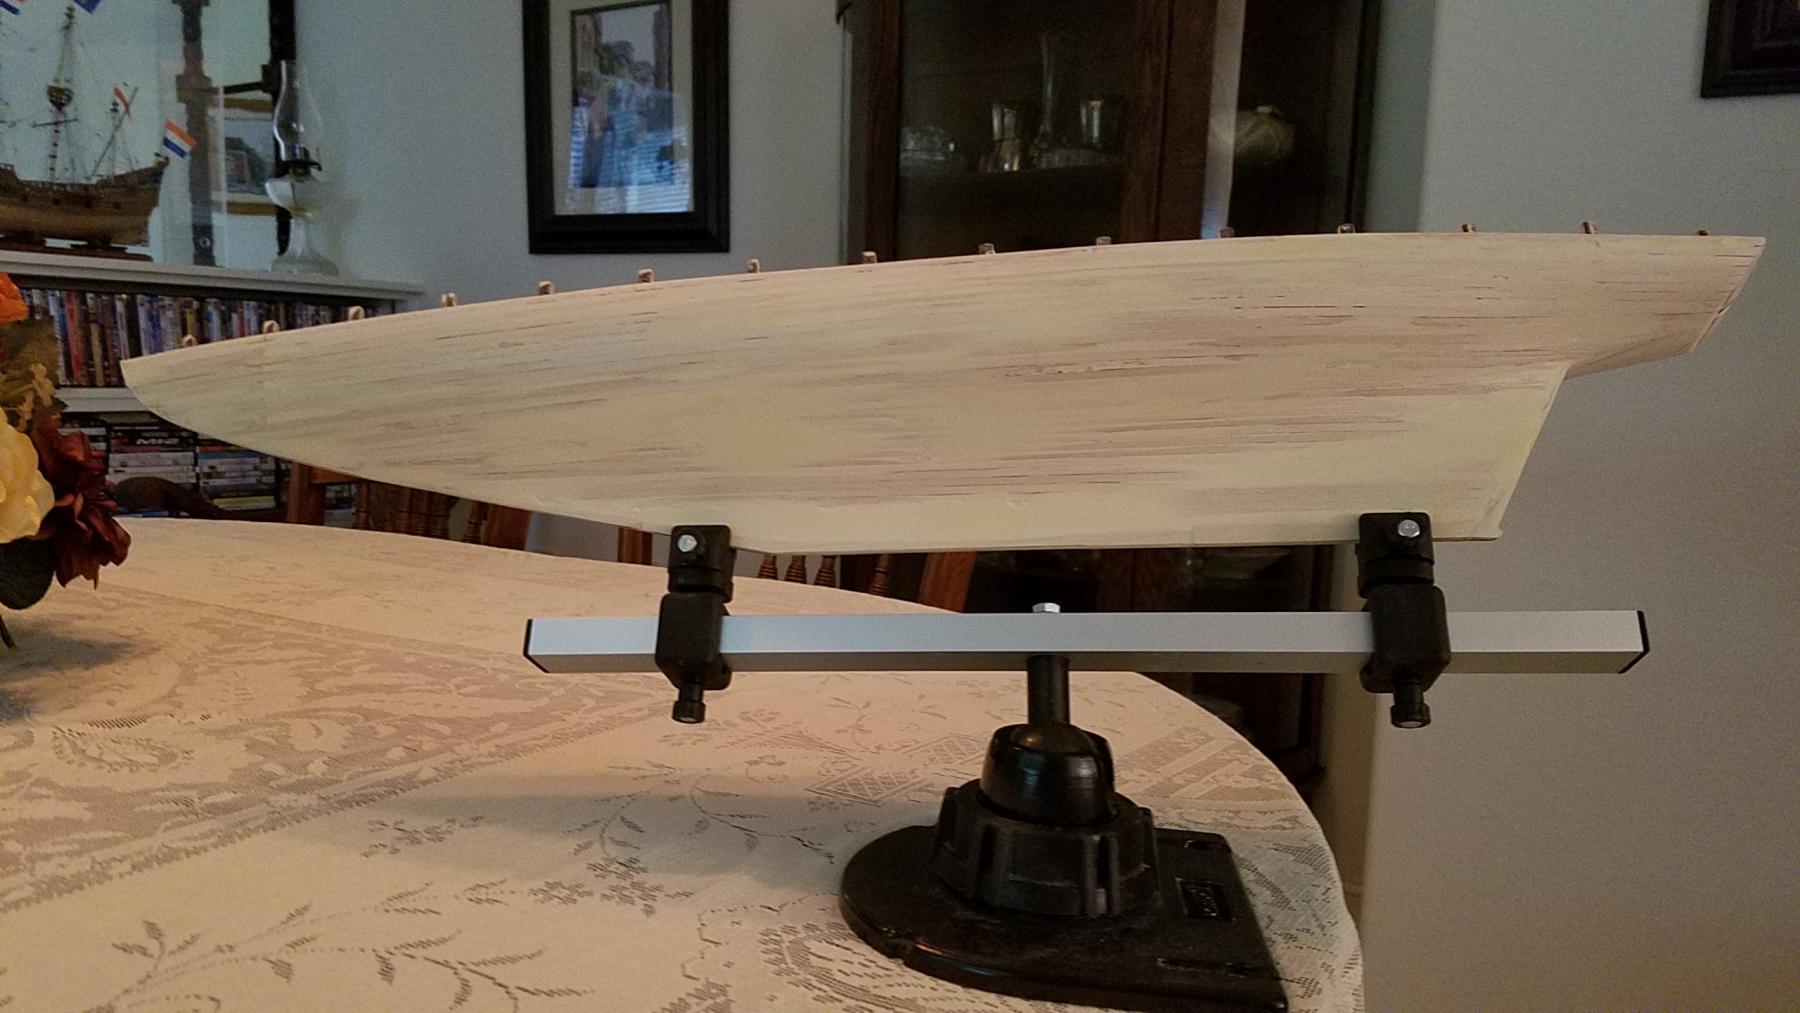
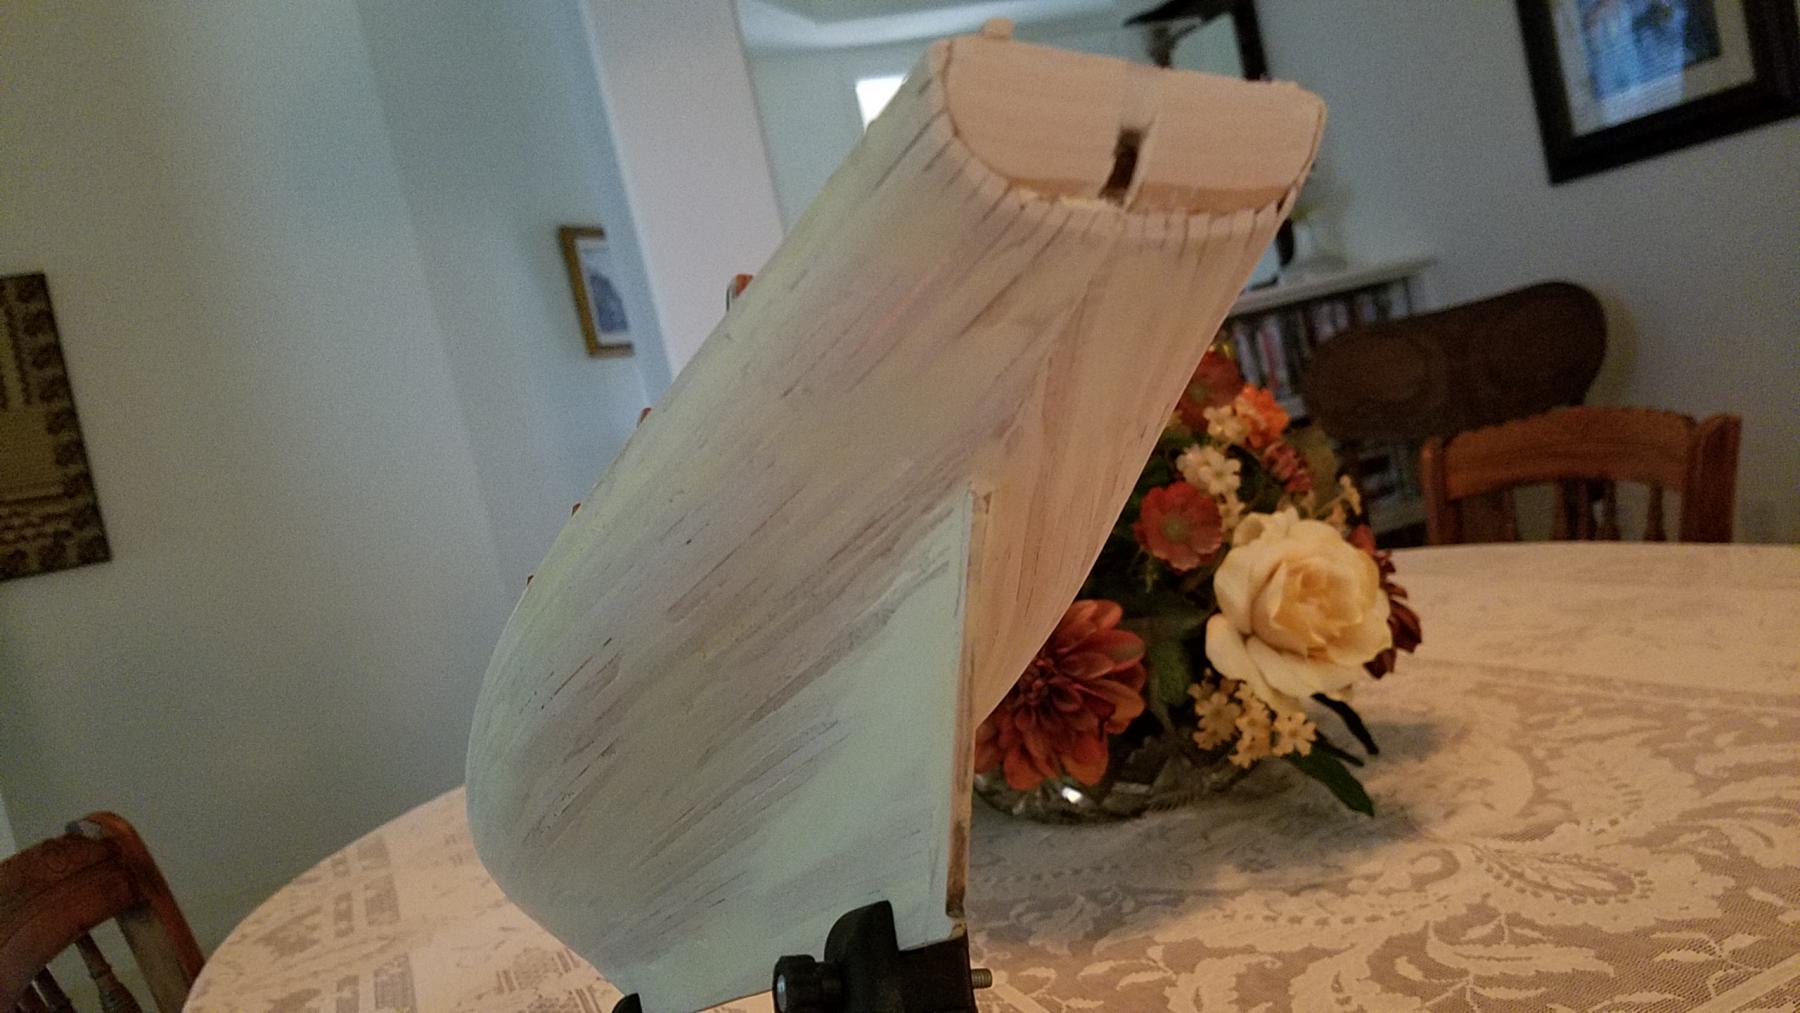
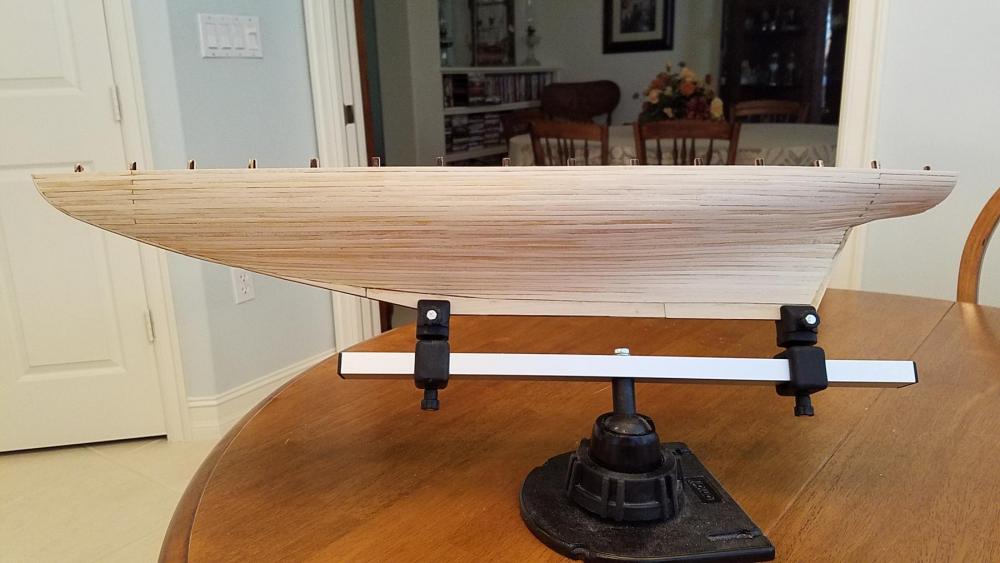
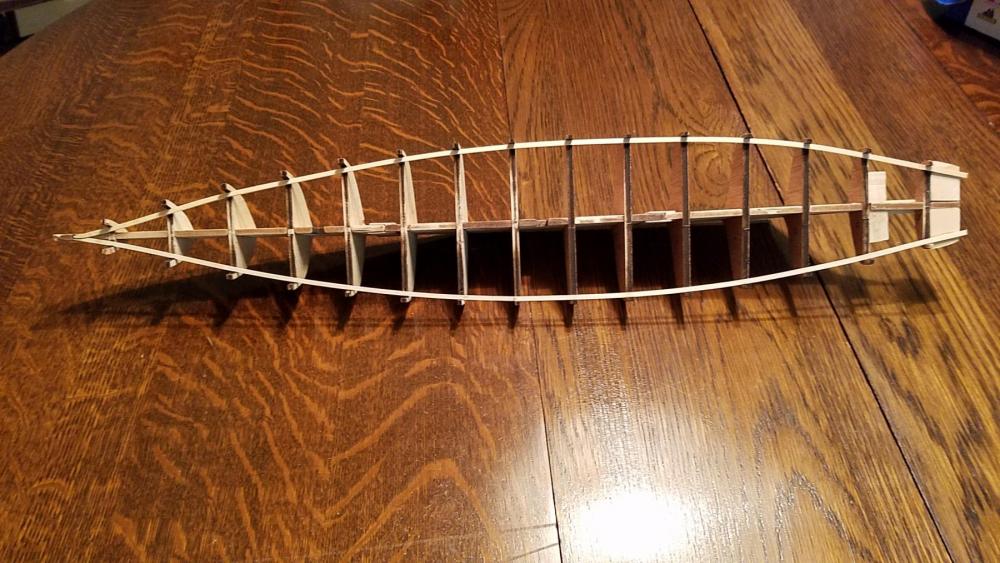
Hello Don. Thank you very much for visiting my site. I hope you'll feel the same way as I progress with this build. This model is interesting as it's a schooner, the first model of its kind that I have attempted, and therefore a different type of hull construction from what I am used to. The photos apparently tend to play tricks and lines that should be straight look crooked. But I'm having fun and that's what counts. I hope you are enjoying good weather and please come to see us again. Best, Jerry
-
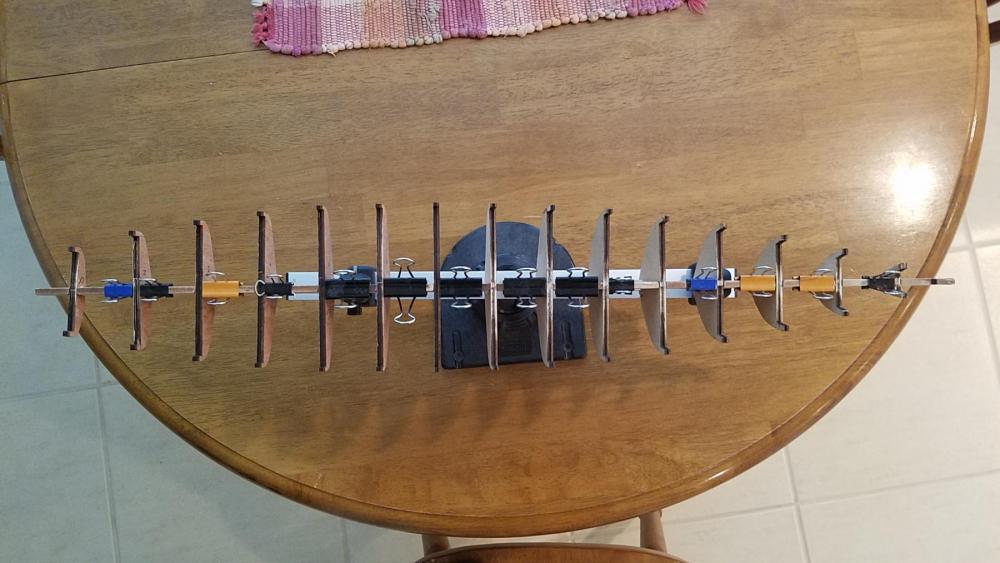
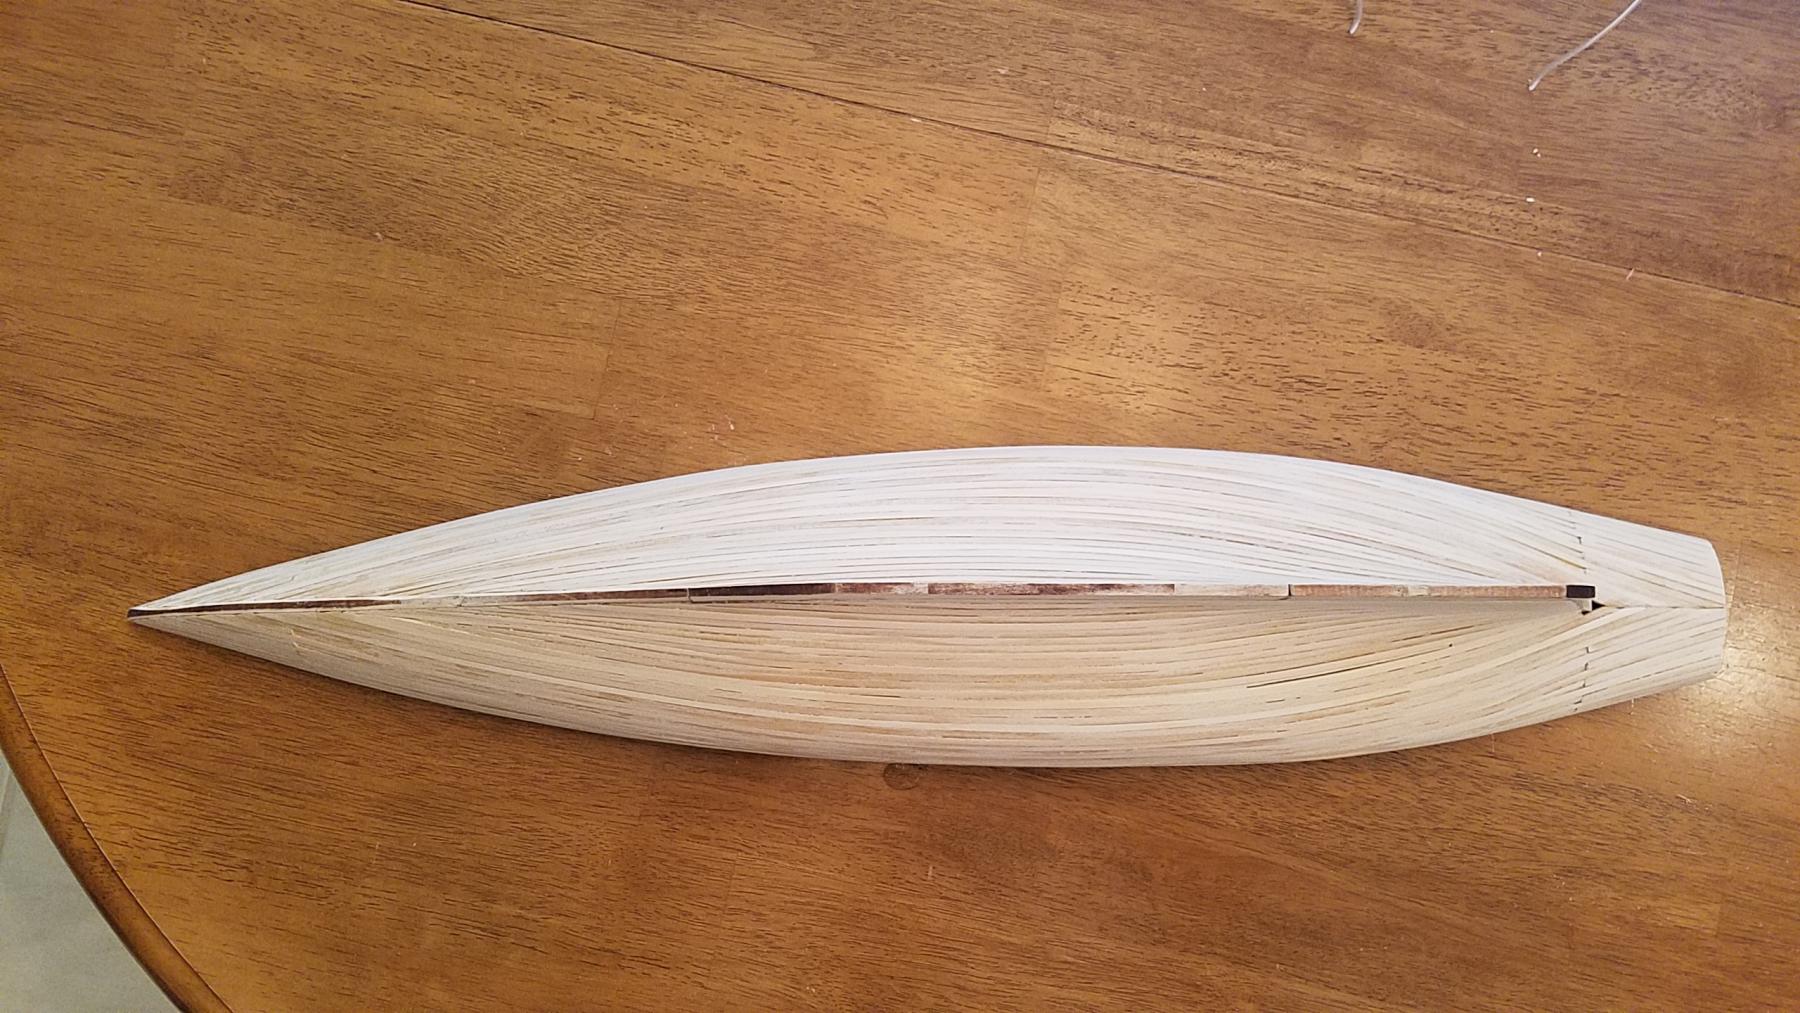
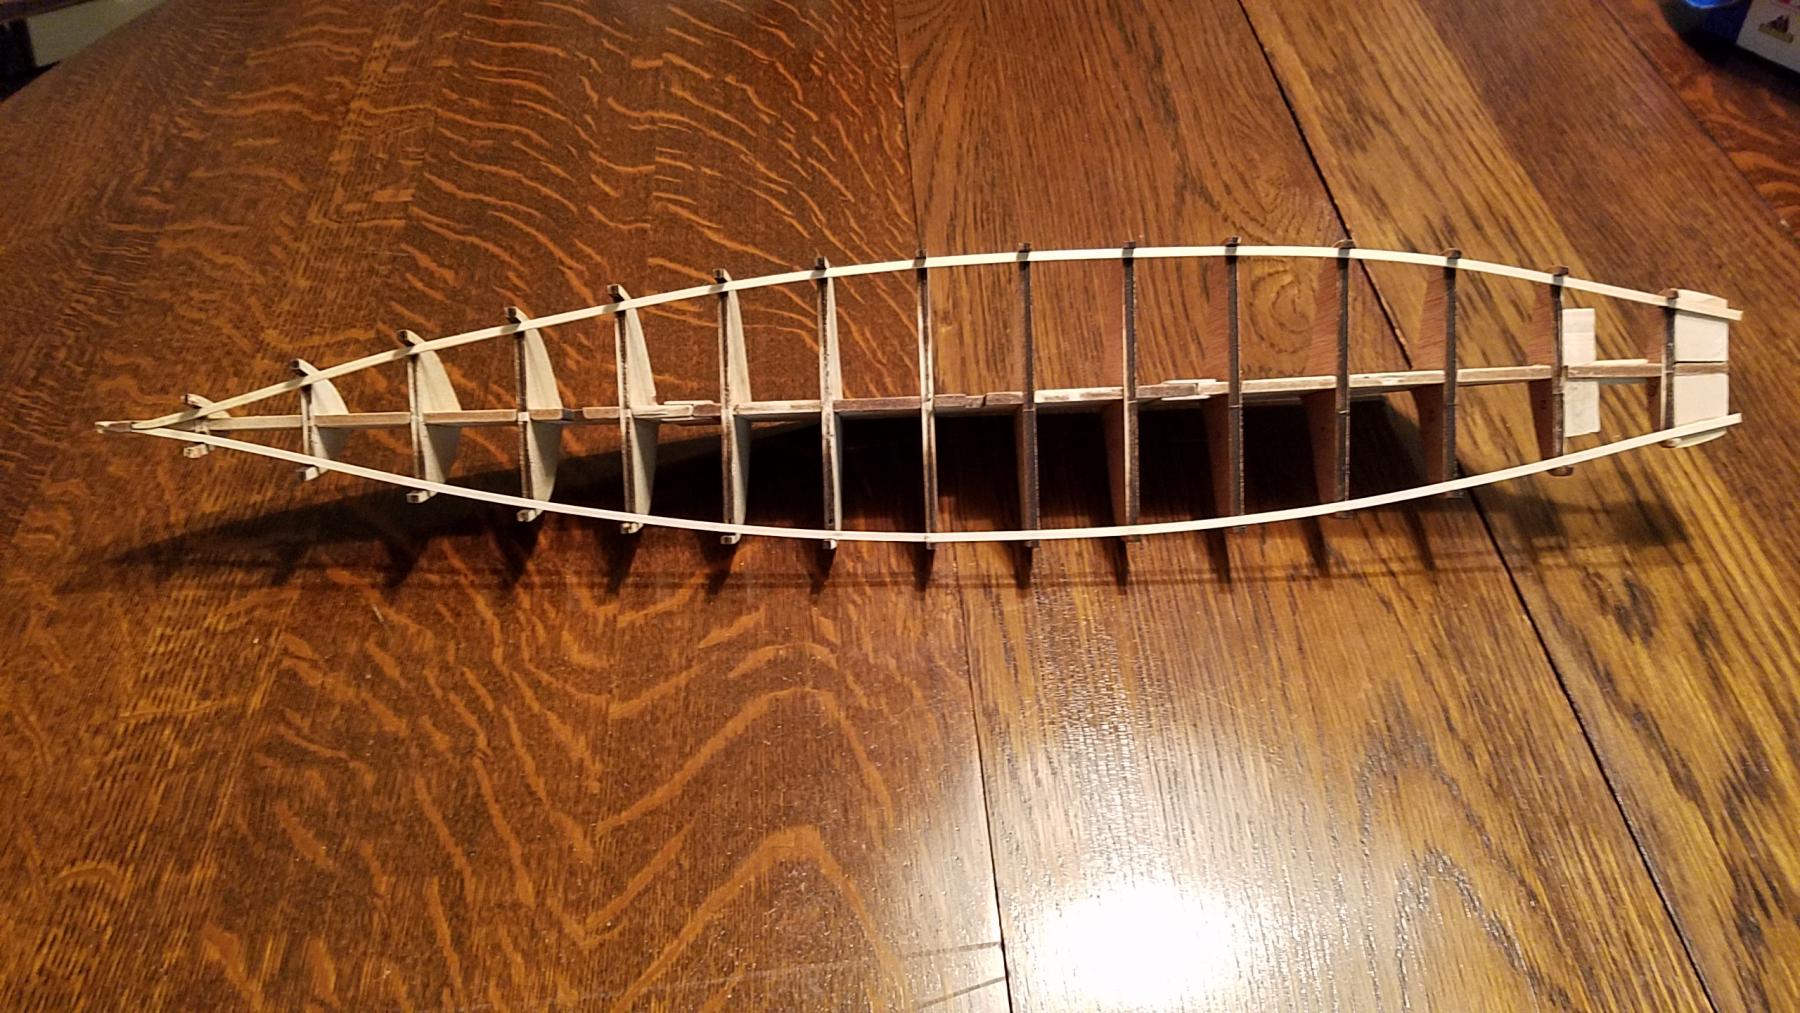
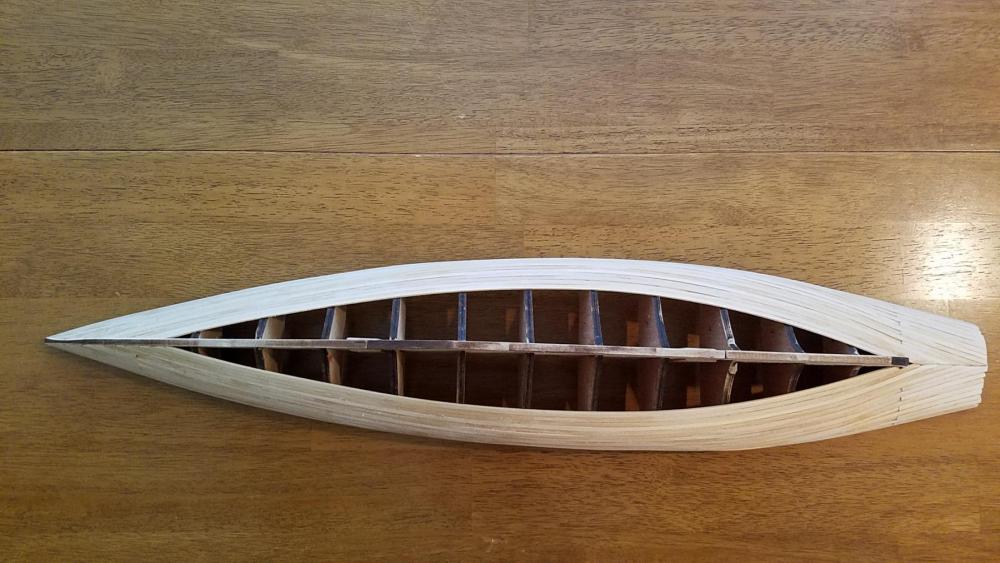
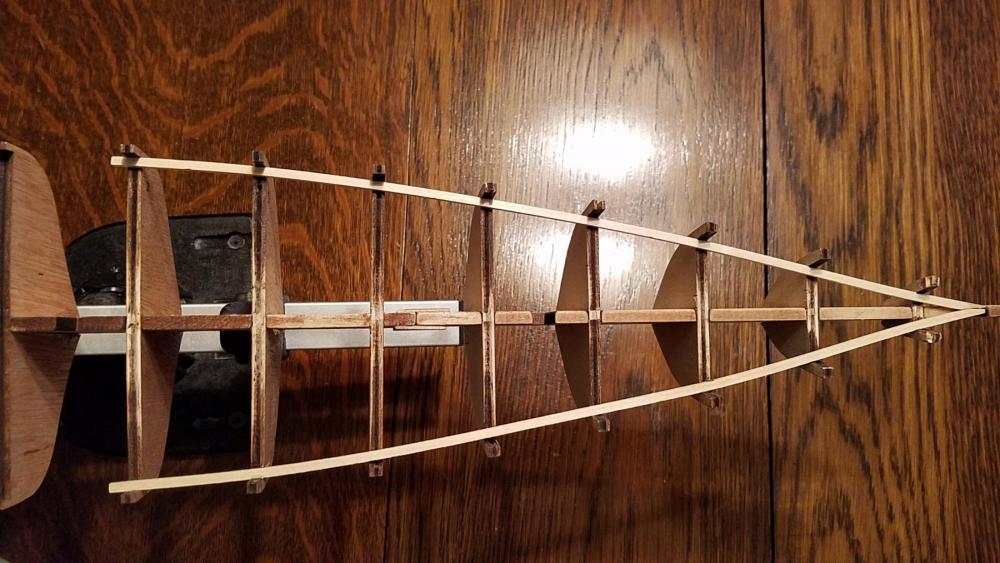
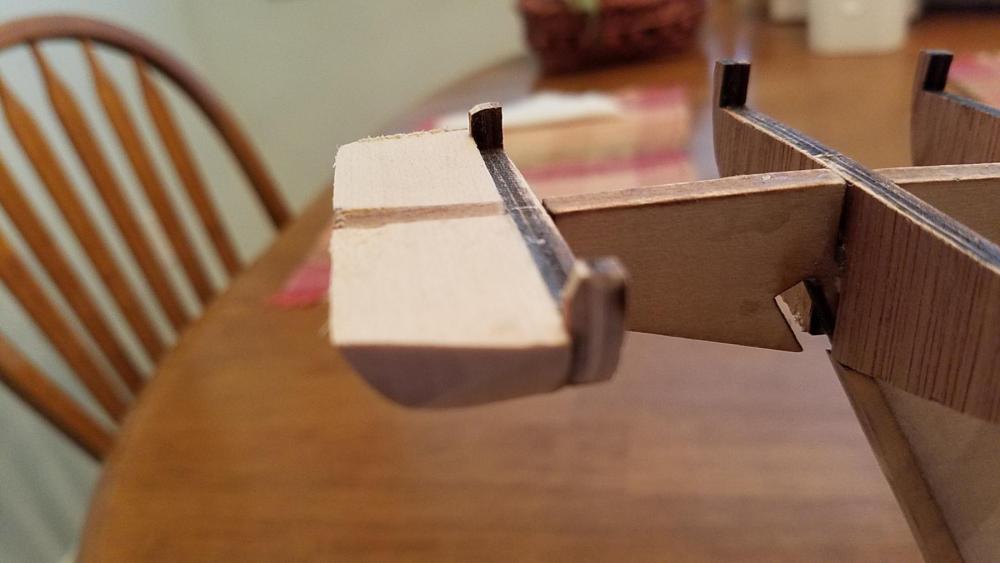
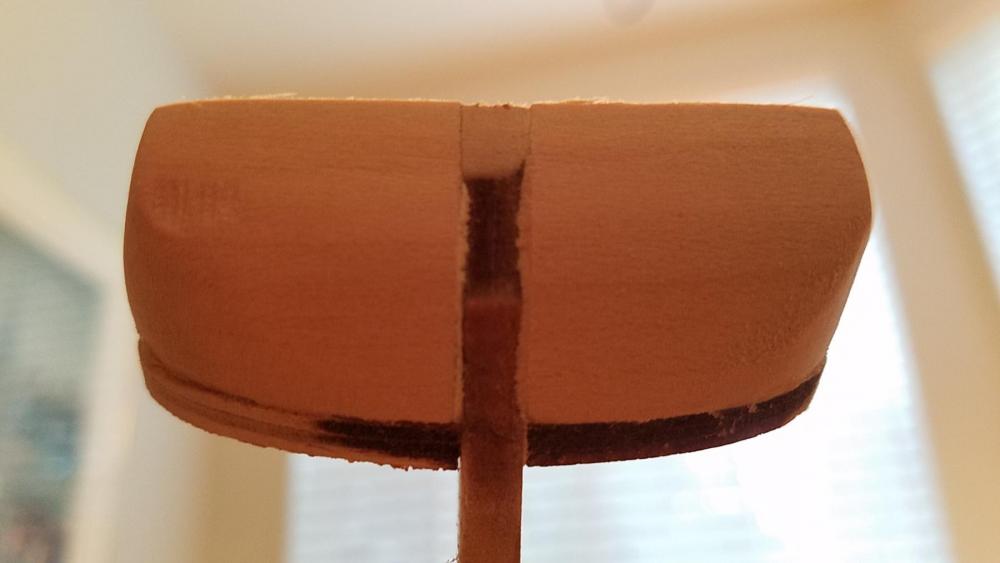
Good morning .. I took this picture to show that the keel is not curved. The camera can play funny tricks especially if your angles are unconventional; mine usually are. Have a nice day everyone. Best, Jerry

-
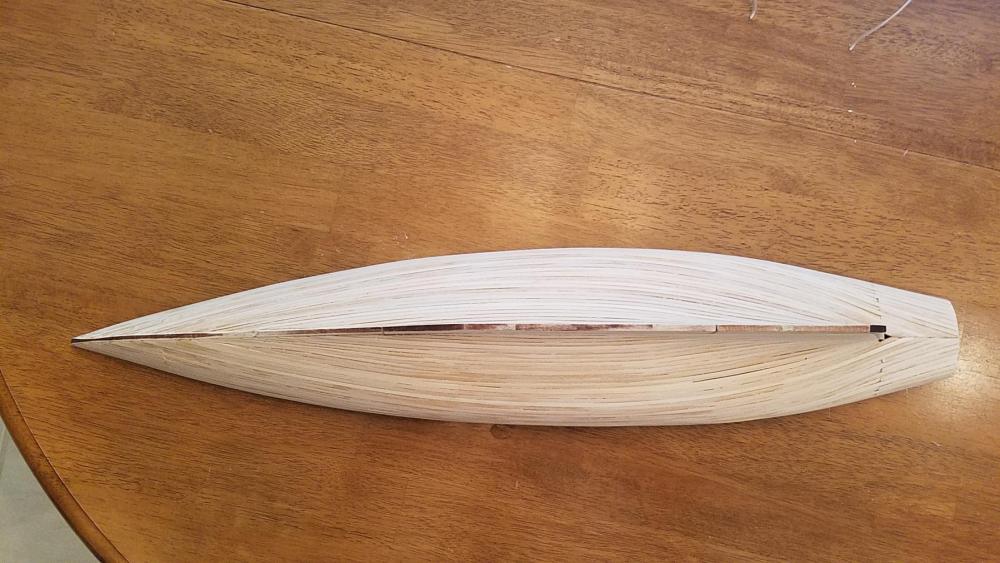
Hello Elija, Grant and Lawrence.. I appreciate your concern regarding the straightness of the keel. I always check for deviation as I build and believe me I constantly checked the keel to make sure it was straight. Check the 3rd photo (overhead shot) of the keel and you can see that it's straight. But to make sure, and after reading your posts, I checked again and what you see is camera distortion. I'm happy to say the keel is straight as an arrow. Please keep watching for any possible errors. Best regards, Jerry
-
Hello Grant. I appreciate your visit and comments and can assure you time will be taken on this one. I do hope you will keep visiting as progress is hopefully made as I value your criticism and ideas. I did see the doctor this morning and she was very happy with surgical results so here I am, thank God, building another ship model. I have attached the latest pictures of the little additional progress. Best to you, Jerry