Jerry
-
Posts
1,753 -
Joined
-
Last visited
Content Type
Profiles
Forums
Gallery
Events
Everything posted by Jerry
-
Hi Gil, It's been a long time and i don't know if you remember me. Just wanted to say hello and also wish Allan the best of luck with the Trafalgar project. Regards, Jerry
- 753 replies
-
- 1
-

-
- finished
- caldercraft
- (and 1 more)
-
To Popeye... If you read this, let me know what ever happened to your moving south? Hope you get this as I don't have your email. Best regards, Jerry
-
Hello Christian, Welcome to the wonderful hobby of building historical ship models. When all is said and done I'm sure , providing you have lots of patience. you will enjoy every minute of your venture. My suggestion is very simple. The best bet for you would be to go back to the store ( a hobby shop, I presume) and ask the same question. They should know what to set you up with and will get you started. And after you begin please feel free to ask me for any help with your progress. I wish you the best. Jerry
-
Good morning, Harry Sorry to take so long to answer you. I checked my model of La Nina and the eye bolts are indeed silver. Hope this helps. Jerry
-
Sorry, Harry, but I received an email that you asked me a question about gluing again. Is that true? Jerry
-
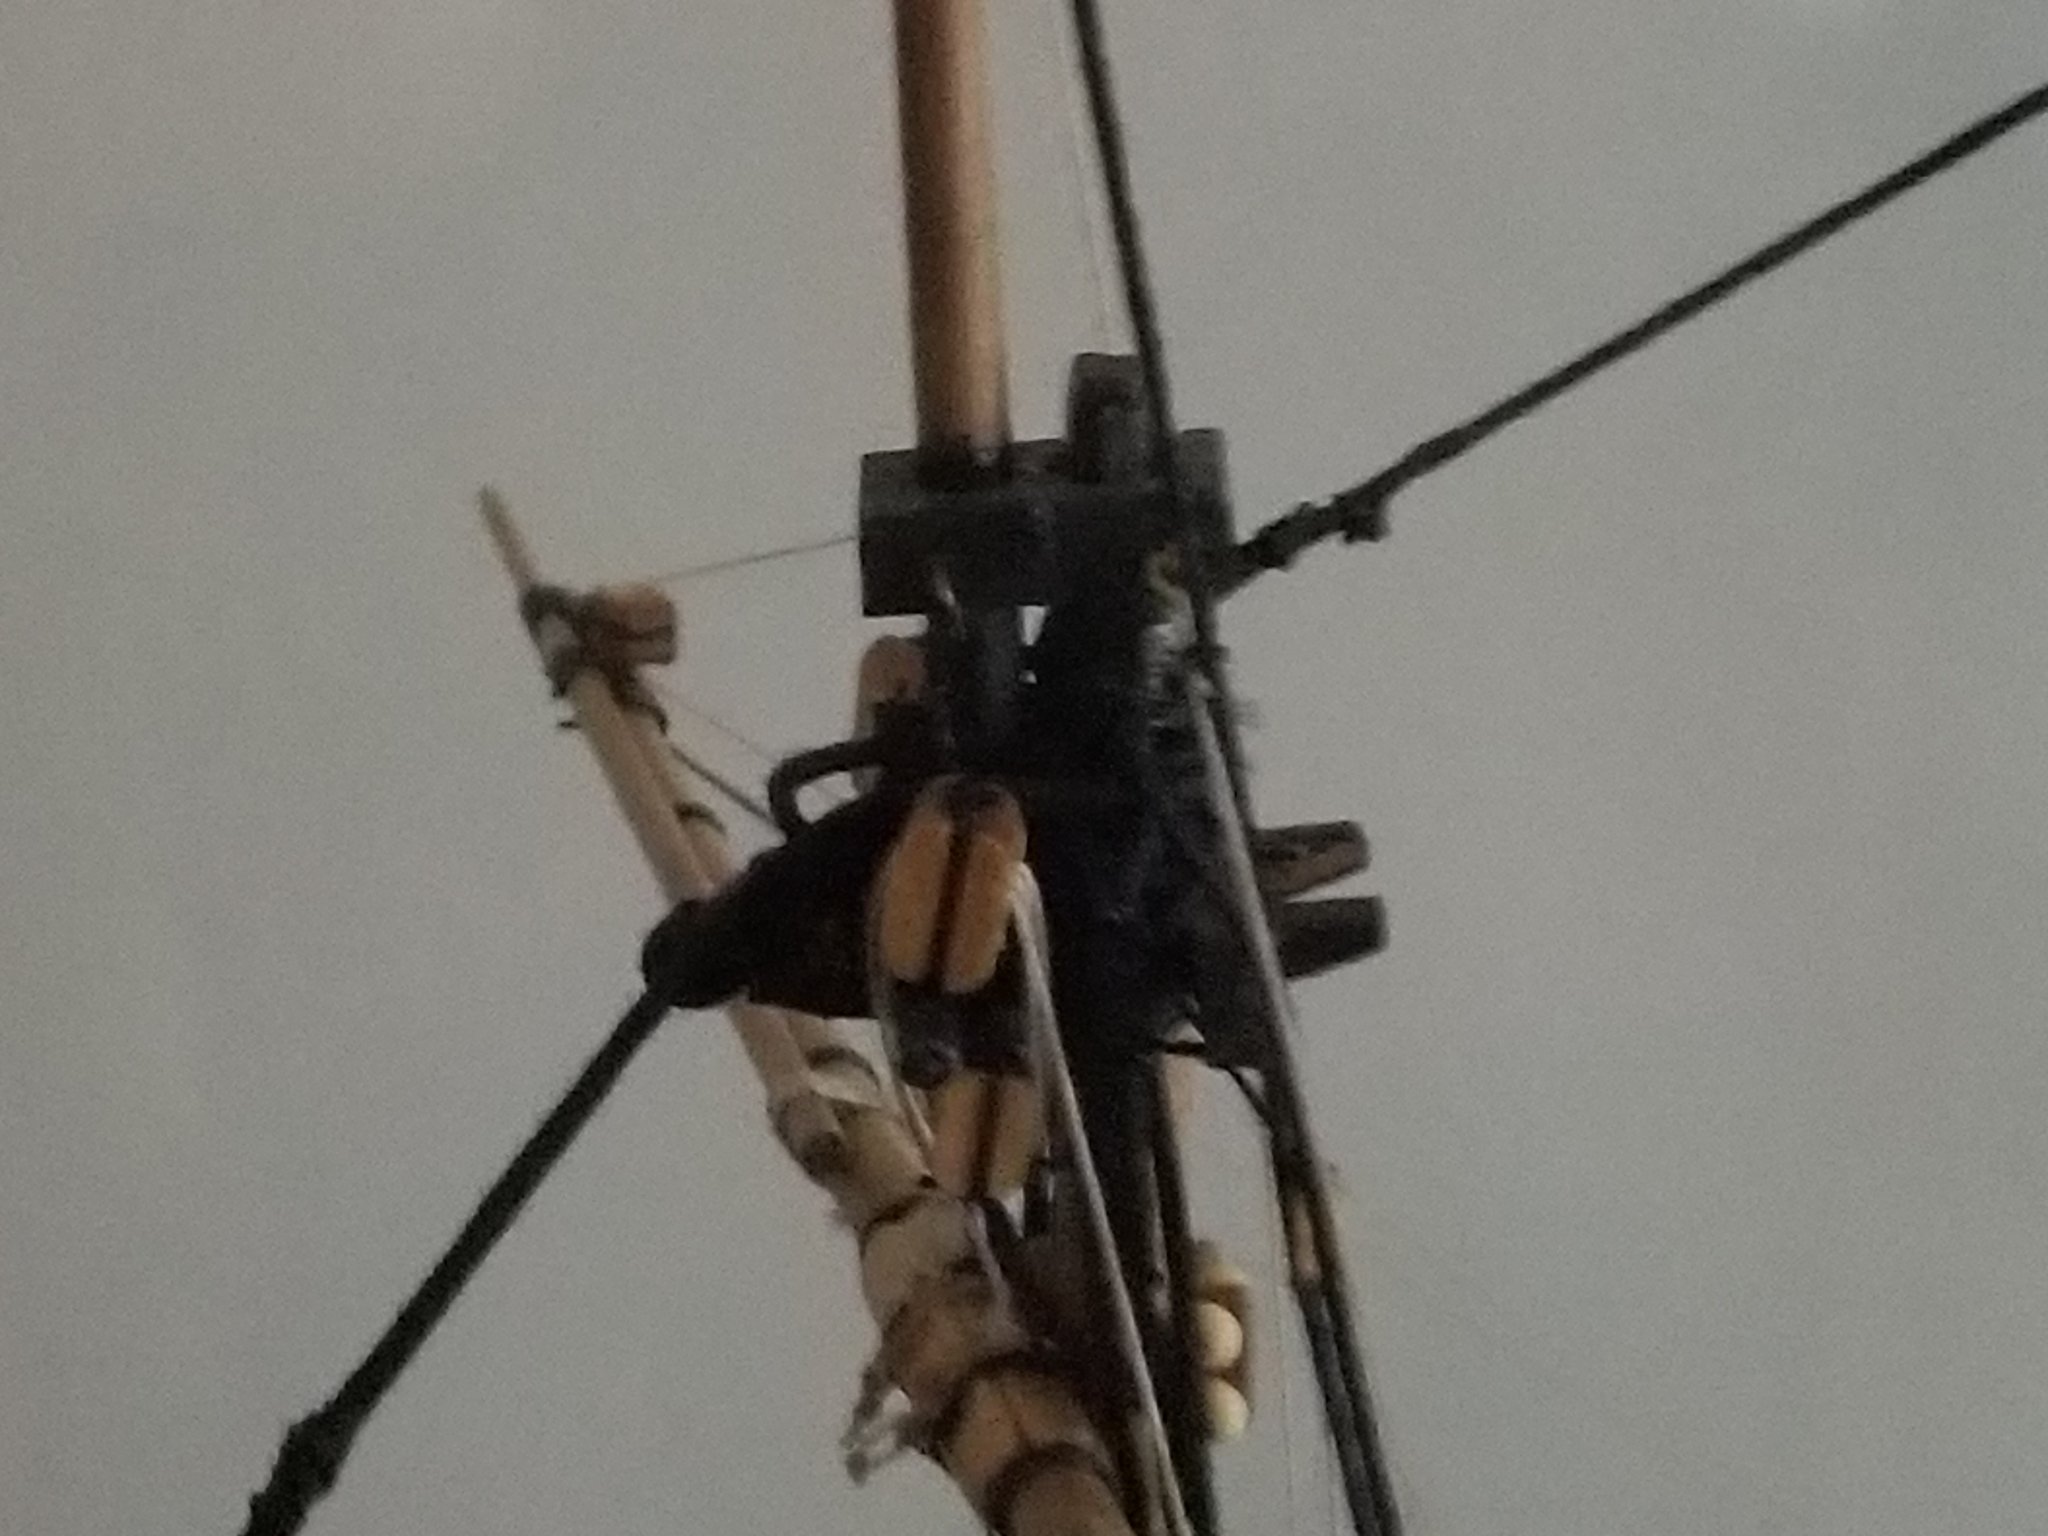
Hello dave, For what it's worth I took a picture of the top section of the foremast on my Bounty and am posting it here. It clearly shows a gap between the two mast sections so I agree that the Amati drawing is different than the actual build since there is a gap between the two holes. I hope you don't mind the picture on your blog. Best, Jerry

-
Hello Dave. My oh my, you are very aloof lately. Checked your log and man your Bounty is looking marvelous. You, my friend, are doing one hell of a great job. Can't wait to see your rigging.. Best, Jerry
-
Trust me, Dave, you're doing very well. The photos don't lie. Your progress is admirably at a fast pace and your model looks great. No one is going to fixate on your model's steering system, believe me. And if one does, you show much to be proud about. I'm looking forward to your next steps so keep going...Model ship building is fun, isn't it? Best, Jerry
-
Dave, You're probably fast asleep when this arrives but a quick question, have you checked my log, page 4? My posti may answer your latest question. Jerry
-
Dave, I will be busy for awhile in my shop. The video you posted has nothing to do with what I was writing about. I will try and sketch something next time to illustrate my method of merely tying a line (thread) around a block if you don't get what I mean this time.. It's really very simple once you understand what I'm talking about. To begin with , yes, a square knot is a reef knot. Lay the block flat on the bench. Make the first loop of the reef (square) knot and slip it around the block. Slowly pull the ends of the thread to close the loop around the grooves in the block. Tie the second loop to complete the knot and put a dab of CA cement on the knot. The ends of the thread should be long enough to attach the block to whatever you need to. Hope you get this. Jerry
-
Dave, Please check page 4 of our build for pictures of the rudder and wheel rigging.. I don't recall having to make any of the parts for this assembly. I do believe everything was in the kit. From all the missing parts you have experienced I would complain bitterly to the party who sold you the kit. Kit bashing is a common practice but it seems you have an unfair amount of missing items. In the past, when I purchased a kit (Cutty Sark) with a lot of missing stuff I demanded compensation and was given an in store credit which i quickly used up, I may add. Keep a stiff upper lip 'cause you're doing very well. Jerry
-
Good morning, Dave. Once again I didn't sleep too well last night so I'm awake fairly early and immediately found your post. Ah yes, display cases...Yes indeed, they are definitely not cheap. There are several ways one can go in this area and glass and wood framing is one. My friend, Lawrence Dalrymple made his display case for Victory with glass and wood. To do this can be fairly simple especially if one purchases a display case kit of which several are available. Four of my models are sitting in plastic cases, all of which I had custom made by a local plastic specialty shop. They are definitely not cheap but in my opinion make the best way to show one's work. I gave the shop the dimensions and they did the rest. I like plastic cases because they offer viewing of your model with little, if any, obstruction. The type of plastic I used is Acrylic sometimes called Plexiglas. The case should be made of 1/4 inch thick material. When you get ready for this step in your construction I will go over details as there are other things to think about, such as breather holes, etc. My display case for HMS Victory (see page 30 of my Victory) is huge and very specially made. It cost. at that time, well over $1000. Most display cases are one piece and put in place by carefully placing it over the model. It is impossible to do that with Victory as most would find the room's ceiling to low to raise the case over the model. So I designed this case with a removable panel. The case was placed on its table, the ship was put inside and the panel added and closed. Again check page 30 of my Victory log. Plastic is not cheap. Talk to you soon, Best, Jerry
-
Hello, Dave... and thanks for the update. Mentor? You flatter me. There's nothing that I can add at this time that will add anything positive to what you are doing. You're obviously getting close to the rigging phase for which I am looking forward to. Everything I see looks excellent. You better start thinking of a display case as your model will bring you much accolades. Have a good evening. Jerry
-
Good morning, Dave, As you can probably see I haven't been able to sleep well last night so I'm up and at 'em quite early. Lo and behold I find your posting first among my emails and actually was very happy to hear from you. I think I read your post before you had a chance to attach your photos. Anyway, I was concerned about your silence the past couple of days but now I'm happy to see you are well and working. As you know I have built a slew of ship models over the past several years and they're all on display in my home. Now the first thing that people ask me when looking at them is usually, "Where did you get the patience to do this?" And that's exactly what it takes...plenty of patience and that's what you are exhibiting as you glue, unglue, scrape, change, etc. Let me assure you that you are doing an excellent job on your Bounty, probably as well as any I've seen, so just keep going along the way you are. And one other thing, maybe something you haven't even thought of...your postings are excellently detailed and will help the next person who decides to torture him or herself and build this ship model. Good to hear from you. Best, Jerry
-
Good morning, Dave. Looks like you were up early this morning; that's good because a good dose of enthusiasm will get you going in the right direction. If you use CA cement it won't matter if the hull is painted or not. This glue will hold (use accelerator). Since we copper clad the hull below the water line on our model and left a good portion above the water line natural, we didn't have much painting to do. However, I would choose to apply the external paraphernalia (such as ladder steps) before painting. Hope you have a nice weekend. Best, Jerry
-
Dave, I tried to do some woodwork this morning but I'm afraid my body is still suffering from fatigue. So here I am sitting in my favorite chair reading my email and up comes Dave with another missive. So I looked at your pin racks and I have a suggestion for you in the future. To make the racks with pin holes in a straight line what I do is draw a pencil line down the center of the rack from one end to the other. Then I mark the location of each hole with a very sharp pencil. Once I'm satisfied that the location of the center of every hole is correct I use an awl to make a small hole on the pencil mark. This small hole acts as a guide for the drill bit. This usually results in a nice straight line of belaying pin holes. I hope this is helpful. Jerry
-
Hello Dave, If you have read our log on the Bounty, you will see that the admiral, Charlene also had a lot of trouble when trying to make the racks using the material suggested in the kit. She too ended up using plywood and as you can see it worked out well. The hinges were made using some copper stripping that was actually 5mm wide and came with the kit. That's as far as I remember. I asked Charlene and she wasn't sure either. Before I forget, when I was building the HMS Victory,my second venture in ship model making, (Cuttysark was my first about 20 years ago) I received a lot of advice and help from another builder named Shipyard Sid. His real name is also David. You mentioned that you lived in the NE of Britain and so does Shipyard Sid. Just wondering if you ever heard of him. Checkout his logs some time. Your work is progressing very well, Jerry
-
Dave, From aft to forward, I count 15, 7, 12. You need to do a little research on these matters such as checking my log on the Bounty. It clearly shows at the bottom of Page 3 of our Bounty log how many belaying pins are mounted. However, as the rigging progressed some of the belaying pins were not used. This is determined by the need of the rigging. I'm sorry that you have had a problem with the rack material but it's obvious that you know what to do as you have correctly solved the problem. Incidentally, I don't know where you got the n umber of belaying pins from as the information I just gave you is spot on. Hope you had a nice dinner. Best, Jerry
-
Good morning, Harry. I used CA for both layers of hull planking. I spot glued about every 5 or 6 mm very lightly. I had no problems. Hope this is helpful. Best, Jerry
-
Your model is looking wonderful, Dave. The finish looks clean, real and uniform with no blemishes . You are amazingly getting much done in a very short time. Just look back when you began and how little time has passed to bring you to where you are. I am very impressed. As I said before, you will end up with a high quality model ship to be proud of. Many thanks for posting your work for all to see. Best, Jerry
-
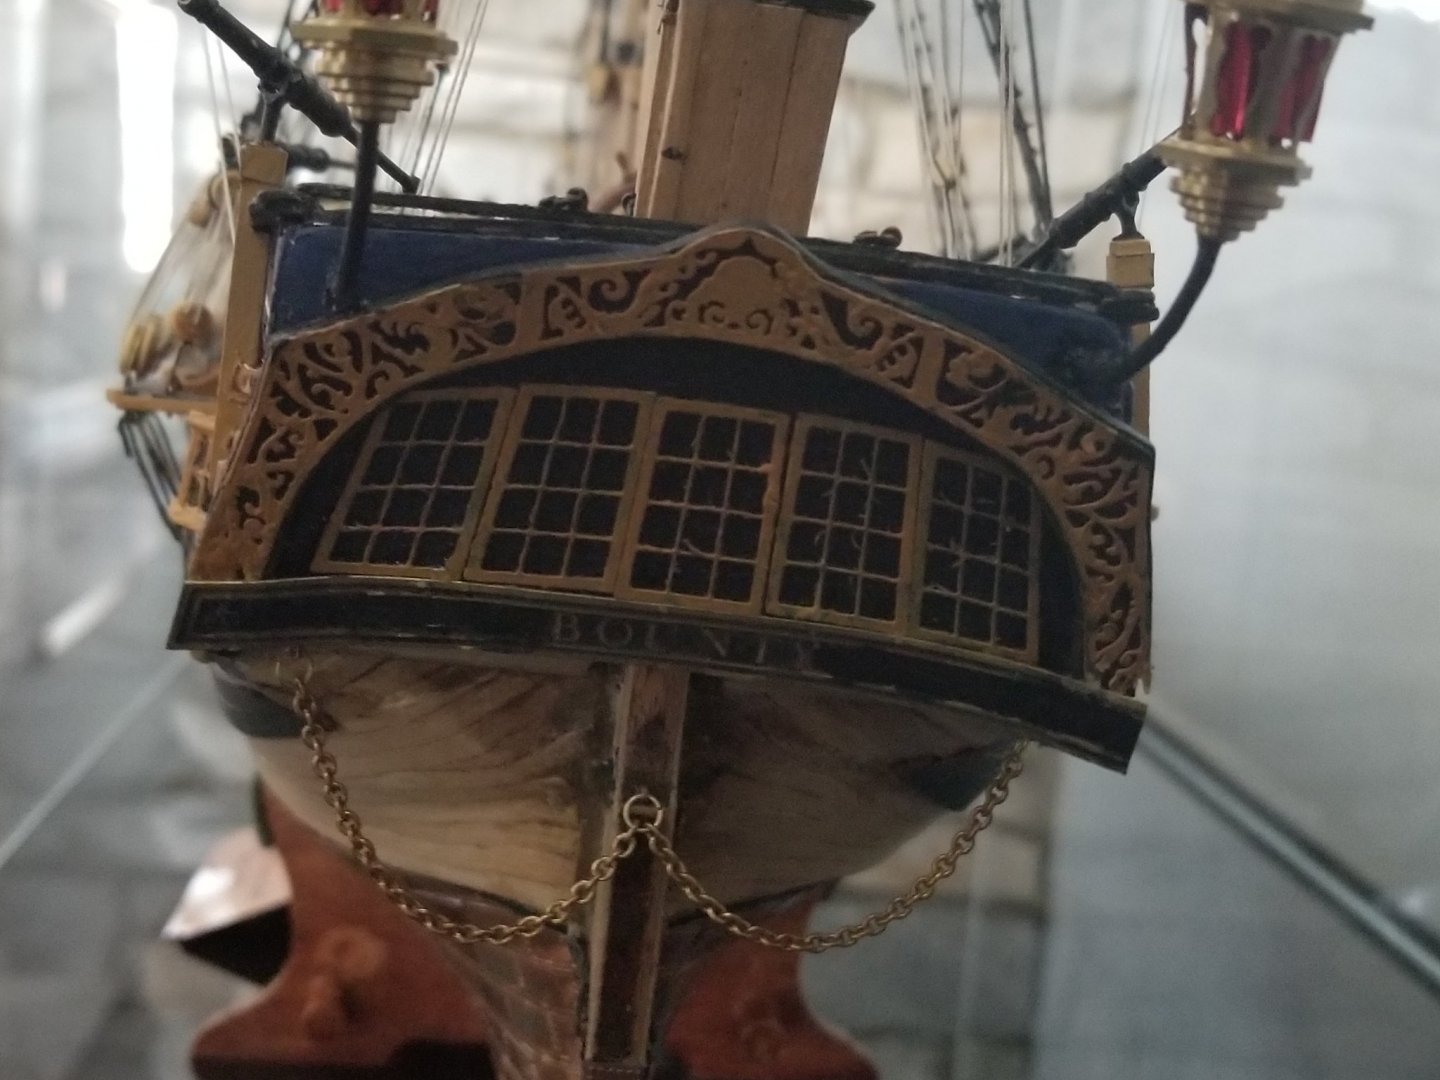
Dave, thanks for the video which I looked at. I see what you mean and of course I have no idea at this time what I did. I can't even remember my middle name. Anyway, here's a picture of the stern on my Bounty which, when looking at it close up now, looks terrible. Things don't look too tidy at this point (on my ship). Keep moving. bro. Jerry
-
Good morning, Dave: First of all I must say that the deck finish looks excellent. The satin finish looks perfect and the planking is top notch. You are well on your way to a beautiful model. From here on in you will find yourself enjoying the build more each time you sit down to work on it. You are doing meticulous work and I'm happy that you have been able to understand each procedure. By the way I'm glad you didn't spend the money for a fancy "slip." I hope your day is going well. Best regards, Jerry
-
Hello Dave... well i didn't expect anything different; our deck planking is excellent. Real decks also have color variance so I would not try to do anything to change the appearance, I'm still a little under the weather so I'm slow in answering your posts; please forgive me for that. I meant to ask you where in Britain do you live? Was it London? My wife and I have spent the good part of two summers in Hertford a few years ago. Best, Jerry