vacotton
-
Posts
95 -
Joined
-
Last visited
Content Type
Profiles
Forums
Gallery
Events
Everything posted by vacotton
-
Good morning Dave, I dealt with the "side-firing" following your lead as I put each fiber in but as you can see I have touch up work to do on some of them. What I am really concerned with is the leaking from the sides of the concentrator. I see why you used a pipe fitting. It looks like the most important factor is centering the light on the ends of the strands. But I am afraid if they are brought too close to the array, they will melt. I haven't a clue how to find a lens of the right focal length to work properly. So about all I can do is keep making lanterns and sconces and then bundle up the whole shebang and stuff the cable into the hole and see how it looks. I will be anxiously waiting to see how you make out on finding a lens. As for the sconces, I will get back to you on that as soon as I figure out a proposed solution. I can see that all of this might be a tad ambitious for me (Mr. Thumbs) at 1:96. I wished I had Evan's "carpentry" skills. Have a great week and make people well. Verne
-
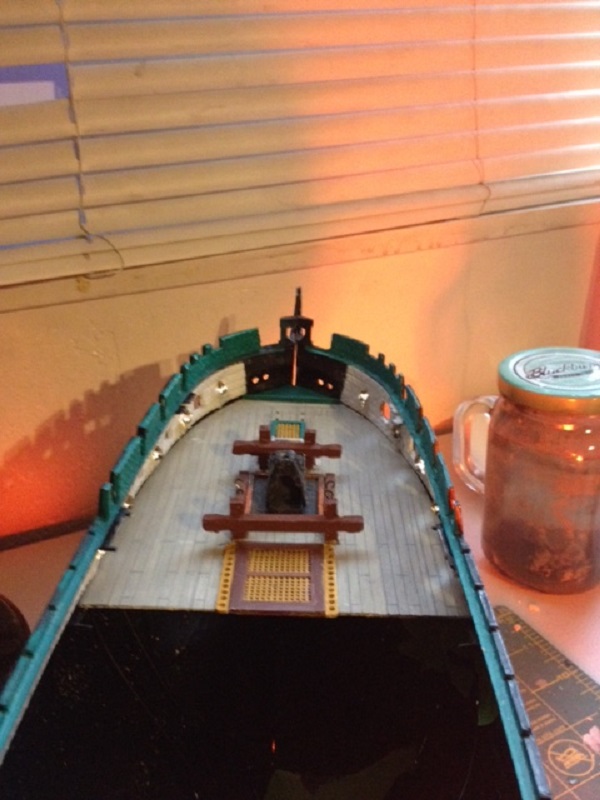
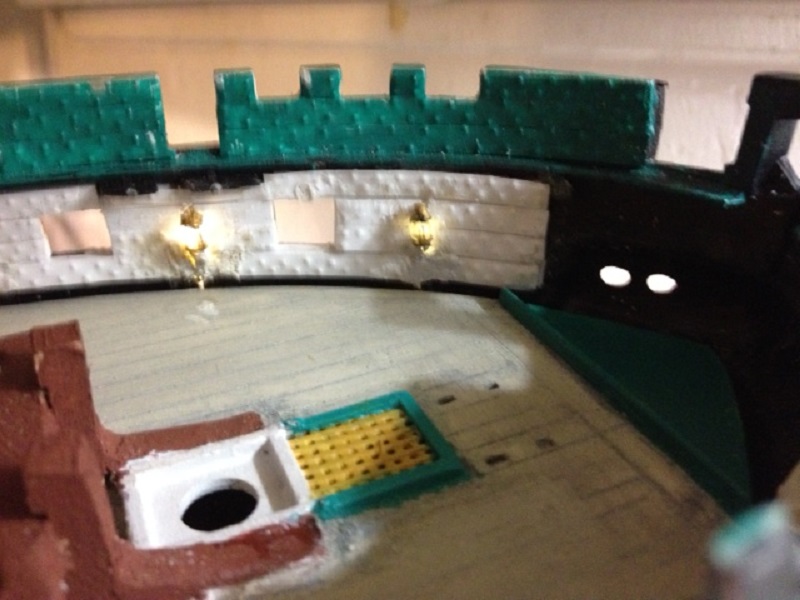
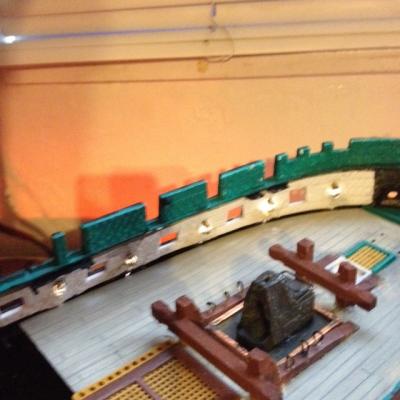
I placed 10 lights into the forward gun deck. Unfortunately, I had to split the gun deck in sections to clear the lights without breaking the fiber optics. Shouldn't be a big problem to rejoin them. I will say this project is not for the faint of heart. I may go back to the pyramid as it is smaller than the funnel and brings the strands in closer to the LED array. A big problem is the amount of light that gets leaked through transmission. Of course, the lanterns are not historically accurate for 1812 but I have engaged this fiction to light up the gun deck so that the fixtures will be visible. I just could not see creating all of this detail and then not being able to show it off. I am trying to design sconces for the after cabin, state rooms, and the captain's great cabin. I probably will use some brass foil and then run FO through the brass. The tip of the strand would be the end of the candle. Evan, I am still wrestling with some ideas for the manger as well.


-
Good to see you back, Evan! That is really clean work and all in styrene too. I will be rebuilding my pumps. The ones now are out of scale and will not clear the spar deck. No matter, as I progress, I learn new skills and then I am dissatisfied with my former efforts. You really set the standard for excellence in craftsmanship, sir.
-
That is good stuff to know. So the resistor would reduce the voltage but not the amps. So I got off on a tangent and was searching for 1/96 wood gratings. I am not thrilled with what was molded onto the decks after looking at pictures of actual gratings. They aren't sunk in but are actually flush with the frames in the real world and have a nice sheen. I wonder if window screening would work. Verne
-
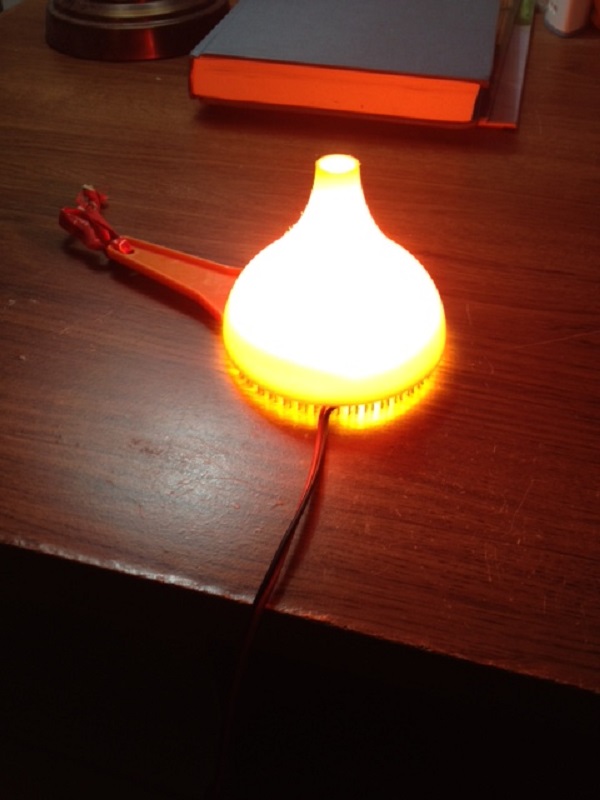
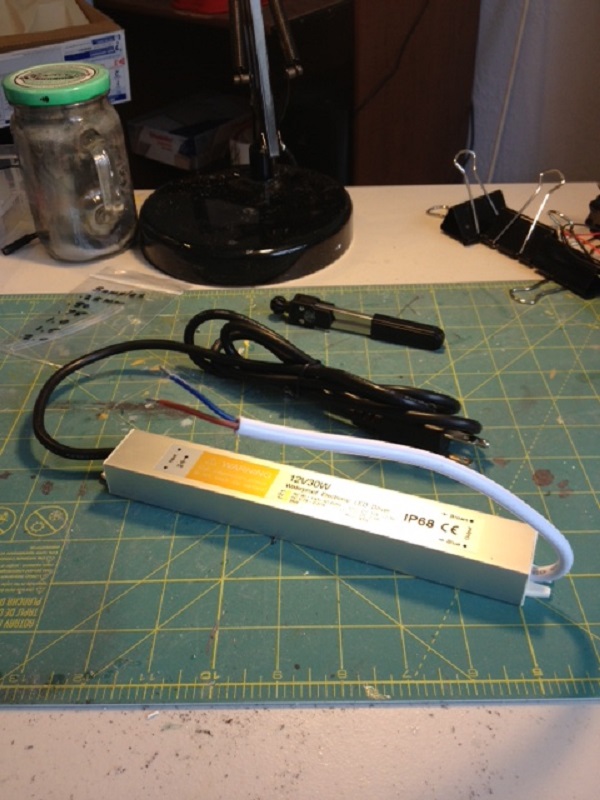
Dave, I decided to discard the pyramid for now. Instead I borrowed my wife's Tupperware 3 3/4" funnel. I am not sure that it has any concentrating effects but it is a perfect fit and will work well to keep the bundle together and organized over the light. As to whether it will focus the light on the ends of the strands, I don't really know. It seems like there is a lot of light leaking through the plastic. I got the 2 amp power supply yesterday and subbed it in for the 1.25 amp unit. Right away the wires into the array started heating up. So went back to the 1.25 unit for now. I will probably have to find heavier gauge wire or just stay with 1.25 amp power supply. Verne


-
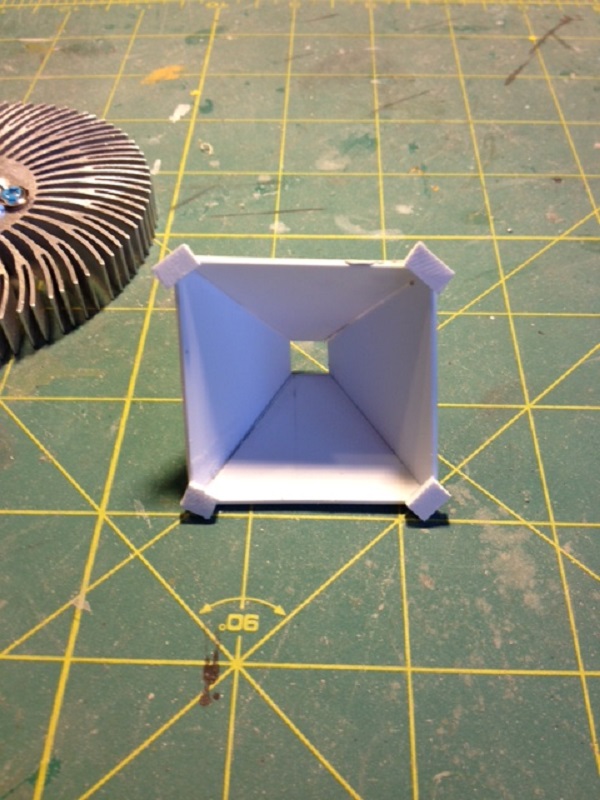
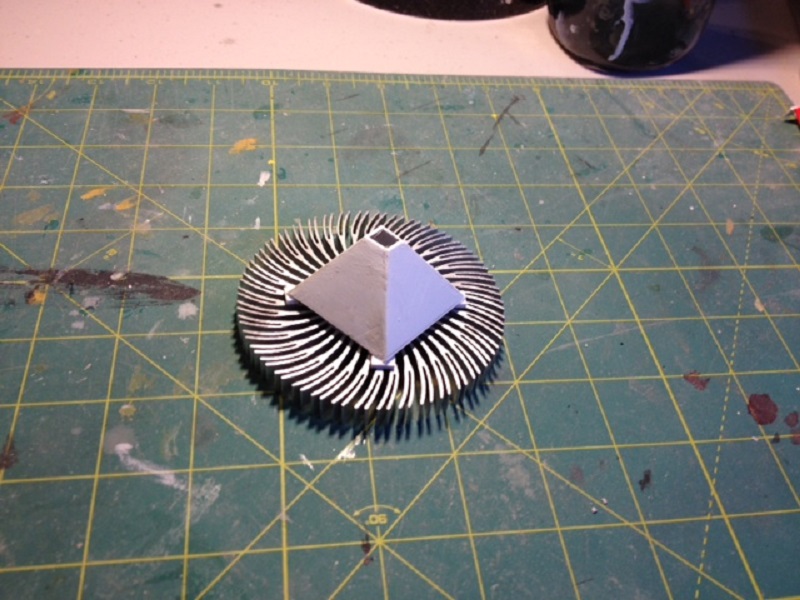
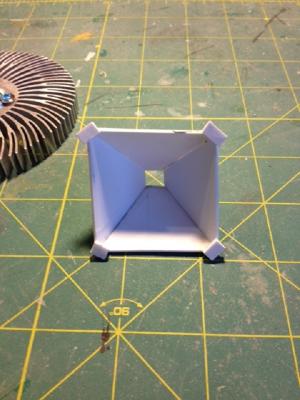
So here is what I came up with to concentrate the light on the Fiber Optic bundle. I cut 4 identical sides from .040 styrene sheet and then created a pyramid with a hole in the top 6mm on a side for the bundle to pass through. I put the pyramid up on blocks to allow air to pass underneath. Air will pass through the heatsink vanes as well. I will route the 12V wires under the pyramid to the array. Of course, heat is my main concern about this solution. Should be getting the 2 amp driver on Tuesday. Verne

-
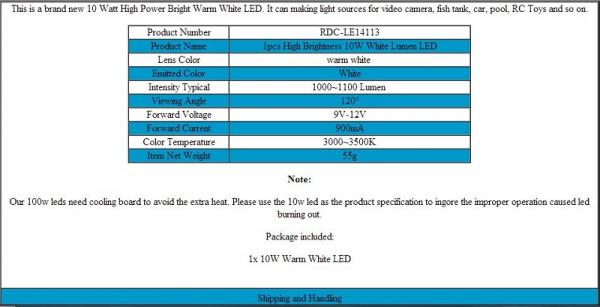
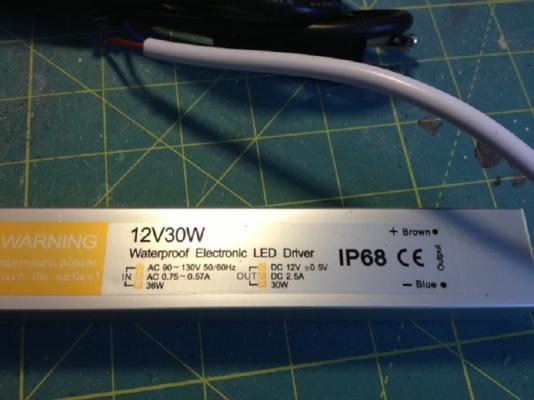
Okay. Got rid of the offender and ordered a 2 amp wall unit as well as some female connectors (only need 1 but they come in 10 lots). Replaced my multitester. So now I am back to square one. To answer your question Dave, here are the specs on that array: Now-- How to make a cone (or a pyramid) to concentrate the light on a focal point. Brass is out because it conducts and too risky for a short to happen. Maybe cardboard or styrene sheet properly ventilated to avoid melting? Verne
-
I probably just got a bad driver unit although I would like to understand what blew out both testers. You would have thought that kind of power would have jolted me as well but it didn't. These units are quite common. Amazon sells them under 5 or 6 different brands although now I am afraid of them. I think I like the wall unit idea with the plug in built into a black box that contains the array/heatsink and light cone. Do you guys think that this unit would do? http://www.amazon.com/Wall-Adapter-Power-Supply-12VDC/dp/B006GEPUYA/ref=sr_1_3?ie=UTF8&qid=1380946044&sr=8-3&keywords=wall+wart+adapter
-
Well I went out and bought a cheap analog voltmeter and hooked it up to a 9 v battery and it worked. Then I hooked it up to the power supply and got a 10 v reading and then apparently the power supply unit burned out the analog. I am wondering if the flashing is coming from too much current coming from the power supply such that the LED is turning off under load and then recycling. So it looks like this power supply has burned out two of my meters. Never heard of that happening. Verne
-
Okay guys, I found my Radio Shack 22-812 but the damned thing doesn't work and they don't sell them anymore. Only used it a couple of times. I will get a cheapo special from Home Depot today. Dave: as for the cycling, I would say it flashes on and off in about 1 second intervals. So I suppose that would be 1Hz wouldn't it. This thing is supposed to be a DC power supply. Really frustrated. But they don't call me the "bulldog" for nothing. Grrrr. Verne
-
Dave, I do have a voltmeter somewhere. Haven't used it for a while. As for the frequency of the flash, it is precisely 60Hz. I think it is junk and I am sending it back. I need to get a driver that works for 10W. Verne
-
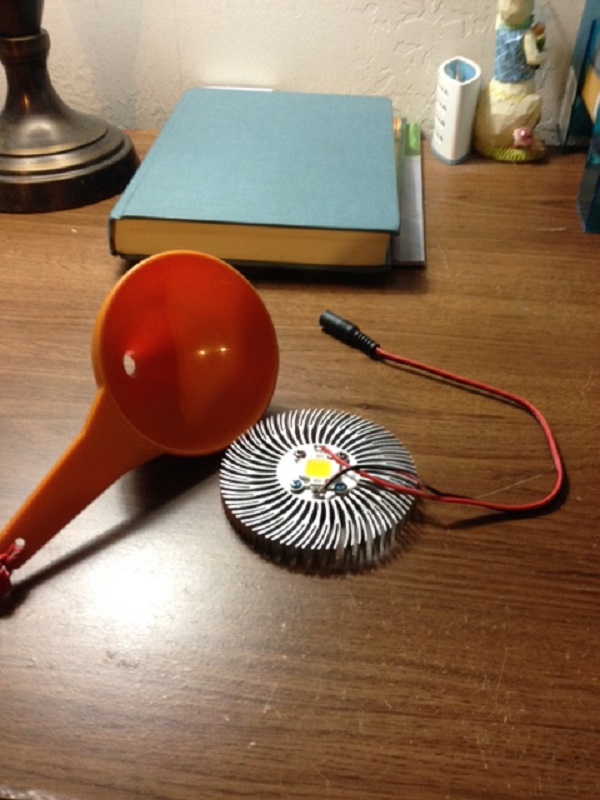
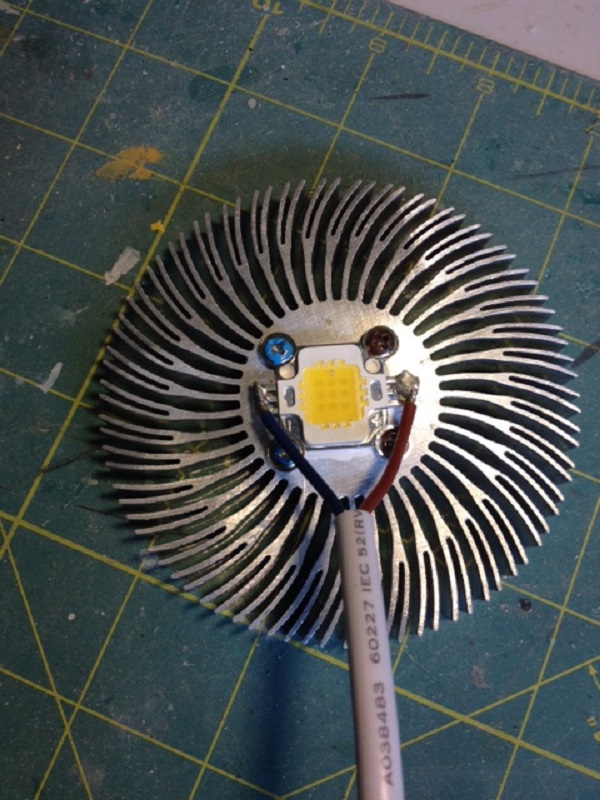
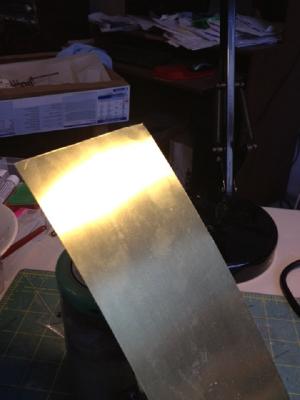
Well, I got my array and heatsink in from China and carefully assembled the array onto the sink with silver grease. Then soldered the LED driver on to the appropriate terminals by polarity. To make sure that there were no errors, I painted the negative side screws with blue and the positive side screws with brown paint. This matches the polarity of the output wires from the driver. Unfortunately, when I plugged the rig in to the wall, I got a bright FLASHING light. Not what I wanted. To make sure that nothing was amiss with the unit, I then drove it with a 9V DC battery and got a SOLID light just as I originally expected. So I RMA'd the 30W DC driver and have to find one that works. Please see illustrations: Anybody have any ideas? Thanks, Verne

-
Hi Dave, Well I tend to self diagnose and my wife get furious with me. She says I should let real doctors do that. Anyway I feel better now. I am a great believer in flu shots. We haven't missed in years. I too am absorbed with the tedium of machining all of those lanterns and wooden stanchions. Now that I have learned how to use my Dremel, I am revisiting a lot of old work. Verne
-
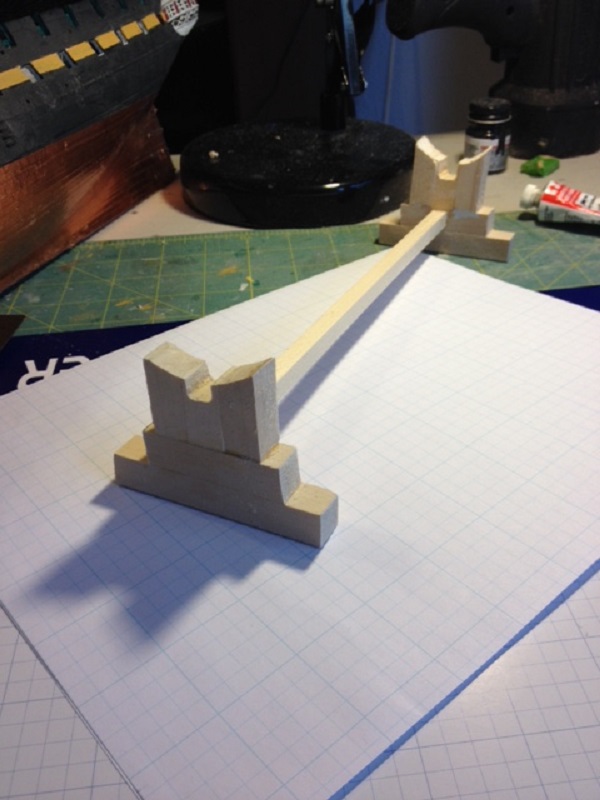
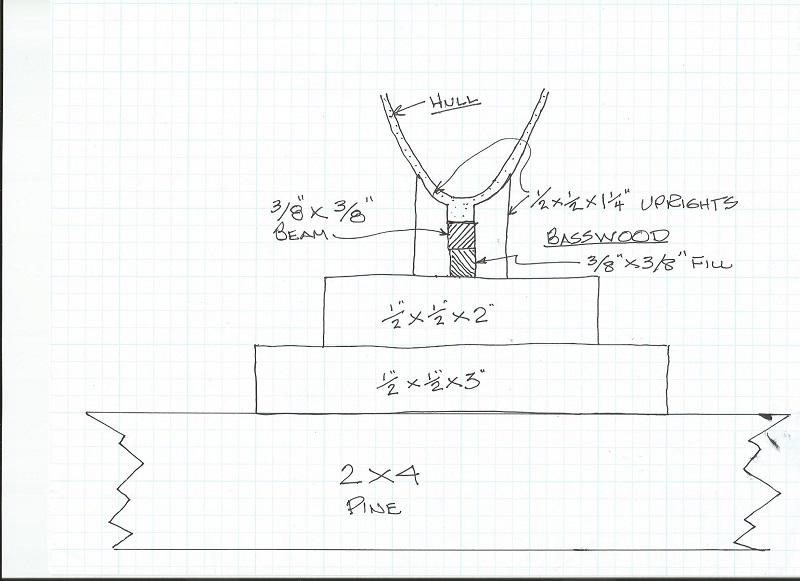
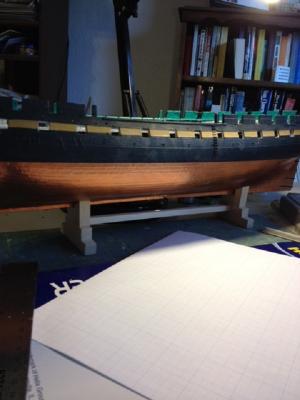
I had to lay off for a few days with the flu. Better now. I got tired of seeing my Constitution heaved over on the table and so designed a simple but secure stand that will allow passage of the optical fibers through the keel. Here it is: And here is a crude drawing of the plan. I will mount the stand on a 2x4 and probably stain the whole shebang and then put a nameplate on the crossbar. The nameplate will sort of hide the fiber optics that will pass behind it into the heatsink/array unit. Still waiting for that stuff to arrive from China. Thanks for reading, Verne


-
Hi John, I have bitten off a lot with this project. If you do it, be prepared to work with a magnifying glass at close quarters. A lot of precision involved. I can only do a few of these at a time and then my eyes feel like they are going to fall out. This has elevated my standards and set a new personal bar for quality. Dave (lmbsbk) has provided a brilliant tutorial to follow without which I wouldn't know where to begin. Right now, I am "building" the lamps out of 1/8' square acrylic per Dave's specs. I doubt you will see much on the log for a while, though, because of the repetitive nature of the current work. I appreciate your words of encouragement, John. Thanks for looking in. Verne
-
Thanks, Dave, for the direction. Yes, I built up my bulwarks and then put a .010 strip over that with bolt details, so lots of room for a trench. I am assuming that the Dremel 1/32 engraving bit is different from my Dremel 1/32 drill bit. Will it work in my Dremel rotary unit? As for the glue, I should be able to get the Testor's Gel at my local hobby shop. Before long, I will have to tackle the stand project and again I appreciate your ideas. Just as an aside, how did you embed your build and your name below your post?
-
Actually, Dave, this is lamp number 3. I will paint some brass on it and put it in a little sandwich bag so I won't lose it. On the next one, I will work on making the wick housing more prominently black. I have plenty to do to understand how to make and use the jig to install the lantern. I suppose the best way to understand is to forge ahead and simply do one. I must say that I don't fully understand how to hide the fiber. Do I cut a groove in the bulkhead and then paint over it? Another realization is that I will have to disassemble the nicely sanded gun deck ala Evan, as I will never be able to put that assembled deck in around the installed lanterns. On a more positive note. I should be able to re-assemble it without the cracks being too obvious if I use struts underneath as you did. Then there's the issue of how to make the correct ship stand. This has been keeping me up at night trying to figure out what to do with those damned fibers. Thanks for your helpful remarks, Dave.
-
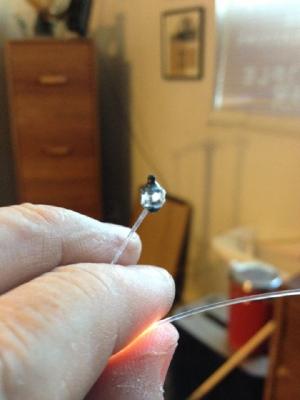
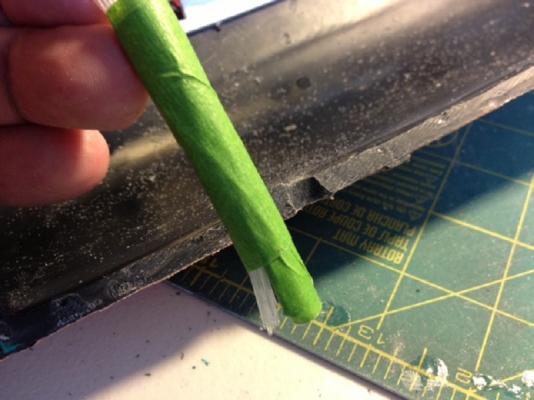
OMG, I actually made a light! (Gasp). The next time though, I am going to wait until I finish painting the lamp before I drill the fiber hole. Awk! Here's what I came up with. Thanks again, Dave, for that tutorial. This is amazing (but very labor intensive). Verne
- 135 replies
-
- 1
-

-
- Constitution
- Revell
- (and 1 more)
-
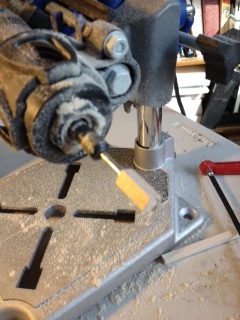
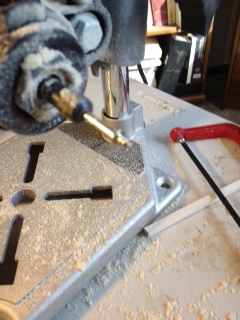
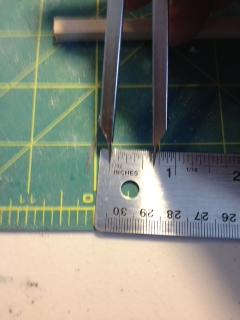
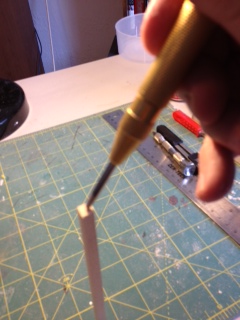
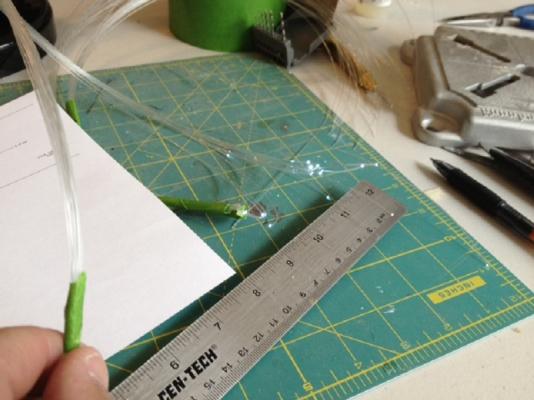
While waiting for delivery of the clear plastic "lantern" stock, I thought I would revisit my stanchions. They were originally made out of dowelling and pretty darned crude plus they were too high to fit between decks. So I turned my Dremel into a "lathe" and went to work. For those of you who are interested in building stanchions under your gun deck here is how it worked out for me. First, I got out some spare 1/4" bass wood (2 scale feet in diameter) and measured a piece to 6 1/2 scale feet which in inch-land is 13/16". Then created a guide hole with a 7/64" bit with the bit vise. Then mounted the piece on the Dremel mandrel and snugged it up so that it was perpendicular. Then turned on the Dremel at the lower speed and shaped it with a small file. Presto! A stanchion that is identical to the one shown in the Marquardt drawings. I will replace those crummy ones with these newer ones. I will need 22 to complete the set. Here are some pictures: Uh oh. Doorbell. The clear plastic is here. A modeller's work is never done. Verne


- 135 replies
-
- 1
-
-
- Constitution
- Revell
- (and 1 more)
-
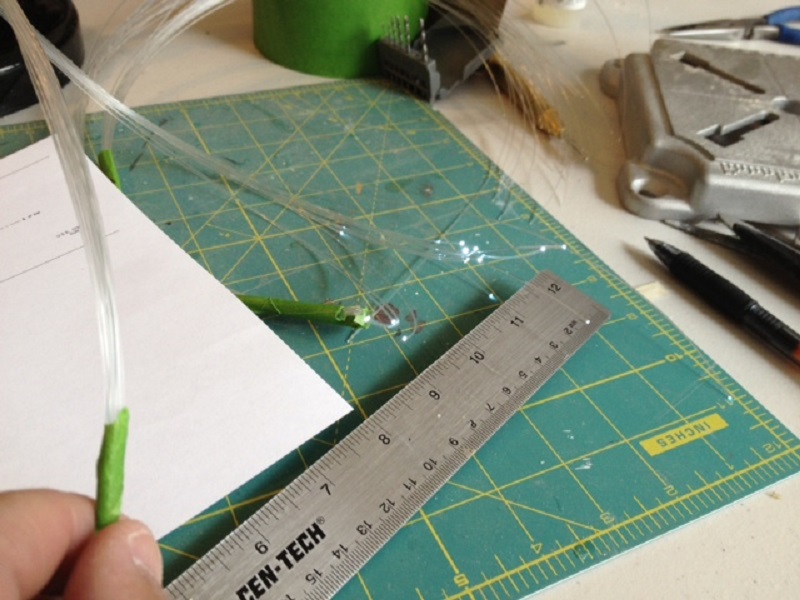
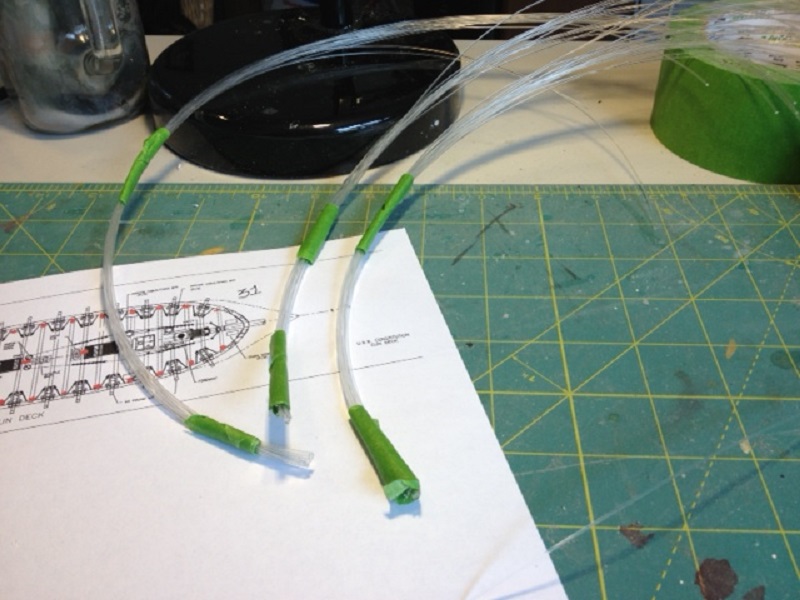
Dave, My fibers are only about two feet long. It appears that yours are at least three feet. I hope I will be alright. After reading your lighting tutorial again, I realized that I may be approaching the problem the hard way. What I may need to do is to dismantle those cables and install each lantern individually strand by strand and then fasten the strand down to the inside of the hull and paint it. THEN pass it out the hole in the keel until the entire hull is done. If I do it that way, I will stay a lot better organized and stuff won't be in the way as I work. My wife came up with a great idea. She suggested mounting the ship on a low profile container with two healthy brass tubes. The fiber bundle would be passed down through one of the brass tubes to the concentrator on top of the LED array which would be inside the container and out of sight. She is an idea person but it is left to me to figure out how to do that. It's been that way for the last 36 years. As for the LED driver, I bought that from Amazon for $14.55. Probably a little bit pricey but it should work safely. Check it out at: http://www.amazon.com/Ledwholesalers-Power-Suppply-Driver-Transformer/dp/B0034GUEY4/ref=sr_1_1?ie=UTF8&qid=1379606913&sr=8-1&keywords=LED+driver If you have Amazon Prime, it can be on your doorstep in a couple of business days. It seems that I have become so absorbed in lighting that I have almost forgot that the real objective is to build a ship. Yes, this seems like the "Never Ending Story" but learning is a gratifying process. I will be sure to wear my nuclear test blast shades before firing up the LED. This is starting to remind me of "Tim 'Tool-Time' Taylor". Thanks everyone for reading, Verne
-
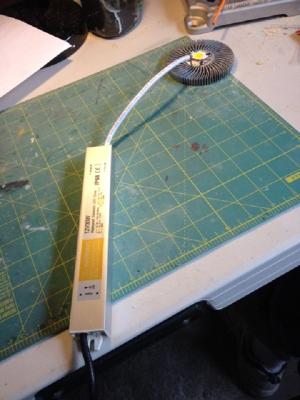
Well folks, I got the ac/dc power source this morning from Amazon. This little bad boy will handle up to 30W at 2.5A. I don't think the 10W array will even phase it. Sorry for the pun. Now waiting on the array and the sink to come from the orient. I am toying with the idea of making a cone out of thin sheet brass soldered together. First I had better make a prototype out of paper and then scribe it onto the brass sheeting. Anybody have ideas about how to fasten the cone to the sink/array assembly? Thanks for visiting, Verne

- 135 replies
-
- 1
-
-
- Constitution
- Revell
- (and 1 more)
-
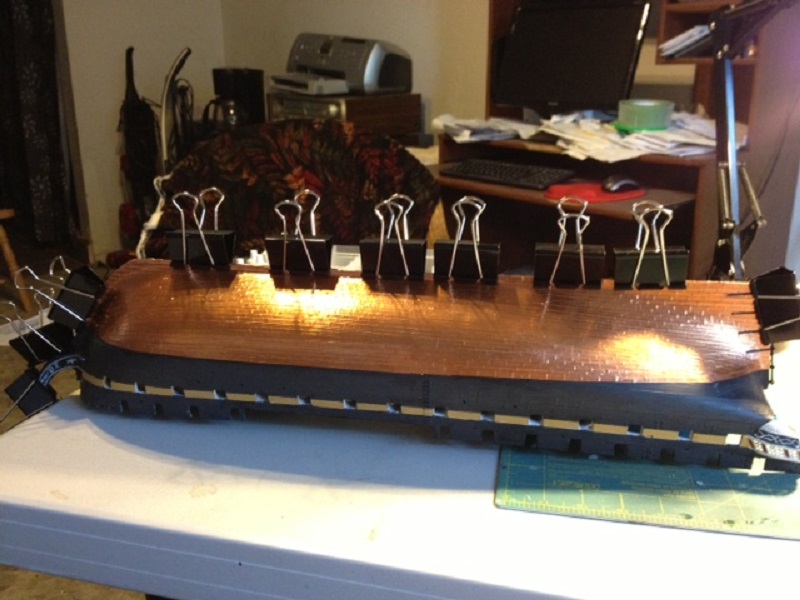
Well, one challenge leads to another. I successfully installed the Fiber Optics only to discover that there isn't enough clearance between the ship and the table to accomodate the FO harnesses. So I will have to build a stand to provide enough clearance and hide the heat sink/LED array/FO. Right now, I am stumped. Anyone have any ideas to share? Thanks, Verne

-
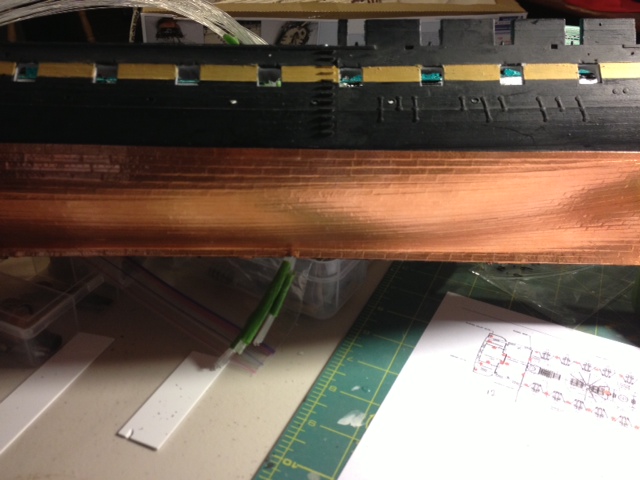
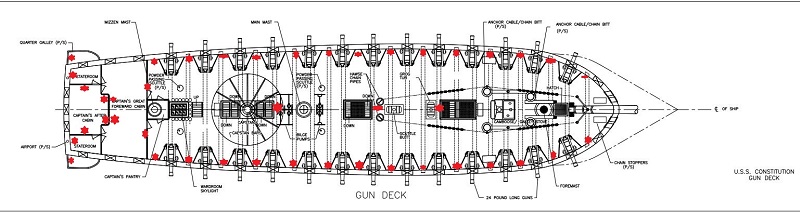
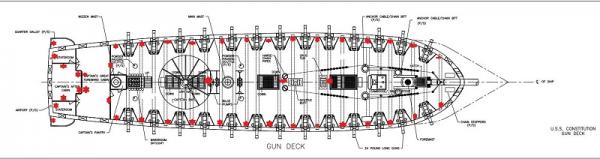
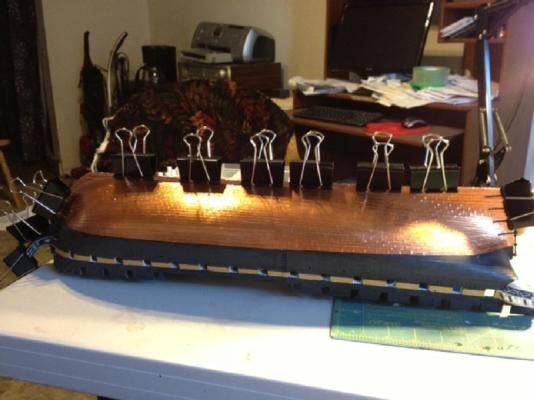
I have come to the realization that I put the hanging knees on too early in the project. So at least one side of knees has to come off. That's okay, though. I found some errors in the knees that made me crazy anyway. Since, I have decided to illuminate the ship ala Dave (lmbsbk), it is all the more imperative that the gun deck be correct. While waiting for the LED array and the heat sink to arrive, I have gone ahead and cut approximately 50 2 feet lengths of fiber optic strands. 18 for the aft, 18 for the fore, and the balance for the midships. I deliberately cut a few extra strands long just in case I get some wild ideas in the future about putting a lantern or two on the mainsail yard. Then I bound up three harnesses, aft, fore, and midships and labeled them. Then I tested each harness. After that I bundled up the three harnesses right where they will pass through the keel. When the hull is nice and dry, I will enlarge the hole to allow the bundle of fibers to comfortably pass through and then fasten the vessel on the stock ship stand for now. Then it's a matter of dropping the gun deck in and start drilling .075" holes per the lighting plan. I am expecting the US Plastic 1/8 by 1/8 clear square stock any day now so my timing should be okay. The red stars represent where each lantern will be placed. I watched "Master and Commander, The Far Side of the World" last night and got totally re-energized. I sure envy those beautiful hatch gratings on HMS Surprise. Russell Crowe wants to do another Patrick O'Brian novel but can't get the backing. That's a shame. Thanks for looking in, Verne

-
Okay, I understand now. Now to Ebay for some shopping. Verne
-
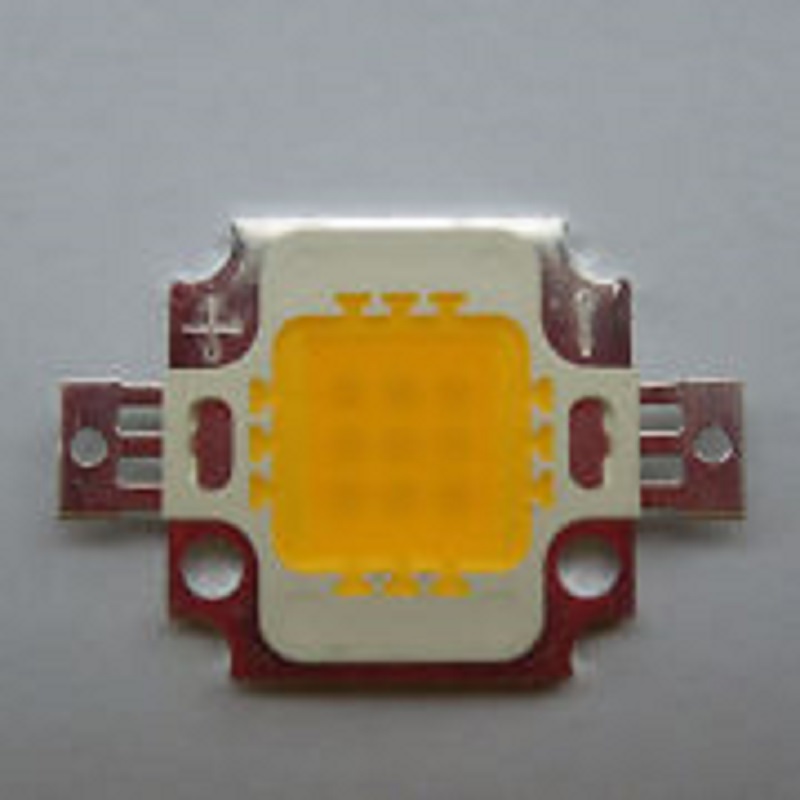
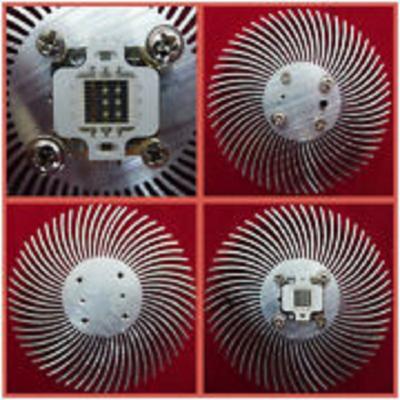
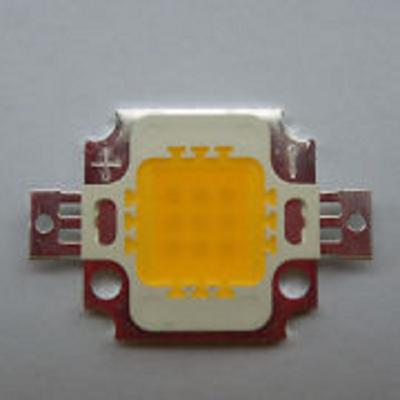
I just bought this LED heat sink on ebay that appears to be pre-drilled. Here is the link. http://www.ebay.com/itm/1pcs-Aluminium-Heatsink-for-10W-High-Power-Led-Panel-free-shipping-mah-/321033809304 for $6.49. If the holes don't fit then there is always Dave's method of tapping it. While I was out there I picked up a 10W 1100 lumen warm light array. http://www.ebay.com/itm/10W-LED-Warm-White-High-Power-1100LM-LED-Lamp-SMD-Chips-light-bulb-for-DIY/330786407913?_trksid=p3984.m2045&_trkparms=aid%3D333005%26algo%3DRIC.FIT%26ao%3D1%26asc%3D30%26meid%3D1312256243334578027%26pid%3D100018%26prg%3D1023%26rk%3D1%26rkt%3D3%26sd%3D330786407913%26 for $1.49. Hope it works okay. Won't get until sometime in October though. Oh well, lots of other things to do in the meantime. Like making sconces and lanterns. Actually, I could continue on my build and bundle all of the Fiber Optics and run that through the keel. Just have to make sure that everything is secure and the fibers are available above deck before gluing the hull around the gundeck. I would hate to have to rip all of those knees out. Thanks everyone for hanging in there with me and especially thanks to Dave (lmbsbk) for his excellent log/tutorial concerning installing lighting. Verne
- 135 replies
-
- 2
-
-
- Constitution
- Revell
- (and 1 more)