vacotton
-
Posts
95 -
Joined
-
Last visited
Content Type
Profiles
Forums
Gallery
Events
Everything posted by vacotton
-
Well guys, I redid the deck and it will stand as it is. Now I have a question for anybody: Is there a way to reduce a bitmap picture of say a sailing ship or map down to 1:96 so that it will fit on the wall of the captain's after cabin? I can't get my printer to print a jpeg that small. Thanks, Verne
-
Well Popeye, I just sanded down the black-grey wash and it seemed to work albeit the deck looks old as the hills and twice as dusty, sort of like me. I will put a coat of Vallejo Deck Tan on tomorrow, sand her down and call it good. True story about tradeoffs and practicality. I sort of look at this way: It's practice and experience and that is the only way to develop skill. Part of experience, I suppose though, is knowing when to stop. Tomorrow is another day. Verne
- 135 replies
-
- 1
-

-
- Constitution
- Revell
- (and 1 more)
-
As I mentioned above, I had to start my gundeck over. Just got done stripping and rescribing my deck. Now it's time to come up with that "just right" color to paint so that the plank caulking shows through. I tried using a dark brown sharpie but that was terrible. I like that Vallejo "Deck Tan" #110 but I want to put some character into it to make the deck look holystoned but not just slab grey. Maybe an undercoat of Vallejo "Black-Grey" #168 wash that could seep into the cracks? I think I had better experiment on a piece of sheeting first and avoid yet another disaster.
-
Yes I do have a log, Pop. It's going to be a long one at the rate I am going. Thanks for visiting. Verne
- 135 replies
-
- 1
-
-
- Constitution
- Revell
- (and 1 more)
-
Oh hell, John, after you boys took me to school today I tore that deck down and I'm getting ready to do it right!! Seriously, I had some issues with that gun deck anyway. The stanchions were too high for the kit and the deck was damaged. I won't have too much of a problem reworking it so all will be well. So, hopefully, all of my ideas will be intact, just a little more accurate work this time. I really admire that Constitution of yours. Verne
-
Well Dave, I just reread your log and I can see that I need to read it again with a notepad handy. I was so green before that I didn't get a lot of what you were sharing. I am starting to focus now. Wow, you guys are good! Thank you for the tip on the riding bitts. I suppose I should pay more attention to the AOTS on my desk. Verne
-
Dave, Thanks for the tips! Now for another rebuild of this deck. Verne
-
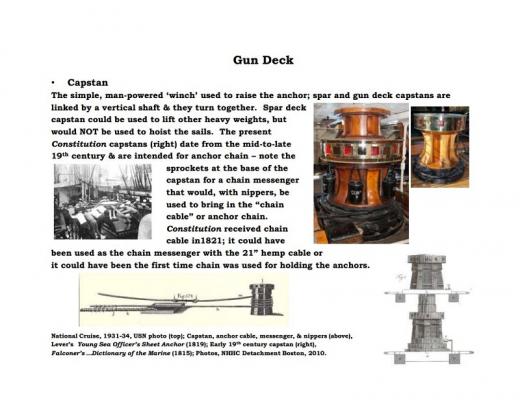
Hi Dave, I was wondering about those riding bitts as well. So then, are those black drums actually the hoisting mechanisms for the anchor chain? Do you know where I can get drawings from the 1812 era riding bitts? Today I am working on the shotracks. Tried to knock them out on my Dremel workstation. No dice. My power drill drifts unpredictably even when I use a punch and the bits clog up with melted styrene. I am going to have to drill those by hand. My thumb joints feel like they are going to explode now. I have been living off of Aleve for the past couple of days. I am looking for a push drill that will accomodate my Dremel bits. As for fun, I am having intermittent bouts of panic. This has been like going to craftsmanship school. As I mentioned the other day, I am willing to tear things down and start over as I progress. I am sure glad that i picked the gun deck to do first. I had better be on my A-game for that spar deck. Thanks for stopping by, Dave. Verne
-
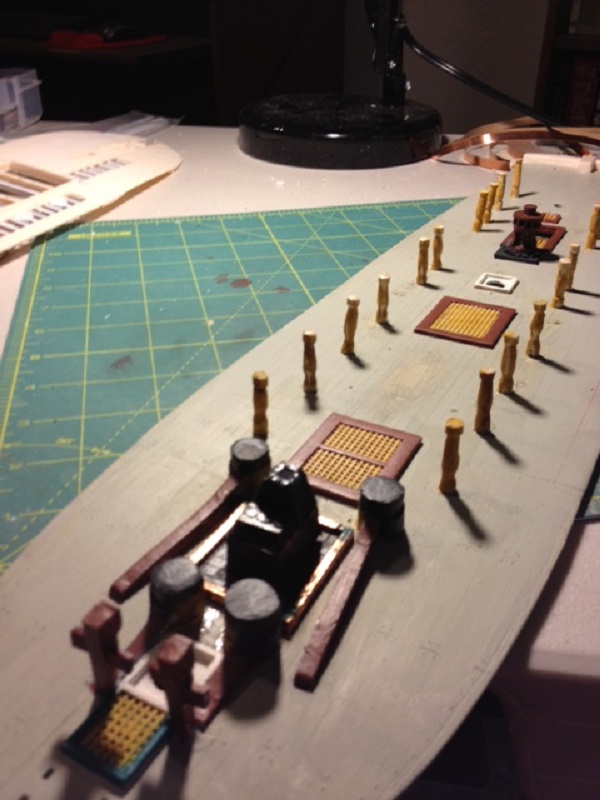
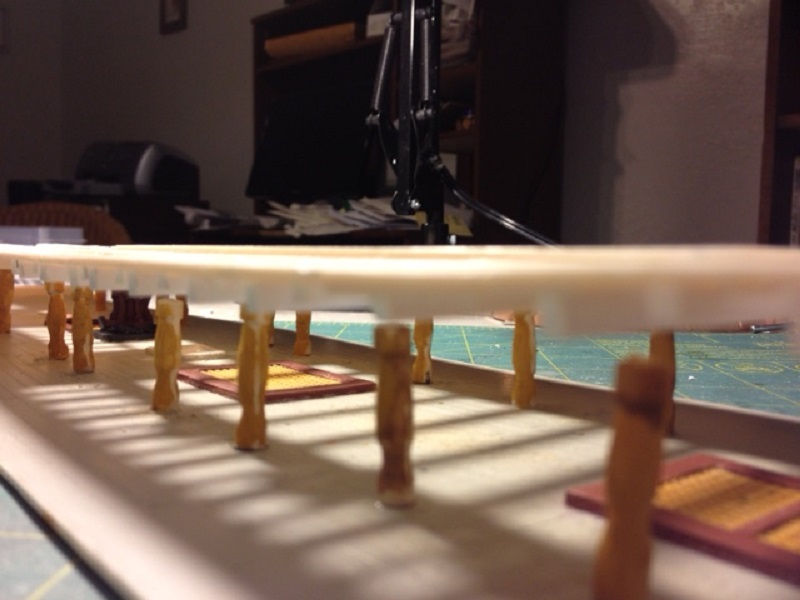
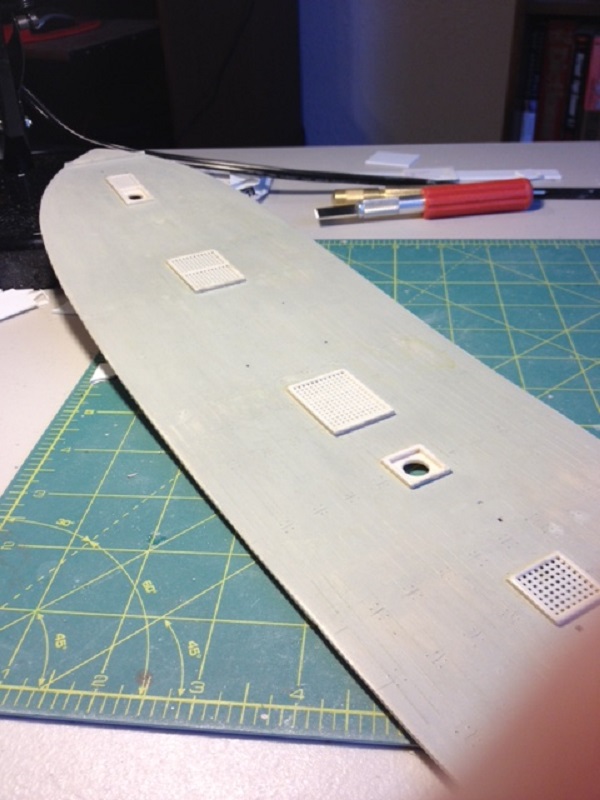
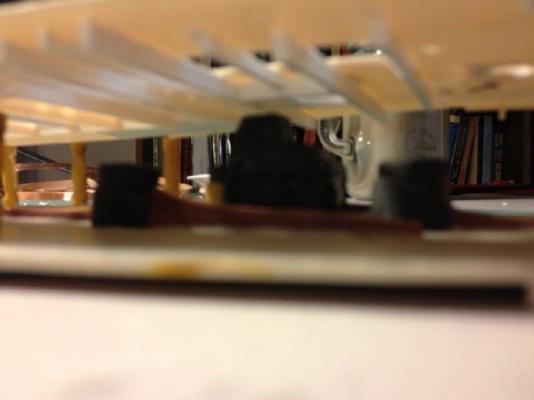
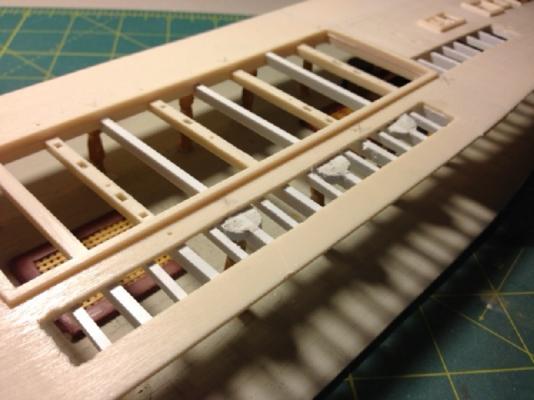
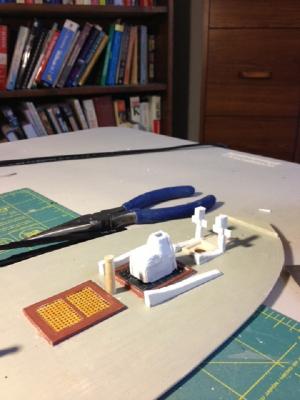
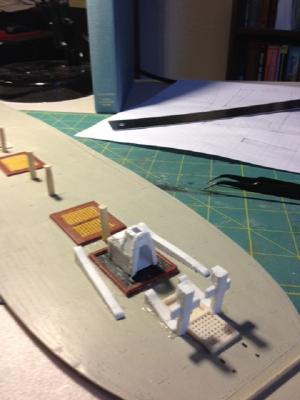
Well folks, I am done for tonight. Couldn't resist. Had to paint up what I have installed on the gun deck so far. Helps me get my bearings a little. I still have the pumps to do, the shotracks, and the quarterdeck area. As you can see the foredeck is complete with the fore and aft riding bitts and the camboose in place. The firepit is finished in copper with a hint of copper corrosion at the corners. Before I go any further though, I have to do some touching up and put a satin varnish overlay on the parts. But the gun deck is starting to populate. Here are some views under the spar deck: And through the cutaway on the spar deck: And finally down the port gun deck: Thanks for your interest and all comments. Verne


- 135 replies
-
- 1
-
-
- Constitution
- Revell
- (and 1 more)
-
Yes Dave, that is a concern. I think that some compromises may have to be made. As I pointed out earlier, there might have been a few things misplaced by Revell. I built my gundeck capstan right to scale and it was about a scale foot too tall so that beautiful work up top on the real capstan had to be left off. It is clear now why Evan built his own pumps. And then he caught that Revell had the elm pumps in the wrong place. I agree that the ladders might become a nightmare. So from where I sit, this looks like one big guessing game juggling books, postings, drawings, pictures and intuition to try to get an accurate picture of this ship back in 1812. I can see that 1:96 is a tiny scale to work at for the detail that we are trying to achieve. Verne
- 135 replies
-
- 1
-
-
- Constitution
- Revell
- (and 1 more)
-
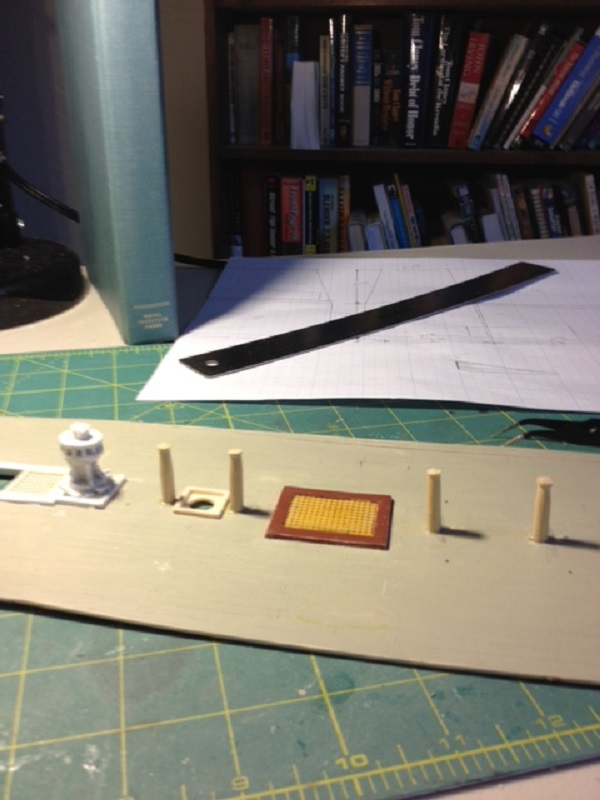
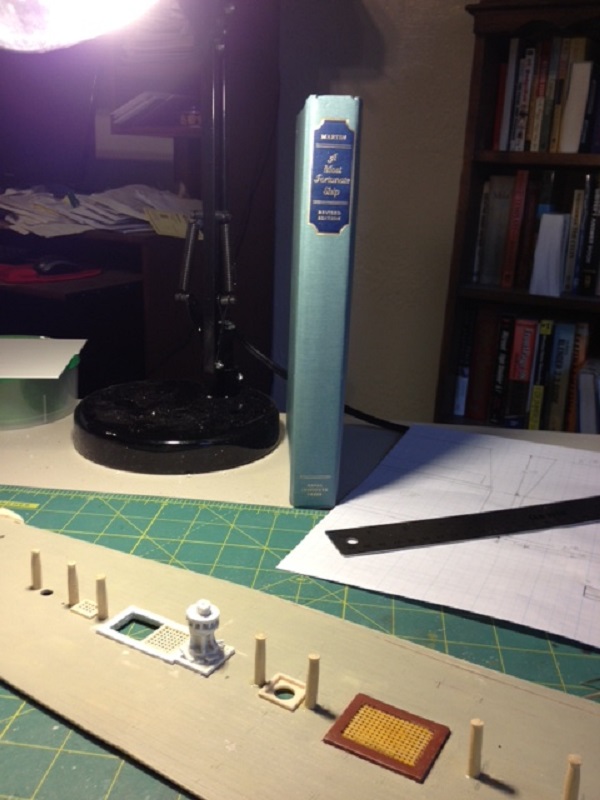
Well, it didn't take very long to find a mistake. It seems that there were really two rows of stanchions under the spar deck. I got the idea of a single line down the center from the Navy Tour pictures. Apparently during a later rebuild, they removed many of the stanchions from under the spar deck. I remember wondering at the time: Why would a designer run the stanchions down the center of the deck where the hatches were? Well, my answer is that they didn't. Thank you Karl Heinz Marquardt for setting me straight on this. In order to correct this, I will have to add missing beams across the waist of the spar deck, move the existing stanchions starboard and make the requisite amount to complete the two lines of stanchions. Oh, and now I know why you more experienced salts hold off painting until everything is all set. Does anyone know if portable stanchions were used in 1812? Thanks, Verne
-
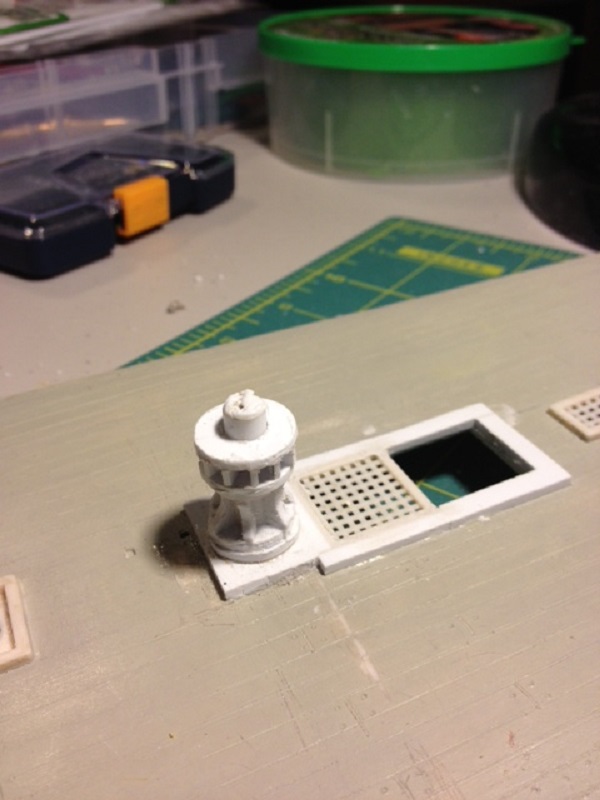
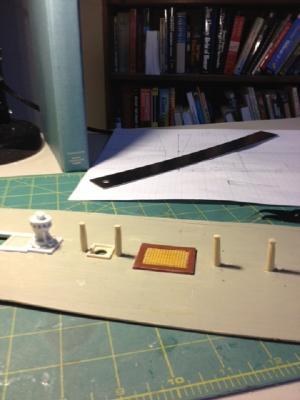
I made a bit of progress these last few days on the gun deck. I started the the two fore riding bitts and the aft riding bitts. I will finish them with 12 mm dowling, cutting them to size and placing them behind the braces. Next I fashioned stanchions out of 4.7 mm dowling, ground them into doric columns and aligned them to match the spar deck beams. Finally, I built the camboose from styrene sheeting and strips. Note the riveting. After a couple of coats of satin black paint, I hope it will be fairly believable. So now I have to create the shotracks around the hatches, build the chain and elm pumps and officers' country, and paint. Then the hopefully the gundeck will be done. I will wait till after the gun deck is installed to build the guns. Now to do a little reading from Tyrone Martin's "A Most Fortunate Ship" (2nd Ed.). I actually got this book for 7 bucks used. All that's wrong is no dust cover. I would say "A Most Fortunate Find". Thanks for visiting, Verne

- 135 replies
-
- 1
-
-
- Constitution
- Revell
- (and 1 more)
-
ROFLMAO, Dave! Verne
-
Dave: Back in the day mine was painted copper too. Popeye: I just got off the phone with my neighbor who is a master ship builder. Name is Mike Allmond, you might recognise the name. He told me not to fool around. Plank my deck with wood. I would be a lot happier. Now I see you do the same thing. My only concern is the vertical dimensions of the hatches. Wouldn't they be swallowed by the planking? Verne
-
Yeah, I am amazed at how easy Styrene is to work with. First experience with making parts and such. As I said in another thread, I am learning to break things down into little "mini-projects". Cuts way down on the frustration factor and forces me to plan better. I remember the Therm. with its green hull. Did the Cutty too. Too bad they are gone now. Popeye: I have one of those admirals too. Already has a place picked out for the Constitution. She wants to know what's taking me so long. Verne
- 446 replies
-
- 1
-
-
- Revell
- Constitution
- (and 1 more)
-
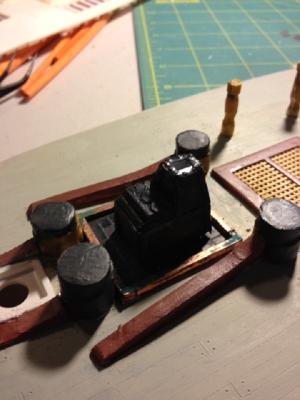
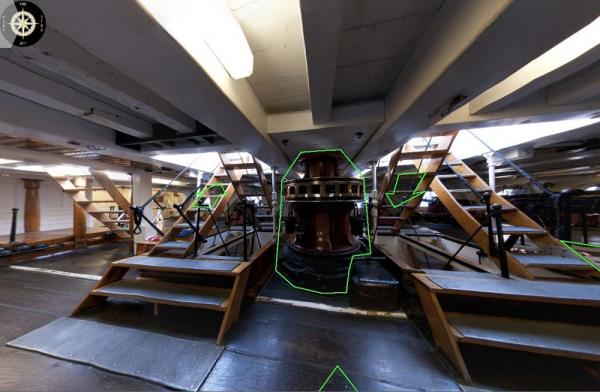
Okay, so the gun deck capstan is roughed out and I am finished for today. Tomorrow: Run some errands, work on some virtual airline business, touch up the capstan and then do some more on the gundeck. Daniel: Sounds like the Brits and French may have had a little more experience that we did at the time. Amazing work on the Victory. Astounding pictures. Dave: I tried to build the small section on top but it just wouldn't clear. Oh well, the main part worked okay. I wonder where the capstan bars were stowed when not in use. Verne

-
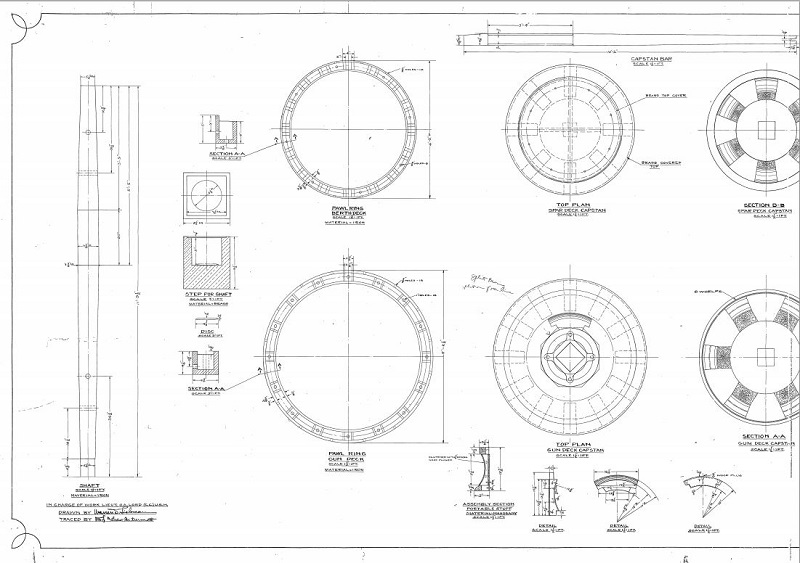
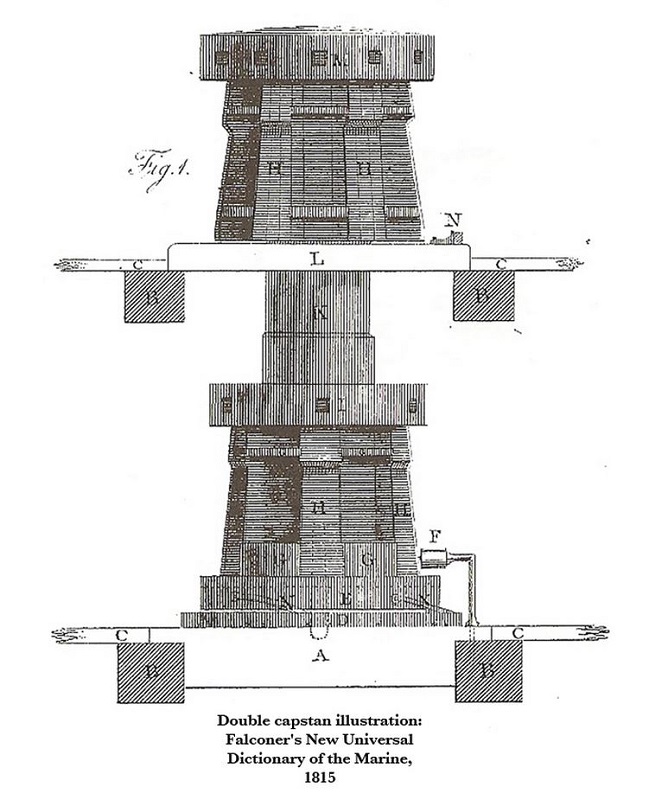
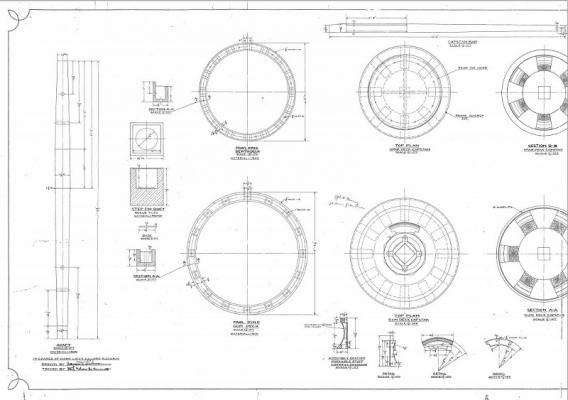
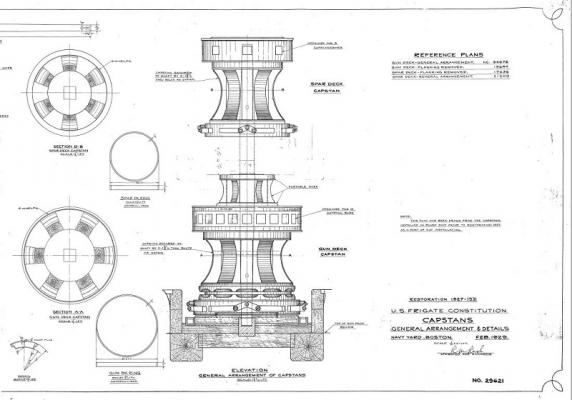
I learned something yesterday: Don't get too much going or nothing will get done and your head will explode. So I am breaking everything into miniprojects. Today's goal: Get the right size metal washers so that I can mill the styrene donuts to the right scale. I found a terrific set of drawings of the capstans both early 1800's and 1927 versions. The Navy tour site is a wealth of information. Another troubling situation: the headroom between the gun deck and the spar deck is barely six scale feet so some adjustments will have to be made. I am wondering if the capstans can be successfully lined up so that a truly double capstan can be built. I think that would be a nice touch. Here's some eye candy for you ship wonks: Back in the day (1815) And in 1927: And a nice little technical blurb on capstans: I might incorporate the stylishness of the whelps of the 1927 version into the model capstans. Those 1815 capstans look awfully clunky. This is the stuff that makes me love this project. Thanks for your patience. Verne

-
Please don't get me wrong, Popeye. This has been my favorite plastic kit over the years. So much so that this is my second go at it and this time with you guys helping me, I am going to get it right. Yes, unfortunately, time travel is not an option so we often have to take our best guess including Revell back in the 60's. The most enjoyable part of this process for me is the opportunity to learn so much about Constitution and that era that I was unaware of. Regards, Verne
-
Evan, Great move on the capstan platform. After looking at the USS Constitution Tour, it looks like either Revell got things wrong with the placement of the aft hatches or there were massive changes in subsequent rebuilds. Either way, yours is a pleasing solution and I have implemented it as well. Verne
-
Question of the Day: How did the guys operate the gun deck capstan with those ladders in the way? Were the ladders placed there later? Hmm. Also, if you look aft of the capstan, you might notice that the aft hatch is snugged up next to the captain's day cabin which is quite a variance from the model gun deck. Again, perhaps big changes over the years? Cheers, Verne
-
In looking at the gangway ladder, I can't understand how anyone could climb up that thing without slipping. Does anyone know if there were handlines attached. Was it a ropeladder? Has anyone modelled that detail? Thanks, Verne
-
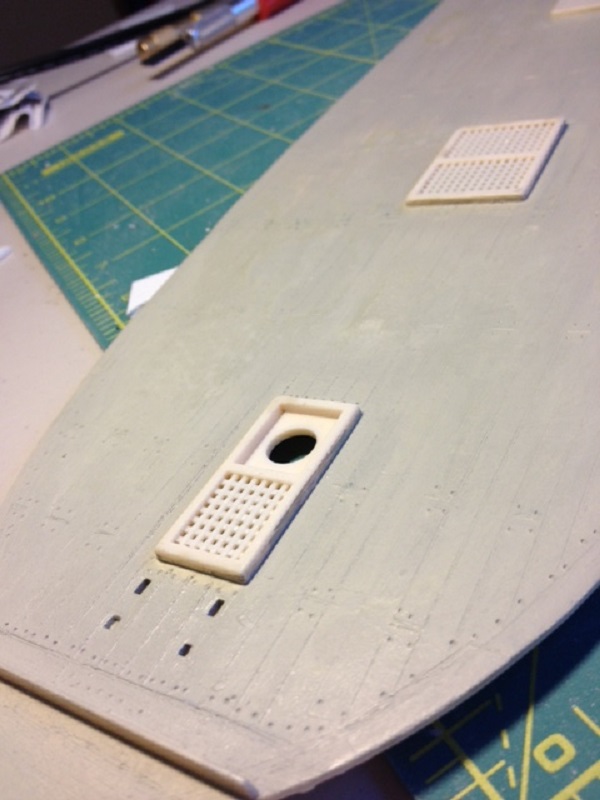
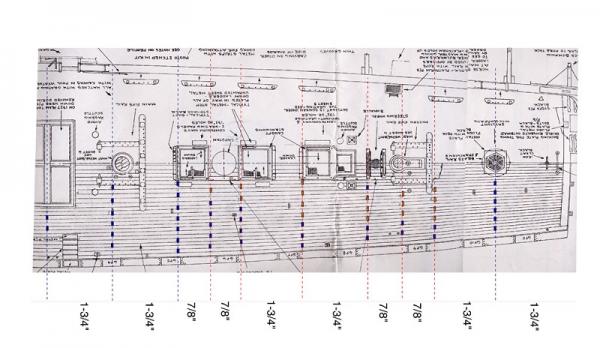
I scribed the longitudinal lines and butts on the gun deck and while I do like the color, it seems a little bit vanilla. Maybe the color of the fittings will make it pop a little. Unfortunately, the lines and bolt pattern don't show up well in the picture and I haven't figured out a satisfactory way to make the them more prominent without making a mess and overwhelming the gray/green of the holystoned teak. If anyone has any insider "tricks" they would be most appreciated. Many thanks to Greg Meyer of Knightdreamers http://knightdreamers.com/HomePage/Ships/13.htm for posting this deck planking plan. After a few hours of puzzling how it works, I finally got it. It is a pattern using 24' and 30' planks and staggered by 6' on each succeeding row. A few mistakes were made in the process of learning. The good news is that much of the gun deck is nicely buried by the spar deck. No pass when I do the the spar deck, though. It has to be right. If you happen to decide to use this chart, here are the numbers worked out for 1:96 scale 24' = 3.0 in = 76mm 30' = 3.75 in = 95mm 6' = 0.75 in = 19 mm 7/8' on the chart is 6' 1 3/4 on the chart is 12' Different scale. I wrote in the converted numbers in on the bottom margin of the chart and arrows from board to board to keep from getting confused. Ordinarily I haven't worked in metric in the past, but I have found that I get finer precision than with inches and calculations are a lot easier. And I am all about easy. Thanks for visiting, Verne

-
It helps a lot, Dave. I think what i might do is practice on a styrene sheet first before I really goof things up. Regards, Verne
-
Hi RadMan, Lots of surprises alright. To think that those 18 century naval architects did all of this without the technology that we take for granted. They didn't even have sliderules in those days. But roots of trees? Such insight. I have been fascinated with these tall ships since I lived near Newport News, VA back in the early 50's as an eleven year old boy. I remember riding my bicycle almost every day to the famed Mariners' Museum to admire all of the nautical models they had and still have. Happily, it turns out that one of the contributors on Fine Scale Modeler Magazine is Professor John Tilley who started his career at the Mariners' Museum. Understandably, his articles are very complete and shed often shed valuable insight into the construction and operation of these old vessels. I am busy setting up the portside bulwarks and doing the bolt patterns. Then I will create a deck for the portside quarterdeck gallery complete with the skipper's head. Then comes the outside hull half painting. That is plenty to keep me busy for the rest of the week. RadMan I appreciate your comments and interest in this project. Best regards, Verne
- 135 replies
-
- 1
-
-
- Constitution
- Revell
- (and 1 more)
-
Dave, You really are a detail guy! I love that kind of stuff. I think it really brings the project alive. I am thinking about starting my deck soon. I saw what Evan said about his scribing technique and what John (jtilly) said on Finescale Modeler about going with holly stripping. I think I will try scribing and I would be interested in how you scribed your deck. Between you and Evan maybe I can avoid some rookie mistakes. Once I get the decks scribed, I plan to go with Vallejo 110 (Deck Tan) which has a hint of green in it. A light sanding should give it a holy stoned look. Regards, Verne