


Erebus and Terror
-
Posts
410 -
Joined
-
Last visited
Content Type
Profiles
Forums
Gallery
Events
Posts posted by Erebus and Terror
-
-
Now that is Beautiful, your done some excellent work on this. Thank you for sharing this with the forum.
well done - something to be very proud off
all the best
I apprecaite your encouraging words, especially coming from builders whose work I so Iadmire!
-
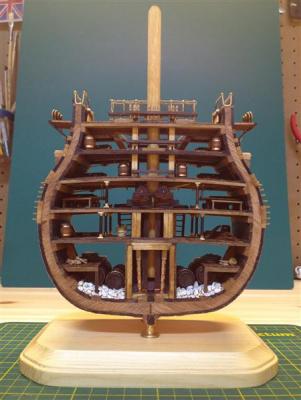
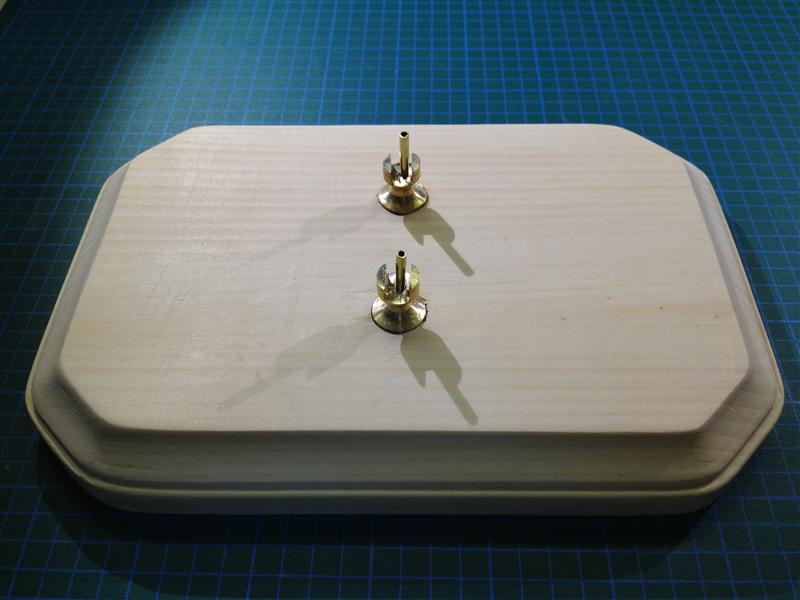
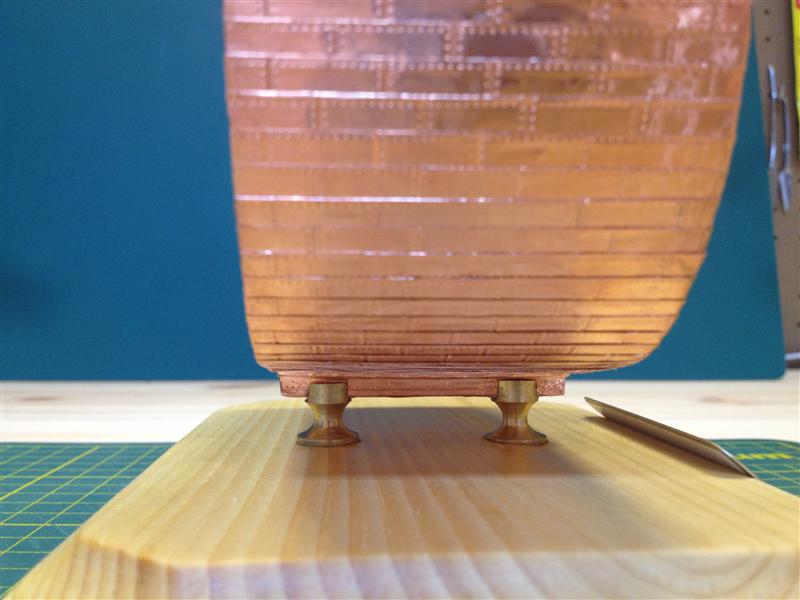
FYI, for those who own the kit, I did buy a new base for it; the base supplied by the kit was far too small for such a top-heavy model.
-
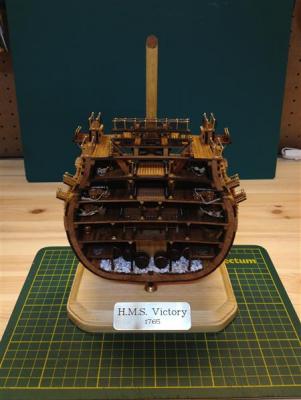
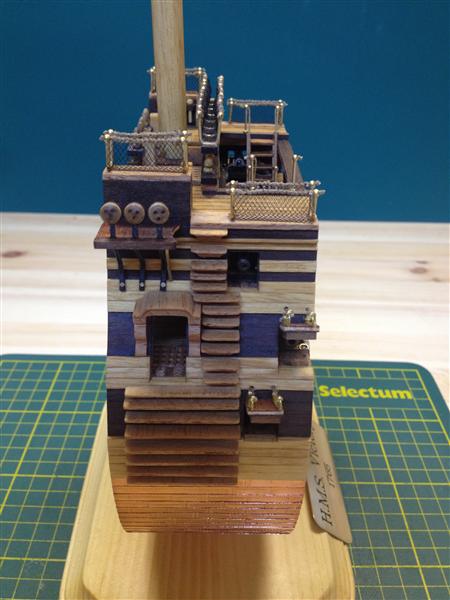
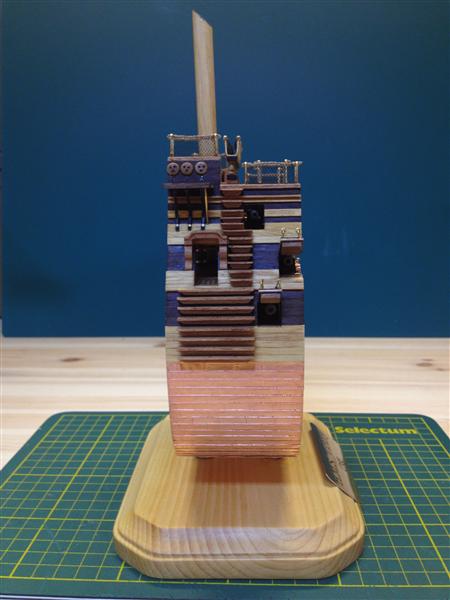
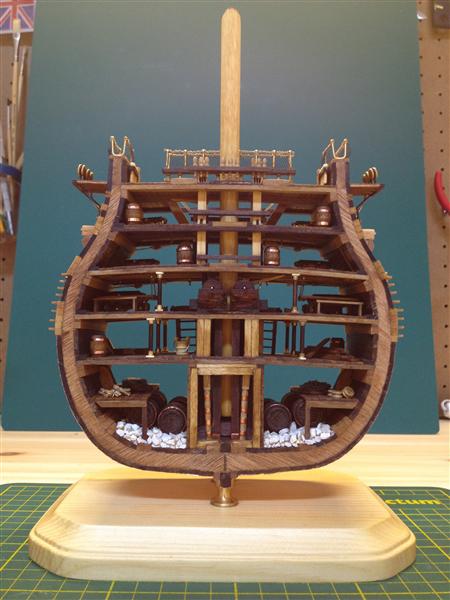
And finally, here are the glamour shots of the finished model. I admit I’m very happy with her. It took 14 months and hundreds of hours to complete this tiny model; hours filled with research and scratch building. Everything I added was built to scale, but I know all its little flaws, every inaccuracy, and each omission (especially the inaccuracy of the deck framing!). I could have done so much more, but at 1/98th scale I’m happy with the level of detail I put into it. It was a great learning experience.


- mtaylor and GrandpaPhil
-
 2
2
-
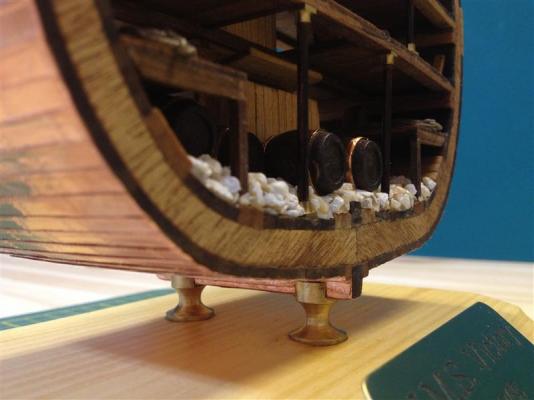
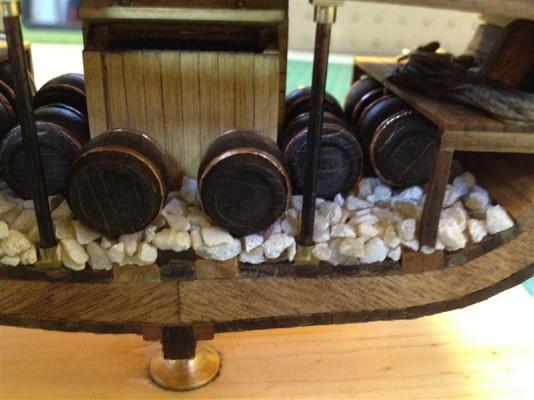
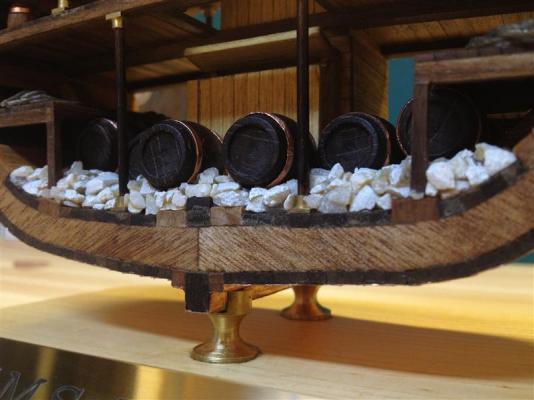
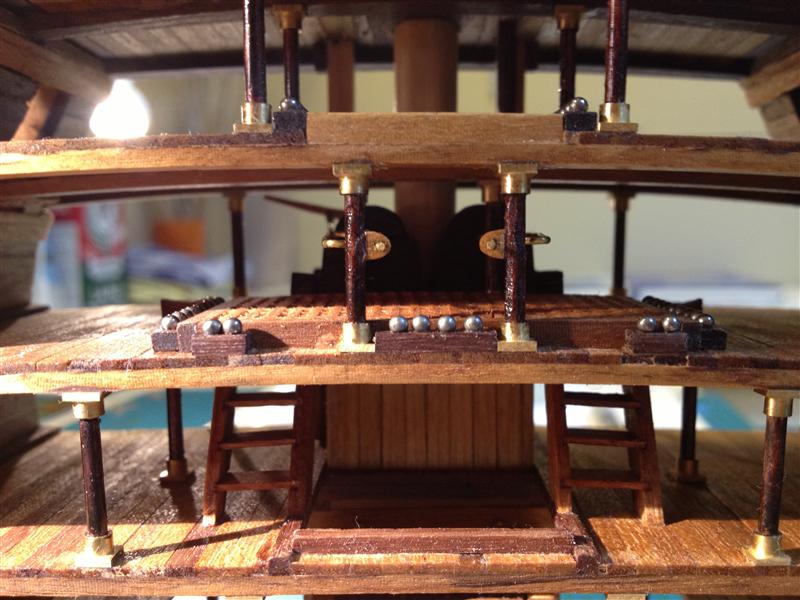
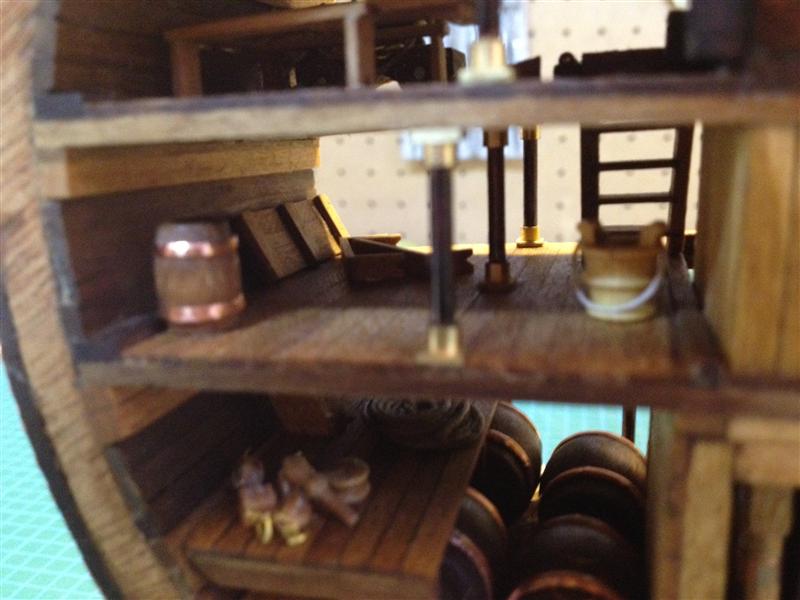
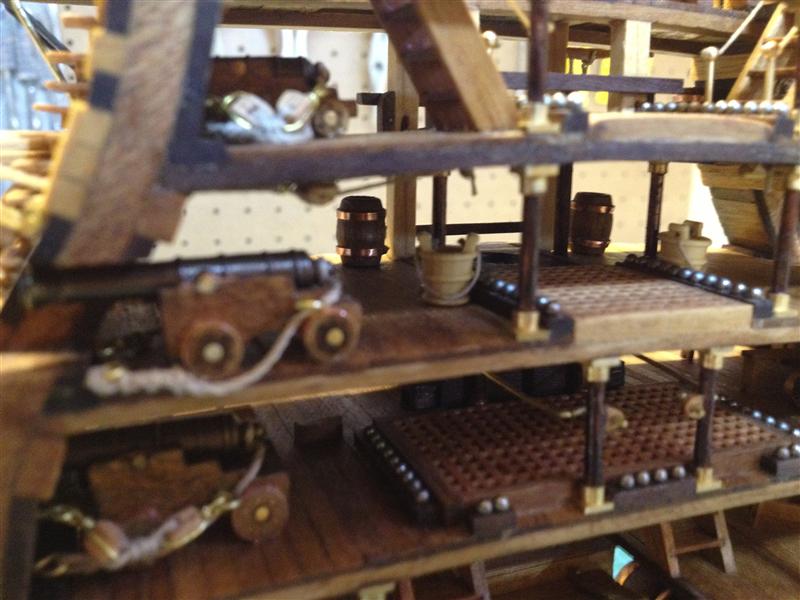
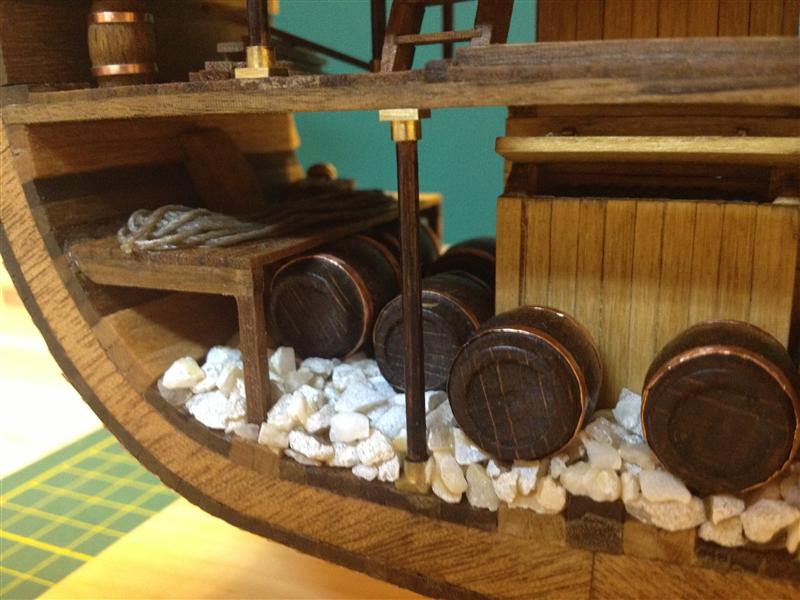
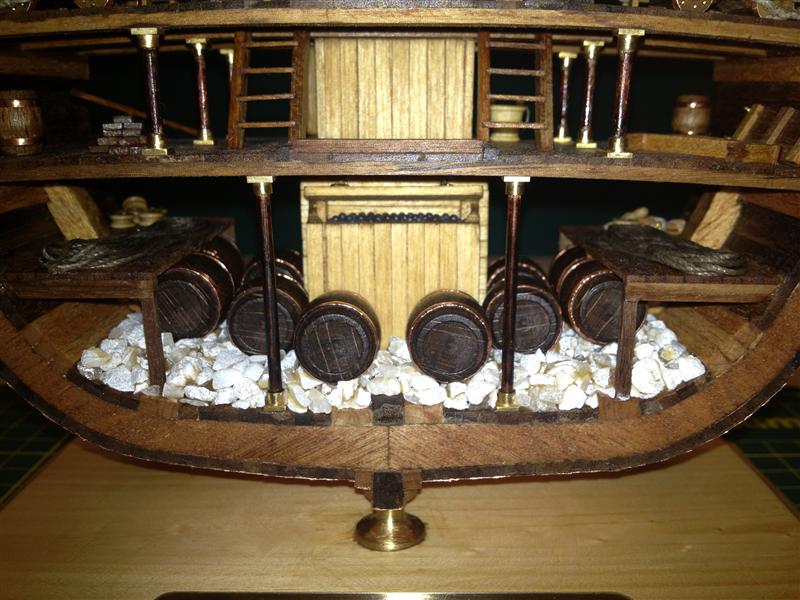
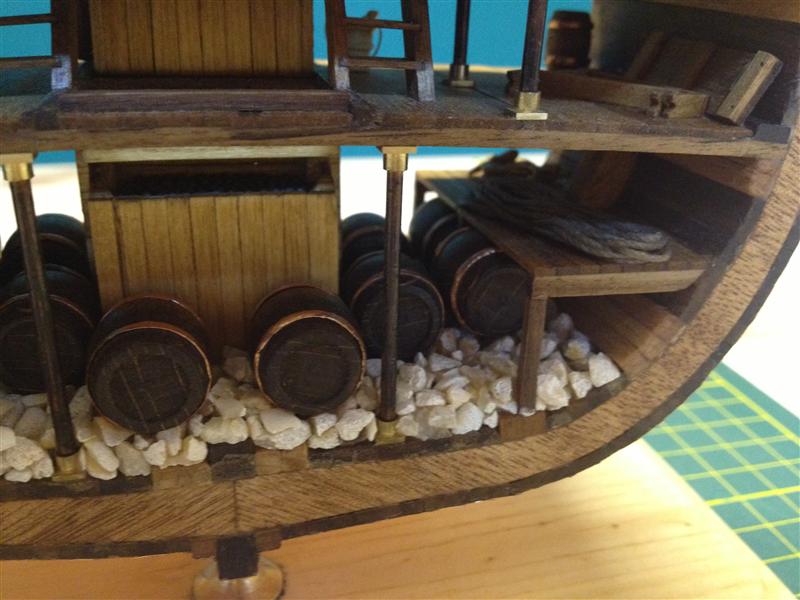
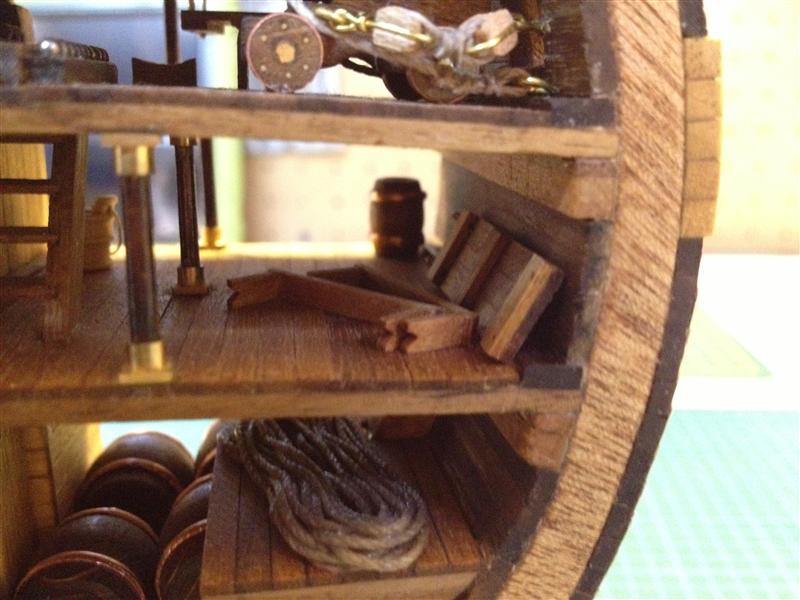
Detail of the ballast and barrels in the hold. Each individual pebble was placed and glued by hand with a pair of tweezers.


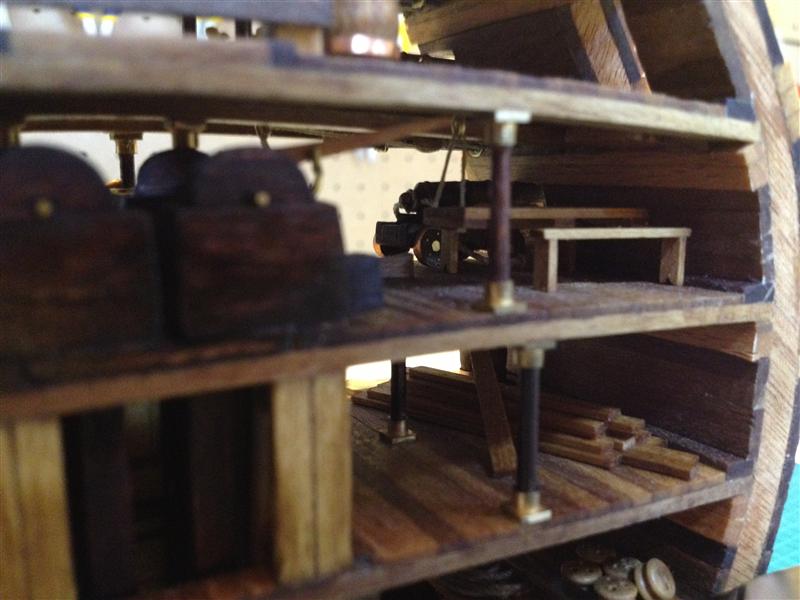
A pile of spare planking.
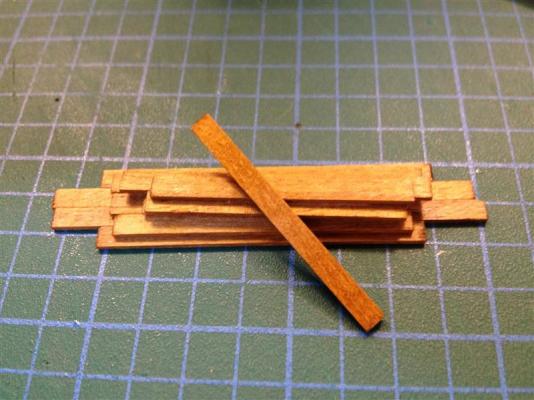
Spare planking and spare deadeyes neatly piled on deck.

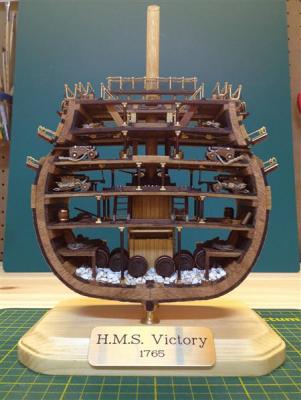
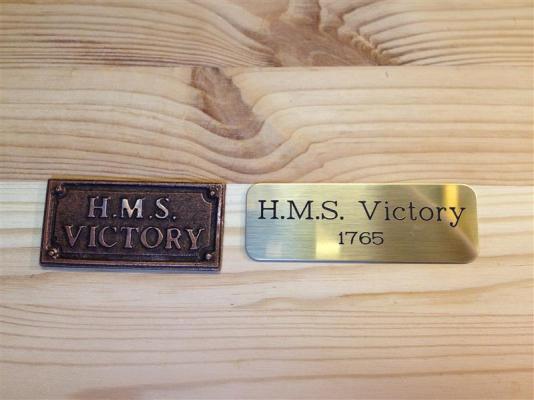
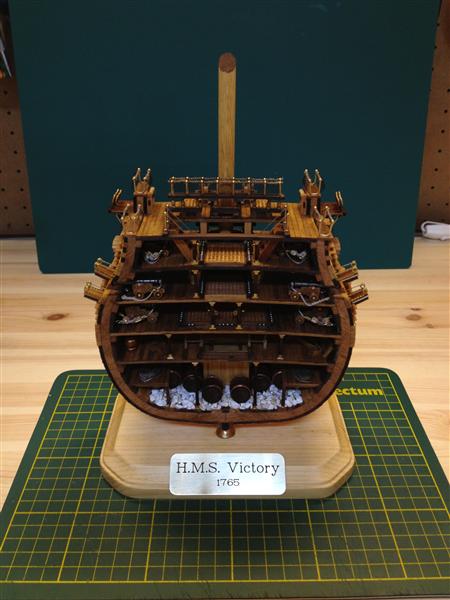
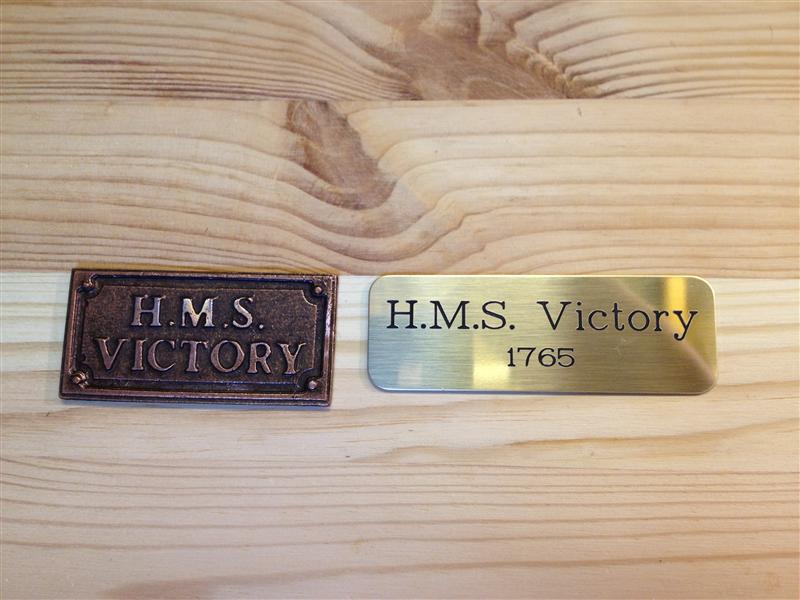
I had a new name plate made; the original plate provided with the kit is on the left.
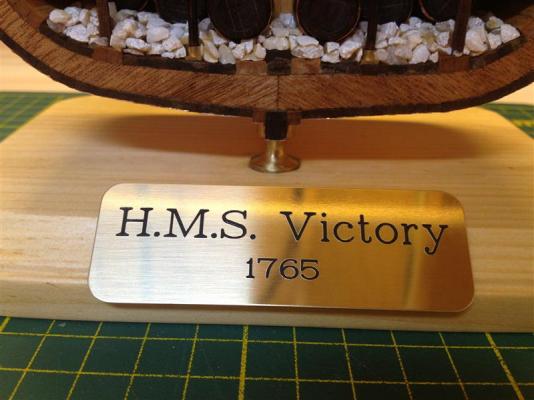
Name plate installed.
-
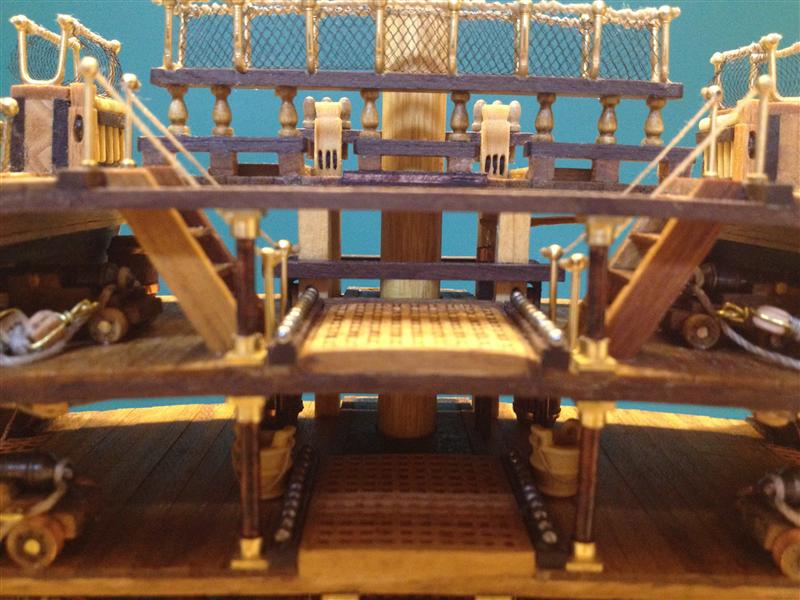
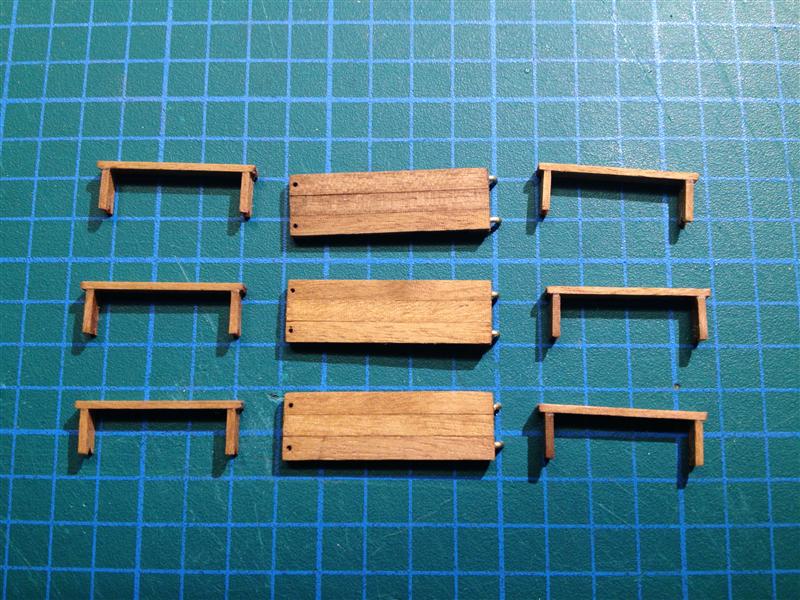
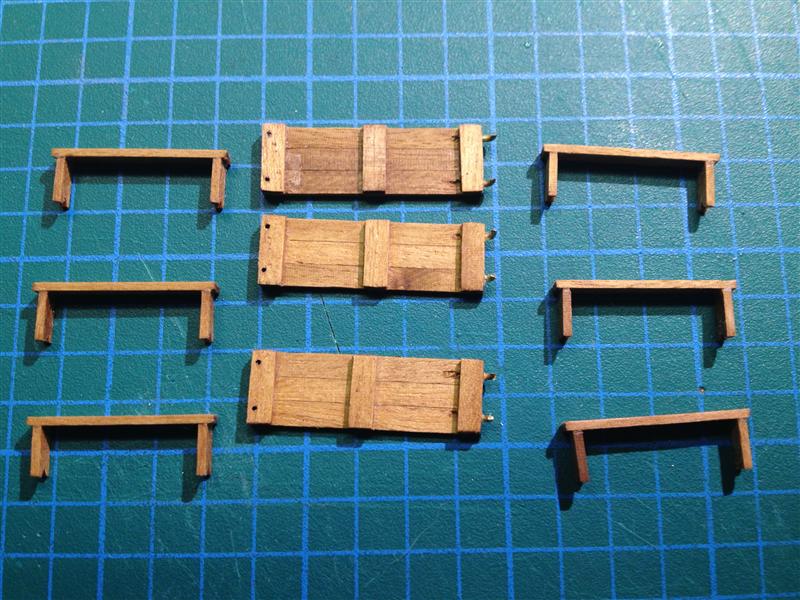
Hanging tables and benches awaiting installation.


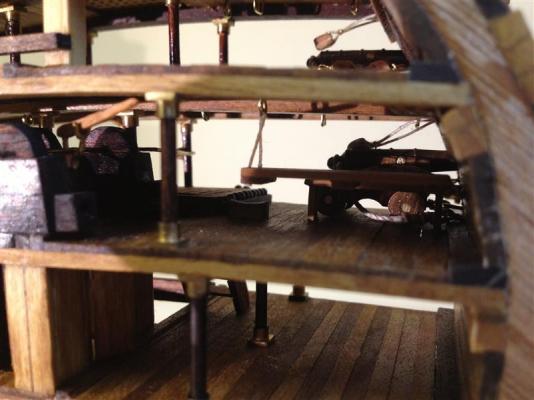
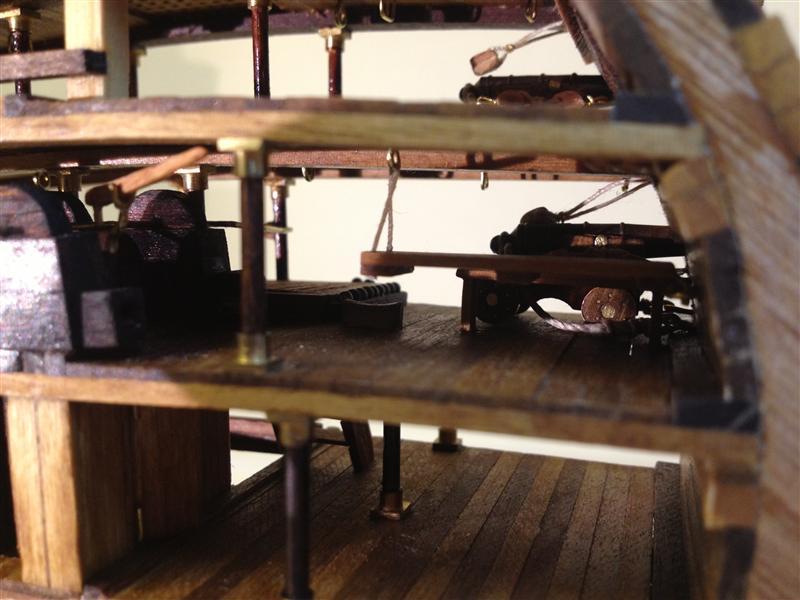
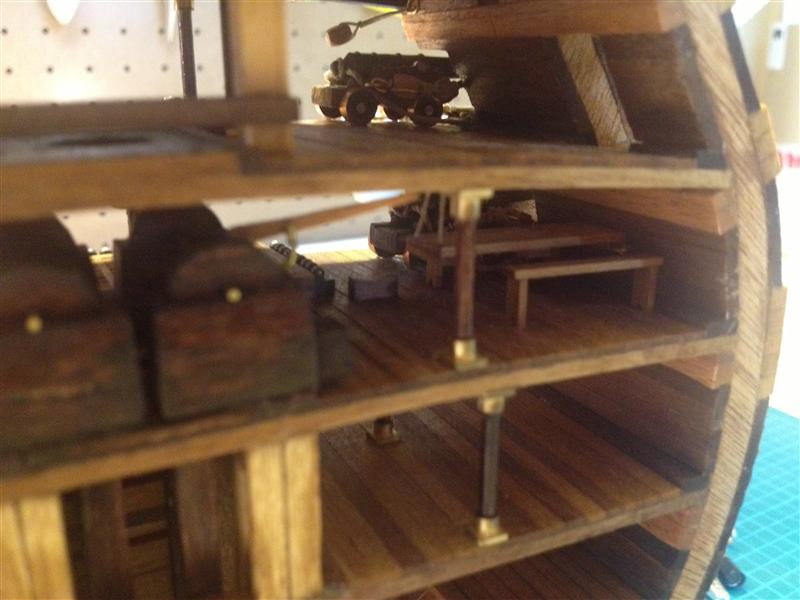
Starboard tables and benches installed.

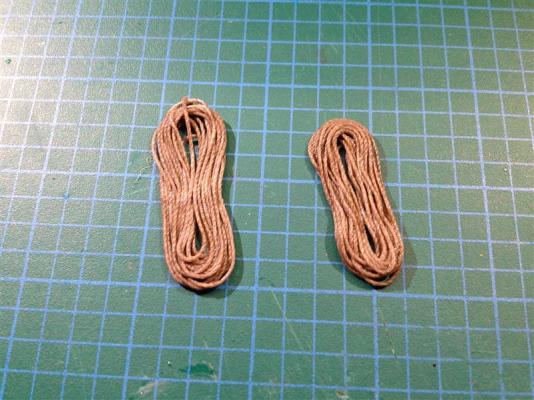
Coiled rope. I made these by coiling the rope into shape with my fingers and carefully applying CA as I slowly moved my fingers to the edges. I’m really happy with the result.
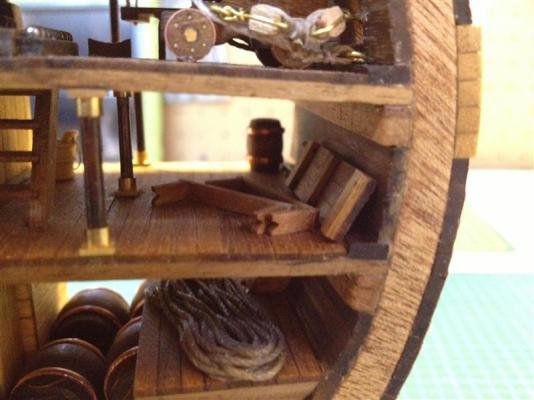
Coiled rope installed (note the spare table and benches on the deck above).
-
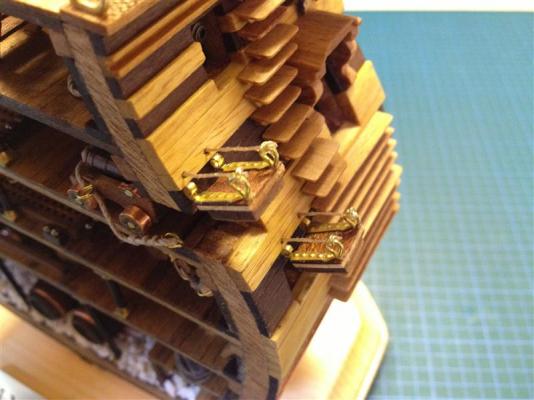
Gun port lids installed.


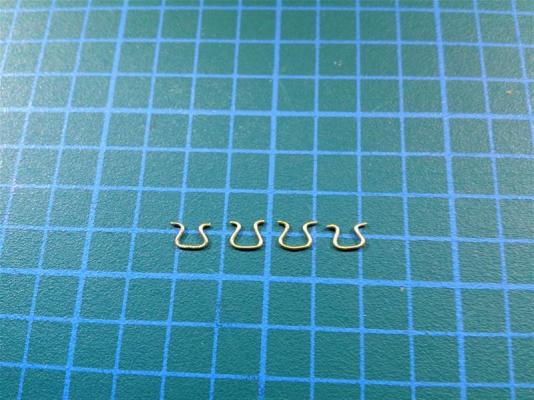
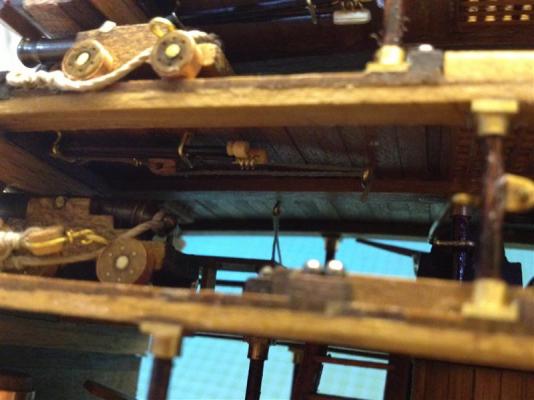
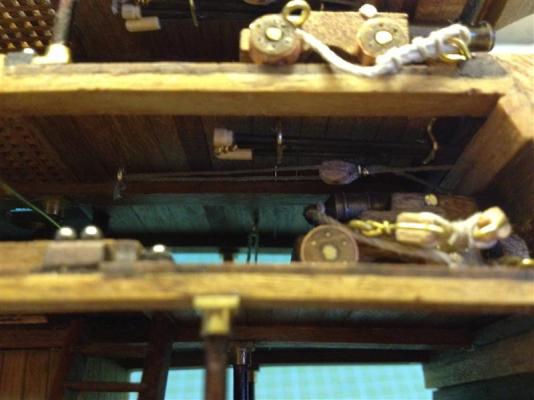
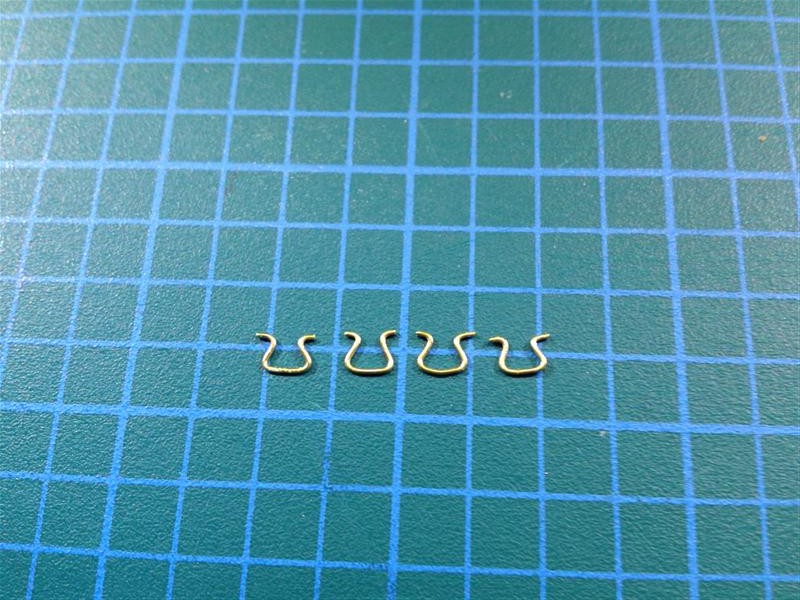
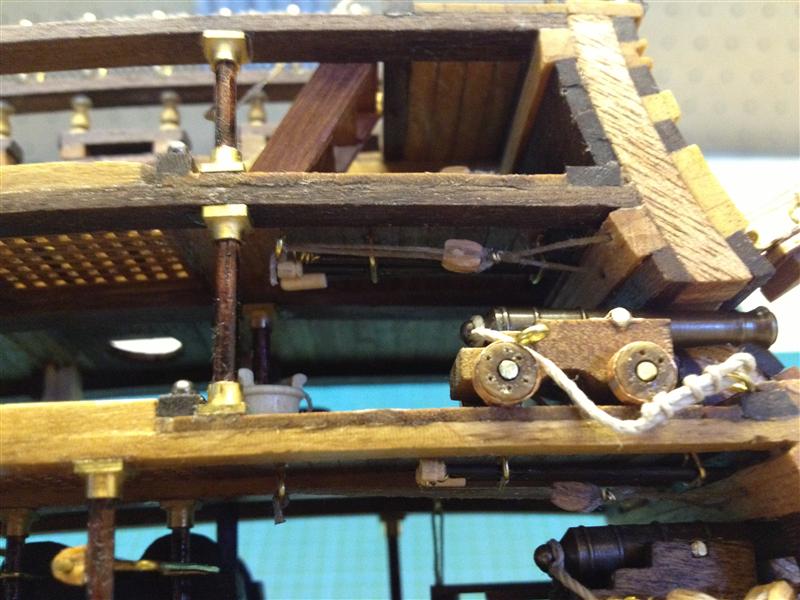
Hardware for storing the cannon equipment between the deck beams.
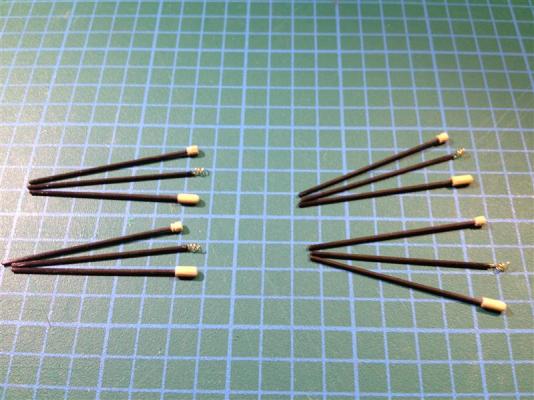
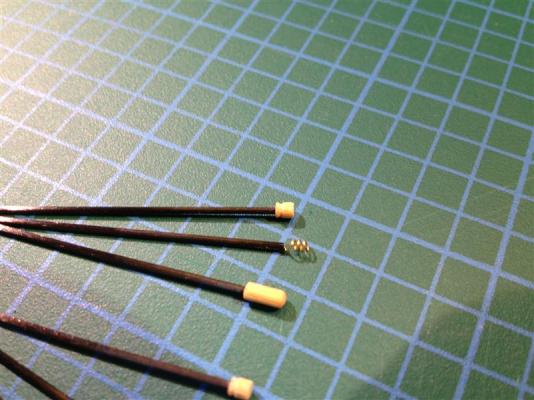
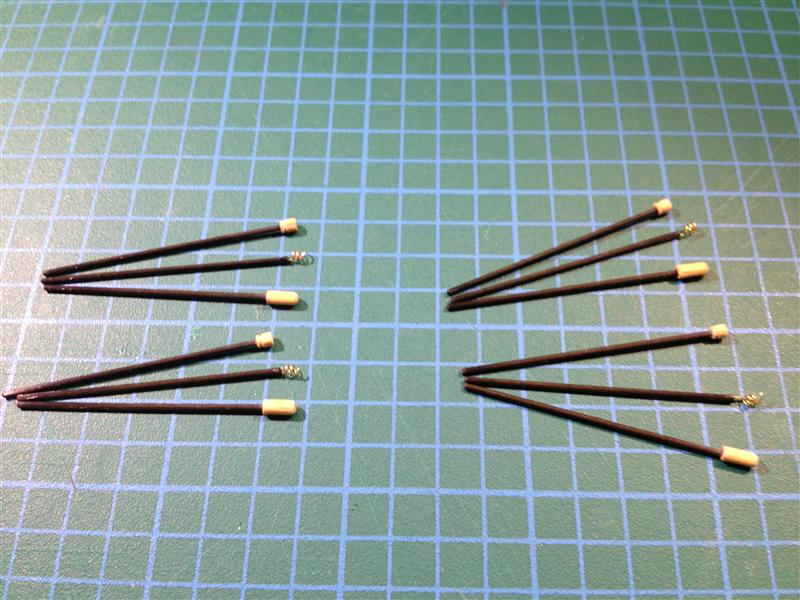
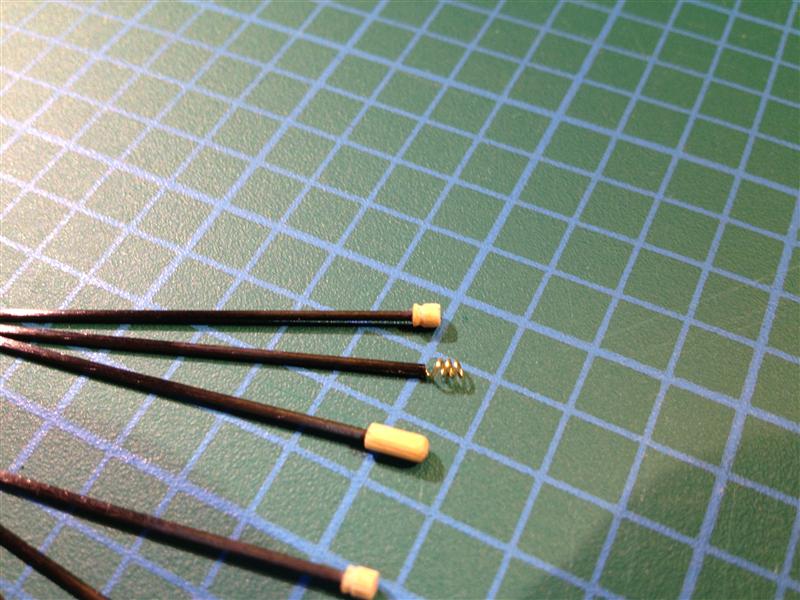
Rods, sponges, and worms. I painted the poles black to match those I’ve seen used with real cannons.
Cannon equipment installed. Note that the port lid ropes and tackle are also installed.

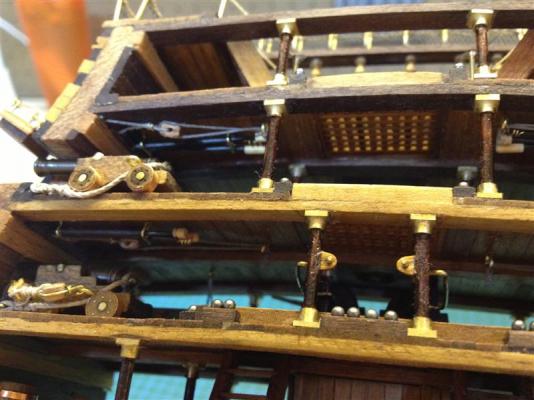
Gun port lids completed.
-
My log hasn't been updated in nearly a month, but that is only because I have been busy finishing my HMS Victory! It’s completed and safely stored in a glass cabinet; hopefully I’ll have the log caught up in the next few days.
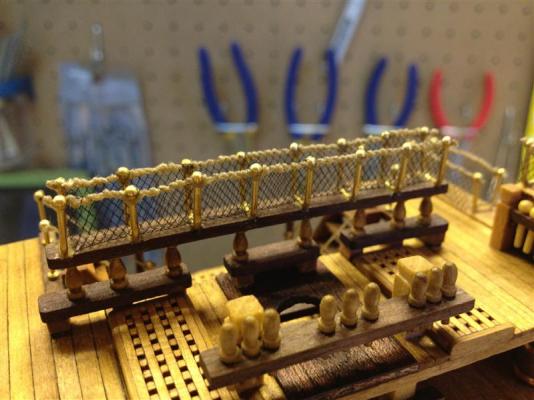
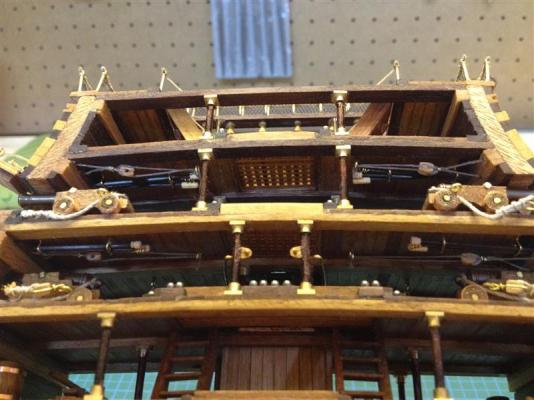
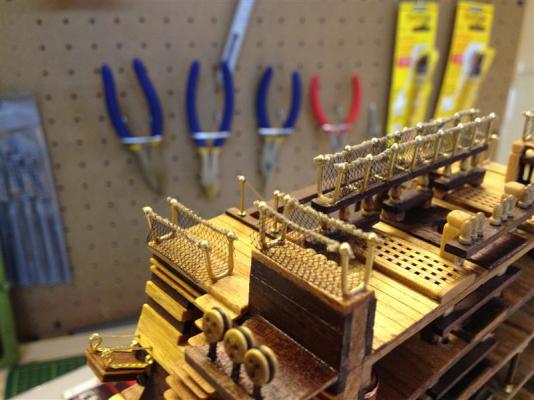
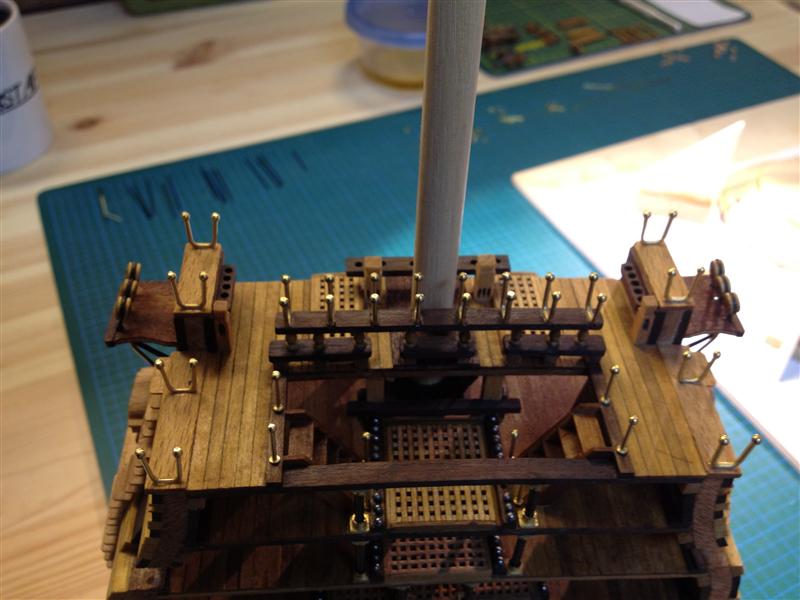
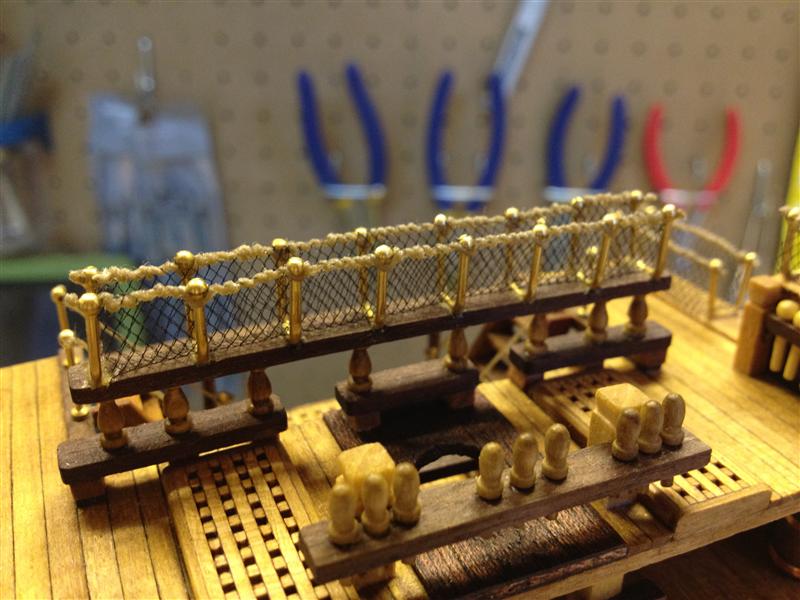
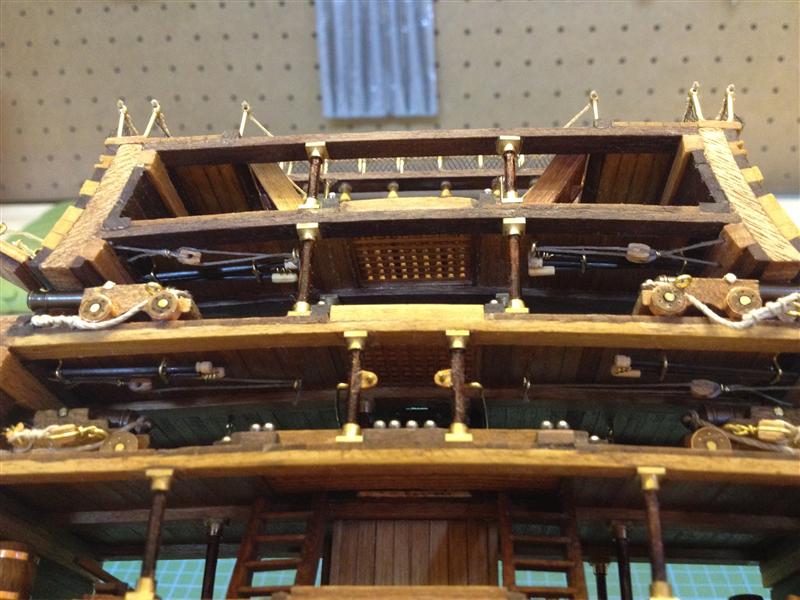
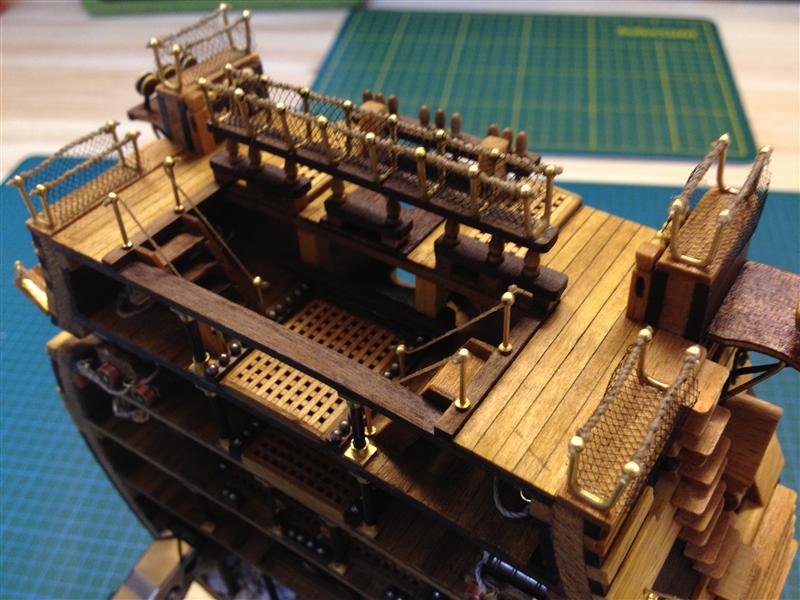
In my last post I detailed the installation of the stanchions, which have now been strung with the stock provided with the kit. I used fine black tulle purchased at the local fabric store for the netting.

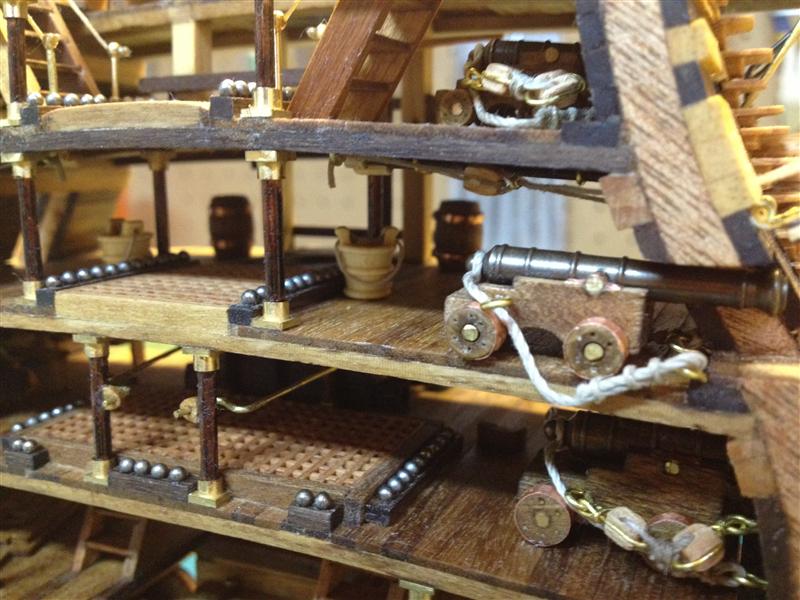
Tackle for the cannons. These are somewhat larger than they should be for 1/98 scale - I'm not happy with final look, but my fabrication skills weren't up to the task of making tiny originals. Oh well....

Cannons installed on the port side.

-
Just excellent work on this! can't wait to see her develop.
-
Just found your log....very nice build....very impressed with the changes you made from the kit...excellent. Will wait and watch for more

Many thanks Pete - I actually finished her last night, and she's behind glass. I have a lot of catching up to do on the build log, and will start the updates this evening....
-
Really clean and impressive work. I will be watching the rest of this one for sure. My wife and I picked up two of these kits a couple of months ago at a model fair and this is the first I have seen anyone build it.
Jared
Many thanks for the kind comments, Jared. I've been keeping up with your Swift build - fantastic, precise work (and good photogrpahs, too).
By the way, I have two companion pugs that keep me company in my workshop. Every ship needs a dog or two.
-
Hi Janos,
A very logical explanation! Thanks very much for the help. This is excellent - perhaps this could be made a "sticky" post at the top of this board.
With thanks,
E&T

-
There hasn't been a question I've asked yet that hasn't yielded the most excellent answers and advice. So here goes again...
I'm planning a scratch build of a 102' ship in 1/48 scale. I need to purchase scale lumber for planking the deck and hull (each will be double planked as in the original ship). I recall a couple of posts on the old boards about estimating the amount of lumber, but I can't seem to find any here.
Does anyone have any tricks or tips for estimating the amount of lumber required for a scratch build?
-
Thanks everyone for their comments. I'll have to think on this. I'm glad to hear that it is widely used, but you've given me some points to consider.
-
I’d be very interested to hear the opinion of more experienced modelers regarding the use of walnut for hull planking. I know from looking at the scratch build logs that many modelers prefer Swiss pear or boxwood. My next project calls for a largely black hull with a yellow wale/channel. I prefer natural wood finishes and I don’t want to dye or paint the hull. I know that most modelers stay away from ebony because it is too difficult to work.
How about a nice even, dark, walnut? How does it bend? I haven’t seen anyone plank their hull with walnut and I wonder if there is a specific reason for this. Any advice would be greatly appreciated!
-
Beautifully executed. Wonderful pictures too.
-
It's looking very nice indeed.
-
Many thanks for the kind words.
-
Many thanks Antony. It's a fun kit and I'm learning a lot. Please post your progress once you get going!
-
For comparison, here is what the Corel Victory is supposed to look like without any modification....

-
Some progress this weekend…
Here are the channels and deadeyes installed and oiled (note that the Corel plans call for four deadeyes, but the Victory should only have three in the area covered by the kit).
Here are the hammock and ladder rails installed.The deck has been treated with tung oil in these pictures.
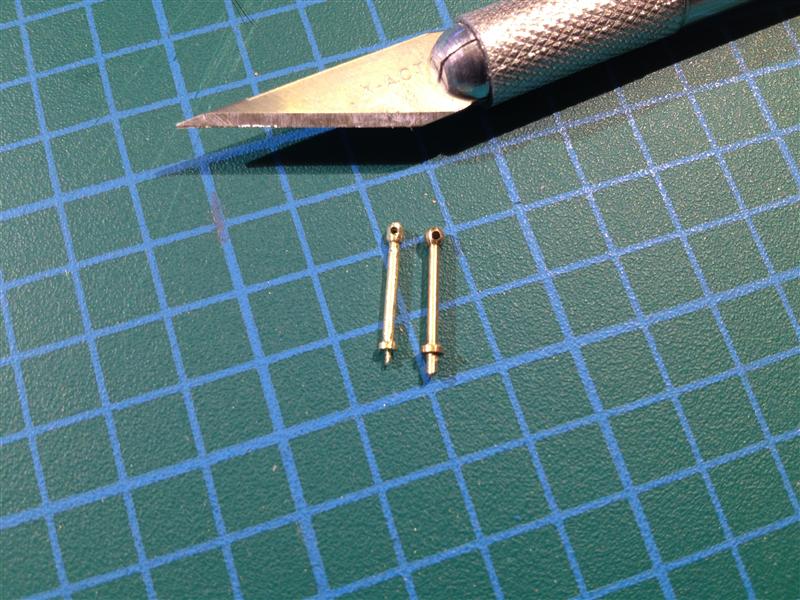
The kit came with one less stanchion than was needed, so I built one out of brass wire and tubing (the tubing was slipped over each end, glued, and then filed into shape). The tab at the bottom of the stanchion will be imbedded in wood and won’t be seen. It’s not an exact copy but at 1/98 scale it’s barely noticeable. I dare you to find it in the above pictures!
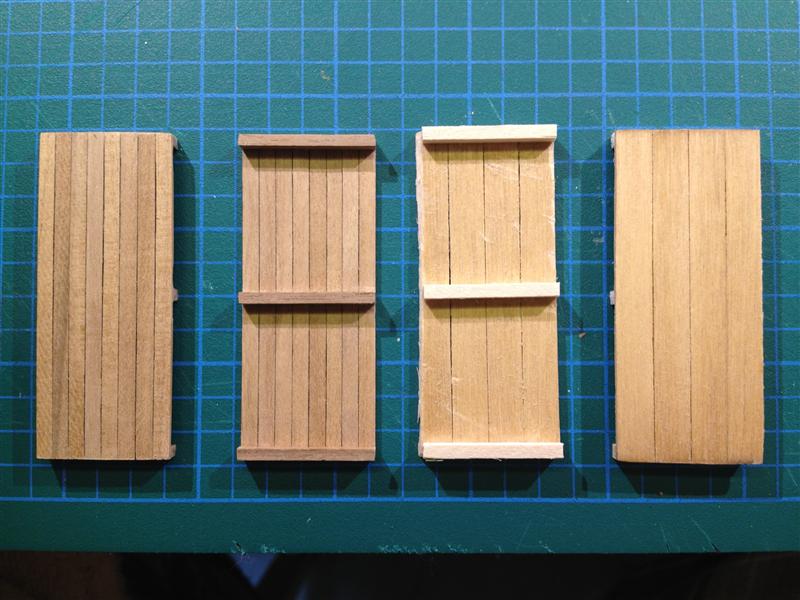
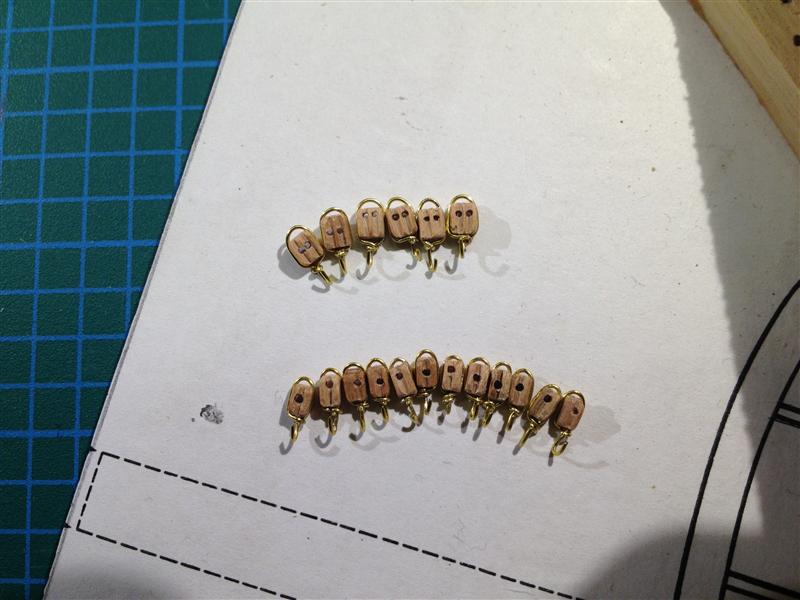
If you go back to some previous posts, you’ll remember that I wasn’t happy with the original hold platforms I installed. So, I’ve rebuilt them with scale materials (the new platforms are on the left and the old platforms are on the right). They look much better, in my opinion, and I'll install them next week.
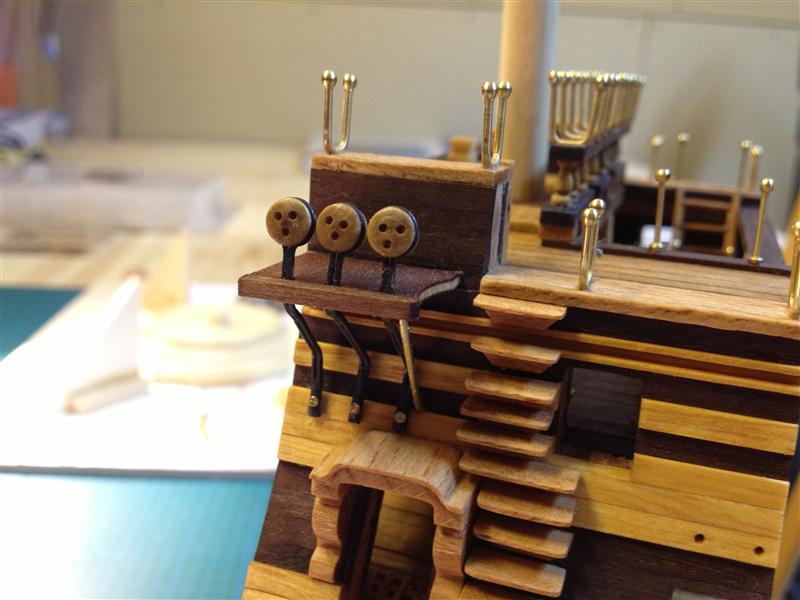
Finally, I wasn’t happy with the brass attachments that I used to connect the chain pump handles to the support columns. So, I’ve rebuilt these as well. They aren't exactly to scale, but they look much better.
-
Hi.
Very nice. I have just orderd the kit now and will be attempting to build making similar changes that you have made.
I have no refarance books to make the mods.
Is it possible do do a small drawing with dimensions of the pump?
Nice workmanship.
Regards Antony
Hi Antony,
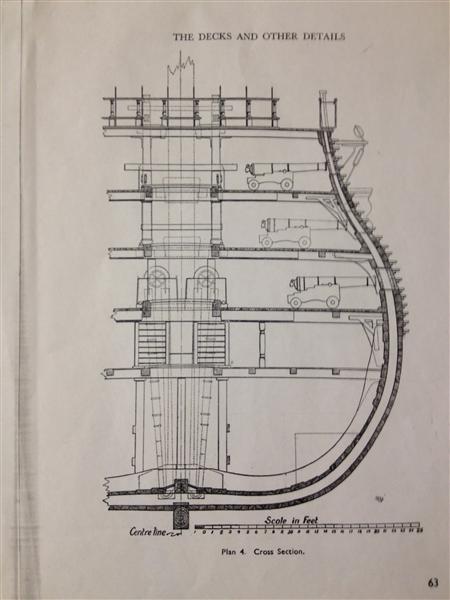
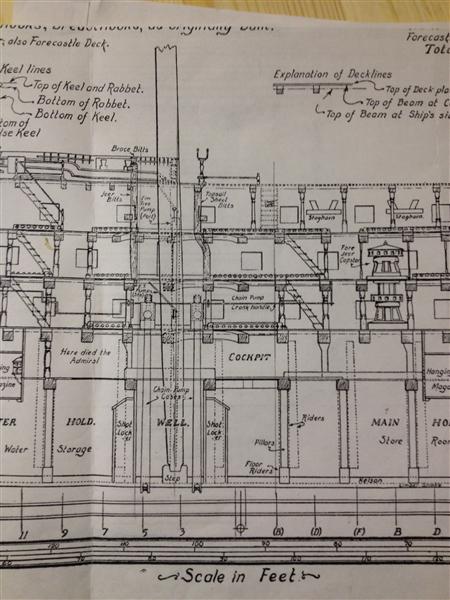
Thanks for the kind words! If you can, you should really try to get Longridge's book from a library. However, I've scanned a couple of his plans for you that show the postiion and size of the chain pumps. In the pfrofile you can see my lines showing where I think the Corel cross section matches his plans.
-
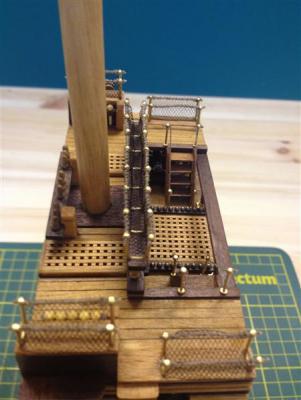
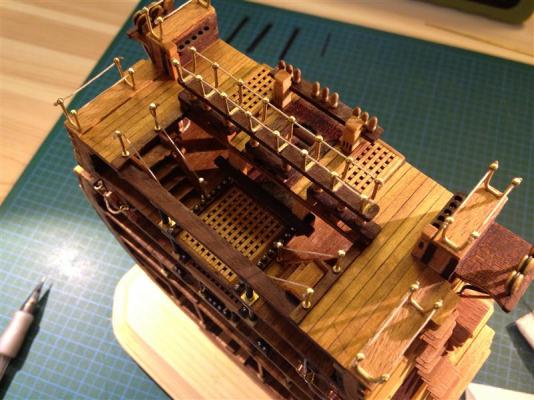
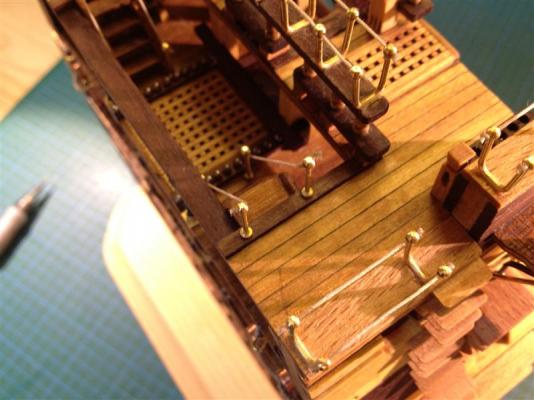
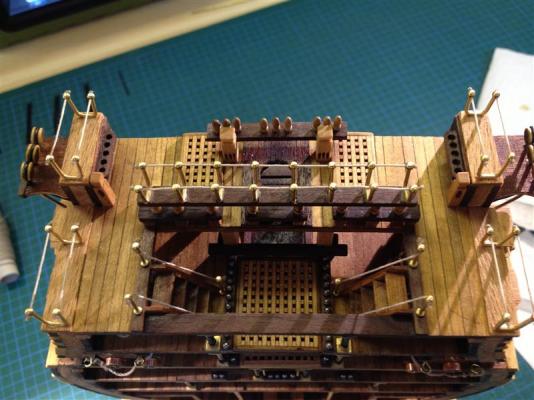
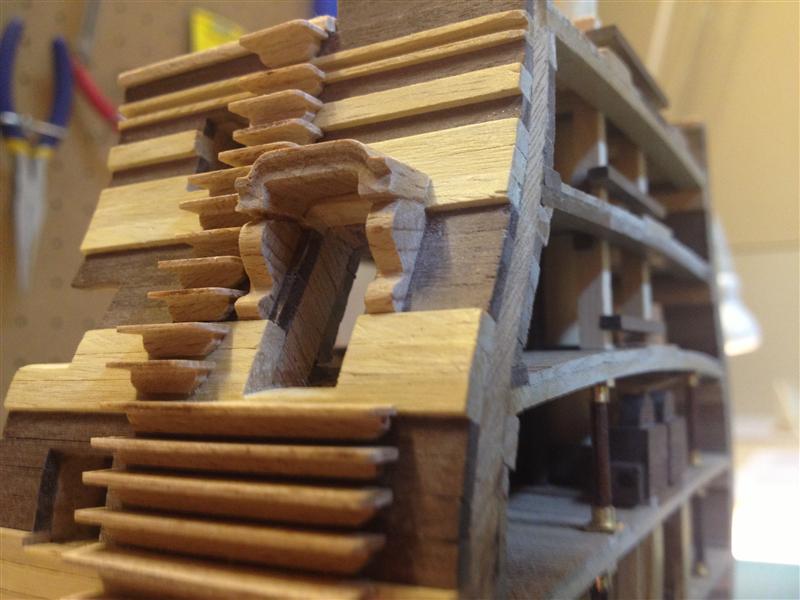
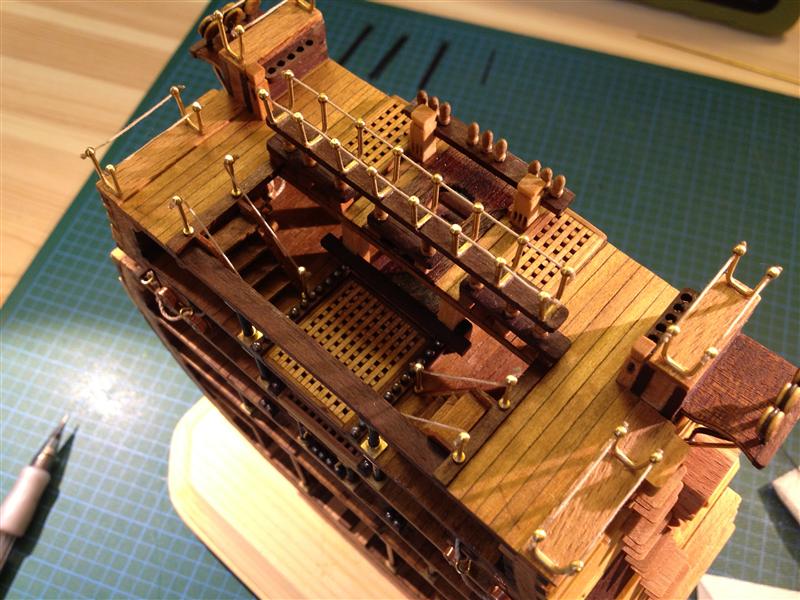
Images of the steps as installed. I could find no consensus between the Corel plans or McKay’s and Longridge’s books on the correct number and spacing of the steps, so I based them on Longridge’s volume.
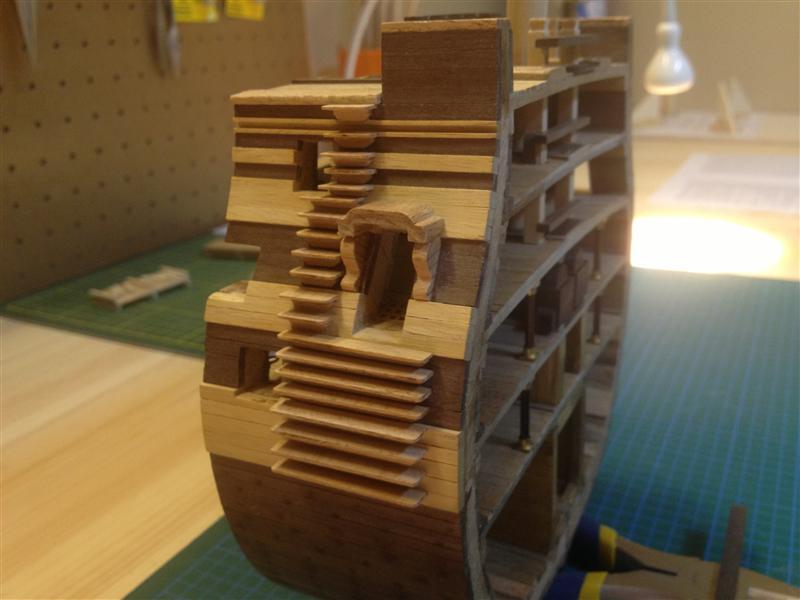
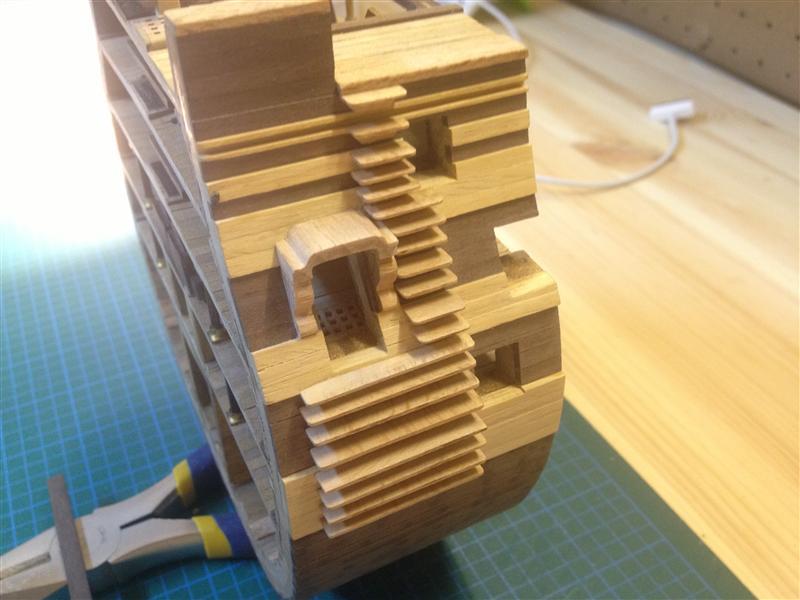
Detail of the enteryways.
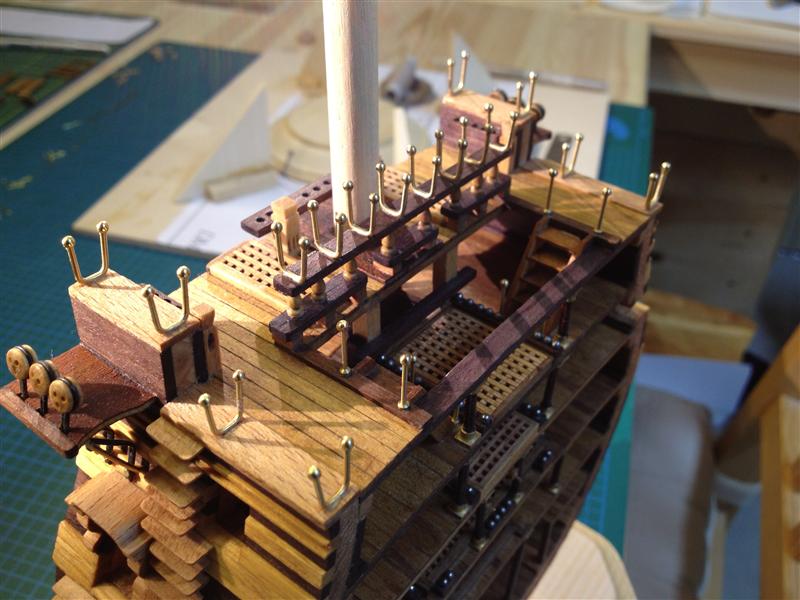
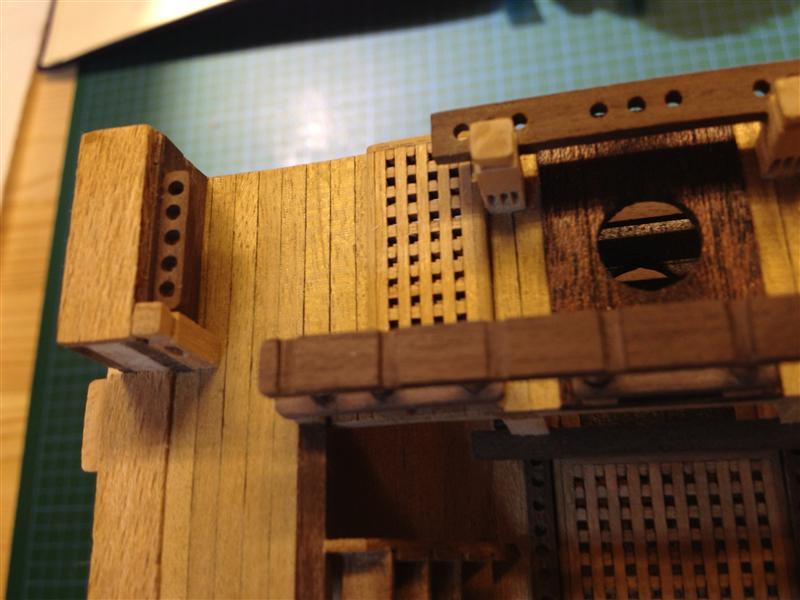
Images of the pin racks installed on the bulwarks.

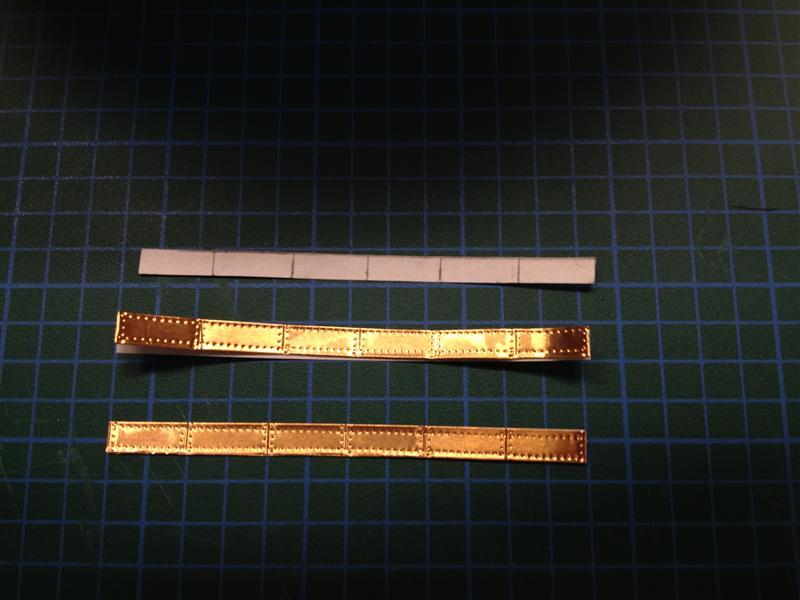
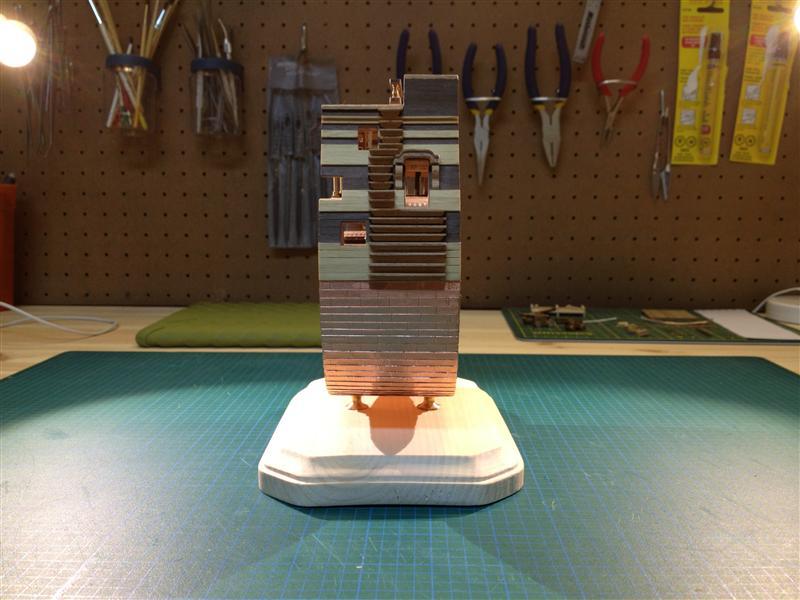
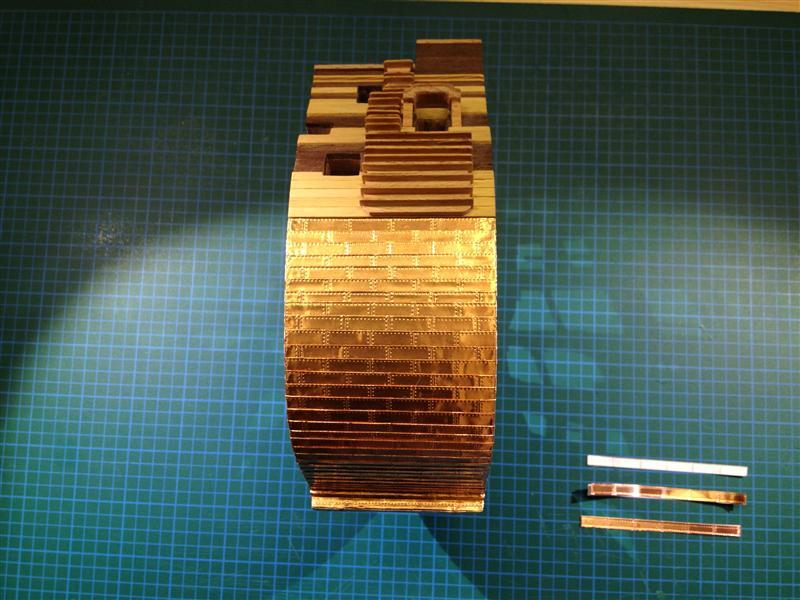
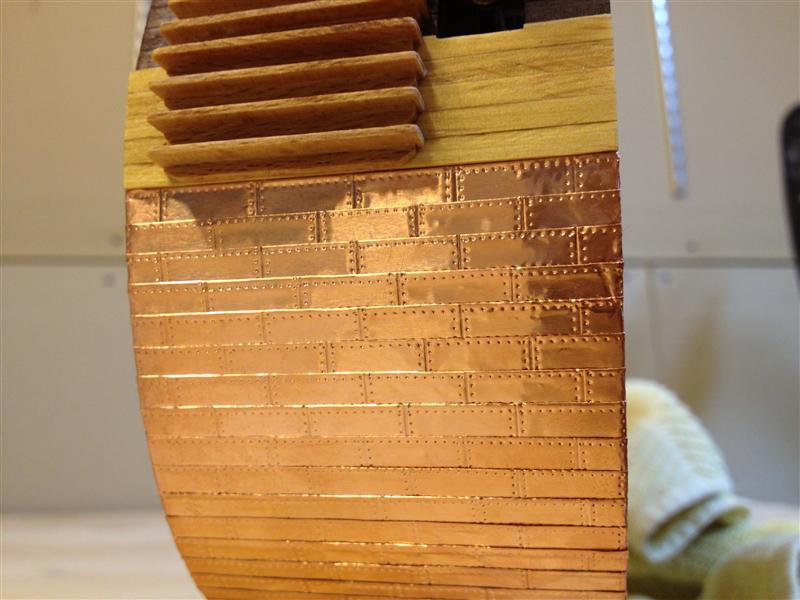
Copper sheeting pattern and strakes of sheeting made from copper tape.
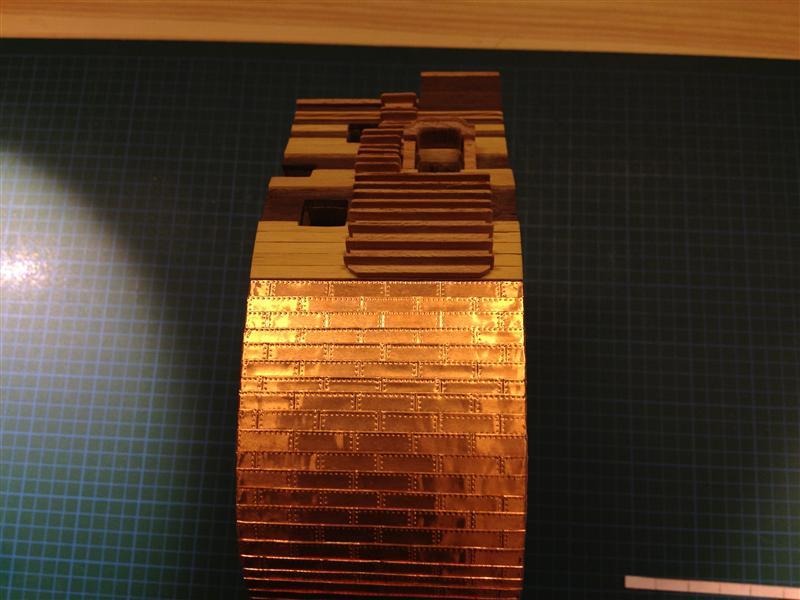
Copper sheeting installed.
I replaced the model base provided by Corel with one that matches the size of the model (and provides a more stable support).
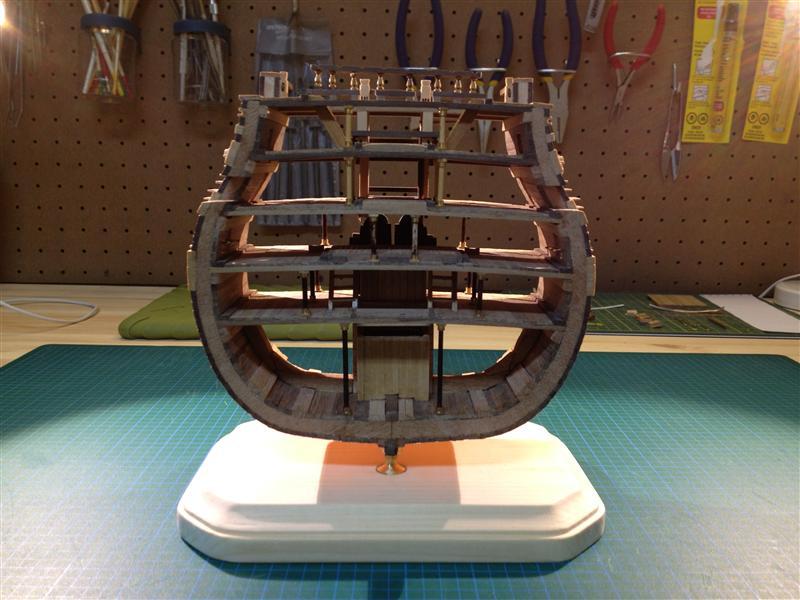
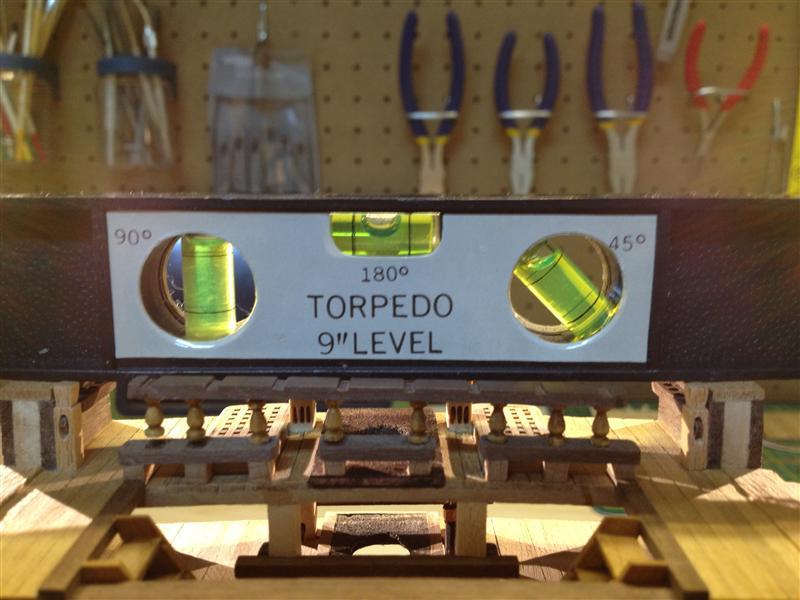
Model installed on the base (and leveled)!

-
Excellent work. I really like this kit and you've done a great job with it. I wish I had seen it before I bought the Corel cross section...
-
Thanks! I like to keep the work area clean...


HMS Victory by zeptraderUK - Deagostini - 1/72 - Cross-Section
in - Kit build logs for subjects built from 1751 - 1800
Posted
Very nice work! I really I like this kit.