Dave B
-
Posts
120 -
Joined
-
Last visited
Content Type
Profiles
Forums
Gallery
Events
Everything posted by Dave B
-
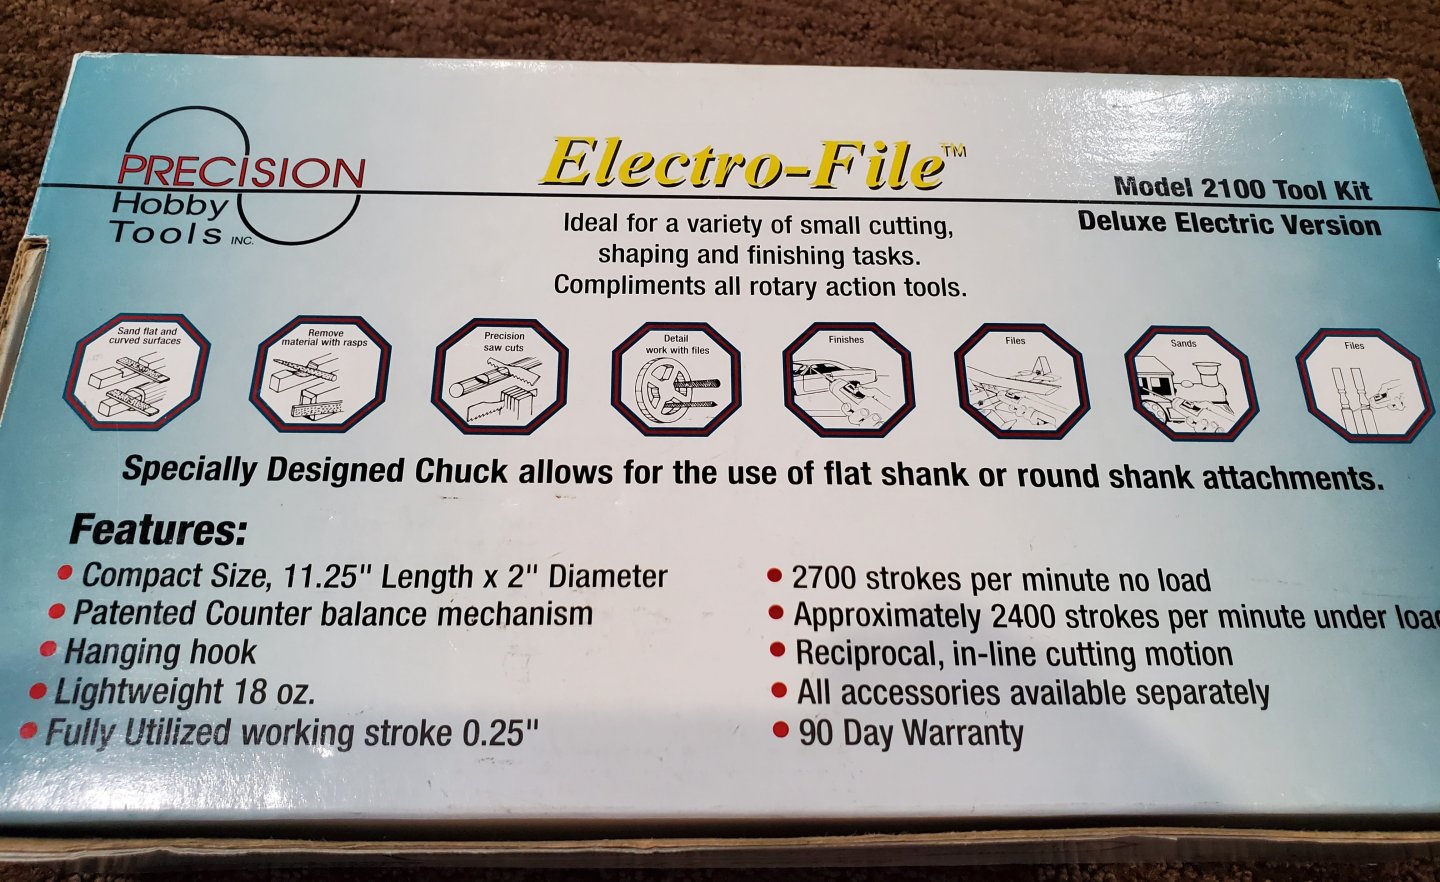
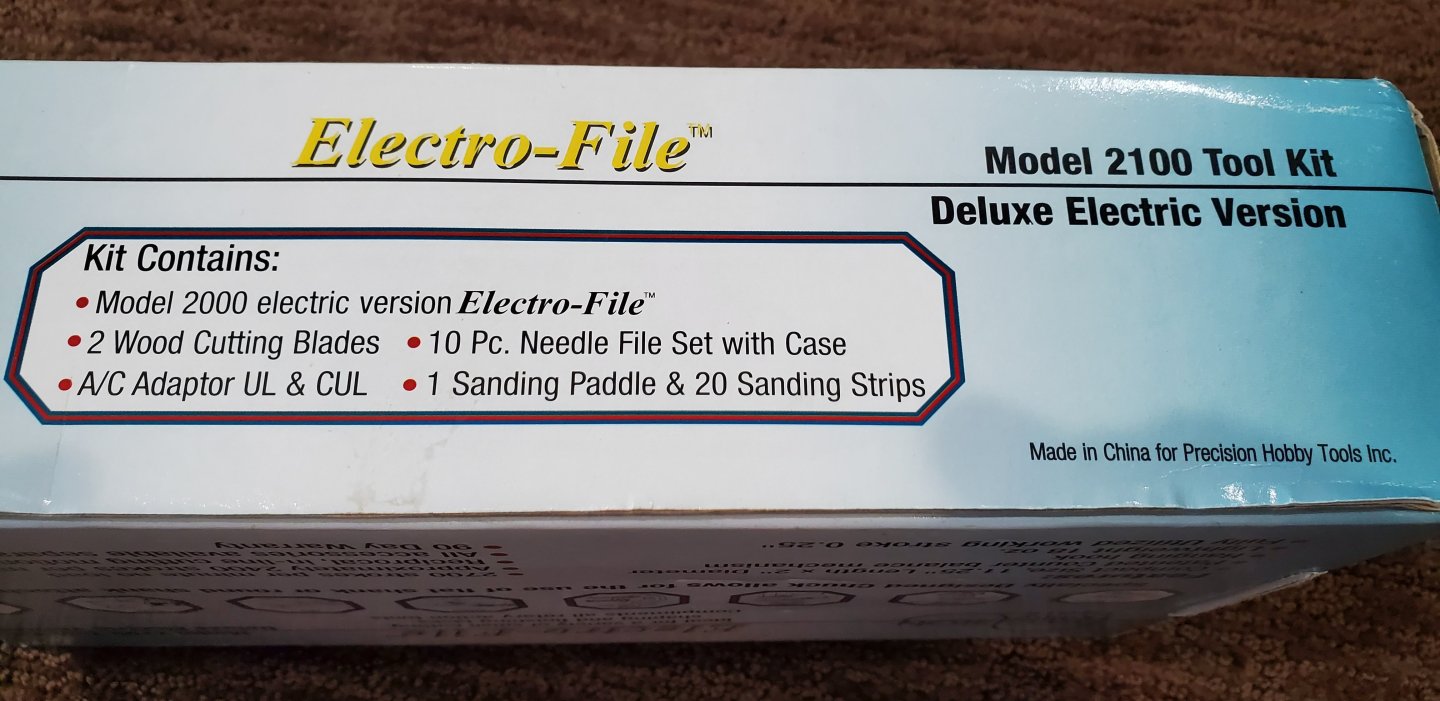
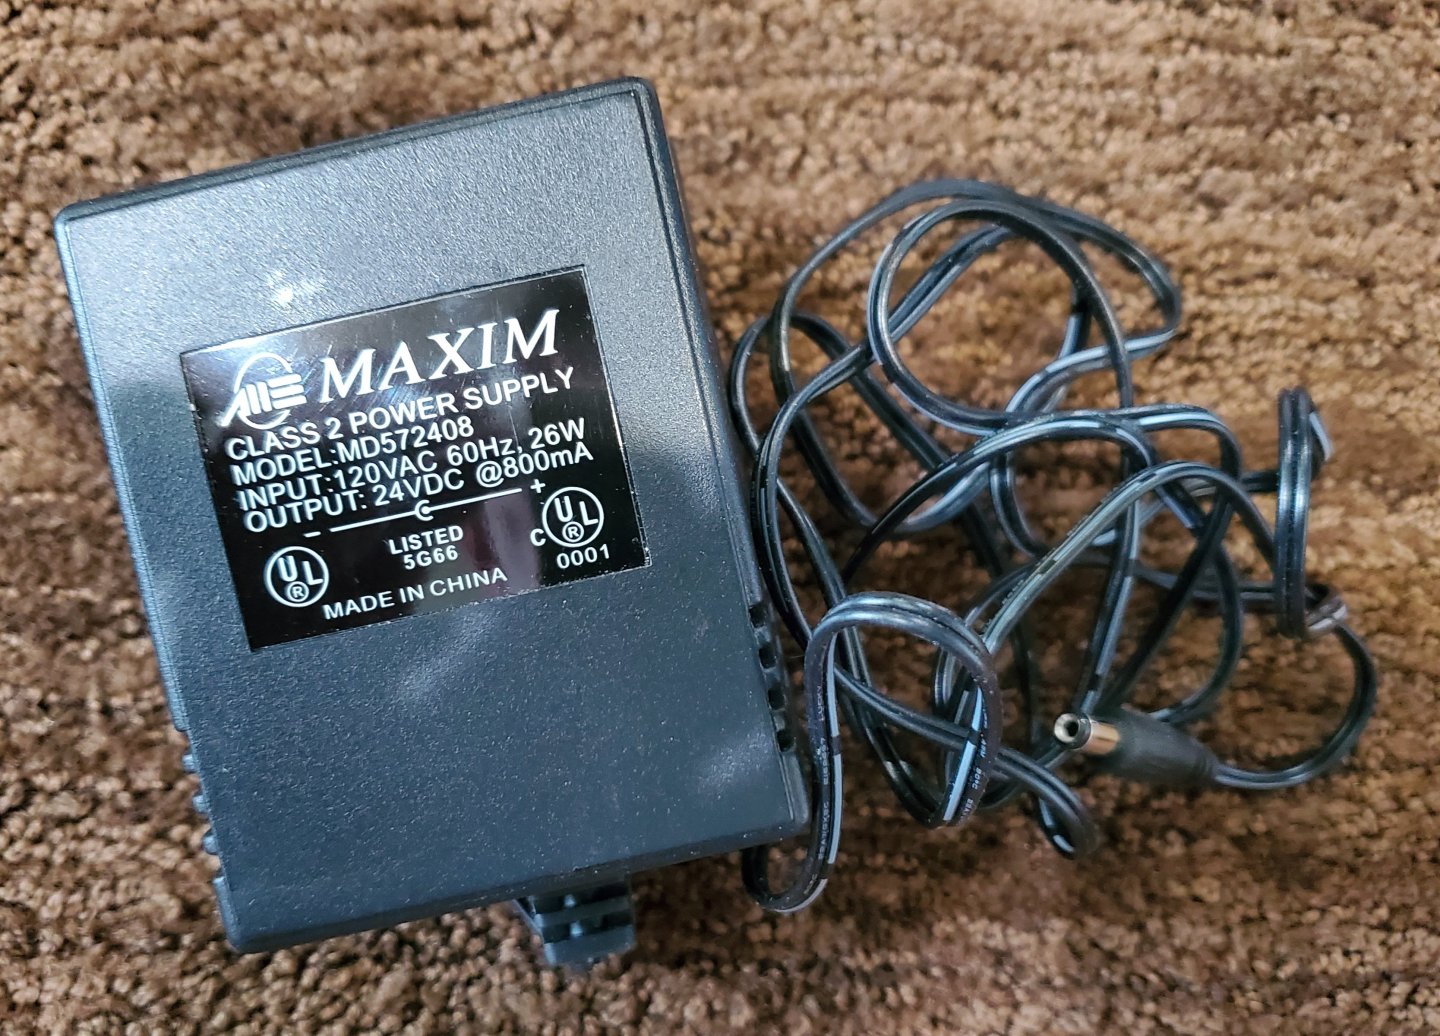
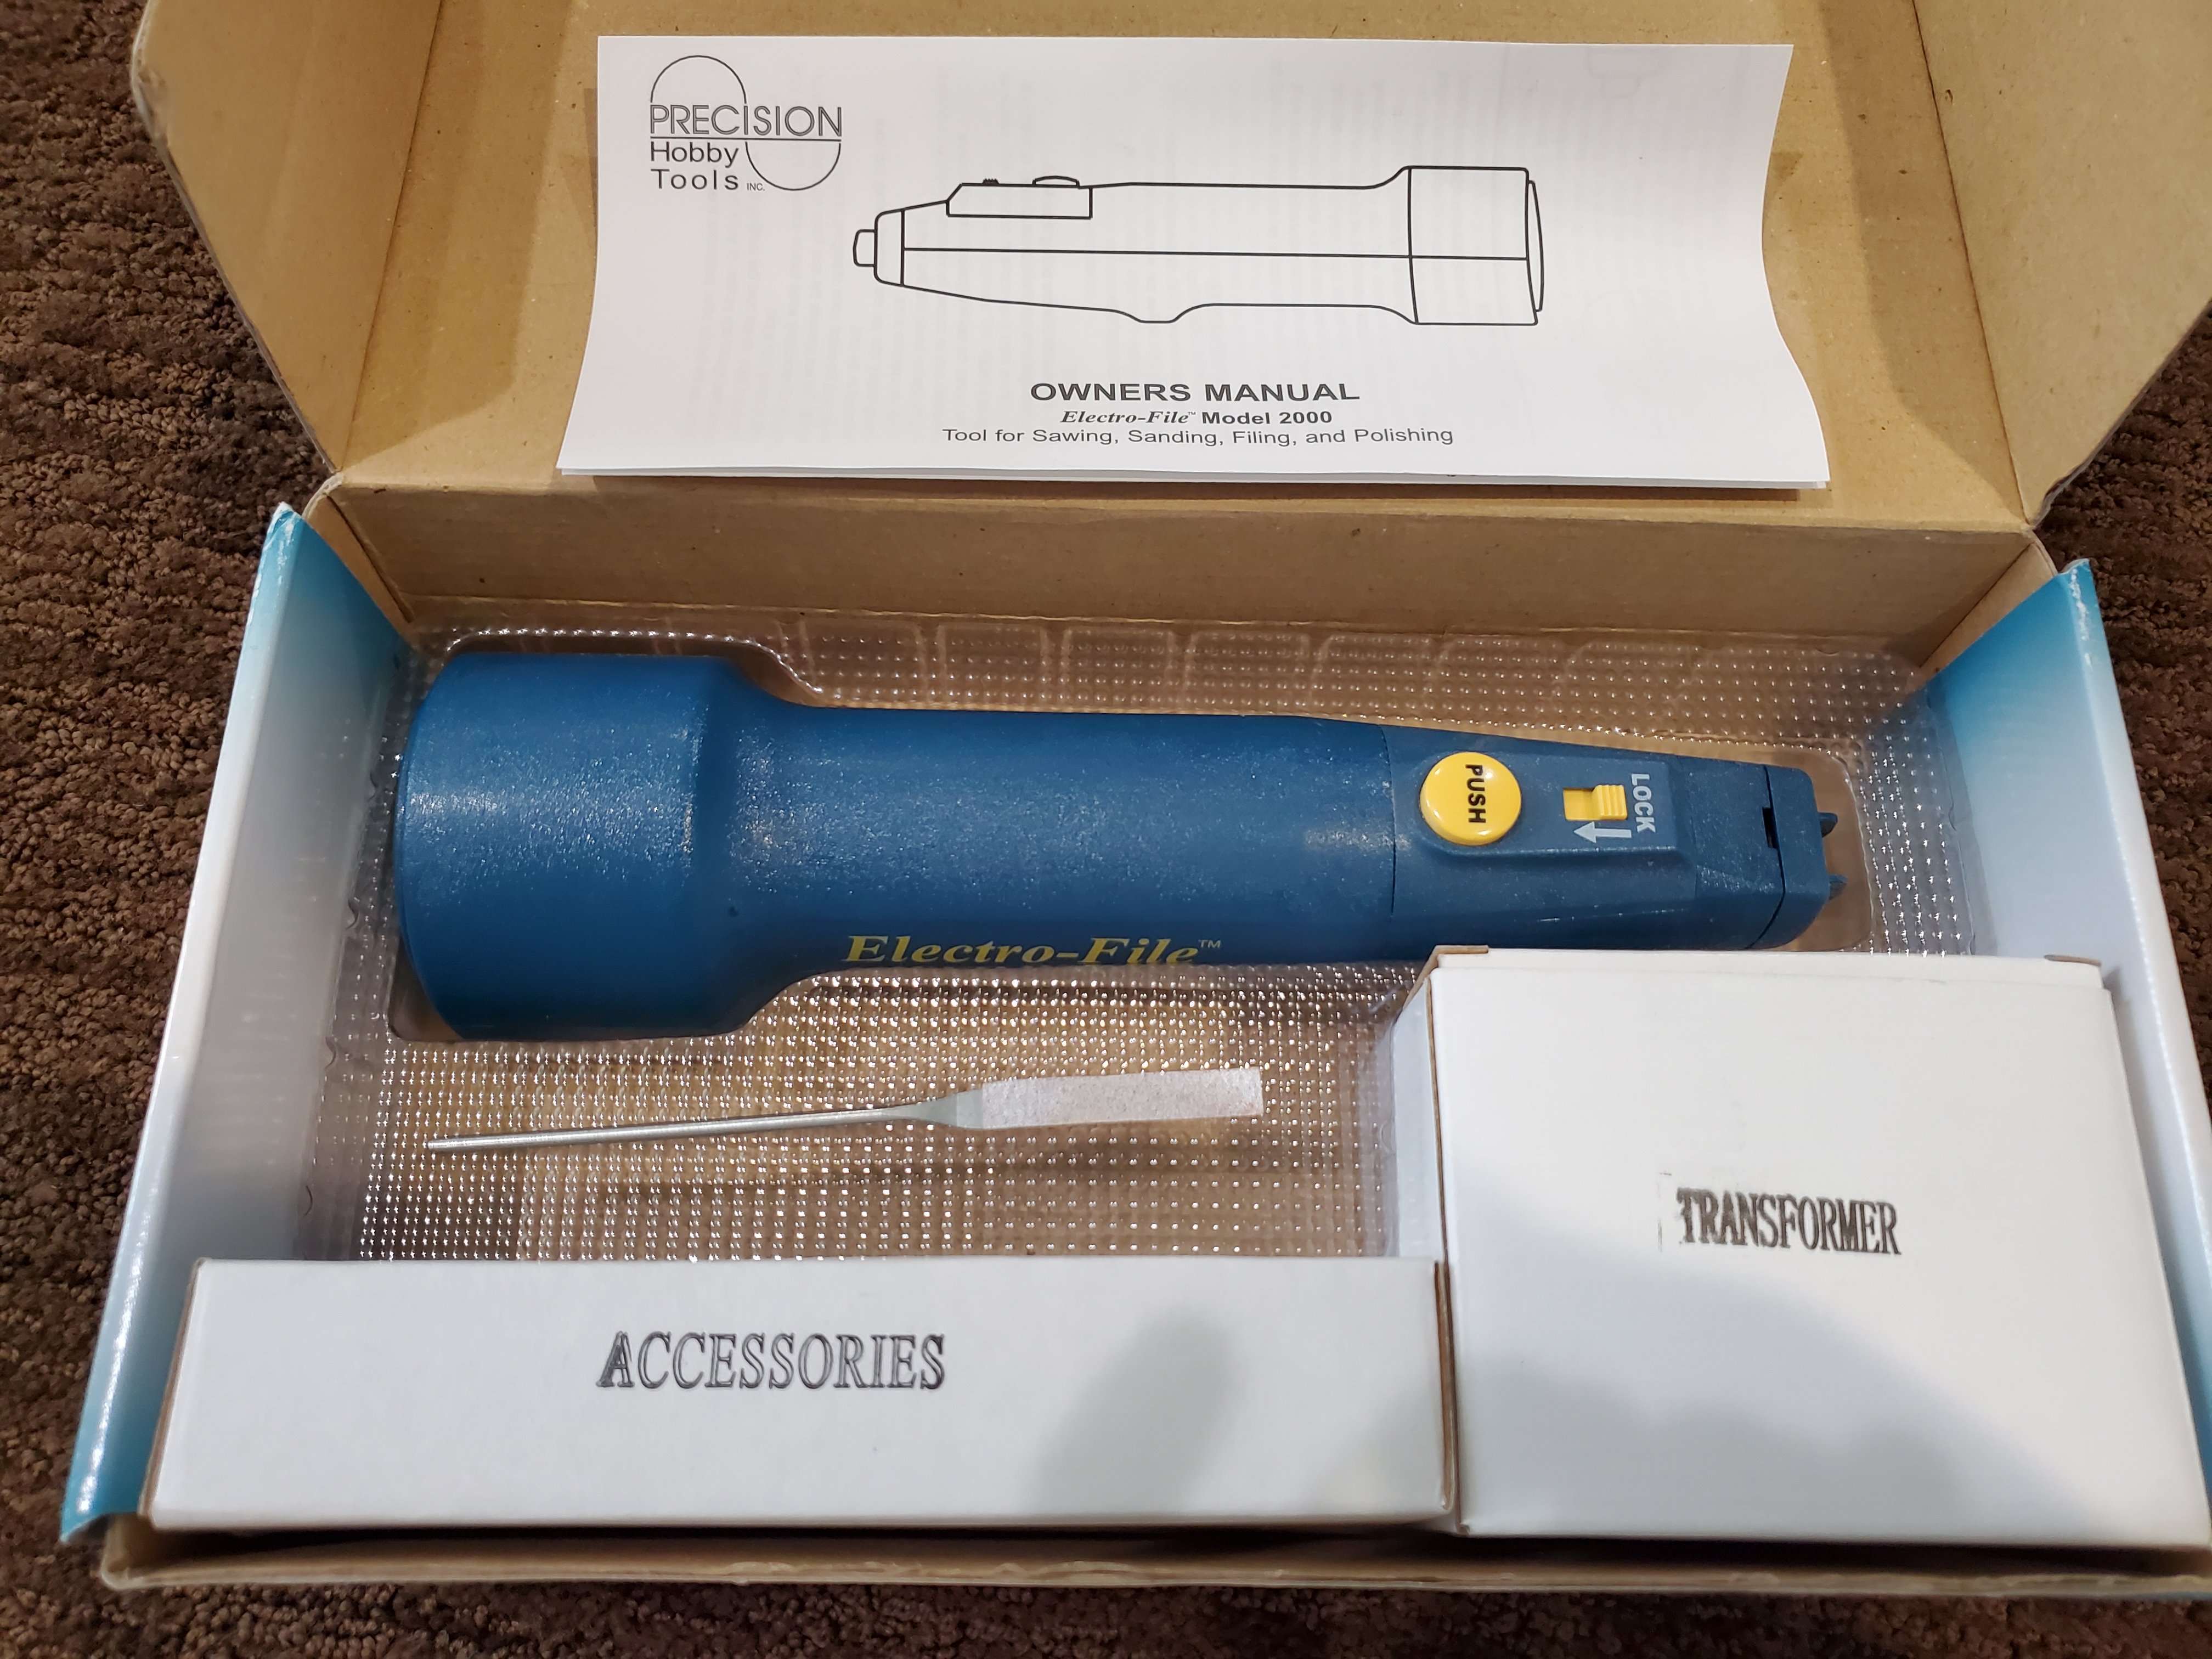
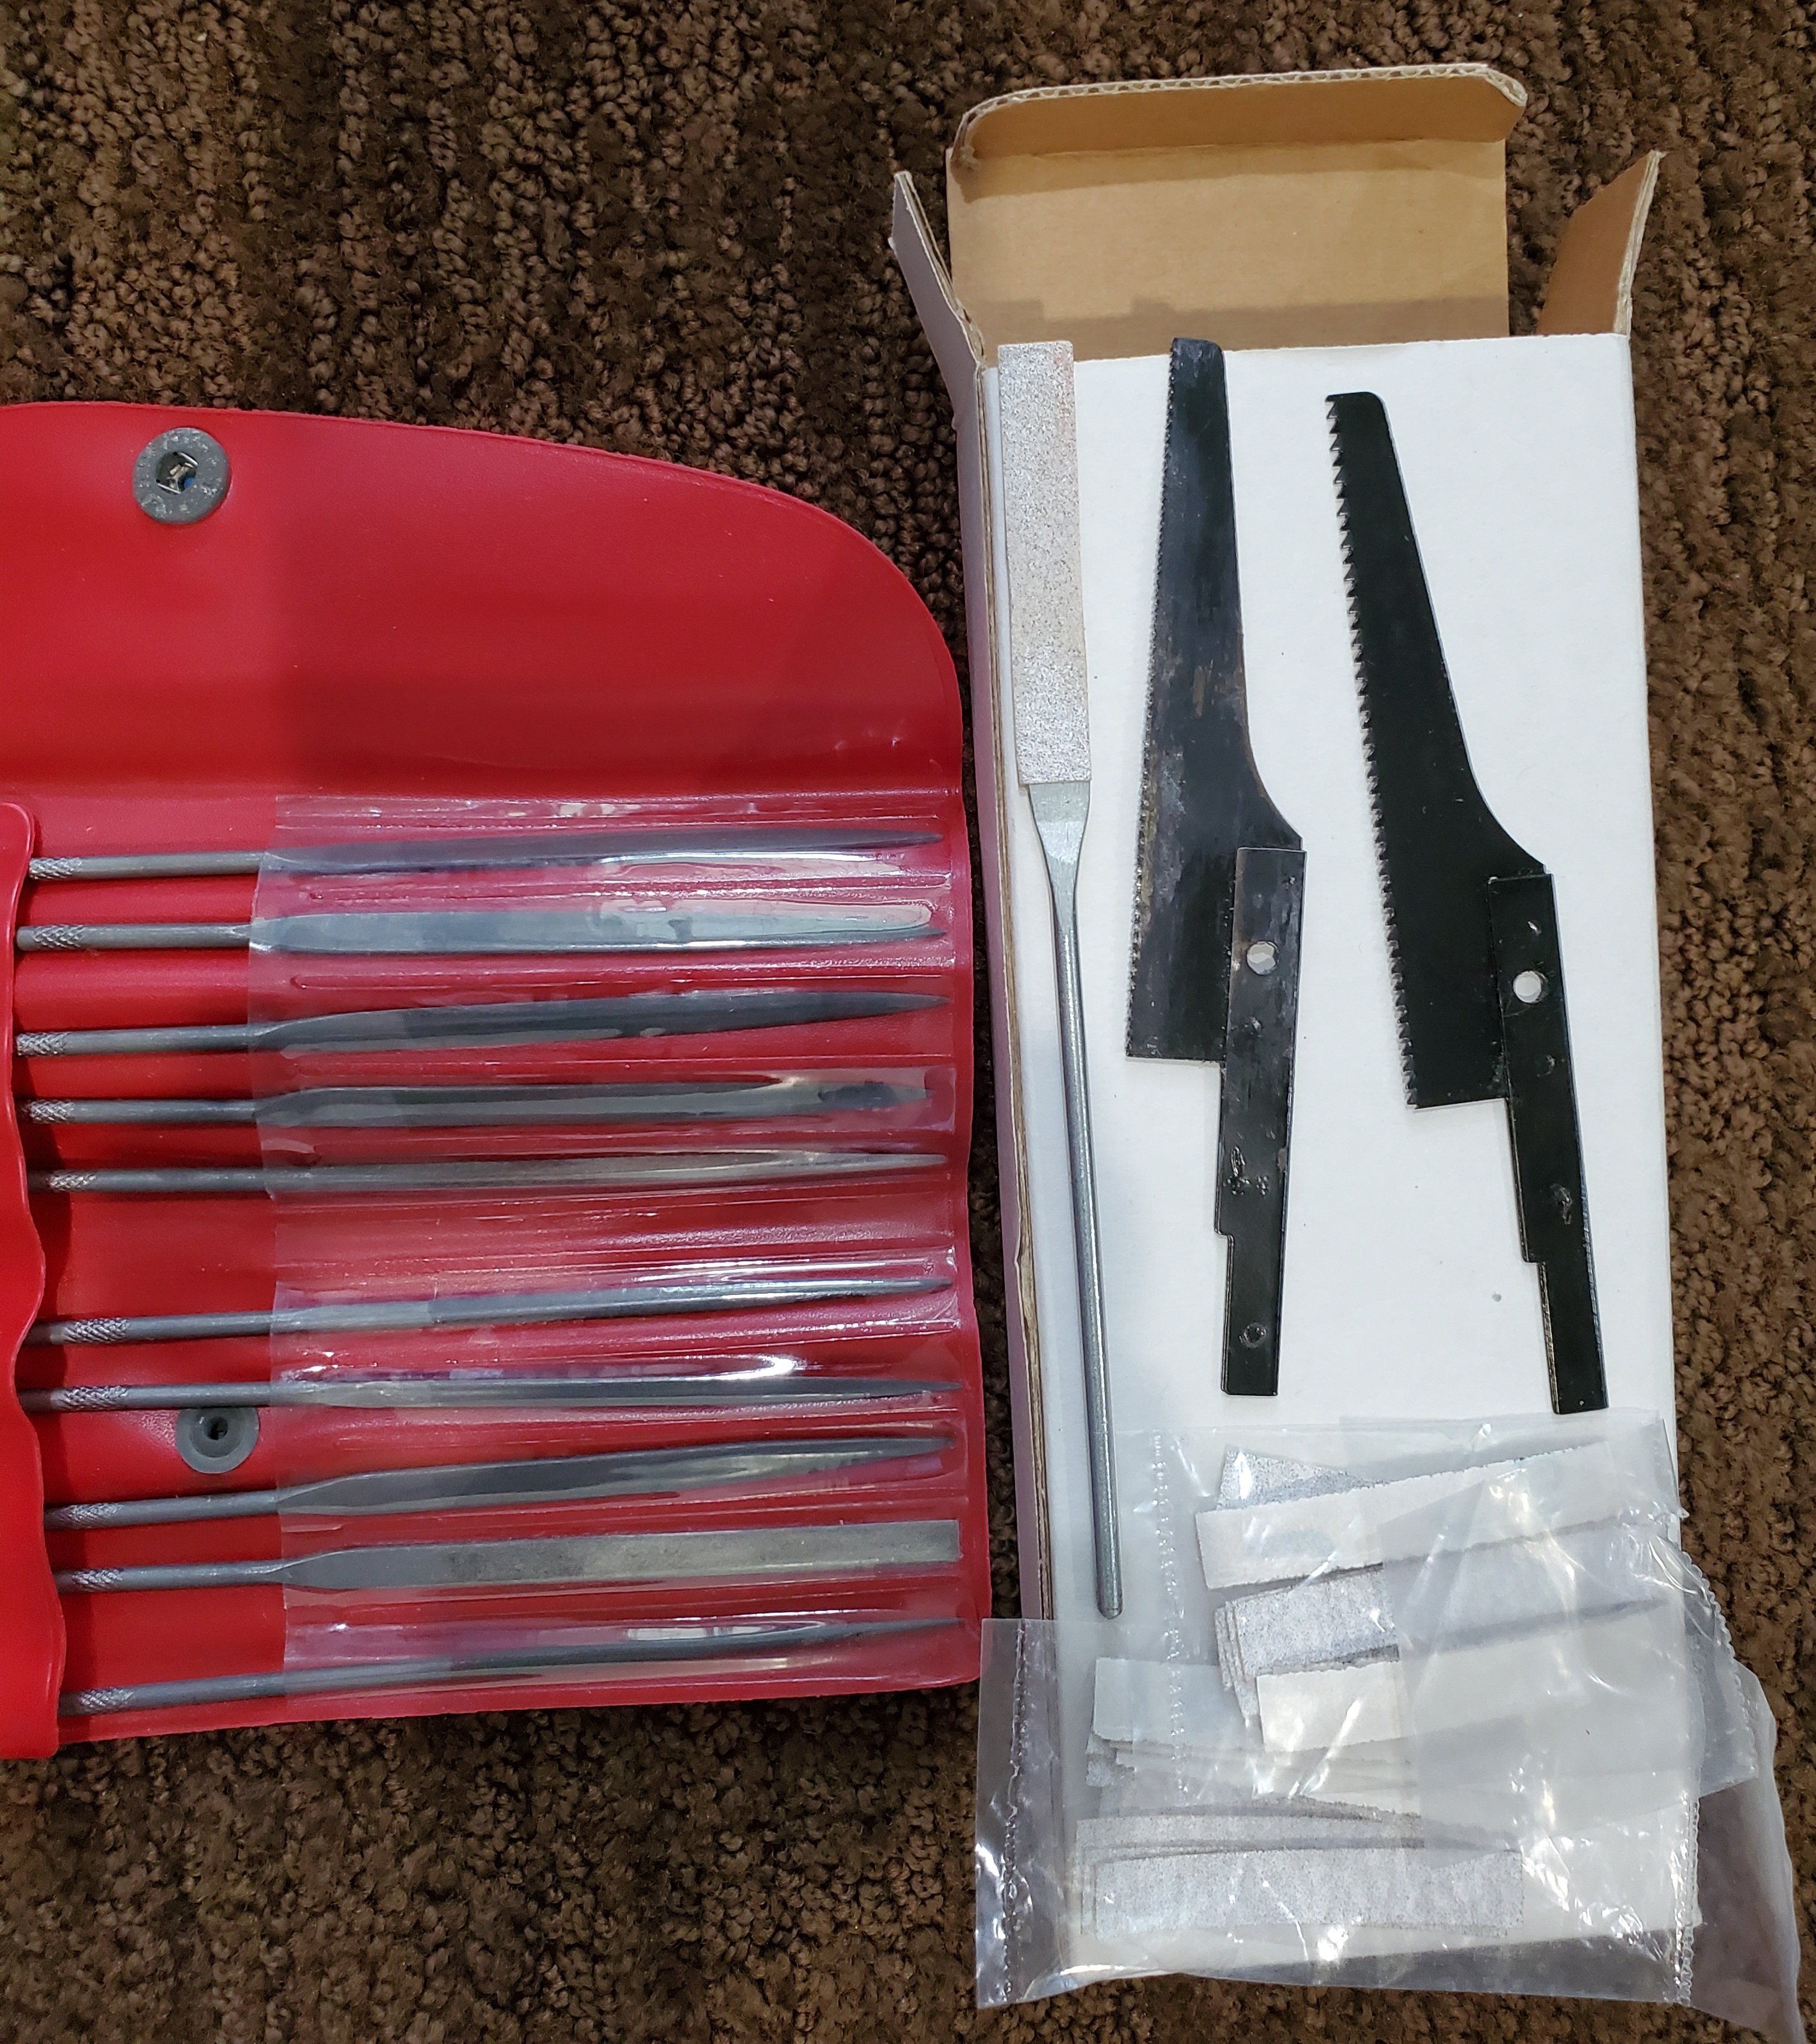
 I honestly haven't used this tool a lot and found it to be a little big for most ship modeling purposes especially at smaller scales. It works perfectly as designed though and has some useful sanding attachments and files and a couple of saw blades. $30 plus shipping Approximately 4 lb box from Missouri. Dave
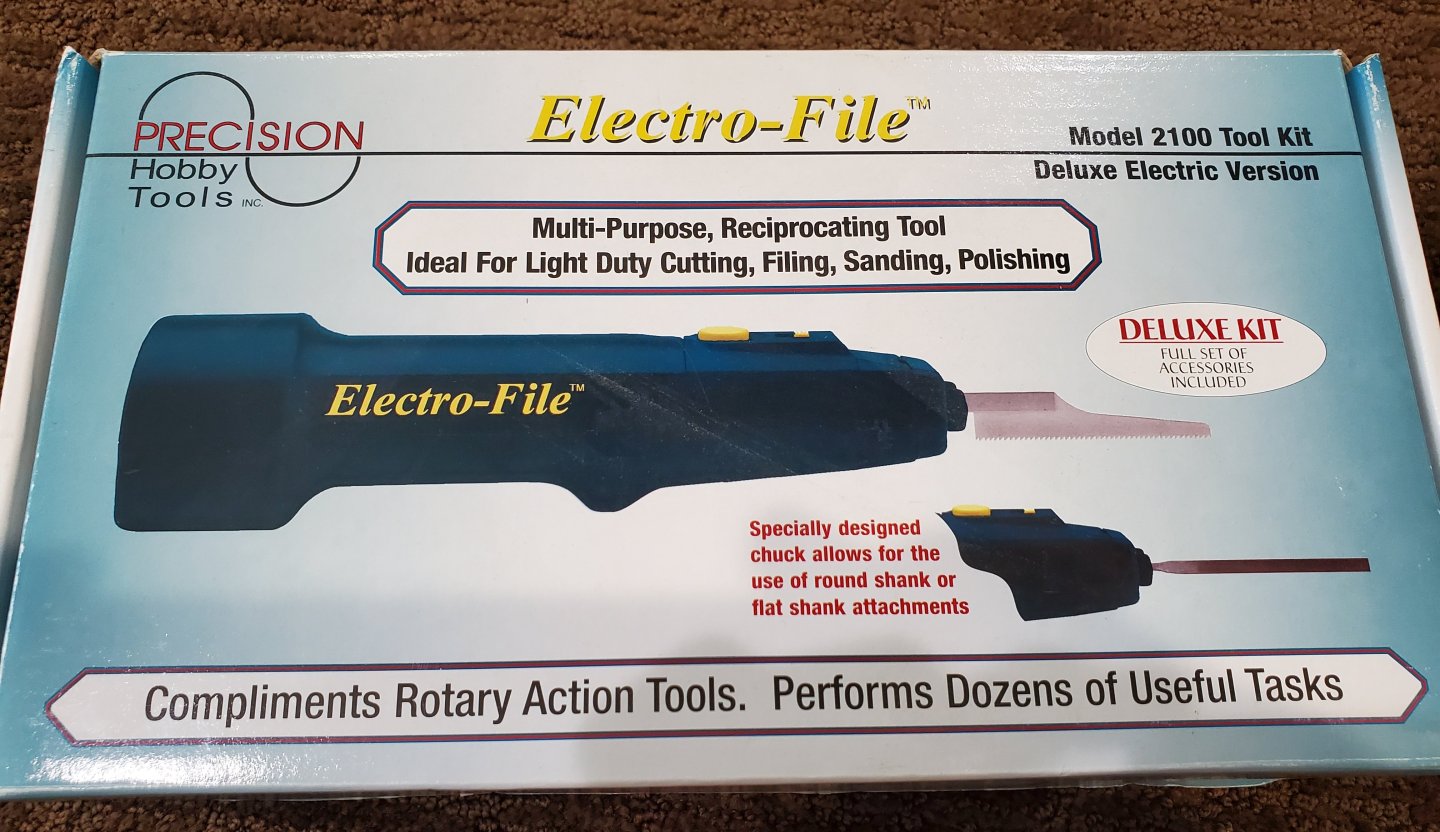


-
- 1
-

-
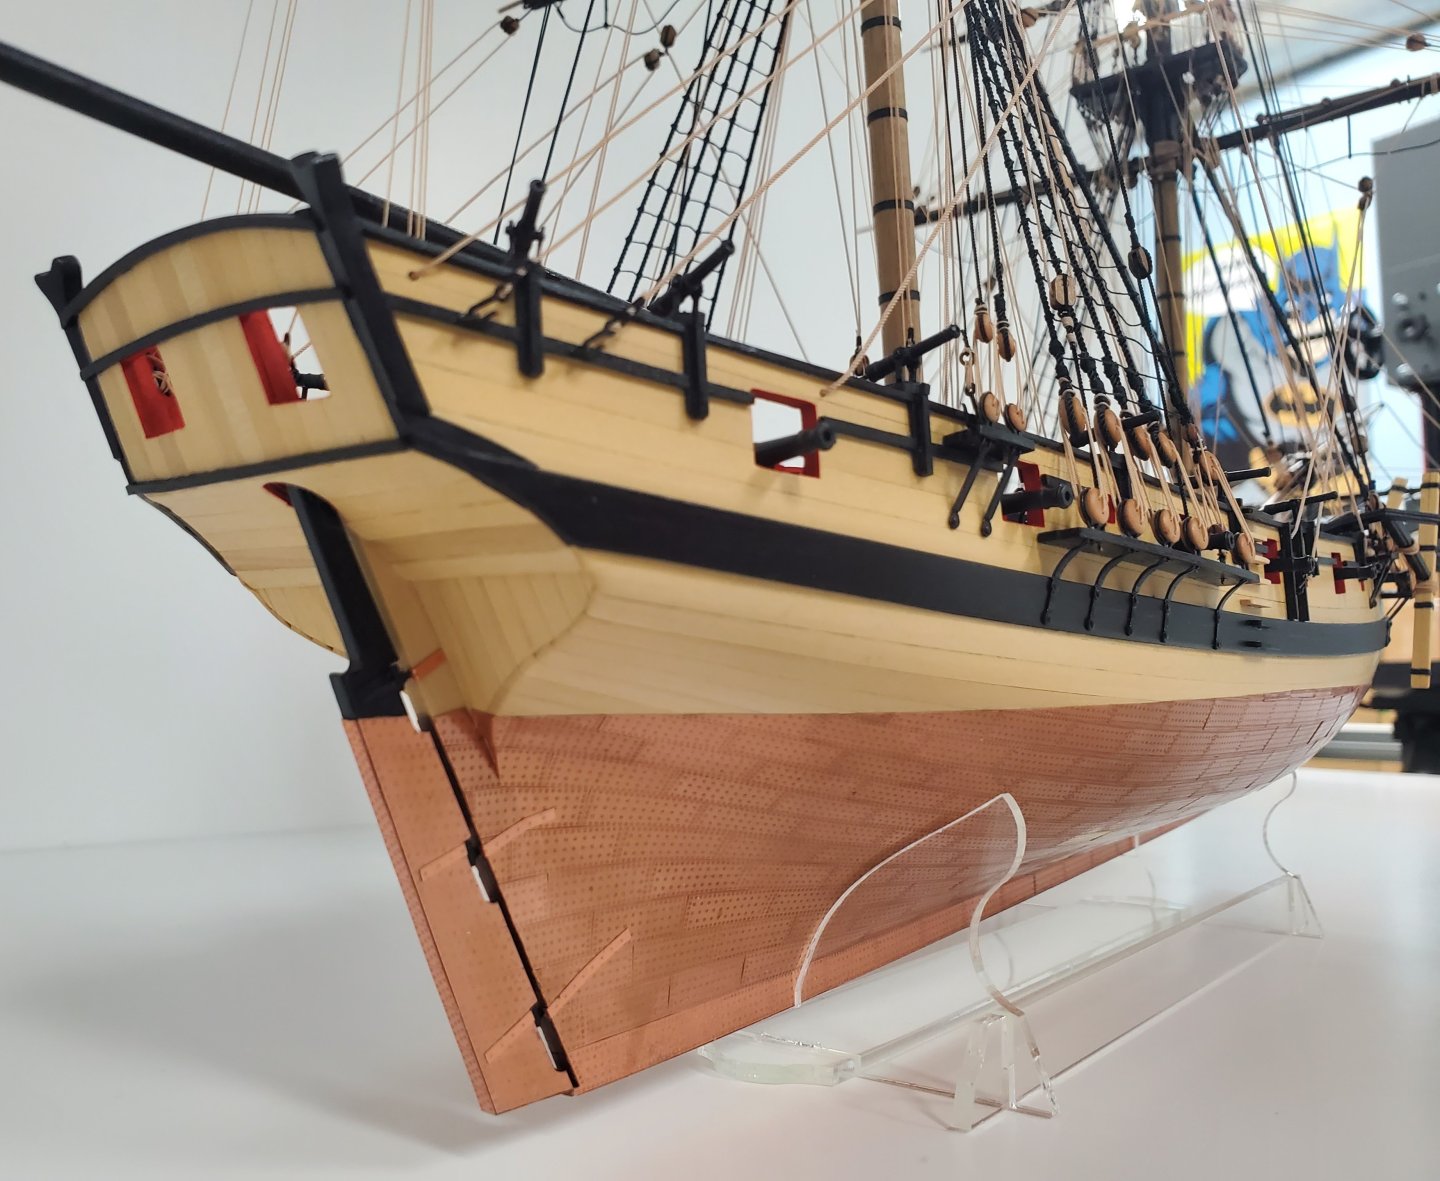
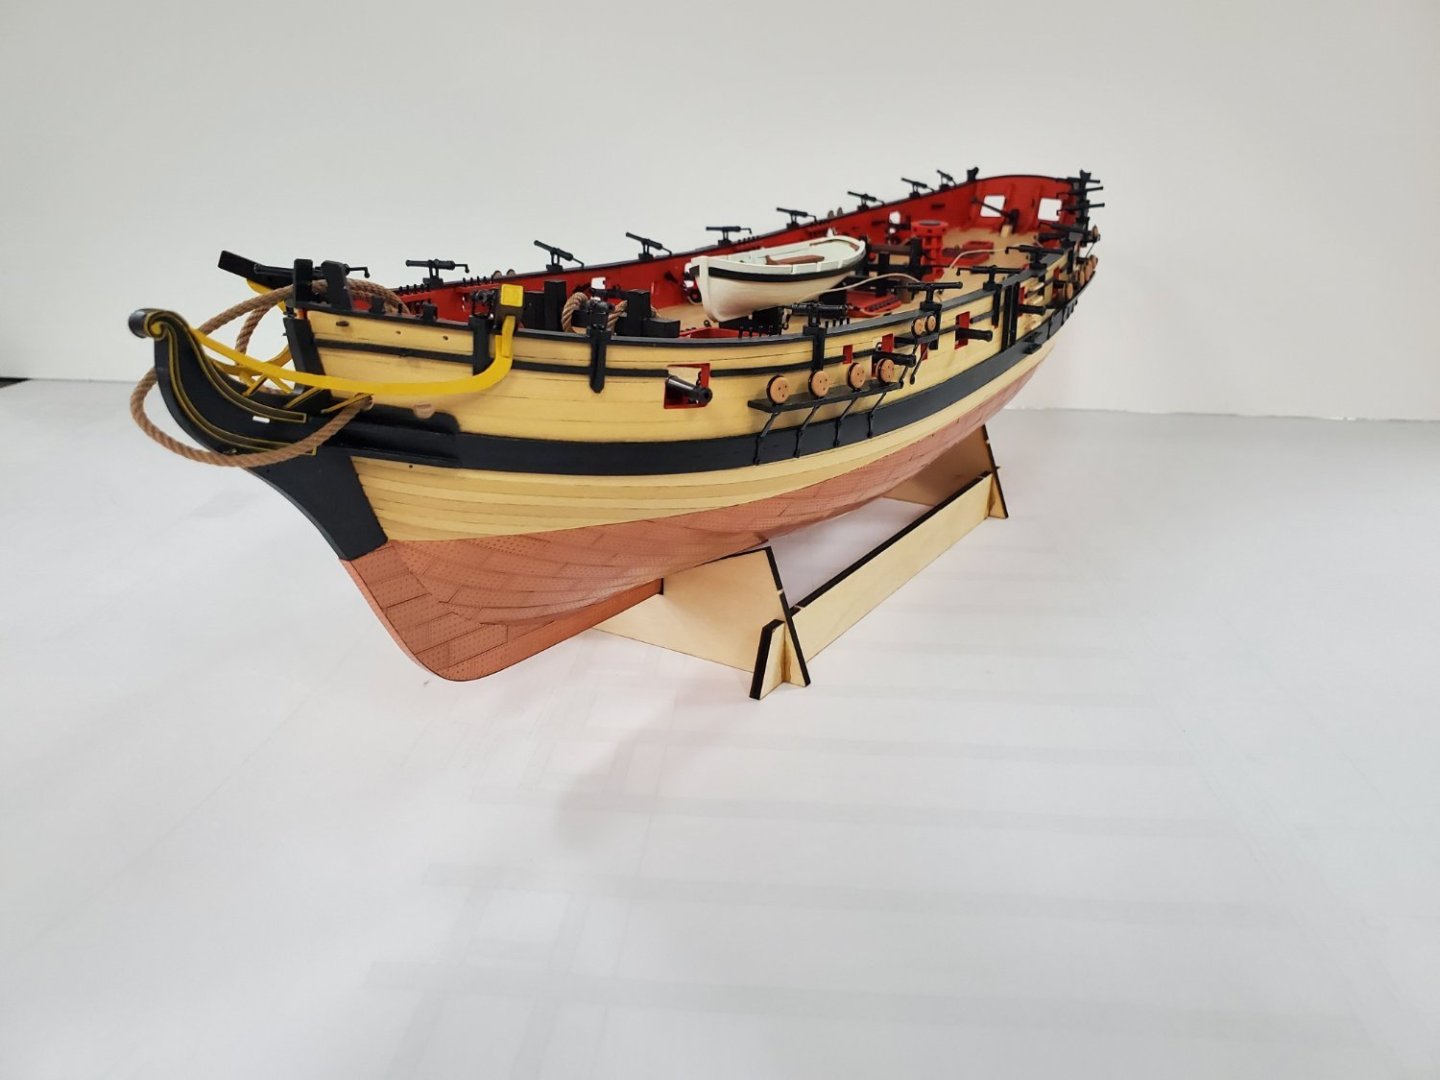
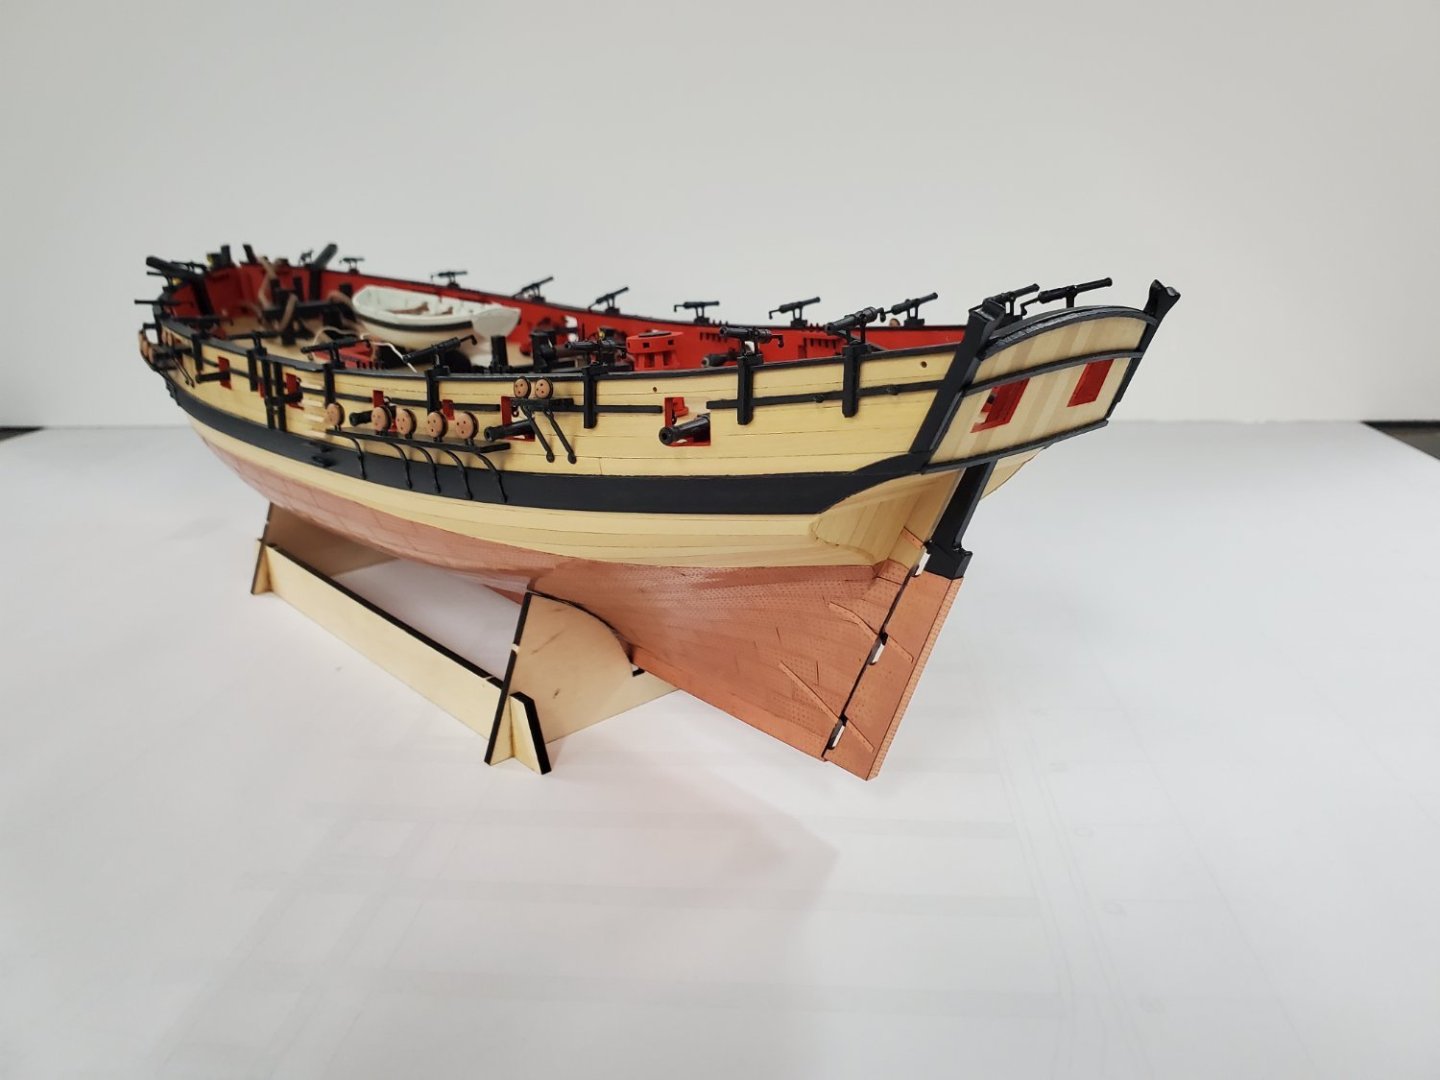
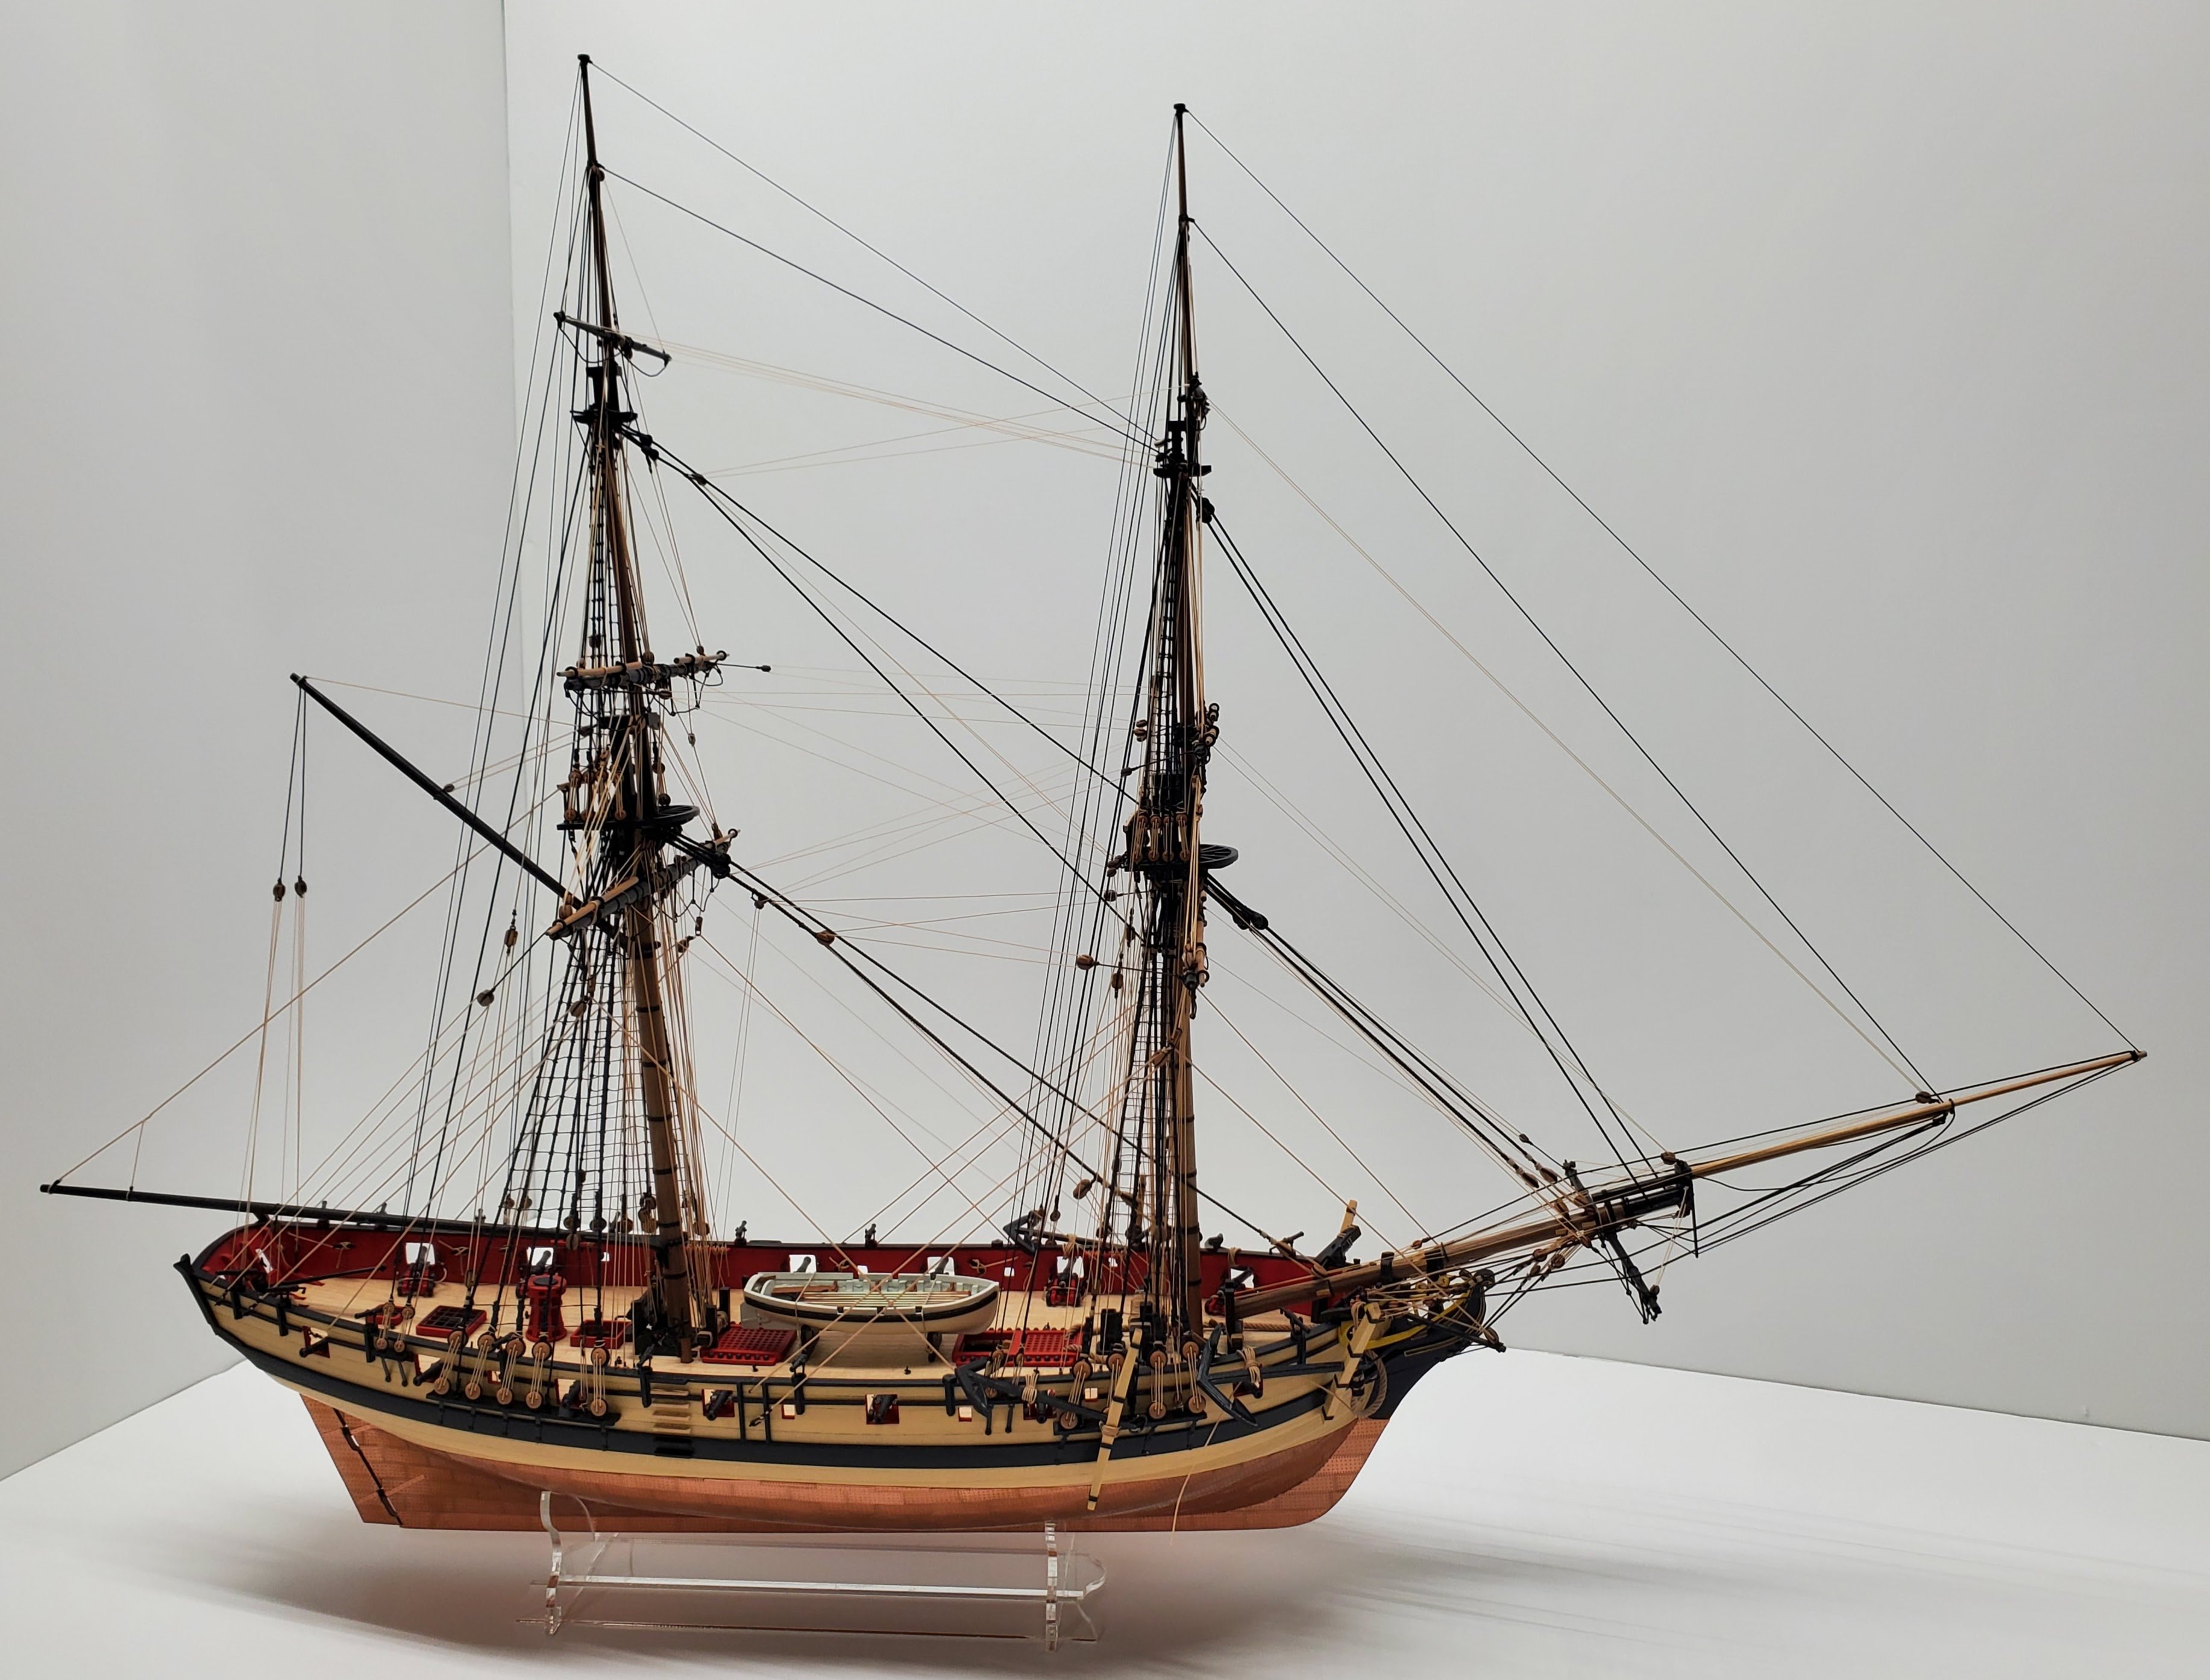
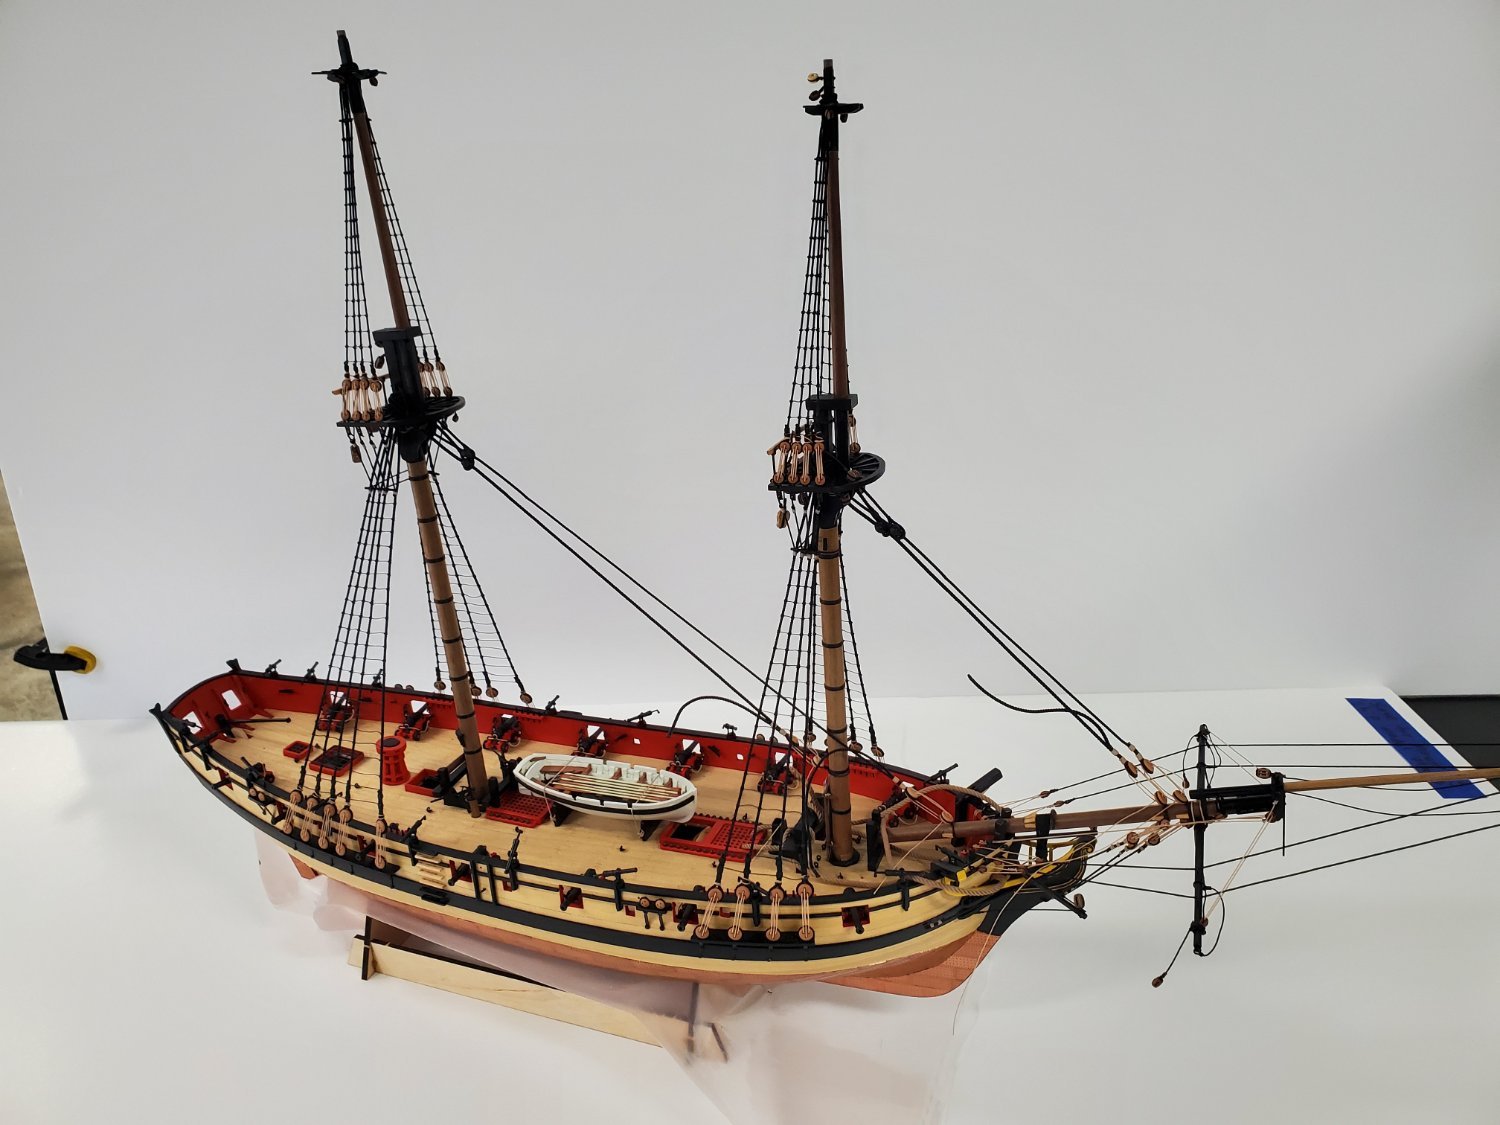
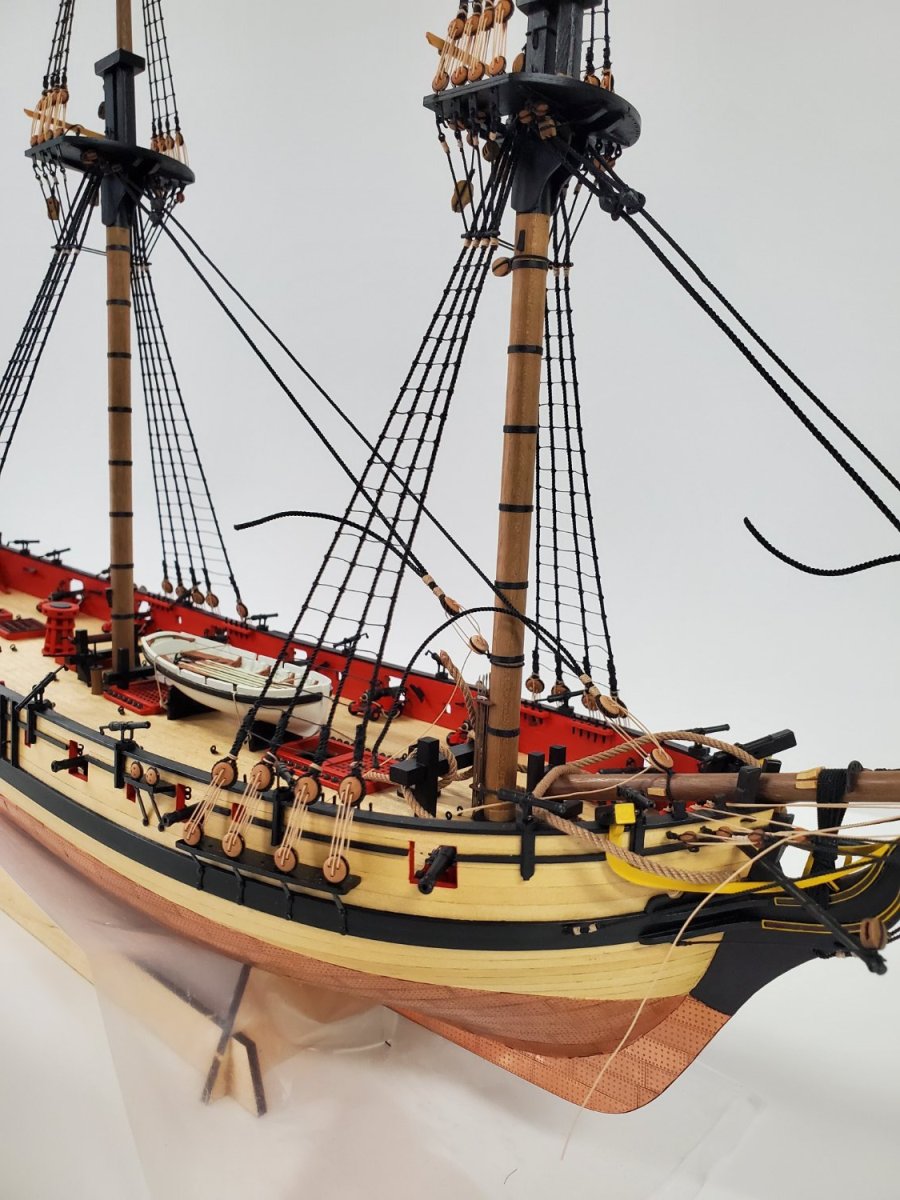
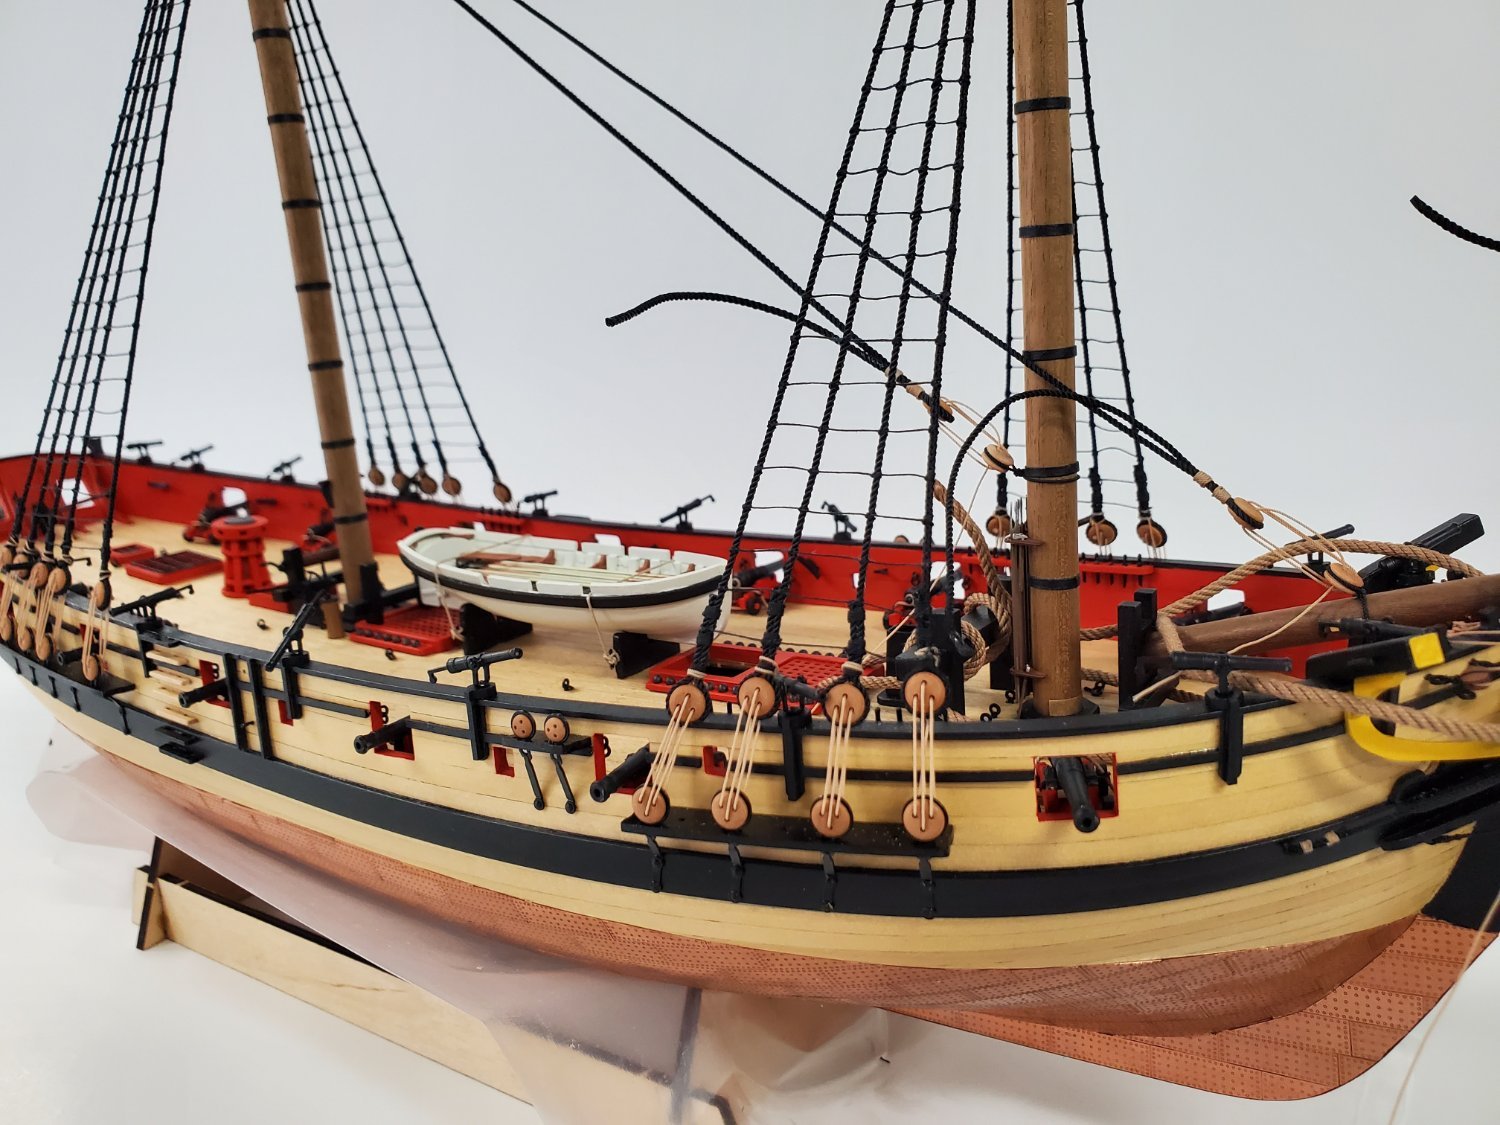
Speedy is completed!!! Approximately 22 months of work, mostly very enjoyable. Finished her up a couple weeks ago. I really didn't run into anything that I couldn't figure out from the plans and/or the other build logs mentioned earlier. Frequently looking ahead in Delf's and other logs saved me in several places. And paying attention to every little bit of the plans paid off as well since it's pretty much all there for you. Such a great kit! I highly recommend it. Will now add a few photos. Thanks to all of you who followed along and offered encouragement, likes, and comments! Dave


- 53 replies
-
- 20
-

-
-
- Speedy
- Vanguard Models
- (and 1 more)
-
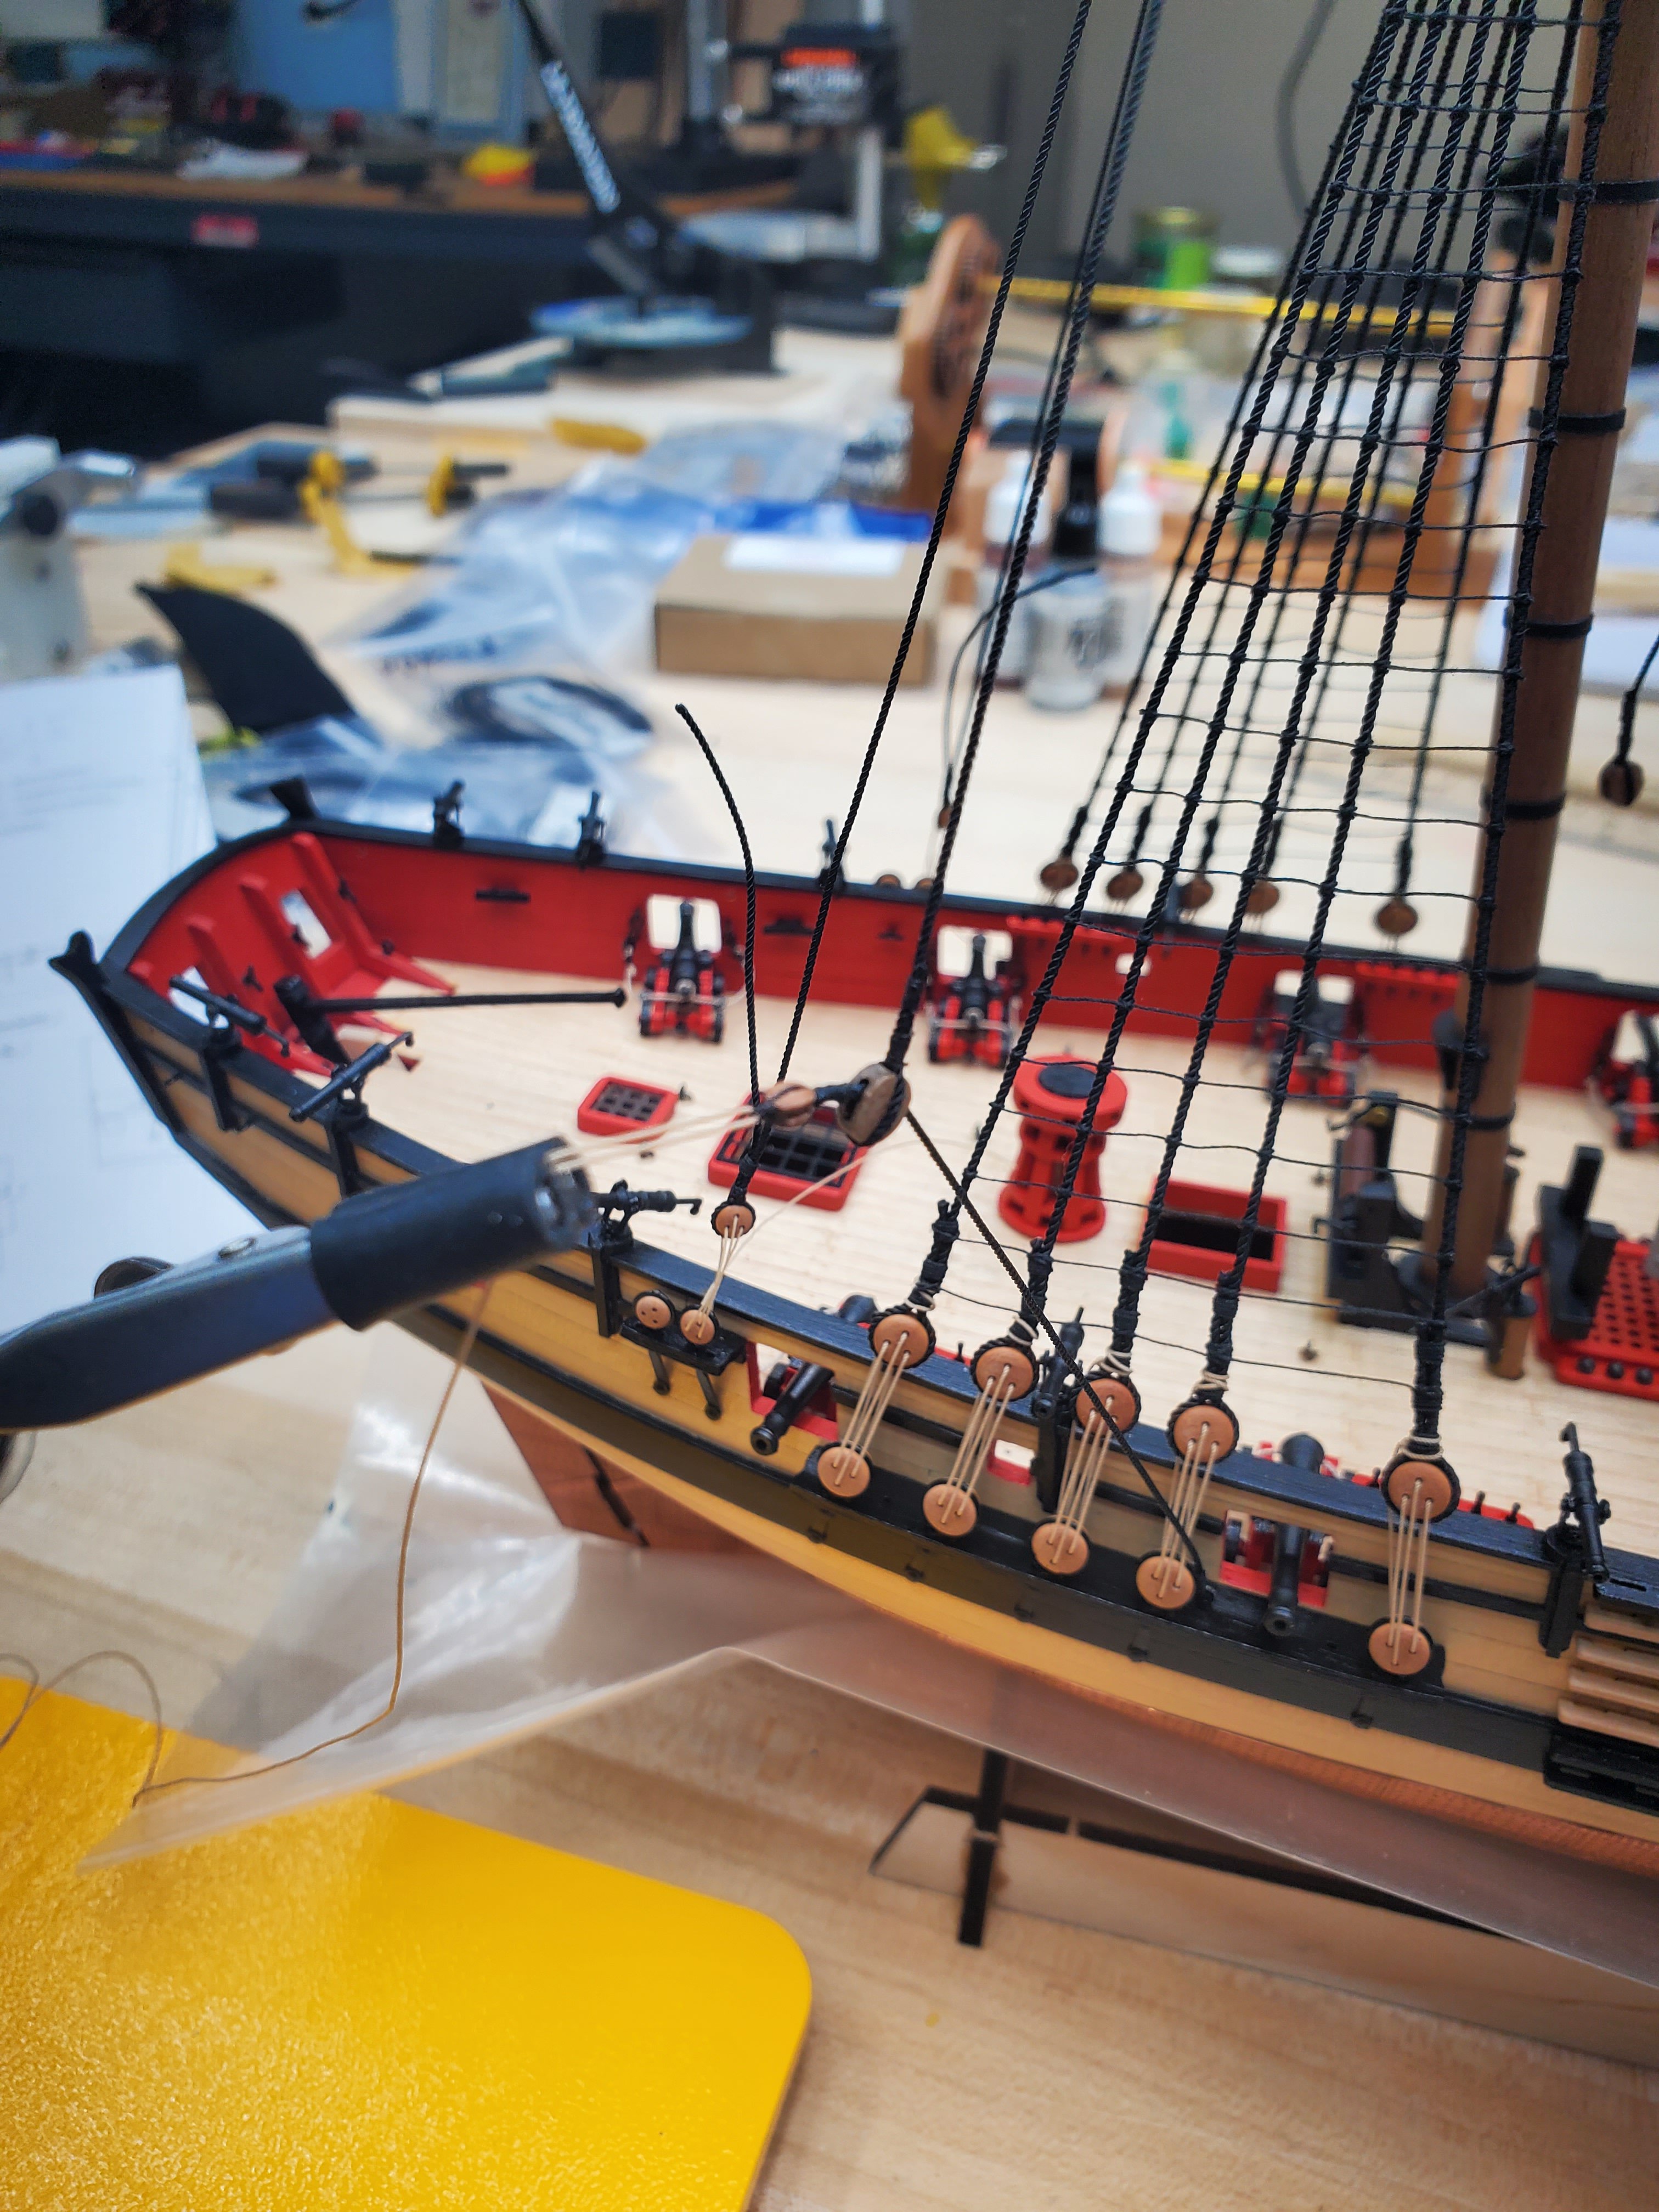
Hi everyone, Here's a couple photos of where things are currently. I'm so grateful to Delf mainly and also other build logs to supplement the excellent plans included. I'm using rigging line from Ropes of Scale in case anyone is wondering about that. It's very easy to work with and has no fuzz, at least that I can see. I've left some of the rigging lines loosely attached at this point, which has made it a lot easier to work around them. So I'll need to go back and secure them better pretty soon. The yards are all attached! Not sure about the exact spacing/placement of those, it seemed to vary a lot from one builder to the next and so I tried to follow the plans as closely as possible. Making steady progress these days, as I've gotten so much faster at working with the rigging lines and blocks with practice to this point. Thanks for looking! Dave


- 53 replies
-
- 13
-
-
-
- Speedy
- Vanguard Models
- (and 1 more)
-
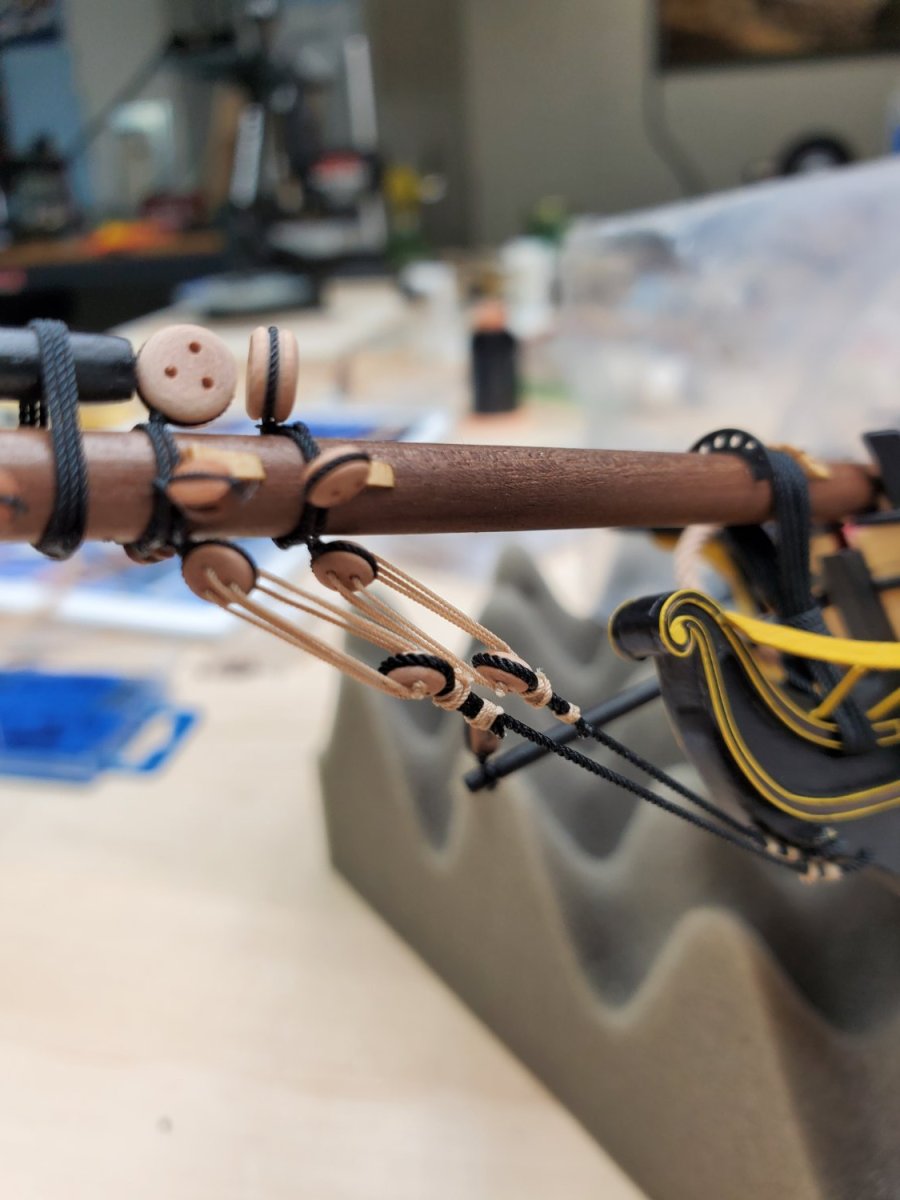
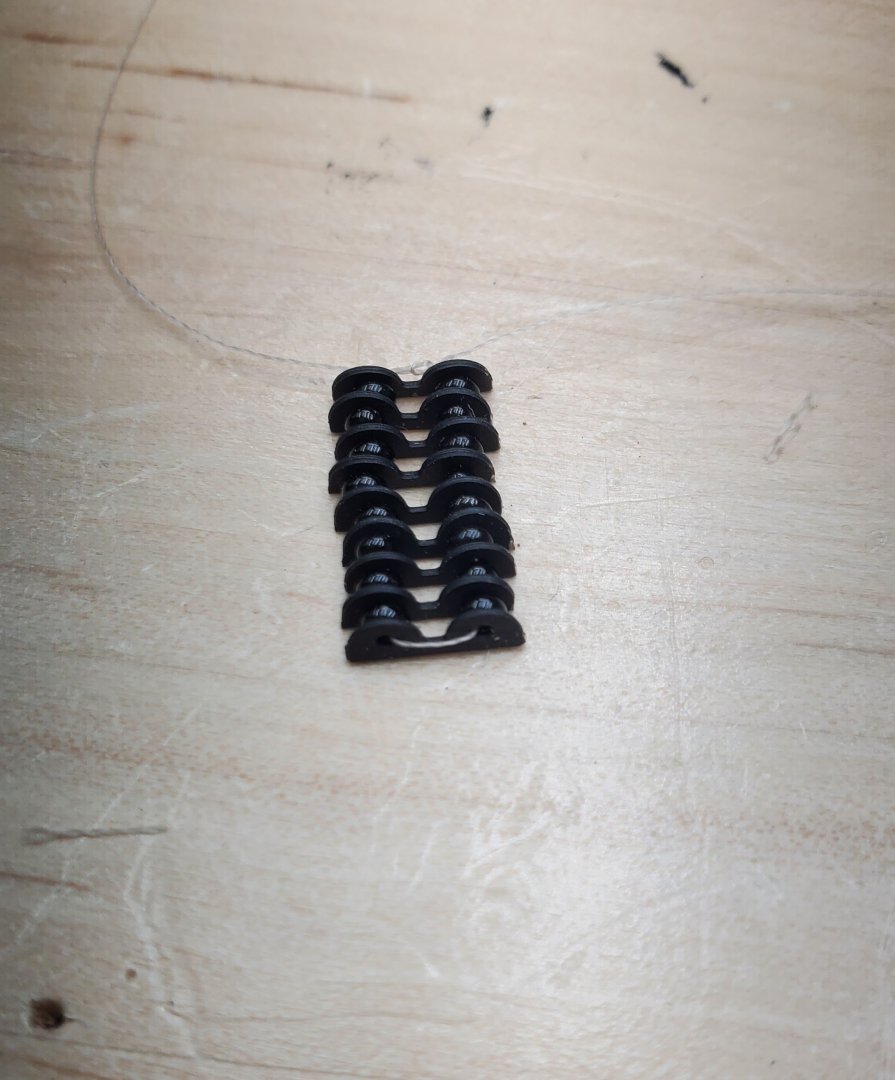
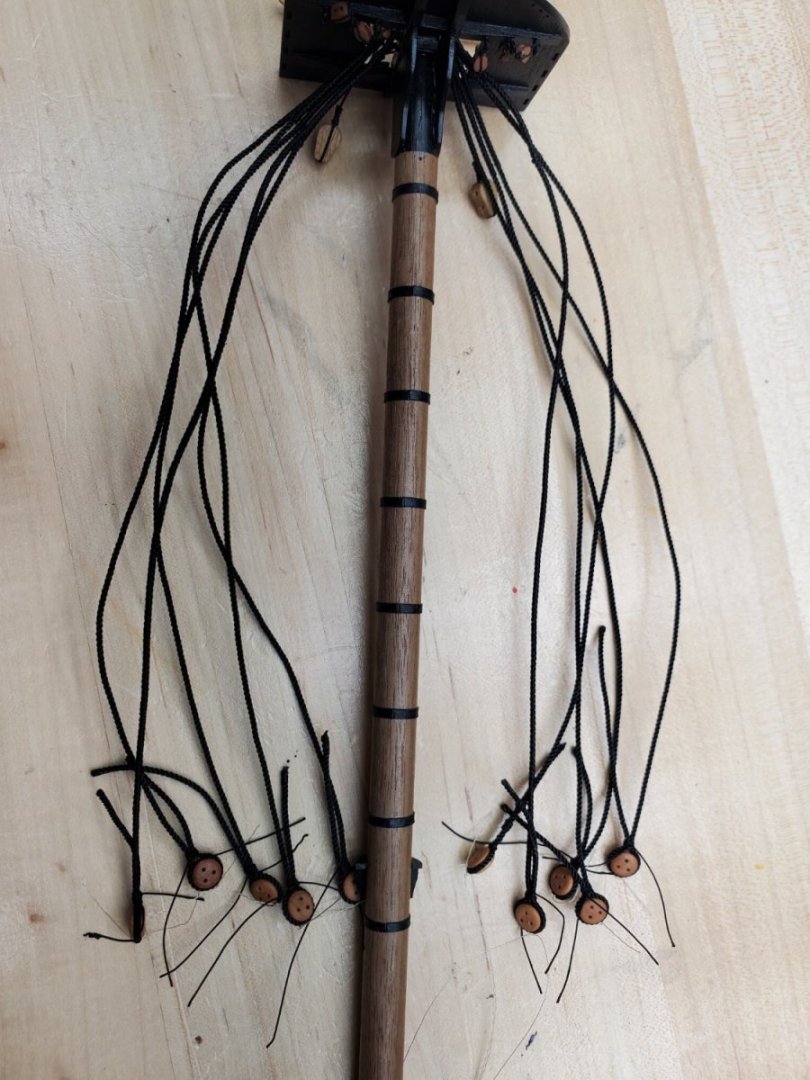
Similar to what I've seen others do, when it came to doing these little double stranded parrel things, I use a very fine thread to hold it all together, which left plenty of room to run the actual rigging line through when attaching to the mast. This made it like a single piece to handle much easier. I just painted the ends of the thread black and it's not noticeable when installed.
- 53 replies
-
- 4
-
-
- Speedy
- Vanguard Models
- (and 1 more)
-
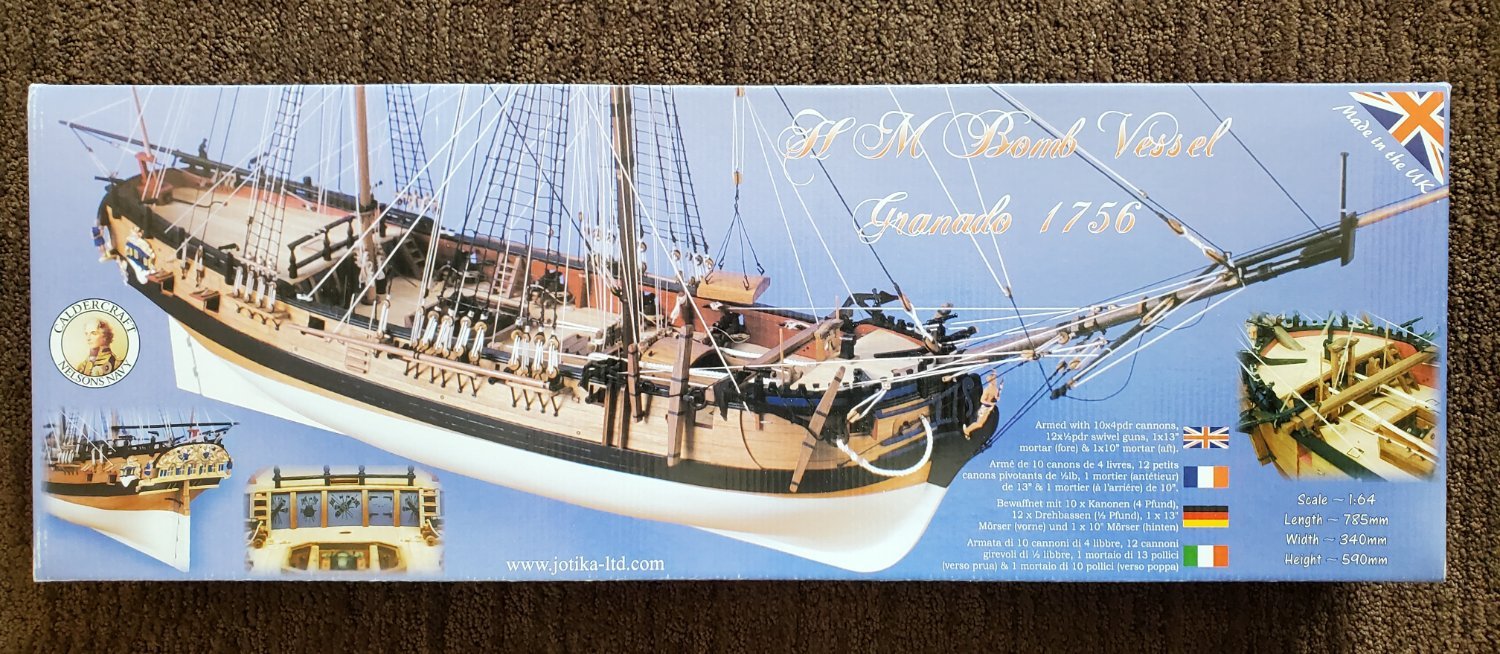
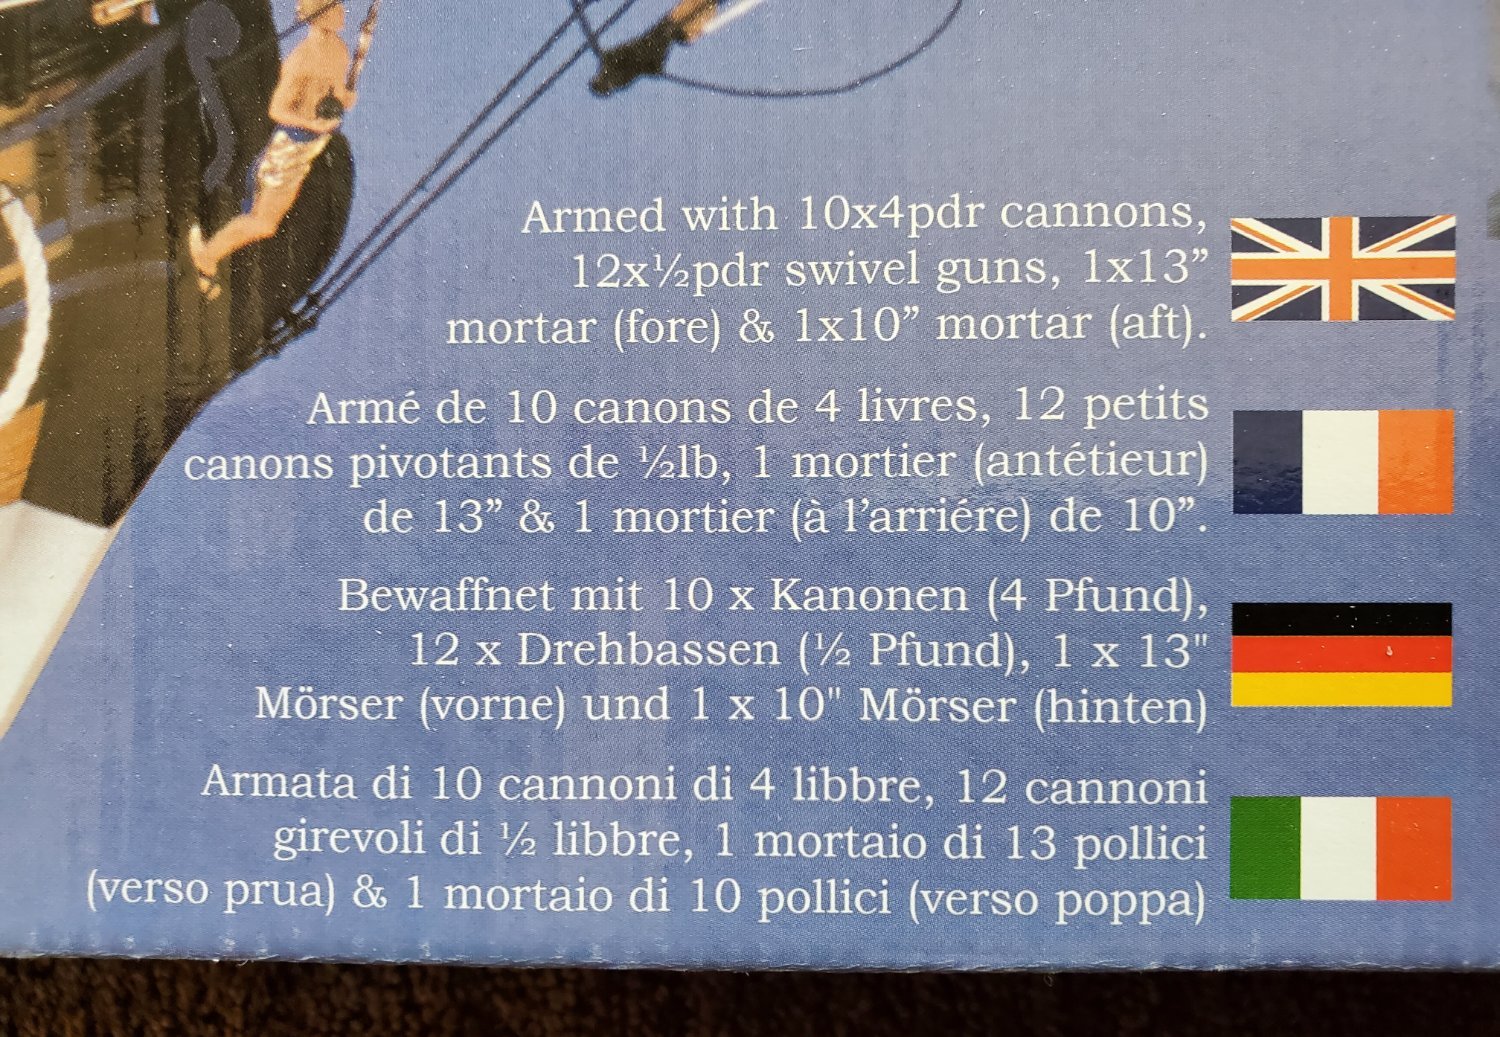
Nice to see this build log starting! I bought this same kit in 1985. I found the receipt in the box, which shows I paid $239.95 from Model Expo. You may prompt me to work on it again. I also purchased enough little copper plates at the time to replace all the wood ones. They have a nice natural non-shiny copper look to them after 40+ years. Will look forward to following your build! Dave
-
New price for this kit of just $140 plus shipping! Dave
-
New lower price for this kit! Now $250 plus shipping. Several excellent build logs to assist are available on MSW. Dave
- 1 reply
-
- 1
-
-
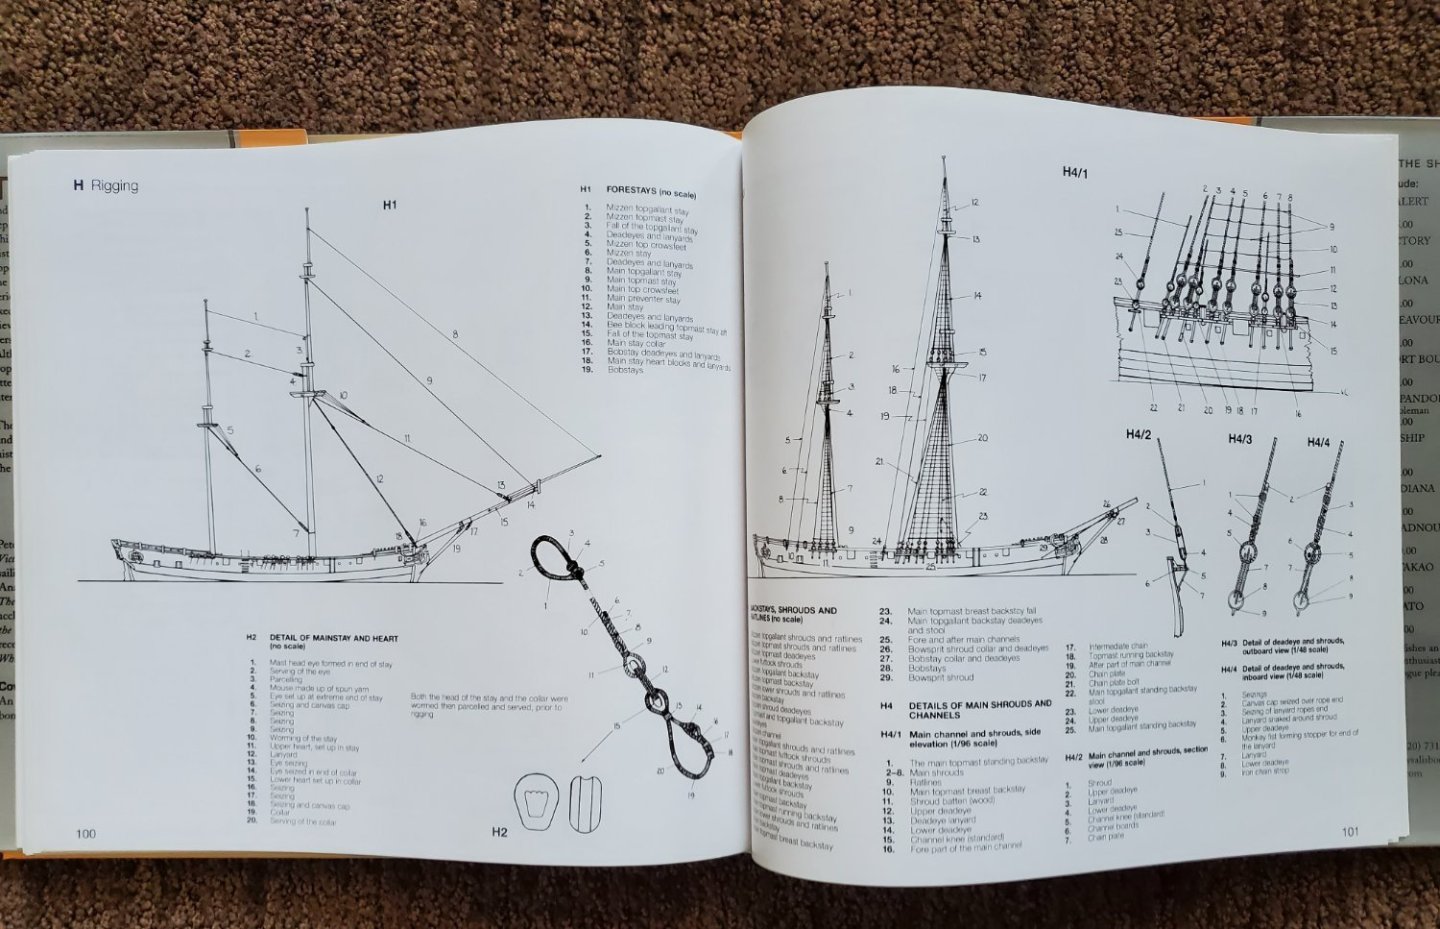
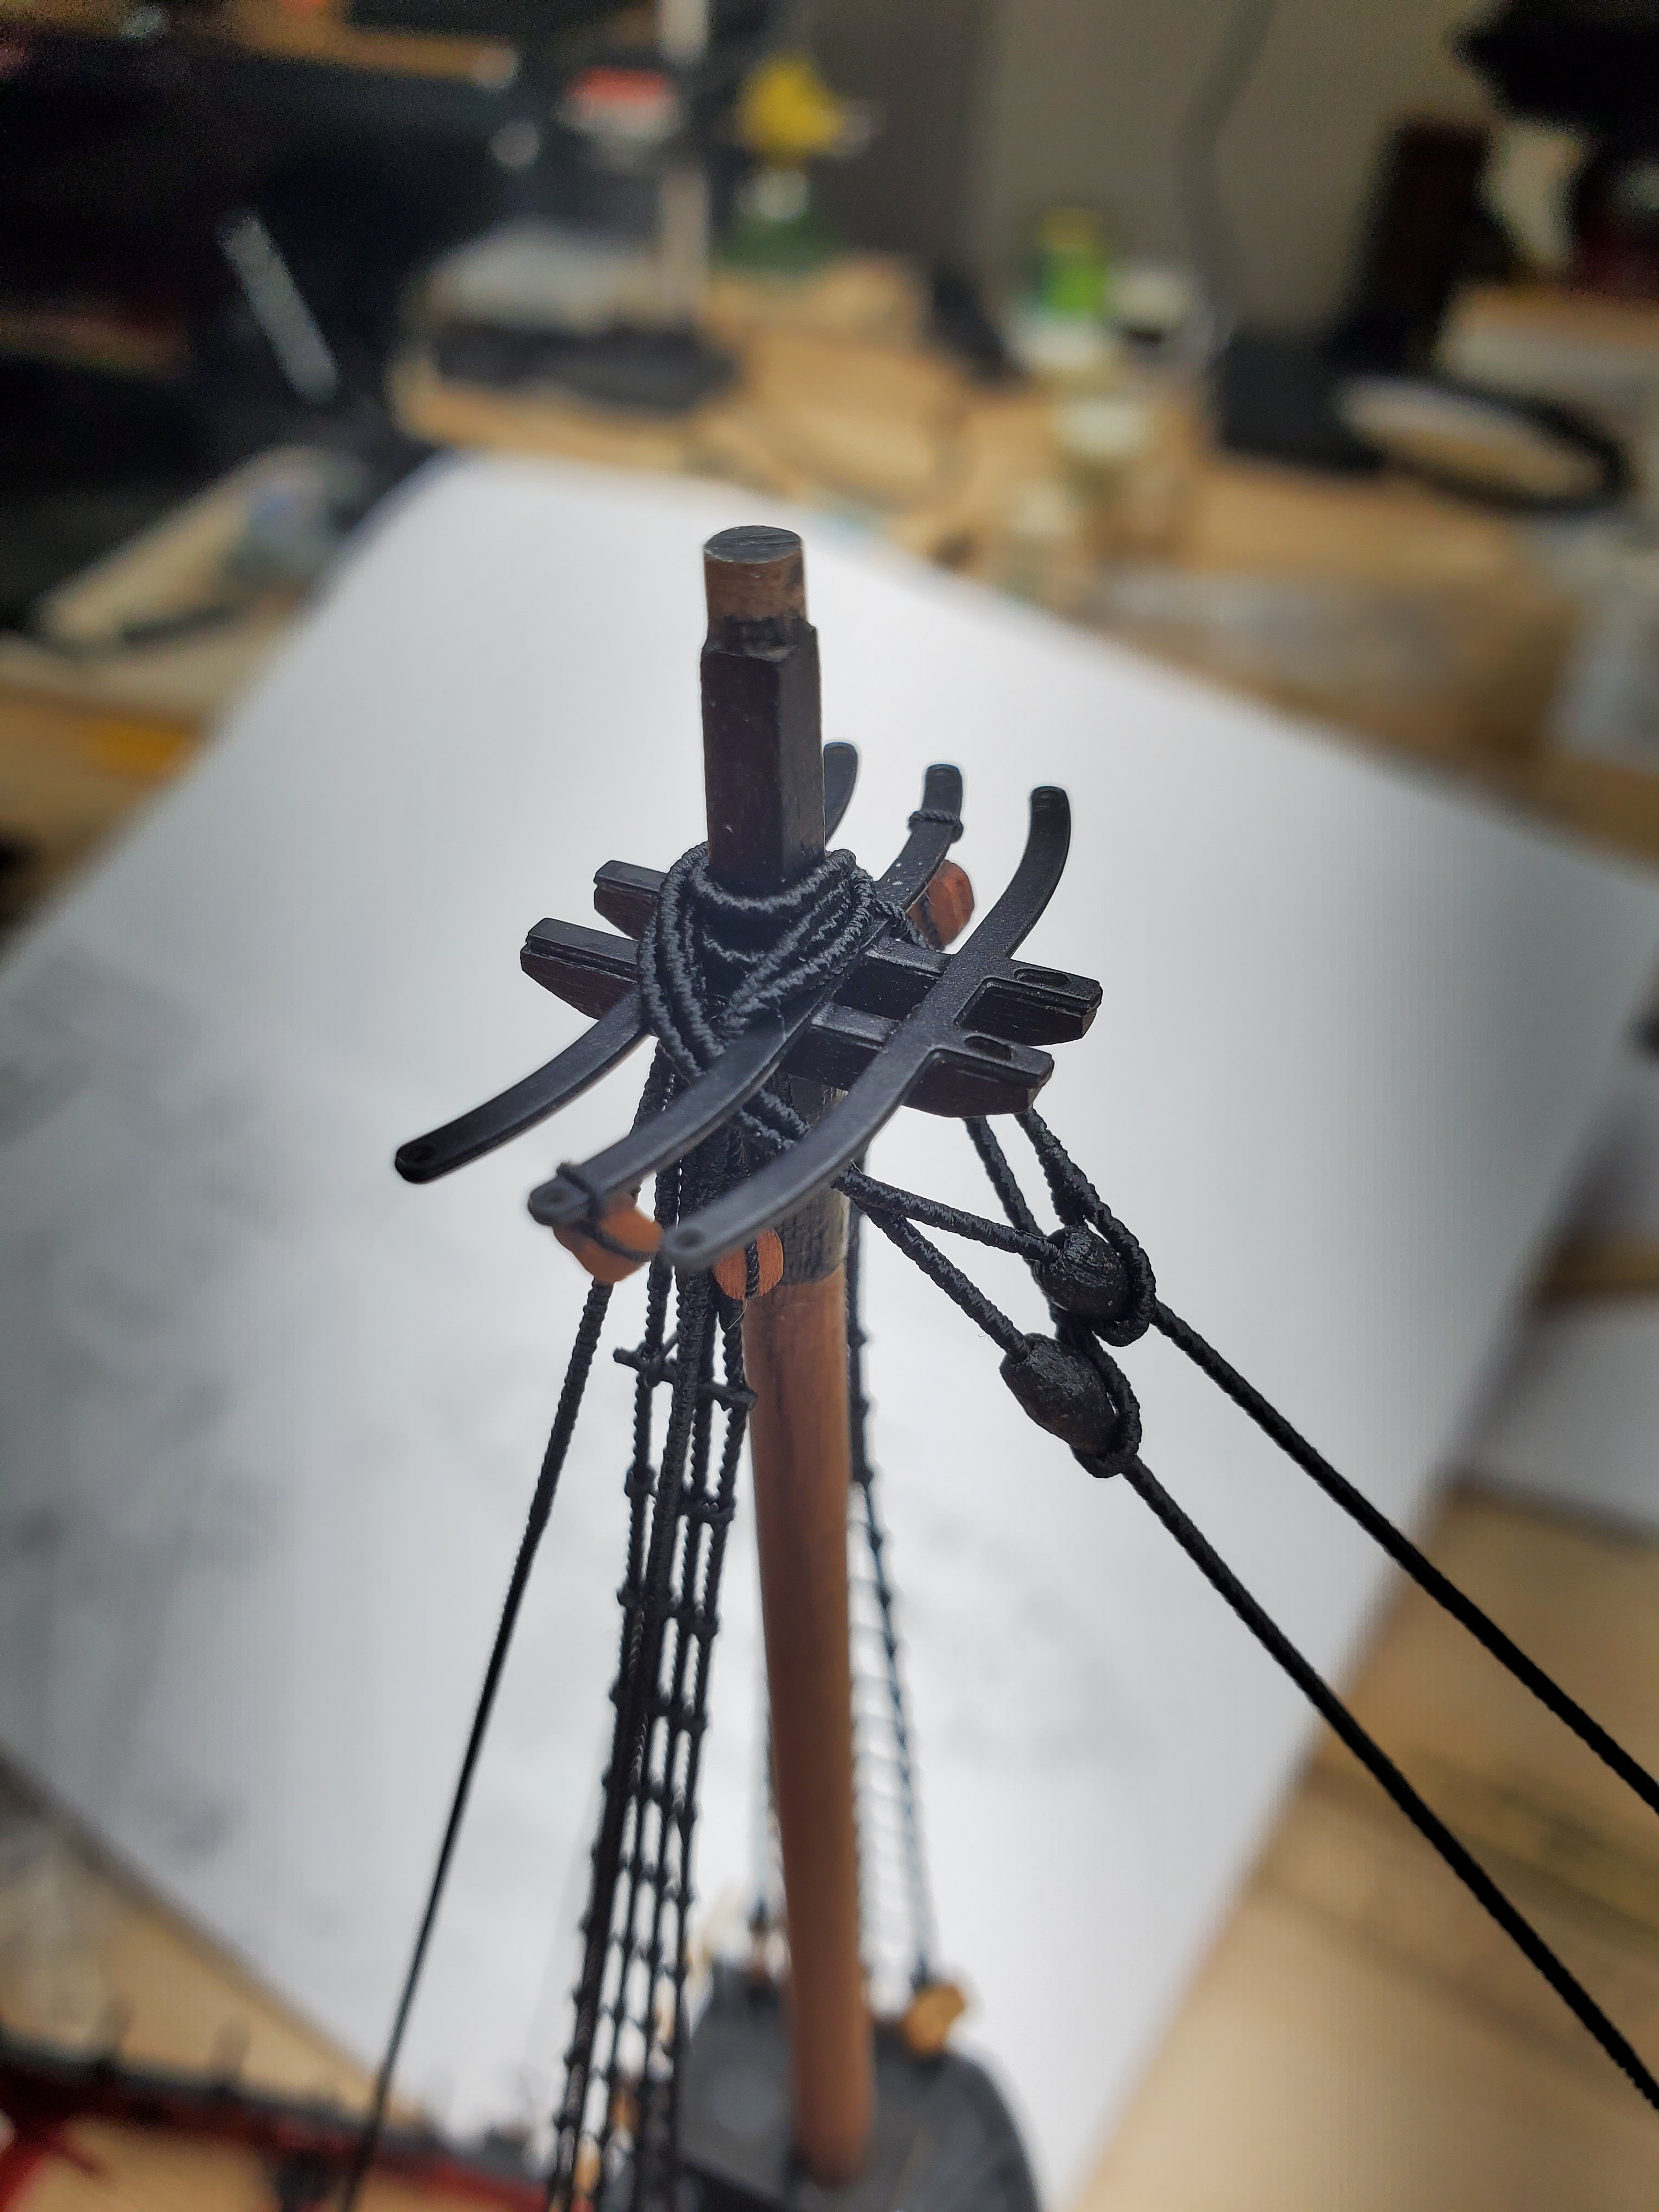
Here I've attached all the lines to the topgallant masts which are ready to put in place once I make sure I haven't missed anything that might be more difficult to access later on.
- 53 replies
-
- 4
-
-
- Speedy
- Vanguard Models
- (and 1 more)
-
After getting one of the larger Quad hand sets, I later added the smallest one which has been handy for more options as shown in this photo. I love how heavy the bases are on these, nothing moves when using them.

- 53 replies
-
- 4
-
-
- Speedy
- Vanguard Models
- (and 1 more)
-
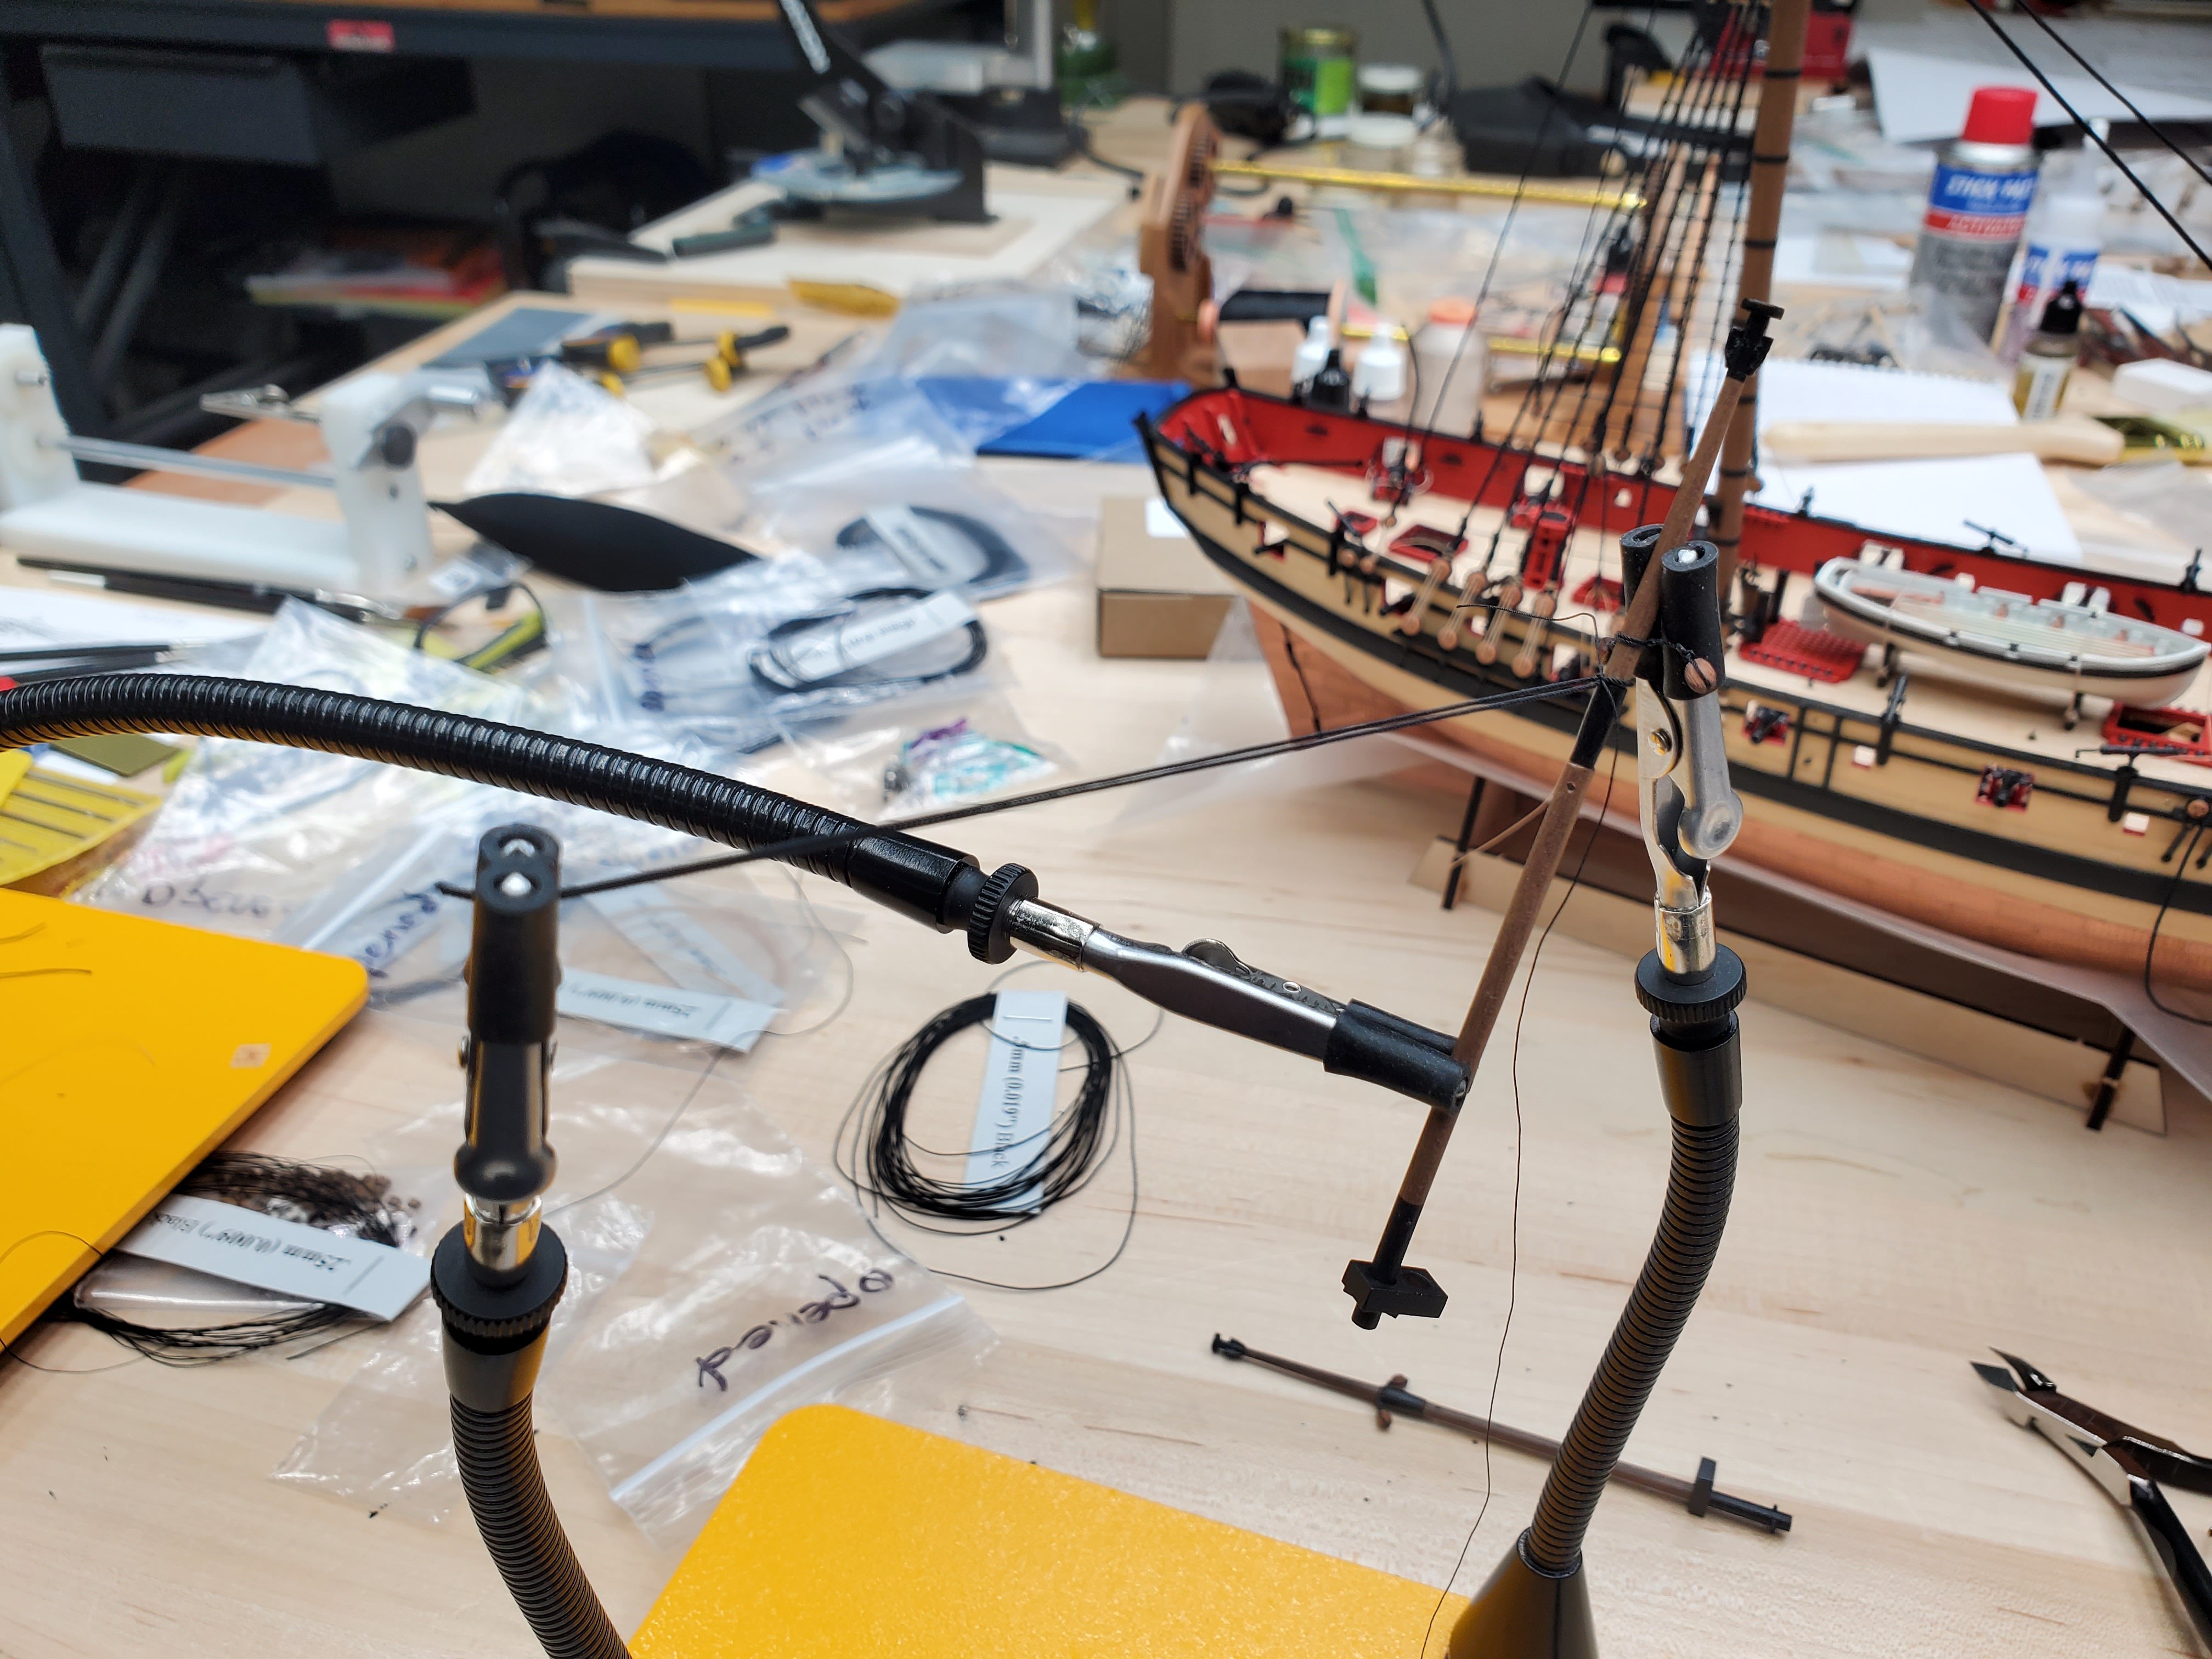
Thanks Theodosius! Yes that worked out well for me. Here is my cluttered workbench and Speedy and photos of using the Quad Hands which has been extremely useful, recommended by other Speedy builders.


- 53 replies
-
- 3
-
-
- Speedy
- Vanguard Models
- (and 1 more)
-
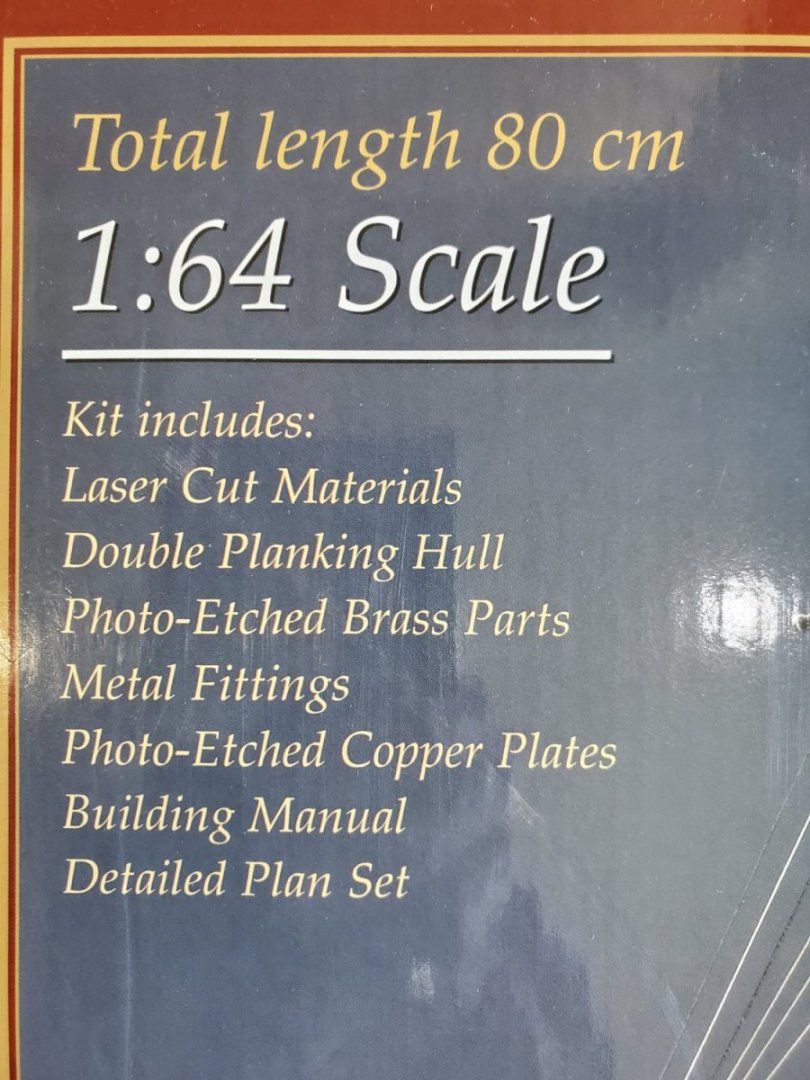
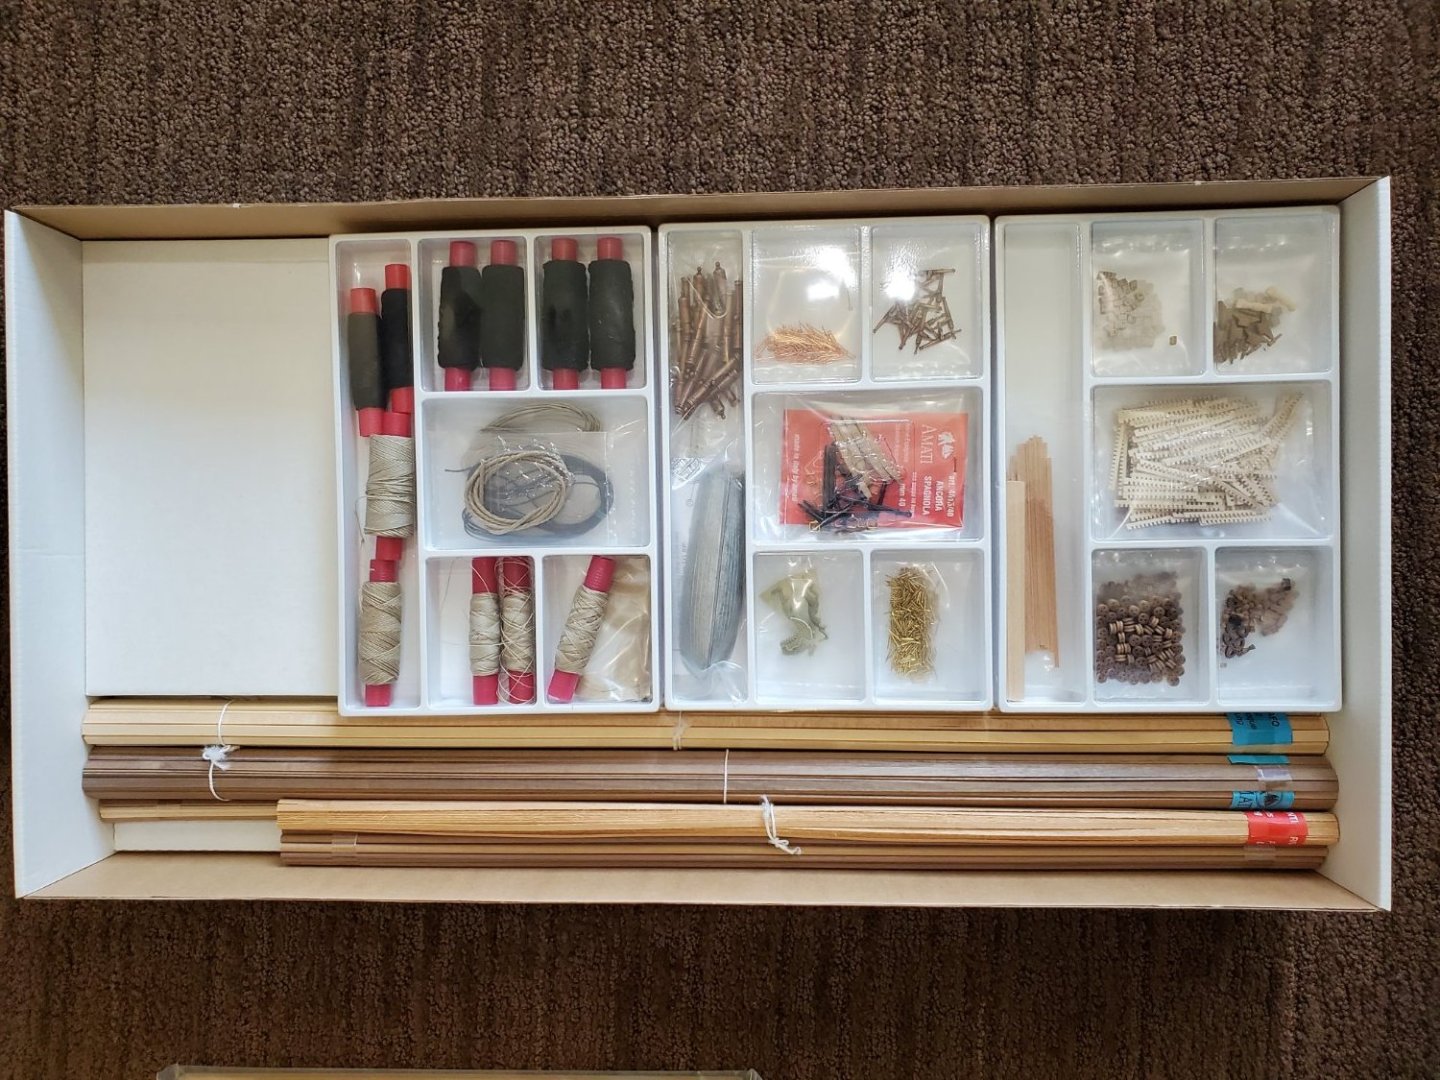
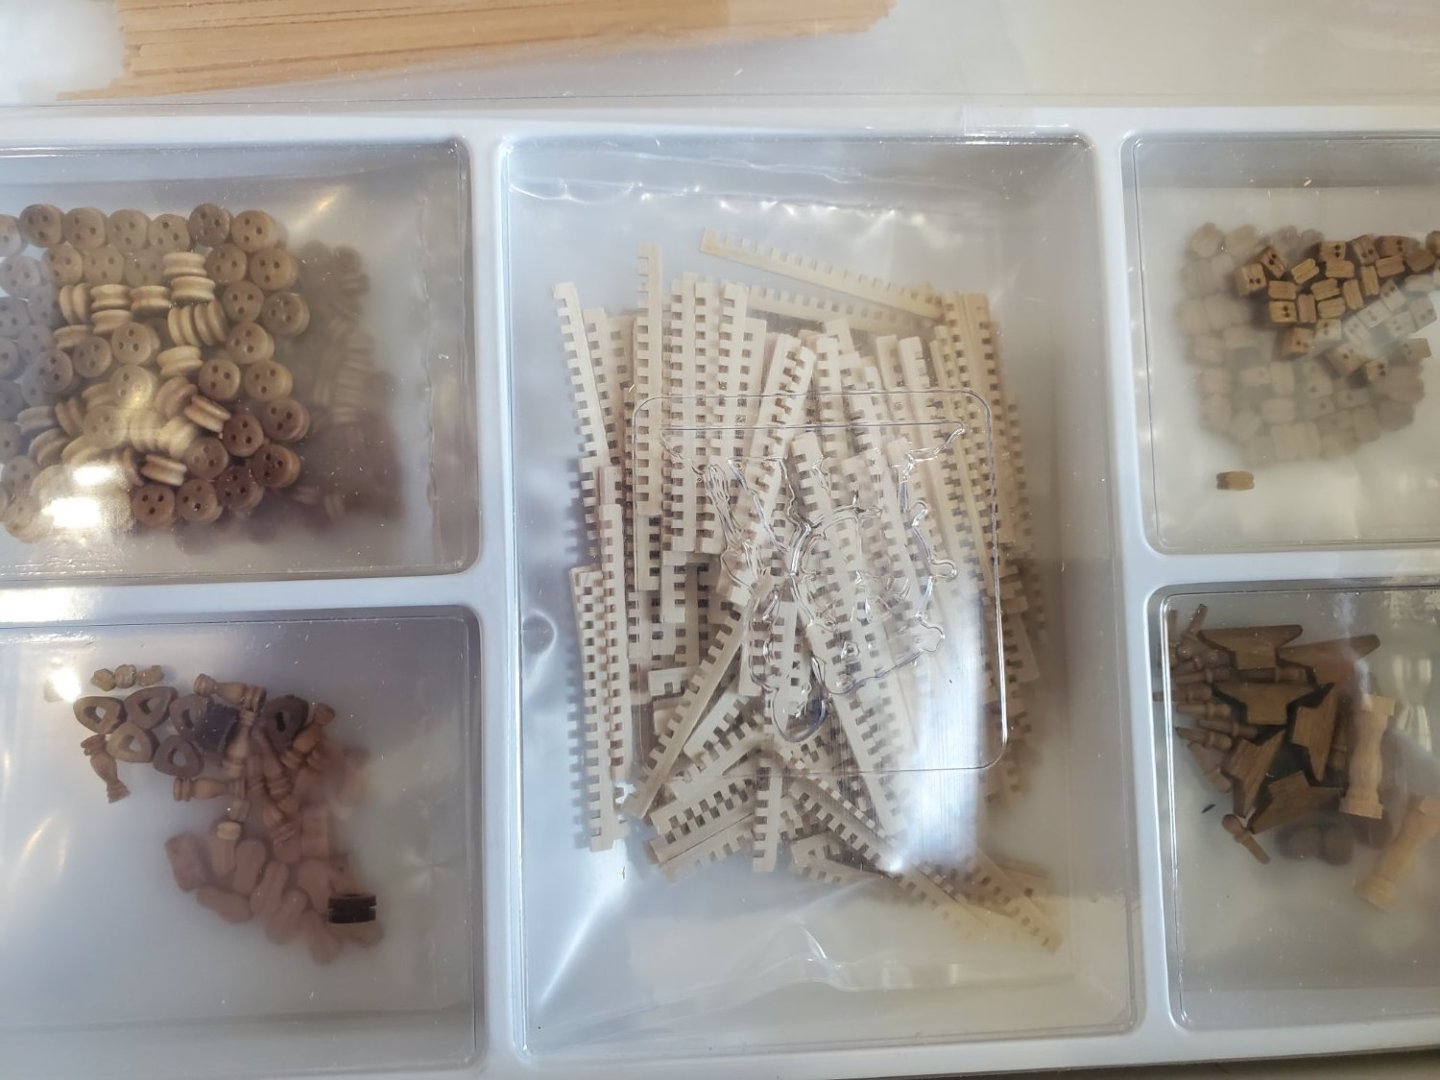
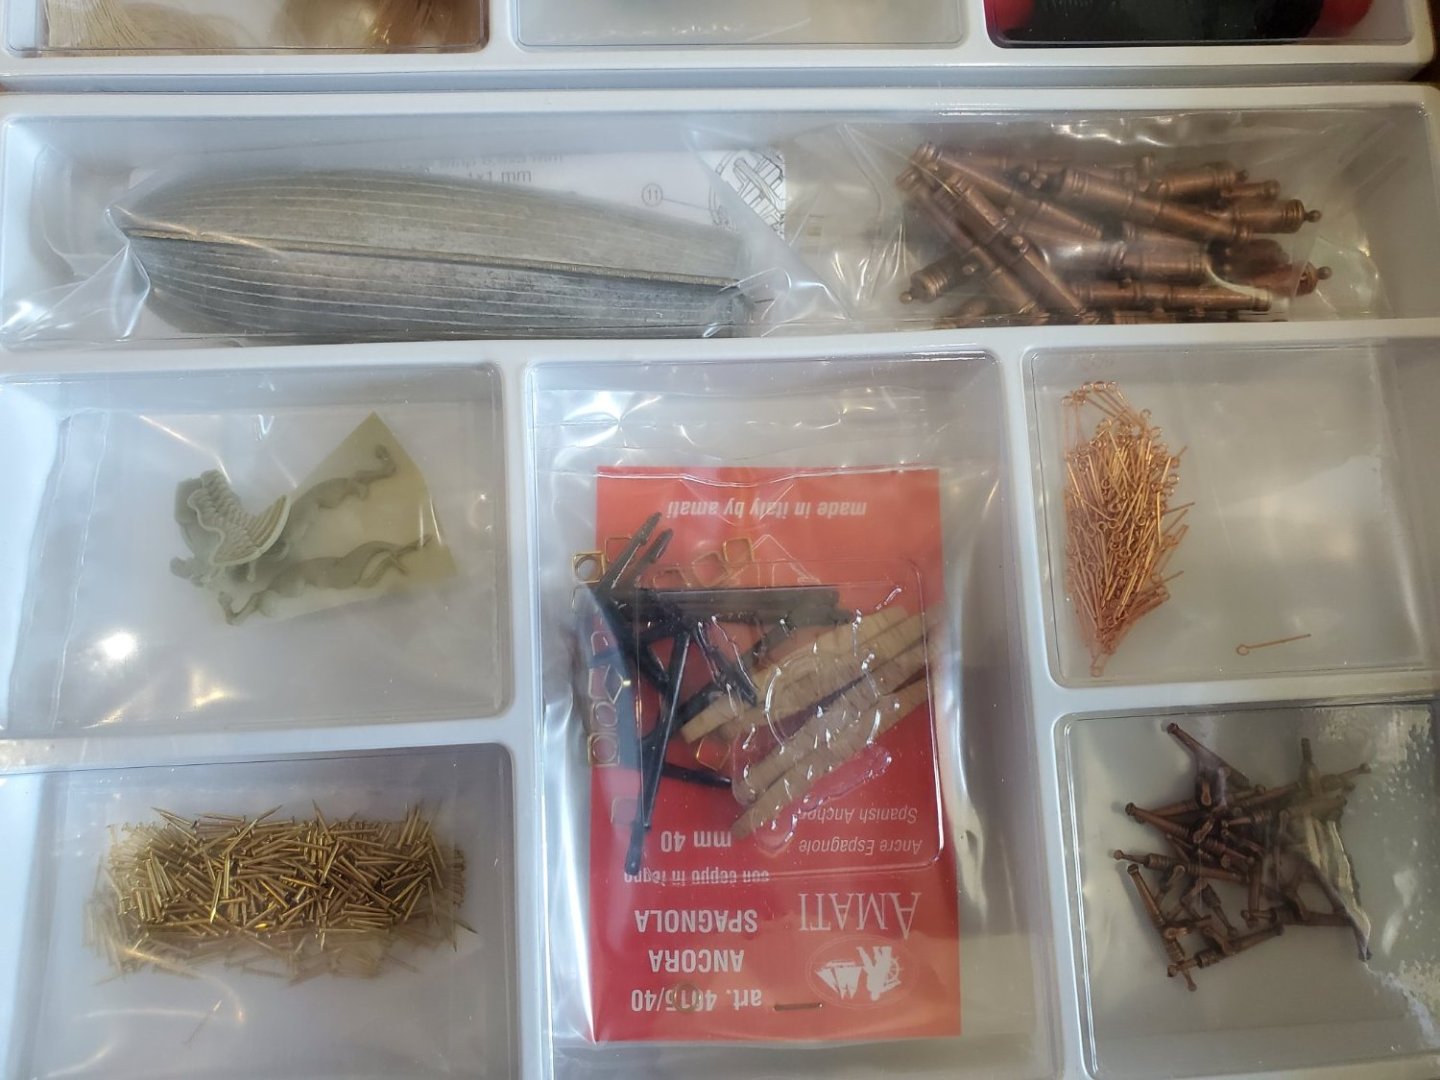
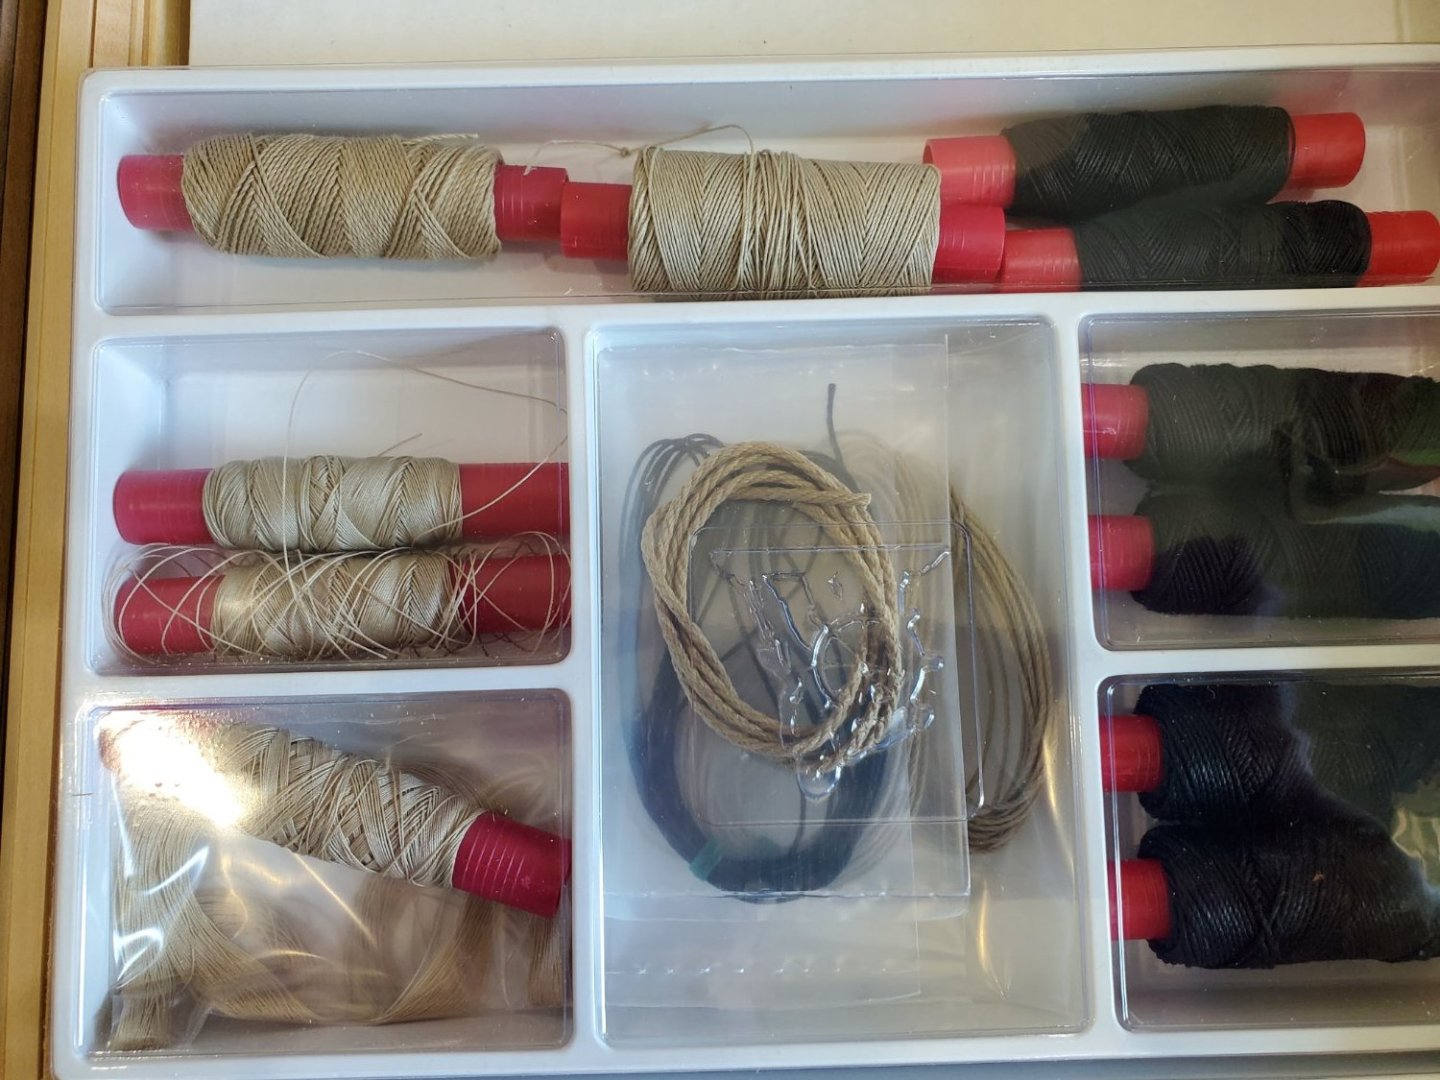
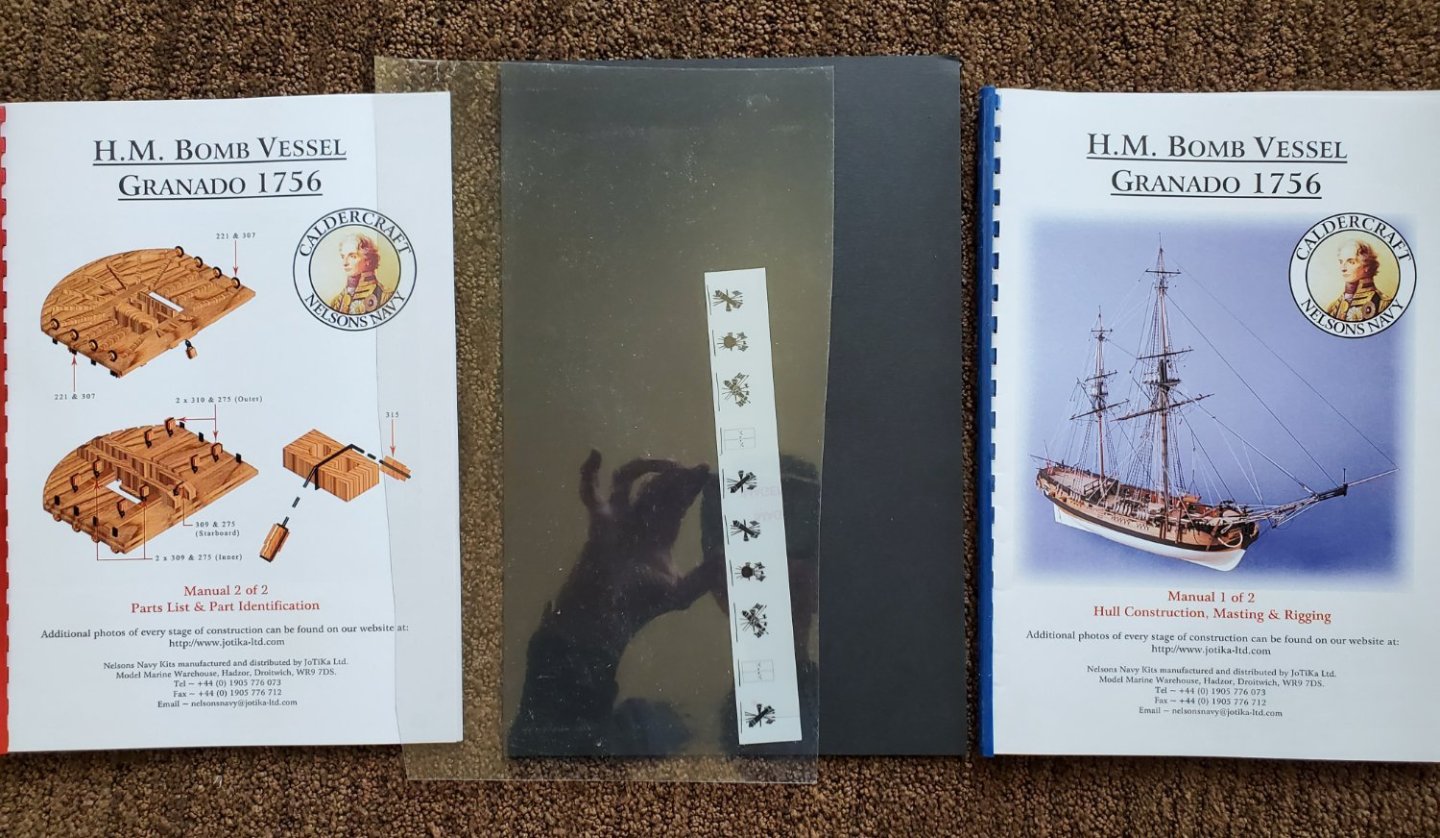
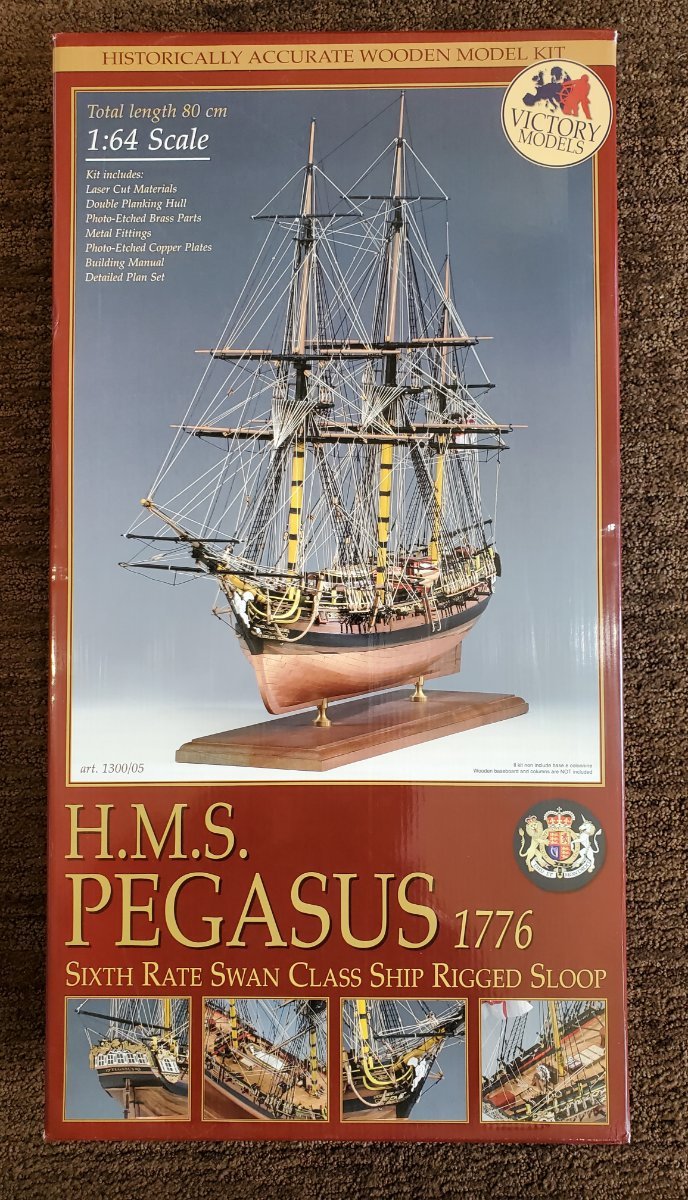
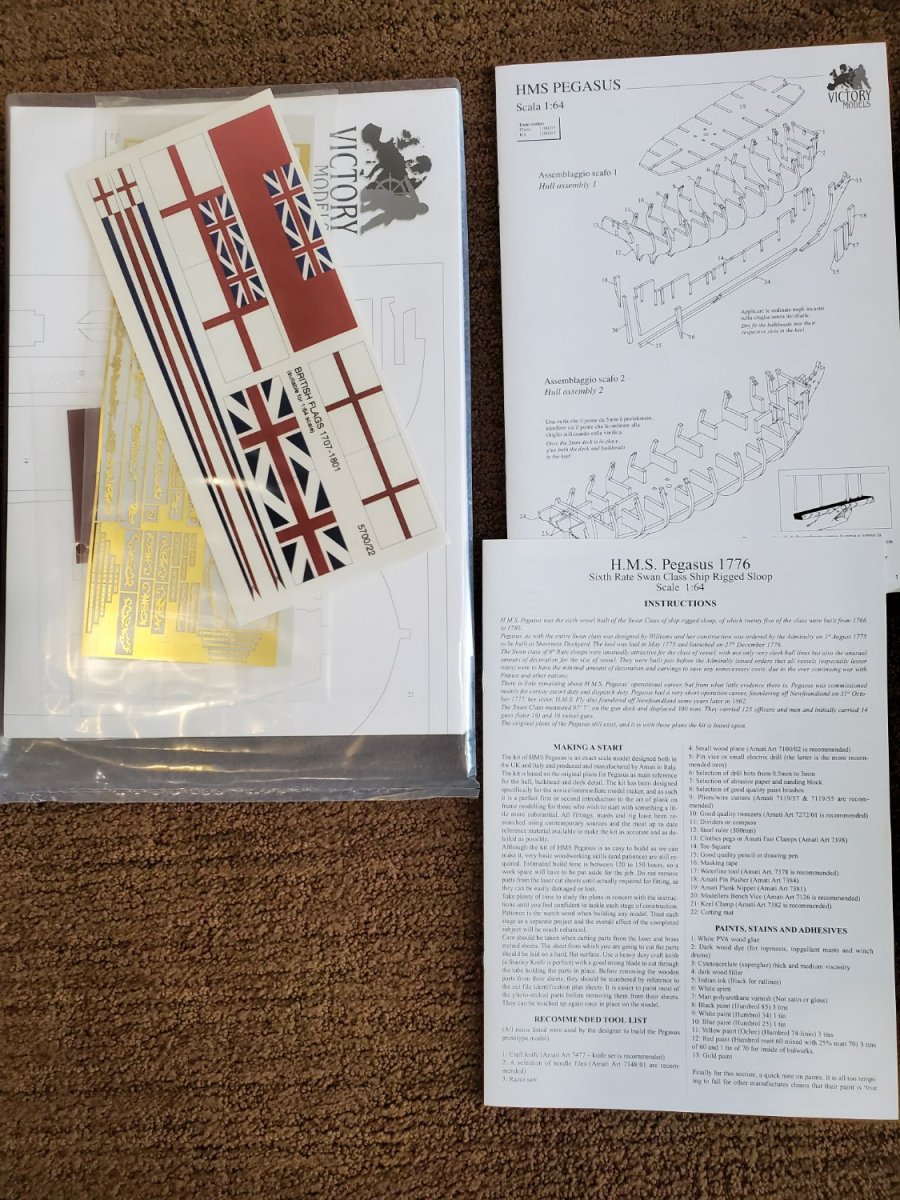
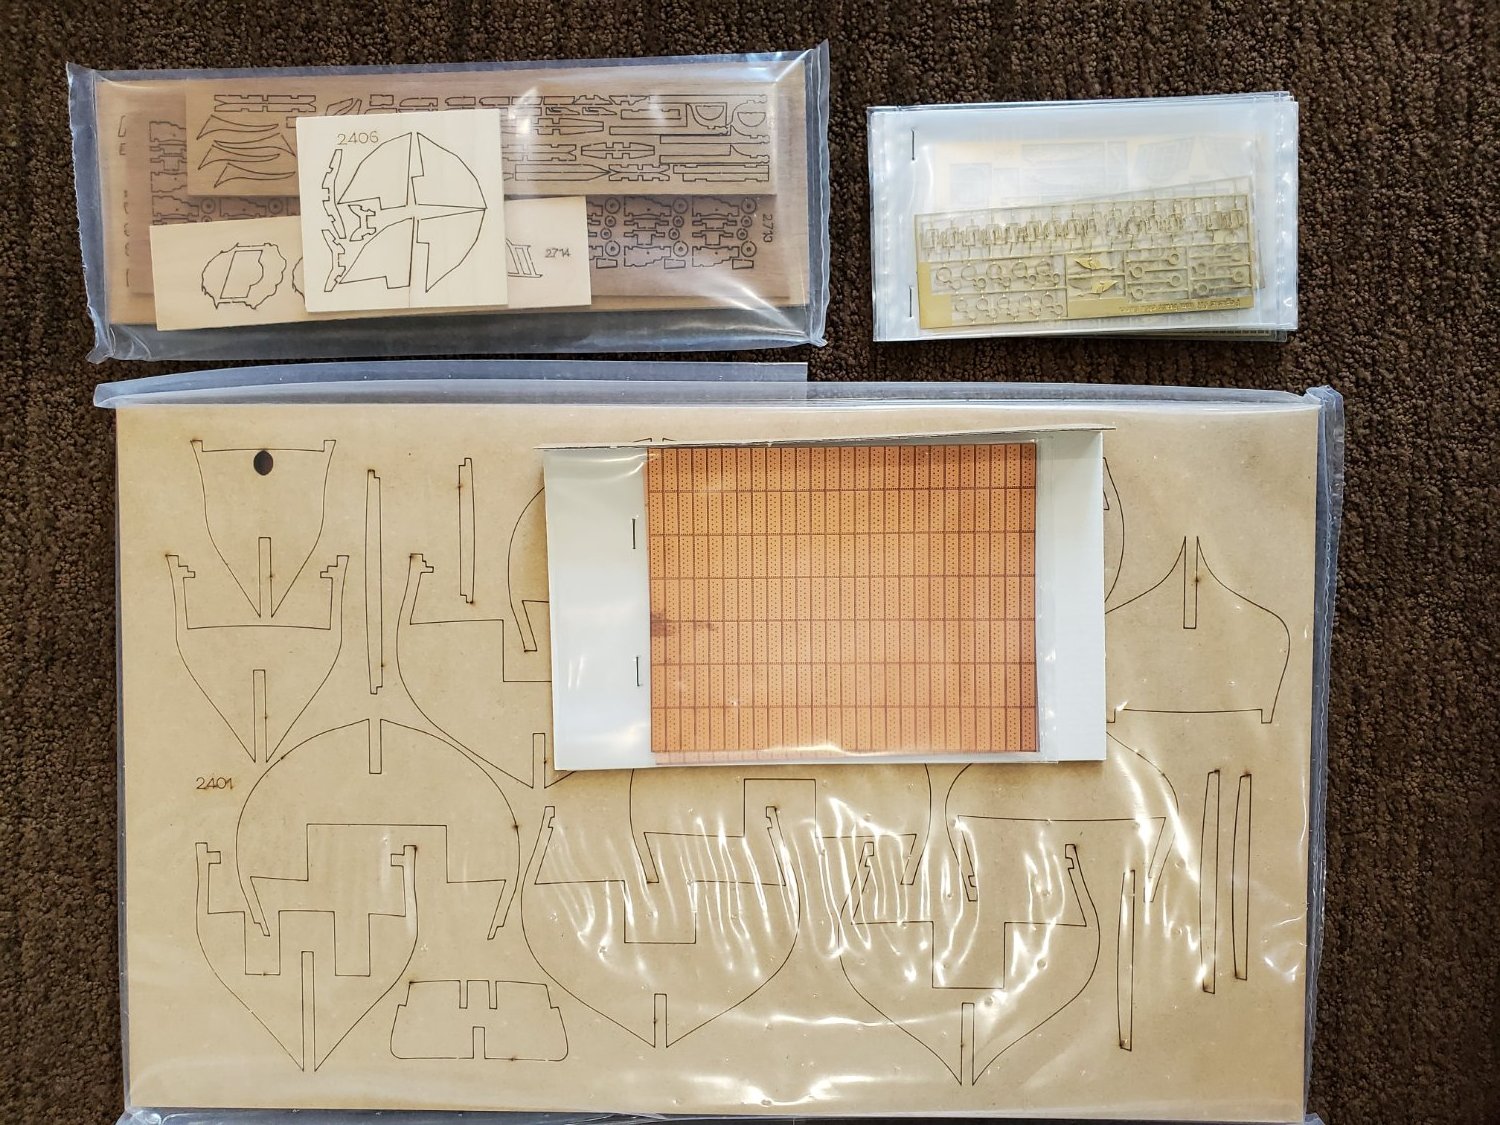
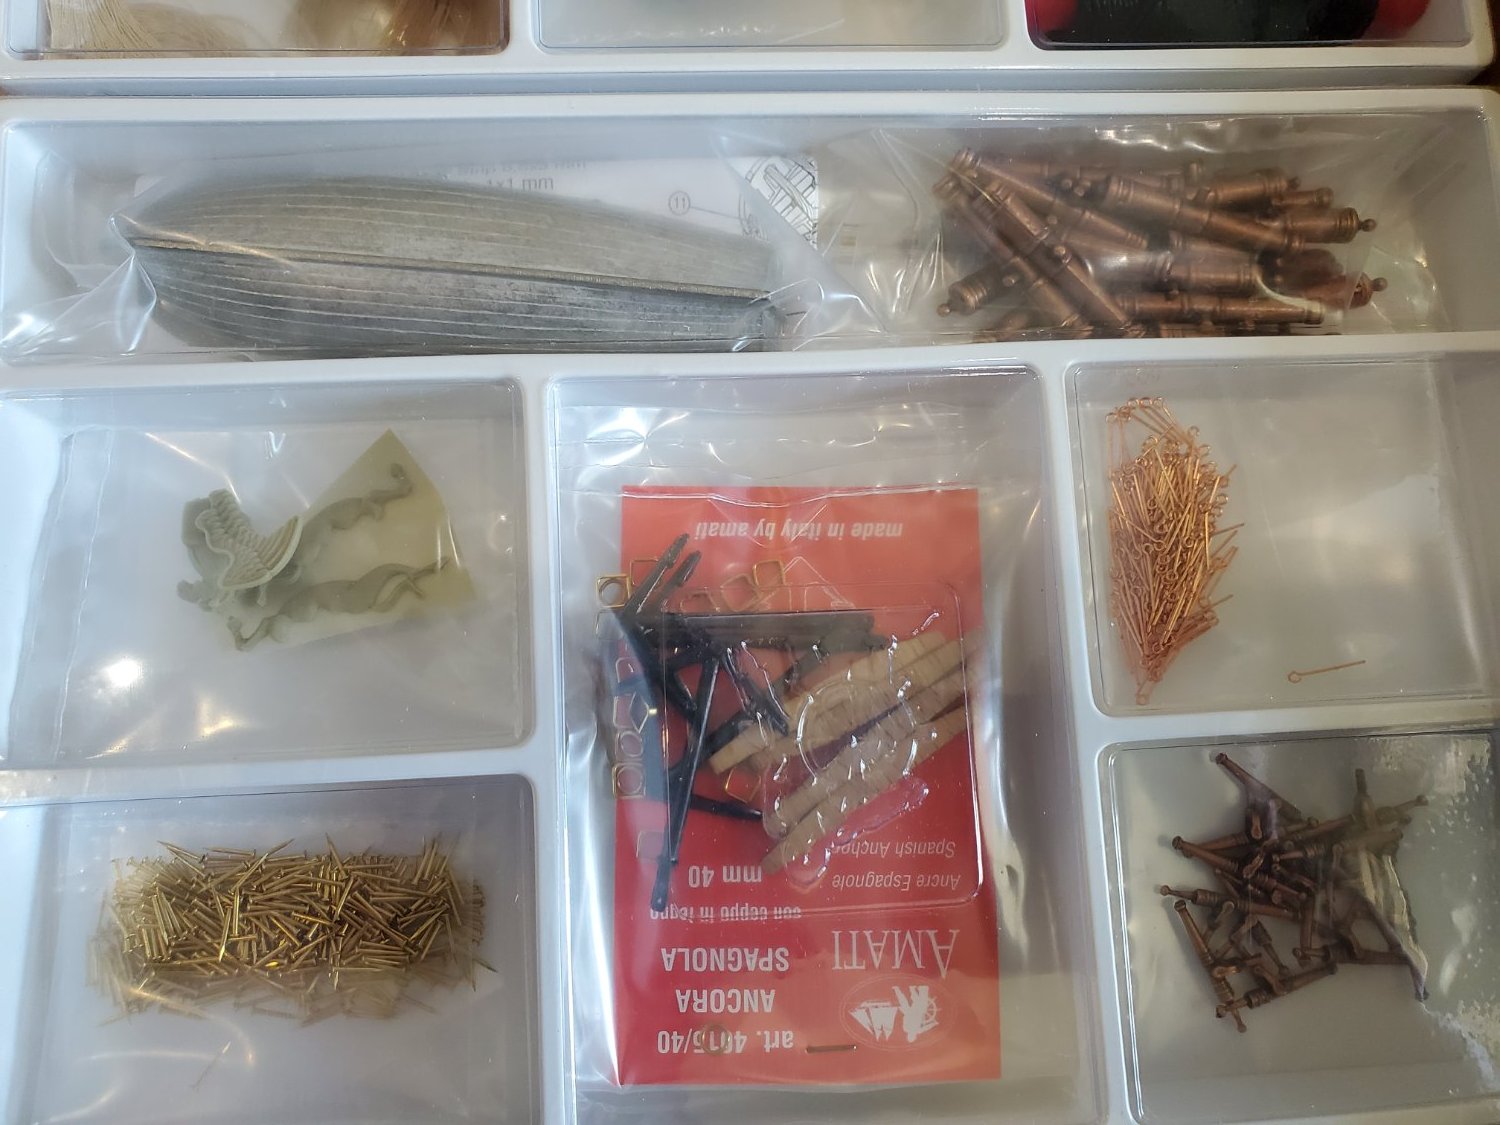
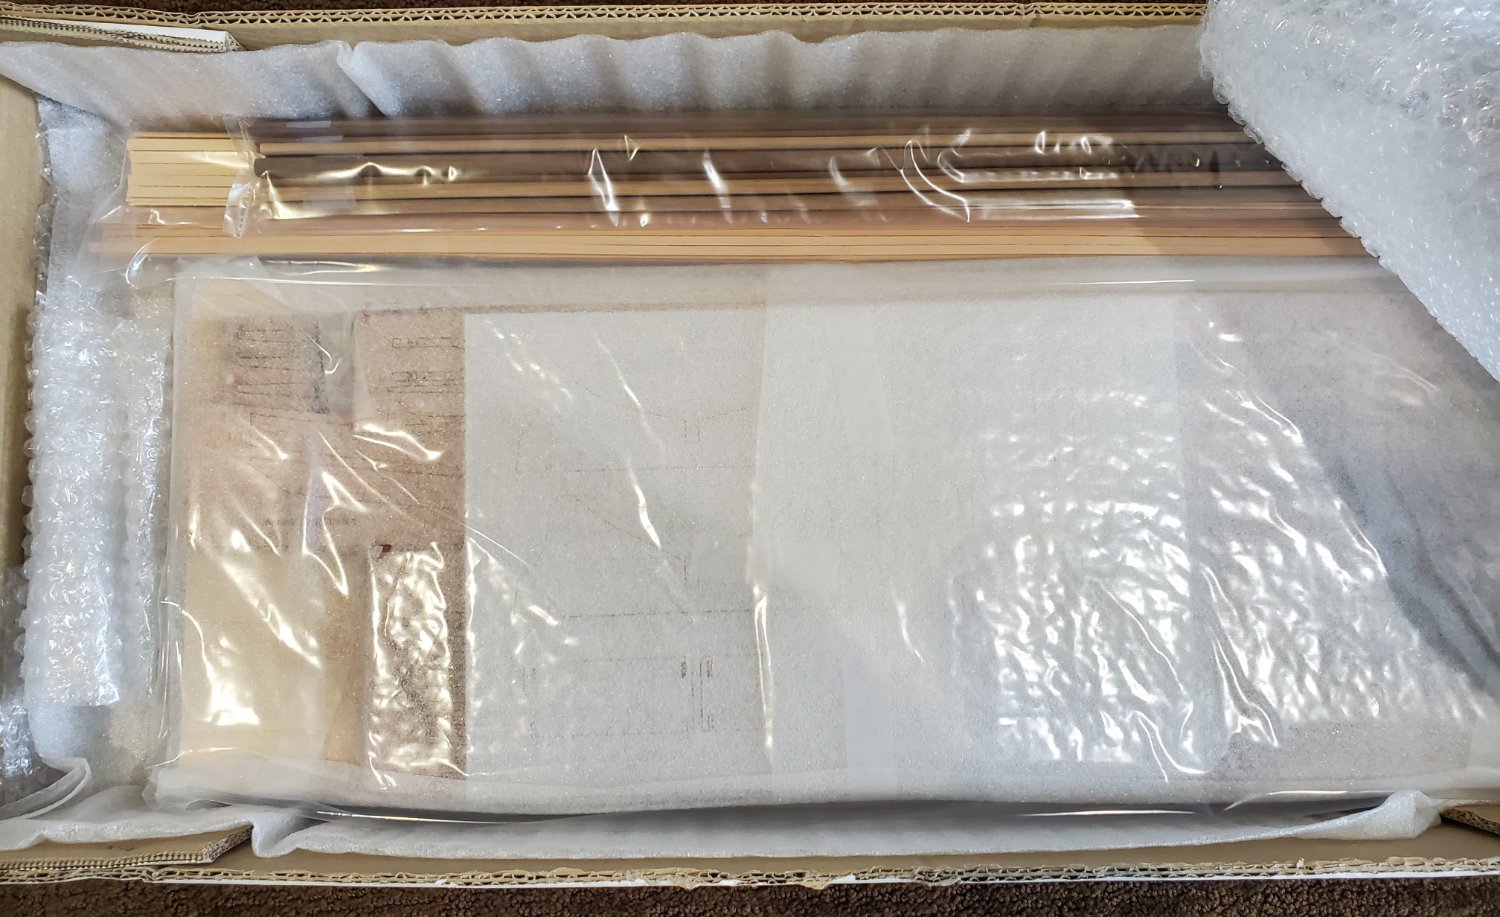
Hi, this is my last extra kit as I pare down my stash. HMS Pegasus (AM1300/05) Pegasus 1776 Swan Class sloop Scale: 1:64 Length: 80 cm I bought it new probably about 10 years ago. It is complete and unstarted. Price is $300 plus shipping. Box weighs about 11 pounds Please see photos! Dave


- 1 reply
-
- 3
-
-
I've lowered the price to $199 for the kit. And $20 for the book if desired. Dave
-
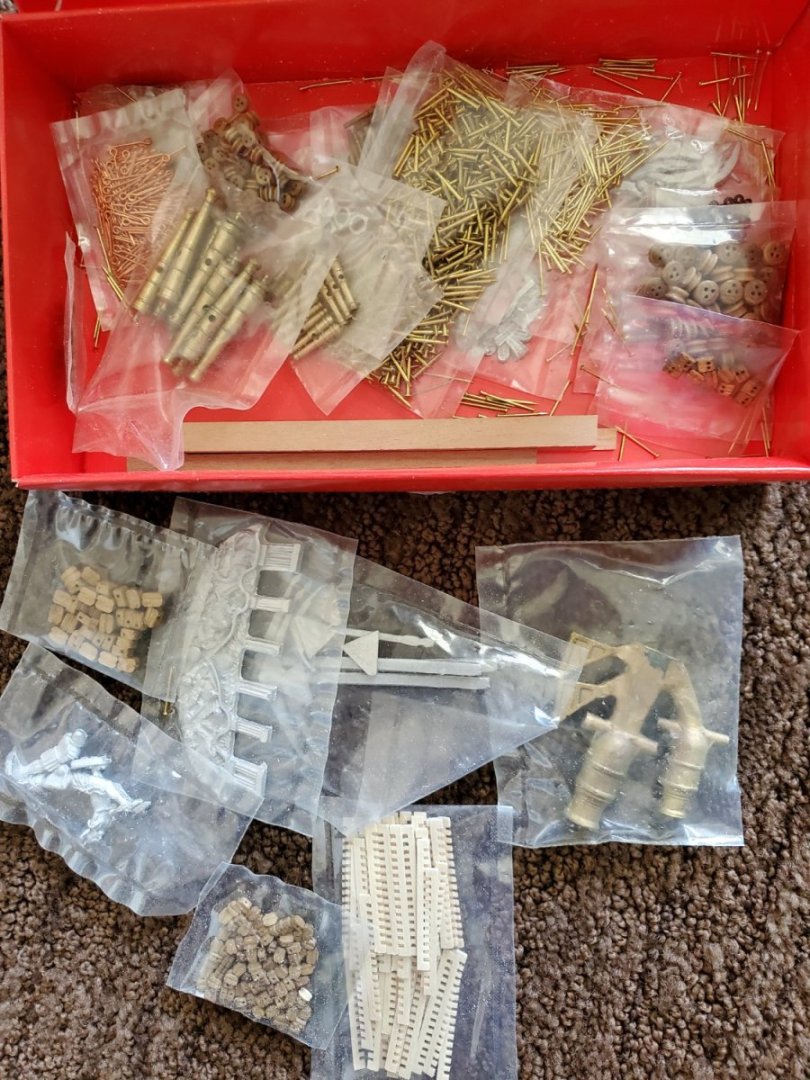
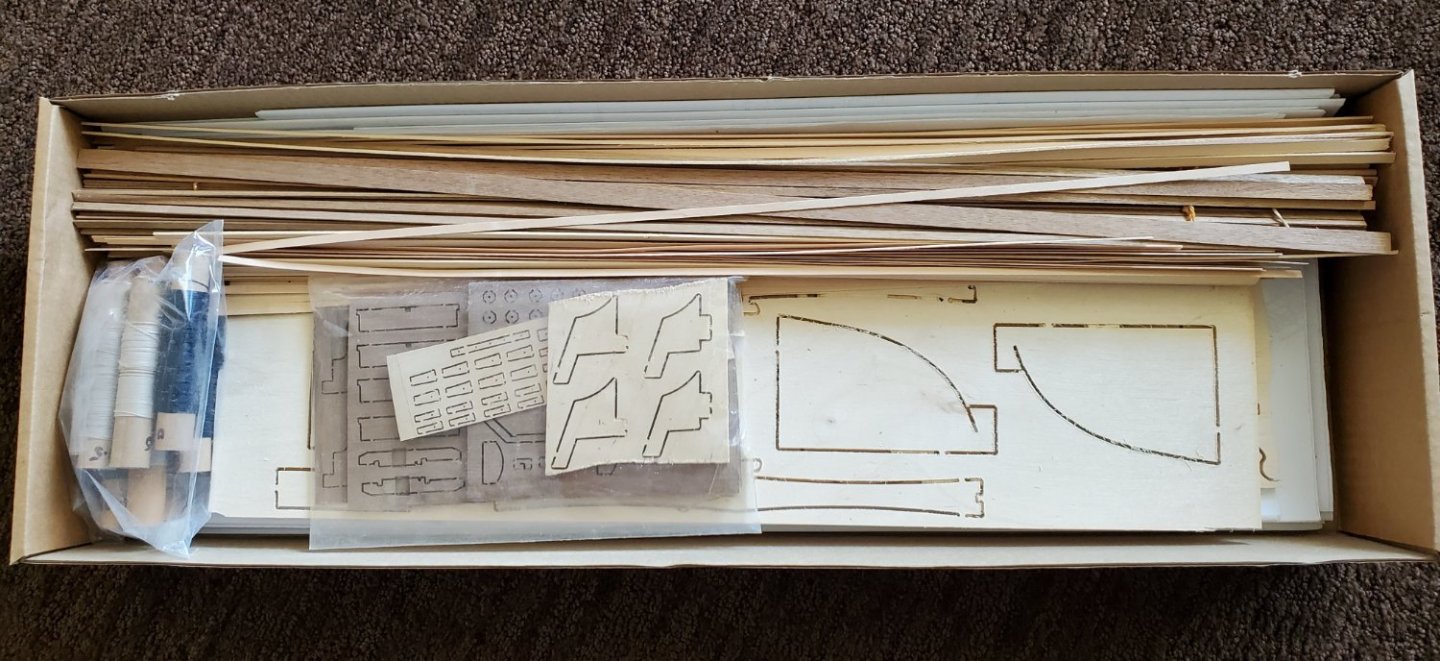
Hi all, This kit is in unstarted condition, contents in great condition as shown in the photos. It is an older kit that I purchased in 2006 but it's been stored in my closet the whole time. Price is $275 plus shipping. The book from the "Anatomy of the Ship" series is not included but I will sell it to the purchaser of the kit for an additional $25 plus shipping if desired. It won't fit in the same box as the kit, so would have to send it separately. I will also be listing a Caldercraft Pegasus kit soon.... Thanks for looking, Dave


-
Sold to brunnels, enjoy! Trying to figure out how to indicate this in the topic listing....
-
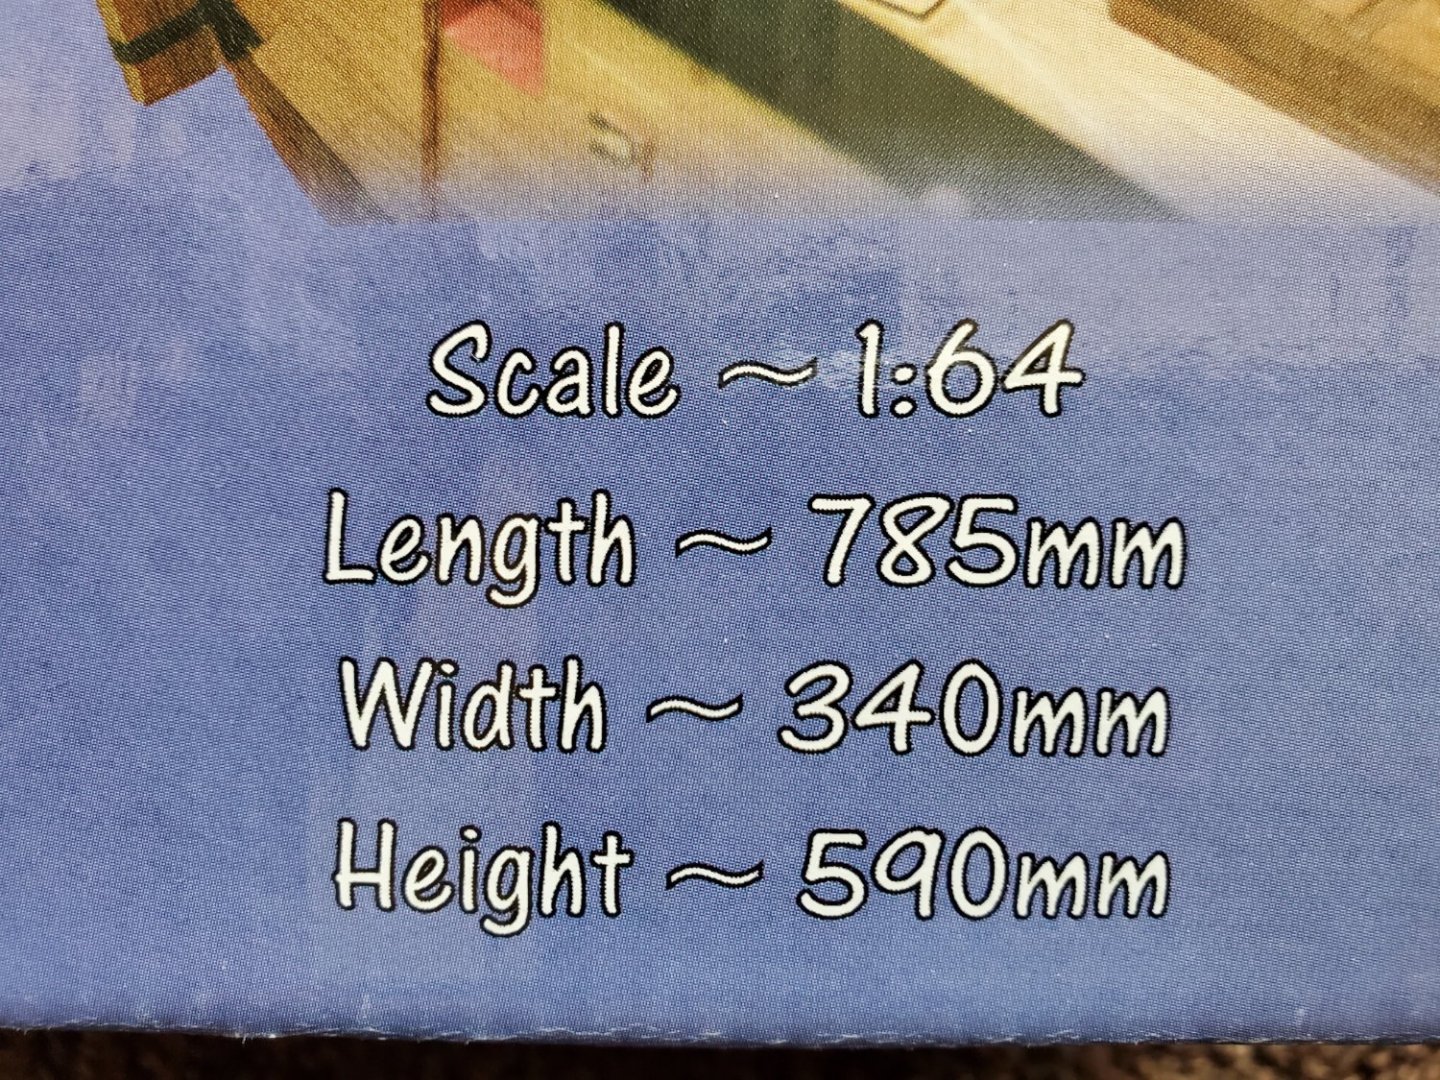
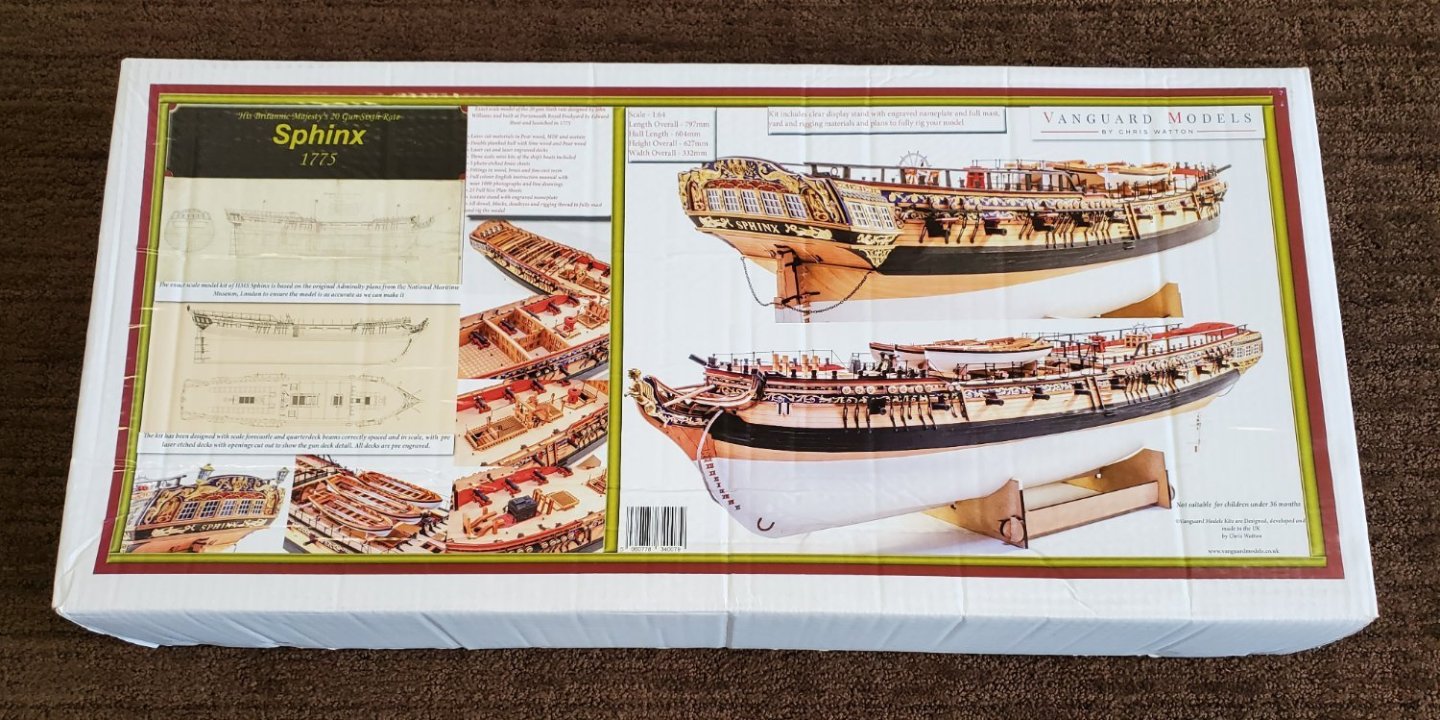
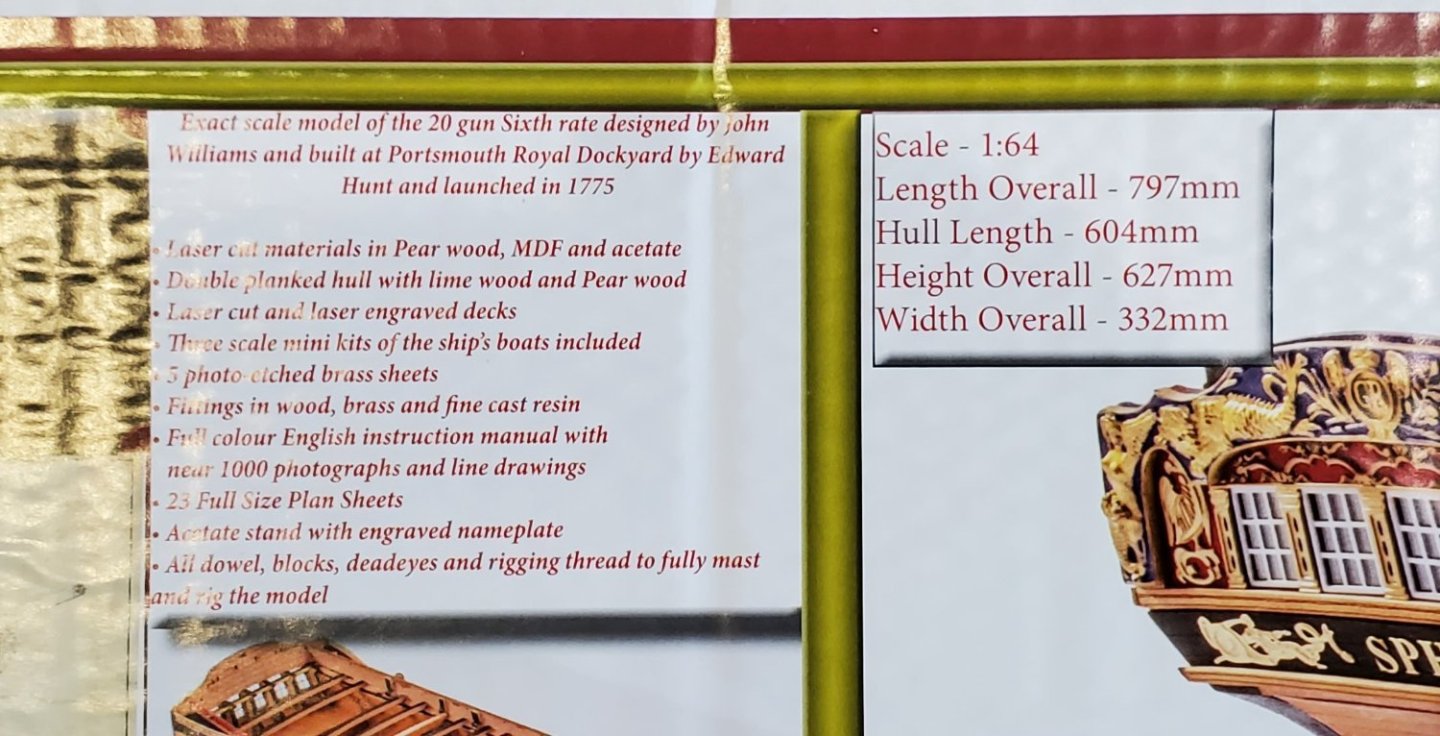
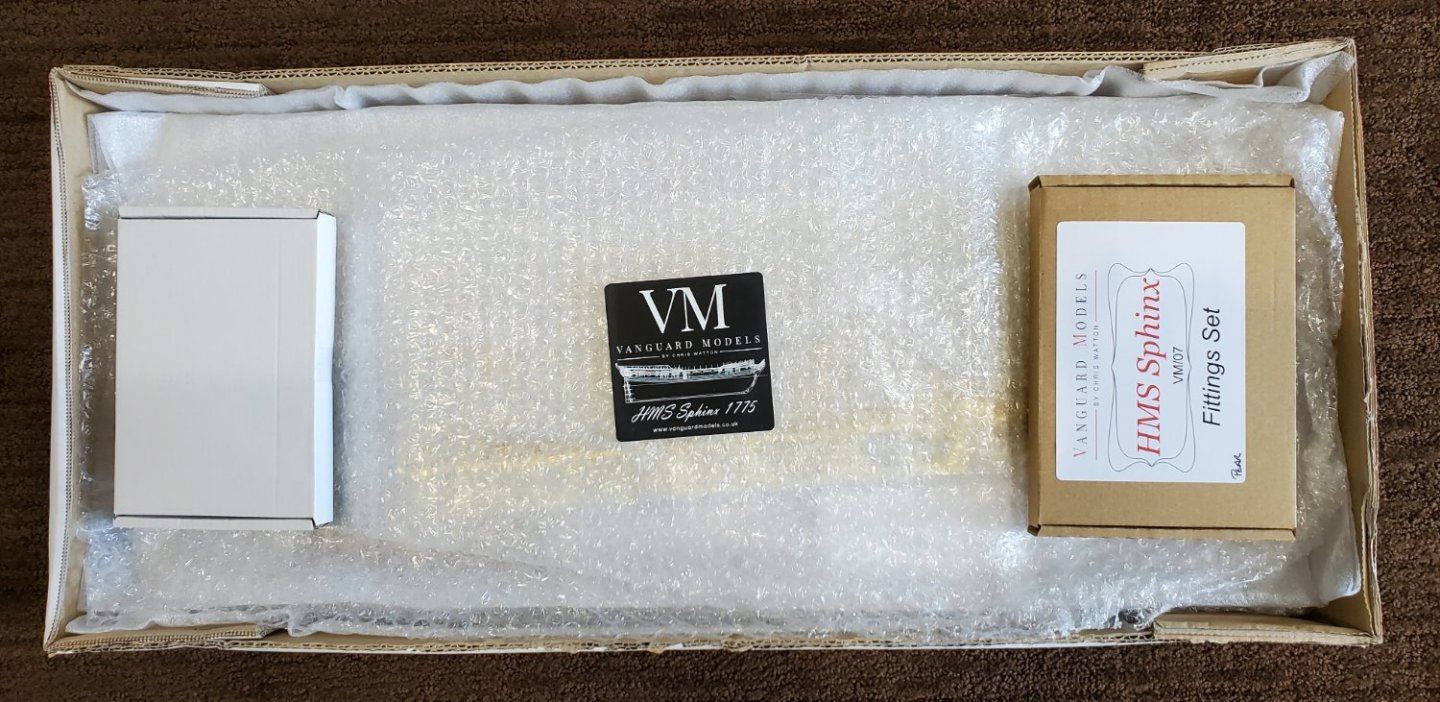
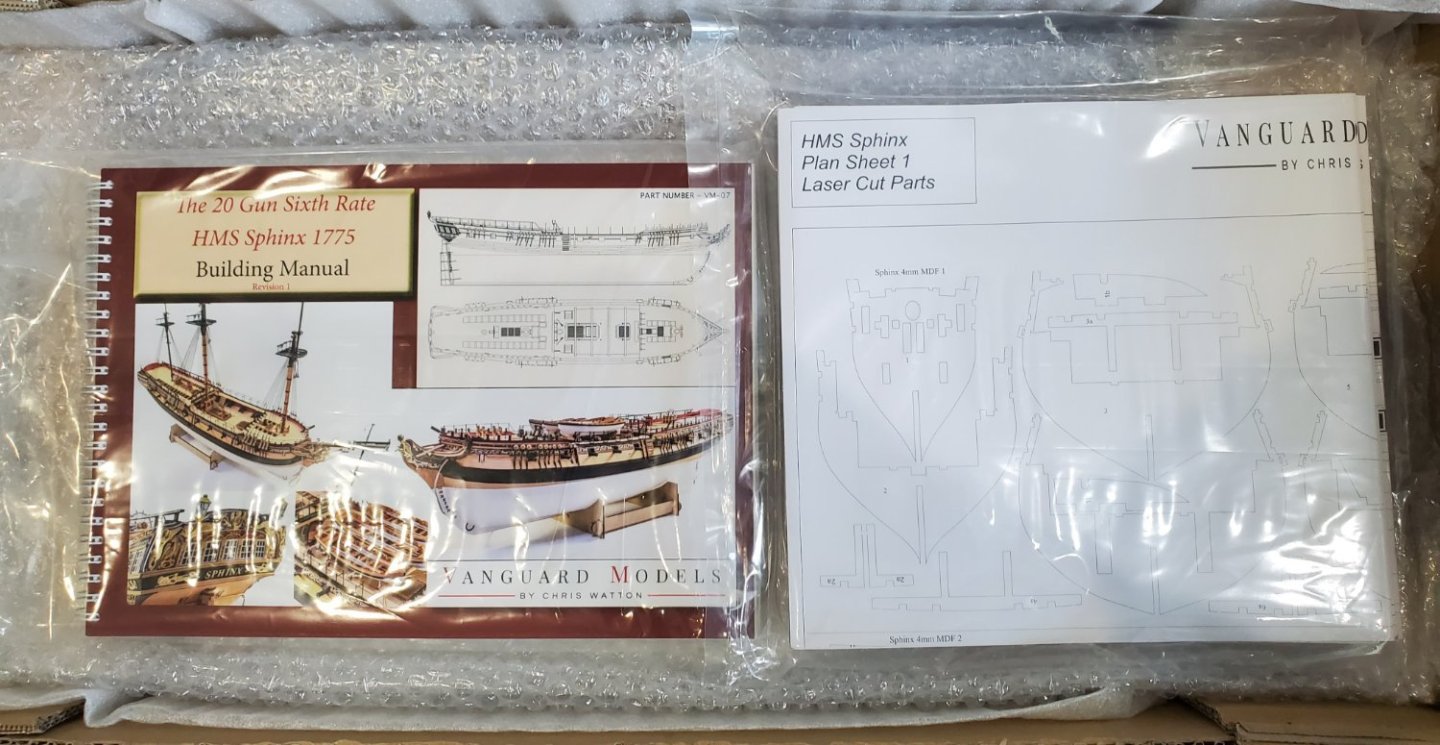
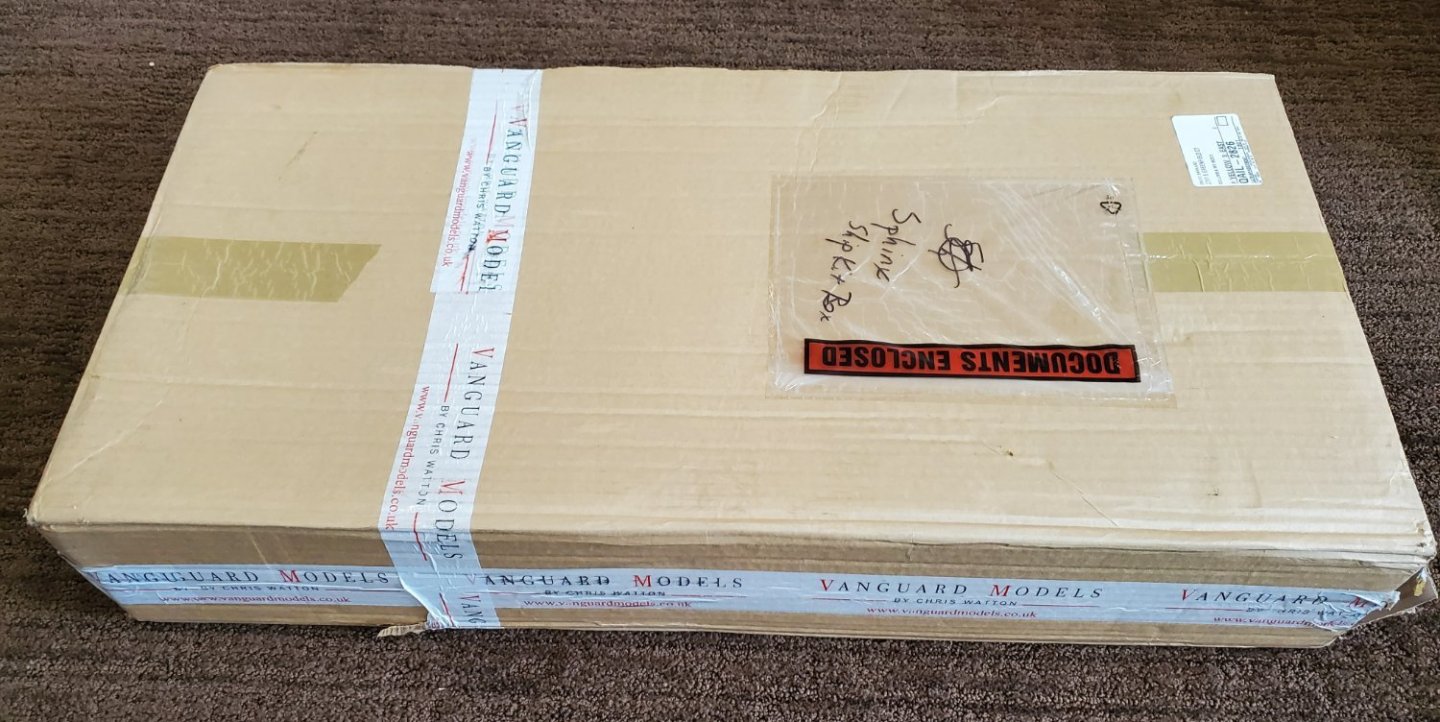
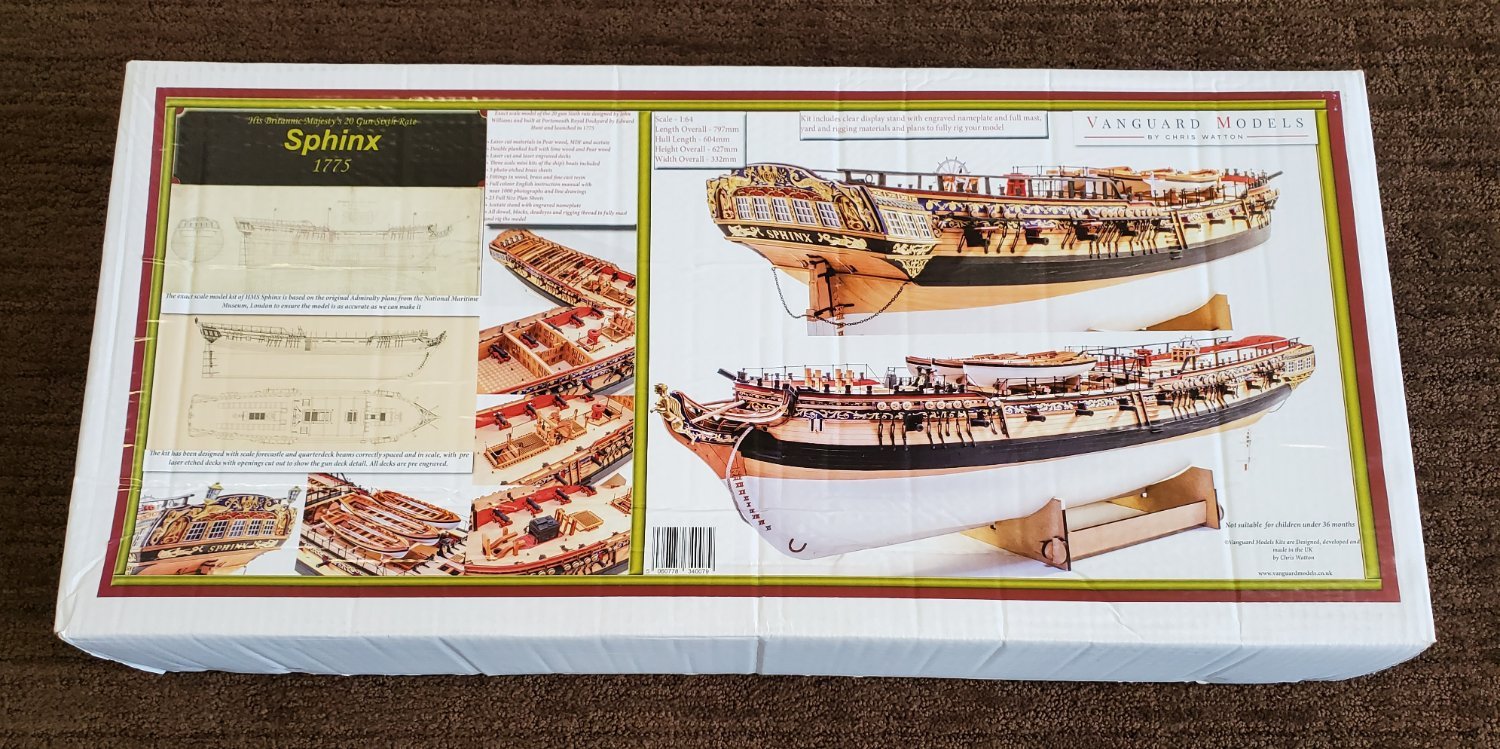
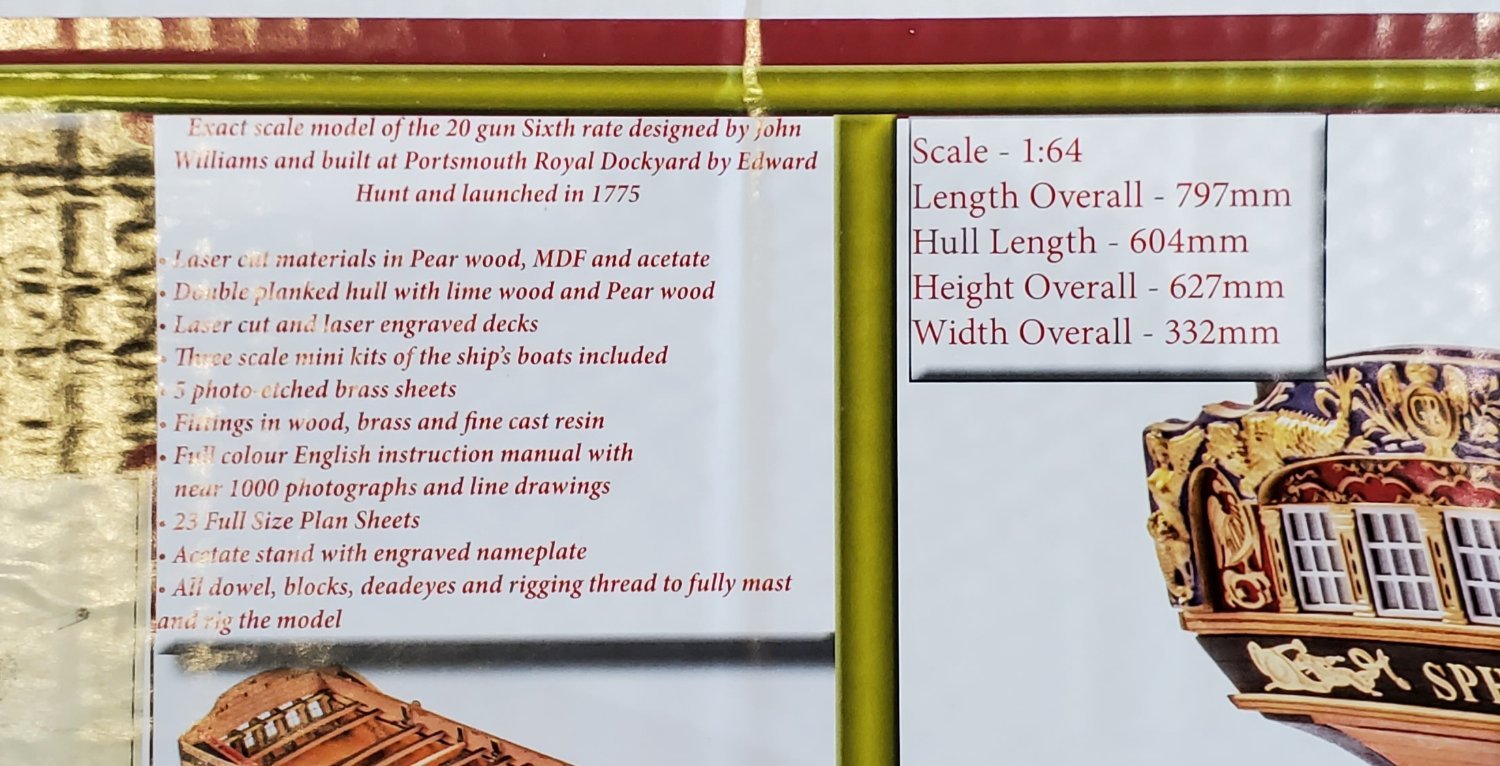
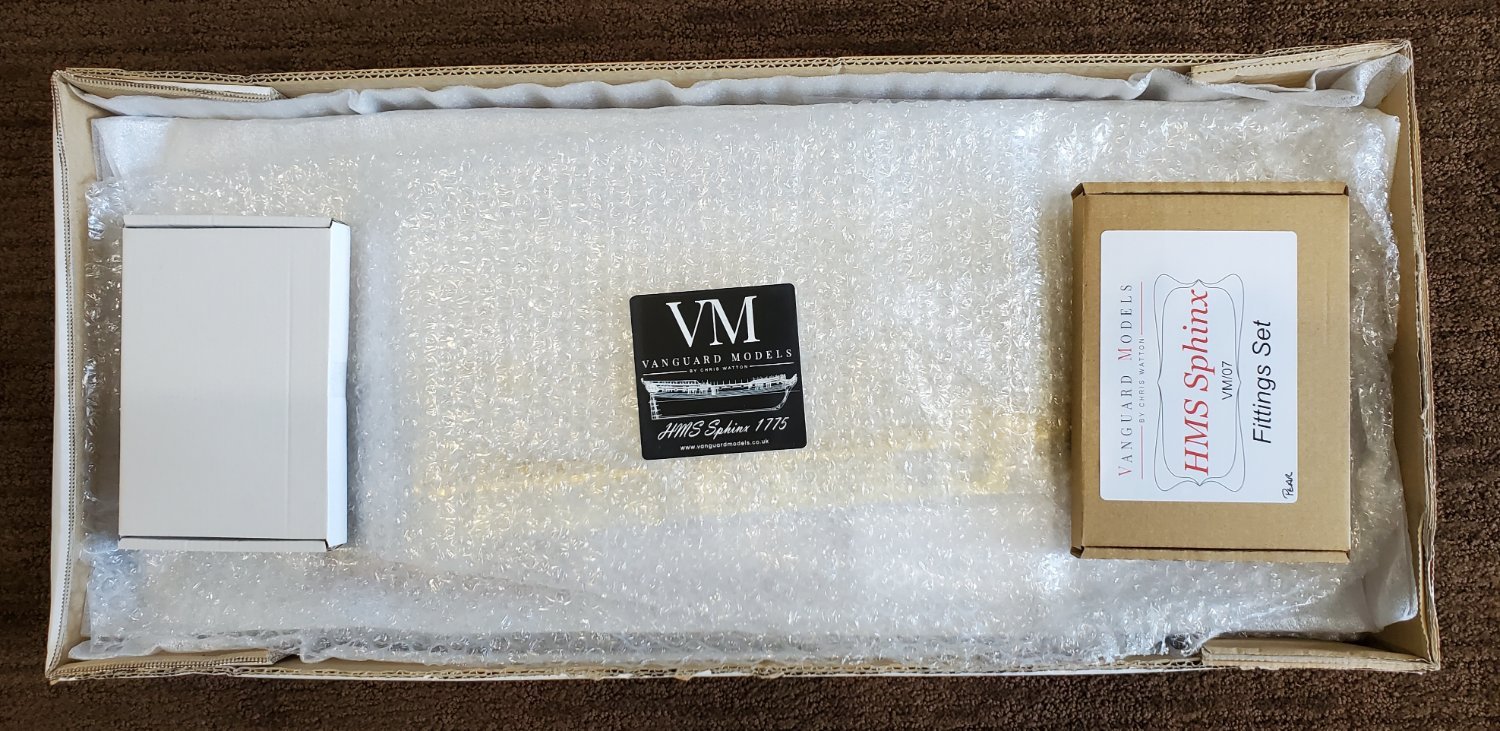
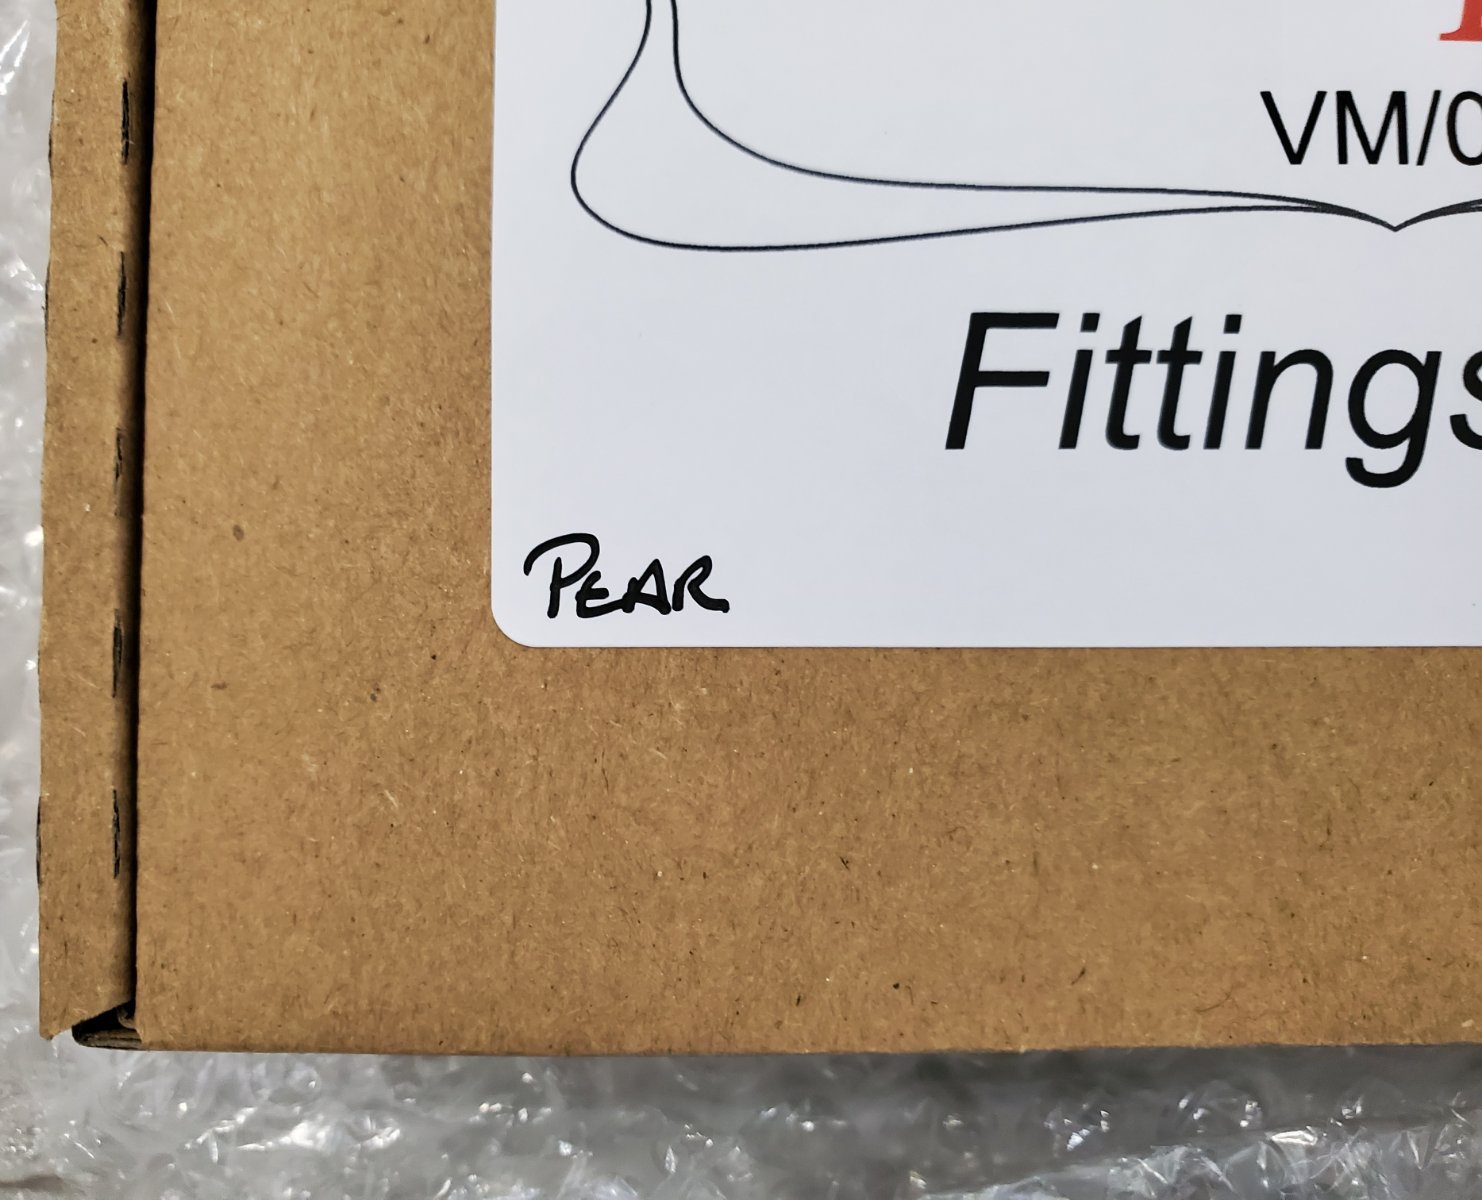
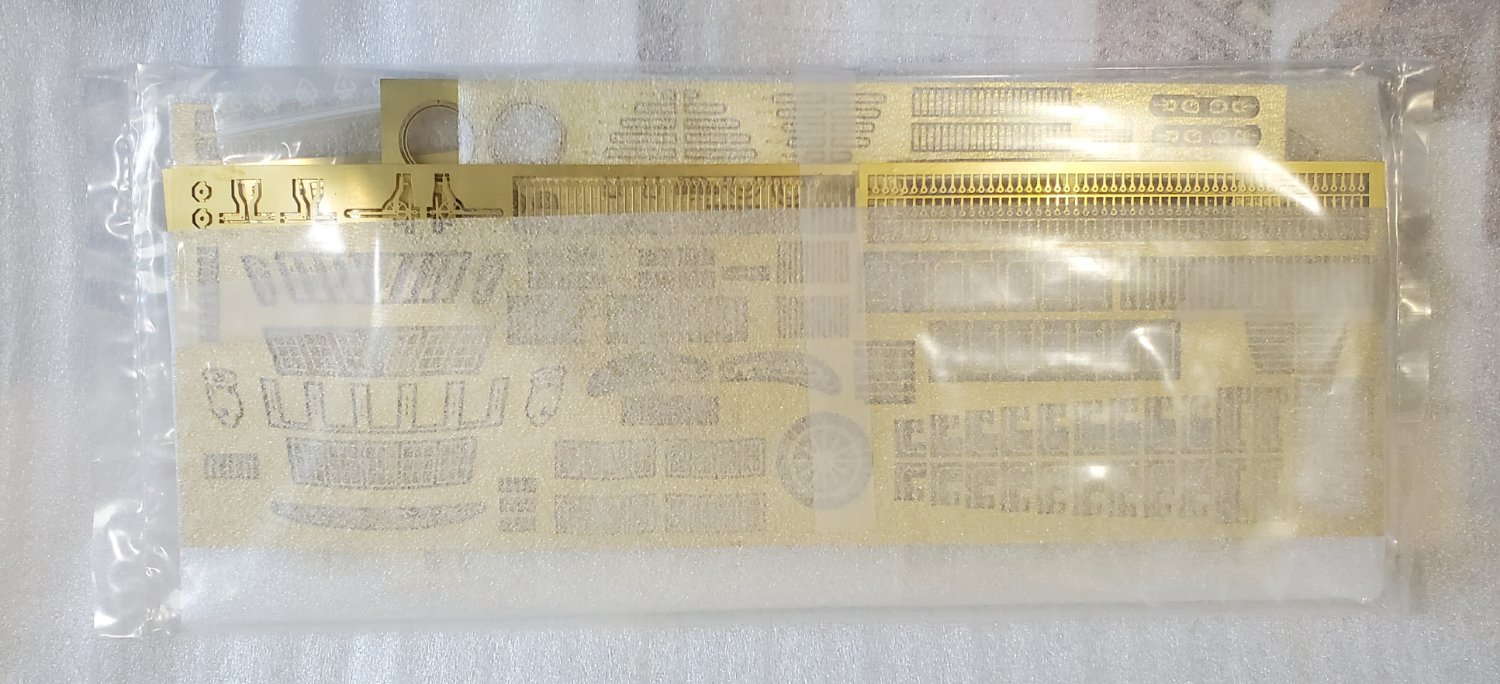
Hello all, I am selling this Vanguard Models kit of the HMS Sphinx which is in completely like new condition. 1:64 scale, overall length 797 mm (31"), advanced skill level. I have not opened up any of the sealed packages inside. Everything is exactly as originally received. It includes the optional pear fittings package. I am pricing it at a 25% discount from the current price on the Vanguard website for the kit and pear fittings set. That would be $750 at the current exchange rate, plus shipping to USA addresses. Thanks for looking! Dave


-
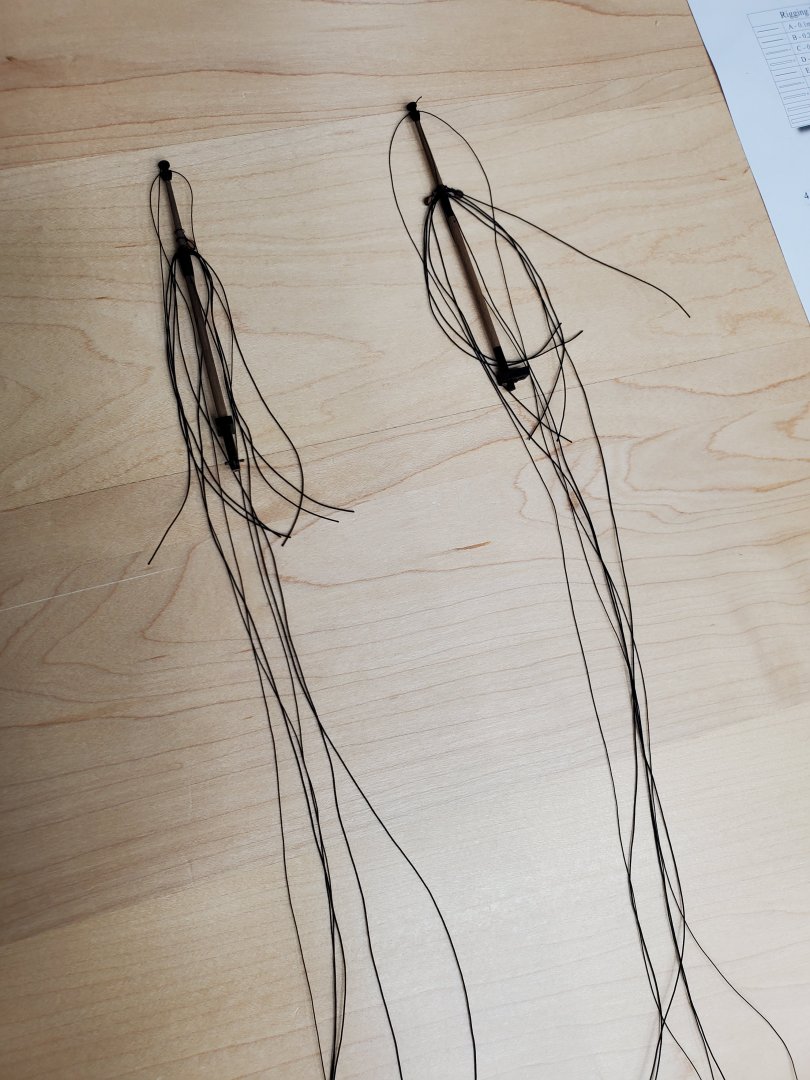
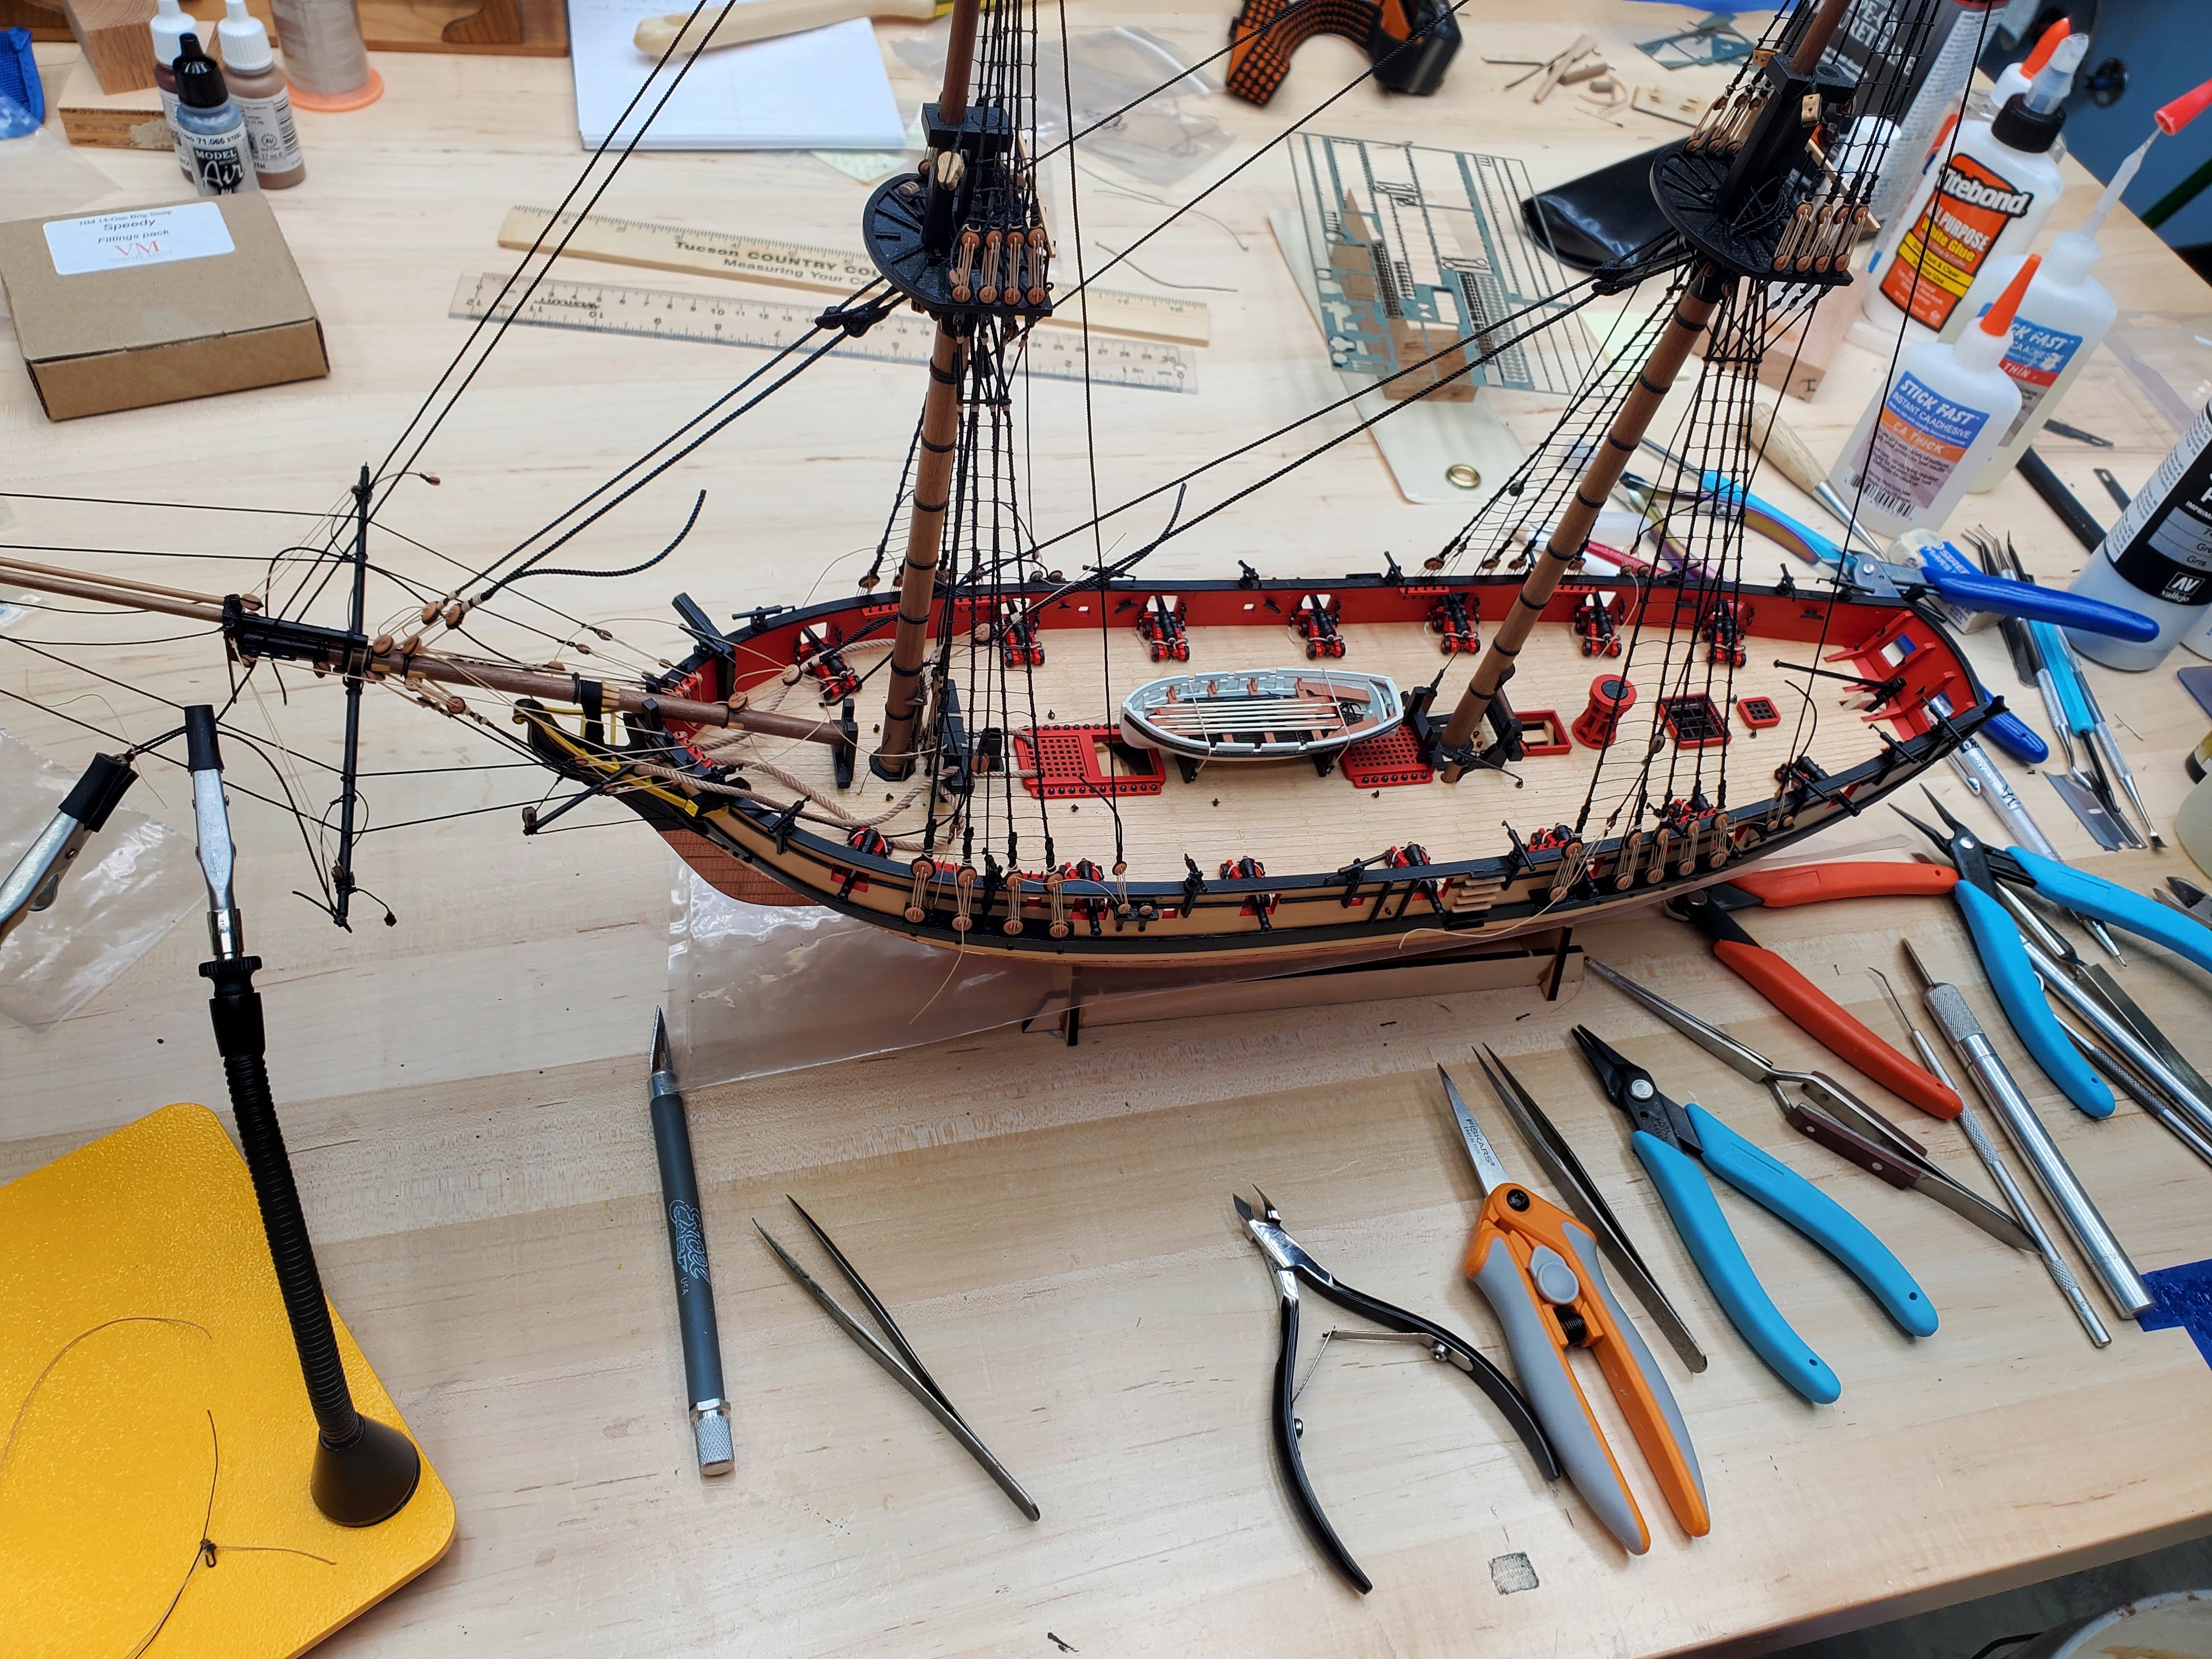
Hi everyone, Looks like it's been over 4 months since my last update....crazy how time goes by I've been making progress though, sometimes very slowly, with the rigging. The ratlines were definitely a trial and error experience for me. I'm still following along the kit instructions/plans supplemented mainly by Delf (Derek)'s excellent build log to guide me. Here are a few photos of where things are now with my Speedy. Please excuse all the lines left hanging but I want to make sure I haven't done something wrong before I make the final trimming of them and as long as I can still get to them easily I figure just leave them for now. Thanks for following along!


- 53 replies
-
- 14
-
-
- Speedy
- Vanguard Models
- (and 1 more)
-
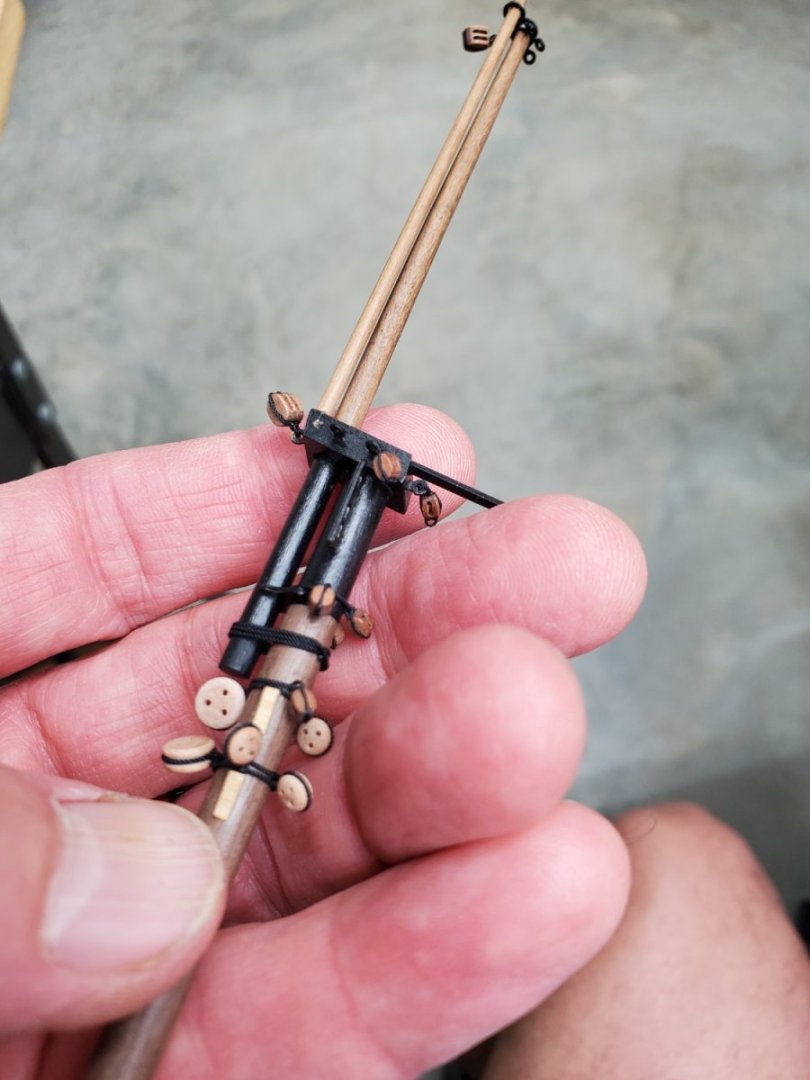
Then after completing the first seizing above the deadeye on all of them, I used the little spacer device to recheck all of them before doing the rest of the seizings.

- 53 replies
-
- 5
-
-
- Speedy
- Vanguard Models
- (and 1 more)
-
Here's how I used it to determine the length and where the seizing above the deadeye should go. I used another trick (I think from Delf) and threaded a little white thread through the bottom of this so that I could work on these off the ship after doing all of them. Mast is tight in the deck so I know the position is accurate but I'm able to remove it.


- 53 replies
-
- 5
-
-
- Speedy
- Vanguard Models
- (and 1 more)
-
Thank you whitejamest! Working on the shrouds and made this little spacing device similar to what I've seen on other logs. CA glue practically welds this stuff together, it's extremely strong if you use a lot of the glue.

.thumb.jpg.2af961de34b2f8da35eb779deb4c7068.jpg)
- 53 replies
-
- 2
-
-
- Speedy
- Vanguard Models
- (and 1 more)
-
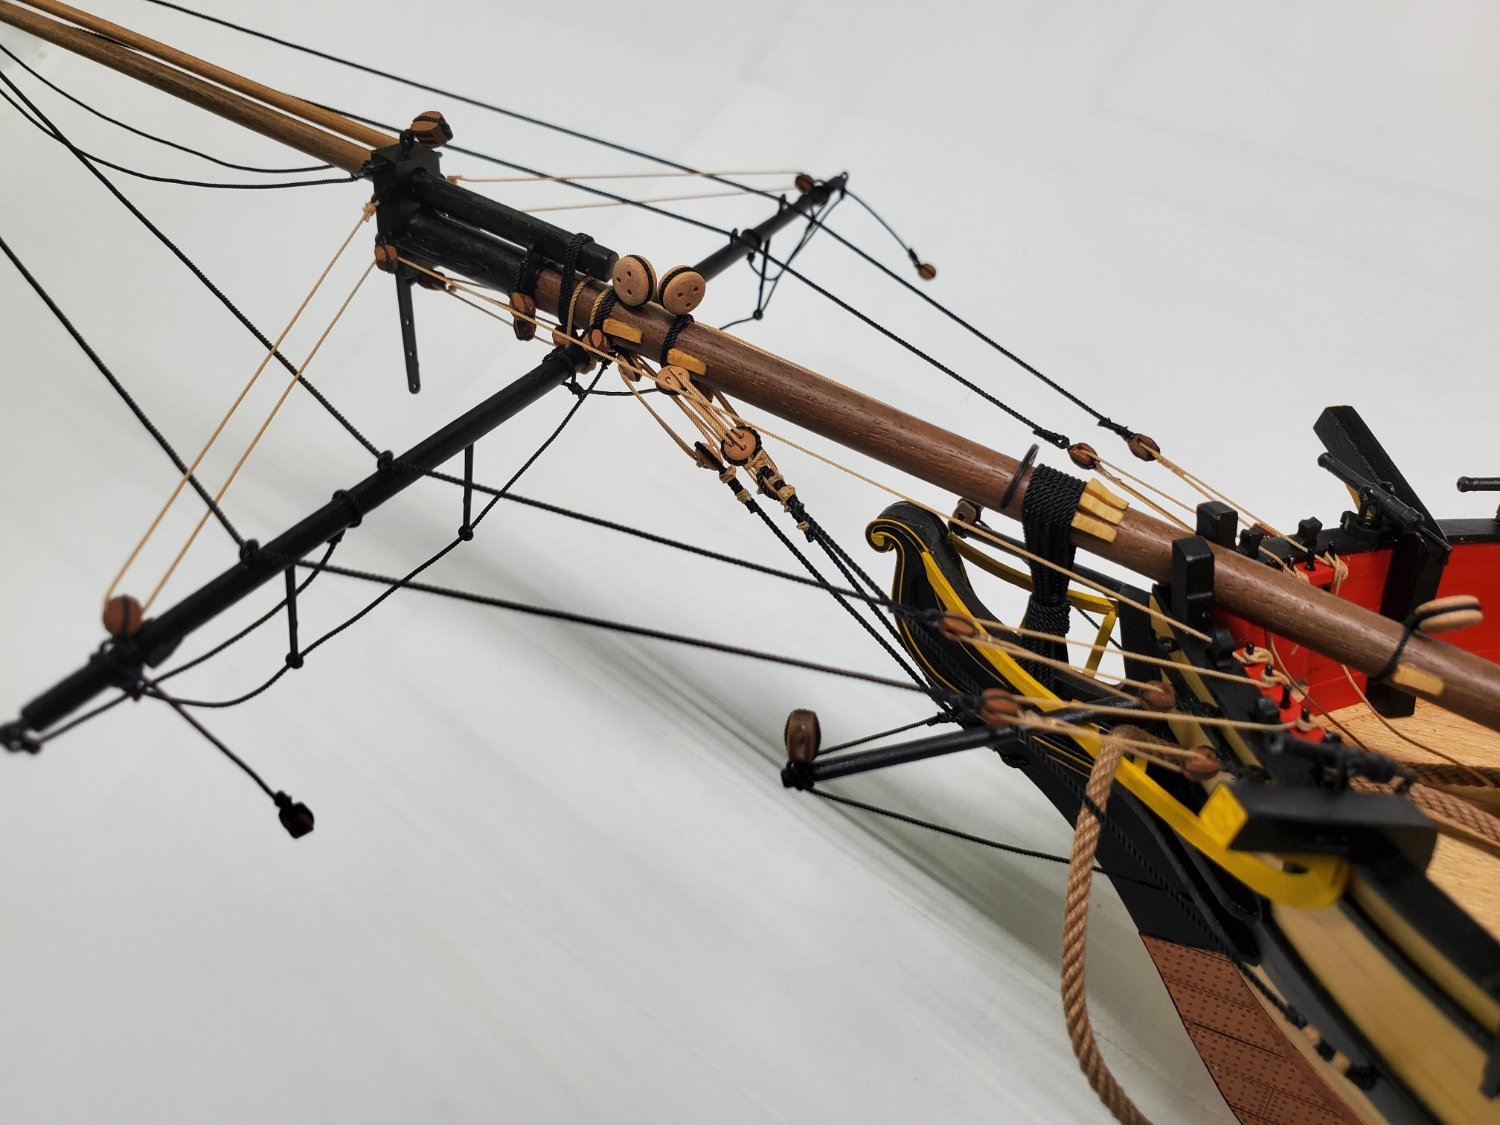
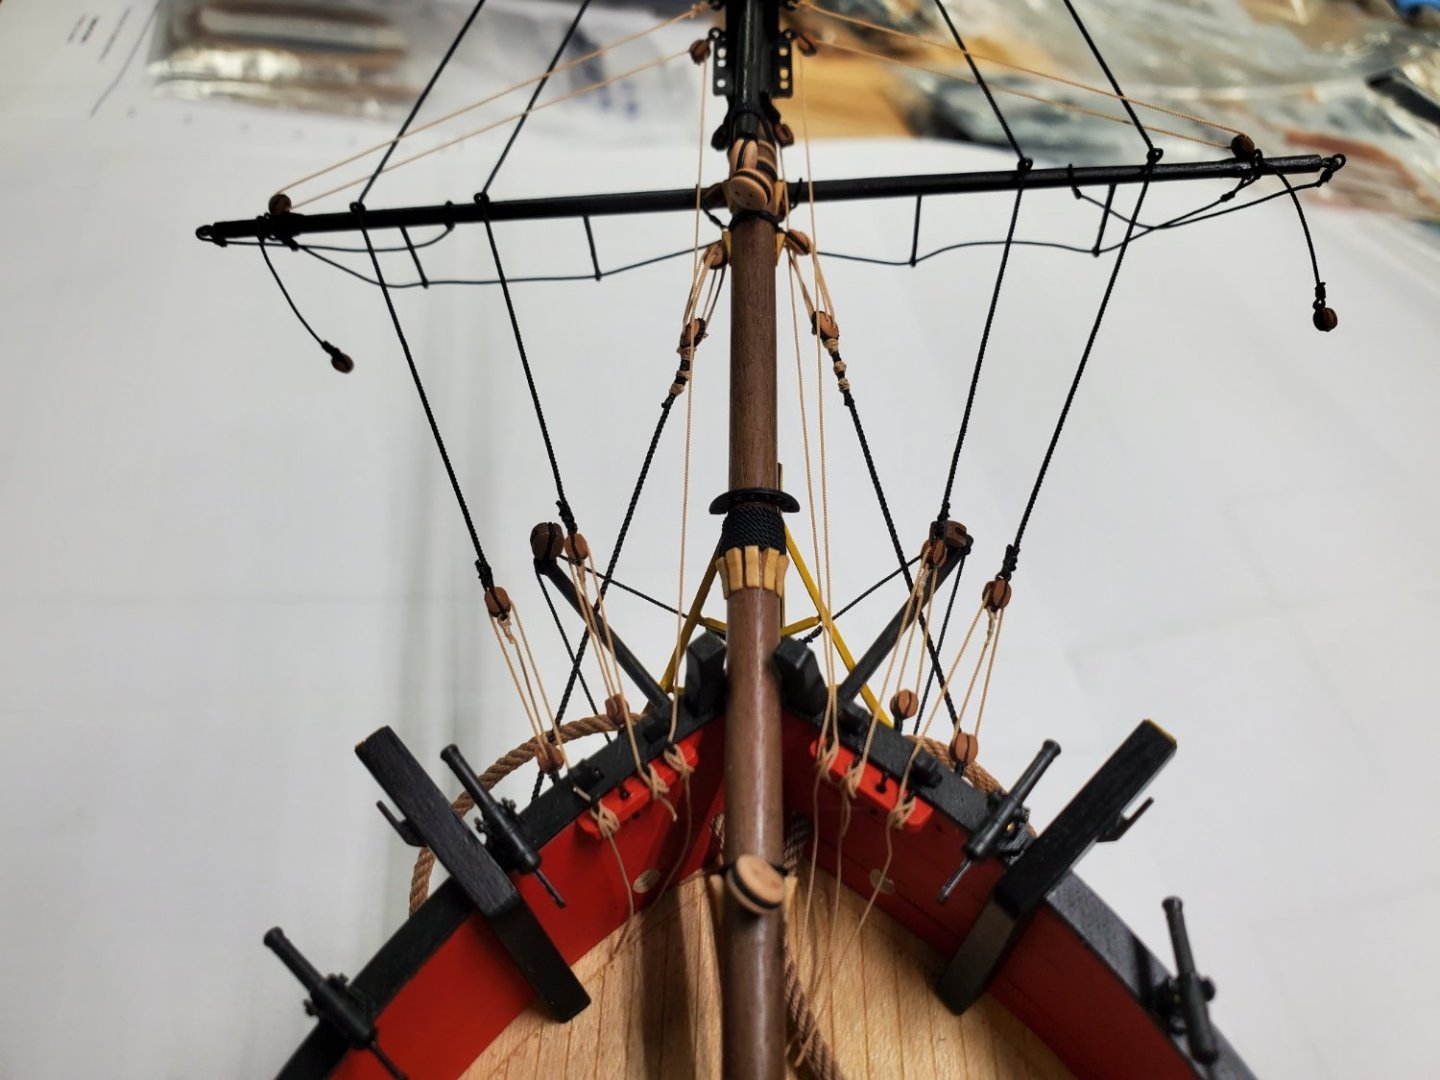
Thank you! A couple more photos I took of the bowprit area

- 53 replies
-
- 5
-
-
- Speedy
- Vanguard Models
- (and 1 more)
-
Hi and here's an update. Been moving along in spurts this past few months. Seems like I spend as much time looking at other build logs as I do actual building. They are so helpful. The plans are great but seeing photos and detailed explanations is helping me with the rigging which I haven't done in this amount of detail for many years. I've got the bowsprit on and a lot of that associated rigging attached, and now getting to work on the shrouds. For the first time ever I did serving of ropes. My Syren serving machine was a little rough going at first but got things smoothed out, I had some parts too tight apparently. Thanks again for all the great help from the build logs! Dave


- 53 replies
-
- 5
-
-
- Speedy
- Vanguard Models
- (and 1 more)
-
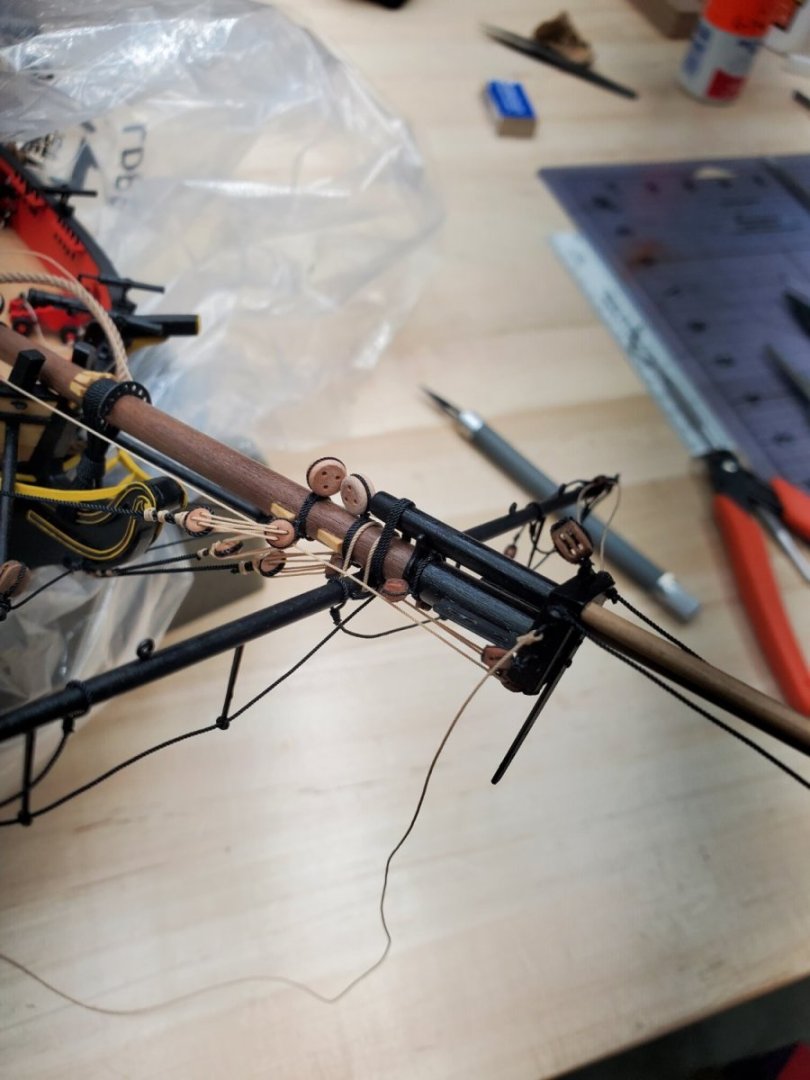
Thank you Glenn for the postive comments and answer to my question! I've made more progress, almost finished with the bowsprit. It was tricky getting the 3 wooden parts lined up and attached correctly, and again the photos from other build logs helped me out with that along with the excellent plan diagrams. Dave

- 53 replies
-
- 6
-
-
- Speedy
- Vanguard Models
- (and 1 more)
-
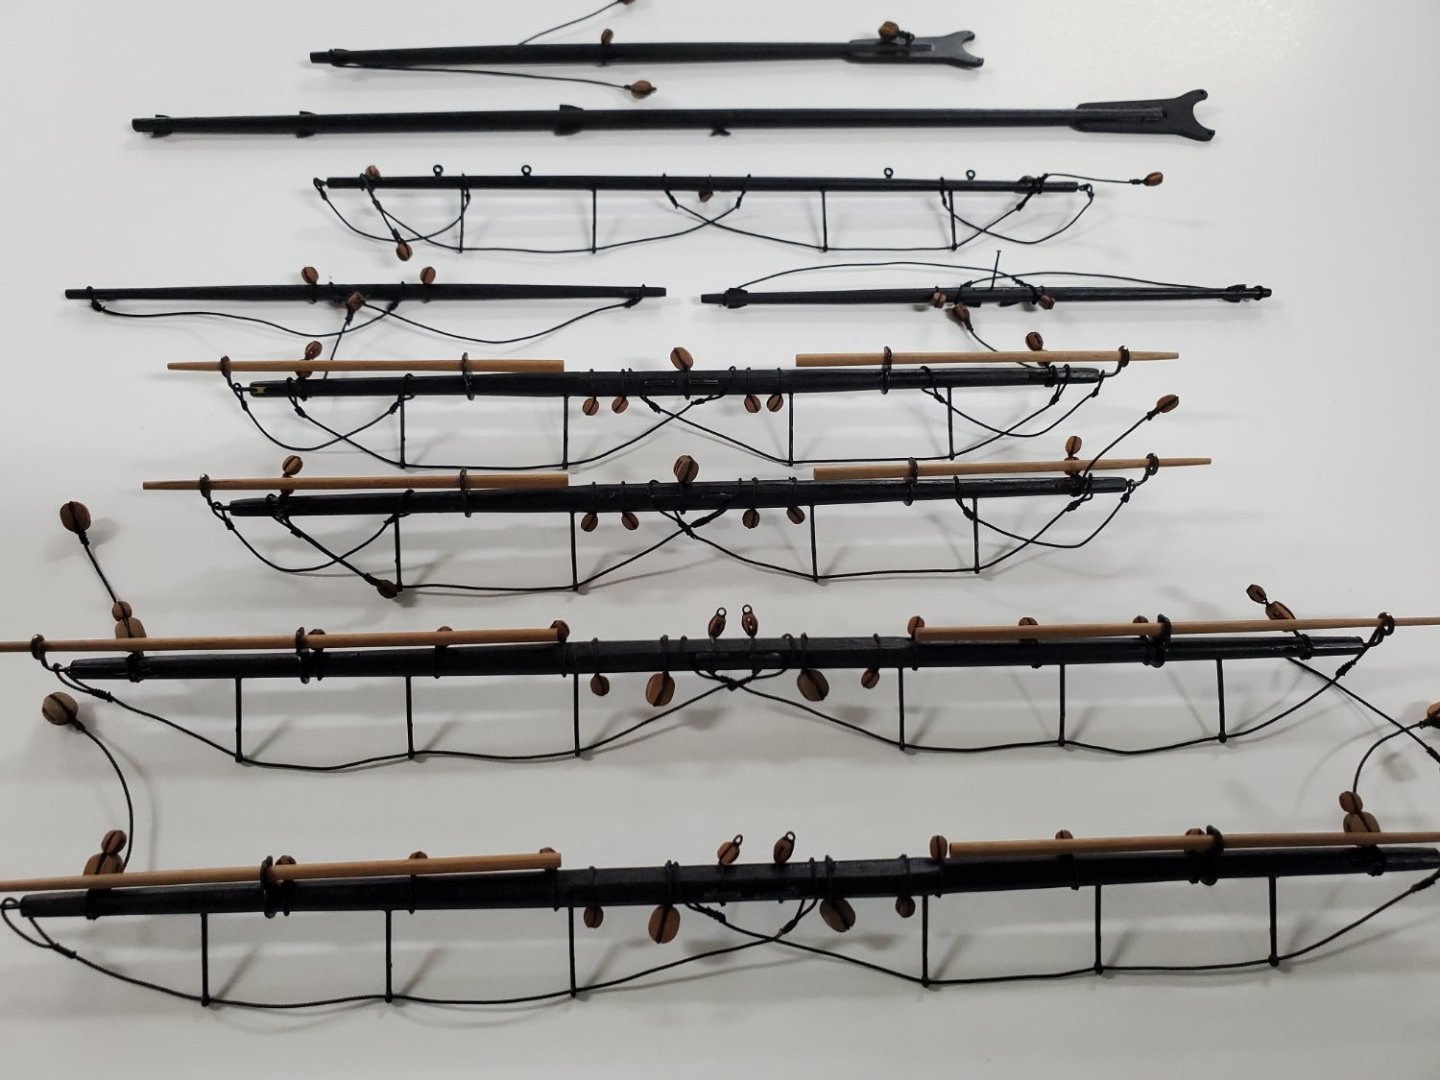
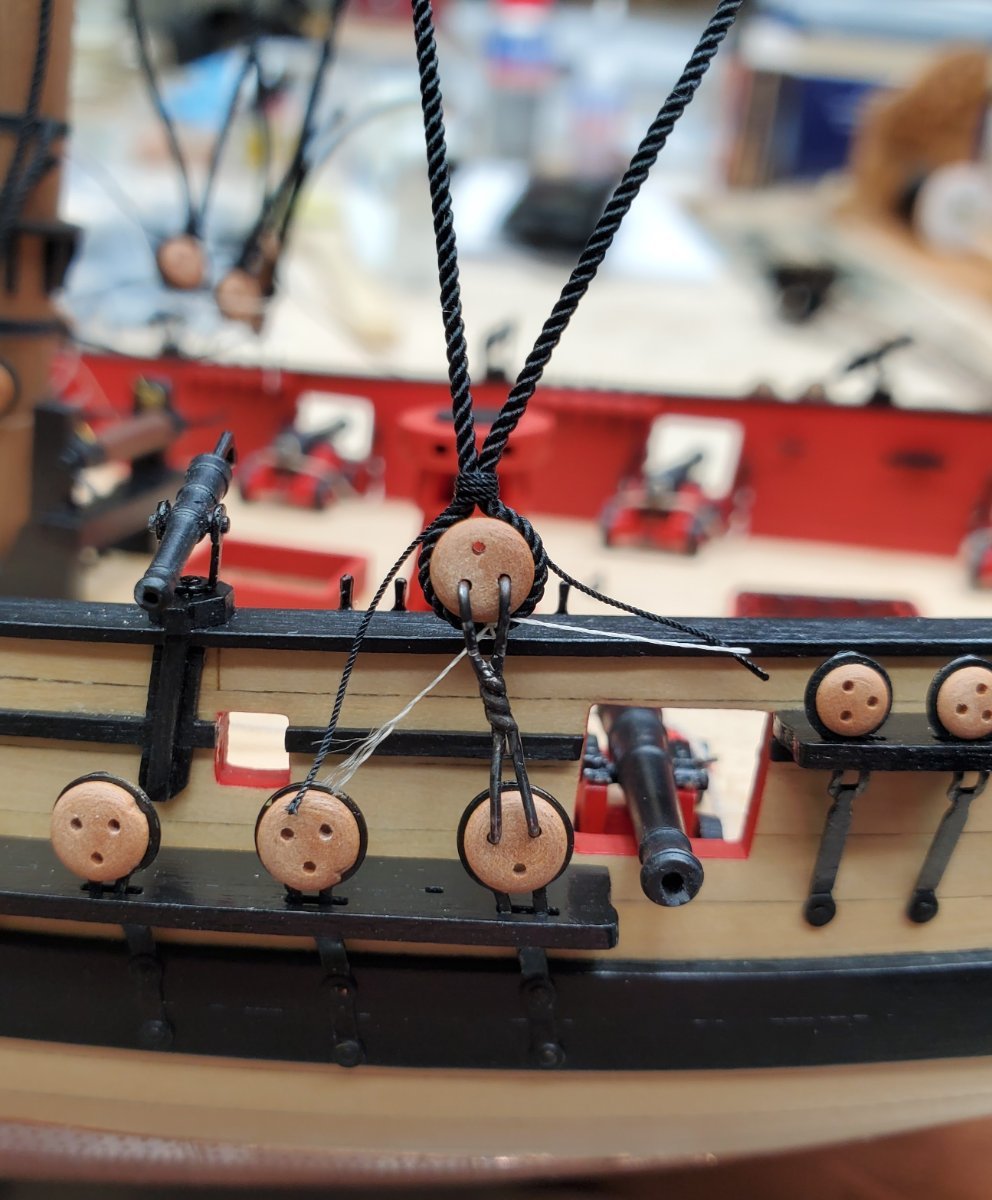
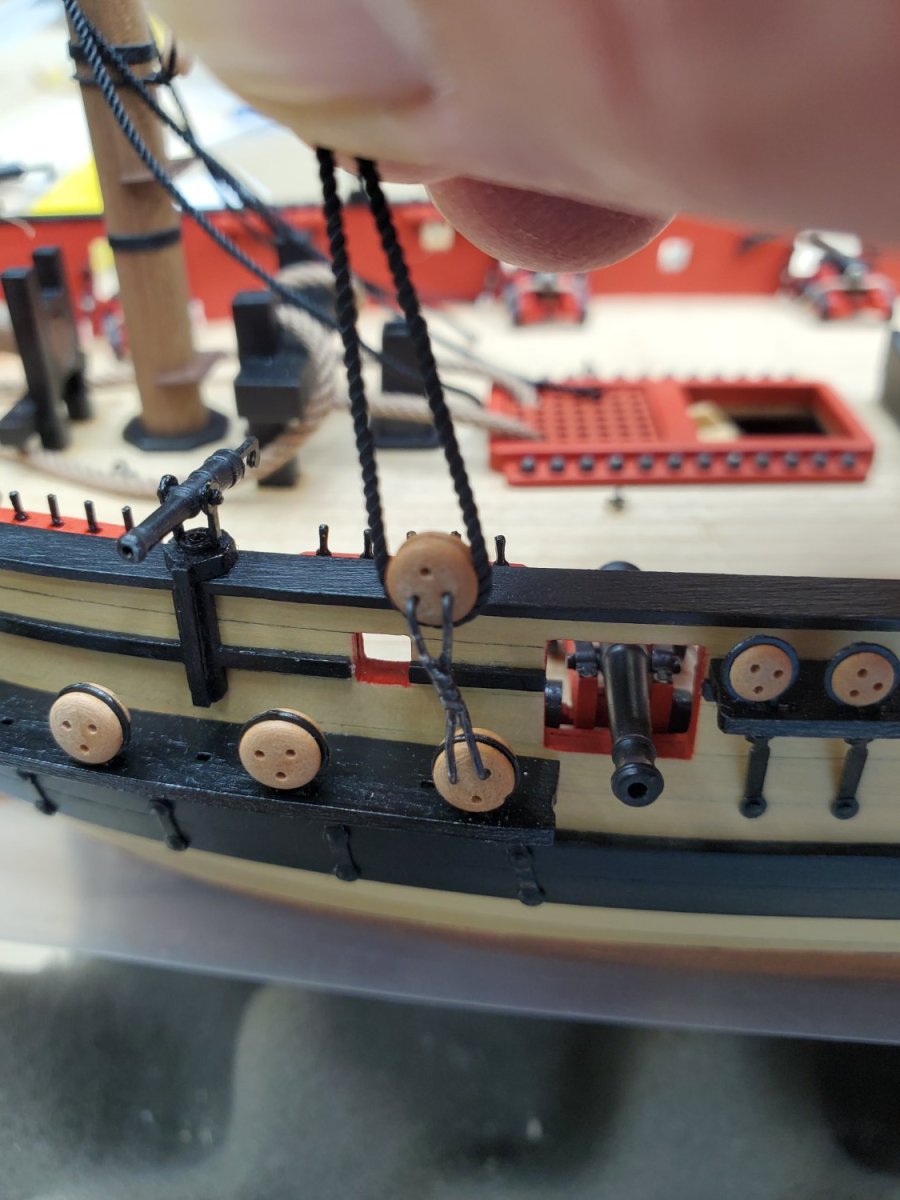
Thanks for the likes as always! Well it's been almost a month since my last update and I have made progress on attaching all these little blocks and lines. Many trial and error episodes to get things to look reasonably close to my references (other Speedy logs) and instructions. Quad Hands that were recommended have been extremely useful. I see I probably should make a few adjustments yet but overall I'm happy with the results! Dave
- 53 replies
-
- 6
-
-
- Speedy
- Vanguard Models
- (and 1 more)
-
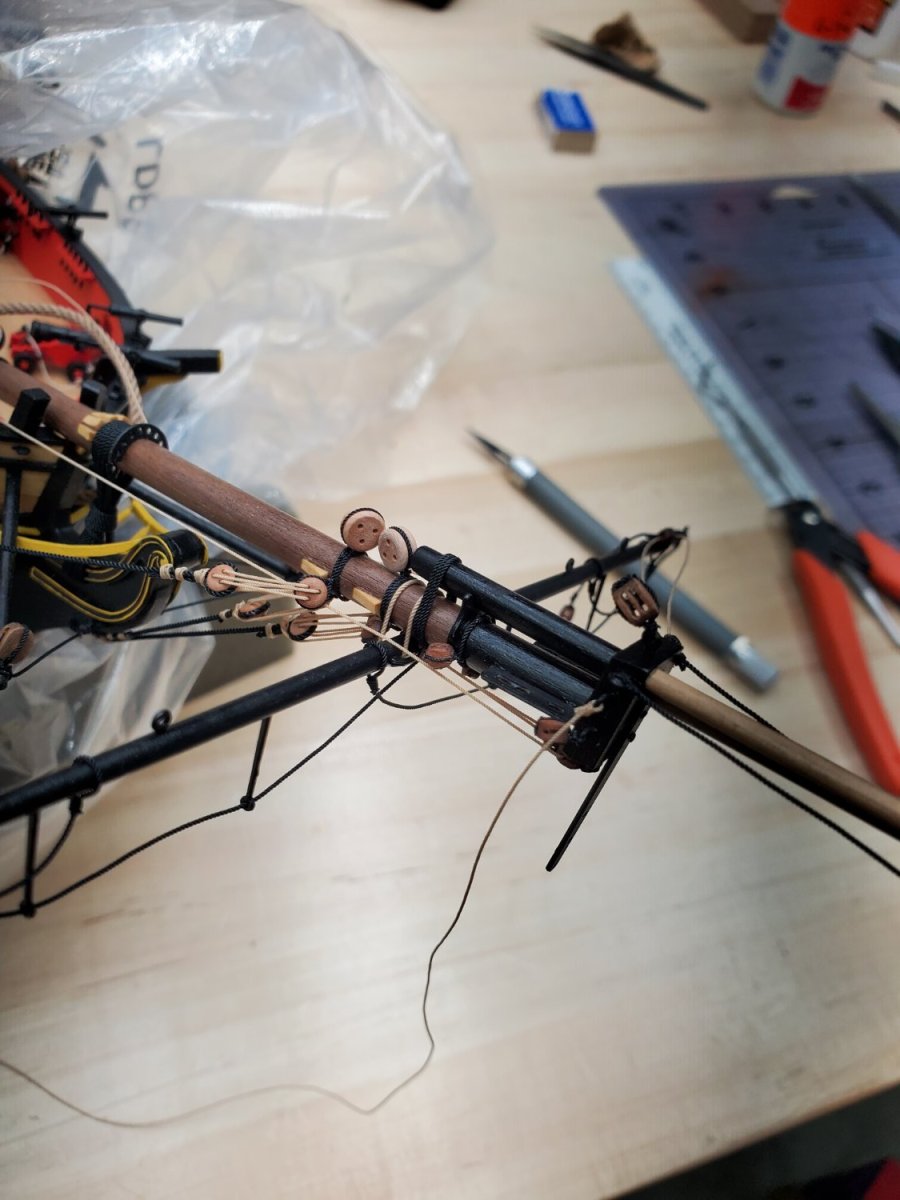
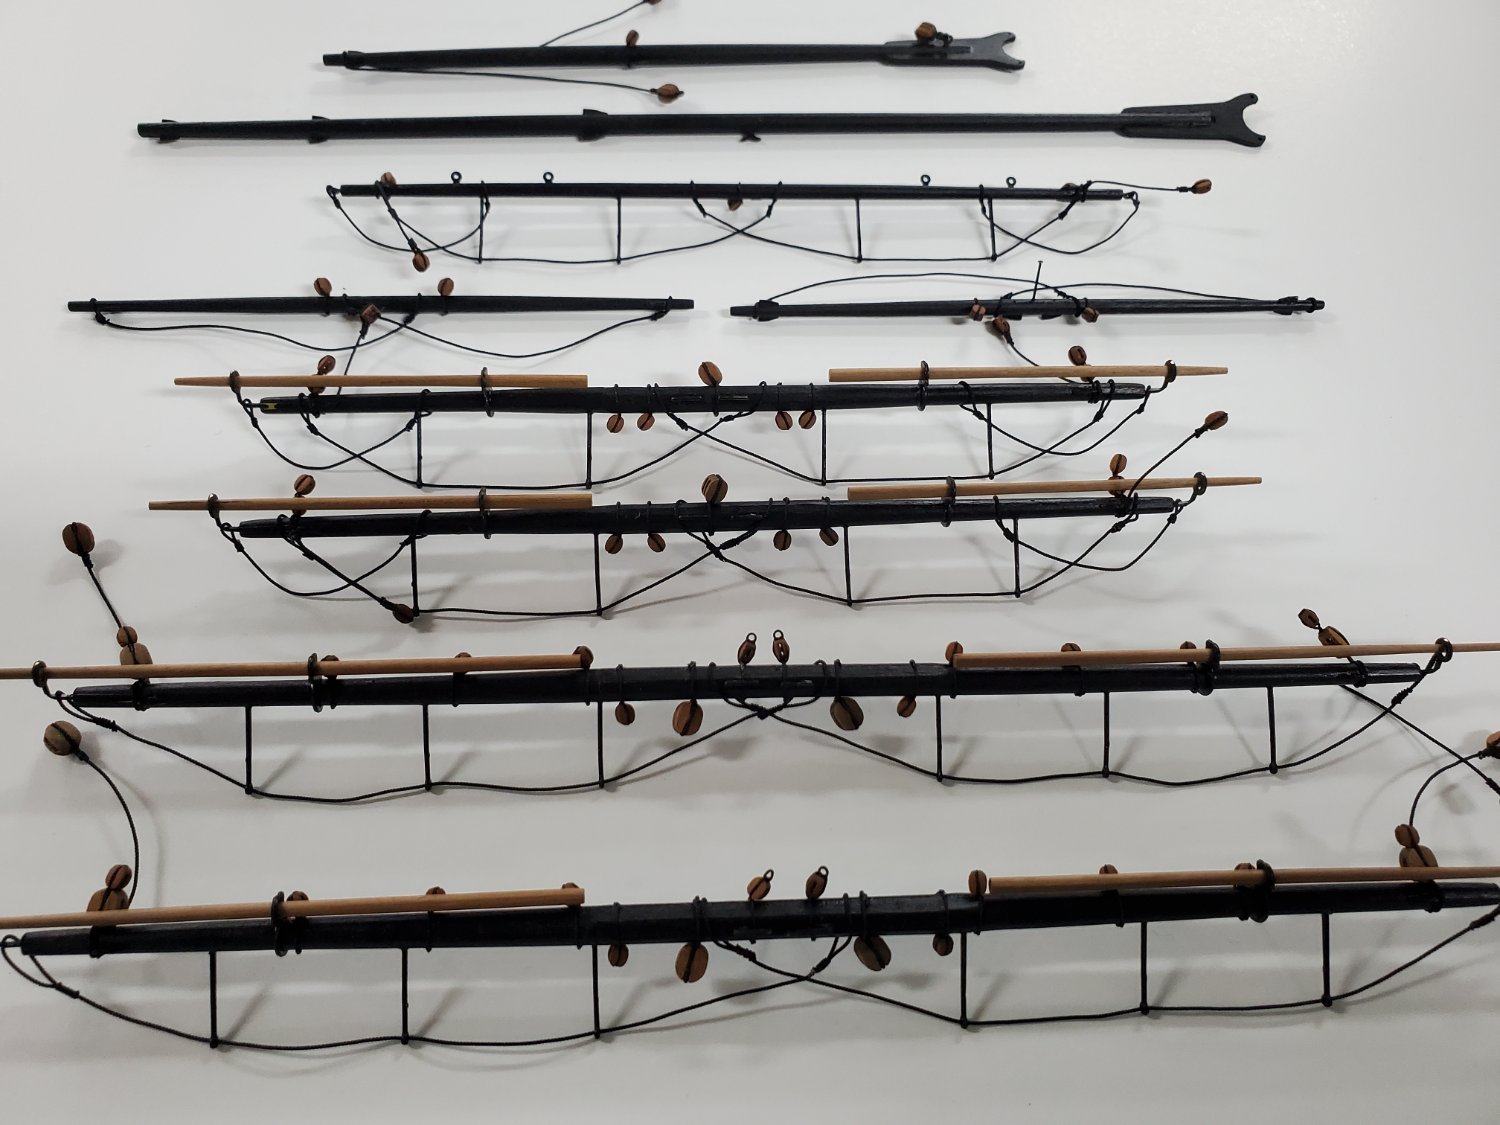
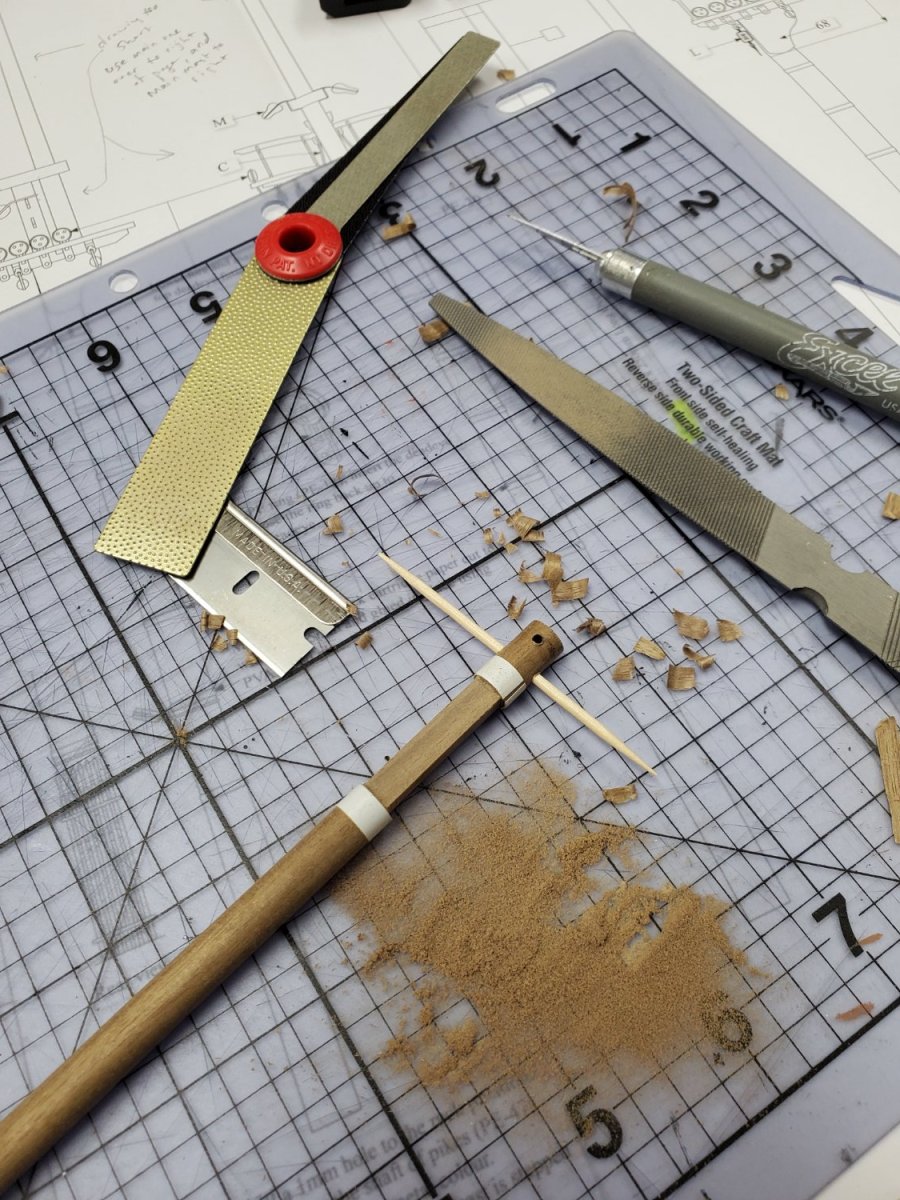
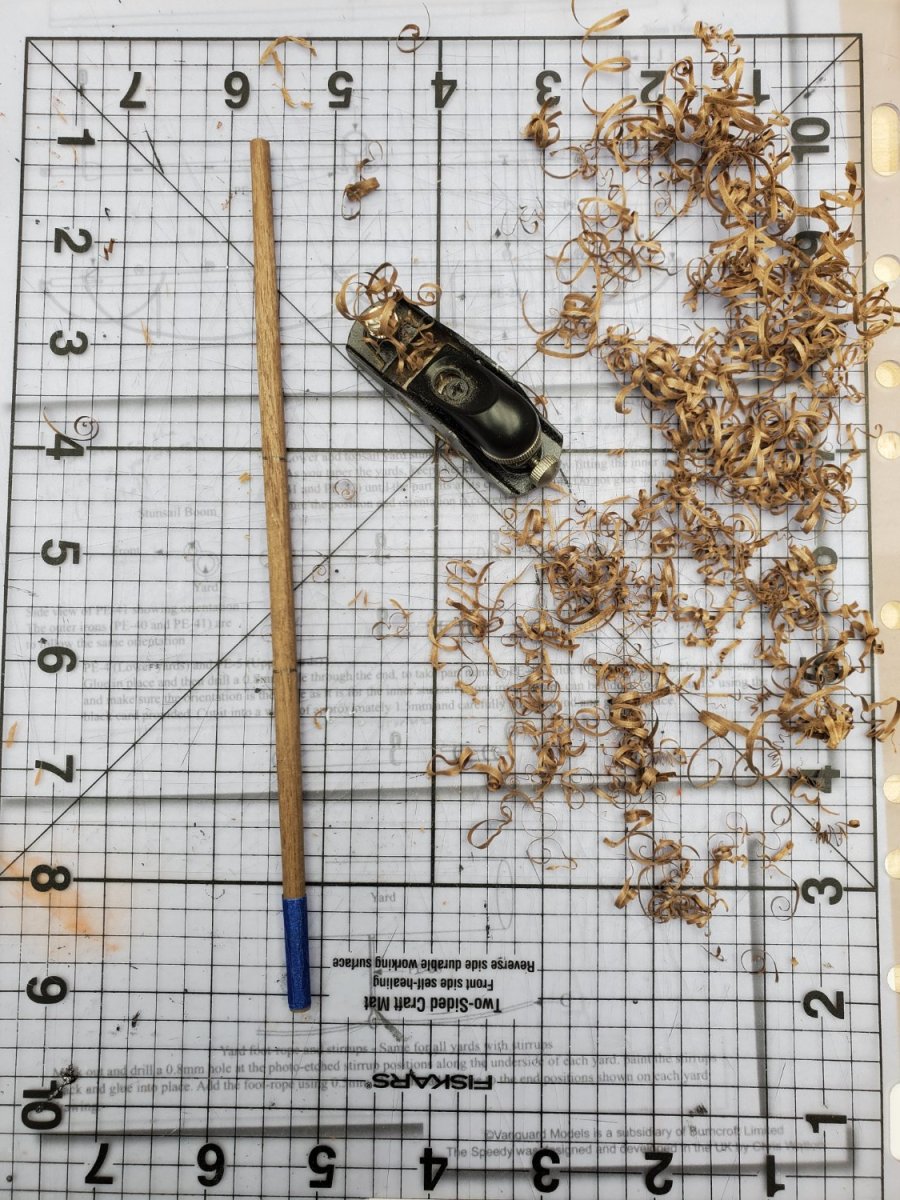
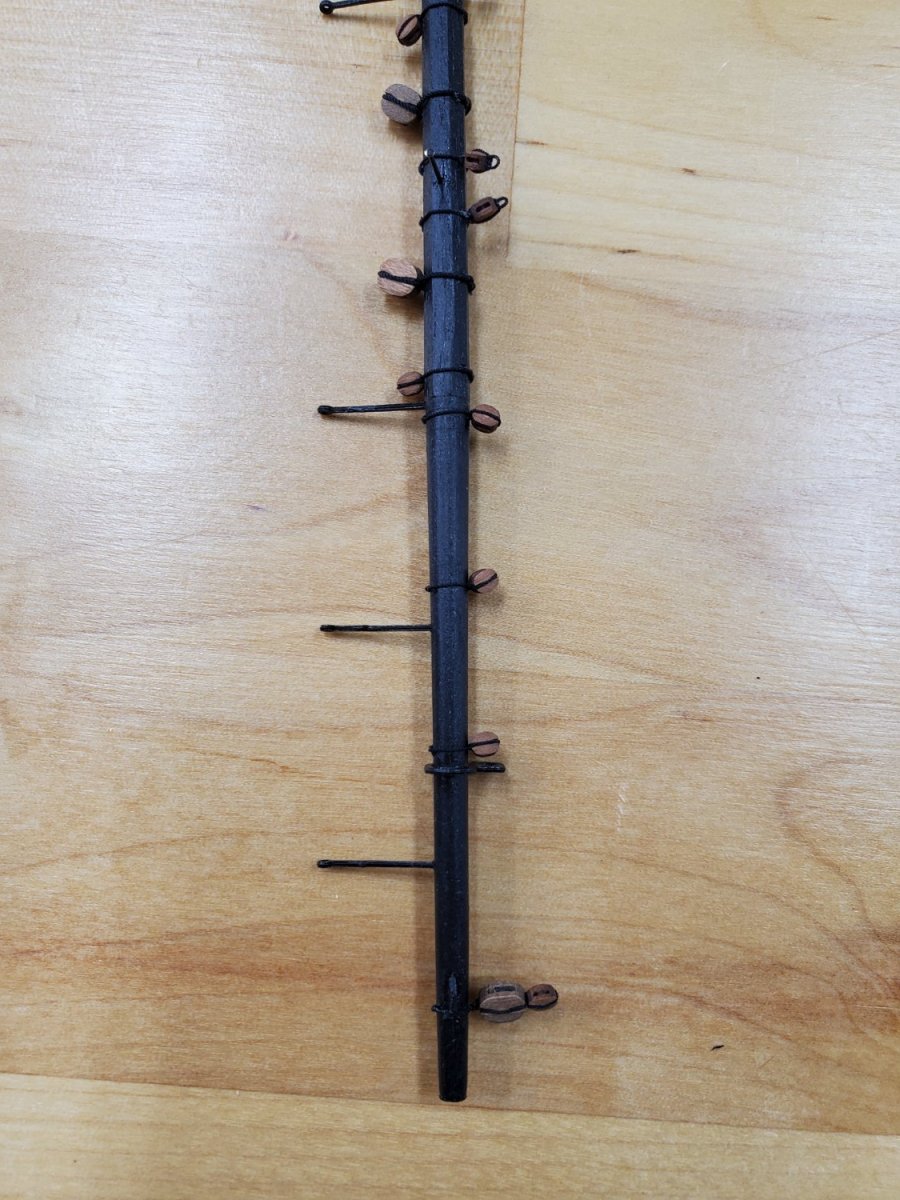
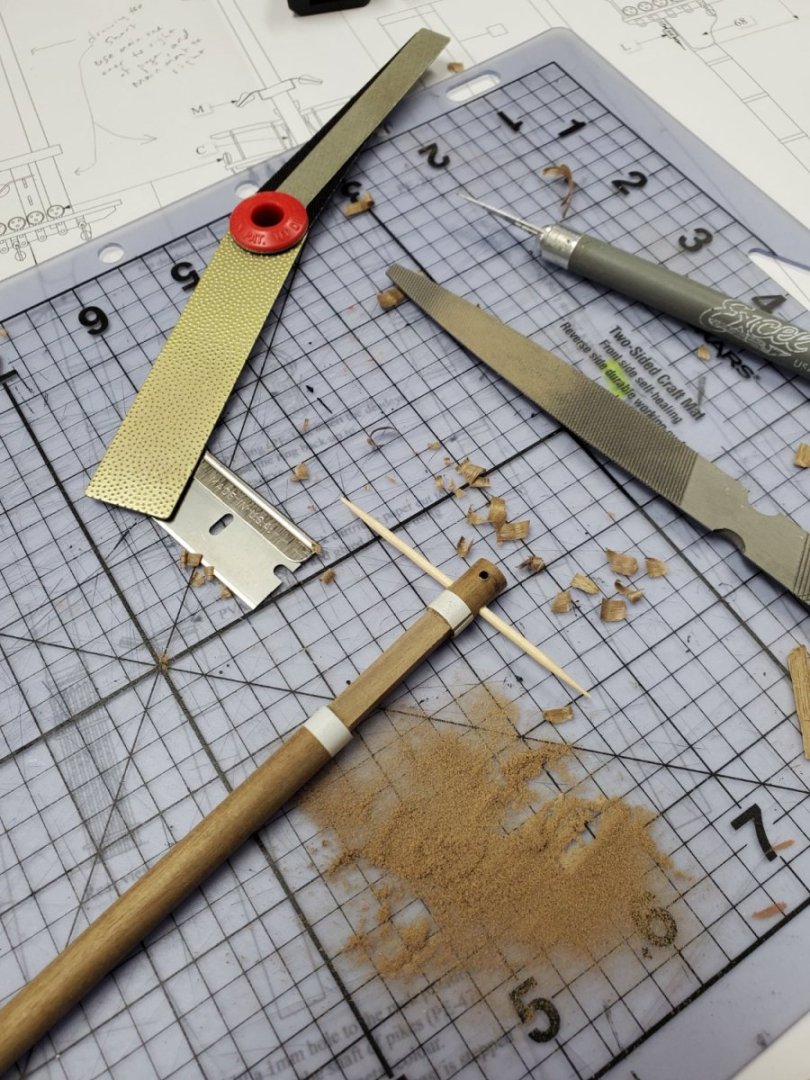
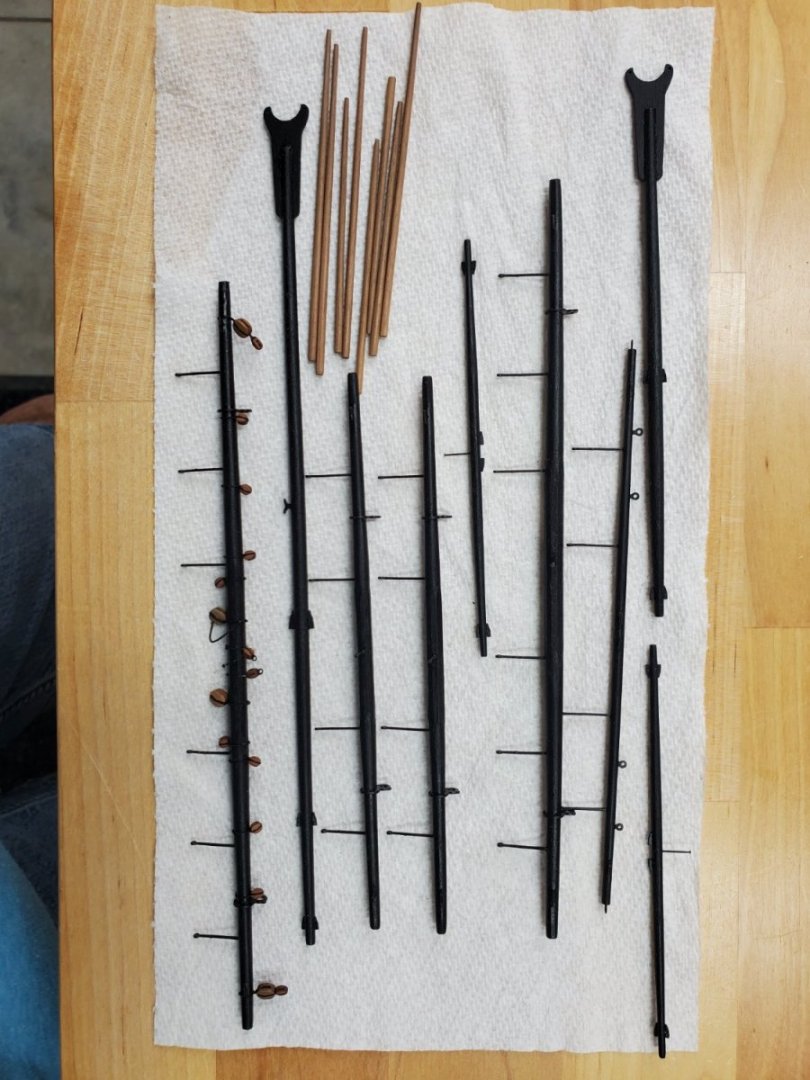
Hi all, I've been working on the masts and yards for the past couple months and it's been slow going. It's been a long time since I last did this kind of thing, and many of these parts are very small (I spend a lot of time on the floor looking for things I've dropped). I tried some different methods and what seemed to work best for the yards was to do rough tapering with my mini plane and then used my drill press for the rest of the tapering using files and then sandpaper, and with a little fine tuning by hand after that. For the masts I also used a plane razor blade for the square areas along with files of various types. I can't recall who I borrowed this tip from, but leaving the mast parts a little longer at first and drilling holes through it with a toothpick inserted allowed me to keep everything nice and square along the length. Now I'm beginning to do the blocks and I've referred to the many other build logs for advice which has been very helpful. I am finally getting a little faster after installing the blocks onto one of the lower yards as seen in the photo. Many more to go! I also bought the Quad Hands I saw on Derek's log and this is a great help to me so thanks for sharing that. Dave


- 53 replies
-
- 3
-
-
- Speedy
- Vanguard Models
- (and 1 more)
-
Thank you Alistair! I don't think you can go wrong with a Vanguard kit that's for sure. Just a couple photos as I'm moving onto the masting and rigging. I've been studying some of the other logs especially Derek and David L. and James and others and these are so helpful in getting started. I've only completed one kit in the past that had full masting and rigging and that was many years ago so I have a feeling this will be a long process but looking forward to it. I really like the crisp details of the plans that are included with this model. I thought about getting a mini-lathe as I see that's popular for making the masts and spars but I'm going to attempt it with my drill press and/or hand drill. Wish me luck! Dave
- 53 replies
-
- 7
-
-
- Speedy
- Vanguard Models
- (and 1 more)


.jpg.161c4d90feb2133d198c7775d80c3f5a.jpg)