-
Posts
29 -
Joined
-
Last visited
Content Type
Profiles
Forums
Gallery
Events
Everything posted by McSpuds
-
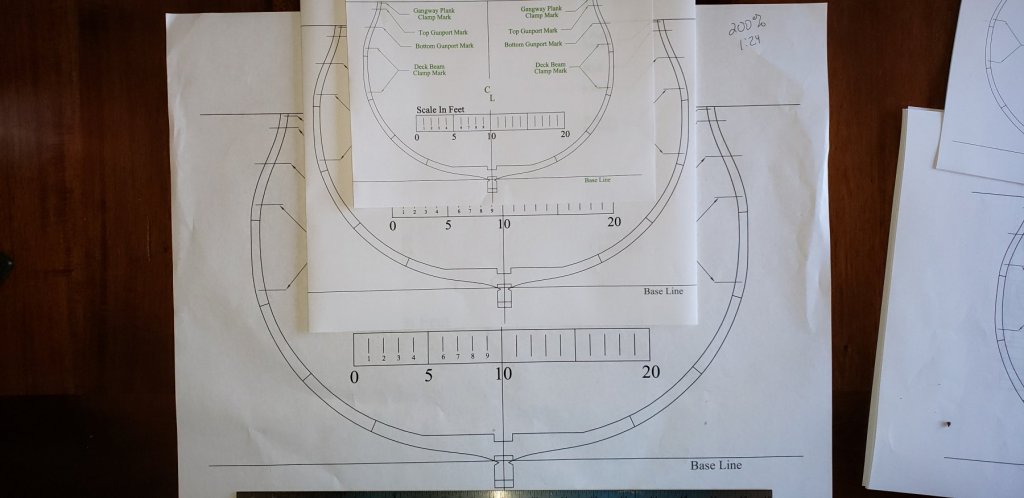
Made a trip to my printer today. I wanted to get the plans printed on their equipment because it would give me a chance to look at the scale I wanted. WOW is about all I can say about 1:24.... I had the 1st frame printed in three scales, 1:48, 1:32, and 1:24. After seeing the size, I have decided on 1:32 Now that I have the scale picked out, time to figure out sizes and types of wood. I hope somebody out there can help me with the amounts needed..... this is going to be so fun.
-
I am not sure yet on scale, but I will go a little bit larger than 1:48. My Arthritis doesnt like stuff too small. I will definitely try to make a list for the larger scale. At least in sheets. I have a good mini table saw to rip my stock. If the two sources here in the US stay closed too long, I will have to buy larger stock and invest in a drum thickness sander.
-
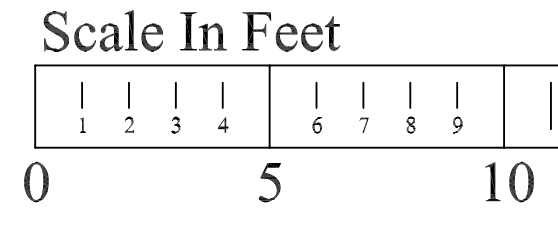
To be sure on my scale, and on proper plan size when printed... I am not sure if the plans are metric or standard, The plans for the Triton are 1:48, so.... On each sheet, The distance between any given number on the "scale in feet" diagram on each frame sheet should relate to the actual scale of model. IE... If 1:48, the distance between #1 and #2 should be 1/4" ? If true then scales are as follows? 1:48 - 1/4" between numbers 1:32 - 3/8" between numbers 1:24 - 1/2" between numbers correct?
-
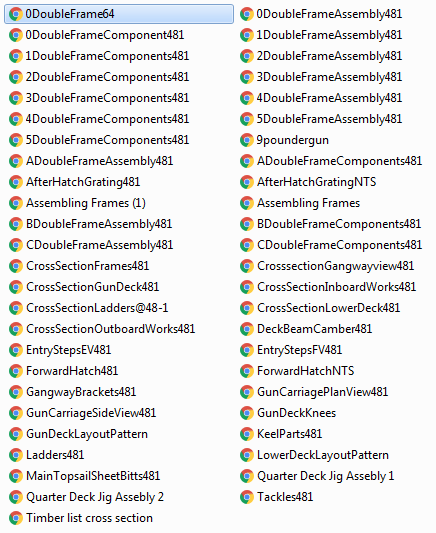
Just a little guidance needed on files before I print most. I printed two Frame sheets. I used no "fit to sheet" option and 100%. Two sections are different scale. I am assuming that the 0DoubleFrame64, selected above, is WHAT? it definitely is not the same scale as the 0DoubleFrameComponent481, of which I think is 1:48 scale at 100% The KeelParts481 is the same scale as the 2nd file. So where did this 0DoubleFrame64 come from? and what is it used for?
-
Ok, I am a new builder so this has confused me a little. I plan on building the cross section at 1:48 wich I presume is what the drawings are set to. "I have downloaded them, but not looked at them yet." Which wood list should I use? I was going to order a Byren sander but will wait, so I need tl order my wood pre milled. Hopefully I can order wood today. I am sure there will be a few mistakes and do overs so a little extra never hurts. Plus if all goes well, I will use the extra on another build anyway.
-
Here we go.... I have finally got back in the saddle again. Although my experience in POB or POF is not much, I do have extensive experience with scratch building 1/144 scale WWI and WWII vessels for RC. I joined Chuck's Syren build years ago and loved it, but I had to eventually drop the build after a time. When I get this one completed I hope to build cross section that includes a mast section. One of my favorite builds in the past I have seen included a cross section with a couple of marines in the crows nest, firing back down into the melee. Like other new builders, I have been looking at some of the other builds and I am definitely a little intimidated! I look forward to seeing how well I can do this. Not sure, but here is a quick question, is it possible to move the cross section forward or aft to include a mast? and how would I perform that?
-
Yep, Taylor, my Syren was coming along good, then life got in the way. My injury had a relapse. Three surgeries later and two moves later, I think we have things fixed. This time around I am going to work on a smaller project first. The Triton Cross Section looks like a good build to learn some techniques on.
-
Syren ran aground years ago (fell off the top shelf and bounced into the fire place) Going to start a Triton Cross build I think.
-
Hi all. I have been here many times in the past, but life had me take a break from building for some time. I am now able to return to building and looking forward to possibly getting in on the Triton build. It is good to see the site full of activity as usual.
-

Syren Hull Assembly
McSpuds replied to Charley54's topic in Building, Framing, Planking and plating a ships hull and deck
I did as one author did. I did most of my sanding before adding any glue... I then did the final sanding, and sanding, and more sanding after I had glued the bulkheads into place and had my filler blocks in place. This also seemed to be stiffer and gave a more solid base to sand with. -
Now the planking begins..... Shortly after this I deployed, and then sadly was unable to continue upon my return due to an injury. Then work and life kicked in hard and I had decided to shelf my boat till I could take more time with her. Now that I am retired, and my injury has been corrected enough to allow me to enjoy my hobby, I once again continue on the build! I hope the brief explanations above are ok, it was a long time ago and I can not remember all the details on why I took each photo. From here on out there will be more detailed involvement in the explanations... For a larger view, click here! For a larger view, click here! For a larger view, click here!
-
Framing in the gun and sweep ports now began...... I used a jig to cut some of the peices, but still a lot had to be sanded... For a larger view, click here! For a larger view, click here! For a larger view, click here! For a larger view, click here! For a larger view, click here! For a larger view, click here! For a larger view, click here! For a larger view, click here! For a larger view, click here! For a larger view, click here! For a larger view, click here! For a larger view, click here! For a larger view, click here! For a larger view, click here! For a larger view, click here!
-
I so hated this part.... flaring the bulkheads... ugh! For a larger view, click here! For a larger view, click here! You can see the runner I used to help flare the bulkheads..... For a larger view, click here! For a larger view, click here! For a larger view, click here! For a larger view, click here! For a larger view, click here!
-
I then placed filler blocks in between the bulkheads. I also did the planking between 16 and 20. For a larger view, click here! For a larger view, click here! For a larger view, click here! For a larger view, click here! For a larger view, click here! For a larger view, click here! For a larger view, click here! For a larger view, click here!
-
Now on to the bulkheads. Some of these where so tight I had to shave the paper off of the bulkhead former. For a larger view, click here! For a larger view, click here! For a larger view, click here! For a larger view, click here! For a larger view, click here! For a larger view, click here! For a larger view, click here! For a larger view, click here! For a larger view, click here! For a larger view, click here!
About us
Modelshipworld - Advancing Ship Modeling through Research
SSL Secured
Your security is important for us so this Website is SSL-Secured
NRG Mailing Address
Nautical Research Guild
237 South Lincoln Street
Westmont IL, 60559-1917
Model Ship World ® and the MSW logo are Registered Trademarks, and belong to the Nautical Research Guild (United States Patent and Trademark Office: No. 6,929,264 & No. 6,929,274, registered Dec. 20, 2022)
Helpful Links
About the NRG
If you enjoy building ship models that are historically accurate as well as beautiful, then The Nautical Research Guild (NRG) is just right for you.
The Guild is a non-profit educational organization whose mission is to “Advance Ship Modeling Through Research”. We provide support to our members in their efforts to raise the quality of their model ships.
The Nautical Research Guild has published our world-renowned quarterly magazine, The Nautical Research Journal, since 1955. The pages of the Journal are full of articles by accomplished ship modelers who show you how they create those exquisite details on their models, and by maritime historians who show you the correct details to build. The Journal is available in both print and digital editions. Go to the NRG web site (www.thenrg.org) to download a complimentary digital copy of the Journal. The NRG also publishes plan sets, books and compilations of back issues of the Journal and the former Ships in Scale and Model Ship Builder magazines.


