Supplies of the Ship Modeler's Handbook are running out. Get your copy NOW before they are gone! Click on photo to order.
×


Nightquest1000
-
Posts
77 -
Joined
-
Last visited
Content Type
Profiles
Forums
Gallery
Events
Everything posted by Nightquest1000
-
 Hallo! to all my fellow modelling colleagues in Germany, does anyone know about a source of turned brass canon barrels, other than the usual supects? I would like to fit a 1/48 model with turned brass barrels. Aeronaut has them, but the list price for the number of barrels I need is more then €700,- Maybe there is a small engeneering company around, who does take on commissions for their apprentice workshop. thank you all. Tom
 -
Hi Nigel, highly interesting build. I will follow your progress, if you don't mind! Looks a very fine work! best regards Tom
-
Hi Nigel, good question. What I did is, I marked the position of each frame on the building board, after the glue has set when I was building the first half. I also transfered the position of every fourth frame from the plans to the building board. This way I was in good control, constantly checking against the plans and when buidling the second half checking against the marks of the first half. Turned out, they both where the exact same length. At some point I will start the hull for "Rivoli". I'm curious to see if I can replicate the results, or if it was beginners luck Tom
-
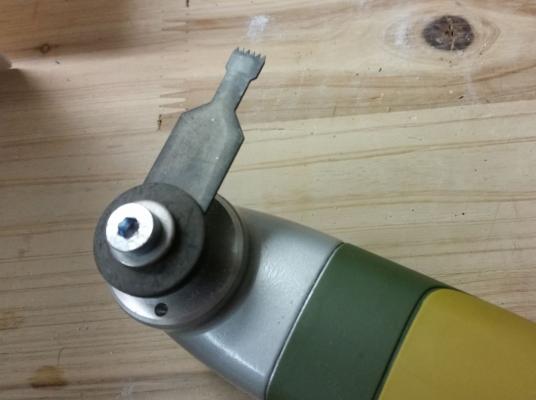
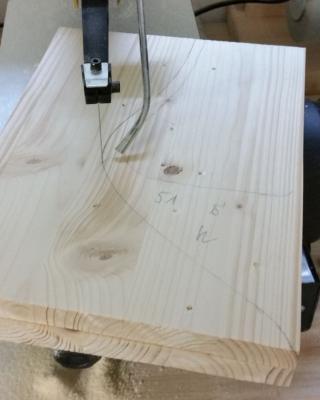
Hi there, a quick note on cutting instruments. I am using a dive-in sawblade, mounted on Proxxon's oszillating micro-sander. This is a convenient way of doing it. You don't need to drill 4 holes and then saw by hand. Just dive in the blade into the material. Works very well, although every 20 gunports you have to use a file to reshape the teeth of the blade. They grind down fairly quicky. I guess after about 70-80 openings you can bin the blade. Tom
-
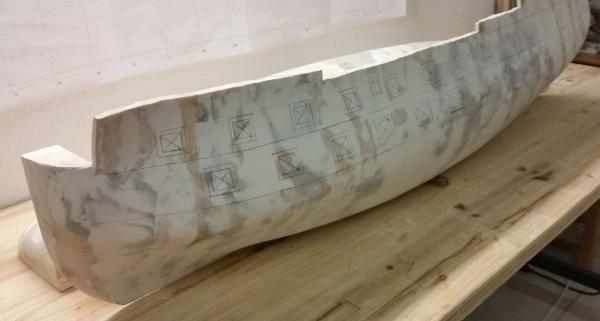
Hi, the gunports have been marked and are ready to be cut. The inner lines are the actual gunport openings. The outer lines are the lines to be cut. After cutting they will be fitted with an inner Frame with a cheap wood for perfect alignment. During planking they will receive their final Frames. This then reduces the openings to their correct size.
-
Hi Michael, I have a question that goes right back to the beginning of your log. How did you manage to get a perfect clean deck, when using coloured woodglue? best regards Tom
-
Hi Keith, nice build! I have two notes, you might consider. Maybe I have overlooked these in all the comments, if so, please excuse the repetition. RW dates back to ca 1670, but ships wheels have not been in use before ca 1700. That means, she was operated by a tiller or whipstaff. That there is no wheel included in the kit kind of implies this also. Hull coppering goes back to around 1708 to 1710. Again, RW would be too old for a coppered hull. Historically you would be safe to show an underwater hull painted with a broken white, to imitate the lead containing white stuff, that they used before copper sheathing was invented. The other option, if you hesitate covering a wonderful planking job, just leave it natural. Maybe treated with some antique wax. best regards Tom
-
@ Nigel I guess he is using some sort of russian fir tree. It has a distinct flamed grain with virtually no knots. The scandinavian furniture building boards, that you can buy in european DIYs can have a lot of knots. I tried to avoid them where possible. Not always achievable, but because they are glued with wood glue and planked both inside and outside, I guess it's not much of a problem. What I definately did not incorporate are areas with resin inclusions. @Michael yes, it makes working on the hull very convenient. But, there will be the point where the halves come together and from there on it is business as usual. Although, marking and cutting gunports for instance is very easy to achive when you only need to handle half the body. Fairing is, well-, sort of easy. I am using flexi curves to control the lines. Pretty straight forward, but I wouldn't be surprised if, when the hull is joined together, your eyes tell you otherweise, and you have to do some corrections here and there. I'll include my experience on that in the building log. @Brian MDF, hmm.. I wouldn't. My fear would be that the comparably thin walls (5mm) wouldnt be strong enough to withstand the forces of the planking procedure. It has no long grain like natural wood, best regards Tom
-
Outstanding Craftsmenship.
-
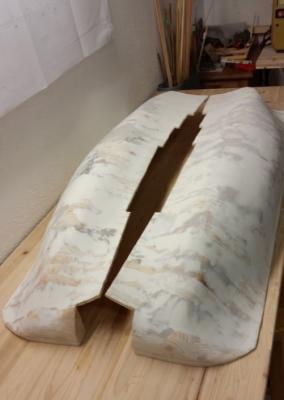
Hi all, here we have port and starboard, ready for the gunports to be marked and cut. regards Tom
-
Hi Bob, Yes, it is new for me as well. I saw it on an australian shipmodelling DVD. This film has been shot in Russia, in the workshop of one of the most famous russian ship modellers, called Dr. Mike. Don't think it's his real name. He is a heart surgeon and a real ship modelling buff. This method is interesting and seems to be straight forward. I have finished the thwo halfs. Pictures will come in the next days. I am not yet convinced it is the best way of building a hull, because the disadvantage is, you produce a hell of a lot of waist wood, that you can't really use otherwise. Not even for the barbeque, because these boards you buy in the DIY are made from strips and contain a lot of glue. Sure not the healthiest things to burn. best regards Tom
-
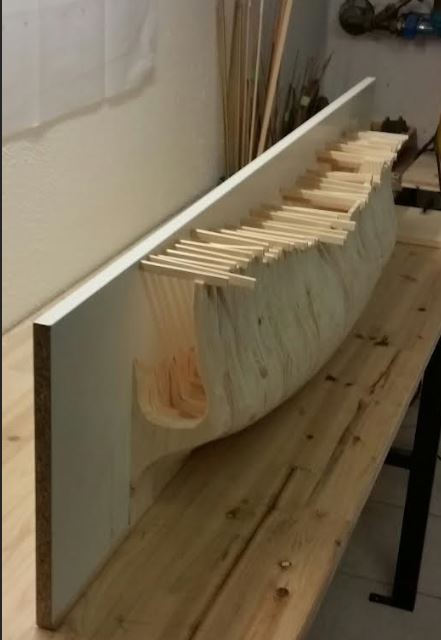
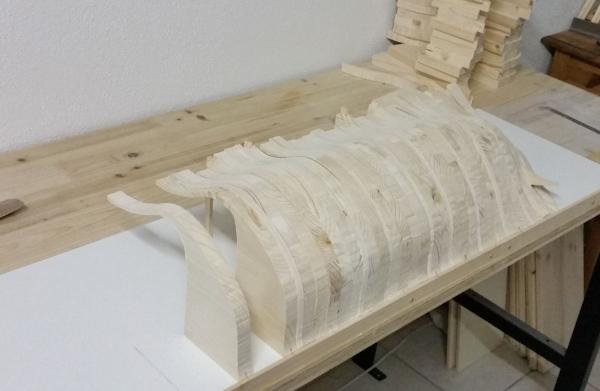
the first half Setup for final outside shaping.

-
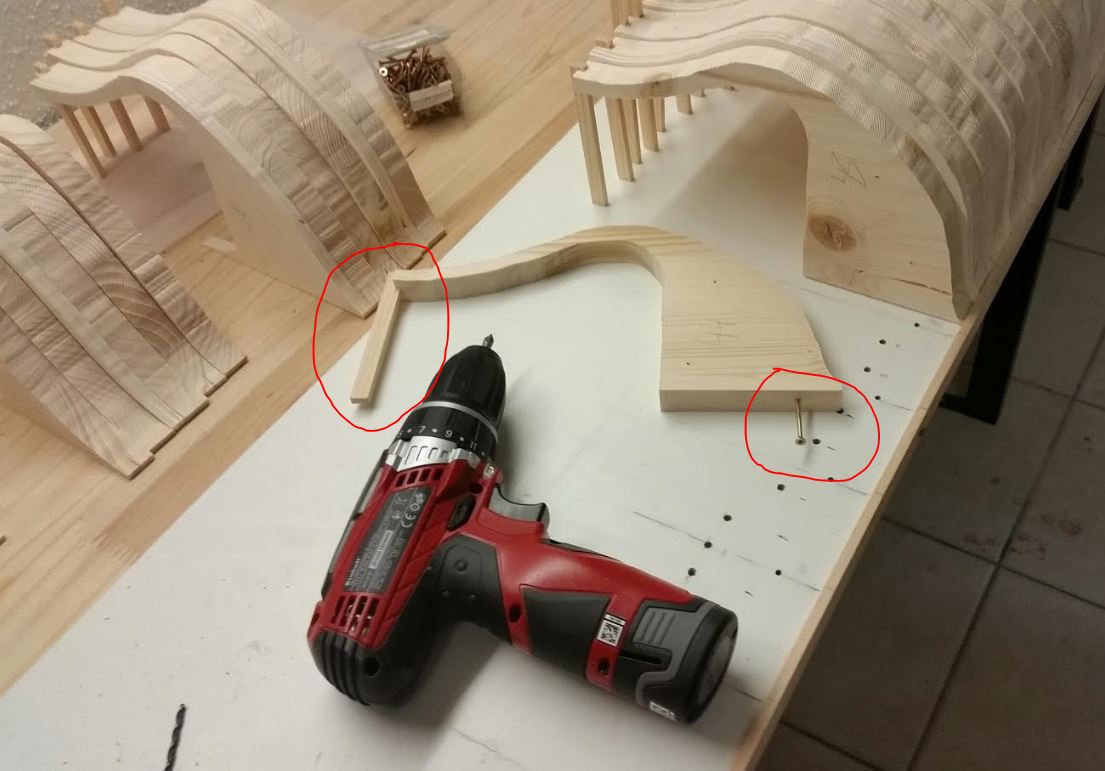
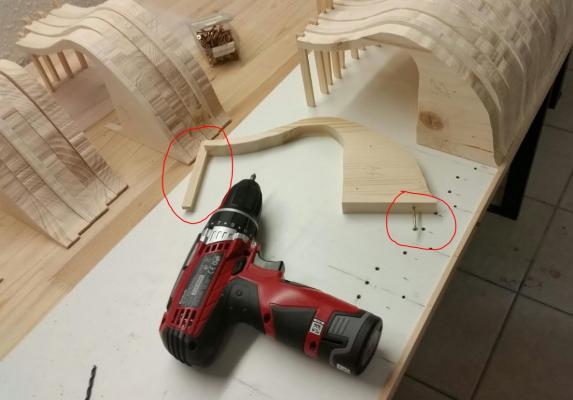
after cutting the Frames each one is reinforced at the top edge in order to Support sanding. All Frames are screwed to the building board.
-
ok, done! I have cut all the fames. The next steps are sanding inside and outside. Then mark and cut the gunports. After that, the starboard and port halfs are joined together. After that I will build the framing for the Stern. Tom

-
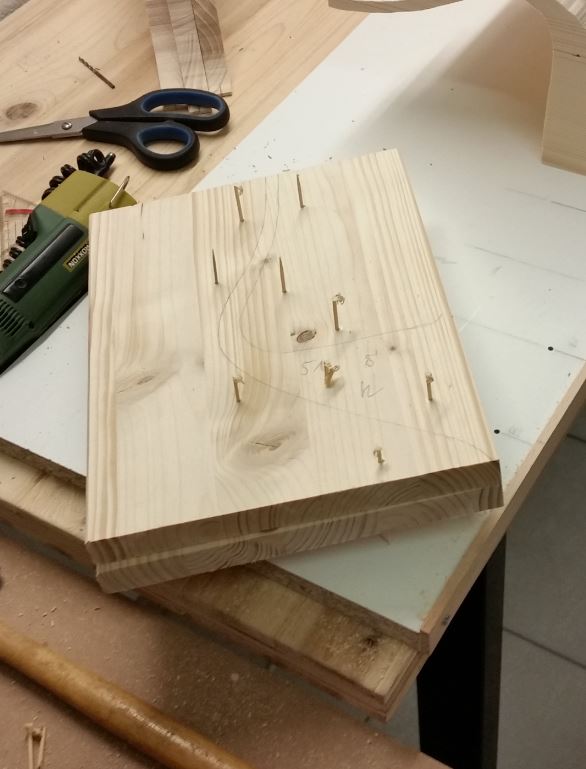
Hi all, more frame cutting. I am sandwiching two pieces of wood using toothpicks. This way i am cutting the starboard and port sides of the frame in one go. The two pieces are dowelled together, the pick protrusions cut and then it's the jigsaws turn.

-
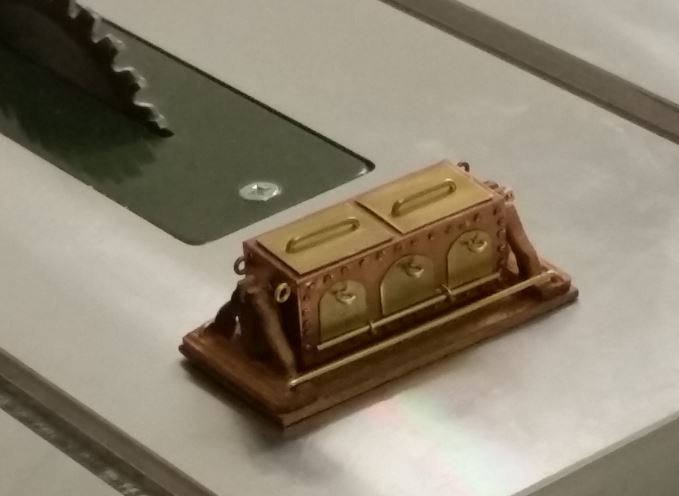
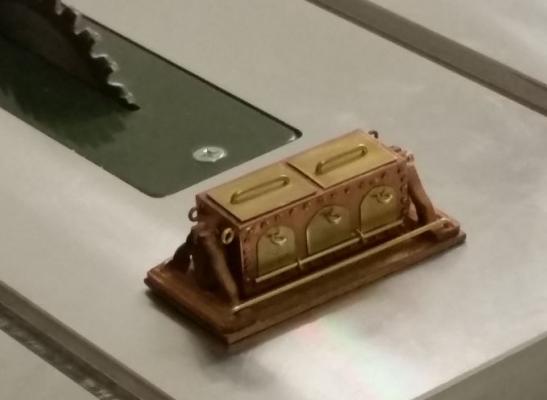
Hi, tracing, cutting, tracing cutting... it gets a bit tedious after a while. I am making progress with the frames, but decided to entertein myself with something more interesting for a while. I've build one of the galleys. I made the base shape from a piece of scrap wood, sanded for a good smoothness. Then this block has been covered with self-adhessive copper foil. The same stuff you use for coppering a hull. The fittings are made from brass and I carved the stand from basswood. Tom
-
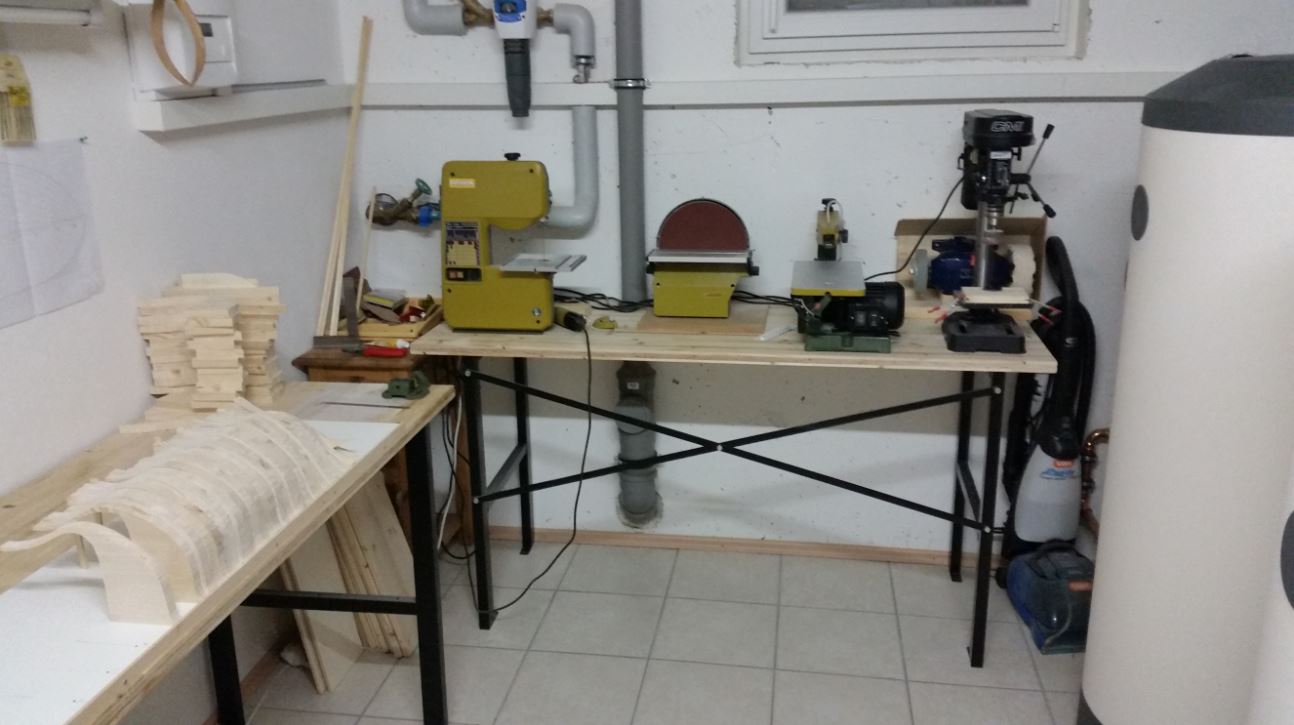
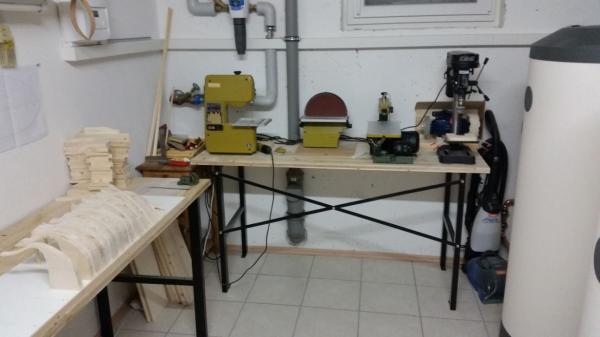
Just to let you know, I have started the building process. The 2 pictures give you a quick peek into my workshop and the early building state of the hull. It is the first time that I am working with this techniqe of building two halfs, joining them after the work on the two sides has been finished. My plan is to give both sides their final shape by sanding. Because I am always sandwiching two pieces of wood before sawing, the buildup of the second half will be much quicker than the first half. Once the shaping is completed, I am planning to mark and cut the gun ports. Then determine the decklines. The last step then is to marry the two halfs before planking and keel-joining starts. Lets see how it goes.
-
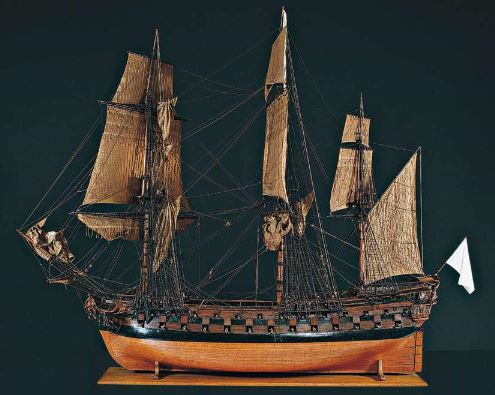
Hi all, I am about to start the French 64 Canon ship L'Artesien. I will build this ship pararell to Le Rivoli, as I want to have the opportunity to change between Projects, when I am stuck with one, or change between the two according to what's on my mind. I was thinking about how to approach these two projects. It was clear to me that I didn't want to build open frame models. I do like the look, but I am scared about the time consumption, because I love to have a perspective on when projects come to a successful end. Having said that, there was still to decide which route to go. In the end I think it will be a mixture of the russian bulkhead method and my own ideas. See how it goes. L'Artesien will be fully rigged with most her sails set. More or less like the model shown in the Musee de la Marine., Paris. I will post updates and let you know how I am getting on.
-
Thanks All !!!
-
thanks Rob, that makes perfect sense. Tom
-
Hi all, I've got a stupid question. When you build scratch and base your build on a plan, say 1:48, what do you do with the overall measurements of the famework. Do you transfer the actual measurements from the plan onto the wood, or do you substract the thickness of the planking you are going to build? If yes, the outer measurements of the model will come out to plan, if no, your hull will be slightly, probably not noticable, bigger. What are the opinions? Tom
-
well, an idea, yes. But, as I said, the dice is just an example. More specific: If I want to stain a carved threedimensional figure. How do I get an even tone on the whole figure without ending with darker spots here and there?
-
to all the Wood buffs out there, I do have a question concerning staining Wood. Take a dice of wood, (not that I want to make dices, it's just for the sake on an example), and you have six sides. Four sides run with the grain, 2 sides are grain-end. Now you sand it to perfect smothness. All six sides feel perfect and alike. Now you stain the dice. The effect is, that, because the grain-end side is more open, These two sides absorb more stain (and deeper) than the other four sides. The result is that you have 2 sides in a darker colour than the other 4. How do you avoid this? How do you get 6 equal coloured sides? Any ideas? best regards Tom