Supplies of the Ship Modeler's Handbook are running out. Get your copy NOW before they are gone! Click on photo to order.
×


Nightquest1000
-
Posts
77 -
Joined
-
Last visited
Content Type
Profiles
Forums
Gallery
Events
Everything posted by Nightquest1000
-
 Henry, AMAZING !!! exactly what I was looking for! Thank you very much for your help. Much appreciated ! Greetings from Bavaria Tom
 -
Hi, I am looking for the rig used to launch and recover a ship's boat. I am in the process of building L'Artisien, a French 64 twodecker around 1770, and want to show the ship setting out a boat. Tom
-
Hi all, maybe I've overlooked it, I didn't seem to find anything. How exactly does the rigg for a hove-to manoevre look in the 18th ct ? Hove-to describes the setting out or hauling in a ship's boat. I would love to have a detailed layout. thanks for helping best regards Tom
-
Hi Doris, you are deliciously mad! all the best Tom
- 883 replies
-
- 1
-

-
- royal caroline
- ship of the line
- (and 1 more)
-
Hi all, it's been a while, but the festive season kept my quite busy and there was Little time to relax in the Workshop. Just a quick update. The inner gunportframes are all in, the two halfes have been joined together and I have loosely fitted the gundeck base. Next step is to install the final gunportframes. best Tom

-
Hi Nigel, good progress. I'm still curious about this pin rolling business. Can you eplain how that works. I am not finding anything here in the Forums. cheers Tom
-
Hi all, got the first batch of milled wood for L'Artesien. Mostly planking material in walnut and swiss pear. I was fiddling with the picture, but can't get the color right. It's more on the red side than the picture shows. Tom

-
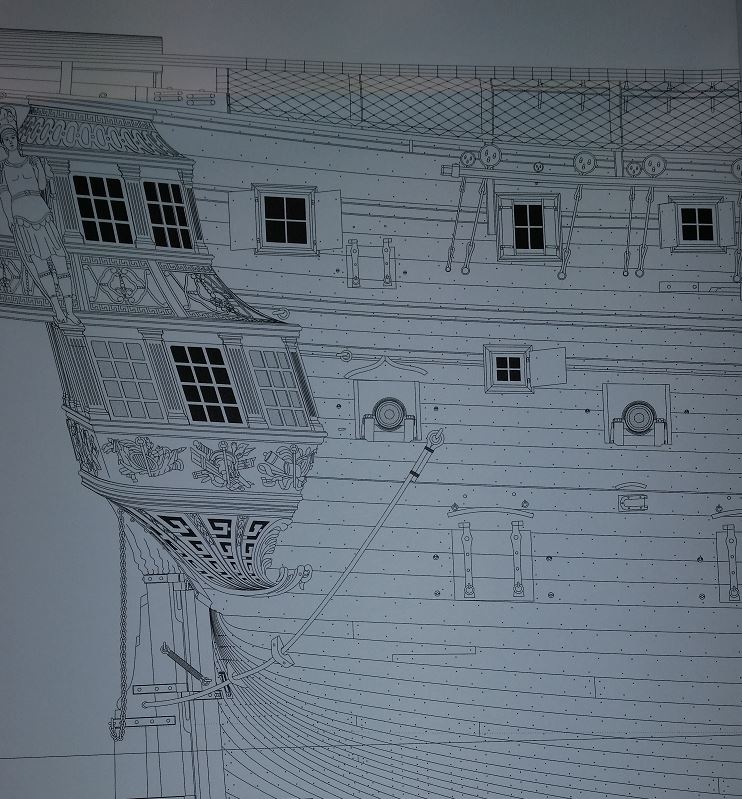
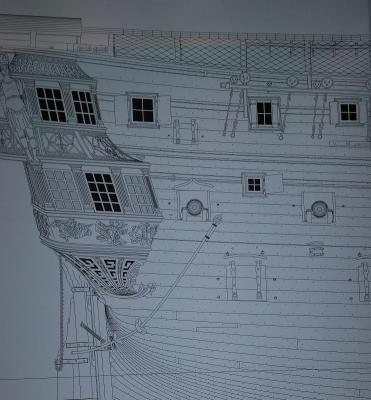
Hi Nigel, thought the best way to answer your question is to show you the respective section of the plans. As you can see, these are all sorts of windows and hatches. best Tom
-
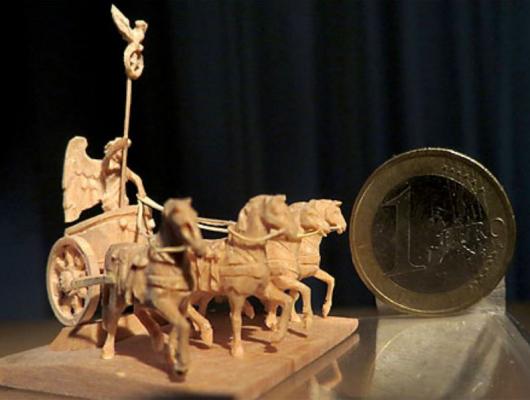
Hi all, I wanted to let you know about my experience with the use of basswood for miniature carving. Quite a lot of modellers, including myself, entertain the prejudice, that basswood is not very good for miniature carving. Instead, the only timber to go for, are all sorts of short-grained, hard-growing fruit varieties. Not true. I have a carving mentor, who lives near the alps. 1 hour driving time. Every now and then I visit him for a lesson. The typical alpine carving style is what he does for a living. Nativity scenes and that sort of thing. But sometimes he does miniatures, just to push the borders and see what's possible. From that, from practicing with basswood, I can tell you, basswood is perfect for miniature carving. Especially, if you plan to gild, or paint it. It is not as hard as the fruit timber, but still holds tiny edges. It is worked with normal, small carving tools. You need to keep them in a pristine sharp condition. But you do not have to invest in expensive high quality dental burr equipment, if you don't want to. This also means you can finish figures much faster than working the much harder fruits, like pear or box. I am attaching a picture of a quadriga, my mentor did. That's his smallest so far. The groundplate is much smaller than my palm. Again, no dental burrs, only knives and traditional miniture carving tools. Tom
-
Hi Nigel, apple is a treat to work with, very similar to swiss pear. Good für planking, beams and even carving. It holds tiny edges as good as pear or boxwood. The natural color of apple i very nice and can vary. Another excellent wood for miniature carving is plum. It has the same characteristics as pear or apple, but has a much wider variaty of colours. Very nice when doing carvings in 1/48. Especially if you don't want to guild or paint it, but leave it natural. It can flare up with nice surprises within one figurehead. Blue-ish grain areas, for instance. Very beautiful. best Tom
-
Nigel, for me, it is exactly the other way 'round. I have no idea how he makes the nails... Tom
-
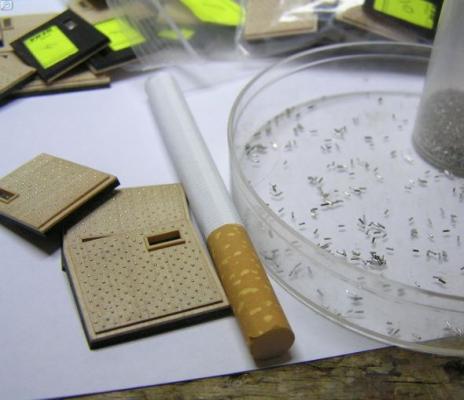
Hi Nigel, your "sea of nails" can be done! Here's a picture of Dr.Mike' approach. Happy nailing greetings Tom
-
Hi all, the first gunport linings have gone in. Tom

-
Hi Nigel, nice work! don't tell me abou heavy. At the moment I am enjoying the two hafls of L'Artesien whilst I am working on the gunport frames. But once the two part are together she will be around the 5 Kilo mark. What are you paying for pear in good old England? best regards Tom
-
Hi Chris, impressive Job for a beginner. I also like your paintwork. best regards Tom
-
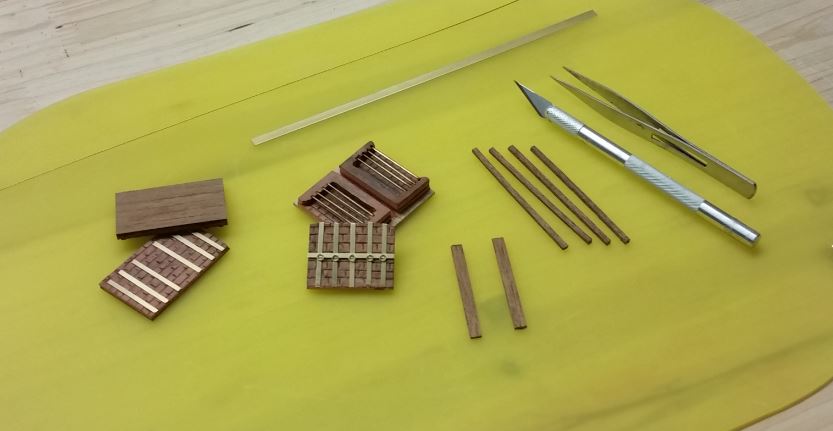
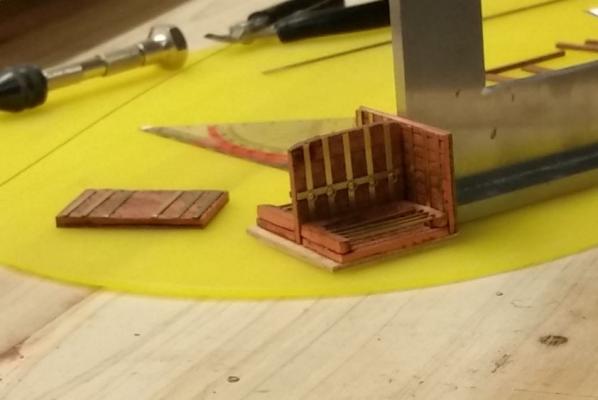
here we have both, the hearth and the swinging kitchen. They look nice together, don't they? The last item in the cooking ensemble is the bread oven, which will follow later. Meanwhile I'll continue working on the hull. till then Tom

-
Hi all ! The galley hearth is completed. It was a joy to build. The brick construction was encased in wooden walls, which were reinforced with St. Andrew crosses. It sits under the forecastle together with the swinging galley kitchen. Bit of a shame, you see the side walls, when looking from the maindeck under the forecastle. Maybe it is possible to see a bit inside the hearth when you look at a slightly diagonal angle. Or through a gunport. Remains to be seen.

-
Very nice progress Nigel! I wish I would be there yet. Still way to go for me. How are you getting on with pearwood for planking? I only used it for carving so far. How does it behave when you are bending it. Does it discolour when you steam it? best regards Tom
-
assembly started
-
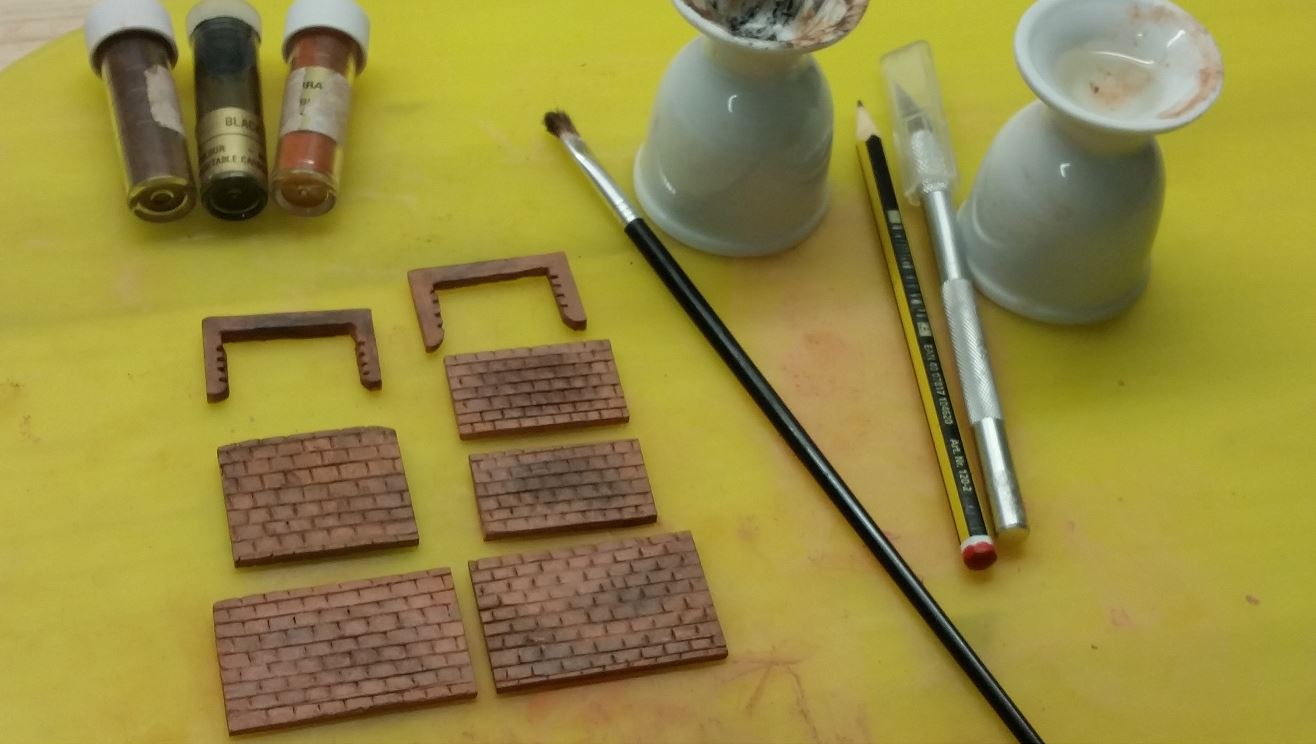
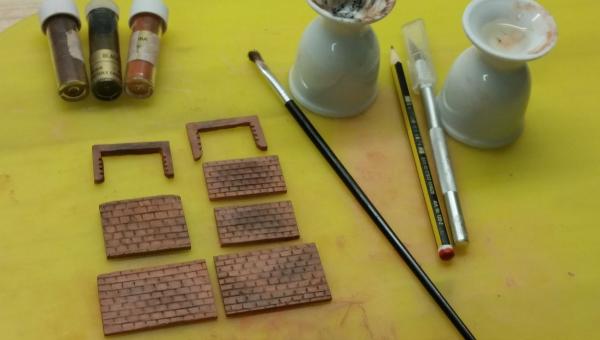
Hi all ! the parts finished for assembly. Fitted with brass straps and rings. The straps secured the brick-work and the rings where for securing all sorts of cooking devices.

-
Hi all, the Brick-work now darkened and aged. I use water-soluable powder colours for this kind of work. In this case I used dark red, brown and black. Apply a very thin wash of red and brown, repeatedly until you are satisfied with the appearance. Don't make it too even. Then let it dry and apply some dark aereas with a mix of black and browm. Just the colour, no water. You probably heard of the dry-paint-method. You need a stiff brush to apply the colour. Again, randomly in various places and try to blend out. Tom
-
dear all, we do need a bit of a change every now and then, don't we? I started on the second galley, which is sort of a double-sided open fire cooking site. No idea what the proper nautical or english term is. I am using air-drying modelling clay for the brick work. Tom

-
Hi Nigel, you are a very good observer And yes, you are of course right. You end up doing the work twice. But, there is a big but, with an inner frame, that you can fair off inside and outside, you have a perfect base to work from. My approach is a bit different, as I am using 2mm for both, the inner lining and the final framing in walnut. This provides a bit of "flesh" for a nice overlap of the planking. cheers Tom
-
Michael, well, I was impressed. You have to get the hang of it, then you are able to maintain a good straight line. At last, over the short distances of a gunport-width. Minimal tear on the under/backside. I wouldn't use it for longer cuttings though, as the narrow blade will definately not cope well with a long straight line, and, as mentioned before, the blades grind down fairly quickly. Re-sharpening is ample. Tom
-
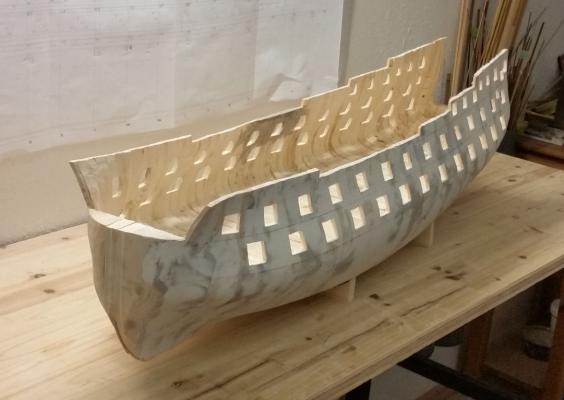
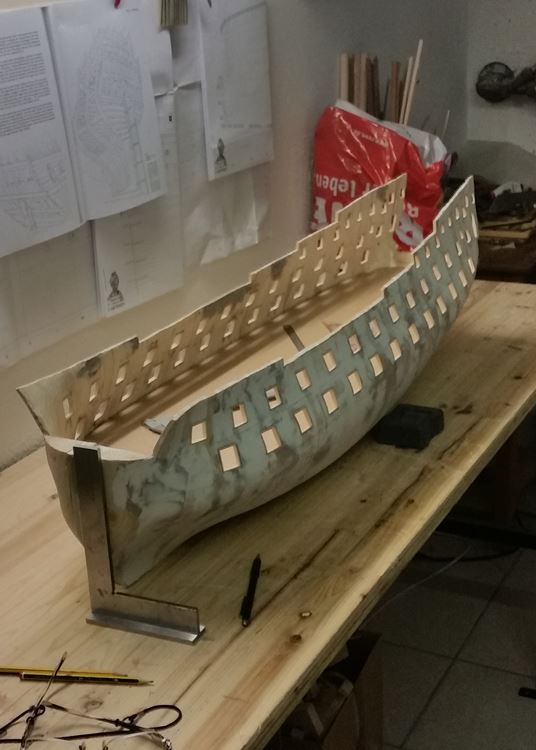
Hi all, just a quick update. I've finished the gunport openings. In the picture the two halfs are put together loosely. The are not yet joined. She looks a bit sad at the moment. Can't wait to get the inner gunport frames done and the final fairing. best regards Tom