HOLIDAY DONATION DRIVE - SUPPORT MSW - DO YOUR PART TO KEEP THIS GREAT FORUM GOING! (89 donations so far out of 49,000 members - C'mon guys!)
×

Spiff
-
Posts
63 -
Joined
-
Last visited
Content Type
Profiles
Forums
Gallery
Events
Everything posted by Spiff
-
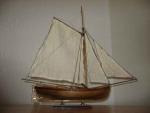
 Hi all Im at the point in my Golden Star build where the hull is varnished and Im starting on the deckfittings and masts. I have done the bowspit where I varnished the parts before glueing together. I usually use PVA glue but for attaching things to varnished wood I dont think PVA works, so I used CA glue. Now, the thing is that it has clouded/frosted the varnish around the joint. What are your experiences with this and how can it be avoided (different varnish or glue?). Cheers Shaun
 -
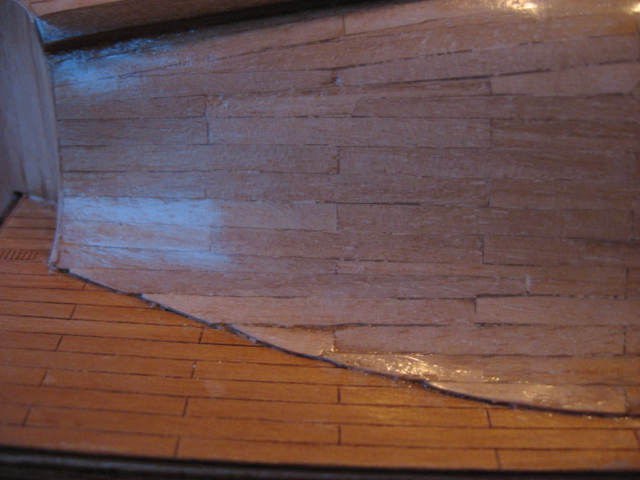
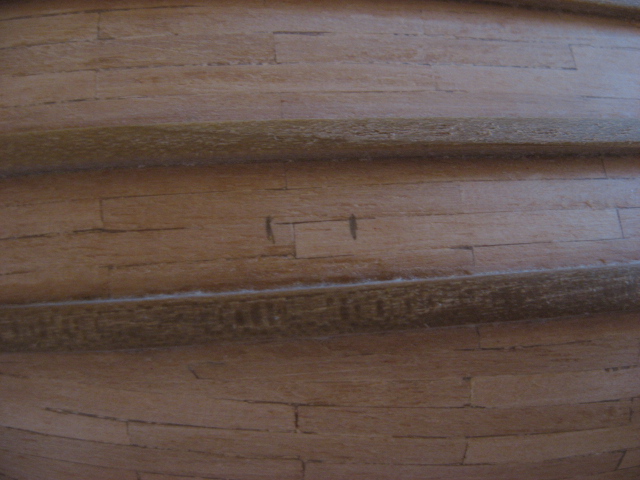
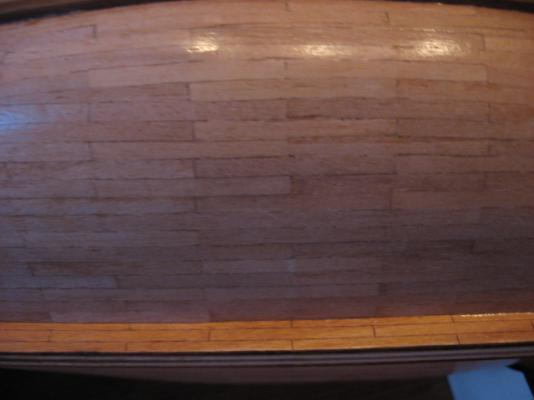
Im guite happy with the results but from the right (or rather - wrong) angles there are stains, which I think must be from the wood-glue used to glue on the various strips on to the planking. Can be seen in this pic. Does anybody know how to avoid this? I have sanded a bit after glueing and scraped as much glue away as posible when glueing.
-
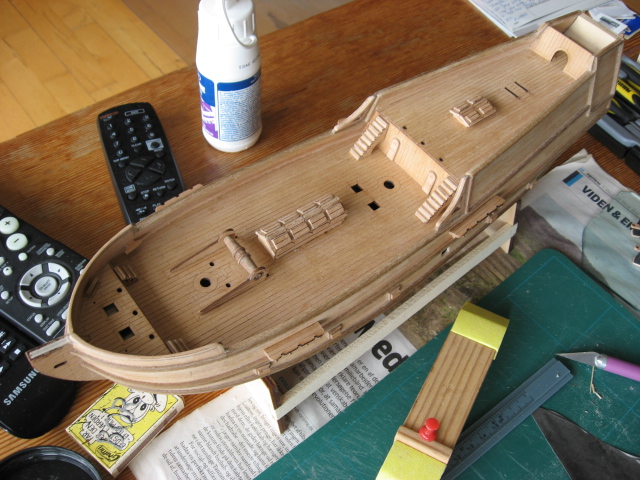
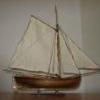
Thanks Jan and Wayne Havnt built so much recently, but have given it three layers of varnish, so now the hull is complete!

-
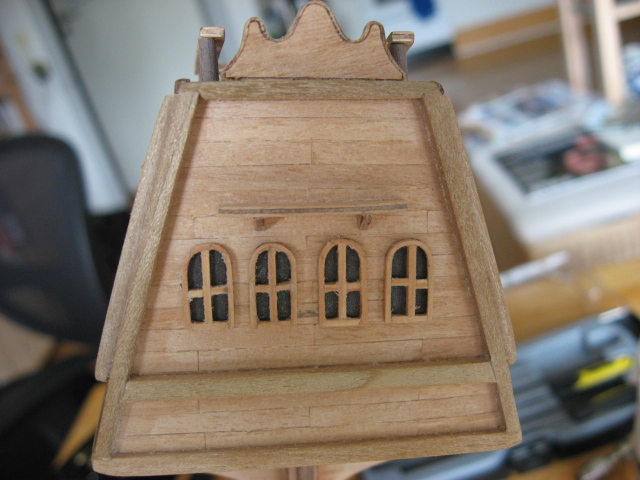
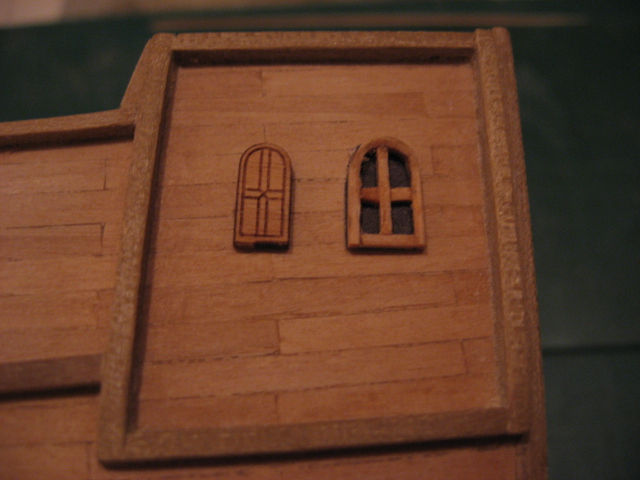
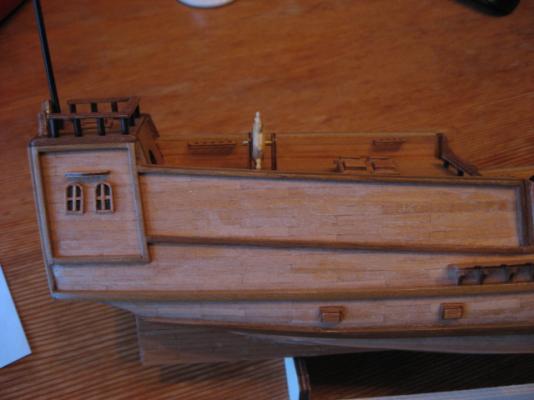
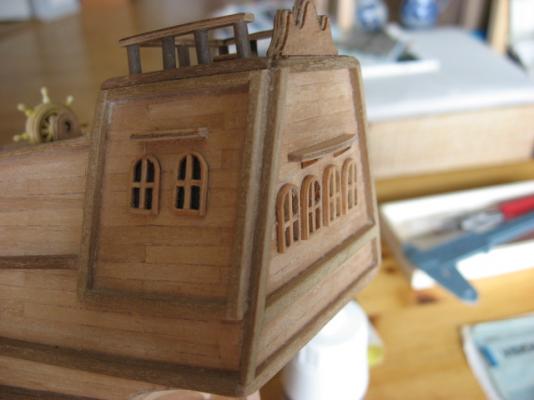
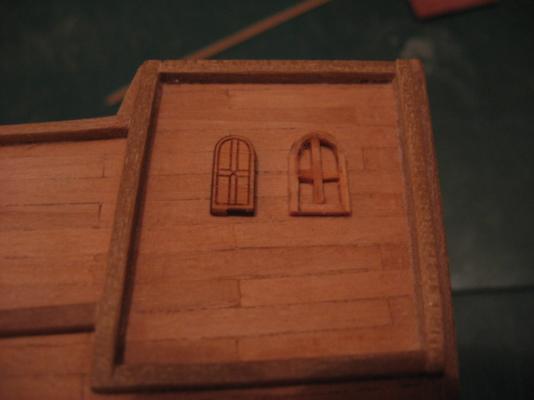
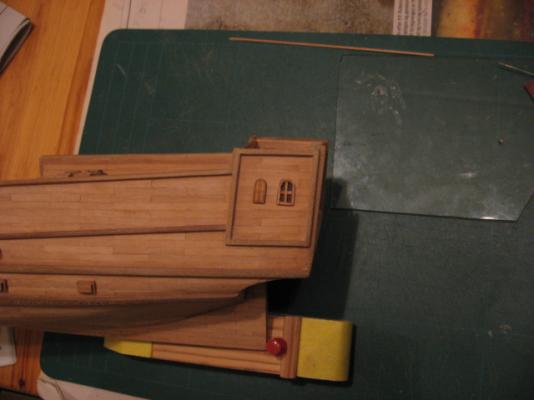
Just realized that after all my work on the windows I dont have proper pictures of them installed So here they are. They arent completely straight and perfect, but Im pretty happy with the result - when viewed from a few feet away they look quite good IMHO.


-
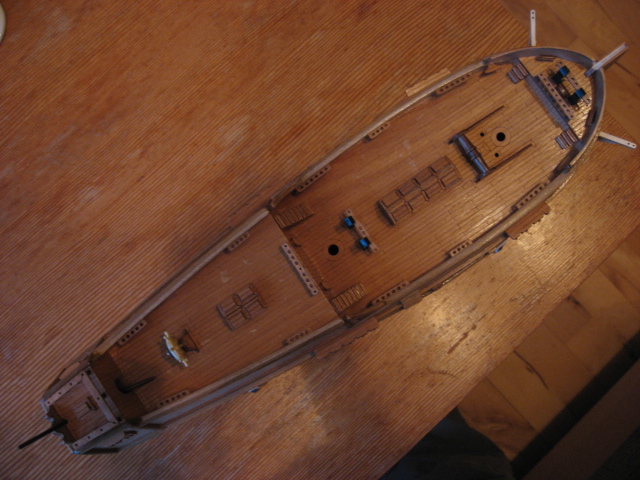
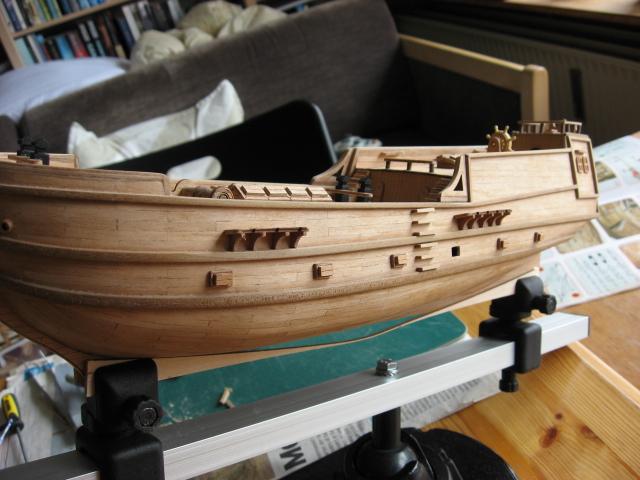
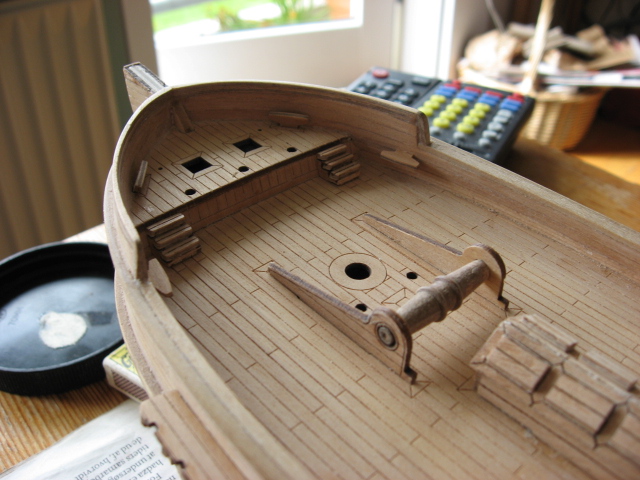
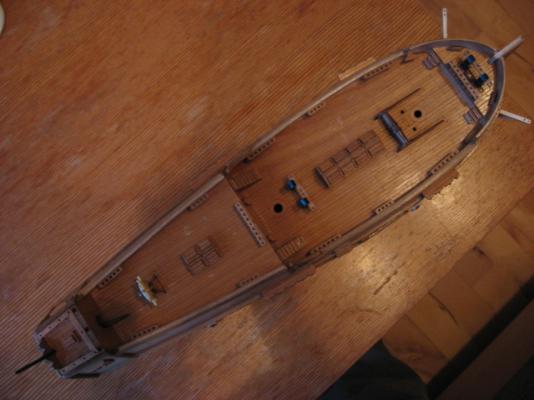
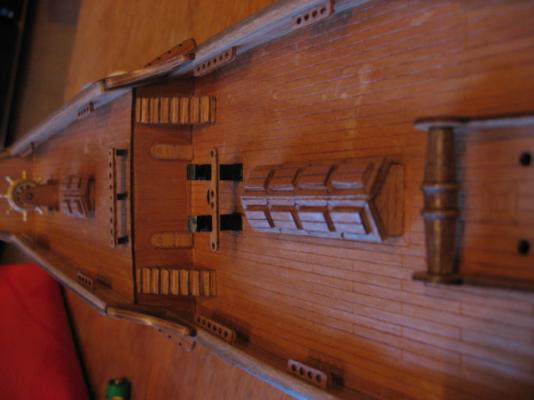
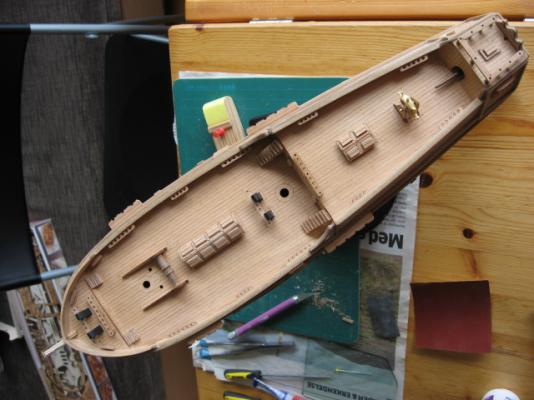
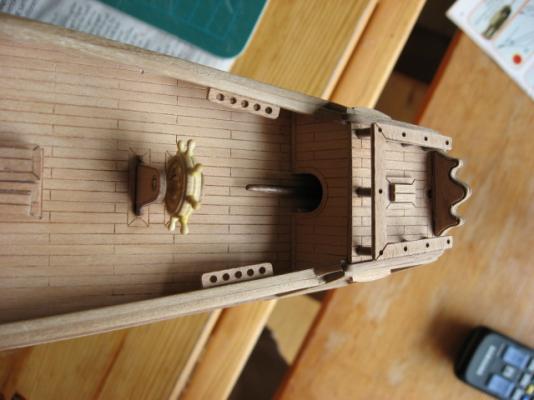
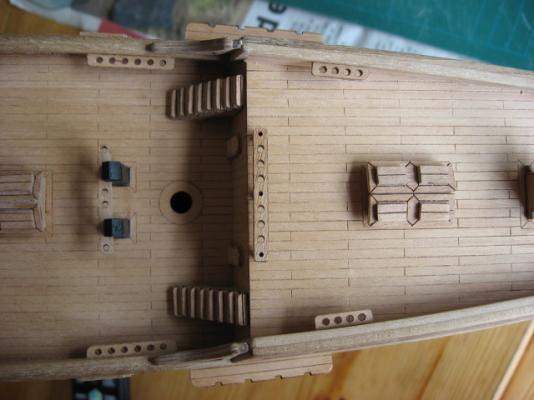
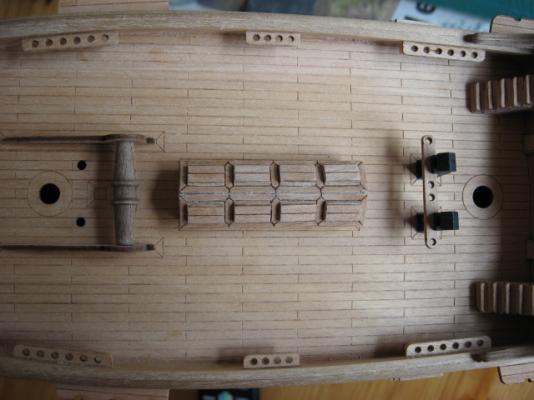
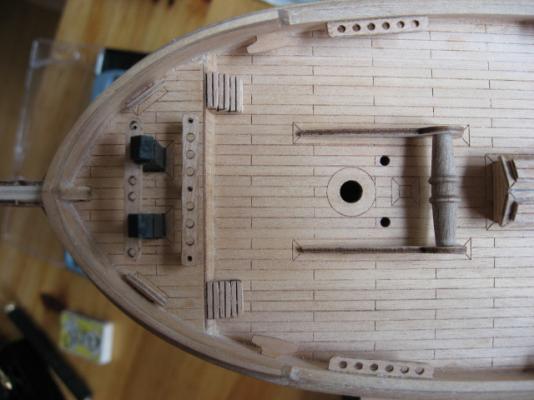
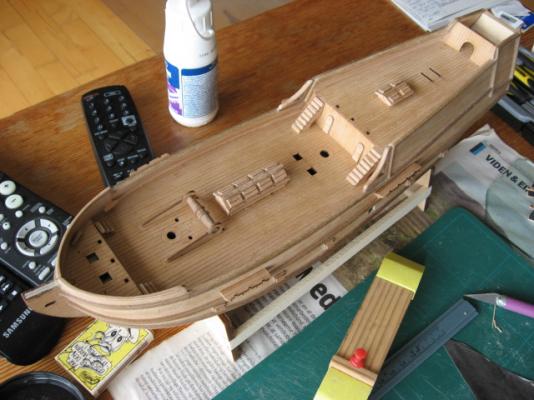
Shes really starting to look like a ship now - have almost all the deck-fittings on, and think I only need the anchor-holders (whatever they are really called ) before I can varnish! Made a quick little jig to make even spacing between the 'steps' on the side of the hull.


-
Its looking good. And I like all the little tips coming on this post - I will certainly try and remember Grants tip about every 4th ratline.
- 773 replies
-
- 1
-

-
- san francisco ii
- artesania latina
- (and 1 more)
-
Hi TMC yes - not long till I start on the masts - looking forward to it.
-
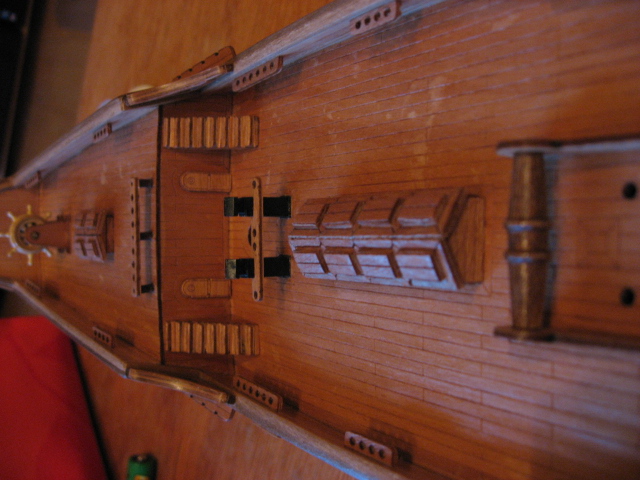
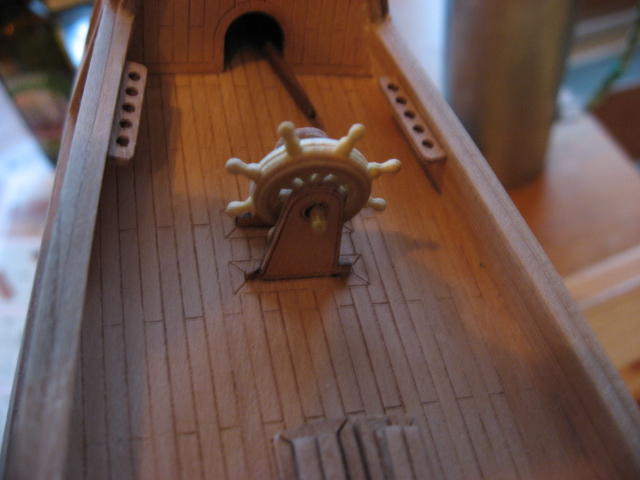
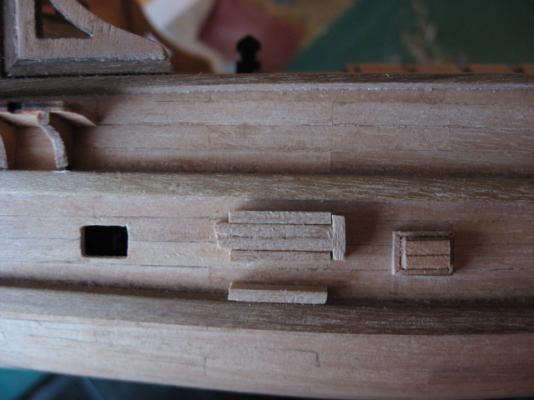
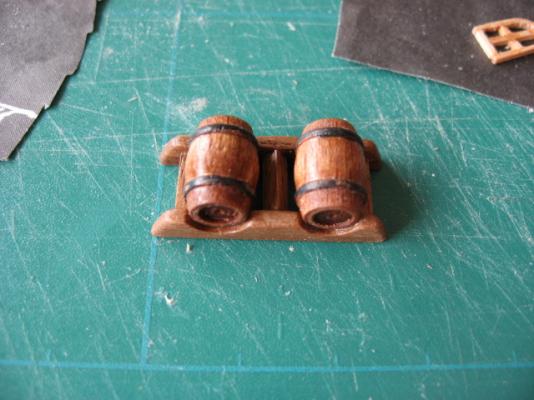
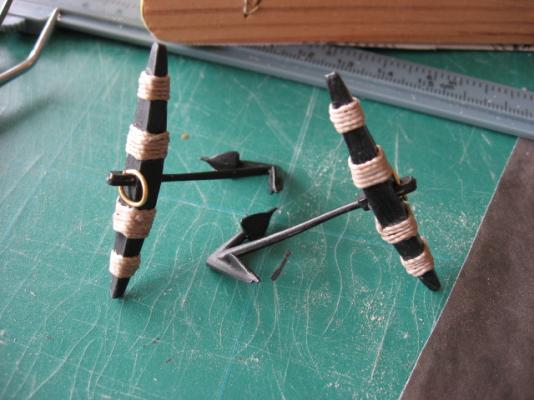
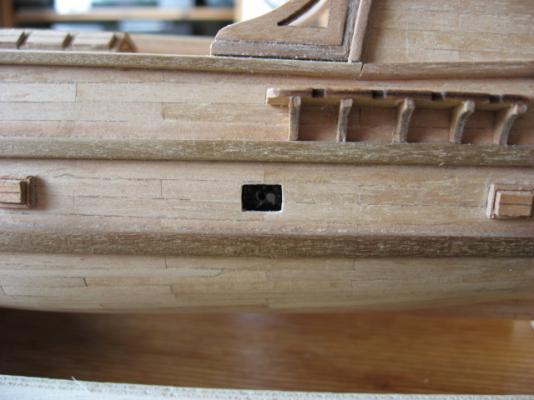
Got more done on some of the little things. Glued my windows to the varnished newspaper, finished anchors, stairs and barrels. Also opened up the two gunports - was looking forward to see if the black strip of wood was in the correct place - behind the gunport. And it was! Made a test fit of the half-canon that will stick out there and it looks quite good I think. Wont install the gun till later though. The two pinracks on the black posts (no idea of the nautical term) were too small for the premade holes in the deck, so have added thin little strips of wood on the bottom, and will then sand that down to get a tighter fit.


-
Wow - that picture Wayne posted is just plain SCARY
-
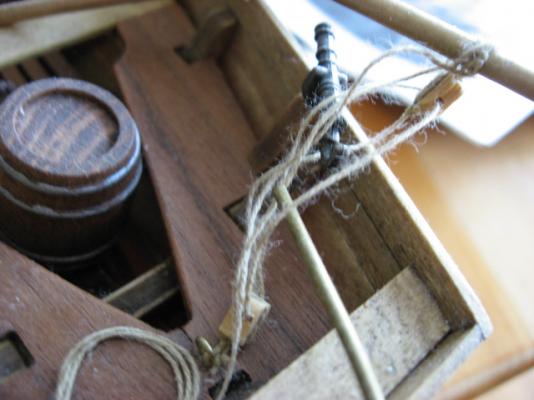
Hi Robbyn Looking good ! I cant wait to see my Golden Star with masts - thats when it becomes a REAL ship I will give you one little tip - I read about it and havent used it yet myself but intend to. Its supposed to be good to smear a little bit of (diluted) white gule on the rigging after installing, so that the string dosnt 'fluff'- (for the lack of a better word). I didnt do it to my first build and can see that just after I finished it the strings looked fine, but now its as though it as frayed a bit - not at the ends but all over. Have a hard time explaining so have just taken a quick pic (and its not (all) dust). Maybe someone who have actually done this can verify?
- 773 replies
-
- 1
-
-
- san francisco ii
- artesania latina
- (and 1 more)
-
I have read The Bounty by Caroline Alexander which is an account of the events - that was reallly why I choose to build the jolly boat - and when I have enough experience I want to build The Bounty. I can recomend the book although I never finished it because the last part is all about the legal proceedings that happened when Bligh and some of the mutineers got back to England - that part of the book got very booring (to me). Im generally surpised and a bit disapointed that there arent more model kits of explorer vessels for example The Endurance.
-
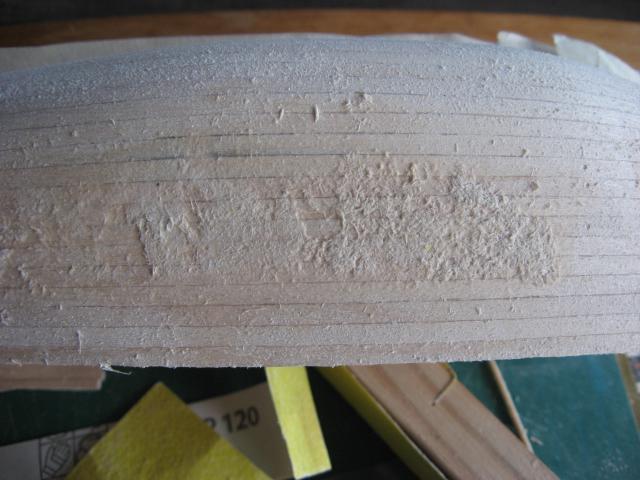
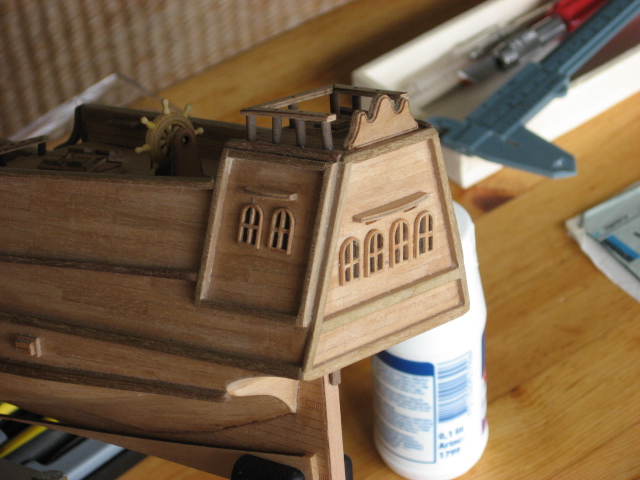
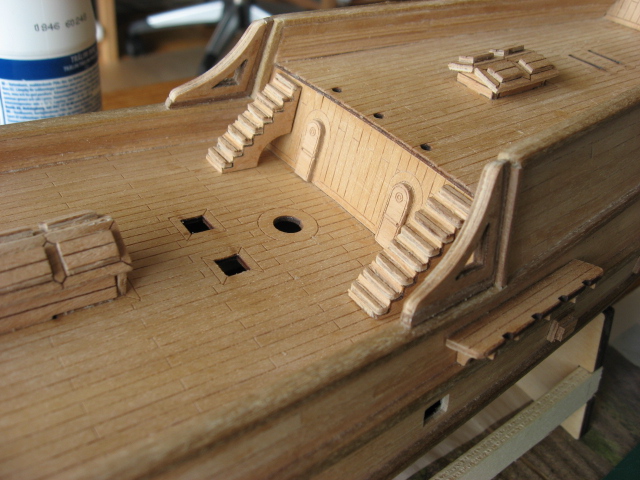
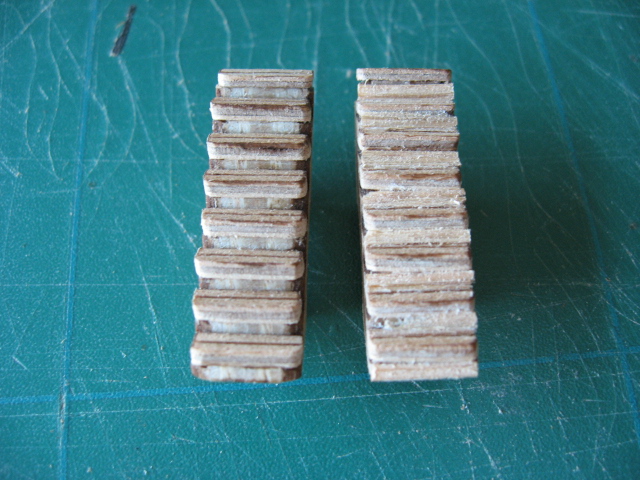
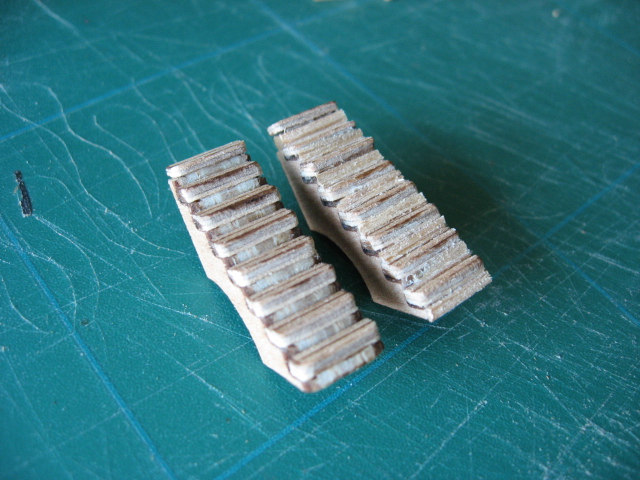
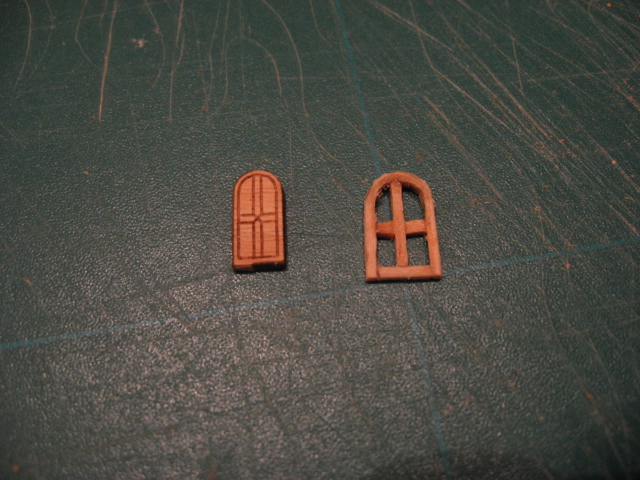
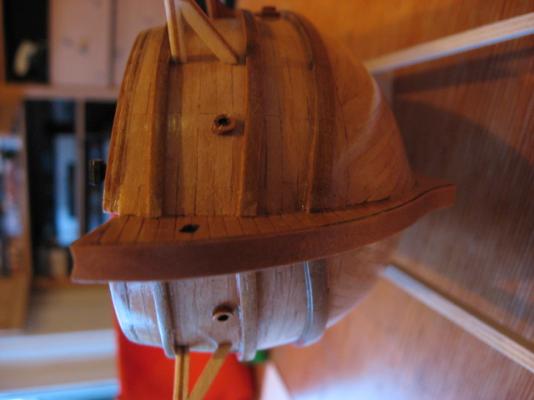
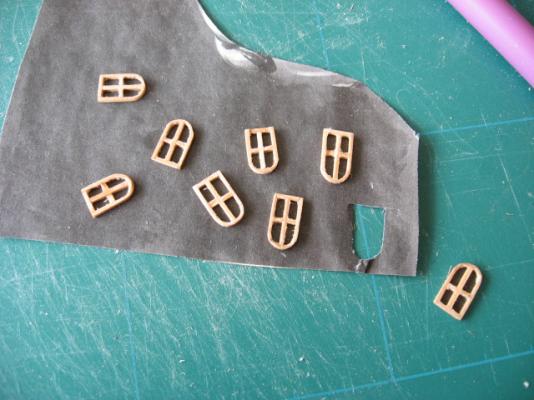
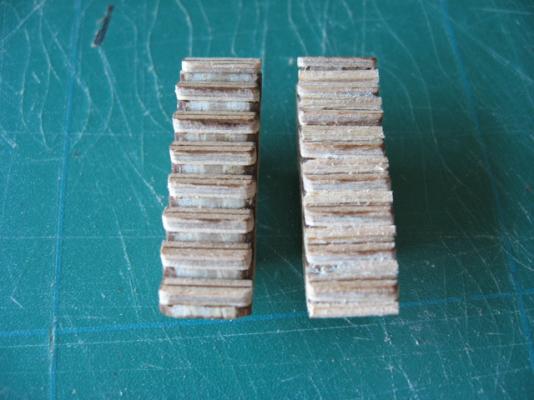
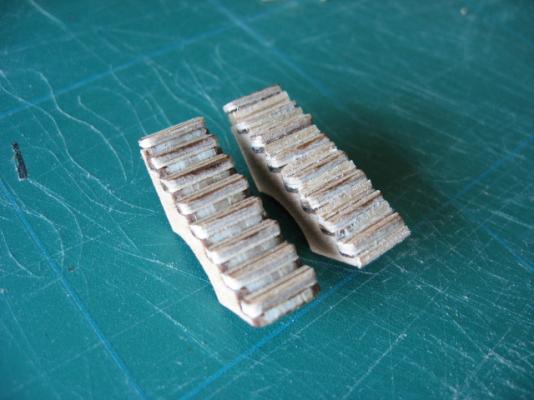
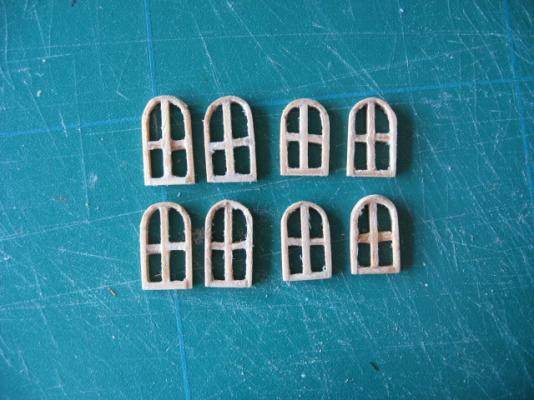
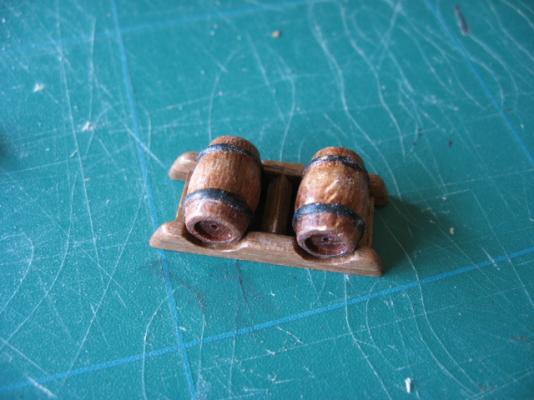
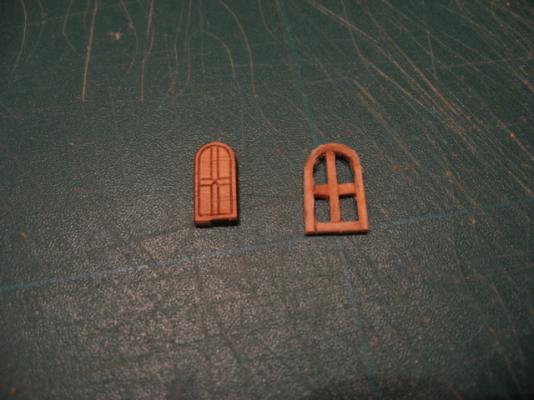
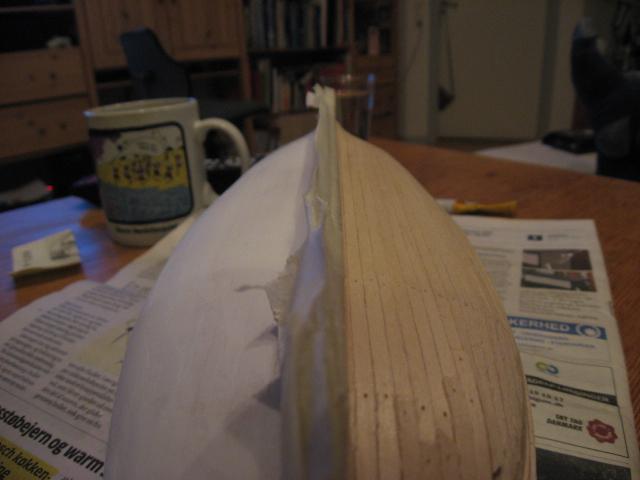
Put in a lot of hours on the ship the last couple of days - but not much has been added to the ship yet - its all been little things yet to be glued on. Made the stairs but not quite happy about the look of the wood between the steps (you can see that its different types of wood lying vertically) - left in the picture. So I added little strips in between to cover the vertical lines -right side picture. Not entirely happy with it, and thinking the best result might be to build my own stairs - just not sure Im up for that right now. Also picture of the finished windows. I accidentially made two different types - one slightly higher than the other - so decided on keeping them and just making 4 of each and will place one type on the sides and one on the back. Also a picture of my testing of varnishing newspaper. Above the text its a waterbased matt varnish - but that turned all white. Below is a solvent based gloss varnish that turned out ok - so will be using that to add behind the windows. Finally made a little stand for the barrels so they can be lashed down instead of just standing loose on the deck (still have to add the lashings).

-
Hi TMC I dont update my log so often, so not much to loose track off Thanks for the encouragement on my windows - my wife thought the same - but then shes biased I havent varnished the hull yet - want to get most if not all of the deck fittings and such on and then varnish it, so I dont have the problem of clue not liking varnish. So guessing the varnish will make it a bit darker, but I dont inted to stain it
-
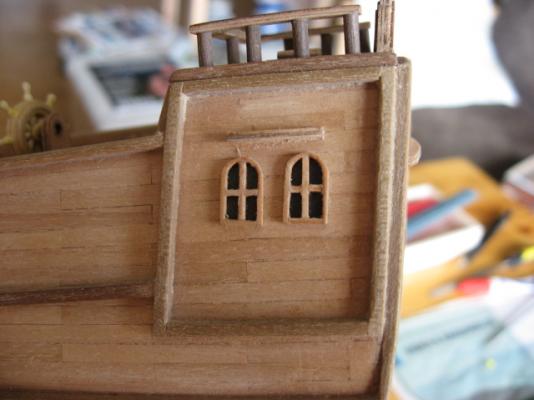
Did my fist bit of scratch building. Dont really like the windows that come with the kit but they are really small so just impossible (to me) to build exactly the same size. I used 1x1mm strips and used the kit window as a template and bent the strip on the outside of the window - so my window is larger than the kit. This really is the limit of how small I can build with wood - the small 'spokes' in the window were just so small that I couldnt do much with them and they were very hard to control - but I got them in. At first I didnt really like the look of my window and didnt know if I should just use the kit window, but this was because I was looking at it too closely - when I put it (just dry-fit) on the model and stepped back a bit I think it looks ok. Have just used some black paper cut from a newspaper behind the window. Was thinking of getting some black plastic - but maybe this simple solution will work just as well. Will have to think about what to use there.

-
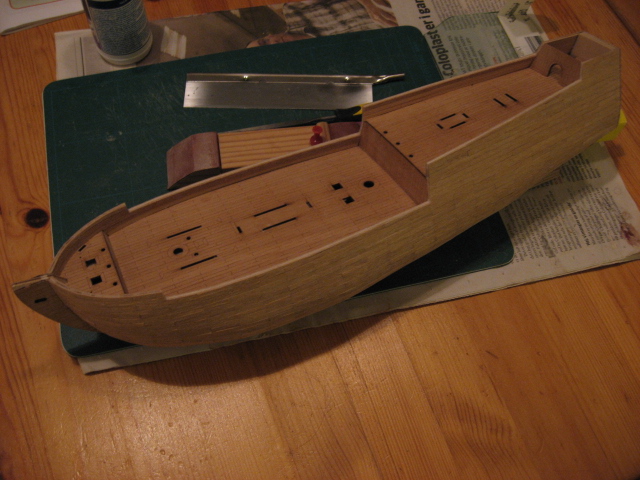
The hull is starting to look more like a ship because I have started getting various fittings on it. Put the gunports on - still lacking the two where I have to make a hole in the planking - both because I dread drilling through my planking, but mostly because I lent out my drill-bits to a friend. I used baking paper to make a template for the gunports - with this I can draw on the paper and see through it and thus use the same template on both sides of the ship.

-
Hi Garward I agree - after I had started I also realized that the planks should probably have been longer, but it was too late to change. Will make them longer on next project.
-
Hi Garward I dont understand what you mean by 'covering levels' ?
-
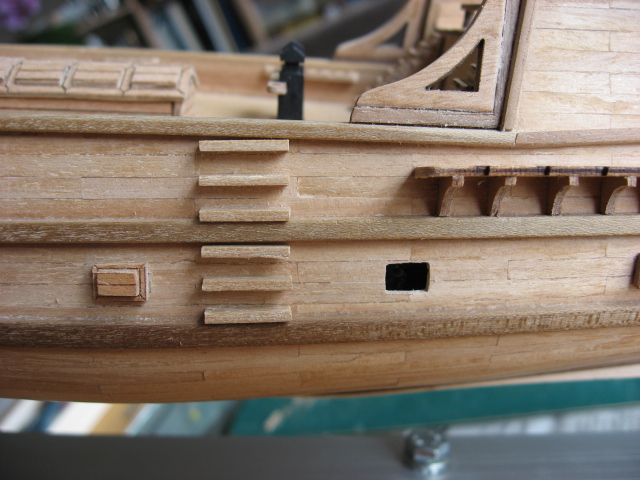
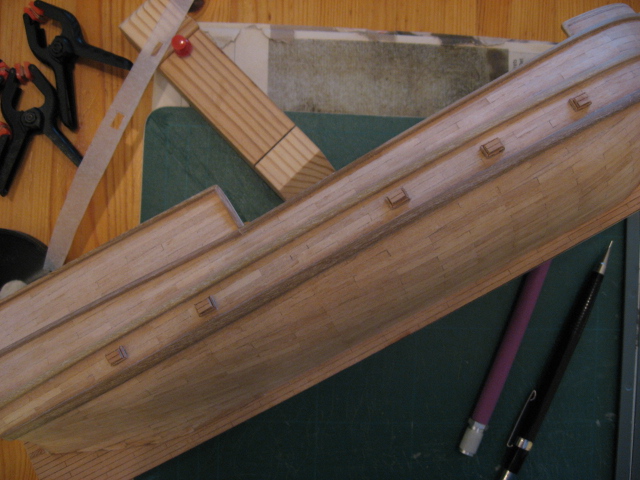
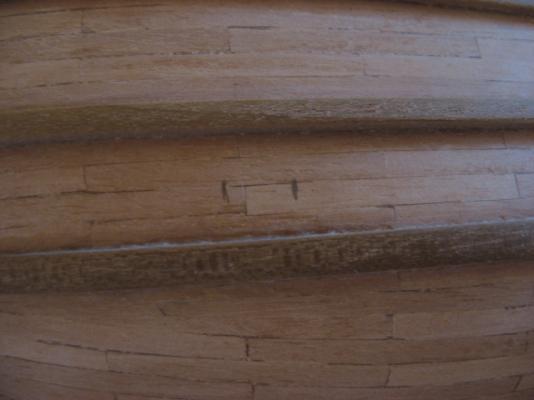
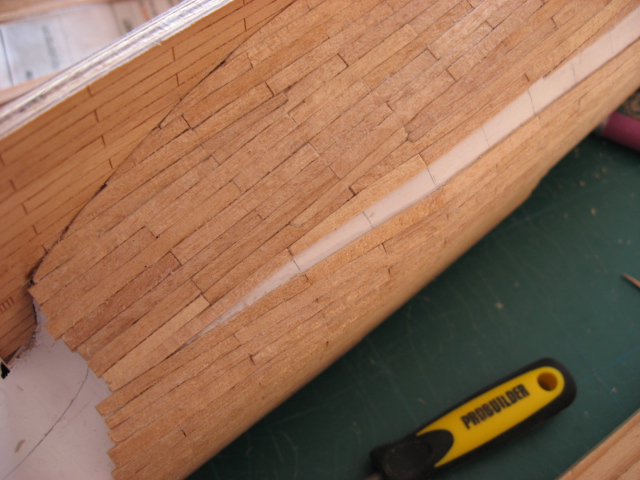
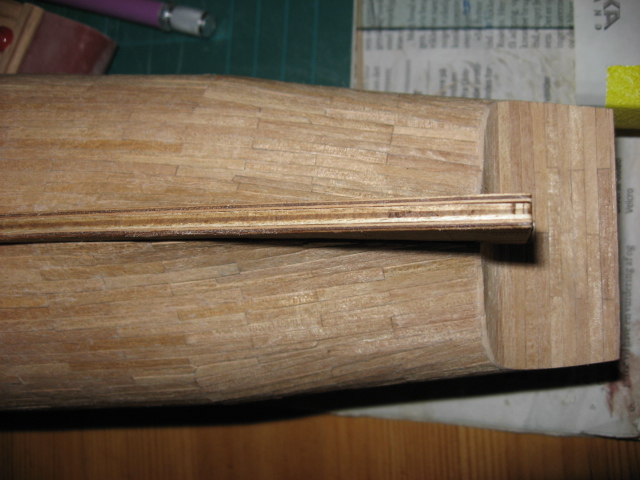
Moving along with the various planks on the outside of the hull and started on some of the deck fittings. Had some problems with the guard strakes as they were so thick that they didnt really want to bend - despite soaking for several hours one of the strips split in both ends so had to use it despite a split, but Im hoping it wont be very noticable - there is a closeup in the first picture below. Also, I am sure the instructions were wrong as they wanted the lowest strake to end much further up the hull at the rear (where my middle strake lies) which would require to bend it in a very 'unnatural' way - it really wouldnt follow the flow of the hull. So I found another build log of the Golden Star in here at MSW and noticed that he also hadnt followed the instructions. It looks straight the way it lies on the hull now, so I think that must be the correct way.

-
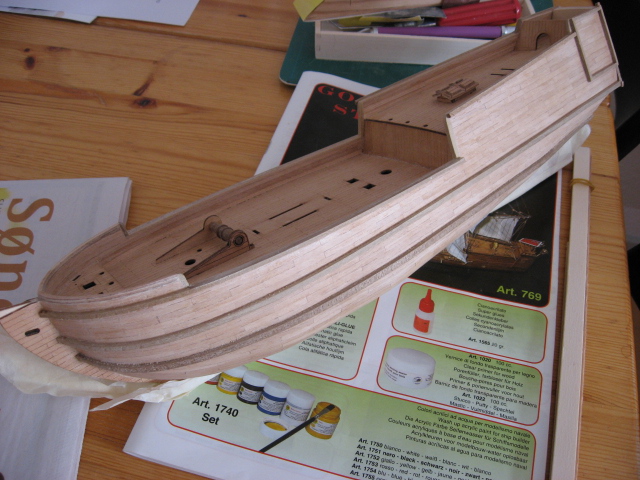
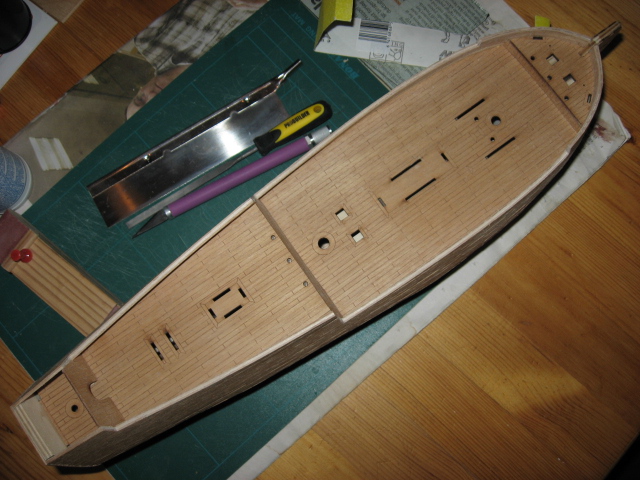
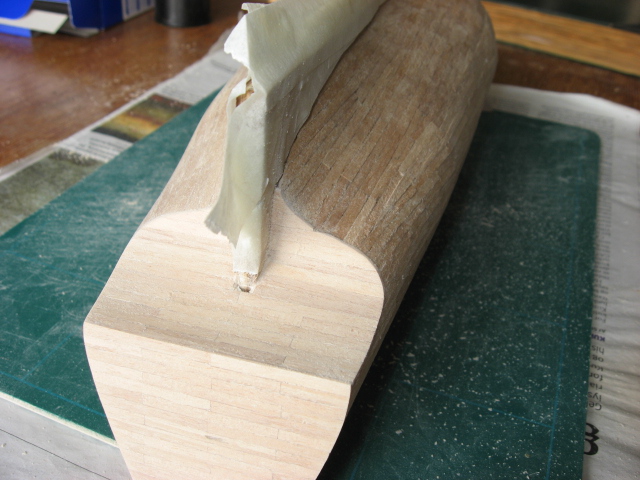
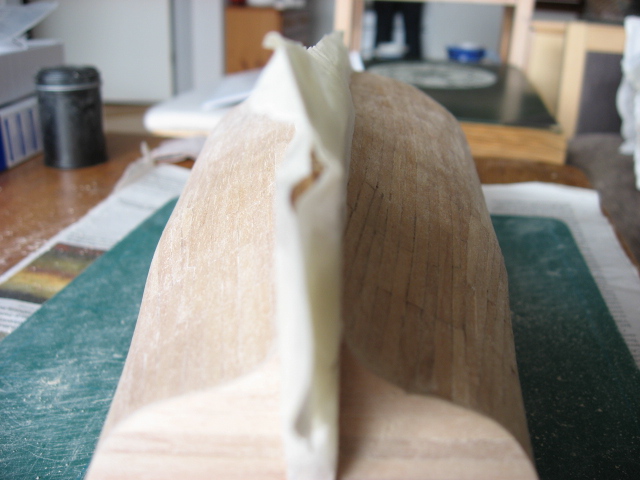
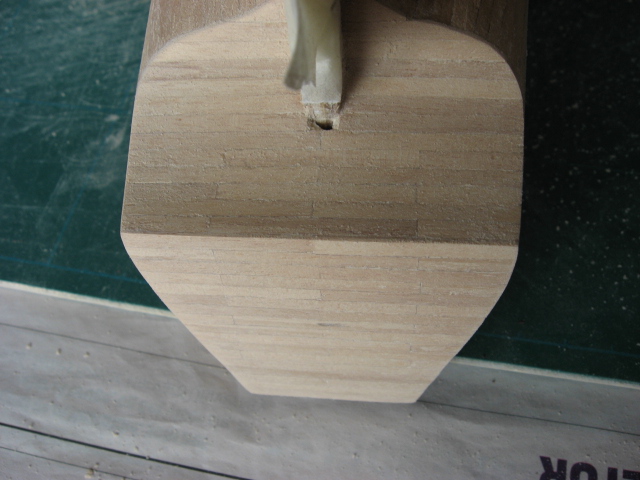
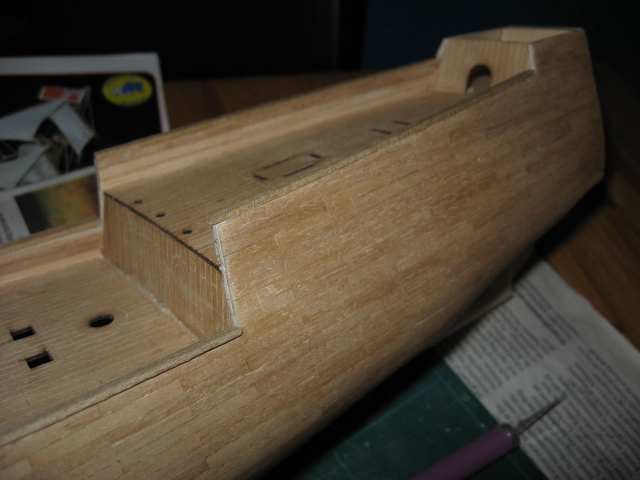
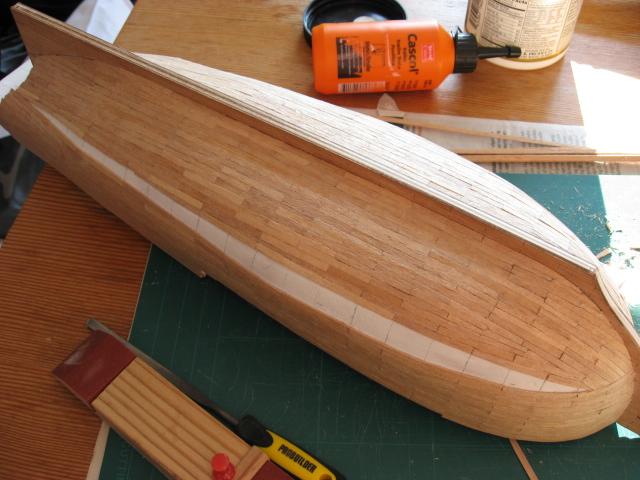
Thanks Dave and Keith Keith - I like your canoe - really like the different woods in it. So, here are the latest pictures, bringing this build log up to date, as this is where I am now. Must say that I like the look of it after sanding, and it should hopefully get even better when varnished.


-
Hi JP thanks for the suggestion - I see what you mean. One thing that I do hope to achieve by doing it this way though is that I mixed the strips so I should get slight variations in the colour of the wood, which you wont get if its just one long strip that you score. But I think I will judge when its finished if it was worth the effort ;-)
-
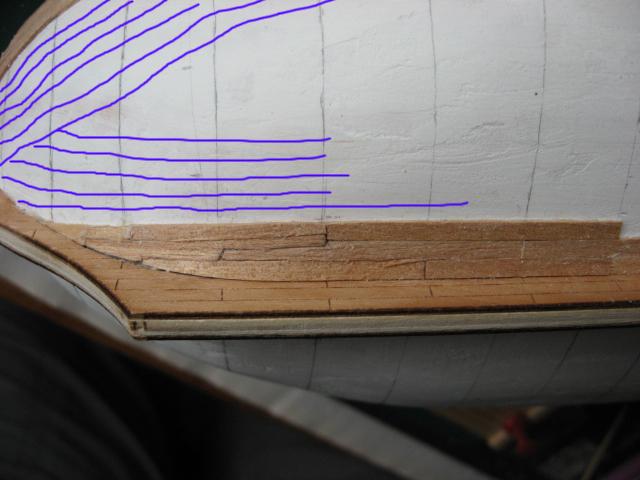
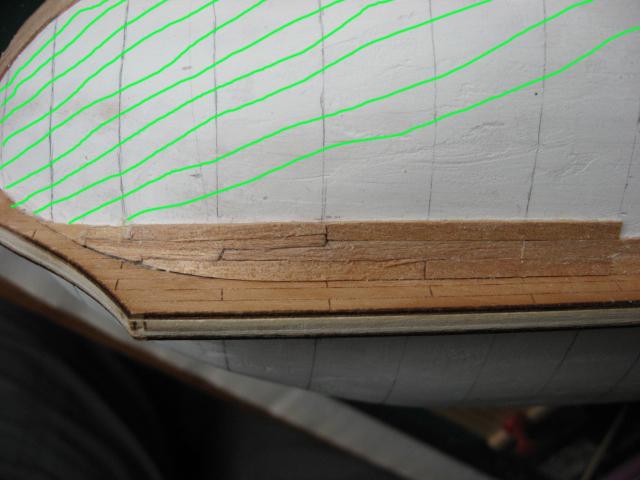
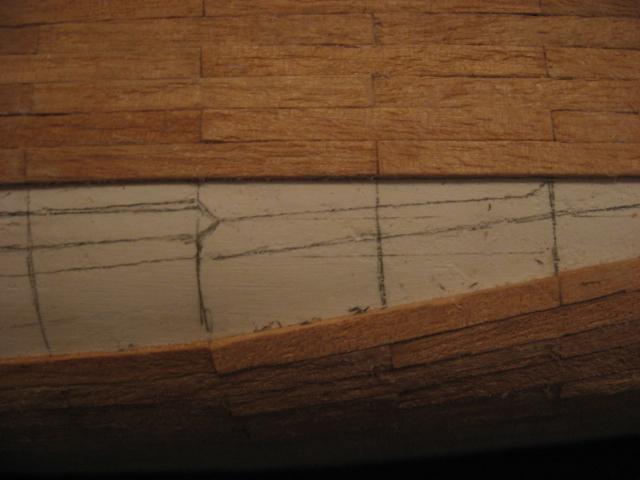
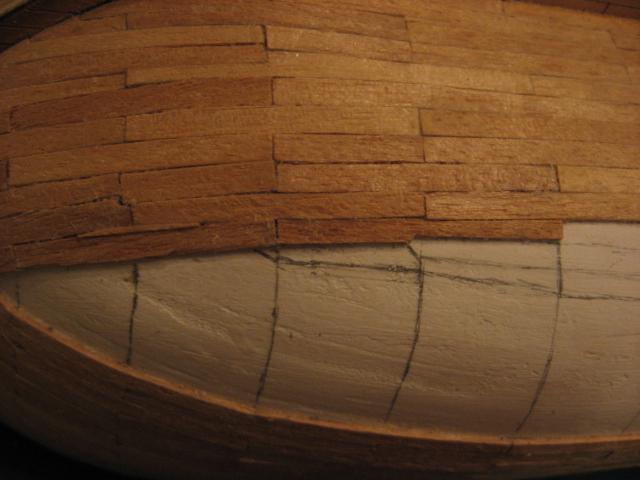
One thing I never understood - even after bying a book about model ship building and reading the begginers guide here on MSW - was how you know and plan when to use steelers and drop planks. I tried it and it somehow nearly always had the opposite effect of what I wanted! I would draw out my plan on the hull and then build accordingly. However - finally - after seeing a build log (again cant remember the name and ship) and reading some of the other planking guides I think I am finally 'getting it'. You really have to plan it all from the start and use that excel-spredsheet found here on MSW. So now I know how to make my next model - I think! It still baffles me how you can know where the drop plank(s) will be and how many to put in. Also - how do you know how to lay the planks at the bow - the bottom planks easily go upwards at the bow but should they go all the way up or 'meet' planks laying horizontally at the midsection... Have tried to draw on some pictures to show what I mean. But otherwise, a couple of pictures of my attempts at steelers and dropplanks (still havent quite learnt which are which). Pleas feel free to comment and help out on some of these issues.

-
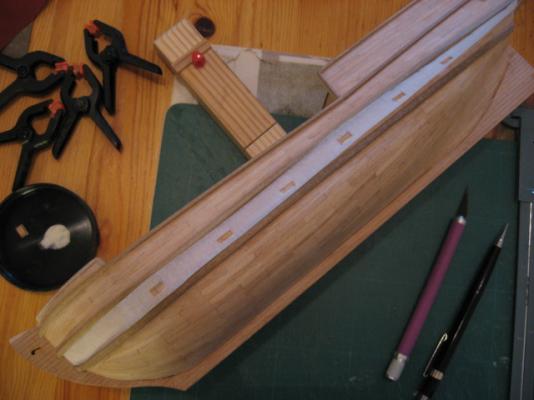
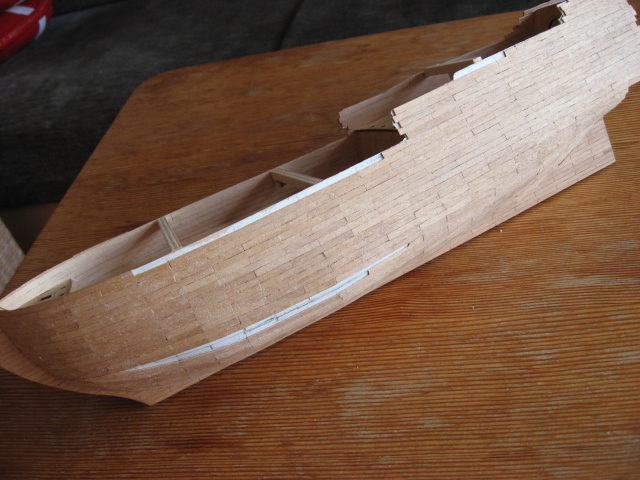
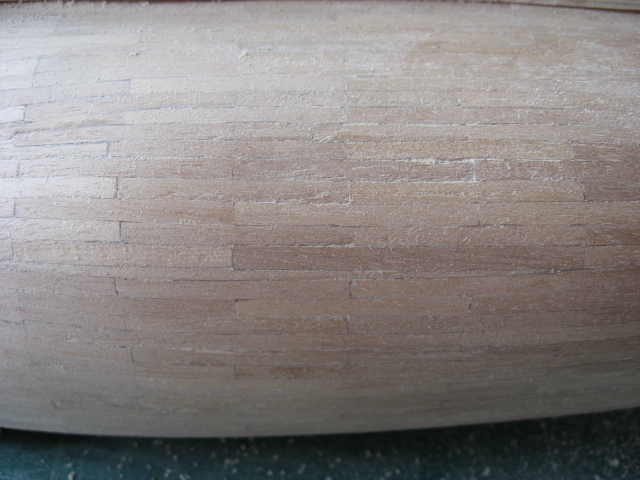
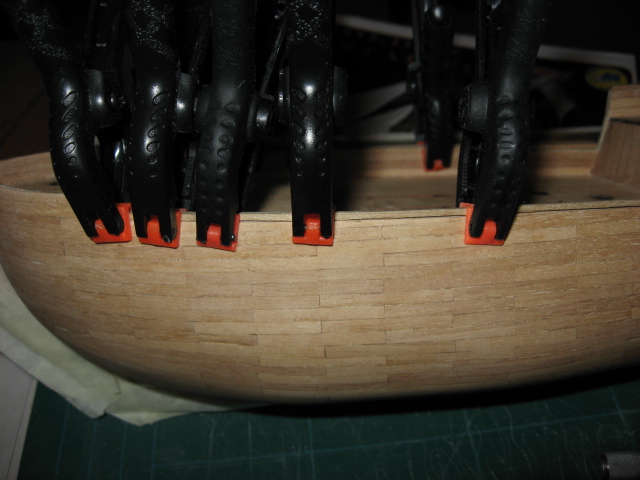
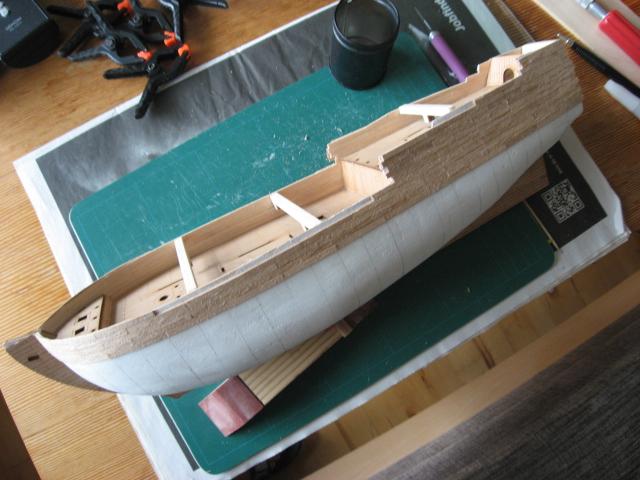
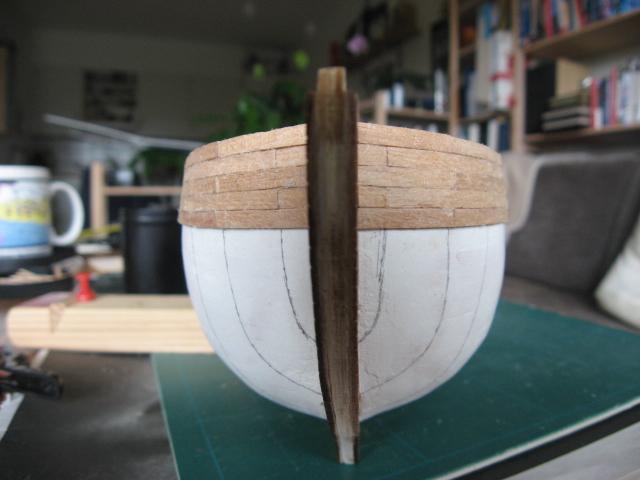
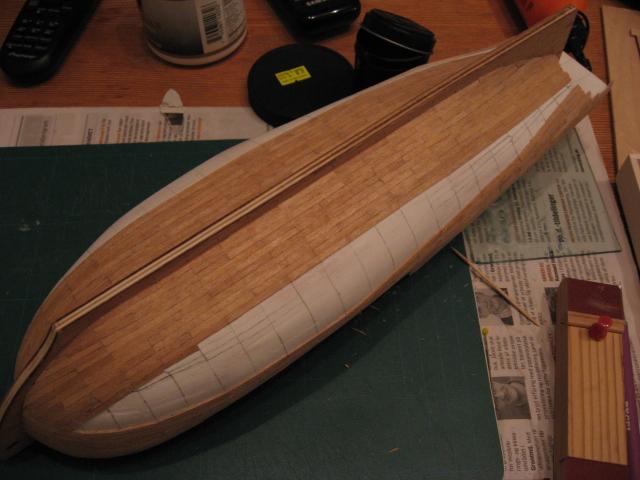
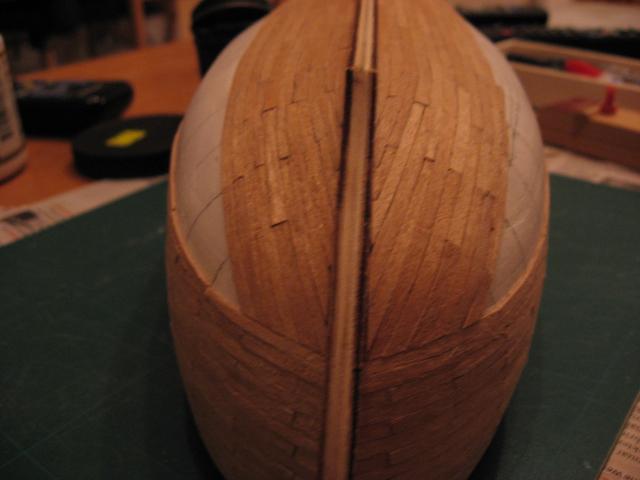
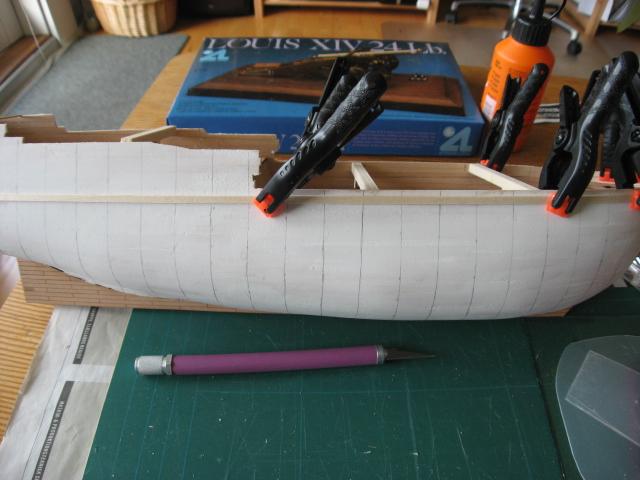
Adding the second layer of planking strips has taken the last 8 months but I have just finished it and started sanding! Here are some pics of the planking process.


-
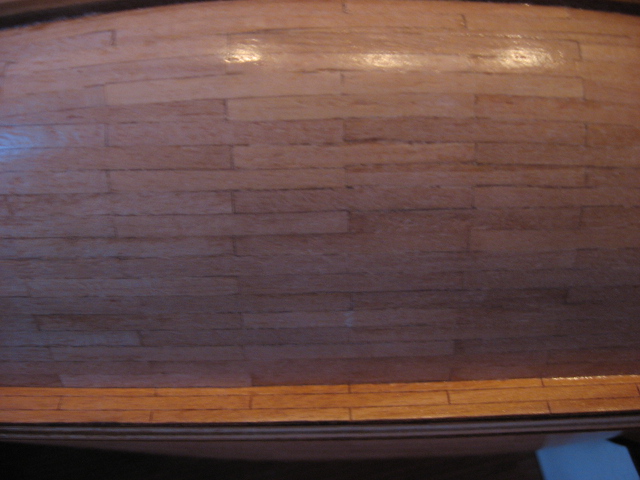
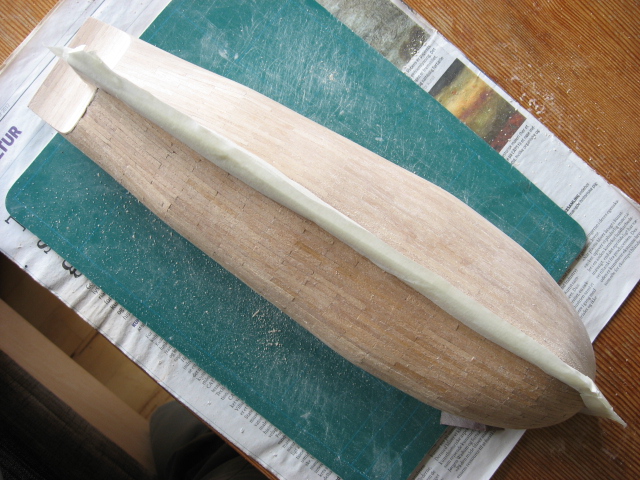
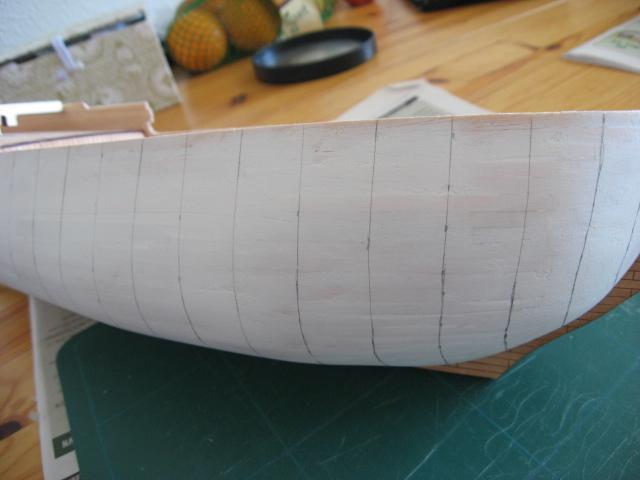
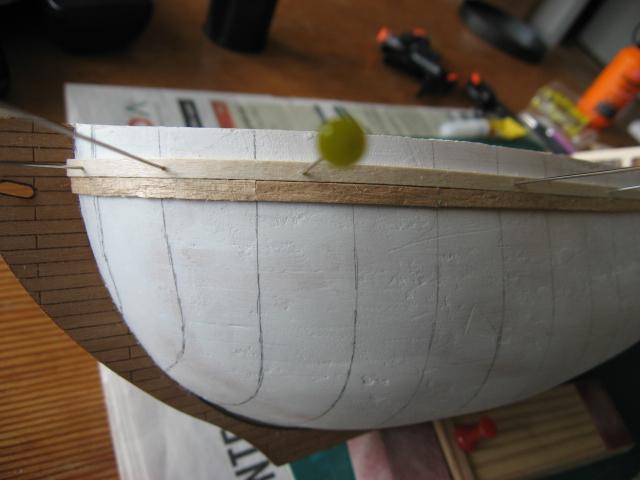
After seeing ..... have forgotten who and what ship it was .... a build log where he didnt just use long single planks along the hull but smalle planks more to scale I decided to alo try that out. So I planked it with strips 3 cm long = 4,5 meter in scale length. I have now realized that they could have been longer and shouldnt overlap the way I did it, but as stated; this is a learning process. I am really looking forward to see how this looks. It has taken ages to build it this way, as it took several hours to lay one length of planinking, which could otherwise probably have been done in a few minutes! But then - this is all about the process and just having fun building, not doing it quickly! So I drew lines at 1,5 cm intervals all along the hull so that I could overlap the plank-strips. Also made a little cutting-jig to make 3cm strips. Started by pinning a plank, and then used that as a guide for the strips.


-
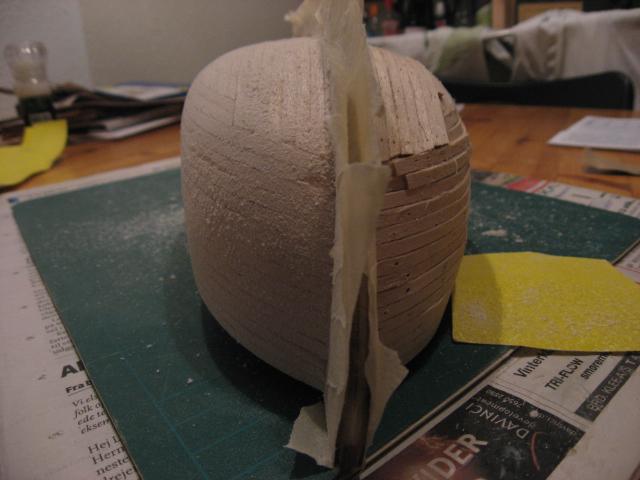
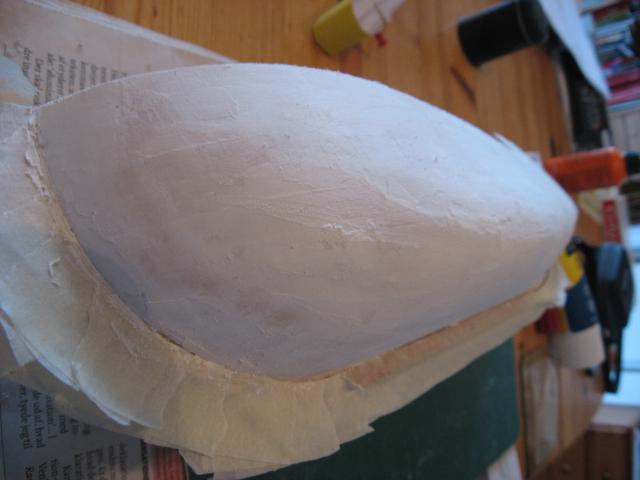
Then I got some filler and spread that all over the sanded hull and sanded it all smooth again.
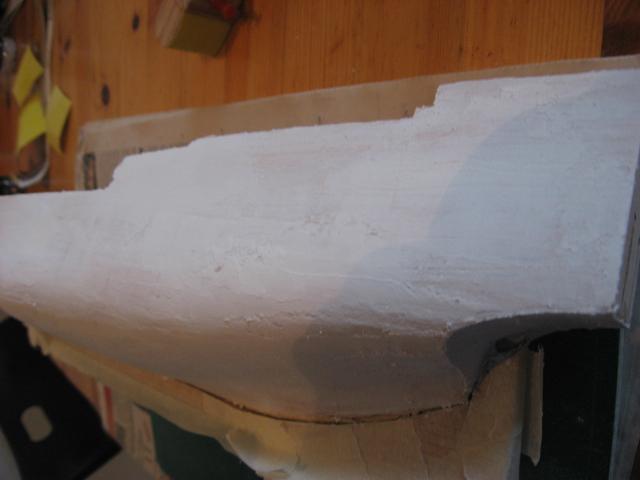
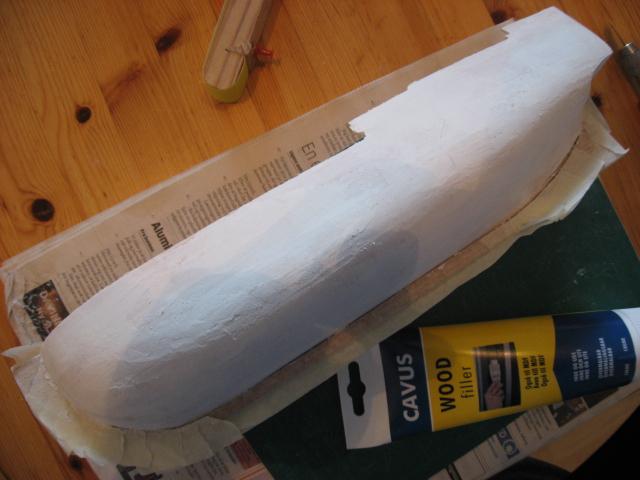
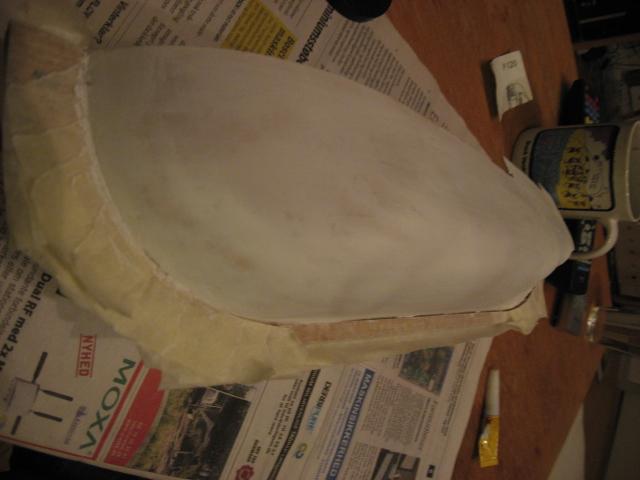

-
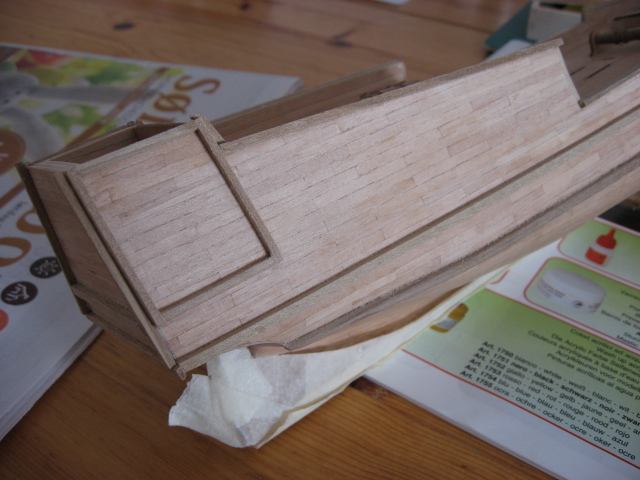
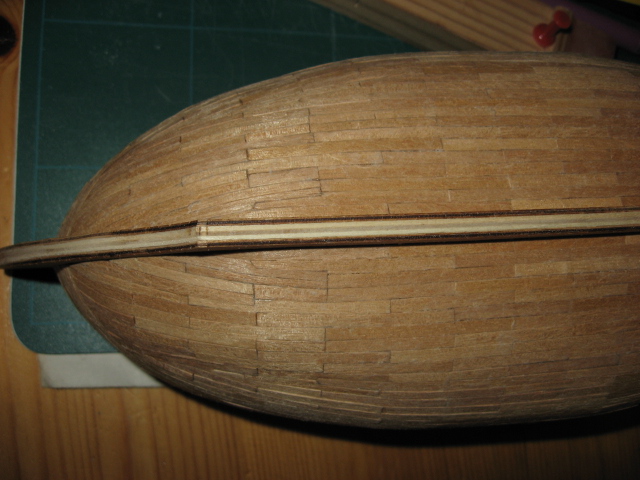
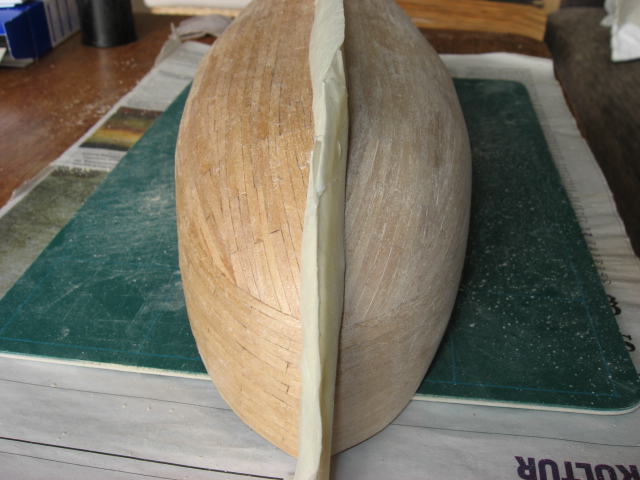
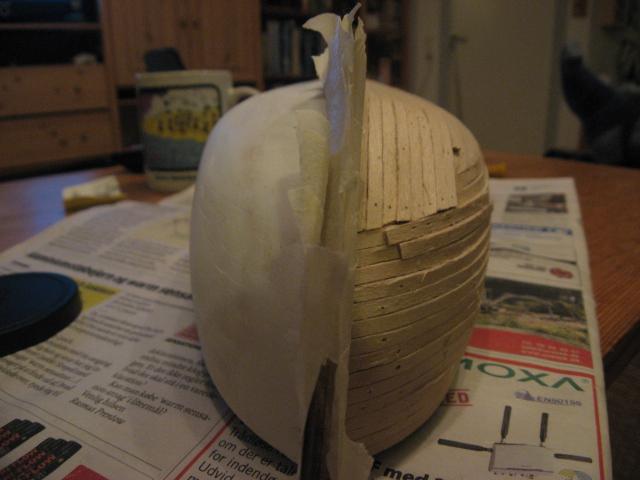
Then the fist planking was done and time for sanding. Did one side first and have a few pictures to show the difference. I had read about using sanding dust mixed with white glue as a filler, but this really didnt work! - it was waaayyy too thick. Think I had sanded with to coarse paper so the dust was relatively large, and didnt mix it with enough glue and water. Glad I tried this as I plan on doing the same with the second layer of planking, so now I know to use finer sandpaper and more water+glue.