Paragraf
-
Posts
45 -
Joined
-
Last visited
Content Type
Profiles
Forums
Gallery
Events
Everything posted by Paragraf
-
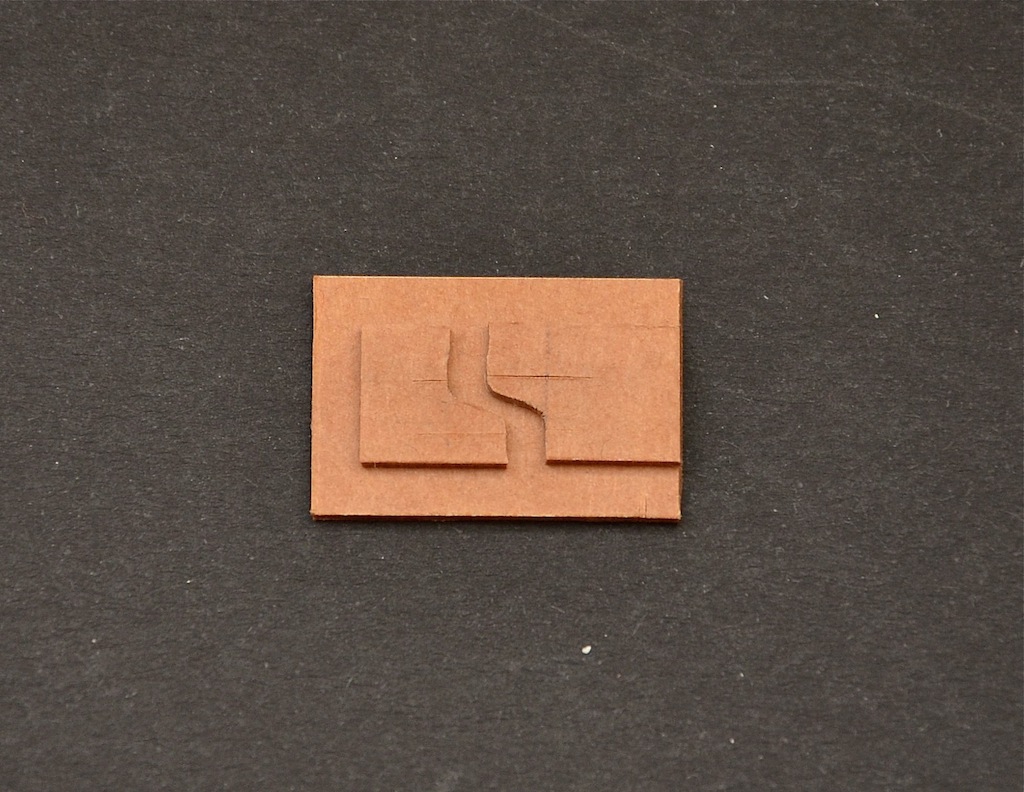
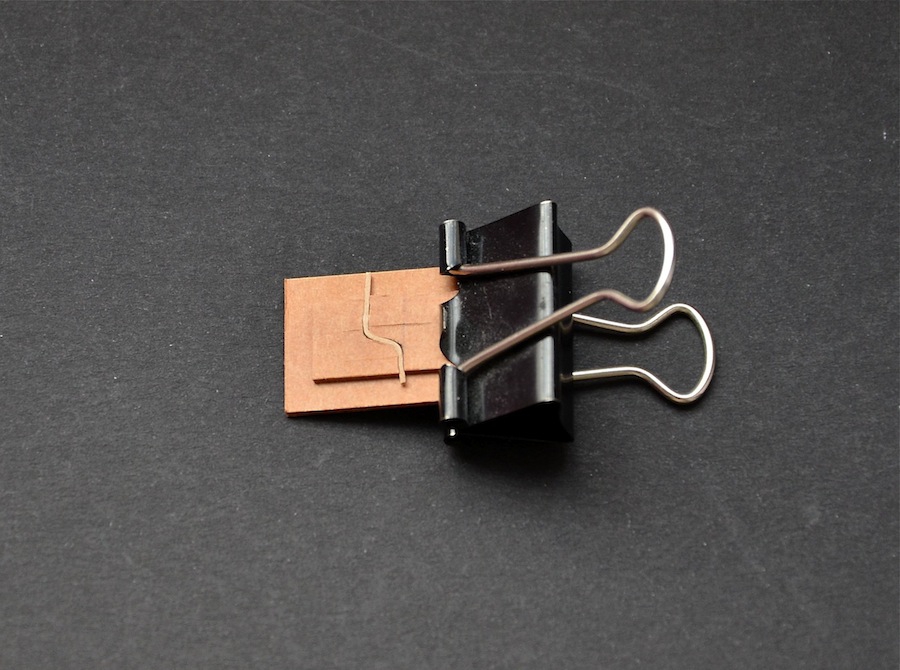
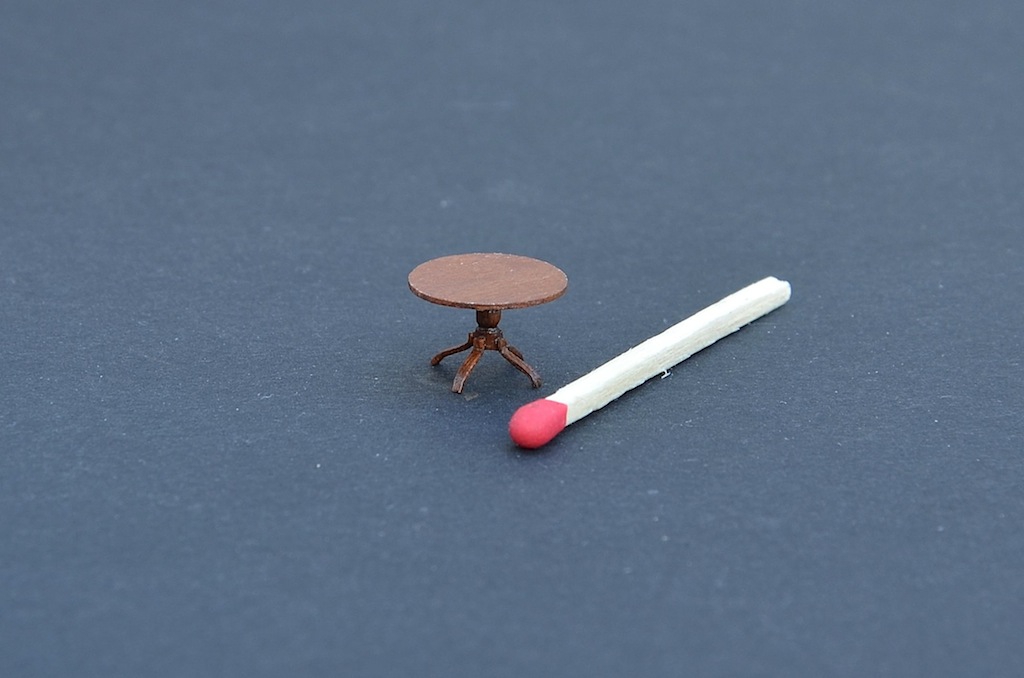
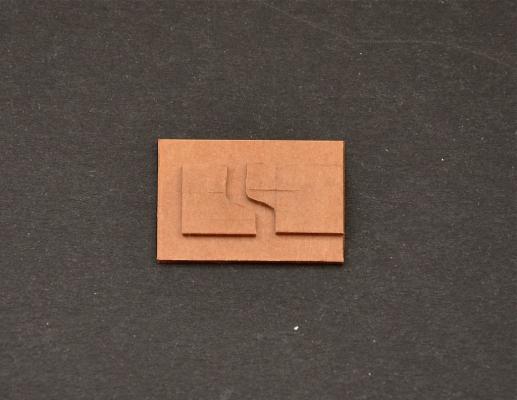
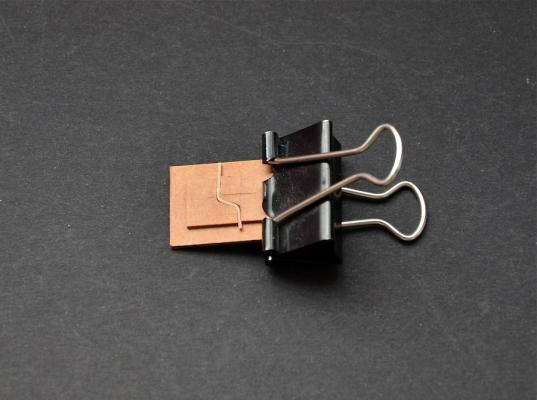
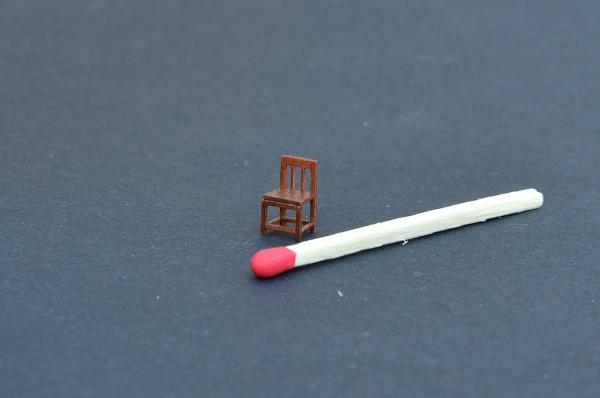
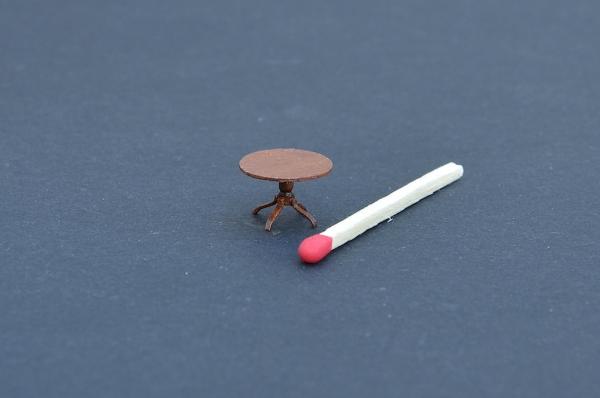
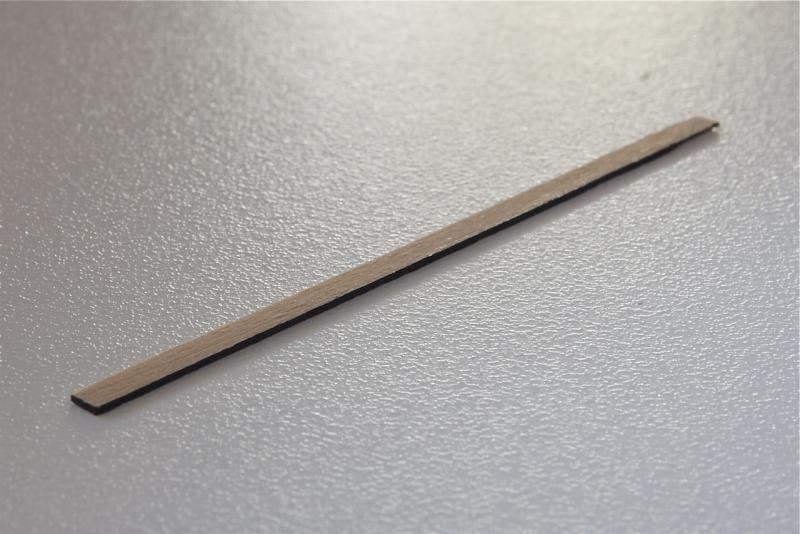
Furnishing Admiral’s cabin has been completed. I performed a table leg using the jig (as usually I do). The jig was cut out of pressboard (thickness 0,8 mm). Between movable (this on the right side) and fixed element of the jig (this on the left side) I’d put wet strip of alder veneer (pear veneer was too hard), and then the movable element of the jig I squeezed with clip. Veneer remained in the jig until dry, about an hour. To be continued...

- 83 replies
-
- 15
-

-
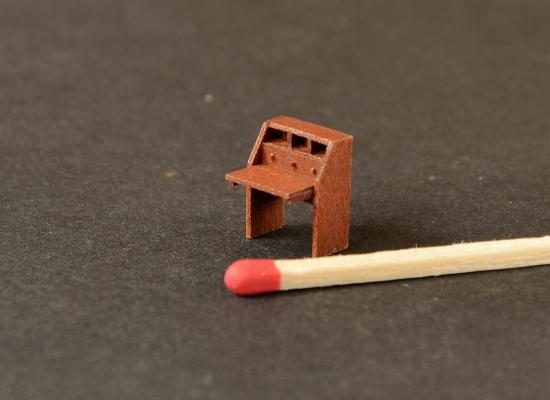
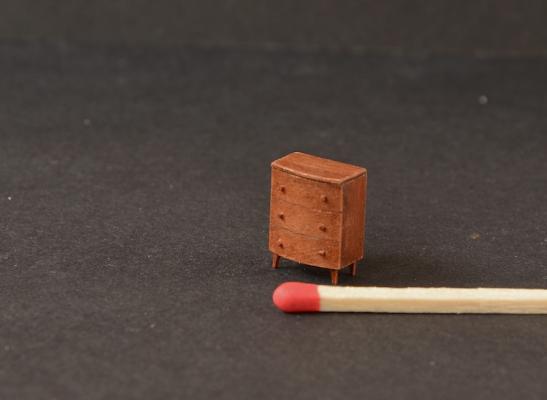
Admiral's bureau. The most difficult thing was to glue these tiny knobs on the drawers. To do this properly, I used a microscopic amount of water glue to the paper. To be continued...
-
Thanks guys. I'm glad someone likes my work. I didn't think that in my work I show some new ideas. It seemed to me that in modeling everything was invented .
-
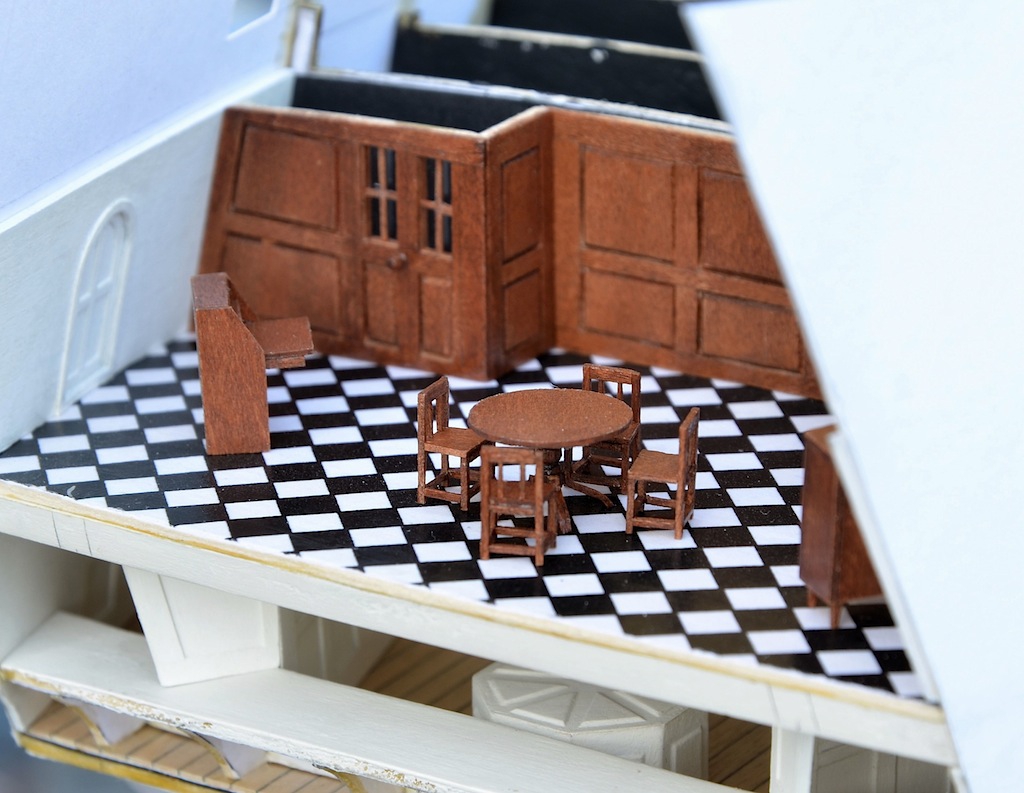
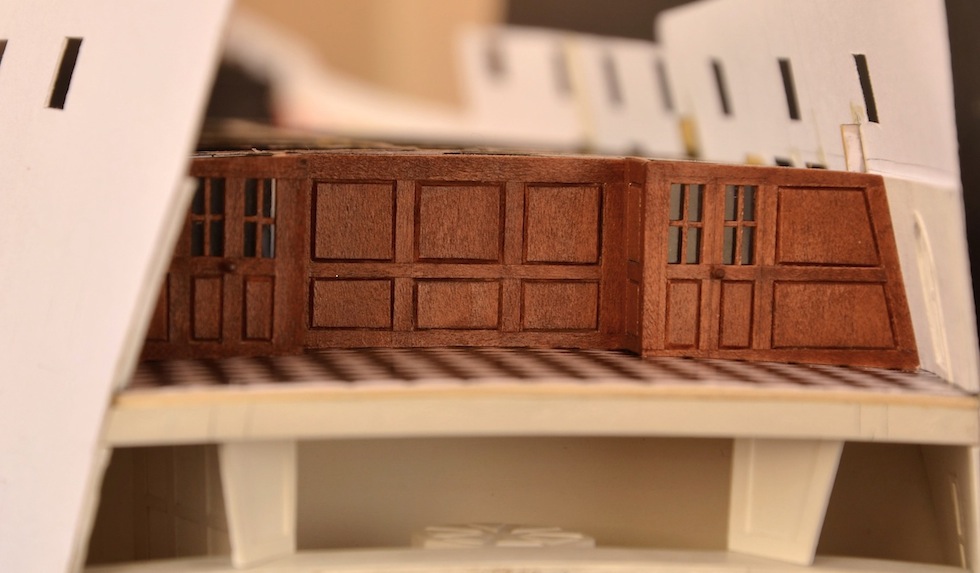
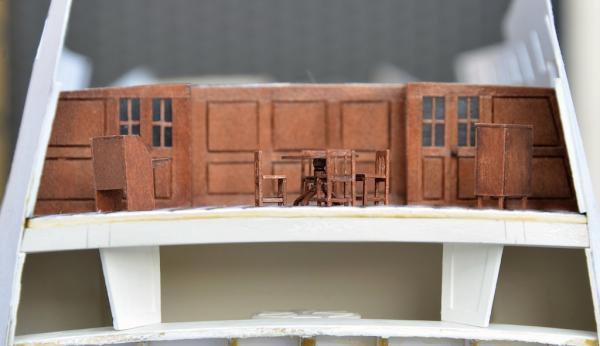
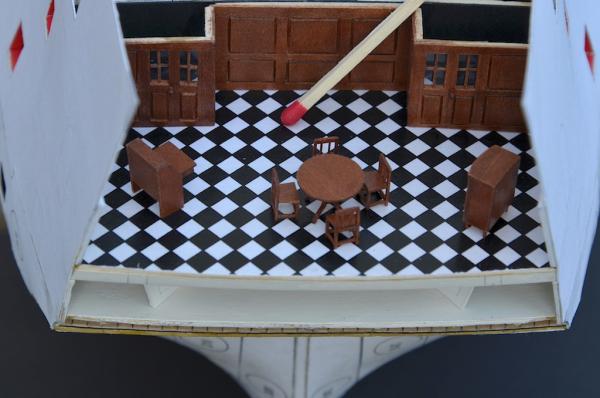
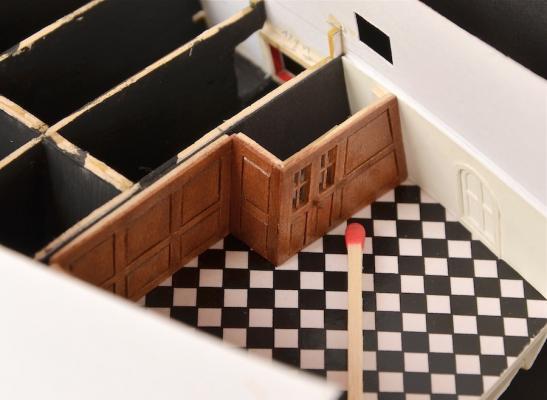
The wall in the Admiral's cabin has been completed. There are also door knobs . All of this isn't perfect, but I think it looks tolerably. Admiral's commode doesn't look like the furniture from the early nineteenth century, but I could't do it in a different way - means more original. To be continued...

-
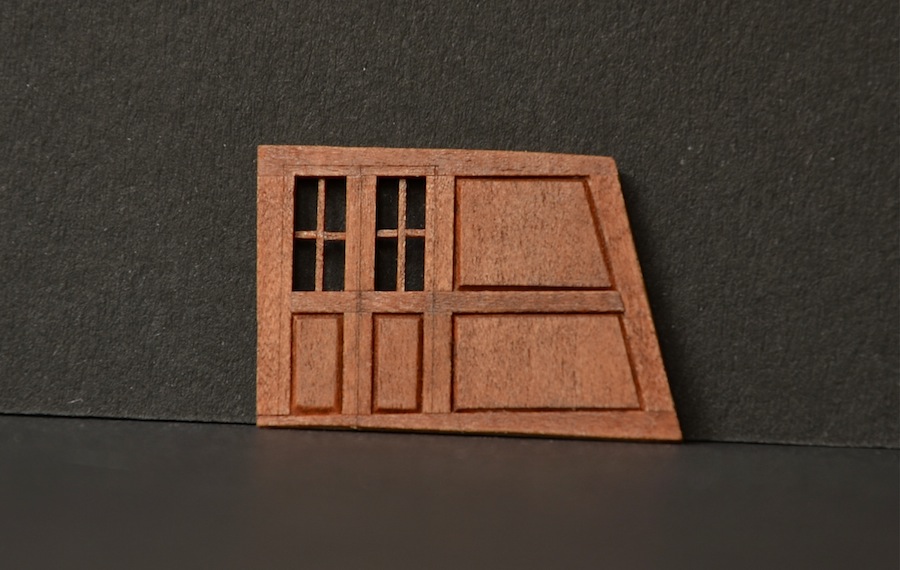
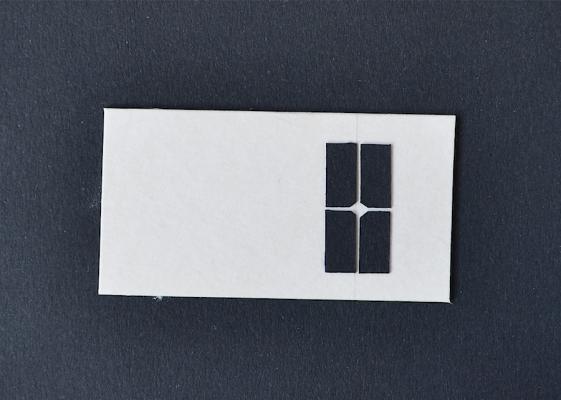
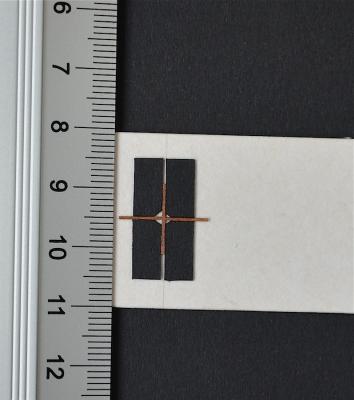
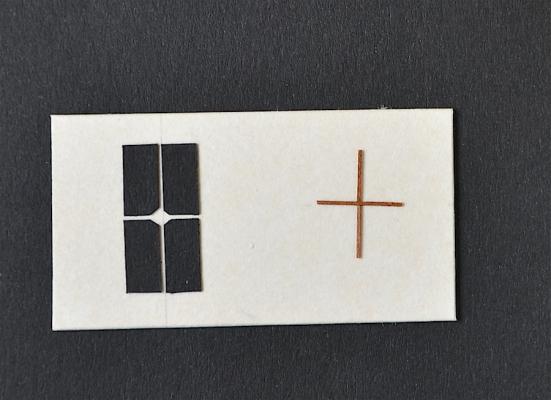
The next phase of work is the admiral's cabin. The first of the walls separating the Nelson's cabin from the rest of the ship was made of pear veneer. Veneer has been covered the stain color of teak. When staining I used a method called „dry brush” - before applying the stain on veneer I wiped the brush in a paper towel so that it was almost dry. Next I let the stain sink (for a few seconds) and then rubbed veneer with dry paper towel to remove excess stain. I placed stain twice, and finally varnished. To perform window frames I prepared myself a small jig. I guess the pictures fully illustrate the method and doesn't require a description.


-
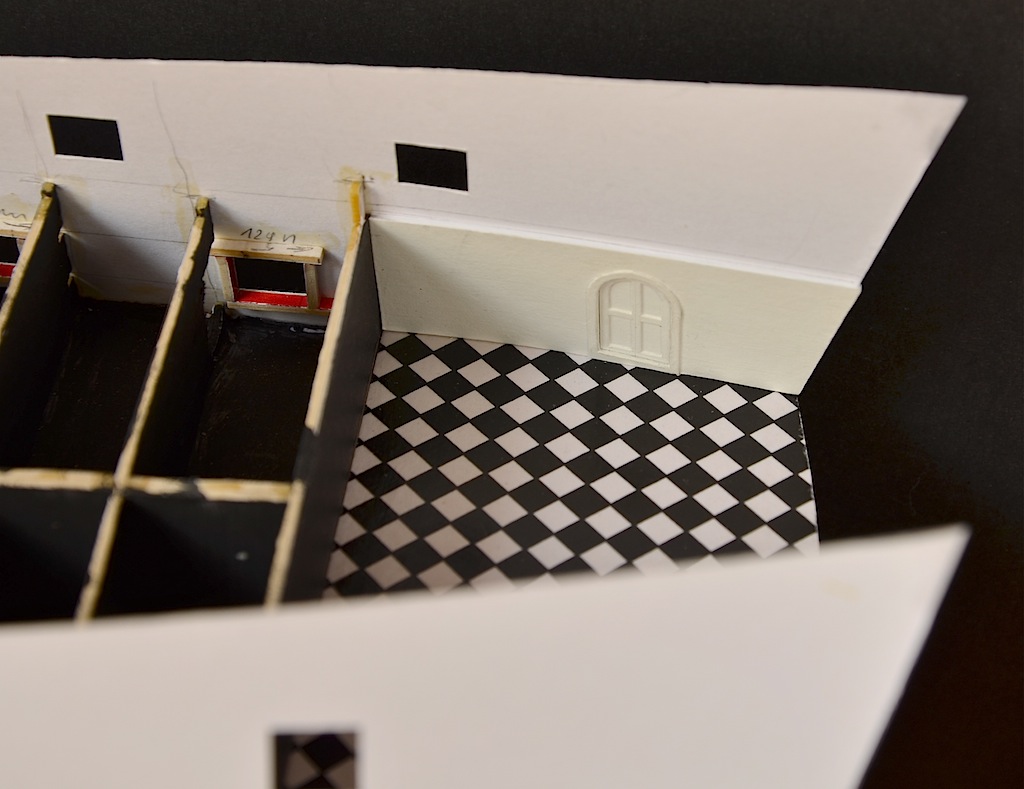
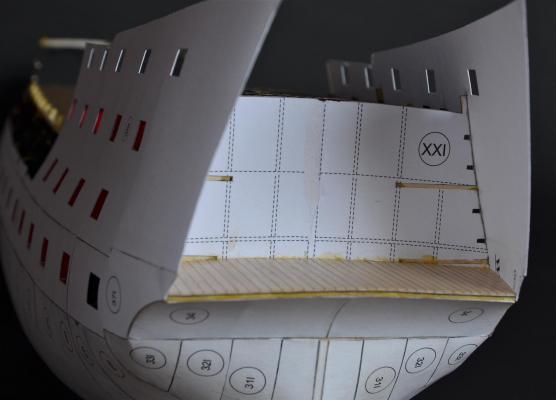
The first cabin has been finished. I realise it doesn't look like the original wardroom which should be much longer, with a big table in the middle. Unfortunately too late I decided to make a wardroom. If I wanted to do it properly I would have to destroy the already glued ship's skeleton. To be conitunued ...
-
Nenad. You're not blind. I didn't write about this, my mistake, sorry. As you said, to have a smooth upper surface, grating after gluing is sanded. In the beginning I use sandpaper grades 320 and finally grades 500 or 600. That's all the secret.
-
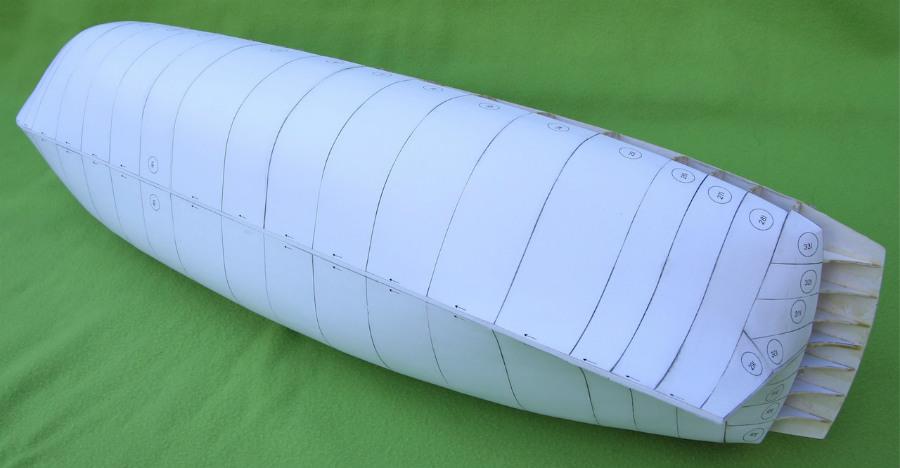
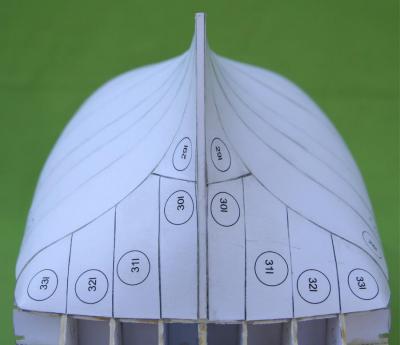
The first paper "planking" has been finished. Slowly "this thing" starts to resemble the ship's hull. To be continued...


-
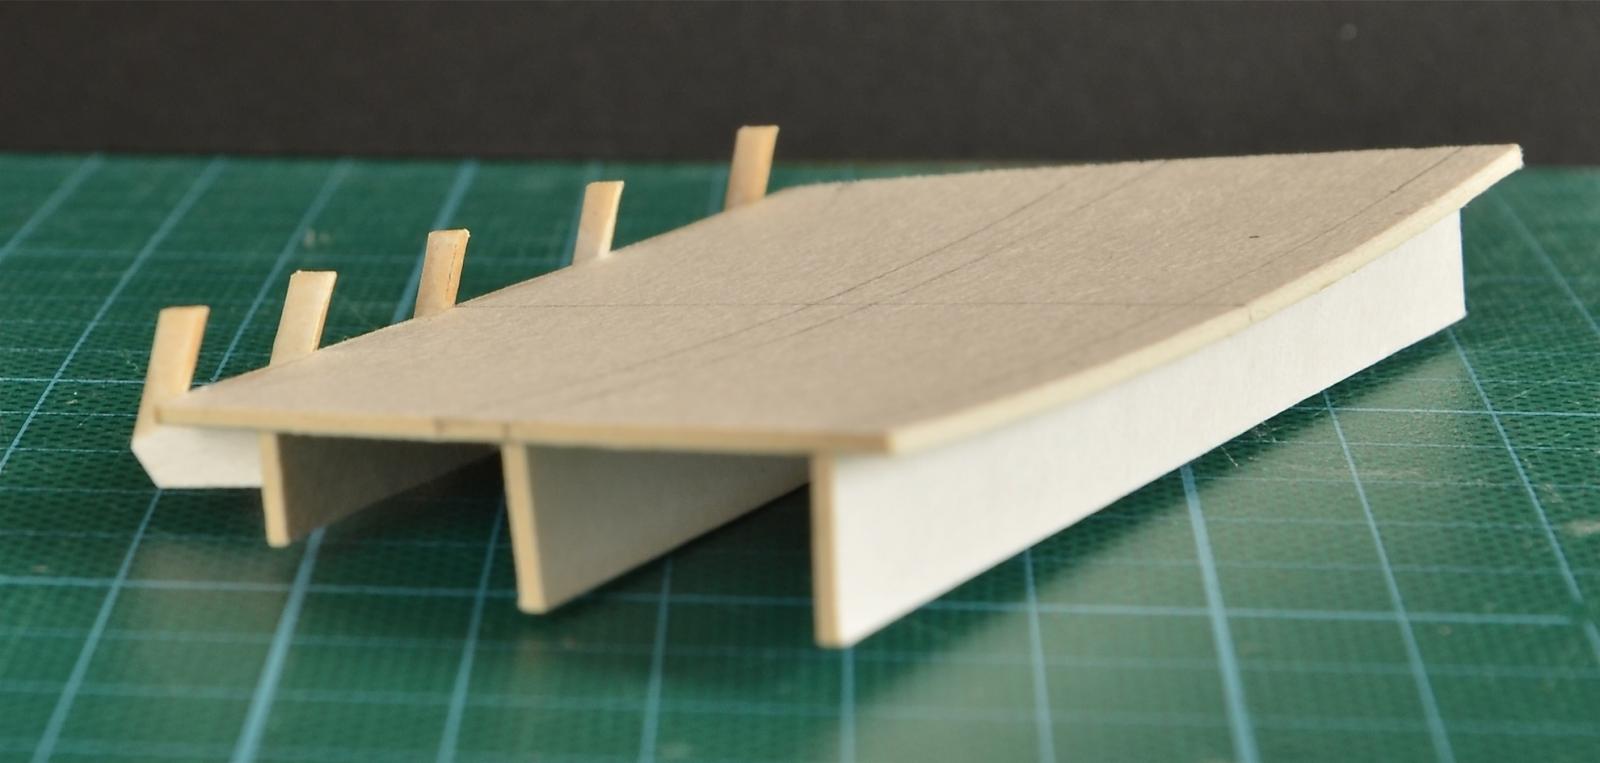
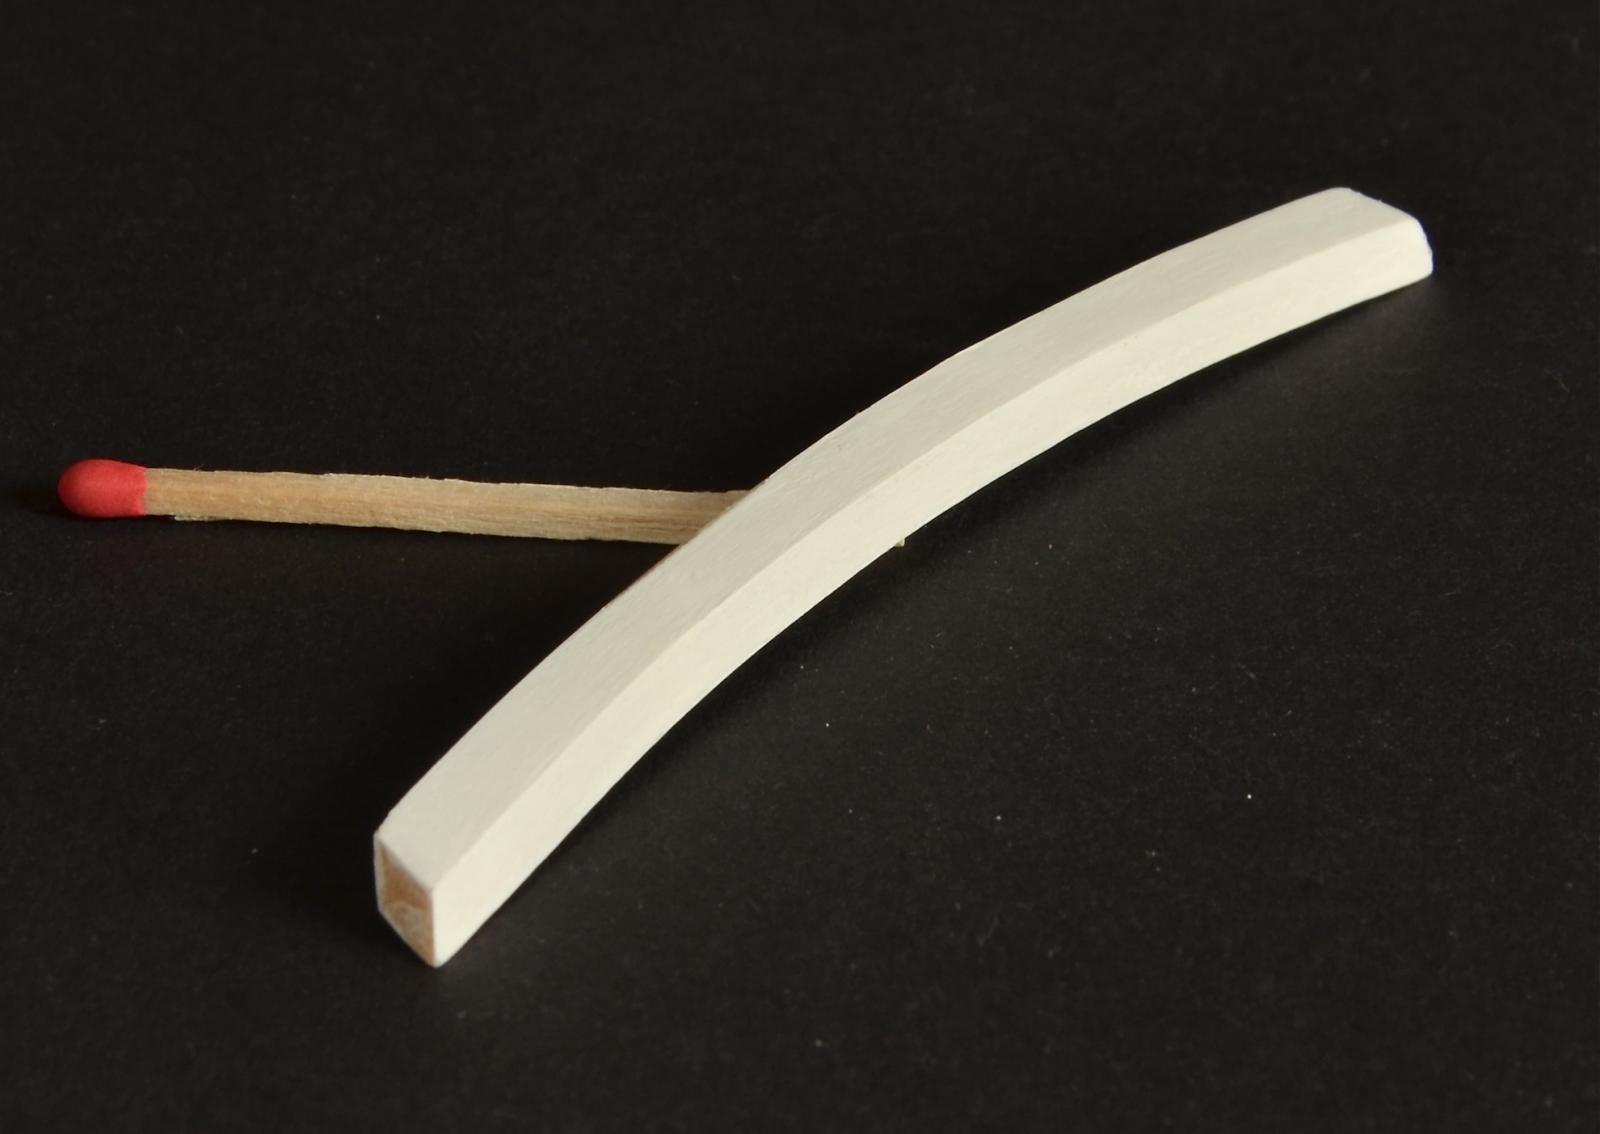
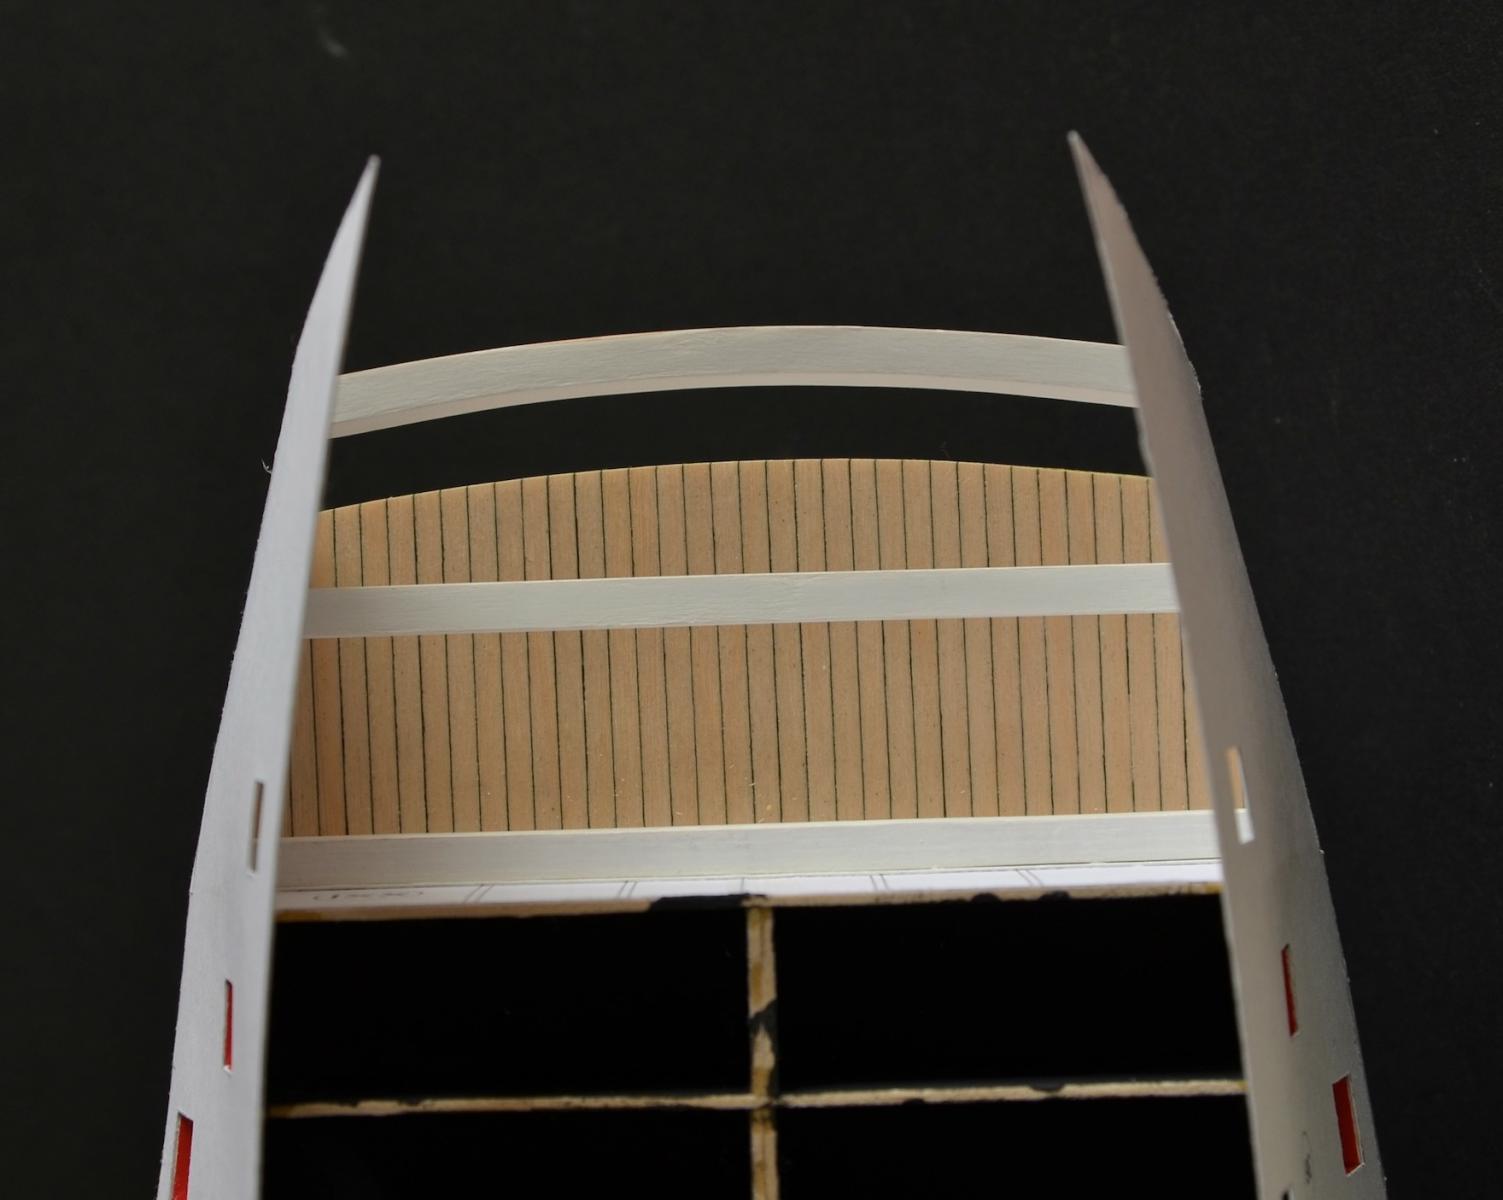
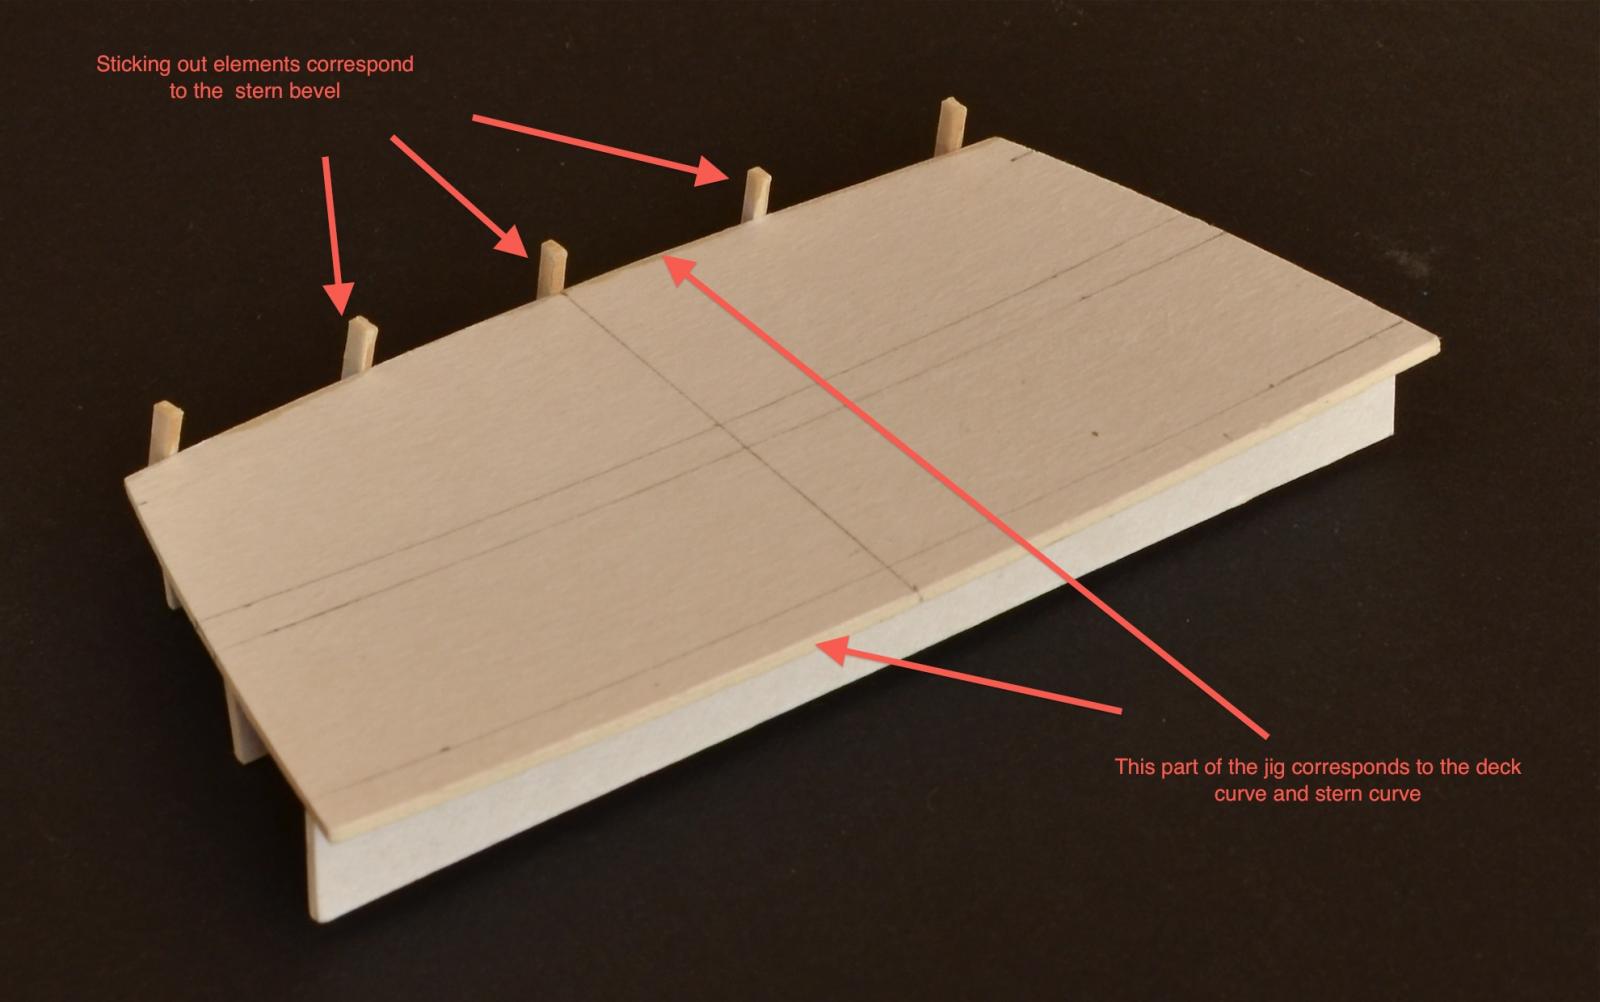
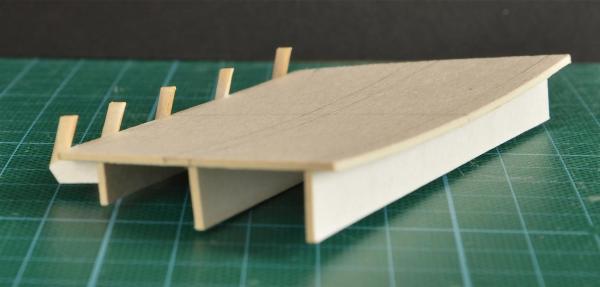
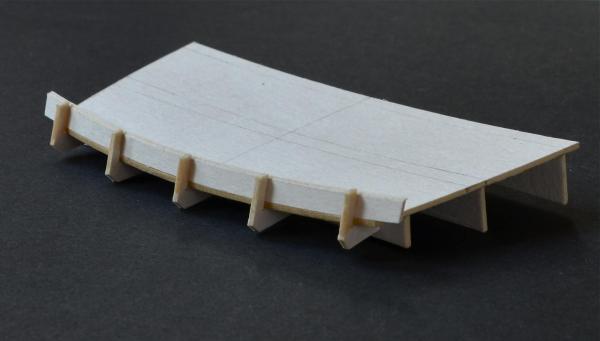
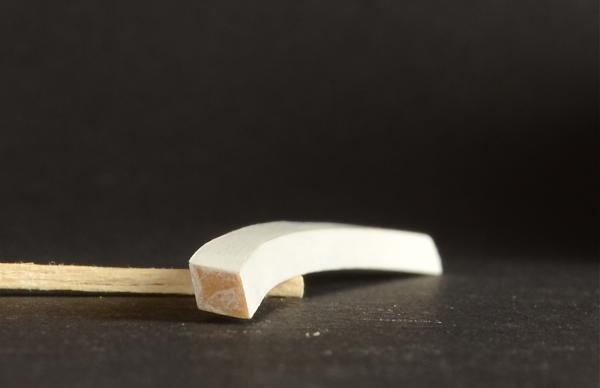
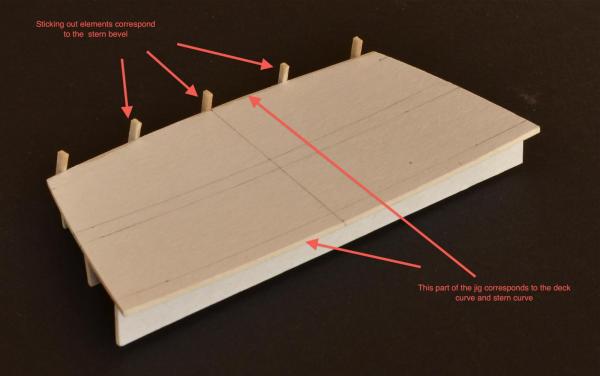
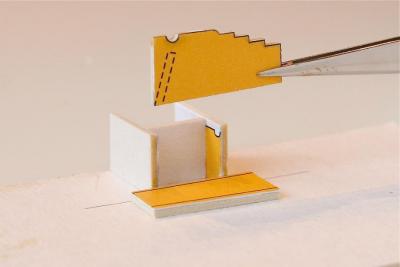
The aftermost deck beam, because of it's specific shape, had to be done using the jig. The first of four cardboard "batten" was glued to the jig. Next three battens I glued only to the first, without sticking them to the jig. After that I cut off the deck beam from the jig, then soaked with CA, sanded to the proper shape and finally painted white.


-
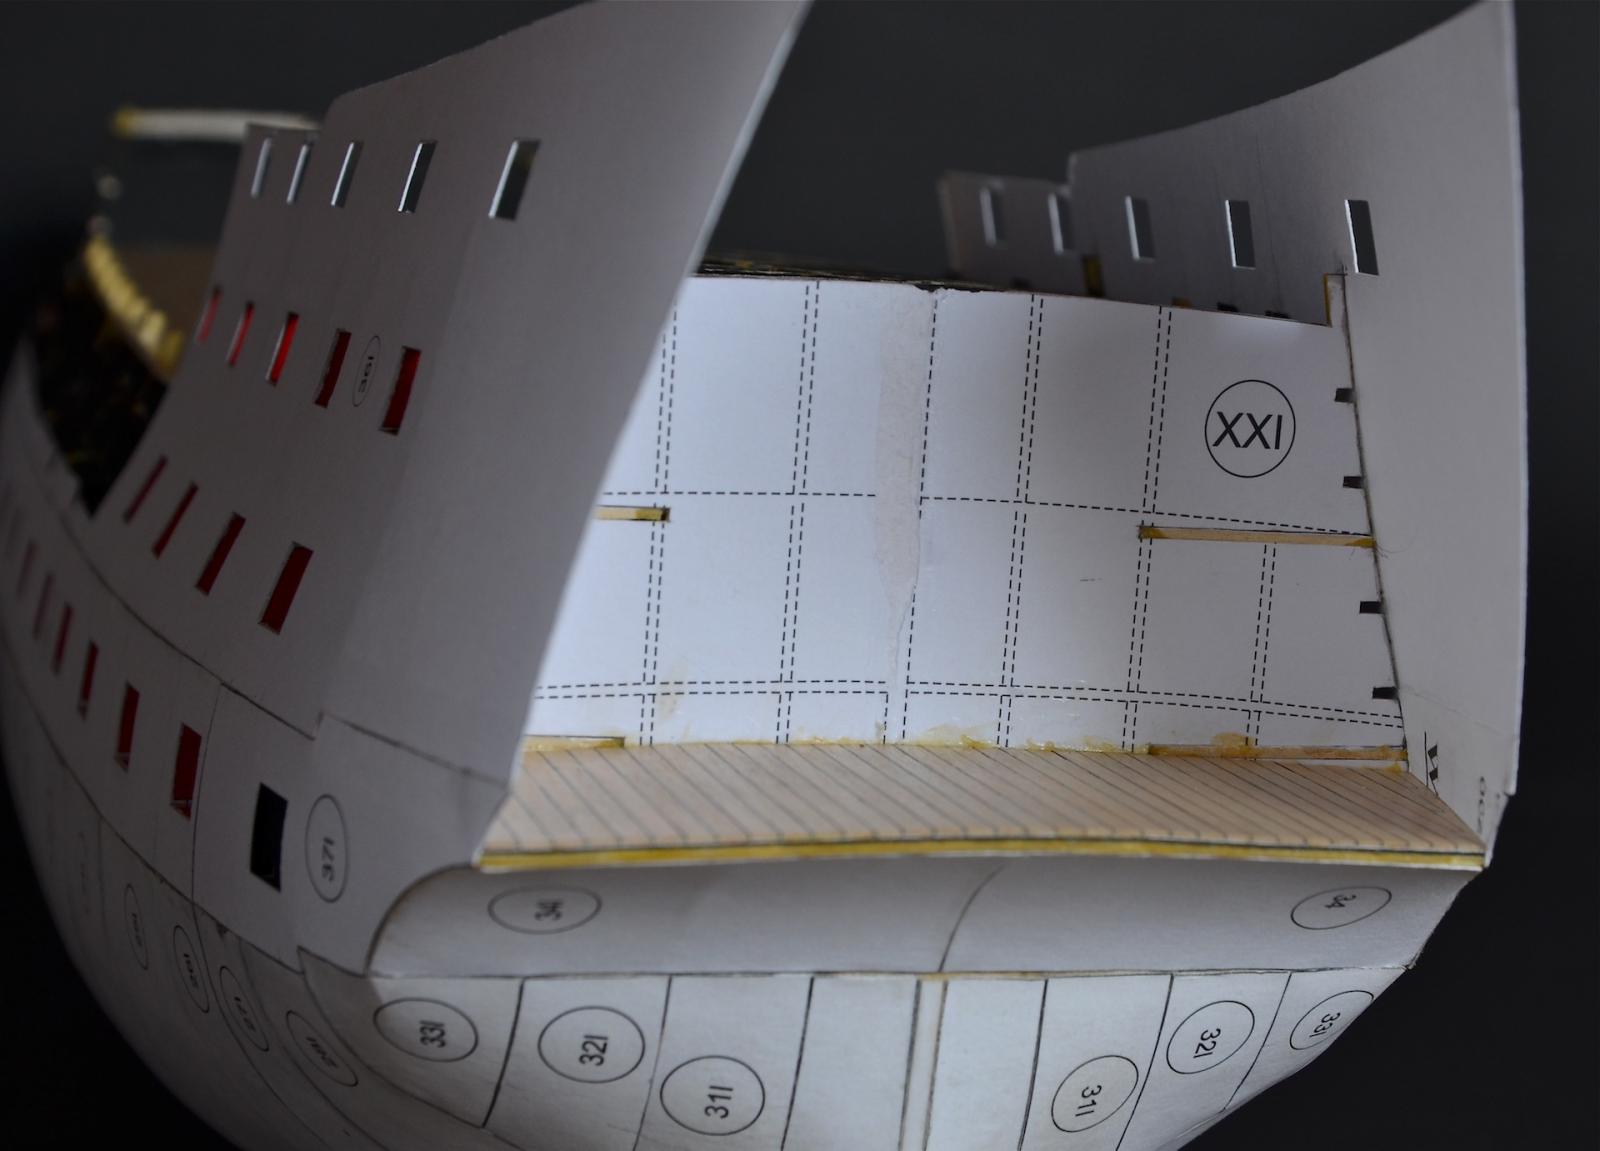
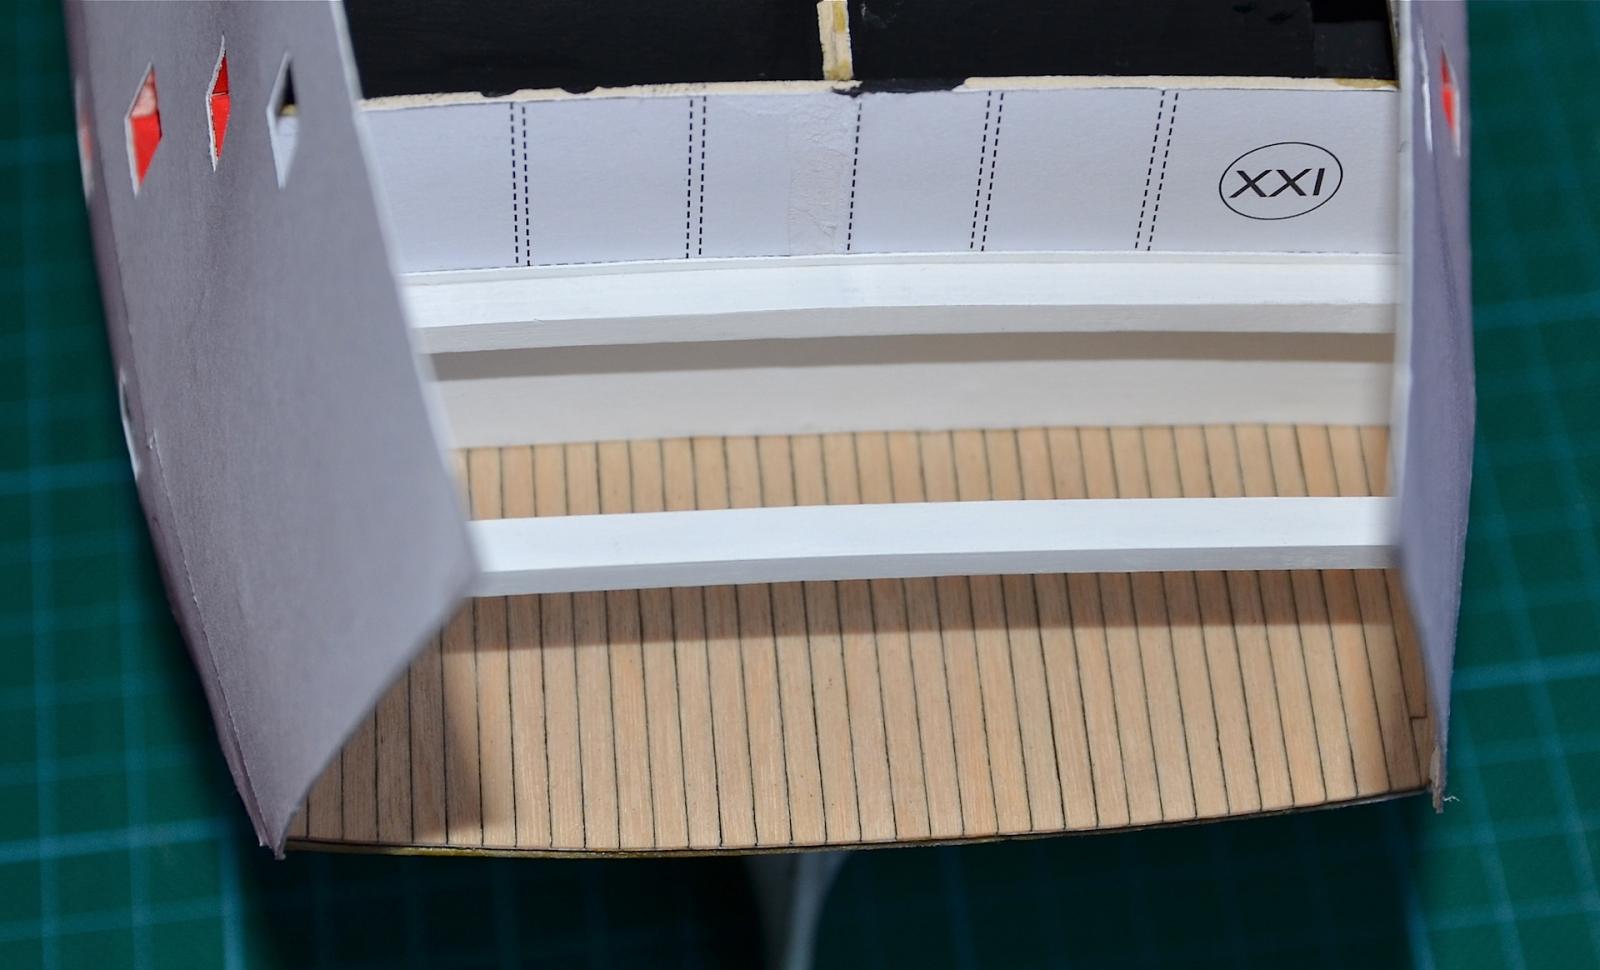
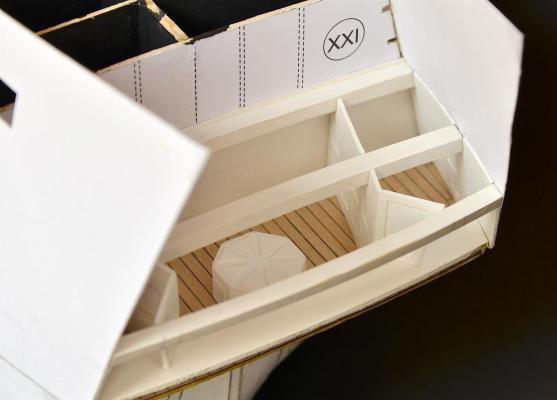
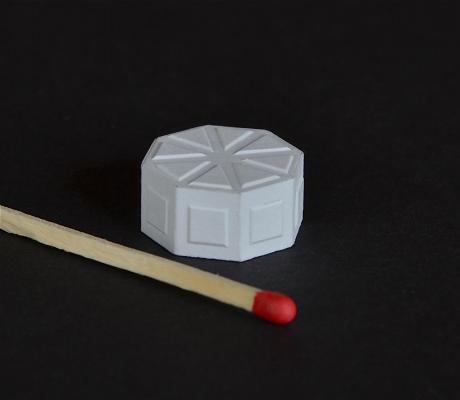
Making wardroom... Octagonal casing over the rudder head. Two of the three deck beams; made from four glued together pieces of cardboard (1 mm thick), then soaked with CA, after that sanded to the proper shape and finally painted white.

-
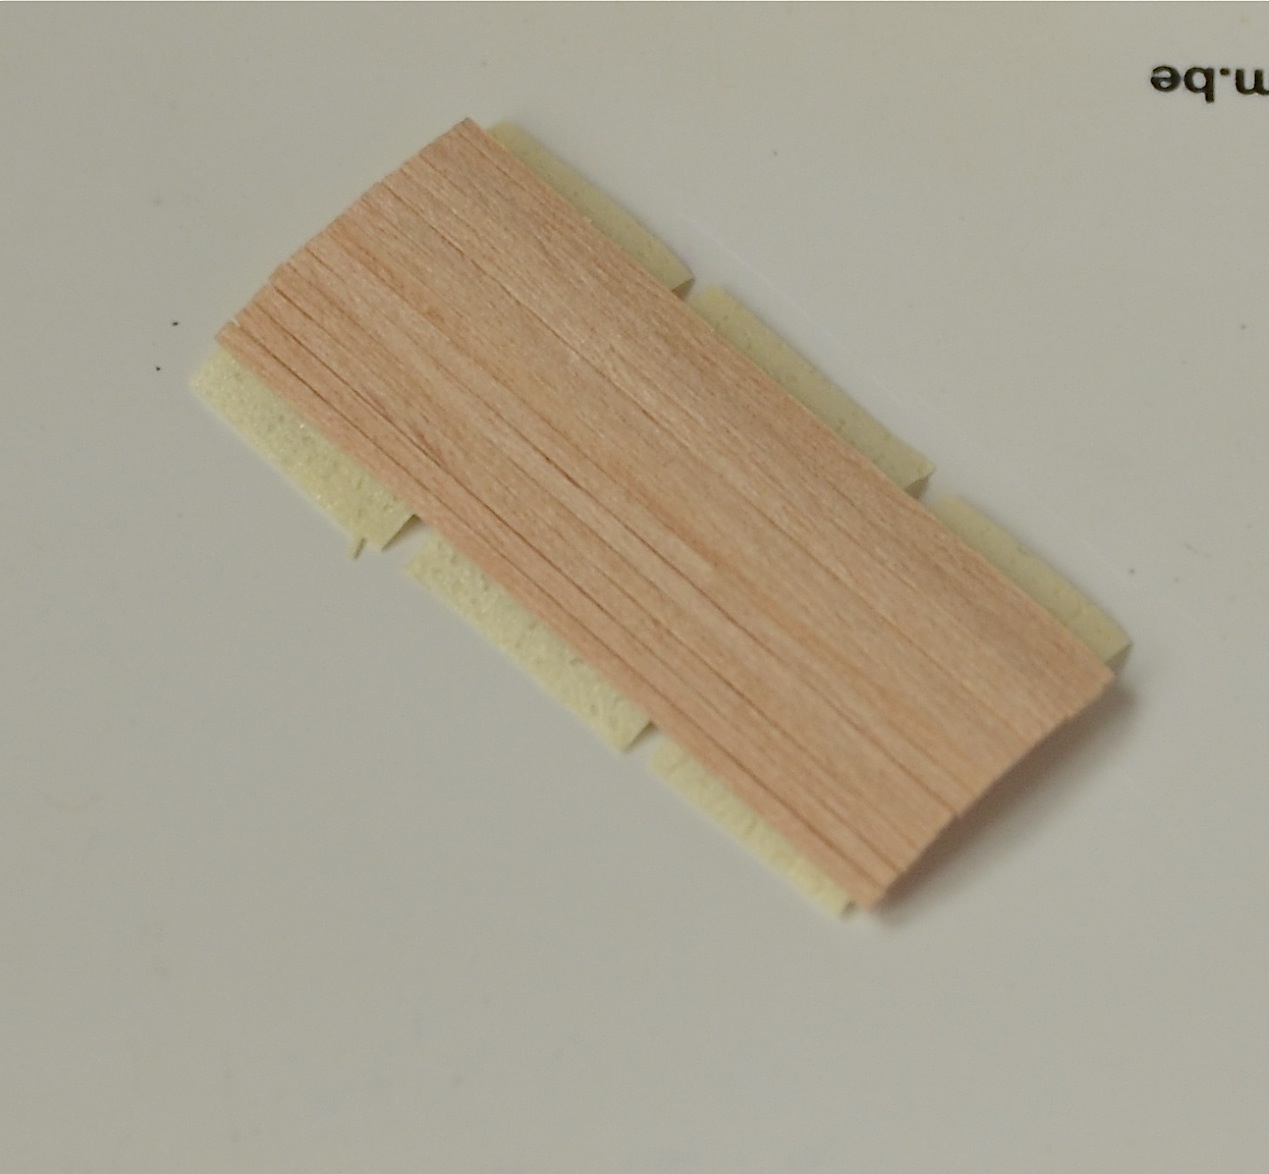
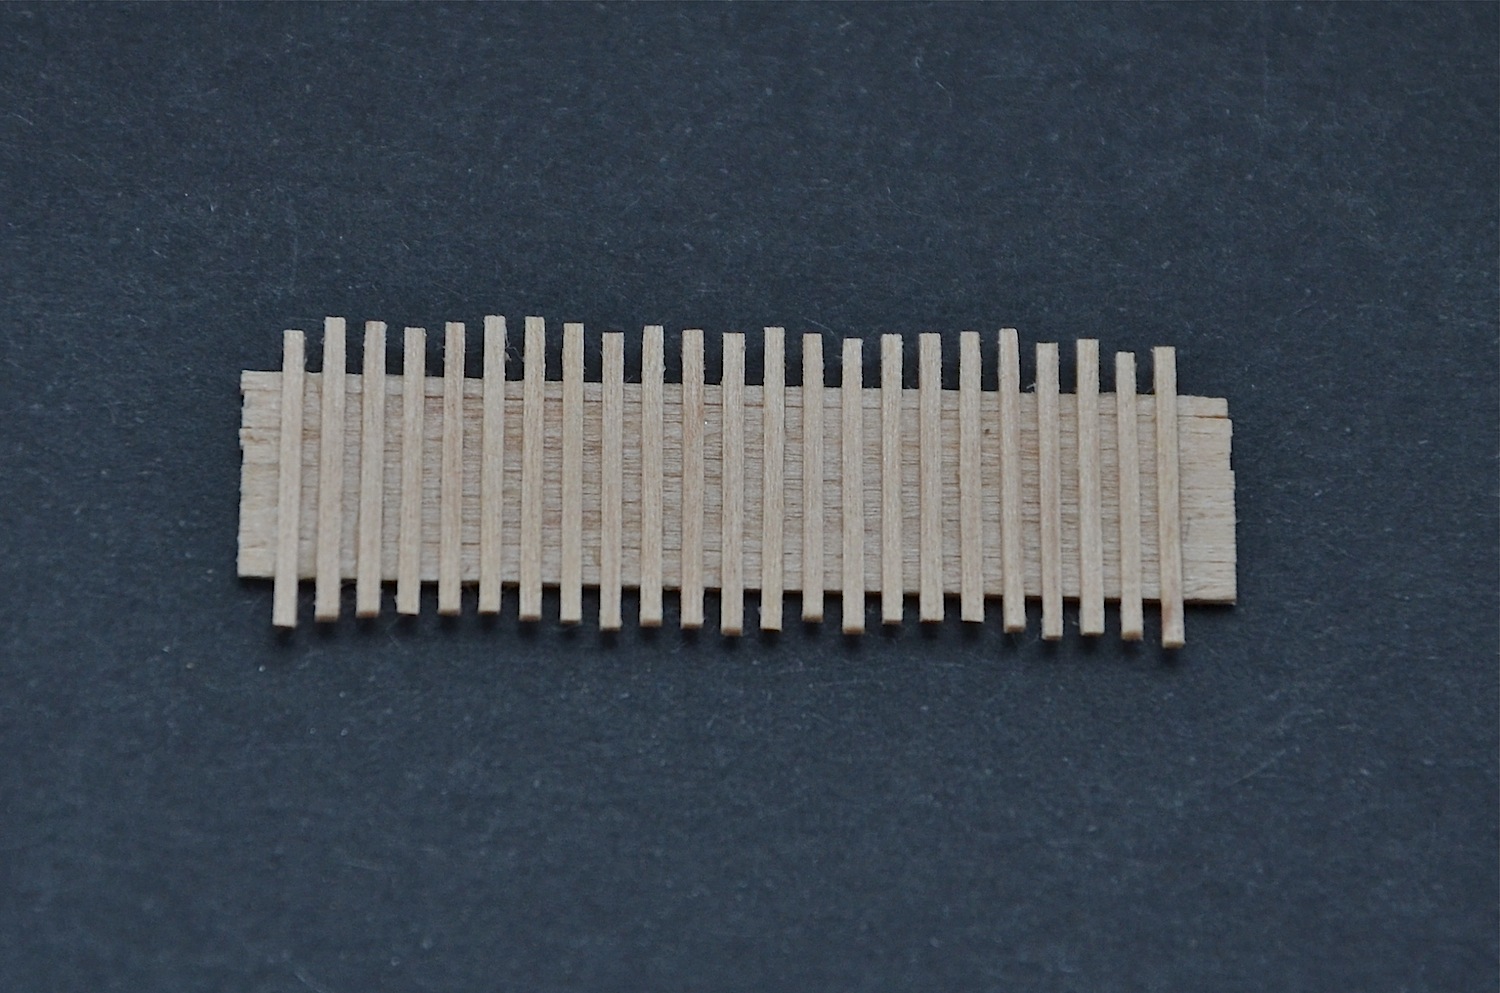
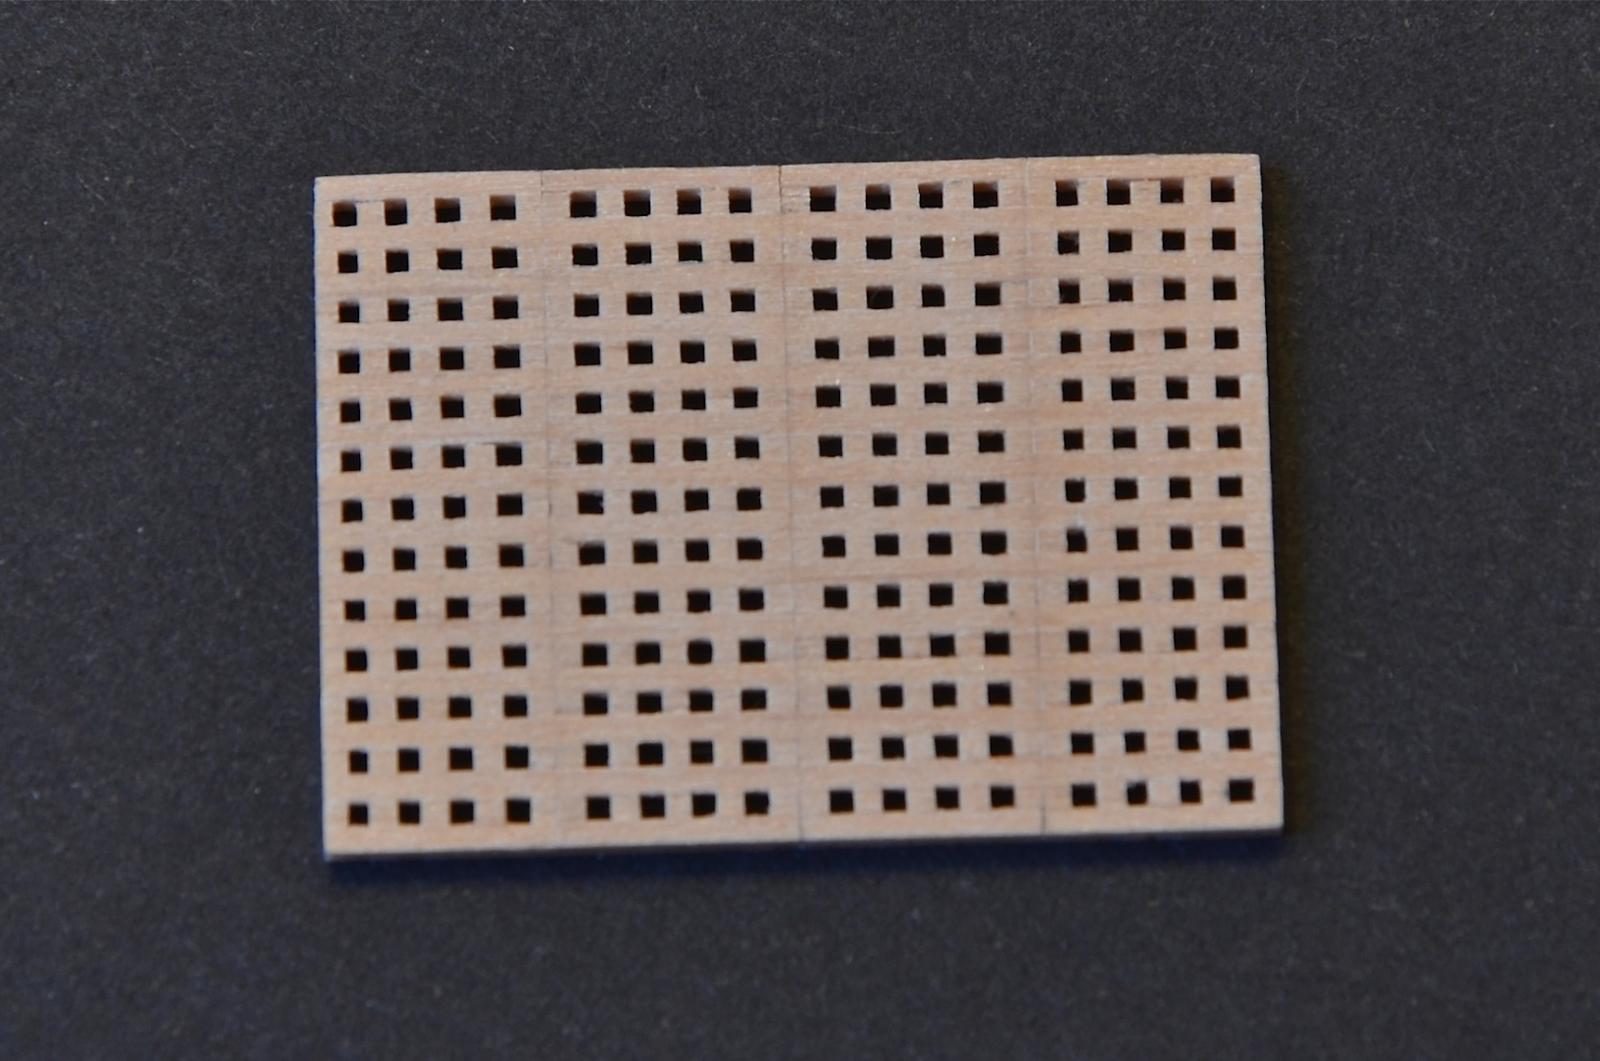
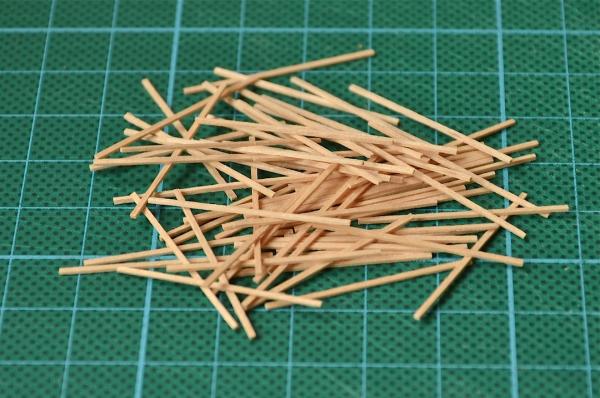
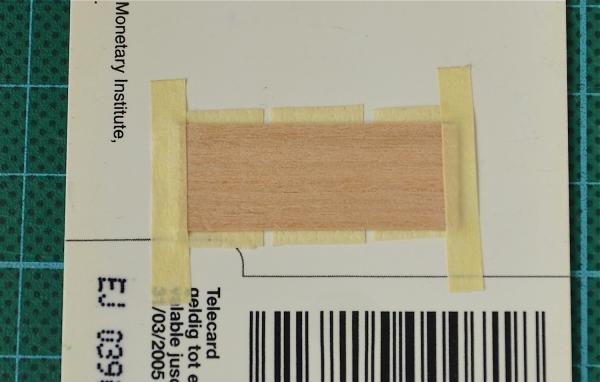
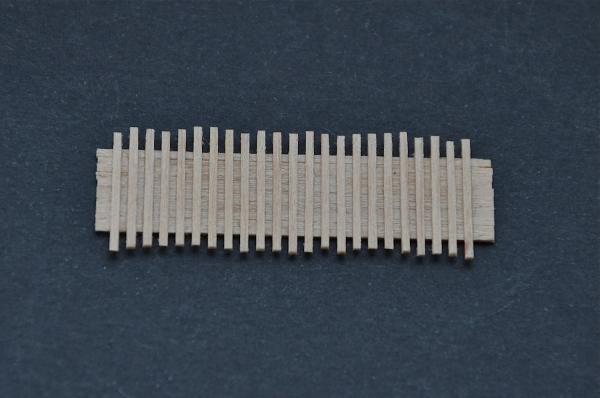
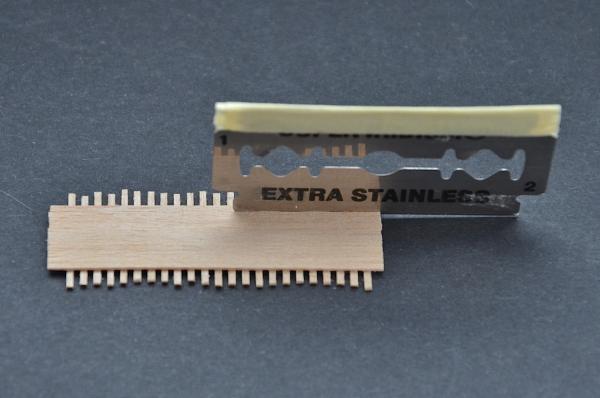
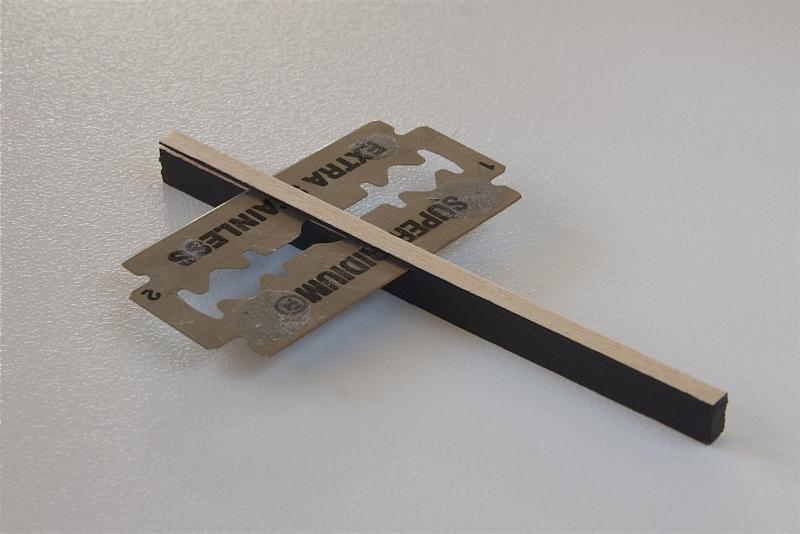
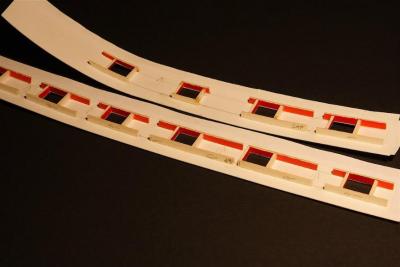
My way of making gratings. The first step: cut apropriate number of veneer sticks; this time I used alder veneer because it's softer then birtch so - much easier to cut. The second: glue sticks on the paper masking tape; they should be glued side by side, very tightly. The third: paste another sticks across to the rest; to have appropriate distance between crossed veneer strips I used another stick of the same size, as a separator. After all masking tape must be removed. The fourth: turn glued element upside down, insert razor blade into the slot between the sticks and cut „teeth”pressing the razor as guillotine. The fifth: put „the combs” together into grating. Grating holes are about 0,8 mm.


- 83 replies
-
- 14
-
-
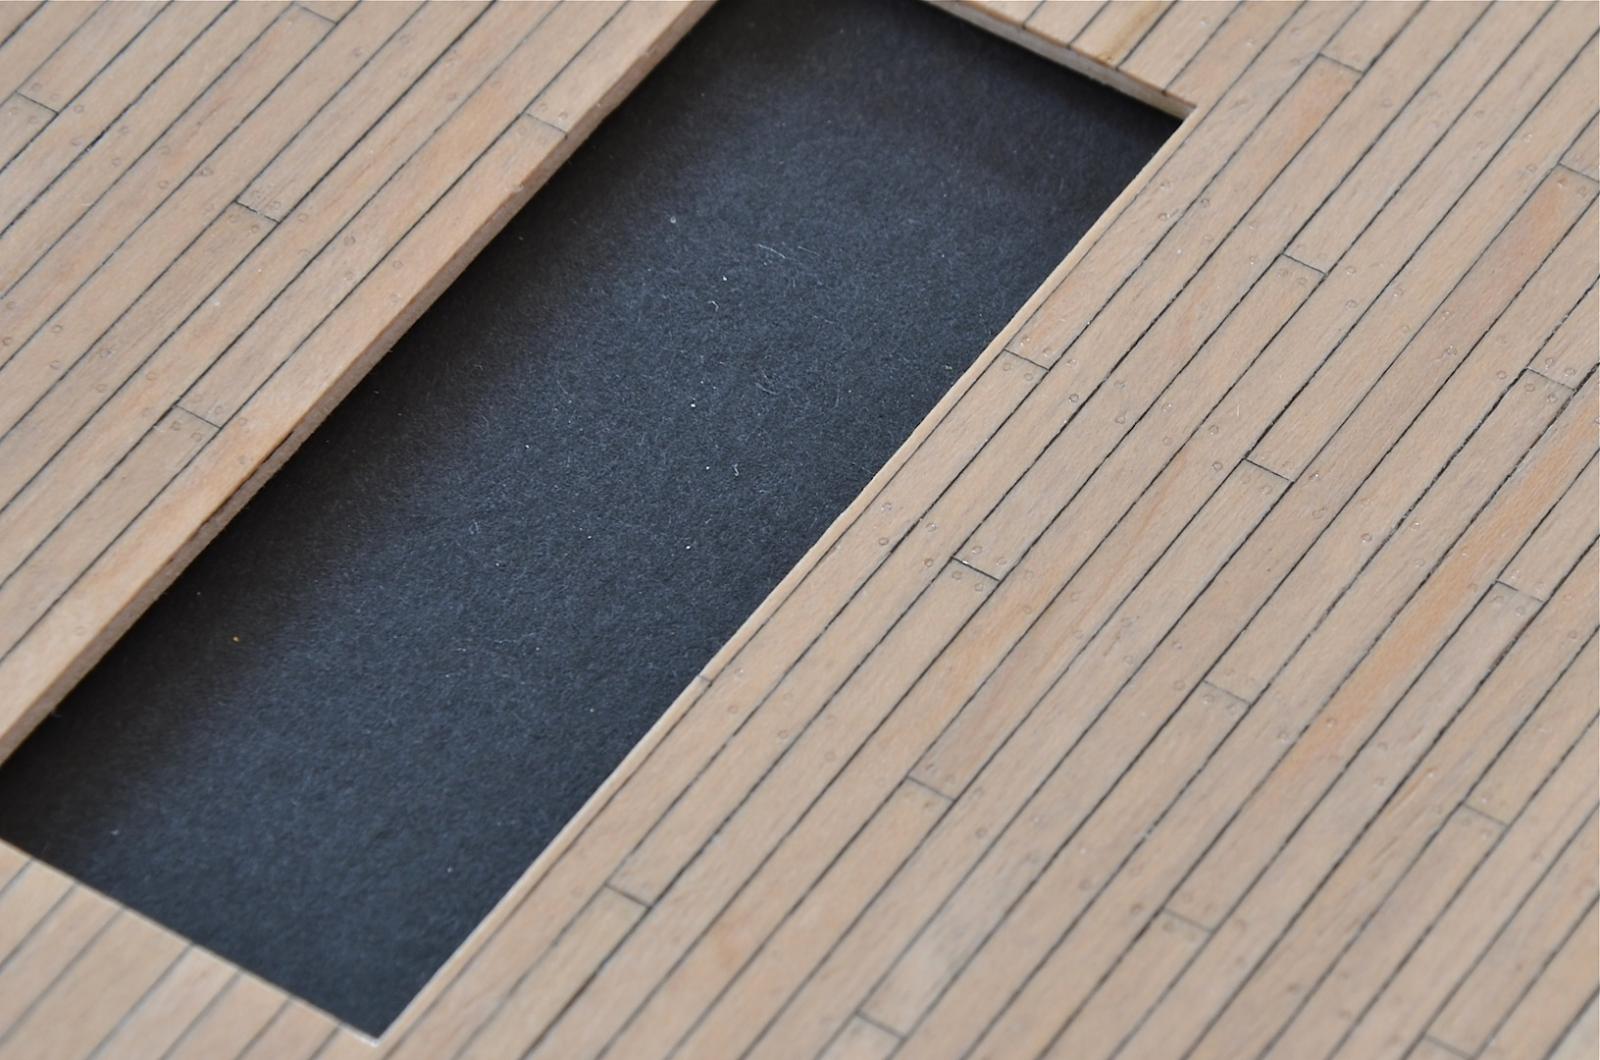
Finished deck – nailed and varnished. Perhaps treenails are too gentle, but concider the model scale they shouldn't be visible to much.

- 83 replies
-
- 12
-
-
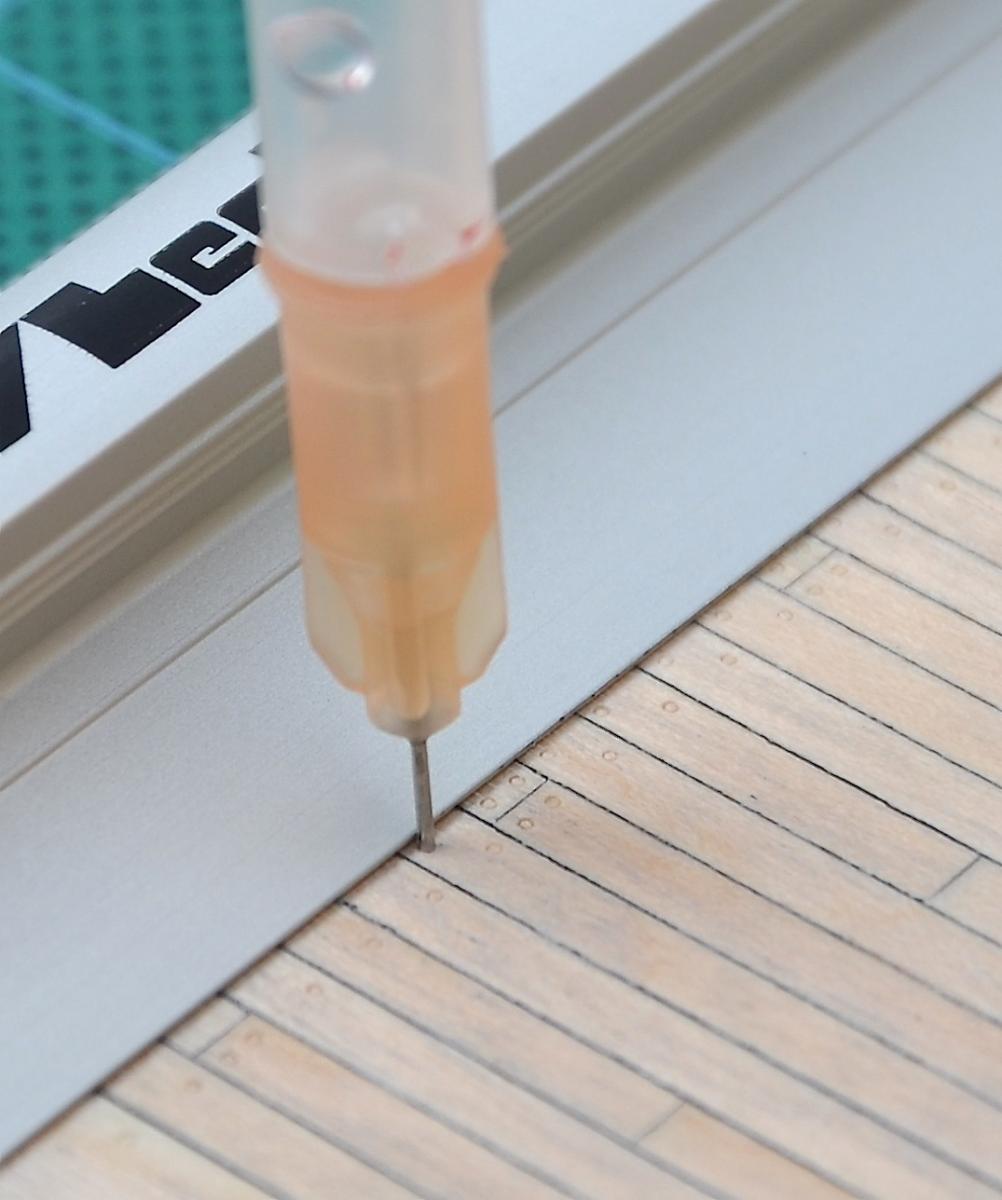
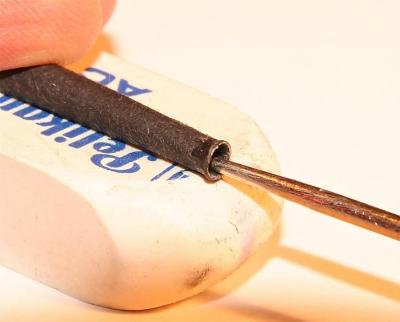
I've started making treenails, using cut off and sharpened at the end hypodermic needle. Needle needs to be only gently pressed to the veneer and twisted several times.

-
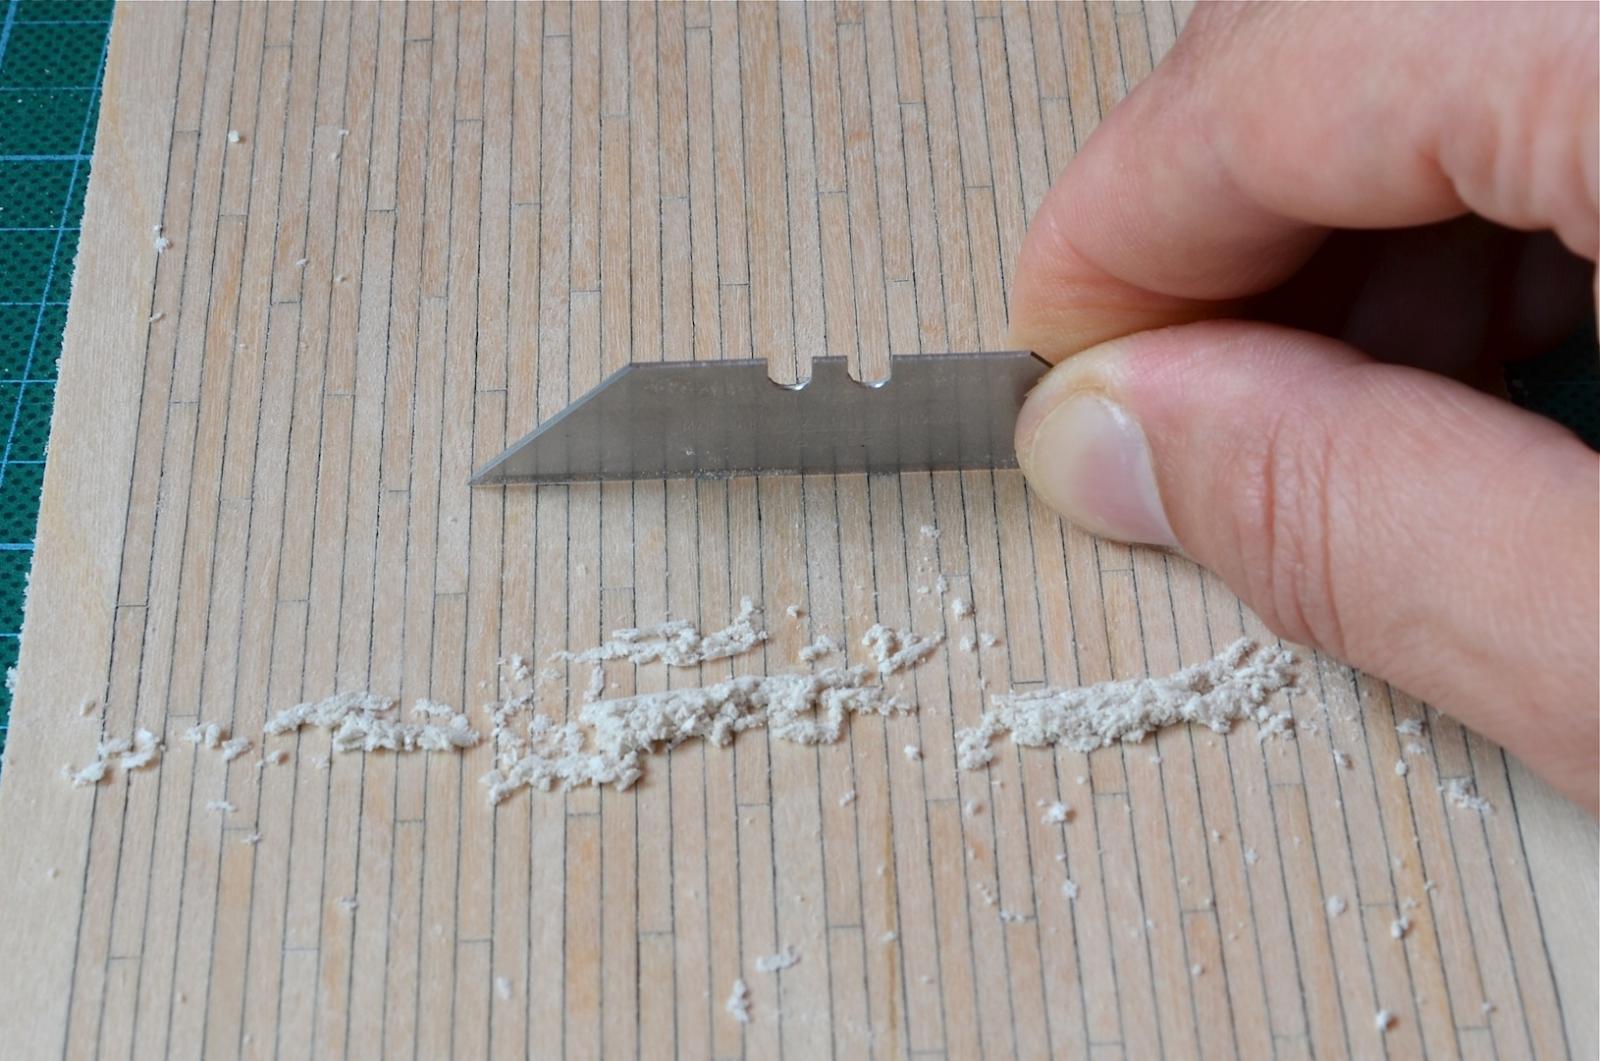
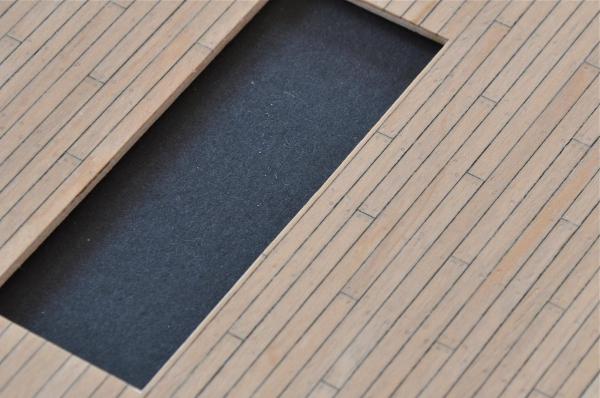
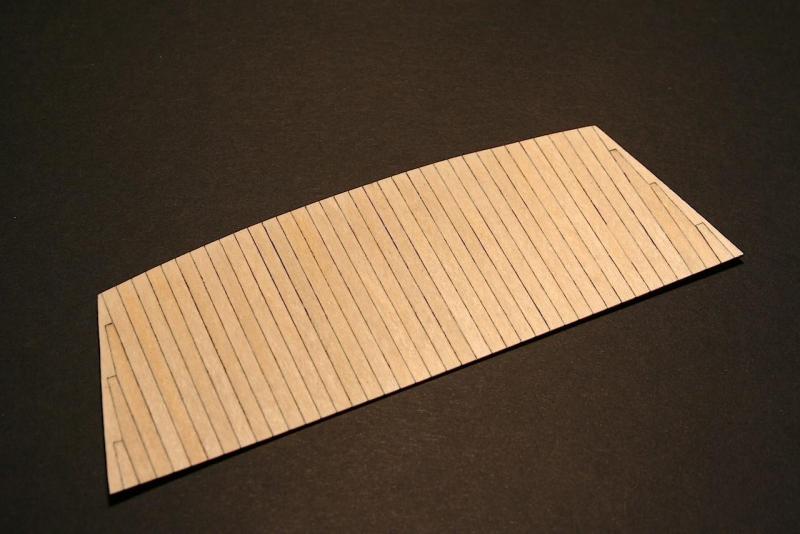
After a long time of laziness the first deck has been made. Each plank was cut to the proper lenght using the jig. The picture below shows not yet polished deck. To have a smooth deck surfice firstly I scratch the veener with the blade, as shown beneath. Finally the deck will be sanded.

-
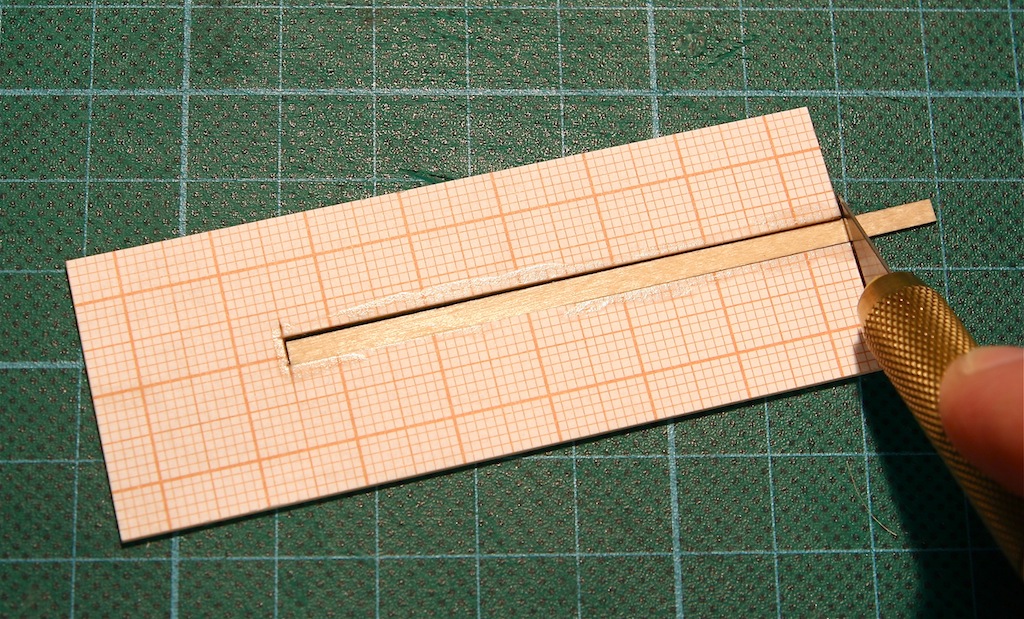
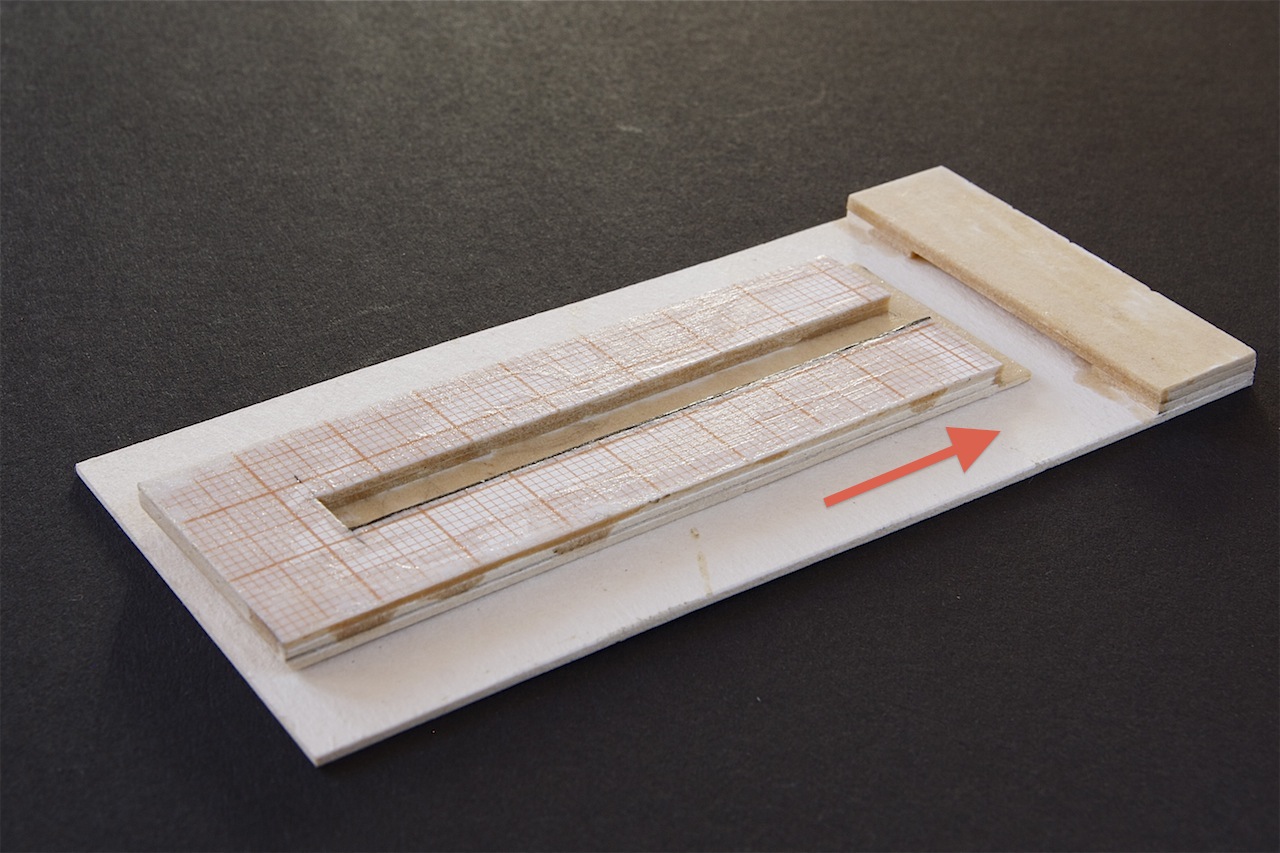
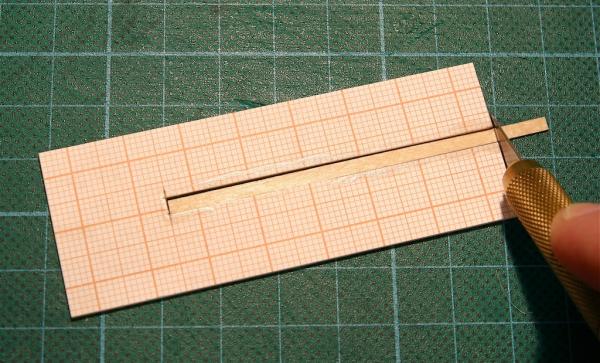
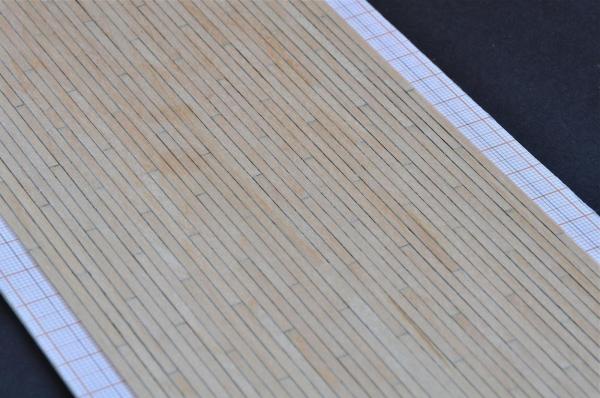
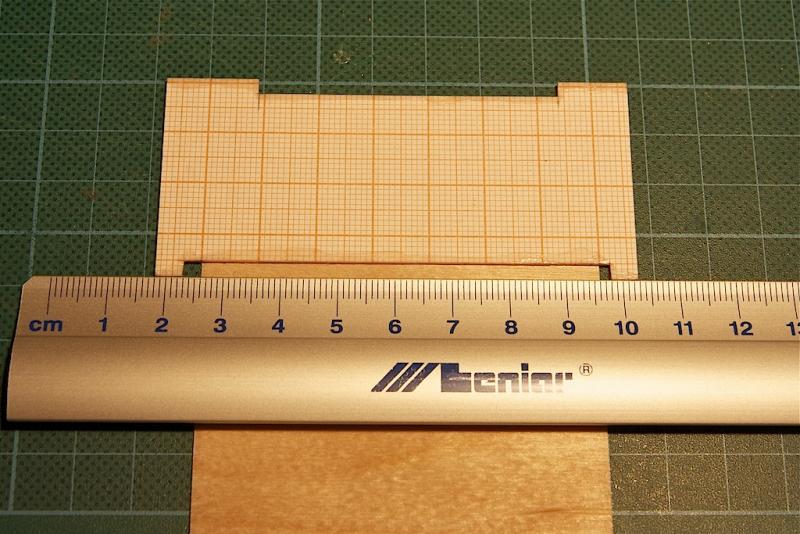
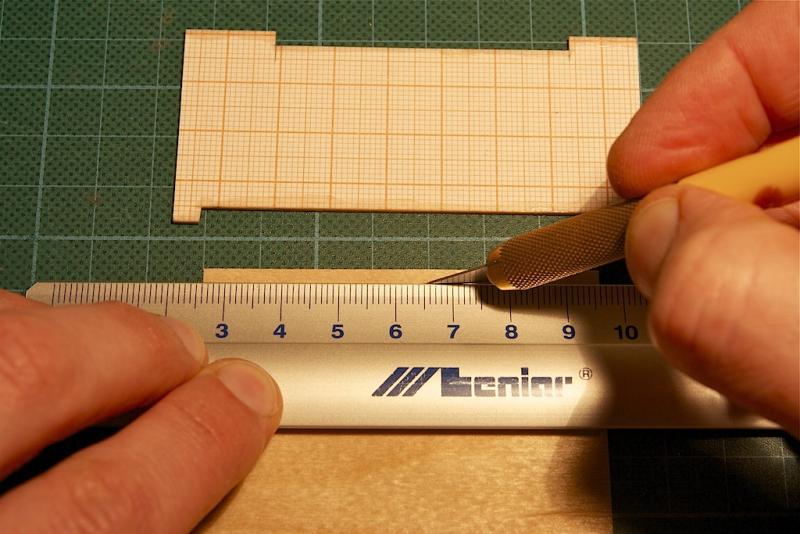
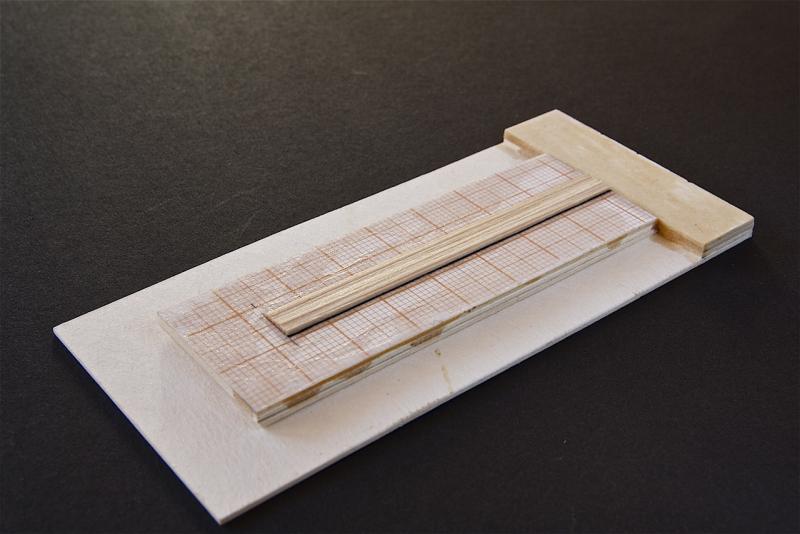
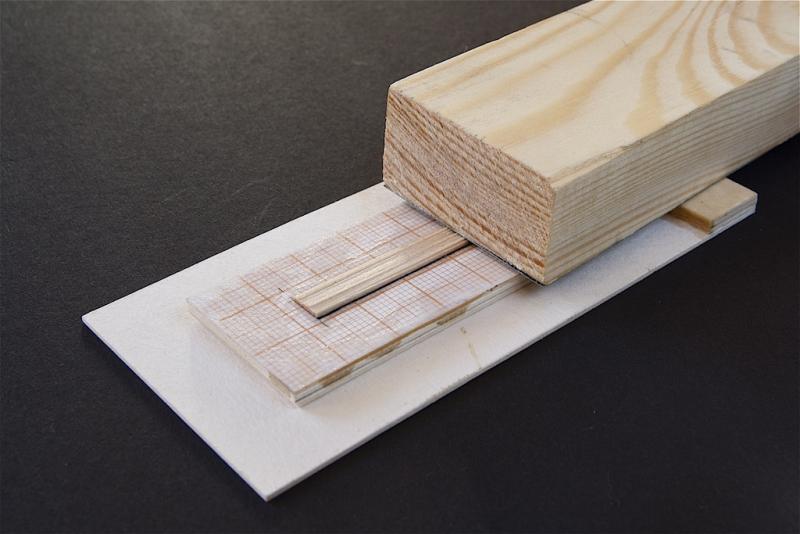
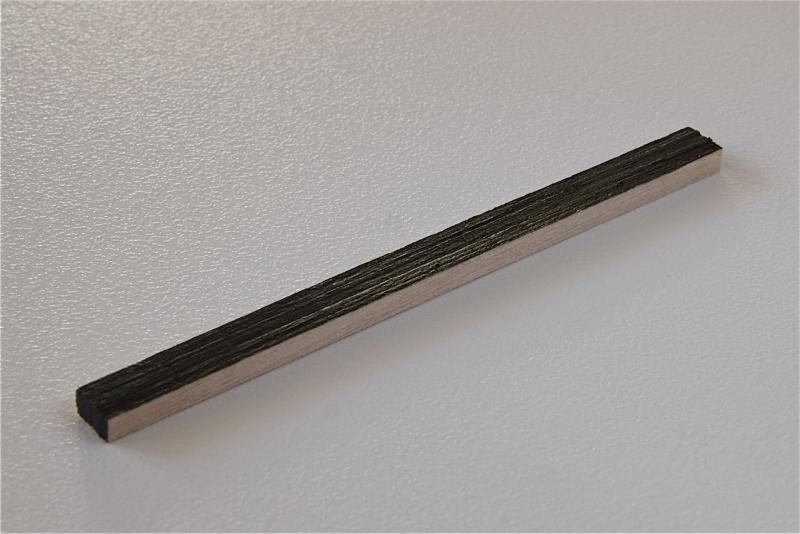
I’d like to present my way of making the deck planks. First of all, veneer should be moist when cutting. Therefore before cutting, I kept it in water (about 30 min.). Cutting with knife is much easier when veneer is wet and there is no need to worry about chipping off the wood. I’ve made a small jig for cutting, which helps me to achieve equal width of each plank. Important thing is to soak the edges of the jig with CA glue; due to this, the cardboard keeps still the same size. Making planks, I cut the veneer twice or three times. I’ m trying not to do it with single cut because it’s harder to achieve straight edge of plank. Another jig has been made for “forming” planks into bundles and sanding their edges. The jig consist of two elements: into the first I lay down the planks and after that insert all into the groove in the second element. Due to this the planks block and do not move when sanding. Next I apply onto one sanded surface the thin layer of glue (I use Pattex for wood), so that paint do not soak into the plank. Then I paint this “glued” surface with black acrylic paint, which imitates caulking. When everything is dry I cut up the bundles for single planks using razor-blade. To be continued...

-
Thanks all of You for the good words. Dancooper. I’m going to make the guns successively. Making all of them at once probably would kill me. Slowly, but one step forward. I’ve made my first wooden deck. This is the deck in a wardroom, made from the birch veneer. I decided not to make planking butt step and treenails on this deck, as it will be hardly visible (only through the stern windows). It’s because of my laziness , but I can assure you, that it will be done properly on the other decks. To be continued...
-
Thanks Daniel. Fortunately I had everything saved in a file on my PC. Pity, that so many wonderful build logs were lost. I hope not forever.
-
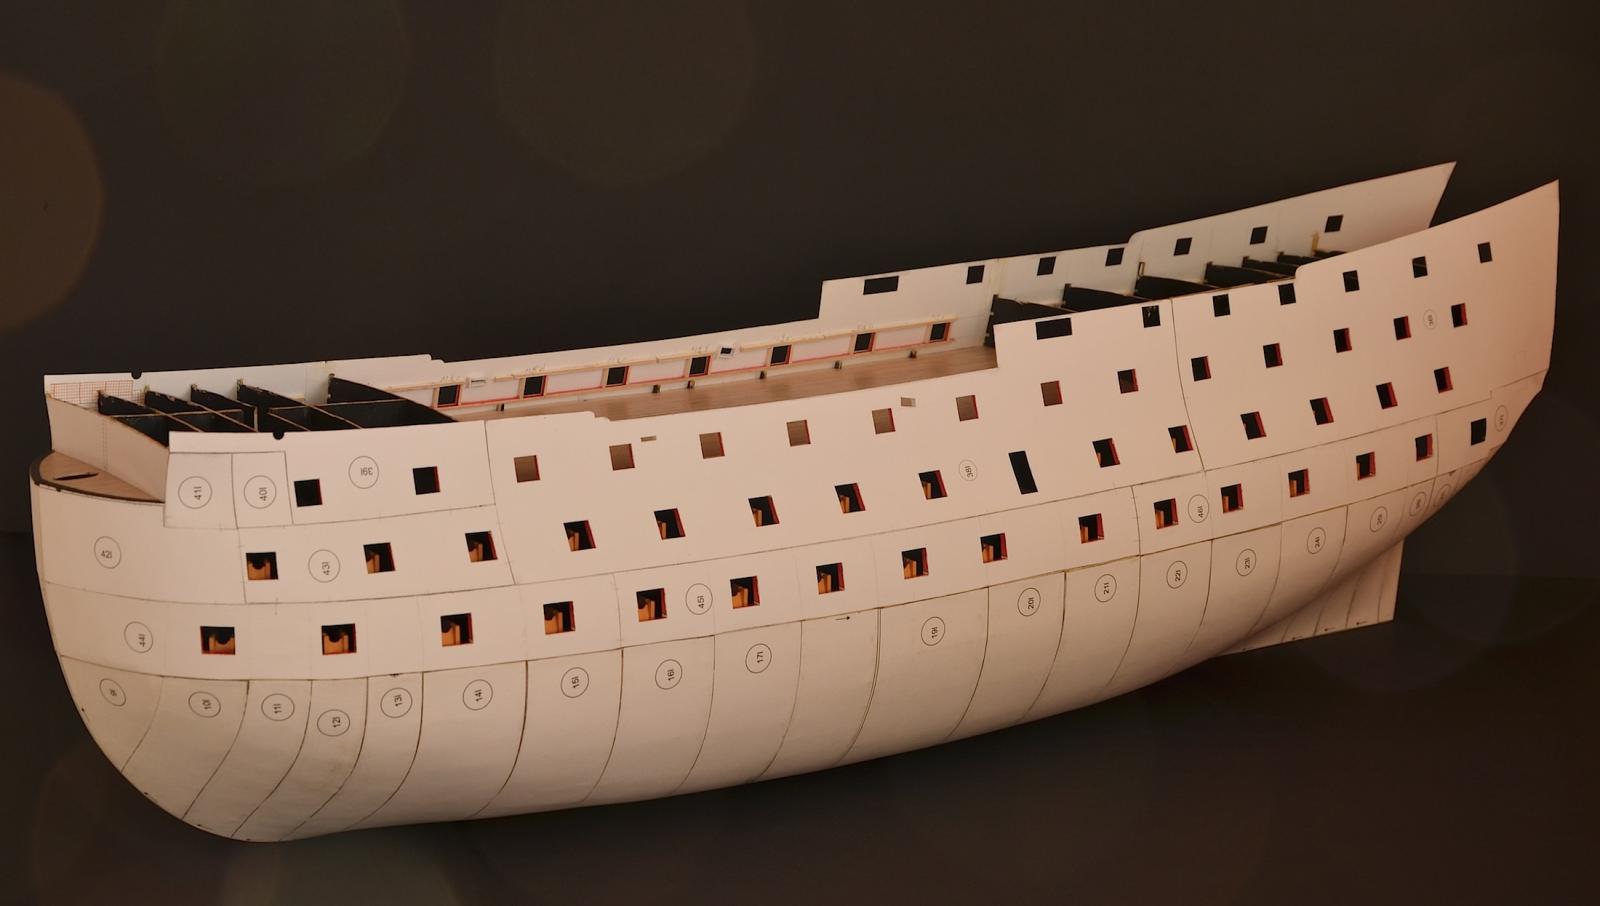
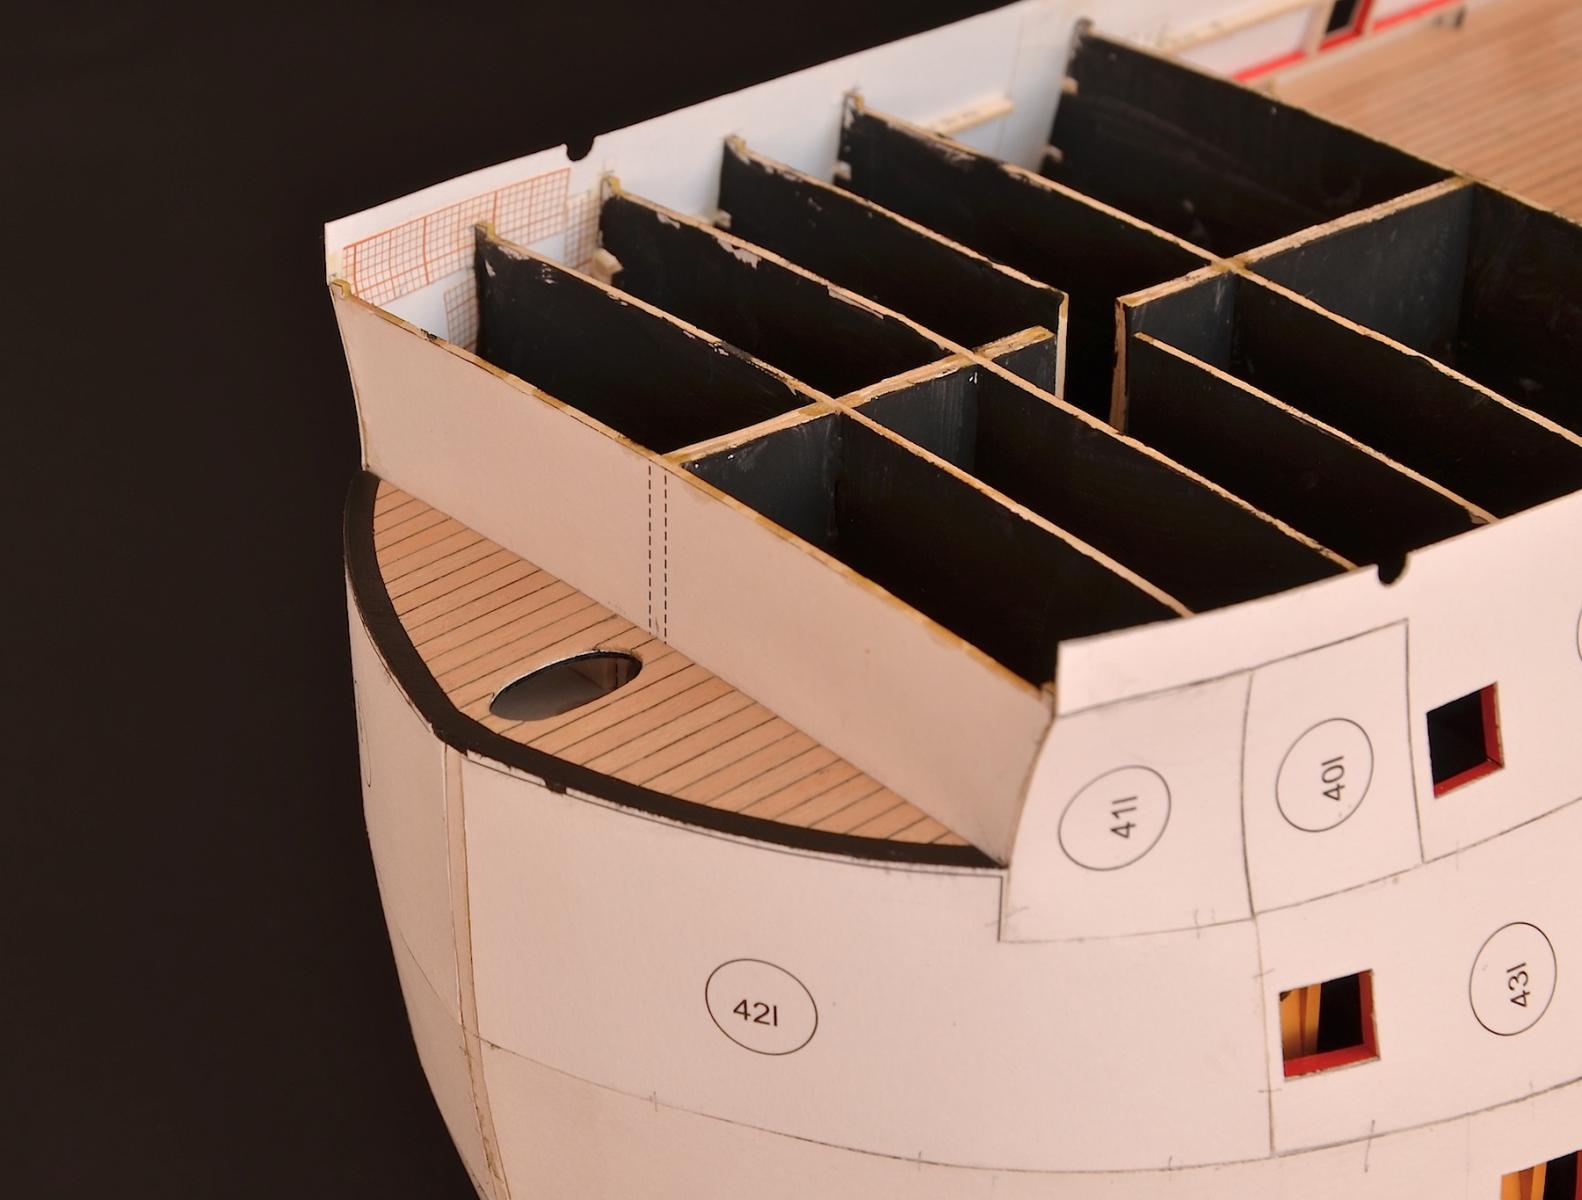
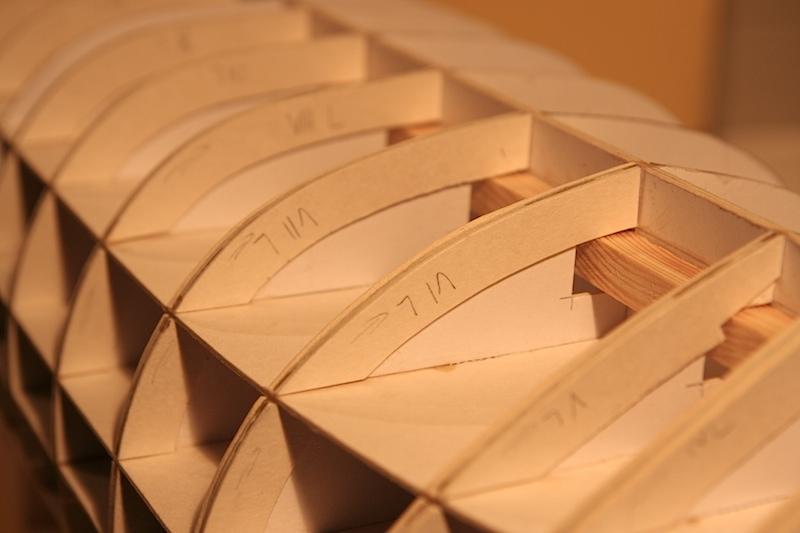
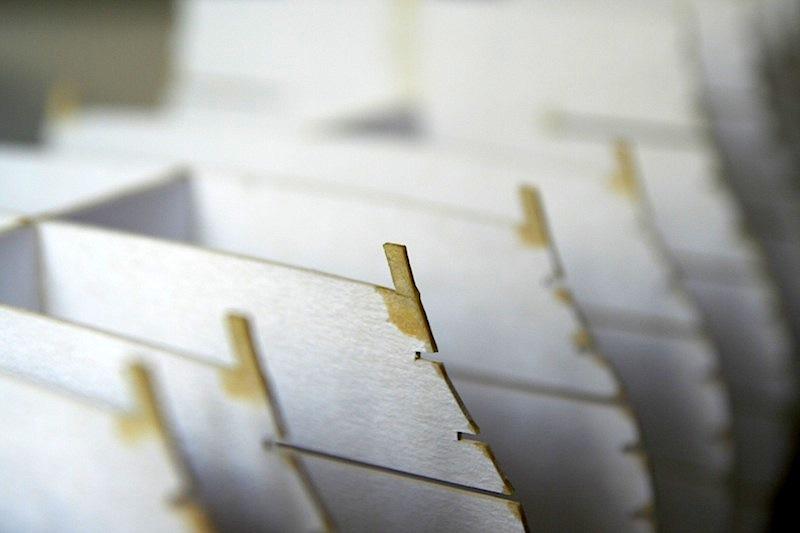
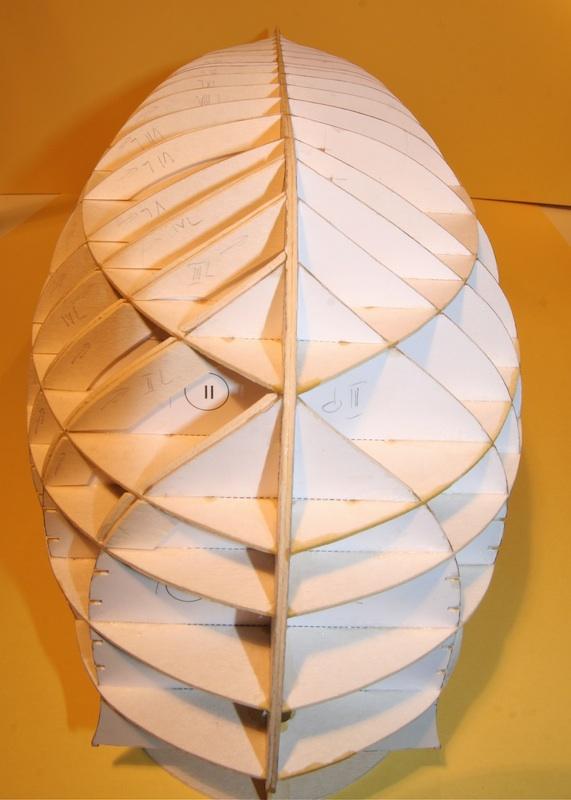
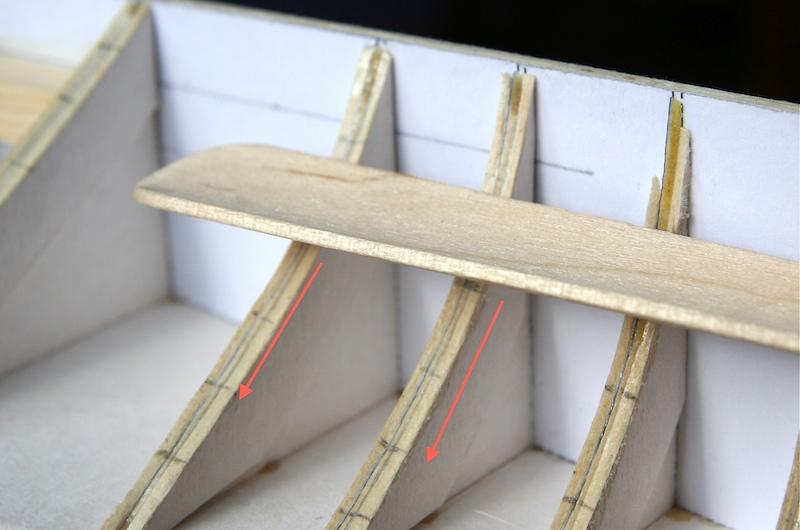
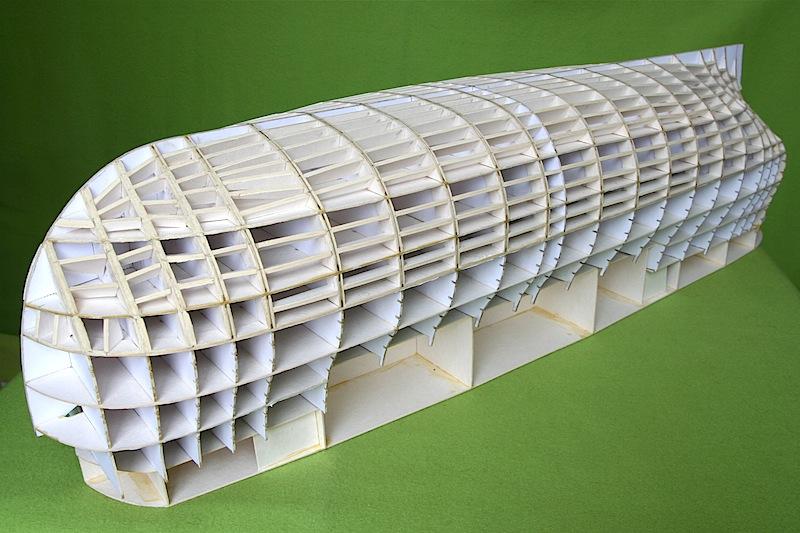
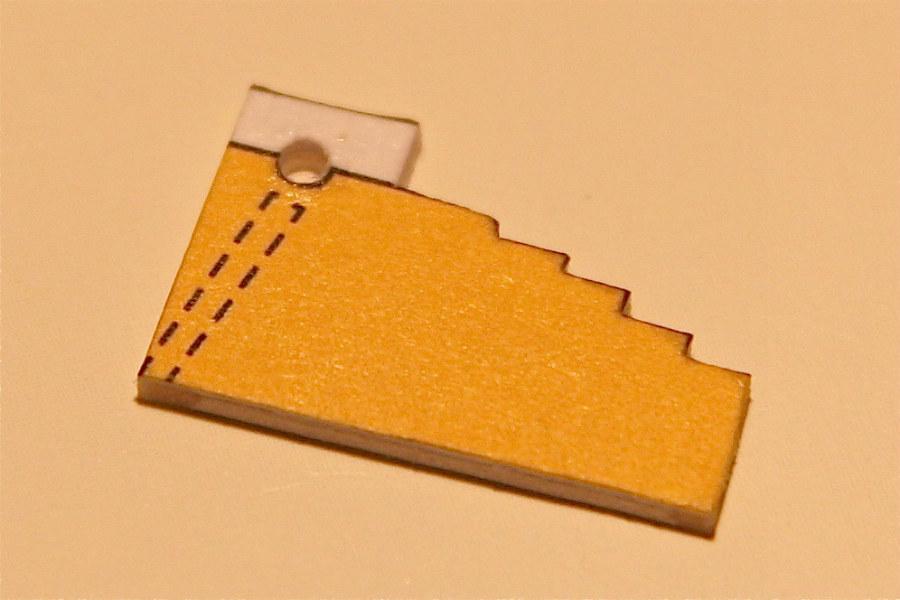
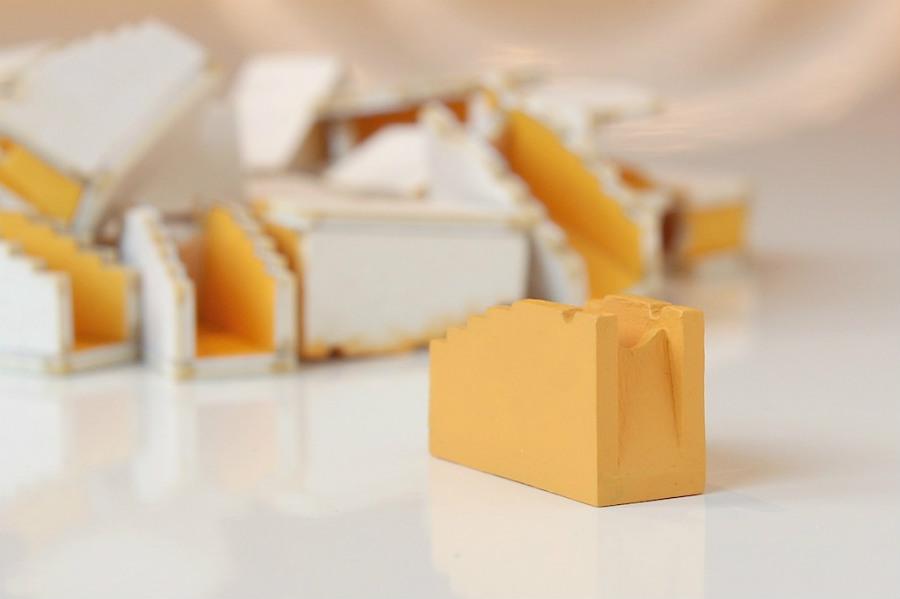
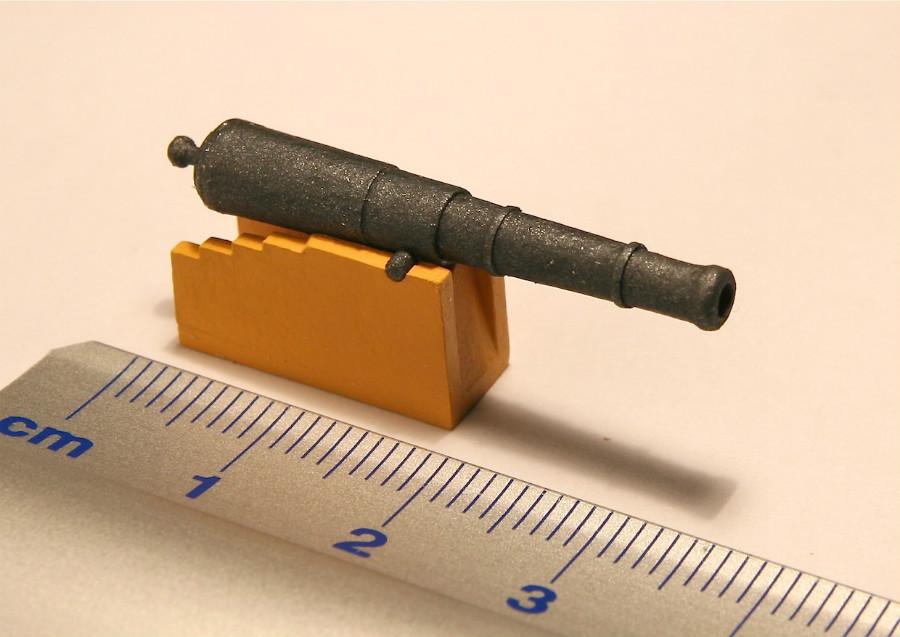
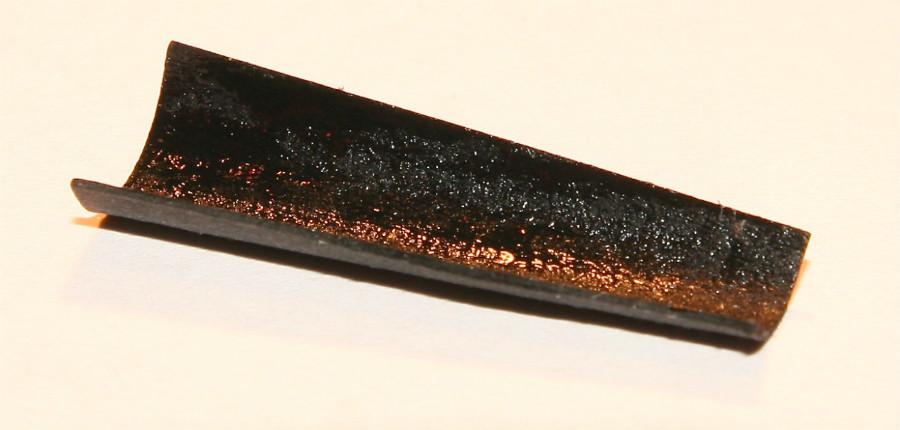
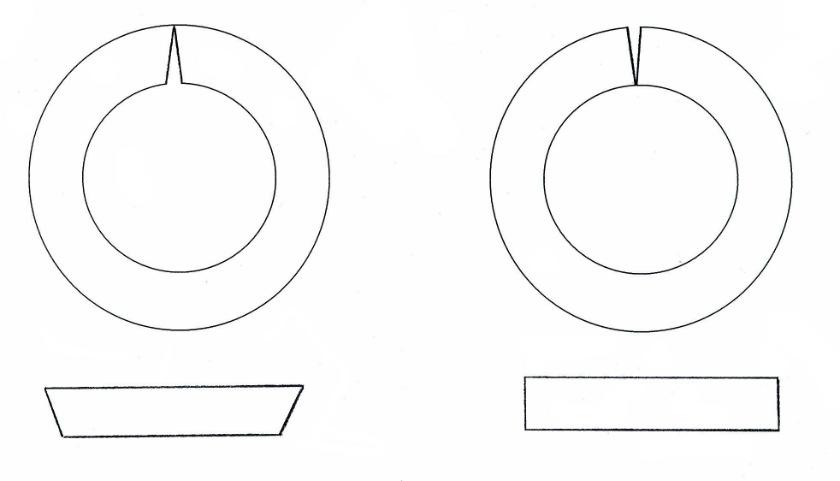
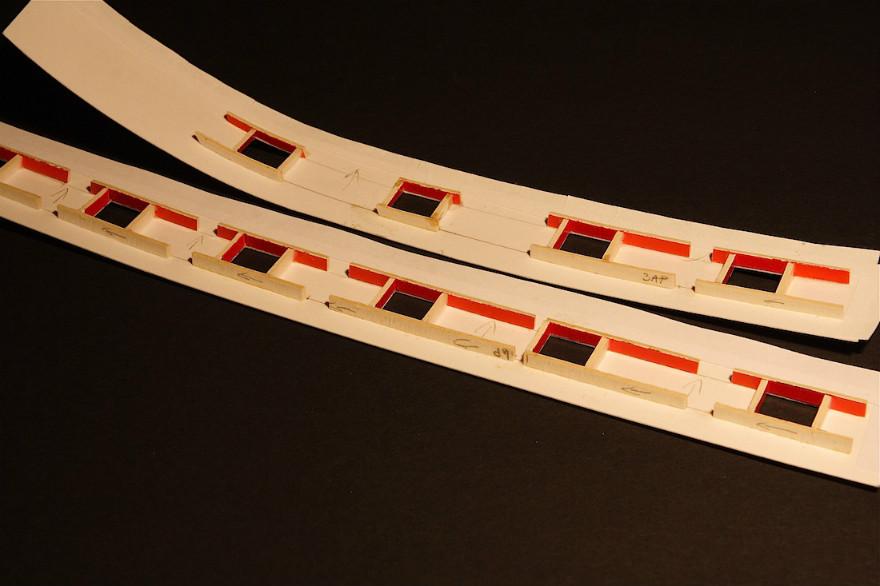
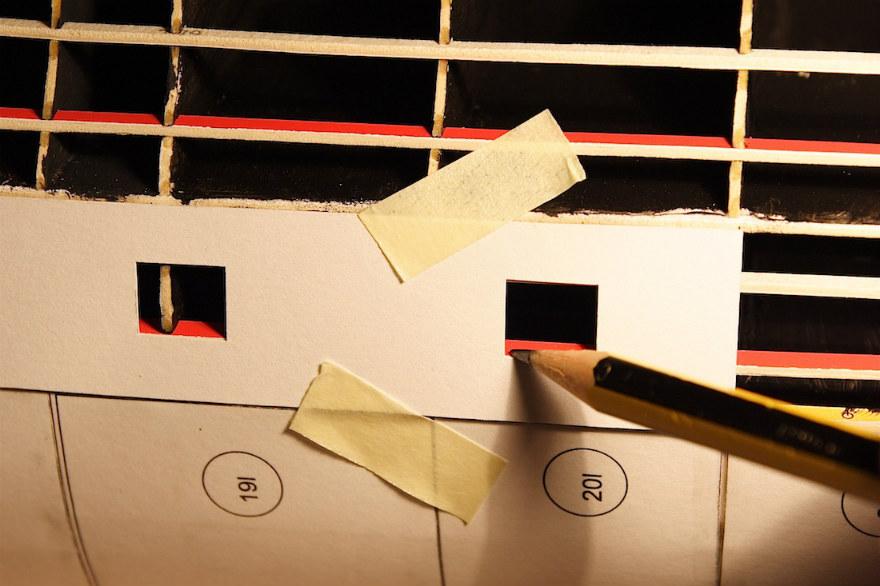
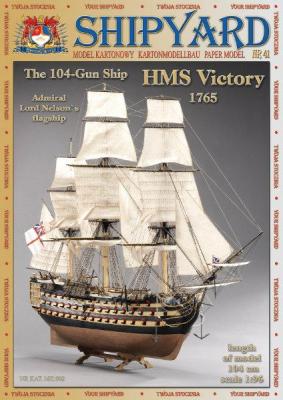
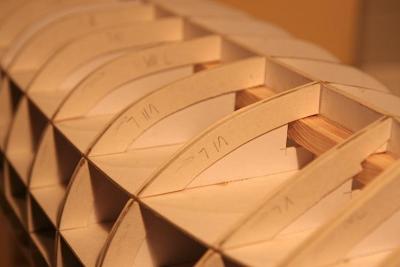
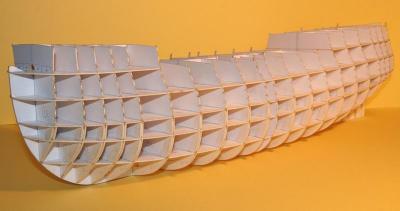
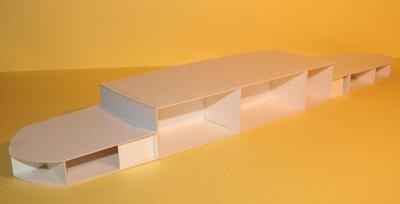
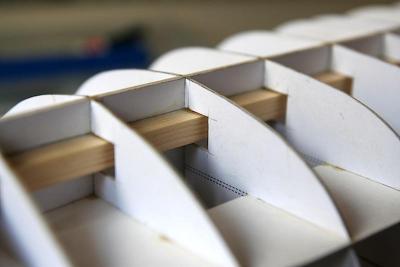
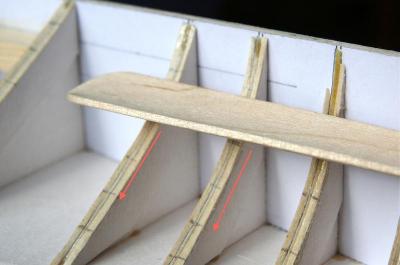
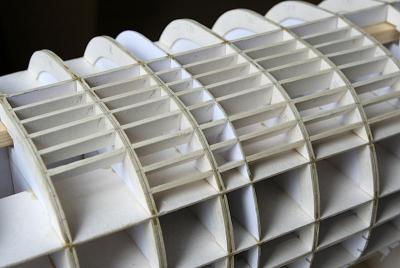
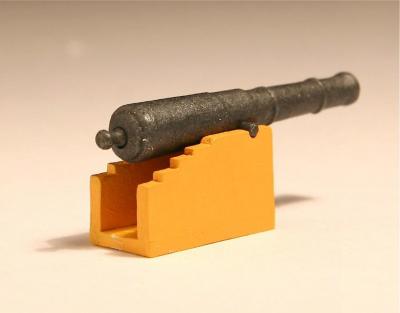
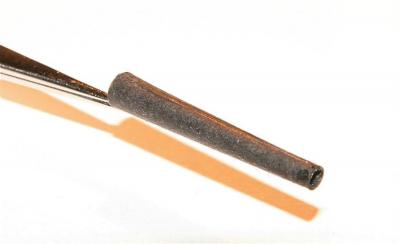
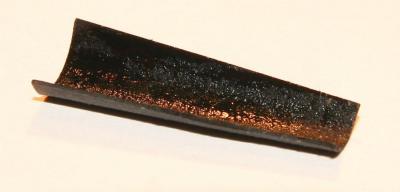
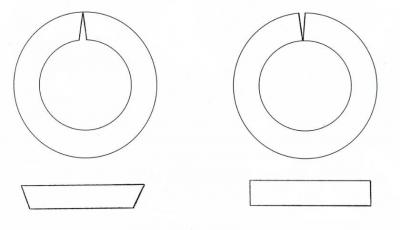
Hello. My name is Jarek. A few months ago I’ve started building my own HMS Victory, as everybody should have this beautiful ship . I’ve been making Victory based on the Shipyard’s card model. I hope that the memberships of this forum help me to finish the project, giving me advice, supporting when doubts appear, criticizing when necessary. Sorry for any mistakes appear in my English All the bulkheads are made from 1 mm cardboard, except the bottom of hull (beneath the waterline), where the bulkheads are 3 mm thick. To increase the thickness I glued additional strips of paper on each bulkhead side. I made this because I wanted to have a wider surface to glue the first layer of “plank”. All sticking out parts of bulkheads I soaked using CA glue. It helps strengthen them to avoid accidentally damage. Also, I’ve made a jig, which helps me to work with a model upside down and not to be afraid of breaking down those sticking out parts. I glued two pine slats, one on each side, following almost from bow to stern, to keep the straight line of the paper “keel”. Every bulkhead was initially “sanded”, but without using sandpaper. I made this by using the colourless water glue, putting it on each bulkhead edge, to soften this element. Then, with a wooden spatula I smoothed the bulkheads edges. Between the bulkheads I glued cardboard pieces (2 mm thick). It helps to avoid “falling” the paper planks between the bulkheads, because they are not as stiff and hard as wooden. It’s hard to believe, but there are about 500 pieces. Finally, the view of the first "planking". On the lower decks, which are not visible, there are “not fully equipped” gun carriages. The small holes in the carriages were drilled. Before drilling I soaked the element using CA glue in order to have a hard surface for the drill. Firstly, all carriages had been varnished (2 layers), then slightly sanded and finally painted yellow ochre (Talens, Van Gogh). I’ve also made a small jig to build them properly. I’ve also made a “trial version” of the gun, needed temporary for marking the right position of the gun in gunports. In the future the gun will be a little modified, to achieve much better “product”, more resembling the original . It is of course made from paper, except trunnion and knob which are wooden. Before rolling the paper I put on it a thin layer of water glue (on the inside). When the paper is wet it’s easy to roll it and make a pipe, even a small diameter. After drying the glue, paper keeps the proper shape. Making the gun, the paper should be cut off with knife holding slightly in angle. Due to it, the edge joint is proper all along the gun, almost invincible. When you cut the paper holding knife perpendicularly, it is hard to join the edges without leaving a slot. To make a specific shape of muzzle, I also used water glue to soften the paper. When the paper was still wet, I’d formed the muzzle on rubber, pressing paper with wire rounded ending. The hole for trunnion was bored using 3 drills, firstly 0,3 mm, then 0,7 mm finally 1 mm, in order to avoid fraying the edges. Before drilling I soaked the paper with CA glue. I’m working on gunports now. Firstly, using a masking tape, I made fast to the skeleton the first layer of planks. This has been done temporarily for marking the position of gunports opening, on the red “battens”. After that, I cut the battens on smaller sections, so that they fit between each of the bulkheads. Every piece was glued from below, because this way is easier to achieve the good looking gunports. A little defect has brought to light. One of the bulkheads is visible in the gunport opening, which of course shouldn’t be. It will have to be cut down which is now not as easy, as before gluing all together. To be continued…


- 83 replies
-
- 15
-