HOLIDAY DONATION DRIVE - SUPPORT MSW - DO YOUR PART TO KEEP THIS GREAT FORUM GOING! (Only 20 donations so far - C'mon guys!)
×


newbee
-
Posts
180 -
Joined
-
Last visited
Content Type
Profiles
Forums
Gallery
Events
Everything posted by newbee
-
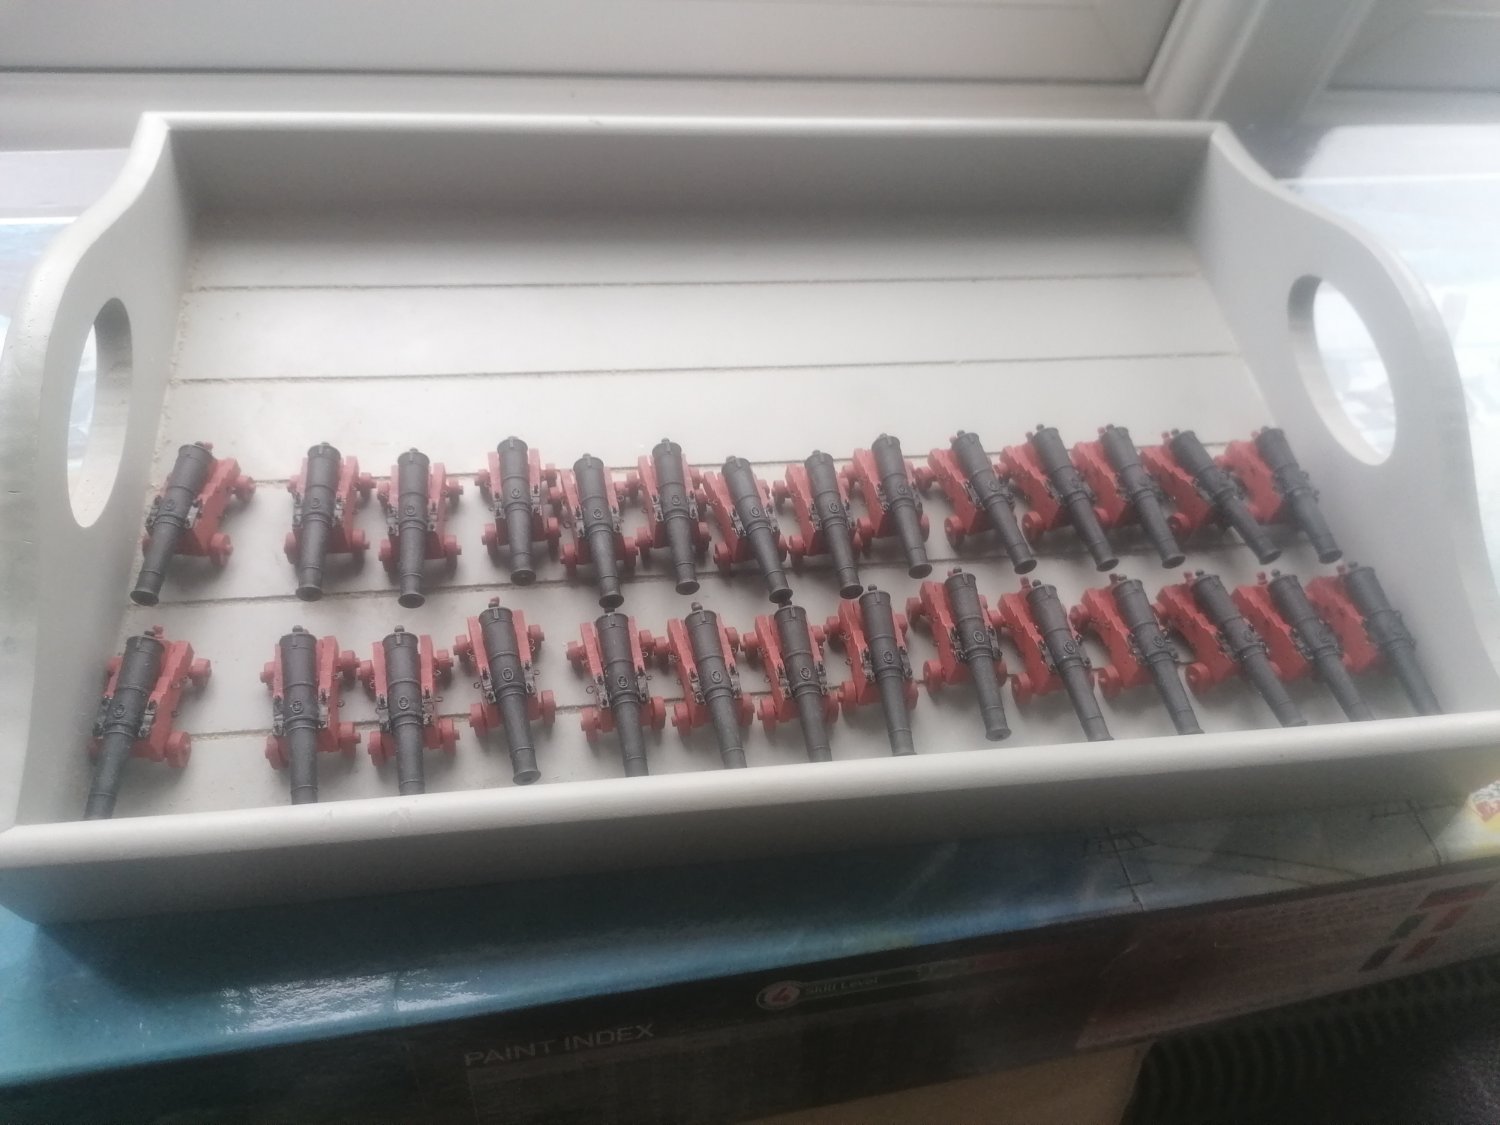
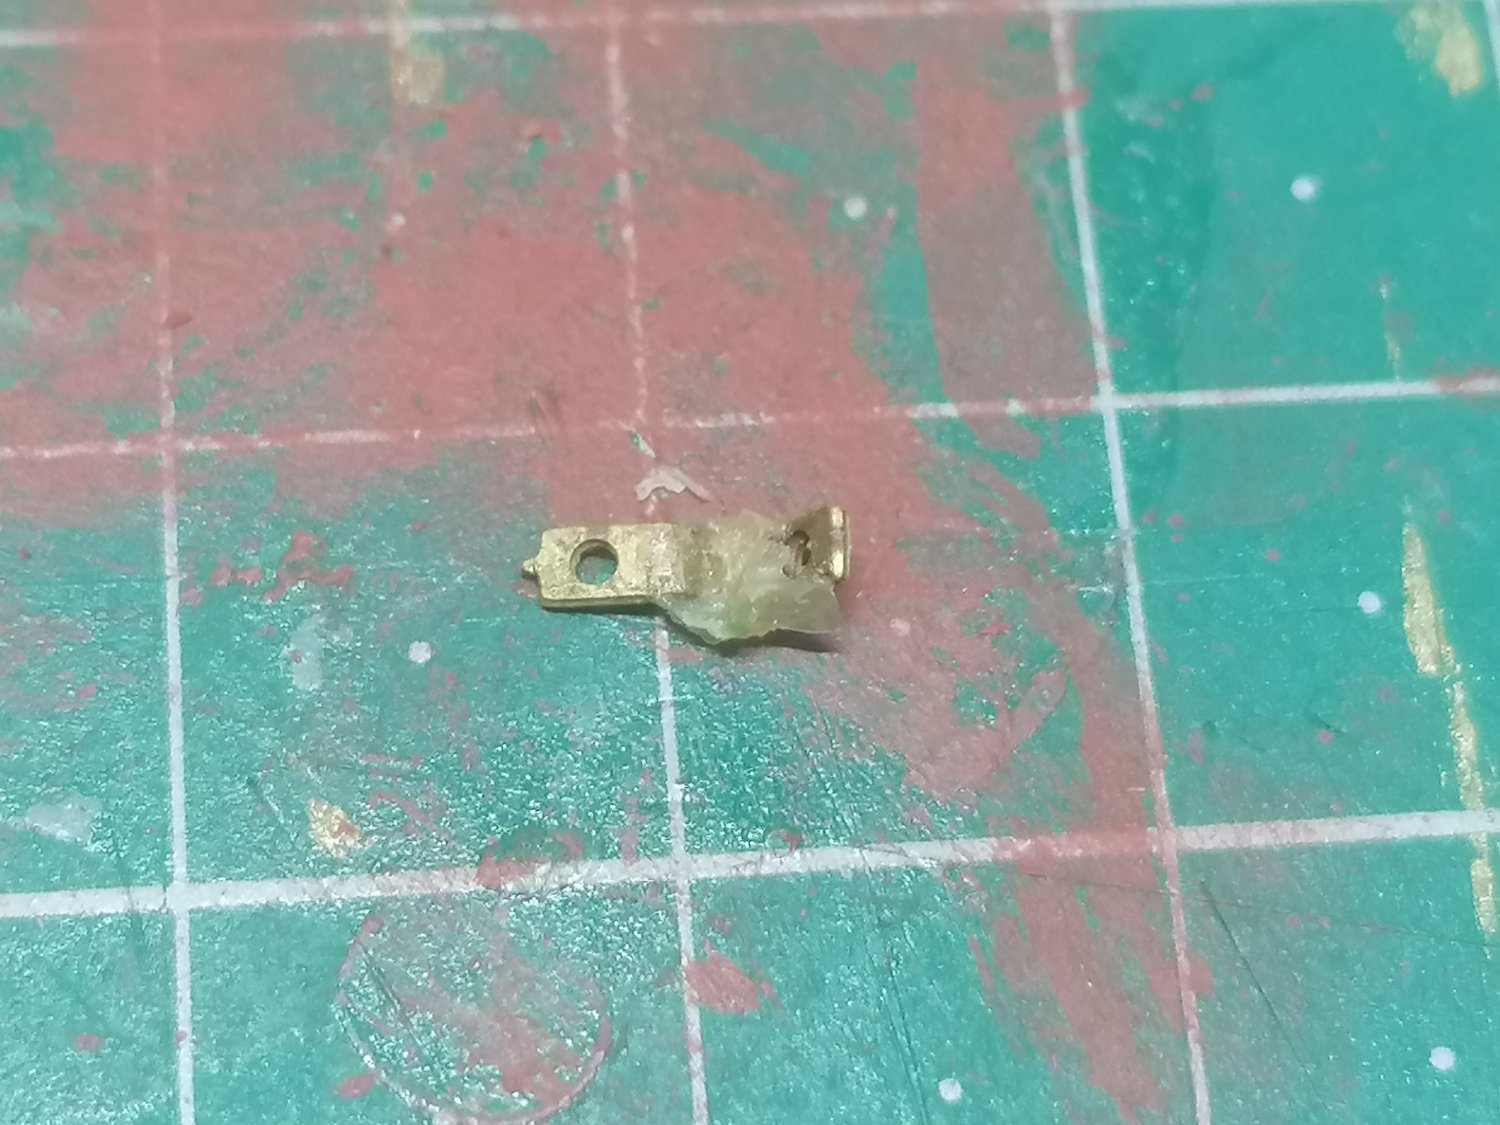
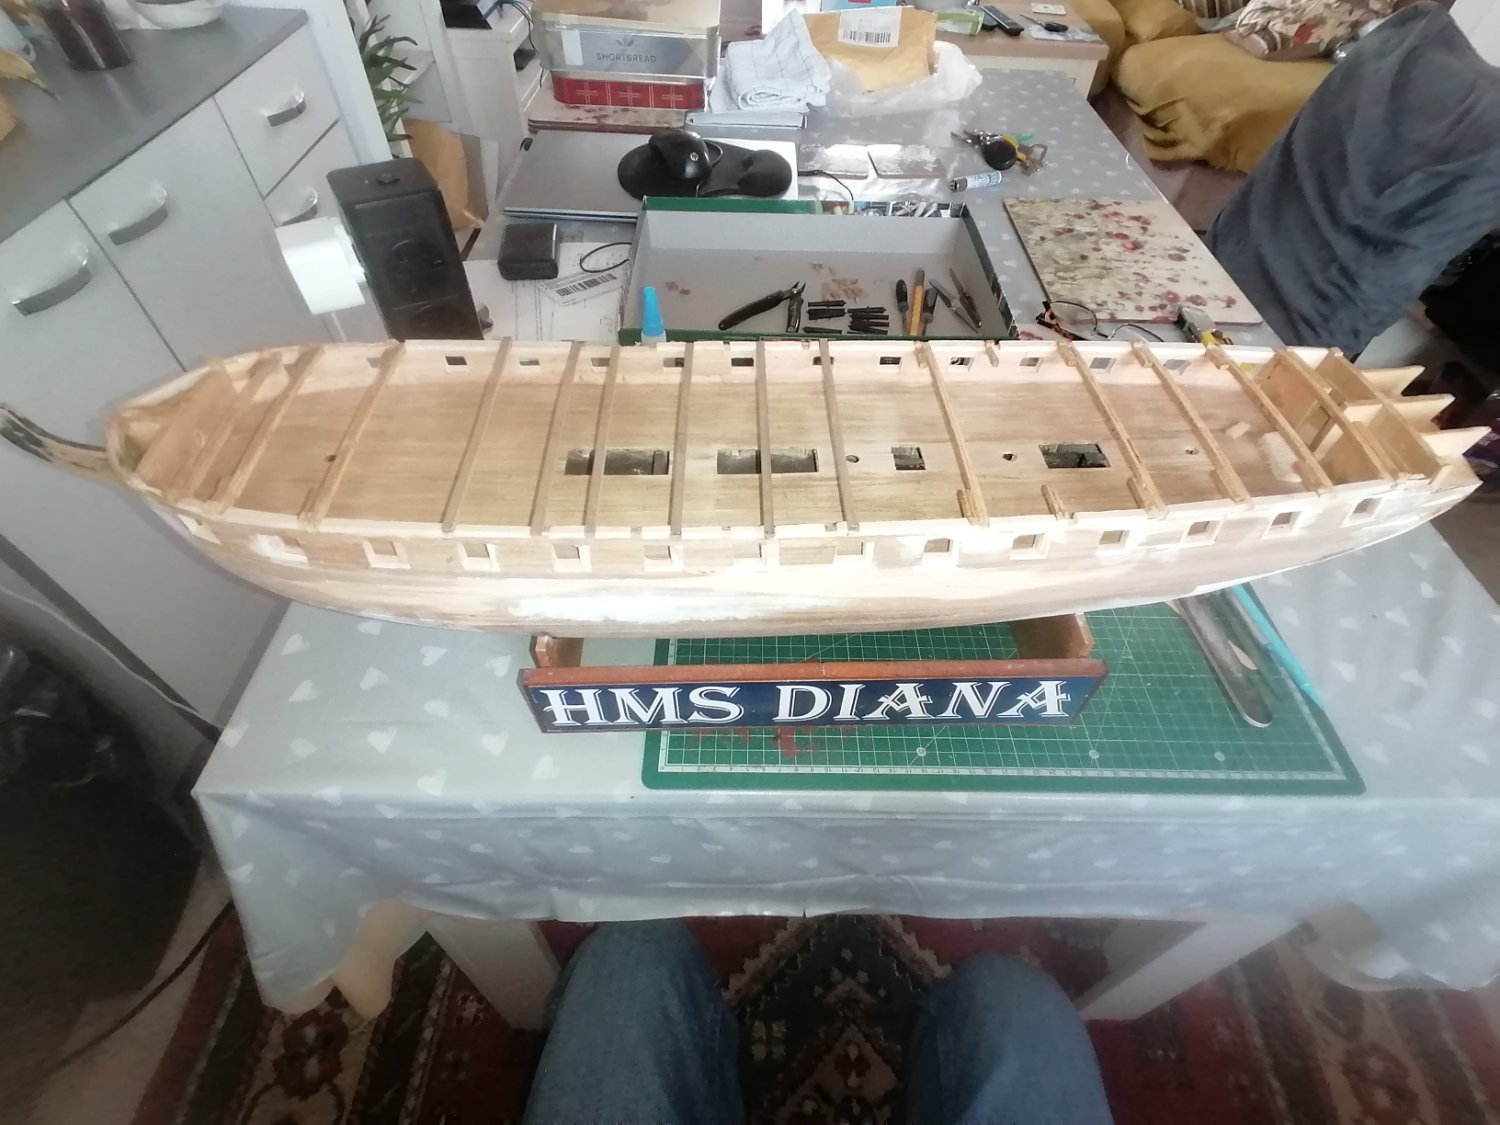
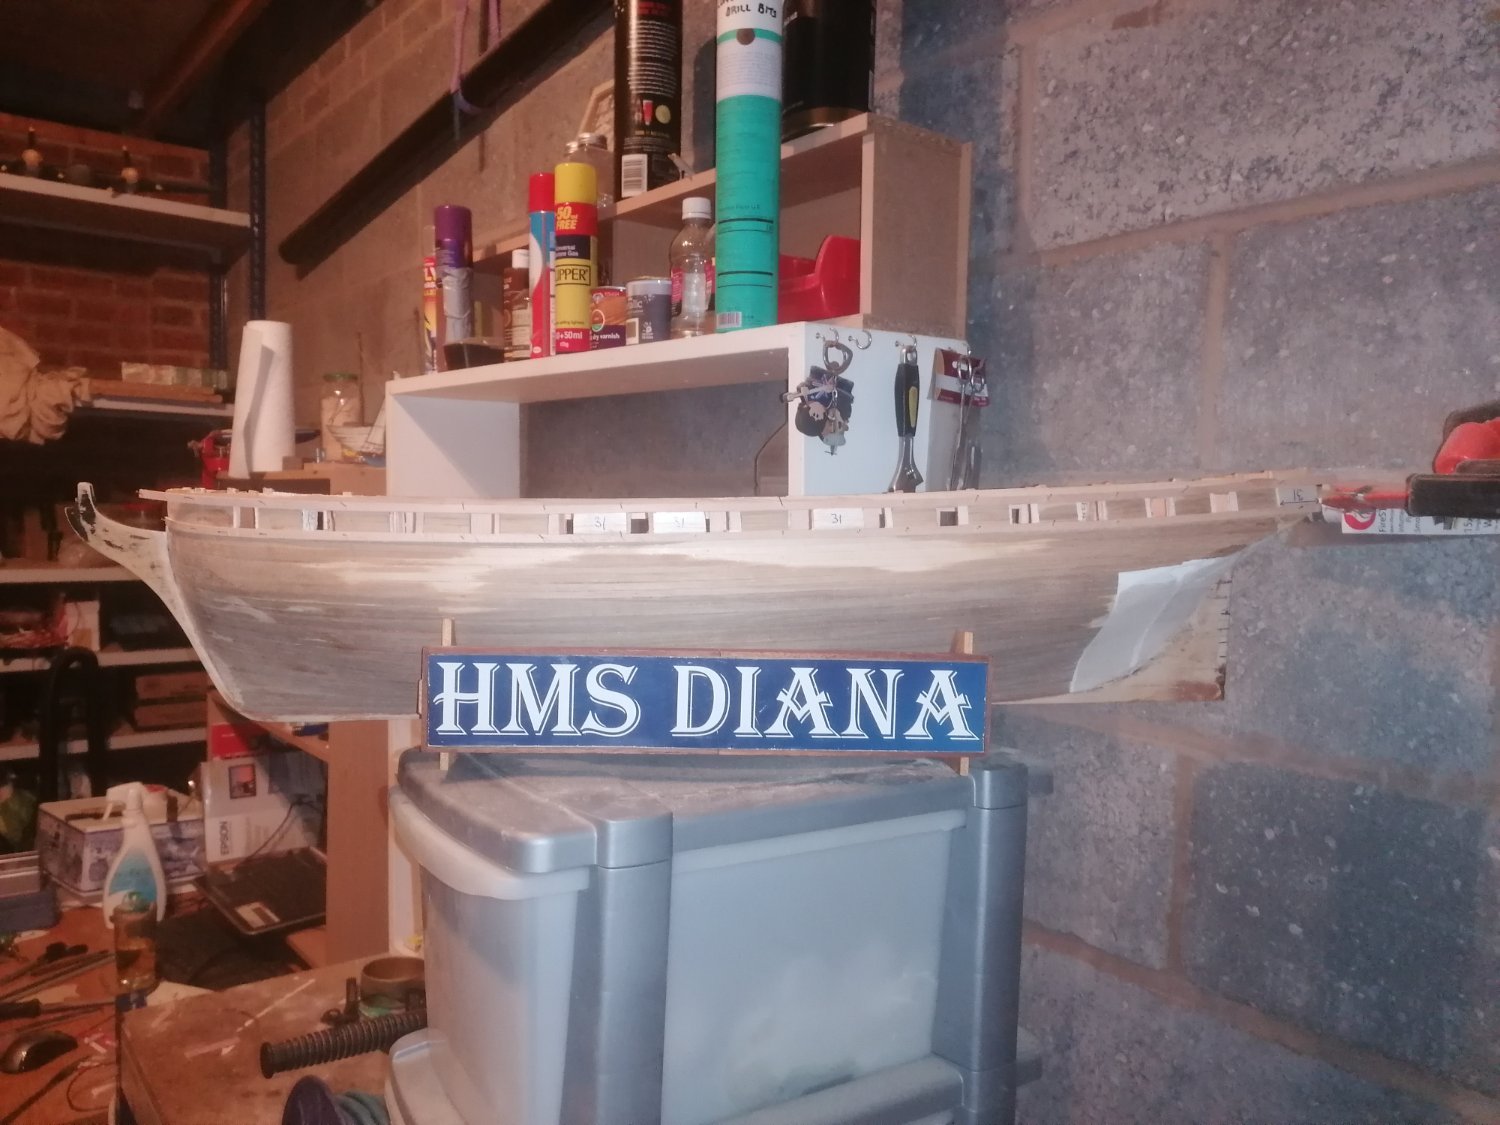
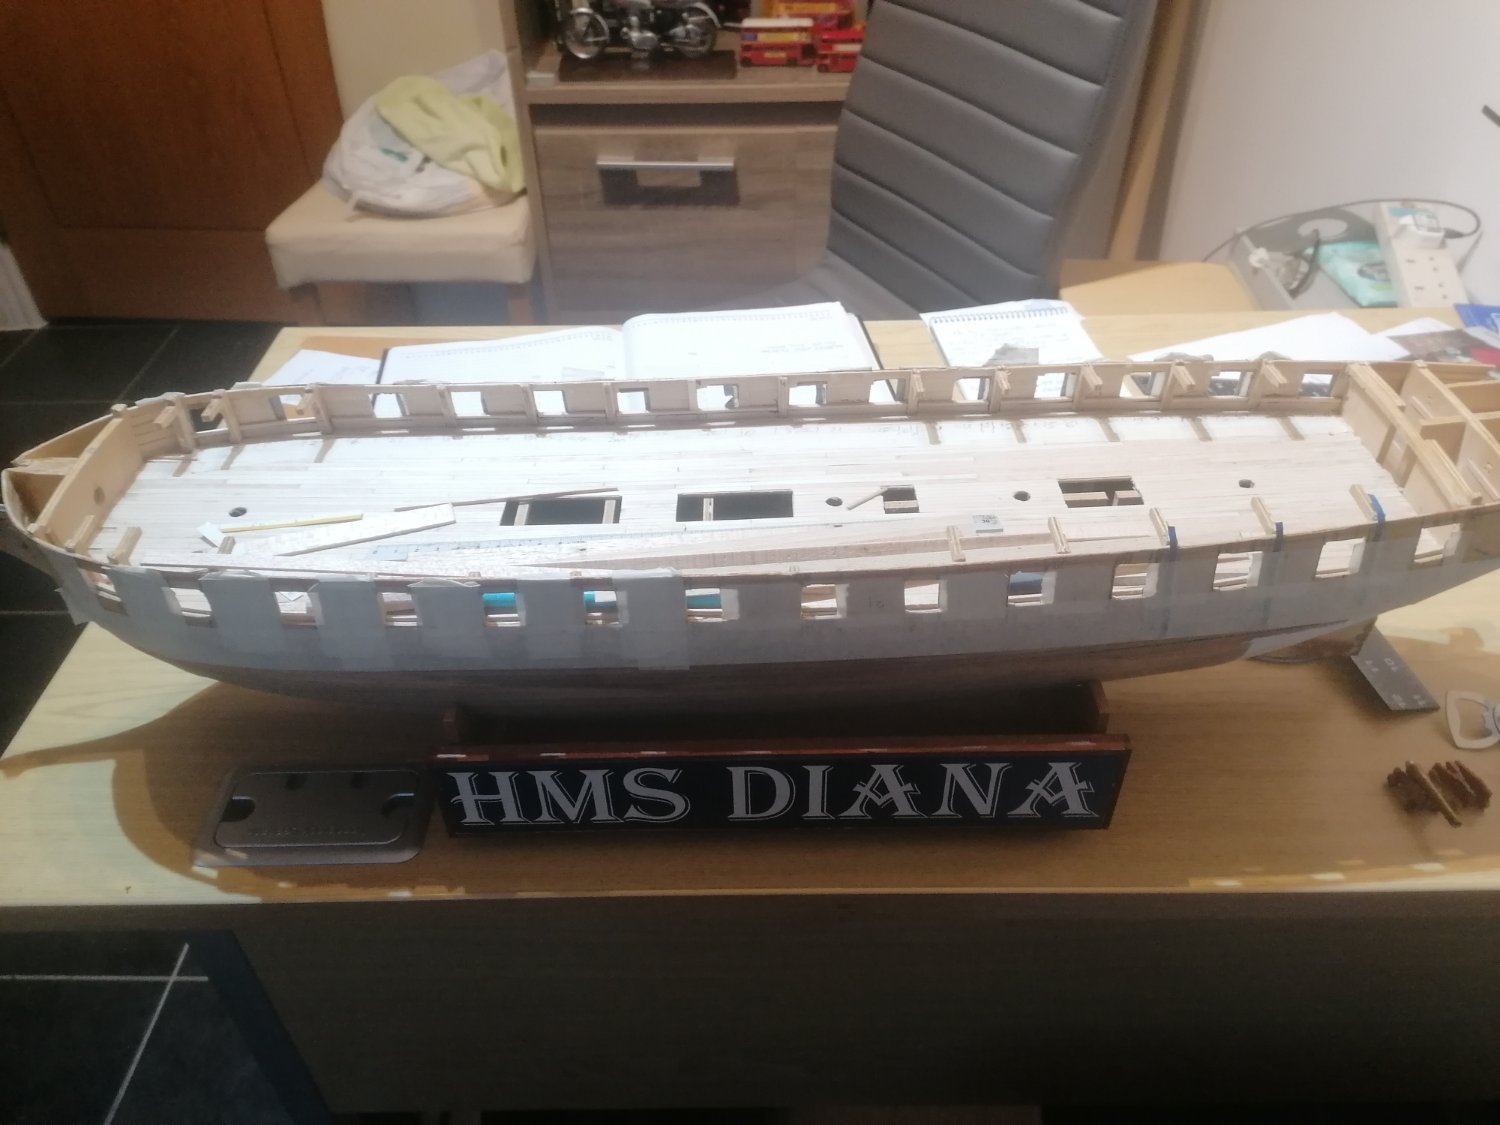
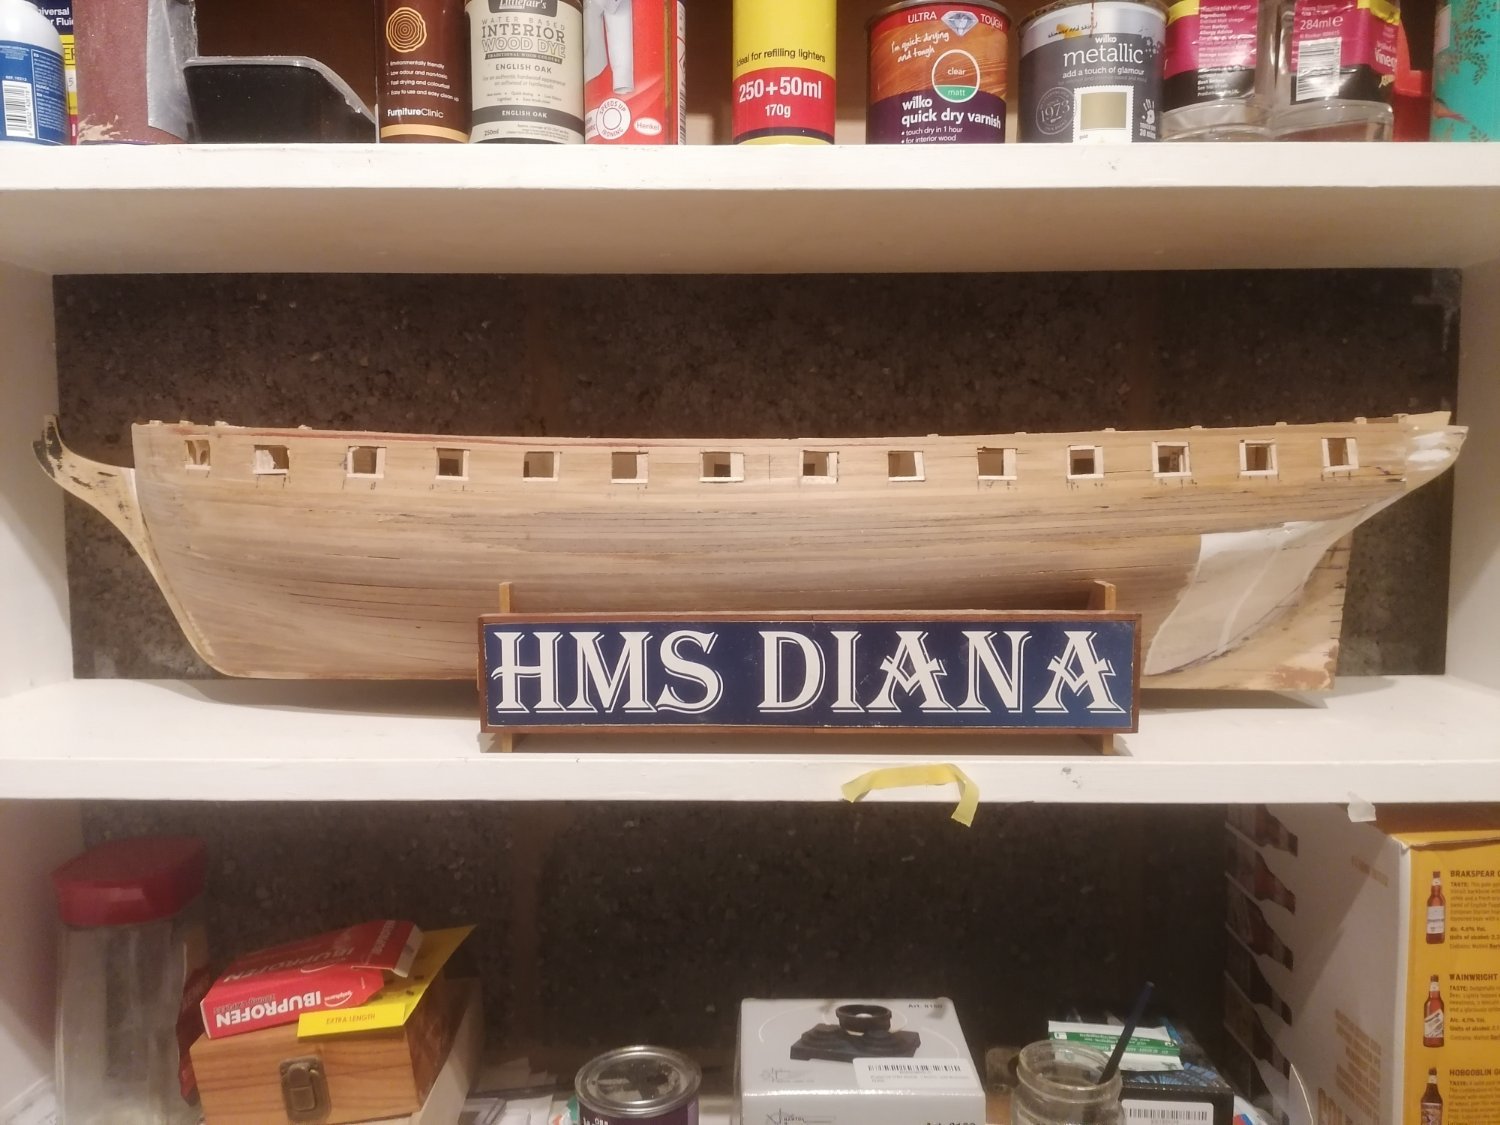
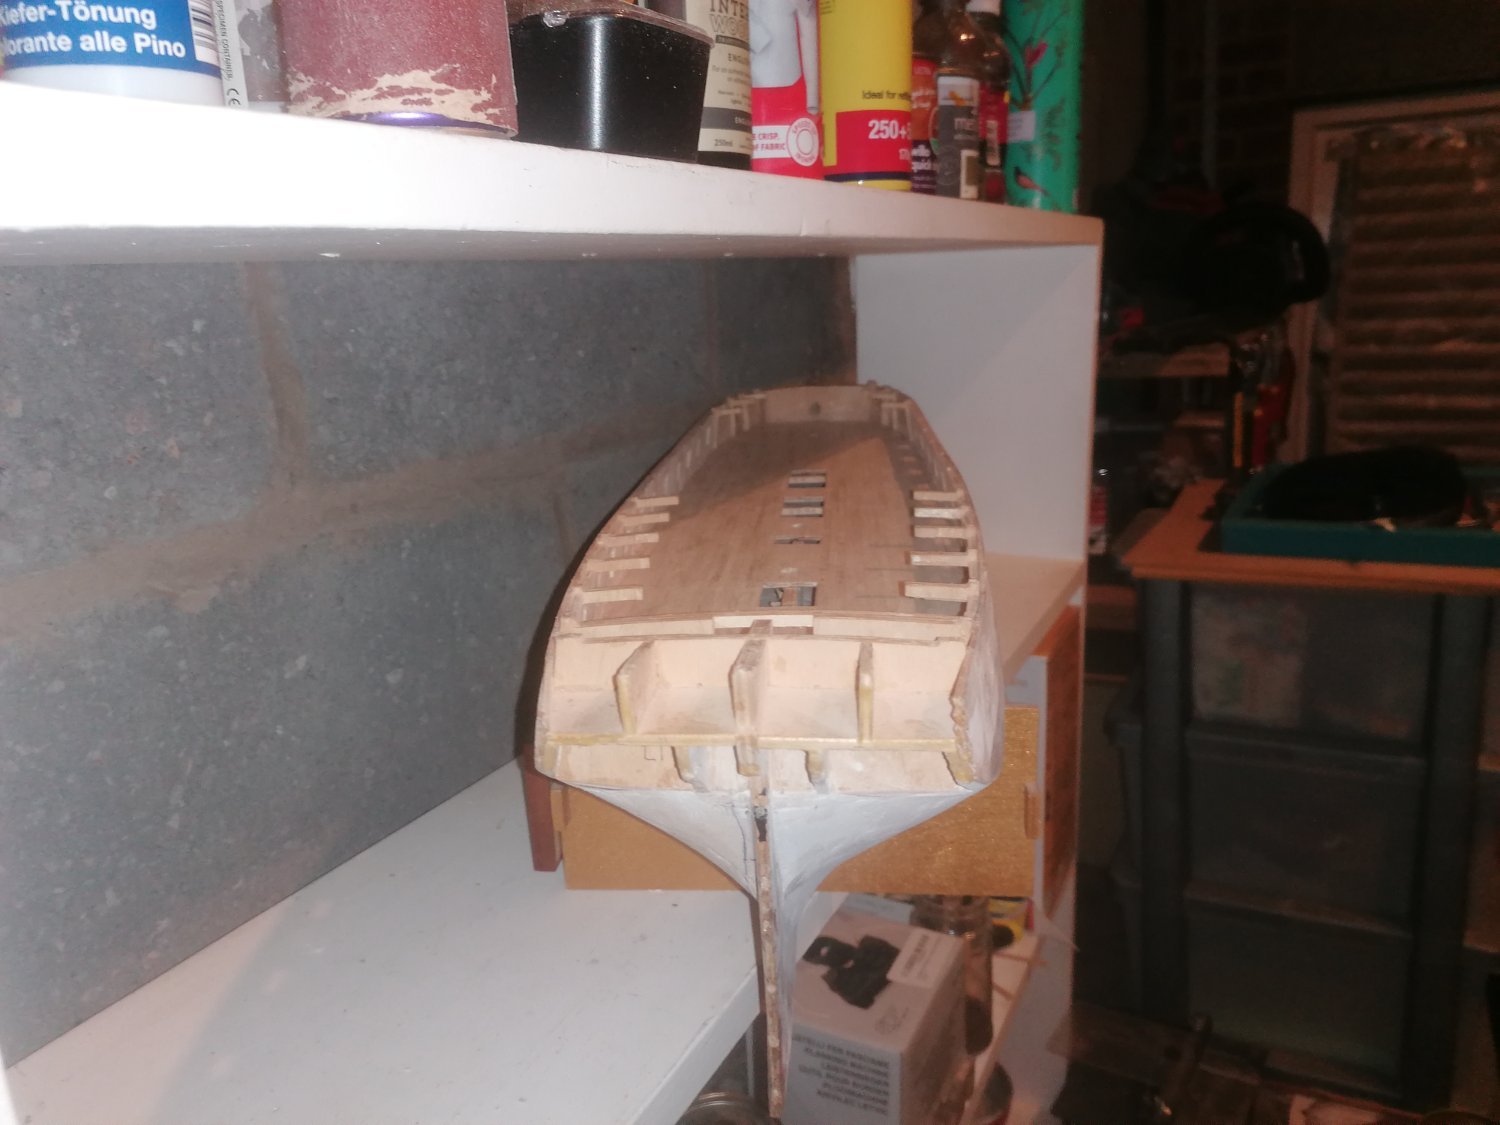
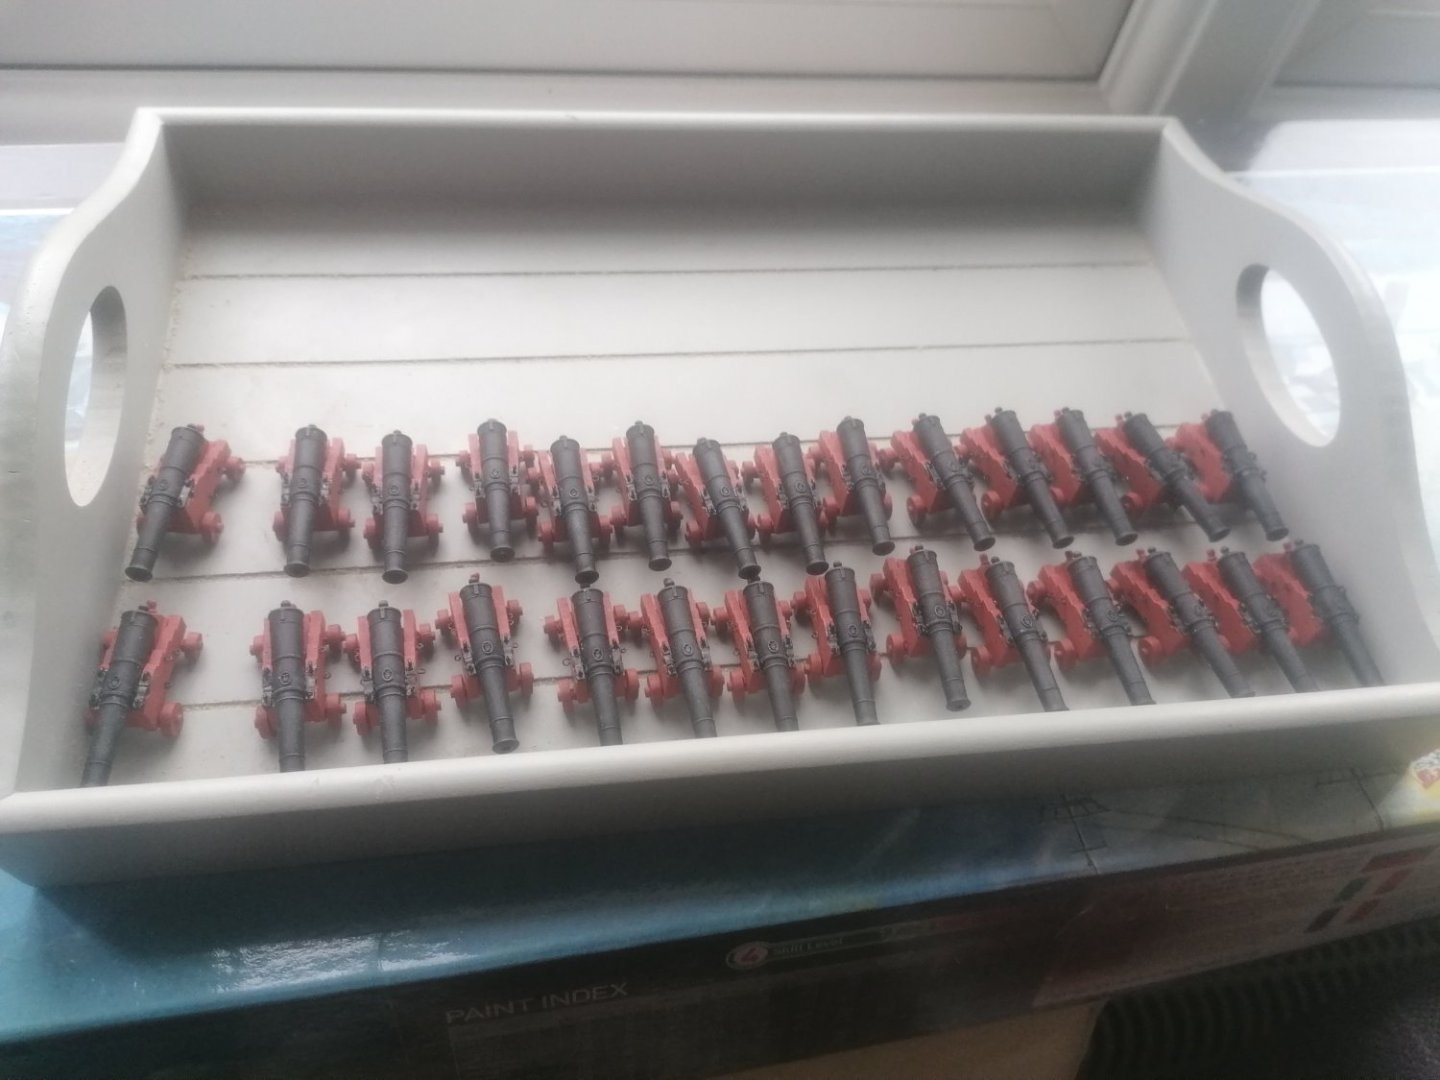
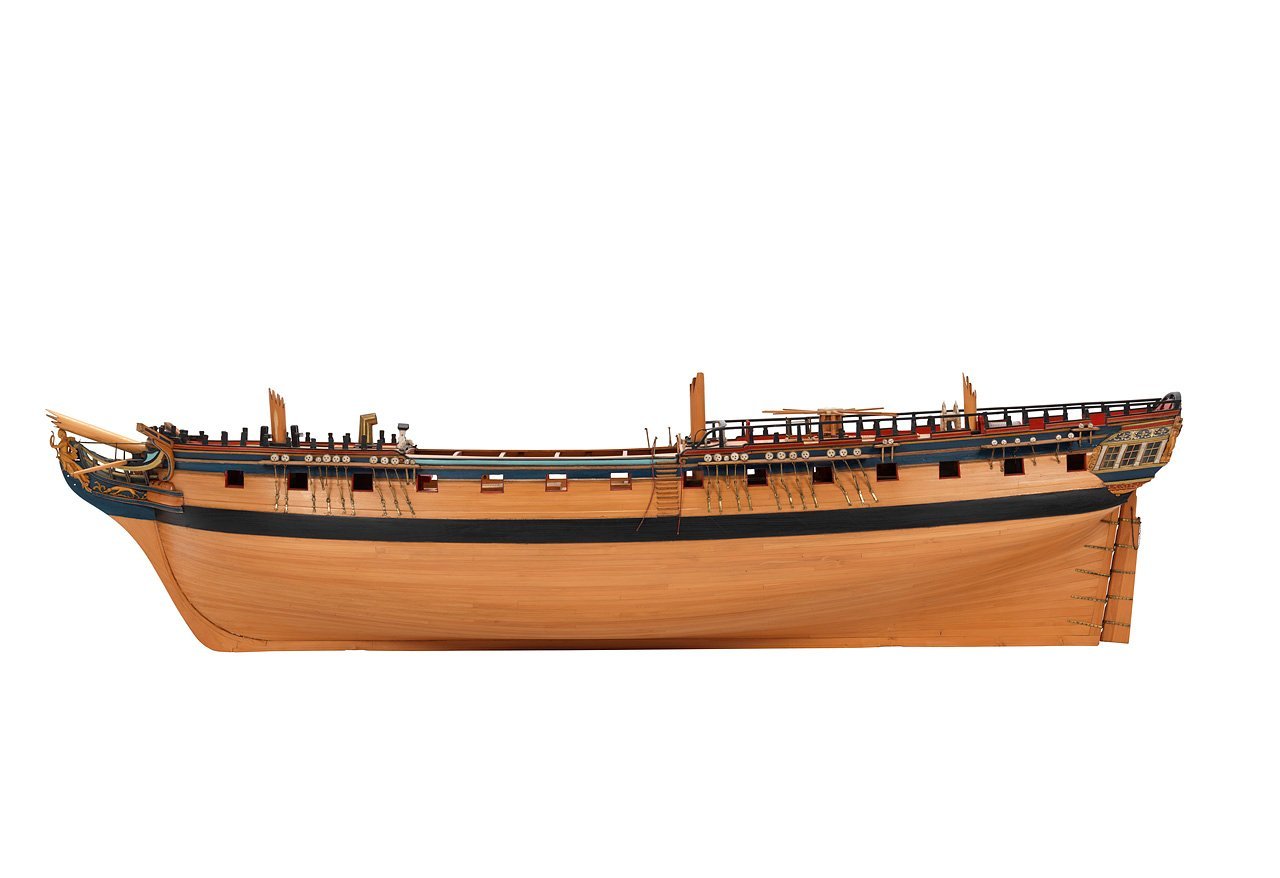
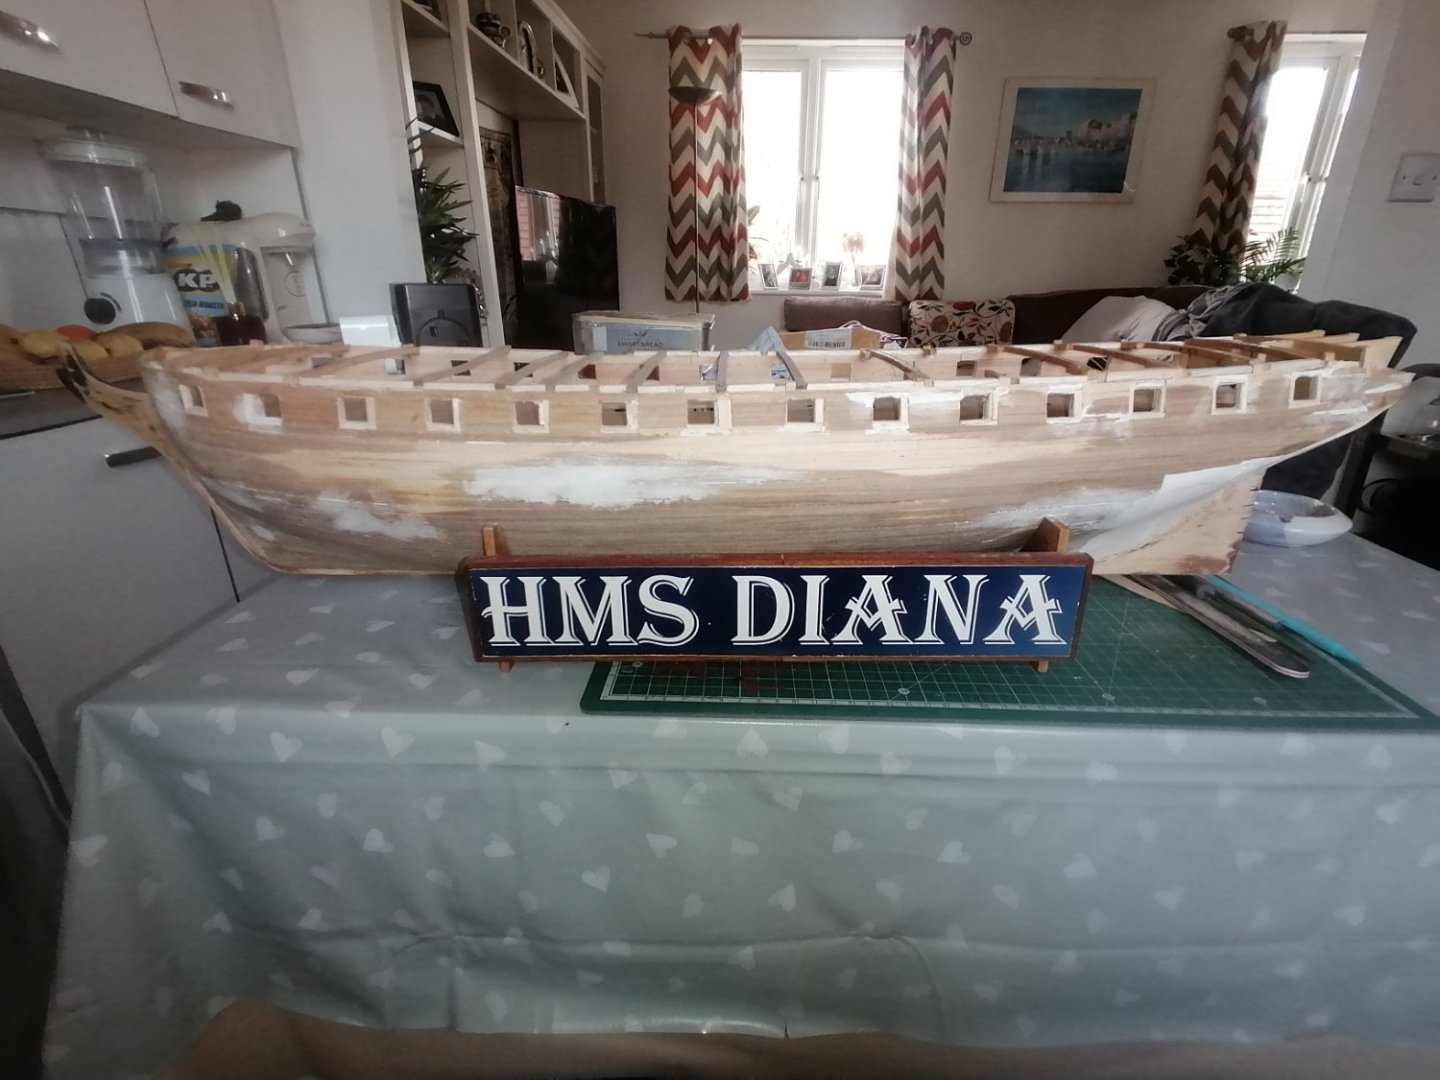
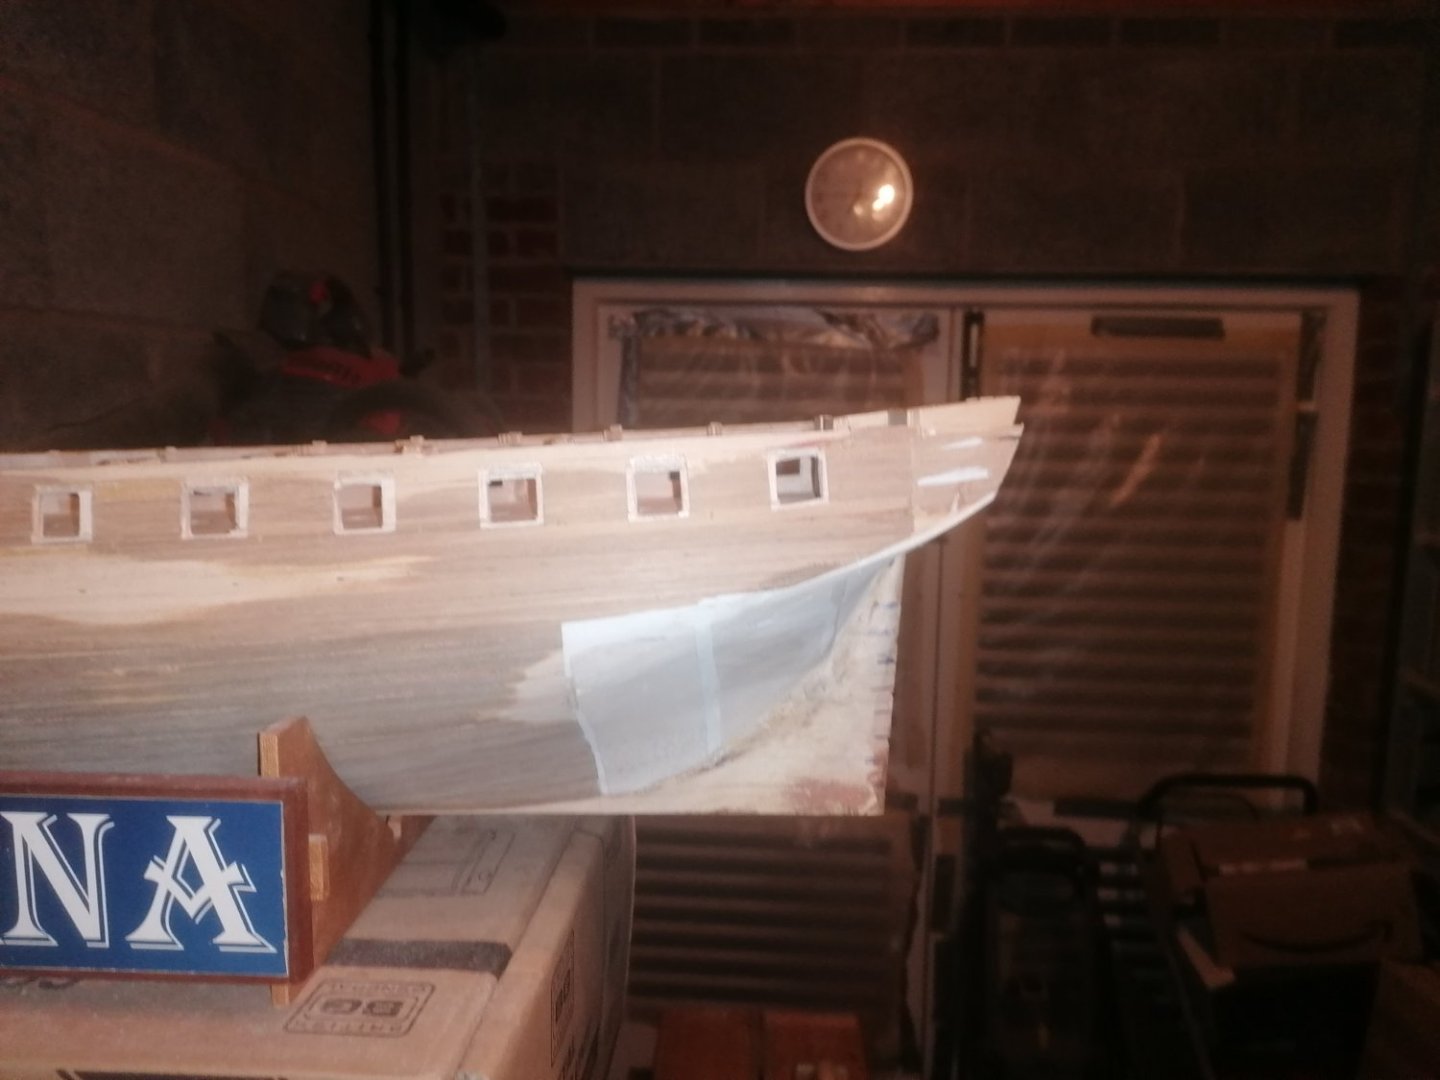
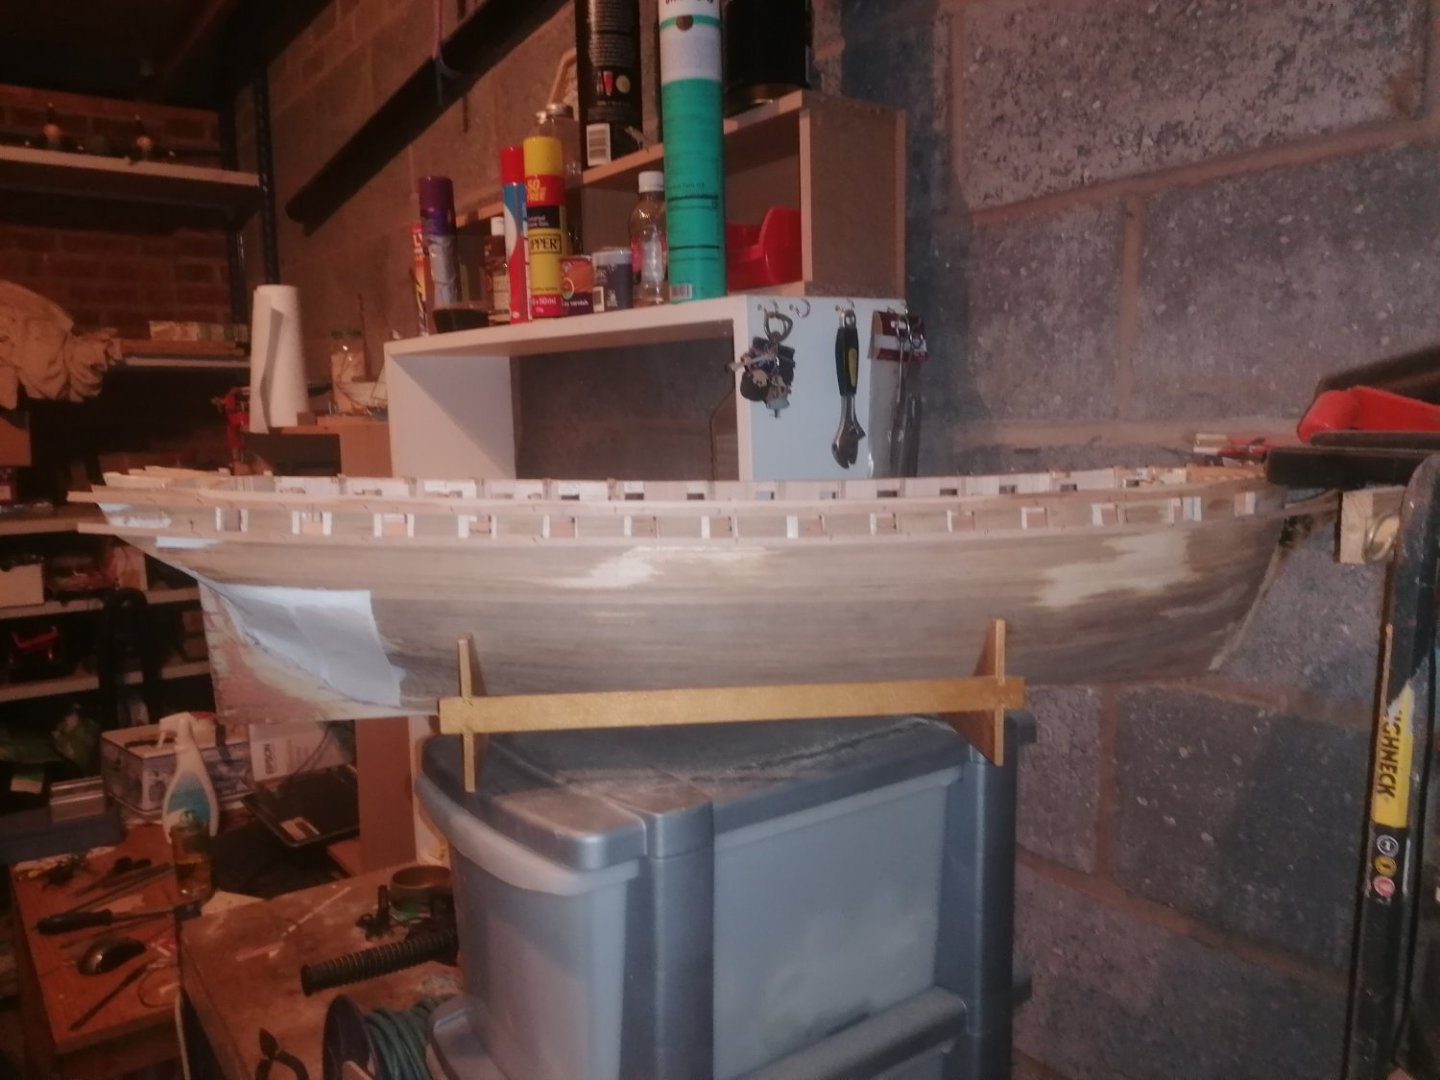
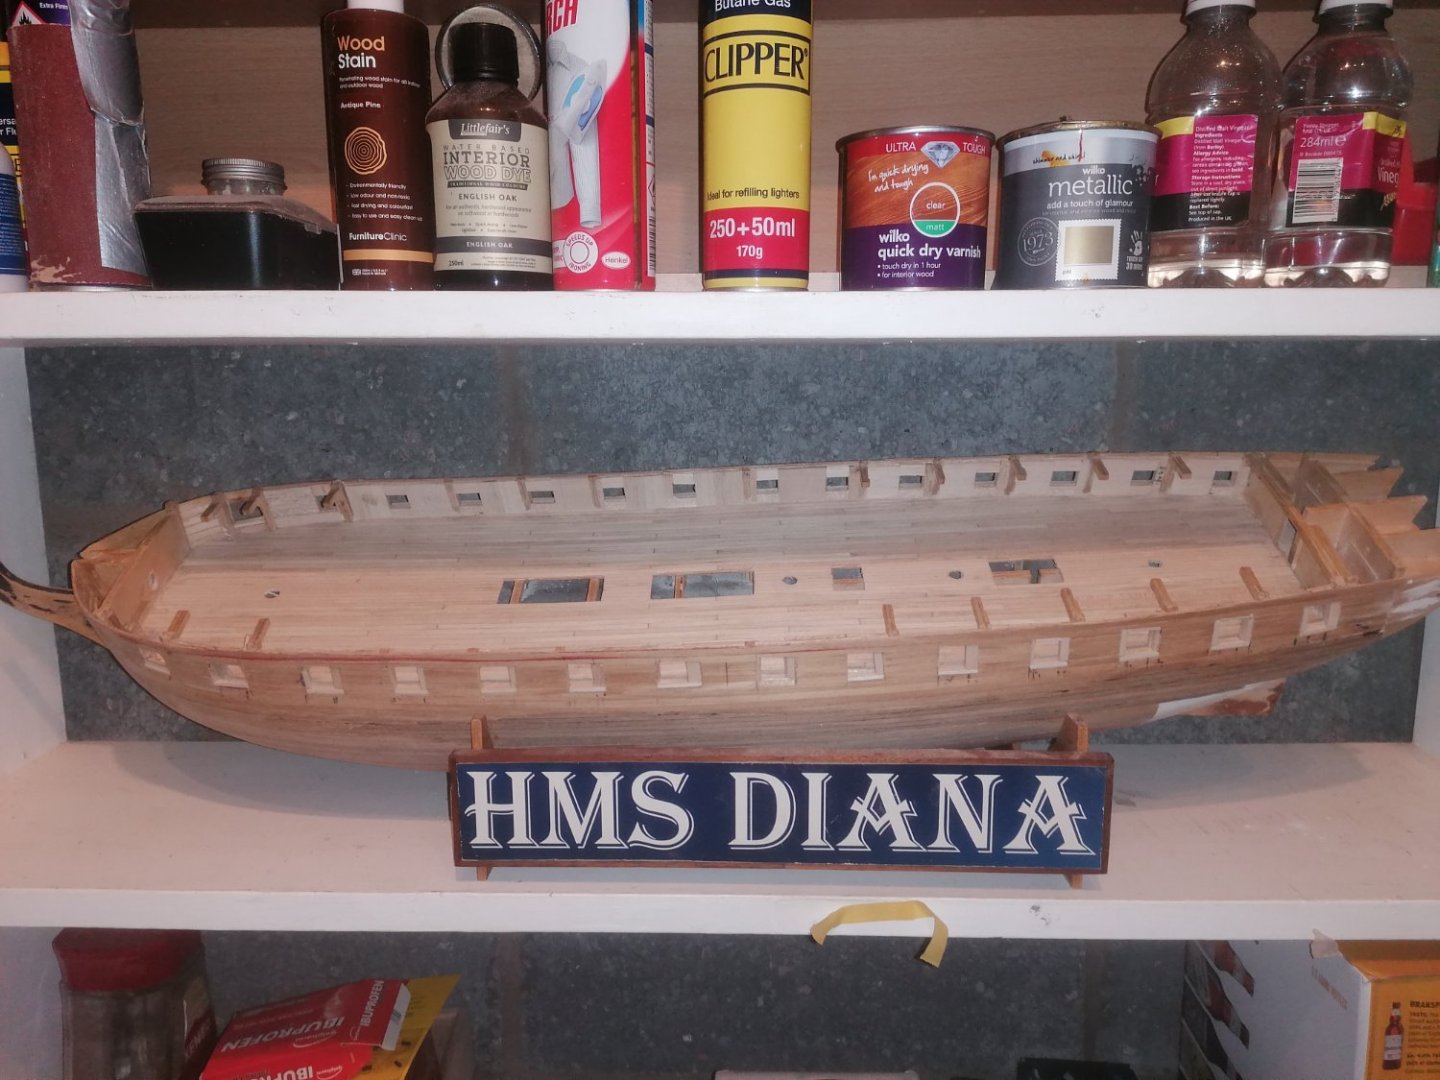
Thanks for the continued likes. At last I can now supply an update. The 18lb carraiges are finally complete apart from the rigging tackles. I originally used the smallest copper eyepins I had, but, having made the eyelets on top of the capsqares, I thought they looked too large so made more of the eyelets for the carraige cheeks. They are maybe a little small now but they look much better I think. The hinges I made from the left over copper eyepins. I next turned my attention to working on the hull along with figuring out the 9lb carraiges. Following the lead of previous build logs, I will try to taper the stern post from 8mm wide at the top to 4mm at the bottom. I am also contemplating adding a 3 X 5mm strip along the keel to give it some extra depth, and improve the shape of the bow section. In the instruction book it says to terminate the end planking 5mm away from the stern and add a 1X5mm strip to represent the stern post. Judging from the photos from the maritime museum it looks to me that the stern post is almost twice as wide at the keel than at the top. rather than being a consistant width all the way up. I have also added another problem if I proceed with deepening the keel, it will alter the shape of the deadwood aswell as requiring the waterline to be lowered followed by the wale also dropping down. This would only be a mm or so but it looks like the shape of the deadwood would change a fair bit. This in turn will alter the curve of the hull up to the stern counter so I am now planning to build from the keel up and see how it goes. I have ordered more timber from CMB which will arrive on Monday. As well as wider strips of walnut for the stern post, I will also have 1.5mm lime strips for the skid beam clamps and spirketting. I tested 1mm strips which looked too thin and also 2mm strips which I thought were too thick. The 9lb carraiges were a challenge as both the Vanguard versions seem too short for the long 9 cannons. I decided to order 10 12lb carraiges as they were about the same length as the 18lb but the cheeks, I hoped, would be slightly lower. Thankfully I was correct and although the rear of the carraige looks slightly too wide, the other dimensions are perfect. I widened the holes for the eyepins before painting the sides of the carraiges and wheels. I have the eypins ready to fit and just need to deepen the trunnion holders for a better fit before adding the capsquares. While sanding down the stern counter I have removed too much balsa so this also needs to be built up again. I will try sorting this once I am happy with the shape of the stern upto the lower edge of frame 17. I may try rebuilding the complete stern above this point and maybe build a frame behind the stern facia so the false keel doesn't block the middle window but again I will wait and see. At least I am still proressing although much slower than I would like. David.


-
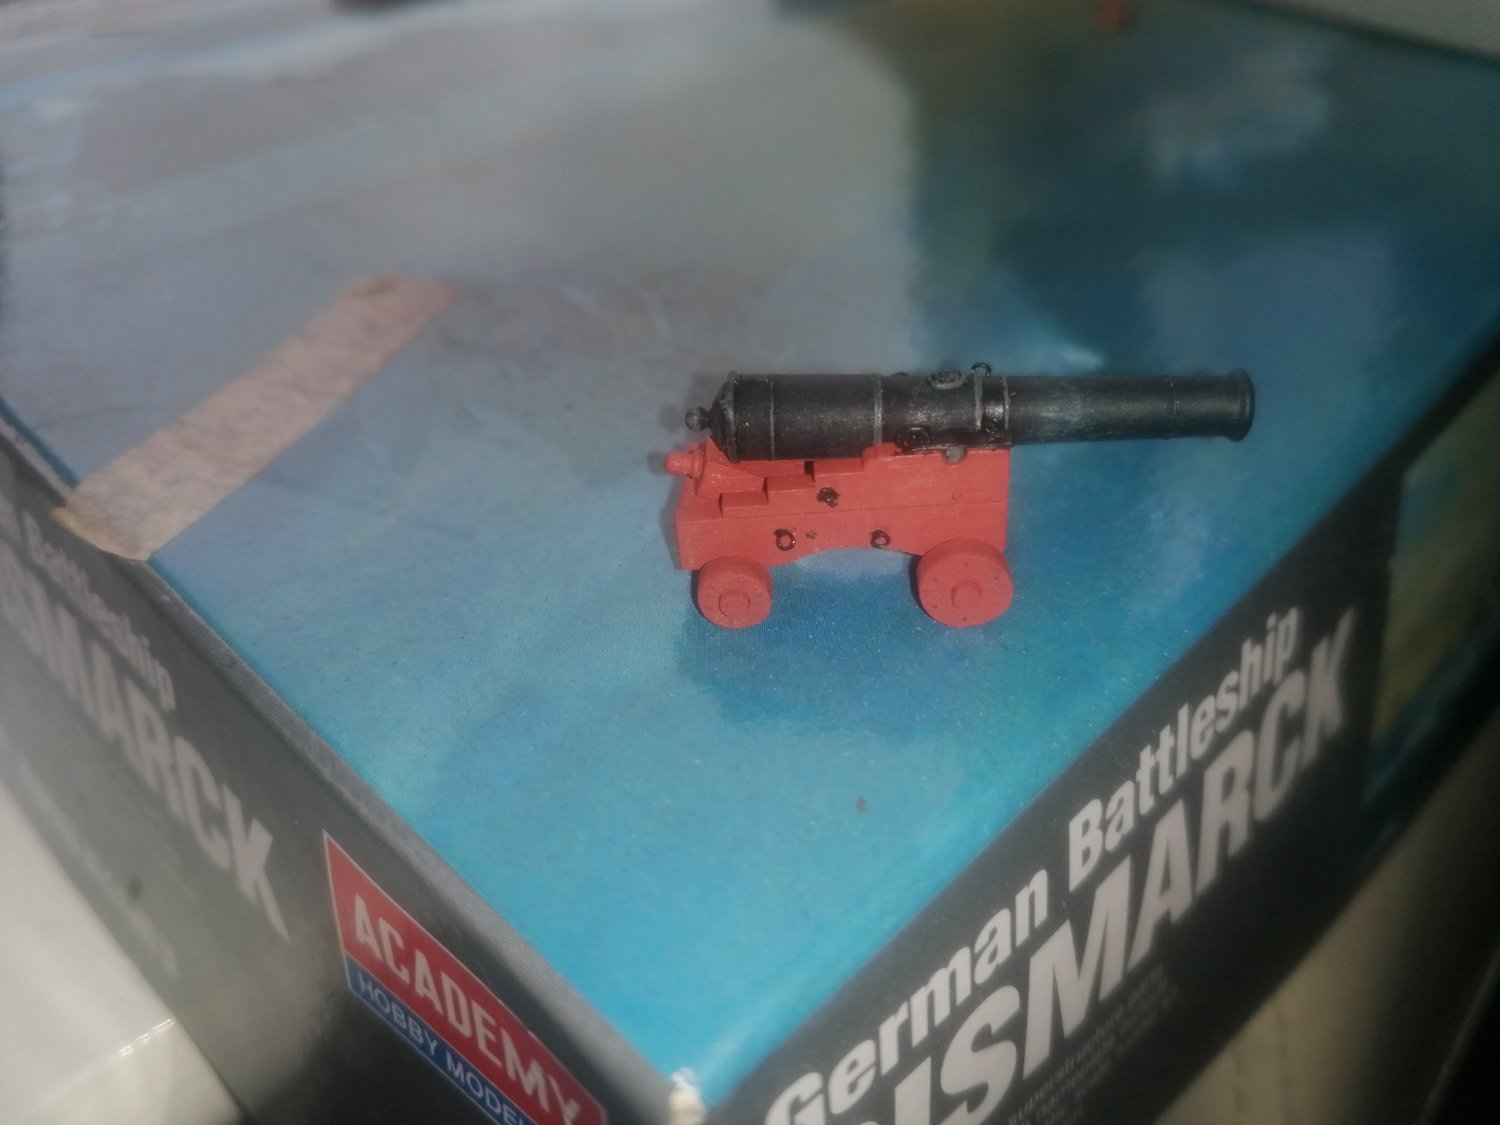
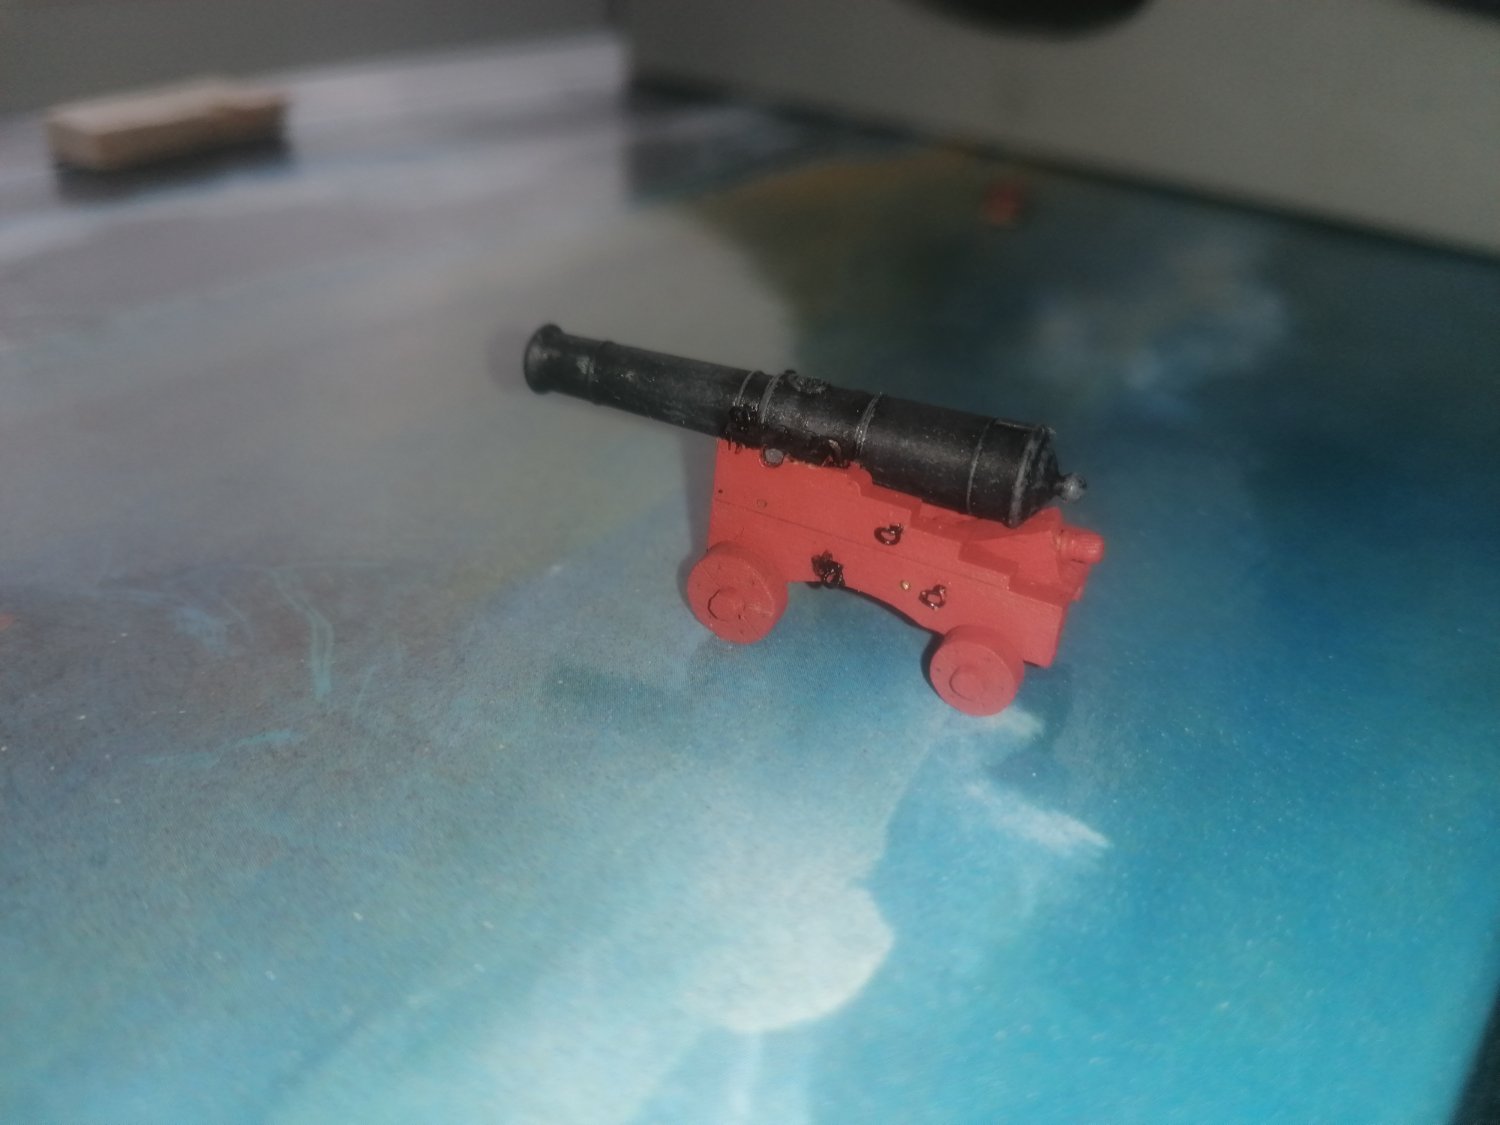
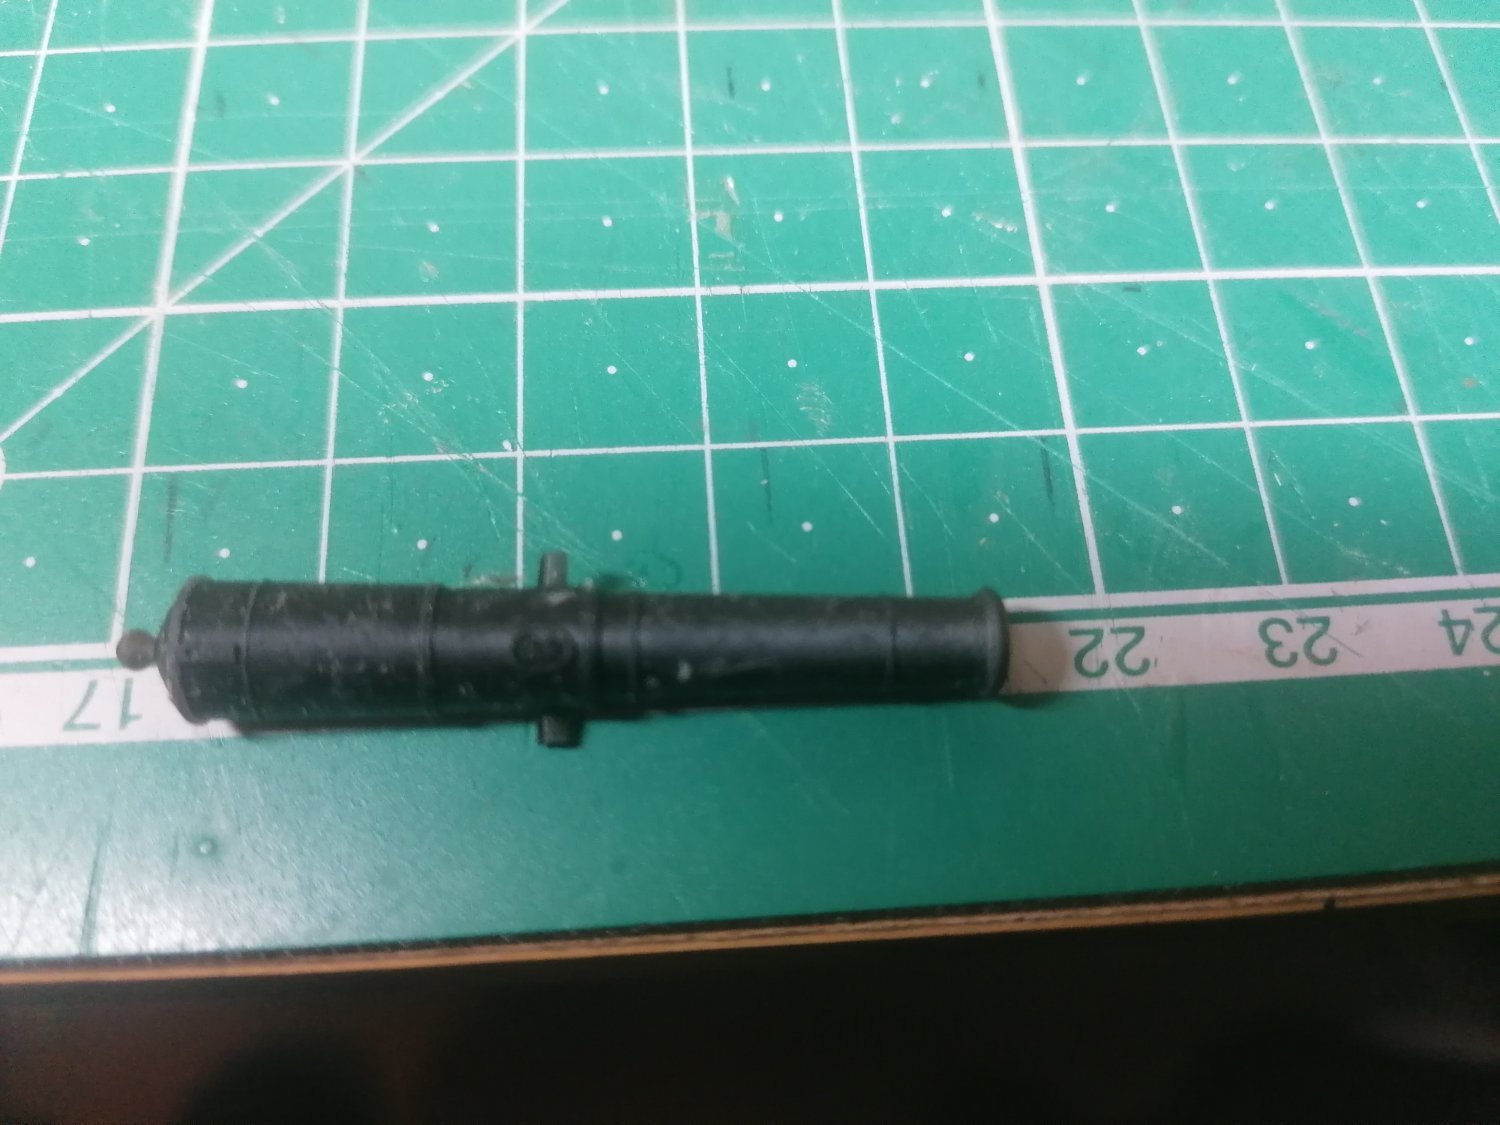
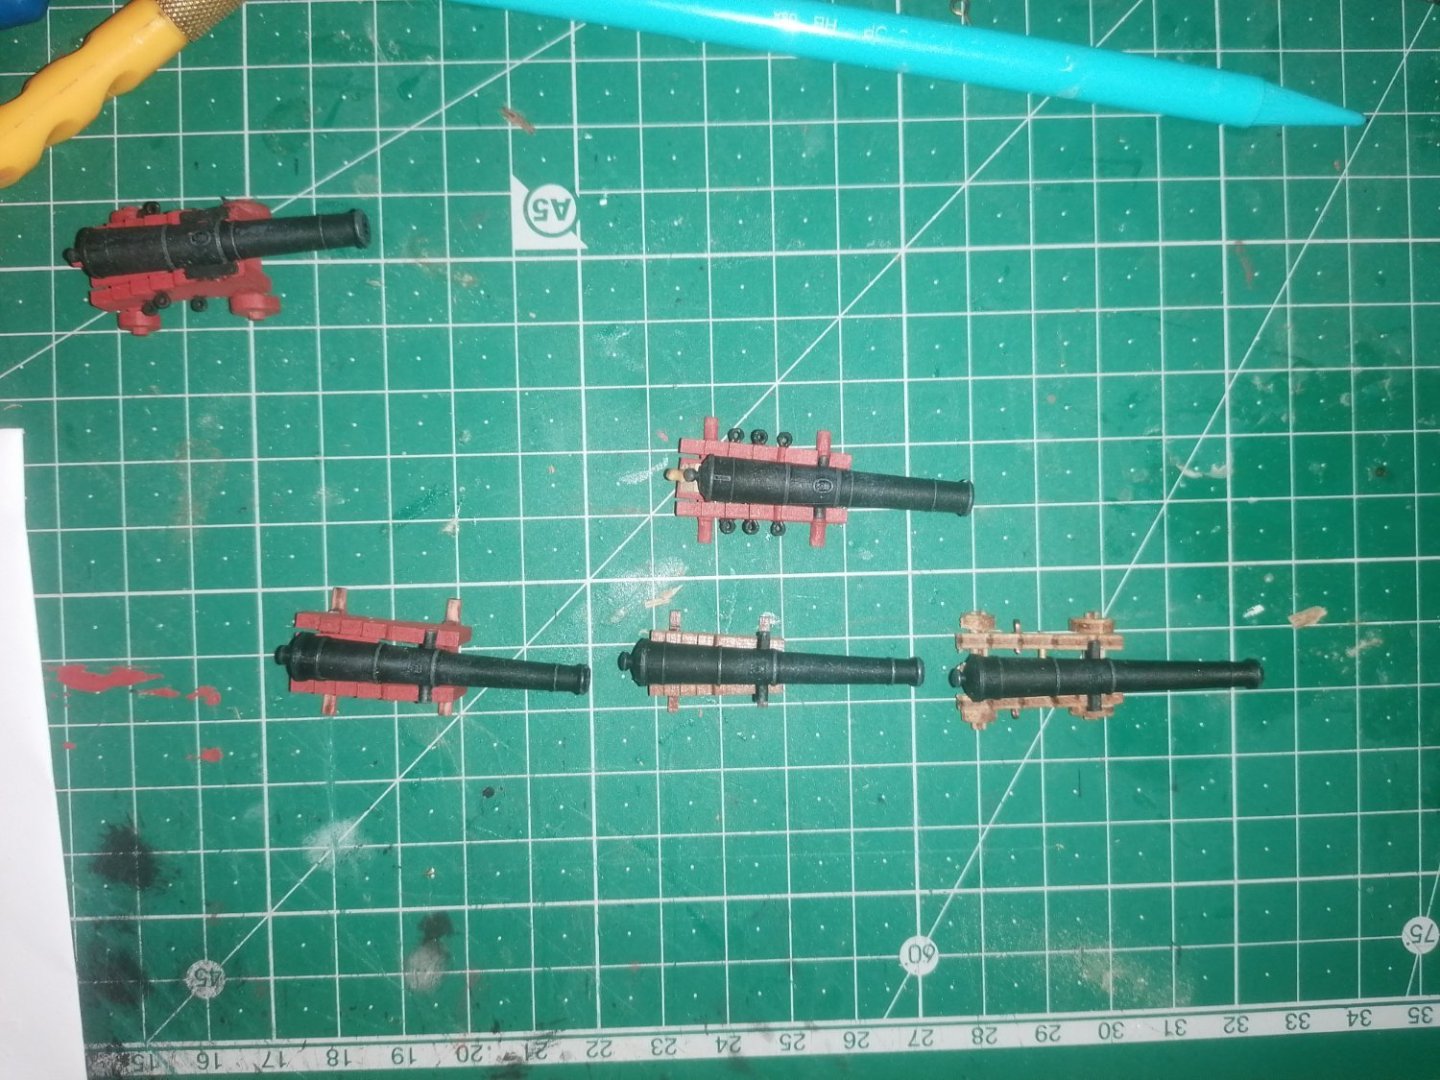
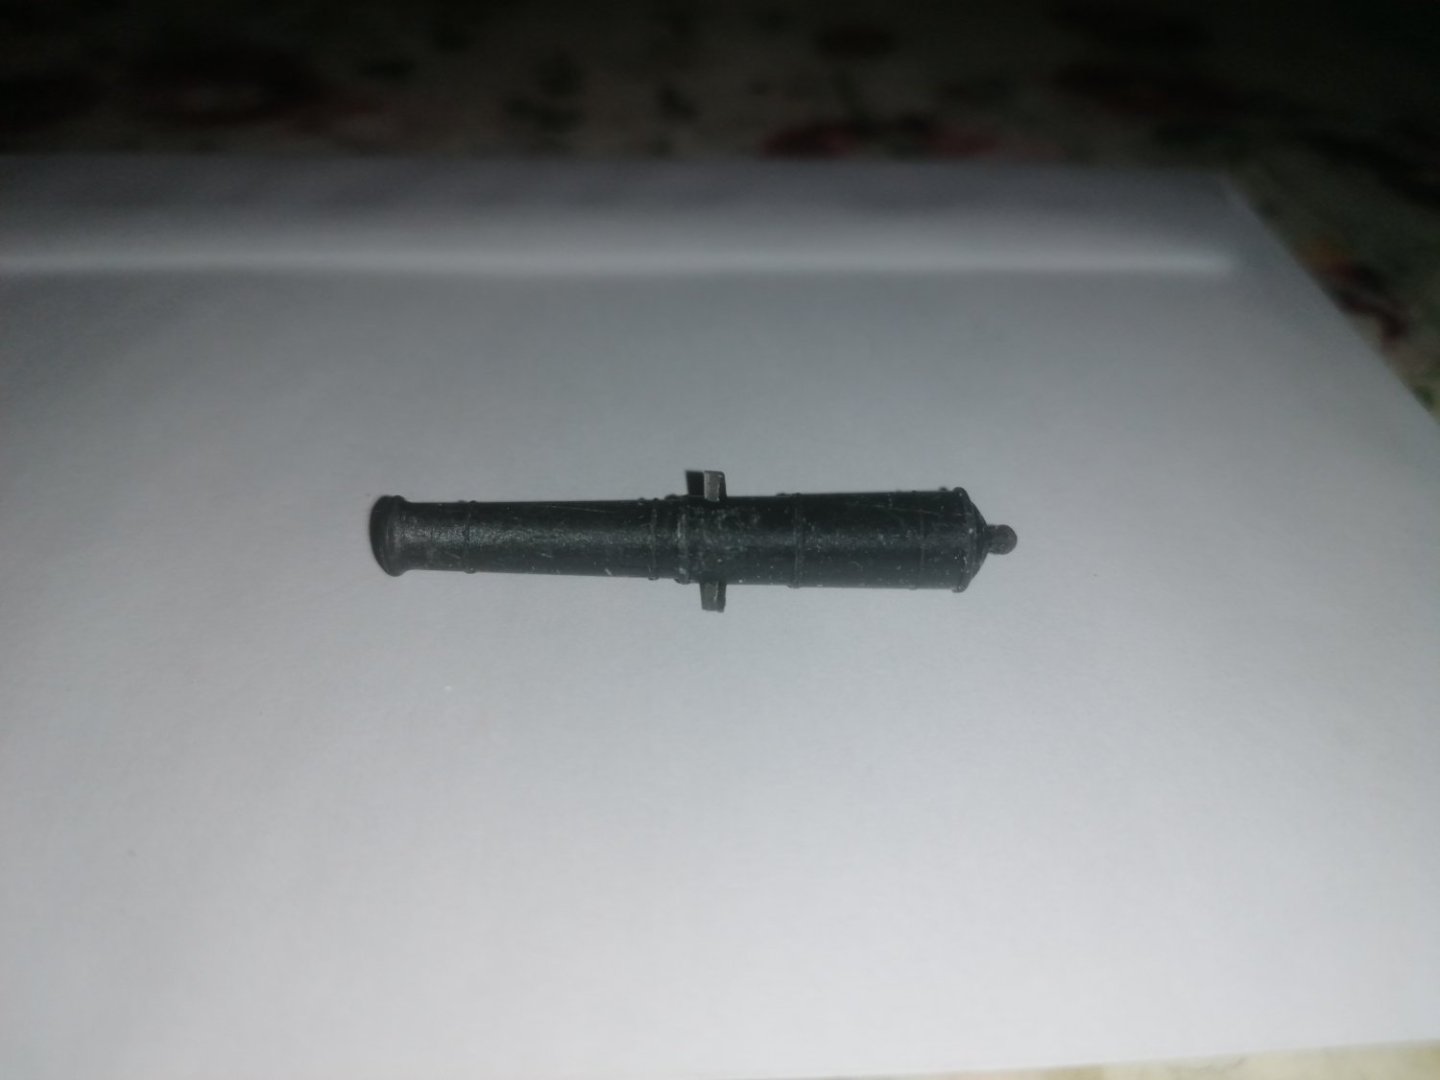
Thanks again for your input Allan, The barrels are from Vanguard and I believe are the Armstrong versions. I painted them matt black and then dry brushed with rubber black and then a little matt black mixed with sea grey. I'm pretty happy with the final results. David.
-
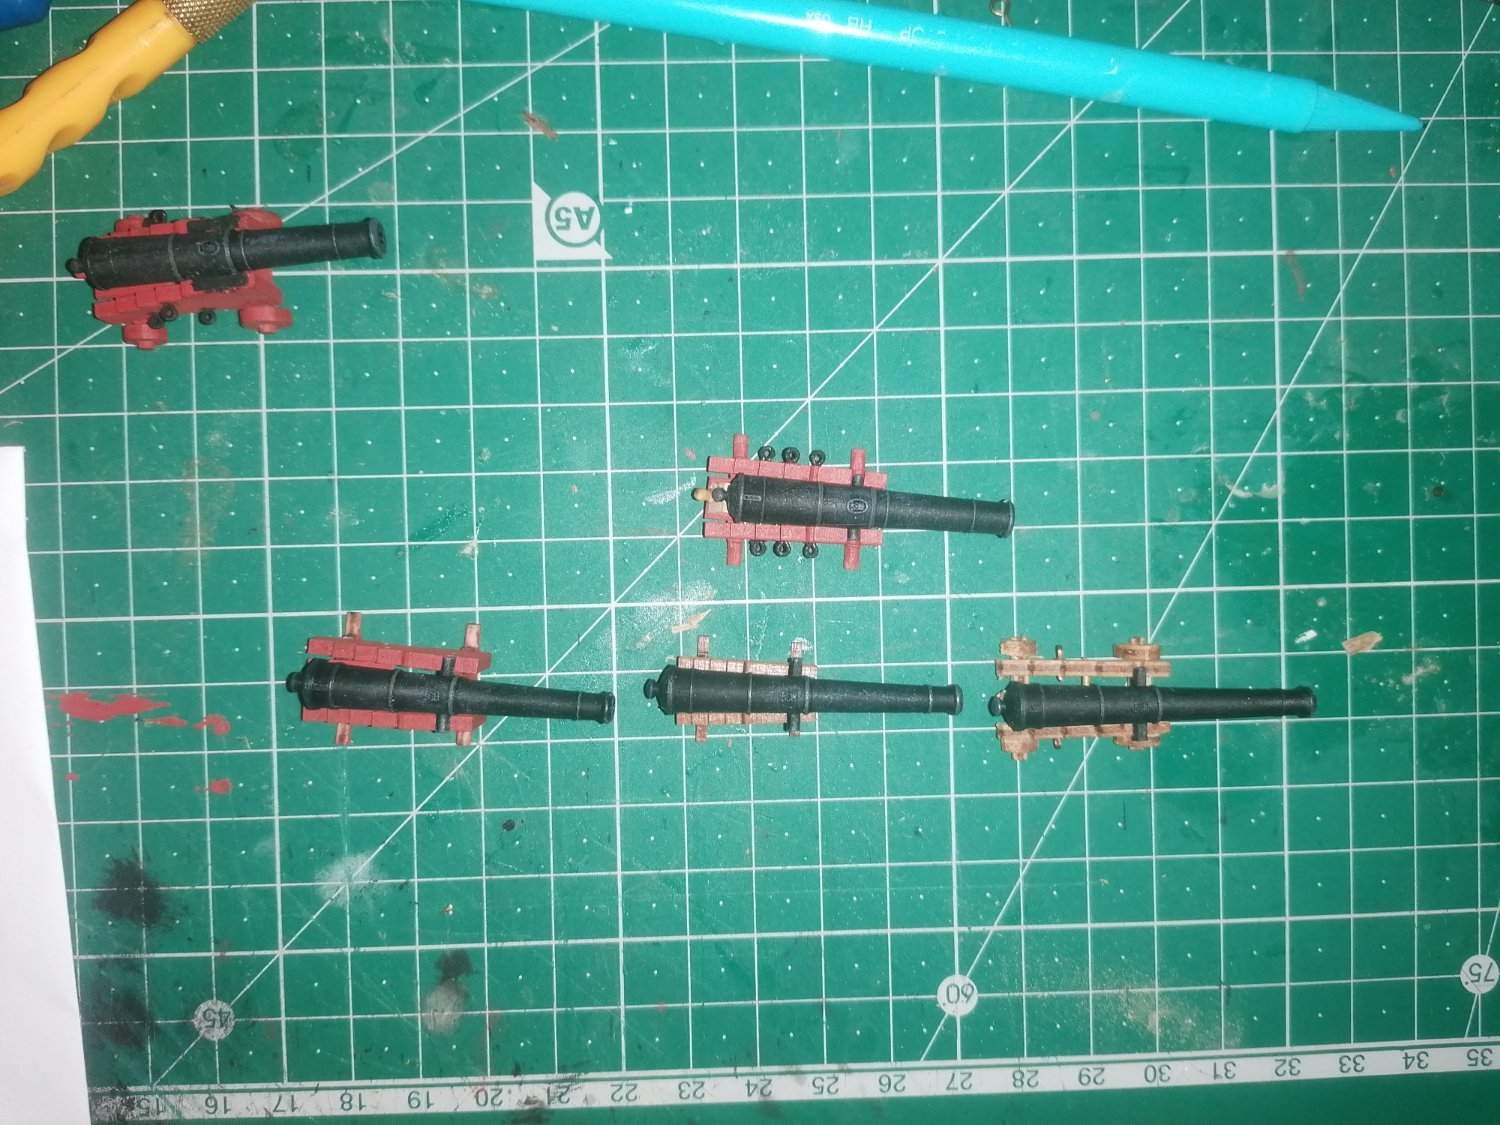
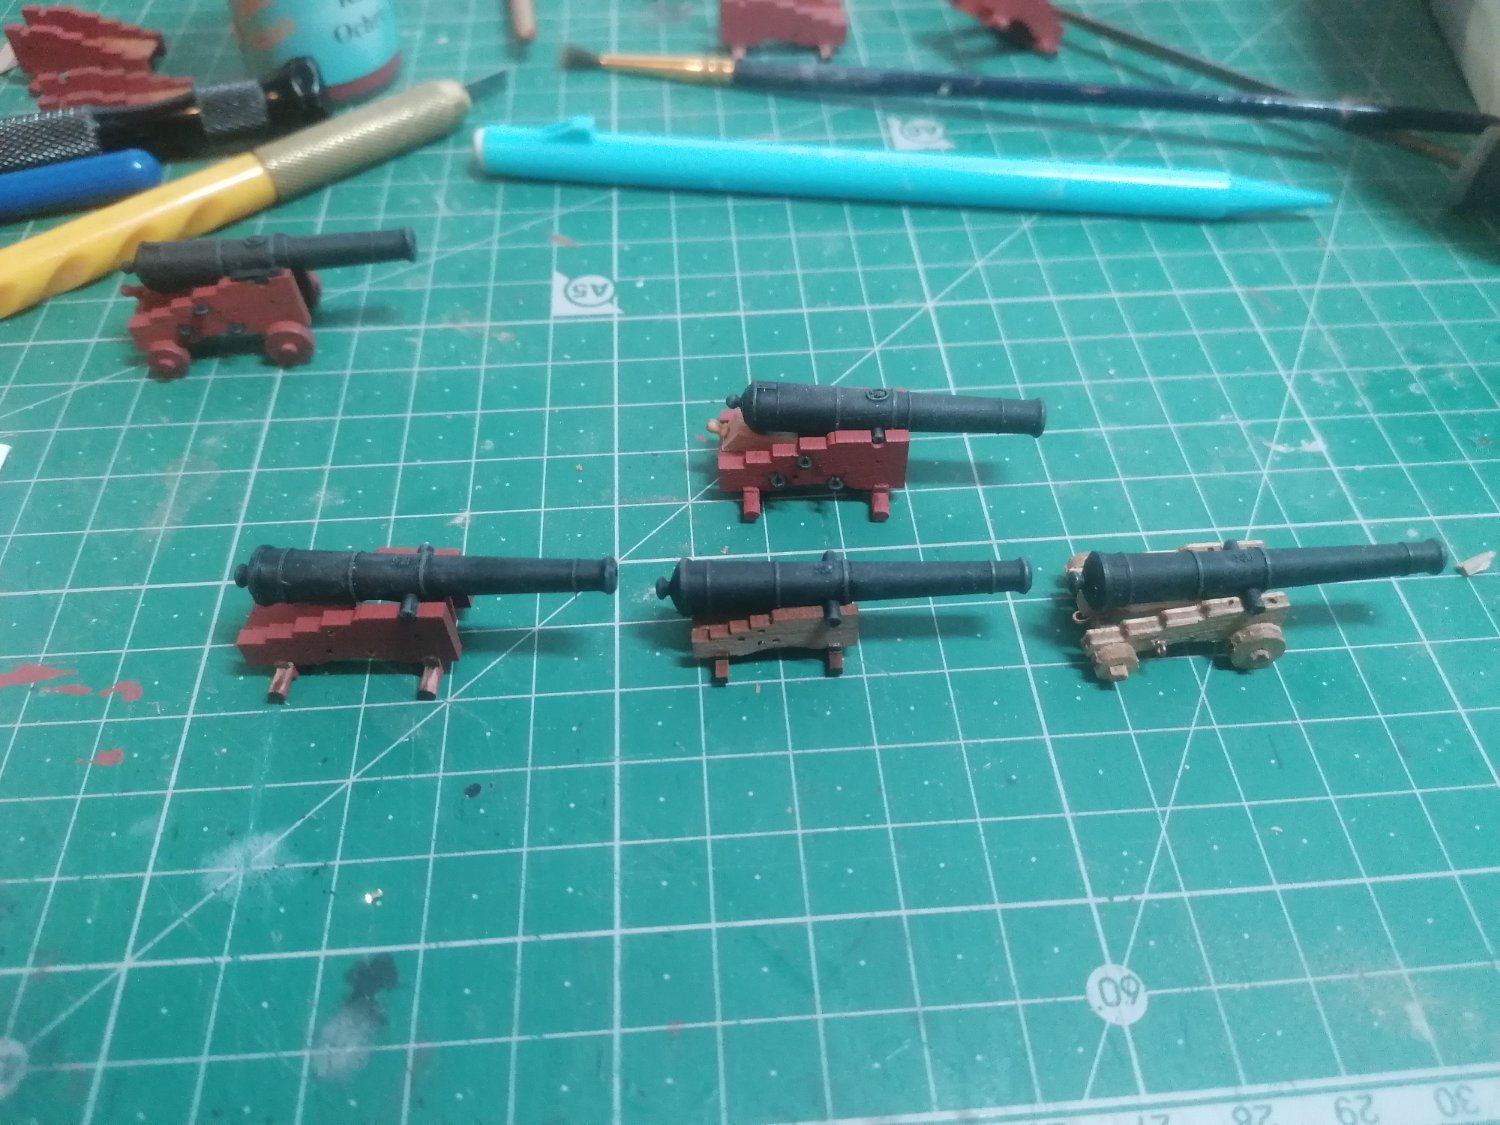
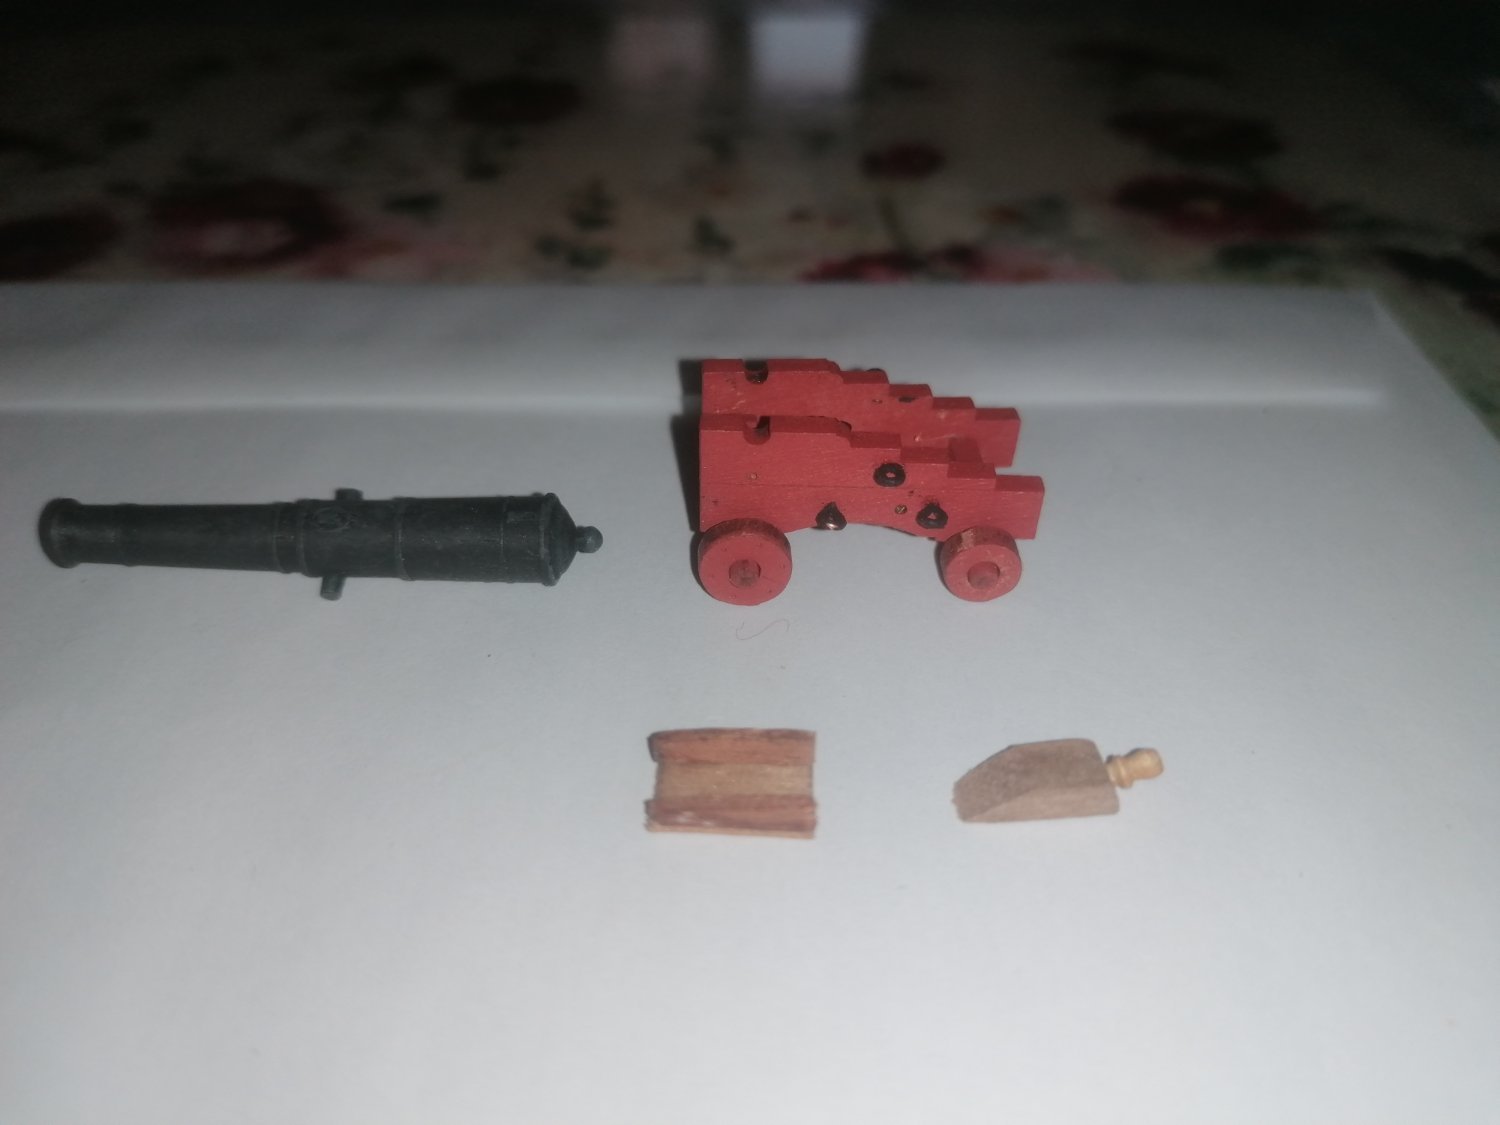
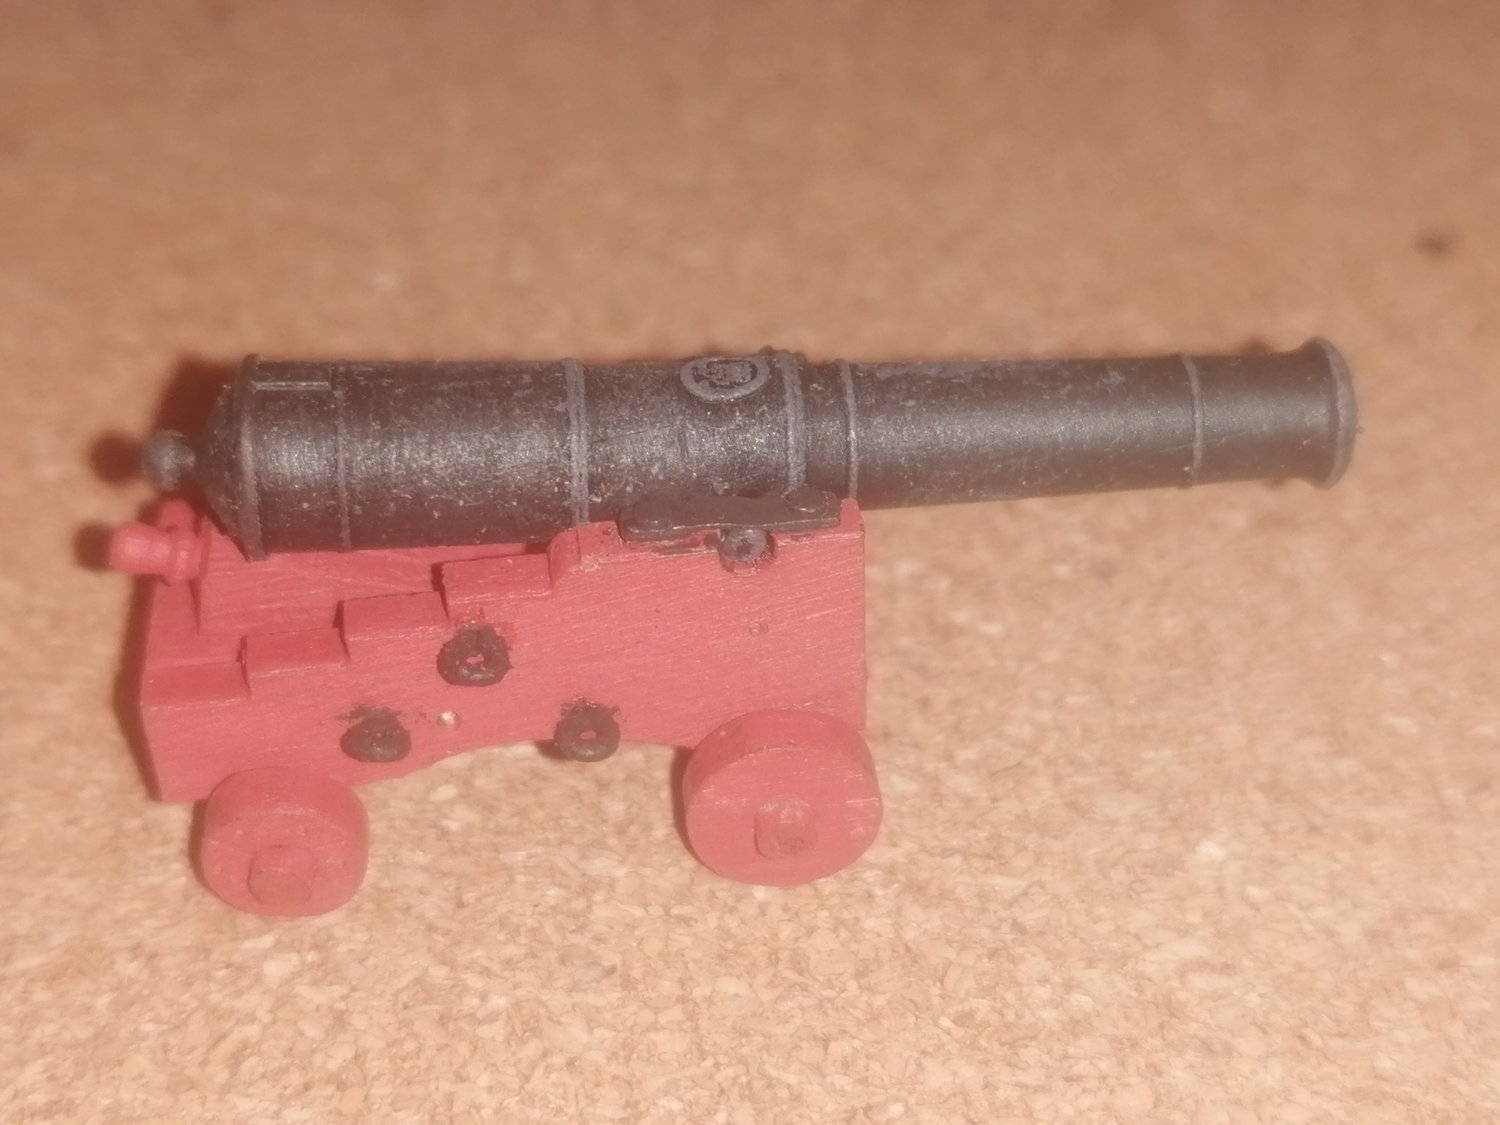
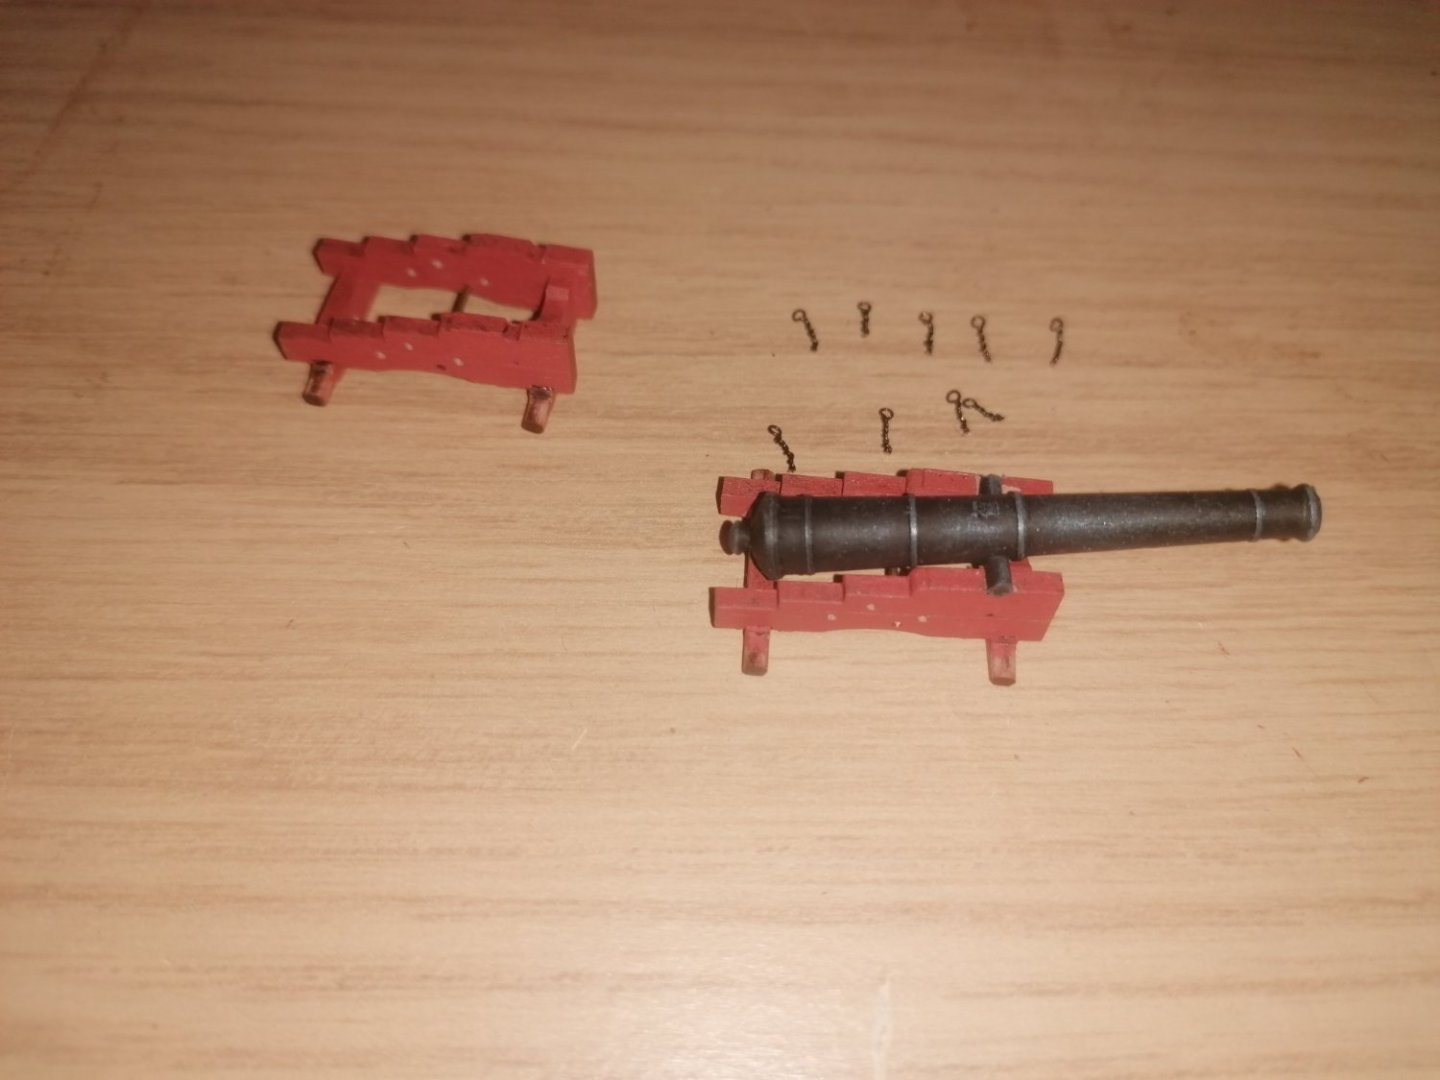
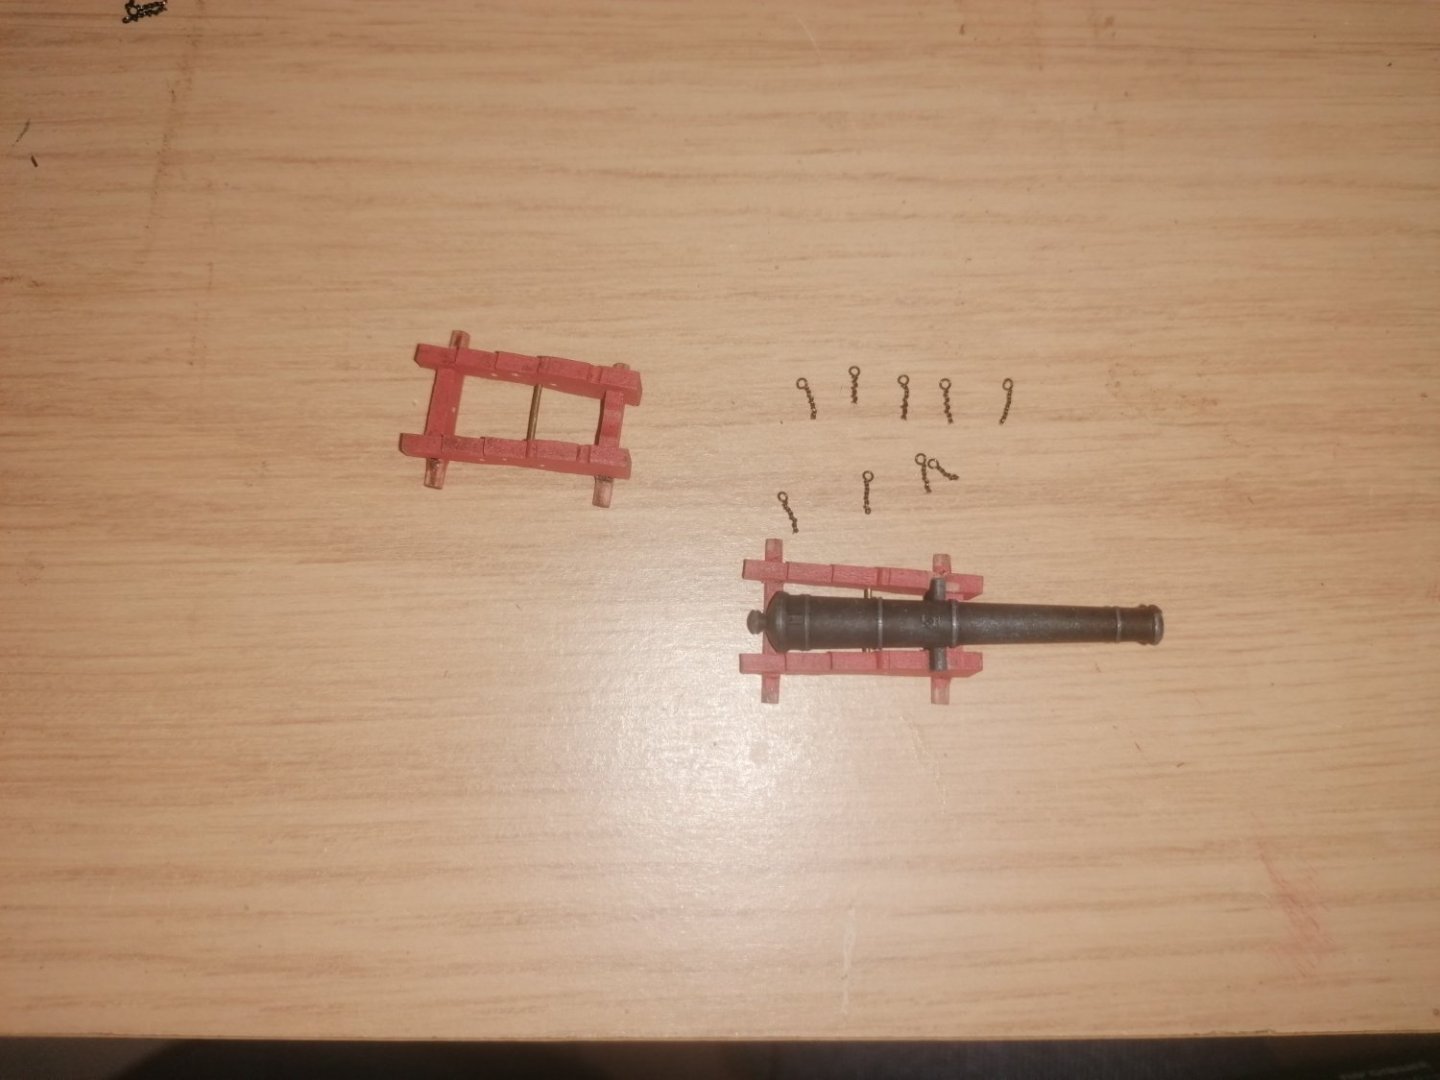
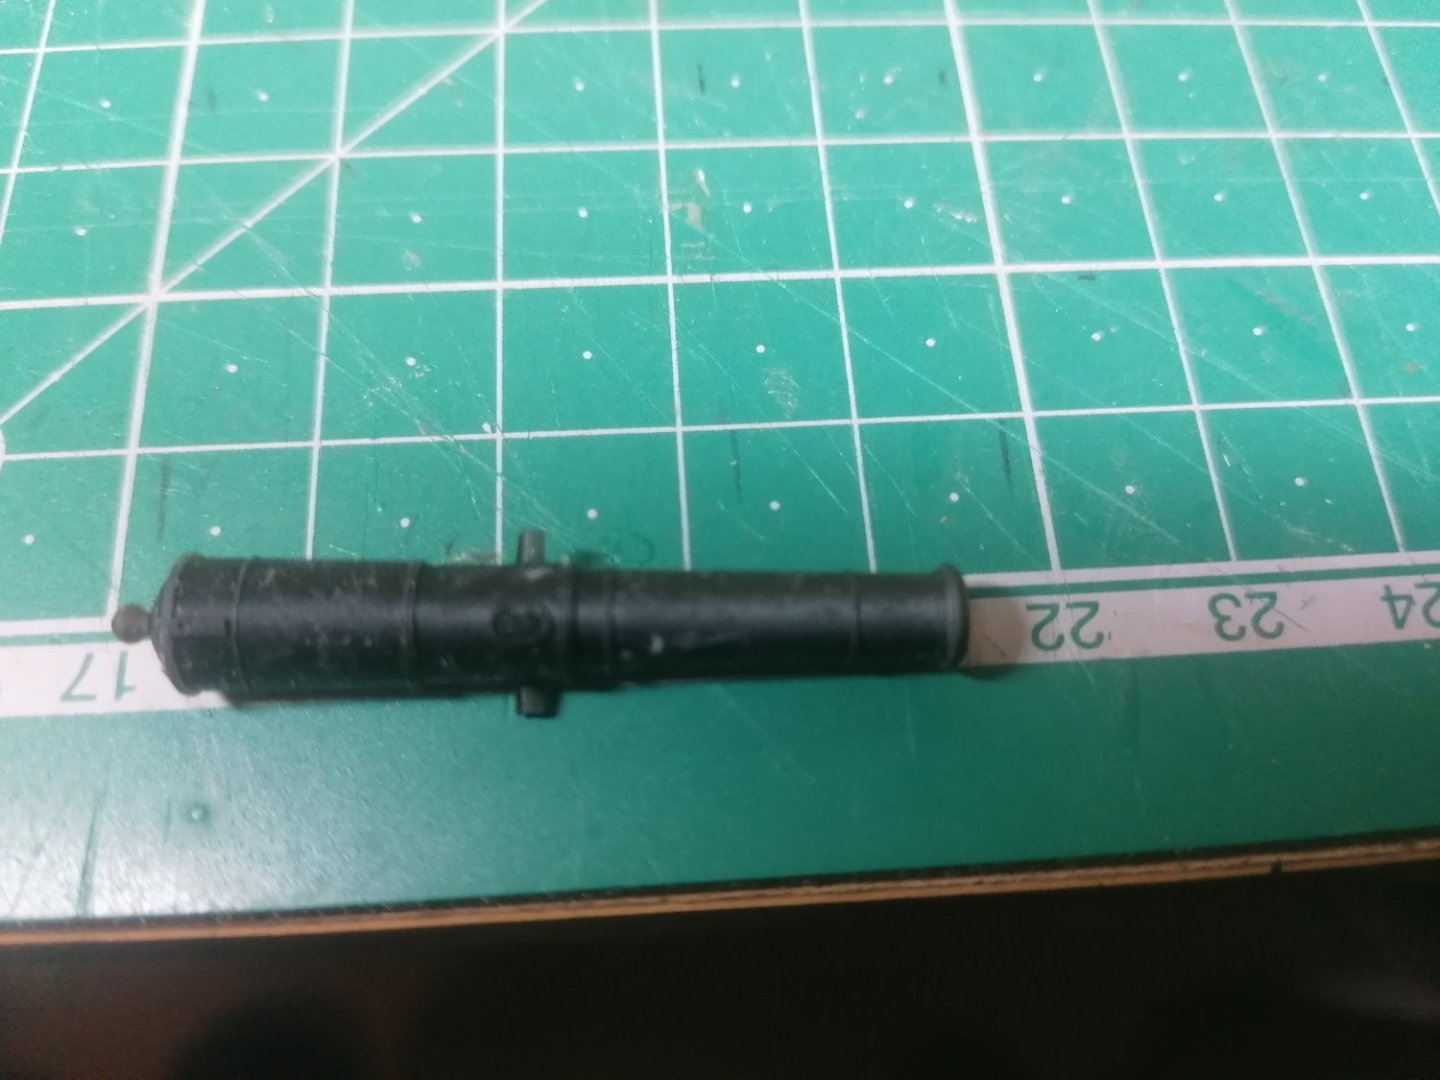
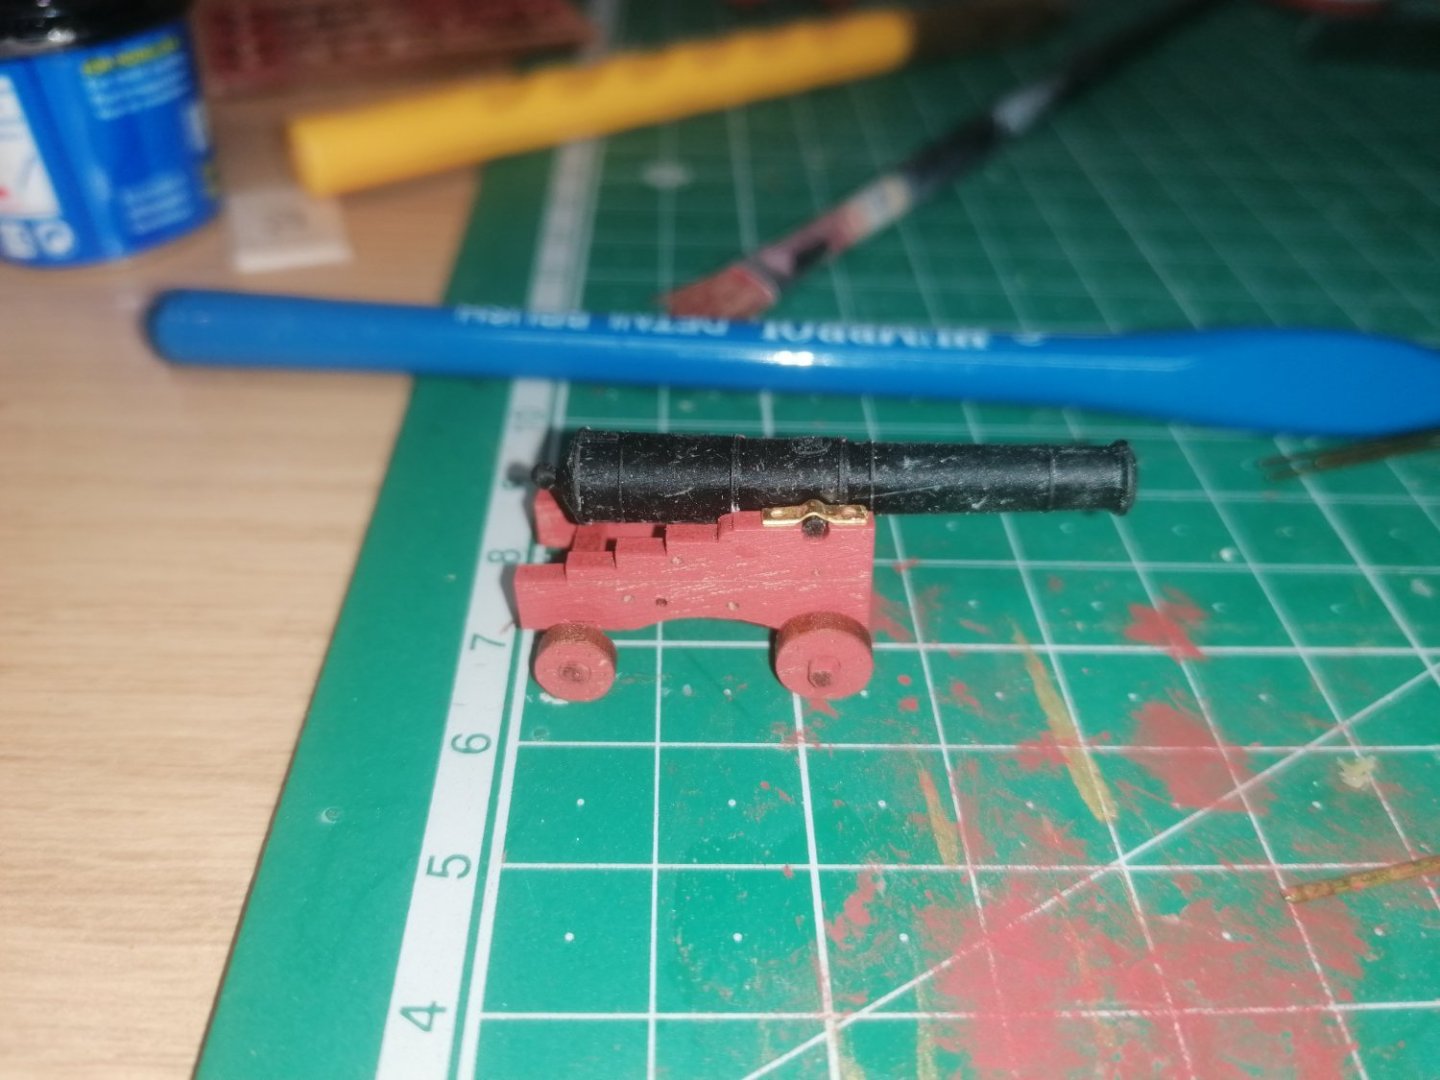
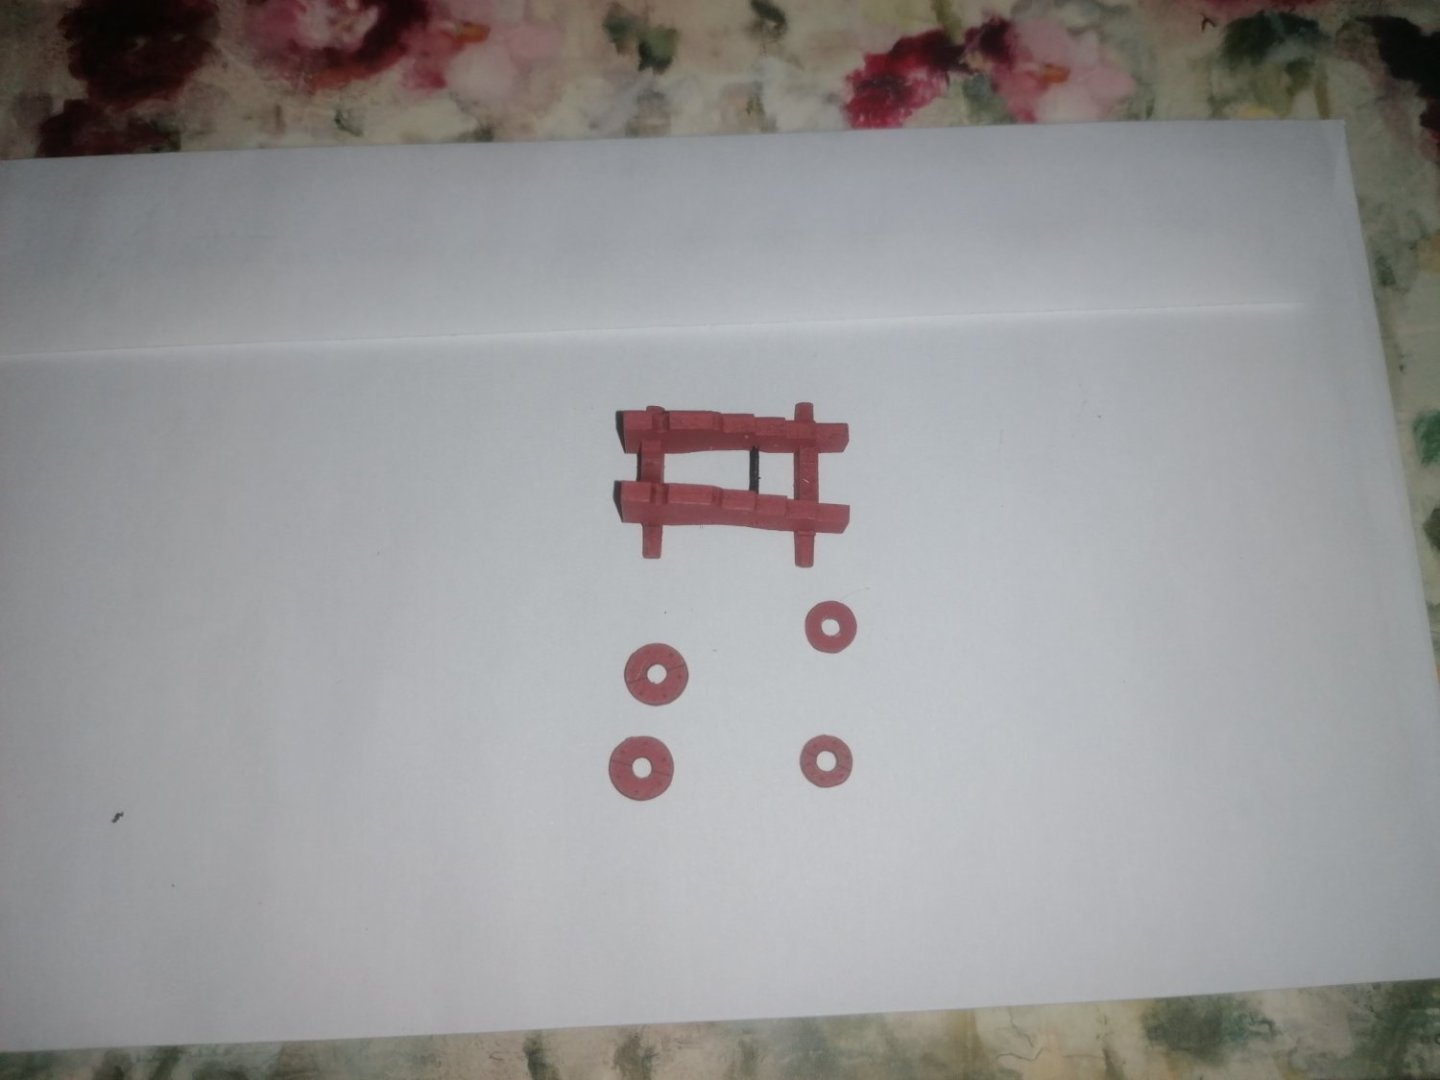
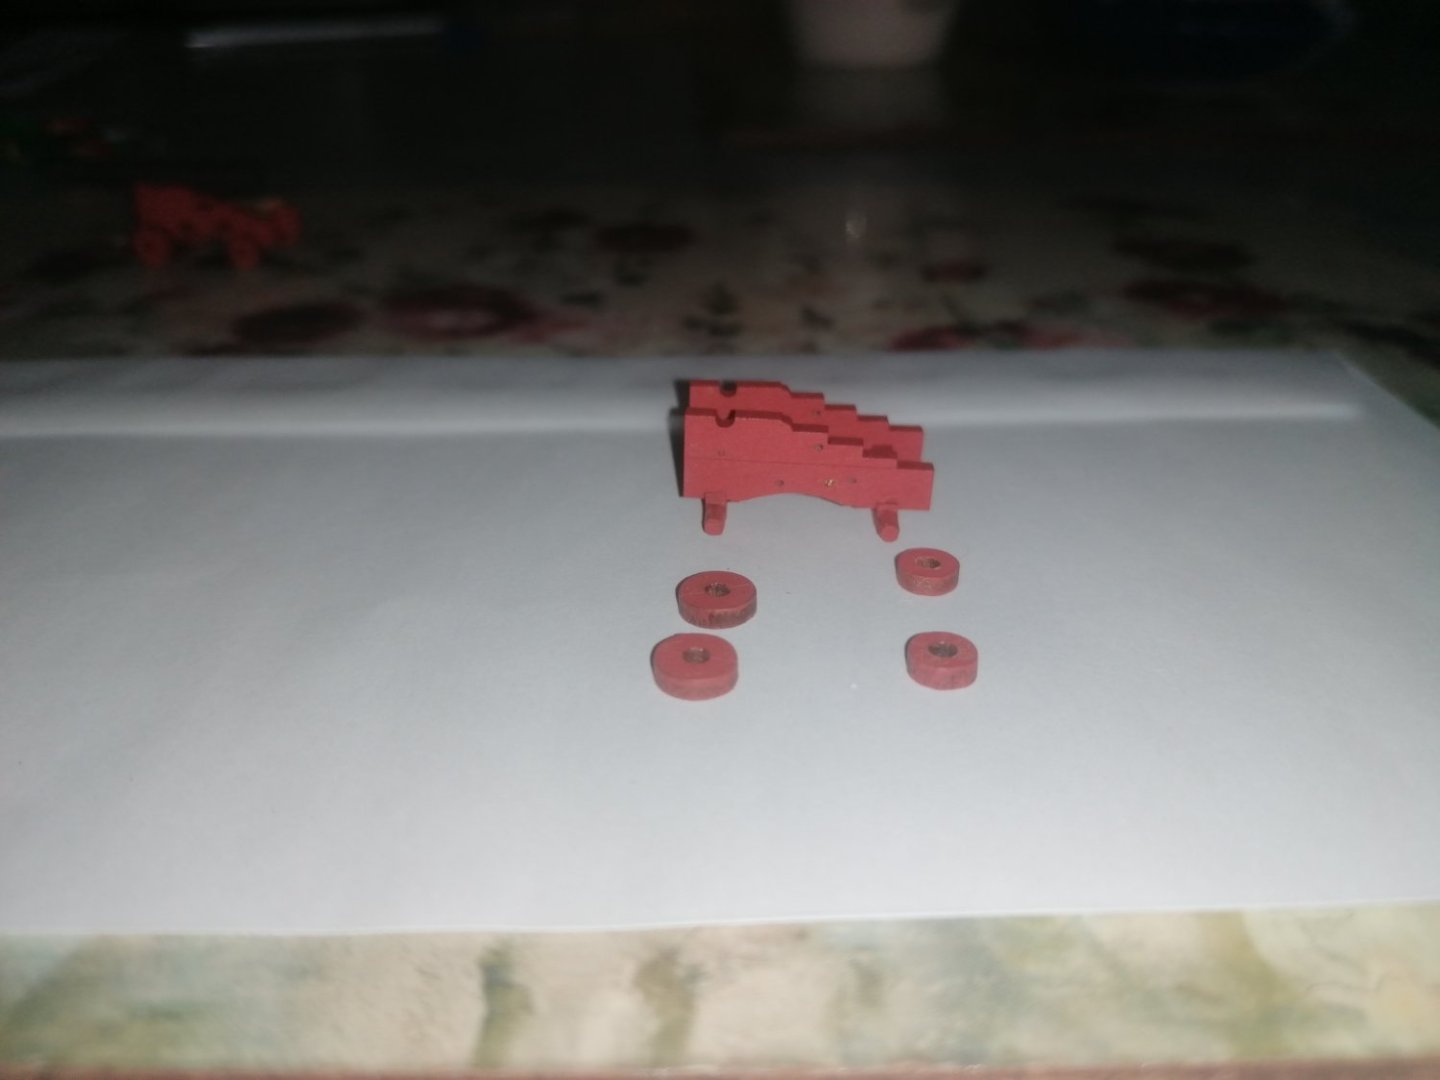
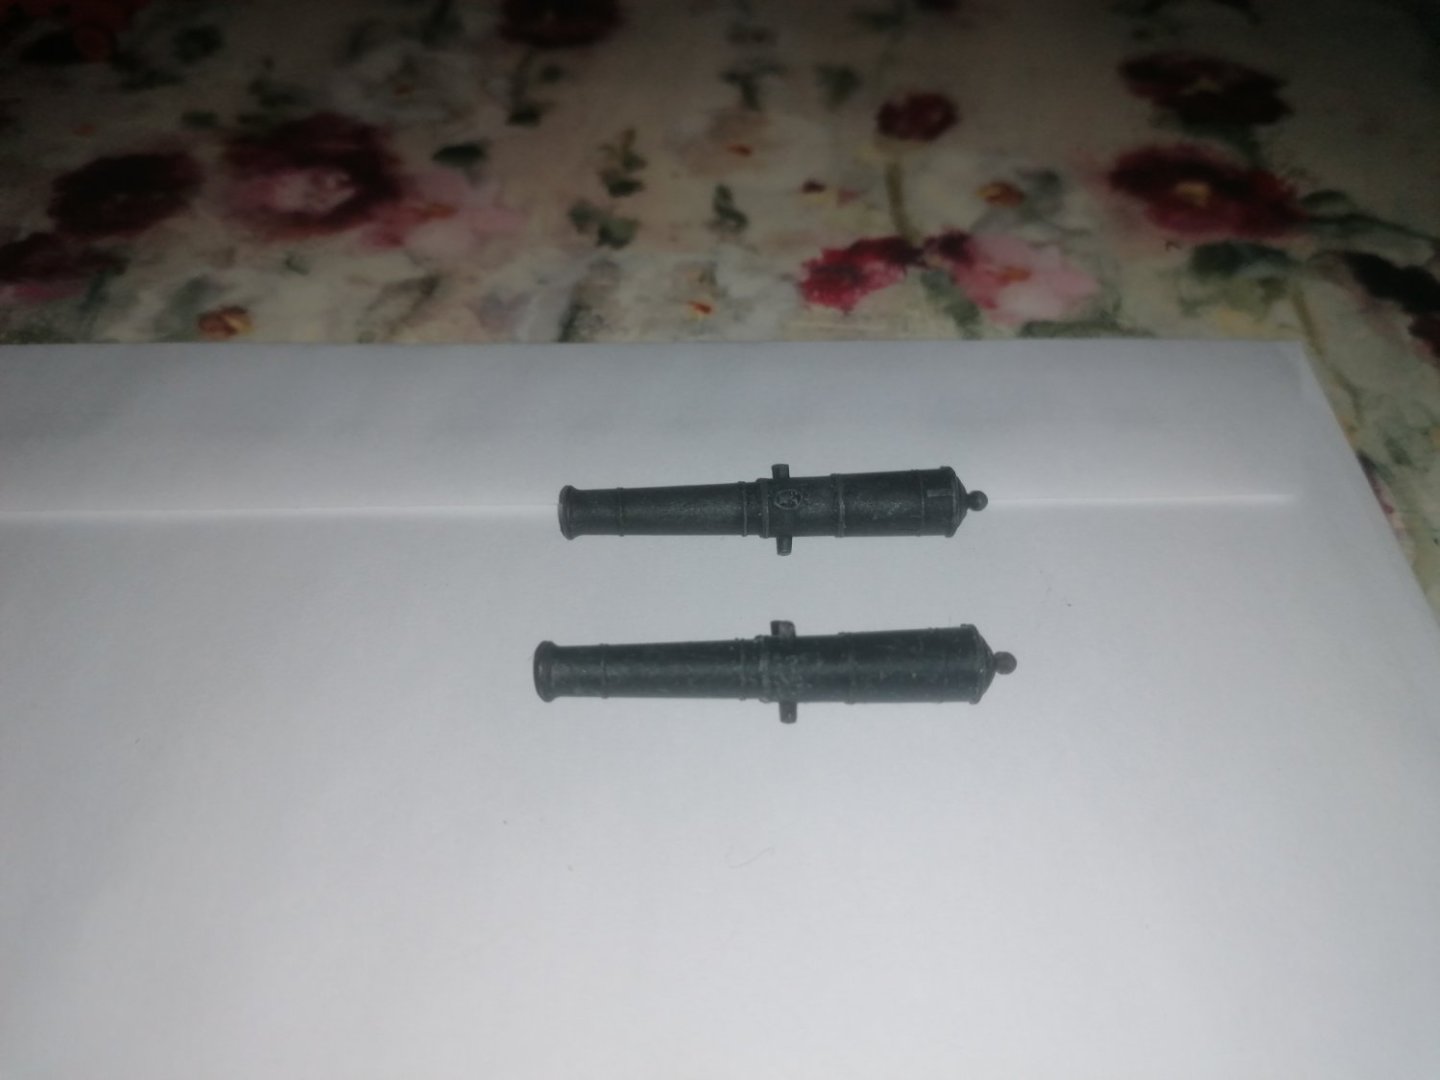
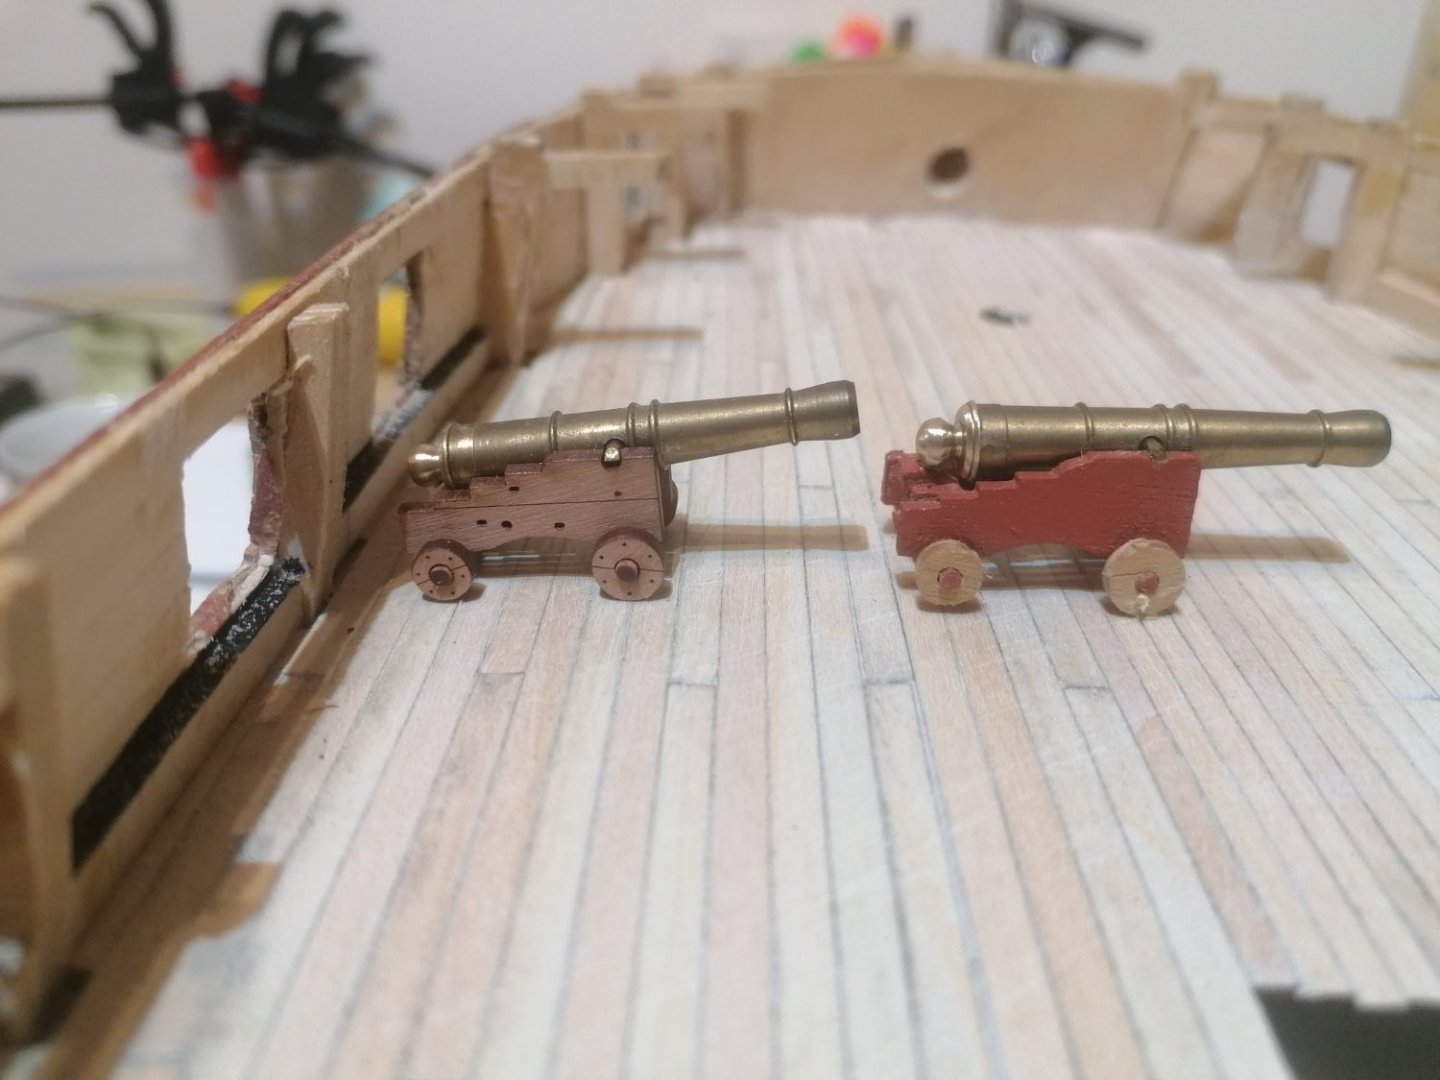
I am sorry I didn't get any notifications on your responses. Thank you all for your input. Alan, I thought you would have some knowledge of this. In between posting my question and now I remembered that Chris (Vanguard) had expanded his range of cannons and carriages after I had ordered the carraiges I bought. I had another look earlier and found that, indeed, he now has different sized carraiges for the long 9s and the shorter ones. I should have included photos to help show my dilemma, which I will do now. Hopefully this can help others. The top cannon is the 18 lb'er. Below left is the long 9 on the 18 lb carraige, middle is the 9 long on the standard 9lb carraige and below right is the long 9 on a carraige bought for a previous build but never used. Thanks again fir your help guys. It's very much appreciated. David.

-
It seems like I have the answer to my question above. I remembered seeing that Vanguard have extended the range of guns and carriages. From the quality of the carraiges, previously bought, I went back to the website and looked at the 9lb'ers again and Chris has longer carraiges for the 9lb long than for the shorter barrels. It's only millimeters but looks like the longer barrels won't protrude beyond the rear of the carriage. I am not sure if they sit higher but am guessing they will. Chris, if you look in on this, would it be possible to post a photo of the long 9 on its carriage compared to the long 9 on the smaller one. It would be handy to see the difference, not just for me but others as well. I also need, in the near future, to plan the foc'stle and quarter deck bulkheads. Thanks. In the meantime I am getting on with the 18lb'ers and am getting to the point where I really want to get back to finishing the hull. I really expected to only take a couple of weeks away from the hull but it feels like months now. Now I am hoping to complete the the 28 carraiges for the 18s. I am hoping to get get back to the hull again sometime next week. I will post more photos once these carraiges are done. David.
-
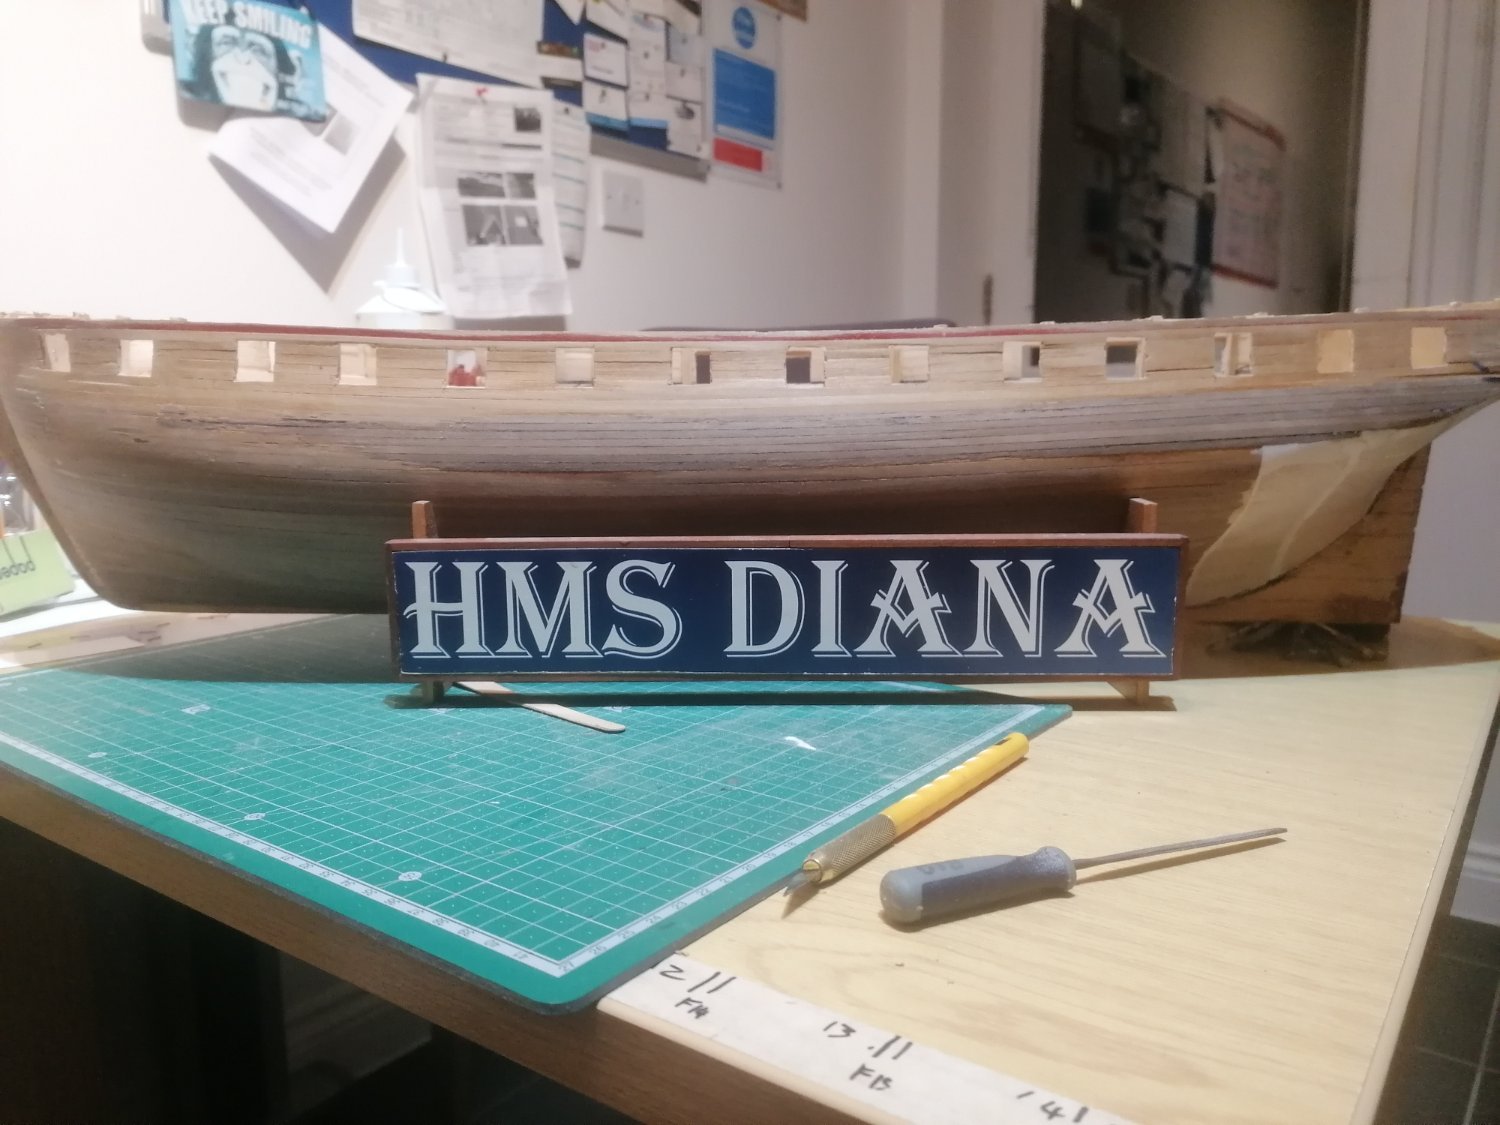
I have posed this question on my build log but thought I would also try here. I will try to keep it simple. Basically I am stuck with the size of the carraiges required for the 9lb long cannons. I believe that all the dimensions of the barrel and carraige were determind by the bore. My problem is that the 9lb long barrels are too long for the carraiges I have. The ship I have taken on is HMS Diana which I believe would have carried the long 9's on the fore and quarter decks. Should the carraiges for these be larger than the standard 9lb carraige. I've searched online for a couple of evenings and have had no luck with this. Any help would be really appreciated. Thanks. David.
-
Unfortunately, progress has been extremly slow over the past couple of weeks. I have made up the quoines for the 18lb'ers and made extra for the 9lb'ers. I knew they would be too large, but, thought I could shape them to fit. Having tried shaping one as small as possible I found it was still way too big. I also found that the 9lb long cannon barrel is way too long for the carraige. While researching cannons and carraiges for the San Fransisco II, I remebered that all the measurements for the cannons and carraiges are calculated from the size of the cannon ball, (ie the cannon ball determines the width of the bore, this determines the width and length of the cannon which in turn determines all of the measurements of the carraige, length, width, height, position of the trunnion ans well as the size of the trucks. I have spent the last couple of evenings trying to search if the carraiges for the long 9lb'ers should be larger than for the shorter barrels, but to no avail. I maybe overthinking this but, as I will probably have quite a few things that aren't quite right with this build in the end, but I would at least like the cannons looking correct. From what I have found the carraiges I have are the correct size for the 18lb'ers and also the 9lb'ers with shorter barrels, but the long barrels are too long for the carraiges. As these barrels are actually longer than the 18lb cannons, should the carraiges for them be a little larger than the 18lb ones or just a little longer but about the same height. In the mean time I will finnish the 18lb'ers and hope for some help with this from the experts among you. I've attached two photos which I hope will highlight the problem. The uppermost gun is the 18lb cannon with it's carraige, the 3 below from left to right are the long 9lb'er on the 18lb carraige, the same on the 9lb carraige and on the right, again the same barrel on a previously bought carraige which is about the same length as the 18lb carraige but a little lower. This last one would require a lot of work to match the quality of the ones I have never mind drilling identically drilled holes for the eyepins. The trunnions on the last two also extend beyond the sides of the carraiges, another problem. Any help with this would be really appreciated. thanks. David.


-
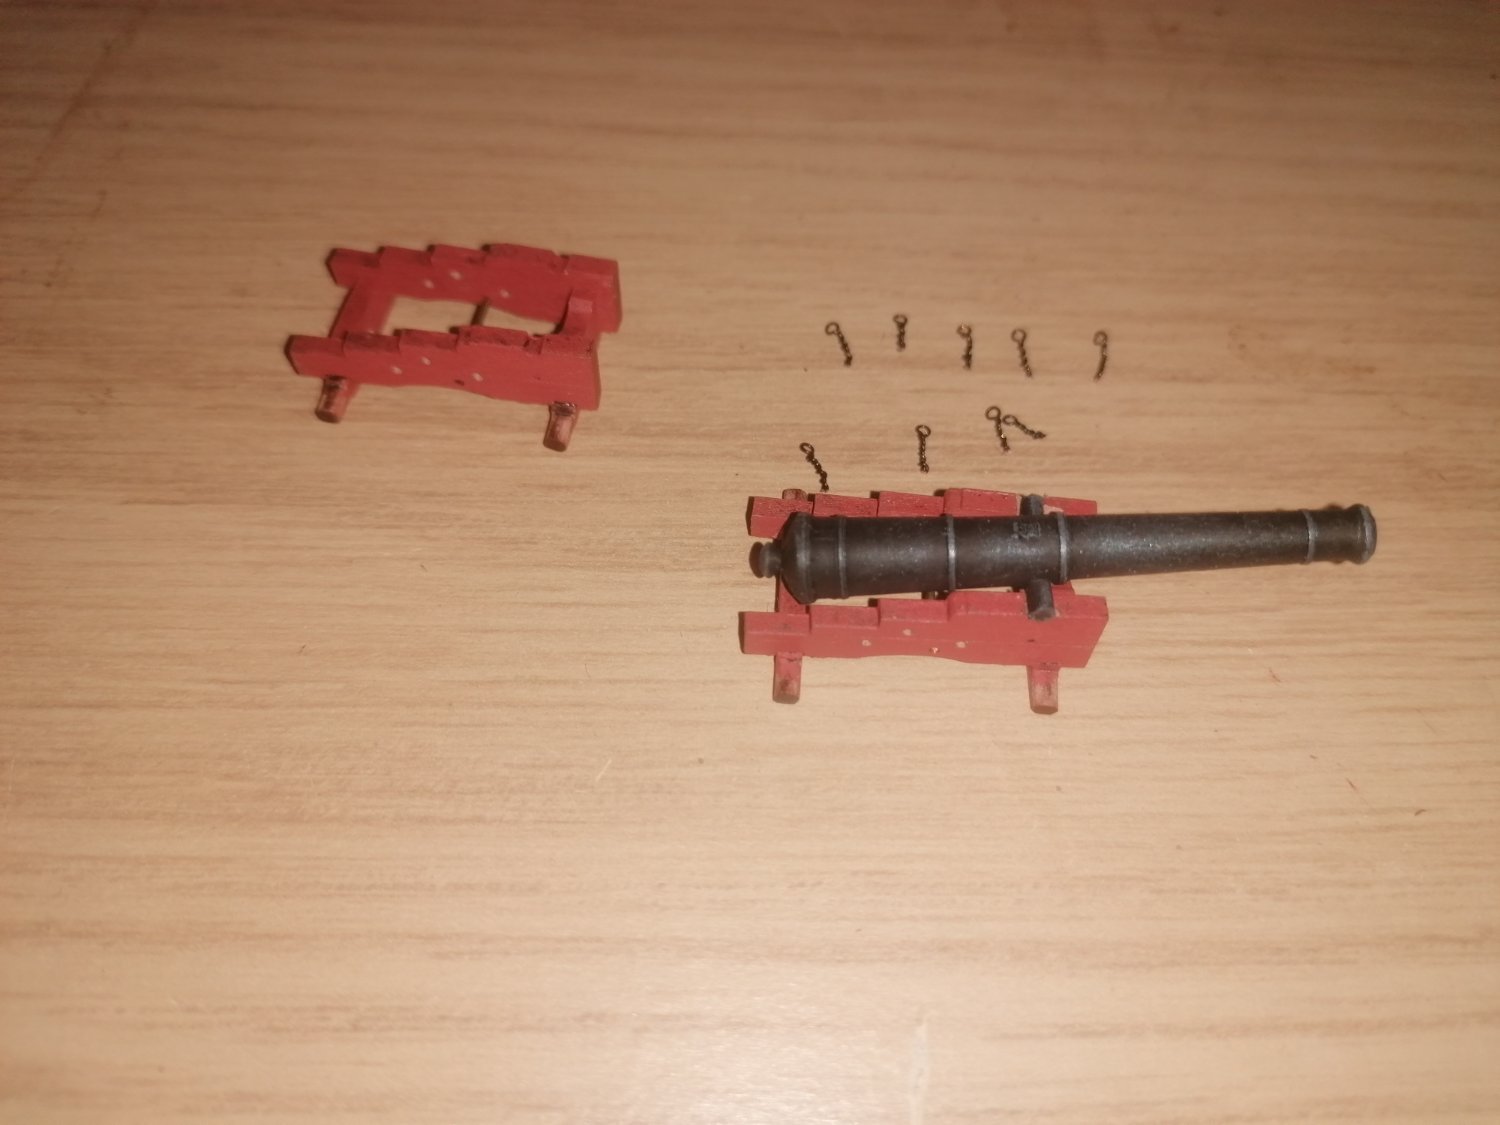
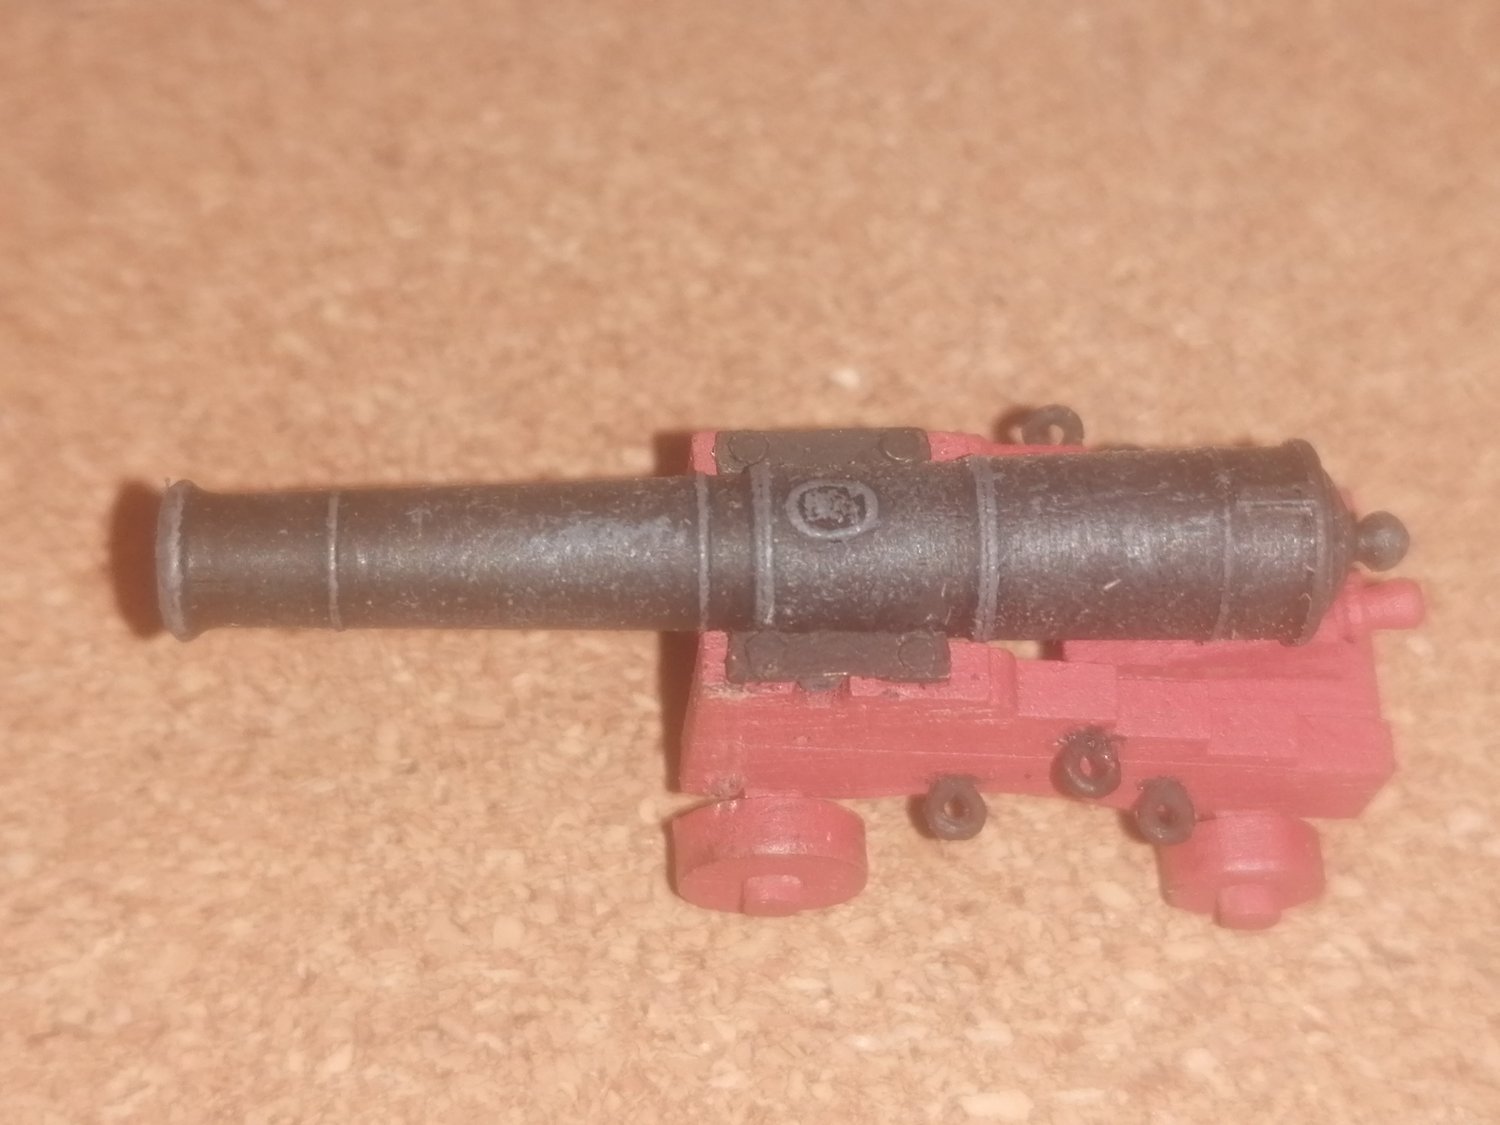
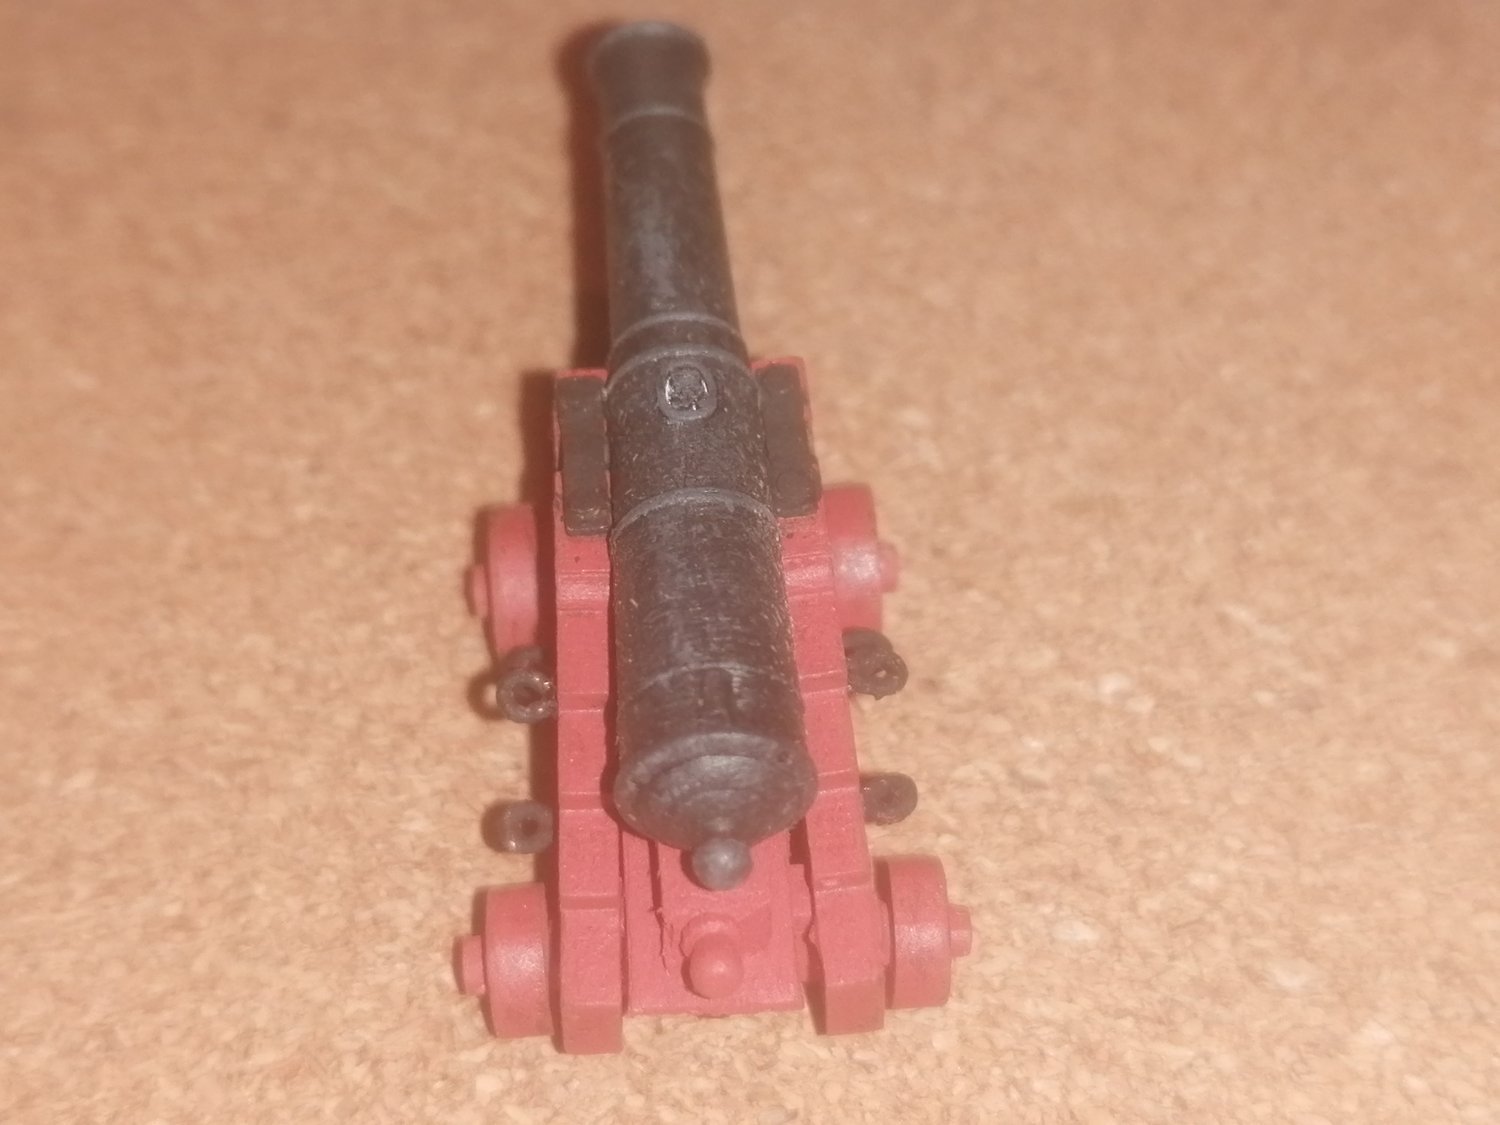
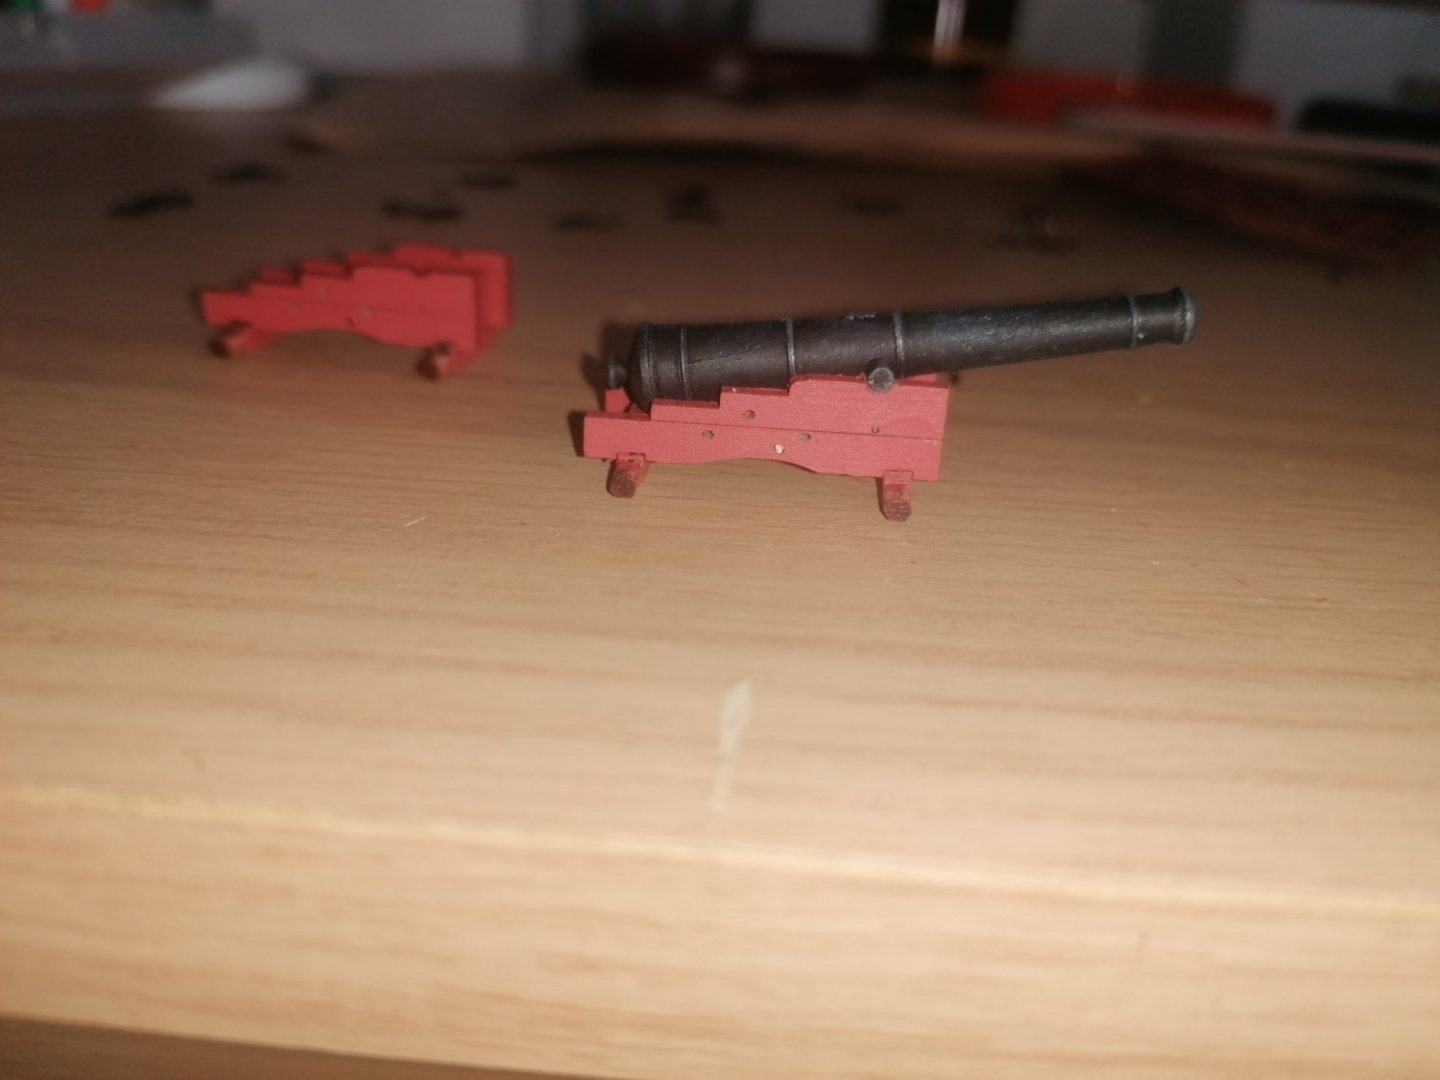
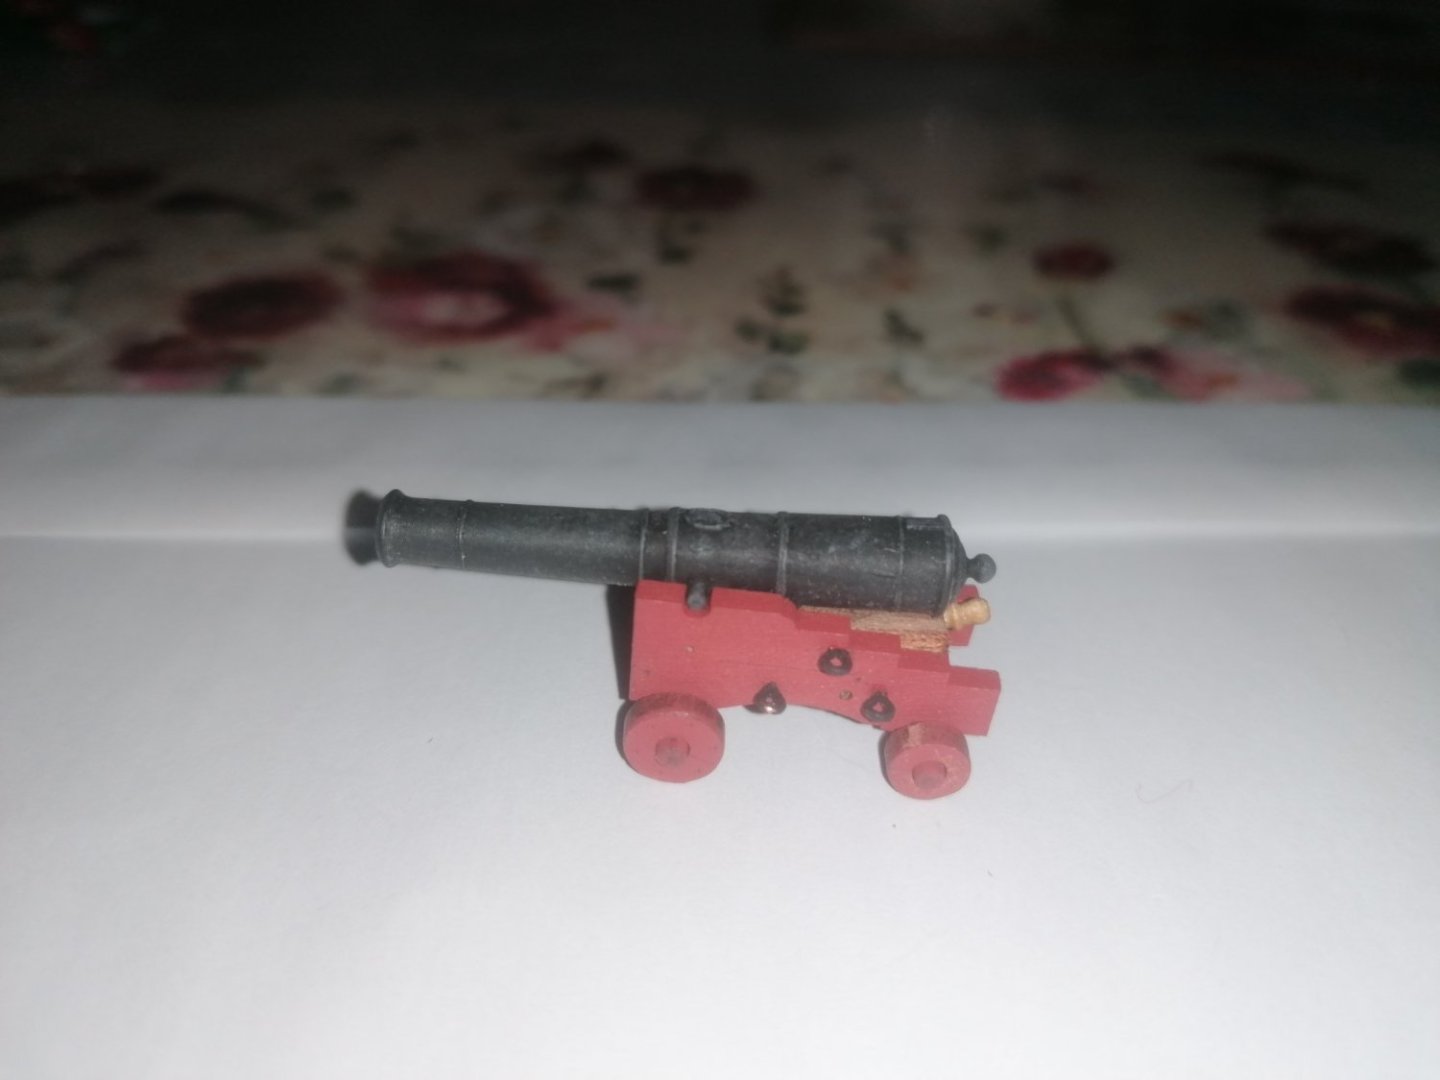
While I decide how to progress with the hull, I have started construction of the 18lb guns. I started painting the cannons first with vallejo matt black as a base and then dry brushed tyre black followed by a mix of enamel dark grey and matt black to highlight the details. I am pretty happy with the final look of these.The carraiges, as previously mentioned look great, and easy to put together. To begin with I only started assembling one of the carraiges as a prototype. I found I needed to drill the 3 holes on each side for the pins to fit into a little larger. I then built up the carraige as per instructions. I used very little pva glue at first to avoid any excess oozing out when clamping the pieces together but, however, the bond wasn't strong enough so I resorted to a litte super glue applied with a tooth pick to the joints. This worked much better. With the sides and axles glued the assembly was painted red. Next I stuck the eyepins into a block of balsa wood and painted them black. These were then glued into place. I also added the qoine bed support with a section of a long eye pin that just happenned to fit into the hole, and coincidentaly, I have enough for all 38 carraiges. With the barrels and carraiges painted I started on the capheads which, after scraping off the glue, straightening and removing the burr from the ends, wasn't as hard as it looked. I then pinned 2 of these down onto the balsa block and painted the black. With this done I test fitted the barrel onto the carraige and realised the qoines supplied were too low and the wrong shape for my needs. After several failed attempts at making the qoines and particularly the beds for them to sit on I compromised and did without the lip on either side of the bed and just used a 1 by 6mm strip of beech cut 11mm long. I then added the qoine on top with a 1mm belaying pin from a previous kit (that was from a wasn't used but may come in handy one day box). God I've got so many of those!!! Anyway here's photos of the cannon. Hopefully it looks pretty decent although a little touching up and highlighting is still required especially the trucks.


-
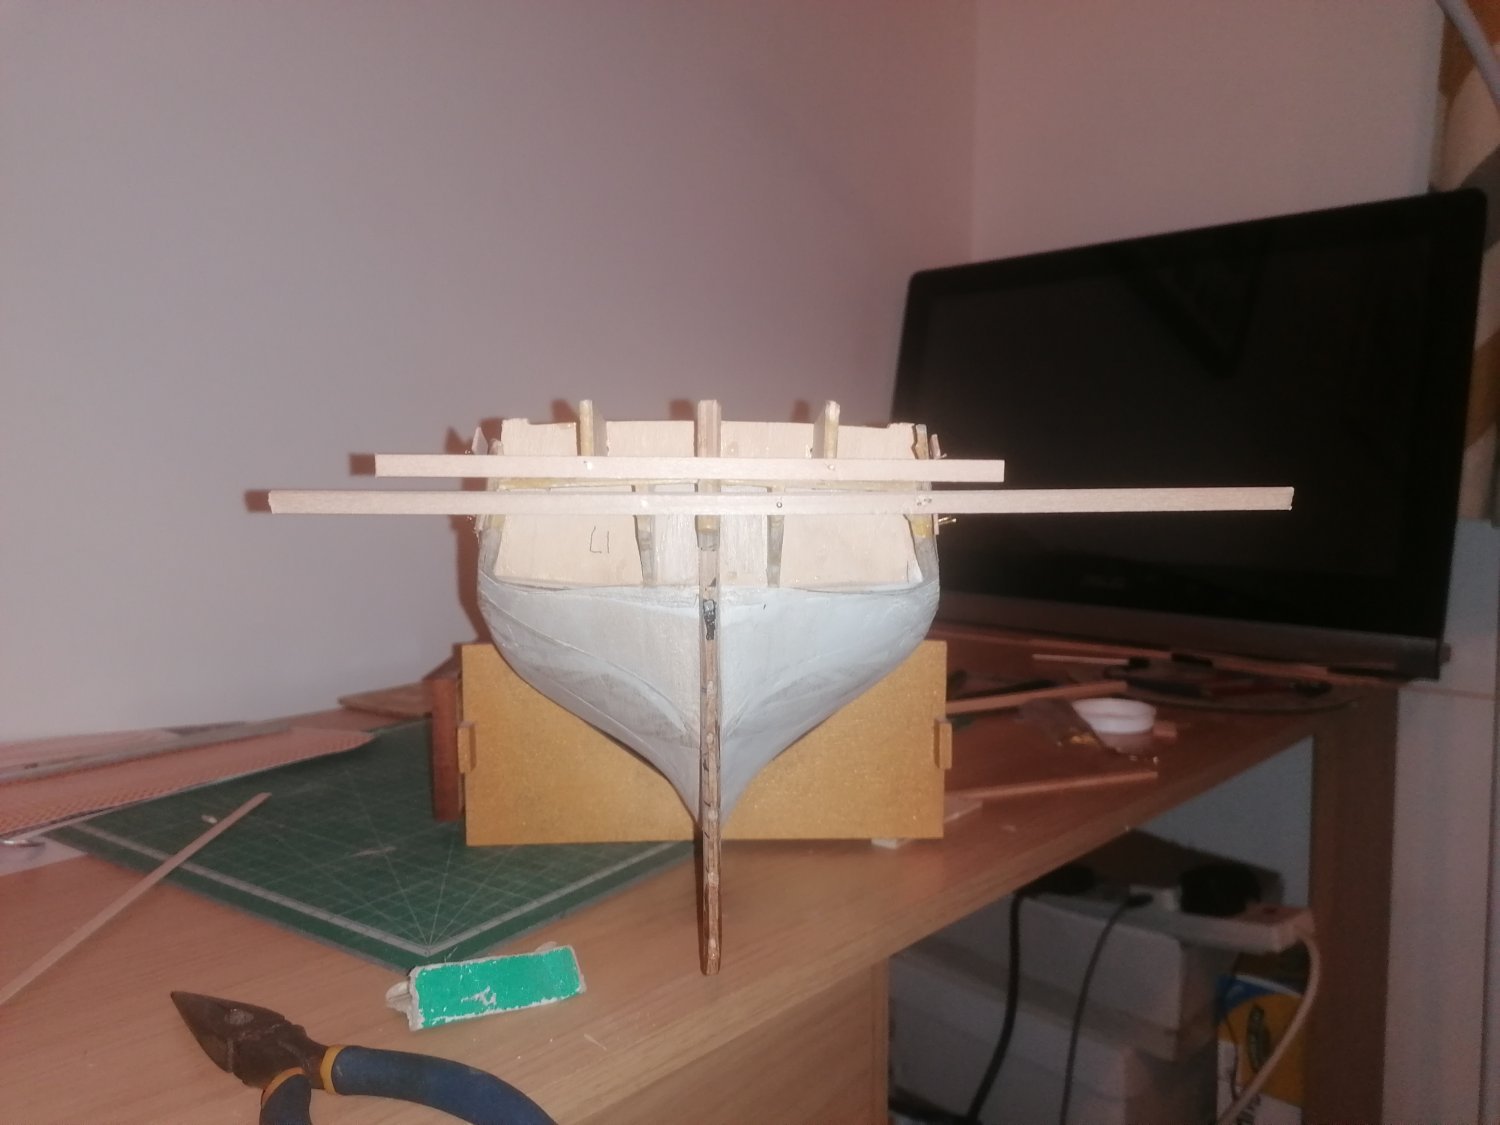
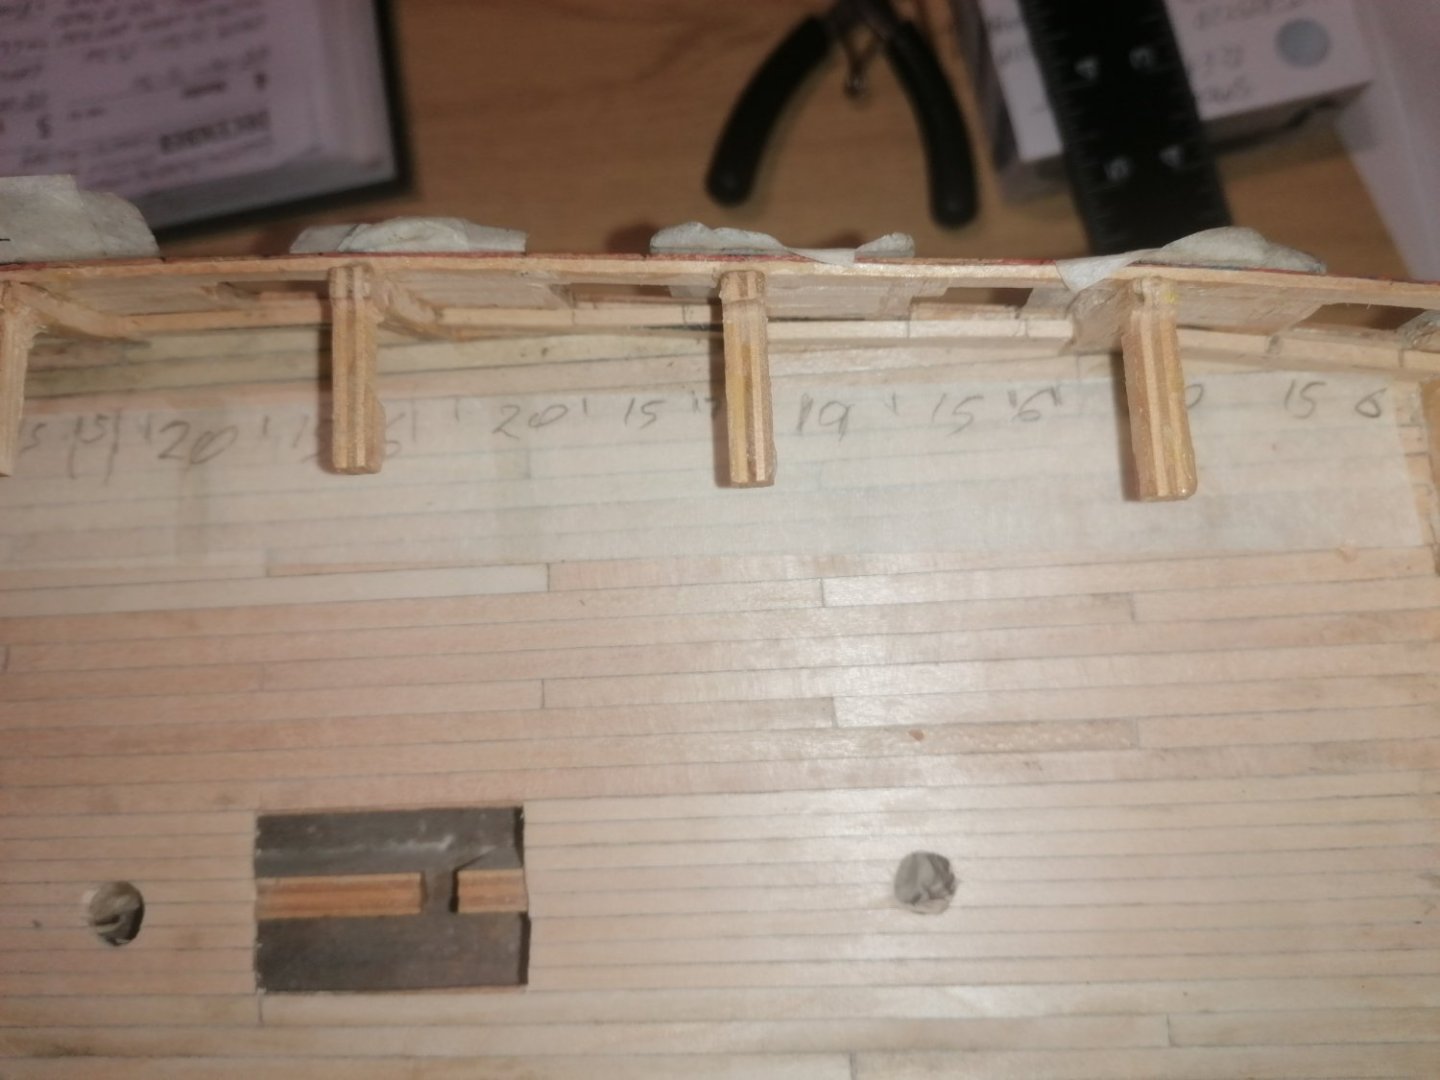
It's been a long 3 weeks since my last post. Thanks again for the likes so far. Having checked my measurements, I have decided that I'm happy with the gun ports sitting 7mm above deck level and the guns will sit correctly. I have built up the spaces between frames with balsa and also remade the skid beams. These now fit into slots on the hull with the exception of the forward most one which lies level with frame 6. I need to decide whether to create a notch or fit a knee to accomodate it. I am also struggling a little with shaping the bow section to accomodate the fore section of the upper deck.

-
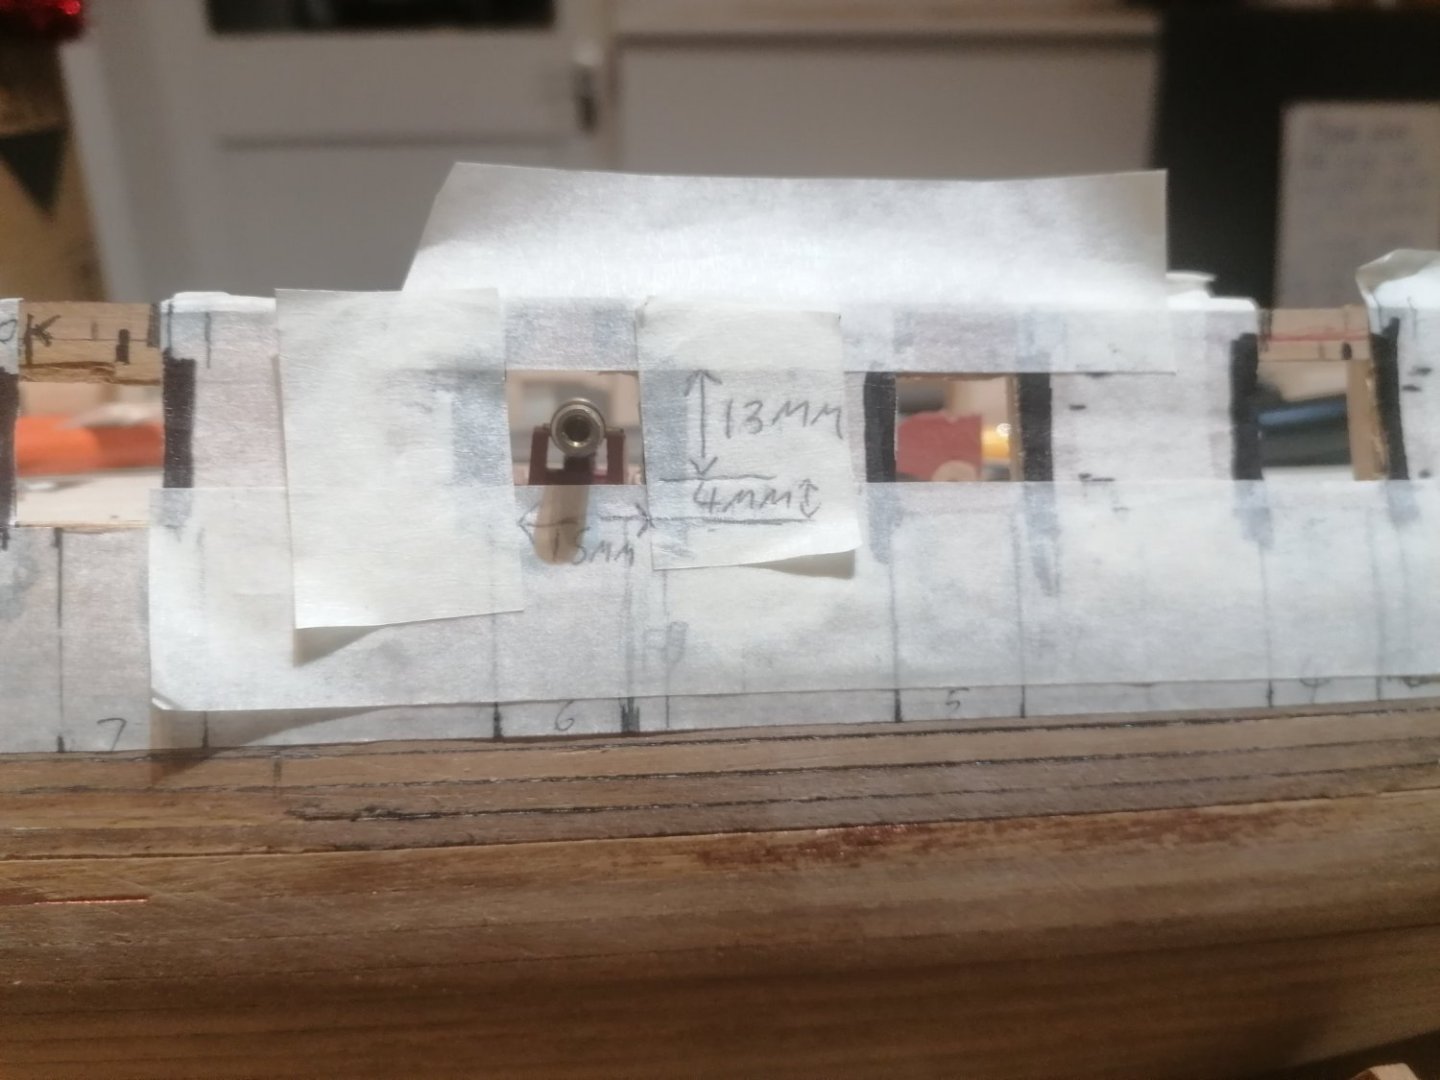
Many thanks for your input David. I take it that means that the gunport sill sits on top of the spirketing, I have a bad feeling I've messed up my calculations. Very dissapointing but, if so, I'm glad it's not too late to fix. My original thought was the gunports should sit 5mm above deck level. But, when I measured the height of the carraiges, I had a height of 14mm and, assuming the cannons should be dead centre of the ports, would make them 7mm above the sill level and 14mm above deck level. I also thought, after much trial and error, that I should make the openings 15mm long instead of 16mm, and 13mm high instead of 14mm, and line them with 0.5mm strips instead of 1mm thus making them still 14 X 12mm when completed. I will need to re think this now, as I am working out how to get the upper deck to fit and I don't have enough space above the gun ports for the skid beam clamps to be fitted. An extra couple of mm's could help me with this. The previous builder had all the skid beams over the open deck sitting several mm away from the hull which, on the real ship, would mean them hanging from the deck planking alone. Figuring out where they should lie was going to be my final task tonight. I have started re drawing the upper deck with the aim, once it's symetrical from the centre line, of making it 2 or 3mm narrower but still fit on top of the sides of the hull to be able to create a lip that it can fit into. When the time comes to fit it properly I will be able to plank over this lip along with the deck itself. I also want to attach the skid beams running accross the open deck area from the hull instead of free standing. Thanks again David. I've named myself newbee for a reason. If I can get a result with this build, in a couple of years I may promote myself to newbee(ish) with your and others help of course. Cheers for now. David. (yet another one)
-
I forgot to mention before that I am planning on adding the skid beam clamps along with the spirketting. The only problem I have is the sizes and correct positioning. I am guessing the clamps run the entire length of the hull and look to be 2 strips of 2X2mm. The spirketting looks like only 1mm thick but I can't tell if it runs level with the gunport sills or runs below them. Any help with this would be really appreciated. Thanks again. David.
-
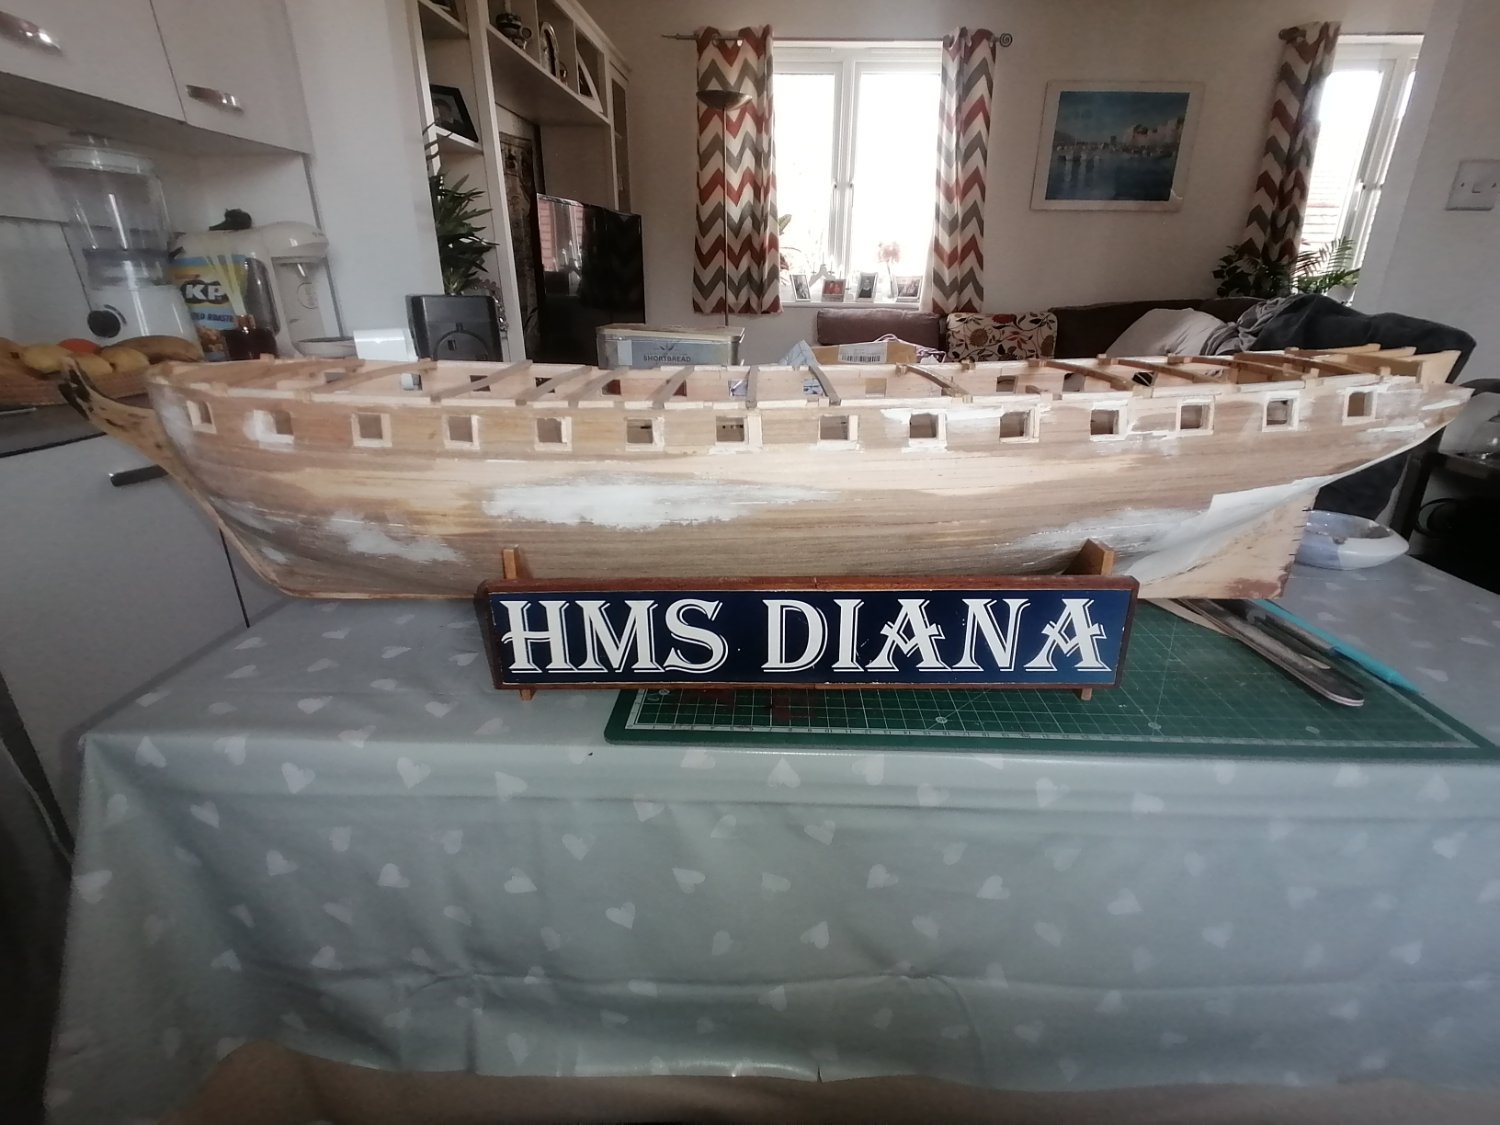
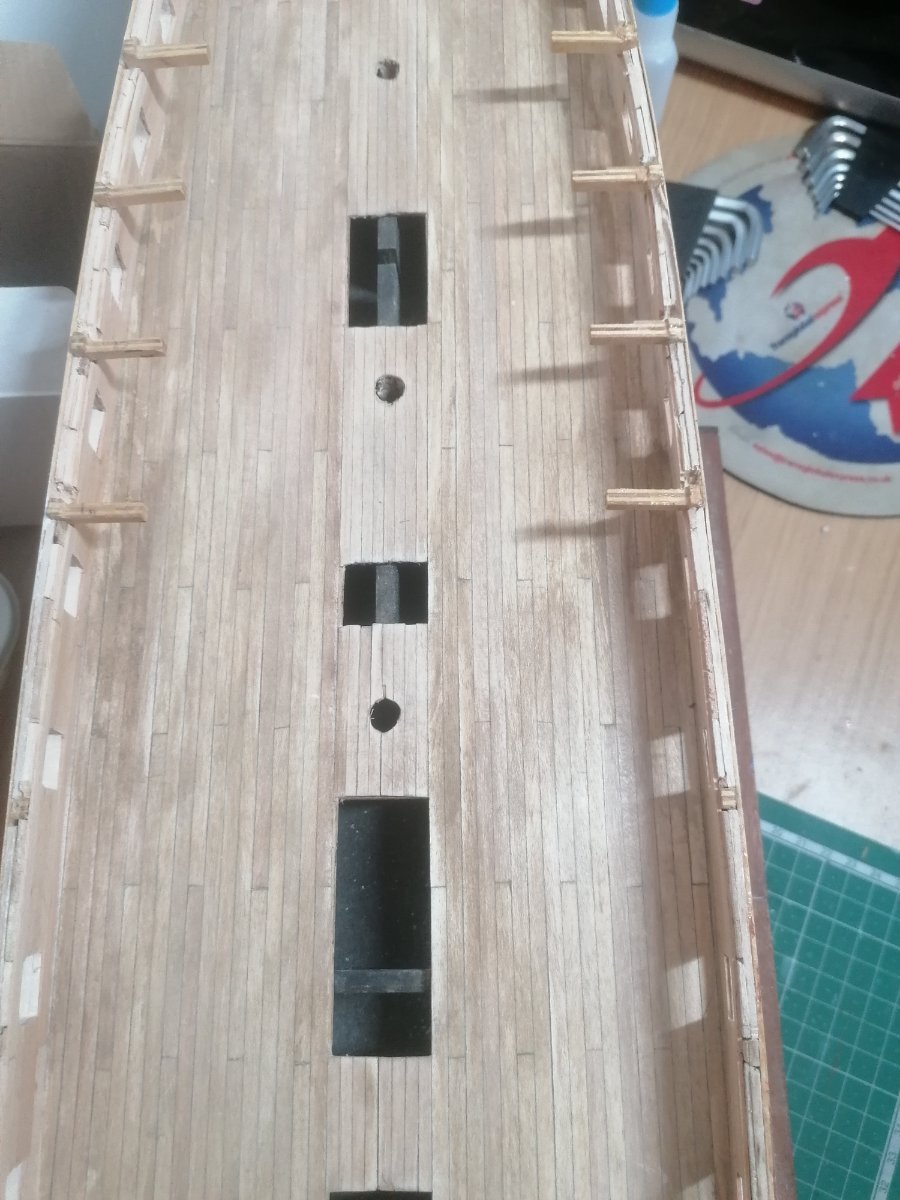
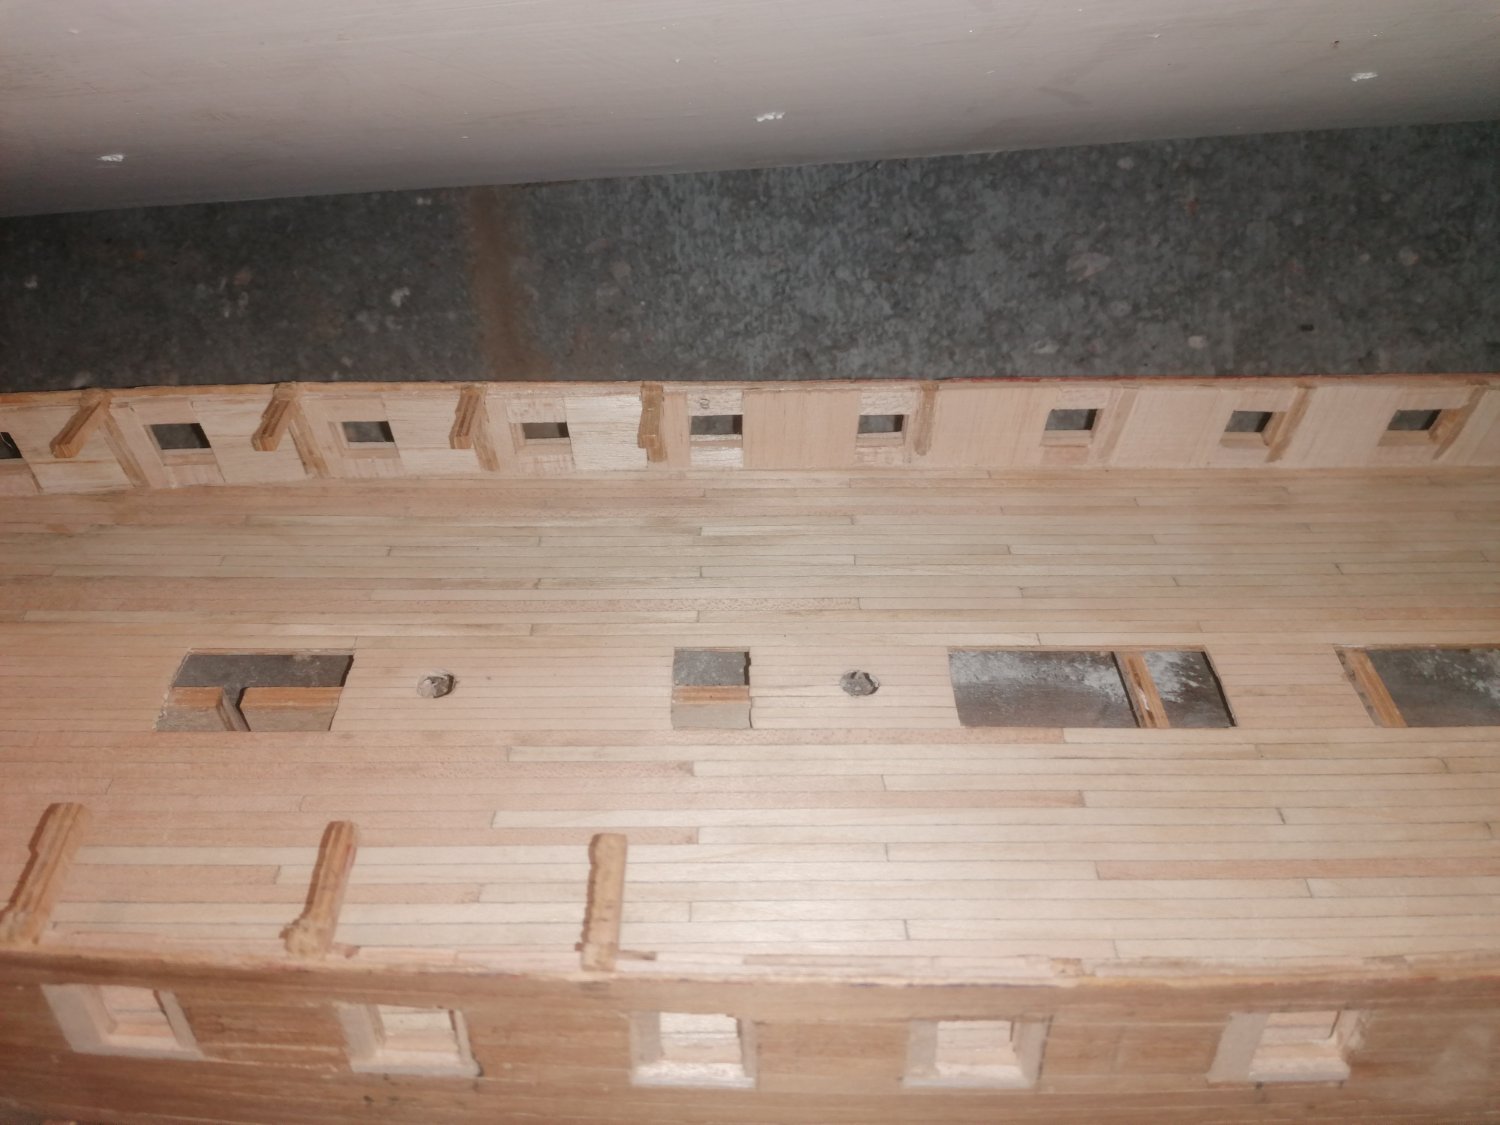
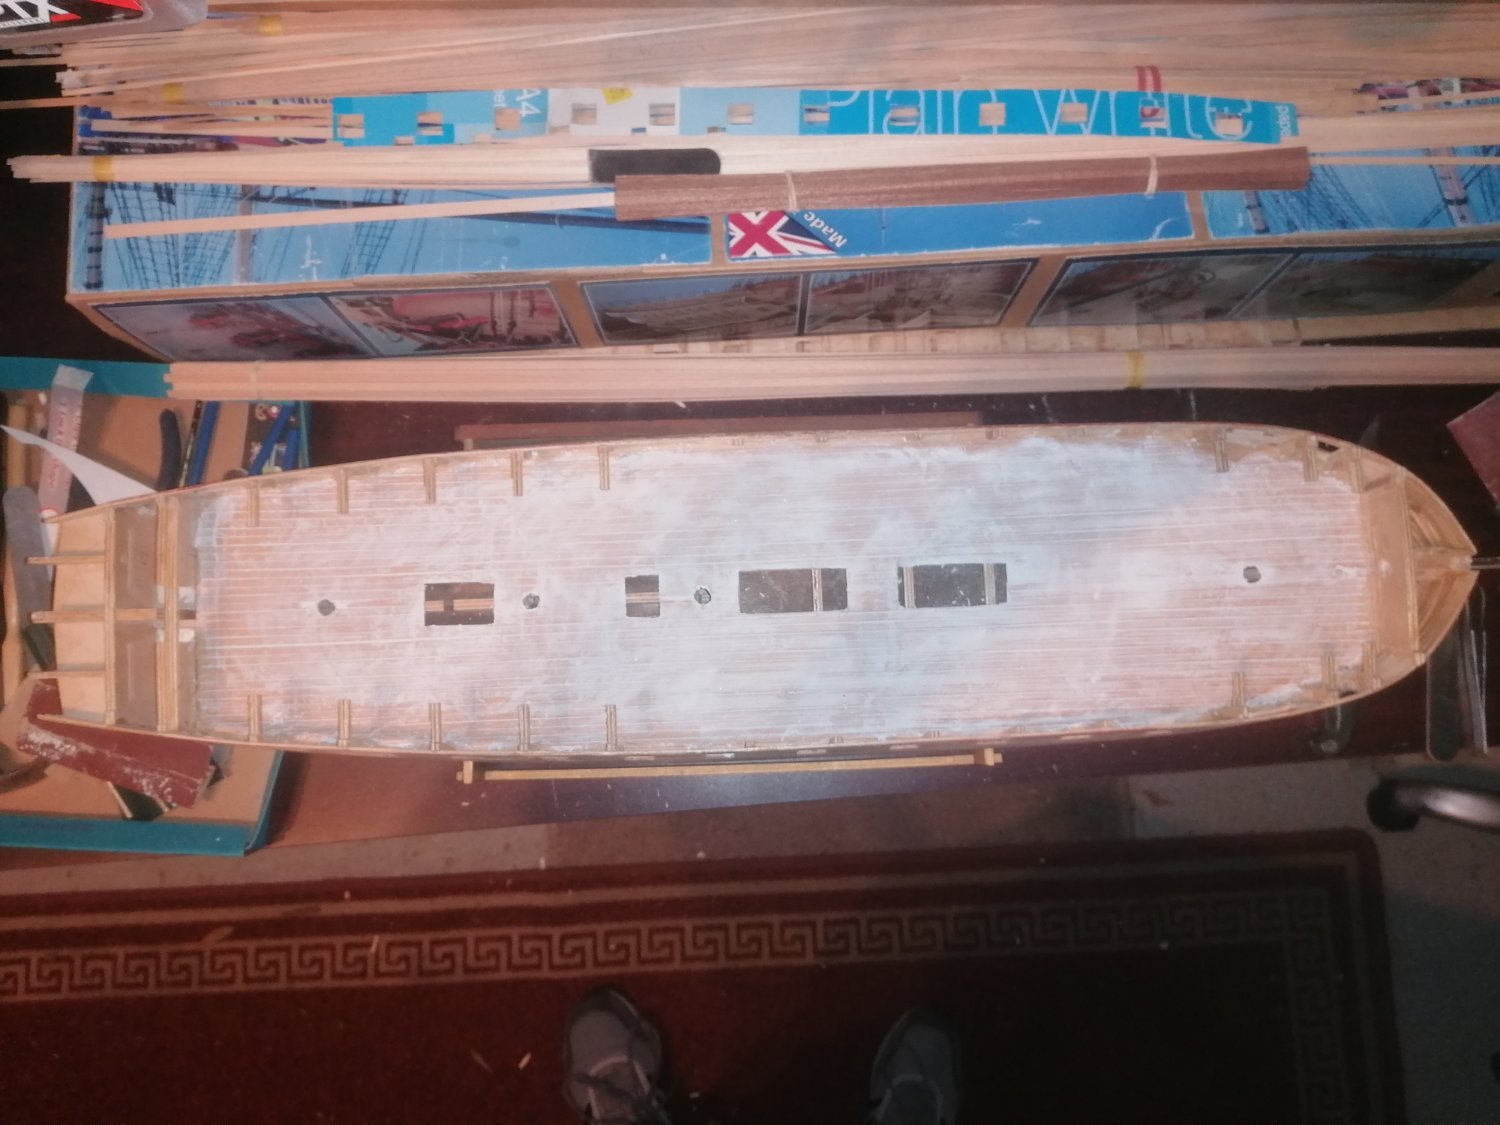
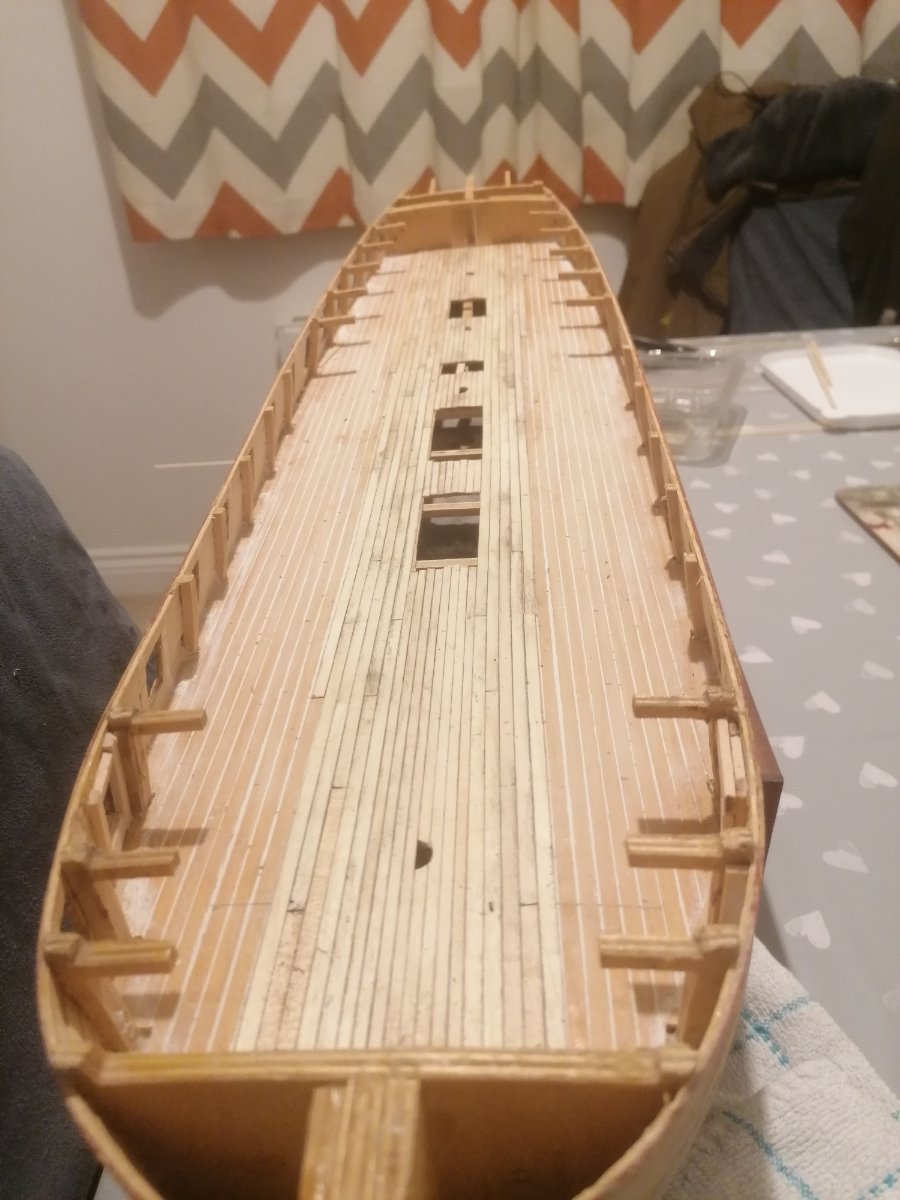
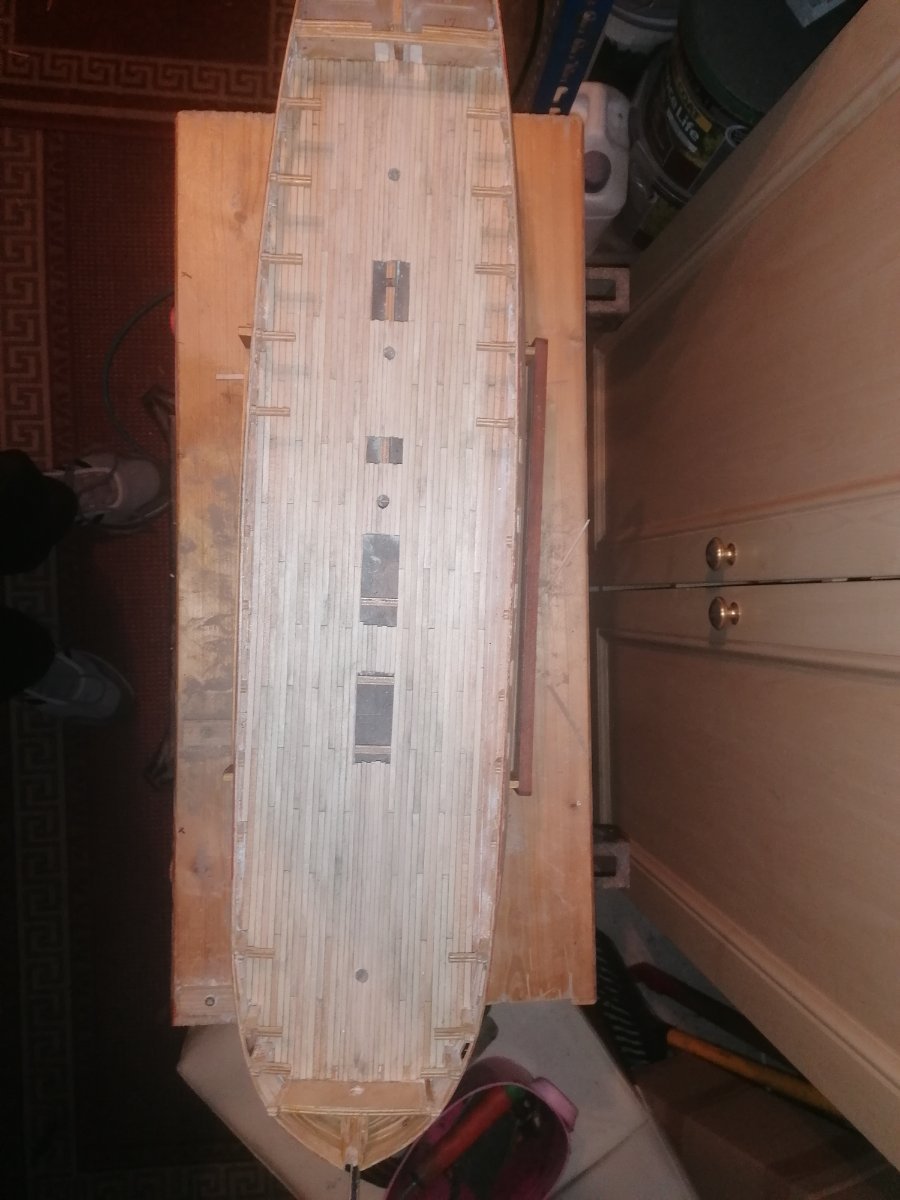
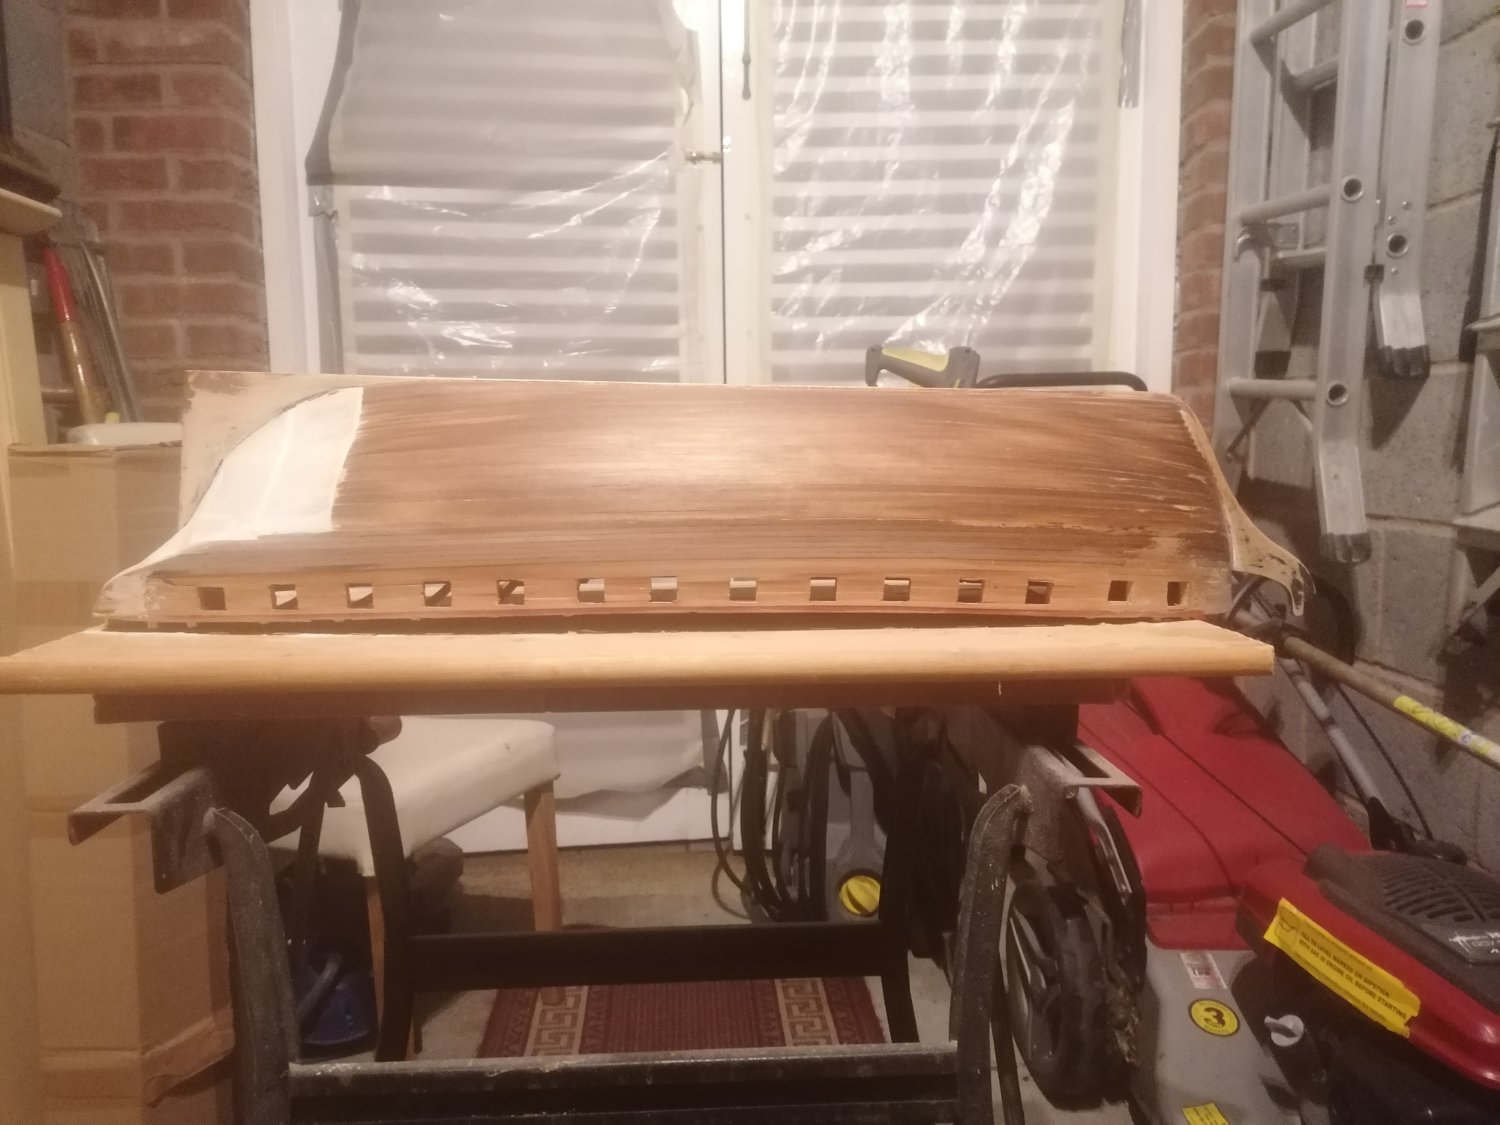
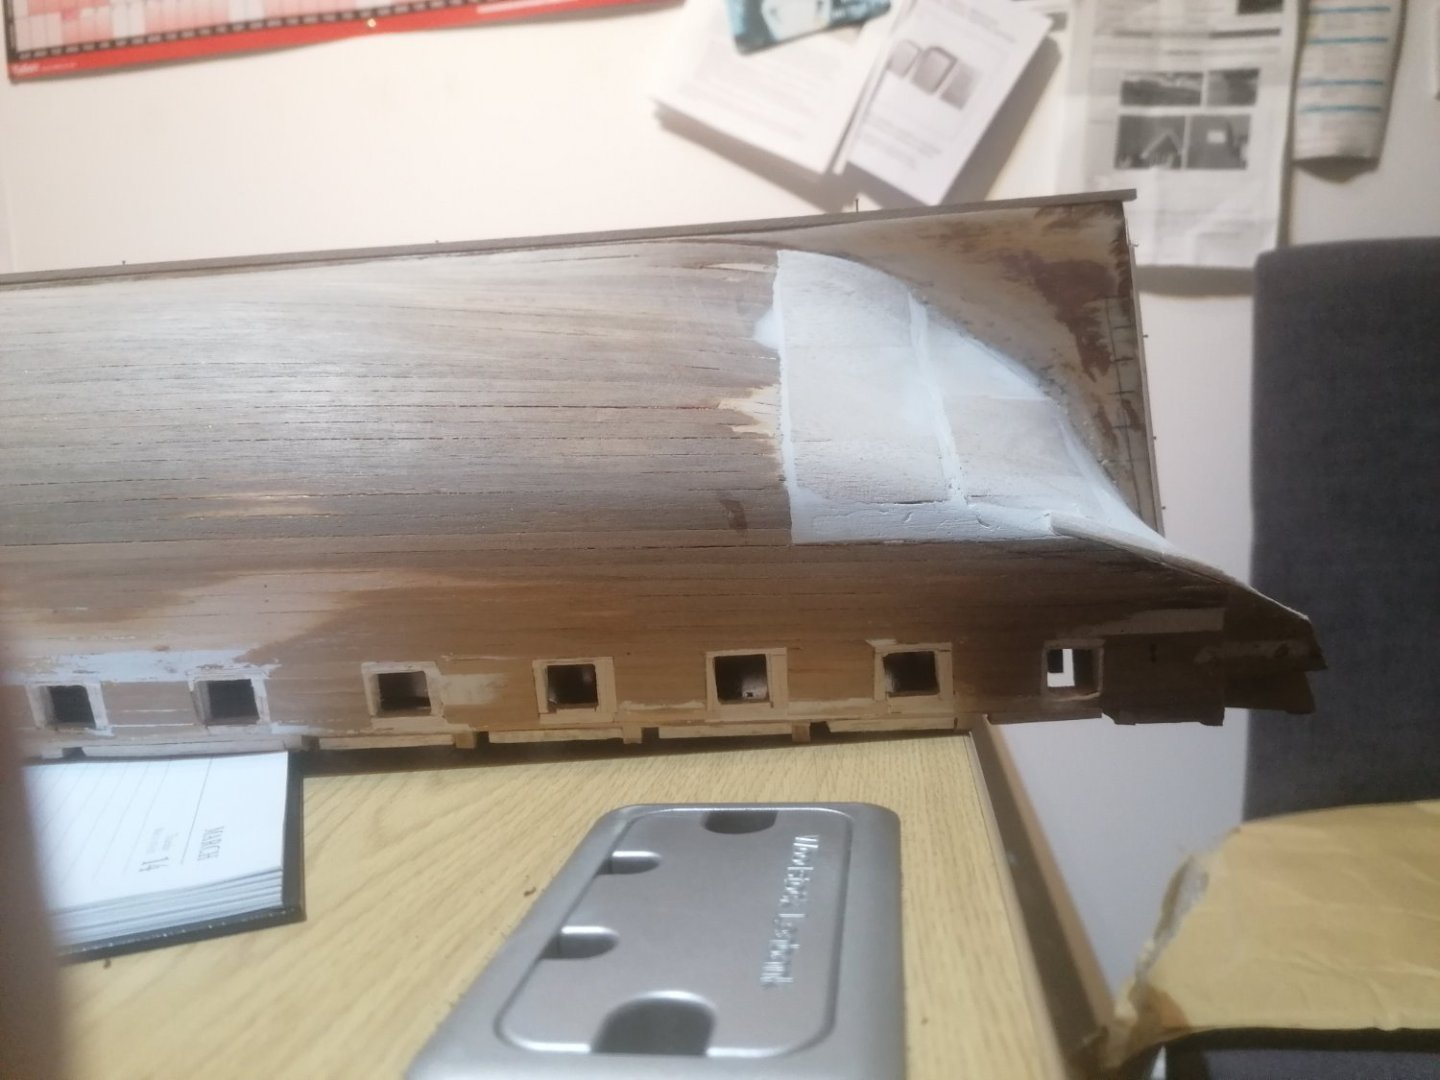
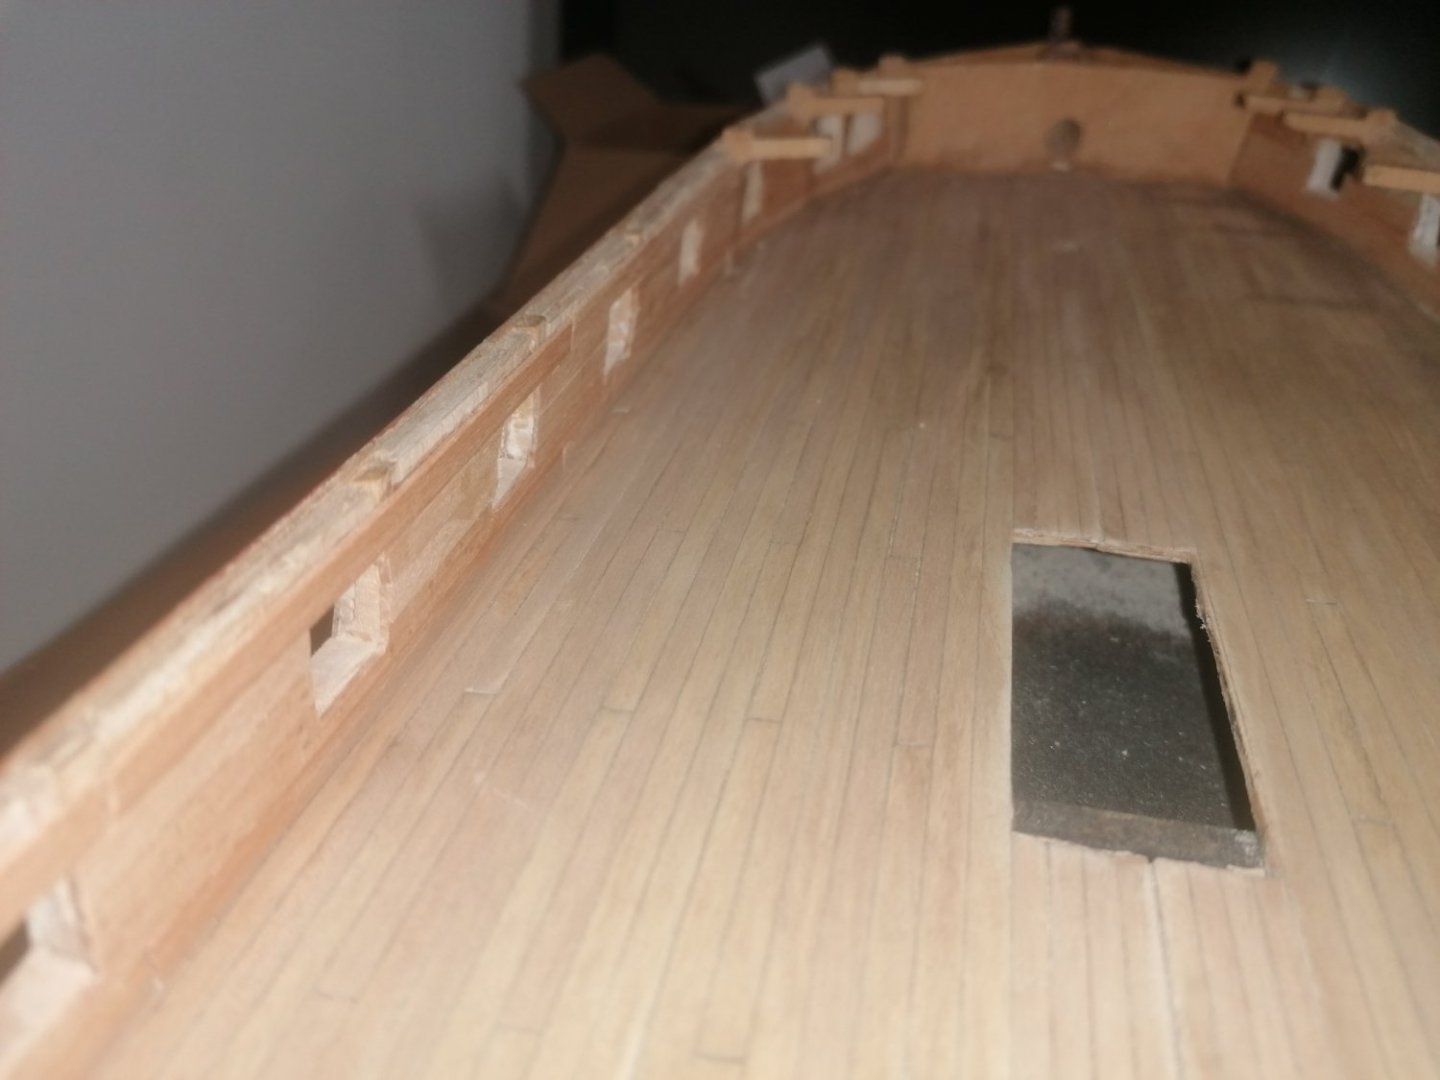
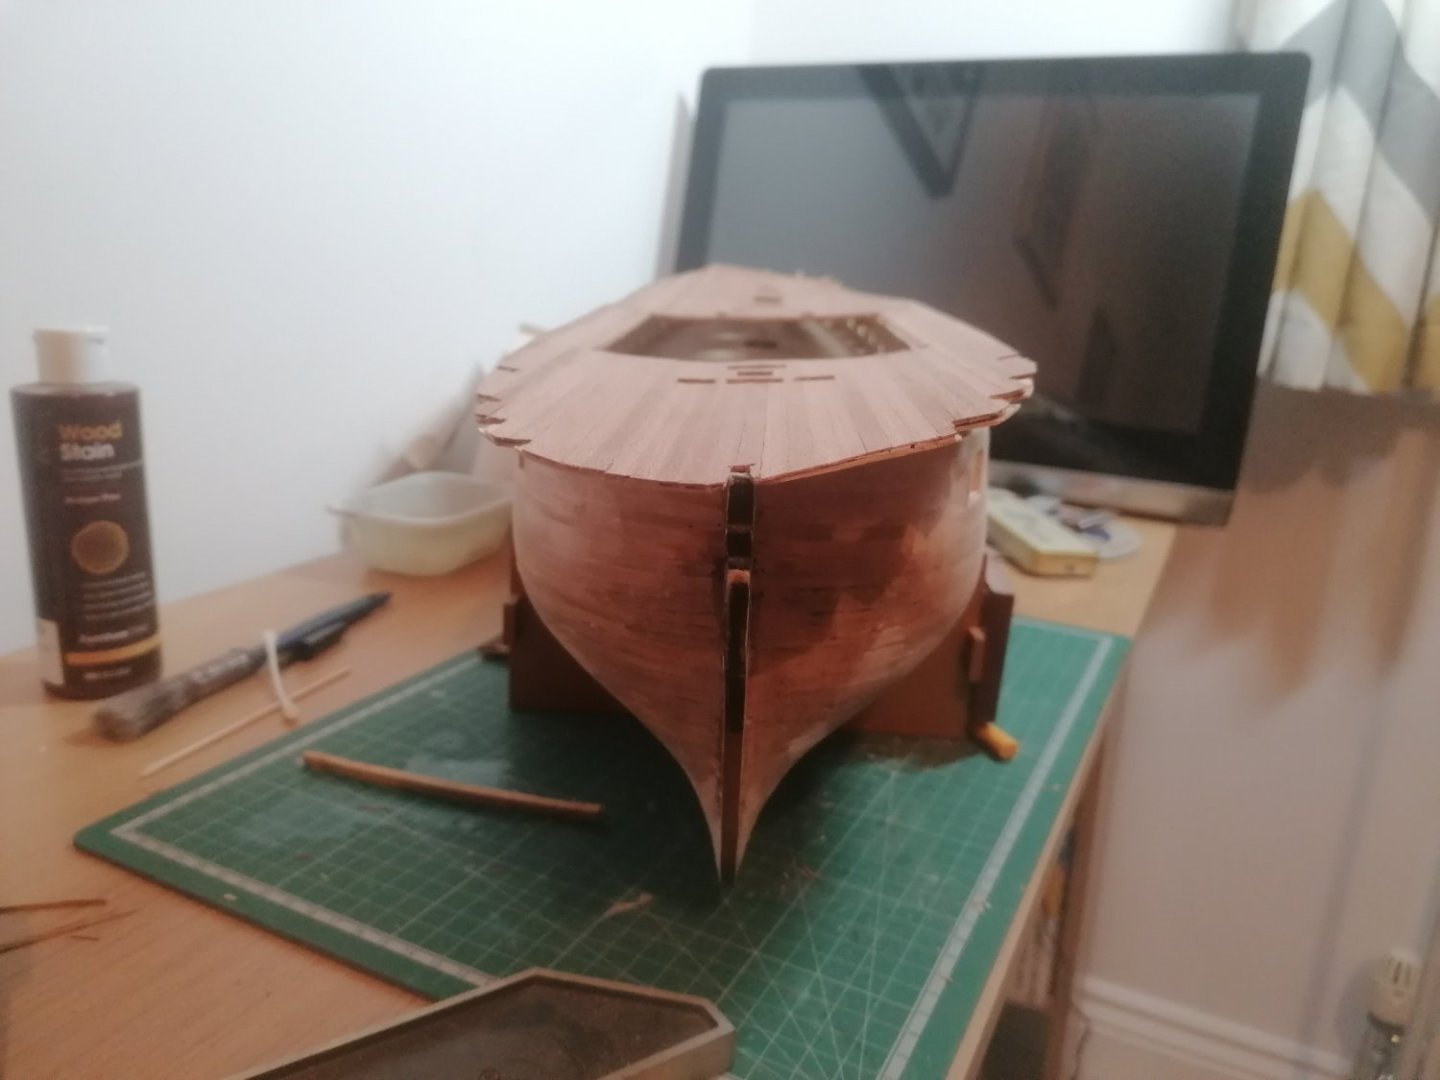
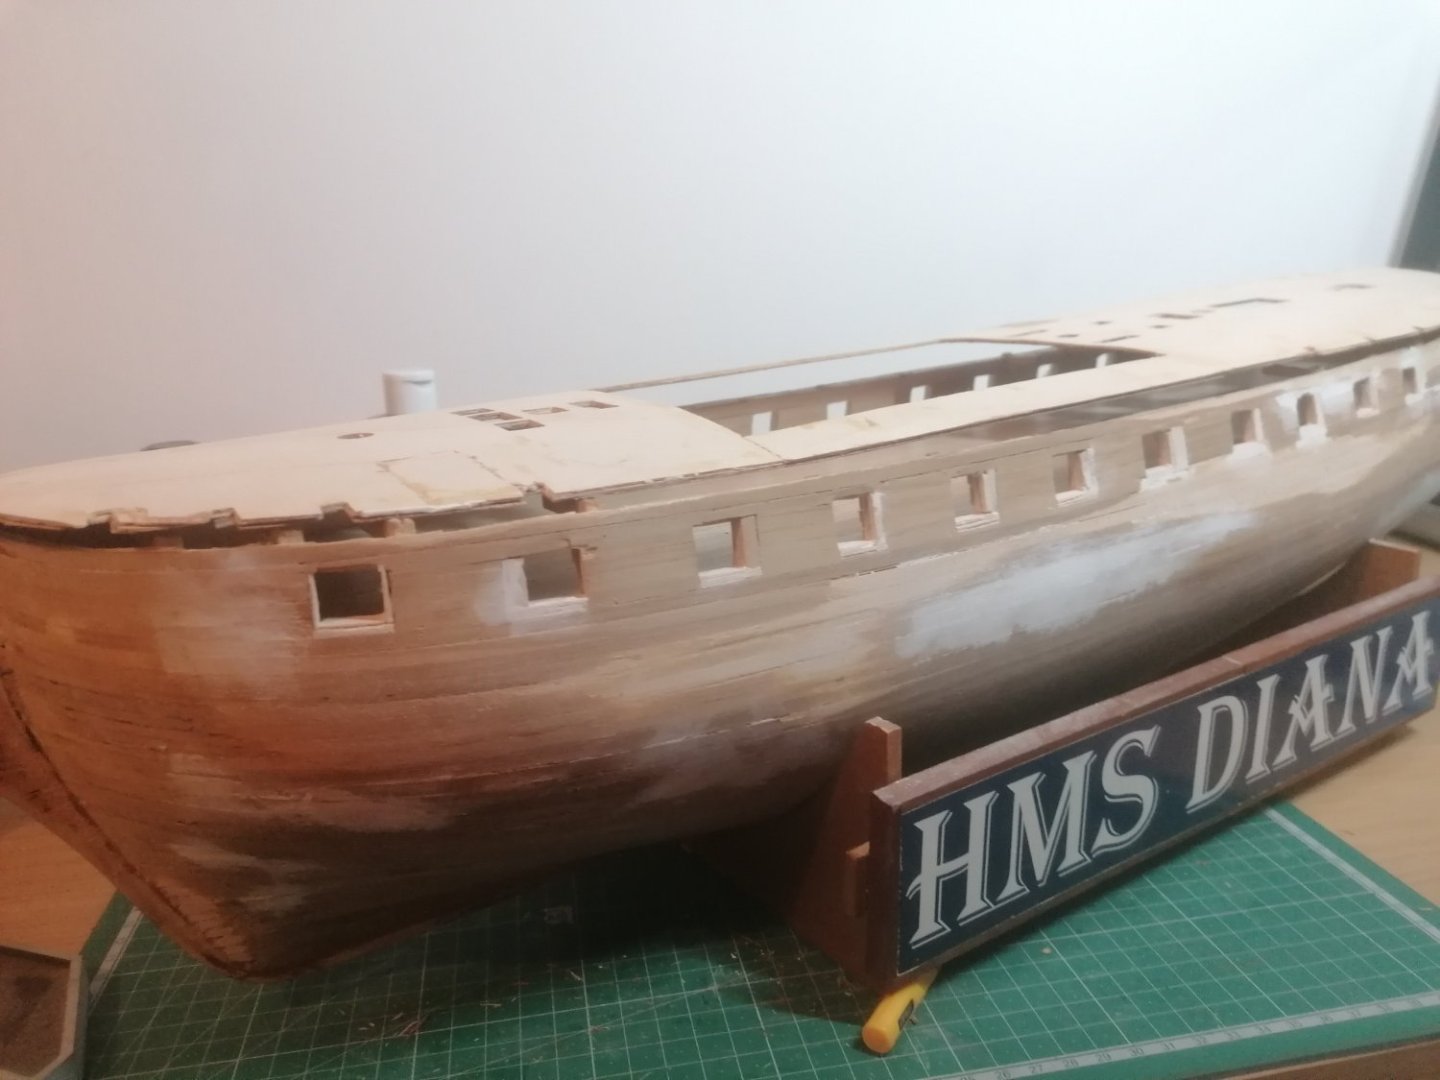
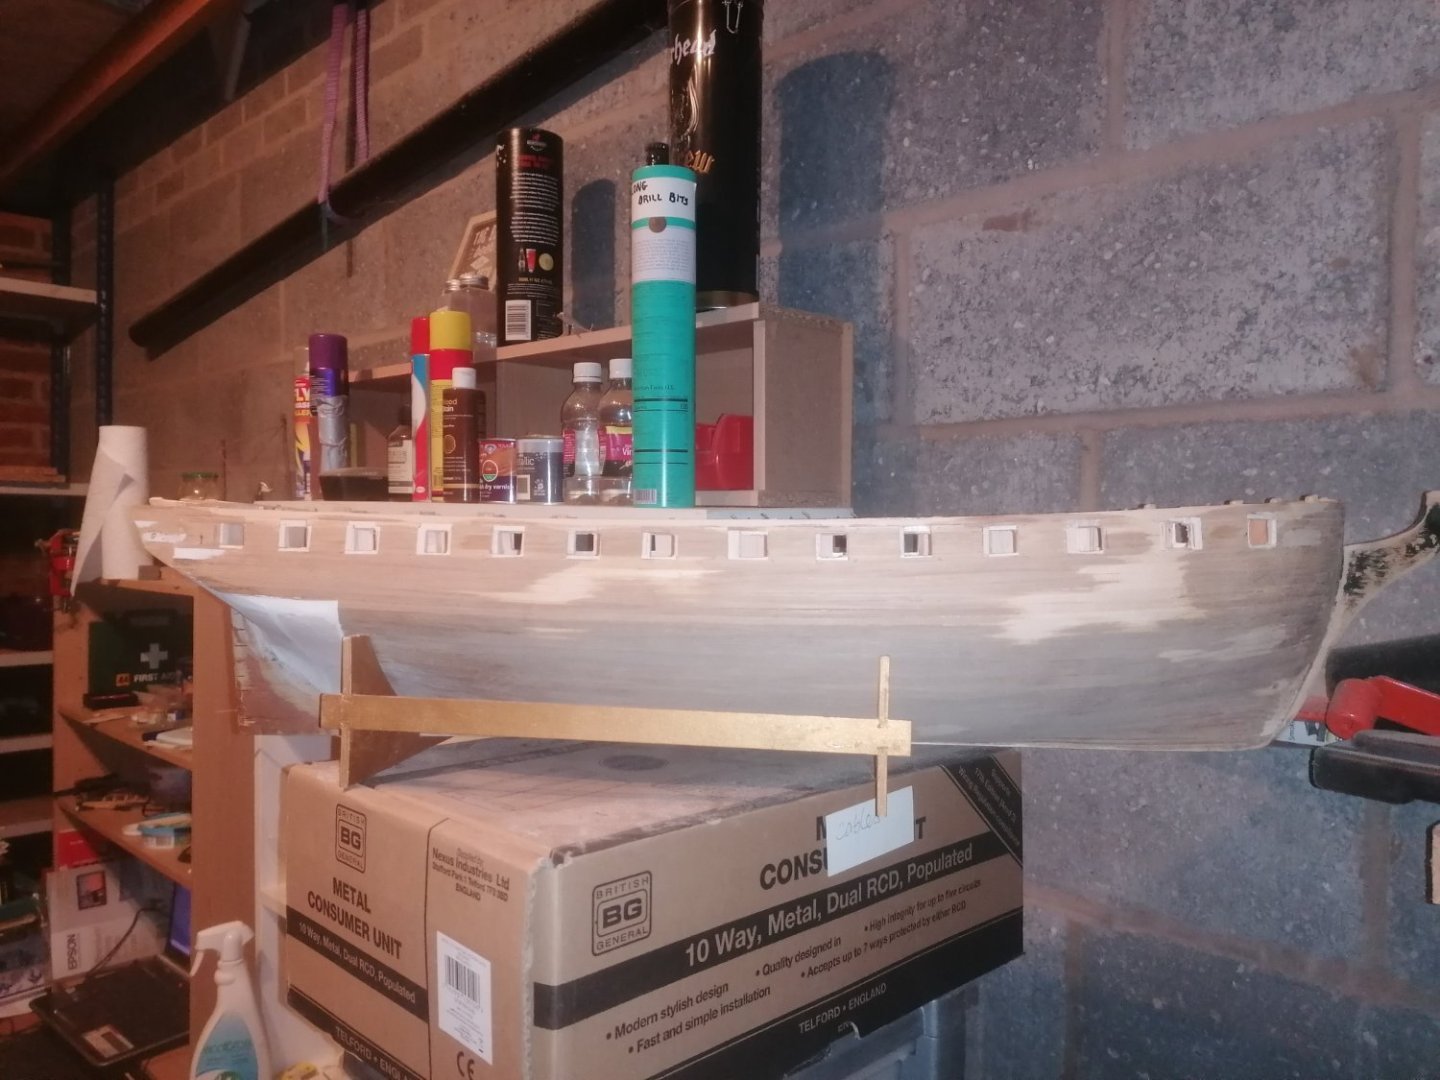
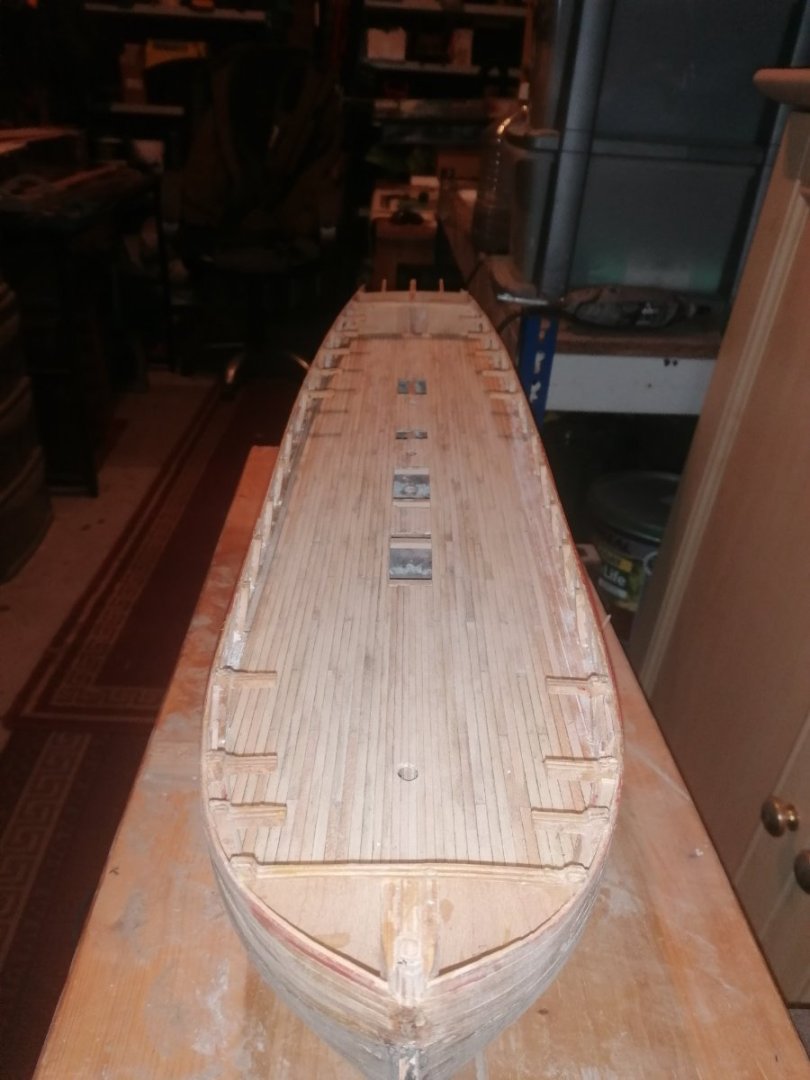
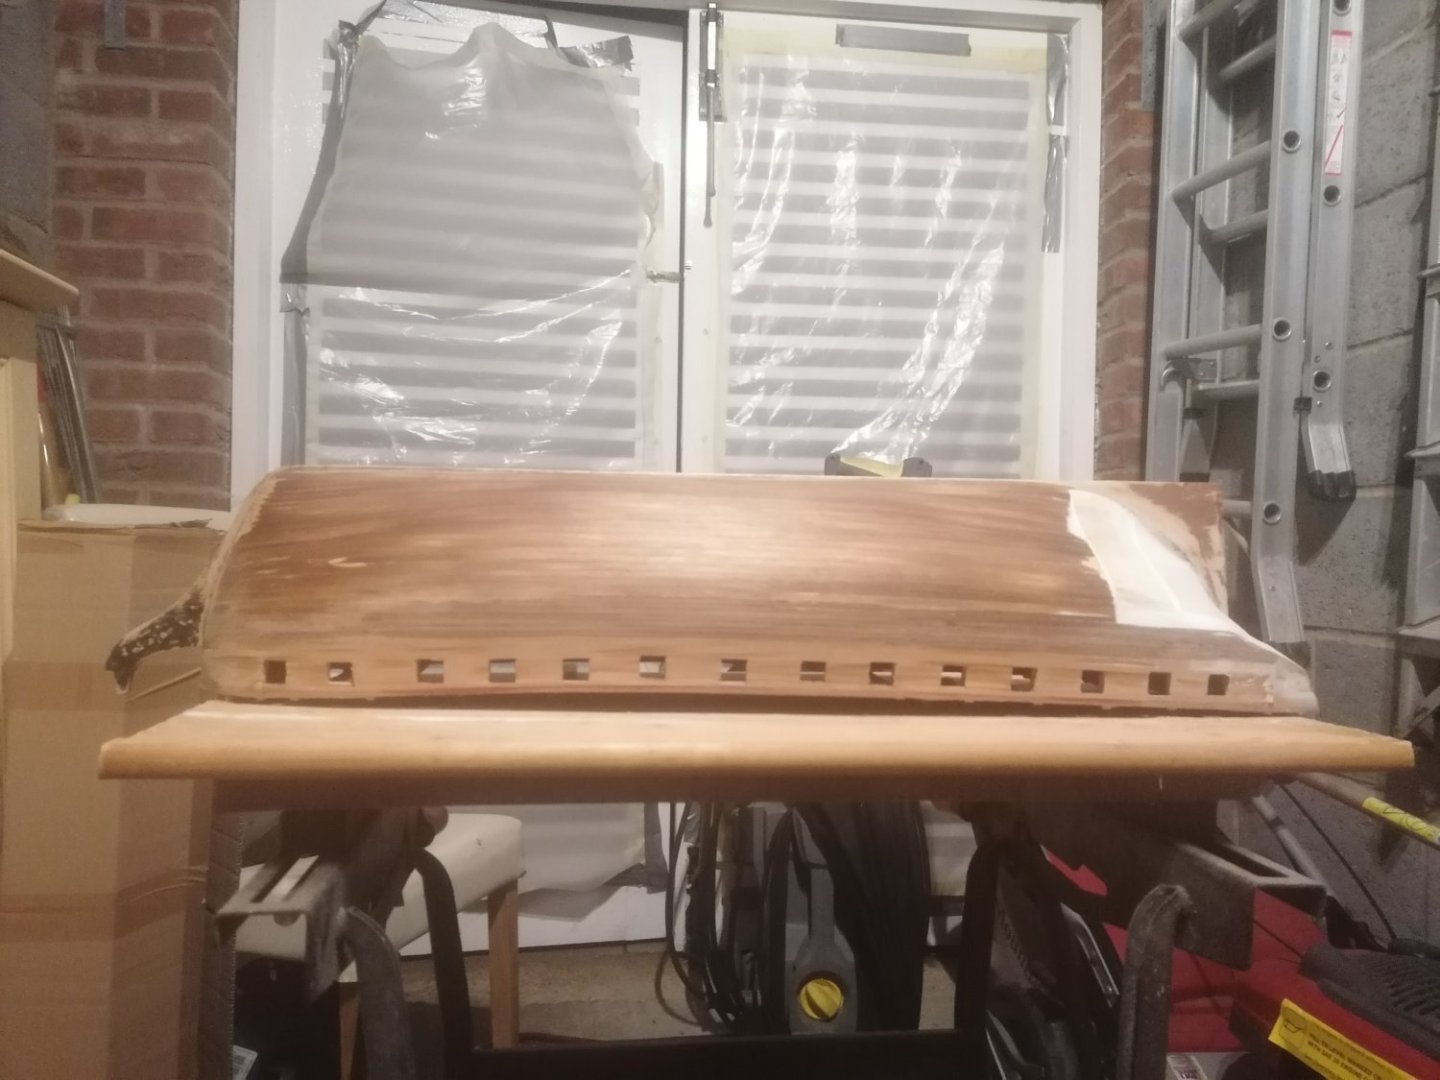
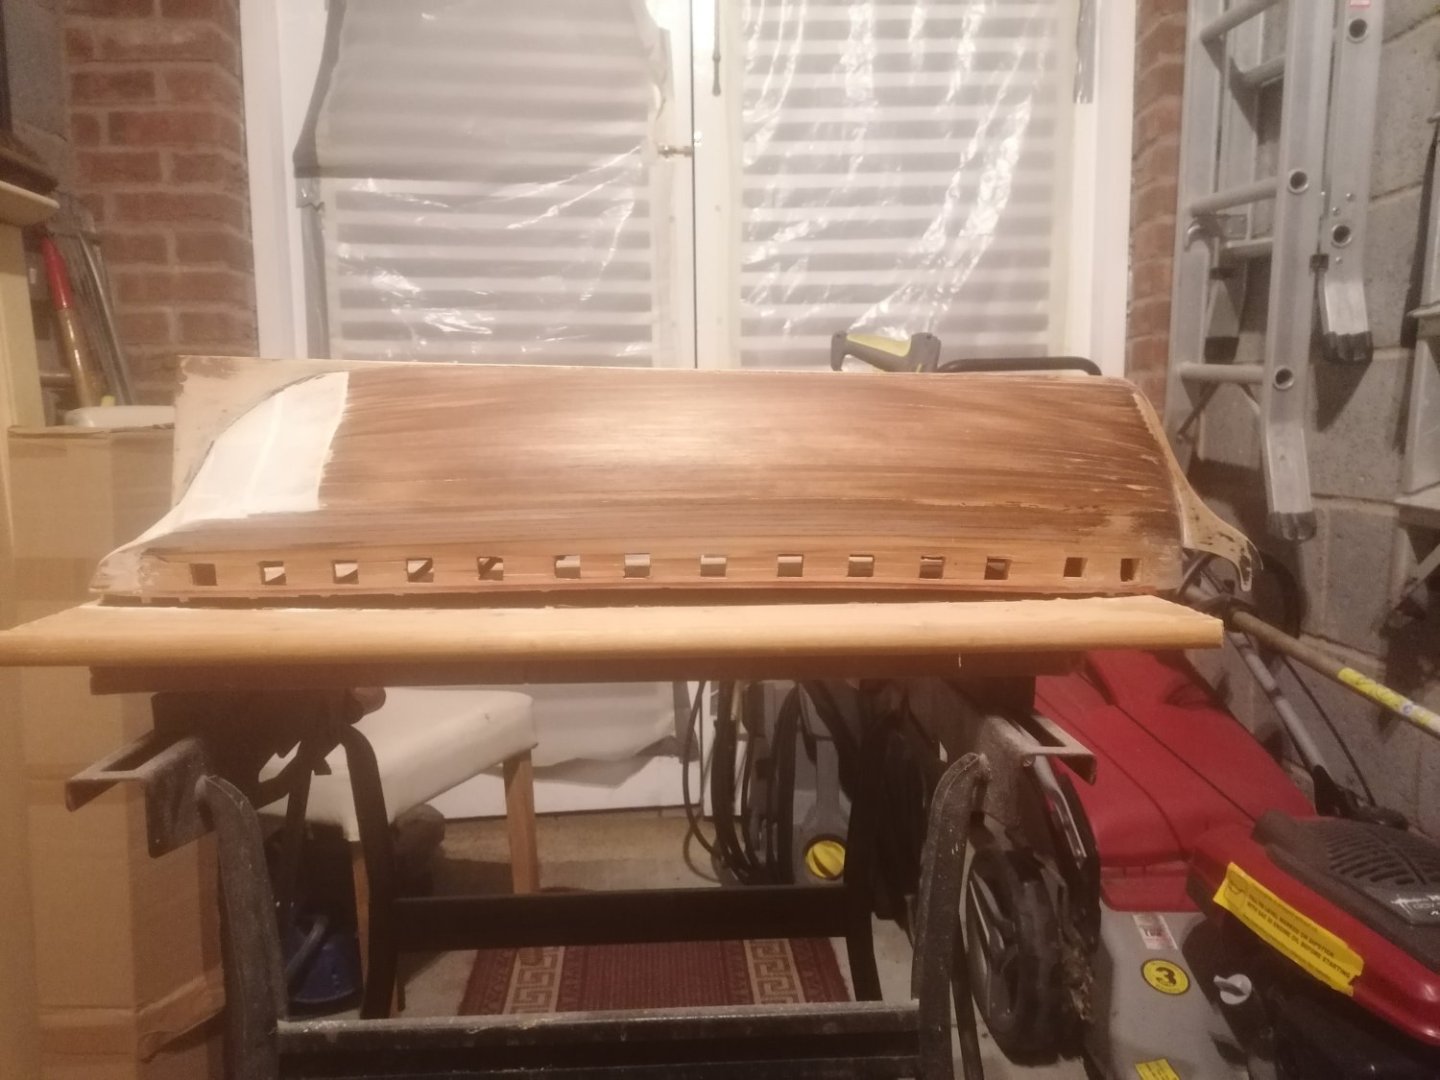
Thanks guys for the likes. I'm happy you are looking in. Another week has passed and I really feel I'm progressing, all be it slower than I would like. I have filled in the lower stern counter and added some balsa strip to the lower the stern counter sides. I wasn't happy with the shape it had but, after starting to sand it down, I realised it needs to be shaped into a shallow concave curve rather than being flat. Due to me losing the shape of the counter sides I hadn't picked up on this earlier. I only thought it didn't look right. At least now I am on the right trck with this and will get it finnished over the next few weeks. In the meantime I carried on with the gun deck. I have almost completed lining the sides with 1mm beech strips and only need to complete between frames 2 and 3, the most difficult part. This didn't prove too challenging but waqs time consuming. I cut the 5mm beech strips into 10cm long planks and laid the first along the deck. The second strakes were also cut into 10cm lengths and staggered by 2.5 cm. these were then laid on top of the first strake and cut to fit 1mm or so inside the gunport to allow for any adjustments being needed. While building up the sides I have also continued trying to sand the lower hull but I have now found that I am unable to sand any further on the port side between where the wale will be and the gunports as a plank or two are now paper thin. I have used filler to fix the depression I had mentioned before just forward of this spot and delicately sanded it down so it is virtually un-noticeable. I have also smooth sanded down the gundeck itself and to prevent any damage to the planking have given it it's first coat of stain. I have two different antique pine woodstain one from Occre and one from Furniture clinic. Neither of them was I happy with for a pine effect. the other stain I have is English oak from Littlefares. This is much too dark for the deck so I mixed a few drops of the pine and added a much smaller amount of the oak and , after testing, got the colour I was happy with. Once it had dried I again lightly sanded it down ready for a final coat before varnishing. In between these jobs I also realised that before I can start adding what will effectivly be the 2nd planking, I will need to have the hull built up at least level with the upper deck, if not a little higher. I removed the 3 skid beams which were still attached to the upper deck (on one side only) and as it is so thin along with the starboard walkway snapping off at the junction with the foc'stle, I decided to reinforce it with 5mm wide 0,5mm strips running along the length of it. Unfortuneately, once it had dried, I found that instead of curving upwards it instead sags to the centre. Pretty baddly. However I can use this to my favour as it can be reversed, and hopefully, will be able to be glued in place on top of the beams easier. Unfortuately I will now need to repair what was the underside as there are 3 sections which seem to have been cut out and replaced ( again baddly) Having planked the upper. or rather now the lower side, I realised I should have properly marked the centre line. Again though, once the deck is flipped over, this can still be marked. I have now cut out the notches front and stern for the location points but these still need to be completed. over the last week I also looked again at the cannons supplied and, although nearly happy with the shape of the cascabels I am unable to reduce the width of the cannons to fit the new carraiges from Vanguard. I decided to bite the bullet and asked on Friday night via the website if I could purchase the cannons seperately. I was amazed that Chris replied on Saturday morning If I wanted long or short cannons. When I ordered the carraiges in November there were no choices of gun length. It appears the range has expanded considerably since then. Chris also mentioned the lengths I would need. To cut to the chase, I have now ordered the 18 and 9lb'ers I will need as well as, in the future will be getting the 32lb carronades along with all of the ships boats,( The 24ft cutter is missing) and the other 3 boats are pretty much beyond any use. I was very impressed with the quality of the carraiges and, having looked at the carronades and ships boats building intructions Chris produces, together with the double capstan already bought, I haven't finnished shopping there yet. I don't know the rules regarding mentioning suppliers, but a huge thumbs up to Chris anyway. Here's the latest photos of progress to date. I may need to take a couple again tomorrow without the flash. Thanks for now. David


-
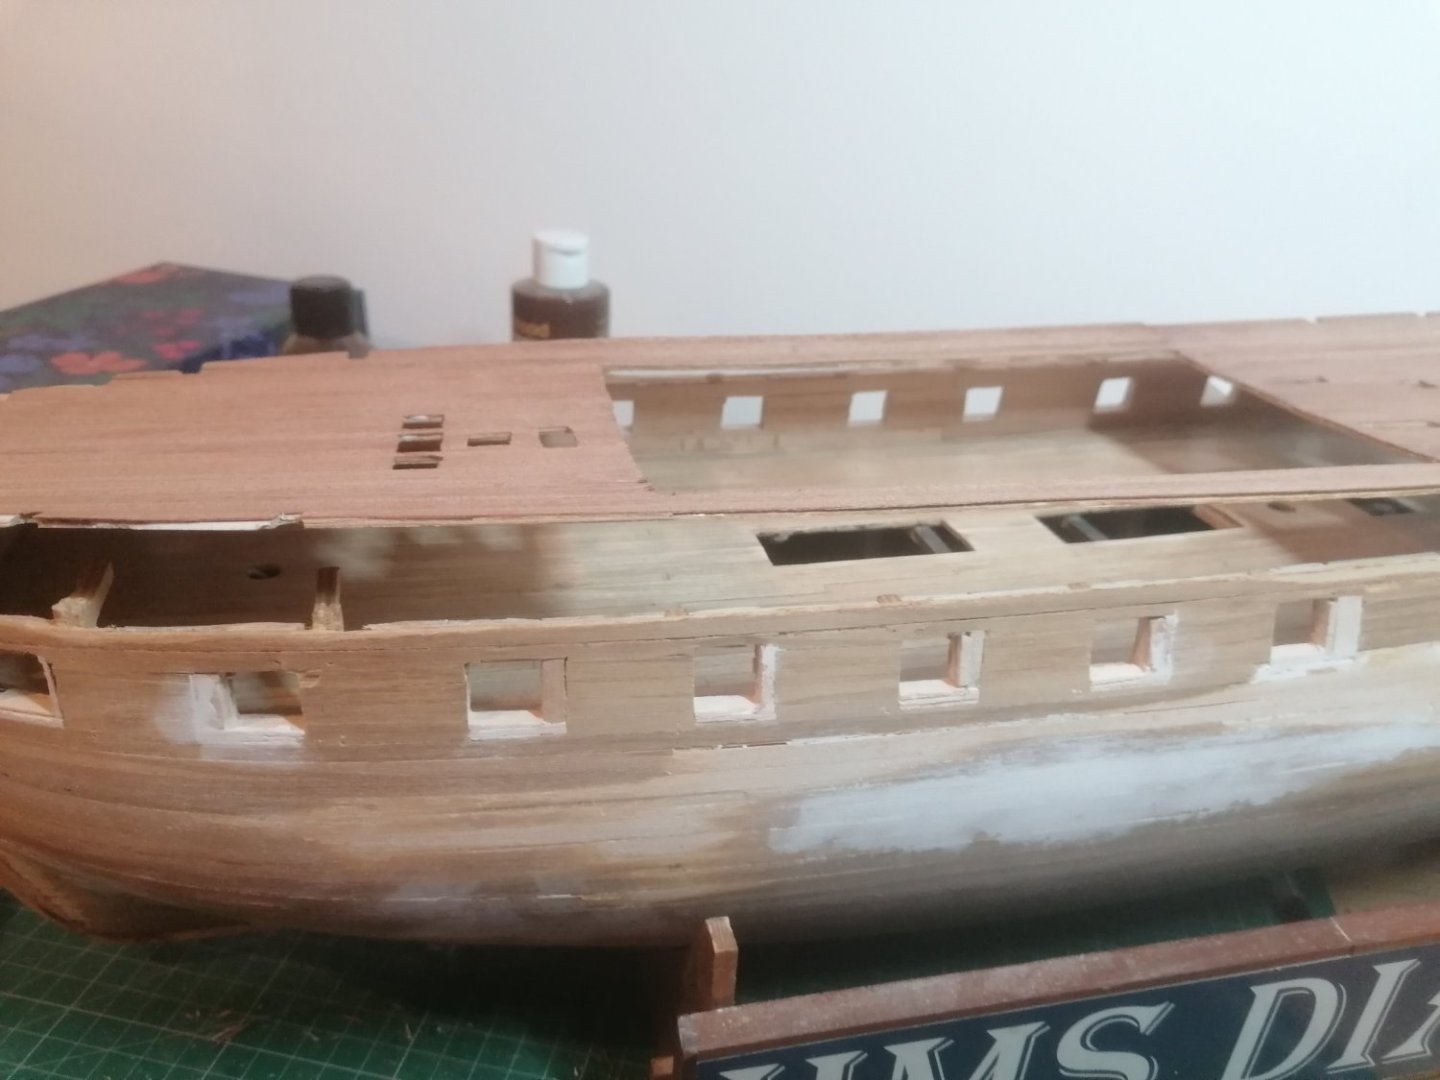
Merry Christmas to everyone at/on MSW, and, Happy new year when it comes. Wherever you are. Thanks for the continuing likes so far. It is very encouraging and I'm very grateful. It's been nearly another 2 weeks on the build and progress has continued slowly but surely. The inner wall of the gun deck has been filled between the bulkheads and has almost been sanded enough to be planked. There's just a couple of bits to finnish. The gunports have been filled and then filed to pretty much the correct shape but more importantly are in the positions I wanted them. With the help of a contour gauge I am now working on getting the lower hull symetrical on each side. There is a very slight depression left on the port side just below gunports 7 and 8 which I will fill with 1mm strips of balsa and then sand smooth. It's only about 0.5mm deep at the most but is still fairly prominent. I have also started working on the stern beside the deadwood to achieve the correct shape. I'm going to fill in the gap between the gun deck and the stern counter with balsa blocks, and then sand them to shape, followed by rebuilding the lower sections of the stern counter sides (which were over sanded) once I have achieved the correct shape. I have now also built up the 9lb gun carraiges and filed a little more off the cascabels of the 18lb'ers. This weekend I am hoping to start lining the gun deck sides followed by lining the gunports and replacing a few bits of balsa that have broken off during sanding. All in all I'm pretty happy with progress so far and feel quietly optomistic on getting a pretty good looking hull in the end. I have also been looking at what I am going to do about the upper deck both the deck itself aswell as how I am going to attatch it to the hull. I am thinking I may need to replace it completely as the underneath is in quite a bad way. I will have a go at sanding it down before I decide. It looks like I will also need to get it to fit before I can really get started on the gun deck gratings, stairs and fittings etc. Happy new again to you all. Cheers. David.


-
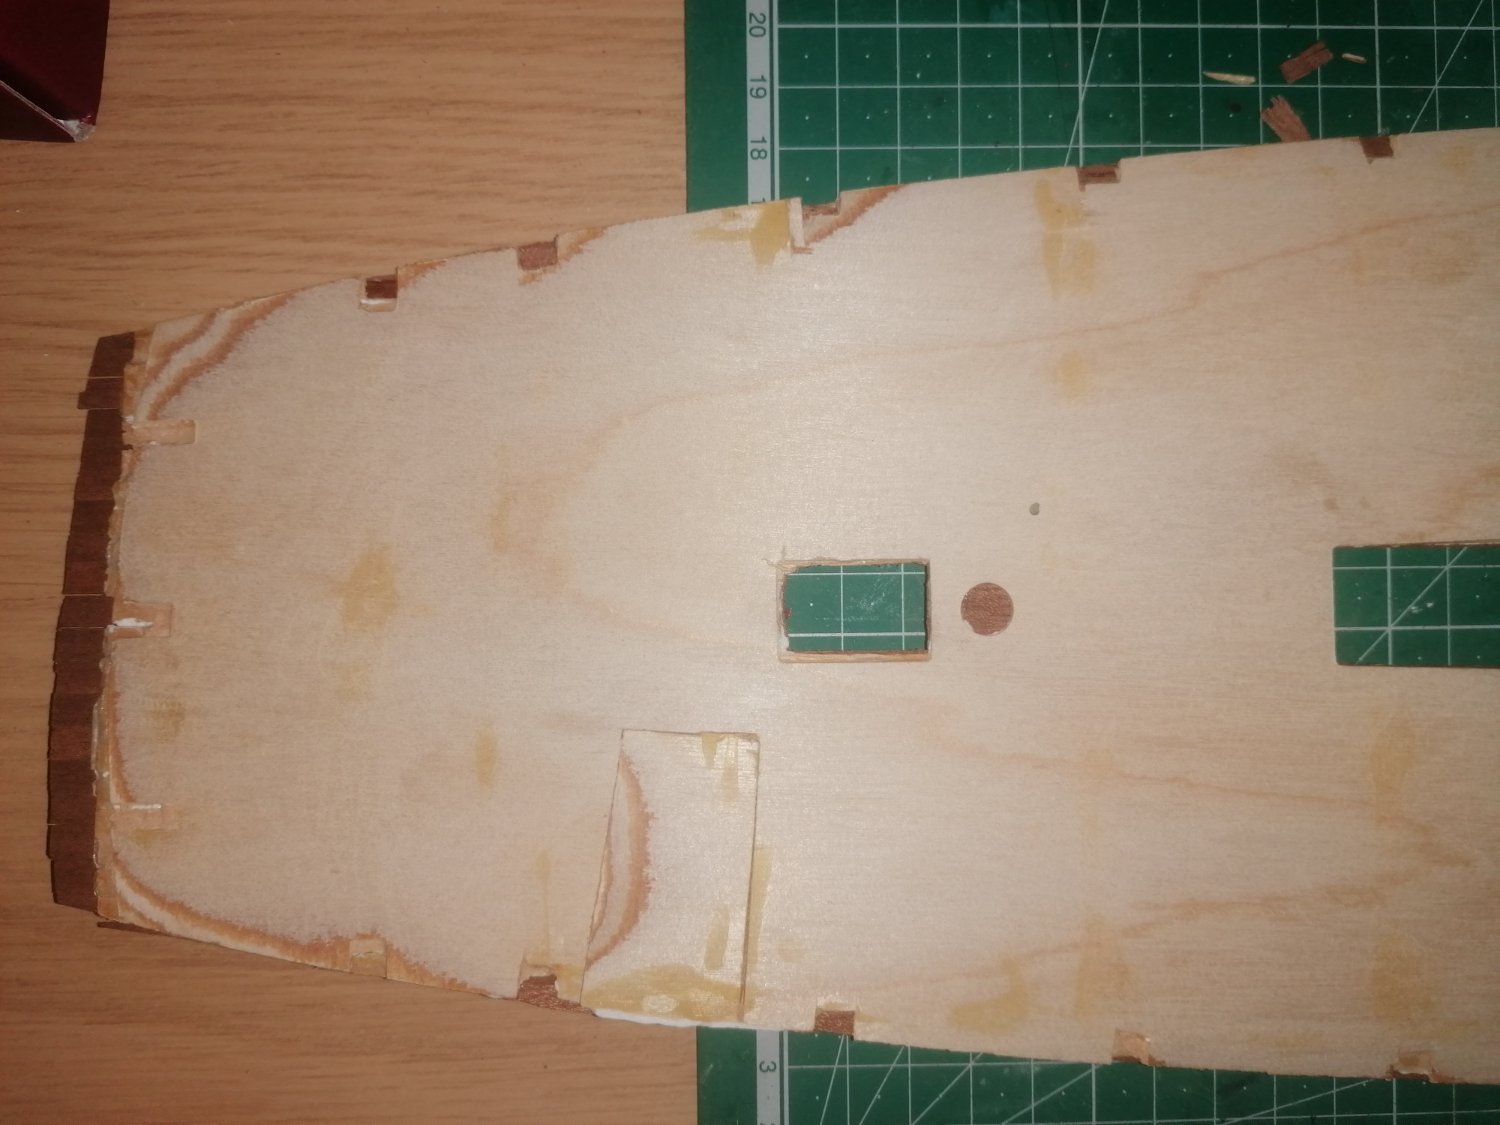
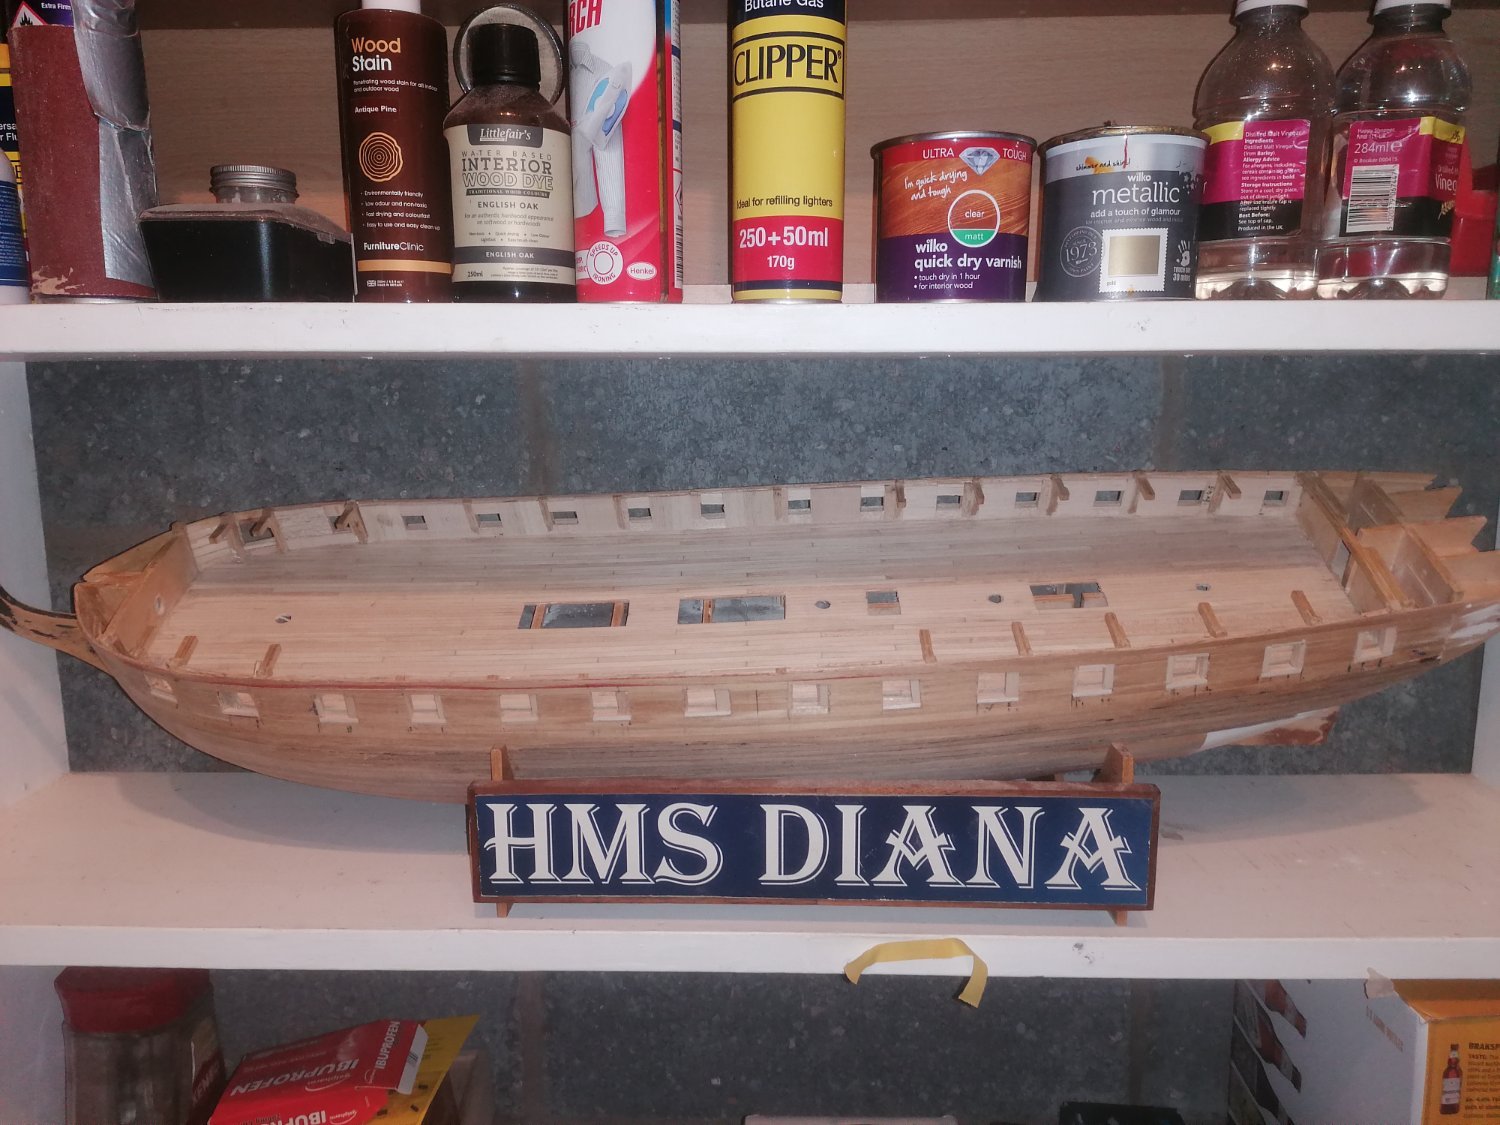
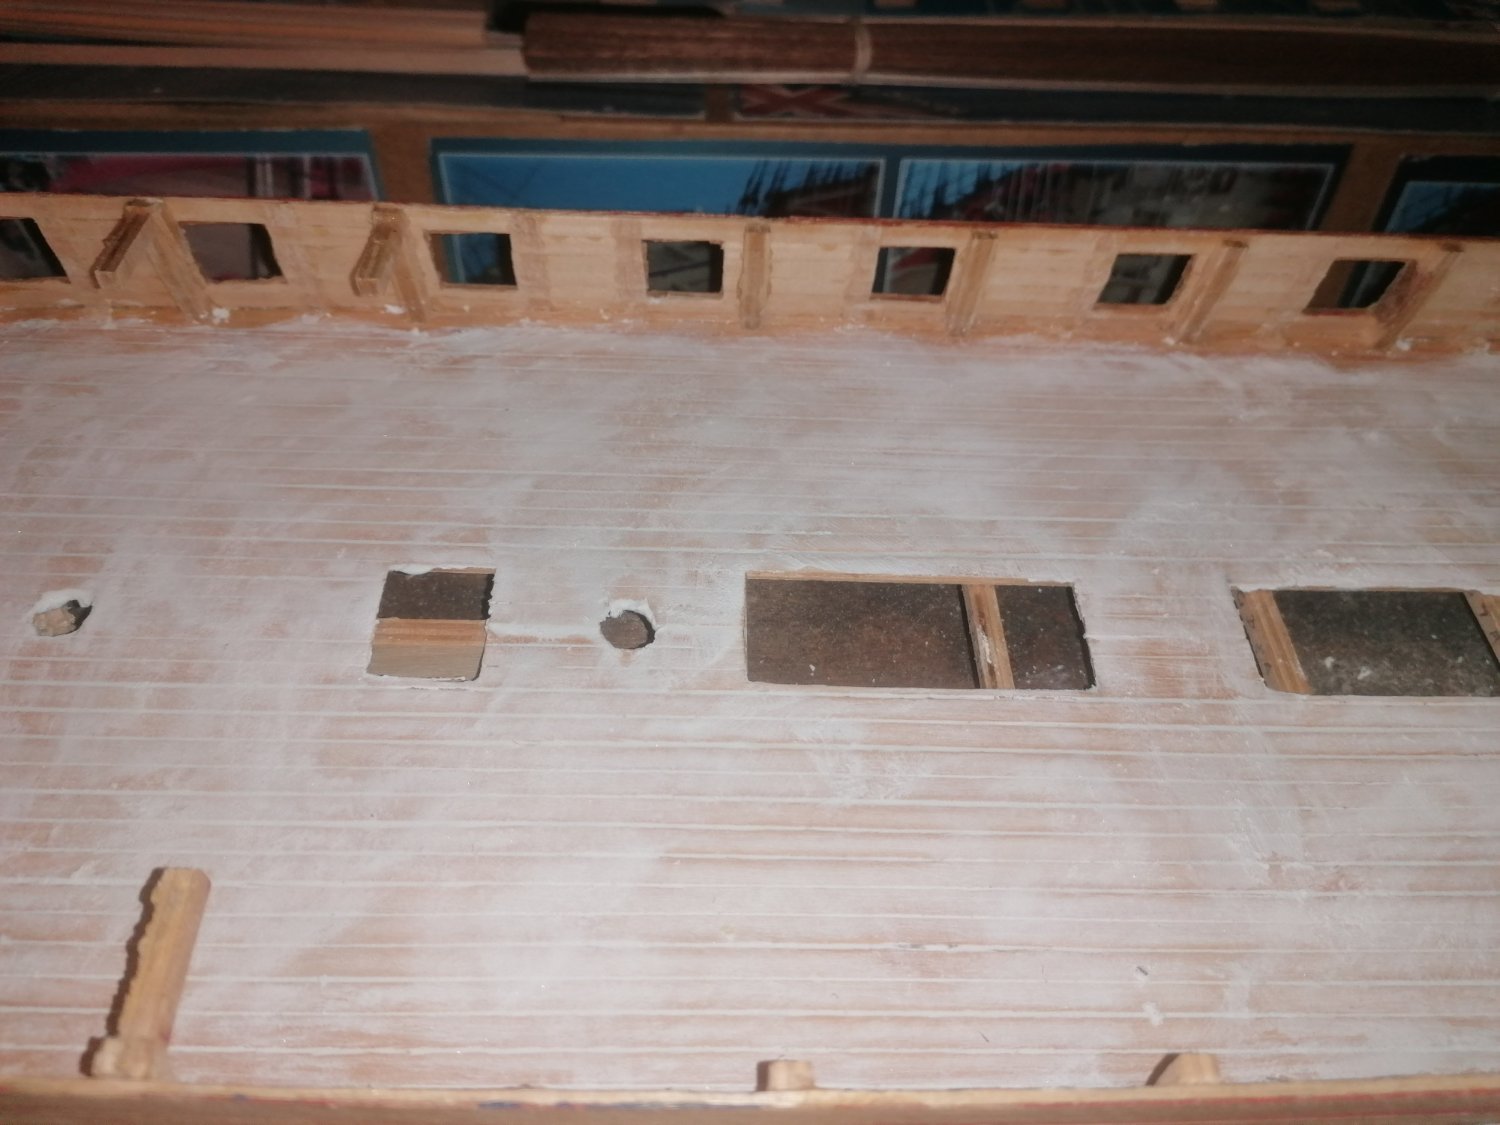
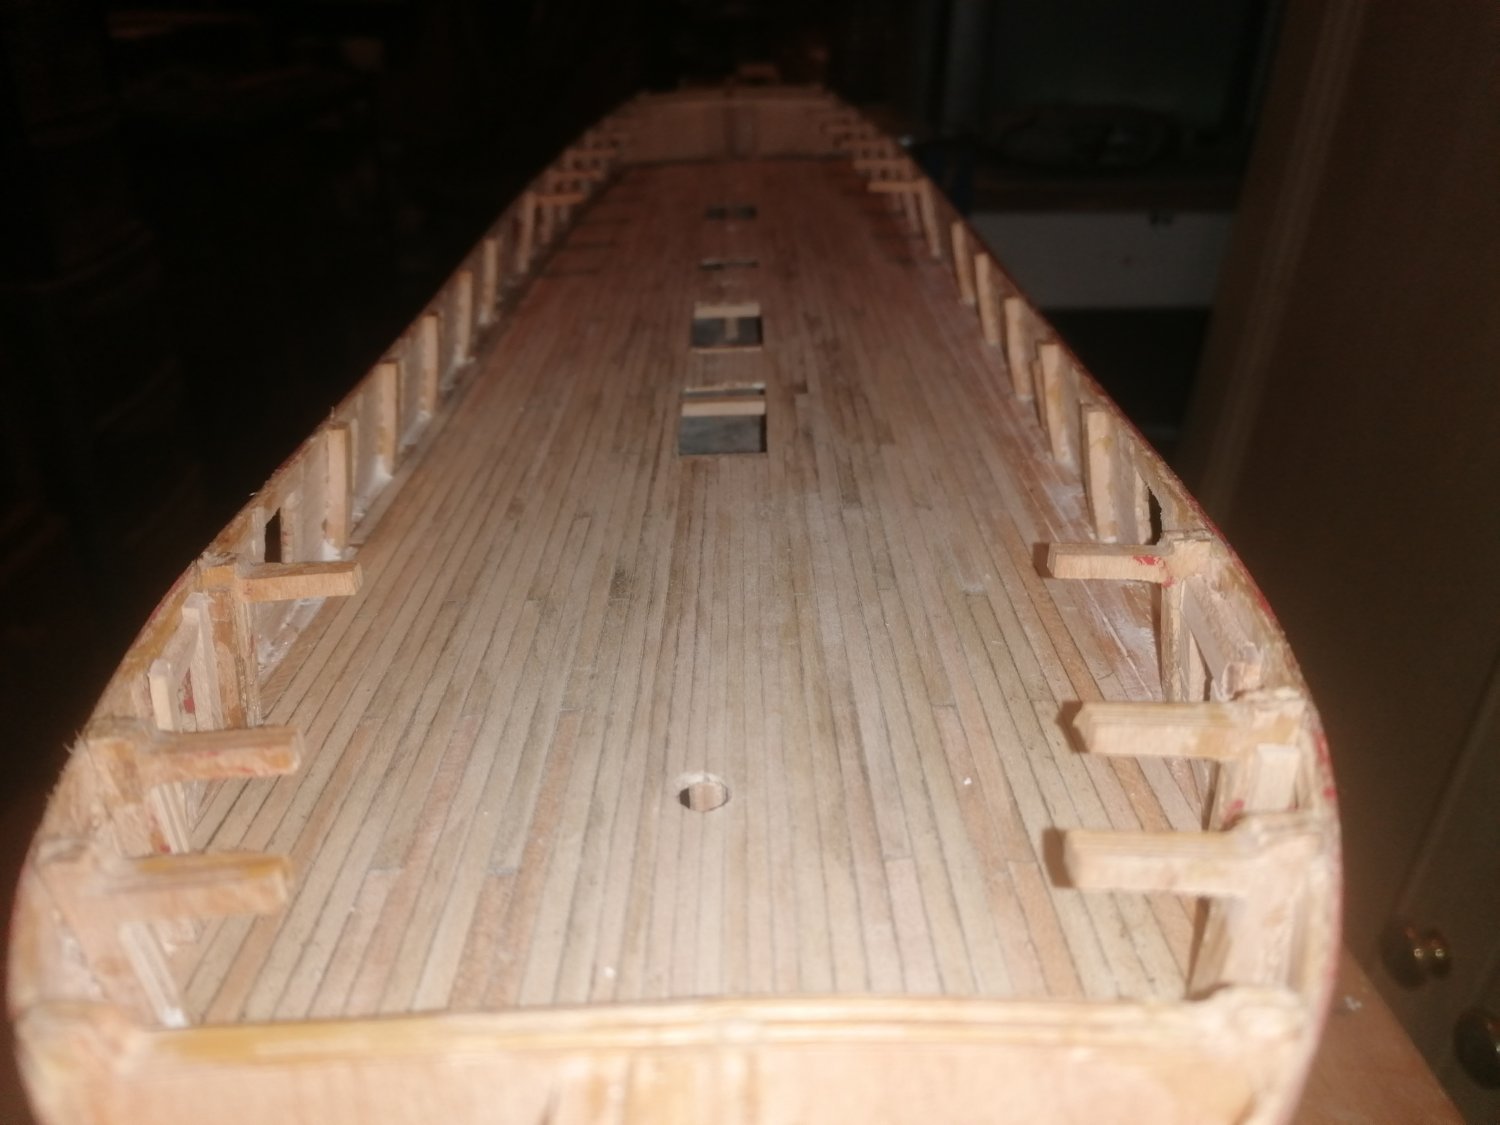
This time it has been two weeks but it feels much longer. The time has been spent building up the inner sides of the gun deck. At this point I rea;ised that the gun carraiges, being 14mm high, would mean the centre of the cannons would also need to be the same height. This, in turn, meant that the sills of the gun ports would need to 7mm high rather than the 5mm I had previously thought looked ok. This being rectified by adding 2X2mm strip on top of the existing 5X2mm strip, I started on the hull walls. After cosidering the options I opted to fill between the frames with 2mm thick balsa strips with the grain running horizontally and then with other 2mm strips with the grain running vertically, hopefully to give extra strength and support for the final sanding and planking of the complete hull. This has now been done with the exception of the area around gunport 1 on each side. I have also sanded down the inner hull using sanding strips with a foam interior to avoid damaging the deck planling. The next task was to fill in around the gunports on the outside of the hull. This was rather tedious as it meant cutting different widths of 2mm balsa ranging from 1mm to 6mm wide. I have also allowed the gunports to become a little smaller so I can file down the openings to the correct size. (mainly as a safety precaution in case I've made any mistakes in my earlier measurements. I have also started adding 0.5mm thick filler planks to the depressions in the hull to hopefully achieve the correct shape and also marked out the the bearding line I think that's the term) on the deadwood. This should allow me to obtain the correct shape of the stern.


-
Thank you again Allan. I have a feeling that I should have said bulkheads rather than frames. I'm sorry if I confused you with my terminology. My worry with this ship is I have weakened the hull by sanding and also removing the inner hull lining. If she had 50 or more frames then cutting out 5 or 6 wouldn't be such a problem. As this build has only 17 bulkheads altogether, and already planked (fairly badly in places) I really didn't want to cut any away. Every post I've seen has some modifications of the gunport positions and even the anatomy of the ship book seems to contain anomalies compared to the maritime museum model and especially the plans for this kit. (which is why I haven't bought it yet). I just knew there had to be a way of fitting in the gunports evenly spaced apart from 7 and 8 within the space between bulkheads. Added to this is the person that started this build had some gunports higher than others and also not square nor with vertical sides. I was tempted to remove everything from the gun deck up and build it all from scratch but decided that would be even more problematic. I also thought about removing the planking but also decided against it as this would mean sanding down the bulkheads. If the previous builder is anything like me, the bulkheads would look like a pin cushion and be too fragile to sand smooth. Thanks again for your advice and interest. David.
-
Thank you Allan. I have a copy of the picture but I really meant I was trying to avoid weakening the sides by having to cut too many of the frames and, also, to keep the gunports as close to their correct positions to avoid problems later. Thanks again for your interest and advice. It's really appreciated. David.
-
Just an afterthought, but, this may be a good time to check how the channels and chain plates will line up just to be safe. David.
-
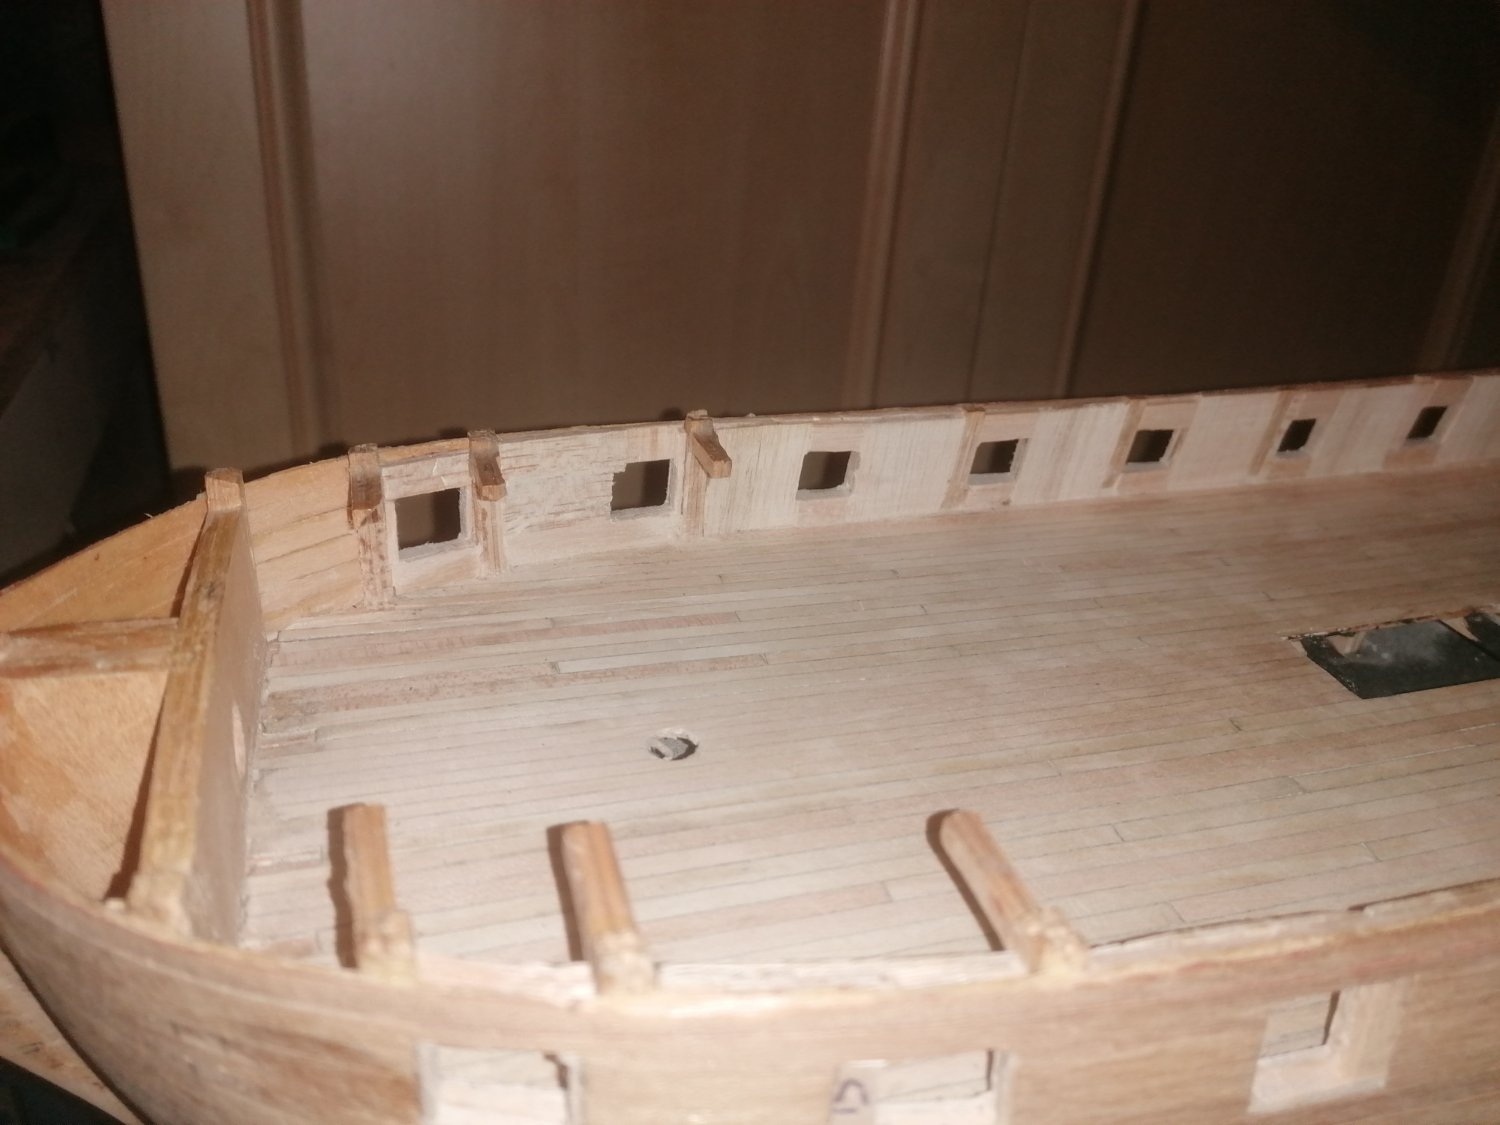
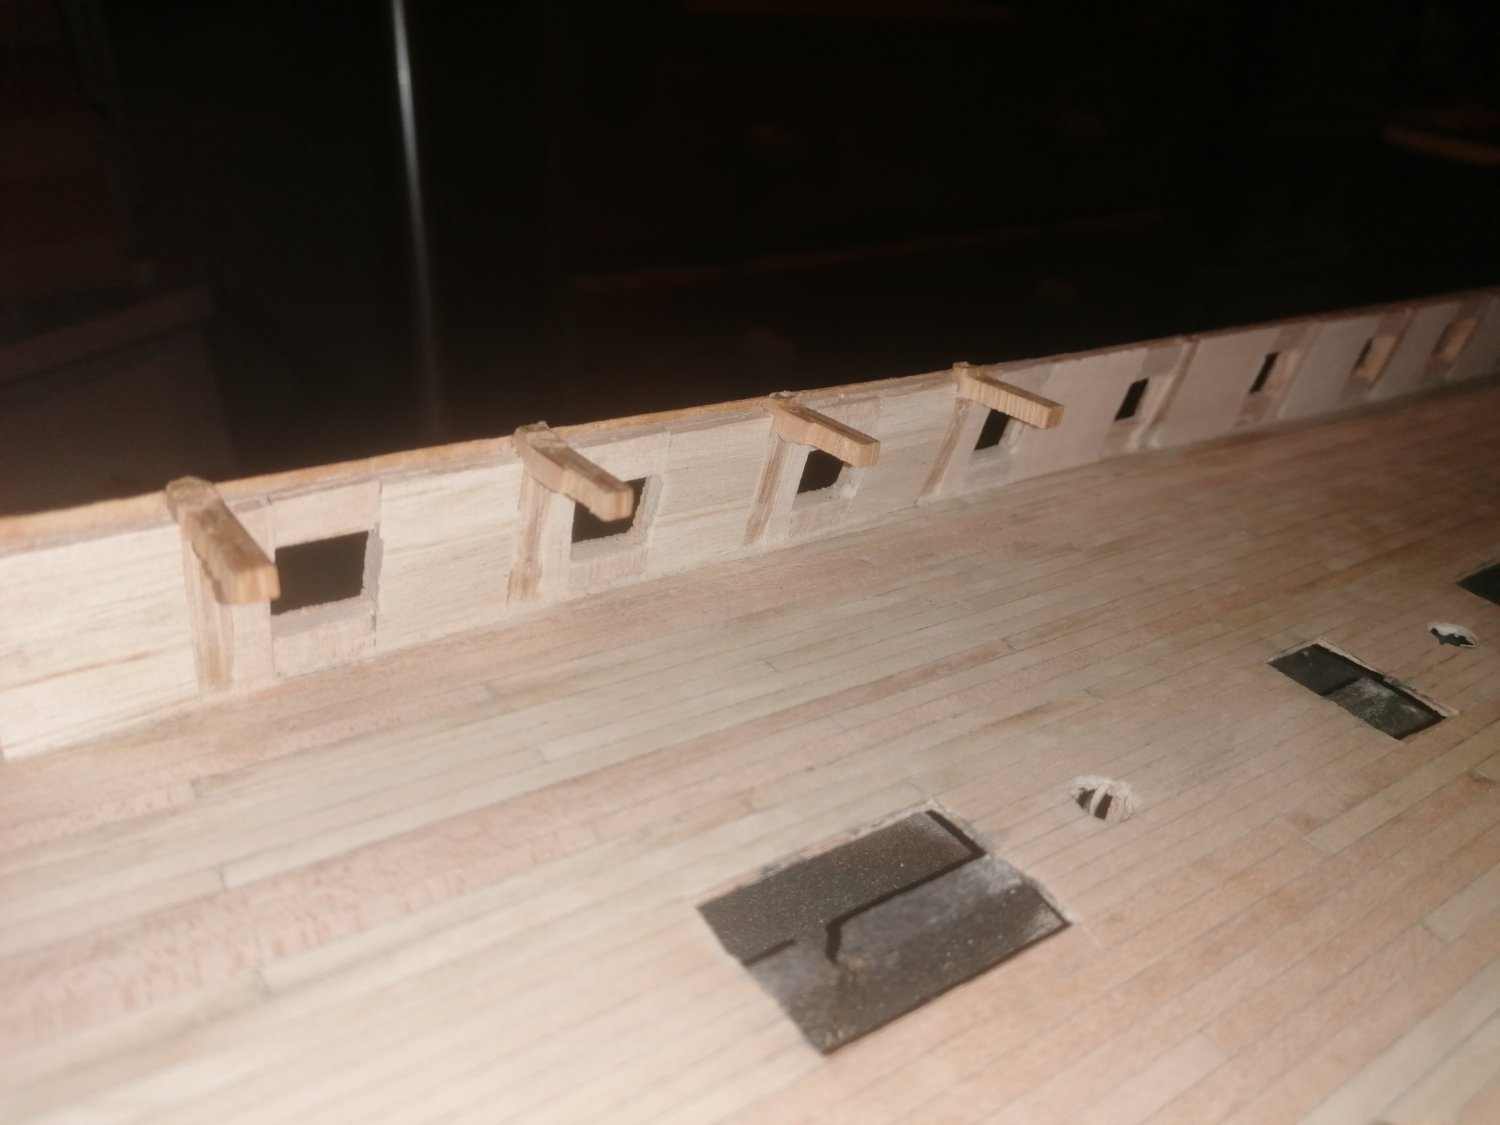
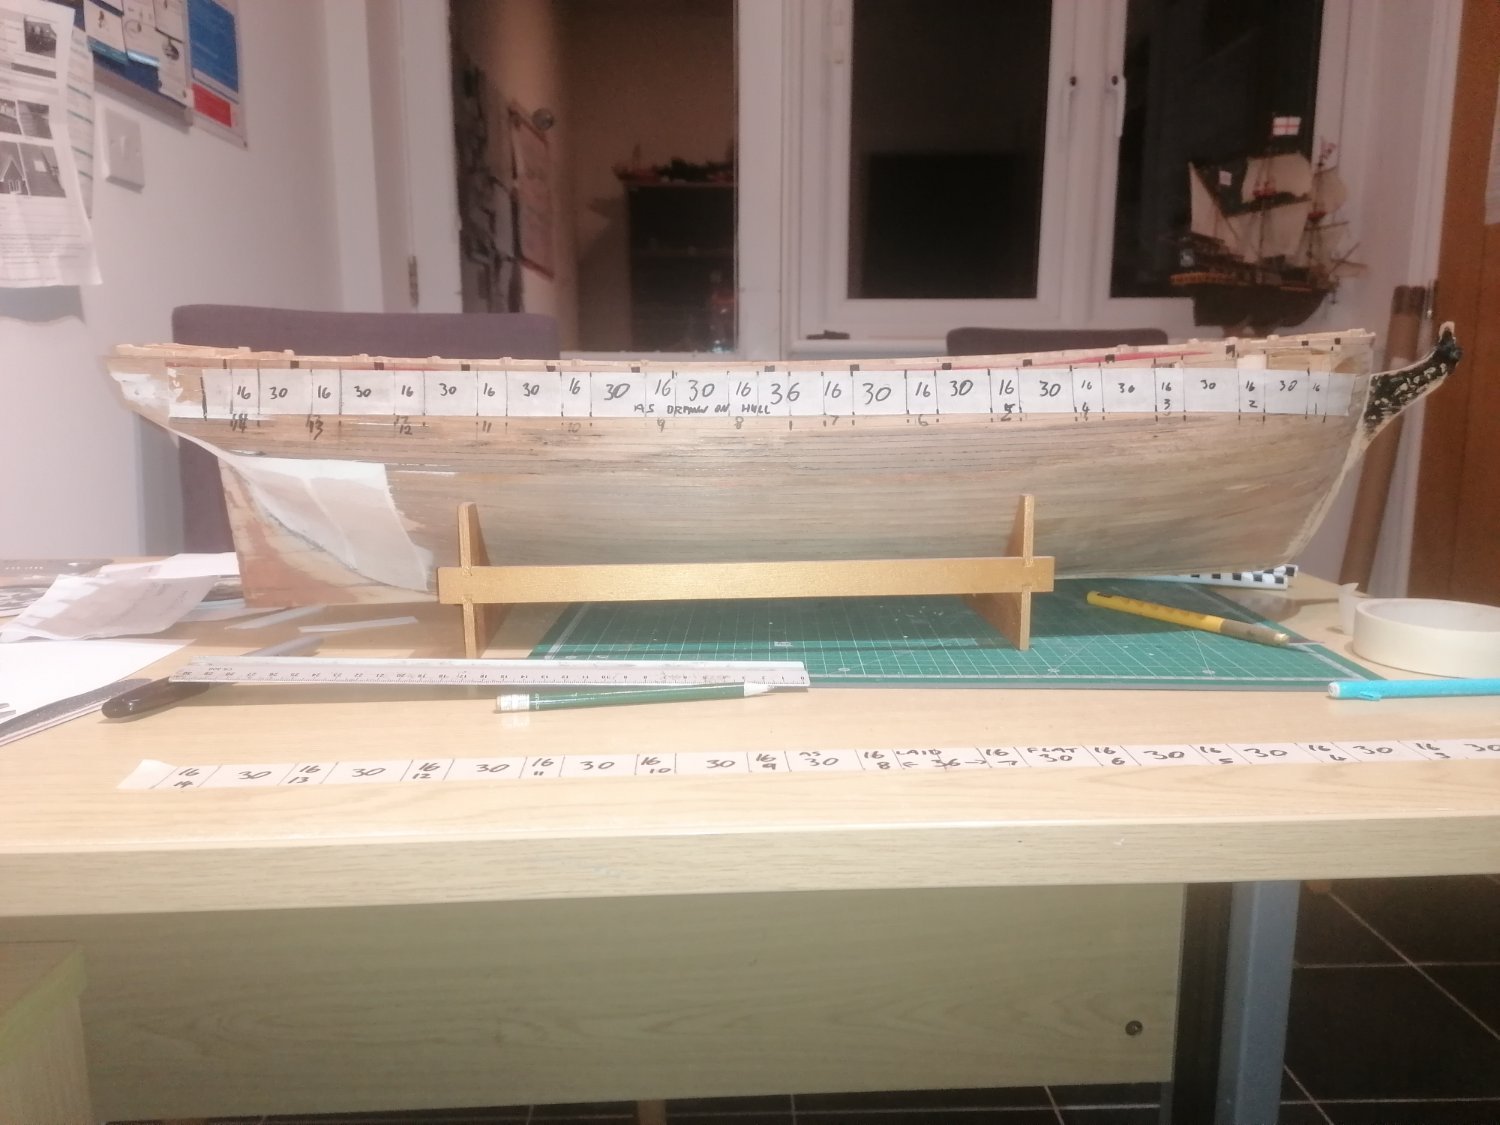
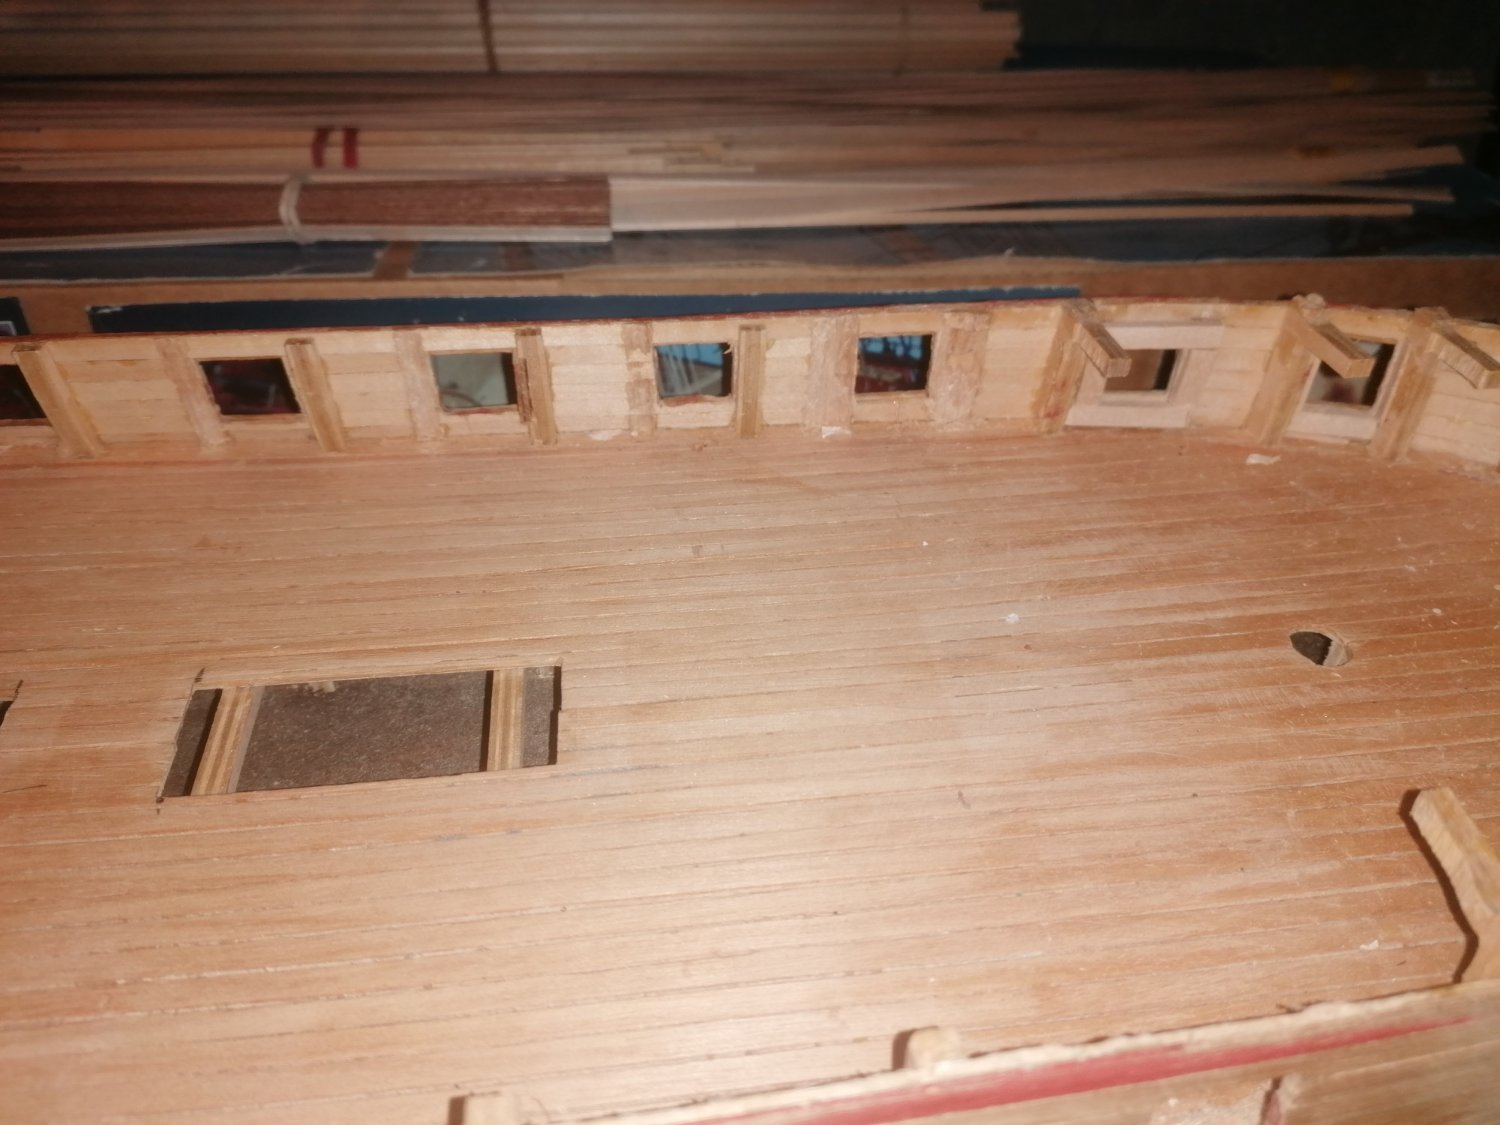
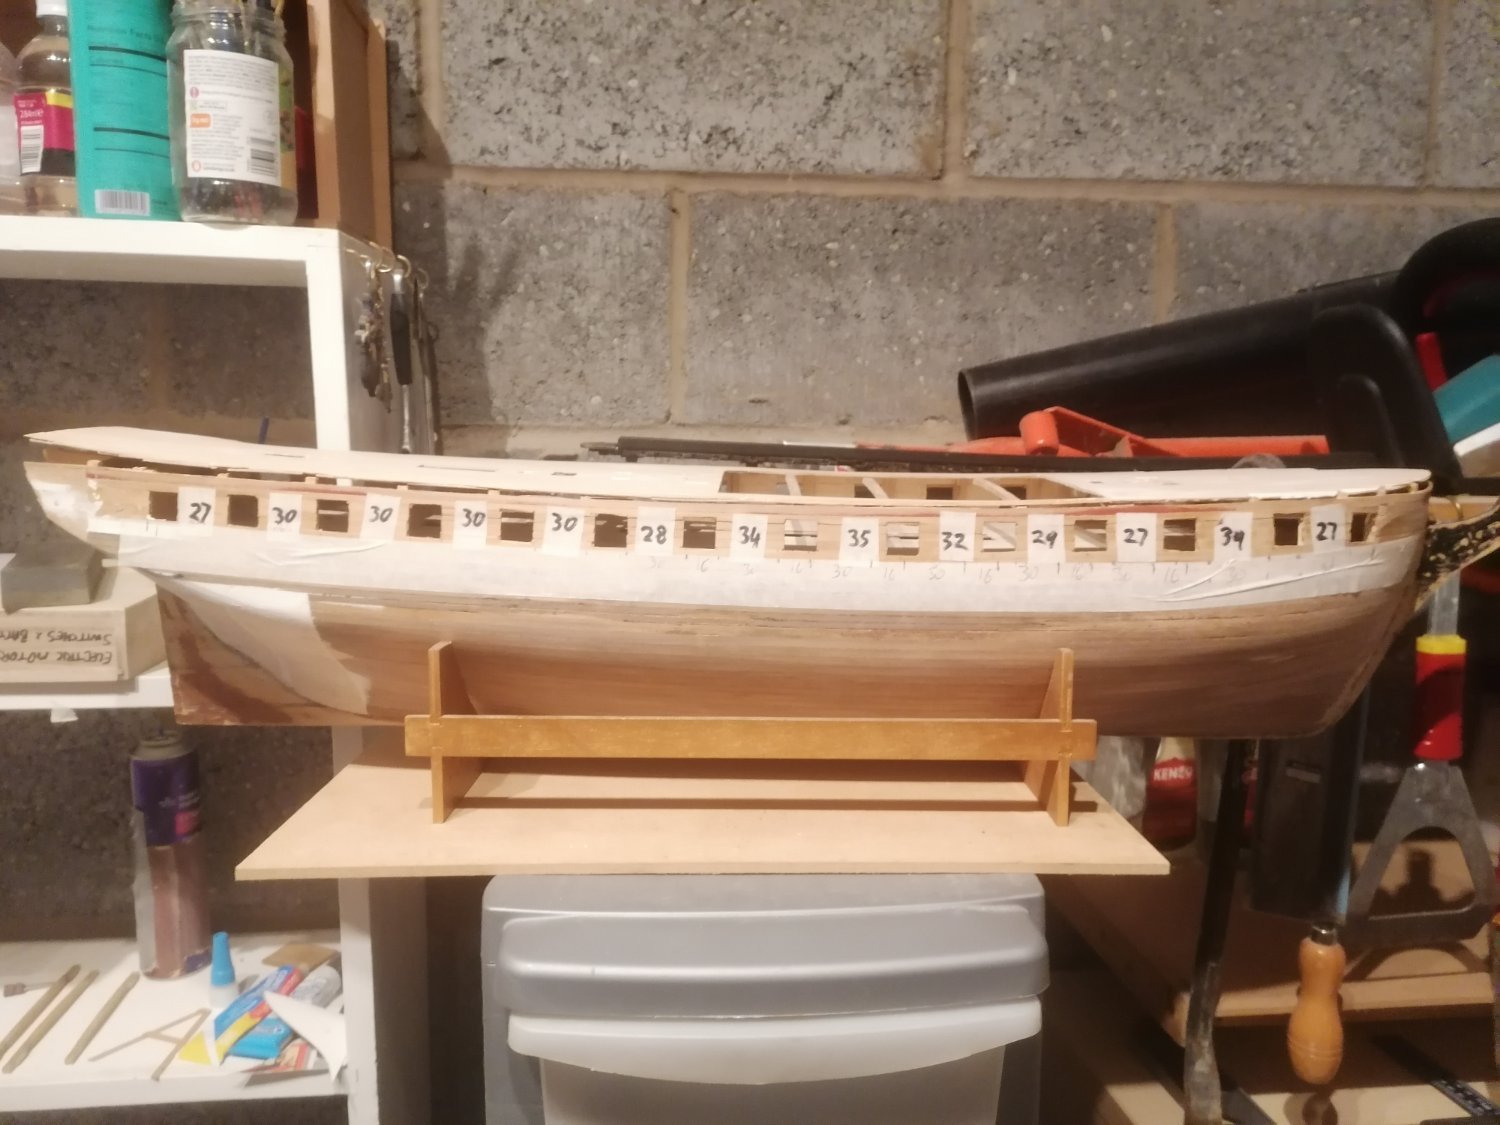
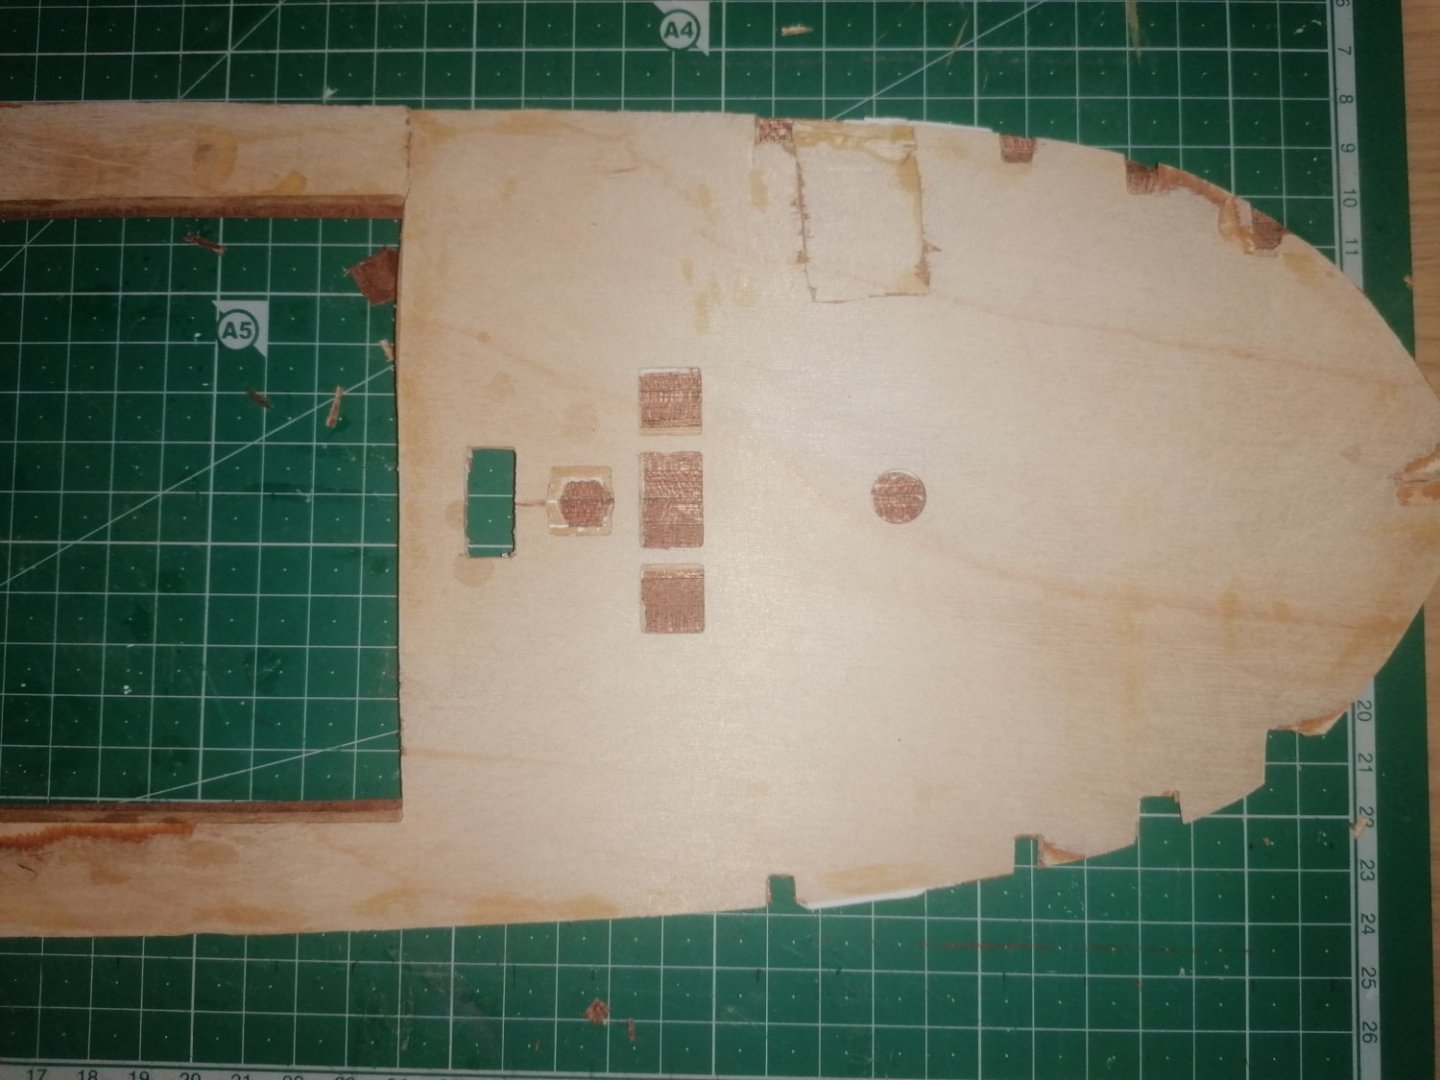
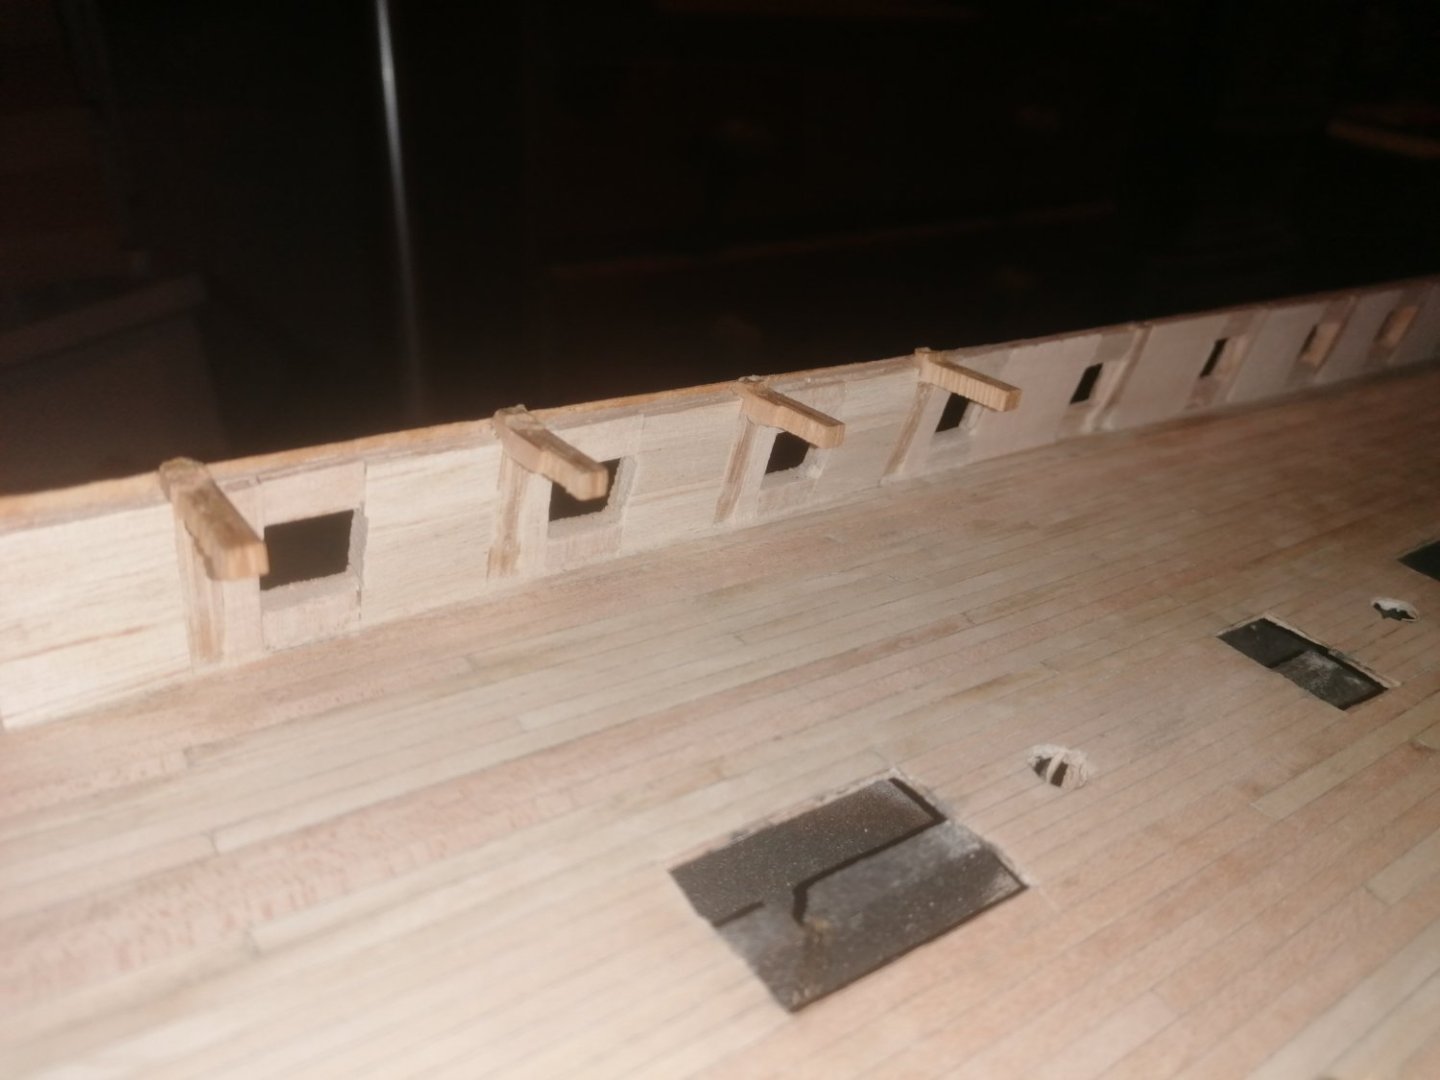
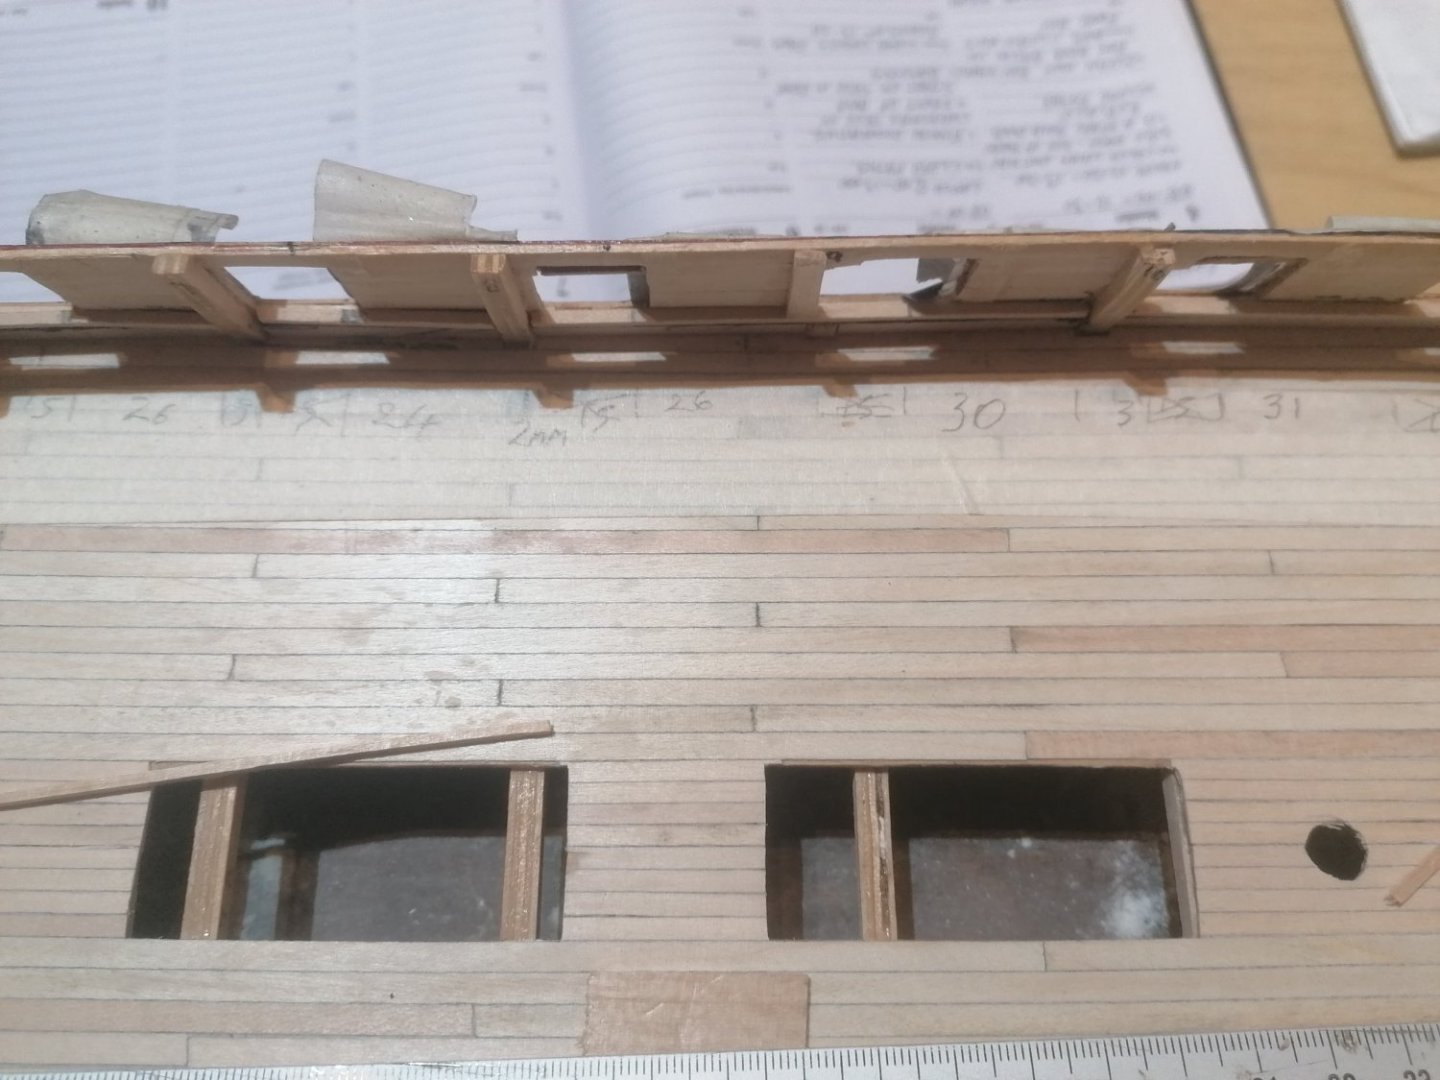
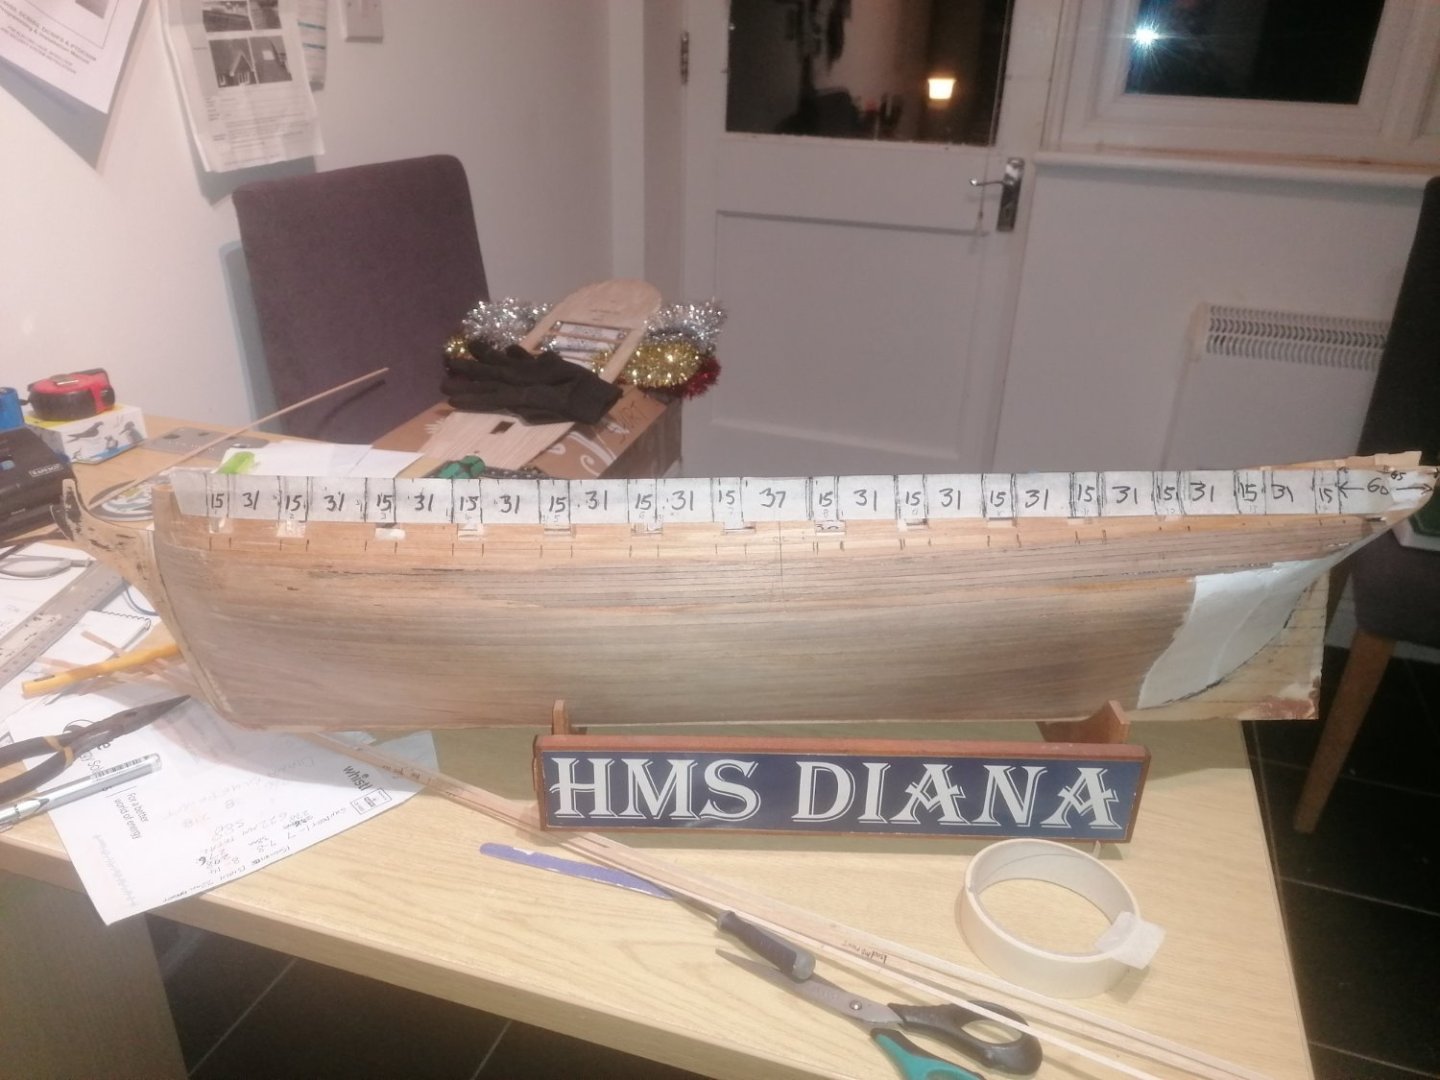
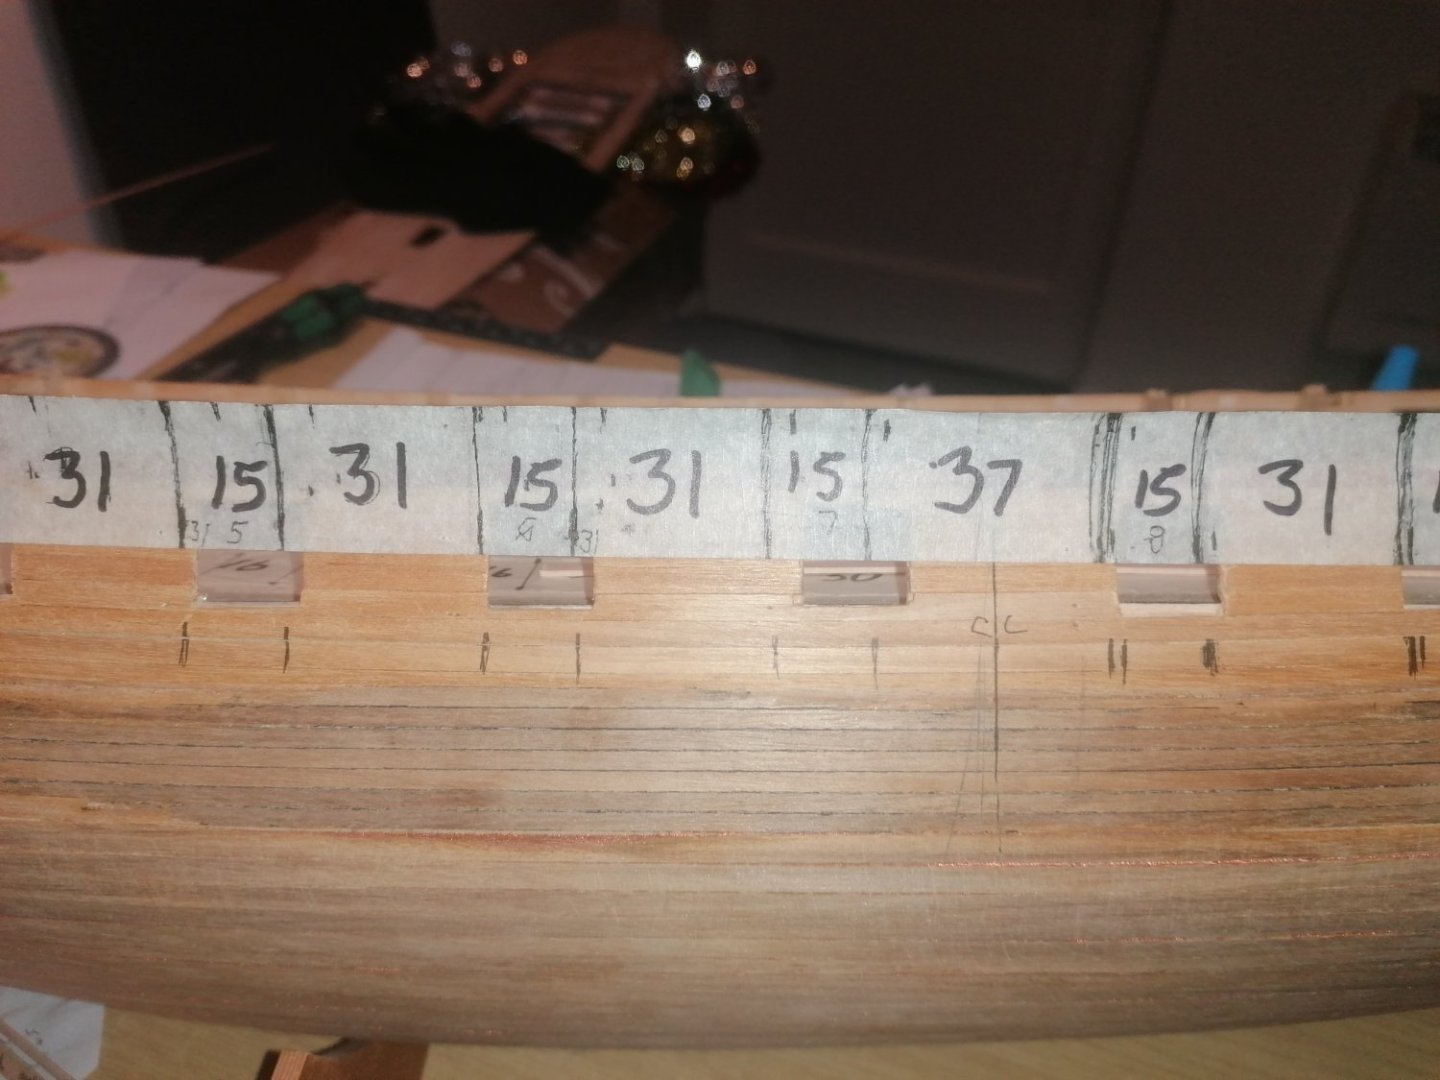
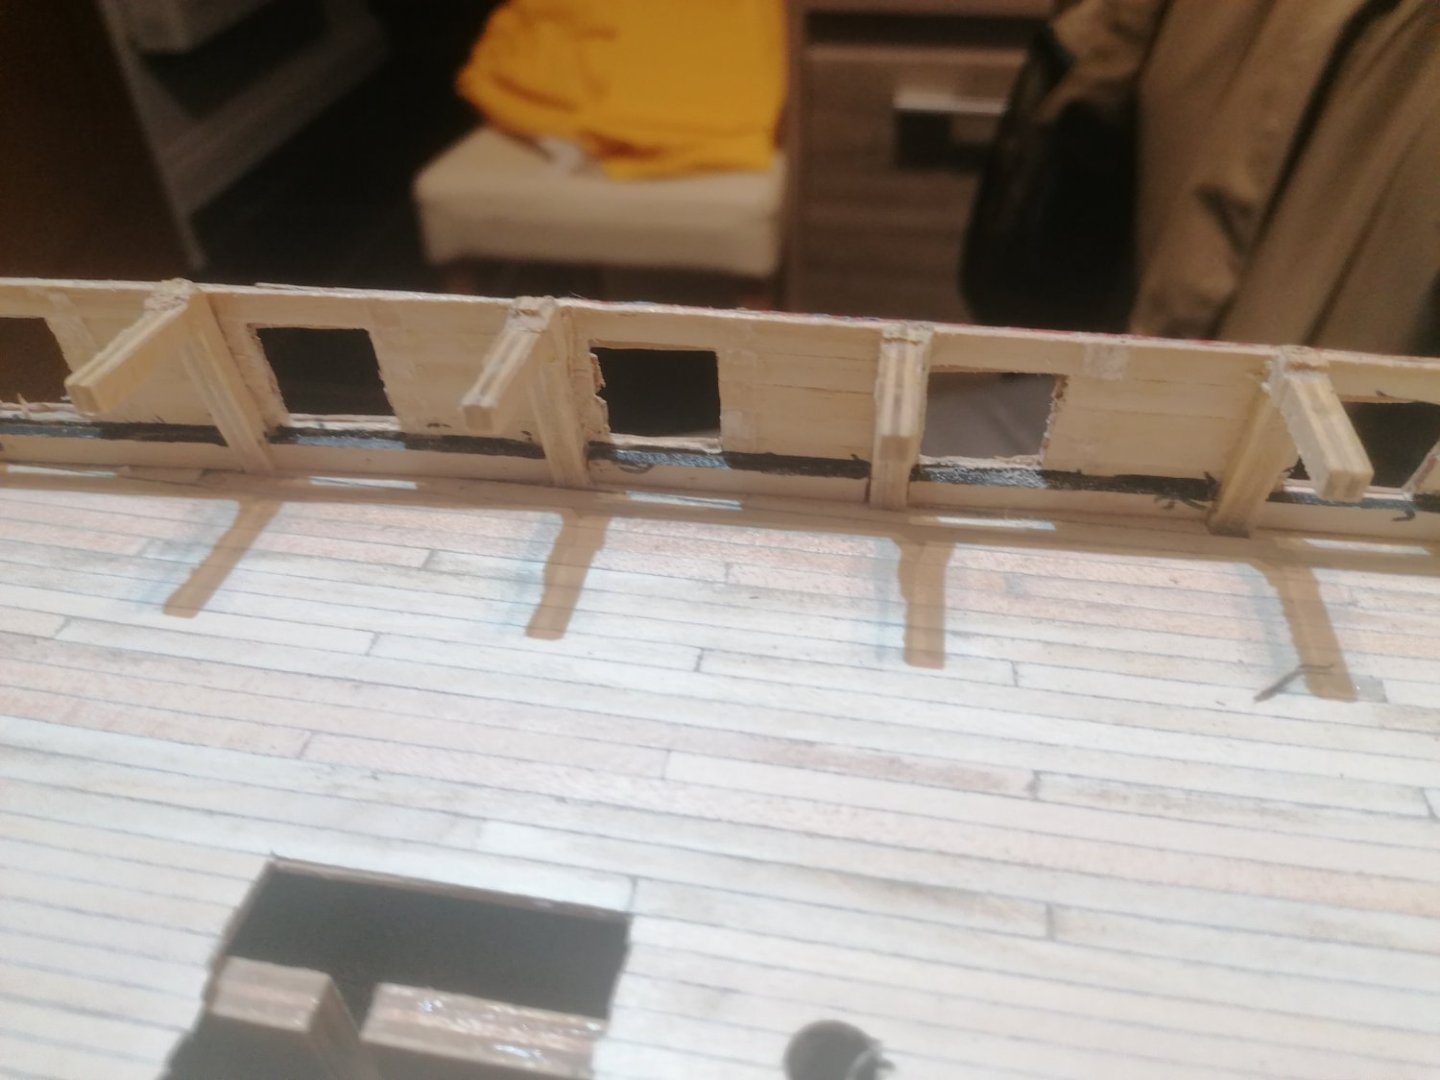
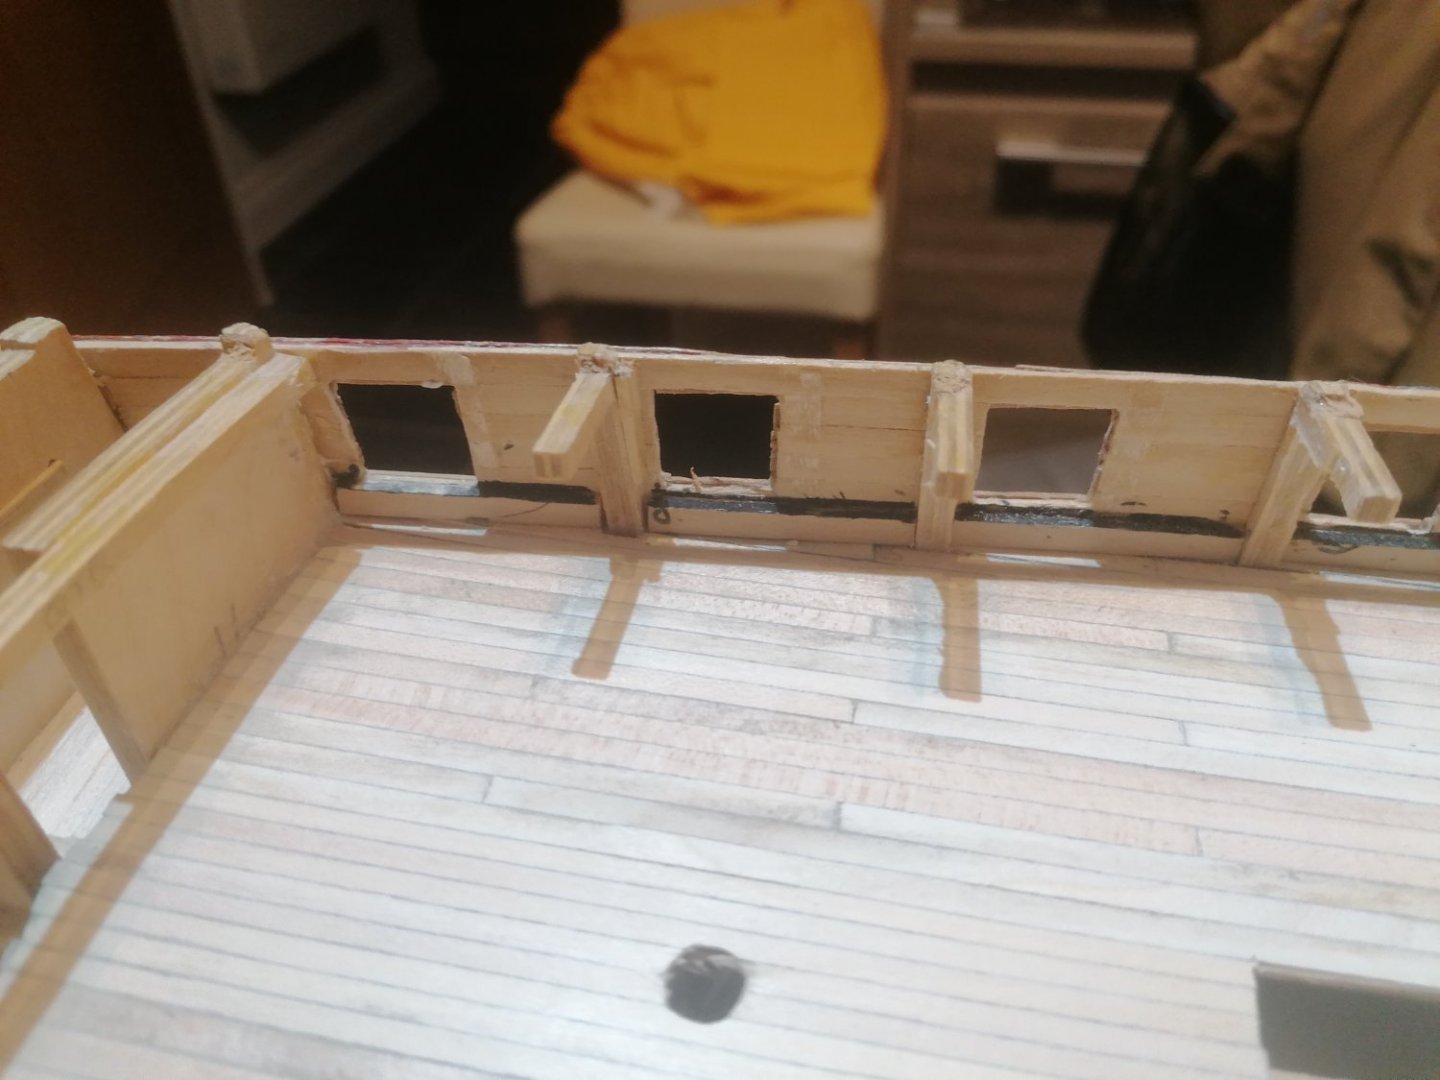
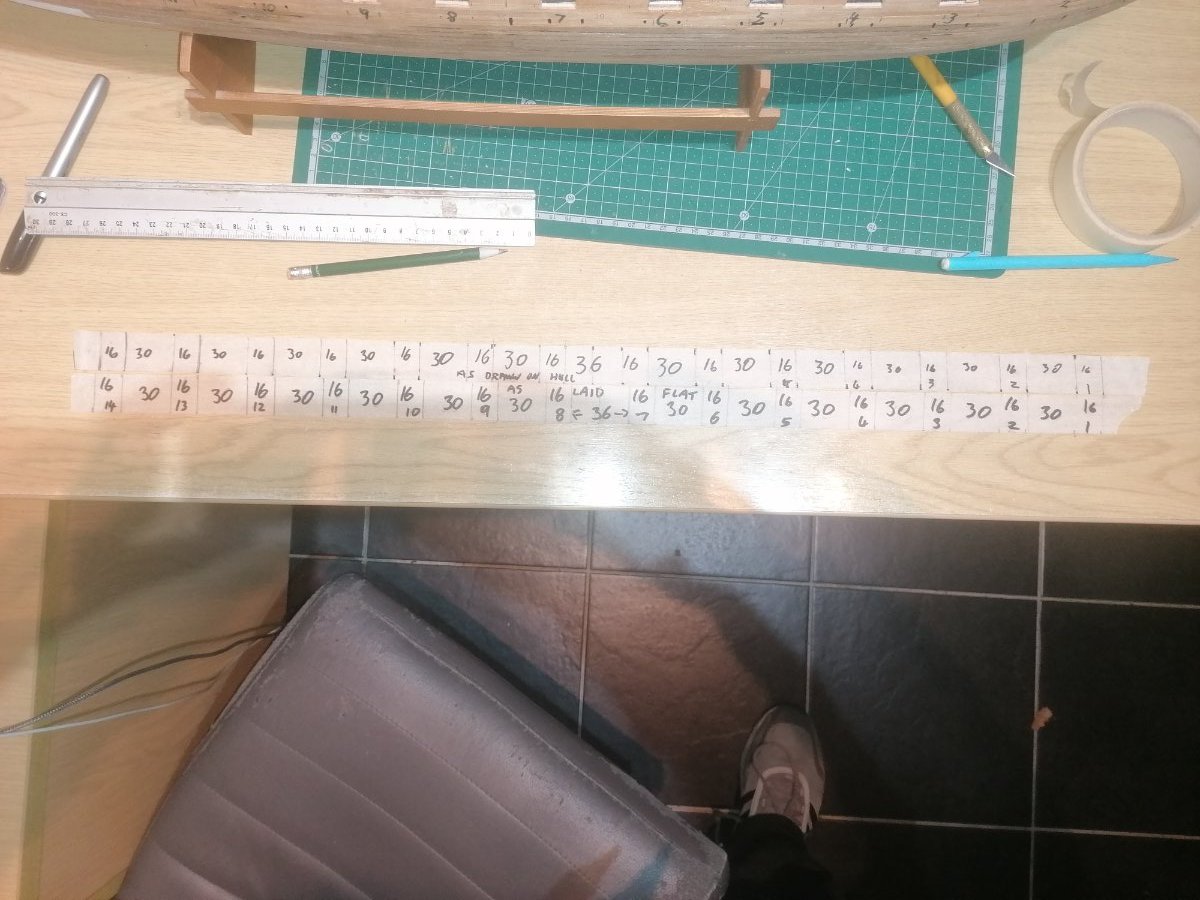
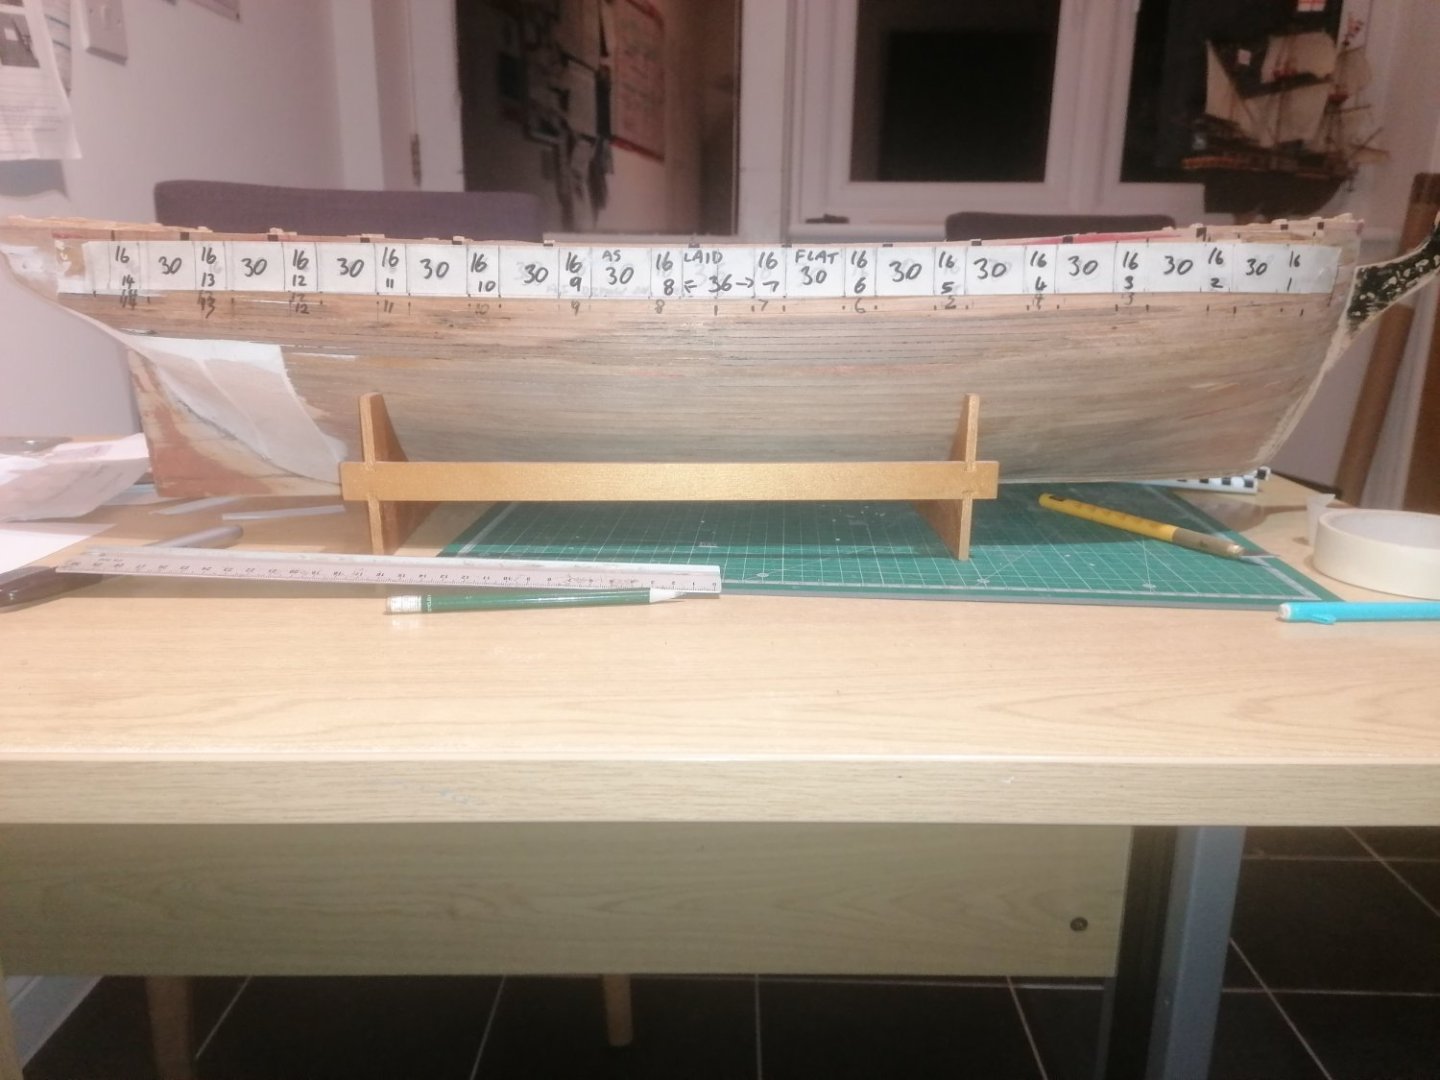
It feels like a couple of weeks since my last update, but, I think I have finally figured out the positioning of the gunports. For the last few weeks I knew the maximum distance between gunports 1 and 14 and was trying to position the rest equaly spaced apart from 7 and 8 which, as was pointed out previously, should be further apart. I was also triying to fit everything between frames. I tried everything I could including scaling up photos and measuring sizes and distances of the ports to match. Everything I tried resulted in at least one or more frames being behind where I thought the gunports should sit. Last night I realised that I may have to compromise and lose one of the frames. The distance from port 1 to 7 and 8 to 14 should be equal. The steps up the hull are about the same width as the gunports but about a gunports width from 7. I also guessed that none of the gunports should be level with the masts. I laid another strip of tape, marked out the centre line and worked my way in each direction, with 15mm wide ports and 30mm wide spaces. This also didn't work but was closer than I had managed previously. I changed the measurements to 31mm apart but kept the 15mm wide ports and starting at frame 3 worked my way along the hull. This was my Eureka moment. Everything lined up perfectly apart from frame 9 which was 5mm too far astern. I checked the measurements again and eveything still matched. I triple checked again tonight and I'm certain, this time I have got it right. I now need to cut away the previous planking to where the gunports should be. Where frame 9 was needs to be filed flush. The next task will be to lay 2 X 5mm strips parrallel to the frams and add 2mm thick and 13mm high balsa strips inside the hull to line up with the ports and also mark the line of the tops of the ports. Once this is completed I will lay strips of 2mm balsa along the top of the gunports level with the the line of the top deck. The entire inner bulwarks will have 1mm strips added to fill out the planking flush with the frames. These in turn will have 0.5mm planking to avoid the hull looking too thick, I hope. Coincidently, the linings of the ports will now be 0.5mm thick which seems to be more accurate. I still have lots to do but at least I think I'm winning.
-
Thanks fore your like Chris. It's appreciated. Just a brief update to say I'm back to square one. I'm not sure if the masking tape shrank a little or if my measurements weren't good. Either way I found the forward gunports are a couple of millimeters out. Looking like I've some more thinking to do. Will update again when I get it sorted out. David.
-
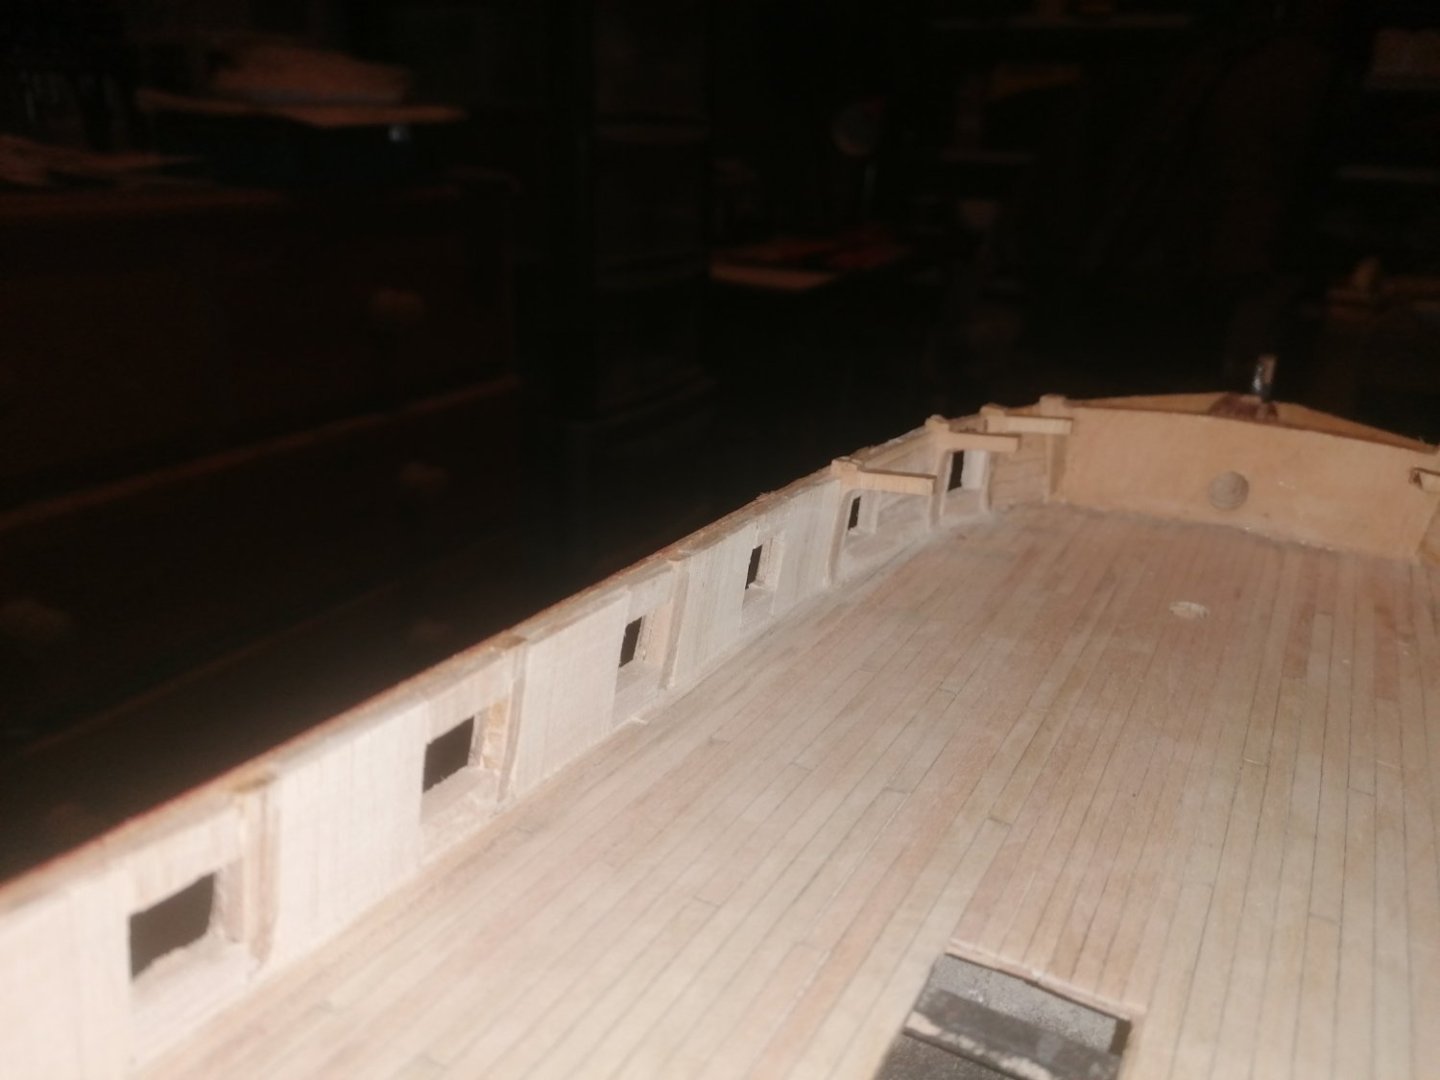
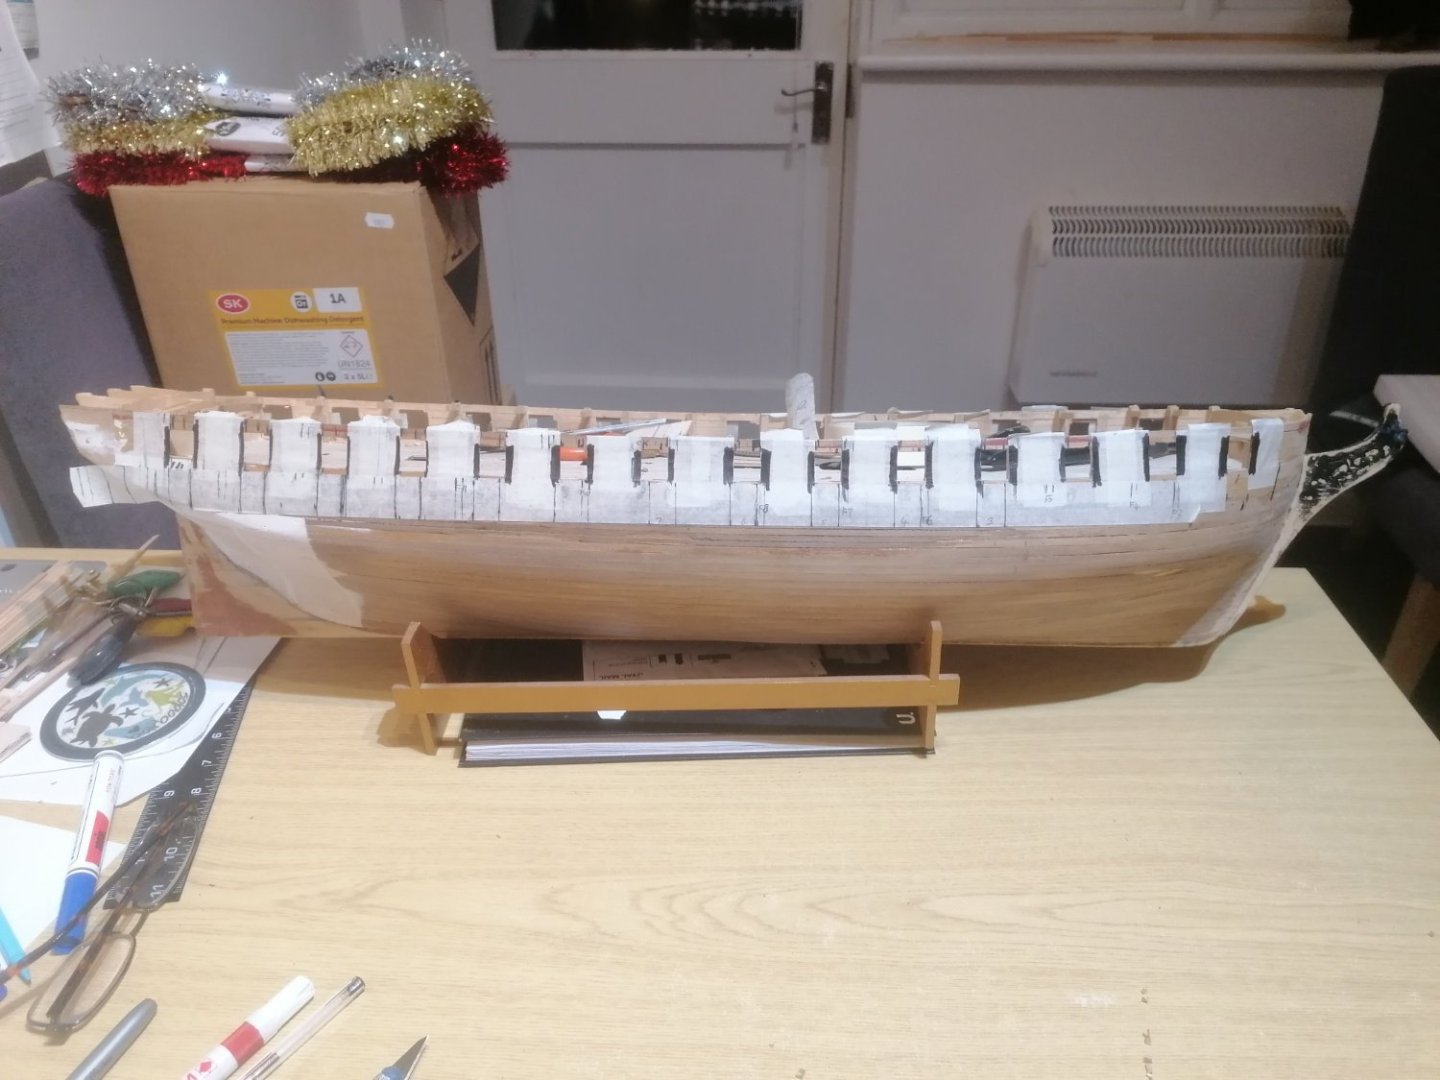
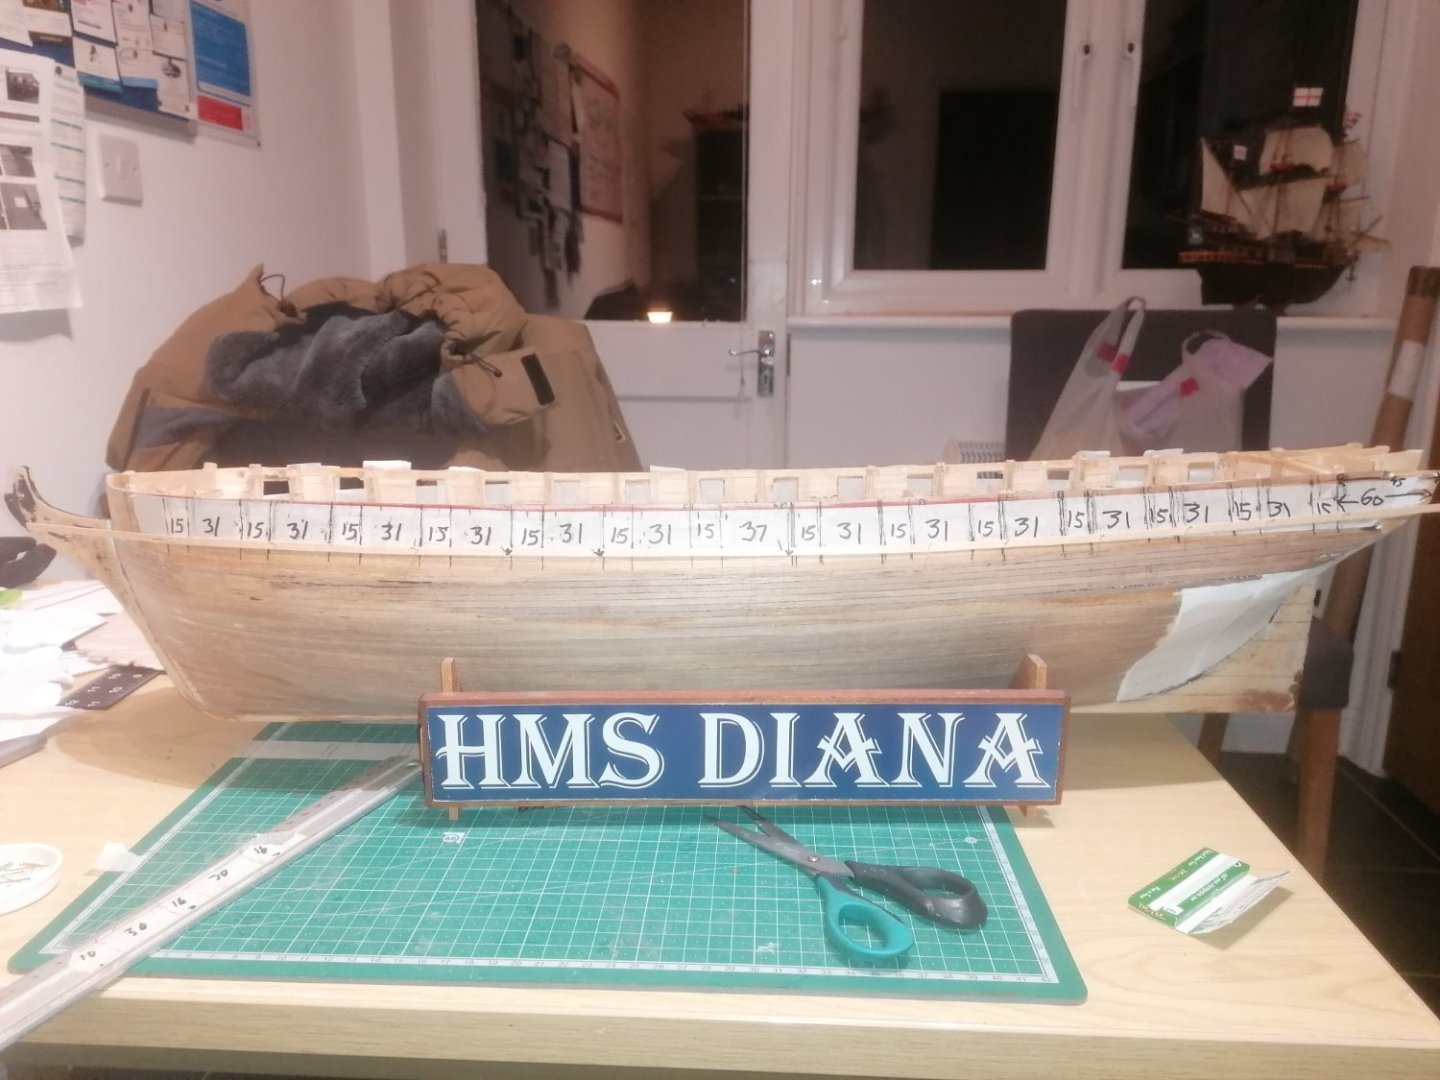
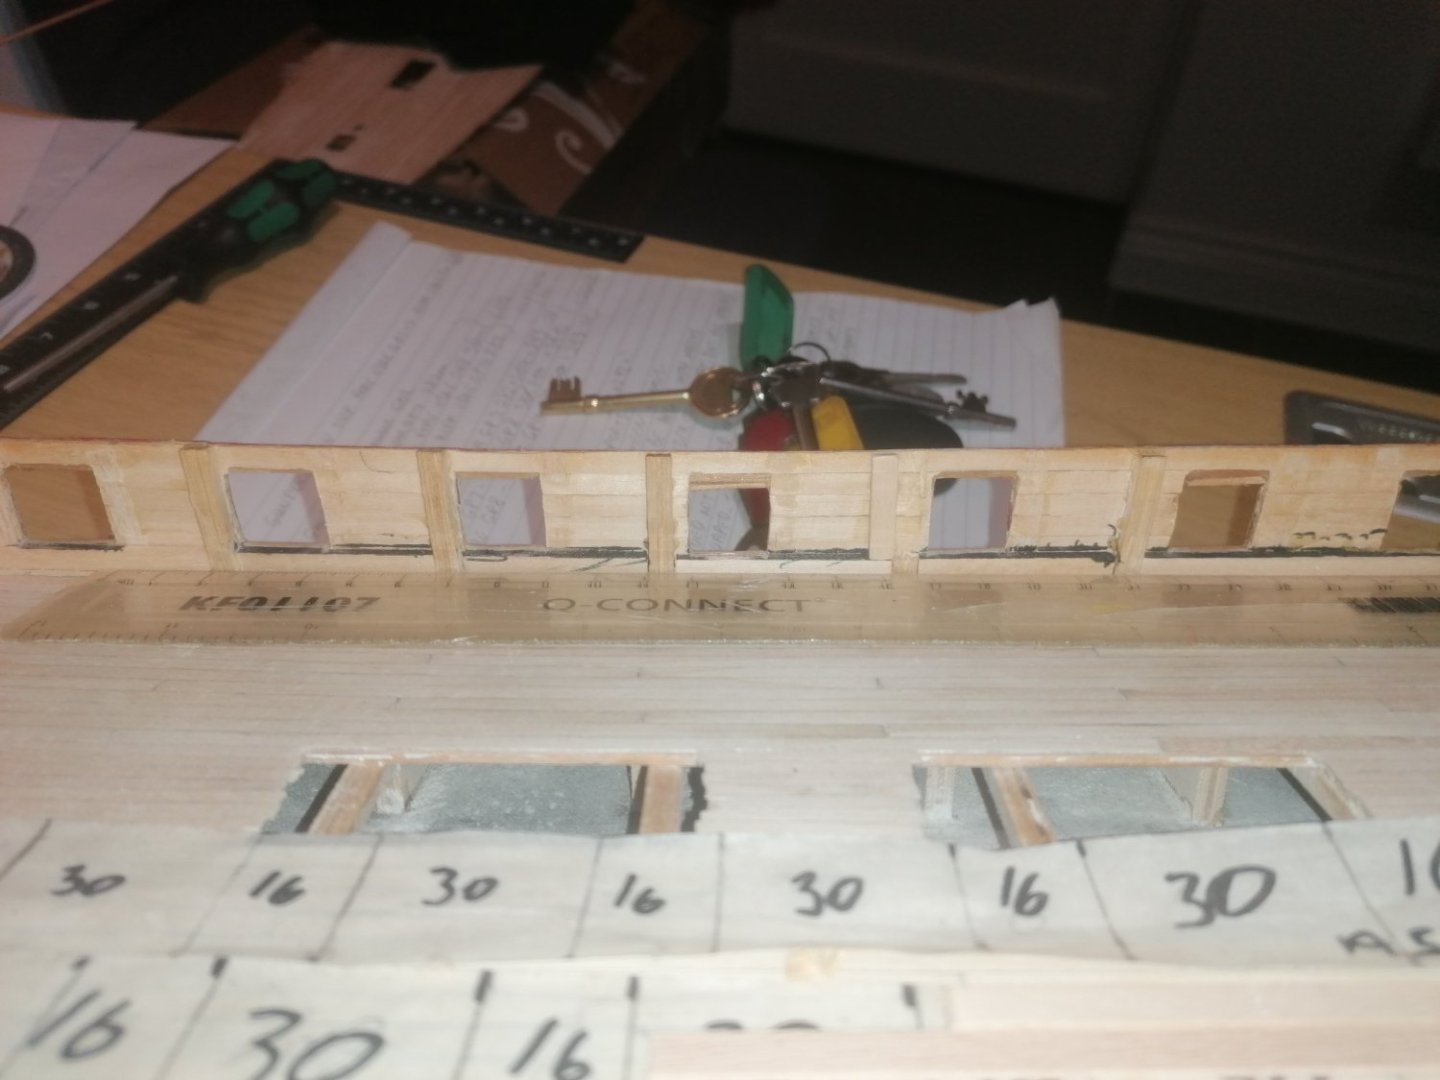
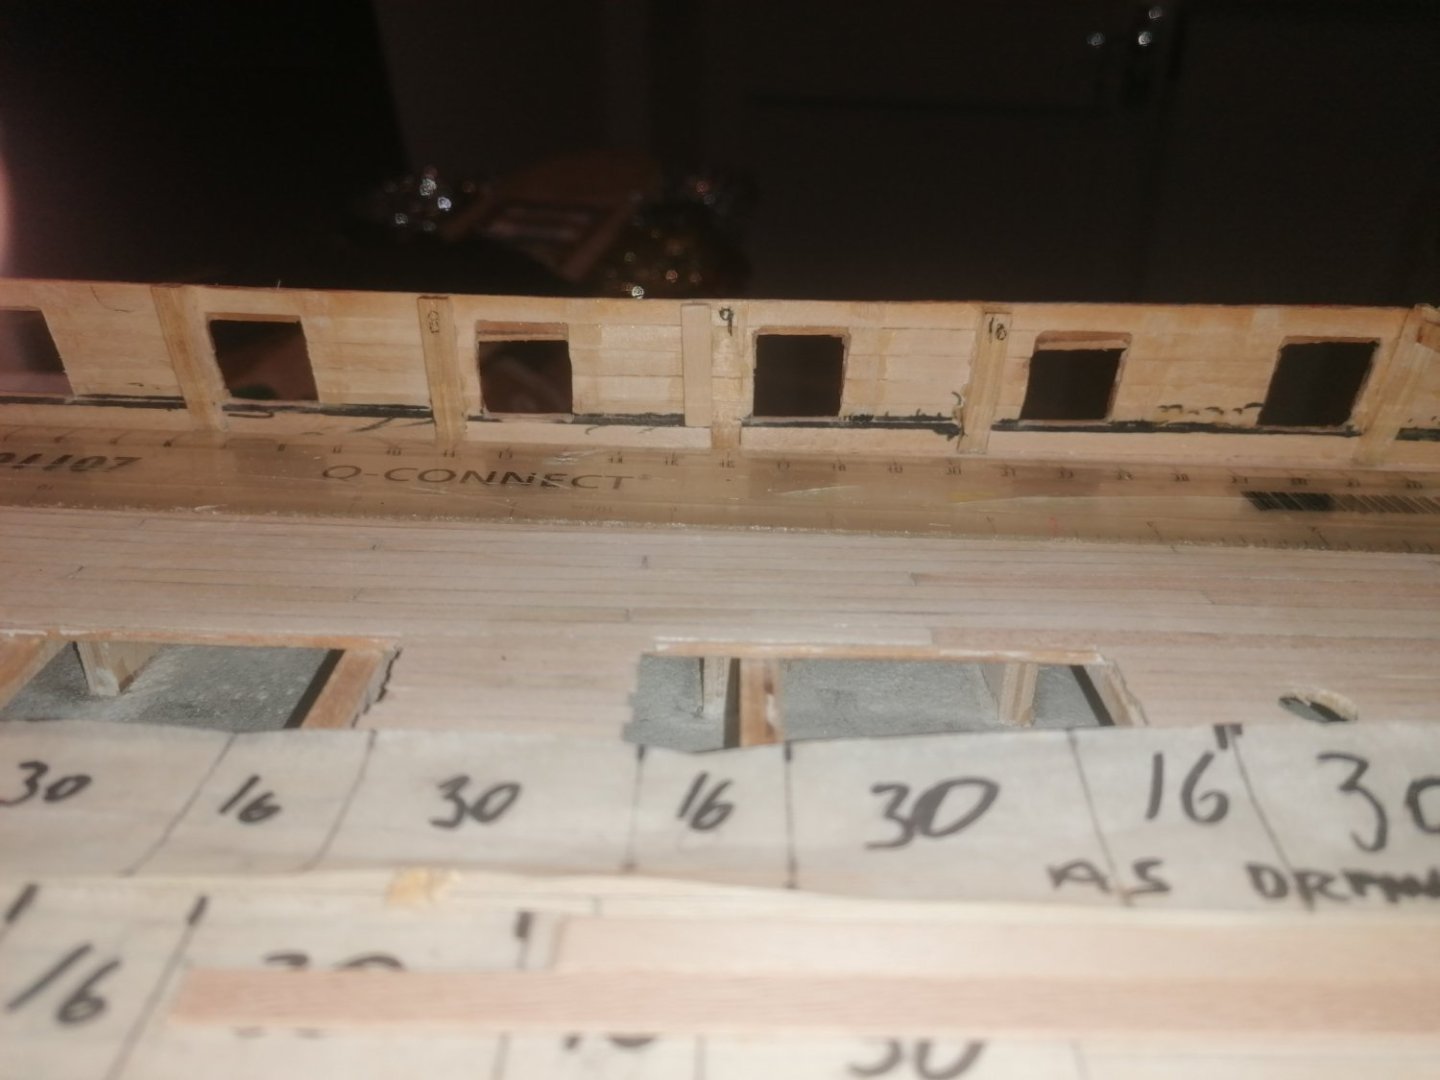
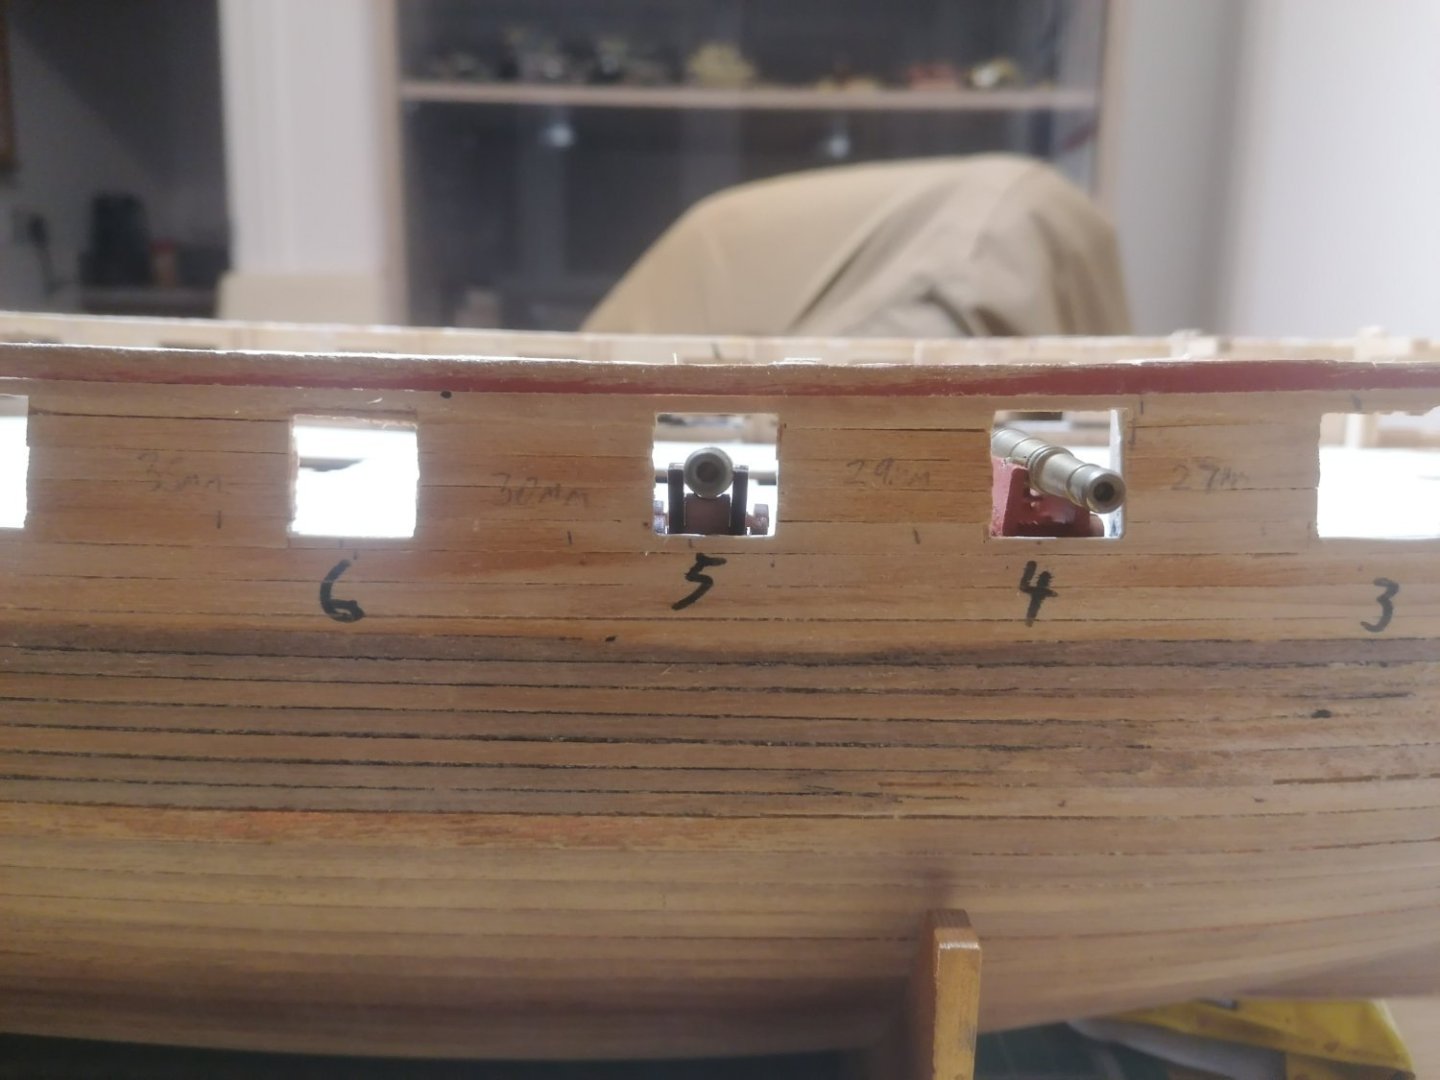
Progress started slowly after my last update. The gun deck has now been fully planked and just needs a light final sanding. So it was back to the gunport problem. The first thing I needed was the correct height above the deck for the gunport bases to sit. I found that 5mm gave me the best fit so I cut strips of 2 X 5mm and glued them flush to the deck and butting up to the frames. Due to the 1st gunport being between frames 3 and 4 I started on gunport 2. I soon found that it was hard to see where the first layer of outer planking ended and where the added strips met. I used a black marker pen to highlight the top edge of the strips which made filing down the lower edge of the ports much easier. The only problem I found was some of the ports were cut too low on the port side so I will have to build these up before replanking. The time spent reading through various build logs 2 weekends ago has paid off. After studying Jason's ( Beef Welington, a big thank you for this) build log I picked up on the fact that all the ports are 30mm apart with the exception of the 2 central ones (7 & 8). I ran a strip of masking tape along the gunports and marked the forward edge of port 1 and the stern edge of port 14. Thinking I had cracked the problem, I removed the tape and marked the gunport position starting at each end and working towards the middle. I marked the edges of gunport 2 on the hull and cut and filed it to size. I replaced the tape on the hull and was dismayed to find that the ports didn't sit where I expected them as a couple of frames were now in the way and port 2 didn't quite fit right. It was too late at night to try figuring out what was wrong so left it as it was. On Thursday the replacement carriages arrived. I was keen to see how they compared to the originals and how well they would fit within the ports. I lightly glued 1 of the carriages together but dry fitted the trucks as I may need to remove them later. They look absolutely brilliant and really feels like a shame to paint them. Thank you Vanguard for these. (Unfotunately they come without the photo etch sheets but this isn't a problem as I have plenty of eye pins and hopefully enough capsquares. I just thought I'd mention it for information.) They sit perfectly within the ports as well. Now it was back to the positioning of the gunports. I laid a fresh strip of masking tape alomg the hull and again measured the distances between the ports. but this time on the hull. gunport 2 now matched up again ,more or less but none of the frames were in the way. I removed the tape and laid it above the original and you can see the difference between them. The next few evenings will be spent marking and cutting the ports to shape.


-
I should have mentioned that the lime strips I have used had varying colours, most were light but others looked more like beech wood. As most of the deck will be hidden I tried limiting the darker strips to where they won't be seen. They will also be stained or varnished or both so it will be interesting to see how they come out. Thanks again for the likes and comments so far. David.
-
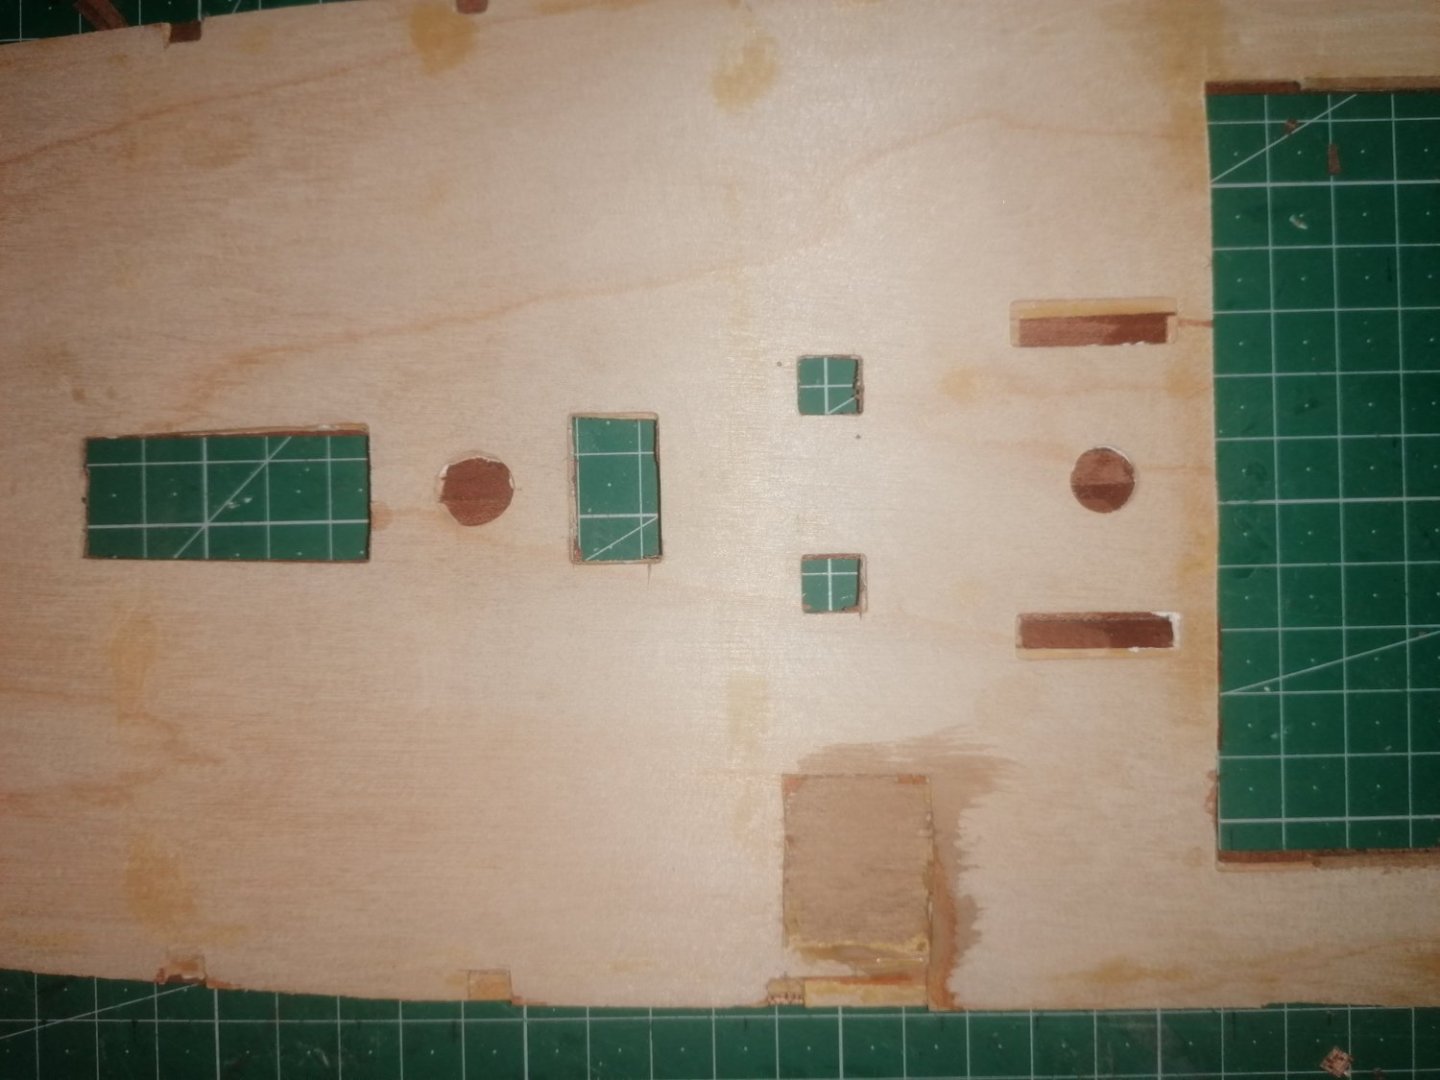
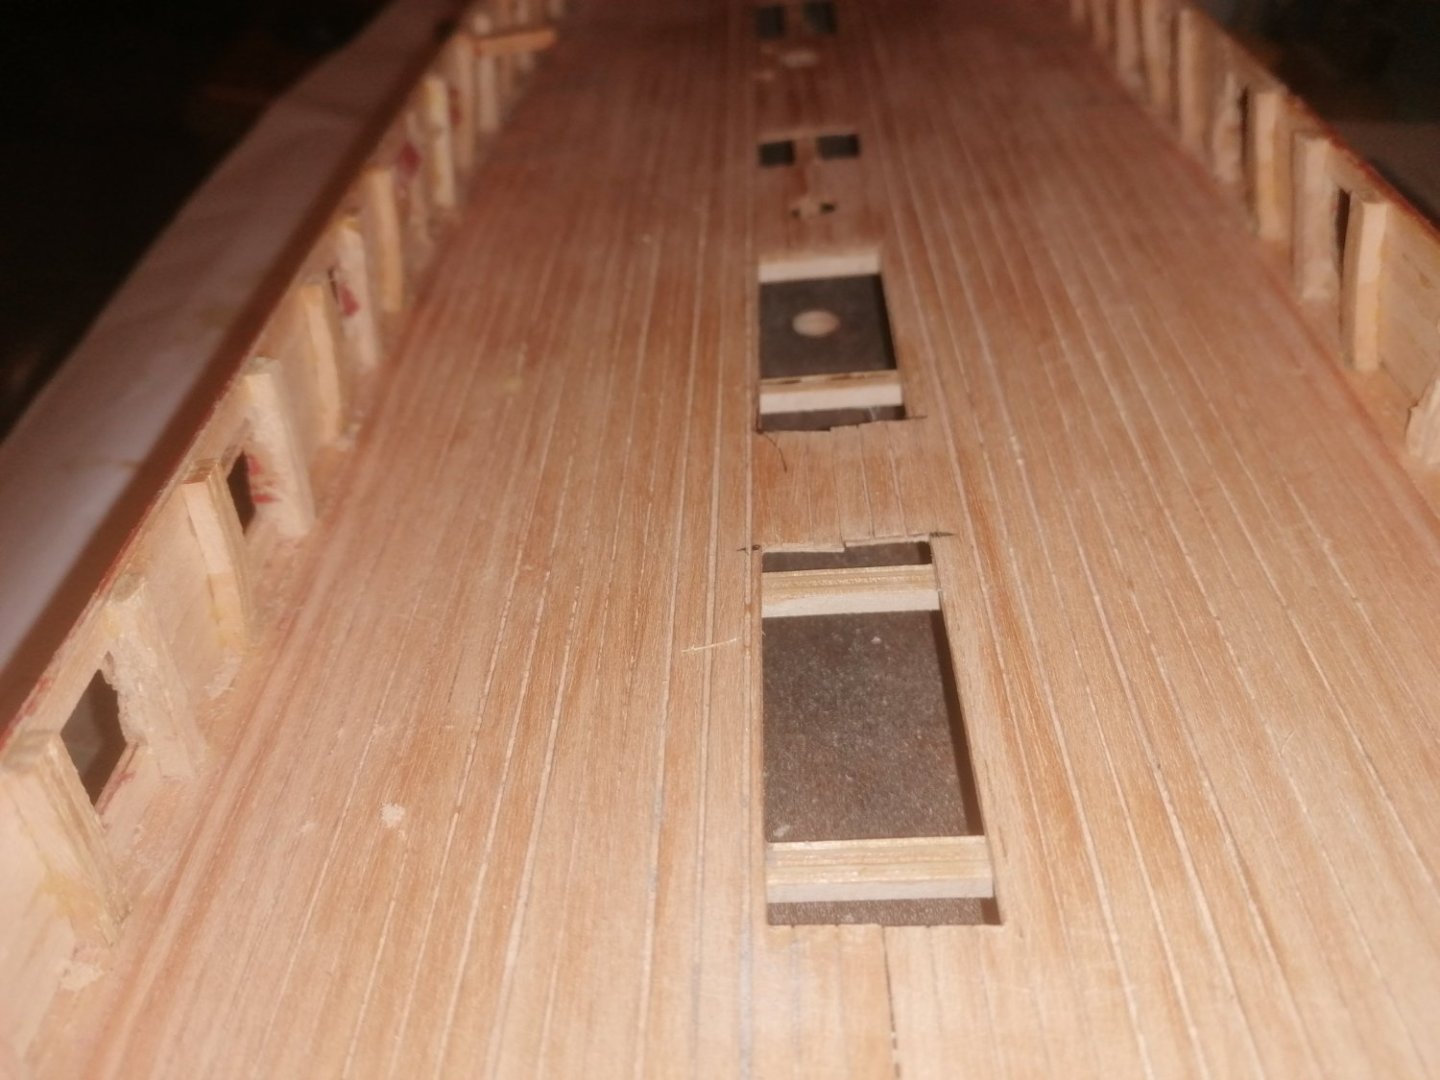
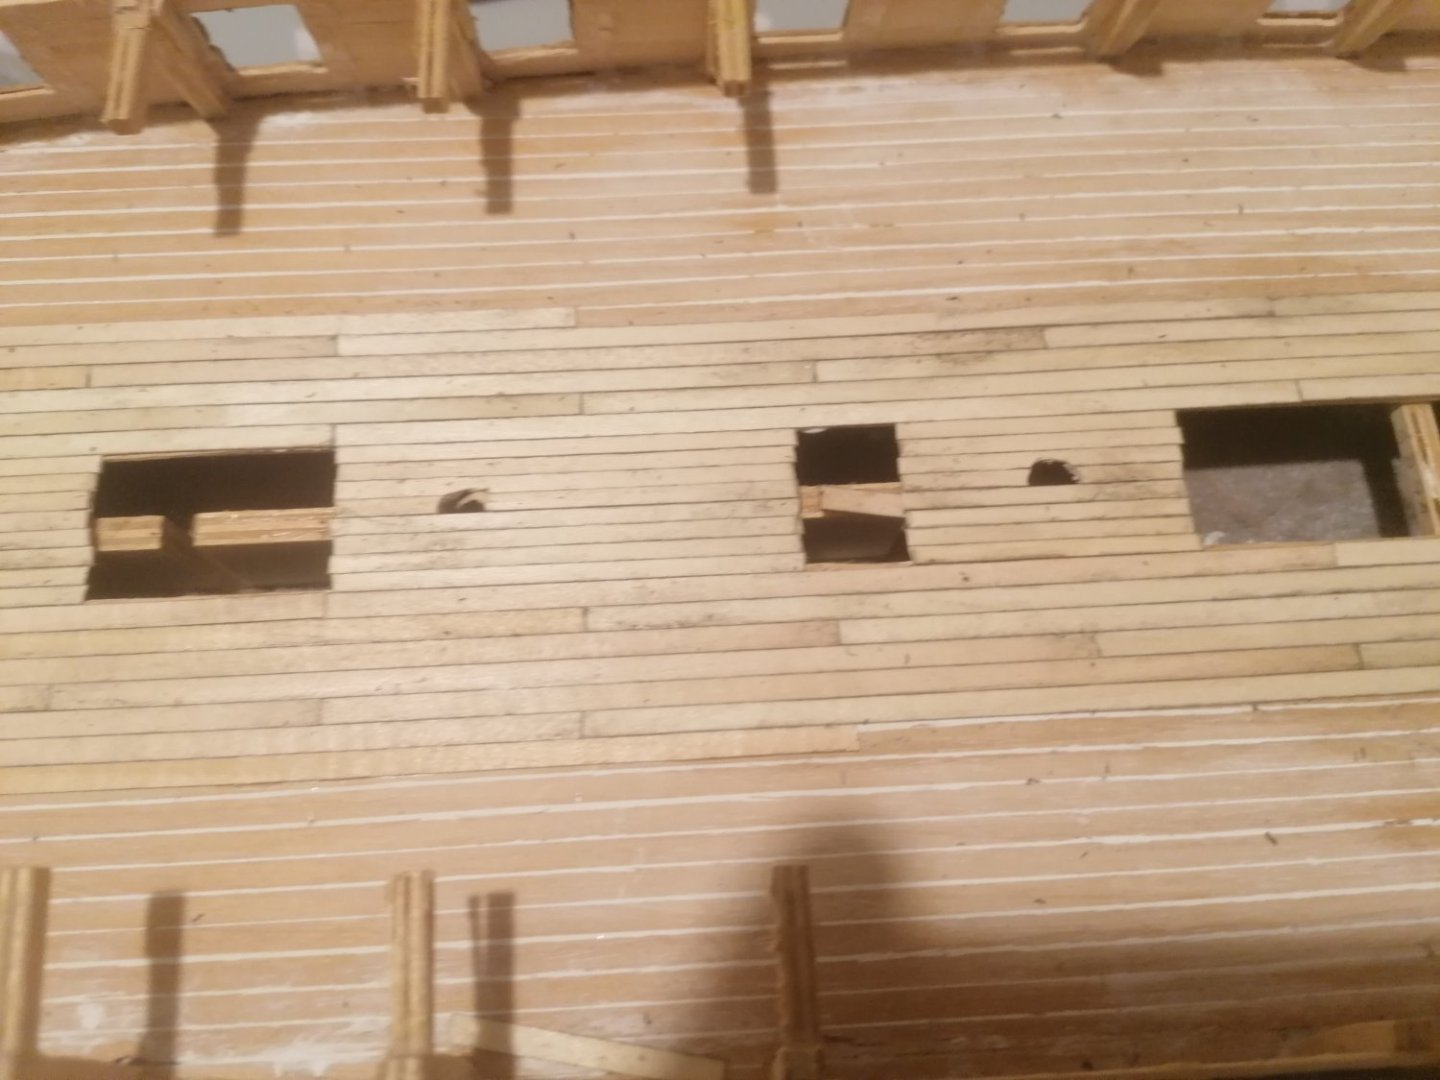
Since my last post I spent most of last weekend studying how to start on the gunports. Midway through Sunday I gave up reading any further as I found I was getting bogged down with all the information. I also wanted to get back to the actual building. I realised that before I could start on the inner lining I would need to re-lay the gun deck. I started laying 3mm strips from the centre line outwards. I had planed to run these 3 deep on each side of the mid point but the grating openings were wider and would mean that the first 4mm srip would need 3,5 mm cut off along the openings so I added an extra 3mm strip each side When I tested the original grating and coamings I found they were actually a lot wider than the openings. As this will be mostly hidden I have left them as they are but will maybe plank the upper deck differently. 5 evenings later and I have almost finnished the gun deck with only the outer edges to plank, between the frames. I have cleaned off and lightly sanded the deck and I dont think it looks too bad, especially, compared to how it looked before. One thing I had not fully appreciated was how large the surface area is. I have used around 30 4mm strips for this deck alone. It is huge. I am desperate to get started on the gunports because I need these done to be able to determine the correct position of the wale. To start with I think I will just build up to the sills with a strip of 4 mm thick balsa which will be shaped to run square between the frames. The outer planking has come unstuck from a few of the frames so I also need to glue these back. Once this is done I will need to re cut the gunports with the required spacings inbetween them. I have measured the distances and marked them with masking tape for now. So I've still got plenty to do. I have also just ordered the replacement gun carriages and also a replacement double capstan from Vanguard. I pretty much destroyed the original when trying to seperate the upper deck from the hull. It was one of the few things that was really well glued together.


-
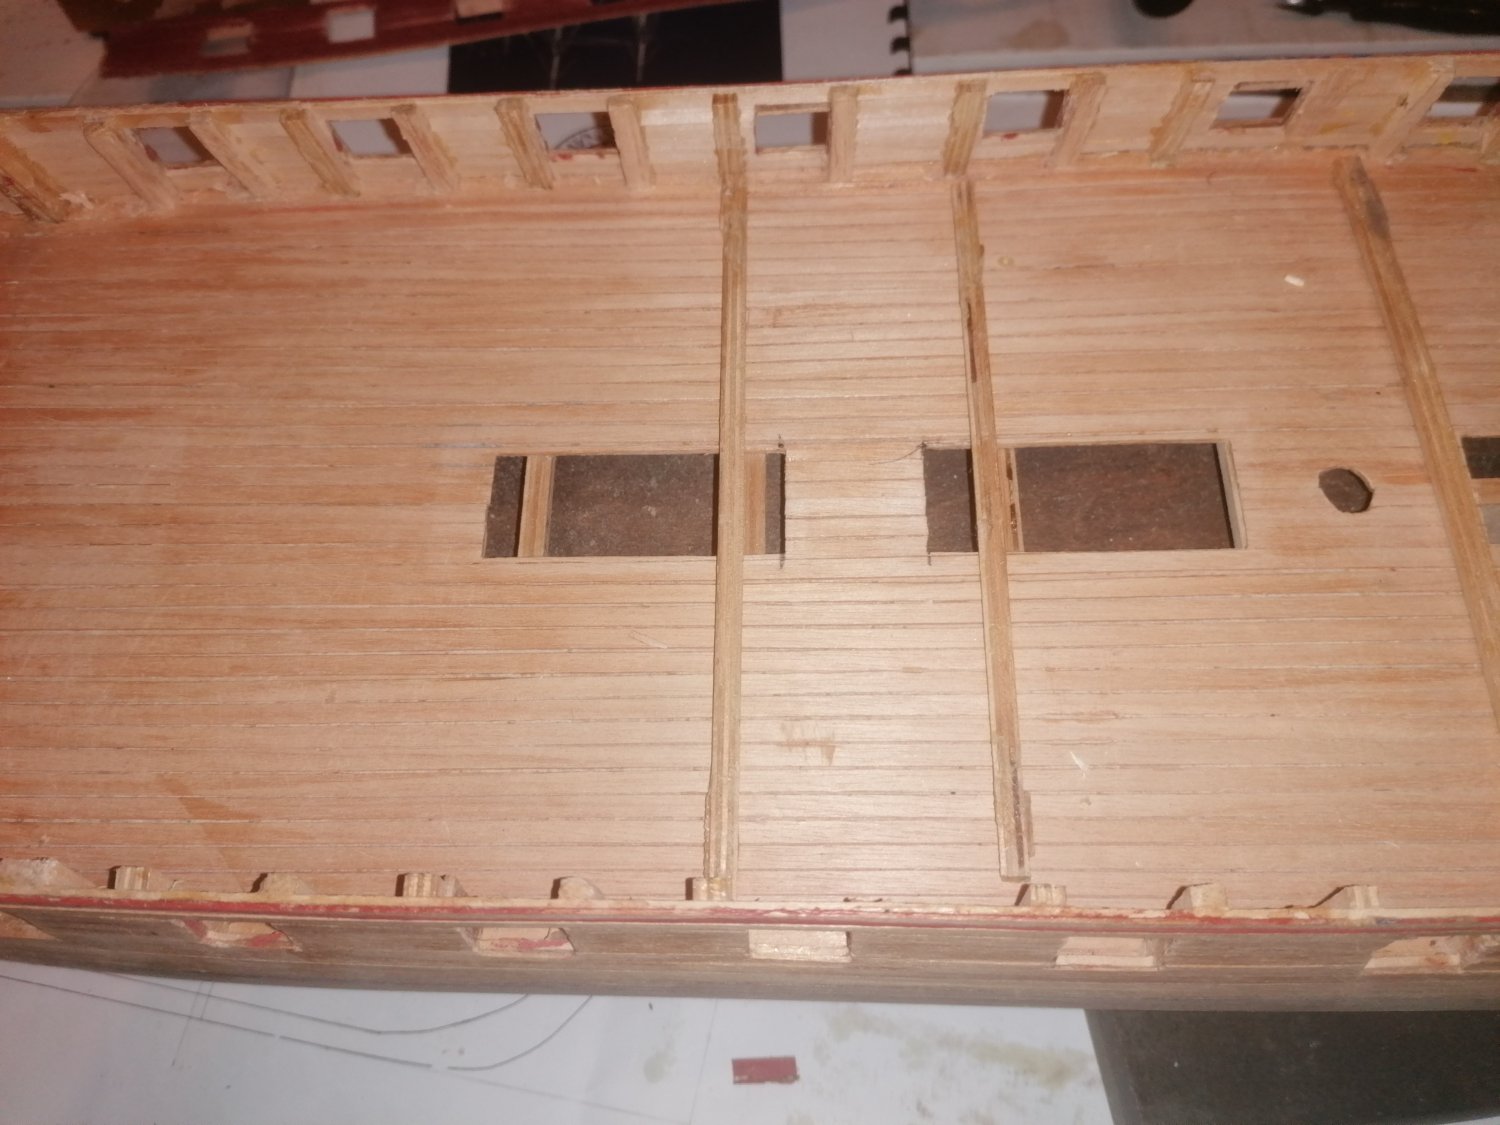
Keith, Many thanks for the advice. I will try that. If it doesn't work I will just cut a block of balsa wood and glue it to the lower deck underneath. The hatches appear to be in the correct places though. You are right that without knowing the ship aswell as not being able to see the work that has already been done at times I am almost working blind. Thanks David for your input too. I should have thought of that being the case as the upper beams are also fitted that way. The beams running below the gratings are not too big a problem as they and the lower deck will be painted black and should be invisible. Luckily I took quite a few photos of the decks before and during removing everything so I can see where to put things back later. I have also been able to remove the main deck support beams fore and aft without damaging the frames too much. This means I should be able to modify them avoiding the run of most of the gratings. There were only 2 deck supports fitted which were under the beam in front of the main mast/ I will be modyfiying these and insalling all that should be in place. I have given myself a lot more work to do but it means I should really be able to achieve a much better finnish. The gunports need to be 6mm above the gun deck so I intend building these up from the inside with strips glued to the outer planking to a thickness of 4mm along the entire length after adding vertical strips beside the gunports to give them the correct width. these can then be relined on the inside and painted. I can then fit the inner hull fittings for rigging the guns etc. I read somewhere that the hull planking below the wale should be no wider than 12 inches but above the wale can be wider. Assuming 30cm is more or less 12 inches then the lower planking should be no wider than 4.6mm at this scale. This ties in nicely with the lower stern frame (frame 17) having 15 planks attached either side of the stern post. This makes the width of the planks 4mm So I plan to plank the hull ,when the time comes the opposite to the instuctions with 4mm below the wale and 5mm above it.
-
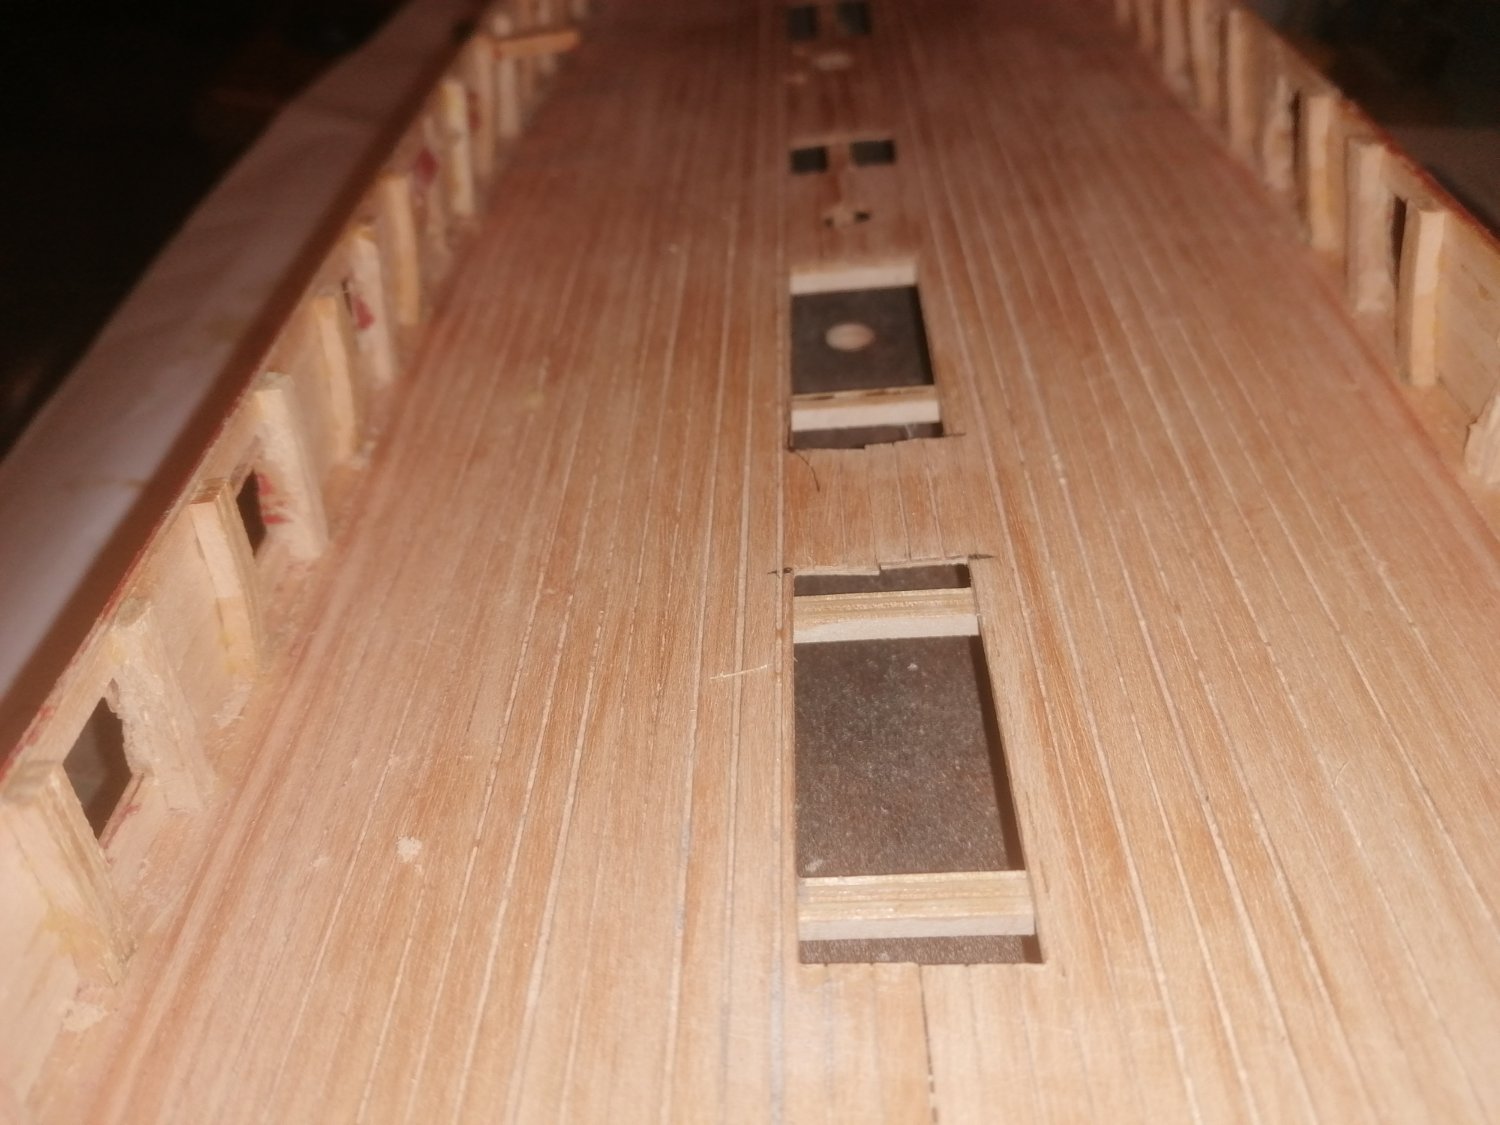
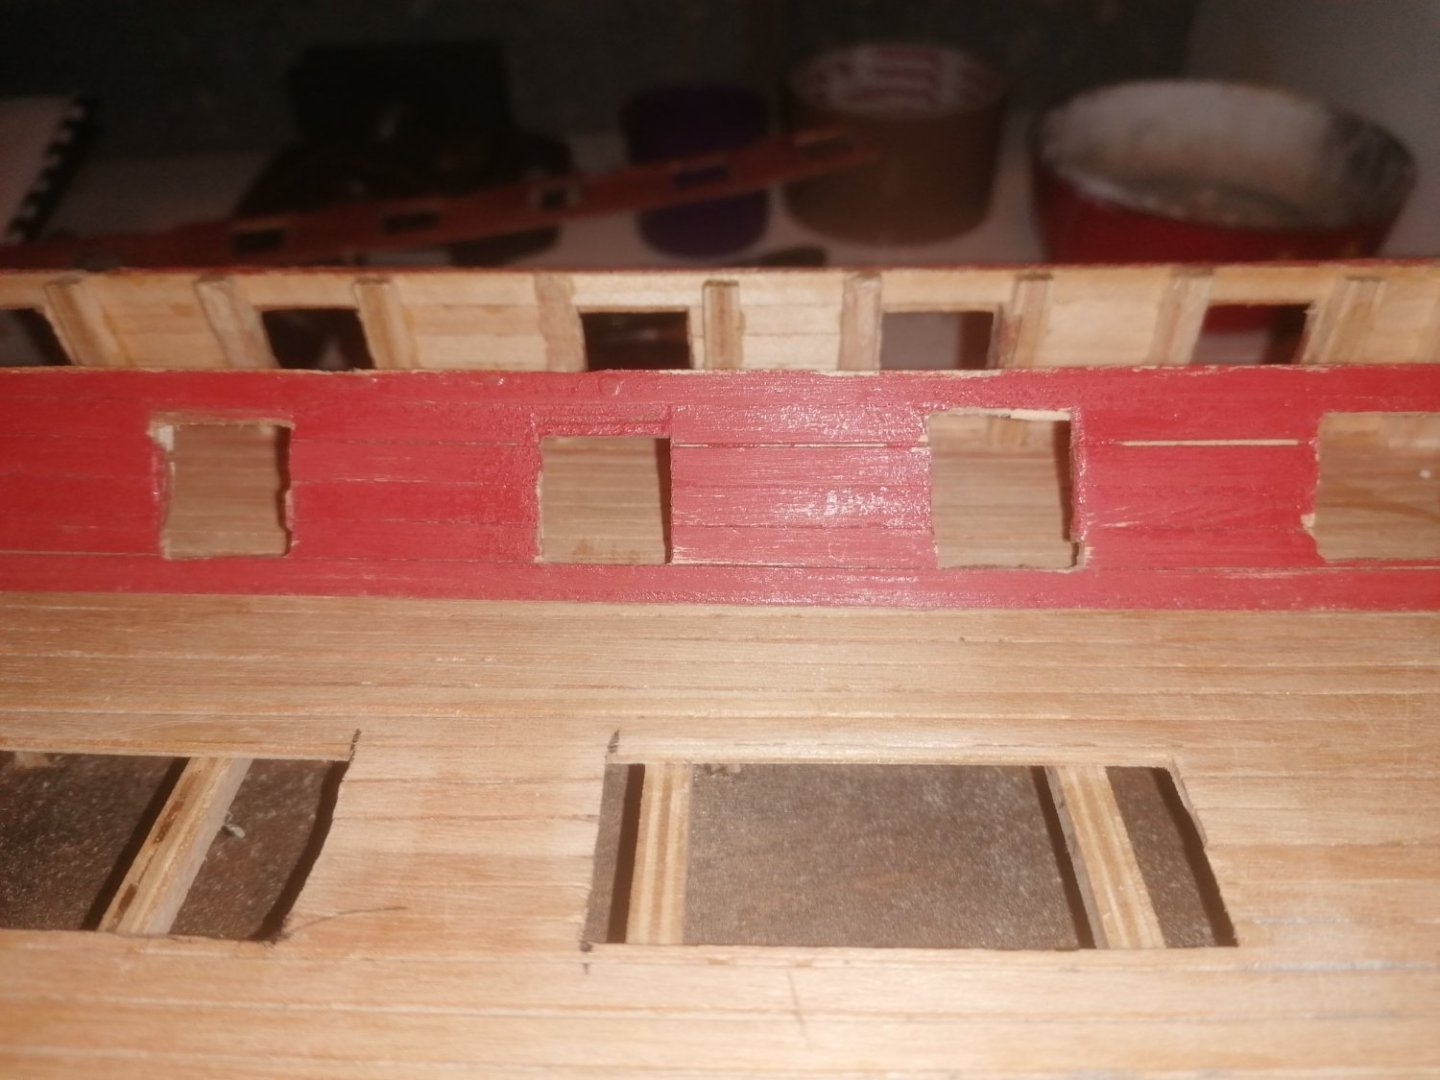
While sanding down the hull I felt something give and found the deck planking between the gratings had given way. Not sure why there was nothing supporting them underneath. I then also noticed 2 beams below the gun deck dont seem to match up. both go under the gratings but are offset compared to the frames. Any ideas?
-
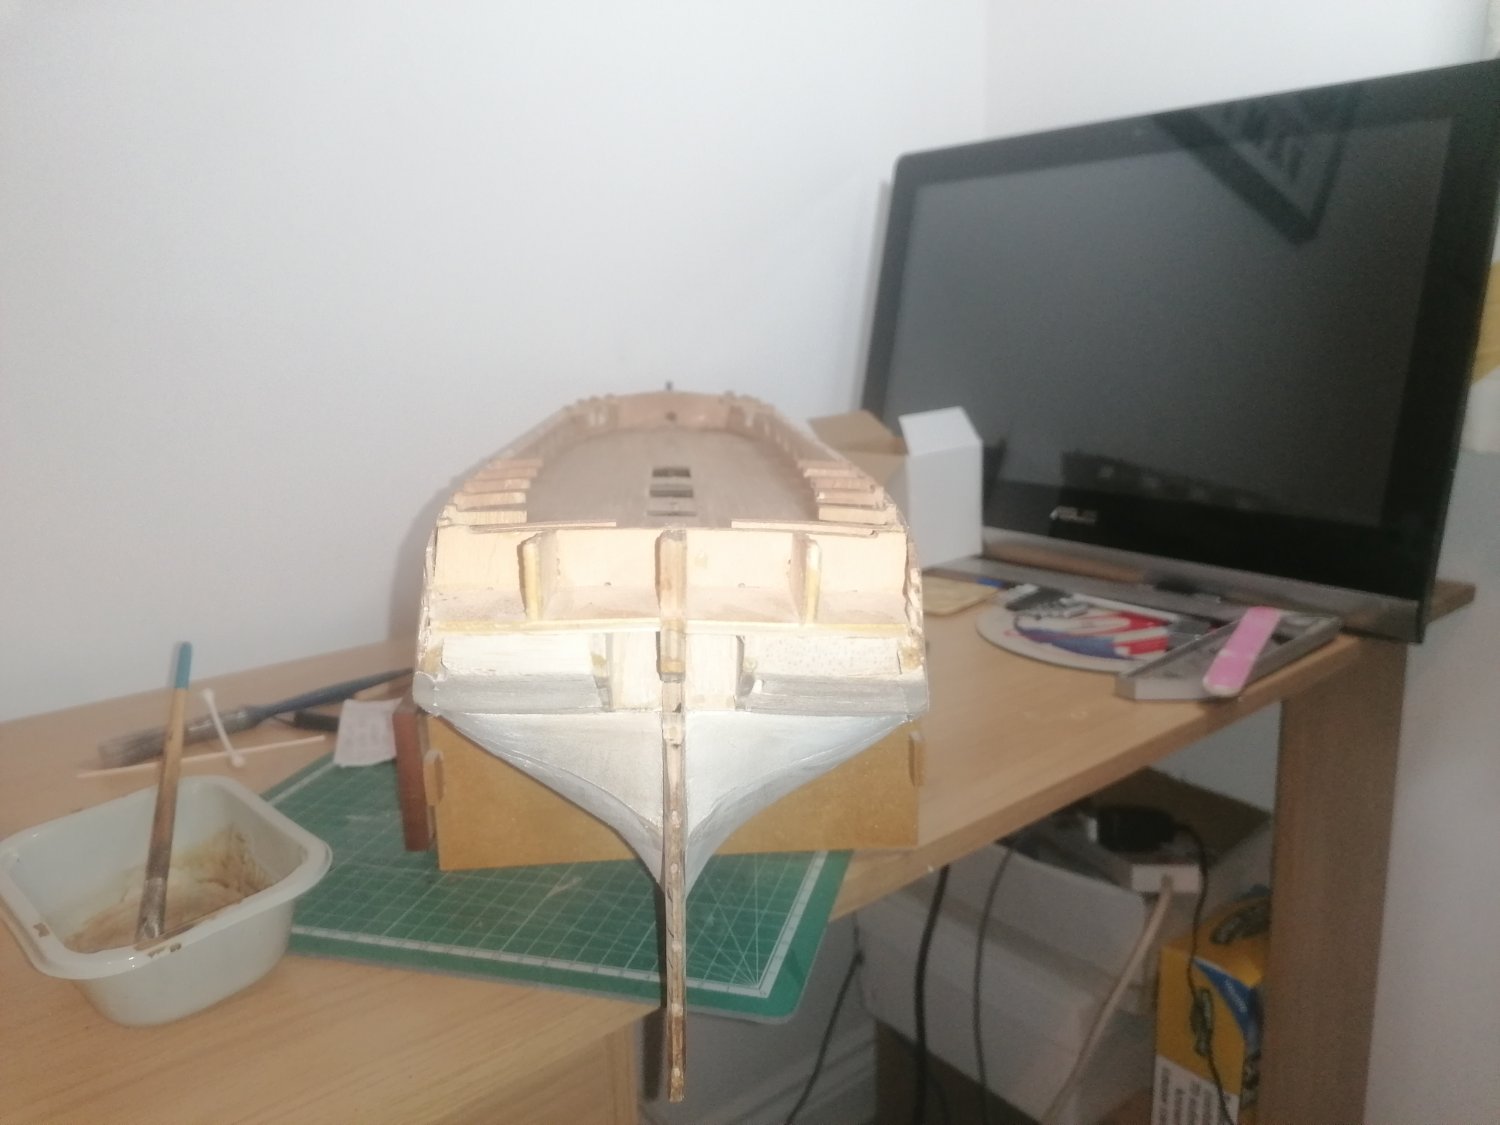
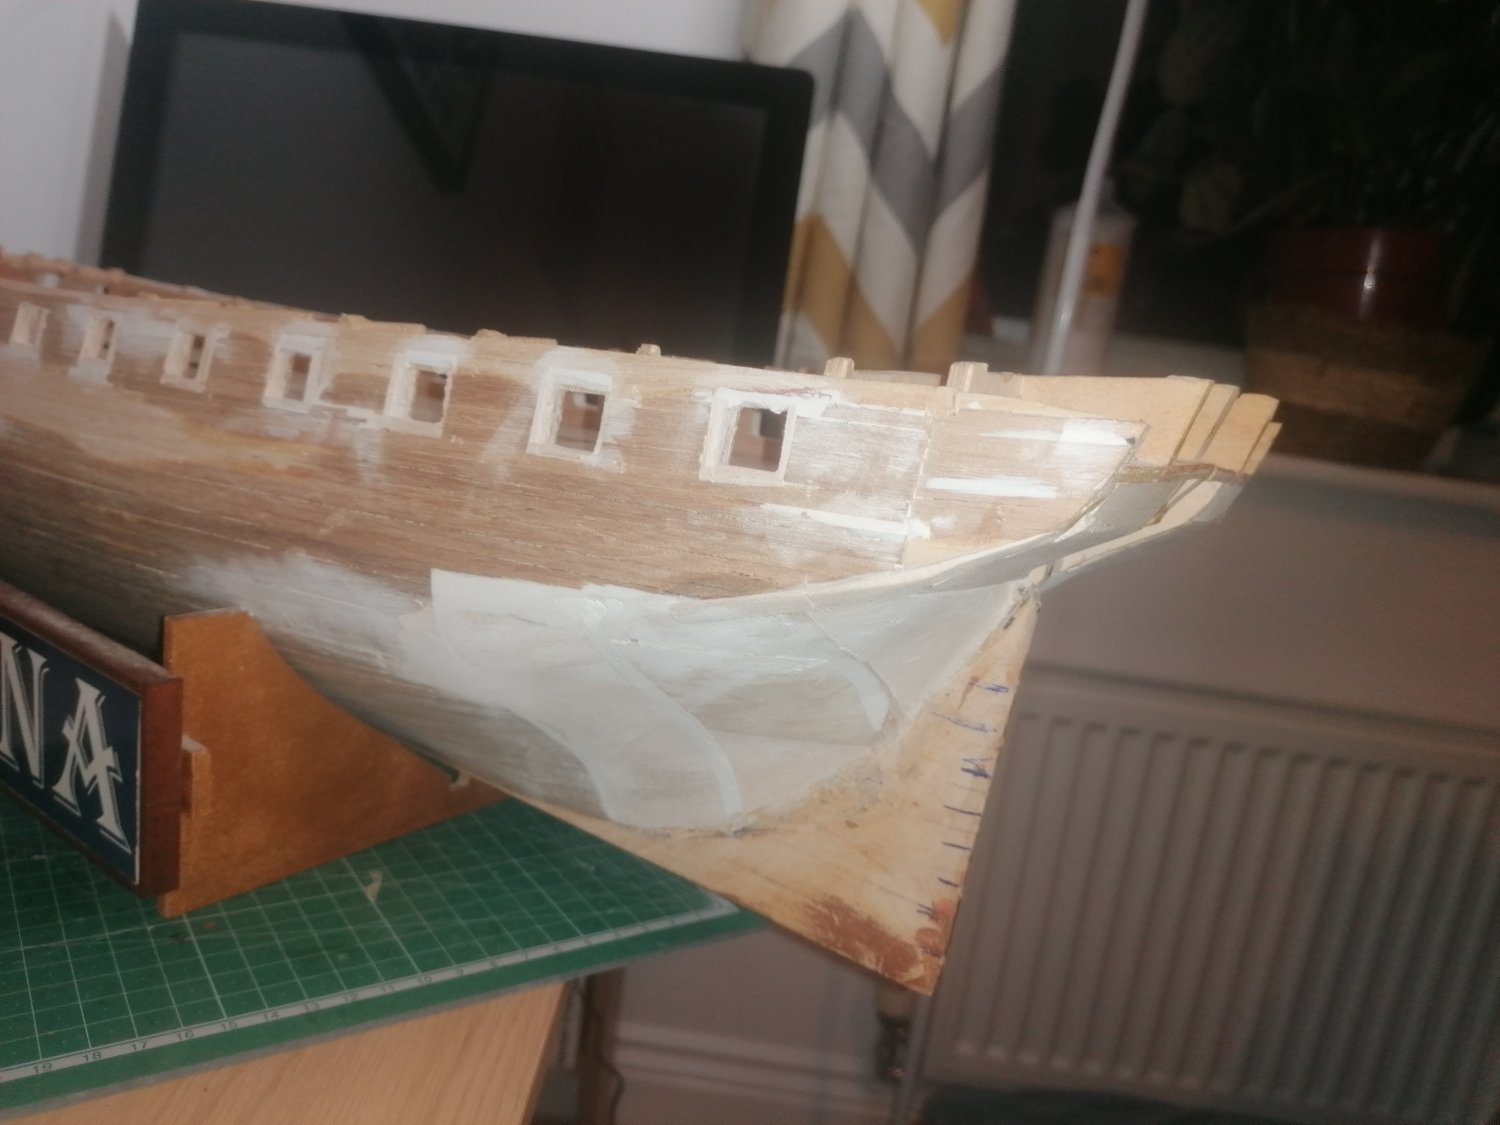
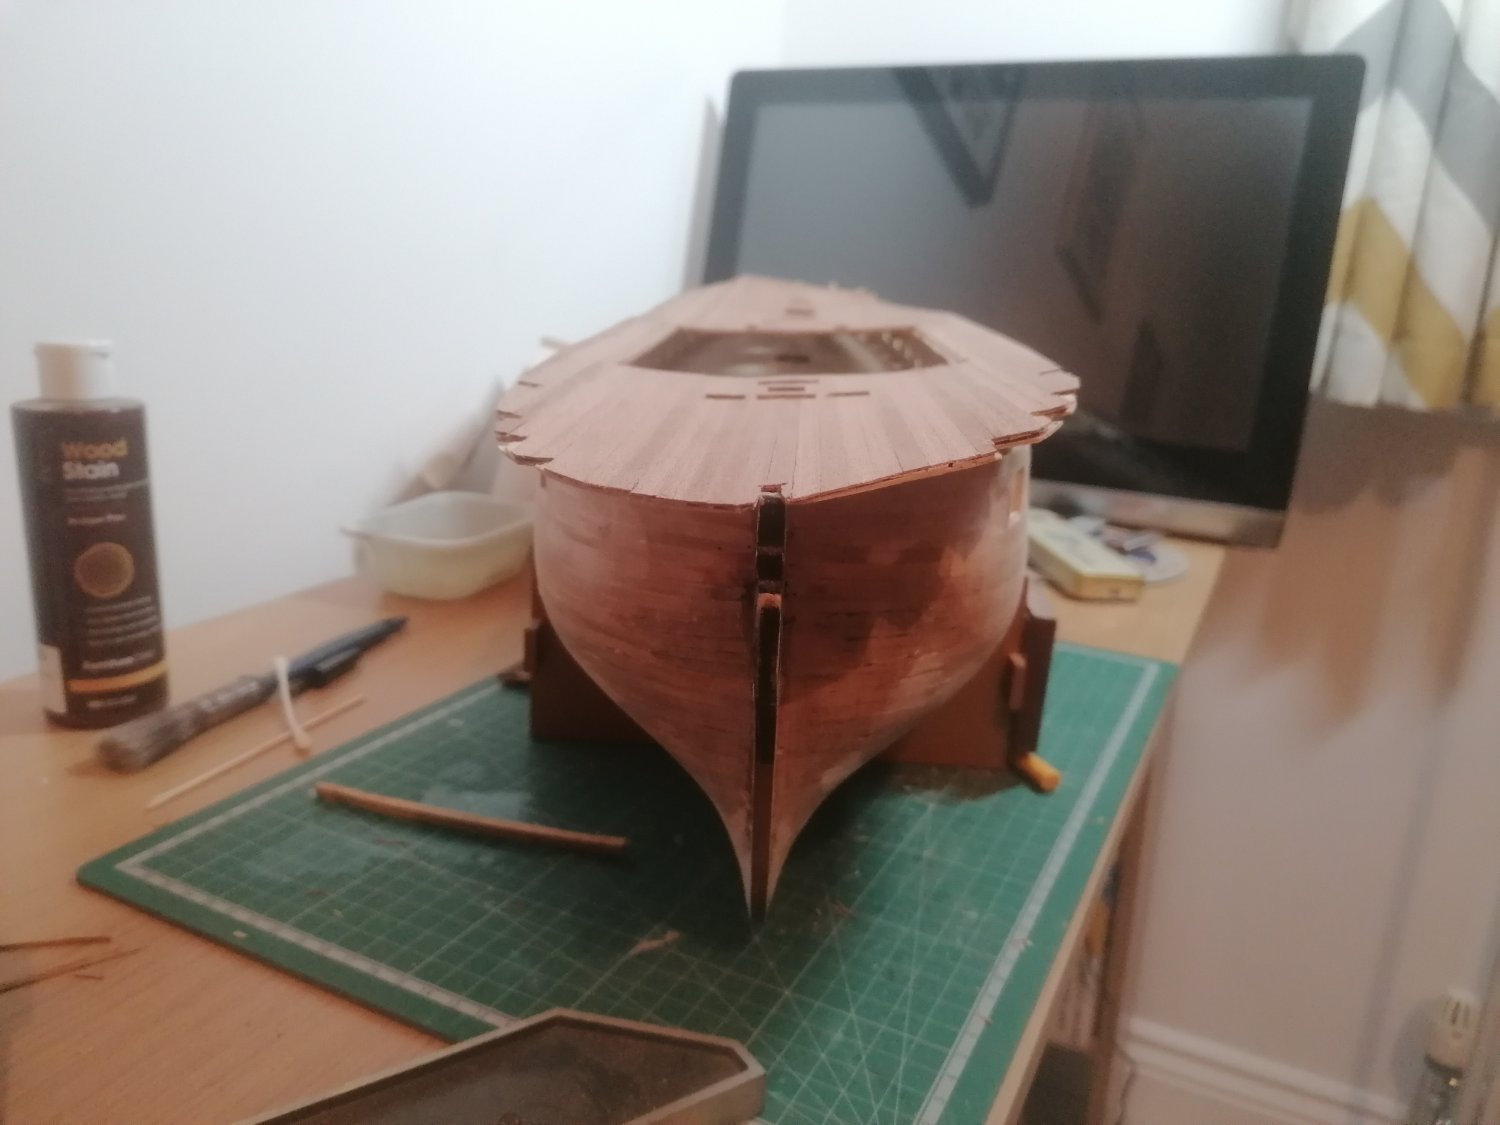
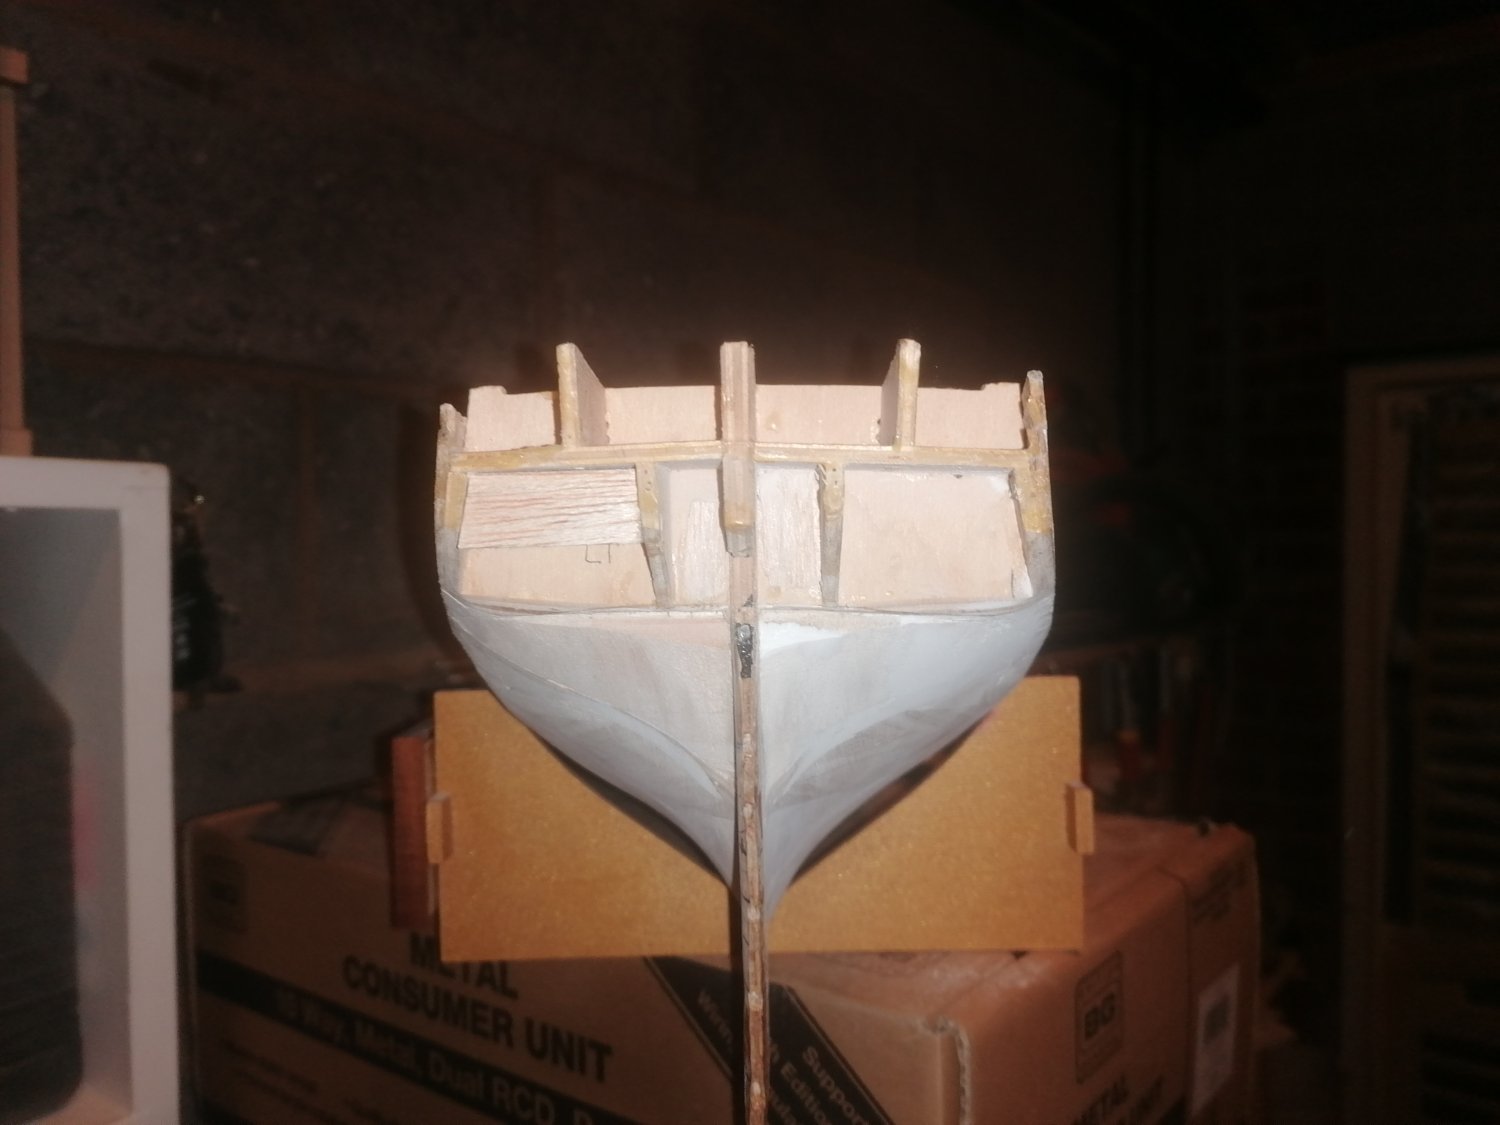
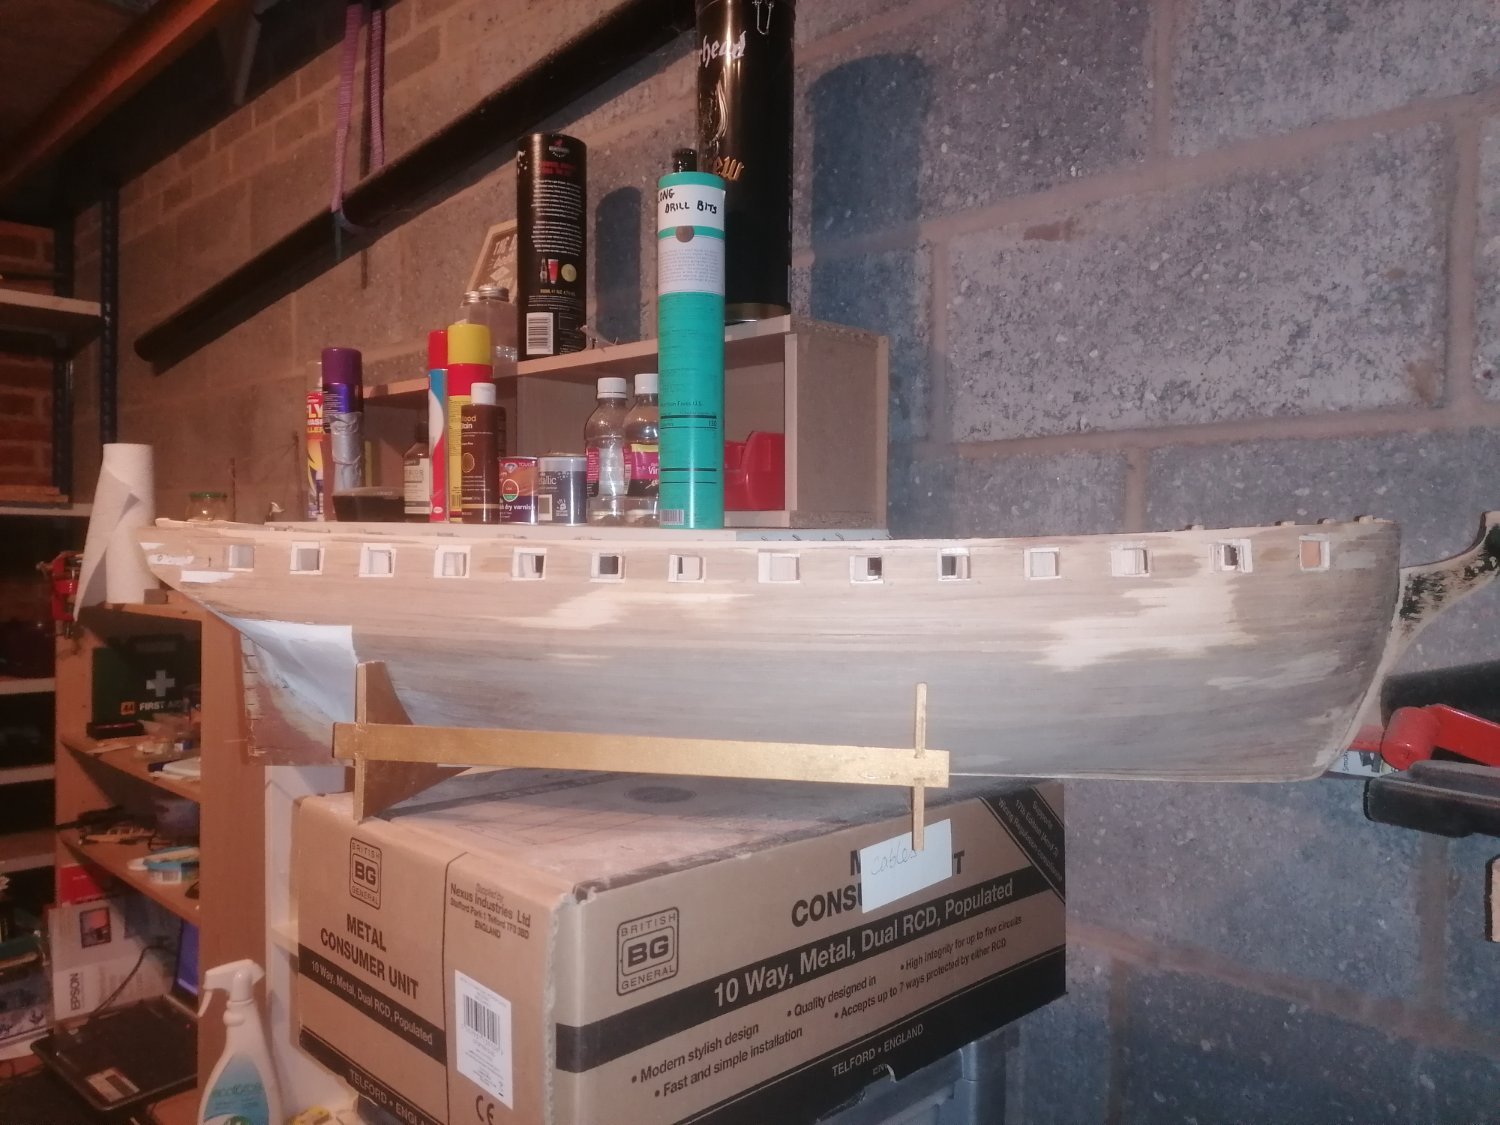
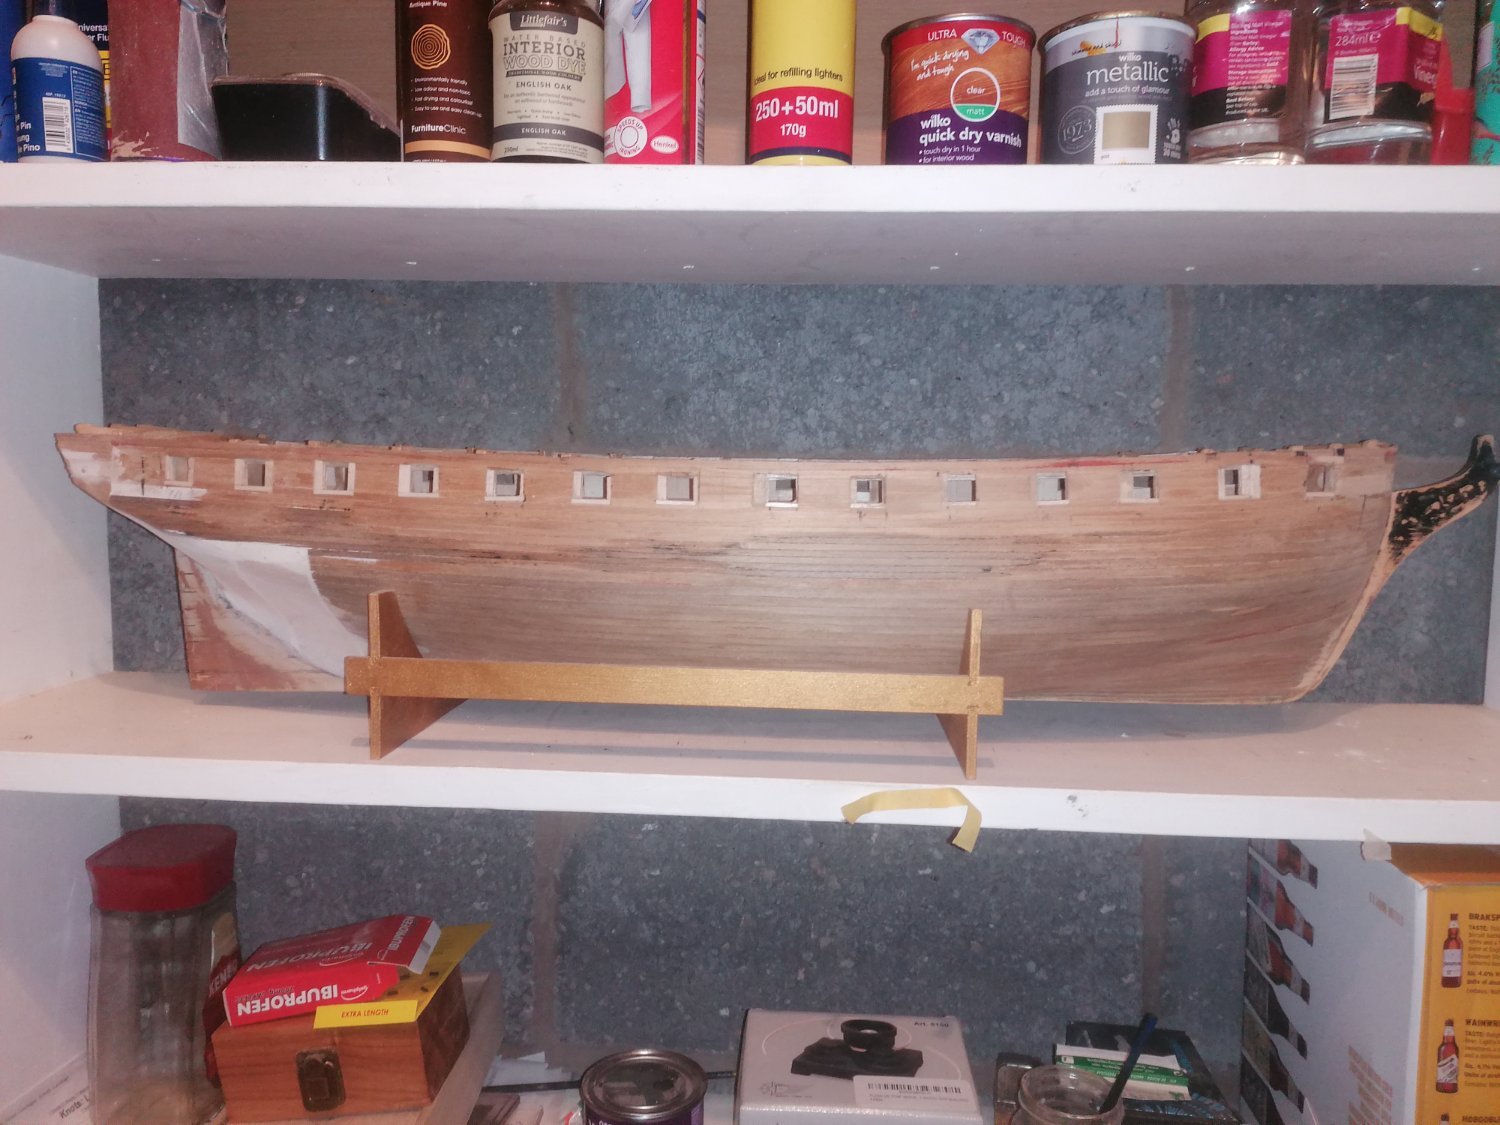
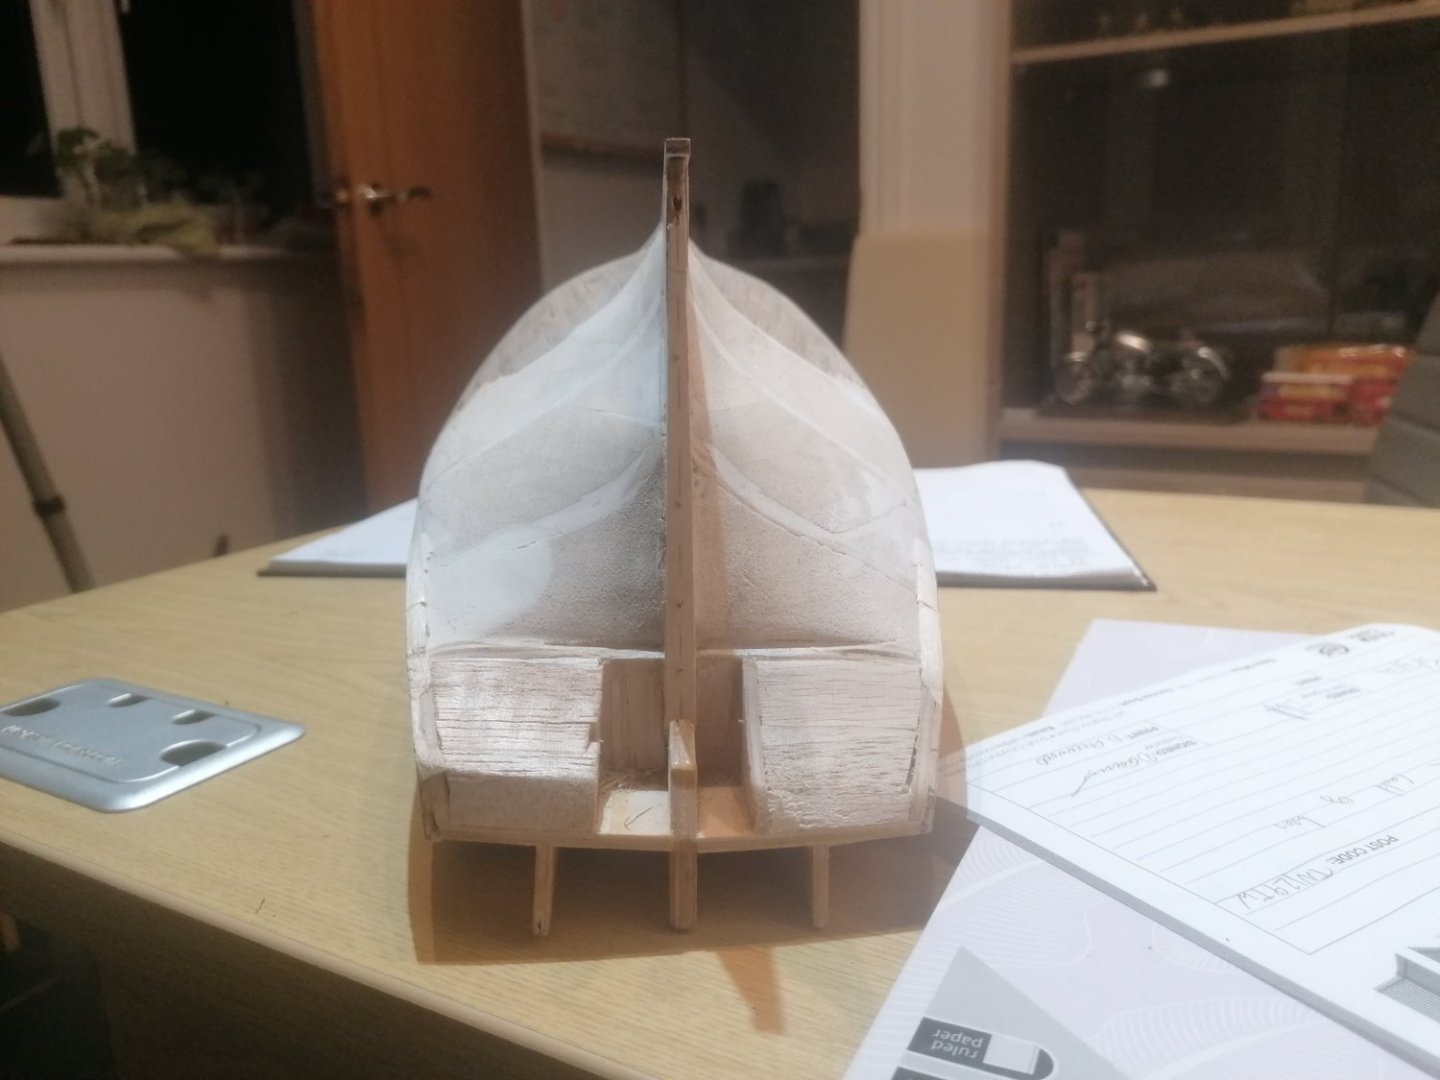
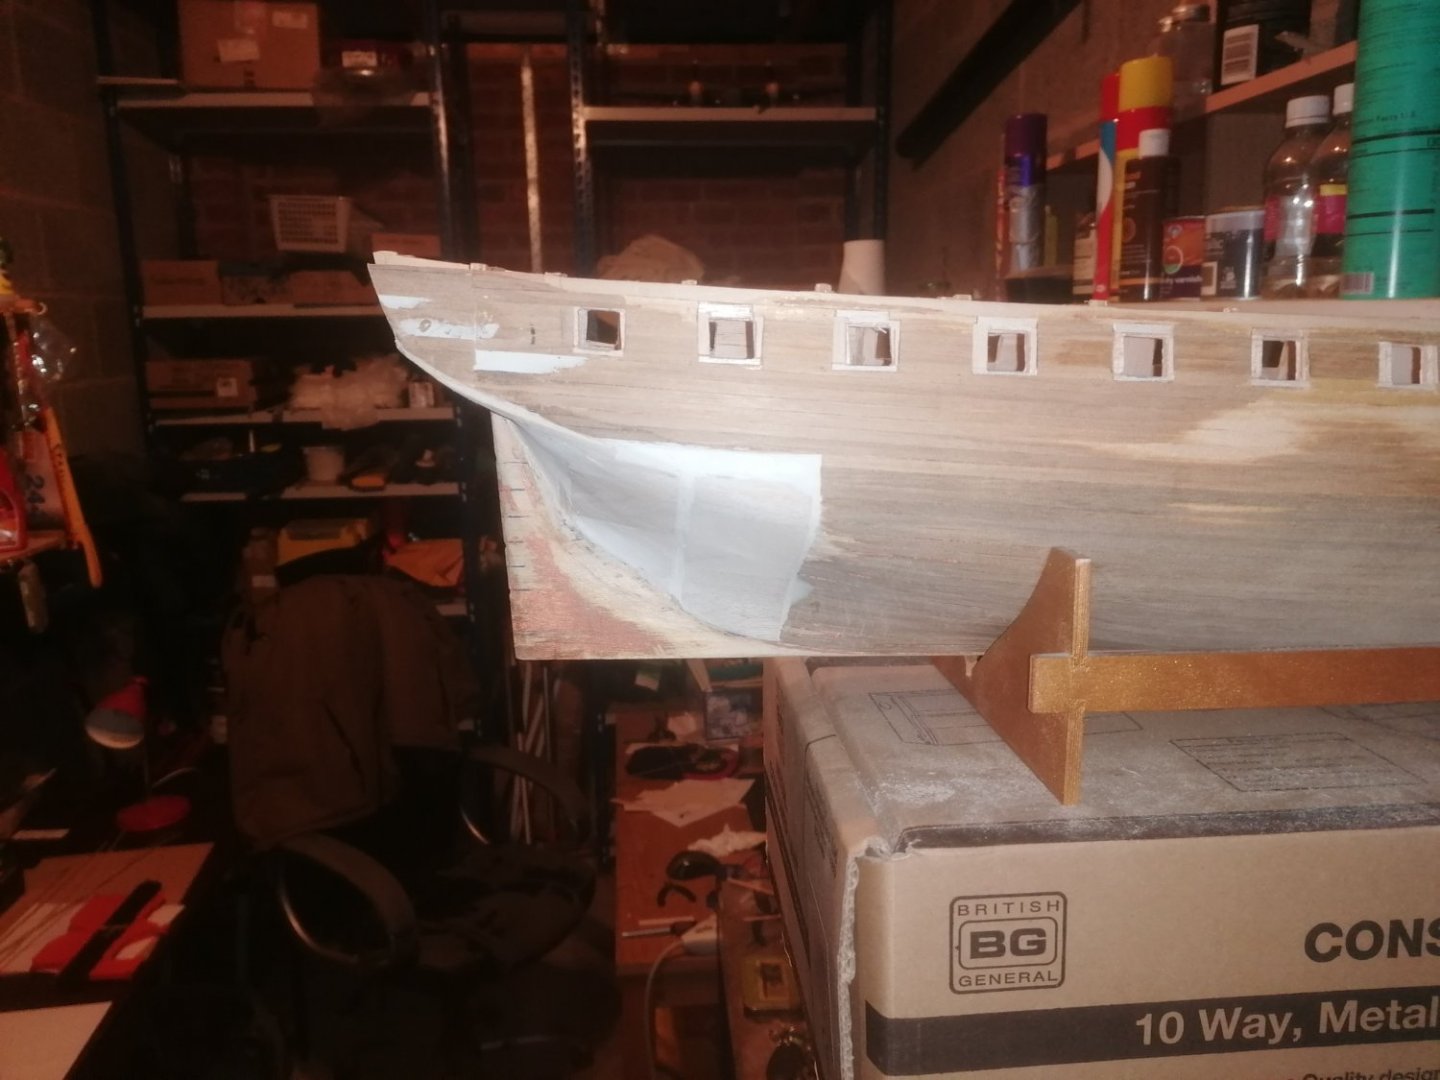
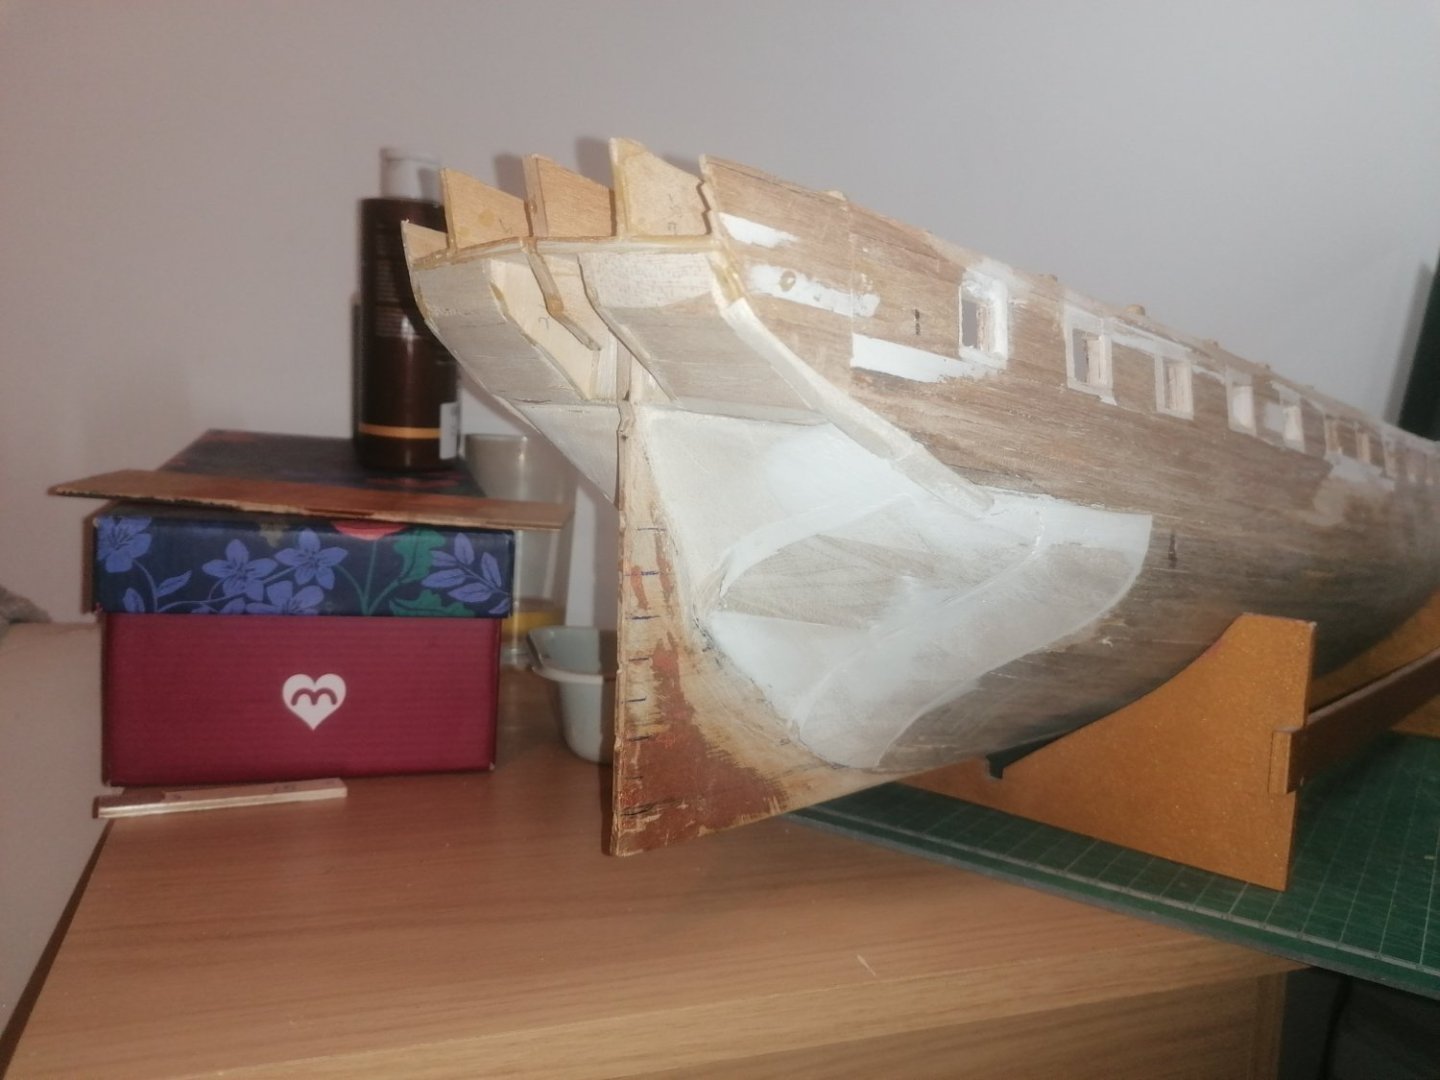
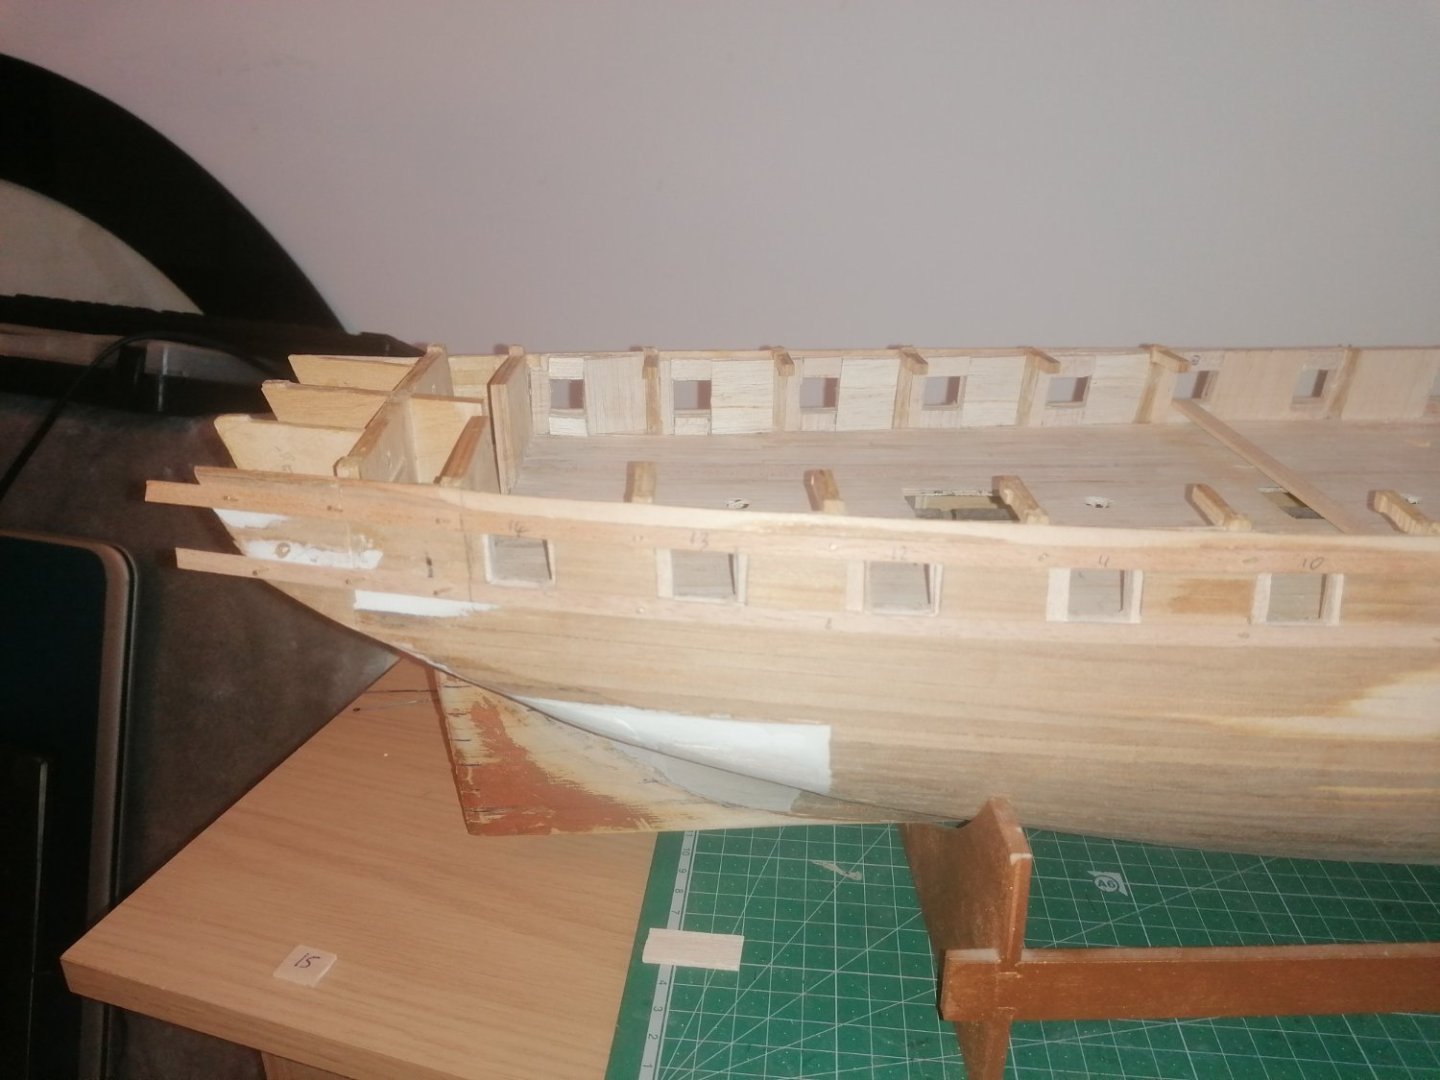
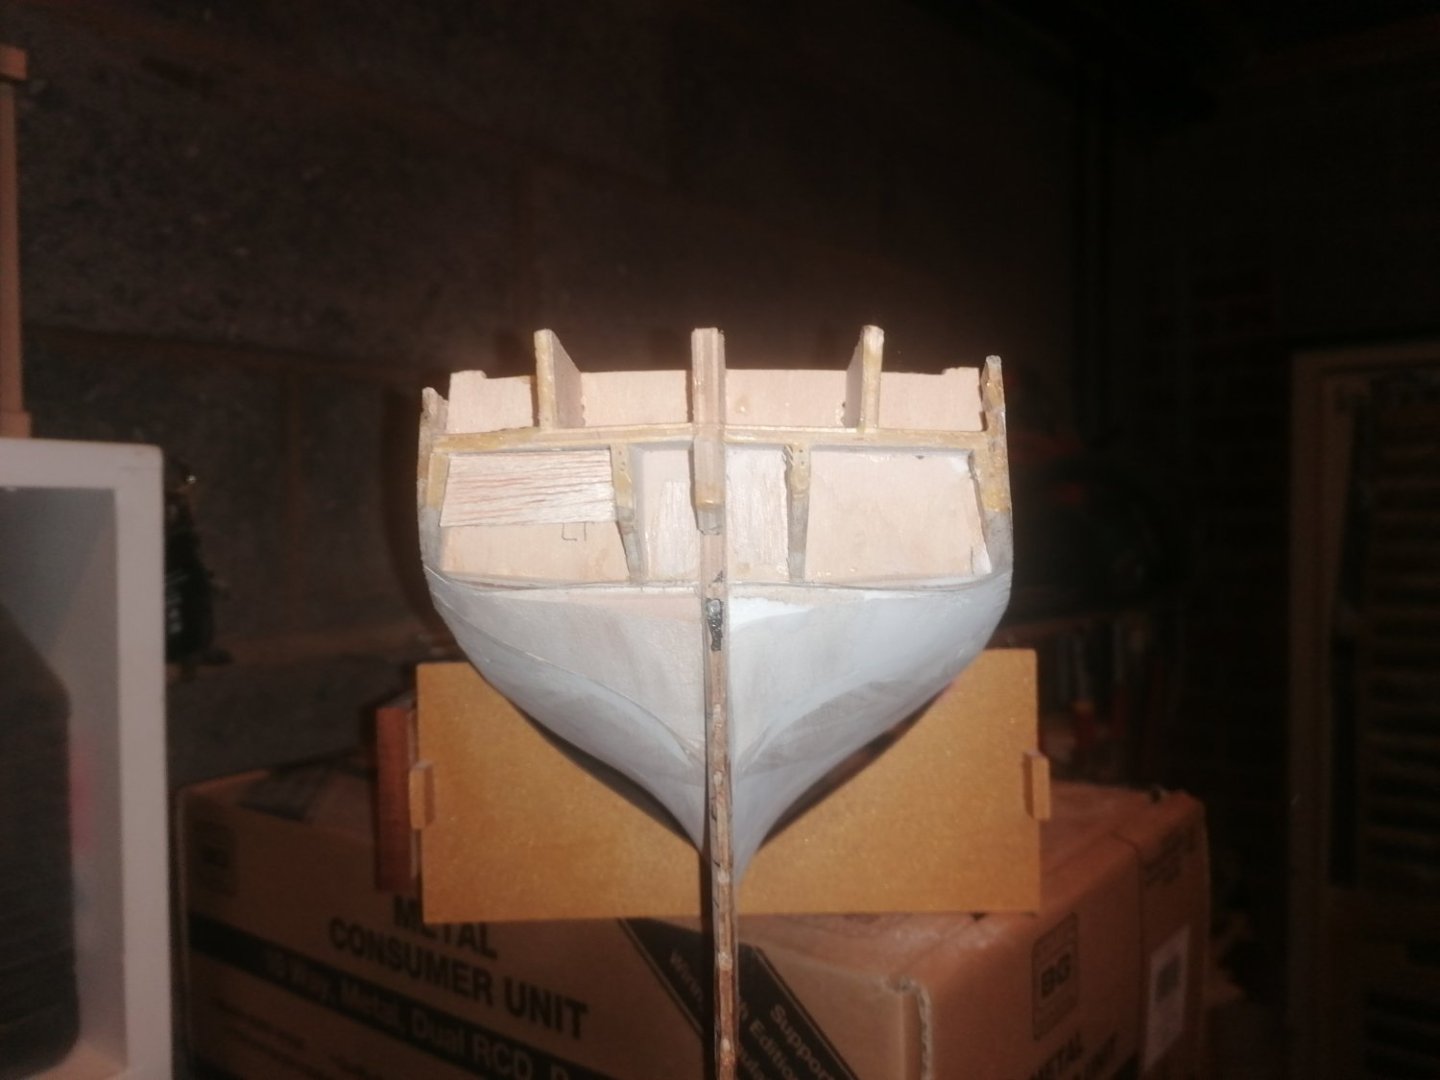
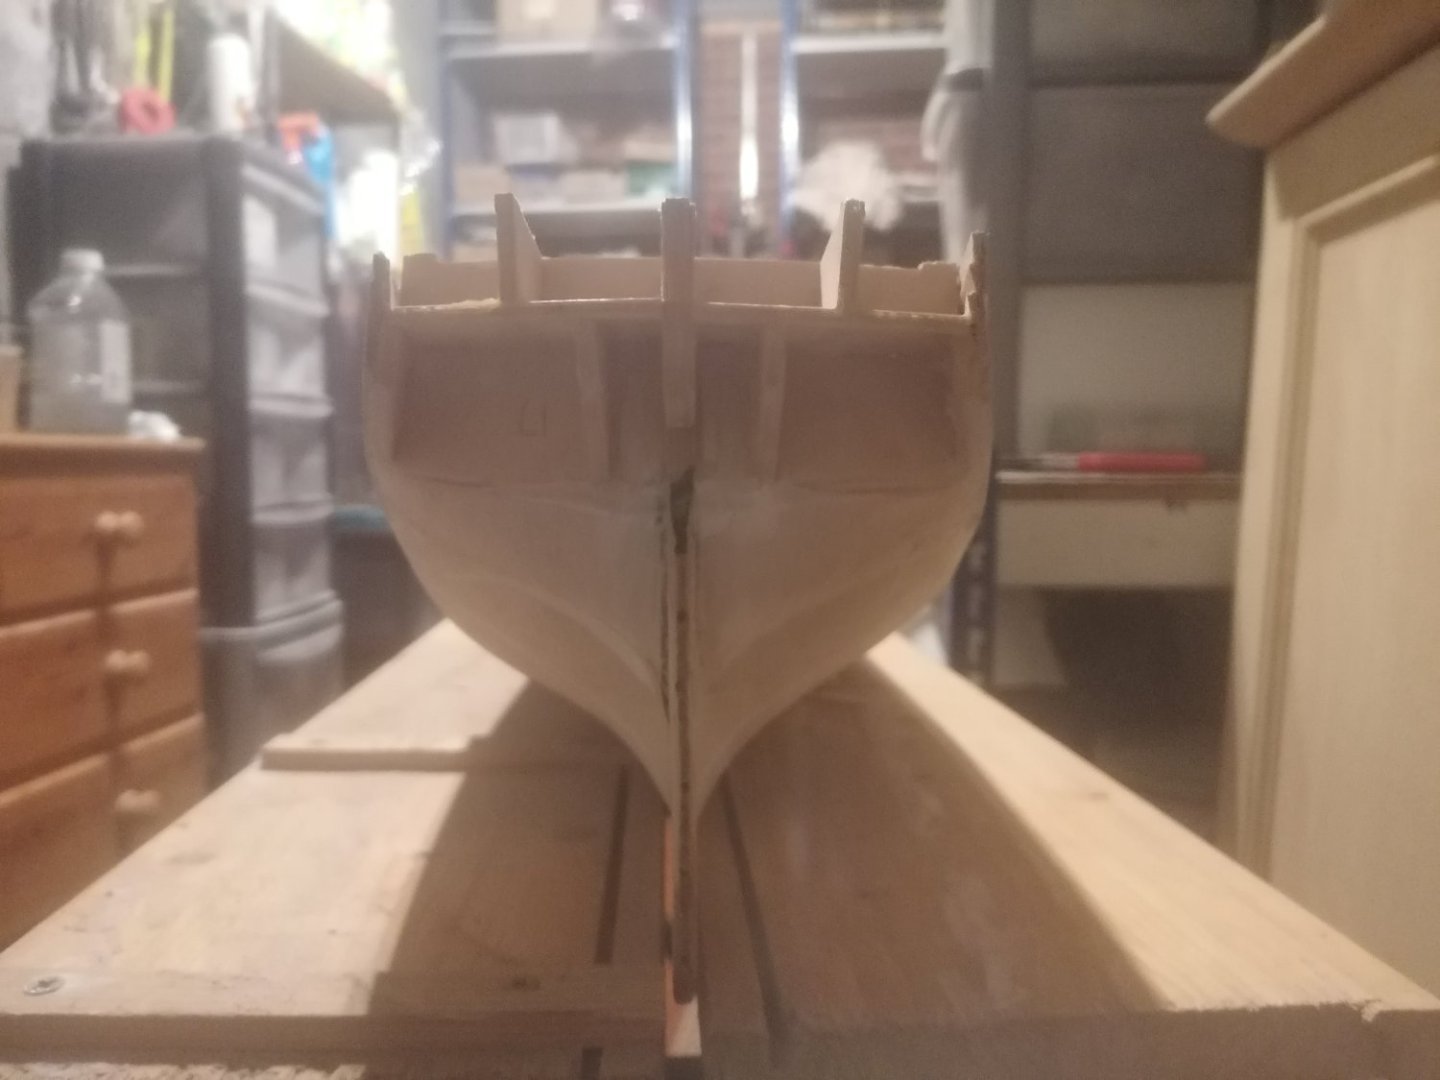
Thank you for the likes. I really appreciate you looking in. This is becoming a greater challenge than I expected but this ship deserves to look better than when I got her. I'm in for the long haul and am learning as I go which really helps. For me, as a novice, the instructions aren't the easiest to undersatand but one thing I have noticed is parts are named especially the rigging side of things. Other kits just show a rigging line going from A to B but no indication of what they actually are. Anyway, back to the build. I have now managed, I think, to achieve the shape of the stern that I am really happy with. This was, unfortunately, after I found I had removed too much balsa on one side which had left a concave depression beside the deadwater. I cut a 1cm strip of cardboard and marked the curve above the keel, which I replicated on the other side. I then worked my way up the stern marking the curve on the other side. Once this was completed I added filler to fix the problem so I now have pretty much a symetrical shape either side. It now just needs a fine sanding down. I then I moved my attention to shaping the rest of the hull. I am aiming to sand this down to pretty much the first planking so, effectively, I can redo the second planking from scratch. However, due the construction, I have almost lost the top plank above the 1st gunport on one side. The inner plank came off when removing the gunport, which, I hadn't realised at the time. So, I moved my attention again to the gunports (and the inner lining). These need to be fitted and shaped before I can sand down the hull any further. I had also been wondering if I would have to remove the sides completely from the gun deck up. If this was done it would be almost impossible to achieve the curve of the hull from the gundeck upwards, especially for the quarter deck and fo'csle. This will be enough of a challenge as it is. Getting the gunport lining good from the outside, I didn't think would be a problem, getting them looking good from the inside will be near impossible. After a bit of thinking and having thought weeks ago the inner lining might have to be removed, especially as it looked so bad and had already come away from the frames. I removed both sides. Whoever had started construction had run strips of balsa up almost beside the sides of the gunports but not quite in the correct position. The reason the lining came away so easily was the planks were glued to these balsa strips rather than the frames. The upshot of this is I can sand down the sides from the inside and build them back up. I am also hoping I can build up the gunports at the same time and line them afterwards.


-
Msny thanks for your input. I have said sanding but I have also been using the half round file at the stern. The wale on this ship is going to be sanded /filed and then completely redone. I am not happy with the width or positioning of it. So I have been more concerned about the shape below the counter. I have run a couple of planks on either side and the flow looks almost right. Once this is completed I will plank the counter and then see how it goes. Thanks again. David.