HOLIDAY DONATION DRIVE - SUPPORT MSW - DO YOUR PART TO KEEP THIS GREAT FORUM GOING! (Only 20 donations so far - C'mon guys!)
×


newbee
-
Posts
180 -
Joined
-
Last visited
Content Type
Profiles
Forums
Gallery
Events
Everything posted by newbee
-
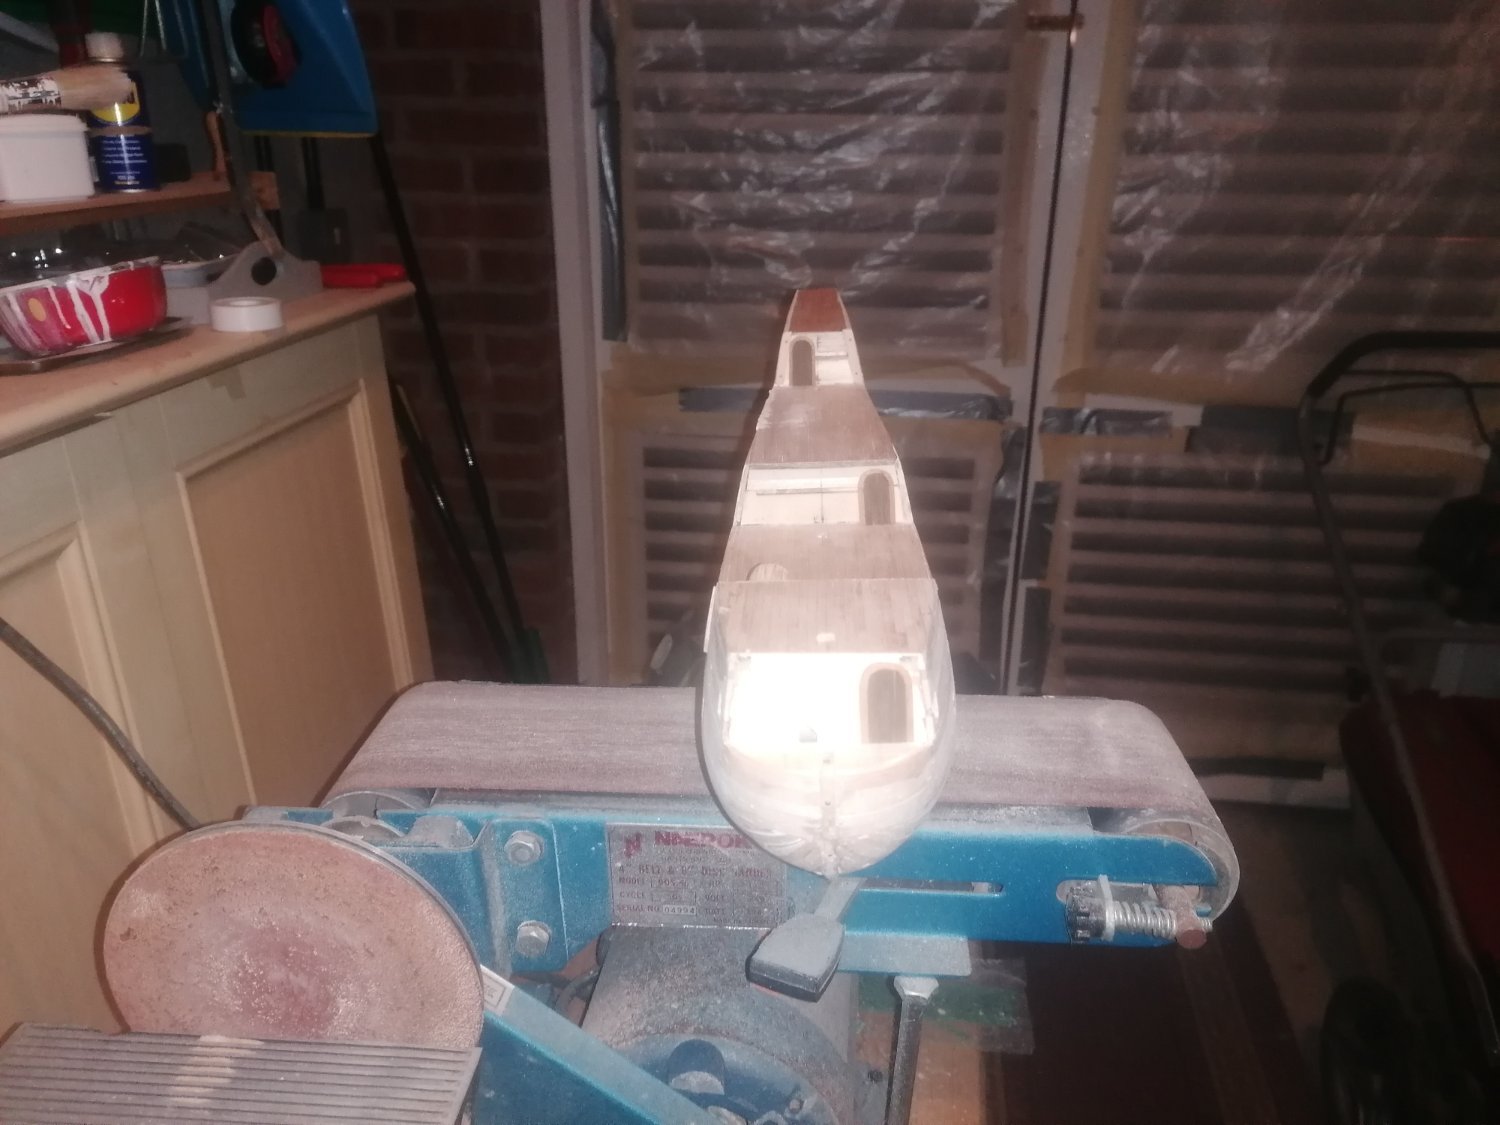
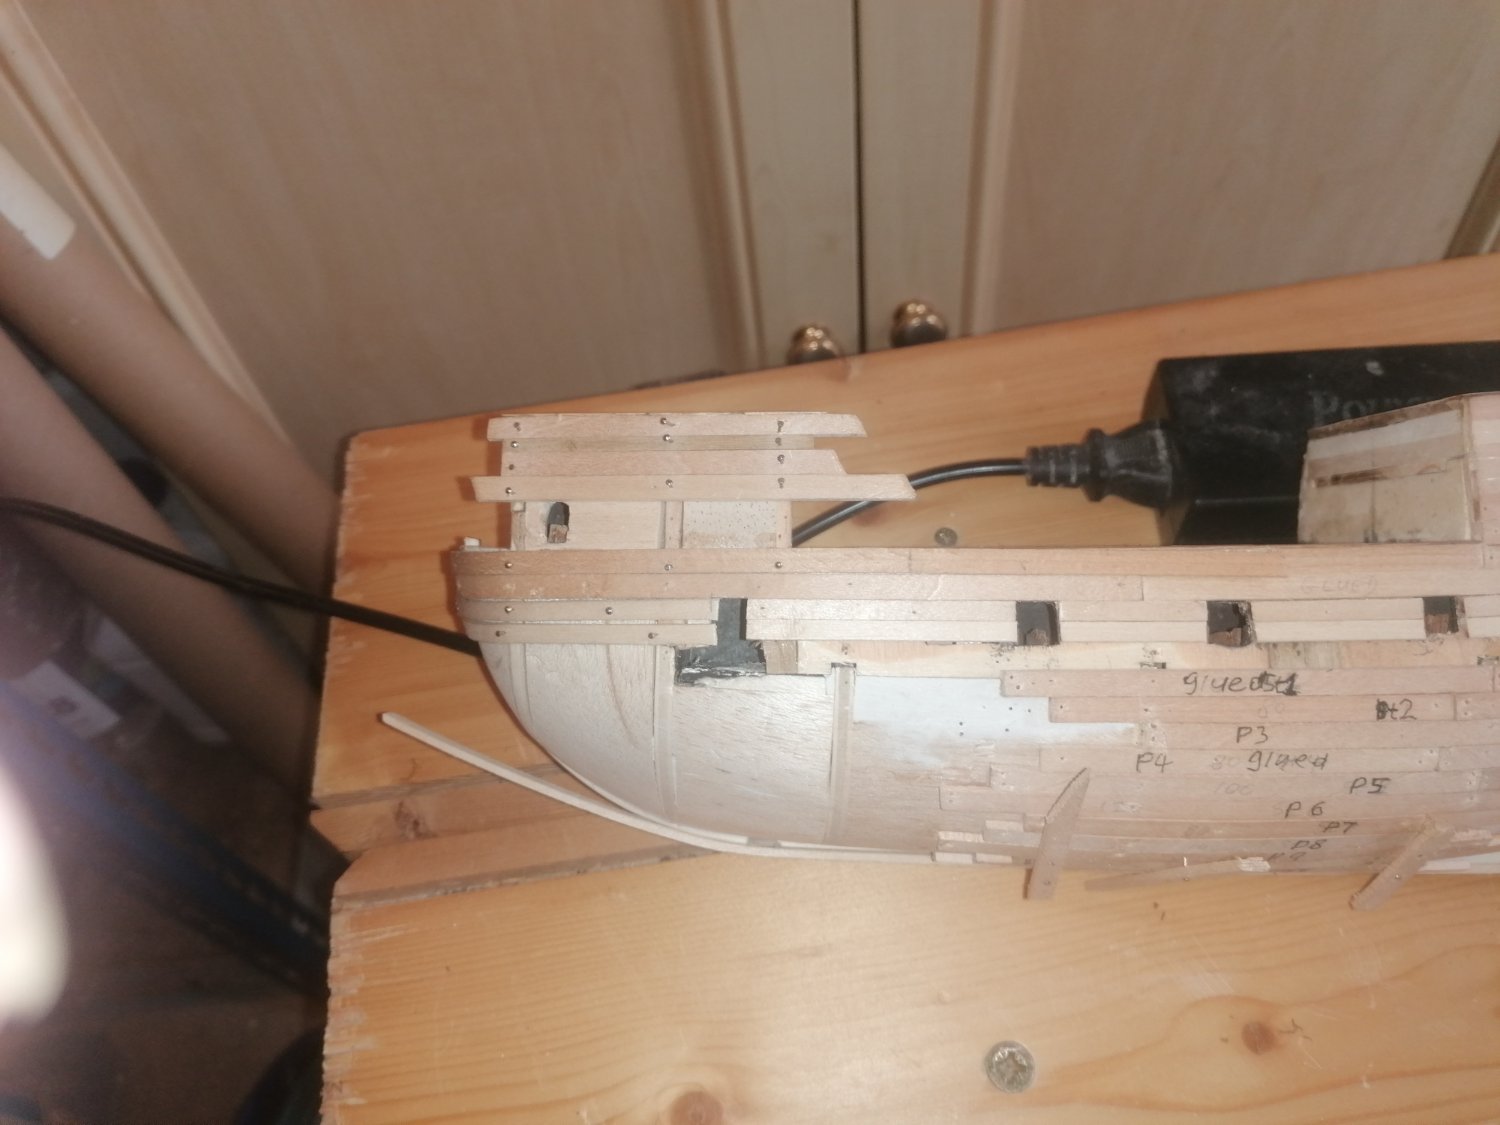
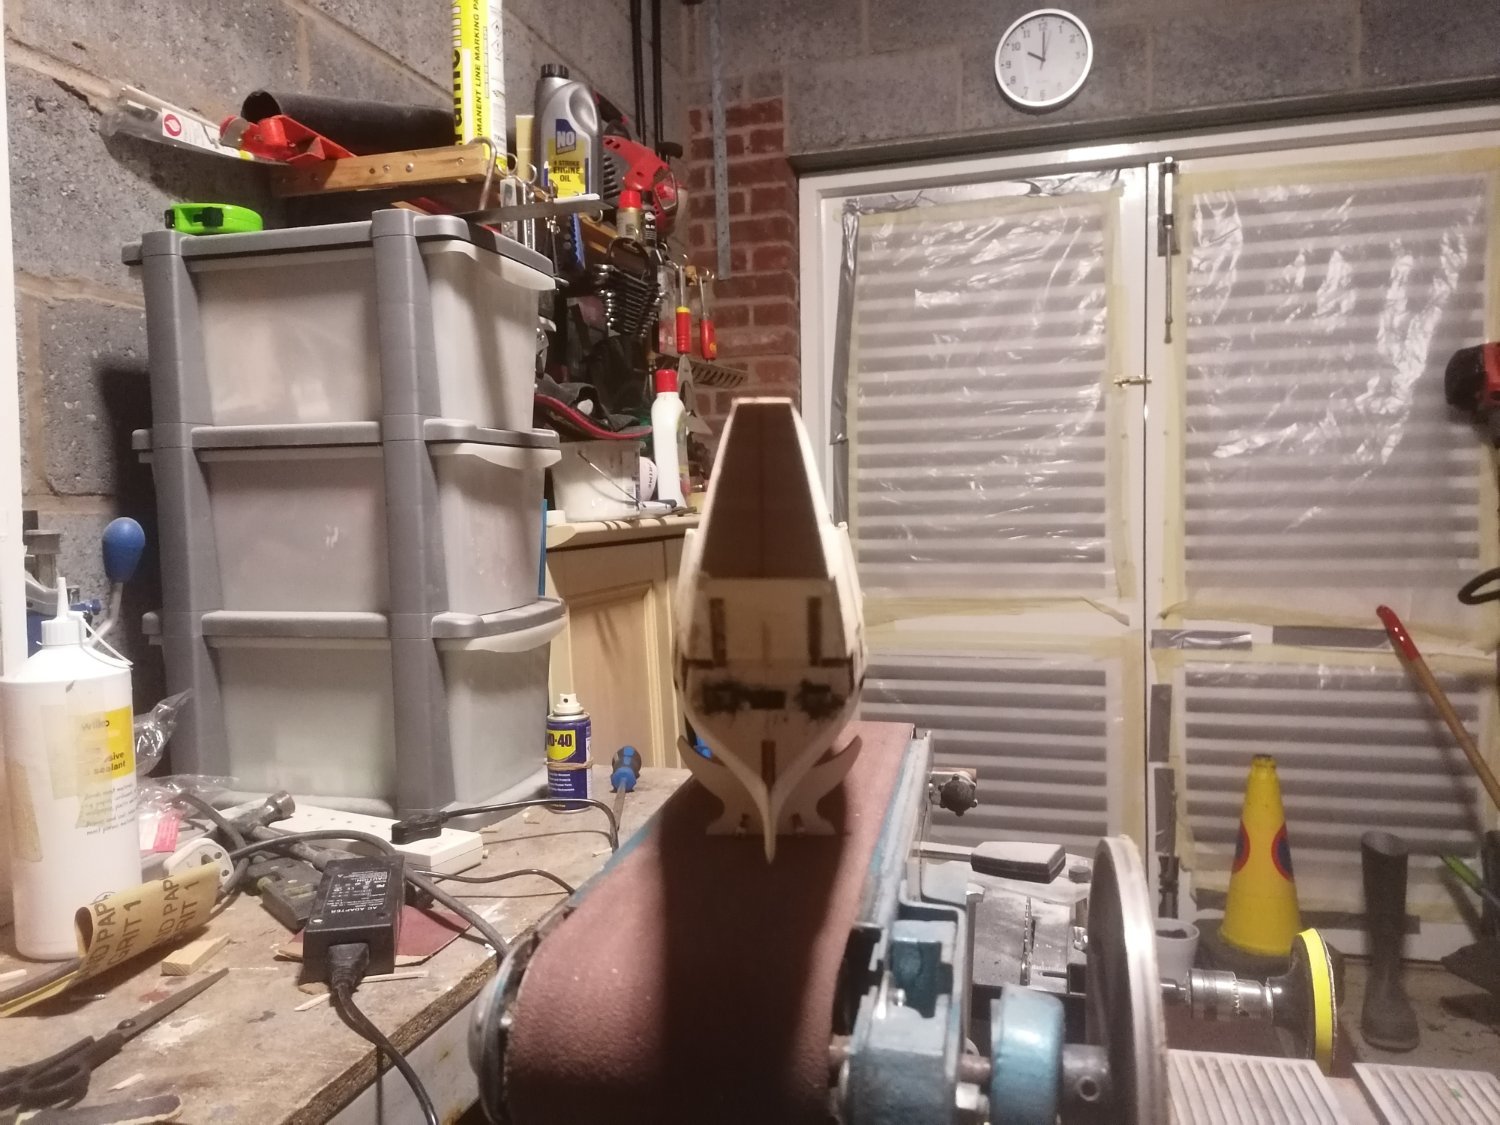
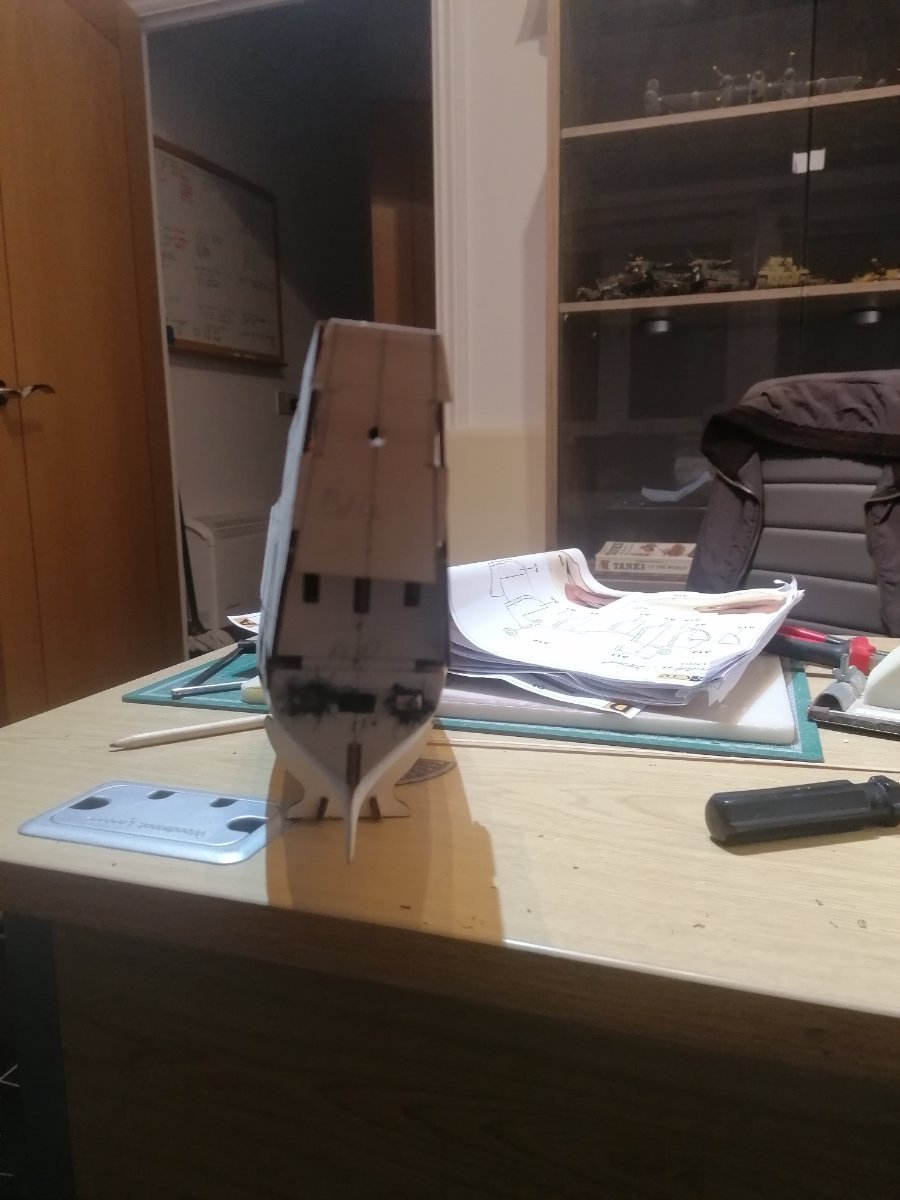
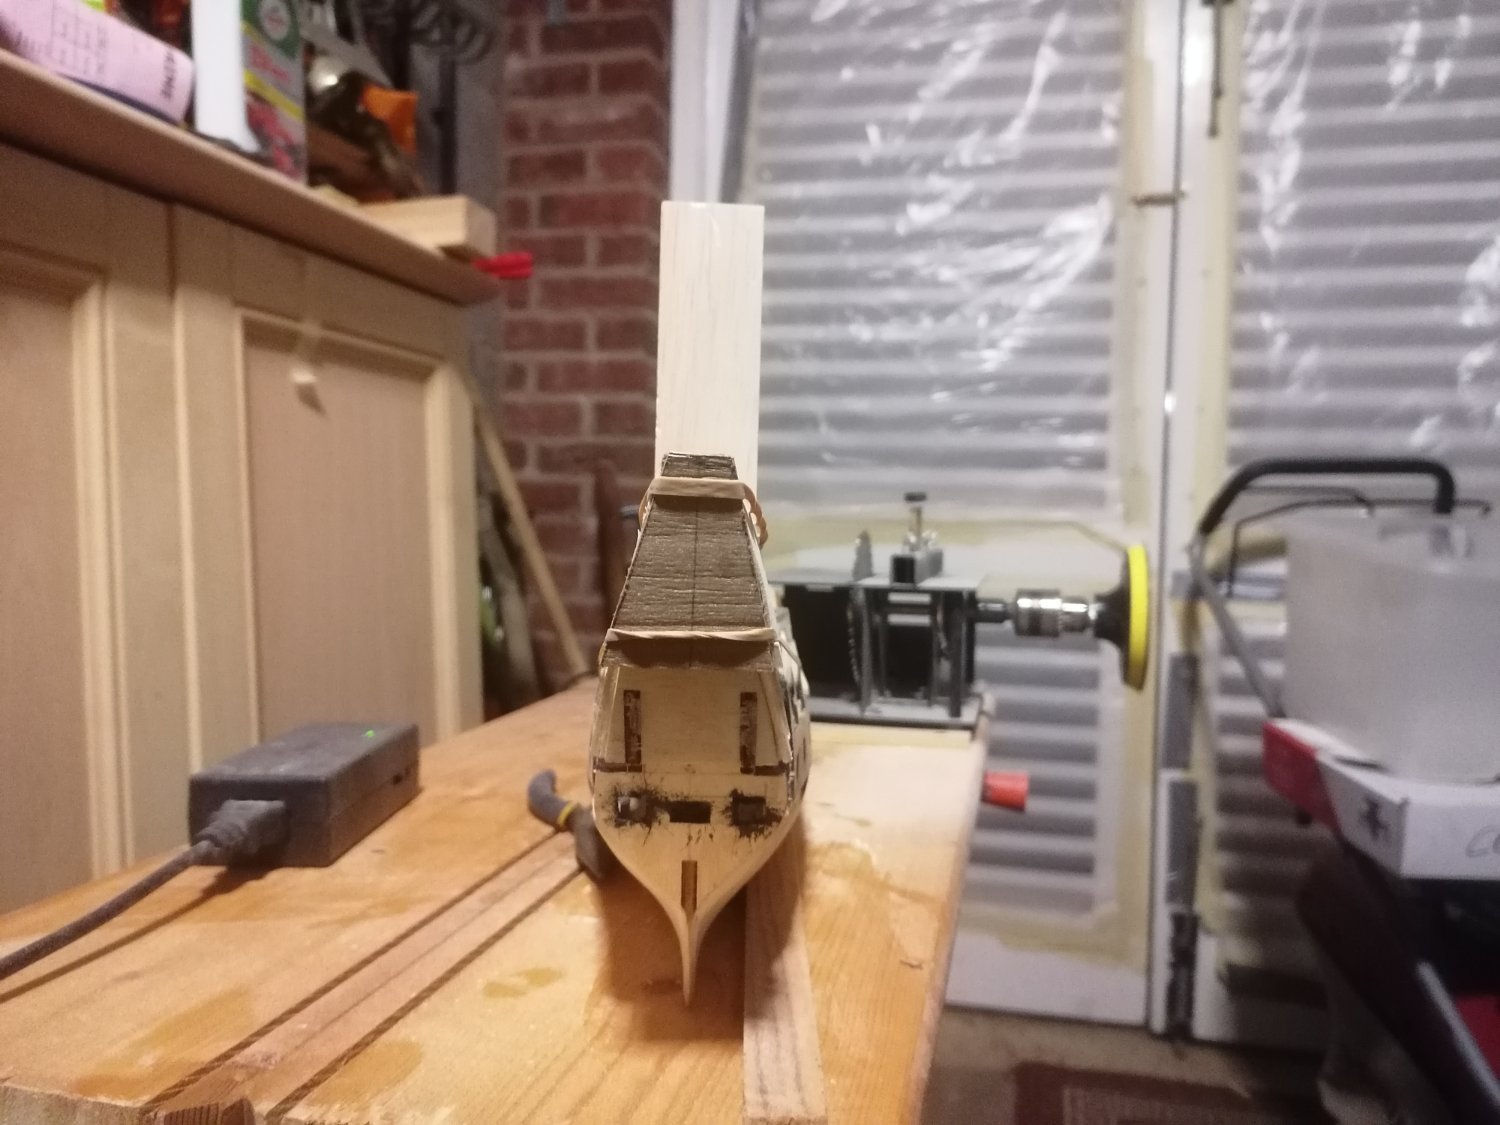
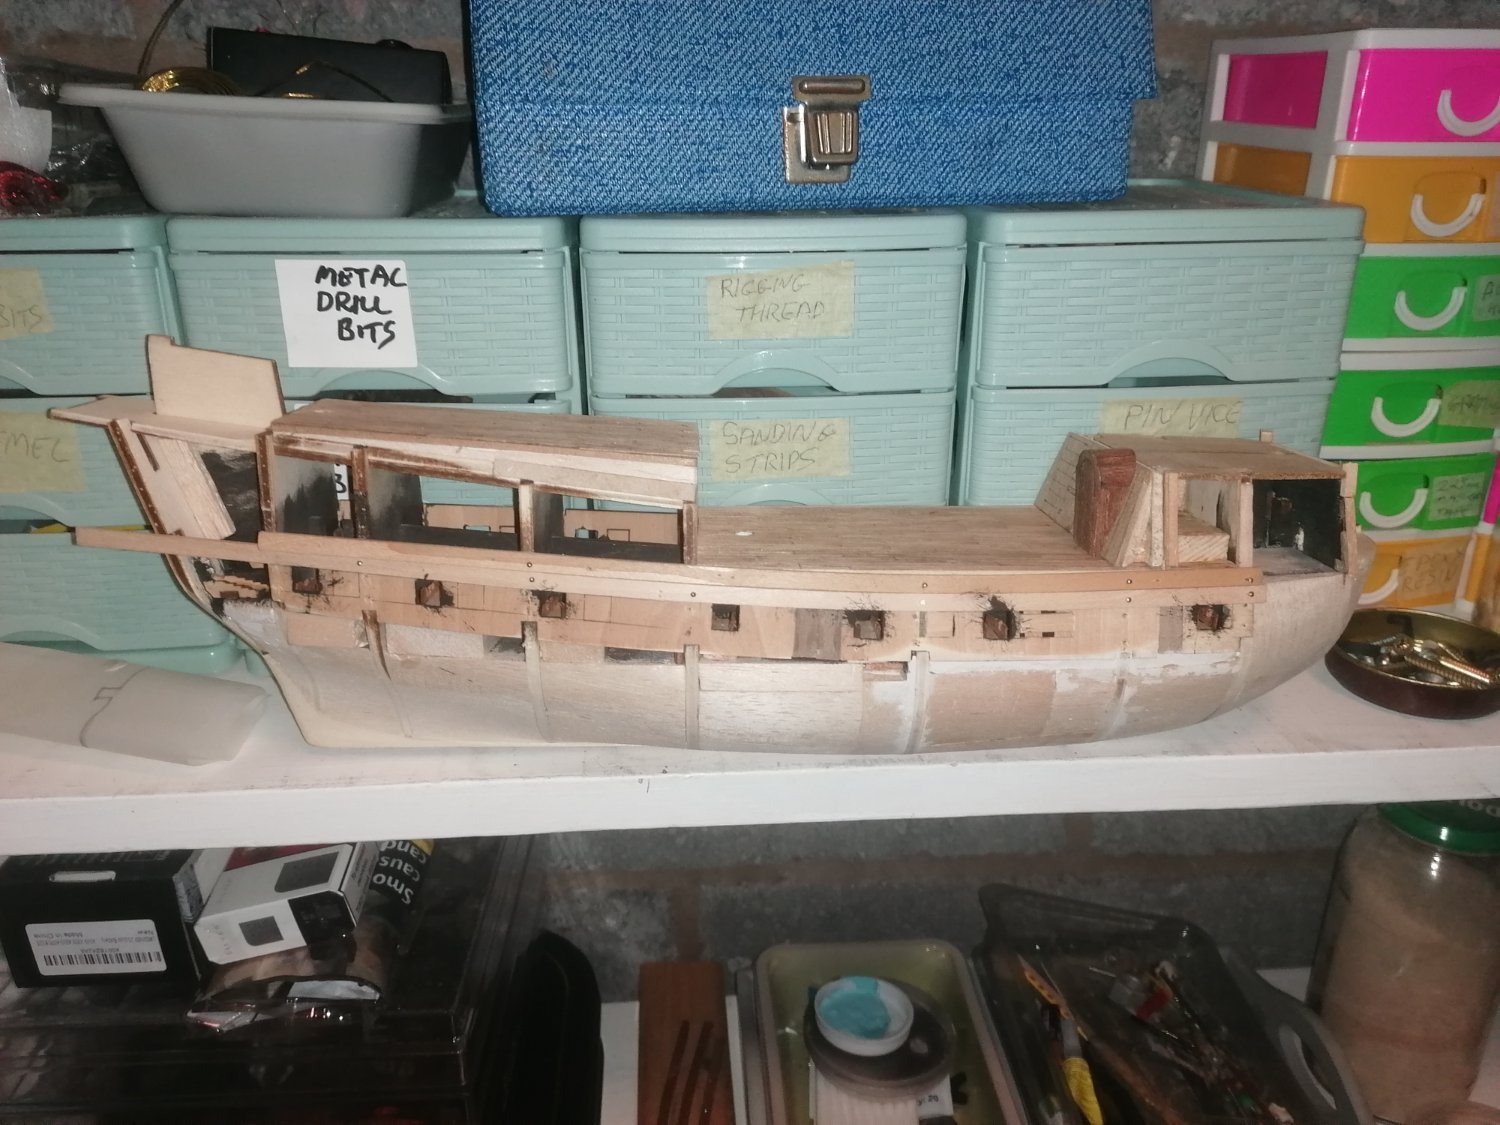
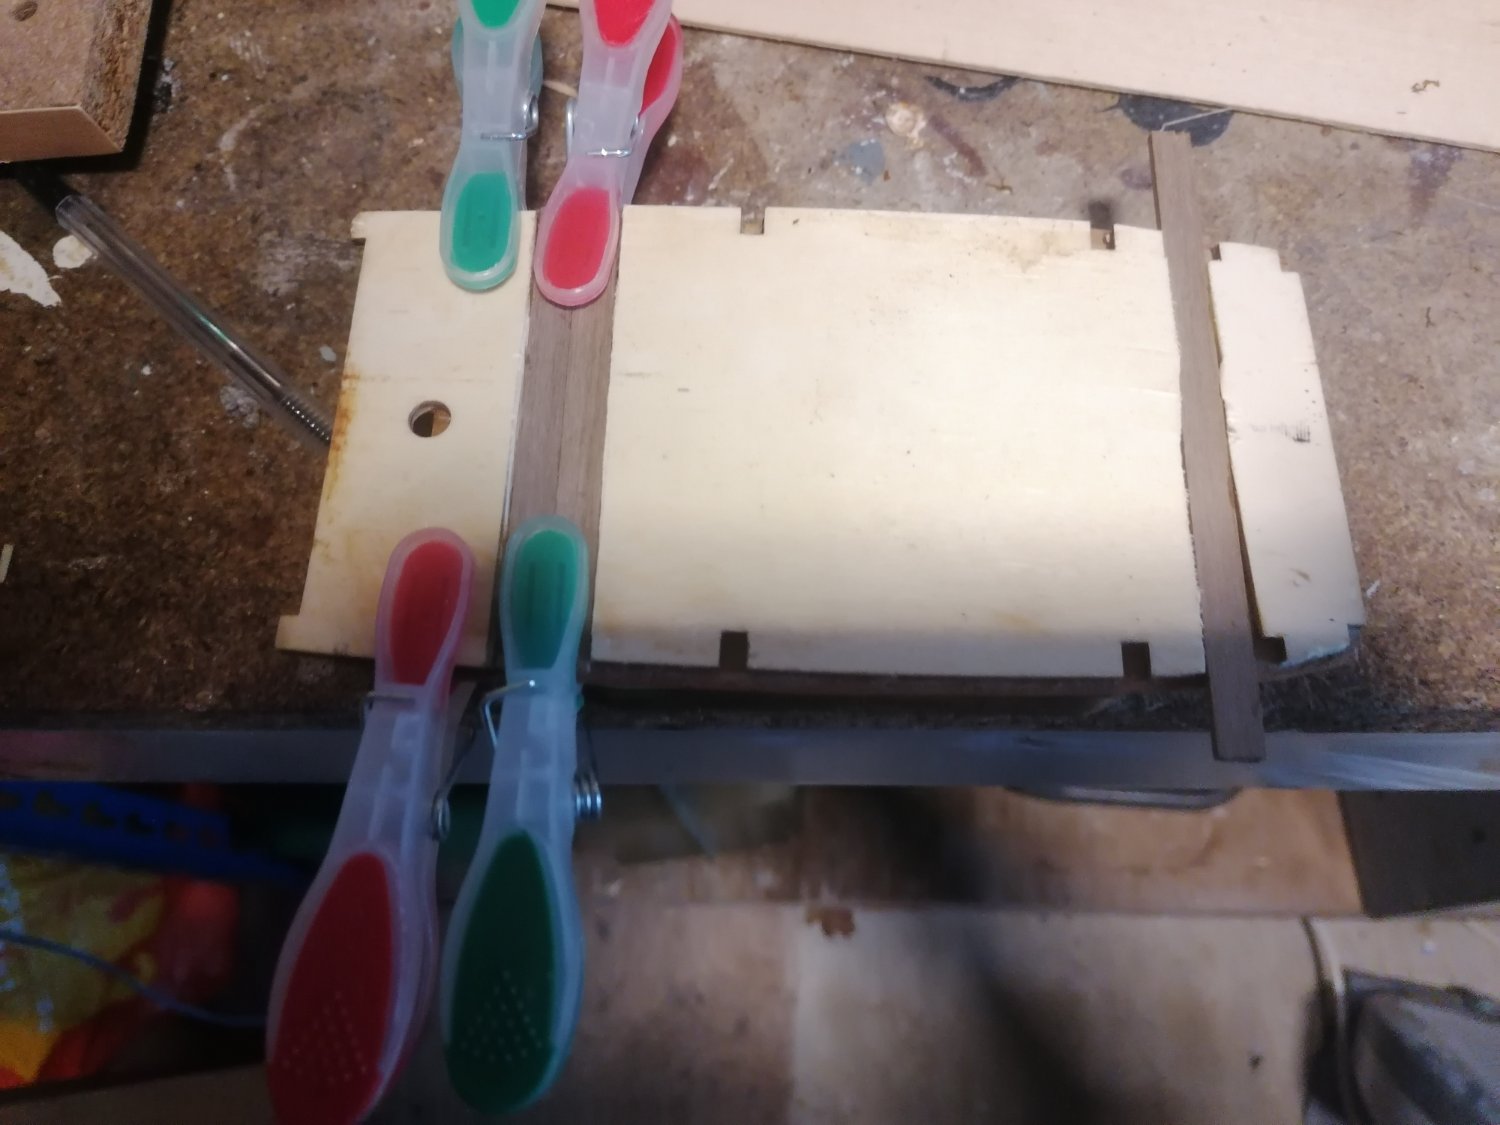
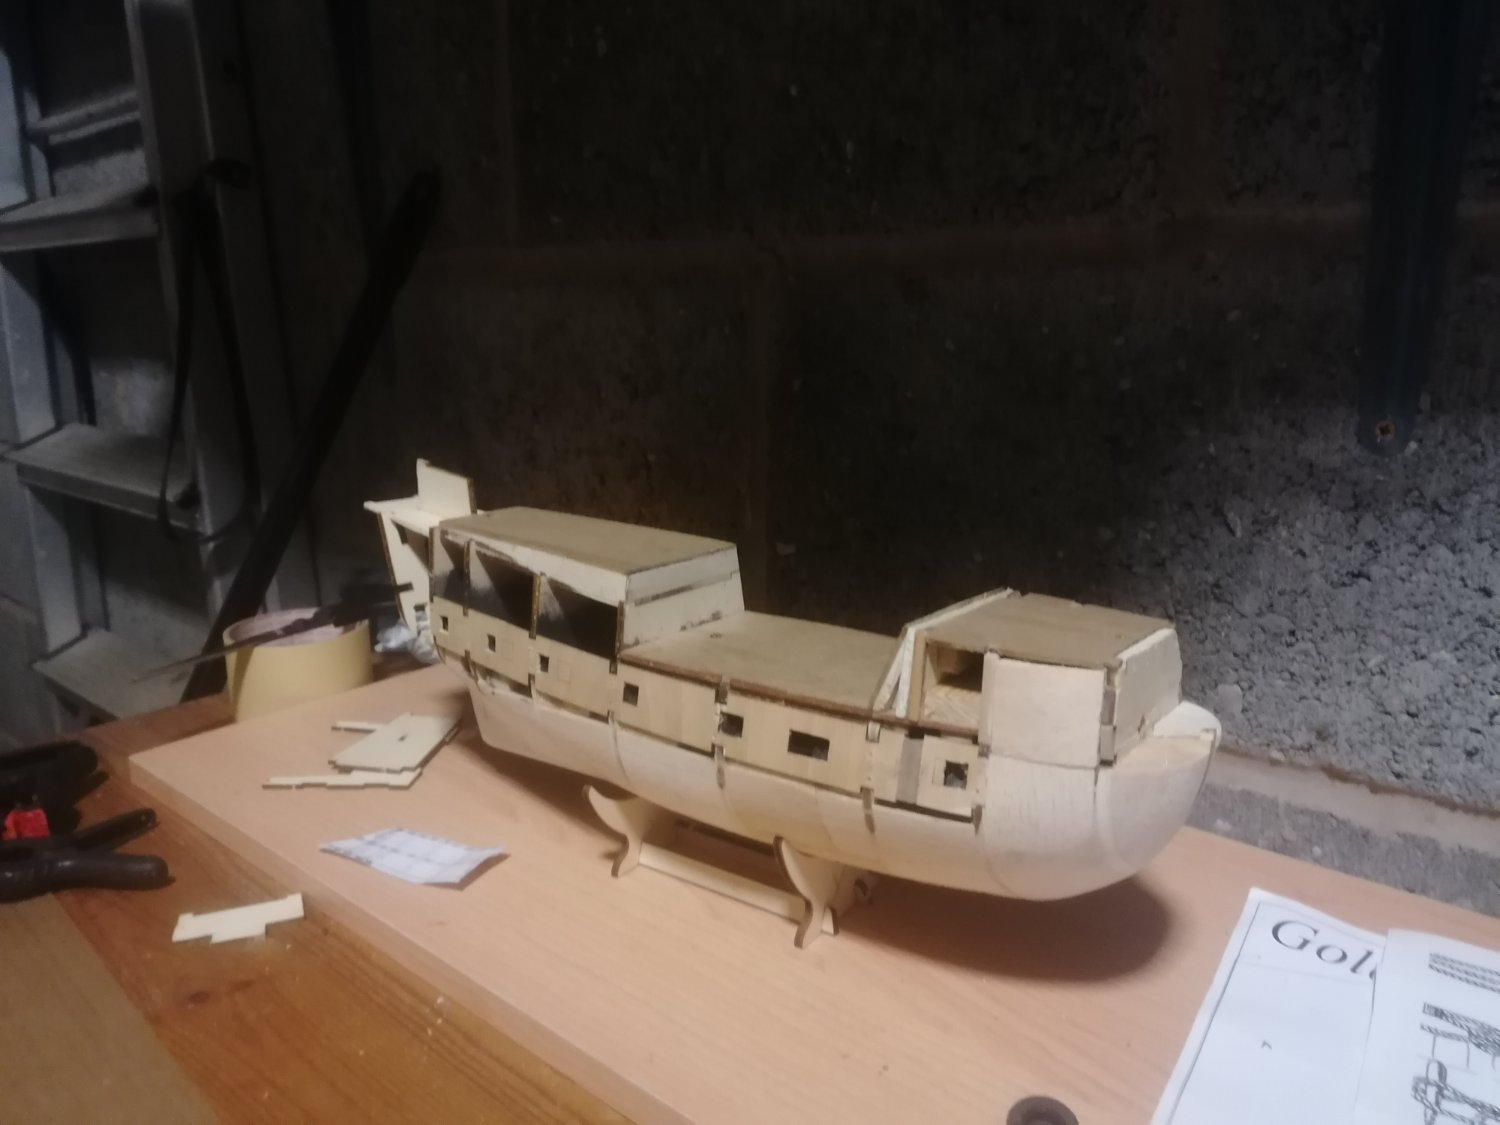
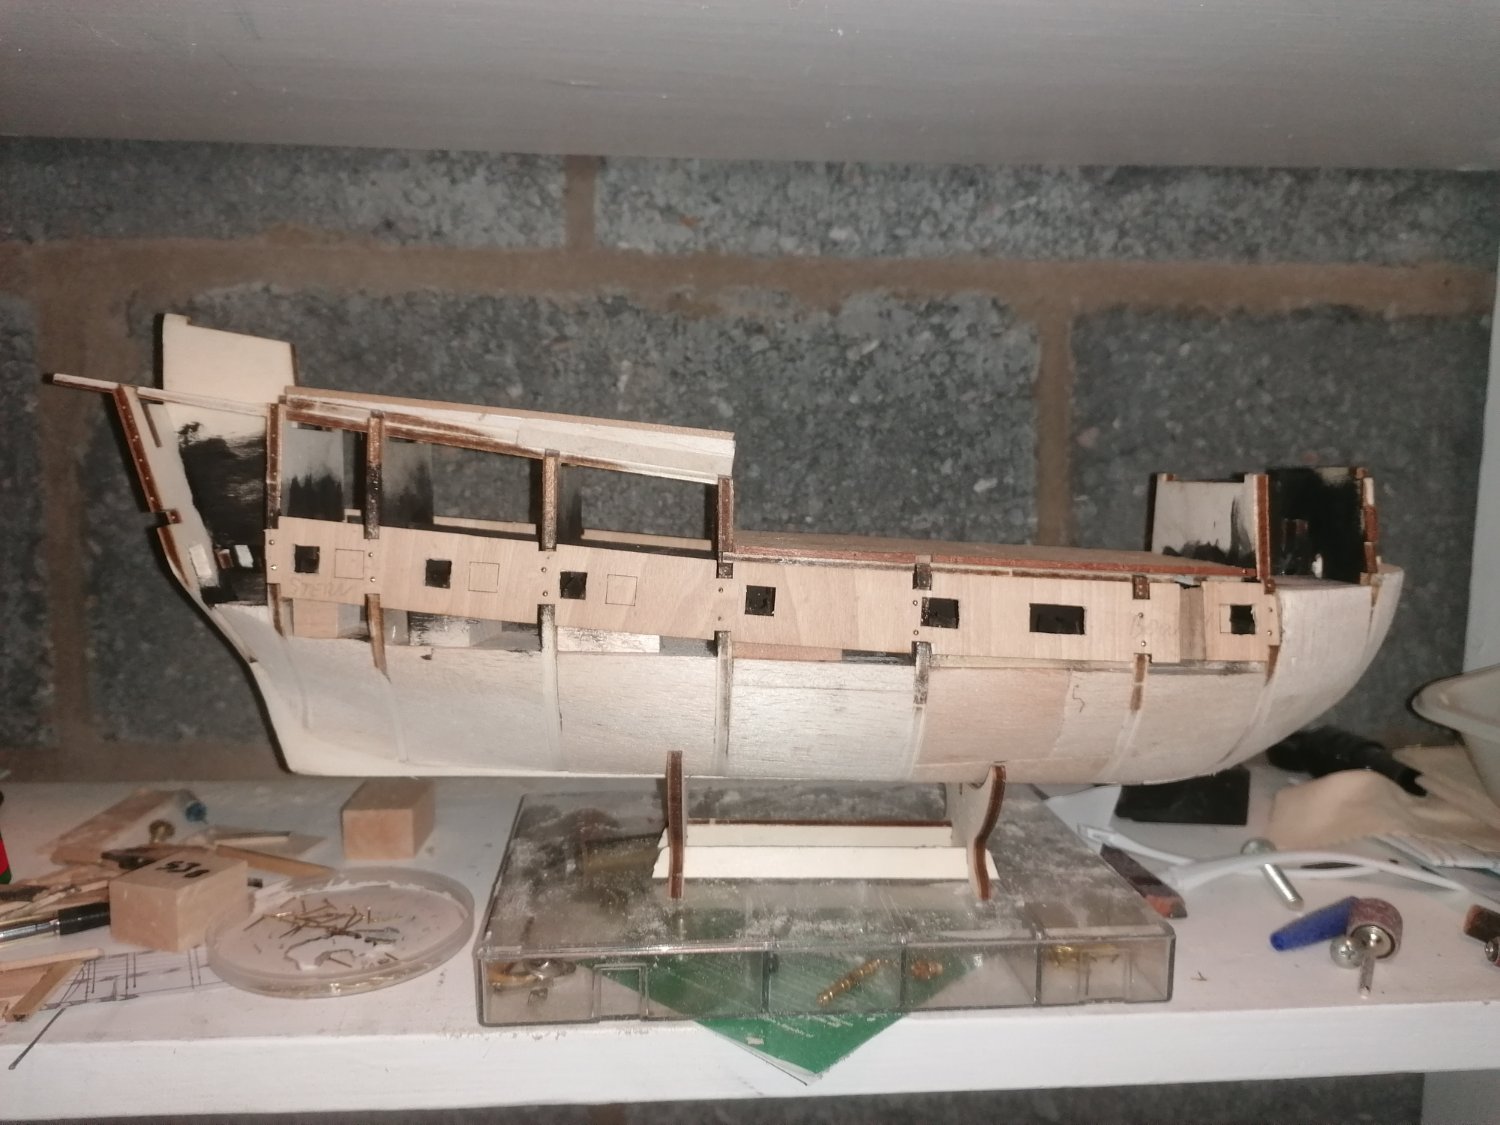
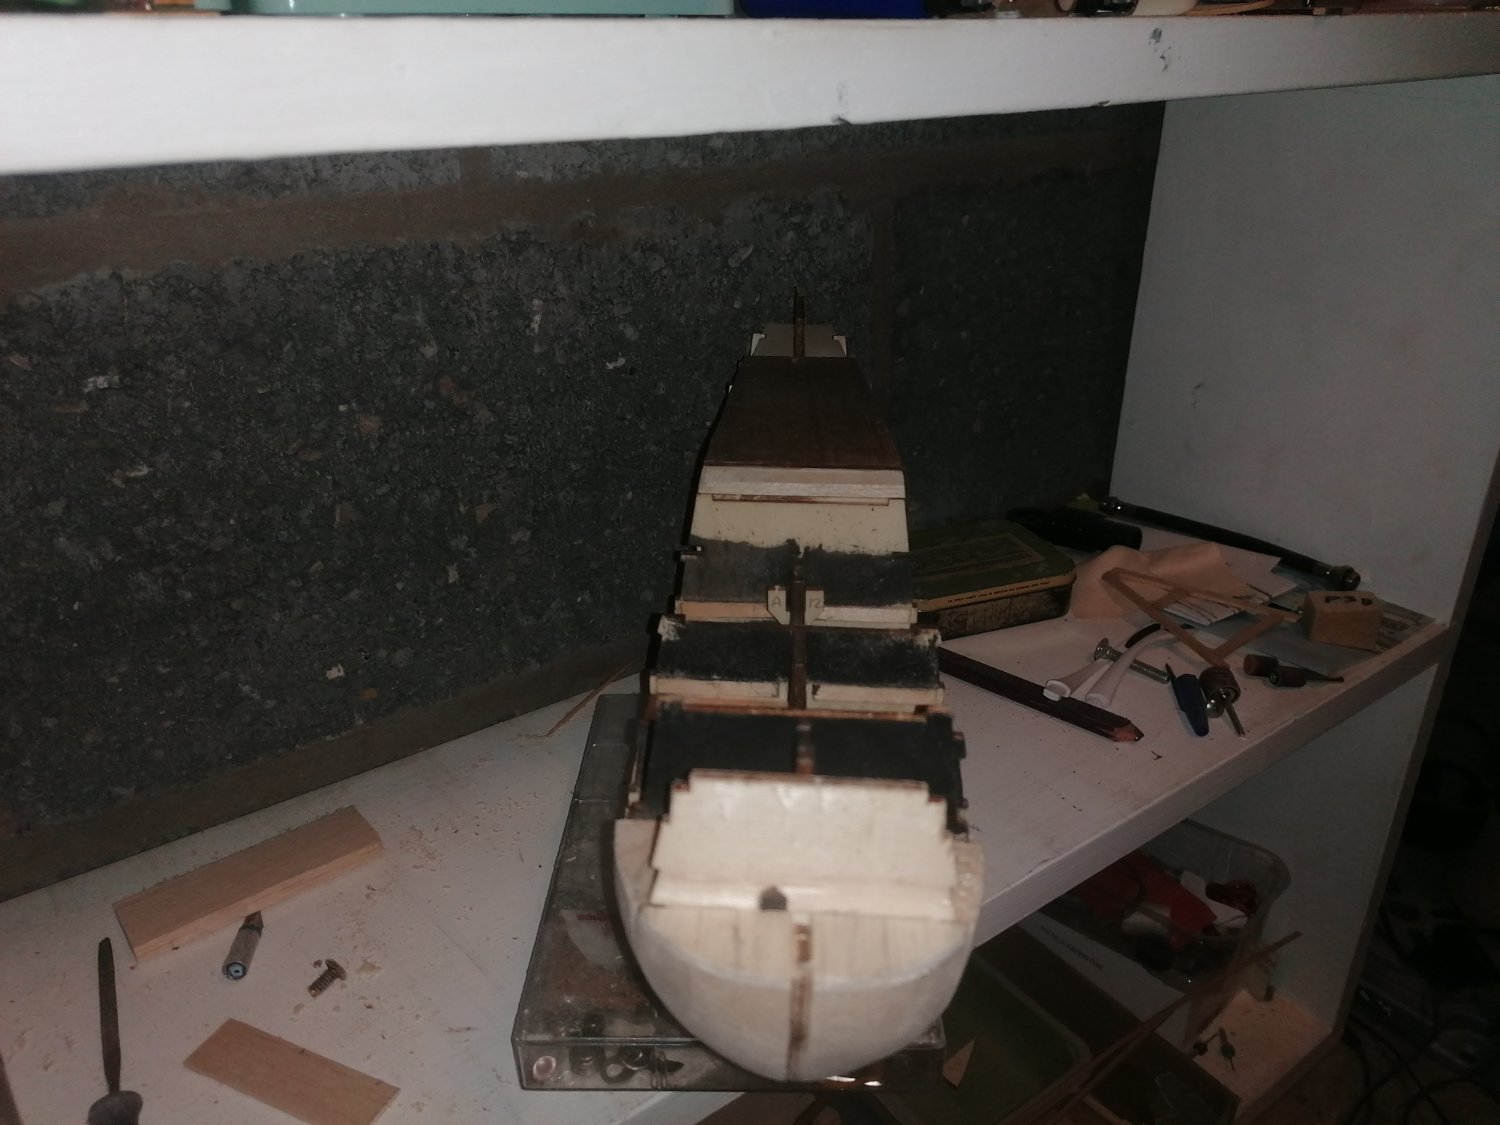
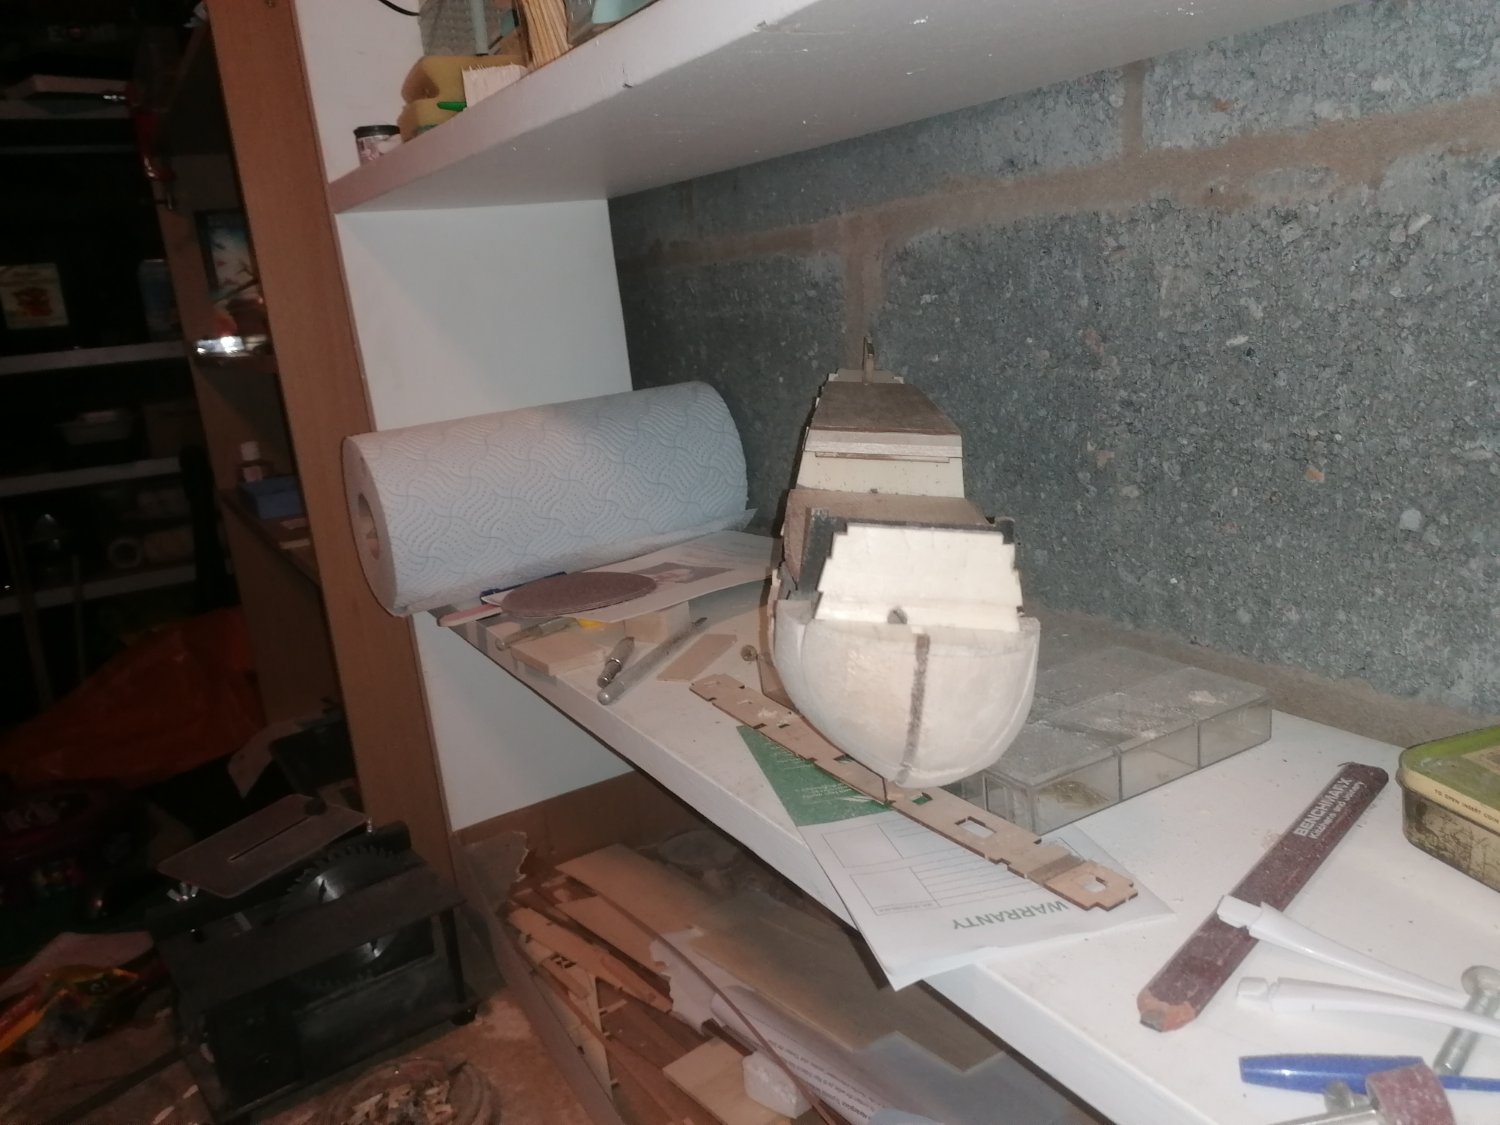
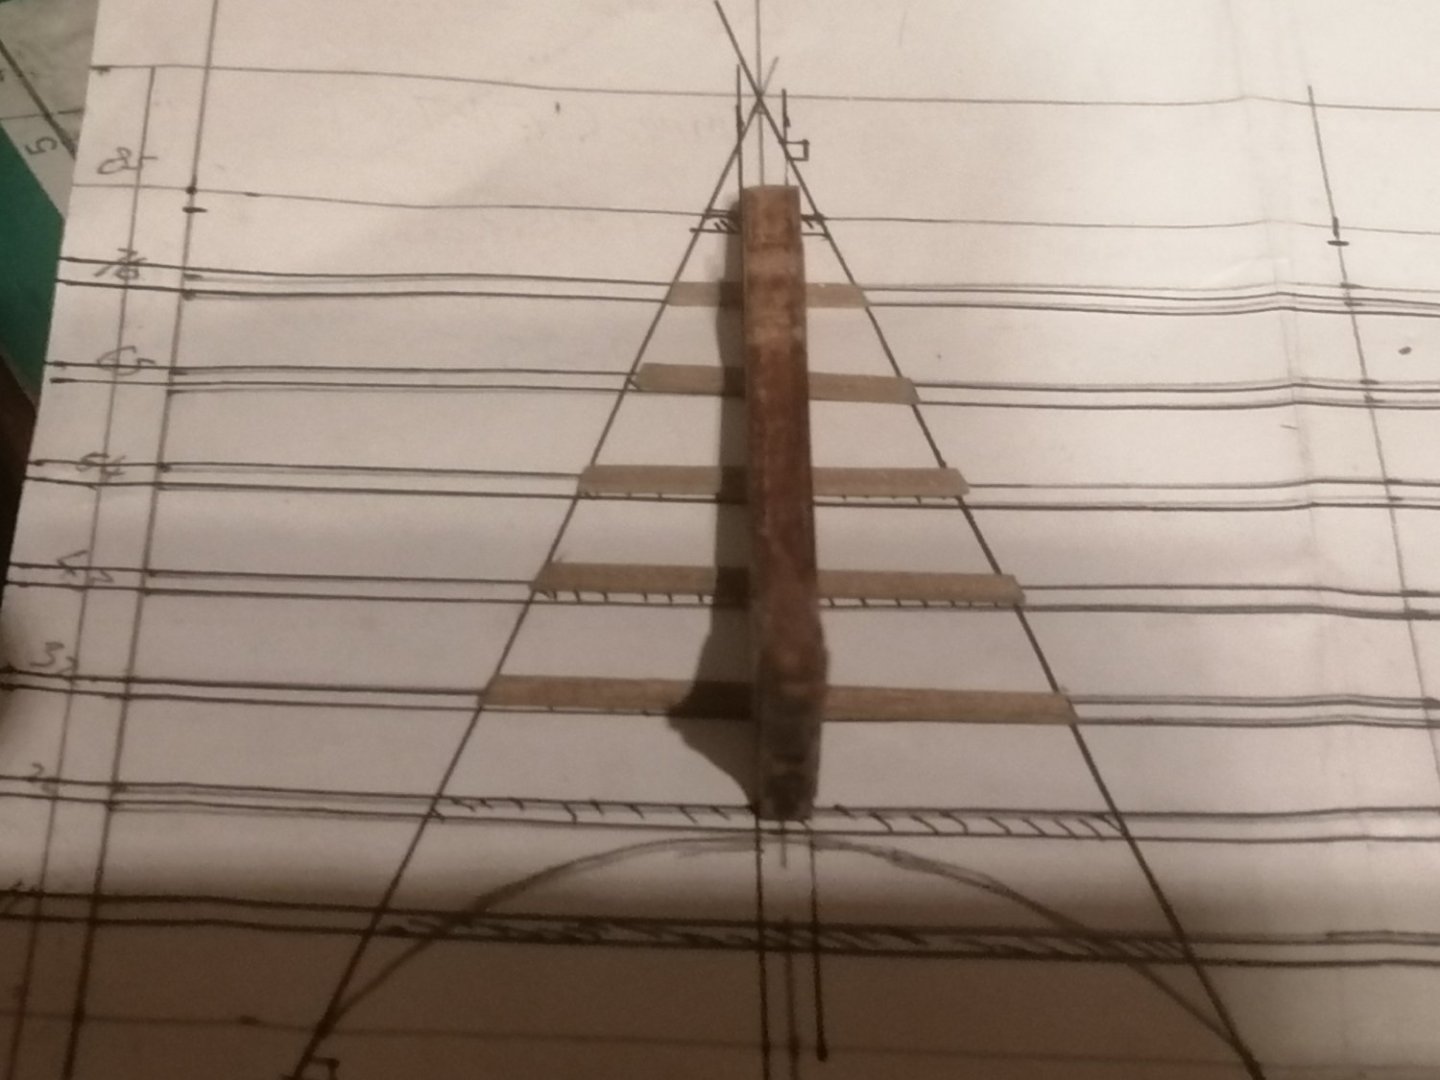
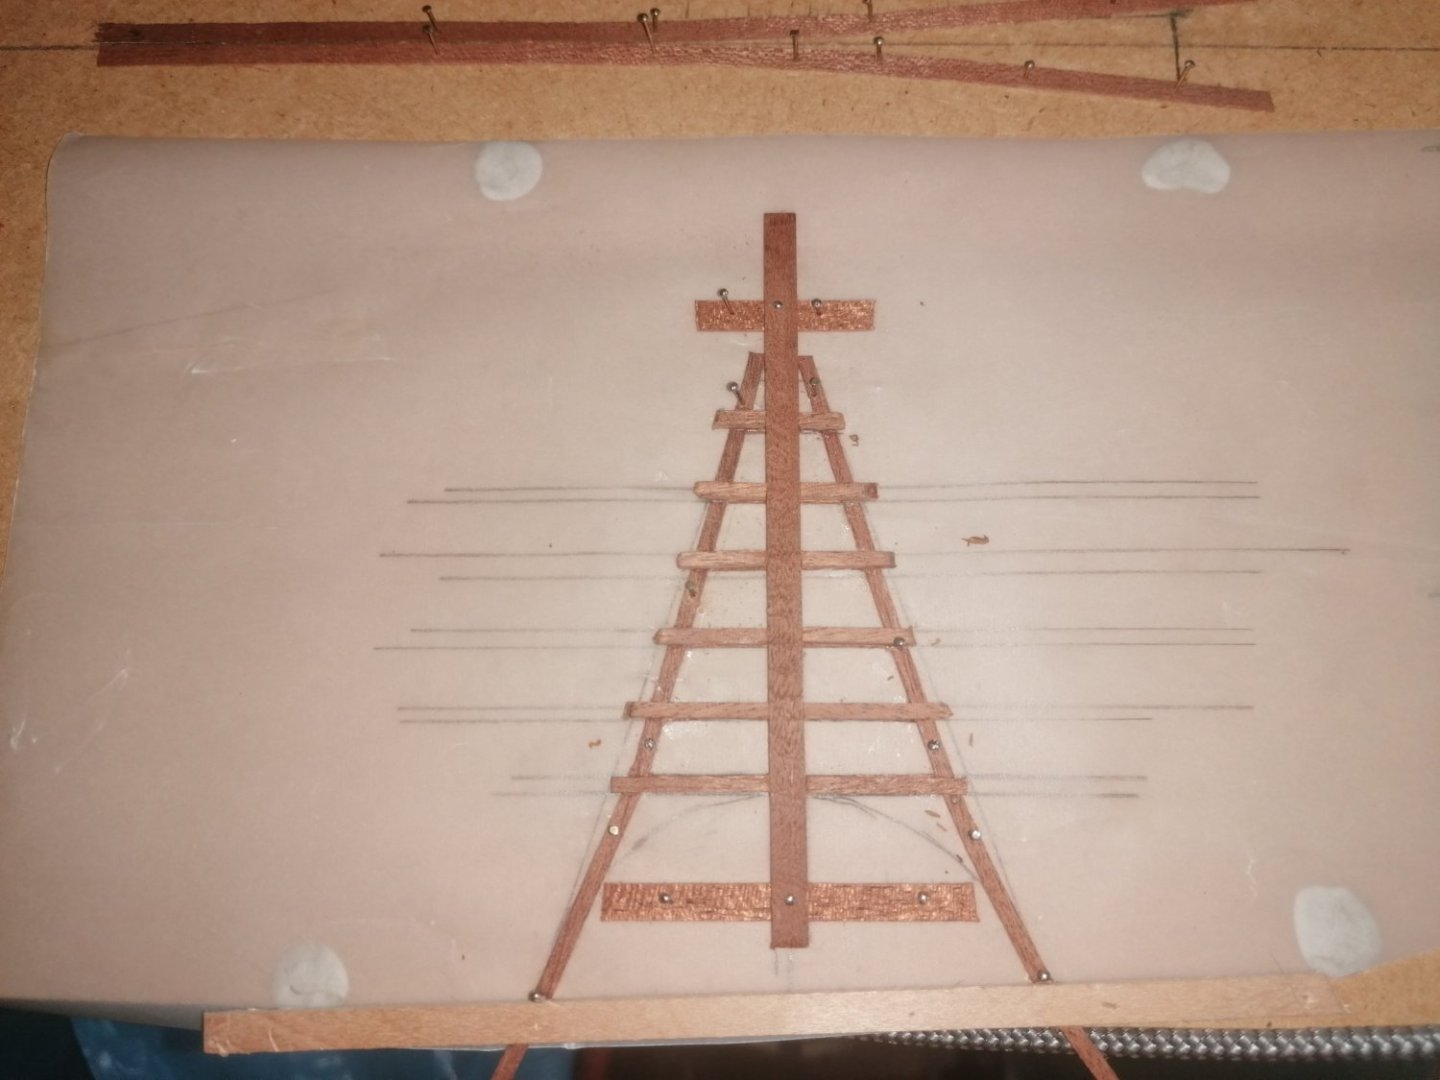
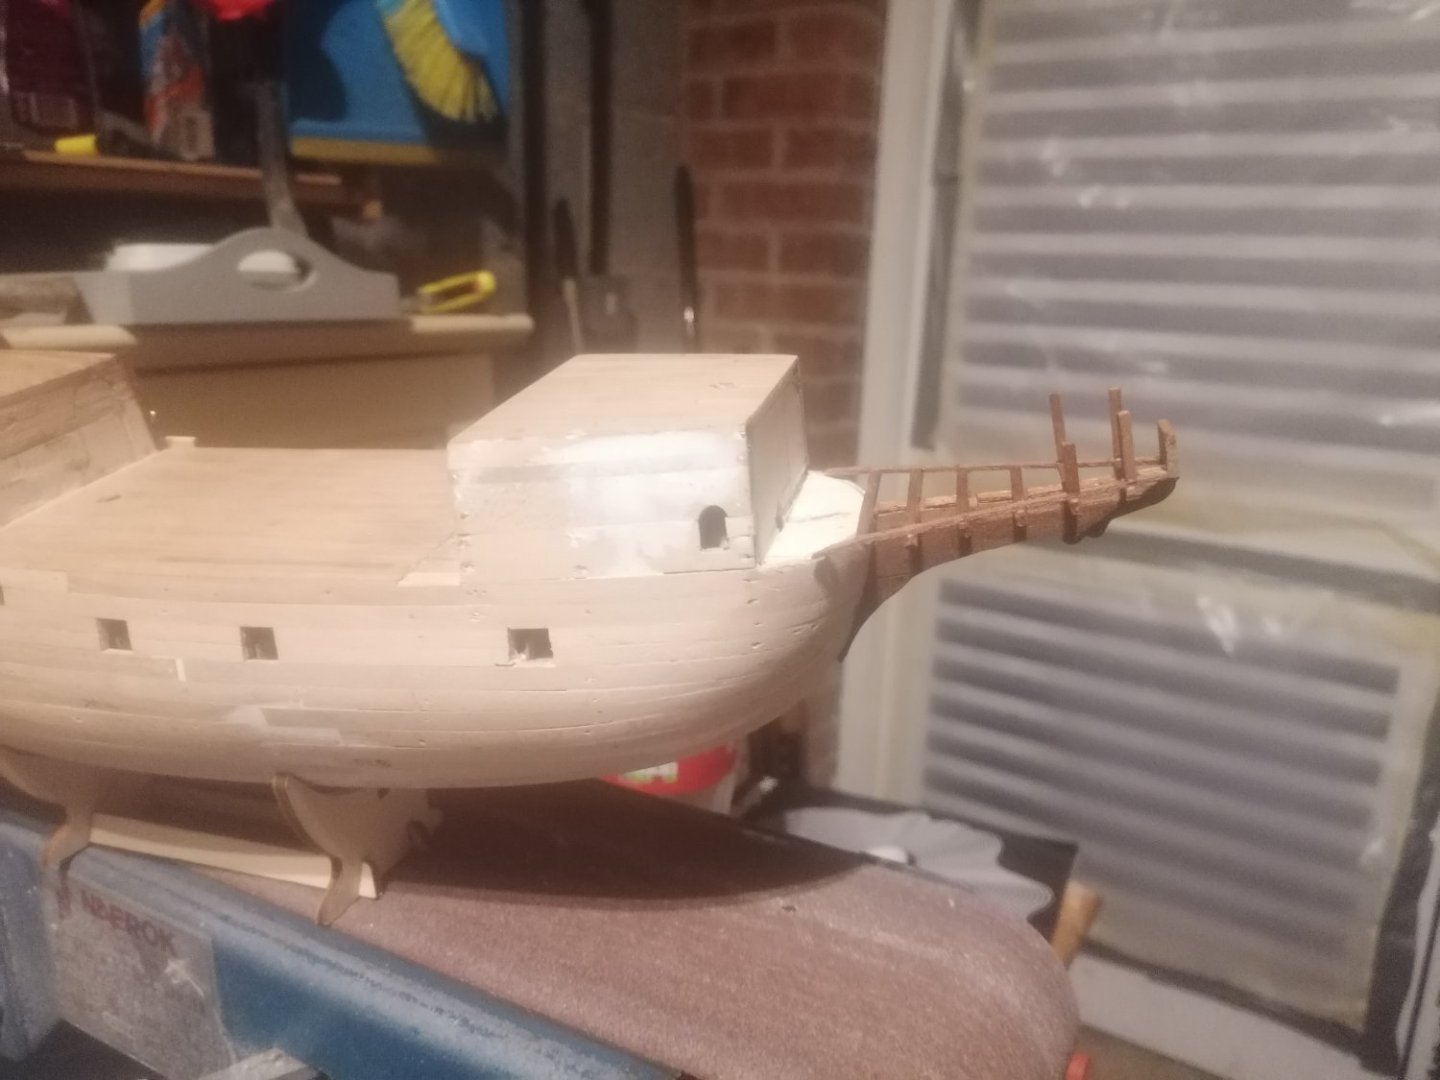
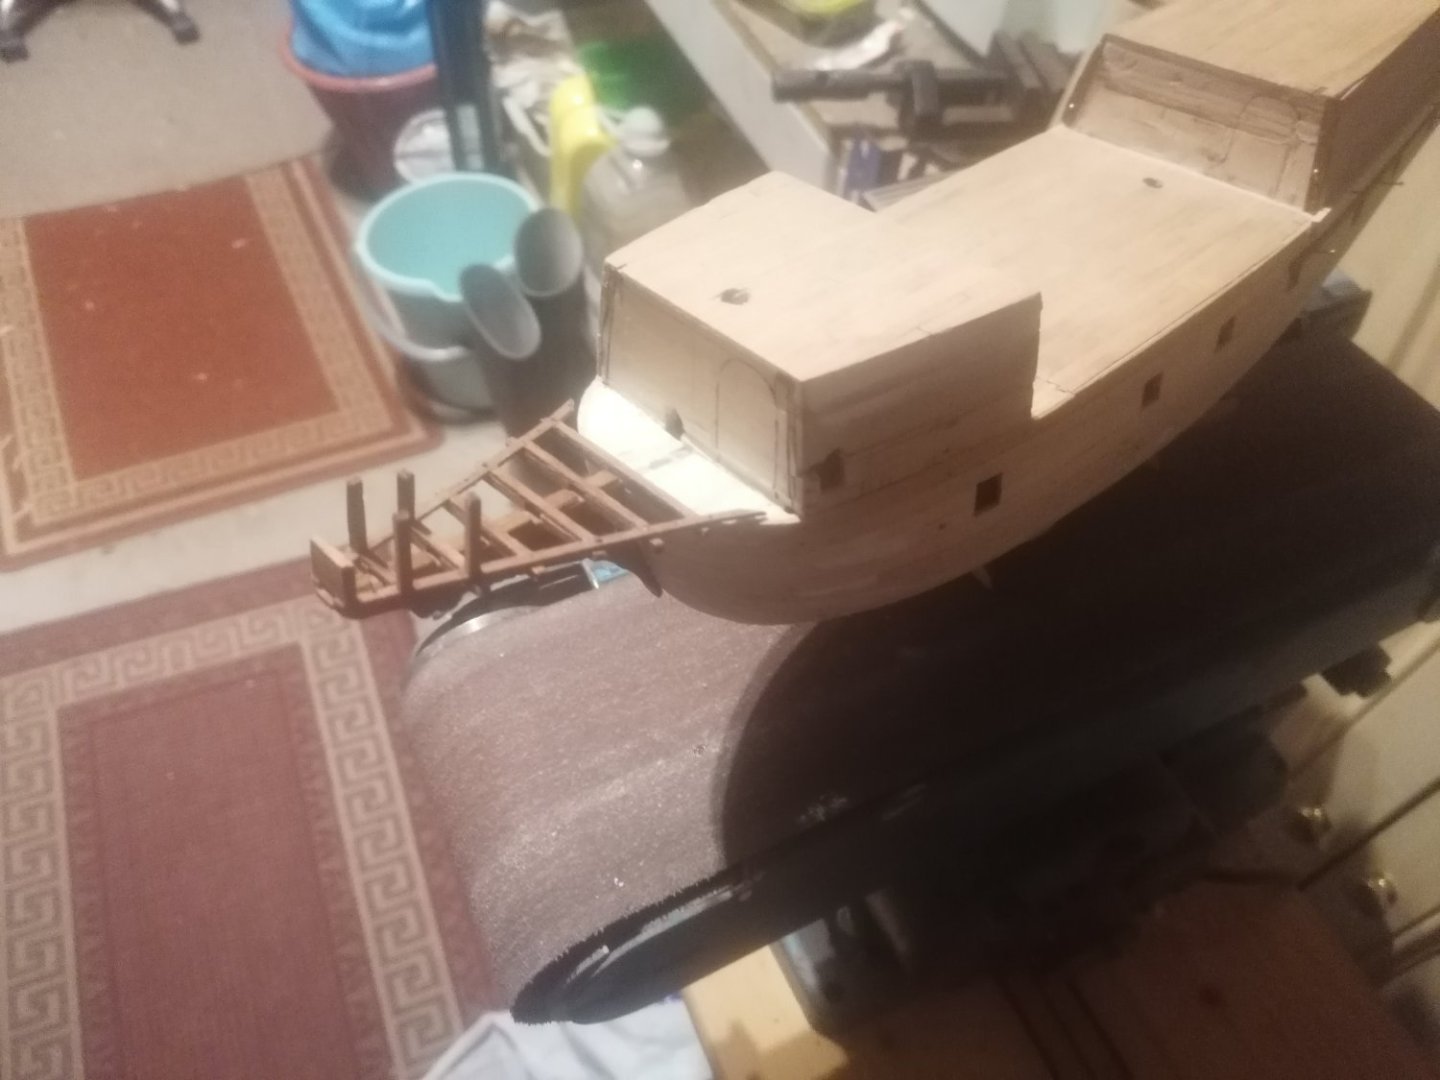
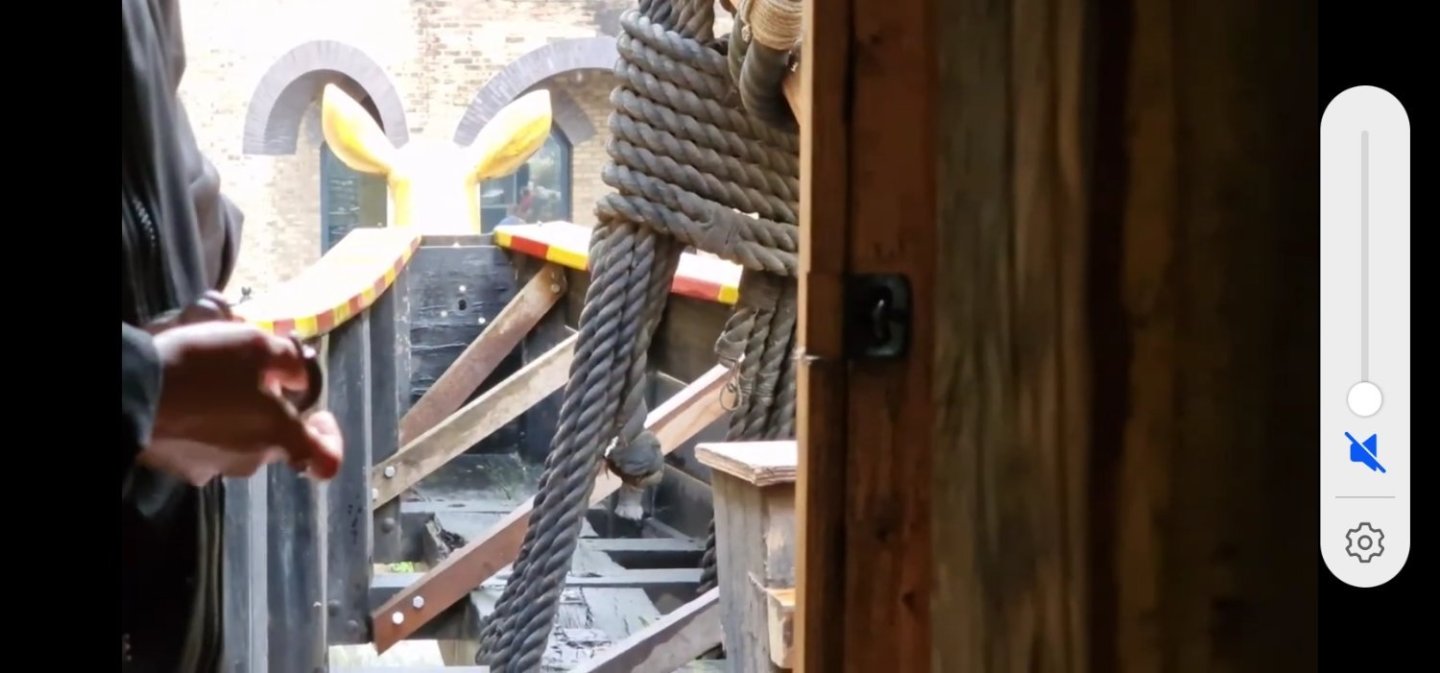
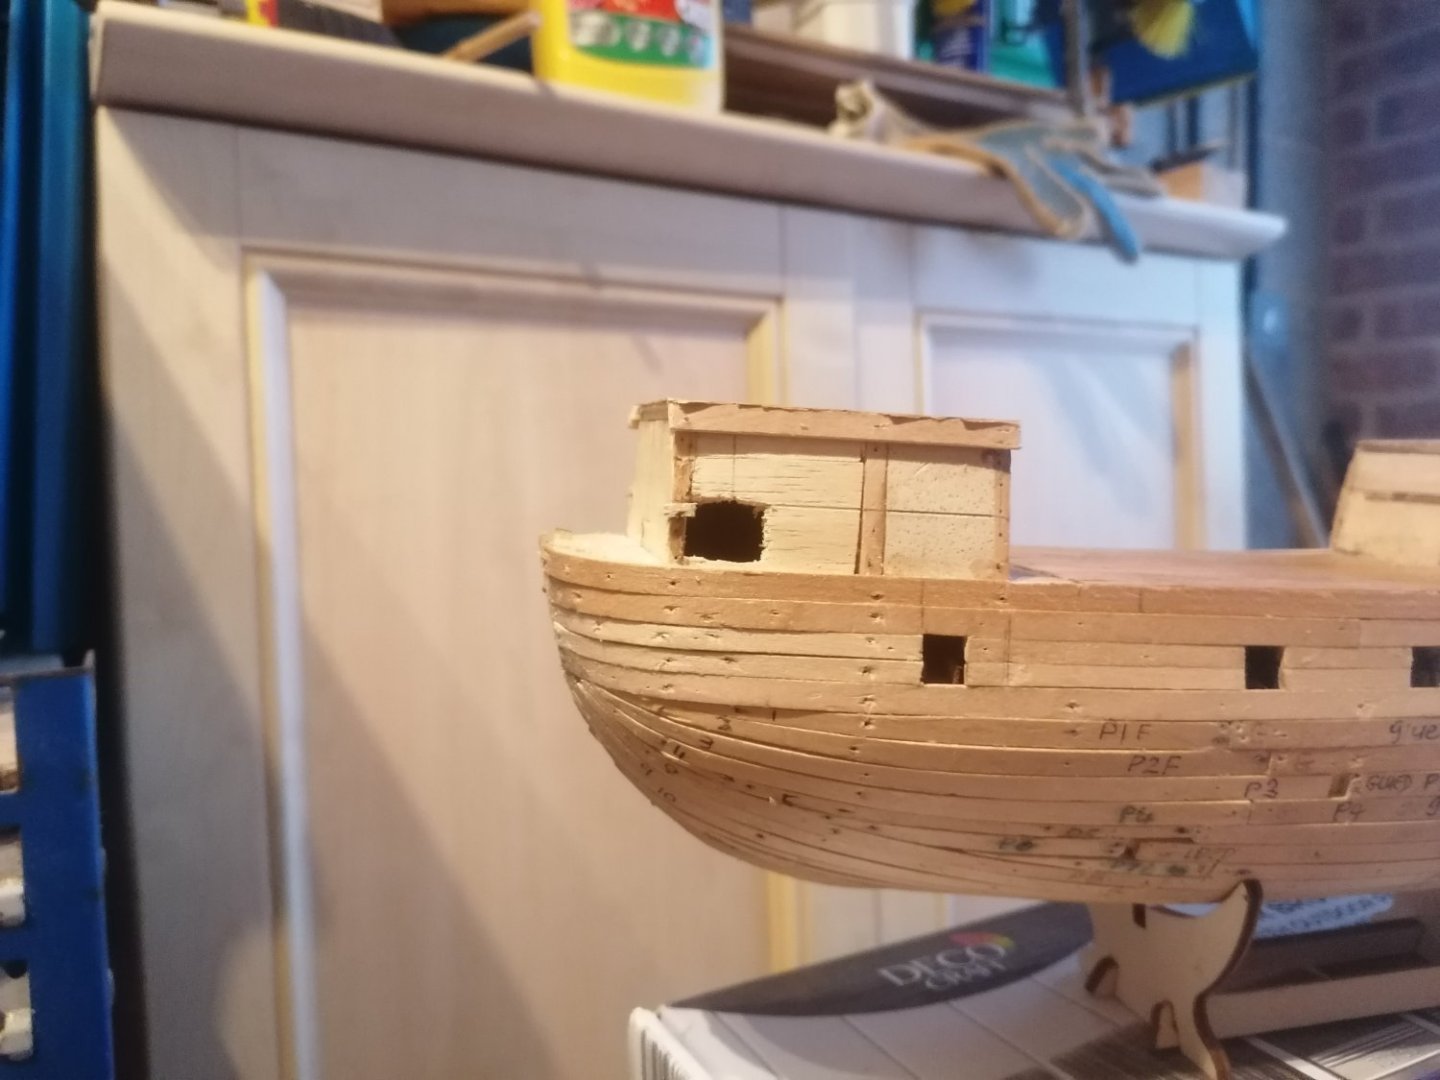
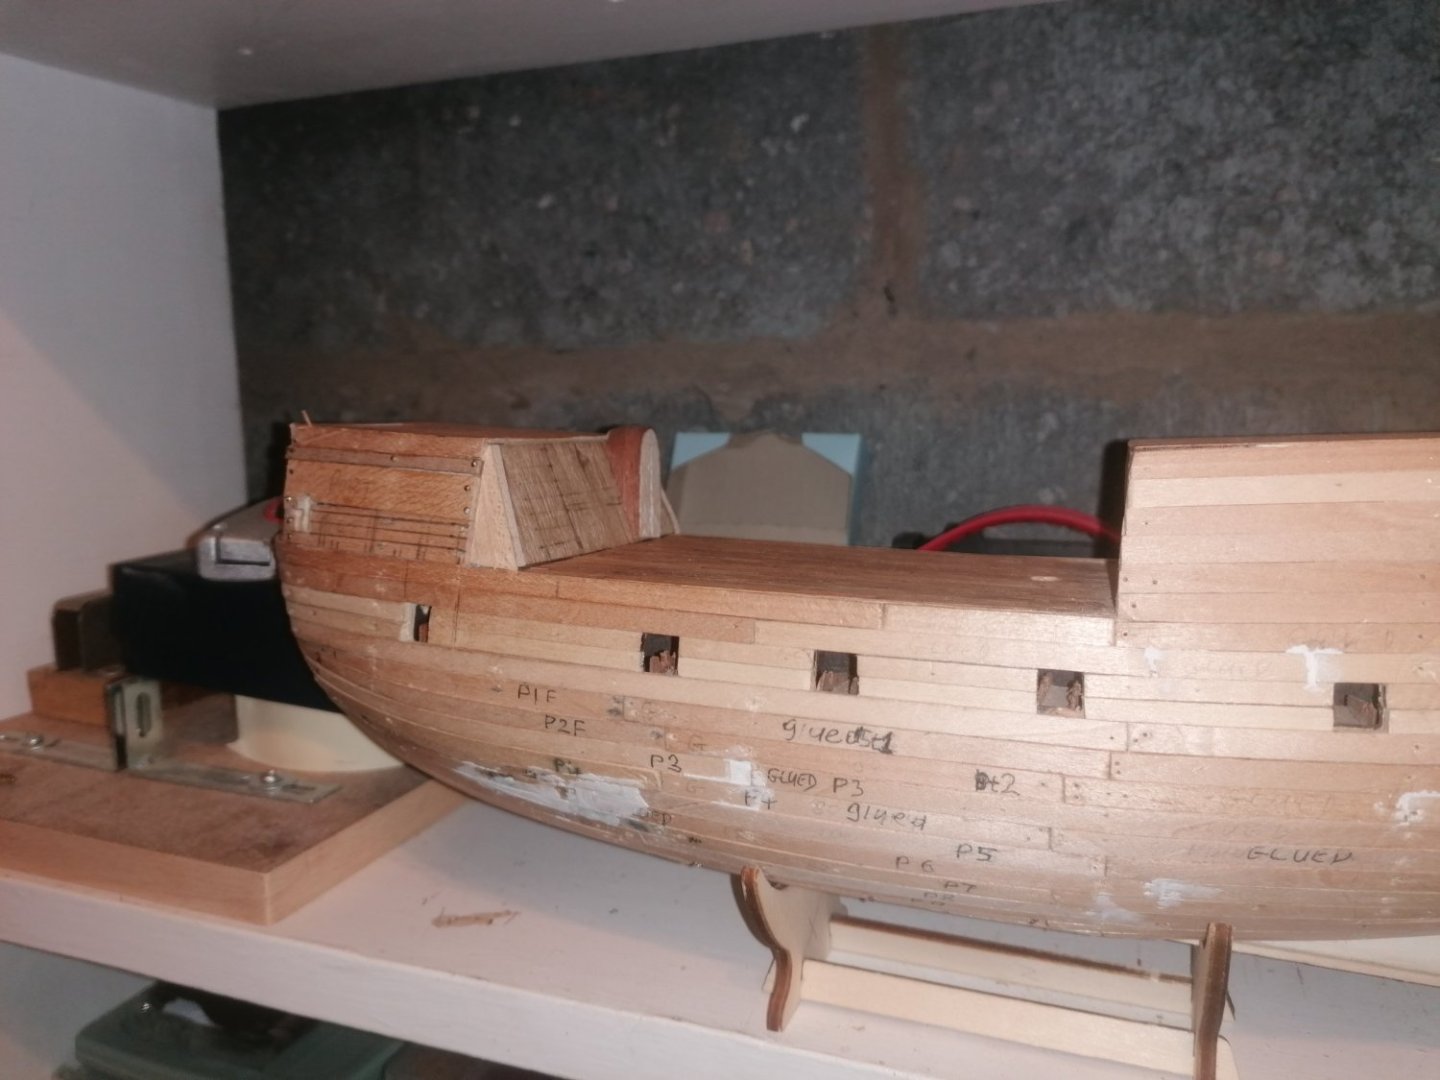
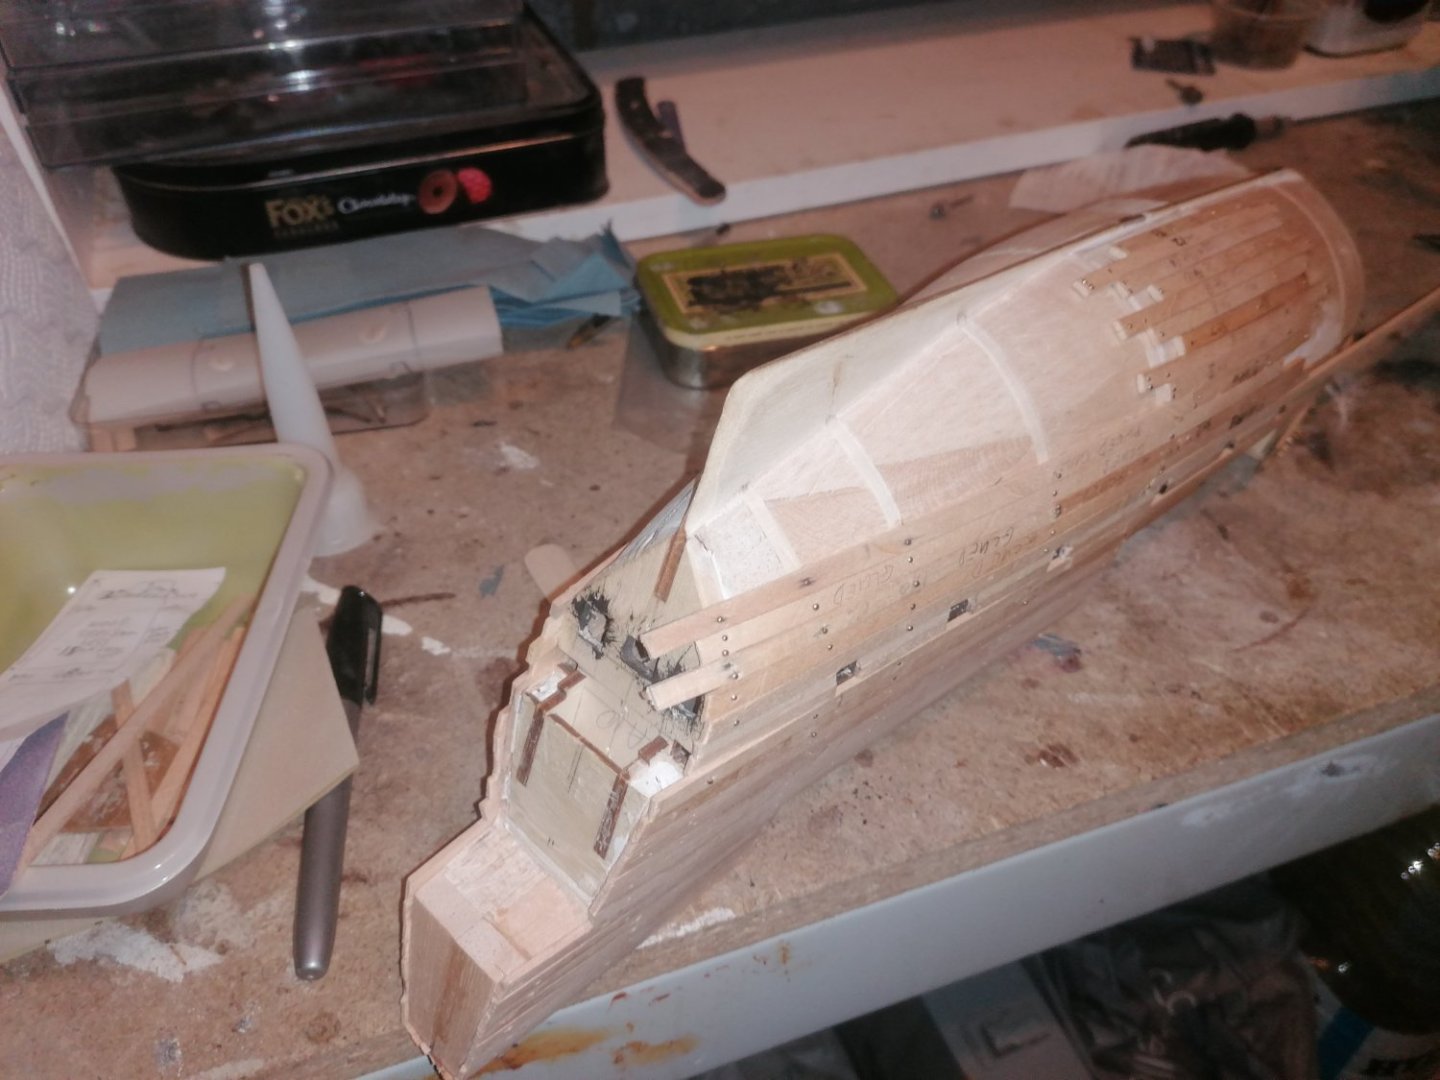
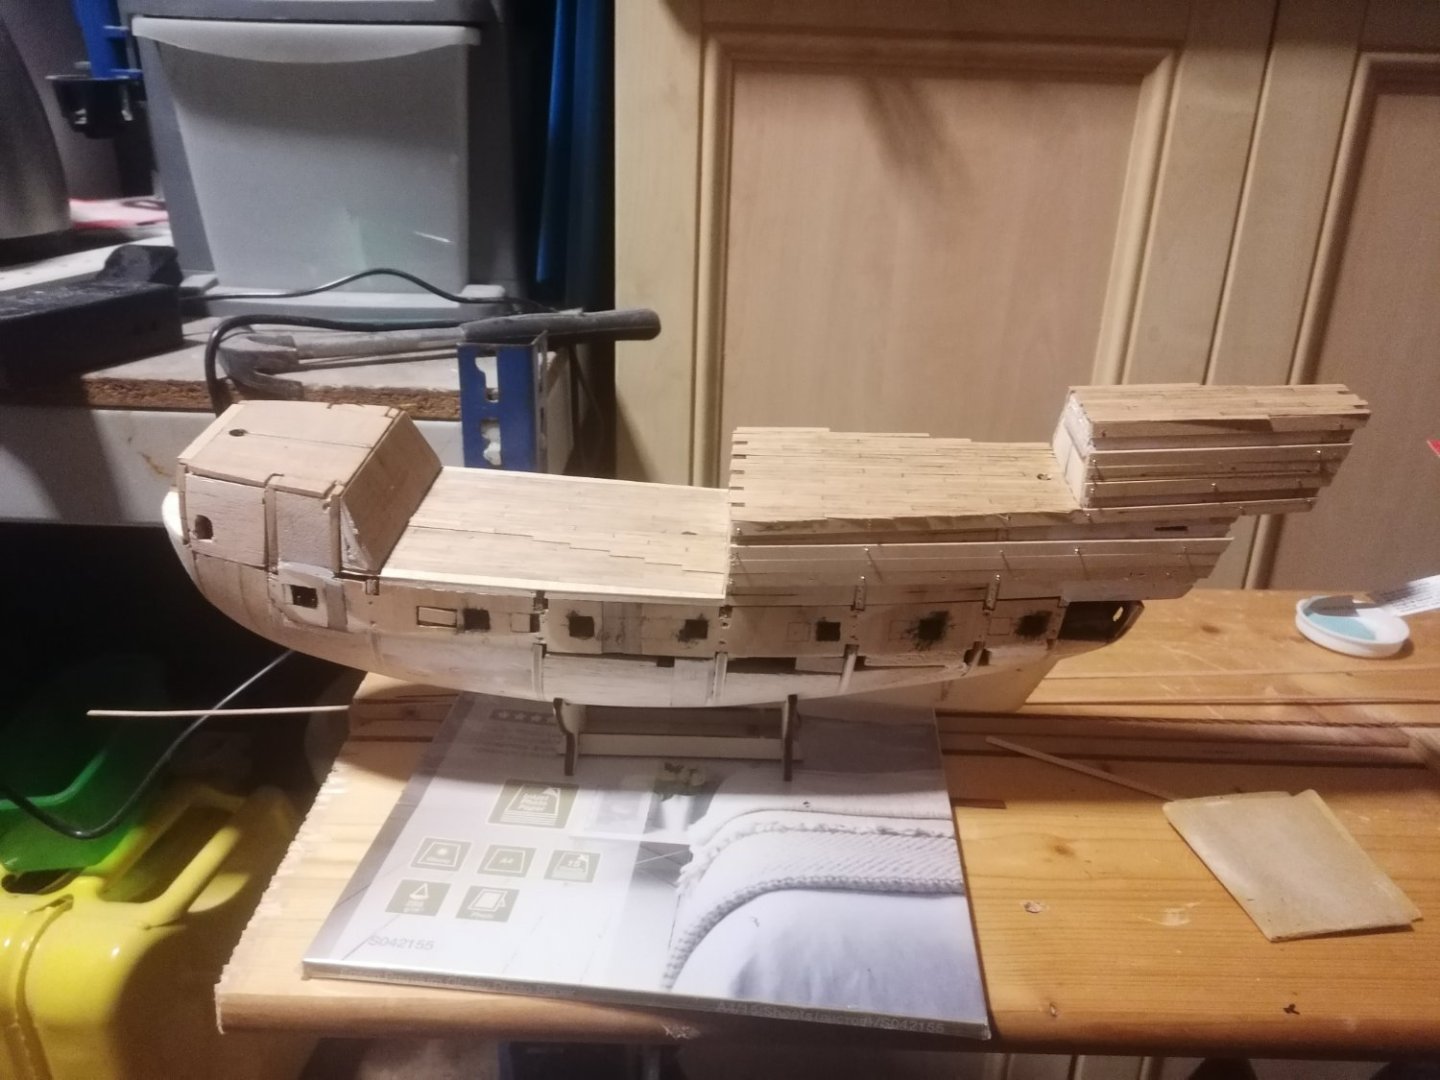
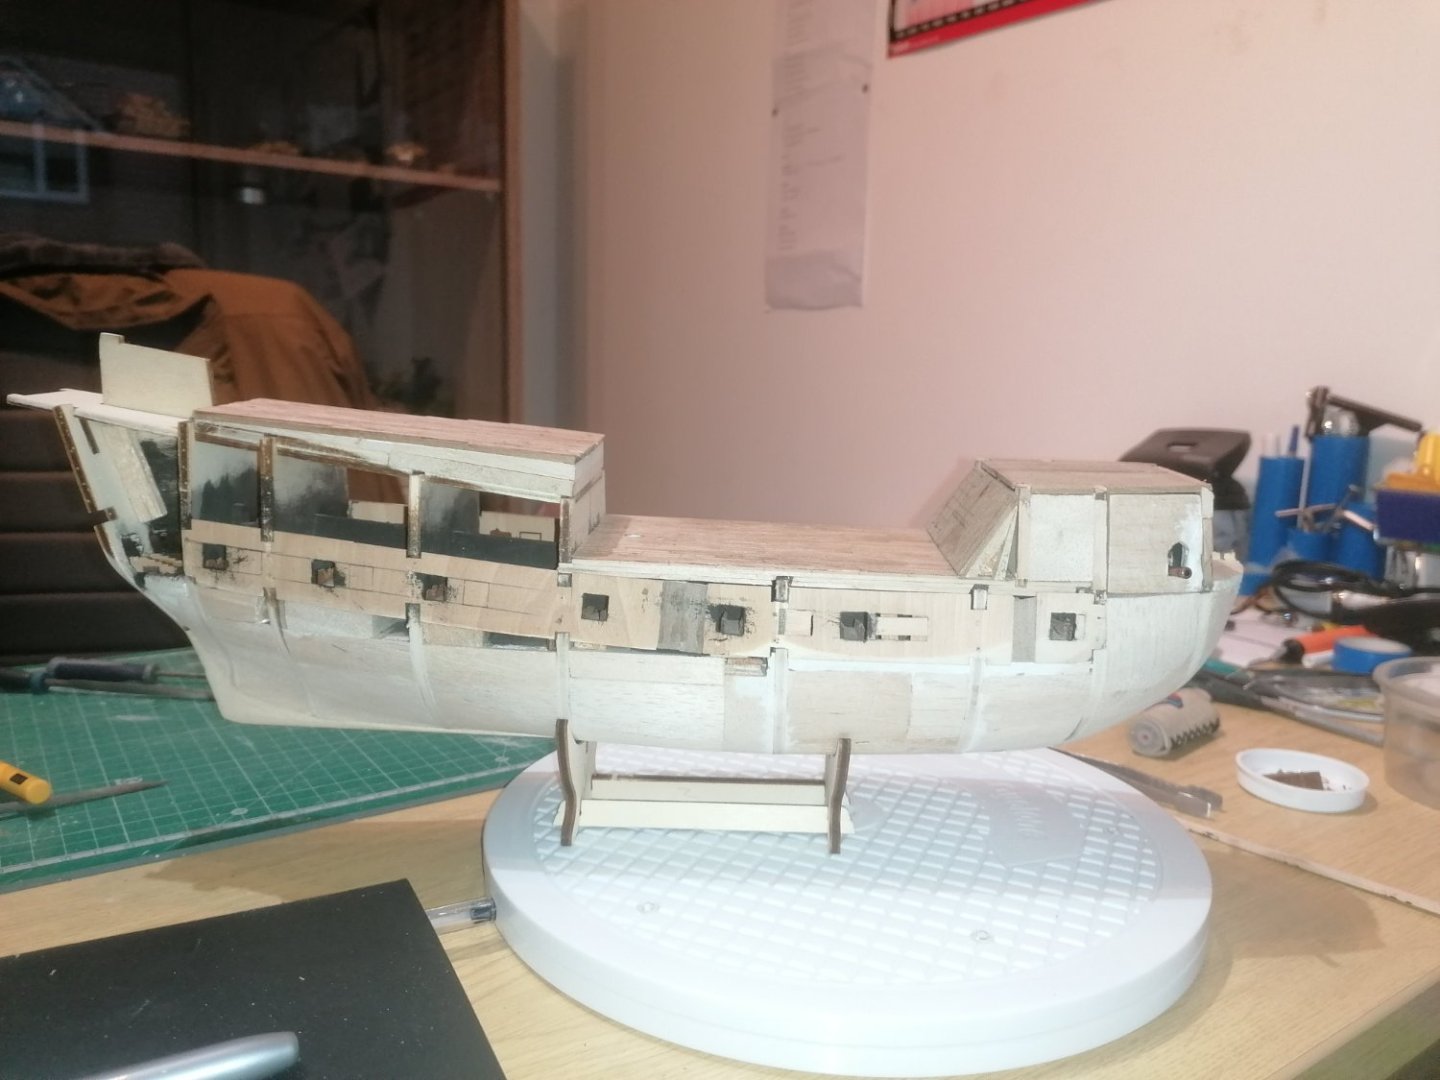
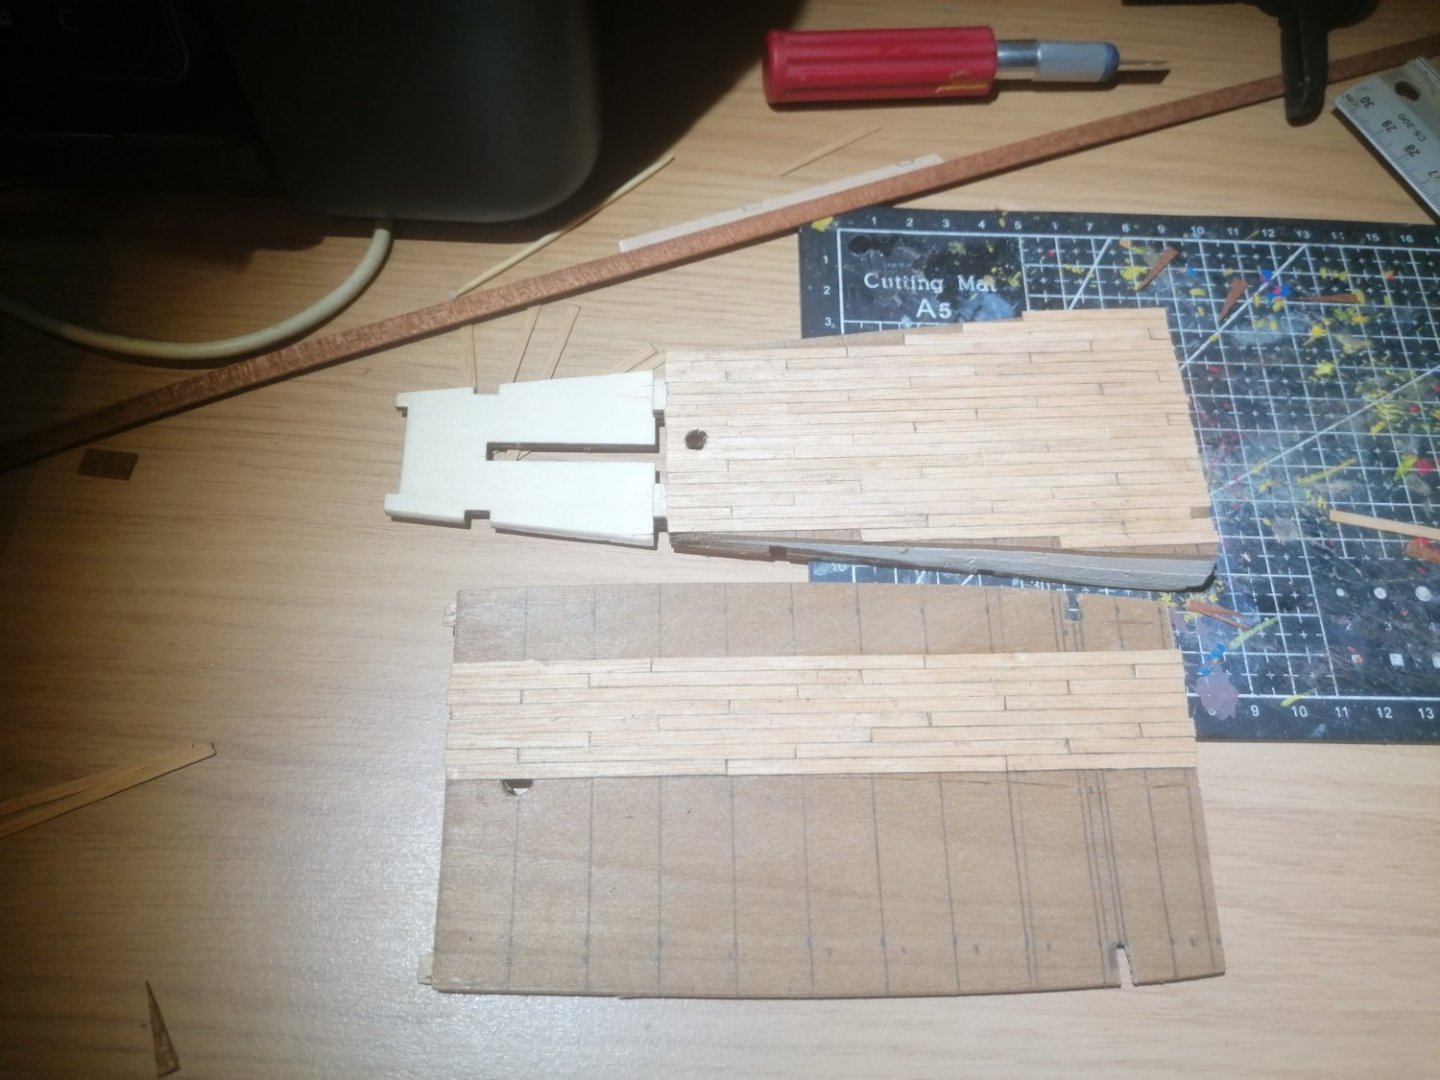
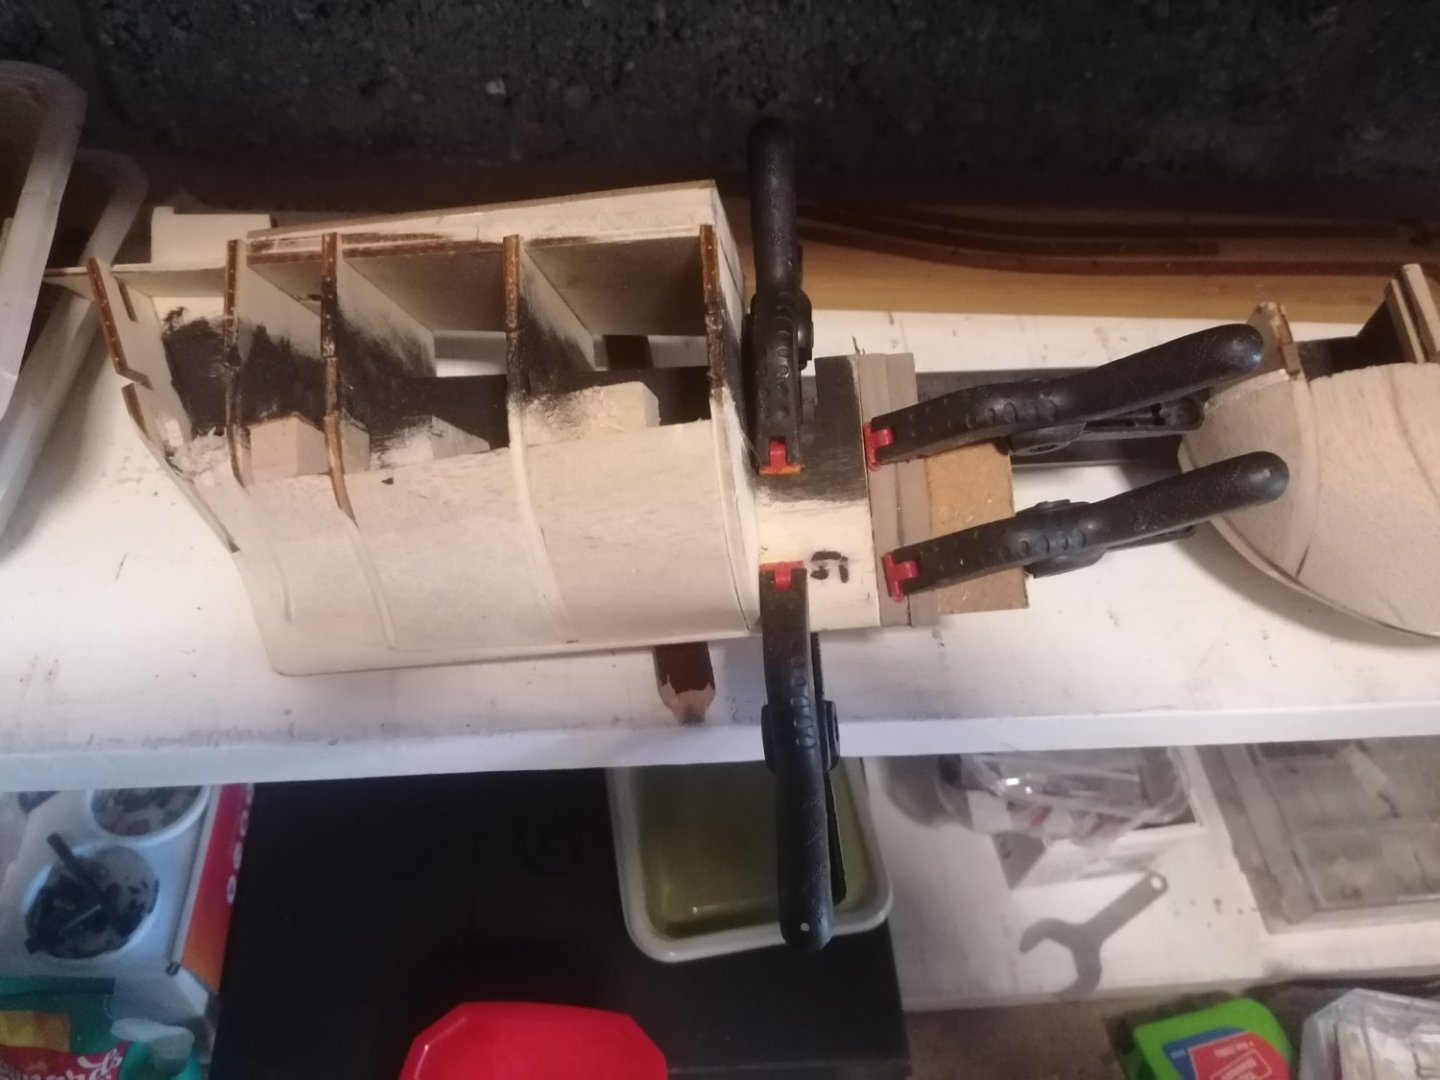
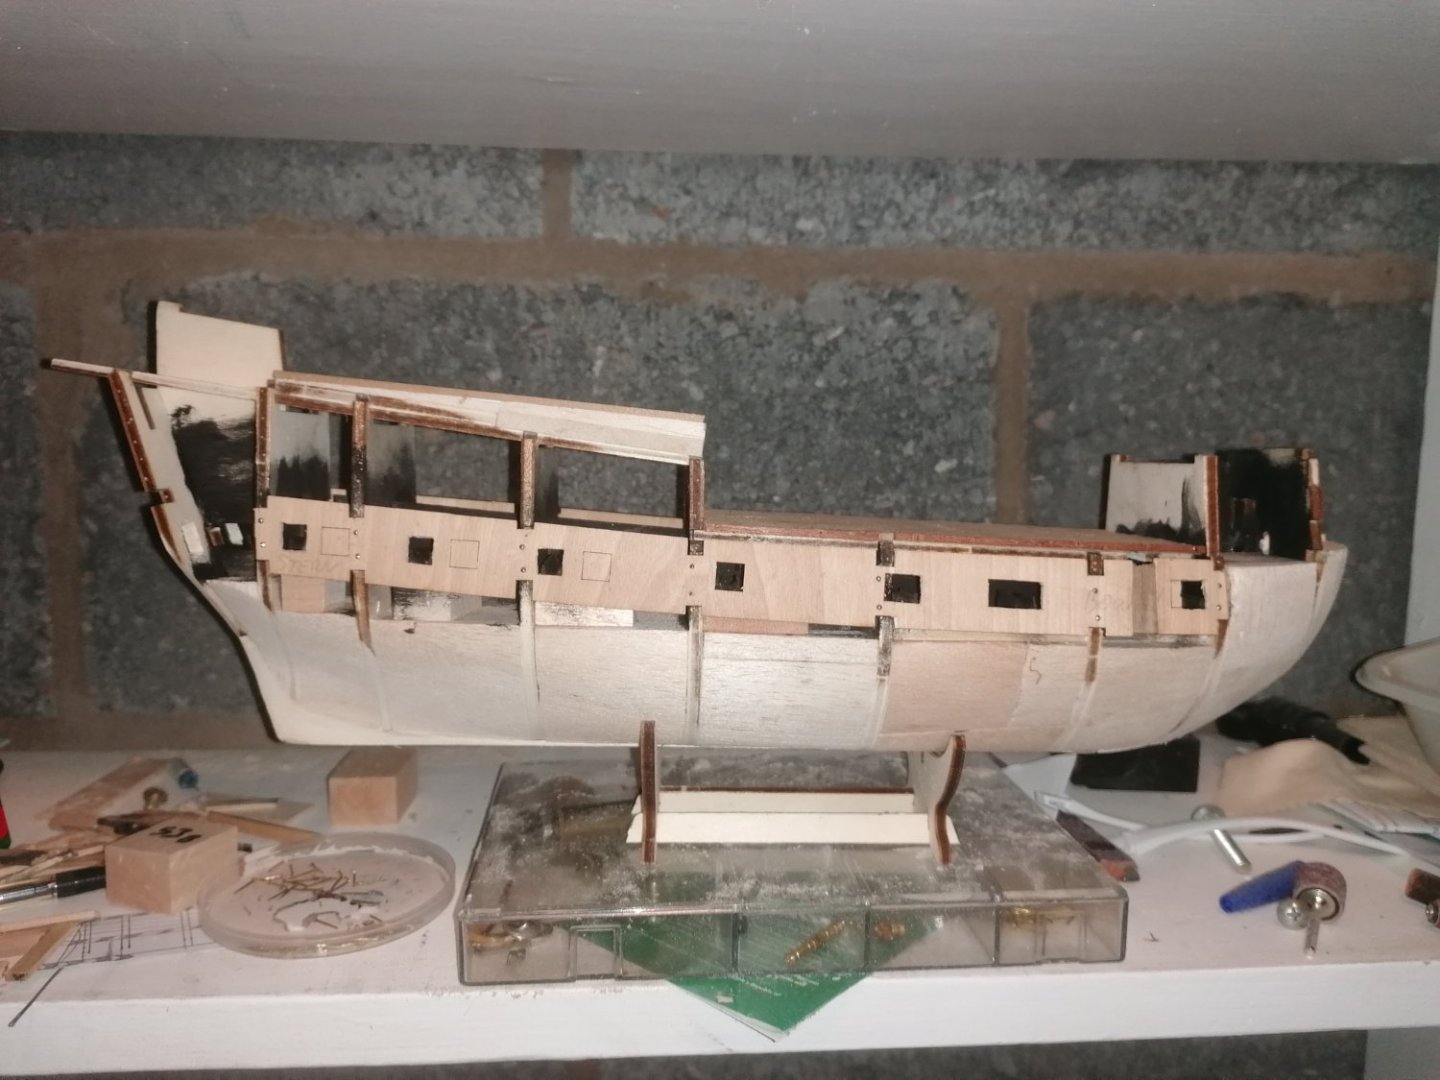
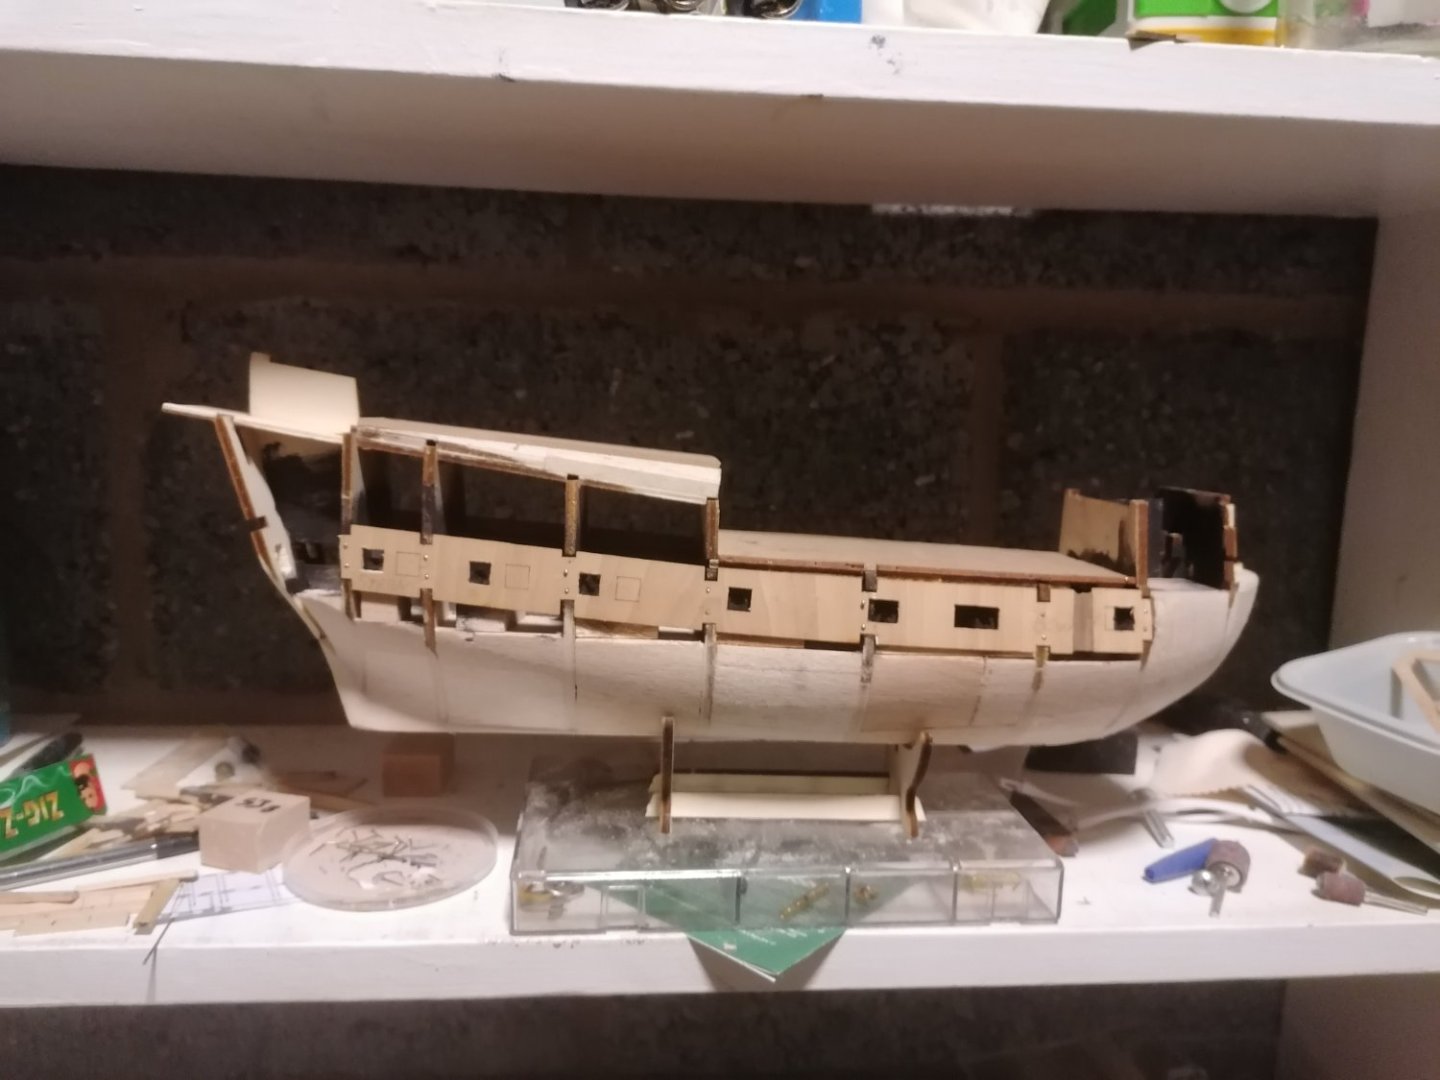
After a few nights I finished the cut water. I sanded the top into more of a curve. and also constructed the frame for the sprit deck, after a couple of attempts. I next attempted to build up the frame work for the sides of the beak with the intention of planking it prior to fitting. I soon realised this wouldn't work and so concentrated on just building the frame. The idea now is that I have the base done and ready to fit onto the cutwater, the beakhead, where the figurehead will go, and the cross beams protruding a little from the frame so I can run a 0.5X4mm strip along the edge with notches for it to drop onto the beams to make the structure a little stronger. Again though. due to the beak still being quite fragile, I still can't start the 2nd planking. Instead, I now need to think about getting the stern completed


-
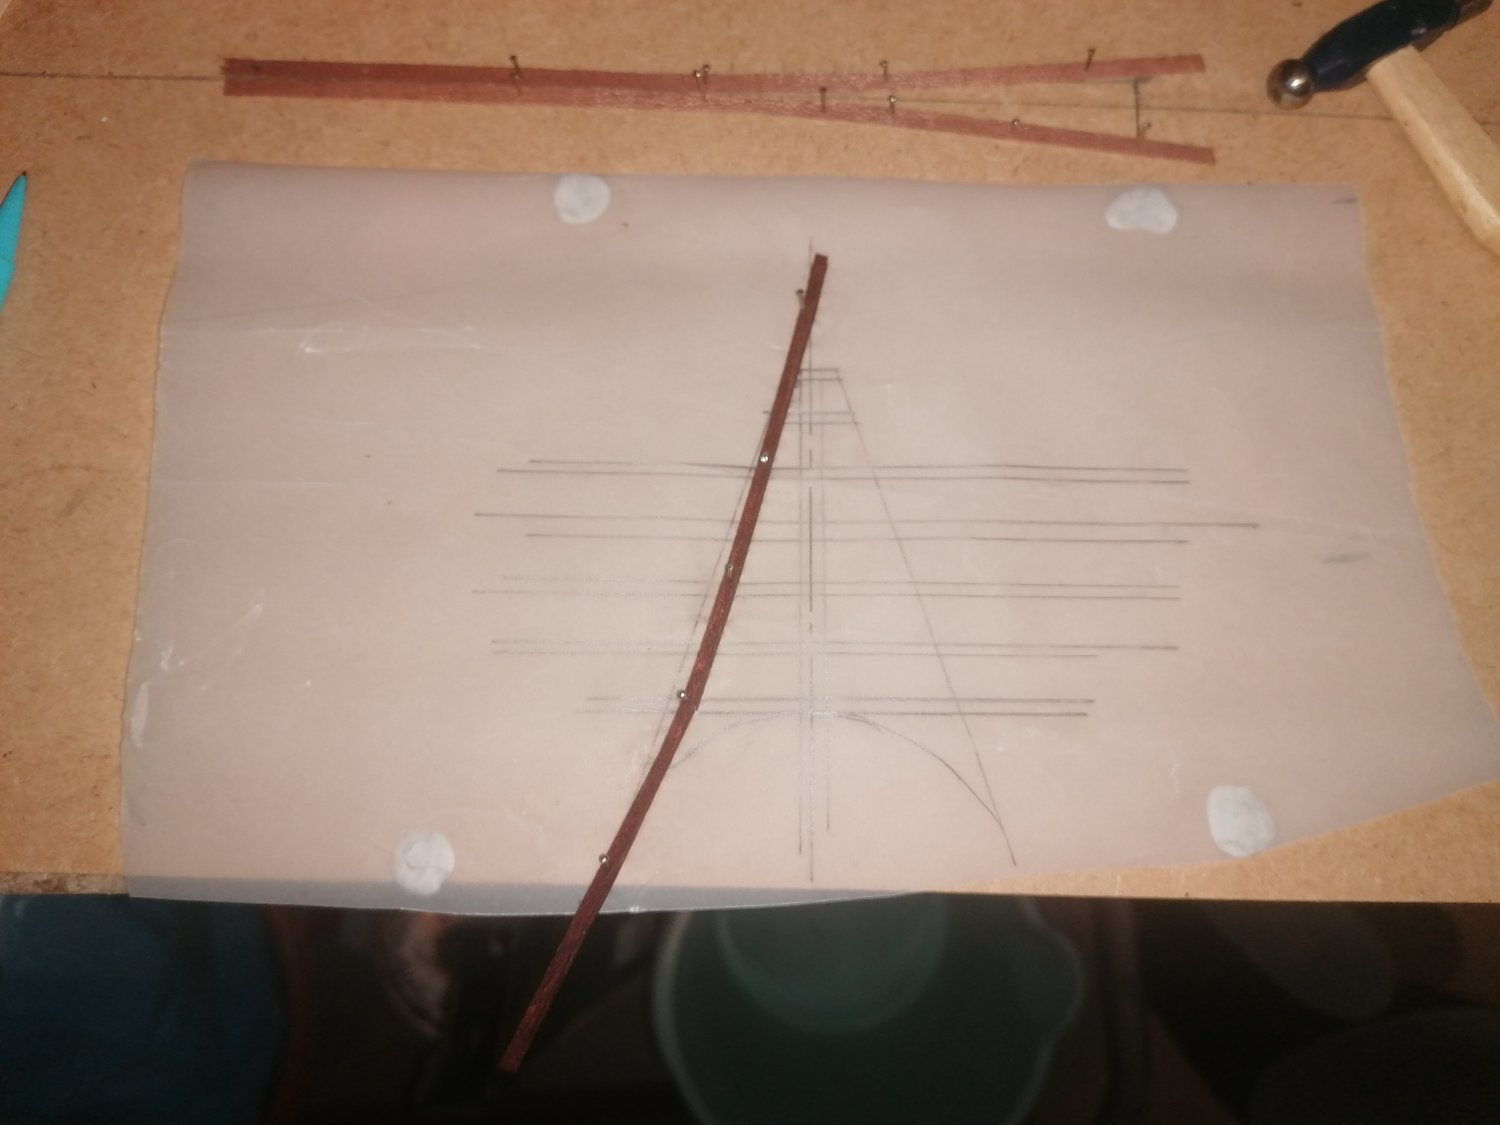
The "A" frame I am using for the bow will not be used but it gives me the basic dimensions of what I need to build. My only concern with the beak is, that it will be pretty delicate so, I think I will need to build it up along with the 2nd planking. This now means I need to work on the stern and in particular the rebuilding and shaping of the gallery. I am getting pretty frustrated with having to work out how and when things need to be built and also not being able to concentrate on one section at a time due to everything having an effect on everything else. I realised, a while ago, also that the planks below the 2x4mm wale are wider than the upper hull planks. I have decided to plank these with 4mm strips rather than the 3mm strips I was planning to use. In the meantime I will build up the bulkheads ready for starting the 2nd planking and then work out the stern afterwards. Here are a few pictures of what I am hoping to achieve. ( apart from the ships wheel) Although I am trying to build her as she actually looks, I am also trying to have her looking as she might have done in 1580ish.


-
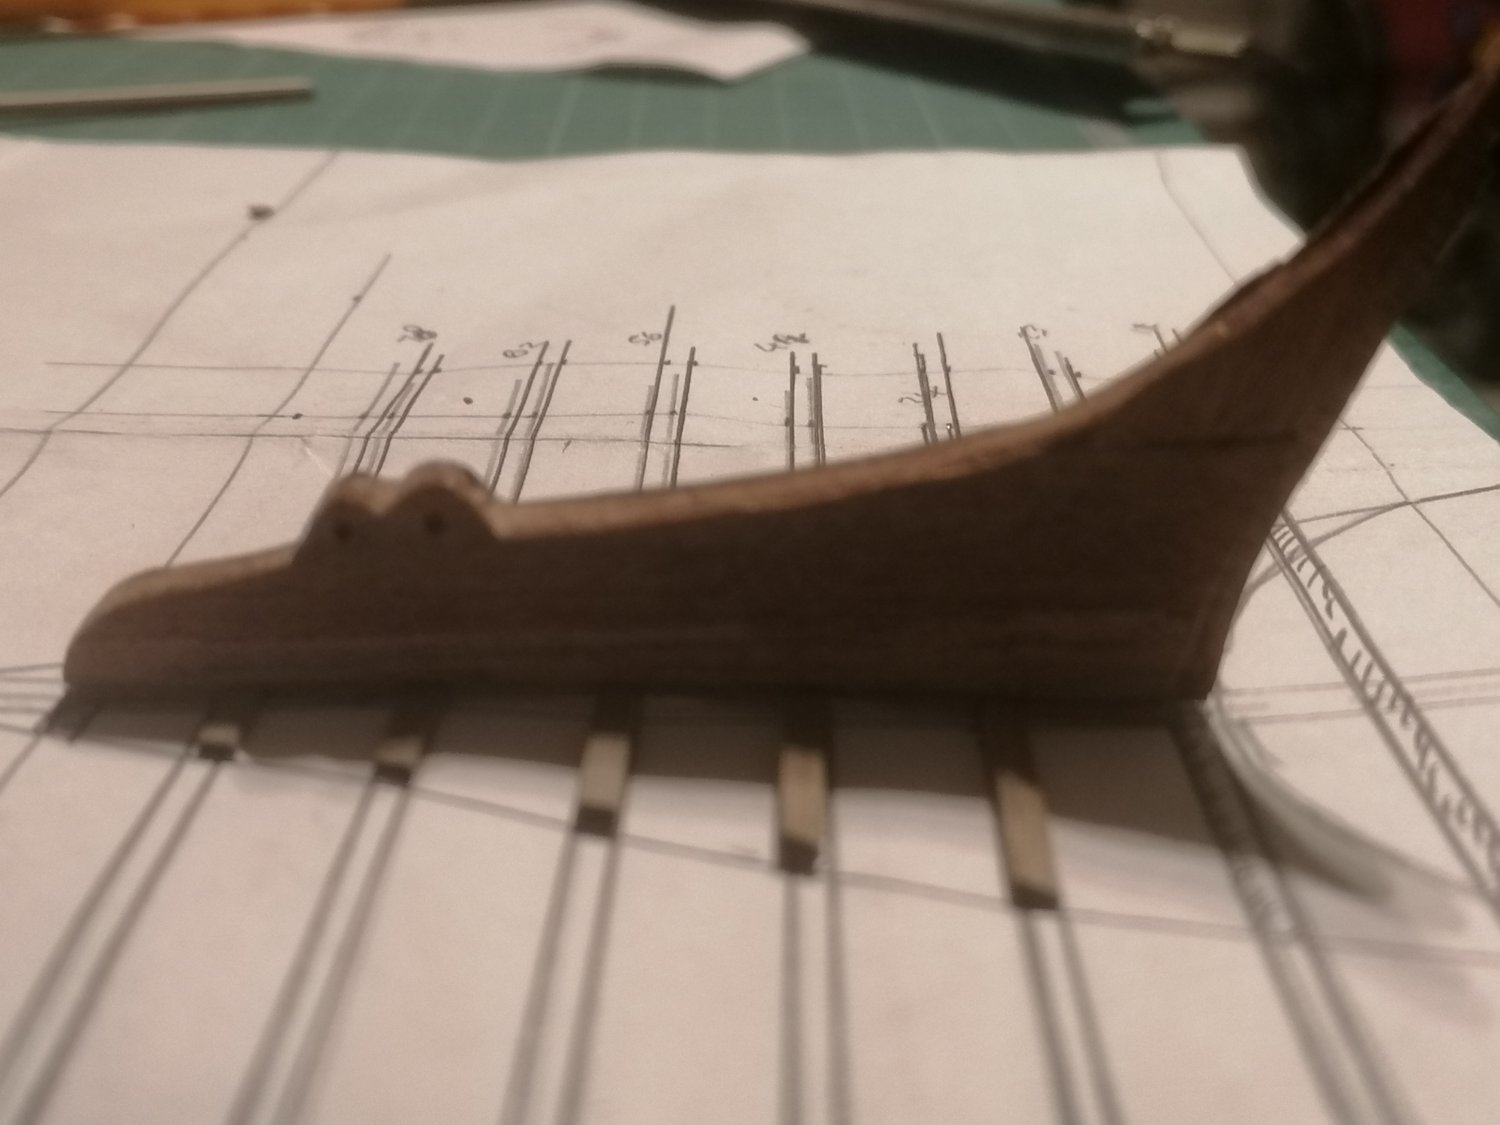
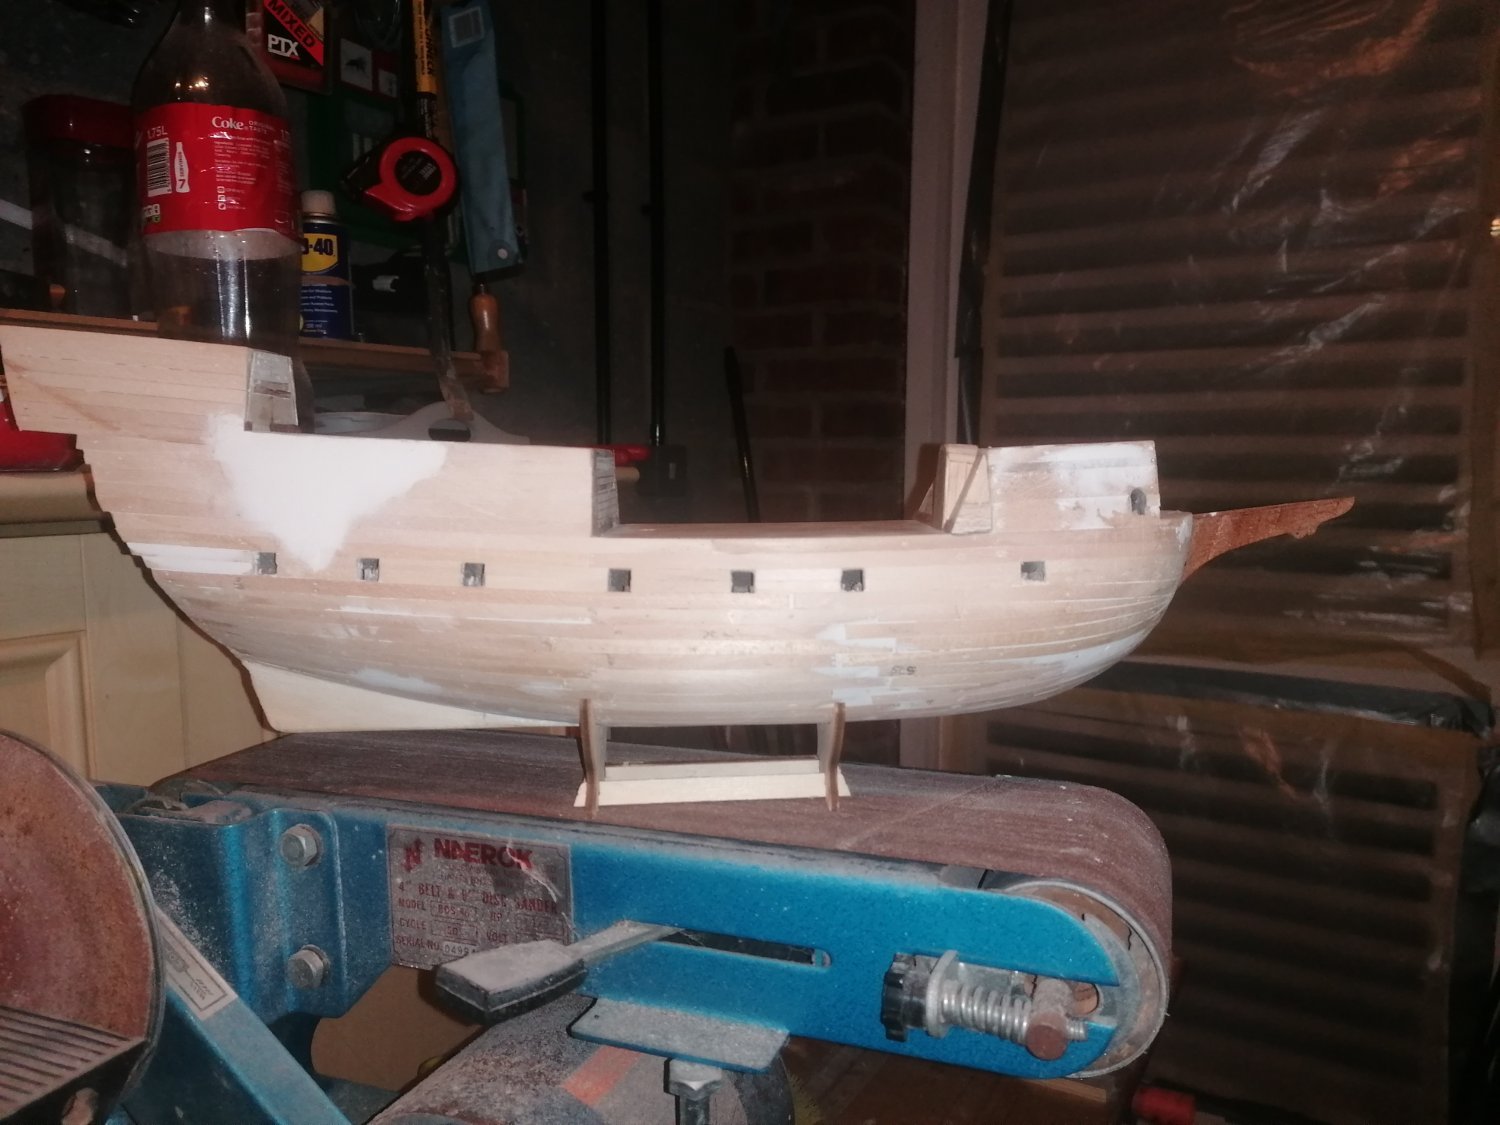
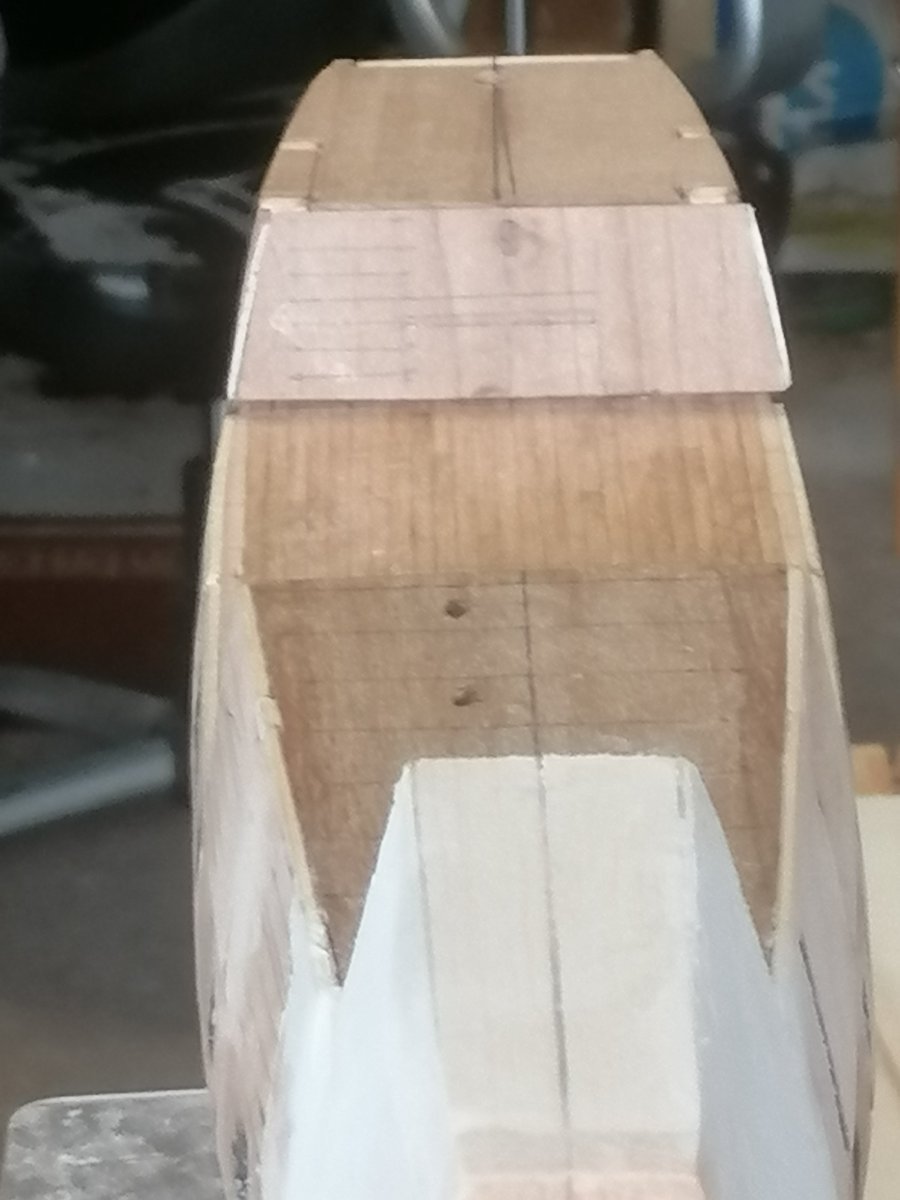
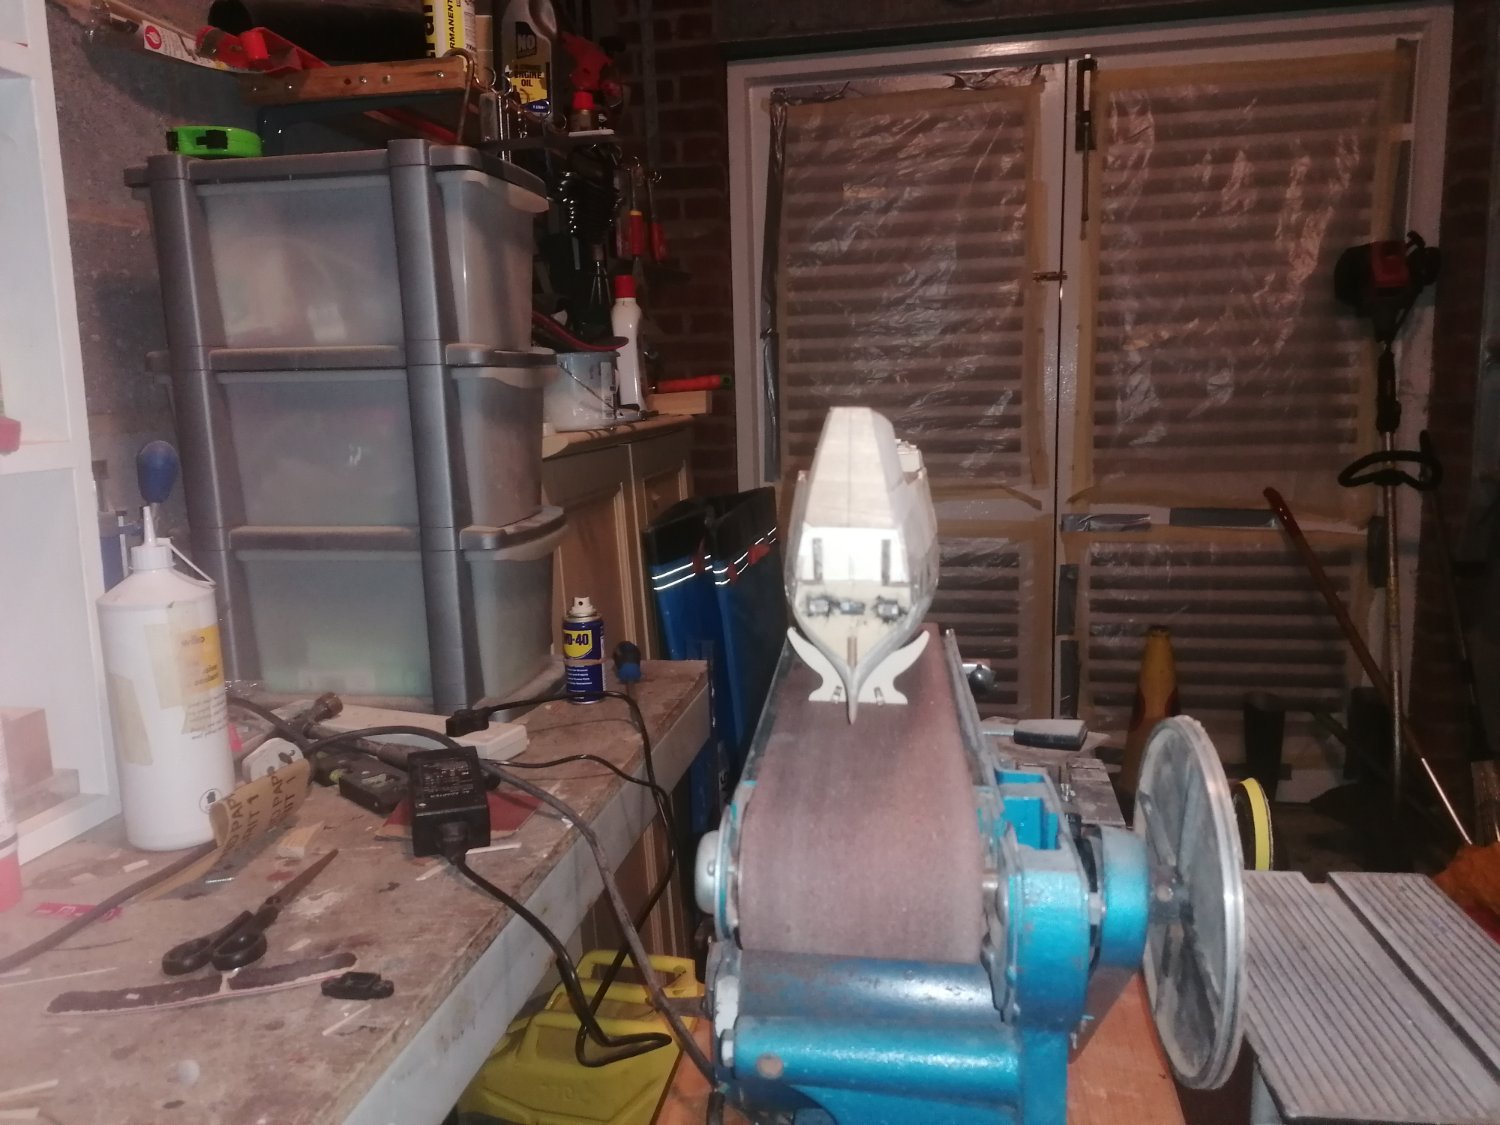
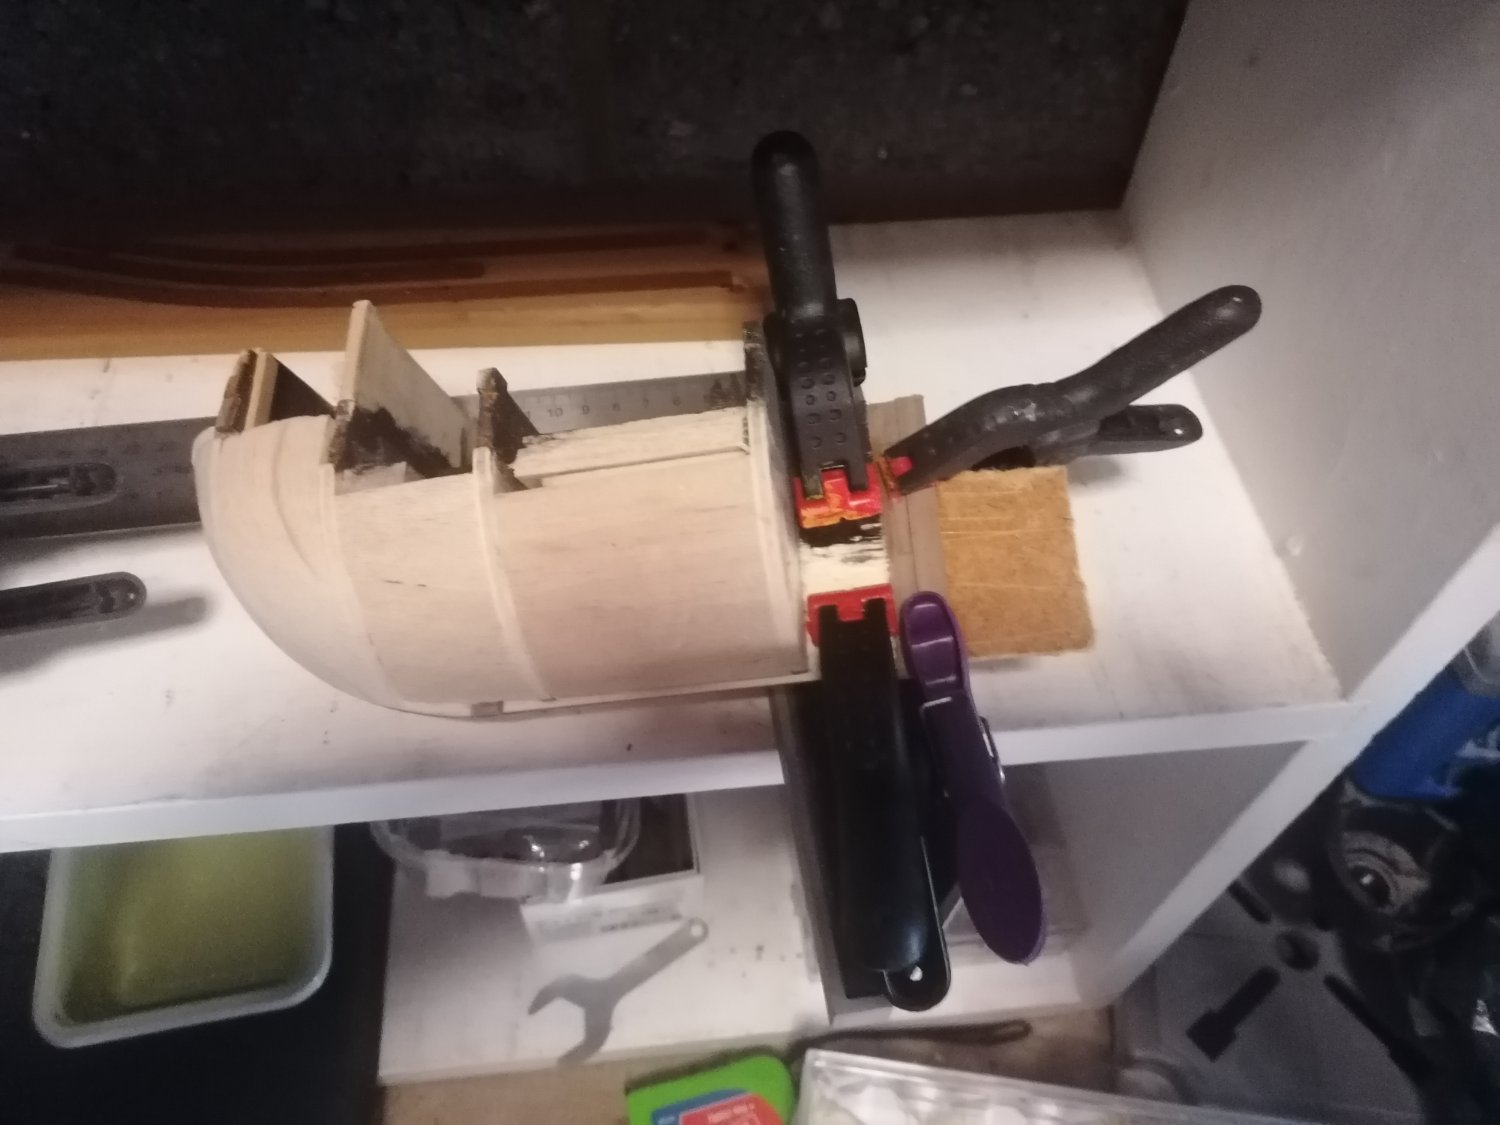
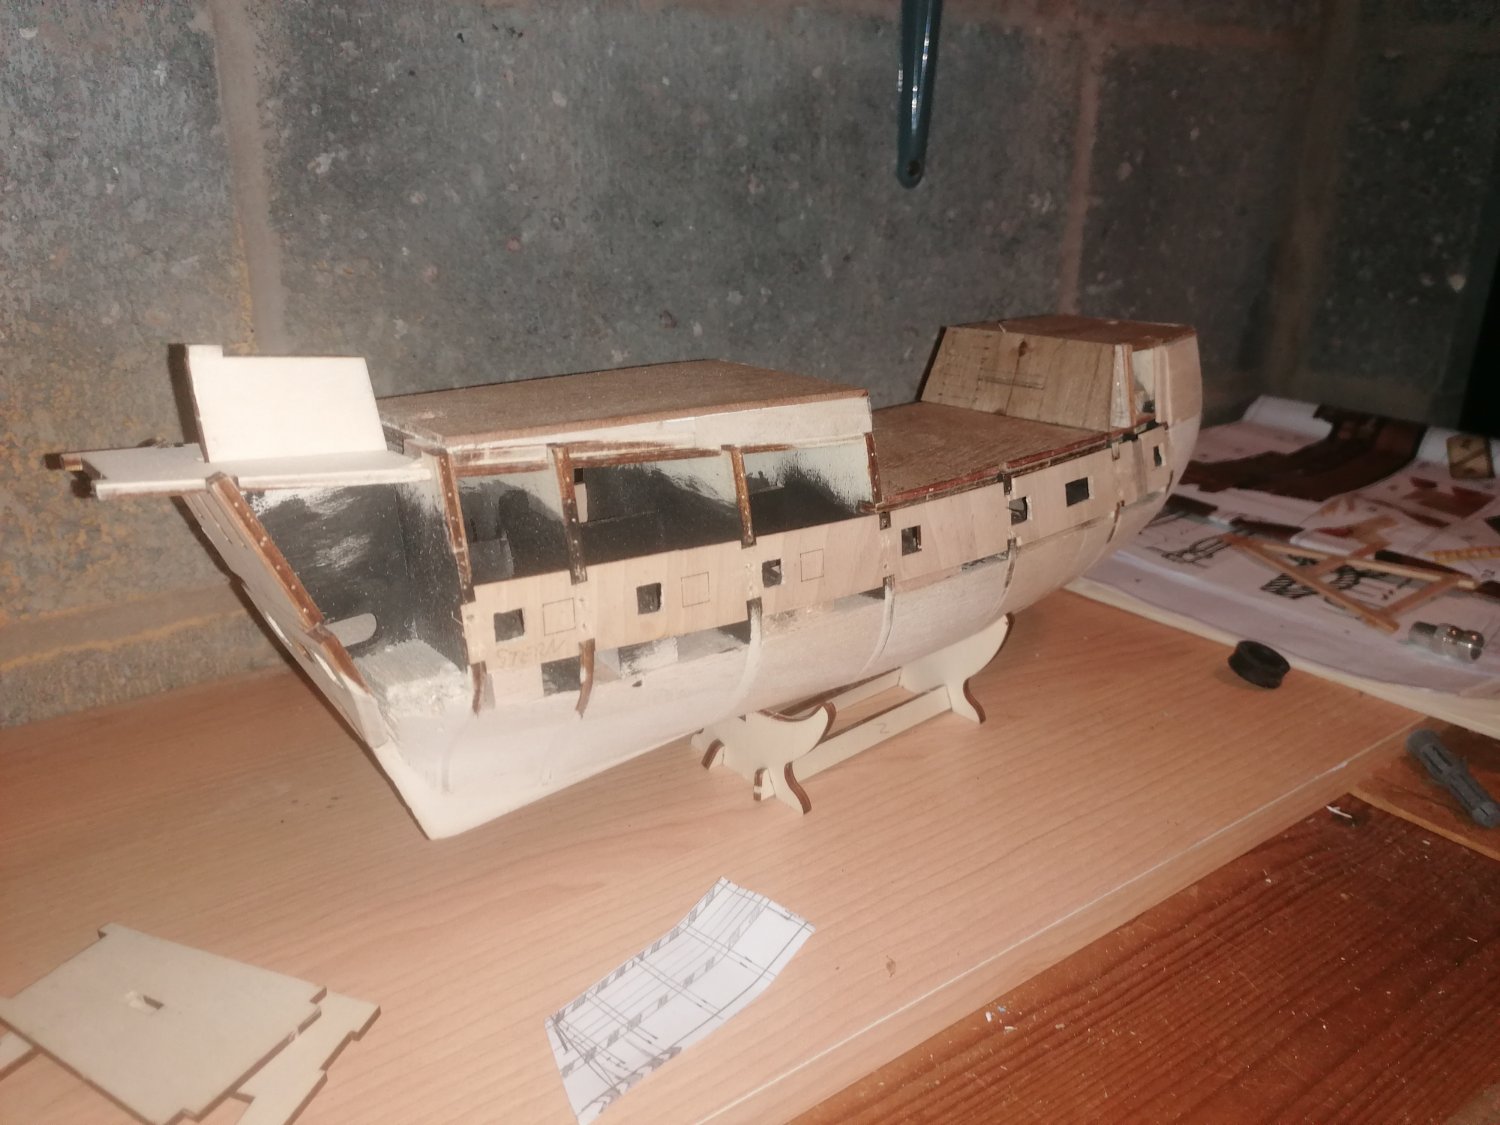
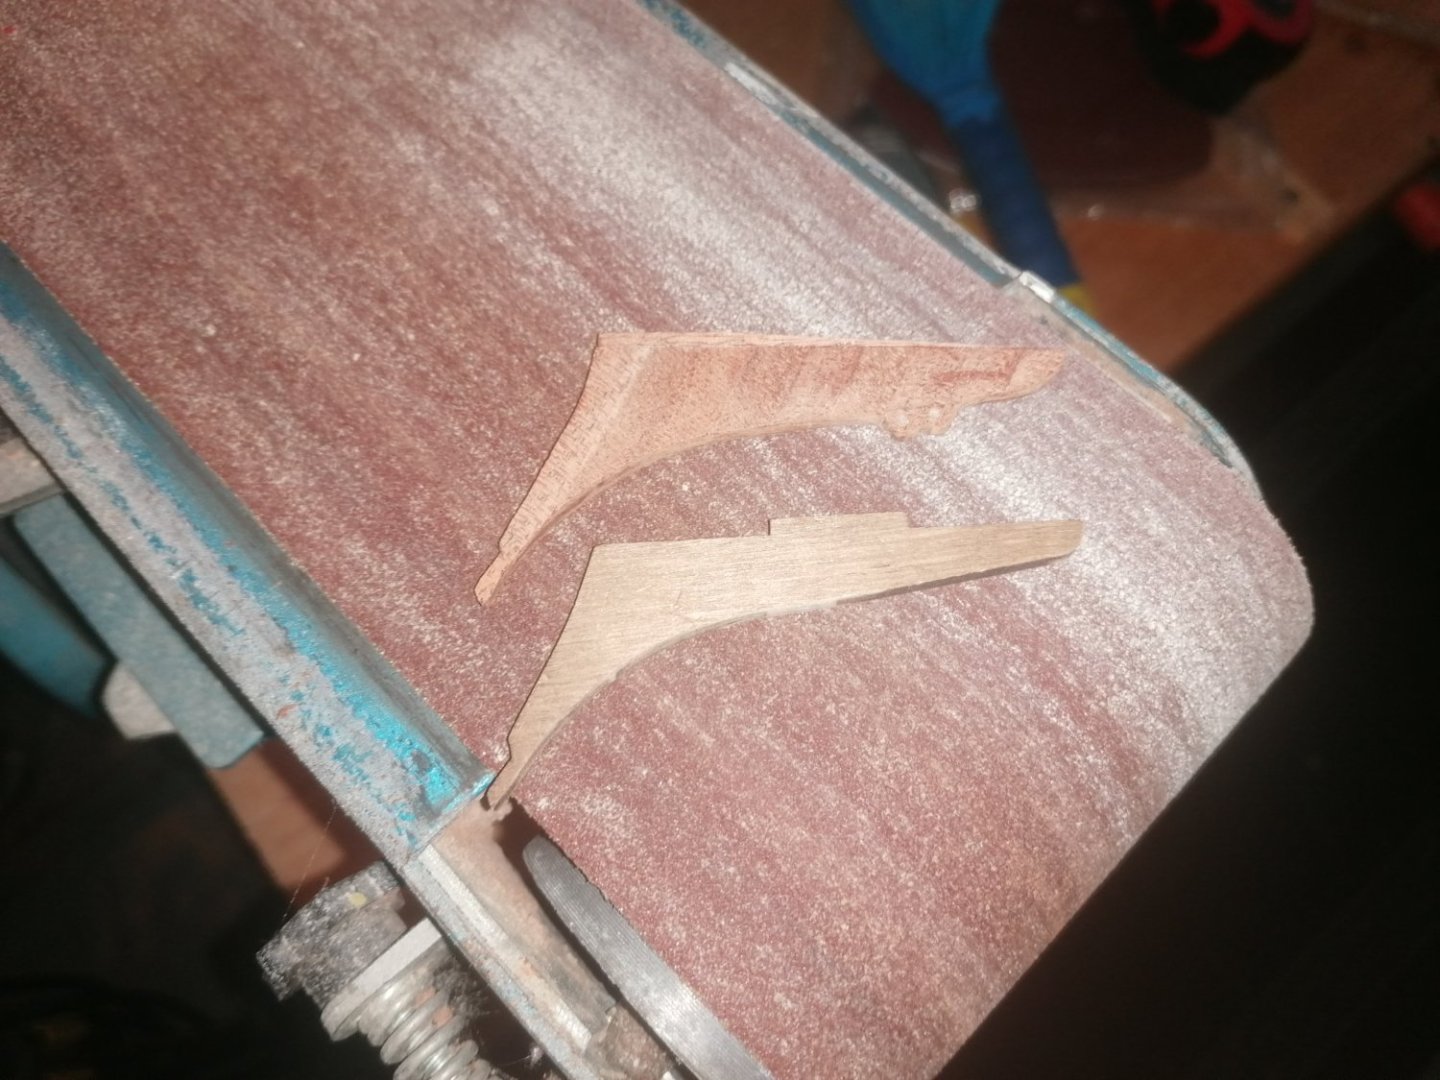
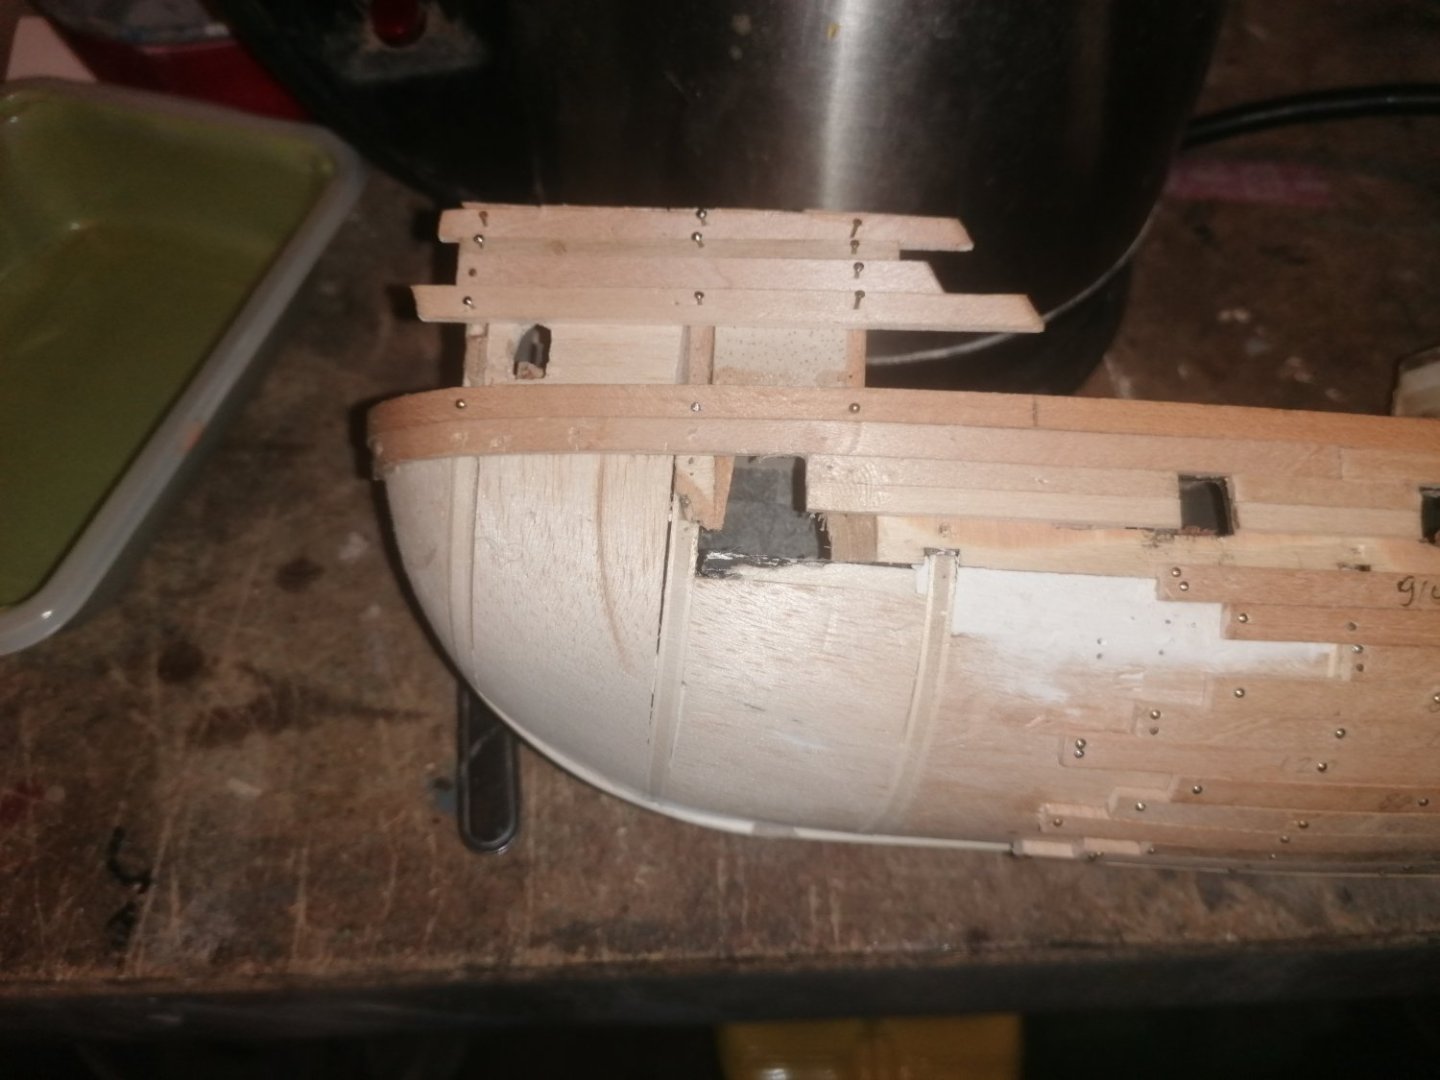
I have also tried seeing what colour to stain the decks. I tested on the poop deck as this will be re planked. I only coated it with pine varnish but I'm not too happy with the colour yet. At the beginning of the post I mentioned about sanding the false keel to a point. I now see this as being a mistake. Although the instruction photo shows this was done I have discovered that I should have only sanded no more than 1mm each side as, this should be planked separately with the 2nd planking. Now that the hull is sanded I wanted to start on the 2nd planking. However, before I can start on this, I need to plank the bulkheads and fit the doors. I have also looked at building up the beak and sprit deck. Looking again at yet more photos, I found that the part below the sprit deck on the cutwater with 2 holes is way too far aft. I decided to try removing it carefully with the knowledge it may not work. It didn't so I have made a replacement. The top of this still needs to be sanded into more of a curve But I am pretty happy with how it has turned out. The holes don't look great but they will be redone with the 2nd planking. I also decided to see how the shape and length of the hull compares to my 1st ship.


-
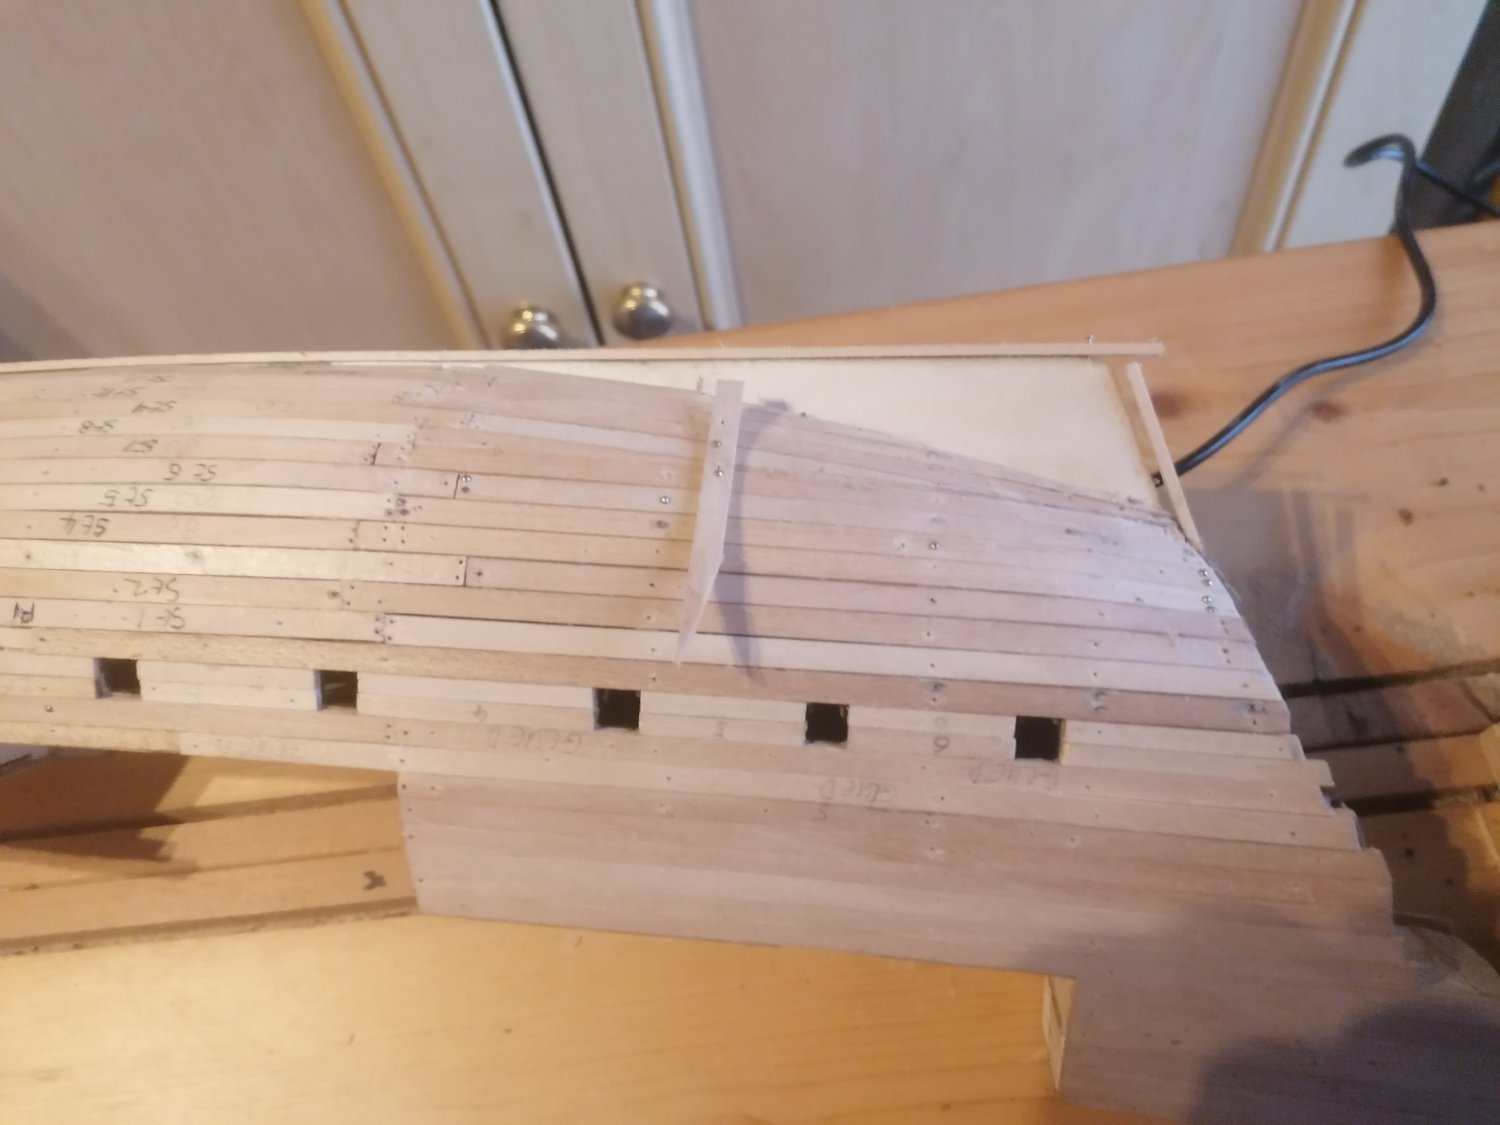
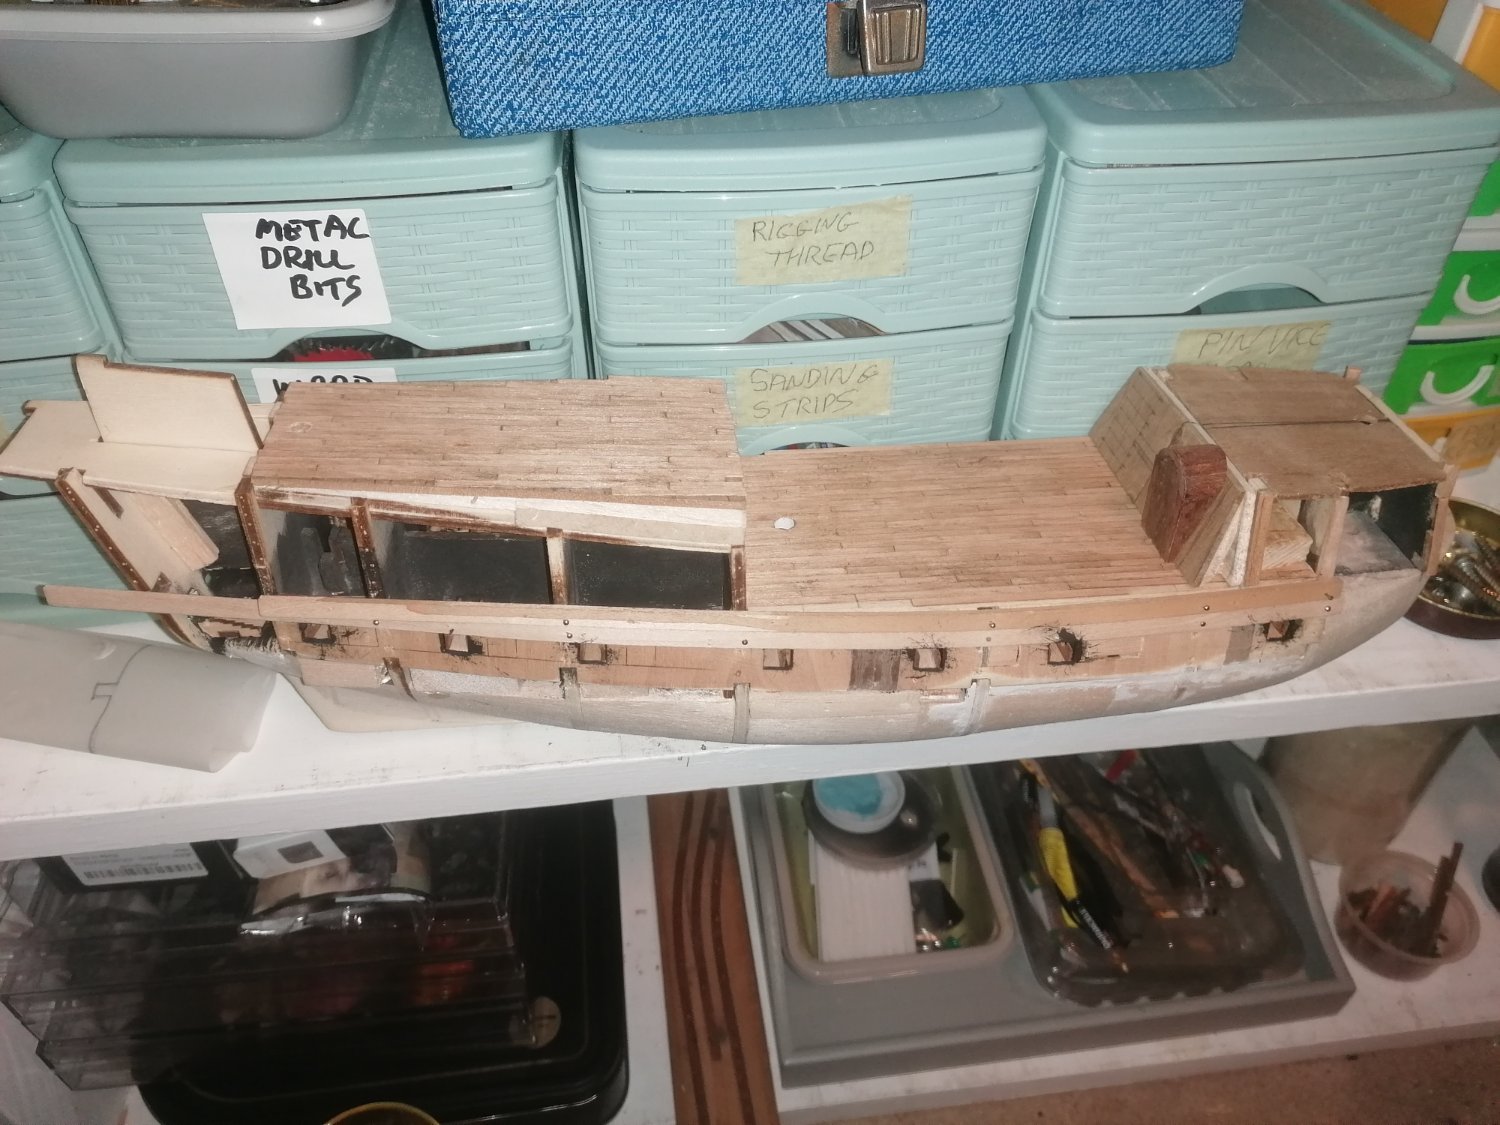
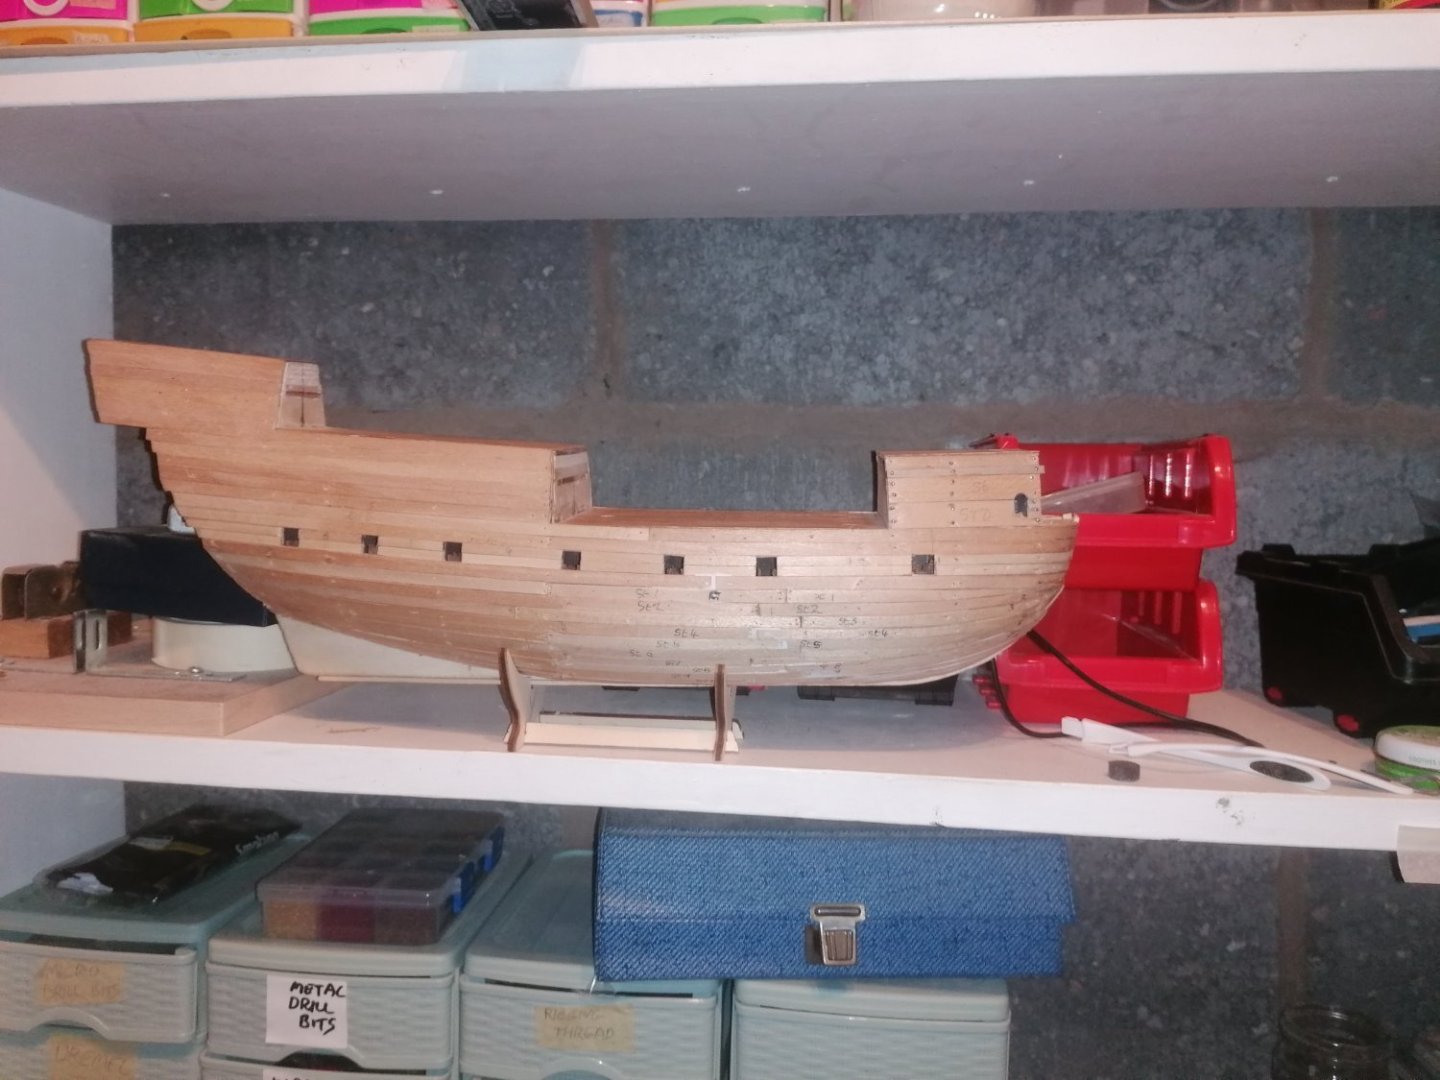
The poop deck is now the correct shape and is sloping at the same angle as the half deck bulkhead. I added 2 x 5mm strips to the sides between the half deck and poop deck and also pinned a strip of wood to the bulkheads to act as a guide for sanding. I marked the edges of these in black so it was easier to judge how far to sand down the sides. With this done I started on the fine sanding to finish the hull.
-
At last I have returned with an update. It would have been sooner if my progress hadn't been so slow. This is partly due to re checking photos and trying to get the proportions right, and also from me wanting to start other phases of the build but realizing I need to build other things first. Anyway, I've checked my measurements and the masts are pretty much as I need them, which is a relief. It also looks like the rubbing strakes should be equidistant at the foc'stle and at the stern so they will be 20mm apart. I have made the doors and they just need to be shortened to fit the space between the decks.


-
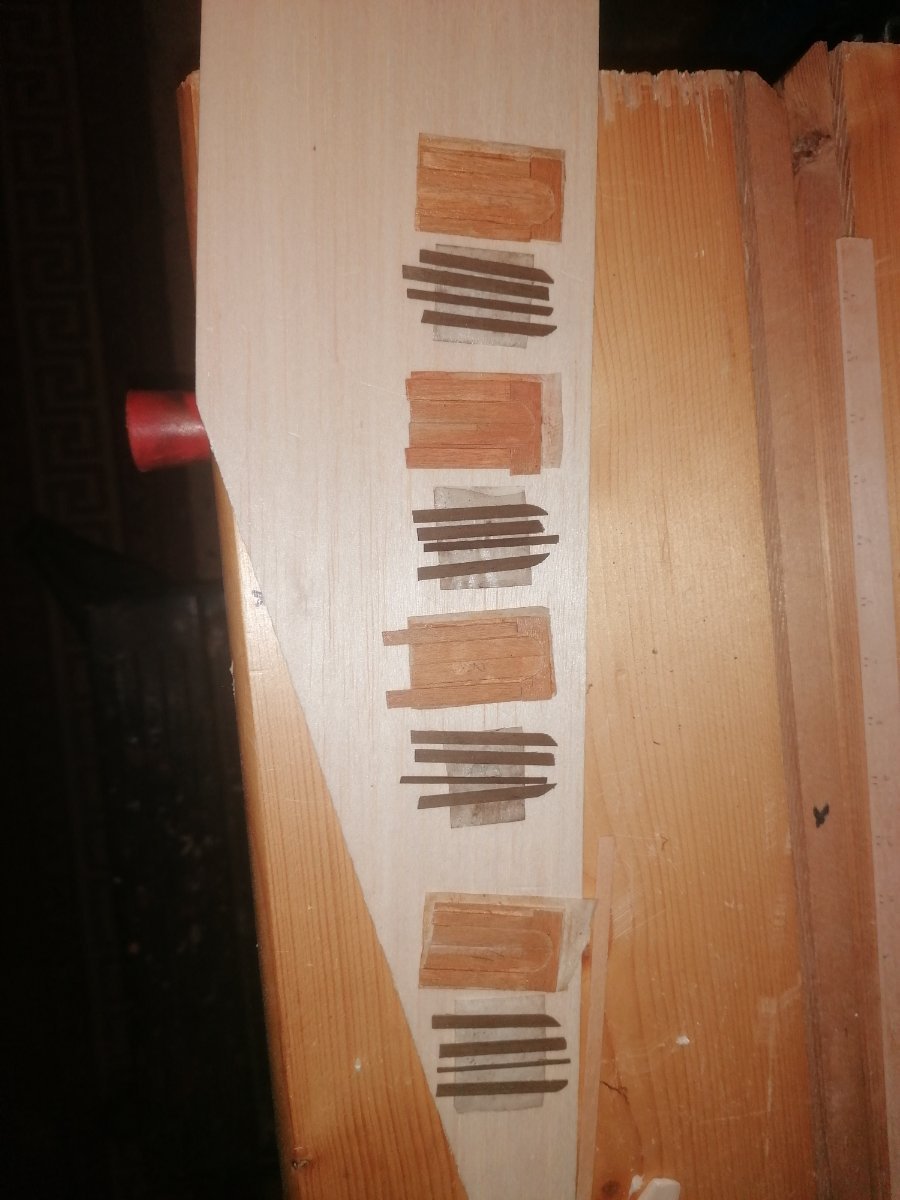
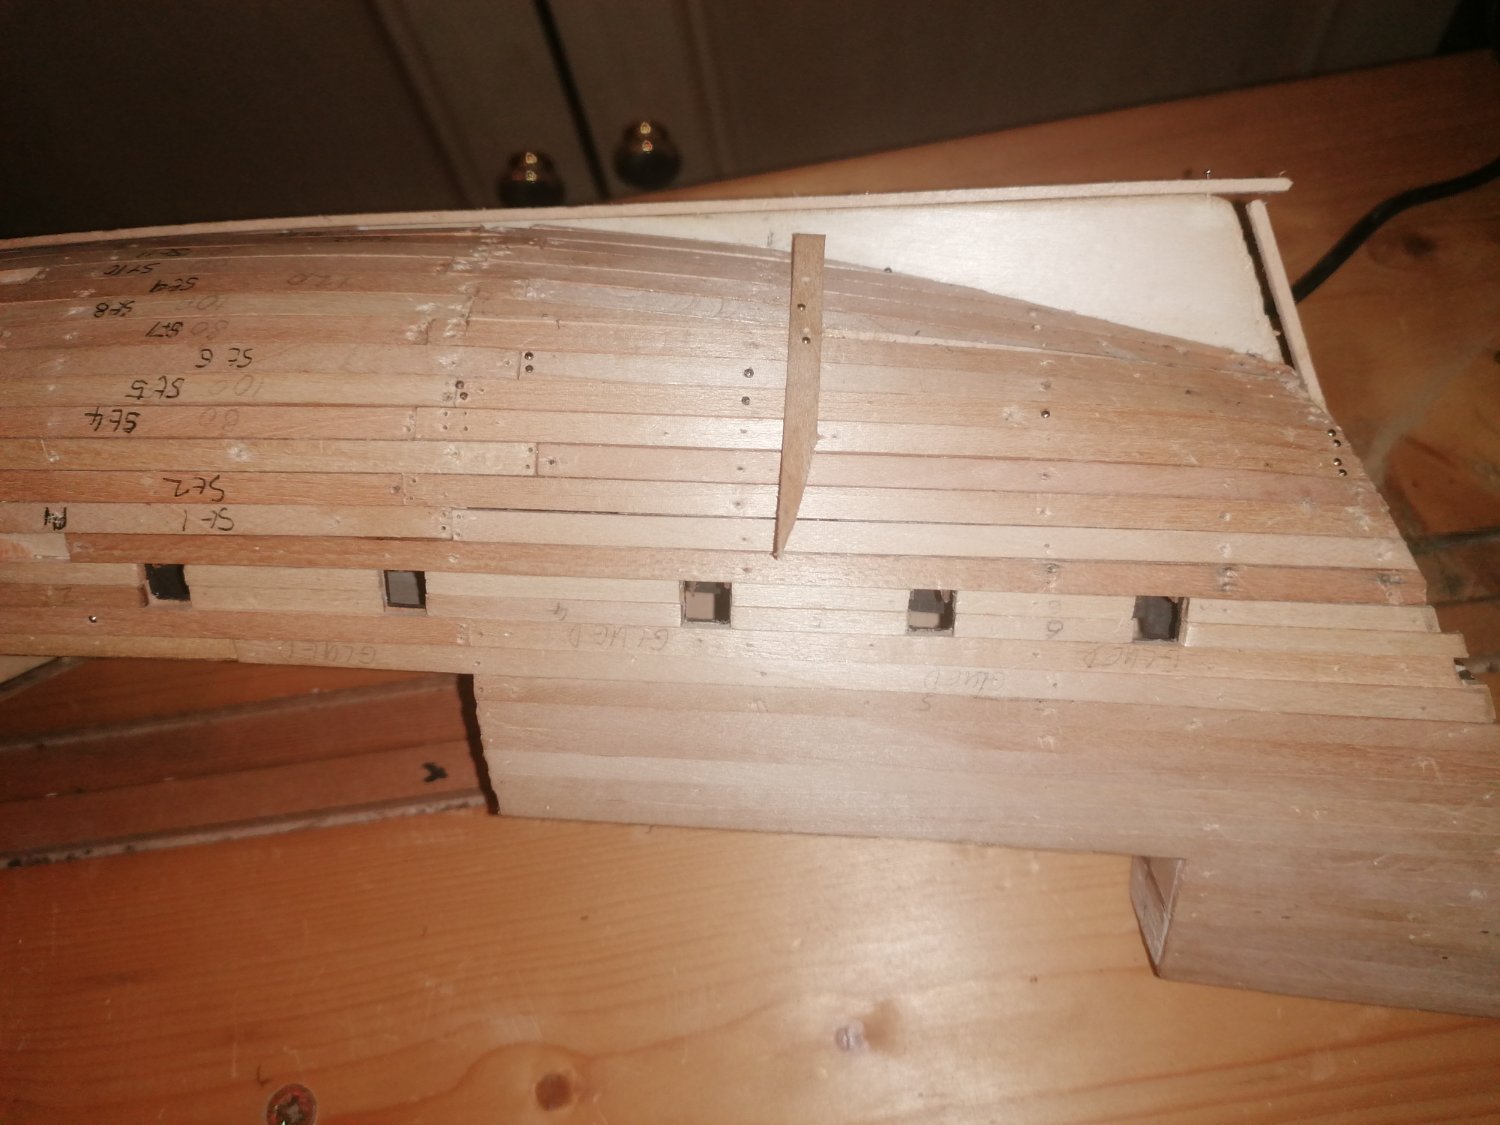
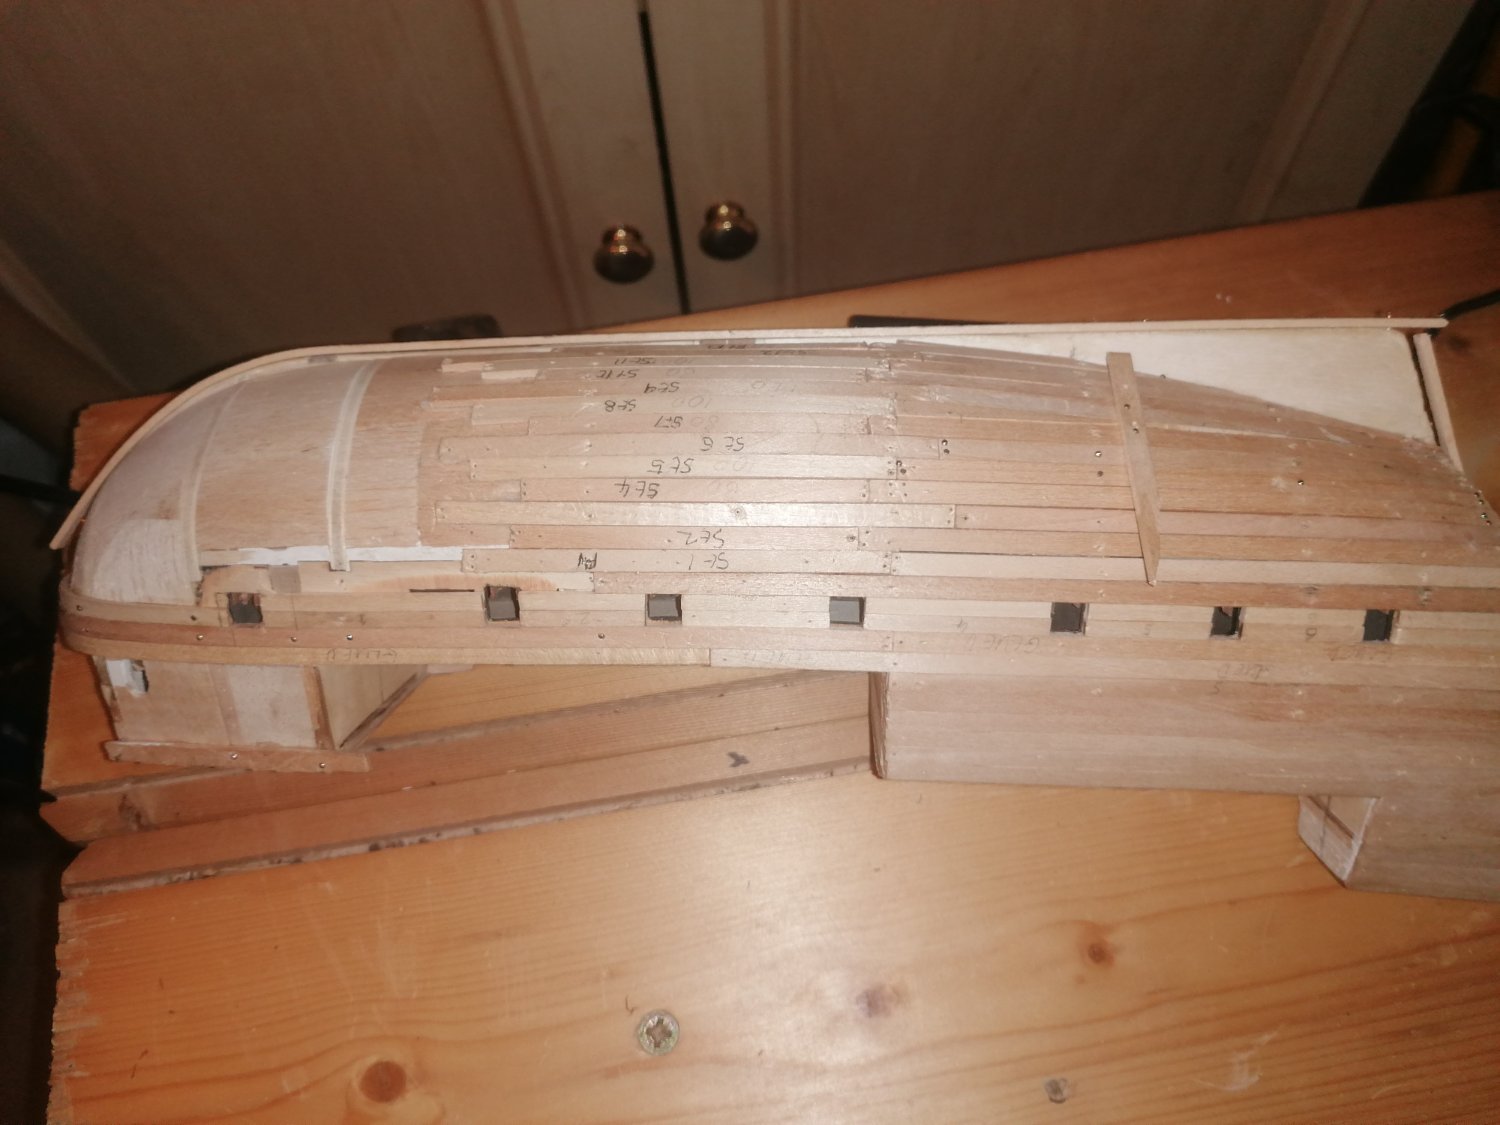
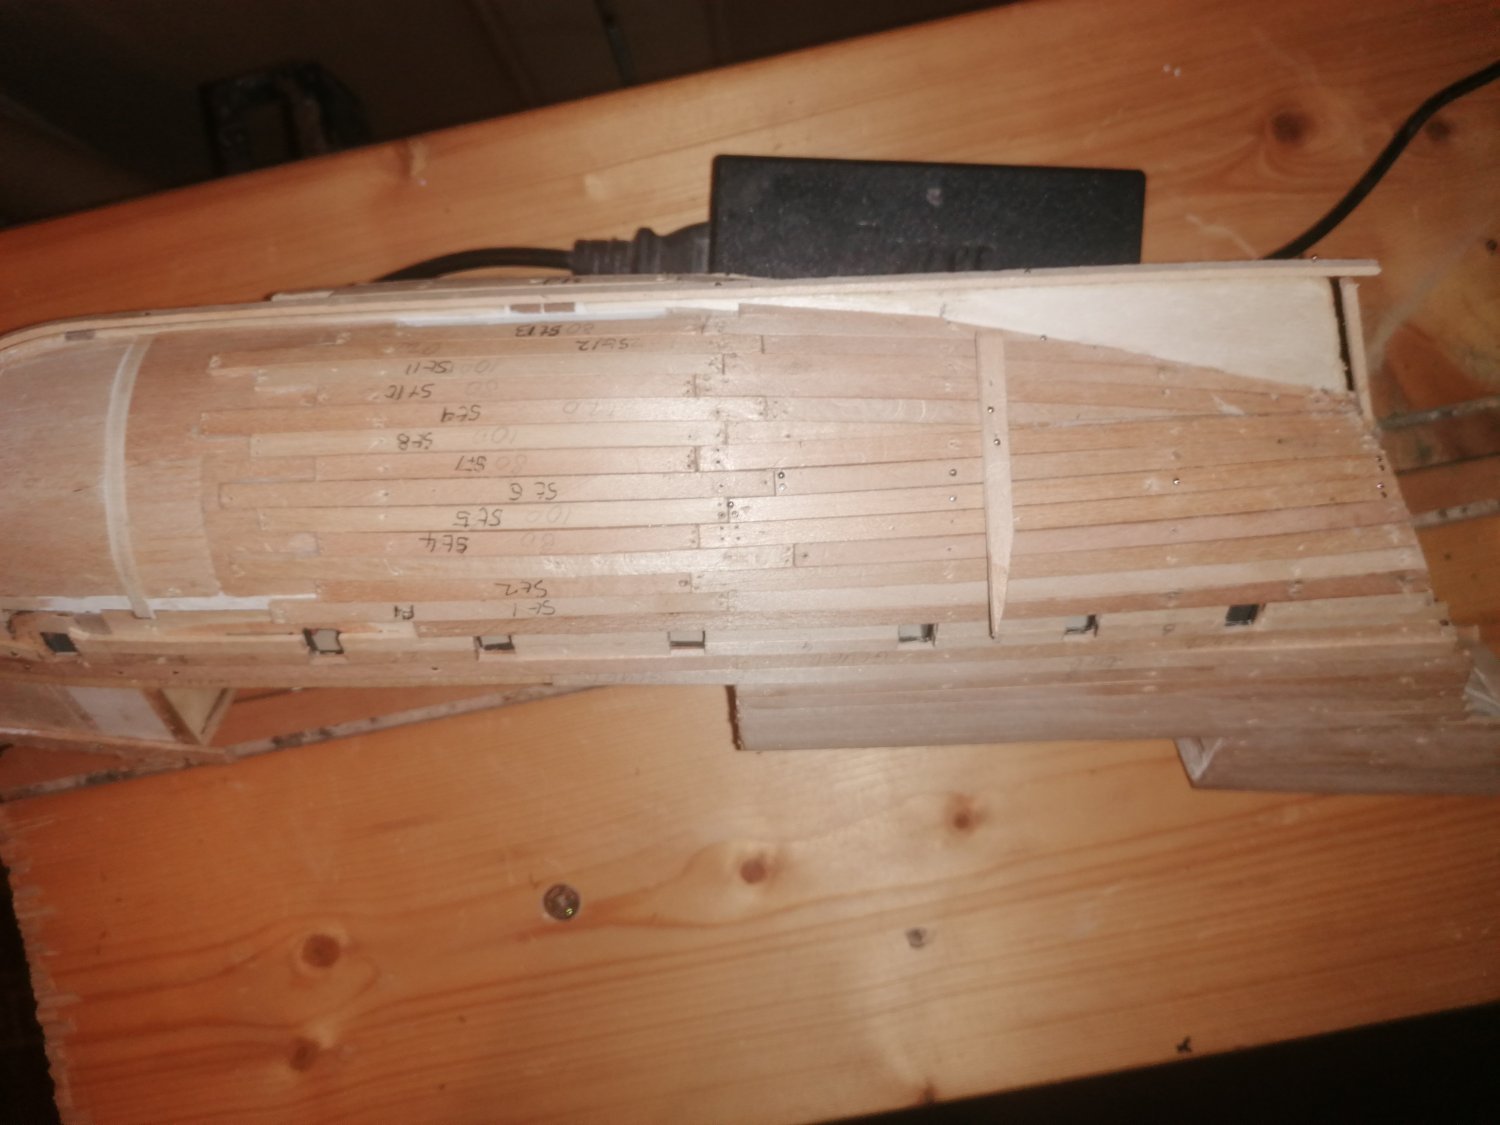
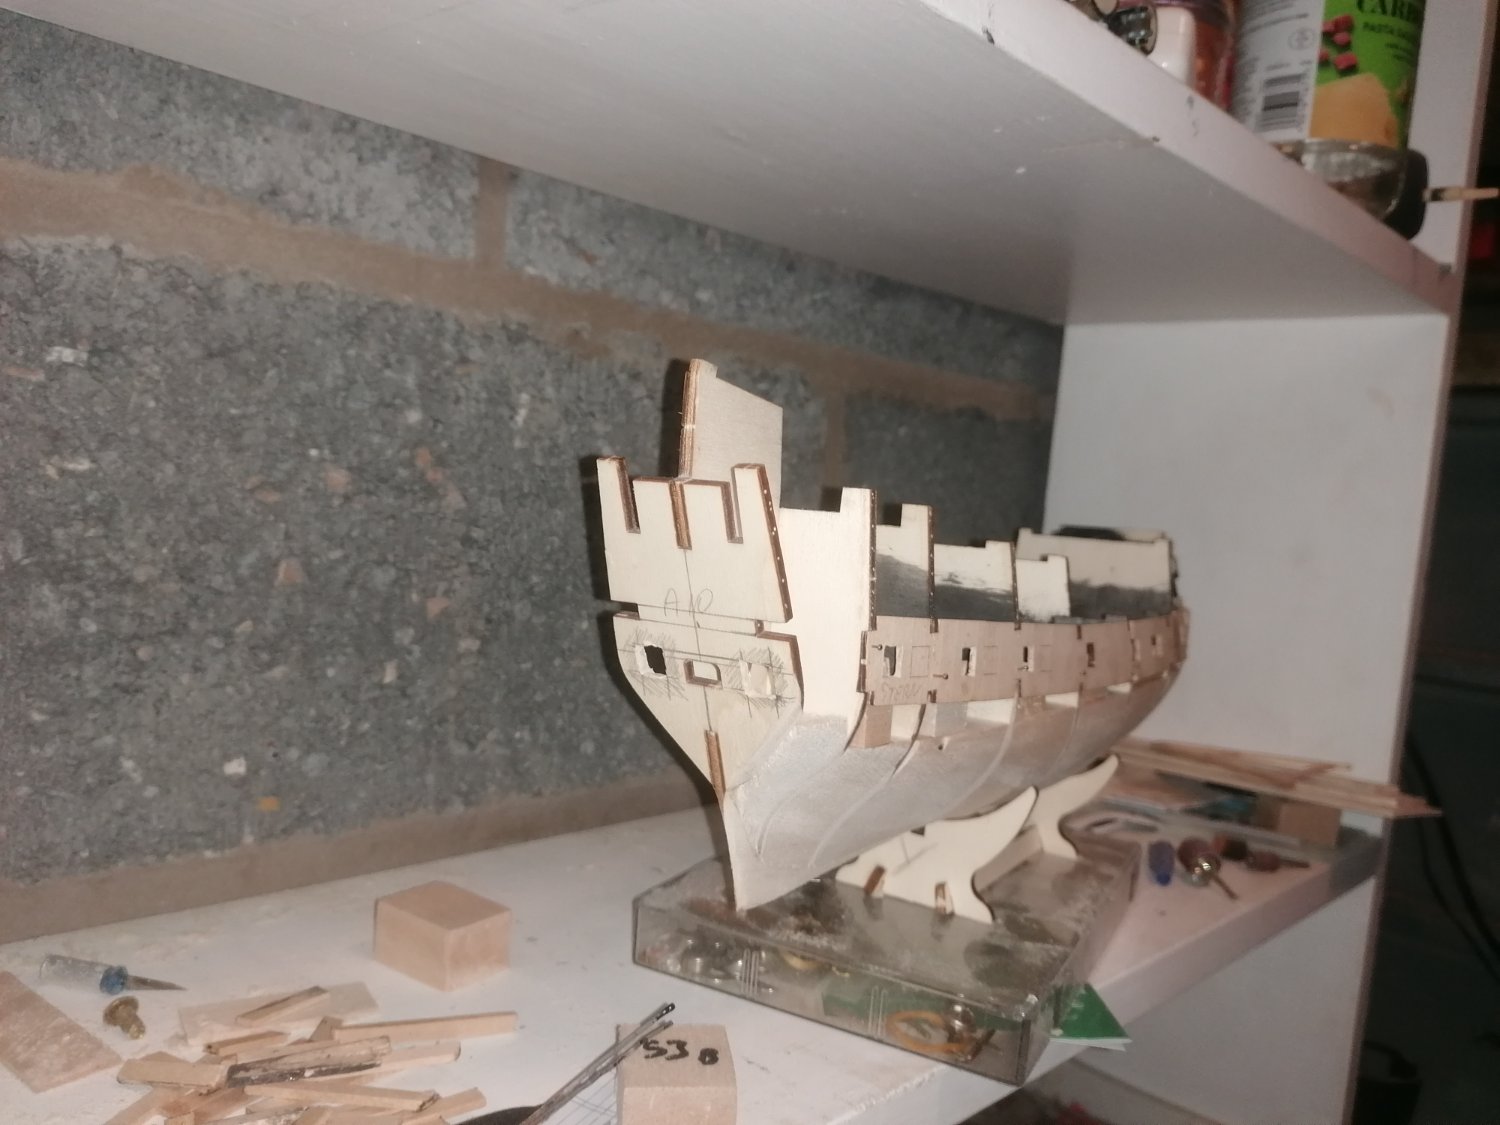
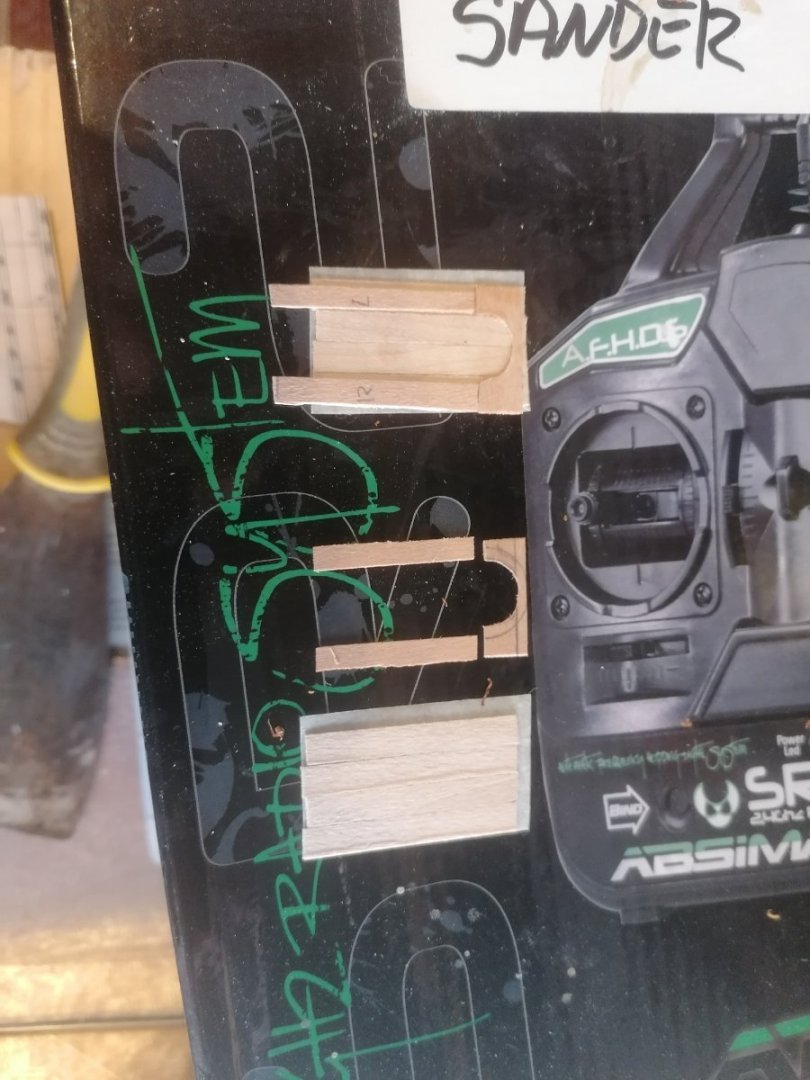
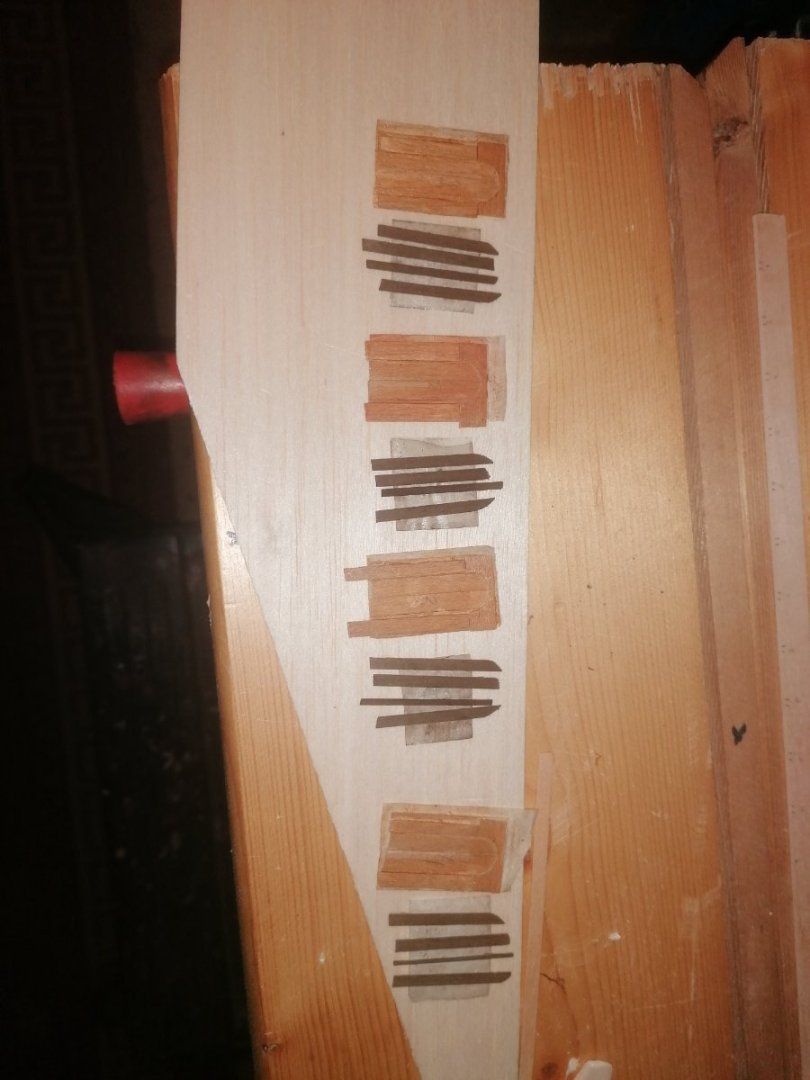
After a shaky start this week, I've actually made good progress. when starting on the foc'stle and looking at photos again, I realised that the arches for the fore chasers were cut too far aft of where they needed to be. I decided to cut away some of the balsa blocks I had shaped and then sanded the inside of first frame to 3mm thick instead of 4mm. The first vertical rubbing strake will be 2mm wide and the edge of the gun port 2mm aft of this so as to be in a better position between the rubbing strakes. I then thought of planking the areas around the gun ports vertically but, after a few unsuccessful attempts of cutting the arches decided to run 2x 2mm x 10mm strips and effectively have a rectangular hole in the lower strip and form the arch in the upper which was much easier to achieve. These have now been pinned and glued in place with the upper strakes. While these dry I have set about making the doors and frames. For these I cut 4 strips of Tanganyika 0.5mm x 5mm to a little more than the required height. I placed these on masking tape to hold them together and then cut out the inside of the arch from 0.5mm x 8mm Tanganyika . This was then glued onto the previous strips. I then used strips of the same for the sides of the door frames. These have now been stained with antique pine wood stain. The doors themselves are 0.5mm x 3mm walnut which have been stained with old oak stain. The inside of the door arches were not as wide as I thought they were so, as a result, I have 3x 3mm strips and one 1,5mm strip for the doors themselves. I will see how the look once they're dry and If I need to I can remake them tomorrow if needed. especially as I now know a relatively easy method for making them. The main thing now is that the hull is almost ready to be sanded though I will still need to build up the sides of the poop deck. from the half deck upwards. I am not looking forward to this having struggled to get it to where it is now. Added to tis is that the forward edge of the poop deck needs to be 2mm wider each side but tapering downwards to be flush with the half deck, but also, tapering back to the width of the stern as it is. While planning for this I realised last night that, due to the location of the masts, both the half deck and poop deck are each 10mm too long. This means I will have 20mm between rubbing strakes whereas they should only be 15mm apart. I am not going to worry too much yet as tomorrow I may be getting a bench drill so if needed I may be able to move the mizzen mast forward. If not I may just need to compromise.


-
The next stage will be continuing lightly sanding down the hull and planking the fo'cstle. in between sanding and filling I will need to make the doors so I can then plank the bulkheads. The poop deck also needs reshaped, and I am leaving the stern as it is for now, as I don't yet know if it needs to be extended or not. I will also need to decide whether to have the stern chaser gun ports curved or not. I know I should but this may be too complicated. I shall see.
-
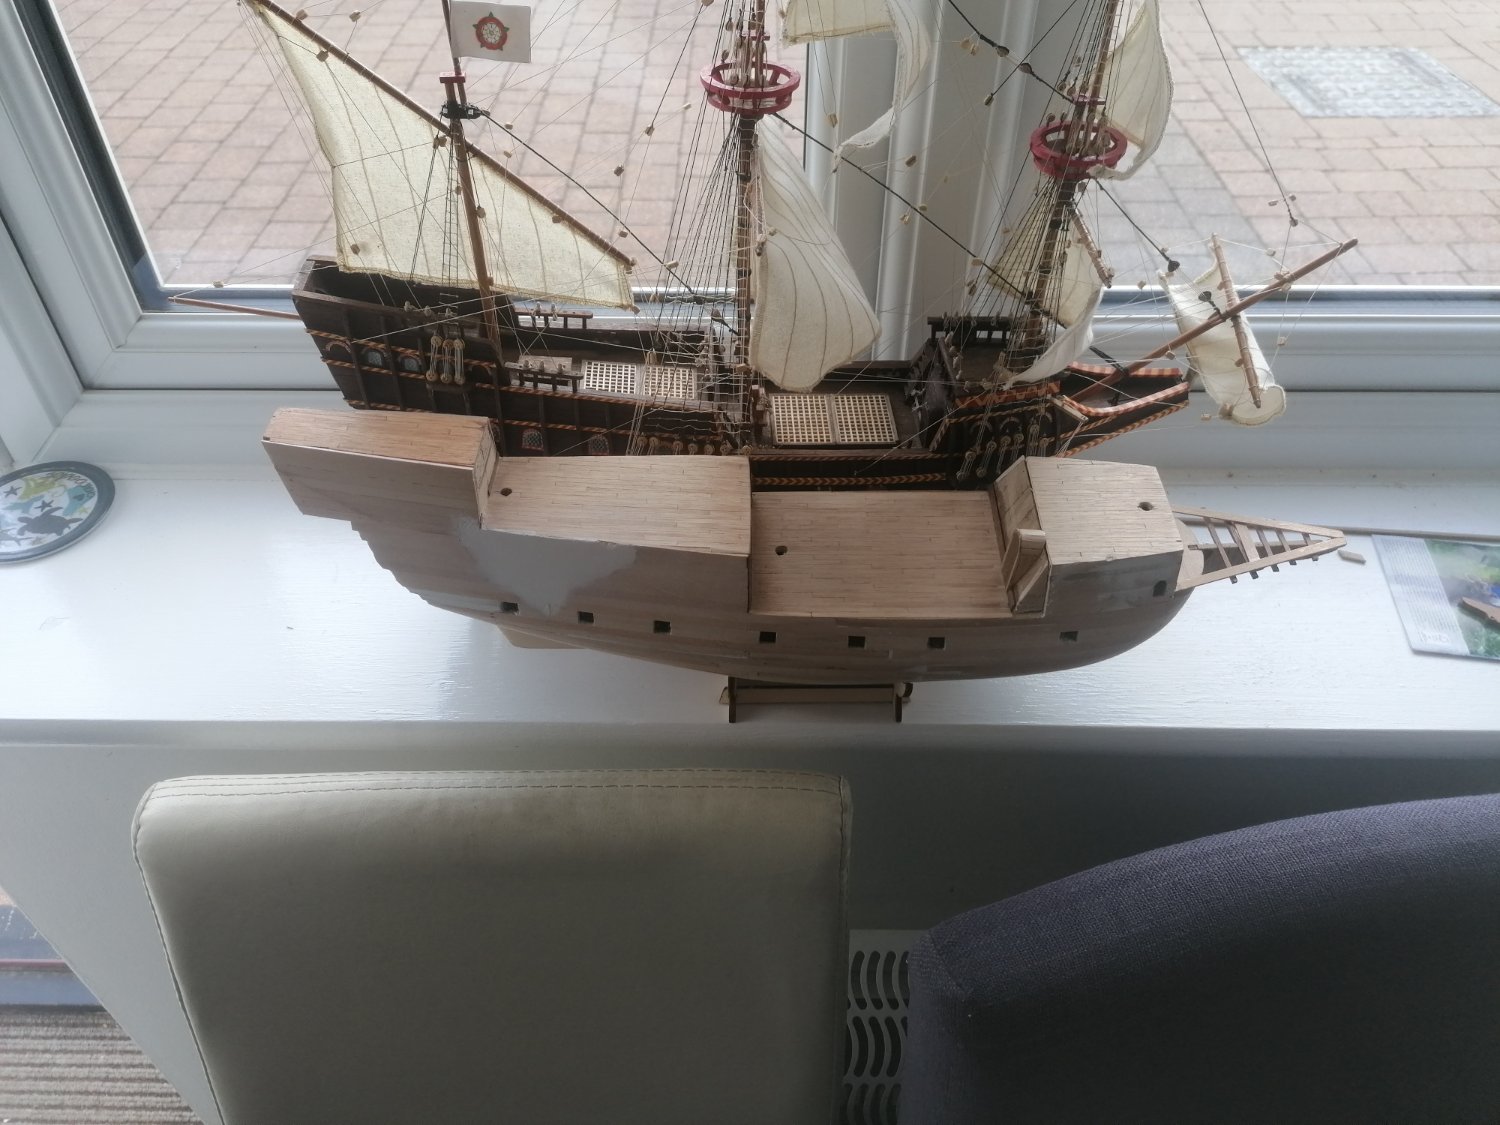
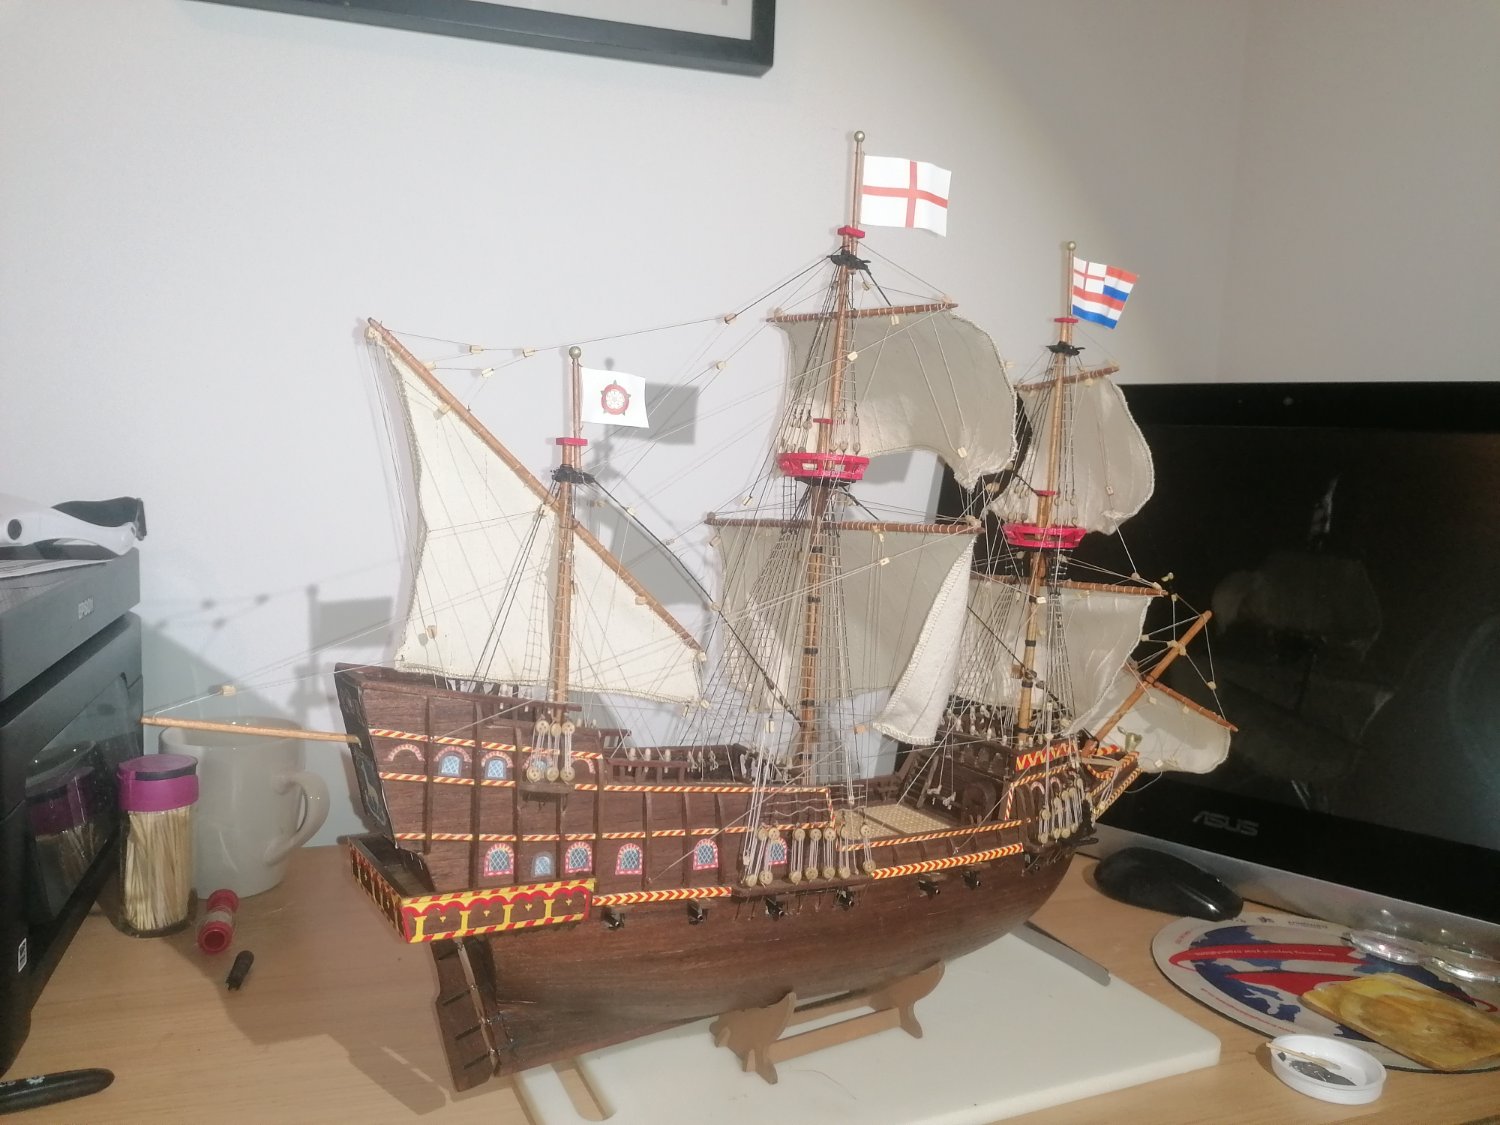
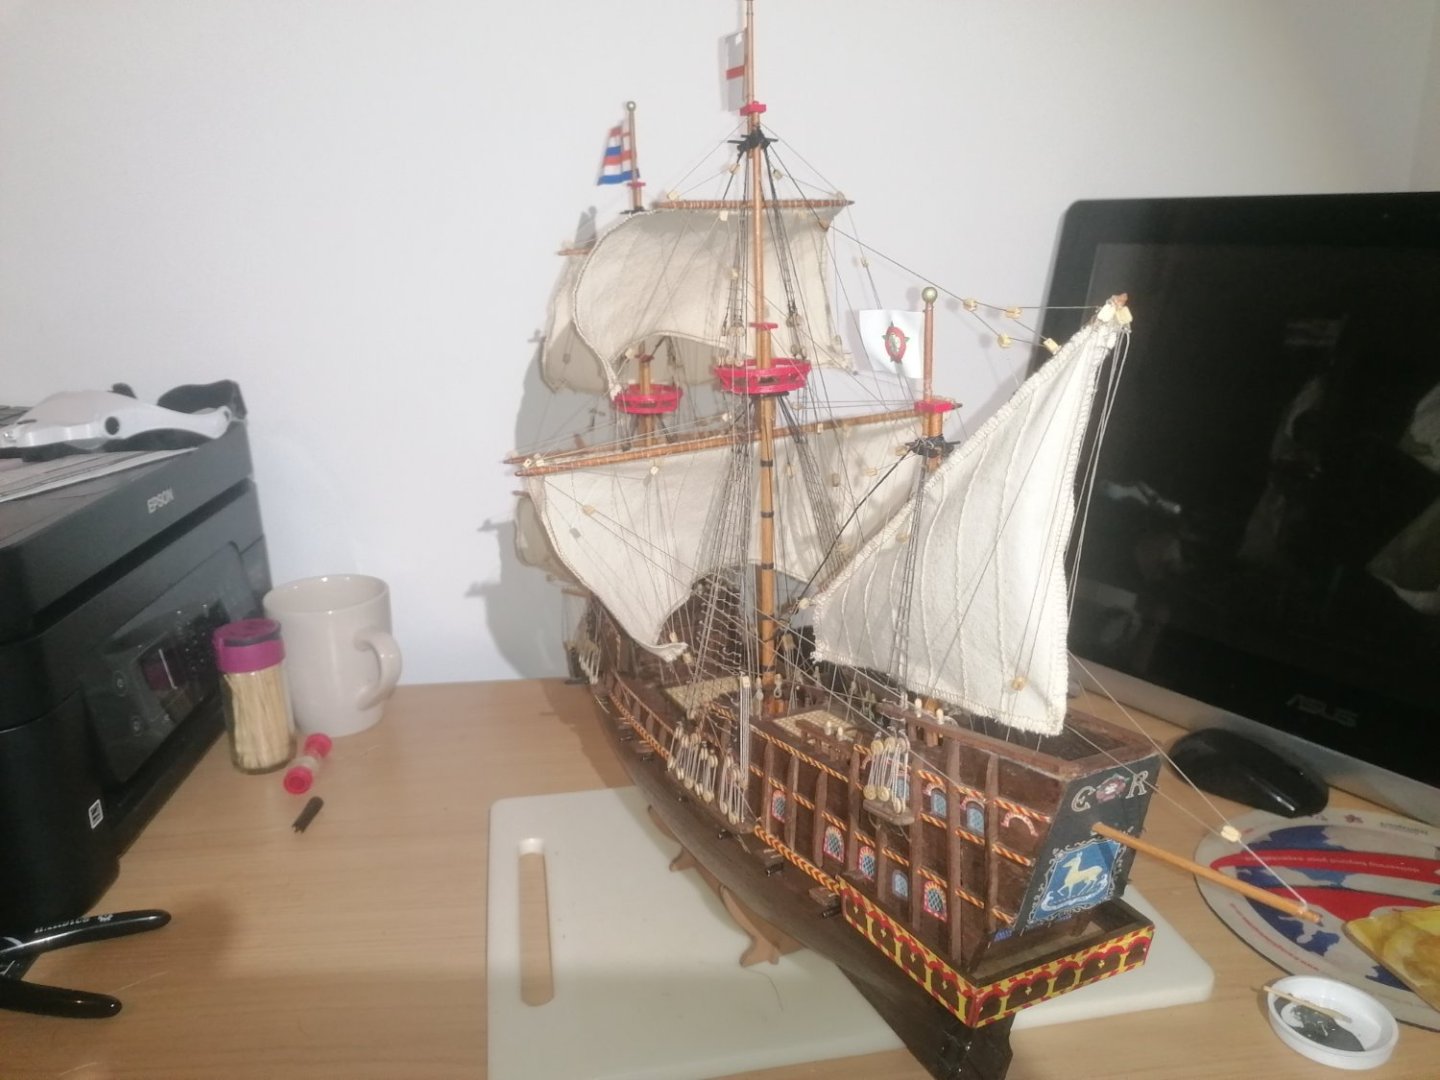
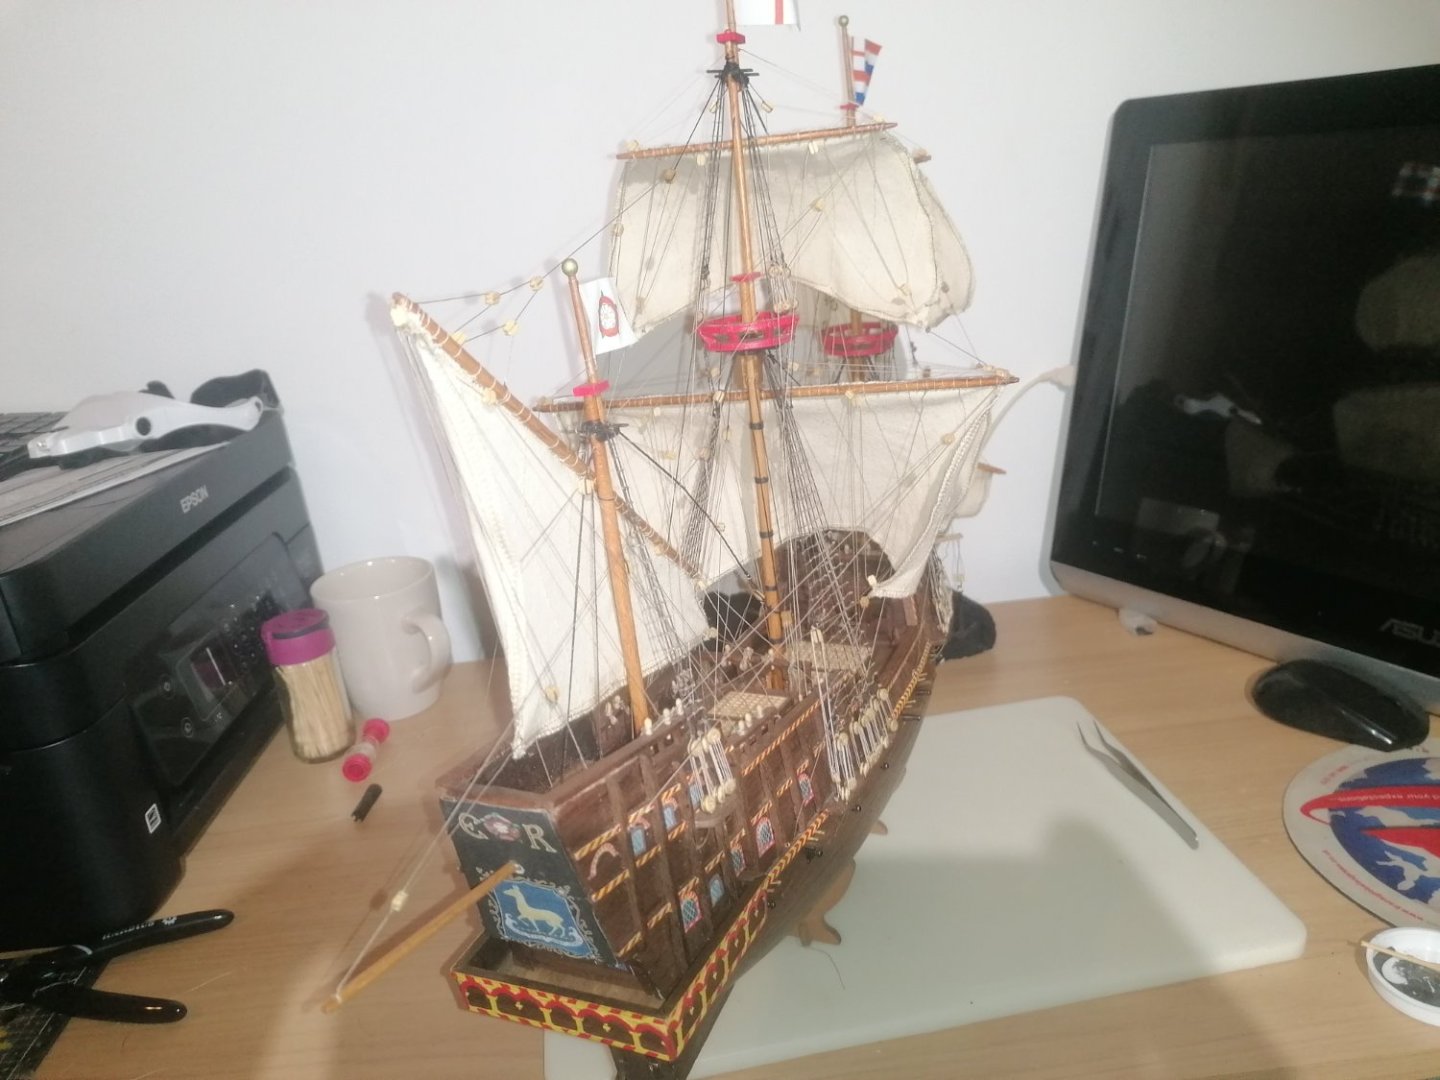
Many thanks for your input guys. You are right Steven. wood is very forgiving. Much as I try to remain patient, there are times as well where you just have to start building. There are so many things I plan to change but they are mostly above deck level. The down side of this is that I've been planning on getting the shape of the hull as close as I can to the actual ship. As for your comments Snug It's such a shame that very little information of ships of this time exist anymore. Just items that you have included for example. Over the last 10 years I have scoured the internet on and off for these kind of details with no luck. Many thanks for these. I will try and follow them up. As for this version of the Golden Hind, I watched her being built, launched and fitted out before she sailed from Appledore. As soon as I saw this Occre kit I knew I had to build it. However within a few weeks of starting her I noticed so many errors with the kit I ordered another so I could get the 2nd ship looking closer to the one I knew. I was never convinced she was completely historically accurate but she's a real ship and has been around the globe like her namesake. Another advantage is that I can get to see her if I need. (Provided the ladders are in place next time) and there's no train strikes. Anyhow back to this build. I've managed to complete the first course of planking with the exception of the fo'cstle. I am thinking of laying the forward section, where the arch for the fore chaser is, vertically with the arch cut out and then planking as normal from there to the aft bulkhead. Trying to shape this had been a nightmare as every face is angled. I had the basic shape but it was not wide enough. to fit between the strakes extending aft. I added 2.5 mm balsa sheet to each side and found it was now 1mm each side too wide to fit between the strakes. I thought about sanding it down but, in the end, opted to build up the edges with 0.6mm sycamore supplied as decking (unused apart from thickening and filling gaps) which now means I can run the planks in between here and the fore section. On the whole I am quite happy with the first planking though where there are more than 0.5mm differences between strakes I will add strips of 0.5mm sycamore so as not to have any planks sanded too thin.


-
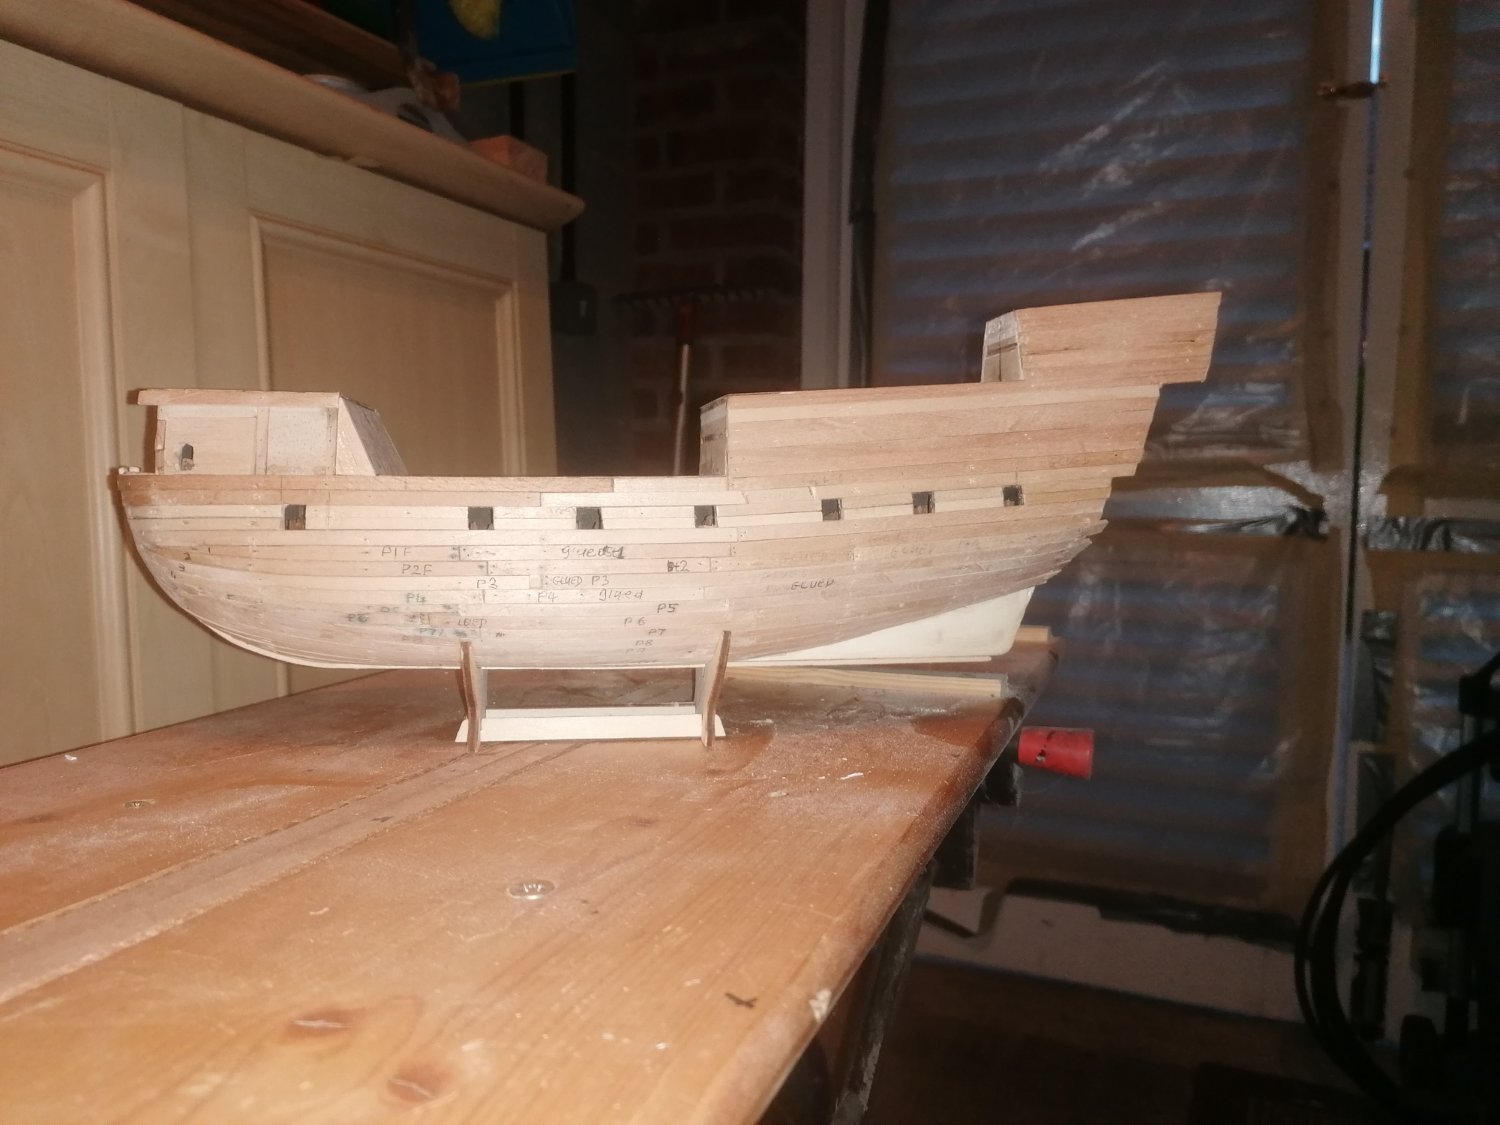
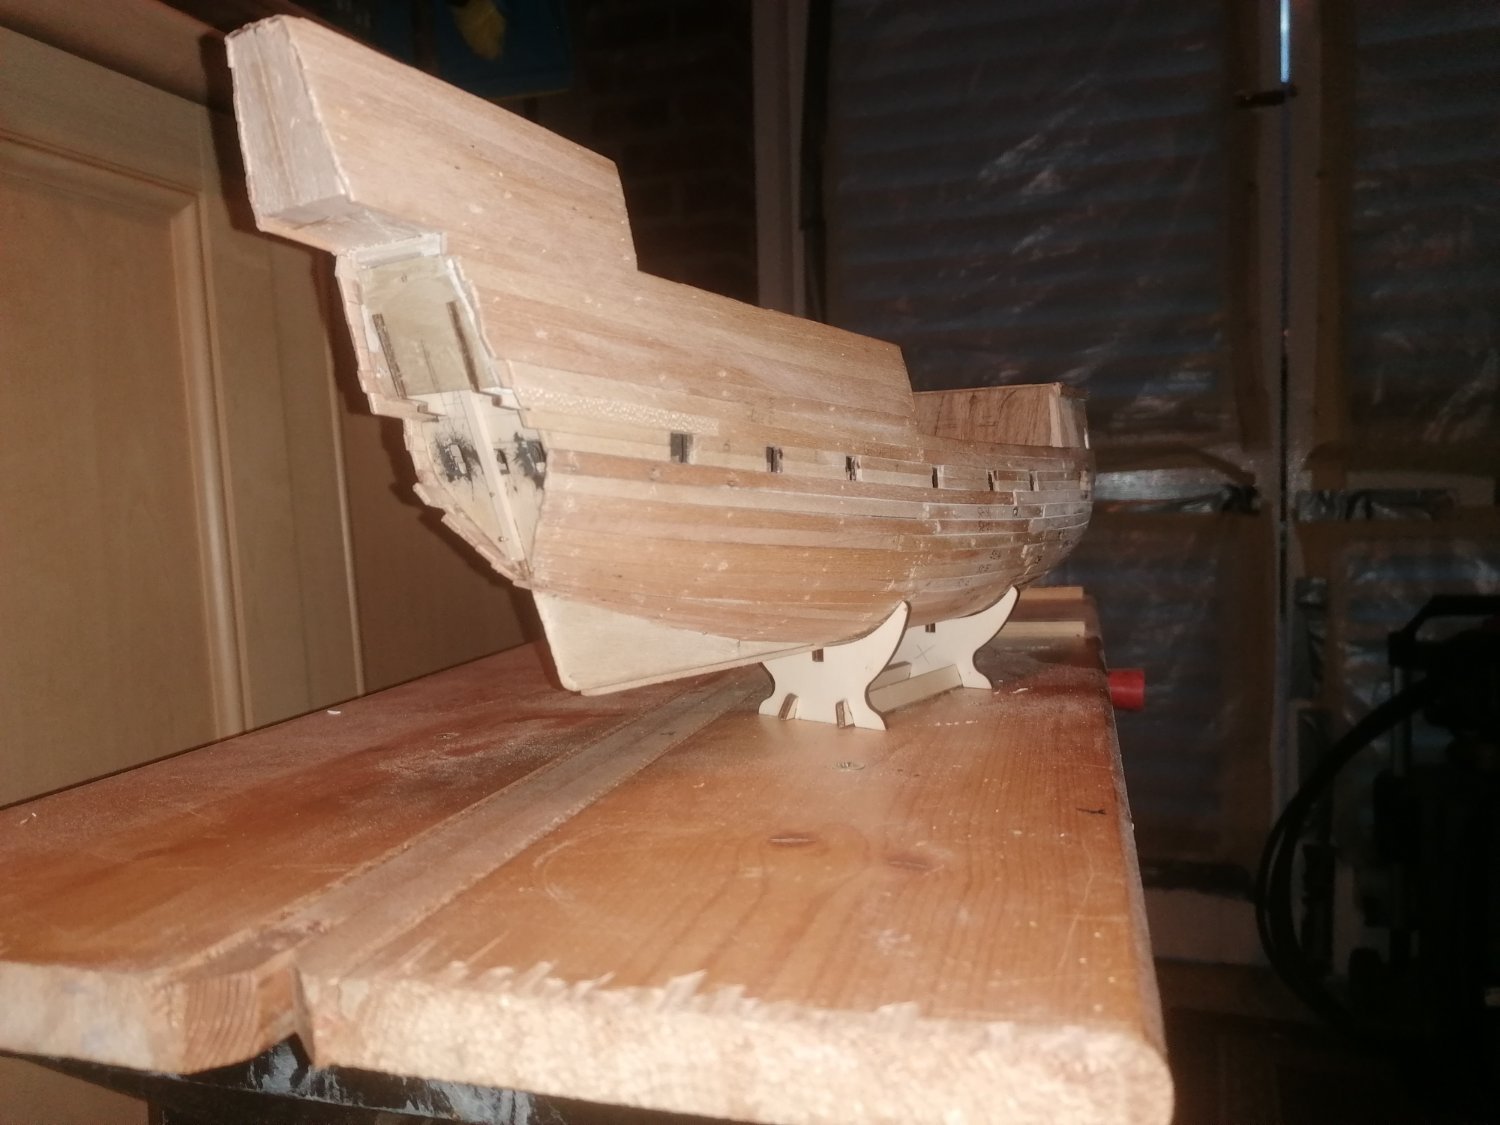
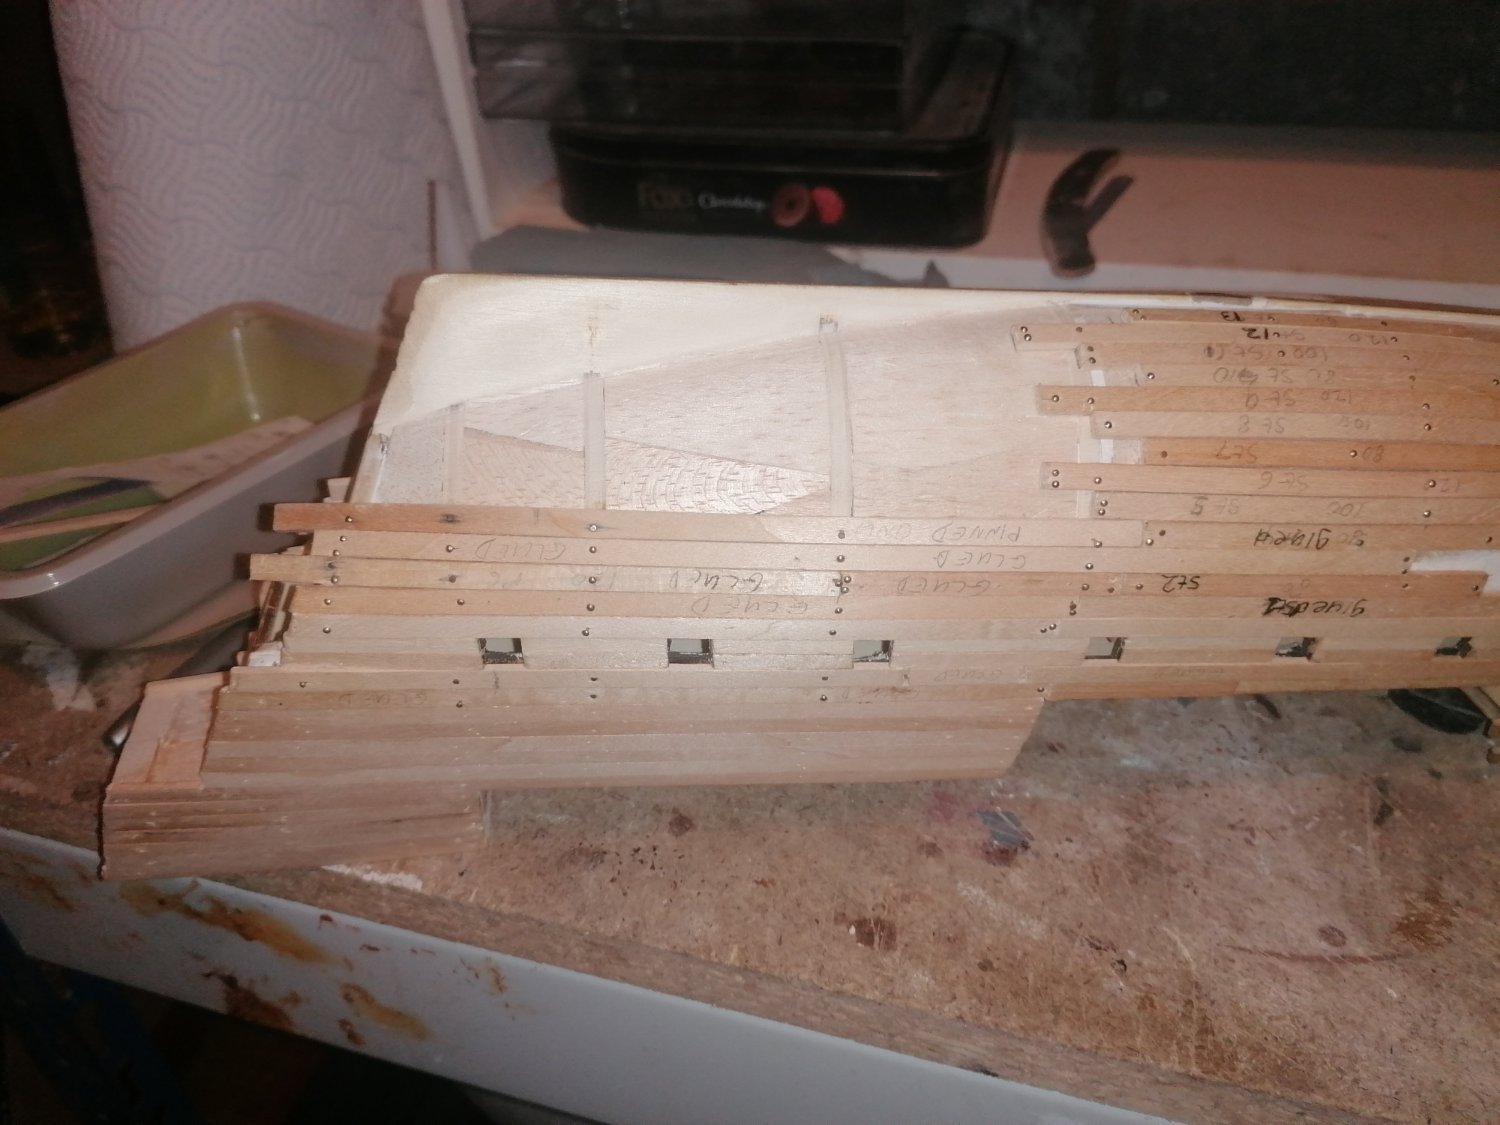
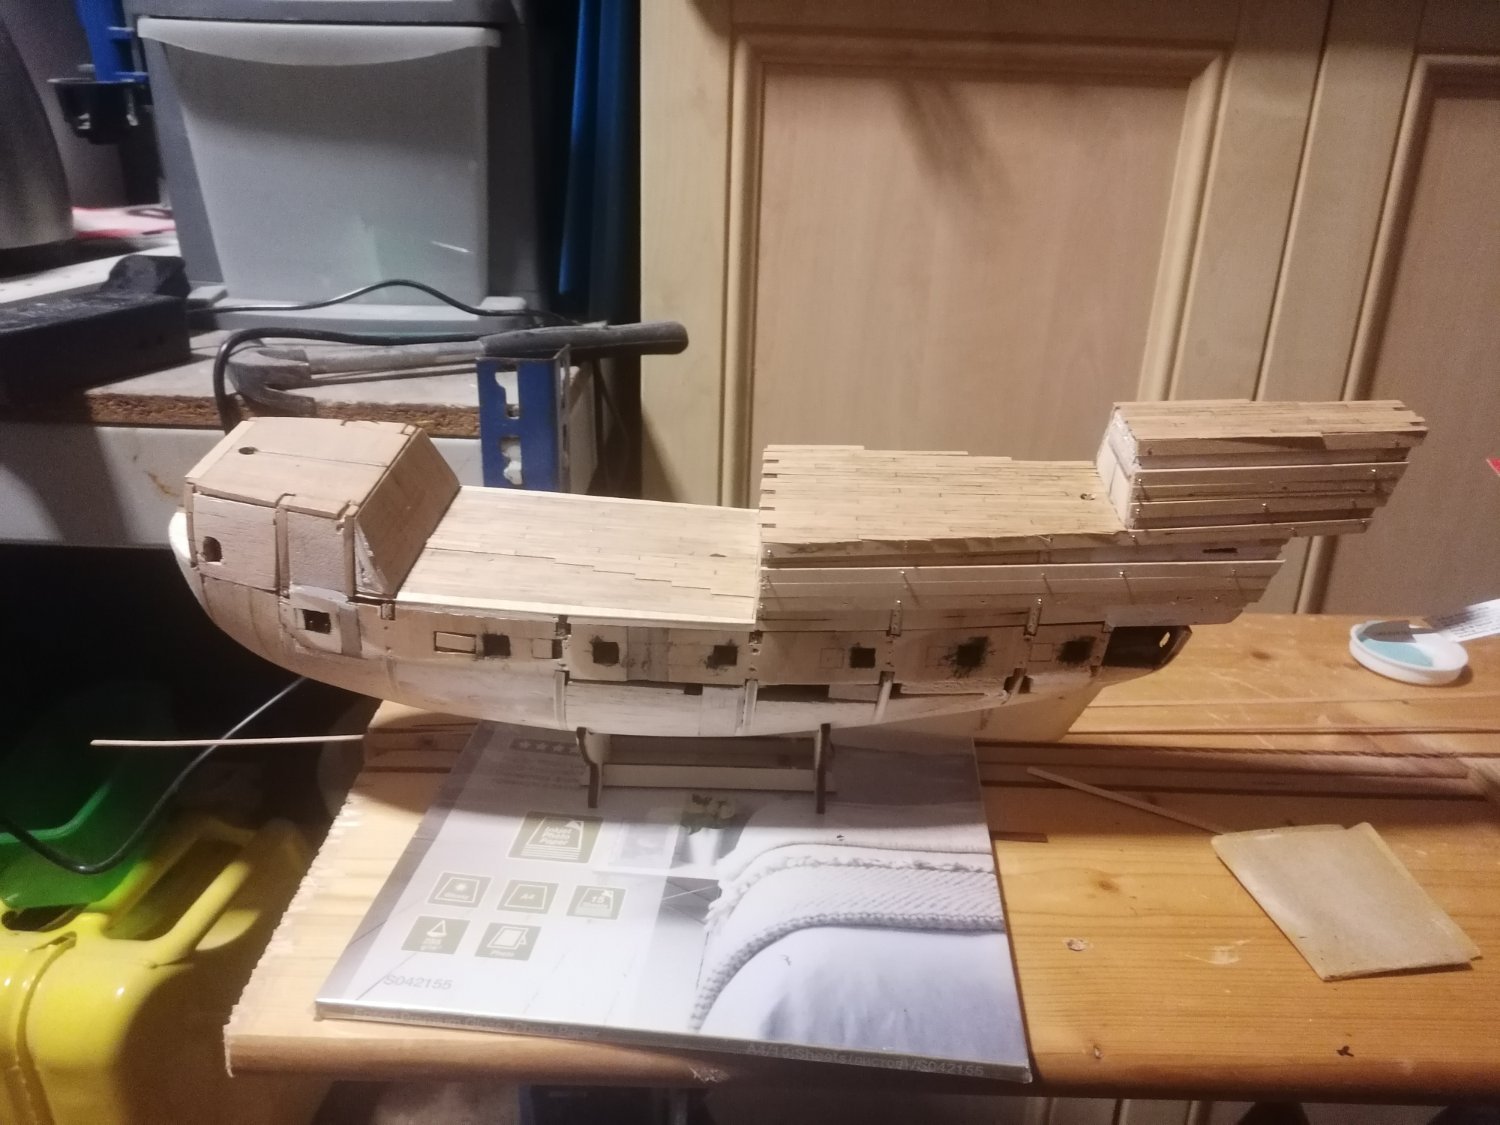
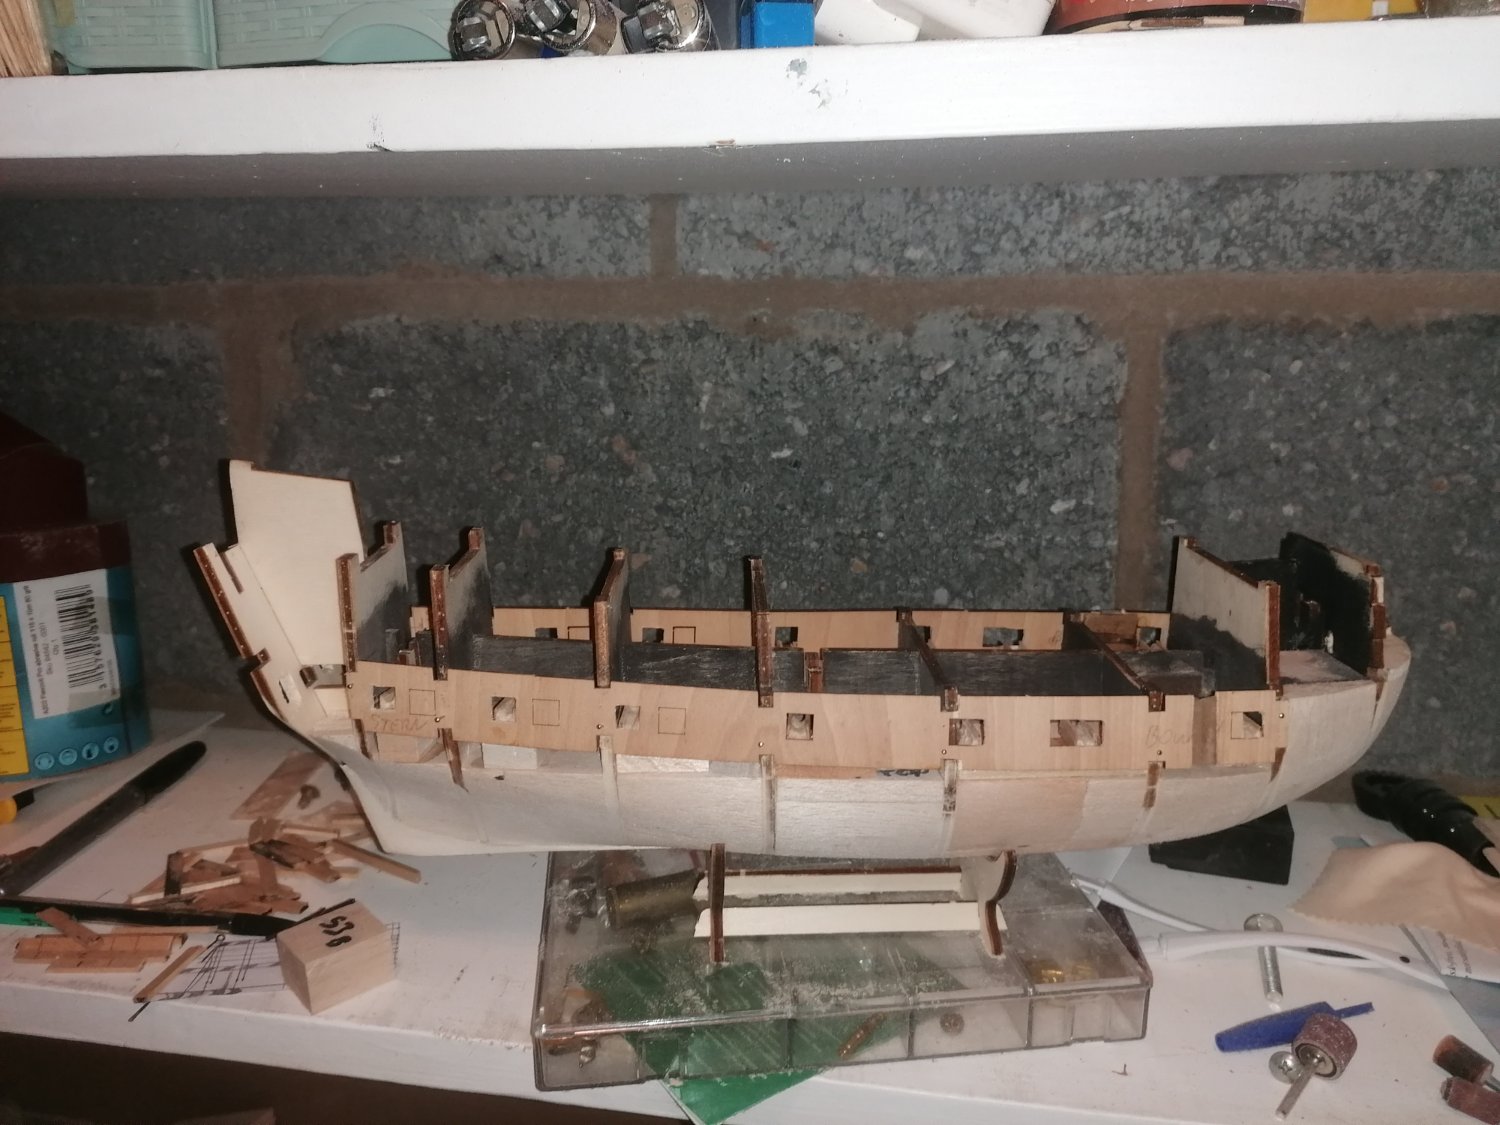
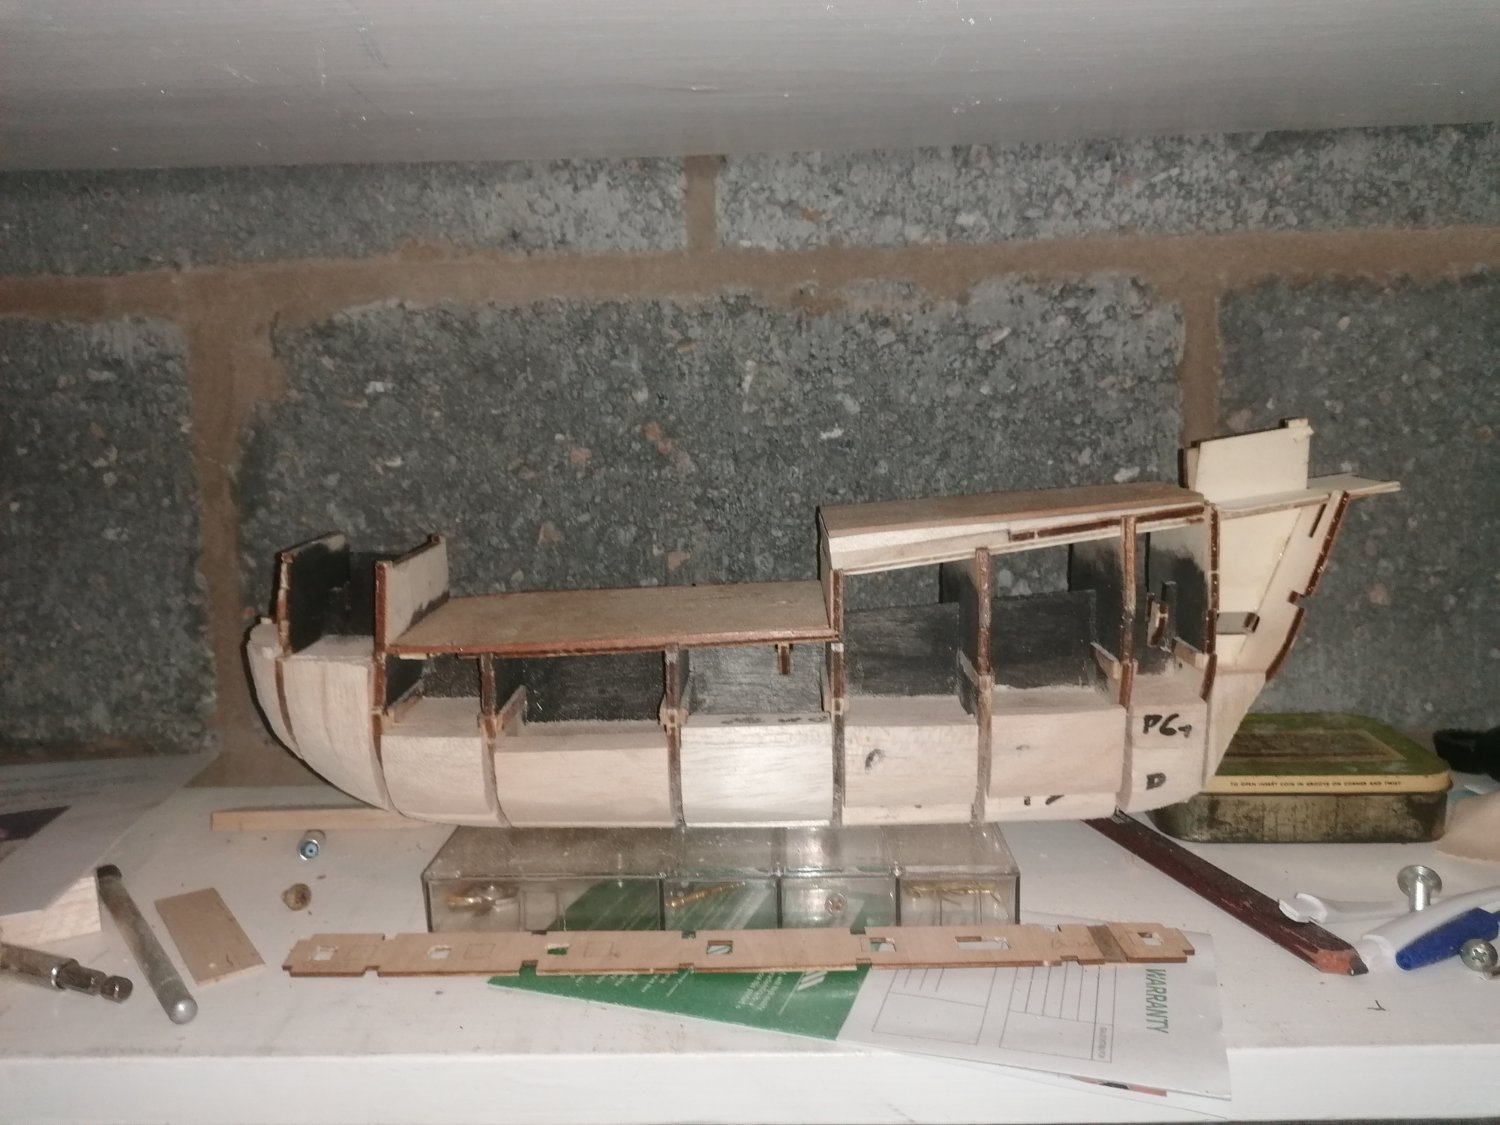
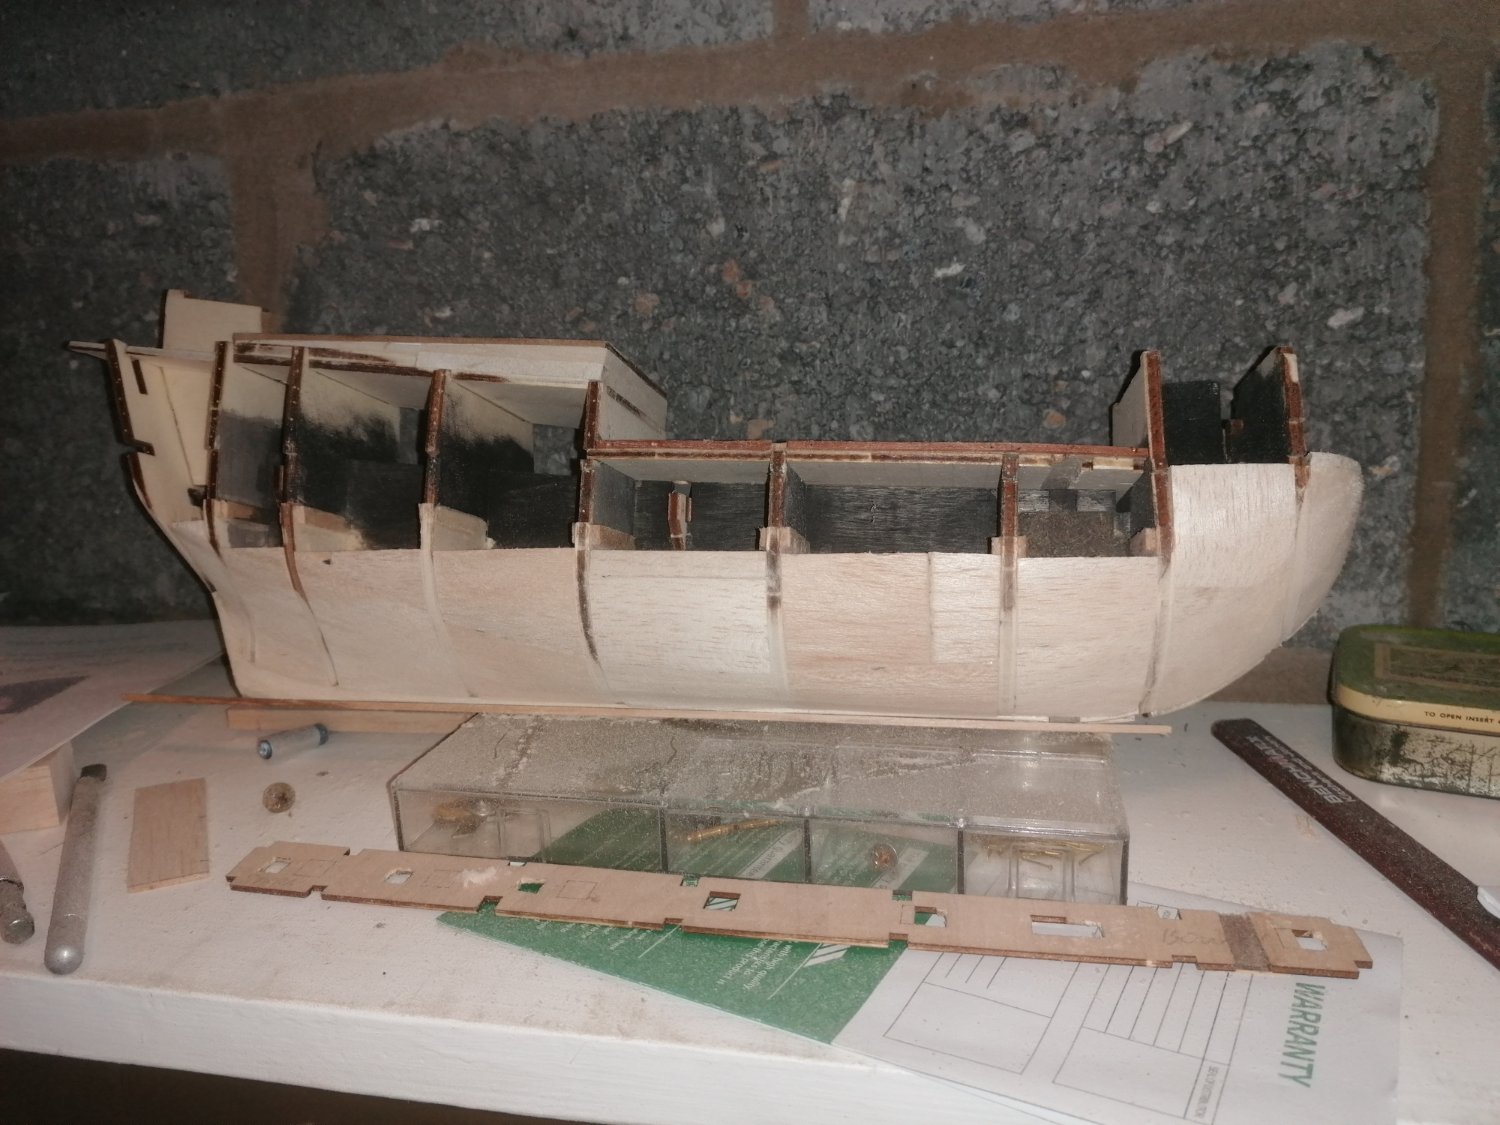
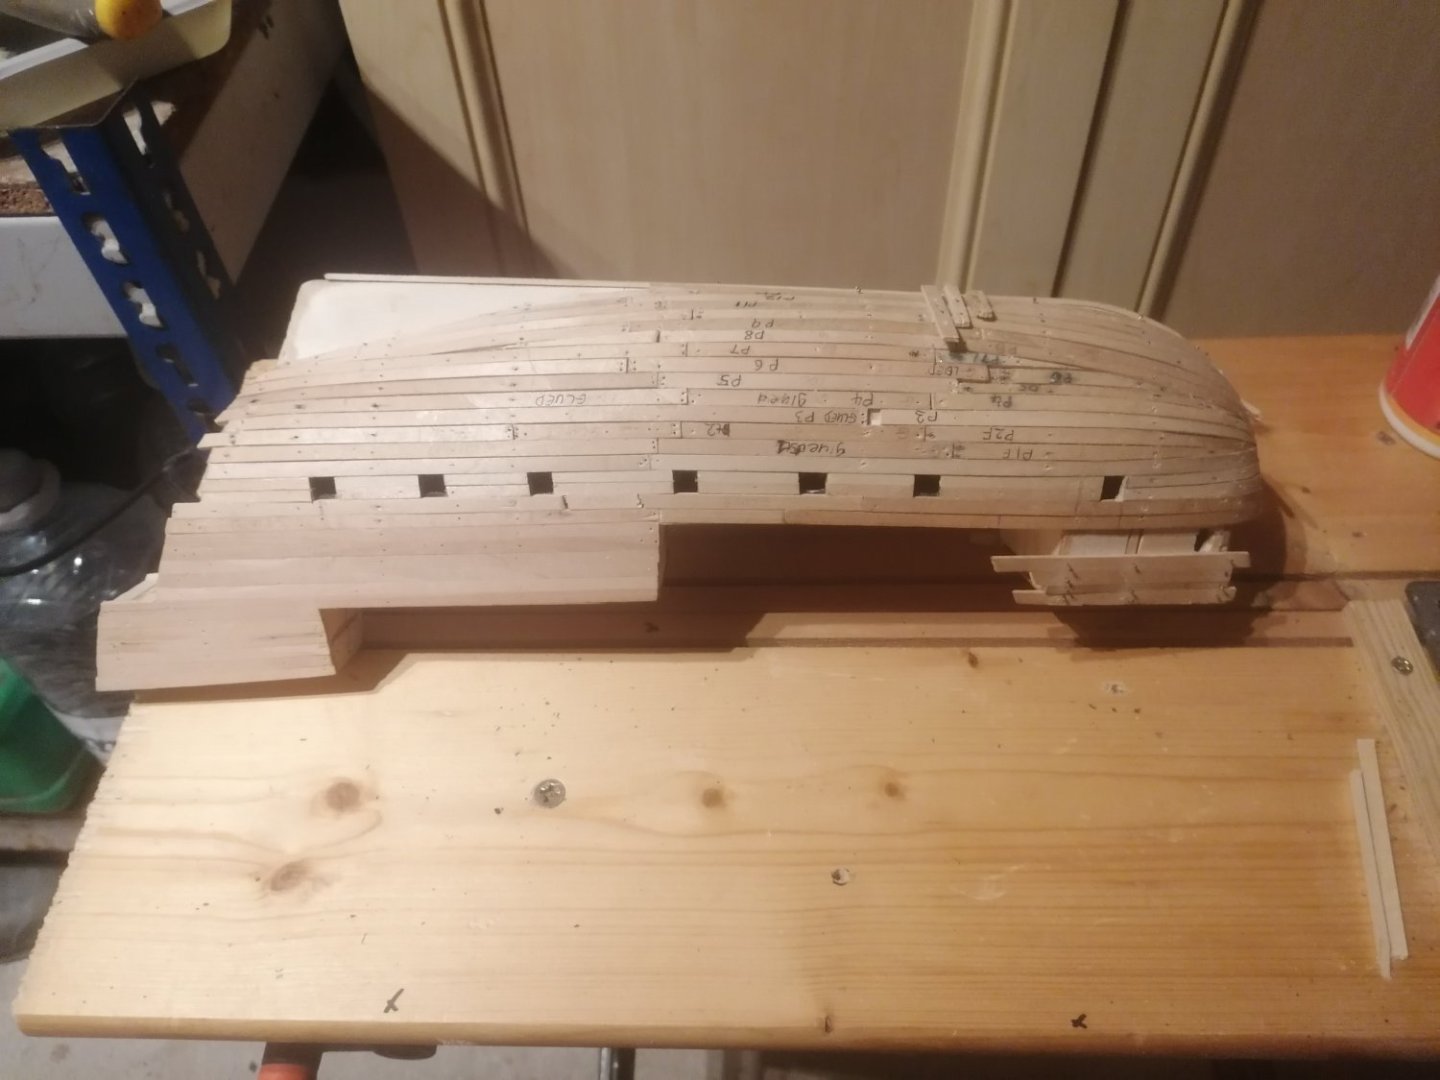
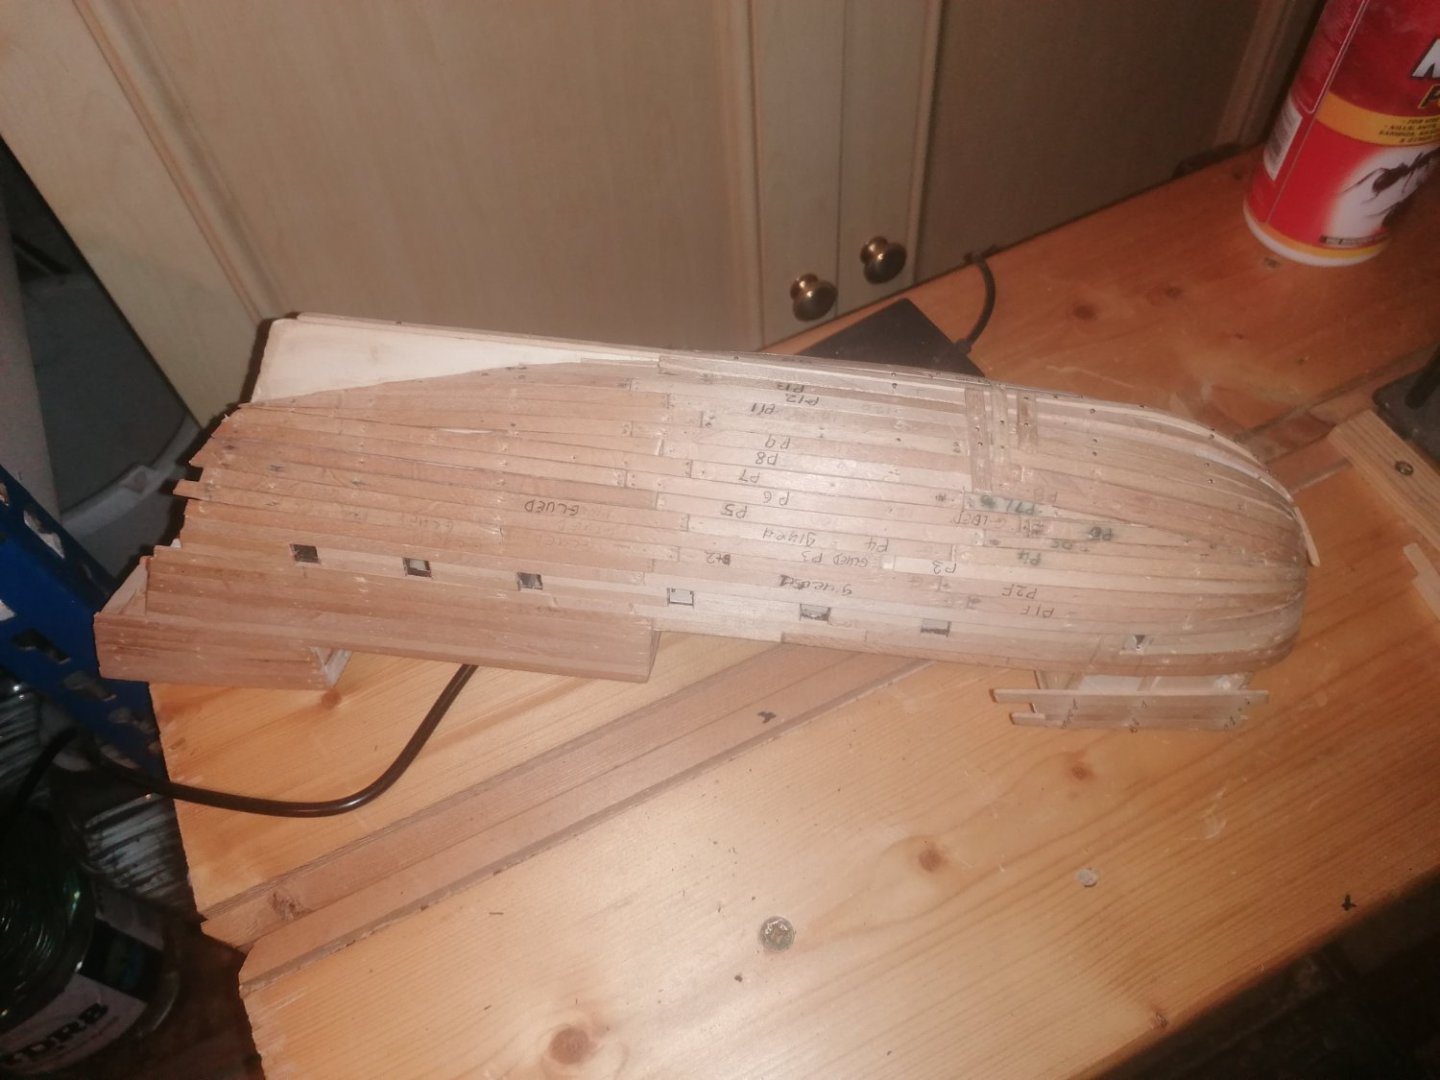
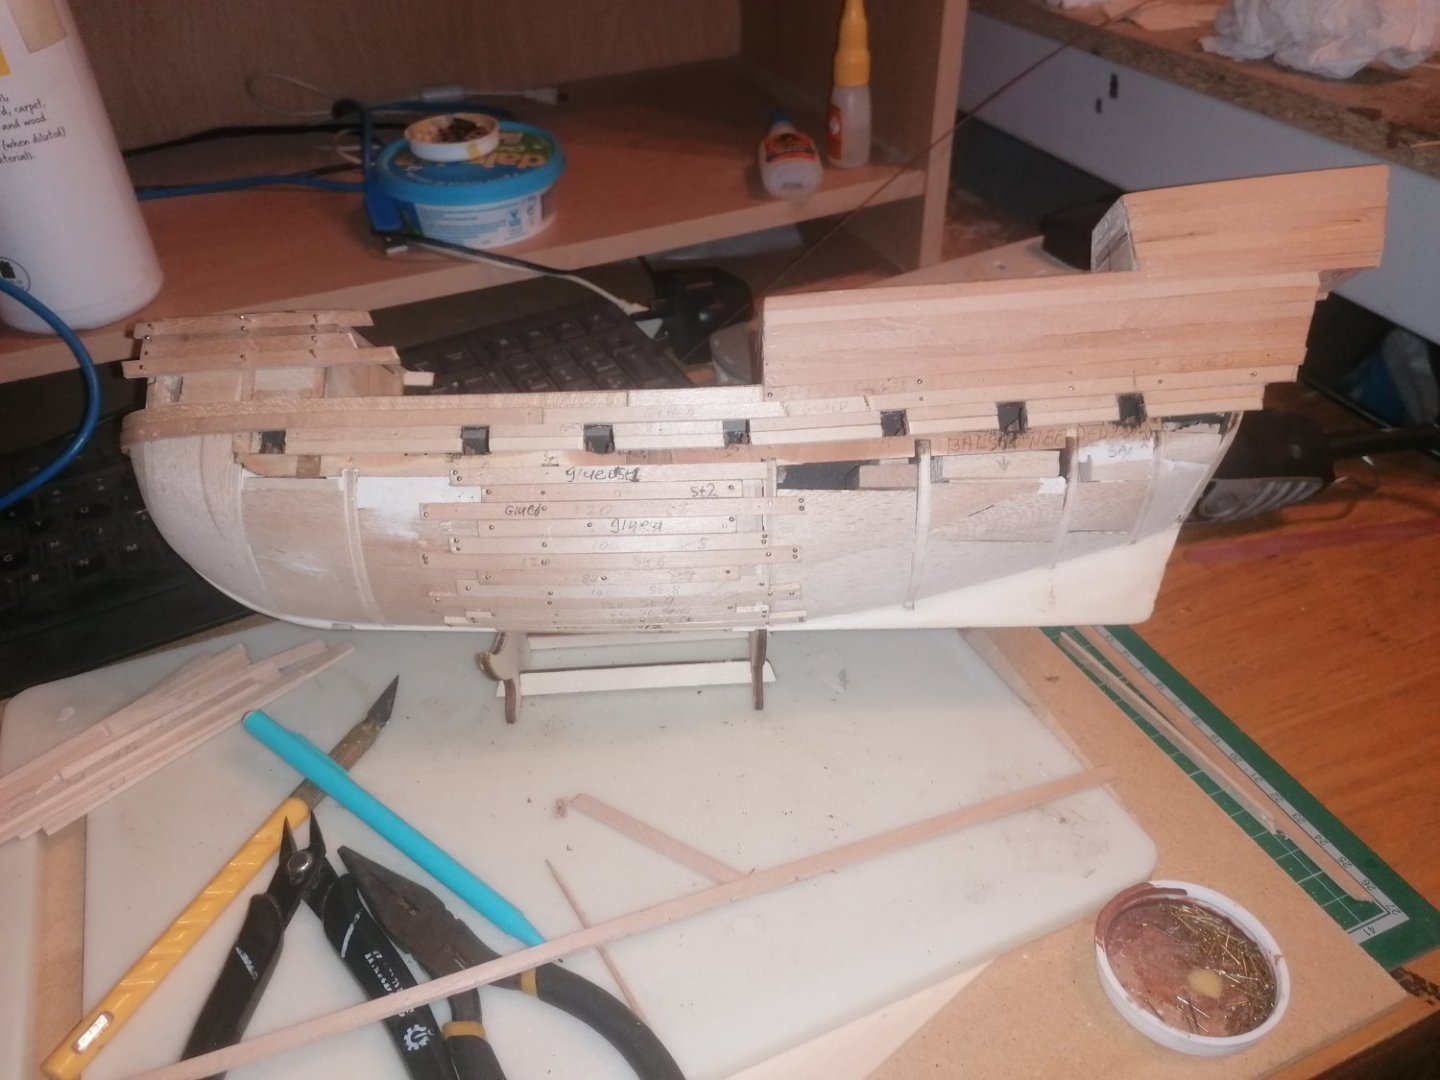
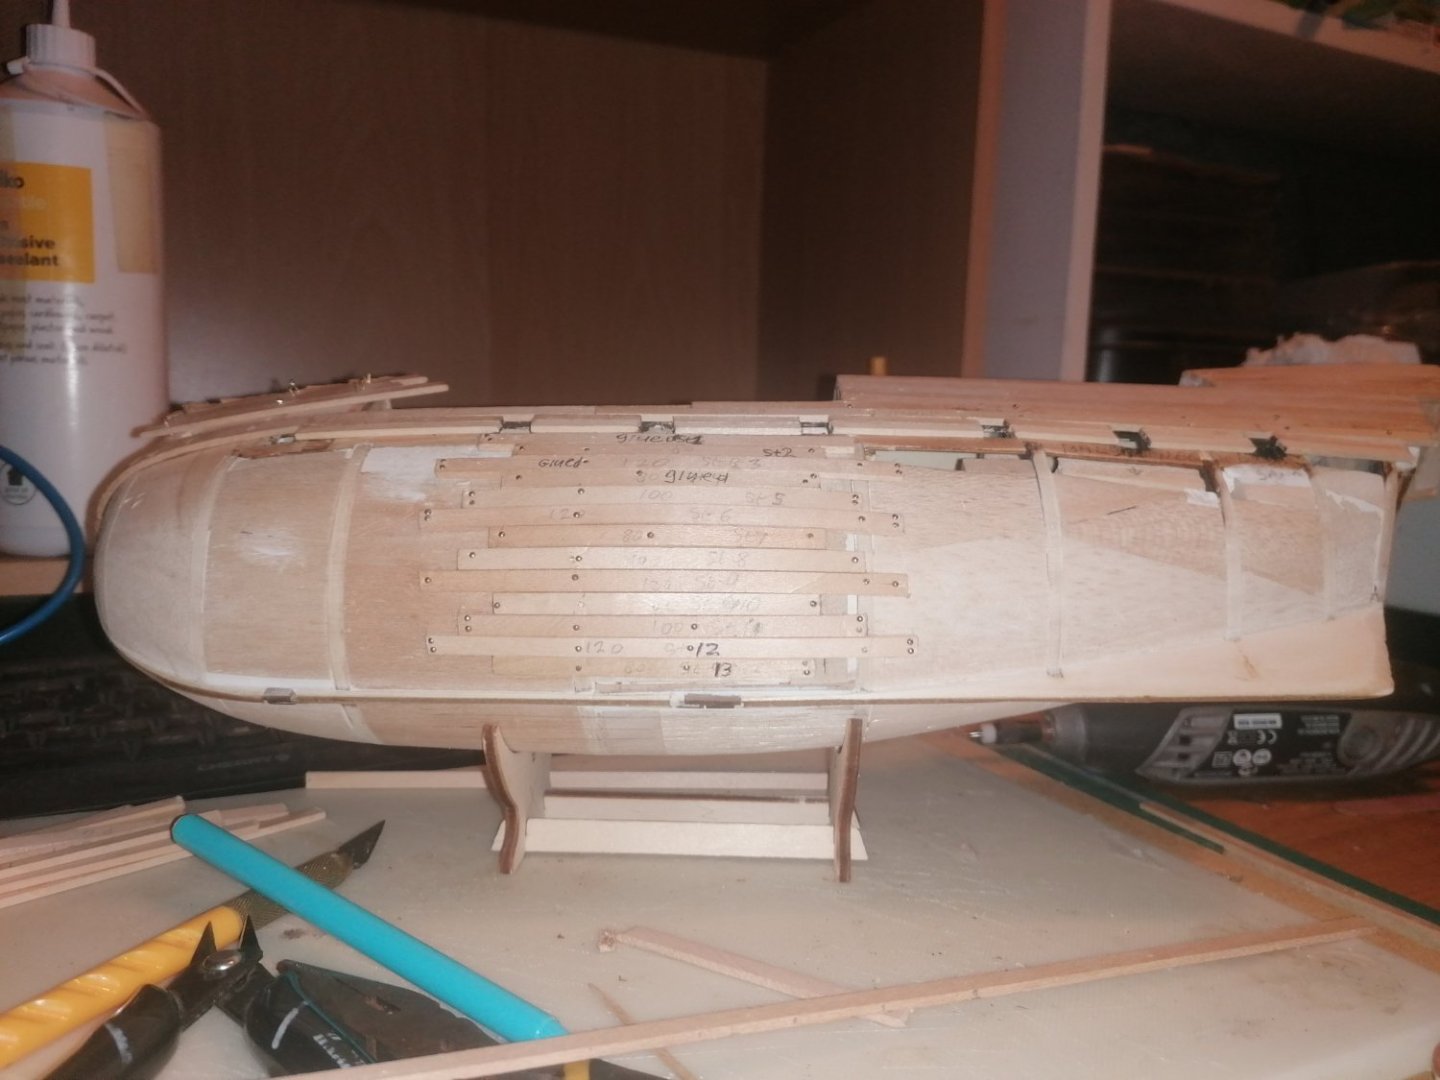
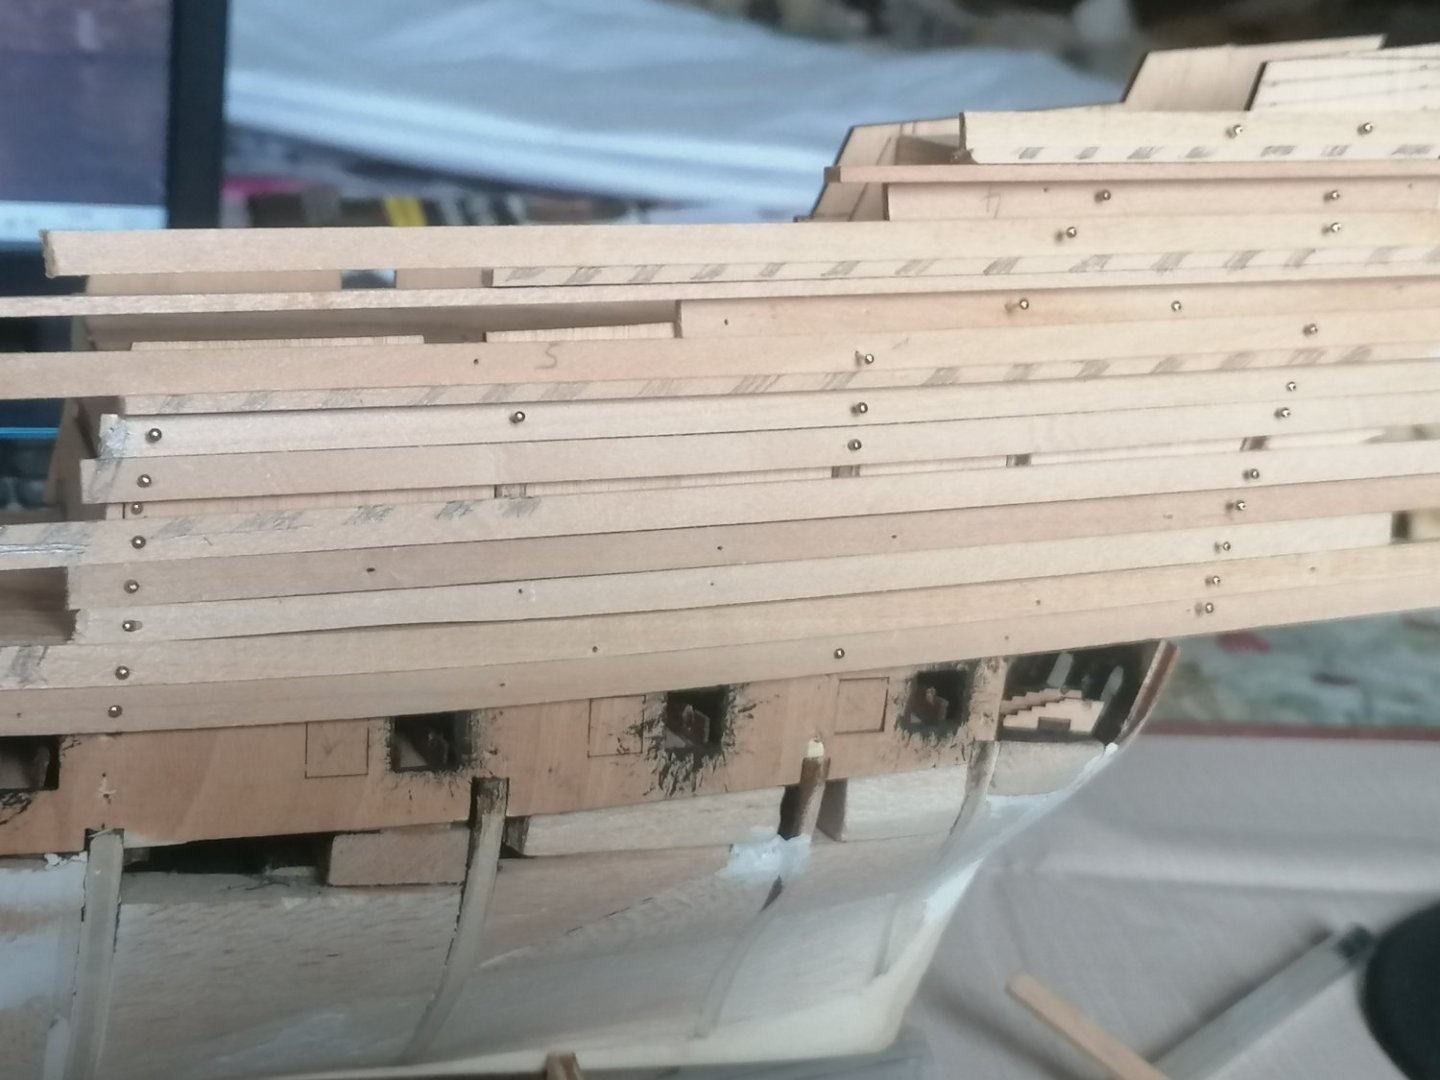
Firstly I apologise for not having posted for over 4 weeks now. The last few weekends have been pretty busy and, again, after finishing work and then ship building, It's been too late to compose a new post. Any way here's my progress so far. In the last photos I had glued the 1st planking to the rear section from the gun ports upwards. These have now been rough sanded but I am not happy with the poop deck at all. I think it needs to be wider at the (what I have previously called the quarter deck) half deck bulkhead. After much thought I decided to plank the fore deck as I am happy with the shape and I can sand the forward edge if required. this has also been sanded smooth. I next started the 1st planking of the rest of the hull. as I've decided that the only way I can get the shape of the stern correct is to build it up and then sand it again to the right shape. The 1st stage of this was to glue the strakes between the gun ports. I decided the easiest way to do this was to use 2X 4mm strips to give the 8mm height required. This was going well until, as I was pinning the forward most lower strake the gun port bulwark gave way and pushed the false deck section out as well. As I needed to glue this back in place I tried moving it but was unable to and damaged the gun carriage in the process . I've now ended up with a large gap from having to remove them both. A small section of the outer part of the bulwark had also come off. This has been repaired using a 1mm strip cut to size. I will make another dummy carriage and fix to a thin piece of balsa wood and insert in the gap before planking it over. As the hull is now longer than the strips of lime wood, I decided to plank the middle section first. I cut 8cm, 10cm and 12cm long planks. I intended to have the 8 cm plank running under the strake below the gun ports, but, found it was too short to pin down without one end laying on a frame. I decided instead to run the 10cm strake first followed by the 8cm with the 12 cm strake below that. The sequence then went from 8cm, 10cm and 12cm etc. I drilled 2 0.1mm holes as close to the ends as I could so the pins would not split the ends. (On my Mamoli Golden Hind I used this technique to decent effect). After this I started on forming the strakes from the forward gun port on each side. I then proceeded planking the stern section, which has almost been completed now.


-
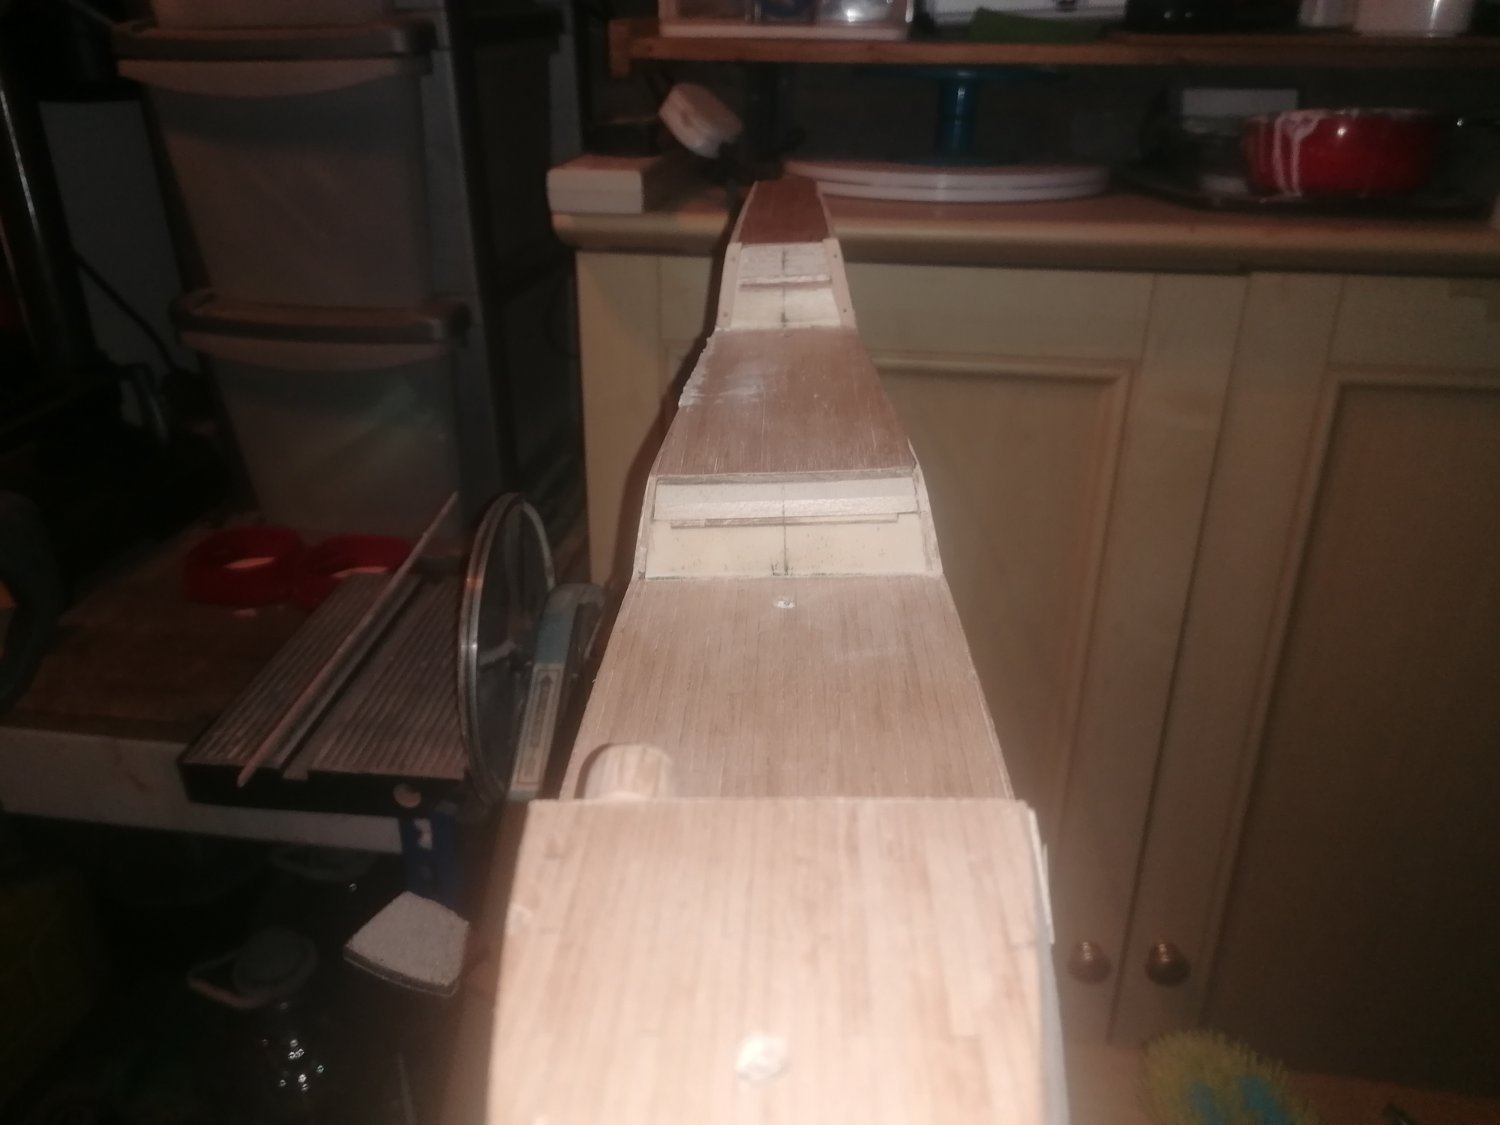
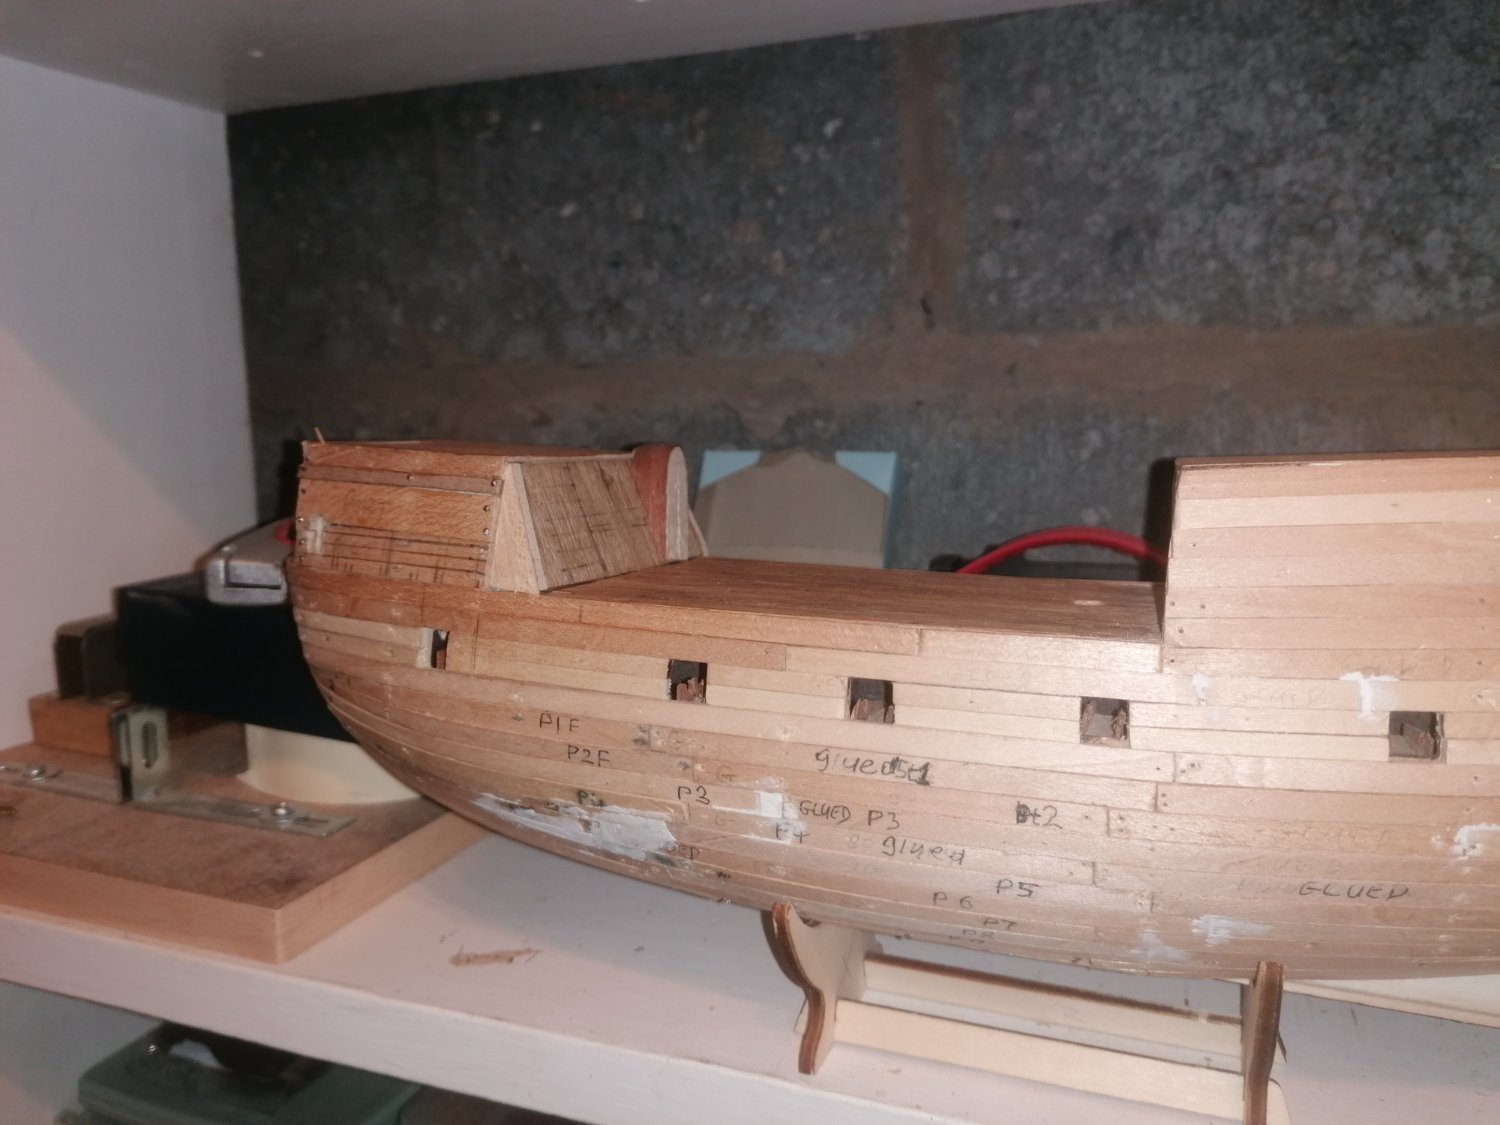
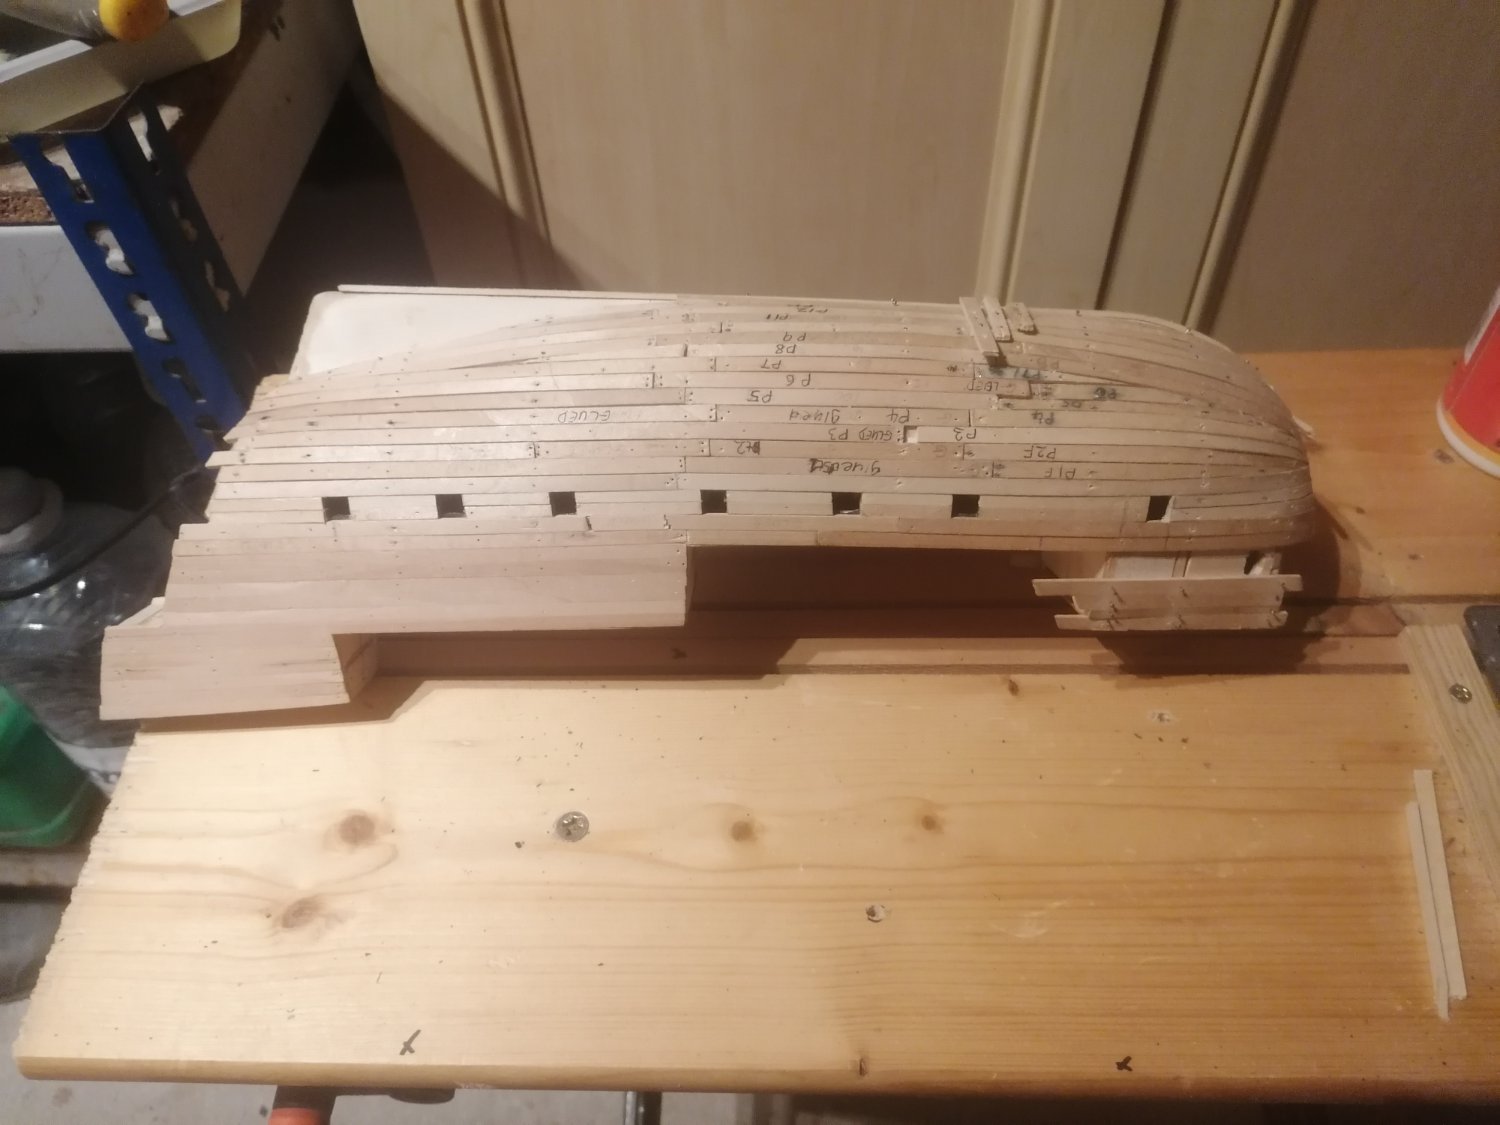
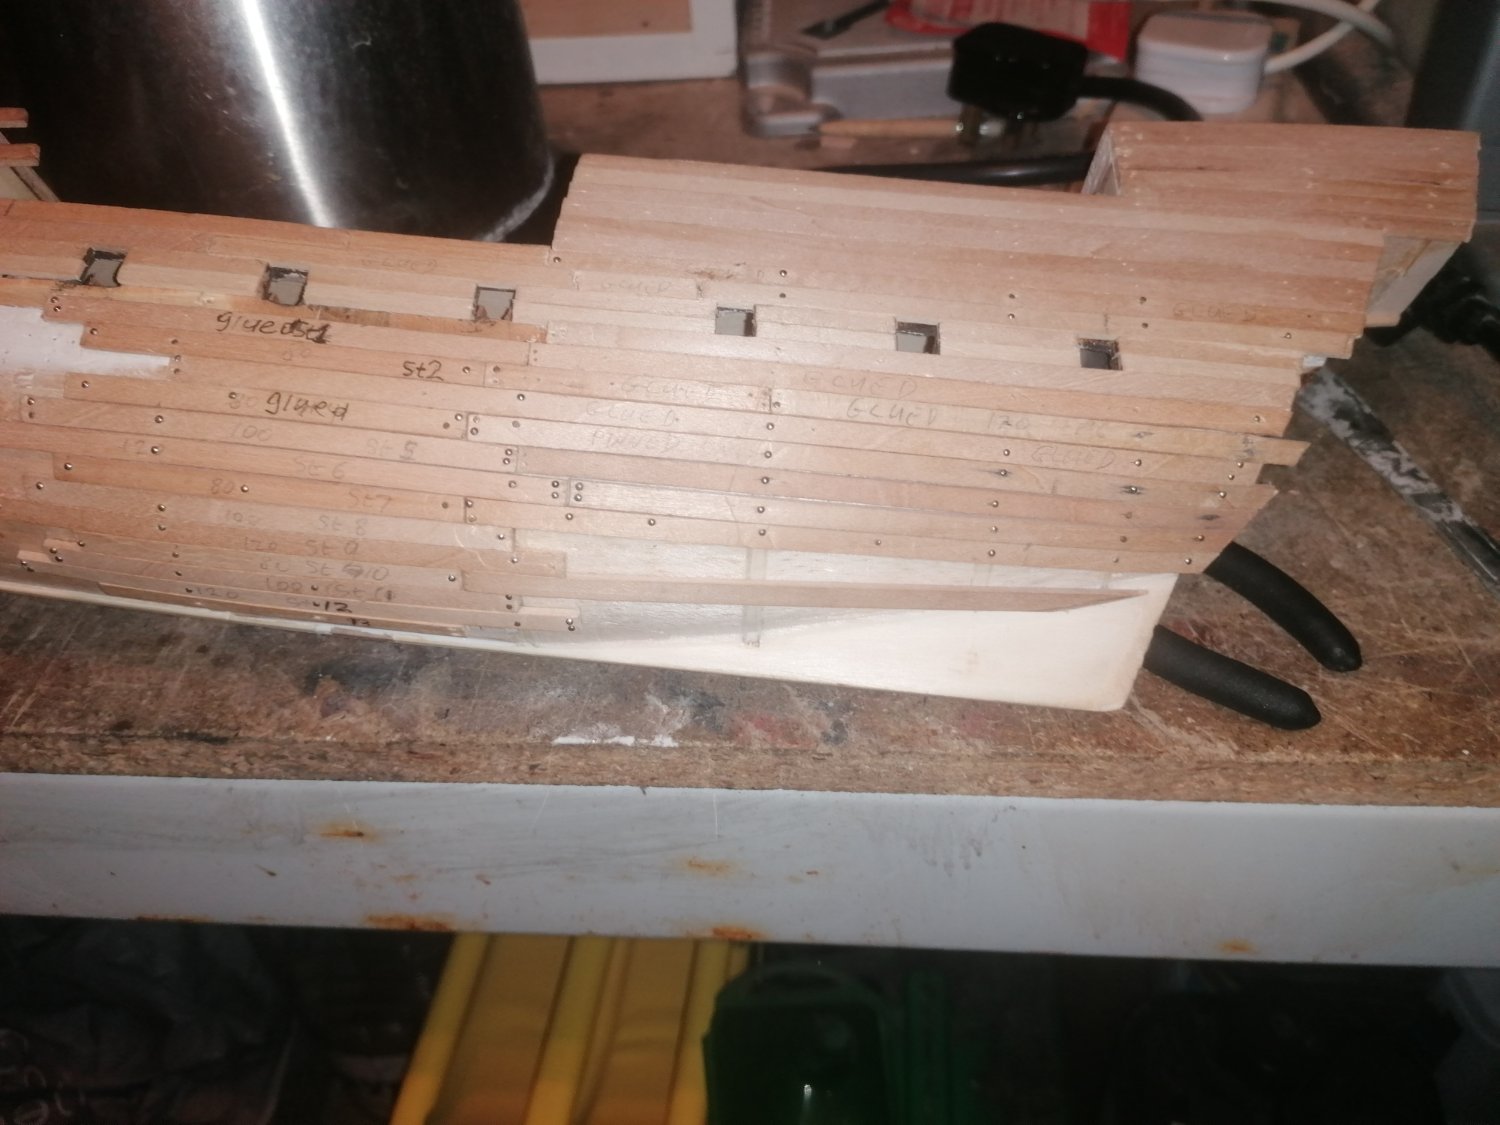
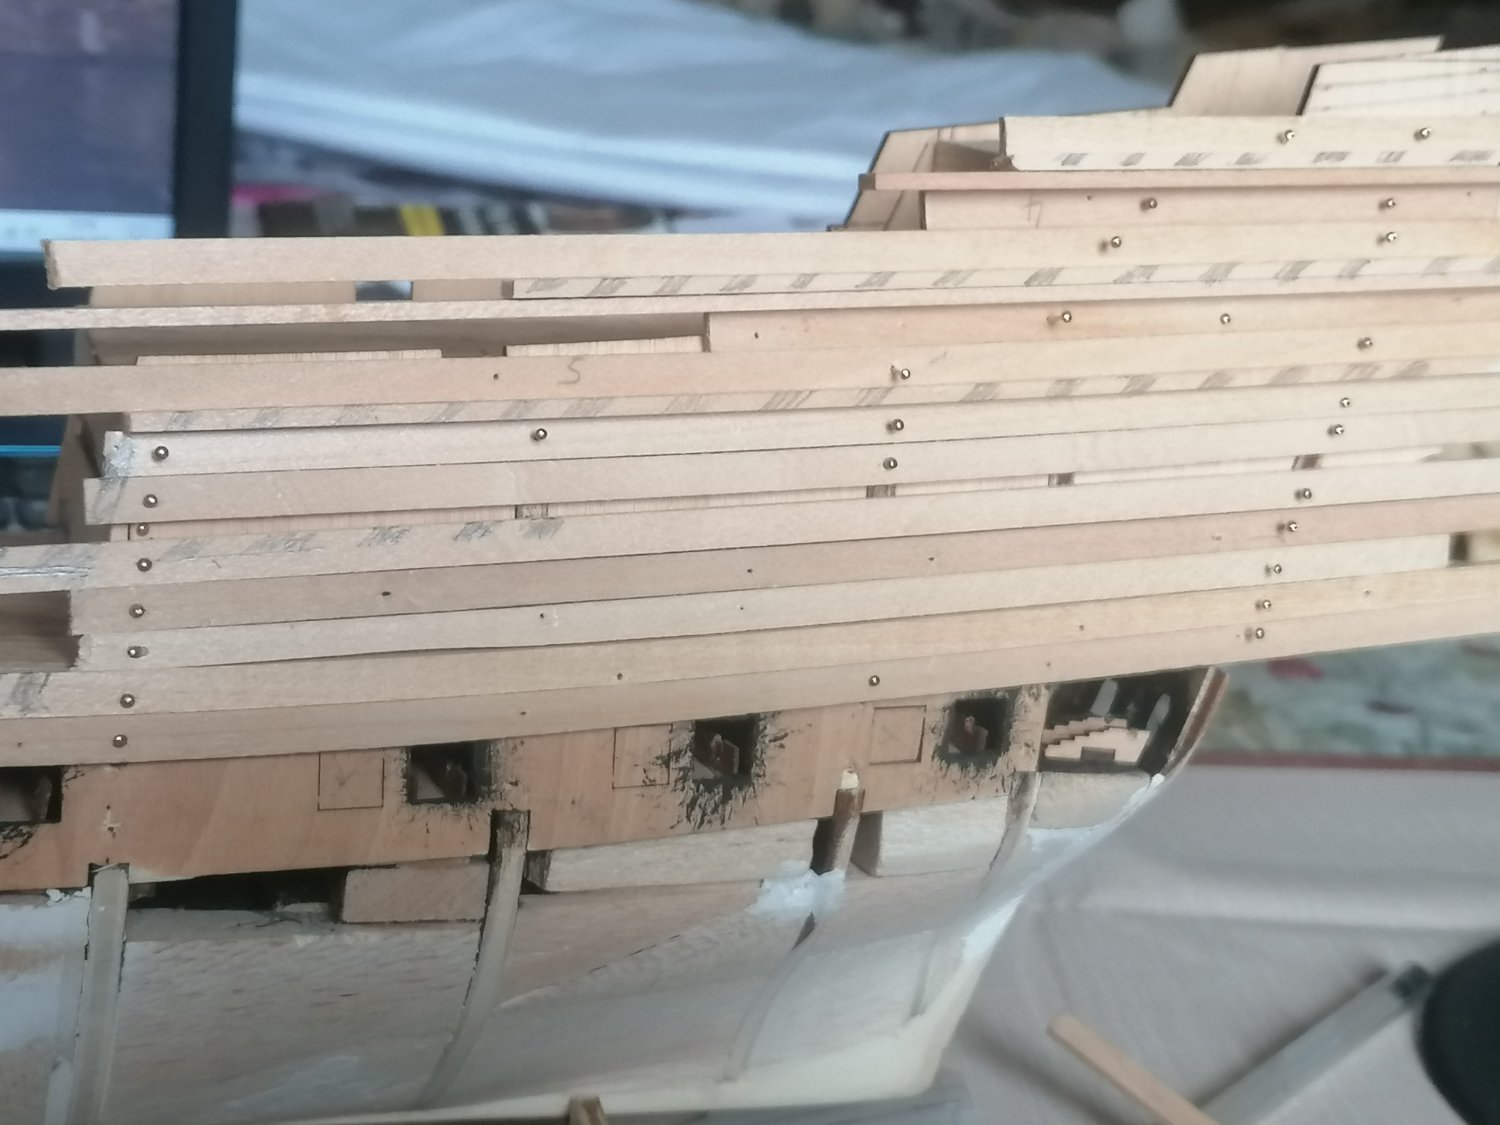
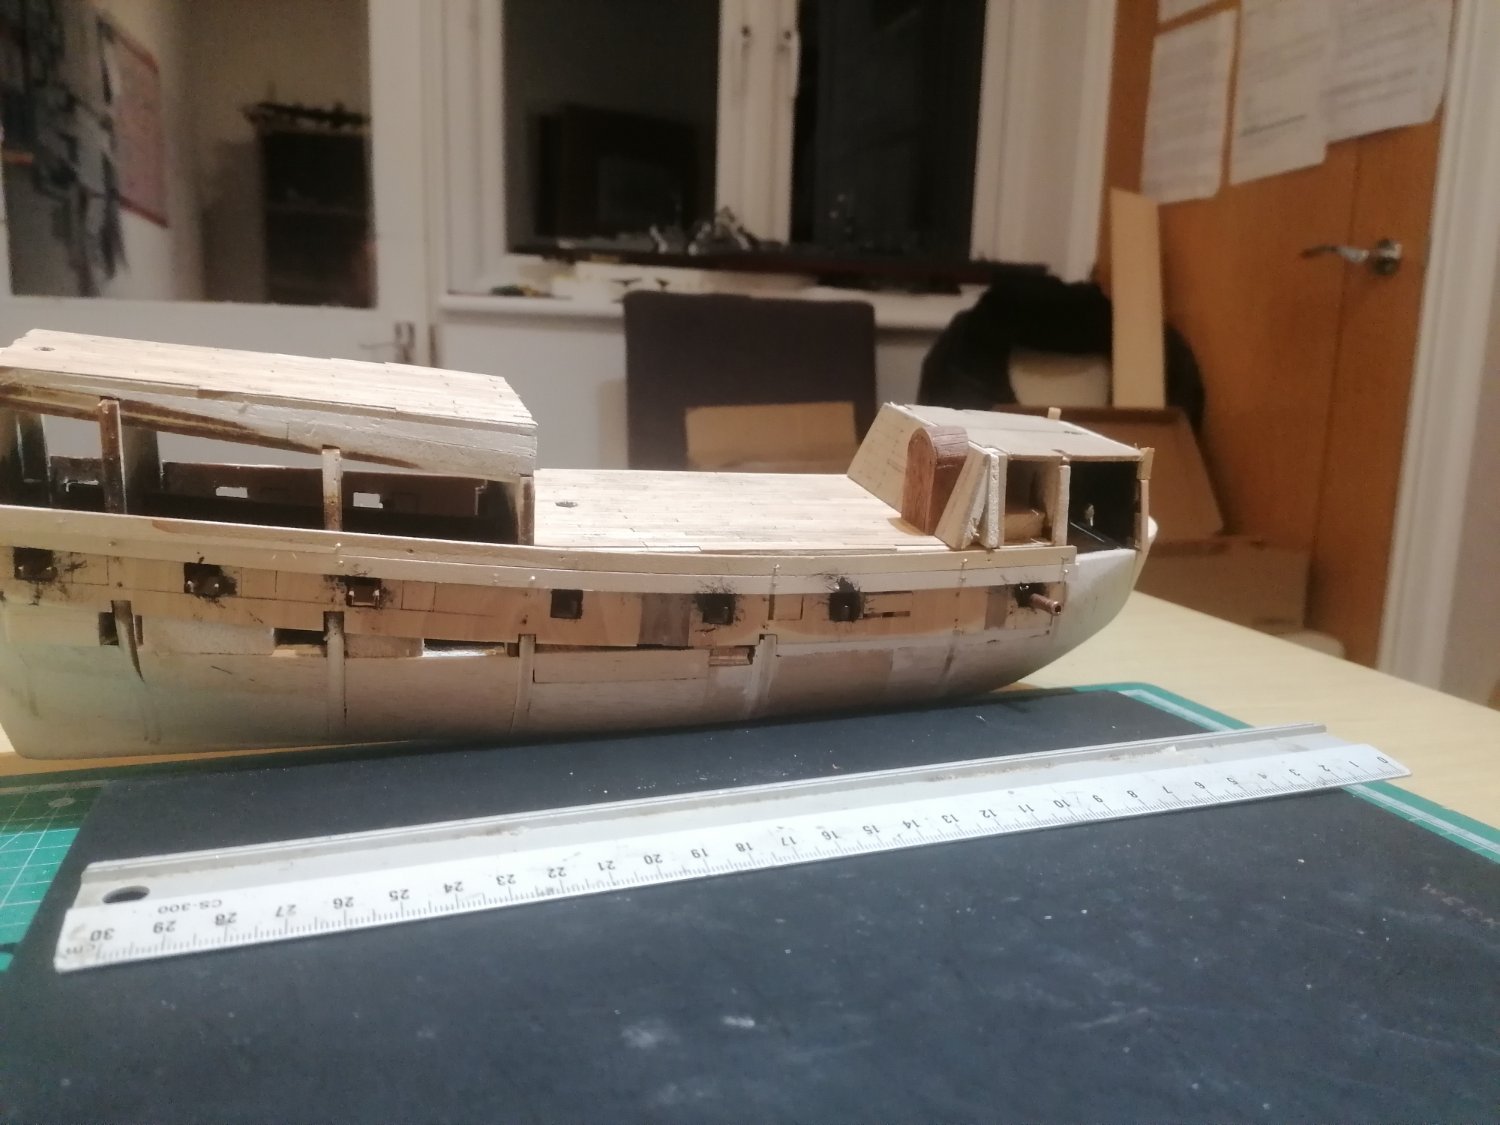
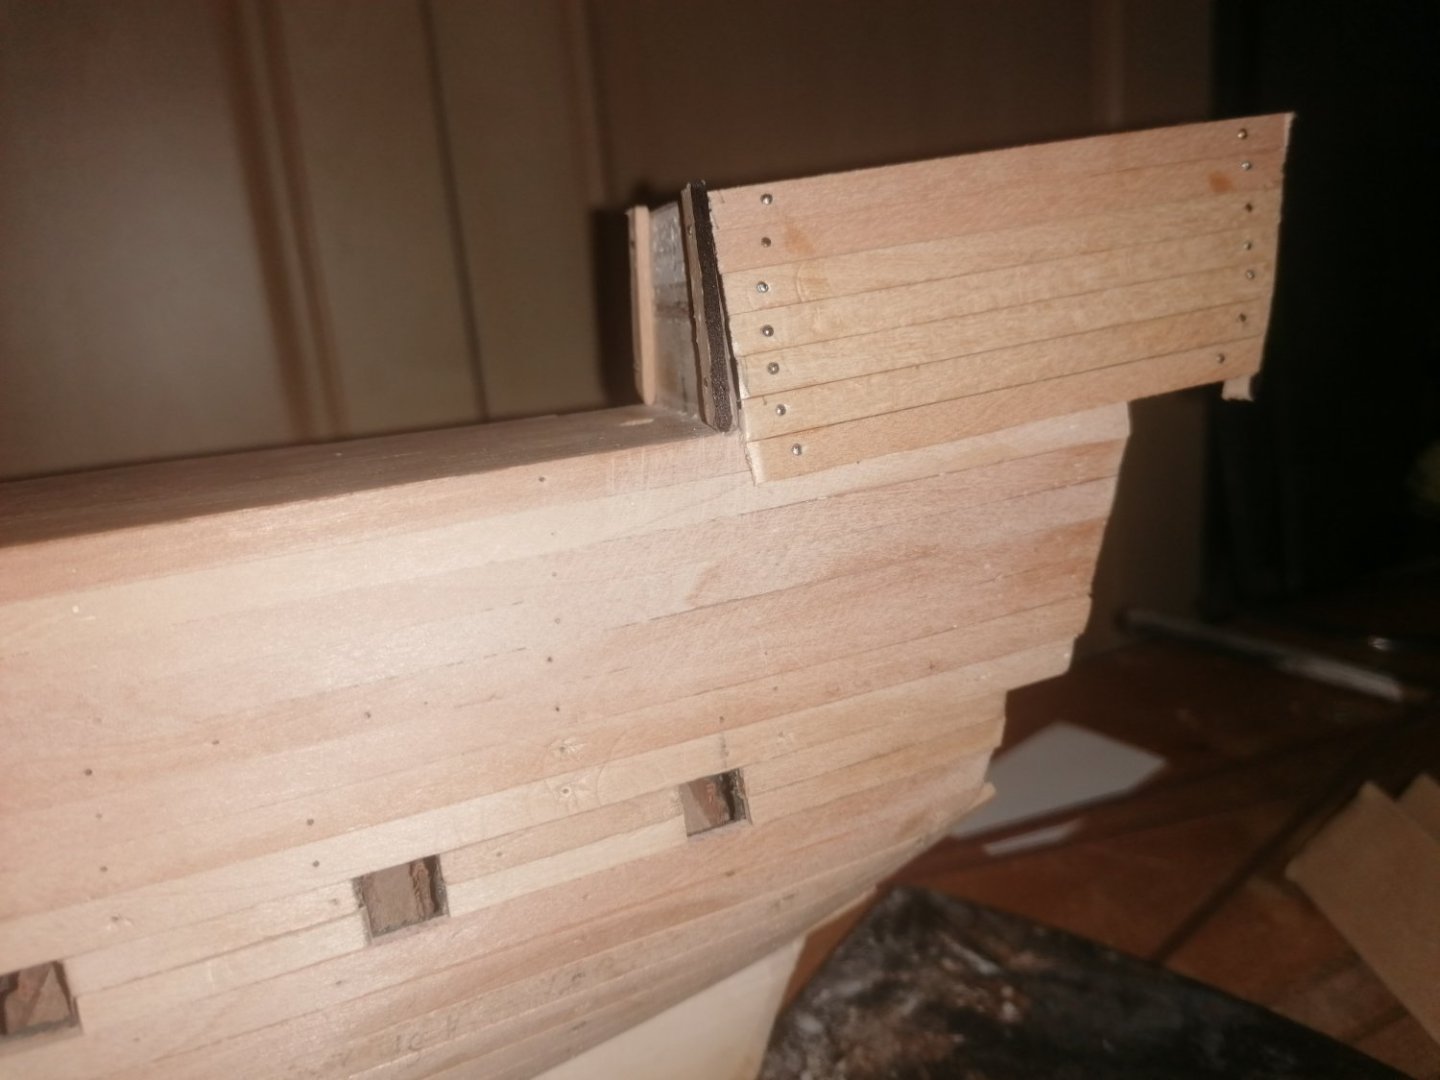
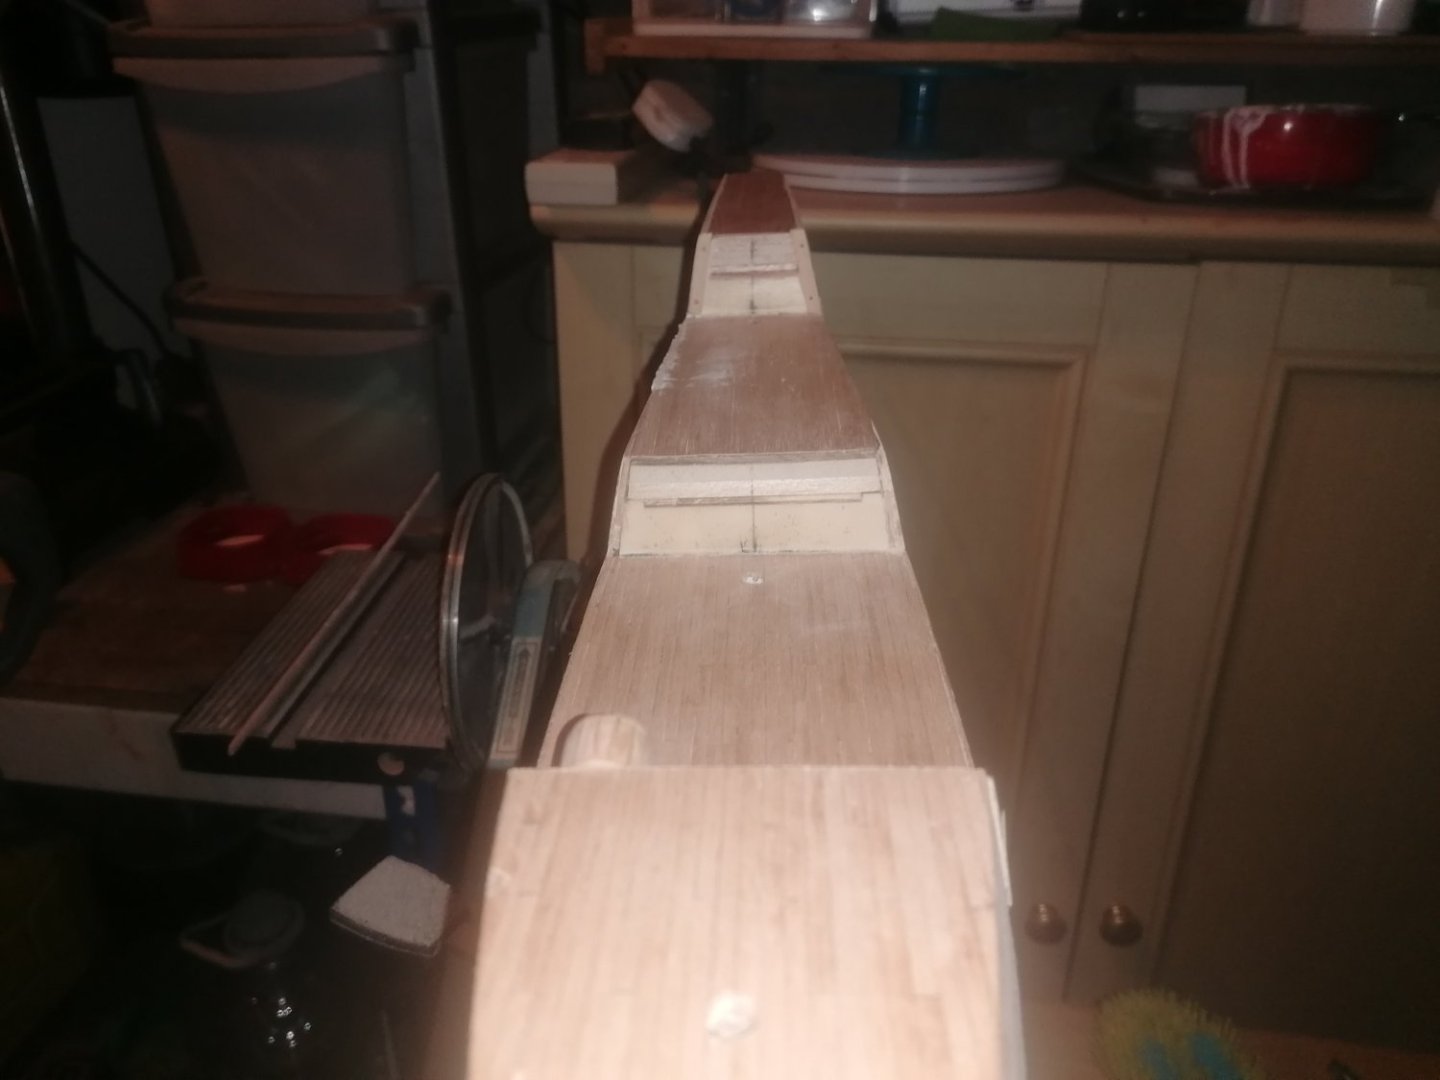
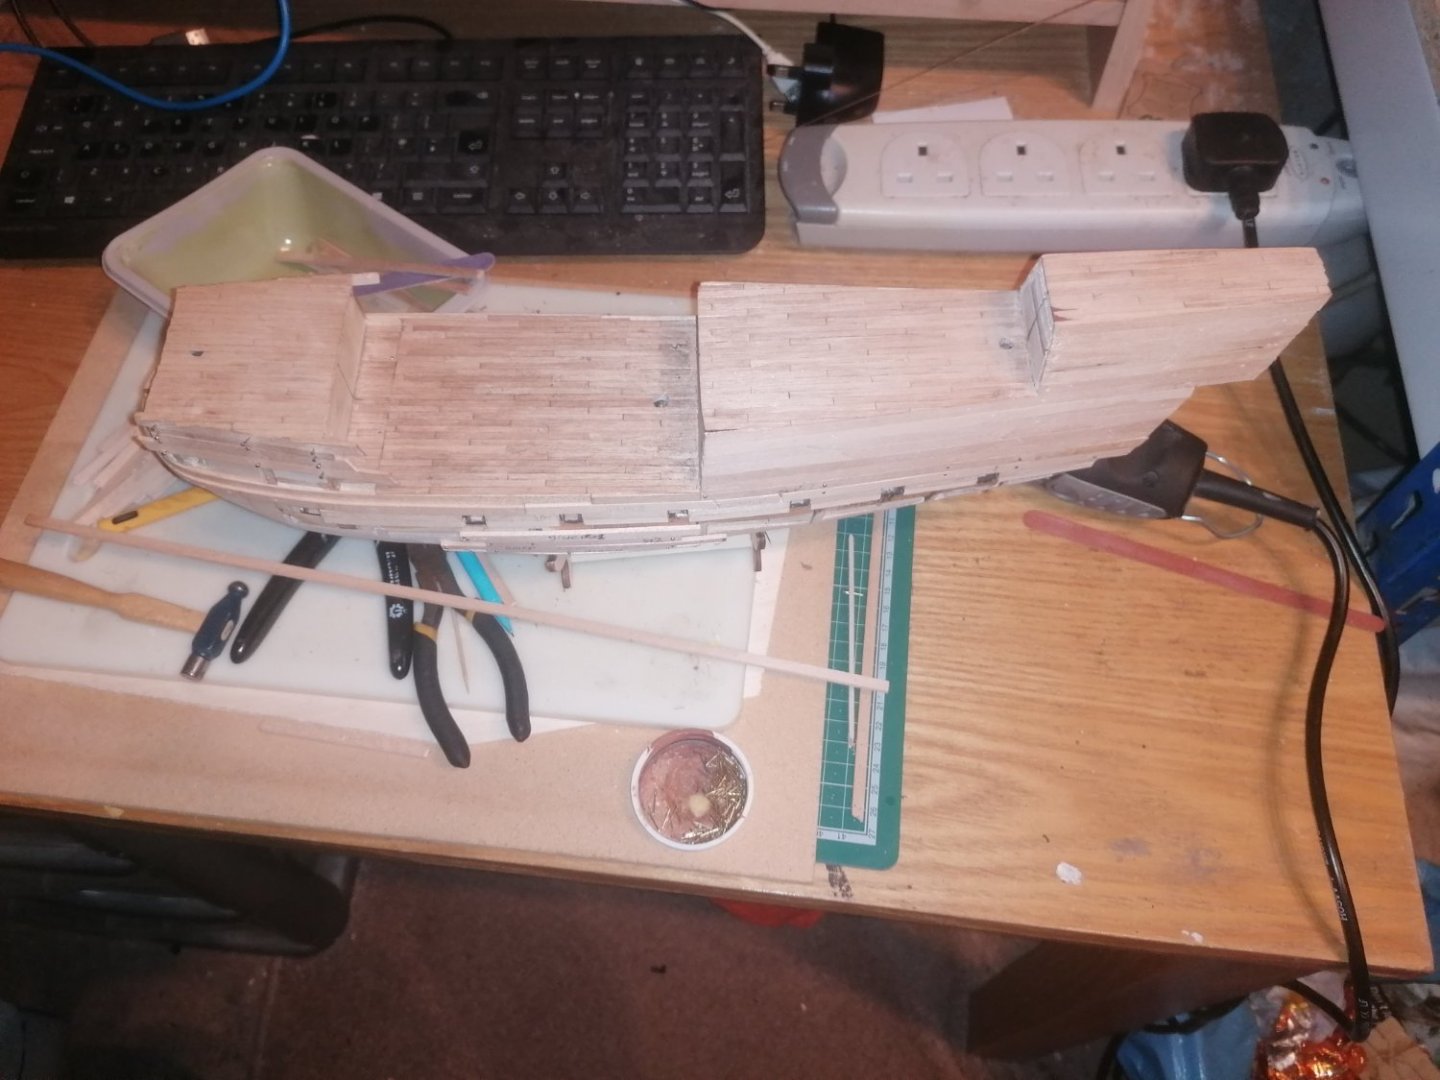
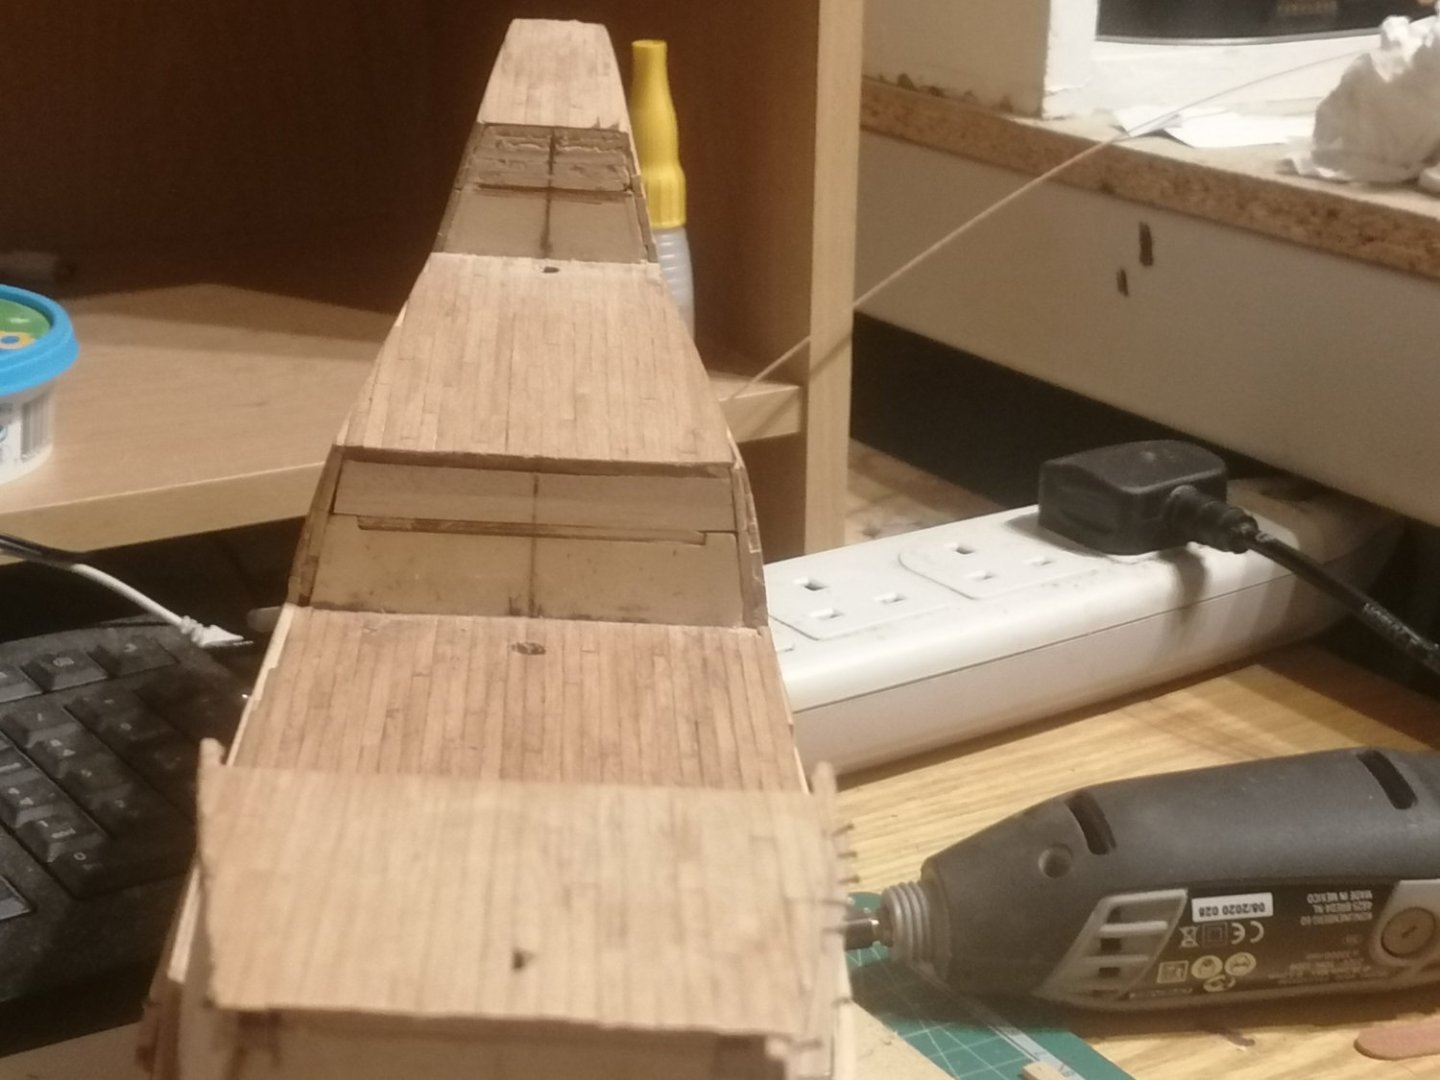
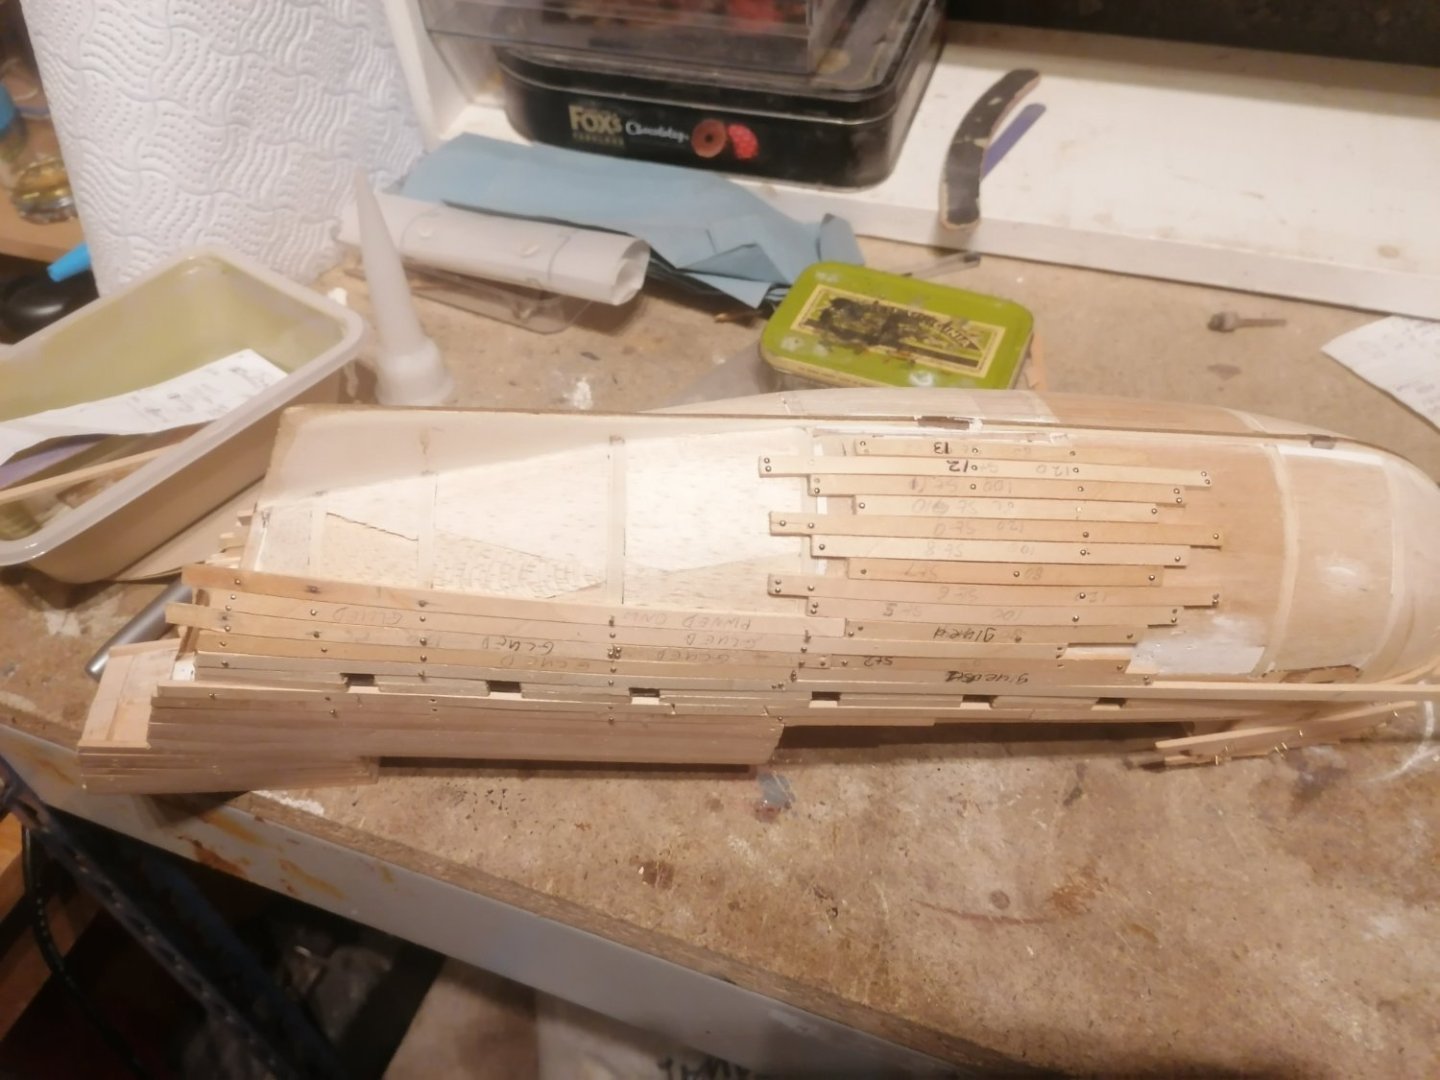
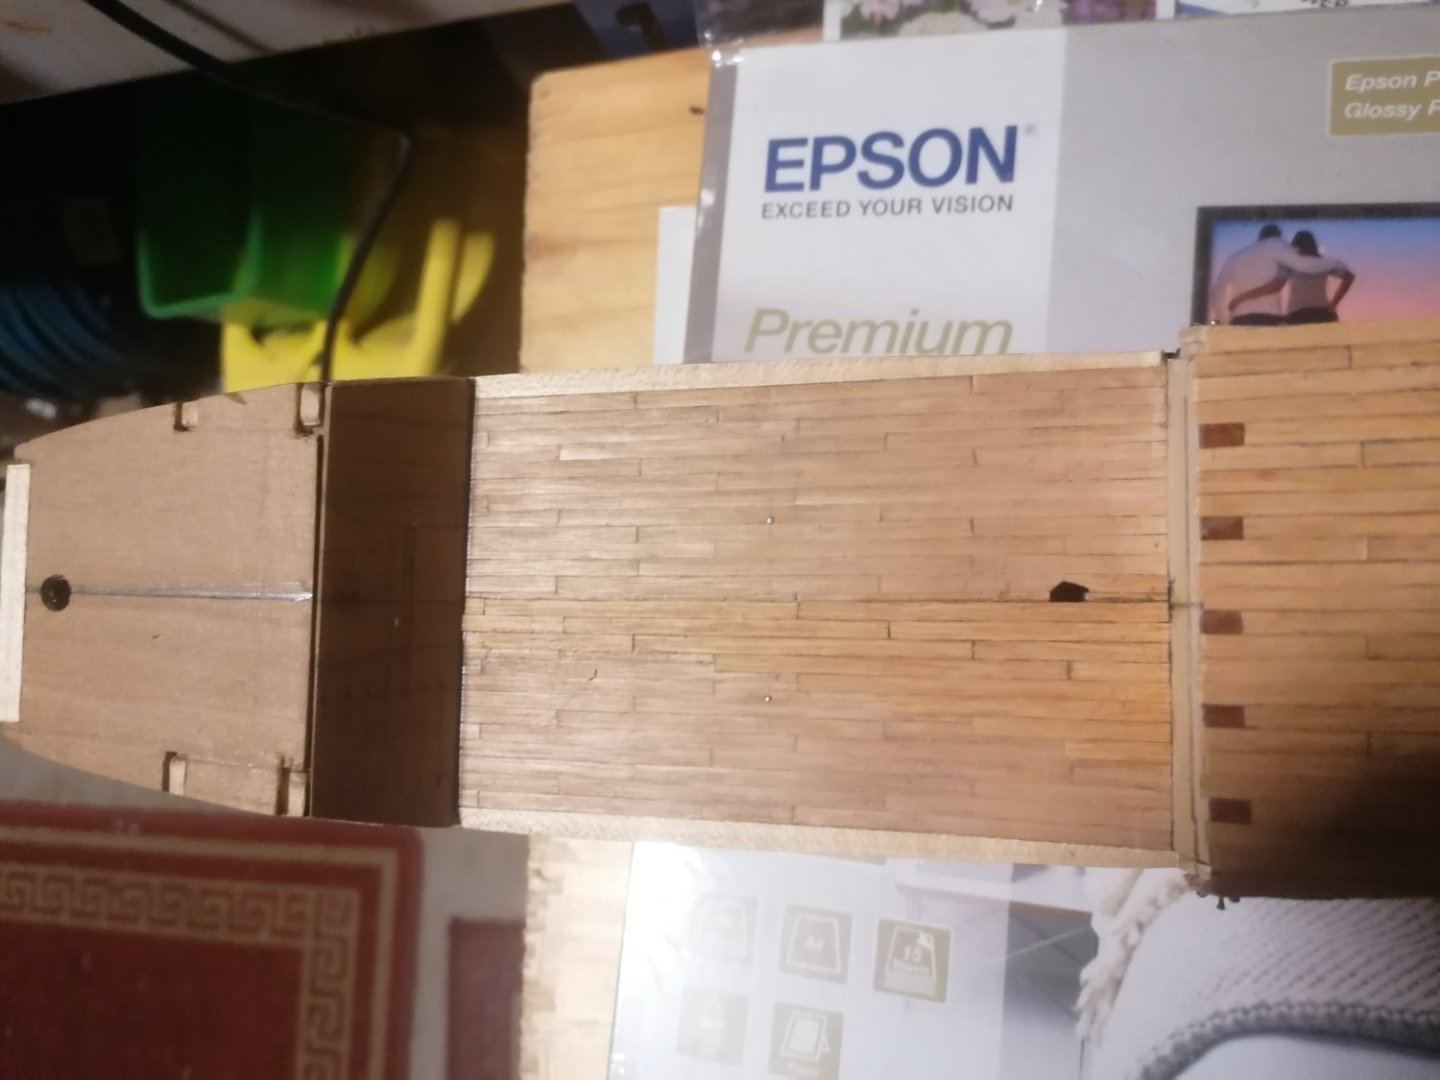
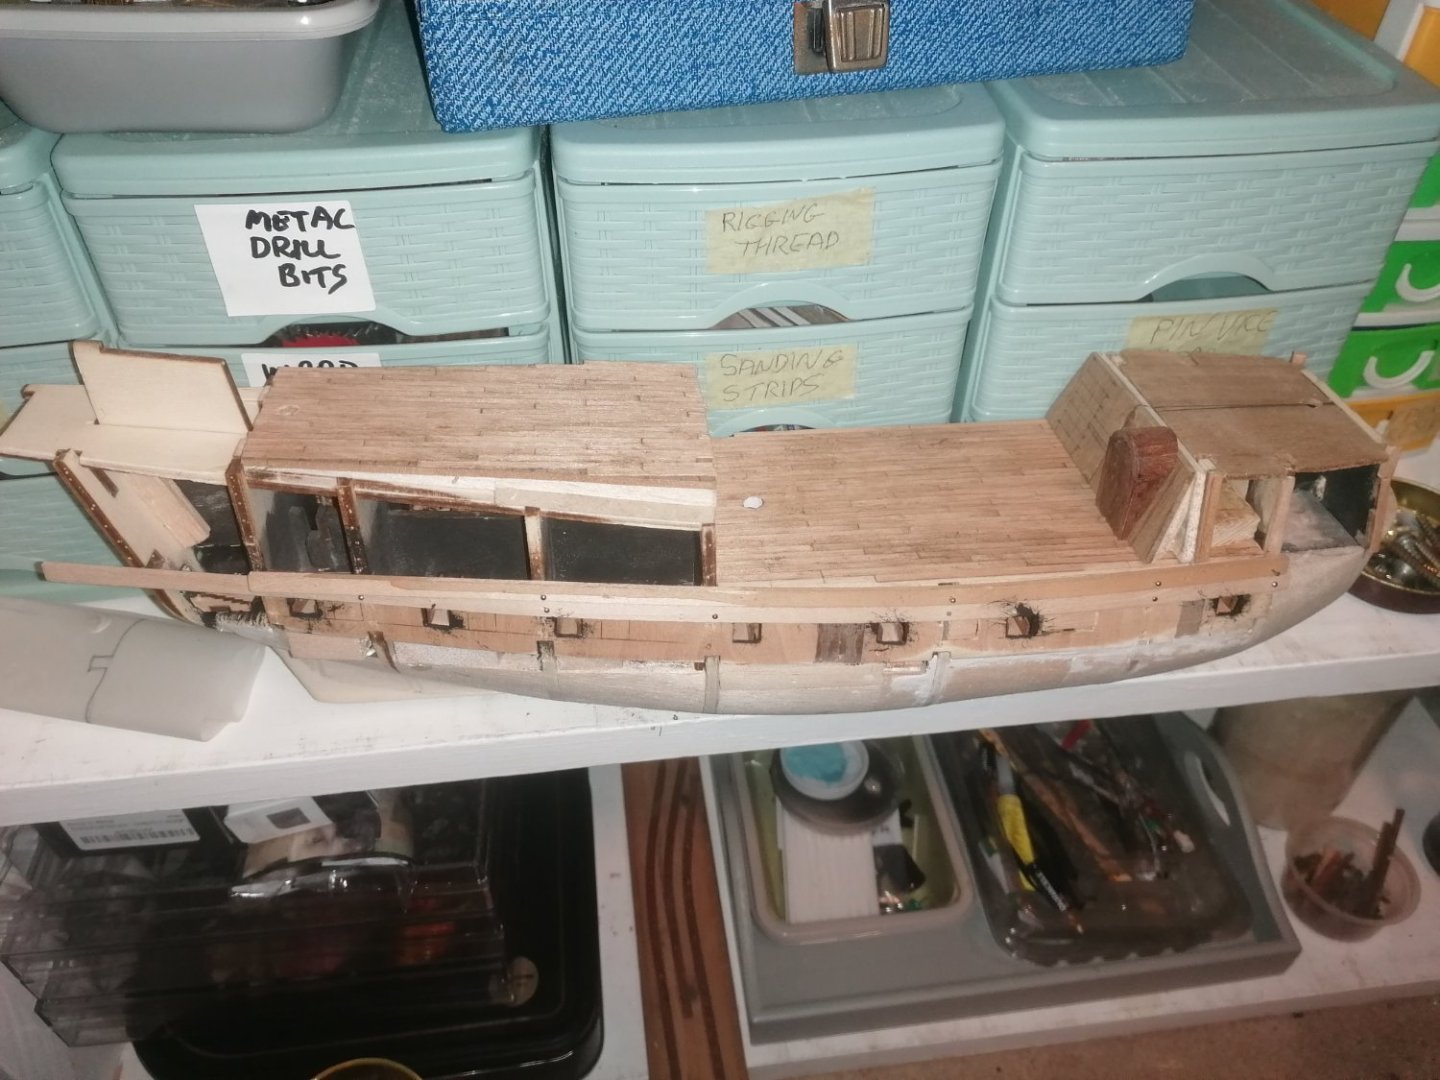
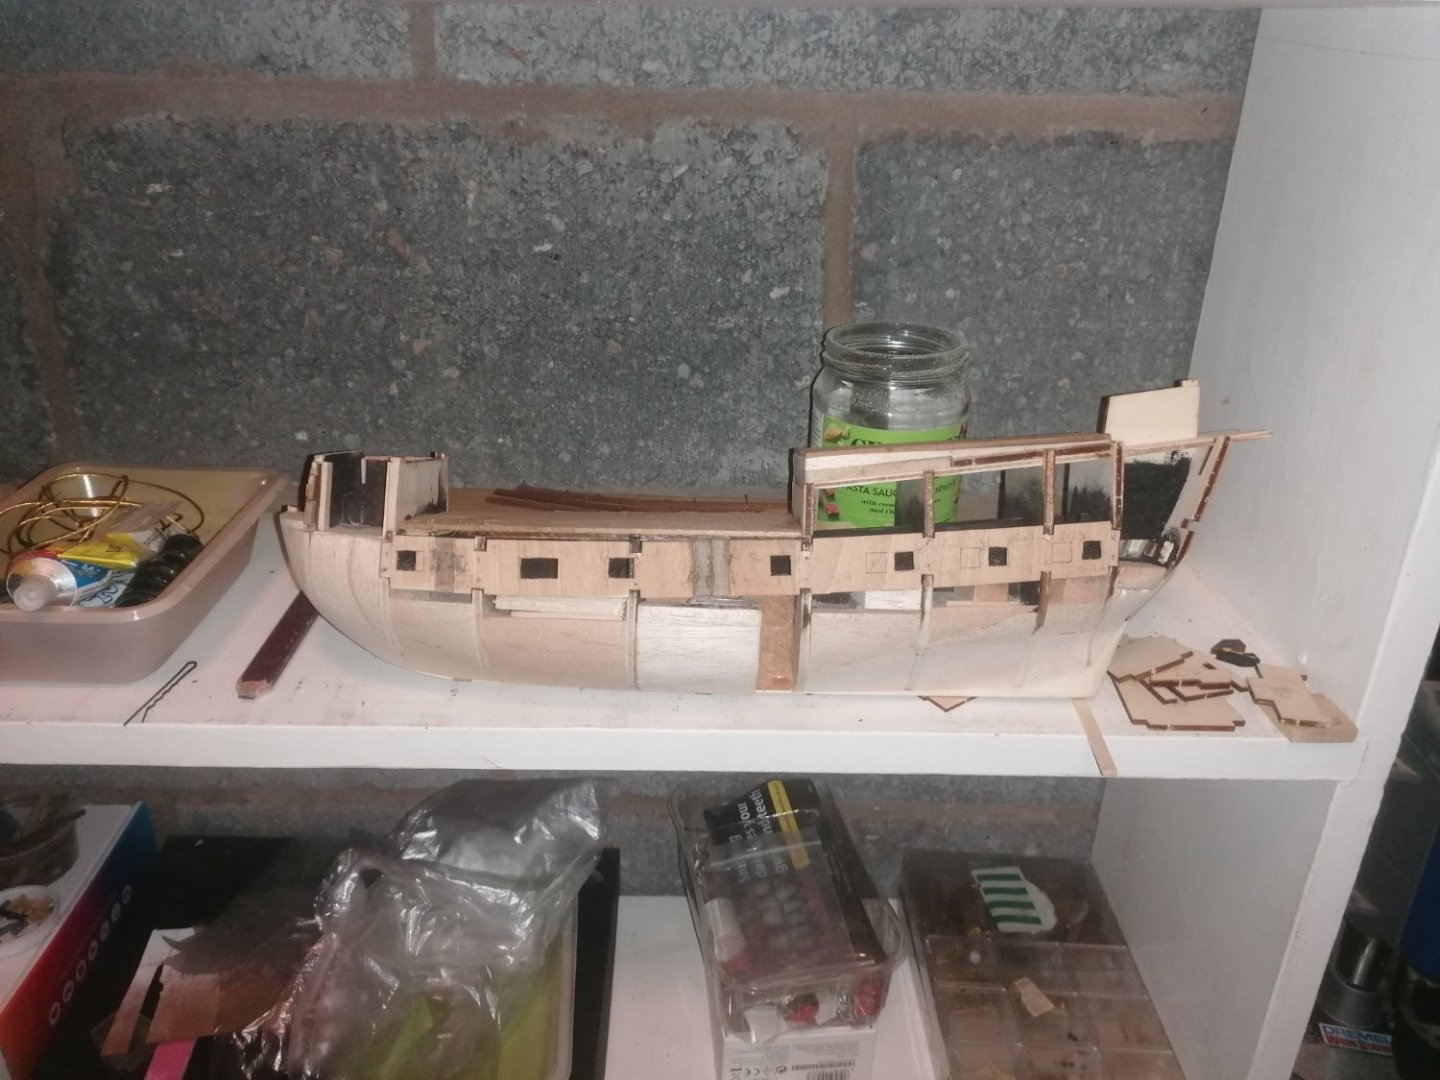
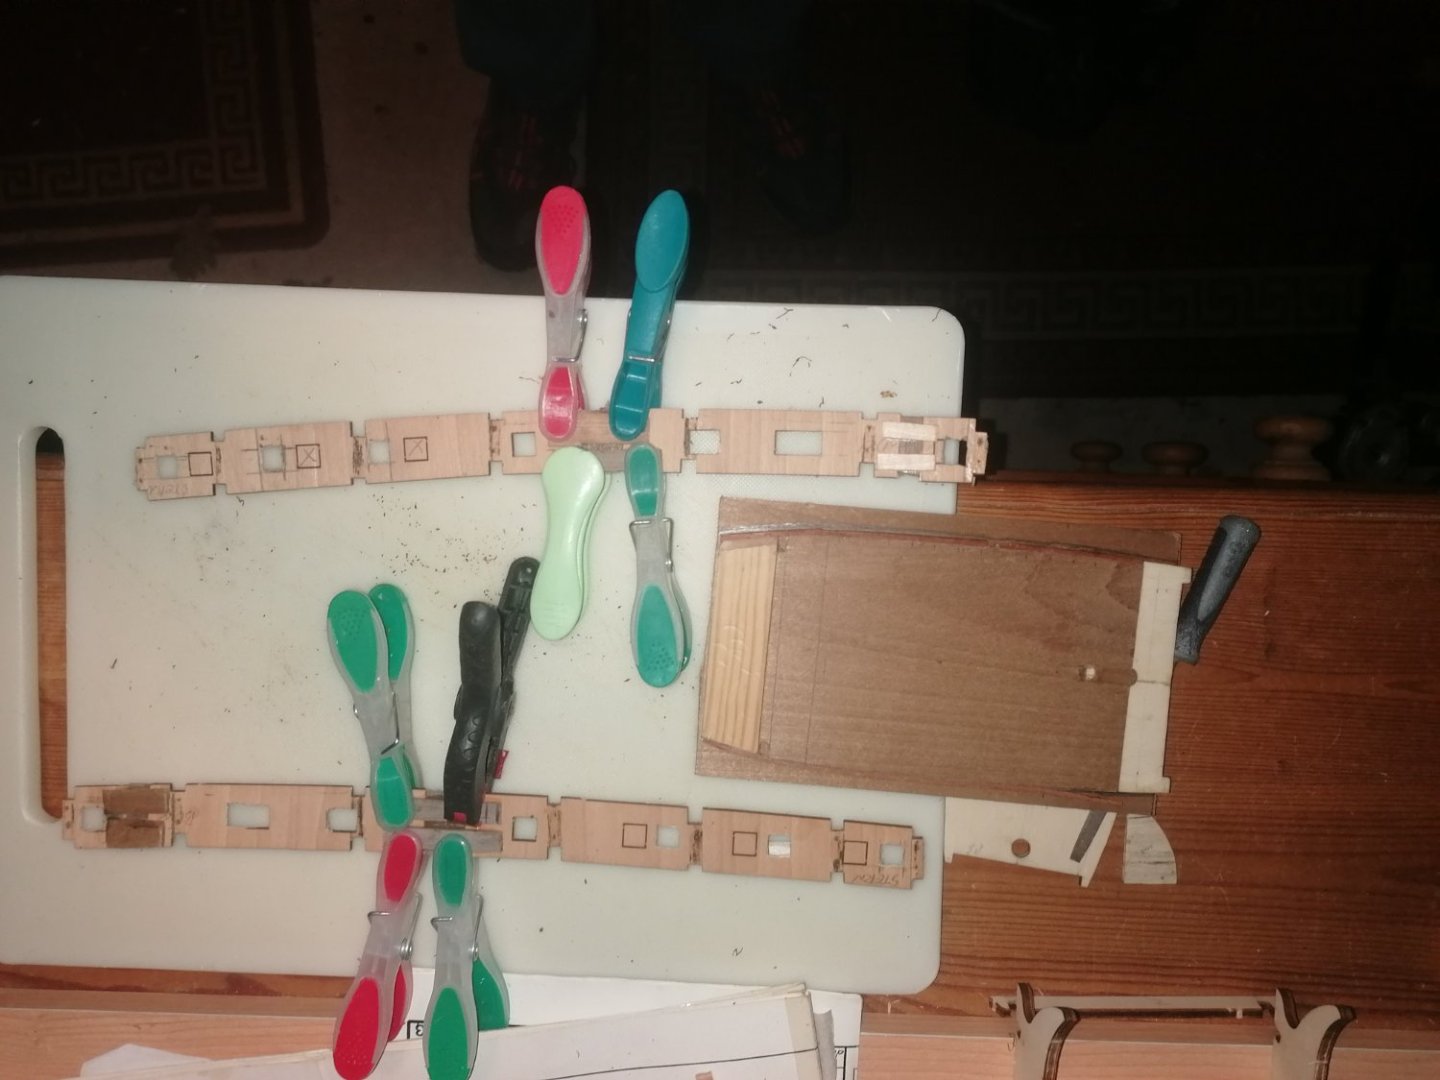
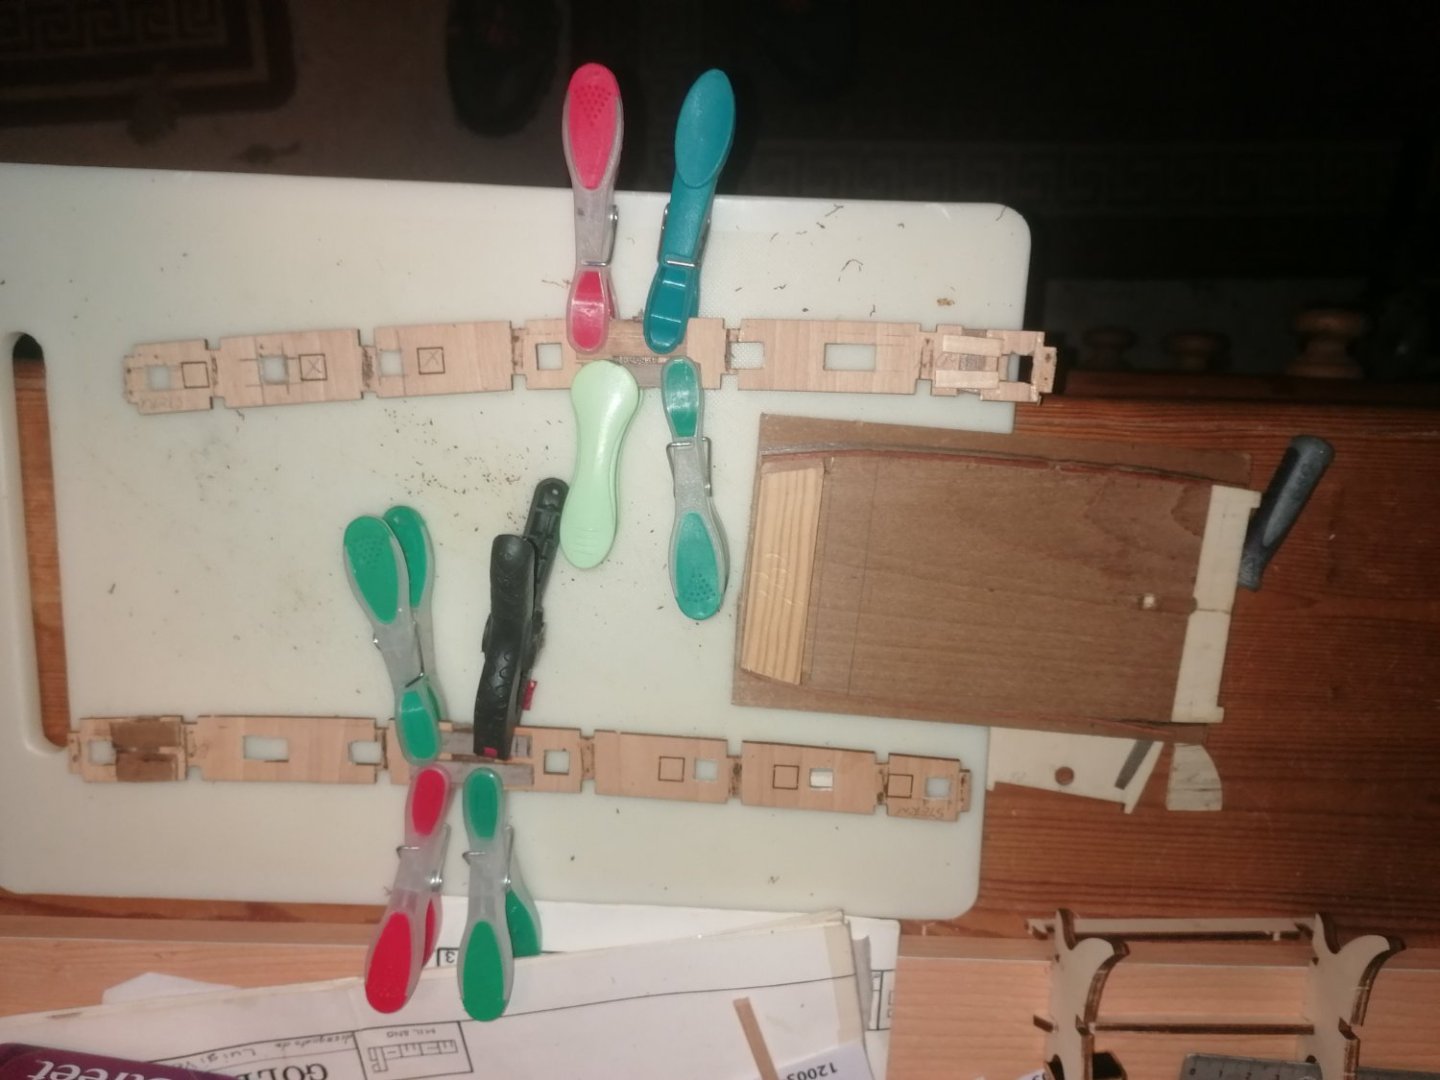
Progress is still very slowly moving on but, I am finding before I can complete 1 stage, I have to start on another. With the first version I was able to plank all the decks and bulkheads before planking the sides. With my modifications I have had to dry fit the first layer of planking from above the gun ports up to deck level to ensure the decks are the correct height and shape. The poop deck was especially tricky to shape but I was happy with the height. I have now been able to glue the upper strakes to the poop deck and quarter deck and, I've pinned the strake below the fore deck. Before I can progress with the main deck I now need to make the doors and arches and then plank the bulkheads. I also found that the original planking of the main deck came 0.5mm to low with the strake on the side so I added a 5mm strip to the edges which filled the gap and then re planked over the original so now the decking goes right up to the side of the ship. I also found that the fore deck was 1mm to low towards the stern but was the correct height at the bow. I added 2 layers of the 0.6mm strips supplied with the kit to build the deck up and then sanded it smooth. again the bulkhead between the foc'stle and the sprit deck will need to be planked before I fit the decking. I am also going to add a door to this as, this has now been fitted to the replica in London. As, the guide explained, it would have made sense to install it as it's a long way down from the top of the foc'stle, with no way of climbing up or down. I have ordered more 0.5 mm by 8mm strips with the idea that I make the shape of the door and frame and then add the actual frame and plank the doors on top. This will make them 1mm thick which should tie in nicely with the clinker style planking of the bulkheads. another modification from the kit as it has the planks side by side and vertical rather than overlapping horizontally. The poop deck and quarter deck are now planked and sanded smooth. I had real trouble bending the strake below the main deck running forwards as the wood kept splintering. I gave up and glued 2 X 0.6mm strips on top of each other and will use 1mm thick strips over the top and then sand the edges to the correct size. while waiting for the wood and some other parts I have ordered ( 7mm triangular dead eyes, 7mm violin blocks and 2 rams head blocks and some 2mm wooden parrel beads) these parrel beads, I hope, will form the bases of the columns on the quarter deck and foc'stle. I I have also noticed that the centre line of the fore deck is 1mm off centre toward the stern but can be compensated for when I start planking it. I shall try to update more often from now on. Hopefully, every other Sunday morning at least.


-
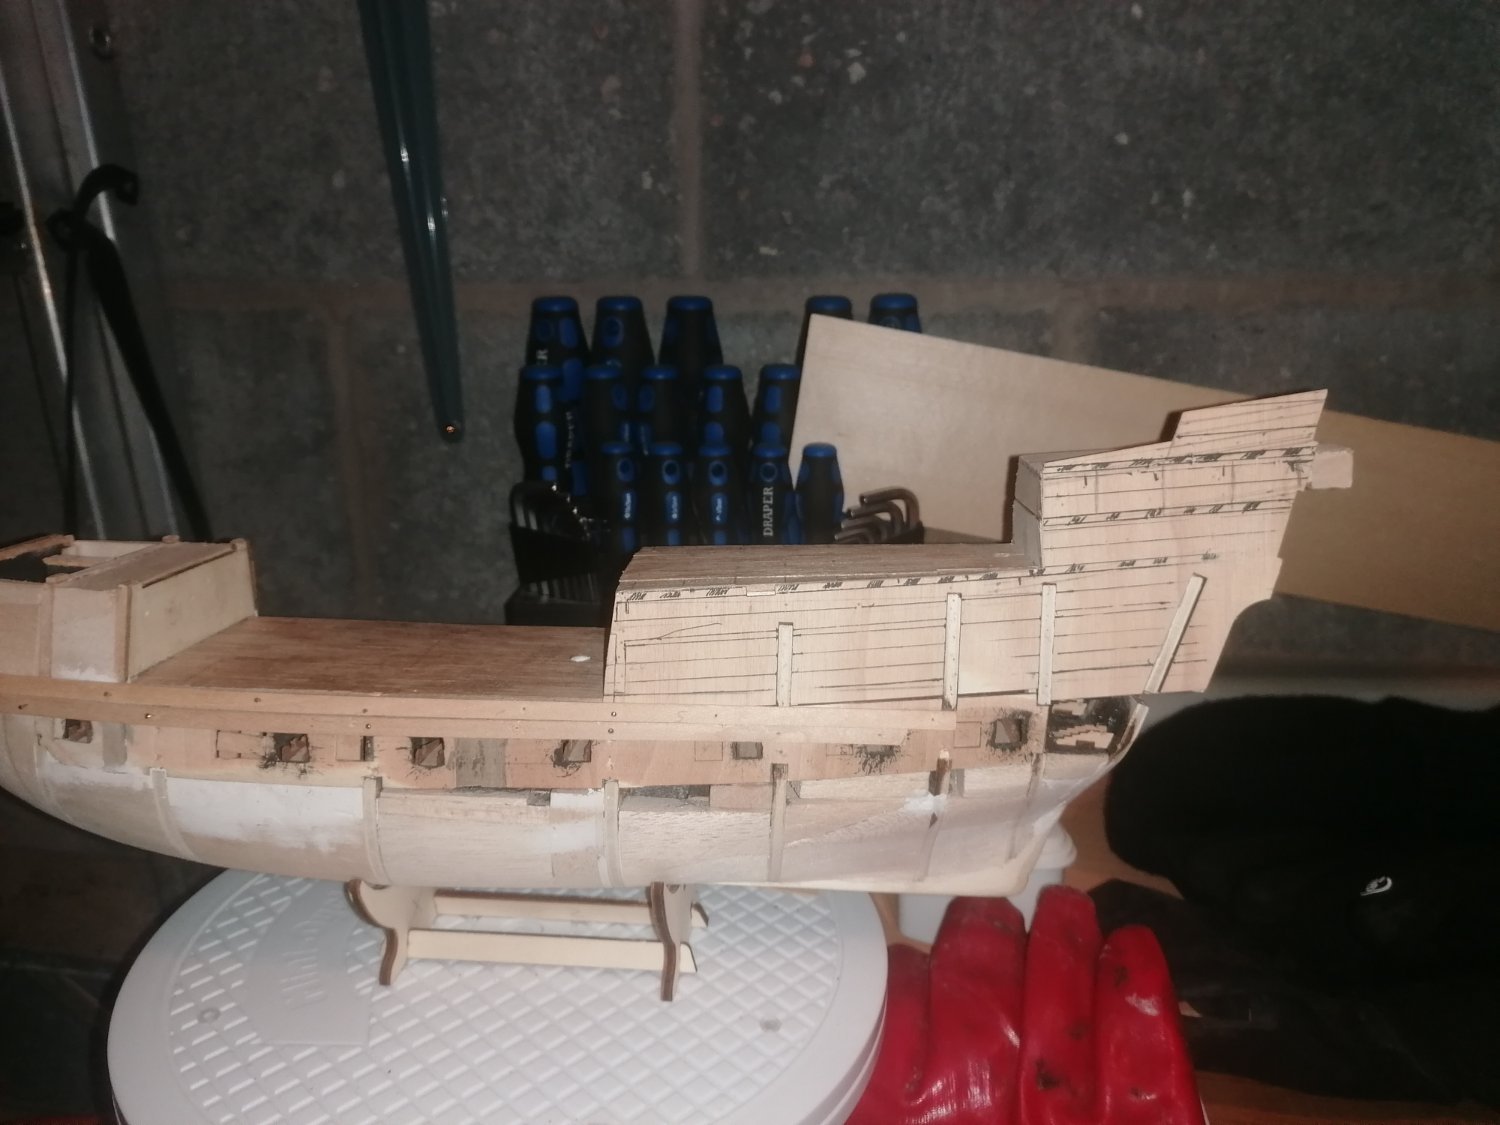
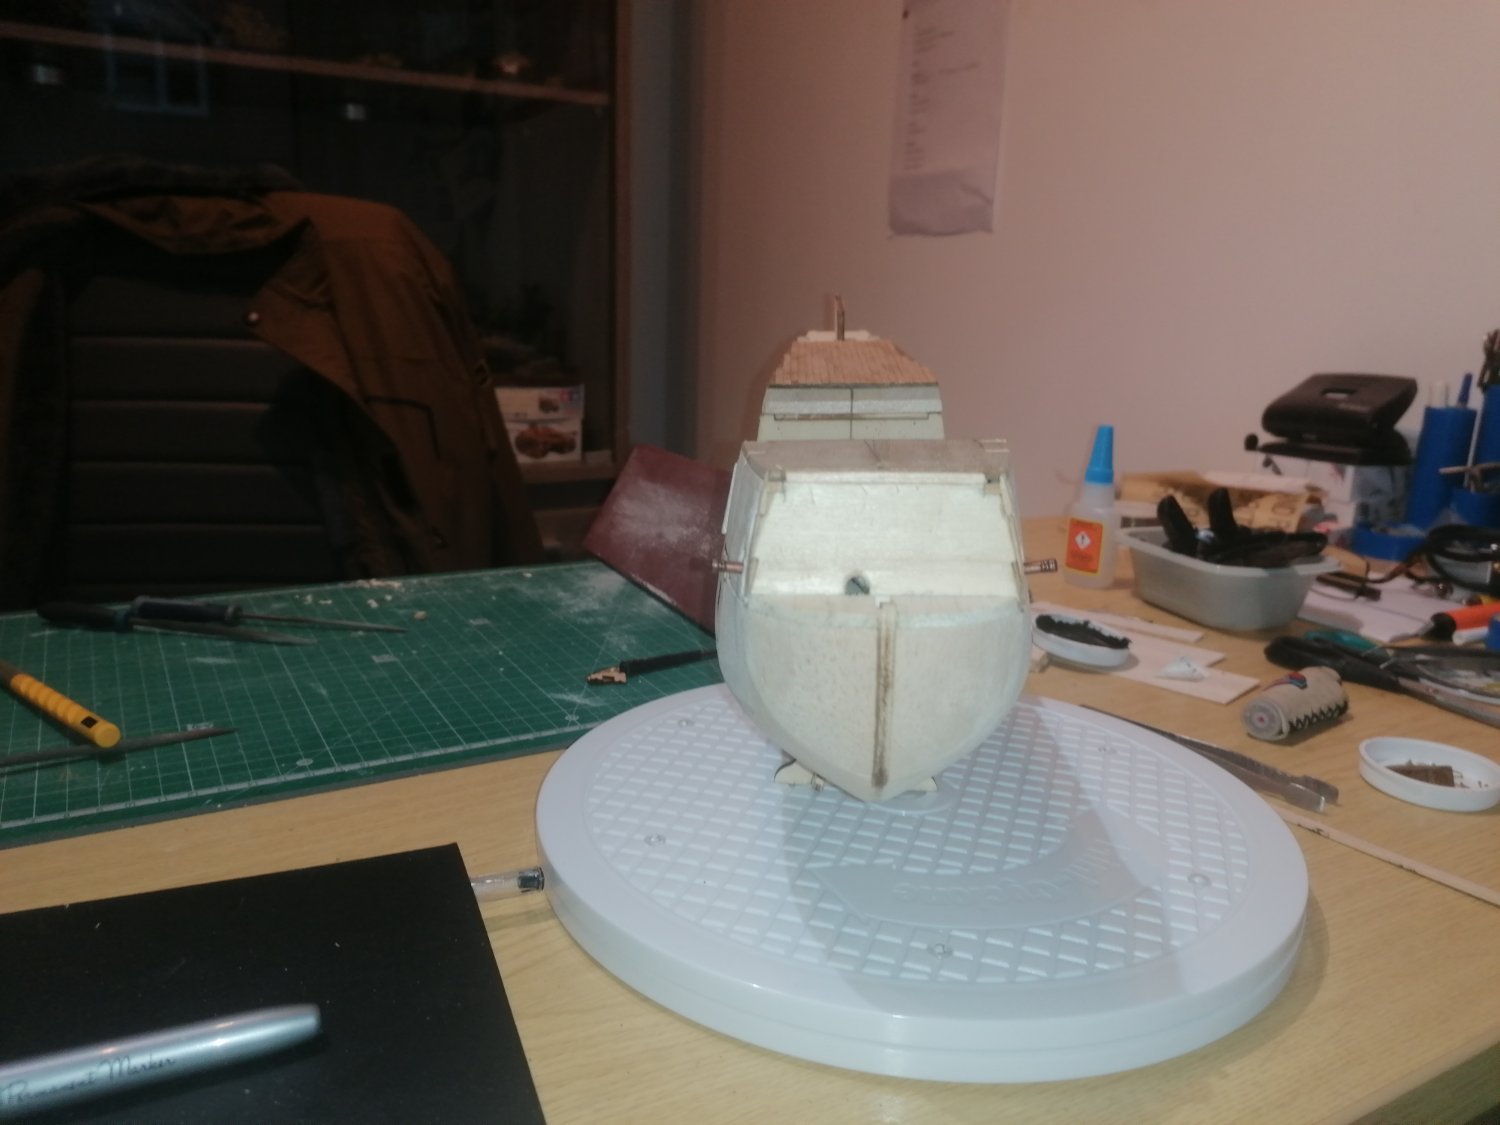
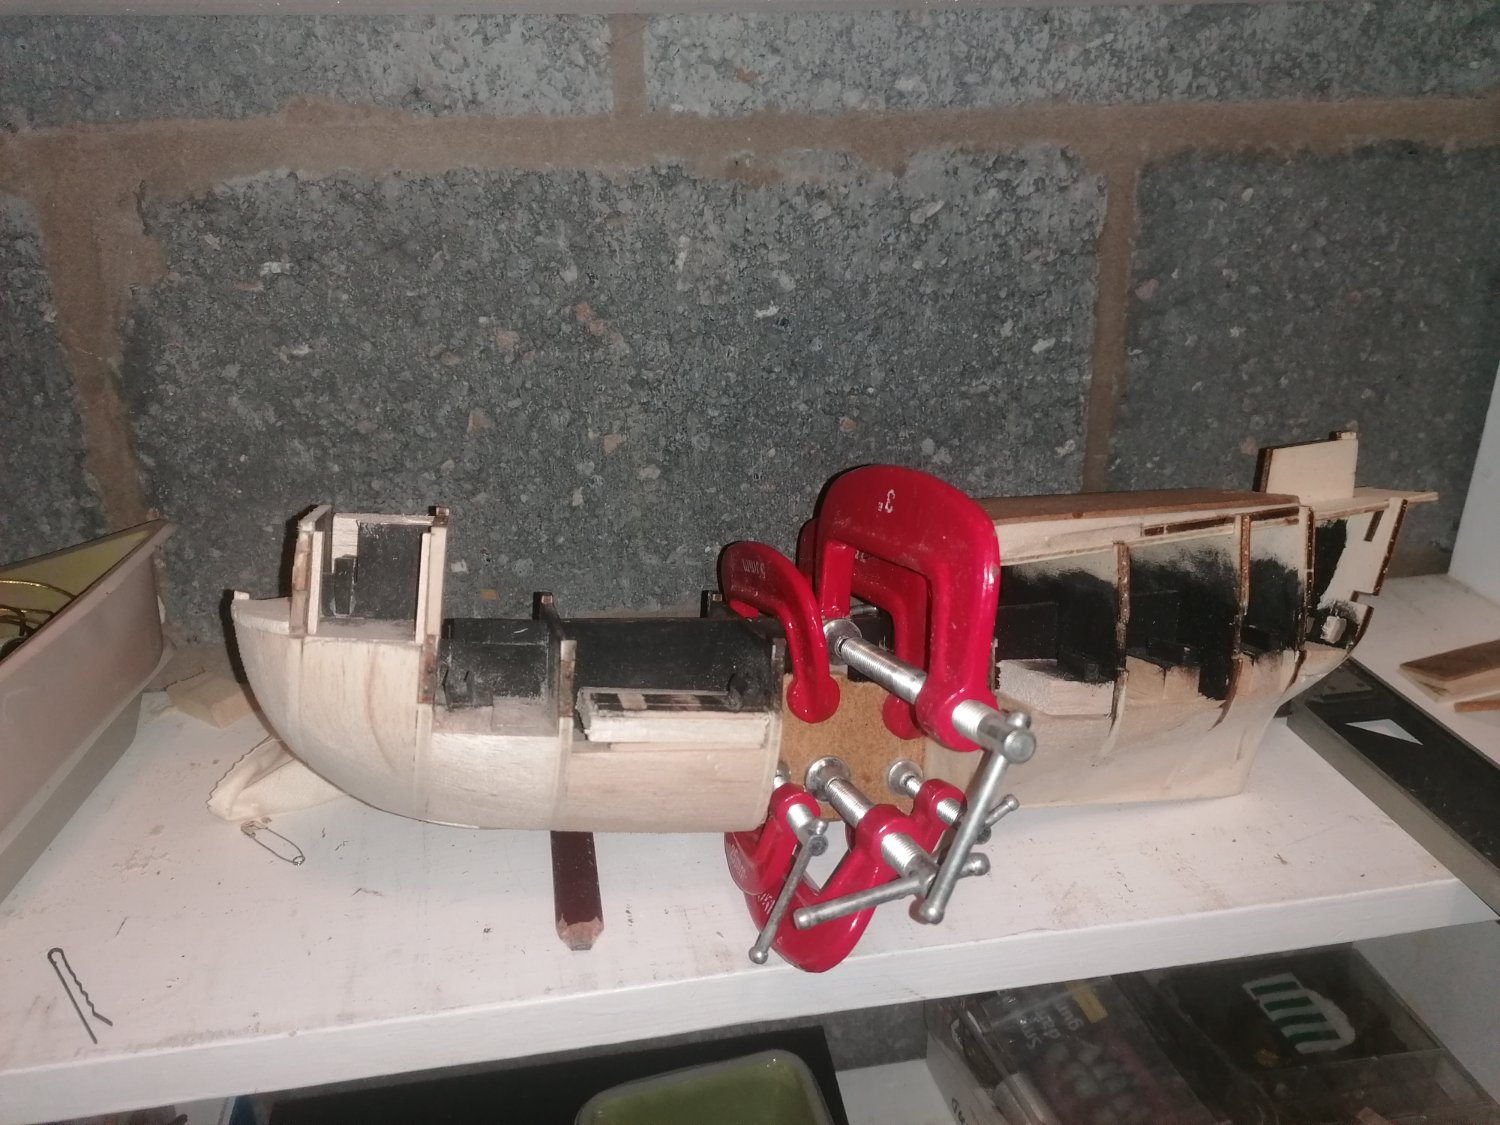
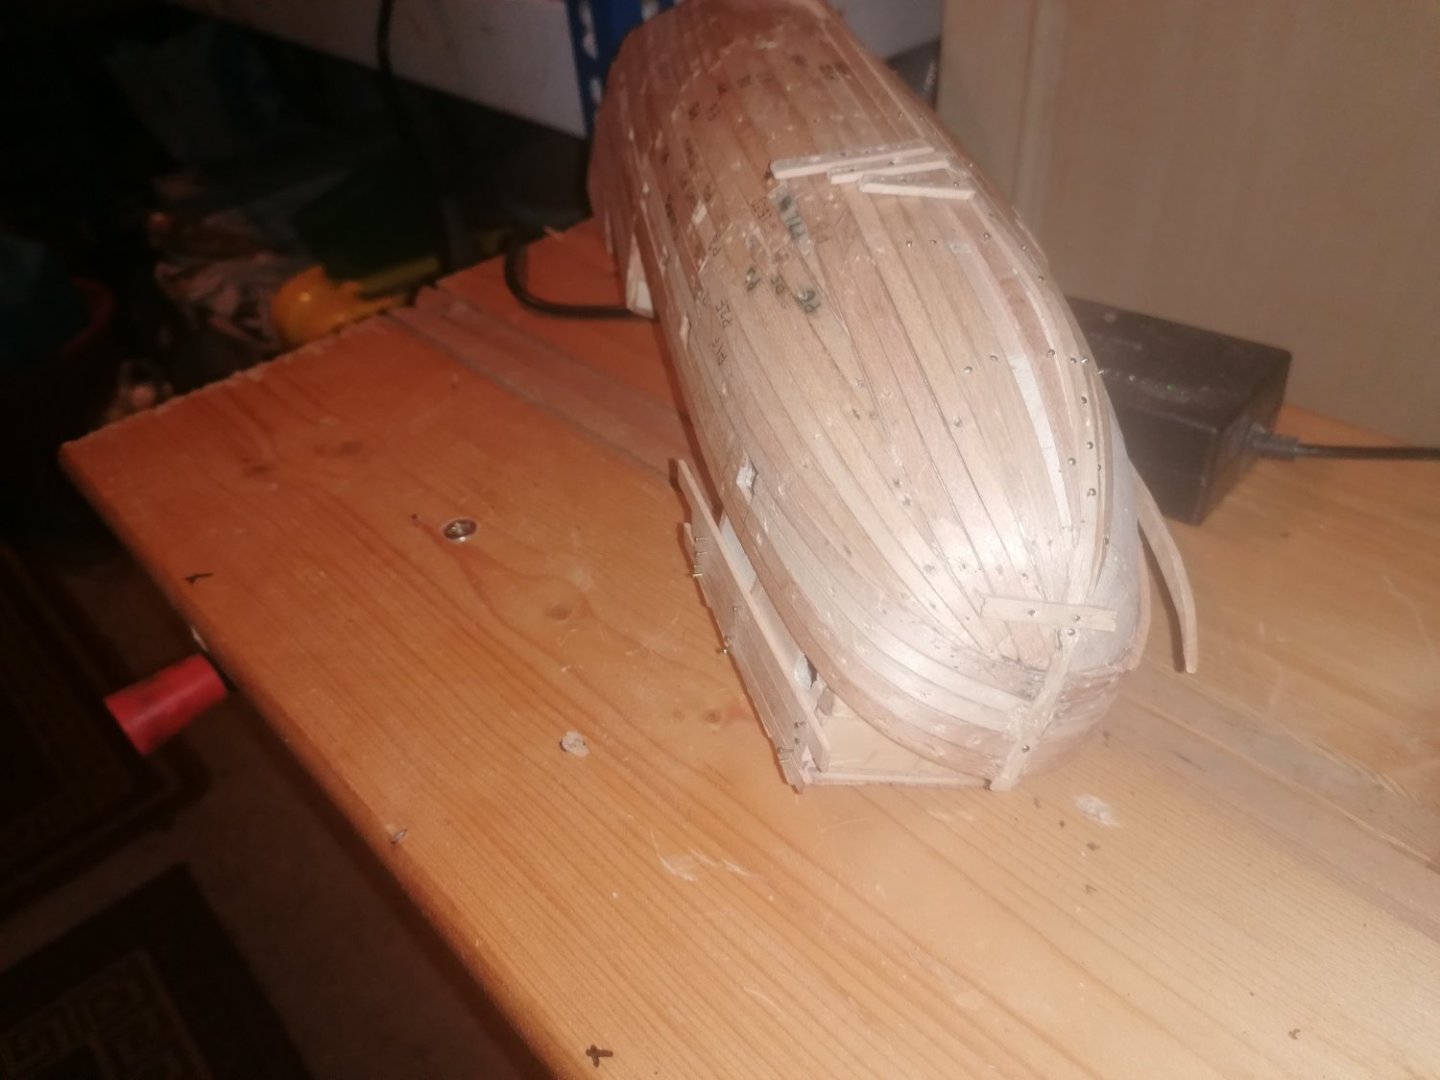
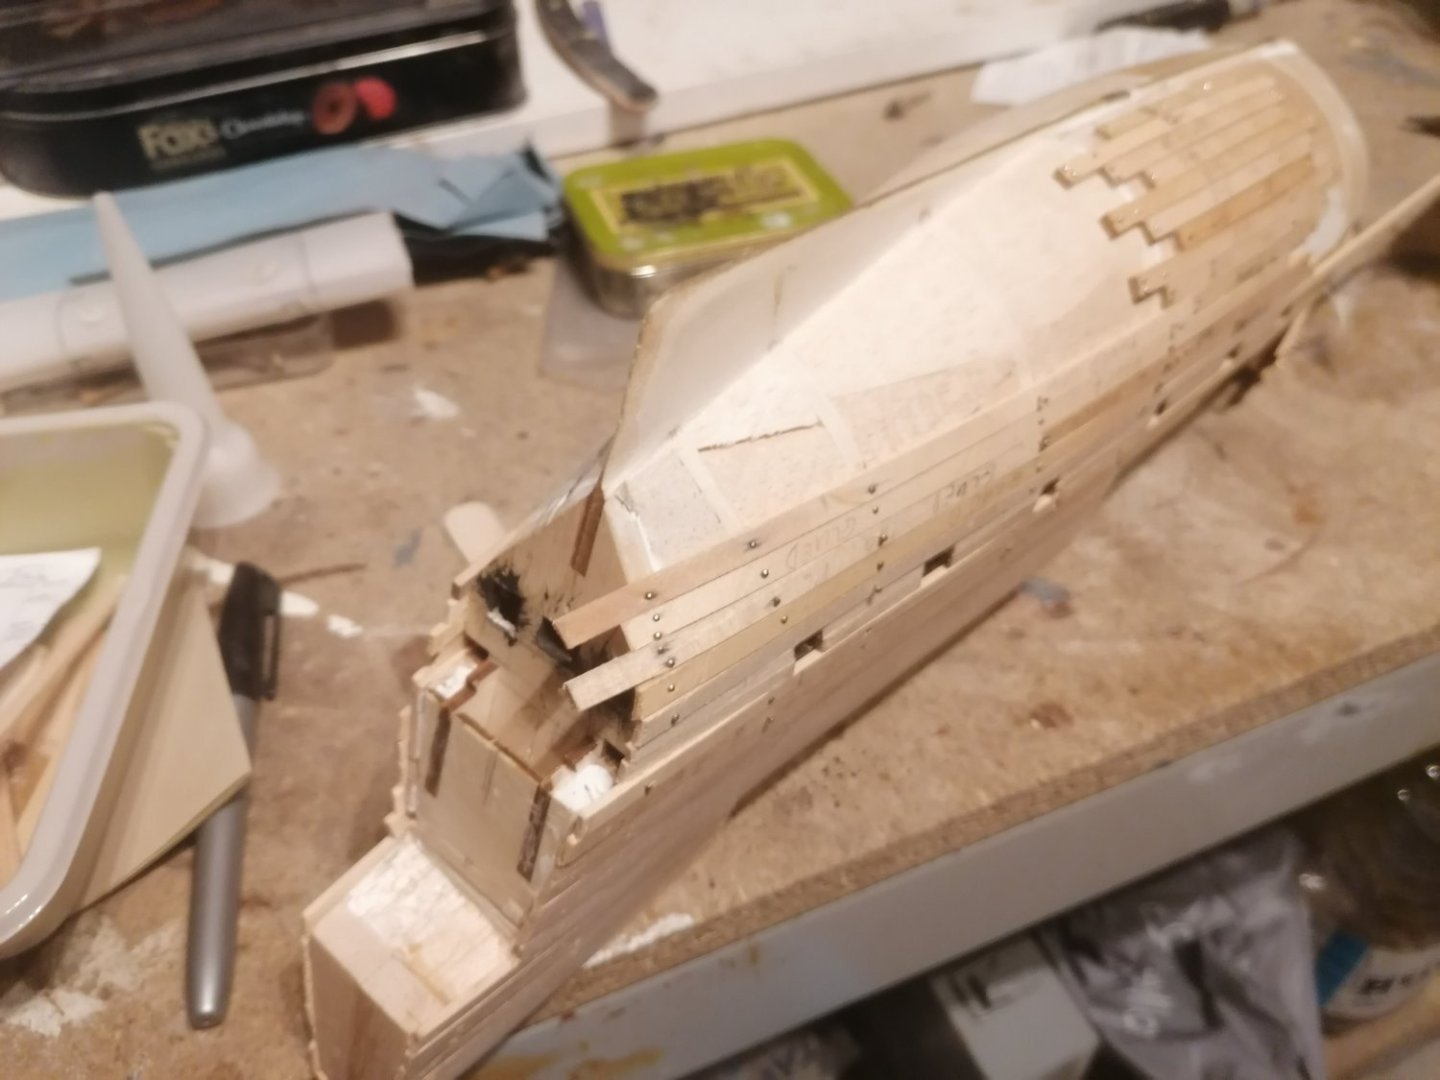
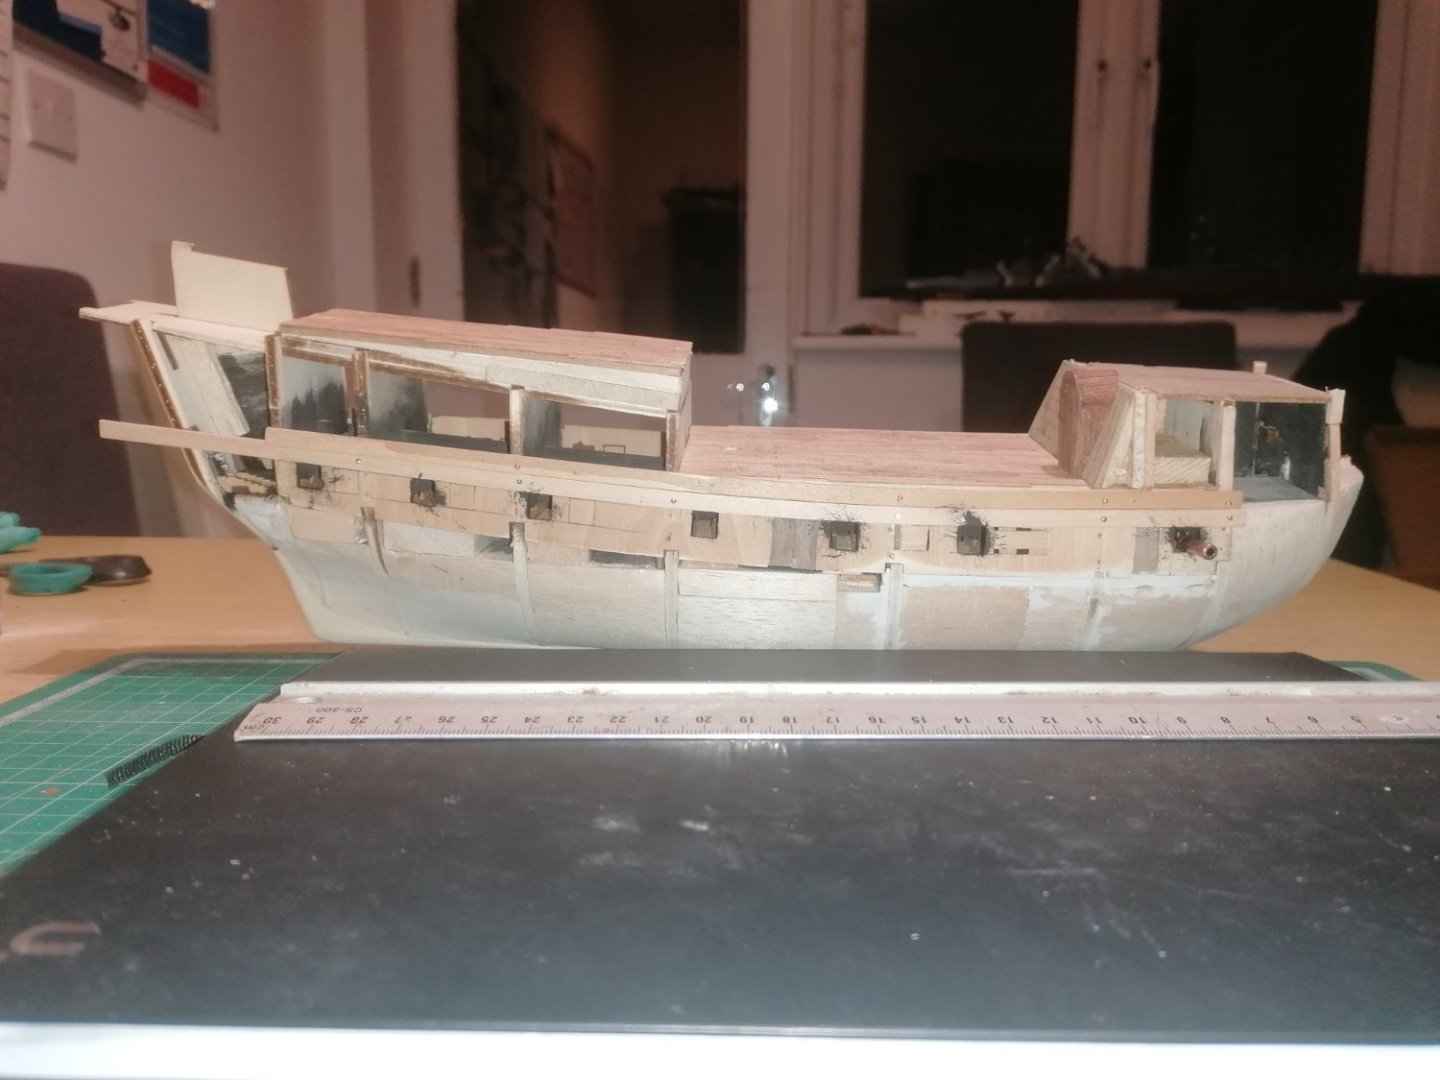
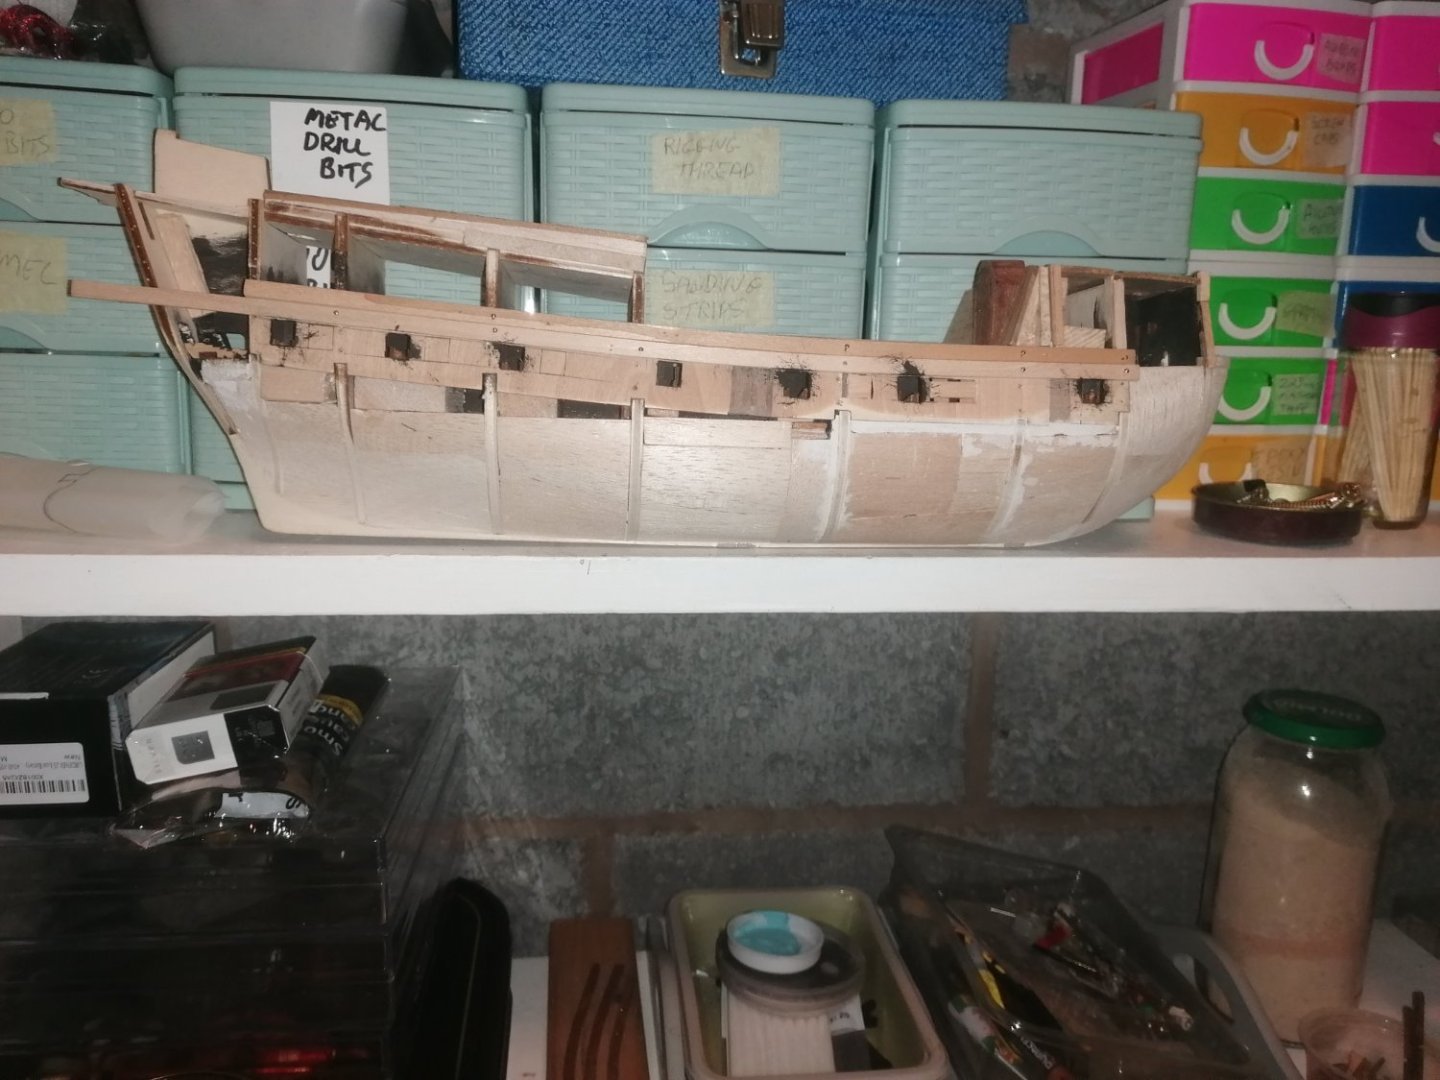
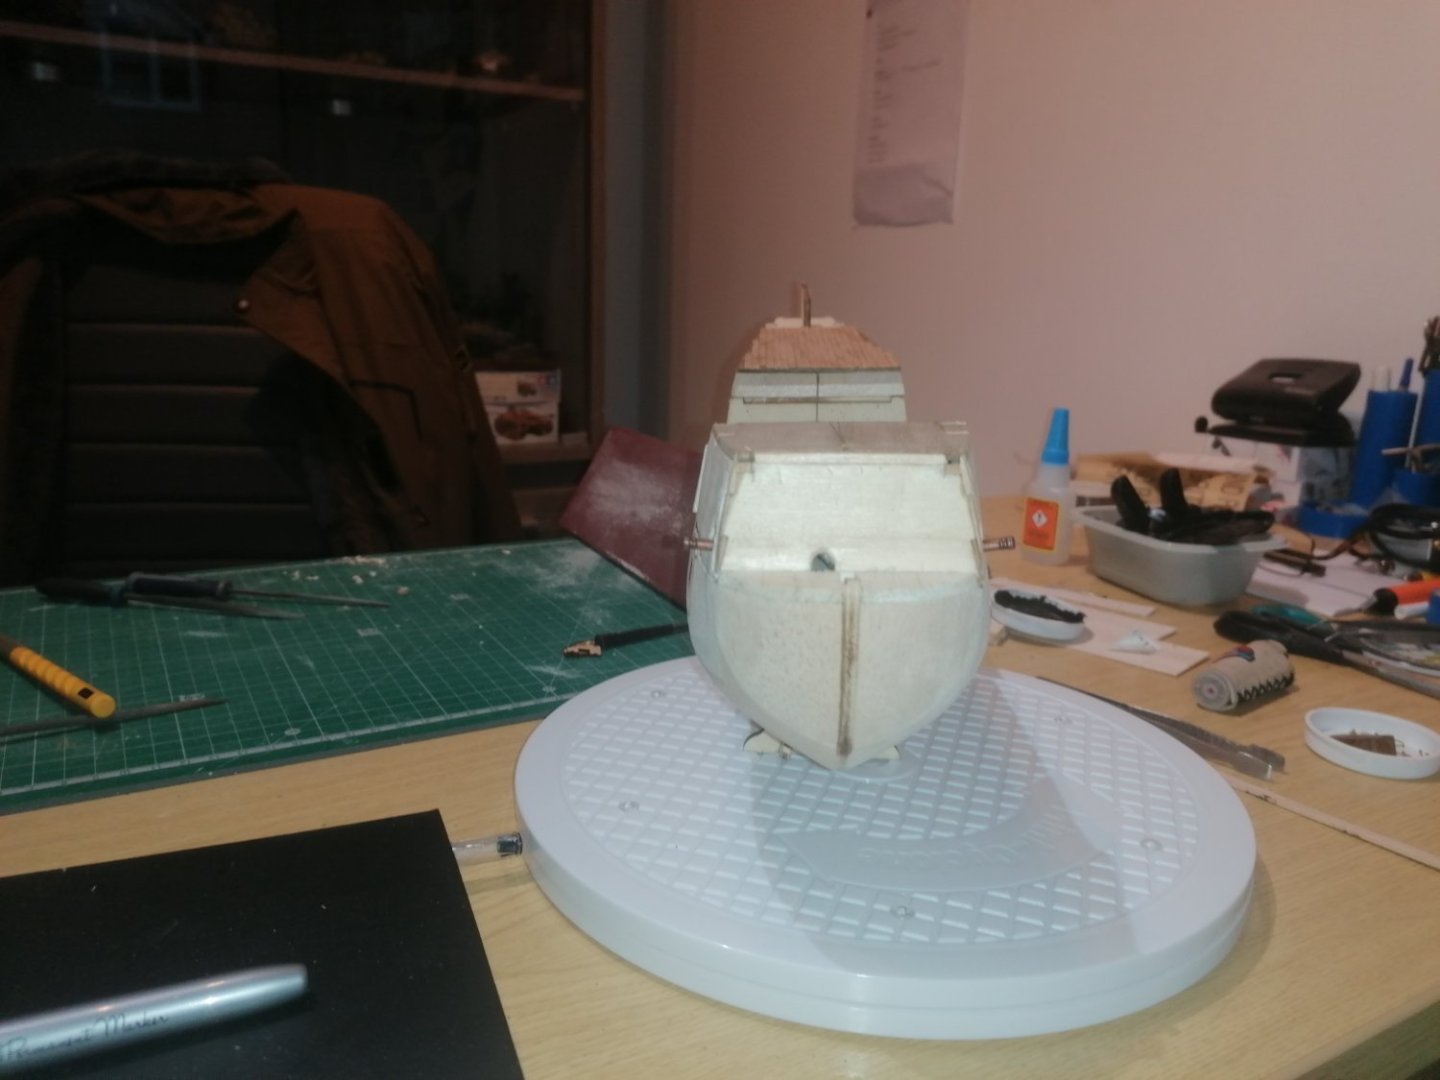
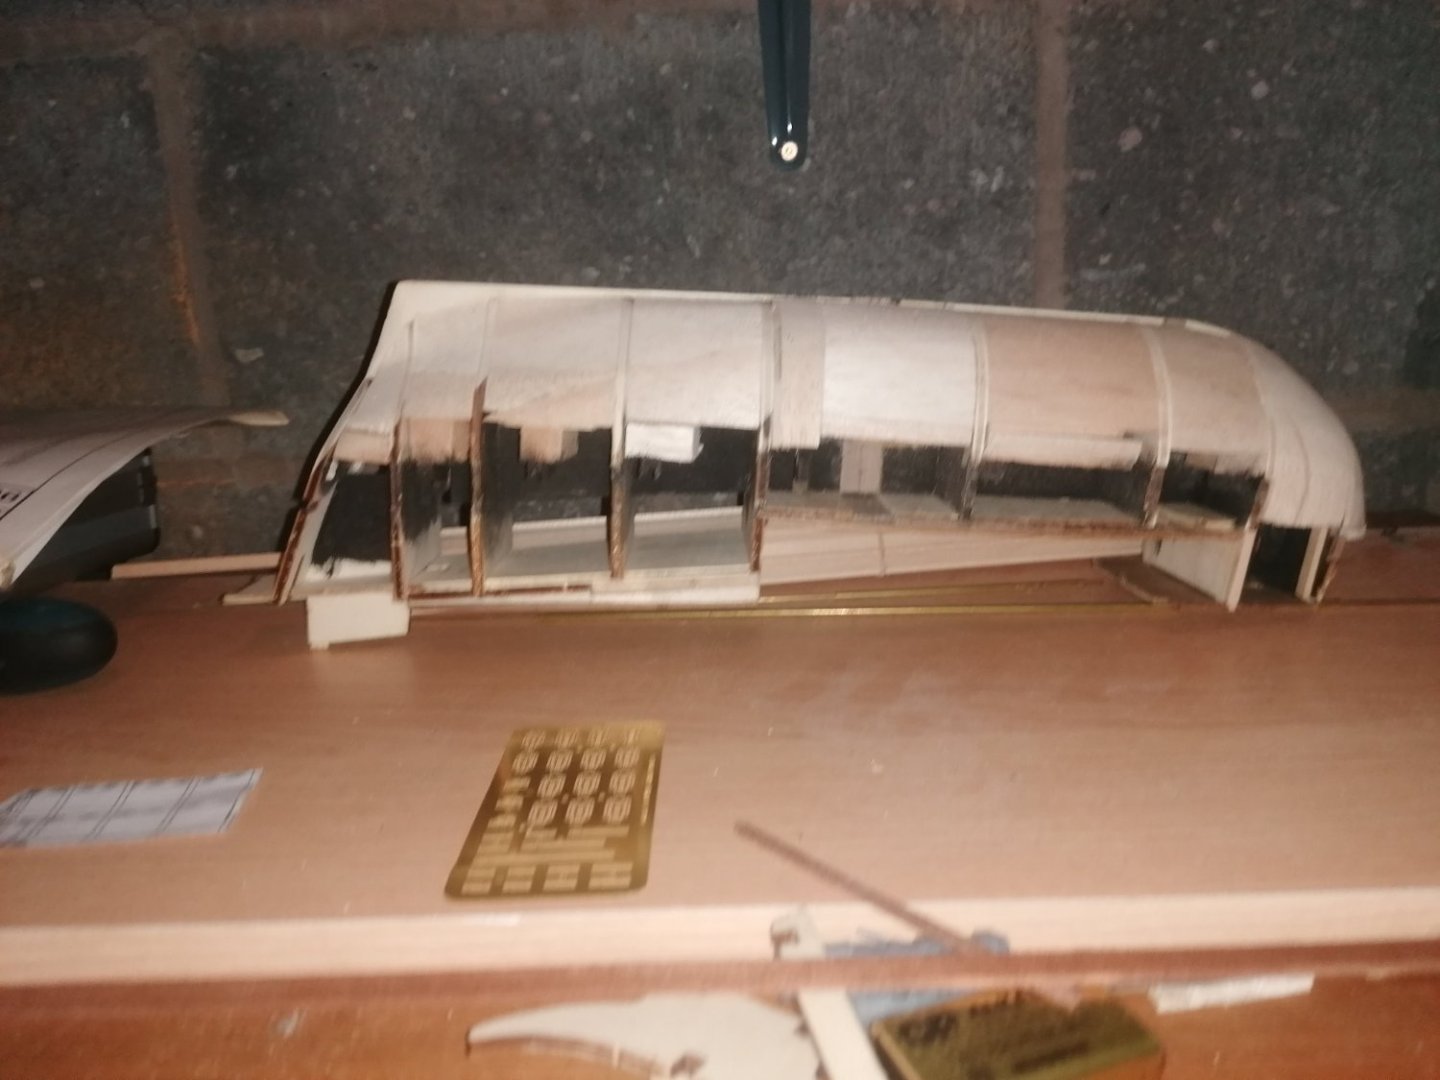
After much head I'm scratching and pulling my hair out, I'm surprised I'm not bald now, I have completed the topsides and almost ready to plank them. However I still need to use a little filler on the lower hull before lightly sanding the entire hull. I guessed the stern would be the most difficult part but, had no idea just how tough. I had planned on having the stern plate 40mm wide at the bottom, but, this meant that the stern was too wide behind the quarter deck. I had also managed to over sand the port side by 1mm so had to reshape this as well. I have now removed the planking completely on the quarter deck so once the first planking layer is done it can be sanded completely smooth. level with the topmost plank. The starboard bulwark also needed an additional strip added to the fore part of the quarter deck as a small sliver came off as I was cutting it. I always say the beauty of a wooden kit is if you make a mistake it's easily fixed. with a plastic kit you're knackered most times. The next stage now is to fill in some dents on the bottom of the ship caused by applying pressure while using the stand. I also need to shape the rear keel better while ensuring that the shape is correct and ensuring both sides are identical.


-
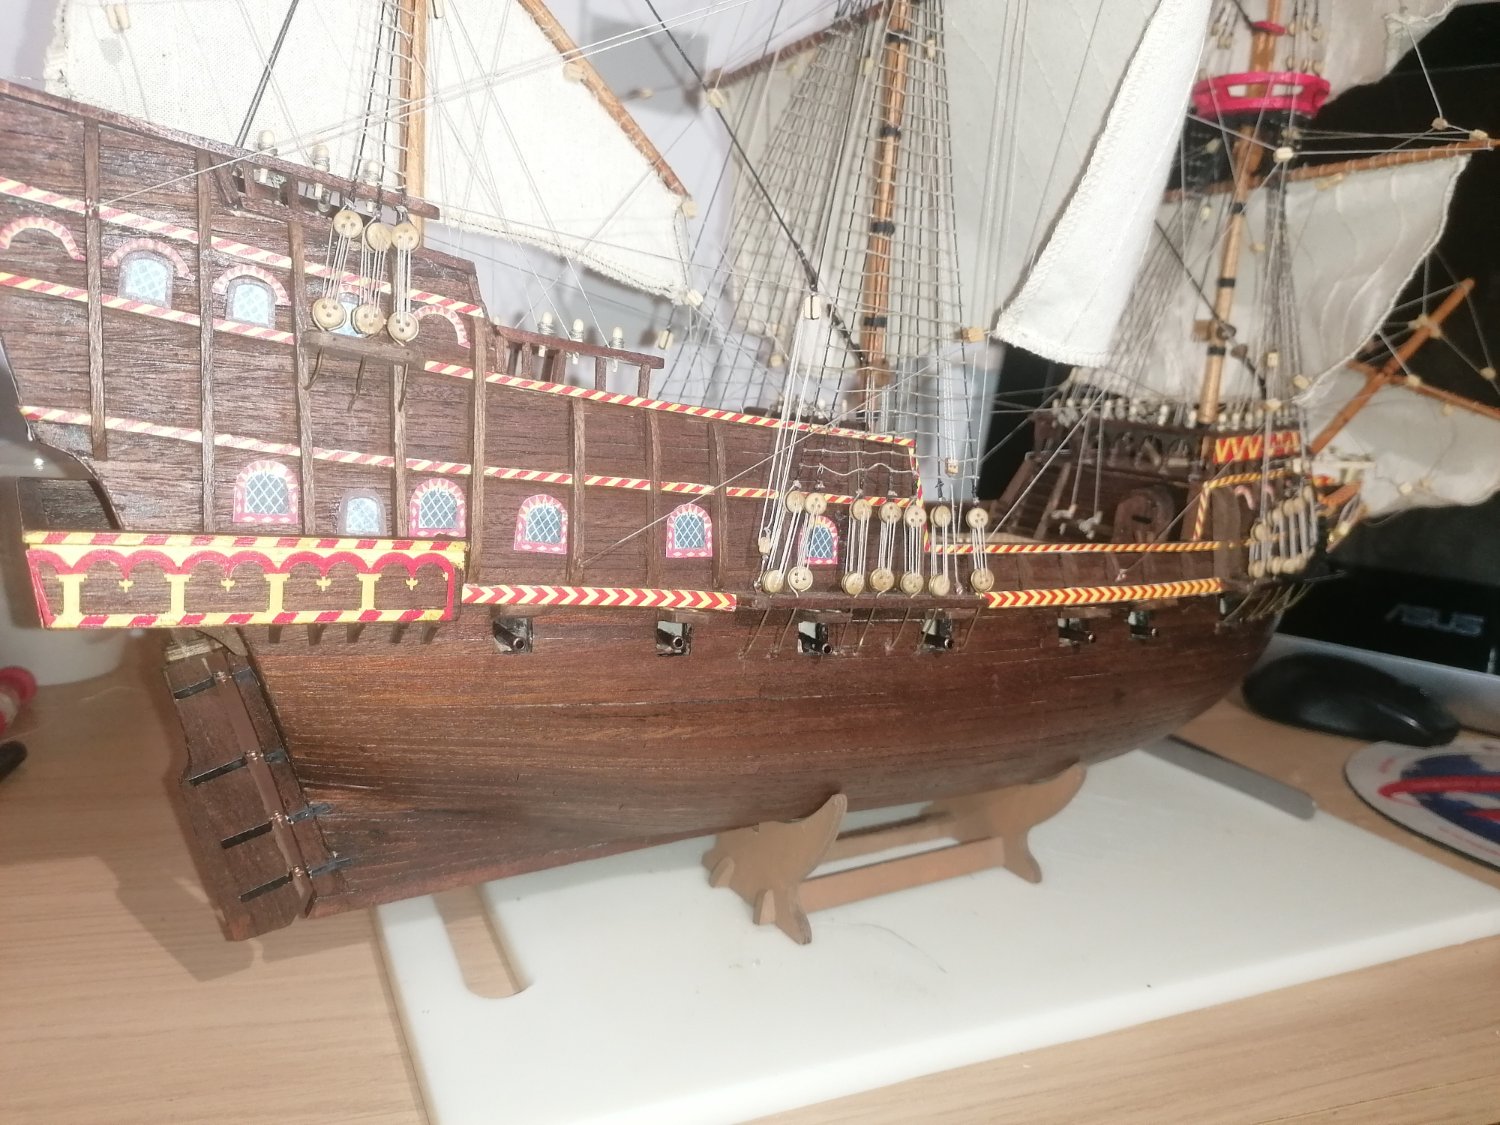
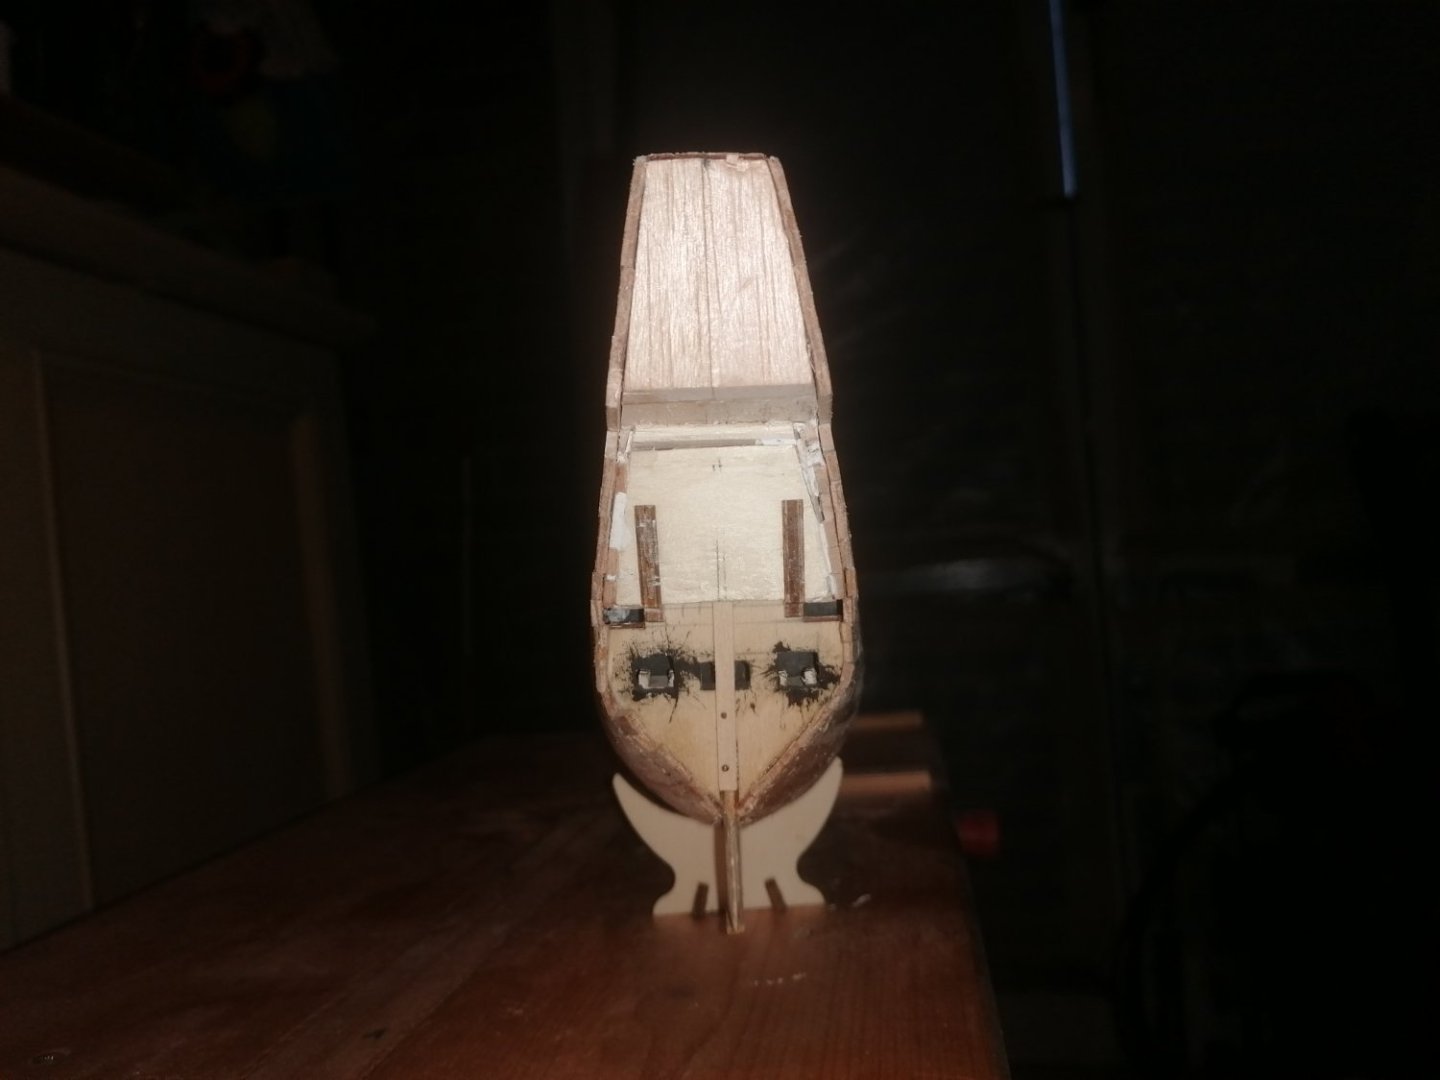
The 1st photo above shows the supplied stern plate compared to the one I have adapted in the last photo.
-
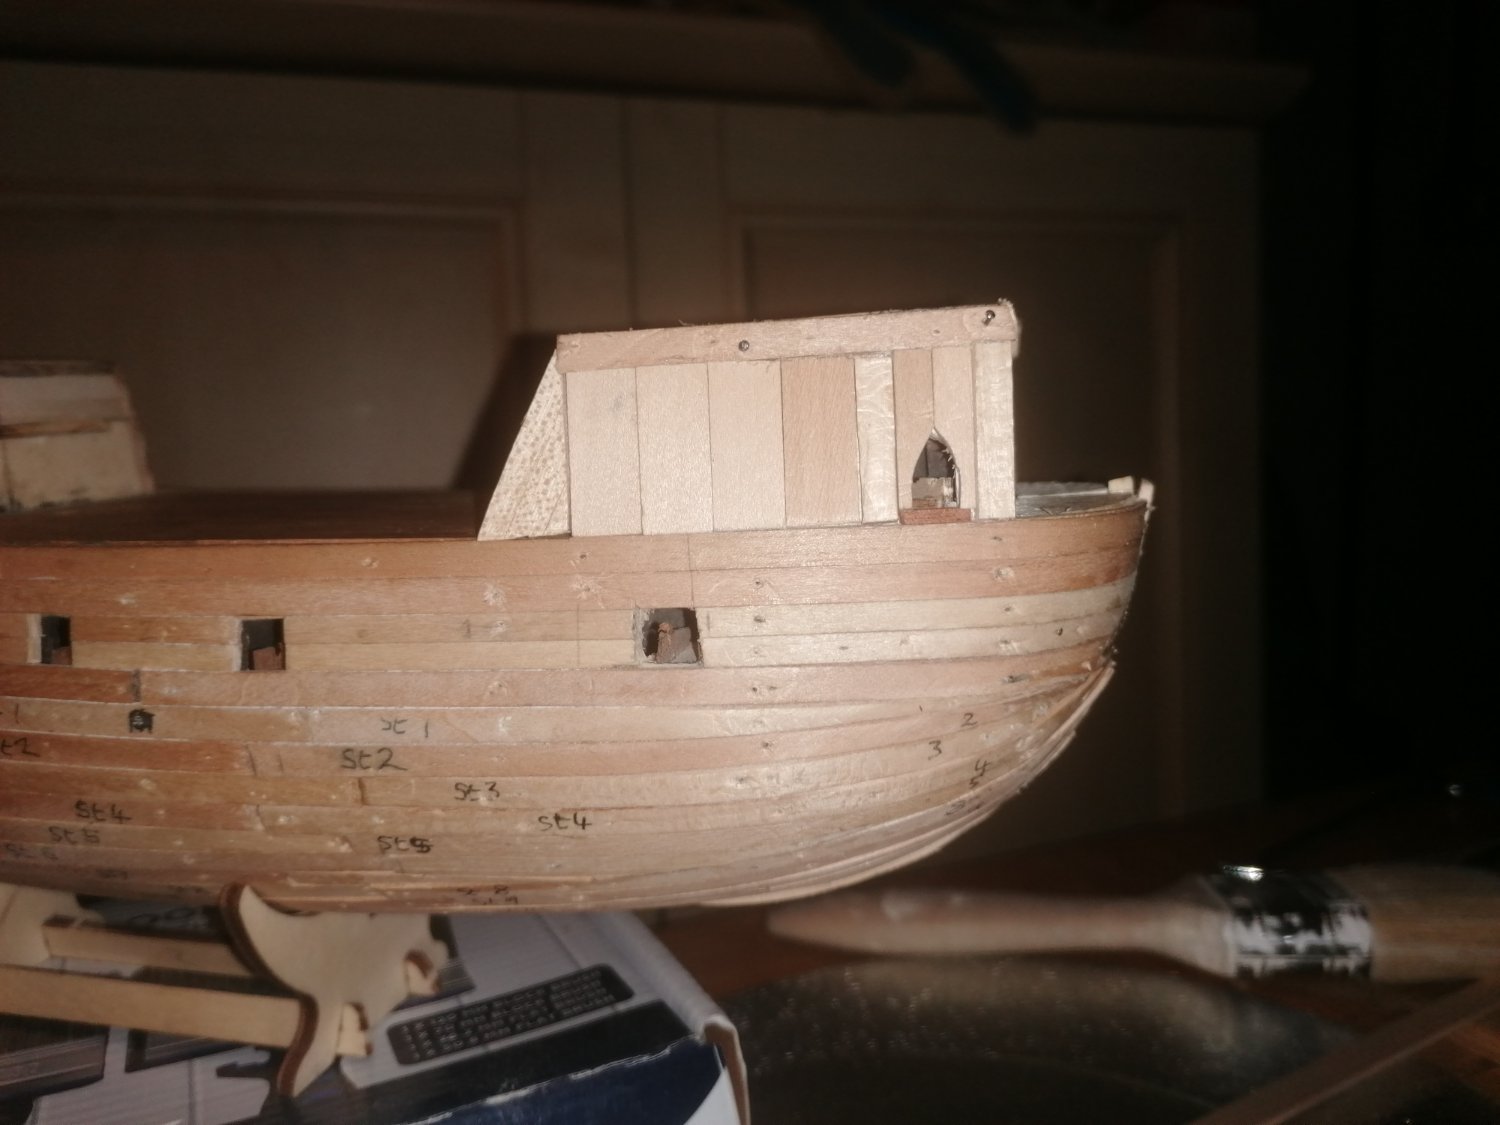
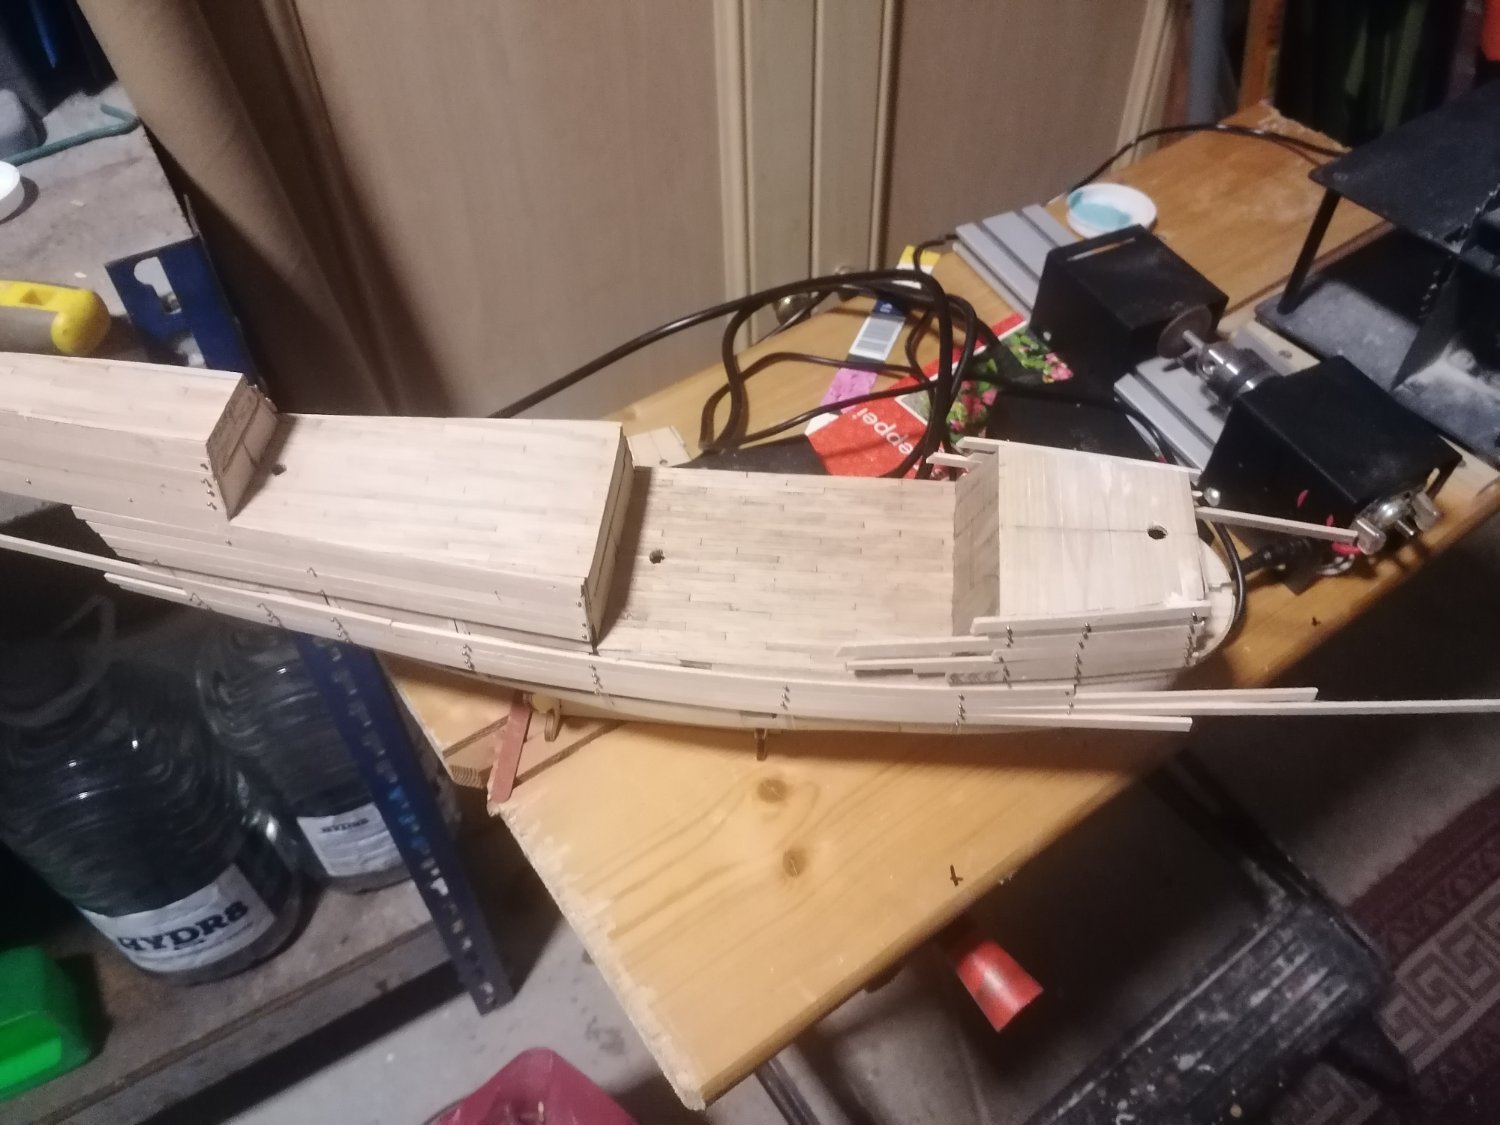
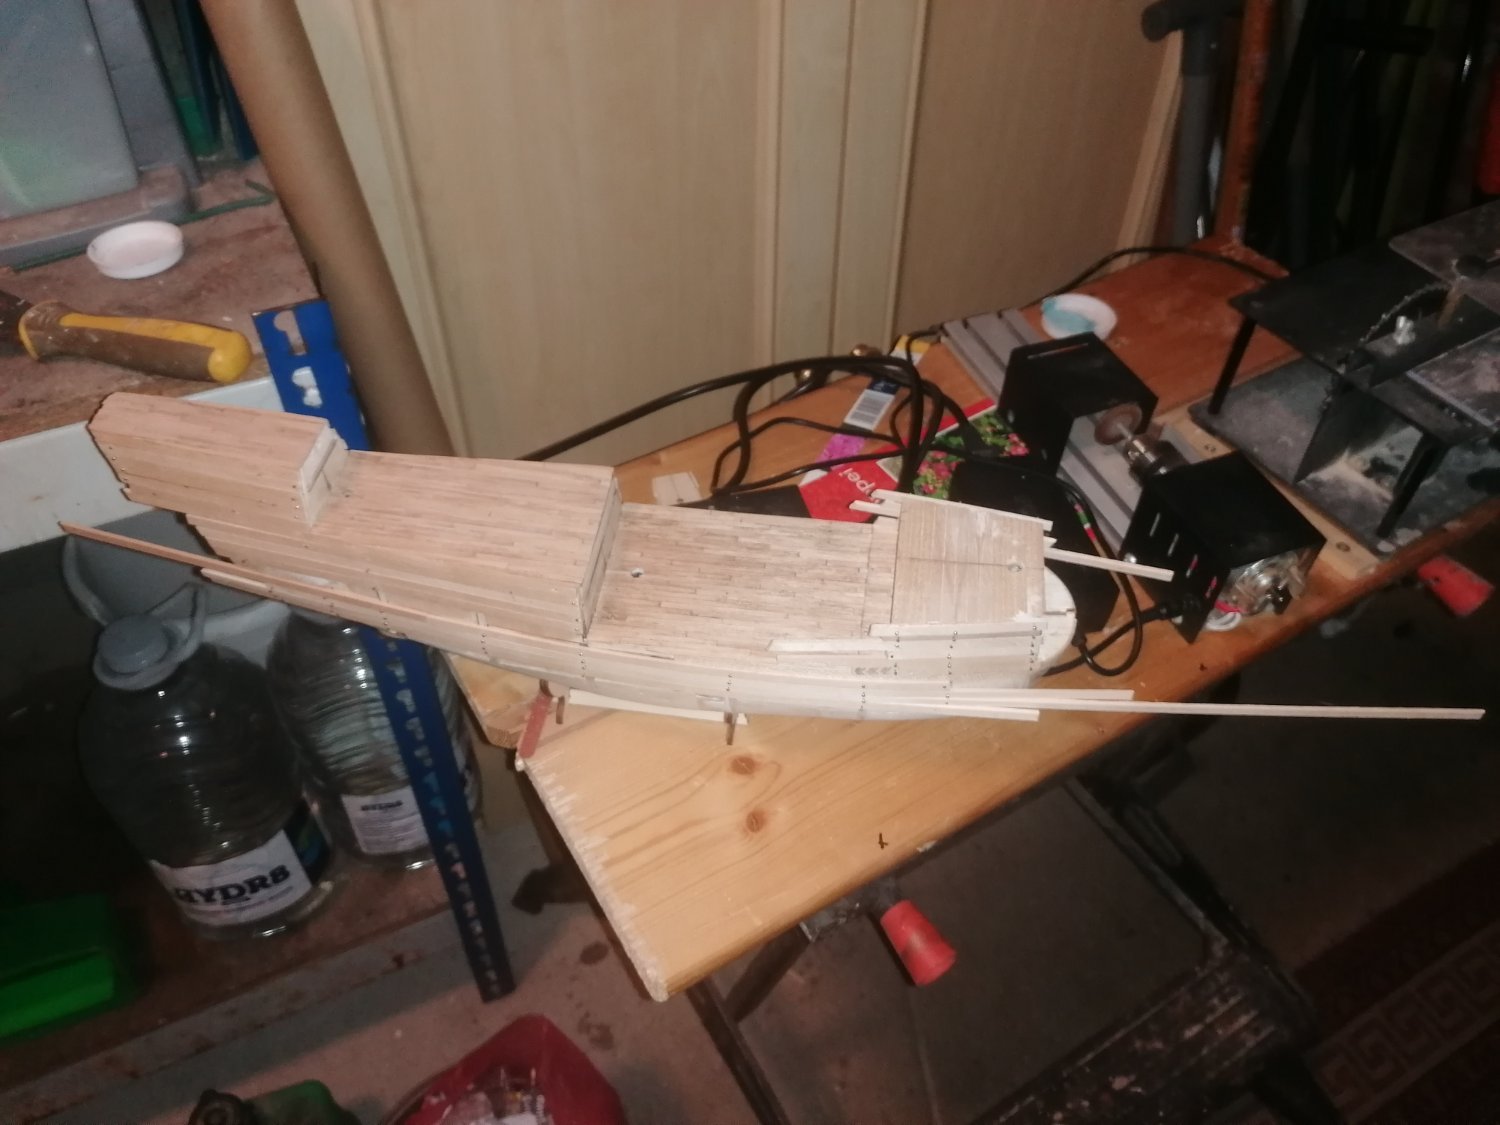
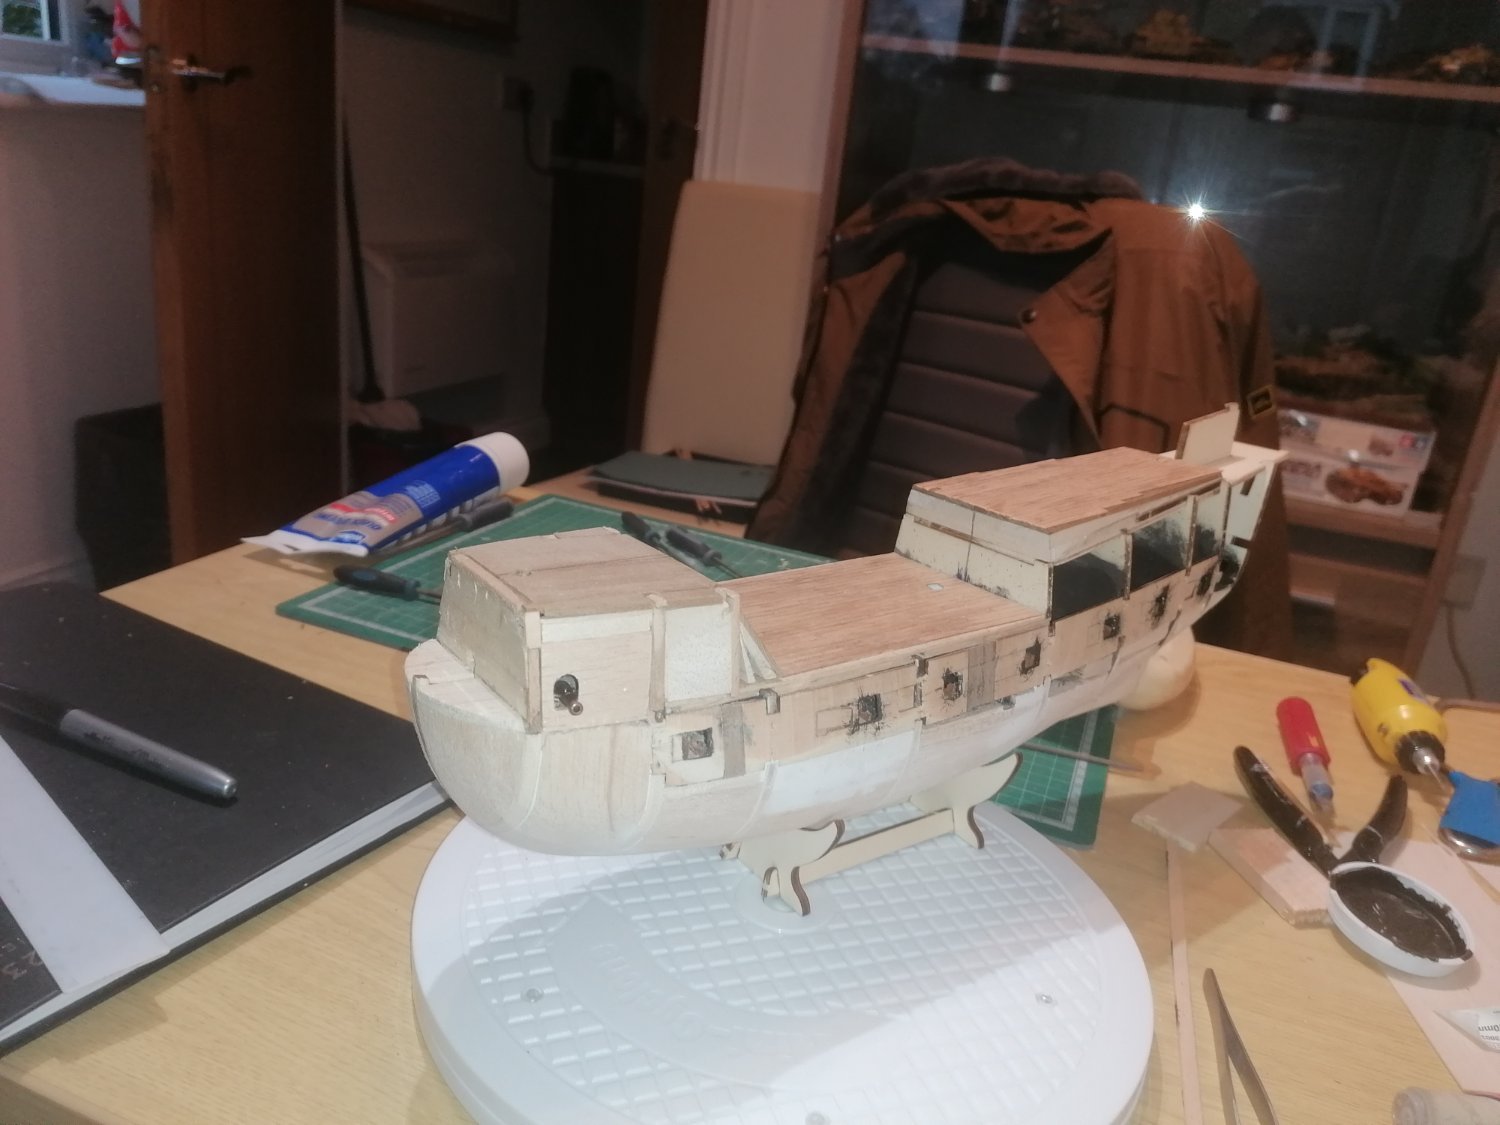
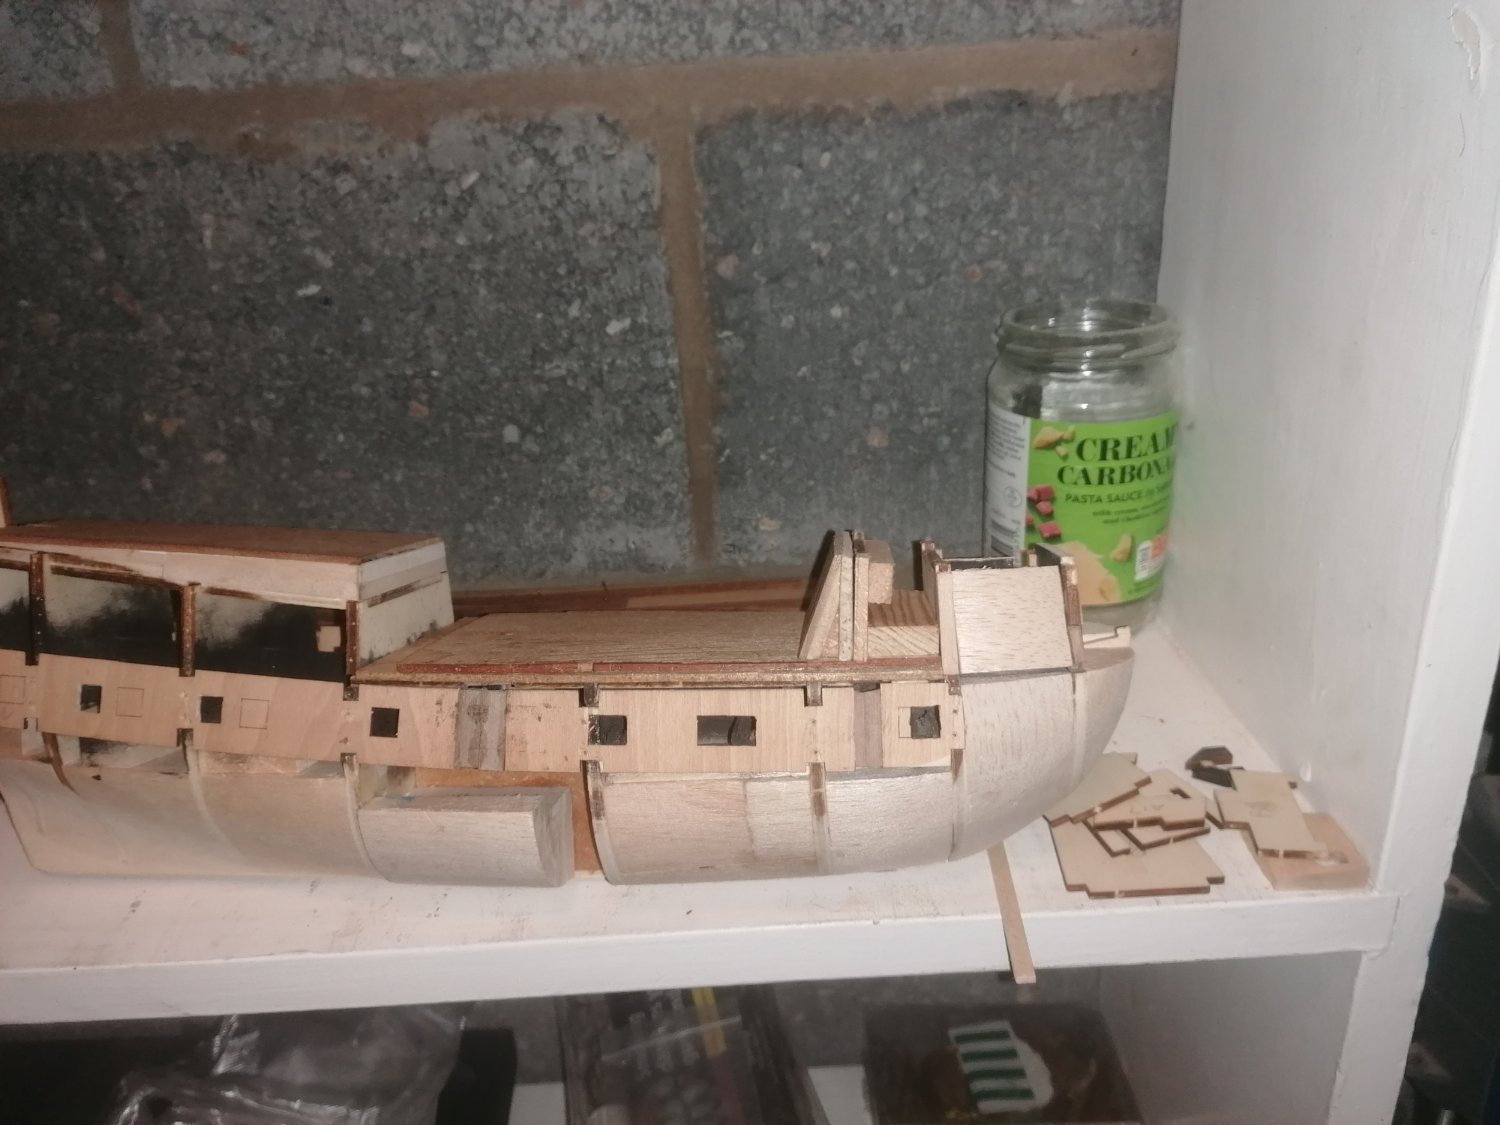
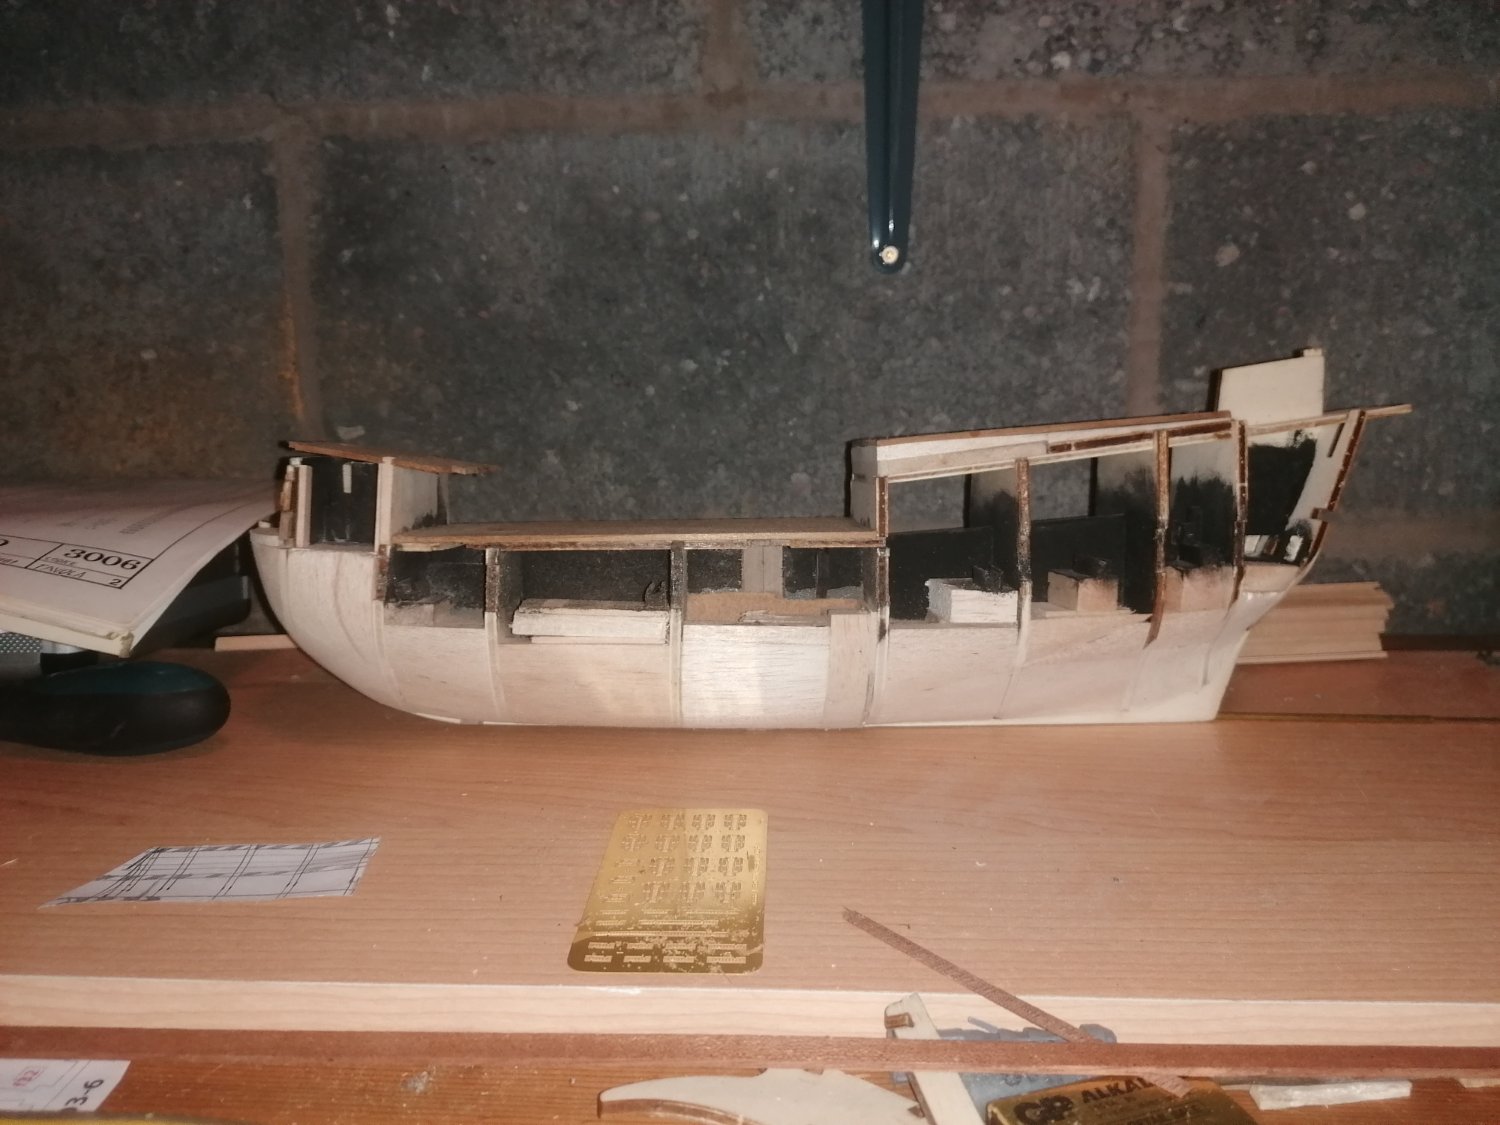
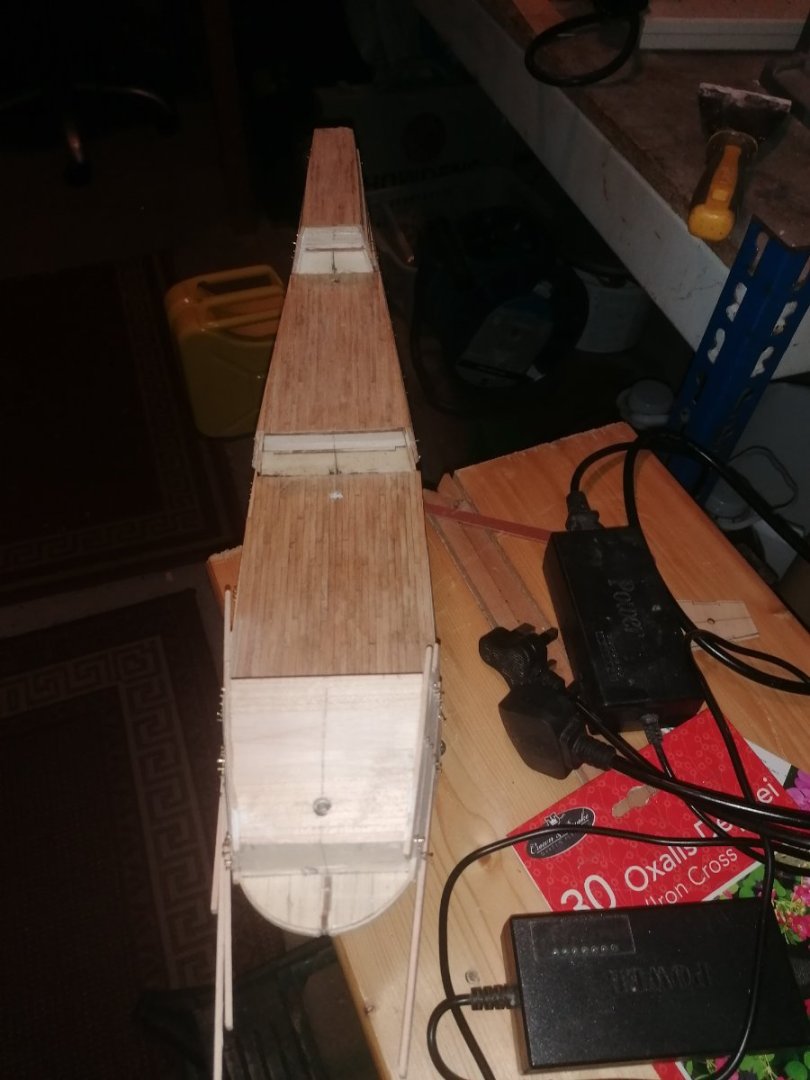
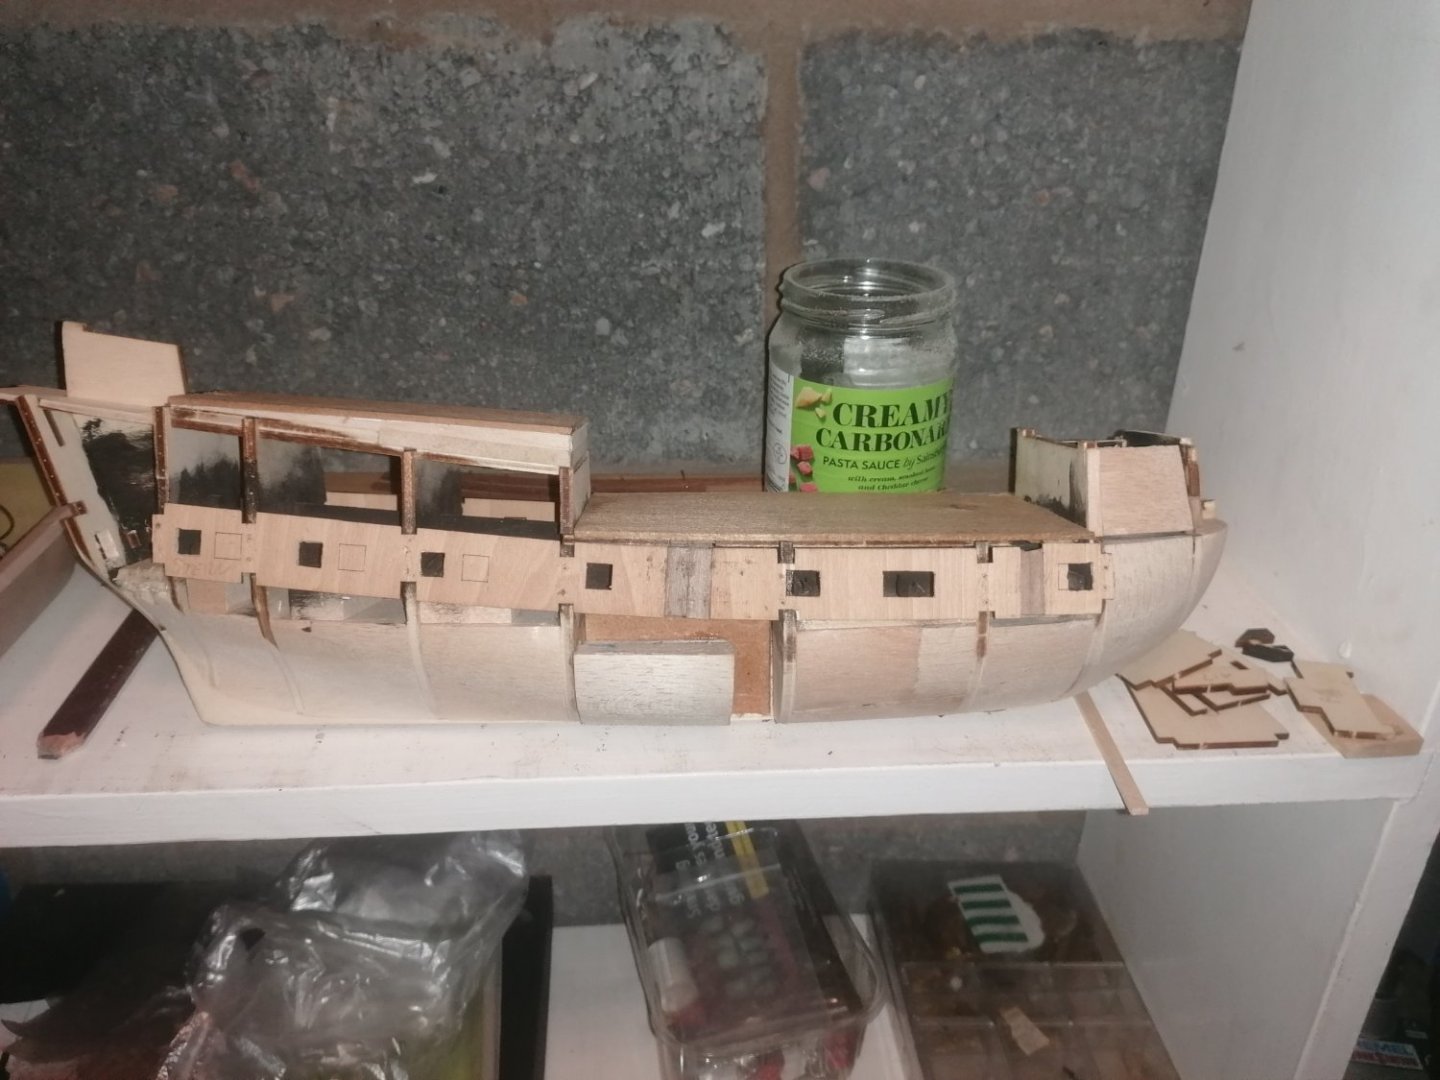
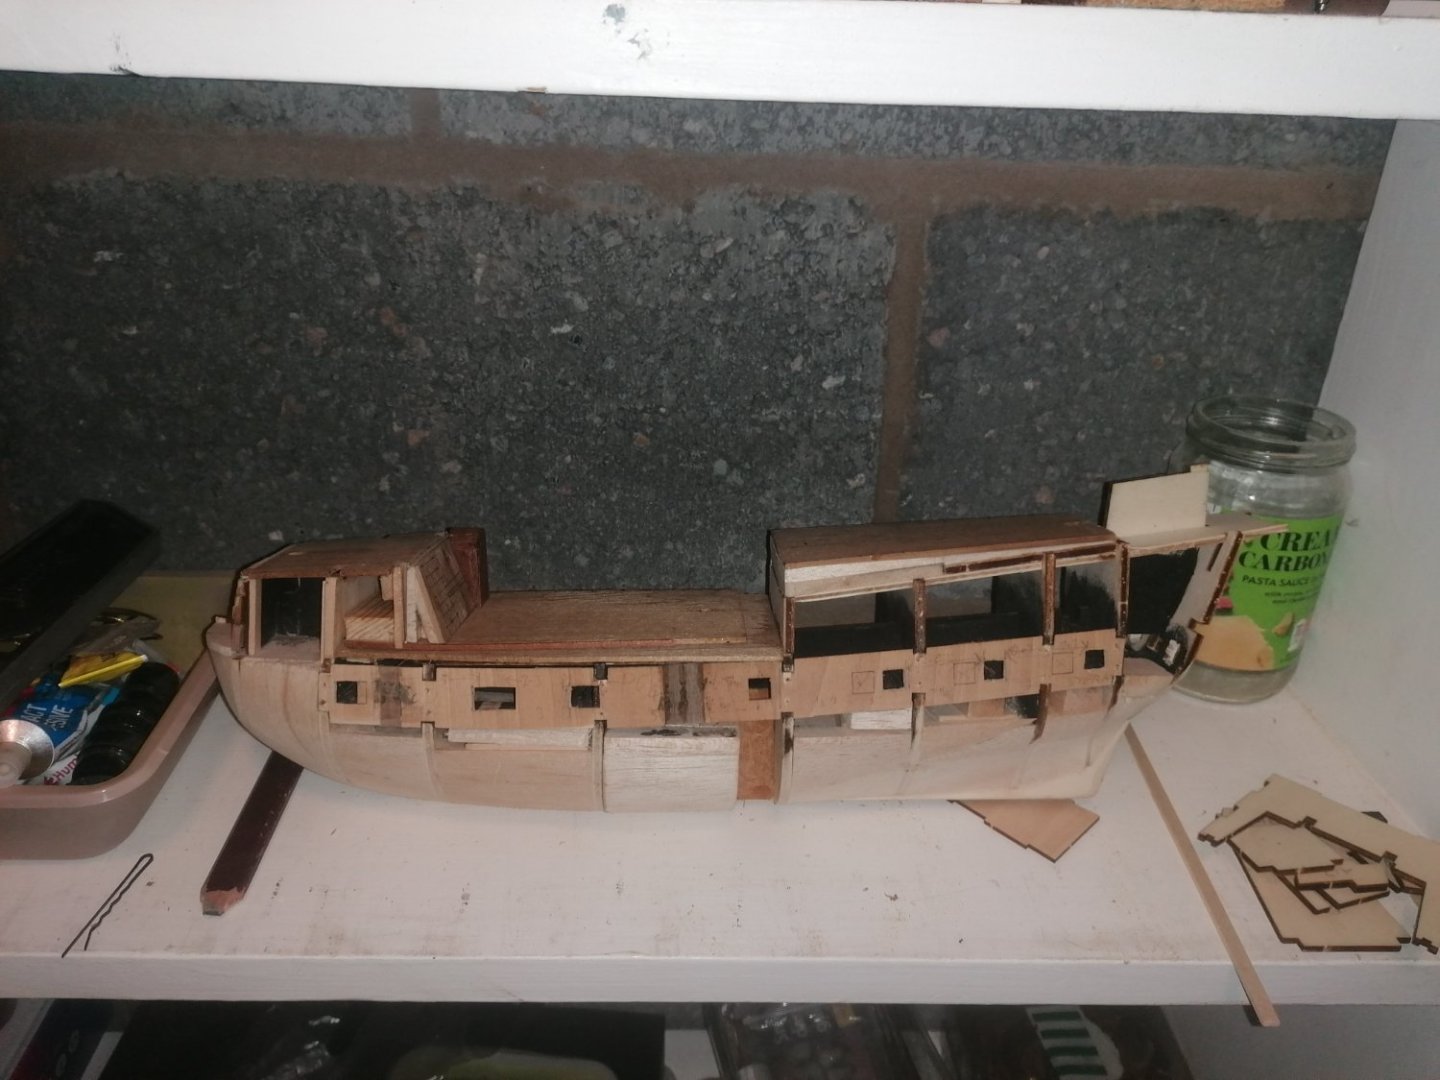
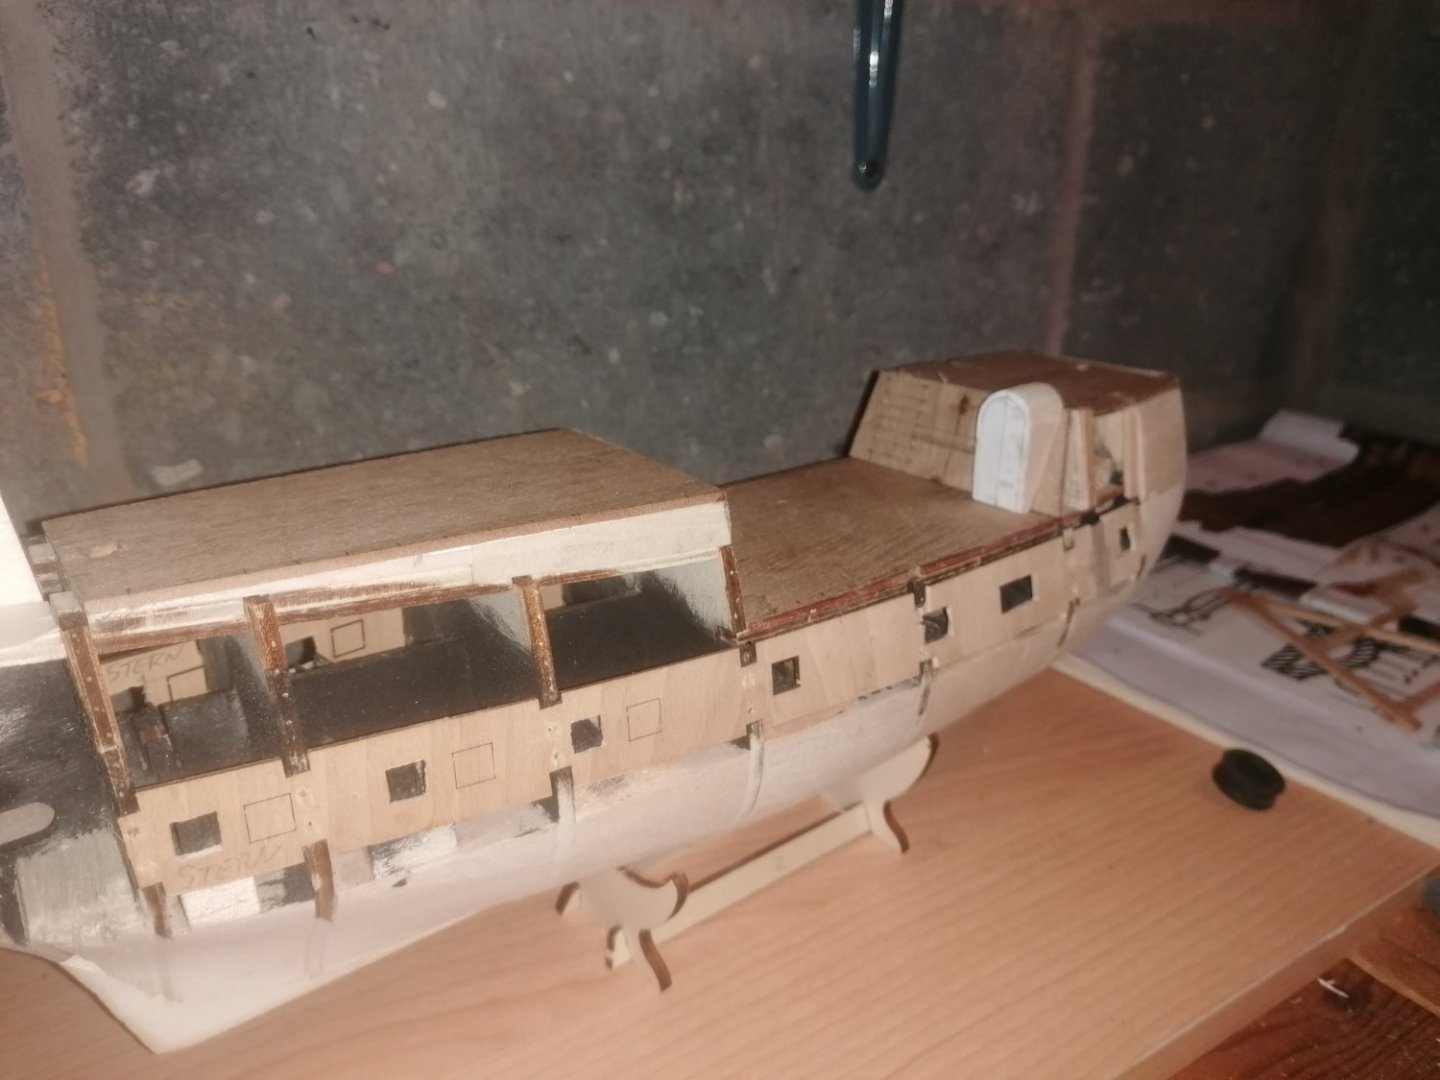
I'm sorry it's been quite a while since my last update. Progress has been painfully slow and I've been working till late most nights on her without being able to fully concentrate on the build, which, has slowed me down quite a bit. However, I have made some progress now and have a little time to compose this addition. The Foc'sle is now built up and fitted with the fore chaser carriages and is ready for the final filling and sanding. I have now almost finished the poop deck section which, has been a nightmare. I think now, with hindsight, I overcomplicated things. As I didn't want to glue too much in place, I found it difficult to figure out the proportions I needed. I marked out, roughly, by pinning strips onto the bulwark, where the painted rubbing strakes will go, but without them being curved. I then marked where the rubbing strakes will need to be placed. Thus I found the poop deck itself was 2cm too short and the bulkhead between it and the quarter deck had to be raised higher so the poop deck was angled less steep. The rear edge of the poop deck has been reduced to 14mm wide which, with the bulwark and first planking, will make it 22mm wide. I achieved this by building up the poop deck with balsa wood and then adding 2mm thick walnut sheet, cut to size and glued on top. I was then able to sand the sides to the right angle, more or less. I have also cut the bulwarks off at deck level as, when the 1st layer of planking is added, the deck planks will overlap. th


-
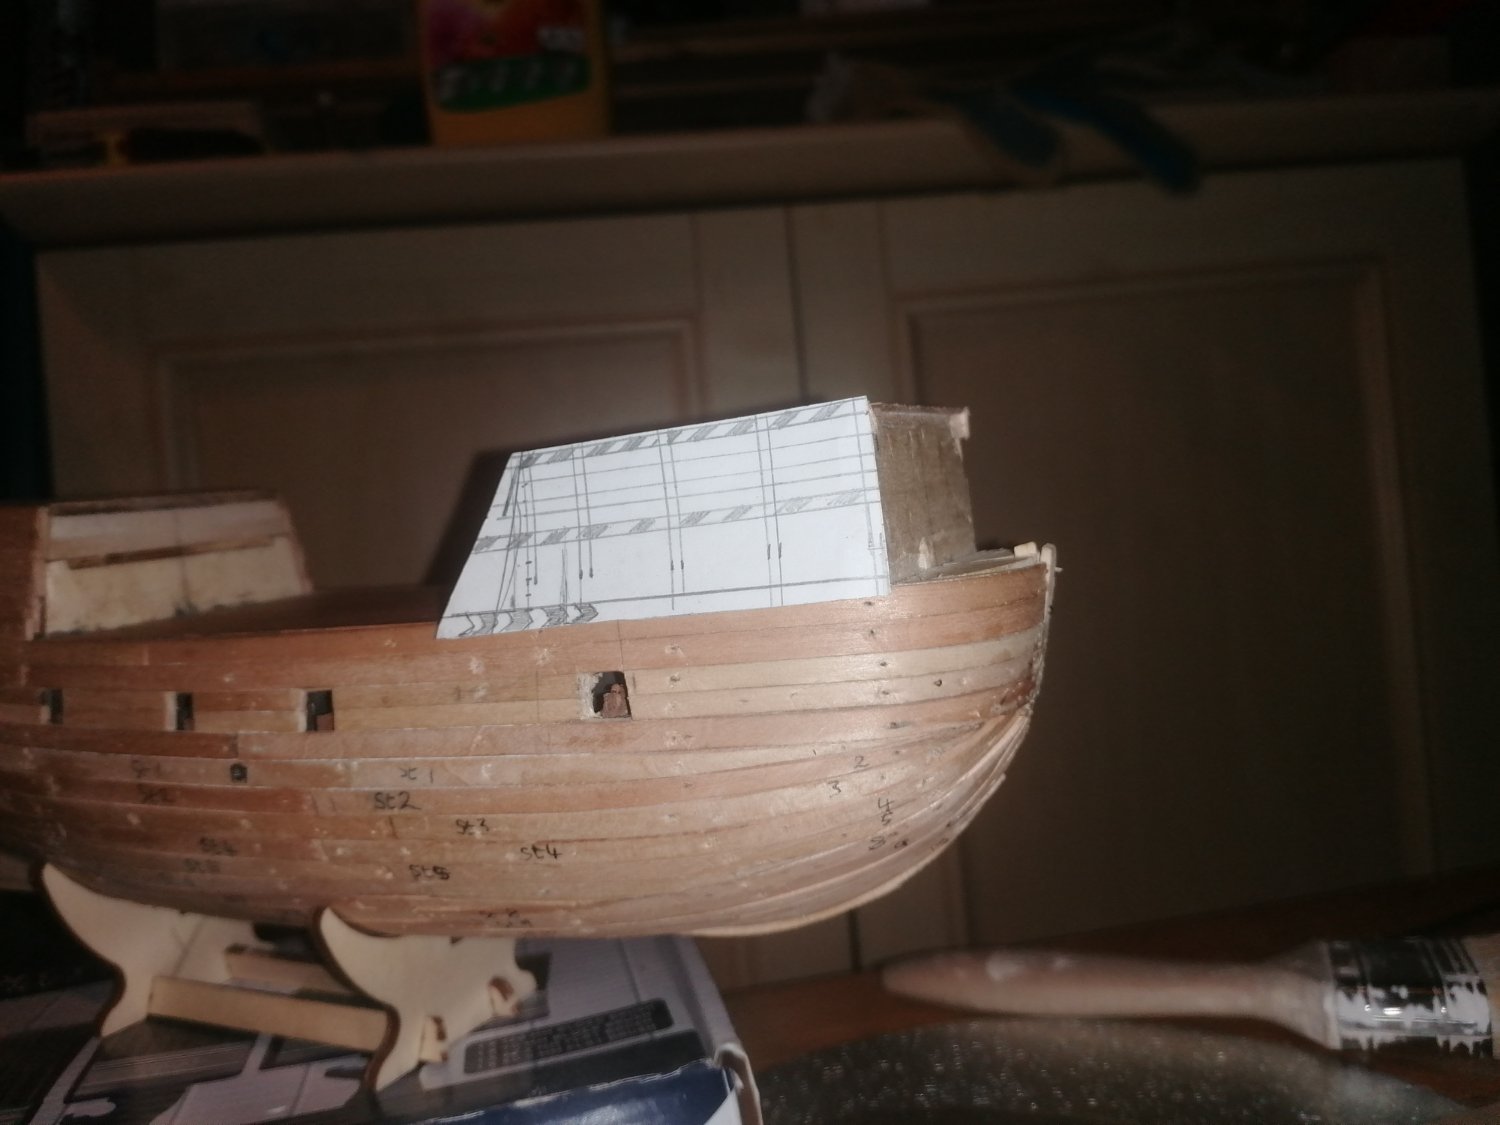
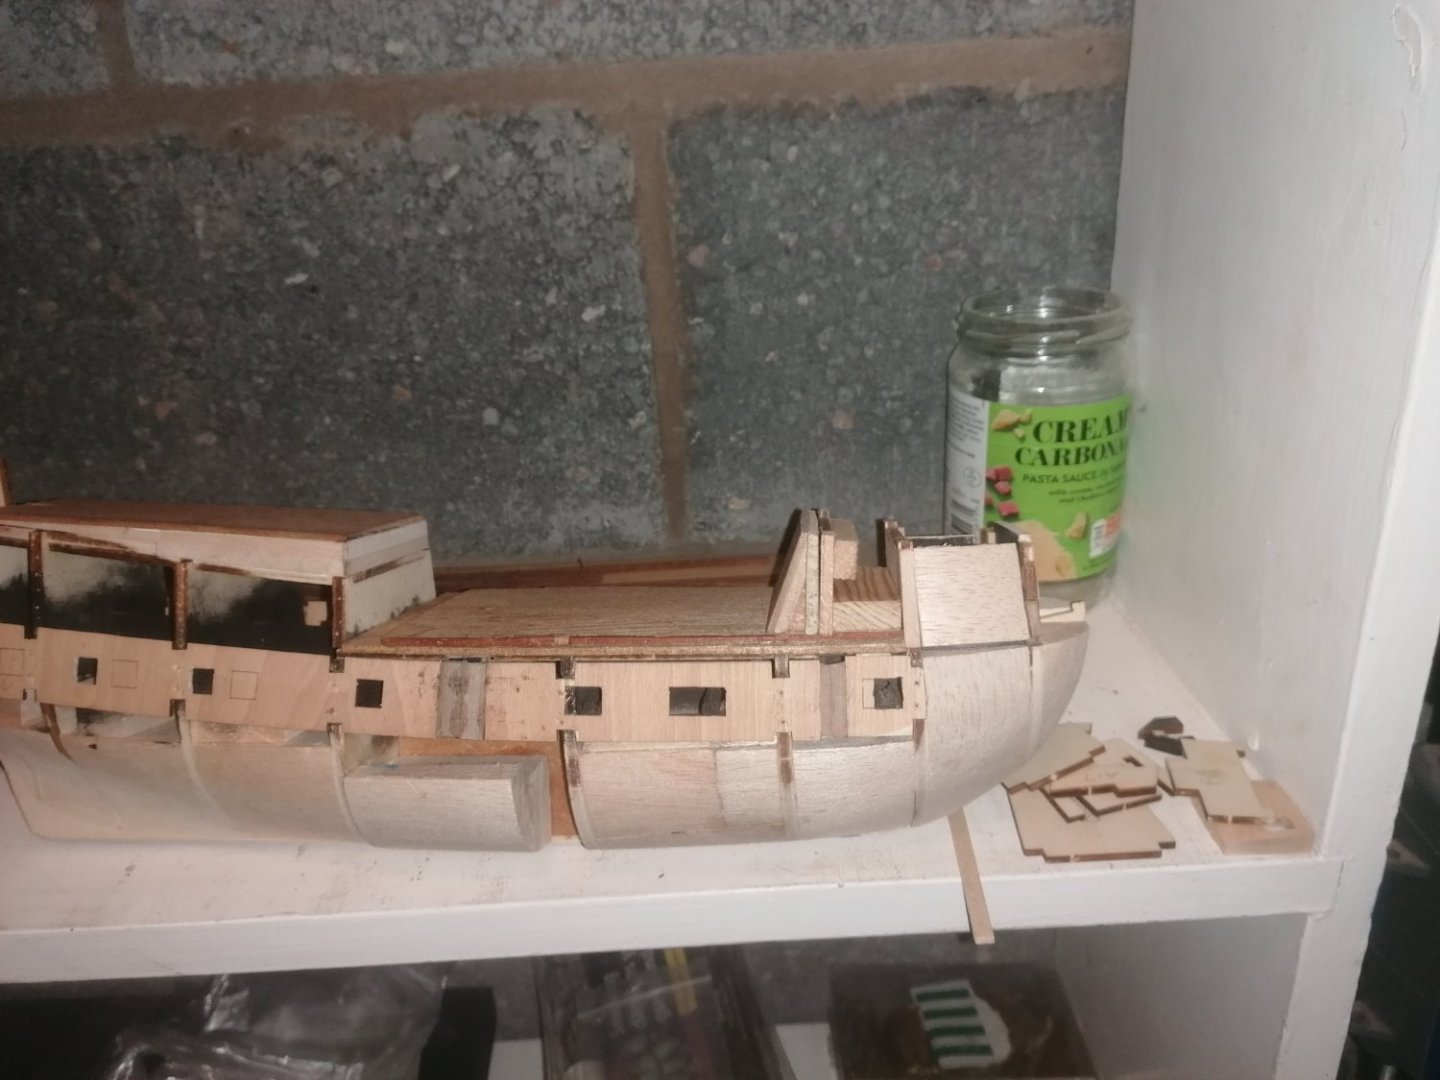
The Photo's above are not in sequence but, hopefully not too much of a problem. I should also have mentioned that between the foc'stle and main deck bulkheads I used a piece of 20mmX25mm balsa wood. Once I am happy with the bow section, I will concentrate on the stern. I have a rough idea of what I need to do, but, not too sure how to achieve it yet. The area above the the stern gallery needs to be at a sharper angle, more like a triangle than a rectangle with the picture of the hind wider at the bottom and narrower at the top. The decorative strips also nee to be added and the hole for the gaff needs to be higher up as well as the poop deck itself. At present I am thinking of using the supplied bulwarks as a guide and adding strips of wood to the frames, and then, sanding the frames down to size. This also means that I need to figure out the angles I need along with the dimensions of the stern plate. i will need to work these out as I go.
-
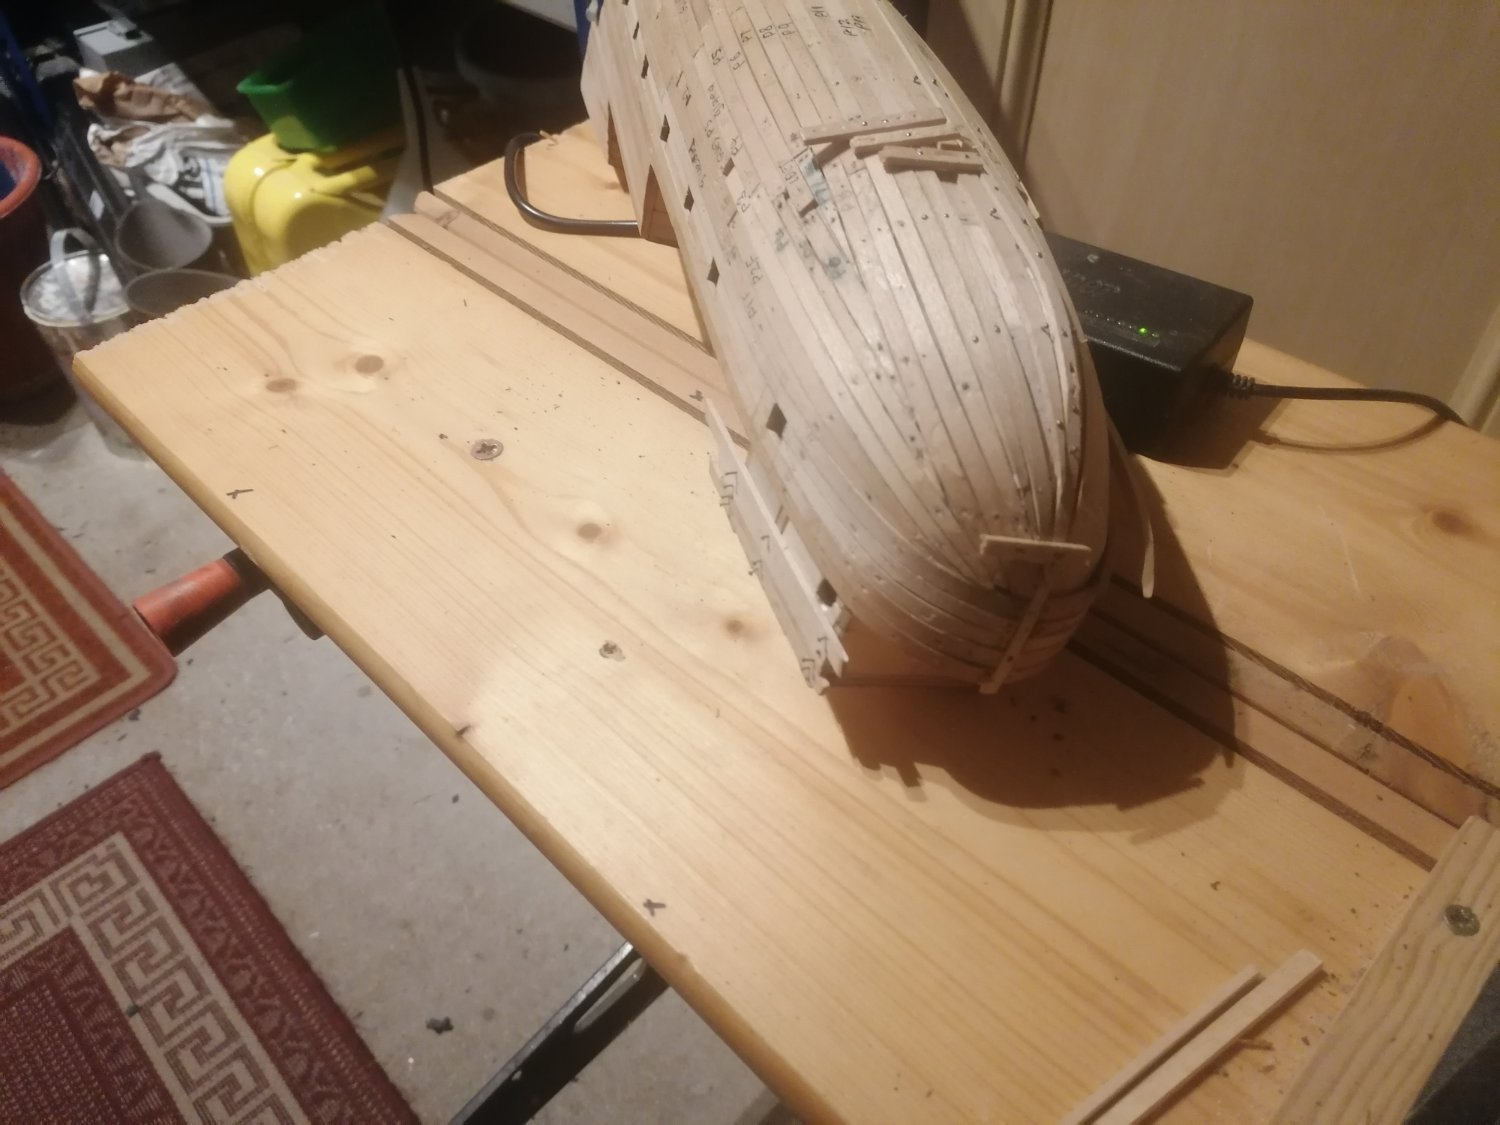
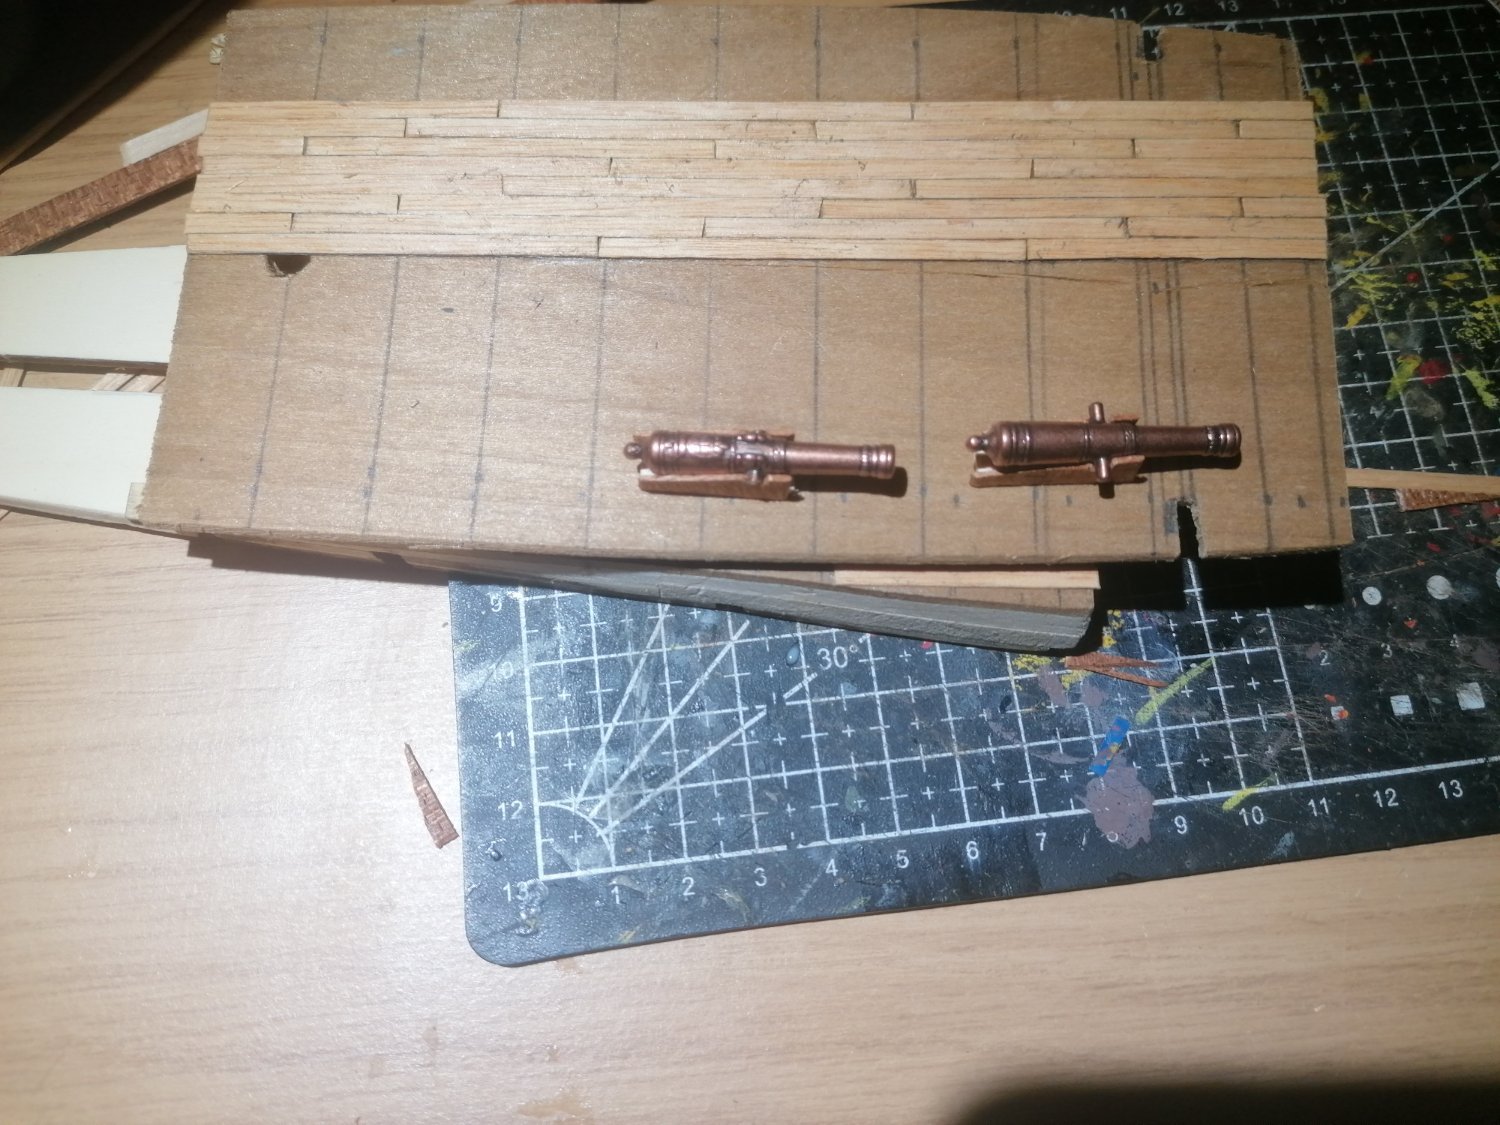
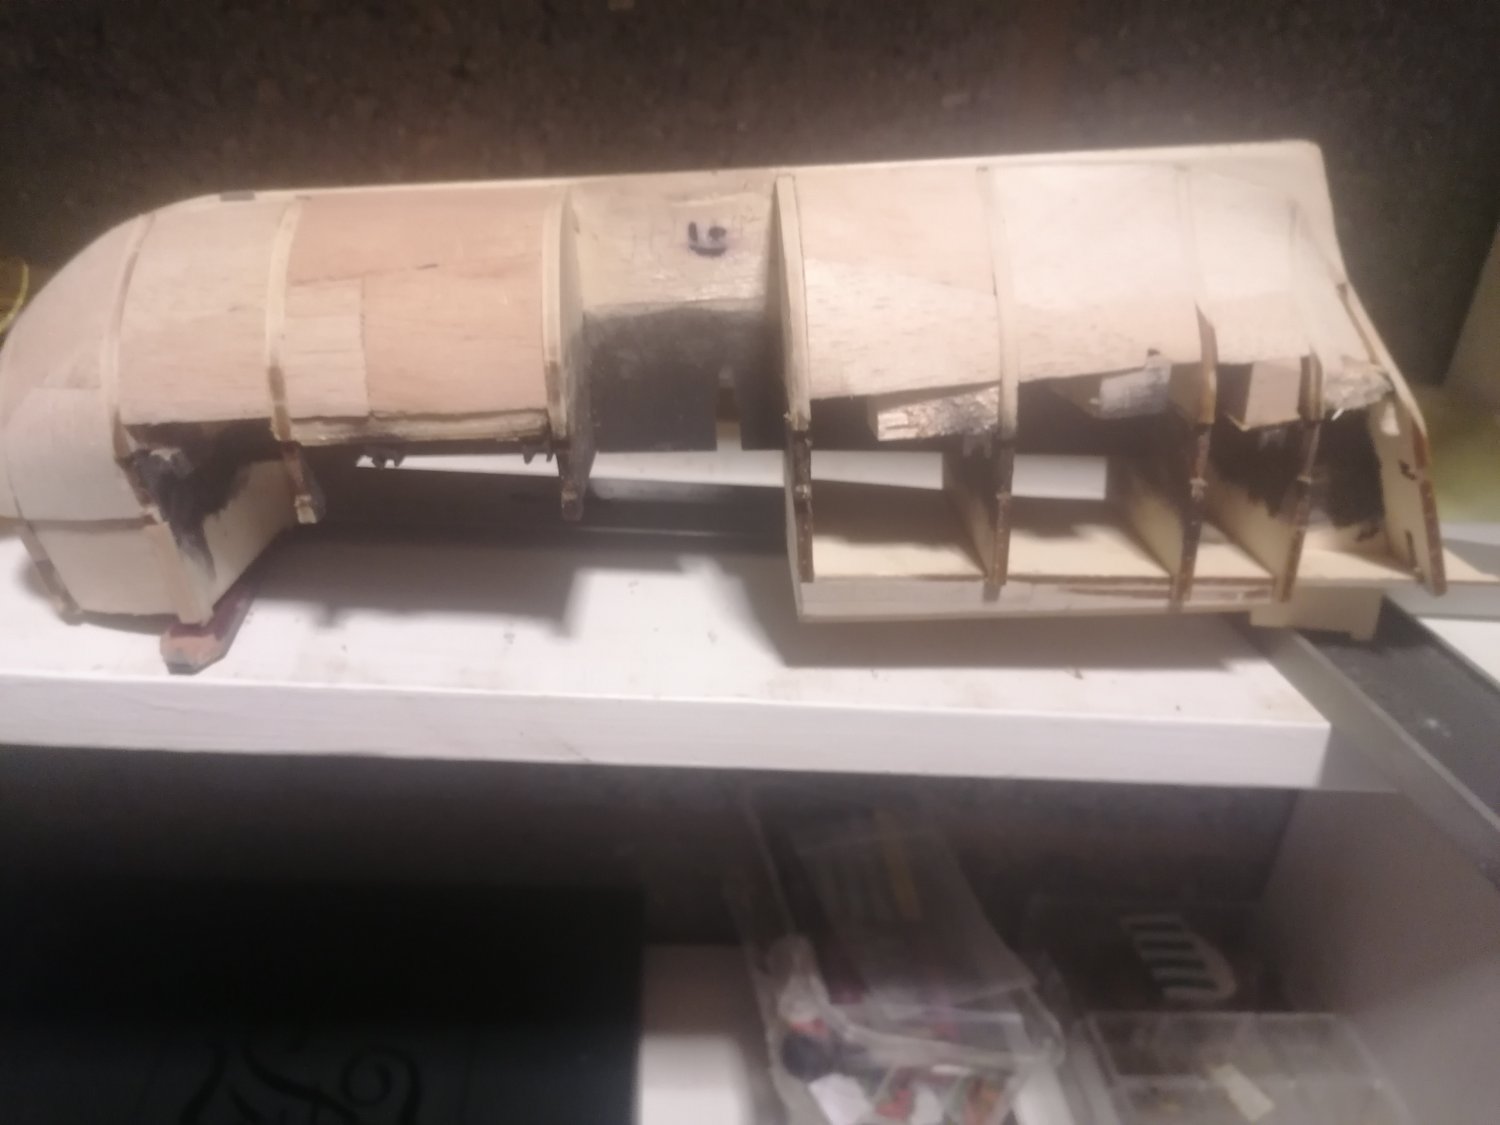
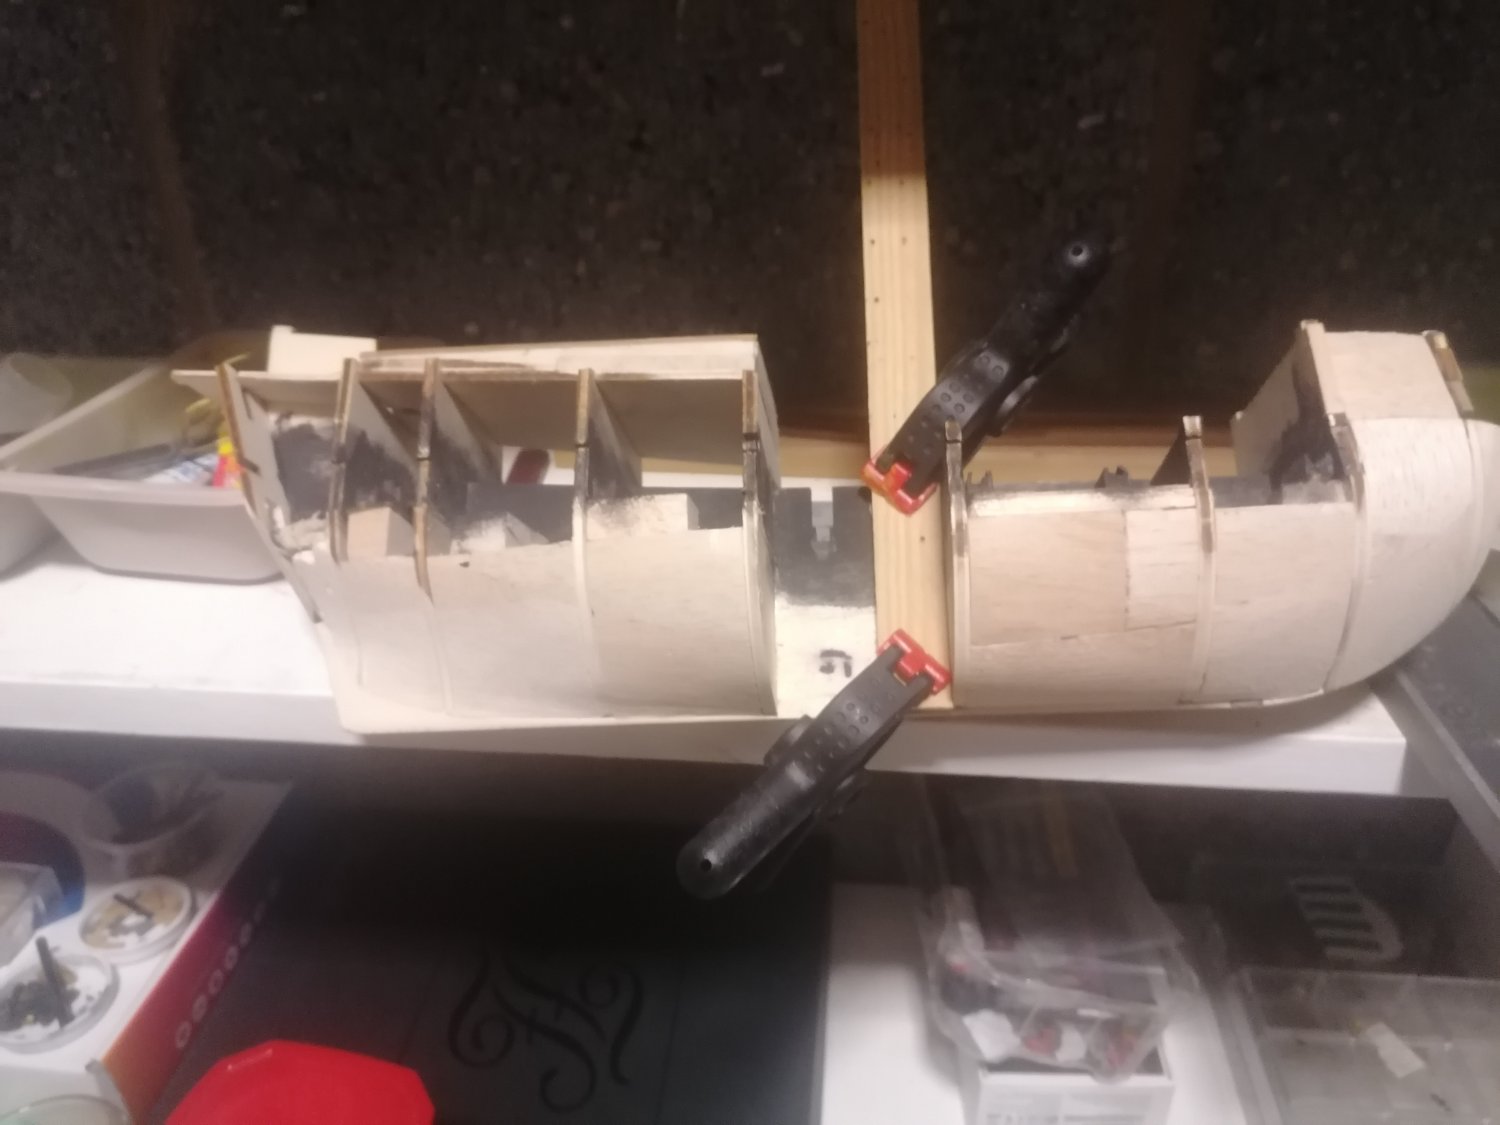
Apologies for the deleted post , but unfortunately, I had started it before I'd realised mistakes I'd made. One of the advantages of taking photos as you go is you can see things you've missed. After my previous post, my attempt at fixing the problem with the main deck failed miserably. I had to remake it from from scratch. Luckily I kept the original modified base and, without having a 5mm thick sheet, I used 2 sheets of 1.5mm and 1 2mm sheet and formed my own plywood deck. Thankfully this worked ok. I then planked this deck but left the edges to allow for shaping them once the 1st layer of planking is started. The planking will need to extend over this. I have now gone on and placed a block of balsa wood between the fore deck and main deck and also shaped the forward part of the foc'stle and cut out the openings for the fore chasers. The improved false carriages have also been installed on the false gundeck, but, I have not added any detail as it would not be seen. For the fore and aft chasers I am using the supplied carriages but, as with the main guns, I am using bronzed cannons I had bought previously, though the chasers are smaller than the main guns as I believe they were, they possibly are not historically accurate but who knows for sure? I like them though. As well as repainting the inner hull black I have also painted the inner gun ports too. I


-
Posted in error
-
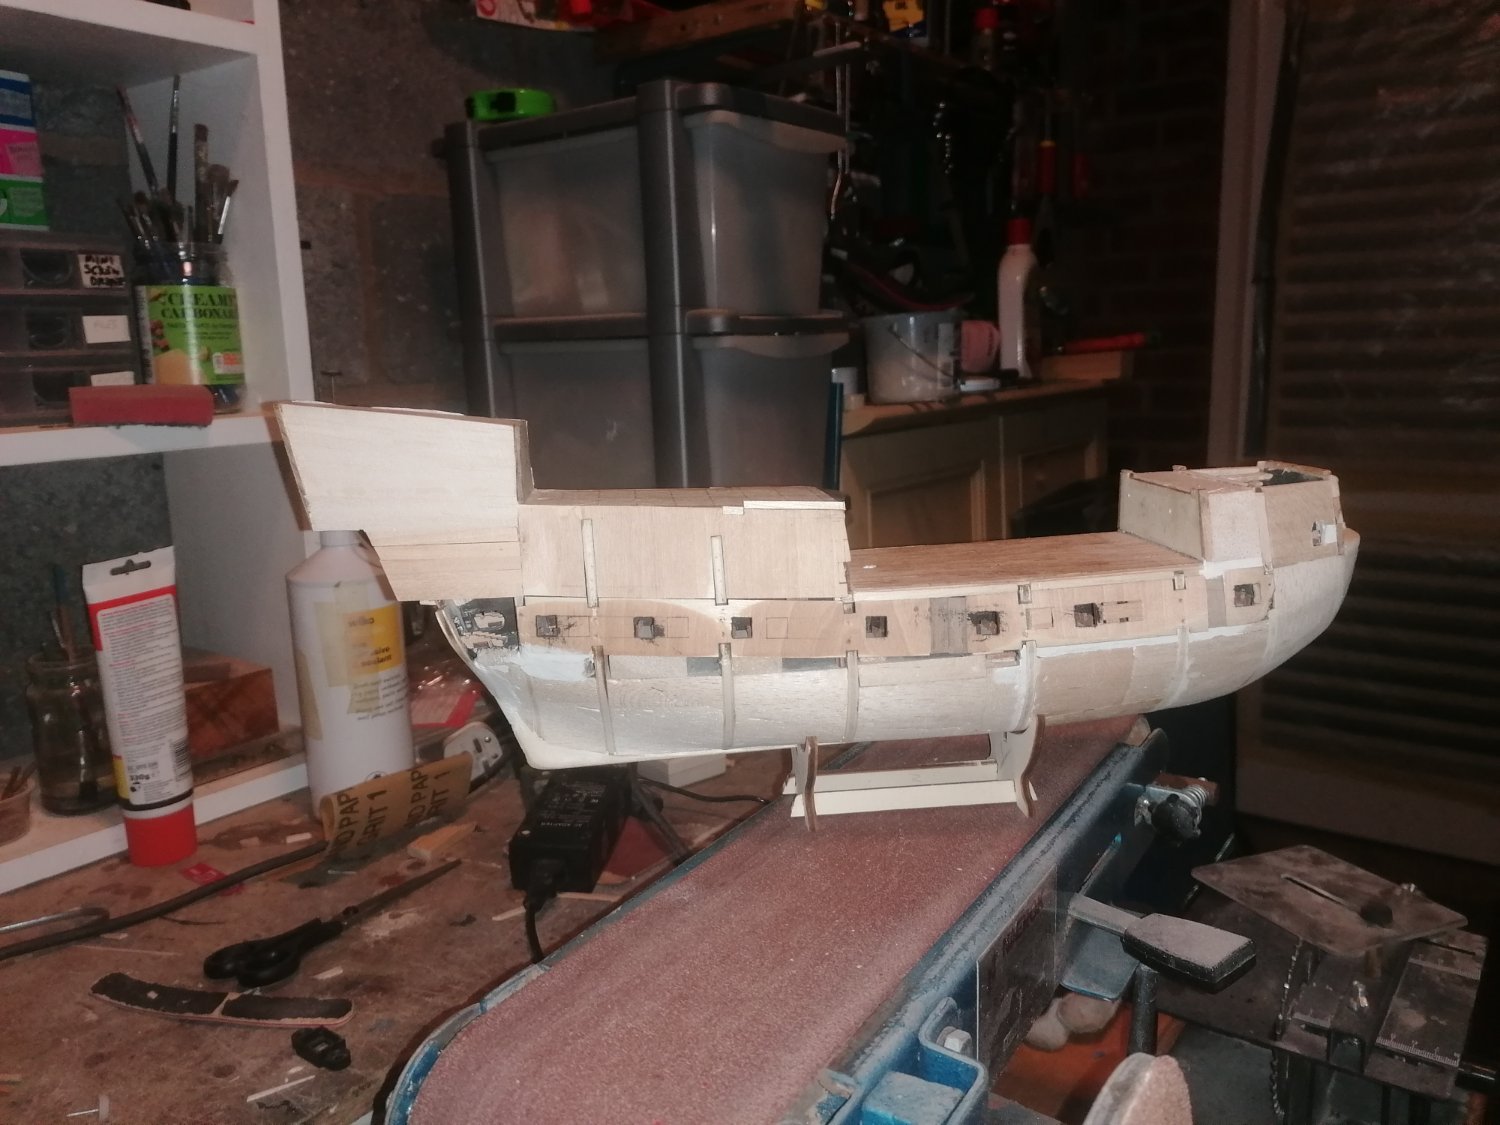
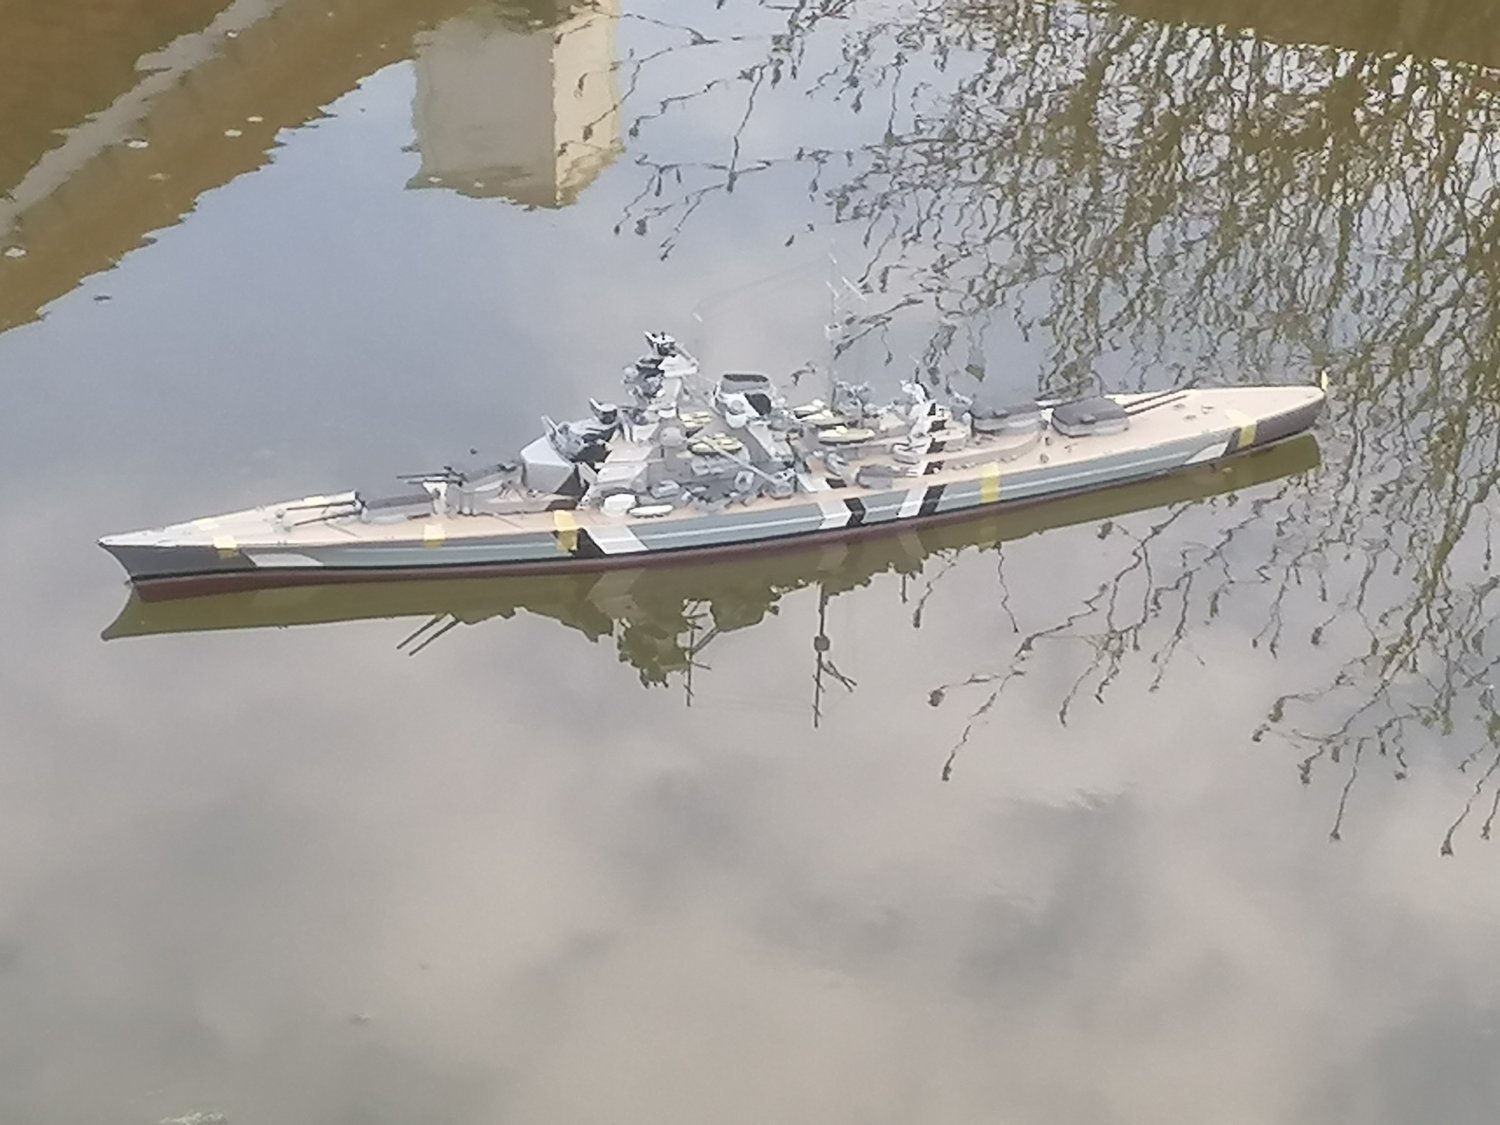
After a few months break I have been able to return to this build. Welcome ilovewoodboats. Sorry it's been a while. Due to the cold and damp conditions I had to stop construction as I didn't want the wood to become damp. Since early January I have converted the 1/350 scale Academy Bismarck for R/C. This will accompany Trumpeter's HMS Hood on the pond in our grounds. I haven't glued the decks onto the Bismarck yet as she still has a small leak from the rudder area, but, I have 2 months to sort this. Anyway, back to the Golden Hind. After looking at my progress I have discovered a couple of patches where I created depressions in the balsa filler blocks. These have now been filled and will be sanded over the next day or two. I was also unhappy with the false gun carriages for the gun deck and have made replacements. I did buy guns with carriages for this but, the carriages are too high and the trunnions too wide. The carriages need to be in place before planking the hull and the cannons have to be inserted after. I have constructed new carriages and shortened the trunnions so, when I come to add the cannons, they will fit through the gun ports and onto the carriages. Also, after much thought, I have started planking the decks. I shall, however leave the sides unplanked until I've added the planks on the side. Photos of the hull will follow next time. I also discovered yesterday morning, that the main deck I brought up on Friday night was badly warped due to coming up into the warm. I think I have managed to sort this by pouring boiling water over it in the sink, placing it on the worktop with a piece of wood over the top and resting a heavy tin of paint on above. last night I turned it over and did the same. This afternoon it seems ok so have begun planking it. I am going to leave the sanding and varnishing for as long as possible so I can see how the sides will line up with the edges of the decks. I also need to see where the hand rail supports will go and the planking can only be completed after.


-
These should have been added above.

-
Firstly I want to say a Happy New Year to everyone and hope for a peaceful one everywhere. Well, surprisingly to me, I'm still ahead of schedule, my plan A succeeded. the hull has held together, the main deck as well as the gun port strip all fit together perfectly. I have added the filler blocks and, as I expected, I've now started repositioning the gun ports between frames A3 and A6. I am also really happy to have completed the 1st version which I am really hoping I can improve on with this build. If not my next 2 years after this will be taken up by building it again but from scratch, and, in 1/40 scale. Yes, your right, I'm really hoping I get it right this time. Though I would really like to donate one of these to the planned Golden Hind museum if I can build one good enough. Any way here are a few pictures of progress so far along with the completed 1st attempt.


-
A little ahead of schedule (captain gone down with covid, along, now with myself, and we've had a warmer few days over Christmas. I reasoned that, I either check to see if I could remove the middle section of the hull (Plan A) or if I would need to rebuild the hull from scratch (Plan B). The reason being that the main deck is 14mm too short. I need 13 ribs along the main deck upon which the handrail will sit. I also need 12 along the quarter deck. The quarter deck allows me to have the ribs 10mm apart. The main deck, however, would have them closer to 8mm apart. I know this doesn't sound much of a difference but, I know, it will really stand out. It also effects the placing of the rubbing strakes along the outside of the hull as well. As luck, I thought, would have it, the 2 sections were quite easy to remove. I then glued a 2cm wide strip aft of frame 5 to give a guide for the hacksaw to cut, and left it to dry. I also did the same with the gun port sections and yesterday, I had a go at the main deck itself. This is where I found out today that I was indeed lucky. The workshop at this time of year seems to be cold but also damp. So as I have been using the PVA glue here, rather than the very dry garage, (which I used last year) although it appears to have stuck well, it still hadn't dried after 24 hours. This helps explain why the middle section was so easy to remove. I added 2 X 7mm strips and cut some 2mm thin chipboard to fit each side between frames 5 and 6 and then glued and clamped them together. These are now in the garage to dry.


-
I am afraid it has taken a little while to get back to this build log and, unfortunately, It is being put on hold until the weather gets warm enough to start working in the workshop during the evenings. I shall return with an update early next year. The good news for me is that I have finally almost completed the first version and will add some photos when it's finished.
-
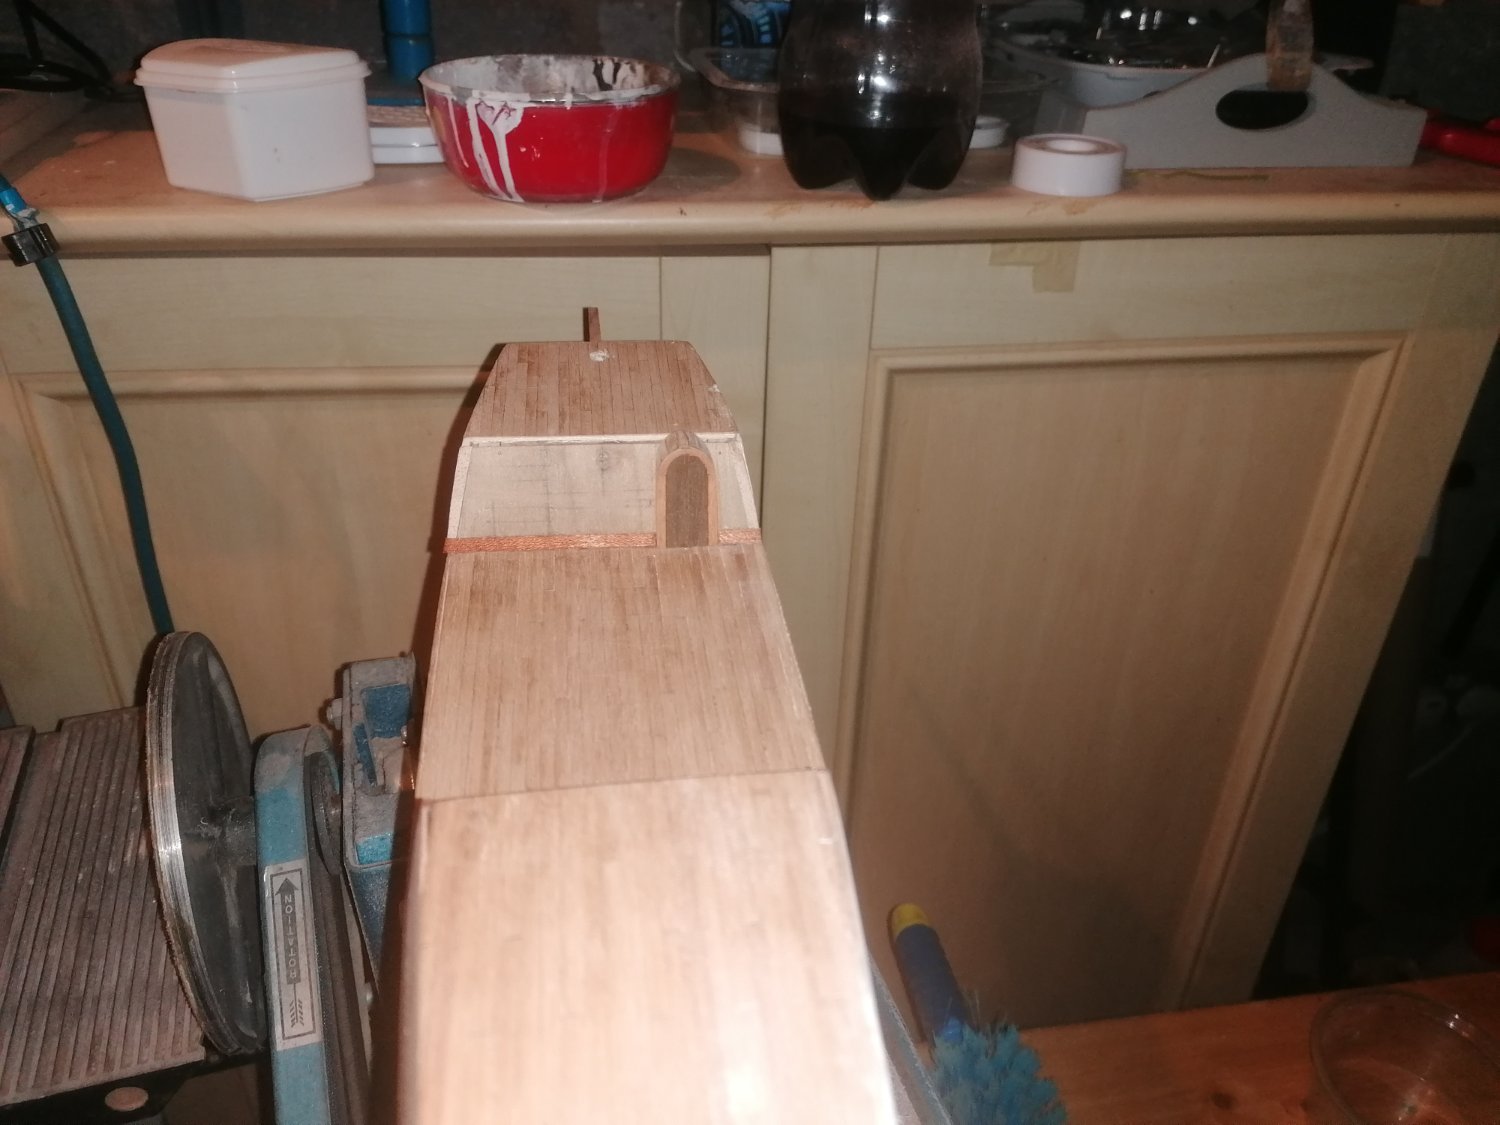
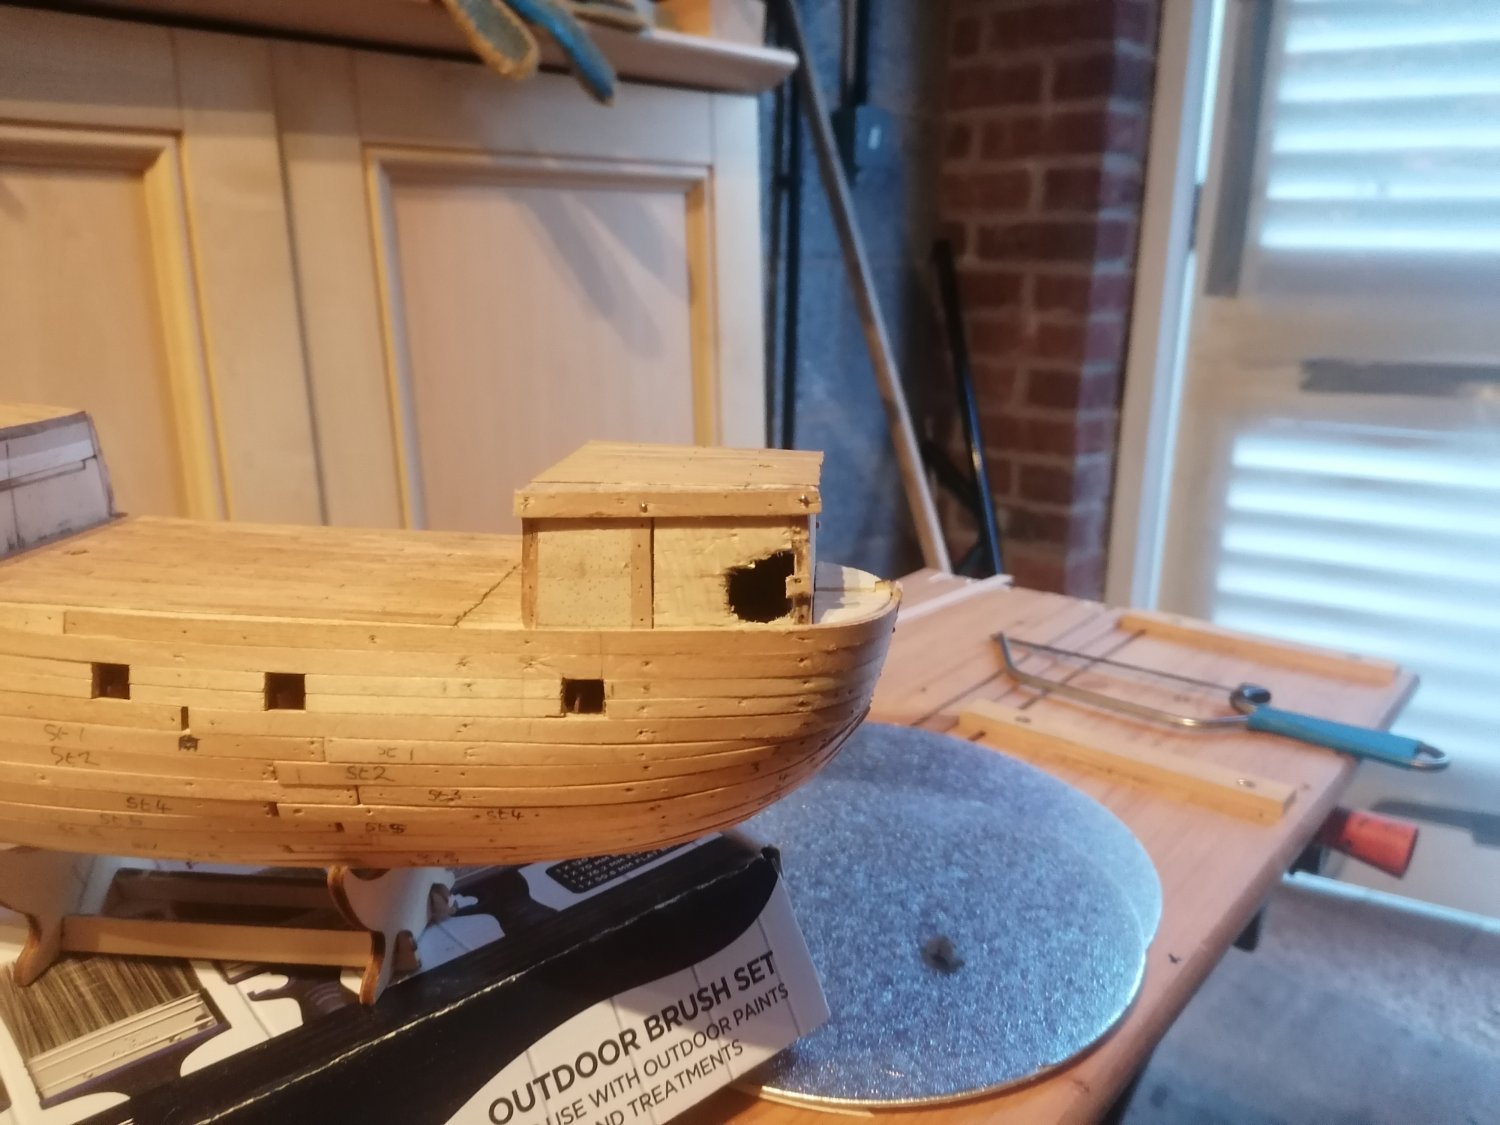
Unfortunately, progress has been very slow over the past 3 weeks. This is mainly due to trying to complete rigging the sails on the 1st version, as well as contemplating how to progress with the stern section. I have, however made a start on the foc'stle and have remade the fore deck larger than the original. I believe that the main deck is 1 cm too short in relation to the quarter deck and was toying with the idea of cutting 1cm off the front of the quarter deck, but this mean that the gunports would need to be redone and the main mast would be too far forward. I may have to leave it as is. The angled bulkhead has been made and the arched doorway shaped. I am now looking at ways to make a good-looking arch to surround the door. I have also sanded filler blocks for the forward section of the foc'stle ready to add the fore chaser gun ports.


-
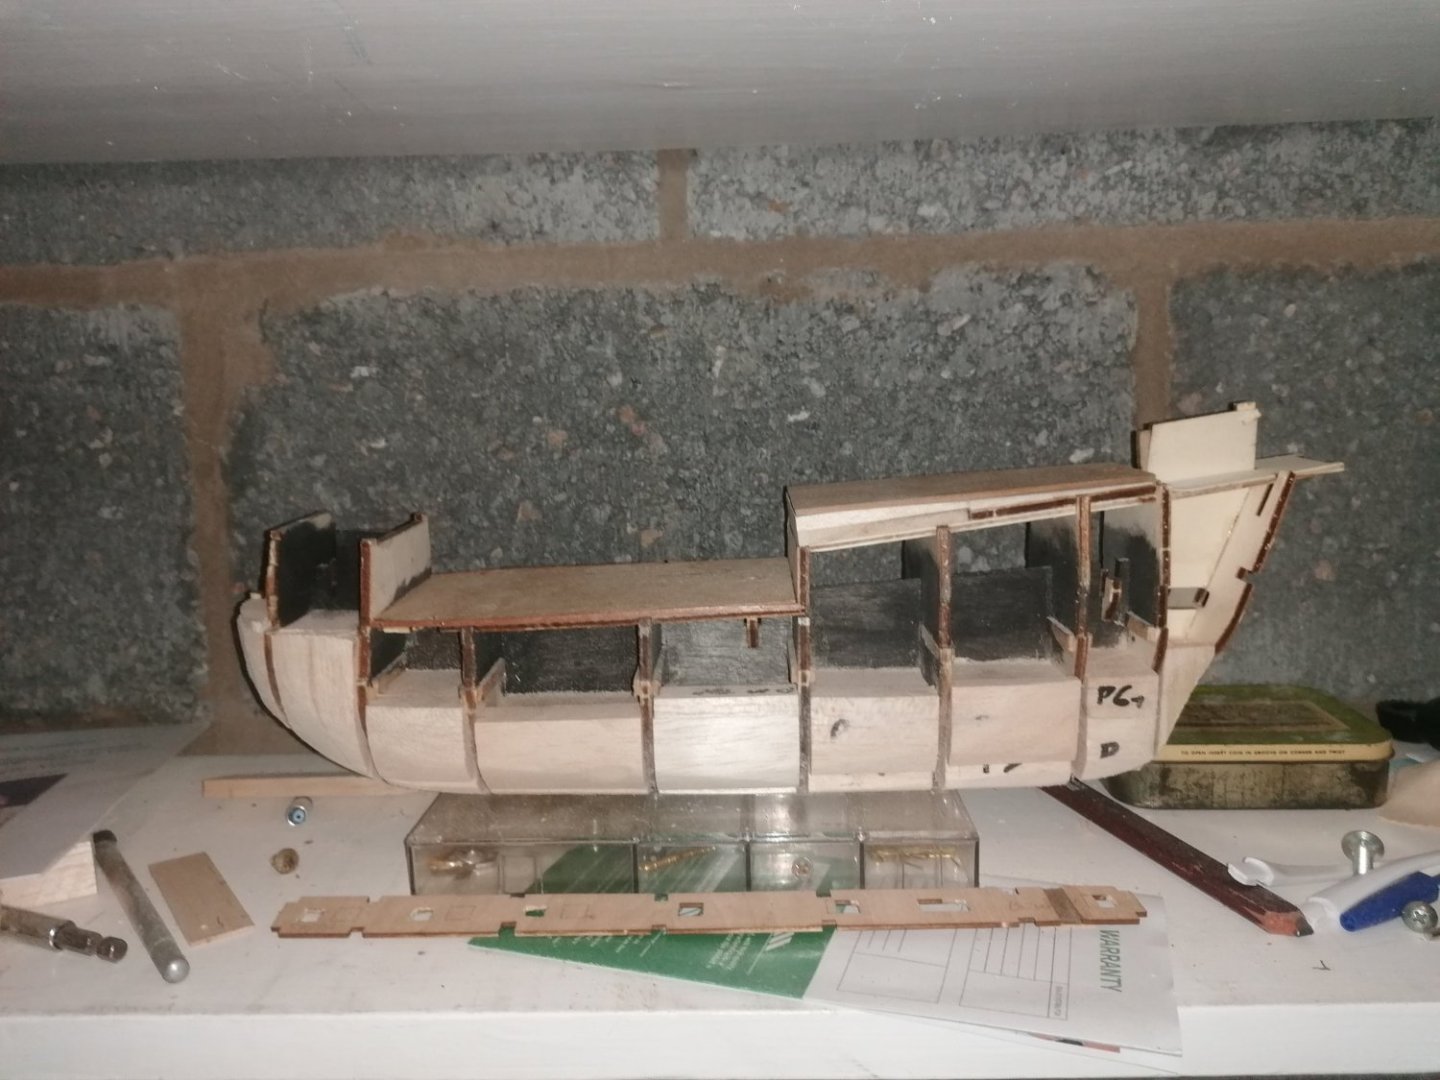
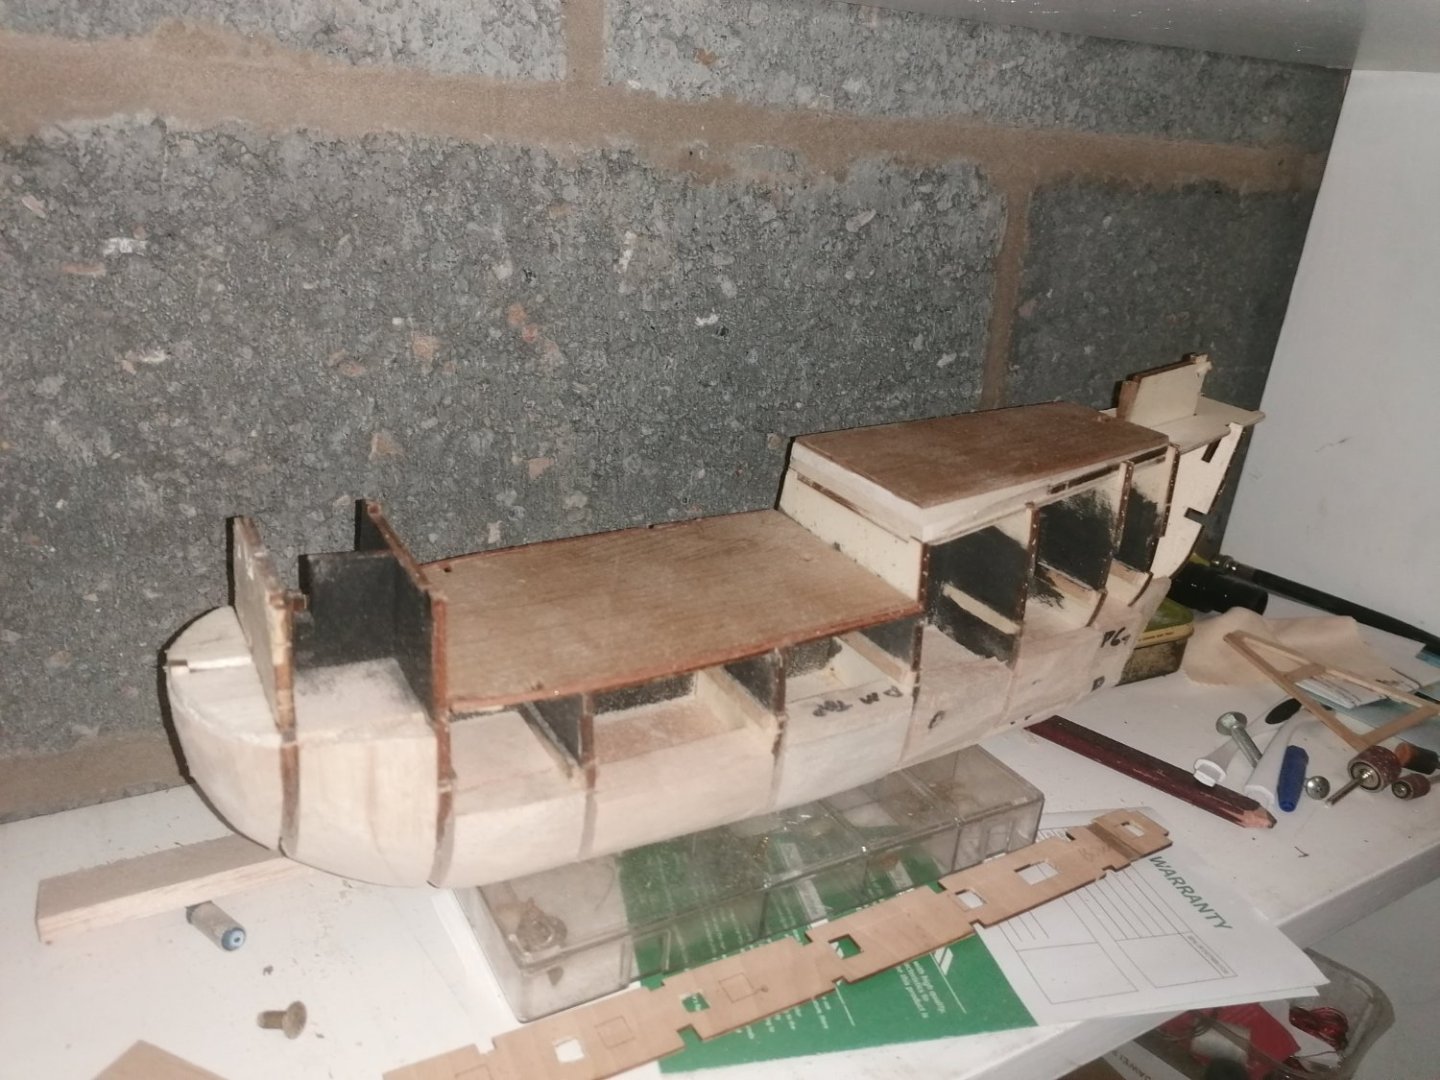
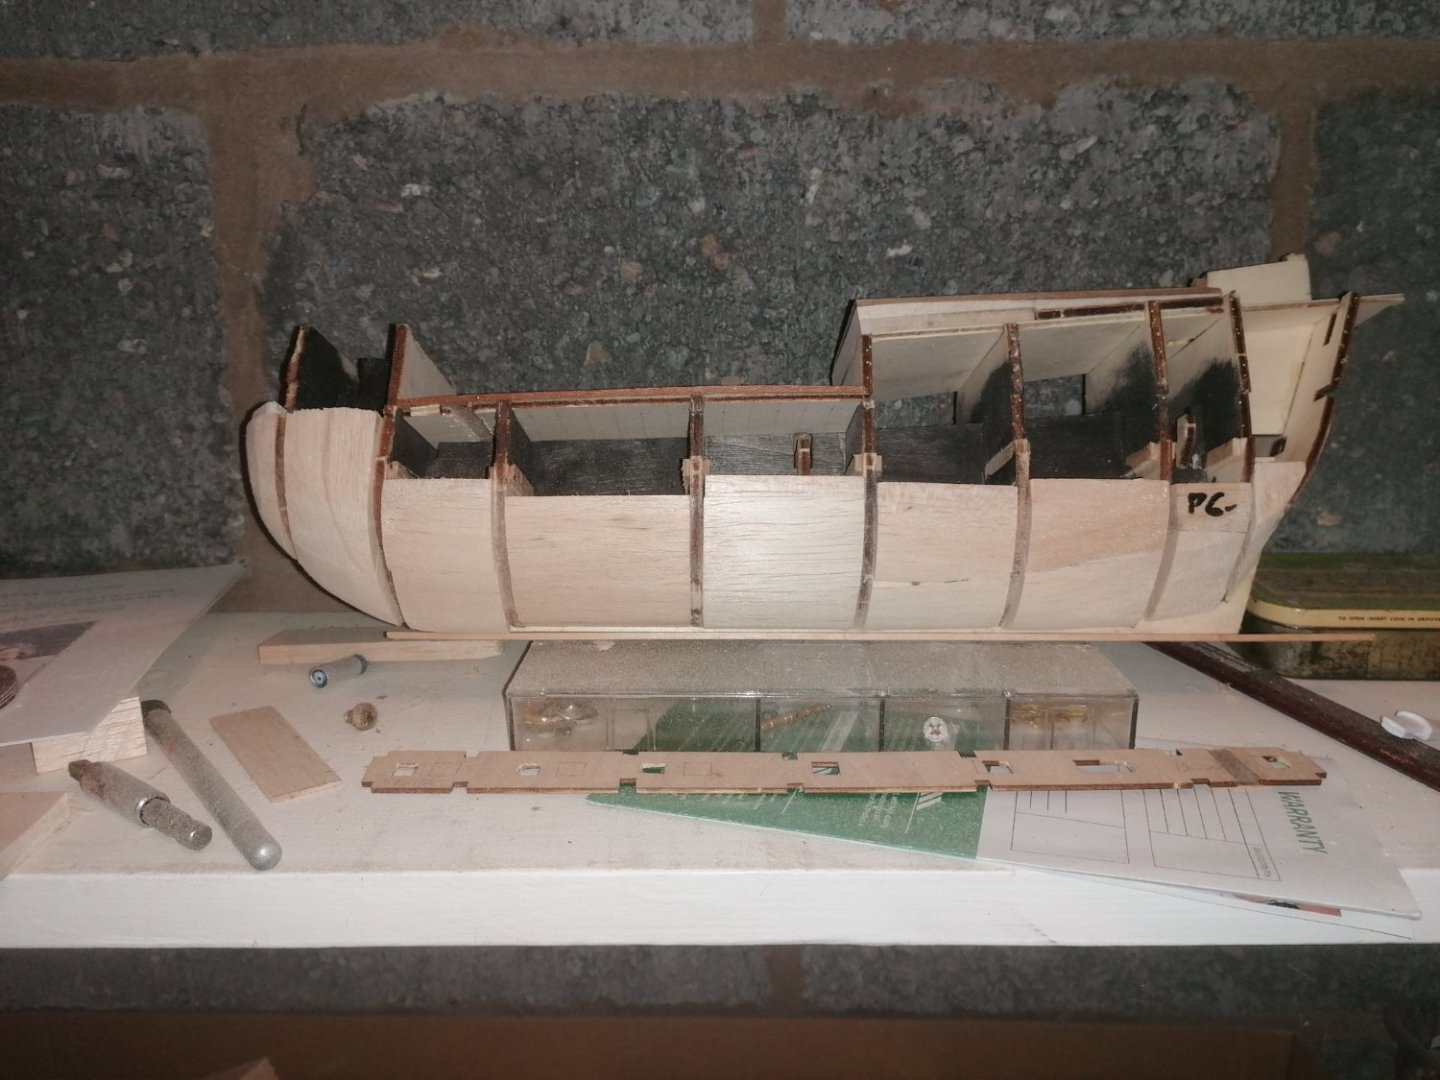
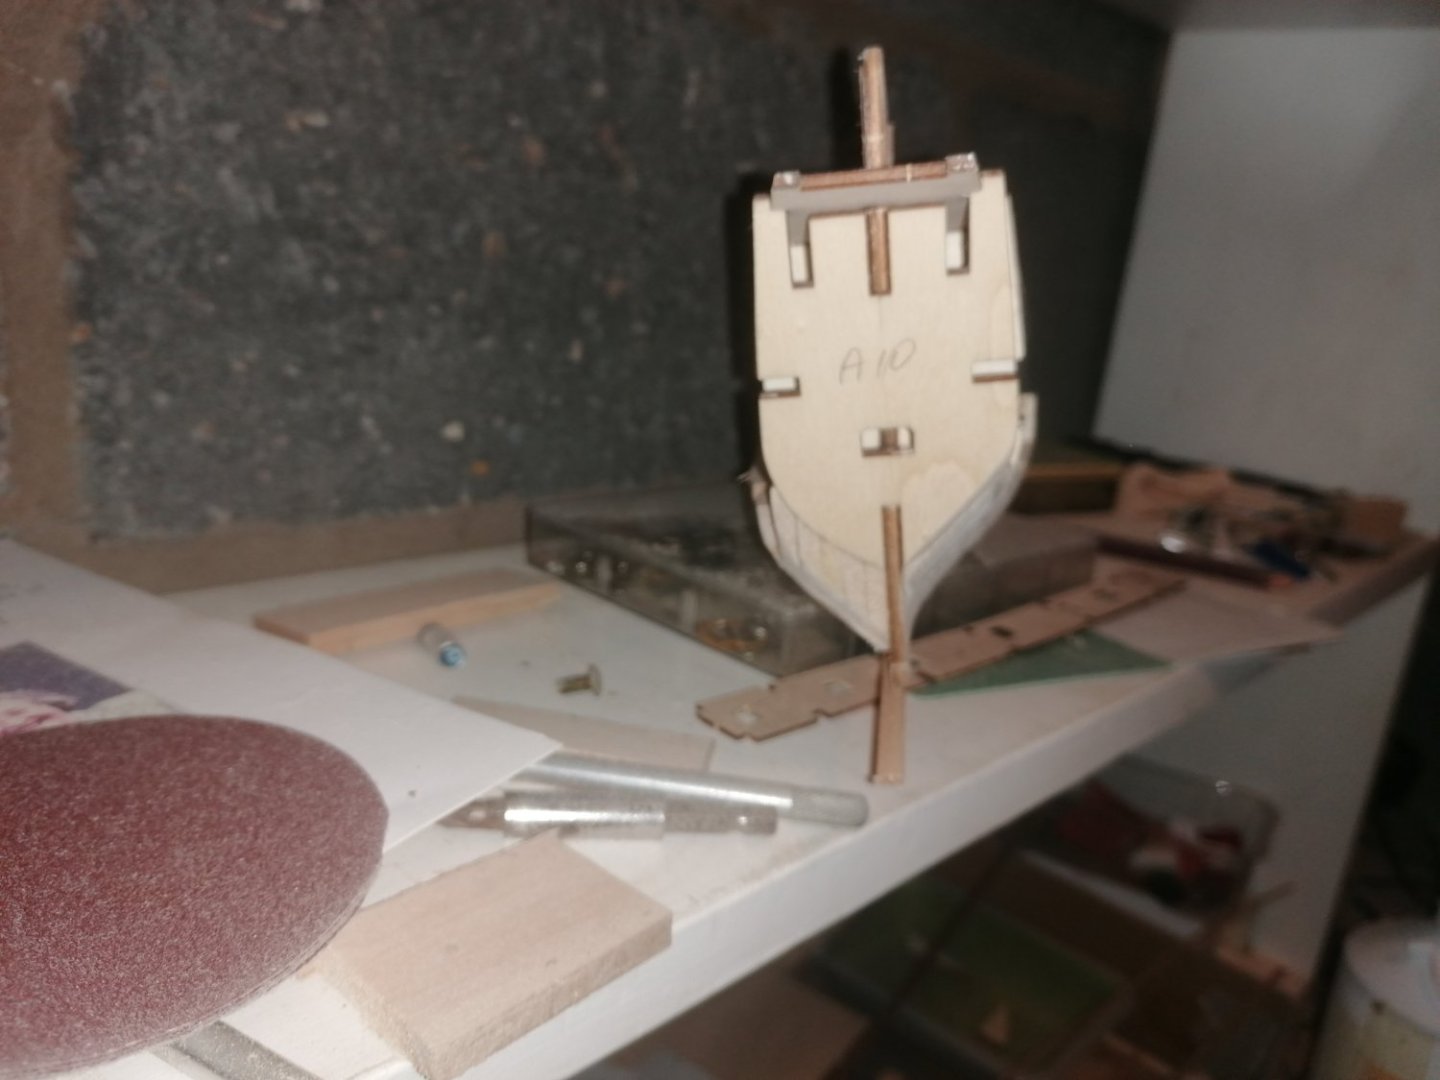
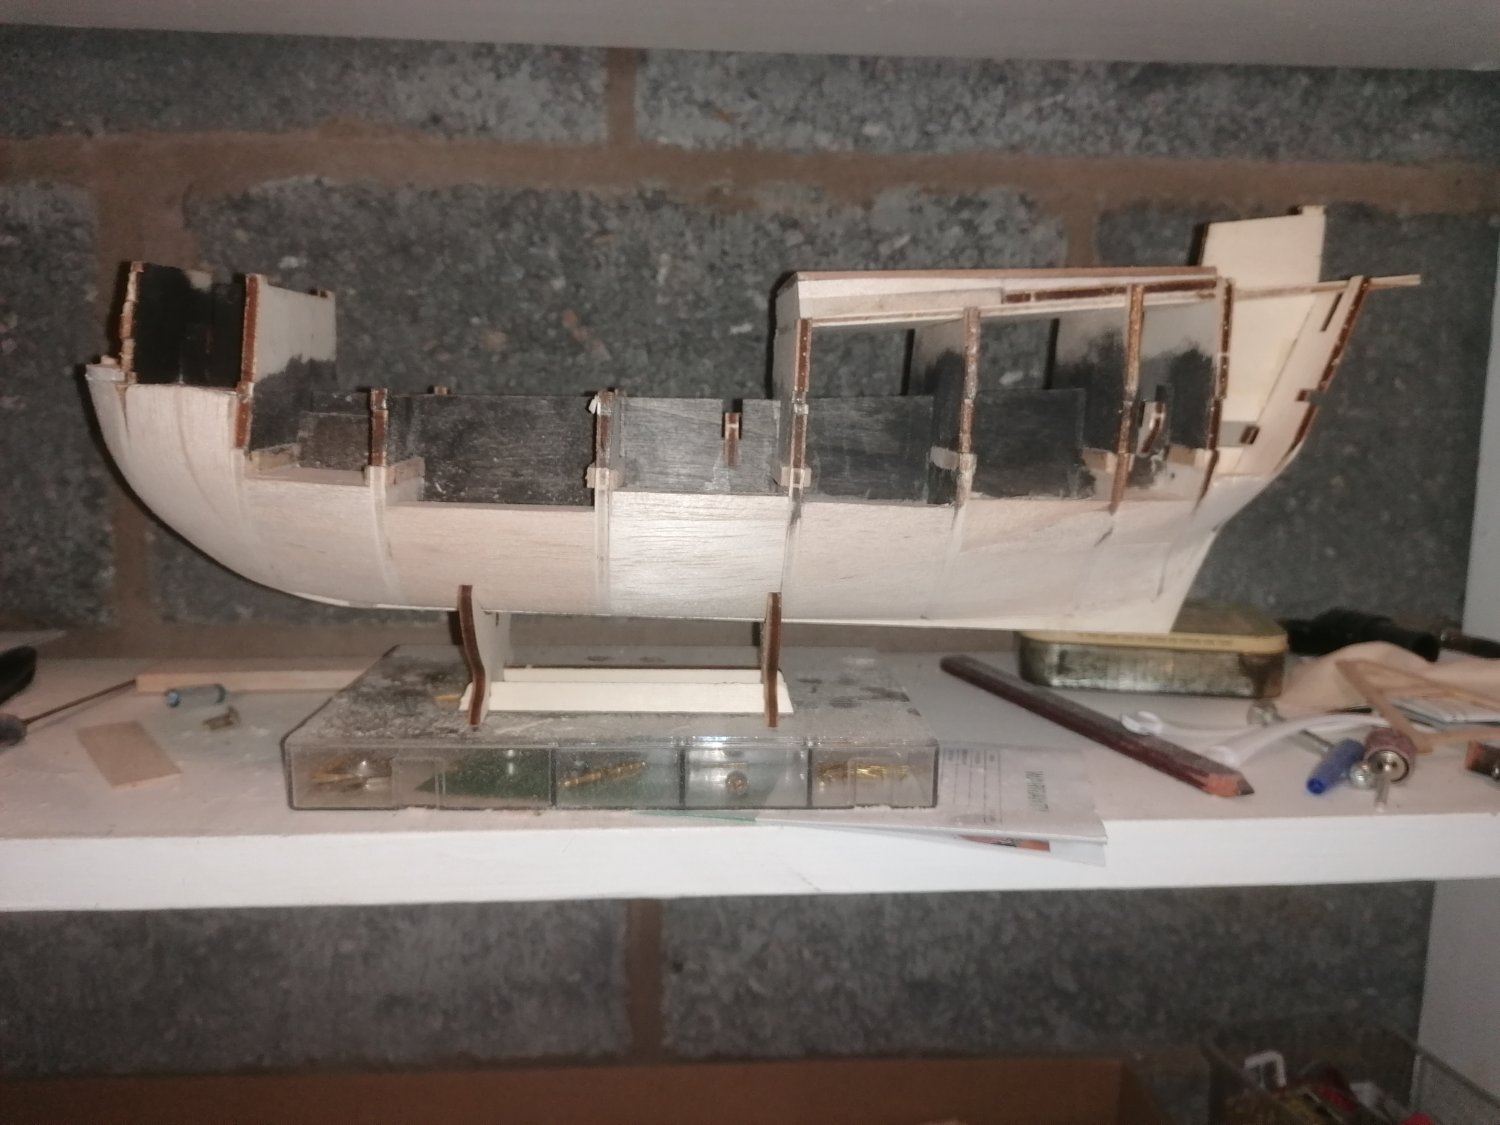
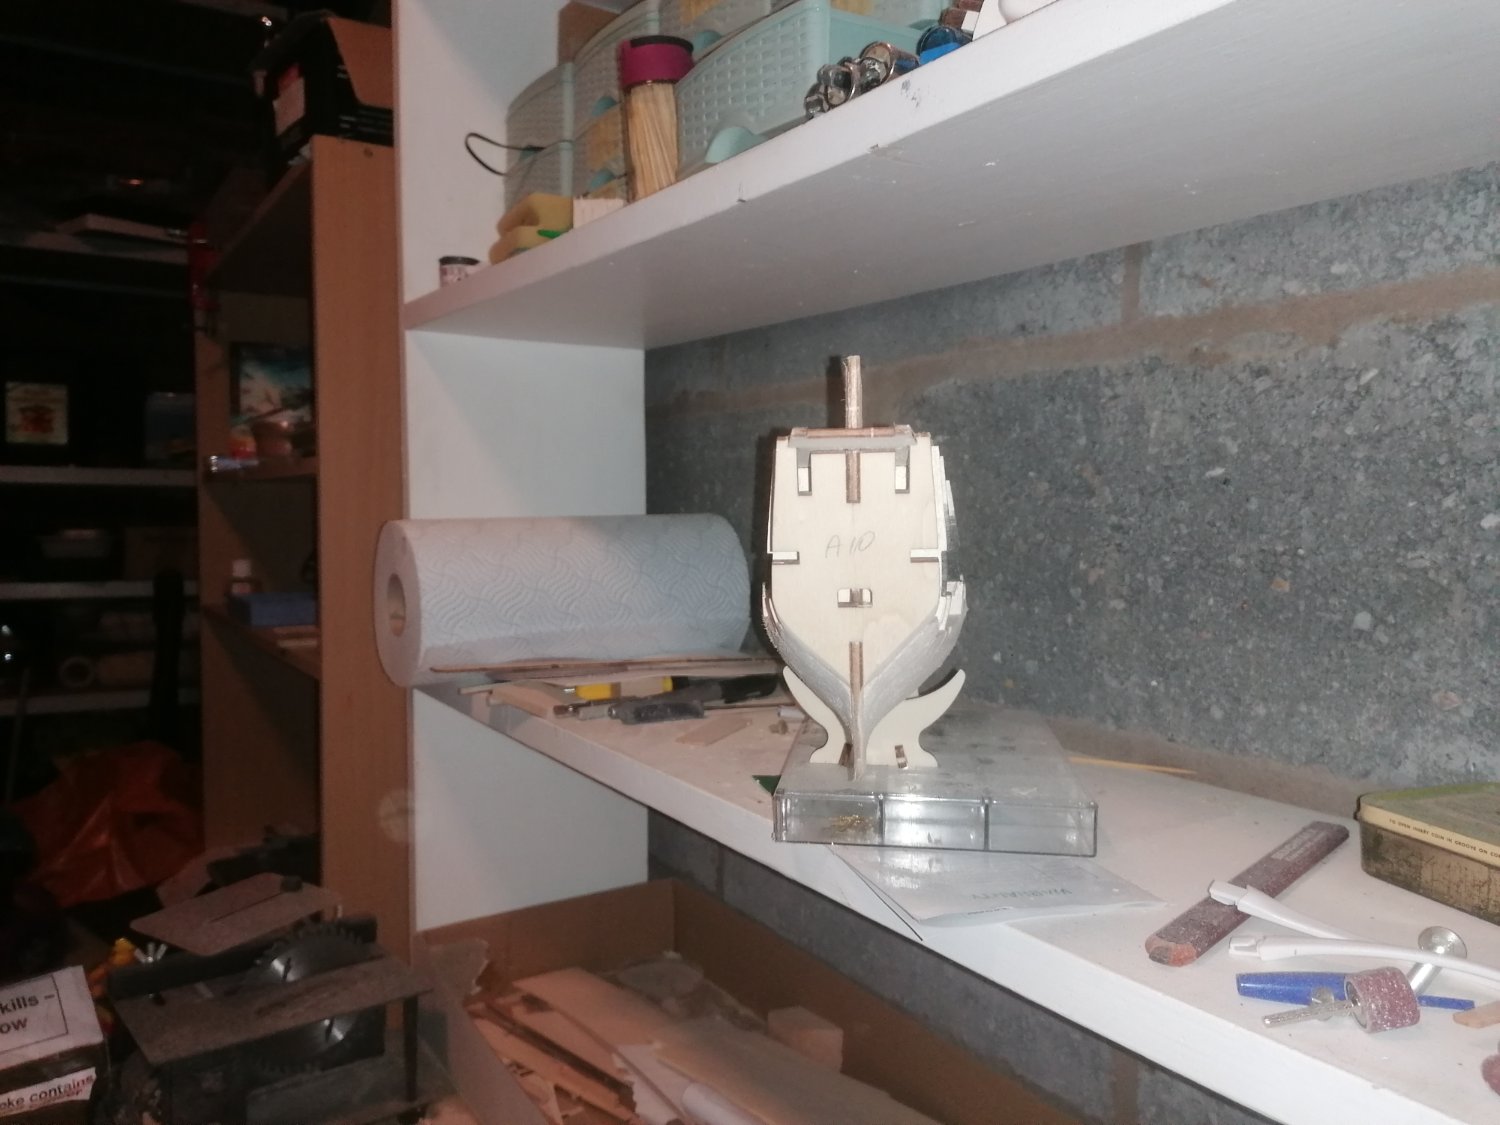
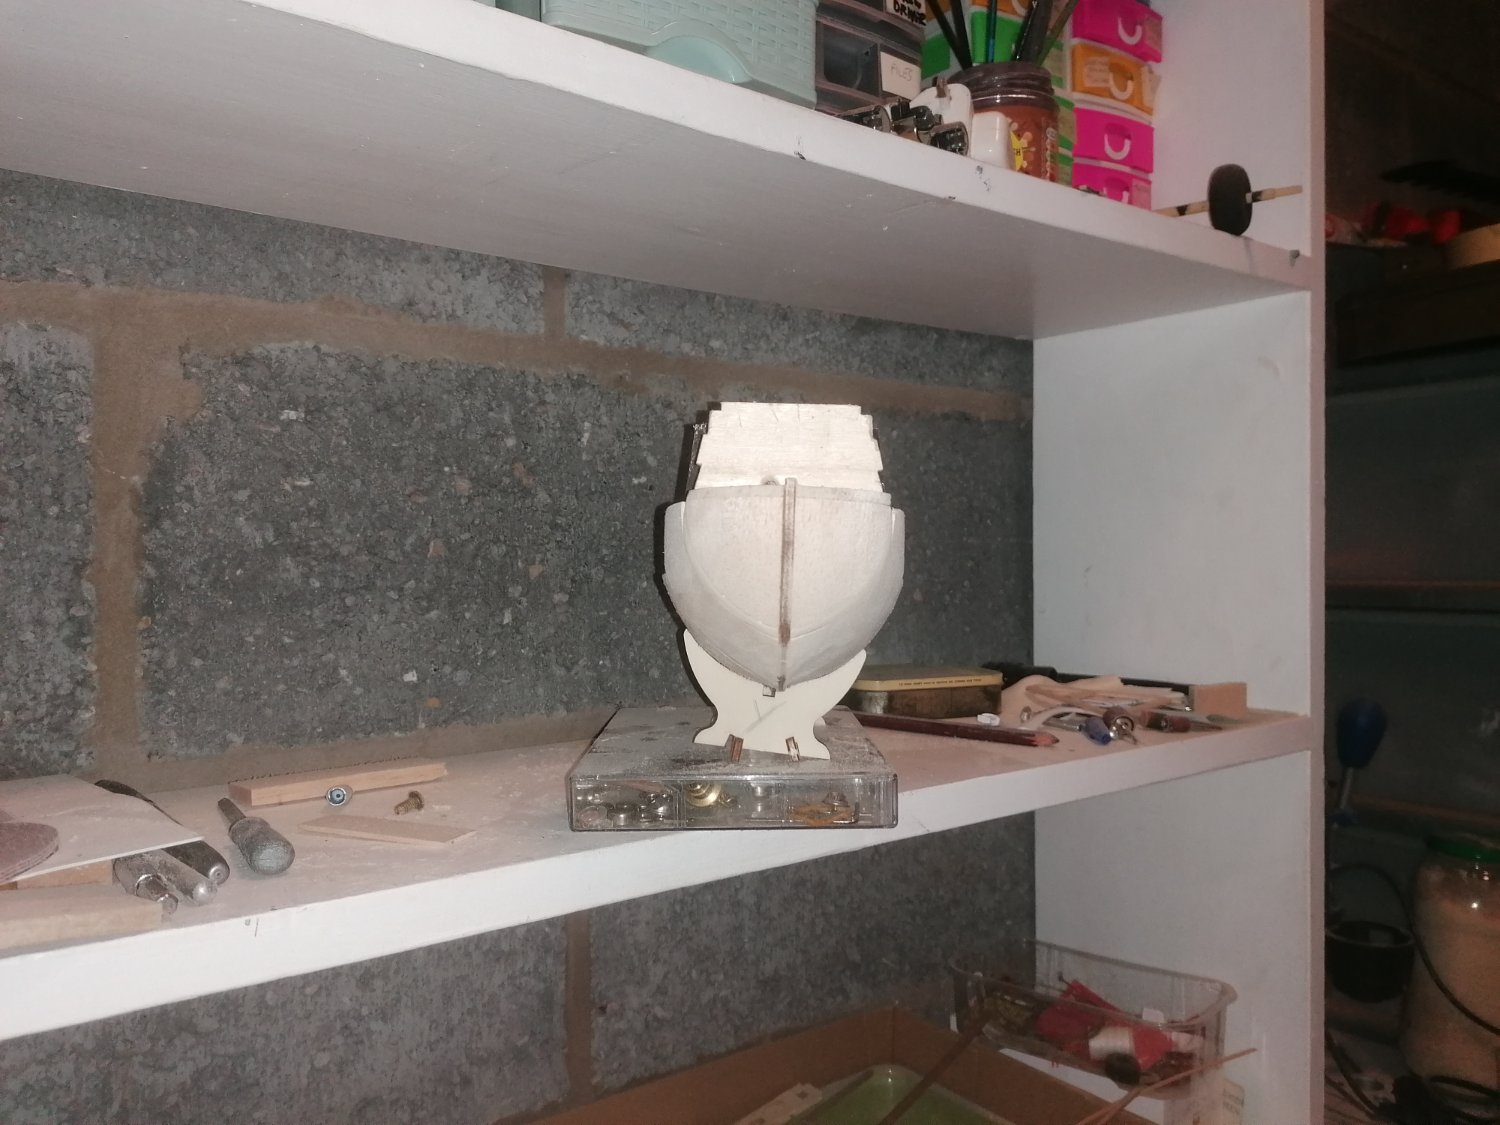
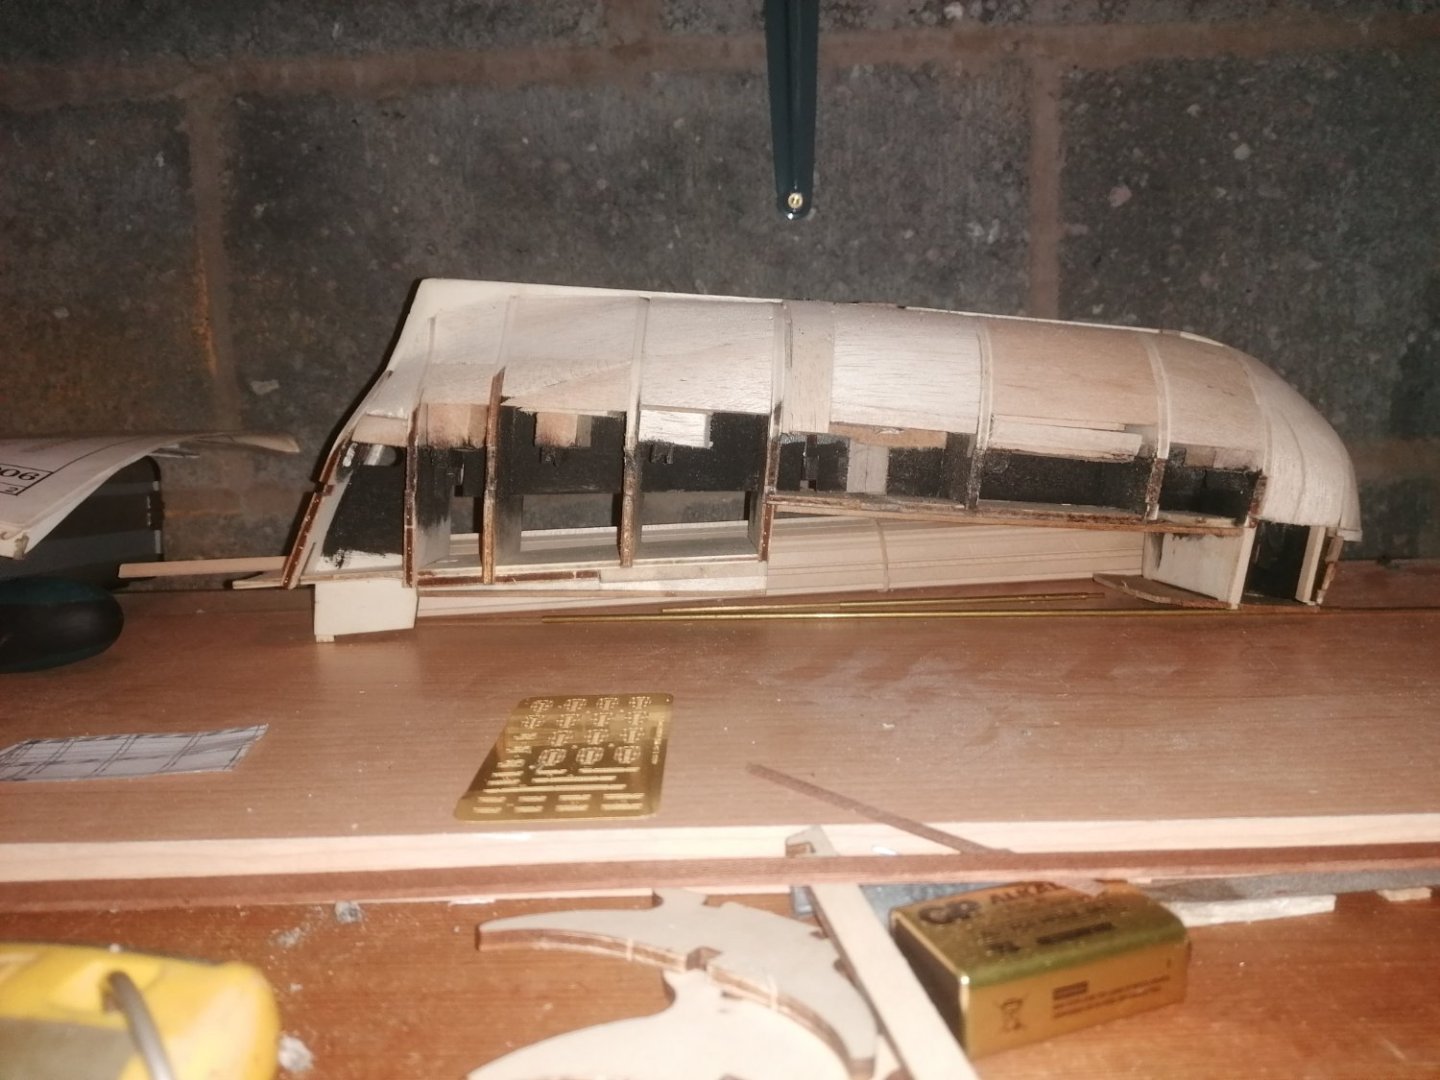
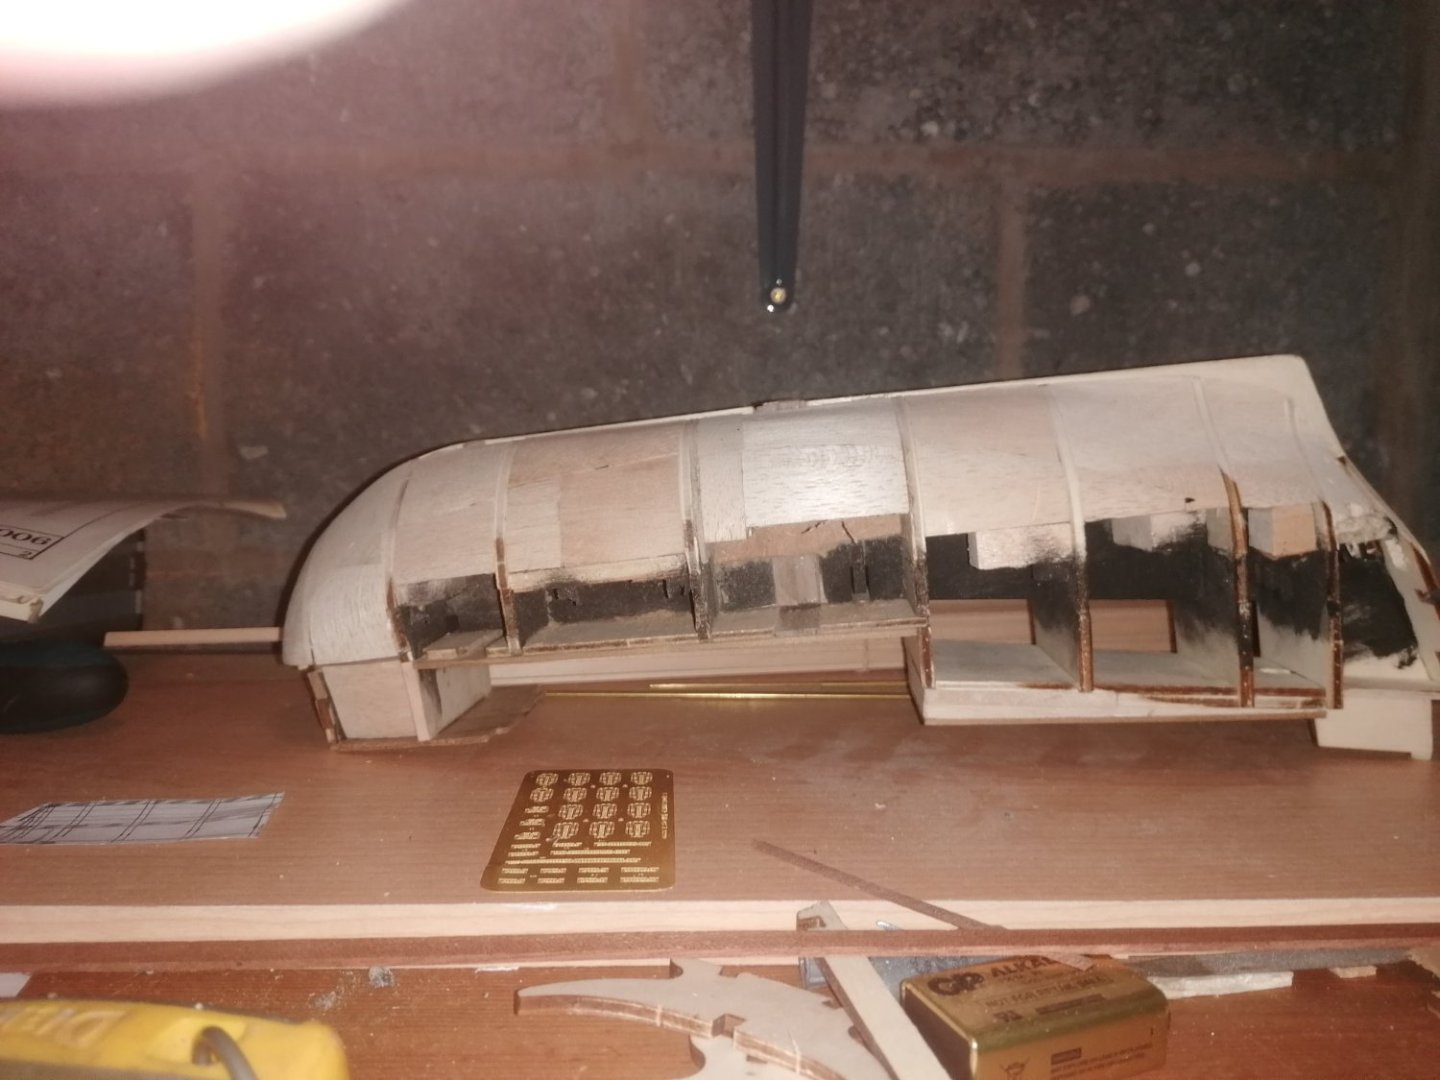
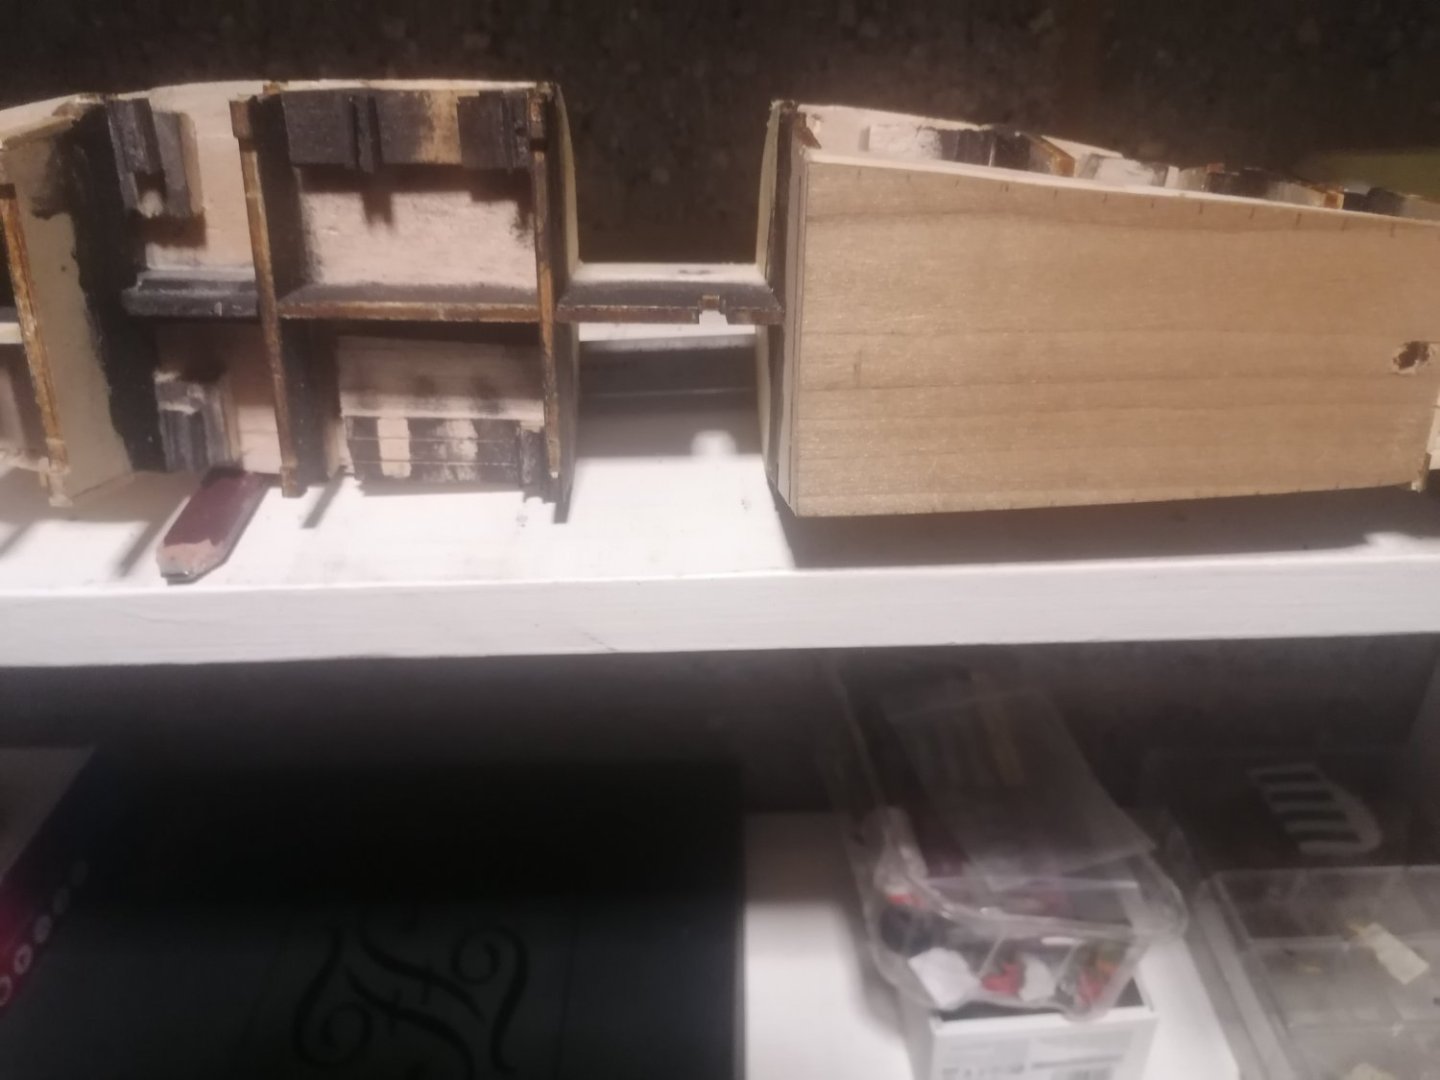
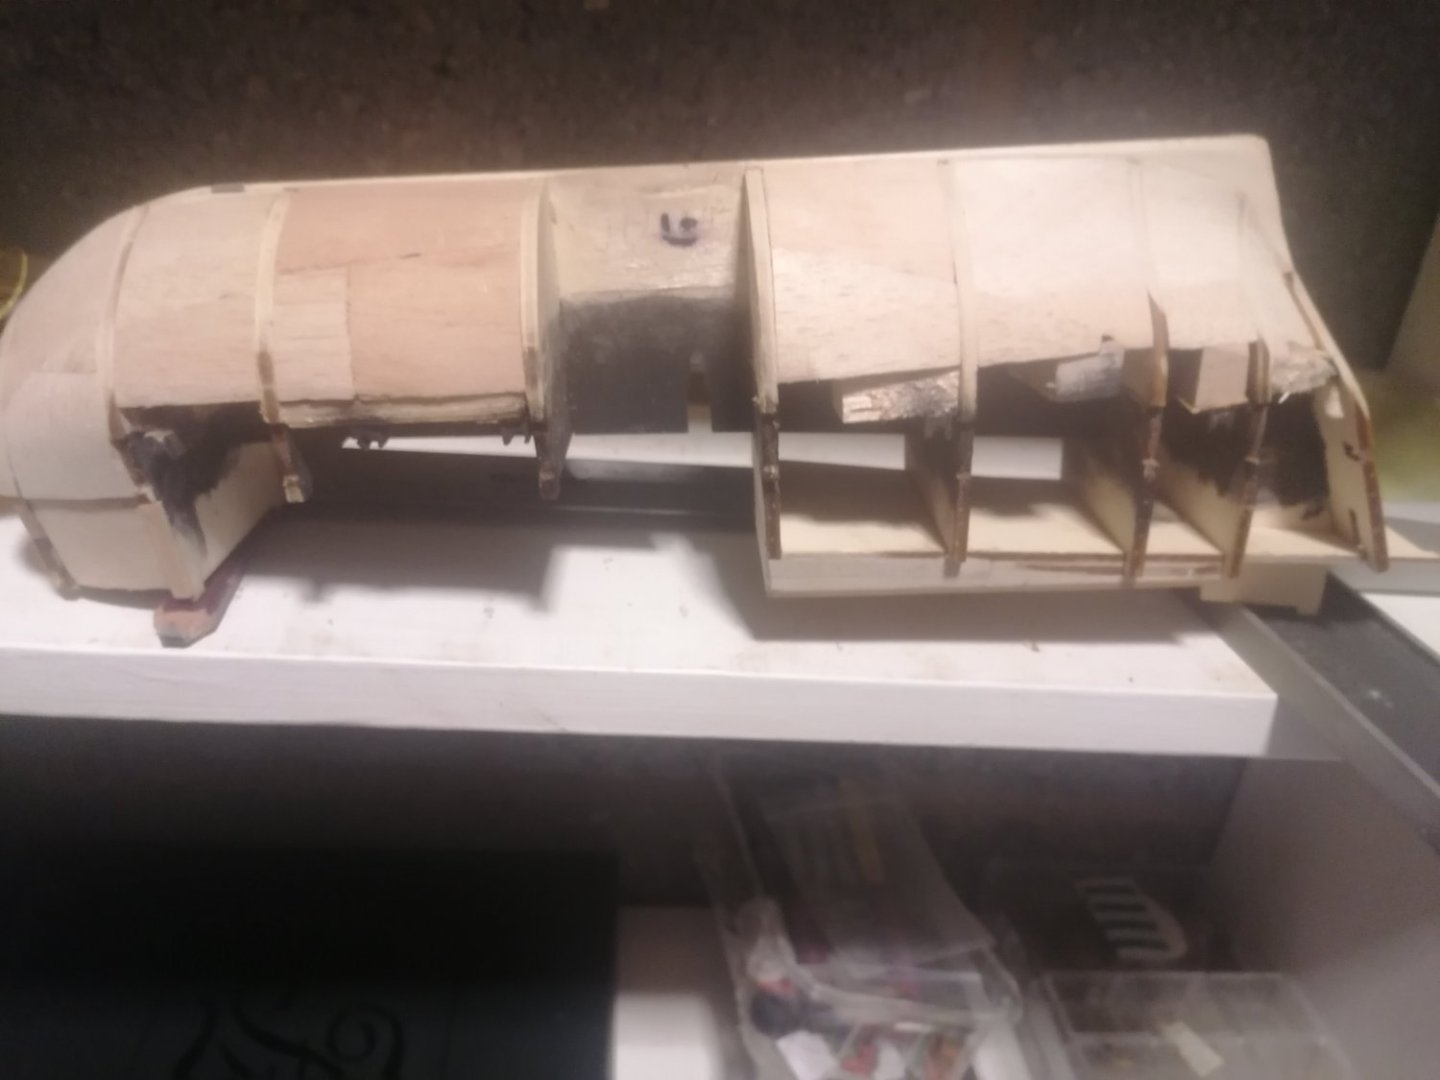
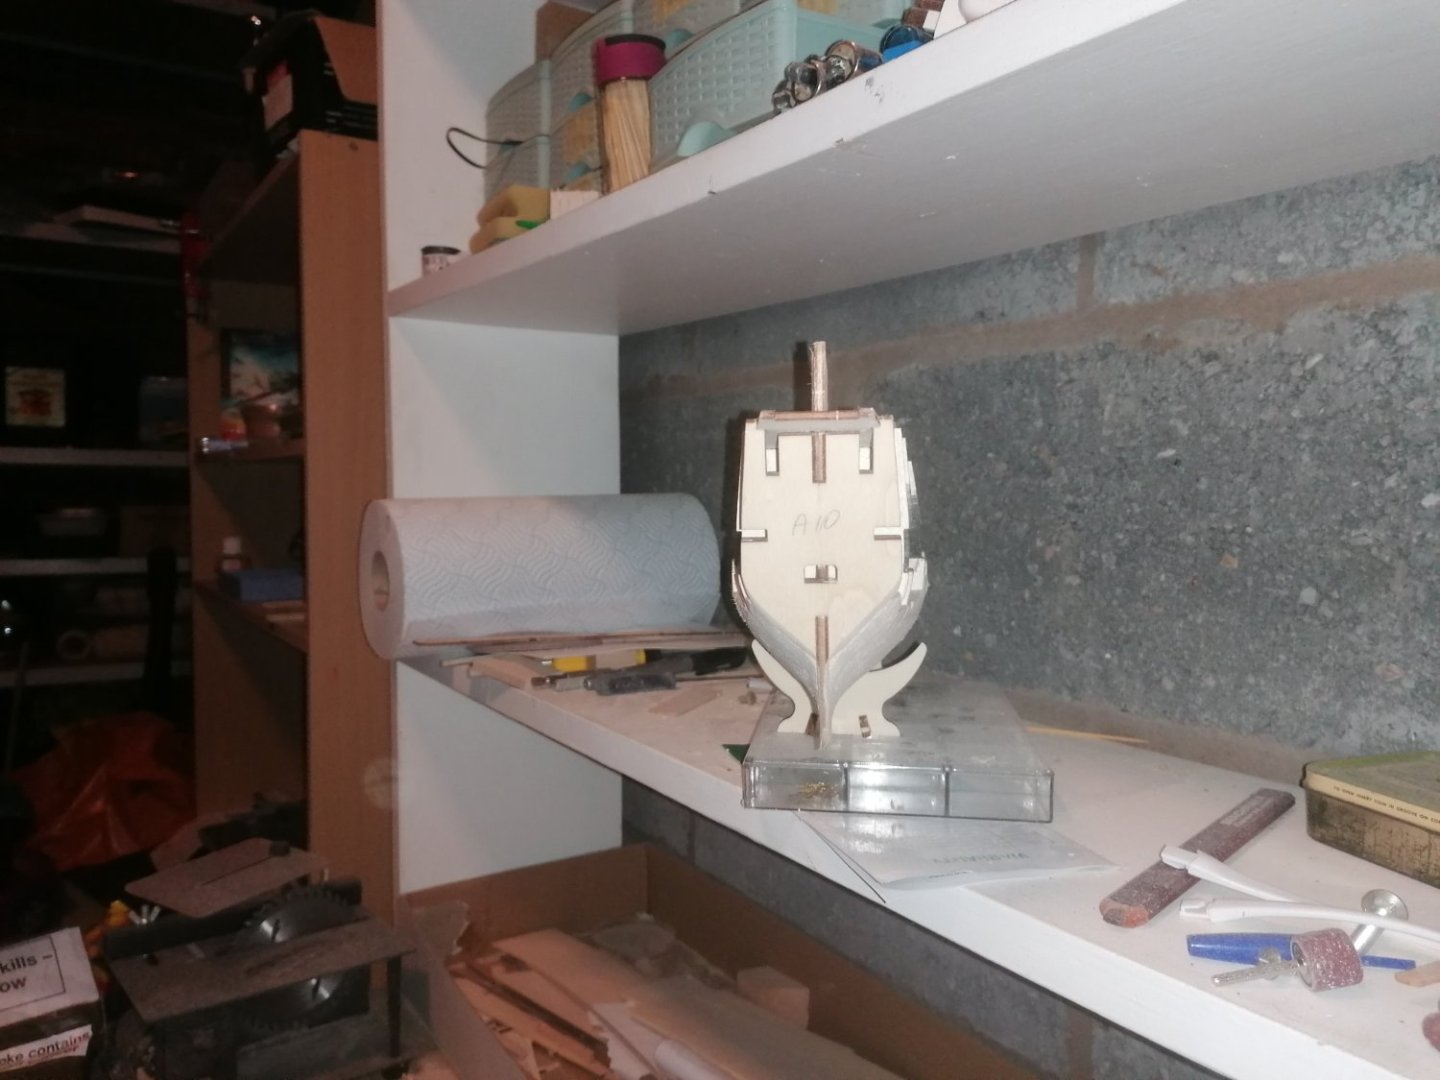
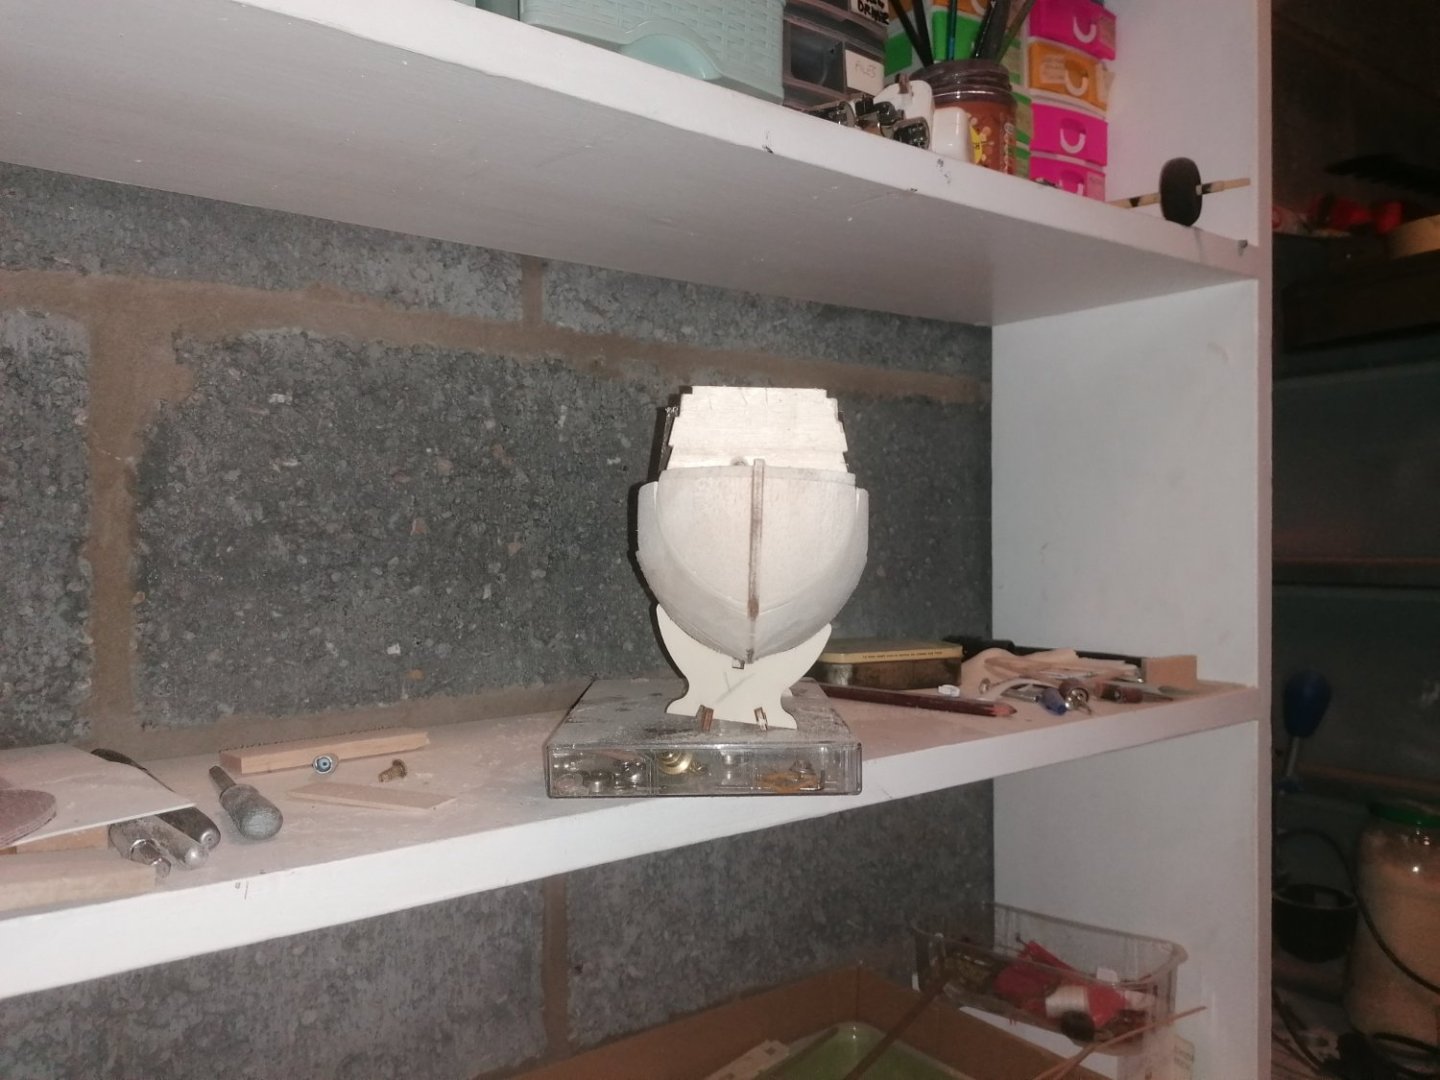
Since the last post I have now added the dummy gun carriages and applied a second coat of black paint to the interior. I have had to remove the gun deck supports as I found I had not placed them correctly after all. Instead, I have built up the gun deck on top of the filler blocks, and, mounted the gun carriages on top. these have also been painted black. I have also cut out gun ports in the stern piece A10 and also glued and pinned the gun port bulwarks.


-
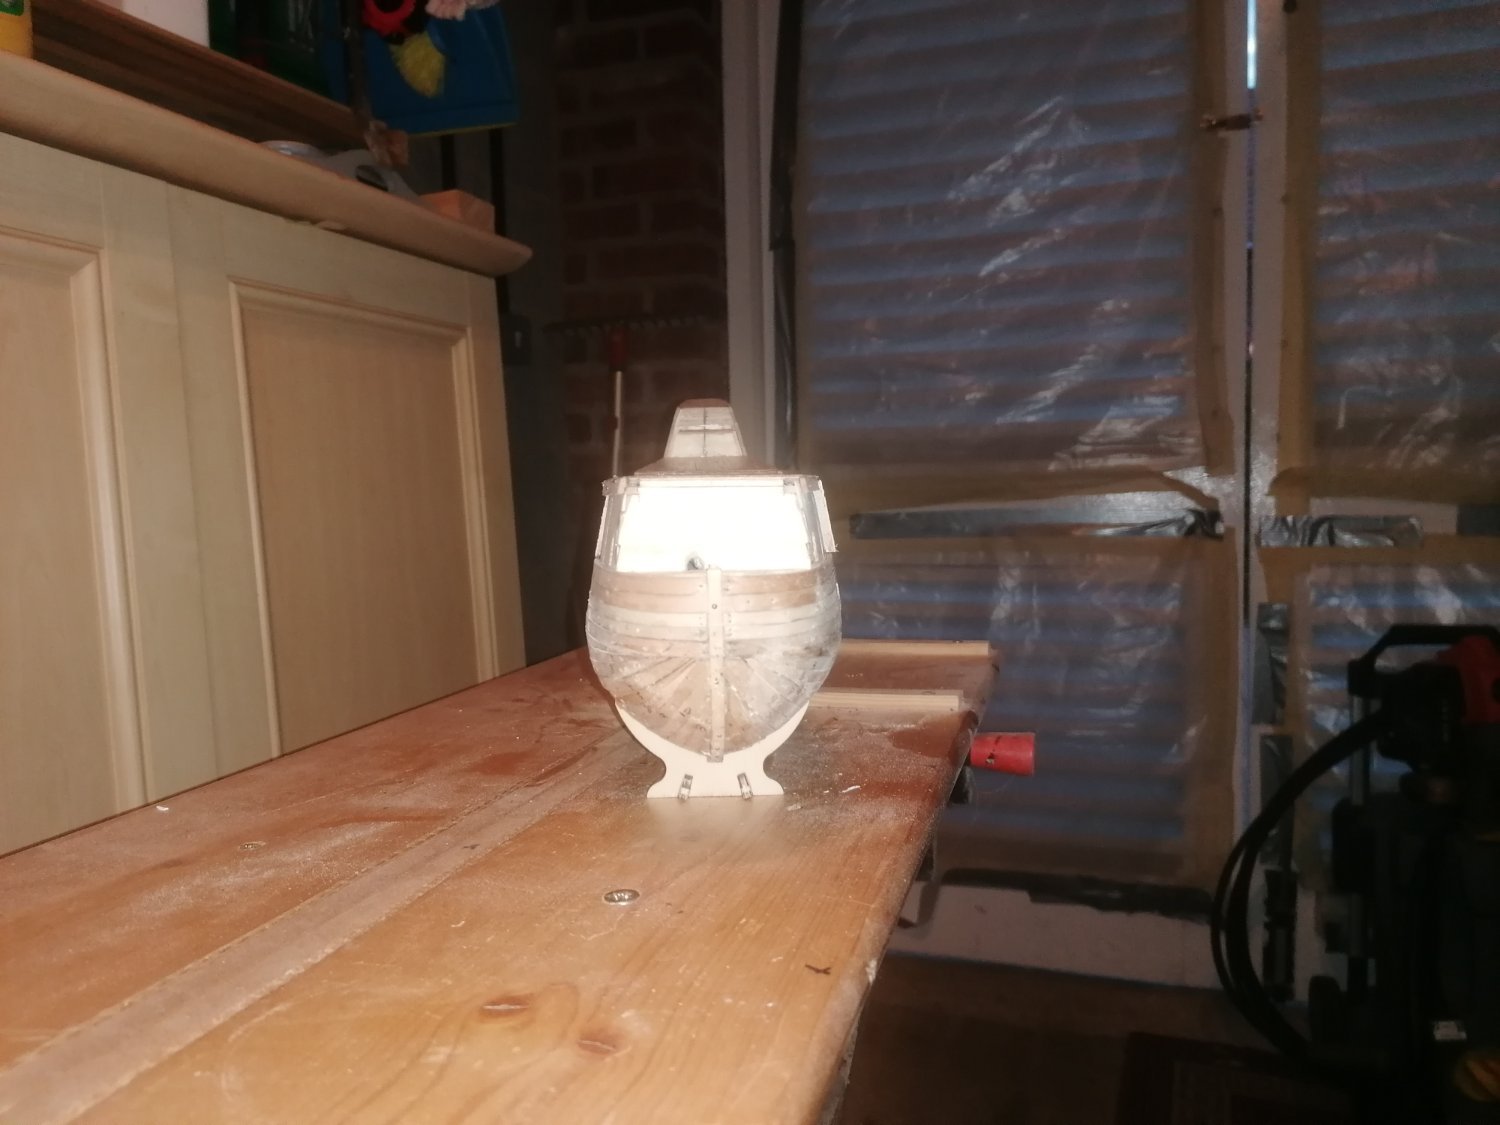
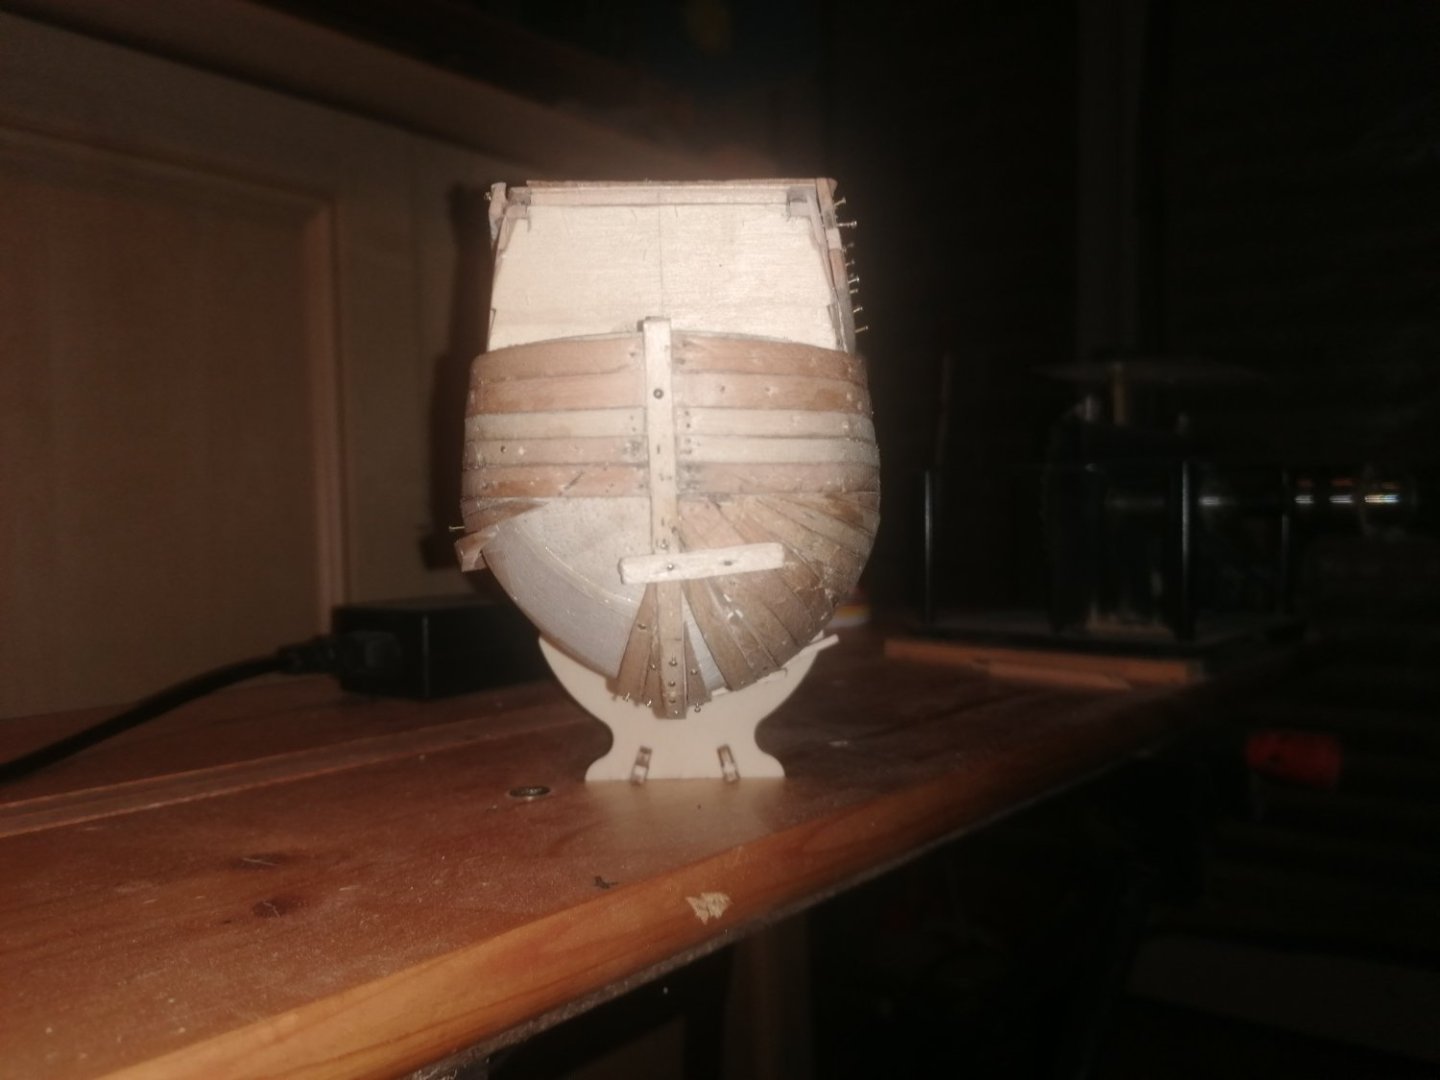
I thought it would take until tomorrow to finish the sanding of the lower hull, but it's pretty much done. It just needs a very fine sanding now. Another thing I have picked up on is, the instructions say to sand the bow to the false keel. They should also mention to sand the stern pretty much to a point. this will make the stern 4 mm thick after the first planking is completed.


-
The starboard side is now sanded down so just need to finish the port side. The next stage, I think, will be to add the first layer of planks up to the main deck level and start on the sides of the foc'stle. For this I am planning to have the sides around 5mm thick but thinned out where the fore chaser gun port will be located.