HOLIDAY DONATION DRIVE - SUPPORT MSW - DO YOUR PART TO KEEP THIS GREAT FORUM GOING! (Only 20 donations so far - C'mon guys!)
×


newbee
-
Posts
180 -
Joined
-
Last visited
Content Type
Profiles
Forums
Gallery
Events
Everything posted by newbee
-
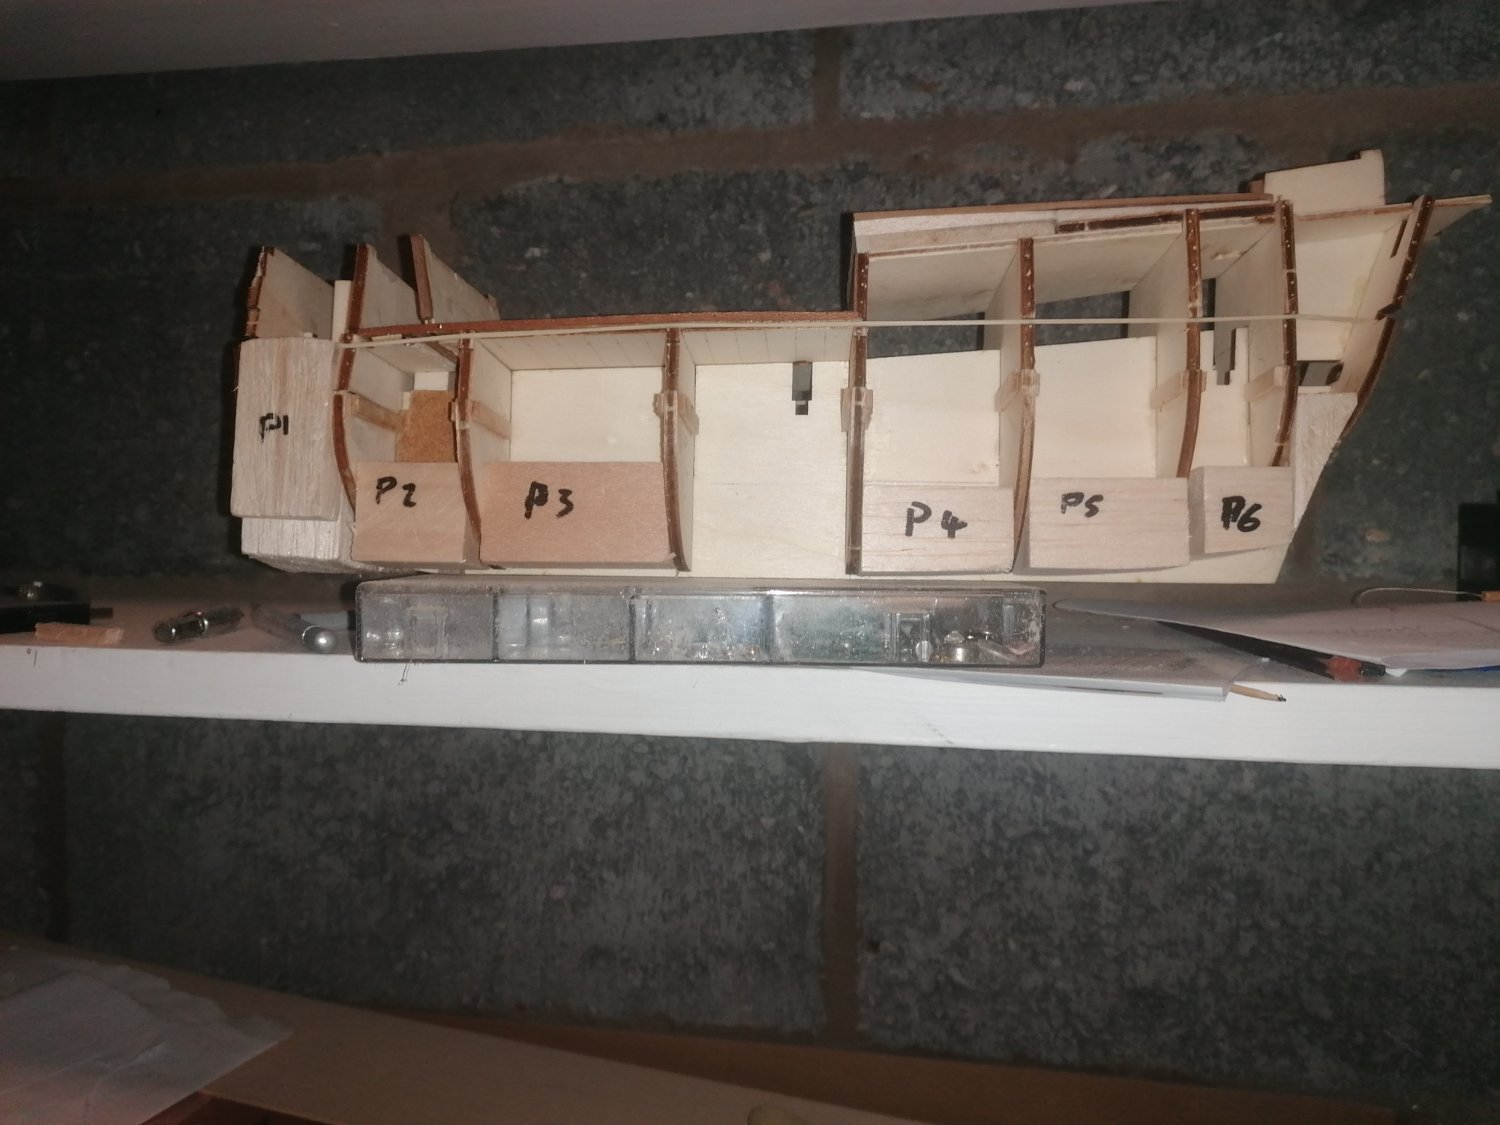
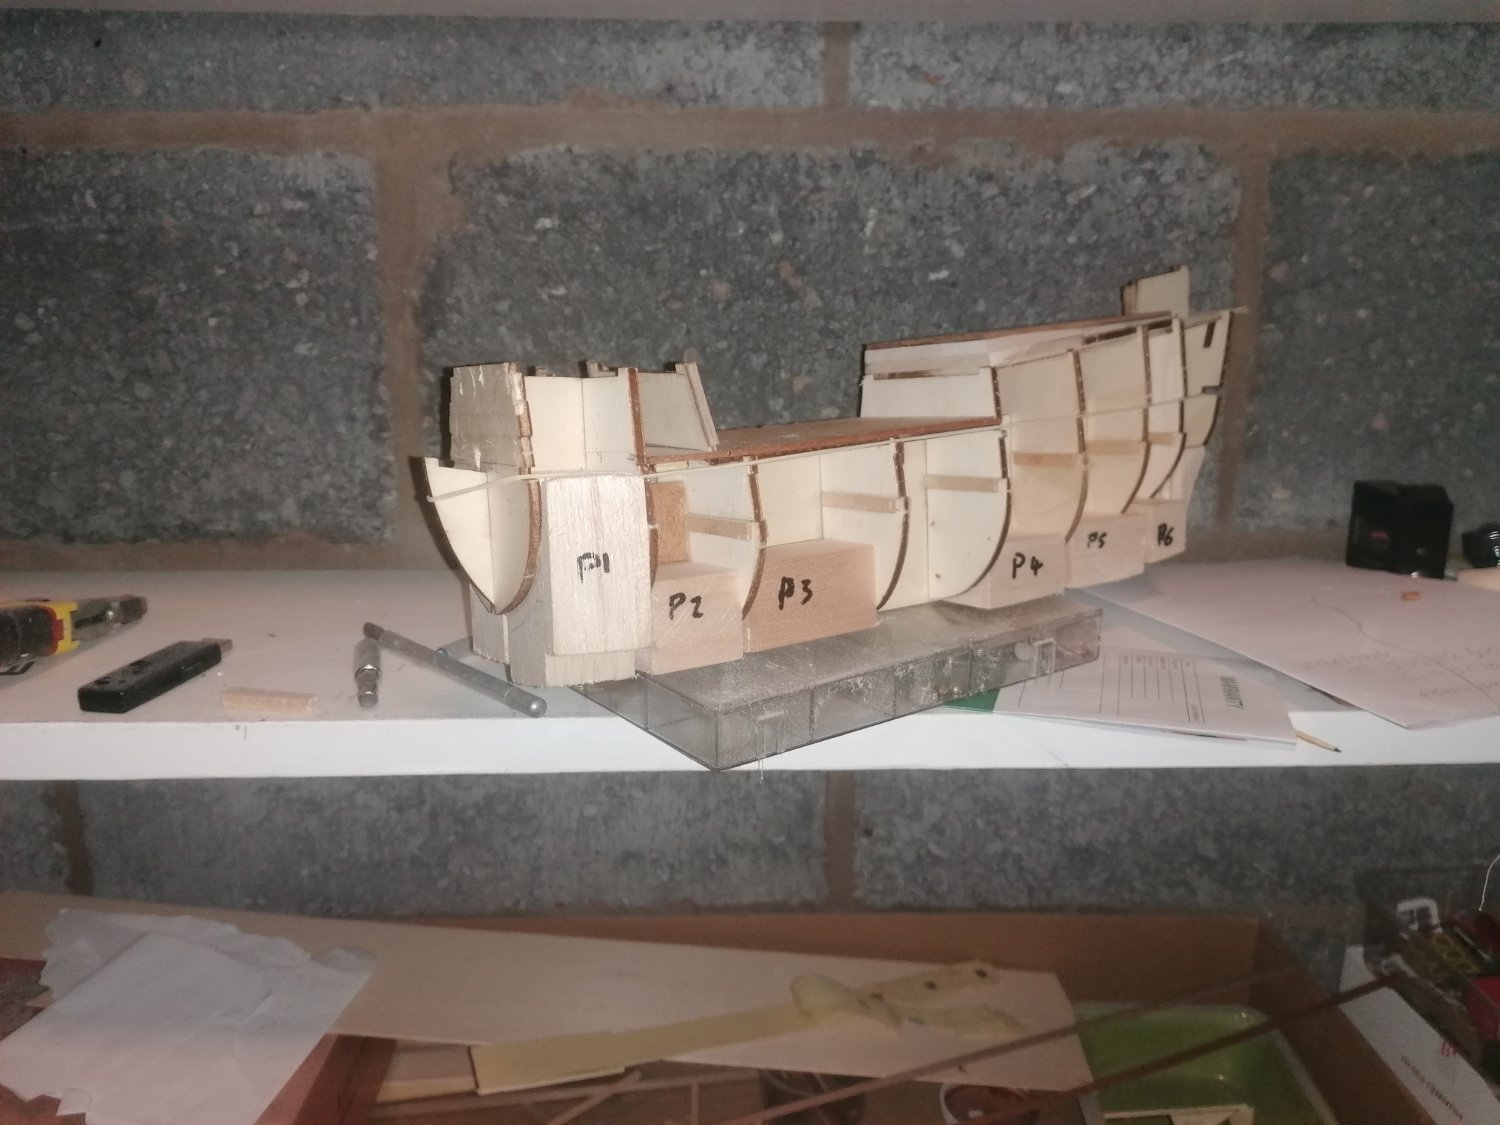
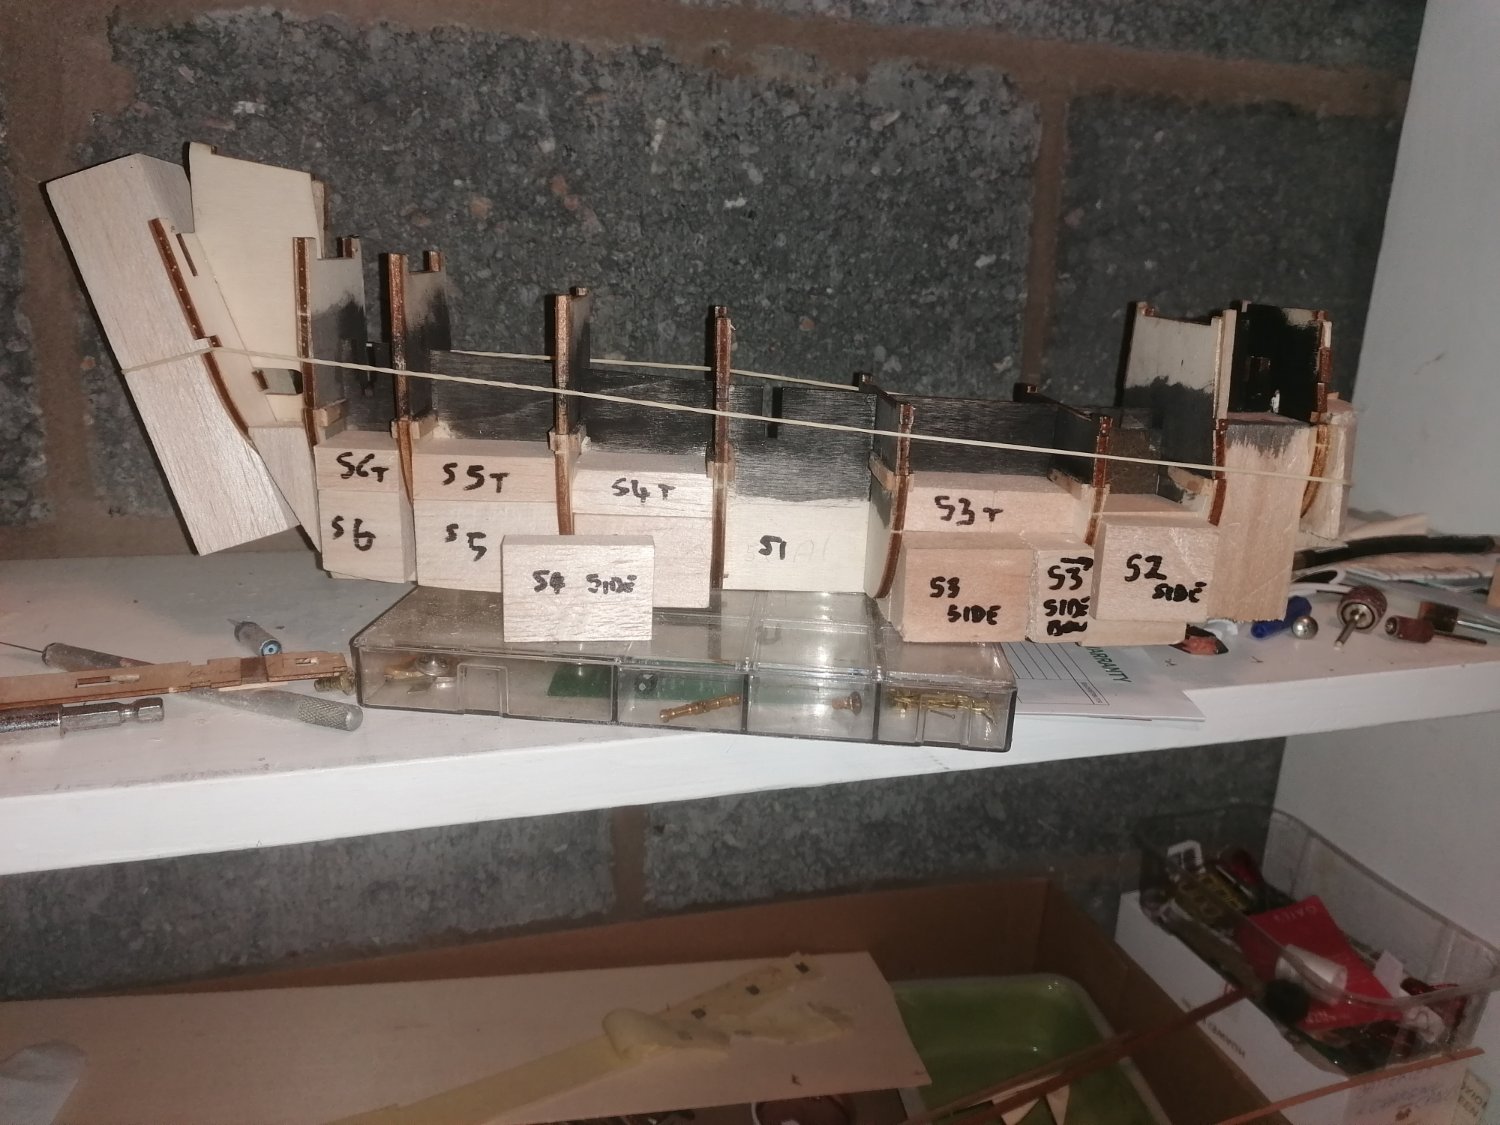
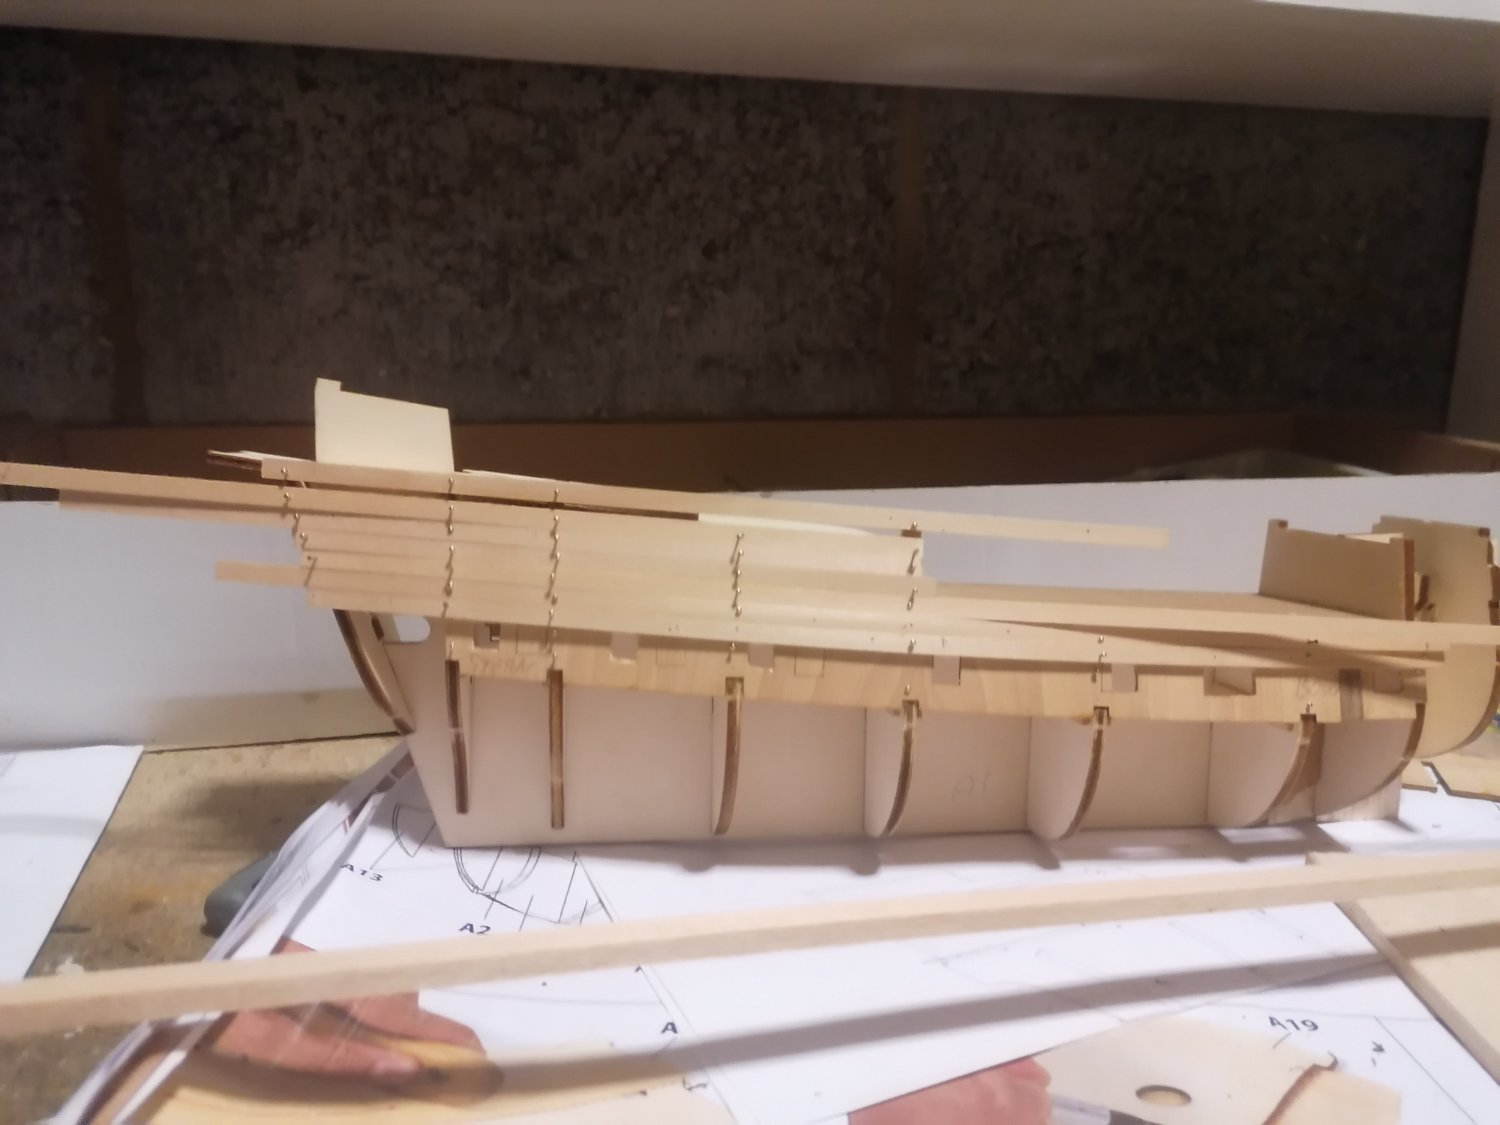
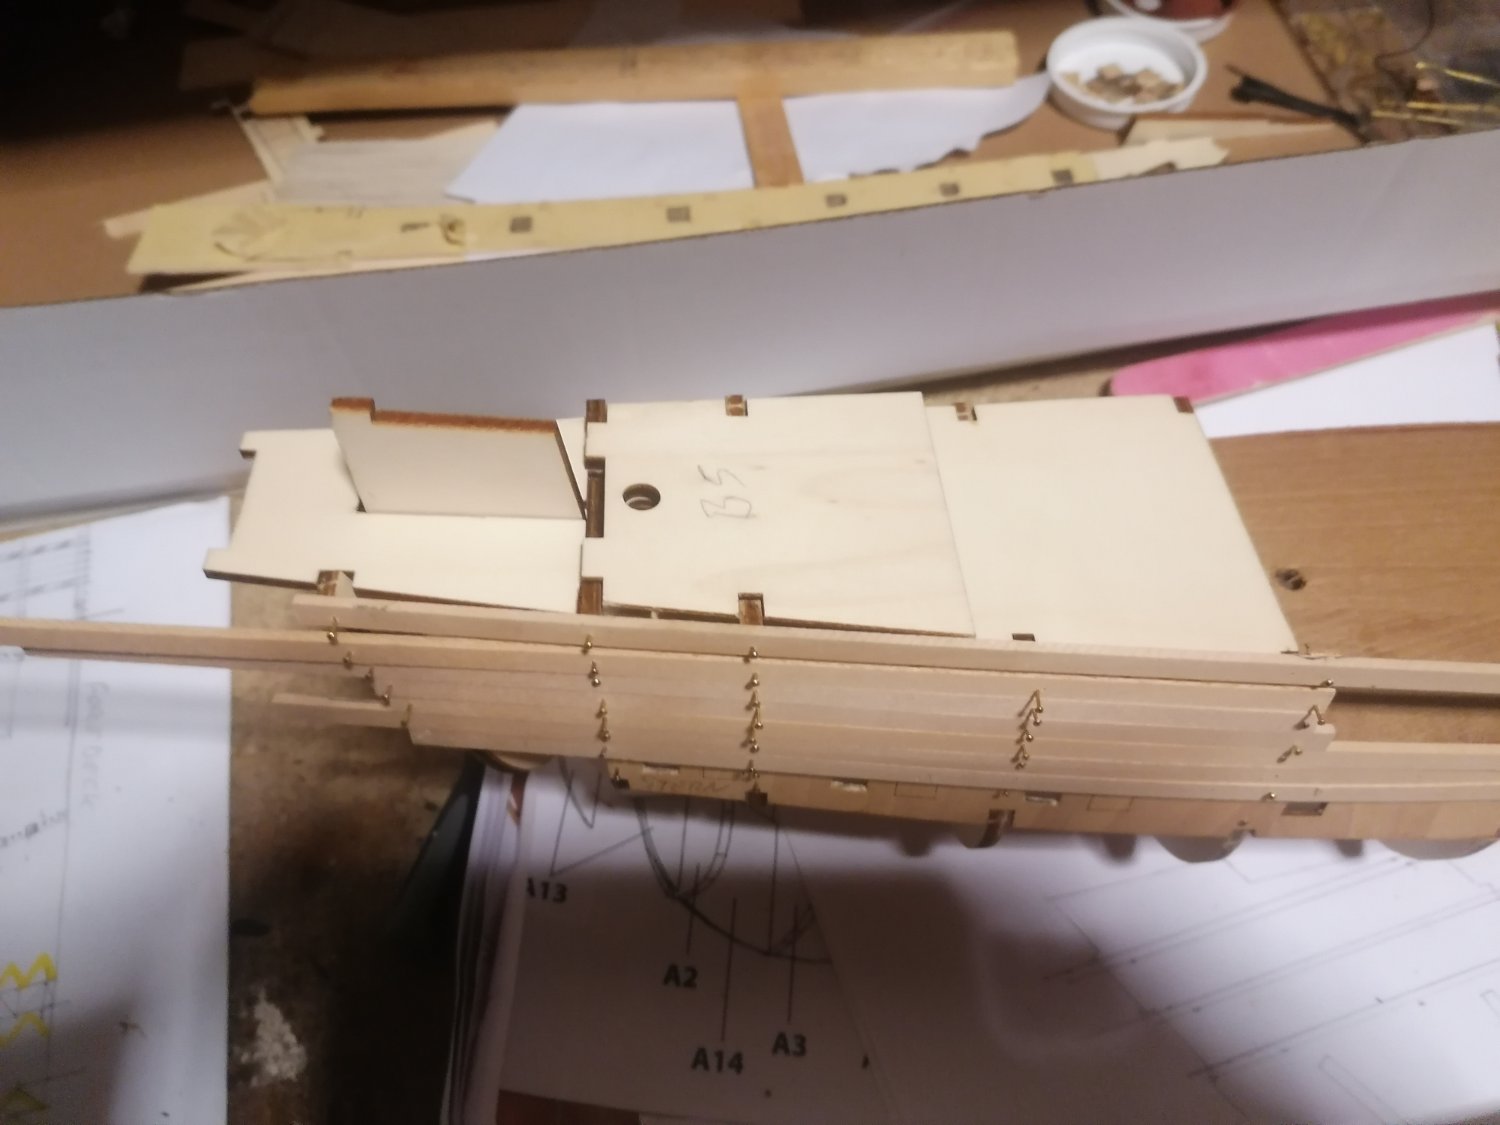
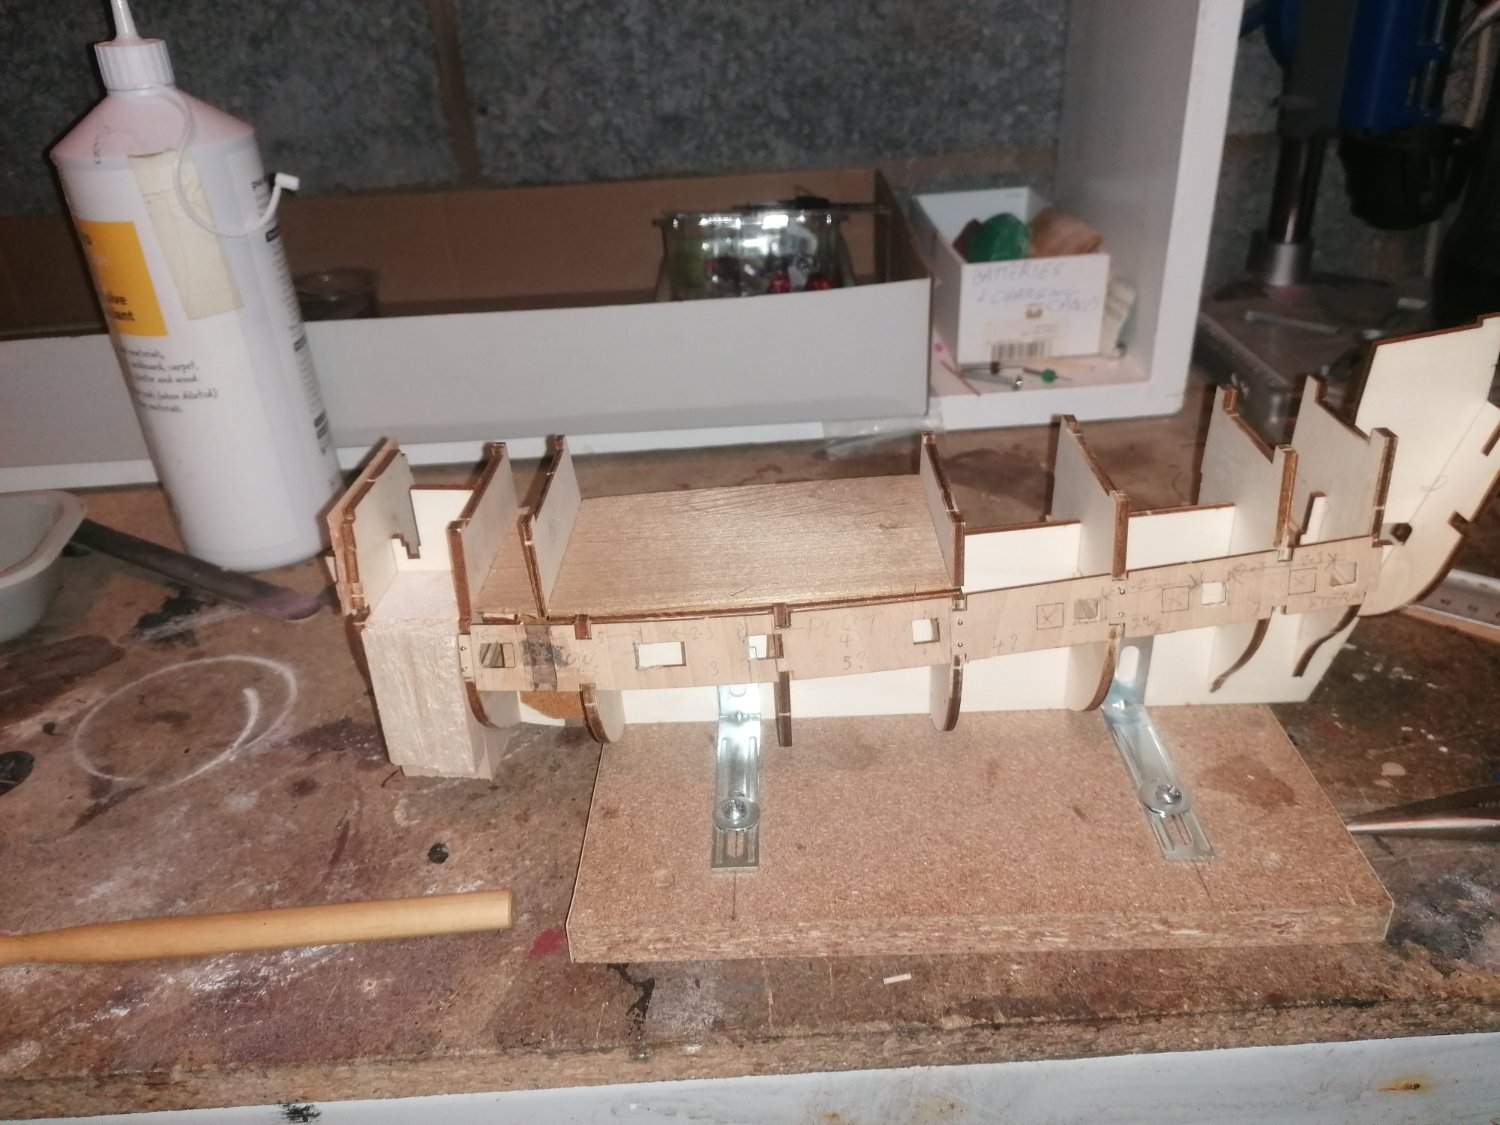
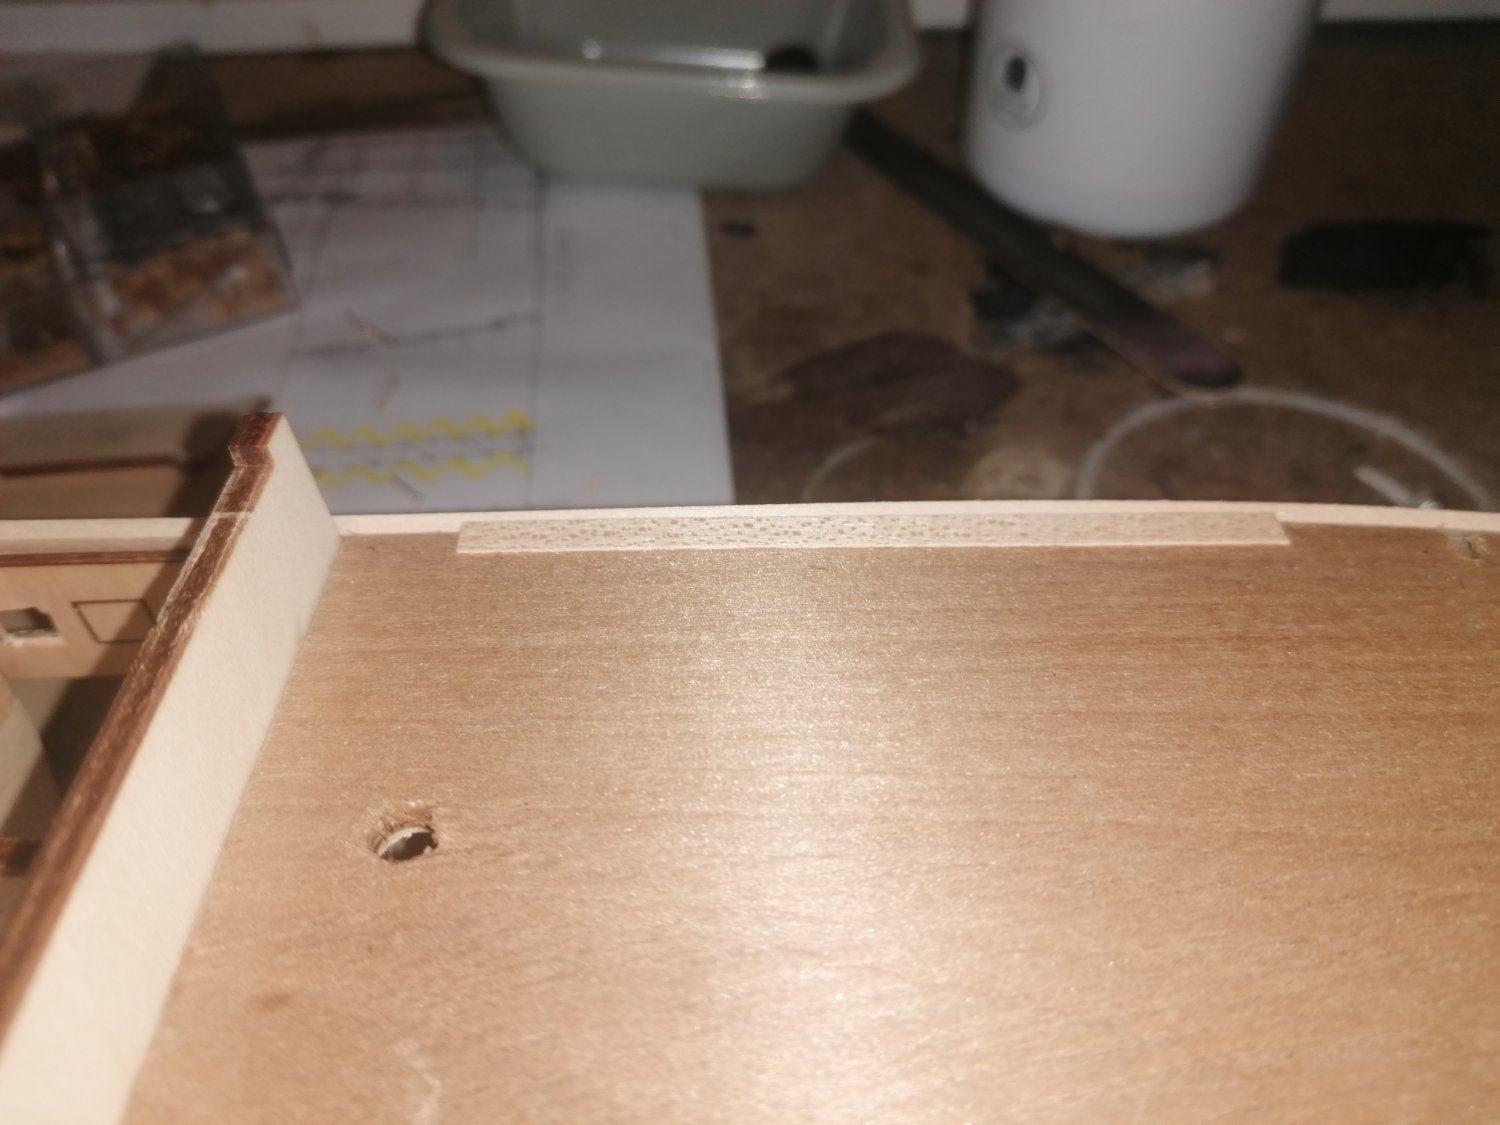
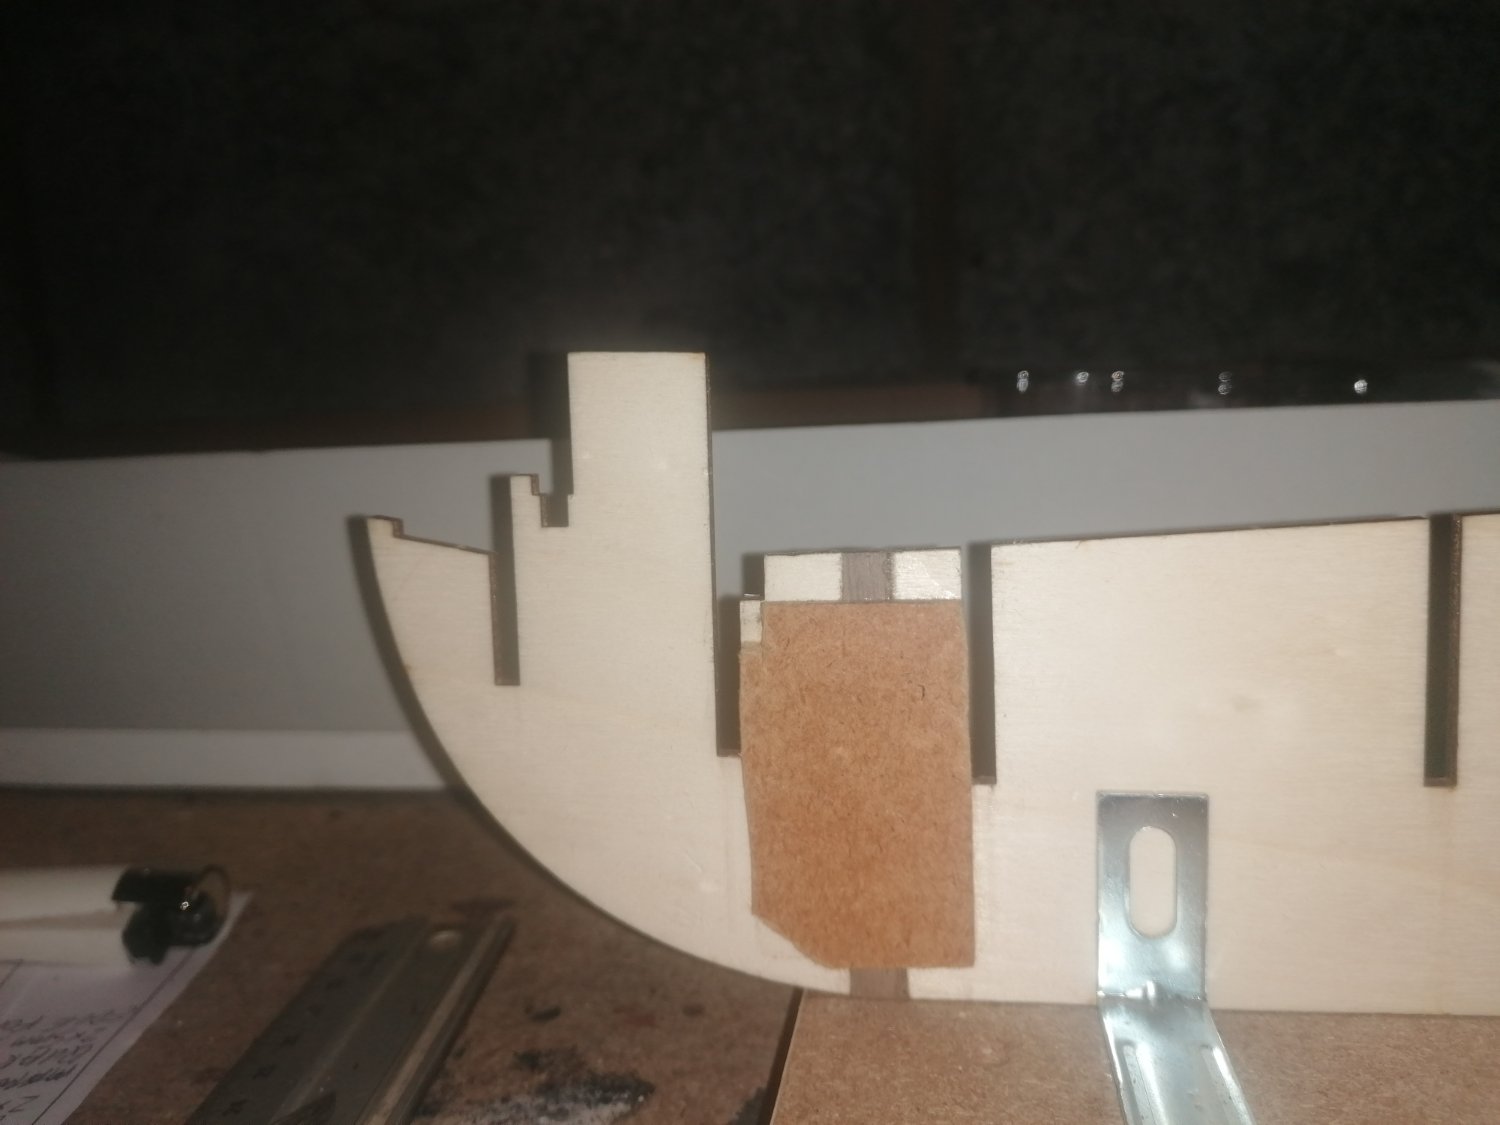
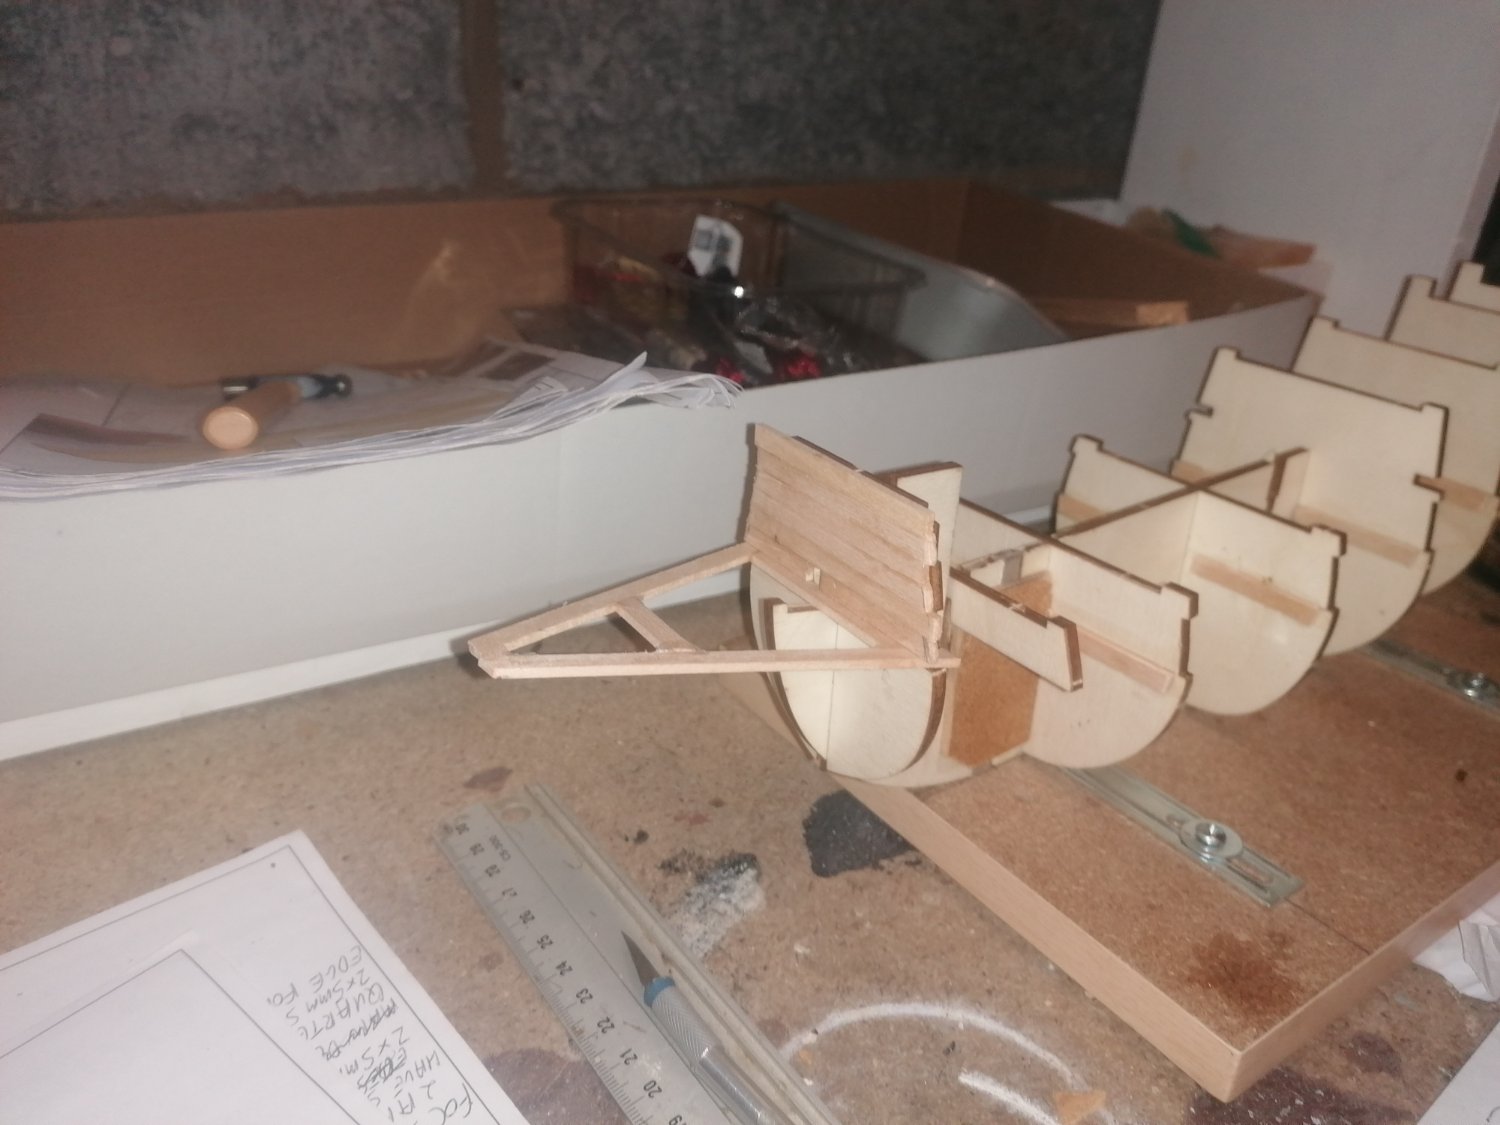
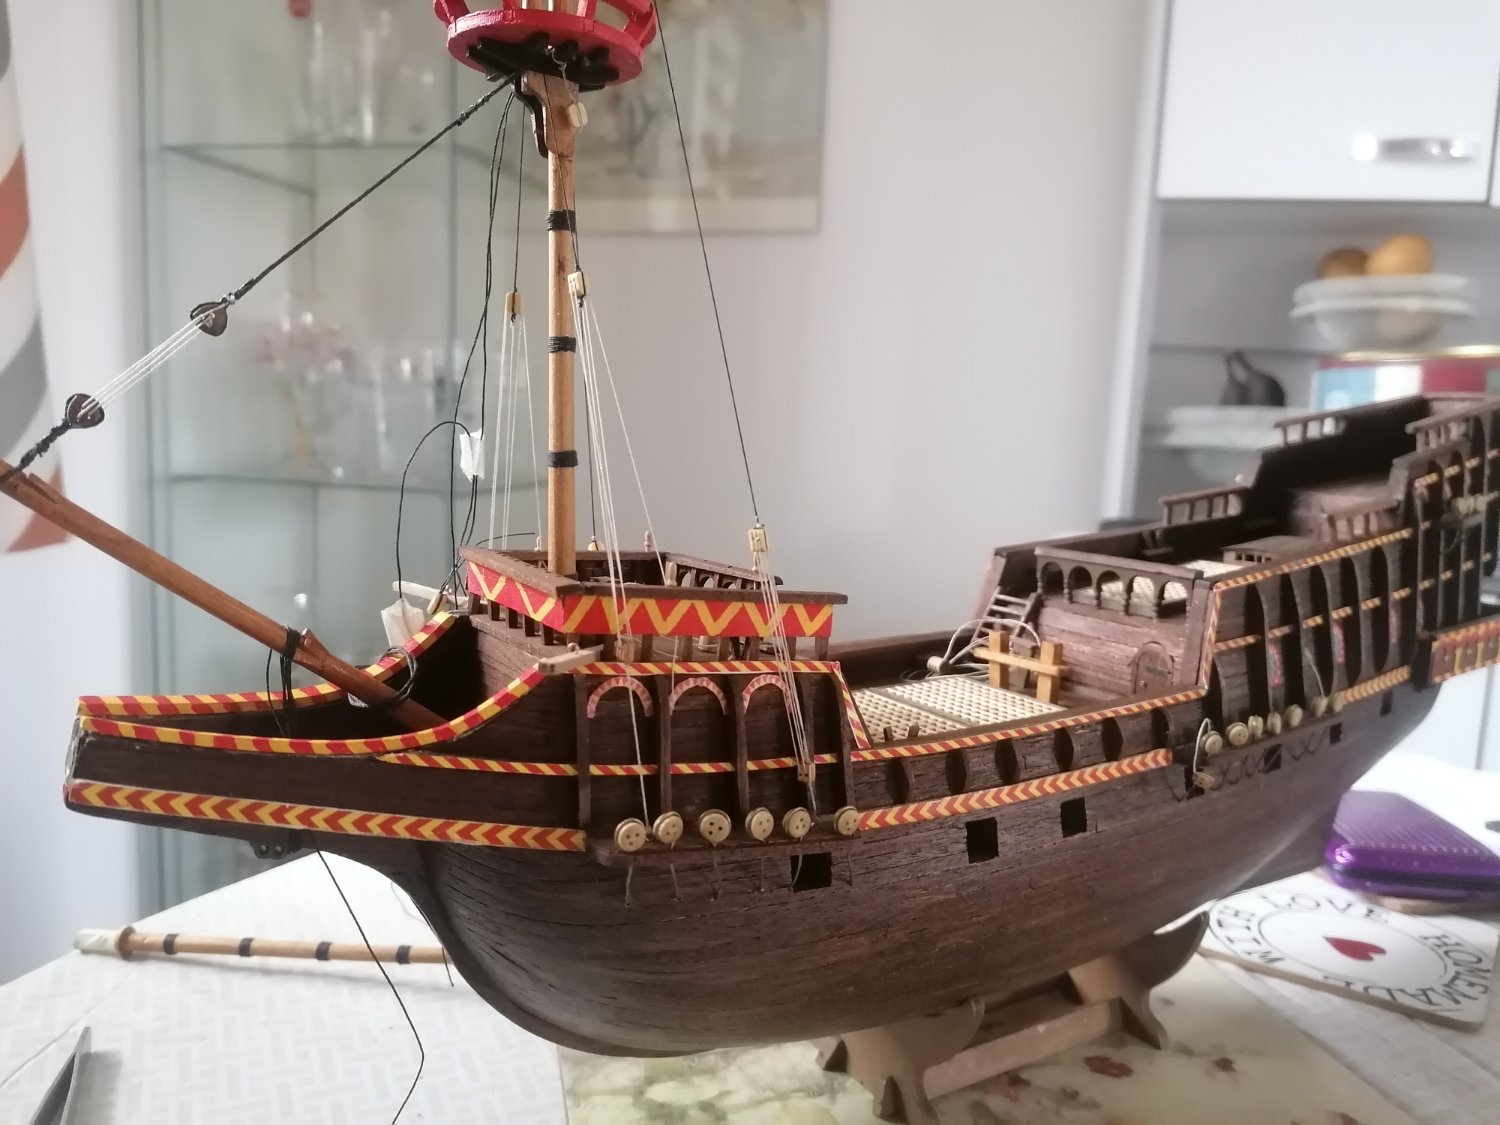
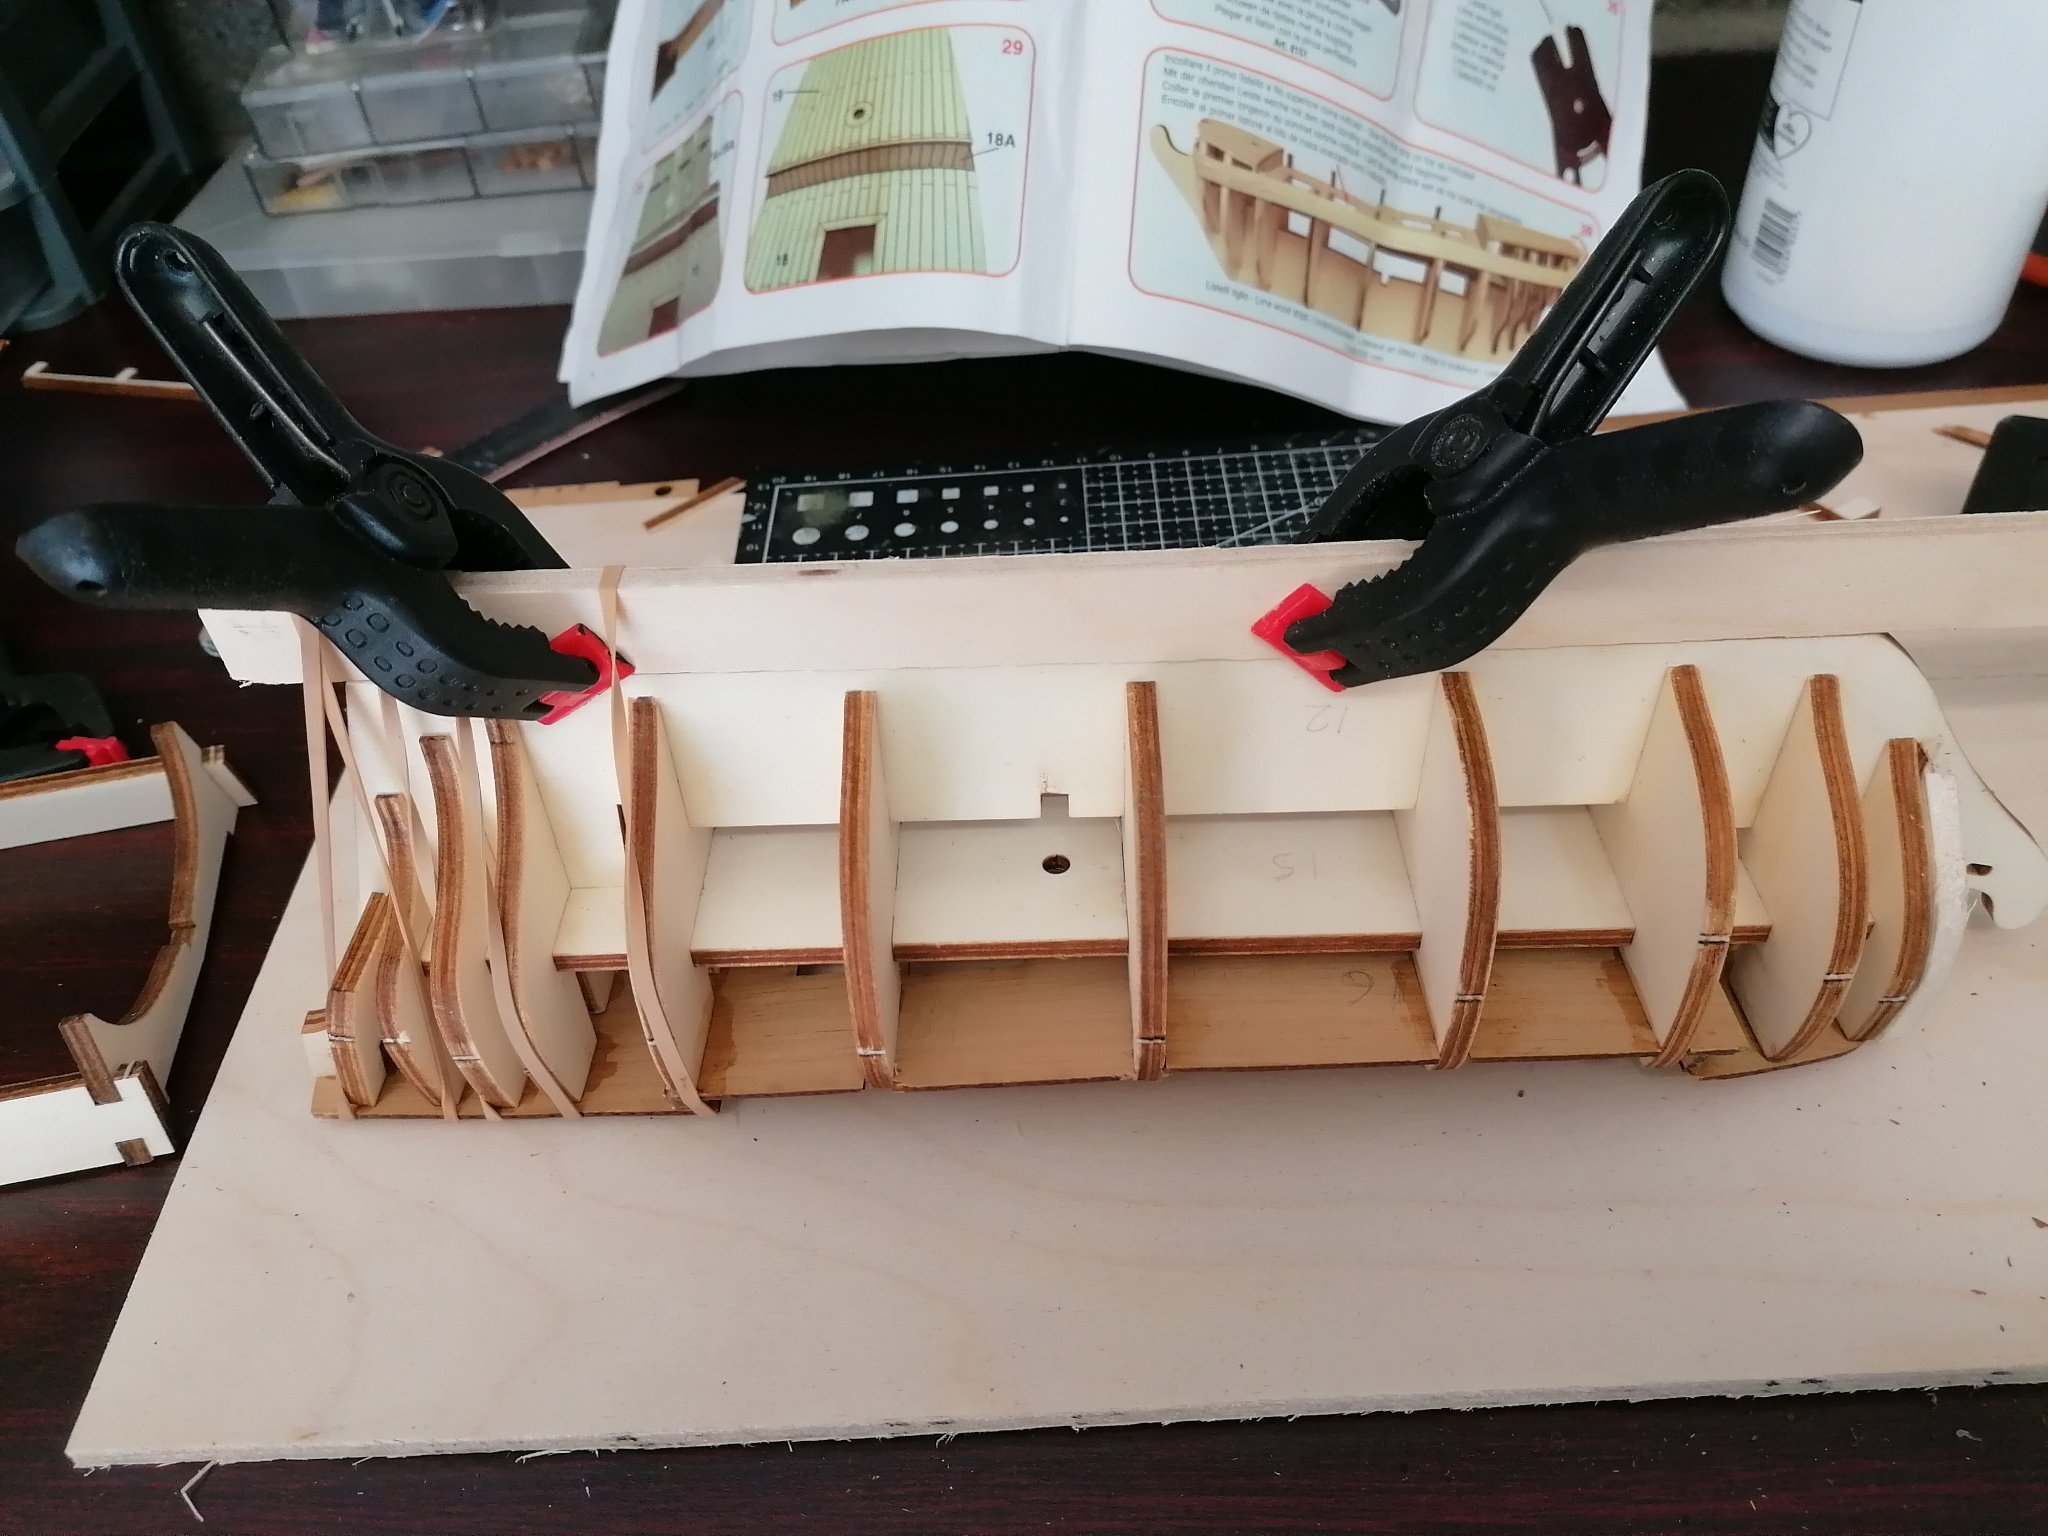
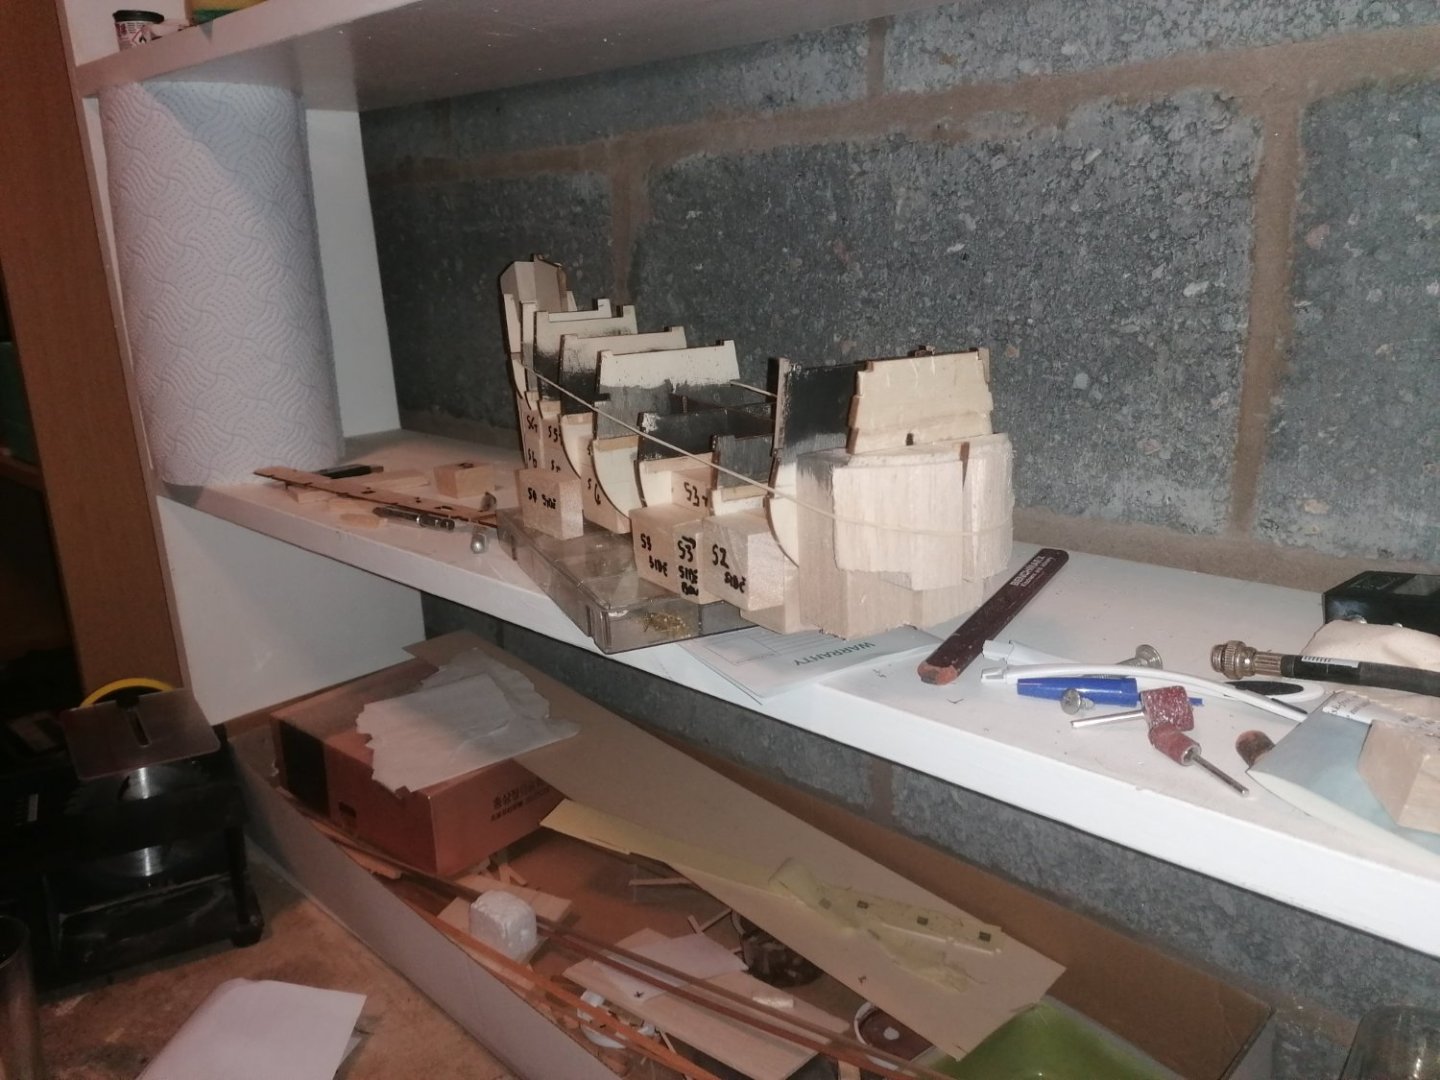
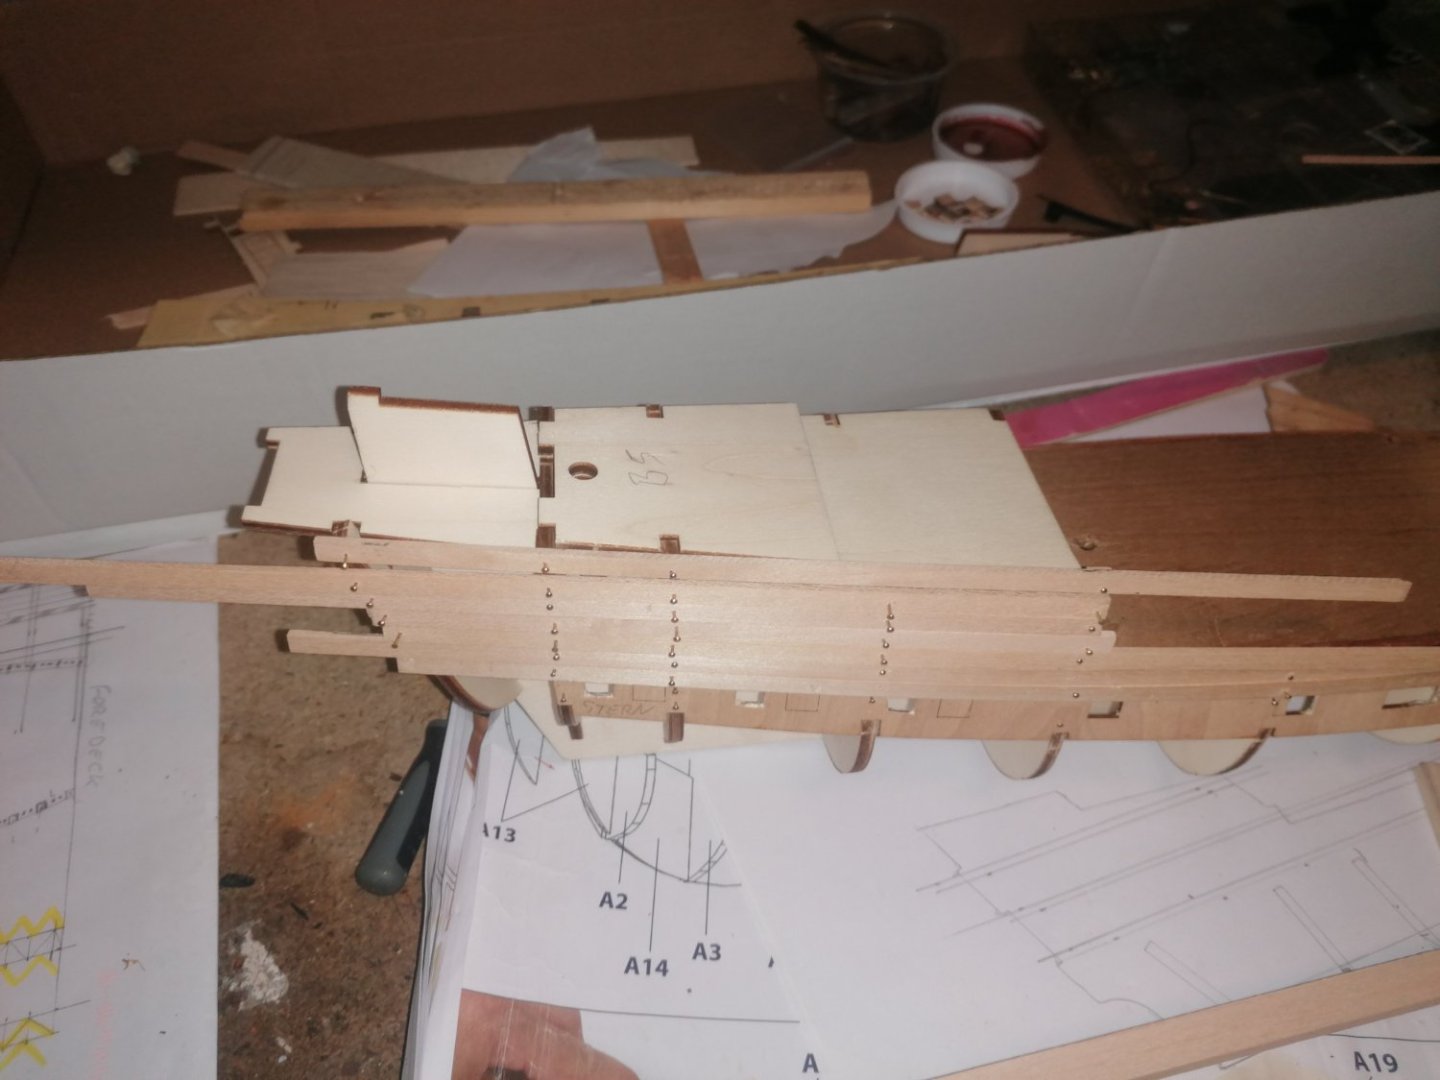
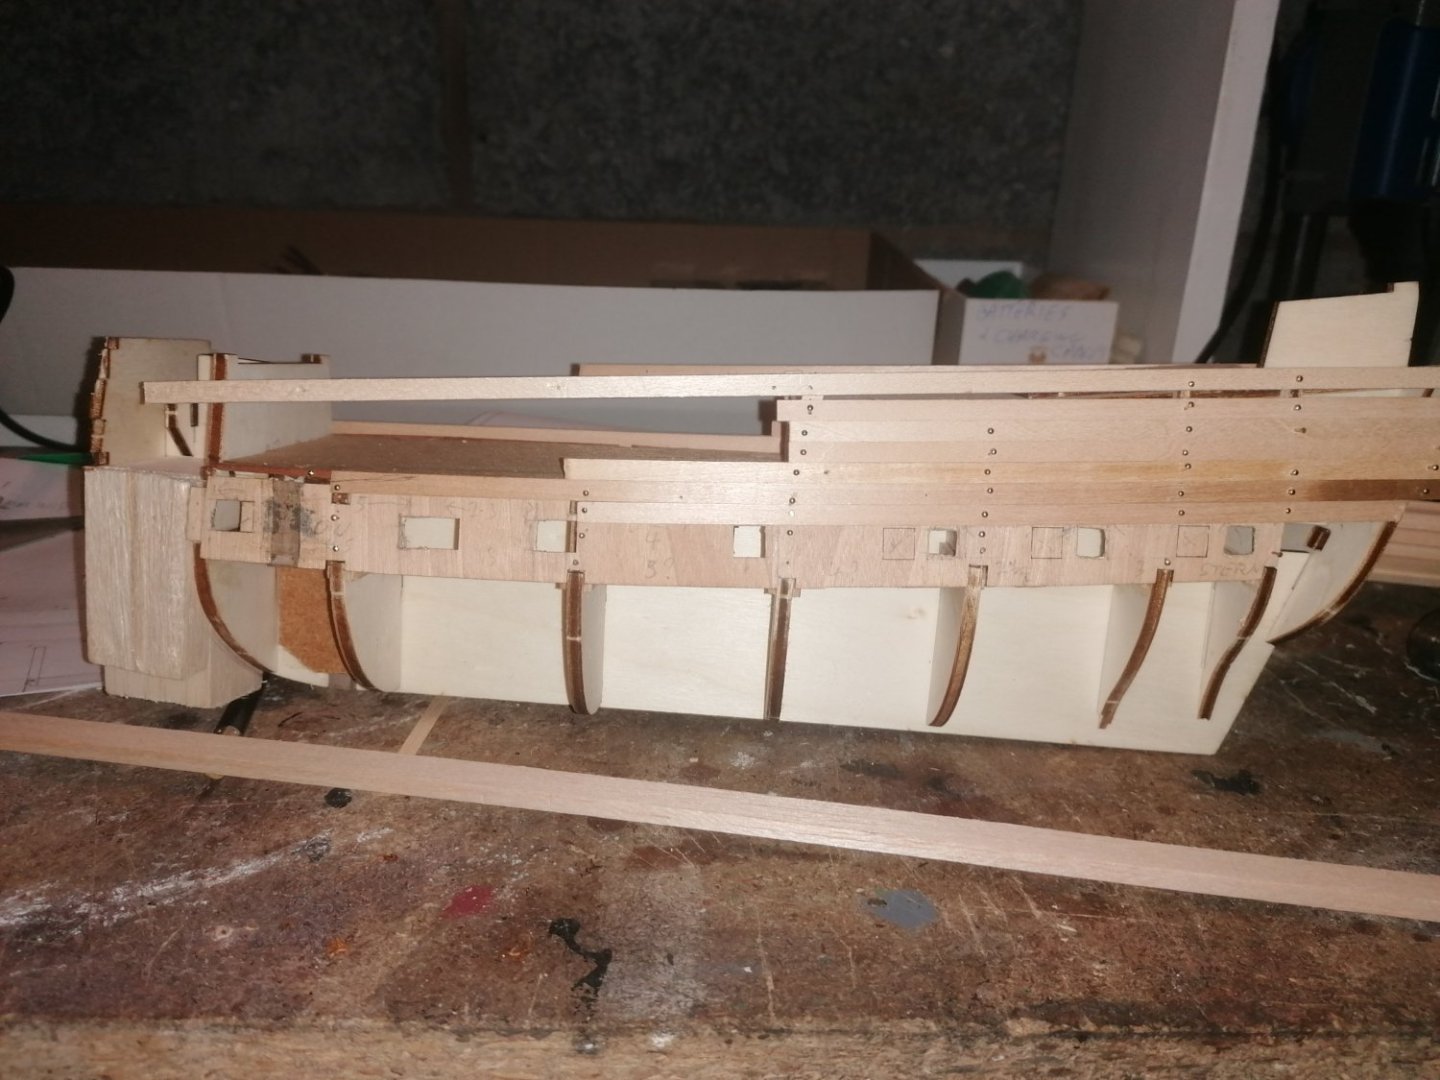
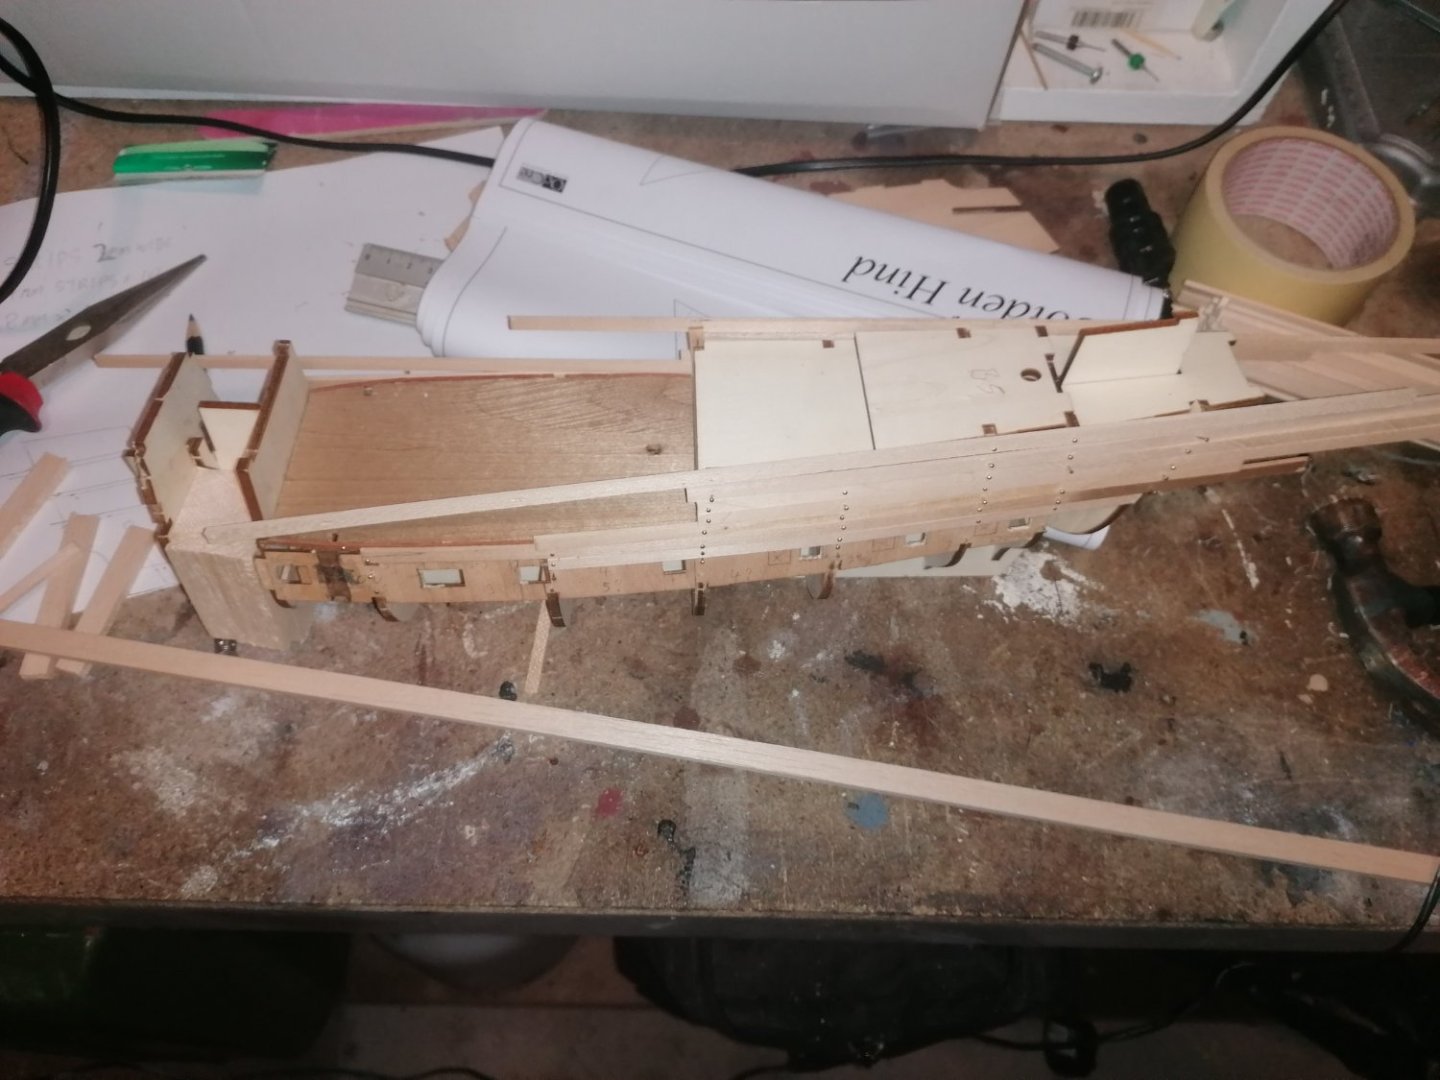
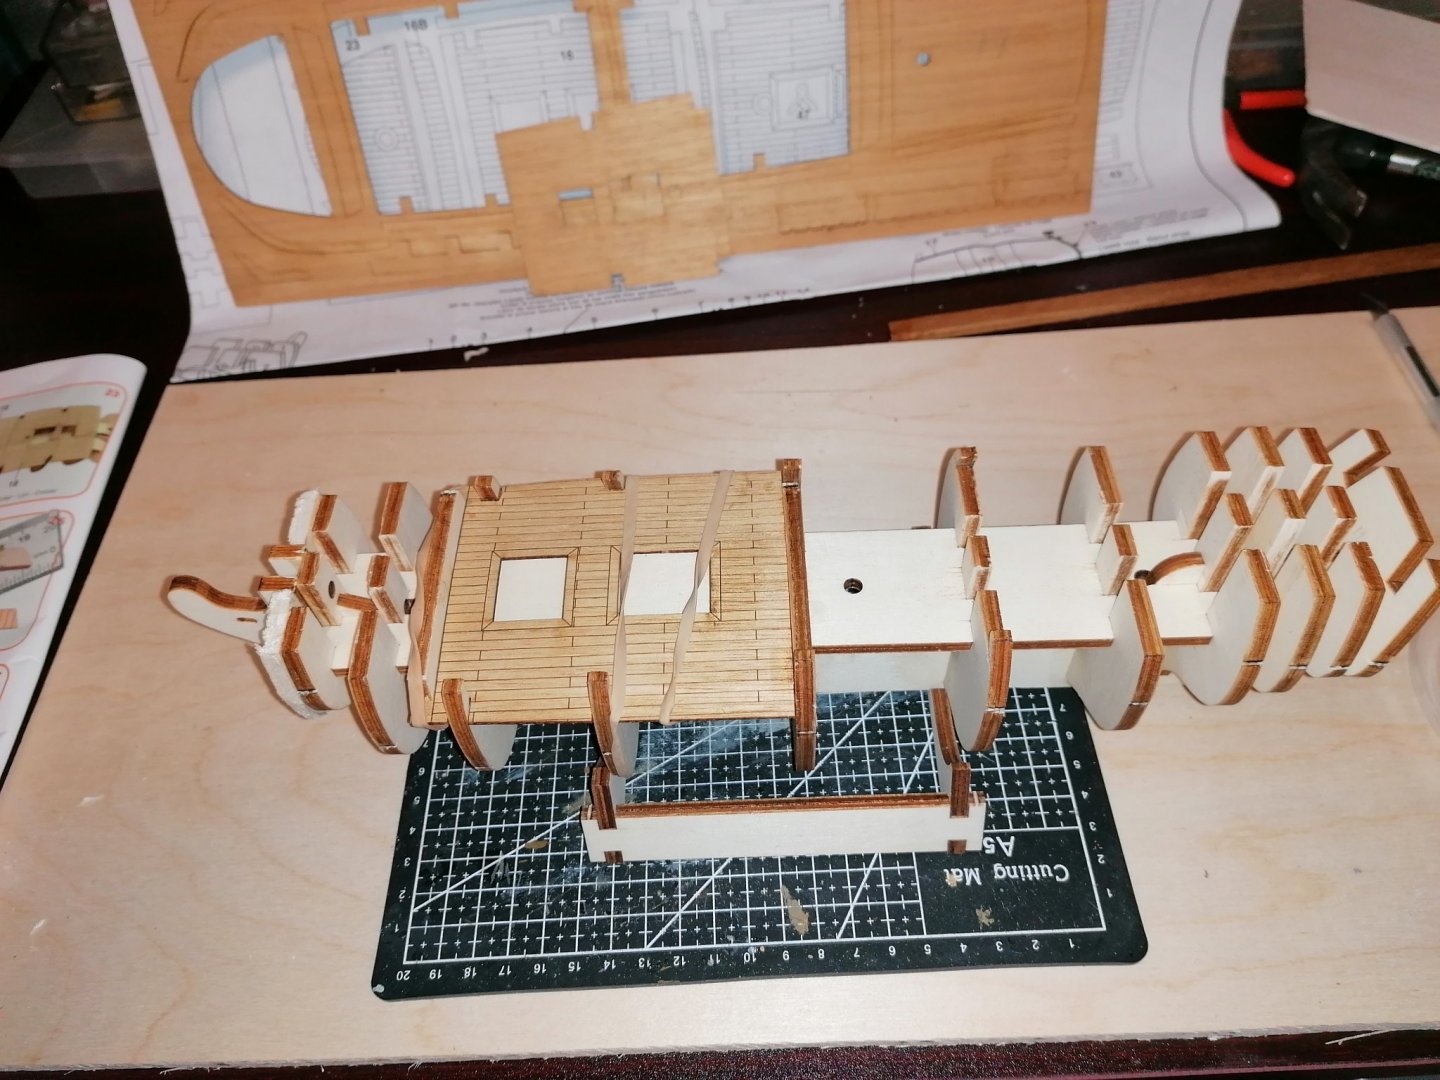
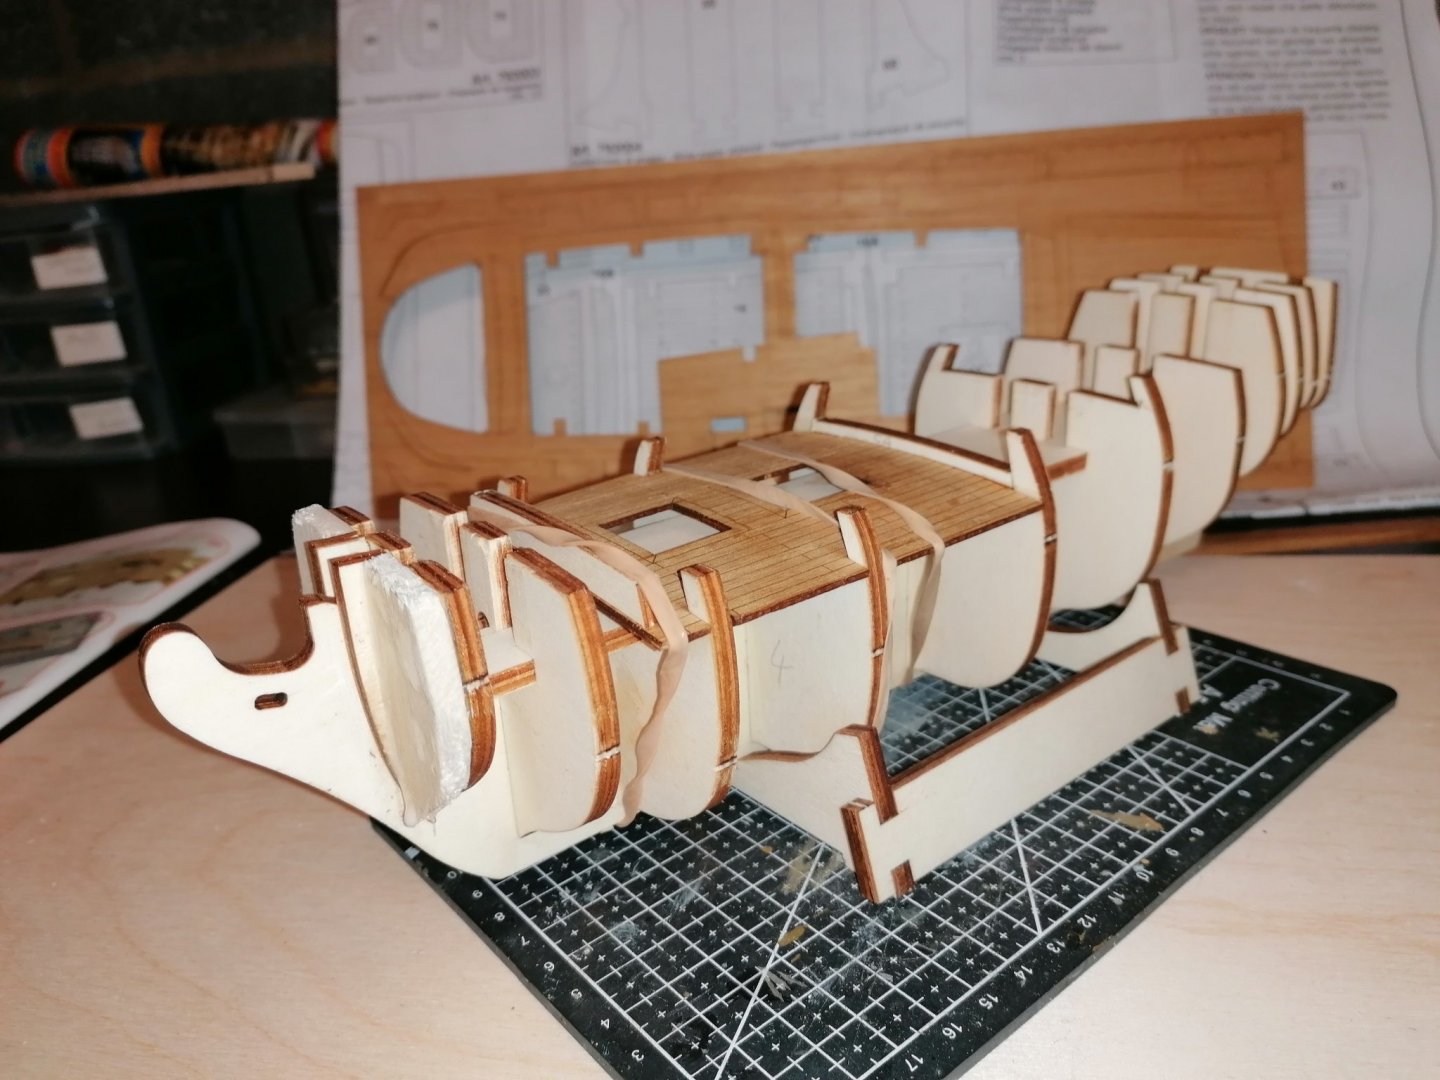
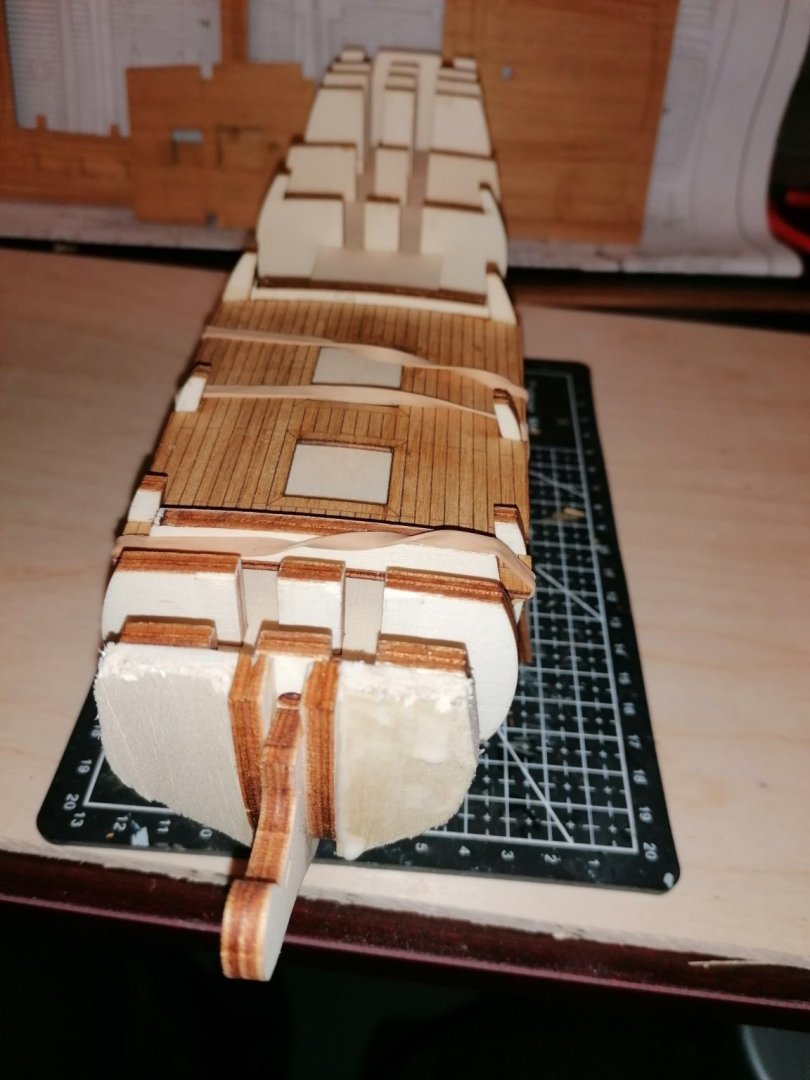
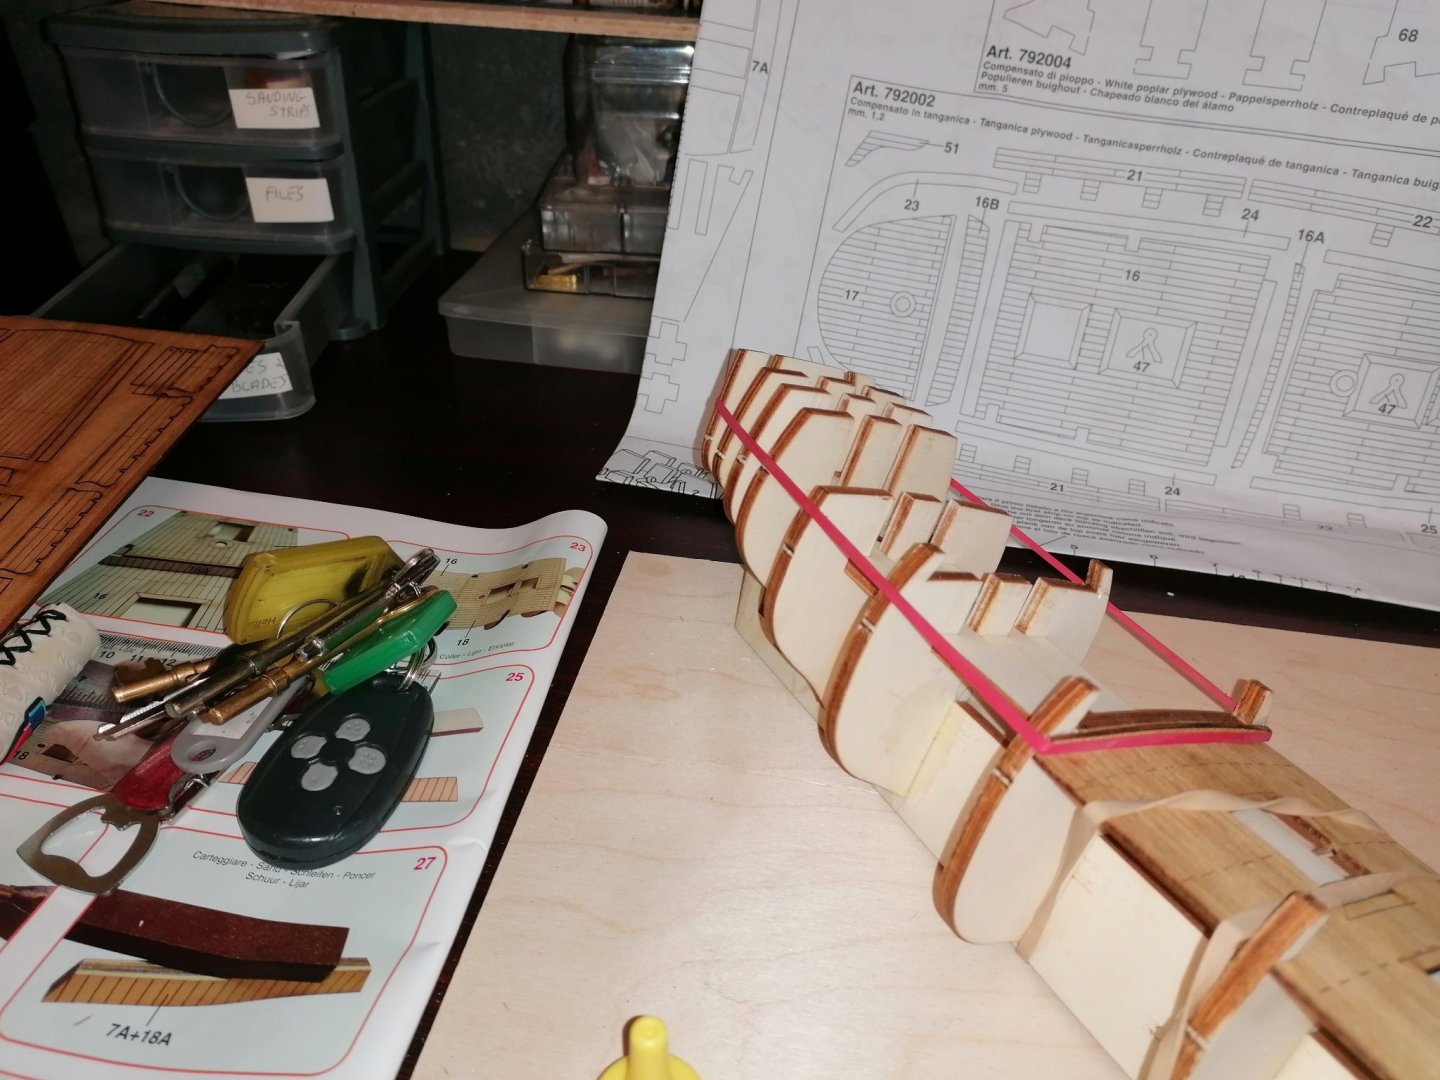
Since the last post I had been trying to arrange the strakes on the aft bulwarks to obtain the right angles and widths of the taper of the planks. The shape of these bulwarks is fairly close to how they need to be, though, the top edges are at the wrong angle. The height at the stern is ok. With the main whale in place above the gun ports I found that I was unable to fit the correct number of planks even with them sloping up at the stern. I did, however, noticed that if the main whale was angled up more, I would get the right fit. This would mean re-thinking the gun ports and raising the stern most ones further up which, would in turn. mean adjusting the position of the stern gallery. After looking again at more photos of the actual ship I realised I had been trying to run the lower decorative strip parallel to the main whale. In reality it is actually higher at the stern than further forward so it will be possible to place all the planks where they should be with the correct curve upwards at the stern. Happy with this knowledge, I have now unpinned everything and have glued the frames in place apart from the stern pieces which I will add later as they need to be reshaped. I have also added the filler blocks all the way along the hull to enable it to withstand the sanding down. I was going to leave the middle section unfilled but realised this could weaken the hull at this point. i have also now added the 2mm sheet on top of the quarterdeck and painted the internal areas black.

-
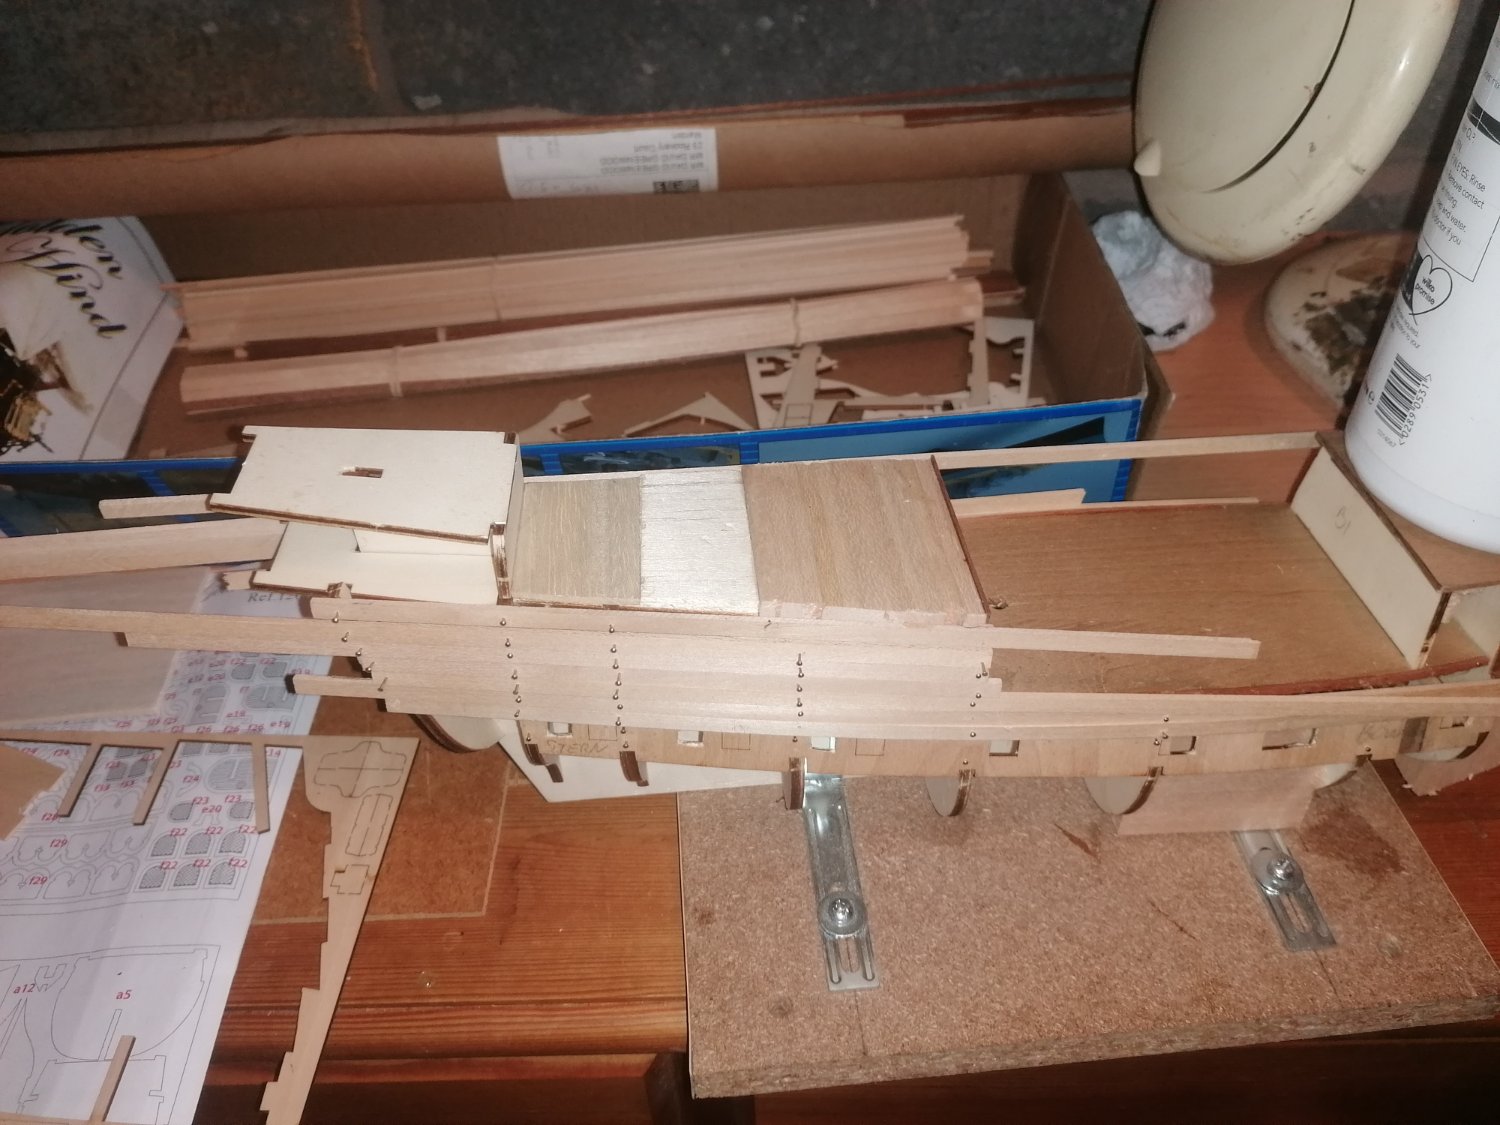
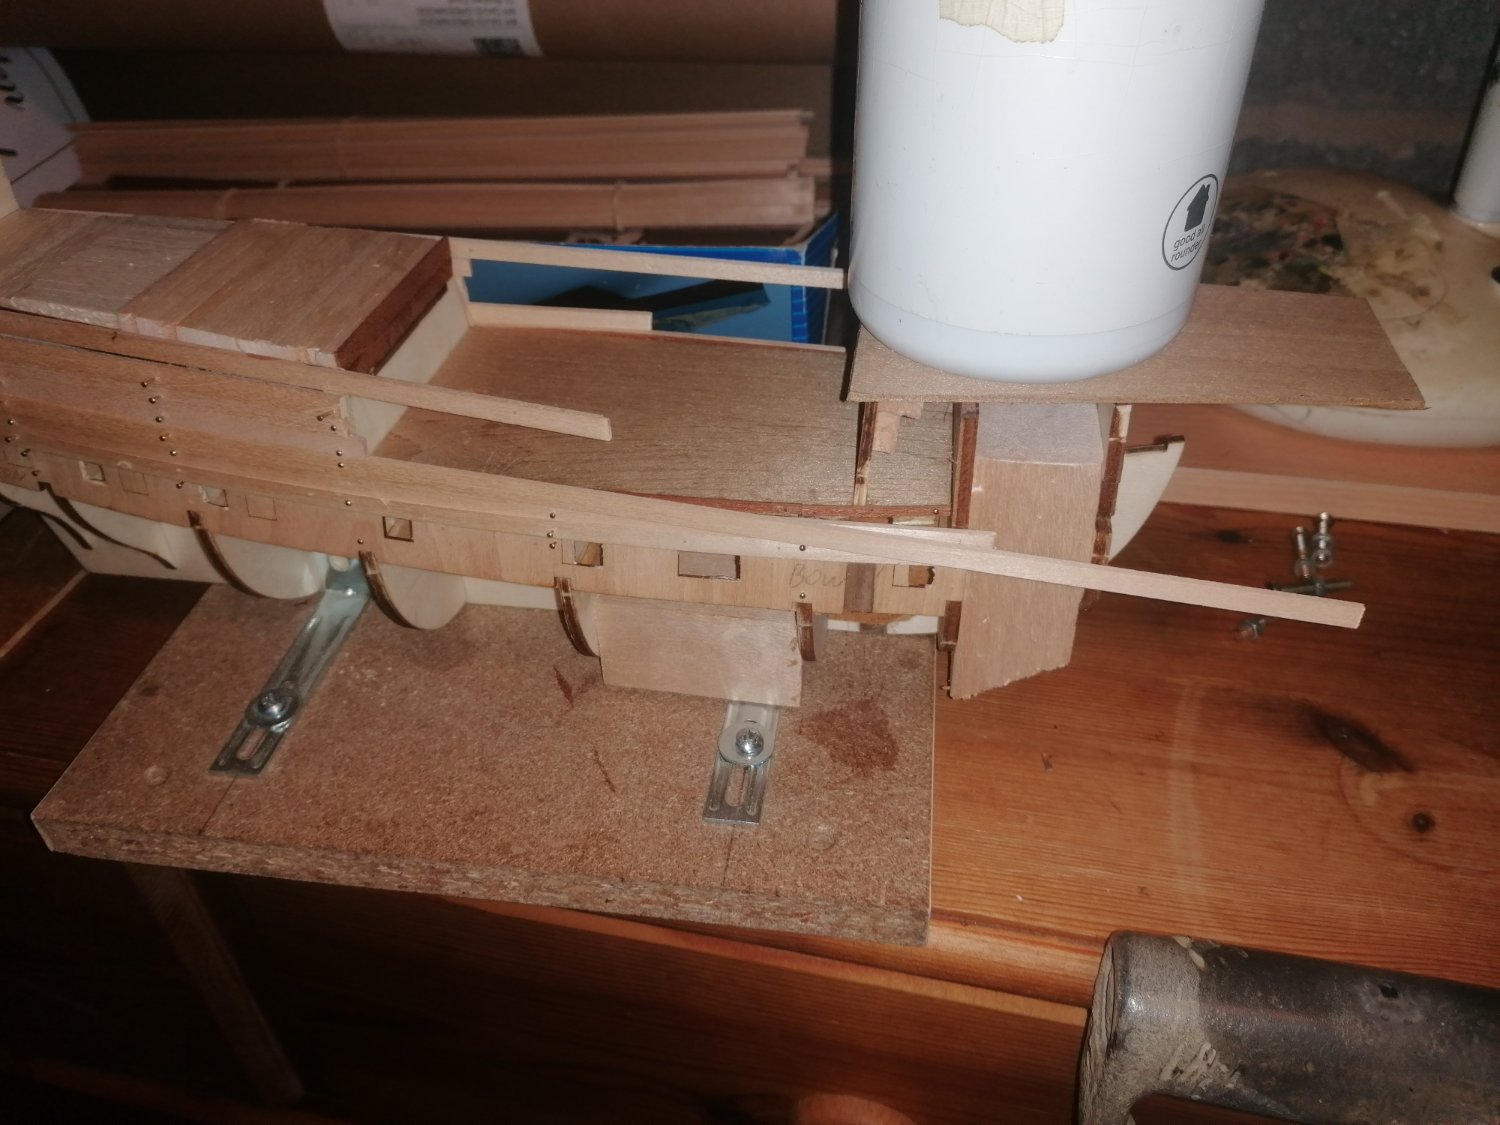
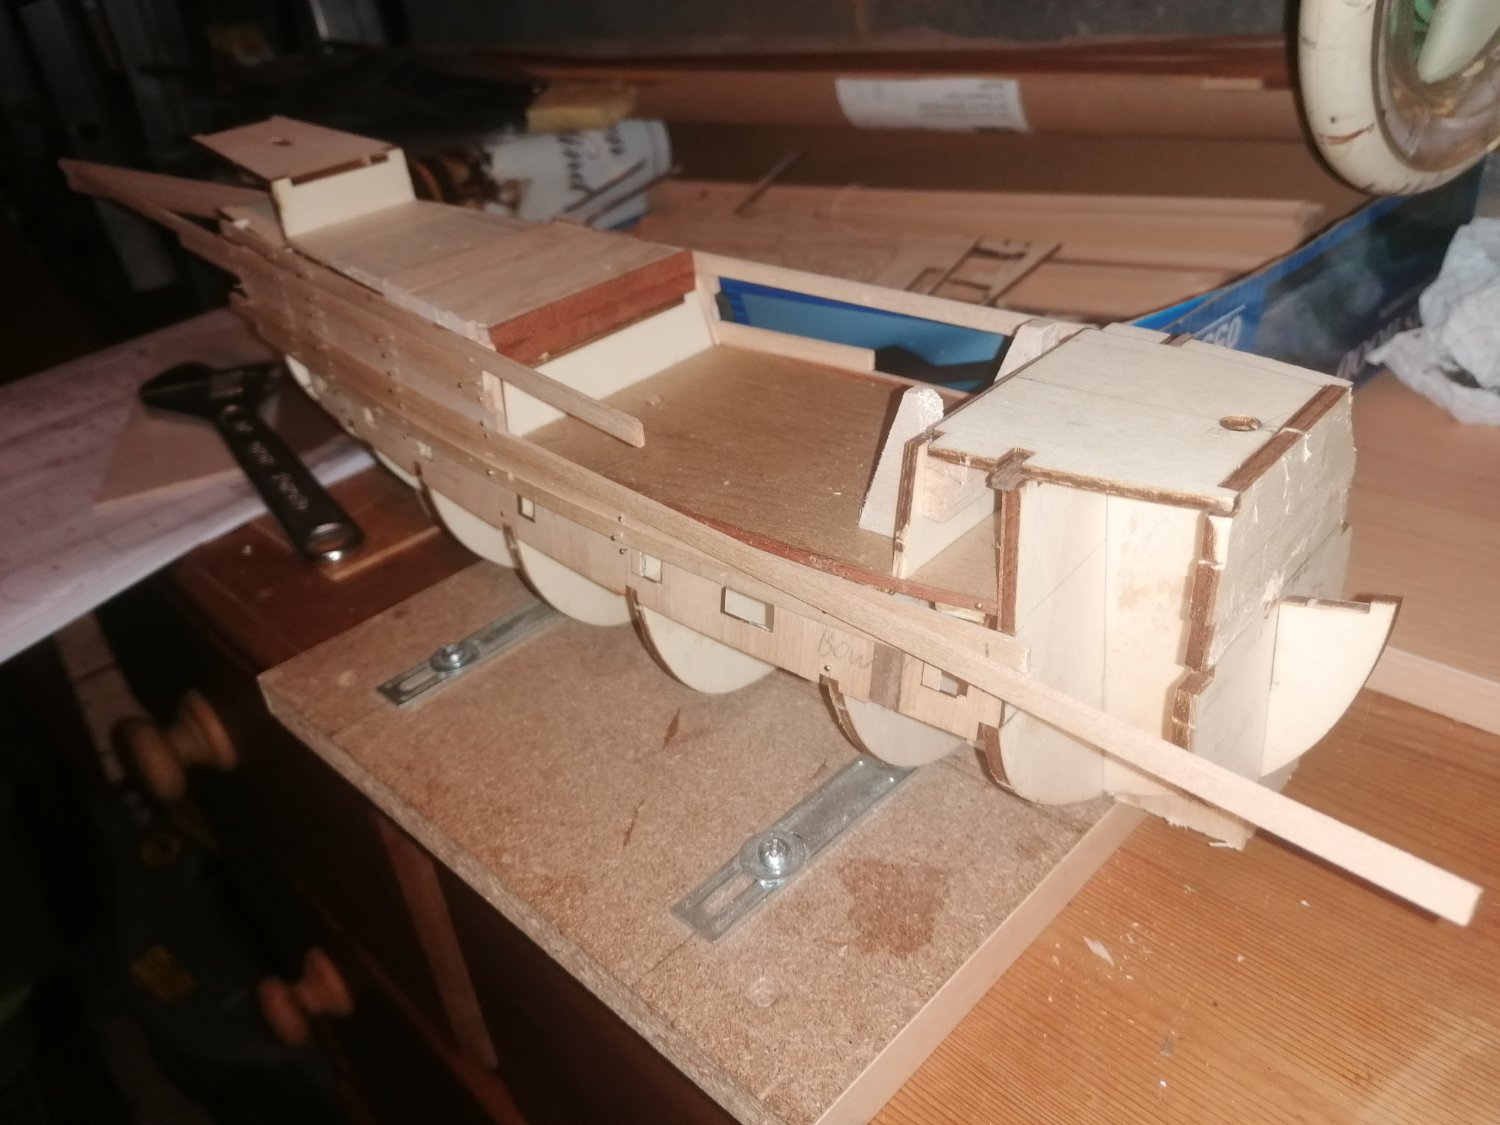
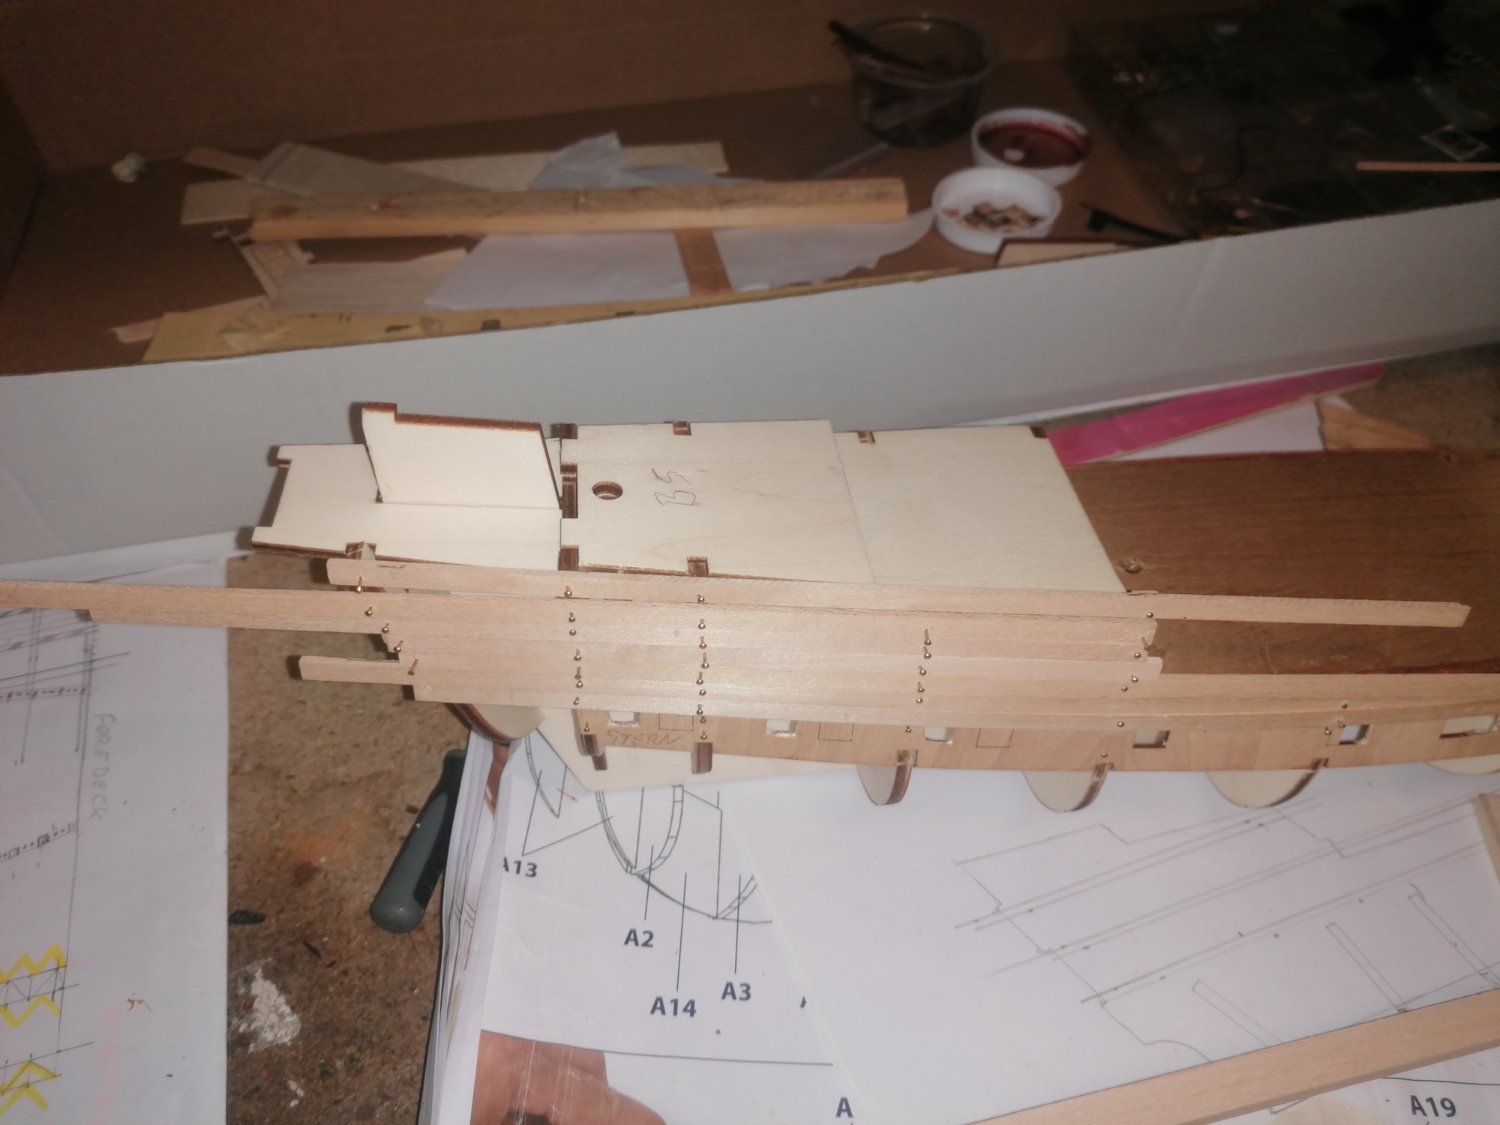
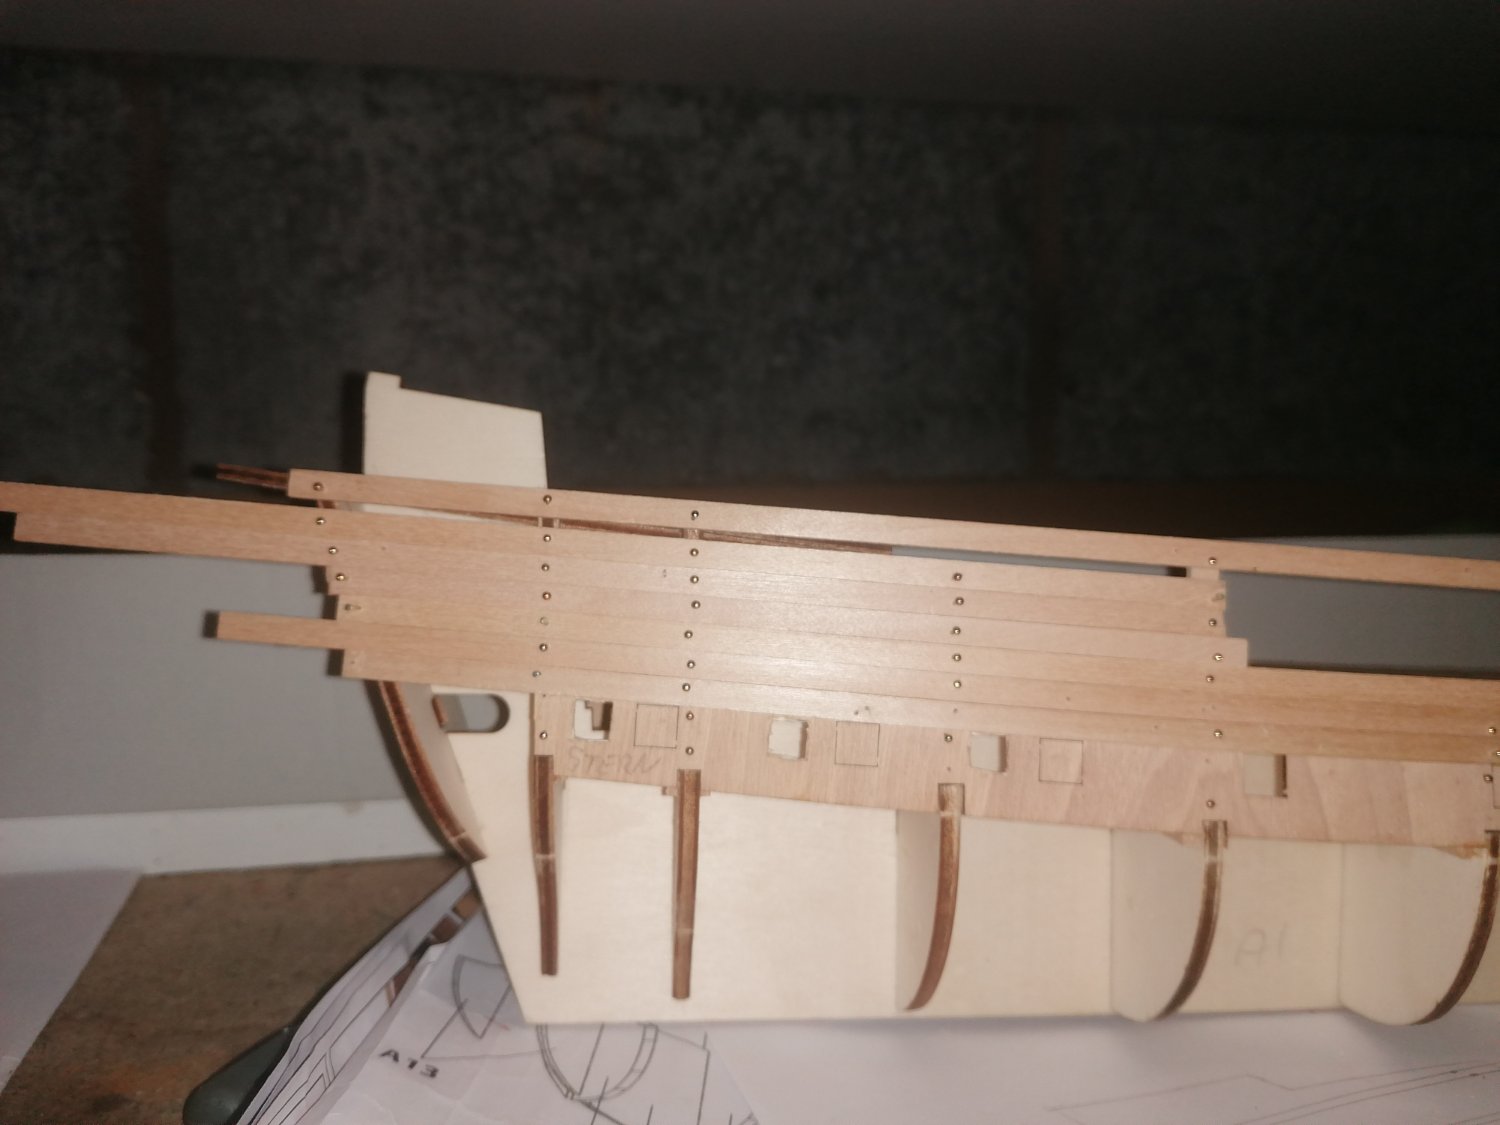
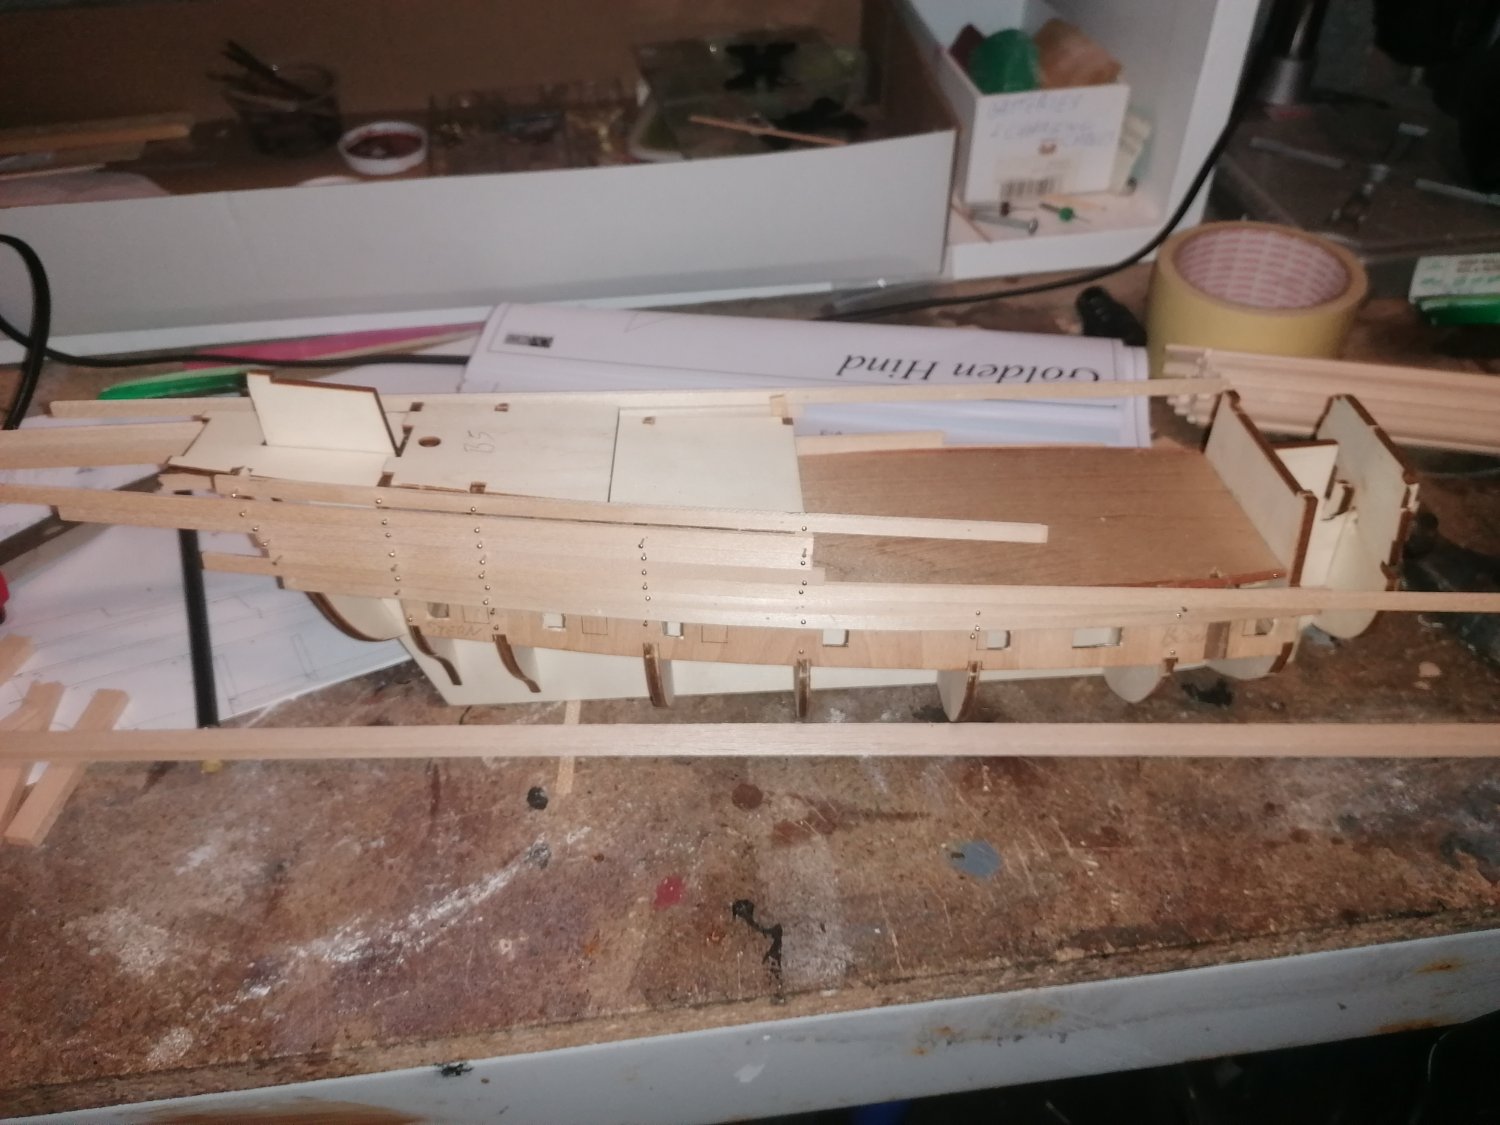
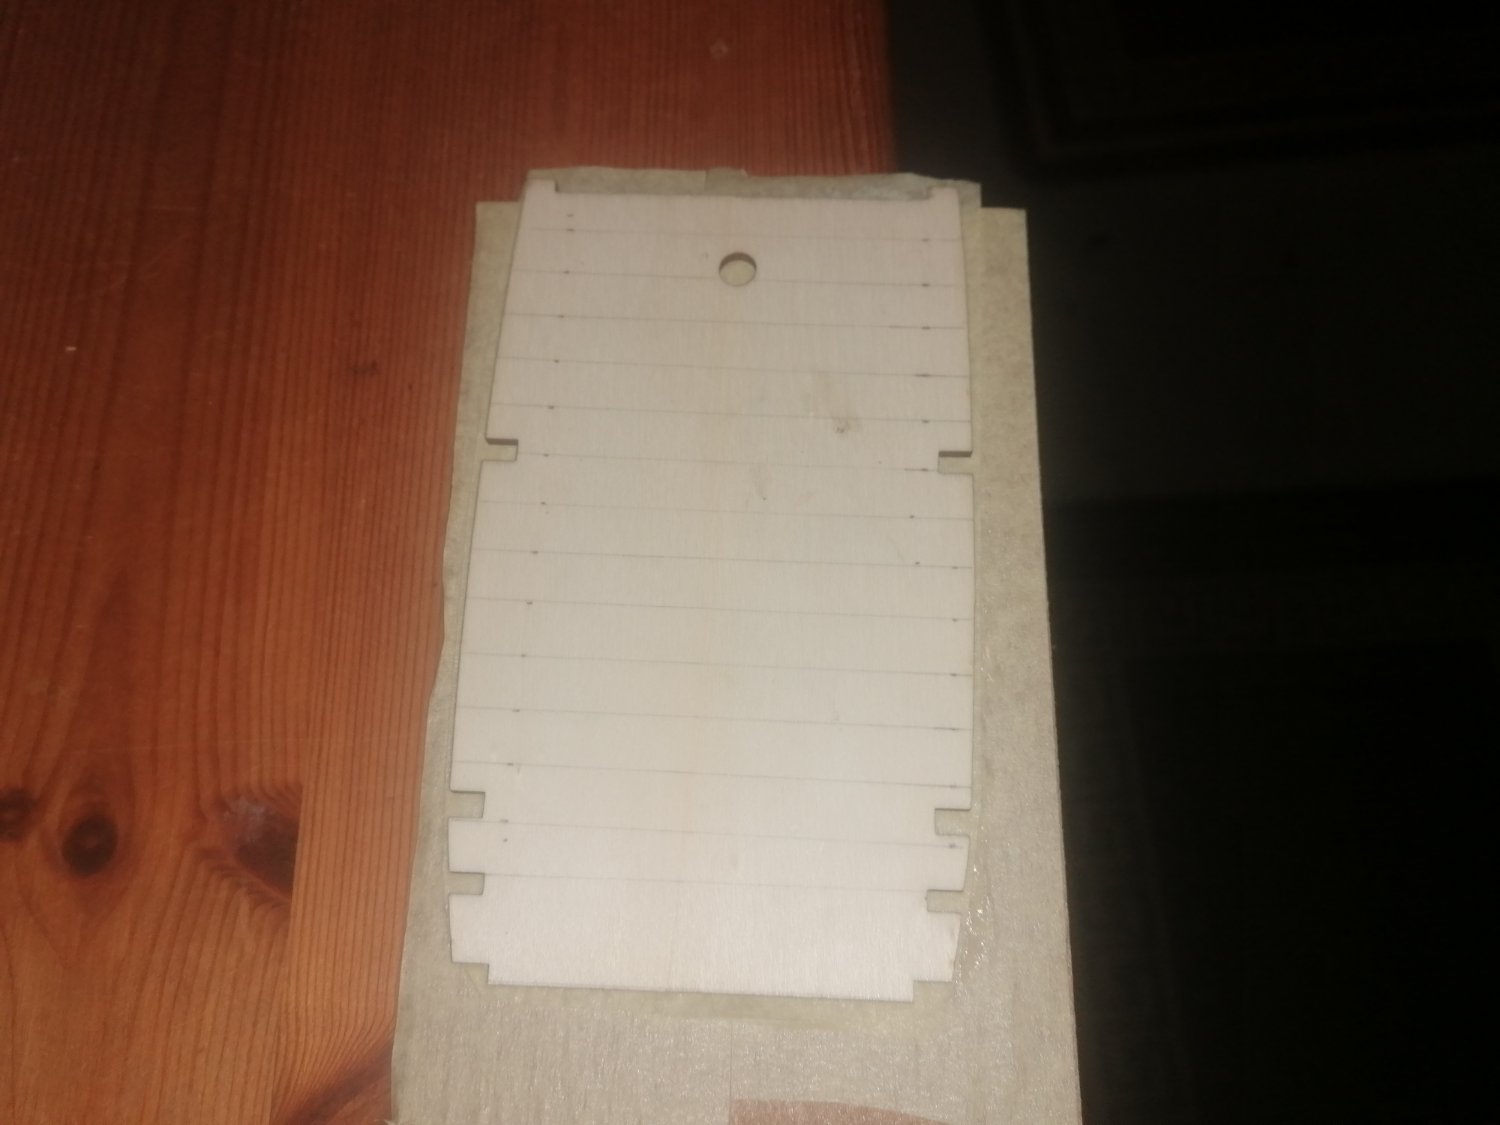
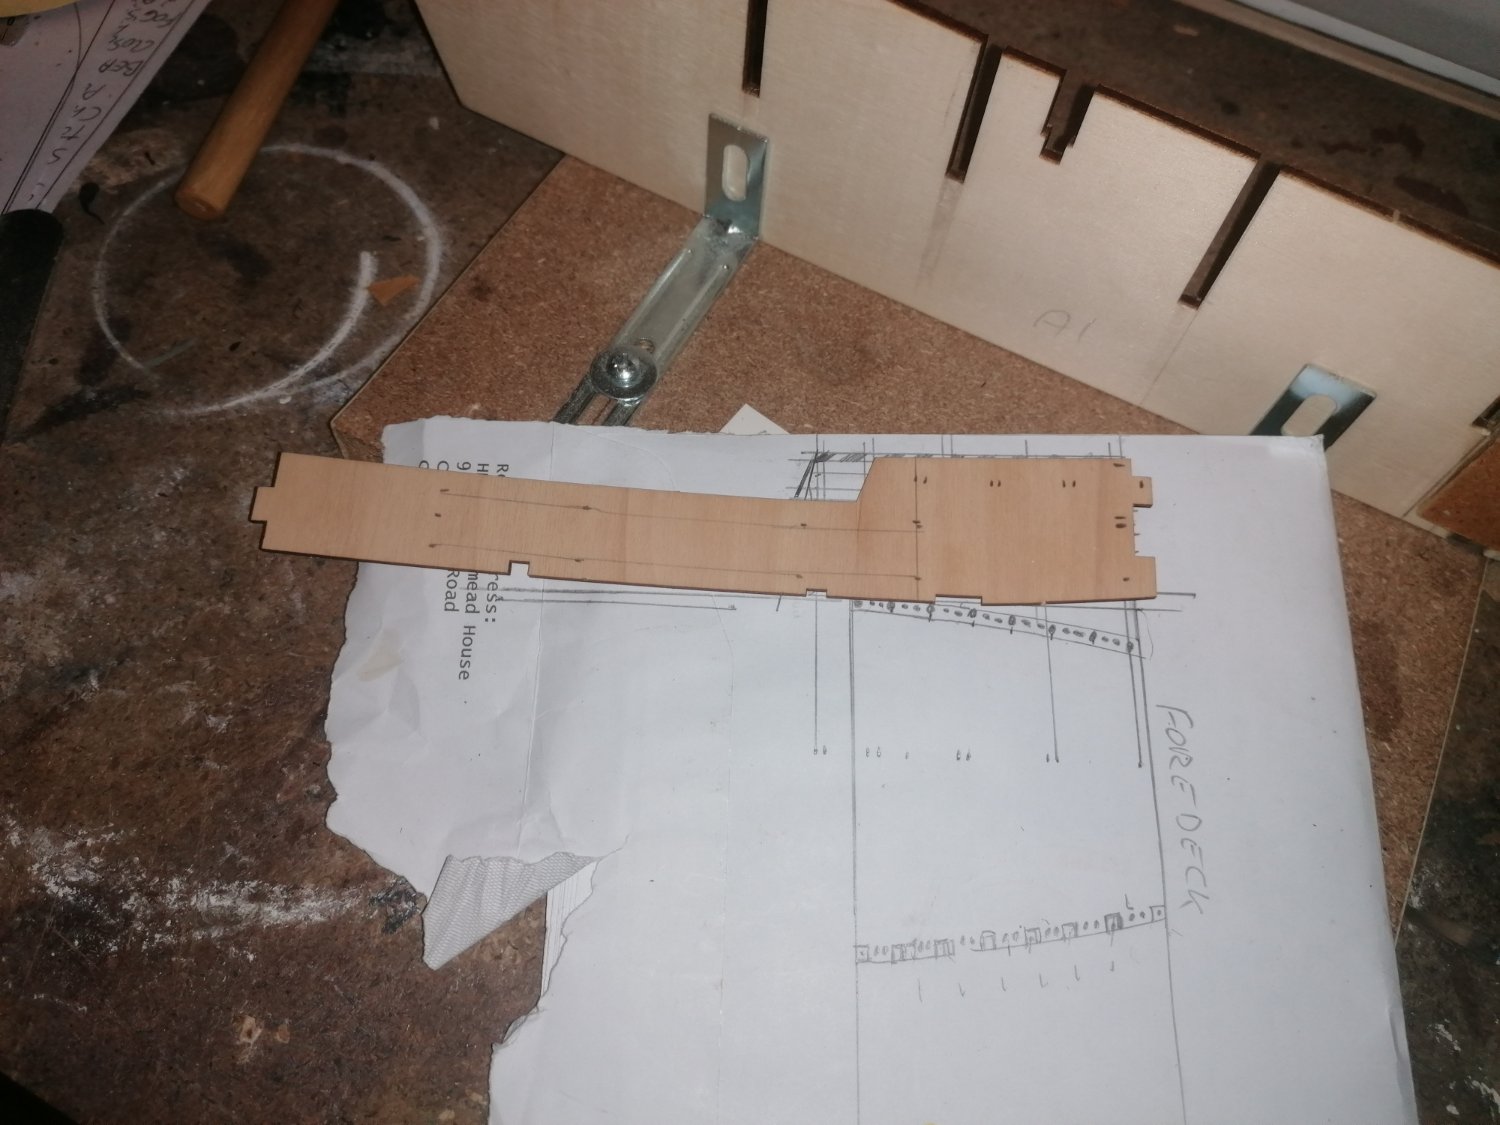
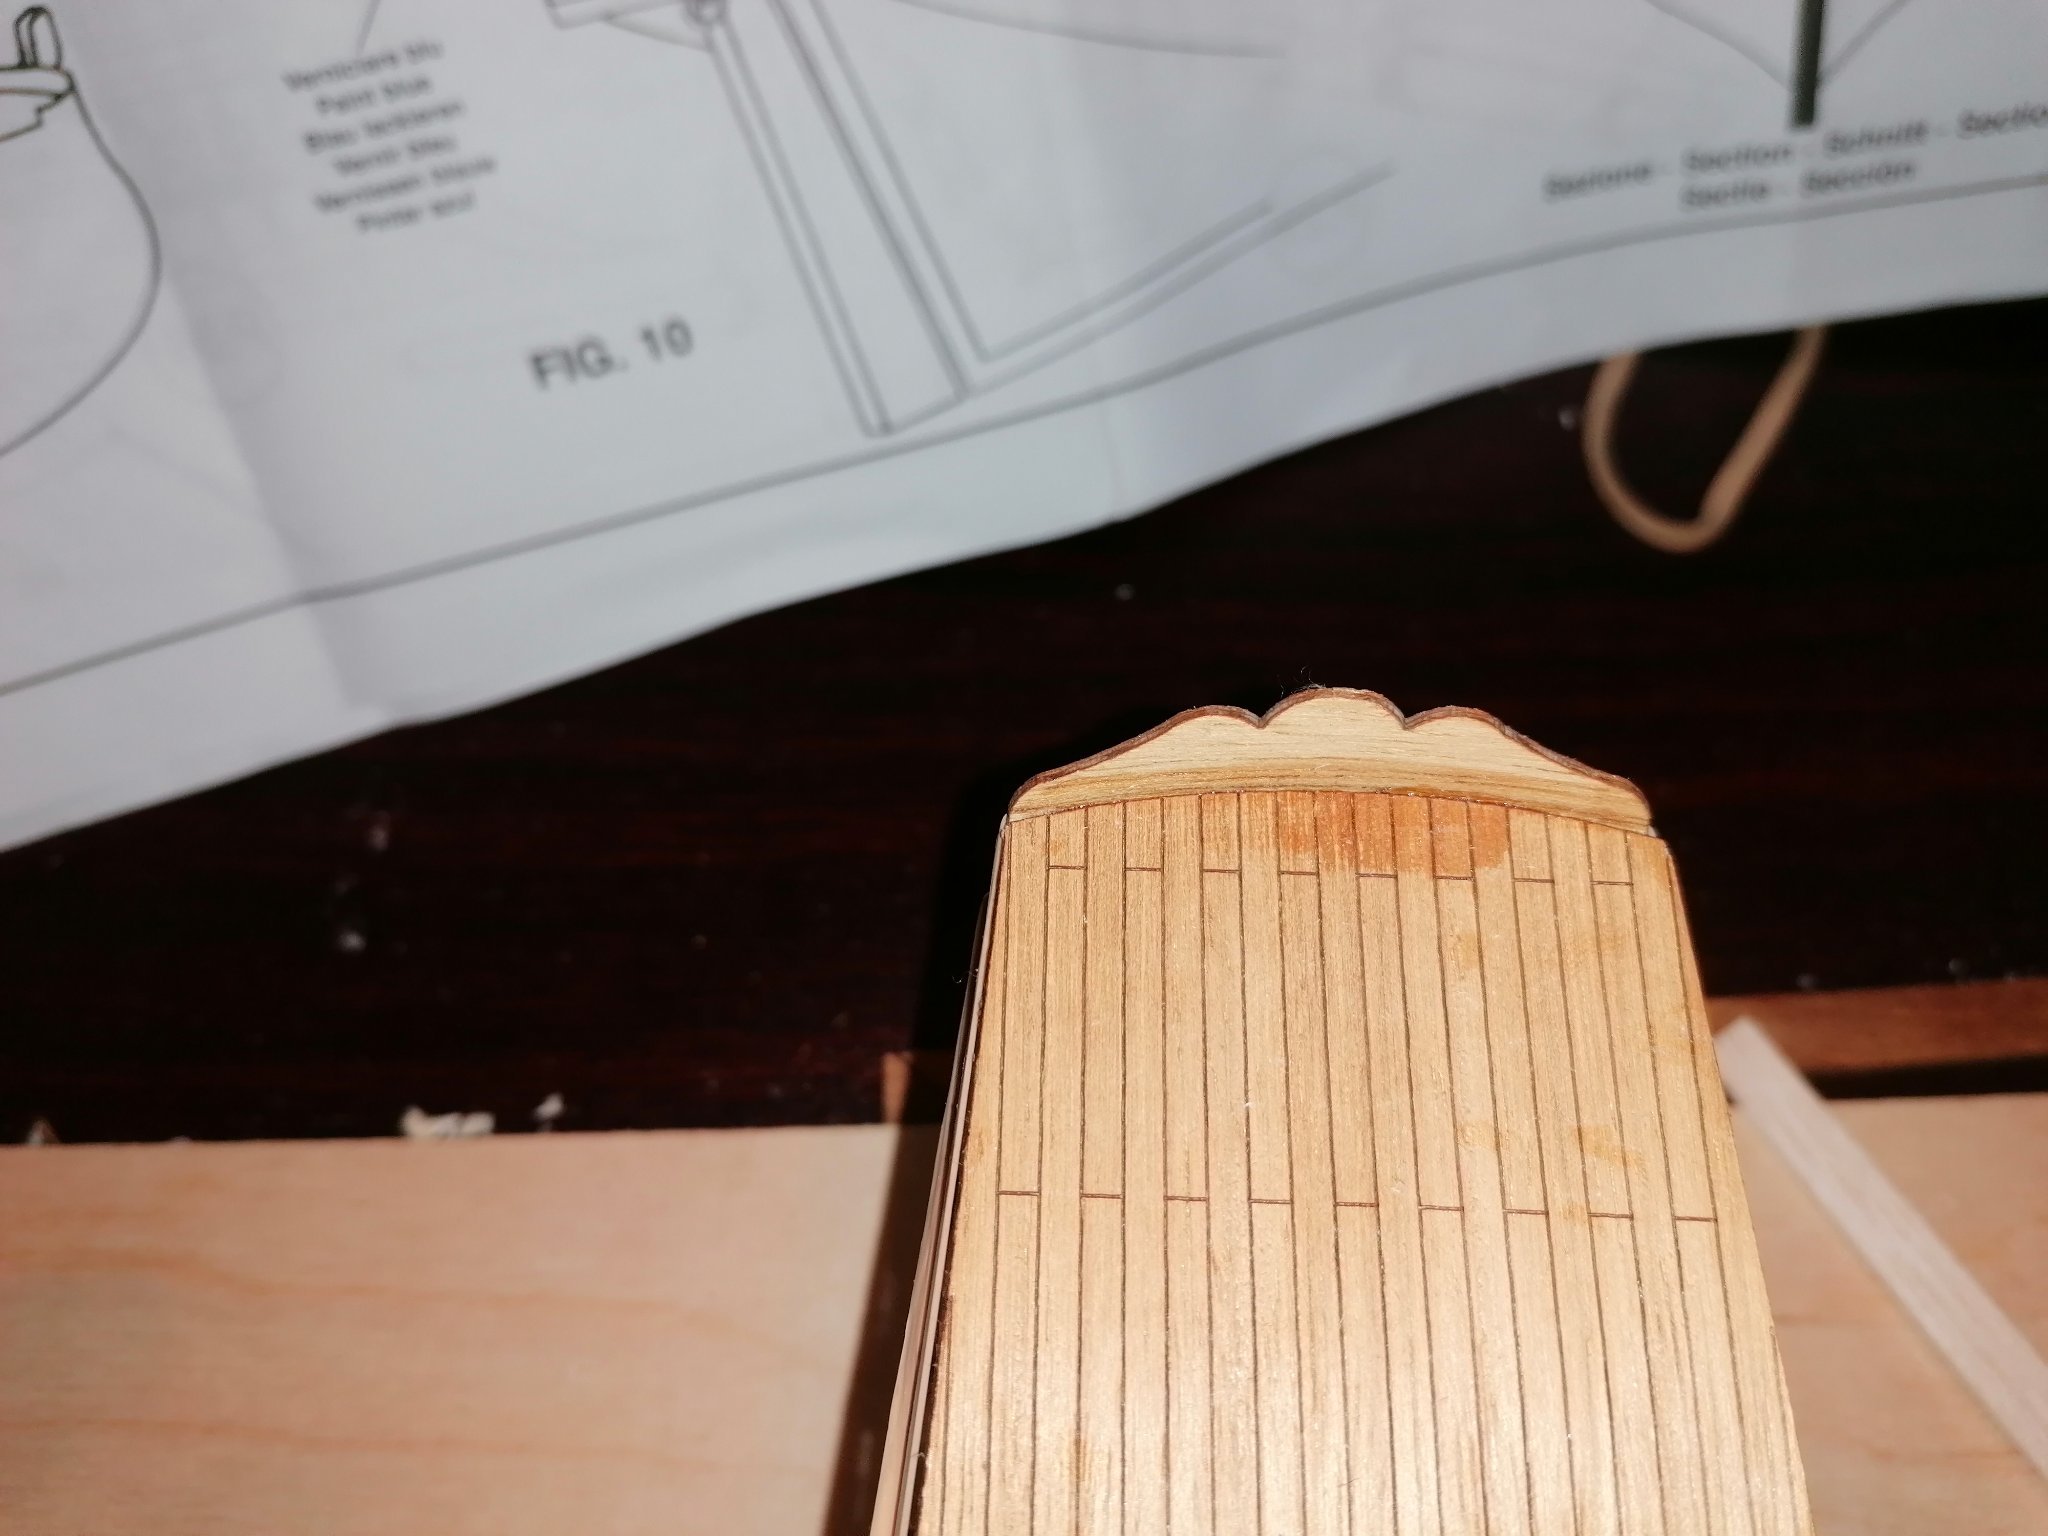
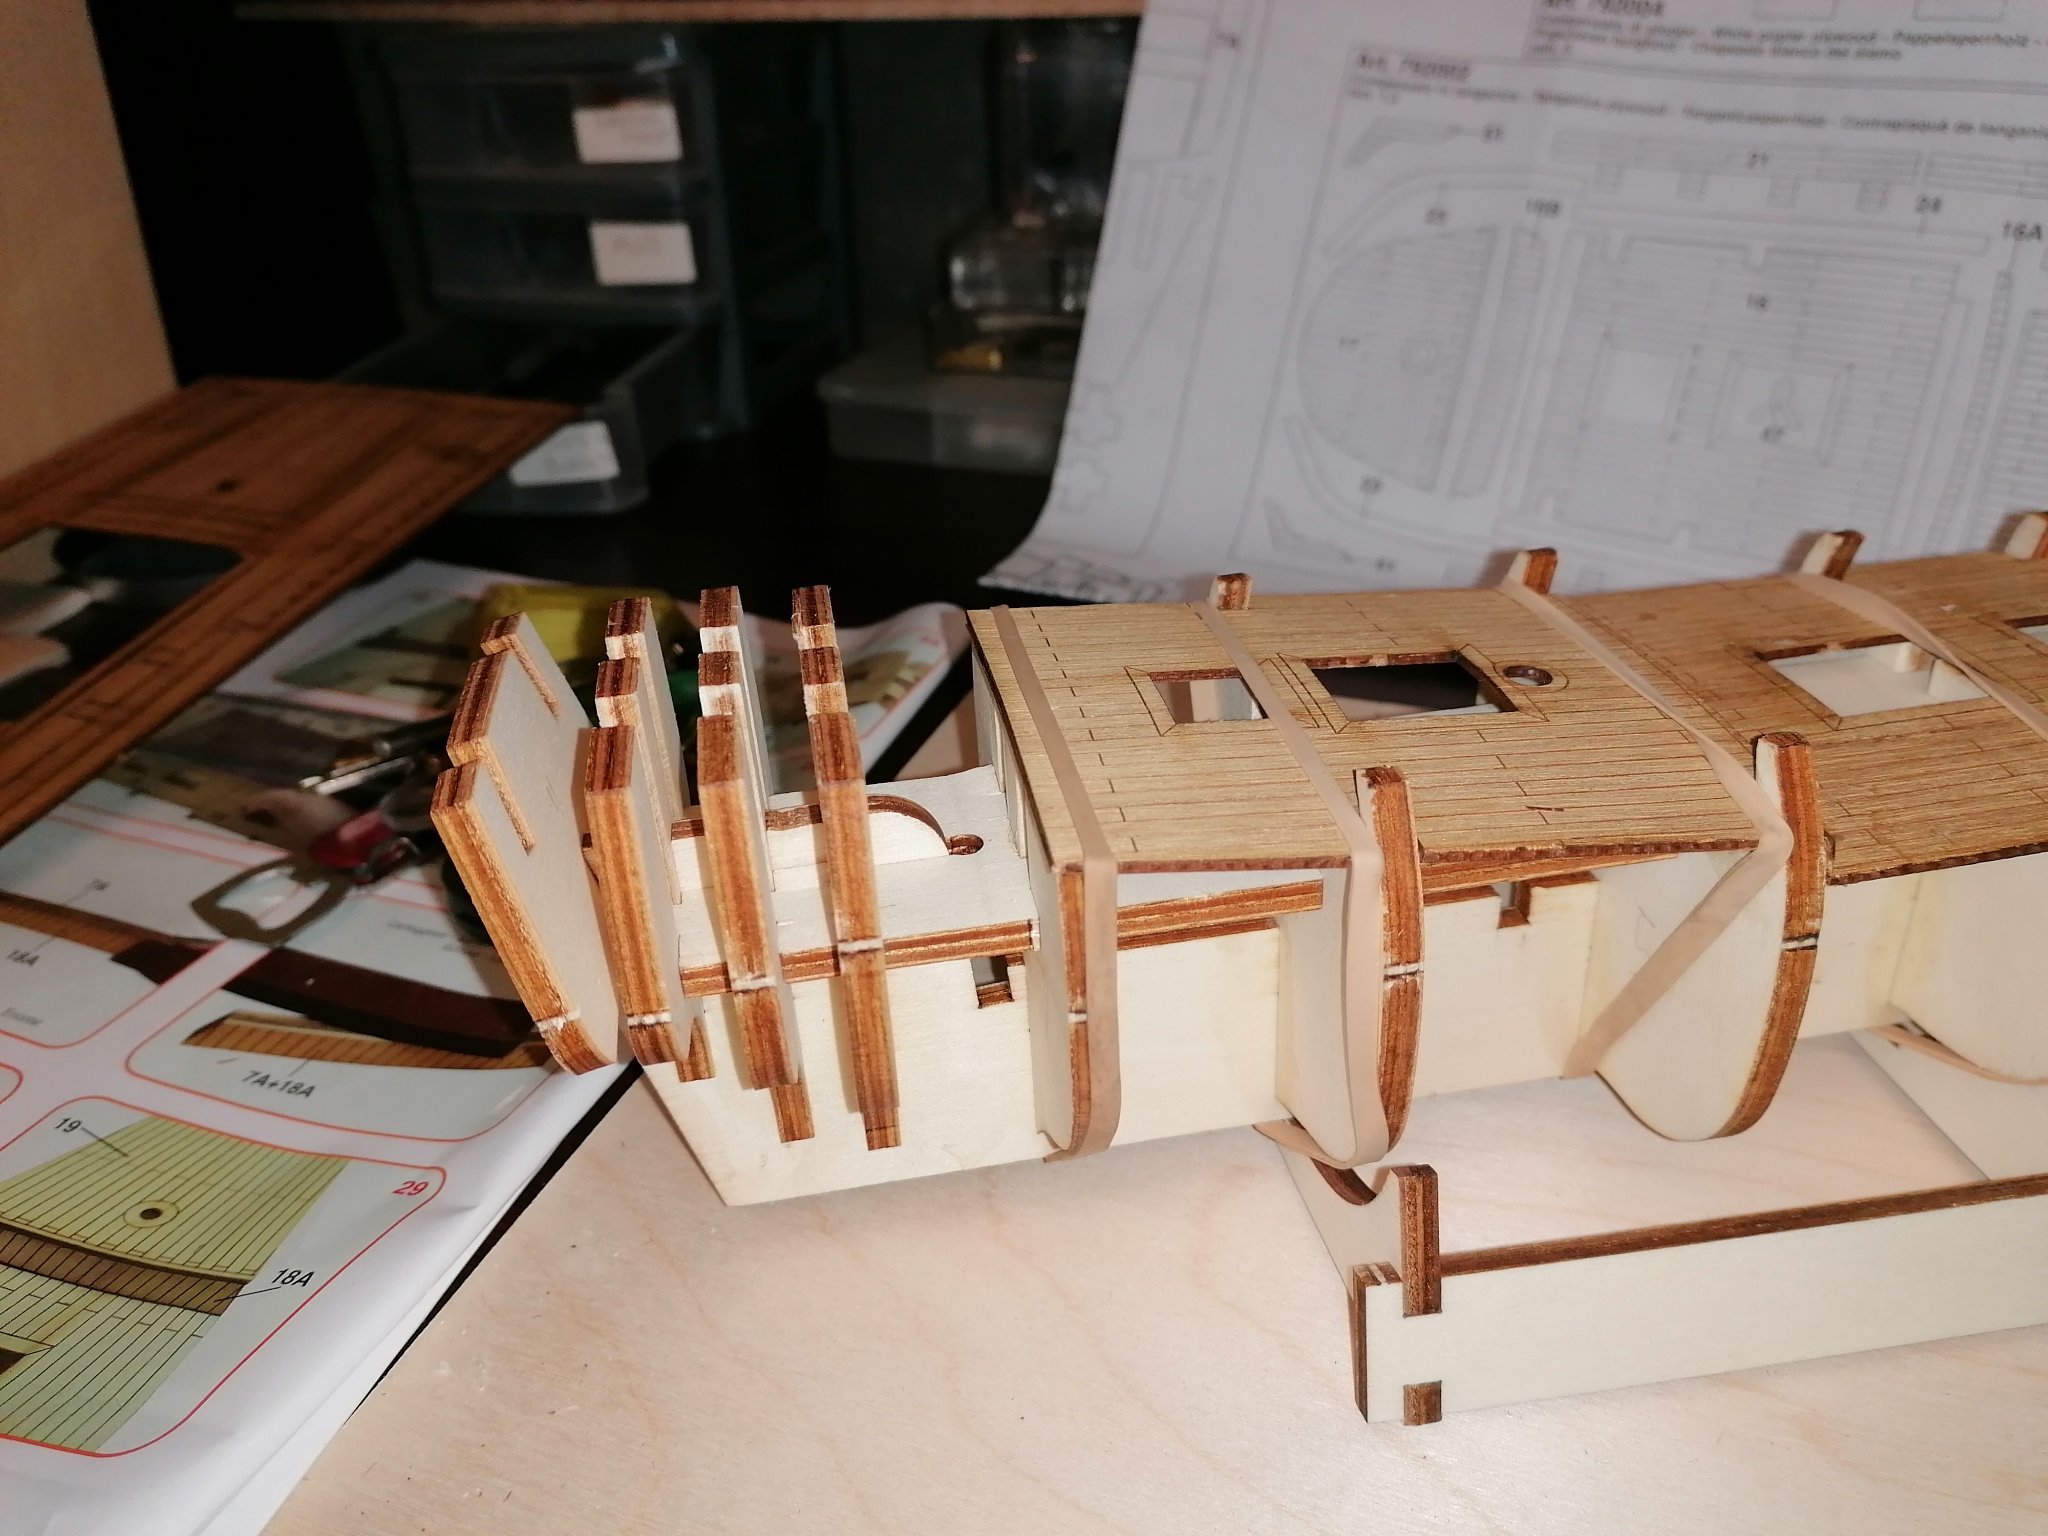
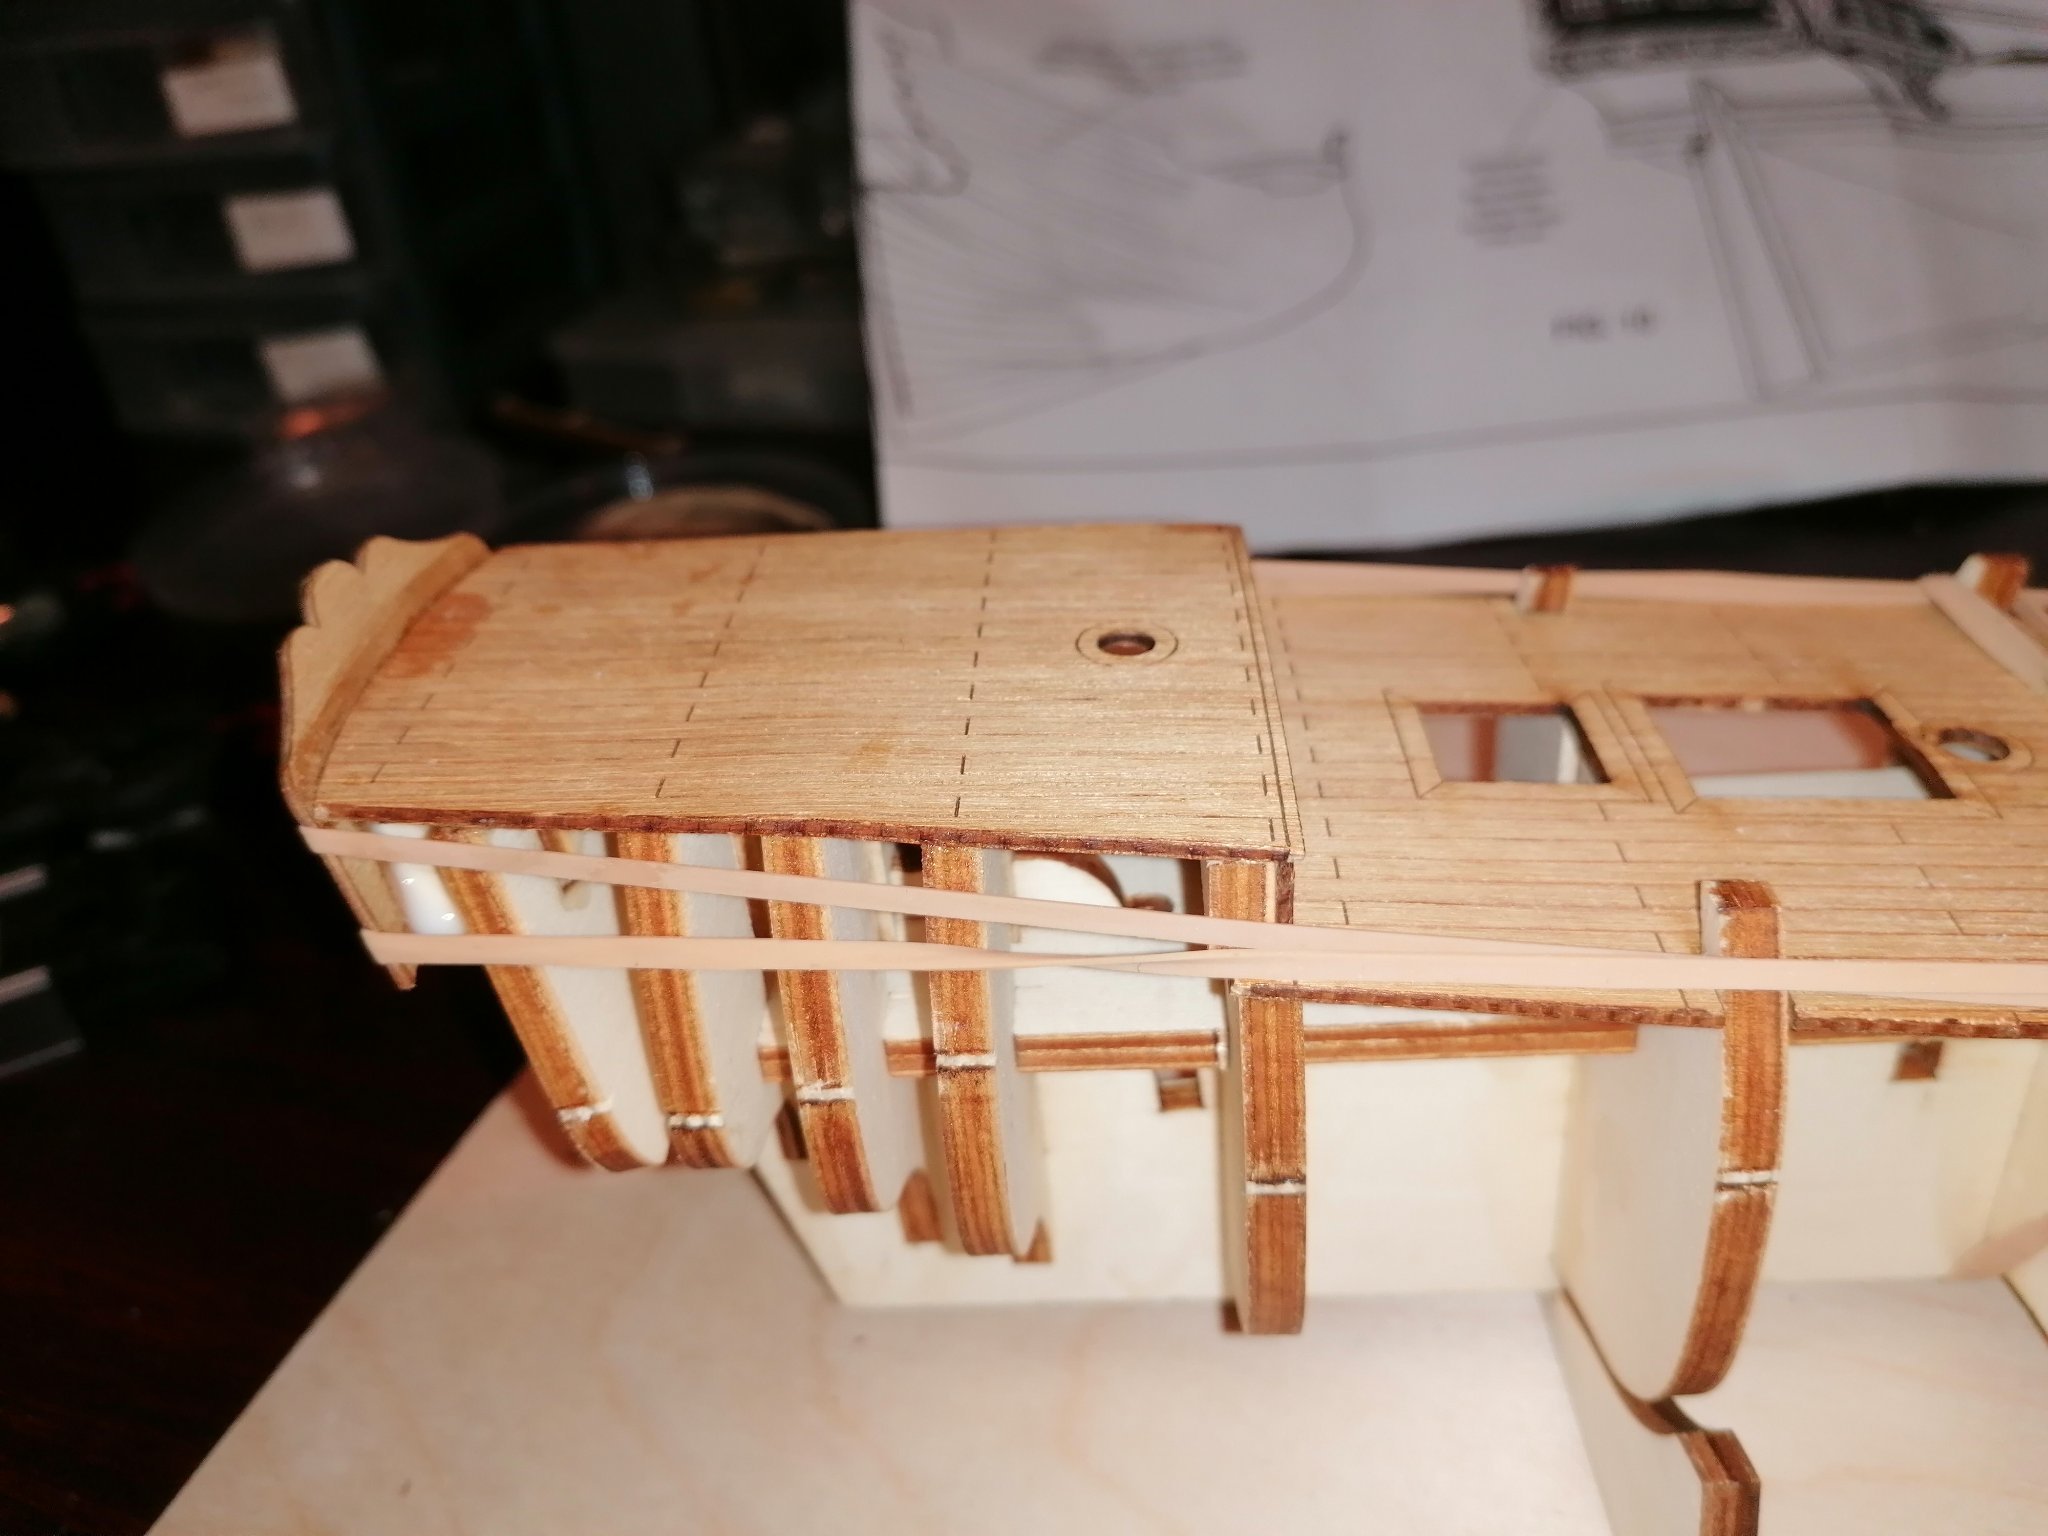
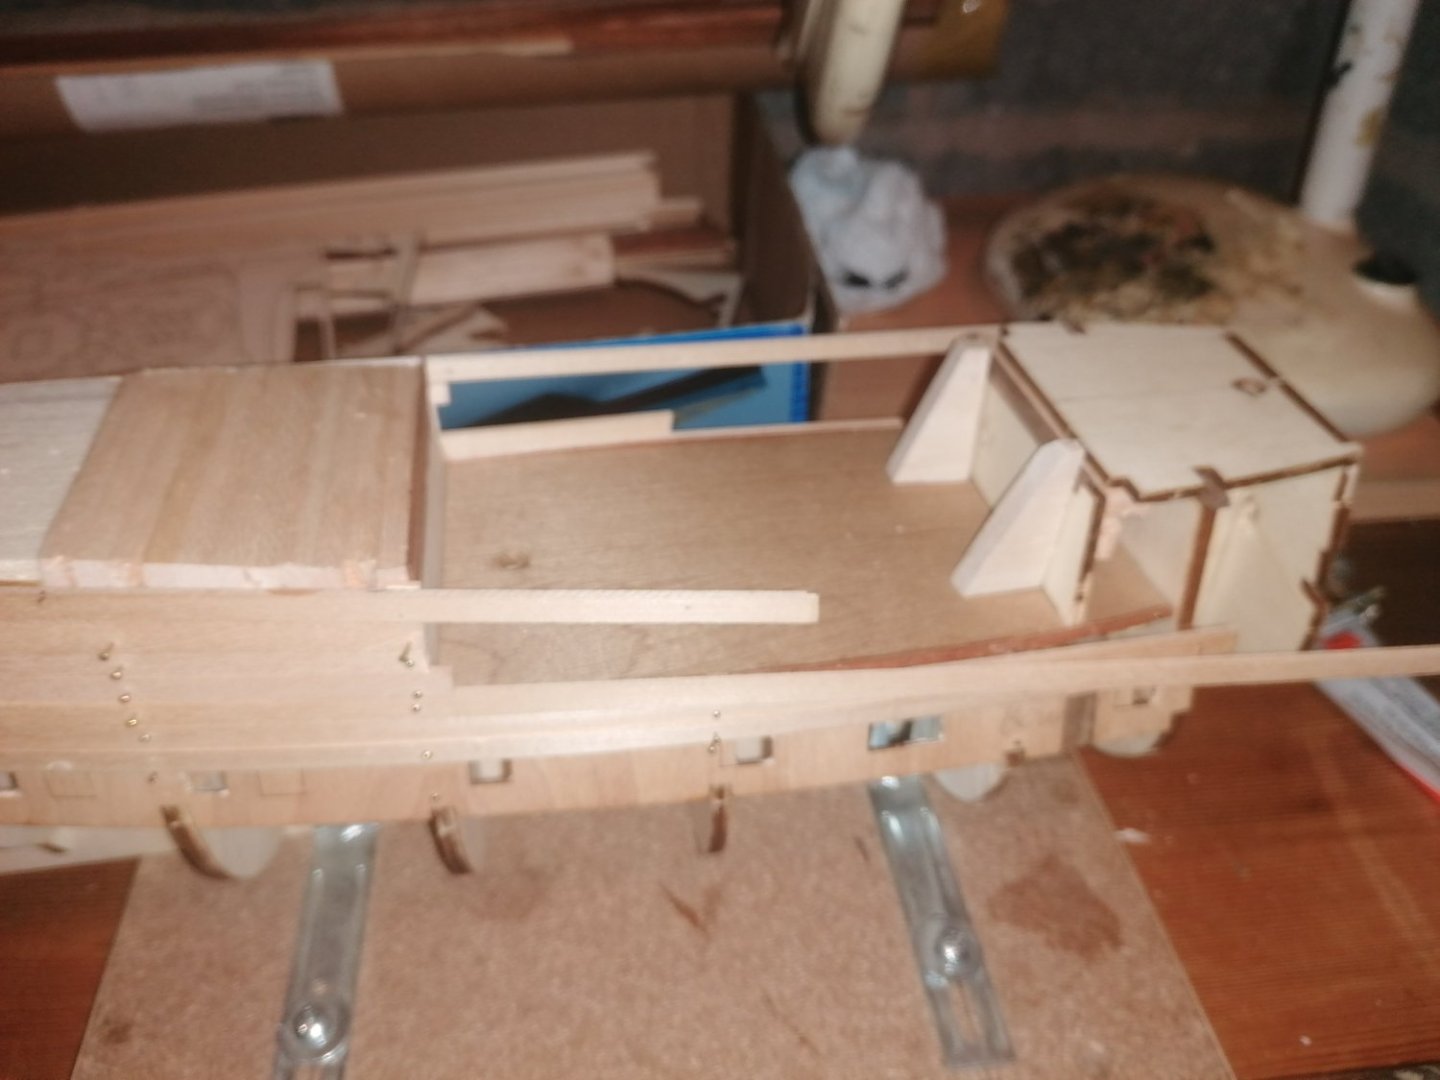
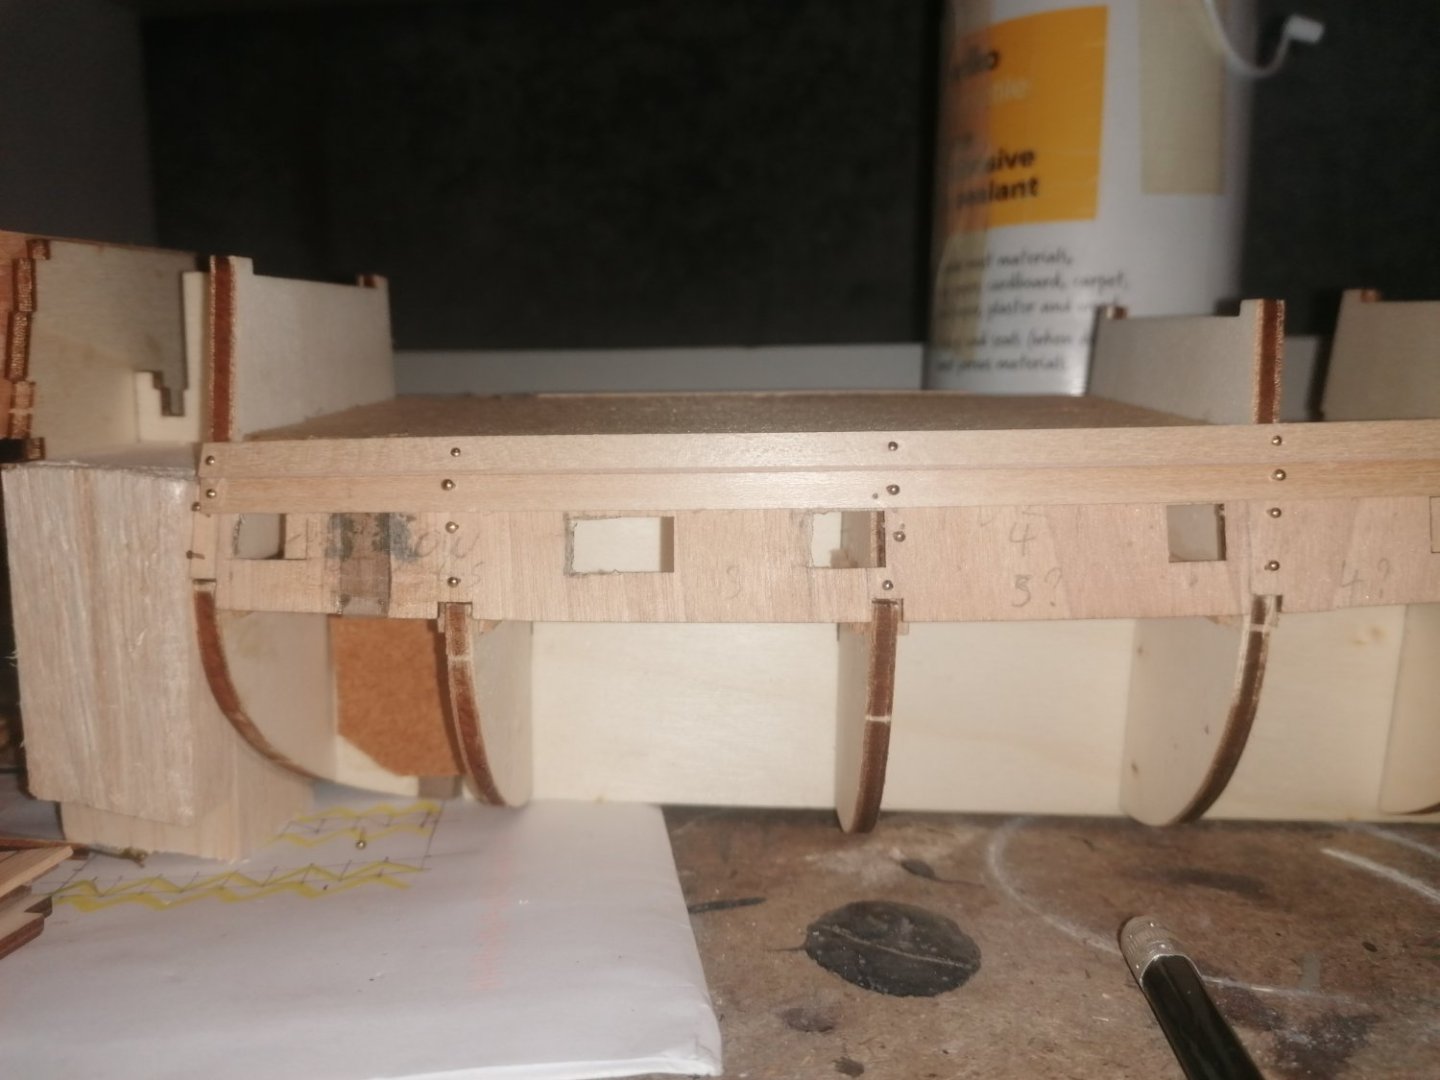
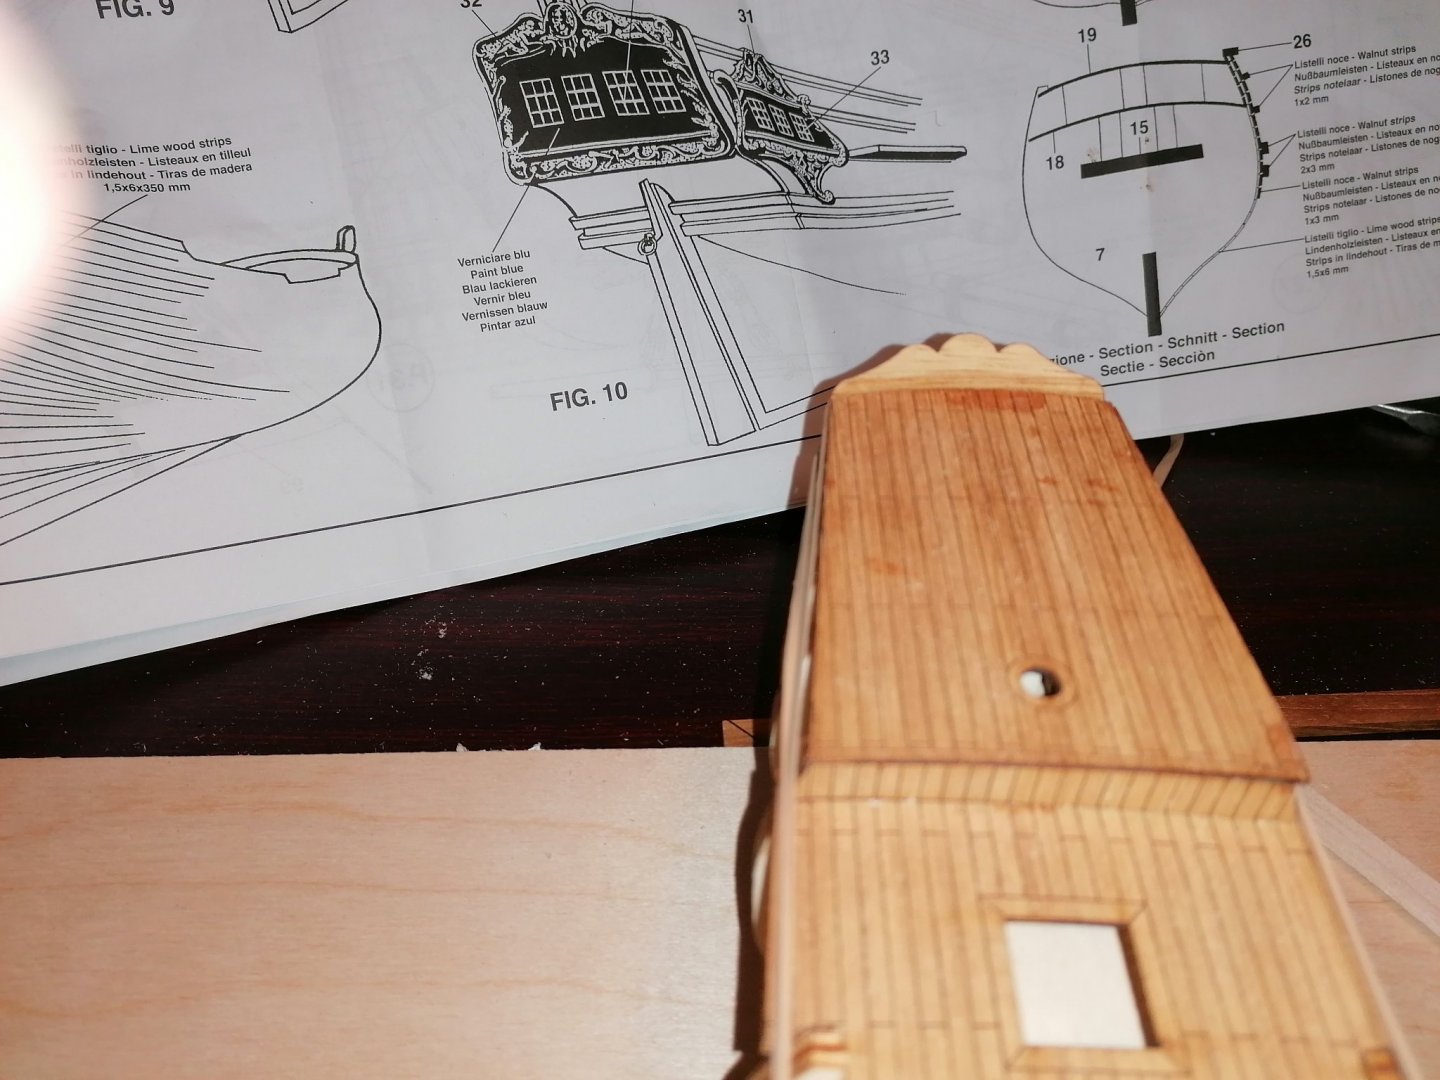
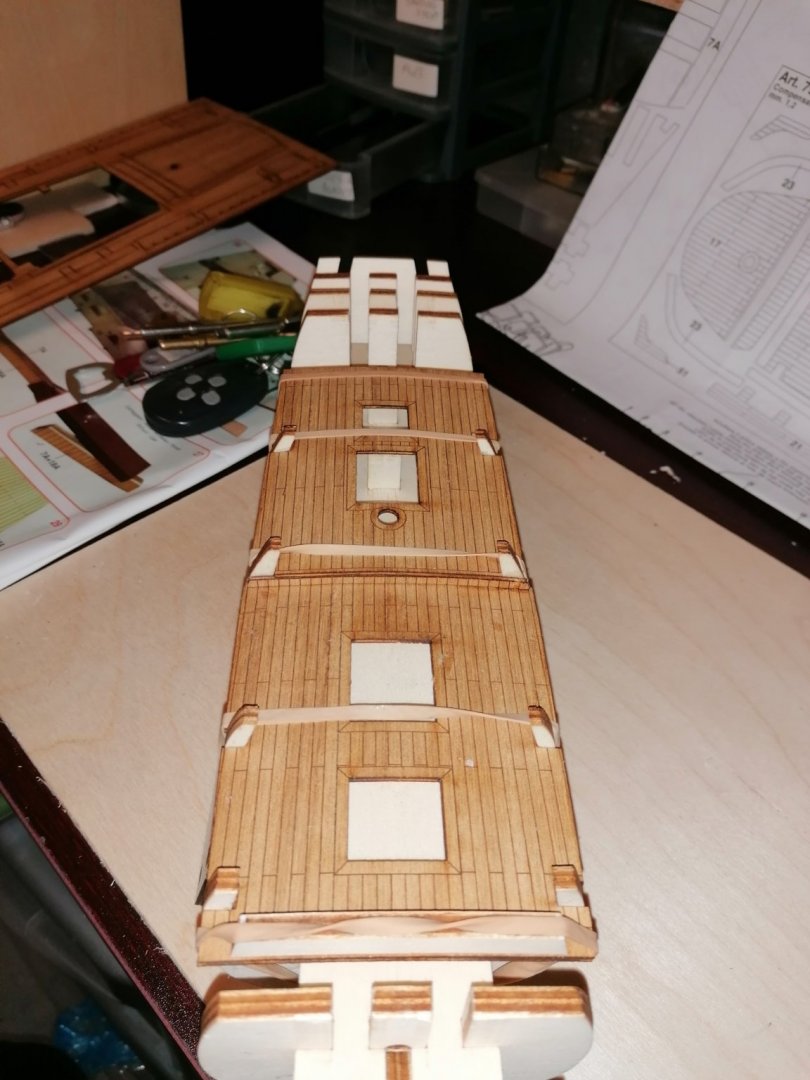
I have now built up the quarterdeck and sanded down the edges. the balsa strips I added towards the front, very usefully, left a 1mm space to run 2 1mm thick x 5mm strips across so, when I plank the bulwark, I will have a harder base than balsa to glue onto. The quarter deck will now be left to dry until tomorrow. Tomorrow evening I hope to sand the top smooth and level with the upper strakes as a guide and achieve the required angle of slope. Now onto the foc'sle deck. This also needs to be extended sternwards and made level rather than sloping. I have made an L shaped support on part B1 to allow the supplied fore deck to rest on. I also had to glue a 3mm section across the gap of both B1 and A2 and added 3mm to the raised edges of A2 to accommodate the notches in the foredeck. Having added the extra height to Frame A6 I have also noted that all the doors need to be enlarged. in photos I took on board, the door under the foredeck is around a fifth of the entire deck and the top of the arch is slightly higher than the level of the foredeck. The bulkhead here is also angled which, with it being clinker planked as are the other three, is another error in the kit design. As I think of it, the only bulkheads angled correctly are the front of the foc'sle and the main deck. The poop deck should also be vertical where I have now added a wedge to make it so. I have also started to make the angled supports for the rear foc'sle bulkhead.


-
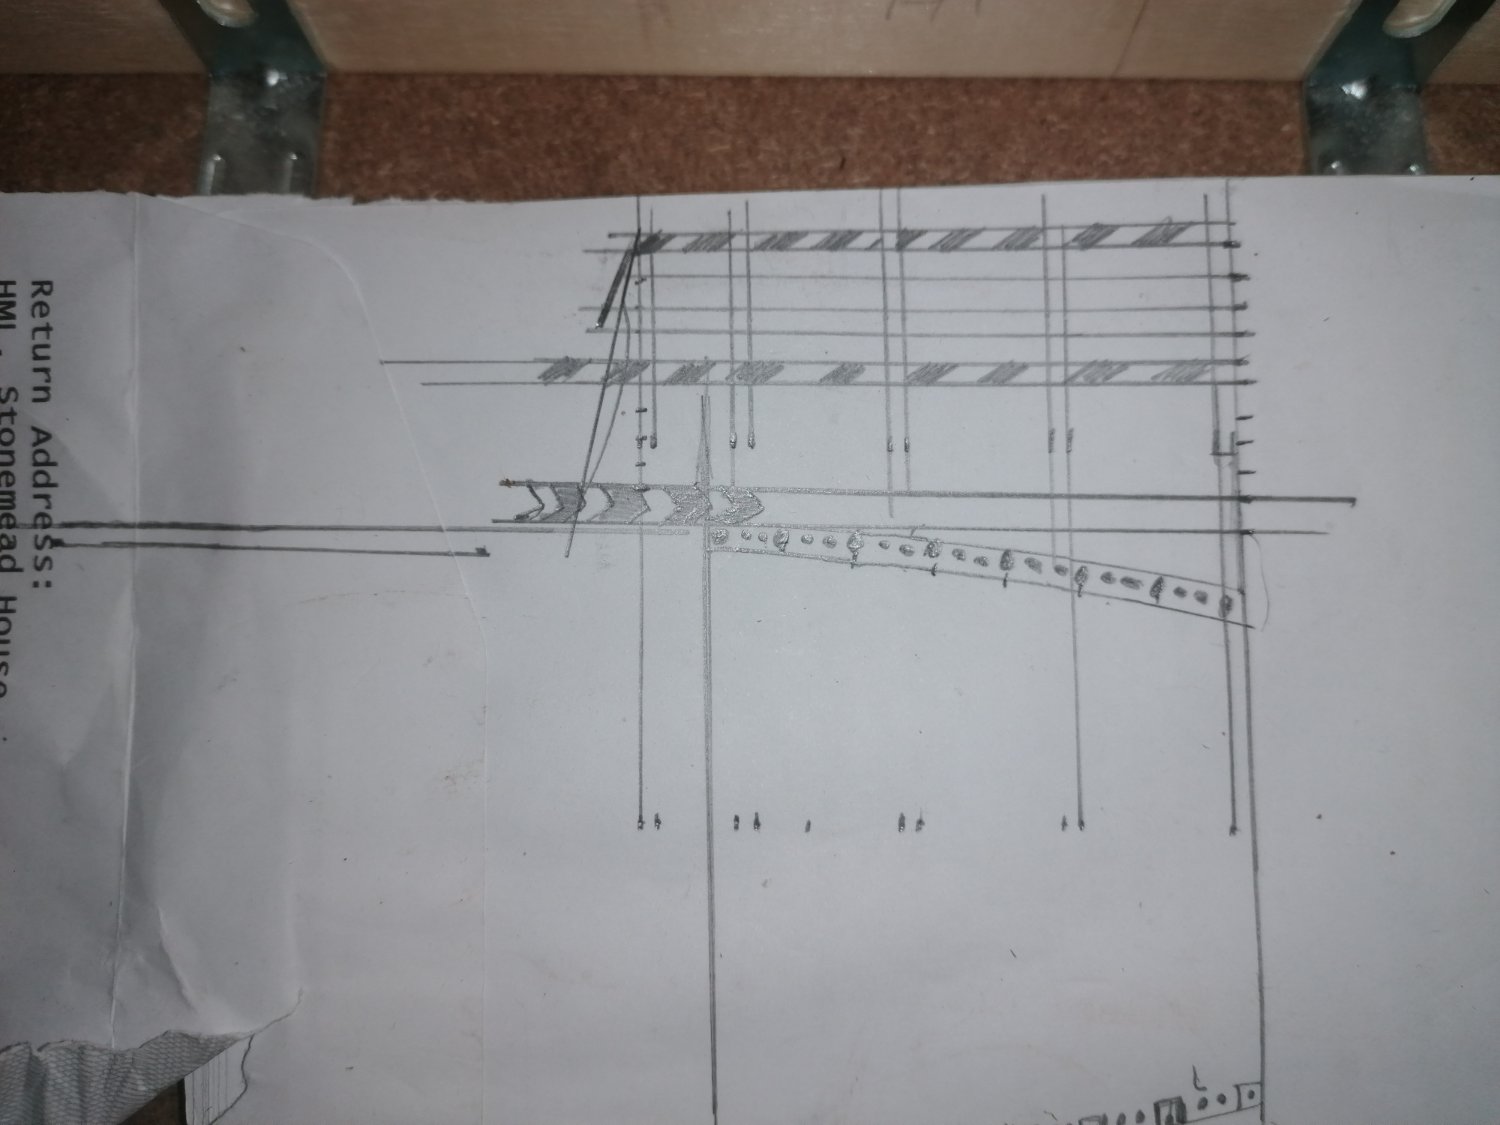
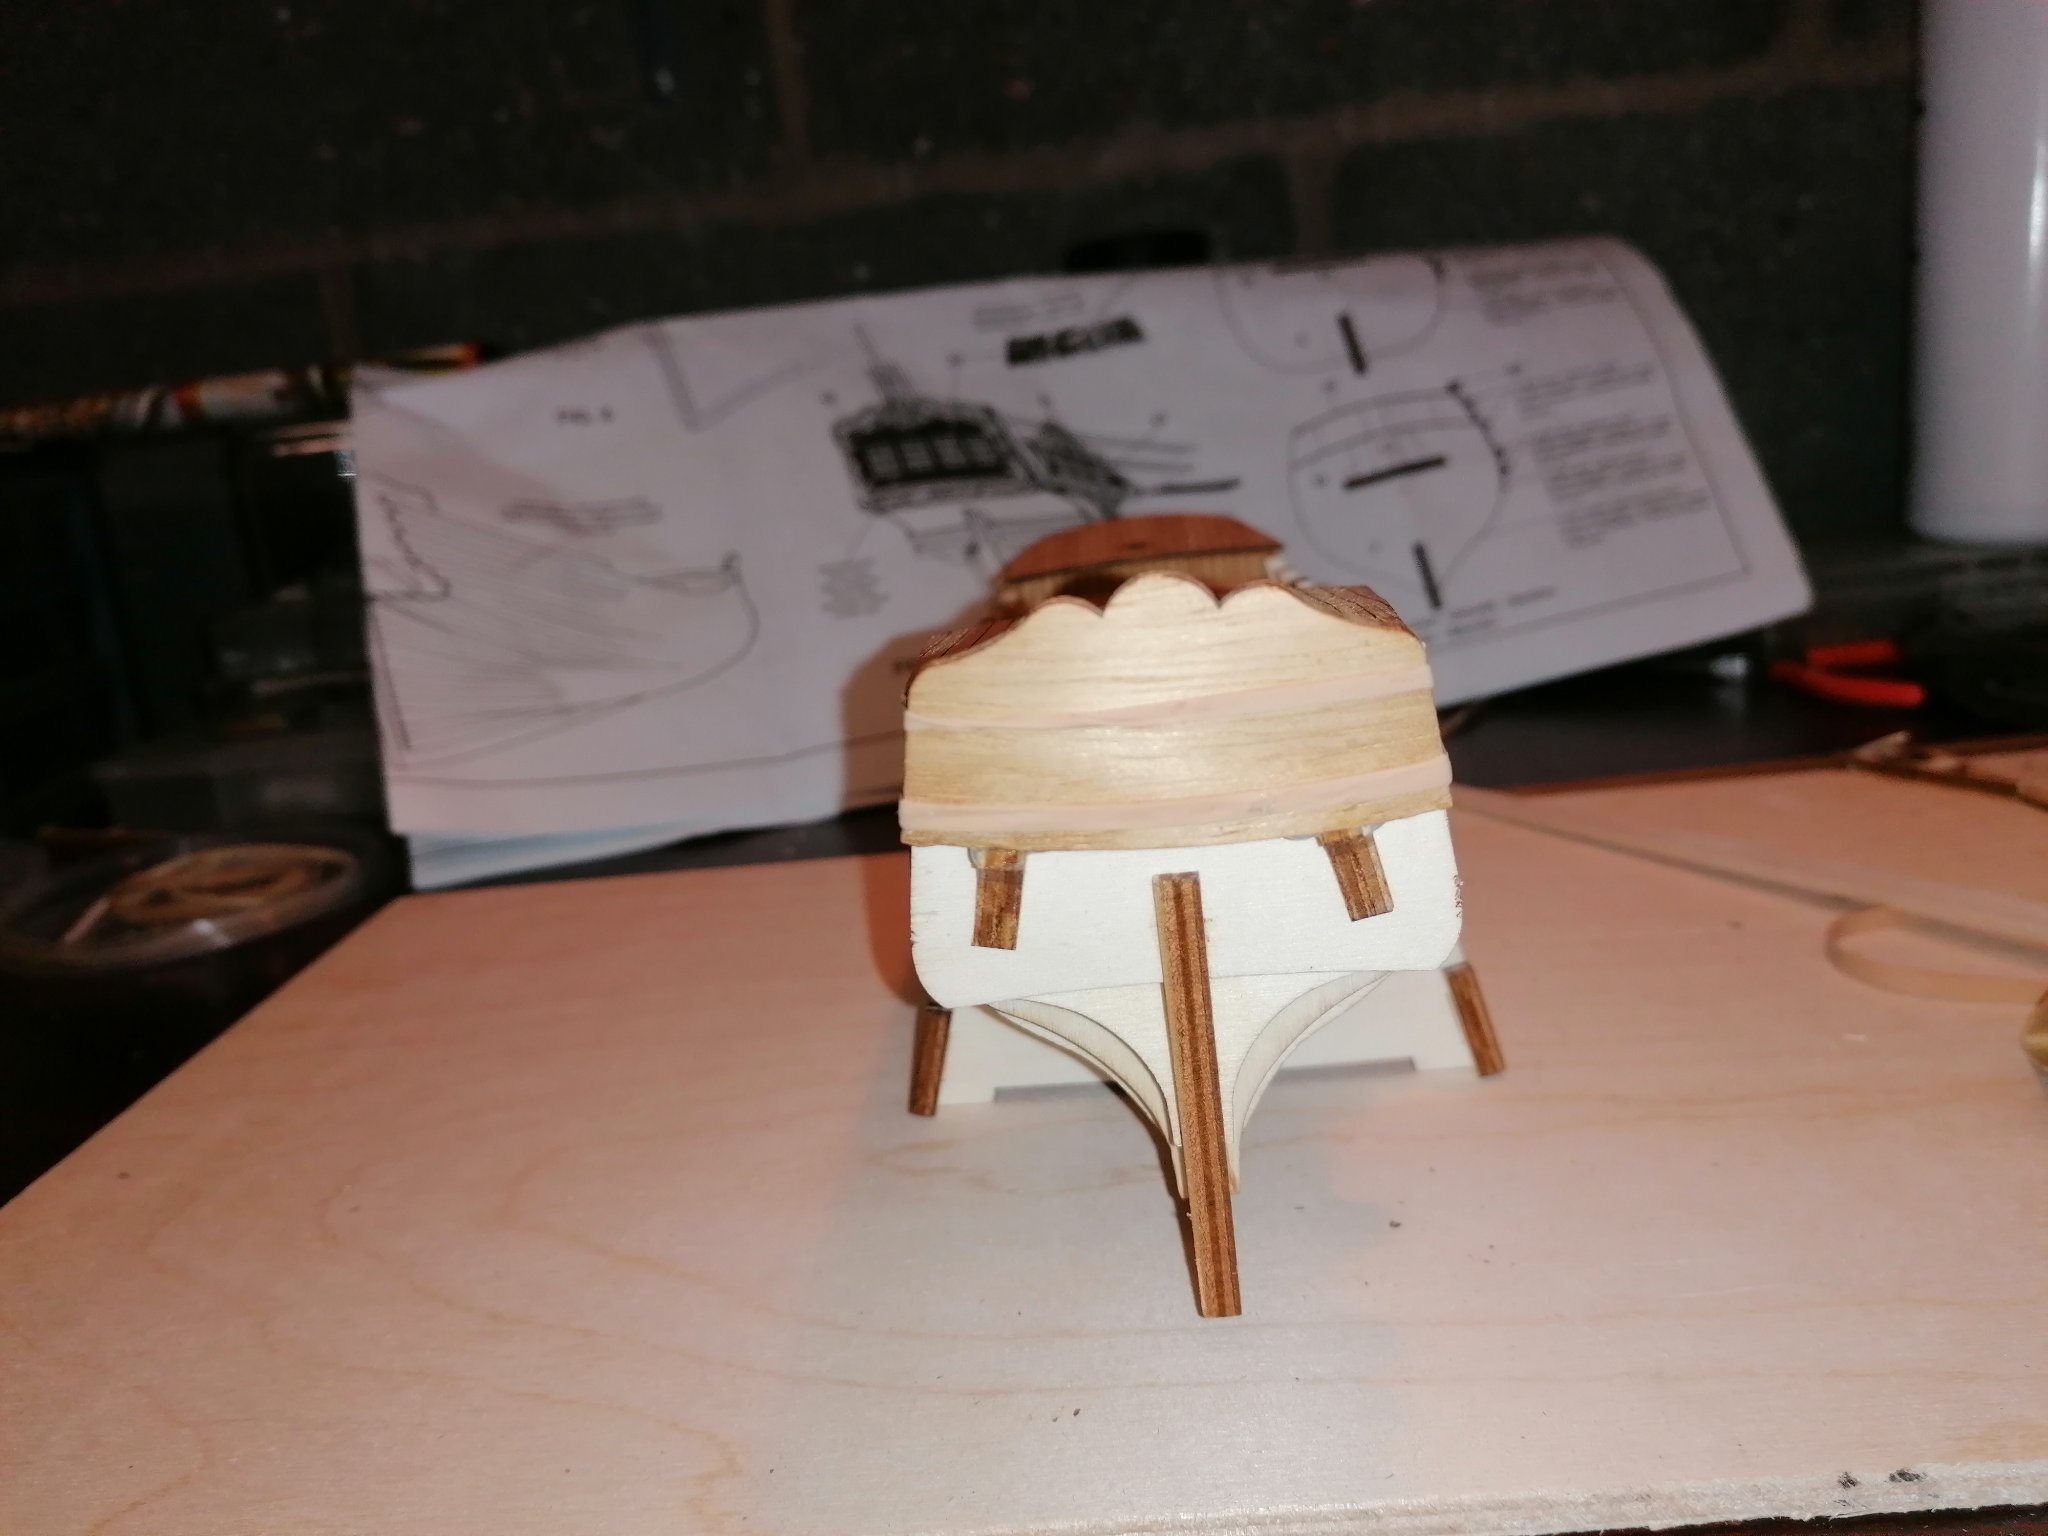
Despite thinking of planning the foc'sle before worrying about the stern, I have started planning the height and angle of the quarterdeck and the poop deck. This is mainly due to realising that I will need to have the sides and decks correctly sized before I can glue the frames to the false keel. I have had many attempts at drawing where the strakes will fit on the rear bulwarks but have found it much easier to pin strips along the hull where I need them. I now have 27mm between the top of the main whale and 2mm below the edge of the quarterdeck. This now means that the bulkhead behind the main deck needs to be 10mm higher. The quarterdeck is laid at too steep an angle and should be flat along its length and not stepped. I have also checked that the windows and arches will fit between the decorative strips (12mm apart) which they do well. For all the hull planking and decks. I am using 3mm strips rather than the 5mm ones supplied with the kit. I am still not sure whether I will use the bulwarks supplied or not but if I do they will be cut at deck level.


-
Hi Paul. Thanks for your input. I shall give that a try. The modifications I am planning seemed fairly easy in my mind but, in practice, will be more challenging. I am working on the assuption that the main hull is appropriately proportioned. From the modified gun port positions it seems to be.
-
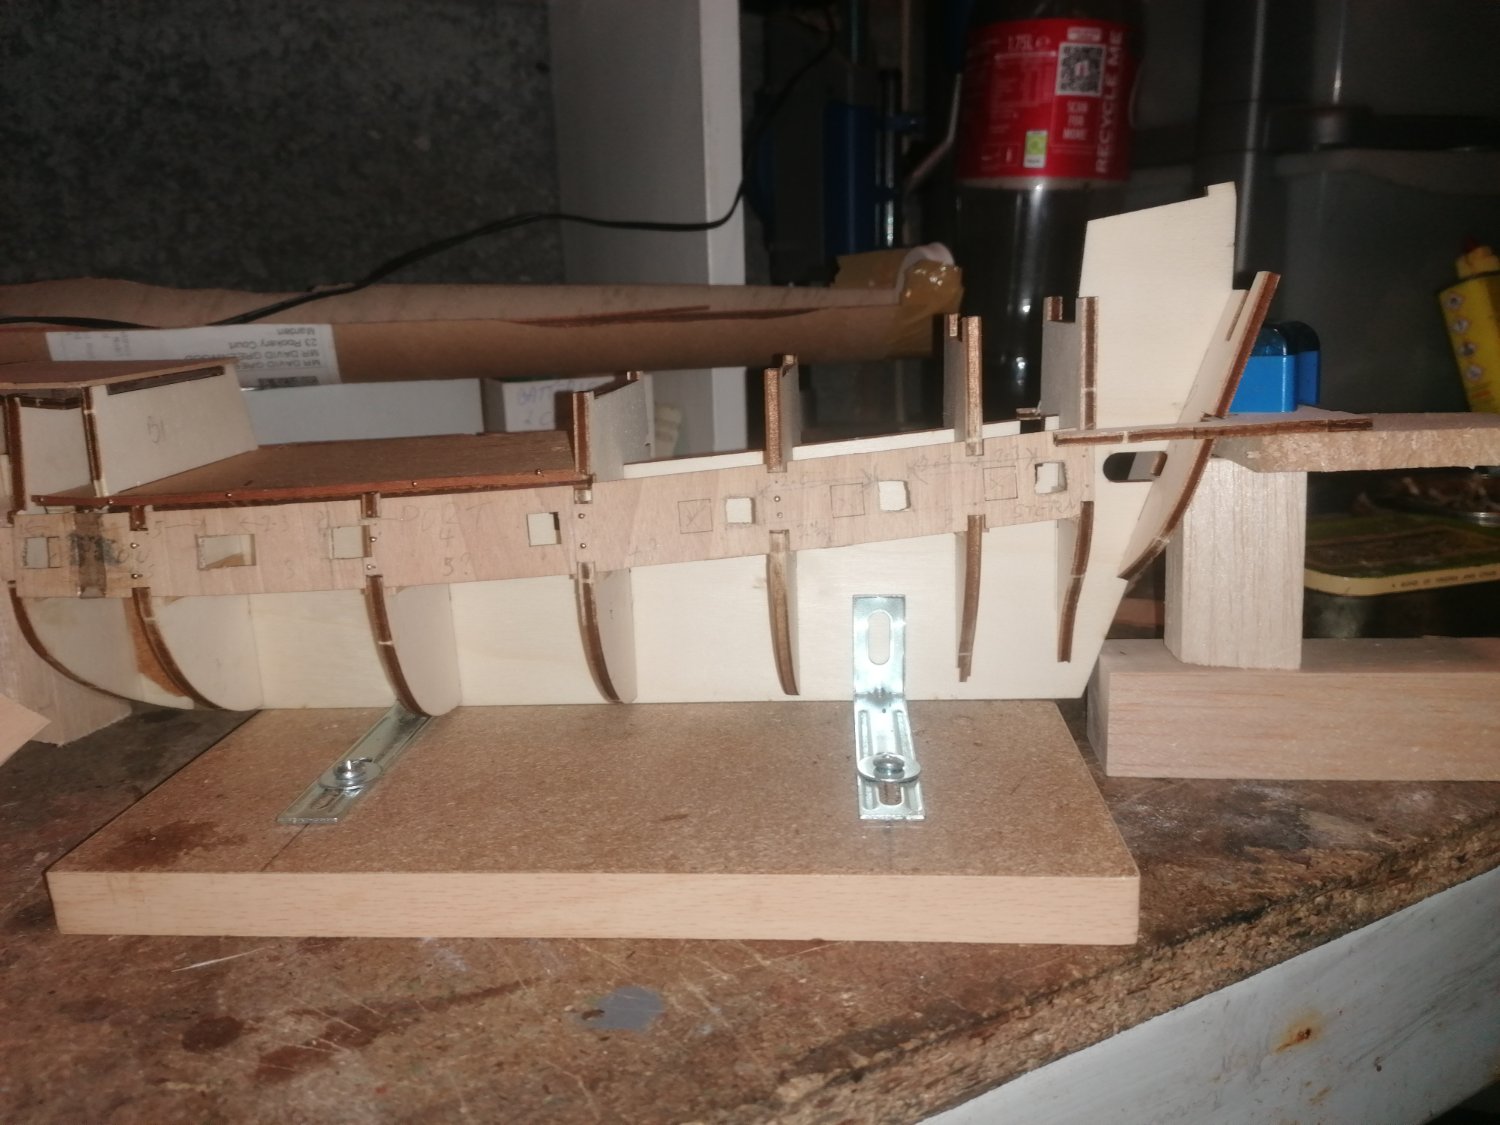
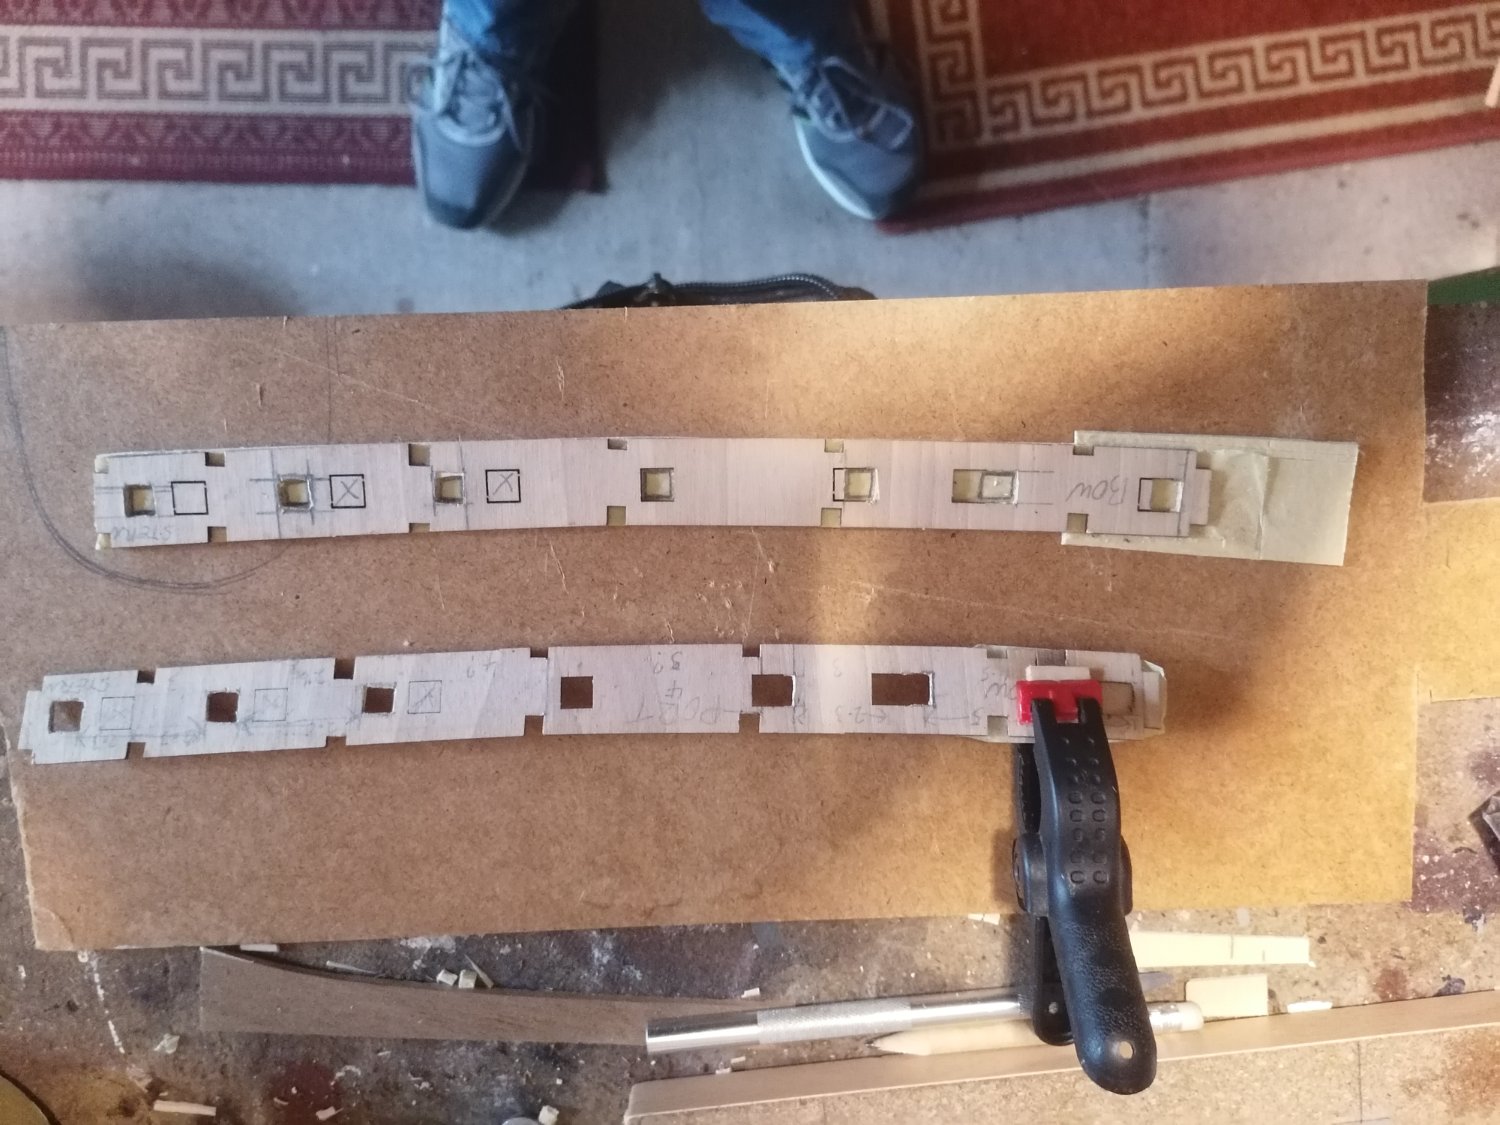
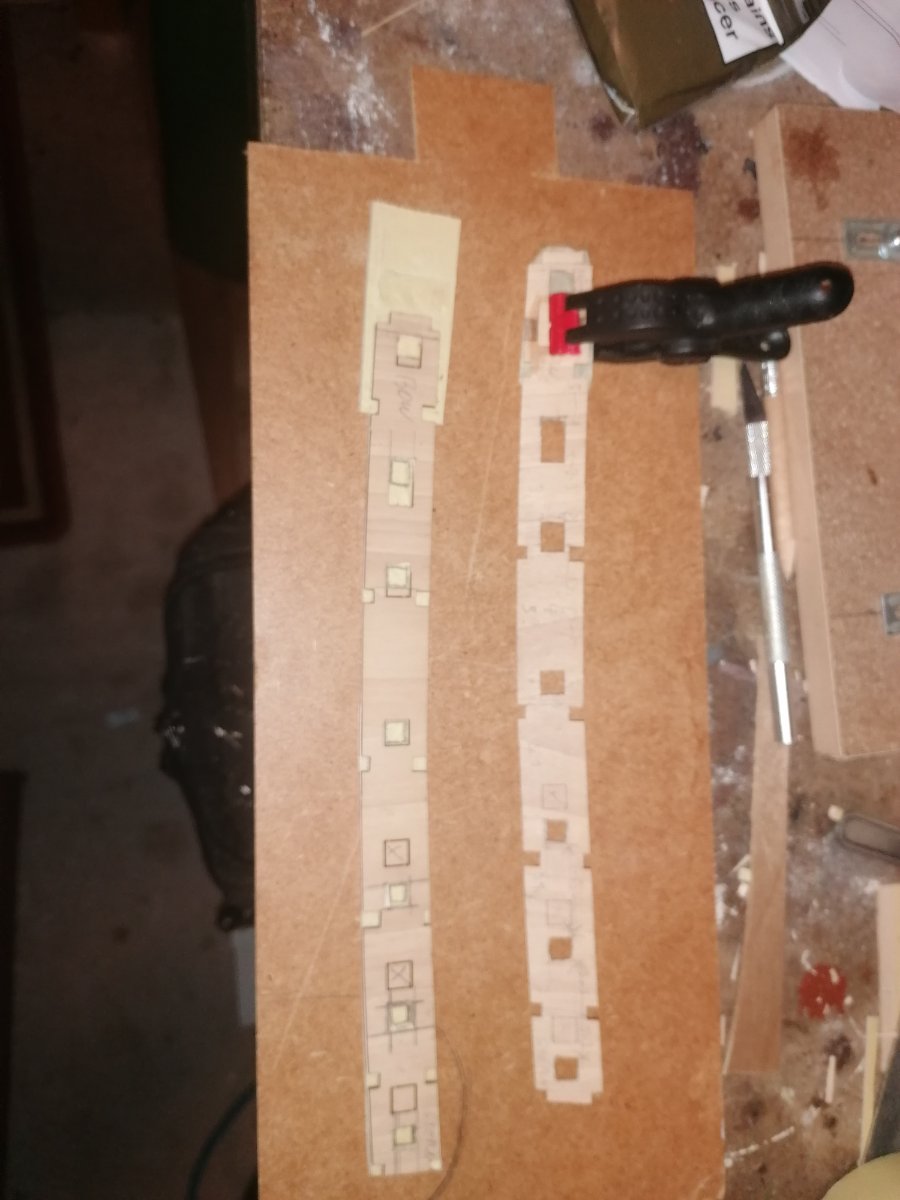
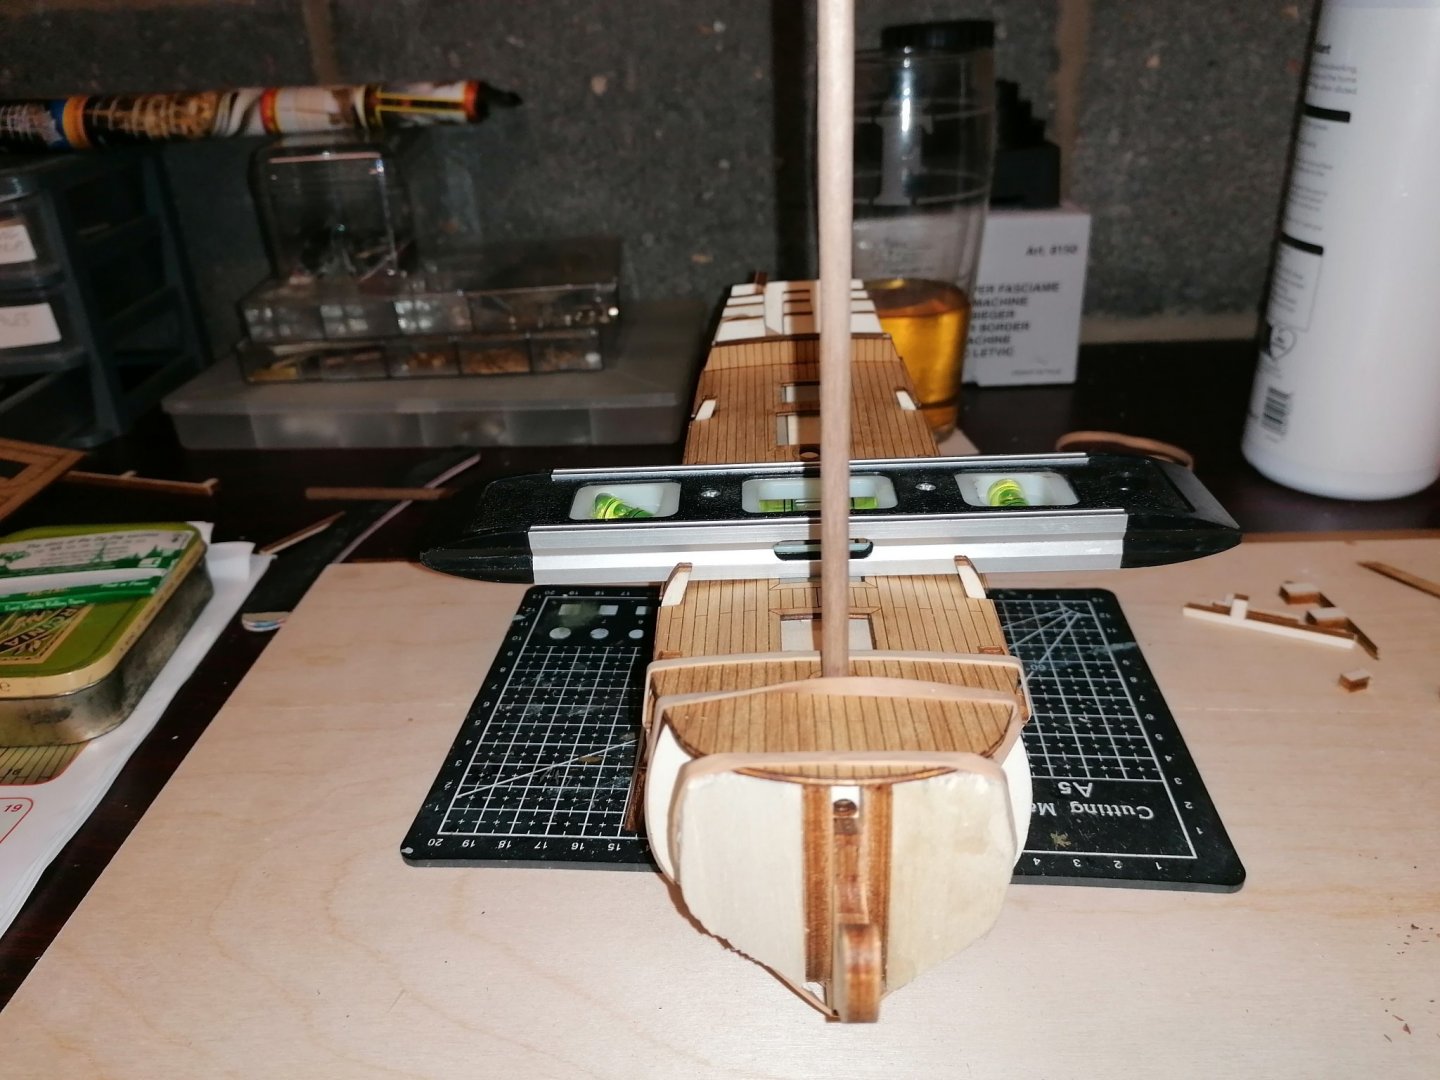
I am now remembering why I gave up on my last build log. The photos don't go in the right place instead of following below each other, each new photo goes above. also, after adding photos, when I try to type the picture below jumps up and hides what I write. Any ideas how to stop this from happening would be appreciated. I don't have the patience for this and will maybe just post photos of progress instead. Anyway, I will try again. Once the main deck was dry, I slotted it onto the frames and added the gun port section. This was when I realised, that as I won't be using the bulwark supplied, the main deck is 2mm to narrow on each side. when I factor in the 2mm lime strips and then the 4 x 2 mm main whale this makes the main deck about 8to 10 mm wider. For now, I am going to have to keep dry fitting and pinning to see how it is going to look, I suspect that I may have to extend the false keel further at some point though I am really hoping it's not necessary. I am really finding out the domino effect of making changes. Frame A2 and part B11 will each need to be widened by 2mm each side along with A6. The good news so far is that having pinned 2 5mm strips from the tops of the gunports there is approximately 0.5 or 0.6mm space for the planking to make the main deck level with the top of the main whale. I have now dry fitted the base of the stern gallery and the aft most gun port seems to be where it is supposed to be. The next few nights need to be spent finishing off the rat lines on my 1st build so will return with an update next weekend, as long as I don't lose my patience with typing.


-
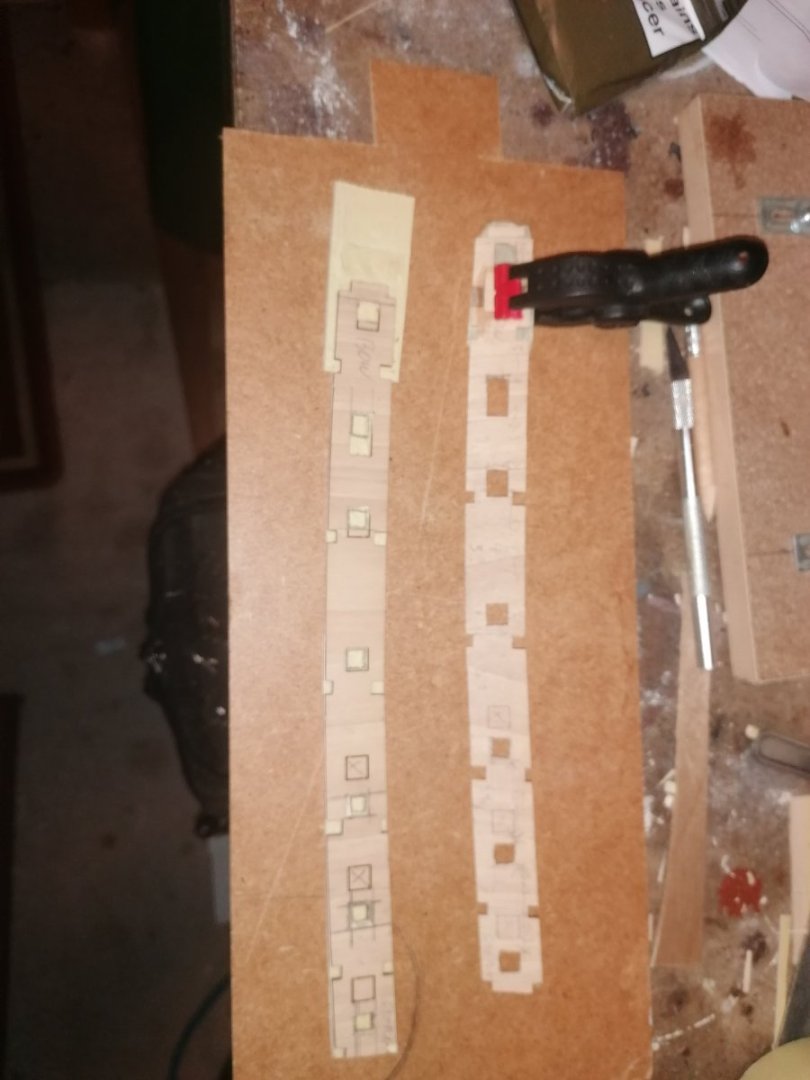
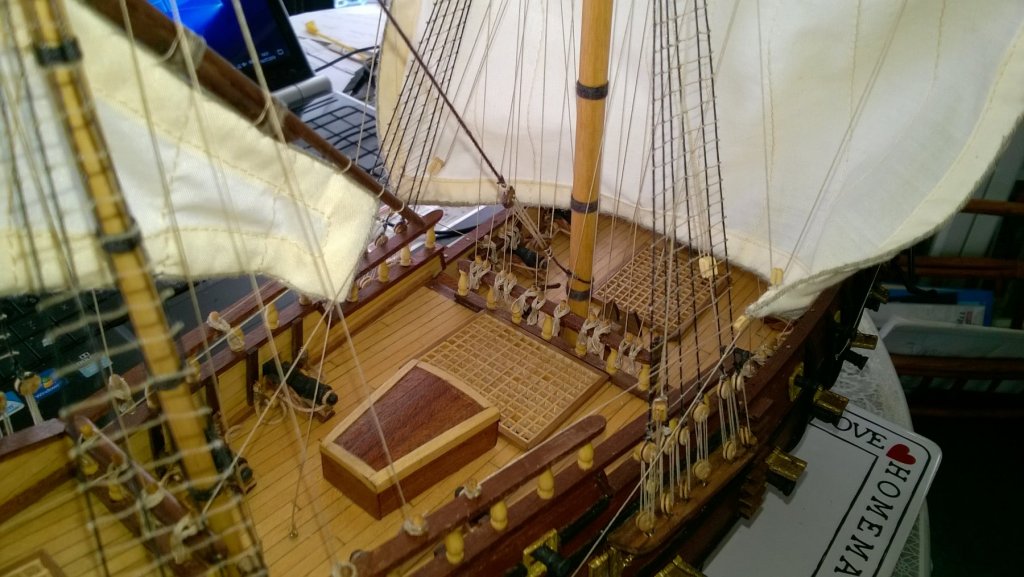
Firstly, for the gun ports I cut rough squares, where I believe they need to be. Next, I made the duplicate gun ports section by using masking tape and pva glue between the layers of timber and then cut around the original and then separating them carefully. Following this I have added 2mm walnut sheet over the top of the main deck and cut off the excess when fully dried. Once dried, I was going to cut out the notches for the frames, but, then realised it wasn't necessary.


-
Firstly, tonight I would like to thank whoever changed the title, though I would have added (hopefully) at the end. LOL. However, on to the build which, as I should have guessed, will not be as straight forward as I was hoping. This is how the false keel looks with the 7mm extension.


-
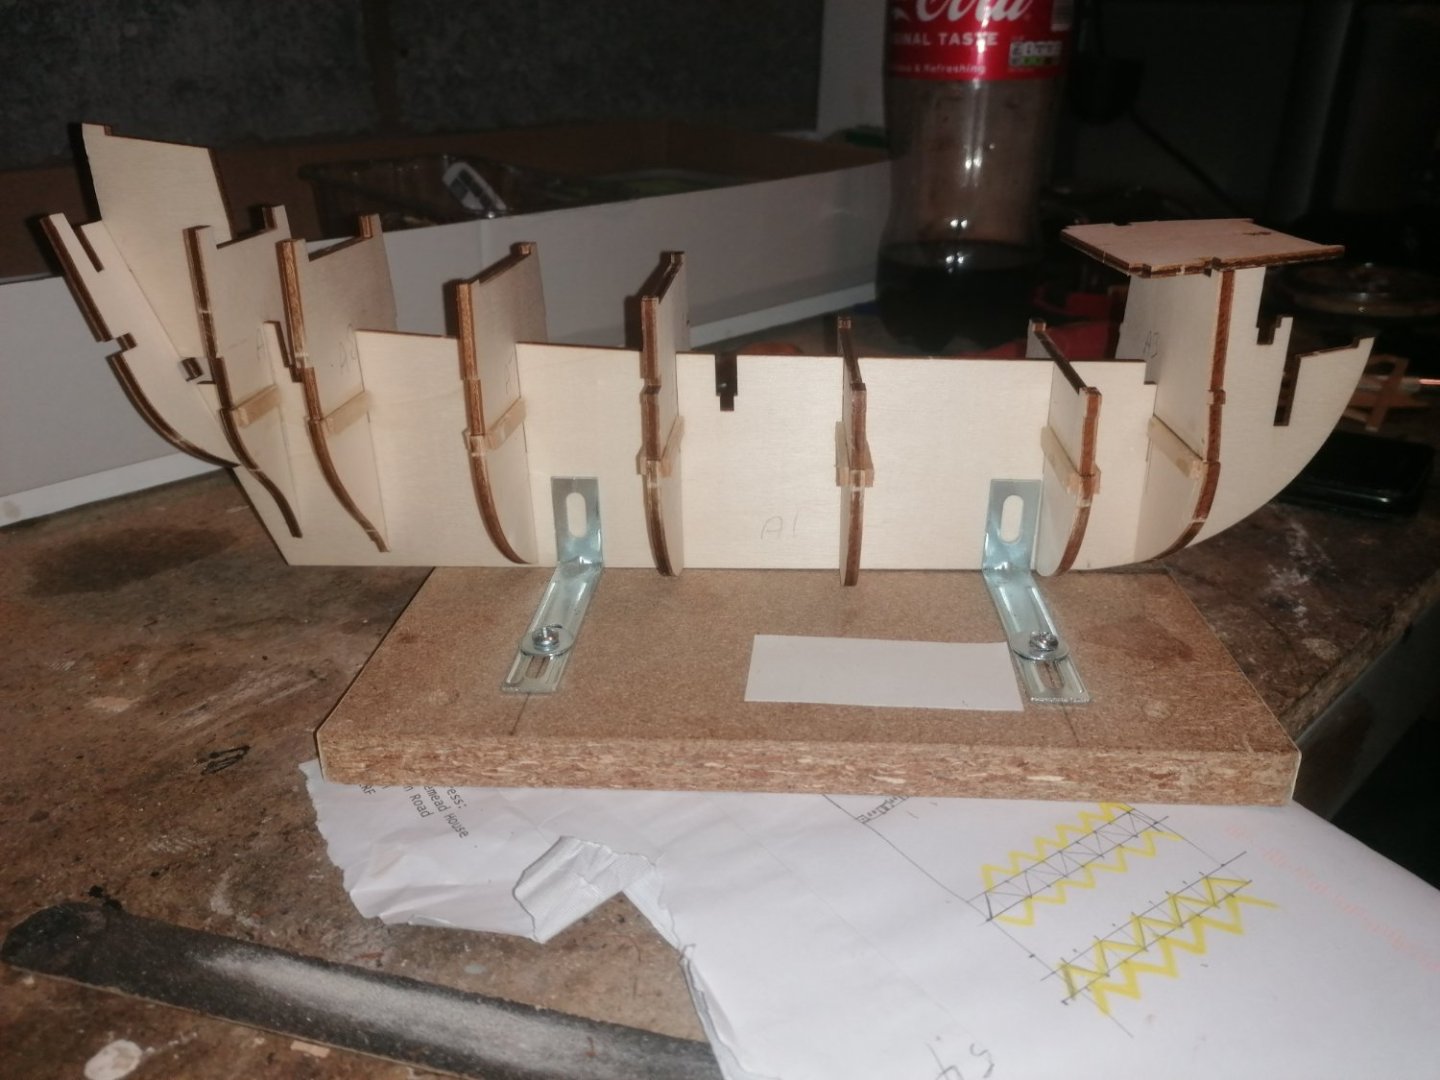
I am not going to start with what's in the box as there are several posts which include this and also quite a few parts I wont be using. There are many inaccurate details which I will try to cover as I go on. Before I can get going the gunports need to be redone, the bulwarks for the foc'sle and main deck are wrong and the main deck itself is too low down. The planks supplied are way too wide with the exception of the 2mm lime strips. The sprit deck should not be planked and the sides of this as well as all the side rails should be narrower and not solid. Also, the sides should be much thinner. The foc'sle bulkhead should be angled to the main deck and not vertical and has an arched doorway protruding. I don't mean to be sounding over critical as she makes a great looking ship. It's just I want to build her to look more like the original in London on which it clearly based. I am planning on building the hull up to the main deck level and also the foc'sle before working from the quarter deck back and up. I've no idea what I'm going to do on the rear section yet but everything above deck level will be scratch built. Sorry if this part has been long, so, onto the build. Having dry fitted the frames and decks to the keel I needed to figure out the correct height of the main deck and how to extend the foc'sle. There are 4 strakes of planks between the main whale and the decorative strip with a further 4 strakes above. The arches on the side are between the rubbing strakes so I drew a sketch of how I thought they should look. And found that the foc'sle should be 9mm longer than it is. I toyed with the idea of extending it forward but that would mean re- working the cut water amongst other things. I could extend it aft but then the main deck would be too short. I decided to add 2mm to the front of frame 2 and extend the false keel 7mm between frames 3 and 4, then extend the main deck and gunports by the same amount. The first thing I started doing was to put in supports for the gun deck. Once the frames are in place and filler blocks fitted, I shall pin the main deck in place along with the gun ports. I'm not sure if the extensions will be strong enough so I will make a duplicate version as a plan B. I have also made a preliminary A frame for the sprit deck.

-
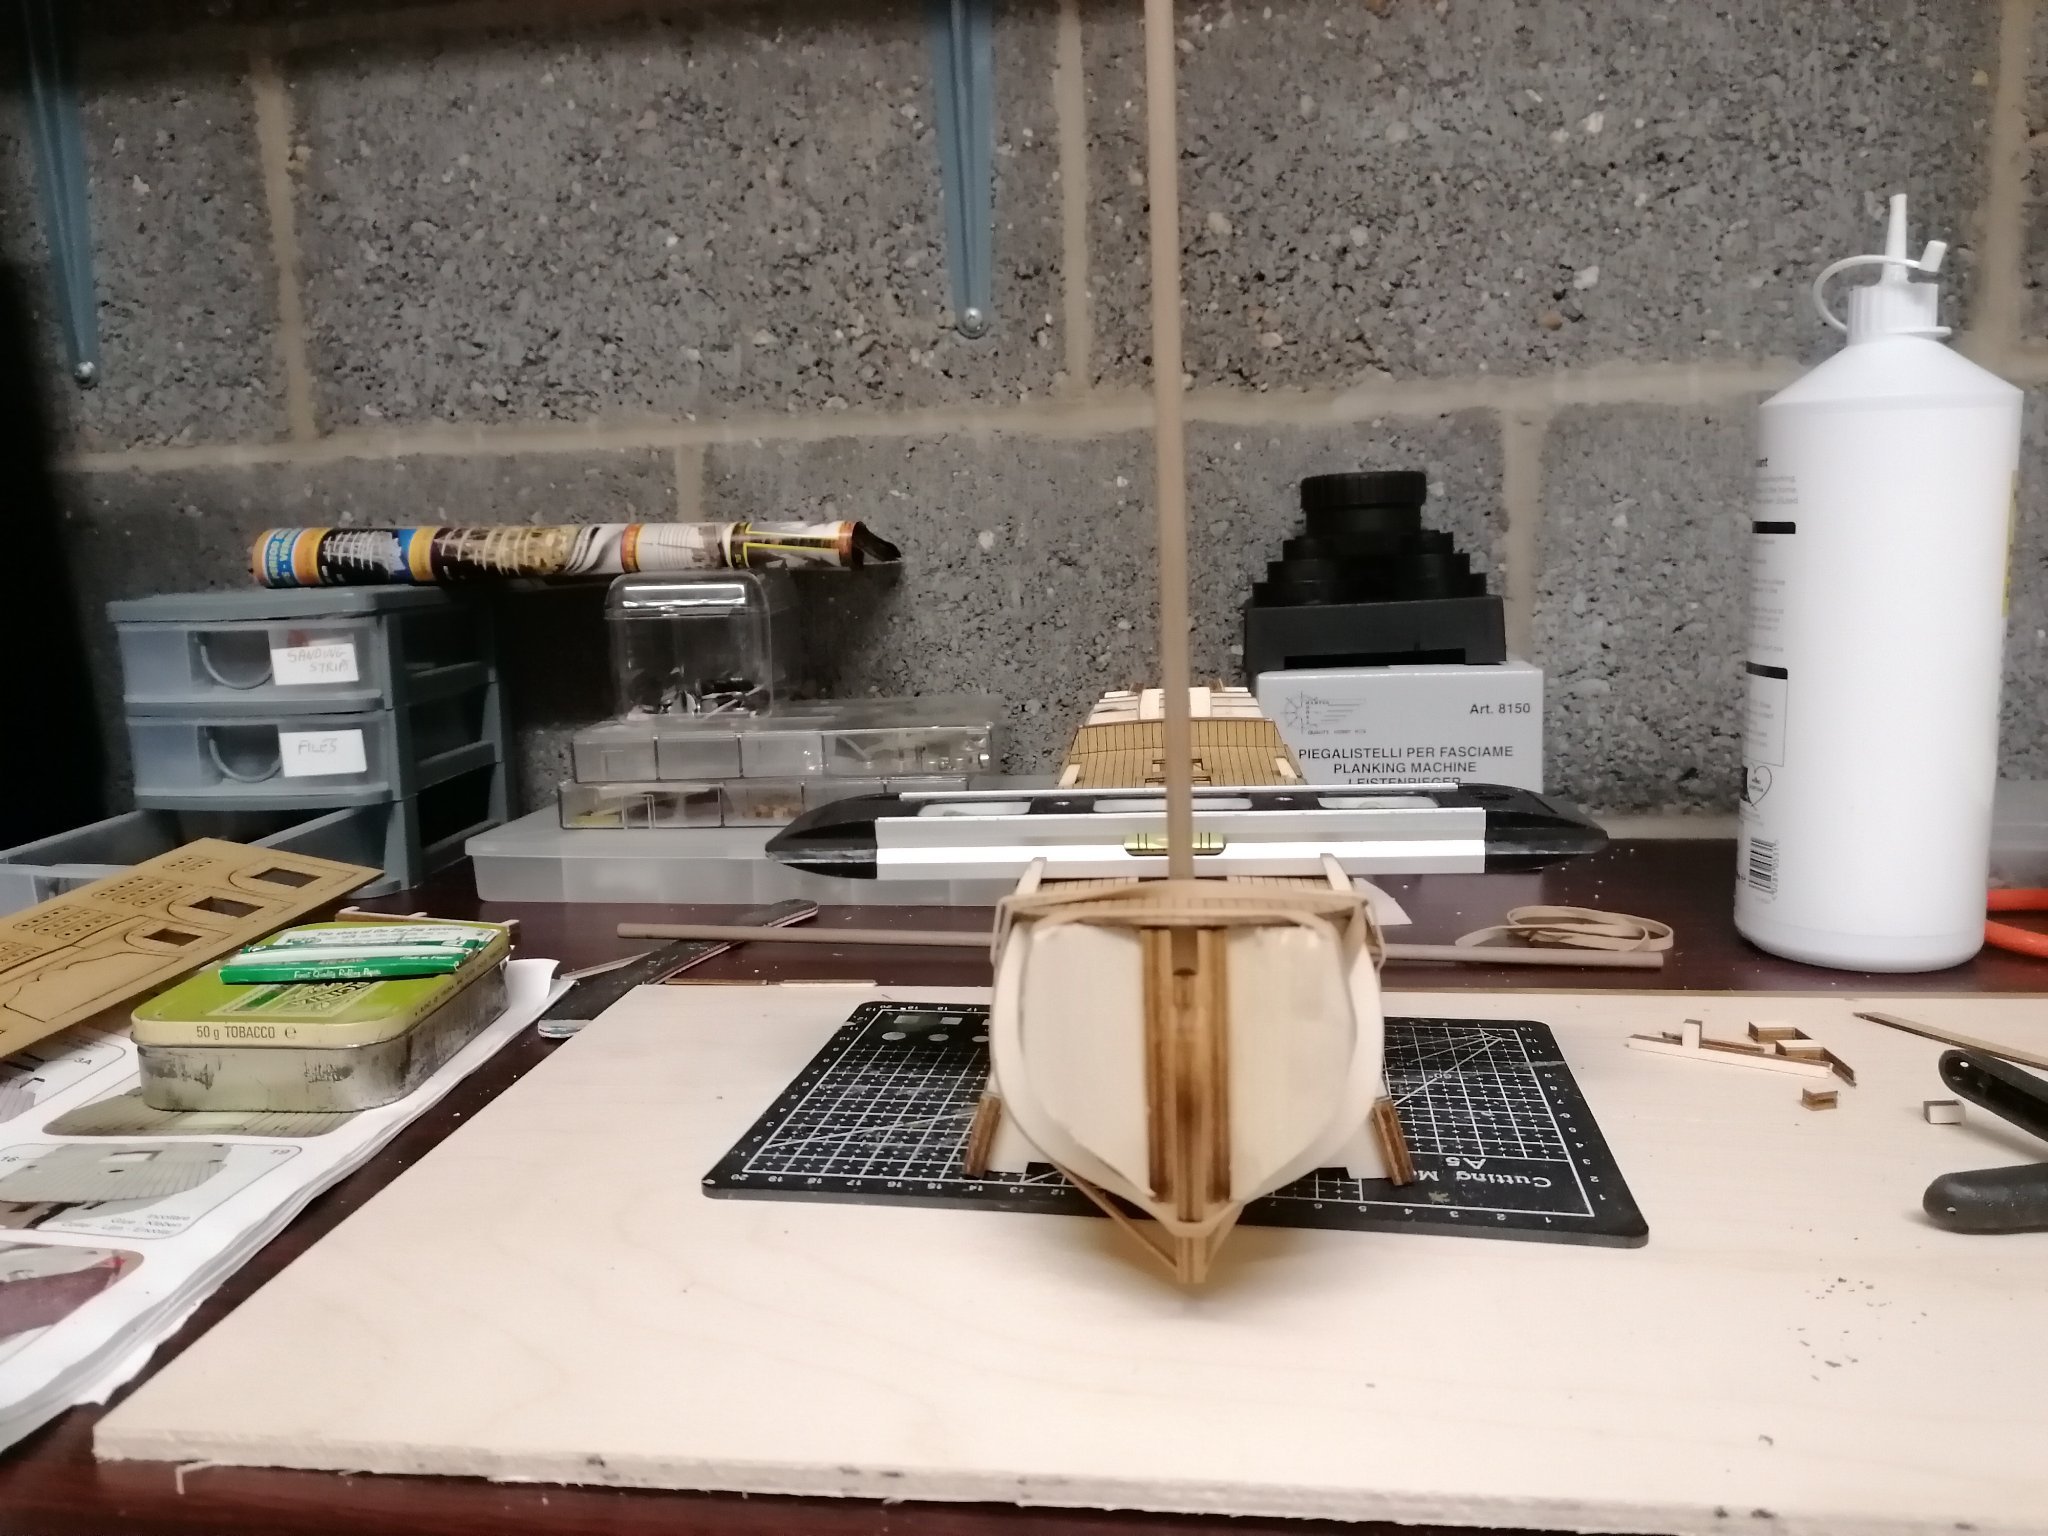
This is where I have got to now.

-
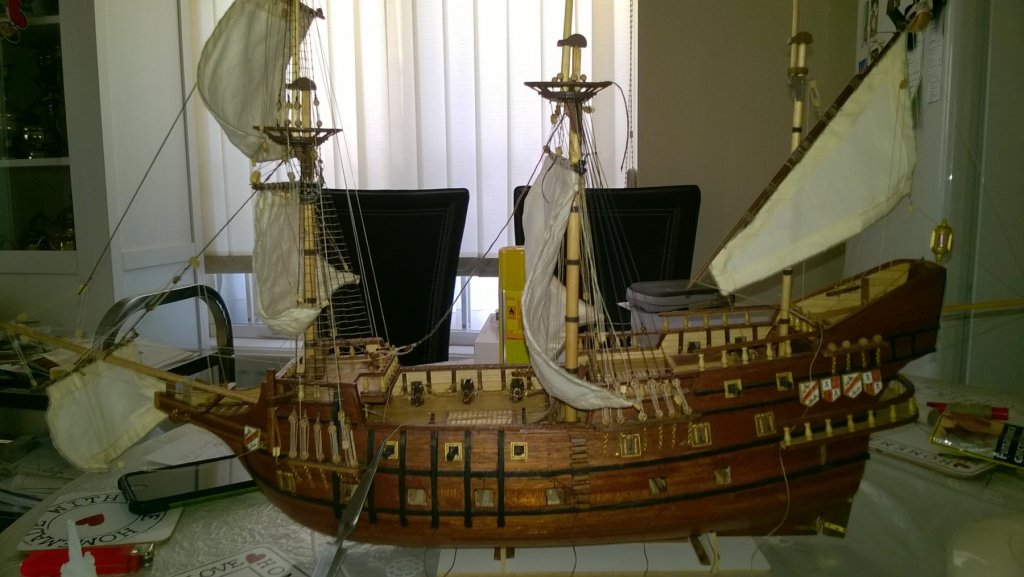
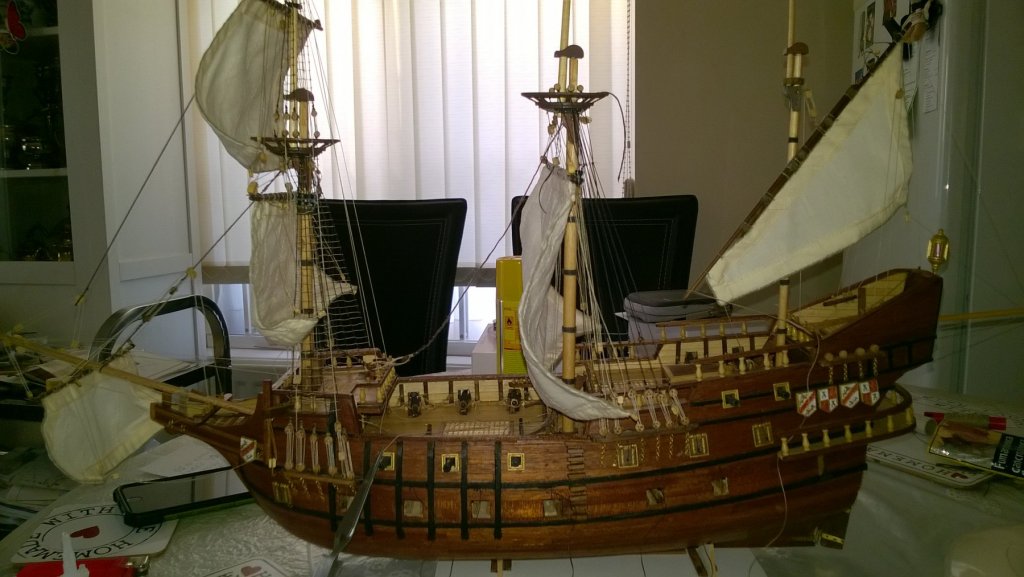
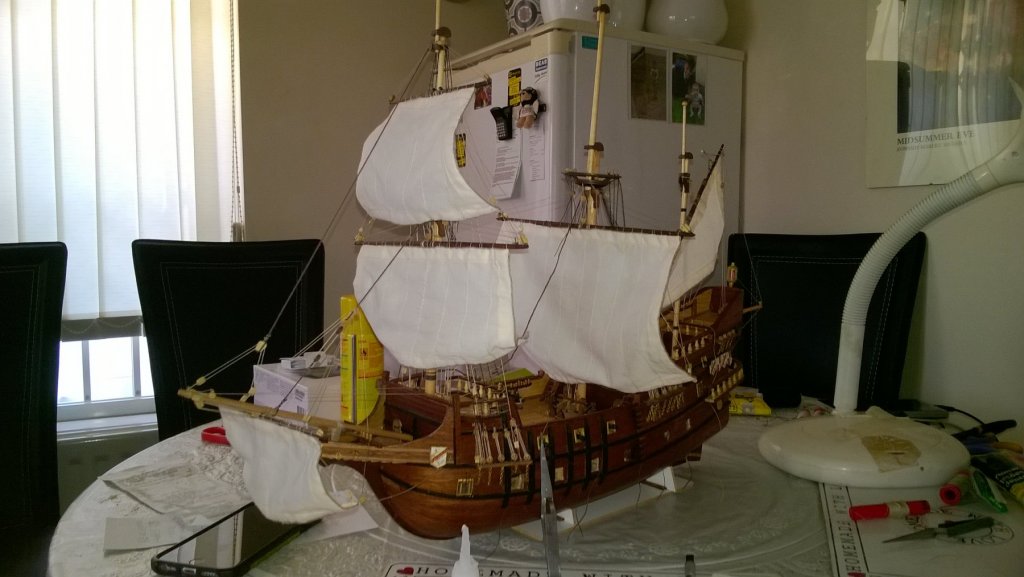
Hi all. First a quick introduction as to building this kit. As a kid I grew up in Appledore in North Devon. watched the Golden Hind built, launched and fitted out as well as the sea trials and her sailing away. fast forward to last September, while losing patience with the President kit I was building I discovered this Occre kit. Due to the many inaccuracies of the ship, I decided not to attempt a build log, but would use this as a prototype for an improved version. I am currently finishing the ratlines of the first version and am preparing some modifications for this one. Here are a few photos of the first taken during the build. with some of the modifications that were required


-
President by newbee - Mantua/Sergal
newbee replied to newbee's topic in - Kit build logs for subjects built from 1501 - 1750
Firstly, I want to apologise for being away for so long. For some reason I was unable to add photos, combined with not being a good at typing as well as me working, eating building and sleeping, I don't have the patience to spend hours on the computer on top. I am, however going to try my best to set aside a couple of hours each weekend to add to future posts. Unfortunately, I have placed the president in dry dock / shelf for now. I didn't enjoy building it as much as I hoped I would. I think mainly down to the era, not being a real warship nor having the accurate details I had expected. On top of that, having fitted the masts and bow sprit I ended up redoing the shrouds on the fore main masts several times while doing the ratlines. At this time, I saw Occre's Golden Hind. This I could really relate to as I grew up in Appledore and watched her being built, launched and fitted out when I was a kid, so I was compelled to buy her. After another couple of attempts at the rigging I gave up on the president. My next post will be my 2nd version of the Golden Hind. The reason for which will become clear from the start of the log. I shall try to at least add photos of how the president looked when shelved. I shall attempt this over this weekend. In the meantime, thanks for your comments and sorry for not being back for a year now. -
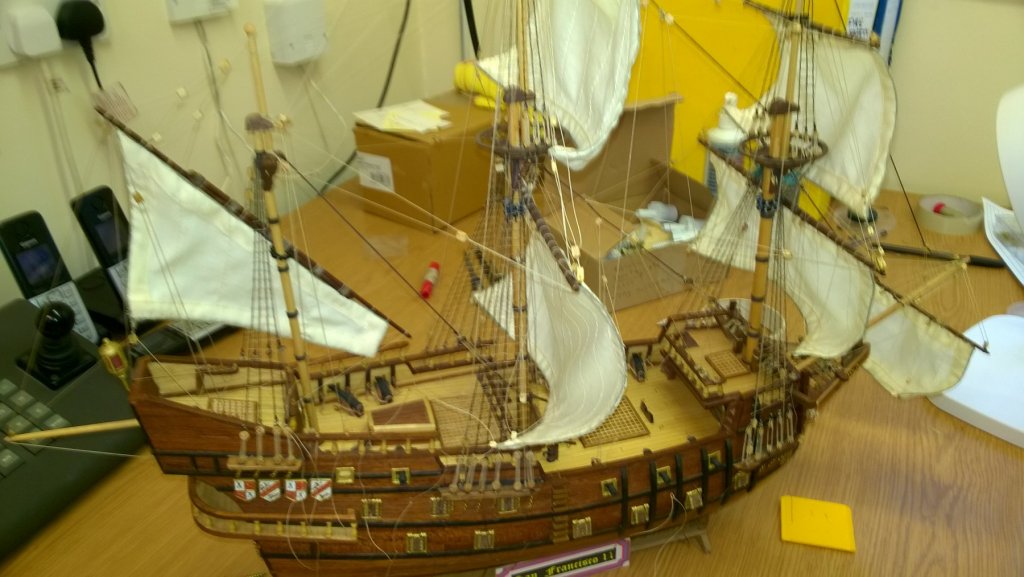
this build log was started as a continuation of my San Francisco II as I hadn't thought of creating a new subject. I will see if I can move the first part of the post from there over the next few days. I also haven't been able to figure out how to add to my post so in the past I simply replied to it and added the info. I shall be adding more later. Here are a few photos of the progress so far.


-
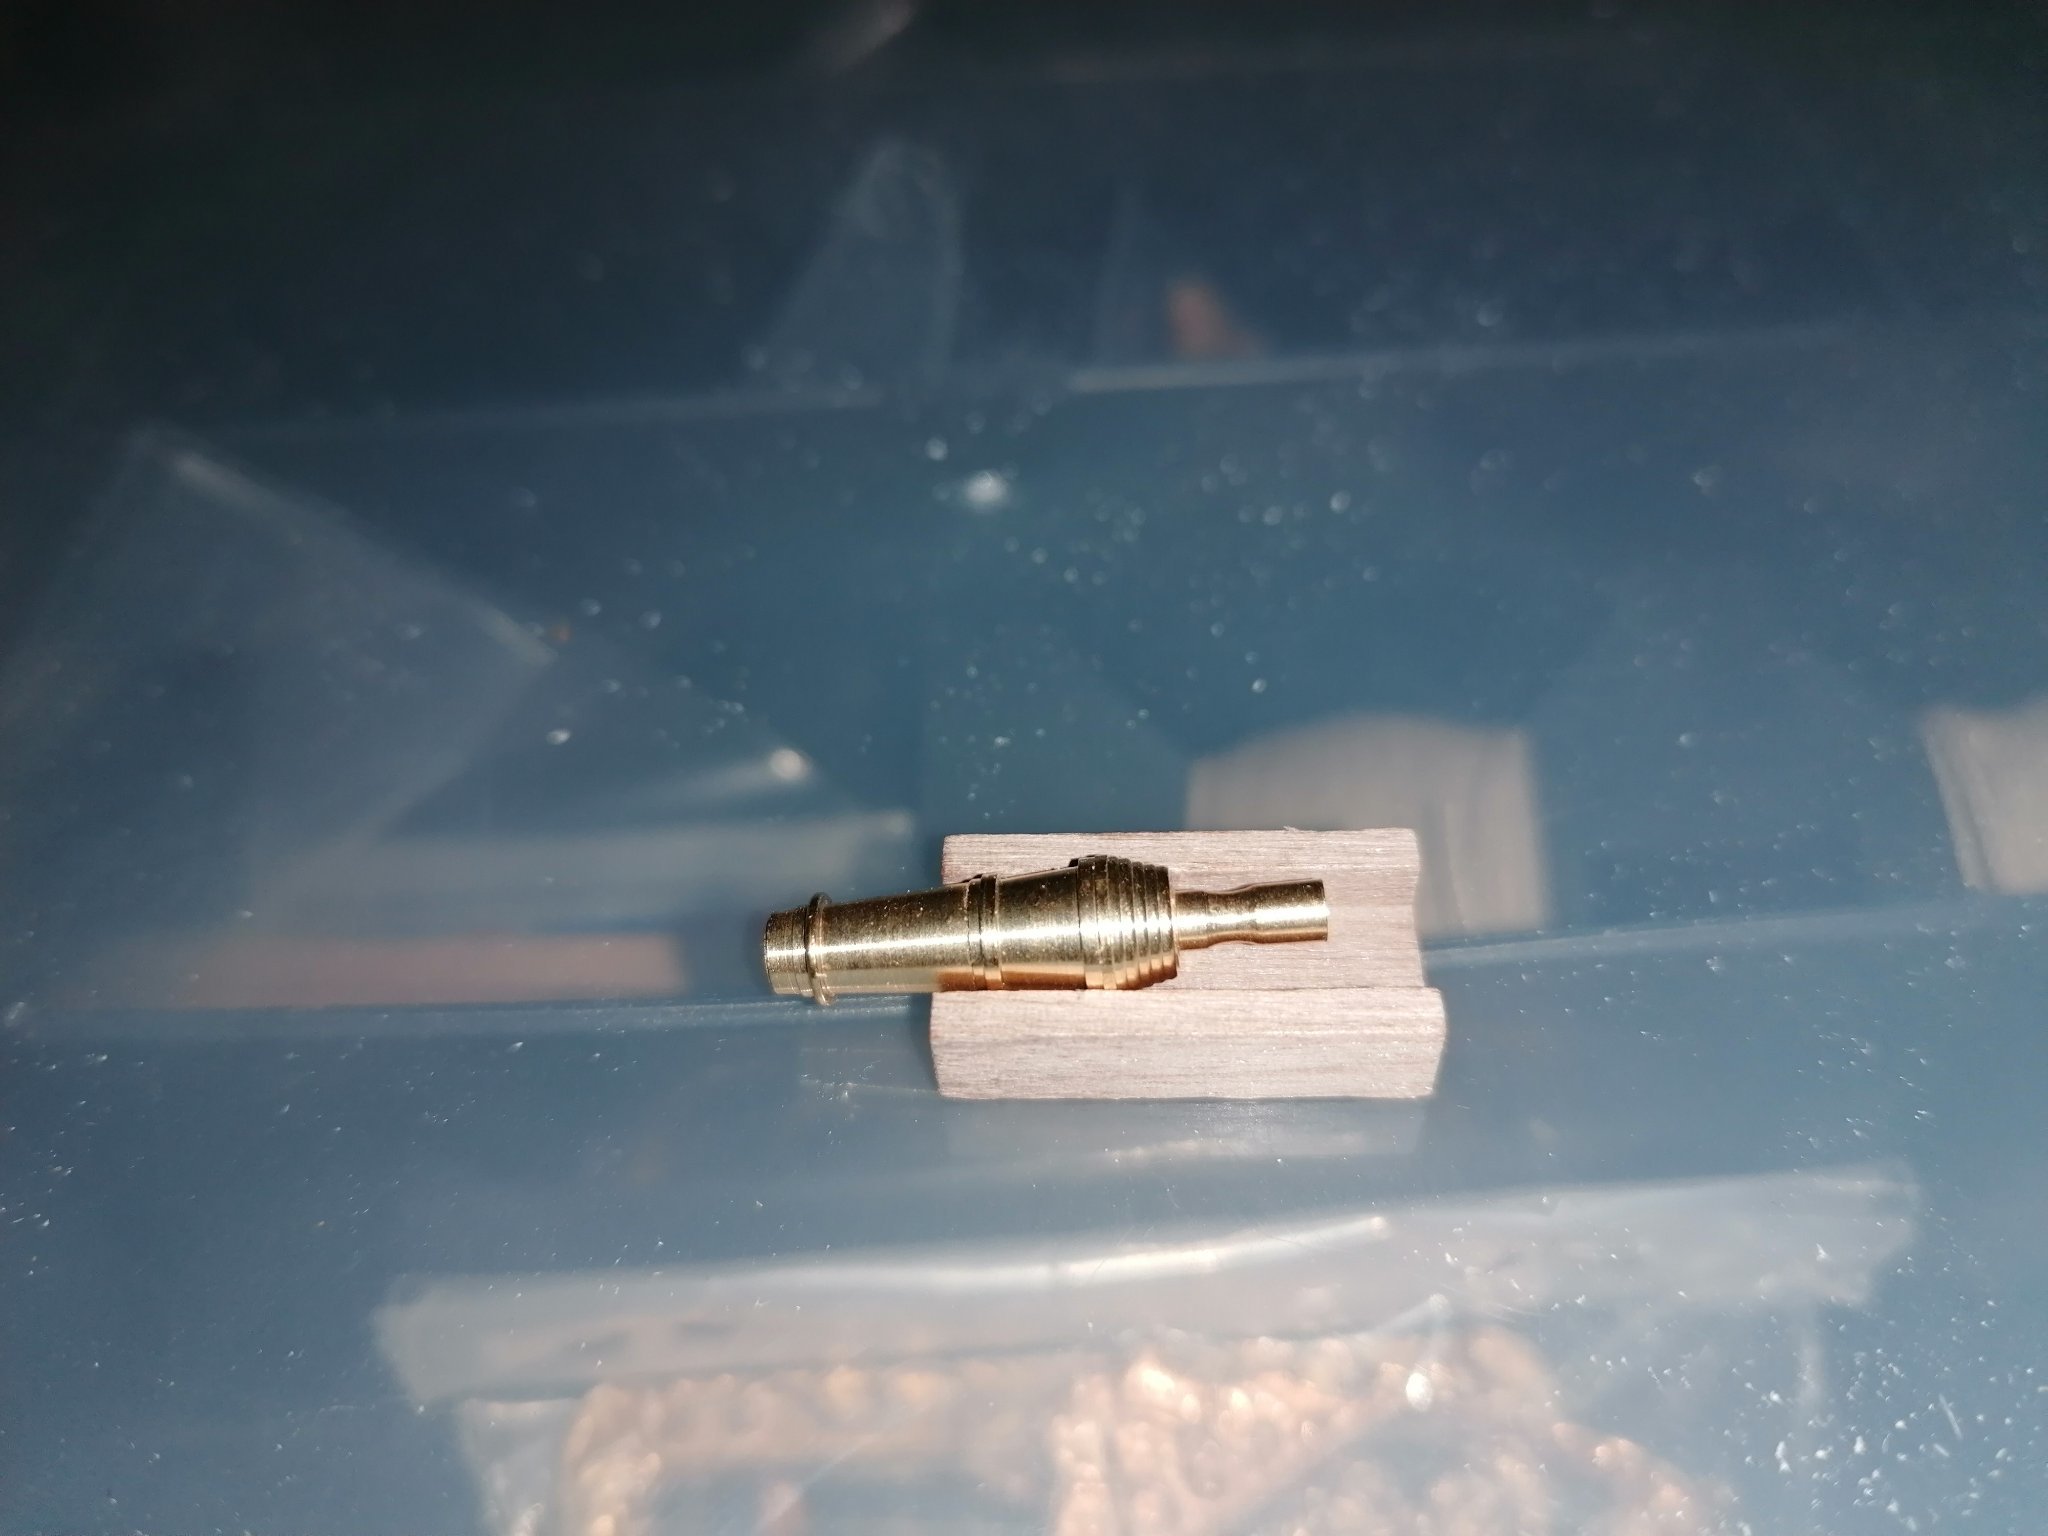
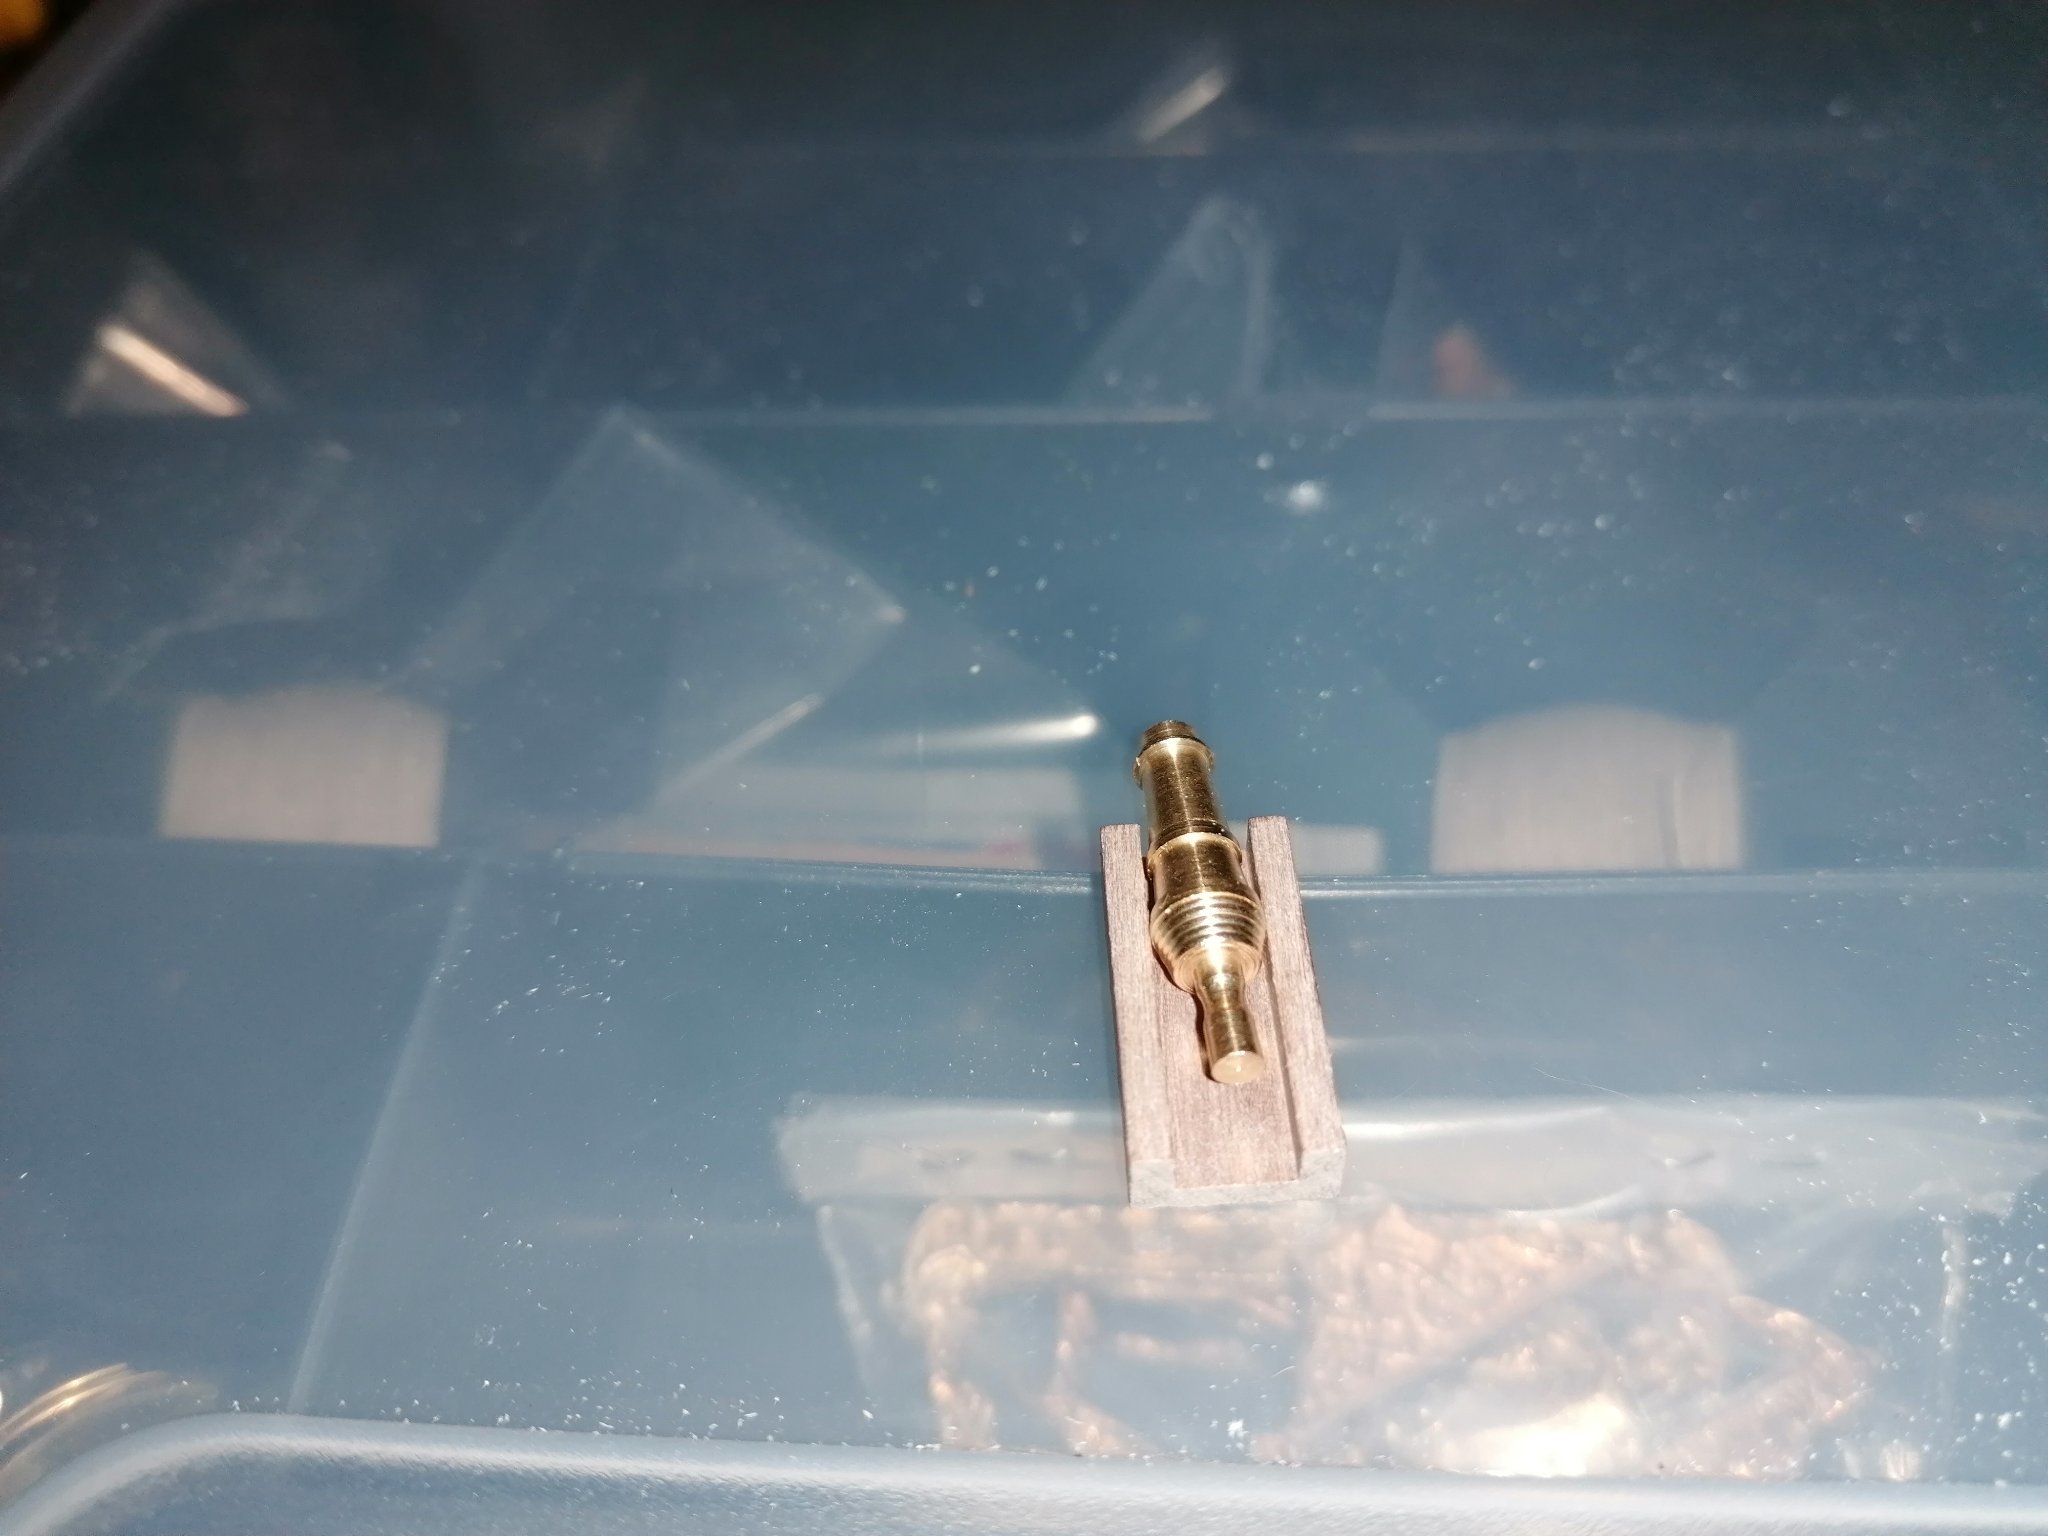
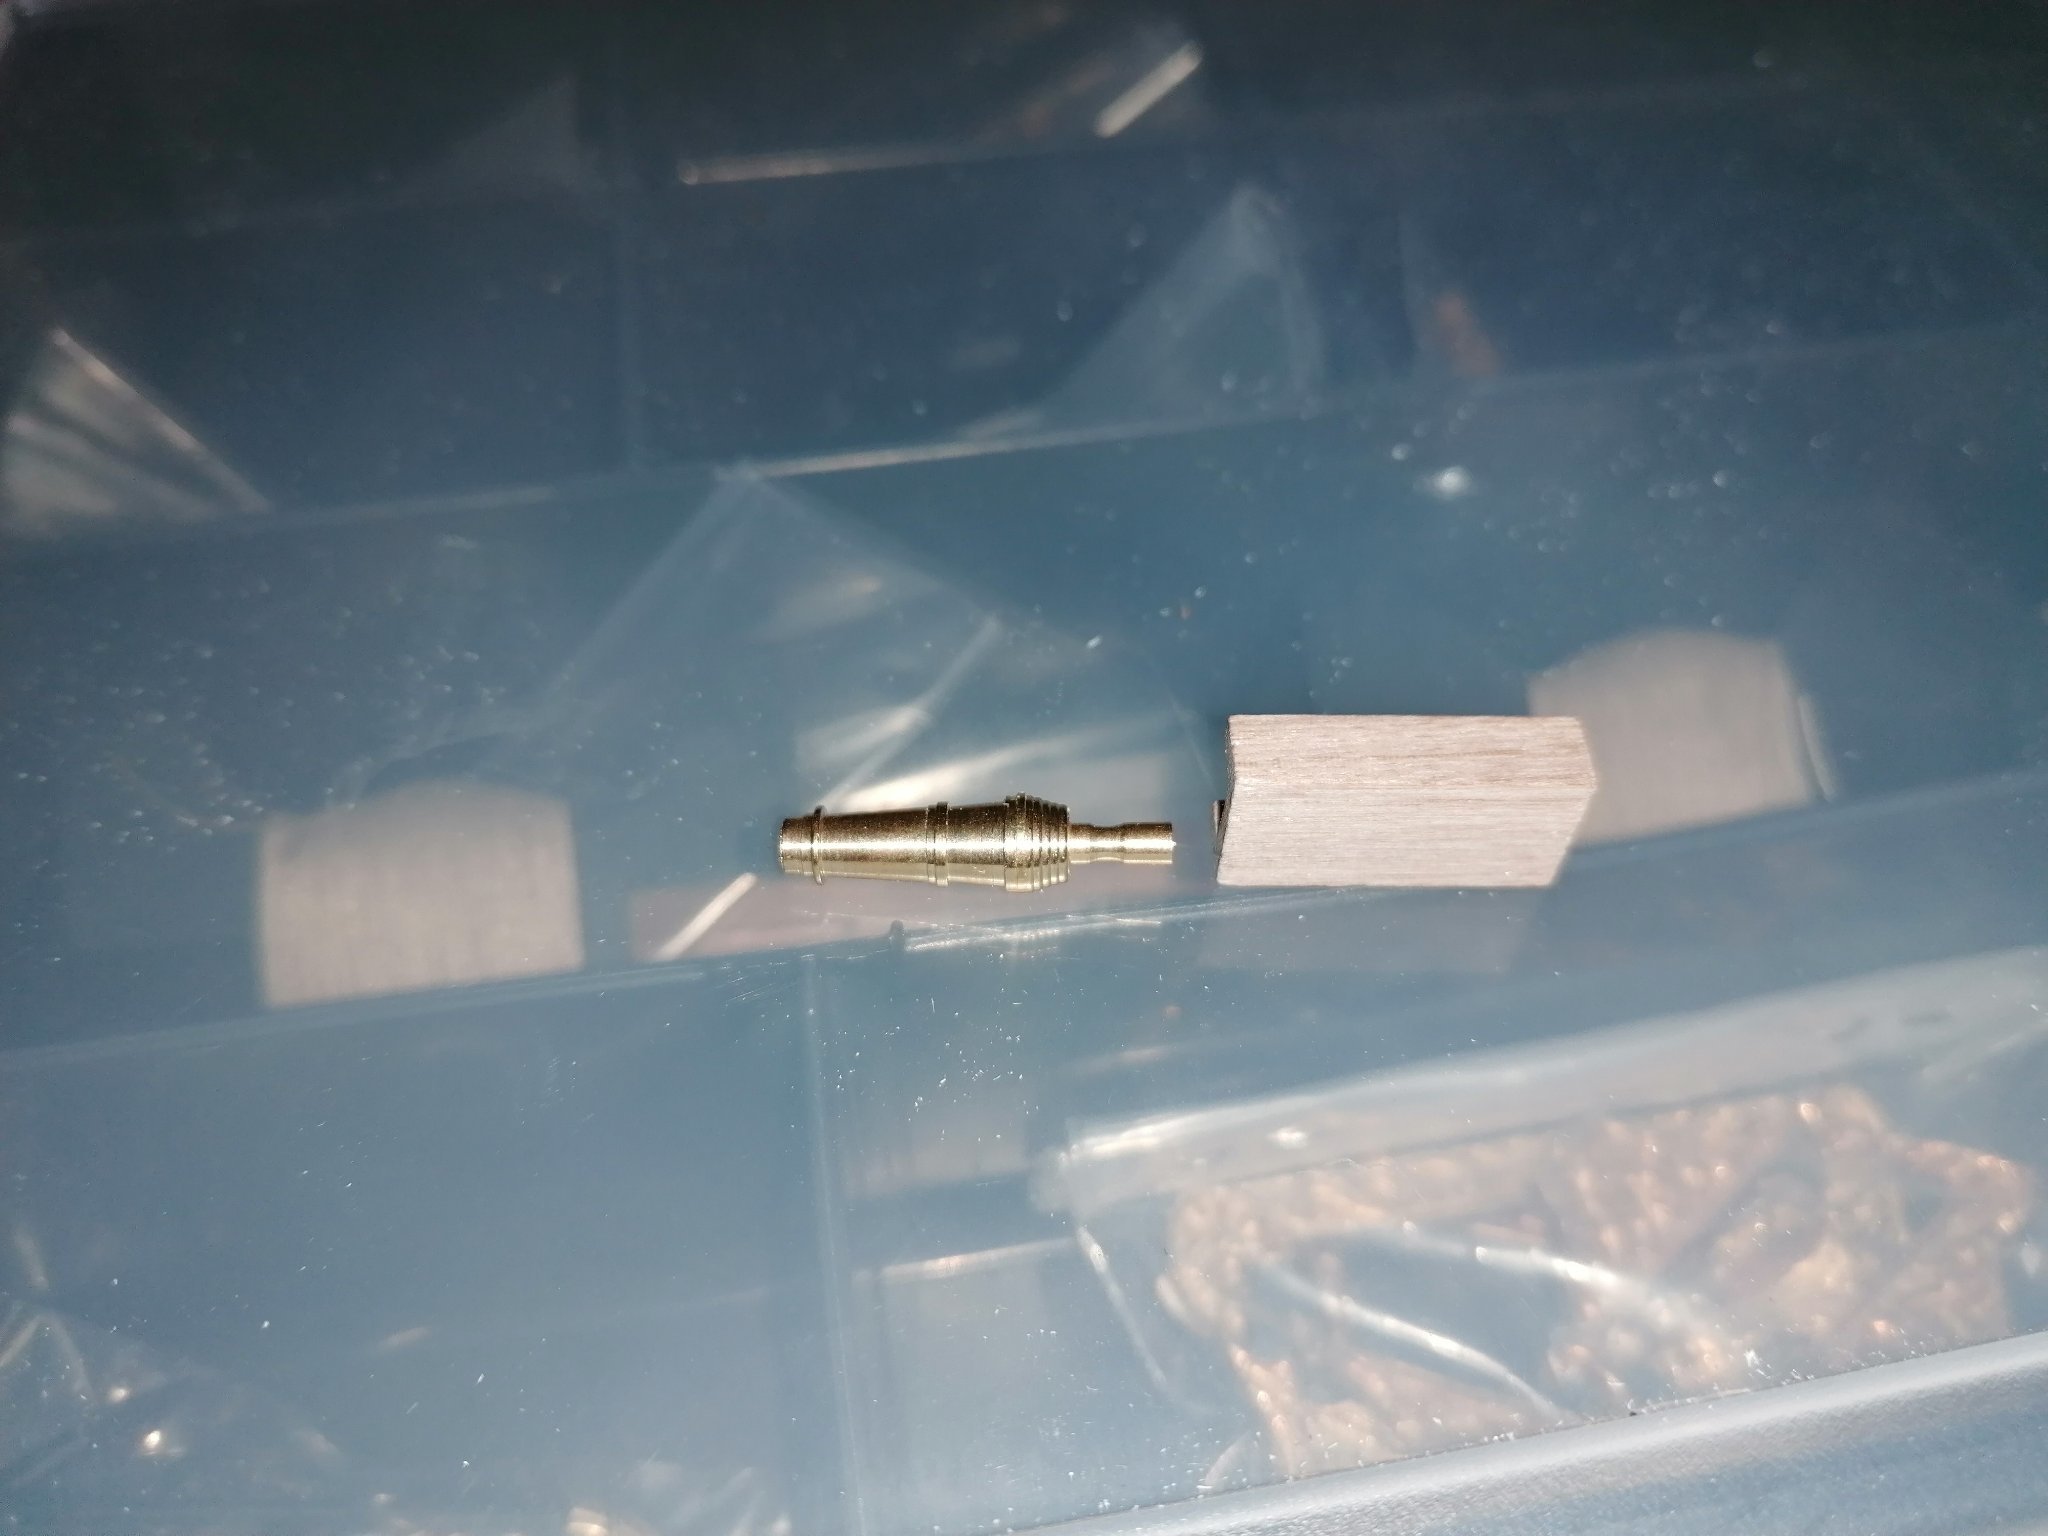
Thank you Bob. I will try to start a separate log. In answer to your question it still comes with carronades and a base which needs to be shaped. I will not be using them unless I have to.
-
I should have mentioned, for anyone that hasn't done this before, that the masts were located through the decks prior to gluing to ensure they will fit correctly later into the build.
- 68 replies
-
- 1
-

-
- san francisco ii
- artesania latina
- (and 1 more)
-
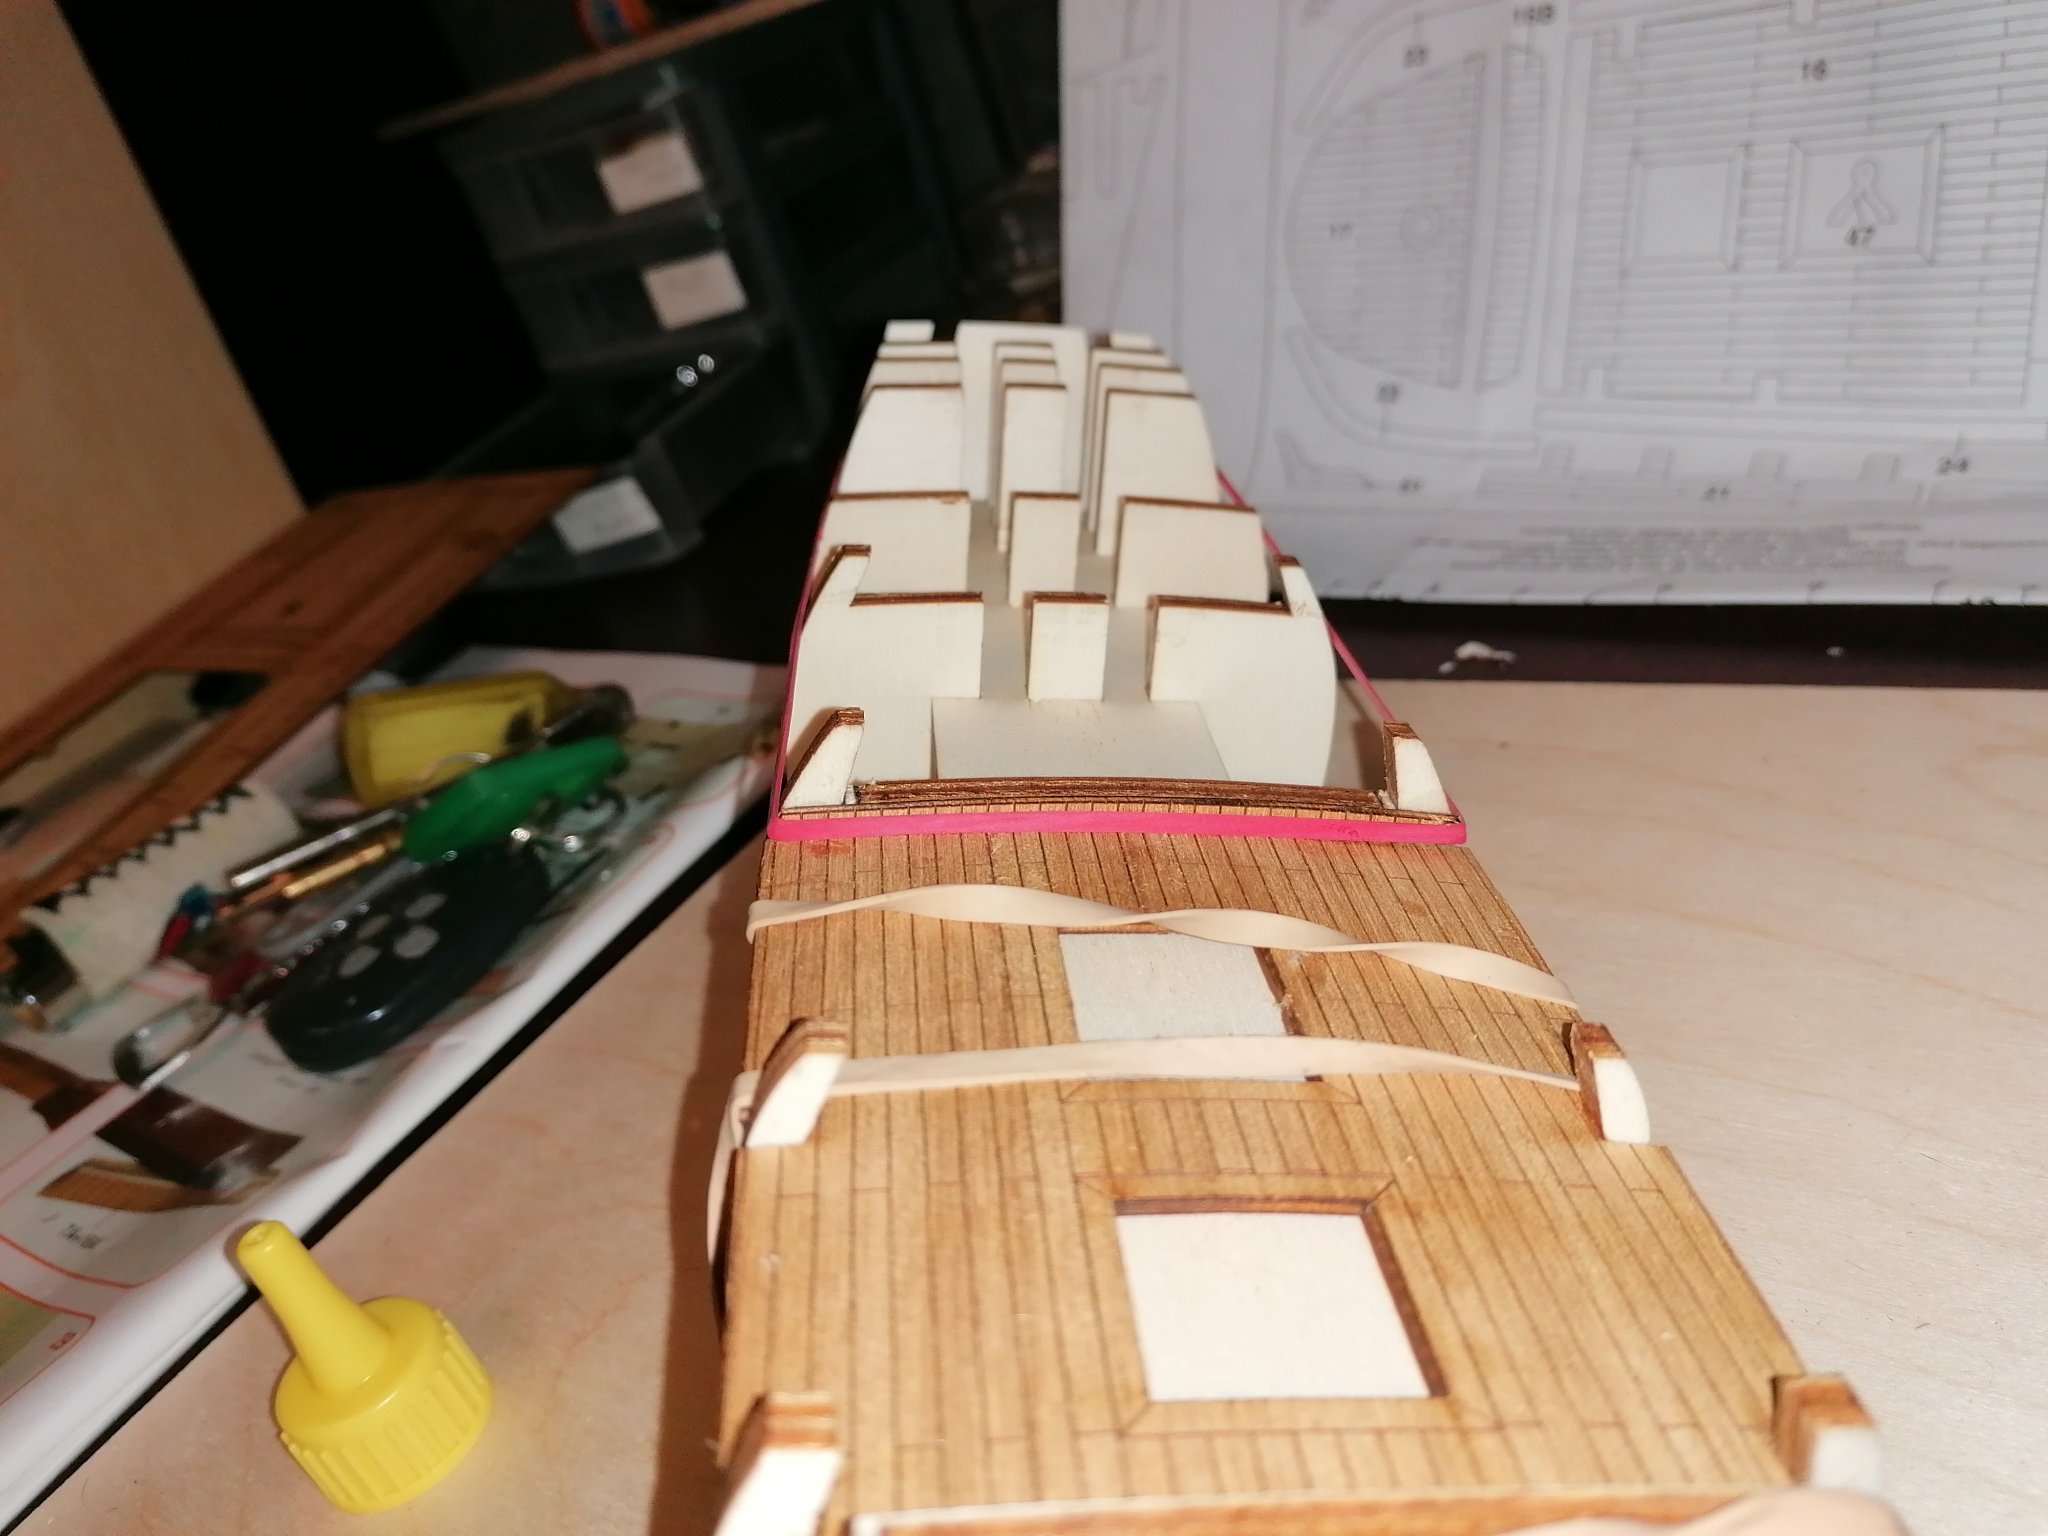
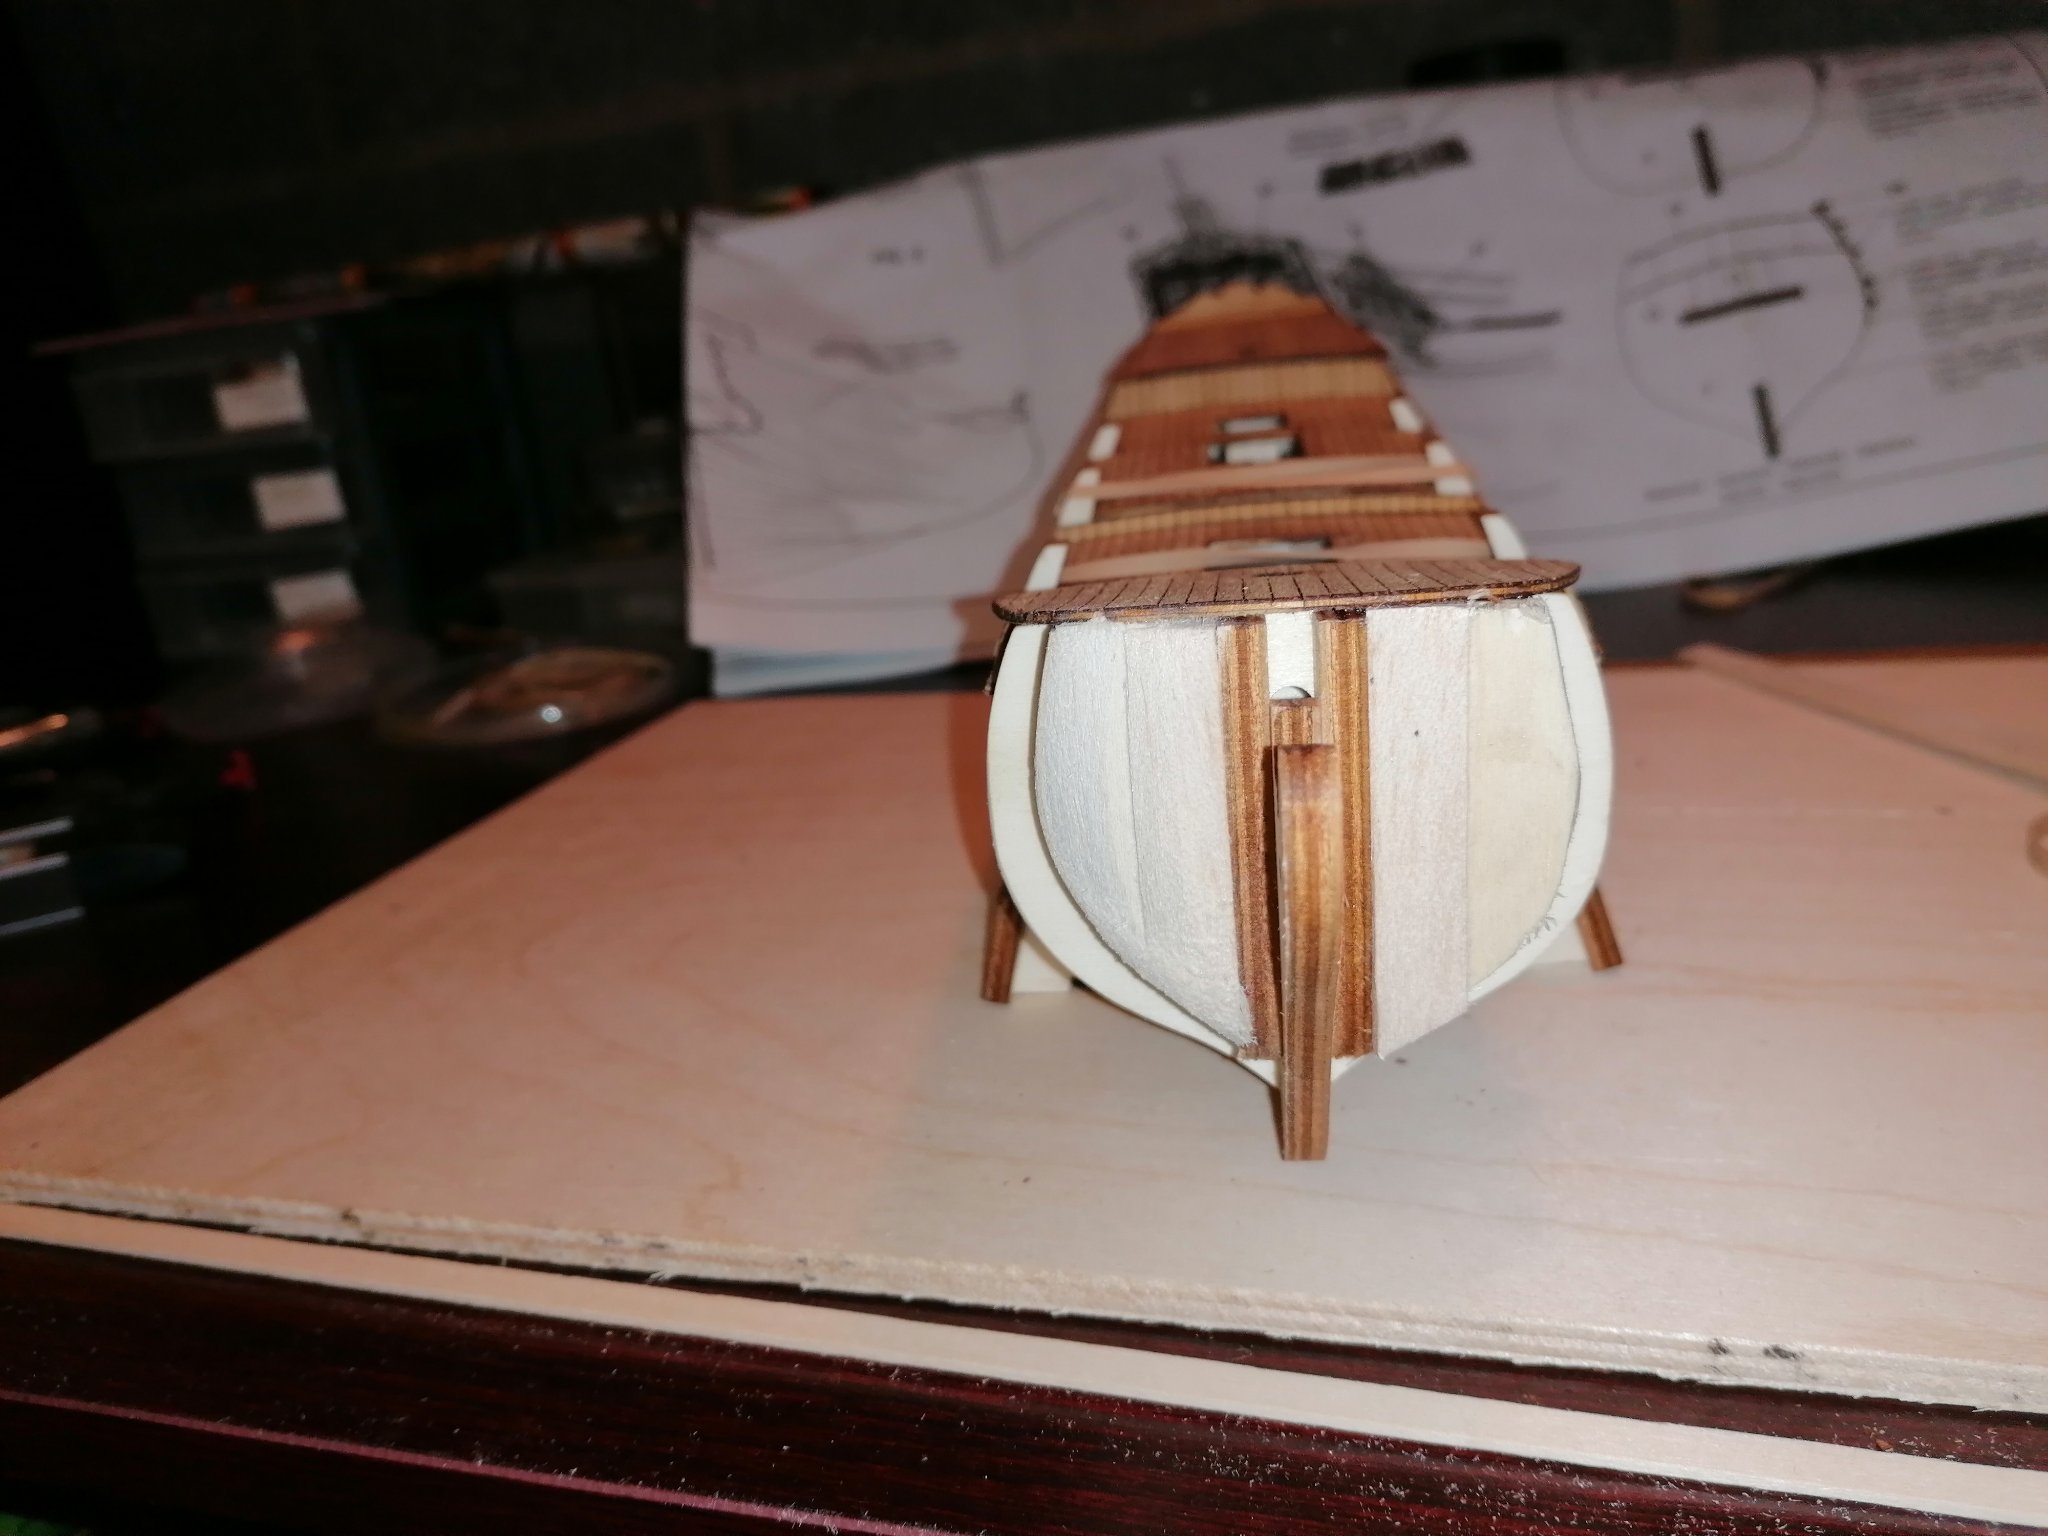
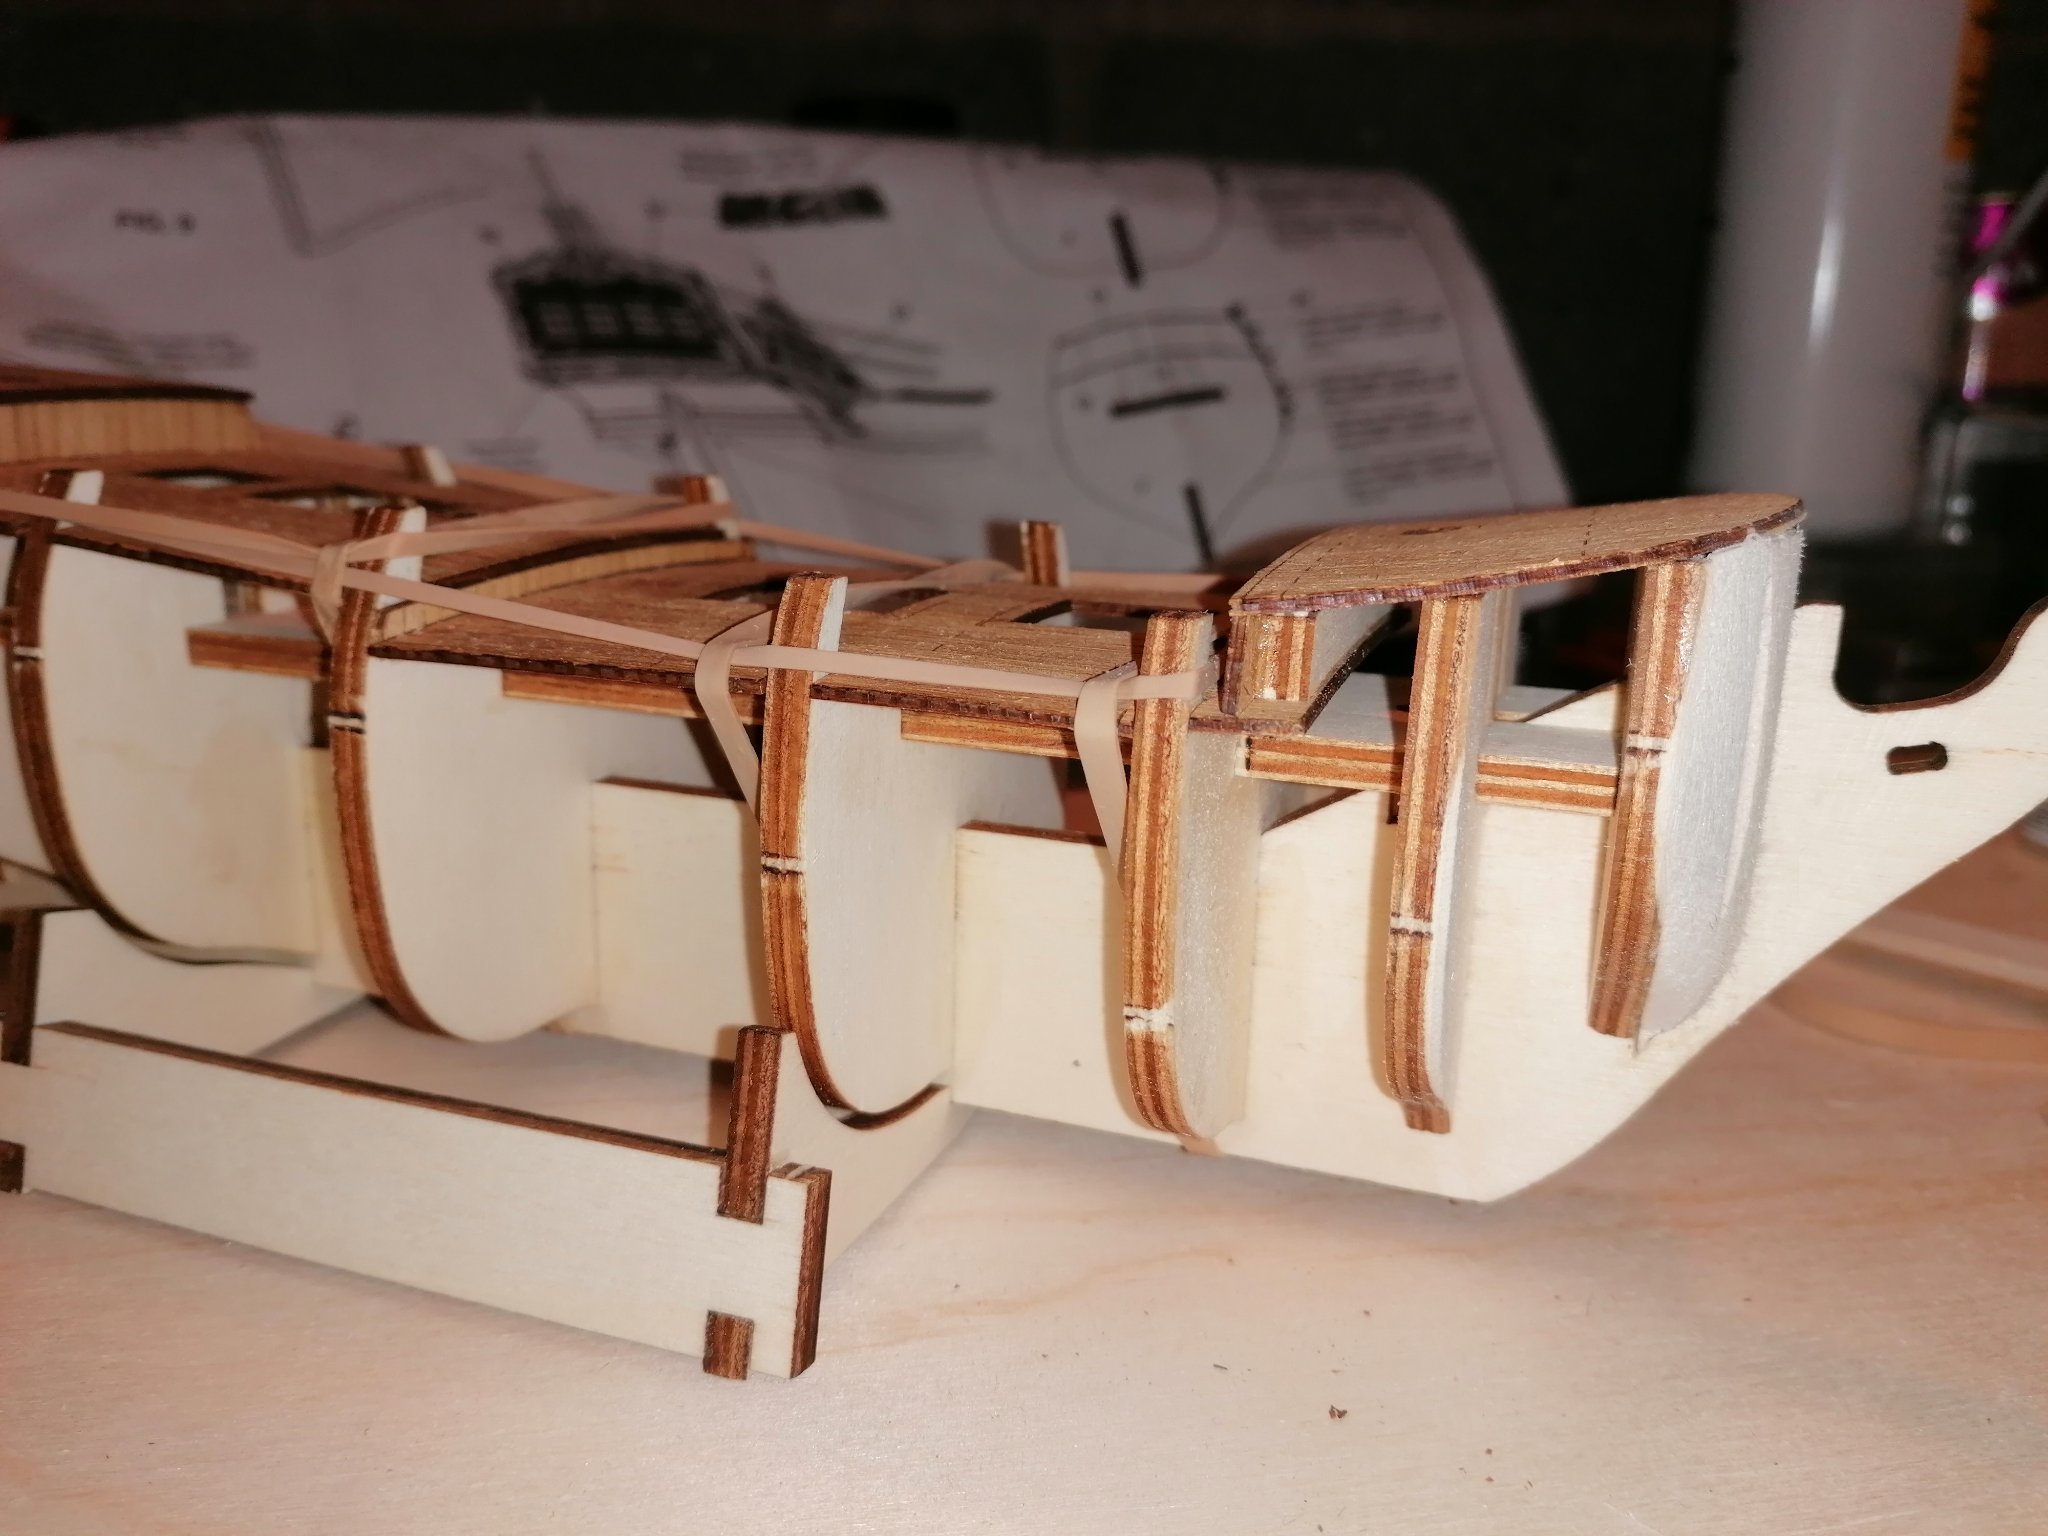
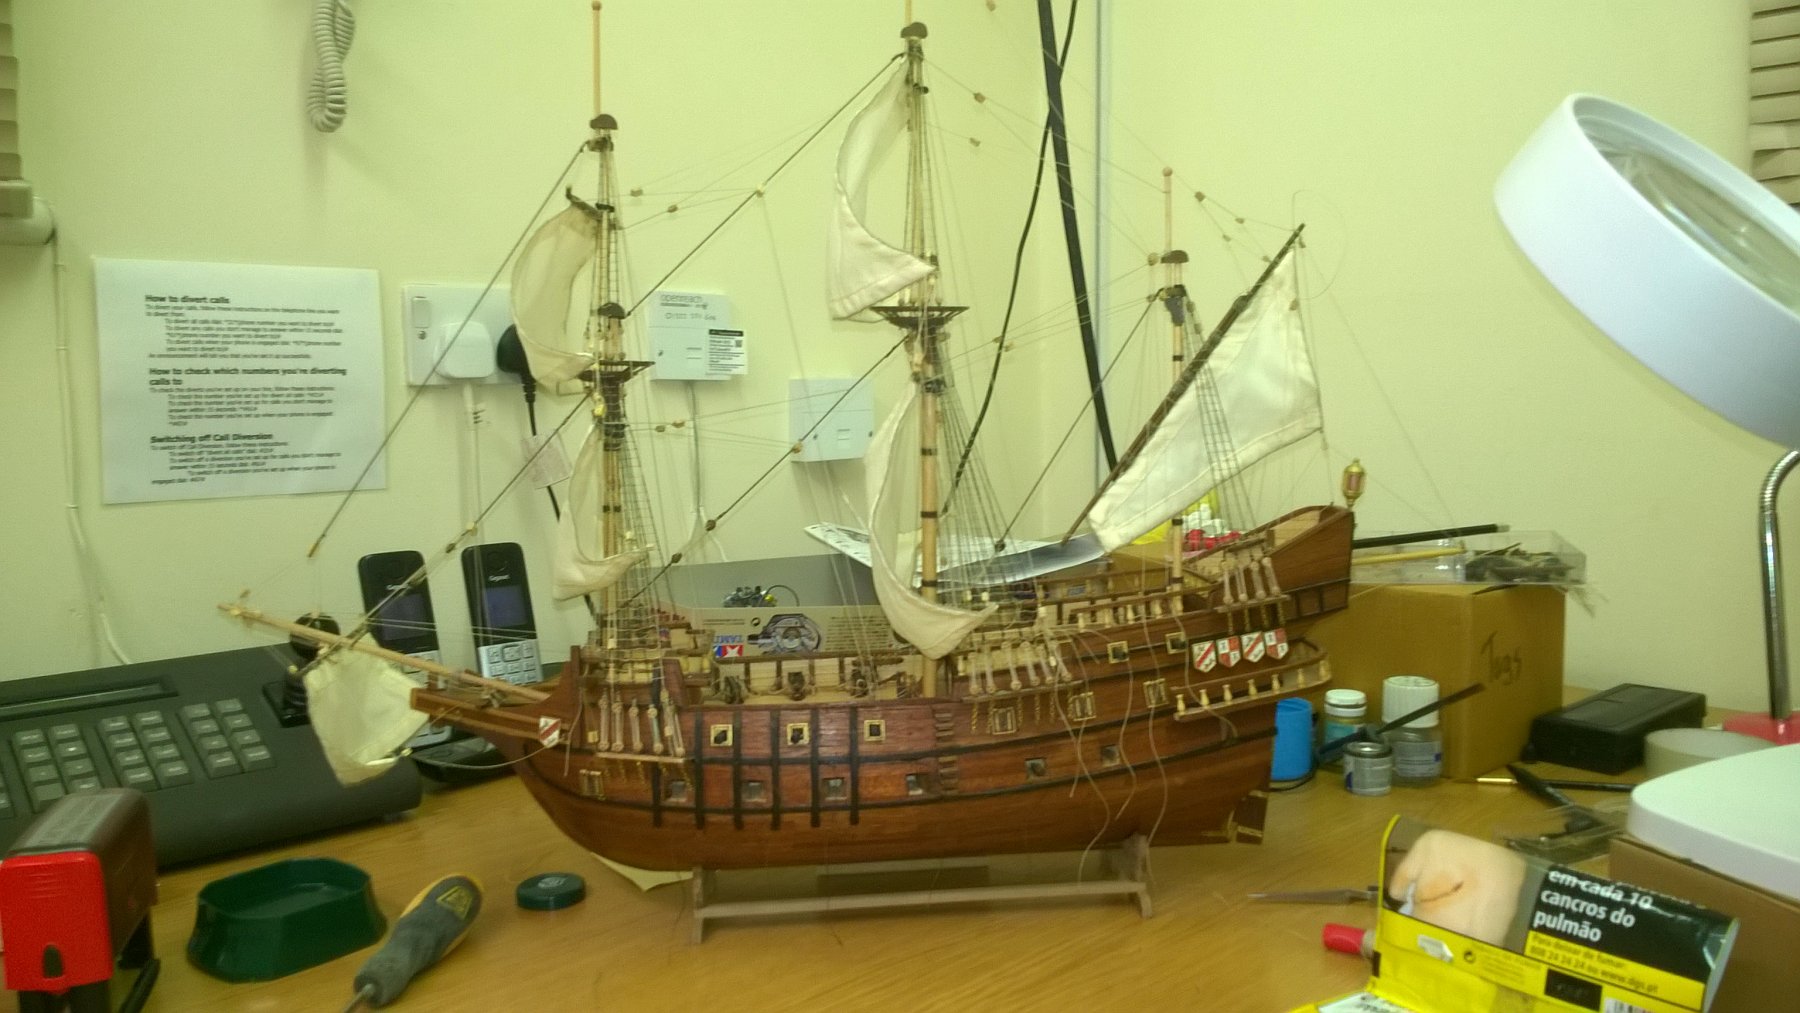
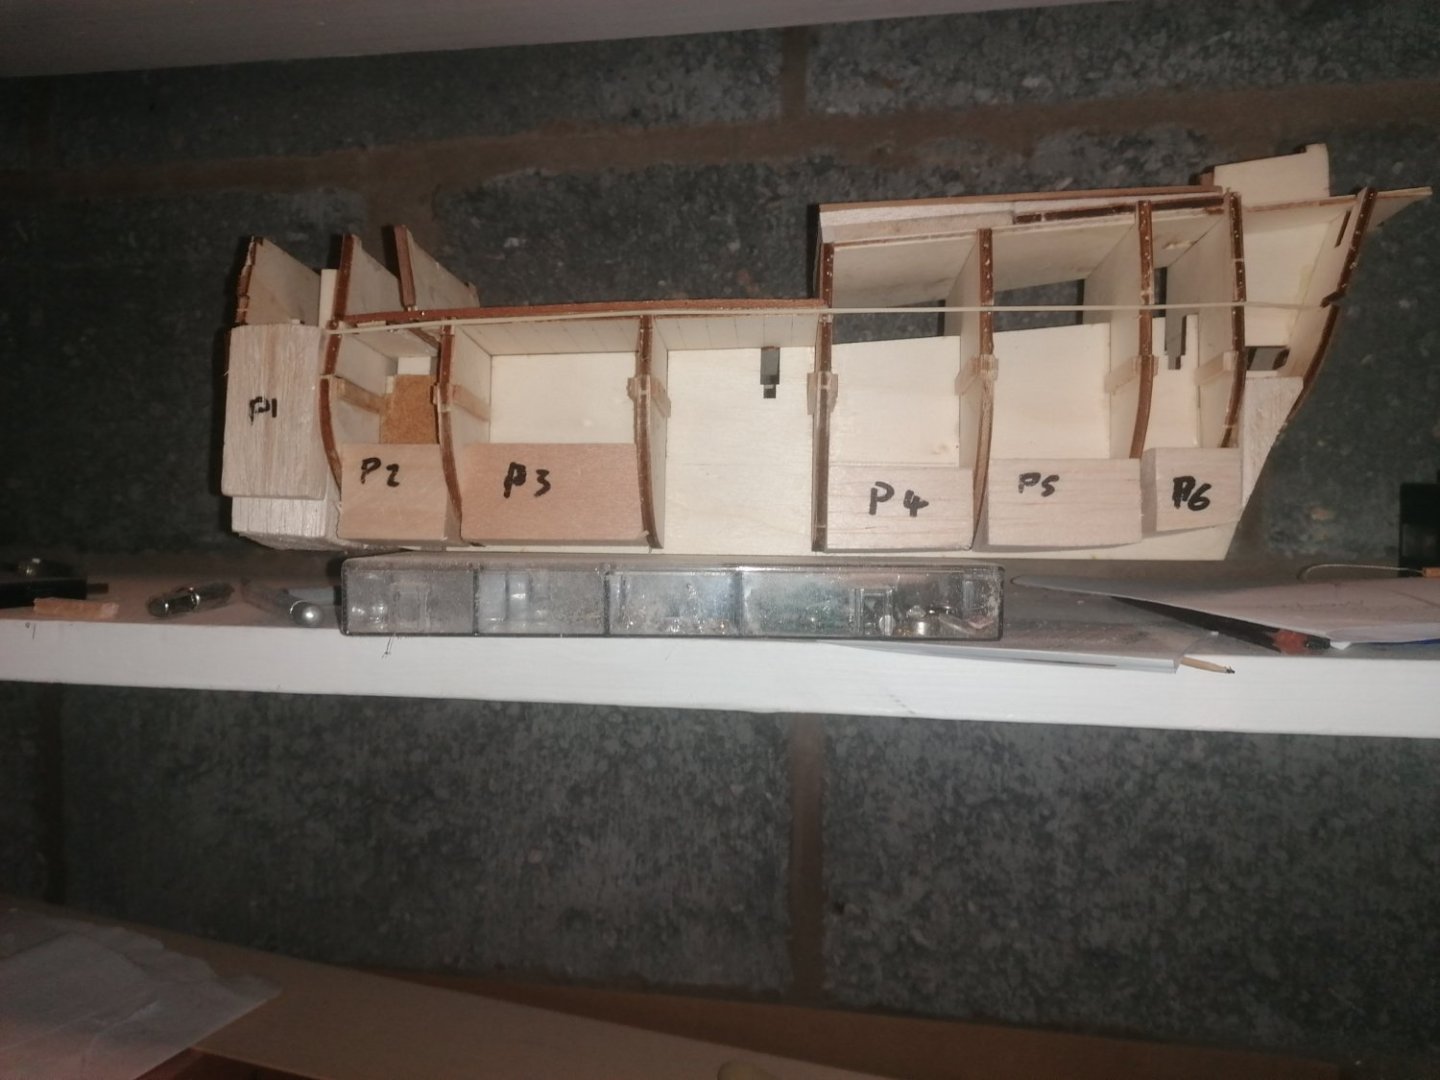
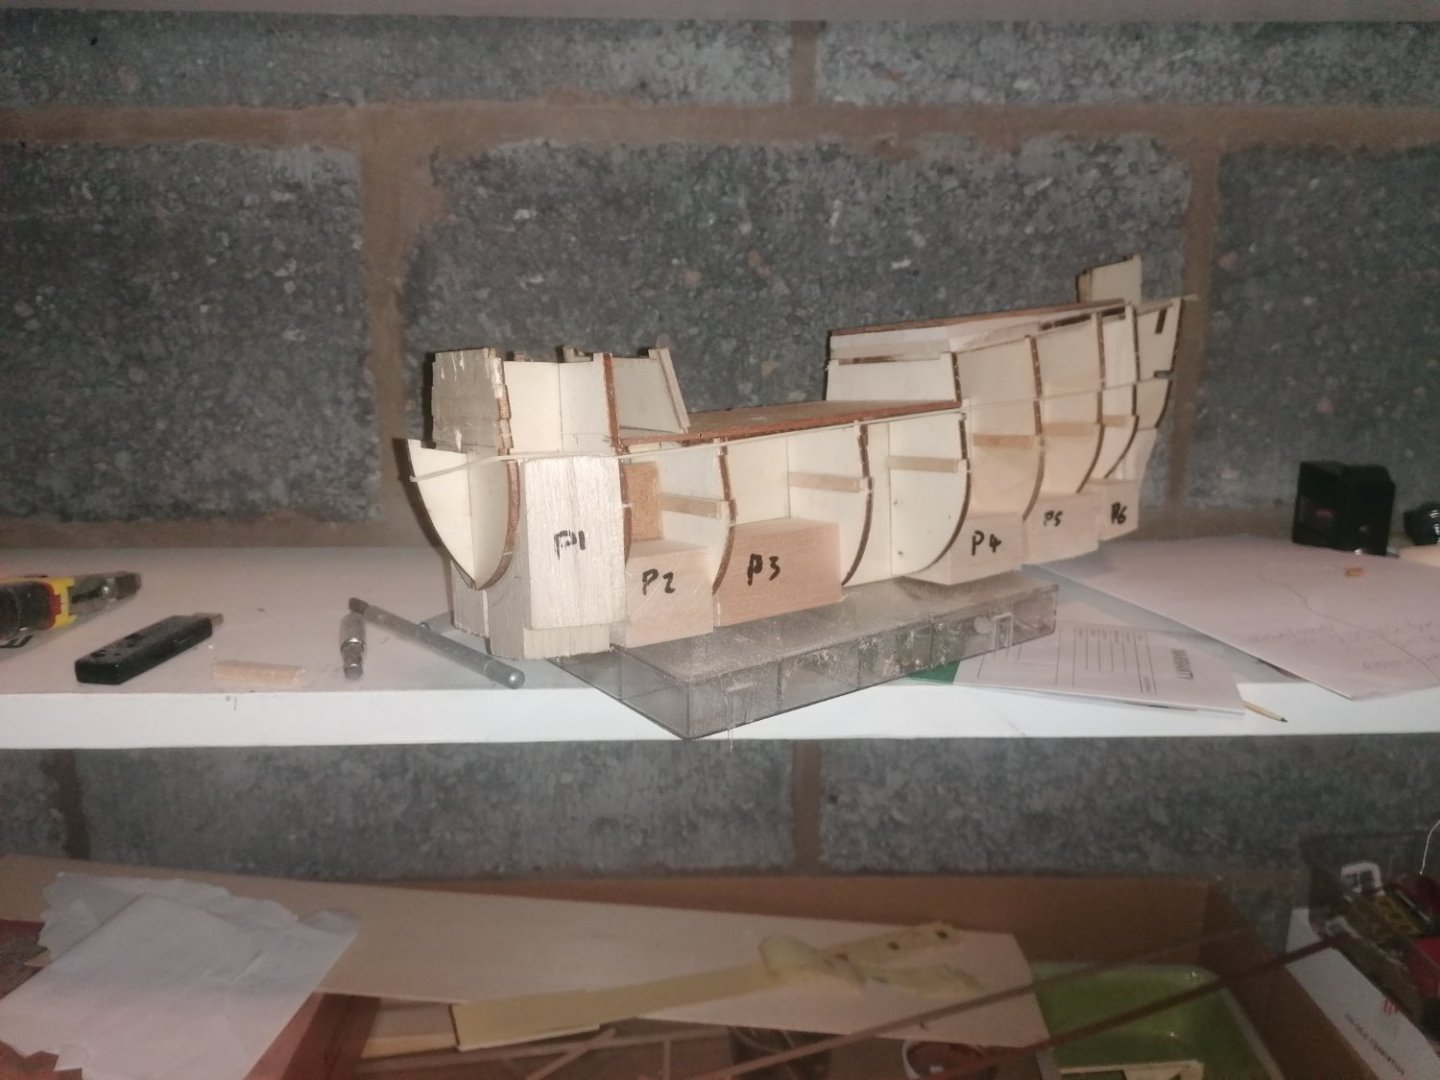
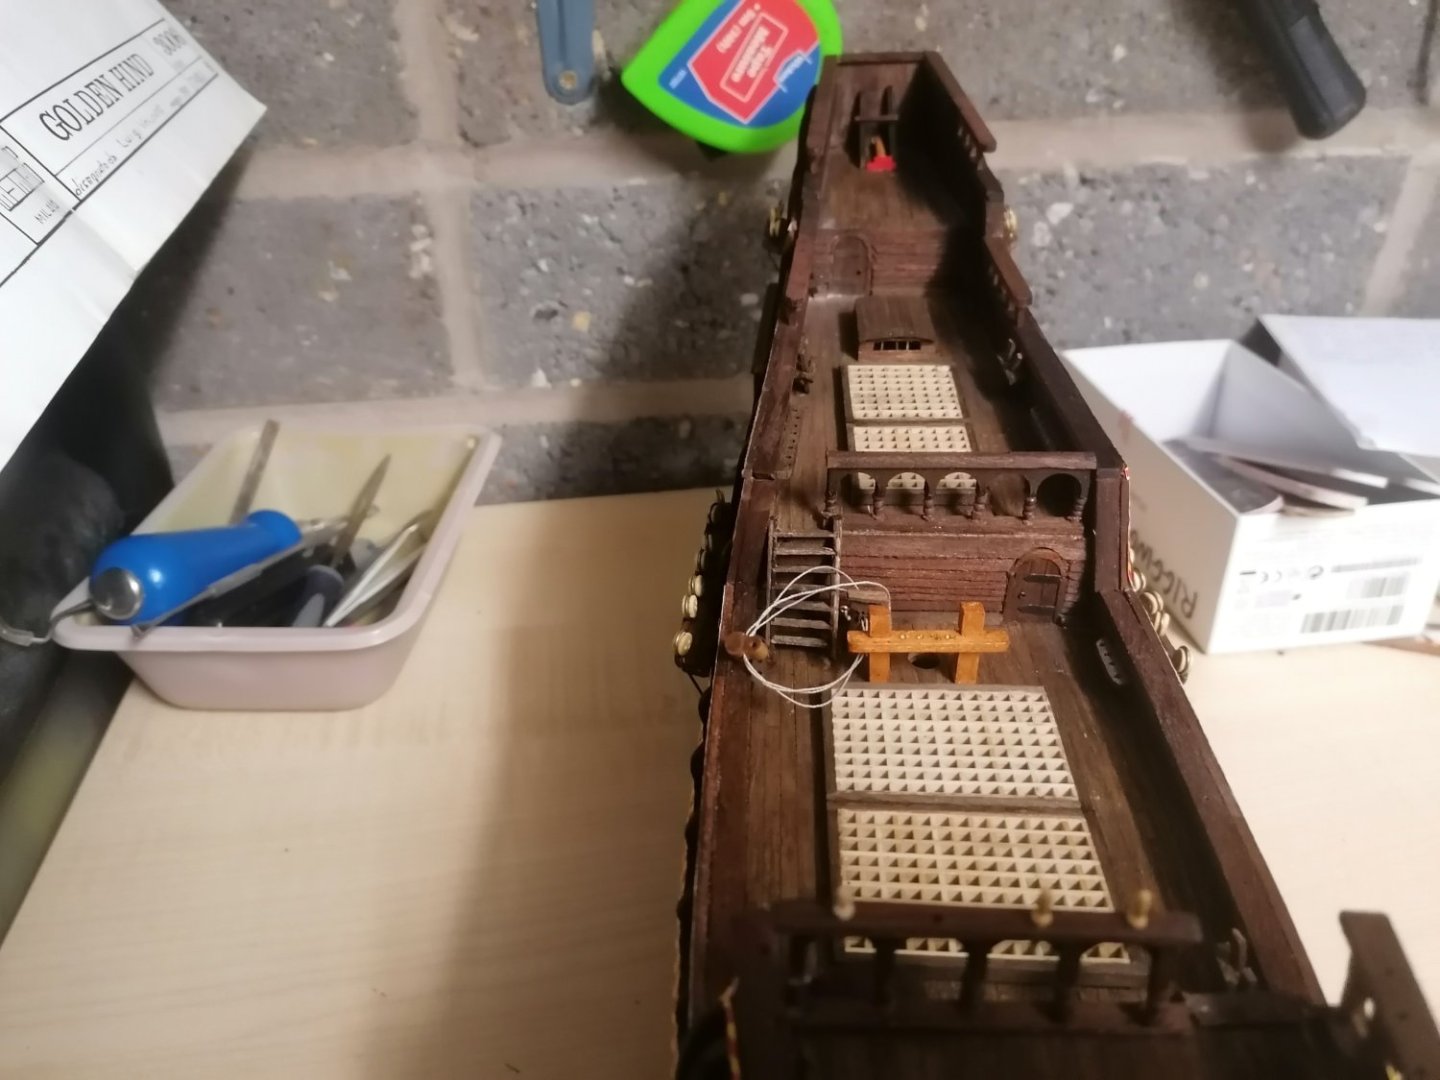
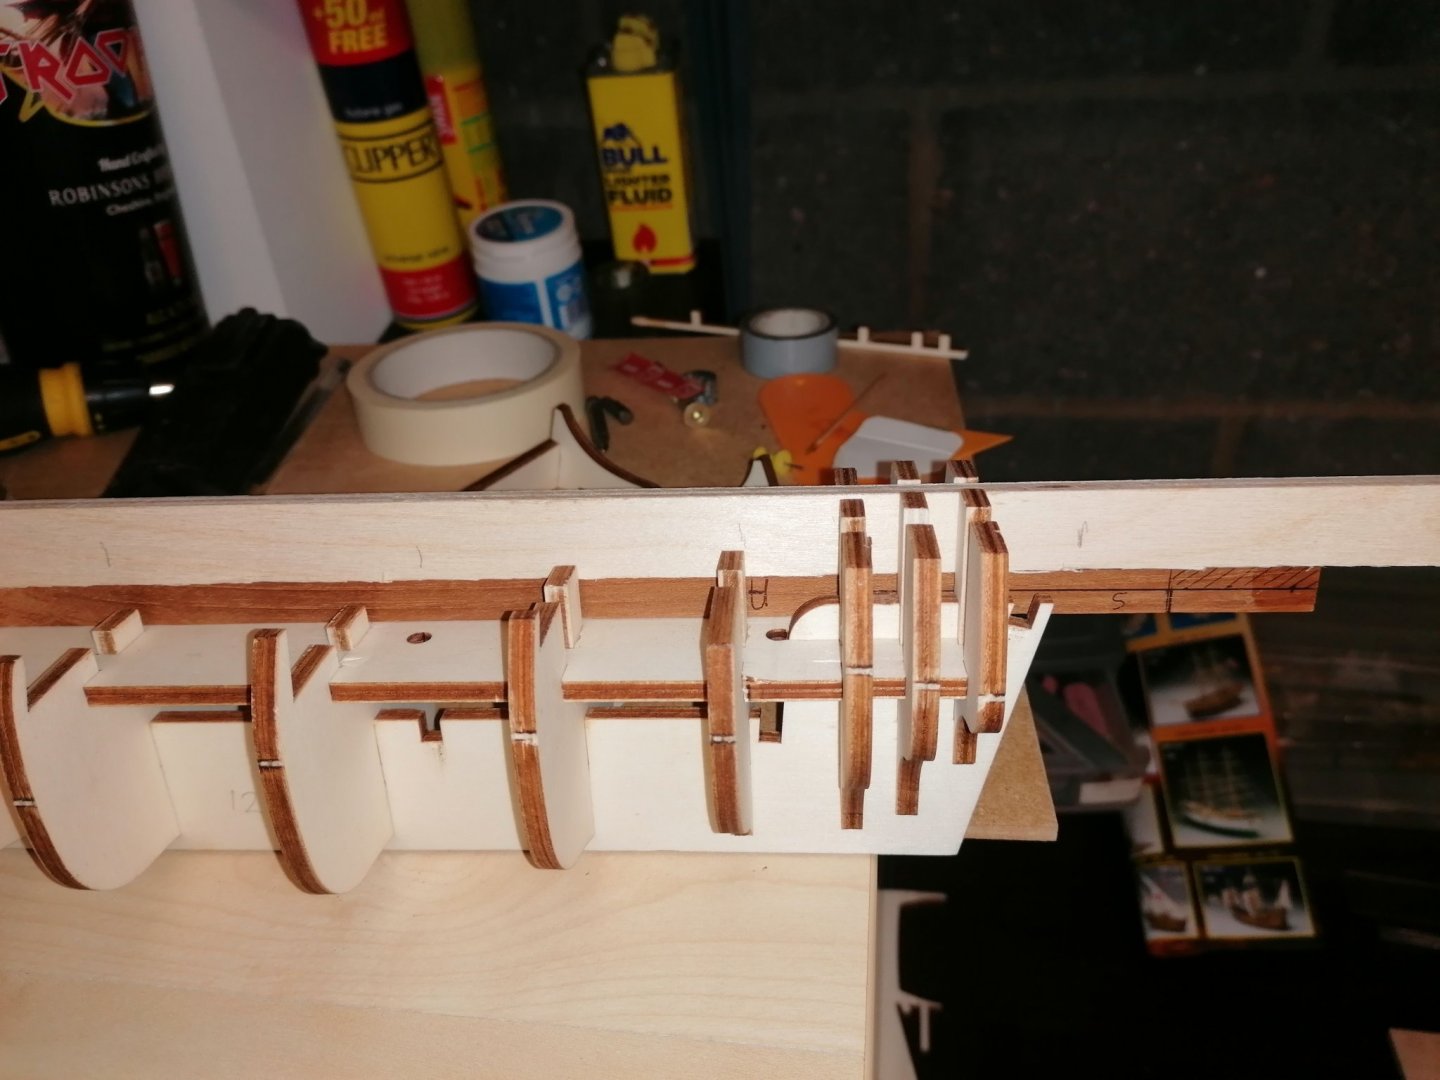
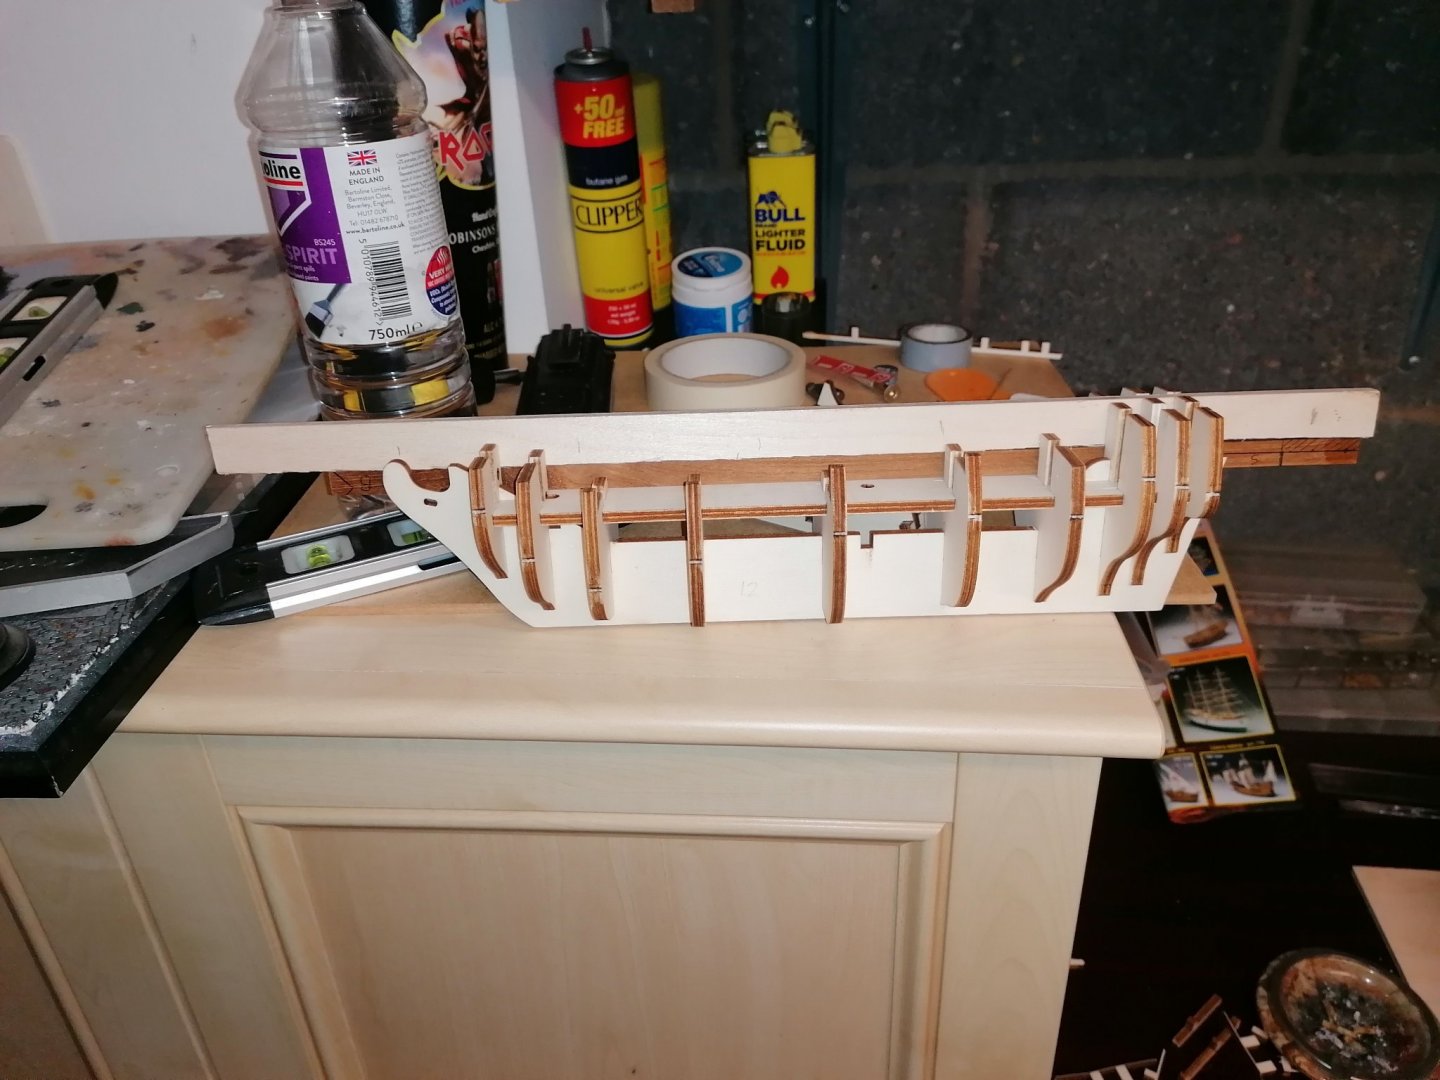
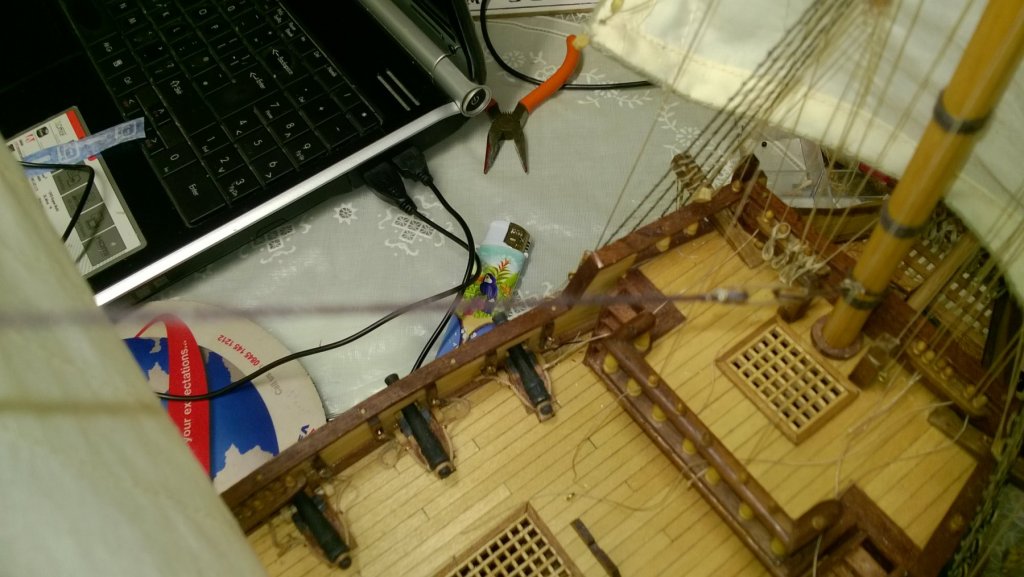
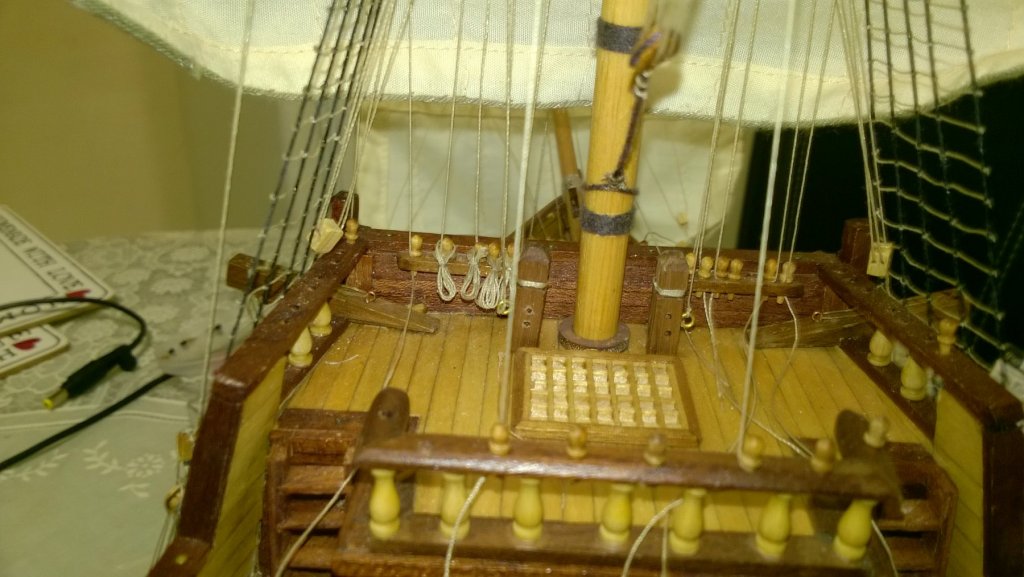
After my last post I had a day off from the build and, by the time I finished, it was too late to add an update on Monday. Added to this I've installed an computer clean up system and now can't get a preview of my photos. Anyway I have now added the decks as well as the filler blocks to the bows. I have also added the stern gallery piece which was made harder by the elastic bands pinging off the bulkheads. This was fixed by placing other elastic bands across them and the decks. There is no mention of having to soak the stern piece to get it to bend to shape. Out of curiosity I looked at the fit of the metal gallery surround and, of course it is flat. 1mm wood panel is easy to bend into the correct position but 4mm metal ??? Any suggestions welcome here. At present I am waiting for the glue to dry and have another go tomorrow night. I'm now convinced this is not a beginners kit. Here's the photos so far.


- 68 replies
-
- 3
-
-
- san francisco ii
- artesania latina
- (and 1 more)
-
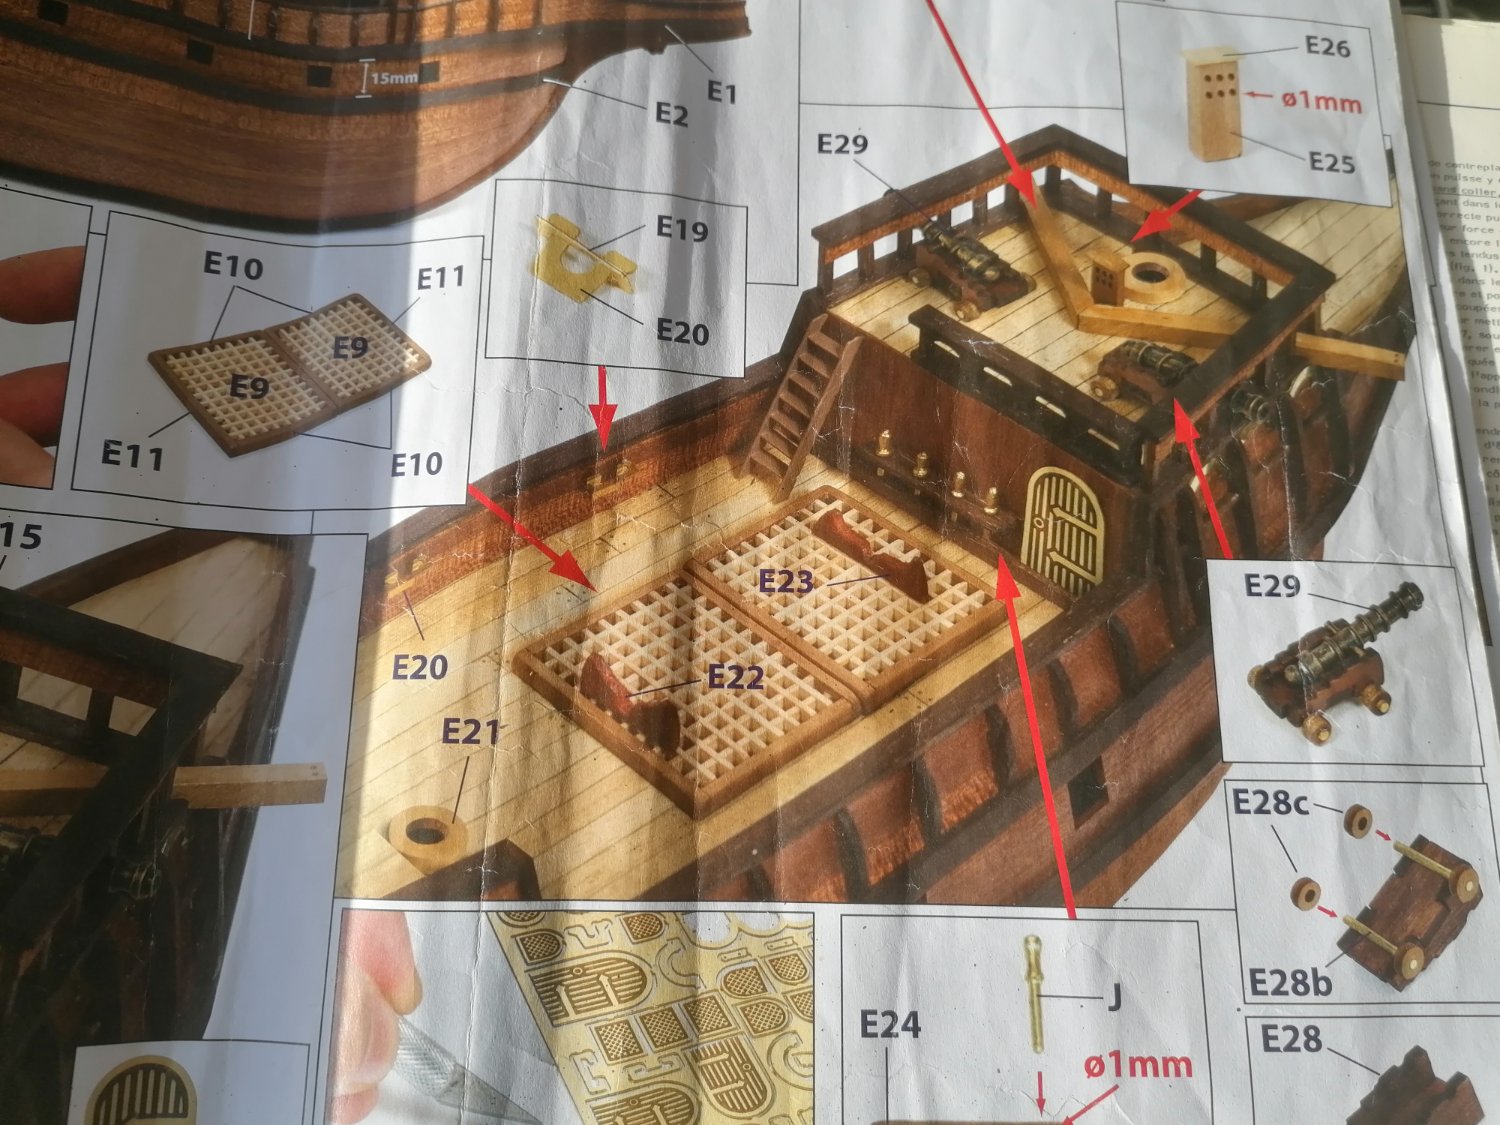
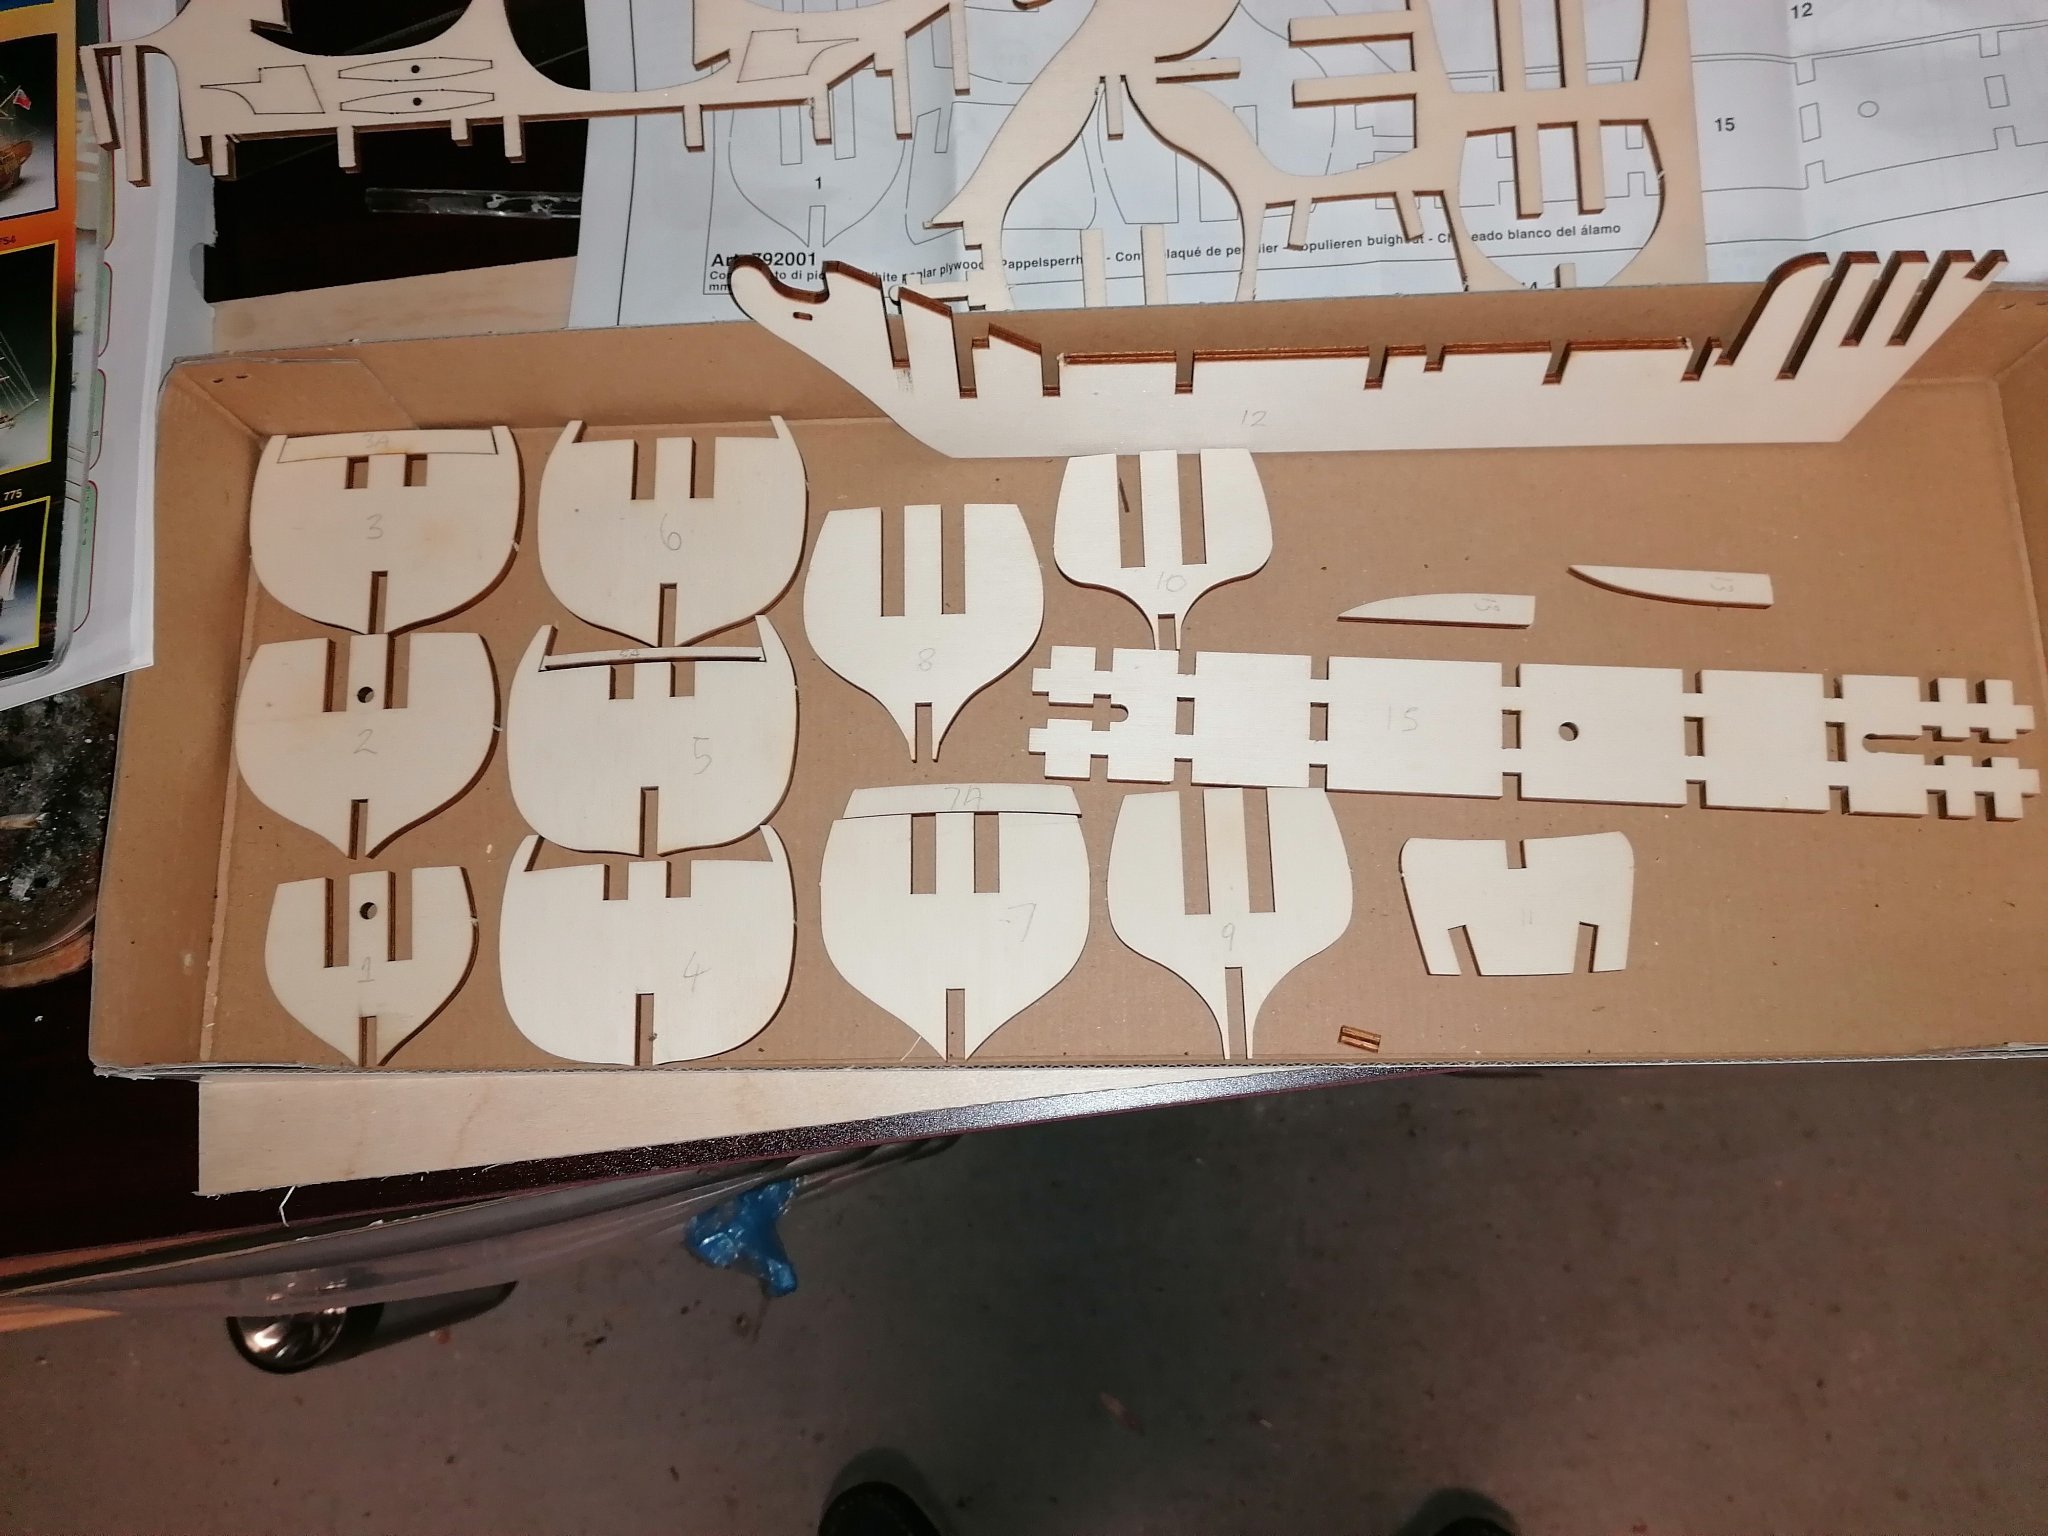
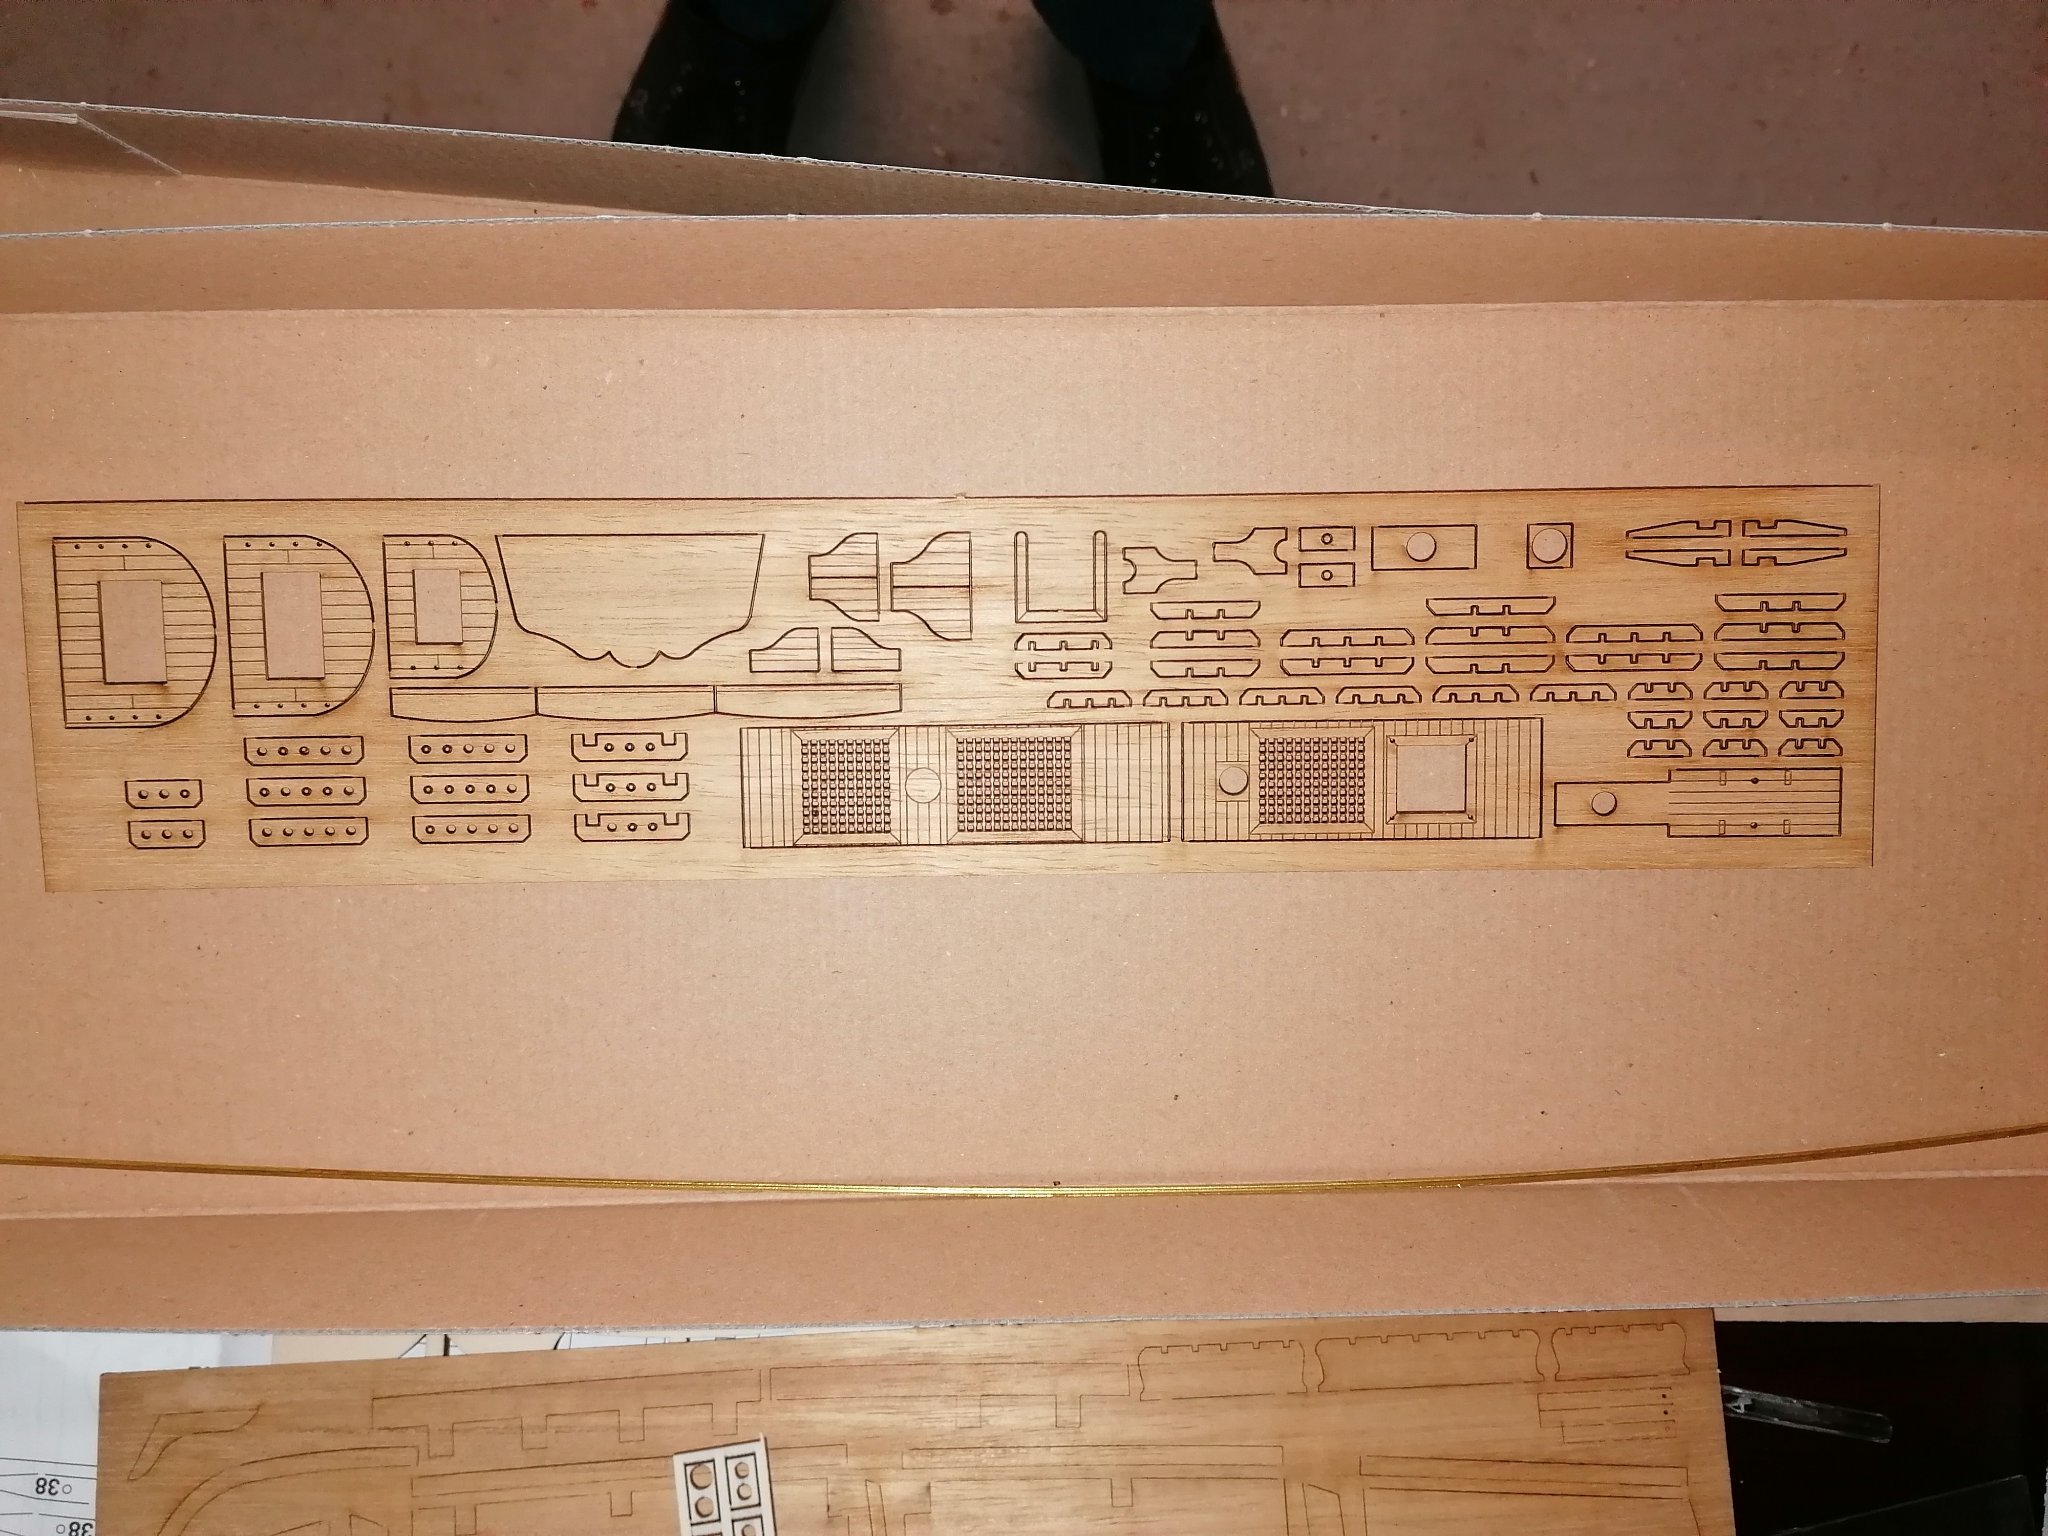
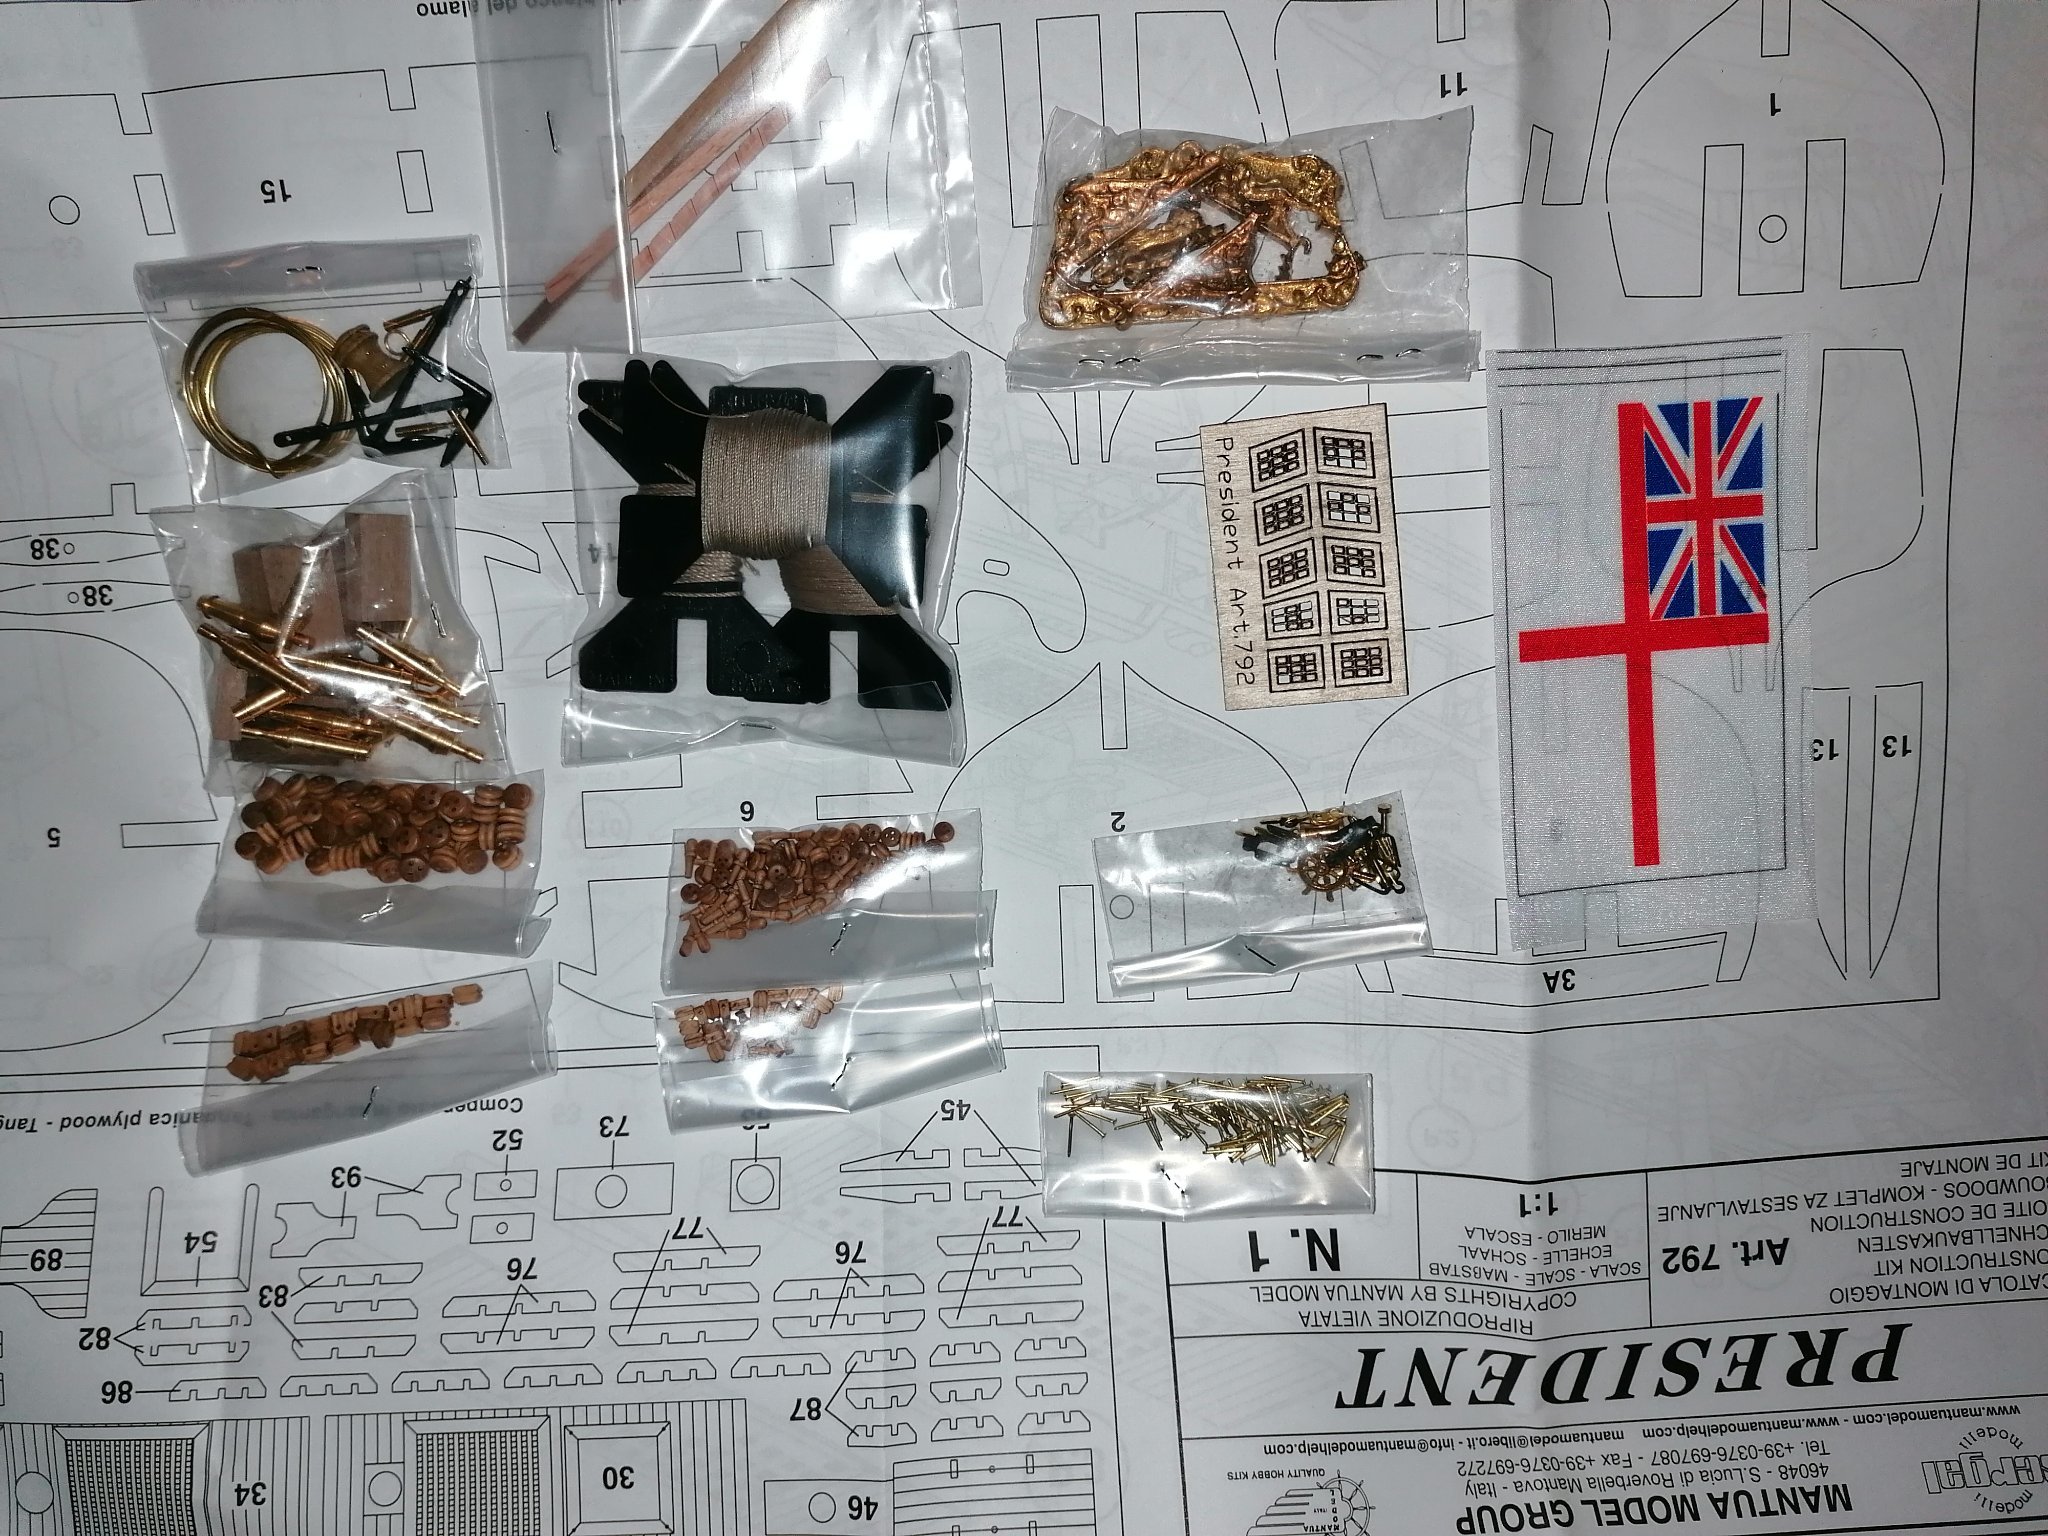
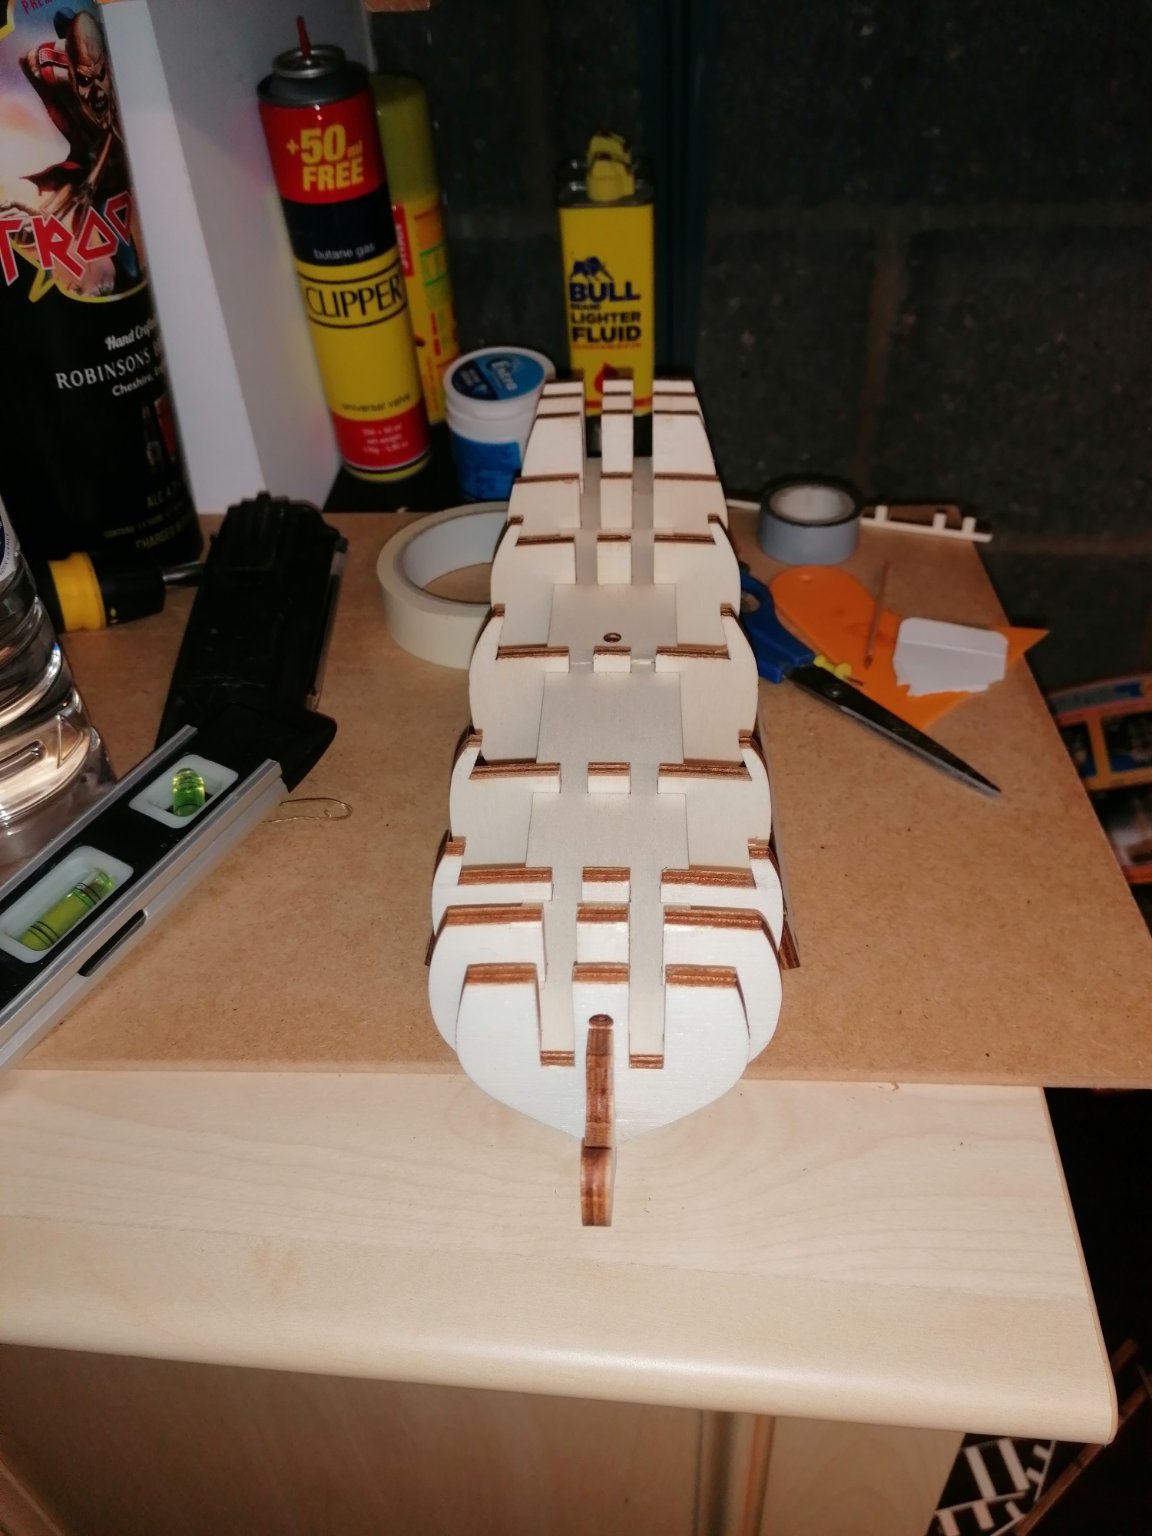
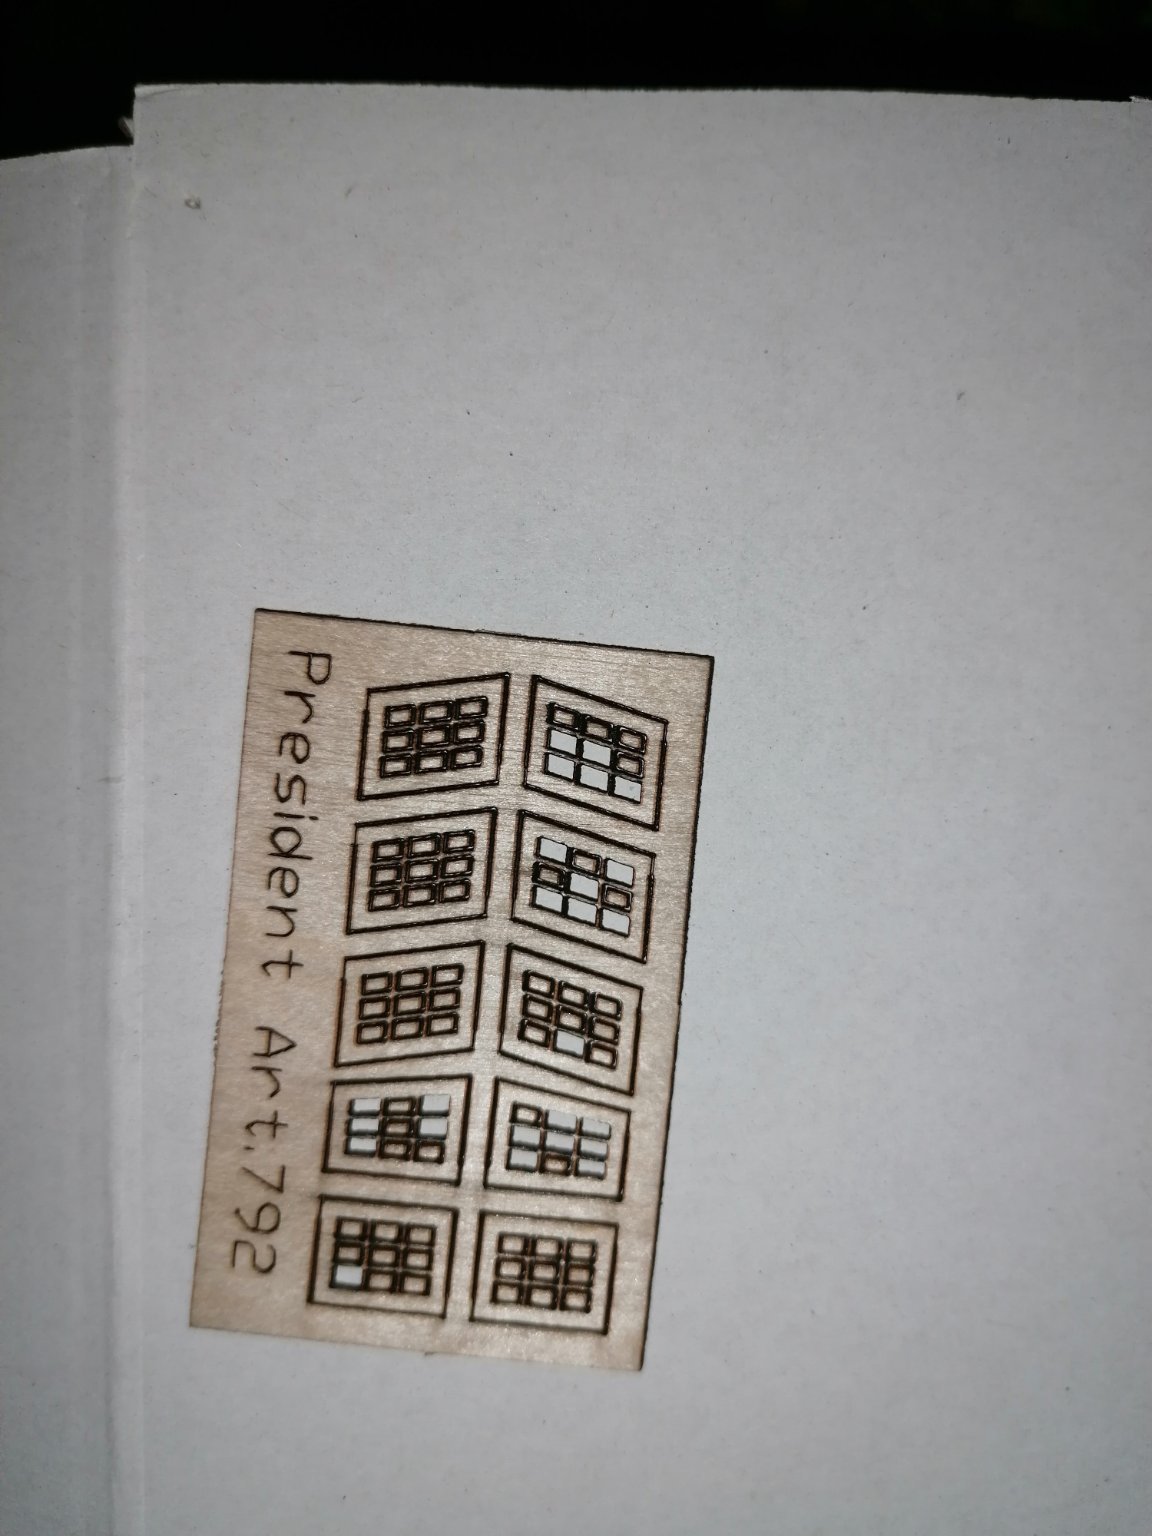
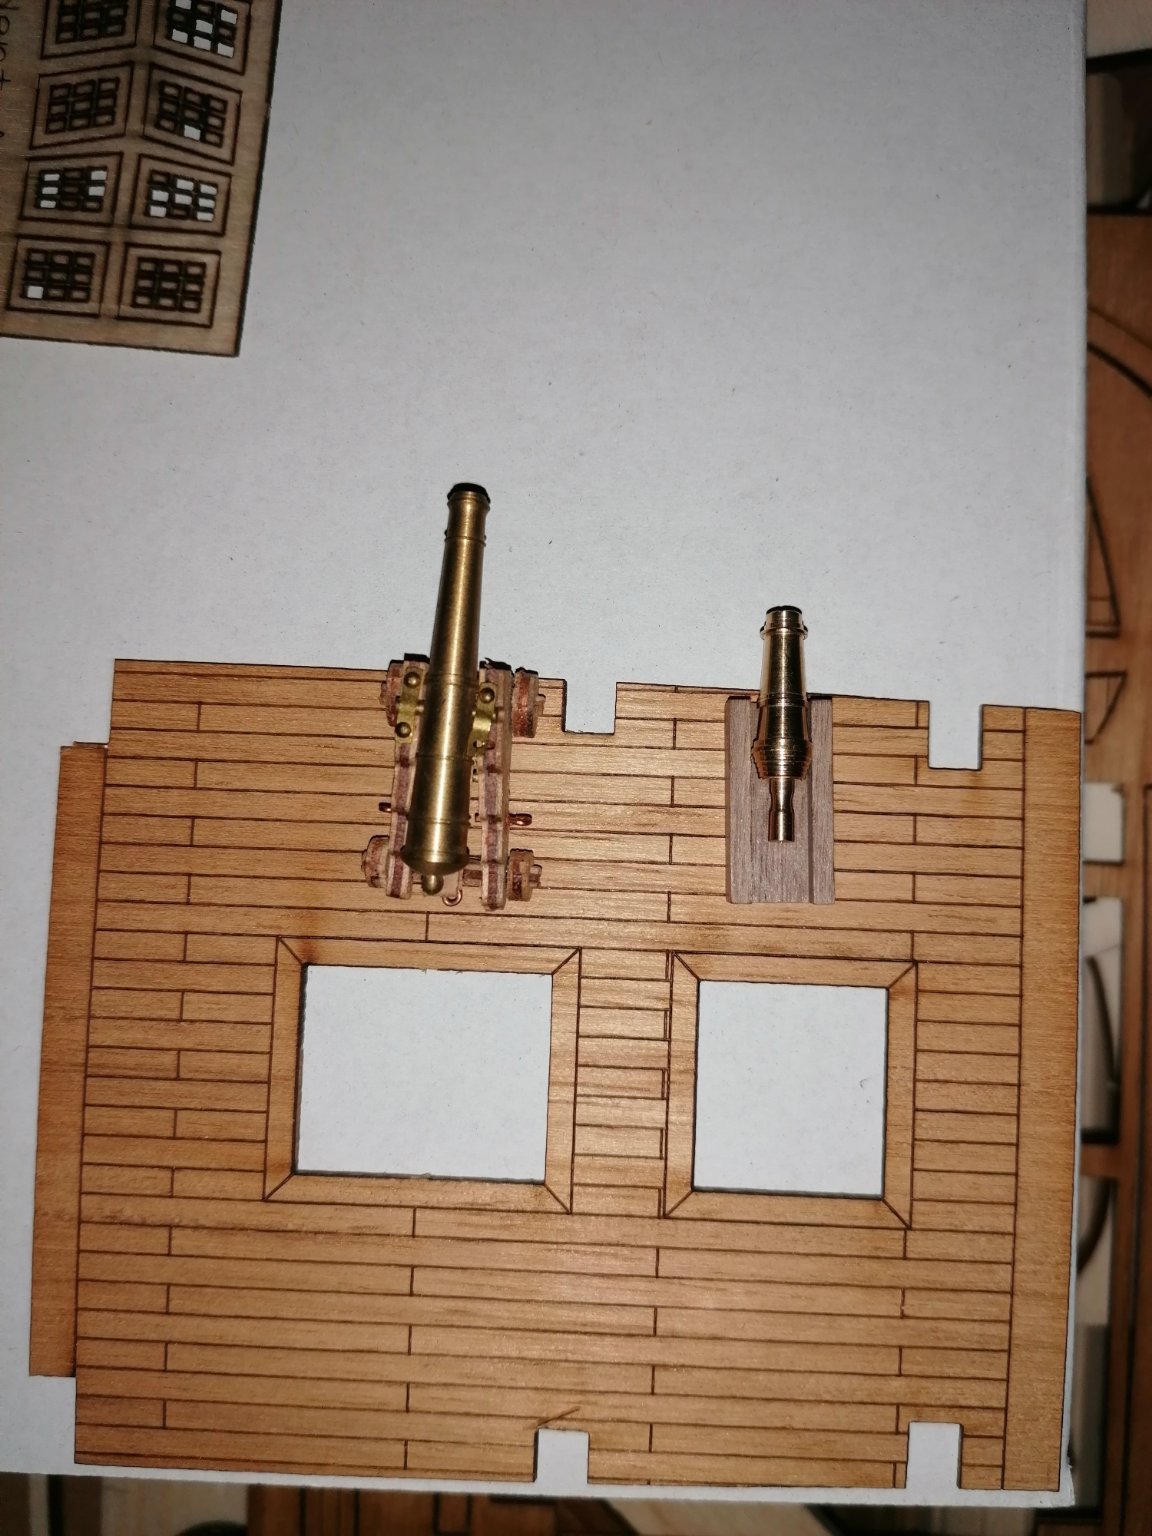
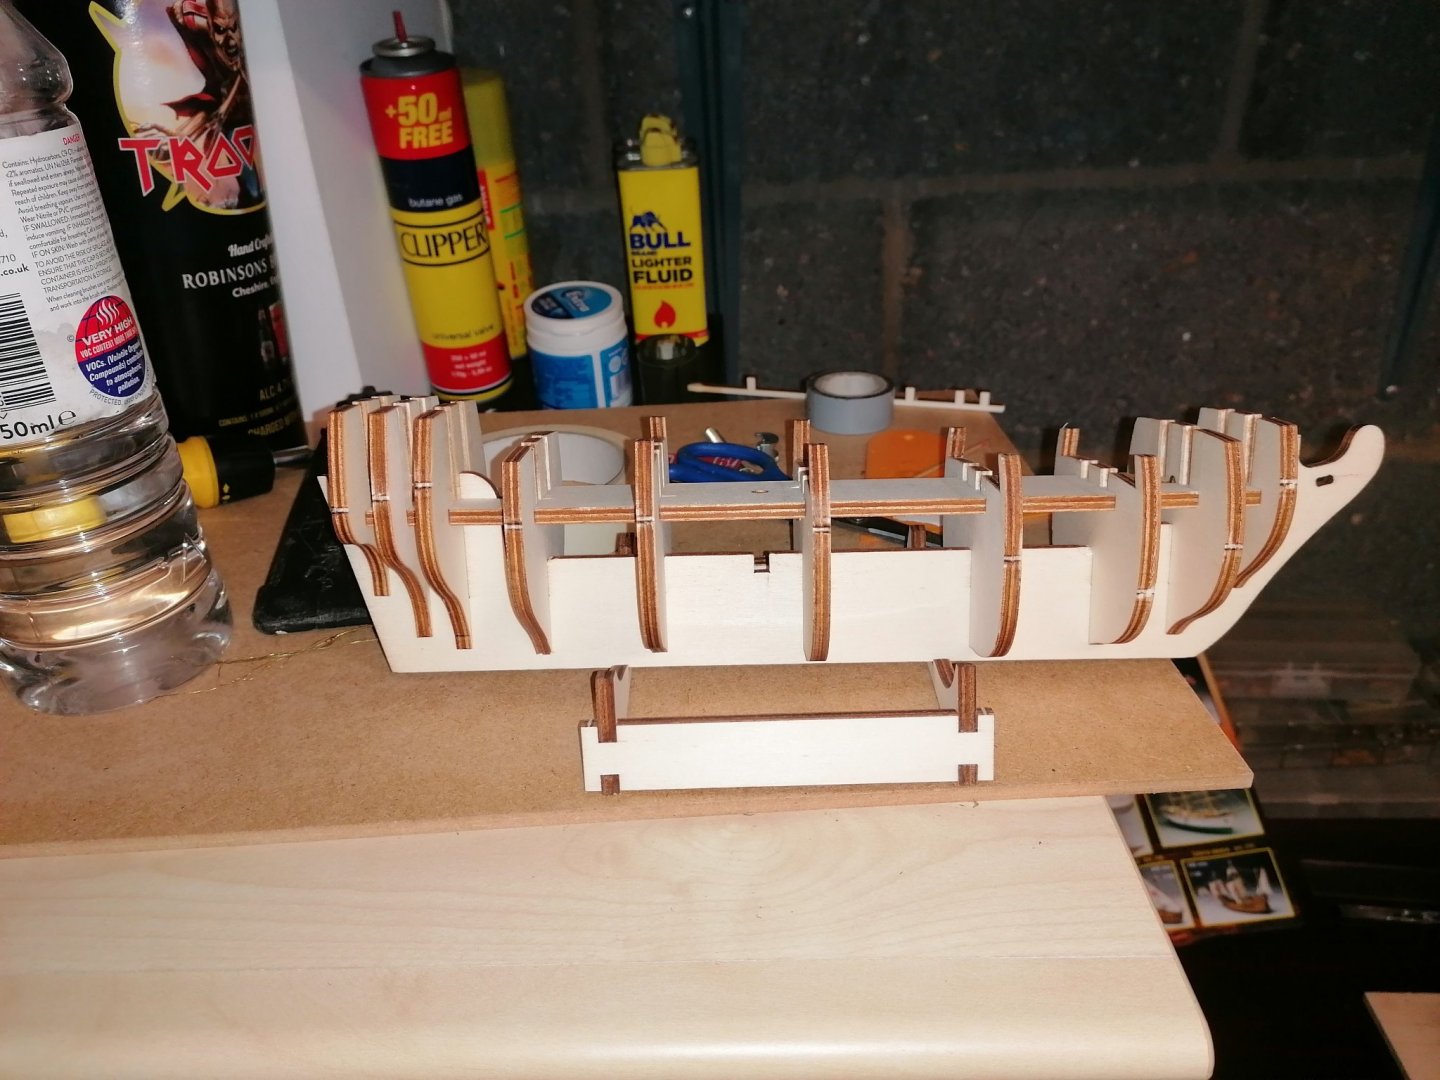
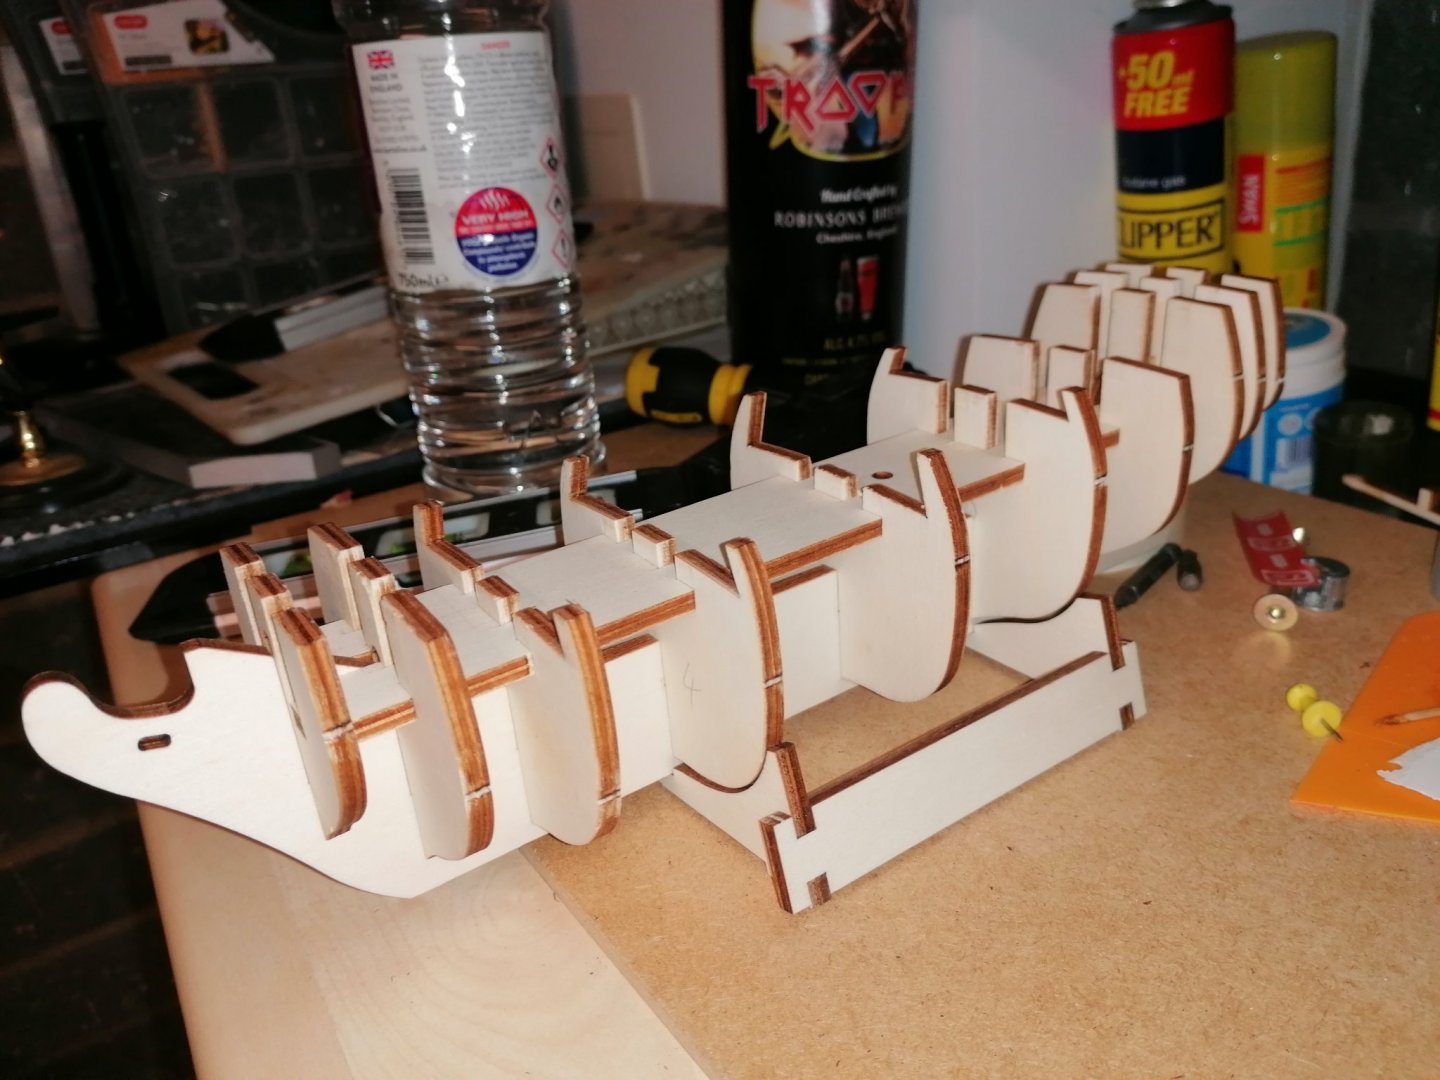
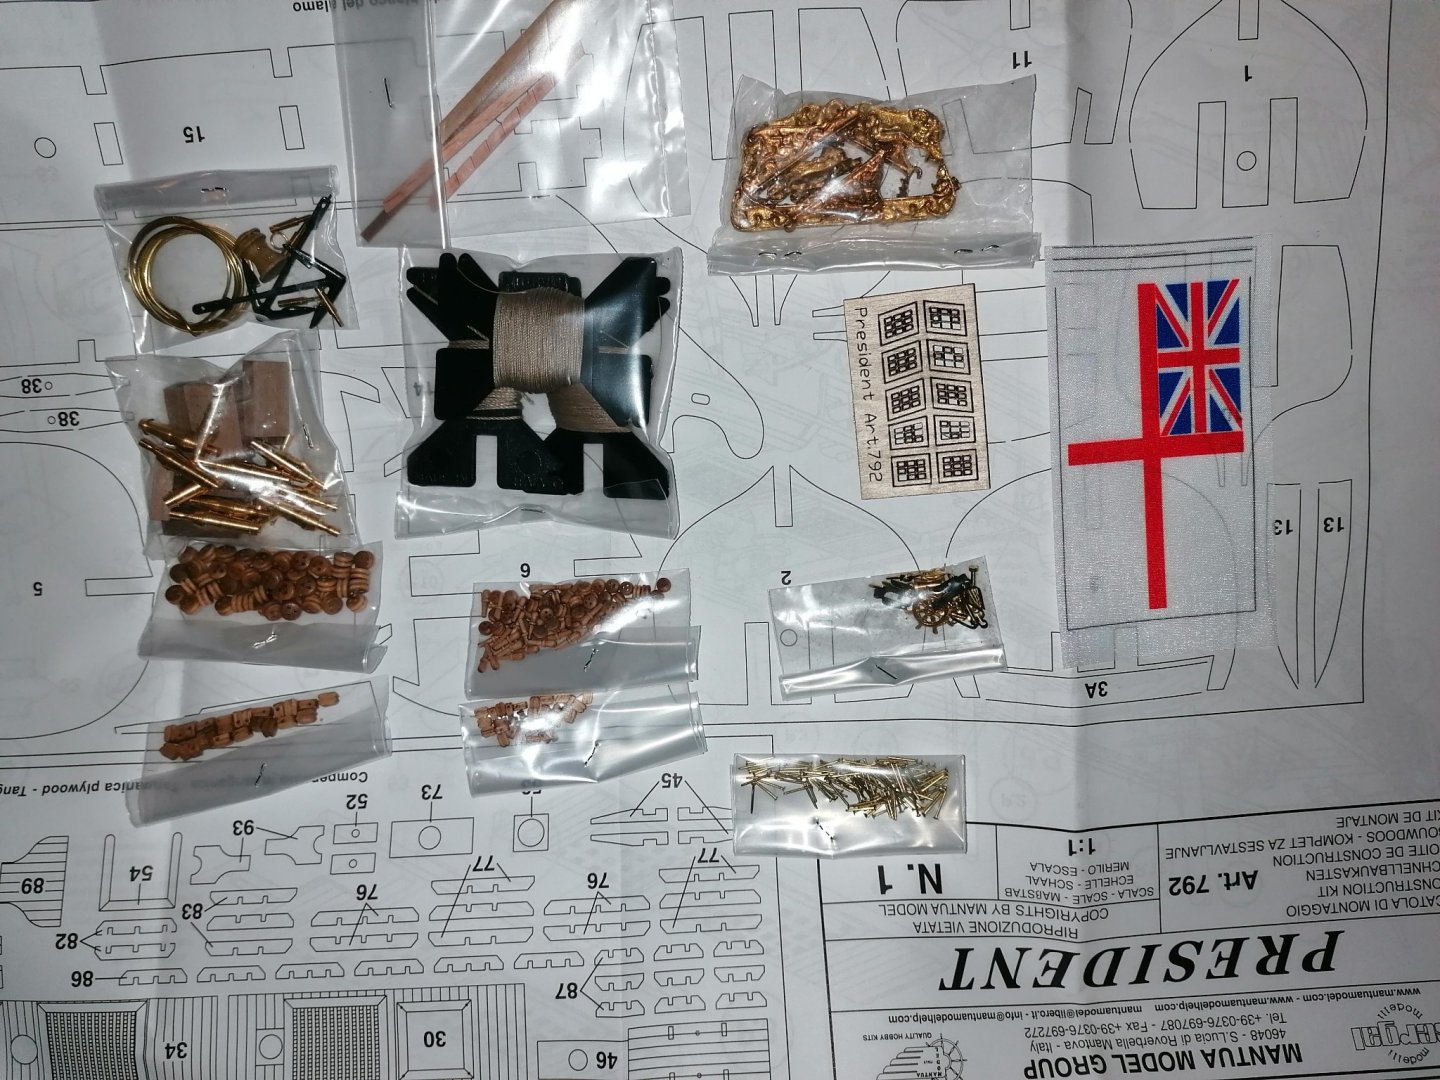
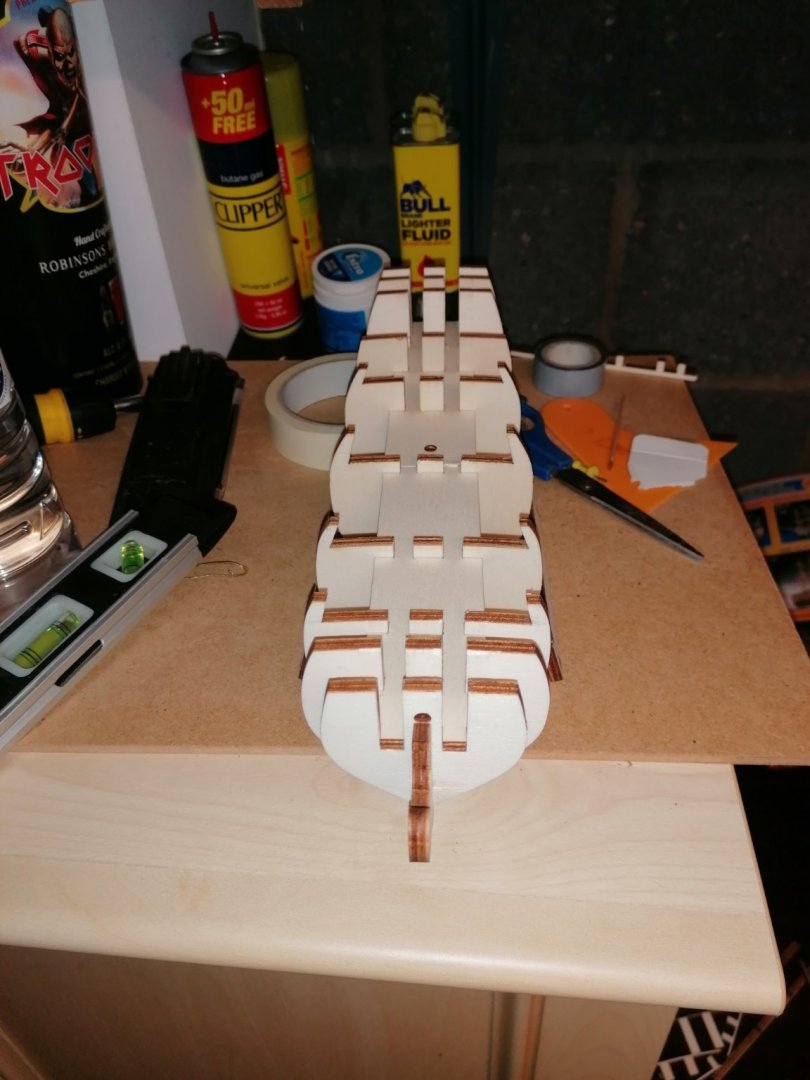
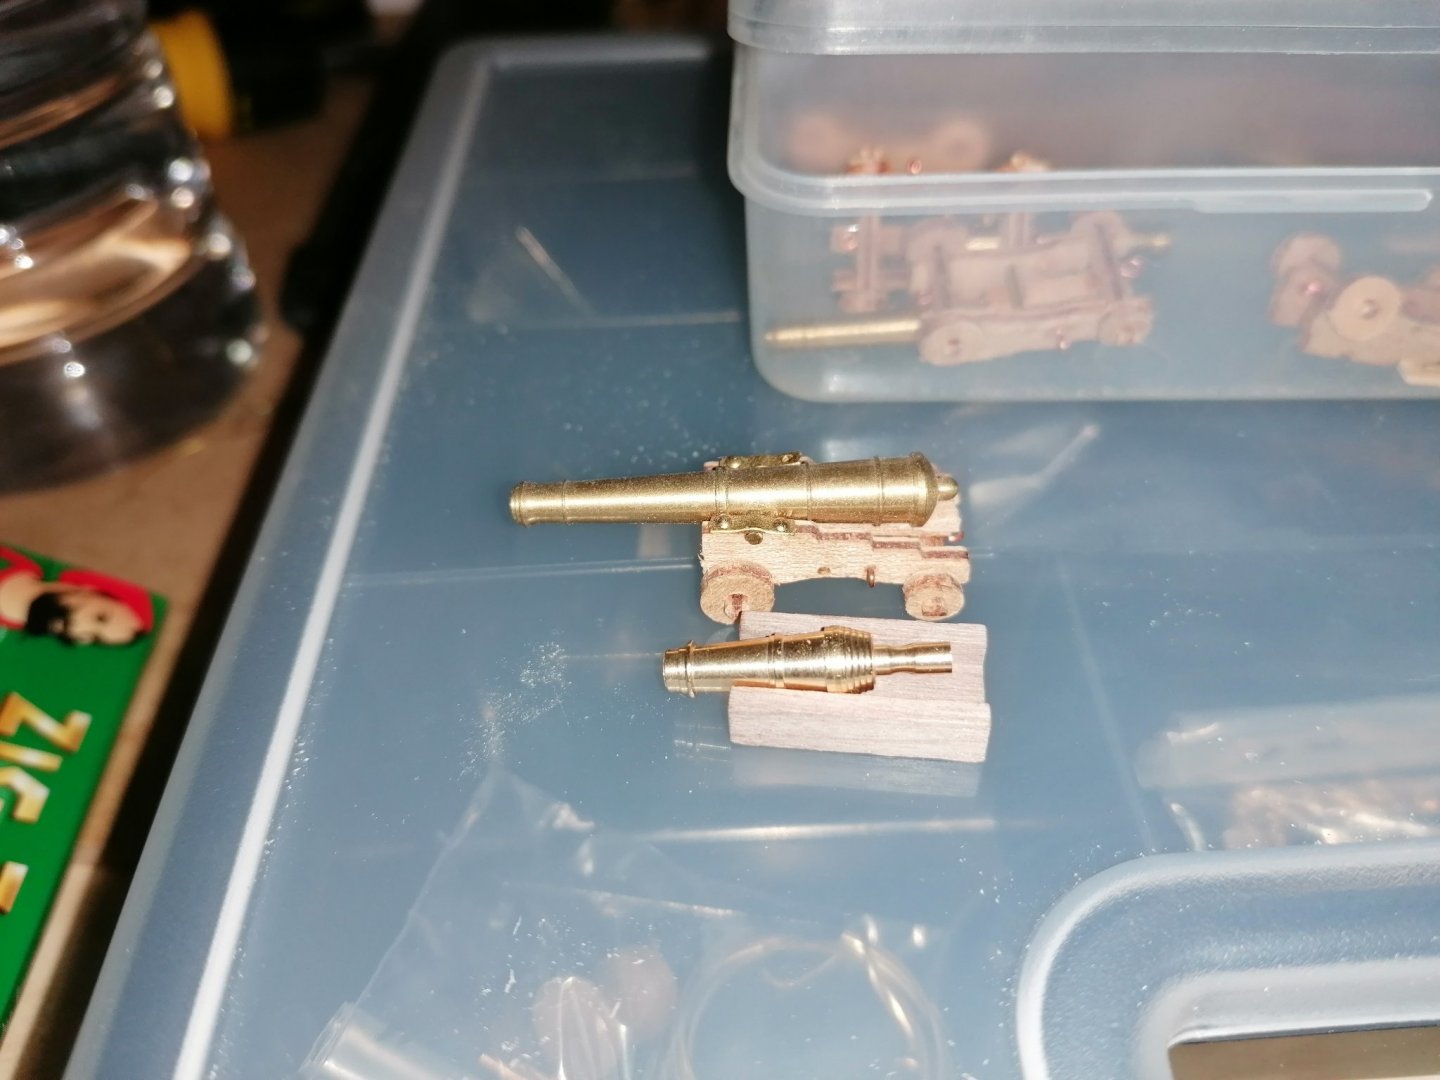
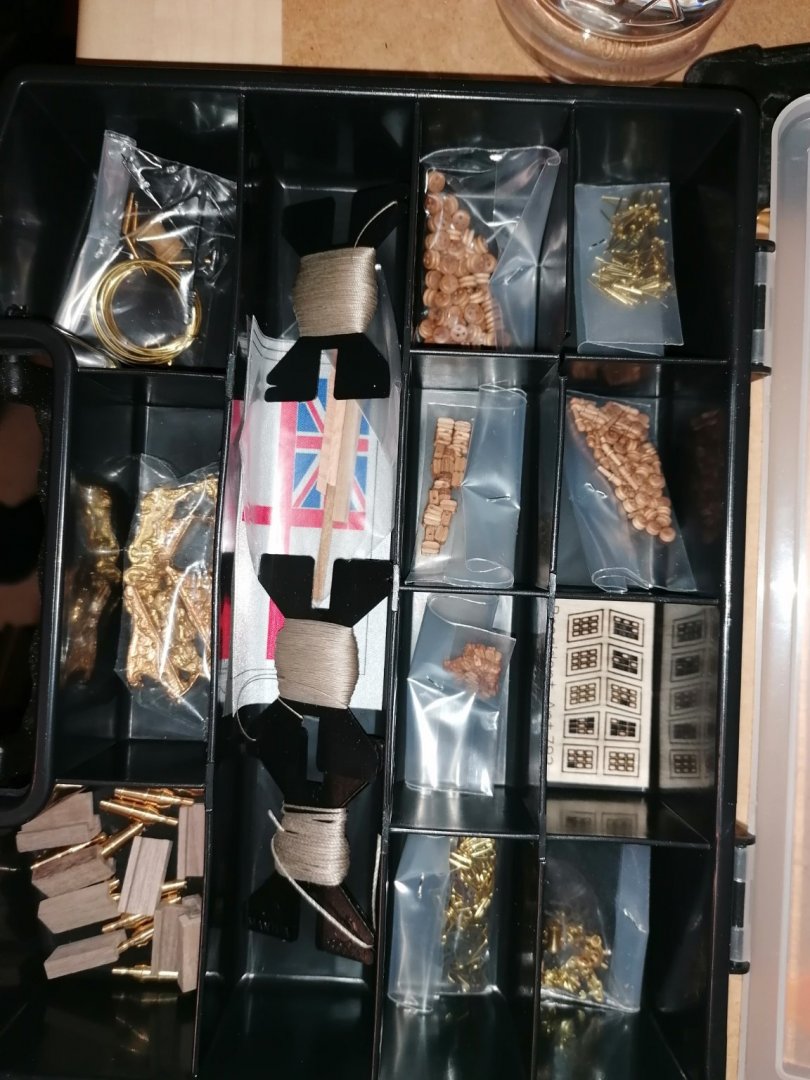
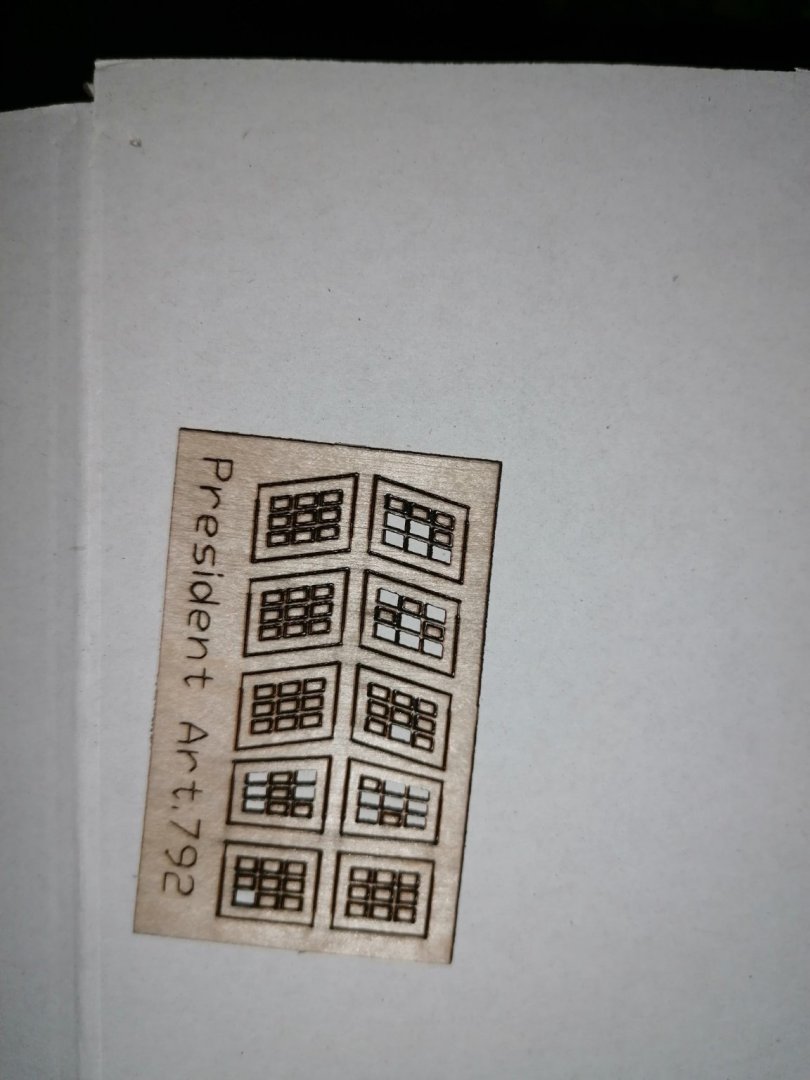
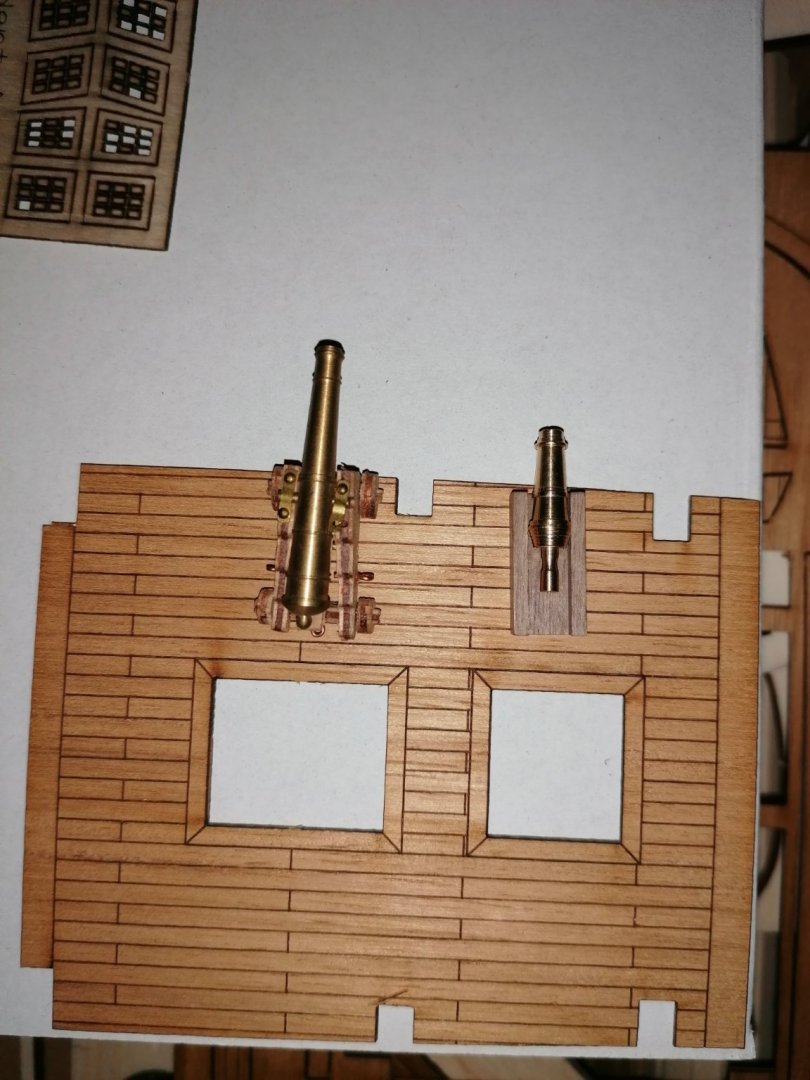
Well the President arrived today, 2 days earlier than expected so I cleared the deck, or rather the desk and opened the box. On first look she doesn't look to bad. The guide book has a step by step guide with great photos, but, as with Artisania Latina the how to do it instructions aren't really there. Also before ordering I checked the length as I didn't want a very small ship. The length is similar to Mamoli's Golden Hind which I was happy with. Thus I was a little disappointed with the length of the false keel and the height of the bulkheads. After dry fitting, eventually, she may not be as small as I had thought. Looking at the sheets of wood supplied I am a little worried that I will run out of strips fairly quickly if I am not careful. The rest of the small parts look sufficient with the possible exception of the blocks. There do not seem to be all that many. My biggest disappointment though are the cannons. The barrels, although short aren't too bad but the carriages are hopeless especially without wheels, despite the instructions saying to carve them into shape. I am also a little disappointed that the decks are laser etched with only 2 strakes. I would have preferred to plank it myself or have 3 or 4 planks between butts. Regarding the dry fitting this was a challenge and a half. The Bulkheads and false keel have 0.00 tolerance so each notch needs to be filed down quite a lot but , little by little, to get a snug fit. When this is achieved the next hurdle is to attach part 15 the deck support. I thought I had filed down all the notches on both the deck and the bulkheads, only to snap it aft of bulkhead 5 as I tried to push it down. Luckily I had a couple of 4mm wide and 2 cm strips of wood which fitted into the notches in the bulkheads to tap the deck into place. (I didn't think I'd need to find them until too late.) This is as far as I have got this evening but have already found out this is not ideal for a beginner. No mention of filler blocks and timber having to be sanded or filed to fit never mind snapping by accident is a bit too much to ask of a novice. These are the photos of contents and progress so far though nothing is glued but considering the tightness of the fit, I'm not sure it needs to be!!


- 68 replies
-
- 3
-
-
- san francisco ii
- artesania latina
- (and 1 more)
-
Thanks so much for the comments and thumbs up. Since the build I have left wooden ship kits to build plastic aircraft and then some military models with the idea of making some dioramas. Partly as they are smaller, they are cheaper but mainly I don't make so much mess. In the meantime we have moved home and I now have the end of a garage I can use as a workshop. I have ordered HMS President which was nearly my first build a few years ago. I hope to start a build log on her next week sometime. Really looking forward to attempting another ship. See you all again soon.
- 68 replies
-
- 1
-
-
- san francisco ii
- artesania latina
- (and 1 more)
-
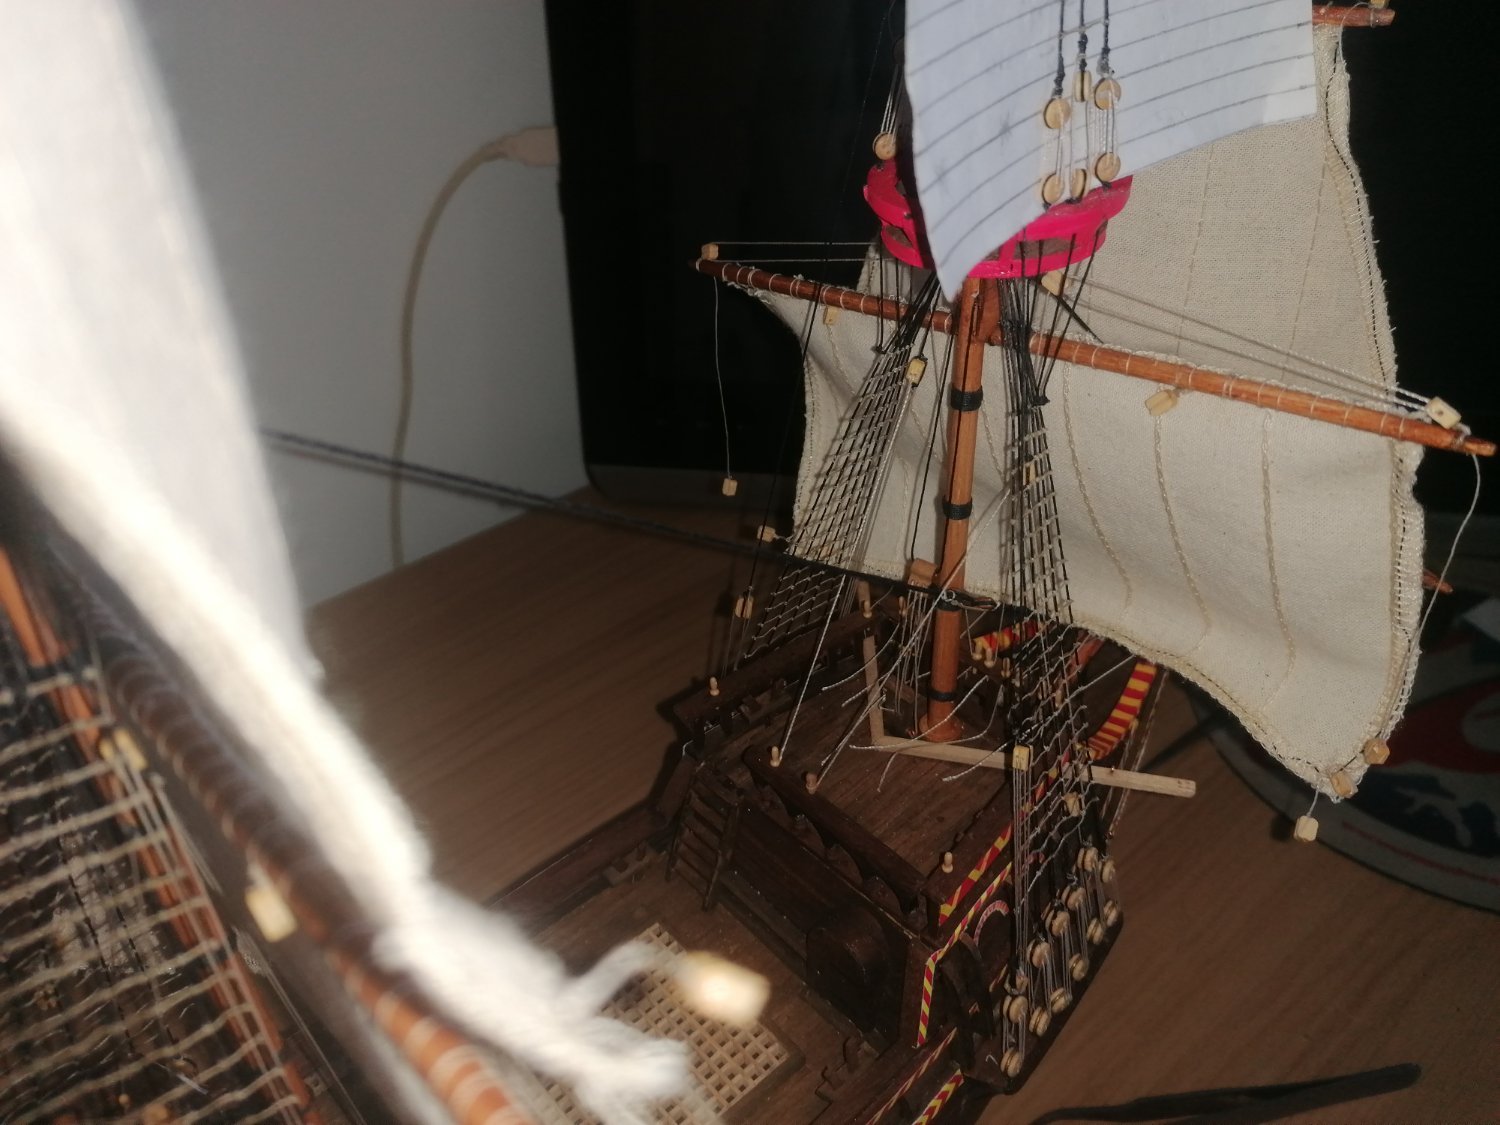
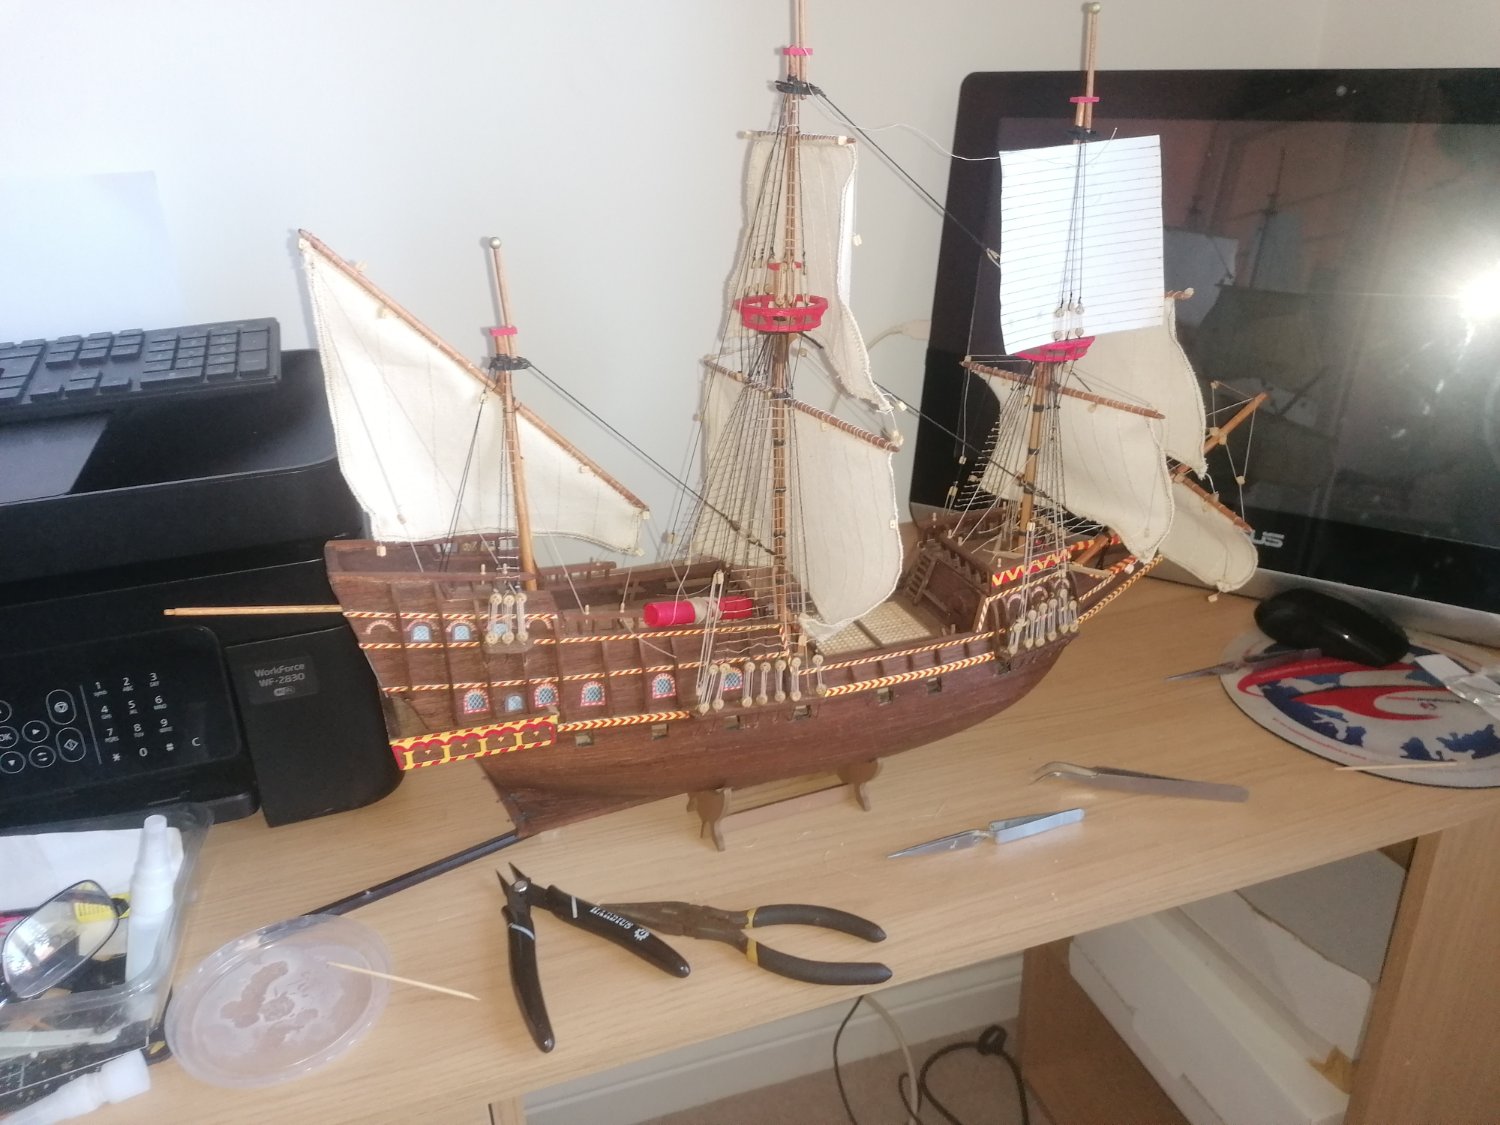
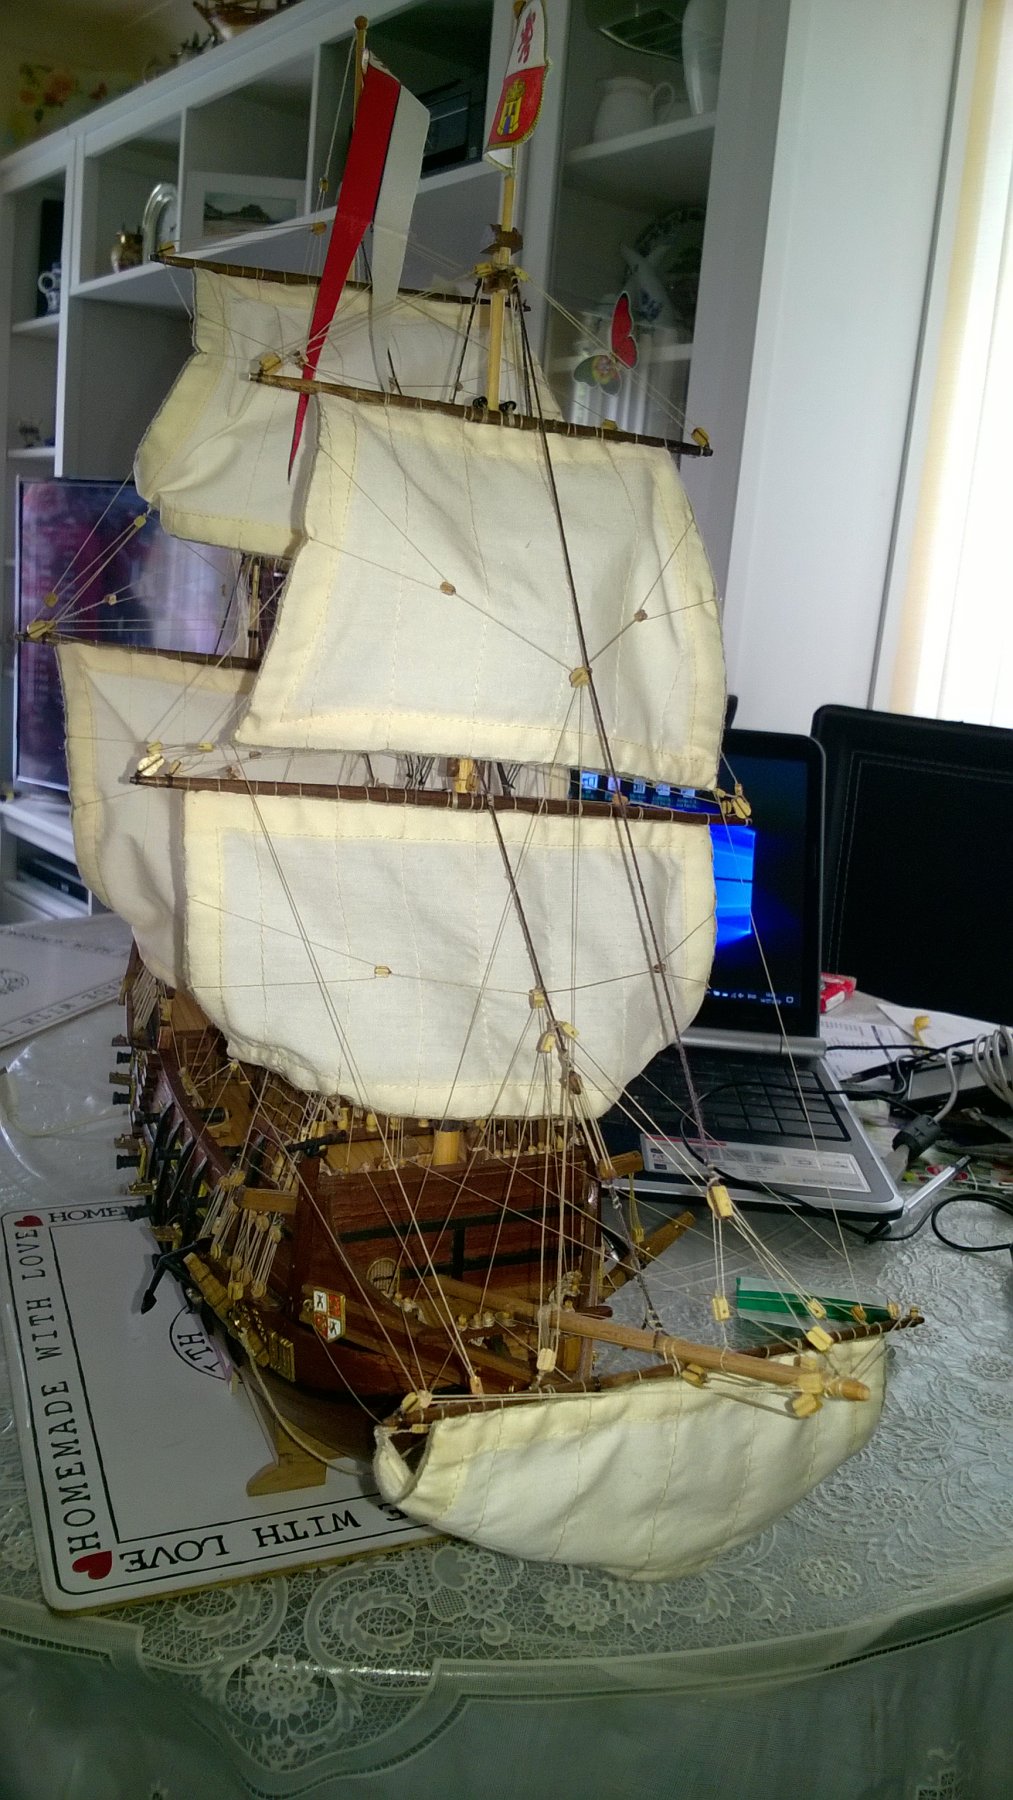
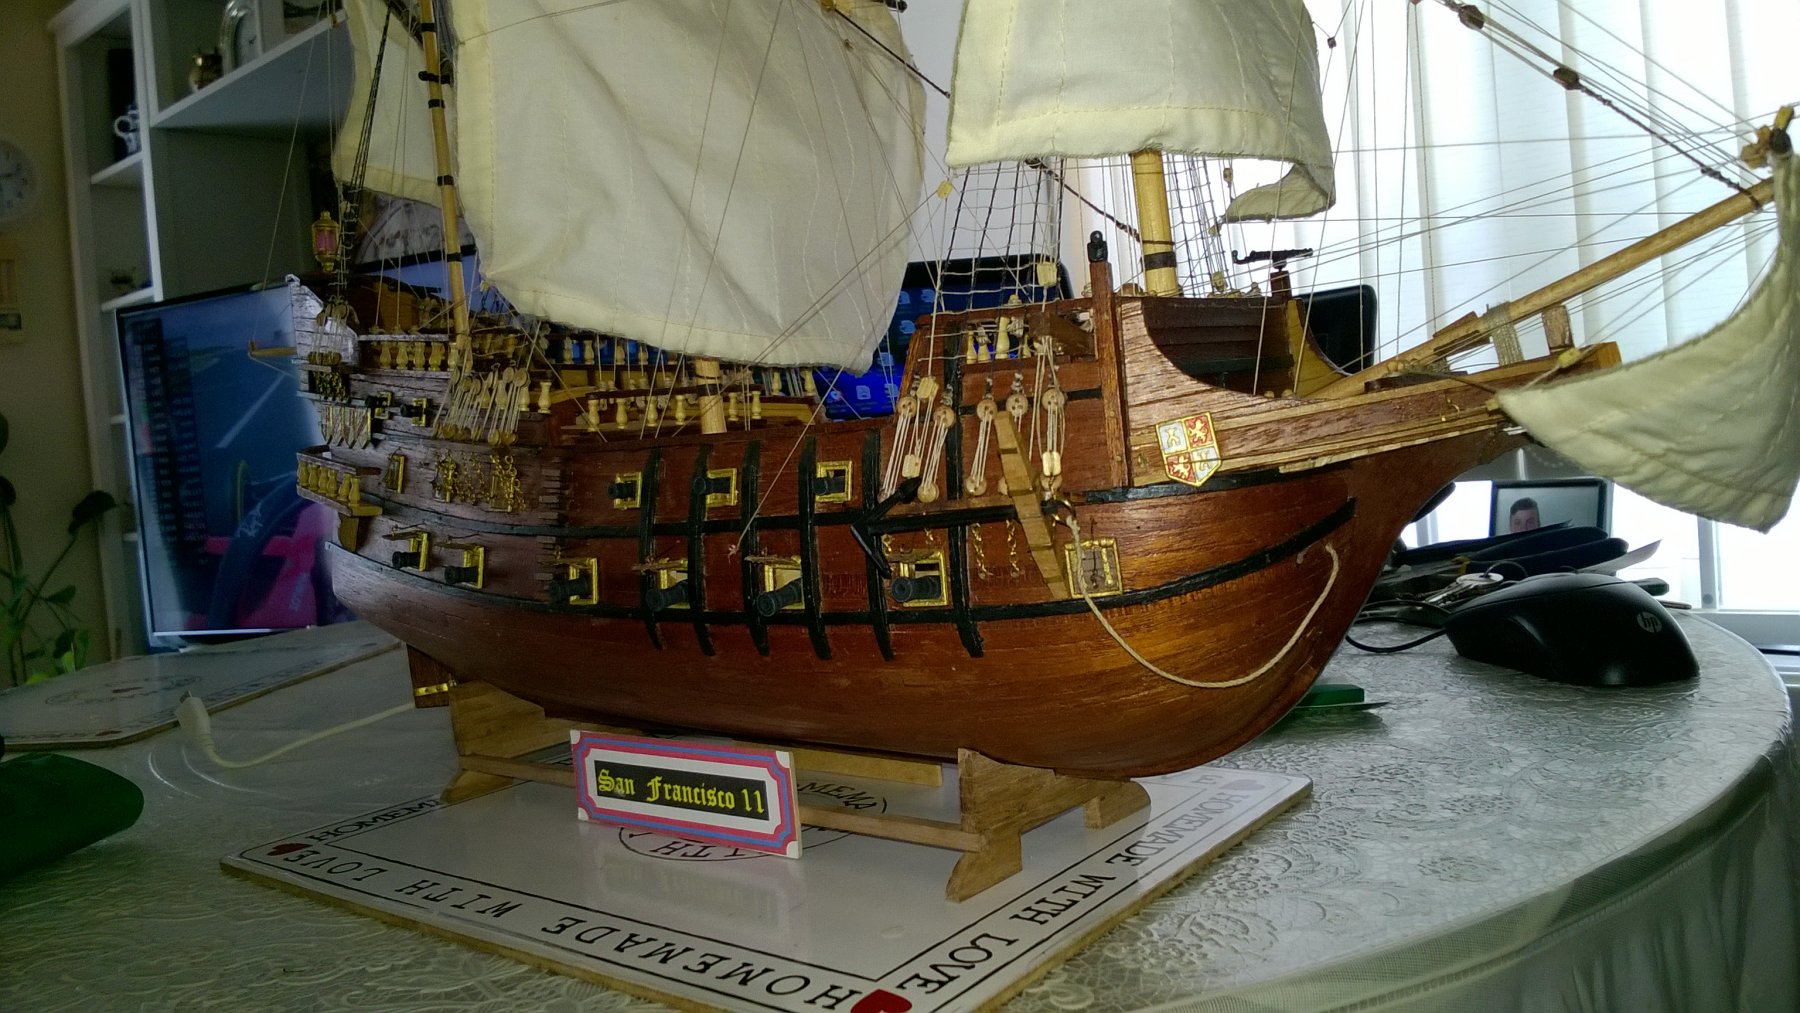
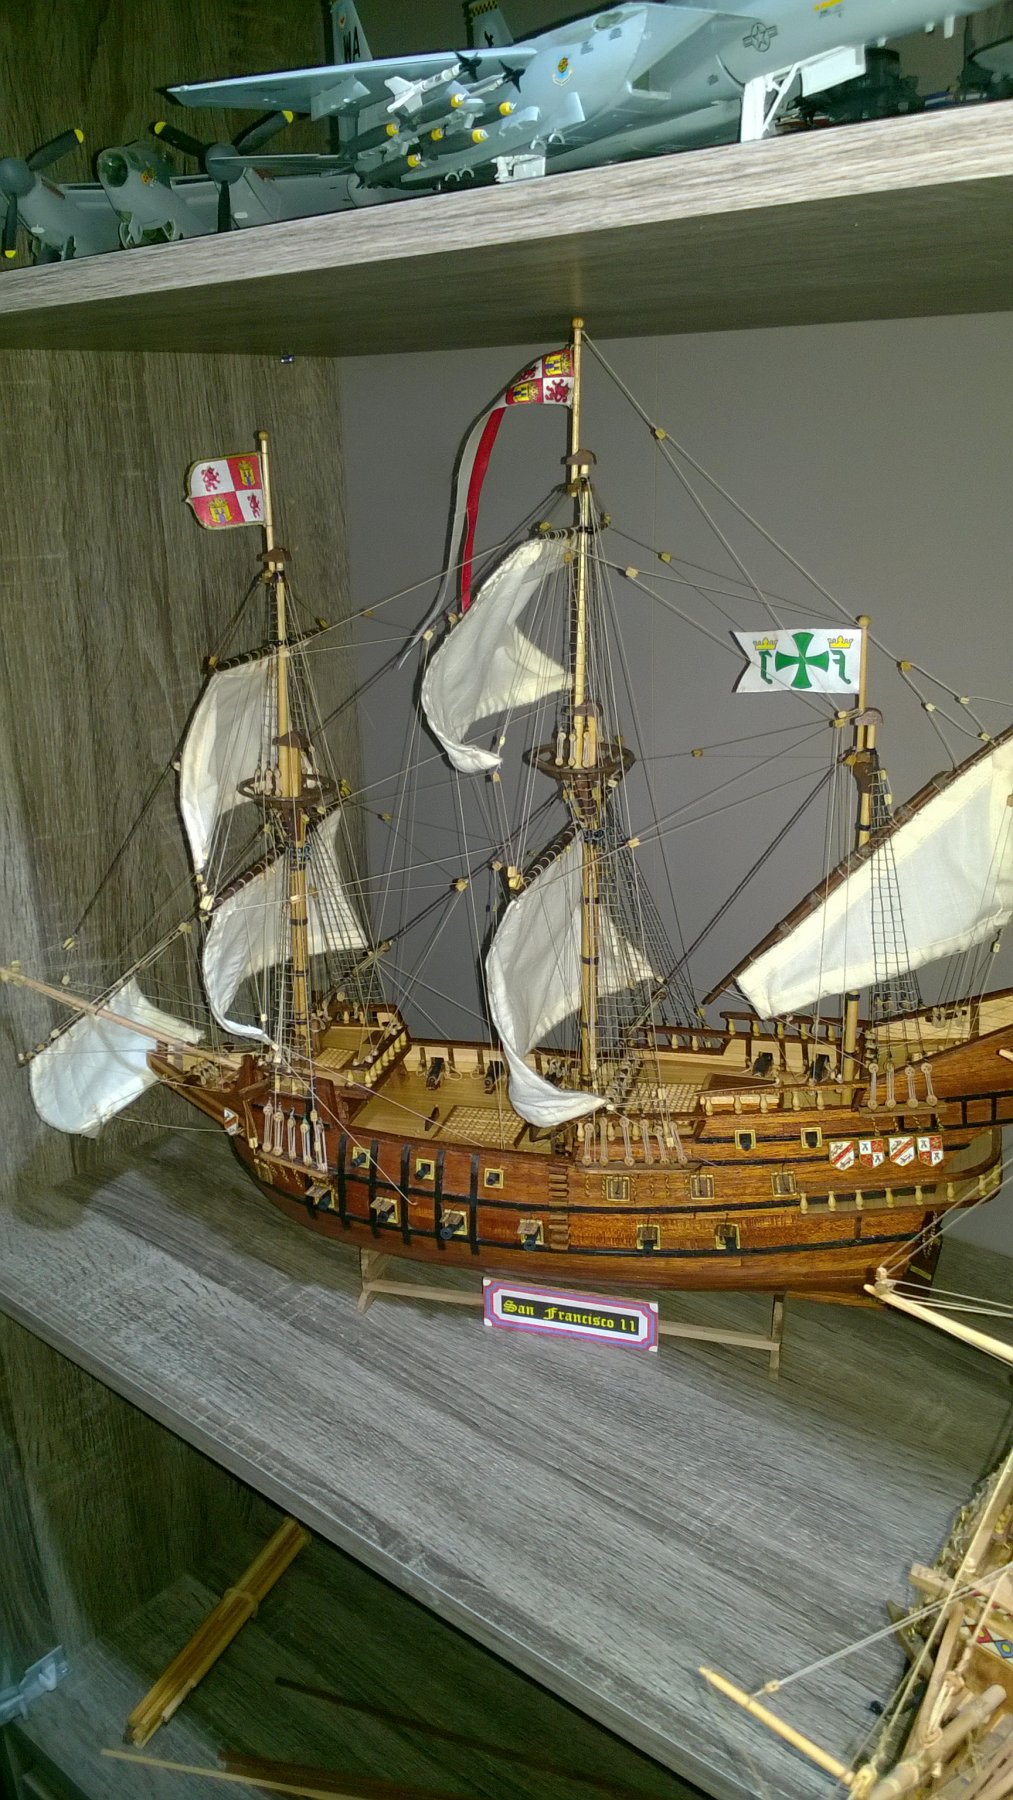
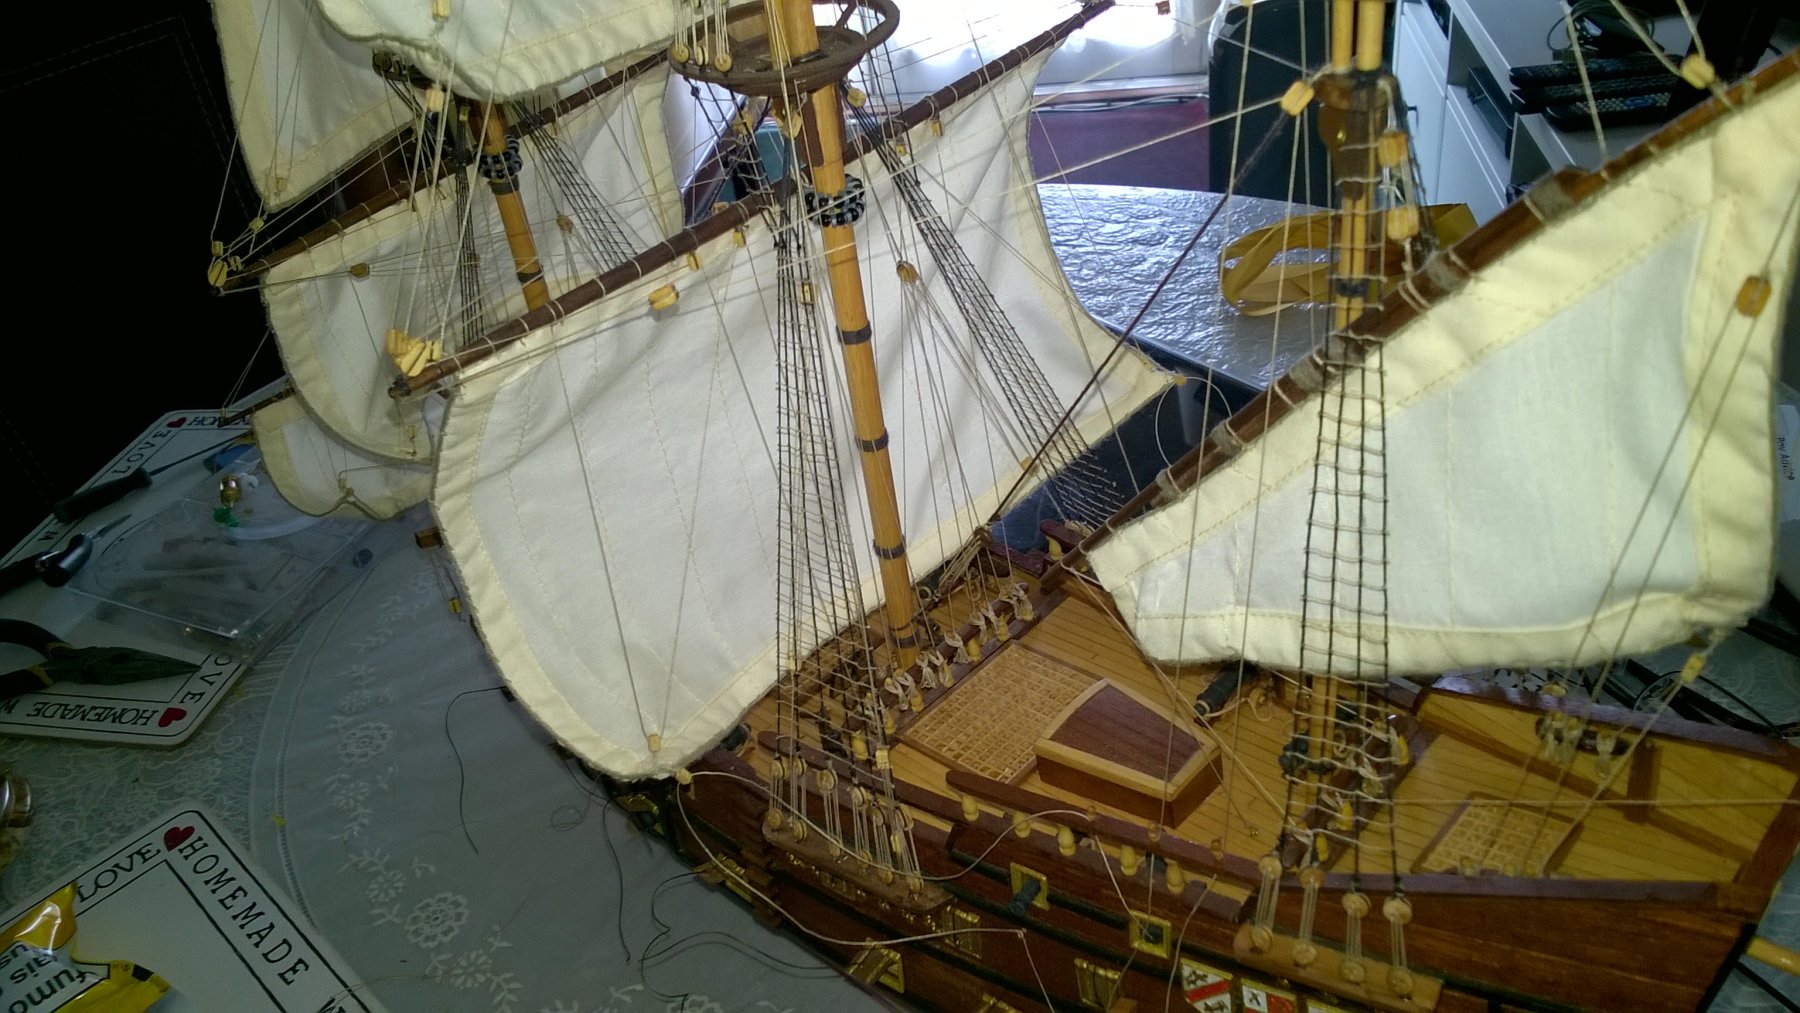
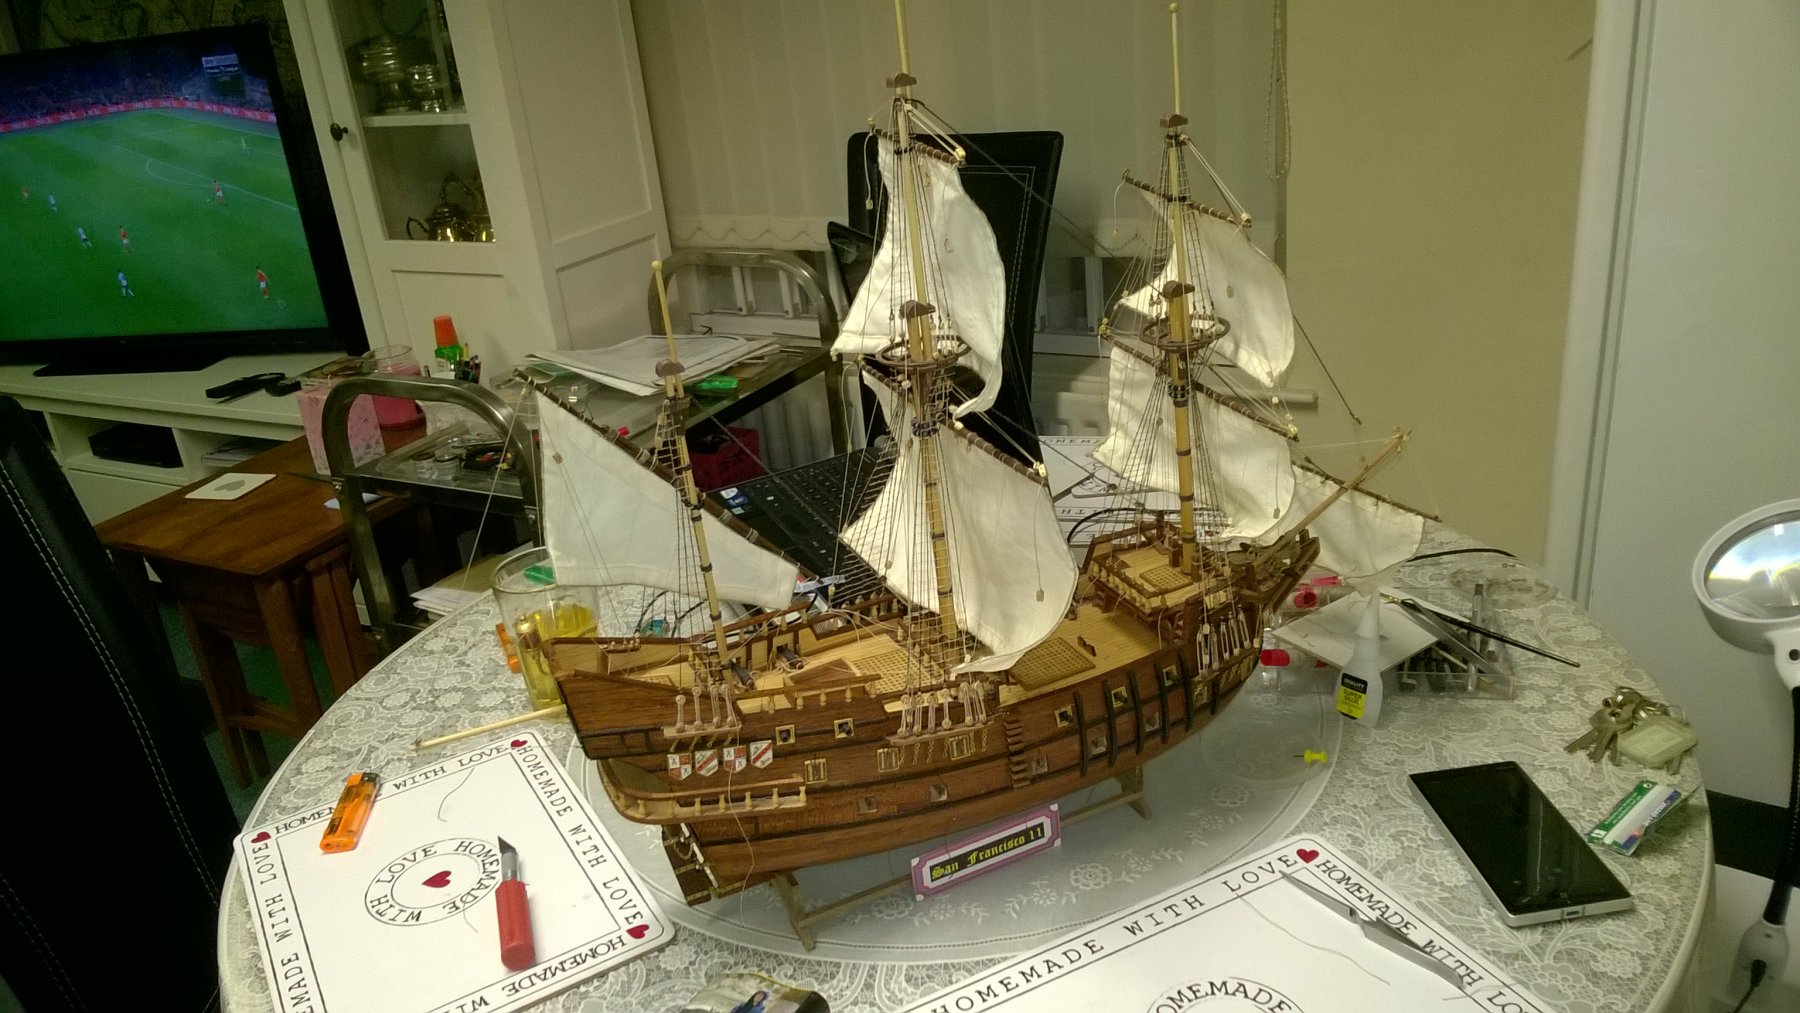
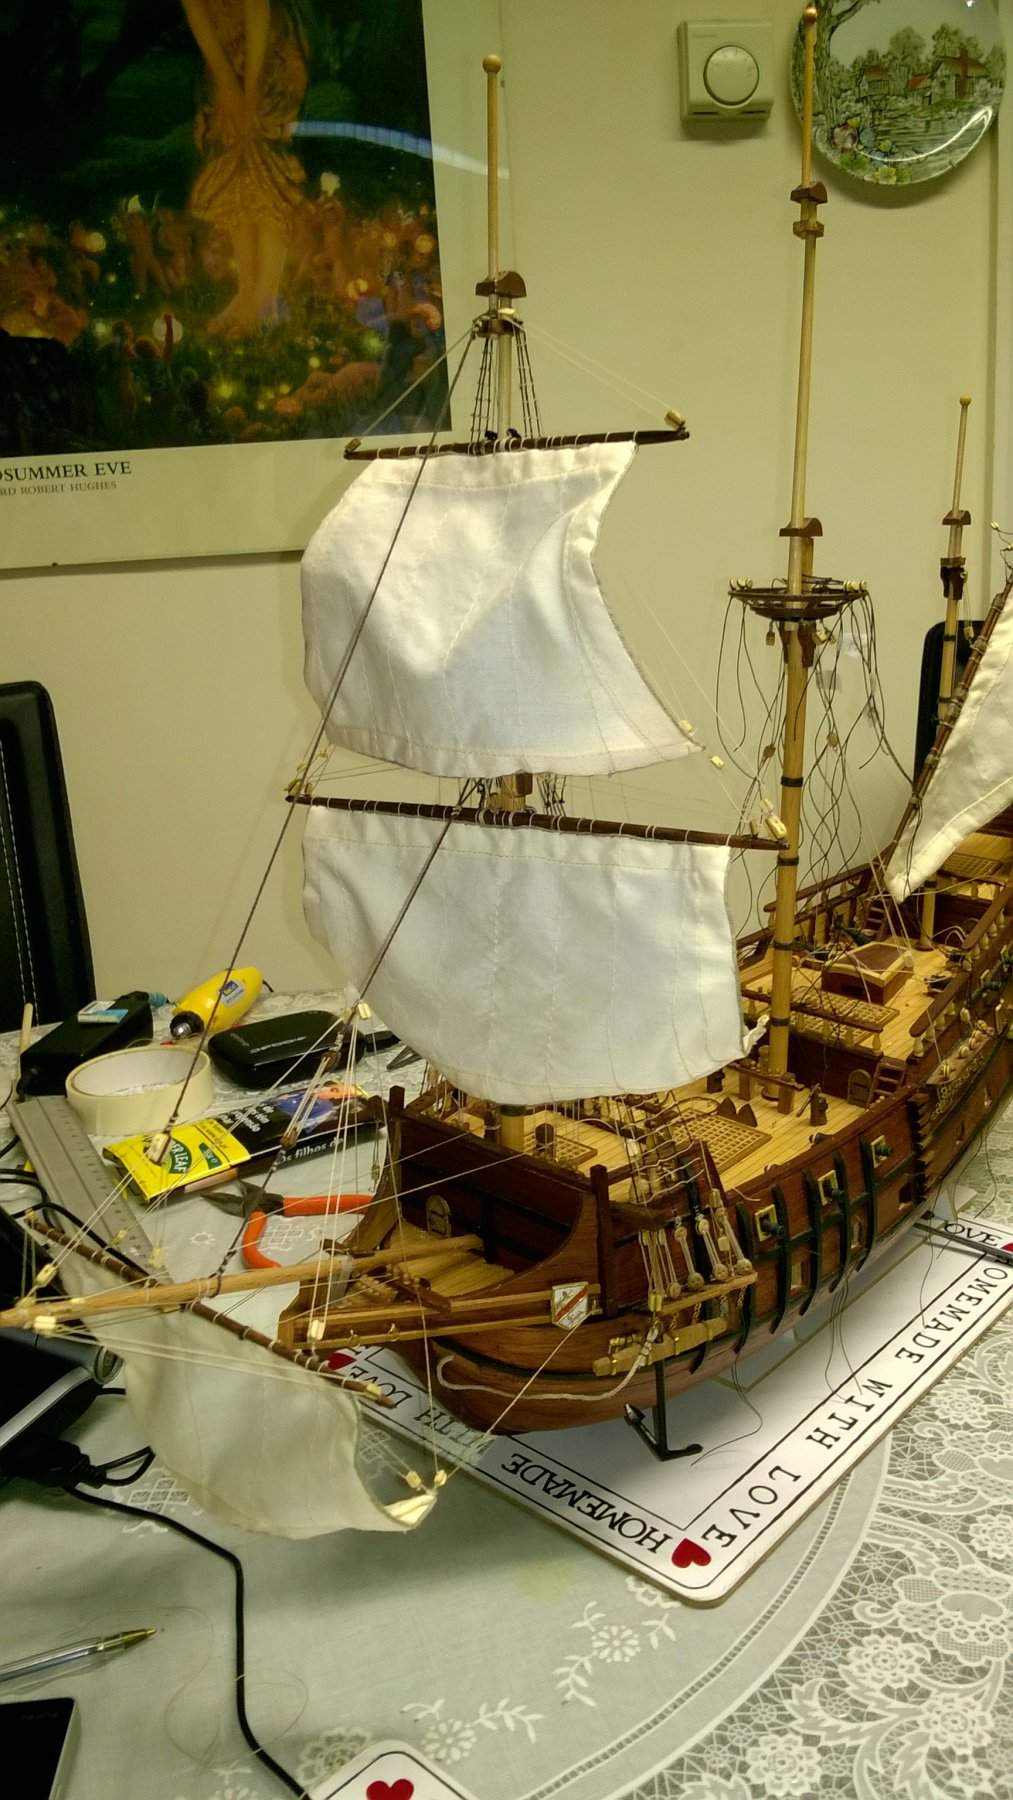
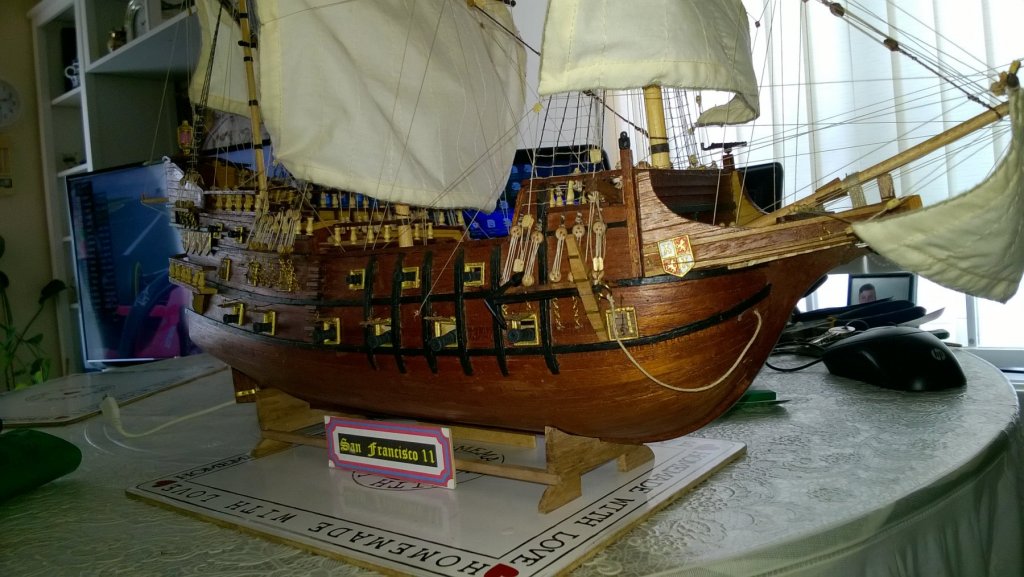
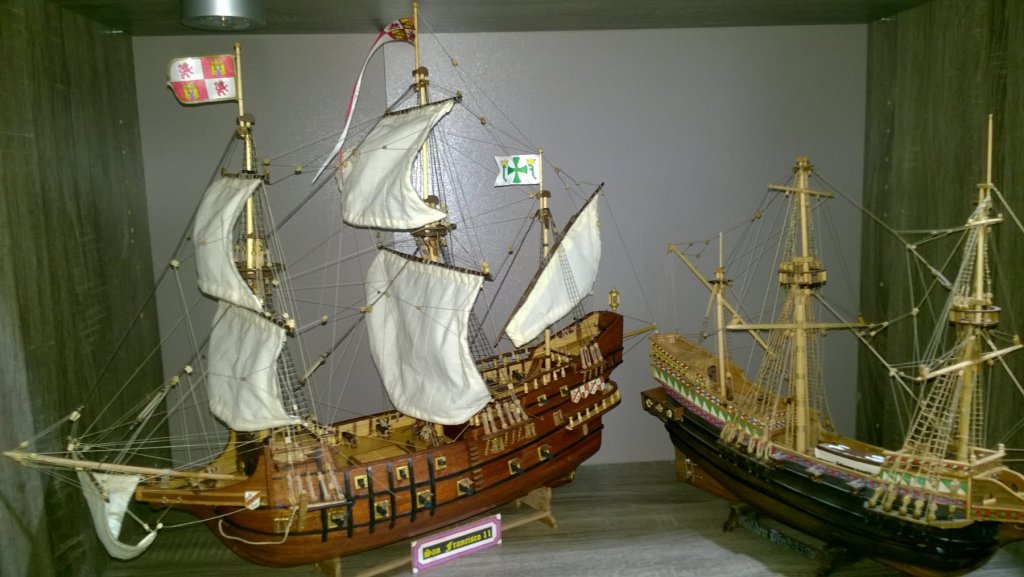
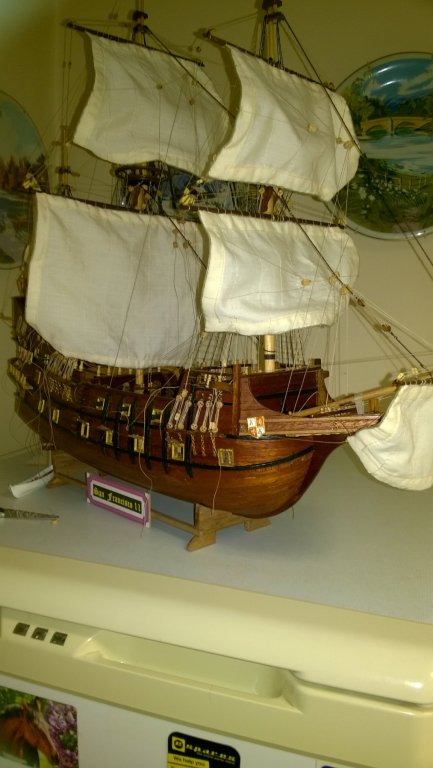
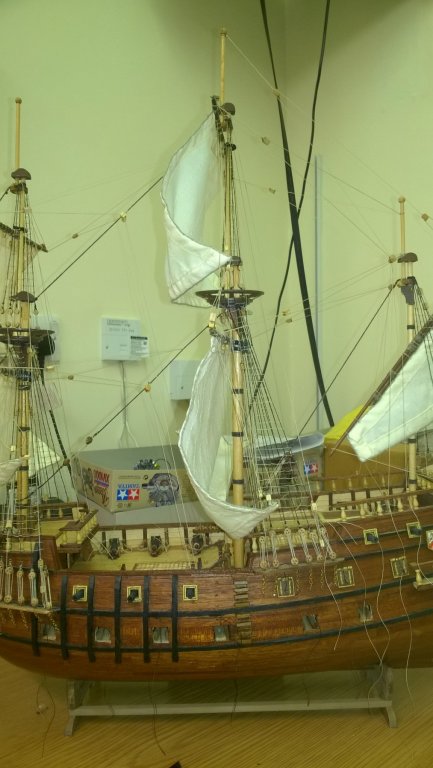
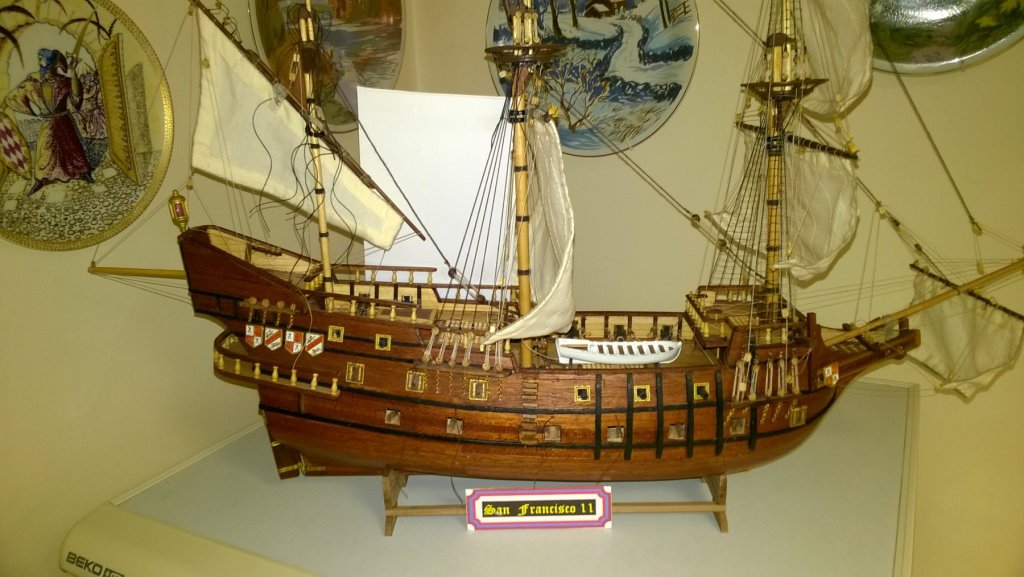
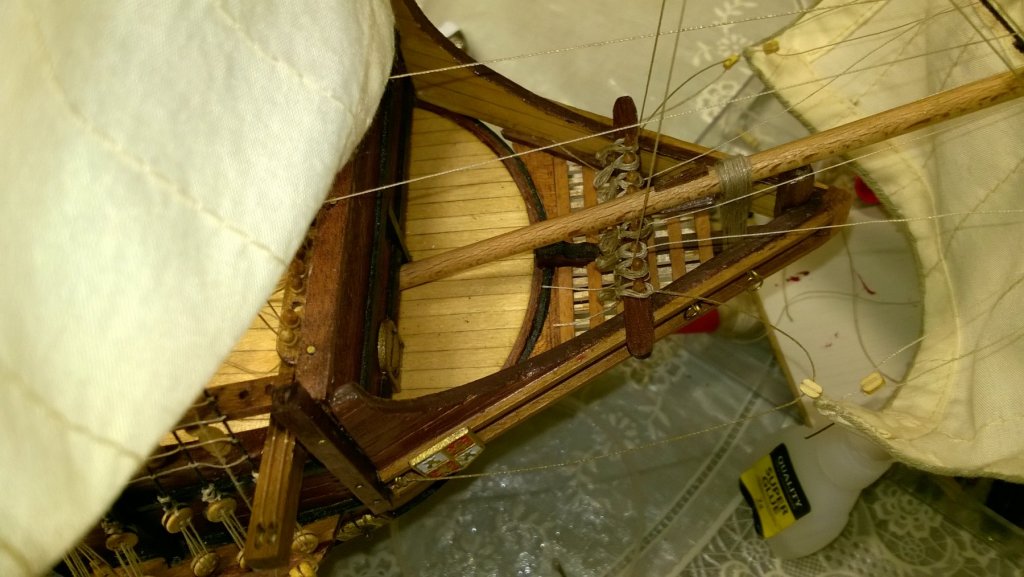
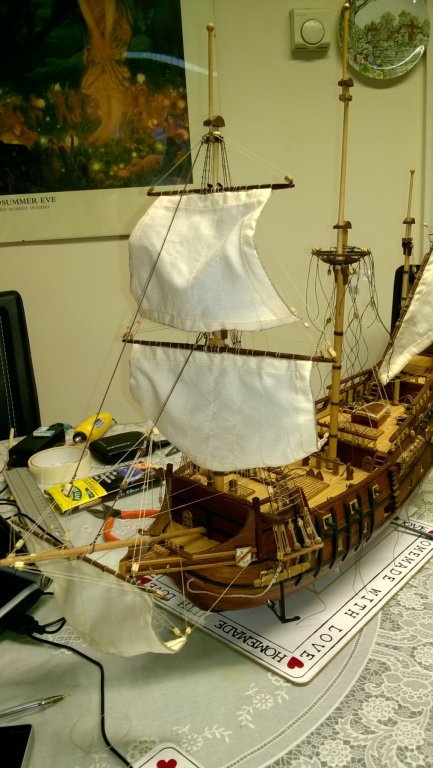
Well, after 2 and a half years, I am final nearly there. With time outs it probably works out at around a year of spare time to get this far. All the ropes are belayed and tied off now with coils attached. This week I have sprayed starch on the sails and placed a hair dryer behind the sails and achieved the shape I wanted. I still need to tie off the anchors to the fore channels and finish off the ships boat, but apart from that she is complete. Thanks for all the comments and encouragement I have received. This has been a fascinating build with a mixture of everything. Some frustration, excitement, disappointment, and achievement. Research took so much time with very little success. Excitement with overcoming a challenge. Disappointment with mishaps or things not working out. And achievement with finally getting there. I am not sure I will be building another wooden ship. My captain says she likes how this one looks but not sure if she wasn't to wait another year or two for another especially having to put up with the dust and bits of wood and thread everywhere. But we shall see.


- 68 replies
-
- 5
-
-
- san francisco ii
- artesania latina
- (and 1 more)
-
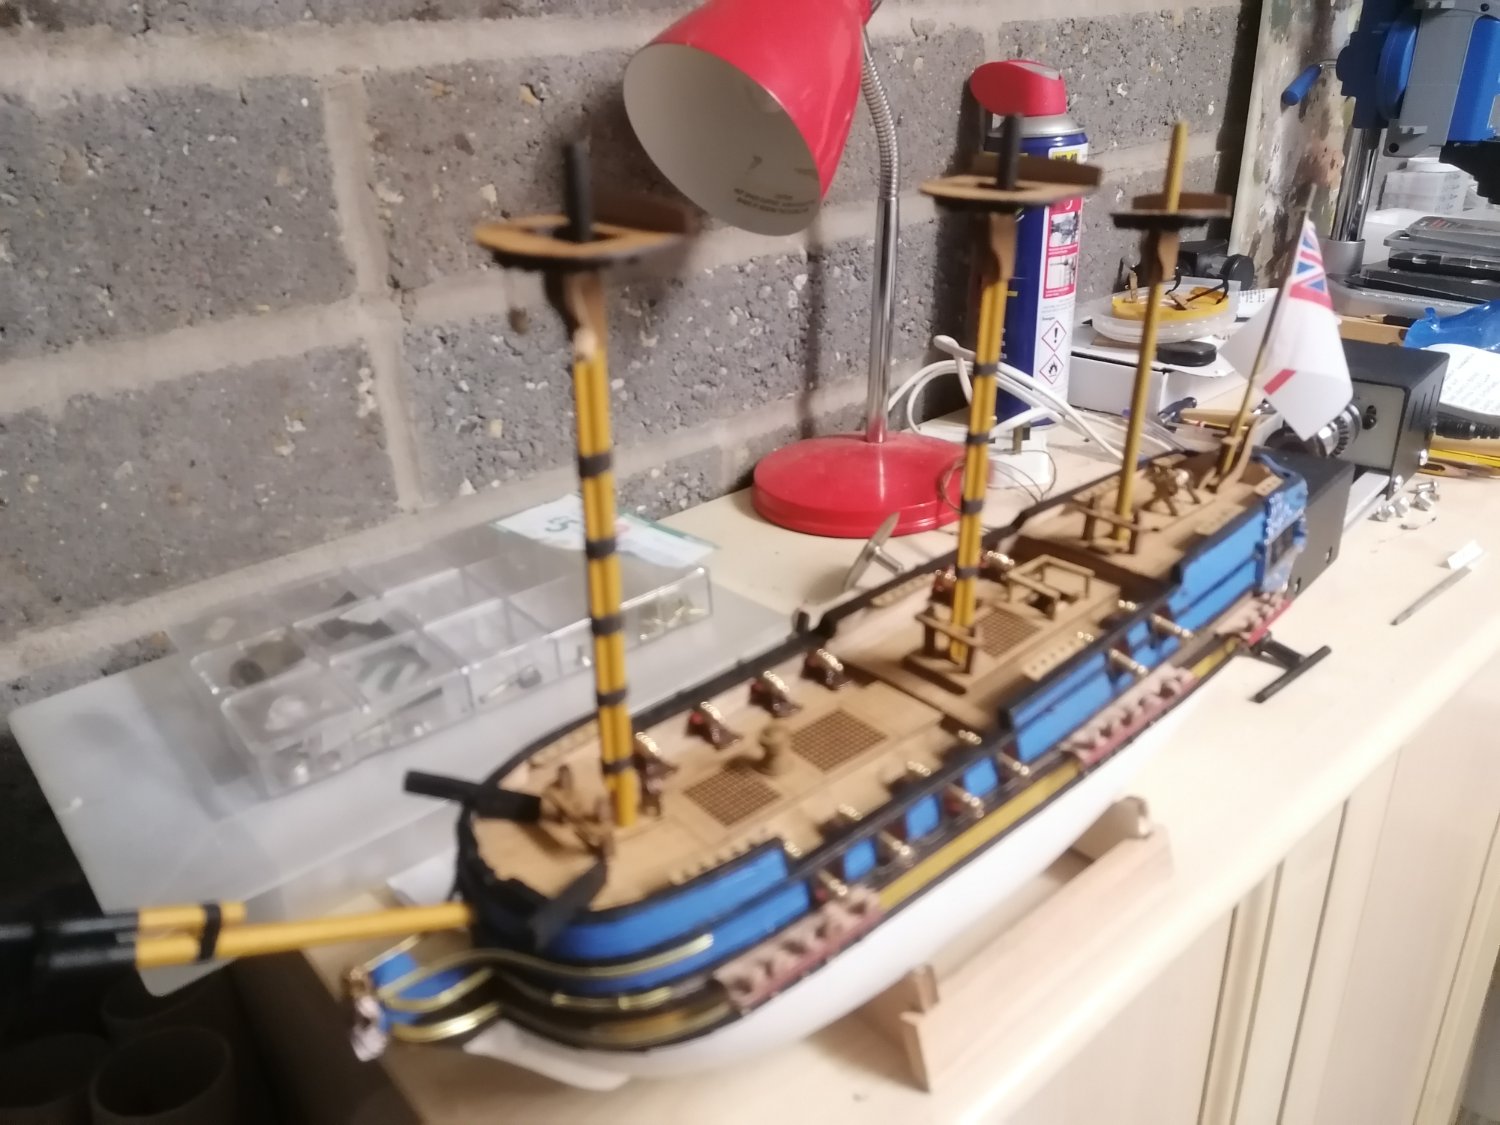
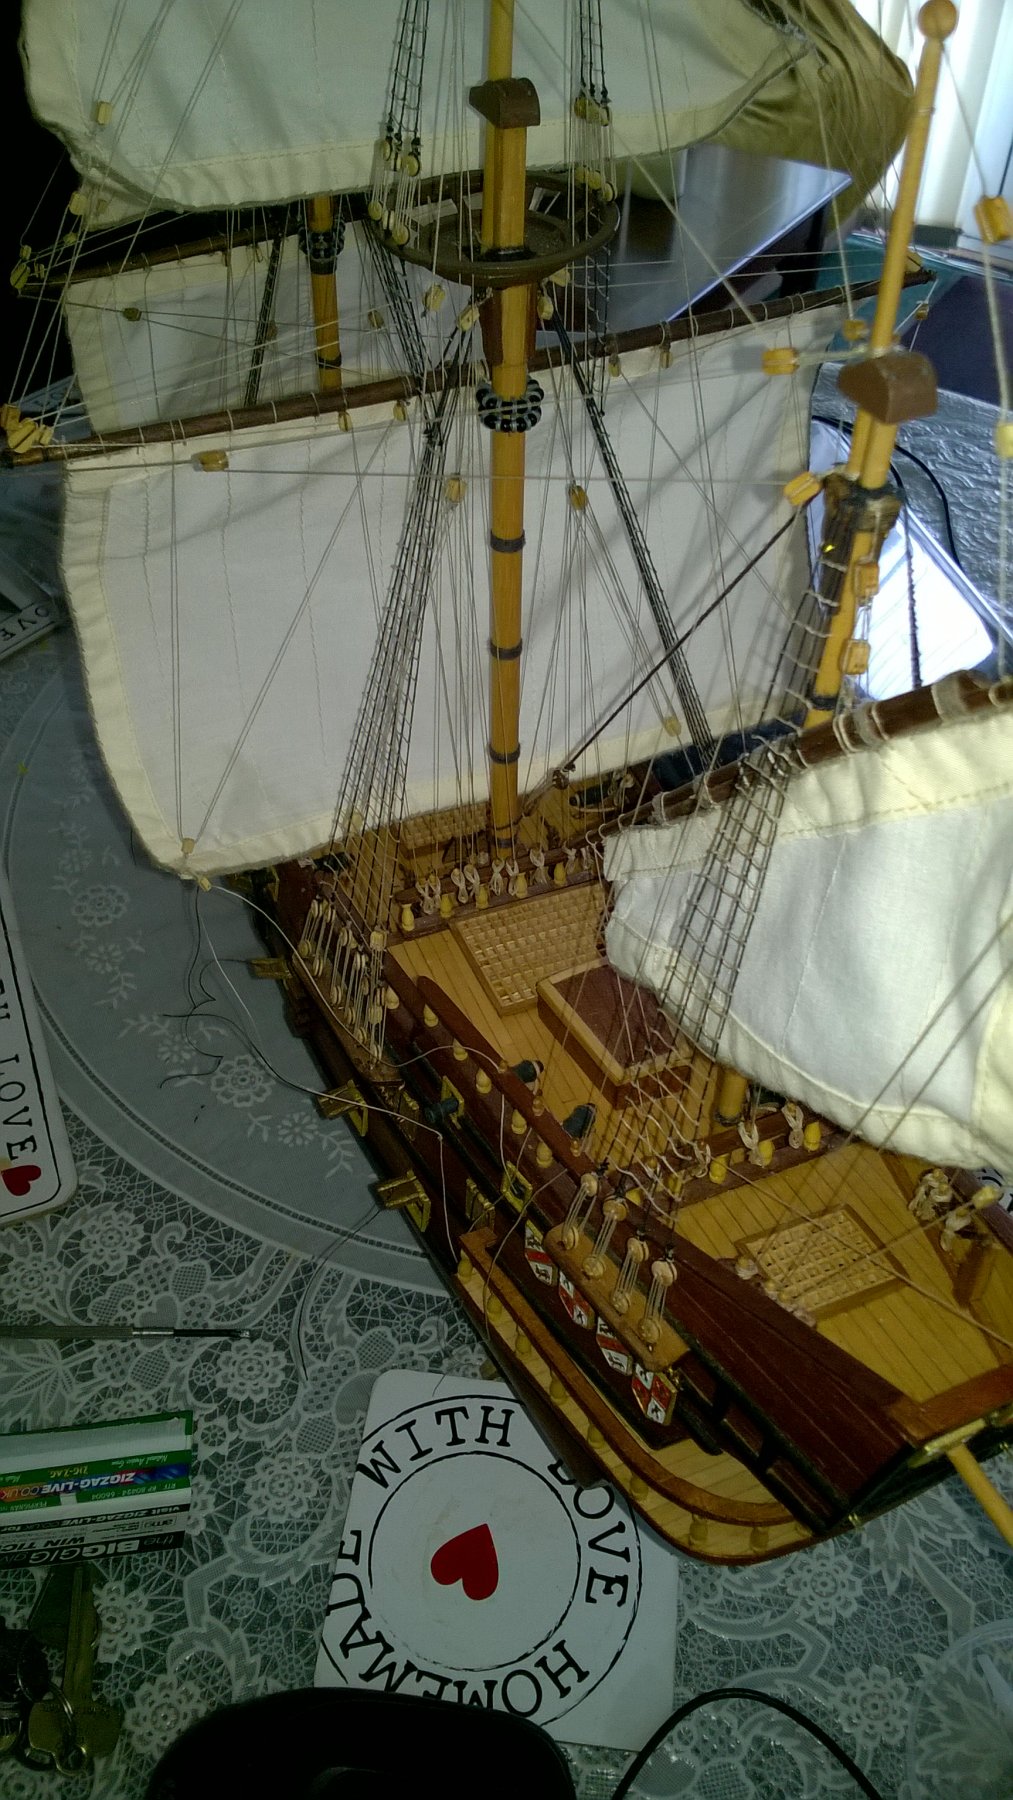
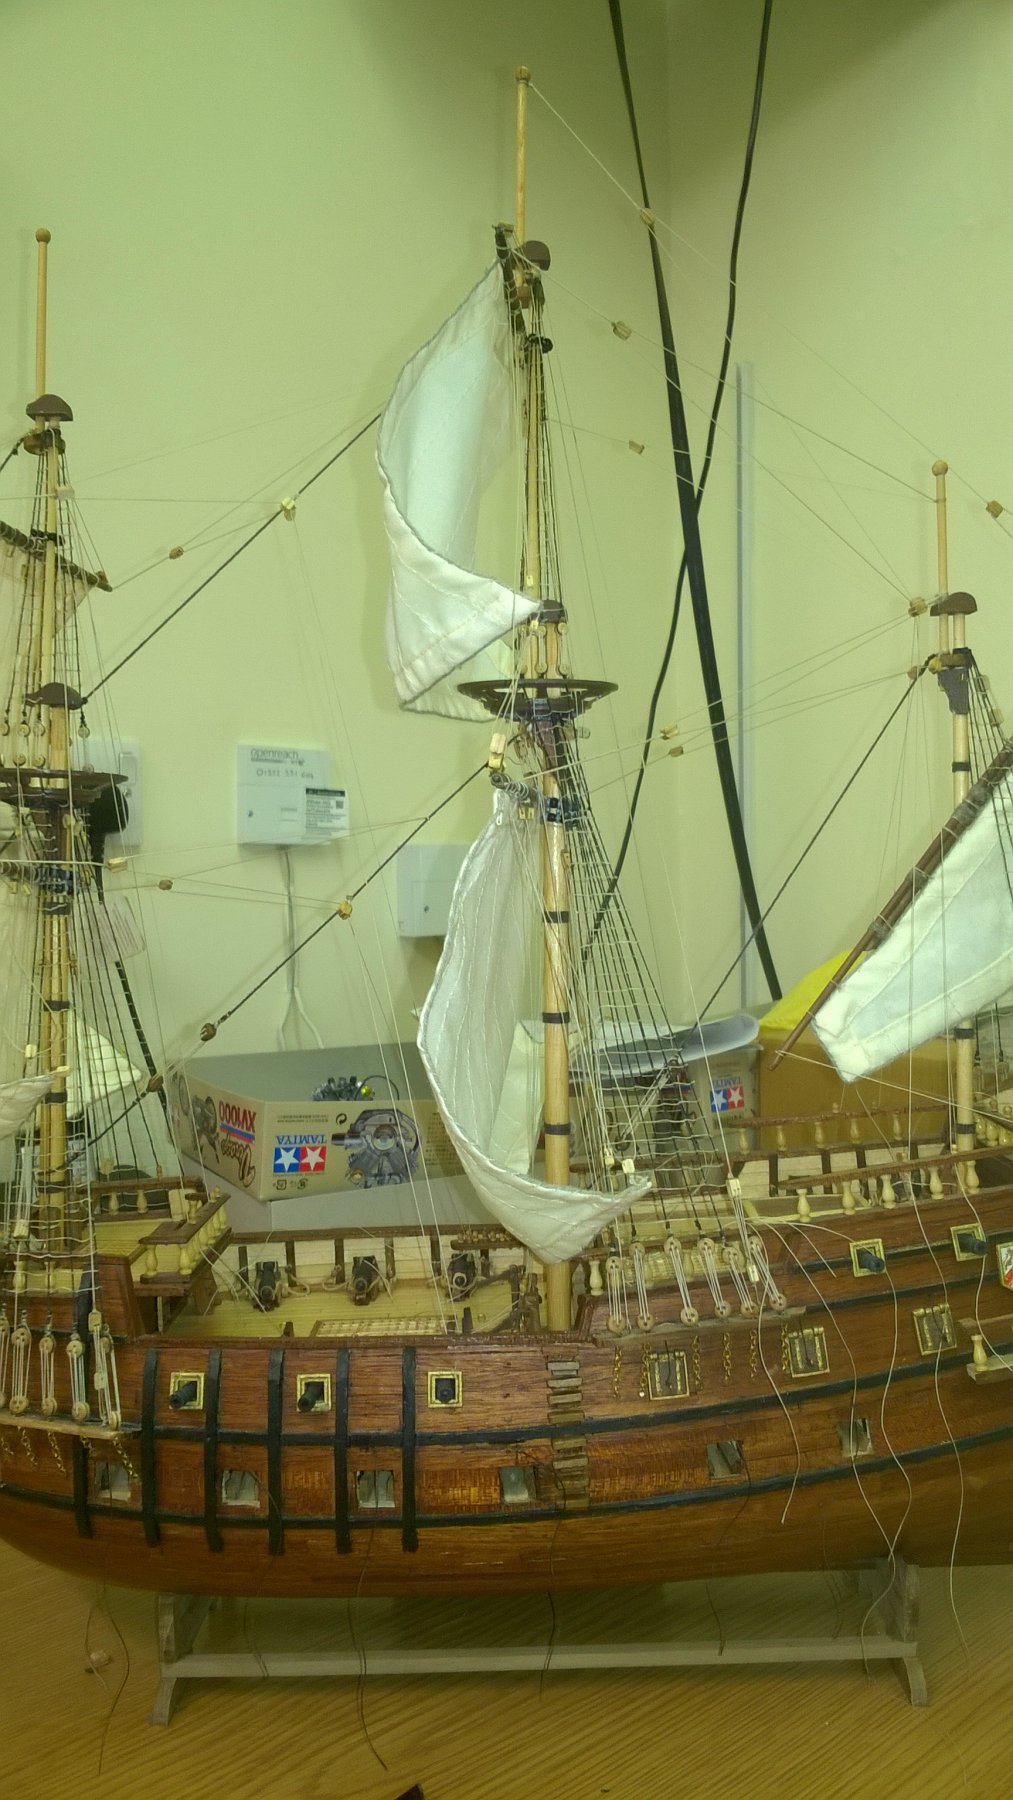
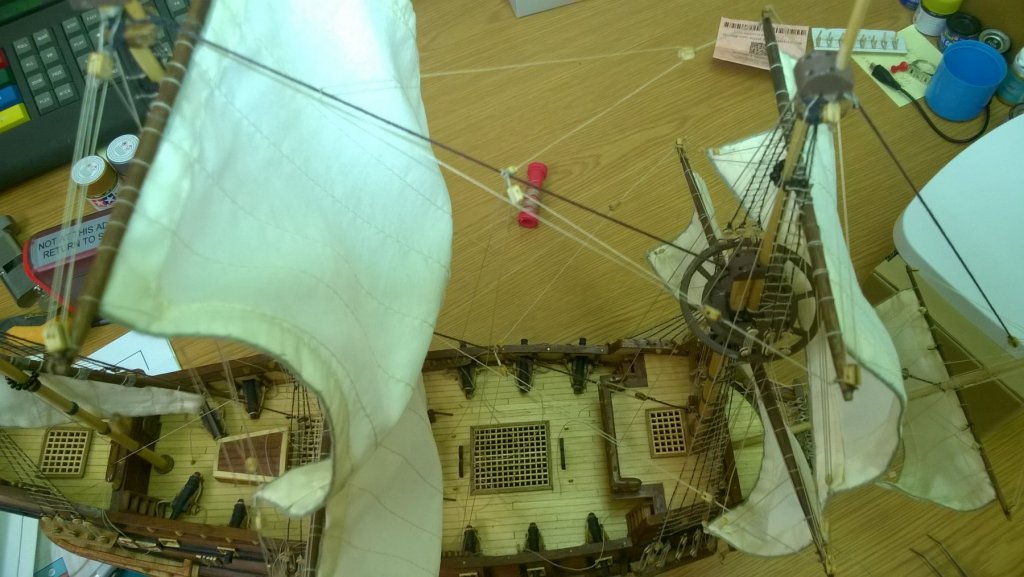
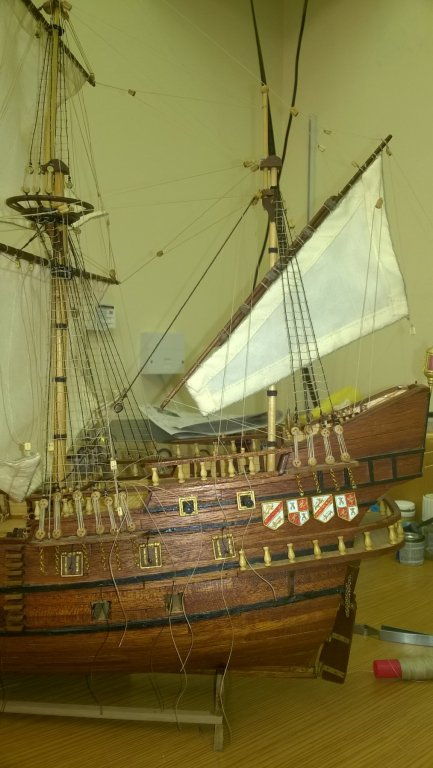
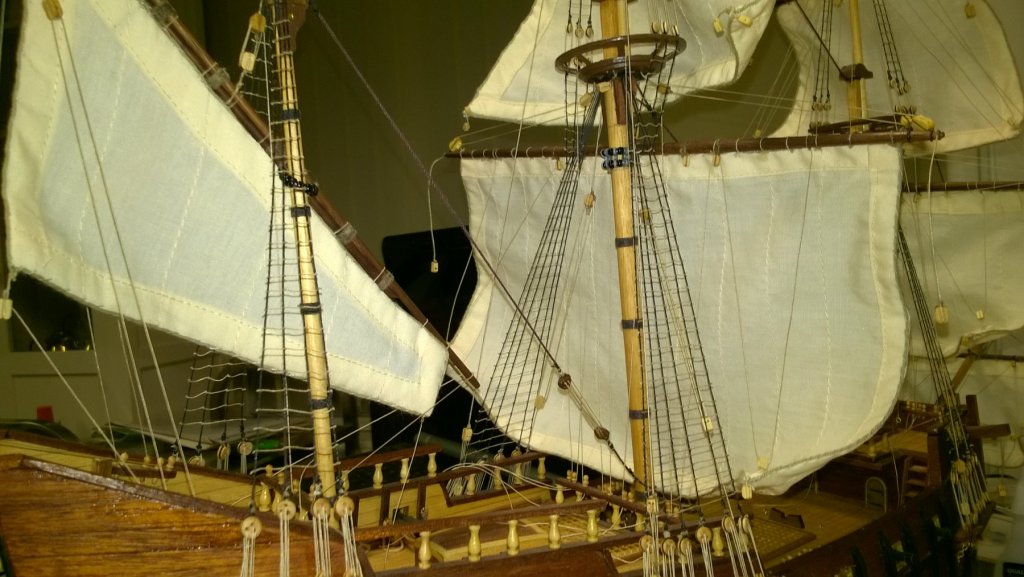
At last I have returned with an update. Having taken a few weeks away from the build. I now have all the rope coils made with only a few to be attached to the belaying pins. A couple of the pin racks coming adrift have also caused small set backs. I was not happy with the shape of the sails and have removed the thin wire I had inserted into the seams. I then wound 3 strands of the wire together and re inserted them. I had added the tack lines but now need to redo them to avoid the sails folding inboard. I have also redone the aft most lateen sail line, which, I think looks more practical and hopefully correct. At present I have not fitted the ships boat yet. There are few ropes crossing the main deck that I am delaying making the oars until I need to. I have attempted them but not yet achieved the effect I want. A couple of deck cannons have come unstuck so I am leaving them loose until the rigging is complete.


- 68 replies
-
- 2
-
-
- san francisco ii
- artesania latina
- (and 1 more)
-
Hi again Warnerade. I've finally managed to drop in on your build. She is coming along very nicely. There are a lot of differences between your kit and my version. Especially not having the gratings cut out in the deck. However, there seem to be a lot of things that don't match up either. These, combined with mistakes I made on top, have led me to much research as well as hair pulling. Good luck with your build and I will look in from time to time.
- 88 replies
-
- 1
-
-
- finished
- artesania latina
- (and 1 more)
-
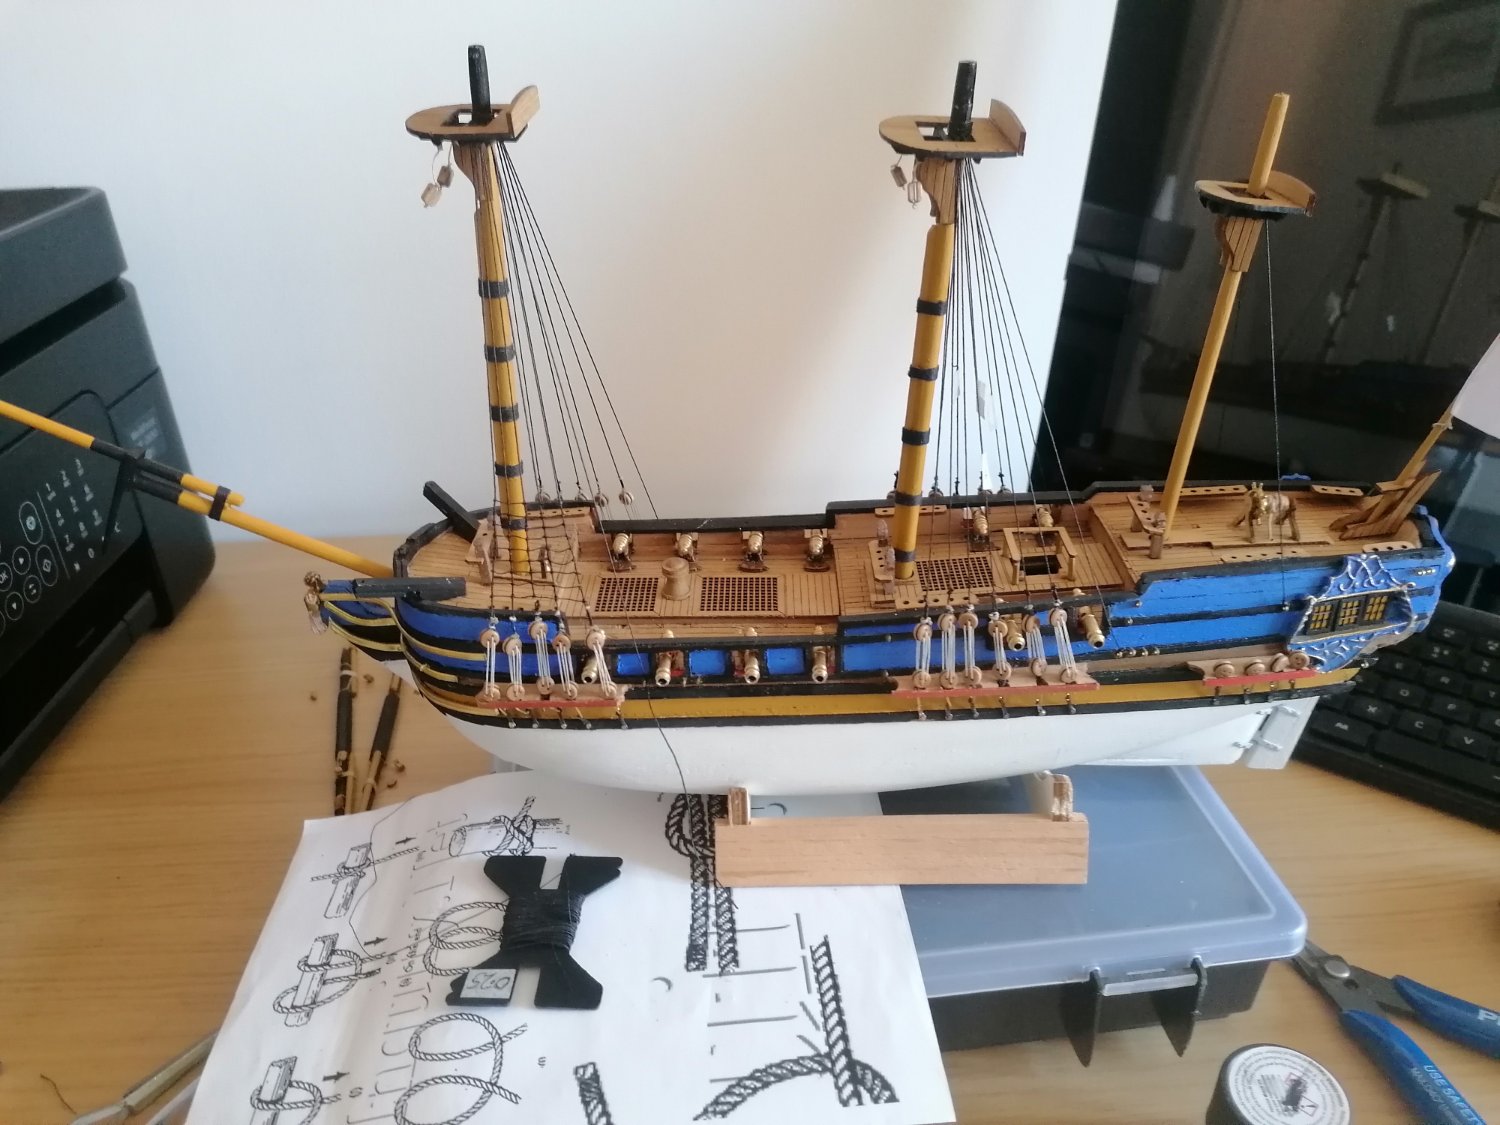
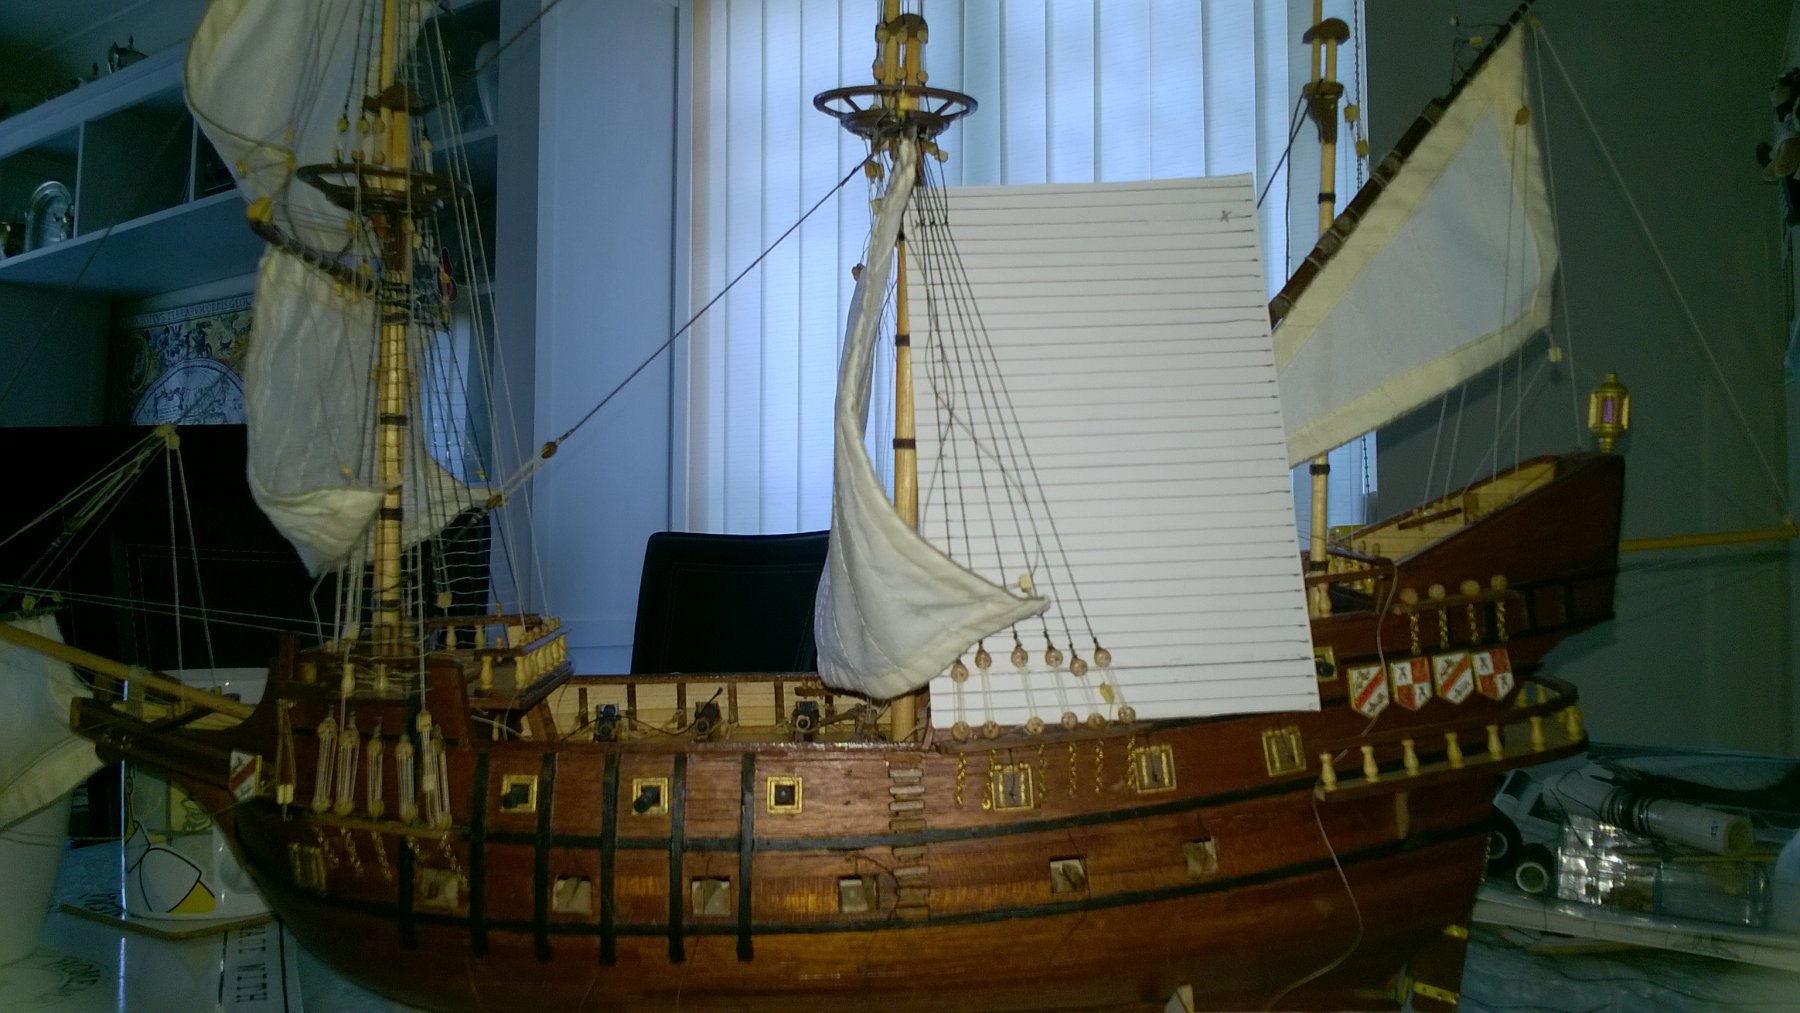
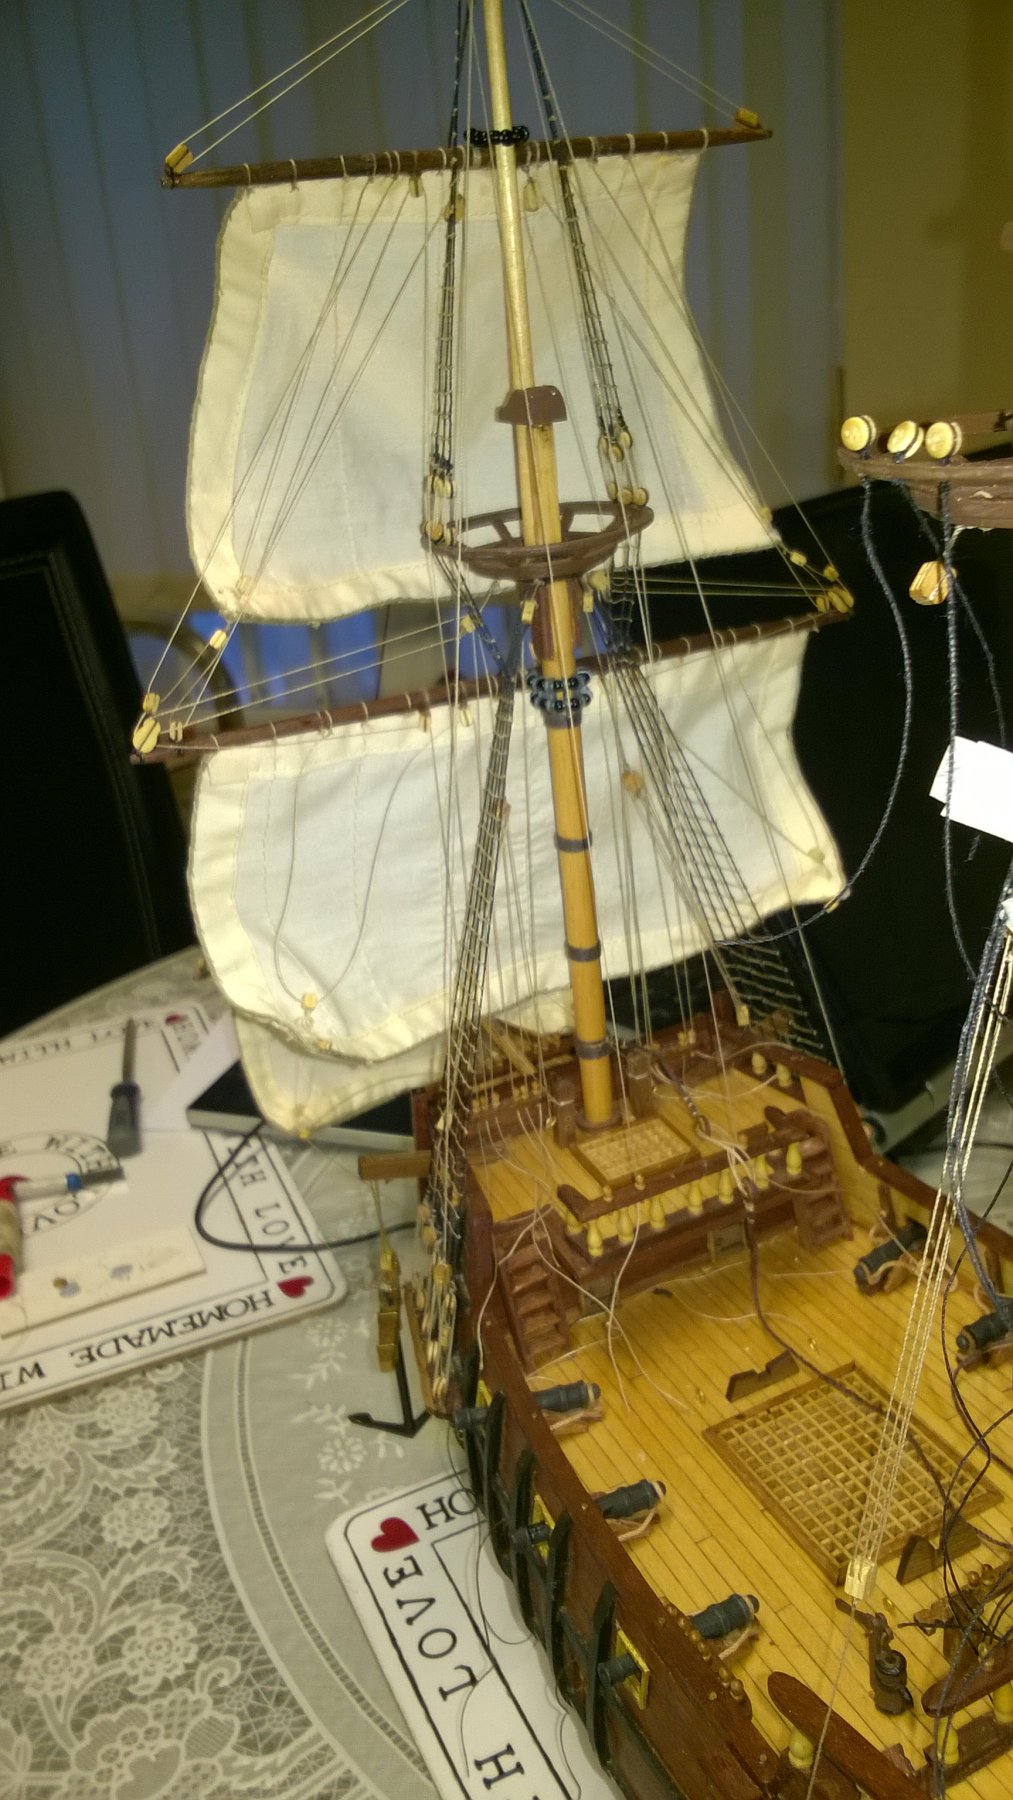
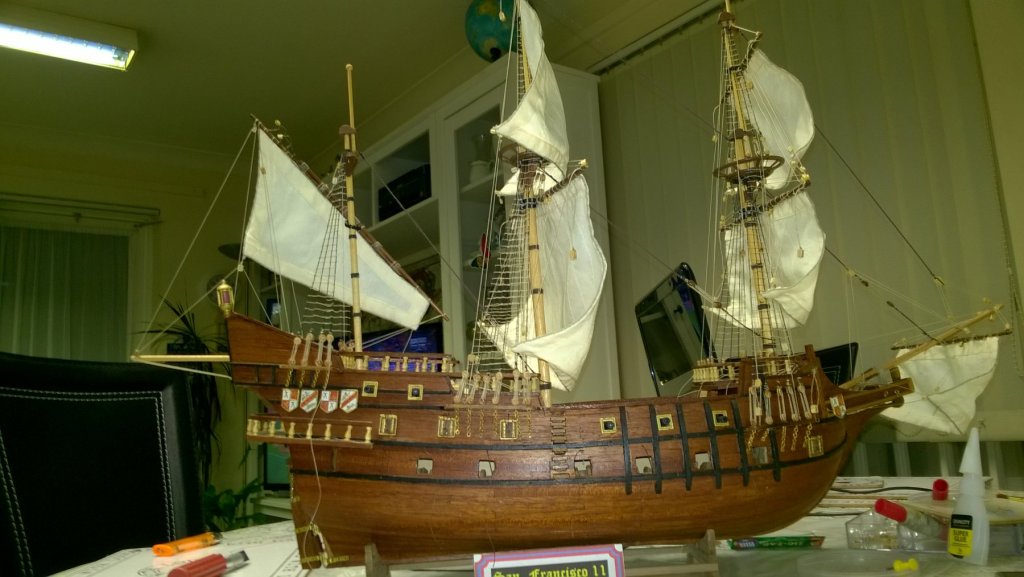
Thanks for looking in Caroline and EJ again. I feel humbled by your comment considering how your San Francisco looked. Like yours mine has been a real challenge and considering a lack of work space and better tools is shaping up quite well. There are a few things I'm not 100 per cent happy with but, overall I am very content. I still need to remember the names of a lot of the ropes as well as figure out where they are going to be secured. I have now fitted the yard braces and completed the mizzen sail apart from redoing the rear stays. Again I am still combining the rigging plan supplied and the plans from the Golden Hind. I am not happy with tying ropes onto the hand rails so have drilled holes to add belaying pins for the main yard stays? I am heading in to the home straight now I think. There are still a lot of rope coils to put on the belaying pins as well as fitting the tack lines on the fore and main sails. I then need to add the lines to bring the sails out slightly which I shall try to replicate from Caroline's build. Also, before I add more pictures I'll get a better back ground for the photos.

- 68 replies
-
- 1
-
-
- san francisco ii
- artesania latina
- (and 1 more)
-
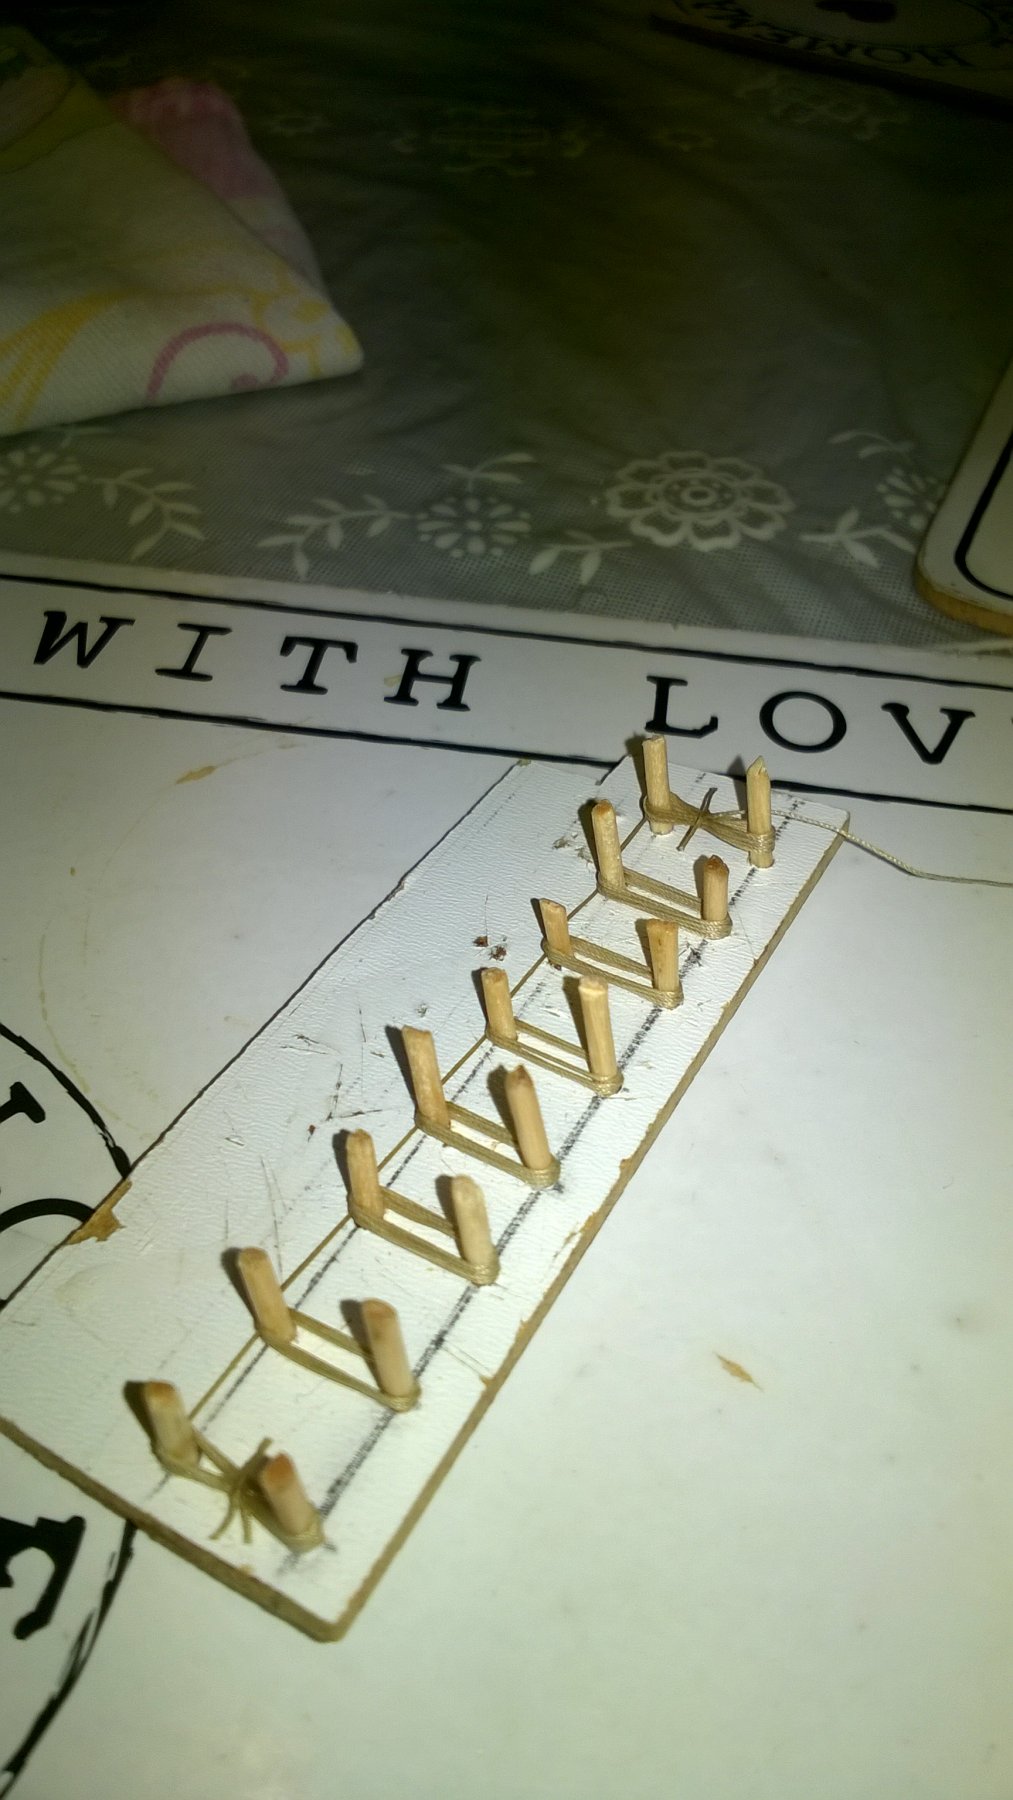
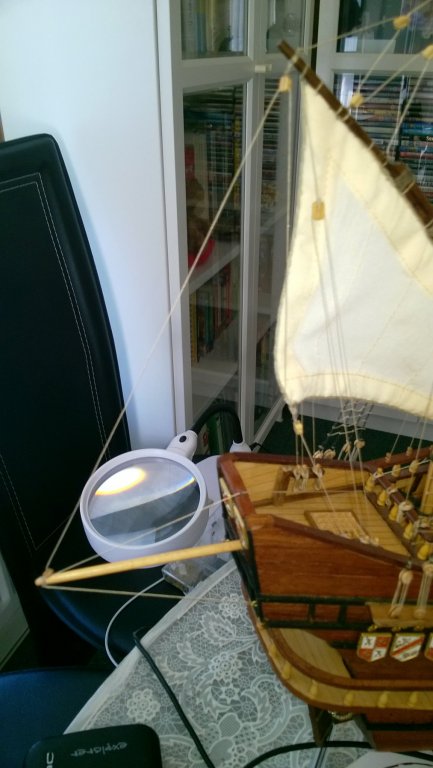
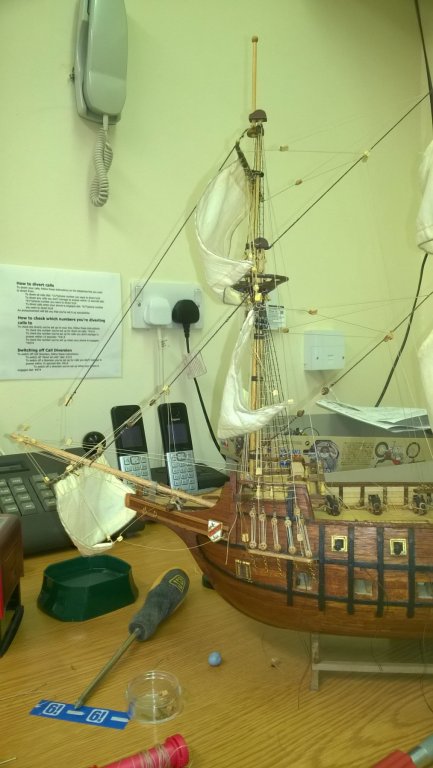
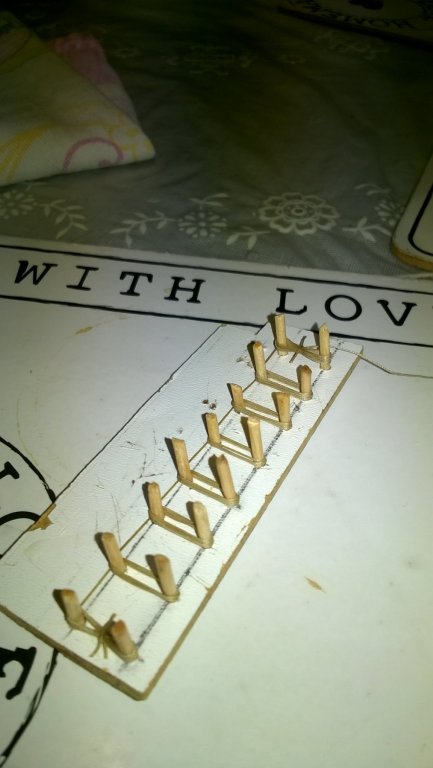
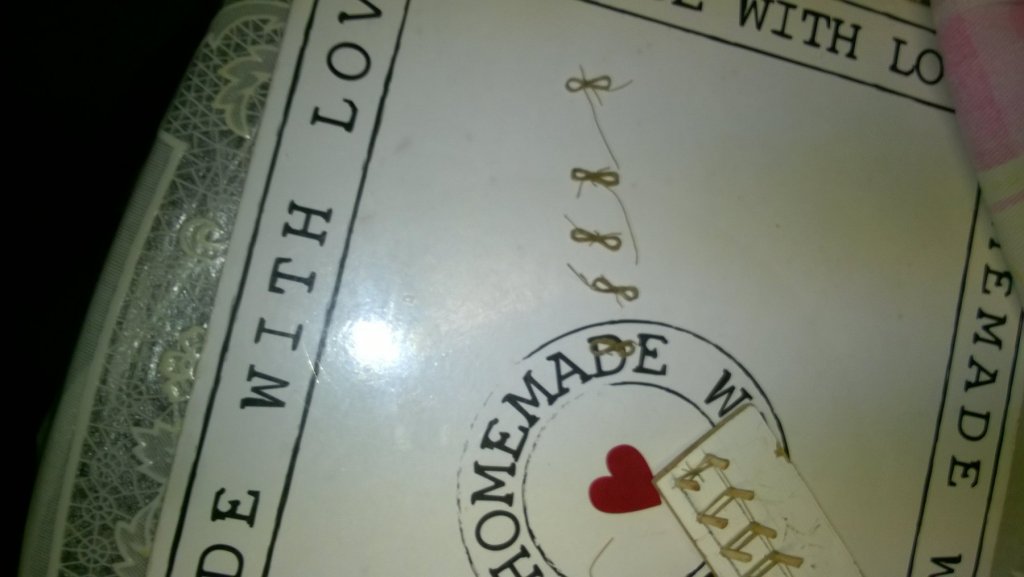
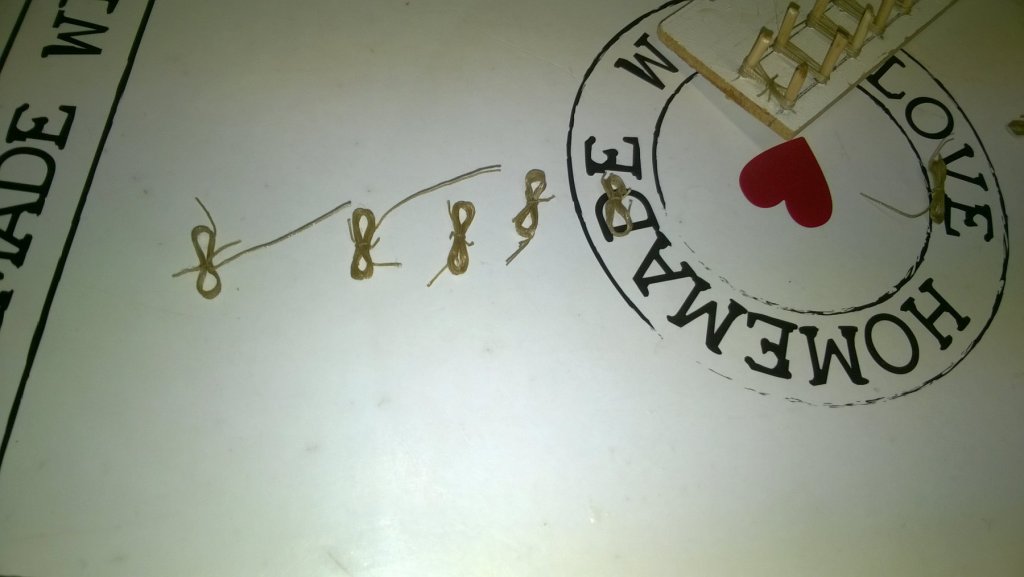
Progress has been slow for the last few weeks mainly due to getting the ratlines finished though I have also started on the rope coils for the belaying pins. I originally tried making a false pin rack and wind the coils but couldn't get them the way I wanted. Instead I marked out a thin piece of board and drew 2 lines 1 cm apart. I then divided these lines into 1cm sections and drilled holes into which I inserted sections of toothpicks. I wrapped .25mm thread 8 times between them and tied them in the middle. I then used a drop of superglue to hold them in place but moved the thread up and down to stop the coils sticking to the wood. Once the glue had dried, however, I found that the glue had darkened the colour of the thread so had to redo them but this time only added a small drop of glue to the knot. These looked much better. There will be pictures of these later. I have now also finished the stand for the ship. All the sails are in place with only the main topsail now needing to be rigged. It feels like the end is in sight now. I will, however be redoing a little of the rigging on the lateen sail. I am not happy with the way it looks. The last of the rigging for the yards also still needs to be finished.


- 68 replies
-
- 1
-
-
- san francisco ii
- artesania latina
- (and 1 more)
-
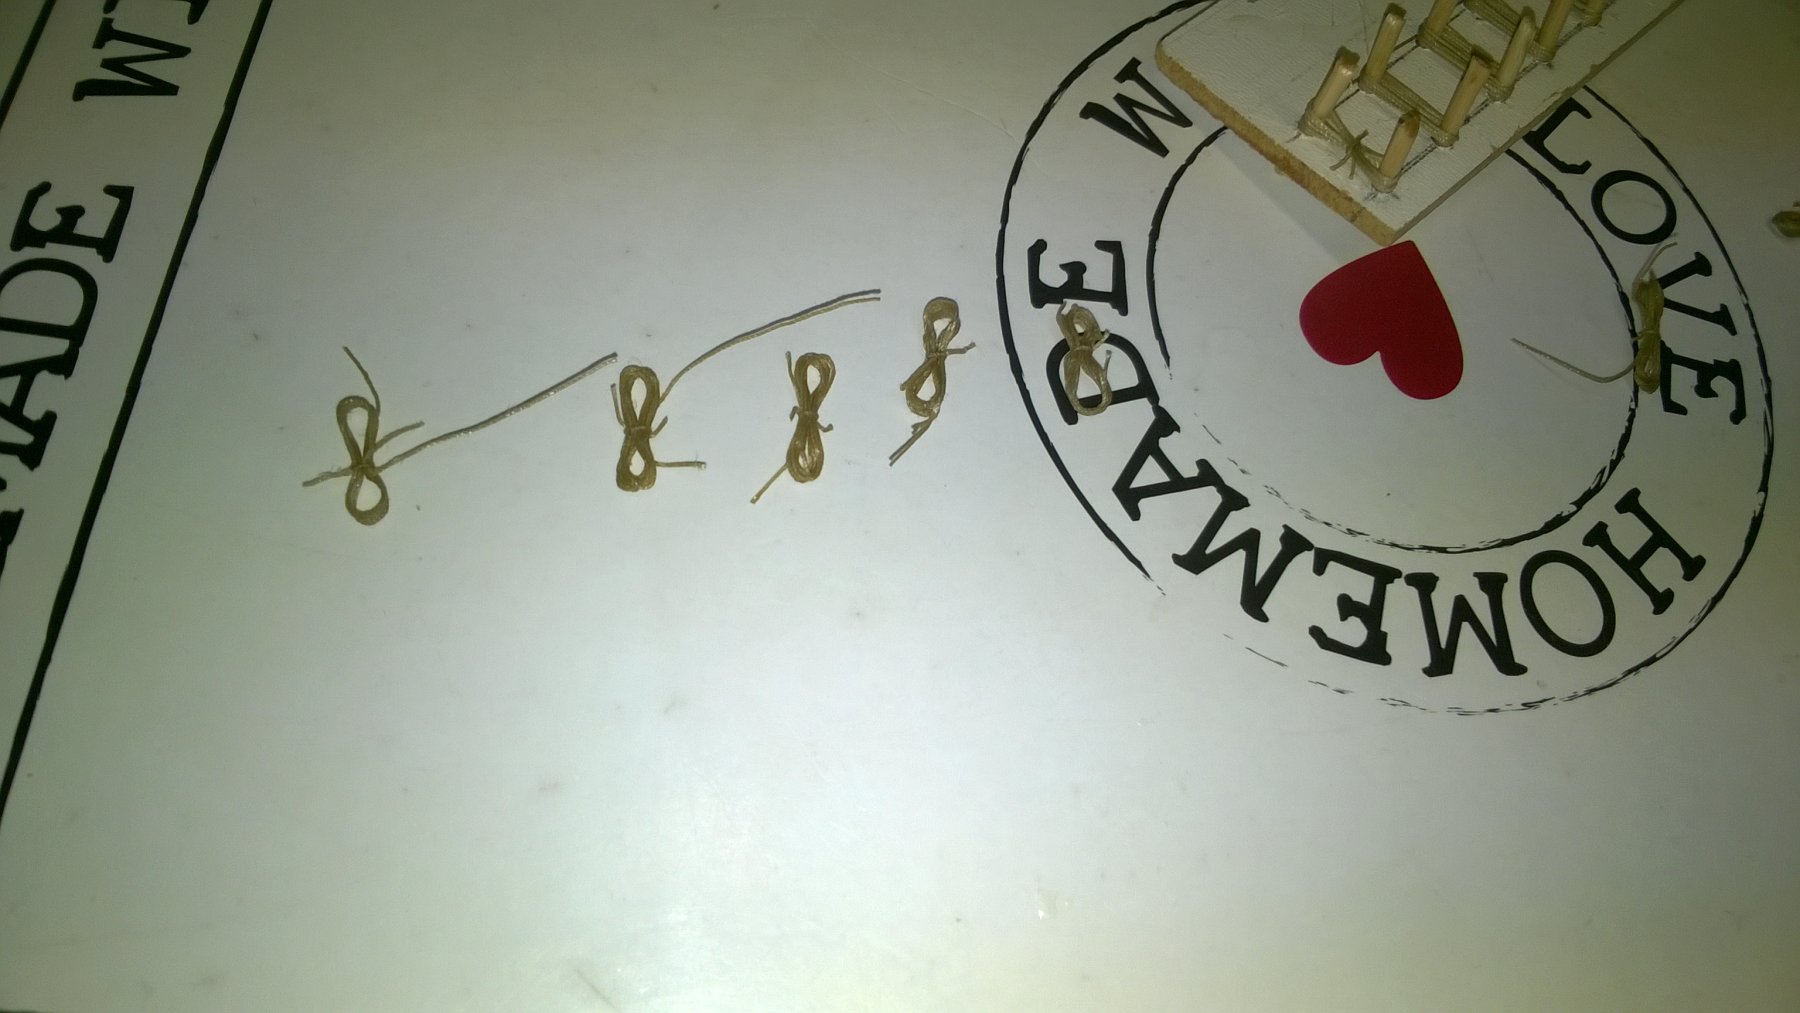
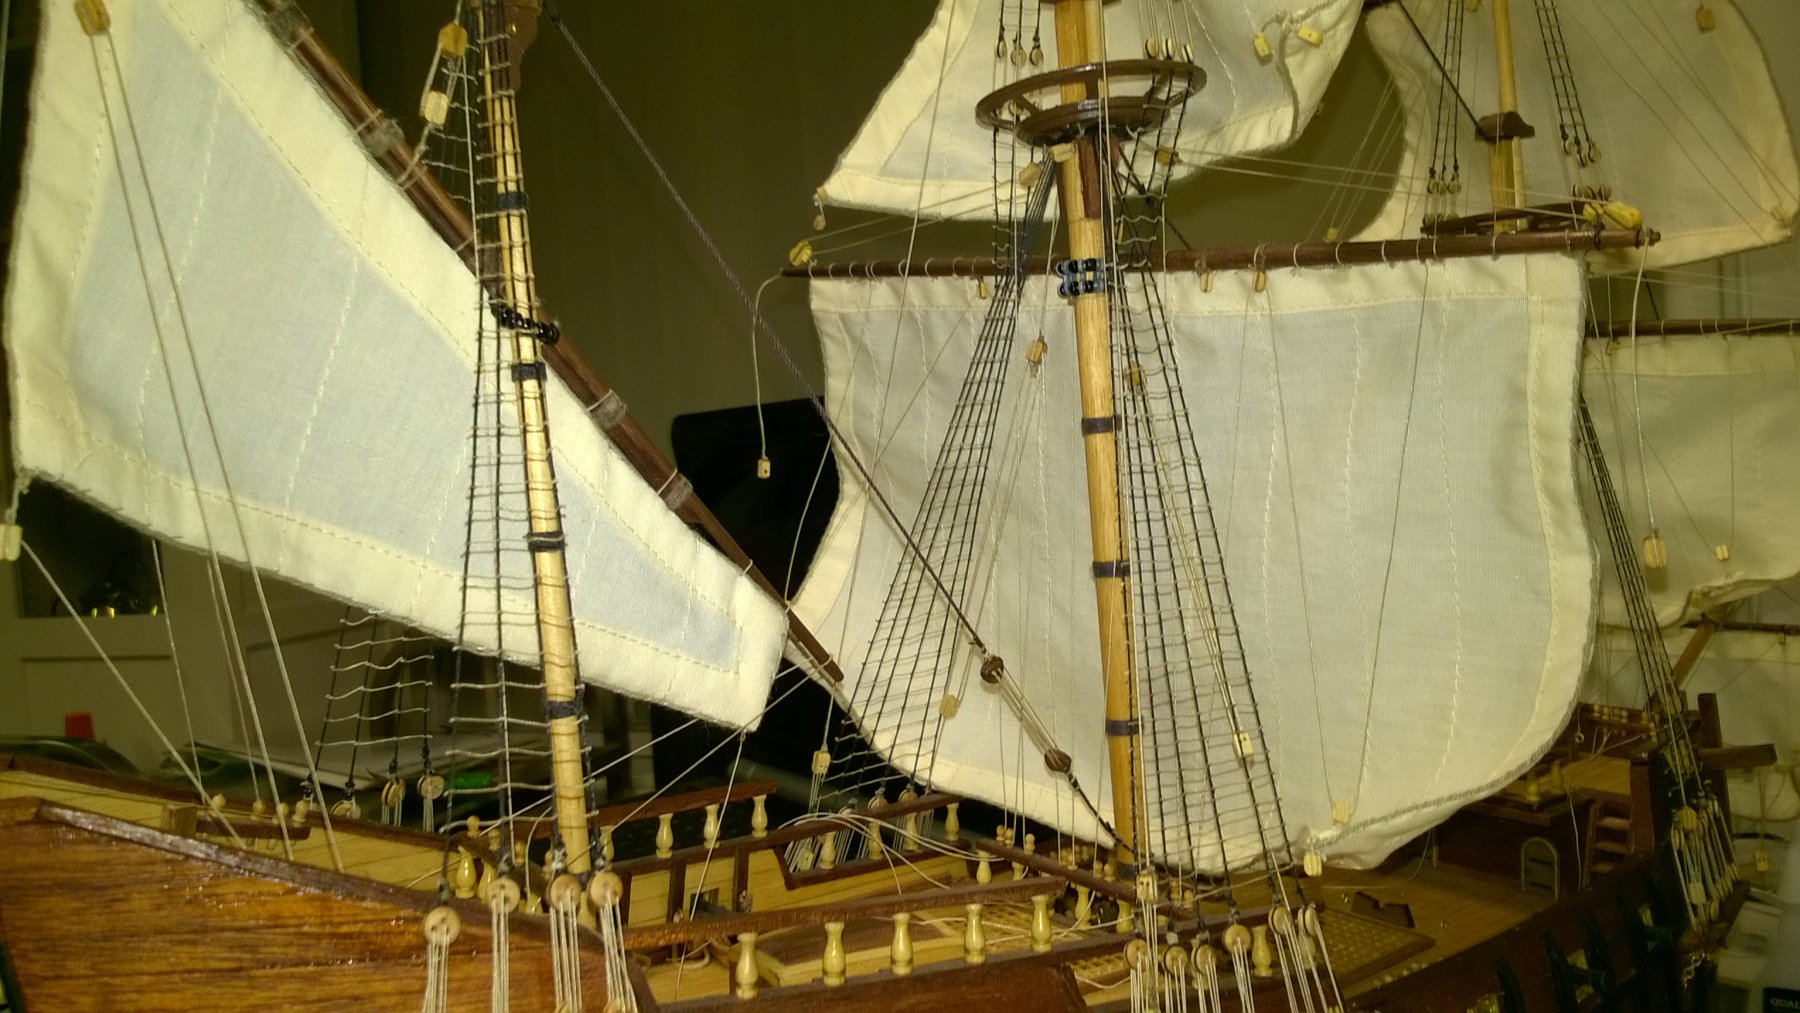
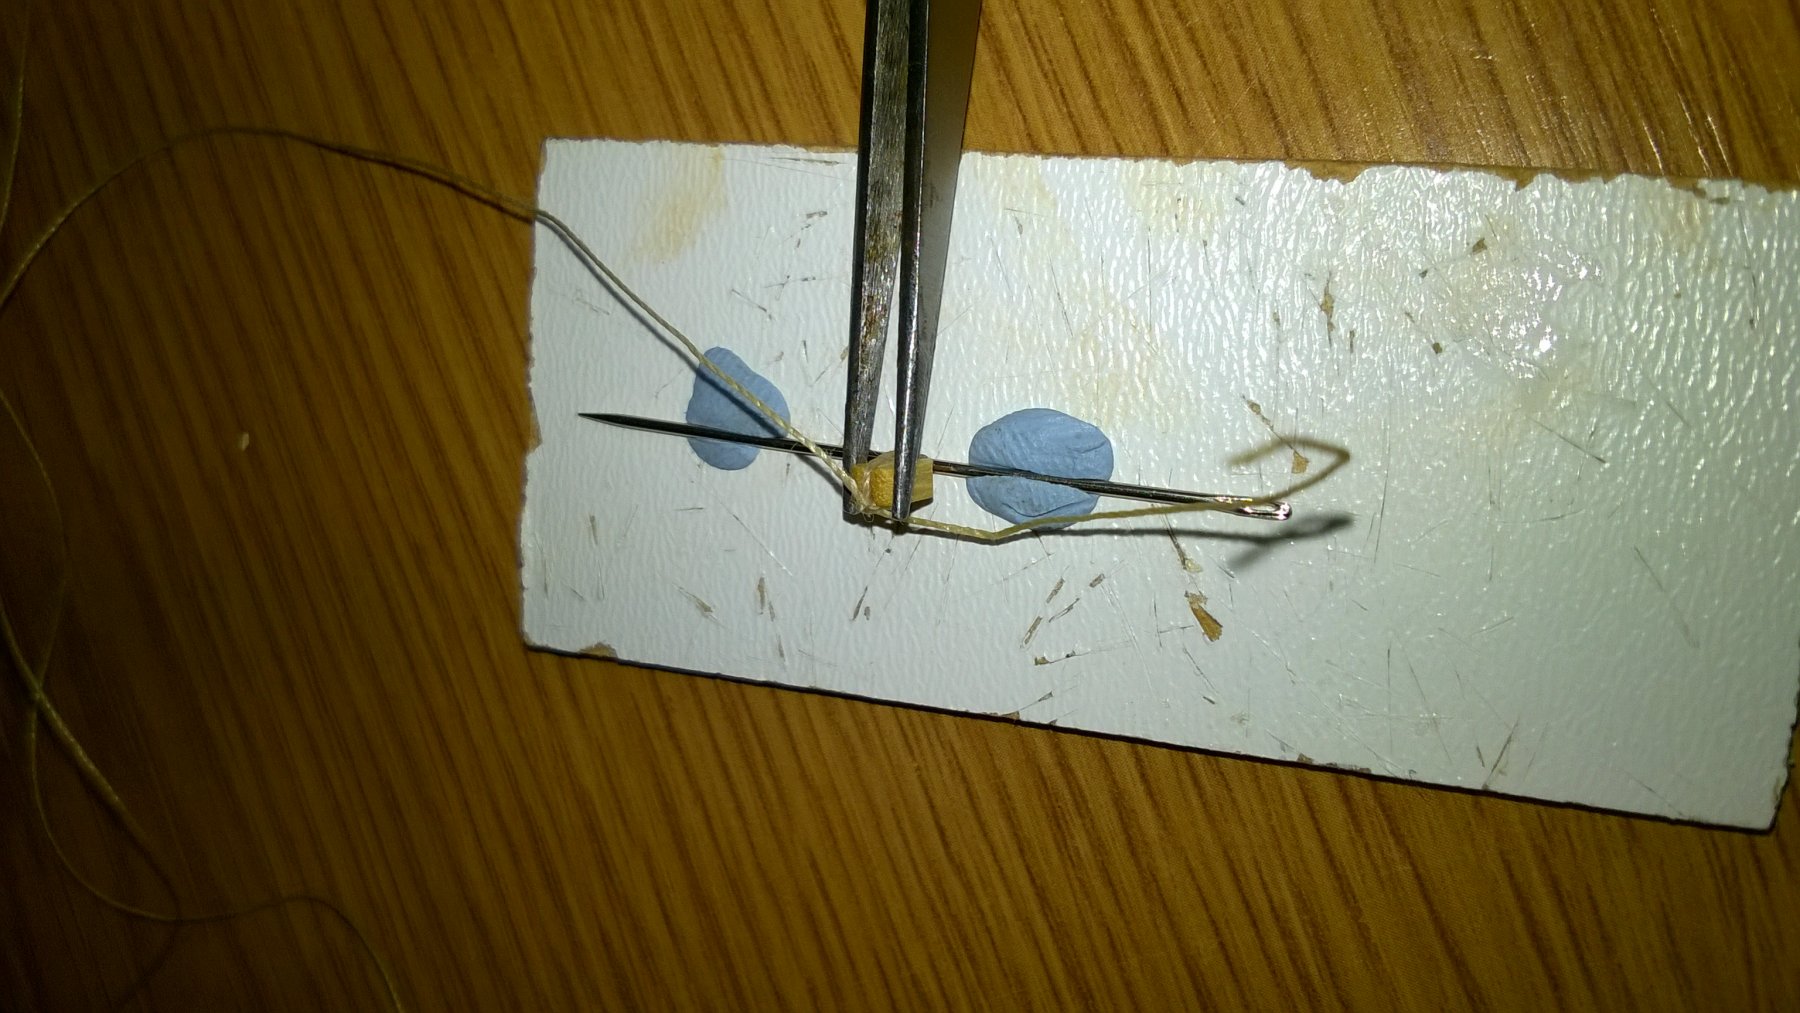
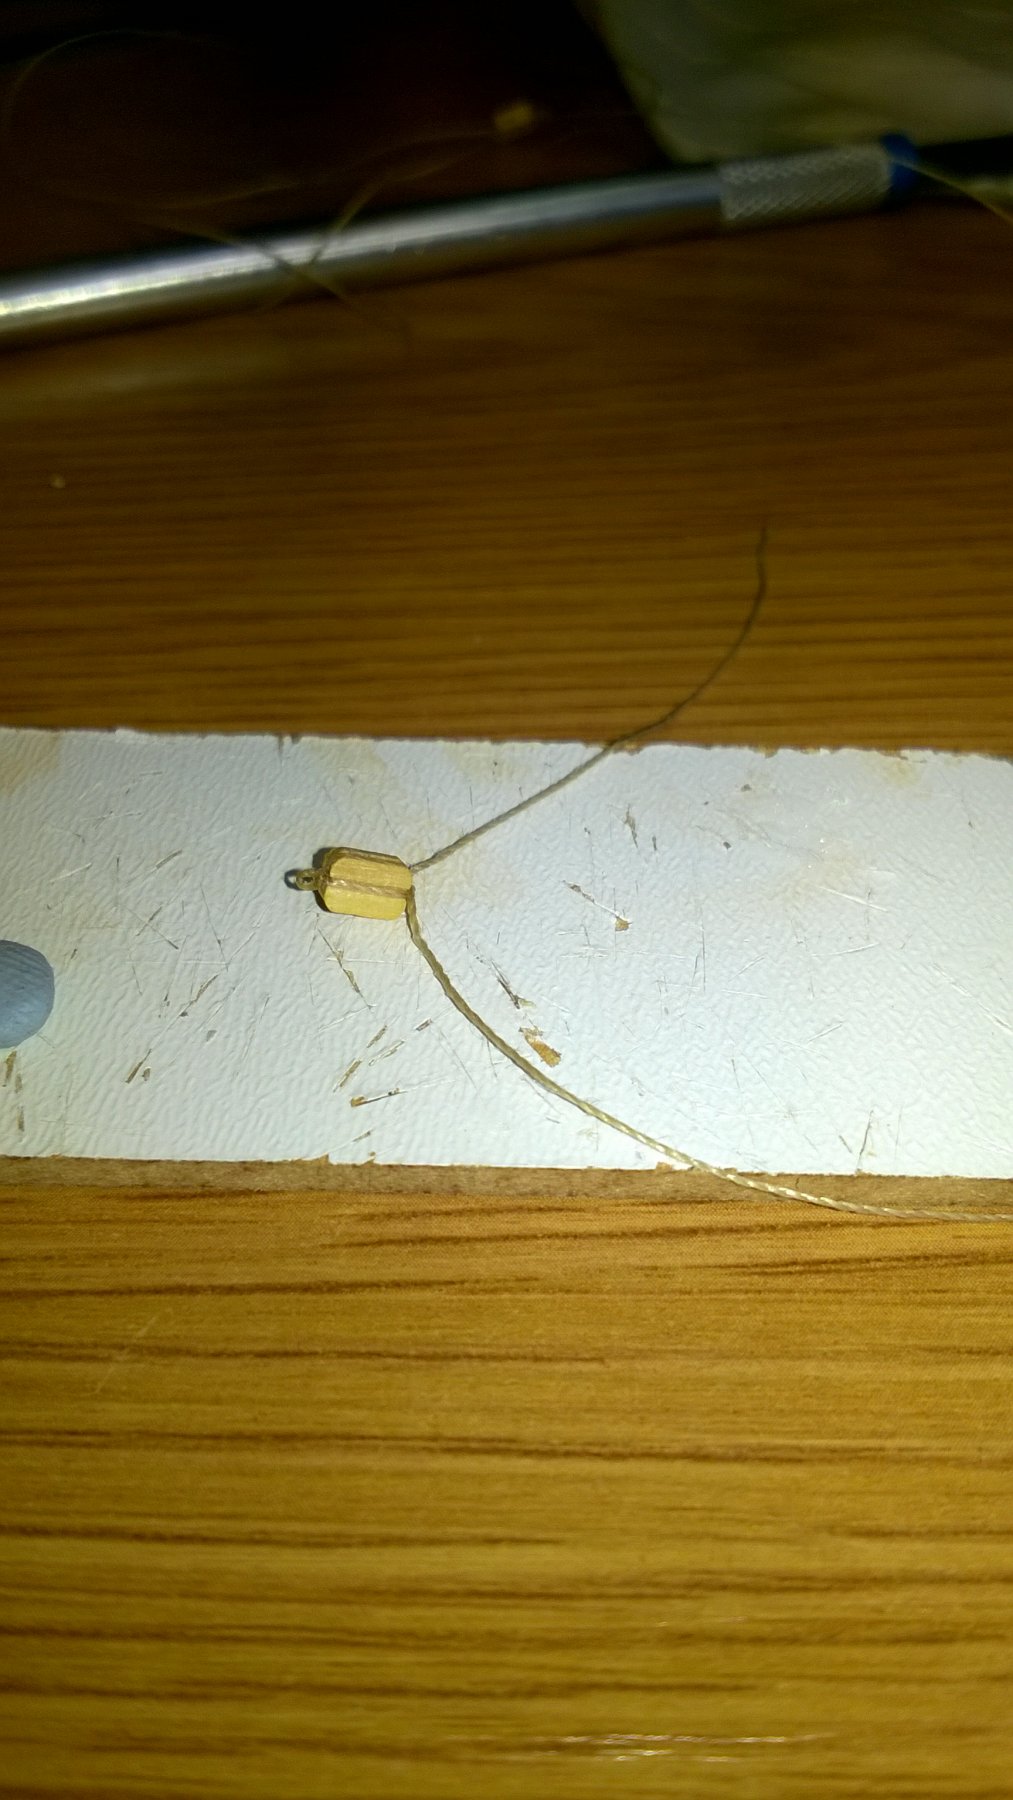
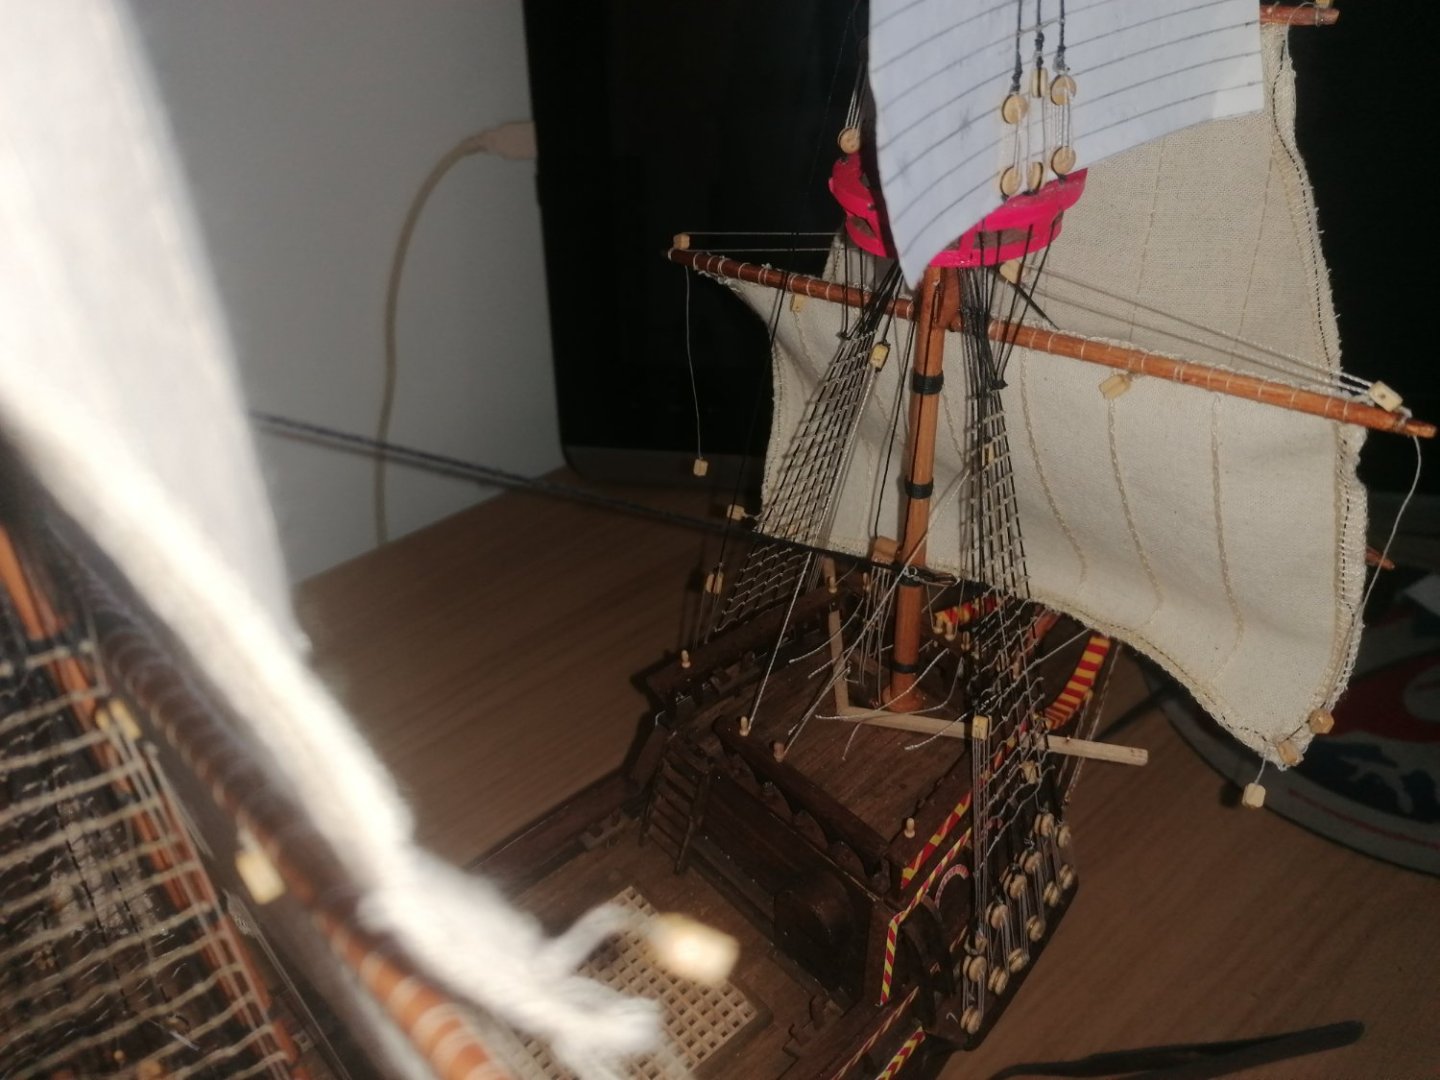
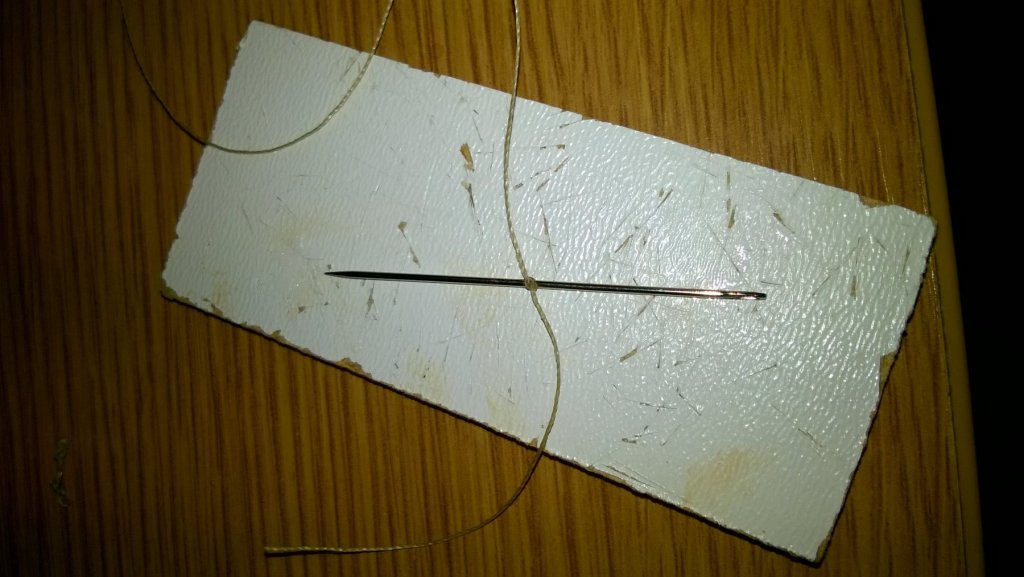
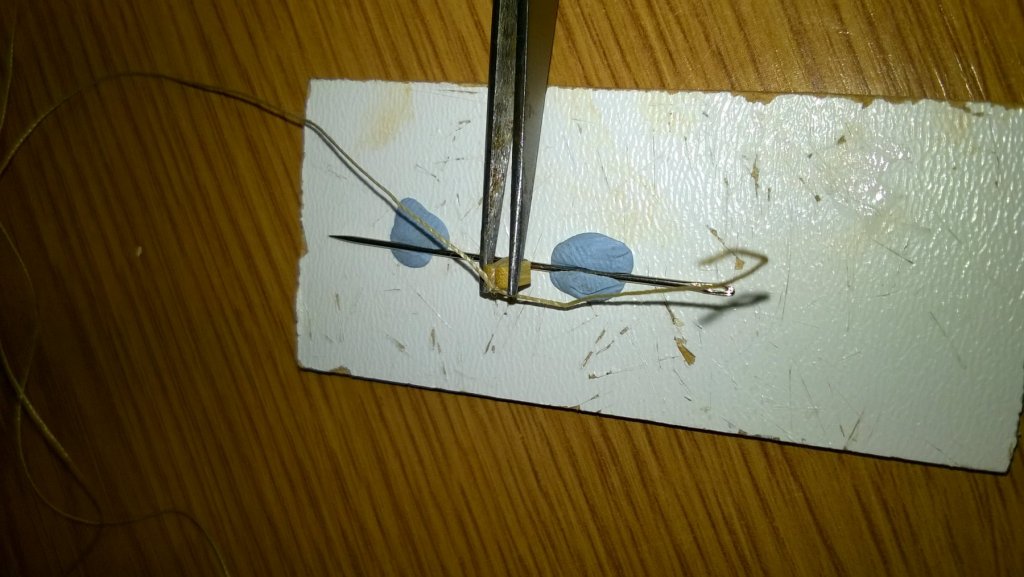
I'm not sure what happened but I added to this 2 weeks ago but it hasn't appeared so am re posting with additions. The fore mast with sails has now been completed but I have not yet added the tack lines. The mizzen sail has been fitted with a few additions. One of the tack lines is meant to go to a pin rack blocking the steps, this I attached to the poop deck handrail. I have added a block to the bottom corner as well. I will need to redo the lifting tackle as I am not happy with the angle it is sitting at. The shrouds have also been added to the main mast and the main sail fitted. It looks far too large but need to stick with it. If I was any good at sewing I would try to redo all the sails as the seams now look far too big. I still need to tie the ratlines on the main shrouds and tops as well as cut the last of the thread from the pin racks but still need to perfect the loops first. I also do not want them held fast yet due to snagging the thread and losing the pins, along with being certain they are actually where I need them to be. I have found a good way, I think, of making the blocks with loops which I hope could be useful for other builders. I tie a piece of thread around a needle, then hold the needle in place with bluetack and tie the block on top of the needle and then, add a drop of superglue to the loop. As soon as the glue is added slide the block along the needle a few times to prevent it sticking and then remove the needle. see bottom photos.


- 68 replies
-
- 1
-
-
- san francisco ii
- artesania latina
- (and 1 more)