HOLIDAY DONATION DRIVE - SUPPORT MSW - DO YOUR PART TO KEEP THIS GREAT FORUM GOING! (Only 20 donations so far - C'mon guys!)
×


newbee
-
Posts
180 -
Joined
-
Last visited
Content Type
Profiles
Forums
Gallery
Events
Everything posted by newbee
-
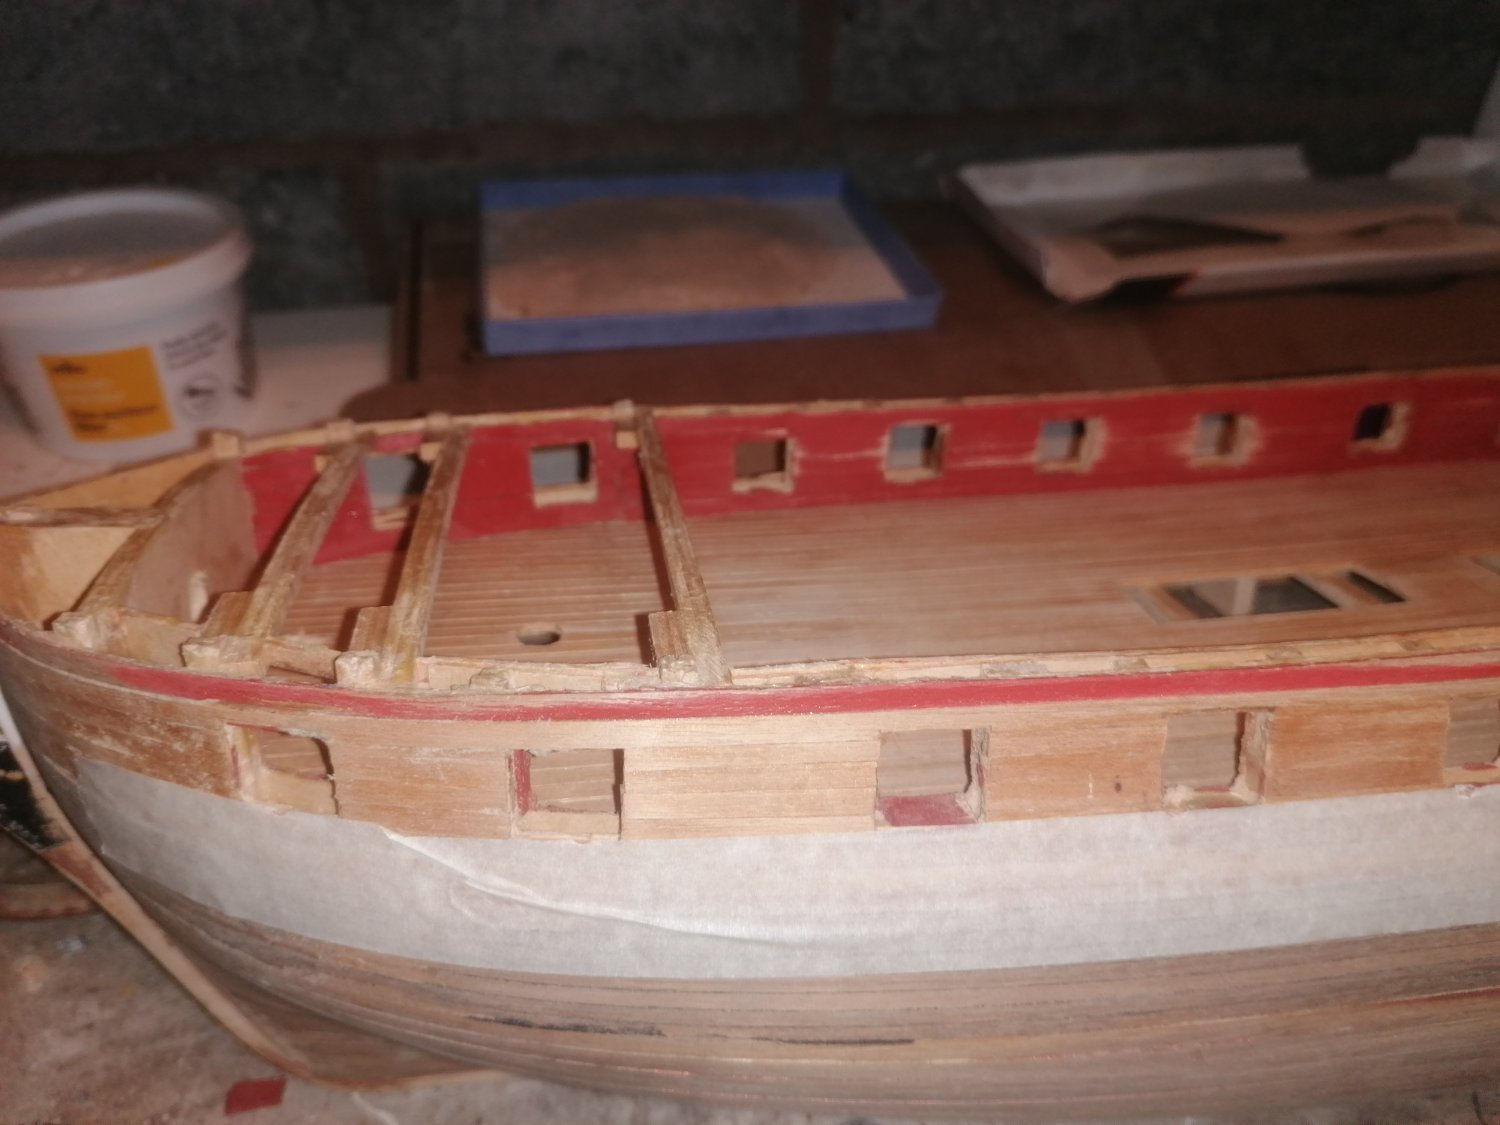
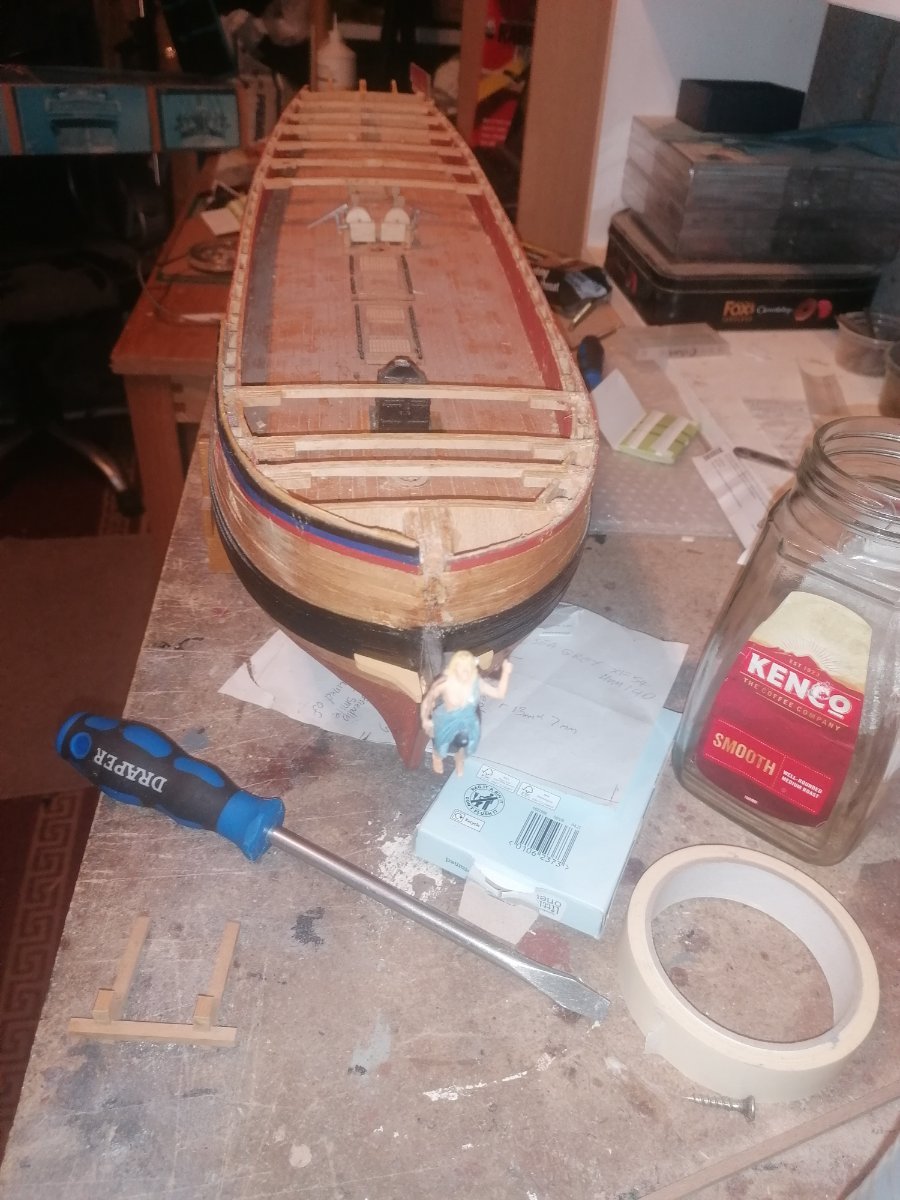
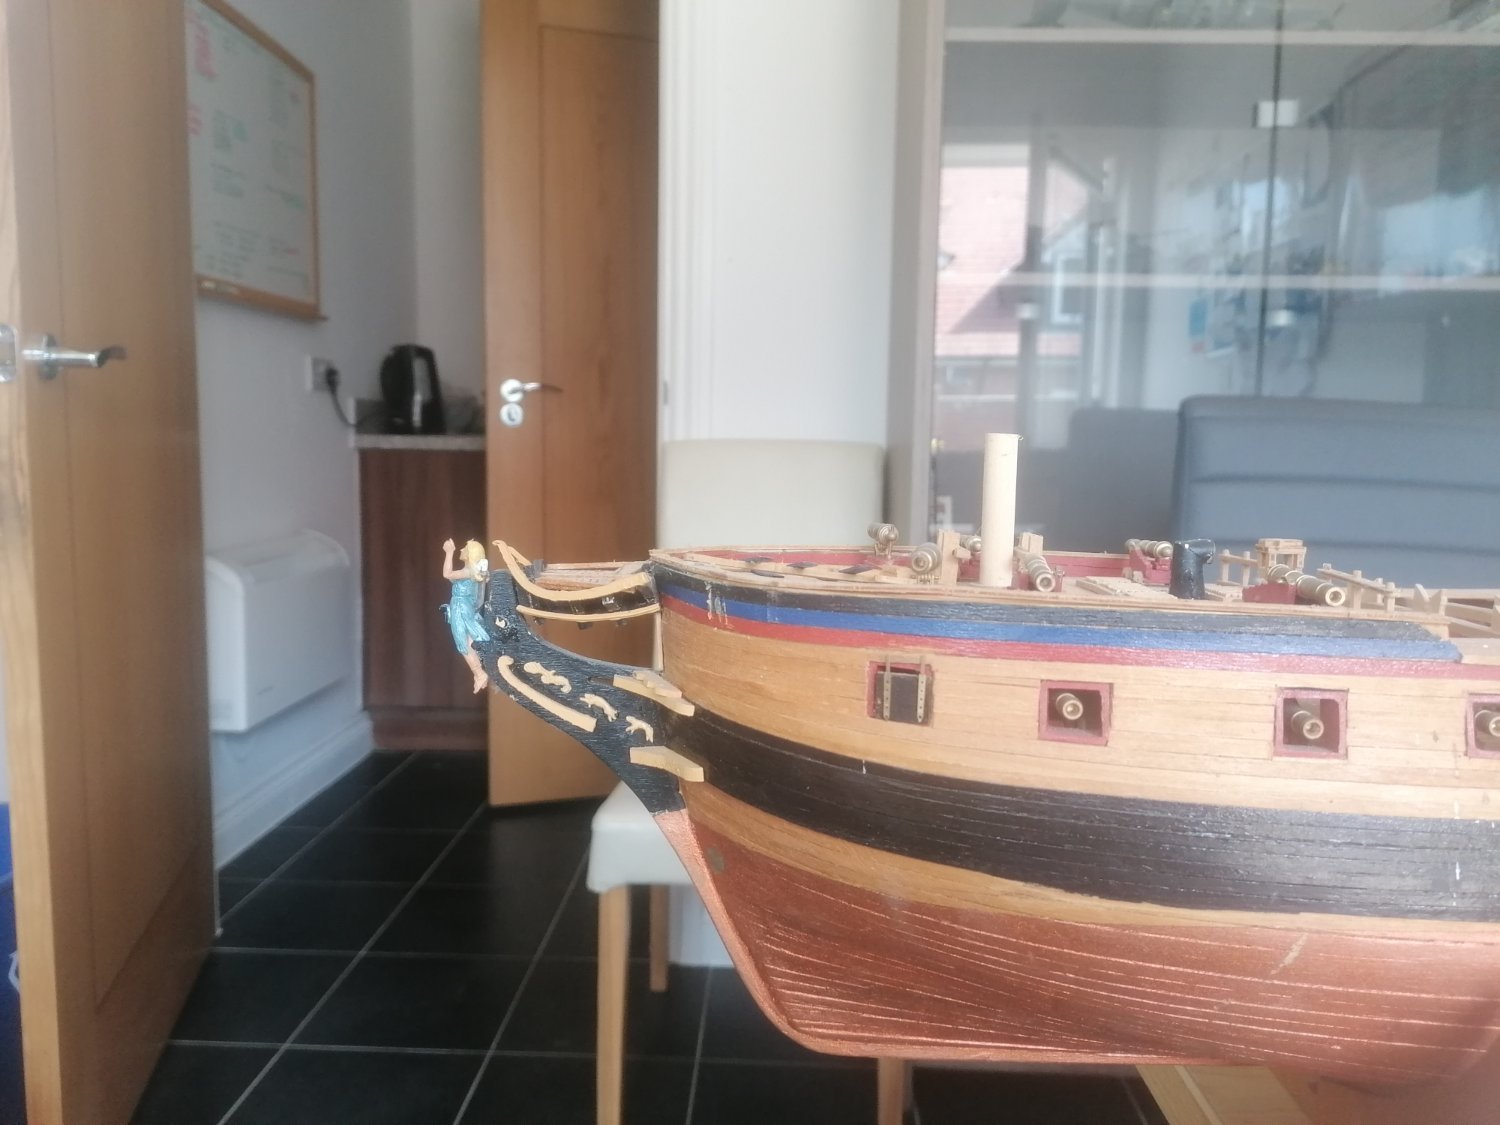
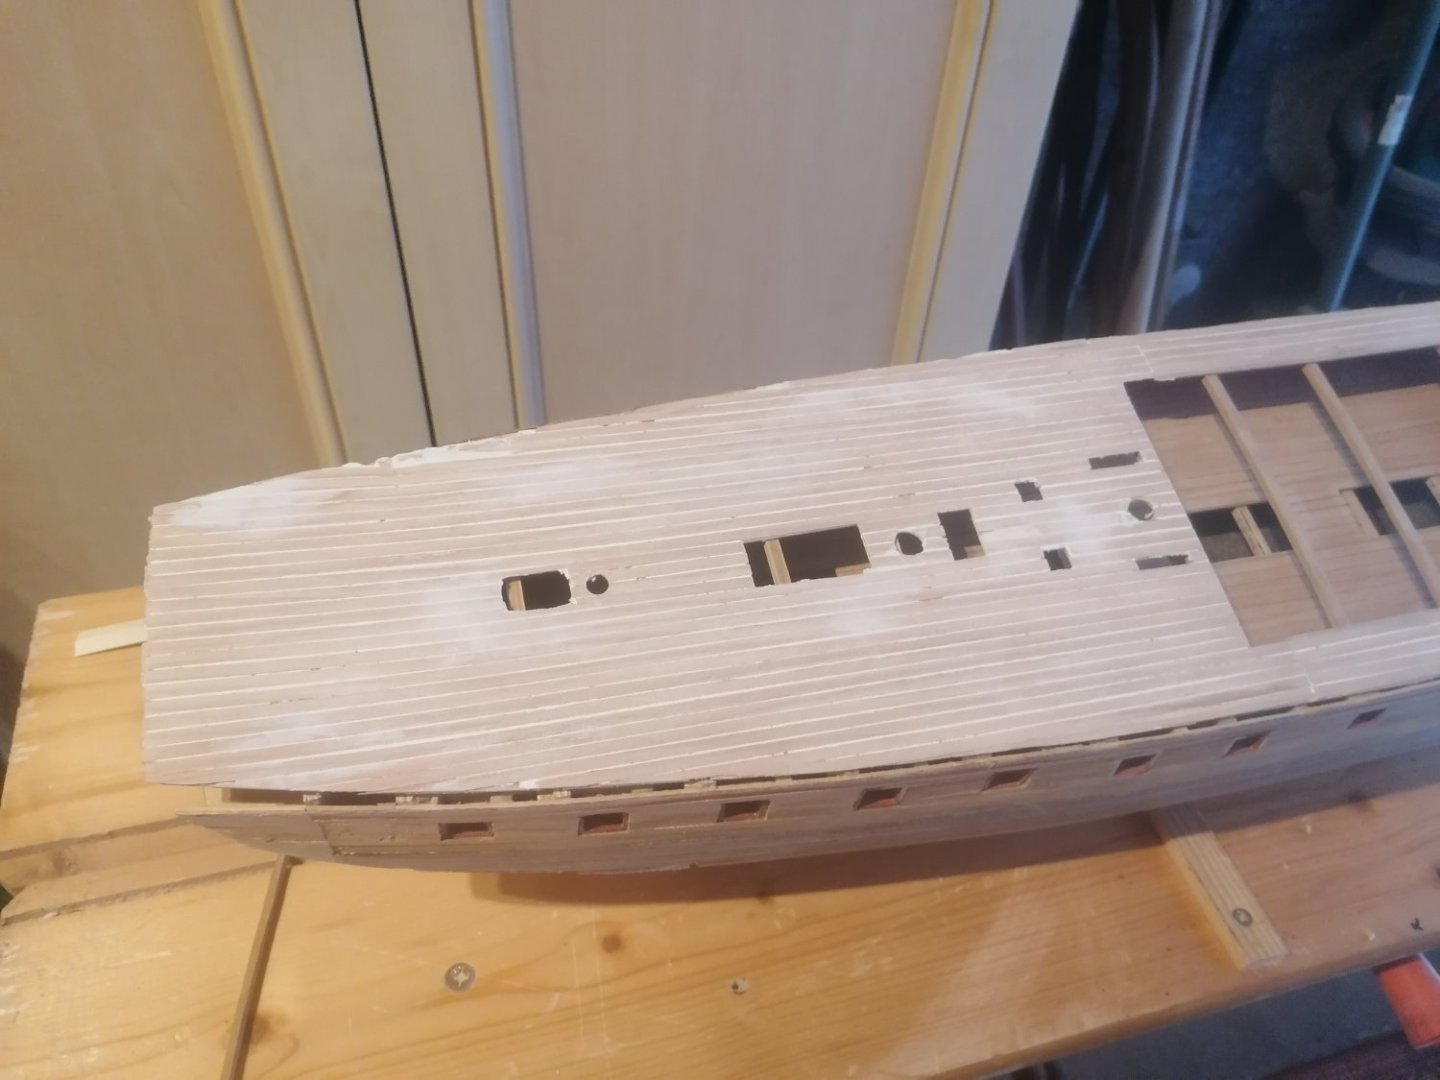
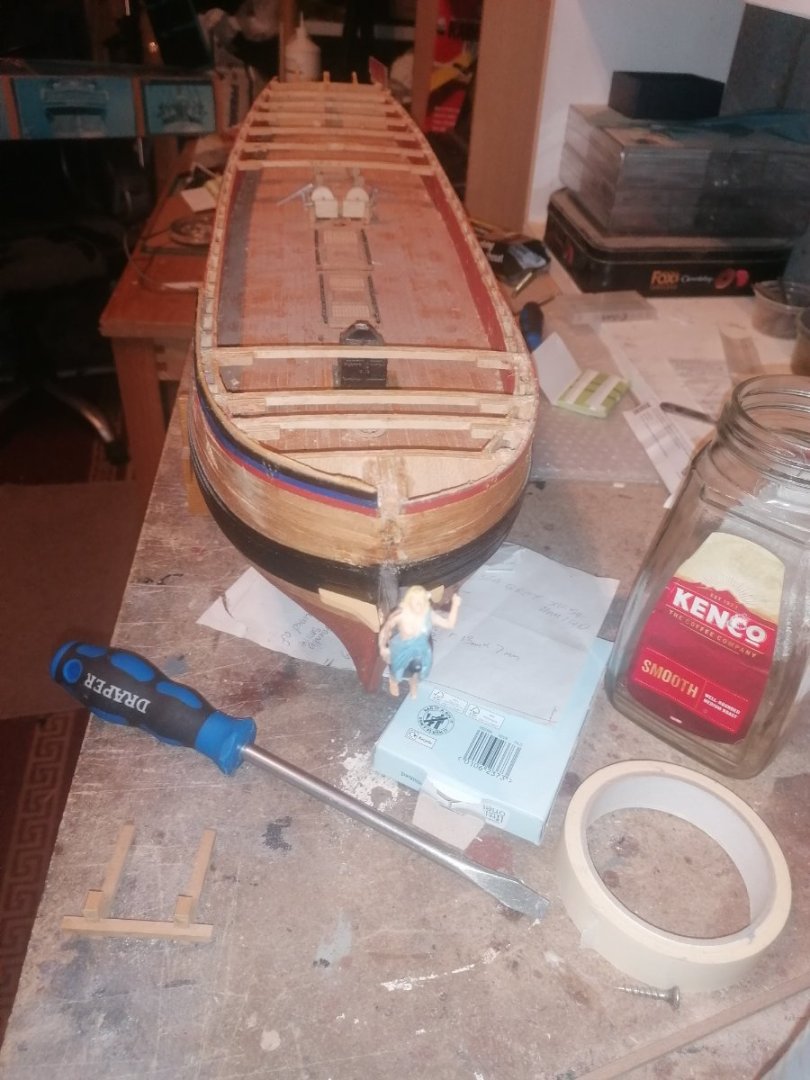
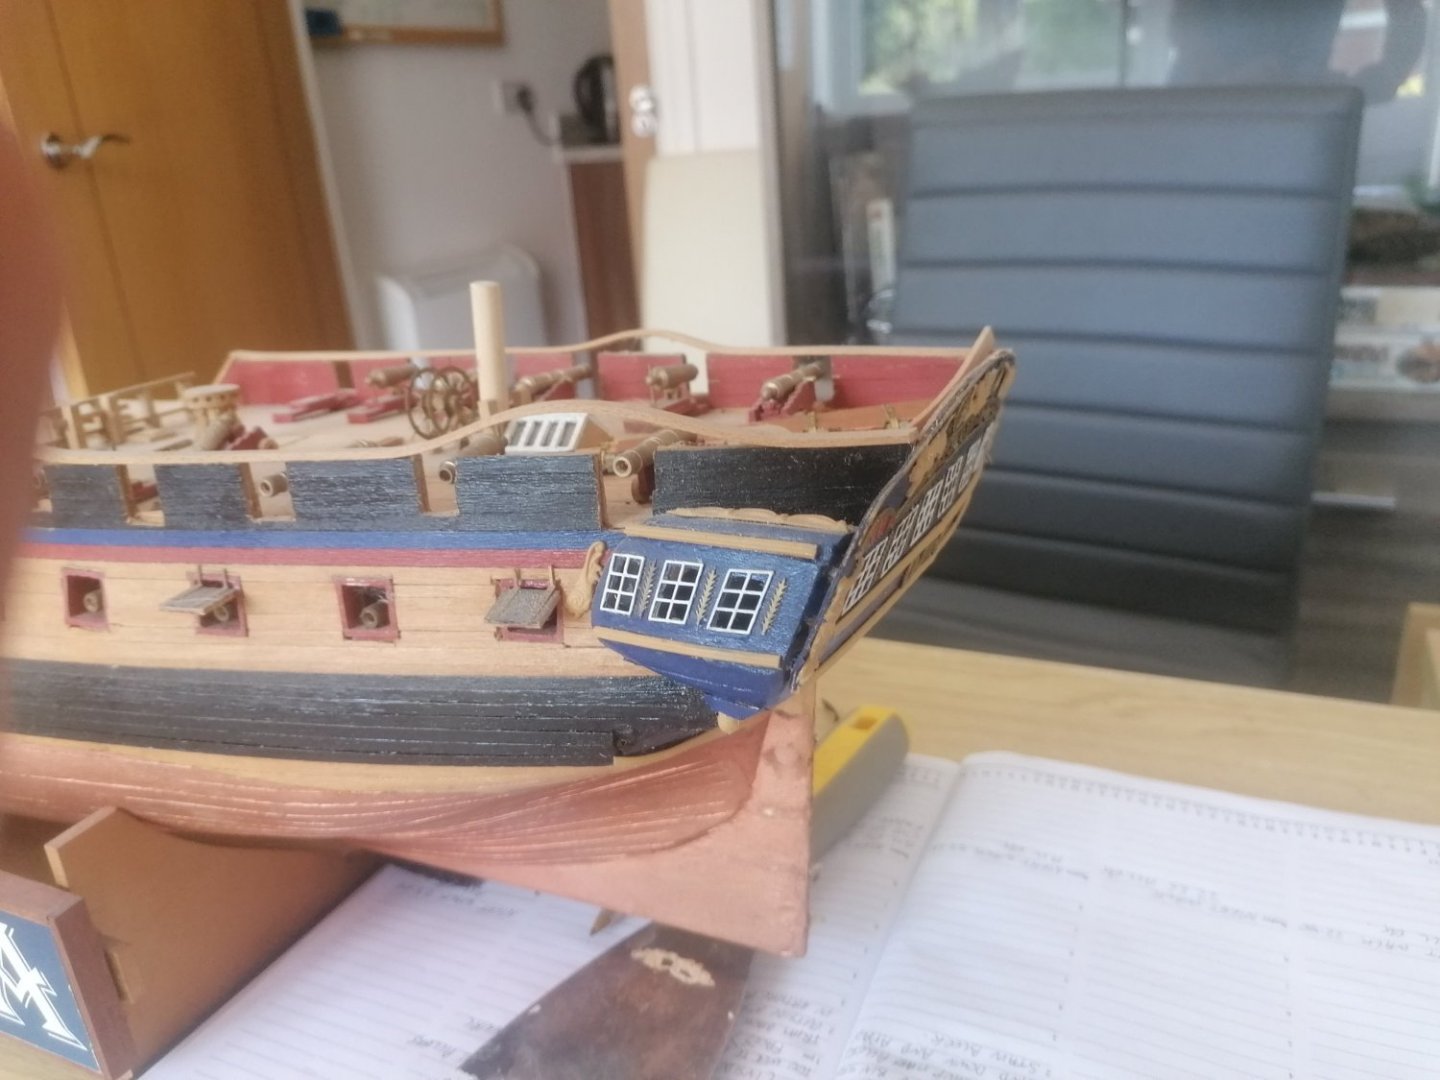
Well, I'm back from the holiday and back to sanding down the hull again. Having started back on the stern I realised that the gaps between the filler blocks (below the frames) were preventing me to shape the hull properly, I decided to use filler and, once dry, I could continue sanding. In the meantime it was back to reducing the size of the cascabeles, which are now half done for the 18lb'ers. Since then I have sanded the hull further and,I think, I have achieved the shape beneath the stern counter required. However, I have also sanded a little too much off the sides where the wale will meet the stern counter, and, also lost a little of the shapes of parts 27, the stern counter sides, Some advice is requested at this point as I don't want to risk making it any worse. I have looked at so many photos and I'm not sure whether to leave it as it is for now and concentrate on sanding the rest of the hull, and then see what to do afterwards, or, sand this section a little more to round it off a little more. The hull needs to be sanded off by about 1mm all over so the shape at thr stern may not be quite as noticable. Any help here would be greatly appreciated. David.

-
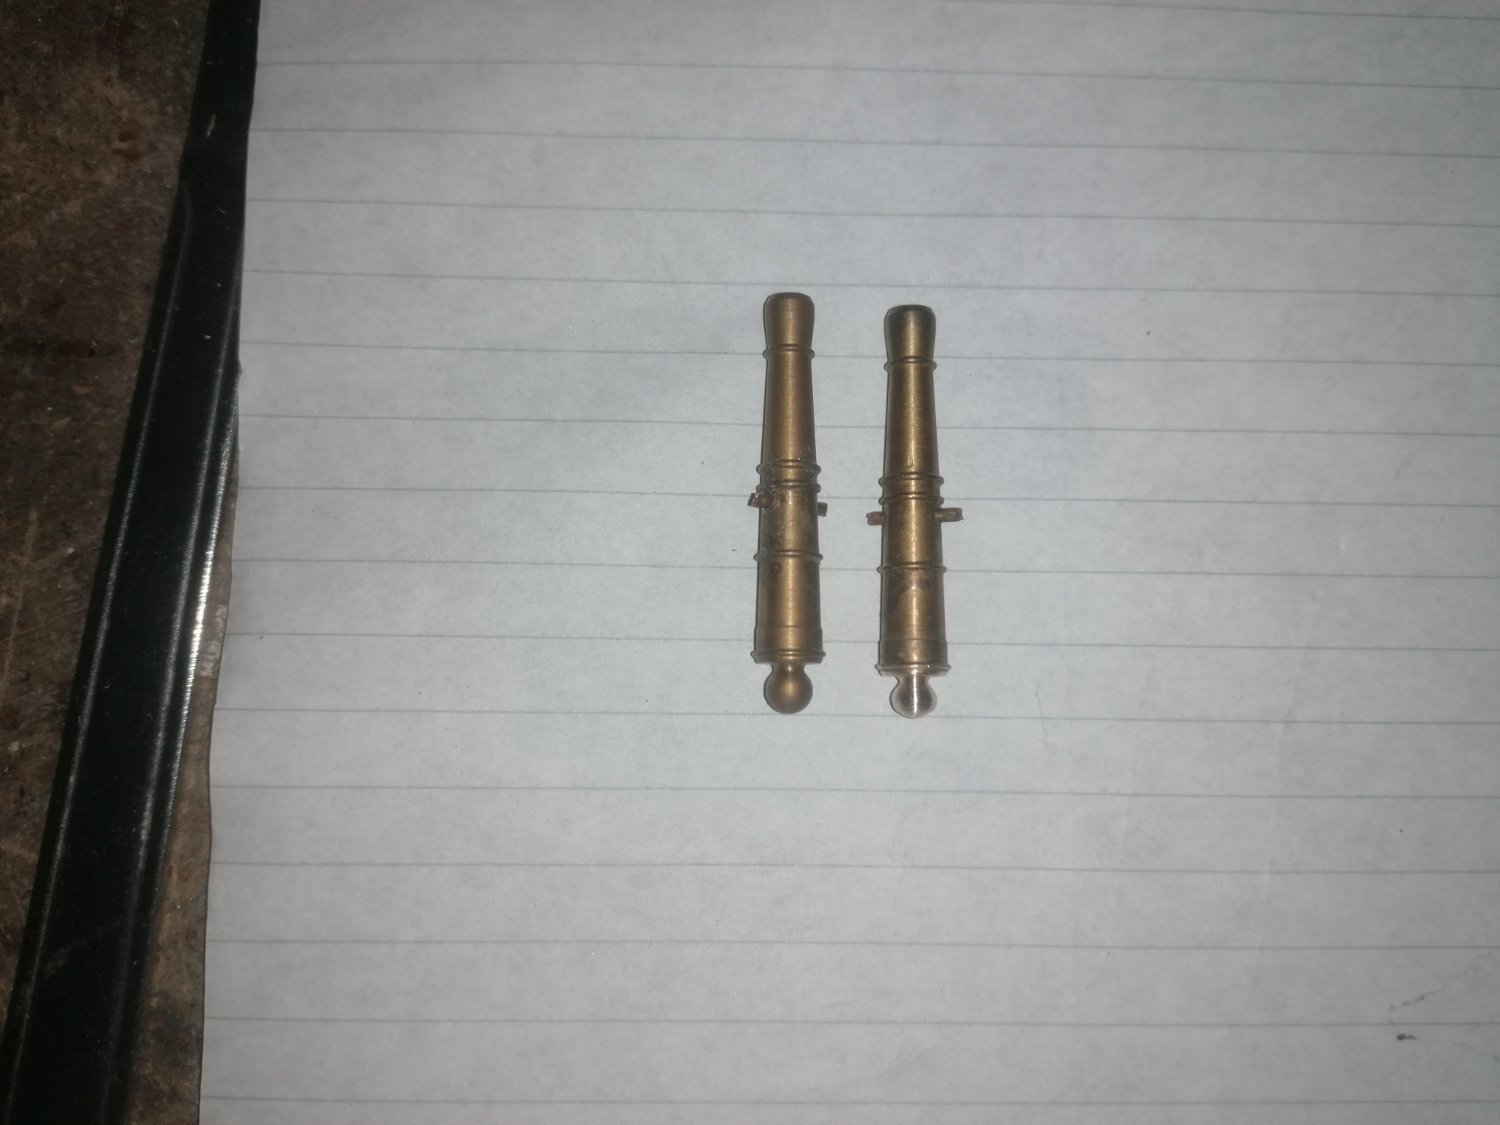
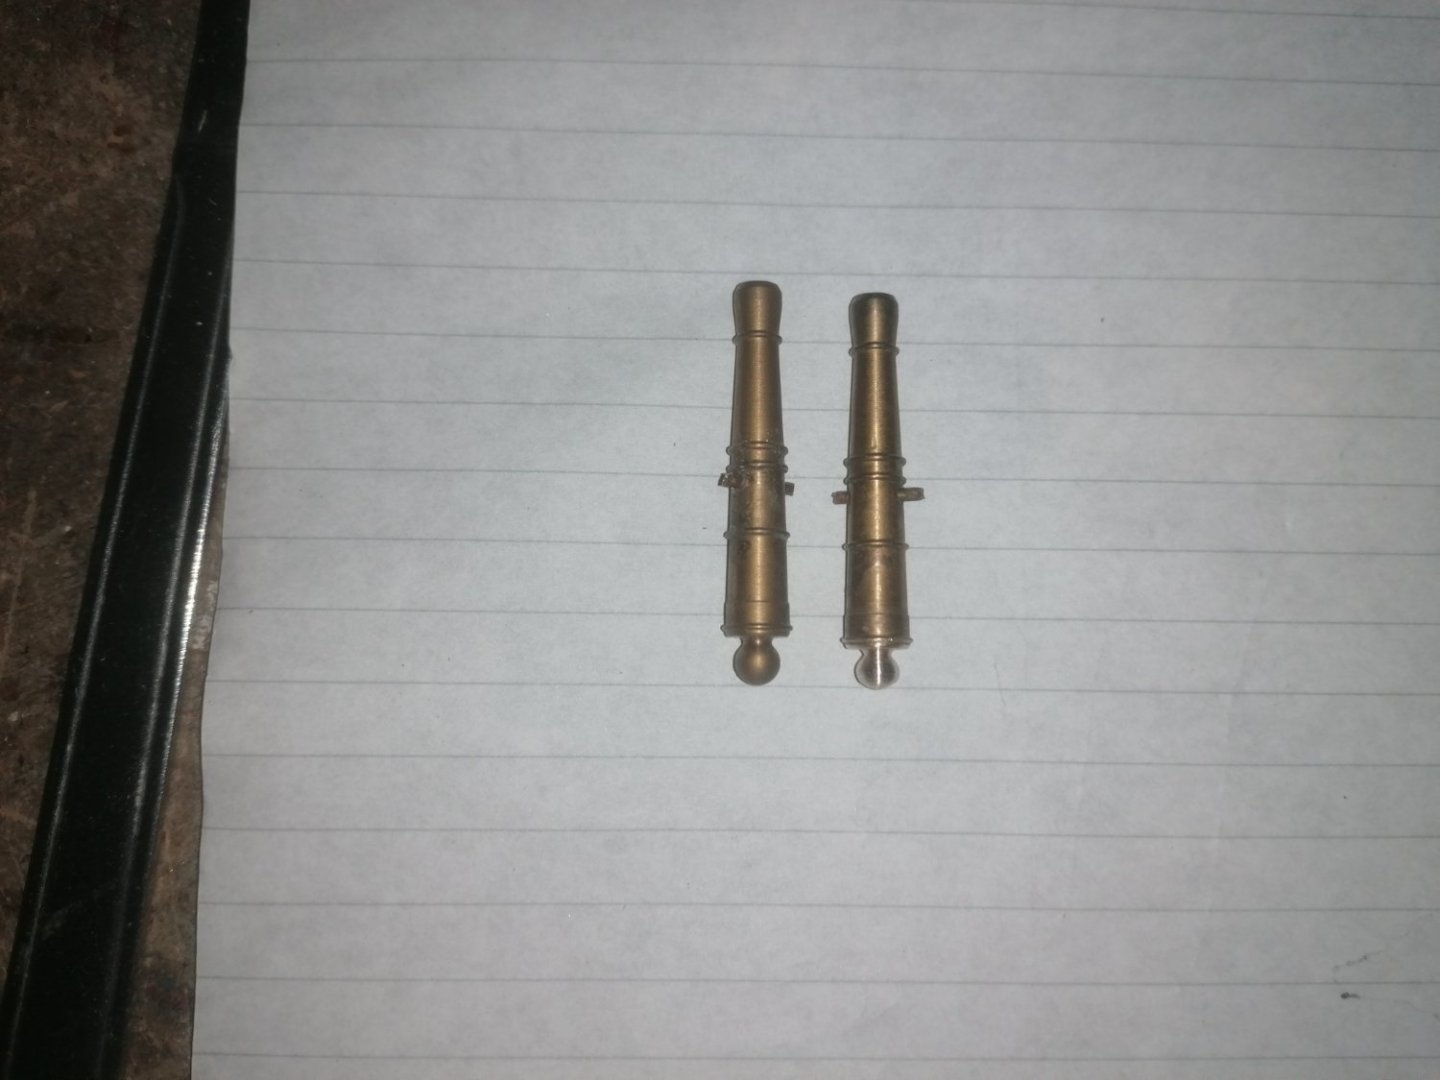
Thanks very much for the info Allan. I was wondering if that was the case. I did mean the carraiges. The Vanguard ones definately look very good and 1000 per cent better than I could achieve and at an affordable price. I must admit the cannons themselves also look great but are way over my budget combined with the carraiges. I am sticking, for now with filing down the cascabel's on the visible 18lb guns and leaving the rest as they are. I think I have found a quicker way of sanding these down, combining a sanding disc fitted to my table saw/sander and mounting the cannon barrel in a cordless drill. It's not only quicker but also gives me a better shape ie not lop sided. This should mean I am able to have all the barrels finished in a few evenings rather than weeks.
-
I am afraid, after getting a decent amount done the weekend before last, things have slowed down a lot. I have done a little more sanding of the hull and also the cascabel's. these are going to take a lot of time maybe an evening for each so will be doing them a couple at a time. I am also on ho;iday for a couple of weeks and need to clear my workshop ready for my relief to take over and have a clear space. I am hoping to do some more research while I'm away although I have been doing this on and off for the last week. I am still worried about getting the shape of the stern correct so, have been hesitating to sand this down too much yet. I have been thinking ahead aswell about changing the stern facia to look more like the RMGC version ( thanks again to Allan for the pics) with rectangular windows and the pillers in between. I have really only thought of doing this as a couple of the photo etch parts are missing, and, on this kit the taff rail was not installed and is still in the box giving me another blank canvas. I also need to read more of the previous build logs as in the stern photos, there are 15 planks either side of the stern post. I have a length of 6cm either side so 4mm planks would fit better than 5mm unless I need to reduce from 5 to 4mm closer to the stern. Once I am happy with the shape I wull experiment with this. I have tried making my own gun trucks in the past but have always given up as I have never been happy with the look of them. This time I am not going to try and will buy the Vanguard ones. At least they will be identical as well as looking very good. The next update will probably be around 3 weeks from now and I am planning on concentrating on the gunports and cannons before building up the hull where it is uneven (especially between the gunports.) I have also given more thought to your question Theodosius and I think, workwise it is probably slightly harder due to not knowing for sure how well she has been constructed but she is certainly strongly built. Removing all the gratings and what fittings there were was pretty easy and apart from sanding and shaping most will be ok to glue back on. The cannons and trucks I would probably have done what I am planning along with replacing a lot of the timber anyway. Time wise it will take longer to complete the hull than if I had started from the beginning but time, I hope, is something I still have a decent amount of combined with what I am learning. If nothing else I will have learned a lot of correct terms of the fittings and ropes. Until now I'd never heard of a chain pump, never mind what it did so the time spent will be very worthwhile to me. Anyway I will return to this in a few weeks. Take care all. David.
-
Thanks for dropping by Theodosius, the answer at the moment is. I'm not sure. There's maybe more work involved with rectifying mistakes but the basic shape is there. The proof will be if I can sand down each side of the hull without thinning it too much. If I can complete this build at 1/2 the price of the kit I will be well happy. I have a lot of blocks from 1/80 scale that looked way too large but at this scale should be ok. The same with the many reels of rigging thread. I have never tried de fluffing them before but am happy giving this a go this time around. We will see.
-
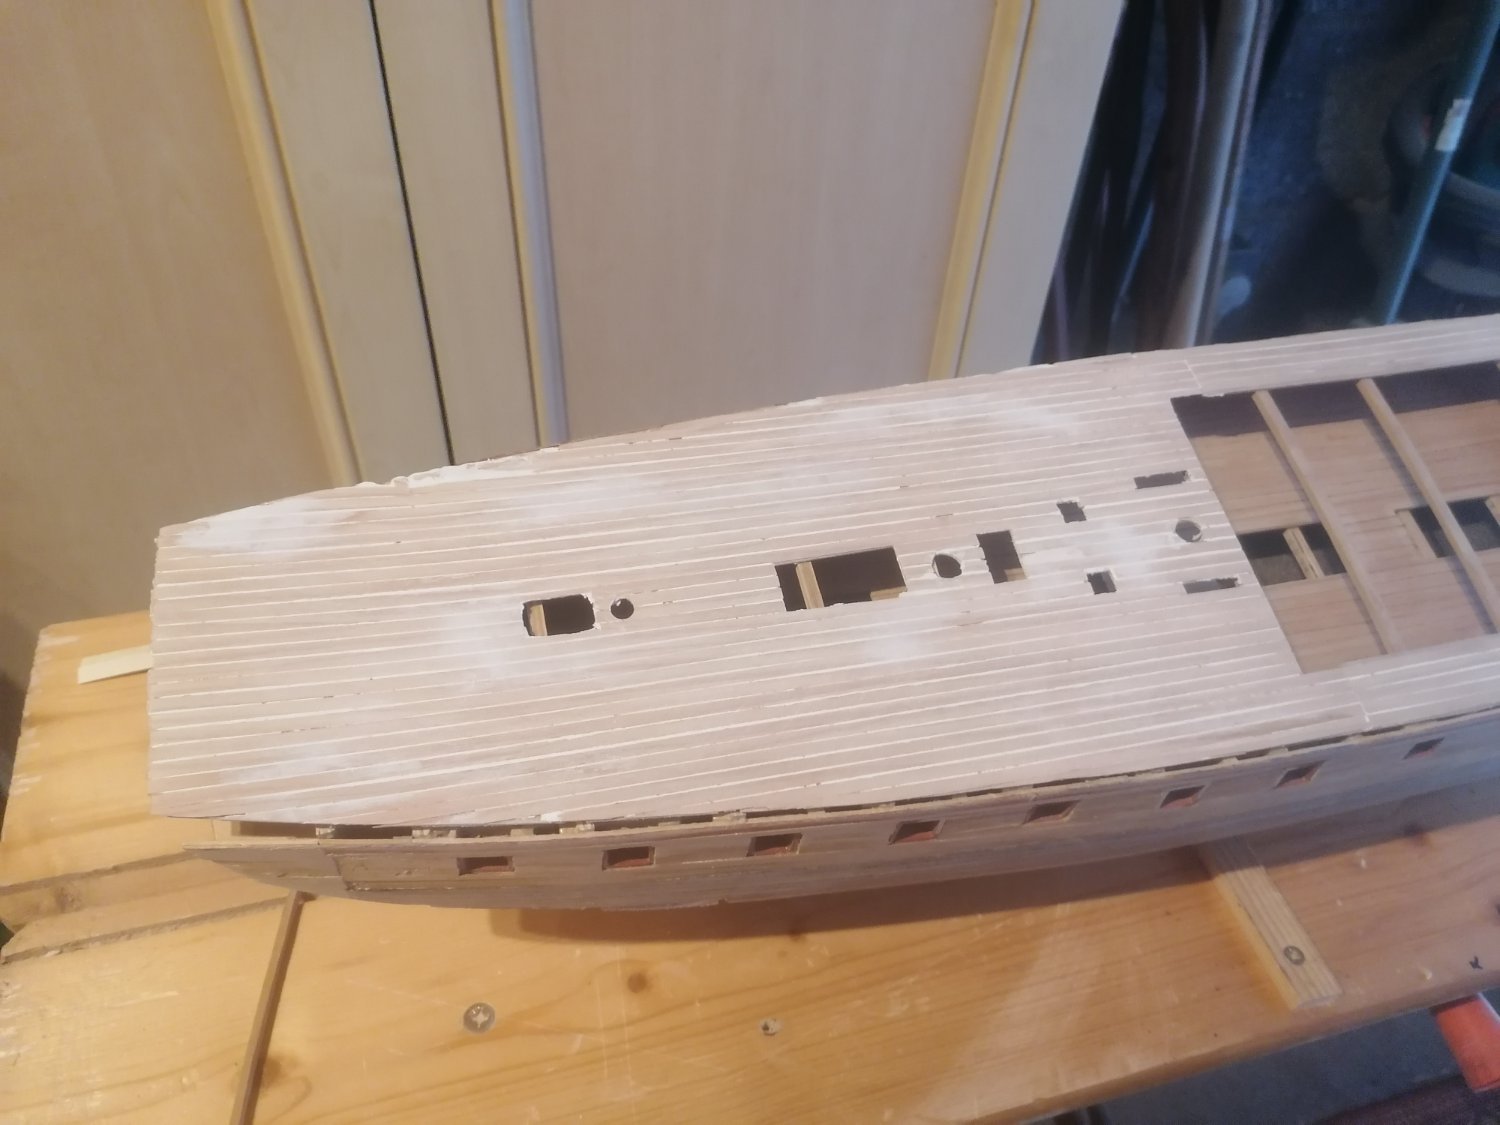
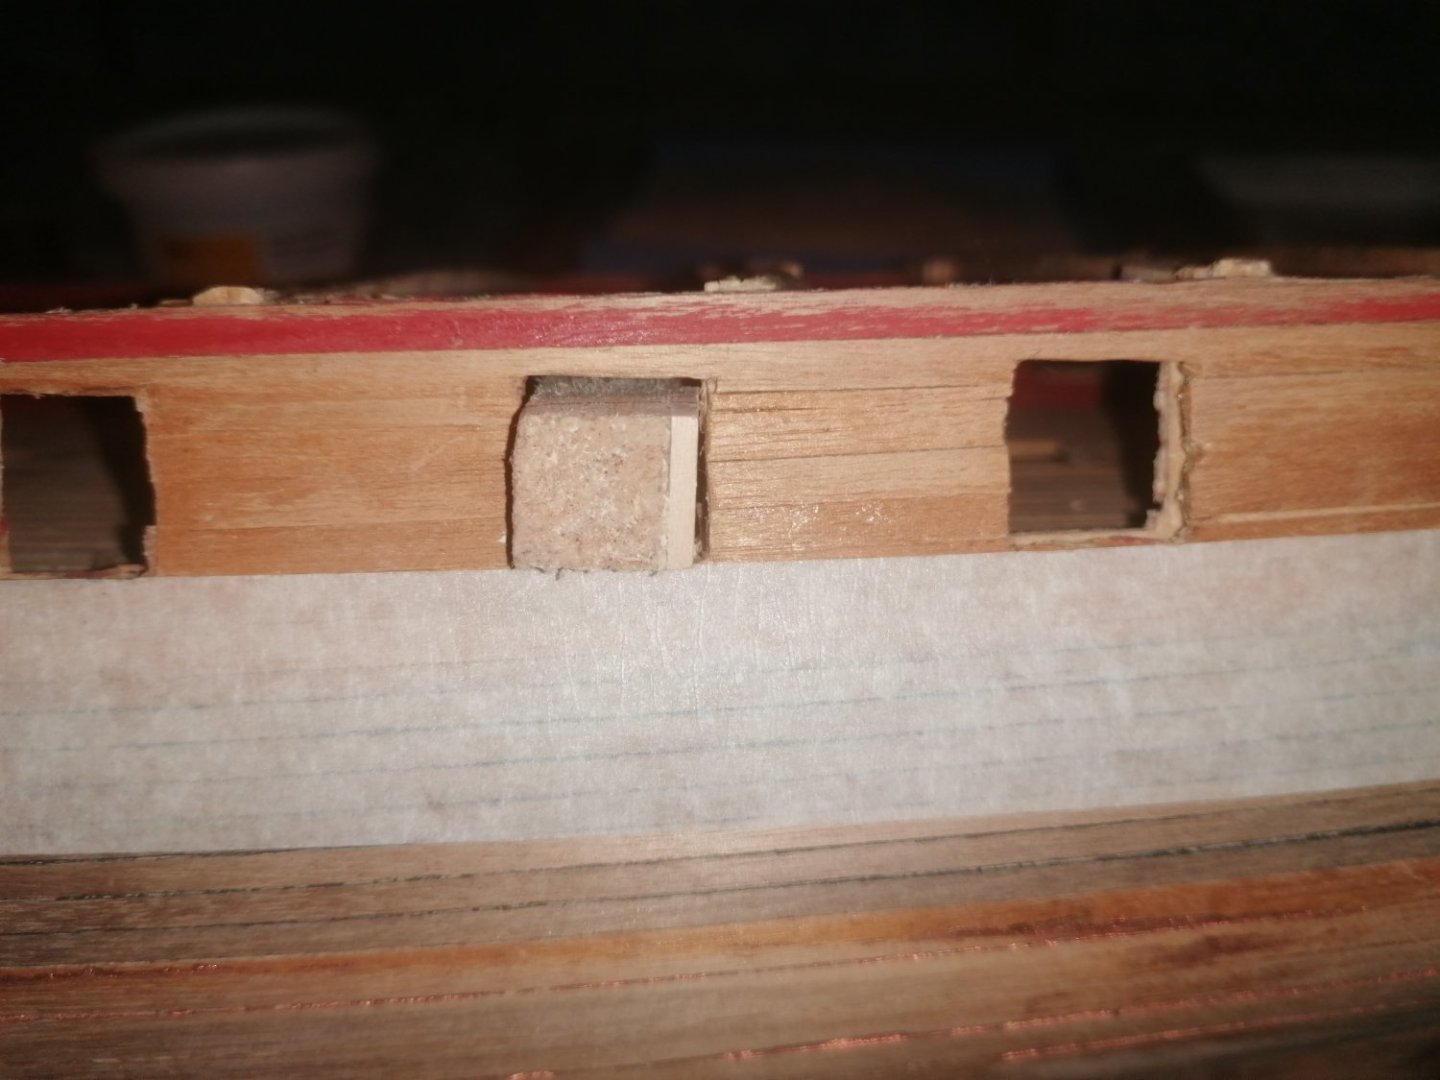
Just a quick update. I've removed the inner planking around gunports 1 & 2 and have managed to build them back up on the port side. Whilst starting on the starboard I was thinking about the rest of the work I will need to do and decided to start planning things out better. I want to sand the hull completely but the gunports need to be finished first. I want to paint the inner hull but ditto. I can't plank the gun deck until the bulwarks are painted etc. I now have a list of 8 steps that need to be done before the main hull is shaped. 1 shape and line gunports. 2 build up gap between the main deck section and the hull. Approx 2x2mm. 3 sand and paint inner hull. 4 plank the gun deck. 5 add all fittings to the gun deck sides. 6 sand down the hull ready for final planking. I need to ensure that both sides are identical.!!! 7 remake or buy 18lb gun carriages and rig the visible cannons but leave loose. 8 add all the deck furniture Where I cut away below the main deck section, there is now a 2mm gap to be filled. The planking is less than 2.5 mm wide so I am thinking to run a 2x3mm balsa strip along the top of the hull, pin the main deck in place and then add another strip of balsa on top. The sides can be sanded down with the hull and the top sanded when the main deck is fitted in place. I am afraid, given my starting point, I am going to improvise (cheat) and build up the upper hull above the foc'stle and quarter deck with strips rather than planking. I am hoping to still use the cannons supplied as, having experimented with 1, I think I can reduce the size of the cascabel to a more accurate one. All in all I'm guessing it's about 2 months of spare time altogether though possibly more. I have made a crude looking 16mmx14mm guide for the gunports so they can be shaped properly. The sides of gunports 1 will also need bevelled to accommodate the guns.

-
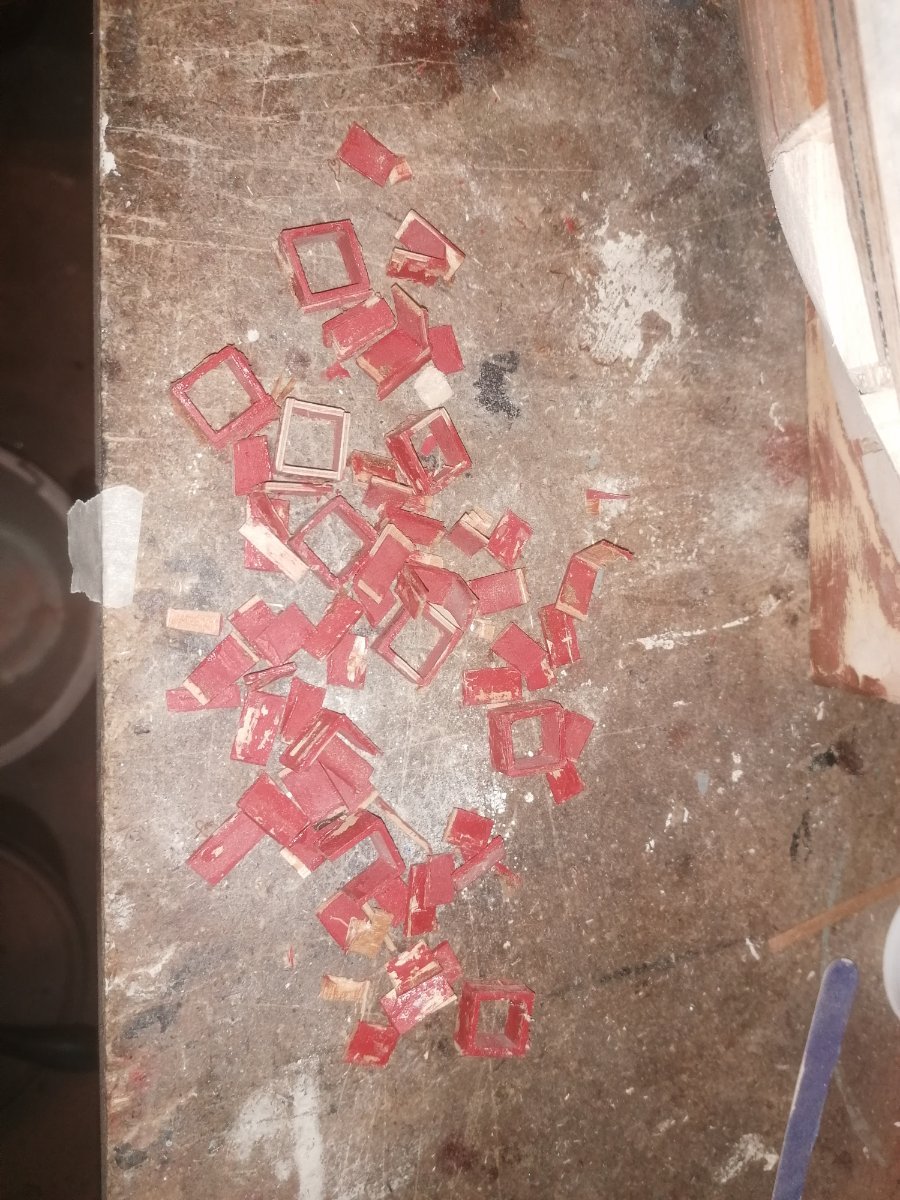
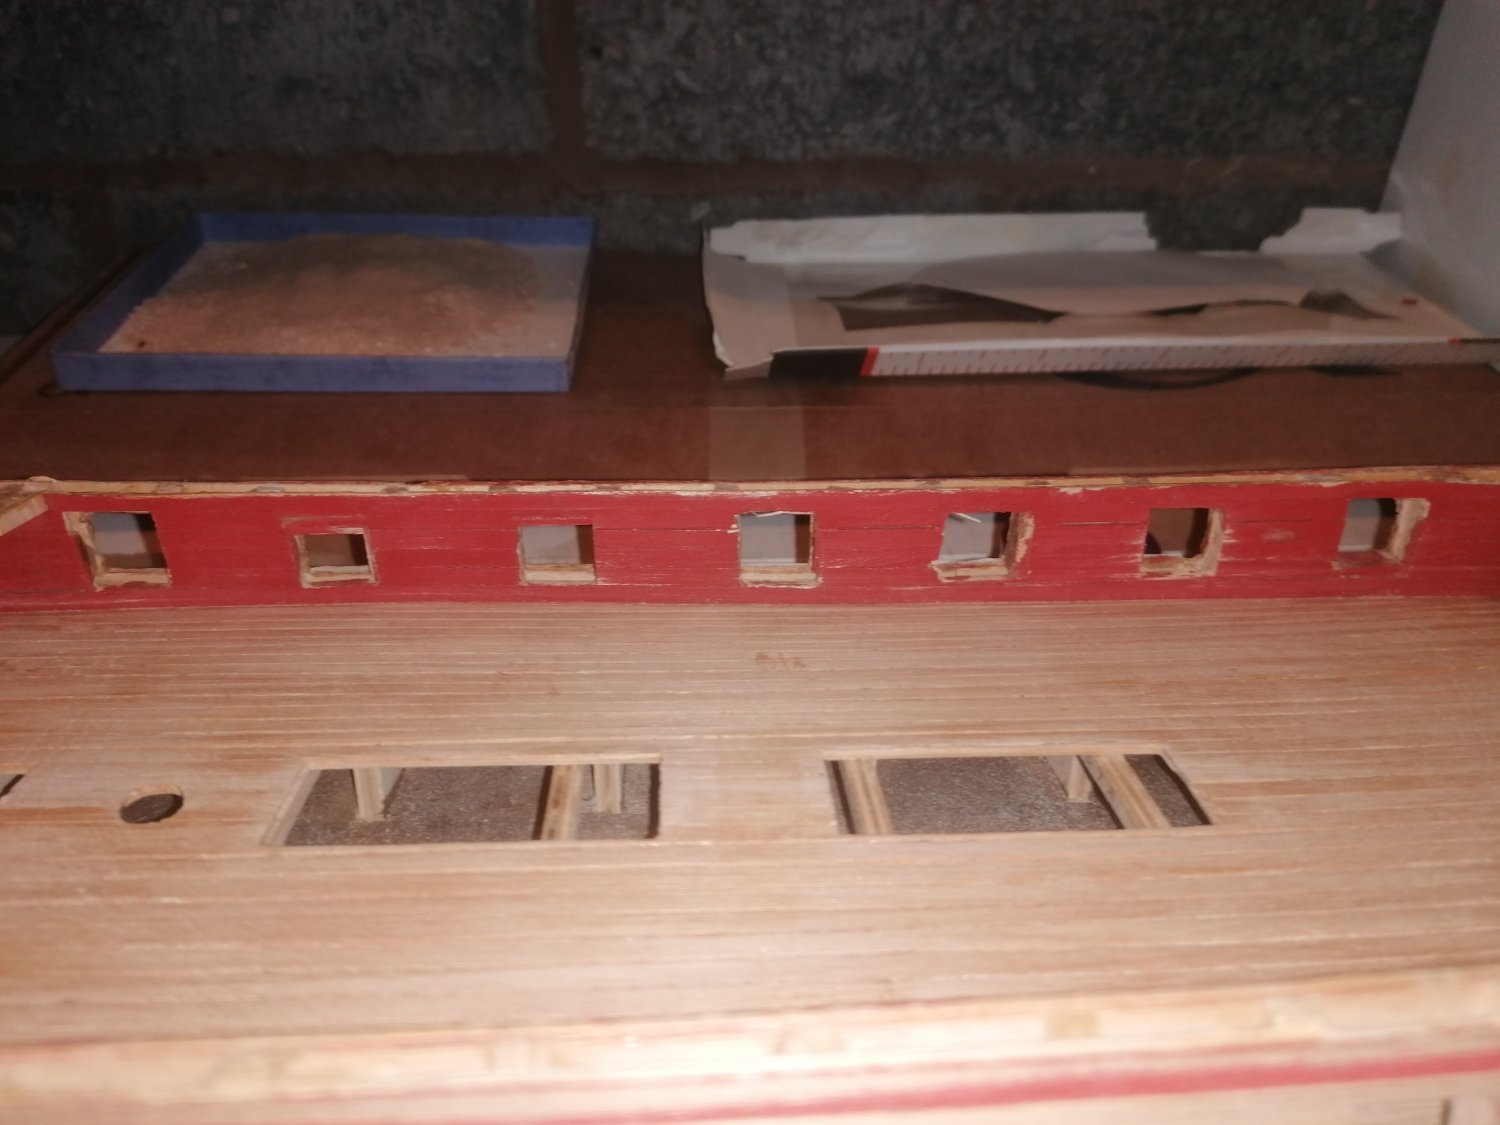
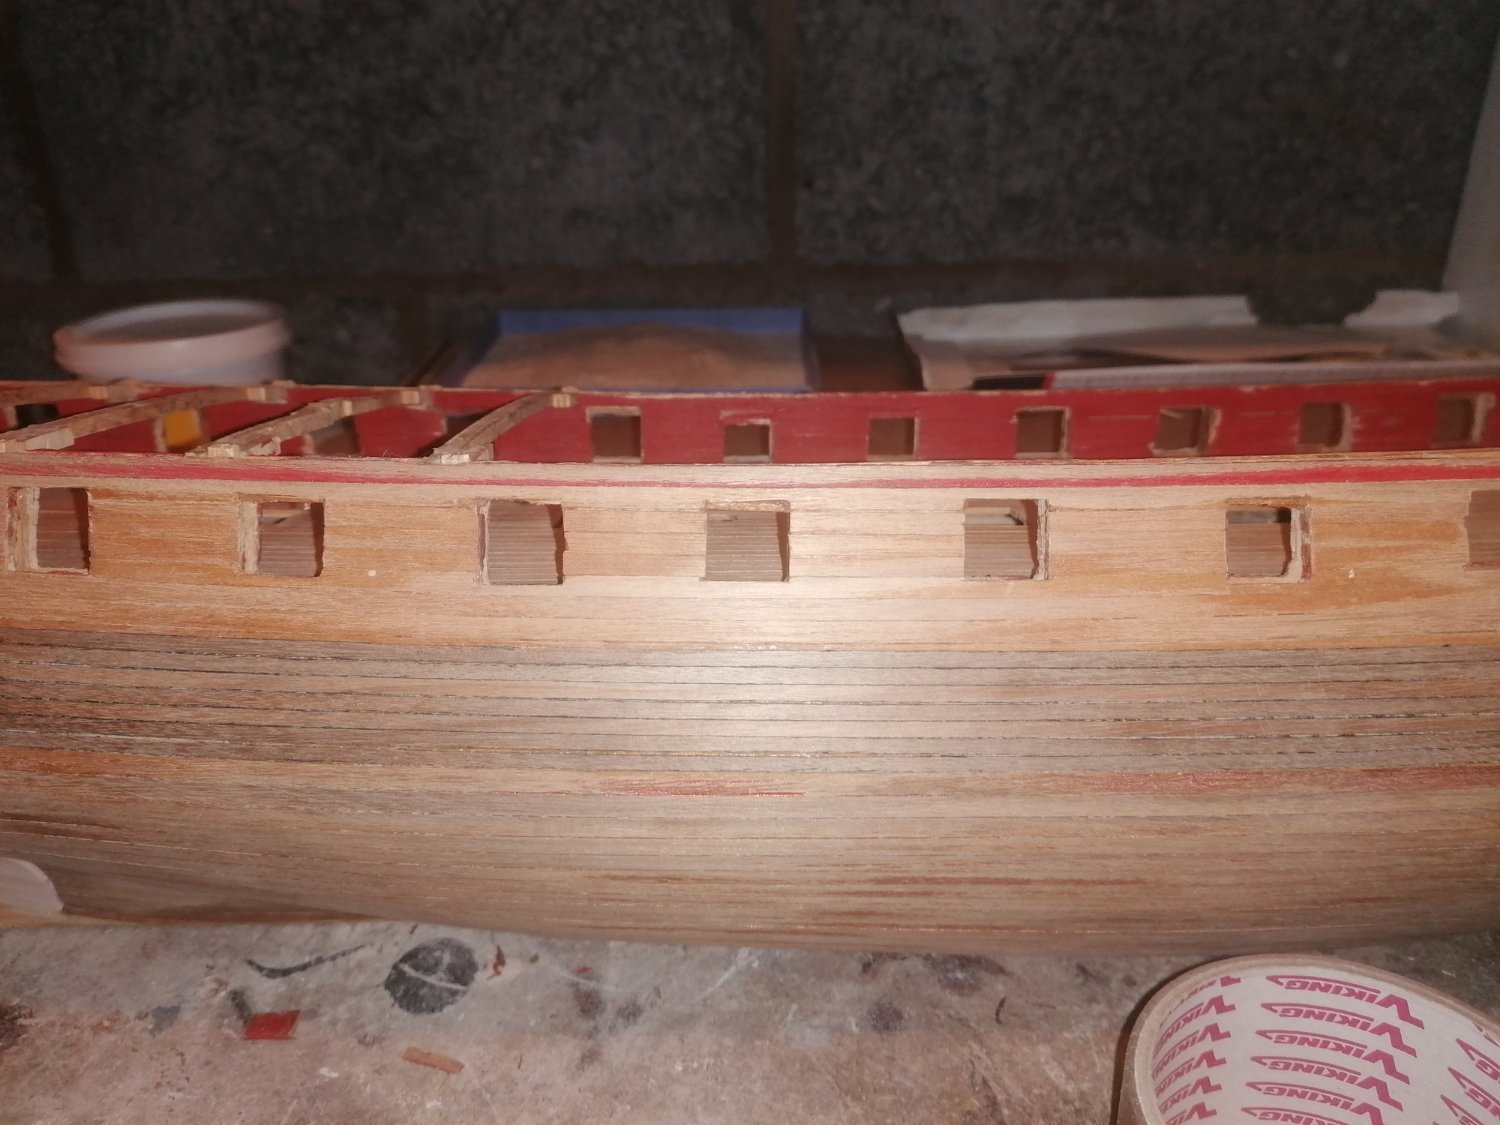
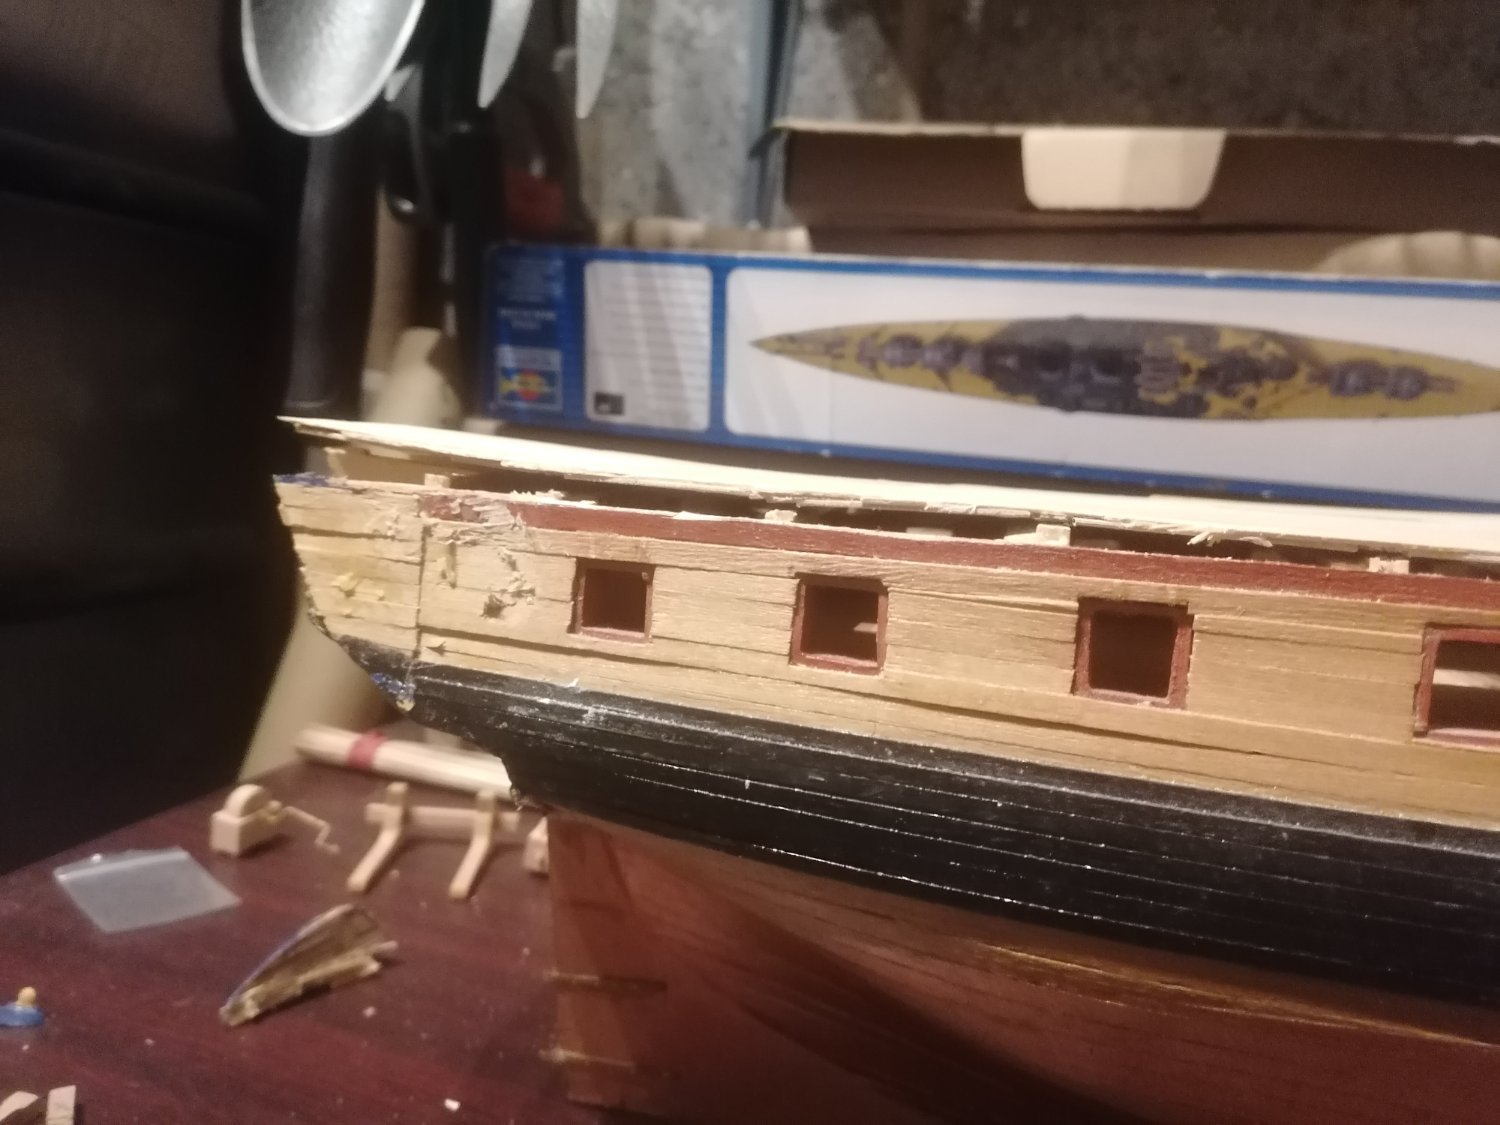
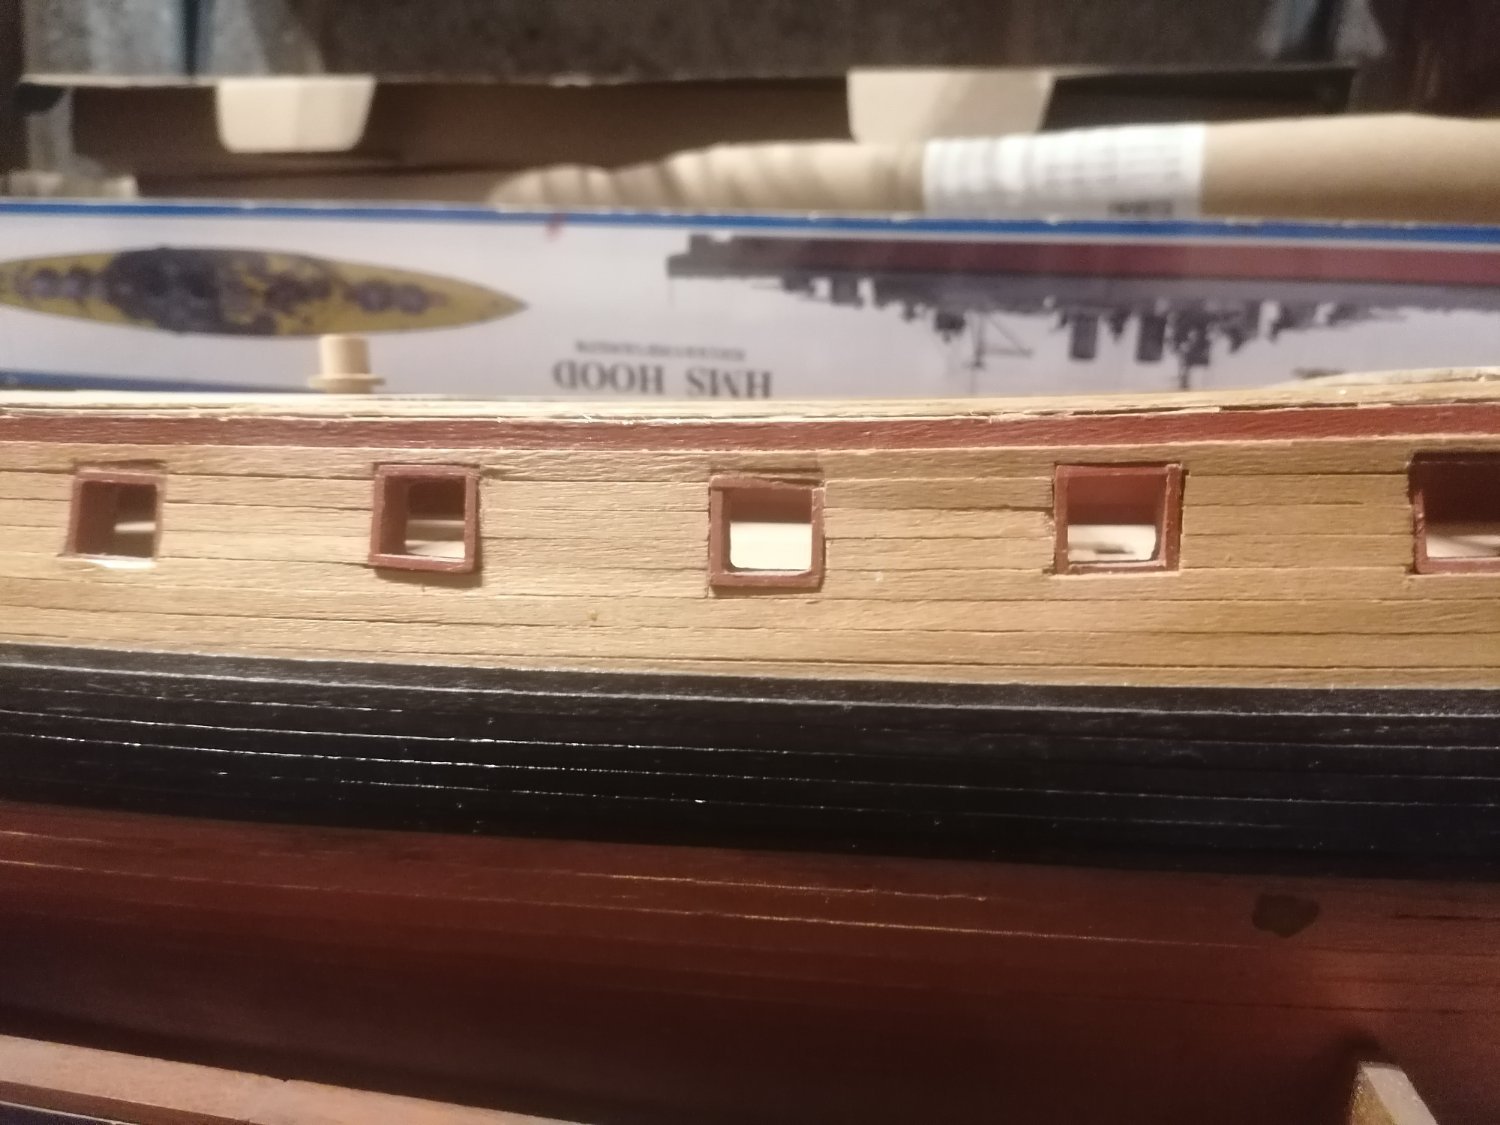
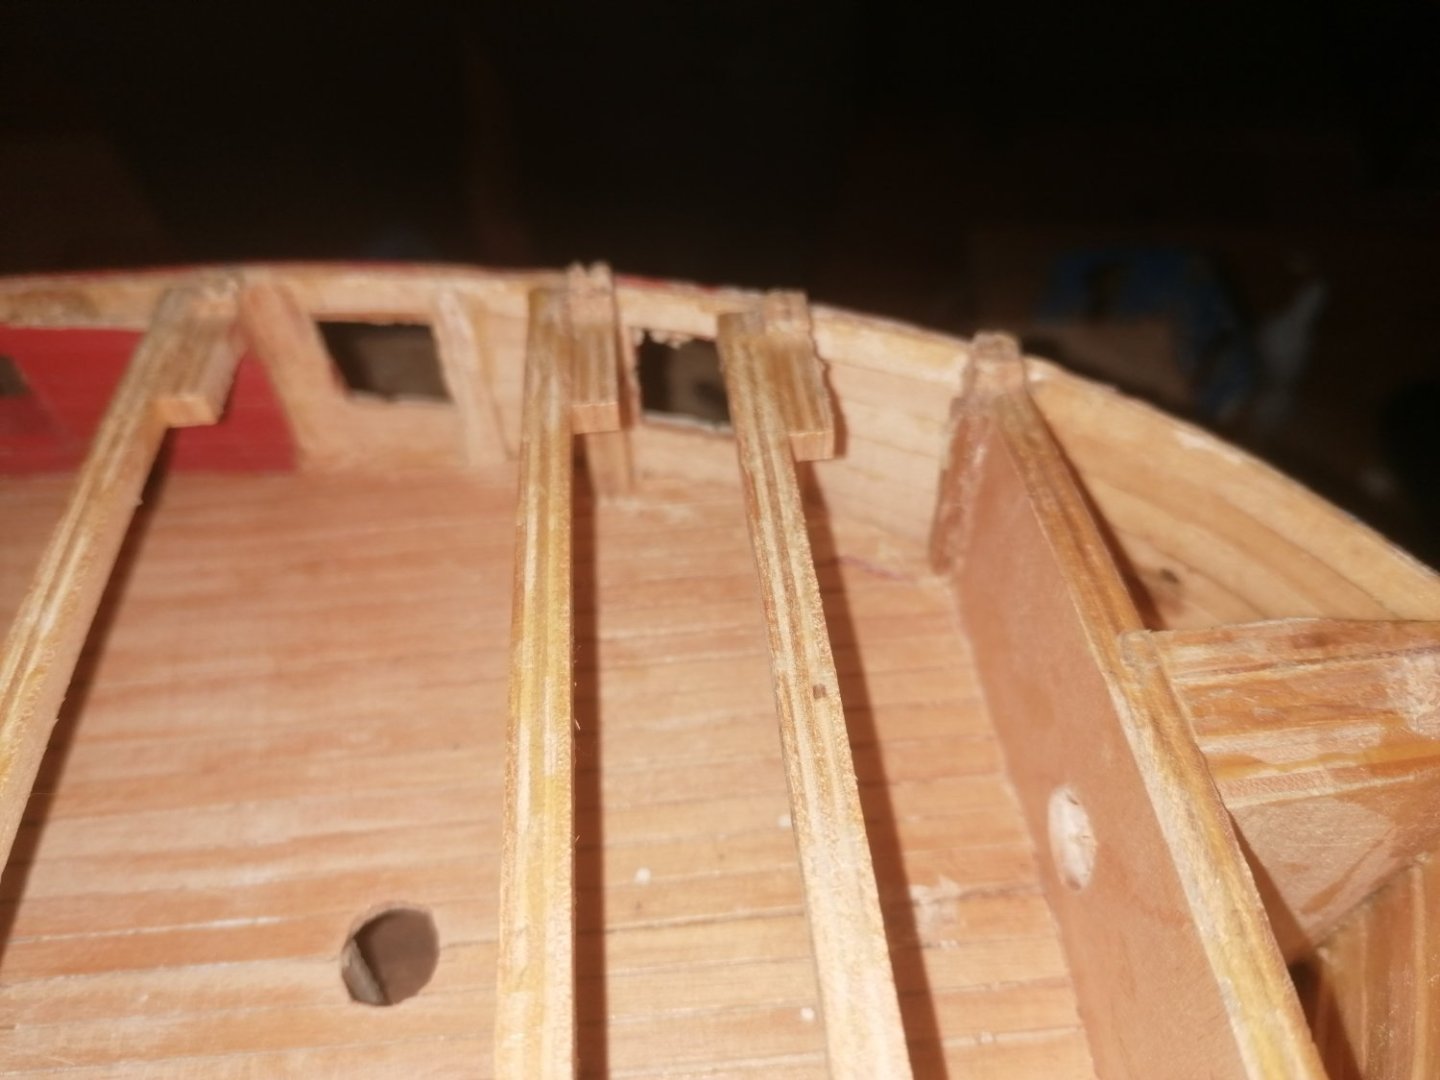
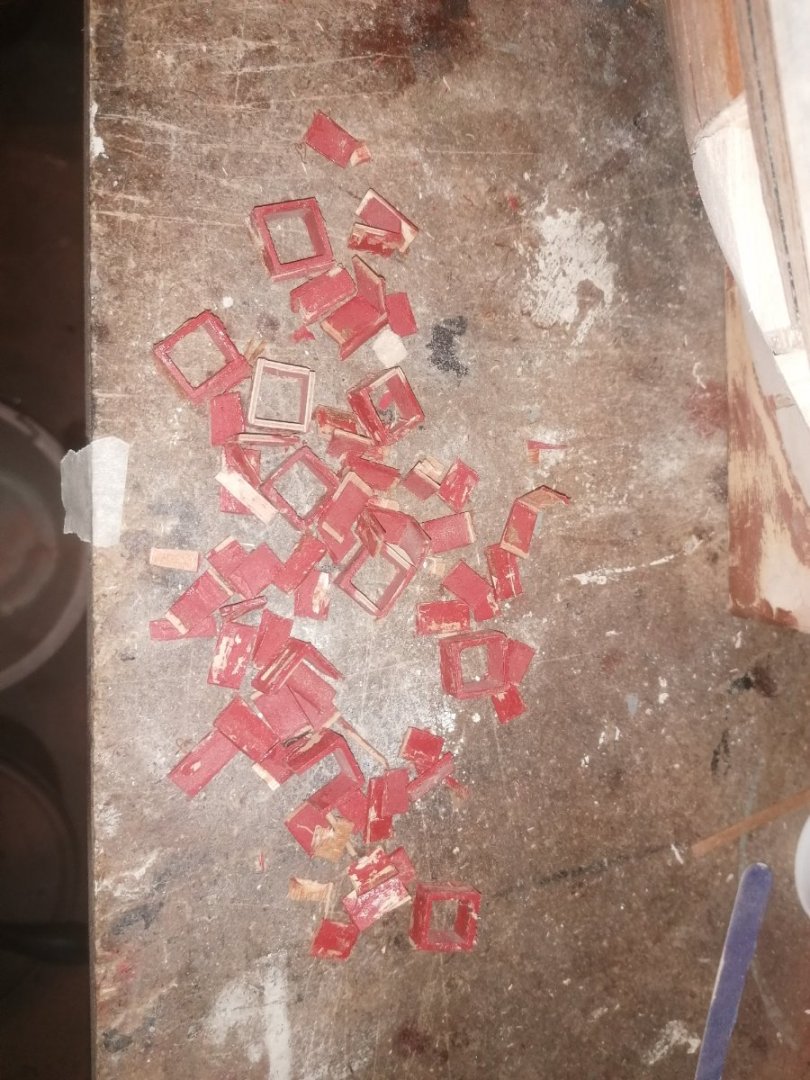
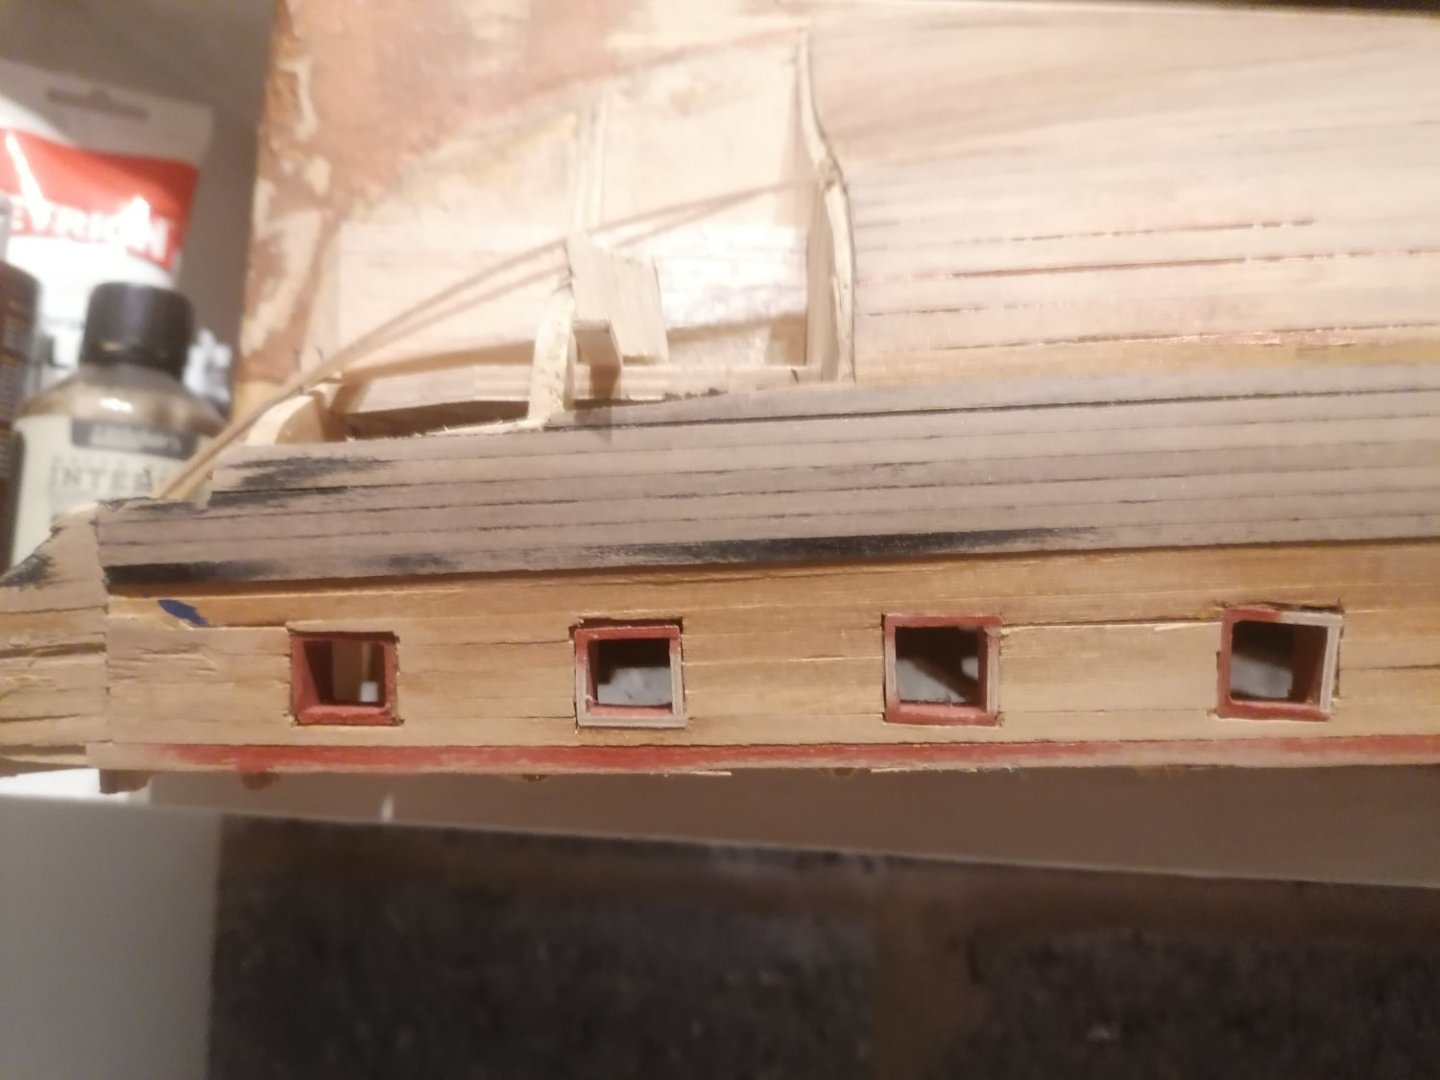
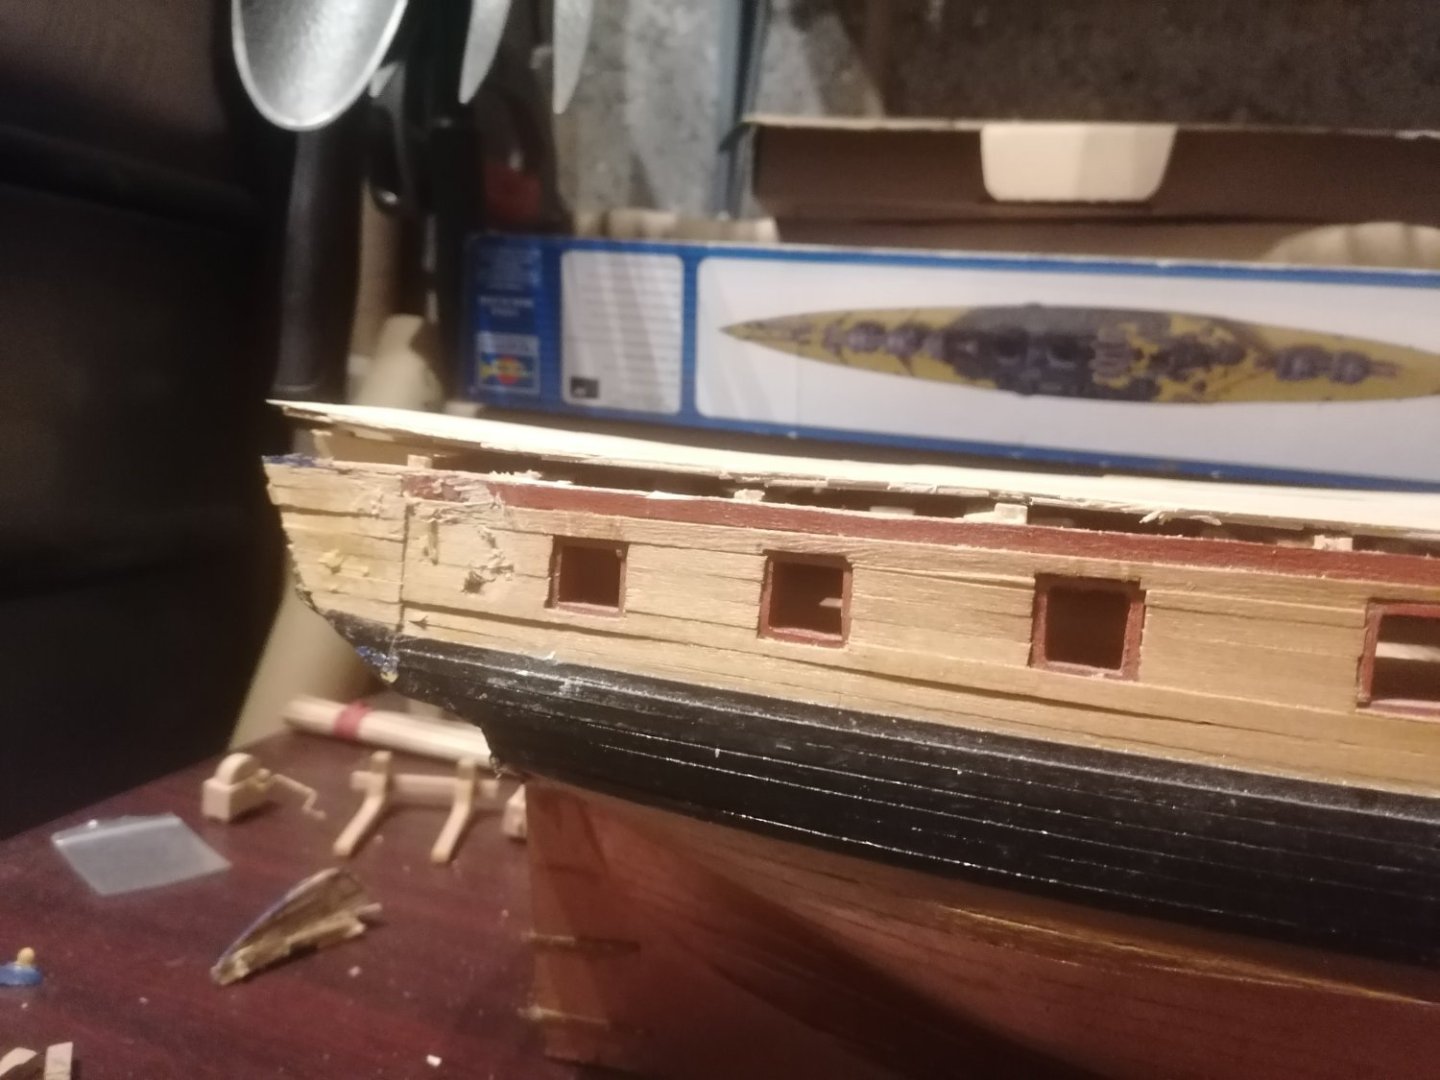
Tonight I took break from sanding the stern and looked at the gunports. These I knew weren't all level nor the correct size. Before I can fill out the ships sides the gun ports will need to be completed. Now I've opened up another can of worms. Most of the ports came out quite easily and some not so. The inner stern planking came away but out of sight luckily. The thickness of the gun ports varies from 6 or 7 mm up to 10mm at the bow. The inner planking runs up to frame 2 but the frames weren't bevelled for them to bend to the correct shape. This means there's too large a gap between the inner and outer planking. Also the starboard side doesn't run straight as there is a definate sag towards the centre line, which I had already realised. This will also need to be built up. Again not a real problem but definately a hiccup. As the inner planking at the bow will not be visible I am thinking of cutting it away from the fore side of the 2nd gun port and building up the inner planking to the correct width. The gunports themselves should be easy enough to get to the right sizes with the addition of of extra strips of timber, but more fiddly work on top of everything else. I have also changed my mind to replanking the hull from 0.5mm to 1mm, which I hope will give a little more wriggle room for shaping the rest of the hull. I also have a lot of red painted match wood, LOL.


-
I have just seen your unicorn log Tim. I see what you mean now. I think it will take me longer to complete my hull as I have so much sanding and correcting before I can replank it. I already have a softish patch on the starboard bow so will have concentrate on matching the port side. At least your hull is un planked whereas mine has benn but I've no idea how well or badly. I'm erring on the side of caution at the moment.
-
Thanks for your comments guys. I knew the filler blocks would be essential to be able to contine shaping the hull Allan. I have looked at the photos both from the RMG but also other build logs here. The photos you've added are better than the ones I have found so thank you for those. As you said Dave some excellent workmanship. Unfortunately I think I've left it too late to get to museum standard but am happy to have a decent looking ship at the end. Thanks for your best wishes Tim. I will need to look at your log of the Unicorn. Until I was 50 I never had the space to attempt a wooden ship kit. I also had never thought any existed until a few years earlier. I had made lots of plastic ones over the years and a few balsa planes. I really wish I had started on wooden ships when I was a lot younger. I still need to finnish the President kit. (Rigging still to complete), the second Golden Hind and also this one. Once they are all completed I will see if I am able to build another one. I'm not going to worry too much as I have at least 4 years work ahead of me to complete them all. I am really happy that I over built the filler blocks ad it's giving me a margin now to work with to achieve the right dhape but, even then, it's not an easy shape to create. There are so many photos to look at but I'm still looking for one from exactly the right angle I need. I must admit I didn't appreciate how much I eould have to do to this hull and the list is still growing!!!
-
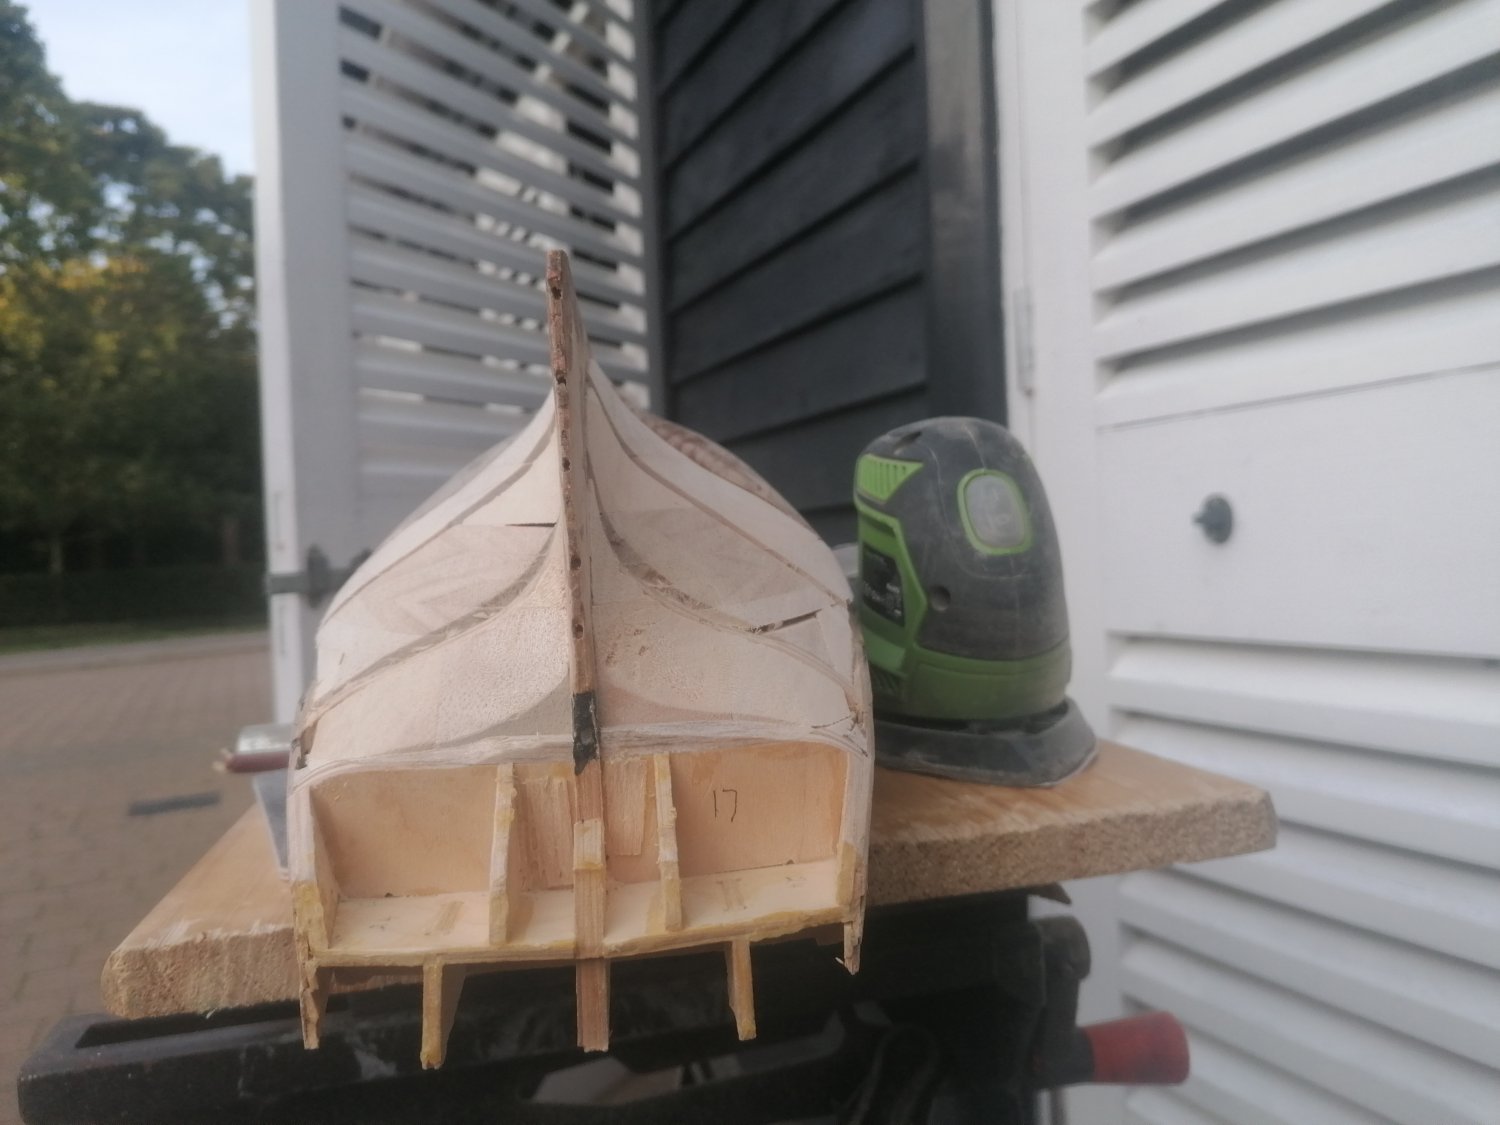
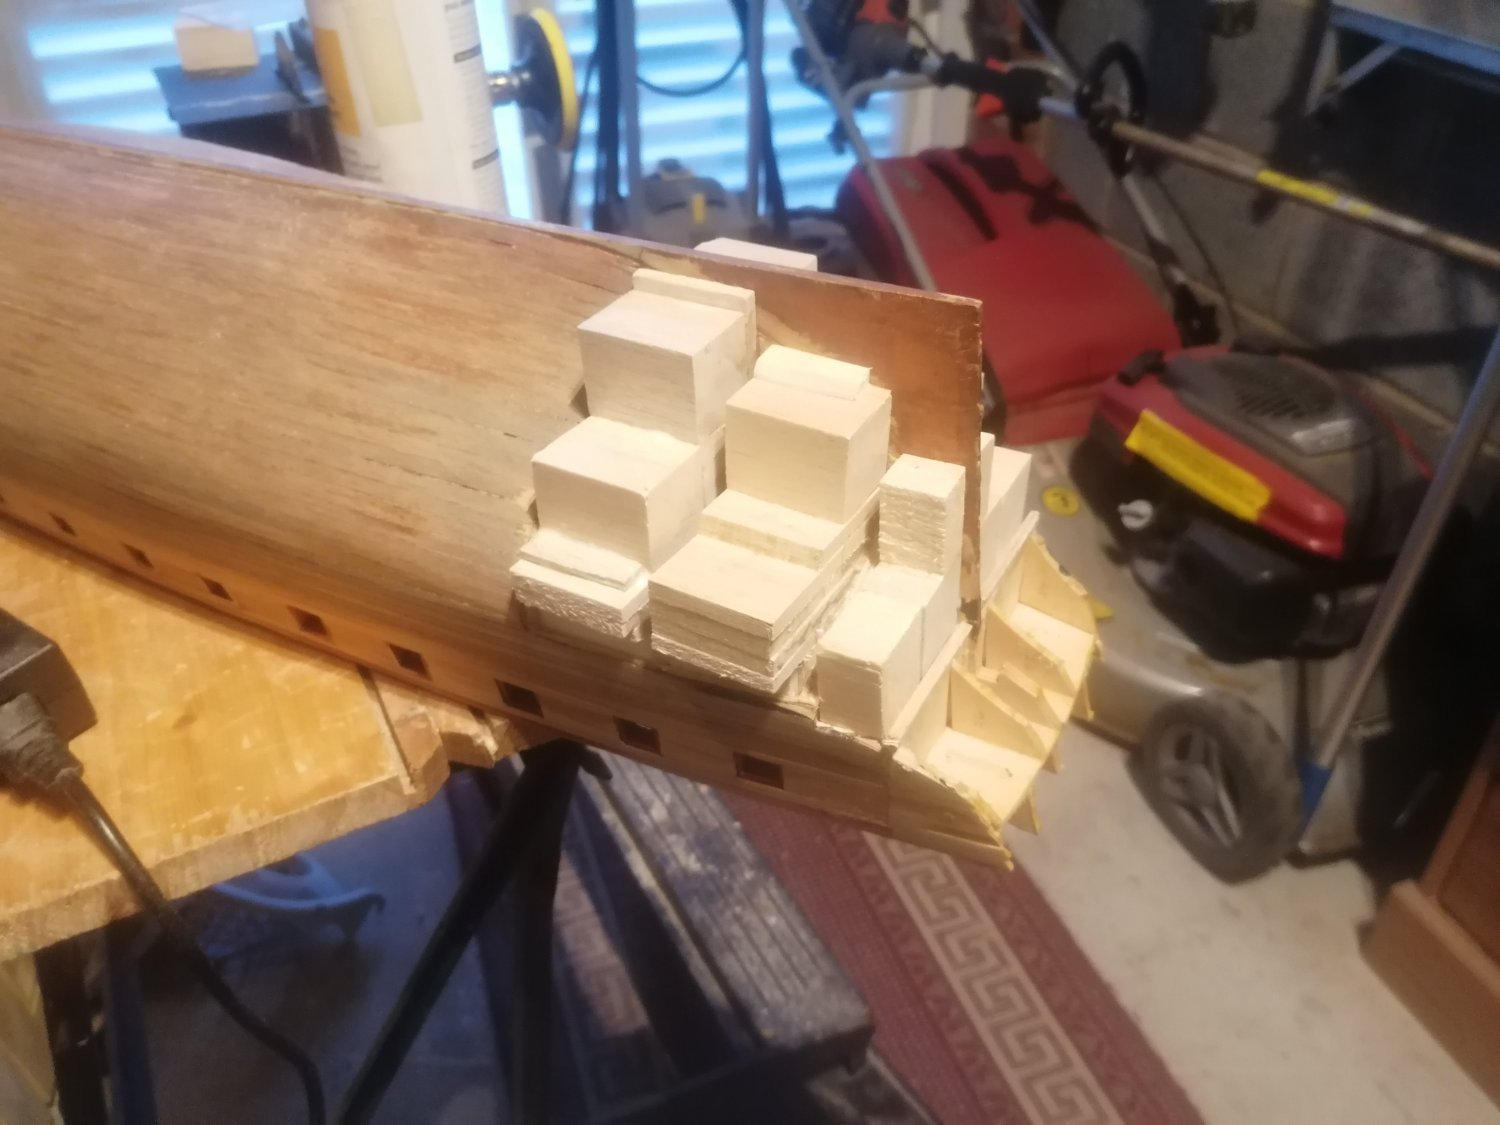
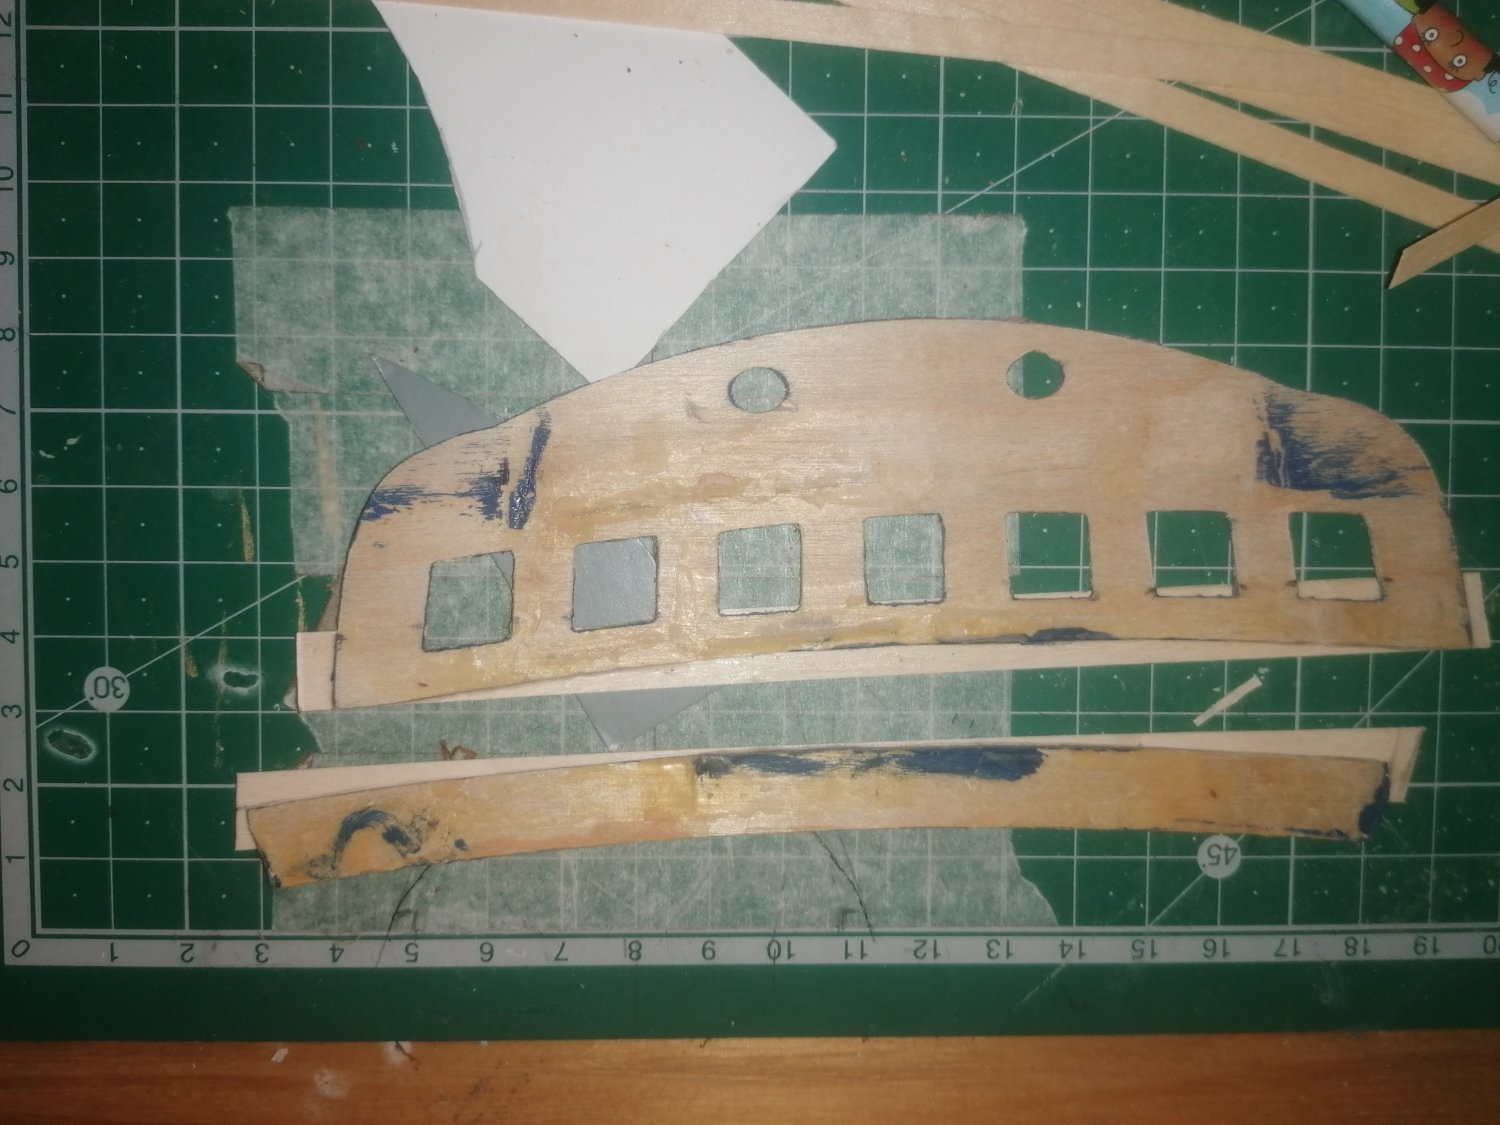
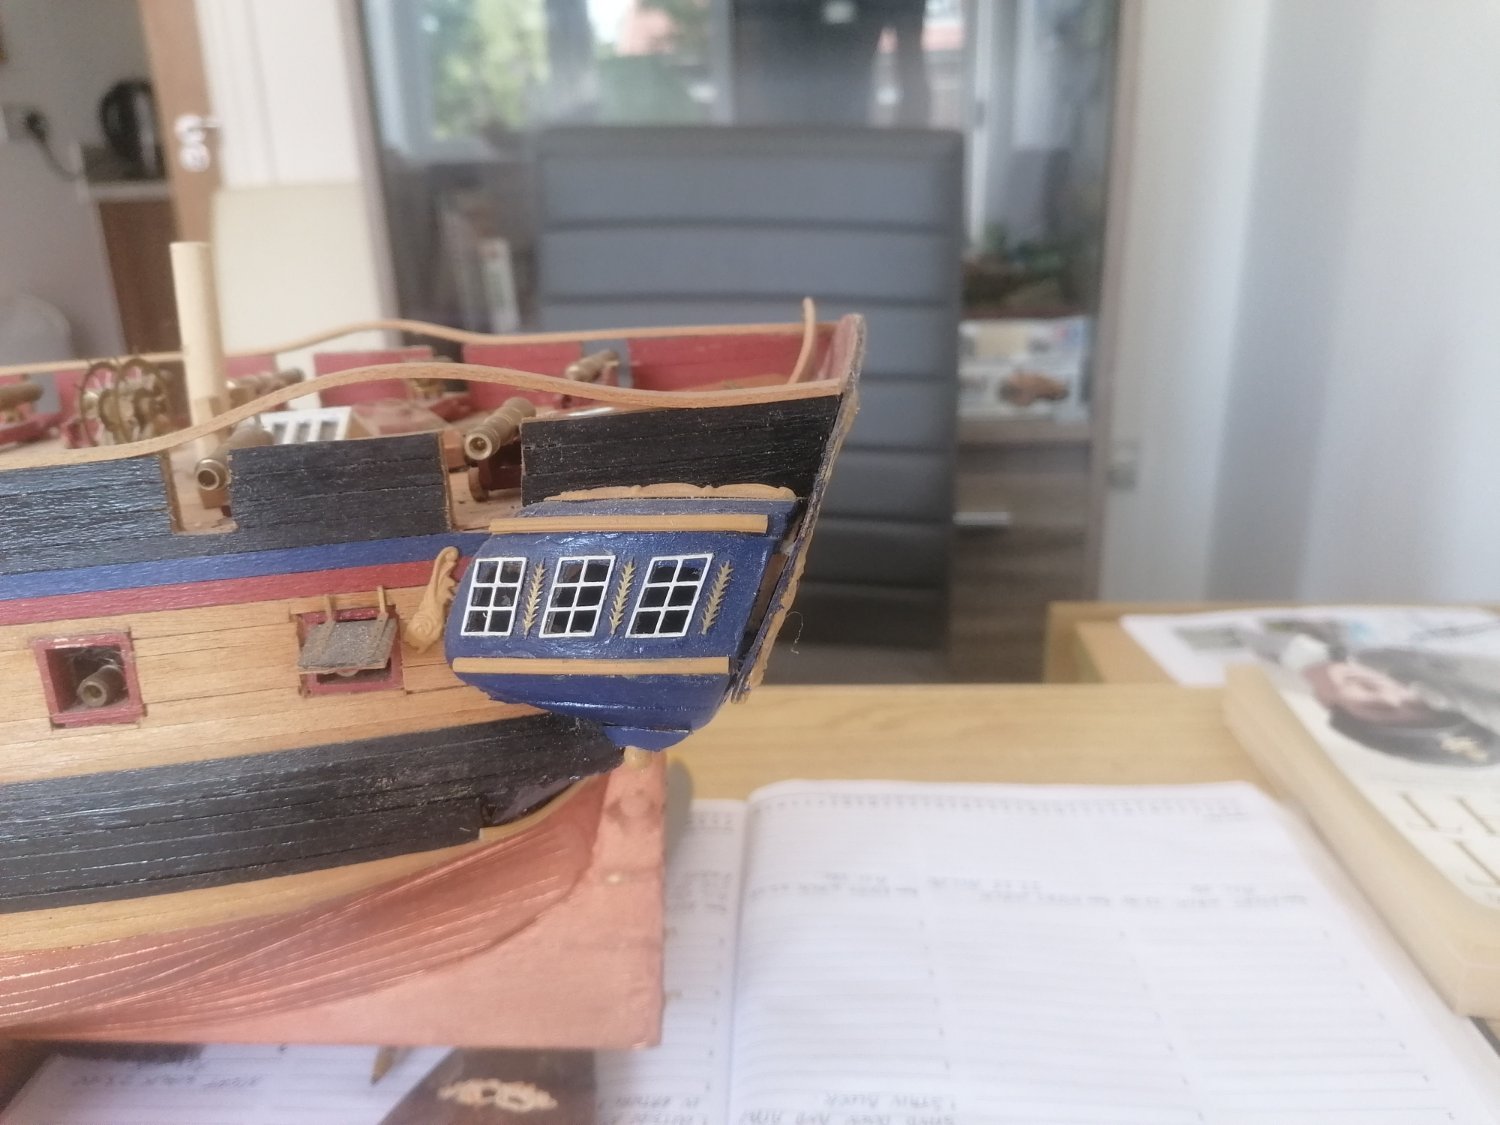
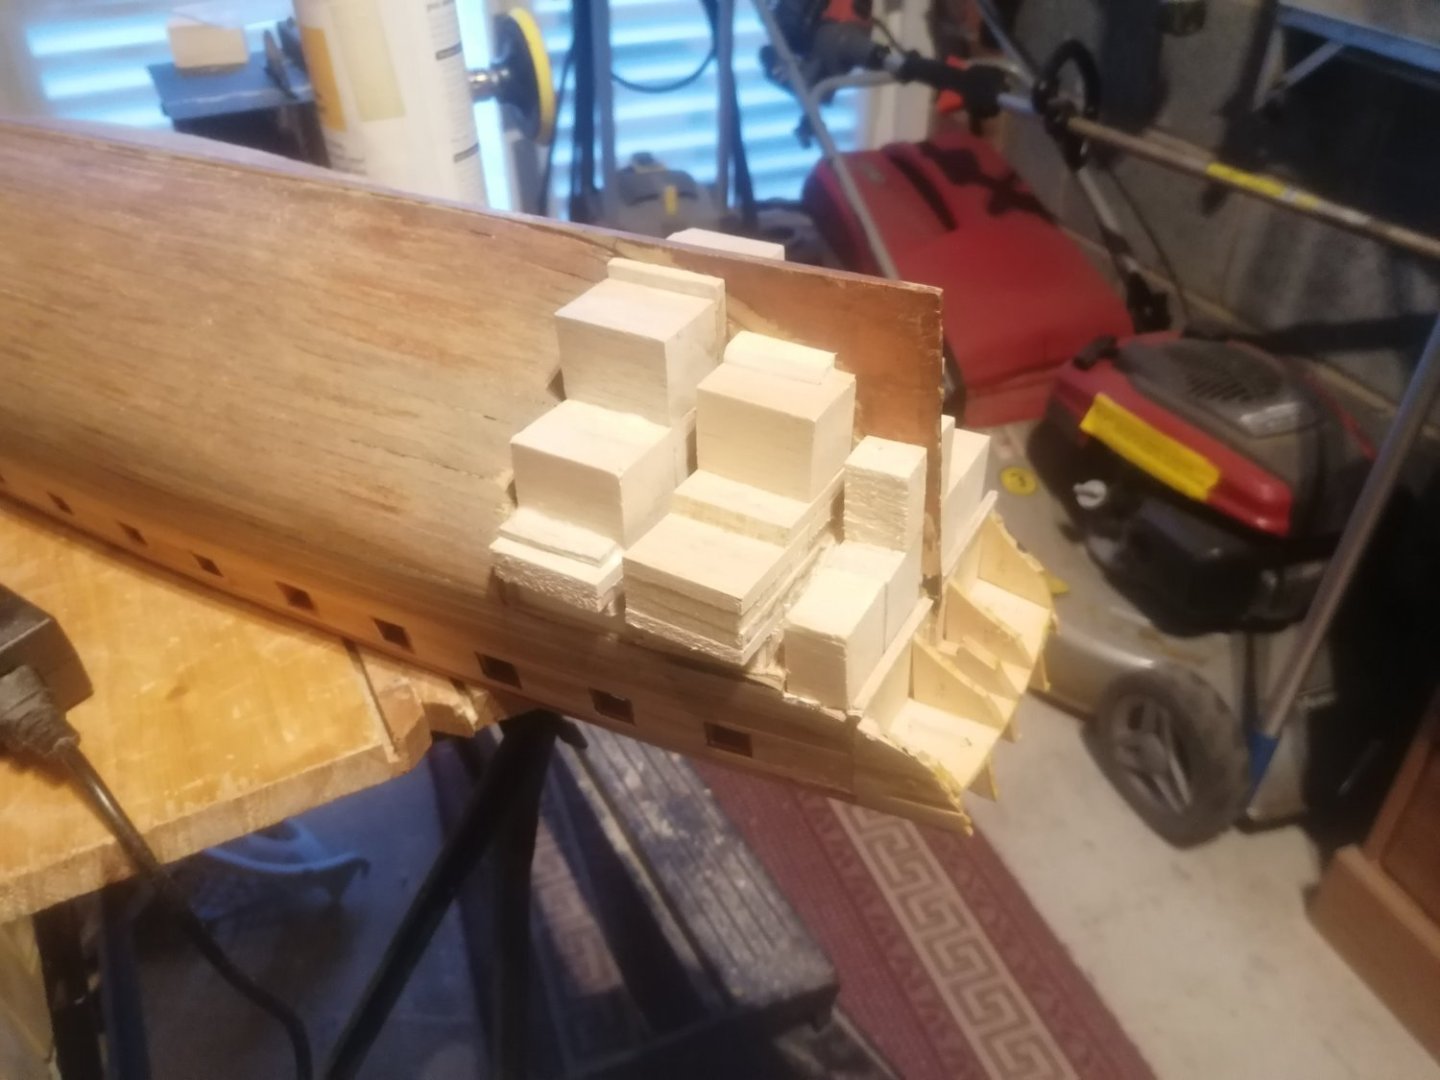
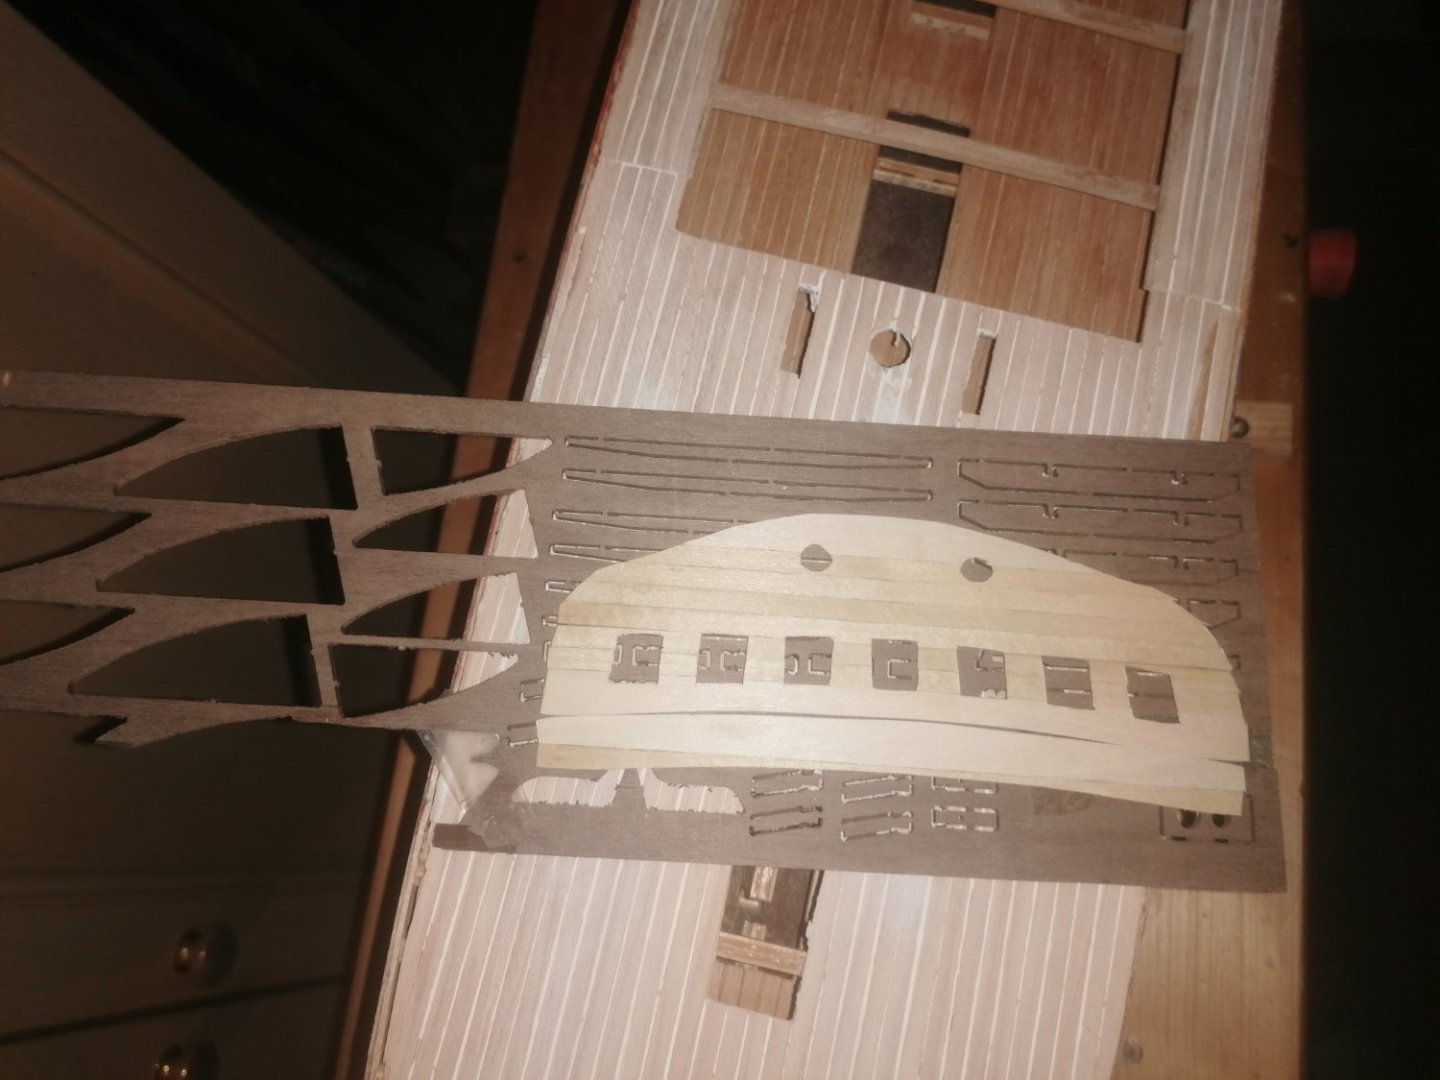
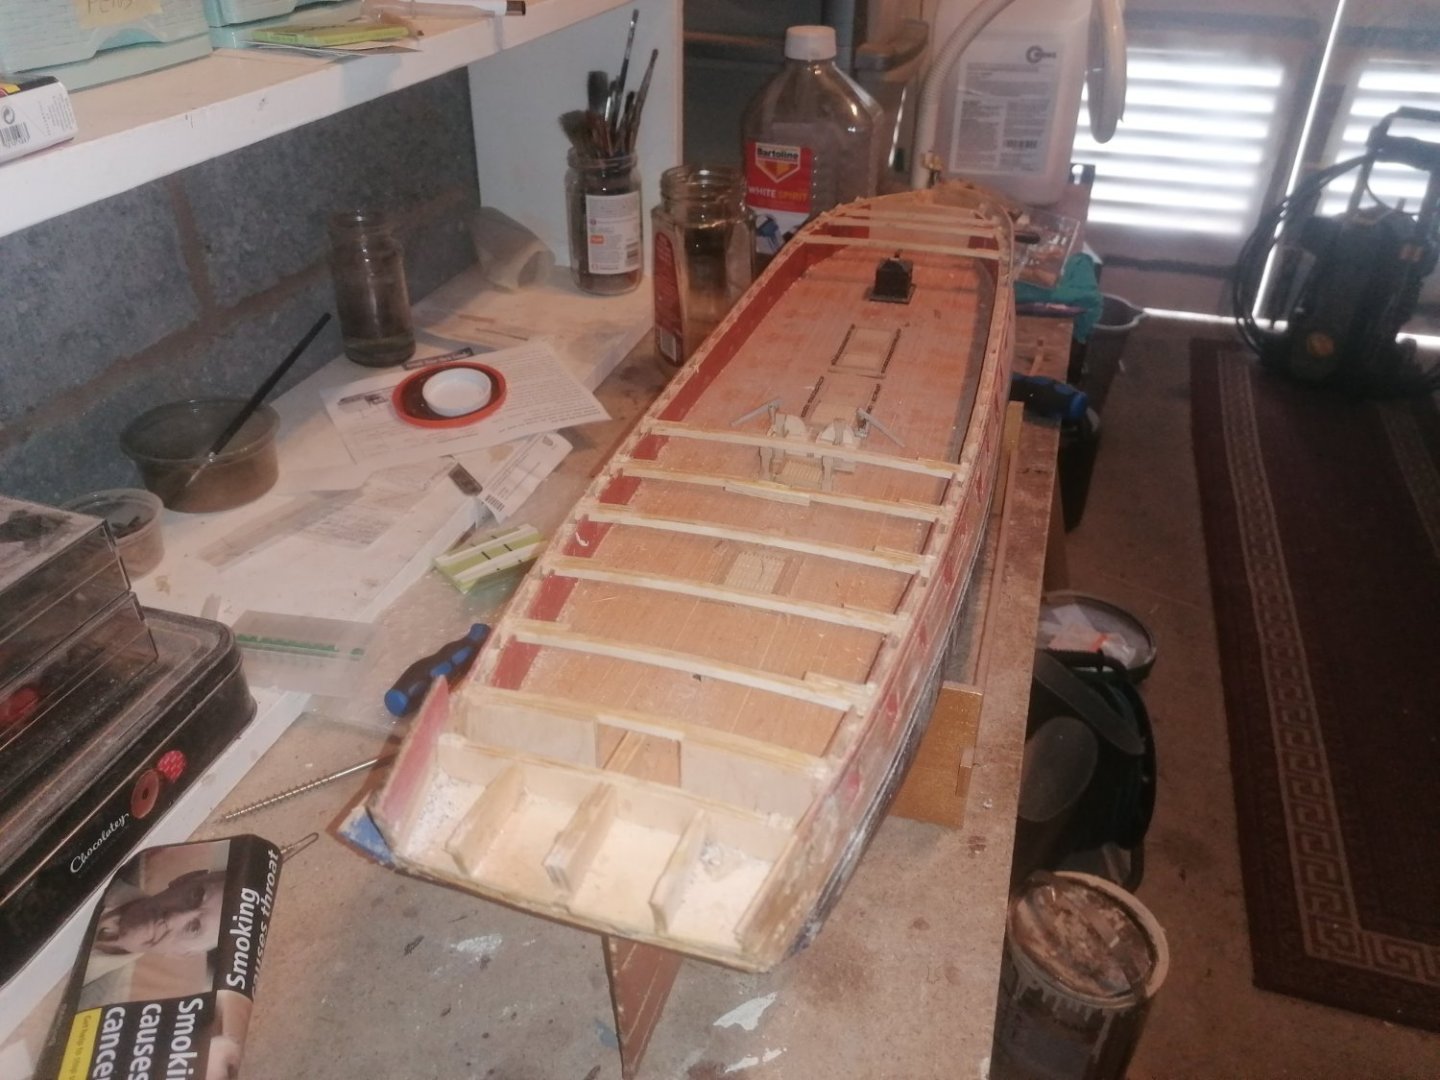
I've had a productive time this weekend, all be it with no work managed on the Golden Hind. I decided to build up the stern with the balsa blocks. I added more than I needed to but I'm pretty much working blind regarding what had been already been built. It looks like I was wrong about the frames being sanded down too far. I had assumed that they would have been bevelled. Having sanded the filler blocks I now believe they just hadn't been bevelled at all. With hindsight, I should haven't used so much as it has meant a lot more hard work sanding, not to mention the waste. However, I did expect this to an extent as, I figured it would be better to add too much and sand to shape, rather than finding out I hadn't used enough and try to add. The bulk of the sanding is now done and I just need to tidy it up and get to the final shape particularly the straight edge of frame 17 for the planks to lay onto. I have also applied more filler to the main deck section and sanded it smooth again. I have also added 0.5mm lime strips to the stern facia and counter. These just need a little sanding before I paint them, particularly, the windows. I have left both pieces slightly oversized for now as I don't know how well they will fit once the sides of the ship are sanded down and re planked. It certainly feels like I am making progress so far. Getting the stern looking right was what would have decided if this build continues or not so I am really happy to be making good progress despite making more work for myself. I am hoping to finish sanding the stern this week and also see if I can remove lining from the off square gun ports. I have 2 meters of 1mm x 7mm lime strip which, should be enough to redo them all, if required. Once these are done I want to sand the hull again to ensure the sides are symetrical, which they aren't at present.


-
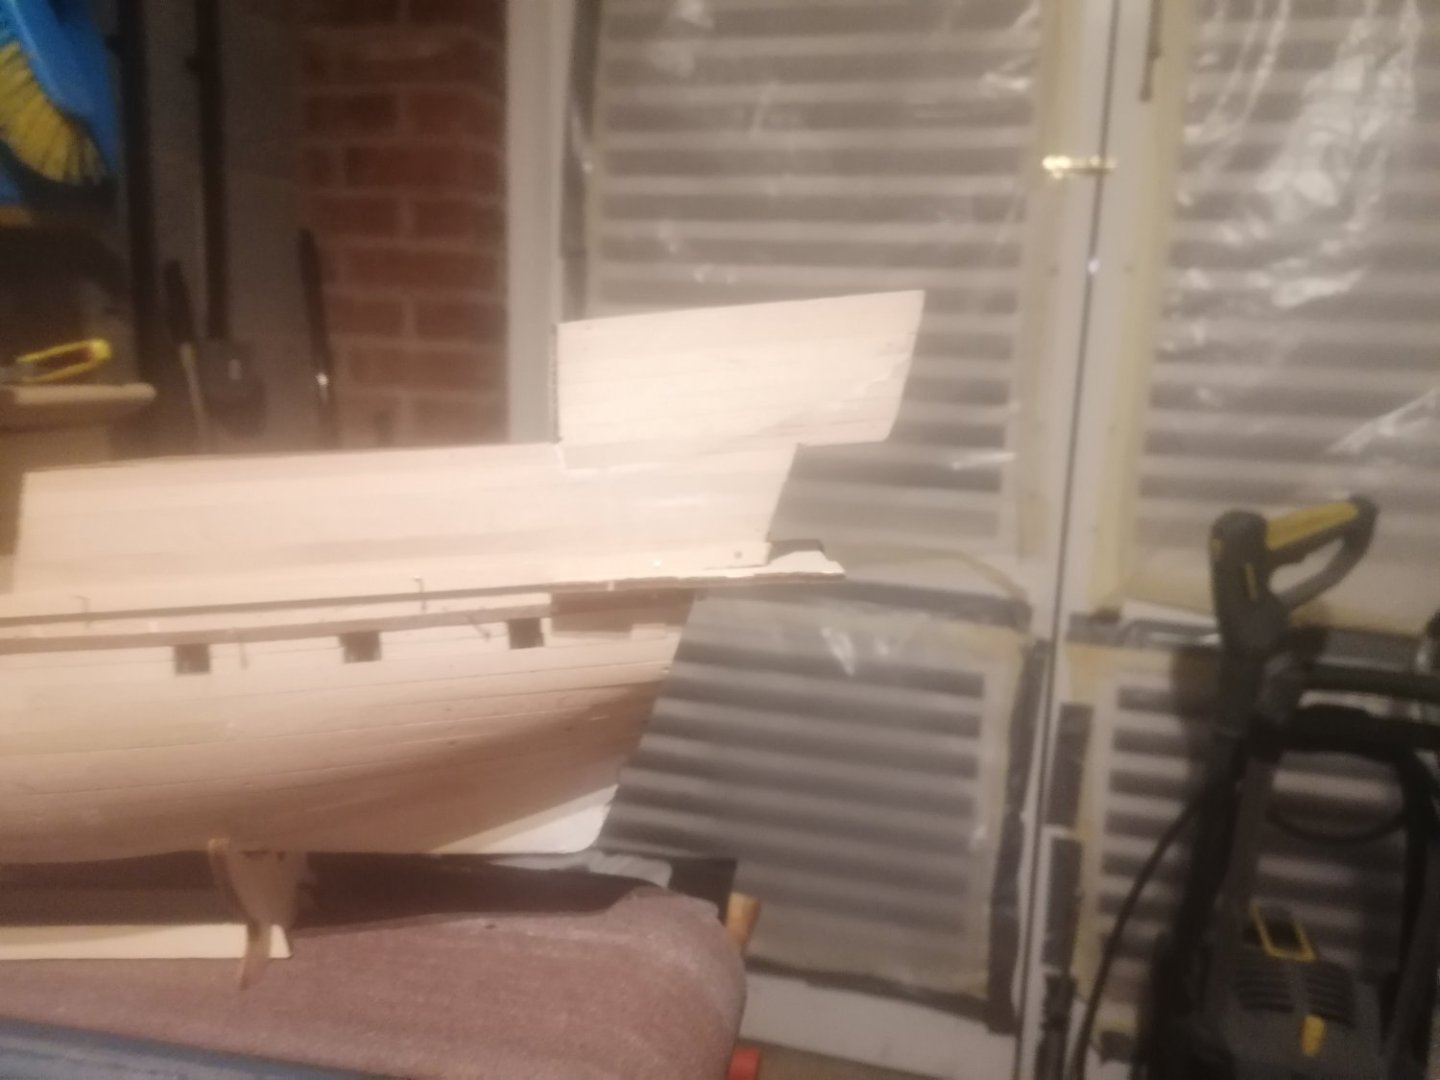
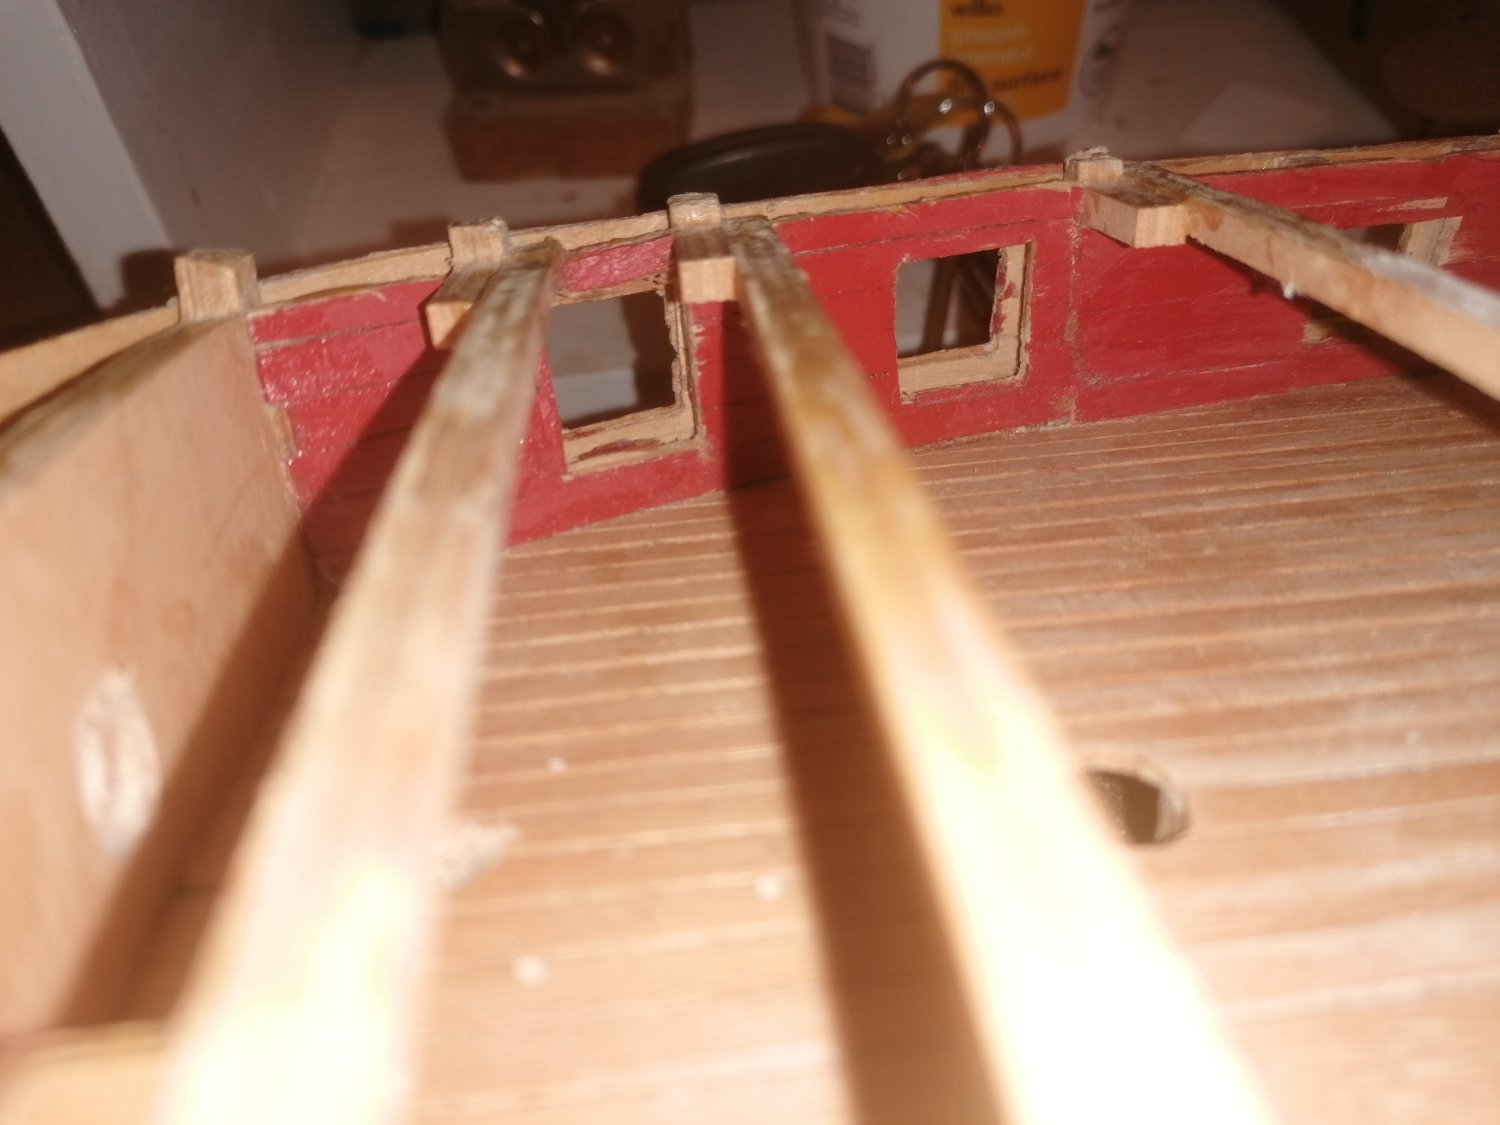
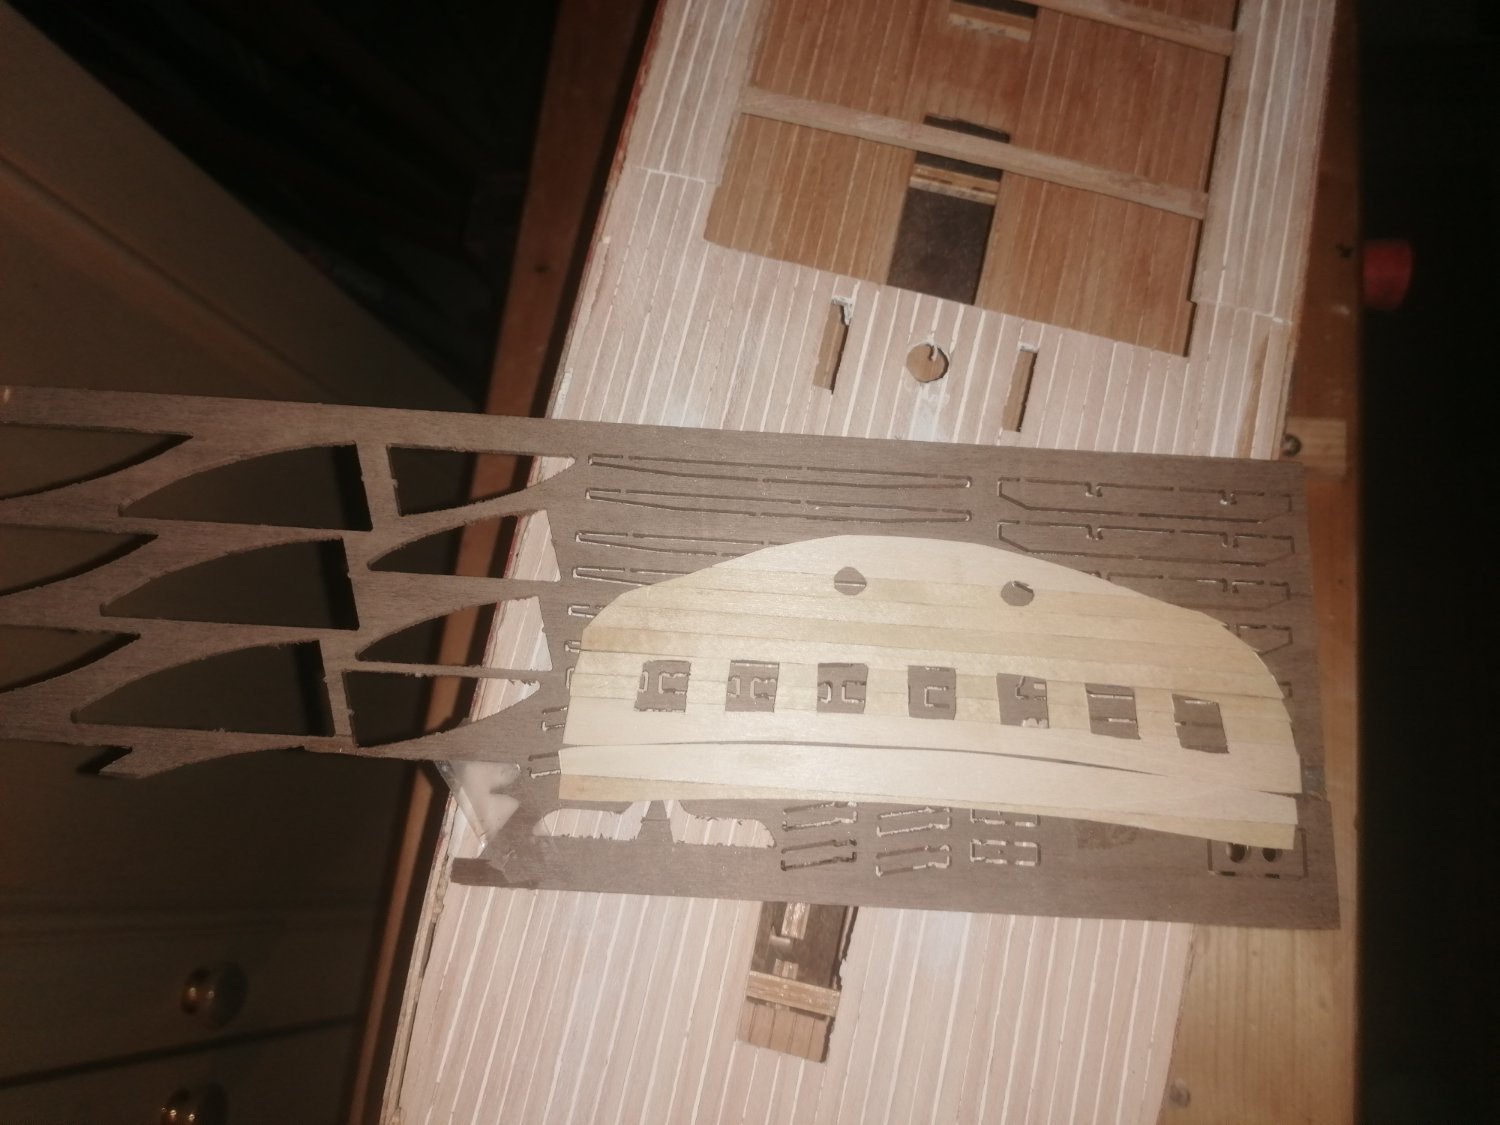
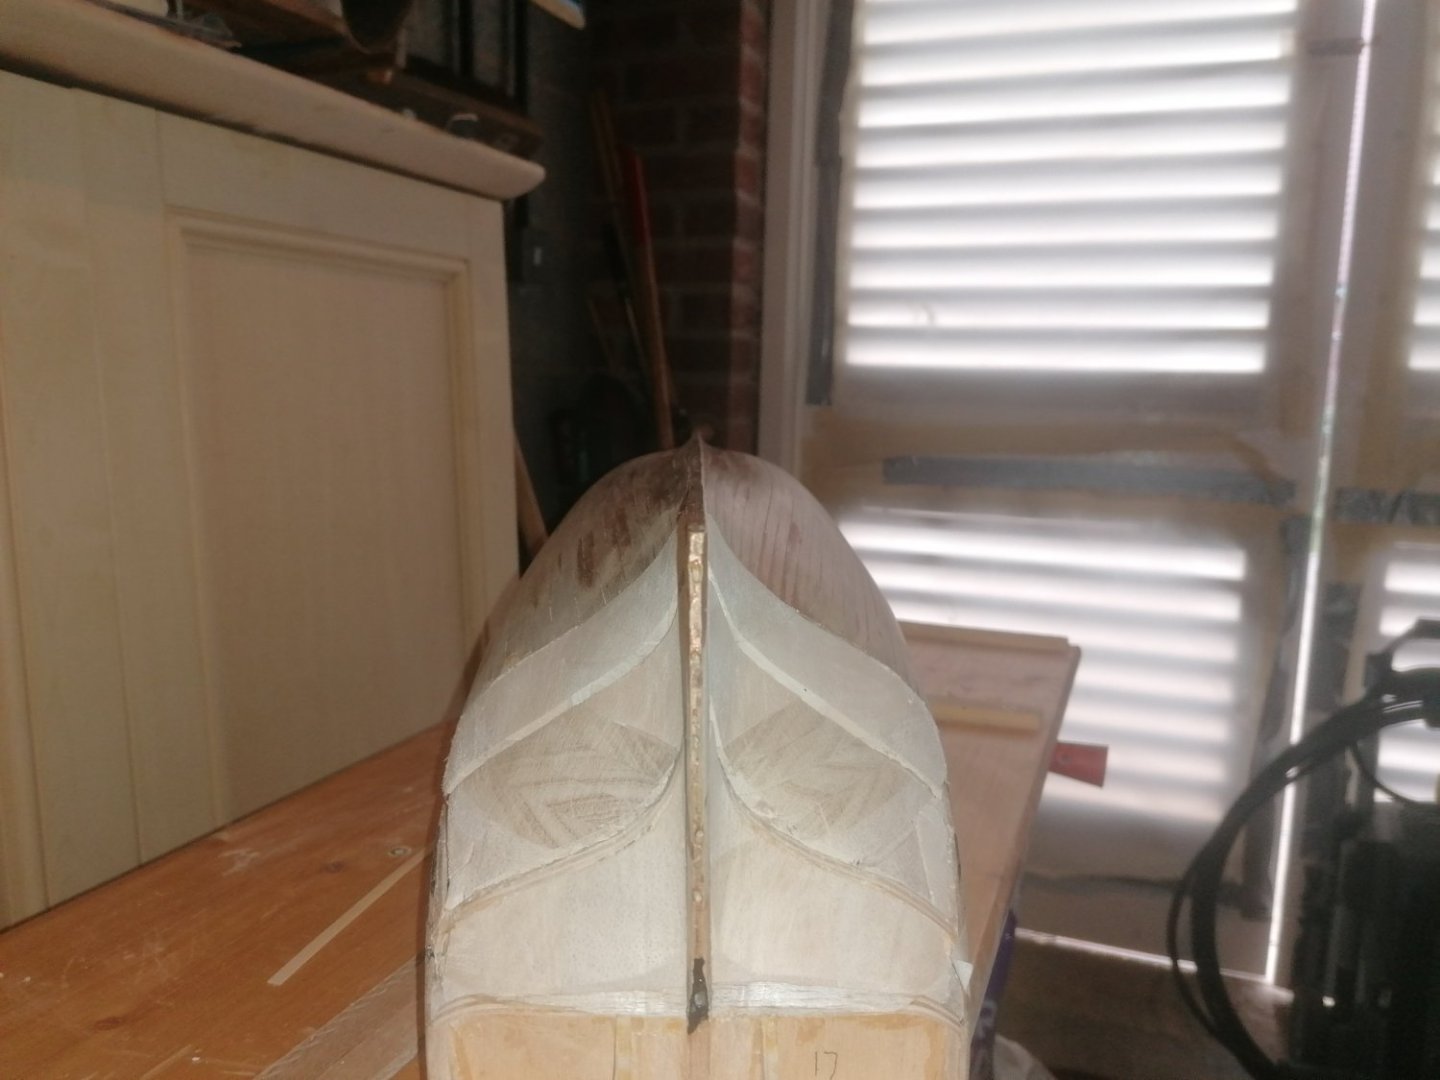
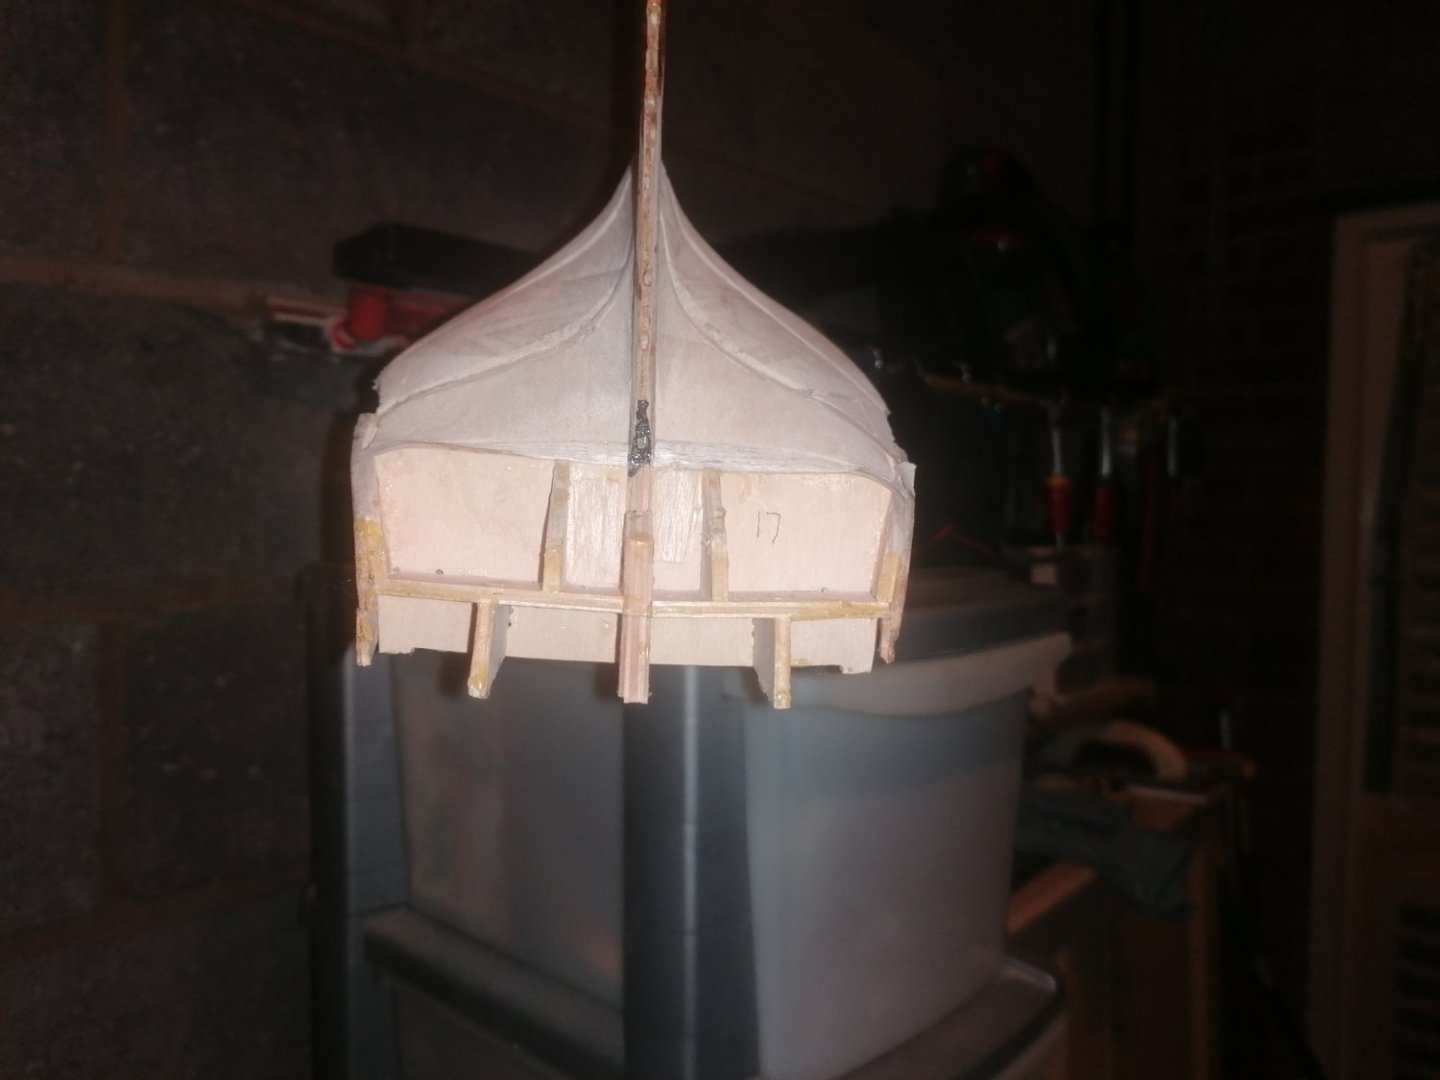
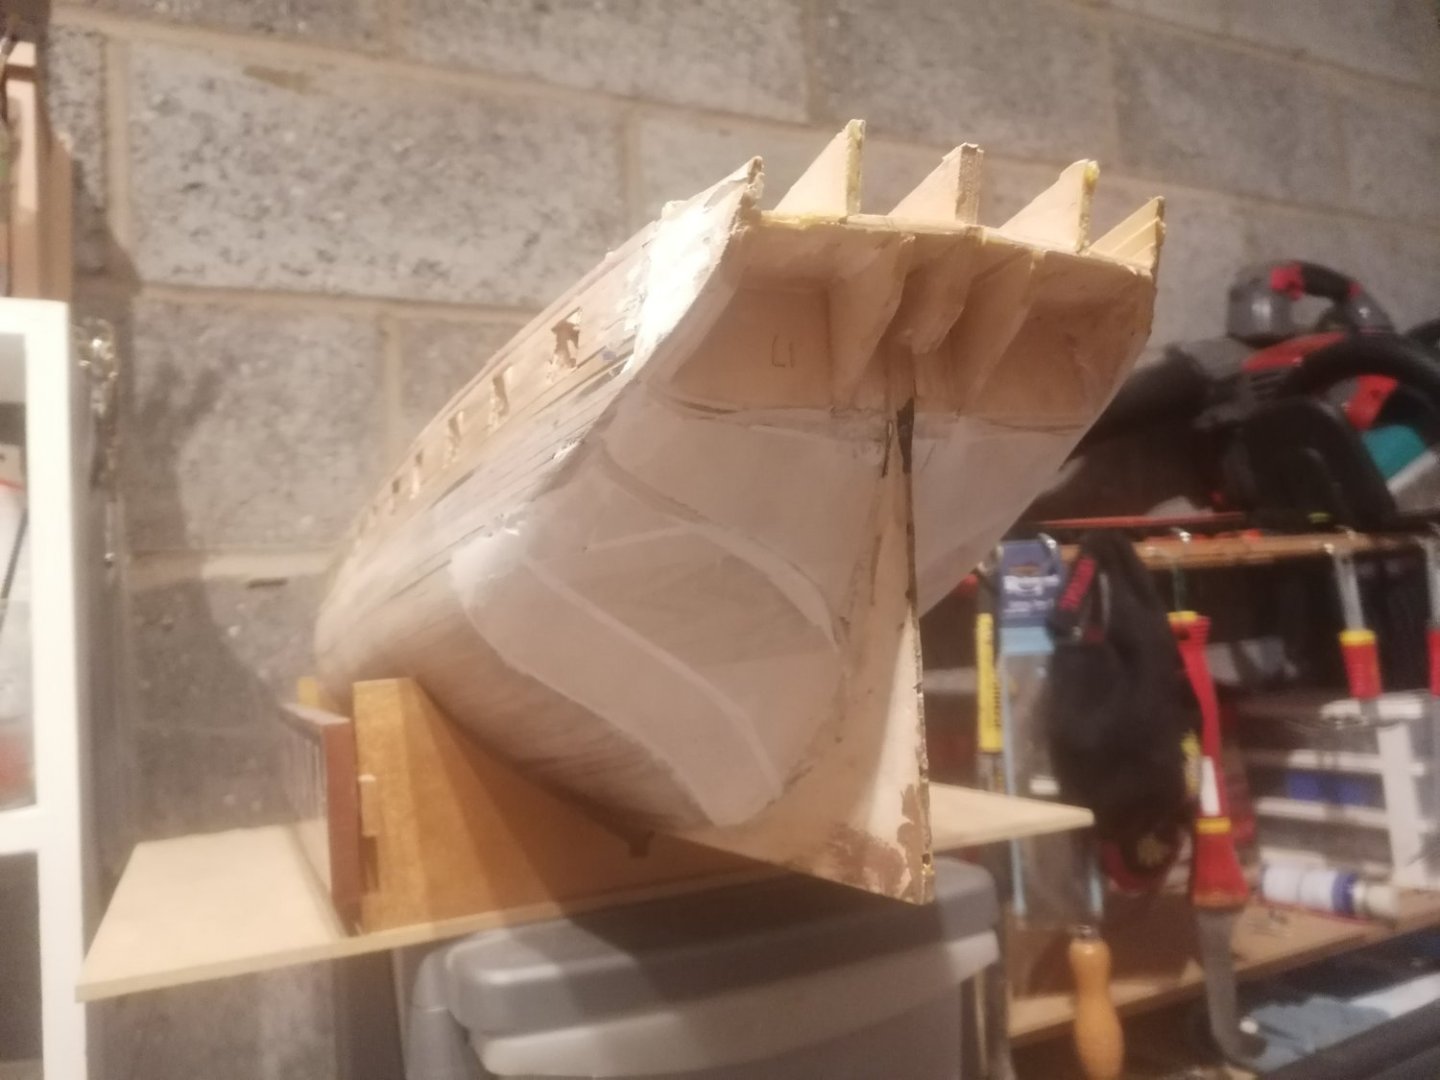
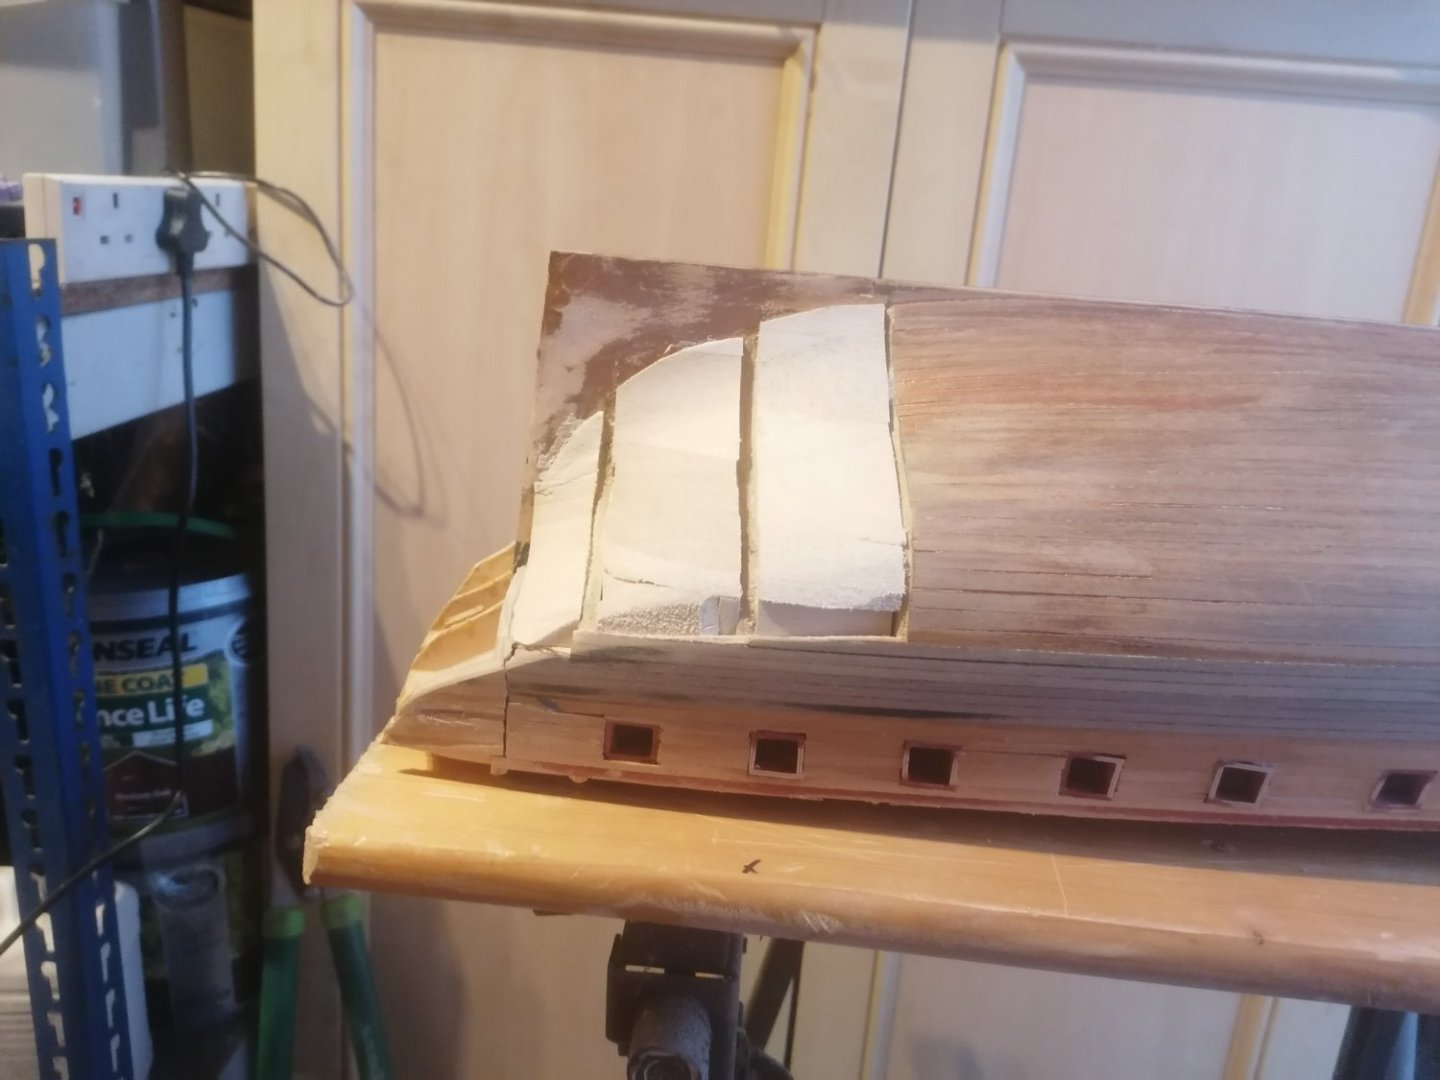
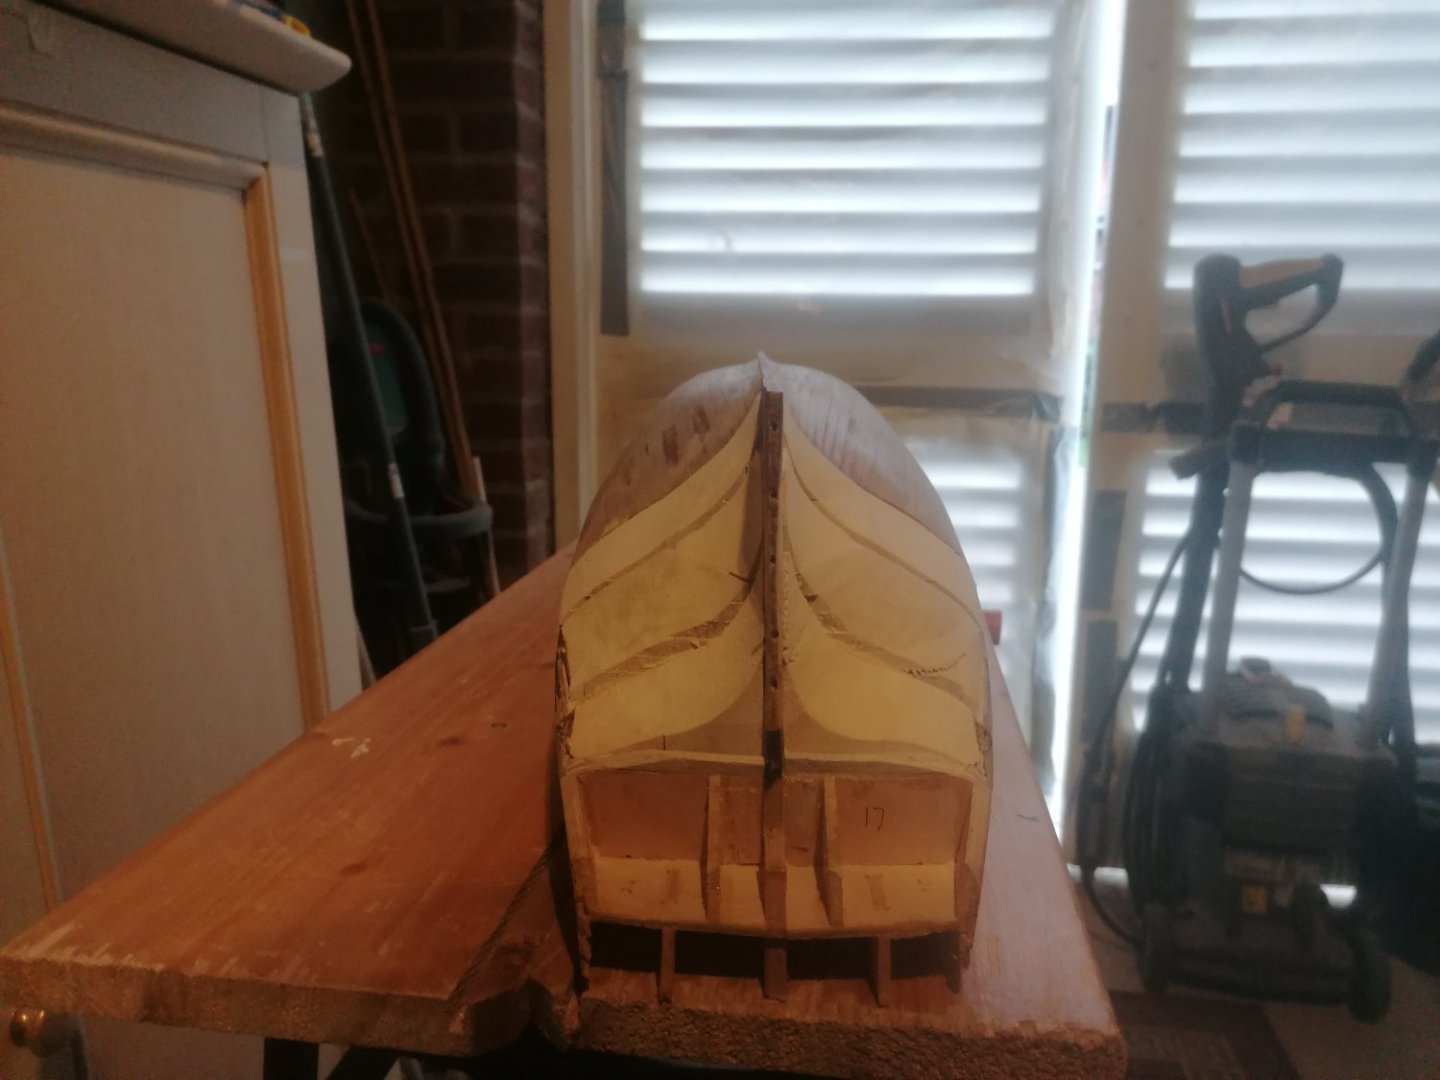
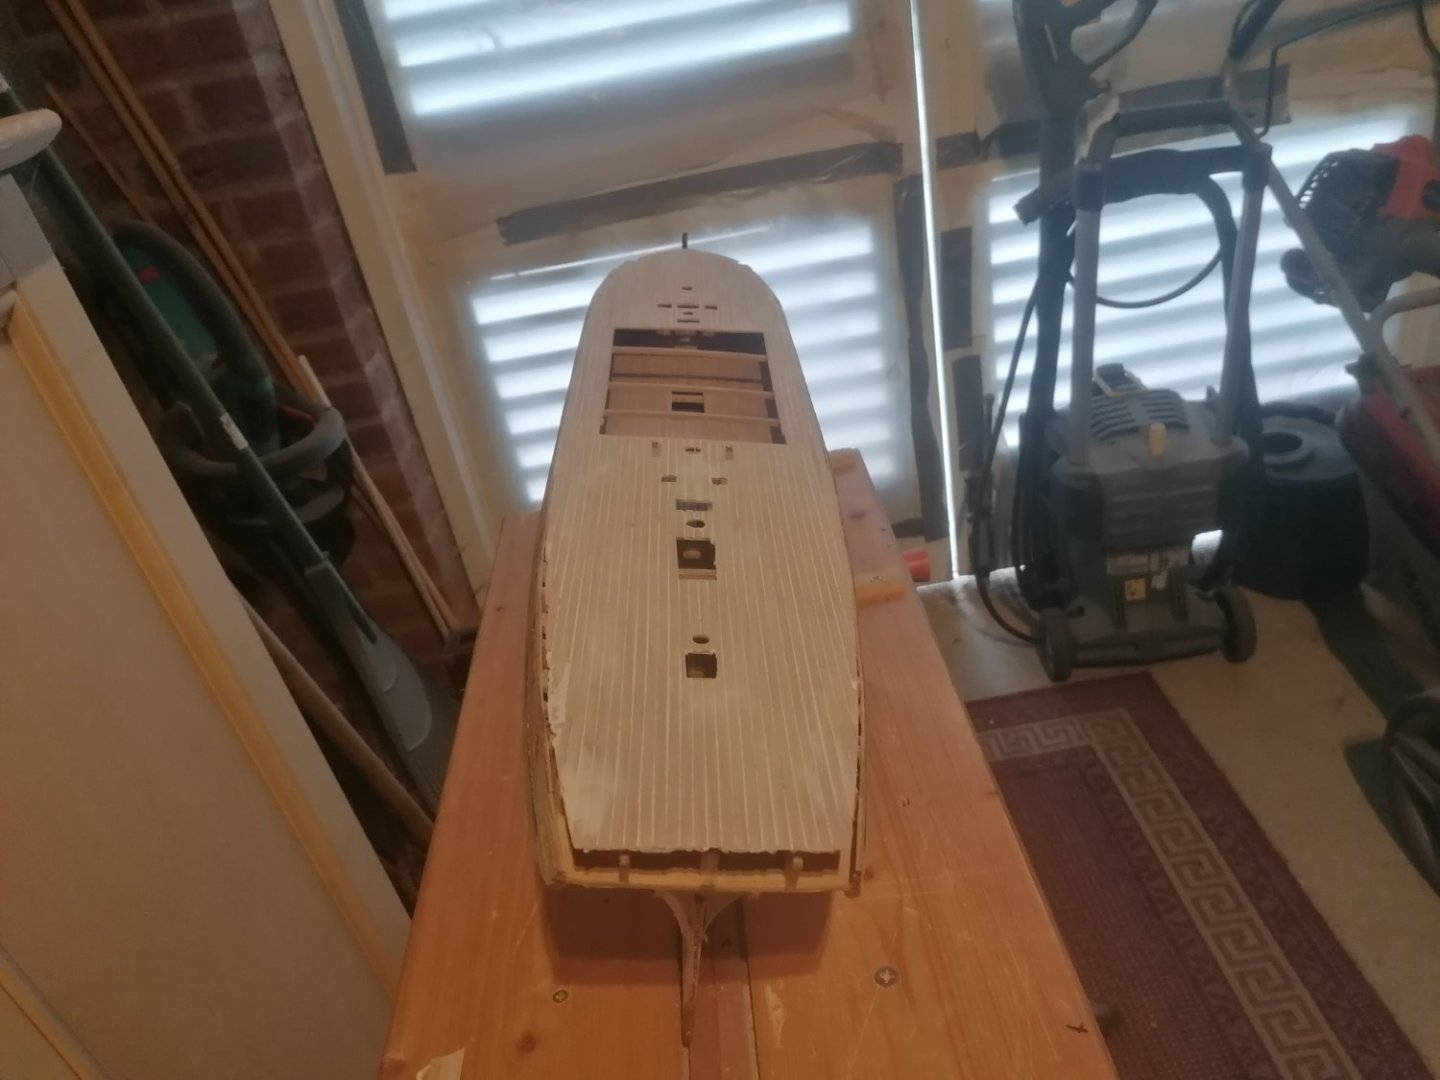
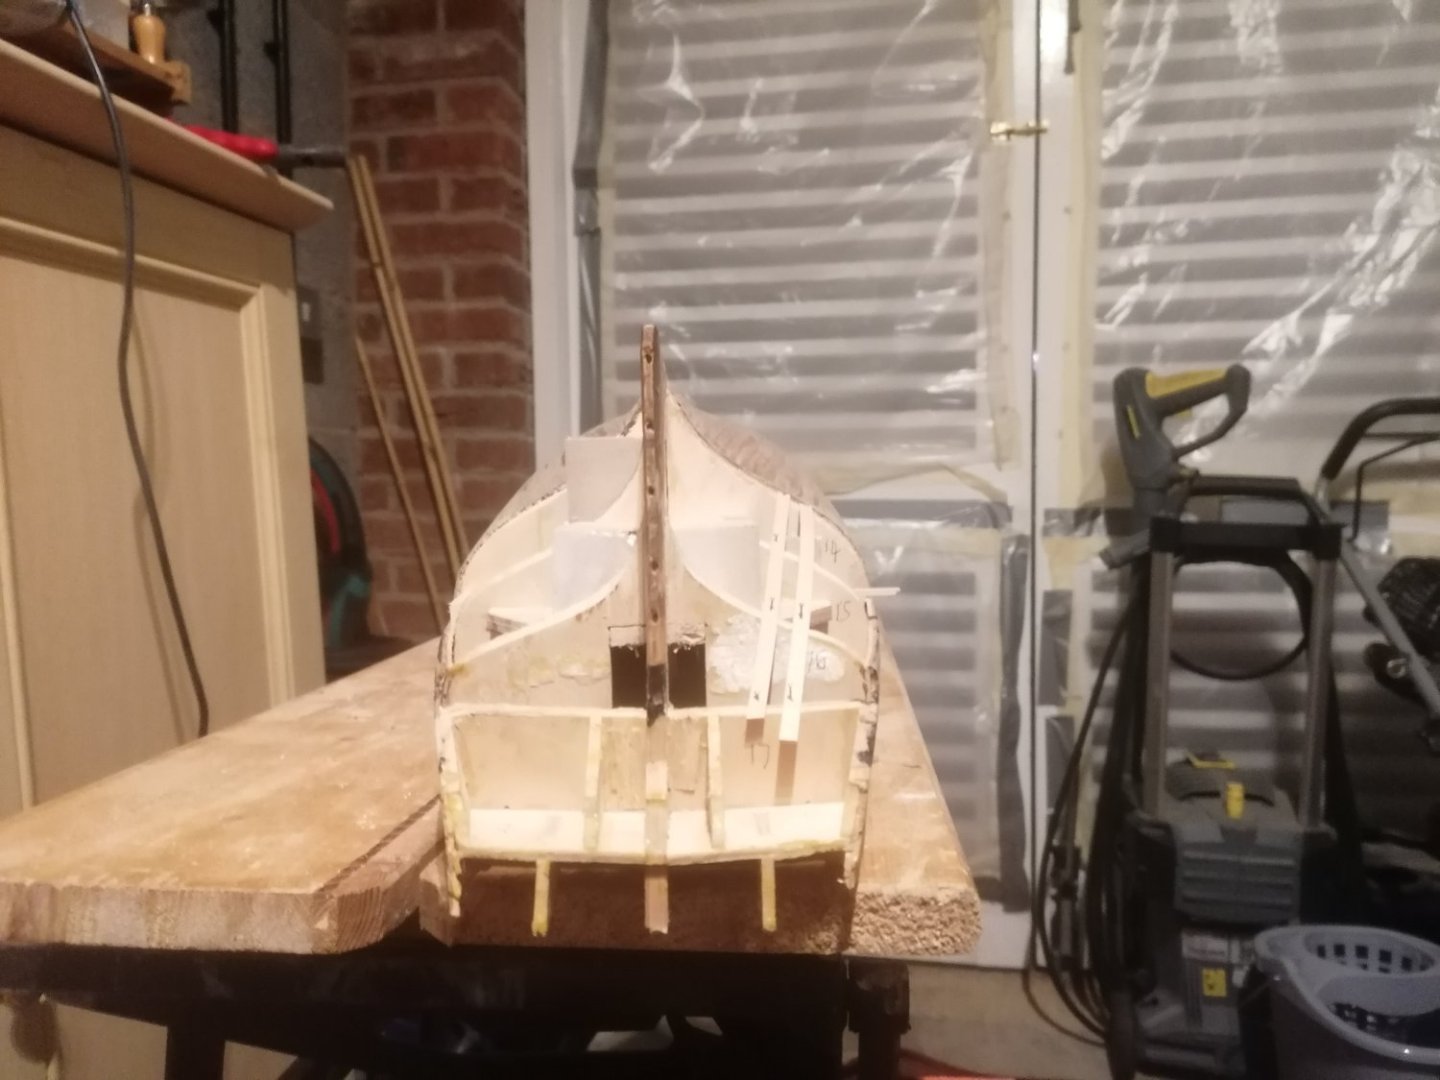
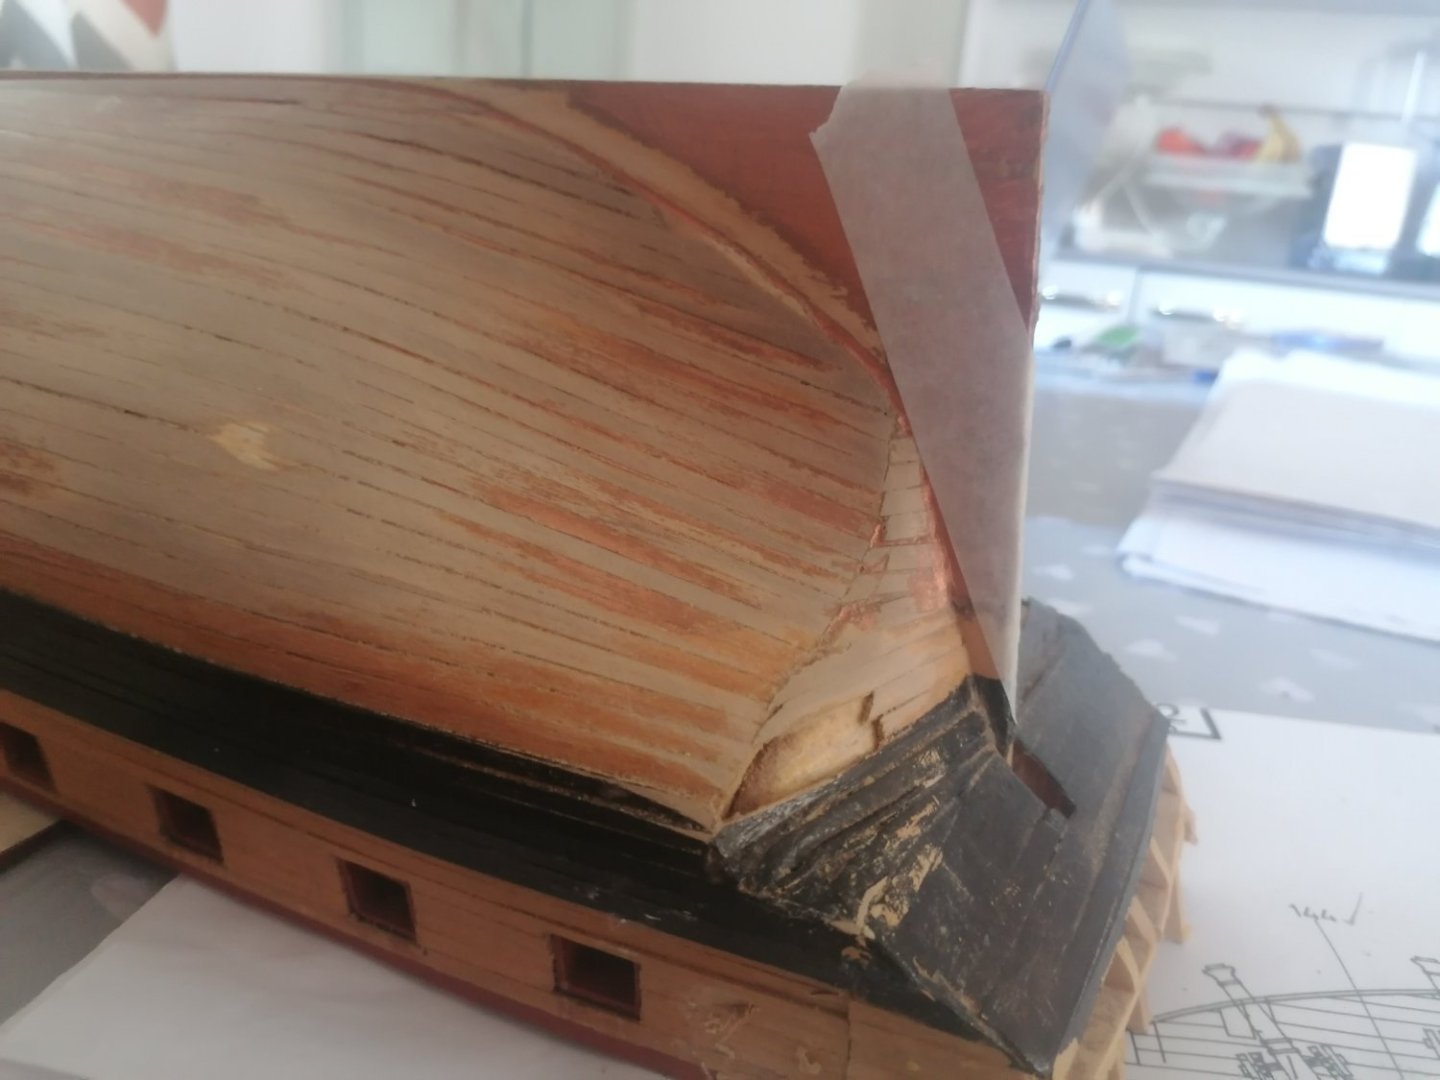
Thank you all for the likes so far. Since the last update I have been busy sanding while still being stuck getting the bulkheads of the golden hind looking the way I want. The shape of the bows still need some work but the sanding here is nearly done. The blocks of balsa have arrived and I have started cutting them into shape. The frames 14 to 17 will have the filler blocks as, from the drawings it looks like the rabbet line extends from frame 14 and curves up to the top of the stern post, The stern section will be difficult to plank as it has a complex shape. I decided to pin a strip of 1mm from frame 14 to 17 to see how it will need to be shaped. The first strip I pinned directly to the frames as they are, which looks like a straight line. The second one I pinned but allowed it to curve which I think looks ok. The problem I have is that frame 15 looks like it needs to be built up more. around 7mm sloping to 3 mm to allow for the curve of the planking to frame 17. I will attach photos of what I mean and need to ask for advice at this point to try to achieve the correct shape starting in the correct position. I have a feeling frame 15 was sanded down way to much and was also not bevelled but I don't know for sure. I added a block of balsa infront of the frame to create the curve. Any advice on this would be really appreciated. I've a nasty feeling this won't be the last time I'll need advice. I've just realised these photos are over exposed. I will retake them tomorrow. I will also need to reline some of the gunports if I can. The keel is also slightly warped but I am not too worried about this at this point, Thanks in advance. David.
-
I apologise for the delay in adding to this post. The main reason for needing the break from the build was being stuck planking the forward bulkhead and the bulkhead aft of the main deck. Several attempts later and I still haven't achieved what I want. I had decided that I need to build them up off the build and then glue them in the right position afterwards. I will keep trying and once I am happy with these I will finnish off the stern and begin the 2nd planking. I am disappointed with my progress as, on the 1st attempt I was fairly happy with the results but not so concerned about having the correct numbet or positioning of the planks. Aiming to have this figured out ovet the weekend and will post photos of the progress then.
-
I have ordered more balsa wood to use as filler blocks for the stern section. Unfortunately I have no decent sized blocks left. In the meantime I will get back to the Golden Hind and a little more sandinng in between. Just a photo to compare the difference between the two. Thanks for all the comments and likes so far.

-
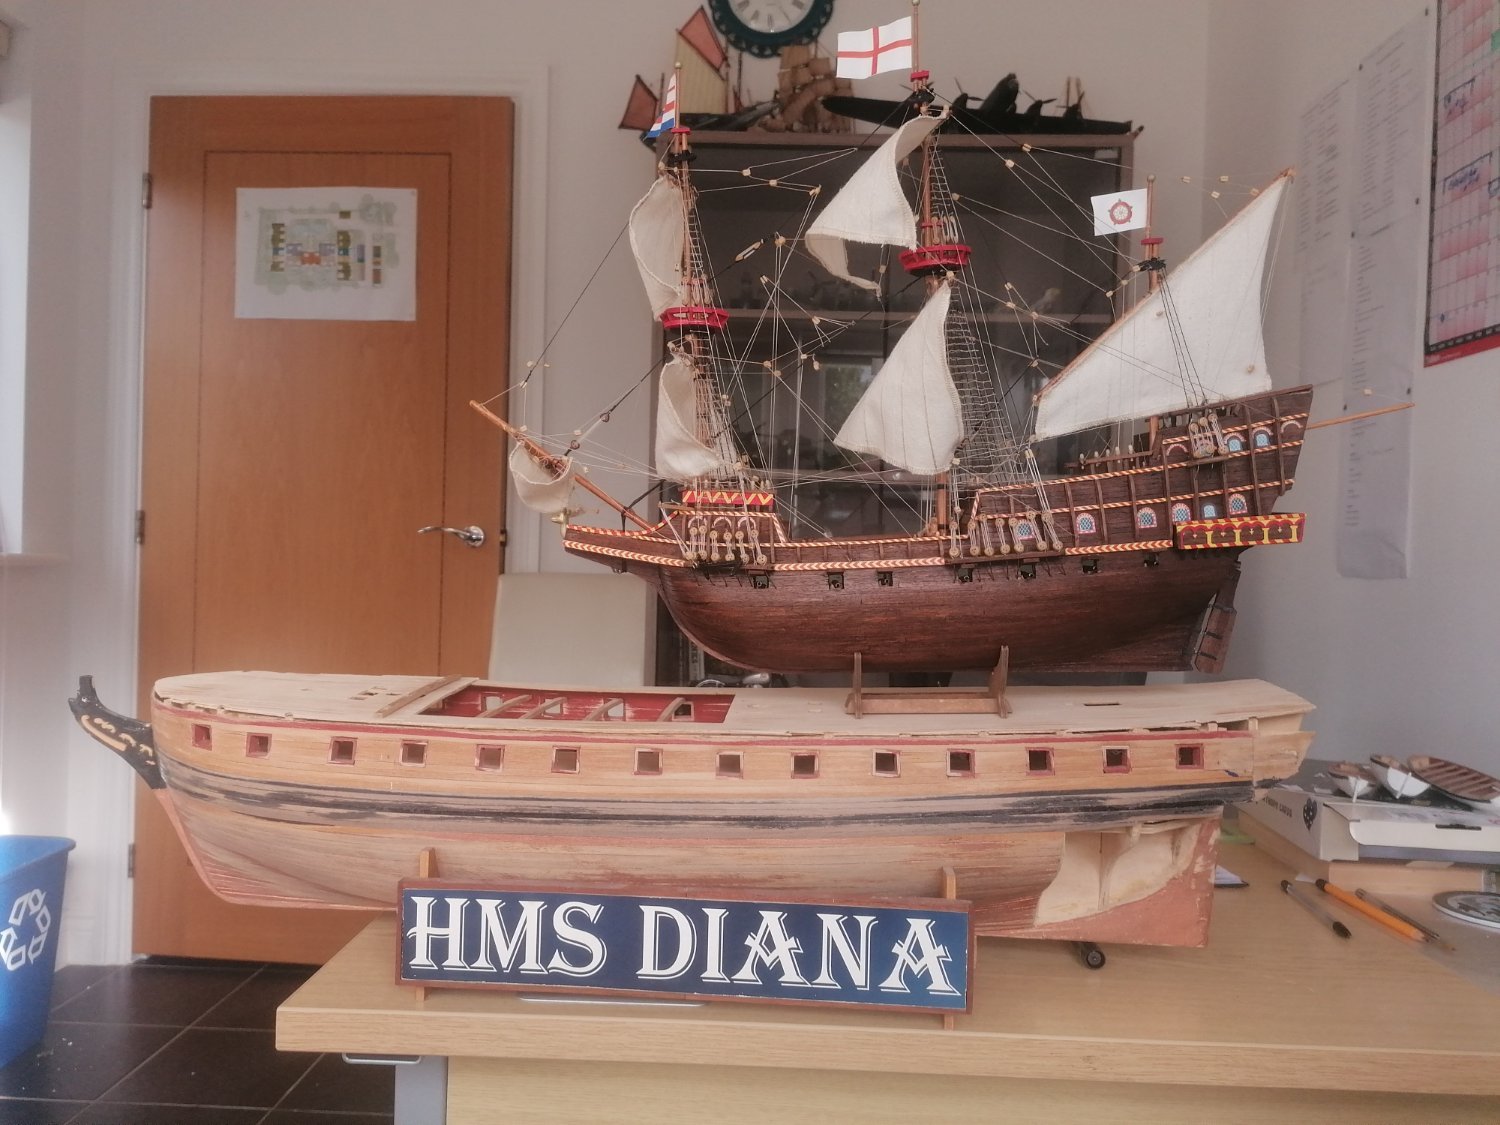
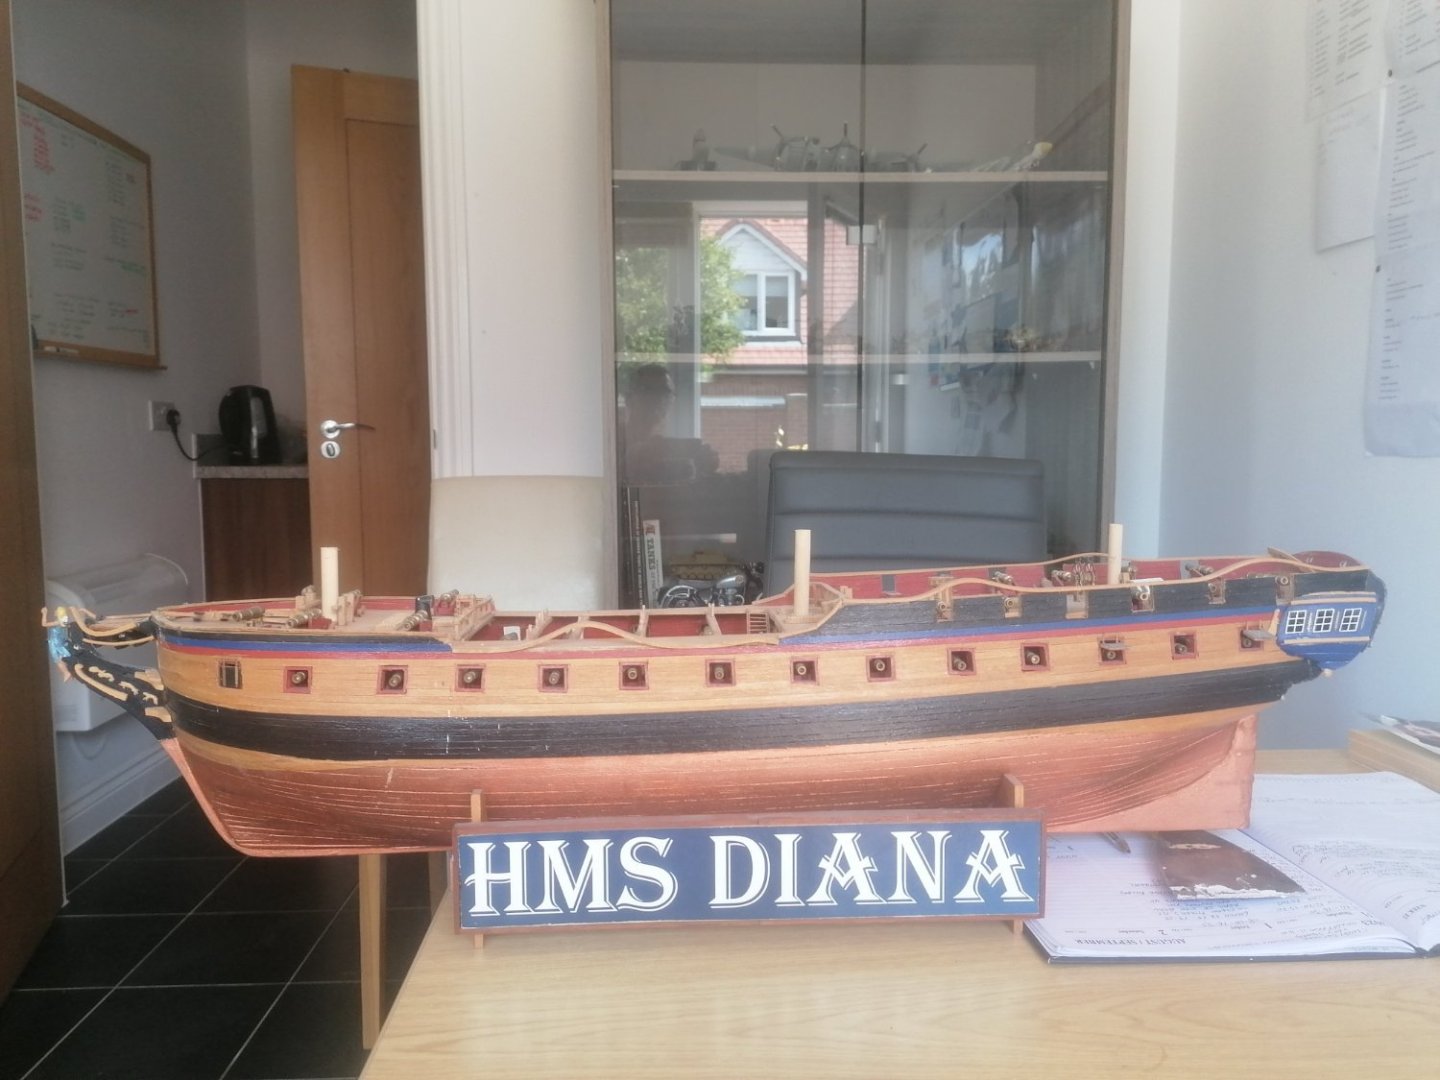
Many thanks David. There seems to be a lot of us. Mind you it's a good name. Really happy for your comment especially after the job you've made of yours. I was really happy with my builds of the golden hind and san fran II. But they look nothing like your HMS Diana. I'm almost sorry I won't achieve that standard but I intend this one to look good all the same. You're right it is a project and a half.
-
Thanjs again. As long as I am able to do a decent job on the stern the entire hull will be sanded down to pretty much the 1st planking. This will give me almost a blank canvas to work on. I may even have a go at removing the beams above the gun deck so allow space to redo the deck. Sanding down will be really difficult with beams in place never mind filling the gaps and redoing the deck with 0.5mm strips. I will see how much /little damage occurs when the time comes.
-
Thanks for your faith in me Jack. It may just be paying off but I daren't count my eggs too soon. There is still a fair bit of shaping to do. I will need to go a couple of planks at a time and sand down the frames as I go. The spaces below the decks and between the frames will look awful but at least they are hidden by the planking. The frames from 14 to 17 on both sides are now pretty much ready to start re planking. I have formed a lip roughly along the middle of frame 14 for the 2 X 5 mm strips to fit into. I am really hoping this works. Normally I find that if things are going too smoothly a major problem comes up unexpectedly.
-
I am afraid you're right Jack. Nothing is impossible though. After trying more sanding down I realised that it wasn't working. The only thing I could do now was strip away the planking. I was worried about not doing the right thing so decided only to do the starboard side just in case it was a major mistake. It turns out, I think, it is possible to rectify the issue. If I am correct, the only problem will be the run of the planks will not match what's already been done. This will be covered over by the 0.5mm I was planning to cover the hull with after it was sanded down. If my plan works it means I won't need to spend 60 pounds or more on extra strips of timber. The main problem with the original build was the last few frames were not bevelled enough. I intend to bevel these further and add some extra timber to the stern bulkhead and taper this to a point where the planking will go across the stern.


-
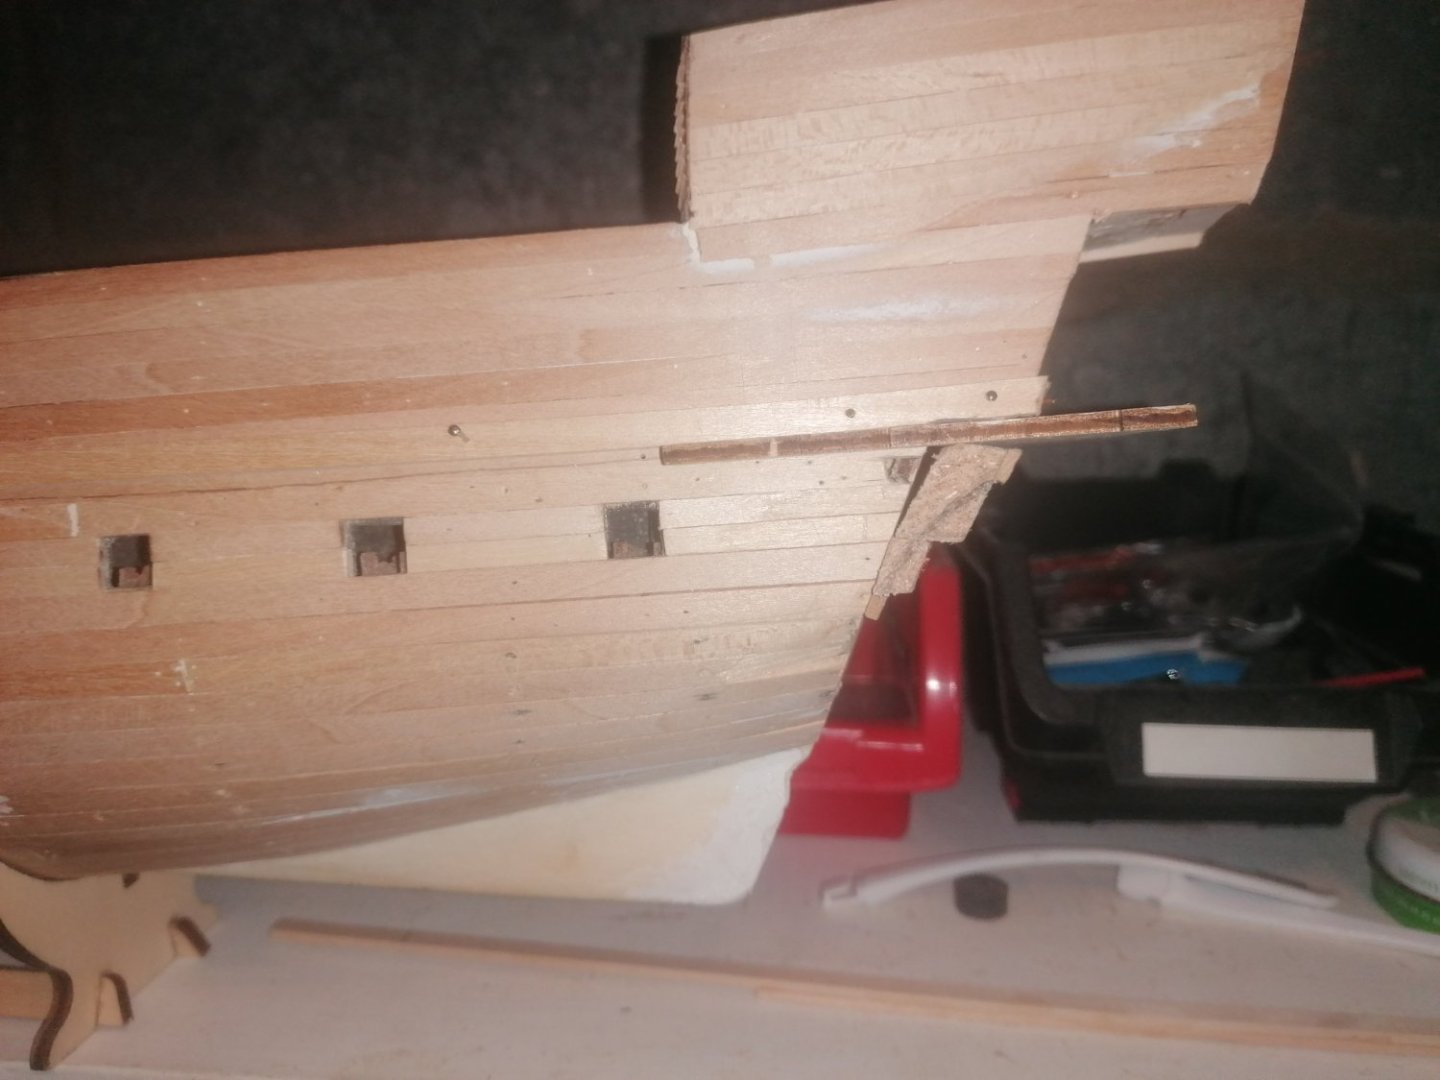
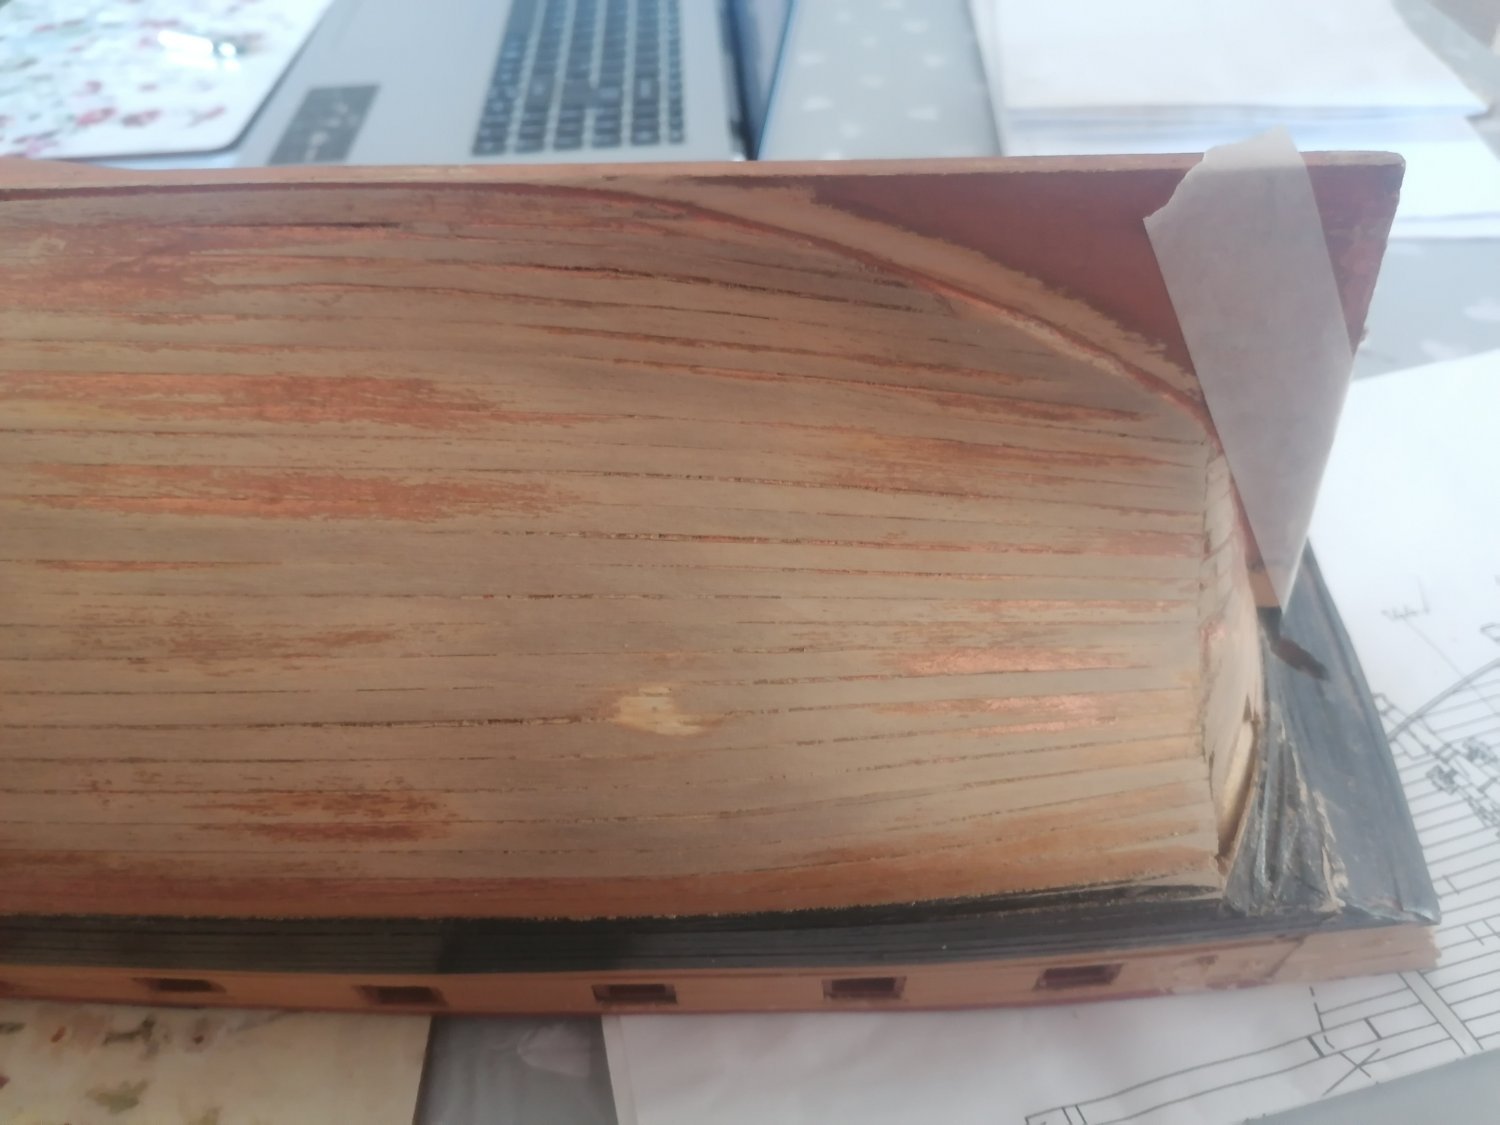
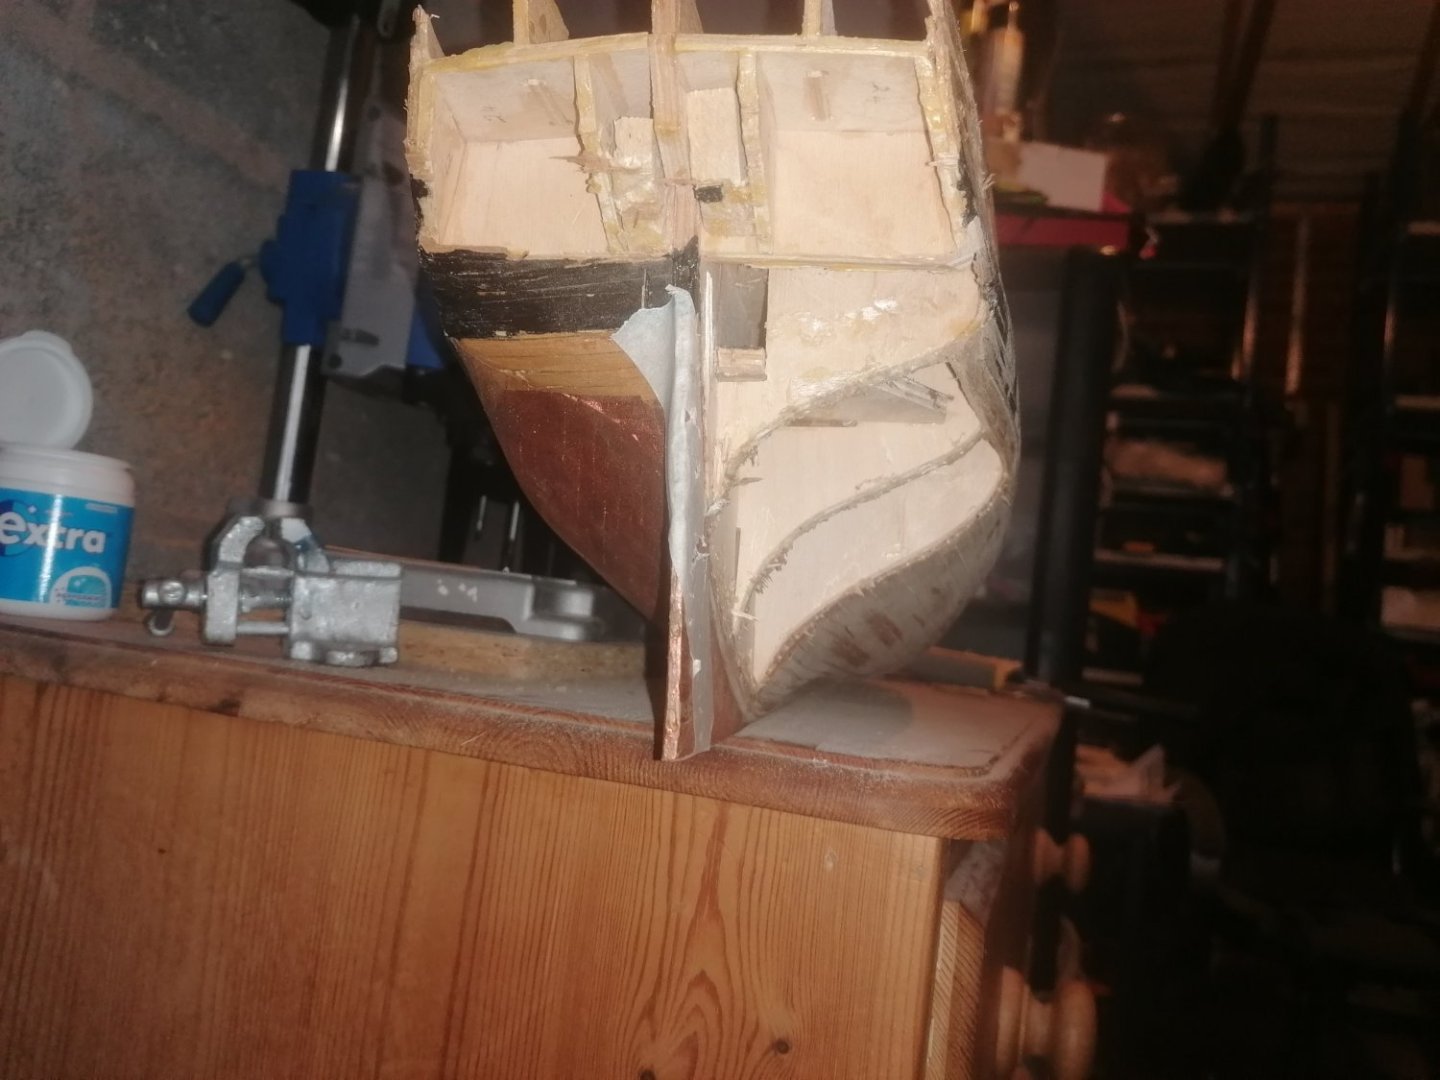
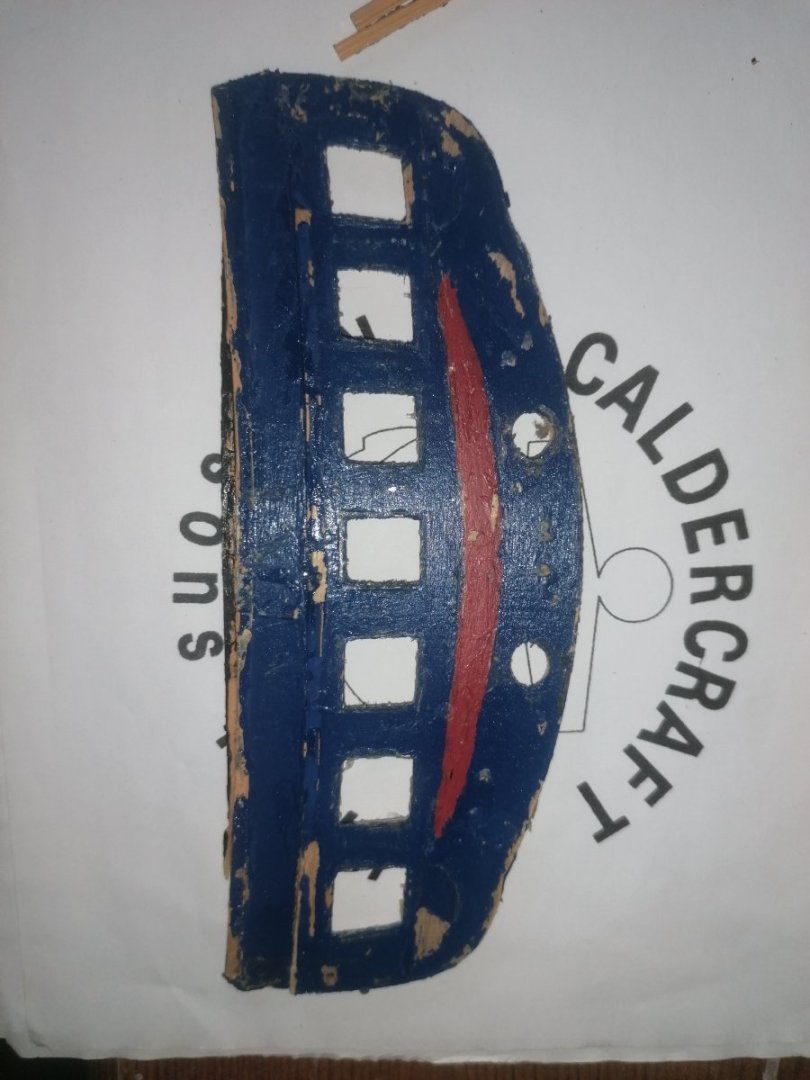
I should have mentioned also that the shape of the stern planking below the stern gallery counter and the base of frame 17, stern bulkhead are wrong along with the hull planking beneath. It seems that the hull was changed as the planks behind the qurter galleries were planked seperately. I will need to remove the black strips as well to see if anything behind them needs work. In the mean time I have started sanding down the starboard stern half of the hull and been able to remove a bulge over the edge of frame 14 which just exposes a patch of the 1st planking.I have used a piece of masking tape to roughly show where the planking should really line up on the false keel. It looks like I could have a major job on my hands with this section.


-
Many thanks for the comments. Il have grown a little in confidence of model making over the last couple of years. I never thought I would think of cutting a false keel up to add extensions until earlier this year. I am now really hoping a little knowledge doesn't prove too dangerous. As for cost I picked this up for 20% of the cheapest new kit of the ship. Something that seems to be approaching my catch phrase is it's only pieces of wood so can always be repaired or replaced. All be it with varying levels of difficulty. One thing I have picked up on is there's no filler blocks at the bow or stern. This means I will need to be extra careful with the sanding here. Even then, as I will be adding an extra layer of planking I do have a plan B but it's really a last resort. The main thing to get rid of is the ridge along and up the keel fore and aft. Once everything is smooth I will check the lay of the planks and then see what I will need to do next.
-
Thank you for your comments. You are right Keith. She is a sad looking ship right now. I'm guessing she ended up on a garage shelf for the last few years. The only thing I know is the kit was bought in 2010. Chris, I think you are correct with the use of the flexible beechwood. They are mentioned in the instructions. They are something I haven't encountered before so I really hope there aren't too many of them. I have the instruction manual and the parts list booklet. There are also 6 full size drawings although not quite precise. The deck plans seem a couple of millimeters out. Not really a problem though. I have already checked out a few of the build logs which feels like a double edged sword. Although the quality of the builds are amazing and the detailing is something else. They also make me realise my limitations. I am hoping to get her looking good but not to outstanding standards of the experts here. When I get started in earnest, I will fill in all the low spots in the hull before sanding it down to a smooth finish. Unfortunately I have no idea how well (or badly) the first planking was done so will need to watch out for any thinning. The hull will then be re planked with 0.5mm strips and the wale with either 1.5 or 2mm strips. I am planning to use the copper plating supplied which I have never attempted before. The stern plate will be planked with 0.5 mm strips to ensure a smooth finish before it's painted. The quarter galleries will have to be remade from scratch.


-
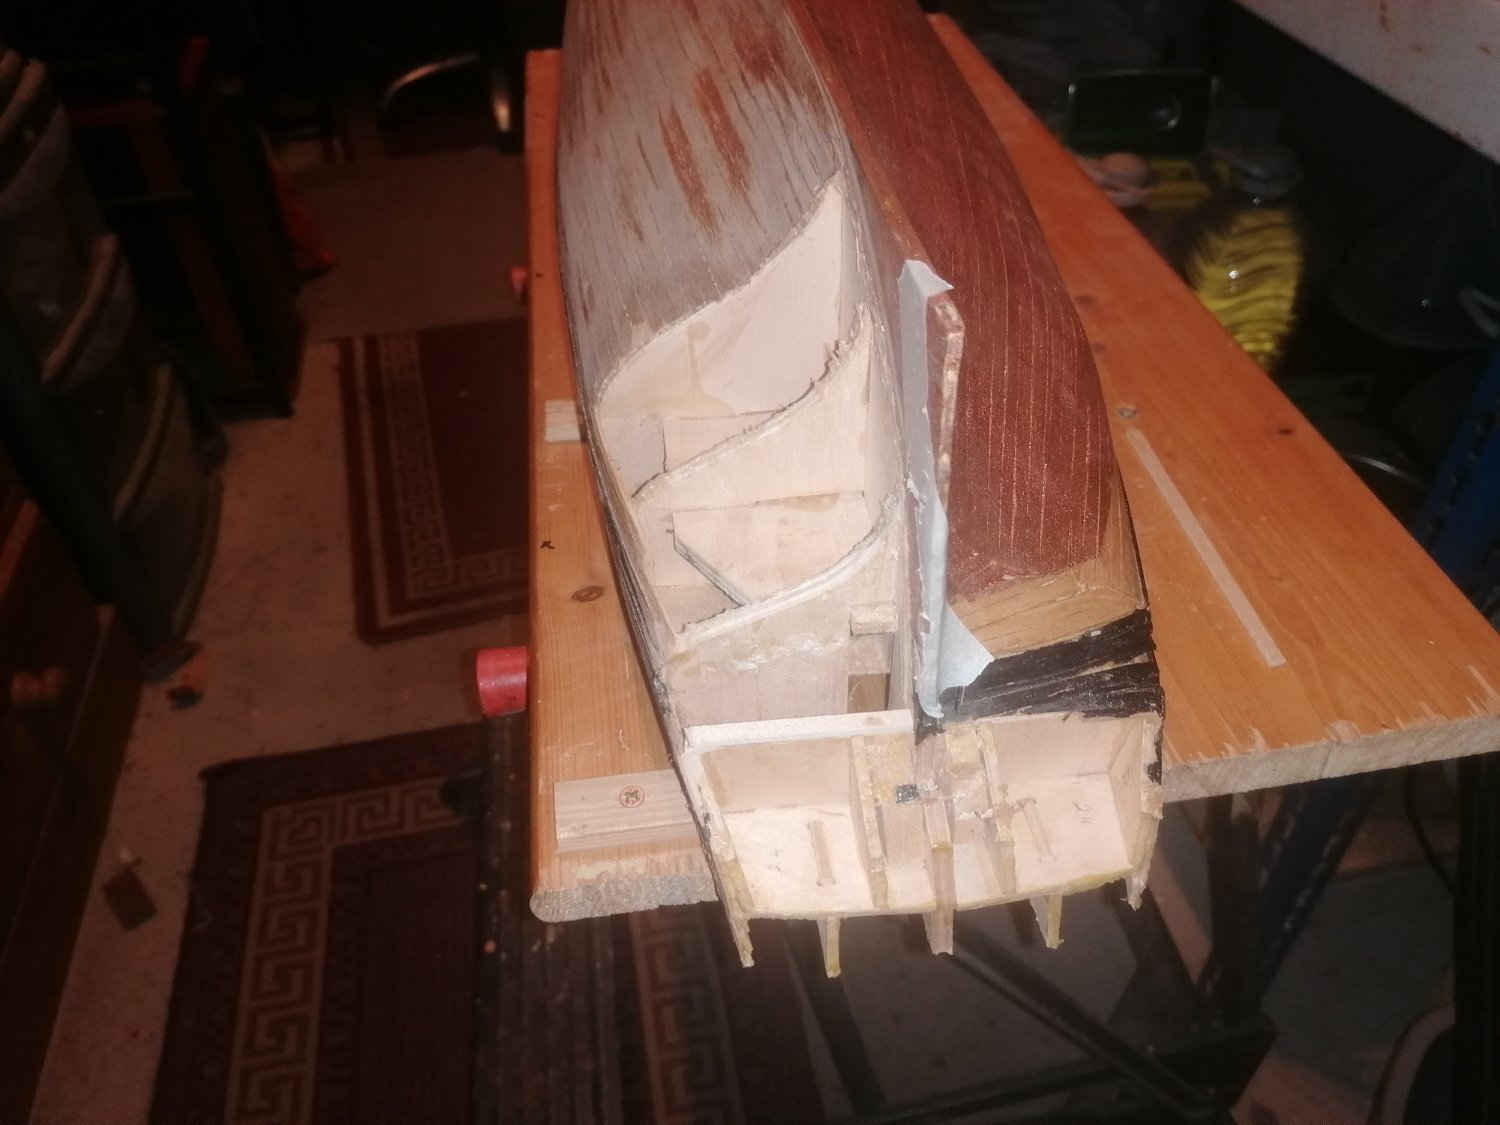
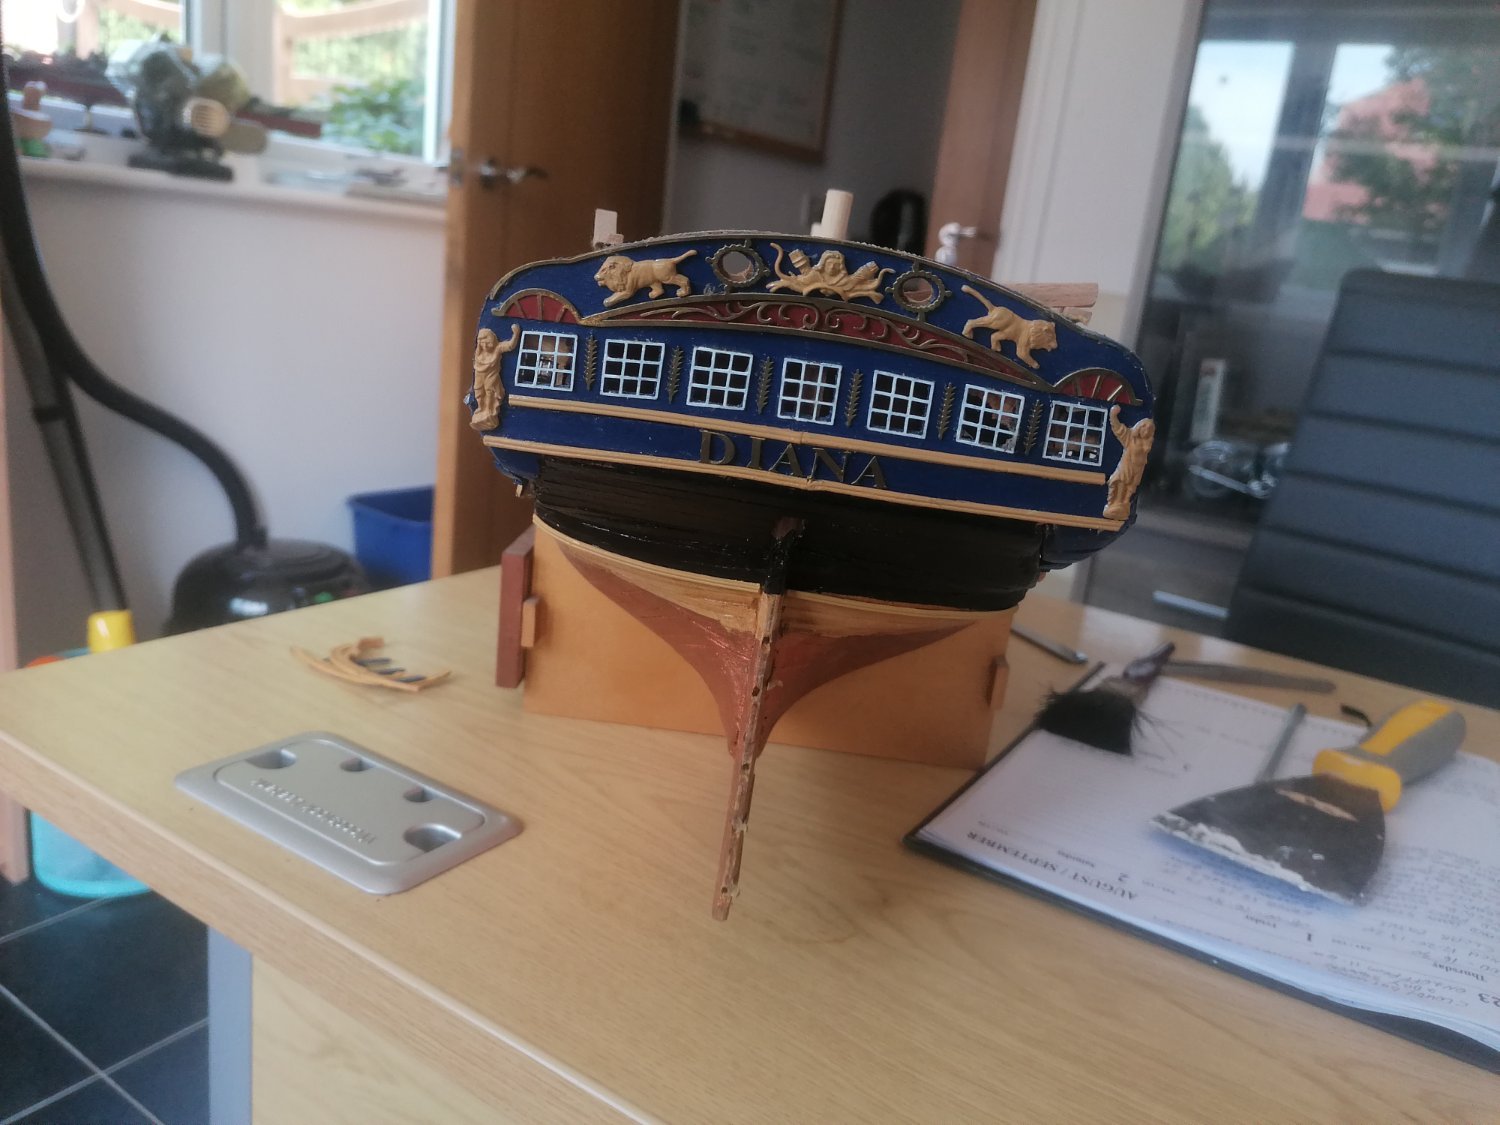
Apologies for the delay in getting back to this build log. I needed to take a break for a few weeks to hopefully approach the build with a clear mind and fresh eyes. I thought after I went to a model show last weekend I would get back to work on her. However, on Saturday I aquired this and until now have spent time figuring out what needs to be done to get her ship shape so to speak. From a distance she doesn't look too bad however, there is a lot to do. I have started another build log on this but won't be updating it until I'm much further into this post. Otherwise it will never get finished. I will be back with an update on the Golden Hind by Sunday I hope.
-
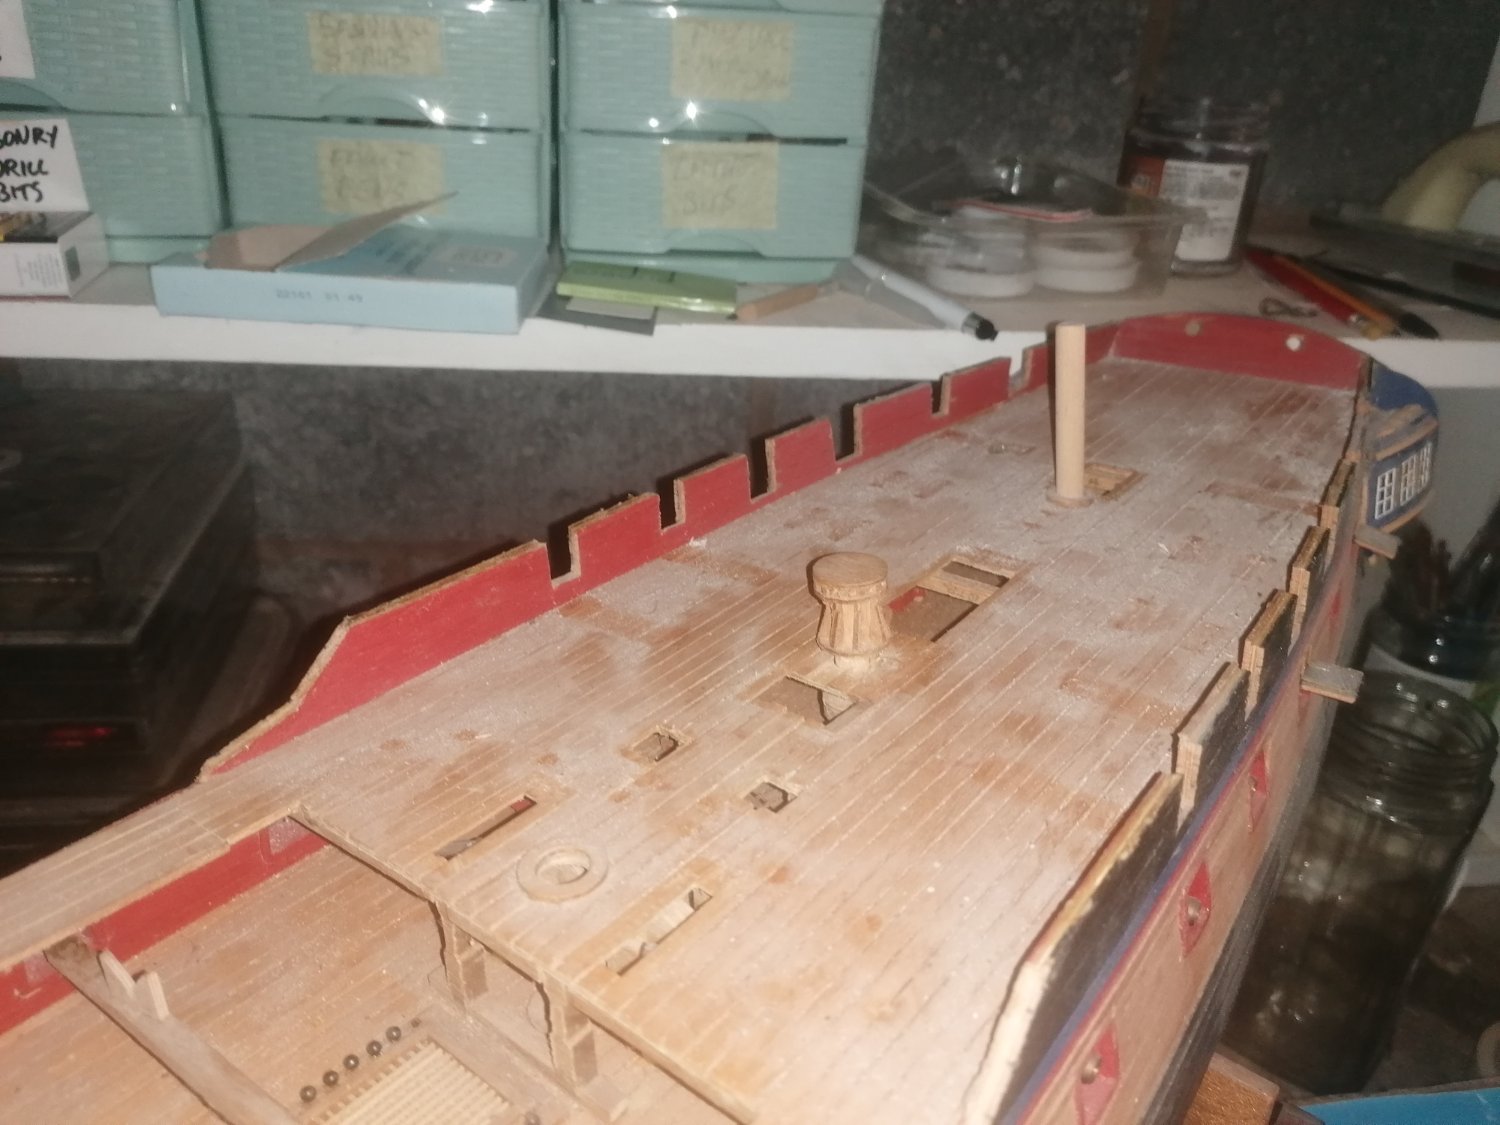
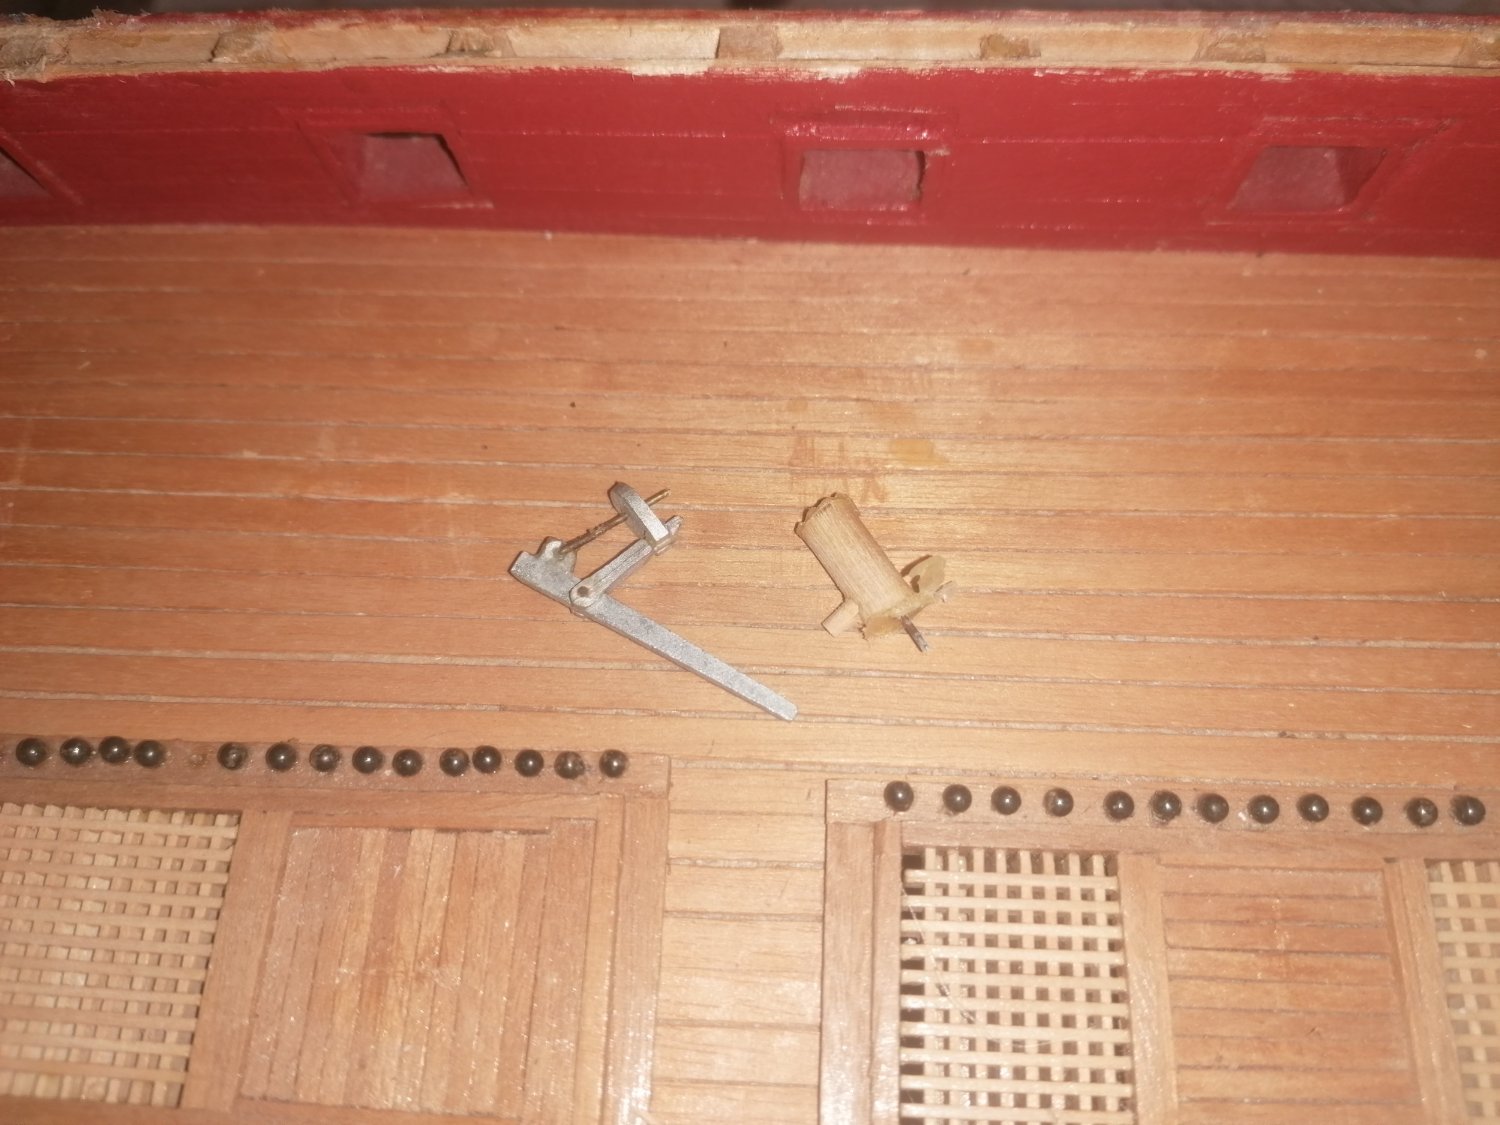
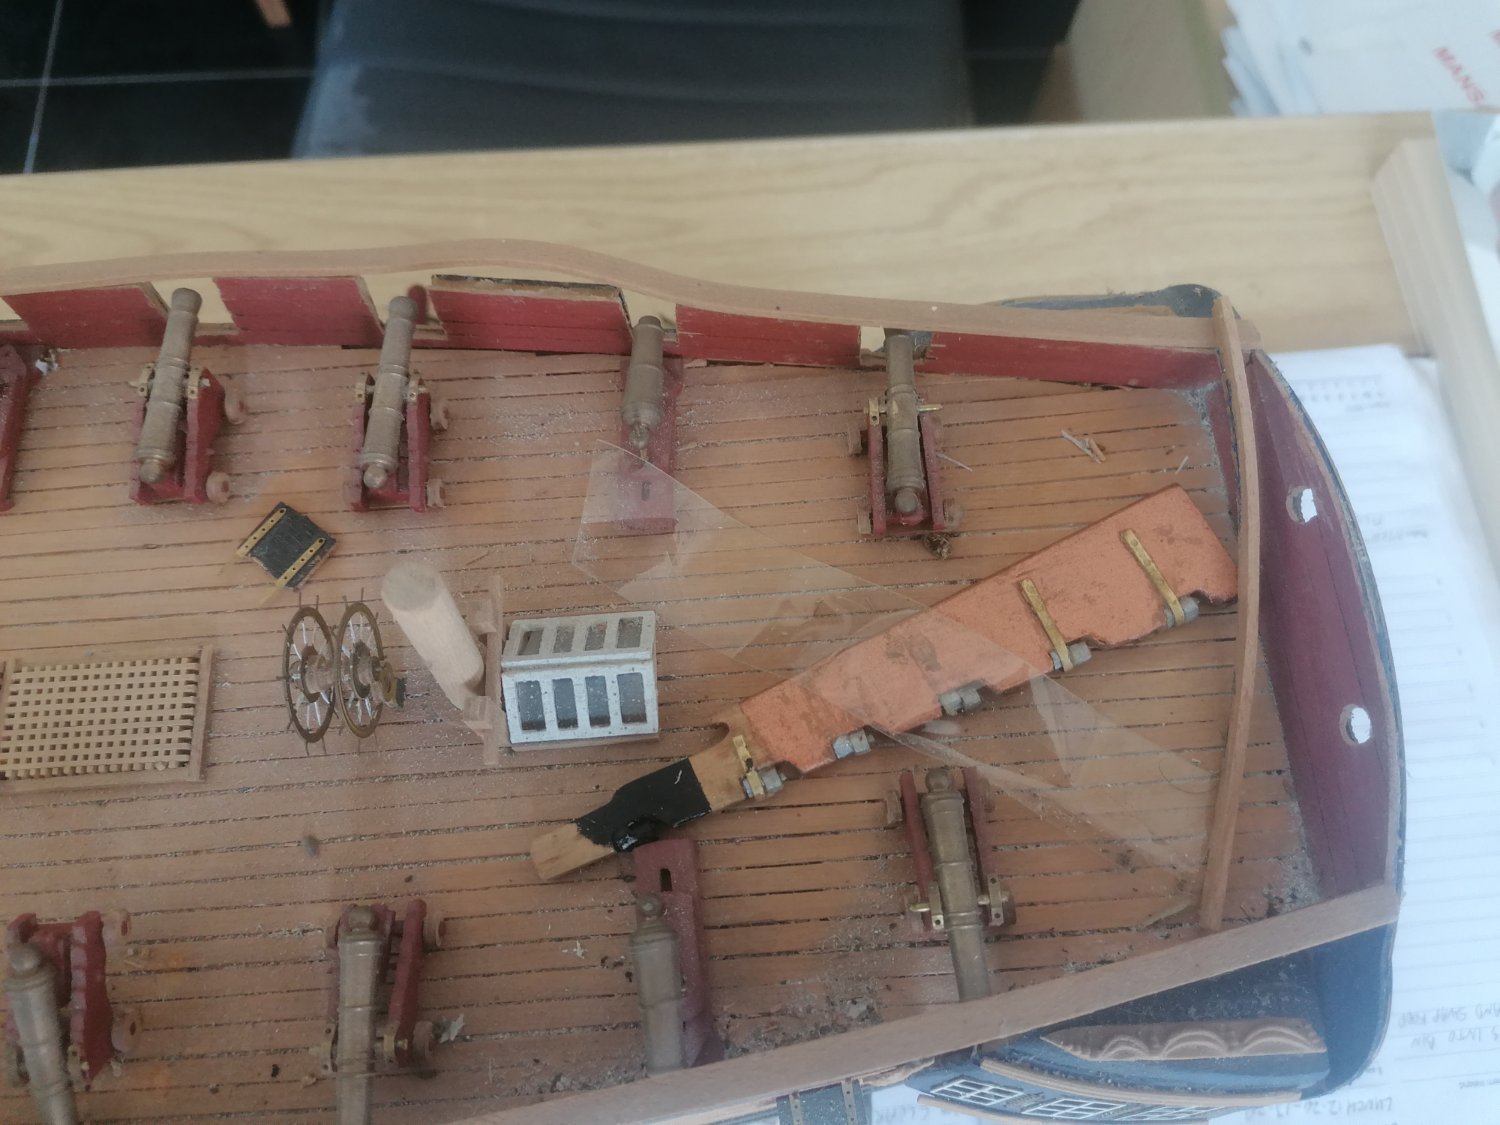
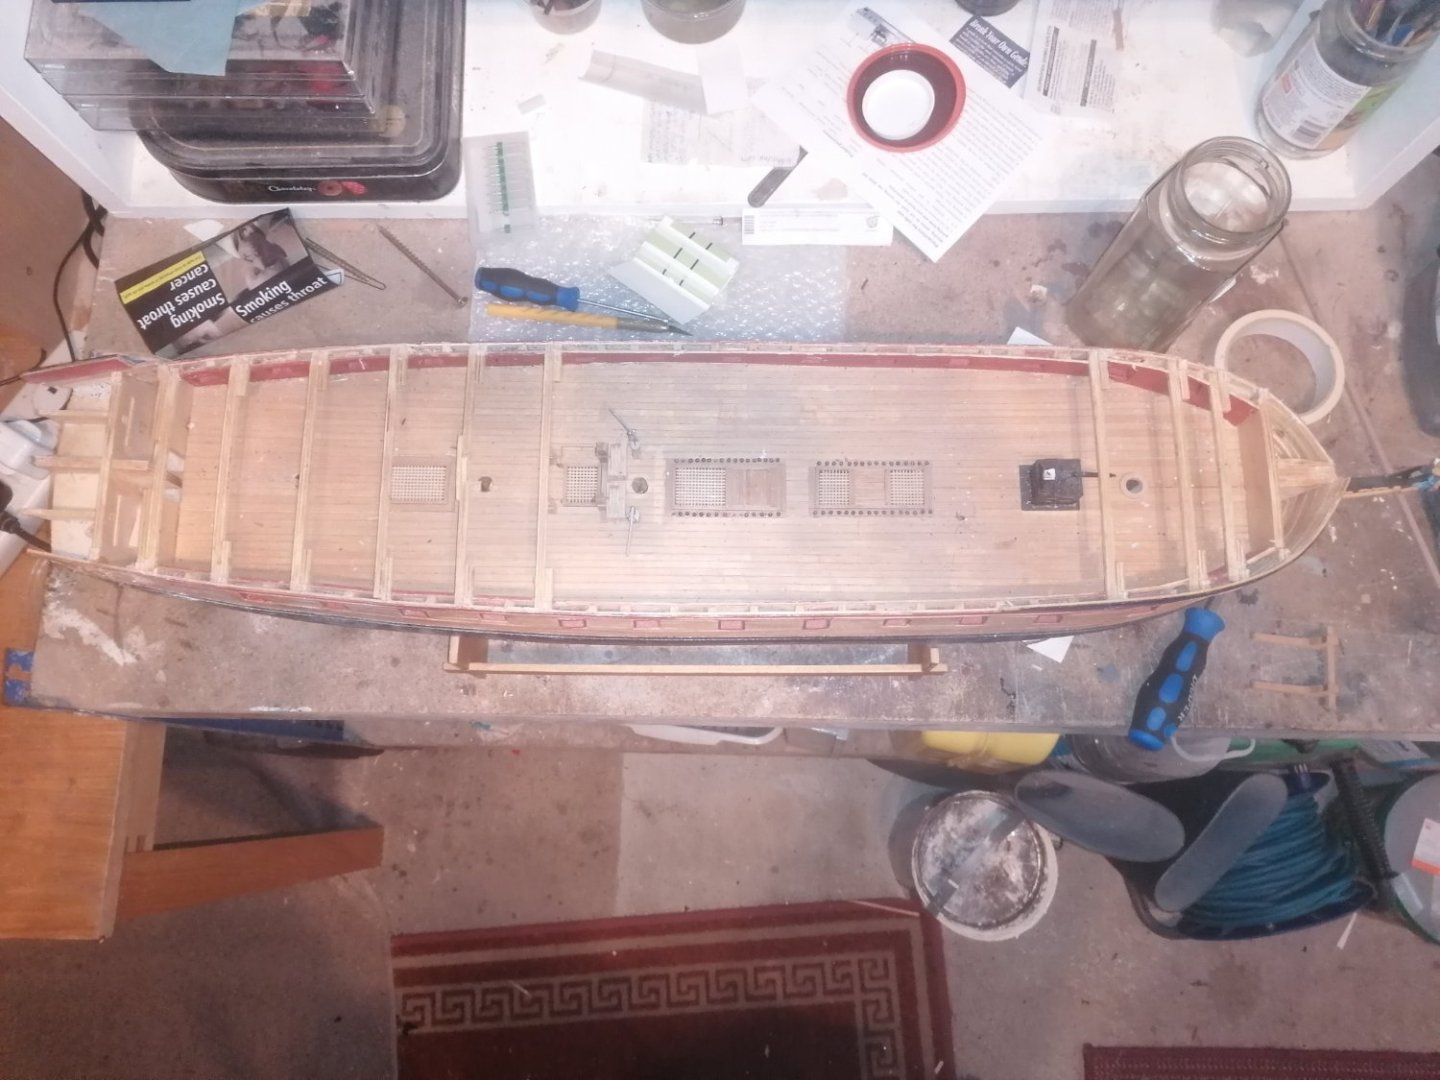
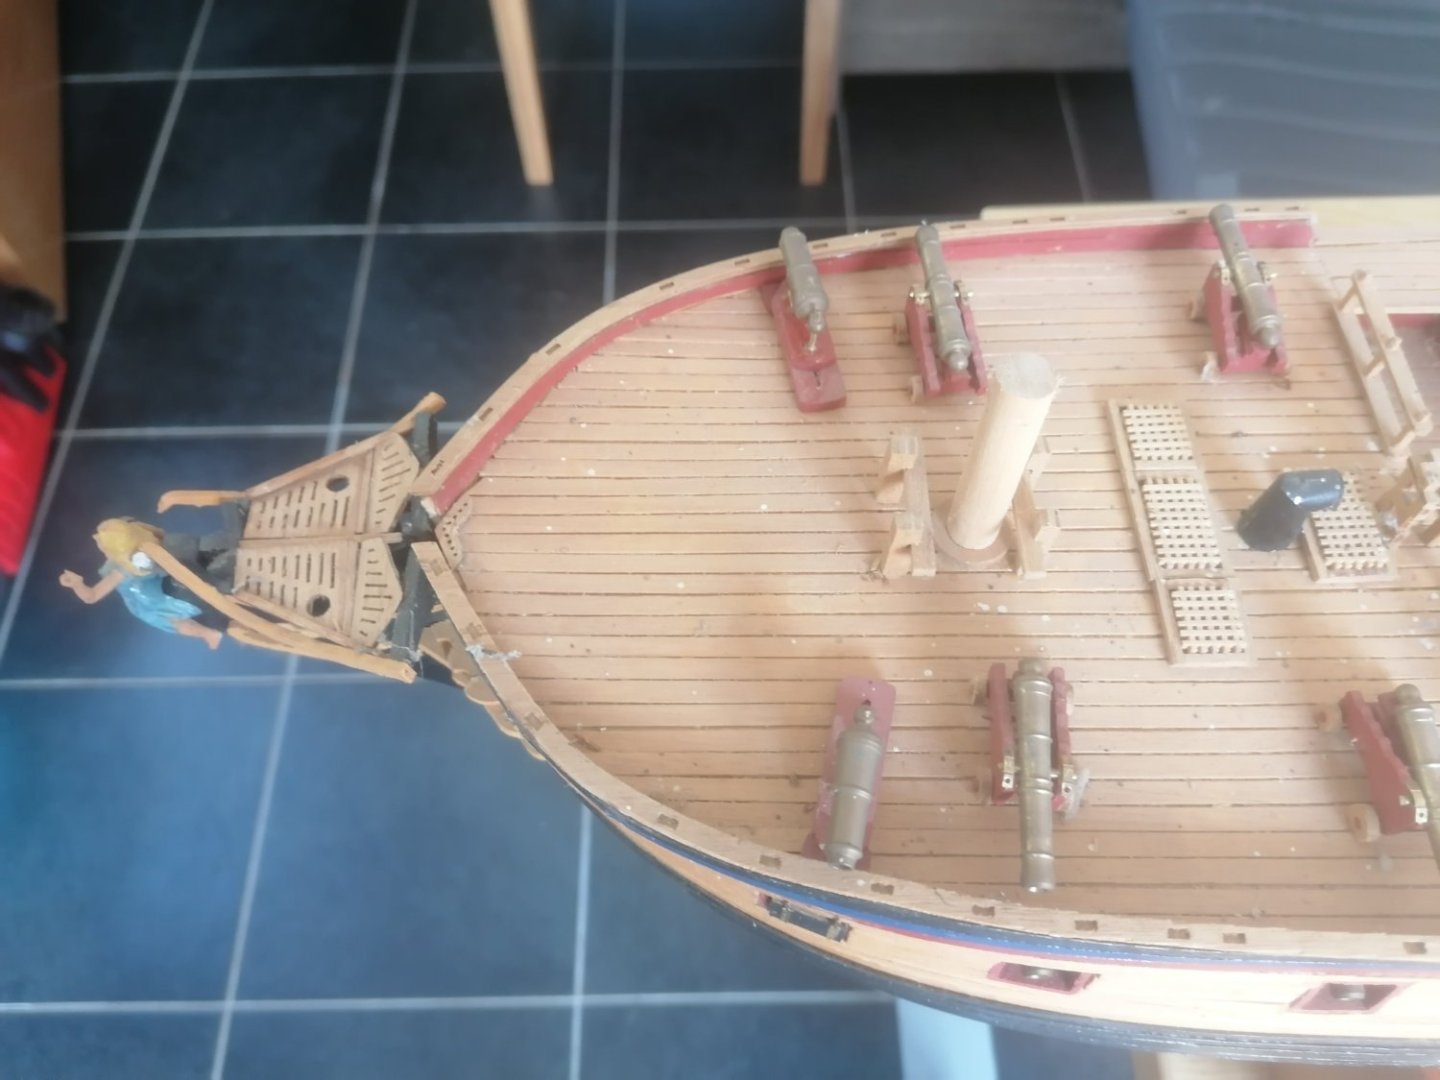
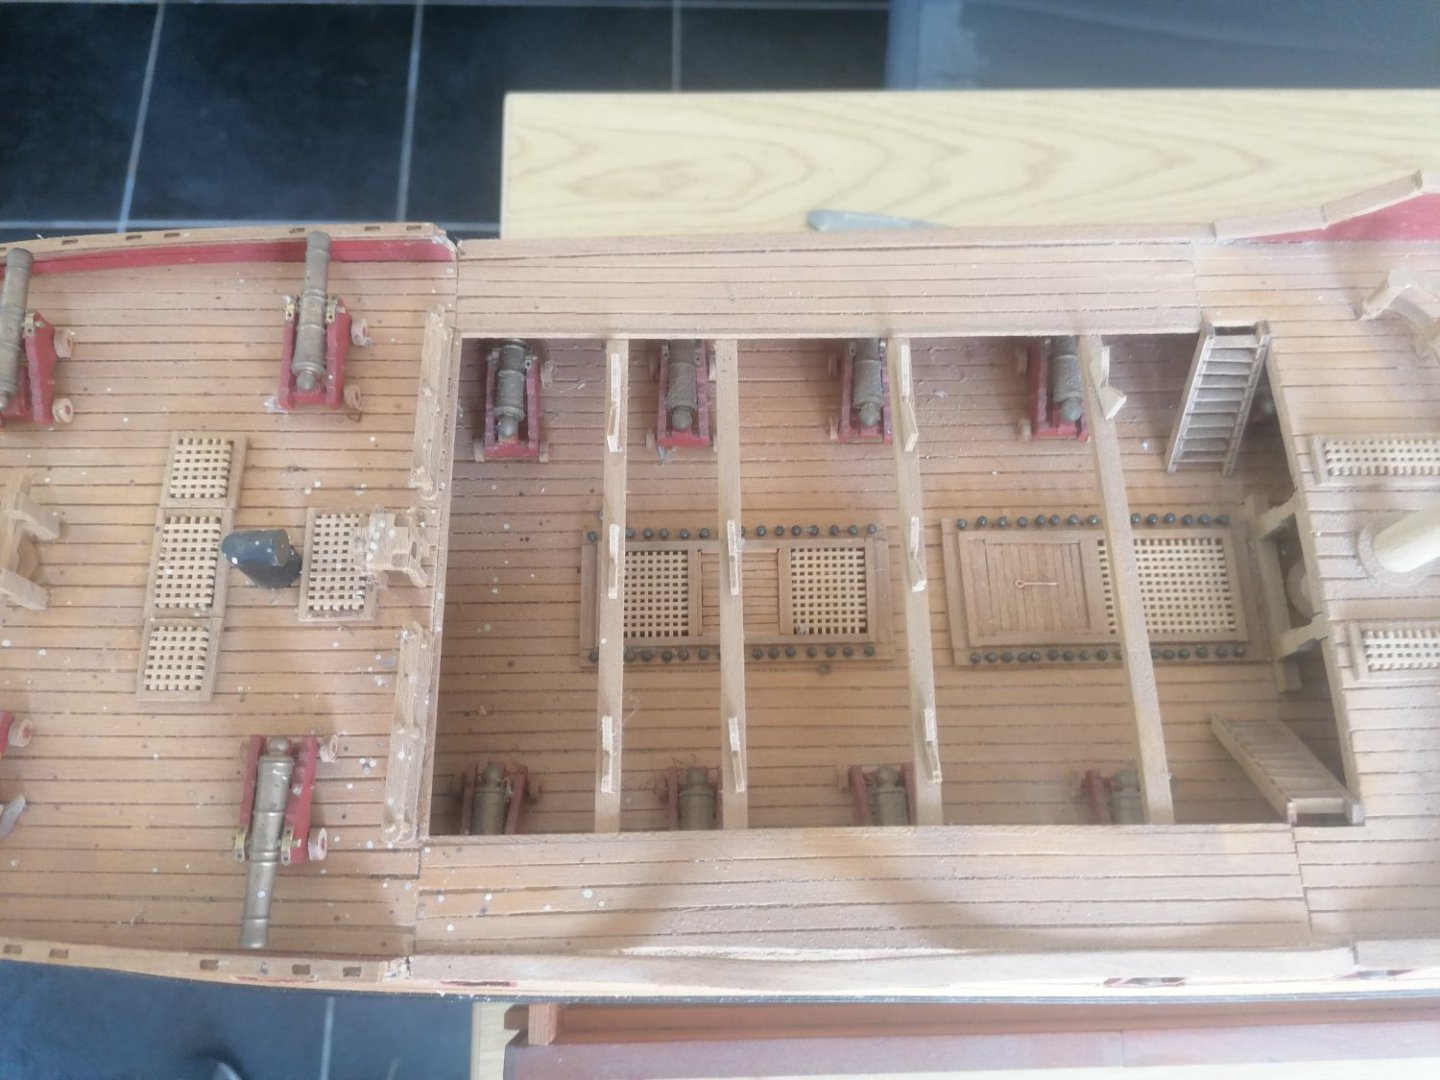
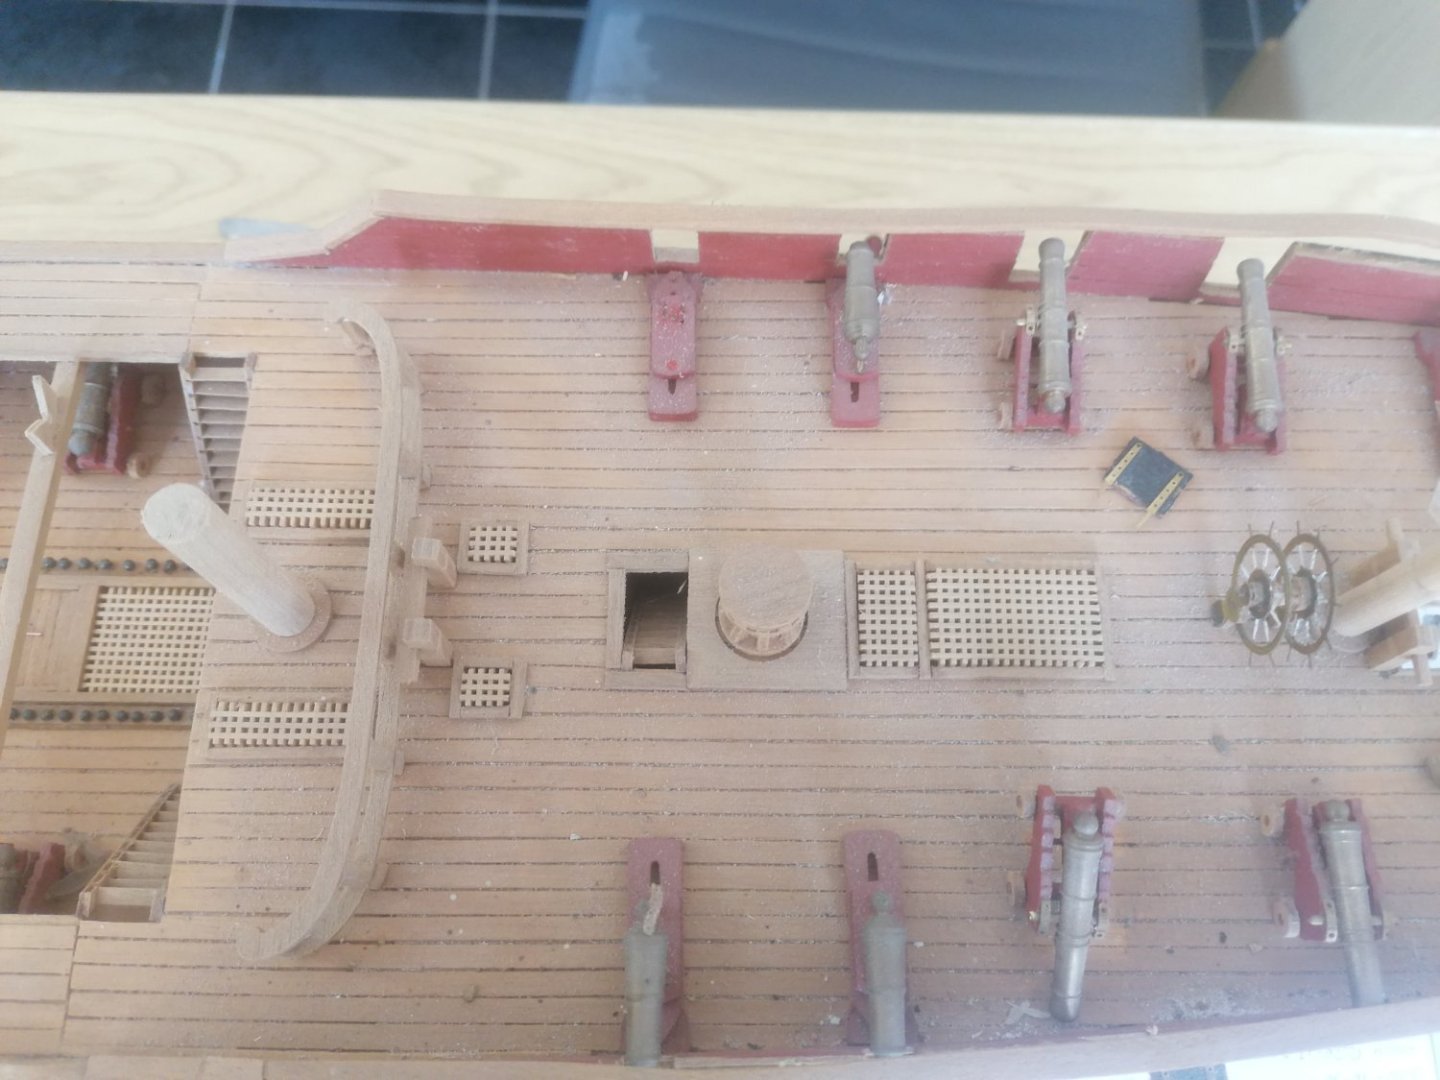
A lot of the parts fitted were still rough cut and there were a lot of glue blobs and splashes. The beams below the main decks I decided to leave in place as I would cause too much damage removing them. I started getting carried away by starting to sand down both decks but realised I have plenty of time to do this once my current build is done. I have also drilled out the hole for the bowsprit. I only discovered it hadn't been done when I removed the head timbers. These were mounted too high, I suspect, because the cross timbers hadn't been sanded flush to the head timber so it wouldn't fit in the right position. I have aquired quite a few storage trays over the years so, as I remove the pieces, I can keep them in related compartments until I start the rebuild properly. I have now also removed the quarter galleries and the stern plate with all the windows and fittings. I will need to have a consistant colour for everything, so I will be ordering everything I will need in one go including the admiralty paints, I hope. Once I need another break from the Golden Hind I will begin sanding down the hull. For now I will leave this post as it is, but, will add updates as and when things progress. Meanwhile I really need to get the Golden Hind done.
-
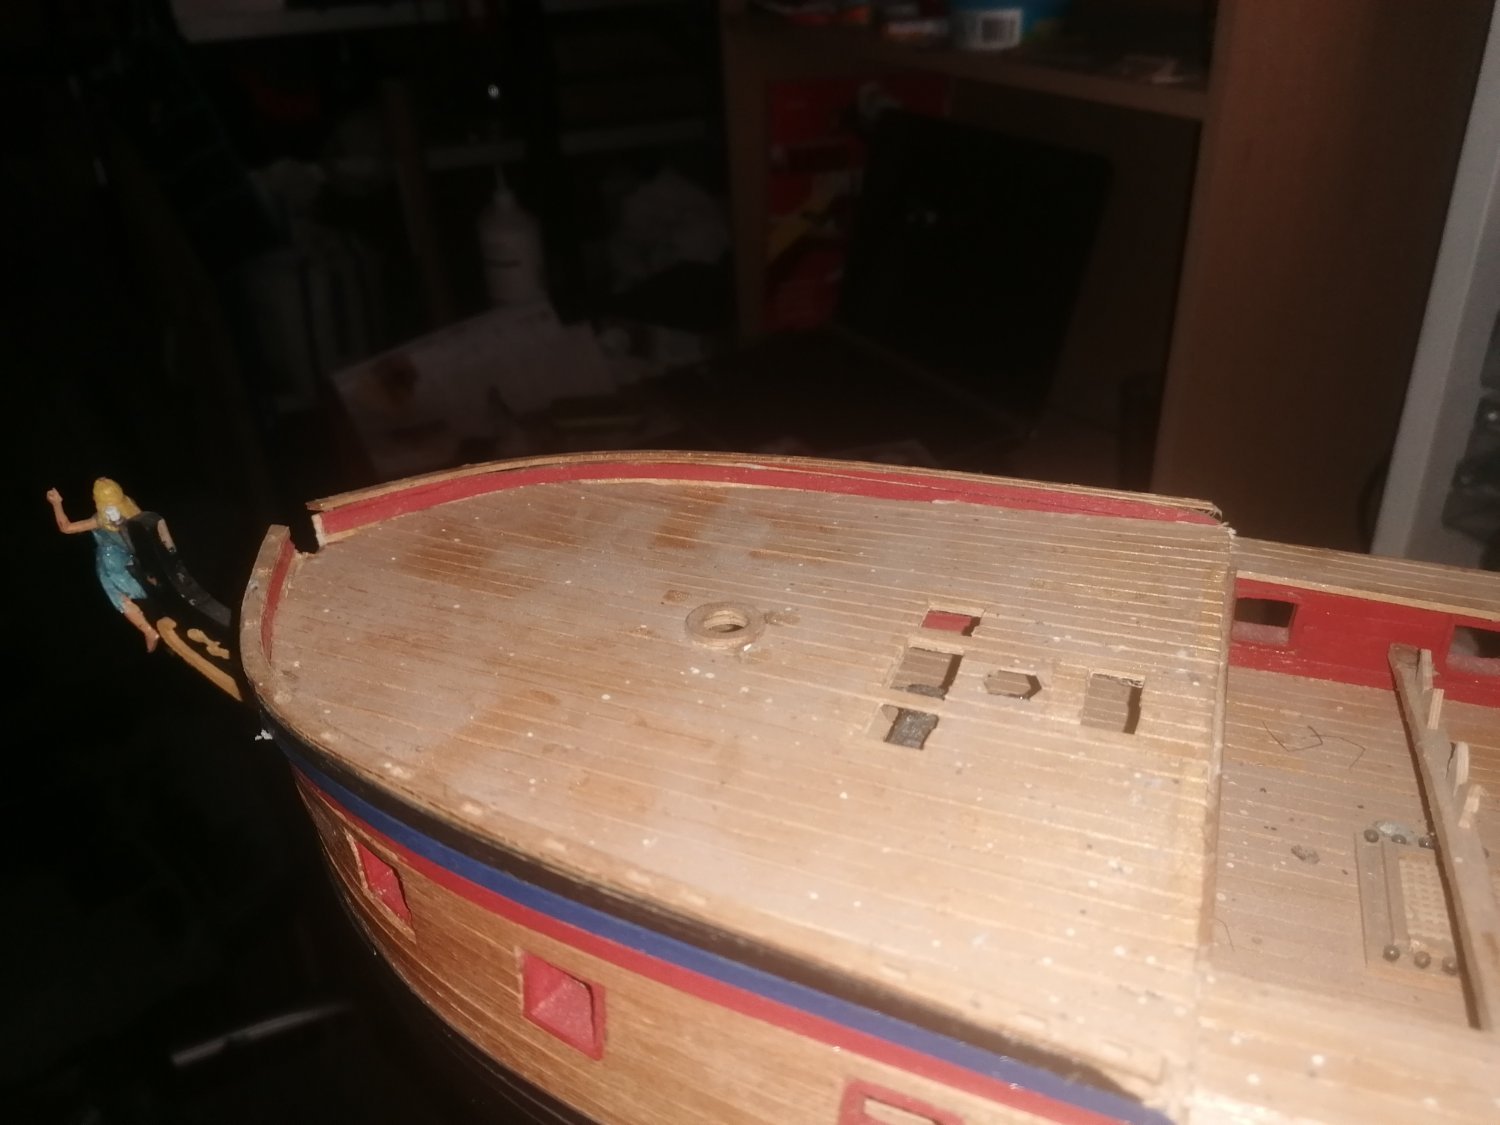
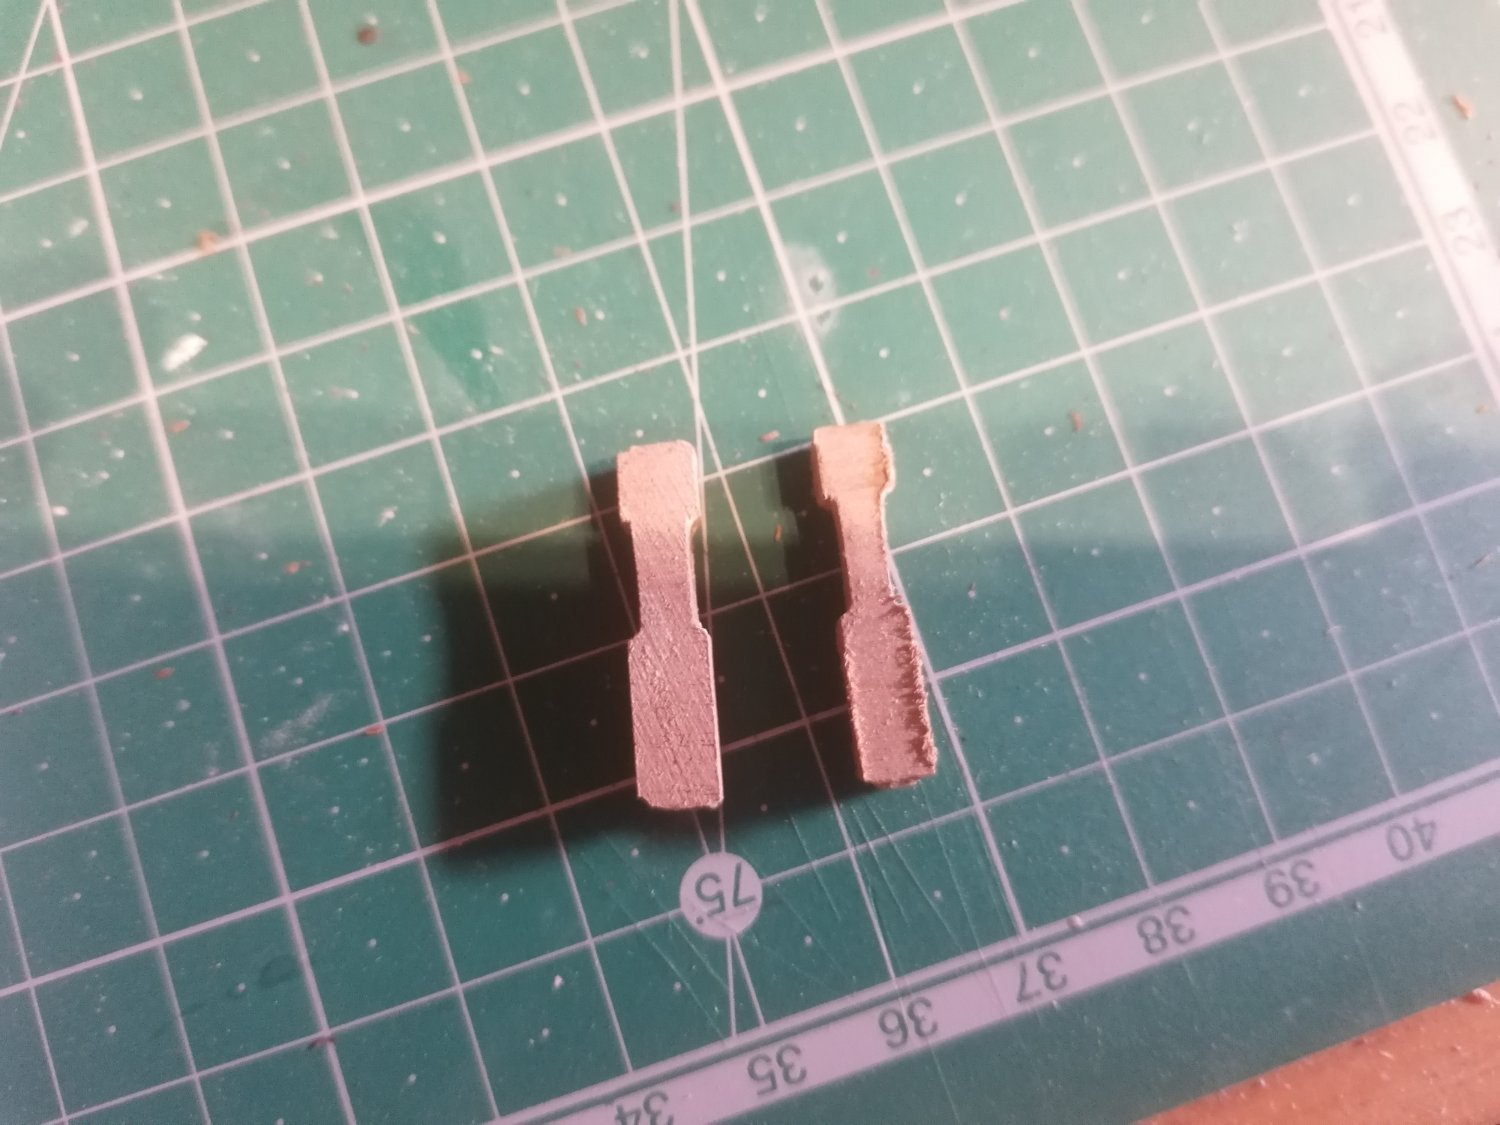
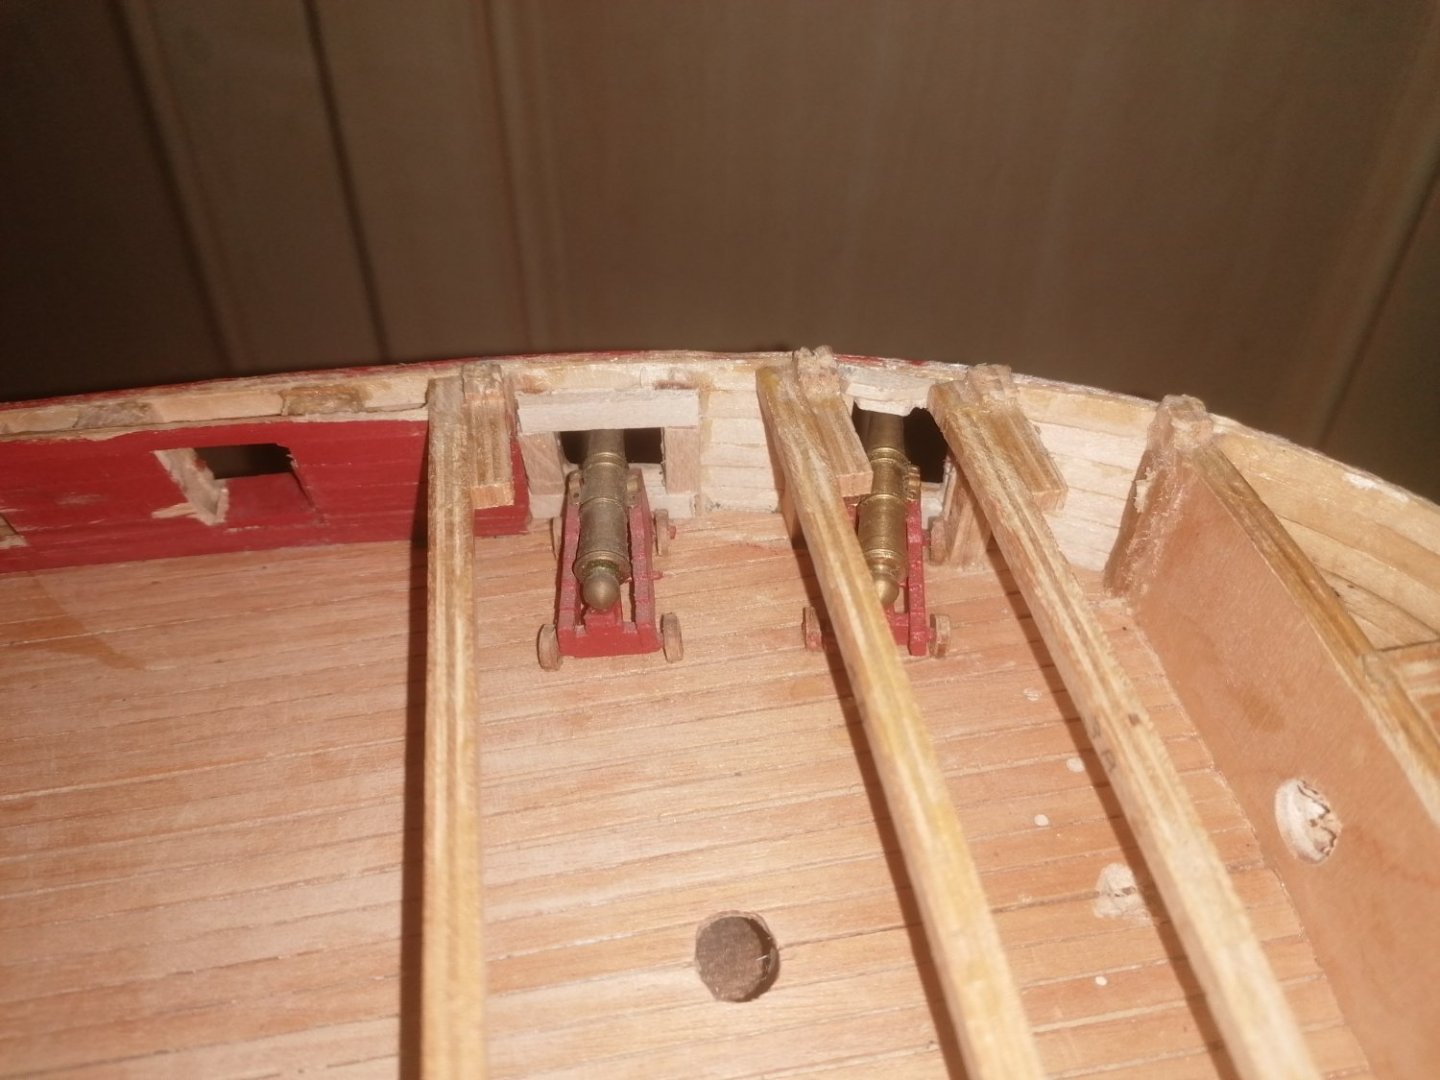
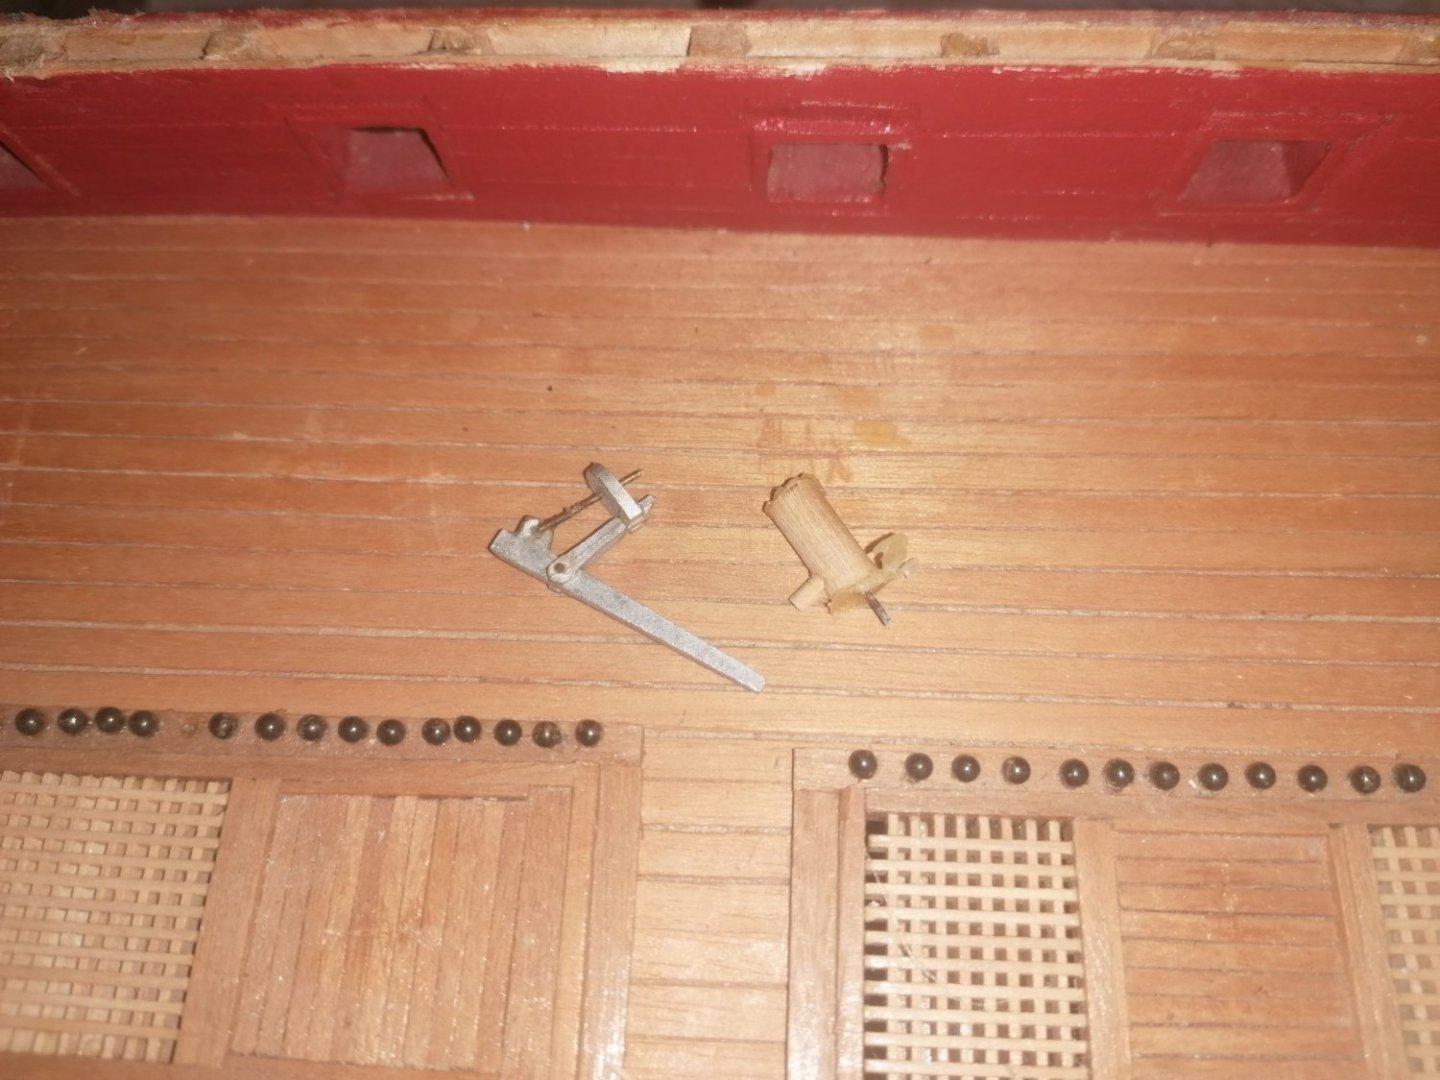
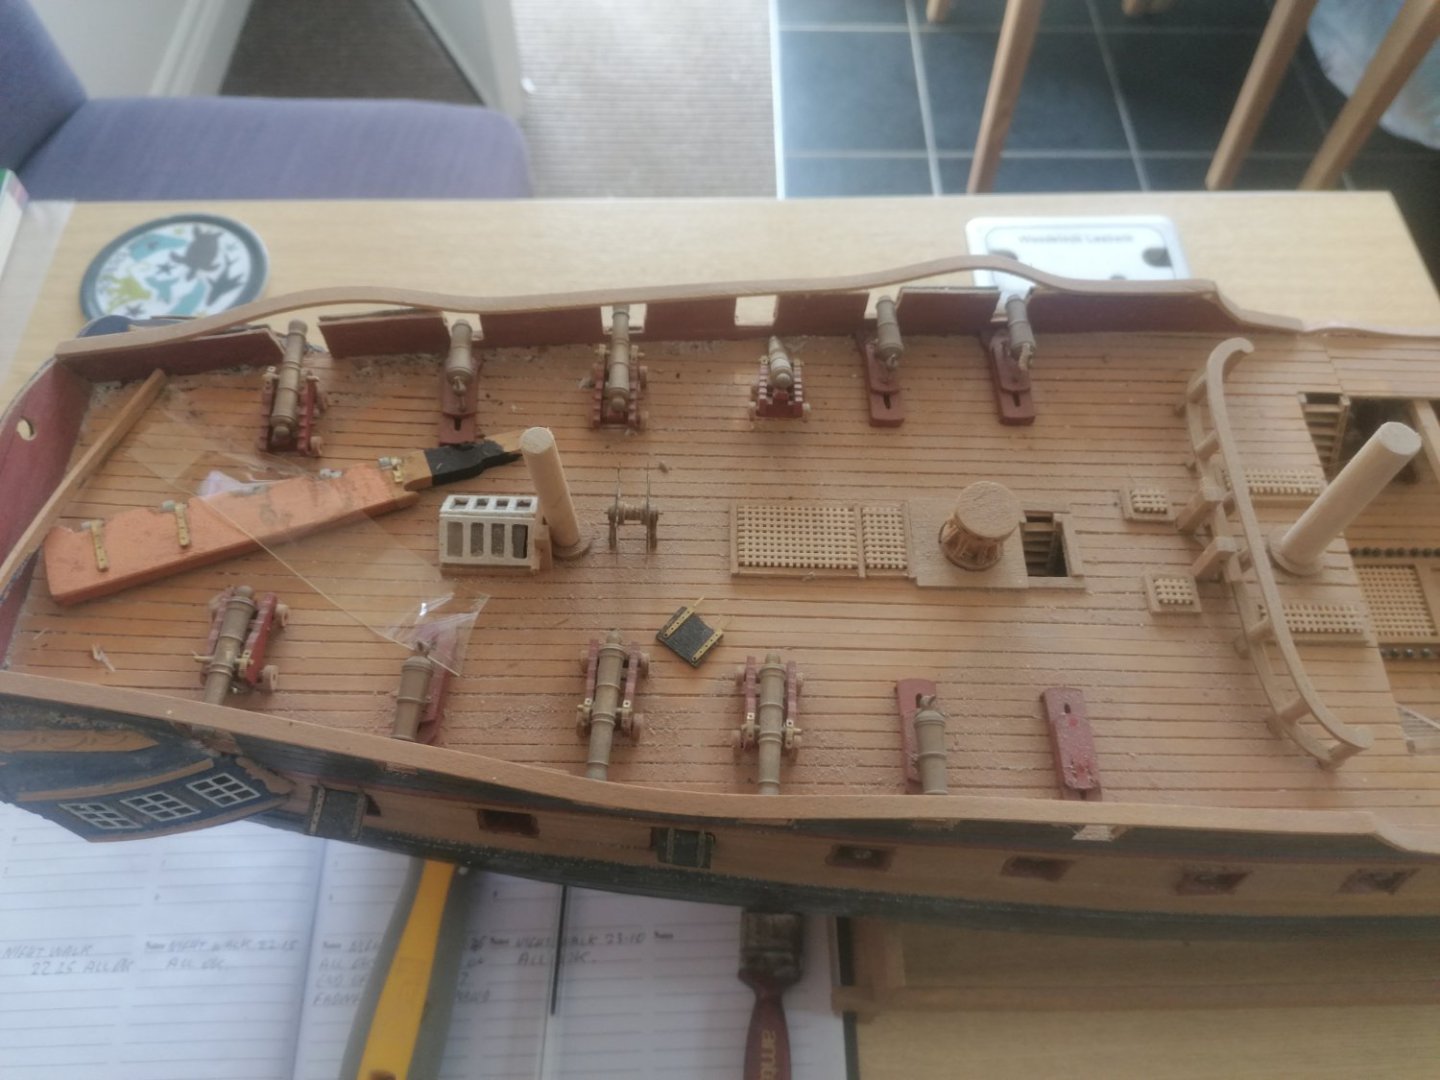
As you can see there is a lot to be done. I have made a start to figure out when and how to really get stuck into this, though it won't get properly started until I have at least got the hull finnished on my Golden Hind. I was planning on getting back to her this week but, this came up on Saturday and I asked at the bring and buy section to have a look and it was only then that I knew which ship she was. Not quite the 50 gun frigate I attempted to scratch build a few years ago but 38 out of 50 isn't too bad. ( I really wish I had kept what I had built now). The next day I just had to see what work was needed. With hind sight I should have looked much closer but I'm not sure it would have mattered as I pretty much had my heart set on her, after 4 looks from a distance. One thing led to another and I removed the head timbers, They were mounted at the top of the fore deck. I then removed the fittings from the upper deck, and the deck itself, which was held in place by the inner planking which I ended up also having to remove. Although the deck planking didn't look too bad, after brushing off all the dust I realised that each of the strakes were 1mm apart but perfectly done? Much harder to achieve than butting them side by side I think. Anyhow, the fitting were then removed from the gun deck again along with the cannons, They were all glued inboard away from the ports. Some of the gratings need work but others can be refitted once I redo the planking. Luckily whoever started building this kit was methodical and ticked off the parts he had used and the rest are still on the formers. There is a lot of timber and all the odds and ends that will be needed to finnish her off are in the box. The only thing missing seems to be the majority of the rigging thread which I would probably have replaced anyway. One down side is the cannon barrels with the football on the ends. I will need to replace most of these. ay least on the visible ones.


-
Firstly I would like help with the title for this log as I have bought the model with the hull. at first glance looking almost finnished. How wrong I was. I have taken time out from my Golden Hind build so as to clear my head and look at starting again with a fresh mind and set of eyes. Then, at the Southern model show I saw this.


-
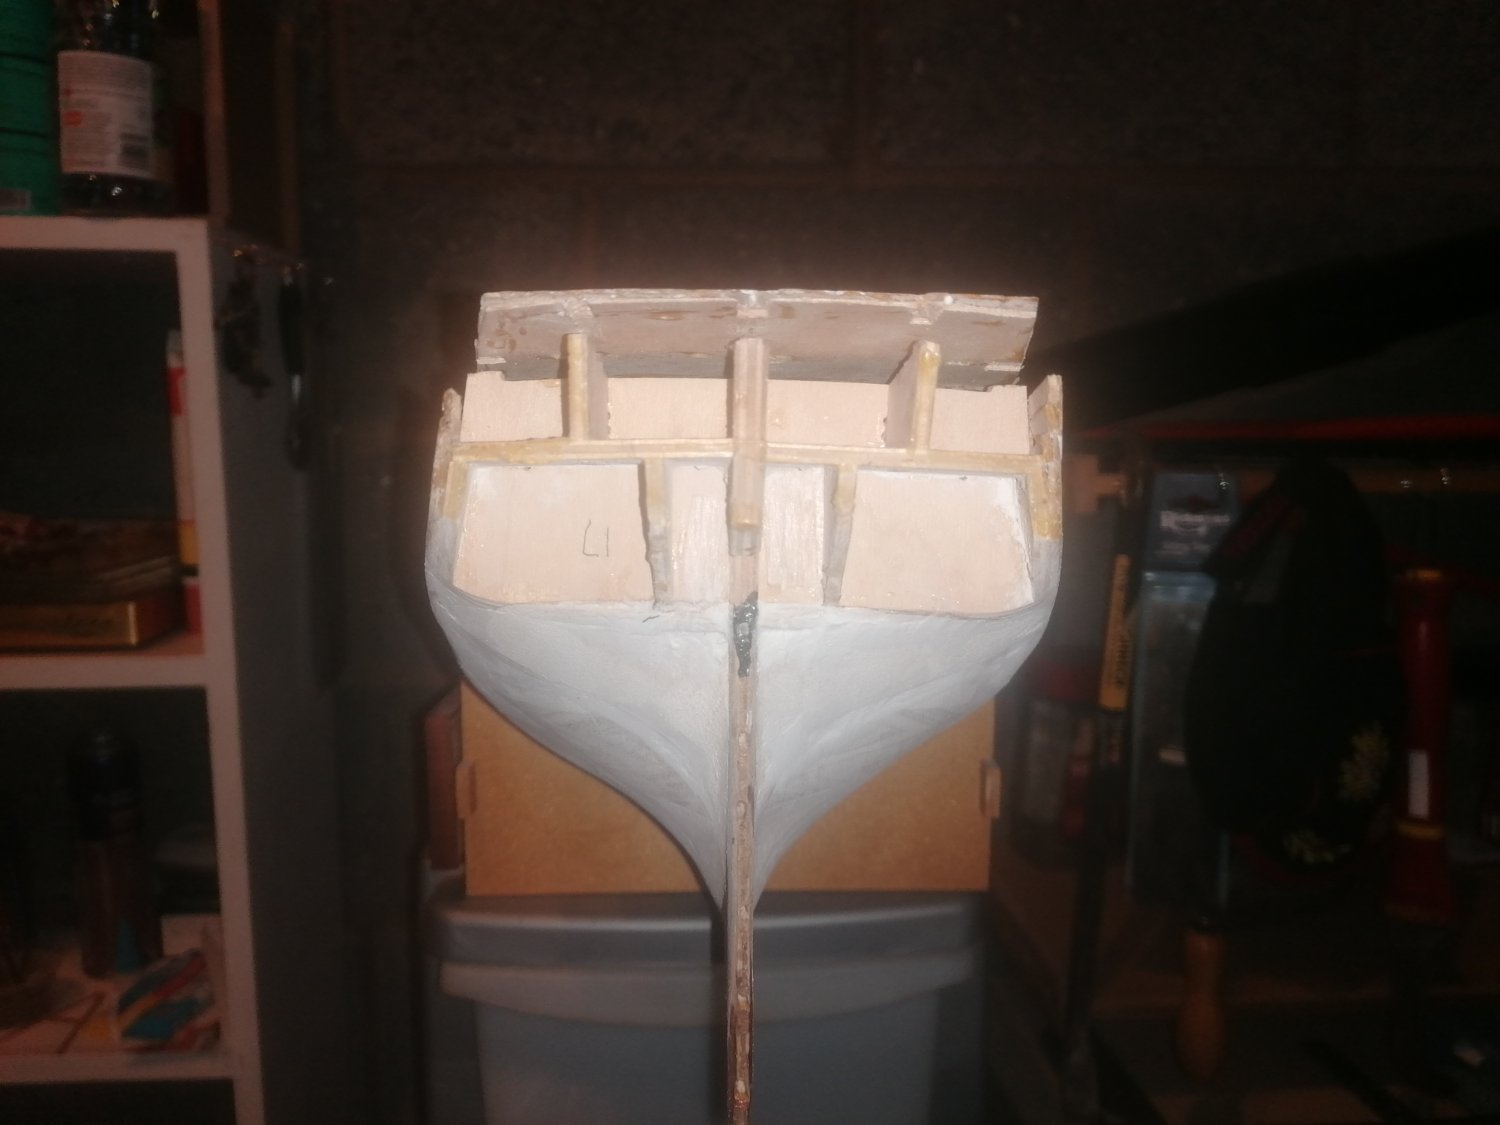
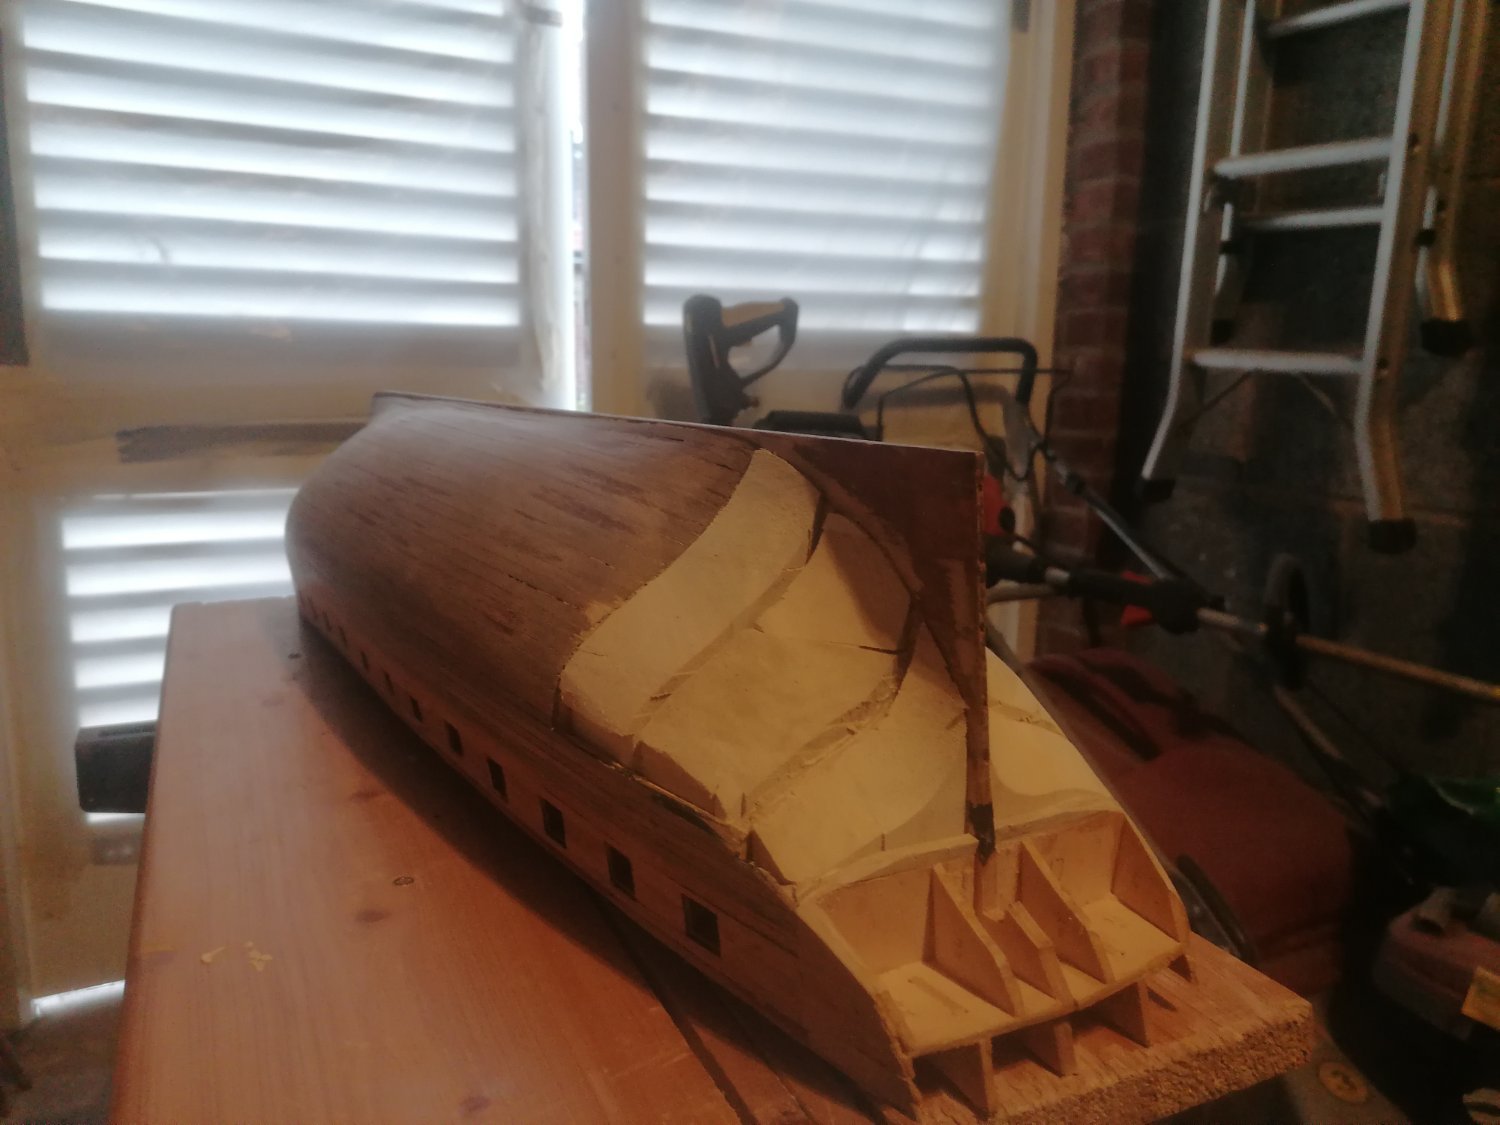
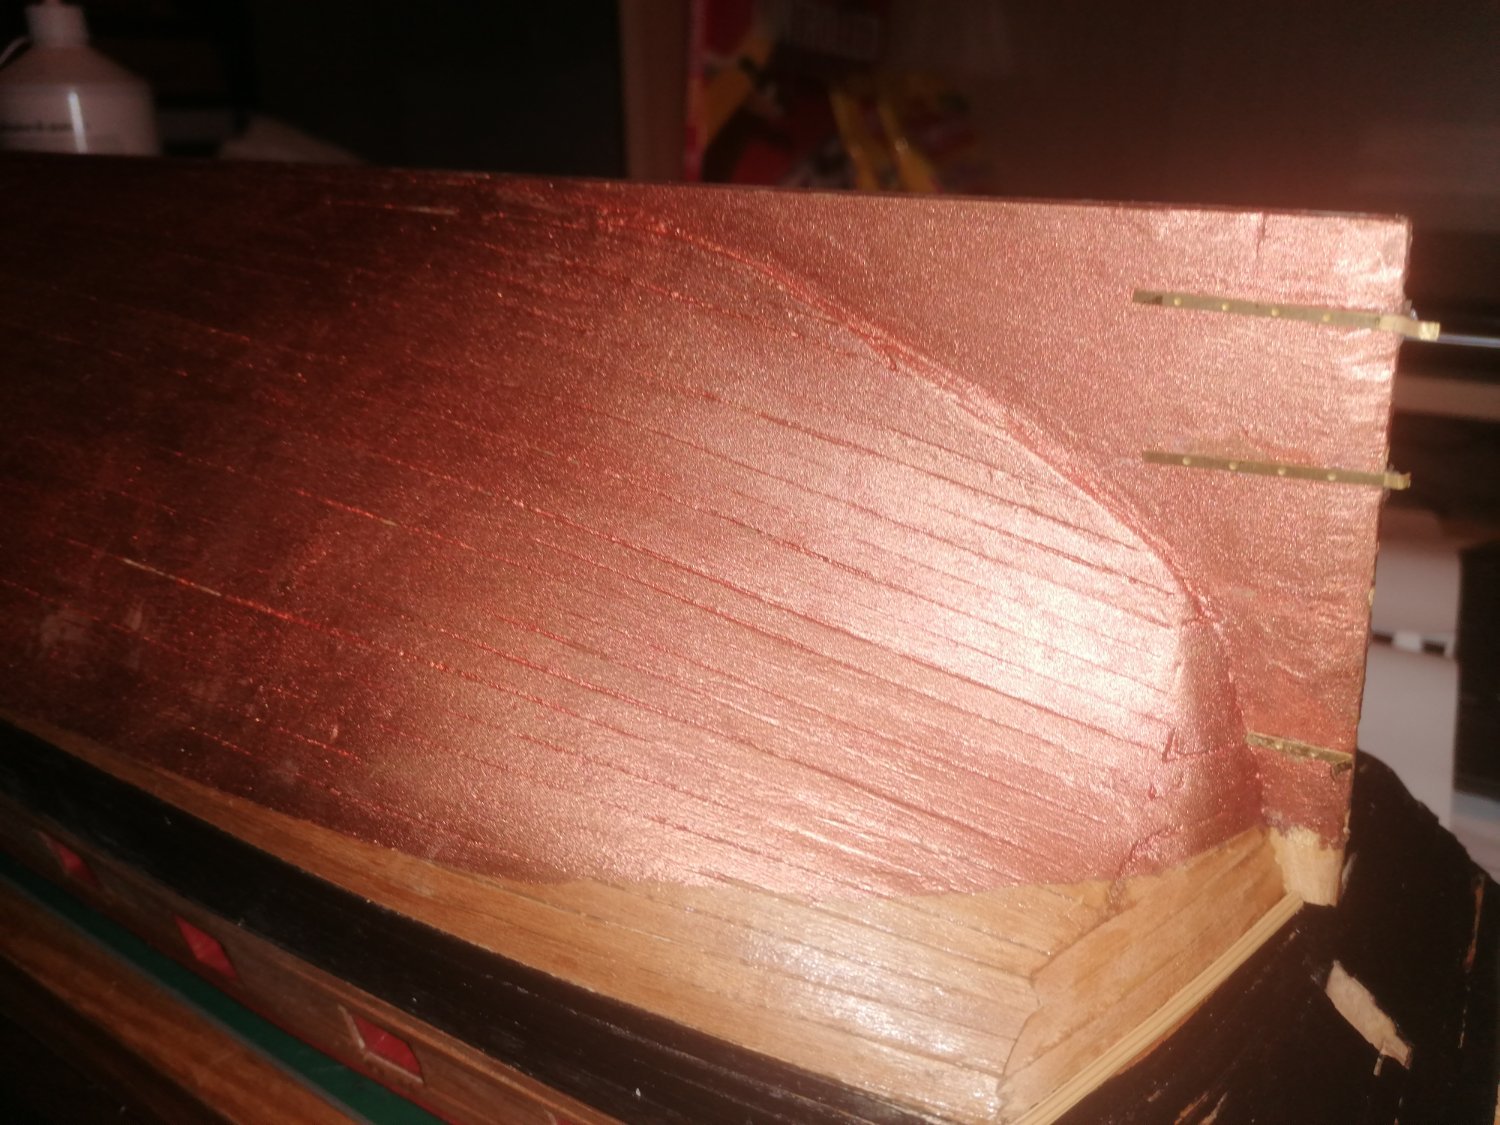
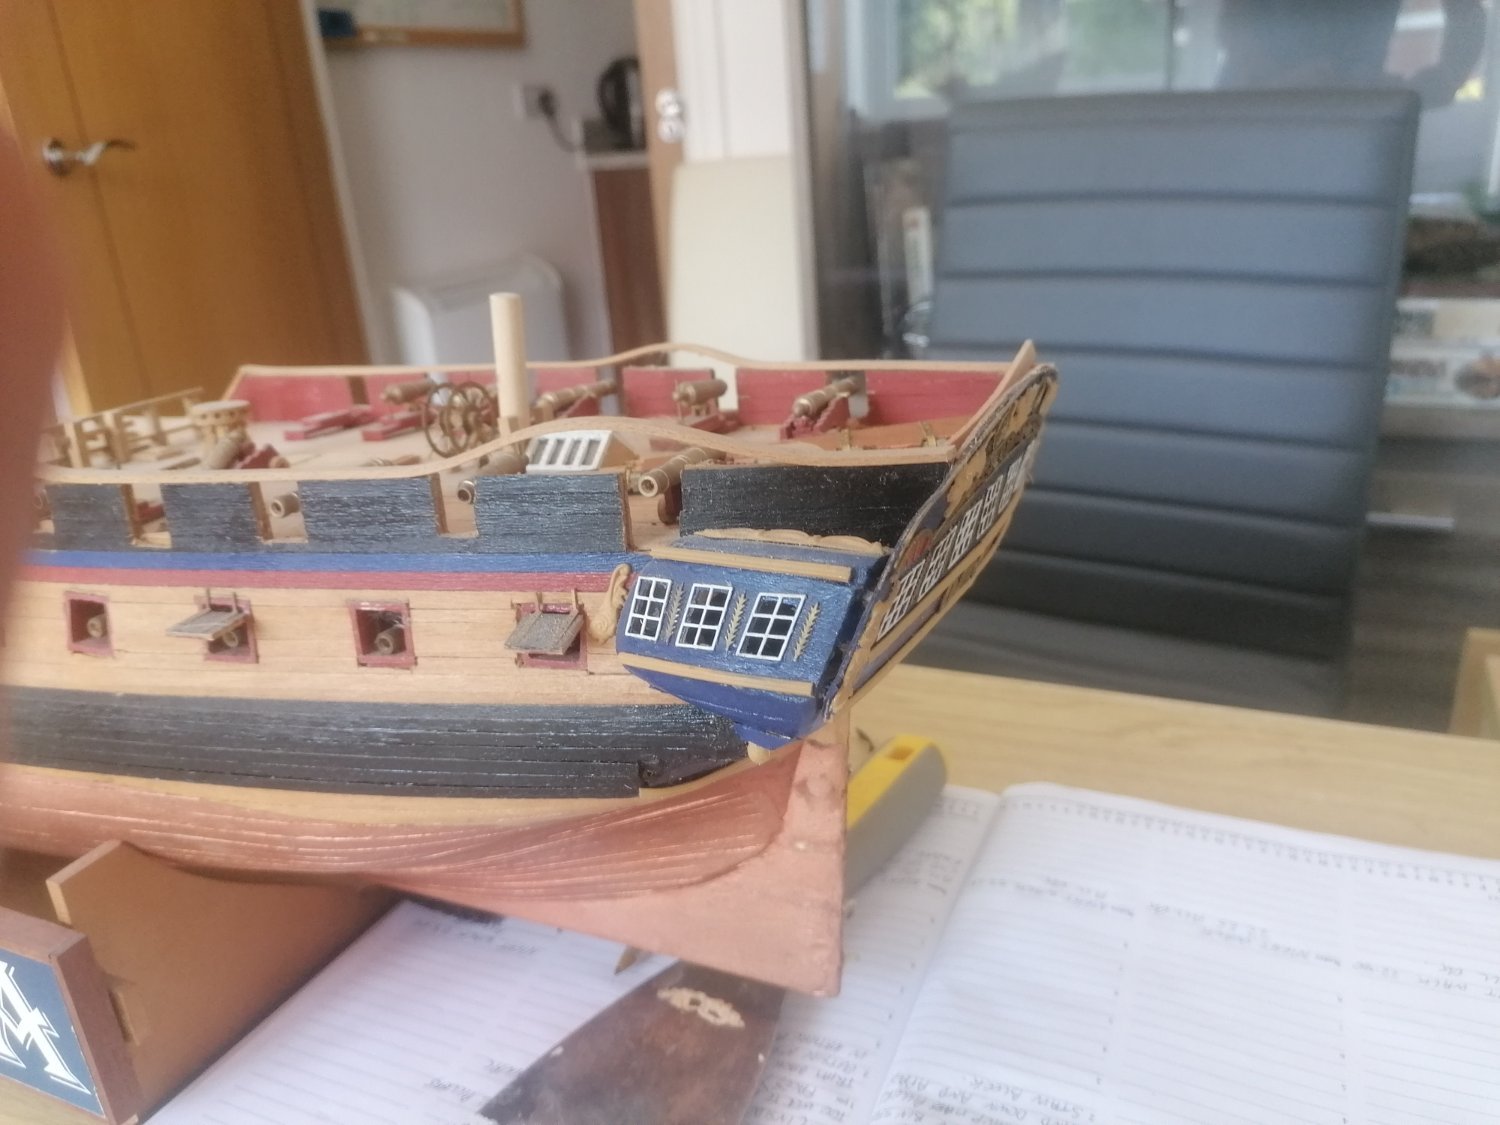
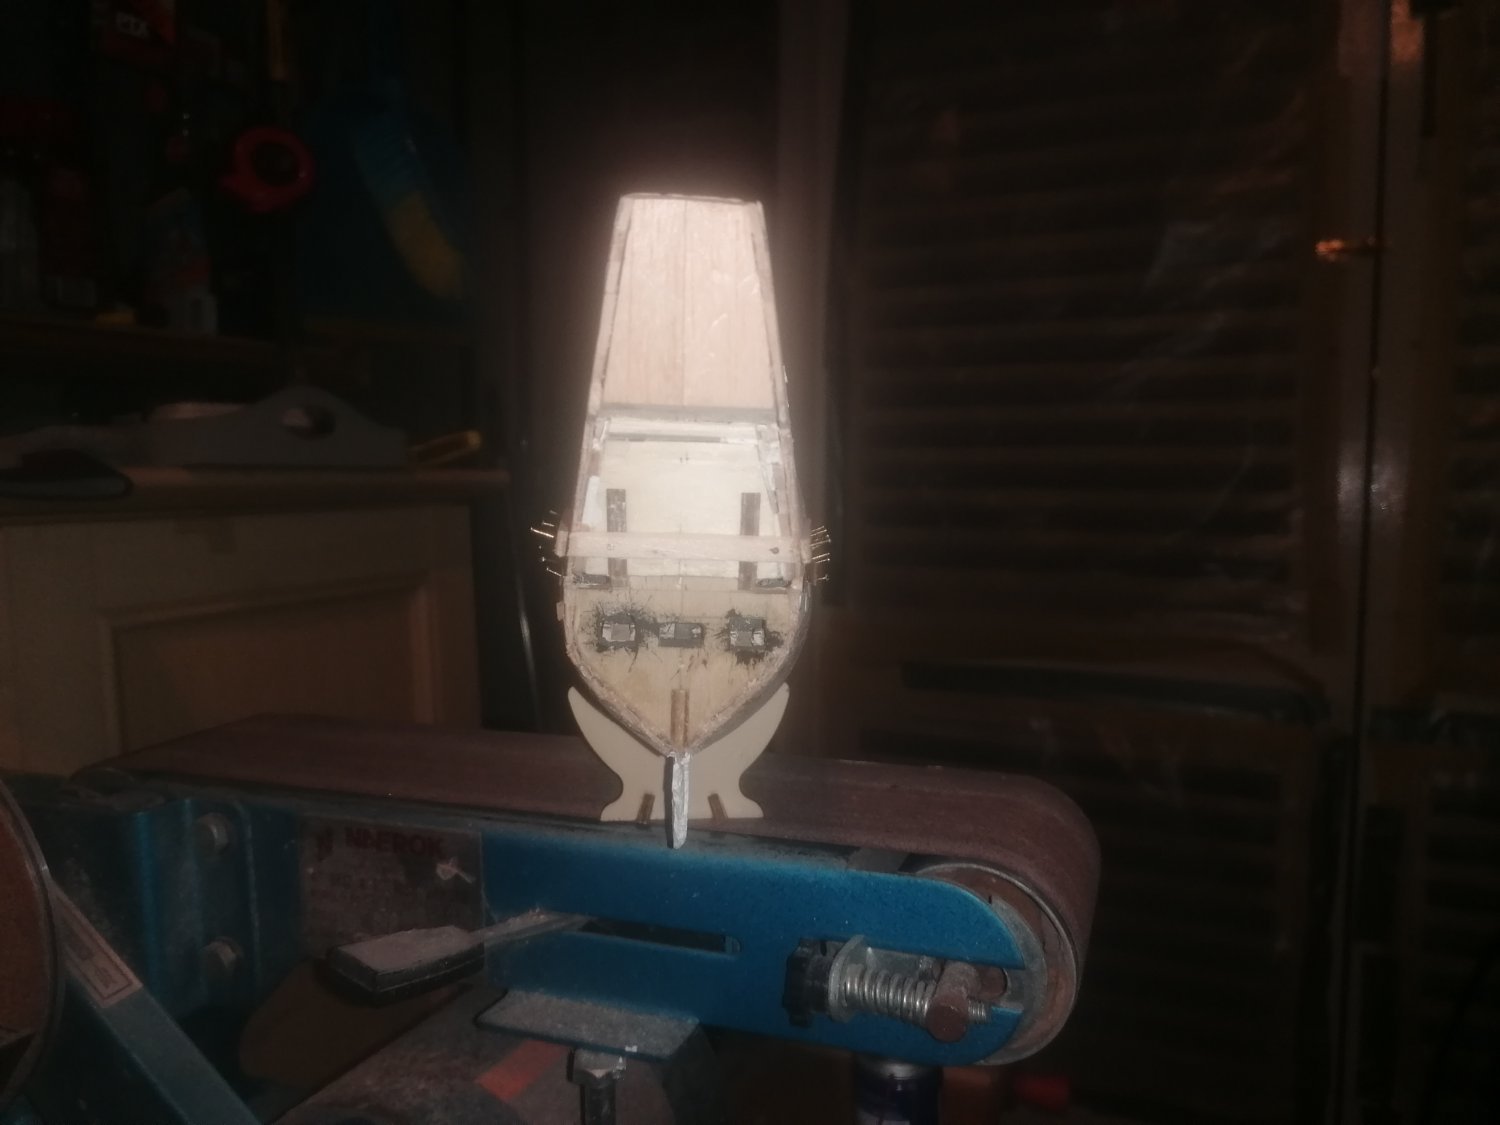
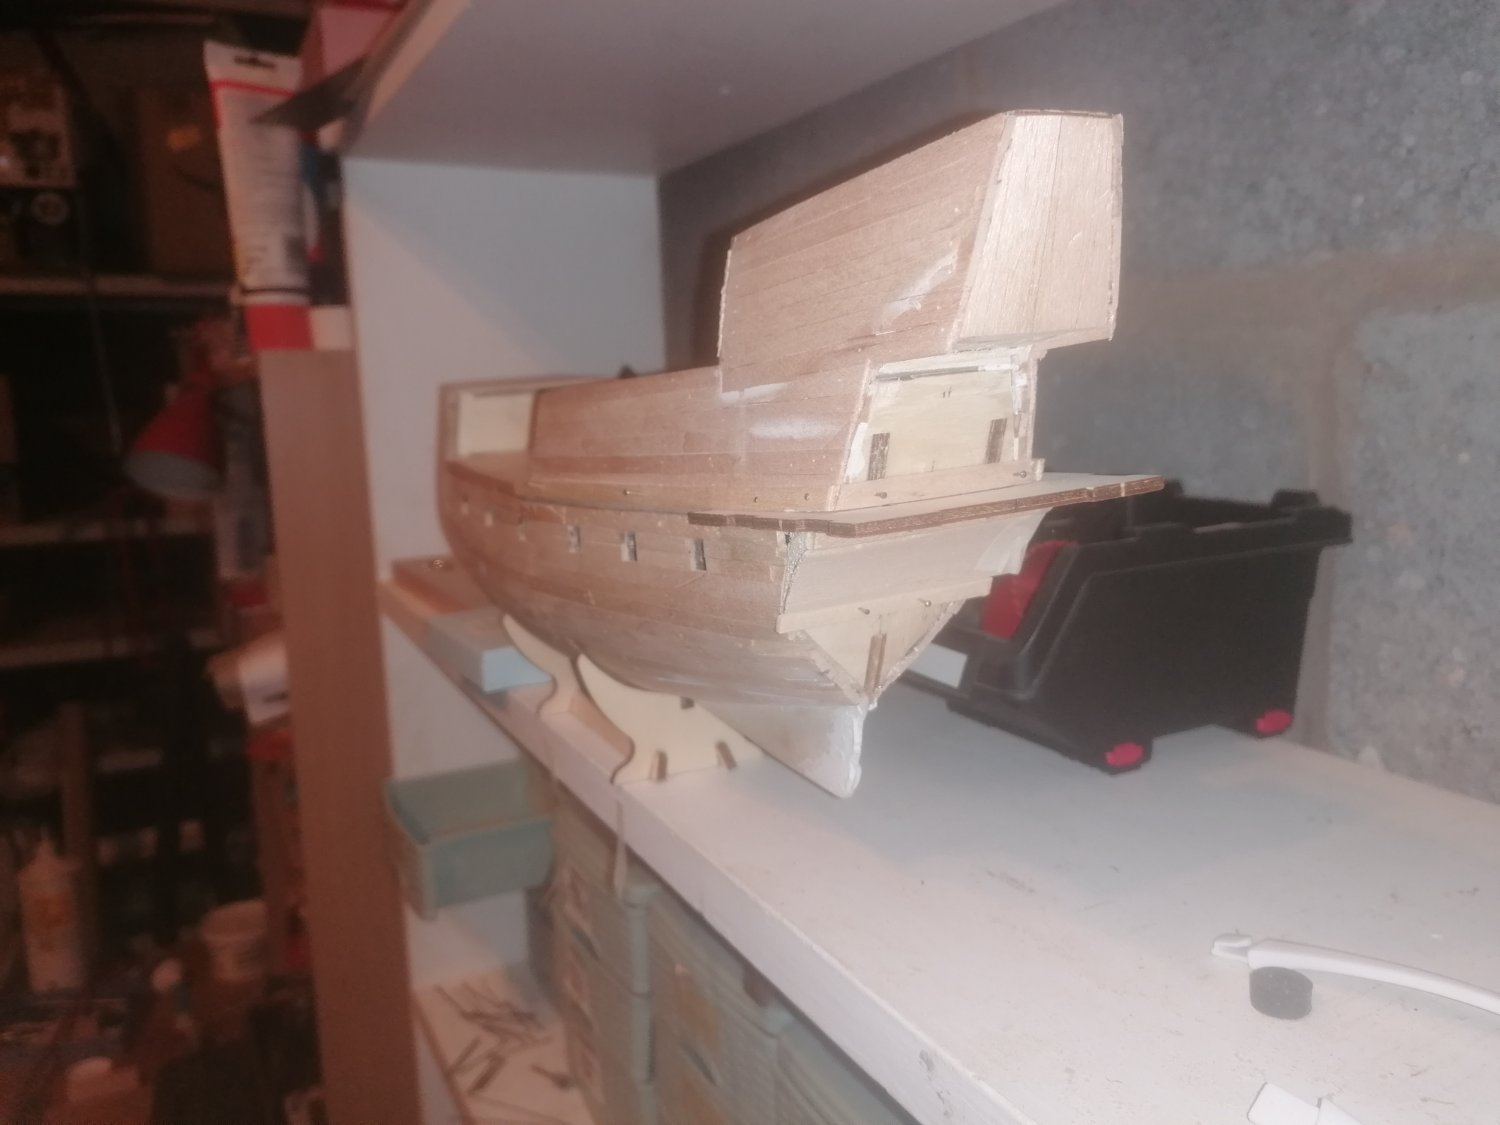
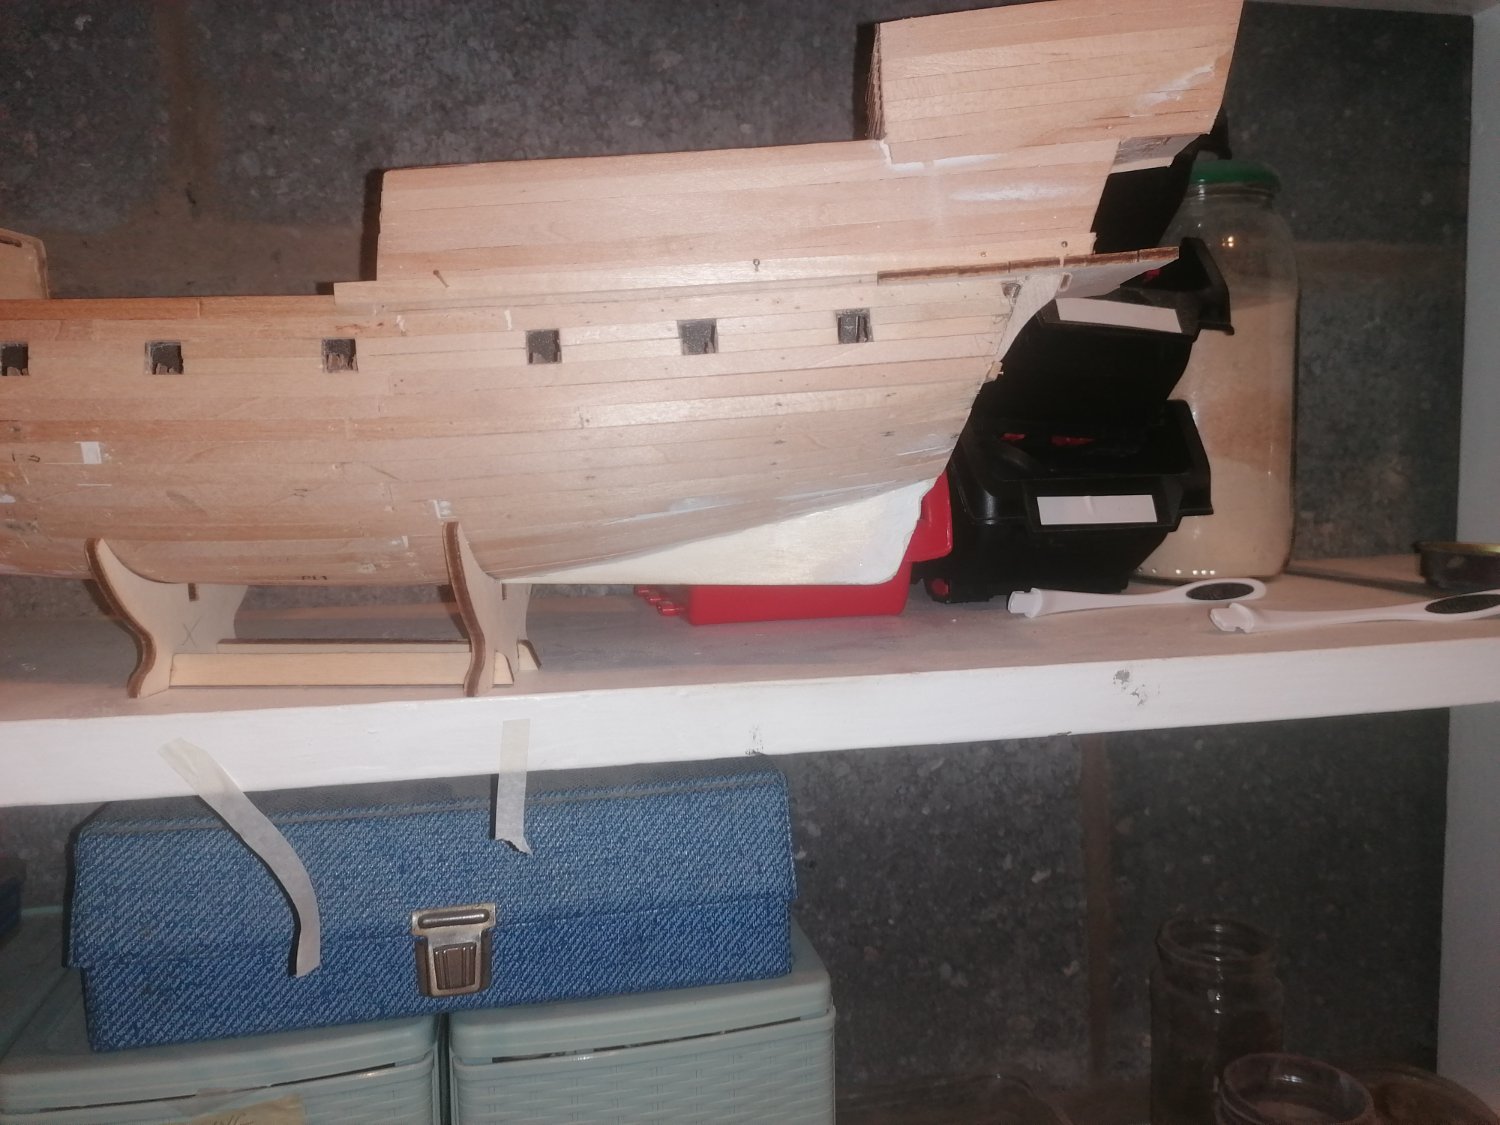
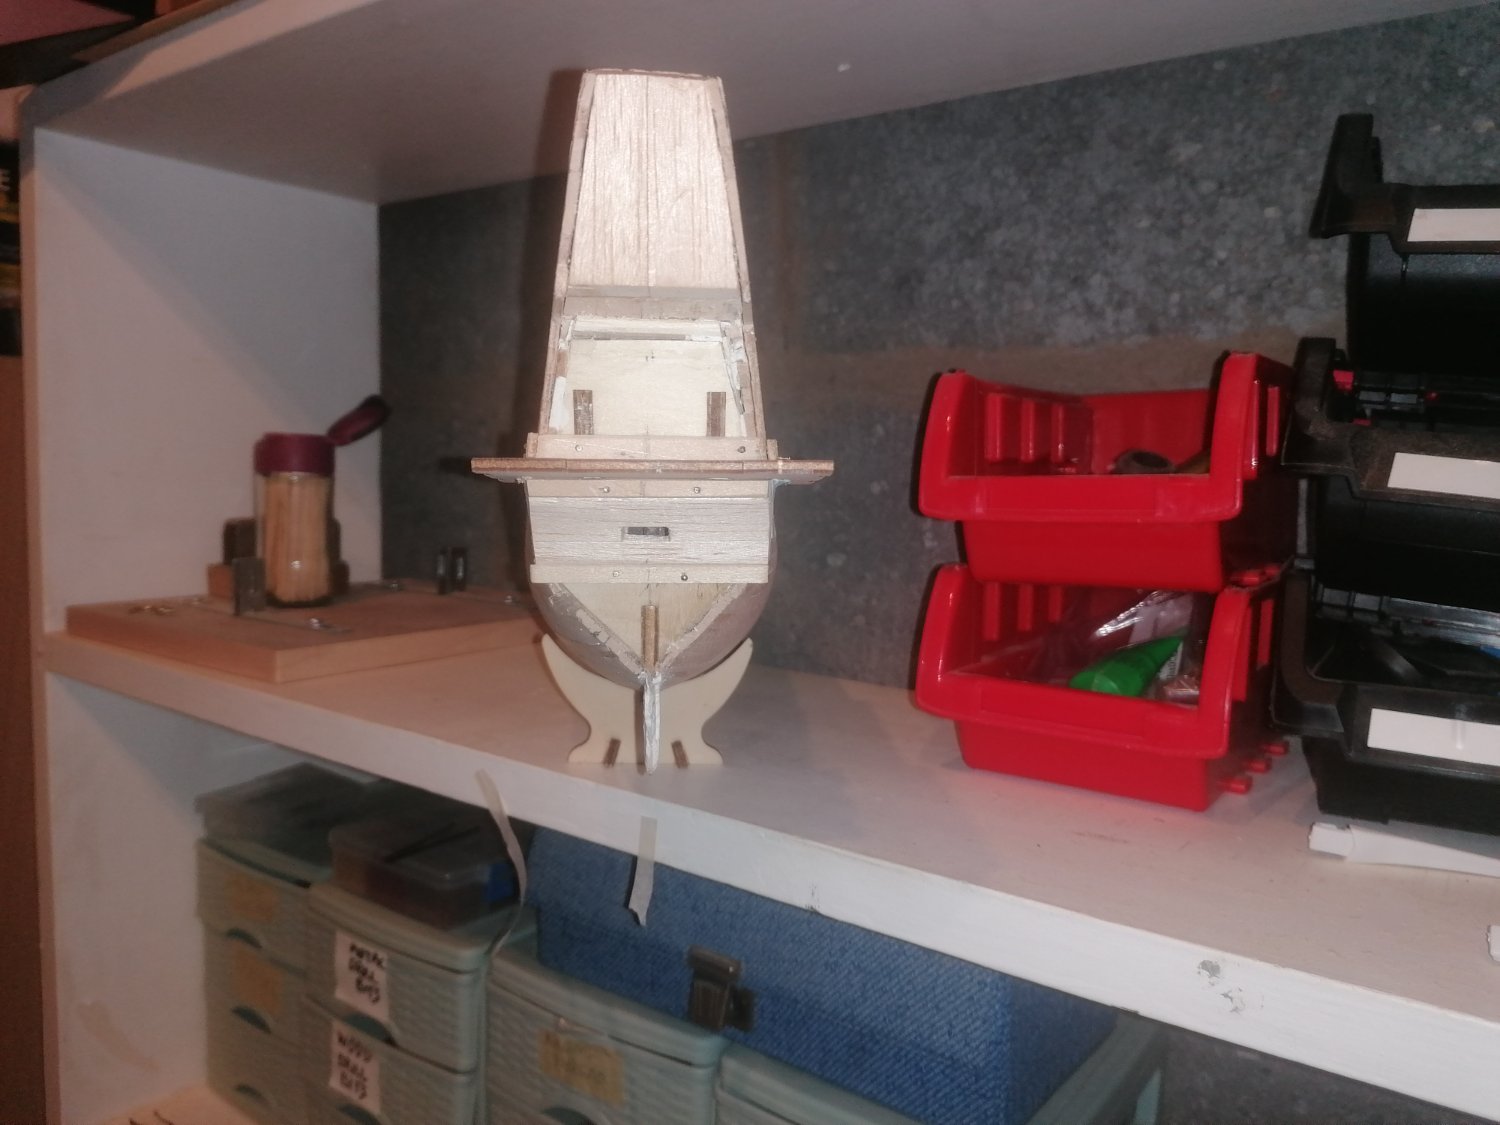
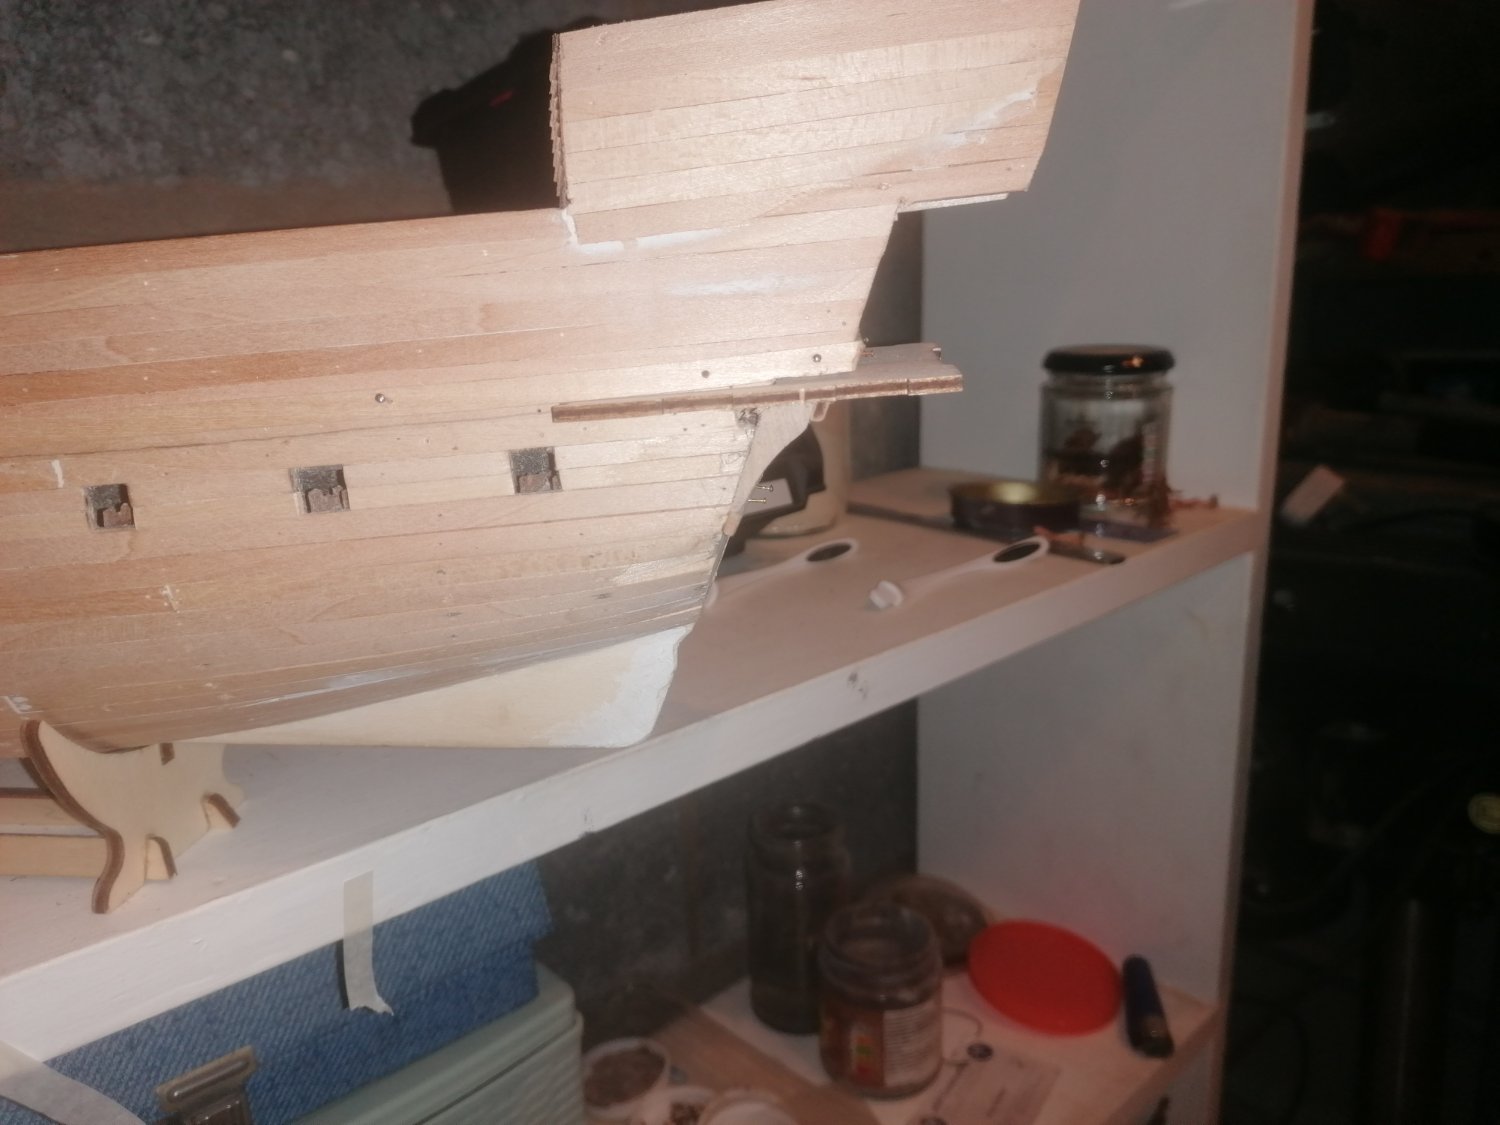
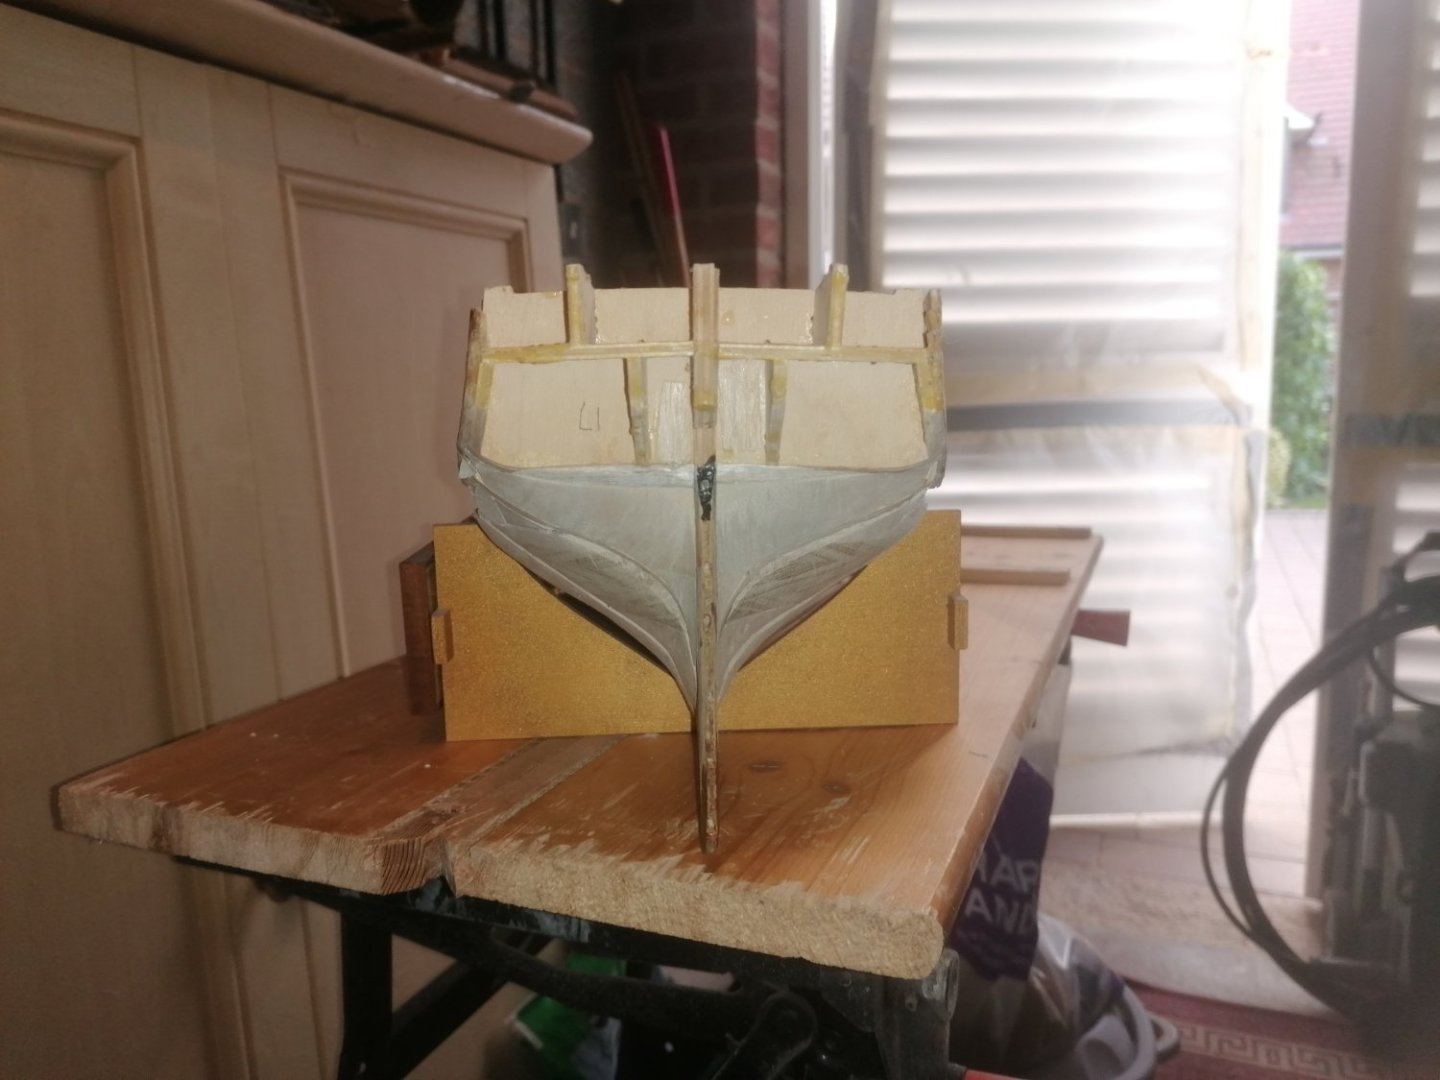
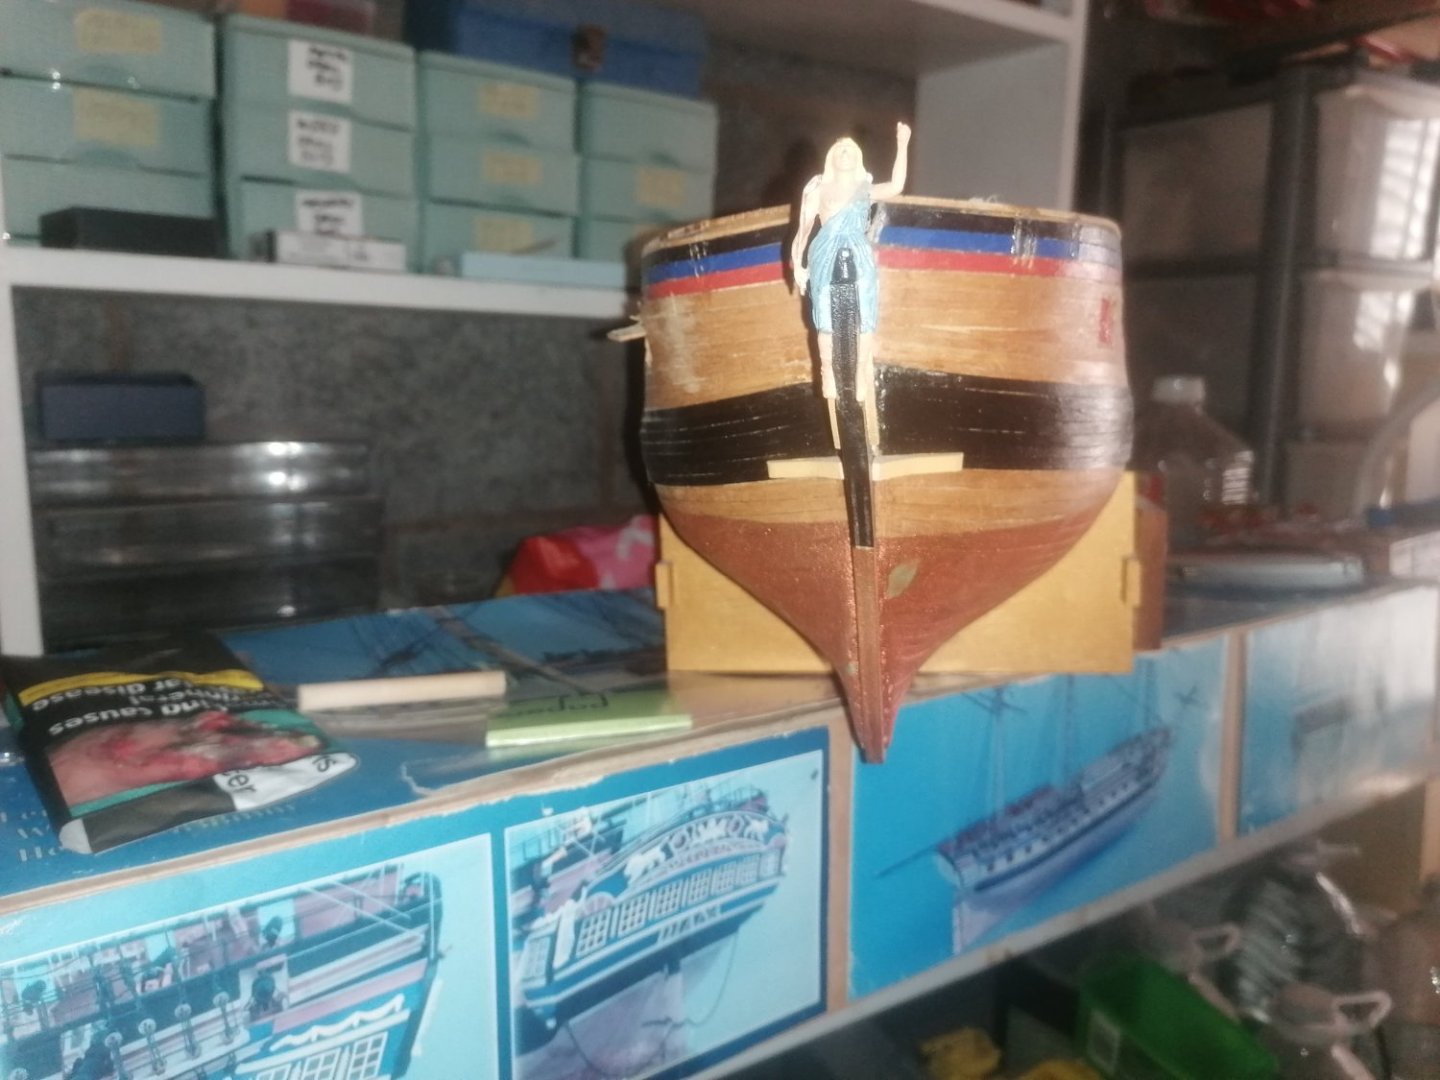
Of course this still needs to be finally sanded but I now have the basic shape. I now need to progress to the the upper portion to the poop deck. Once I am happy with that I need to work on the stern piece of the keel. I will also finish the bulkhead planking Which I have had to restart.
-
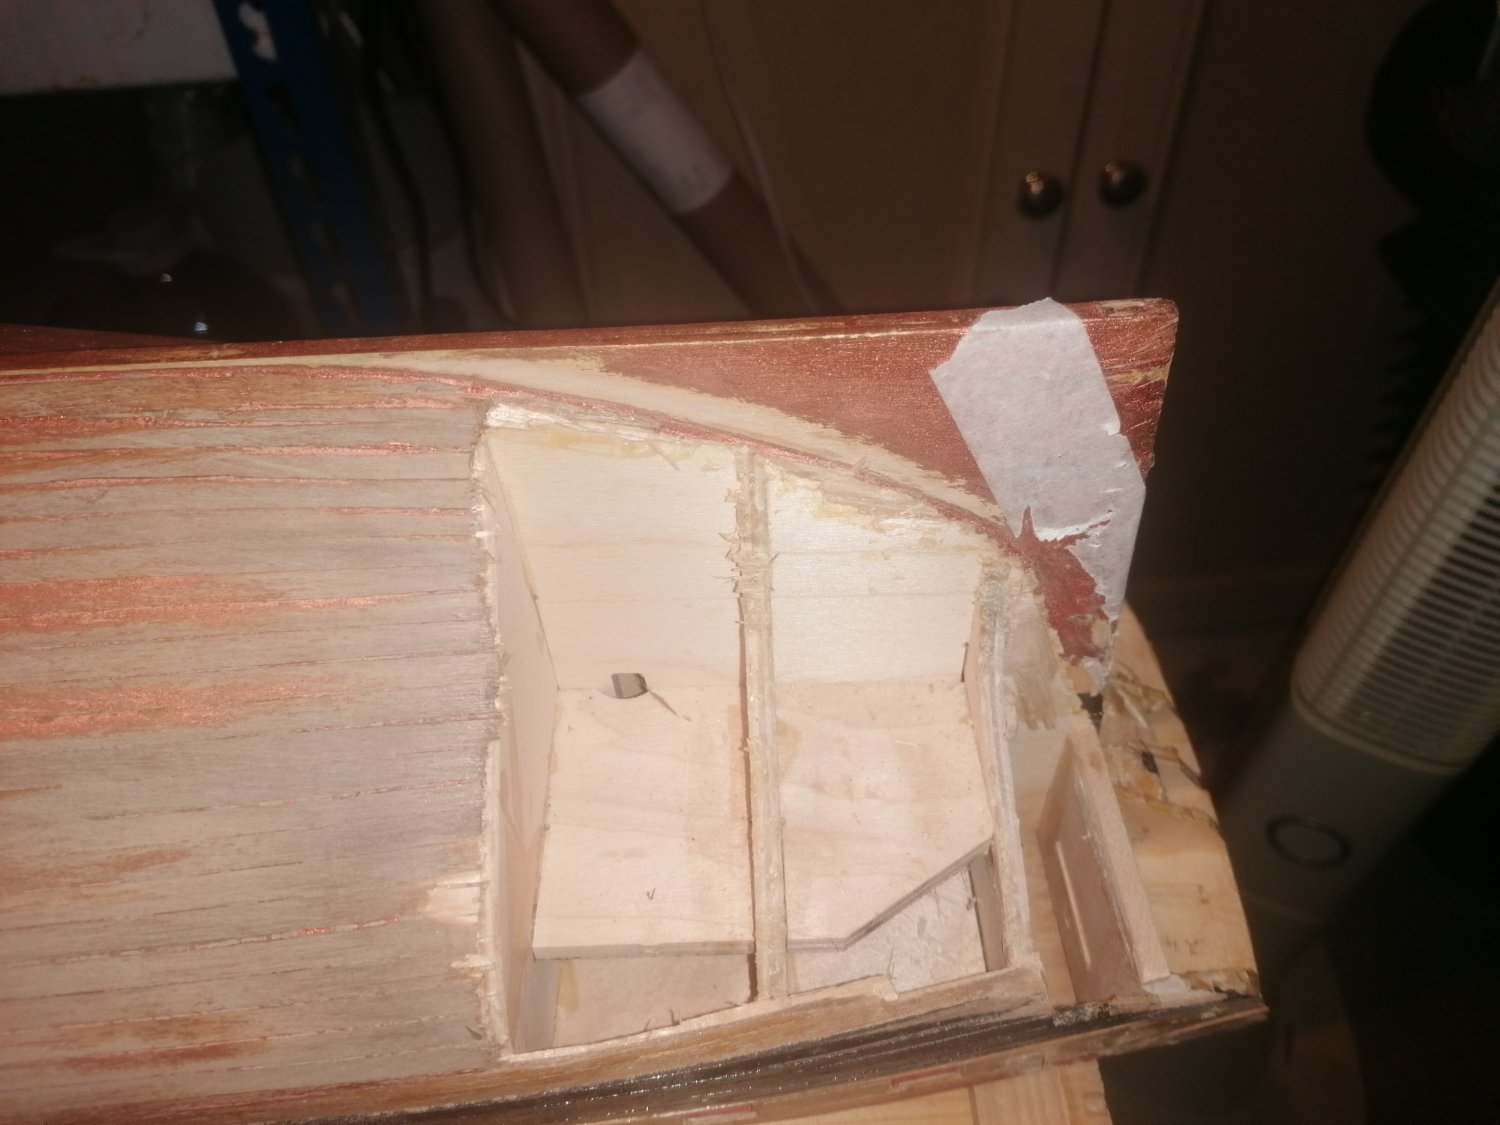
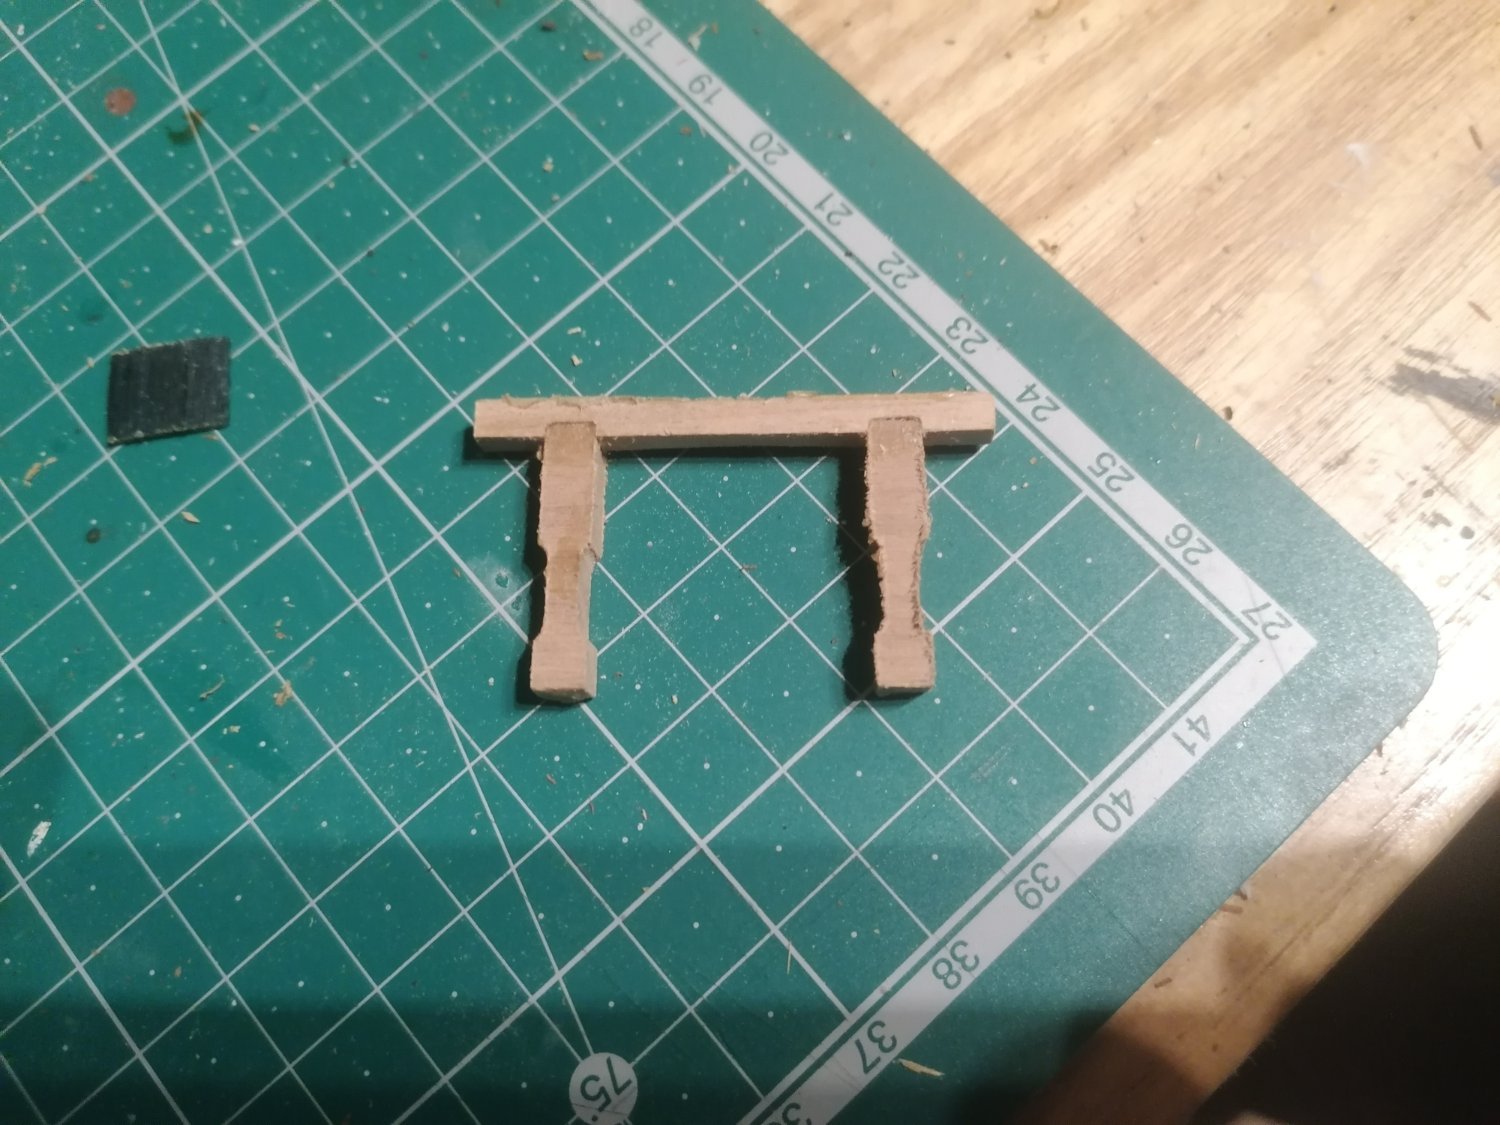
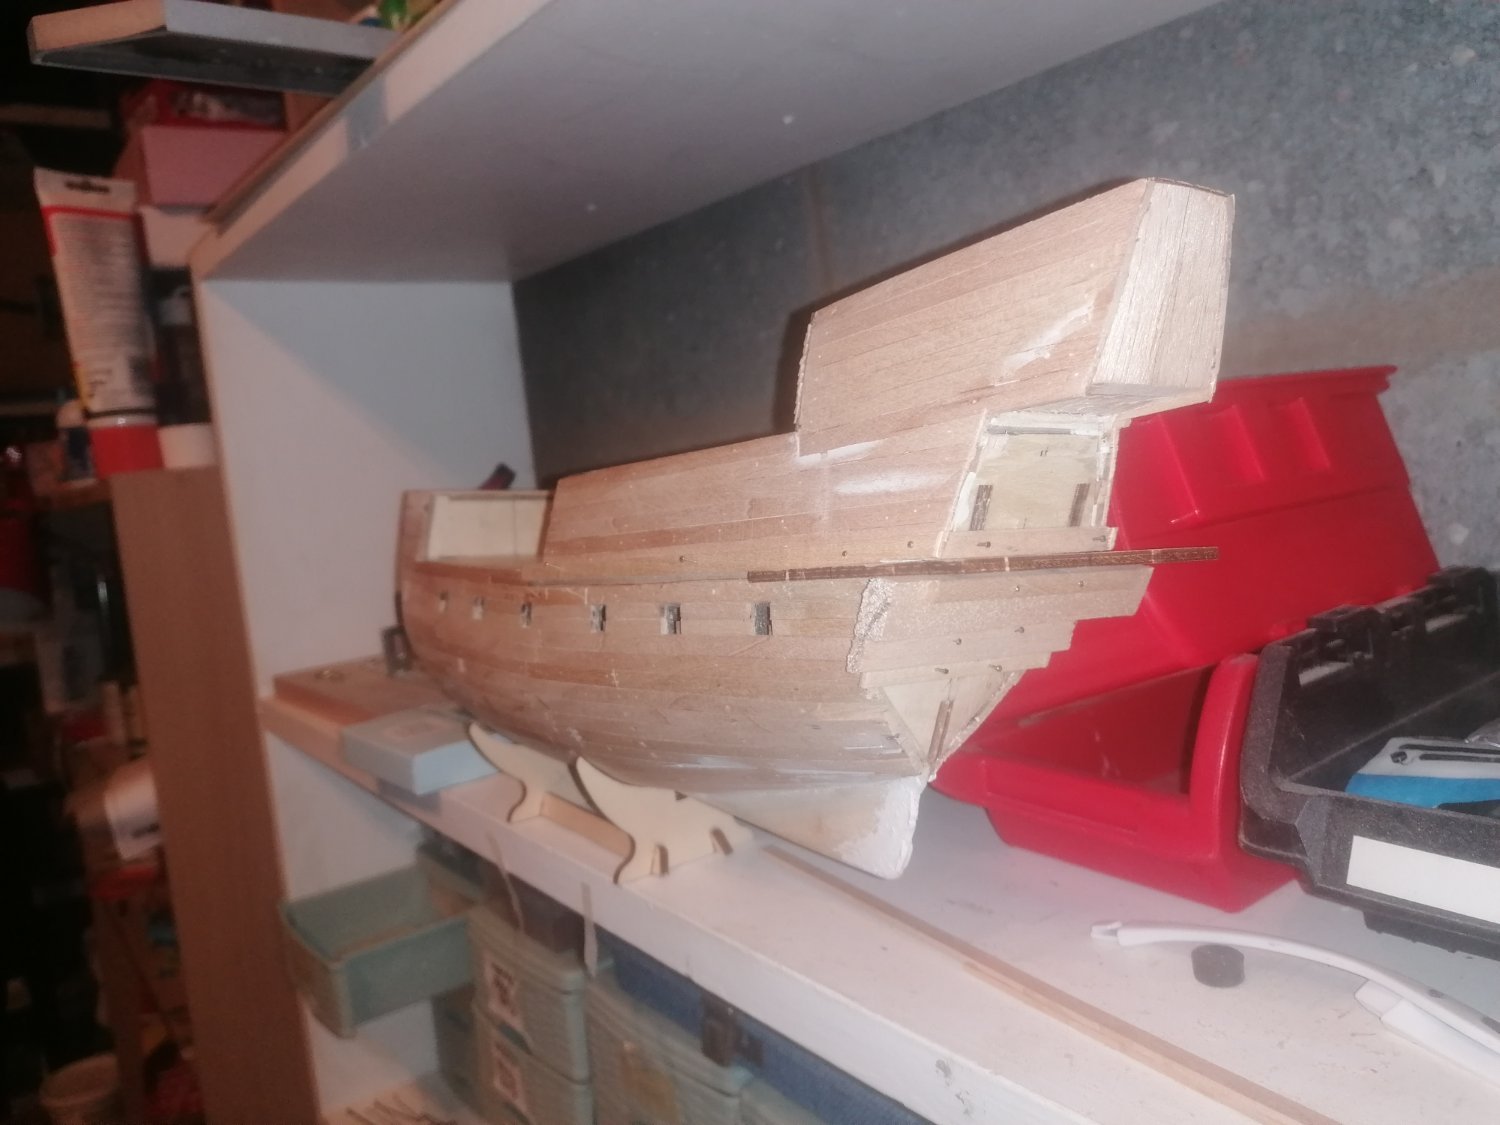
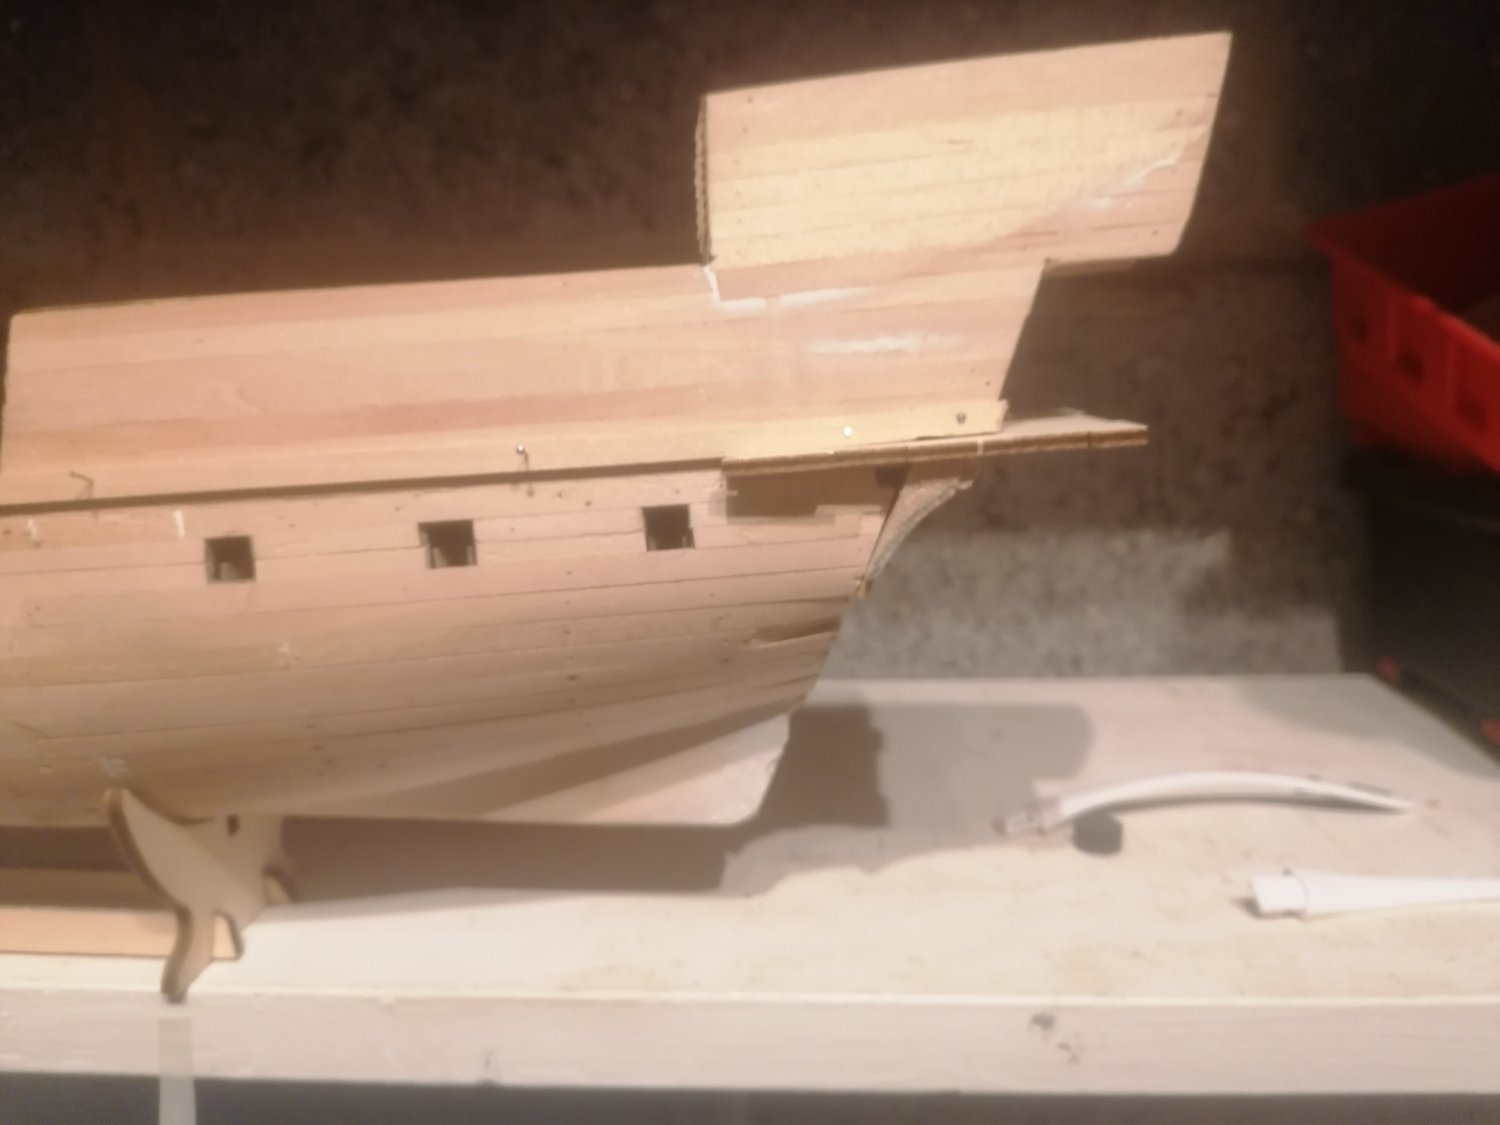
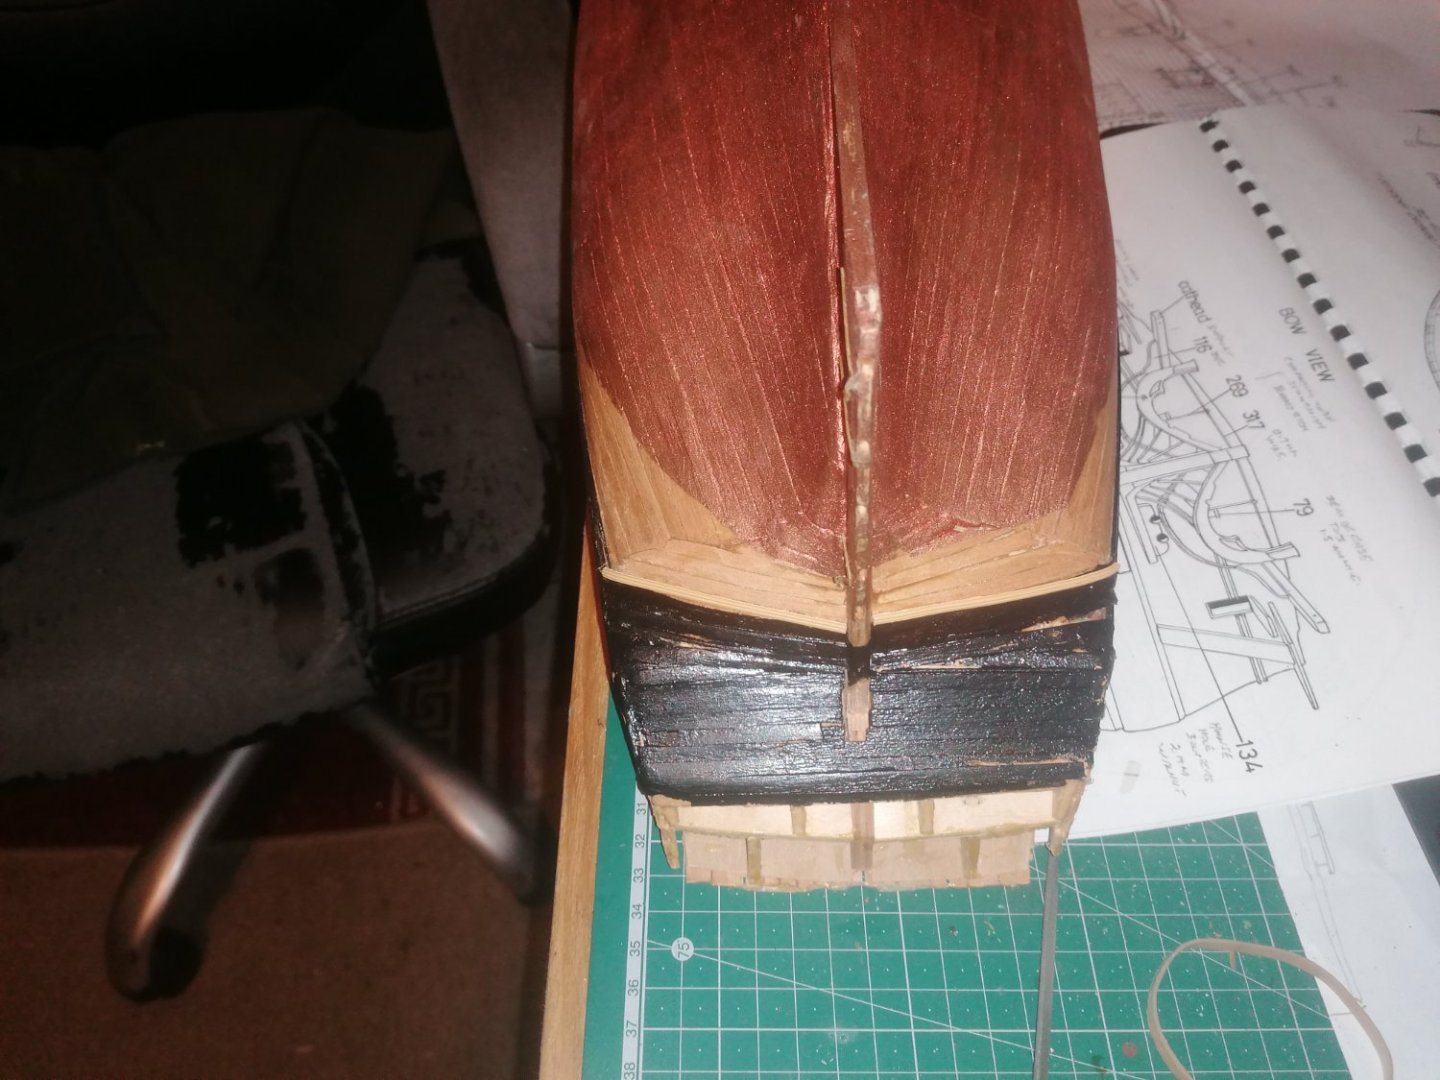
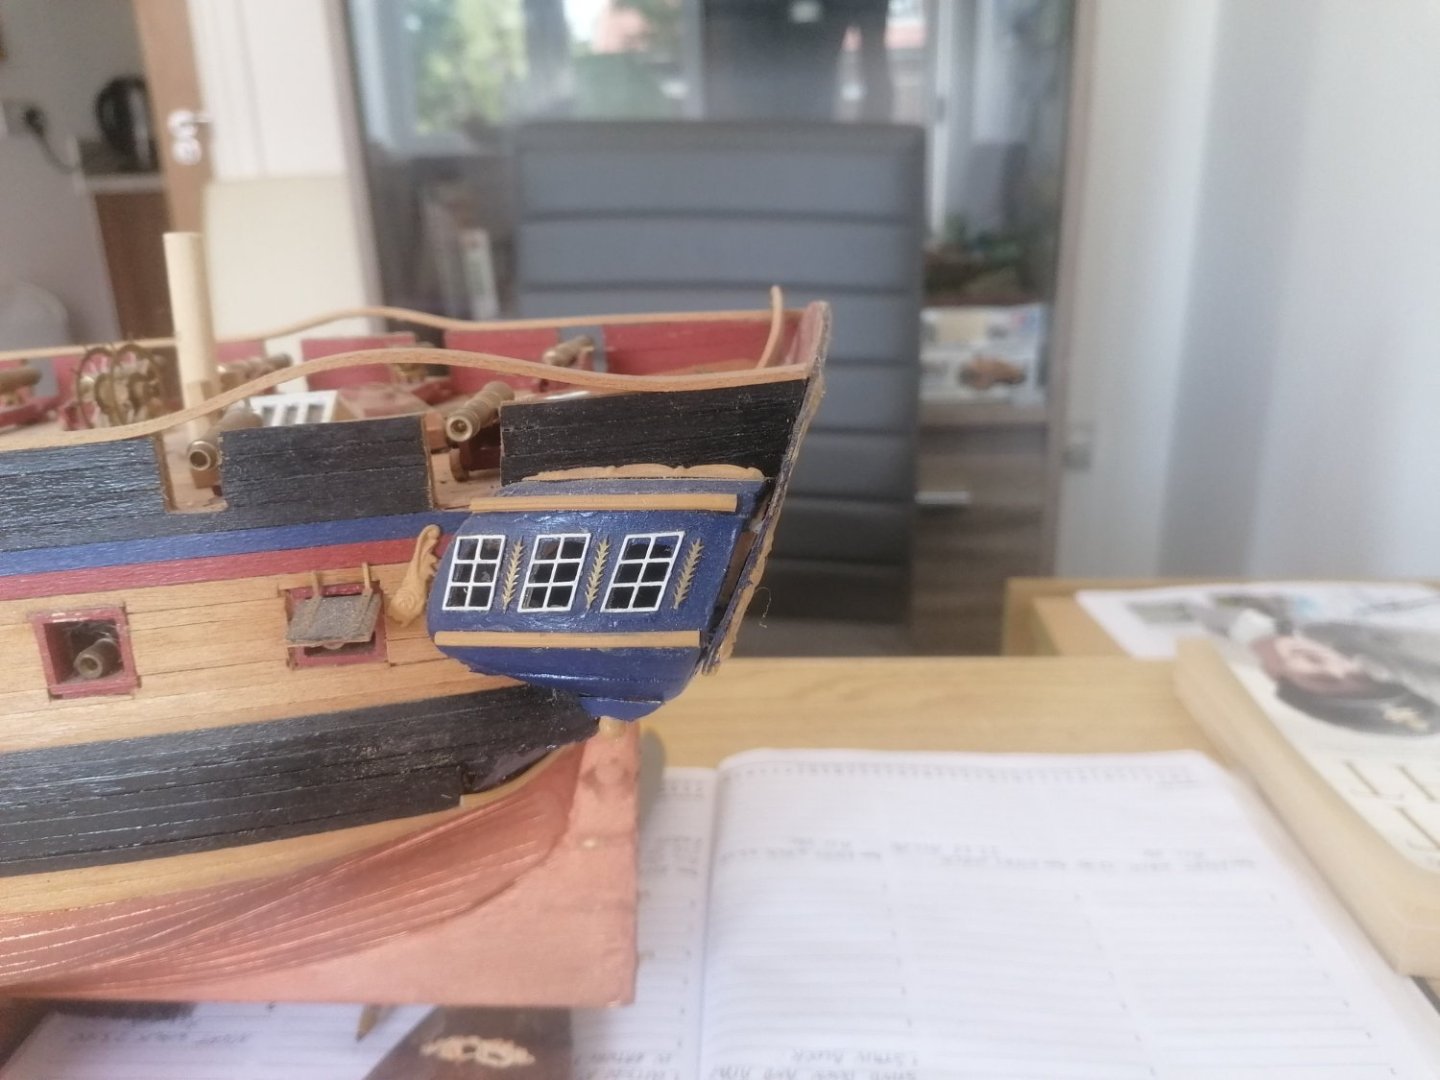
Starting on the stern, the first thing I discovered was, the stern gallery deck is too low down. Although it looked ok at the beginning of the build. This in turn means that the stern chaser gun ports are also too low as well as the tiller opening between them. This now means I am unable to have the gun ports open, however, I am not too disappointed as I can correctly shape the stern and have the curve below the gallery. The stern post and rudder will now also need to be 5mm longer. I am hoping they will still look ok in the end. I measured where the stern gallery needs to be. I pinned a strip of 2mmX4mm wood along each side and then ran another strip linking them across the stern. This gave me the guide to cut away the section of the hull to the correct height. I then pinned a strip of wood below the bottom edge of the gallery deck and another where the wale will be, I hope. It's possible I may have to adjust it's position but I'm hoping not to. It will depend on how it looks. I have cut and sanded a strip of balsa block to fit between the strips with, a strip of 2X4mm wood which will be replaced with mahogany and will have the supports attached to hold the deck above. This section will be double planked with 0.5 mm strip apart from the gun ports, which, will be built into the spaces afterwards to keep the curve.