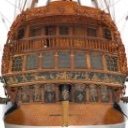
Rich Sloop Posted October 29, 2025 #1 Posted October 29, 2025 (edited) I am working through my first build- a Vanguard Sherborne. I have taken my time reworked a few problems and so far am please with progress and what Ive learned. After applying the first coat of paint some cracks appeared. Not really cracks but some planks have loosened. Not enough glue? How to correct the two loose planks? Edited October 29, 2025 by Rich Sloop Bad pic upload
druxey Posted October 29, 2025 #2 Posted October 29, 2025 Is this water-based paint? Wait until the moisture has completely evaporated and see if the planks sit down again. Then reglue from the inside. (I assume this is still accessible.) Be sure to sign up for an epic Nelson/Trafalgar project if you would like to see it made into a TV series http://trafalgar.tv
palmerit Posted October 29, 2025 #3 Posted October 29, 2025 (edited) Did you try using a super thin CA (super) glue? It can wick into narrow seams and you can push down with something other than your fingers. Not regular CA glue. Bob Smith is a recommended brand and they make super thin varieties, some of which are specifically designed to wick like that. ZAP also makes a thin CA glue. I never knew there was such thing as a super thin CA glue until I started building wooden ship models. I tend to avoid CA glue and prefer wood glue, but the super thin certainly has its uses (and CA glue or epoxy is needed to glue things other than wood). Depending on how wide the gap is, you can also dab a very thin piece of wire or a very thin pin into the thin CA glue - it'll wick to the metal - and use that to "inject" the CA glue into the gap. You'll certainly need to do some additional coats of paint after you make the repair. Edited October 29, 2025 by palmerit Current Builds: San Francisco Bay Scow Schooner (Midwest Products), Gunboat Philadelphia (Model Shipways), Zulu 'Lady Isabella' (Vanguard Models), Maine Peapod (Midwest Products), Sakonnet Daysailer (Midwest Products), Nonsuch 30 (Model Shipways) In the Queue: Oseberg (Ships of Pavel Nikiten), Endurance (Occre), Syren US Brig 1803 (Model Shipways), Duchess of Kingston (Vanguard Models) Completed Builds: Lowell Grand Banks Dory (Model Shipways), 18th-Century Merchantman Half-Hull Planking Kit (NRG), Norwegian Pram (Model Shipways), Endurance (Lego), Muscongus Bay Lobster Smack (Model Shipways), Grand Banks Dory (Midwest Products), Sherbourne 1763 (Vanguard Models), Ranger 1864 (Vanguard Models), Chesapeake Bay Crabbing Skiff (Midwest Products),
palmerit Posted October 29, 2025 #4 Posted October 29, 2025 6 minutes ago, druxey said: Then reglue from the inside. Didn't think of that and I can't remember the building steps. My bet is that the subfloor planking is in the way and will not permit gluing from the front, but I could be wrong. Current Builds: San Francisco Bay Scow Schooner (Midwest Products), Gunboat Philadelphia (Model Shipways), Zulu 'Lady Isabella' (Vanguard Models), Maine Peapod (Midwest Products), Sakonnet Daysailer (Midwest Products), Nonsuch 30 (Model Shipways) In the Queue: Oseberg (Ships of Pavel Nikiten), Endurance (Occre), Syren US Brig 1803 (Model Shipways), Duchess of Kingston (Vanguard Models) Completed Builds: Lowell Grand Banks Dory (Model Shipways), 18th-Century Merchantman Half-Hull Planking Kit (NRG), Norwegian Pram (Model Shipways), Endurance (Lego), Muscongus Bay Lobster Smack (Model Shipways), Grand Banks Dory (Midwest Products), Sherbourne 1763 (Vanguard Models), Ranger 1864 (Vanguard Models), Chesapeake Bay Crabbing Skiff (Midwest Products),
Solution Y.T. Posted October 29, 2025 Solution #5 Posted October 29, 2025 (edited) Glue it with thin CA as suggested. You can press plank in with the fingers but through the plastic bag. If gaps are present fill them in with wood filler or the saw dust mixed with PVA. Grind smooth with scrapers and sand paper. Repaint. Edited October 29, 2025 by Y.T. Rich Sloop 1
Dr PR Posted October 29, 2025 #6 Posted October 29, 2025 Unfortunately, cracks probably will reappear after time. Wood expands and contracts as humidity changes. I have two older (50+ years) hulls that were planked with wood glue between the planks and they have both developed cracks. I started coating the inside of the planking with thin epoxy "paint" that was used to coat motor mounts in flying model airplanes. It prevented fuel from soaking into the wooden mounts. I have also used the thin epoxy that is used to coat counter tops. The epoxy soaks into the planks and bulkheads, and flows between the planks. It glues everything very solid! I have a single layer planked hull that is about 40 years old and it has no cracks. Rich Sloop 1 Phil Current build: USS Cape MSI-2 Previous build: Vanguard Models 18 foot cutter Previous build: Albatros topsail schooner Previous build: USS Oklahoma City CLG-5 CAD model
paul ron Posted October 29, 2025 #7 Posted October 29, 2025 (edited) use a needle to feed titebond glue behind n between the planks essentially gluing them together. then clamp it up tight n all is good again. Edited October 29, 2025 by paul ron Rich Sloop 1
Rich Sloop Posted October 29, 2025 Author #8 Posted October 29, 2025 12 hours ago, druxey said: Is this water-based paint? Wait until the moisture has completely evaporated and see if the planks sit down again. Then reglue from the inside. (I assume this is still accessible.) Not sure how to access the inside. Maybe I can use a needle to inject glue through the crack, let it set up and sand? paul ron 1
Rich Sloop Posted October 29, 2025 Author #9 Posted October 29, 2025 12 hours ago, palmerit said: Did you try using a super thin CA (super) glue? It can wick into narrow seams and you can push down with something other than your fingers. Not regular CA glue. Bob Smith is a recommended brand and they make super thin varieties, some of which are specifically designed to wick like that. ZAP also makes a thin CA glue. I never knew there was such thing as a super thin CA glue until I started building wooden ship models. I tend to avoid CA glue and prefer wood glue, but the super thin certainly has its uses (and CA glue or epoxy is needed to glue things other than wood). Depending on how wide the gap is, you can also dab a very thin piece of wire or a very thin pin into the thin CA glue - it'll wick to the metal - and use that to "inject" the CA glue into the gap. You'll certainly need to do some additional coats of paint after you make the repair. I will look into a this CA. I have only used the thick stuff to date. Knocklouder 1

Recommended Posts
Create an account or sign in to comment
You need to be a member in order to leave a comment
Create an account
Sign up for a new account in our community. It's easy!
Register a new accountSign in
Already have an account? Sign in here.
Sign In Now