HOLIDAY DONATION DRIVE - SUPPORT MSW - DO YOUR PART TO KEEP THIS GREAT FORUM GOING! (Only 13 donations so far - C'mon guys!)
×


Ray
-
Posts
404 -
Joined
-
Last visited
Content Type
Profiles
Forums
Gallery
Events
Everything posted by Ray
-
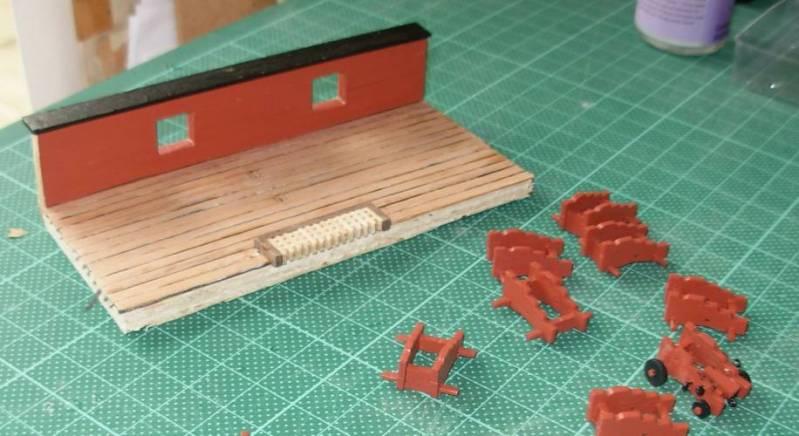
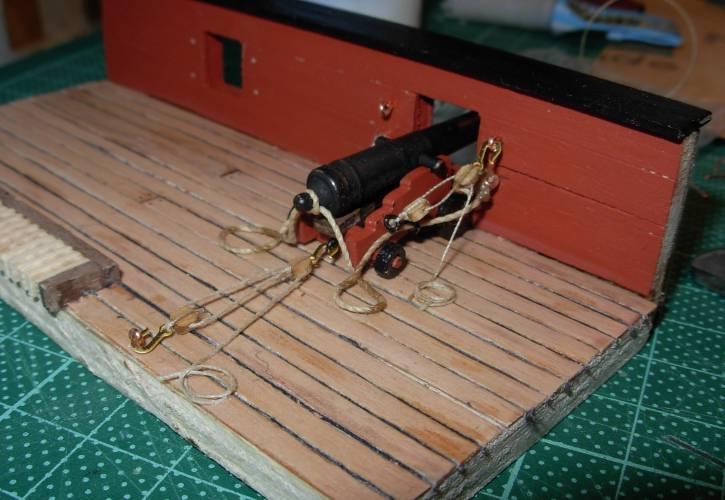
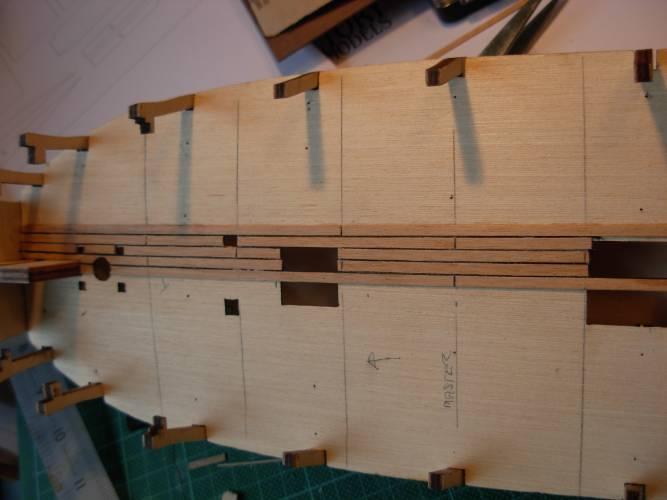
 Whilst awaiting the replacement deck planking I started to make up the cannons, making up all the carriages and painting all the wheels. I was happy with the barrel finish on the Lady Nelson so did a few barrels the same way, just spray them with matt black (4 or 5 very light coats) painted the carriages and added the rigging rings to 4 of them. I then out of scraps made a two port mock section of the gun deck so I can mock up two fully rigged cannons, I may even leave this made up and fit closed gun ports to the two bow positions. At this point the new planking arrived much better quality, so I carried on with the deck planking, I planked the deck just leaving the last couple planks off to allow the tops of the bulkheads to snapped off after the hull is planked. The planking was sanded and the treenail effect added with a .005mm black marker pen the deck was given two coats of matt varnish to finish it off. I have rigged up one cannon, but I am not yet sure if this will be how they will end up, I think I will rig the second one without the coil on the deck, on the breech rope, I assume that rope must have been that sort of length or they would not have been able to get the cannon back into a position to reload, but it looks a bit cluttered, and as being an artist, I know full well that sometimes it is just as important what you leave out as what you put in?


-
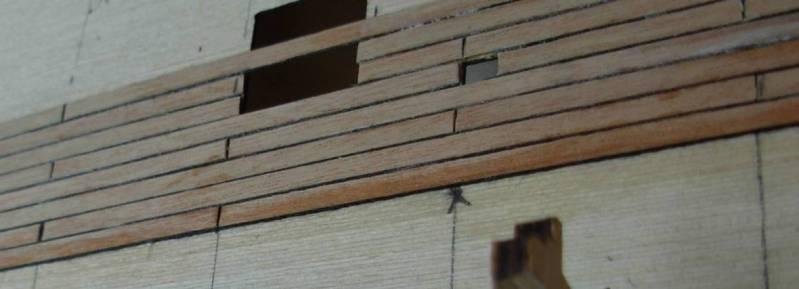
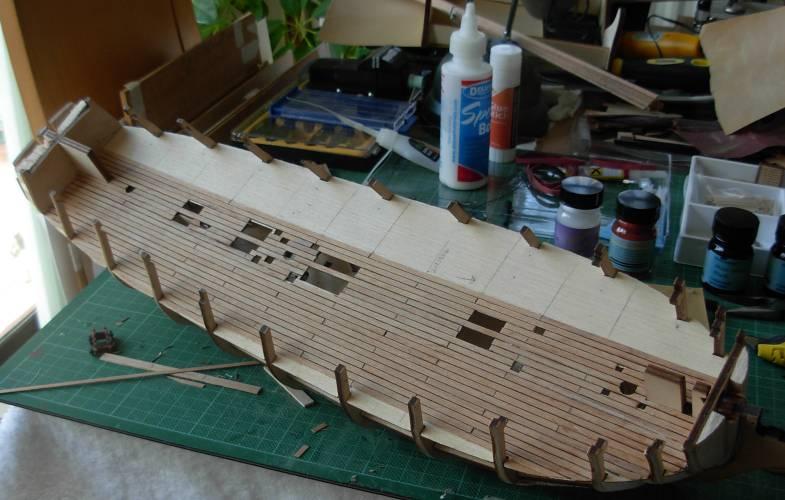
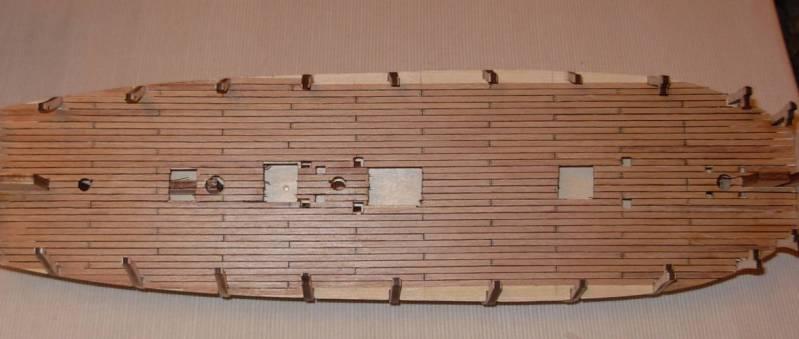
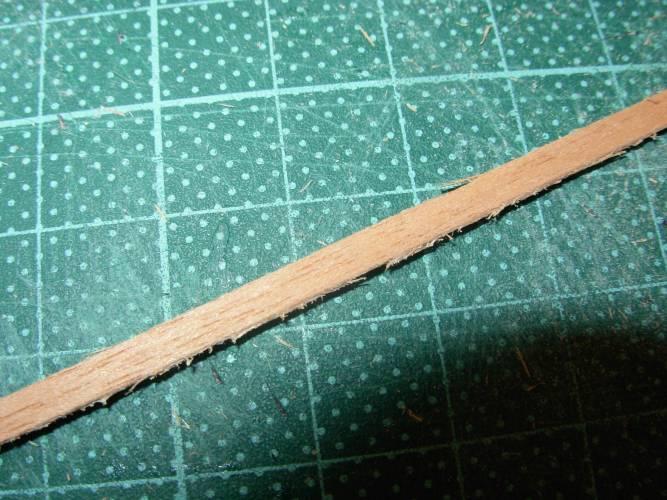
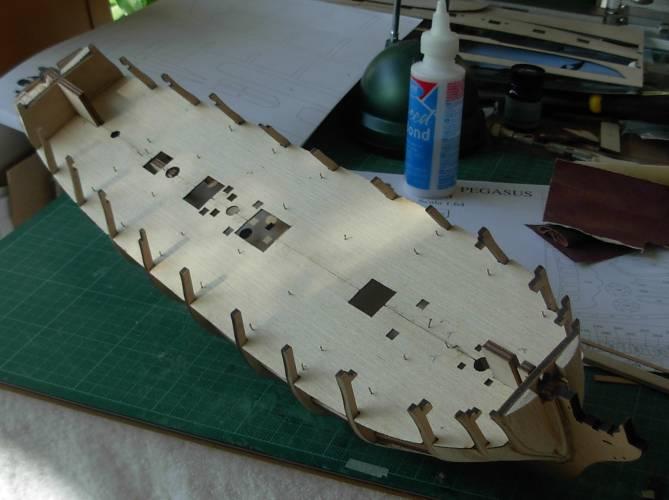
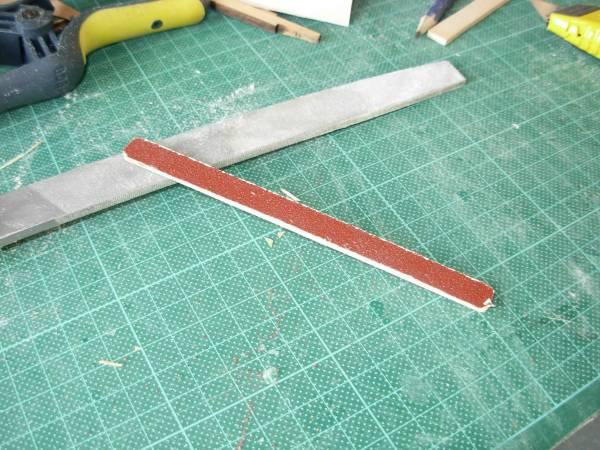
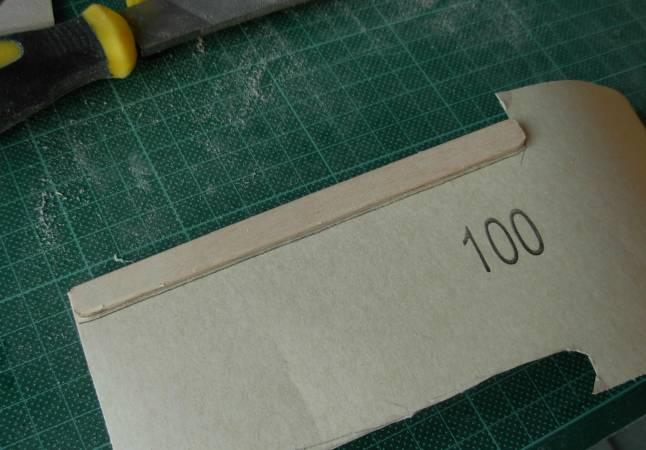
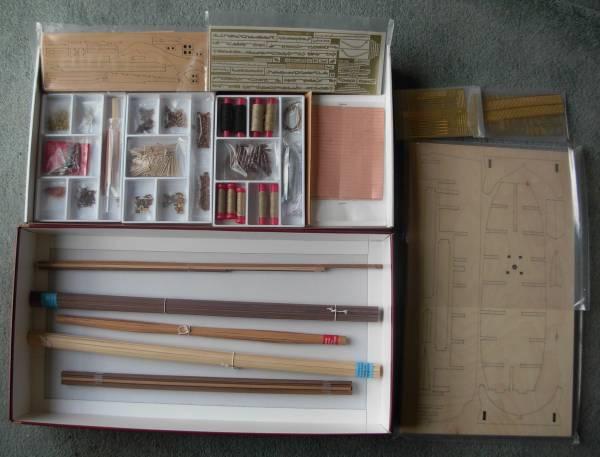
The main gun deck is supplied in two parts, it only require a small tweak before both halves fitted ok, my only concern as it is made from very thin ply is how it easily bent and could dip in the middle so I added some extra deck beams and just sanded to get the correct camber, the two deck halves were the glued and temporary pinned. I started the deck planking I decided to run the planking the whole length of the deck as to my mind the two cross way planks on the instructions do not look right so I started using the same method as on the Lady Nelson, first length down the centre the (extra deck supports came into their own) black .25mm thread placed between each plank. Now my first real problem, the deck planking material it took a lot of sanding mainly on the edges to make in usable (see photos) I checked it against some left over Lady Nelson planking and that was of a much better quality so I have stopped laying the deck, taken some photos of the planking material and e-mailed Amati, and a day later Chris Watton who responded quickly and agreed the planking material is substandard and will be replaced, I await its arrival. I hate to whinge but I feel the materials in this kit should be at lest as good as the other one, it was taking three times the amount of time to prepare each length than fit it, and I broke most lengths whilst sanding them. Whilst I wait I will make up the gratings and cannon carriages. Ray


-
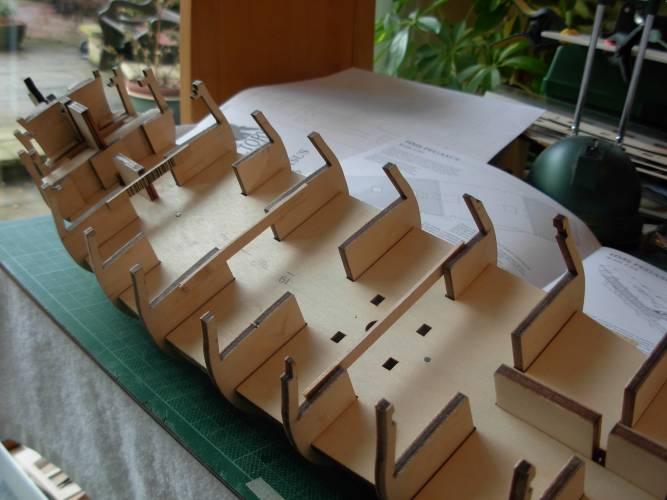
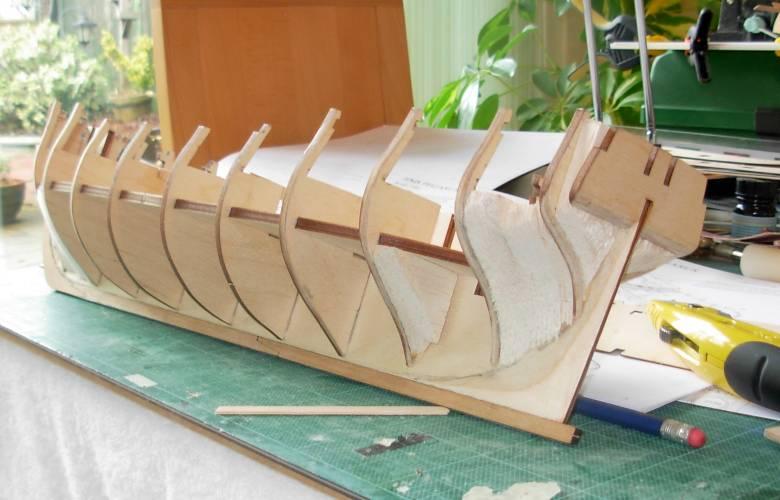
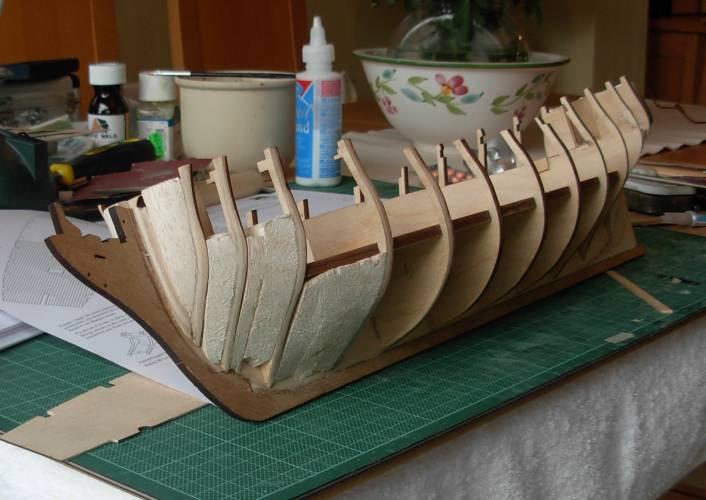
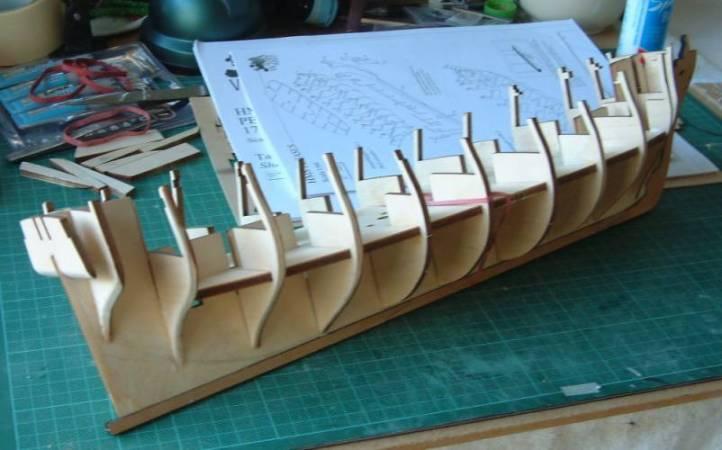
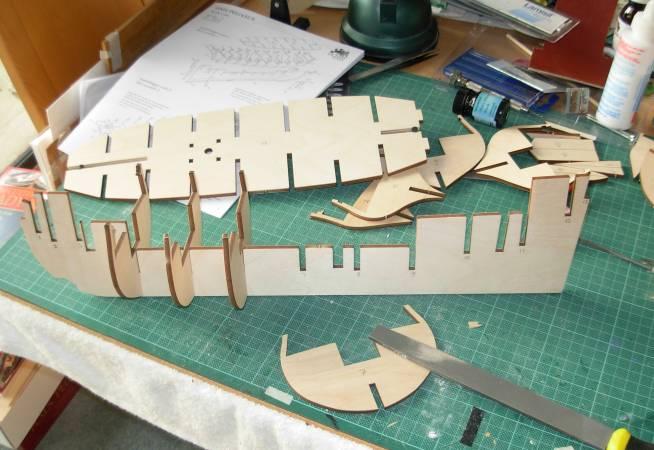
Once the dry fit was finished the bulkhead at the bow & stern were chamfered holding a length of planking across bulkheads to asses the amount required which right at the bow and stern is quite considerable, but this is the time to get it as good as possible, before they are glued on to the keel. The hard wood keel was glued to the ply one next, and when dry the chamfered bulkheads together with the false strengthening deck were glued together with PVA. I did not use the plank termination parts other than the one between bulkhead one and the keel as my preferred method is two fill between the early front and the last couple of bulkheads with balsa and you don’t need both. So the balsa filling between those bulkheads was done next and sanded as required a couple of bit chipped out of the balsa but this does not matter. Ray


- 102 replies
-
- 1
-

-
- victory models
- pegasus
- (and 1 more)
-
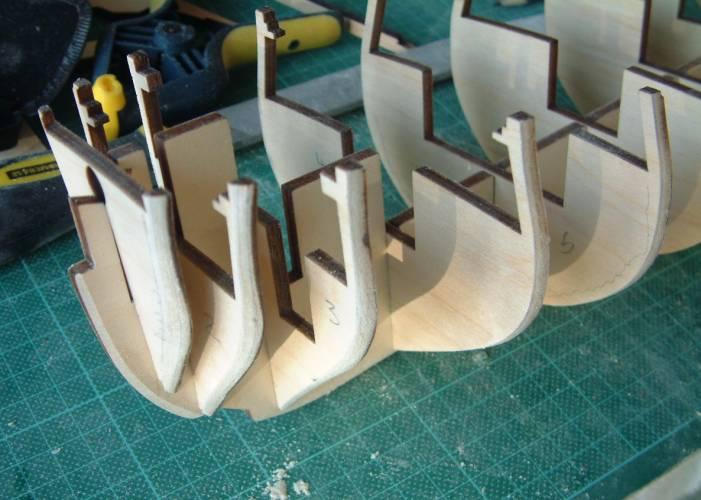
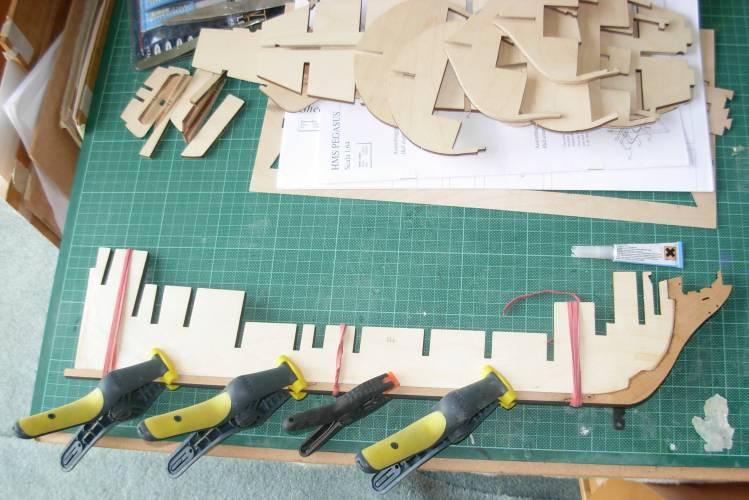
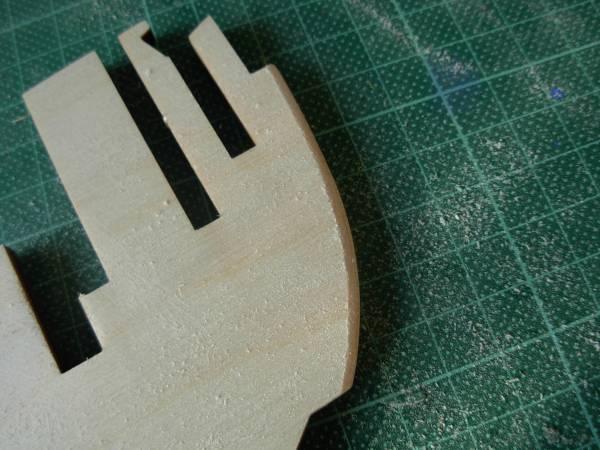
Getting Started First a good look at all the plans, the 5mm ply false deck looks like it will solid up the frames-bulkheads. First job dry fit the bulkhead and the false deck they were all a wee bit tight and just needed opening out. I made some sanding boards just like nail emery ones, using some 4mm ply & coarse & medium paper see the photos they worked really well in opening up the tight bulkhead slots. After a good dry fit of the bulkheads I decided to sand down from the bearding line and chamfer along the rest of the keel to give a semi rabbet, when the hardwood keel is glued on.


-
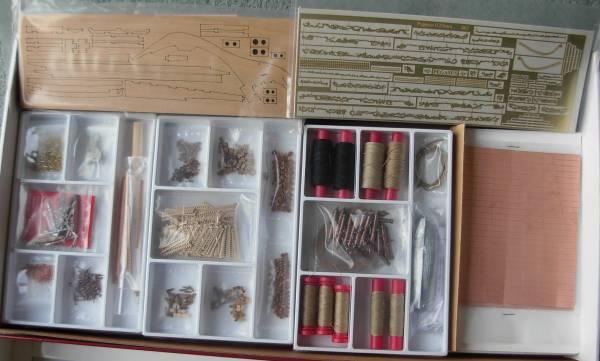
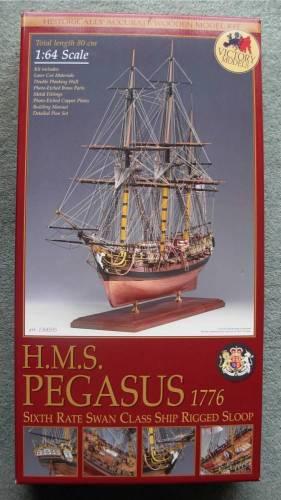
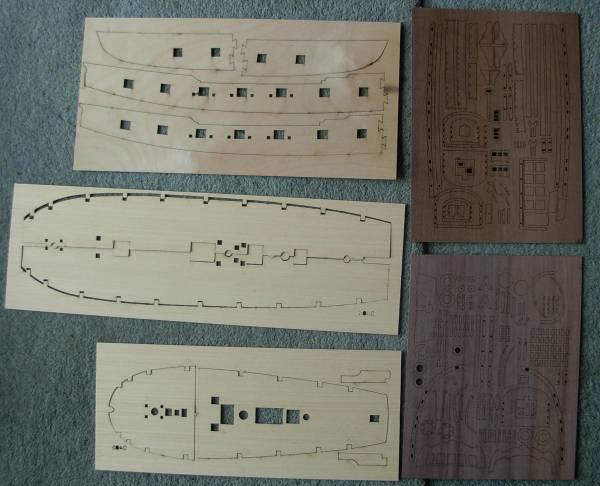
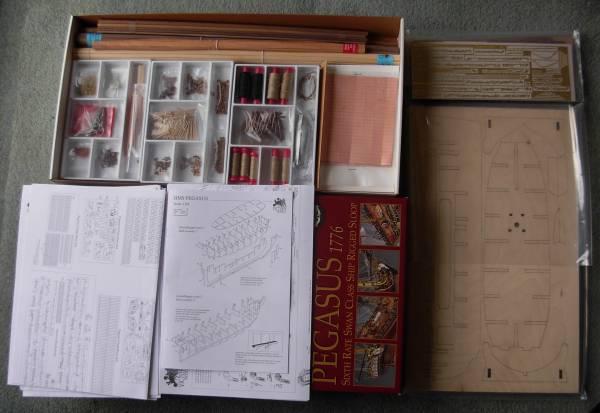
1st Post the beginning After some deliberation I have decided to do a build log for Pegasus even through there are some outstanding Pegasus & Fly logs, if nothing else it hopefully will show what can be learnt from them. I did have a very quick look inside the box when it came and as I said in my Lady Nelson build log it looked fantastic quality. Now I opened up the box for real and found there is a lot of it, and it all looks to be of the highest quality, this justified its fairly high price, but this quality was to expected after the Lady Nelson kit. There was however one disappointment I could not find the display stand after all The Lady Nelson has one, I very nearly contacted the supplier, but noticed just in time the note on the box saying you do not get one! something most of us would have only found when the kit arrived, as I said disappointing in an expensive kit. I am now read up on the current build logs for Pegasus & fly to get as much insight as possible, so I can make any alterations-updates as others have done, I thank them all for this information, it should make my build easier, this is such a great forum with so much help and advice freely offered. I hope all becomes clearer as I go along, I sometimes think as you read you cannot see the wood for the trees, but path does becomes clearer as you travel along it. For instance I will most likely add the fore and aft bulkheads, the two rear sweeps and the gun port lids. I also think the two widthways planks on the main deck look wrong and will plank a continues run, plank the deck in situ, stopping before the edge and complete the planking later once the bulkhead tabs have been removed. Anyway I will make a start.