HOLIDAY DONATION DRIVE - SUPPORT MSW - DO YOUR PART TO KEEP THIS GREAT FORUM GOING! (Only 13 donations so far - C'mon guys!)
×


Ray
-
Posts
404 -
Joined
-
Last visited
Content Type
Profiles
Forums
Gallery
Events
Everything posted by Ray
-
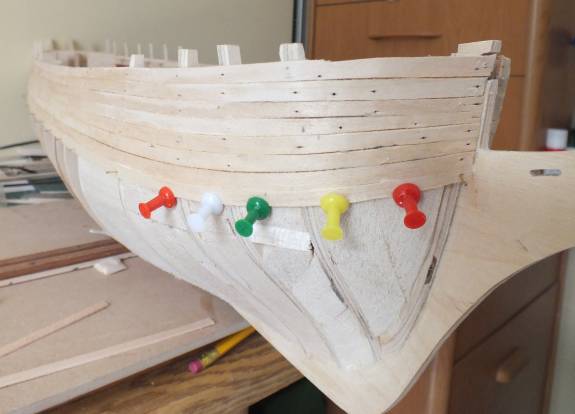
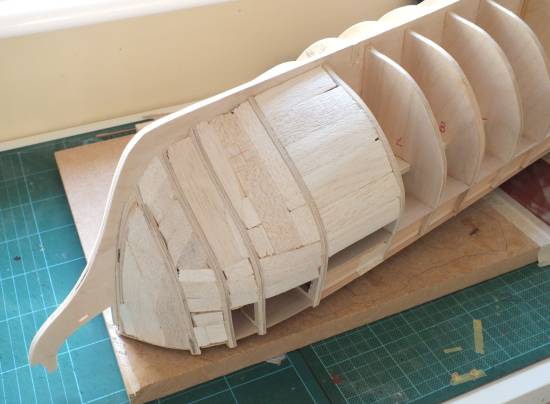
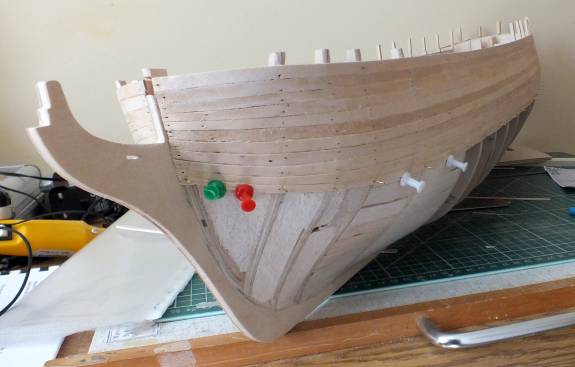
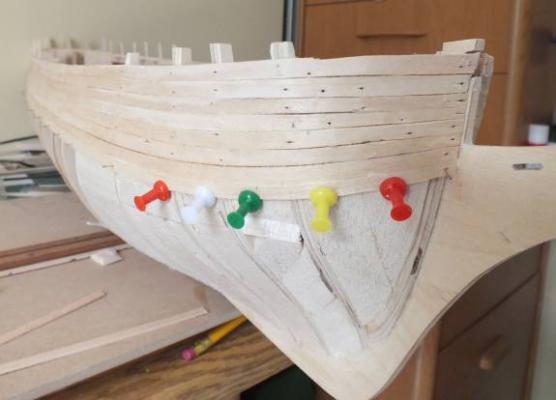
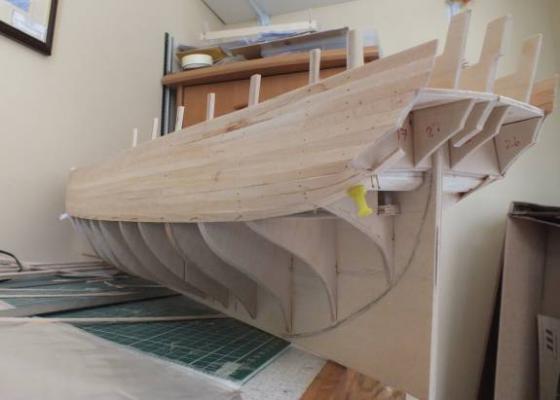
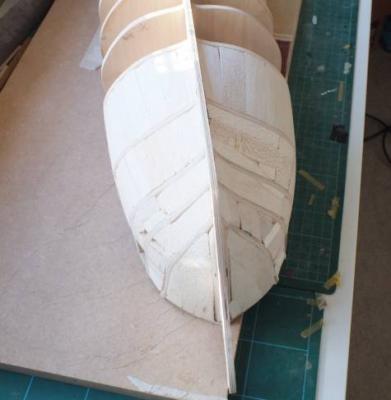
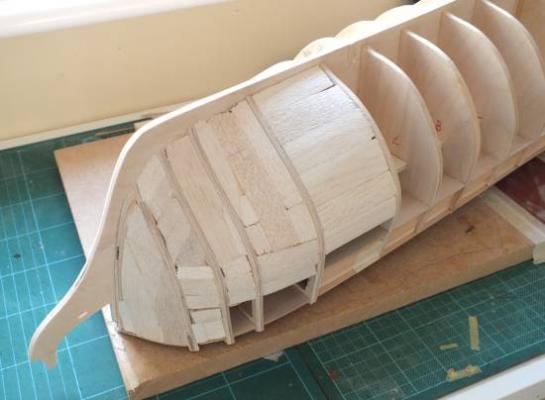
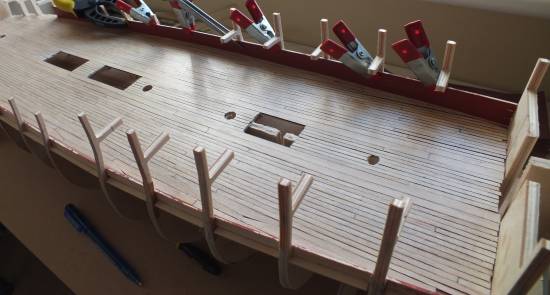
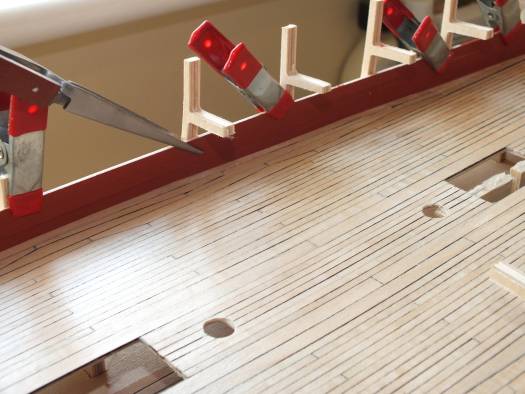
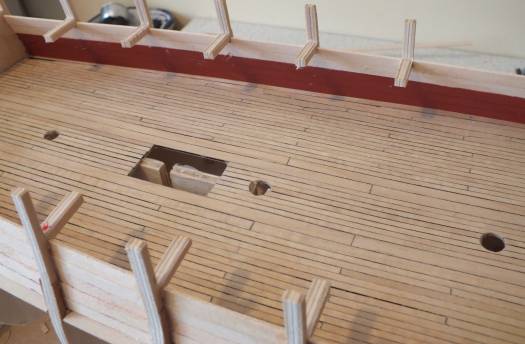
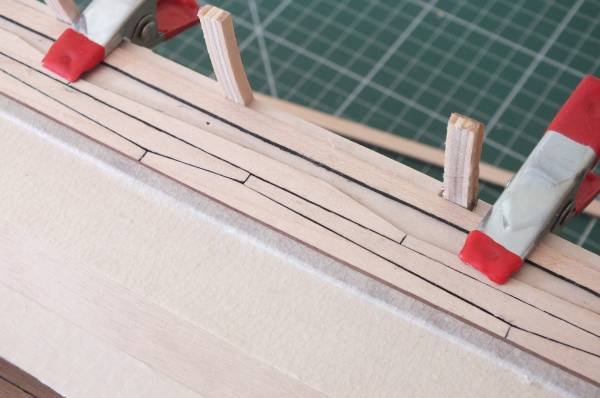
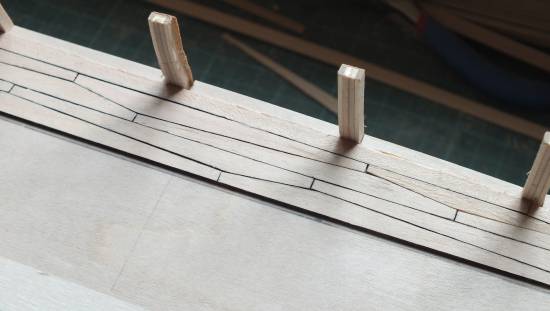
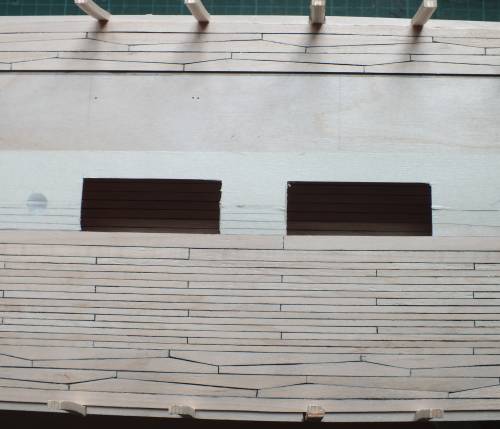
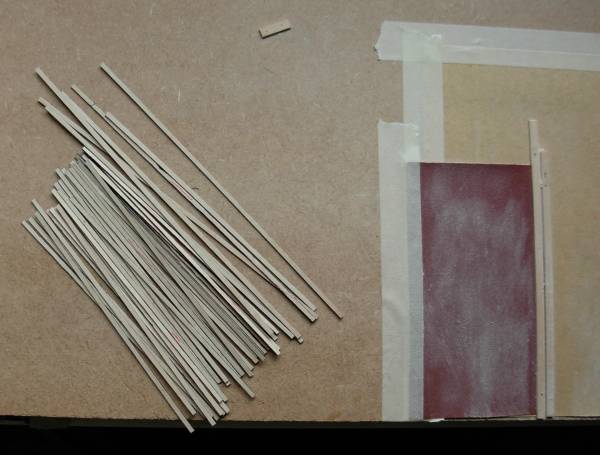
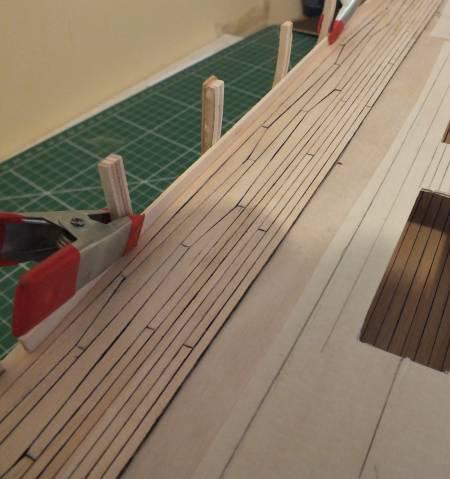
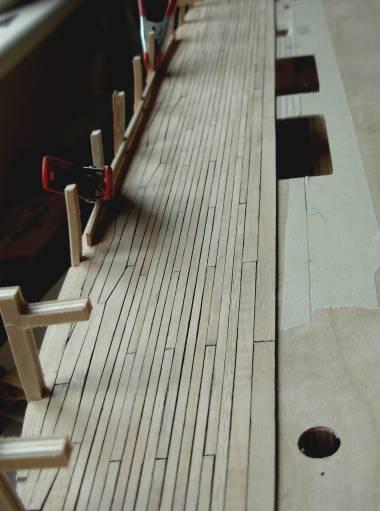
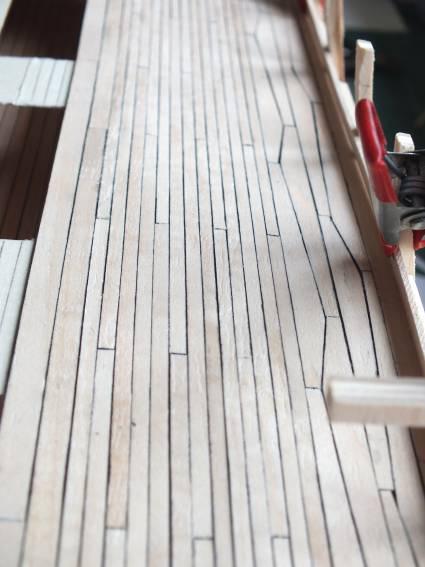
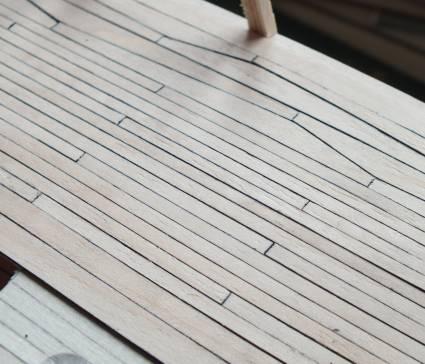
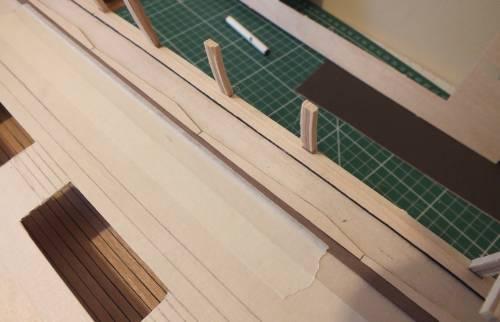
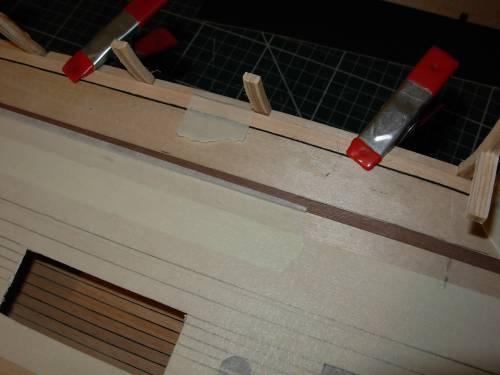
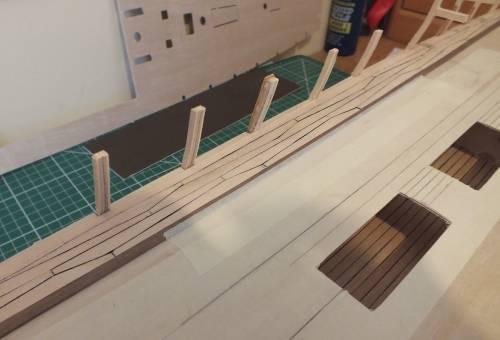
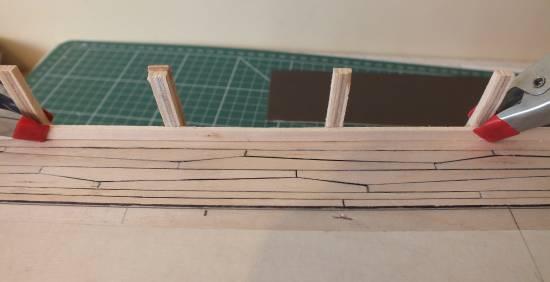
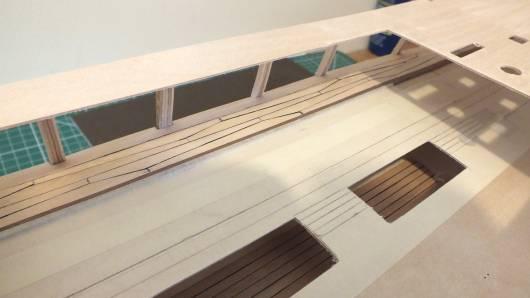
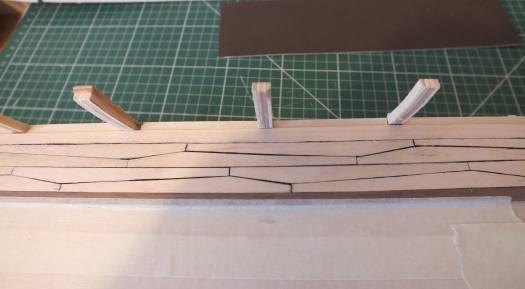
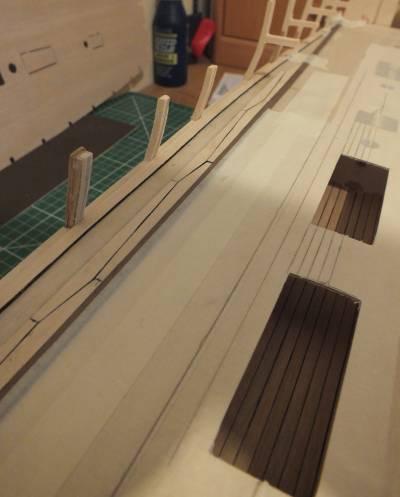
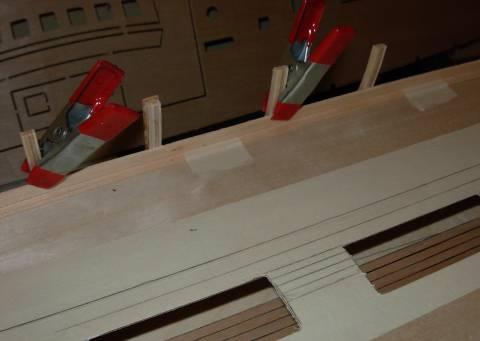
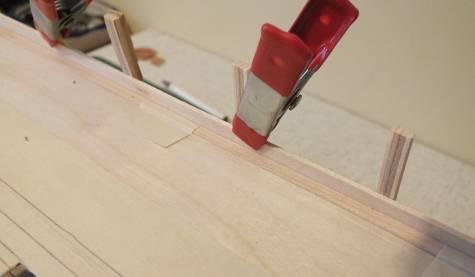
 First planking continued An update on the first planking no problems so far I am laying the planks damp to very damp, I soak the planks in an blanked off length of pvc pipe, and then bend and cut them damp, I fix with pins using PVA speed bond and after fixing the first two rows full width, I am tapering the rest at the bows I do it by eye and feel. First few rows on A few more rows on A few more rows on shows balsa filler helping with pinning planks Stern planking

- 536 replies
-
- 5
-

-
- diana
- caldercraft
- (and 1 more)
-
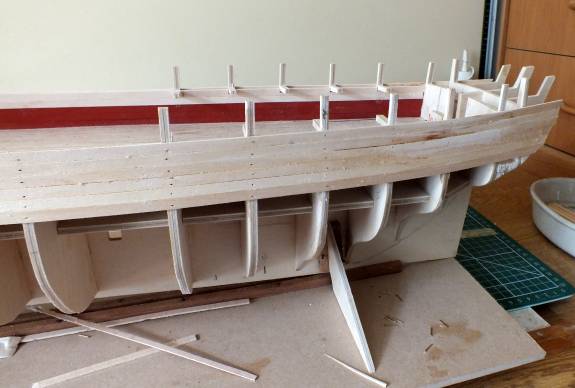
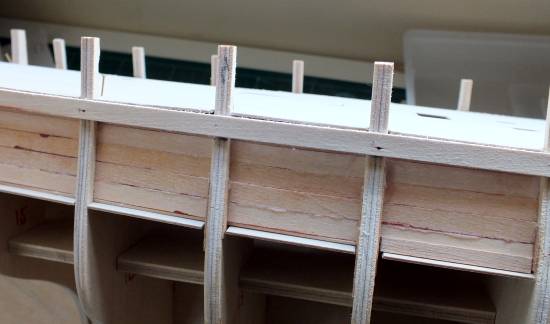
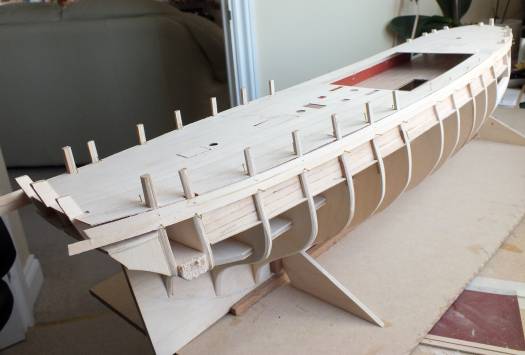
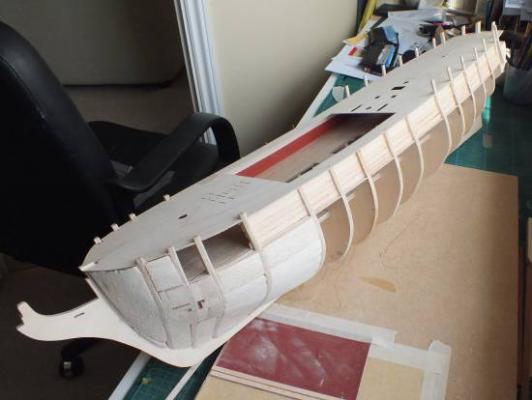
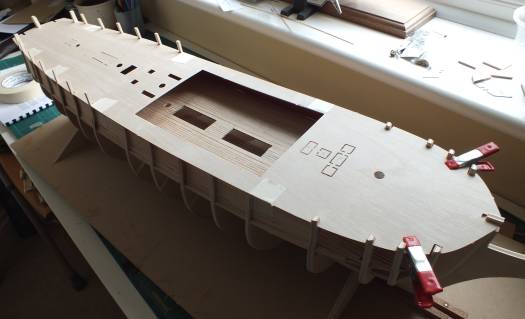
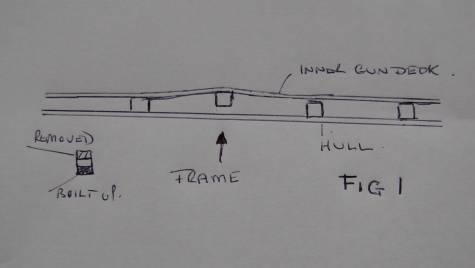
First planking I have started the first planking, and the first plank to be laid lines up with the top, of the top deck, as mentioned before at frame 13 the cross beam is to high so I allowed for this also at the bow the balsa fillers had pushed up the ply deck about the width of the ply so I also allowed for this by setting the first plank that width low. One other problem is that on some of the frames dip in one side, so a filler strip needed to be glued to the frame to counter this, it is not a frame misalignment problem as no reduction of the frames were needed on the other side, and visa versa, I tacked a plank on both sides before gluing up to check I had a nice even curve the same both sides with no dips or humps, two planks a side have now been attached the rest to do, I also removed the top deck. First plank on shows high deck beam frame 13 shows same curve both sides with frame 16 reduced and 15 packed out First two rows of planking on
- 536 replies
-
- 2
-
-
- diana
- caldercraft
- (and 1 more)
-
I pined the top deck in place next which showed up one problem, one frame13 is to high or rather the deck beam part is, which puts a hump on the line the top plank would take, I could have removed the deck and dressed down the beam but I thought all the pin holes would be not as tight when the deck was refitted so I decided to leave it for now and just make sure the top plank runs at the correct height. The next job was to balsa fill between the first few bow frames and the last stern ones and sand down. I then trimmed the top deck so that it did not protrude past the outer edge of the frames ready to start planking. Inbetween thefirst few frames have been filled with balsa and sanned down
- 536 replies
-
- 1
-
-
- diana
- caldercraft
- (and 1 more)
-
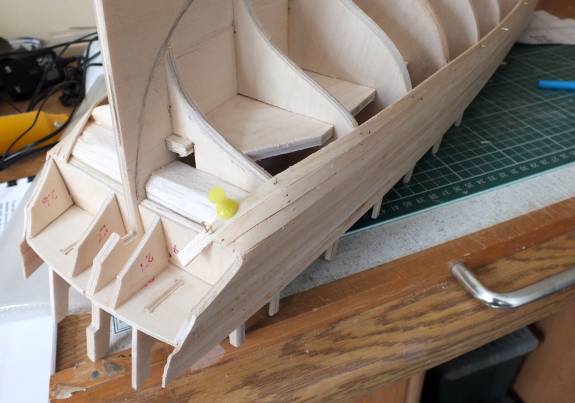
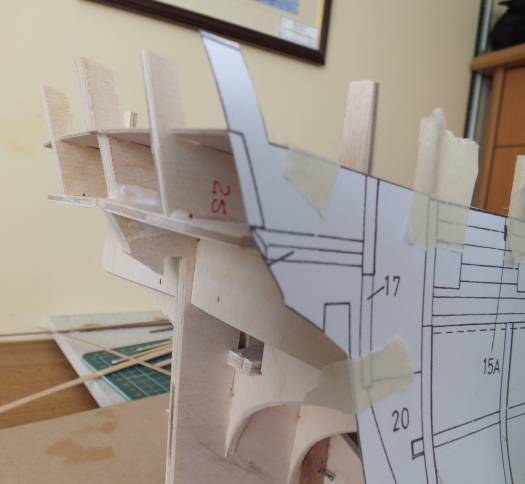
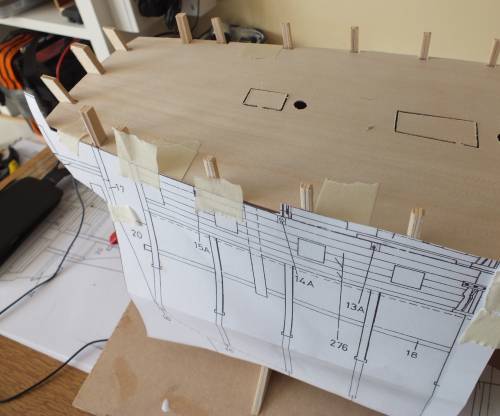
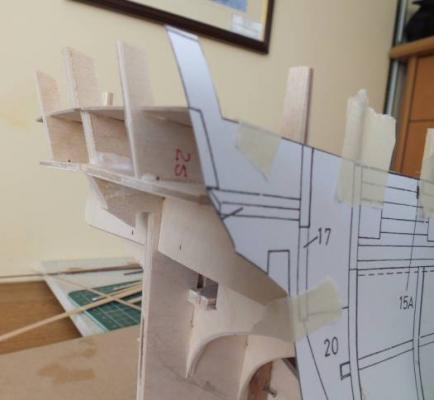
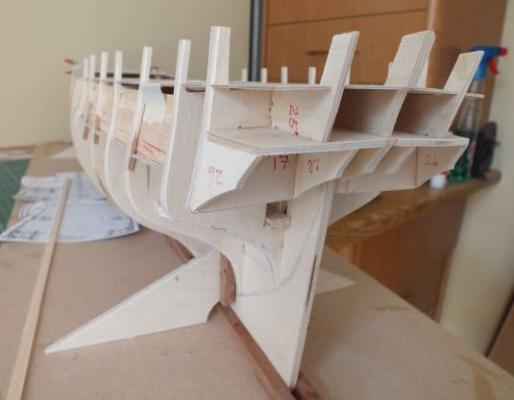
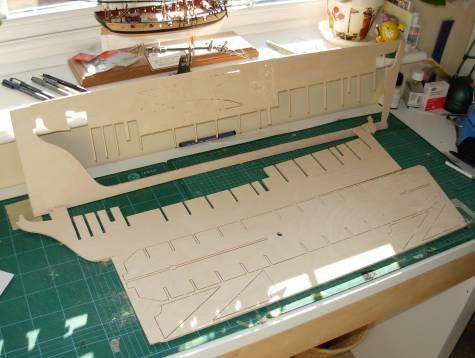
The troublesome transom I have had a building break over the last 2 weeks as since the knee replacement I have had a bit of a reaction to the morphine pain medication, and ended up with a change to a different type of pain relief which made me sick and being a bit away with the fairies, so now its somewhere in-between so back to the build. I remember reading how these parts are a pain to fit and get right, and it is difficult to see if it will be ok until much later, if you dry fit all the parts edge to edge as they are cut they fit ok, but warnings have been made do not get it set to high. I looked at it a fair bit before deciding to not fit the parts until now as I mentioned it the last post, as I thought having the deck on would help and I believe it does, plus I scanned the side plan and cut out the side view and laid it up to the hull, (as you can see it the photo), this I used to help line it all up, and to me looks to be right anyway its now all fitted, but time and maybe some fettling will tell. P S parts 26 and 27 I marked up wrongly so 27 is 26 and they are fitted correctly top deck and transom dry fitted scanned part of plan taped to hull to help alinement top parts glued up all parts glued and fitted

- 536 replies
-
- 1
-
-
- diana
- caldercraft
- (and 1 more)
-
Hi Jason You can not see much more of the gun deck than can be seen in the photo, you will see all the deck fittings and the cannons which I will fully rig, again I will only rig the ones you can see the same as in my pegasus build. The kit so far very good, maybe not quite as good as the Pegasus kit and some have said this because this is an early kit in the Caldercrafts range, it is a step up from Pegasus but I would think not to big a one from Snake, I decided to build Diana over HMS Agamemnon size being one issue Pegasus hull is 21 inches Diana 32 inches so not to large I liked the lower gun deck, and with Diana you have a fully armed top deck, I am going to replace the caronades with 9 pounders as built so plently to see, plus a three decker will be next.
-
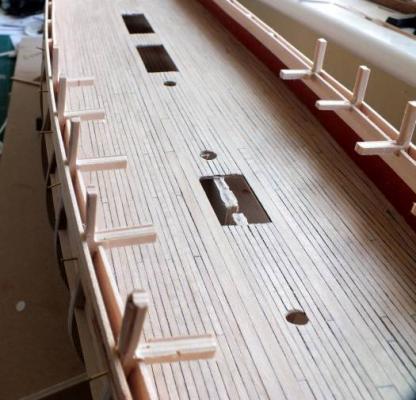
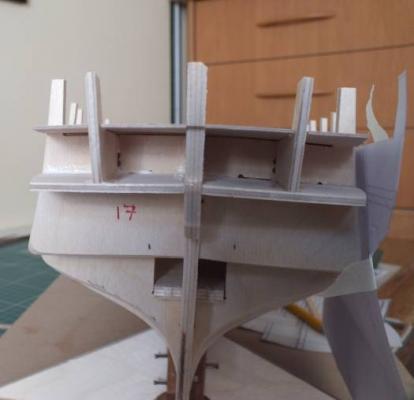
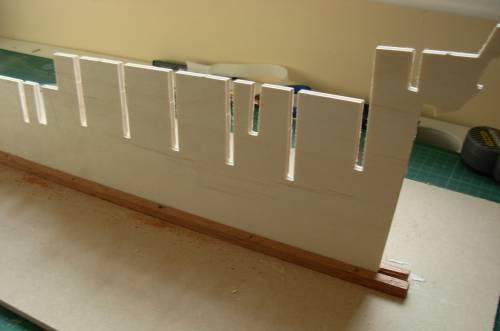
Thanks for the comments guysMort I hope one of these photos show the stem planking you would like to see. The inner wall of the gun deck has now been fitted, I painted the first three planks just to help keep a nice line to where it joins the waterway, later I will sand down and repaint the whole inner wall. I have also started to dry fit the top ply deck this needed some of the slots adjusting and at the moment it is just clamped and taped down, as the next job is to fit the transom parts and I think having the deck in place will help to align the parts. You can also now see how little of the gun deck can actually been seen. Inner gun deck wall started Planking inner gun deck walls done top deck dry fitted gun deck through top deck


- 536 replies
-
- 3
-
-
- diana
- caldercraft
- (and 1 more)
-
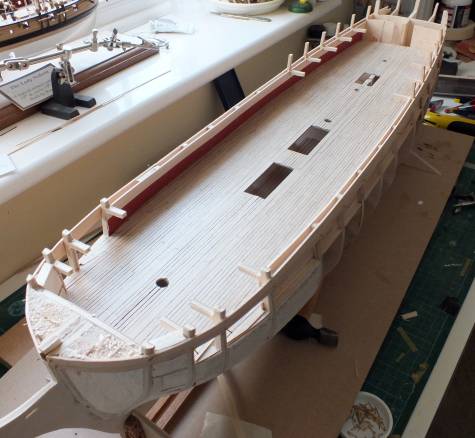
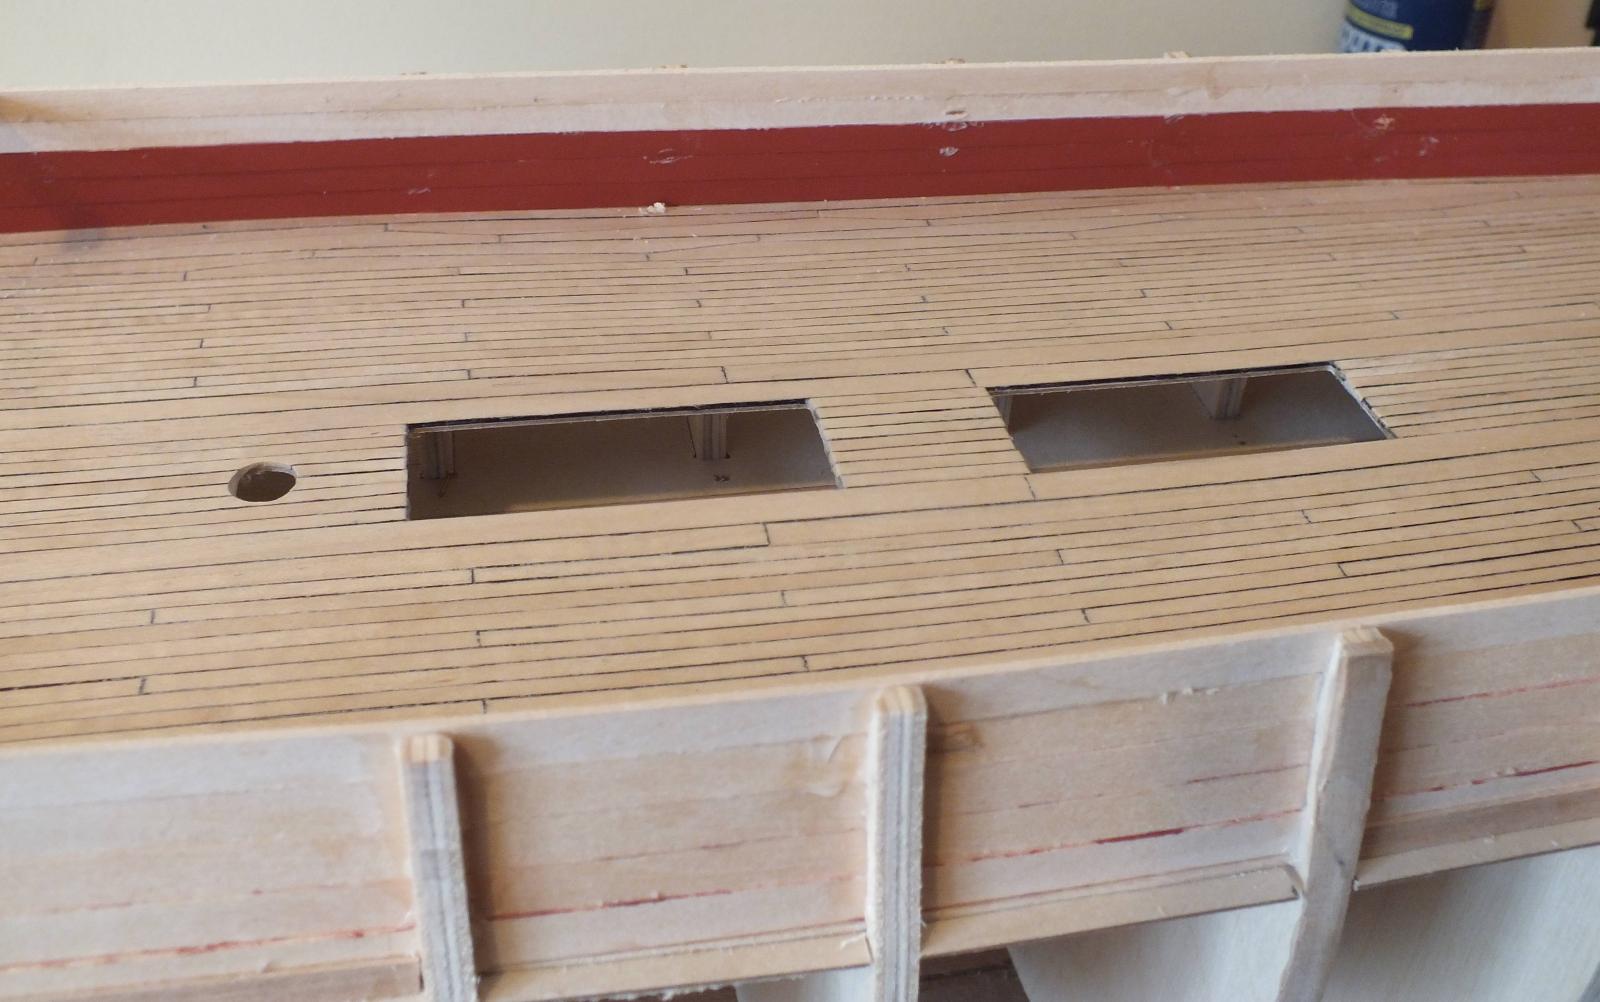
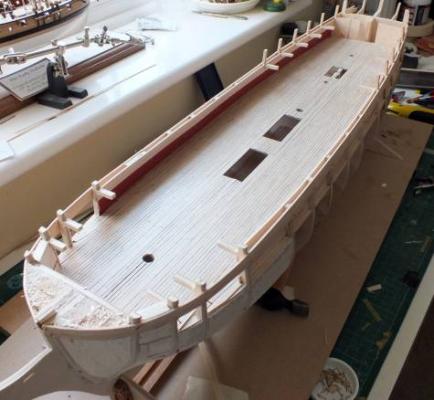
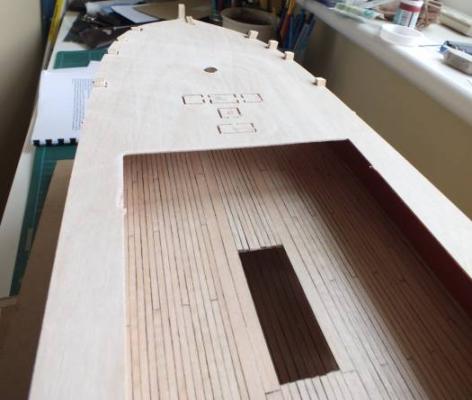
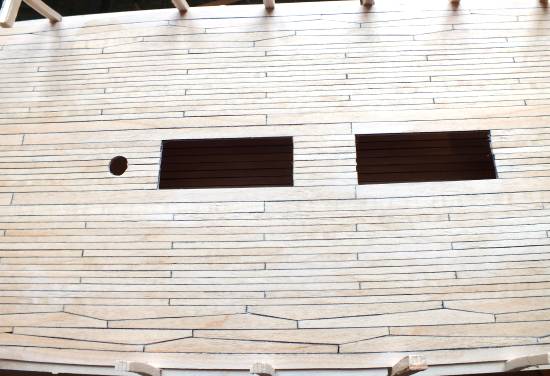
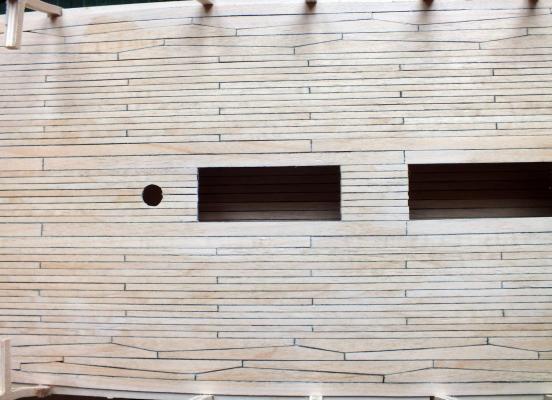
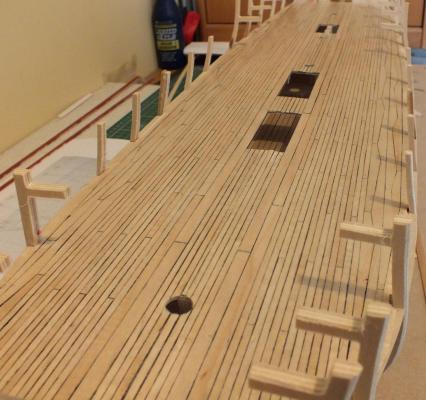
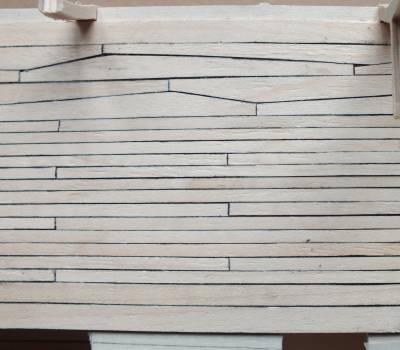
The gun deck planking has been completed, sanded and varnished, I think it looked its best sanded and wiped down with wet wipes and dried, but to leave it unvarnished would not be practical, to easy for it to be marked spilt on and alike during the rest of the build. In the photos it does look a bit mottled but does not look so in real life. I must admit to being pleased with the deck and well worth the replacing of the timber and the top and butt-planking pattern with the wide planking near the deck hatches and the 3mm planking in-between. One thing I did not add was treenails, I think at this scale you are right on the edge of them being added or not, I did try them on a test piece and decided against two reasons firstly I did not know where they would be on the top and butt planks and secondly they looked a bit crowded on the 3mm width ones. Next jobs plank the inner gun deck bulwarks and balsa fill between the first few bow and stern frames. planking under way second side Gun deck planked Gundeck planked and sanded Gun deck finshed


- 536 replies
-
- 3
-
-
- diana
- caldercraft
- (and 1 more)
-
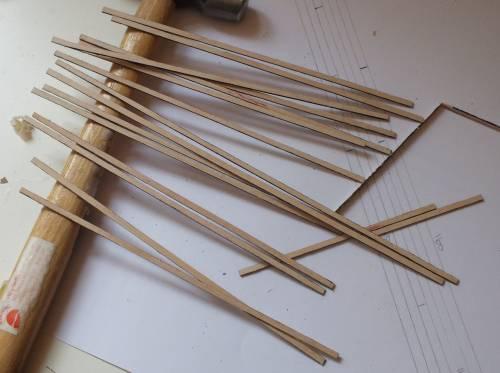
I have started the second side of the gun deck planking and have now laid the waterway and the top & butt planks, bit of a job to concentrate due to the pain relief so I only did a small bit at a time, I have also cut sanded blackened the edges of quite a few lengths of 3mm planking. Top & butt plank template Water way and planking Top & but planking all done Ready for 3mm planks Pile of 3mm planks ready to lay

- 536 replies
-
- 2
-
-
- diana
- caldercraft
- (and 1 more)
-
Great work Gil The photos with identification to which lines are very helpful, I only finshed my Pegasus a few weeks ago and at the start of rigging her I would have found these great, keep up the superb build and infomation.
-
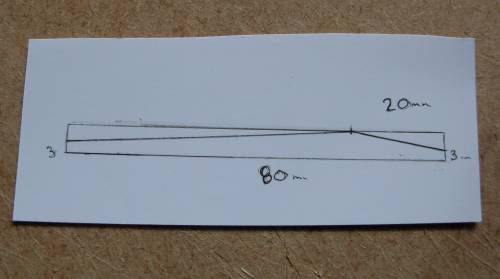
Hi Guys thanks for the comments and best wishes. My knee surgery went ok, only in hospital for four days, but it is extremely painful so I have not yet done any more work on Diana, Sharpe knifes and alike mixed with a fair bit of morphine are not the best mix. Hi Mihai I did use the brush/pen on all the decking laid so far and I am very pleased with the result, and its having the benefit of it being faster as well over my normal method of laying black cotton thread between each plank not very practical on the top & butt planking. Hi Mort I did not use a jig for the top and butt planks I just cut and measured each one from 80mm length of 5mm maple (as in the photo) I cut a few at this standard size and laid the ones that just fit together nice and trimmed as necessary others, or cut one to give a snug fit and carried on to the bow and stern cutting each one as required, tapering them to give the straight line were the 3mm planking starts.

- 536 replies
-
- 2
-
-
- diana
- caldercraft
- (and 1 more)
-
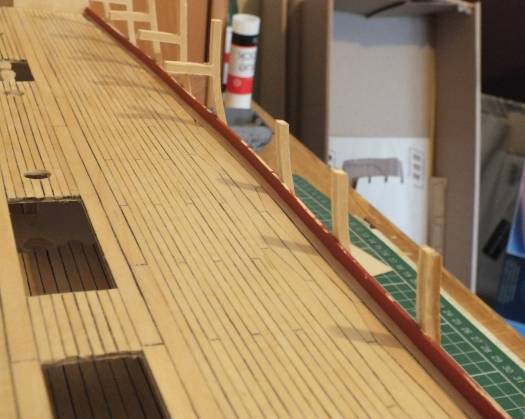
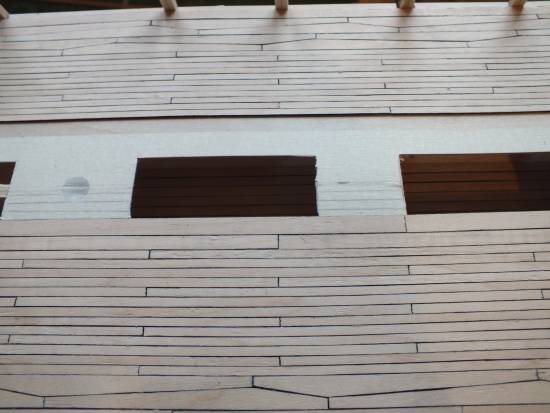
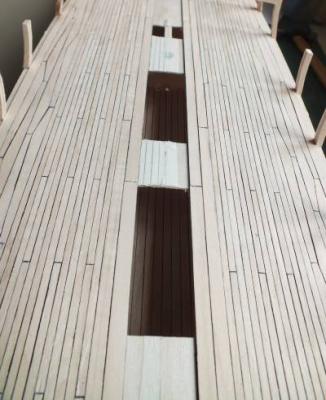
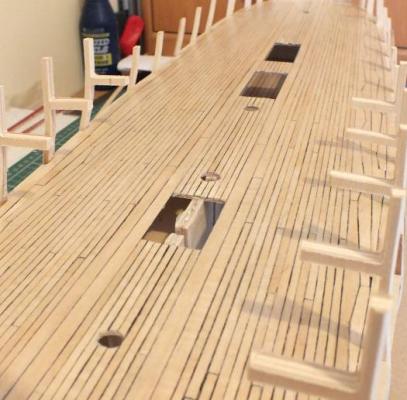
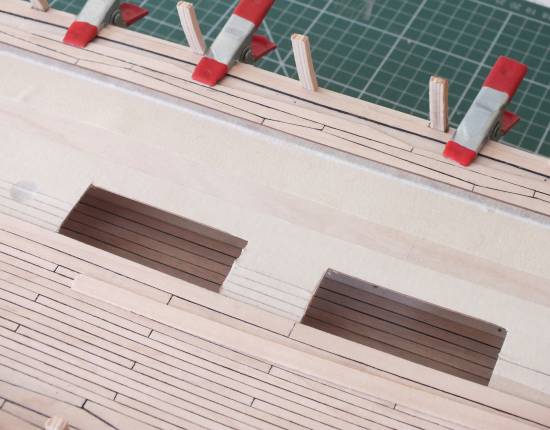
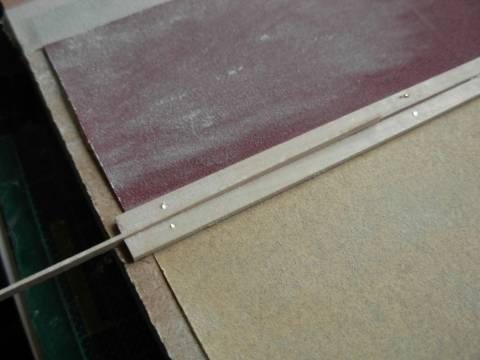
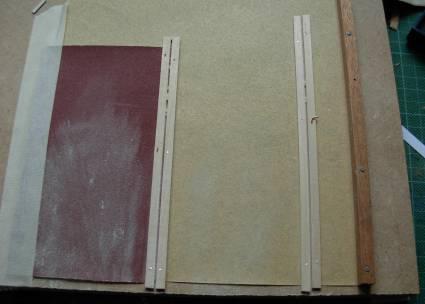
One half of the gun deck has now been planked top & butt, then 13 rows of 3mm planks and lastly two rows of 5mm up to the edge, where the gratings come to, the part left in the centre of the deck reverts to 3mm planks, I will fill that in after the other main half has been done, so far I a pleased with the effect and the maple. The other photos show my planking station just some pined down glass paper and spare 1.5 x 5 mm planking pined to allow the ends to be sanded square. This might be the last update for a while as tomorrow the 6th I am going into hospital to have replacement knee surgery not looking forward to it very much, hopefully after the first few weeks I might have a lot of time to put into the build. 3mm planks ready to lay Sanding station Sanding edge 3mm planking being layed 3mm planking done One side finished

- 536 replies
-
- 5
-
-
- diana
- caldercraft
- (and 1 more)
-
Hi Steve Early days yet as to a direct quality difference, I would say the Victory kits are very, very good.This kit so I am informed is a early Caldercraft one, at the moment I do not like the all ply keel as much or the dowel for the masts but the rest of the timber is just as good as the pegasus kit. some of the cast fittings also as not as good the ships bell for instance, but time will tell on the rest.The plans are all full size which I like slightly better but that makes them big to use.This is my opinion so far.
-
Hi Guys thanks for all the comments I am shure your Pegasus builds will turn out even better,I am working on Diana now, the big Frigate, I hope to put to use all I learned when building Pegasus the little Frigate.
-
Hi Jason I am using maple for all the decking, I think it looks much better than the Tanganyika supplied in the kits, and it cost around £35 to replace it ,so not to bad it is just a pity the 3mm is not as sharp on the edges as the 5 & 7mm.Aplying the pen/brush, it only just bleeds a tiny amount on the ends so I am very lightly touching the ends to stop this.
-
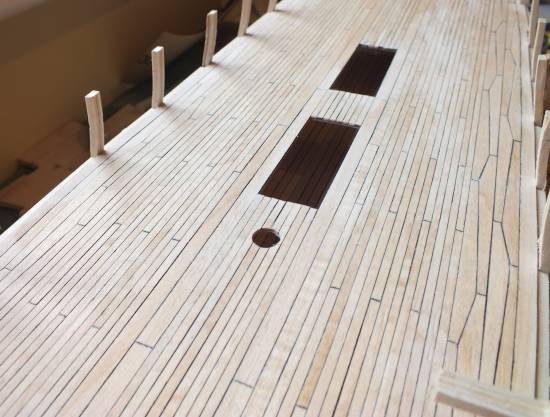
Gun deck plankingI started the gun deck planking by adding the waterway plank, it was trimmed and shaped from a 7mm wide length of maple, it was set hard against the frames and with a bulwark plank set on top, this gave the waterway a 4mm width. I then cut out a few shaped planks and worked out a straight line in from the waterway parallel to the deck centre line at about amidships wide enough to cover the planking pattern, which is four planks wide, this was the compromise as in the last post, the top and but planking was then laid from that line to the waterway. I tried the ply top decks on, and you just do not see where the top and but planking tapers you only see it at full width. Next I started laying the 3mm wide planks and I will say the 3mm timber was nowhere near as good on the edges as the 5 & 7mm and requires a lot of sanding, as showed a few rows have been laid the rest to do. Waterway & stright edge for distance First row of planks Two rows Top & but finished one side Top & but finished one side with ply top deck in place Top & but finished one side with the first rows of 3mm planking and a bulwark plank in place
- 536 replies
-
- 2
-
-
- diana
- caldercraft
- (and 1 more)
-
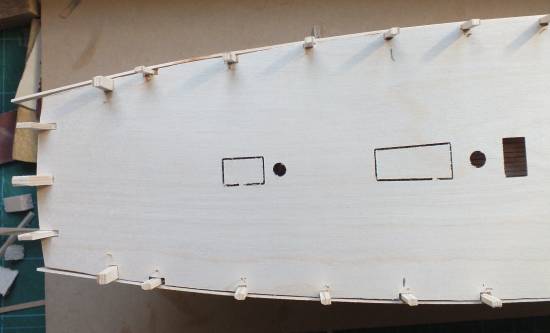
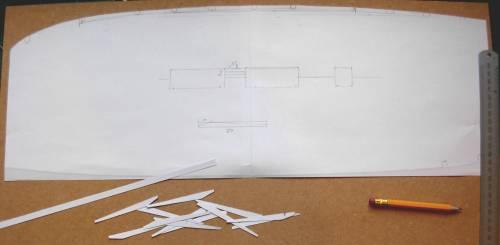
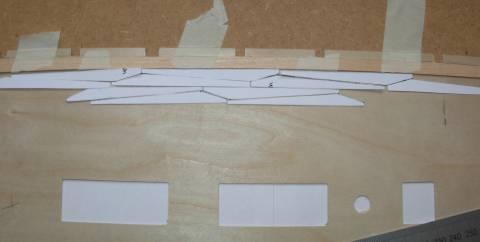
I decided to plank the gun deck top and but as the pattern in the Anatomy of the ship “The Frigate Diana” although the book does not show the gun deck planked in this way, this method of planking was done to strengthen the deck, so it seems the book is most likely flawed on this point on page 52 as on page 108 it shows the deck underneath an 18 pounder top and but planked. To get my head around how to set this pattern I made a paper pattern of the deck and thin cardboard planks. Normally I would start planking from the deck centre line and work out to the bulwark but this method would not work here, I would have to work out from the bulwark to the centre of the deck, but needed to have a straight line where the top and but planking ends to make the rest of the planking look right, as there will be about 8 or 9 widths of 3mm planking, and the 2 widths of 5mm up to the gratings and 4 or 5 3mm planks in the centre. THIS WILL BE MY COMPROMISE I know the top and but would be the same width from bow to stern but you can only see a smallish length of it, when the quarter, and fore decks are on, and in the same way, I will not fully rig the guns that cannot be seen. The ply deck was glued in place, this method also requires a waterway tight up to the frames so a 7mm plank was cut and shaped to fit. Paper deck plan setting out with card planks waterway being set up ply deck marked out and glued on water way shaped ready to fix

- 536 replies
-
- 1
-
-
- diana
- caldercraft
- (and 1 more)
-
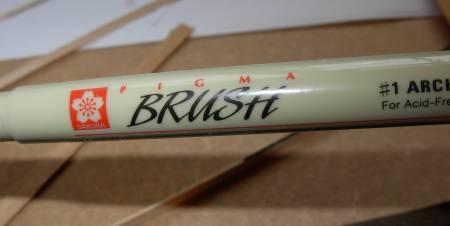
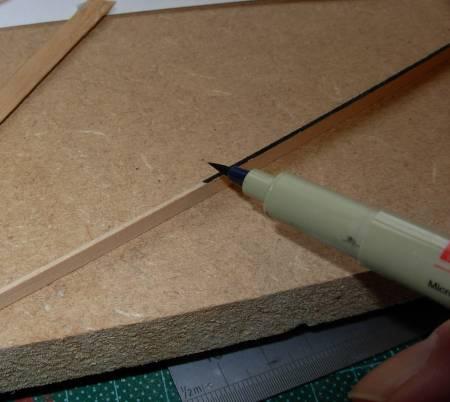
Deck planking As I am going to top & but the gun deck planking I thought my normal method of laying black thread between the planks would not be very practical. I had seen on the old site some black brush pen, which it was, reckoned do not bleed so I ordered two pens to give this method a try on the lower deck of which a bit will be seen through the gratings, I also used the supplied planking to do this. The method just run the pen over the edge of the plank lay it and run a pencil along the deck and repeat, the result surprised me how good it looked and how fast. The pen Blackening the edge lower deck planking


- 536 replies
-
- 4
-
-
- diana
- caldercraft
- (and 1 more)
-
Hi its coming along well the stunsail booms look good they are a bit tricky to get set right and they look right.
- 431 replies
-
- 1
-
-
- pegasus
- victory models
- (and 1 more)
-
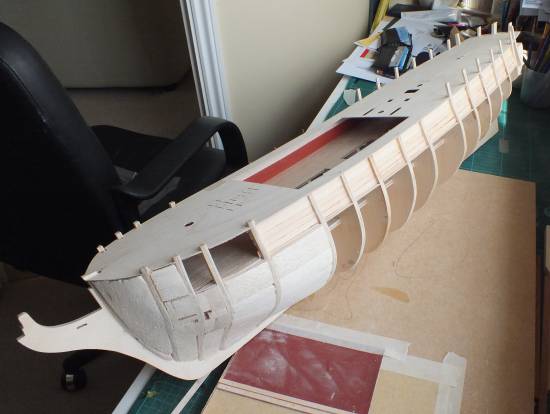
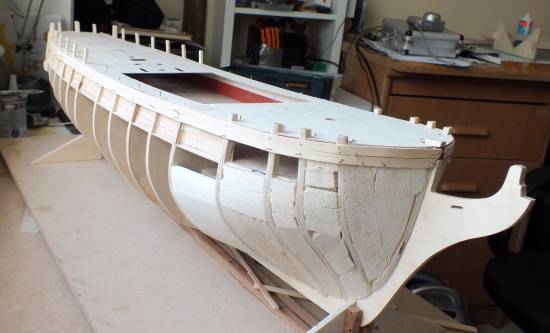
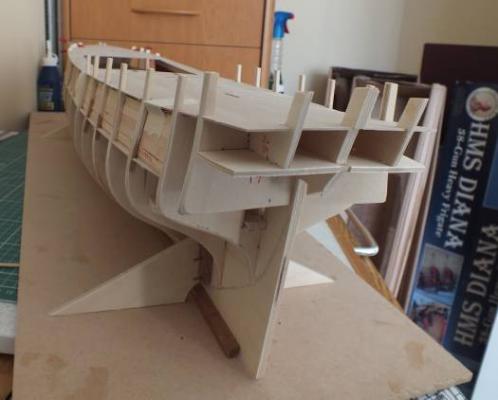
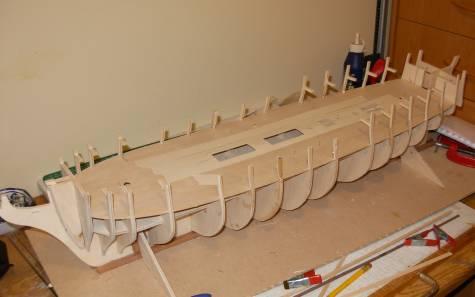
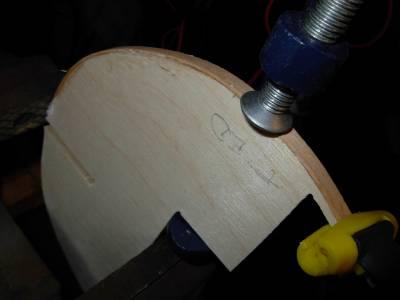
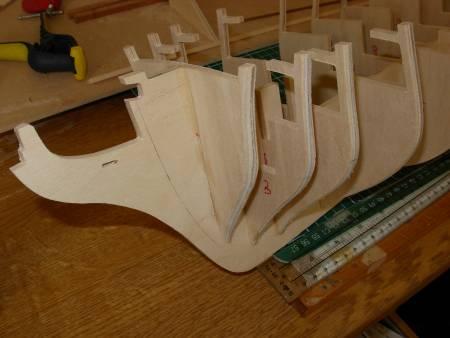
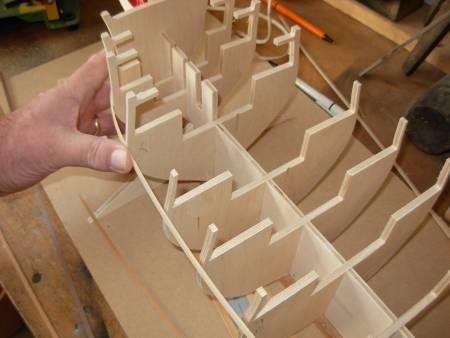
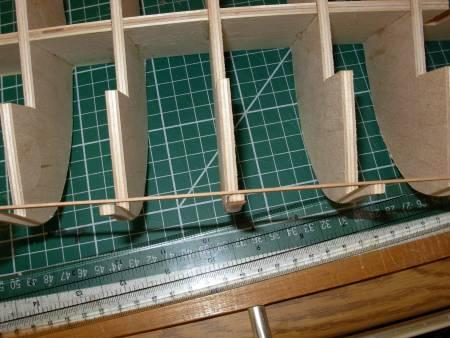
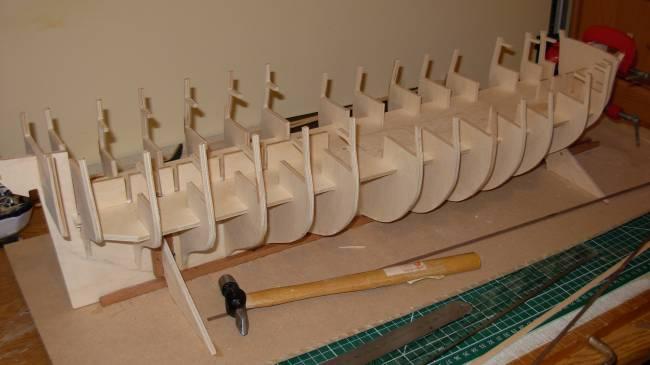
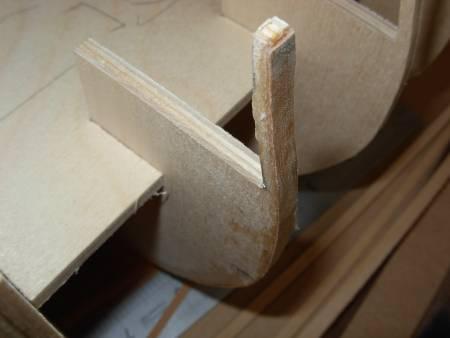
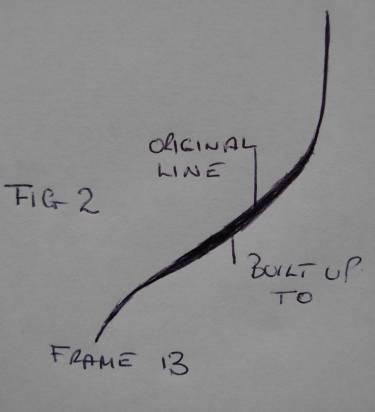
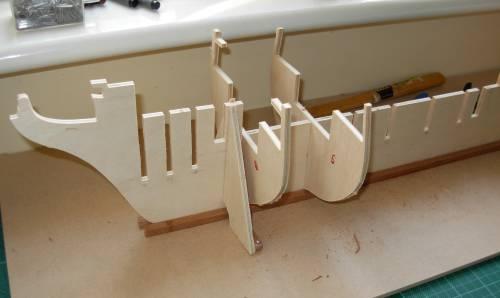
Next job was to taper the bow and stern frames plus the bow blocks it’s a matter of get it as close as you can now before the frames are glued in place and one good thing with this build is the lower deck does hold everything fairly well in place dry fitted, one problem I did encounter was with frame 6 it was too narrow as can be seen in the photos so I packed out, the outer edge, it also needed the inner edge reworking as well again the photos show this, and frame13 Needed packing out as the hull planking would have dipped if this had not been done, several of the rear frames semi broke when the lower deck kept going on and coming off so they were glued up and strengthening strips added to the sides, when all the tapering was done the frames were glue into place and then the lower deck glued on as well. I will balsa fill between the first few and the last few frames before I plank. Tapering frames checking taper bow frames done shows problem at frame 6 adding material to frame 6 frame 6 nearly sorted problem at frame 13 extra material needed frames and lower deck glued up


-
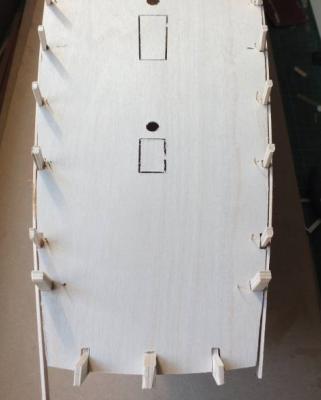
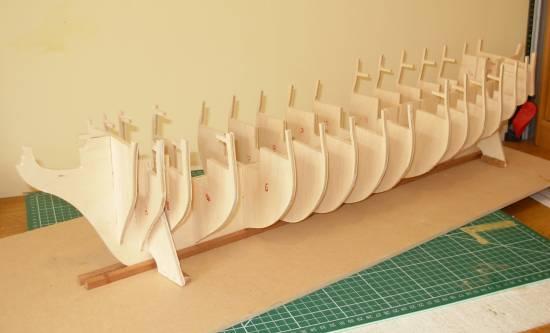
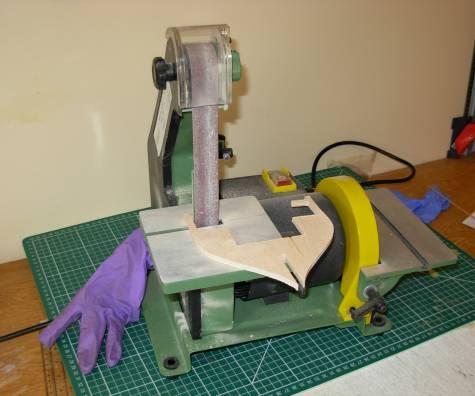
The first real part of the build was to remove the frames/bulkheads and the keel from the ply sheets and dress down the edges, which gave me the chance to use one new toy a belt and disc sander. The keel in this kit is just ply no hard wood outer edge not as good as the other two kits I have built so I will paint the bow black to cover the ply edge. I then made up the build board, which was needed as the ply keel did have a bend in it. With the keel slotted into the board the frames were all slotted on to it and the lower plywood deck, and they all slotted together well. I also ordered the maple for the new decking. Keel and frames out of the box Keel on build board New sander Starting to dry fit Allframes dry fitted
- 536 replies
-
- 4
-
-
- diana
- caldercraft
- (and 1 more)
-
Hi great to see you back I hope to build my Diana as you have done with the open quaterdeck rails and the extra 9 pounders I thinks its a more pleasing look. Thanks for the heads up I seem to remember in some old build logs this transom height problem when I get near to fixing them I can dry fix and send some pics to you to check the heigh, it may be a bit down the road as I plan to top & but the main gun deck first.
-
Hi Guys thanks for your comments I can rearly now get on with Diana after reloading my old build logs. I have a few weeks and then am due for a total knee replacement so I am not shure if that will give me more building time or less ? Christian I seem to remember in some old build logs this tramsom height problem when I get near to fixing them I can dryfix and send some pics to you, it may be a bit down the road as I plan to top & but the main gun deck first.
- 536 replies
-
- 1
-
-
- diana
- caldercraft
- (and 1 more)
-
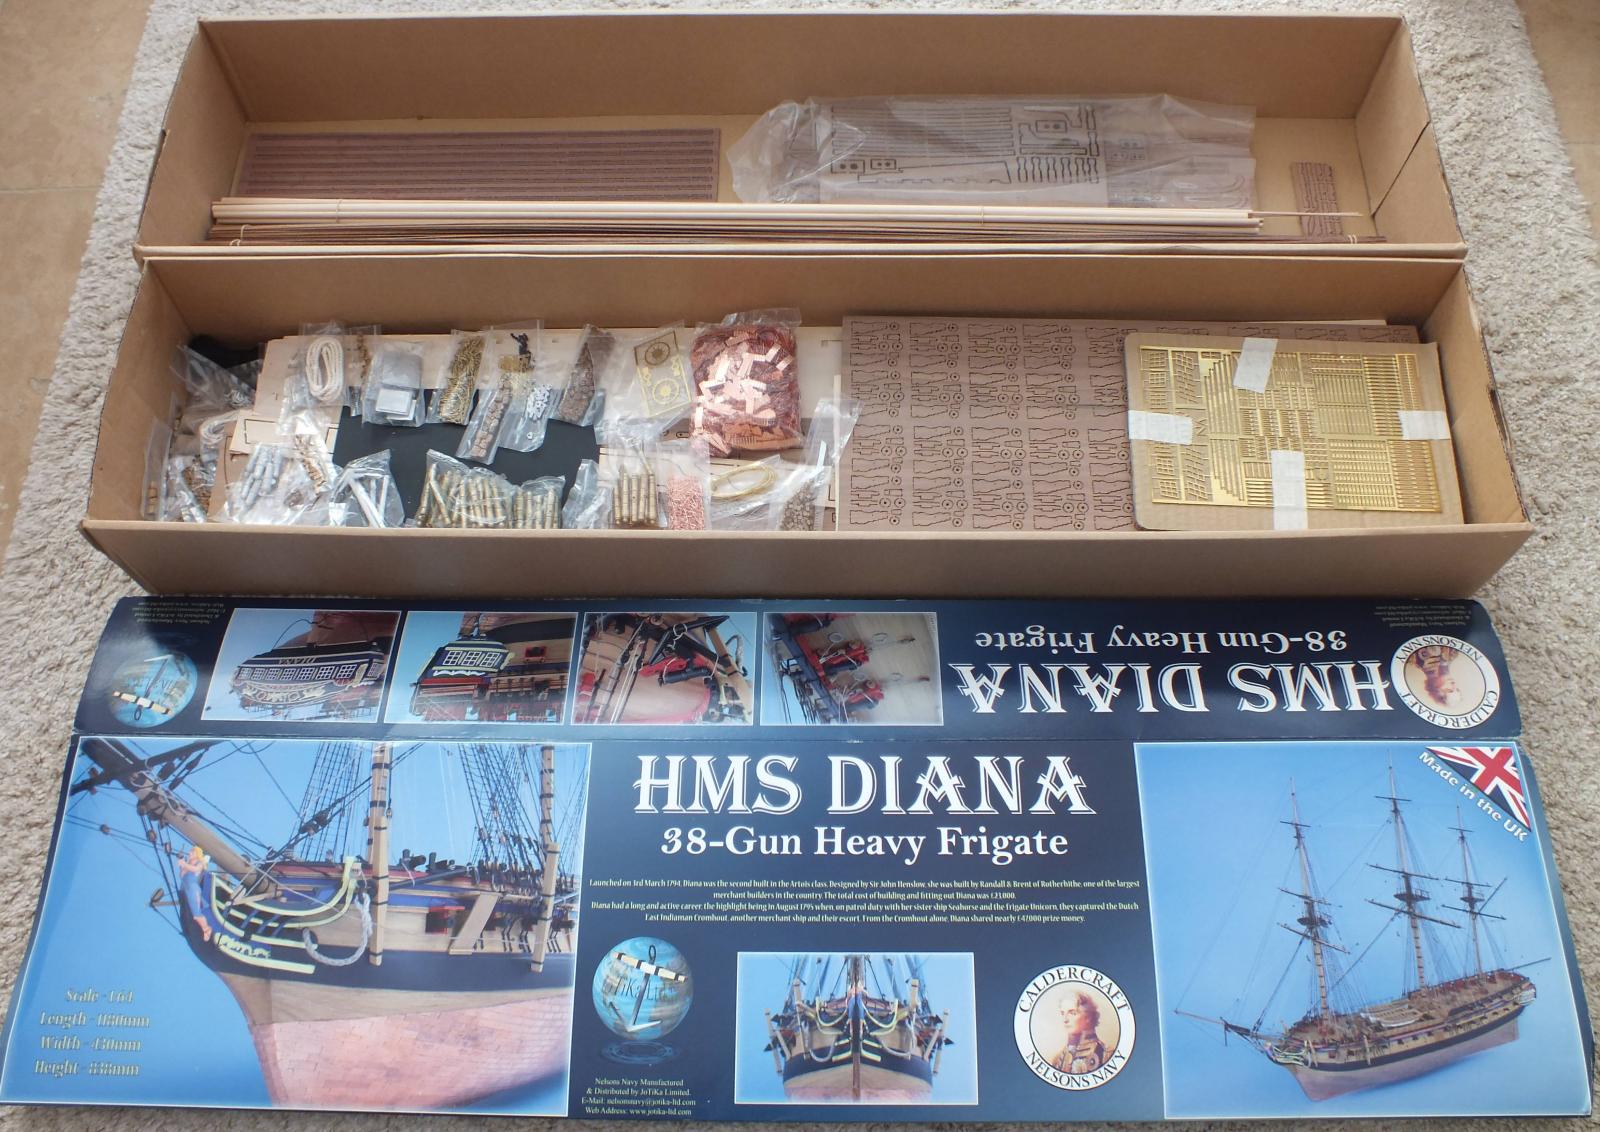
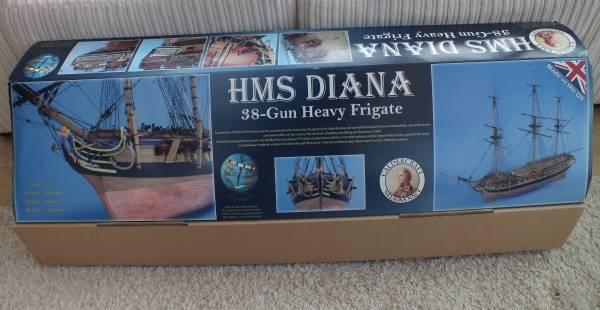
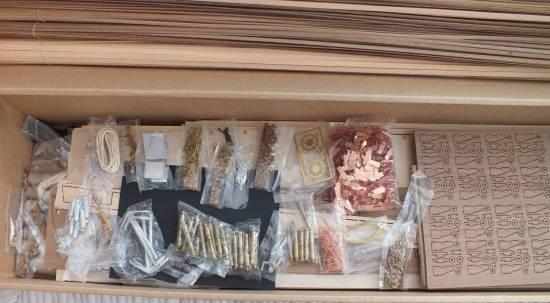
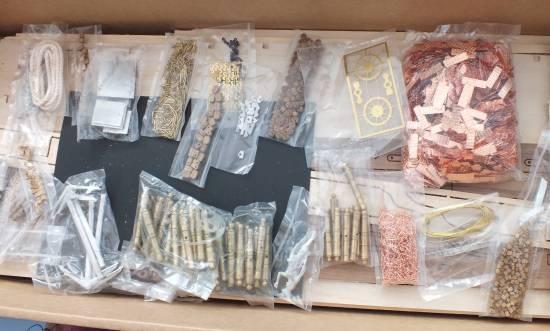
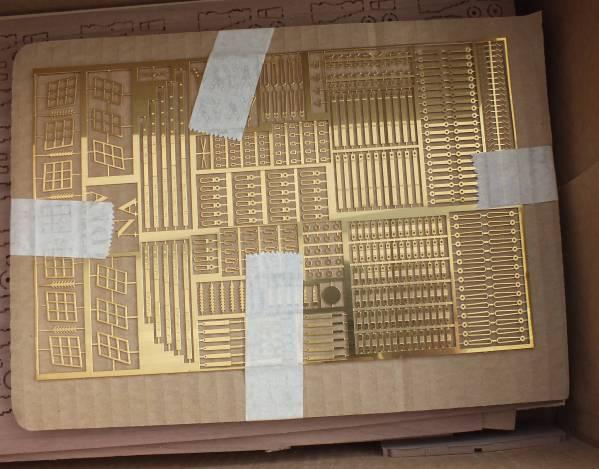
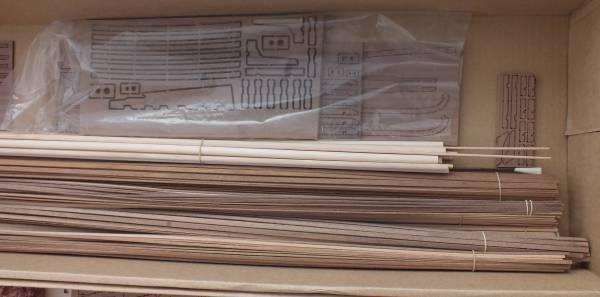
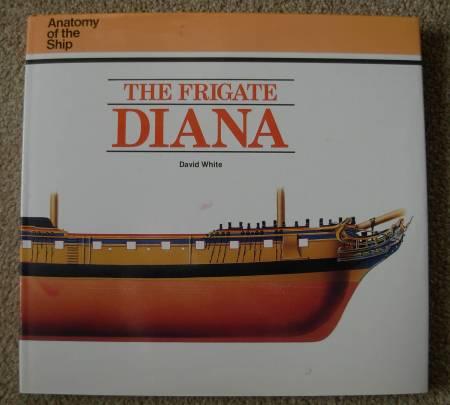
HMS DIANA 1794 By Ray– A 38 Gun Heavy Frigate (Caldercraft) I intend to depict her as built in 1794 with open rails on the quarter deck and replace the quarter deck carronades with 9 pounders, I also intend to plank the decks as in Anatomy of the ship “The Frigate Diana” by David White so will replace the supplied wood with Maple. I have had the kit for several months, but only had a quick look inside the box to see if all seemed present and correct, I did not want to start thinking about her too much until Pegasus was completed. Now Pegasus has been completed I delved into the box in earnest, and it is quite a large and heavy one, all the contents seem to be good quality although I would have preferred walnut dowel to the Birch wood dowel supplied this just does not look as good stained as the walnut does varnished, so I will replace any dowel that is not to be painted with walnut. The one thing I would like to replace are the copper tiles, I think they are nowhere as good as the Amati ones, to me the ones supplied are to bright, and the rivet detail is in comparison, nowhere near as good but at a cost of around £100 this may not be possible. I have been in for a bit of stick from family members, as my first wife’s name was, you have guessed It, Diana, so I will have to get used to “ off to your room with Diana again” and “we never thought you and Diana would spend so much time together” a cross I will have to bear. Diana boxed kit opened Fittings Timber Book

- 536 replies
-
- 4
-
-
- diana
- caldercraft
- (and 1 more)
-
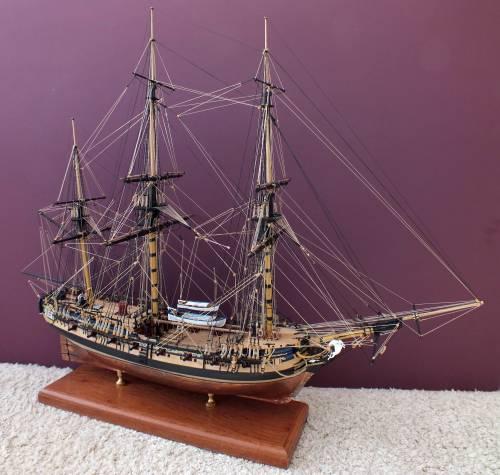
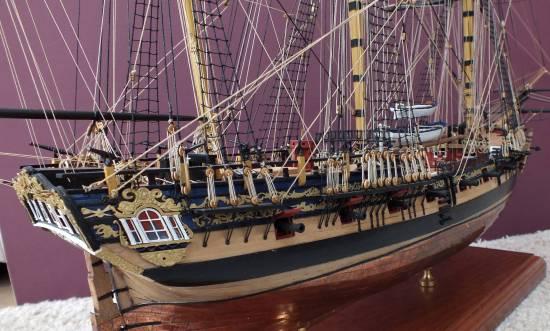
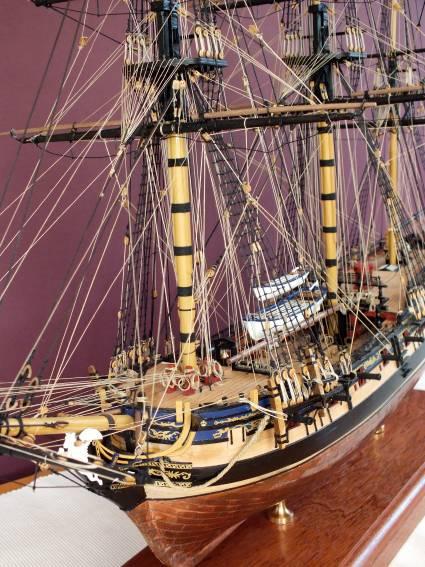
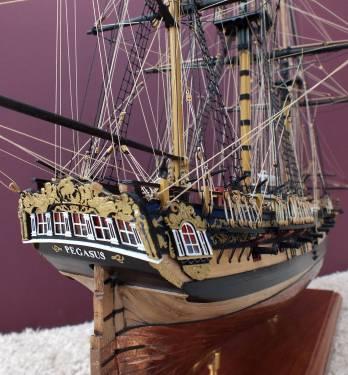
HMS Pegasus completed Well Pegasus is finished, its been a three year build a bit longer that I anticipated, but we did move house during that time. How did it all go, the quality of the kit was very good and I recommend it without any reservations. Looking back on the build there were no real problem in producing this fine model, for she really in a handsome ship. The most daunting part of the build was for me was undoubtedly the rigging, not the standing rigging but the running rigging, mainly because there is an awful lot of it, but in the end it was not that bad, the key to this I think was leaving access to the centre of the deck which made tying off the cordage ends ok, I will say one thing, I did use a fair bit more cordage than came with the kit. The most difficult part of the build was probably coppering the hull, but it does look great when finished. I also think fully rigging the cannons and adding the rope coils were well worth the extra time and effort. Final thoughts a great kit, makes up into a super model but not for the beginner, I hope this log helps other Pegasus/Fly builders. ******** HMS Diana is next ********


- 102 replies
-
- 3
-
-
- victory models
- pegasus
- (and 1 more)
-
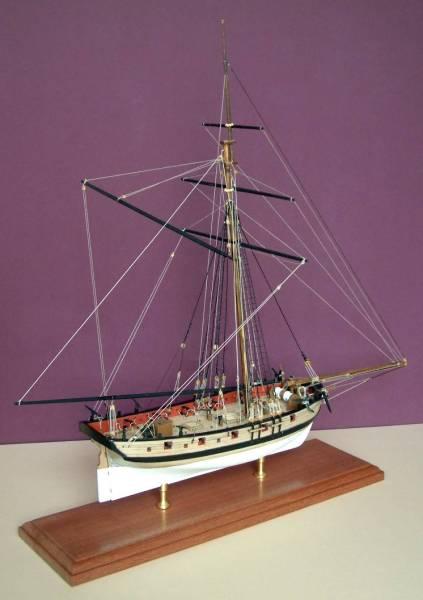
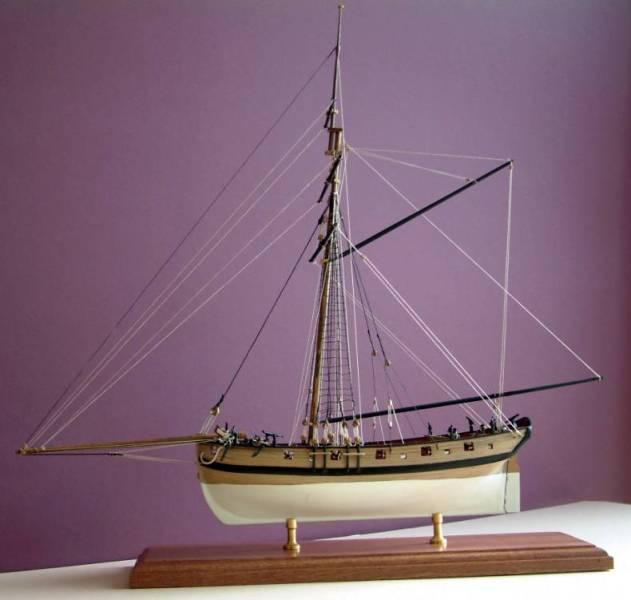
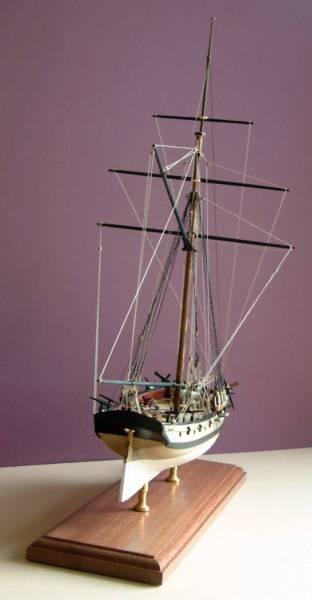
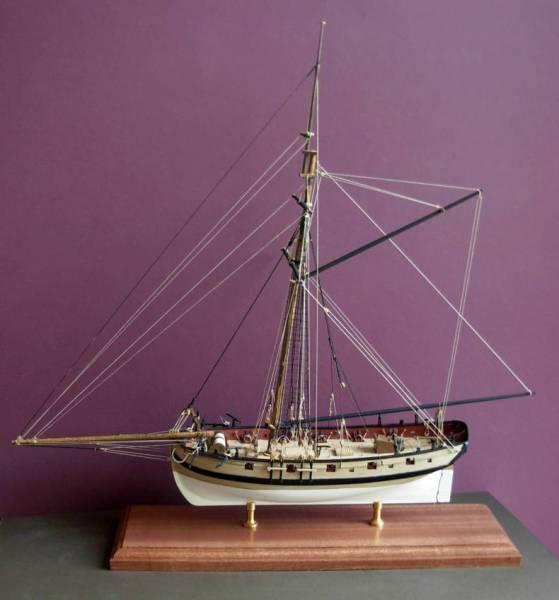
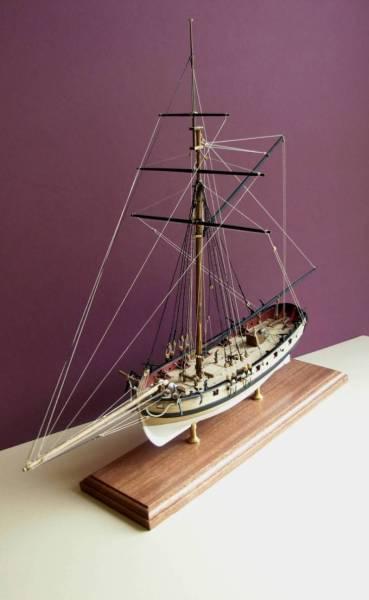
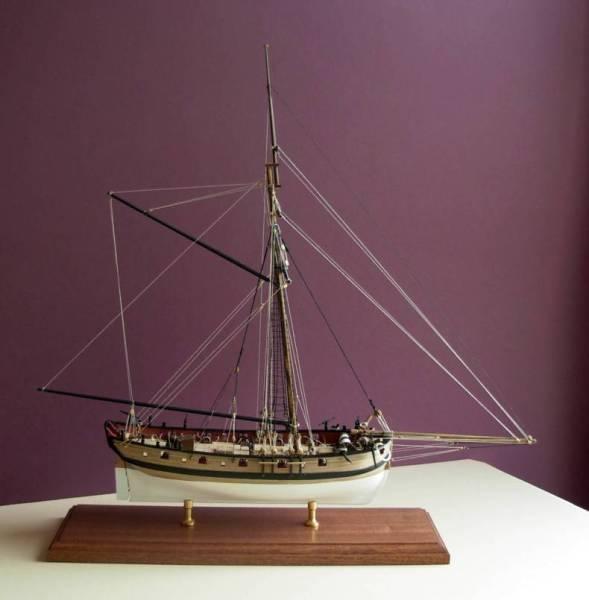
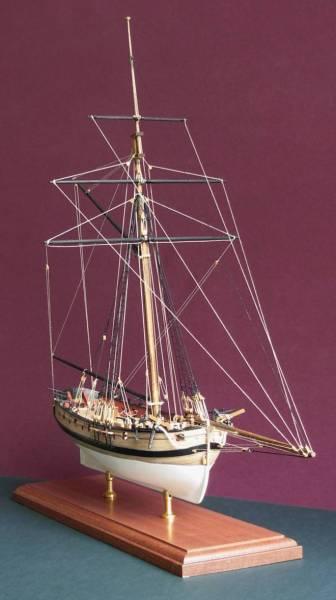
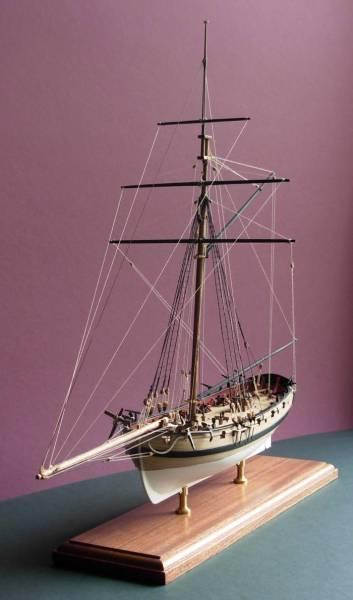
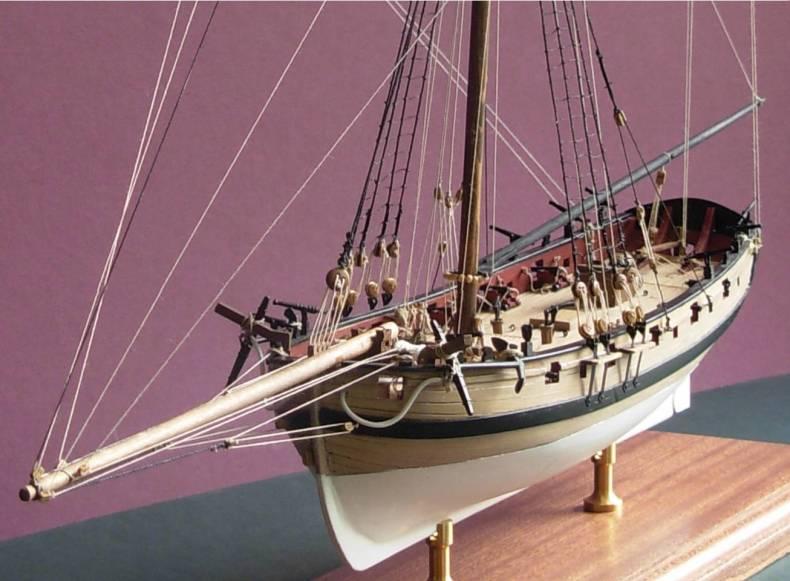
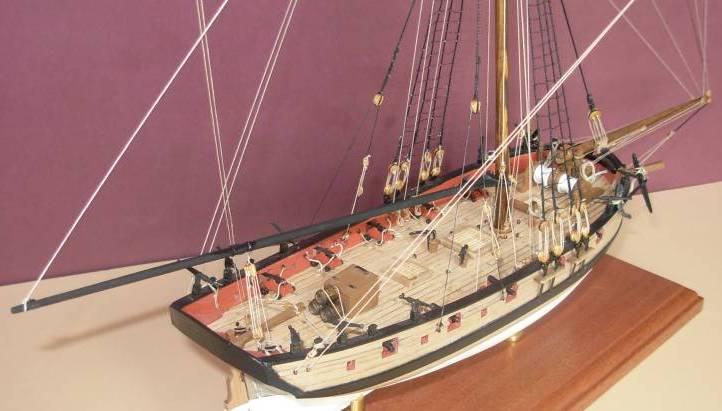
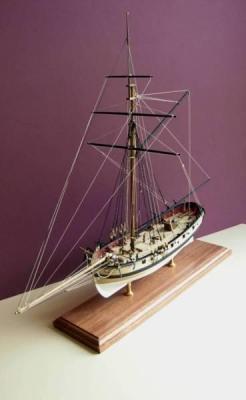
The Lady Nelson This is my finished Lady Nelson Great fun to do, and a good relearning curve, having not built a model for many years, and I am well pleased with the end result. The kit I would I recommend it, 100% yes, great quality materials super plans and drawings, plenty of wood, both planking and dowel, cord as well, the only short fall some 3mm blocks and eyes but is there anything perfect. I can now open the box of my next model HMS Pegasus in earnest, not sure whether to do a build log for her?


- 20 replies
-
- 4
-
-
- lady nelson
- victory models
- (and 2 more)