TBlack
-
Posts
1,308 -
Joined
-
Last visited
Content Type
Profiles
Forums
Gallery
Events
Everything posted by TBlack
-

SS Vinal Haven by TBlack - FINISHED
TBlack replied to TBlack's topic in - Build logs for subjects built 1851 - 1900
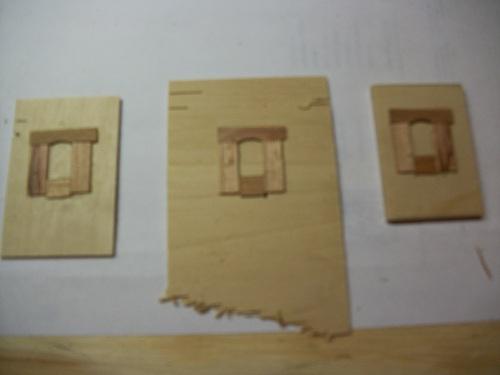
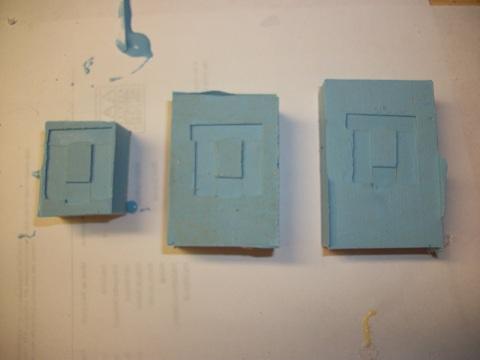
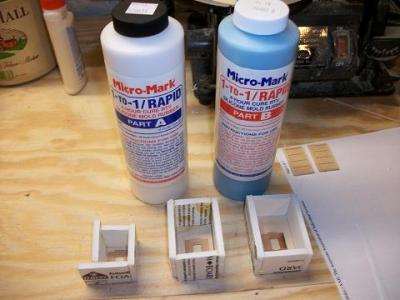
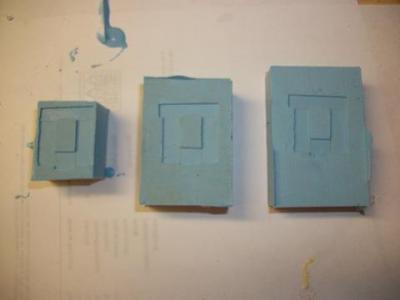
The windows had insets applied to the backsides. I made these of plastic moldings for uniformity. The pictures below show the process. I don't seem to have a photo of the finished product, but it comes out white and needs cleaning up around the edges and some green paint.
-
SS Vinal Haven by TBlack - FINISHED
TBlack replied to TBlack's topic in - Build logs for subjects built 1851 - 1900
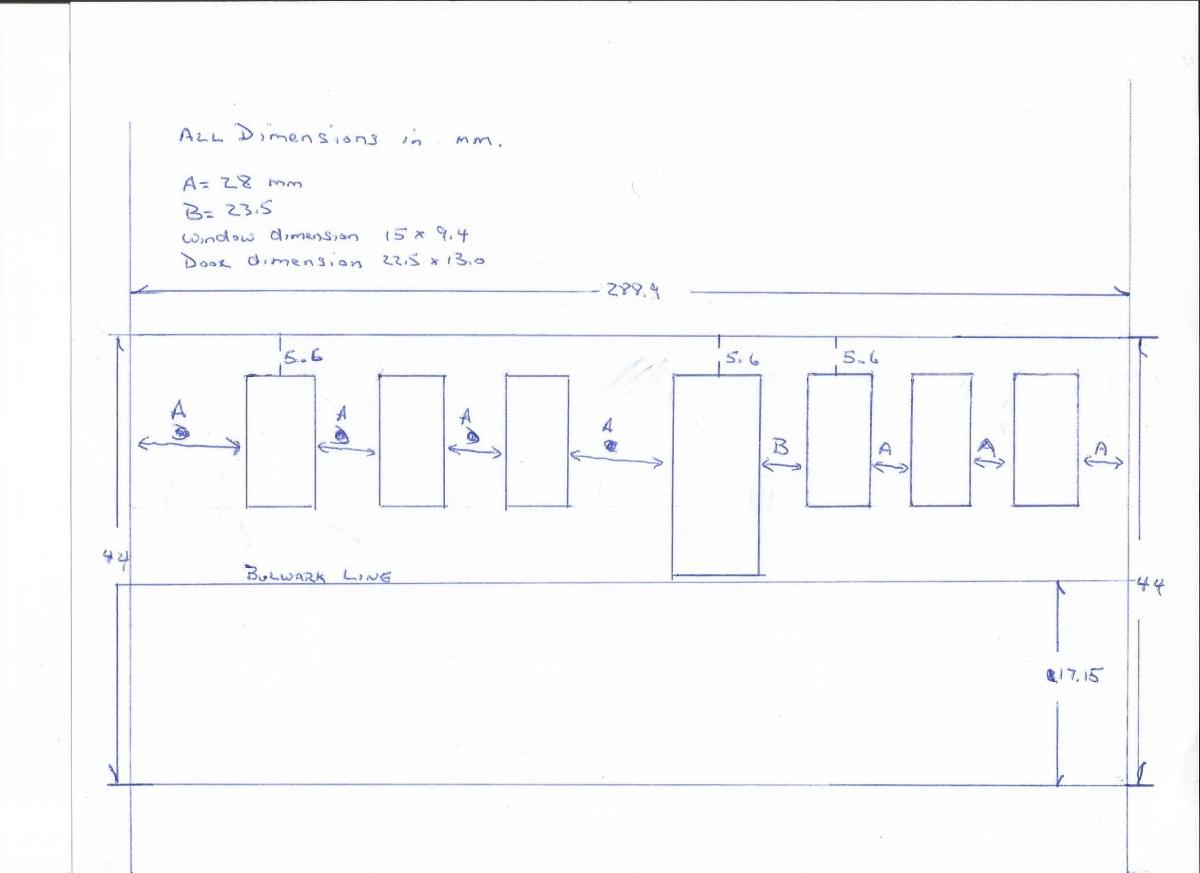
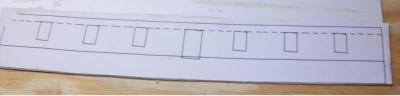
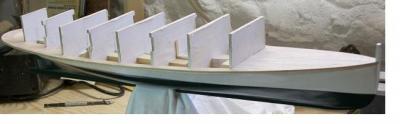
On to the cabin sides. It's a little tricky, because the windows have to follow the sheer line but the sills are parallel to the waterline, and the door has to be high enough to clear the bulwark. I wasn't sure how to tackle the layout, so I tossed the problem to my brother, the architect, who has a CAD program. I gave him the photo on the left with a copy of the sheer line and he came back with the photo on the right. All I did was to paste that drawing onto a piece of sheet cherry and cut it out. Simple.
-
SS Vinal Haven by TBlack - FINISHED
TBlack replied to TBlack's topic in - Build logs for subjects built 1851 - 1900
Seal the deck and apply a little paint to the hull, and voila!
-
SS Vinal Haven by TBlack - FINISHED
TBlack replied to TBlack's topic in - Build logs for subjects built 1851 - 1900
Not a lot of main deck to install as you can see in the first photo. I decided to get creative with regard to the deck material. I discovered sycamore which has a grain and color that looks very similar to oak; hopefully you can see that in the other three photos.


-
SS Vinal Haven by TBlack - FINISHED
TBlack replied to TBlack's topic in - Build logs for subjects built 1851 - 1900
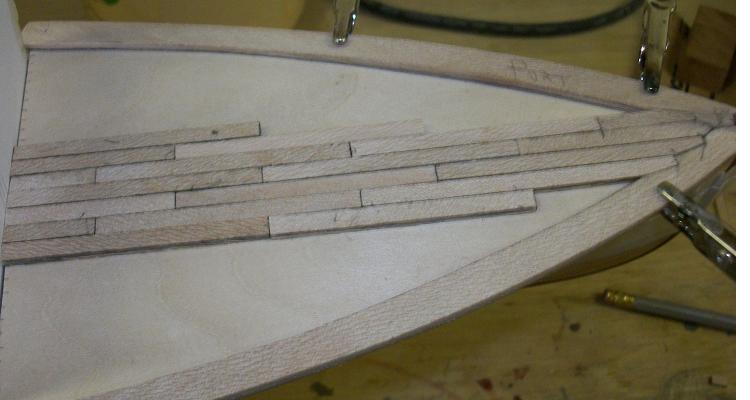
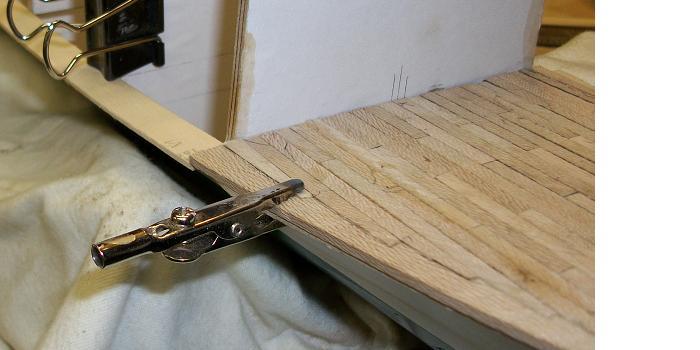
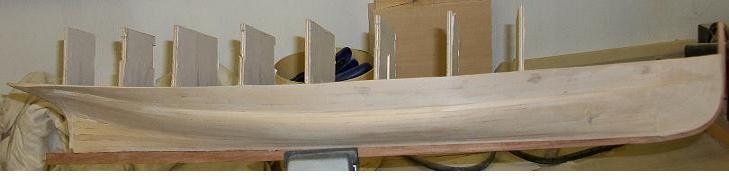
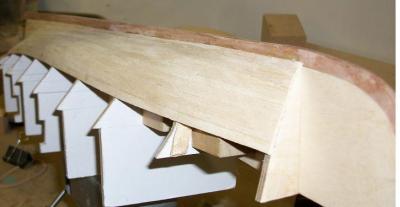
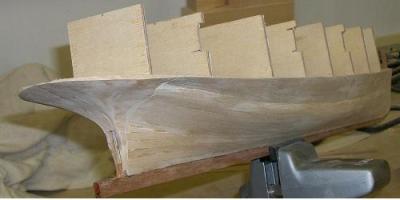
More planking. The sponsons are starting to show up. The trick is to preserve a definite curved line where the sposon attaches to the hull.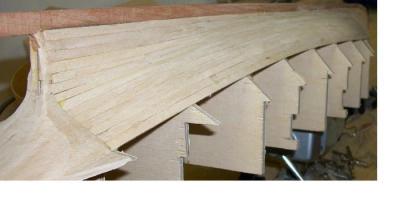

-
SS Vinal Haven by TBlack - FINISHED
TBlack replied to TBlack's topic in - Build logs for subjects built 1851 - 1900
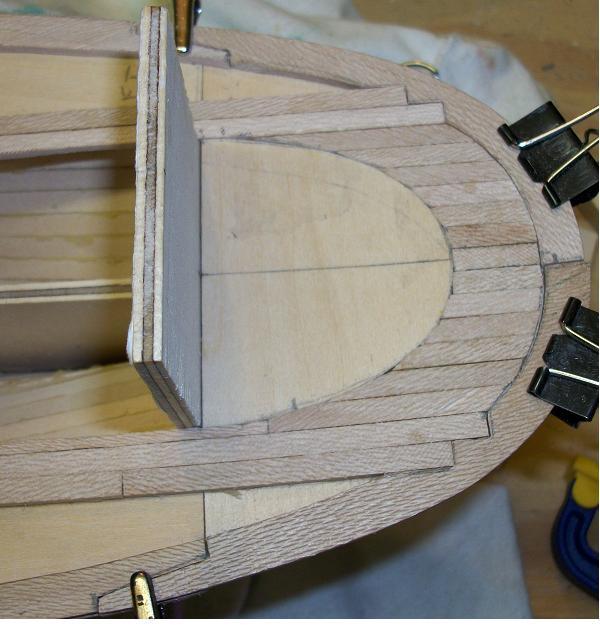
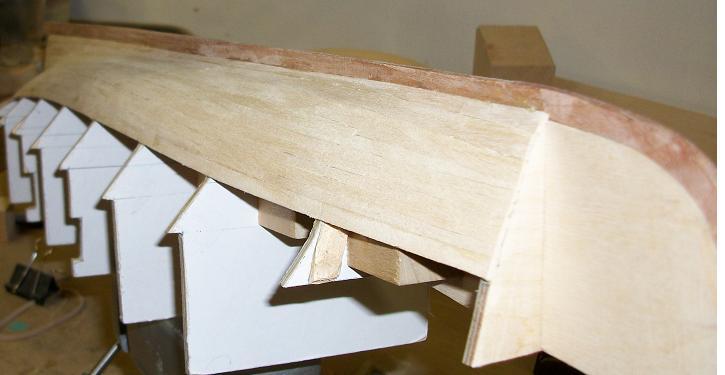
I decided not to try to plank the stern area. The lines are too fine back there and I would have made a hash of it. Instead that part of the hull will be solid, shaped basswood (left photo). I decided to do the same thing at the bow; in retrospect, I'm not sure why I thought that area would be difficult, because it really isn't. Anyway...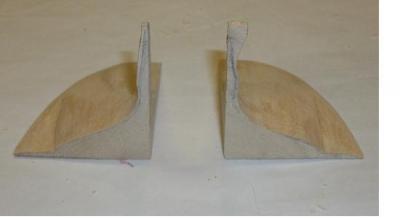

- 326 replies
-
- 1
-

-
- vinal haven
- steam ship
- (and 1 more)
-
SS Vinal Haven by TBlack - FINISHED
TBlack replied to TBlack's topic in - Build logs for subjects built 1851 - 1900
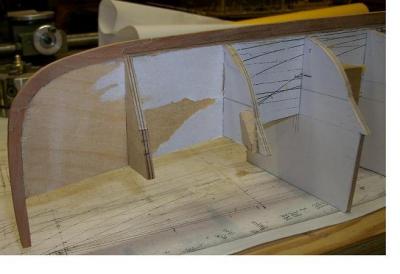
The keel and Stem are next. I made those out of cherry and borrowed a technique from Chuck Passaro whereby I put a stringer between the keel and profile piece to create the rabbet.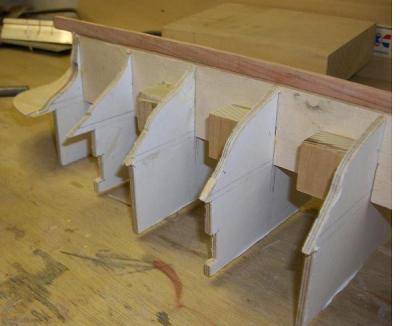
- 326 replies
-
- 1
-
-
- vinal haven
- steam ship
- (and 1 more)
-
SS Vinal Haven by TBlack - FINISHED
TBlack replied to TBlack's topic in - Build logs for subjects built 1851 - 1900
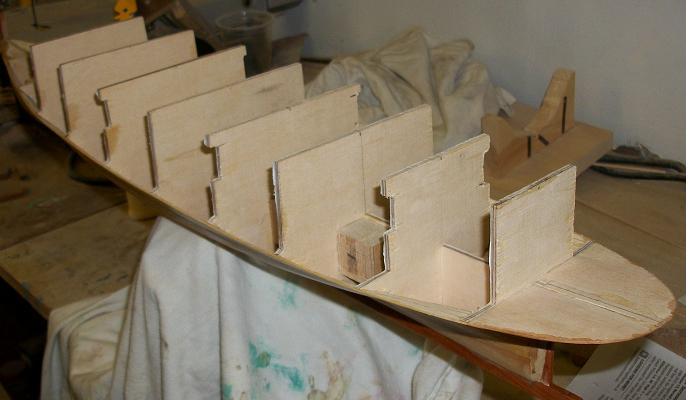
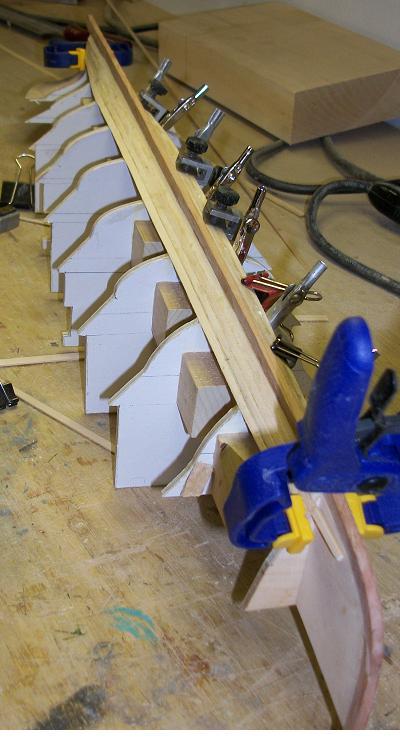
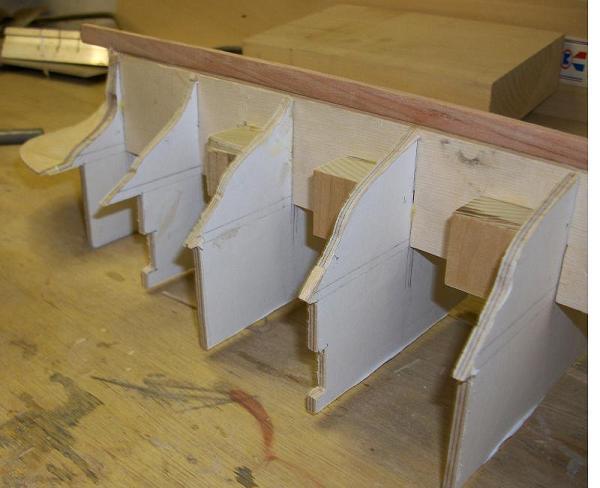
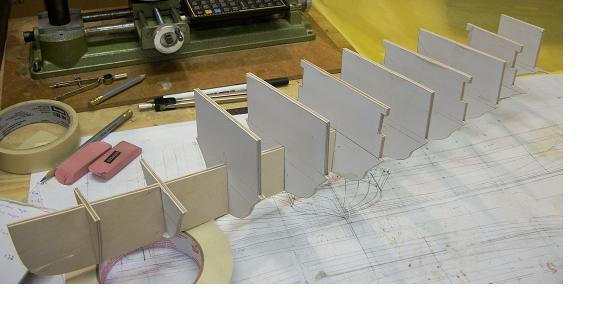
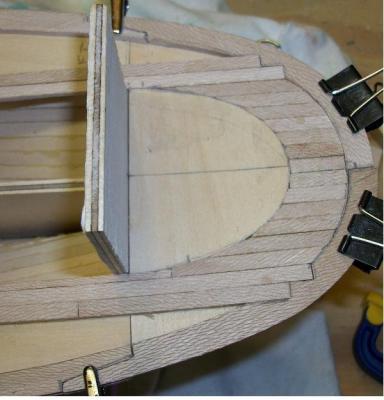
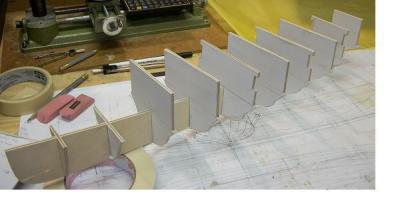
I'm building this model POB style and the plan has 10 station lines which correspond to the bulkheads on the model. 10 bulkheads over 25" hull length means a little more distance between bulkheads than I would like, but I have no drafting facilities or capabilities, so I can't add anymore bulkheads. I'll just have to deal with it. The picture on the left shows (faintly) the 10 bulkhead lines taken off the plan and cemented to the bulkhead material. The right photo shows the bulkheads mounted on the profile form. The middle bulkheads extend above the main deck to provide a framework for the main deck cabin.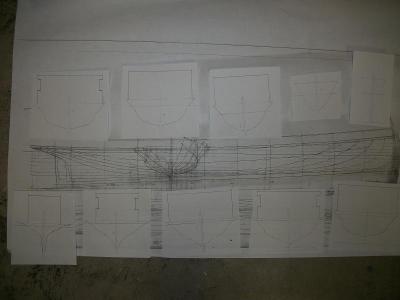
-
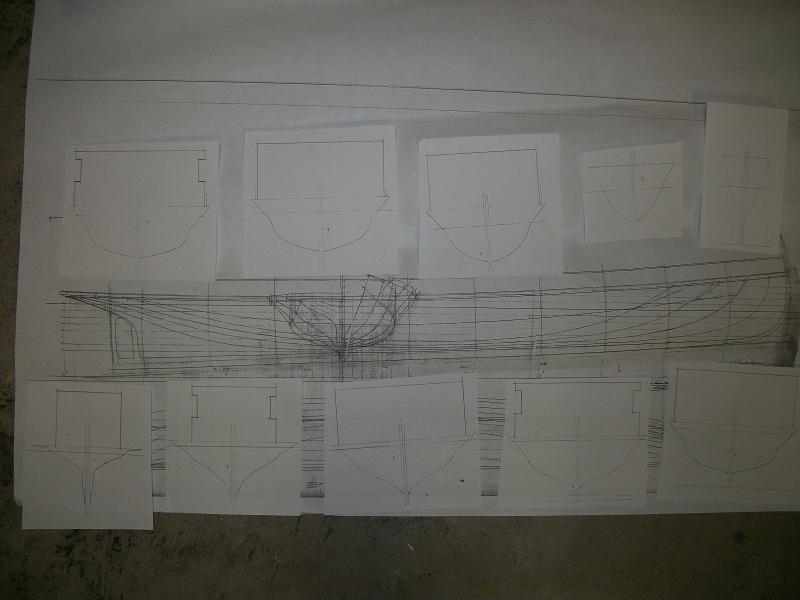
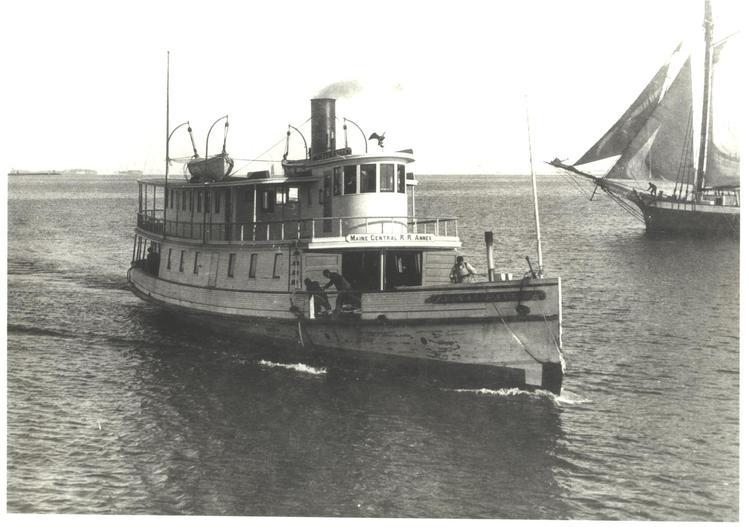
Chuck brings good news and bad news. The bad news is that I have to redo all my entries and dig up all the old photos. The good news is I get to redo the log and polish it up as I go! Vinal Haven (sometimes Vinalhaven) was built in Searsport, ME in 1892. 6 months after launch she caught fire which destroyed the original superstructure. The yard in Searsport rebuilt her with a newly designed superstructure, and it is this version of the boat that I am modelling. Later, in 1905, the ship underwent additional changes; she was lengthened by 15 feet. Vinal Haven provided ferry service out of Roclkand, ME to the islands in Penobscot Bay, principally Vinal Haven. She survived until 1938. I was able to locate a plan of the hull at the Mystic Seaport Museum, and various pictures of the ship come from the Maine Maritime Museum in Bath, ME, the Penobscot Maritime Museum in Searsport, ME, and the Smithsonian in Washington. I will build this ship at 1:48 and can use the plan to get an accurate hull, but will have to build the superstructure from the photographs.


- 326 replies
-
- 3
-
-
- vinal haven
- steam ship
- (and 1 more)