Cristiano
-
Posts
423 -
Joined
-
Last visited
Content Type
Profiles
Forums
Gallery
Events
Everything posted by Cristiano
-
Too pity that I discovered it now. The plans you own are a copy of the ones that are currently sold by the "Associazione Navimodellisti Bolognesi", which owns and sells the originals. So probably there was a multiple passage on that selling of those plans. They sell them at 115 euro, including VAT, excluding shipping cost. The sheets are 13. below the link of the Andrea Doria plans page: http://www.anb-online.it/navi-mercantili-e-imbarcazioni-da-diporto/transatlantici-e-navi-da-crociera/0638-andrea-doria/?lang=en If the sheets that you have are 13, everything is Ok, otherwise something has been missing...
- 108 replies
-
- 5
-

-
- andrea doria
- ocean liner
- (and 1 more)
-
Thank you again to everybody, you're very smart (I am not used to such level of sugar!! ) Thank you Carl! I count on it! It will be a scratch built project, but now my intentions are a bit "foggy"...so at the moment I don't know exactly when I will start it... :huh: Again thank to everyone!
-
Thank you to everybody for your smart comments! Maybe in autumn I will open again the shipyard with a new project...
-
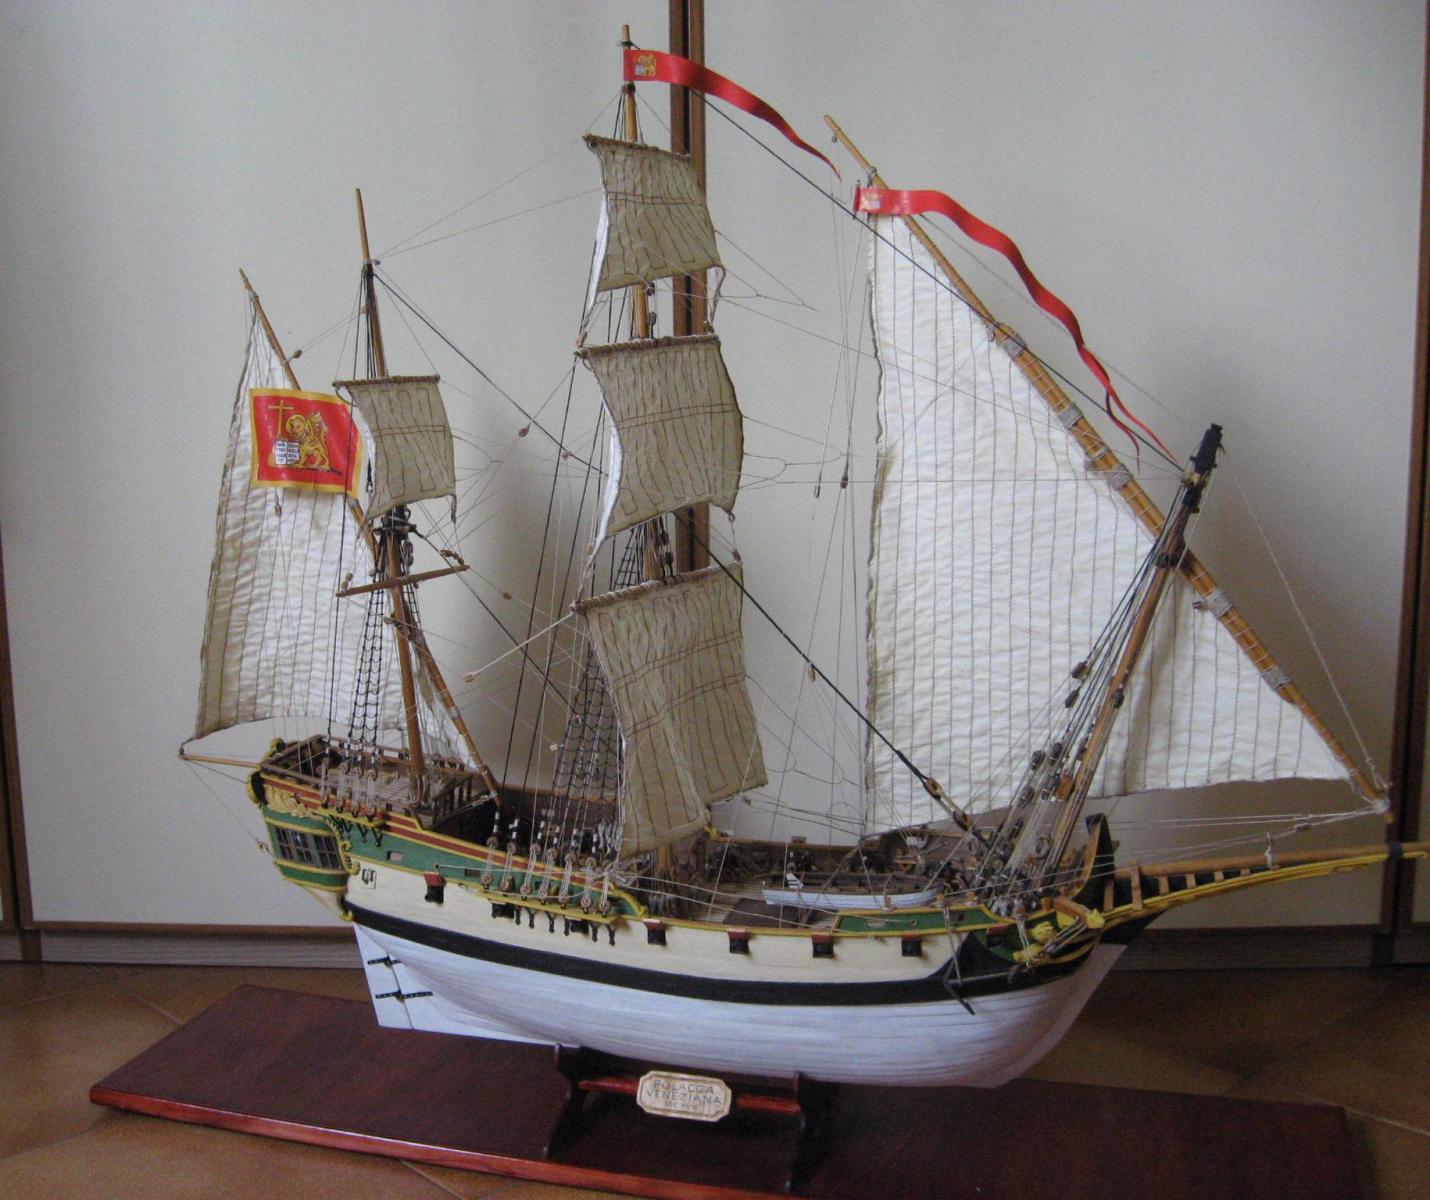
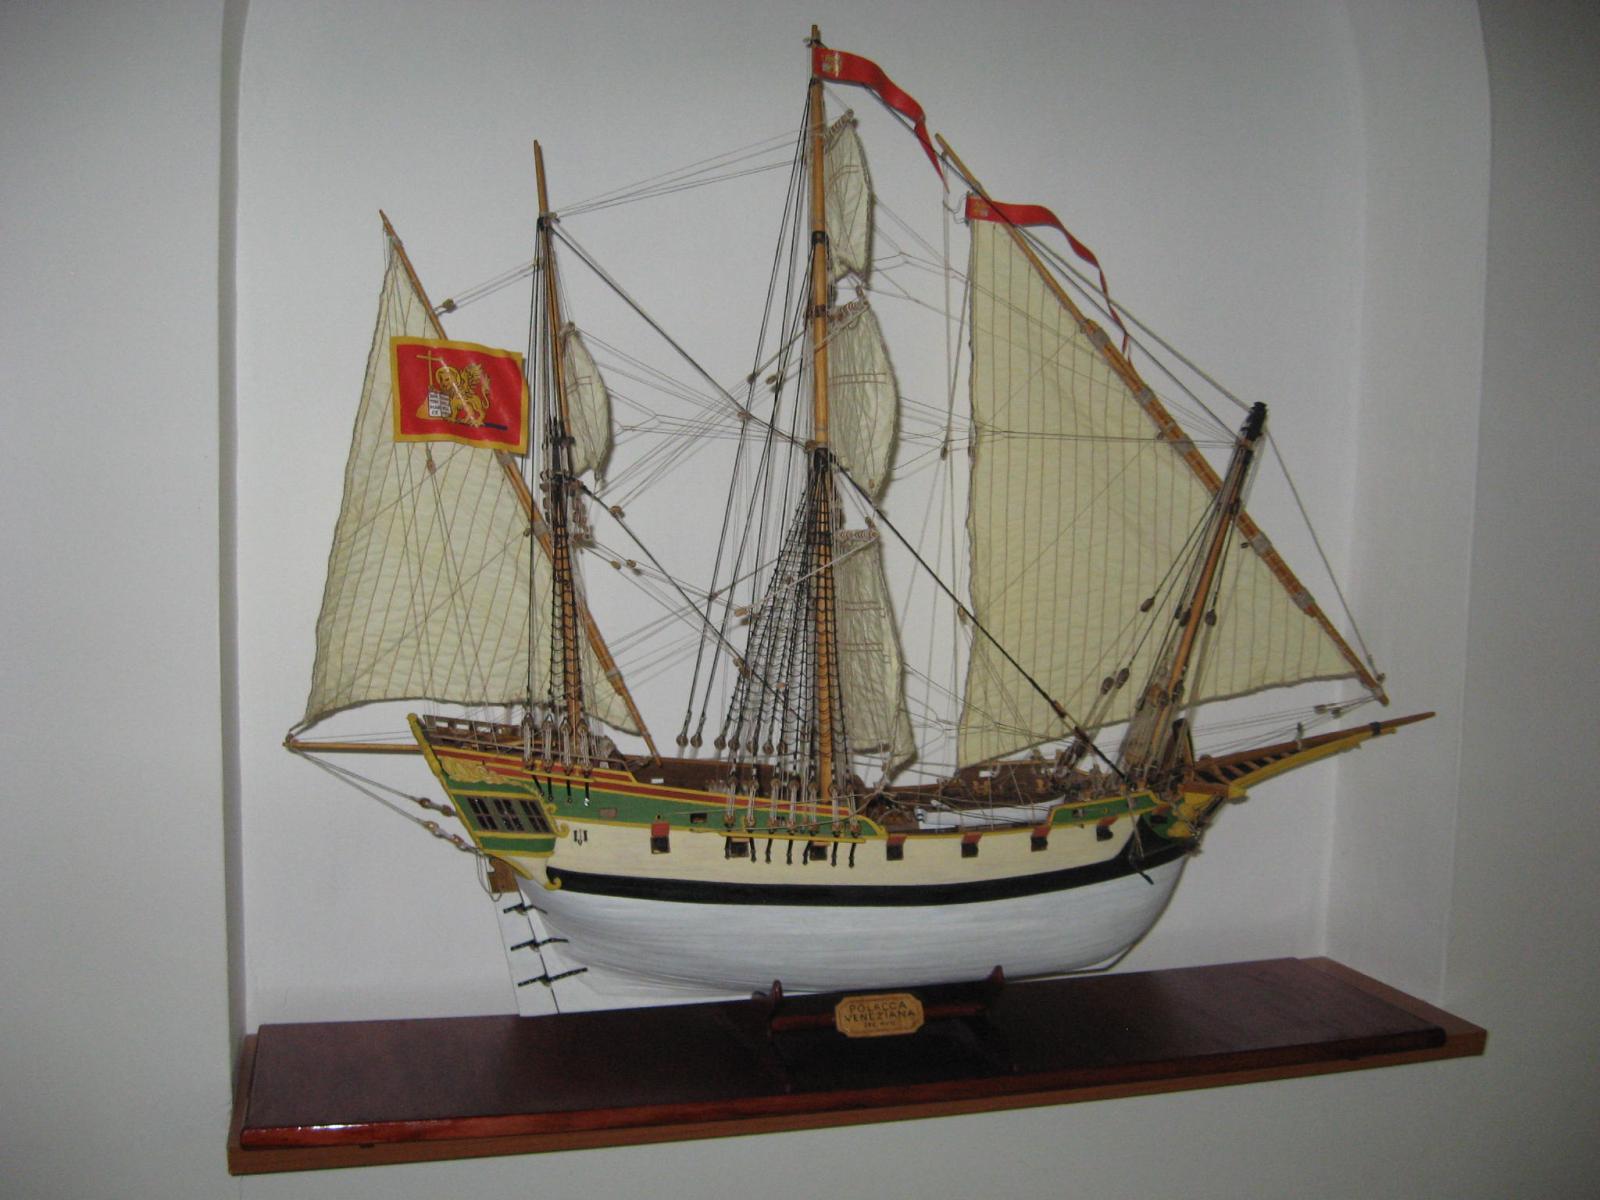
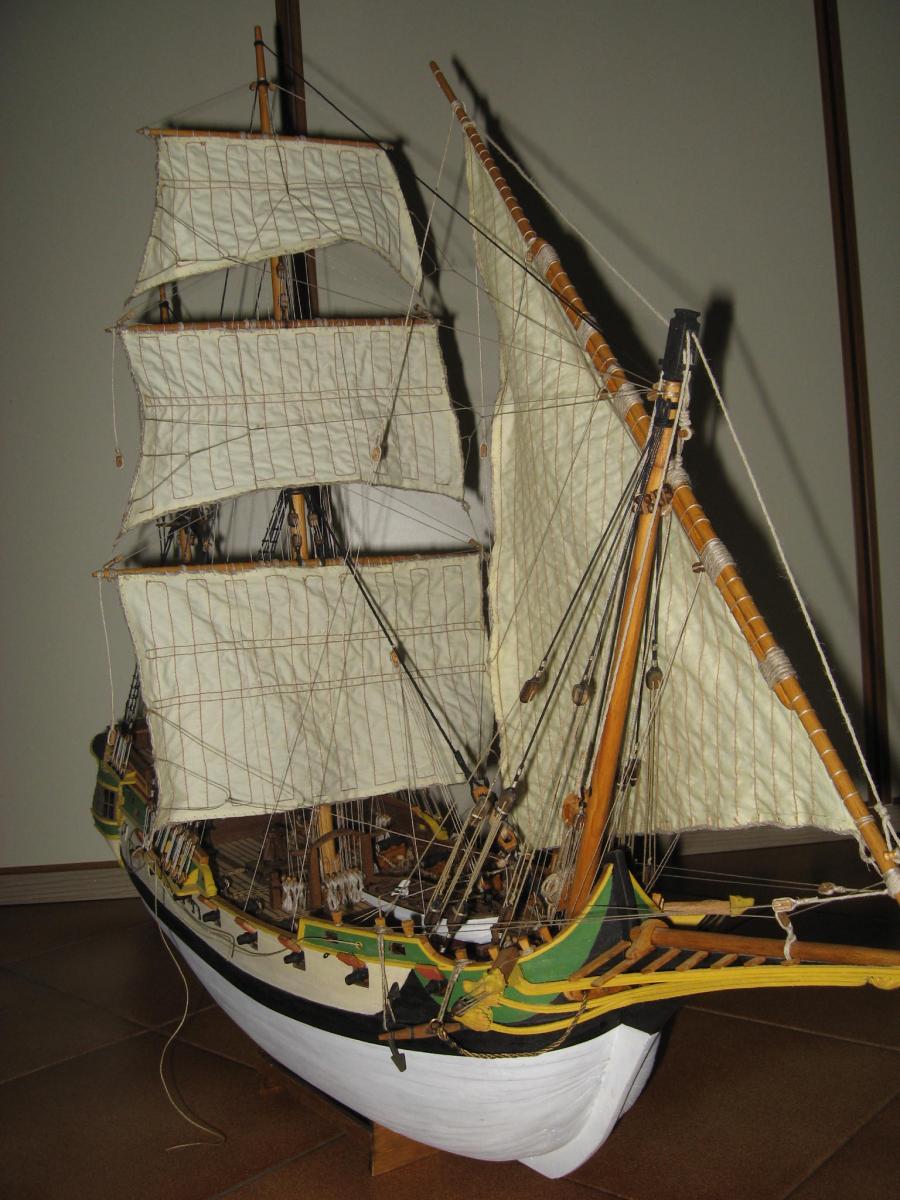
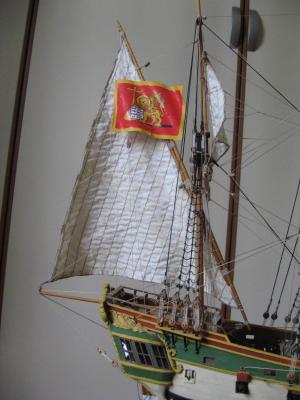
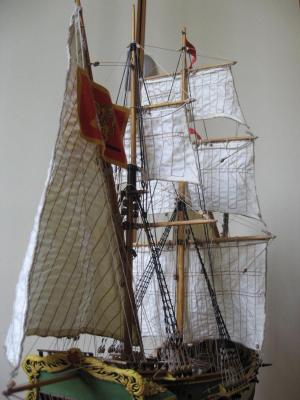
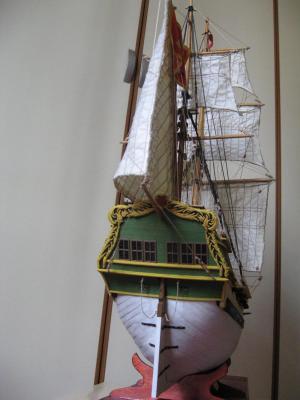
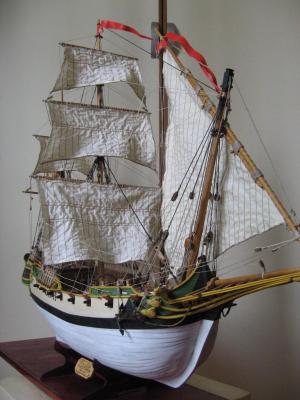
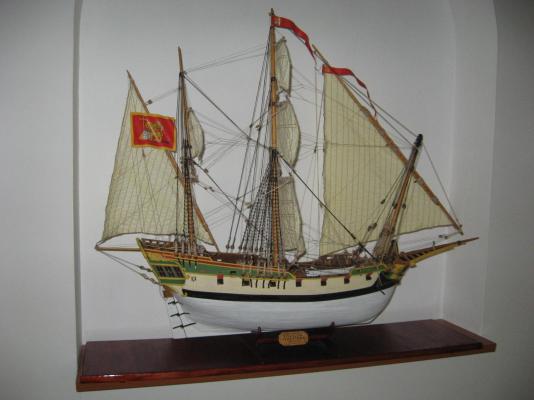
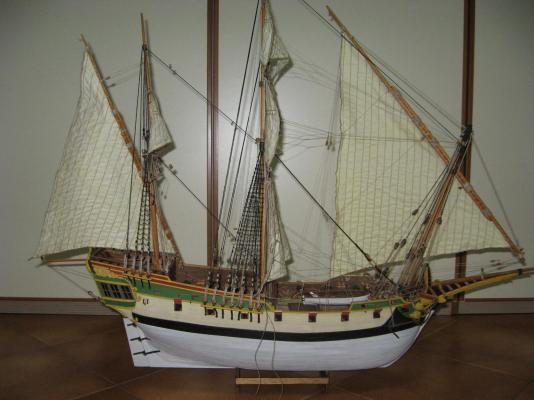
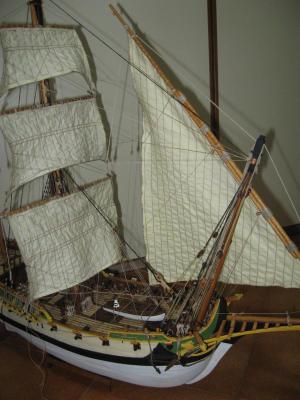
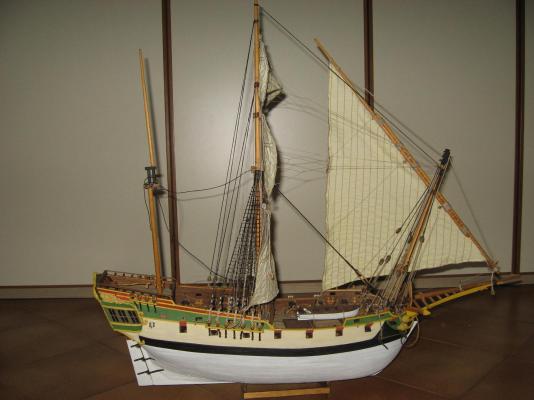
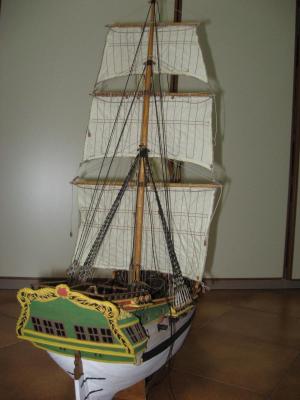
You can see it now Carl! :cheers: :cheers: Done! Finished! I finished the model finally! :cheers: :cheers: The flags were the final touch. I re-painted them with acrylic paint in order to let be "less shiny". Now it will take some time to pack all the tools and accessories used during this year... I made a bit more photo than usual, just to show better the final appearance of the model. The last photo shows its final positioning in the wall niche.


- 190 replies
-
- 17
-
-
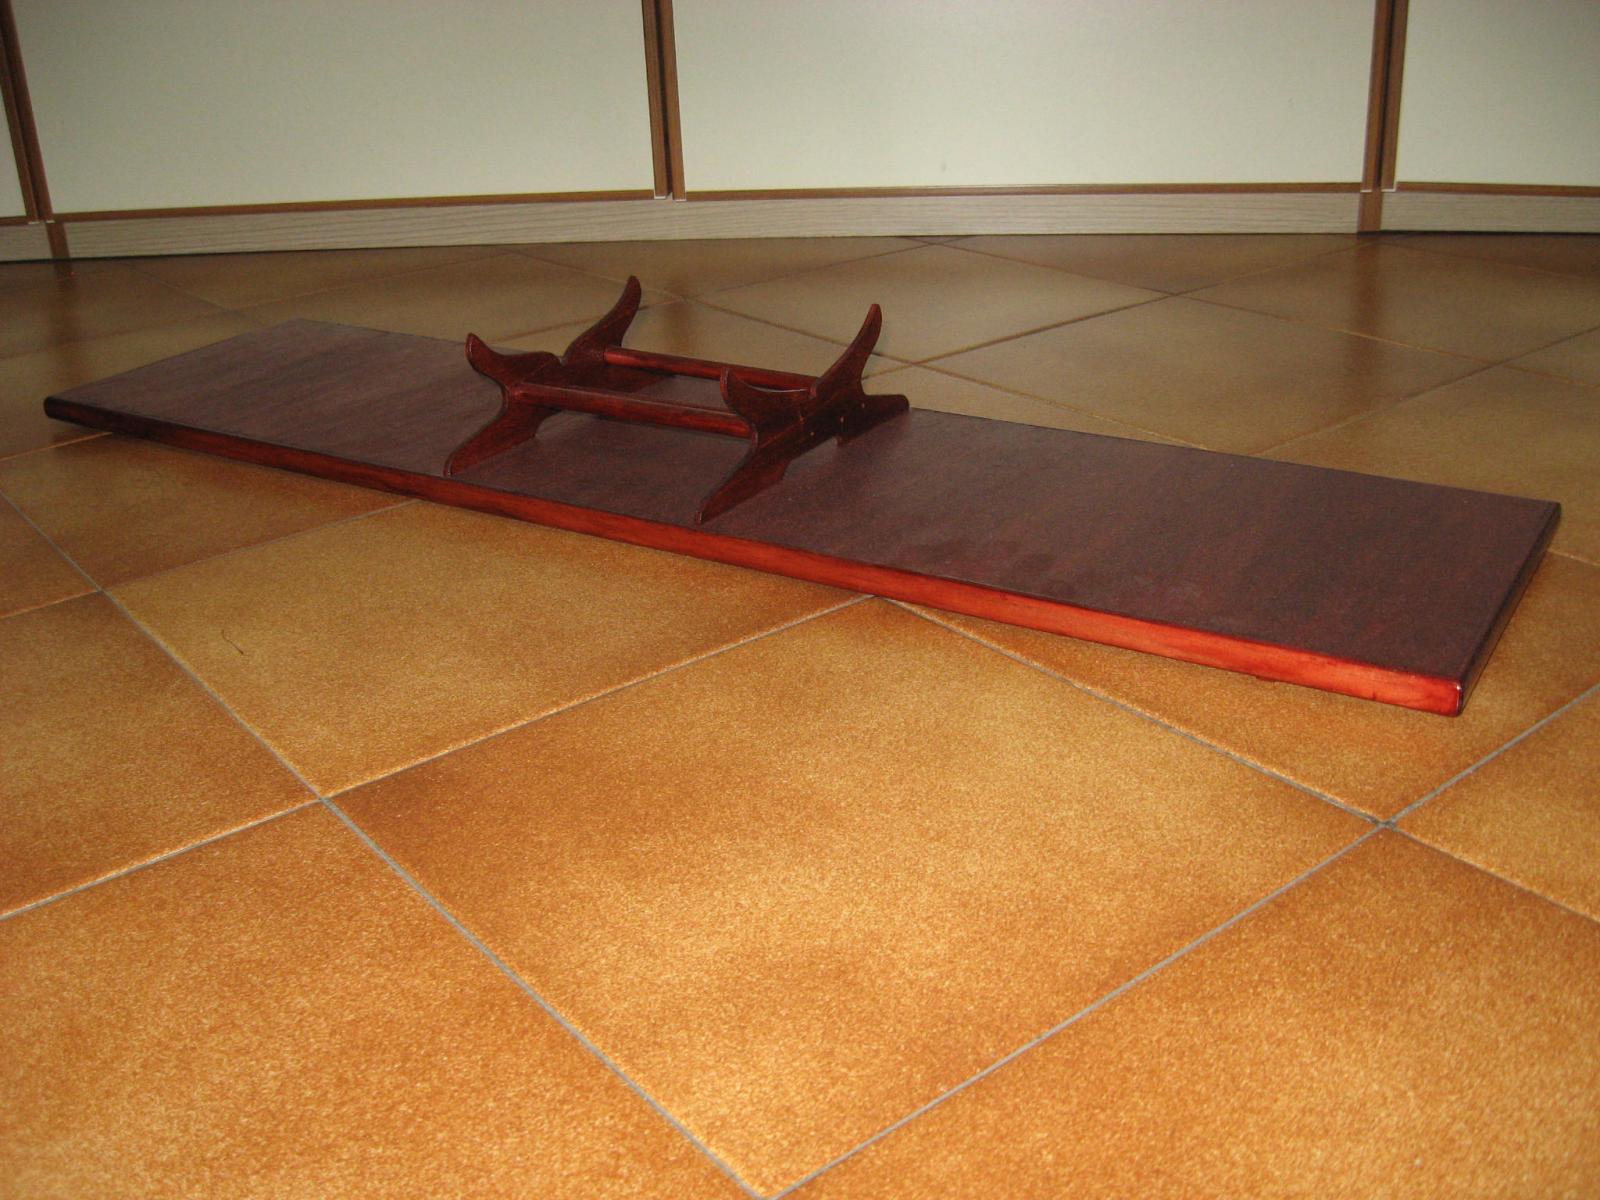
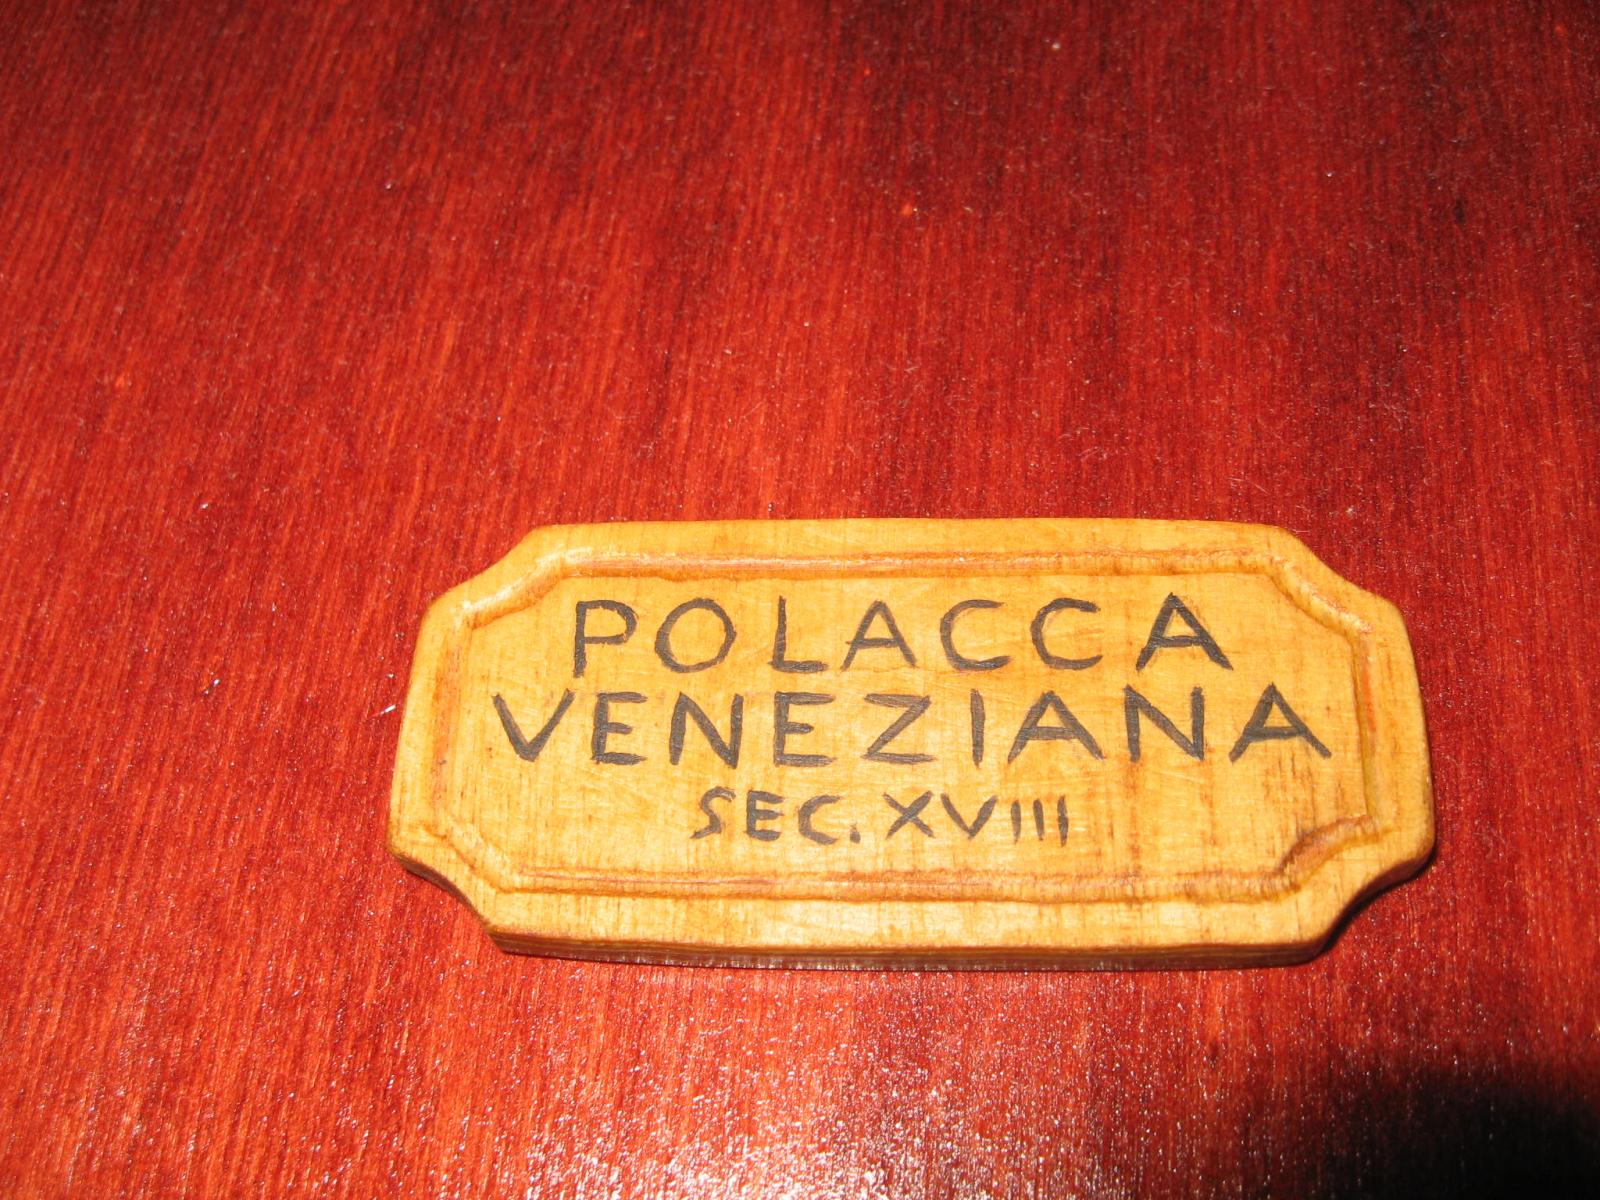
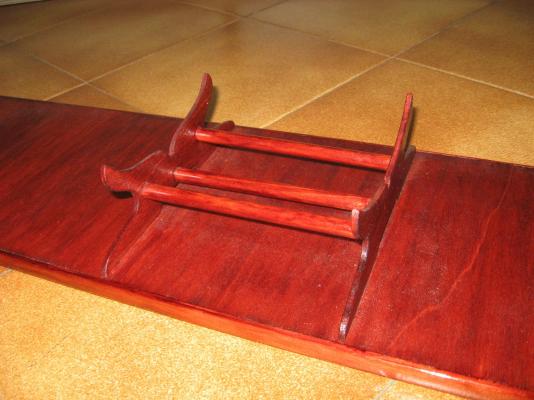
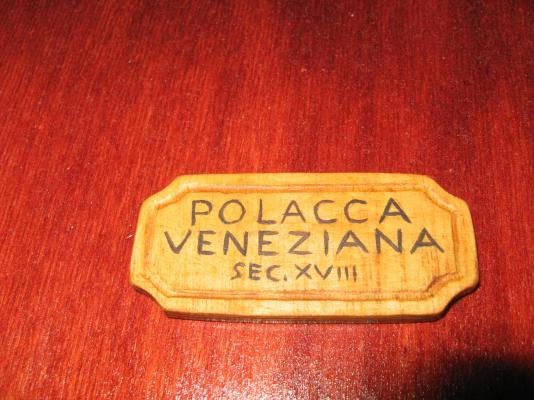
Thank you to everybody for your smart comments! Thank you Jesselee, but is rather easy to make such coils if you use a "mask" like the one I showed in one old post. I can feel that the end is near... well, the end of the model building! I think that in less than two weeks I should finish...if the wind blow in the right direction... Only two chapters remain to be closed: -The remaining rigging of the mizzen mast, done at 70%. -The flags, done at 10%. The flags are kept for last (the last seal on the chapters). a tiny update: After few months, now the paint small is definetly disappeared from the model pedestal, so I taken it out from the home basement. In the meanwhile I prepared the plate for the pedestal, which be glued on the horizontal bars (other photo). I prefered to make it by wood and painting the words, since it give to the overall model a more "warm" appearance. In another photo, it can be seen how it was when I made it some months ago.


- 190 replies
-
- 10
-
-
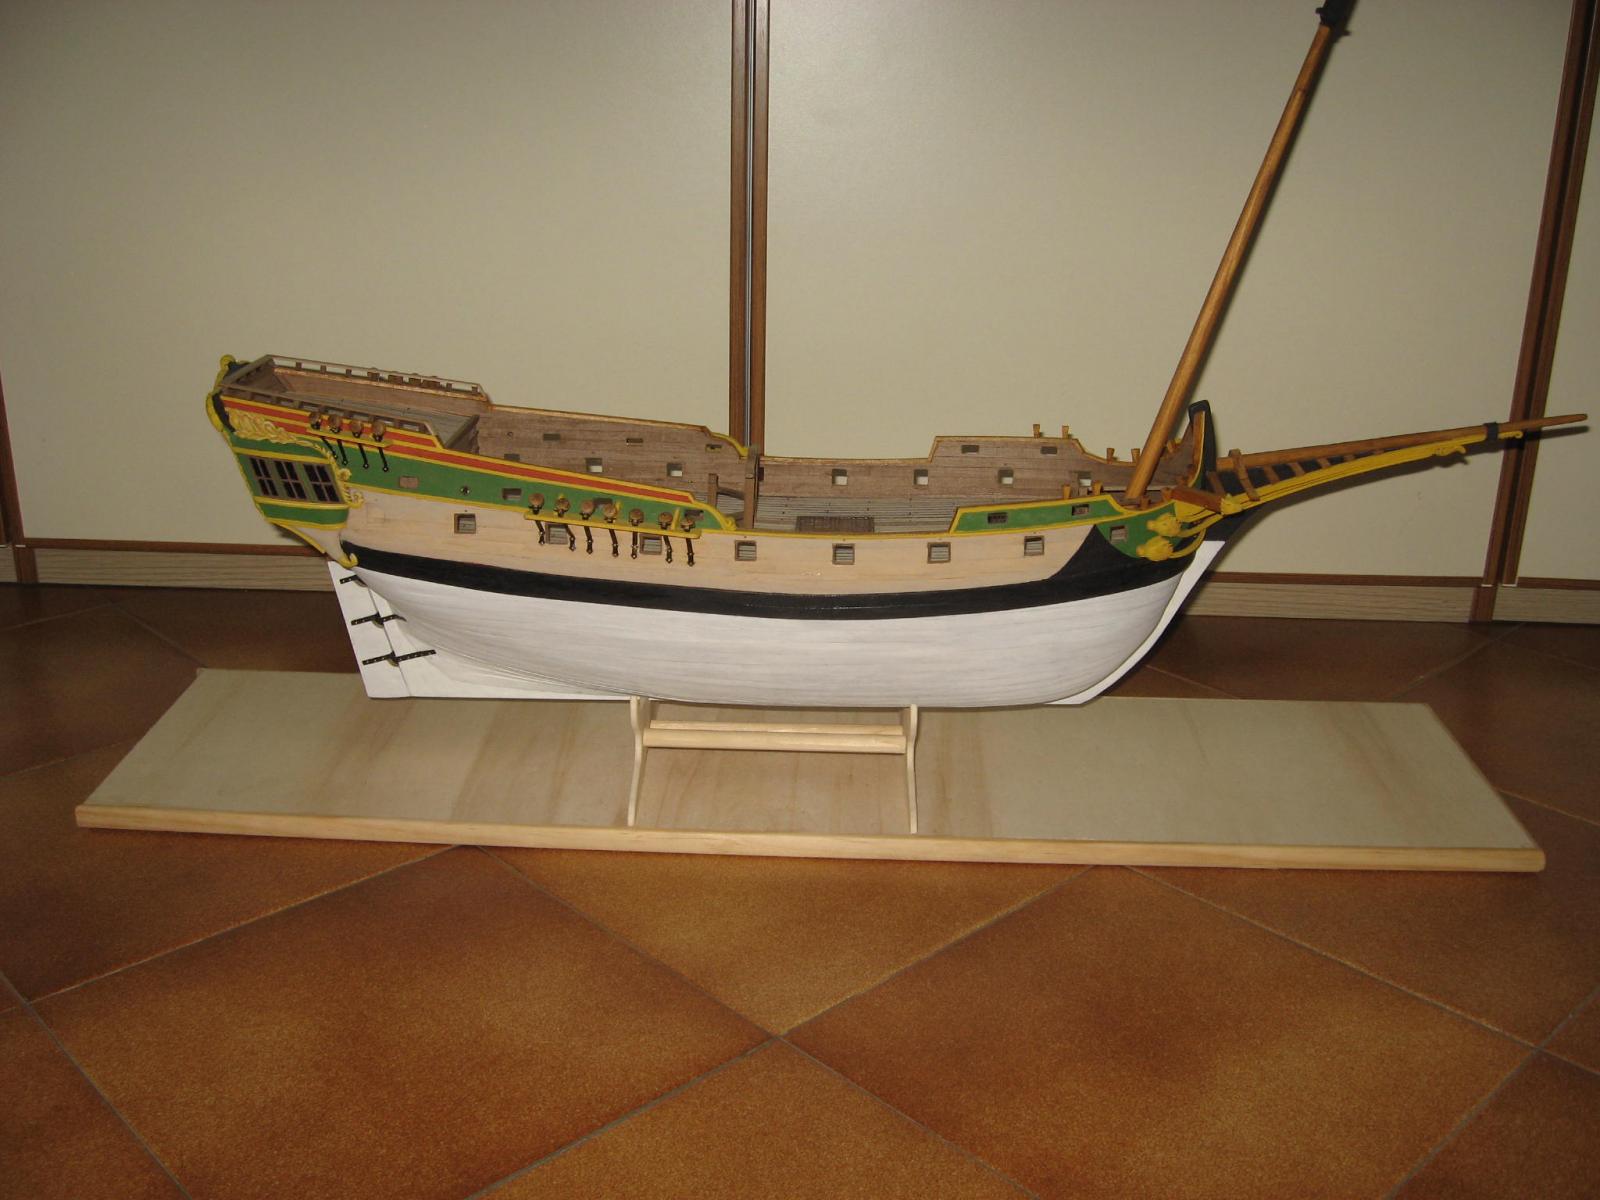
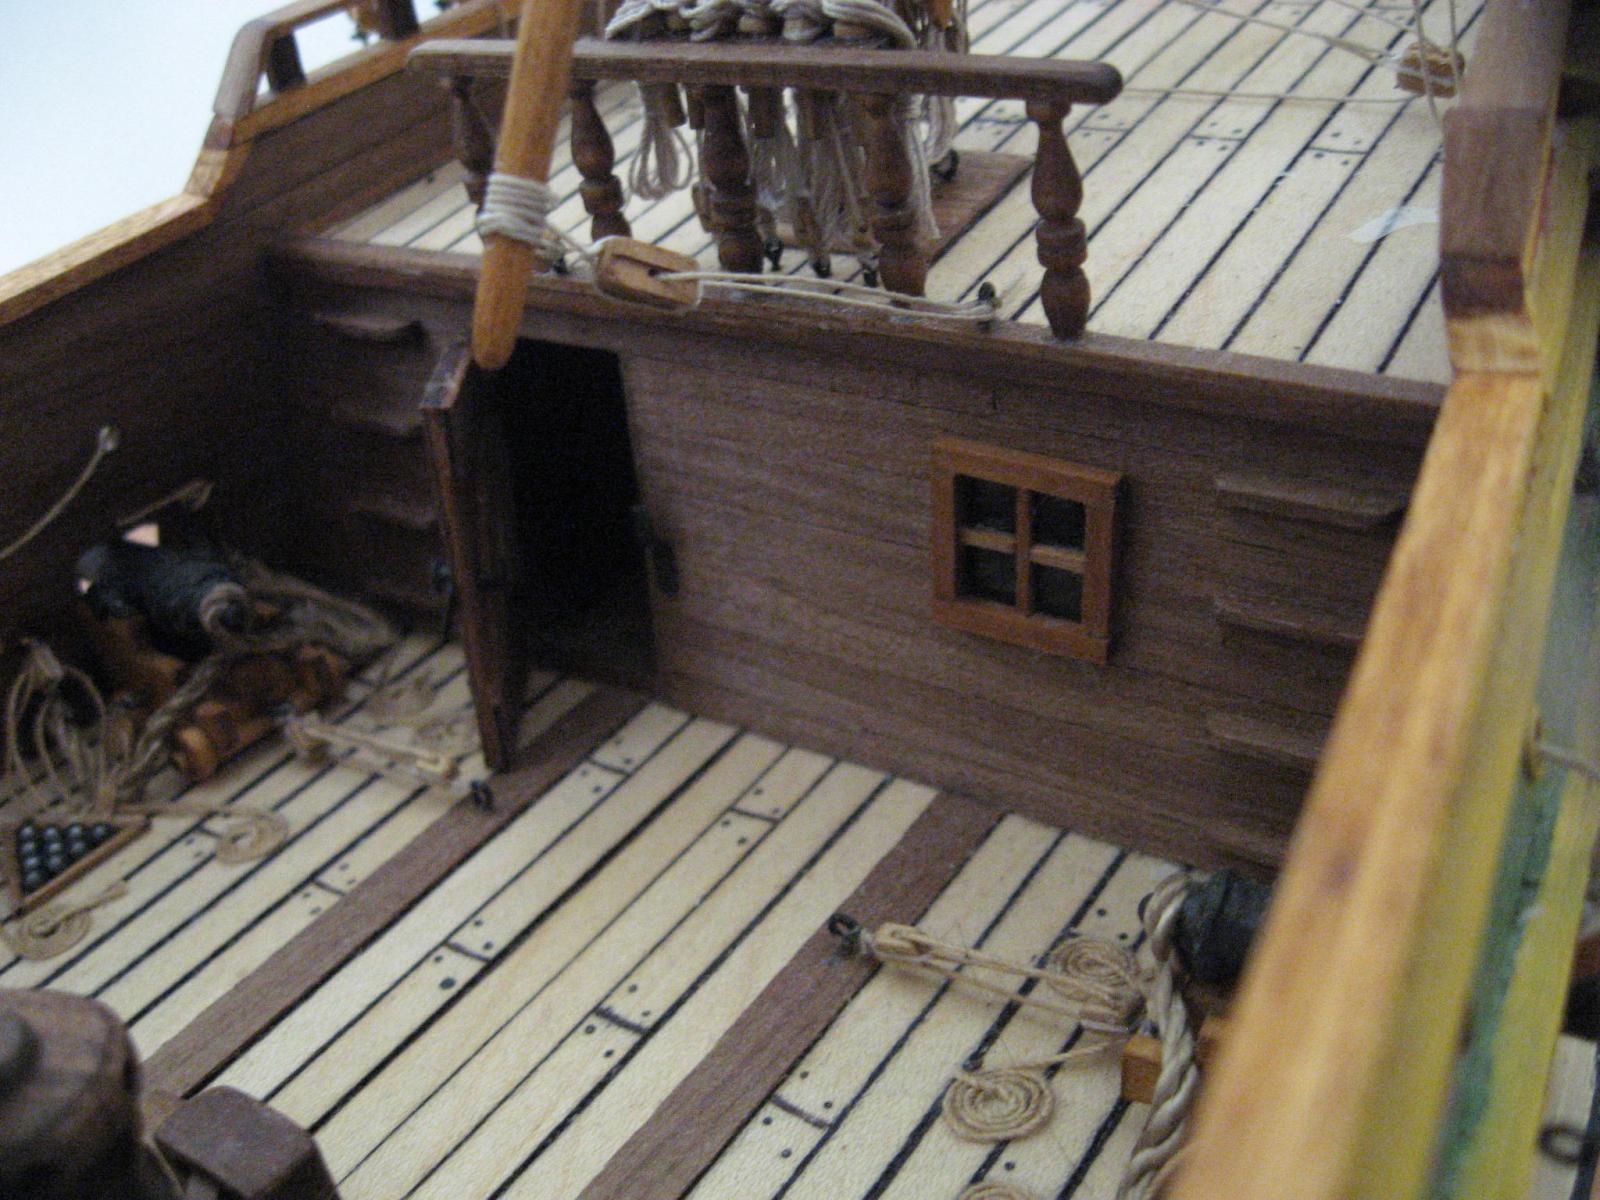
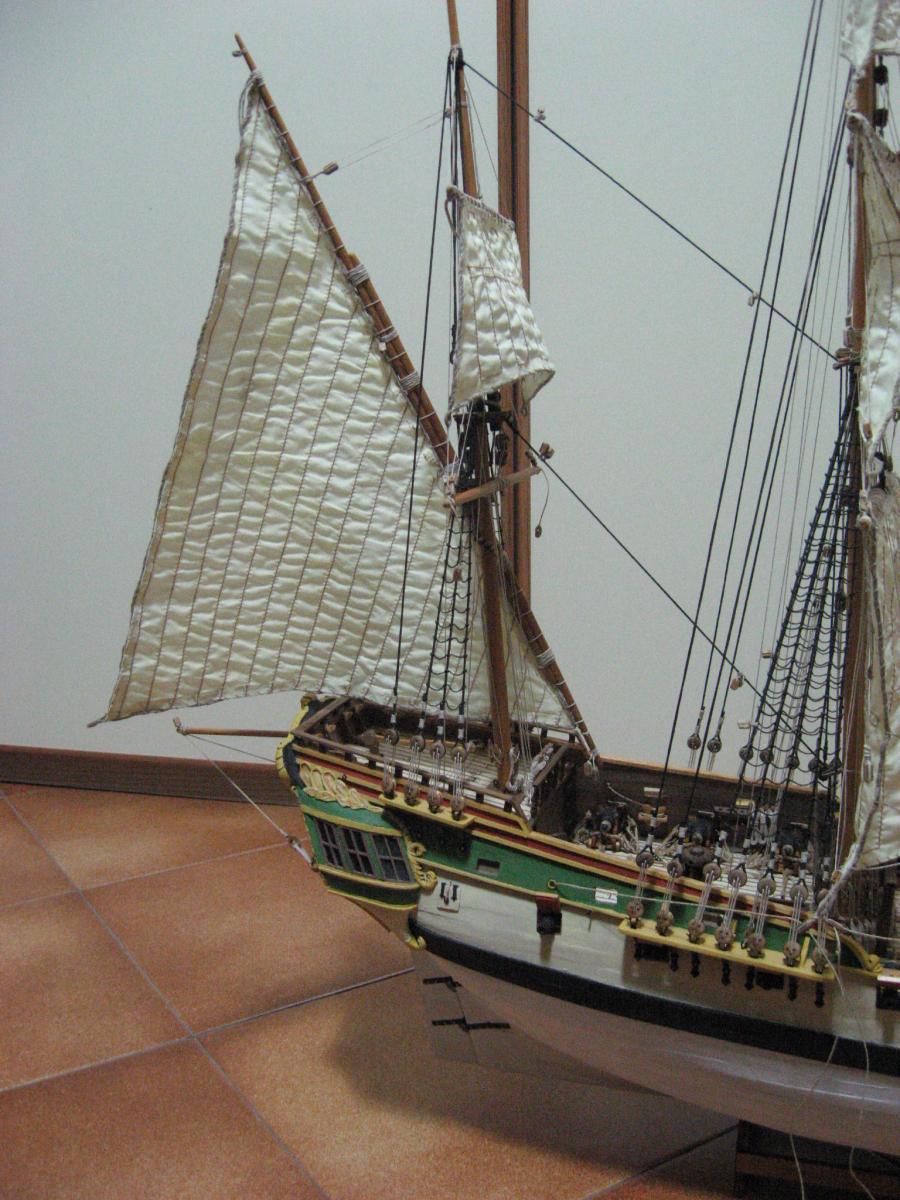
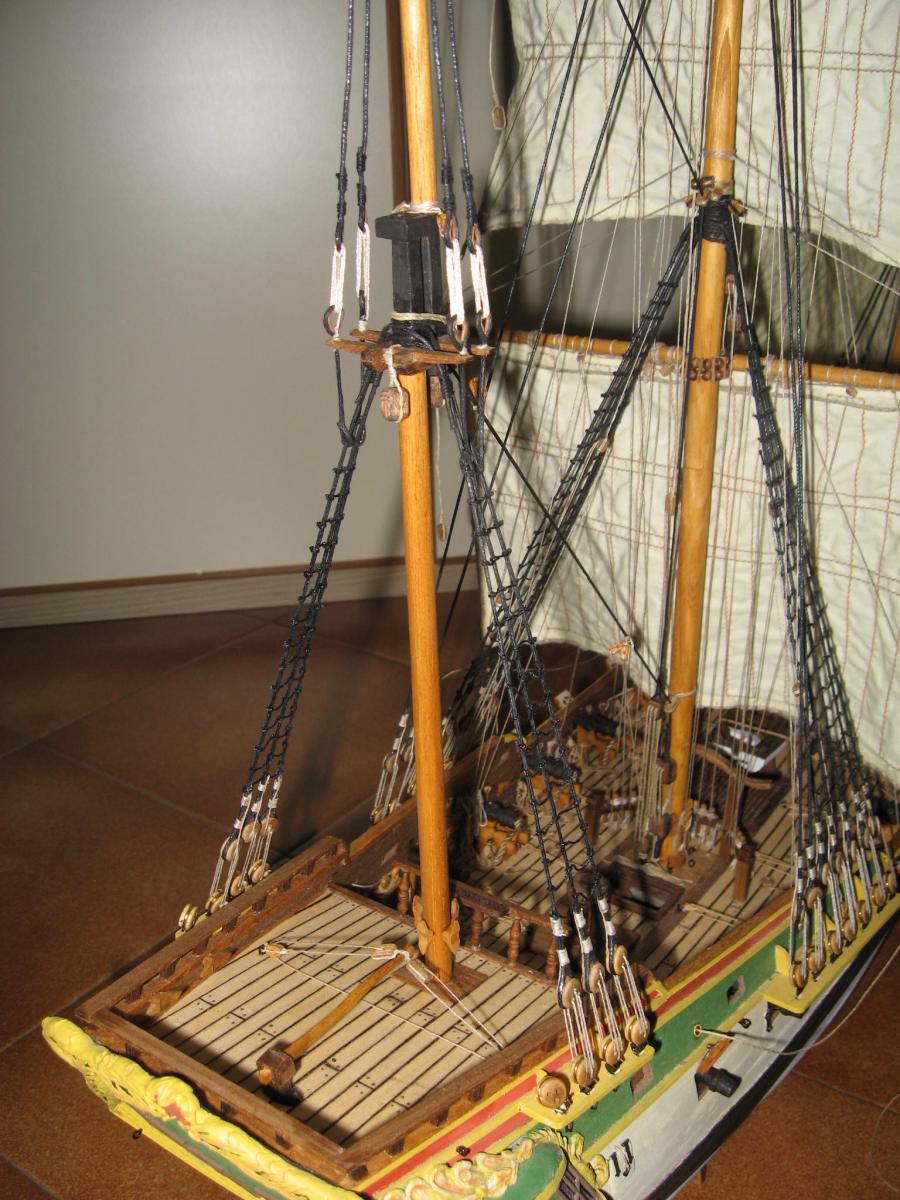
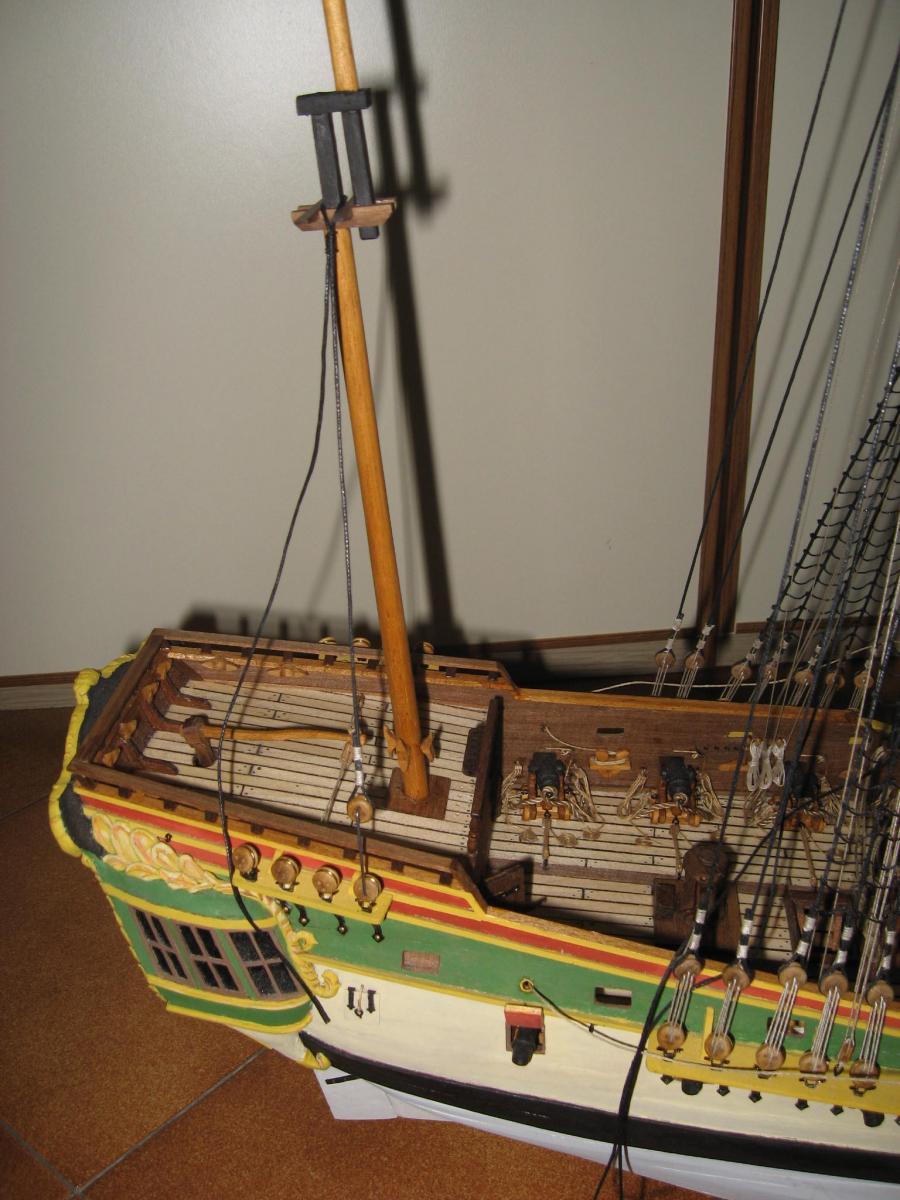
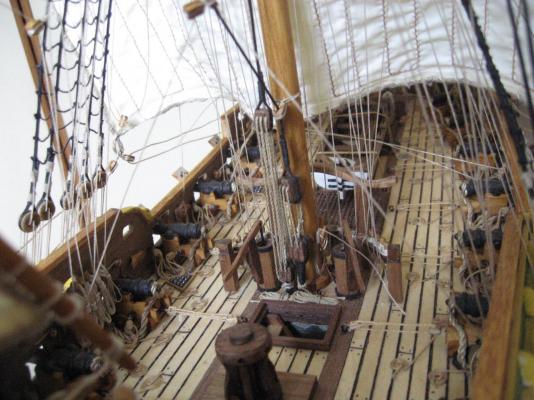
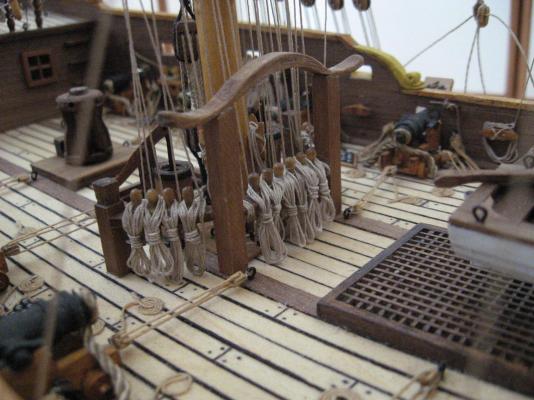
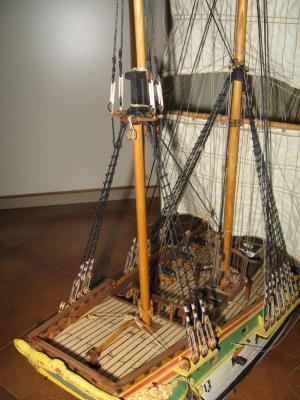
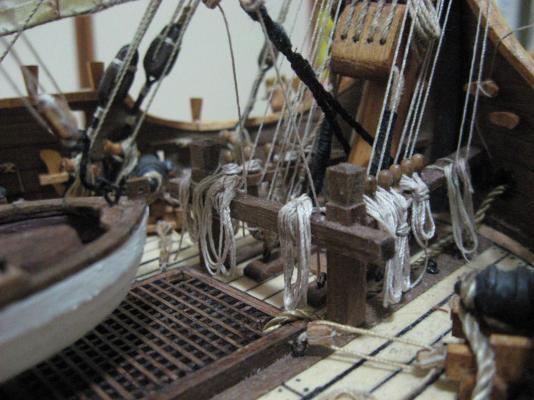
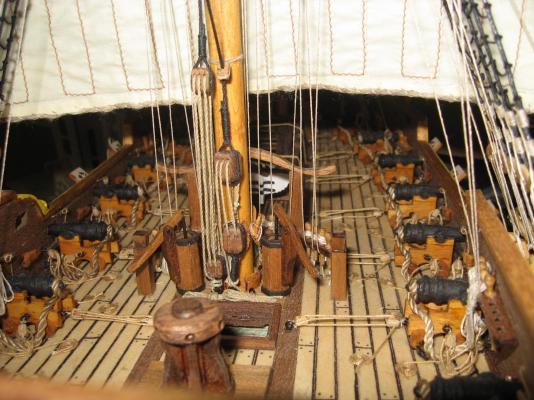
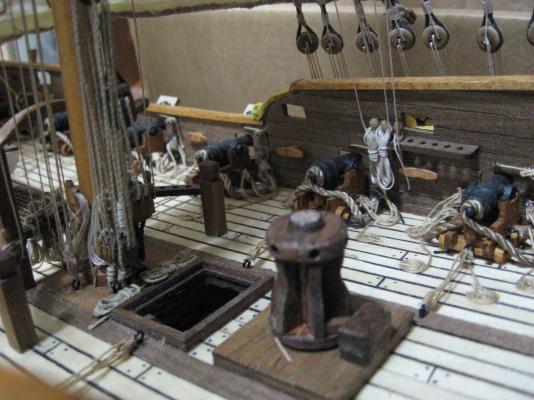
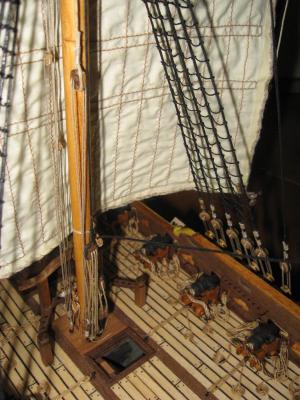
Another update. Another "milestone" reached: I completed all the rigging that is related to the main mast base, so I completed that zone with the two bilge pumps. All the belaying pin rails of the main mast are now complete. three photos "celebrate" this milestone! In another photo can be seen the other belaying pin rails which I am slowly filling and a partial view of the rigging that I made in these days (I know that many rigging photos seems hydentical, but are not). I added a small window in the cabin front wall, because it can be logically possible that existed at least a small window (the cannons inside that cabin needs some source of light), even without sound evidences.


- 190 replies
-
- 16
-
-
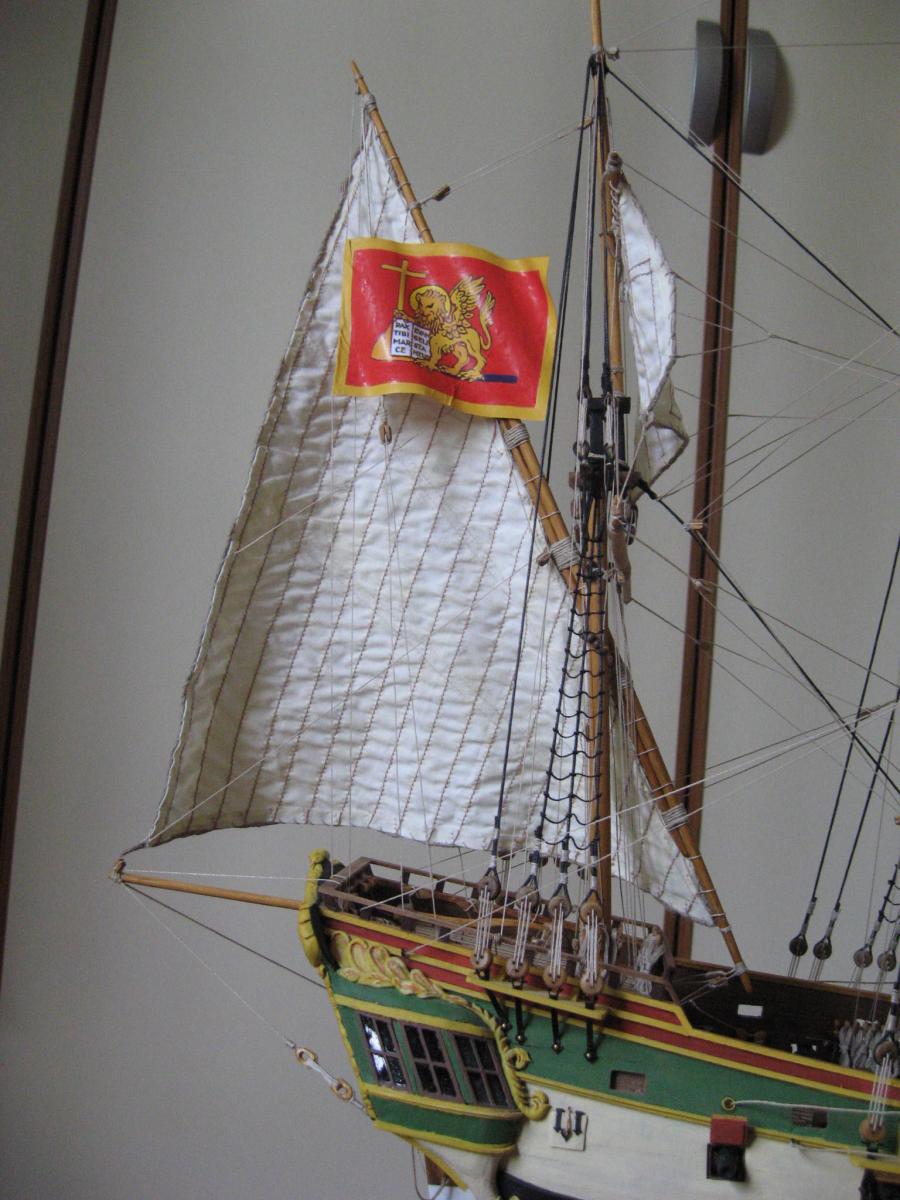
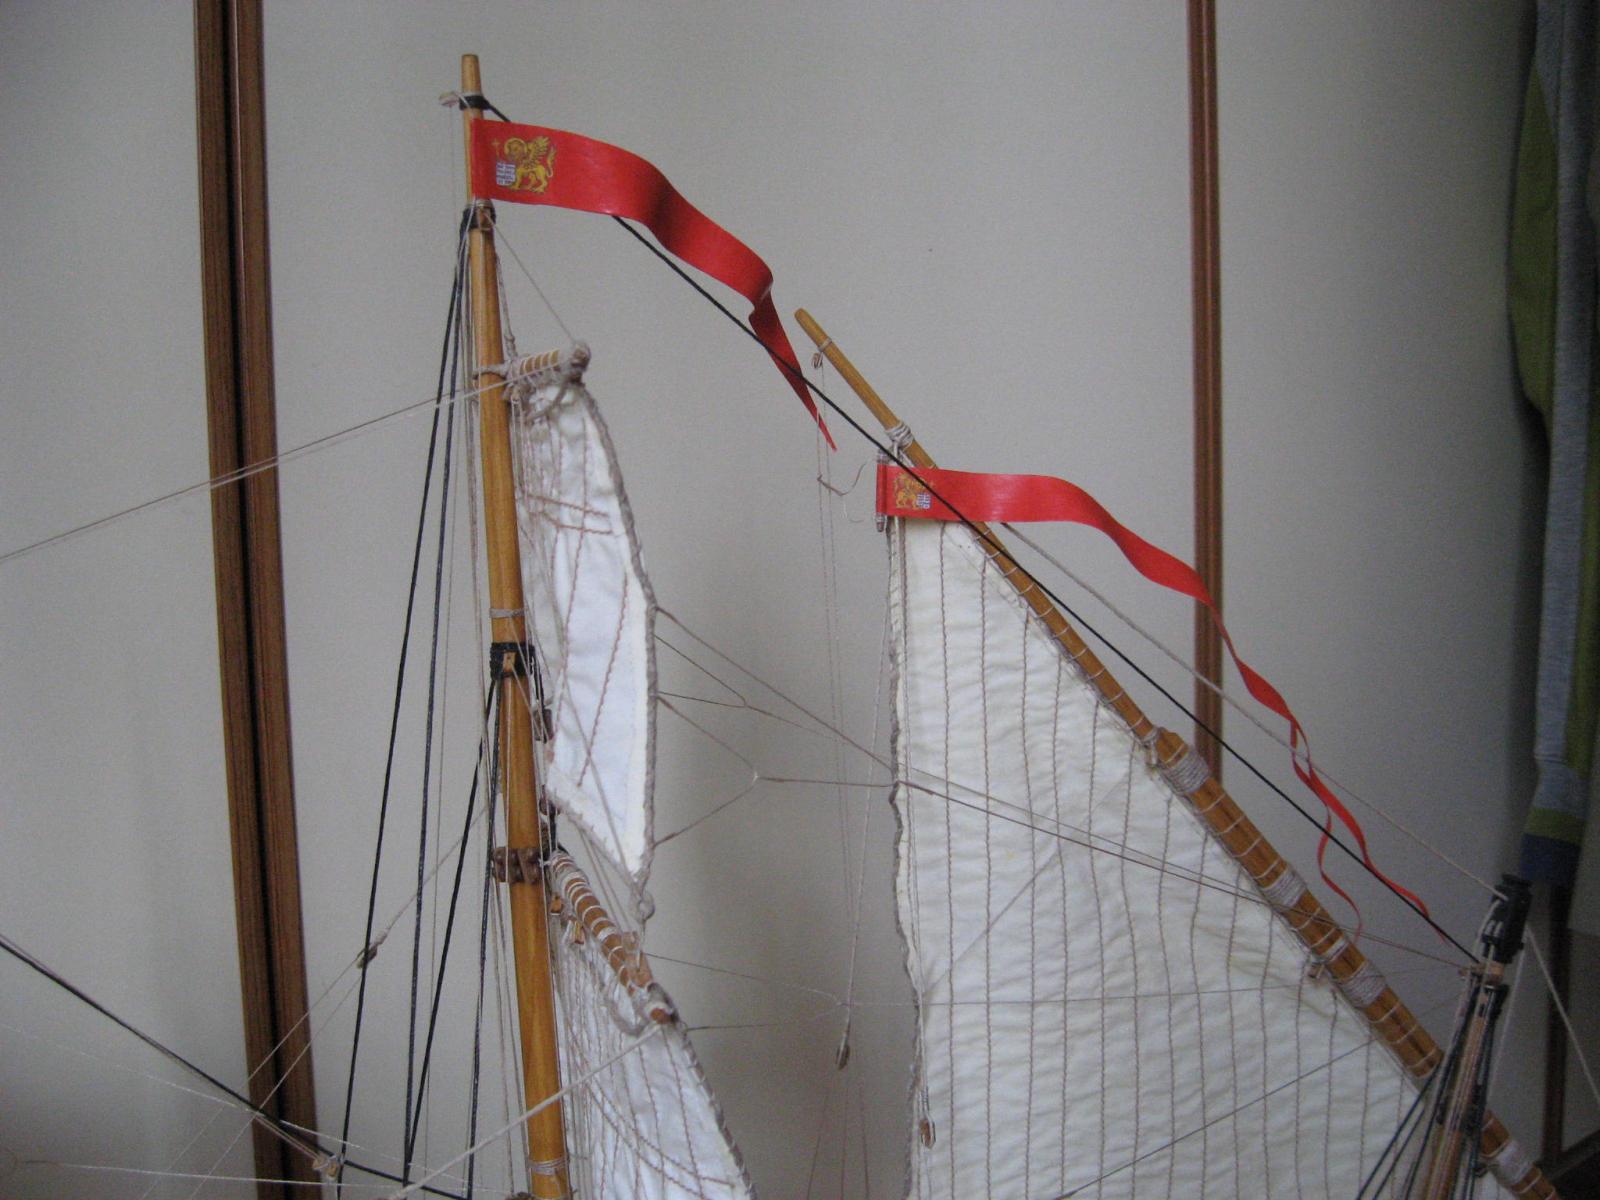
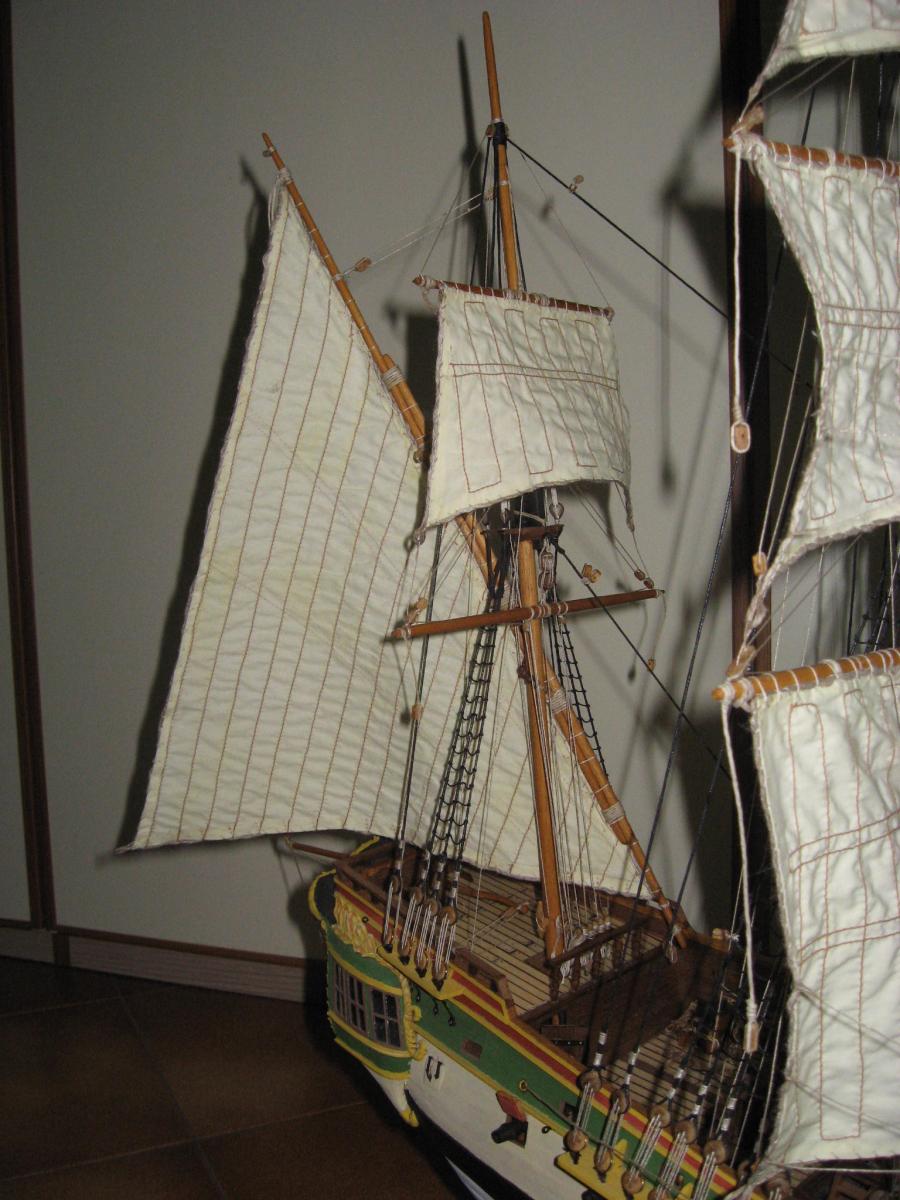
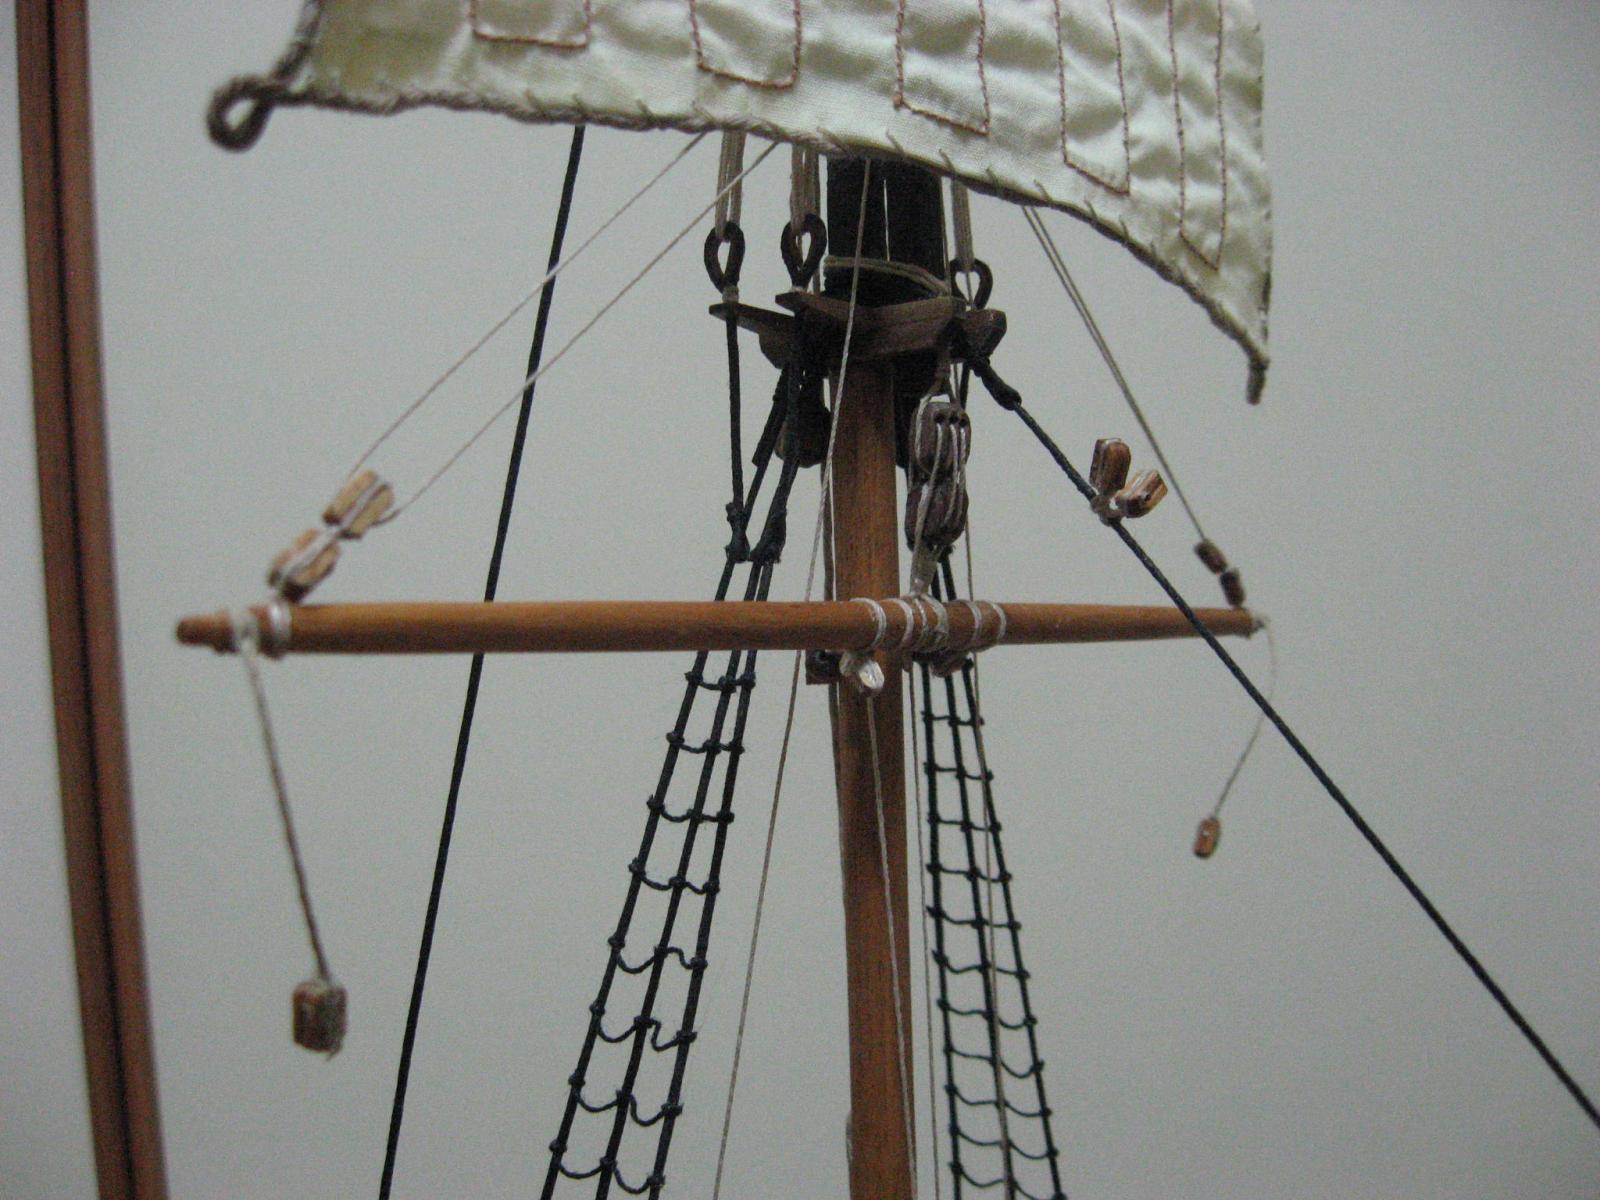
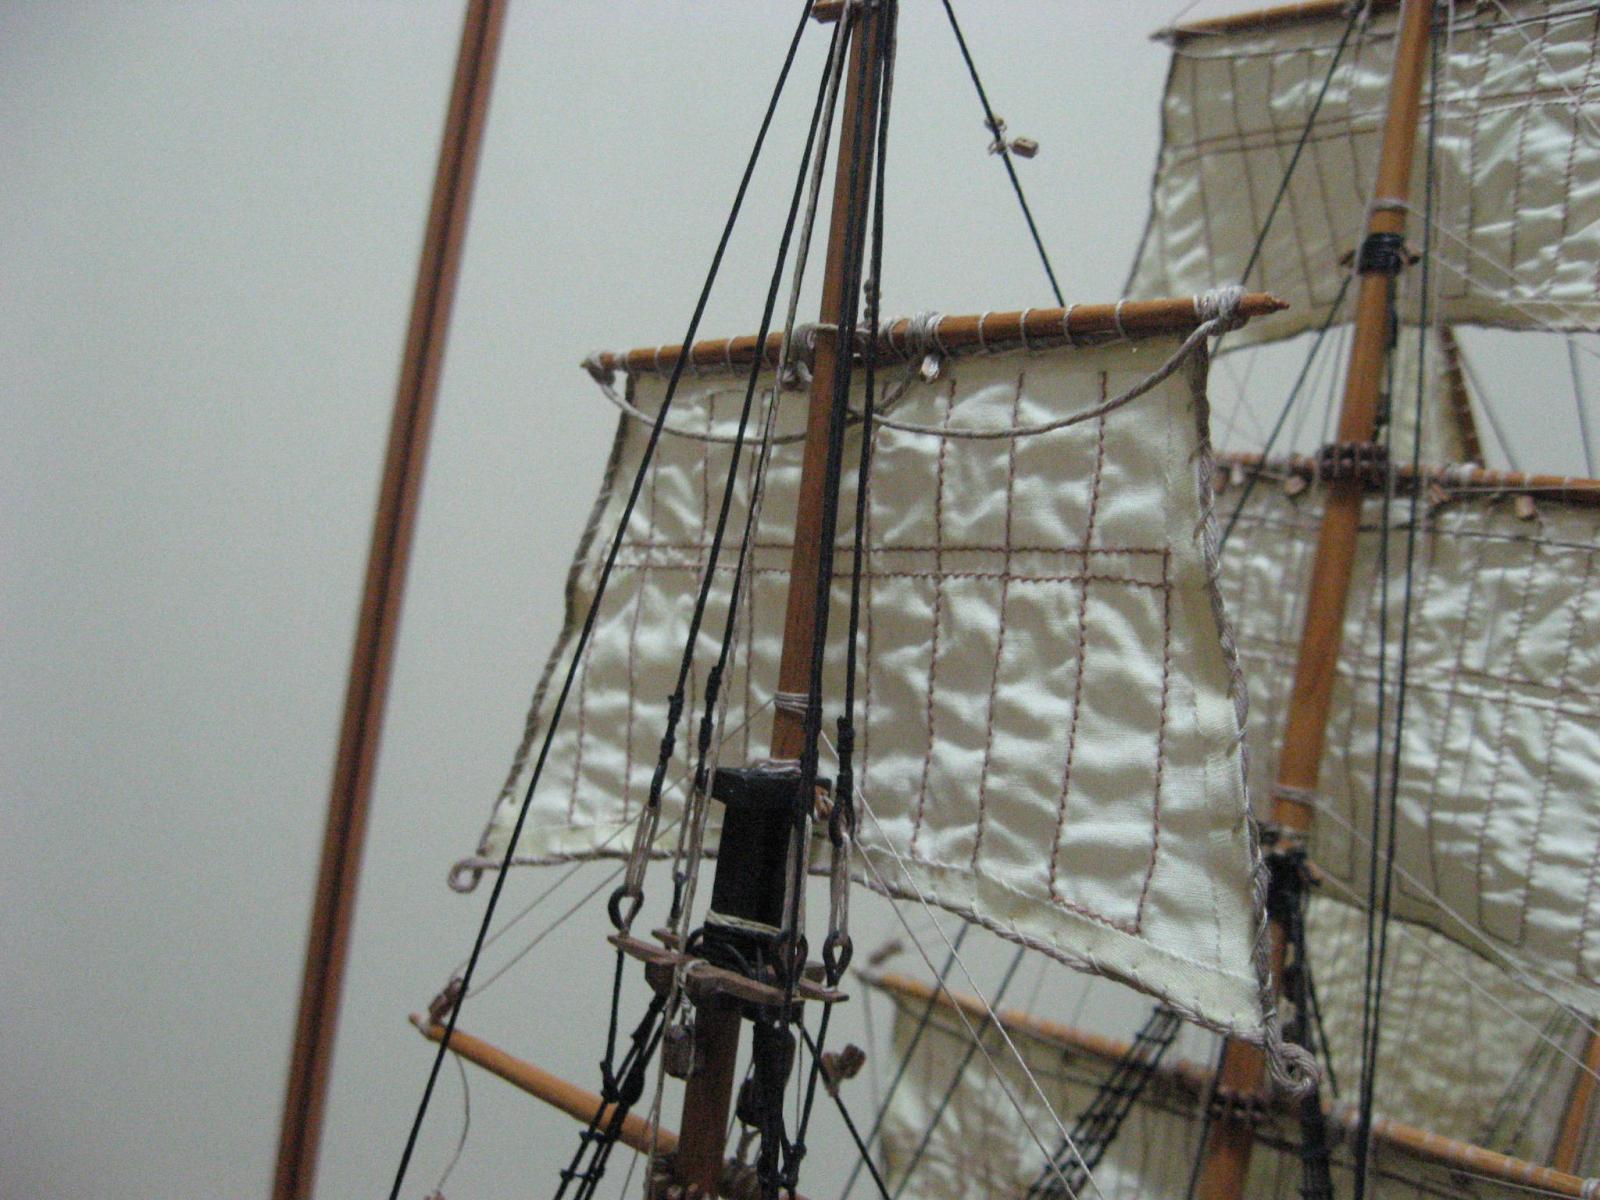
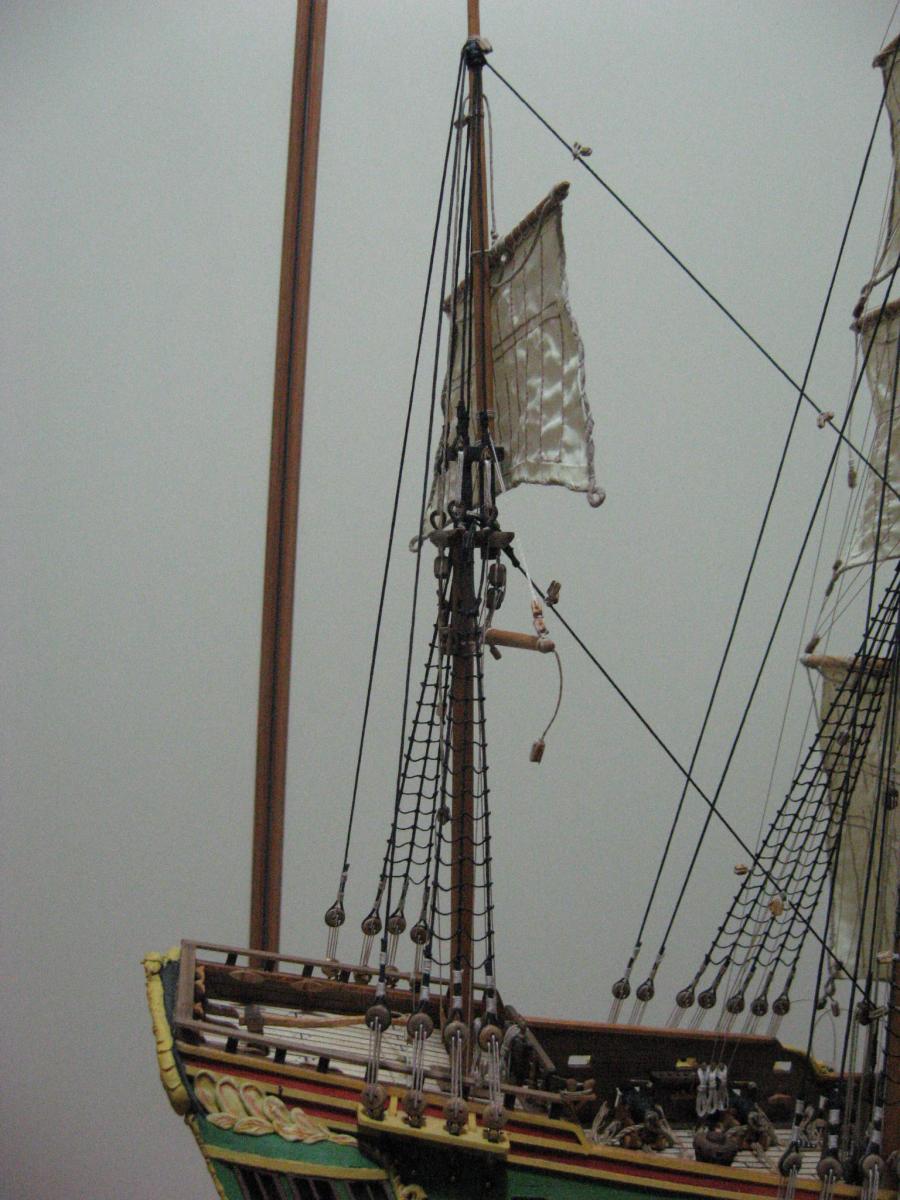
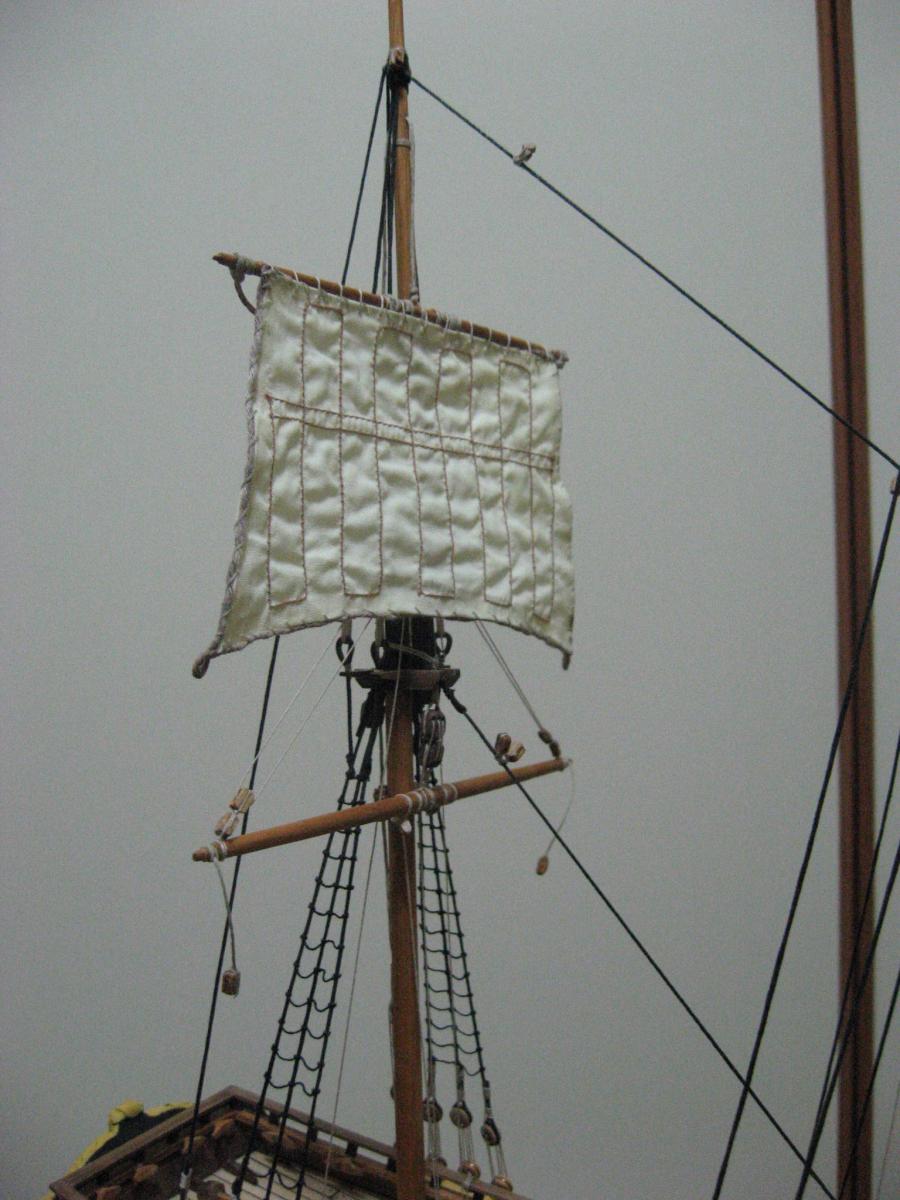
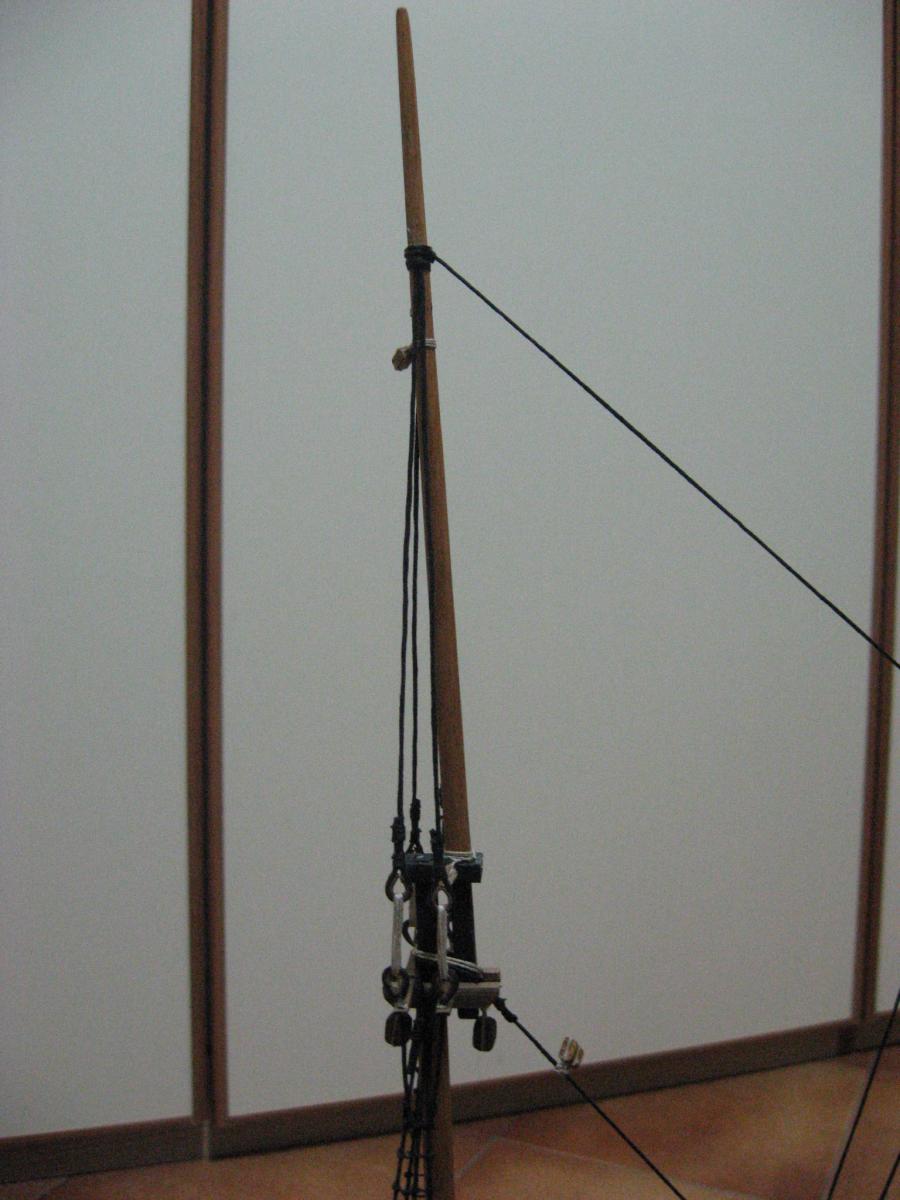
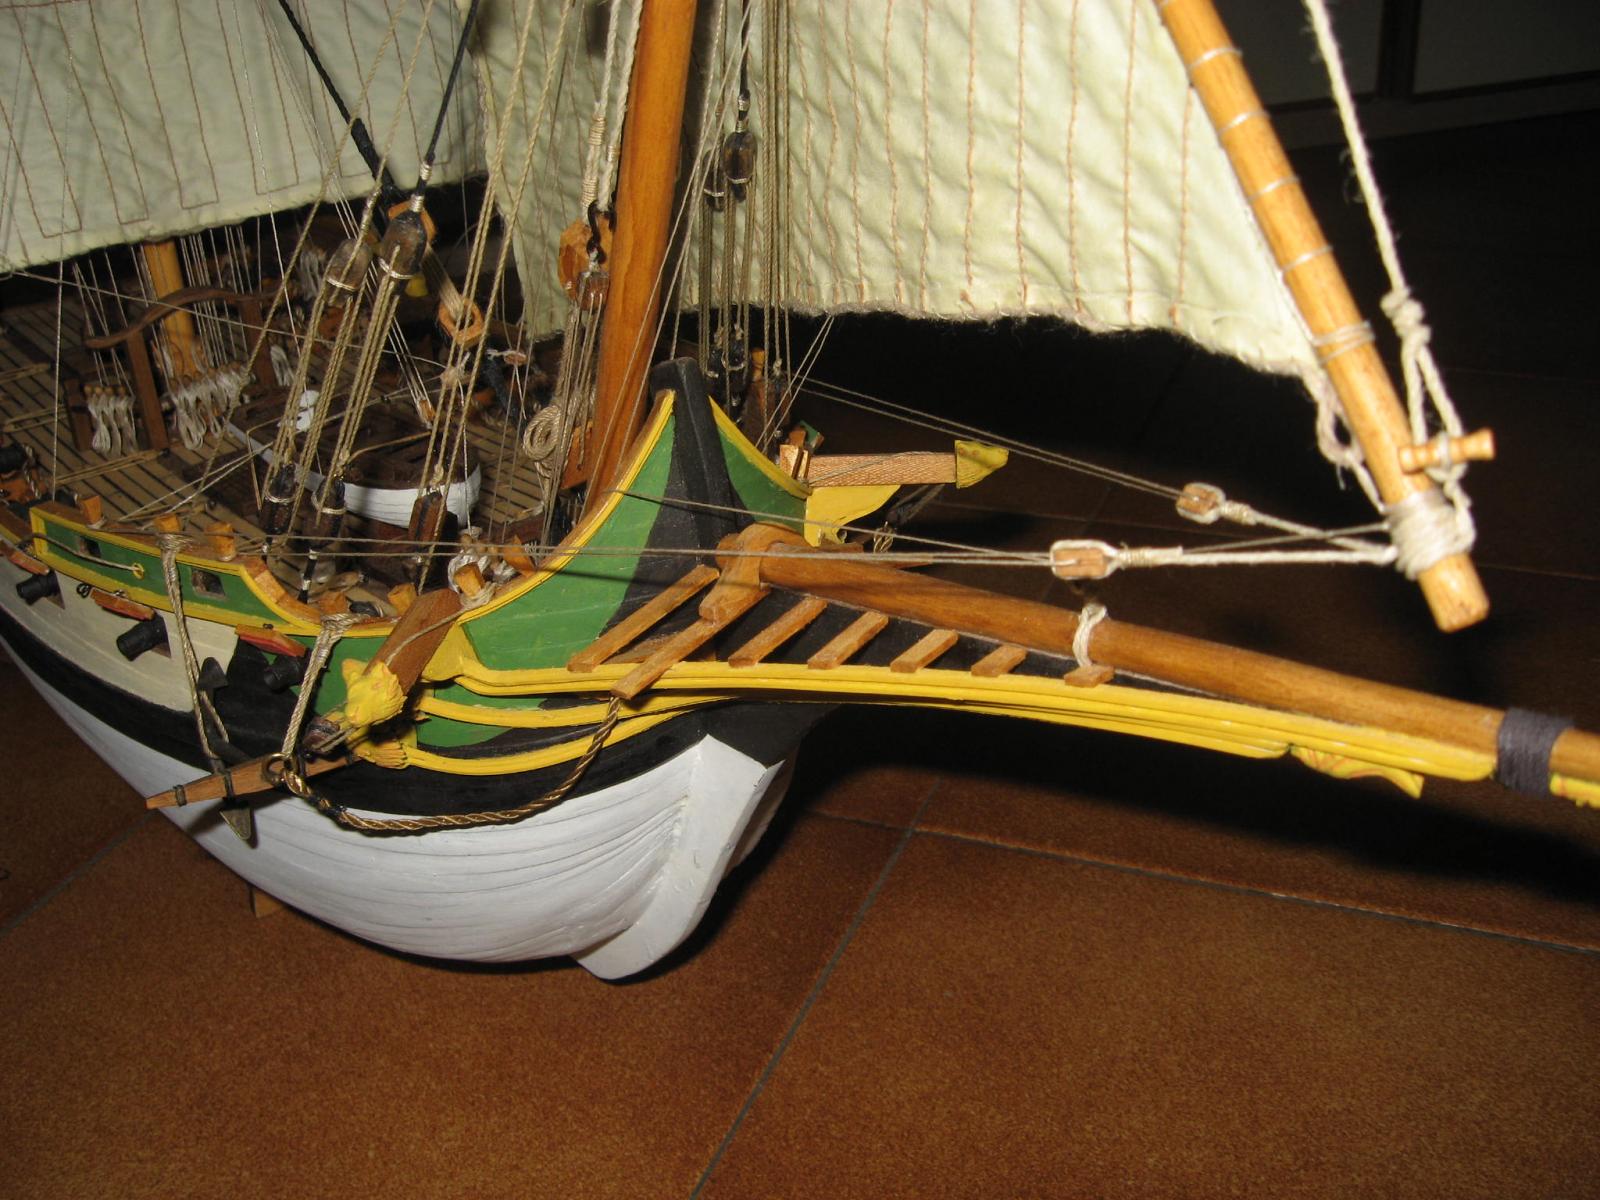
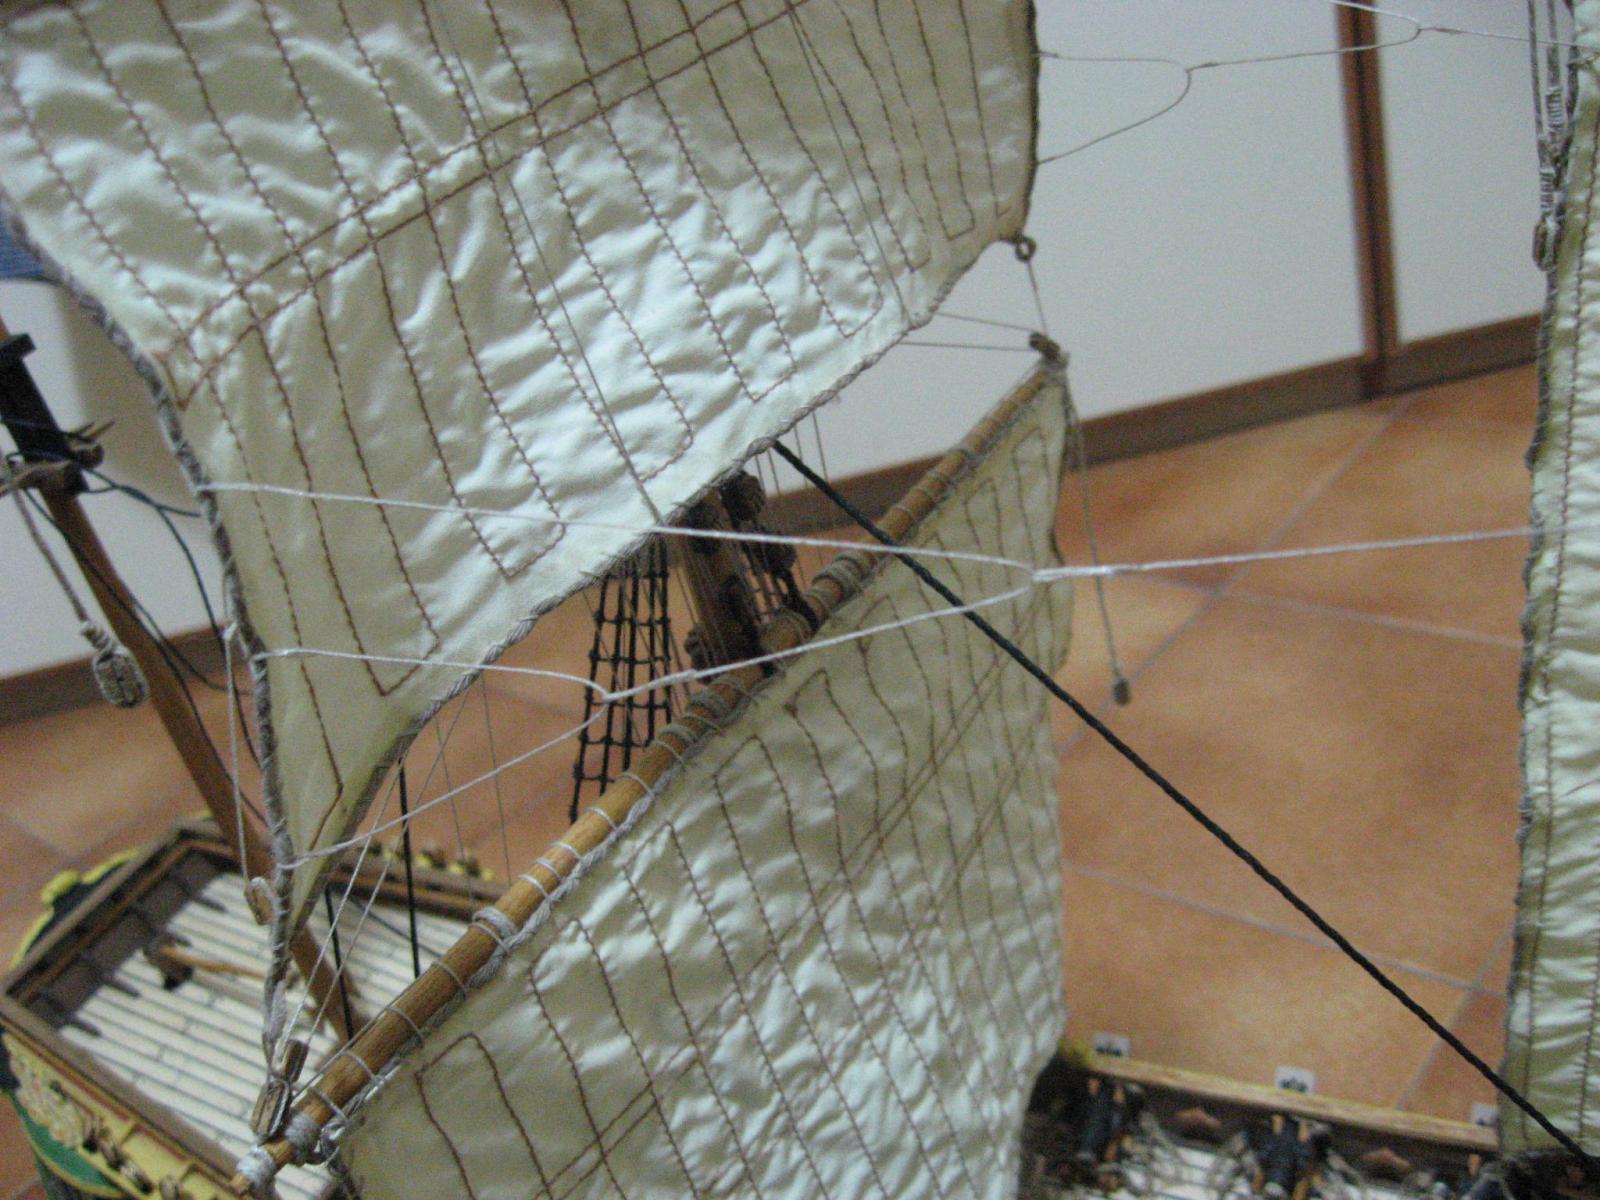
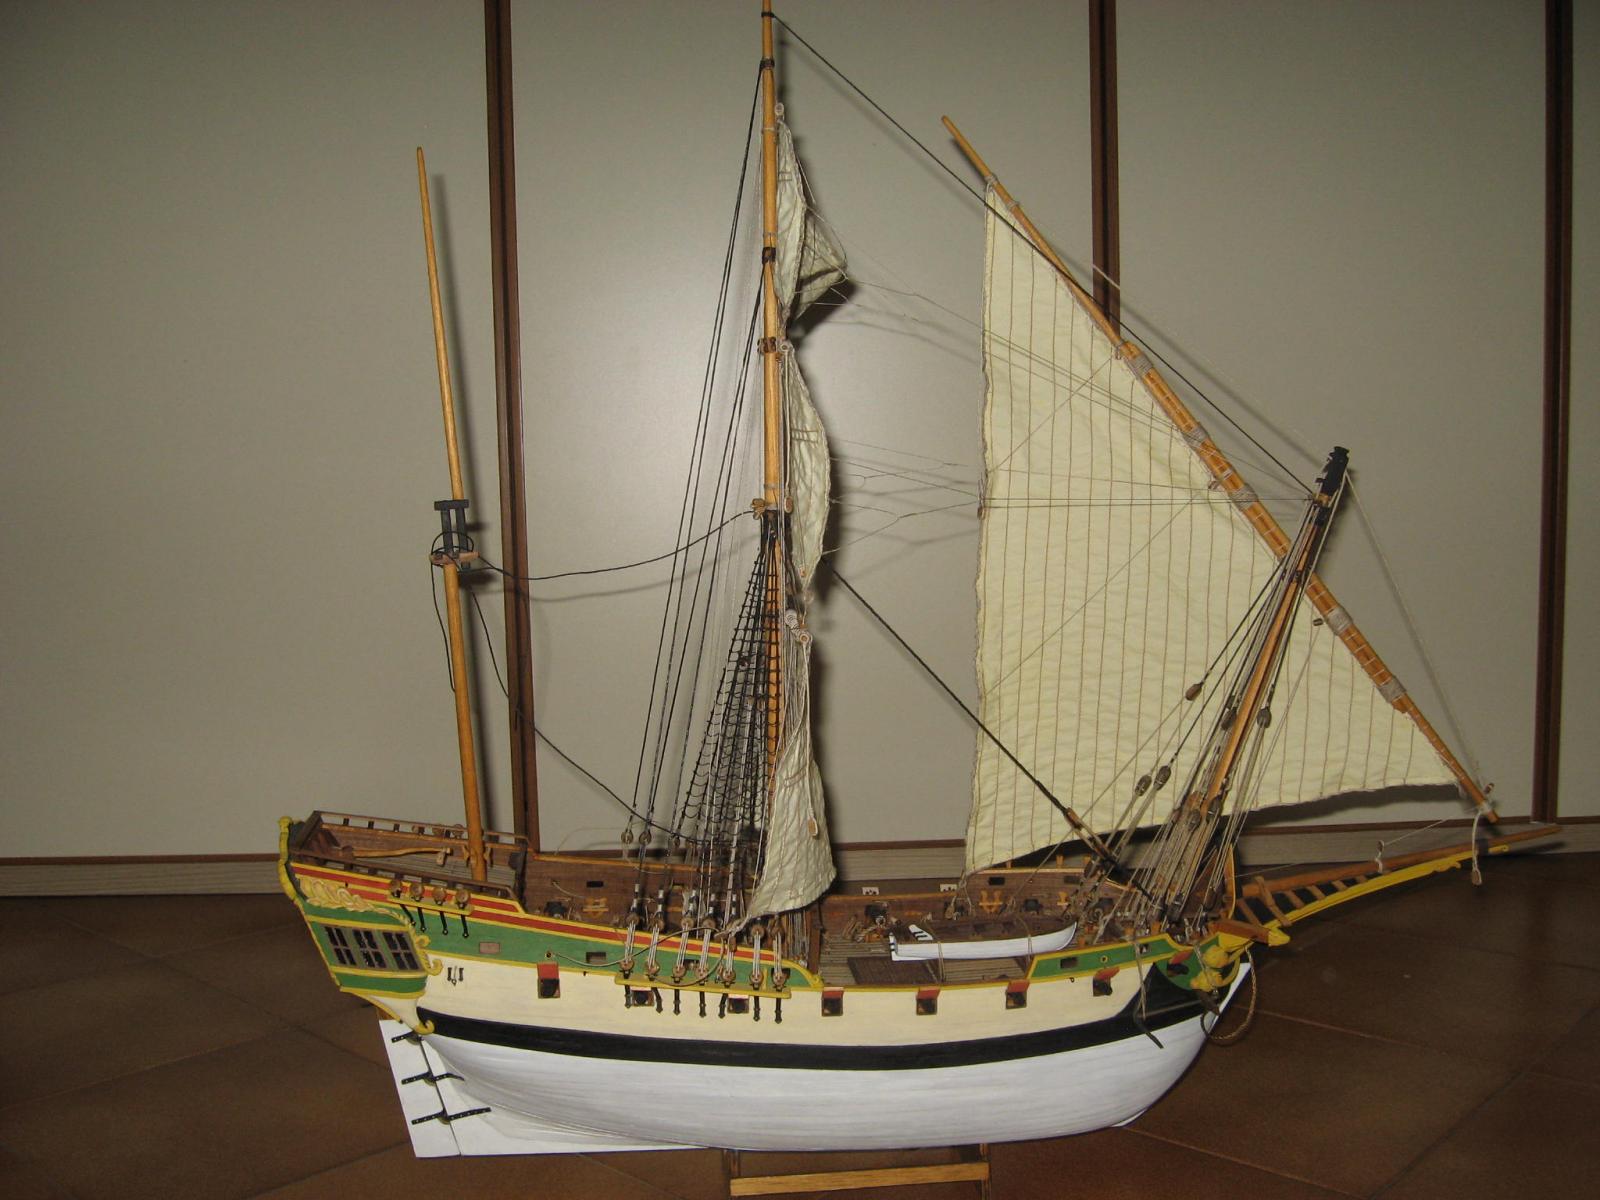
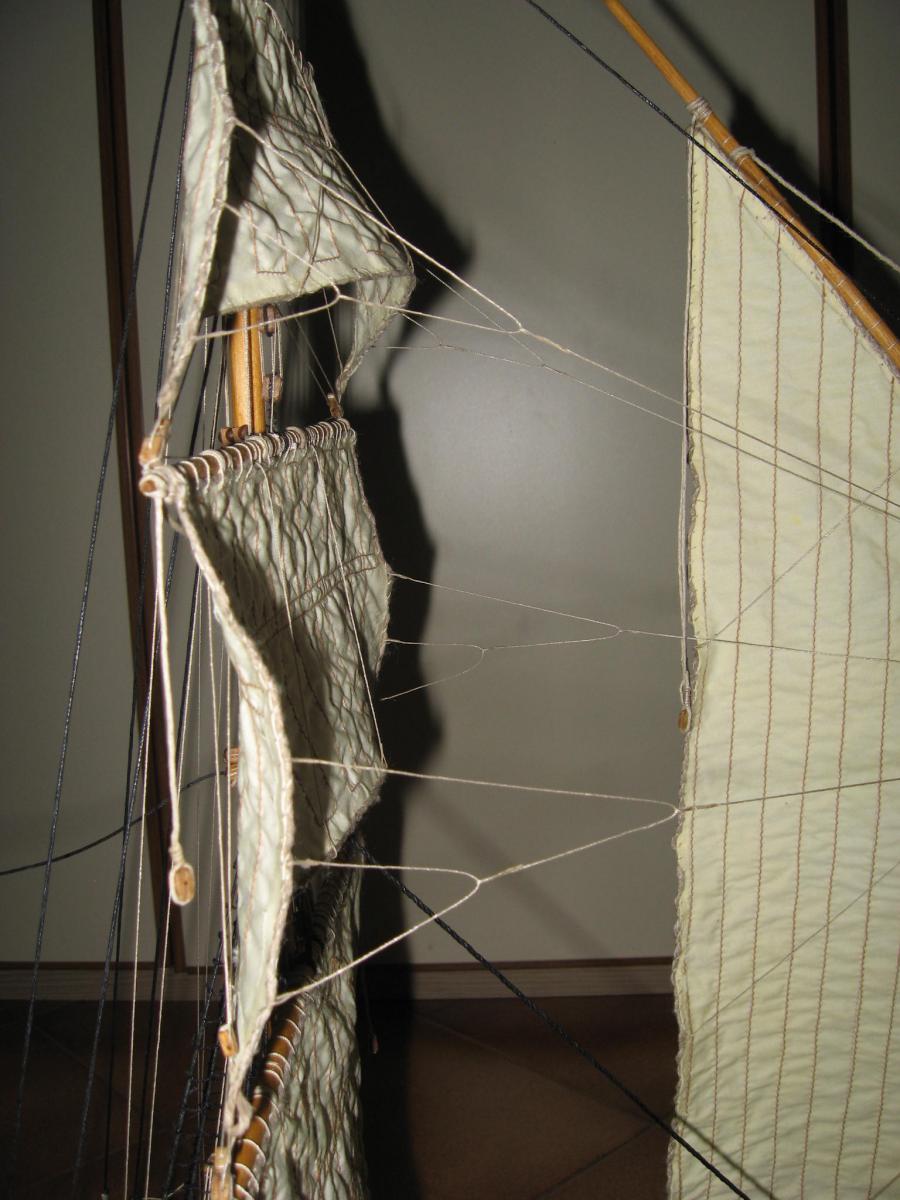
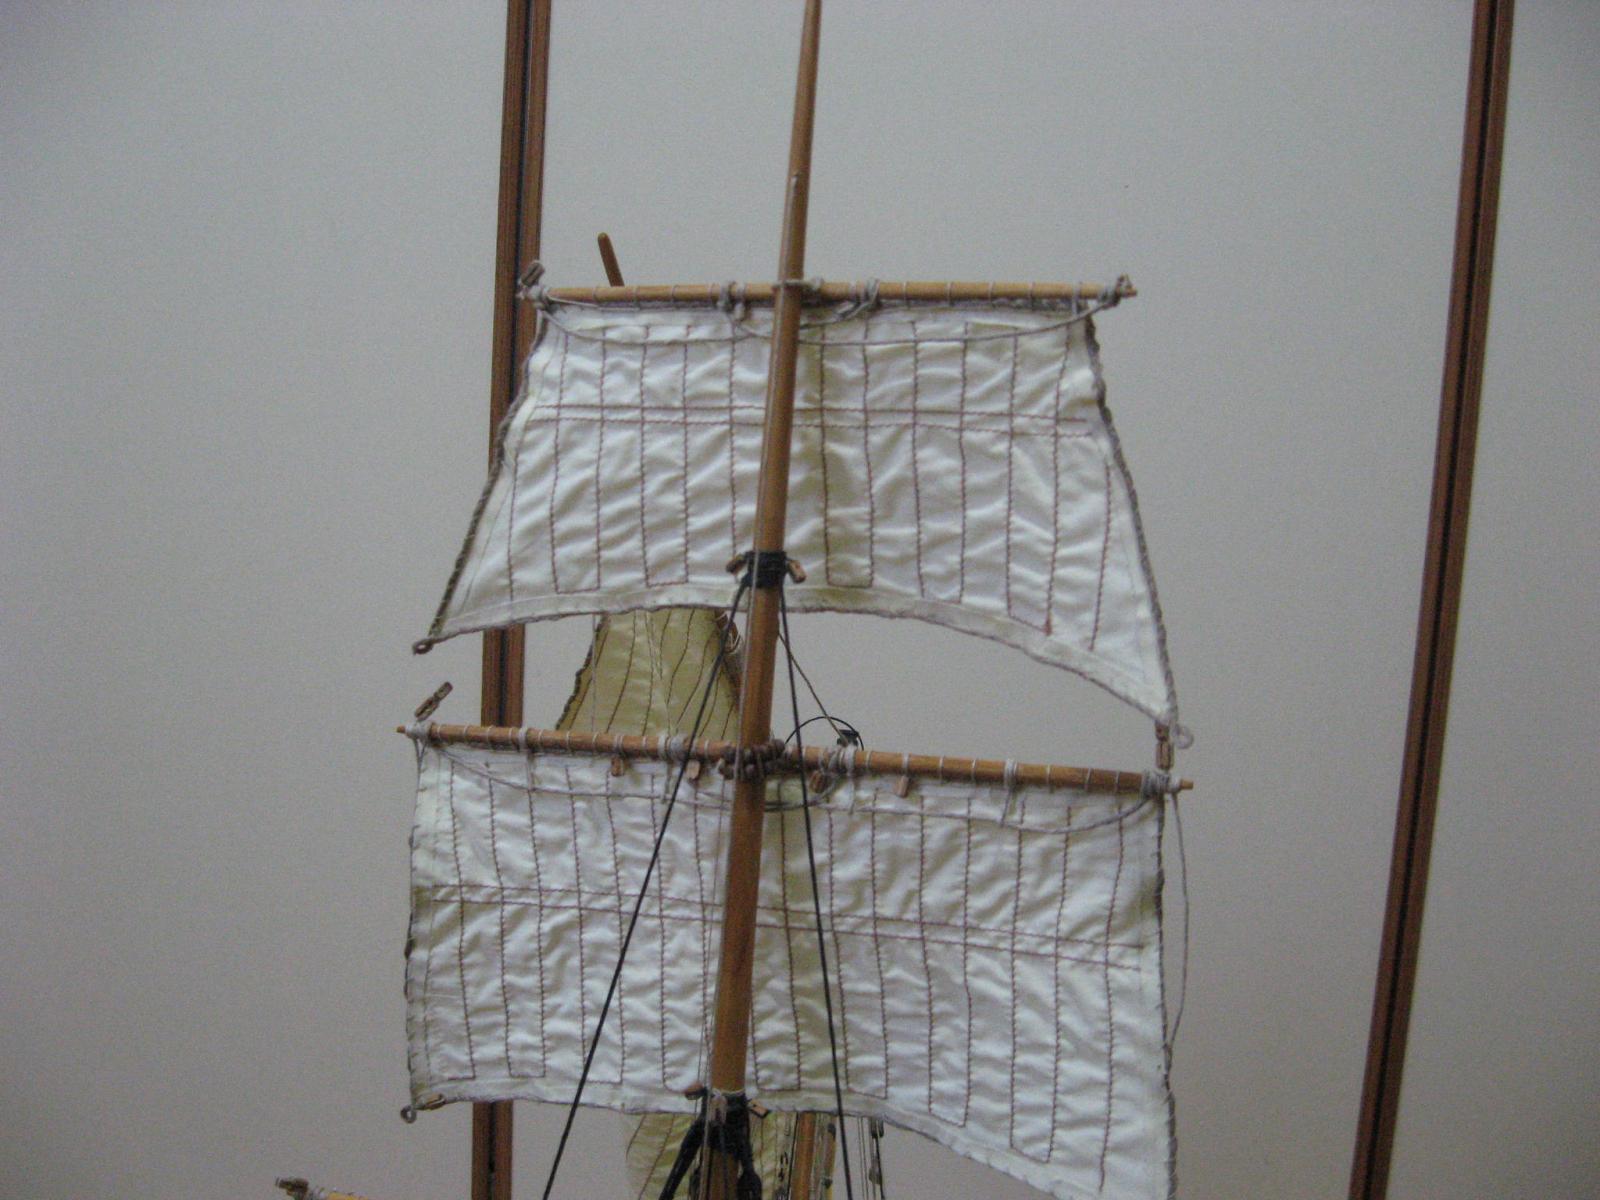
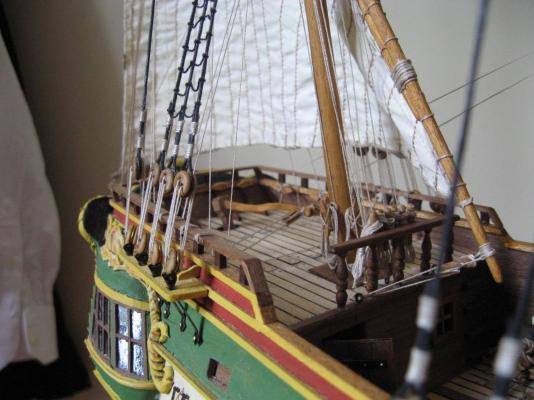
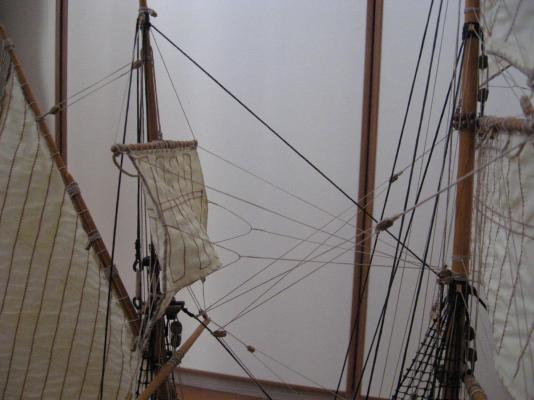
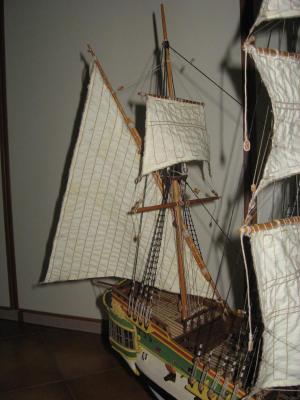
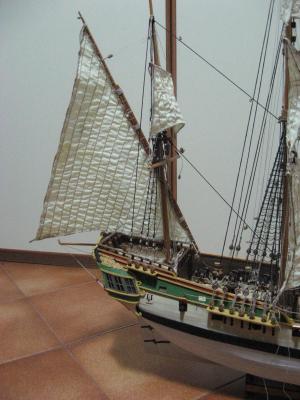
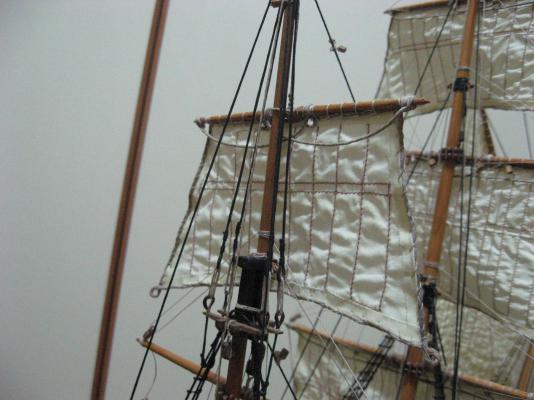
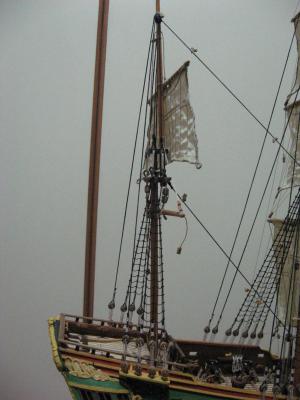
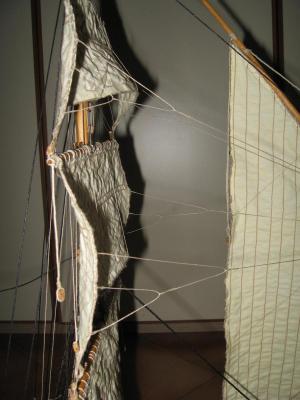
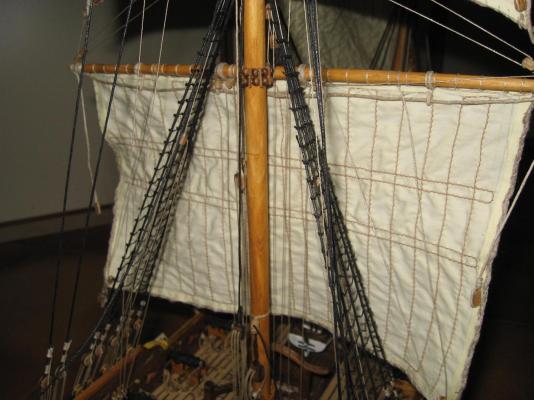
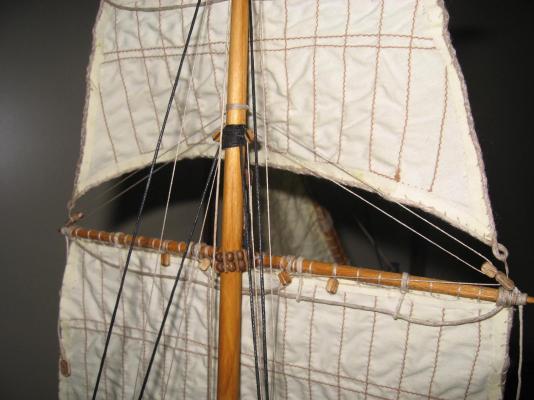
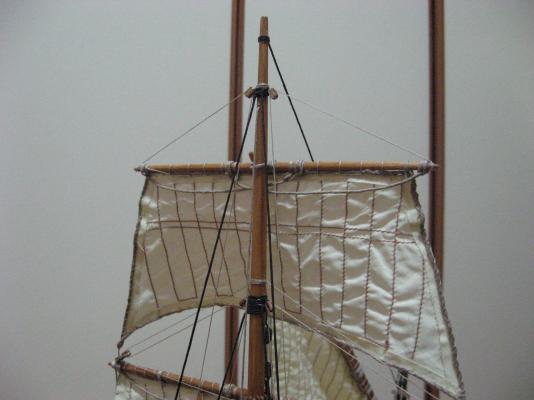
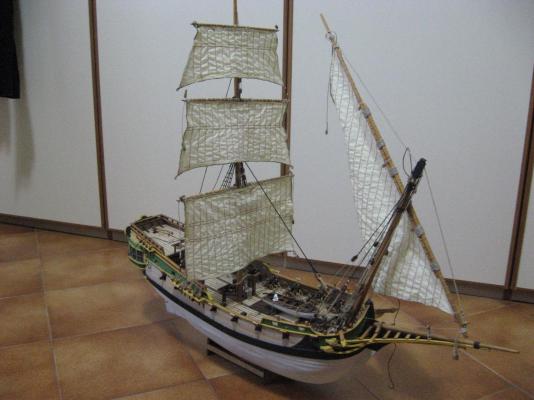
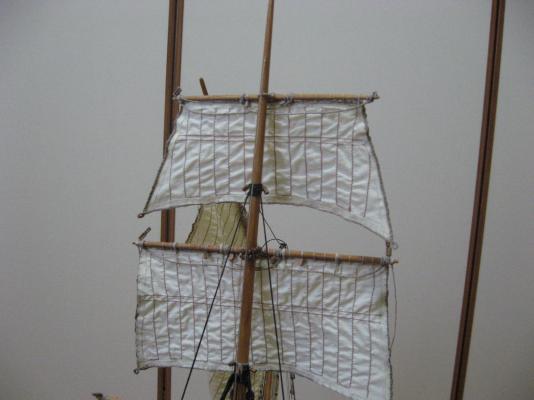
For Carl: Those were all the versions of the flag that I made before the final one...are all showed in the posts. Another update: I finally installed the mizzen mast lateen sail and its related boom. Now, as can be seen, the model start to have its definitive "appearance". The two lateen sails are not "aligned", but it is normal, since are not "tied" to their mast in the same way (it is not a xebec). I am proceeding with the rigging, and apparently it seems everything a bit loose. It is normal since I have not yet placed the ropes that keep tight the sails. I completed the filling of the belaying pin rail of the mizzen mast (other photo). A lot of rigging is still to be placed, in addition of a lot of rope bundles (tons of ropes! everywhere! ) I am not satisfied by the stern boom since is too short (other photo). But I have no solution, since the model "must" be placed in a niche inside a wall that has a maximum width of 90 cm. that means a maximum lenght of the model of max 88 cm. I know that is a silly problem and a silly limitation, but that is the space available and I must consider it... Maybe one day I will become rich and I will buy a villa and I will have more space for this model and I will.....rebuild this boom! :D (dreaming is free)


- 190 replies
-
- 13
-
-
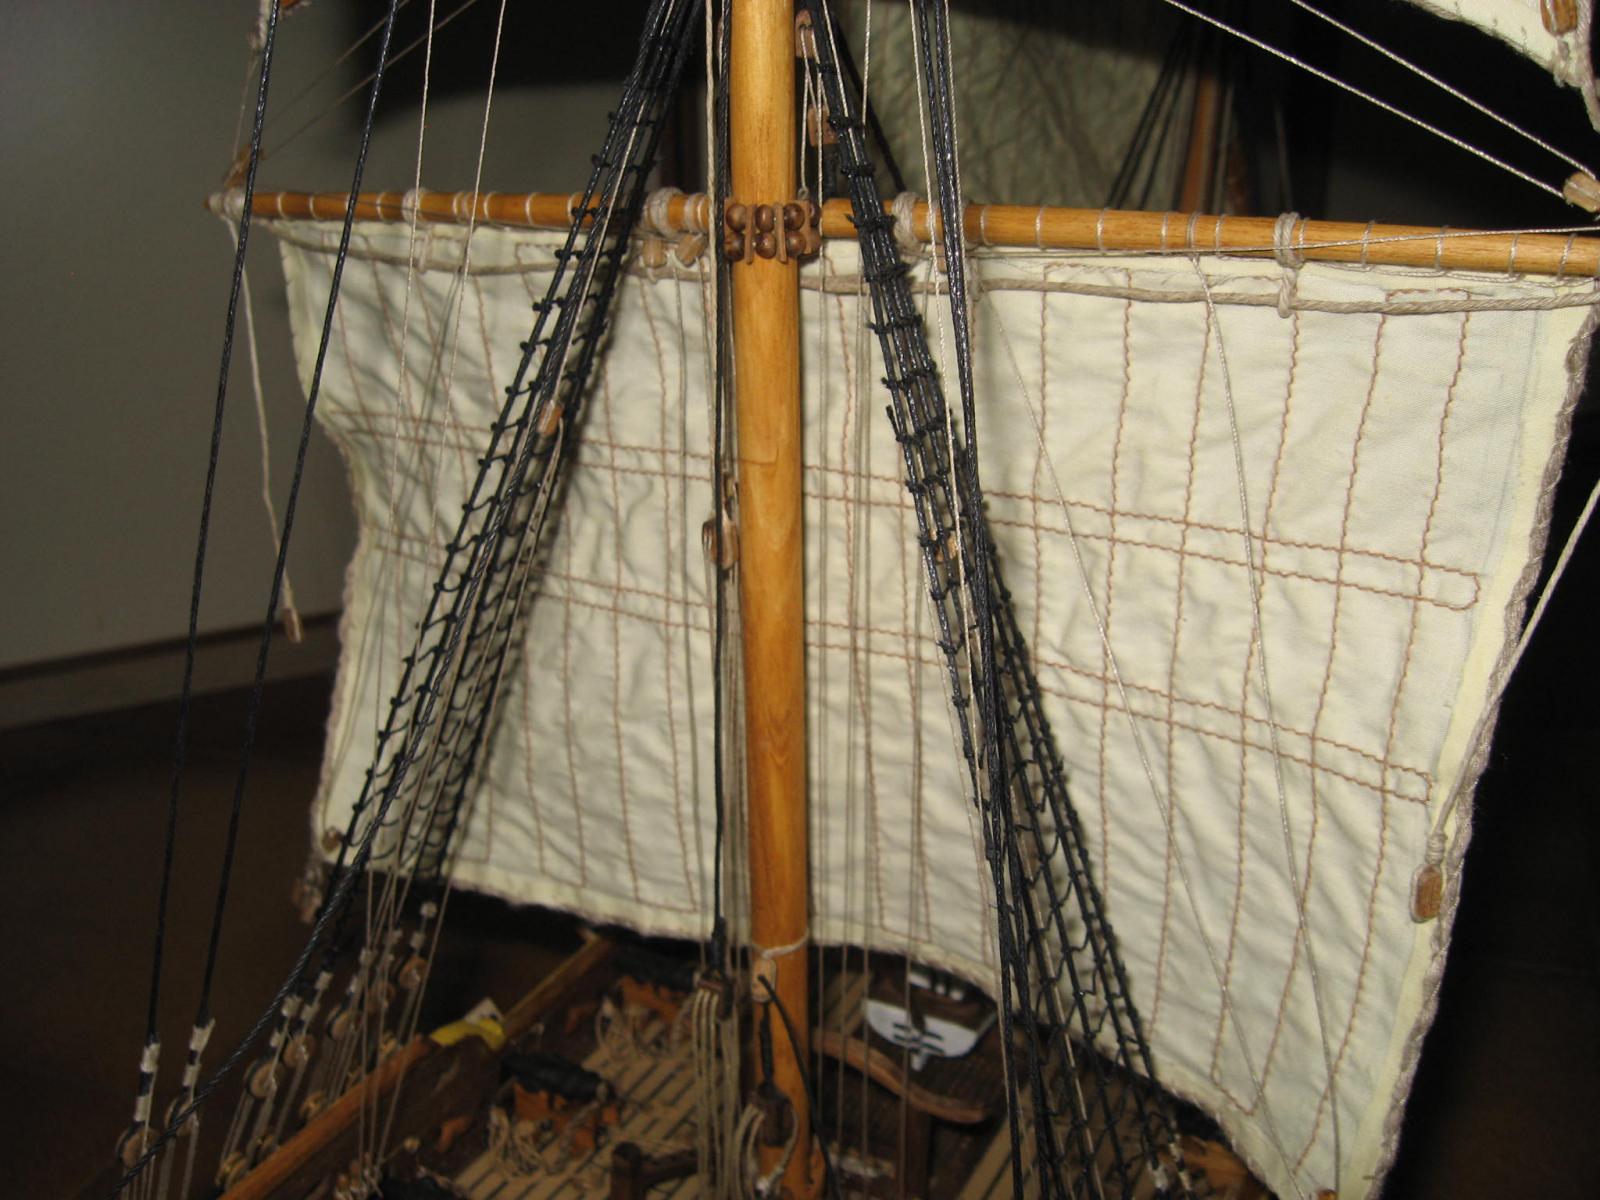
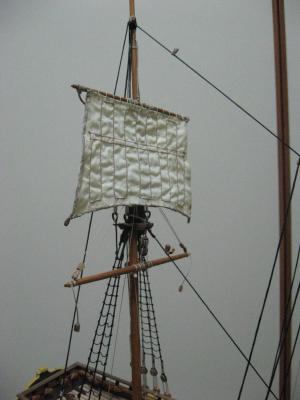
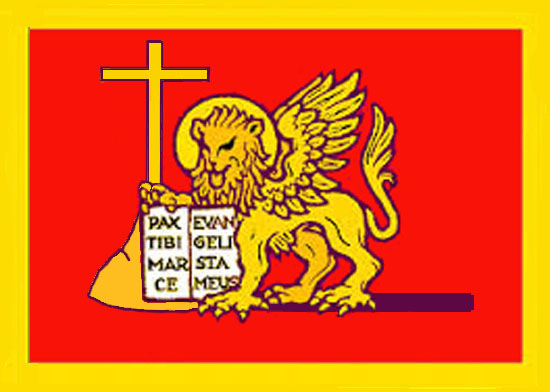
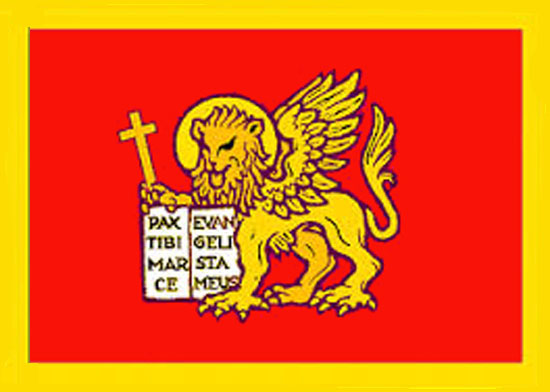
Another update... I am proceeding with the two yards of the mizzen mast and the related single square sail. As can be seen, a lot of ropes are yet to be installed, so everything is rather loose. I attached all the cannon shots holders (one every two cannons, since I am lazy and I don't want to make 16 of them ), as can be seen in another photo. Ah yes, I finally released the "Venetian flag 3.0", which will be the final and definitive one! :D I don't want to put the hands anymore on this flag, because it was a very tormented decision and tormented research...
- 190 replies
-
- 13
-
-
Hello Carl, I am deeply sorry, I am sure that they will never be translated in English, since belong to a niche field of interest... This author made very interesting books, with a good mix of text and photo/drawings, but the text part represent no less than 60% of each book, so cannot be ignored. by the way, why you stopped just to four languages???
-
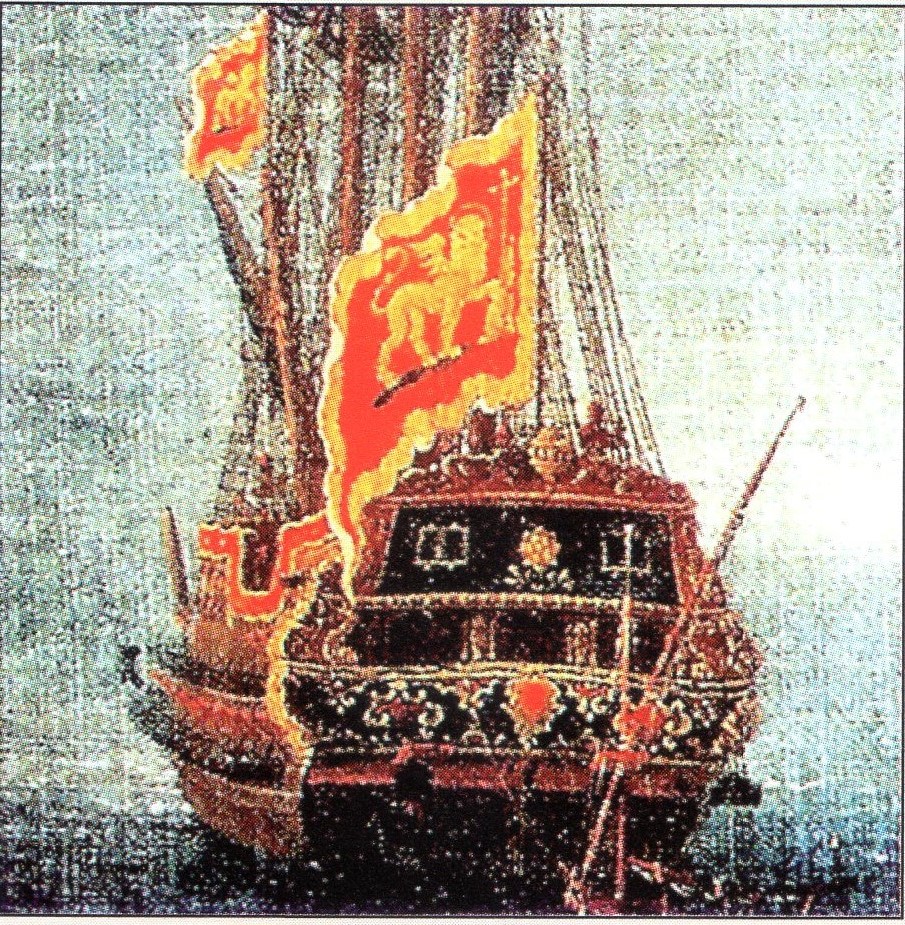
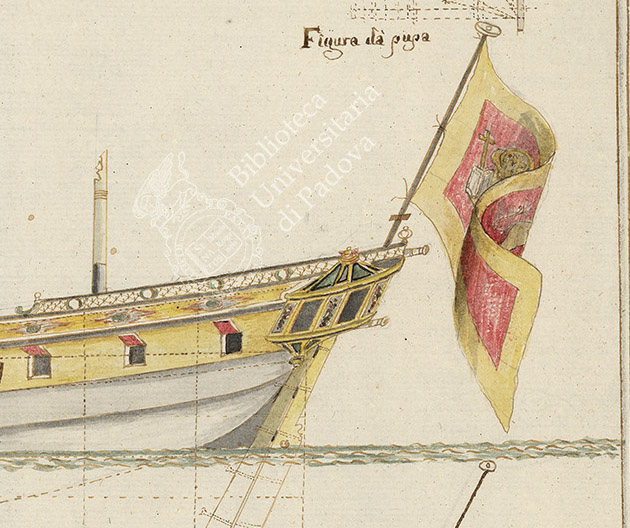
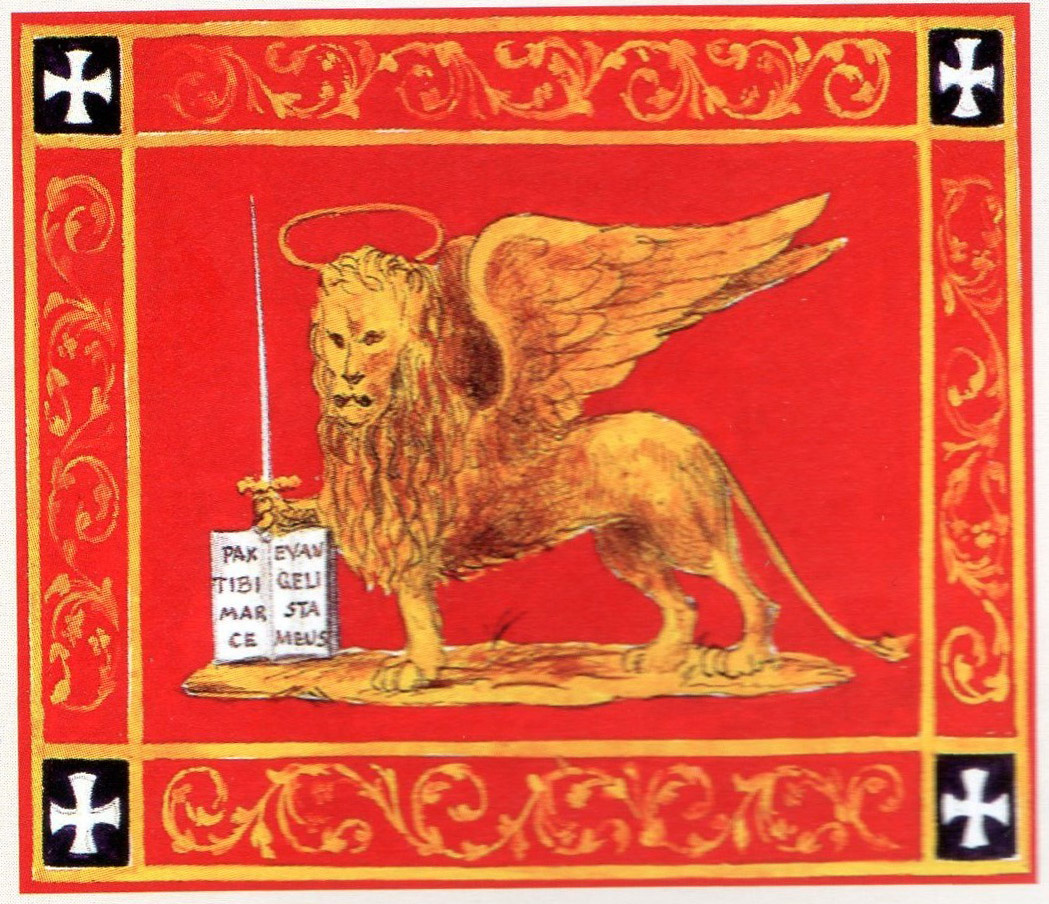
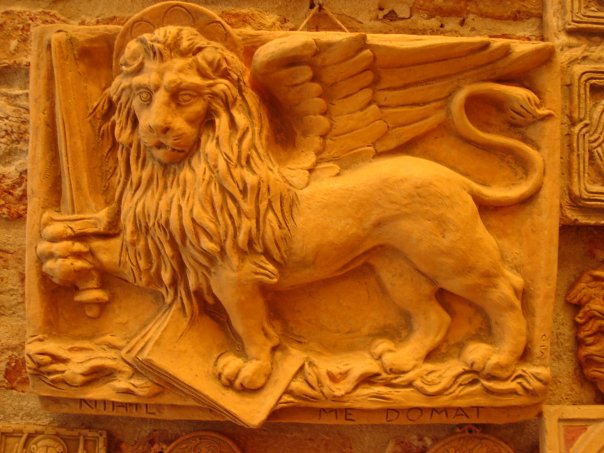
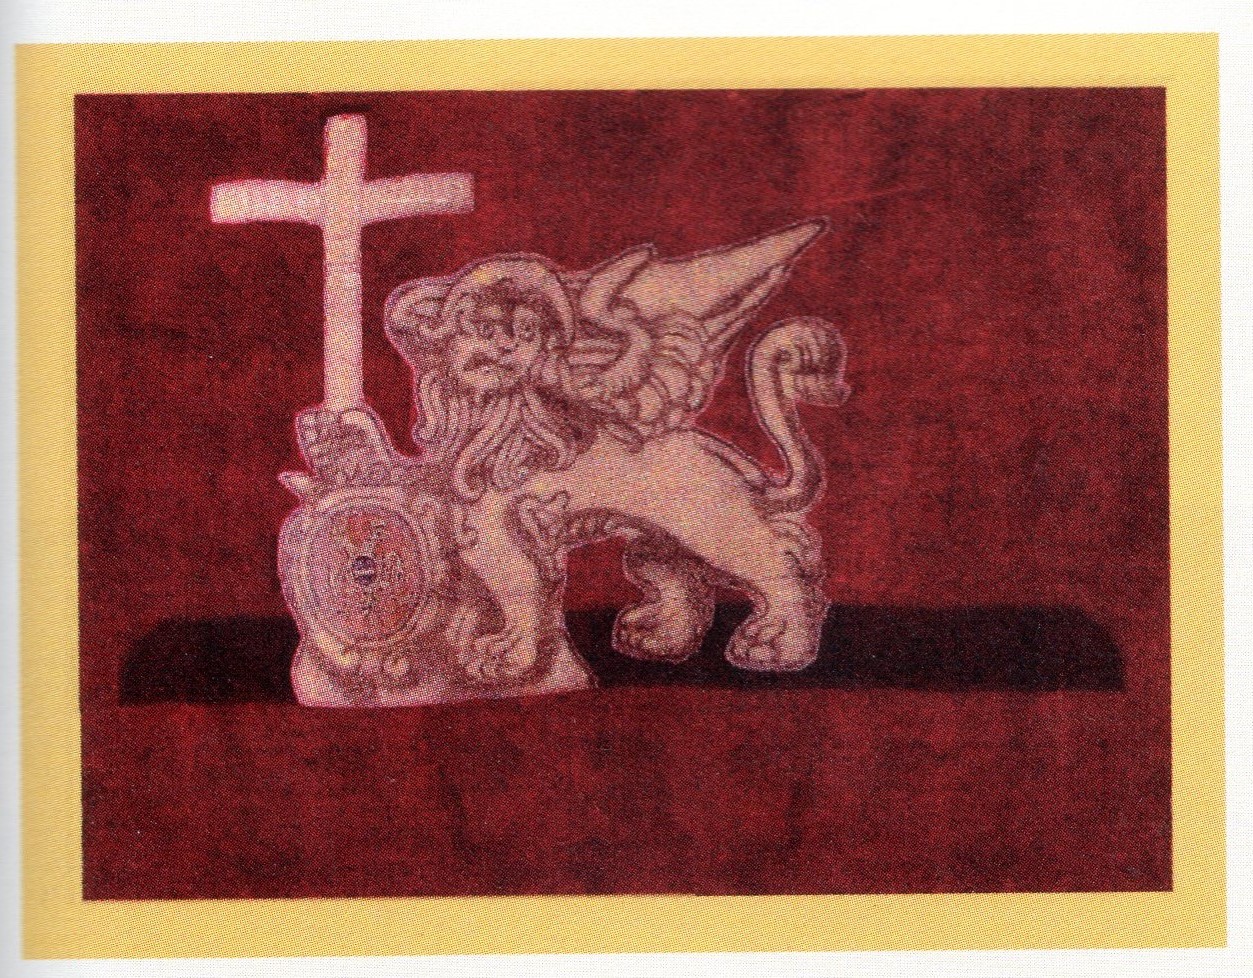
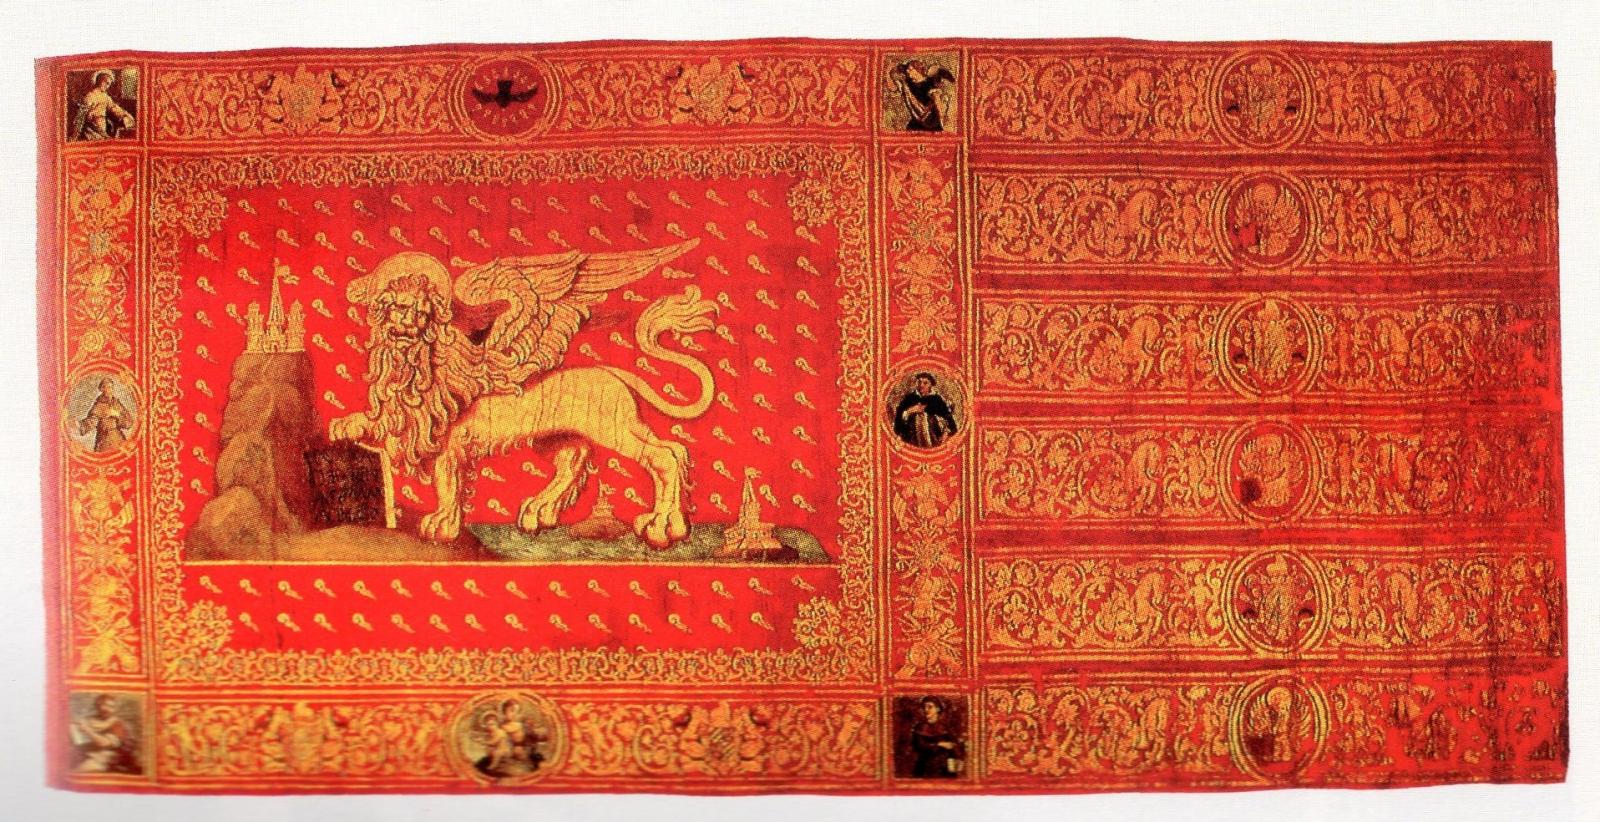
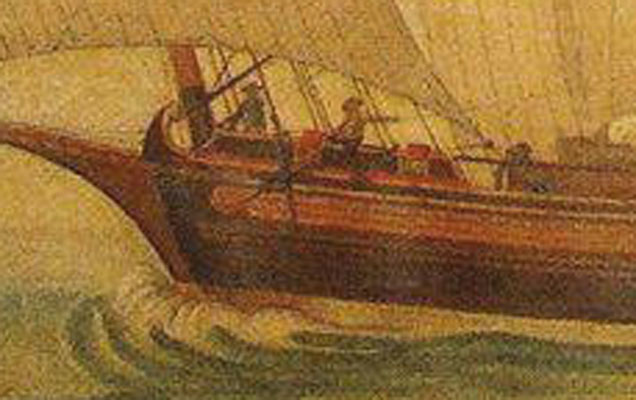
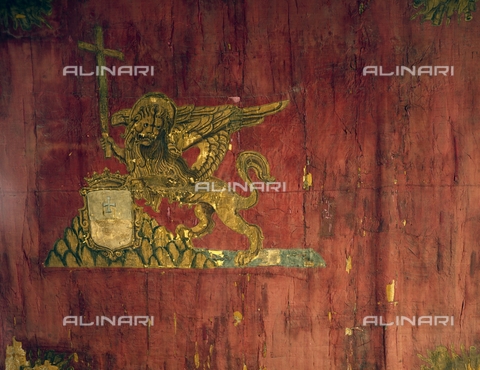
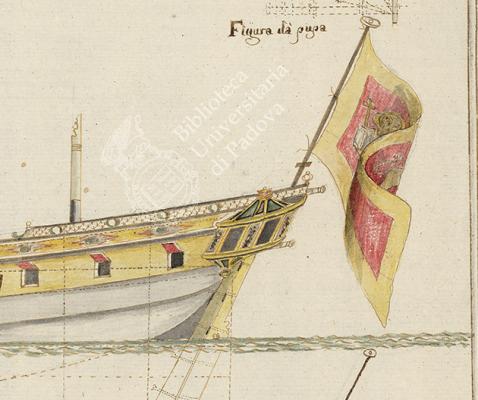
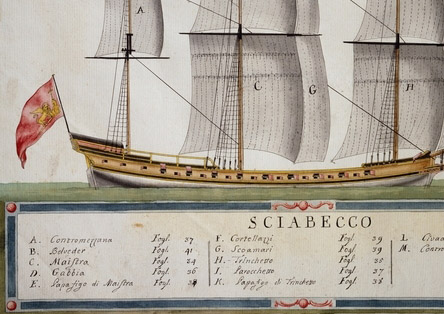
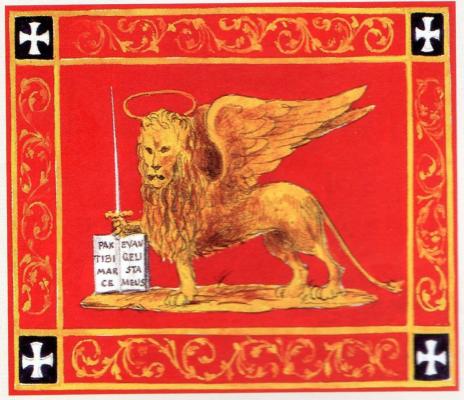
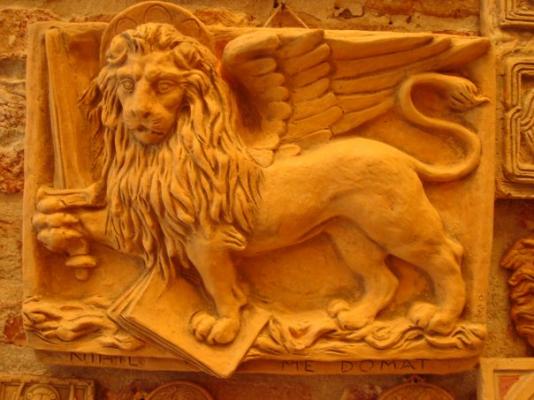
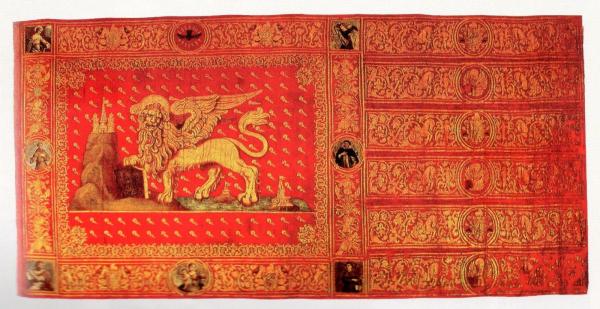
Hello Fam, I appreciate your attention to this detail of the flag. Yes, I know of the existence of a version of the lion bringing the sword, but as for I know it was used only by the land troops. I was fascinated by the possibility to use the lion with sword, but definetly, after checking many paintings, books and drawings, I abandoned this idea, since there was no evidences at all of its use for the military ships. The lion holding the sword instead of the book was also a symbol of the justice administration, so it is found in many buildings which were part of the Venetian Republic. Since the battle of Lepanto che Venetian fleet used a flag with the lion bringing a cross (defender of Christianity!), and so remained until the conquest by the Napoleon troops. The only deviation was the flag of the flagships, which was made like in the previous post (a more famous way to represent the venice flag). If you have the occasion to go to Venice again, you can go to the Museo Correr, which has a lot of paintings of naval battles, many contemporary. In one way is boring, but you can see all the flags used by the ships! Below you can find some photos to give some consistence to what I said: first photo (taken from Alinari archives): the flag used by the Venetian fleet at the battle of Lepanto, from Museo Correr. second photo: A detail of one of the ships of one of the paintings from the Museo Correr. third photo: a detail of one drawing taken from the collection of Biblioteca di Padova; fourth photo: a detail of a painting from the Atlas made in 1785 by Gian Maria Maffioletti. fifth photo: a flag used by land troops, with the above mentioned sword raised (but book open!), from Museo Navale di Venezia. six photo: one of the many sculptures present in Italian buildings with lion with sword raised (and book closed!) If you are interested, I can suggest some sources of informations (not easy, all sparse informations to be collected) in anycase try the books written by Guido Ercole, edited by Gruppo Modellistico Trentino, which have a lot of interesting informations about this argument!

-
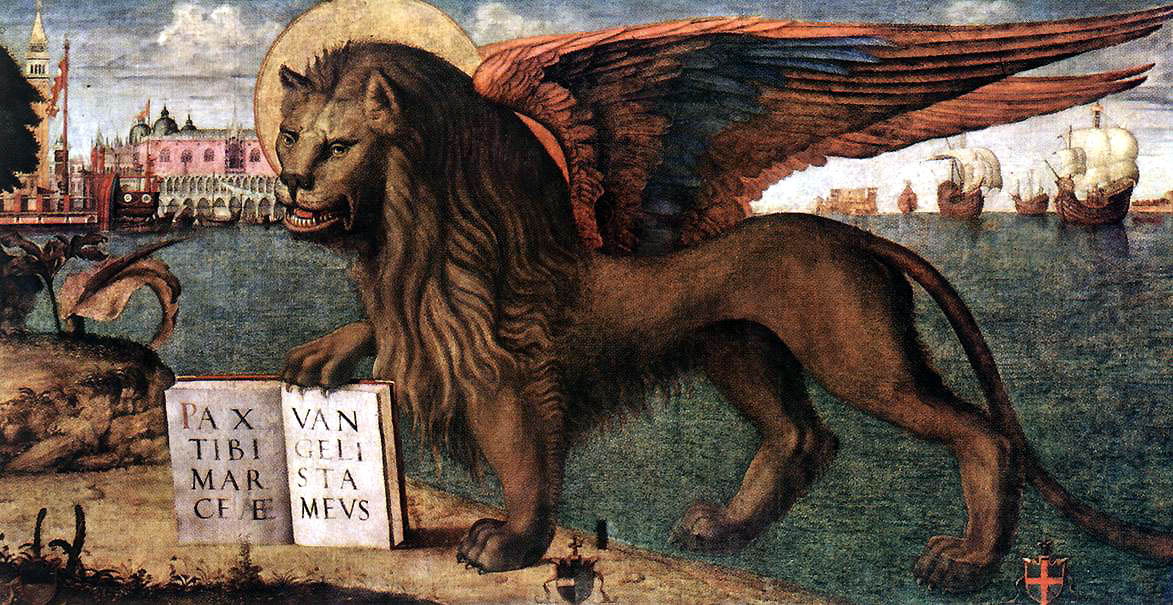
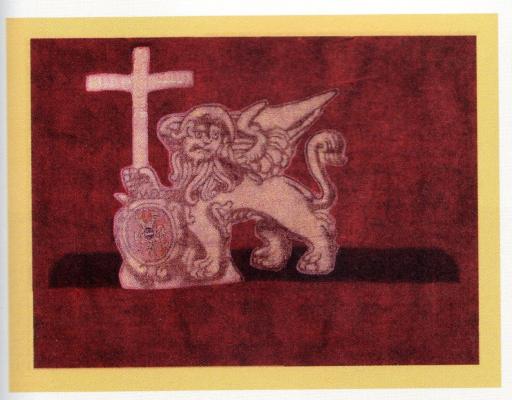
I decided to fight against my laziness and I modified the Venetian flag. Now is more similar to the one that should have got this polacre. Now the cross is stright and big, as it should be, and I added the sea. Some explanation is needed, since the venetian flags were filled of symbols, that varied during the centuries. in the first photo there is the modified flag, that "theoretically" will be added to the model (until new modifications are made!). the second is an original flag, of the first years of 1700, present at the Venice Naval Museum. The difference is the presence of a coat of arms instead of the open book. But it should be considered a variation from the "rather" standardised one. the third photo is a section of the painting of the "Sacra Famiglia" ship, where is clearly visible this type of flag (see old posts). the fourth photo is an original flag of a Venetian flagship, dated between 1660-1675 (Which is of the type more famous). the fifth is the Venetian Lion made by Carpaccio in 1516. the last two photos are just to explain better the meaning of sea in the flag: The lion has two legs on the sea and two legs on the land, to symbolize that its power is extended both on sea and land.


-
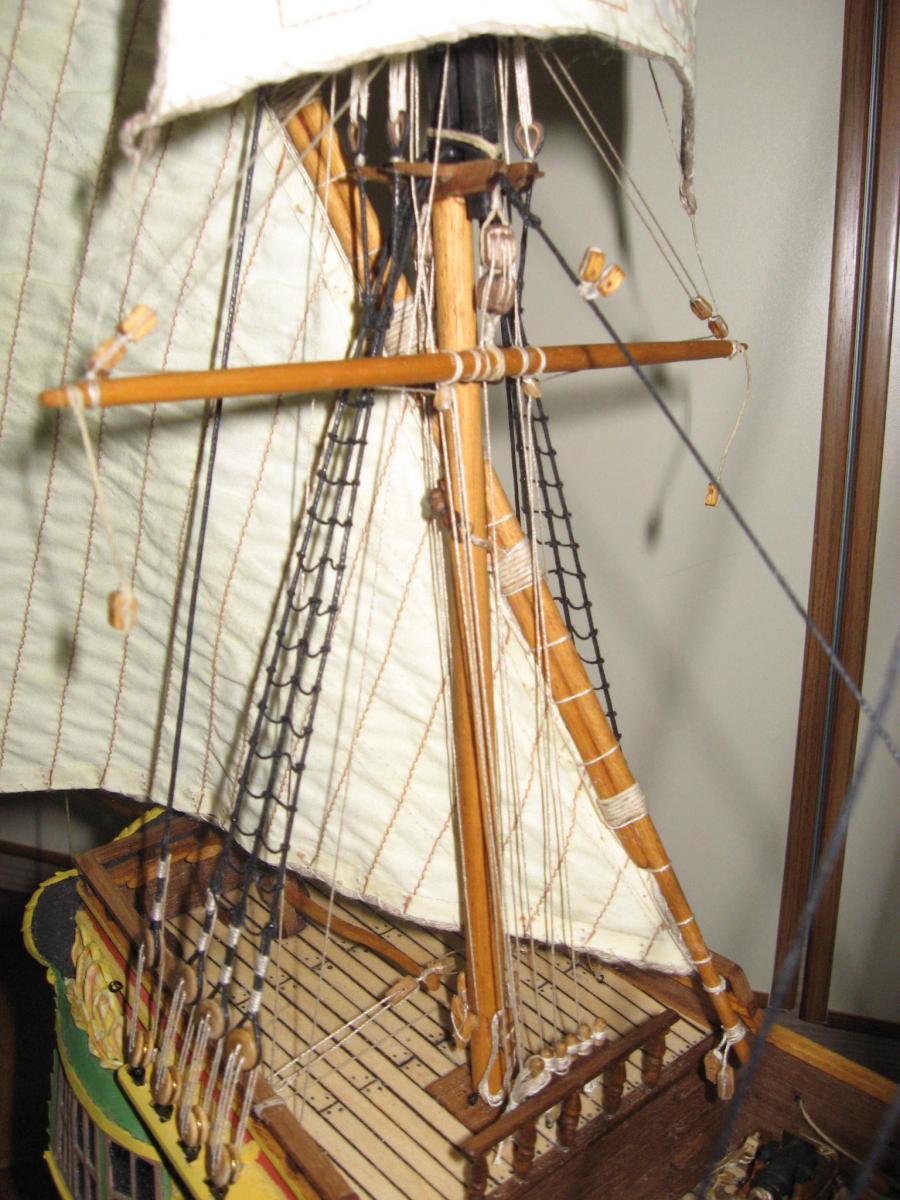
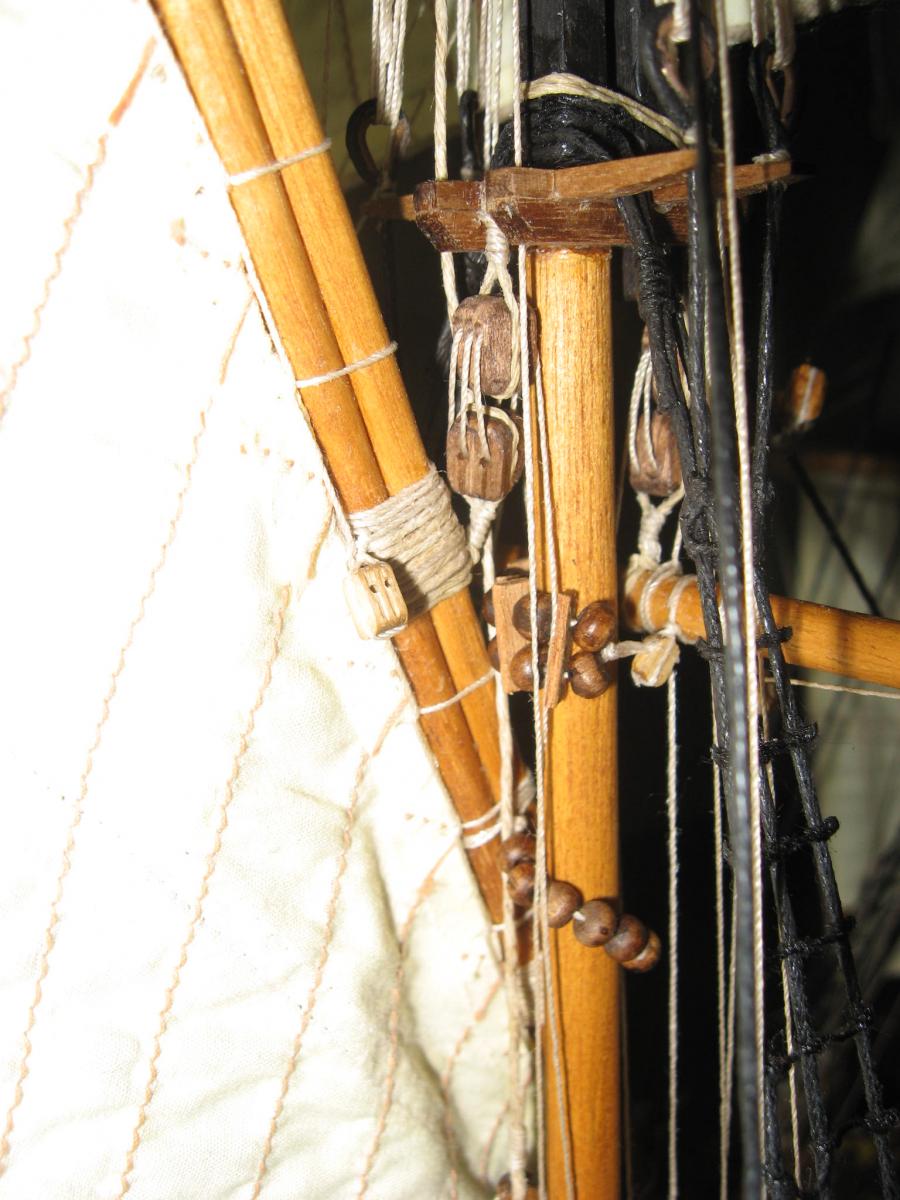
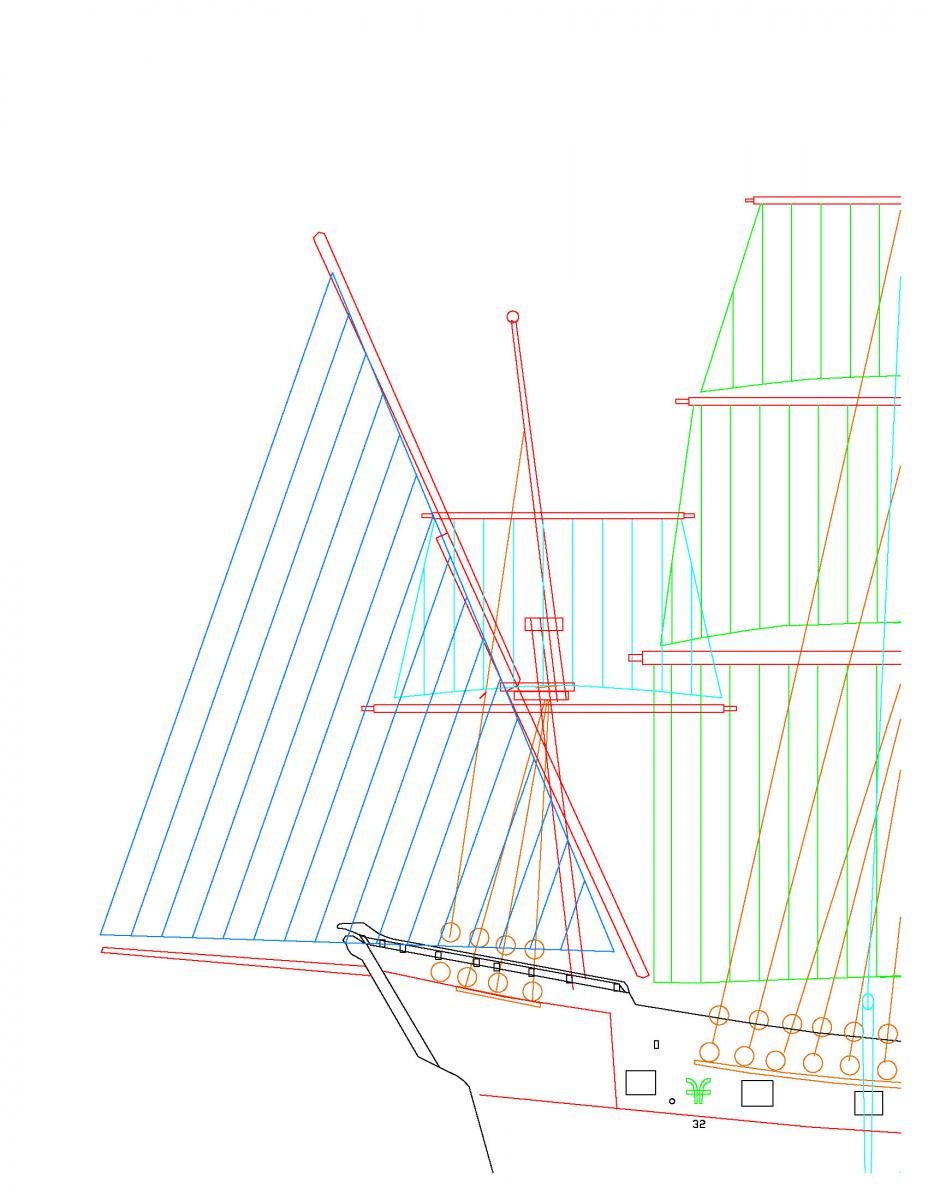
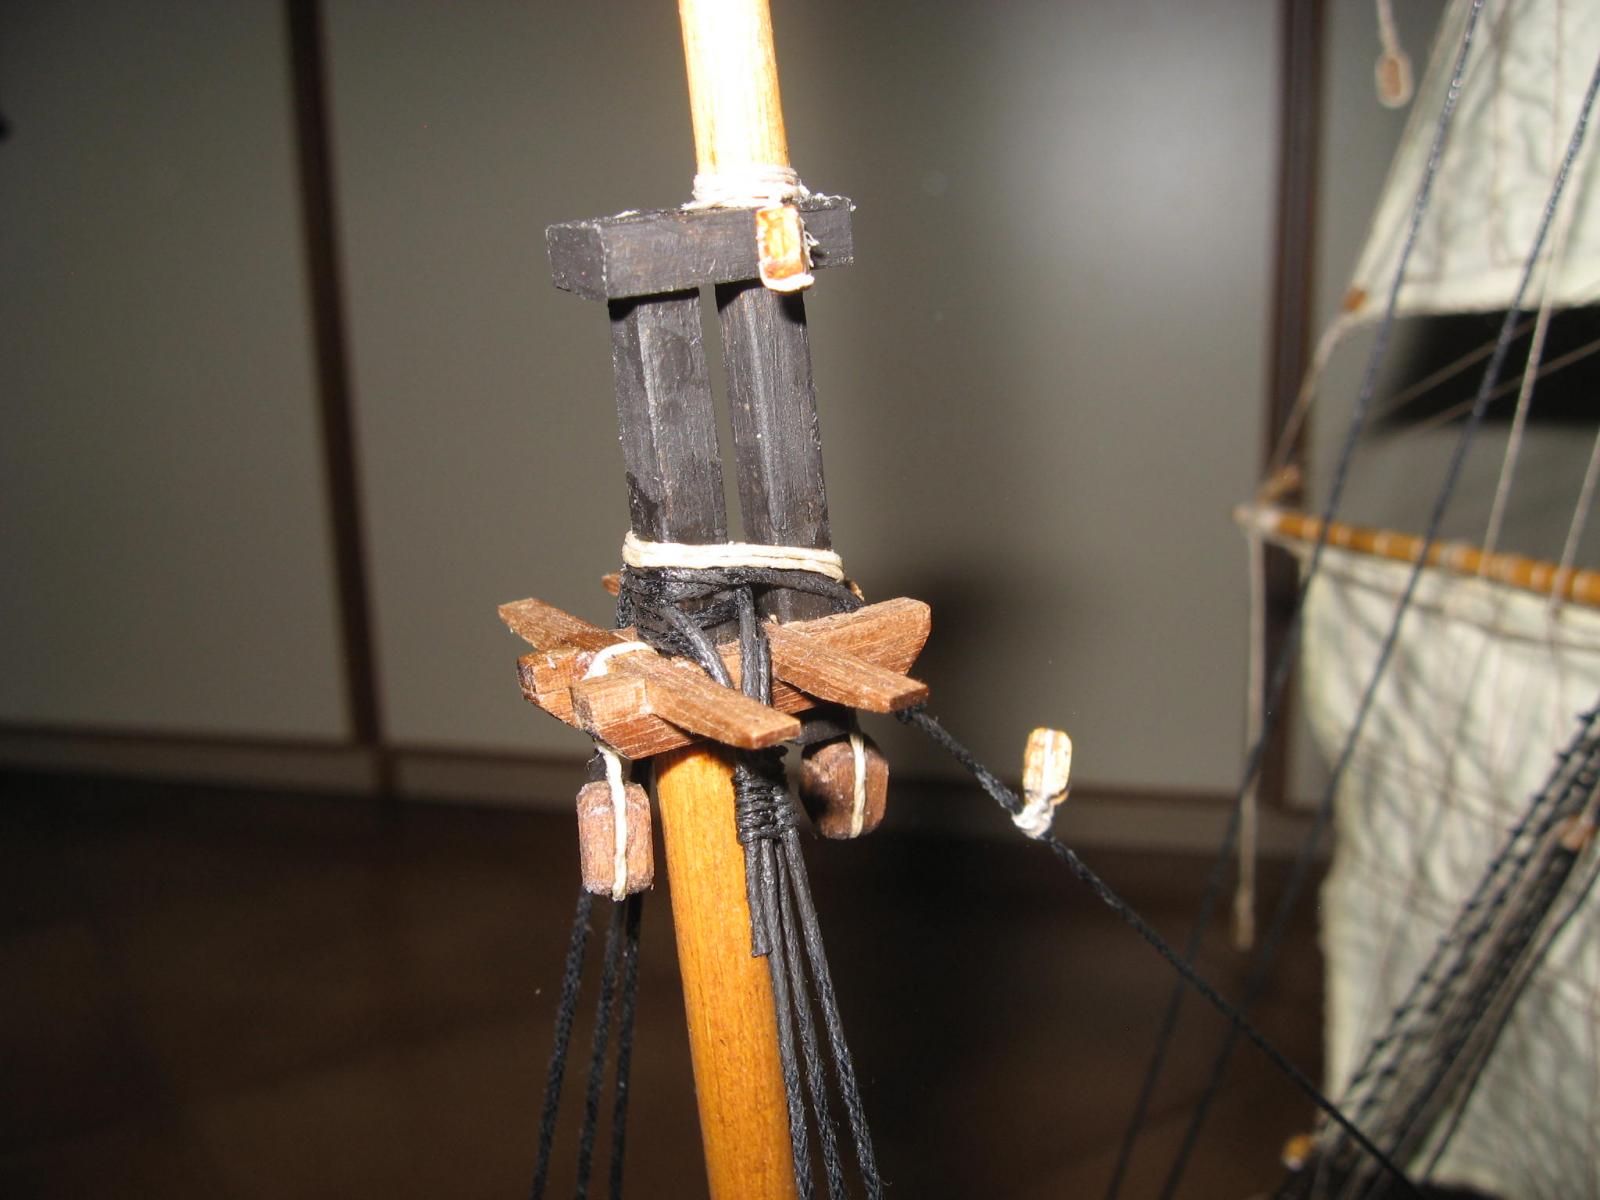
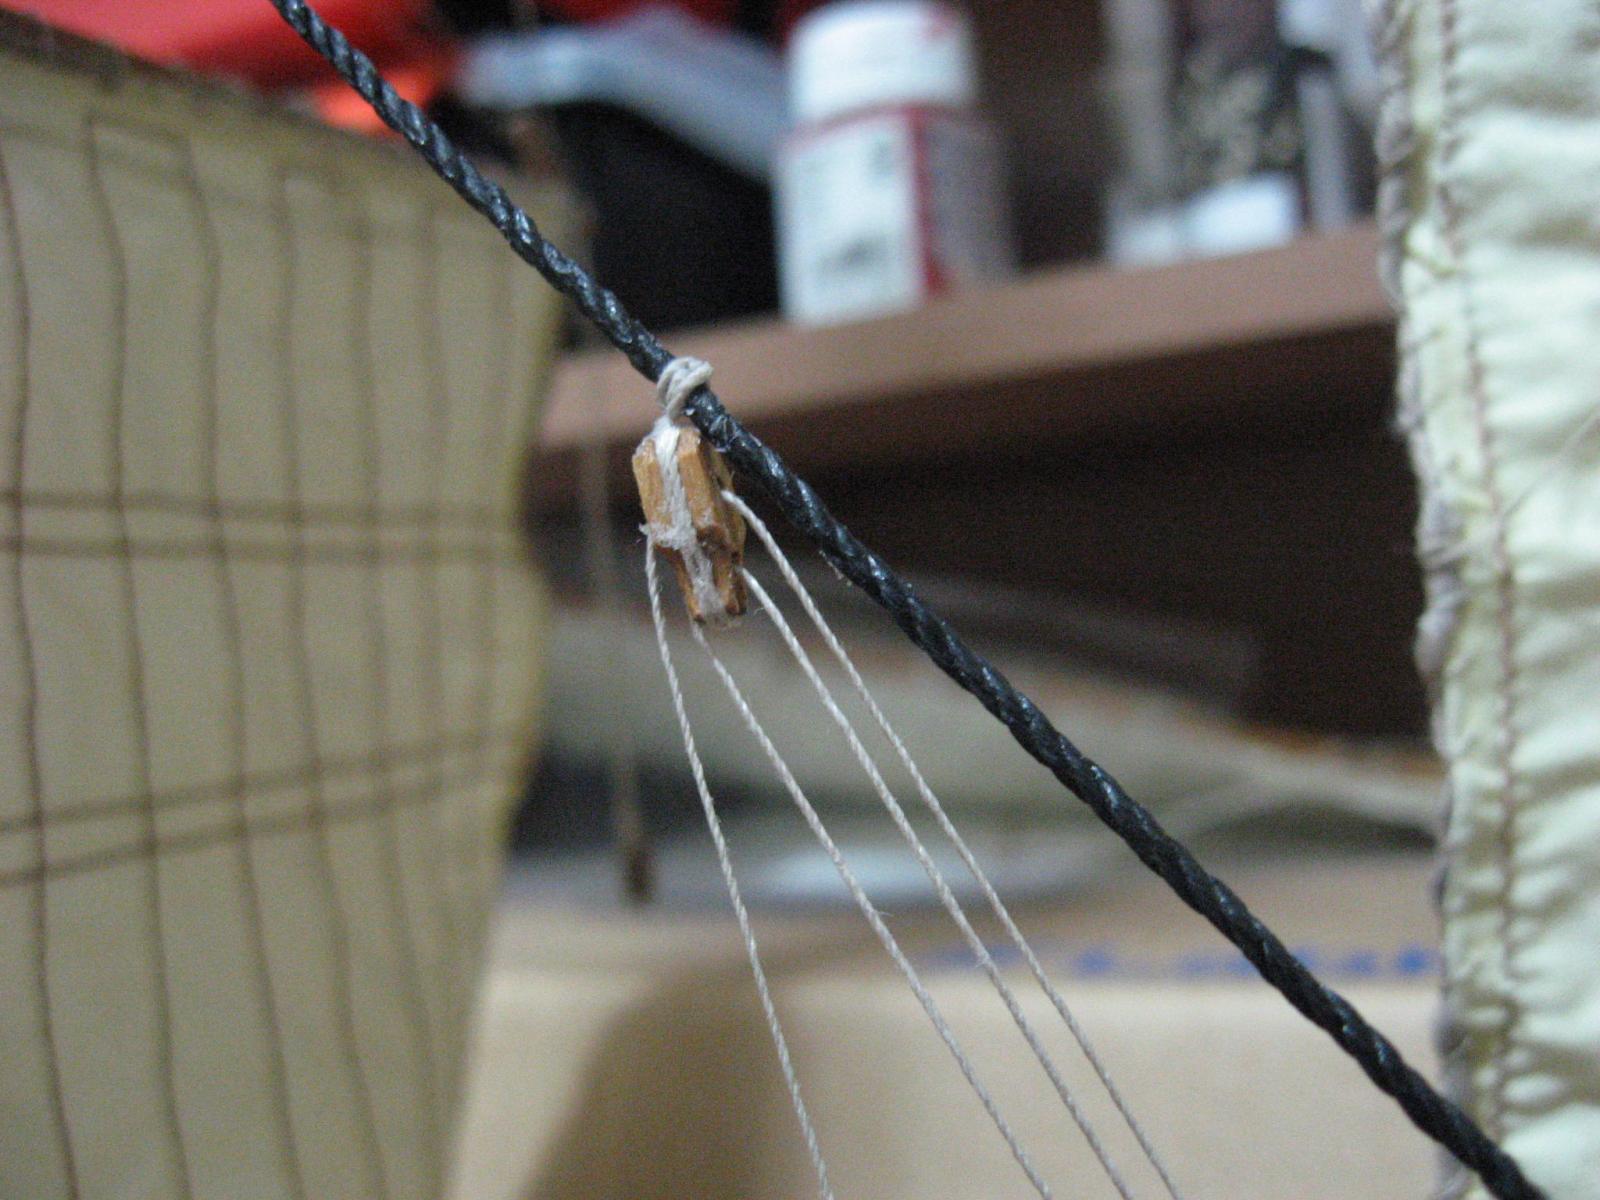
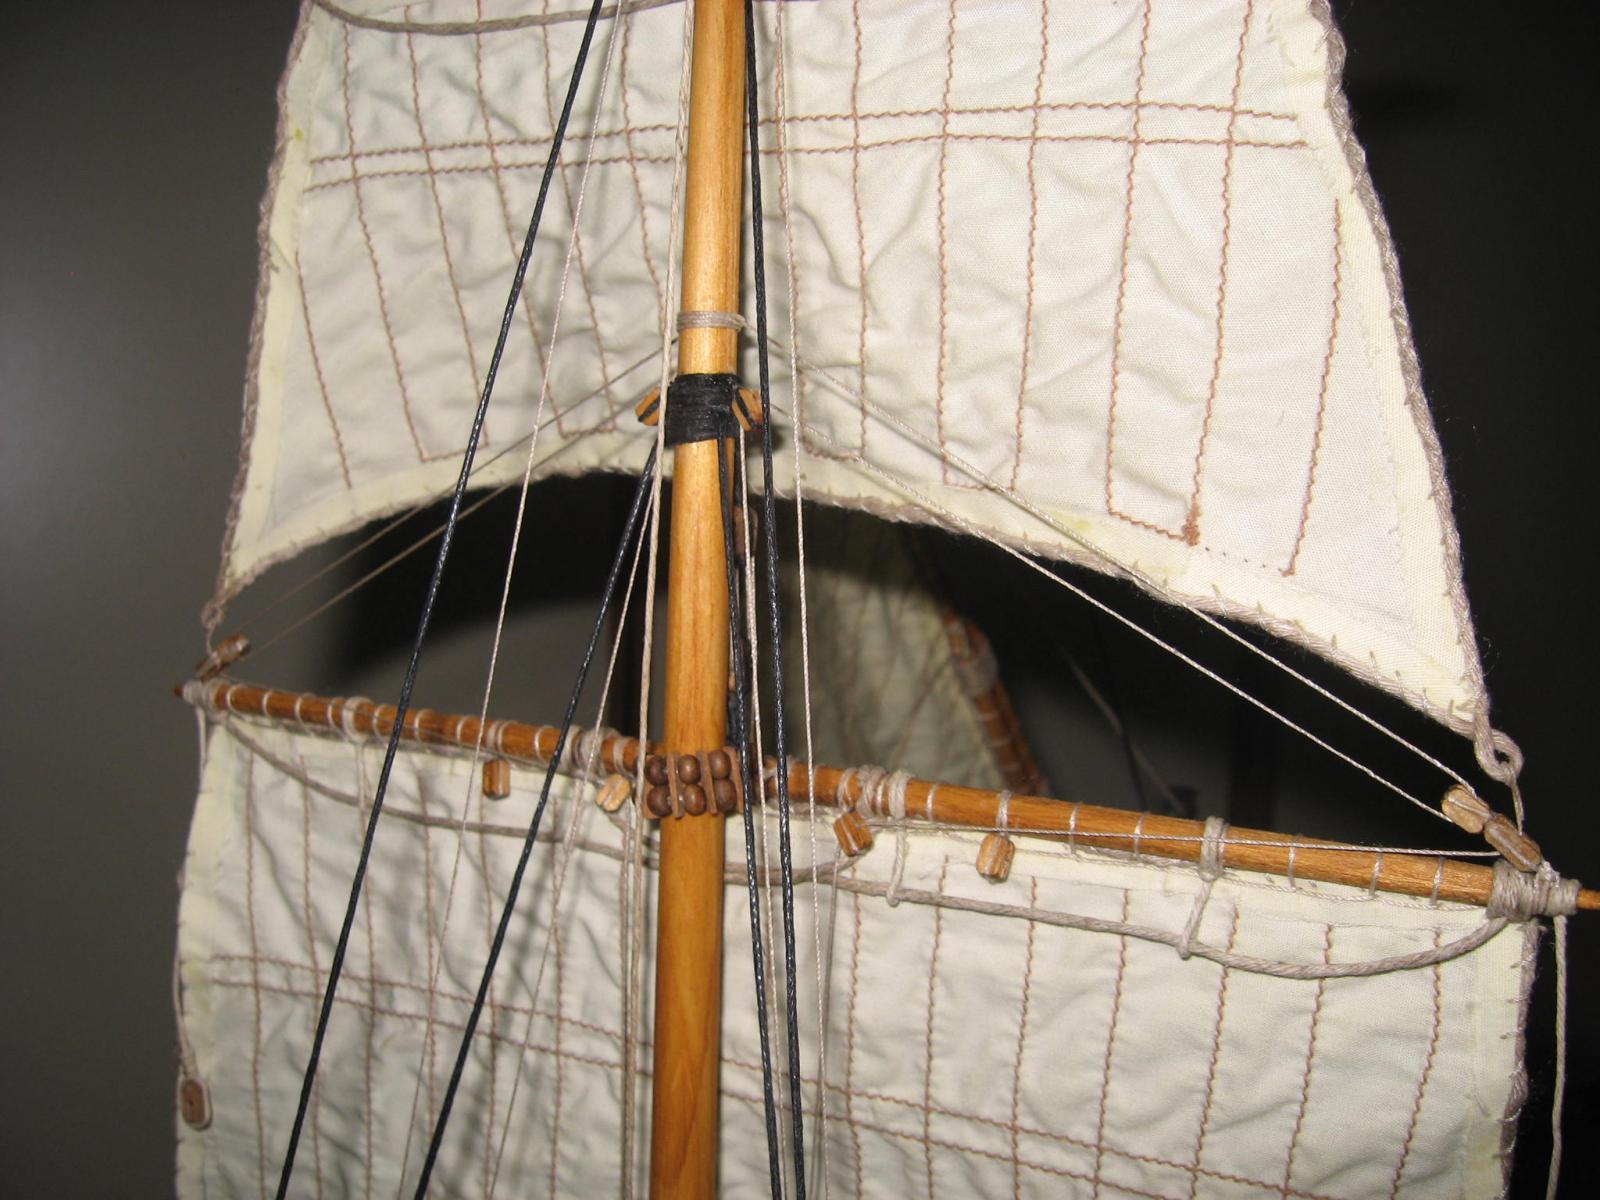
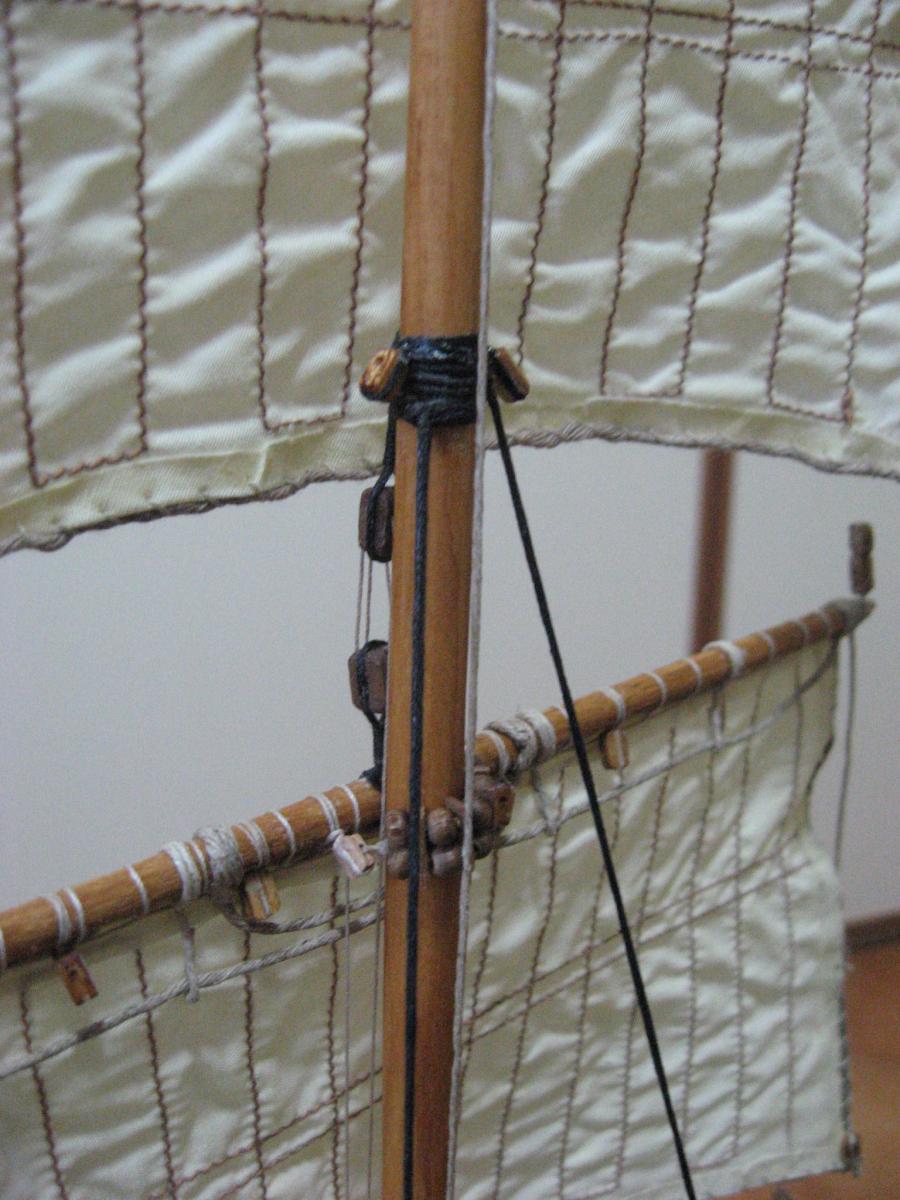
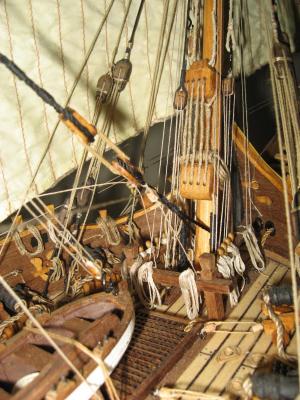
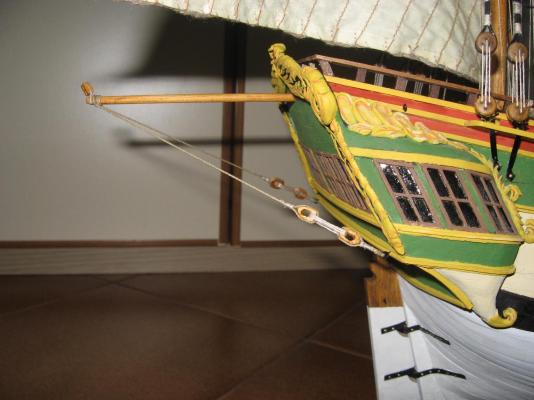
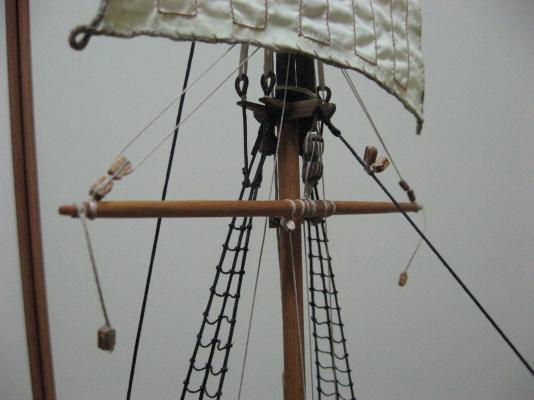
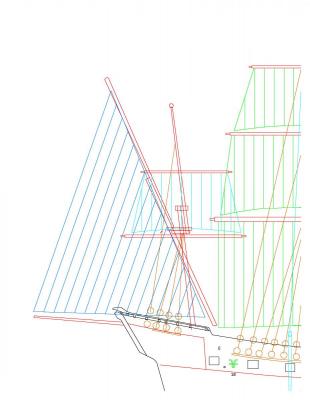
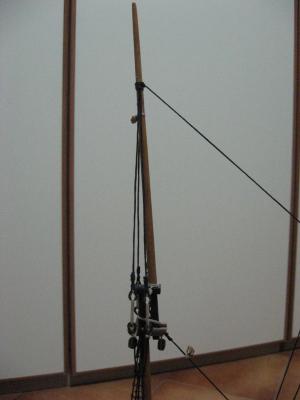
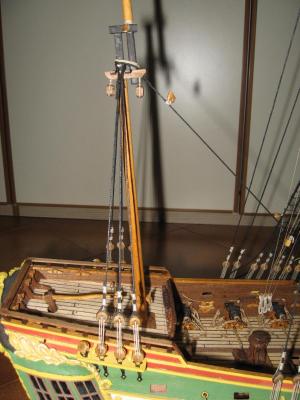
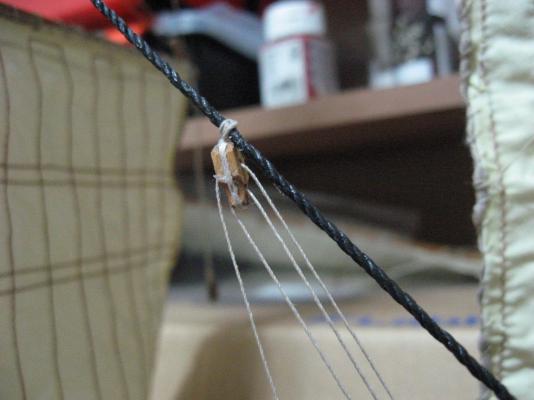
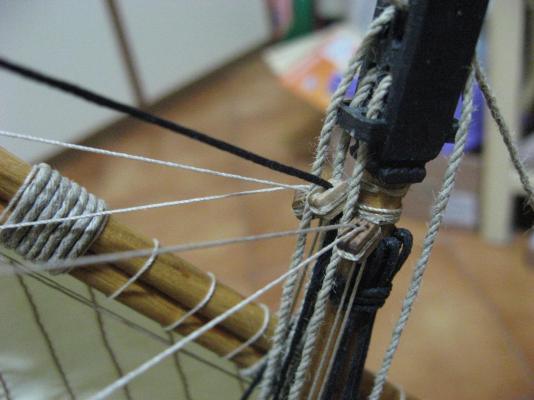
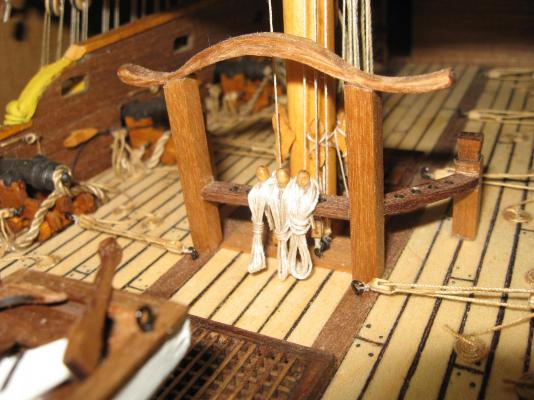
The last one deadeye will be used for the "mizzen-top-mast backstay" (If the term is correct). its role is showed in the image, too. Since this one doesn't interfere with the sails installation, I have no hurry to prepare it.
-
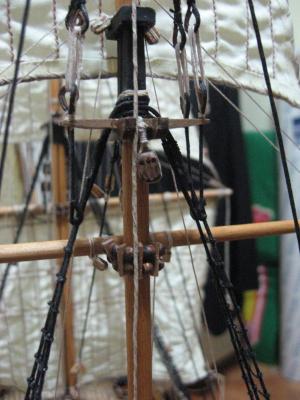
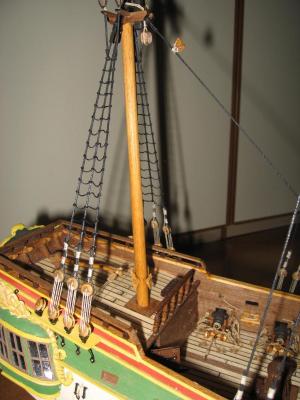
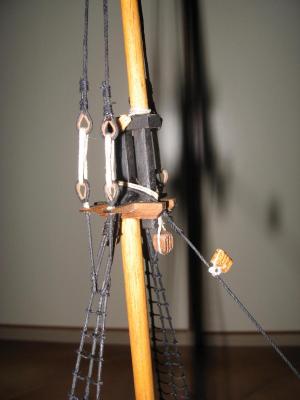
Thank you everybody for the smart and "silent" support! Thank you JesseLee! In these days I am very busy with work and the progress on the model is proceeding very slowly (well, just like observing a glacier movement!! ) I almost completed the standing rigging of the mizzen mast. After many afterthoughts, I finally decided to don't use the deadeyes for the mizzen top-mast shrouds. After checking contemporary models, paintings, drawings I decided that they were not used on these small ships, in that position of the mast and in that part of the Mediterranean basin. I used instead the heart type ones. Since I added the mizzen top-mast stay, now I can add the blocks to it, too. I finally decided to not add the rope ladder that almost reach the top of the main mast. The presence of the ladder will add more mess in an already messy deck... In addition, it must be considered that I am too lazy to make it, too...

- 190 replies
-
- 12
-
-
Thank you Patrick and Carl for your agreement! You are my "loyal supporters" in this smart adventure! Considering the few time that I will have in near future, I think that there are still various weeks before completing the model. The flags will be printed on paper, and the final result will be like the flags I made for the Halifax and Endeavour, both made in the same way (printed and painted): http://modelshipworld.com/index.php/gallery/image/8298-hal-5/ http://modelshipworld.com/index.php/gallery/image/1933-img-9090-7/ I will darken a bit the colours of the flags, otherwise too "flashy and new".
-
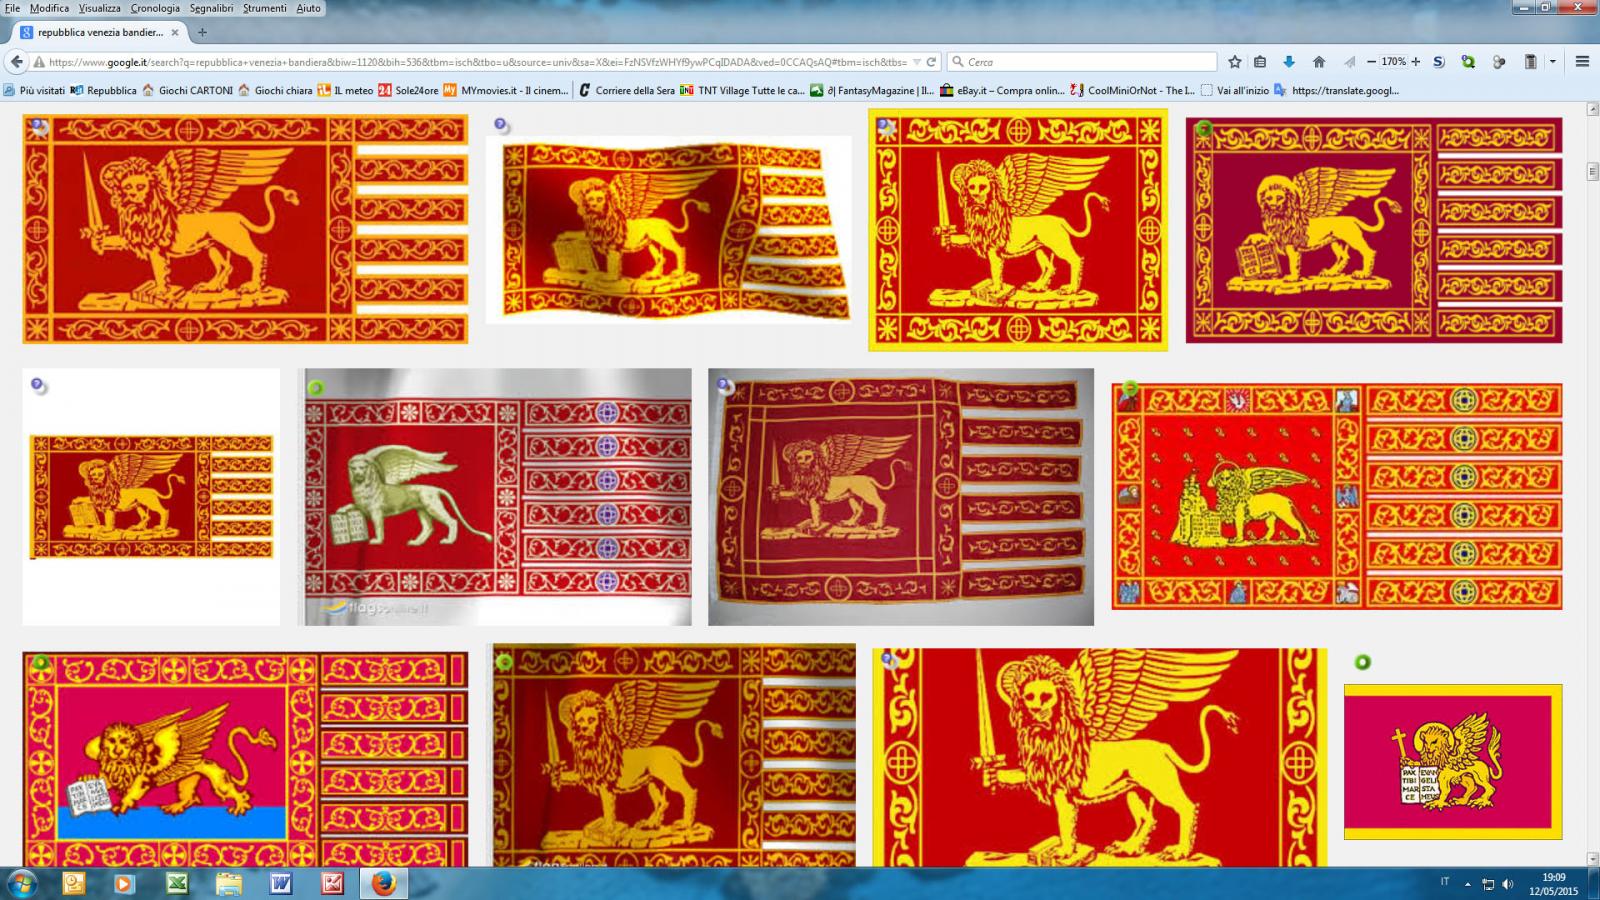
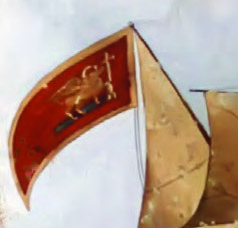
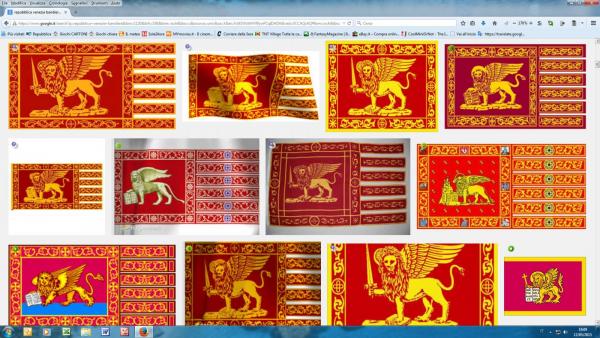
I am procceding with the rigging... The foremast is complete now. I installed the second anchor too... I started to install the blocks related to the mizzen mast sails. this weekend I will focus on the ratlines of the mizzen mast. In the meanwhile I prepared the drawings of the flags. I seached on the web and I found plenty of digital images of the Venice Republic flags...unfortunately only one was the needed one! In the photo take from the browser can be find it in the lower right corner. This is the flag that belong to the Venetian Navy, the so called "San Marco" by the sailors. The original one should have a bigger cross, but I am too lazy to modify it. I prepared a banner too, and a bigger and longer one for the lateen sail of the foremast will be done. The flags will be later printed, glued in the right shape, painted over to give them a more "antique" appearance. But before that, I must proceed further with the mizzen mast section. In the next two week I will be very busy with work, so very few update will be done.


-
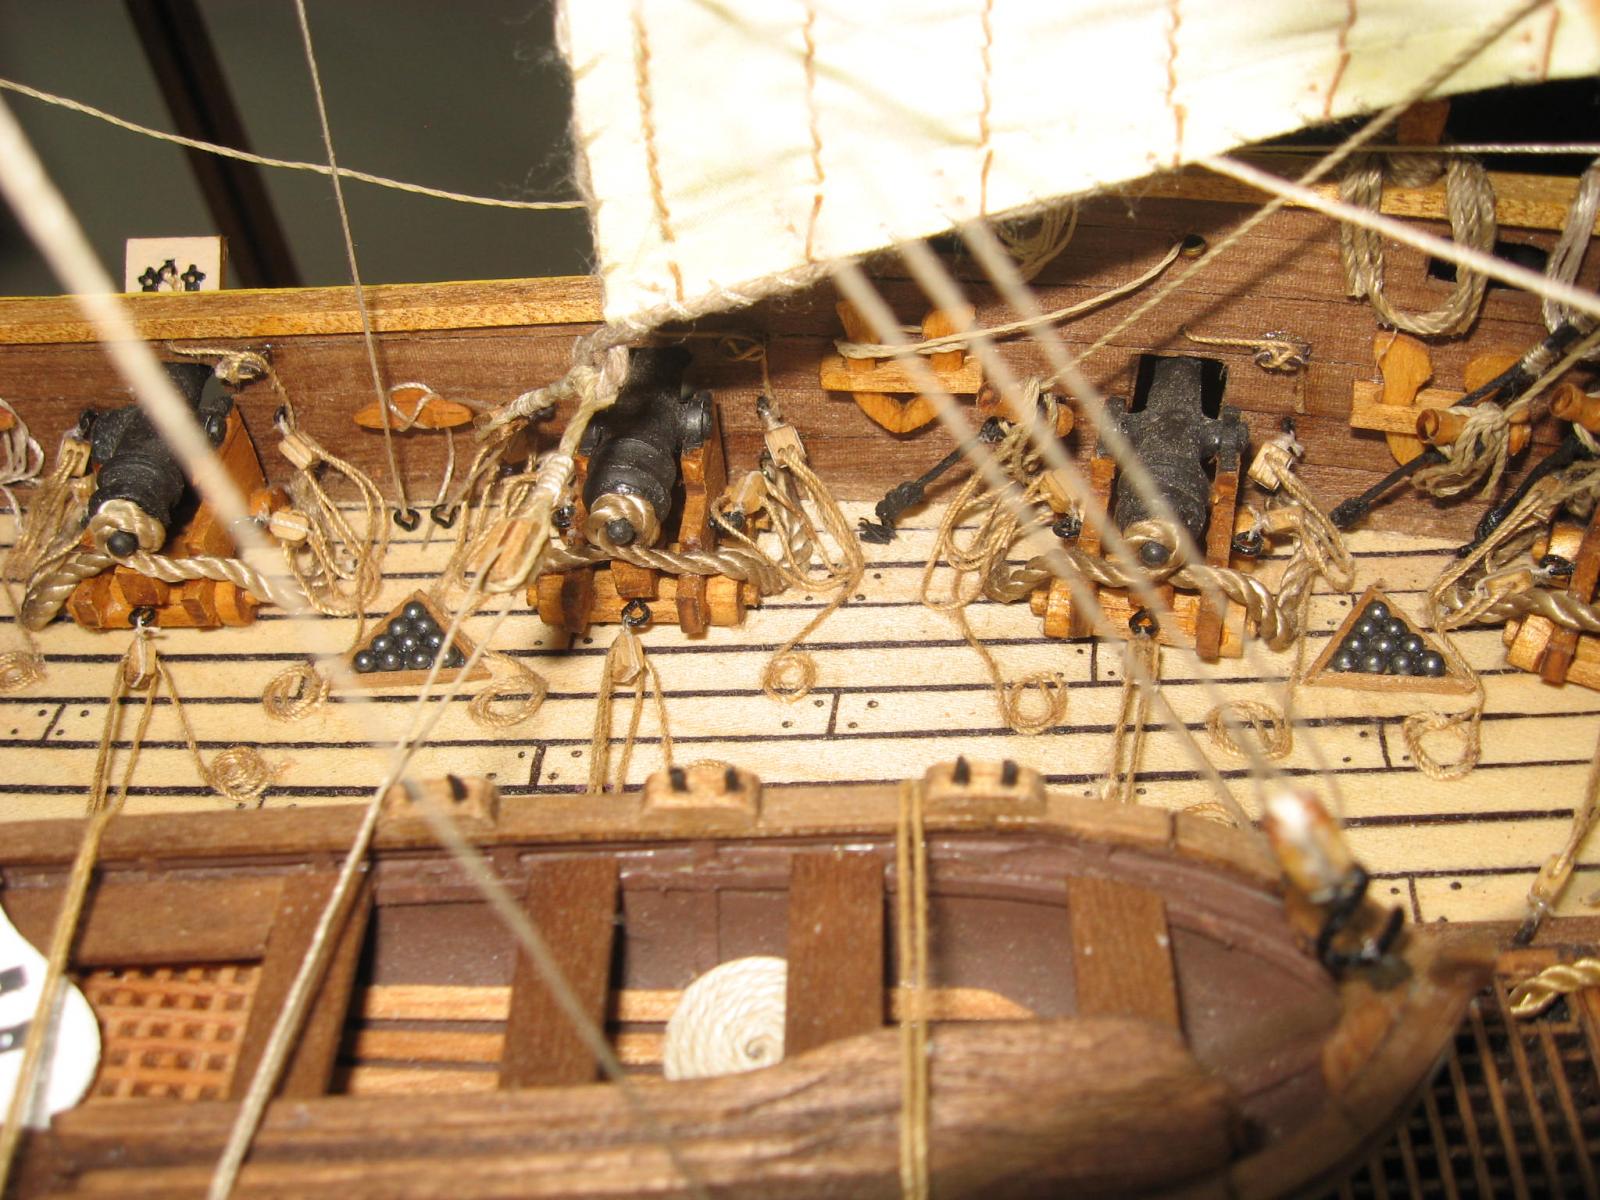
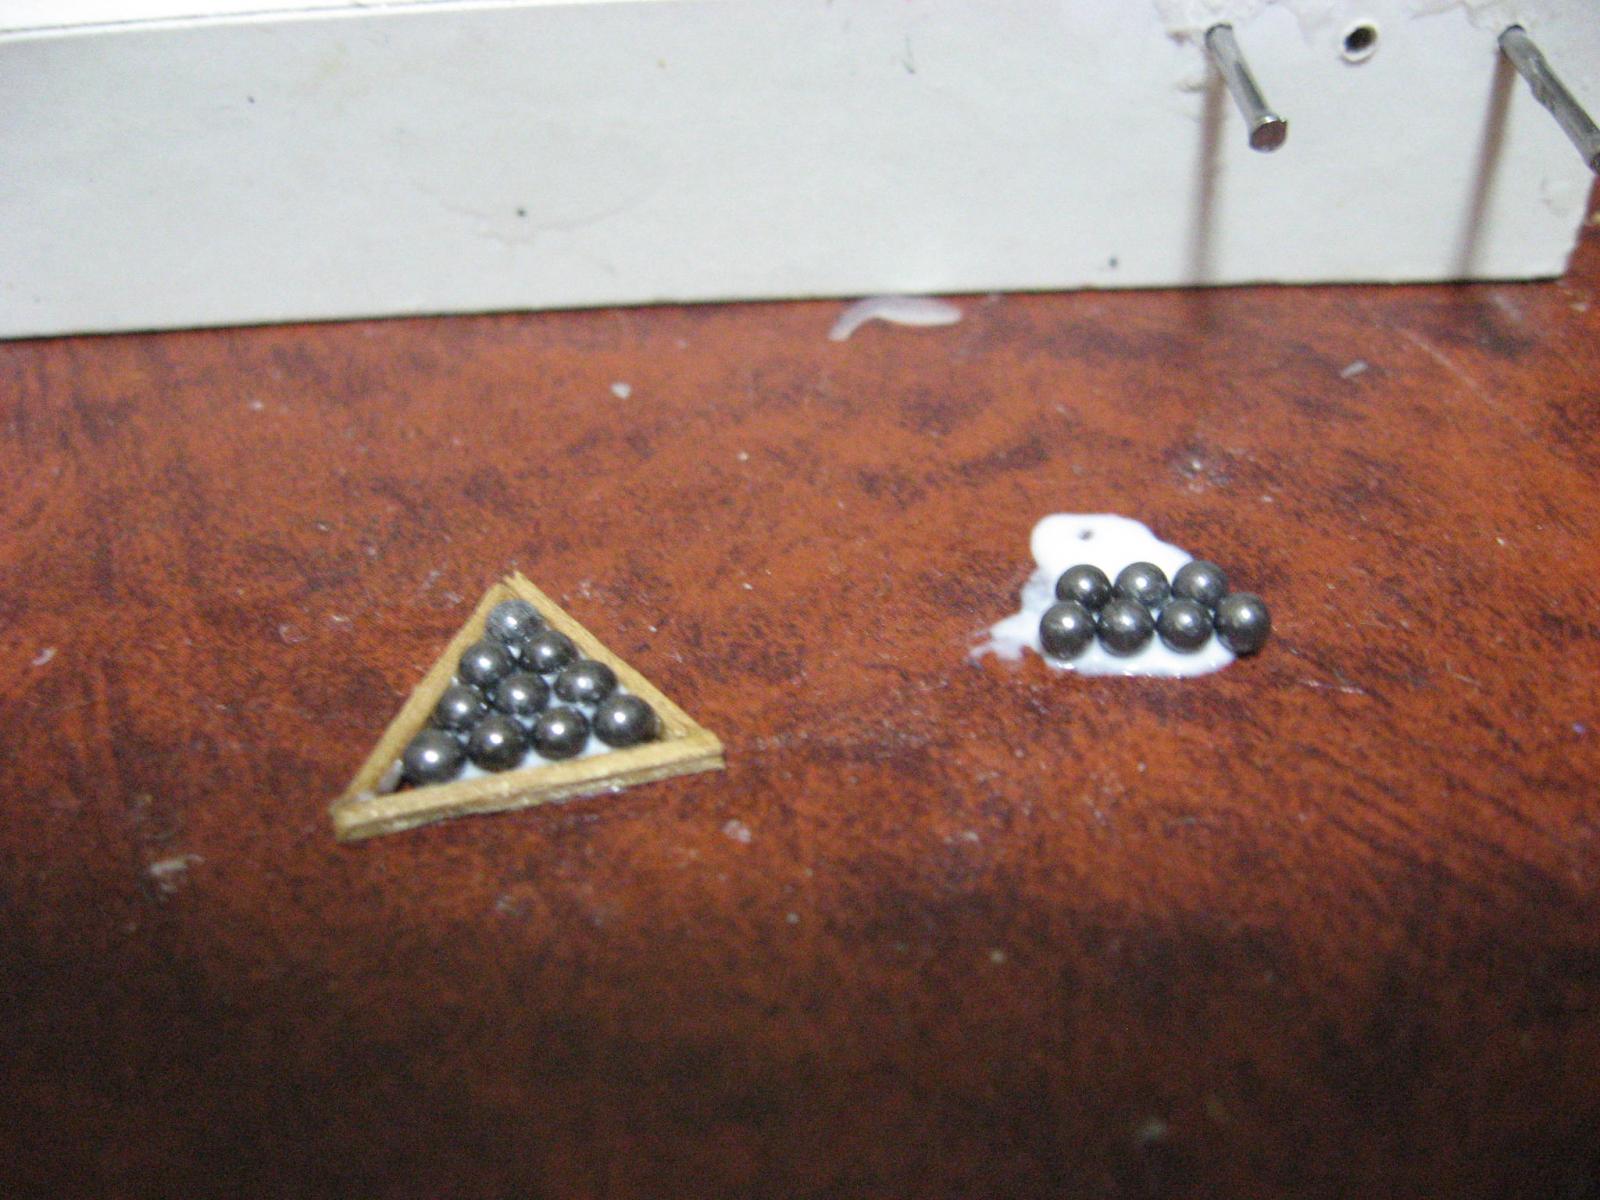
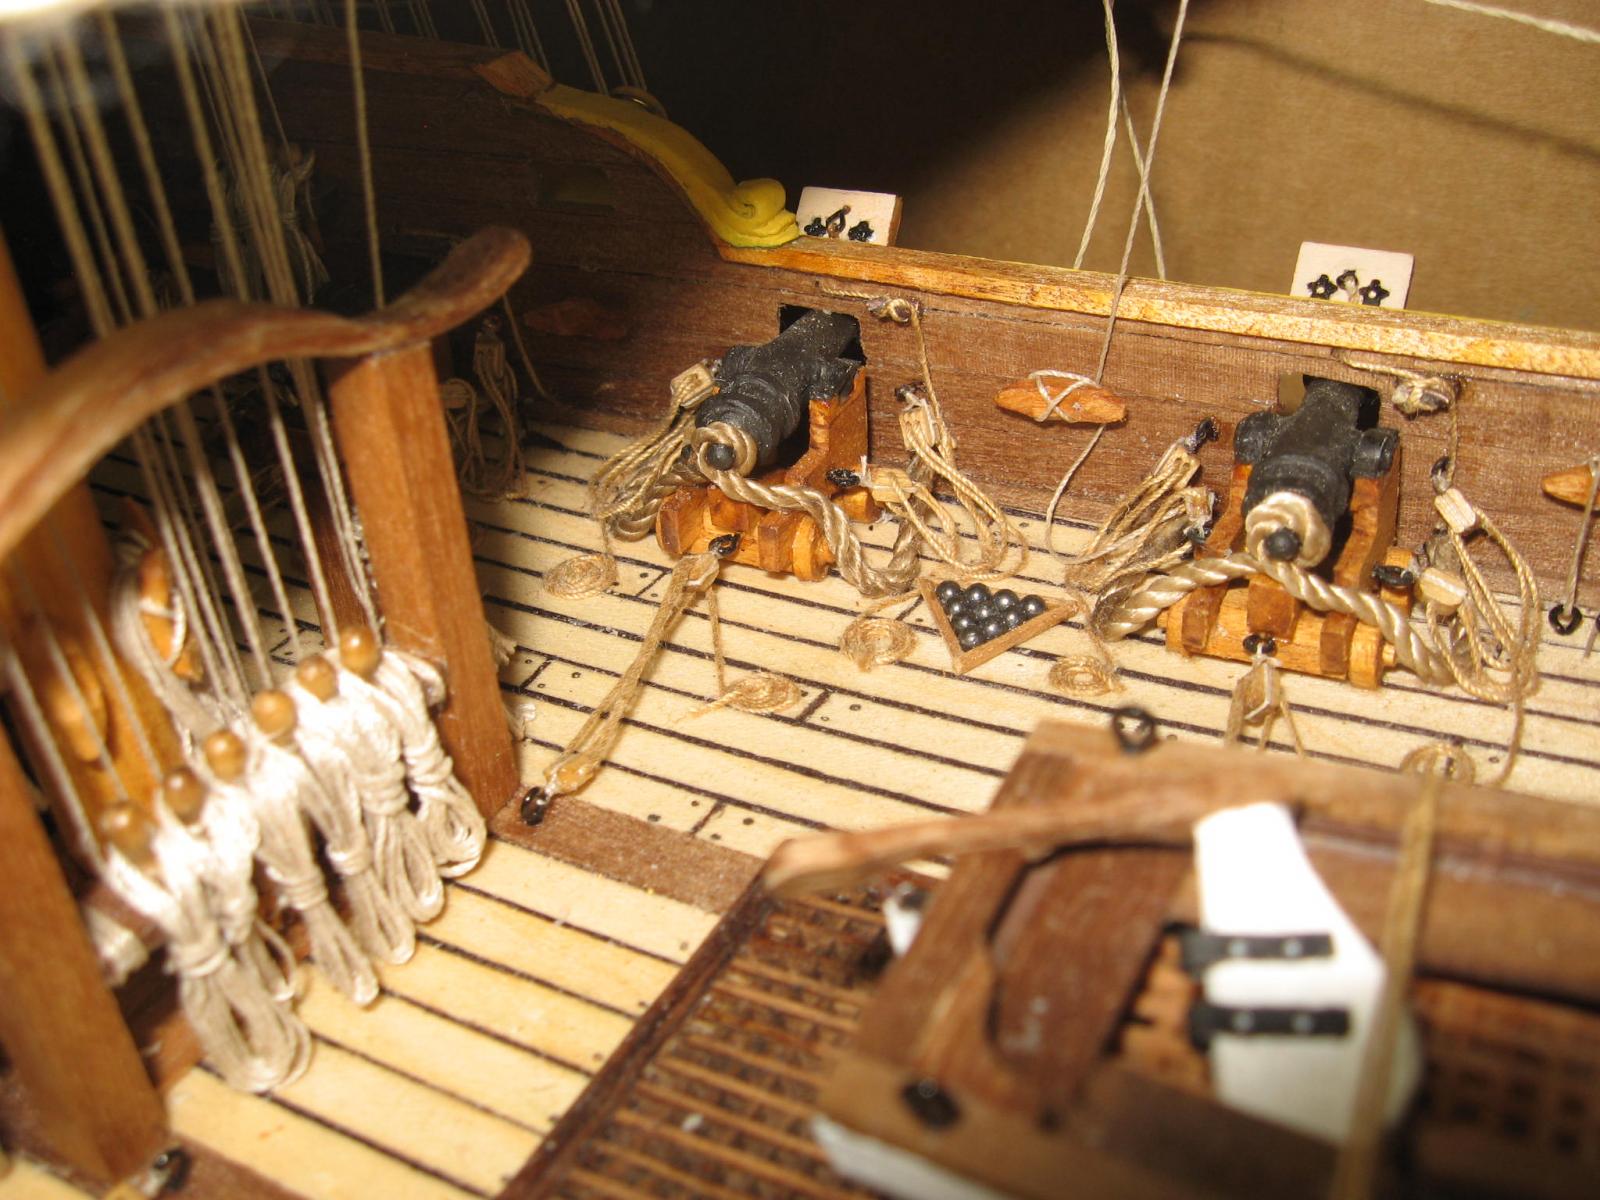
NOT on my ship! they are glued in place....forever! I carefully avoided the more famous pyramid of balls, which probably was used mainly in castles/fortress and rarely or never on ships...
-
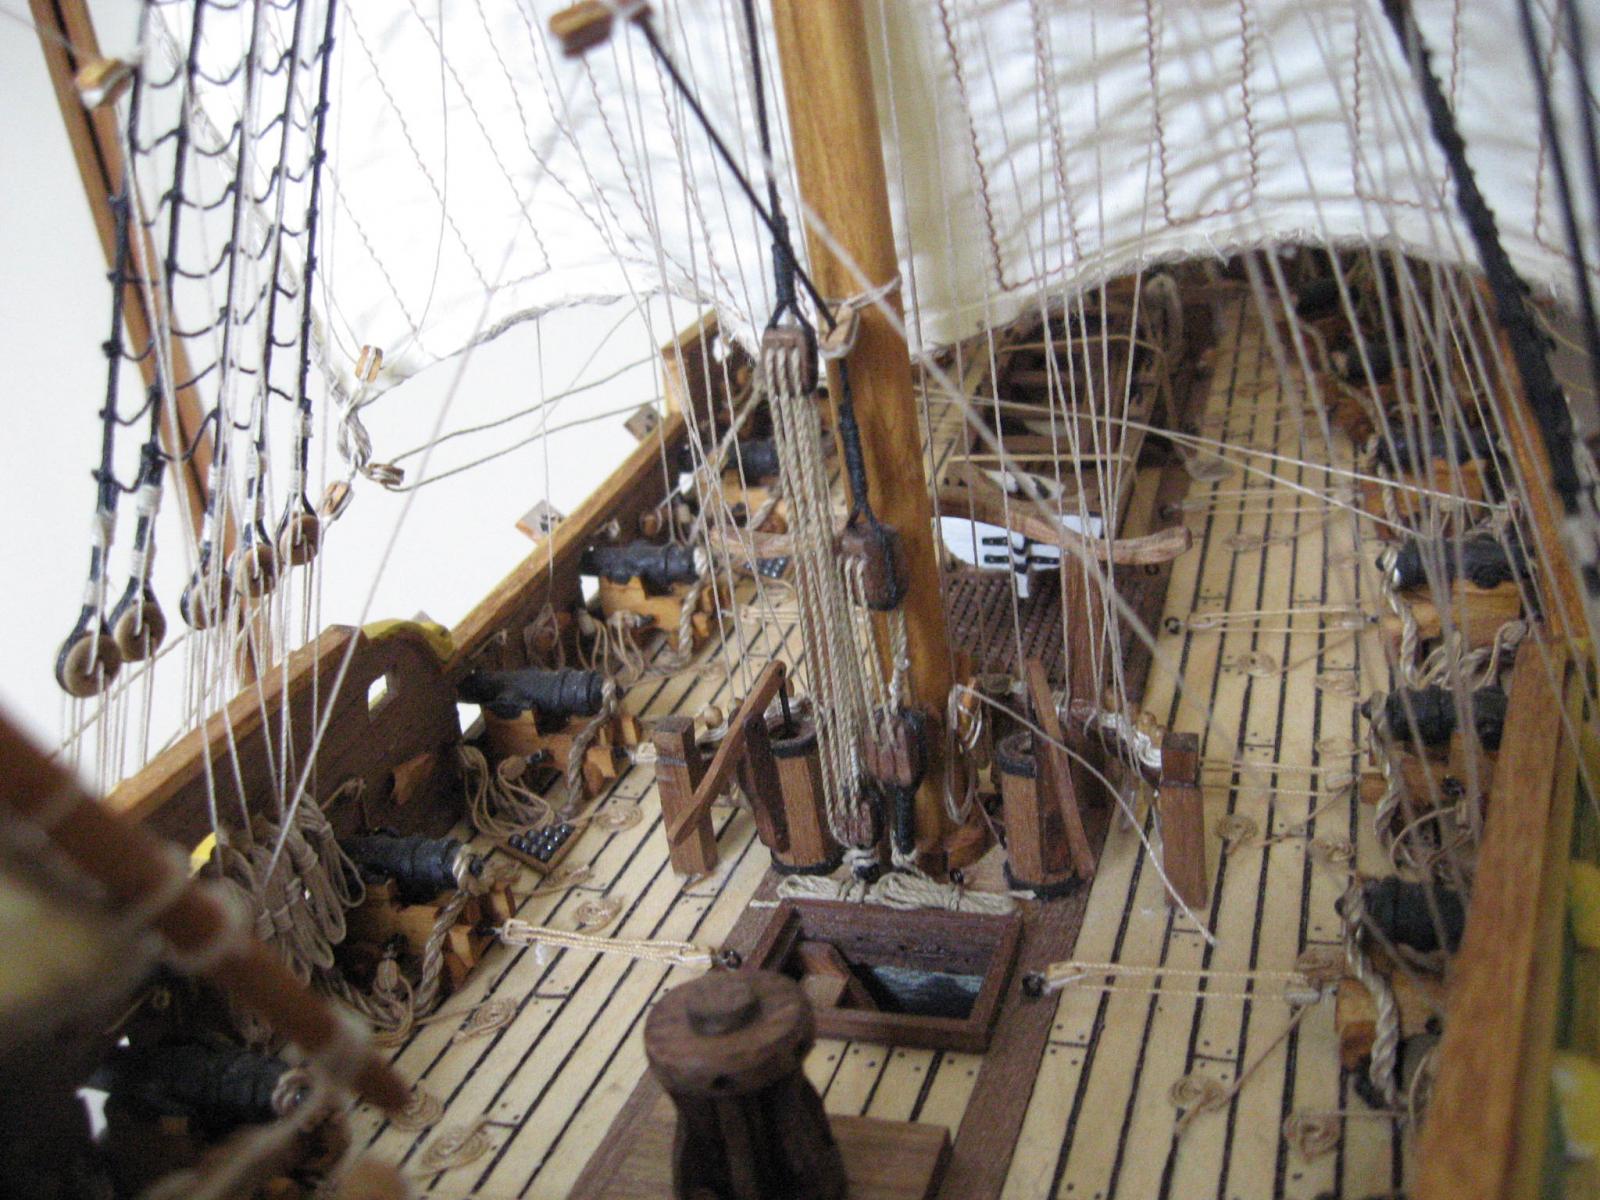
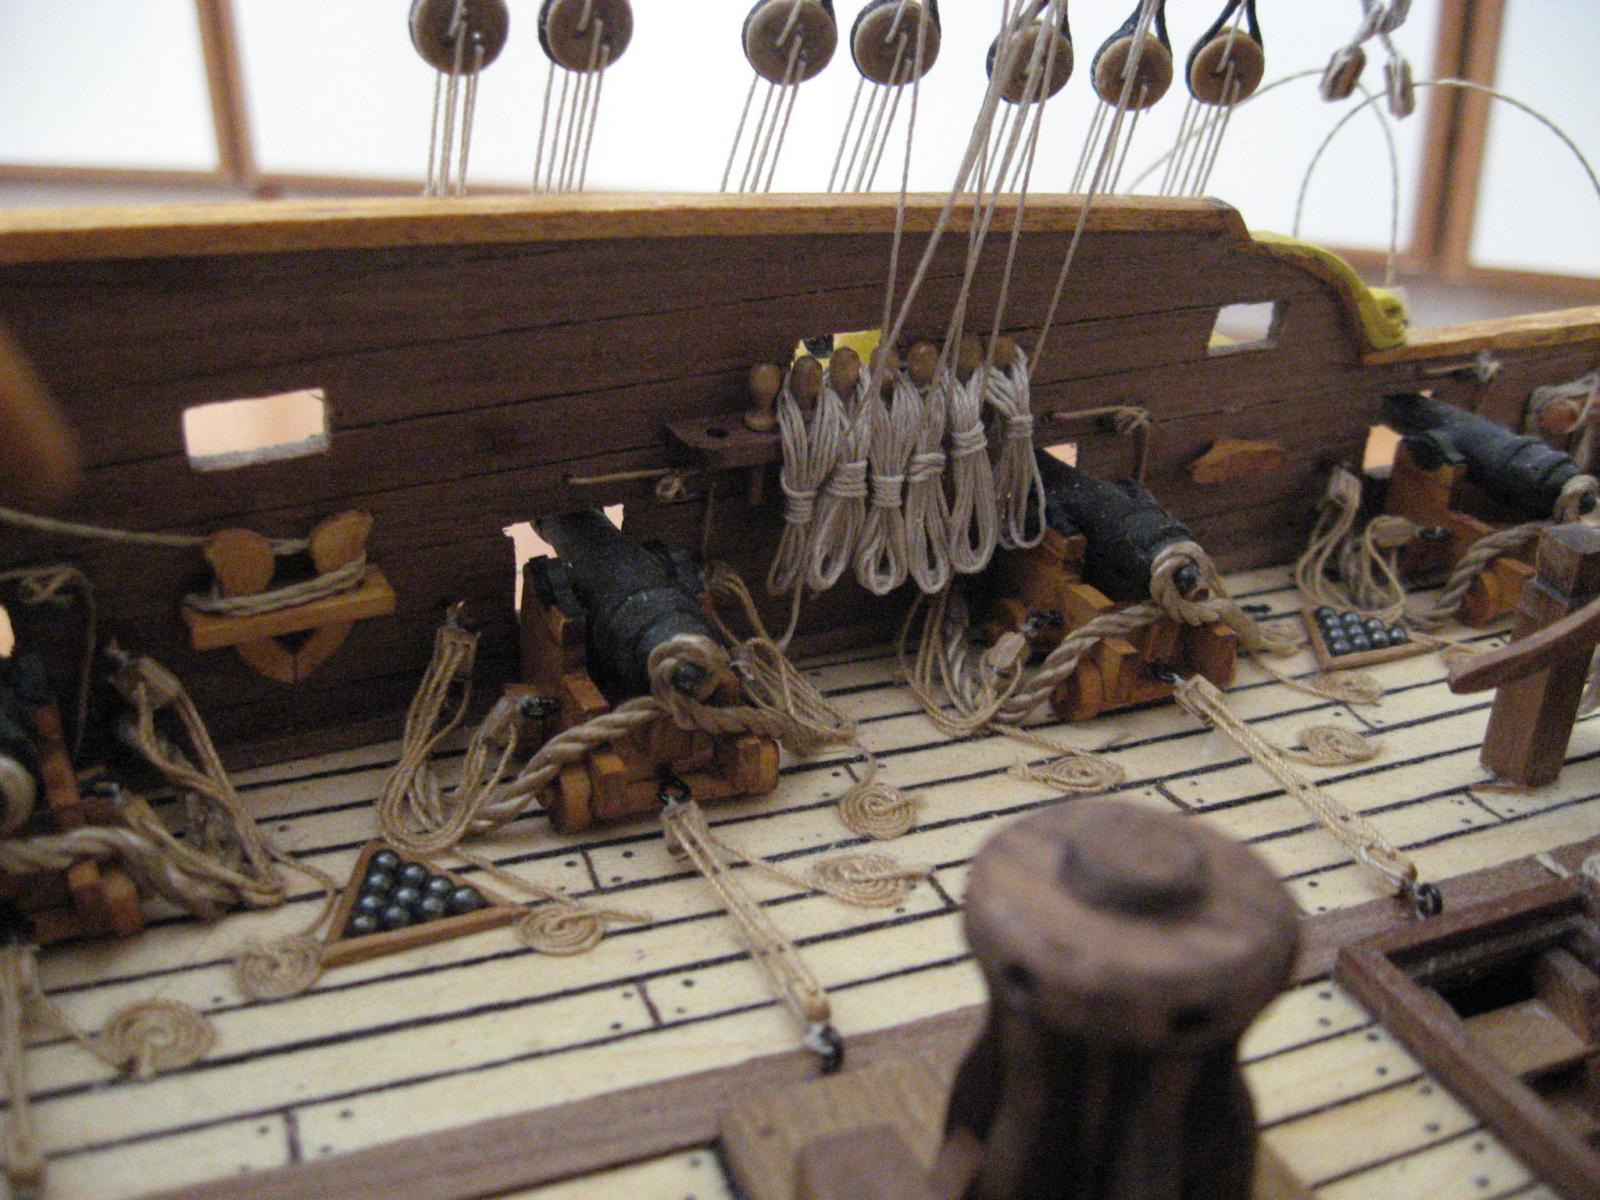
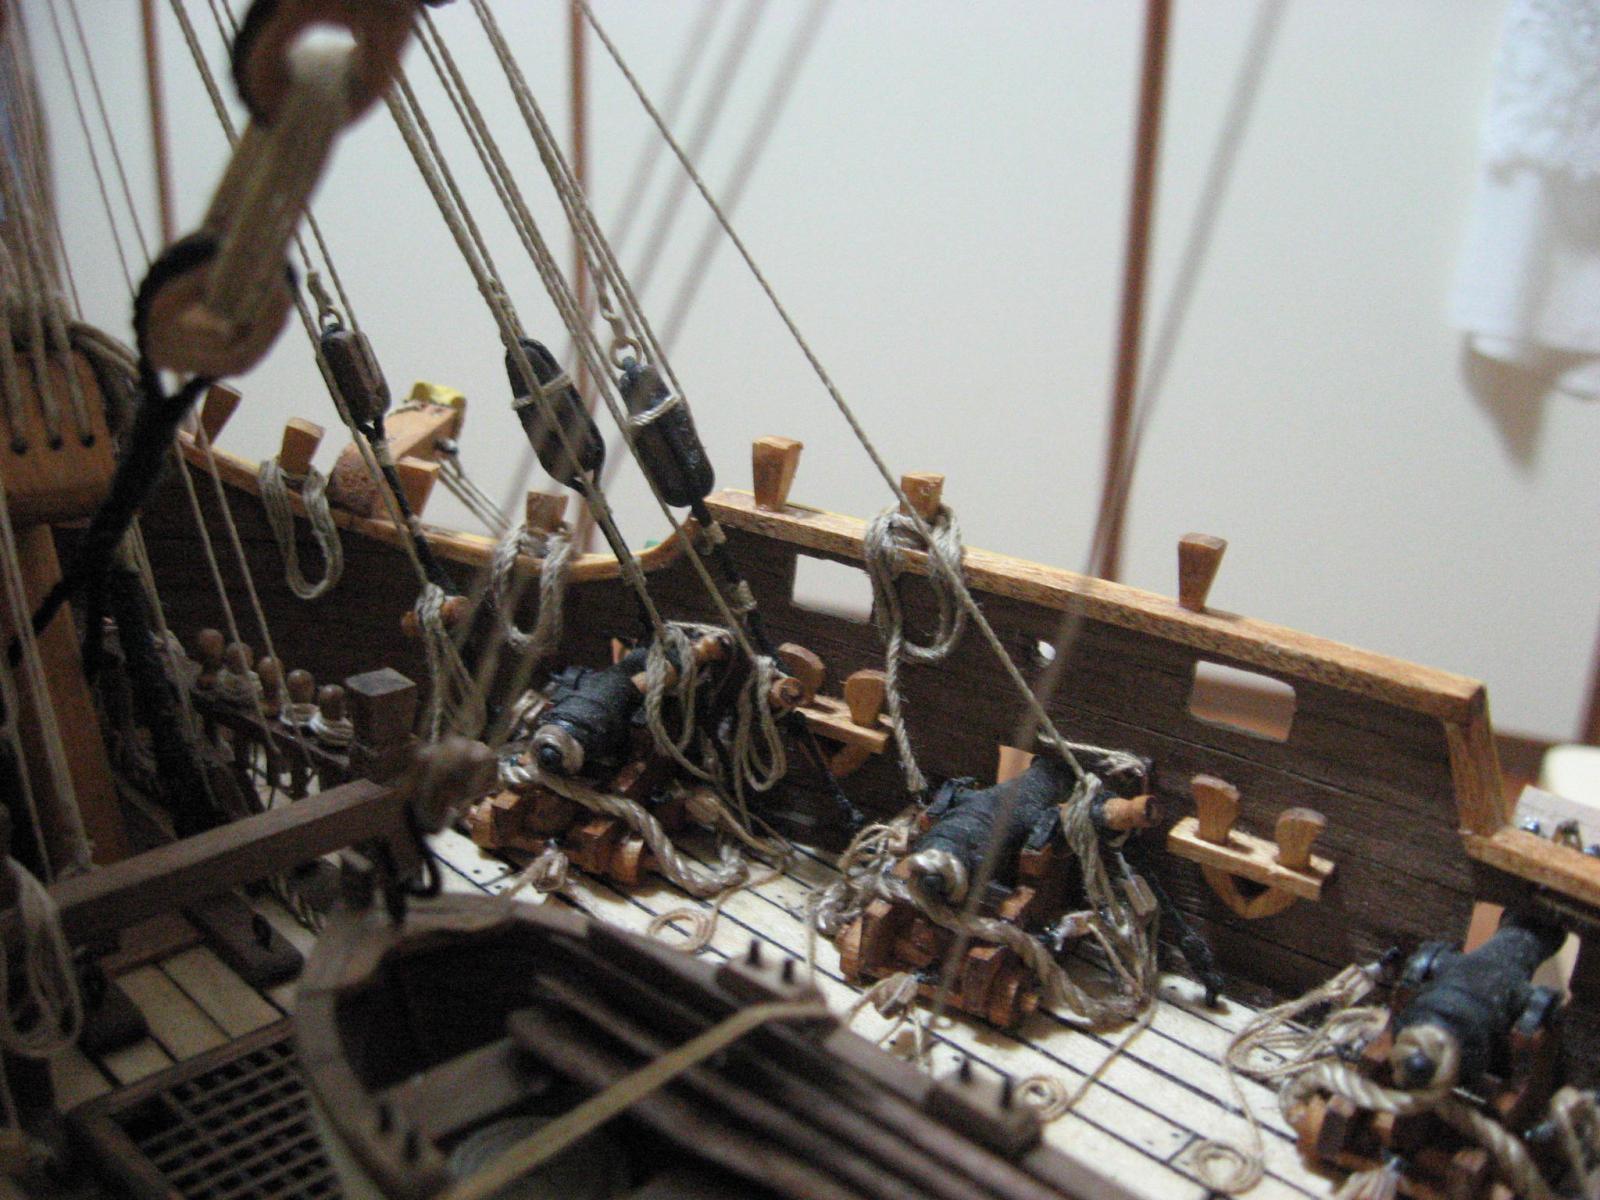
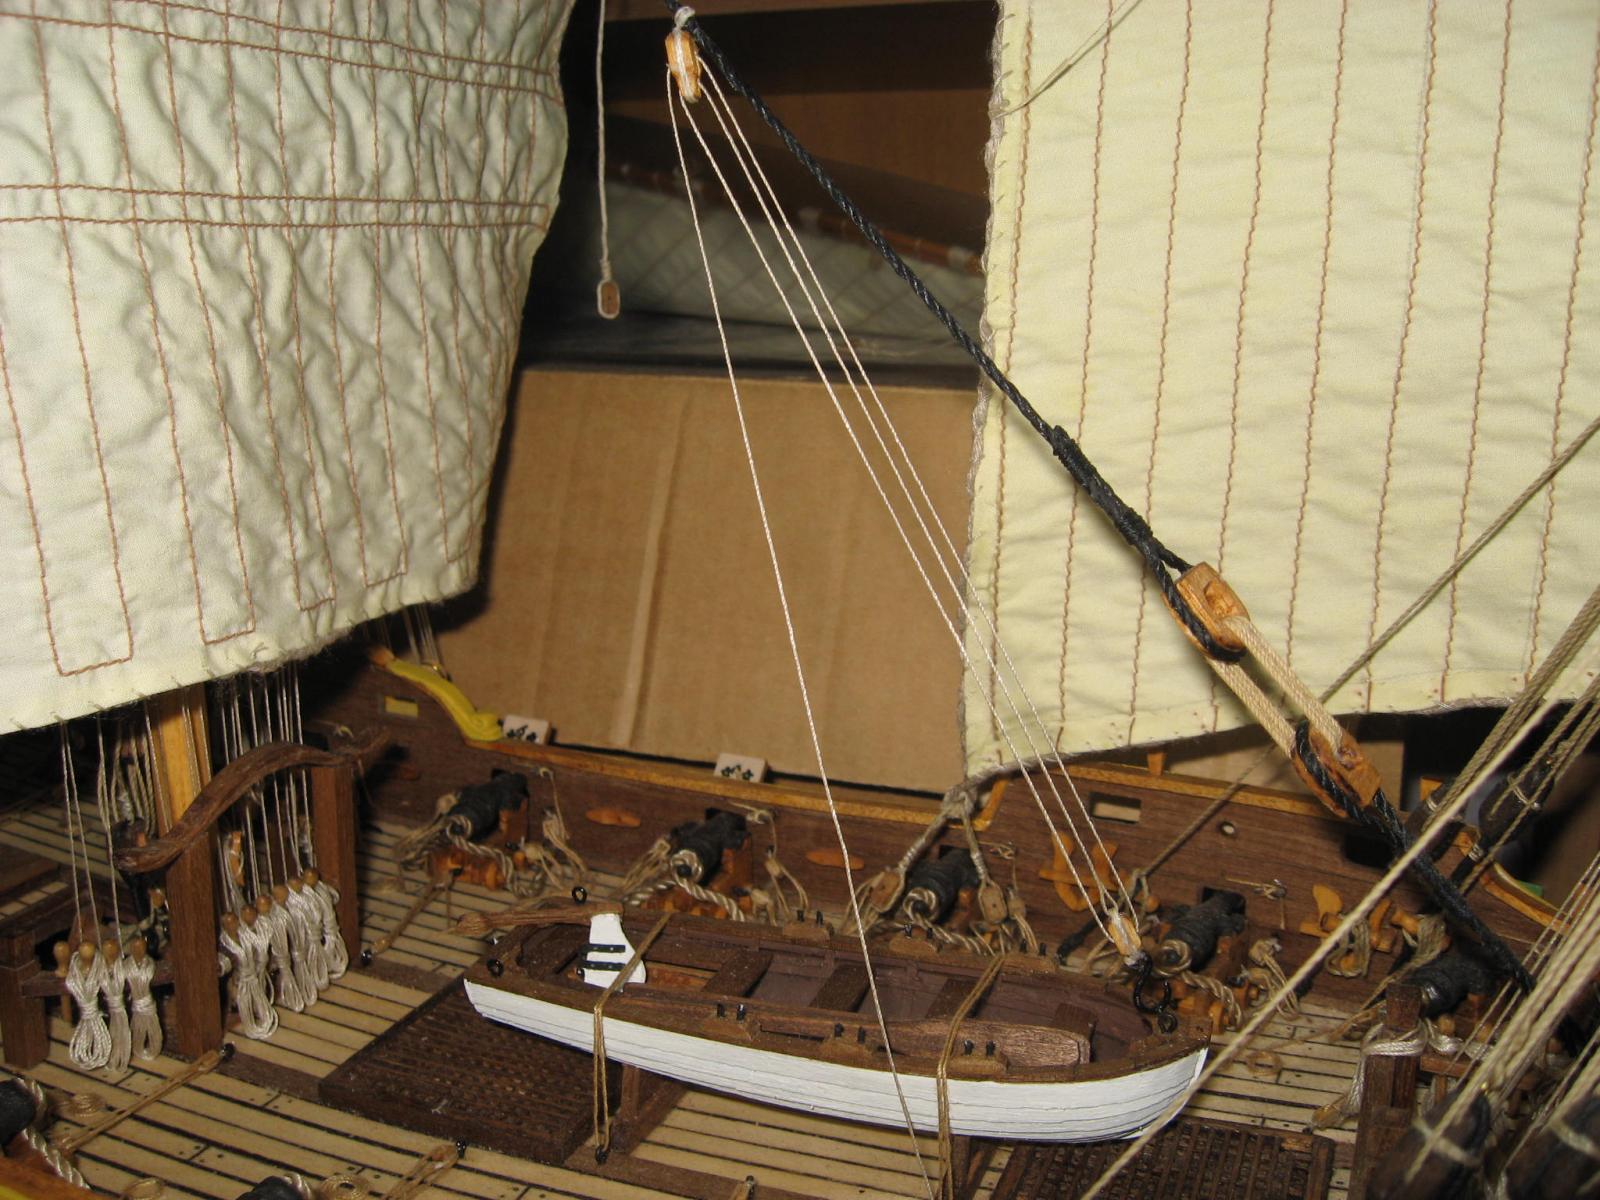
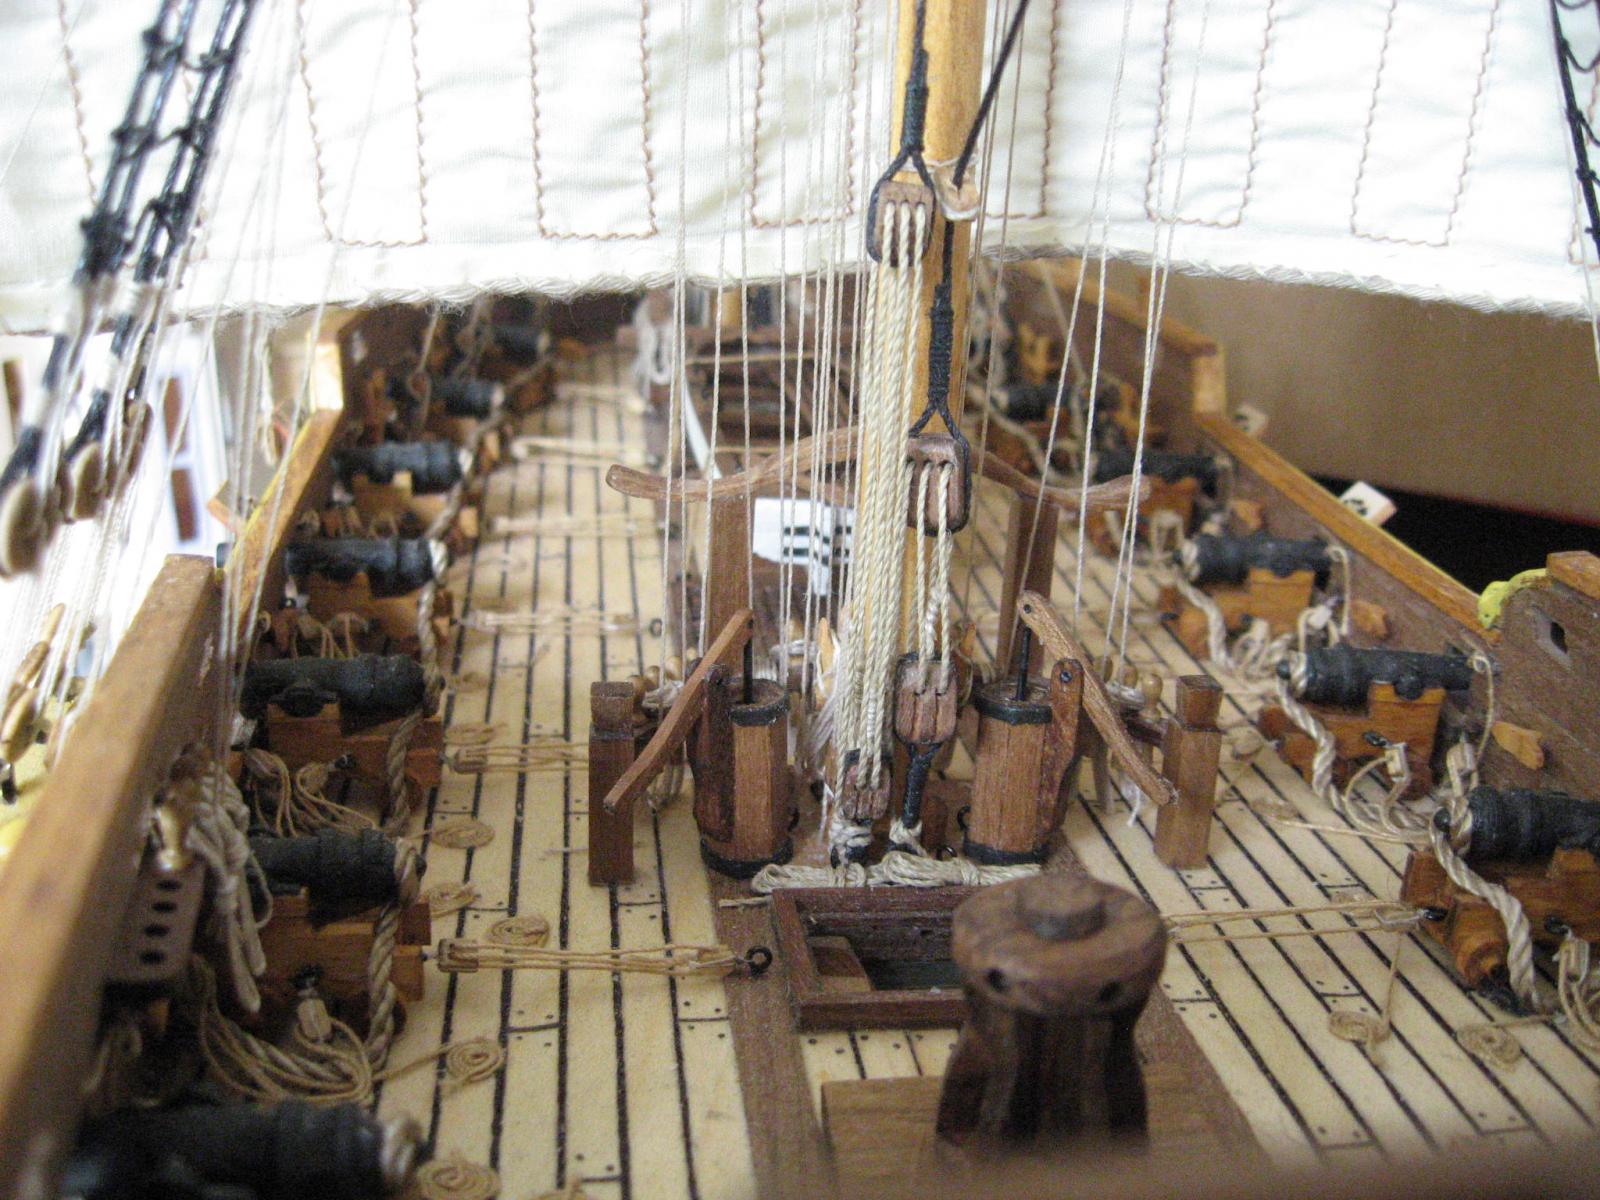
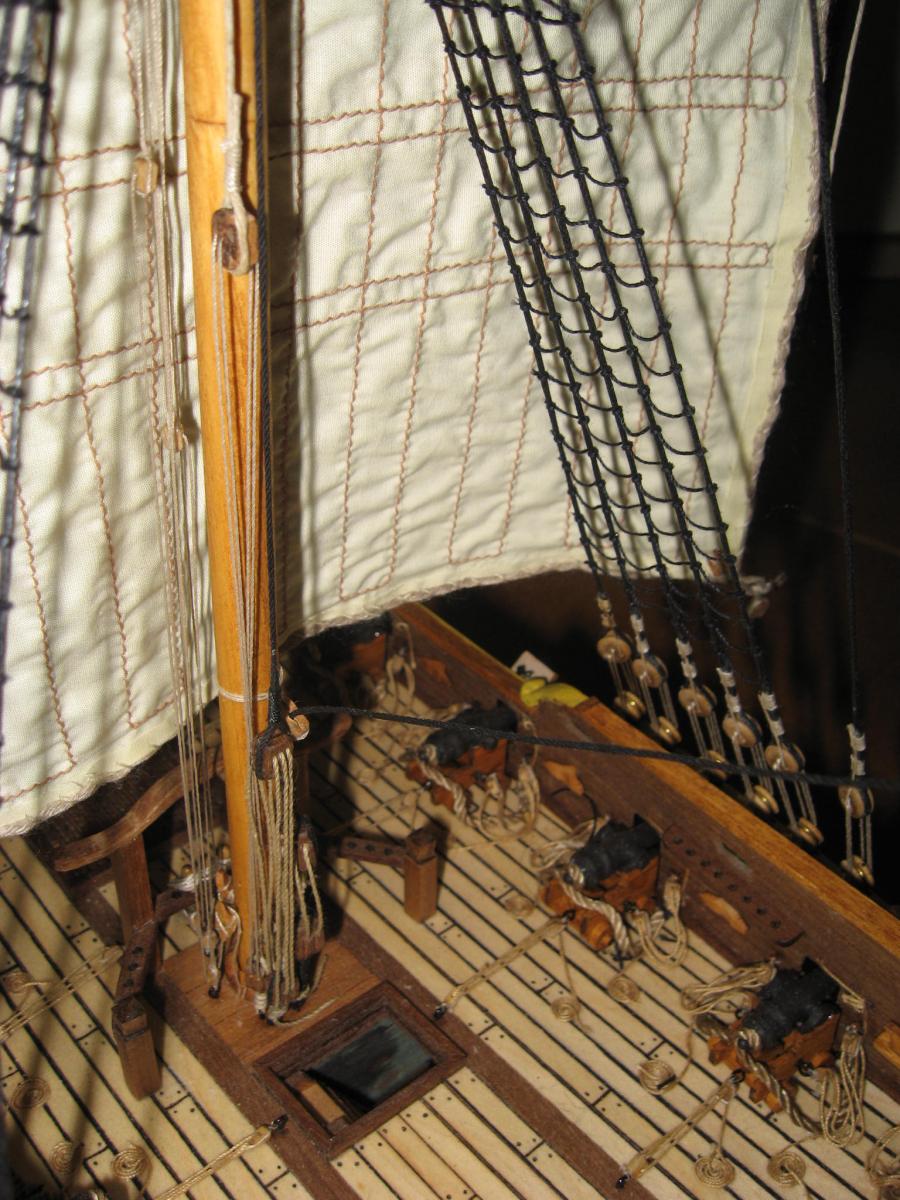
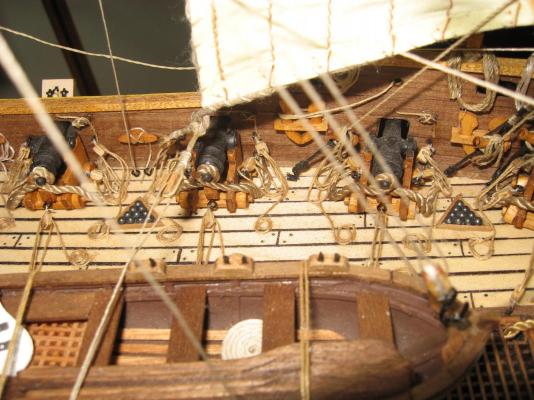
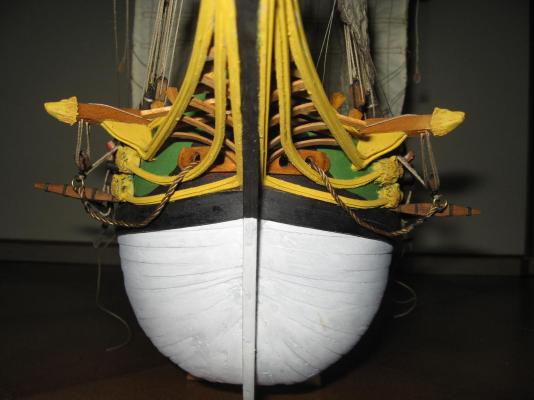
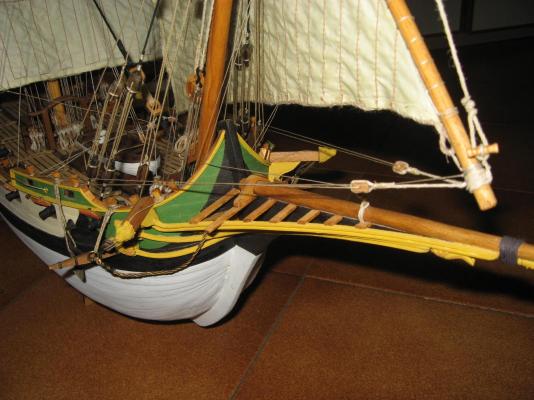
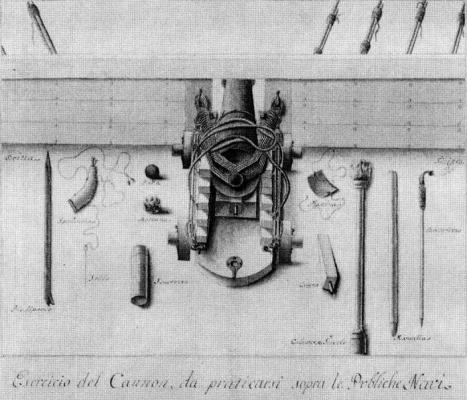
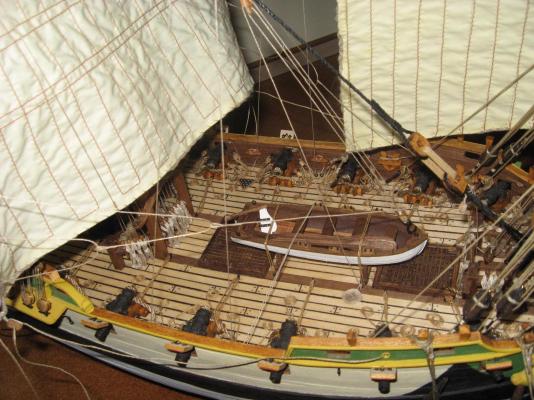
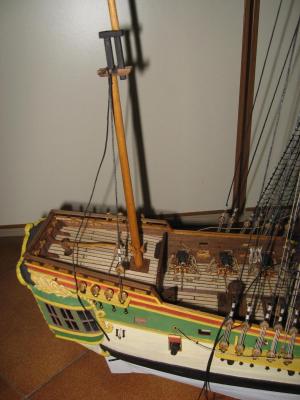
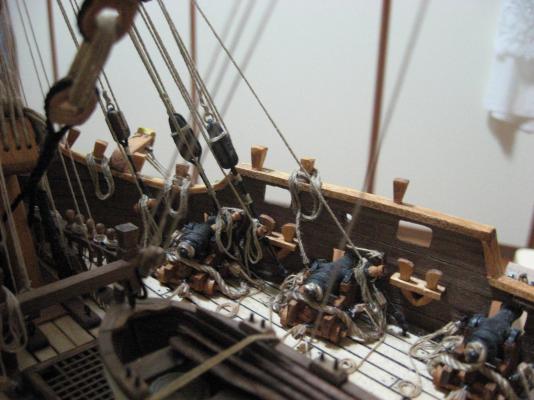
Update: I have almost finished the rigging related to the foremast and main mast. It lacks only one anchor. Well, it is not easy to see the difference from the previous photos, but the difference exist! In addition, I started to prepare the cannon balls boxes. I excluded the shot garland, since it is of typically Anglo-saxon design, so it was not yet diffused on the Adriatic sea. I made several research and I have found many informations, including a complete Venetian artillery handbook, but unfortunately it seems that no rules were made by the Venetian for the way to store the cannon balls on the deck. In a photo can be seen an original drawing of a Venetian cannon contemporary to my model. As it can see, I was not lucky and the cannon ball box is not drawn. Probably was not judged something that worth to be regulated by norms. If someone is interested (and can understand the old Italian language), the Venetian artillery manual can be downloaded freely here: http://www.arsang.org/Z-Frames%20STORICHE/Trattato_del_artiglieriaT.Moretti-%20Integrale.pdf Well, the same site that hosts the manual is interesting,too: http://www.arsang.org/STORICHE.htm in this page can be seen the various cannons showed on the Corfù fortress, which belonged to Venice for various centuries. The forth cannon from the top is a Venetian naval cannon. http://www.arsang.org/Z-Frames%20STORICHE/Cannoni_corfu.htm Is interesting the reconstruction of the cannons carriage, made by Italians artisans. each cannon is provided with a photografic presentation of the carriage manufacturing. Returing back to the cannonballs holder, I decided to avoid "dull" square boxes and I choosed to make the more "fashionable" triangular arrangement, for 10 balls, of French origin. So this is probably a deviation from the historical accuracy, but I have no further informations to evaluate. In two photos can be seen how I made them (using hunter plomb balls for rifle cartridges) and how they will appear when placed in position. I decided that one triangle will last for two cannons, so 8 must be made. In the other photos can be seen that I started the stern deck, so the cleats are finally installed and the standing rigging of the mizzen mast is slowly starting to be made...


- 190 replies
-
- 10
-
-
Thank you Carl, the problem is that in many painting and contemporary models the anchor is "forgot" and results completely absent, so I have few evidences on which was the usual approach used for these kind of ships. The problem is even more tricky, considering the presence of a cannon very near to the cathead and of the high bulwarks. But maybe there was not a defined way to secure the anchor in such small ships...
-
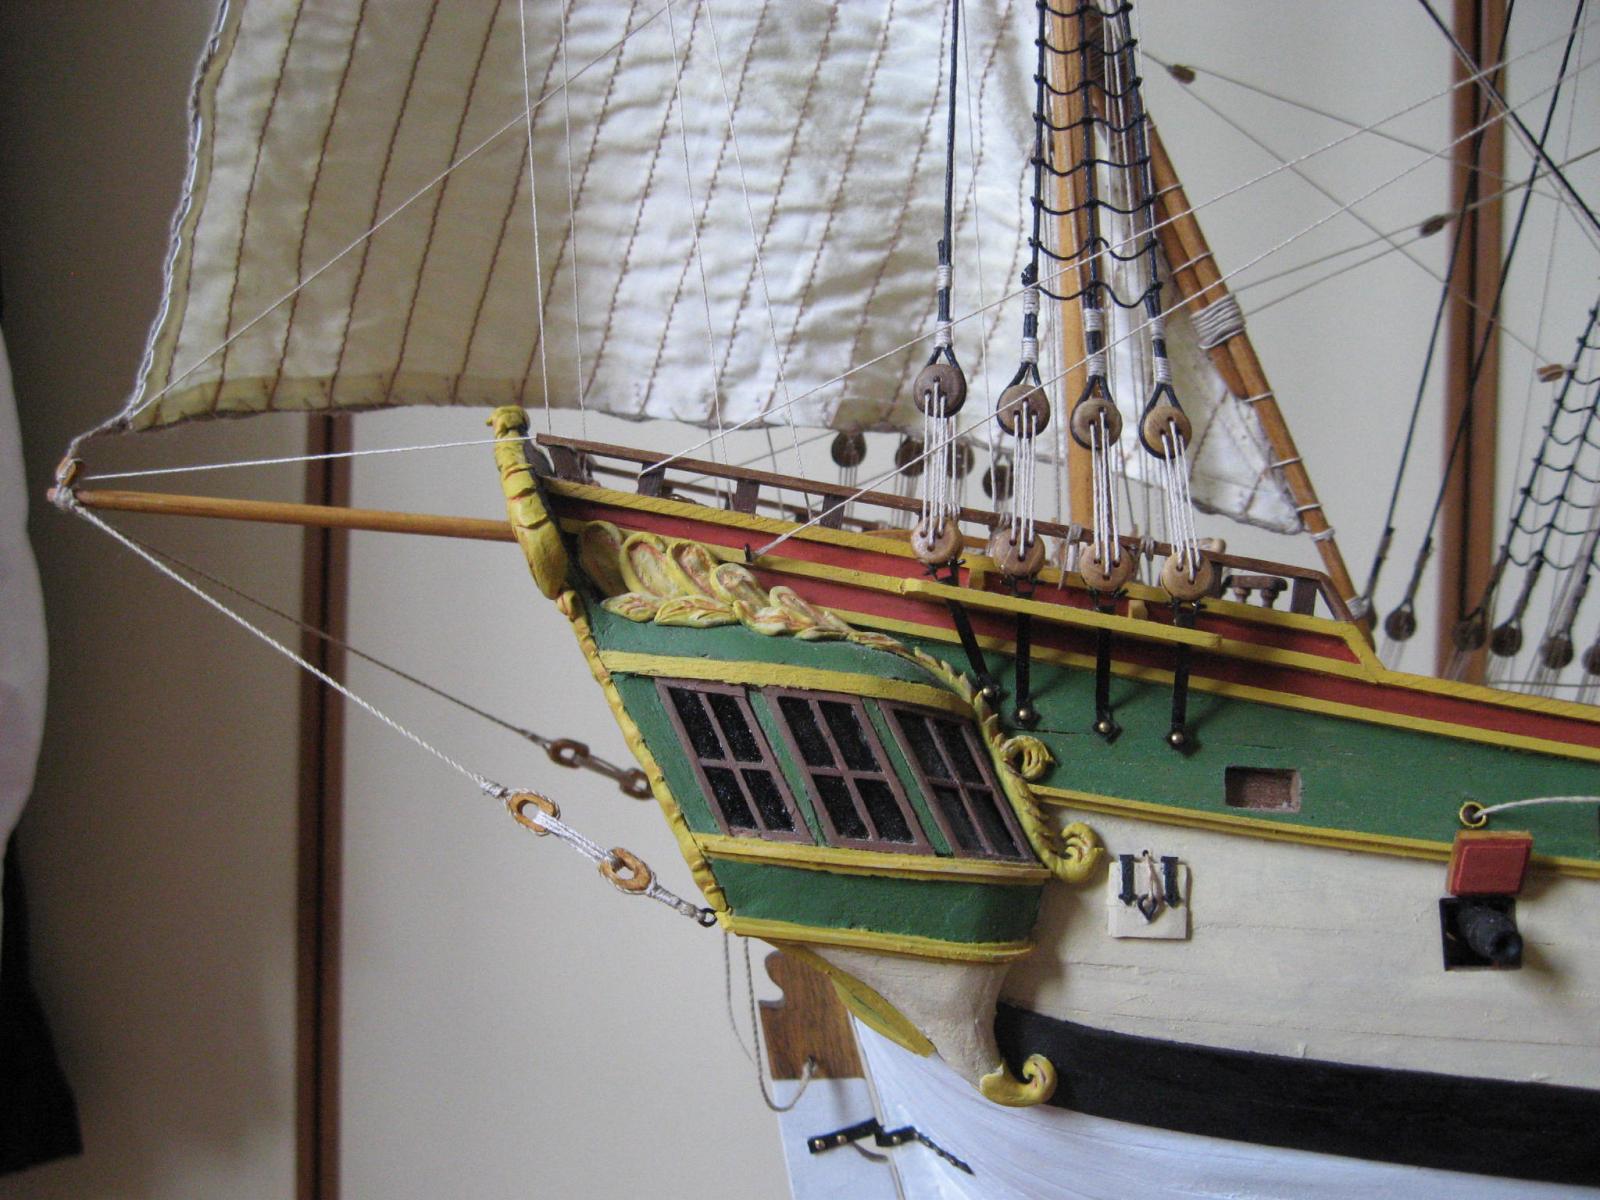
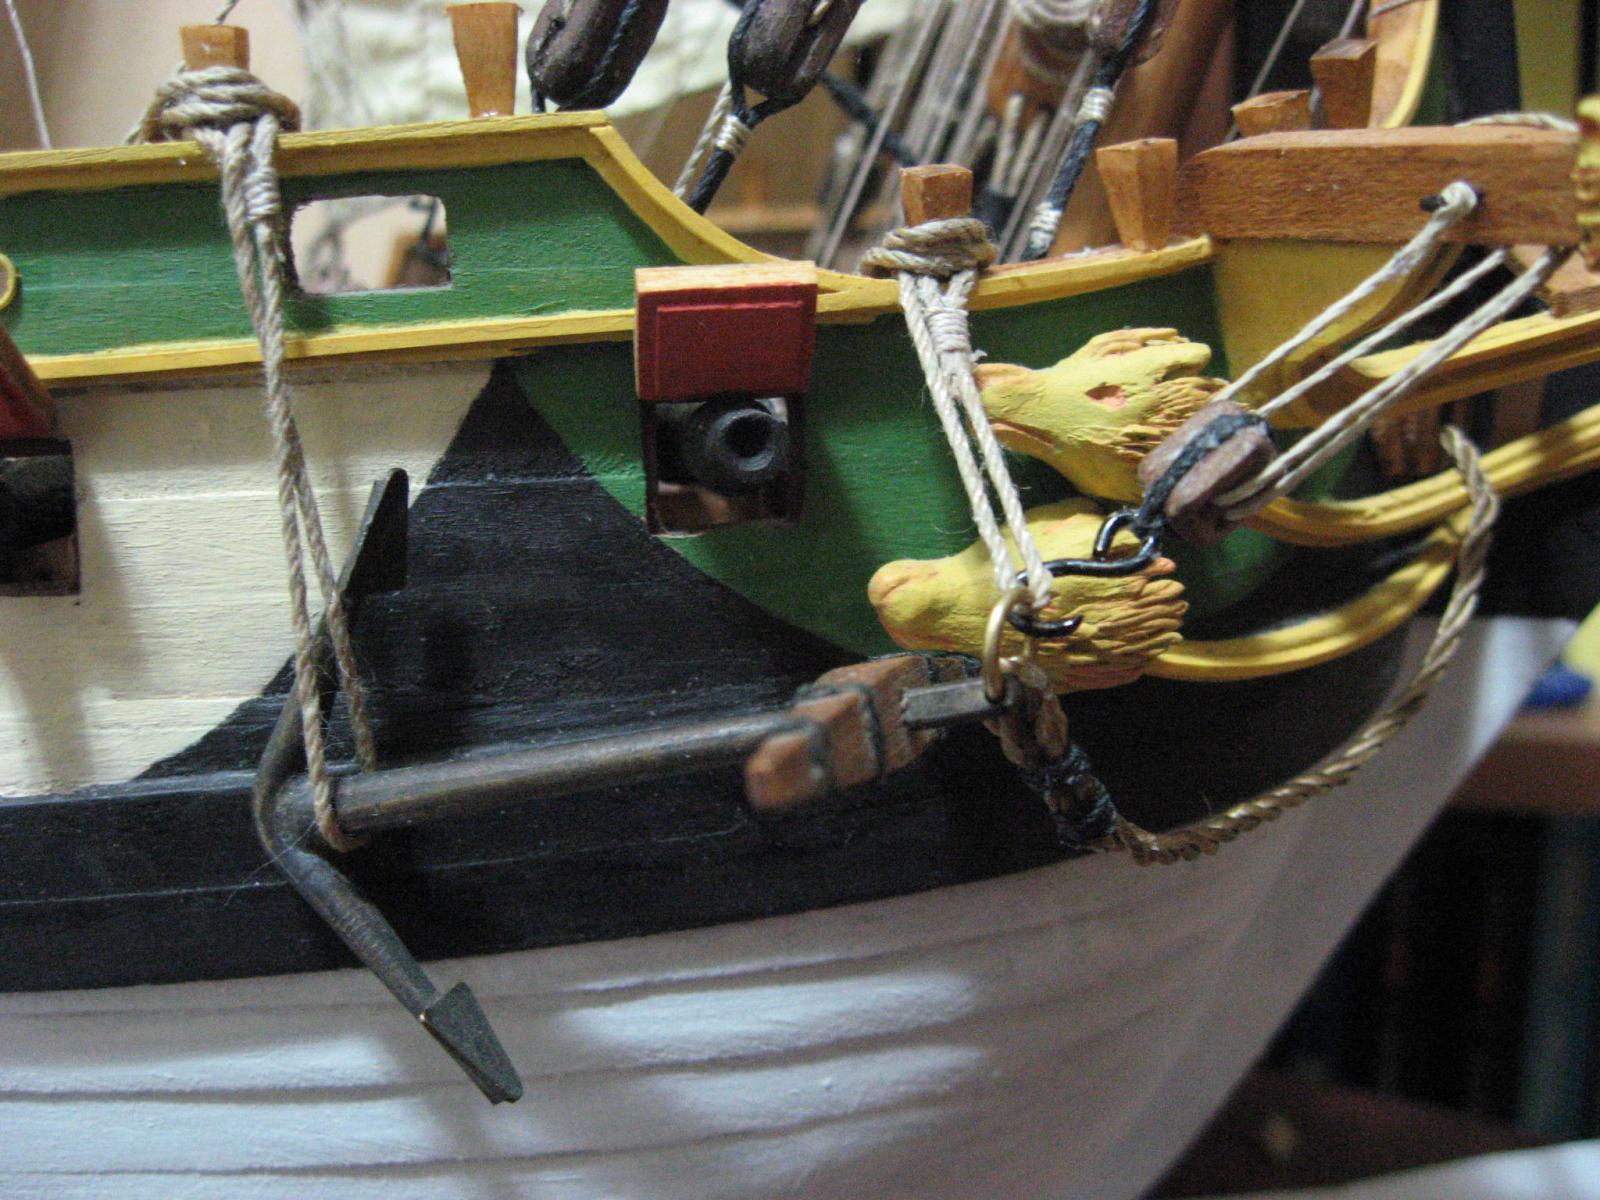
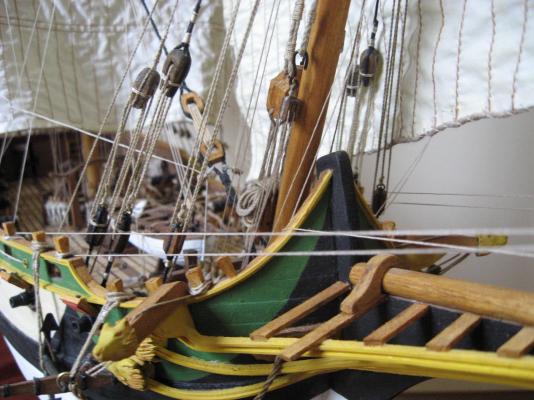
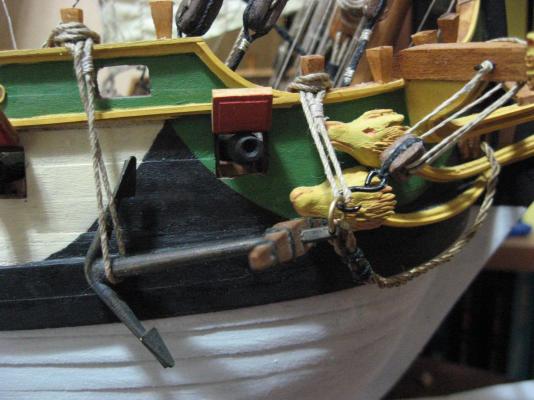
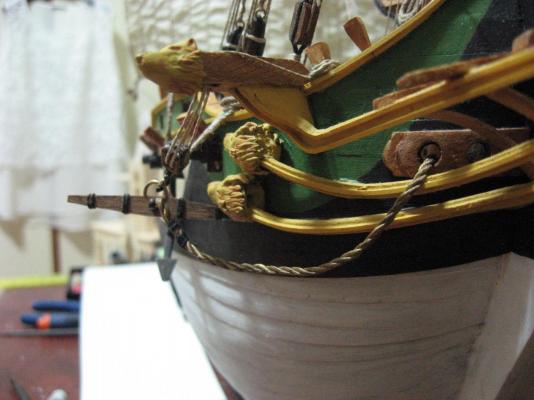
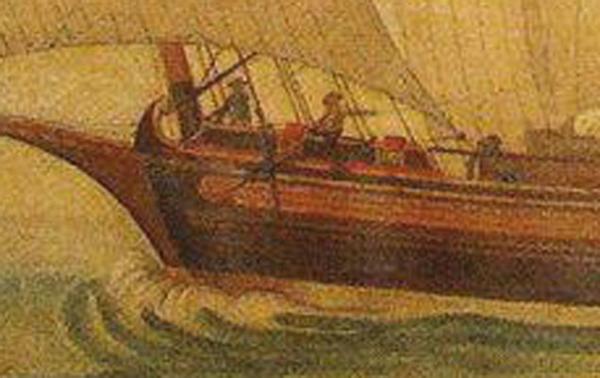
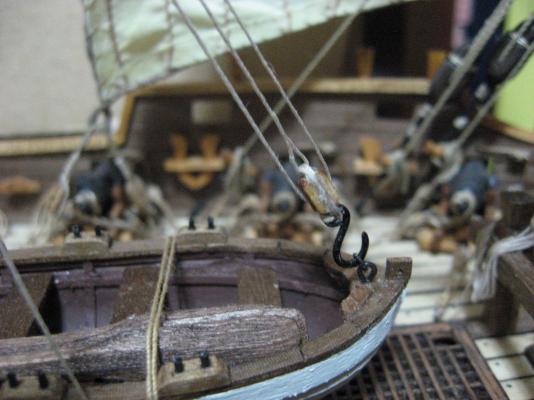
A tiny update: I finally installed one of the two anchors. It was a very tormented process, since I didn't find the right way to secure it to the hull. I consider the final result a compromise that doesn't satisfy me. but probably nothing more better can be done since the cathead is in my opinion too much near the bow of the ship. In addition, the cannon near the wolfes heads doesn't allow to place the anchor in a different way. But I am convinced that the BLACK TRIANGLE present in many paintings (and in my polacre) was simply a zone were the anchor touch the hull more often, so it was more often repaired/painted. So the black colour, simply to mask the wear of the wood (just my thought of course). In the painting of the venetian ship "La Forza", the anchor is placed exactly as in another contemporary model of a venetian gunboat, which is in the Venice Naval Museum (other photo). But unfortunately in my polacre the bulwark is higher, due to the presence of the windows, so the same arrangement cannot be done. So I reached a compromise (life is an ethernal compromise!! :D ). In another photo can be seen the three bundles of rope related to the anchor blockage. Note: I avoided to install the buoy, since I judged the ship too small for this kind of accessory. Another update: I installed the tackle for lifting the service boat.
-
Thank you, Carl theoretically the rigging that complete a ship like this can be far more than the one that I planned to install, but I decided to stop and avoid the minor and less important rigging. Otherwise for the external viewer it became only a big mess of ropes. So, I am pretty sure that my 80% (even if related only to the main and foremast) is a real 80%! Or mabe a 75%... But keep in mind that the mizzen mast is still frozen to 0%! In addition: -I have not yet installed the anchors; -the flags are not yet done -the boxes for cannon balls are not yet done; -the label for the basement has not yet done; -the tackle for the service boat is not yet done. So there is still a lot to do...
-
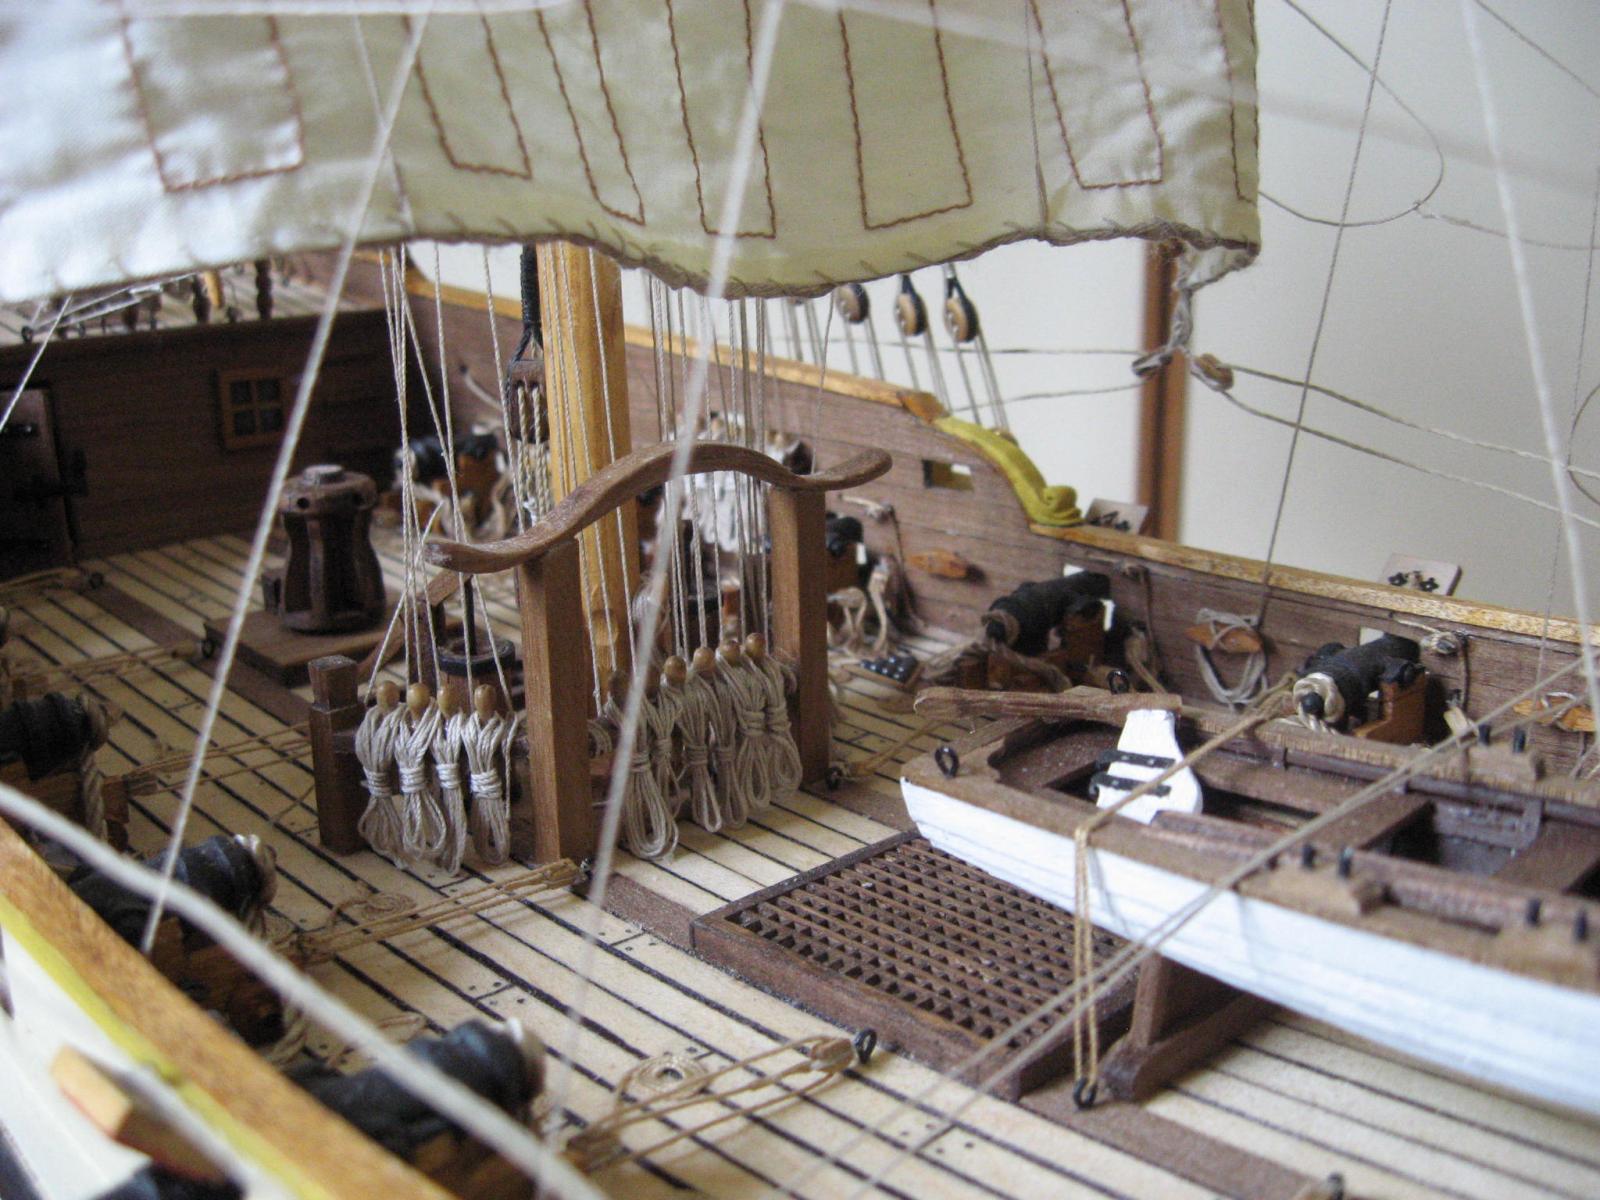
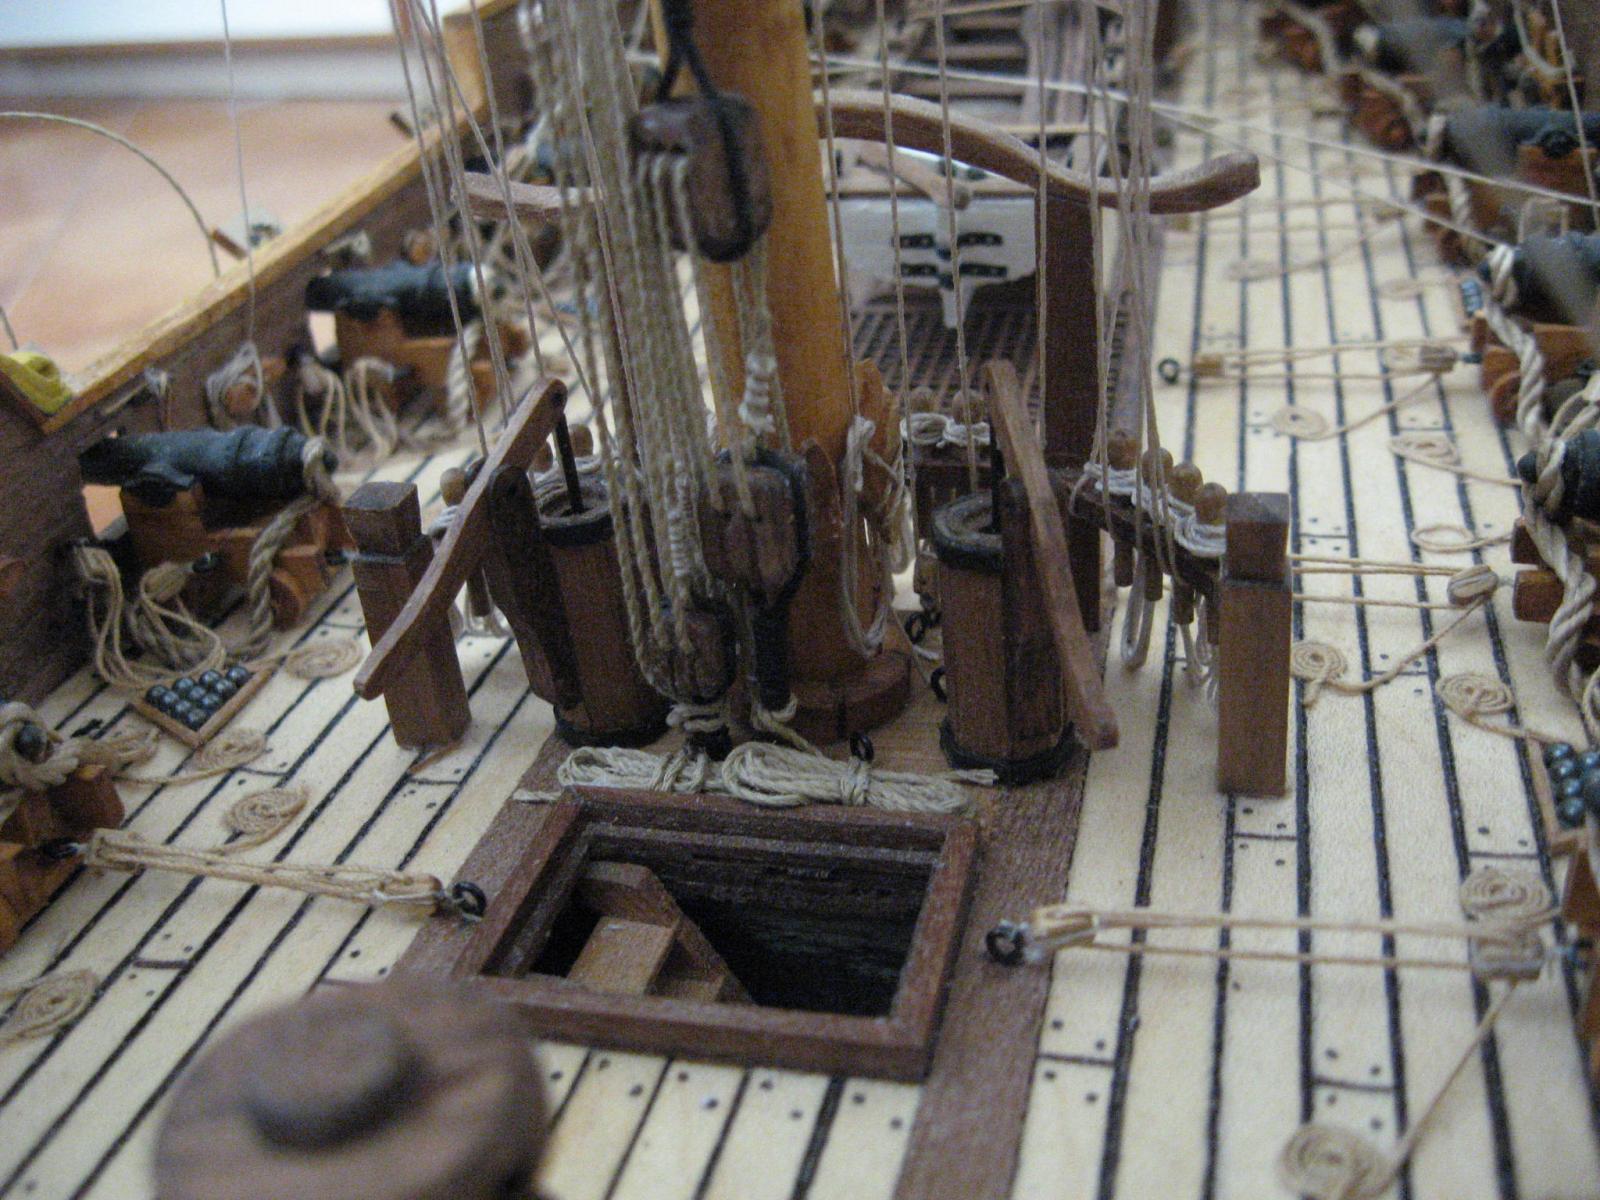
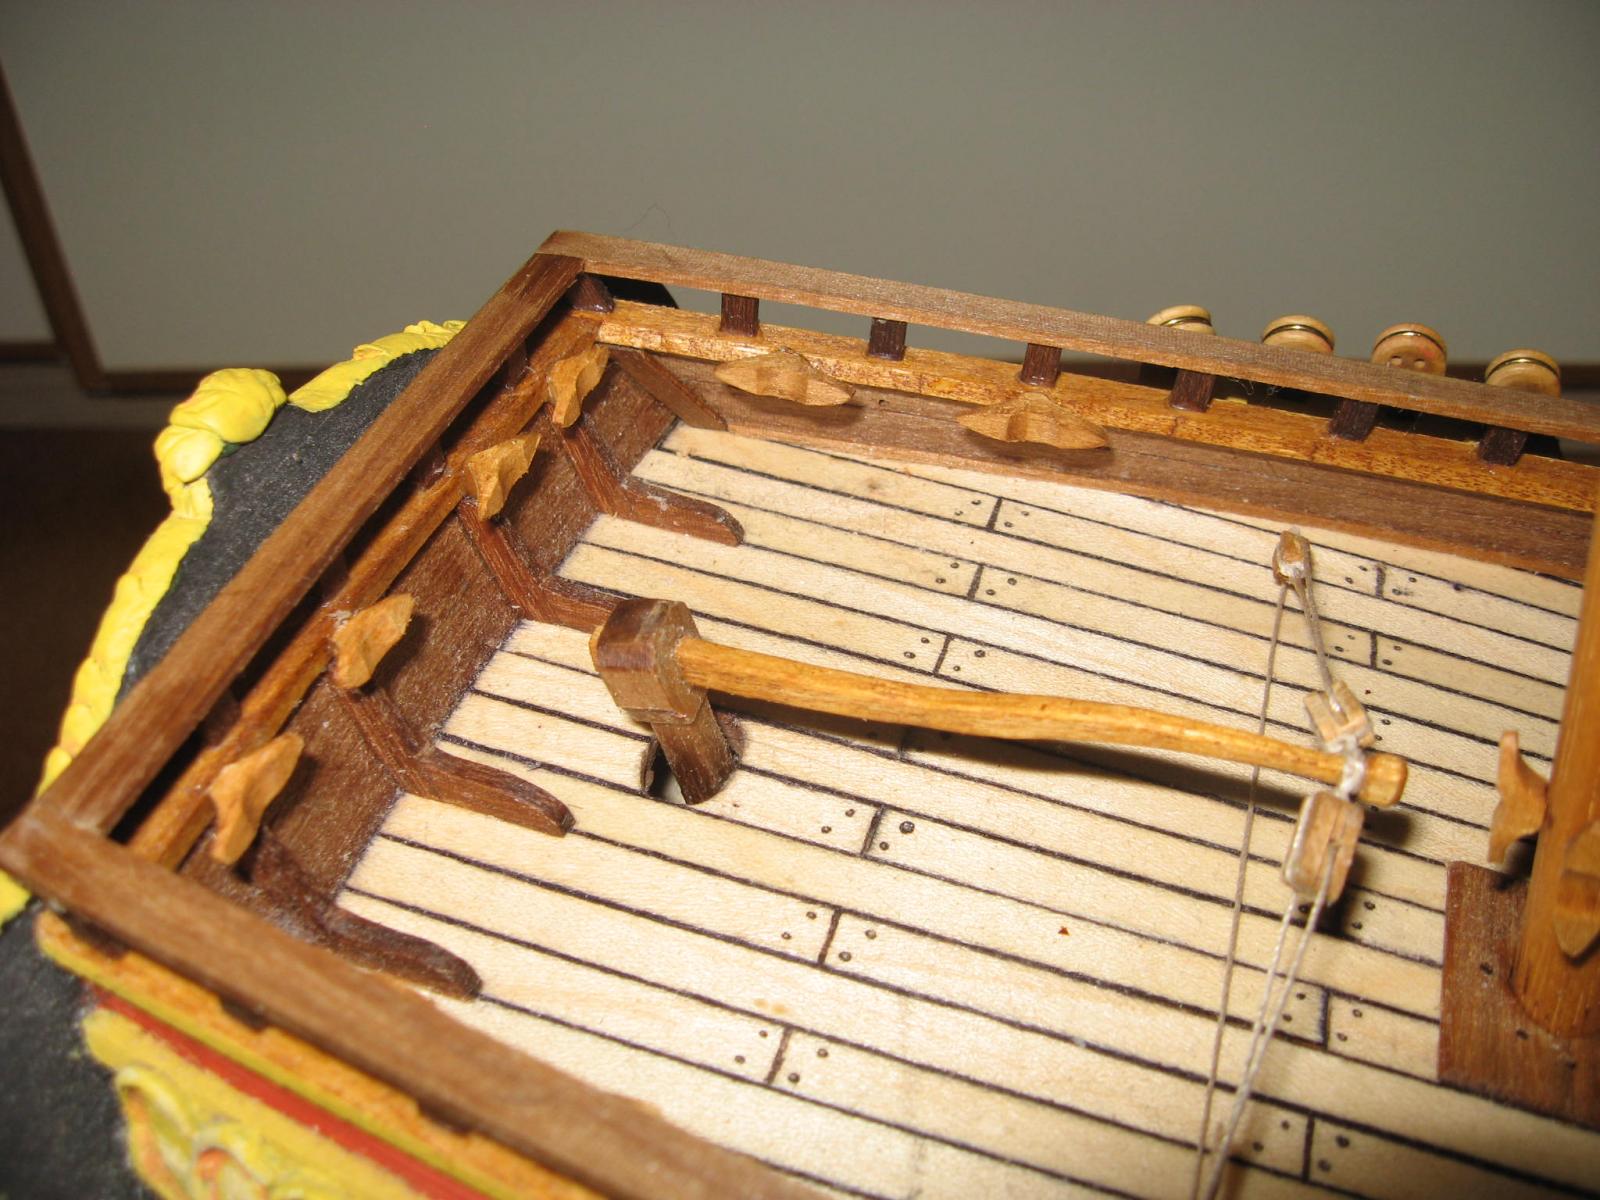
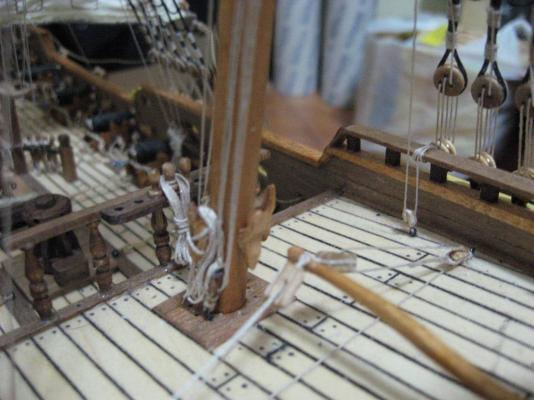
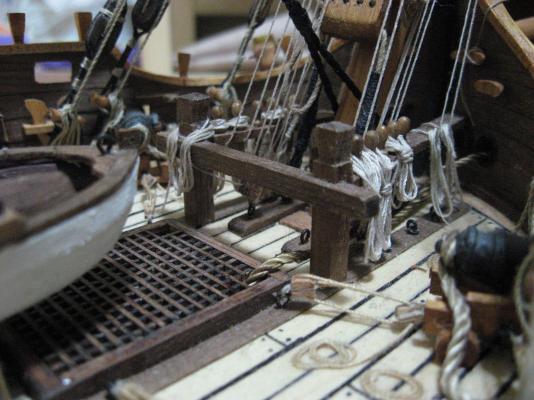
Another update The largest part of the duty is making the running rigging. I done around 80% of both the main mast and foremast running rigging. One of the photos is a "view from the stern deck", where I placed the bilger pumps, too (not yet glued in place). As said previously, "tons of rope" is my mantra. It must be considered that none of the photos show a complete work. In all of the photographed sections the rigging is not complete. I finally glued the mizzen mast, too. But before starting the work on the mizzen mast, a lot of work in the other masts is still to be done. The stern deck at the moment is still completely "naked". Are not present neither cleats, blocks, ring, nothing at all!


- 190 replies
-
- 11
-
-
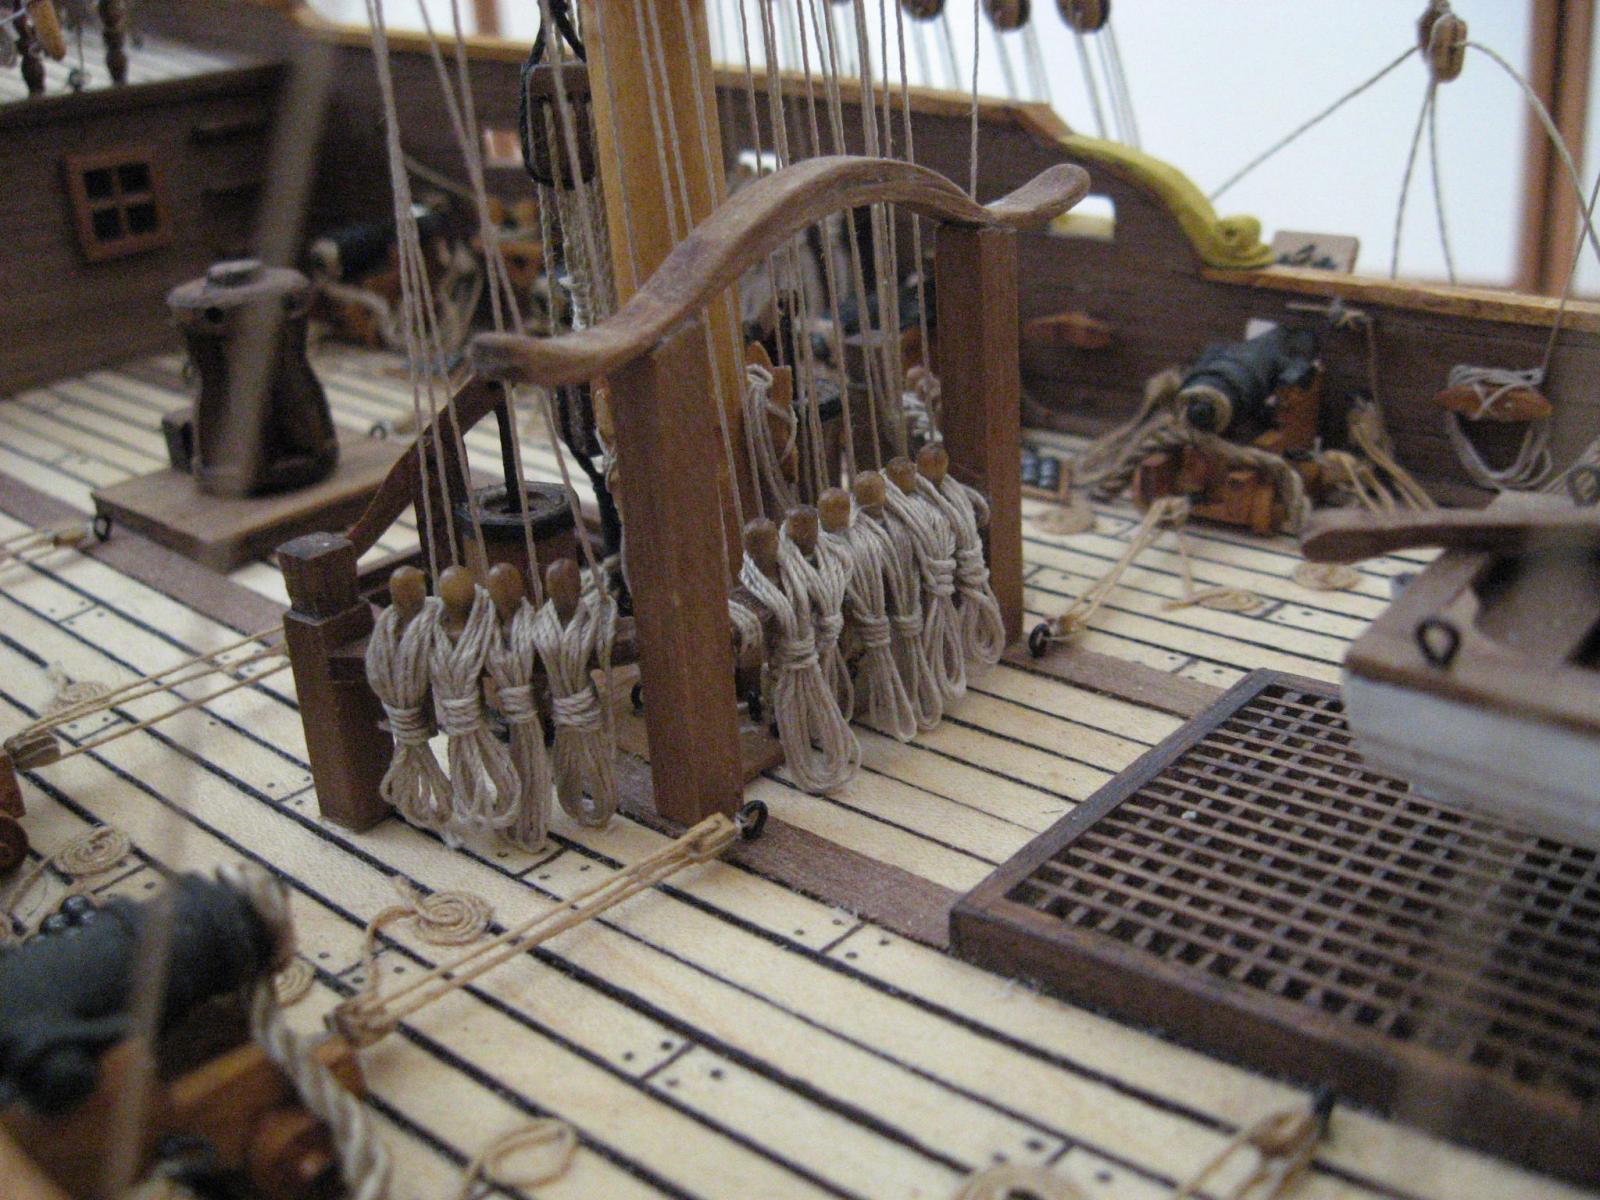
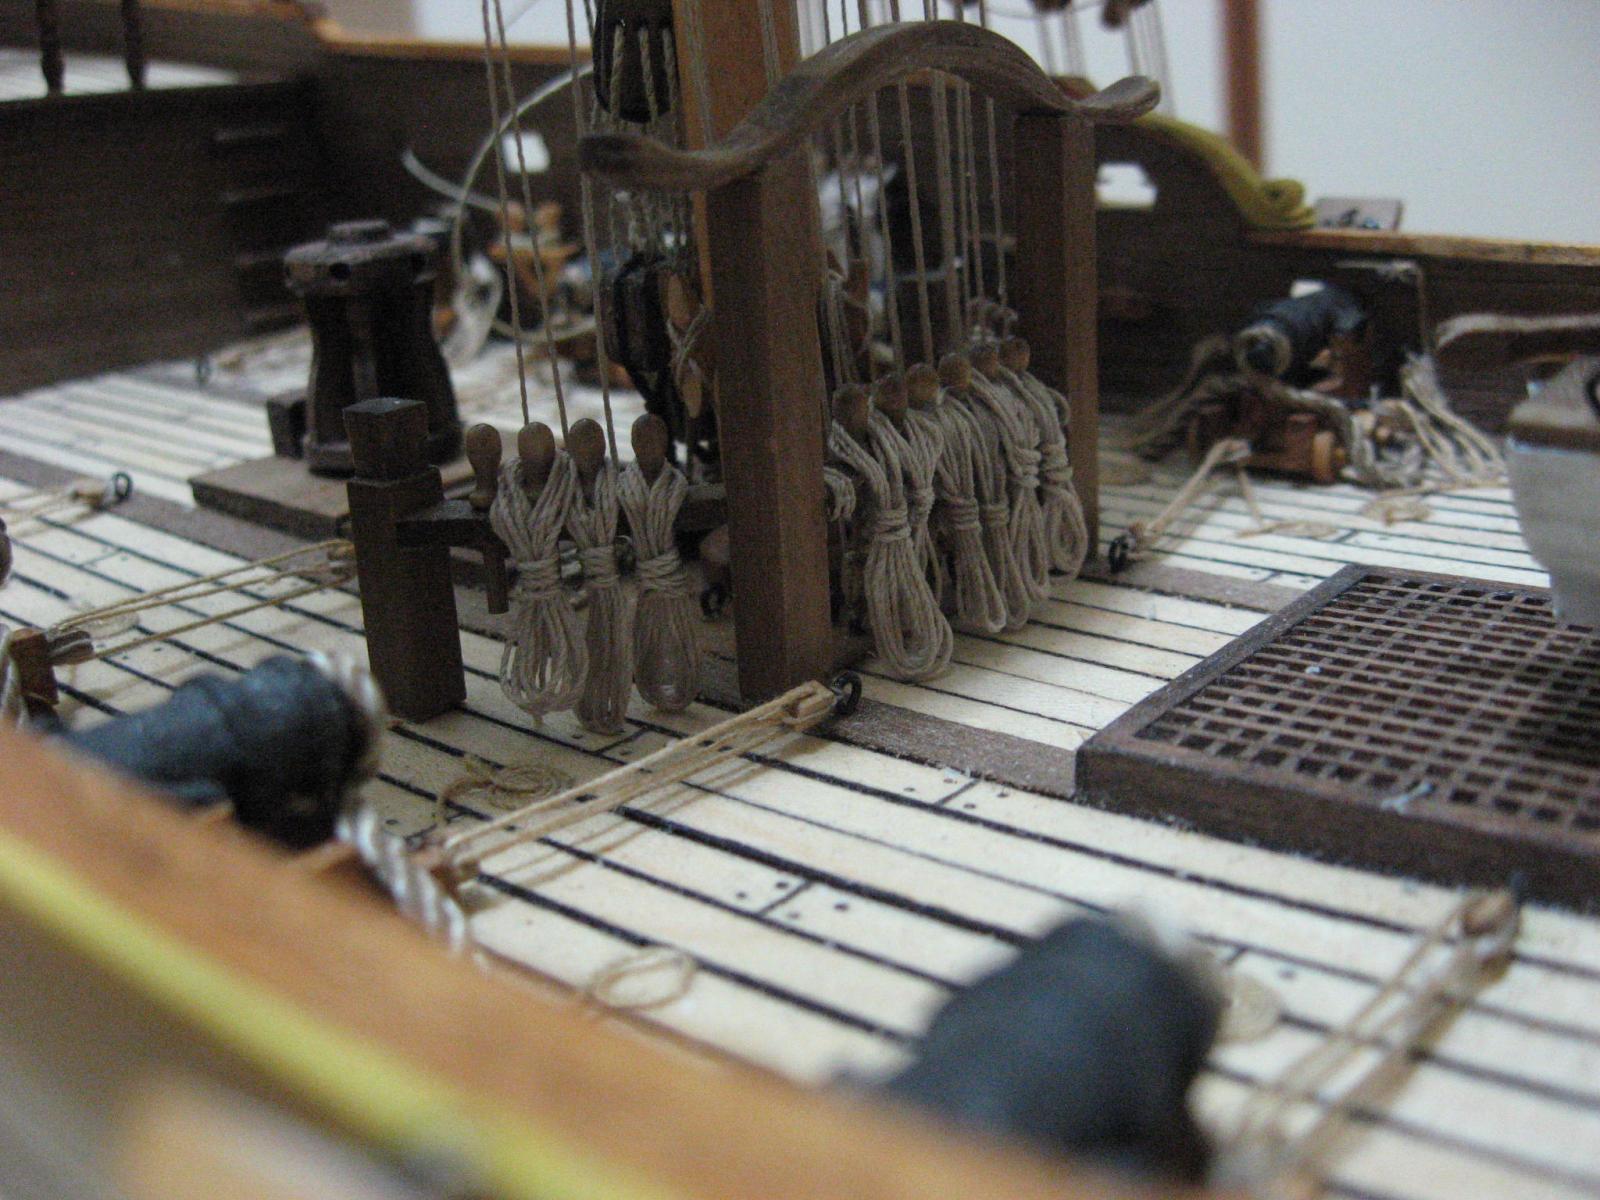
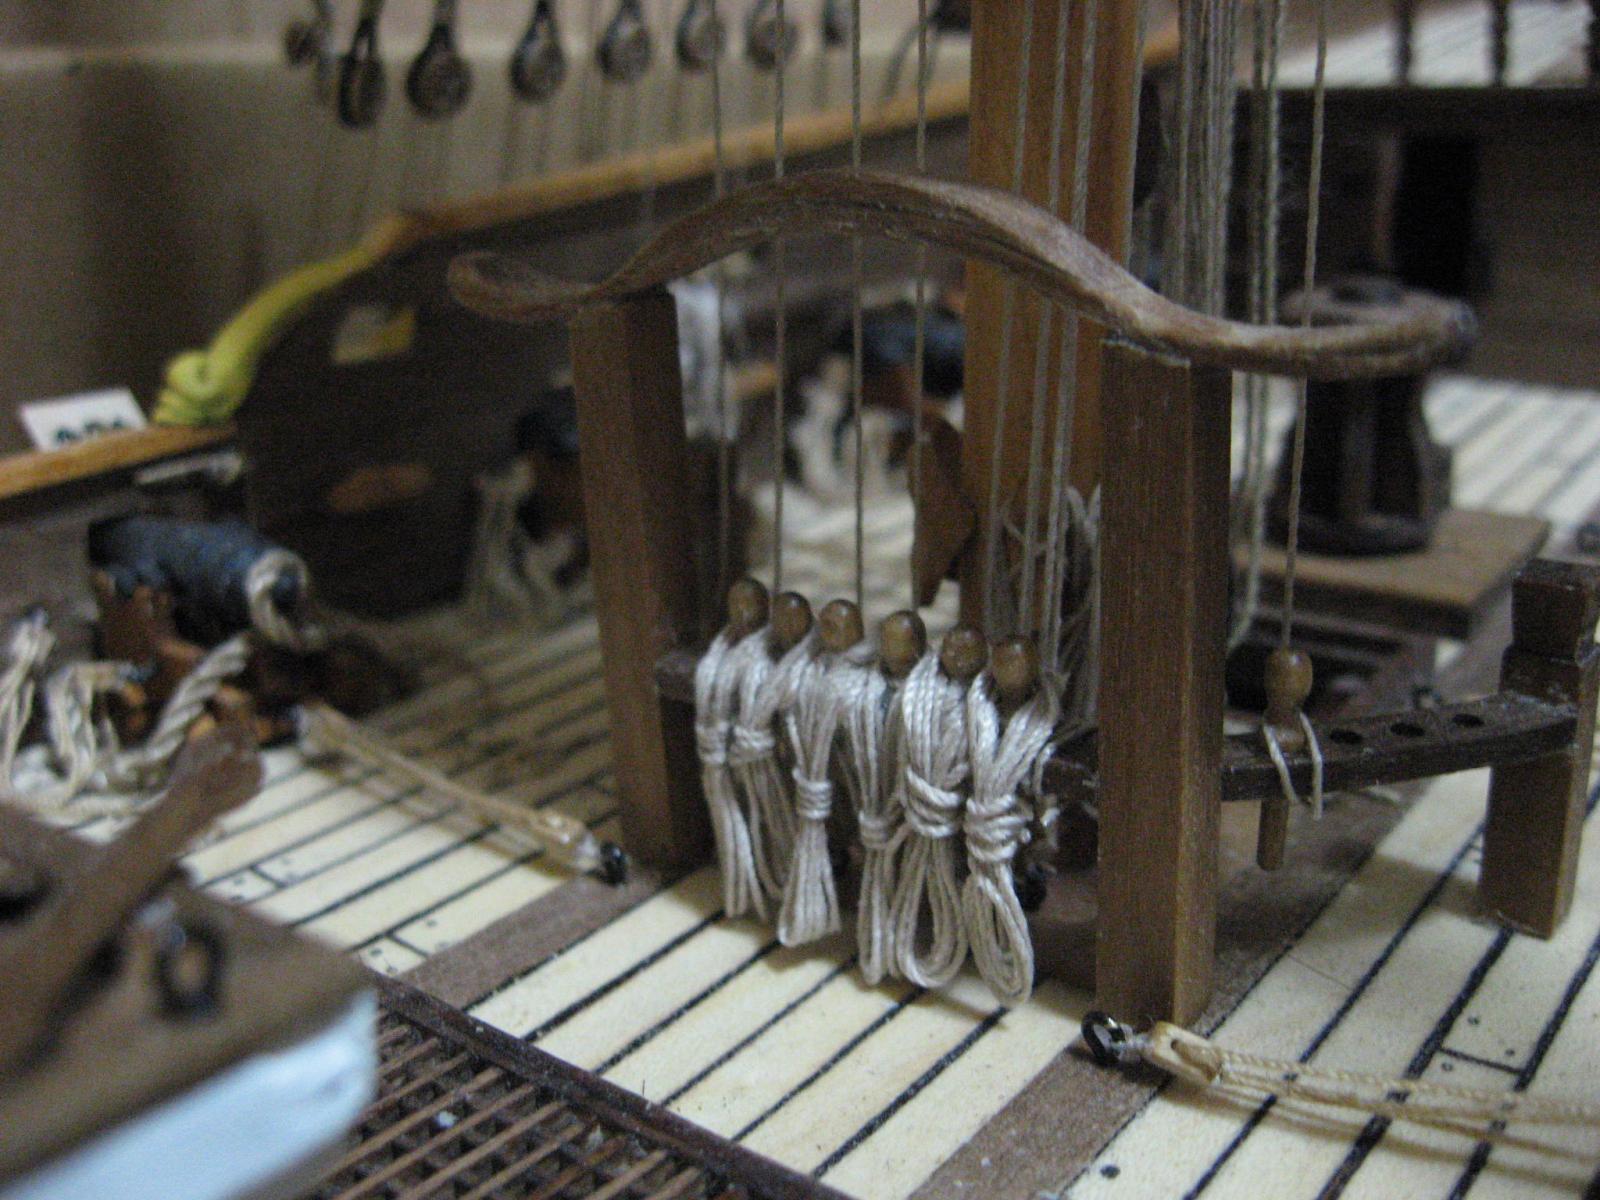
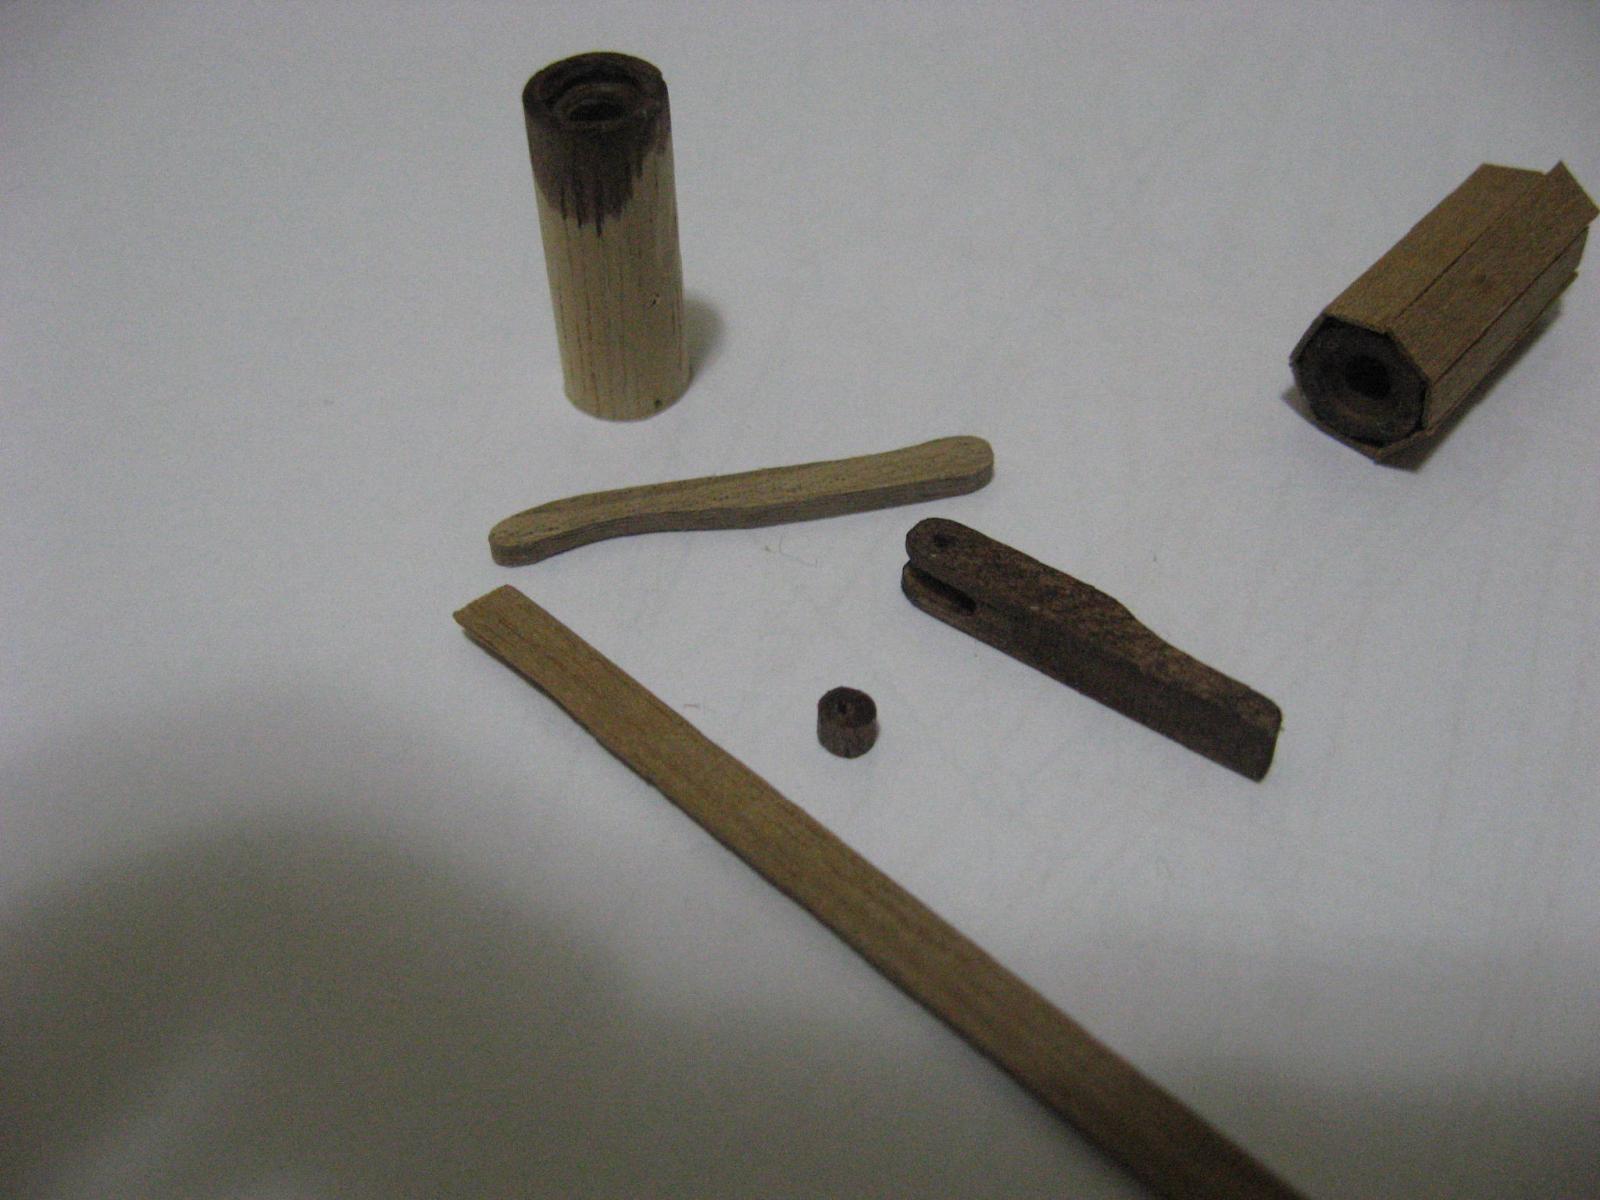
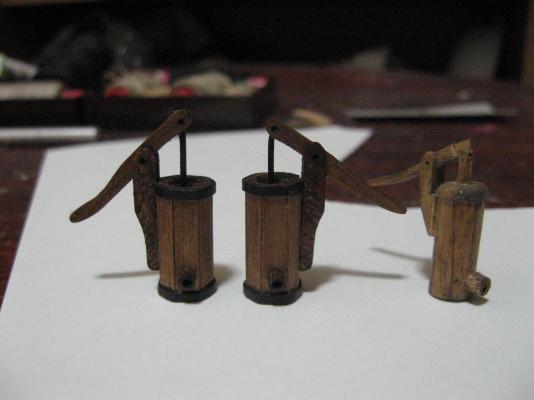
Another update I am proceeding with the rigging of the main mast. the cleats around the main mast and the belying pins in front of it are now completed. Various coils of rope have been added, since it is better to proceed with them too, otherwise this boring part become too much big. I completed the two bilge pumps, but will be glued in place only when all the rigging that end at the main mast base will be done. There is a comparation between the old and the new ones. In another photo there are the pieces used for making them... It is difficult to show a real update, since the rigging apparently appears not too different from previous posts, but I am really proceeding with it!


-
Thank you Patrick, The scale of the model is rather big (around 1:55 or similar, i don't remember), so it became "mandatory" to add some details. In addition, coils of rope are accessories easy to be made (even if boring) and helps on hiding construction mistakes. In anycase I don't like the decks so empty that remind a dance floor. In these ships there were always tons of ropes present. Eventually all orderly placed, but always tons of ropes. So "tons of ropes" become my mantra...
-
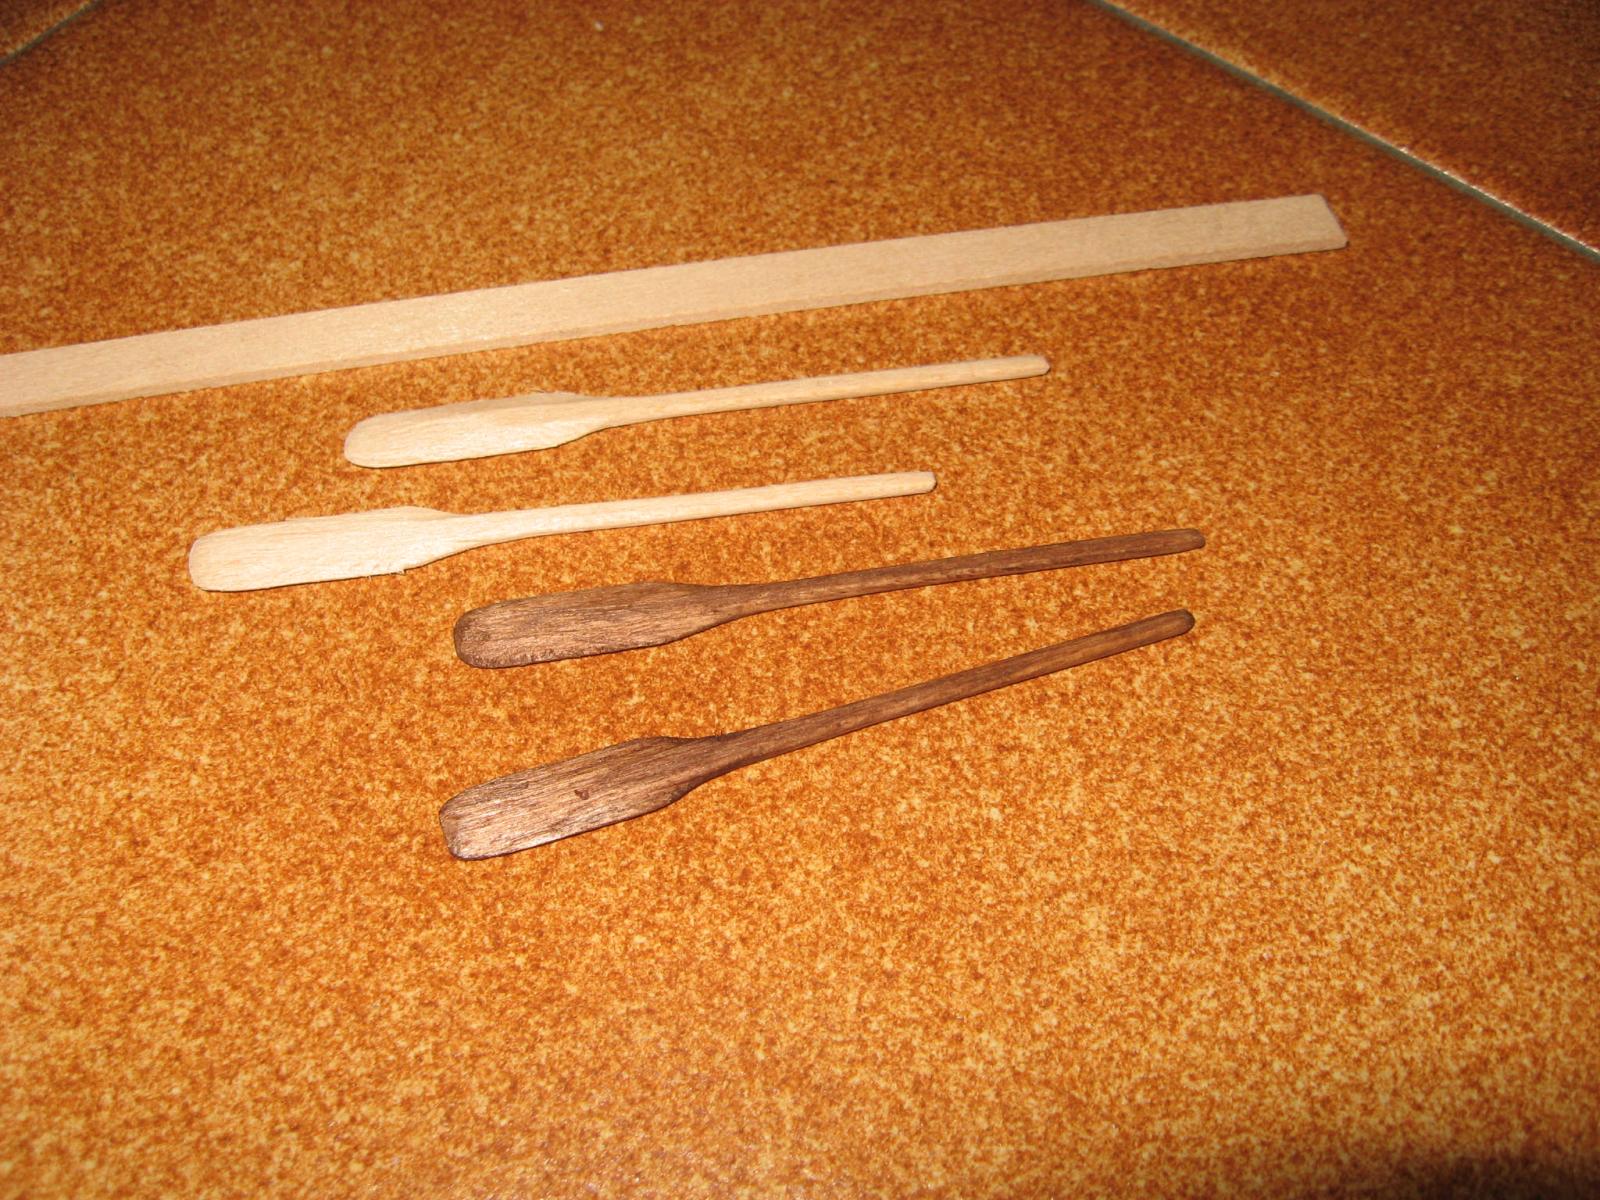
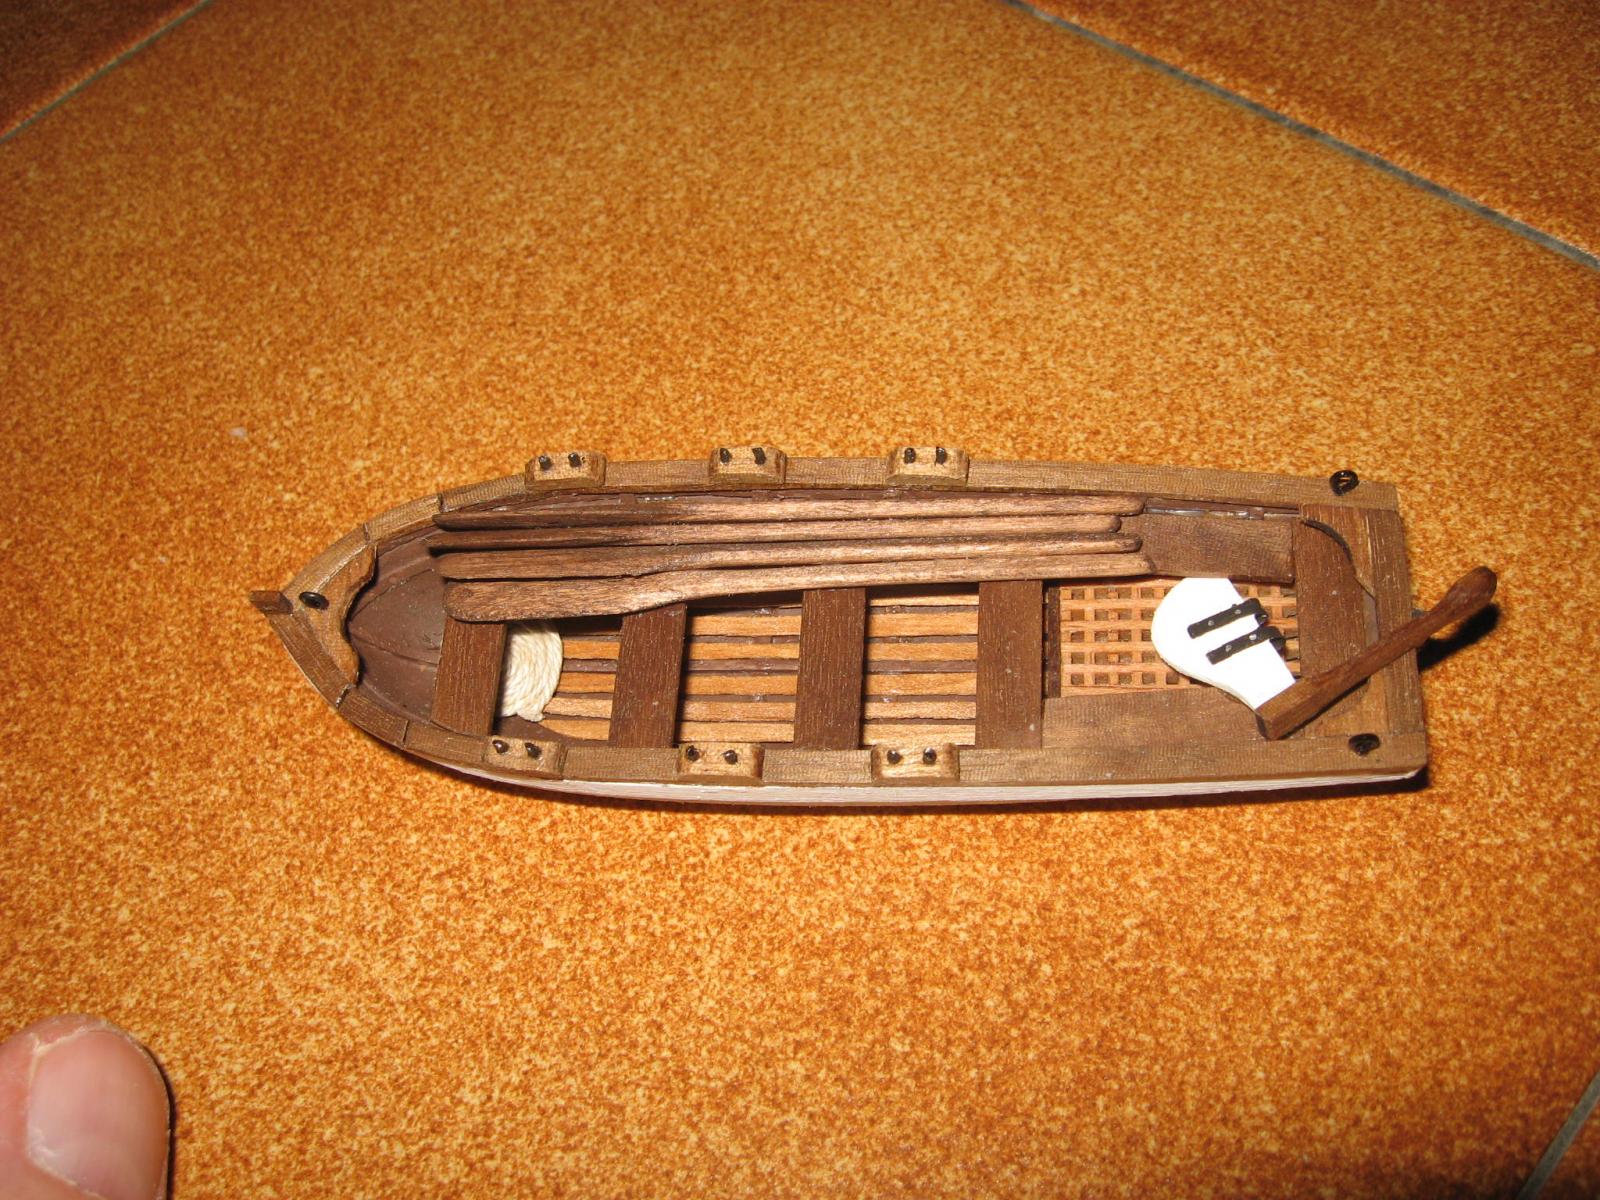
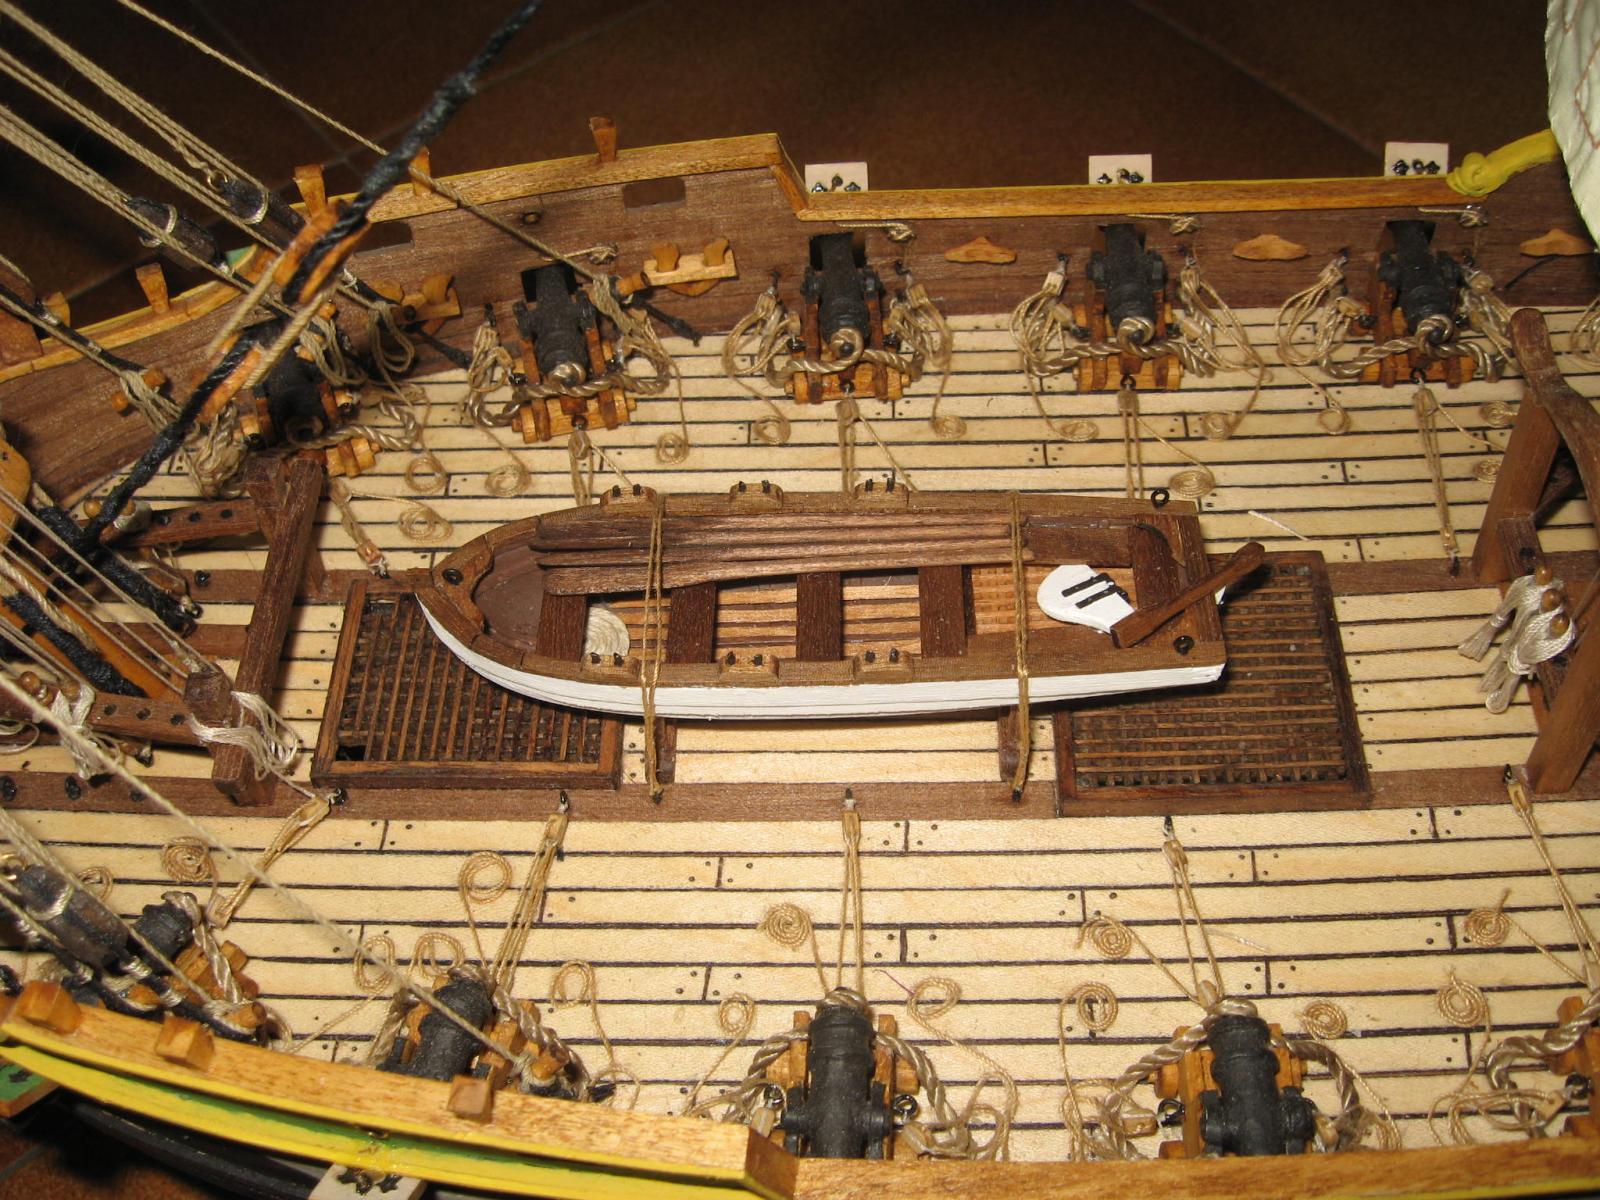
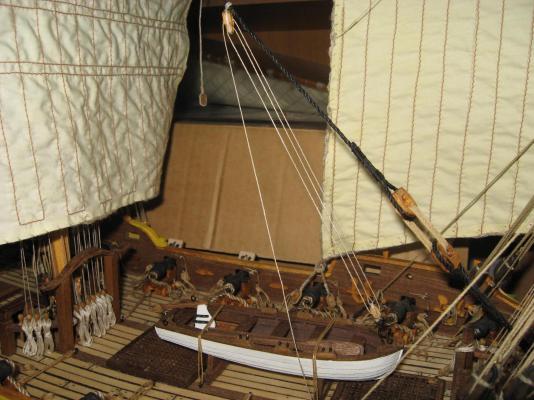
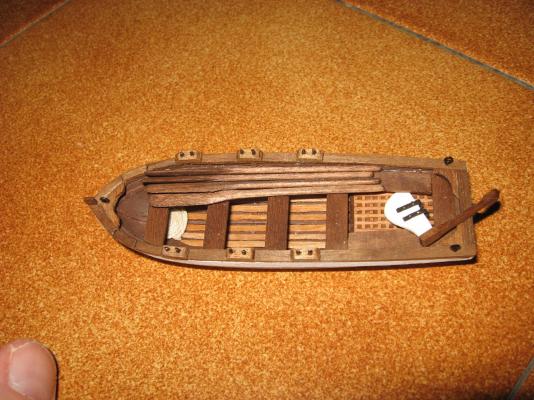
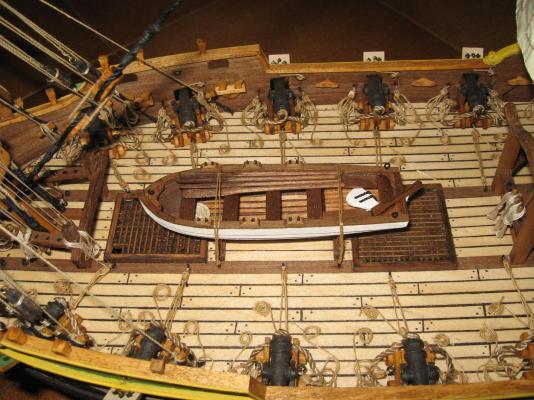
I finally find enough time for proceeding further with the model... The truth is that I started many sub-sections which are all incomplete, so sometimes the results are not as they will be when finished. I installed the three sails of main mast, but of course are loose, since 90% of their rigging is still to be done. Slowly I am adding the coils of ropes on either the belaying pins and cleats. When the boat will be complete, a lot of coils of rope will complete the rigging (as it should be). I finally complete the accessories of the service boat: I made four oars and a coil of rope. I stopped to four, since six oars probably cover too much of the boat surface and the internal part of it cannot be seen. Maybe in the future I can add a small barrel of water, but now I have too much things left to do. The boat must be placed and tied now, since later it will be too much full ropes around there... I almost finished the two bilge pumps, but are not complete, so I cannot show them.


-
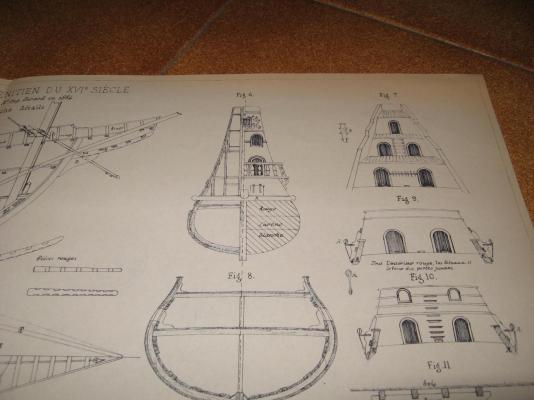
Hello Nazgul, you are lucky, since I sold the plans some years ago, but I still have some shot used for the ebay auction. in the photo can be seen the part of the plans related to the stern. There are no surprises, since more or less all the galleons of this period were similar.