Cristiano
-
Posts
423 -
Joined
-
Last visited
Content Type
Profiles
Forums
Gallery
Events
Everything posted by Cristiano
-
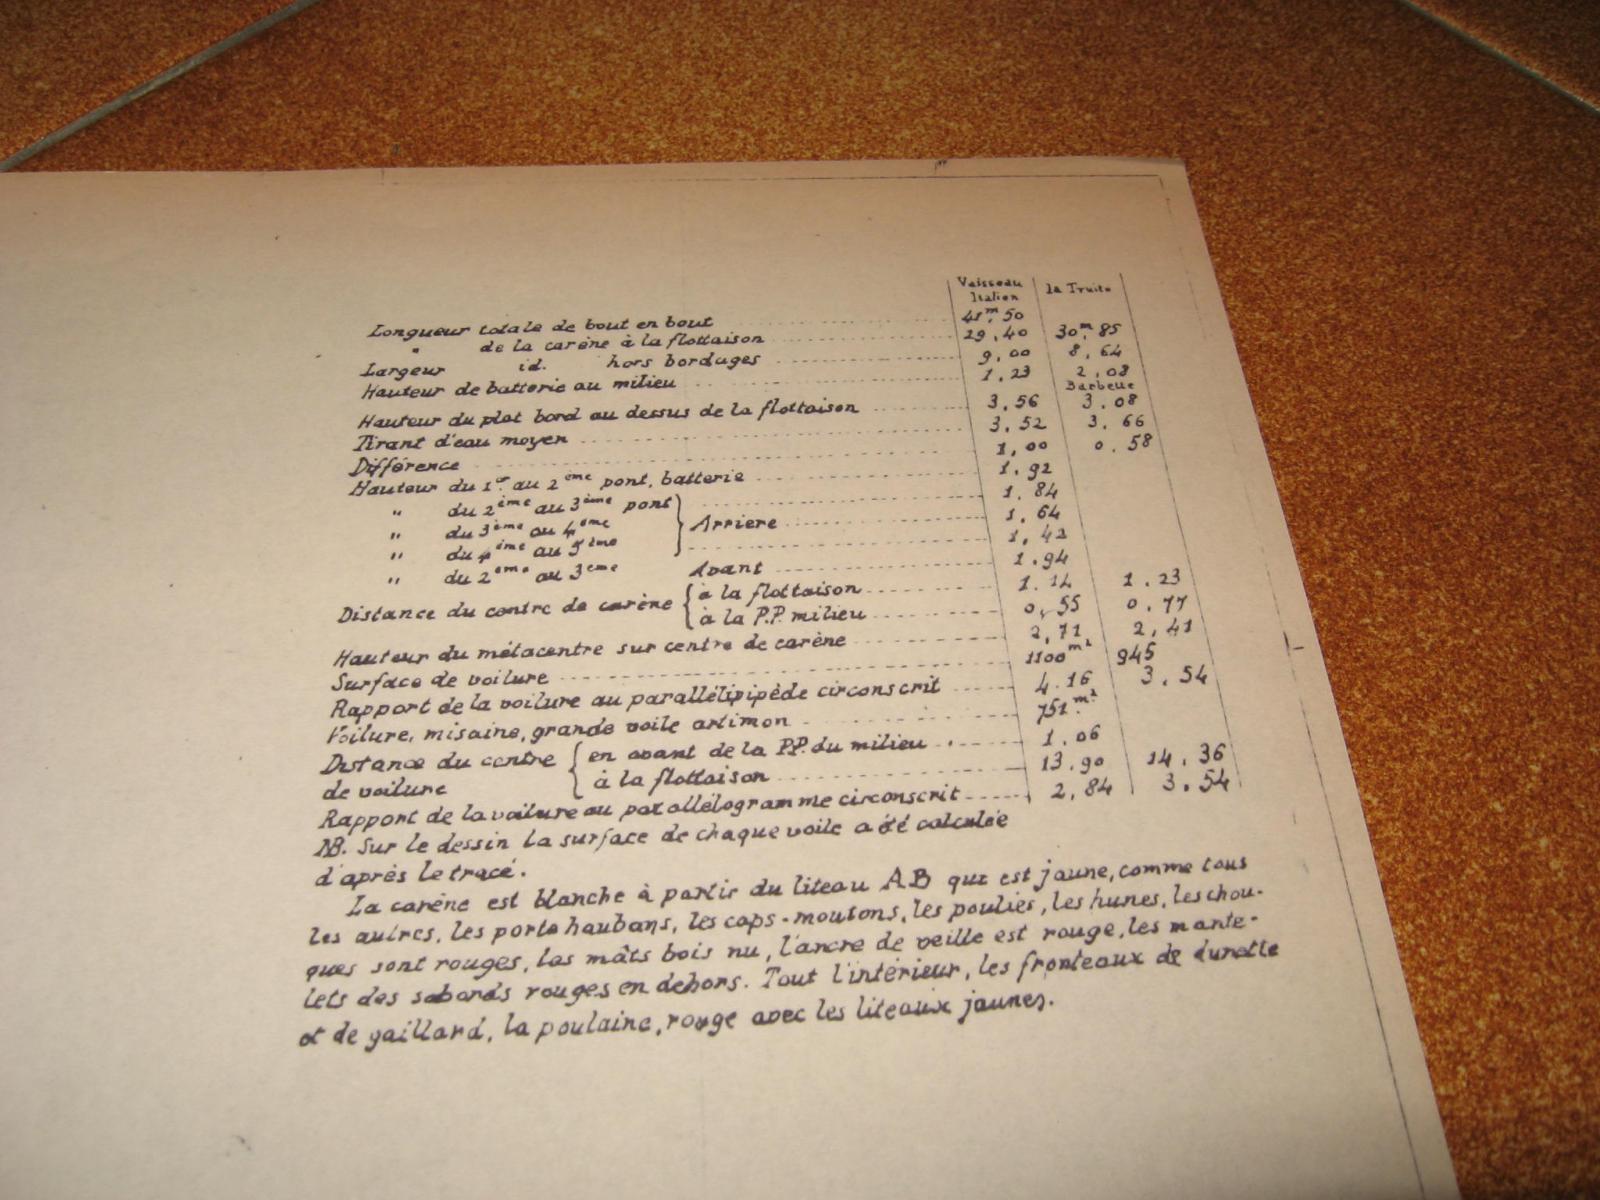
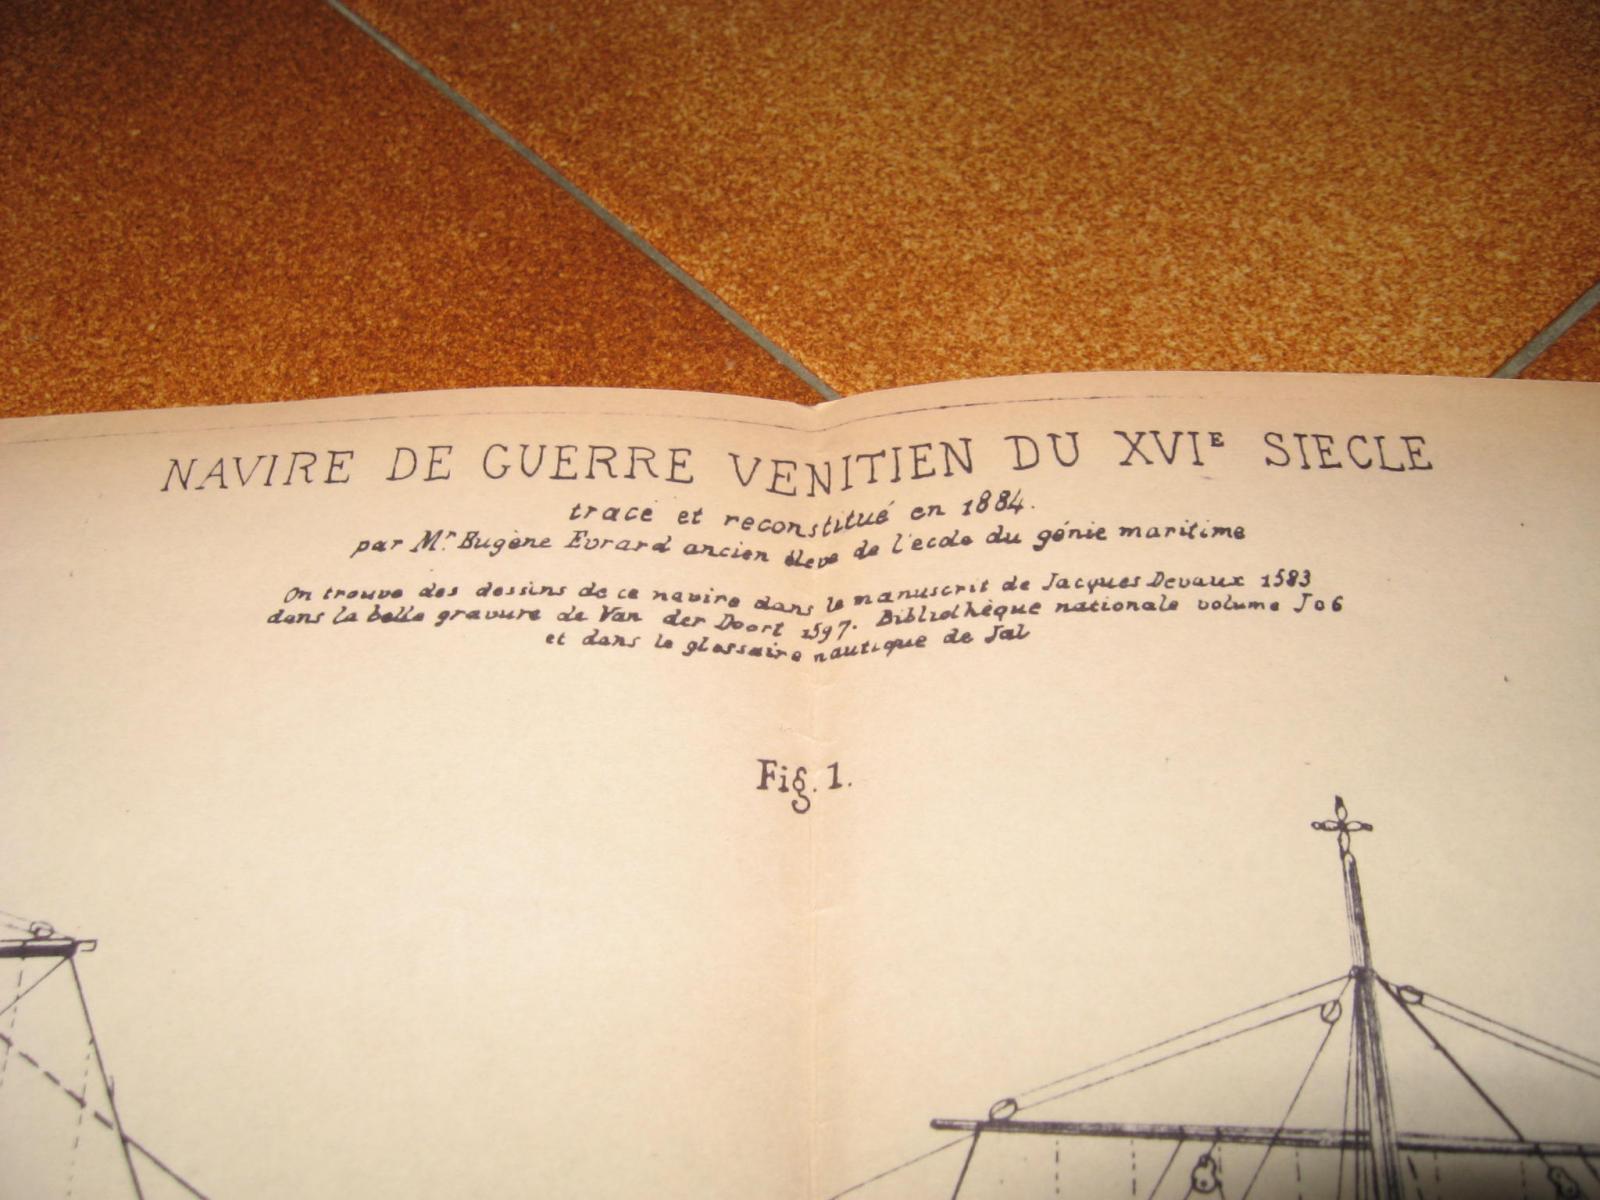
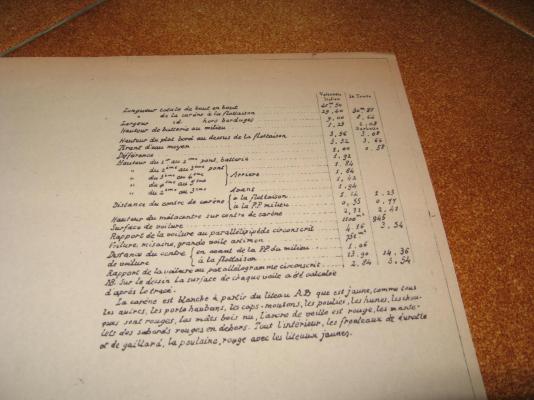
below there are the informations about the size of the Venetian ship that I show previously. Are French written, but can be understood, I think. Well, is nearly 30 metres of lenght.
-
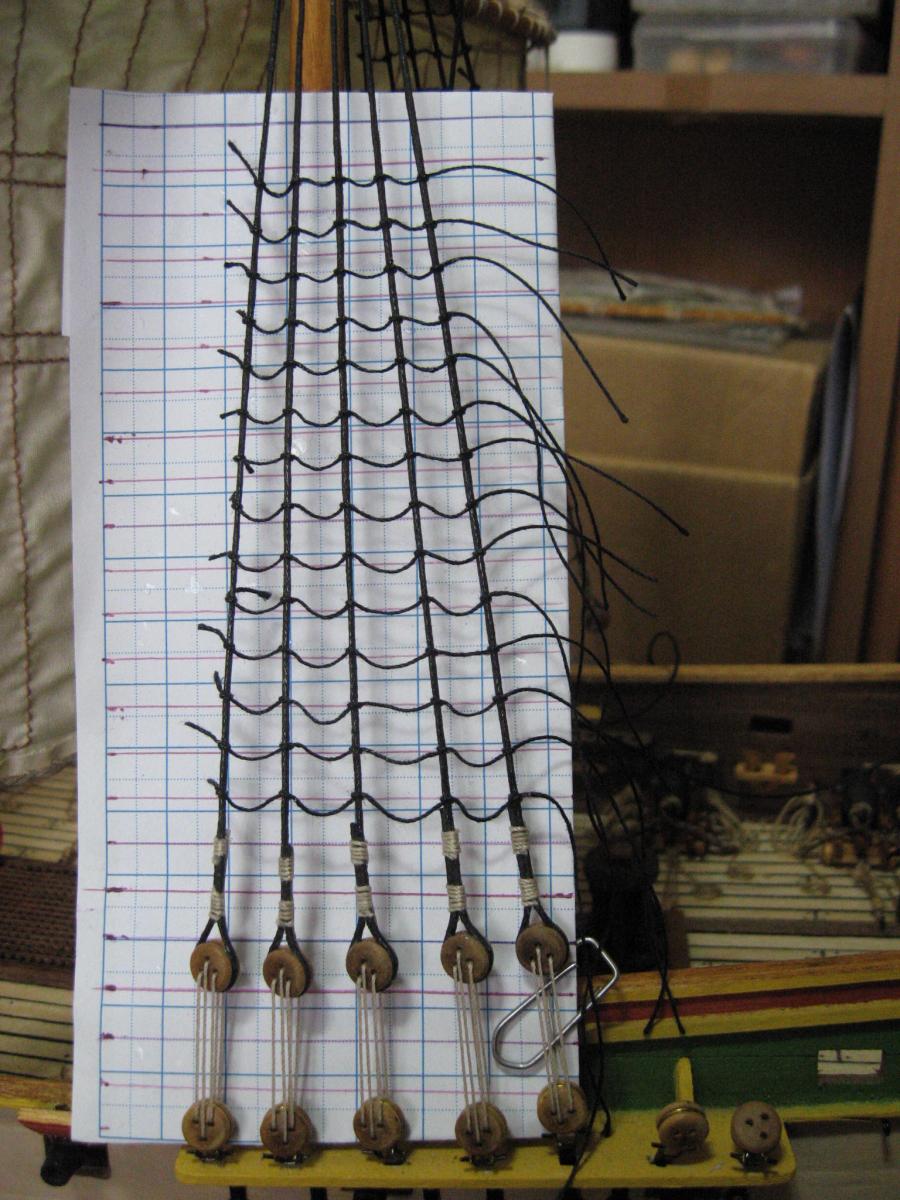
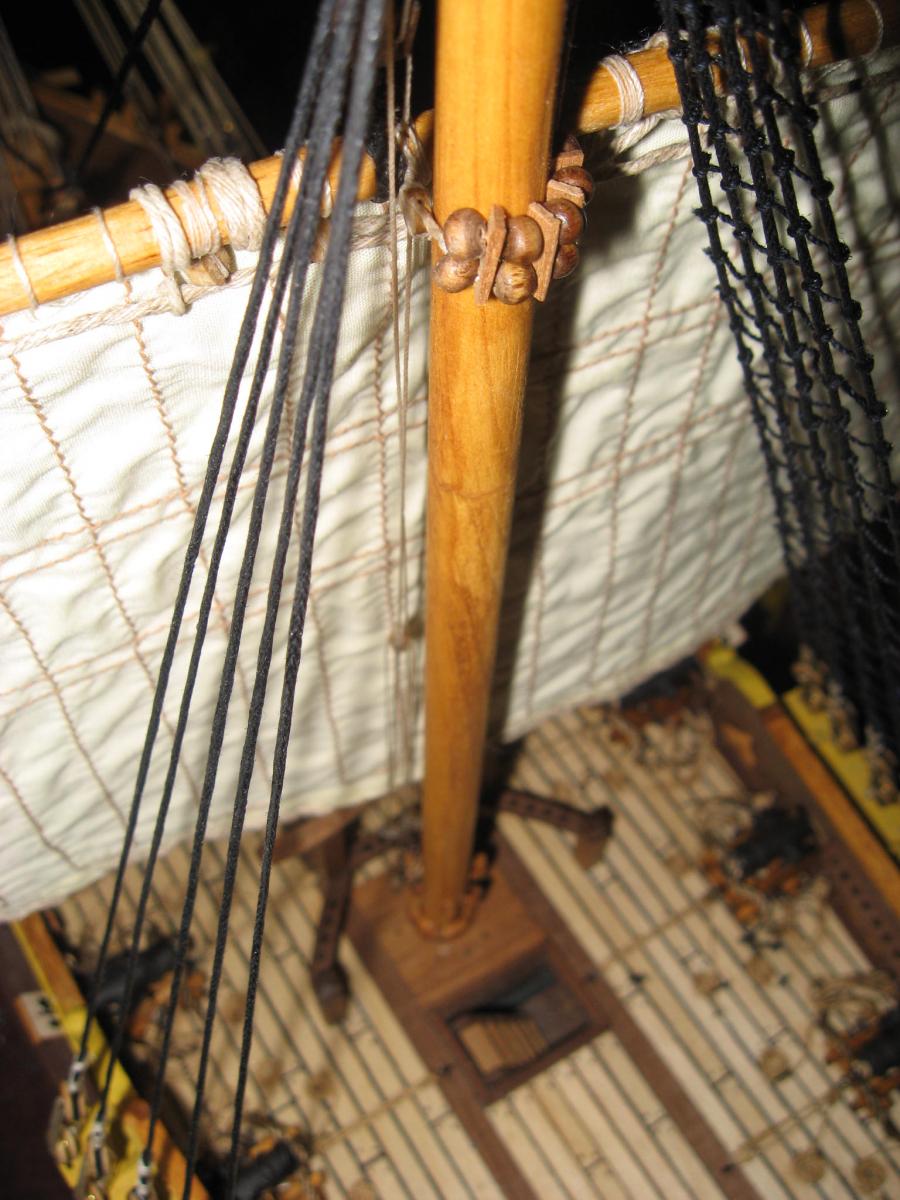
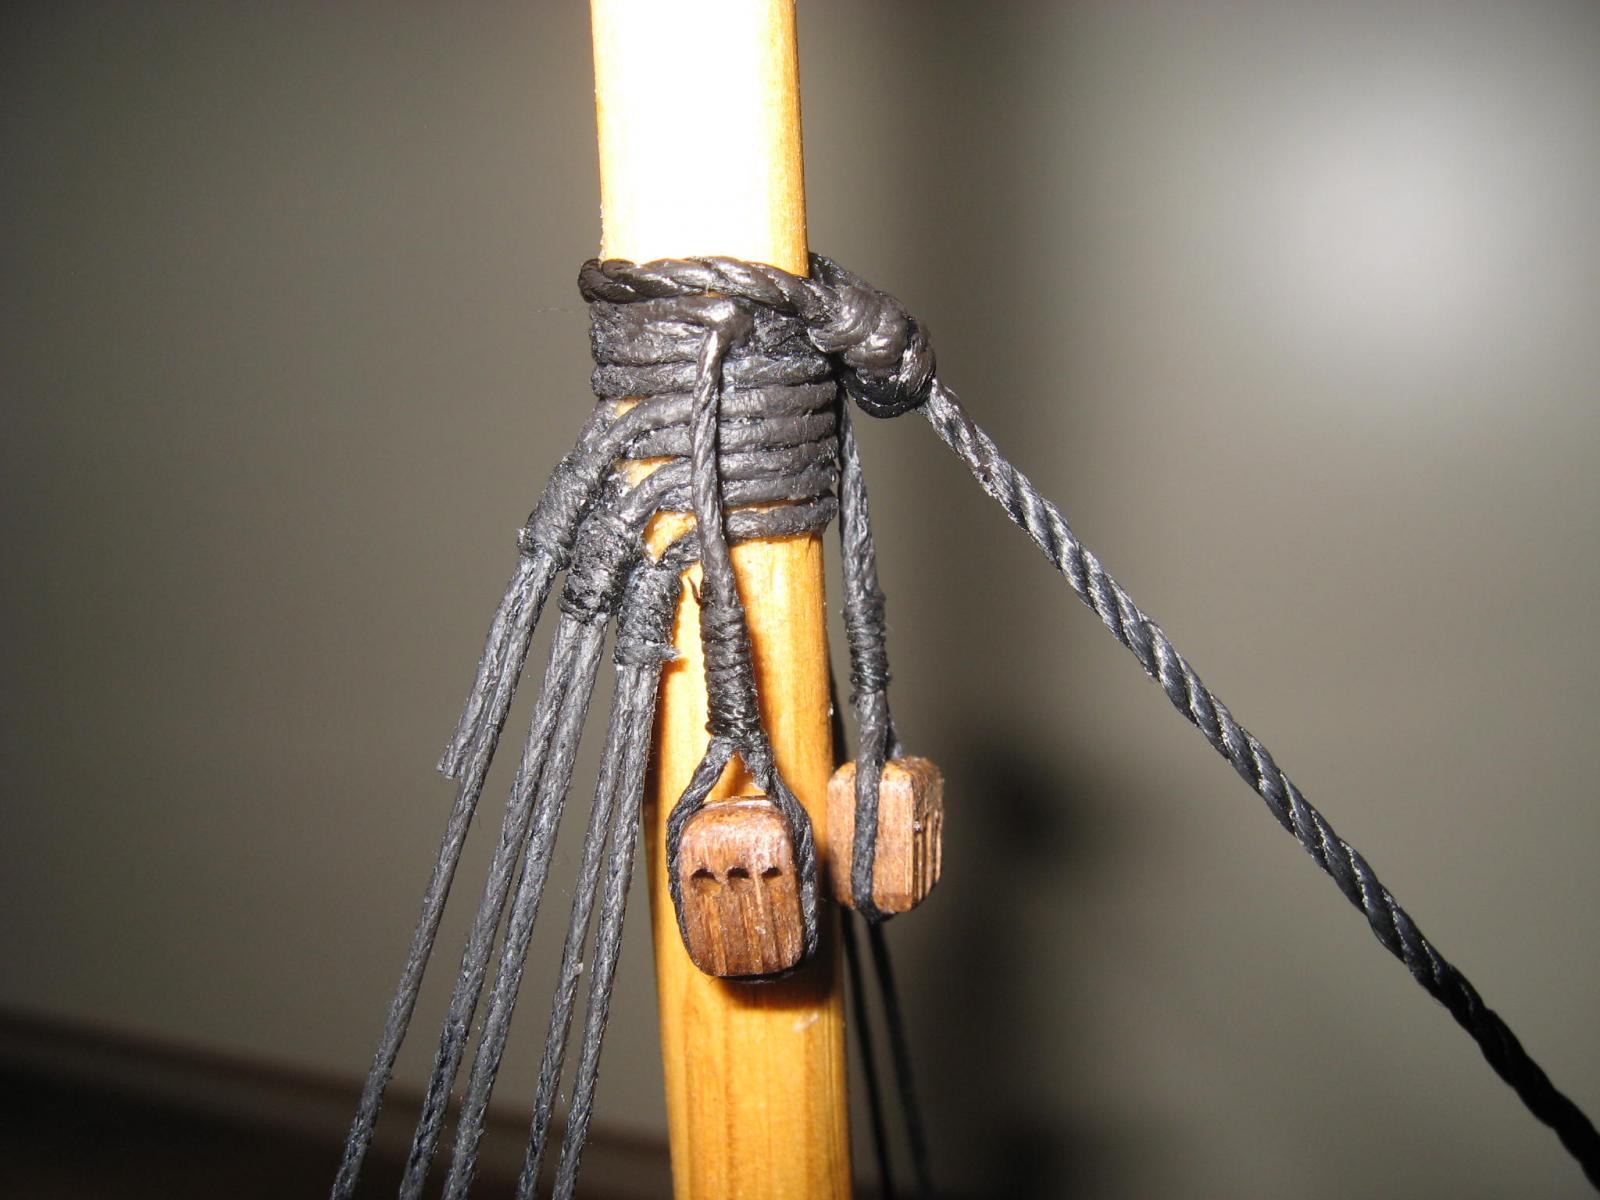
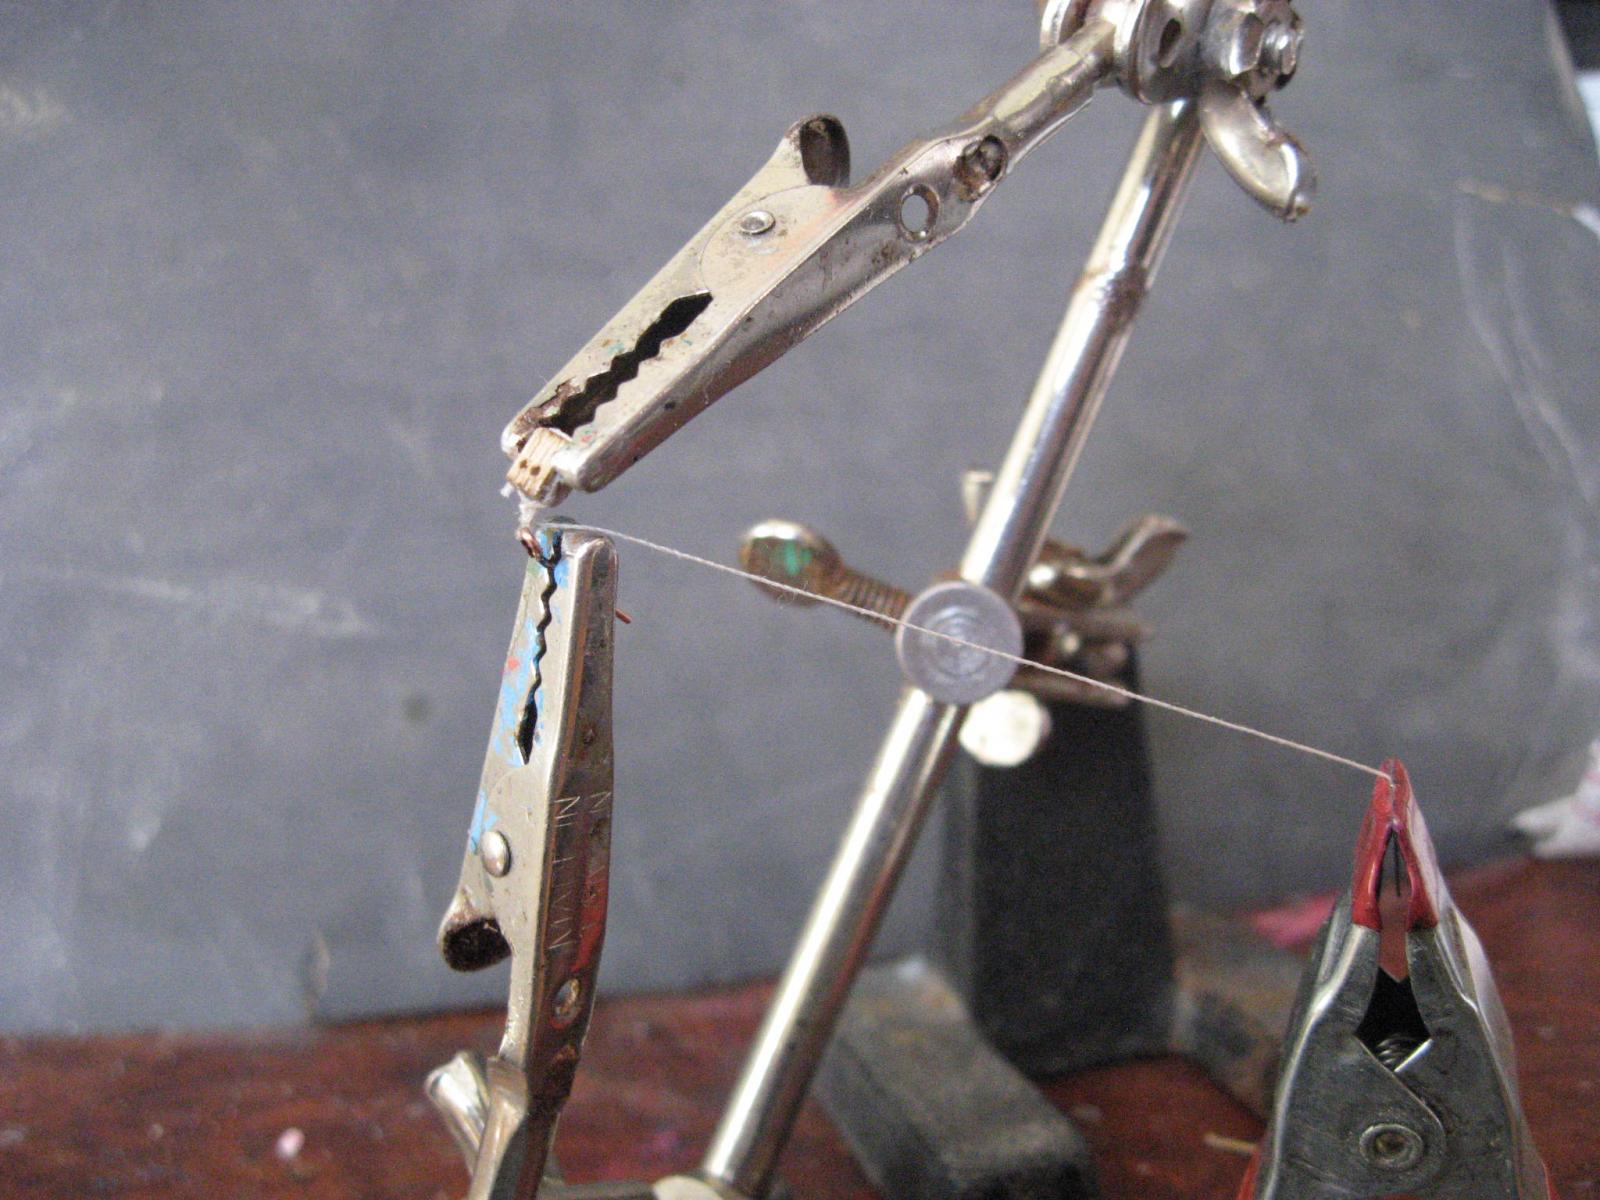
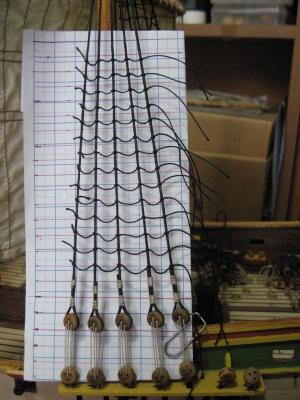
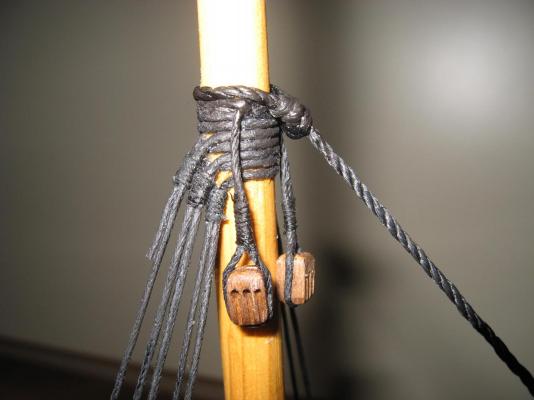
Thank you Kees for visiting the shipyard! Thank you Carl! Thank you for your smart comment, but it is just a matter of patience... If you have it, you can do what you want! For these steps craftmanship is not involved (but the extensive use of tweezers is highly suggested). The ratnails are made using one tweezer for each hand and the knots fixed with cianoacrilate glue. The result are straight shrouds, not suject to bending...forever, since the cianoacrylate expands inside the rope and everything became rigid. The final result to the eye is good. But this can be done only with the black ropes, otherwise the stains of glue are too much clearly visible. so only patience is involved!
-
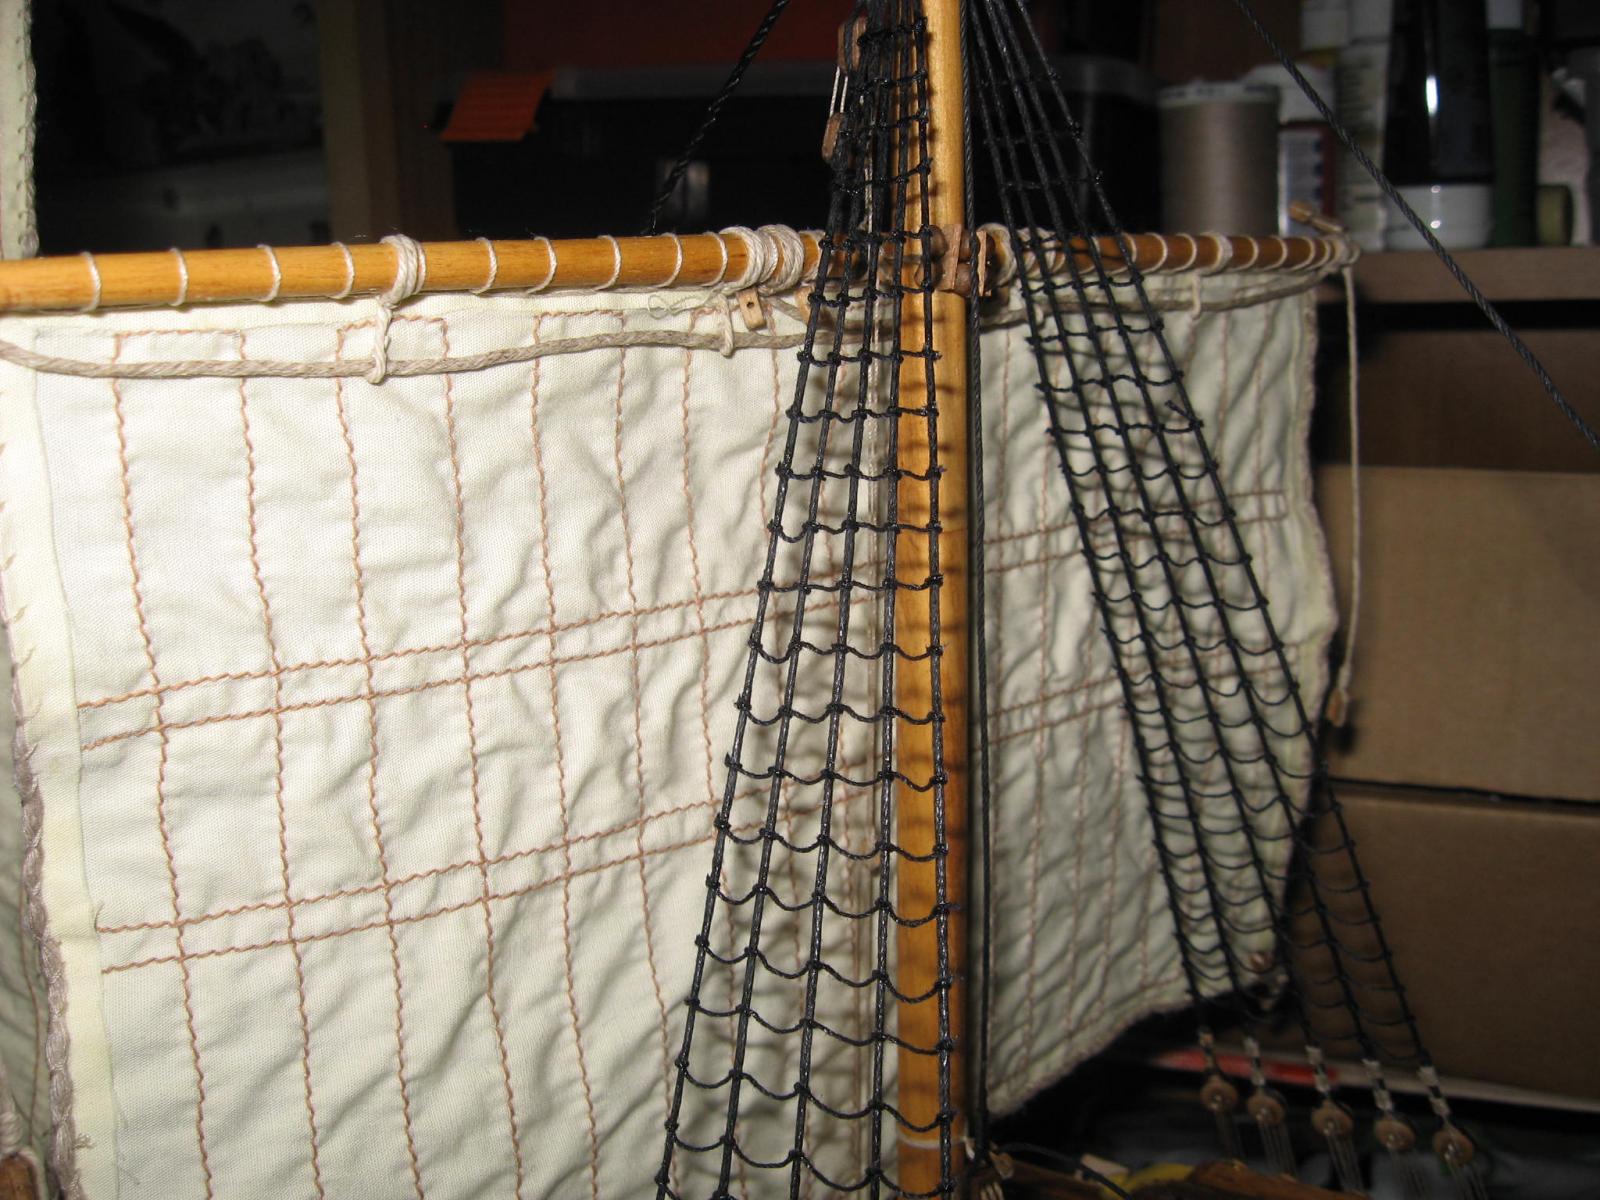
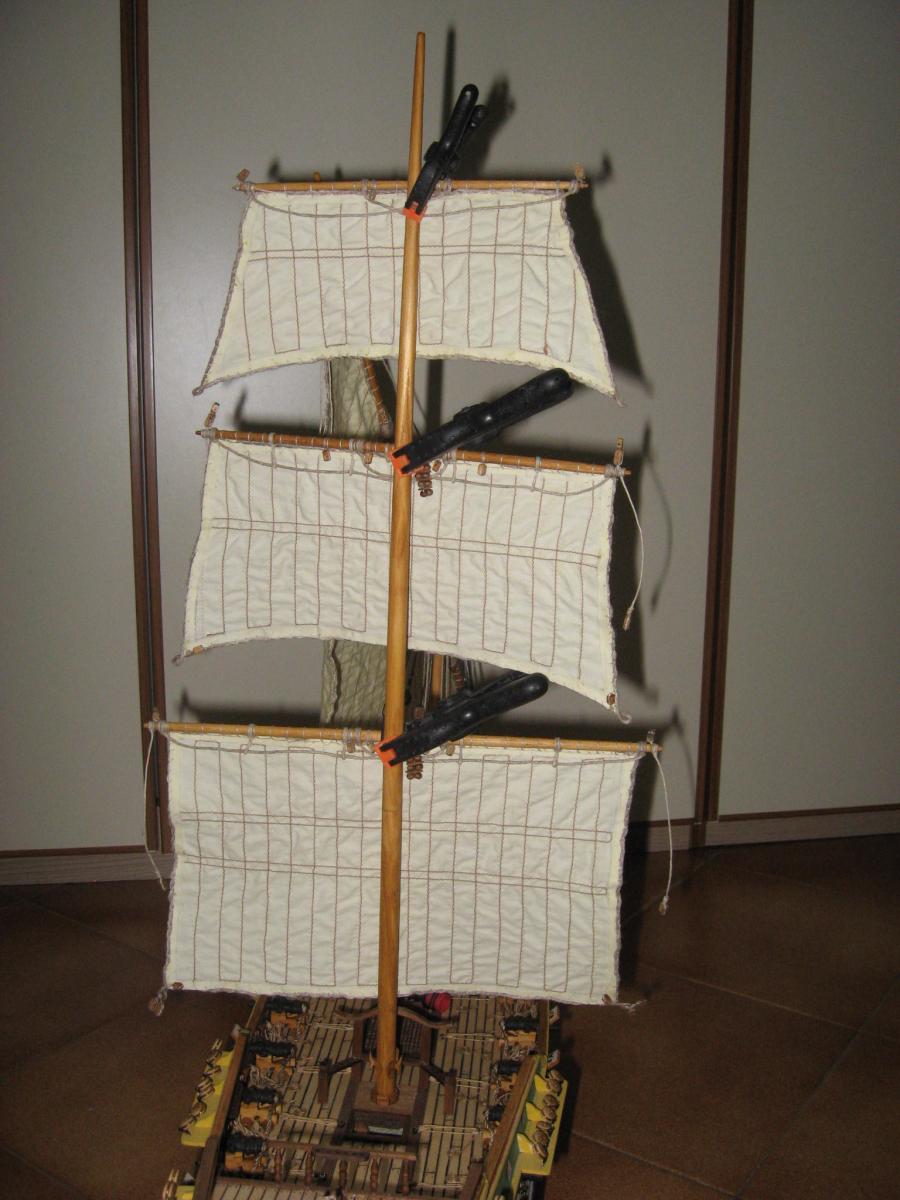
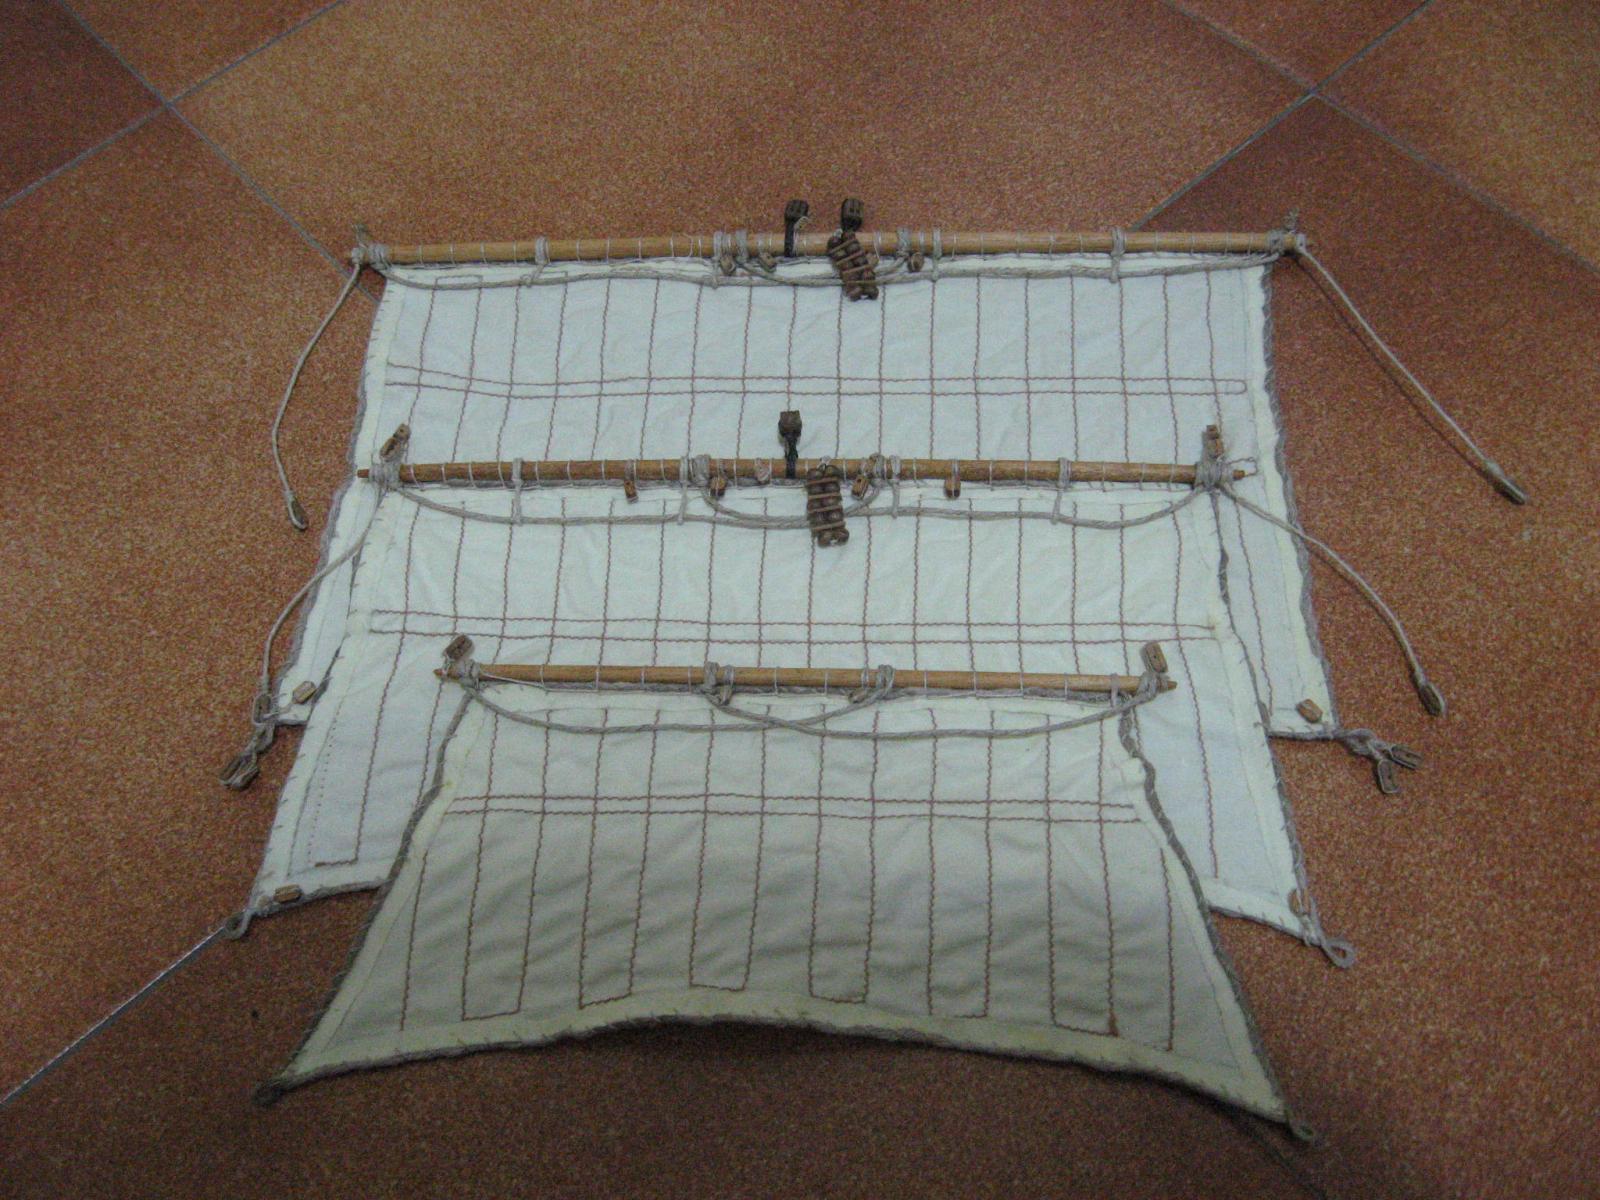
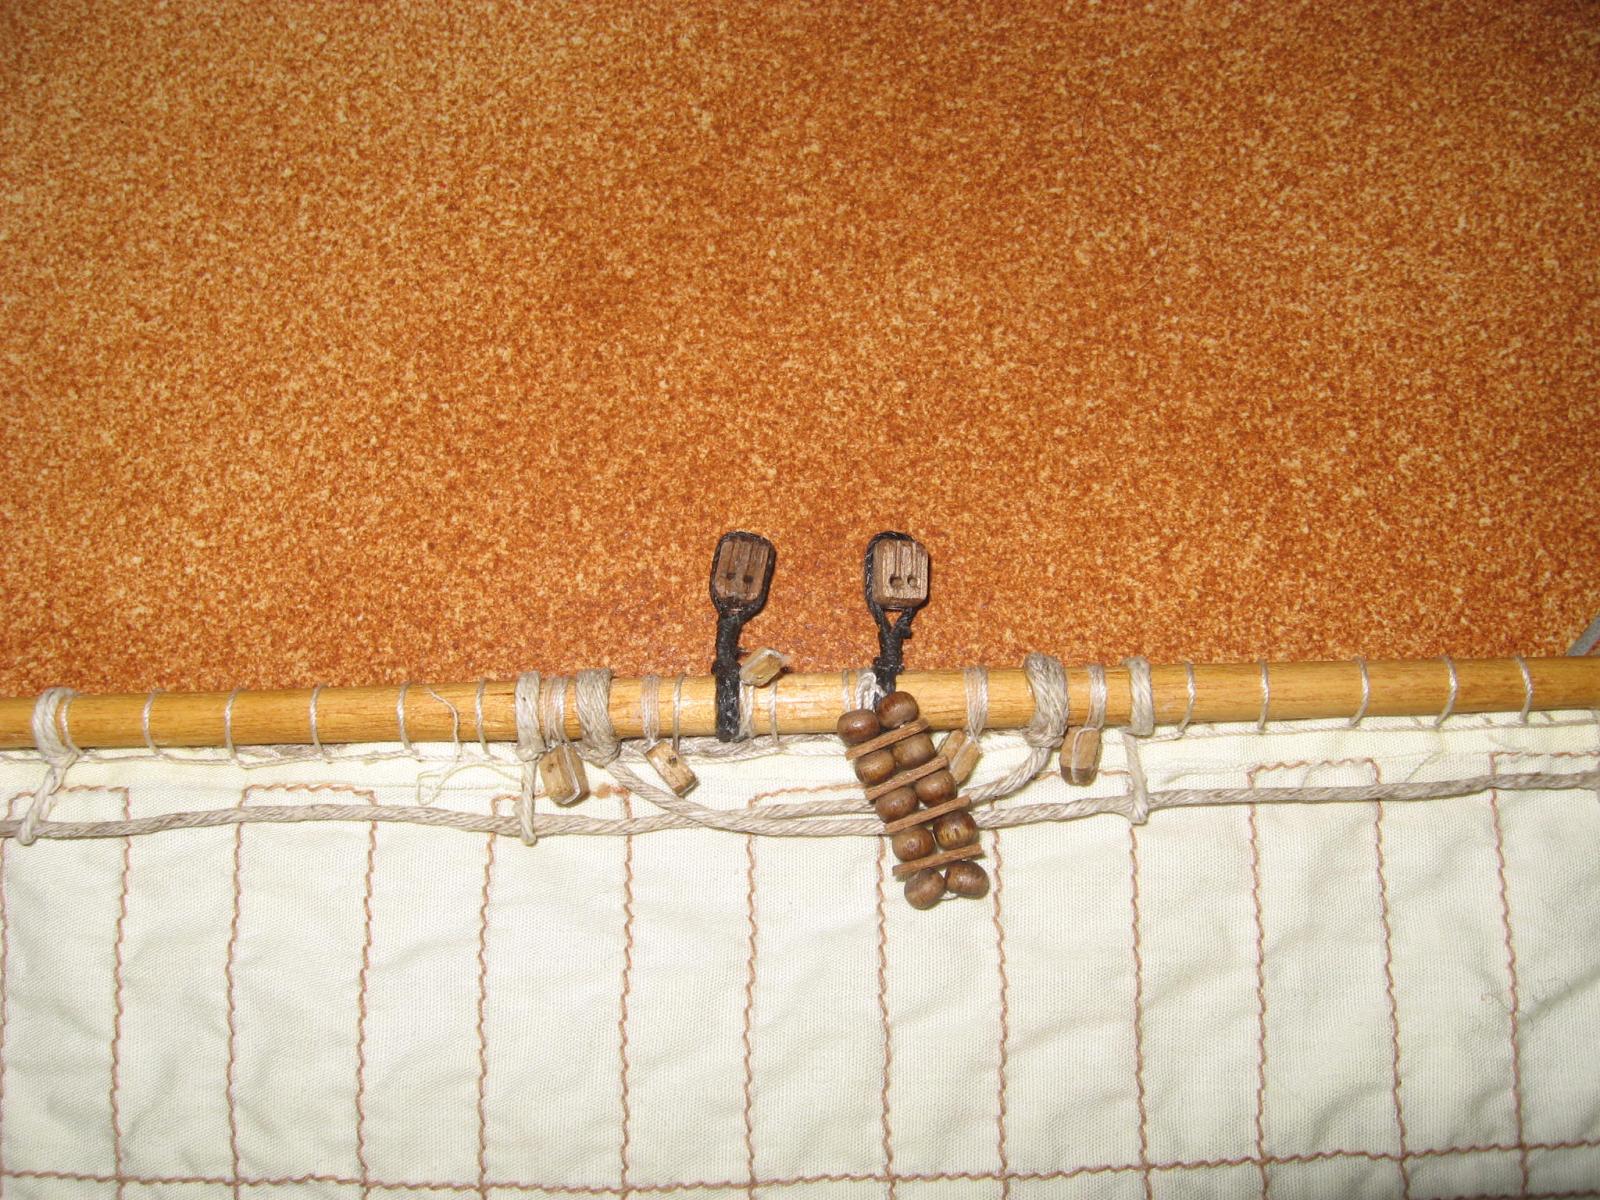
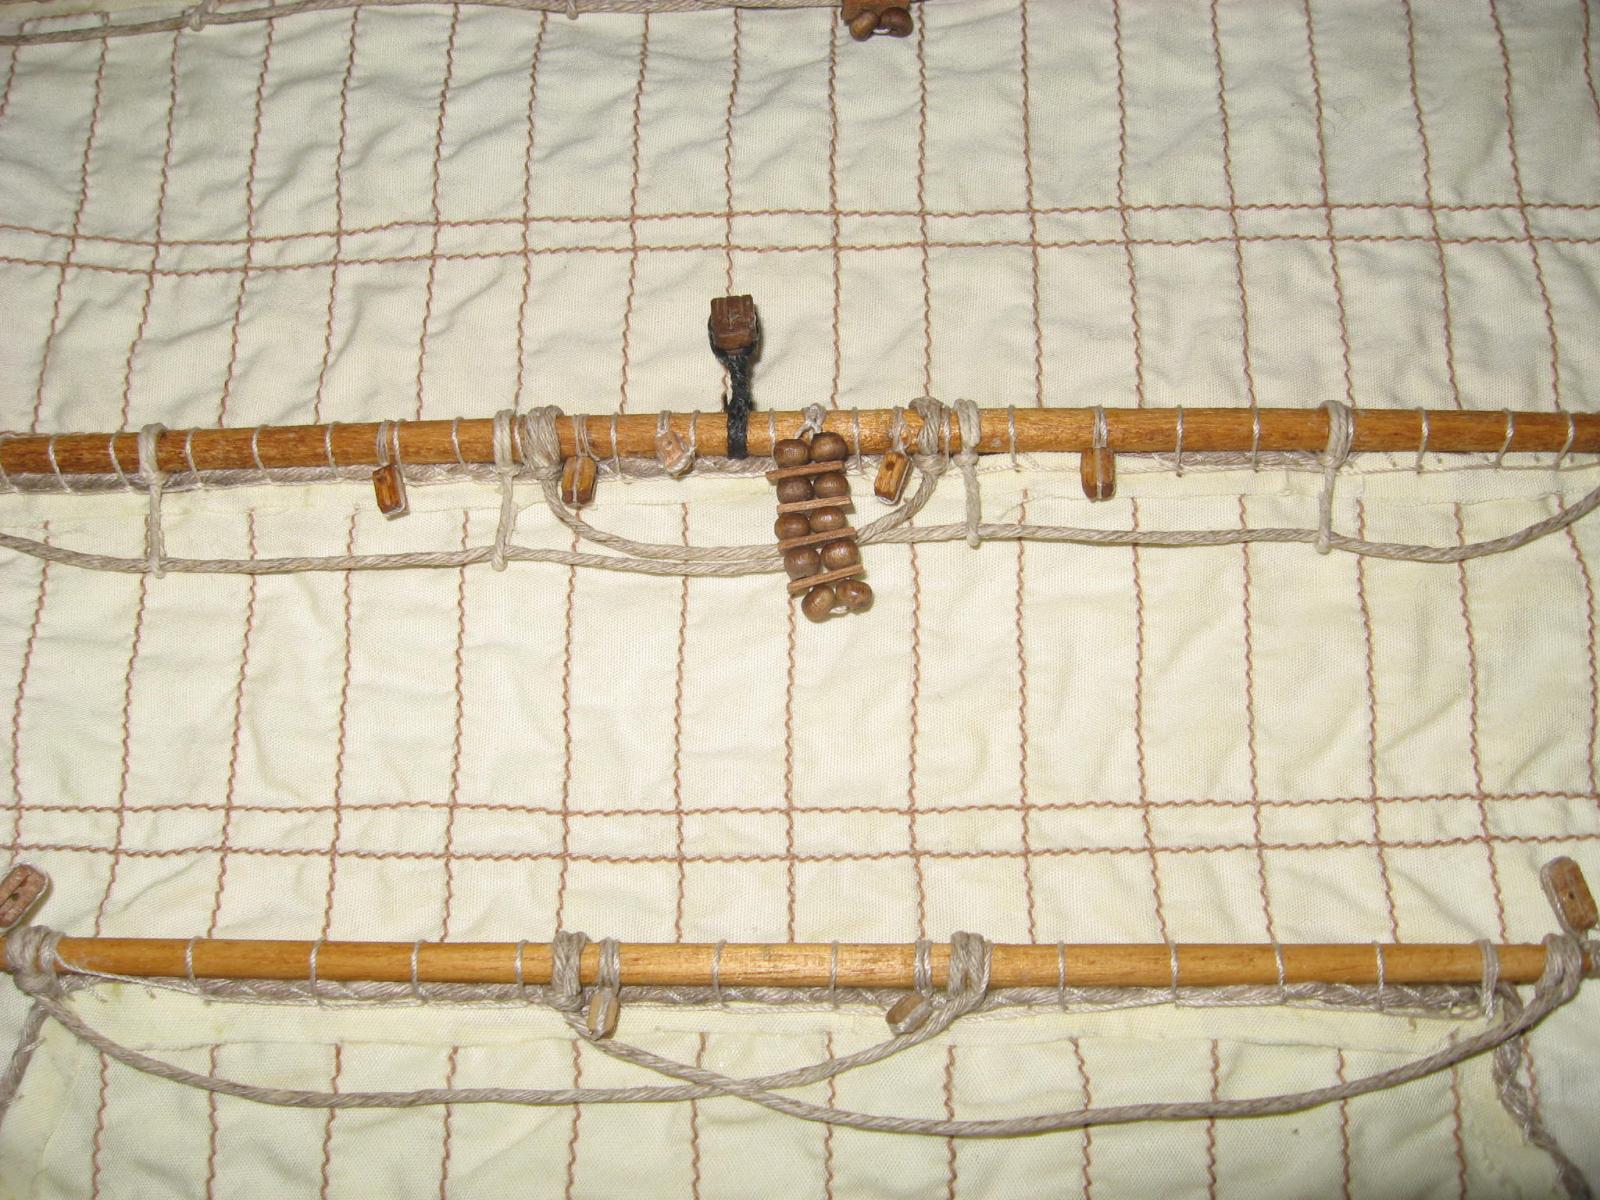
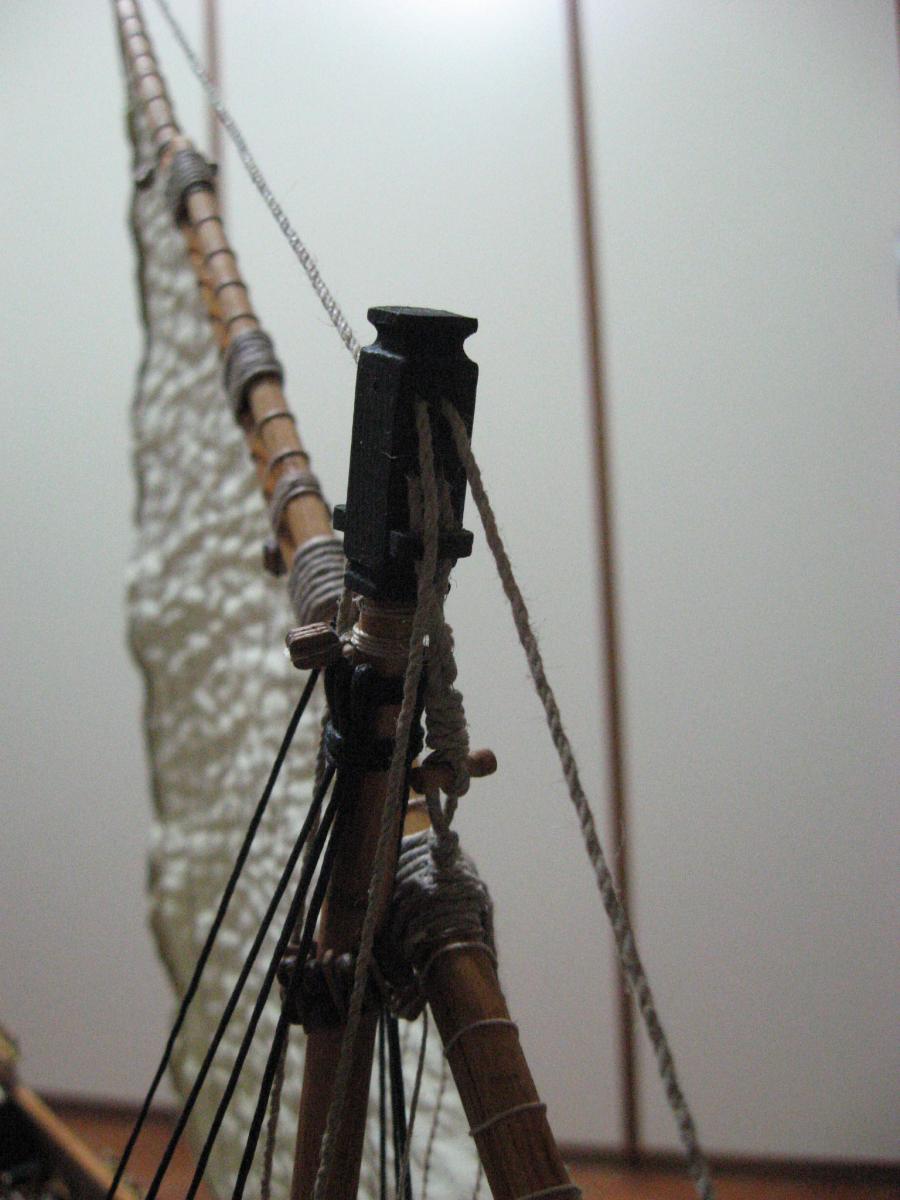
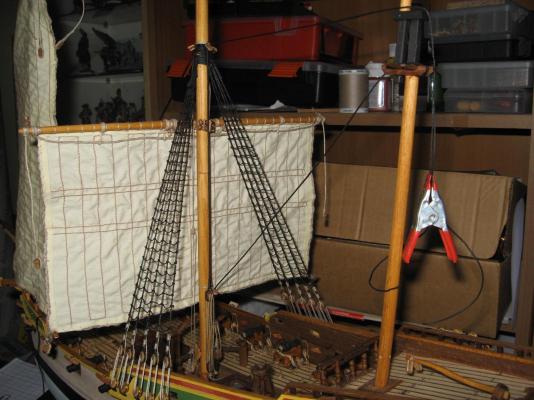
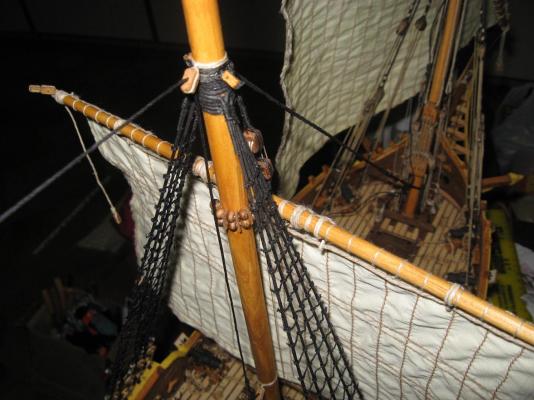
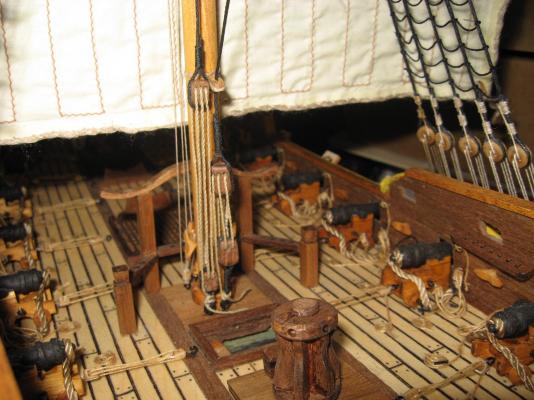
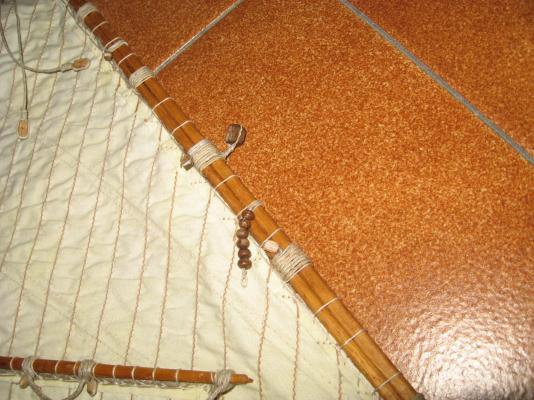
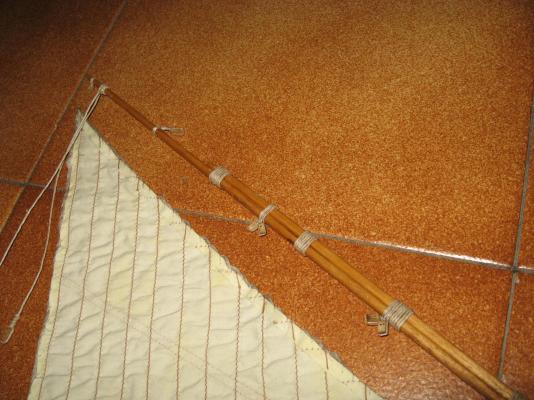
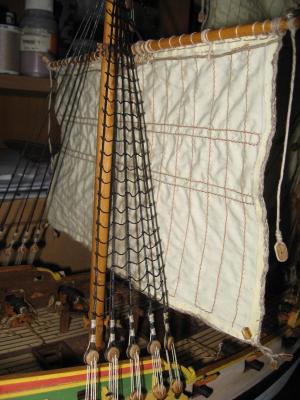
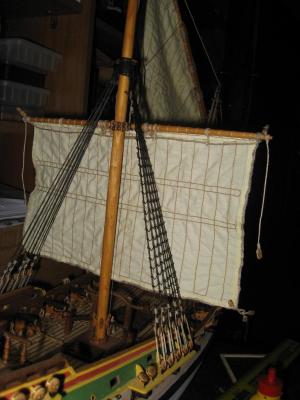
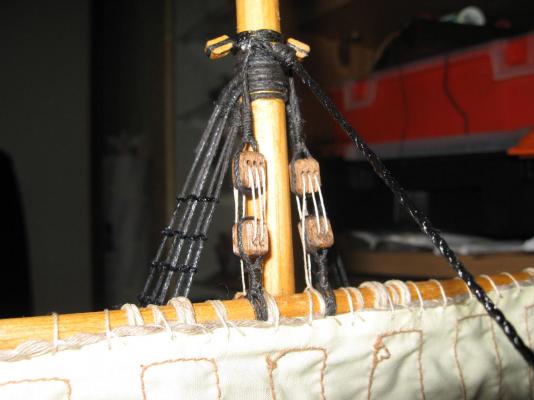
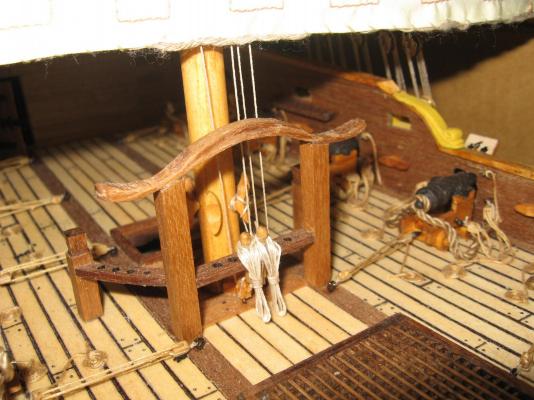
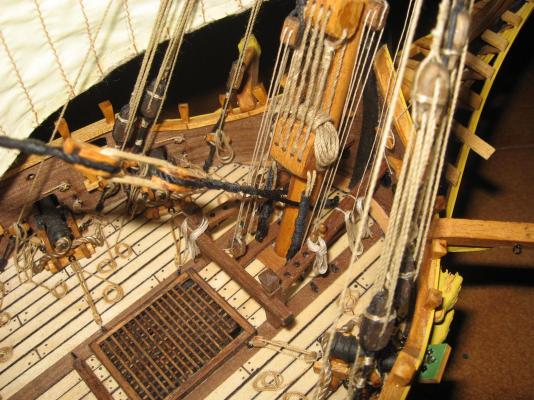
These days I focused on ropes of every type... First of all, I finished the ratlines of the main mast! :cheers: Since I was forced to evaluate the rigging of the mizzen mast, I prepared the two sails of the mizzen mast. As said before, I cannot proceed further with the main mast until I attach the mizzen mast stays on the main mast base. That can be seen in one of the photos, where the multiple blocks are showed (the decorative bundles of ropes are not yet placed). the mizzen mast it is not yet glued. The short term objective will be to complete the two bilge pumps. I prepared the pieces, but are not yet ready. after that, I will return to the main mast rigging, with all my clouds of doubts, that surround it like a mist...


- 190 replies
-
- 10
-

-
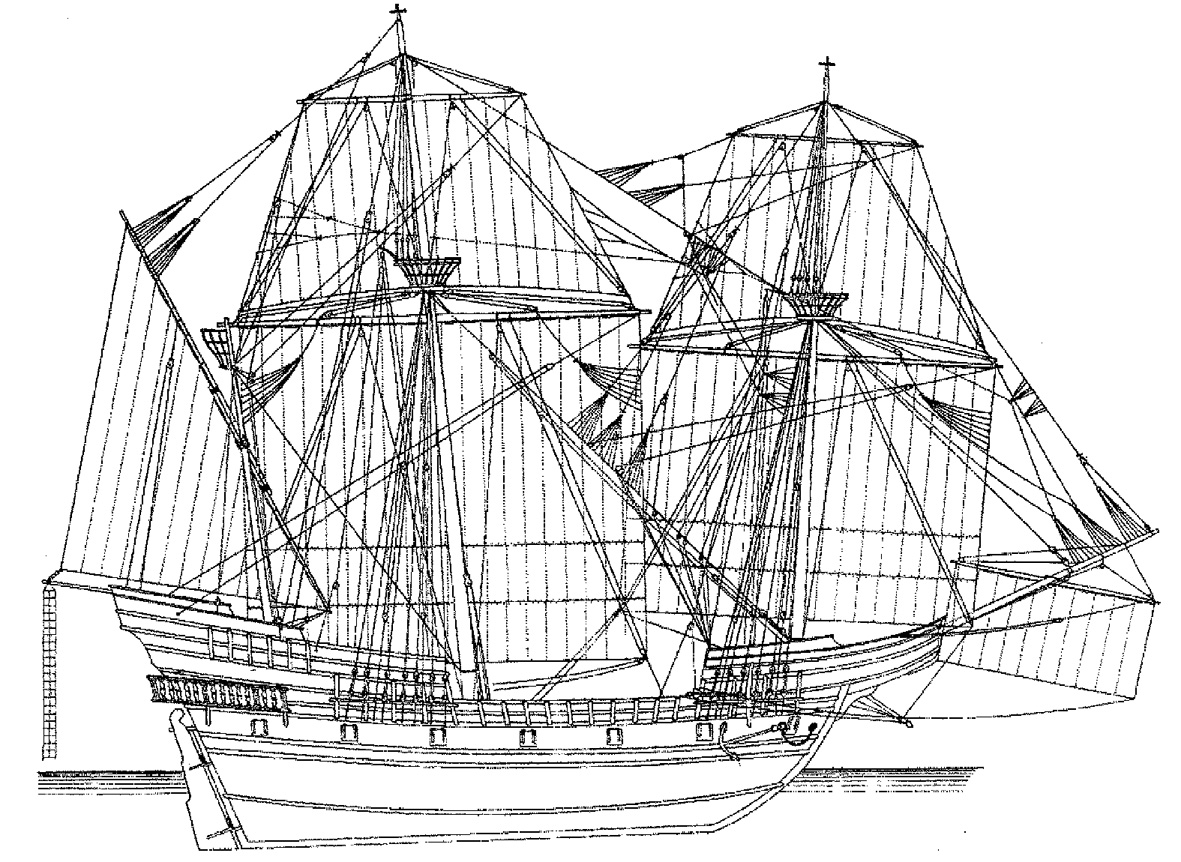
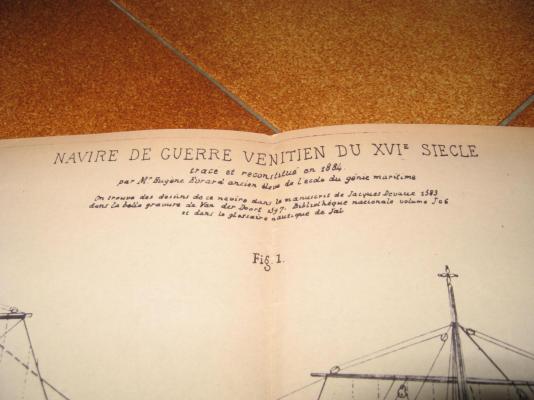
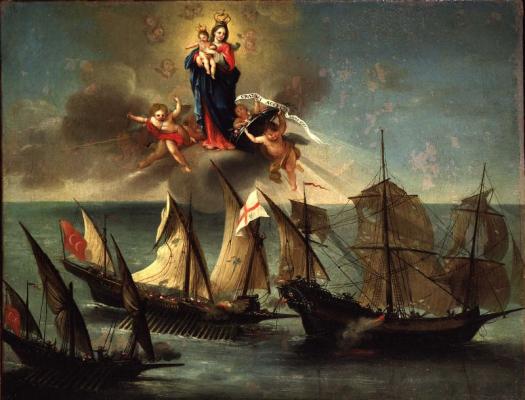
Hello Nazgul! interesting your research! maybe can be of help the following image: represent the side view of a Venetian Galleon of mid XVI century. As you can see, it matches a lot your Gripen. this ship was a contemporary ex-voto model, which was studied and drawn by the Admiral Paris in 1884. the drawings made by Paris were used by Corel for making its own "Galeone Veneto" kit. I bought in the past the Paris drawings from the Venice Naval Museum, but now are available in many online shops, and are very complete (from my point of view).

-
Thank you Carl! Making a model from scratch in that way is like writing in a completely empty blackboard, so sometimes doubts raises. This saturday I will proceed with the ratlines and installing the mizzen mast stays. by the way, "LOVELY CANNONS" should not be the right term to call a weapon that bring death and destruction.... :D
-
Thank you Patrick! Thank you Robin! What generates my headhache (and the days of study) is to find the correct way to place the running rigging. The correct position of some rigging is the result (in real life) sometimes of centuries of ship sailing. The final result is an harmonious overall view of the rigging of the model, where a simmetry is present and no odd cables crossing are present. Well, I have rather clear which are the cables that MUST be present and their role, but if I place them wrong, the final result can be a messy overall view (to an expert view). When I made the Endeavour, following its monography, the final result of the rigging was an "huge quantity of ropes", but everything was placed in the right position and the final result was an harmonious view.... Just to explain better what are the various reasons that sometimes slow down my construction...
-
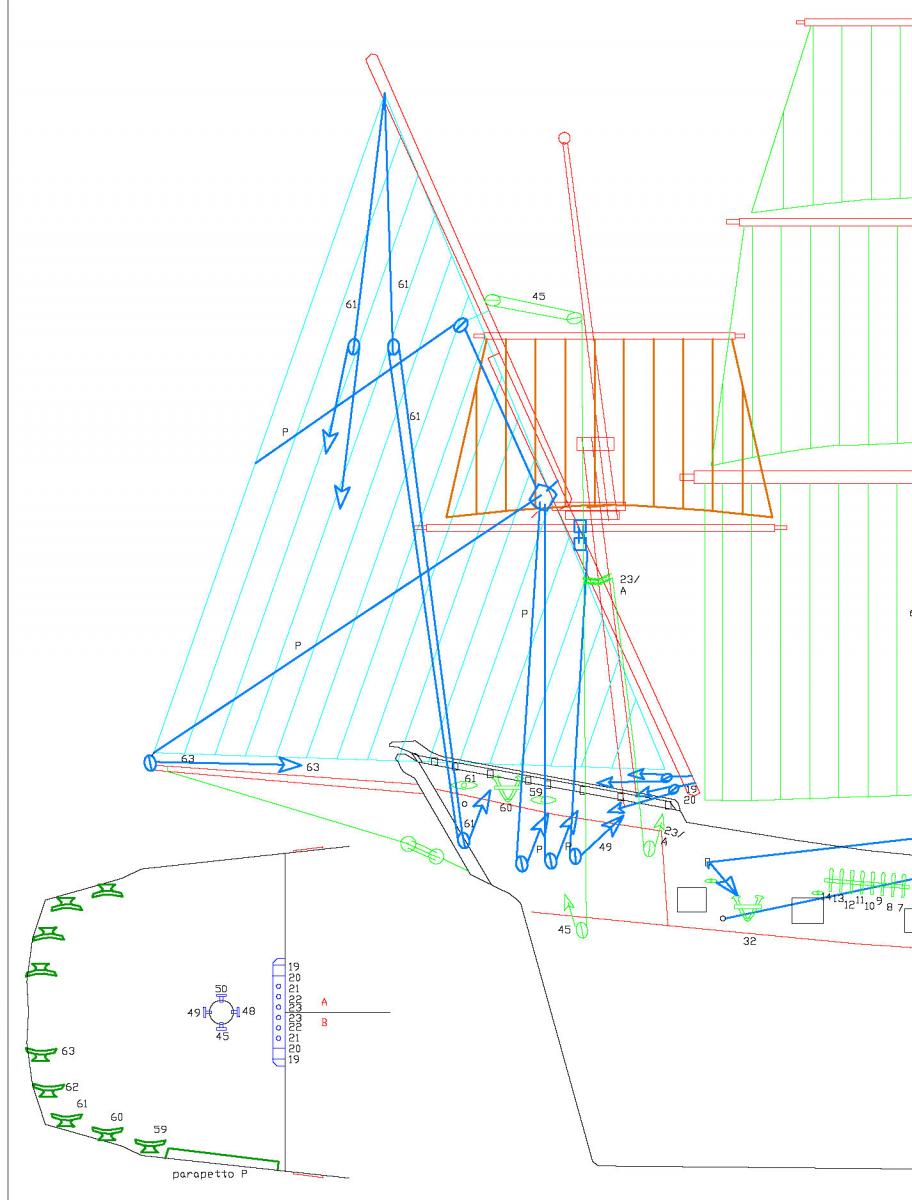
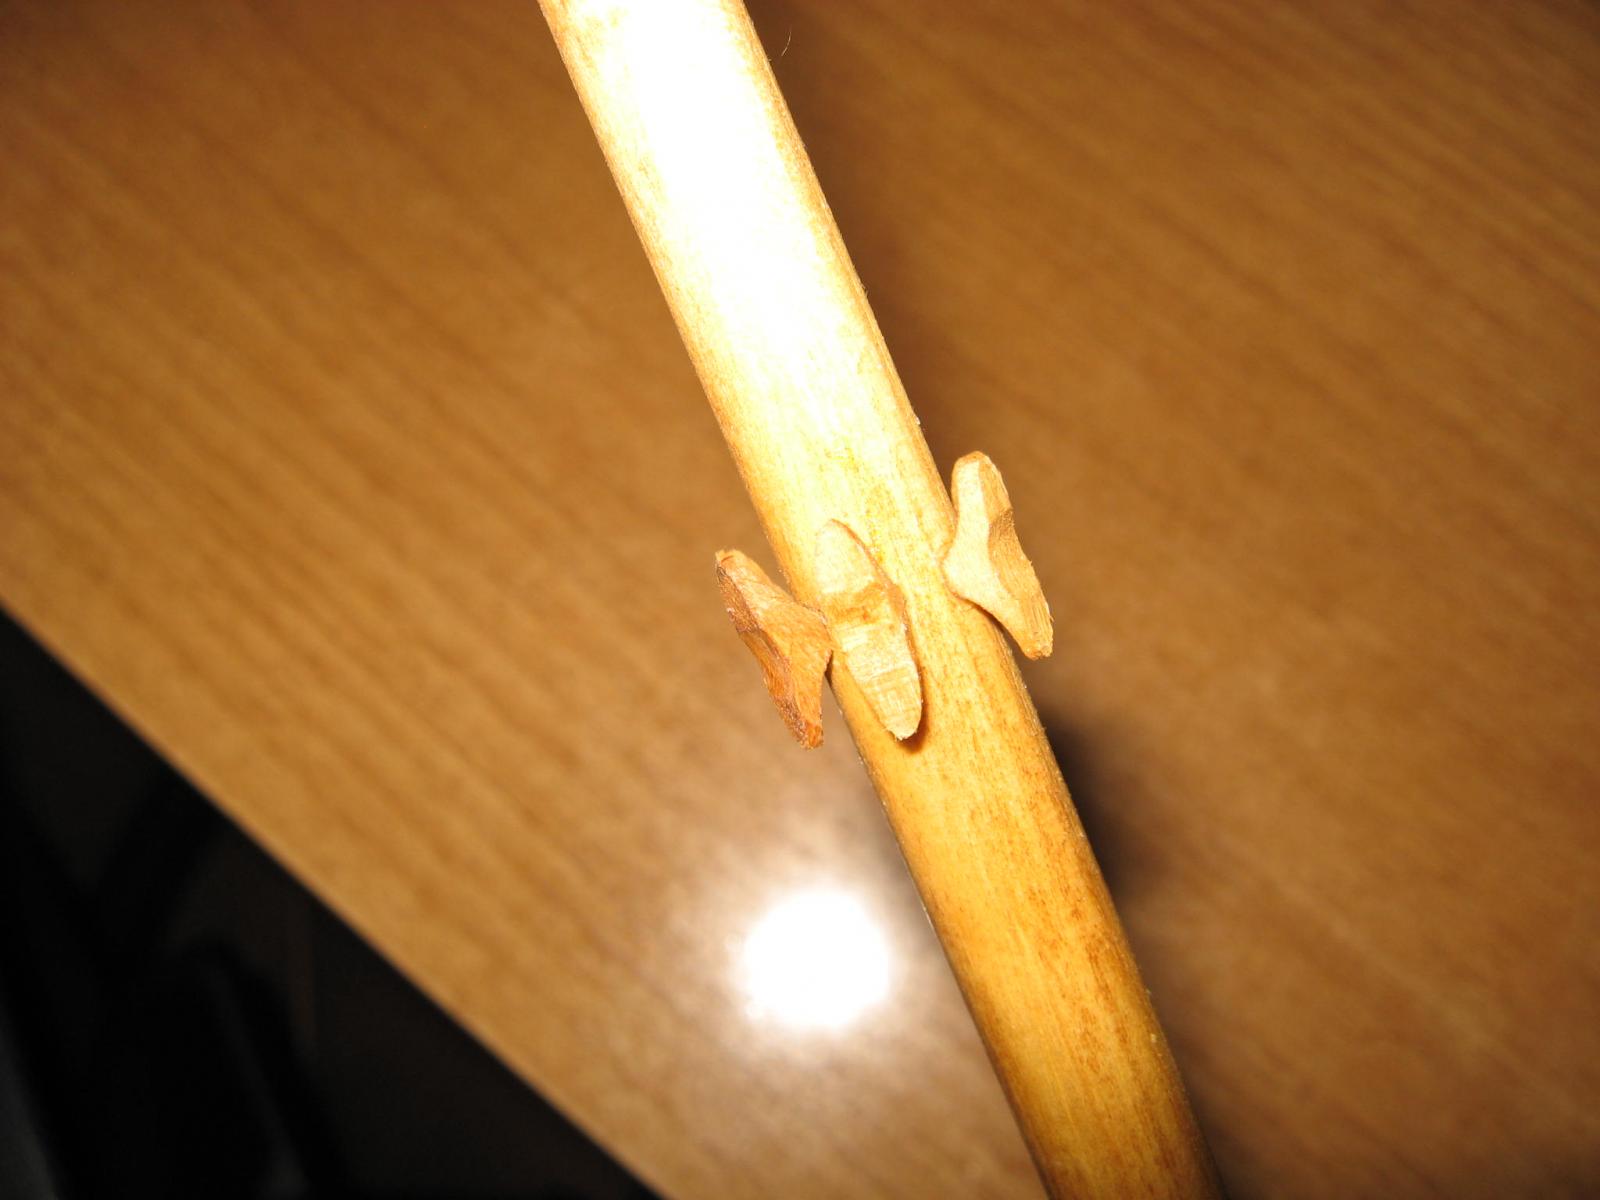
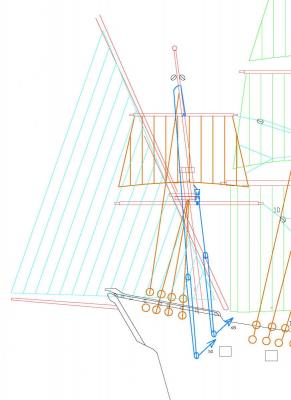
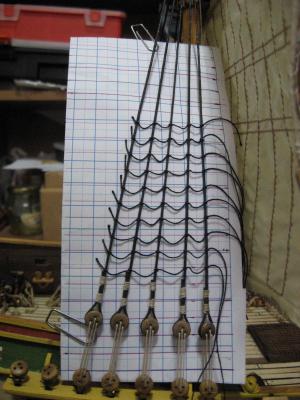
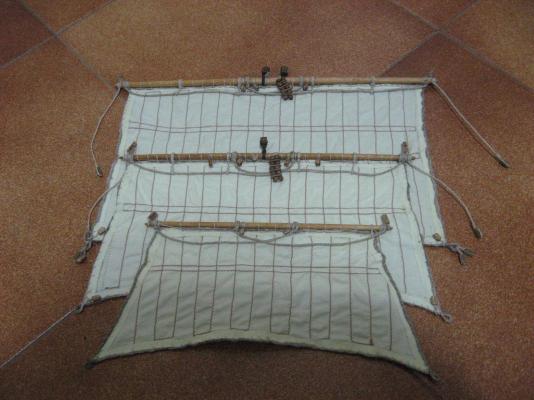
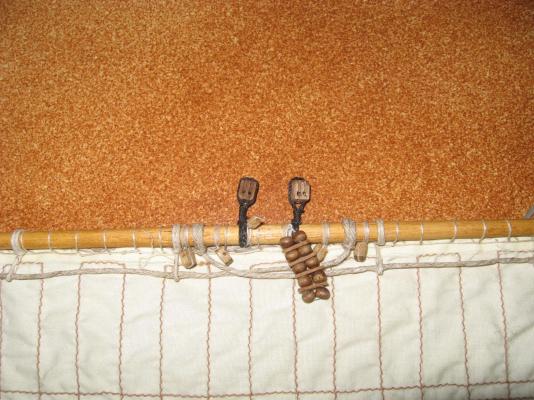
A small update It has been days of study... I abandoned a bit the shrouds and ratlines of the main mast, since I discovered that before proceeding with the ratlines I must install the terminal points of the mizzen stays, which are located behind the main mast base. But before doing that I must define other points related to the mizzen mast rigging, which I leaved frozen. but before doing that I must define the position of some blocks on the mizzen mast related to the mizzen latin sail but before doing that I must define the blocks position on the mizzen lateen sail Well, it's just like a chain reaction.... since I am doing the rigging project by myself, it is a continuous evolution... Now the end of this chain reaction impose to reduce the cleats placed on the mizzen mast from 6 to 4 (the mizzen mast is too thin ). So I rewrote the arrangement of the running rigging of the mizzen lateen sail. the final result, in a more criptic way is as can be seen in the two drawings. I presented here just the rigging of the lateen sail, since my cad drawing is too messy to be showed. Some of the blocks it is possible that can be removed, since the mast is small and the sails too. the photos are related to the mizzen lateen sail, which I am forced to put forward. I anycase during these days my brain was too much jammed (cause too much work in office) to make the ratlines...


-
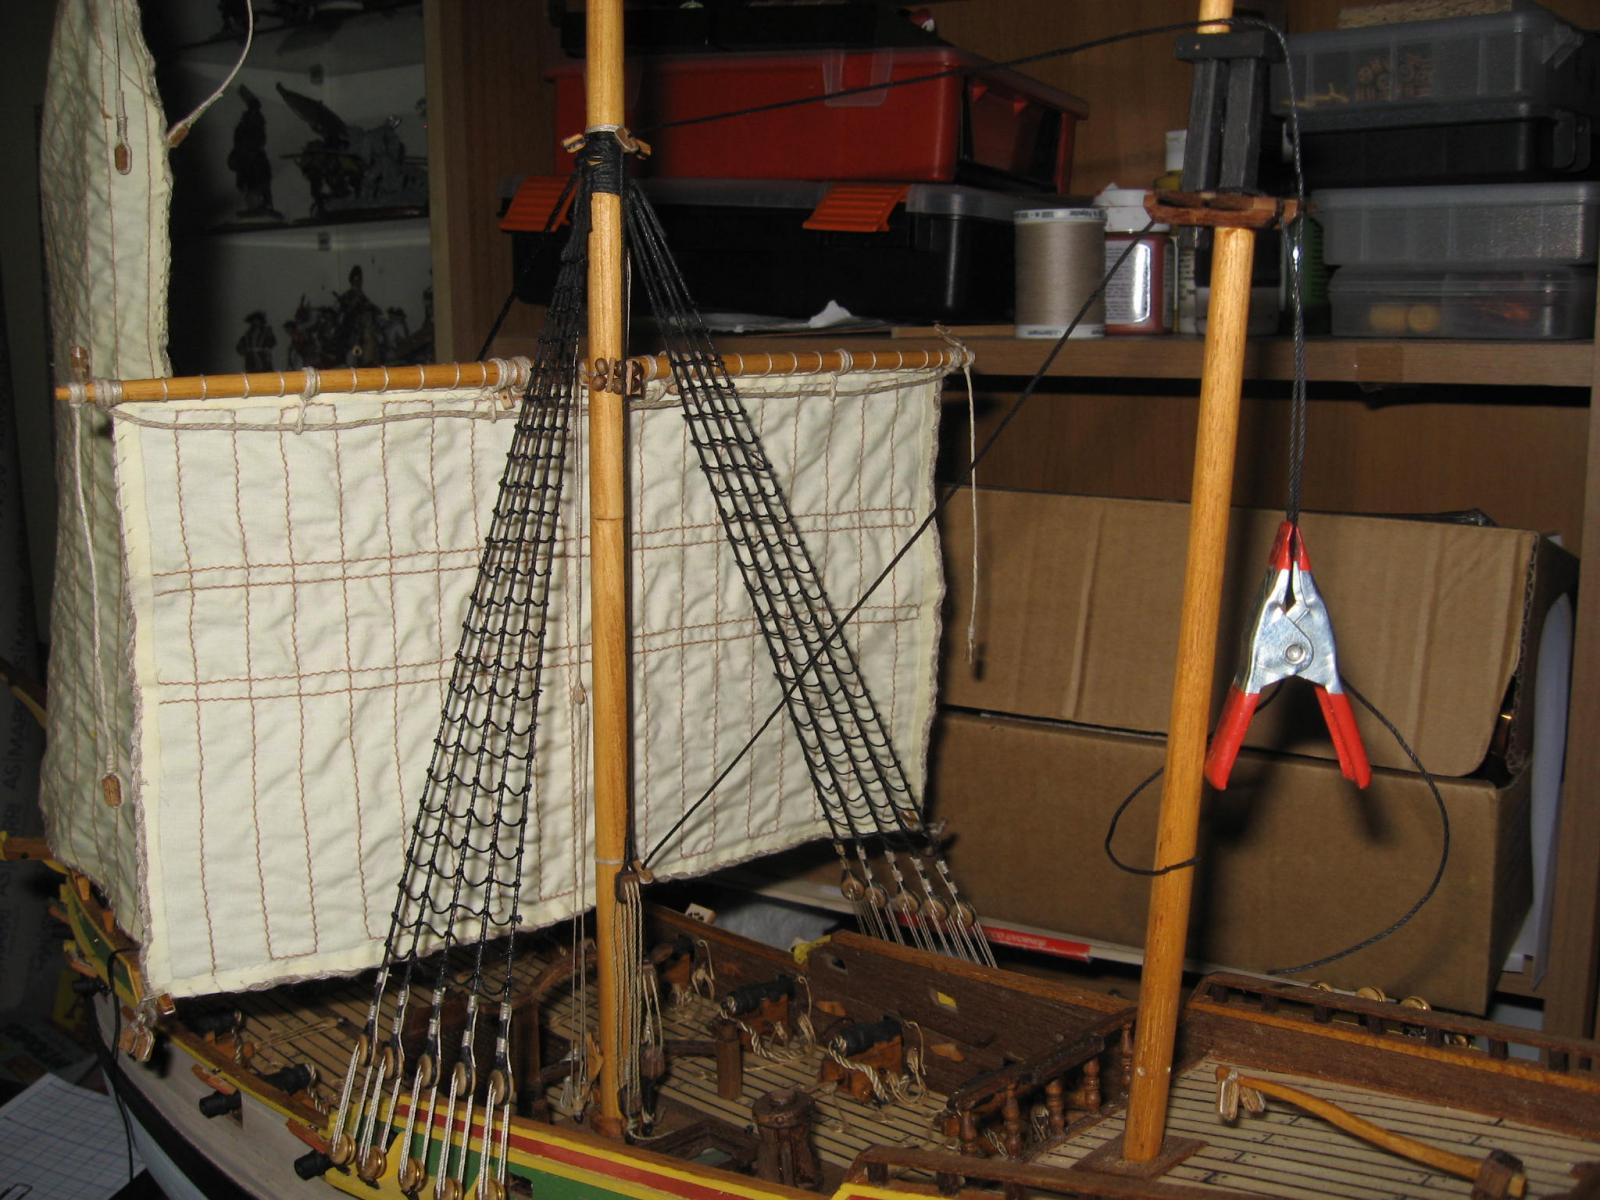
Thank you again Patrick! I'm too lazy to restart a new service boat... Some update... I installed the first sail, but I stopped the rigging just to the ones that keep it hanged (what an horrible way to explain the rigging :D ), since I discovered that the way I arranged everything needs absolutely that I complete the rope steps on the shrouds before proceeding further. If I don't do that now, I will have some problems of available space for my hands for attaching them. So, I was forced to start another boring step... I completed one side of the steps of the shrouds. Next week I will prepare the other side, and finally I will restart with the sails installation!

-
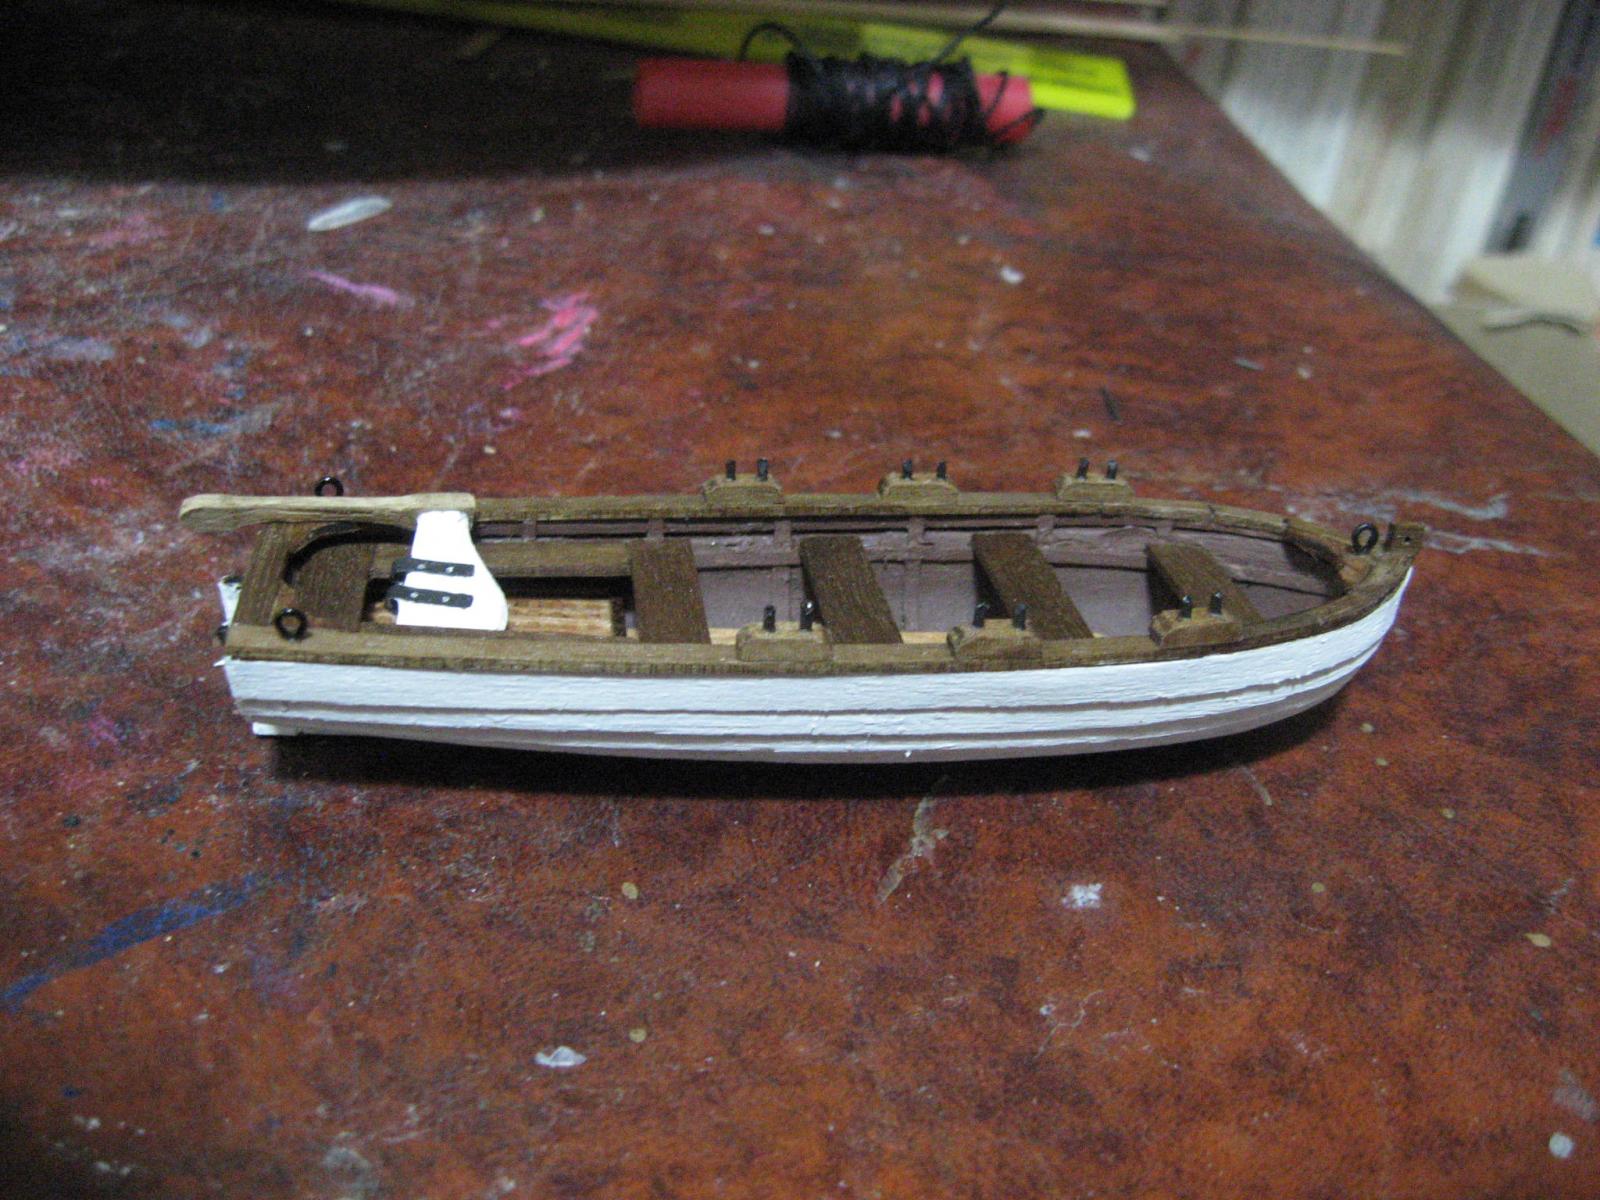
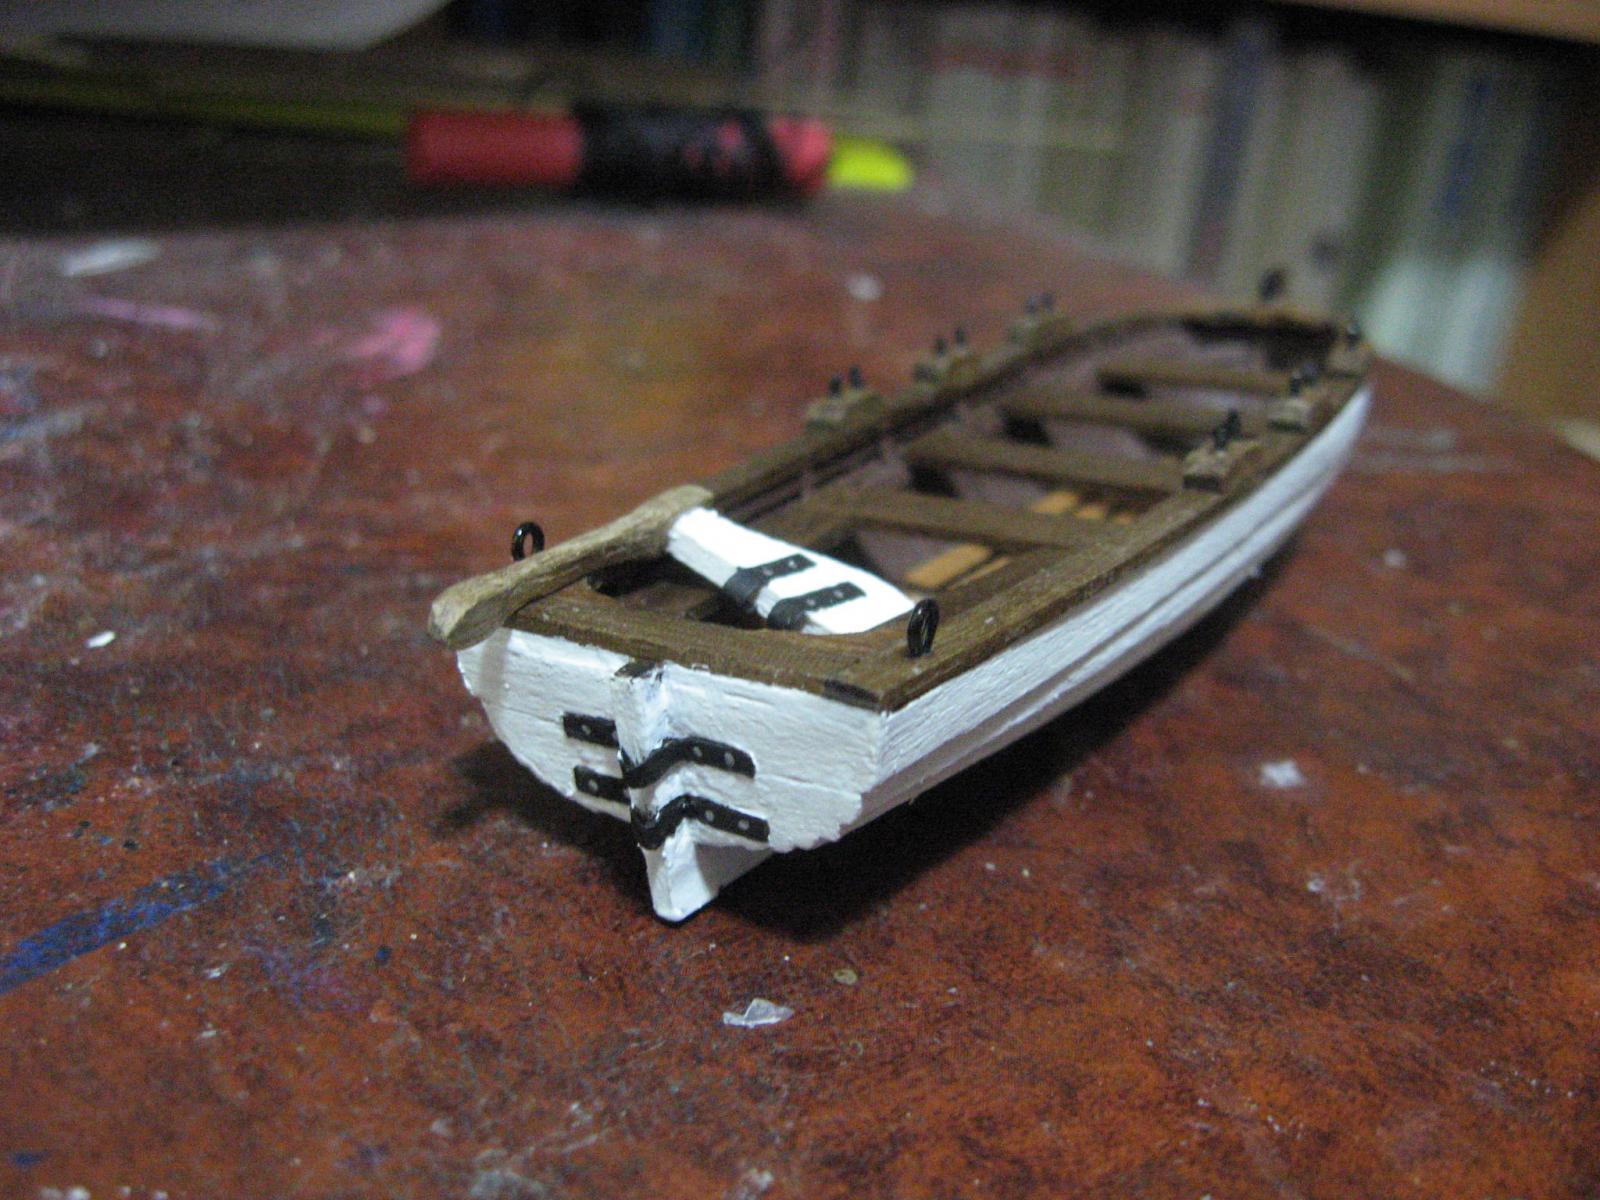
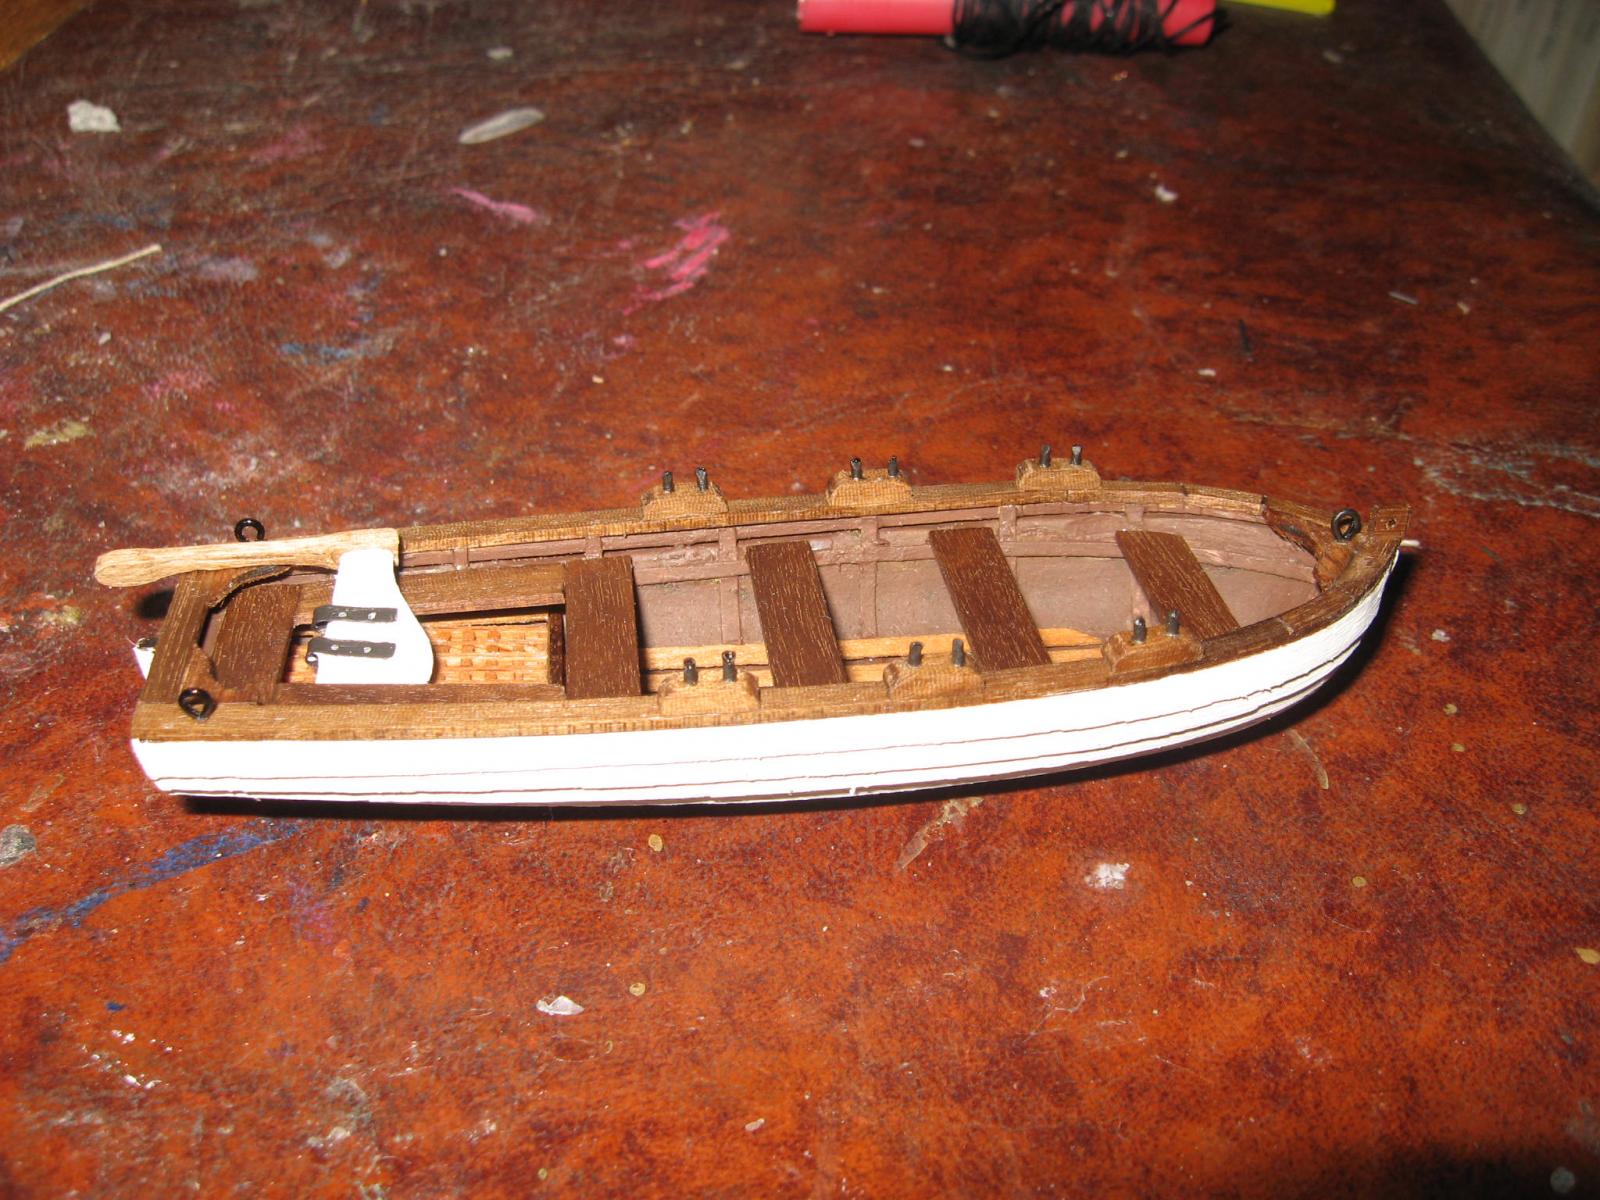
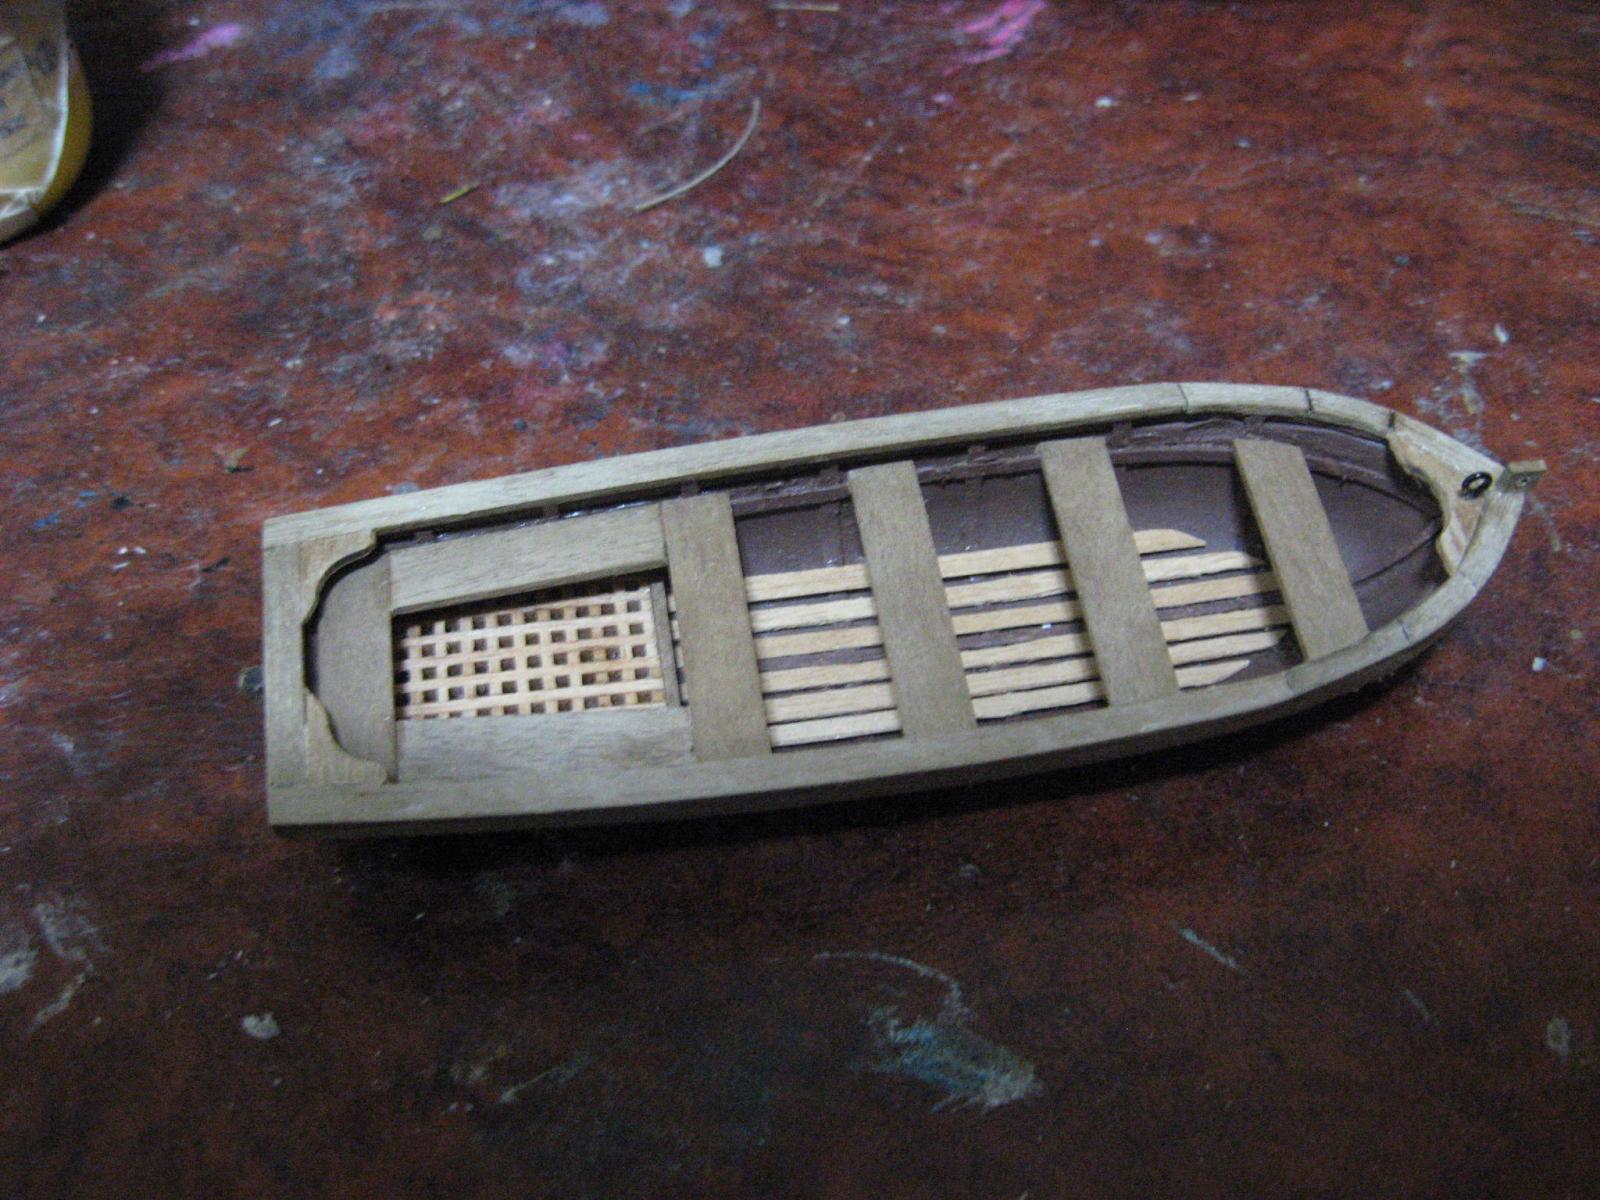
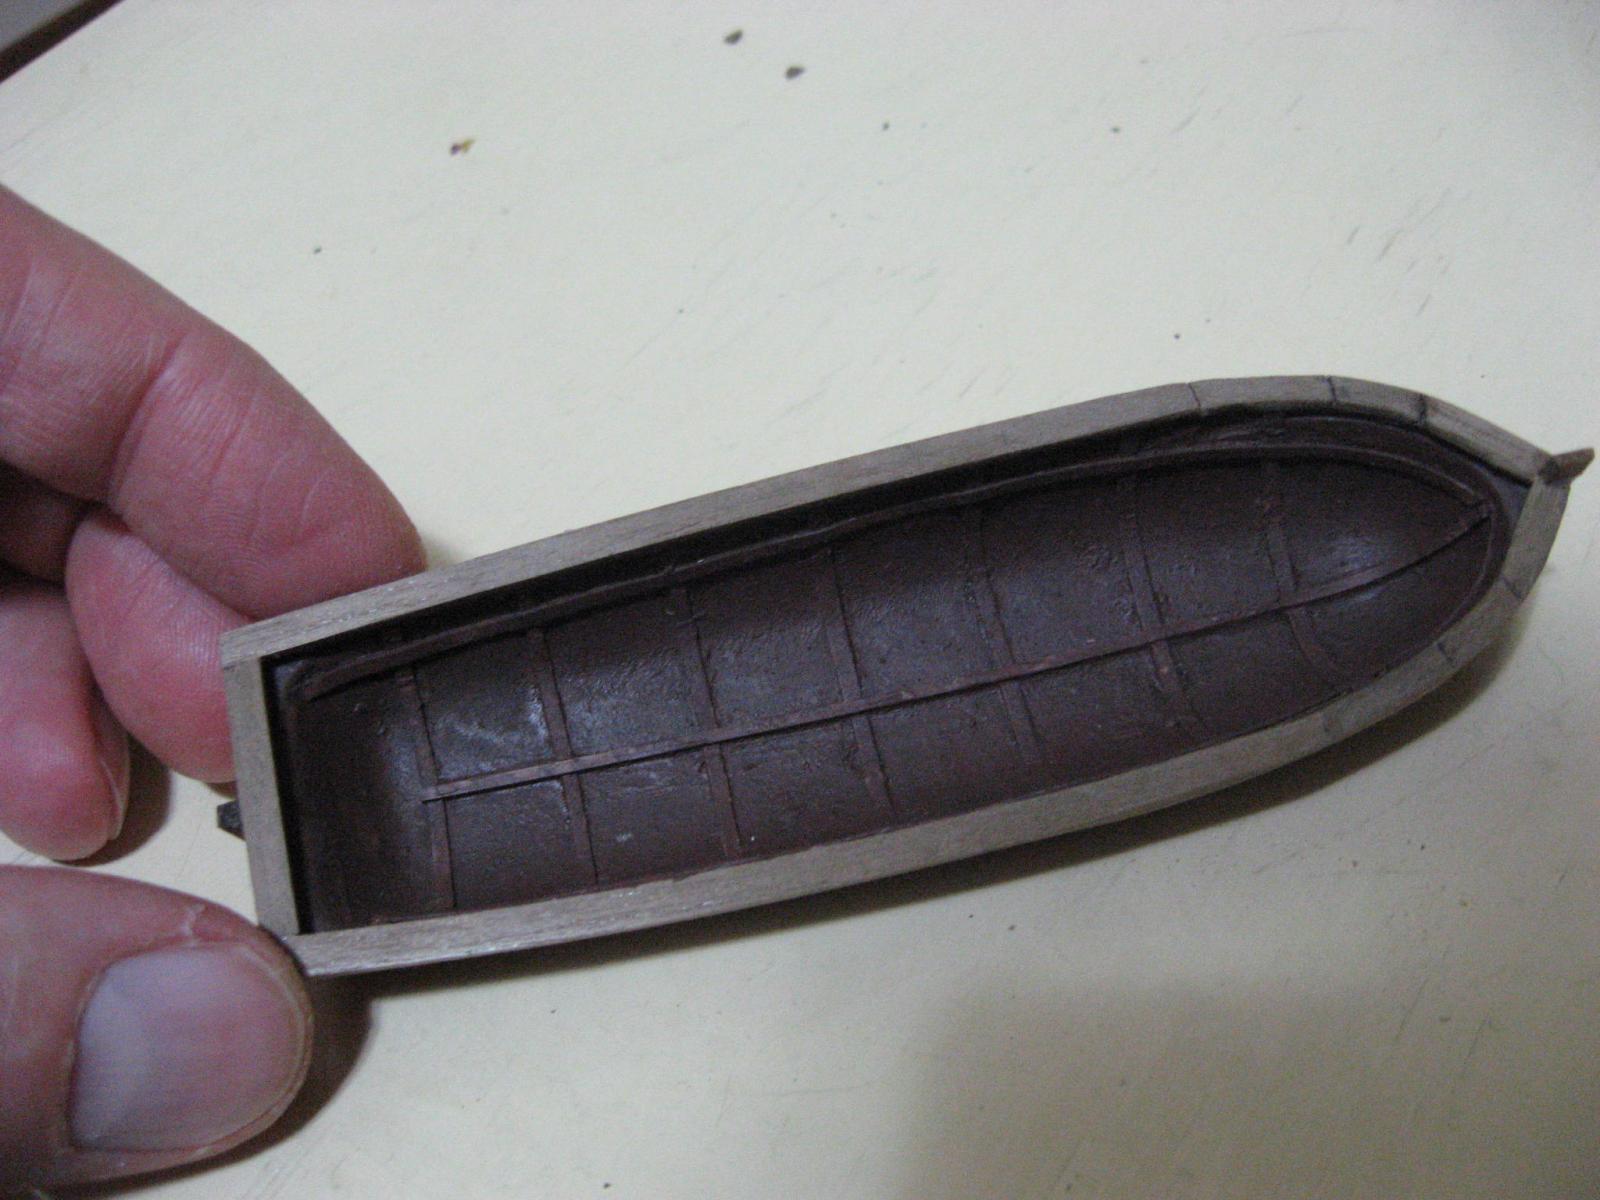
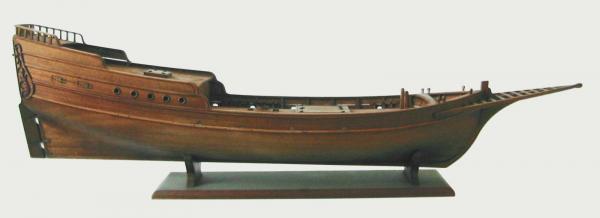
Thank you Patrick! to be honest, I don't know if it is historically accurate. I made a "generic XVIII century service boat", since I have no informations if there was a specific way of design service boats on Venetian Republic. In addition I think that is a bit small, if compared to the size of the ship (in terms of crew capacity, not in terms of scale), but I was too lazy to make something bigger...
-
Thank you Patrick! I appreciate your attention to the details. A tiny update... I made further little progress with the service boat. -I made the rudder, which will be positioned dismantled on the boat; -I made the oarlocks; -I painted the boat. The project can still have some modifications, depending on how deep I want to improve the rigging, but the problem is that I don't want to create a "mess of ropes" in the model, so sometimes I slow a bit my work and I evaluate possible ways of proceeding... That is one of the reasons of the variable interval of times of the updates.


- 190 replies
-
- 11
-
-
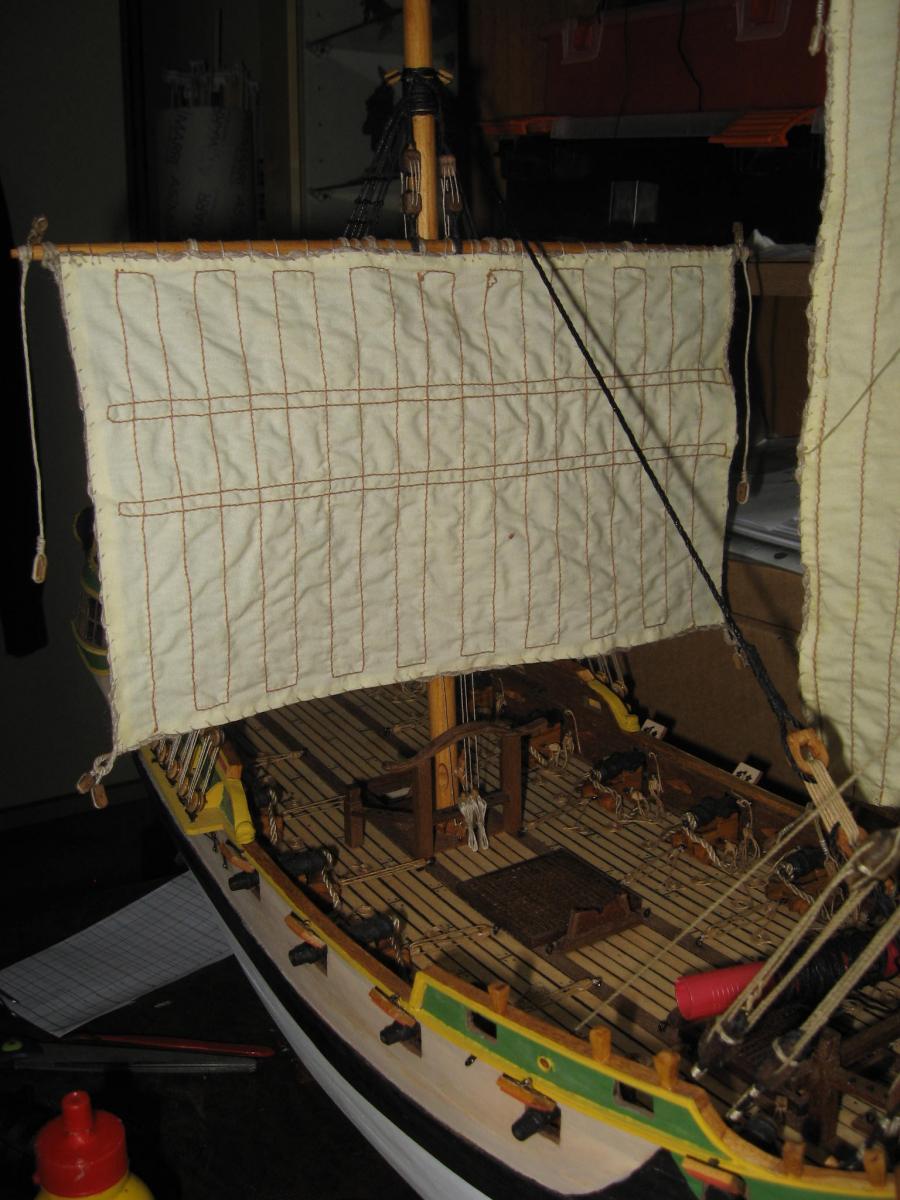
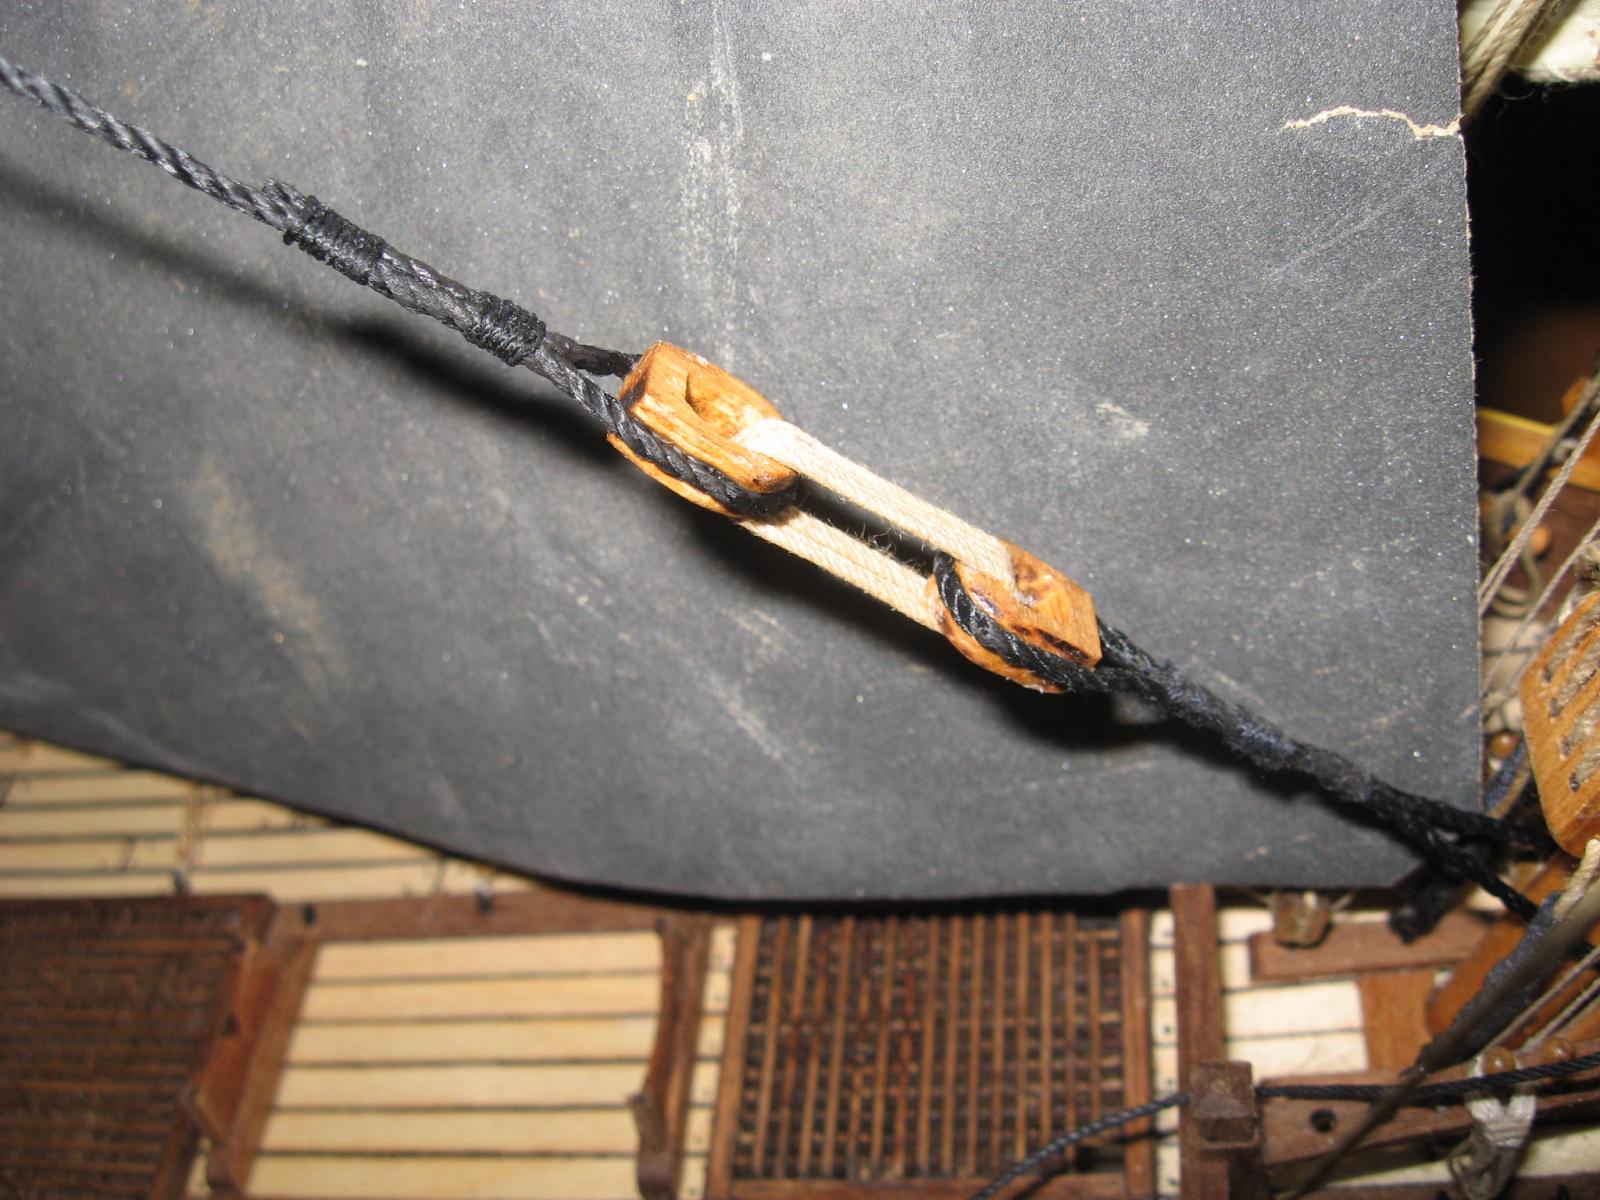
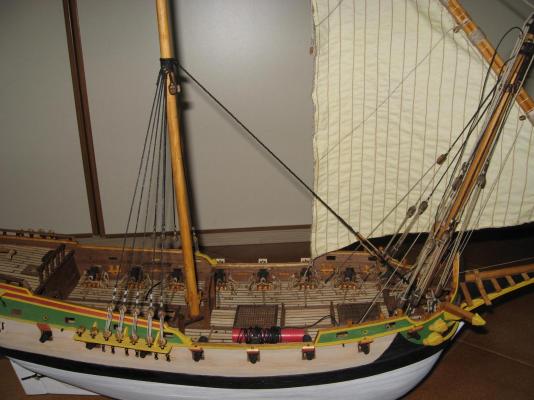
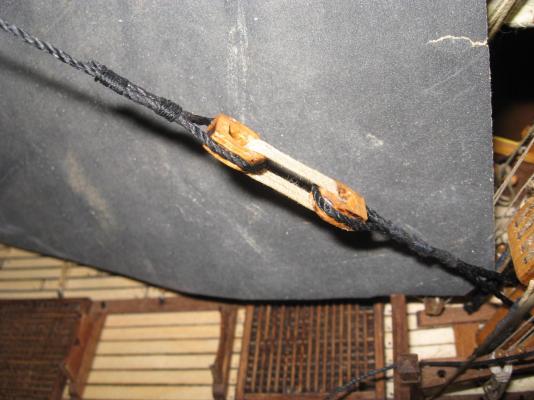
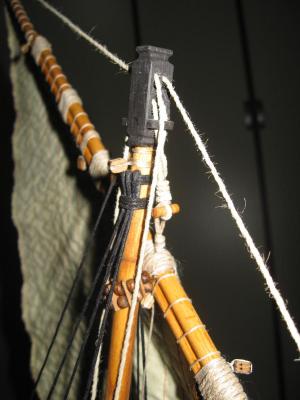
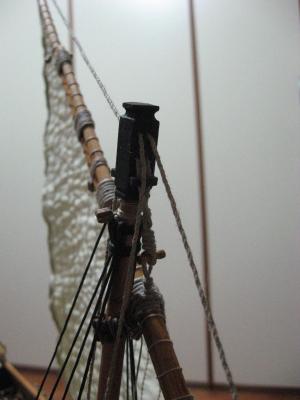
Thank you Patrick! I really appreciate that you like it! thanks to a lot of spare time, today I proceeded very fast with the standing rigging of the main mast. As can be seen, I connected the main stay to the main mast, too. I installed the two triple blocks where the first sail will be connected. Now I must stop and "study" more carefully the rigging of the mizzen mast, in order to install the blocks and cables that are needed around the main mast, before it became too much filled with ropes. Now the spare time is finished and my fun is over...for the moment!

- 190 replies
-
- 11
-
-
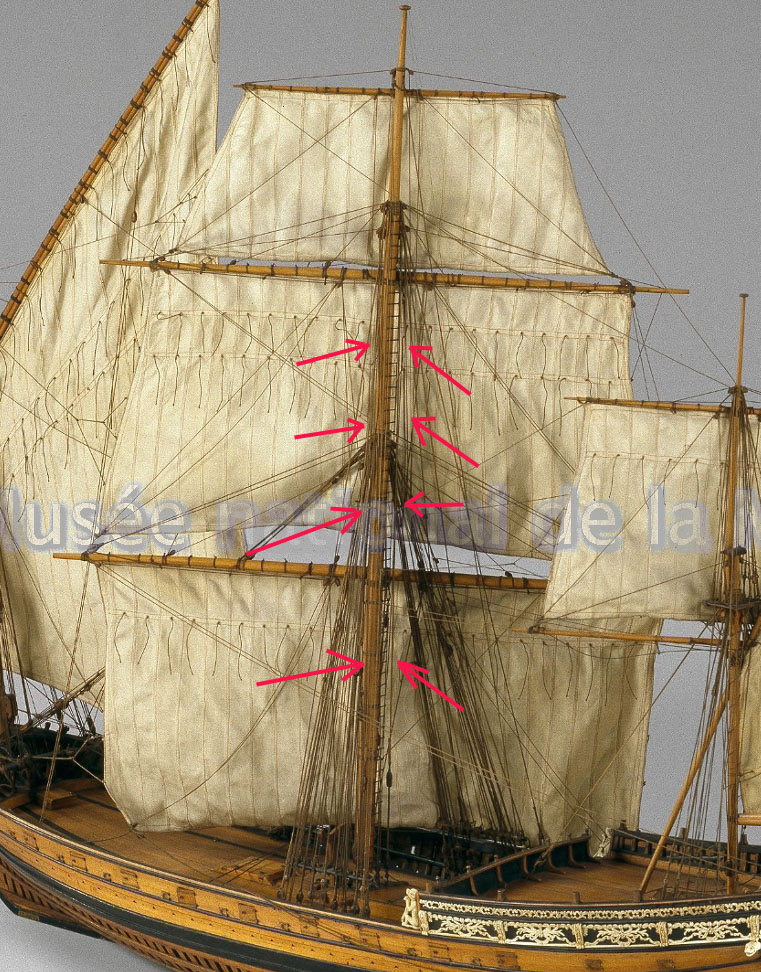
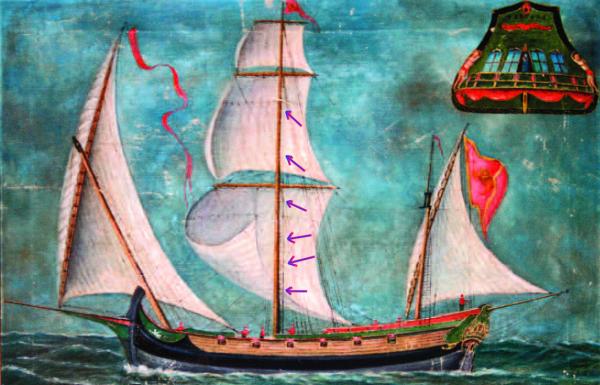
I always wondered how can be possibile making "extraordinary maintenance" in the higher part of the main mast in such polacre, since the shrouds arrives only just to half of the mast. Well, the answer came out just checking better the various imges that I found in the past. As can be seen in this photo from the Musee de la Marine of Paris, in this "La Singe" model there is a rope ladder that arrives stright up to the blocks that sustain the main topsail. Red arrows indicate that ladder. Luckily I found the same rope ladder in the painting of the "Beata Vergine". Again are indicated by arrows. Surely I will add it to the model! Again I want to remark that the venetian ships that I showed in my posts are "ship portraits" and not generic "maritime paintings", and that it is very important, since the artist didn't used its own imagination but simply painted real details. So I believe that really there was a rope ladder in that "Beata Vergine".

-
Thank you Carl! Always nice comments!
-
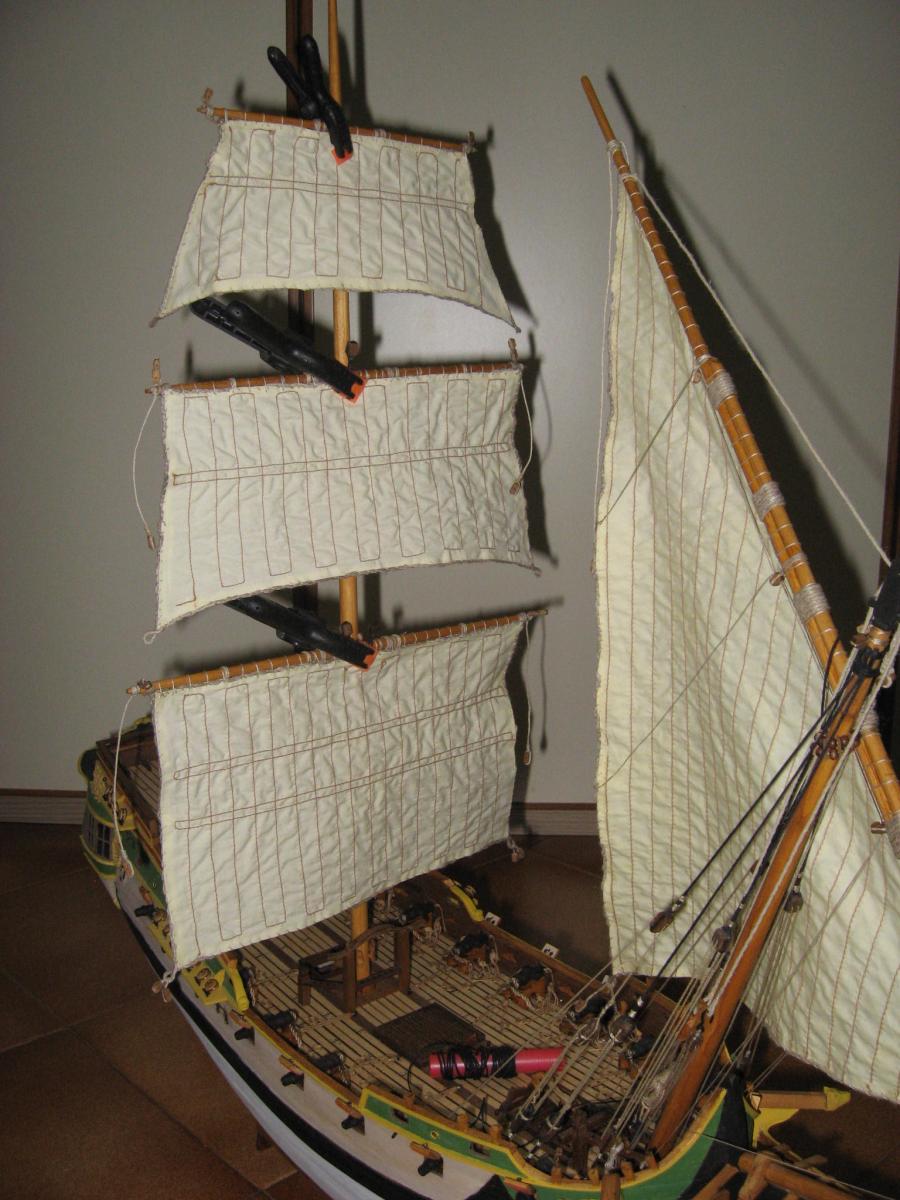
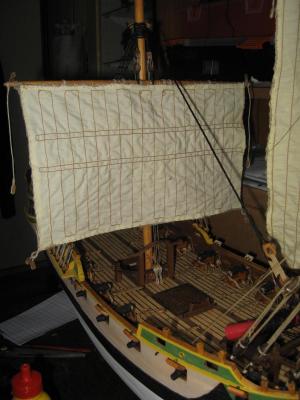
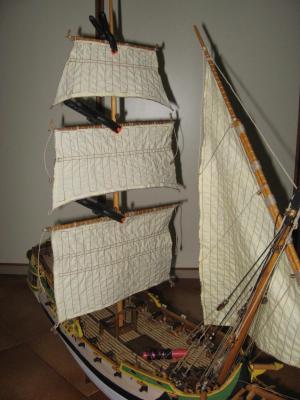
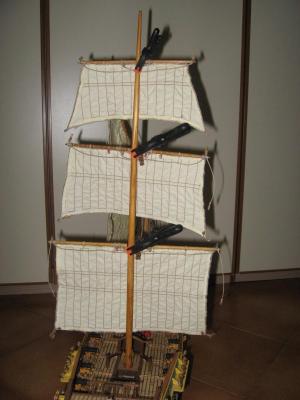
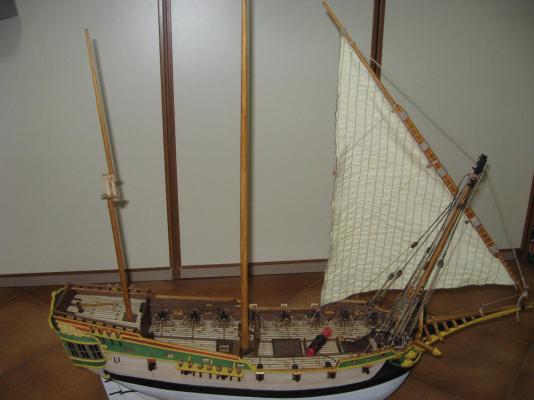
I completed to prepare the main mast sails and related yards. It was mandatory to do that now, since otherwise I cannot evaluate where to place them in terms of height. Since the polacre main mast is a single piece mast, there are no reference points for placing the standing rigging. So the reference became the position of the three sails. as can be seen in the photo, I placed them temporary with clamps. Now I know which is the main mast point where the shrouds should logically terminate. Life is more complicated if you build a polacre.... In other photos can be seen the three sails of the main mast. Note that their shape is not completely correct. the main topsail is of wrong shape (too short) if compared with the ones of the paintings that I showed in the past. But well, it's too late... They resemble a bit the sails of the French chebec/polacre Le Singe. Now I will start with the main mast shrouds and related deadeyes. Another boring step....

-
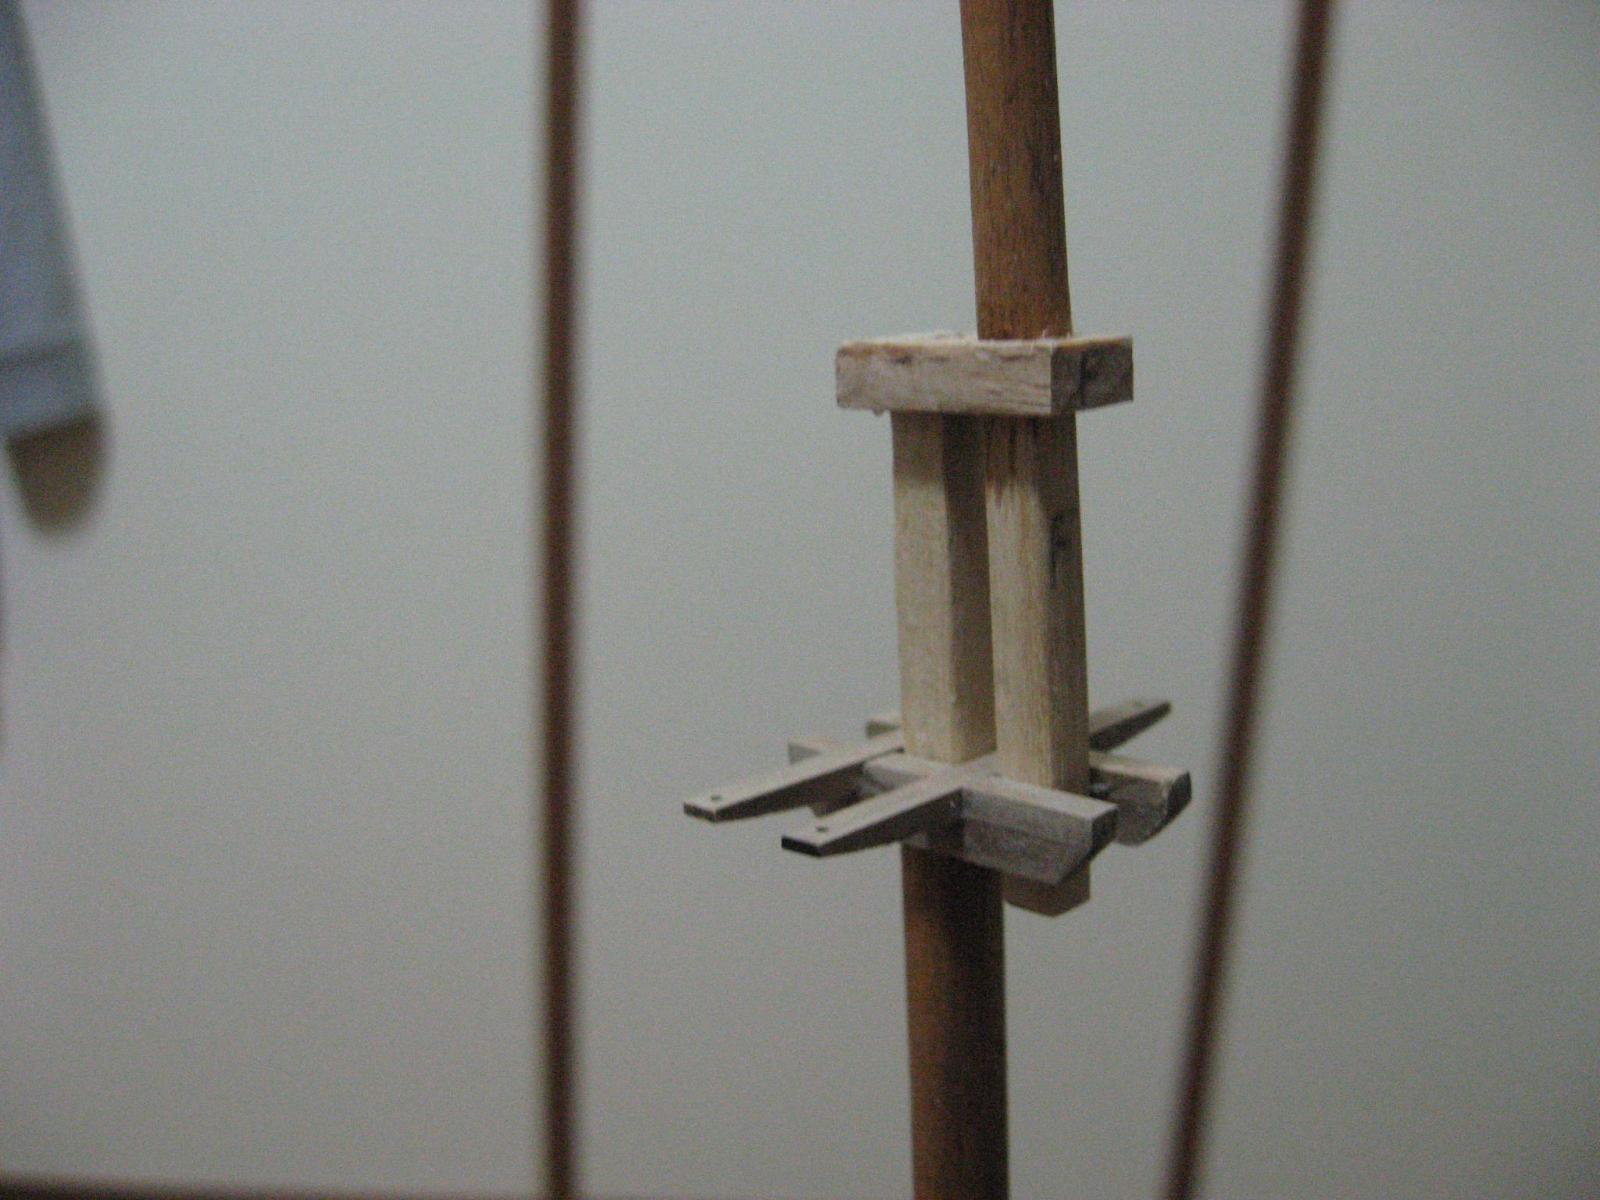
Thank you Carl! I kept some small items for the future steps...just like like a squirrel that keeps aside the nuts for the winter! The "main mast standing rigging chapter" is approaching and it will be another boring step, so some small "accessories" will be made during that chapter... Next days will be dedicated on preparing the three yards of the main mast.
-
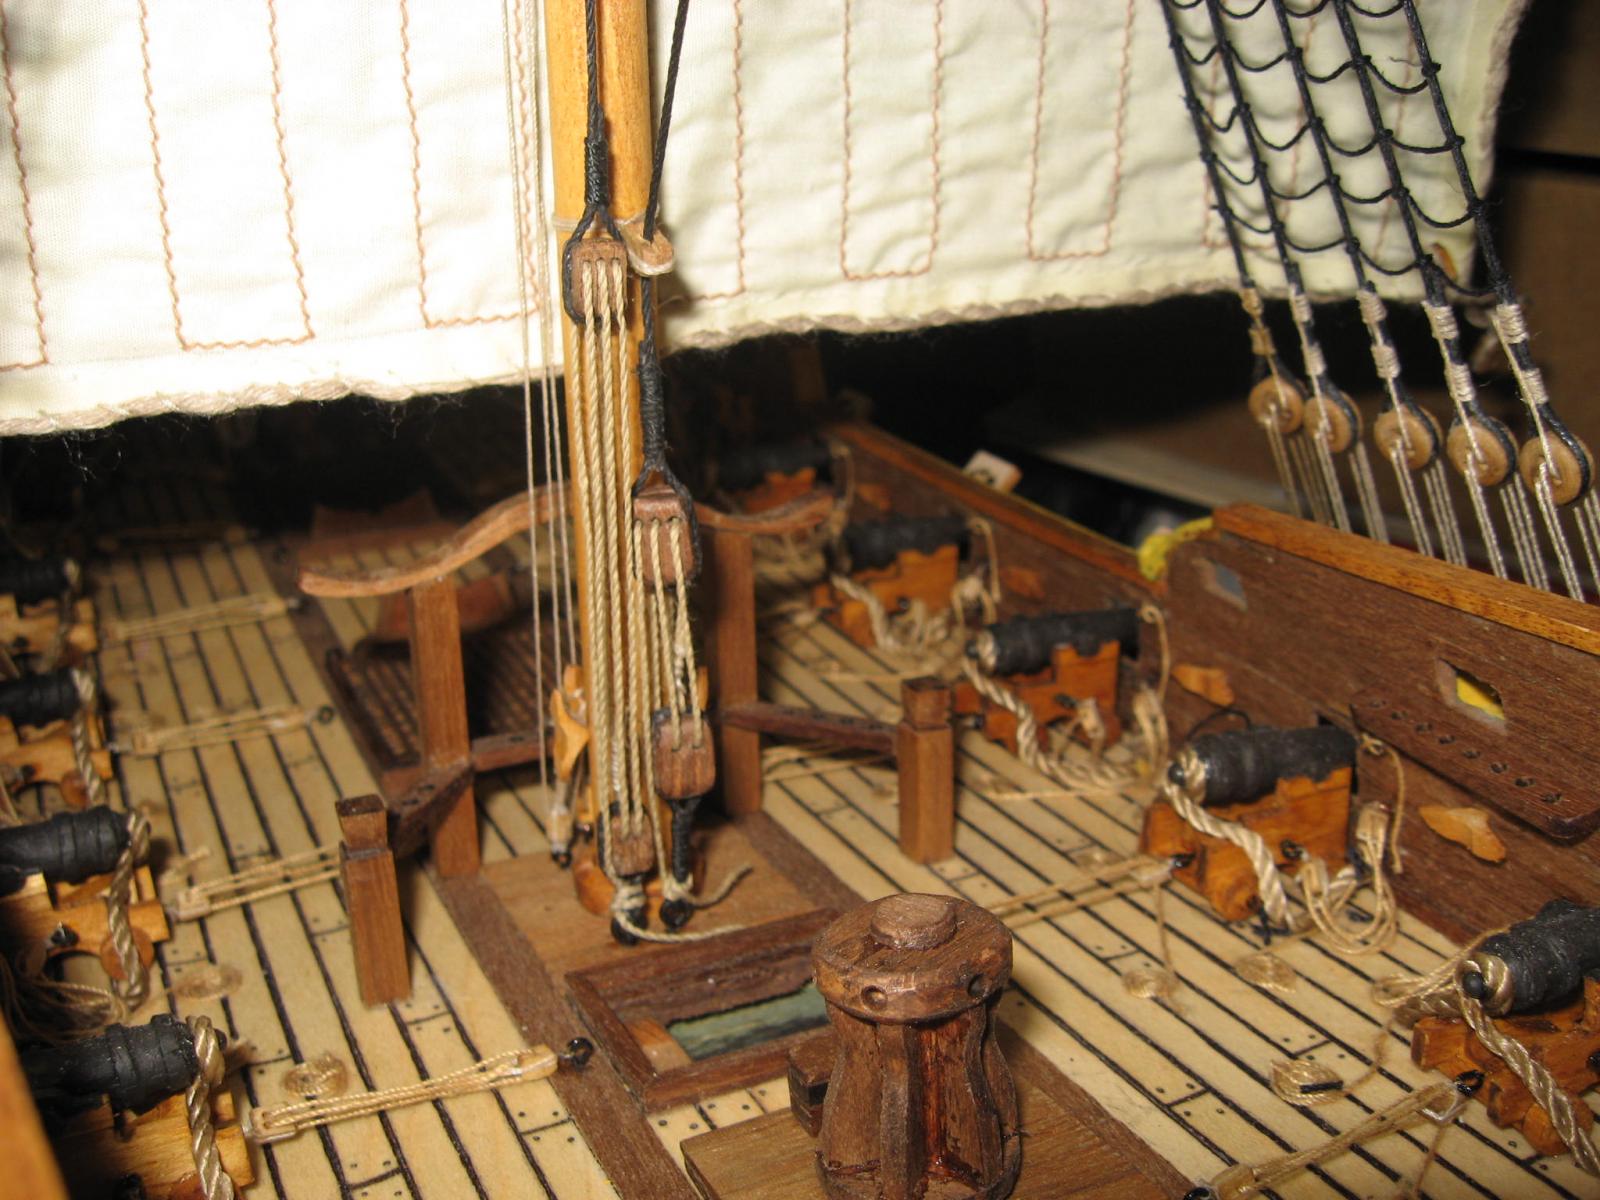
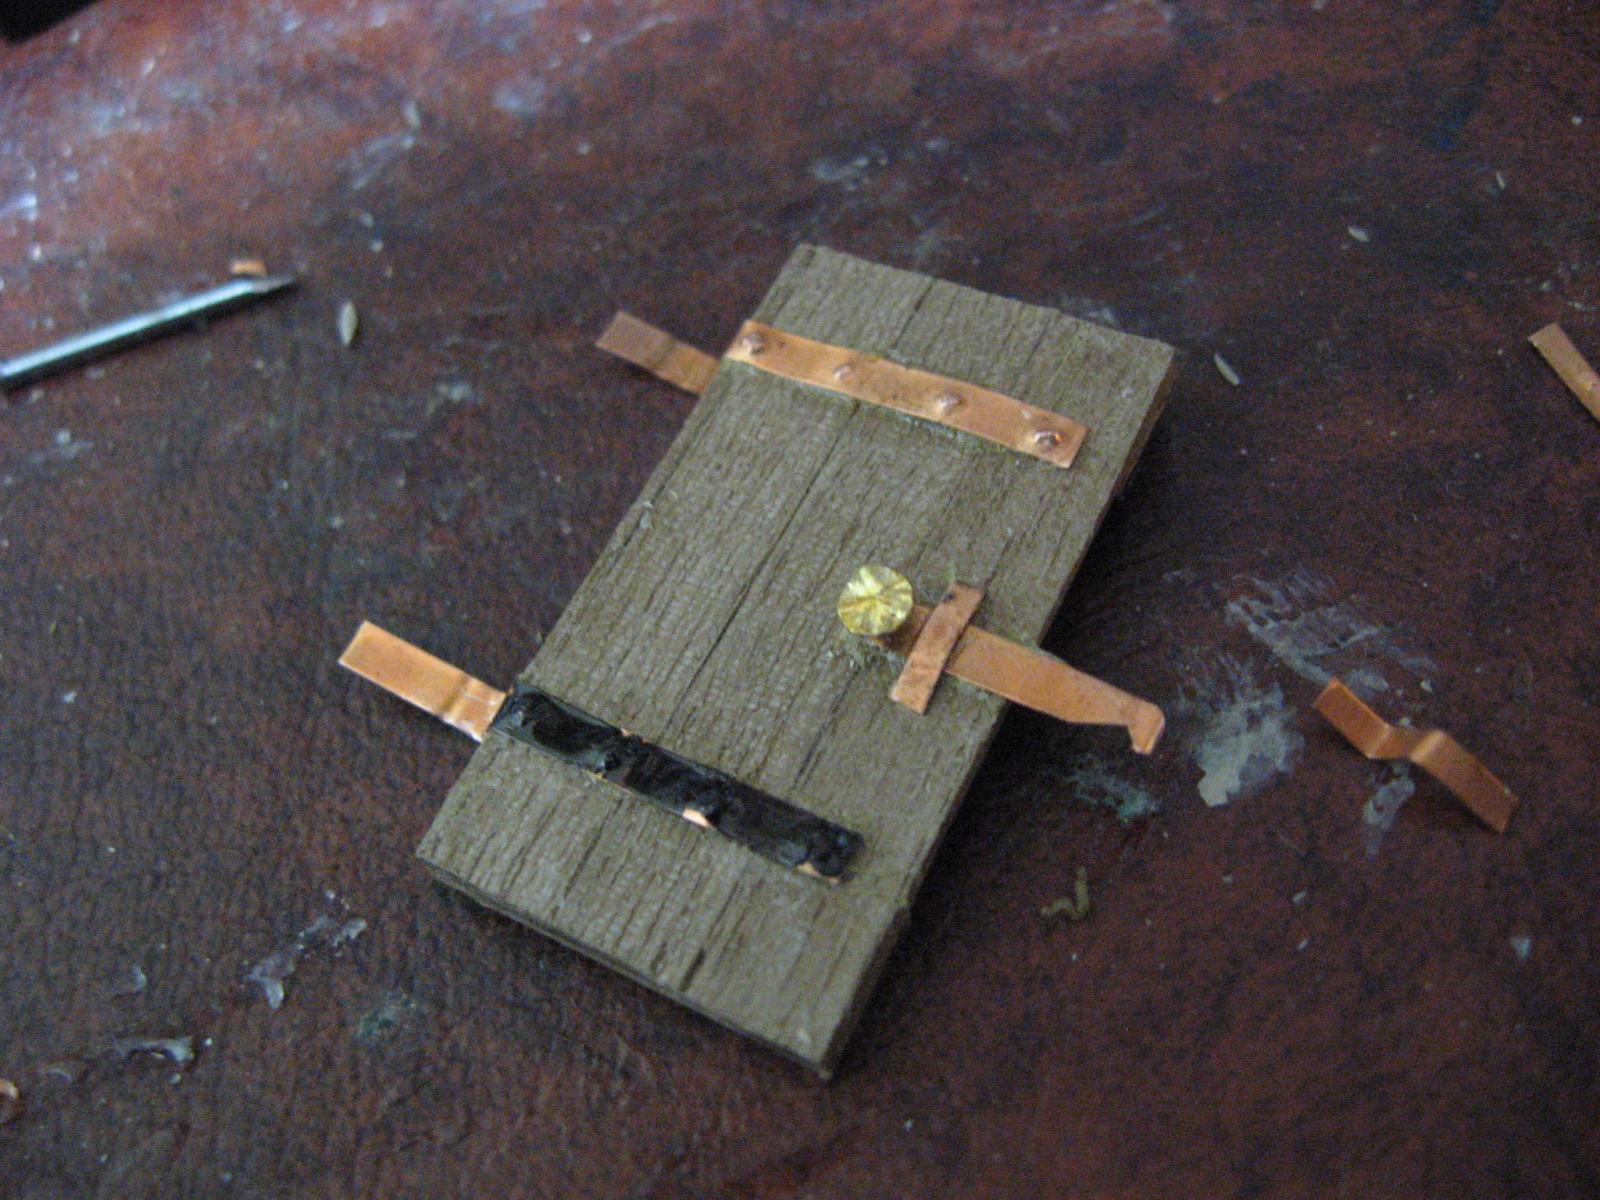
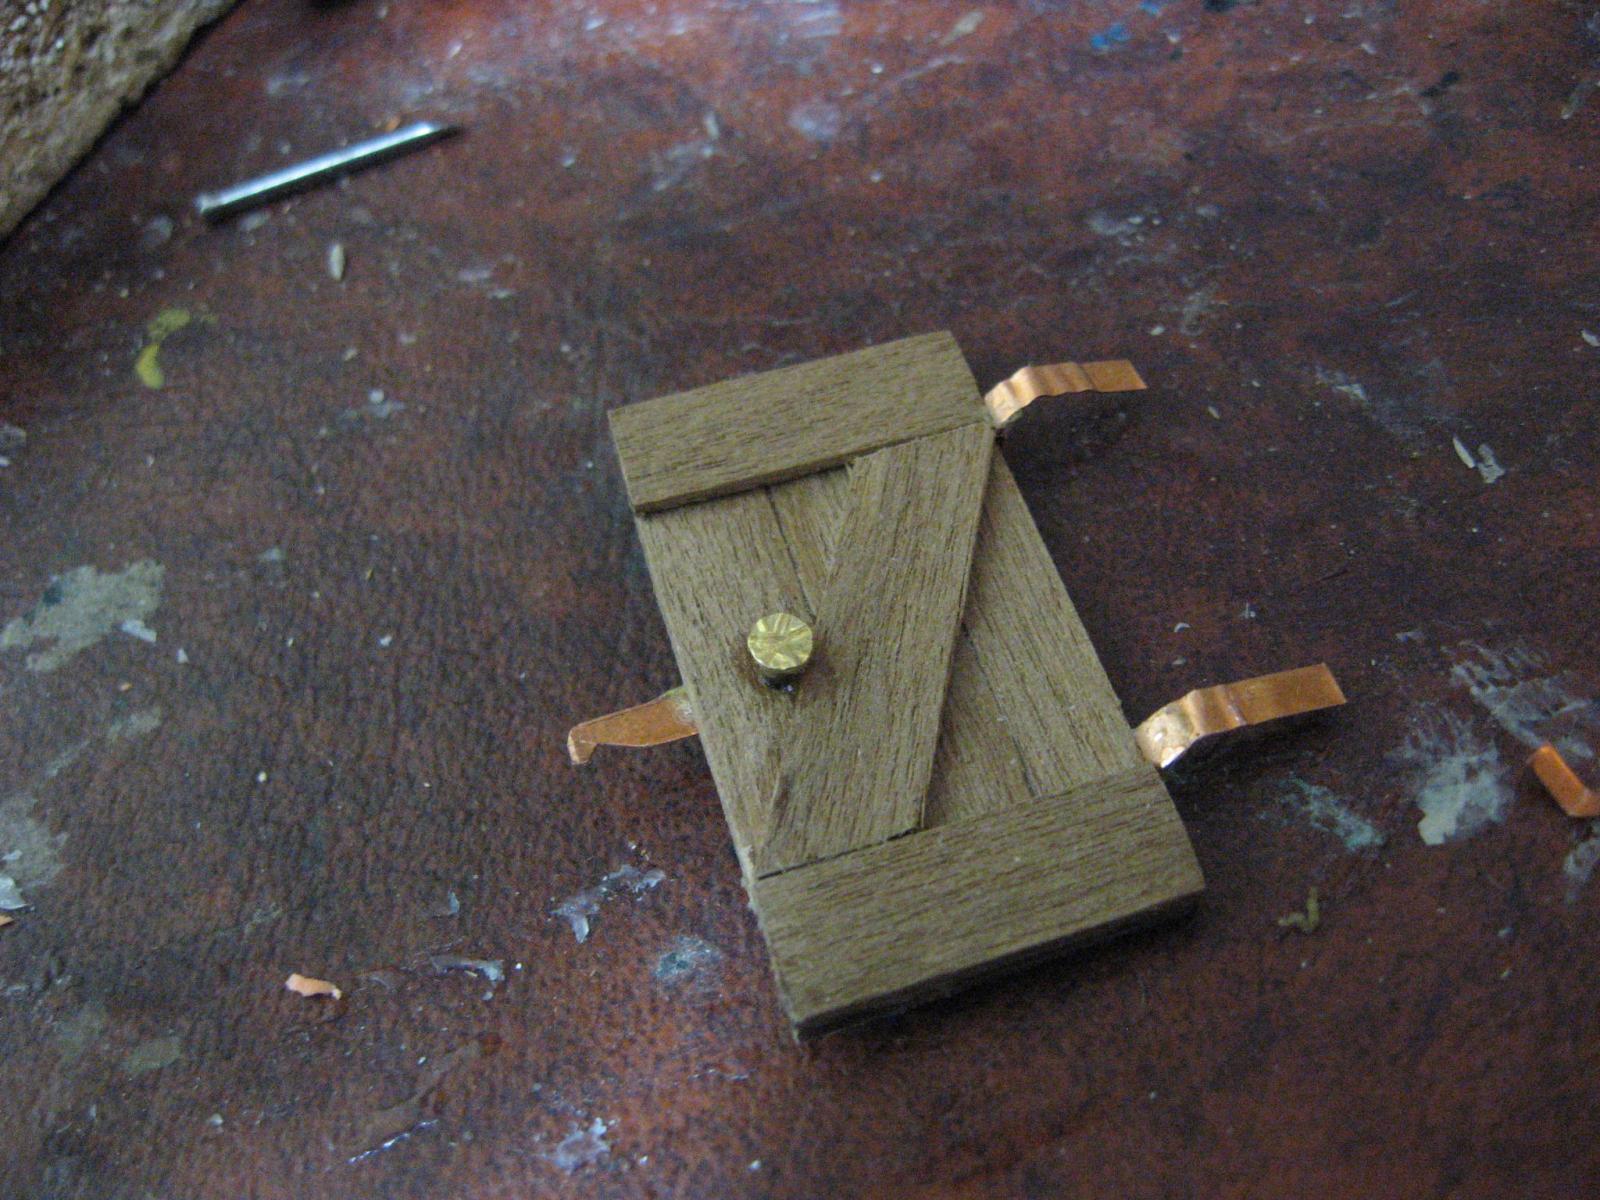
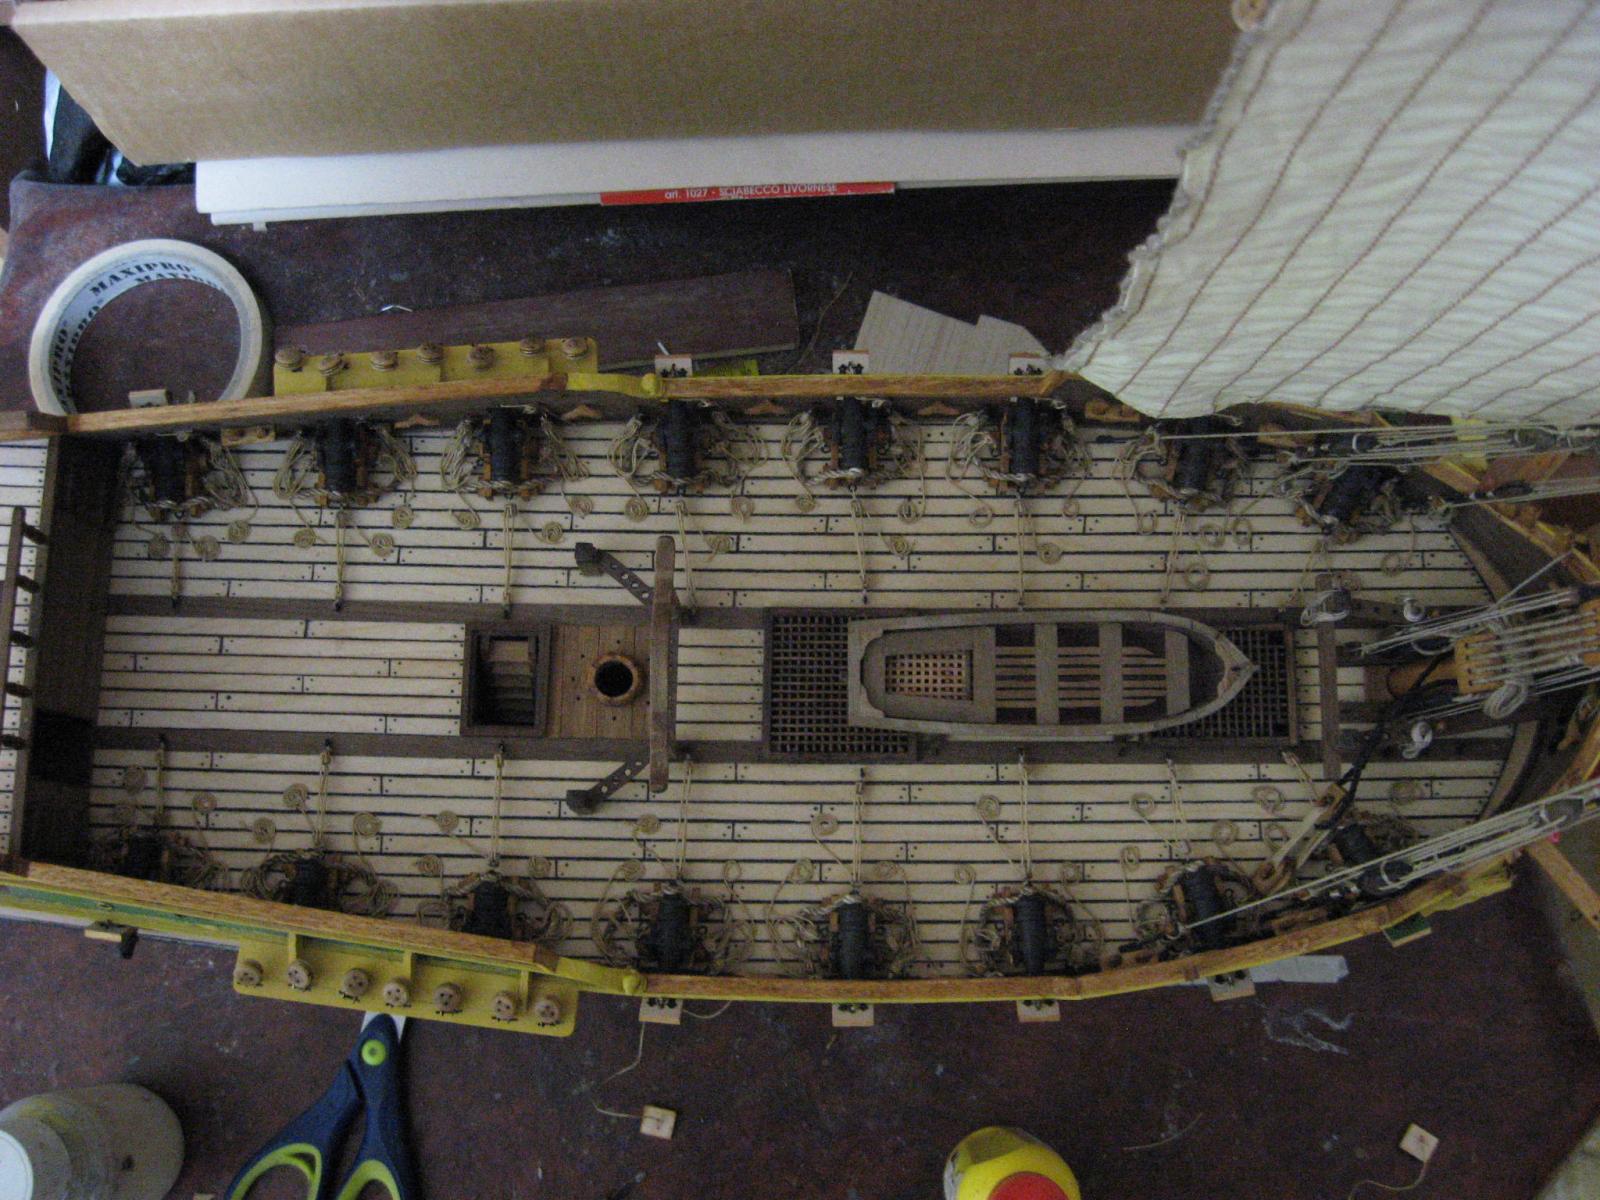
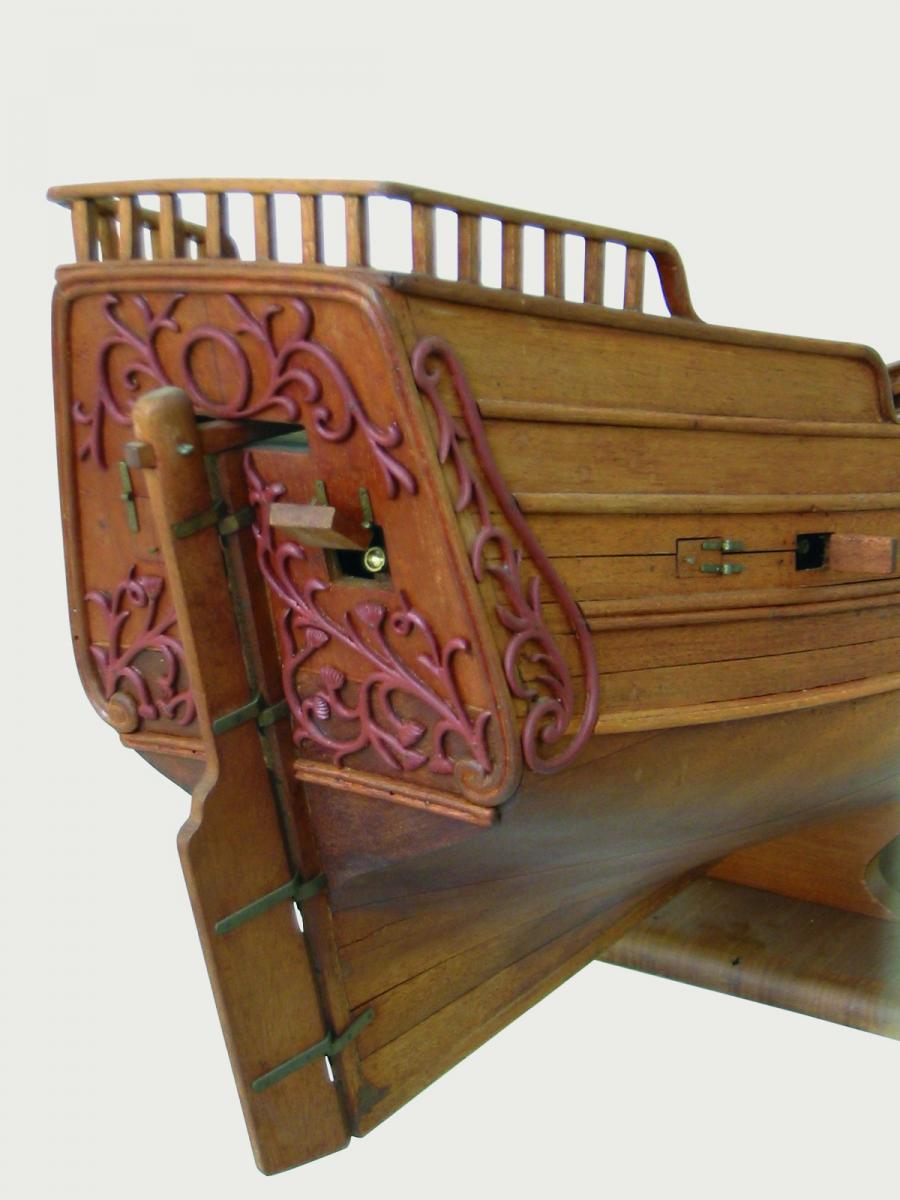
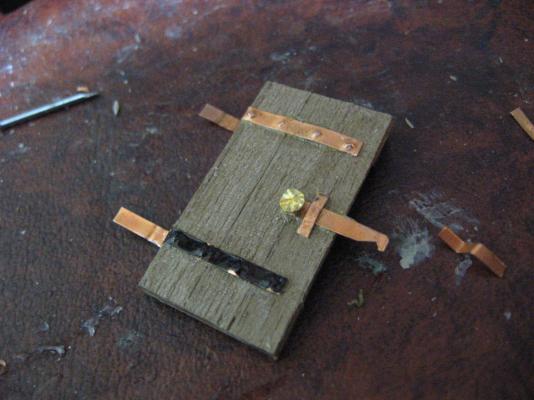
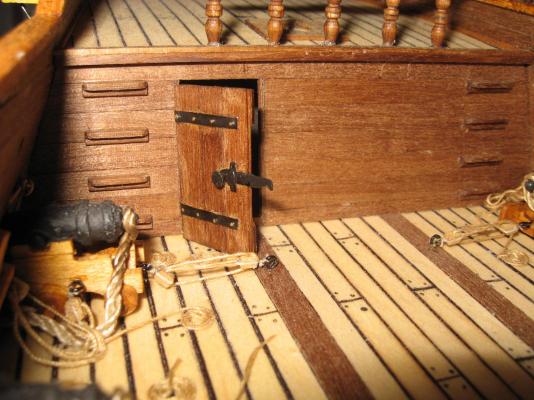
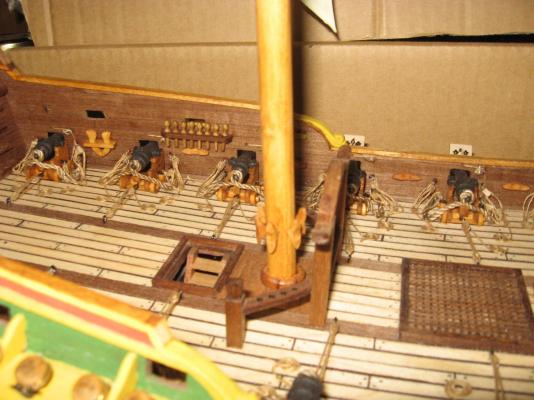
This weekend has been focused on completing some accessories leaved behind. First of all, since I completed the cannons installation, now I can install the cabin's door. -I prepared it with walnut strips and completed it with copper sheet properly modified and painted, a can be seen in the photos. -Then I installed the belaying pins support for the ones that are needed for the main mast. -I installed permanently the main mast. -I prepared the mizzen mast, which now need a bit of holes and rings before installing it. In the meanwhile I am attaching all the blocks and the sails to the yards of the main mast. that must be done now, since I must "study" the effect of the sails on the mast, for evaluating the correct installation's height. So, apparently...many small news!

-
Thank you Carl! the service boat need still all its accessories, like six oars, the related oarlocks, a coil of rope (always useful ), the rudder... eventually a small barrel of water and a small sail with its own mast. the last two accessories I have not yet decided if adding them or not. You should consider that the service boat is 11 cm long, so the scale is big and it became "mandatory" to fill it with accessories... Before blocking it to their support with the ropes, I need to add all the accessories. But now I must take care of the big lateen sail's rigging...
-
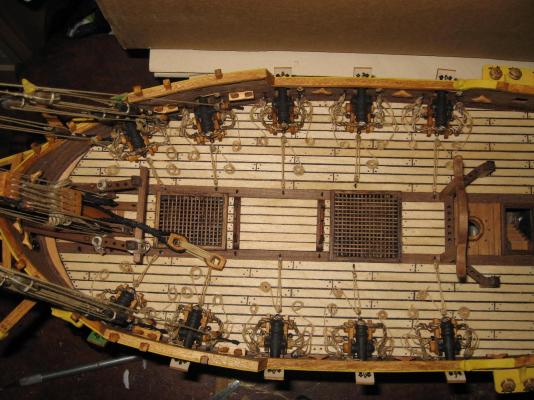
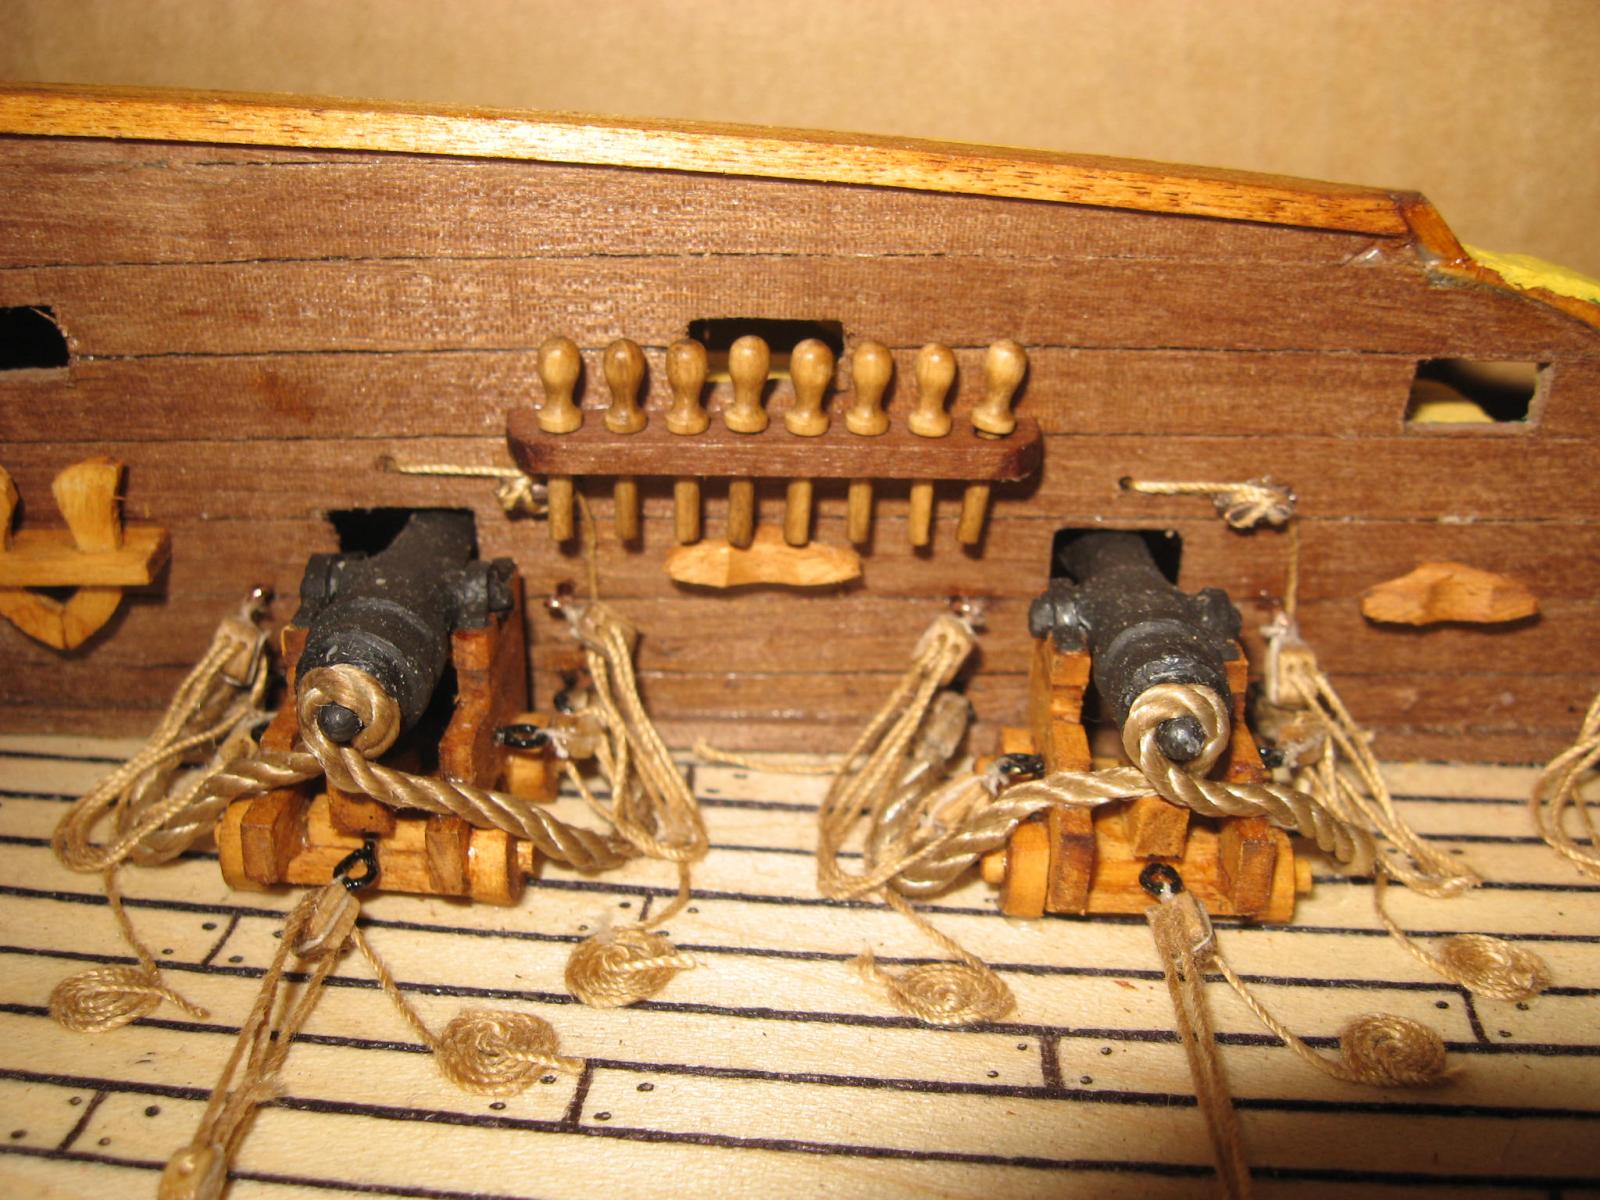
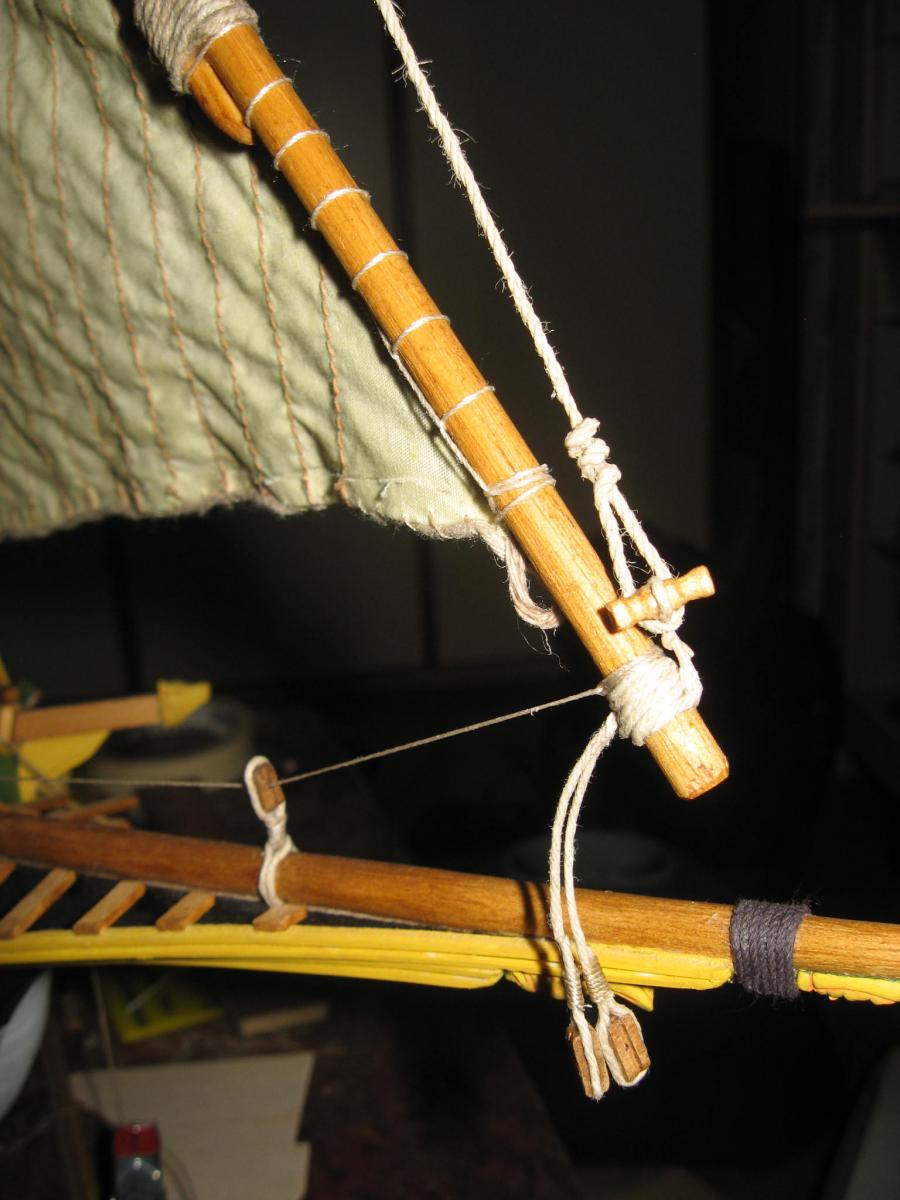
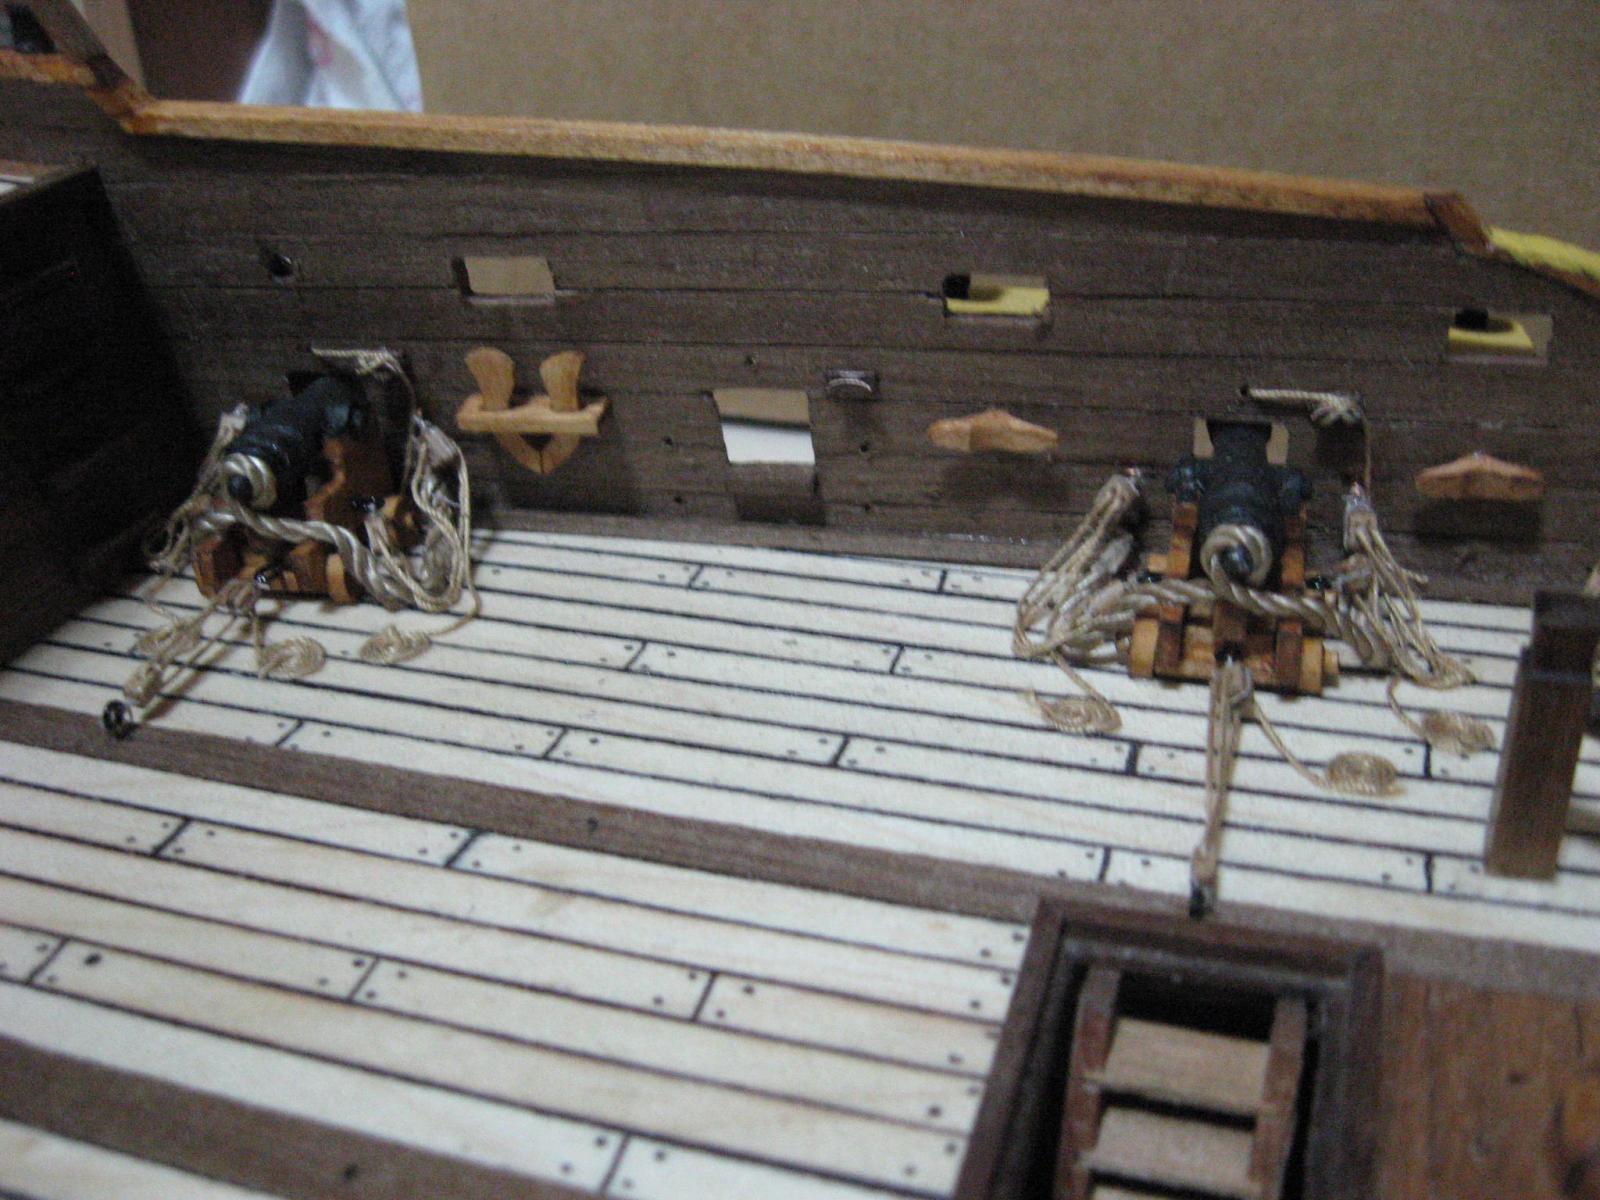
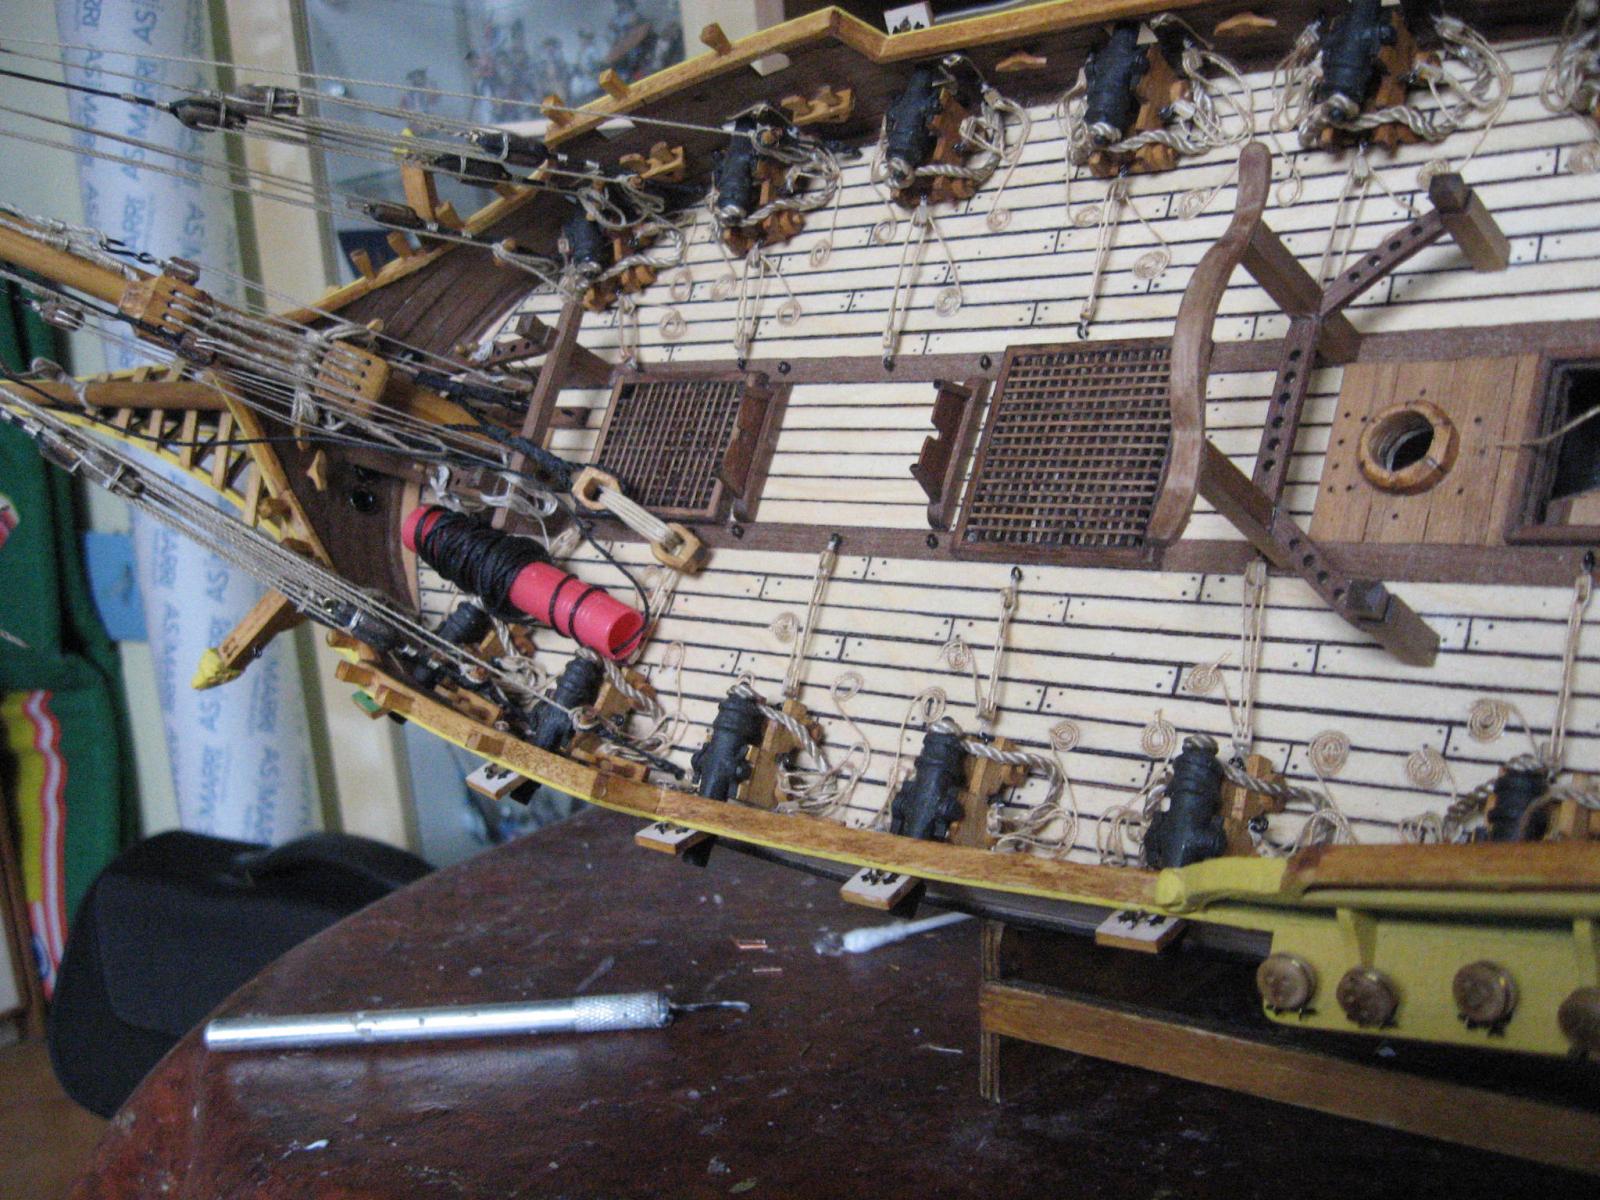
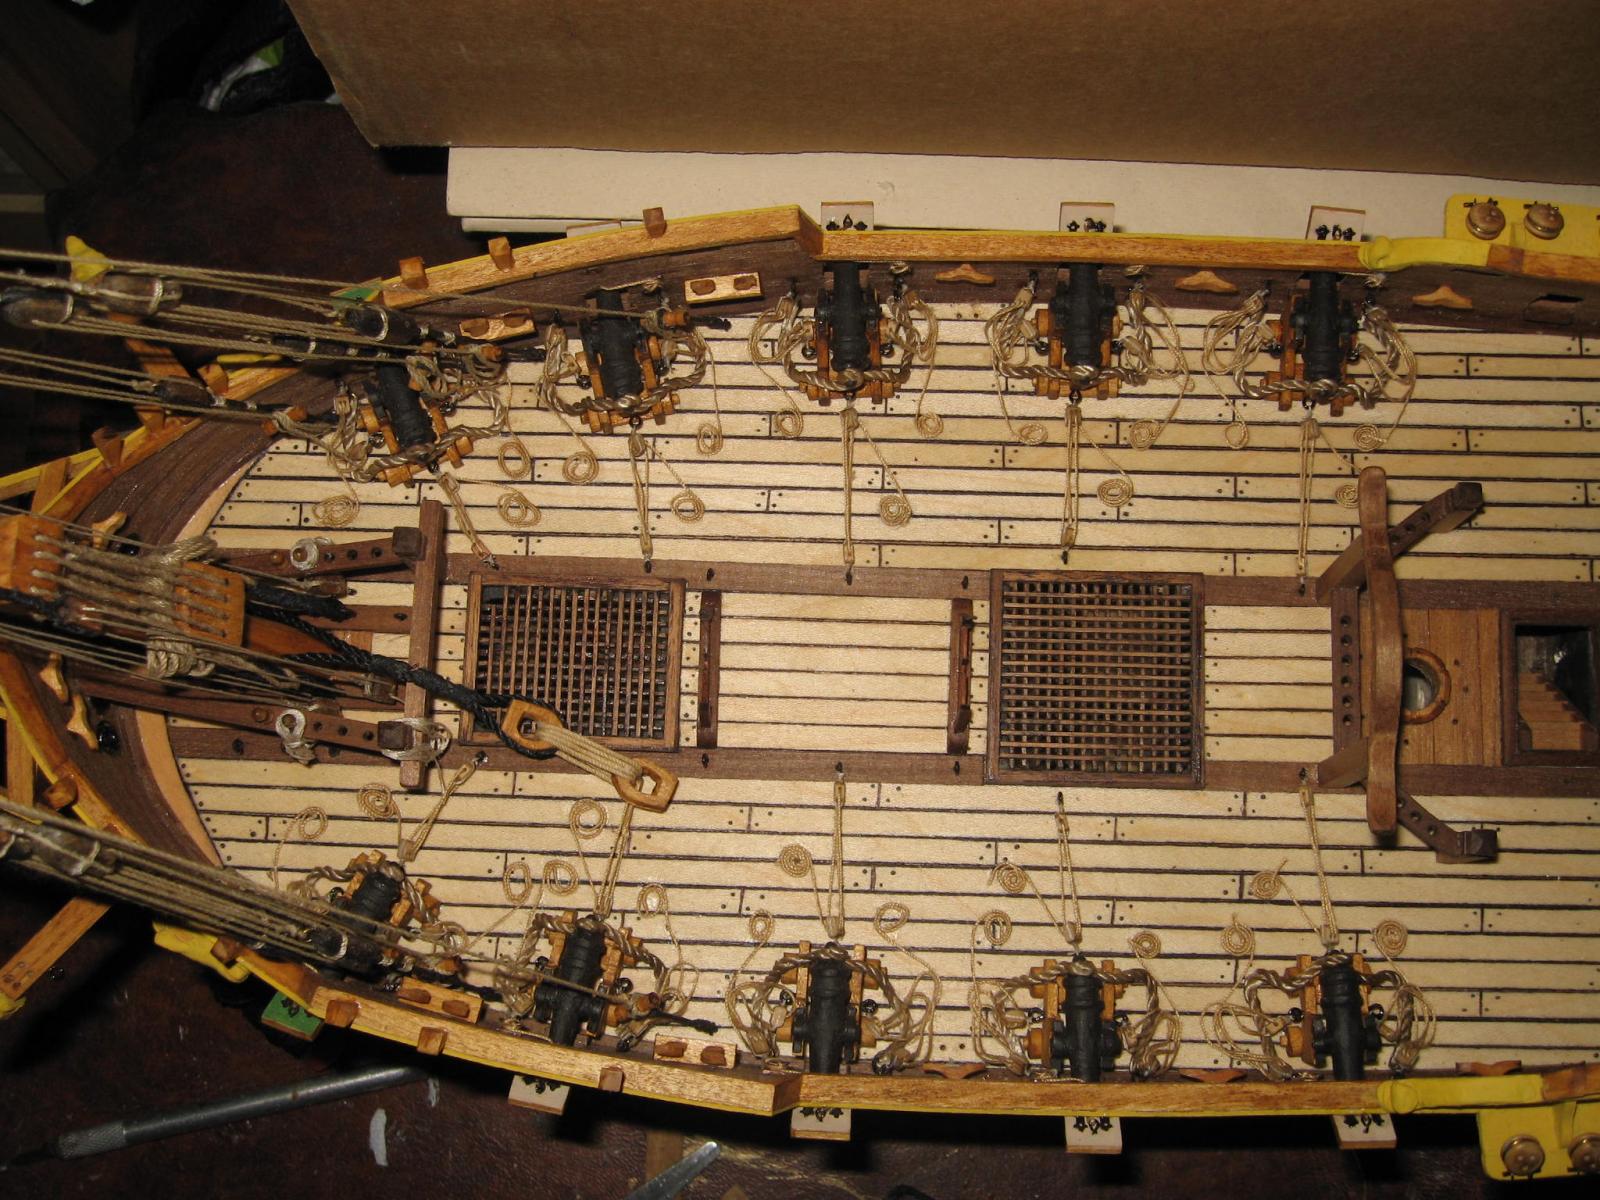
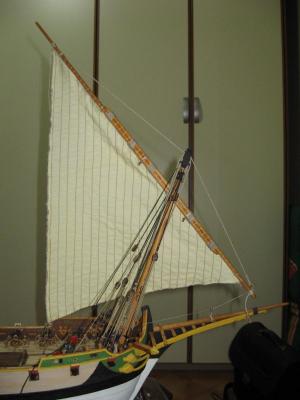
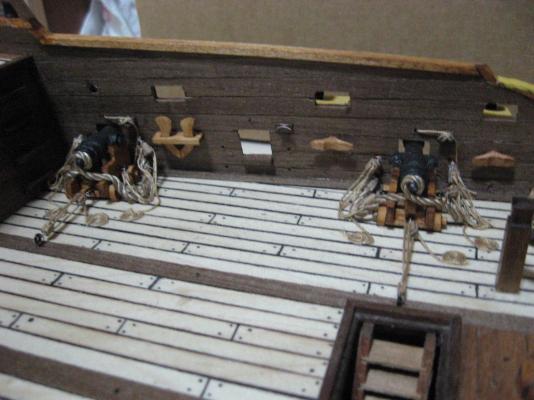
Great! The "cannons chapter" is finished! :cheers: Well, I have not yet installed the last two gunports, but that not a problem. As can be seen in the photos, I am proceeding with the service boat, but it is not yet finished. The key step of this weekend has been the installation of the big lateen sail of the foremast. The rigging is not yet completed, but the main cables have been connected. Finally, I started to install the cleats on the main mast.


-
Regarding the statenjacht, you can explore the plans made by Chapman, where various complete plans ships like the statenjacht are drawn. Various ship kit manufacturers have taken "inspiration" from these drawings. Below were you can download directly them (the museum that owns them): http://www.sjohistoriska.se/en/Collections/Archives/ChapmanNet/ChapmanNet/Drawings/ to complete them, eventually you can find in internet the sail plans of the "De Utrecht", or buy the plans of the Corel "Leida". Regarding the xebec, there is no doubt that the best drawings available on market are the ones made by Ancre and related to the "Le Requin" which was a French xebec of around 1750. they are sold jointed with the book, but are extremely expensive: http://ancre.fr/en/monographies-en/18-monographie-du-requin-chebec-1750-.html Since exist a good detailed ancient model of "Le Requin", the drawings are very accurate. As an alternative, there are available original plans of spanish and venetians xebec, but must be completed with the rigging and sail plan. to complete them, you can buy the Amati plans of their xebec, which are rather good. If you want to see the above mentioned spanish and venetian plans, let me know and I will answer by PM. But beware, since are original, the visual informations provided must be completed. Probably if you ask that in the chapter of the forum dedicated to kit discussion, you will be submerged by a lot of interesting answers!!
-
Thank you Hartmut, I think that both are attracted by "alternative" type of ships, since a pinco and a polacre are not so diffused in this forum...
-
Hello Angarfather, you are doing a great job! I recently found this painting of a genovese pinco, dated around 1700 and I remembered your WIP. It represent the pinco named "Nostra Signora dell'Acquasanta" (more or less: "Our Virgin Mary of the holy water") during a fighting against two Ottoman ships (possibly an ex-voto?). I thought that it can be of interest, since you are in the rigging step and since it is an original source of informations. In addition (but it is too late to be of interest for you) the other two photos represent an original model dated around 1780-1820 of a pinco. This model is owned by the Naval Engineering Dept. of the University of Genova. I hope that the provided material can be of interest for your model building.

-
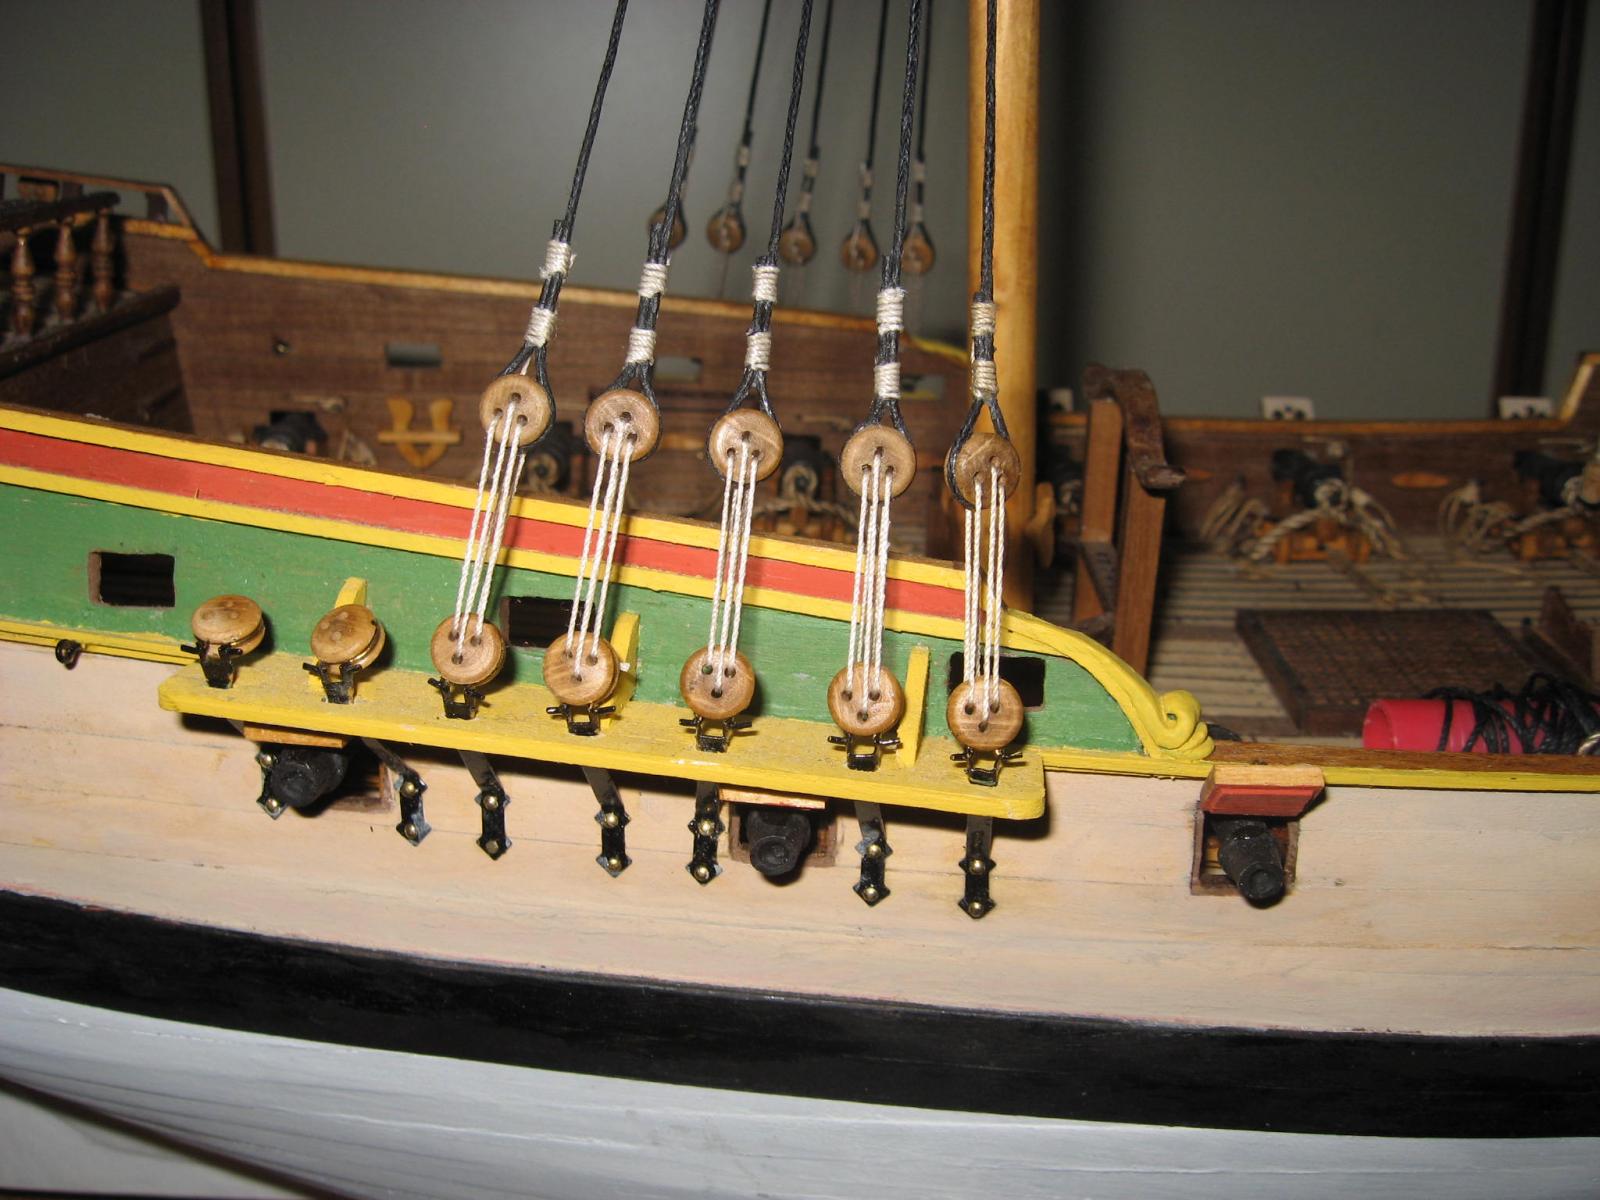
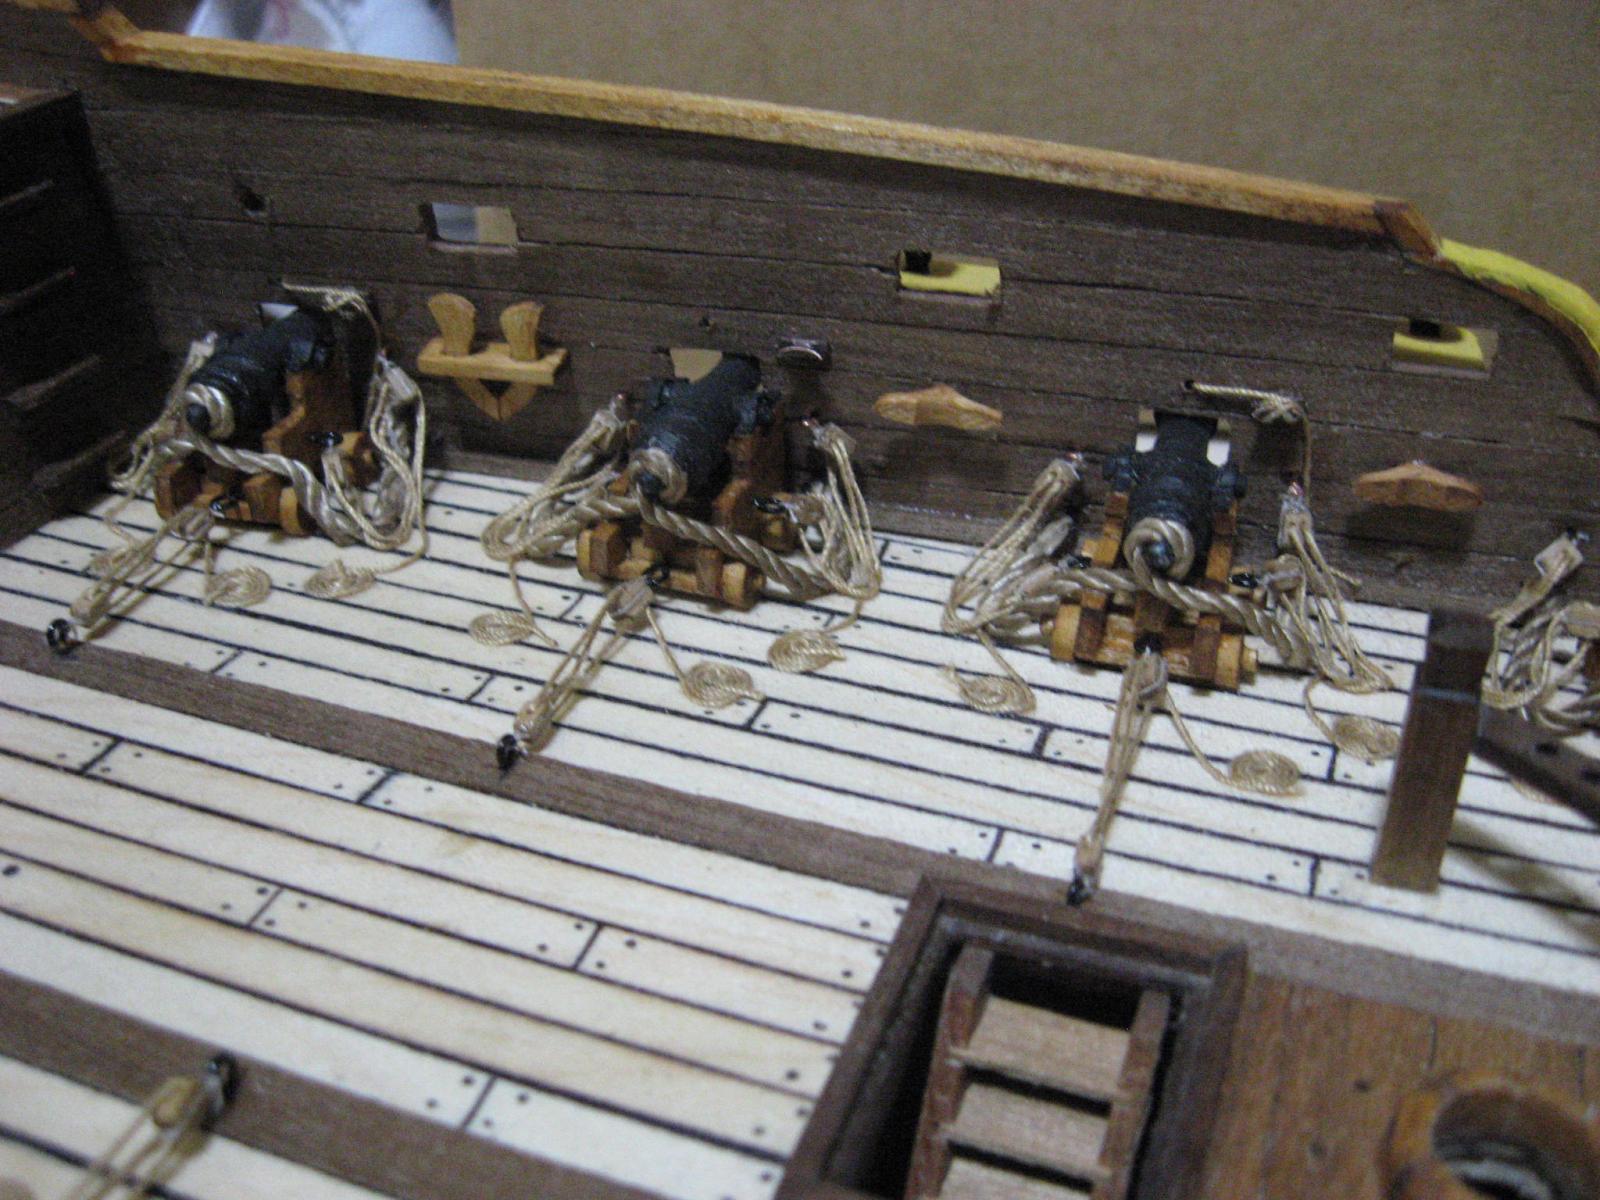
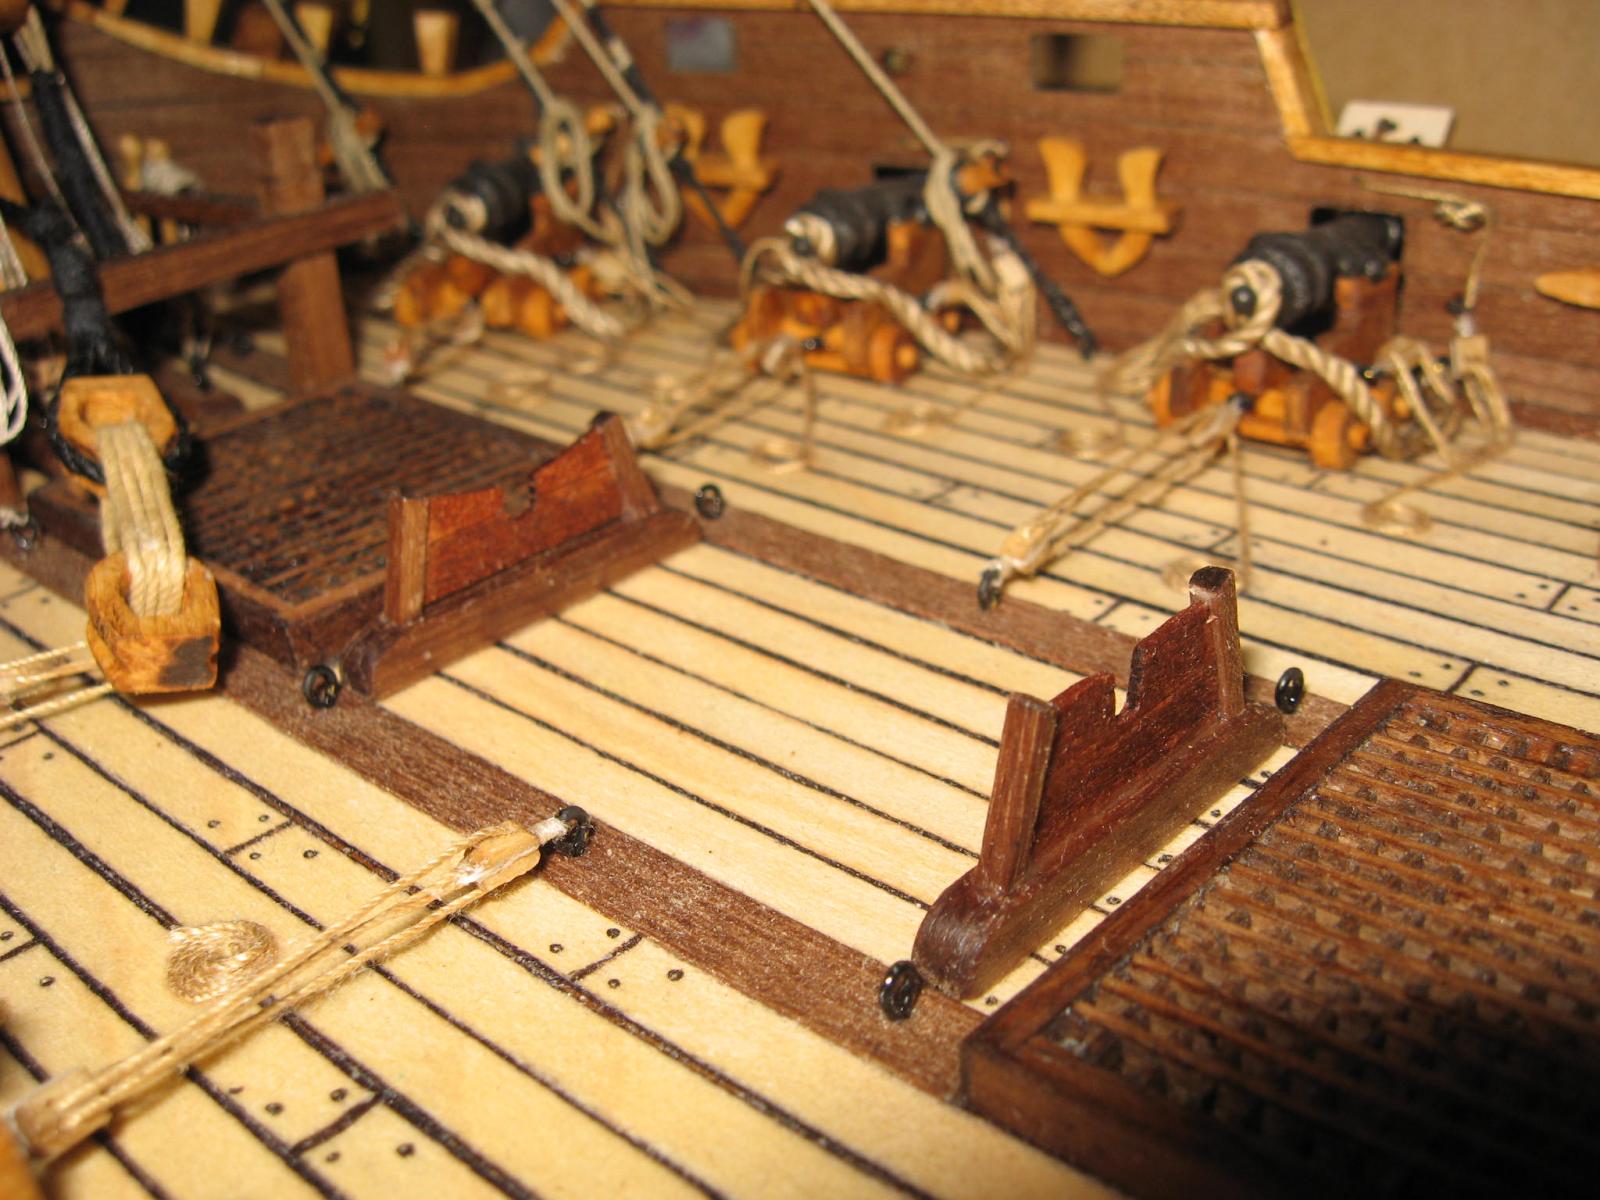
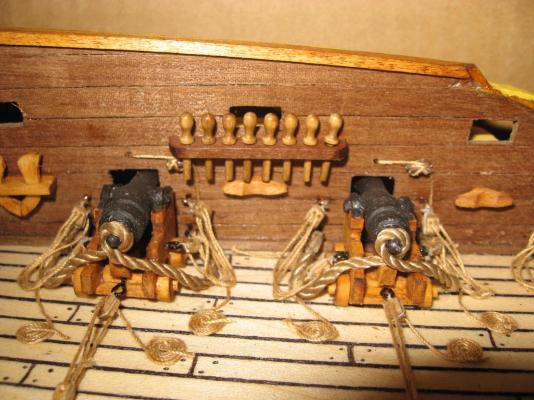
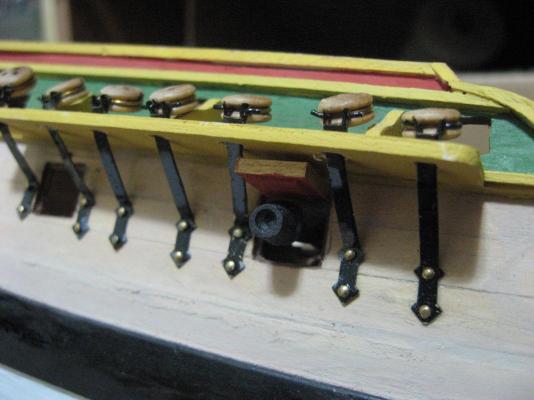
Thank you Carl! I think I succeded on comunicate my frustration to you regarding the cannons installation... One additonal problem that is present is that due to the limitated thickness of the bulwark, I cannot make deep holes for the installation of the block's nails of the cannons. So the holes cannot sustain the blocks. The blocks installation is made only with cyanoacrilate (because has a fast effect) and the simultaneous use of both the hands. Probably there are better ways to install them.... but now is too late!
-
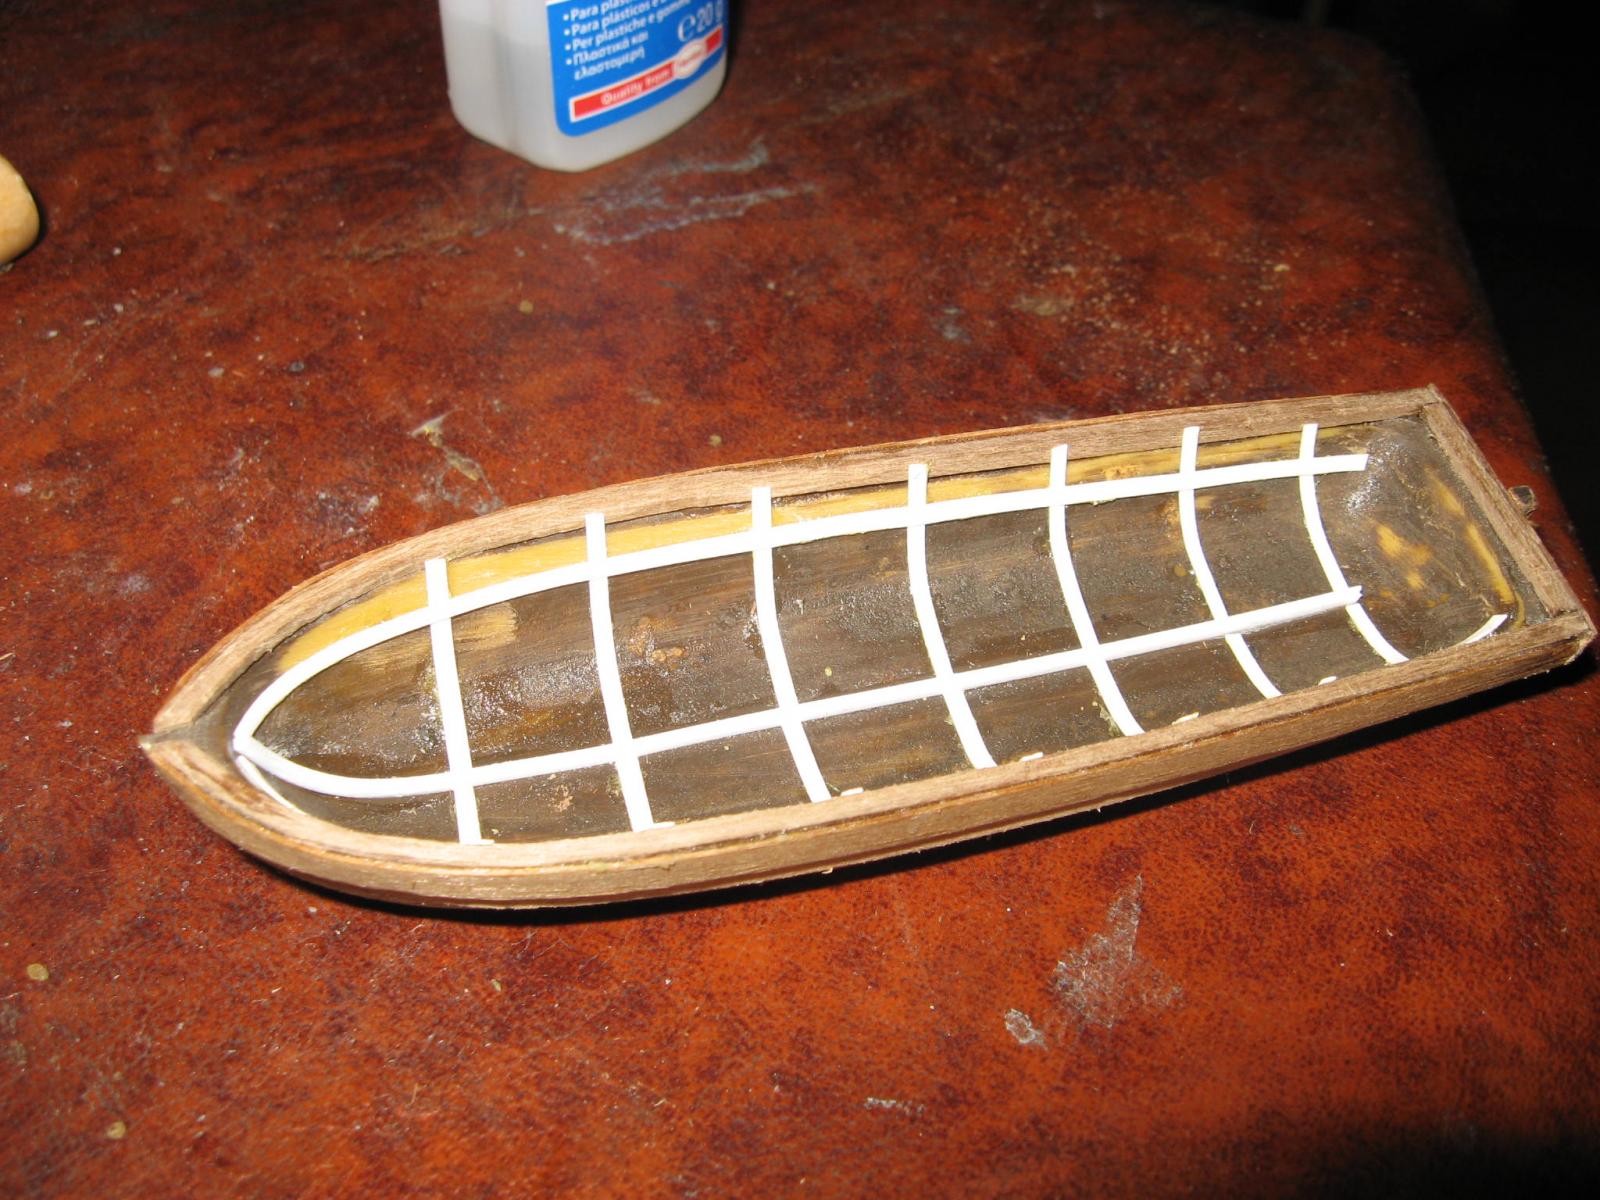
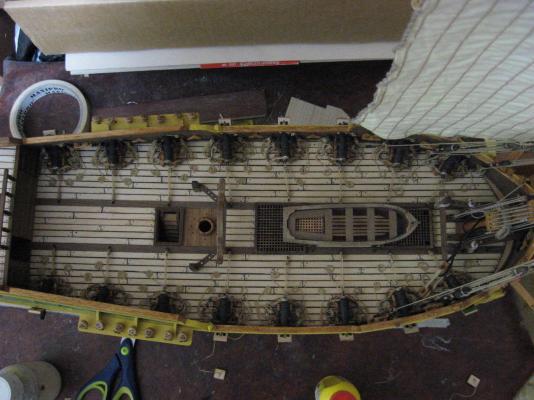
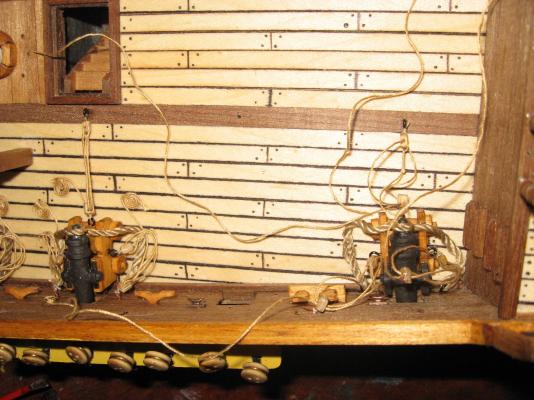
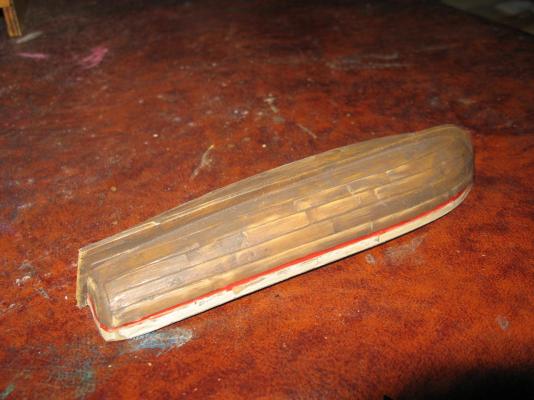
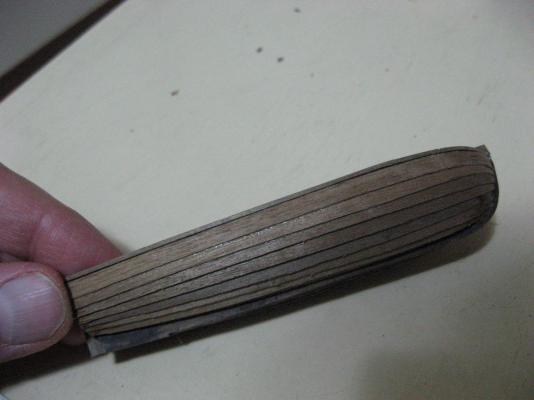
I (slowly) continued with the cannons rigging making and installation. I decide that I cannot proceed further on the masts and sails if I don't finish first the "cannon chapter". I installed other four (!!!!! !!!!) cannons. Only two remains... As it can be seen in another photo, for installing each cannon the model must be laterally strongly tilted, otherwise I cannot attach the blocks to the bulwark. So the mast and sail cannot be placed at the moment. During this week I think that I will prepare the last cannons. In the meanwhile I started to prepare the service boat. The old one was plastic made. Since I have not enough patience for making a new one, I will modify heavily the old one. I scrapped everything and I leaved it naked. I covered the external hull with thin walnut strips, arranged to simulate a clinker construction. Internally I glued thin strips of cardboard, which simulate the internal frame. Later I will add the decks and all the accessories. The service boat will be painted white. It is not so smart, but when it will be finished the largest part of the errors will be hidden.


- 190 replies
-
- 10
-
-
Thank you Carl! A wooden ship model needs ABSOLUTELY to be made only when you are in the right mood, otherwise the results are not good...
-
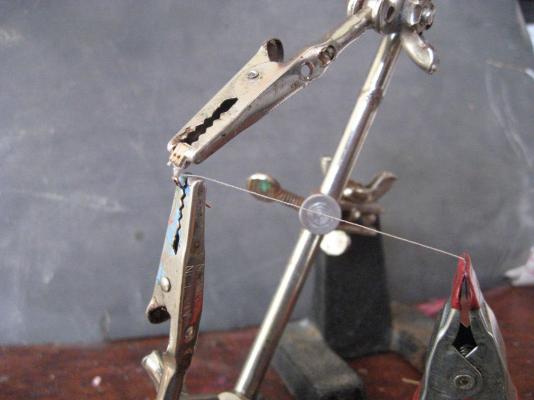
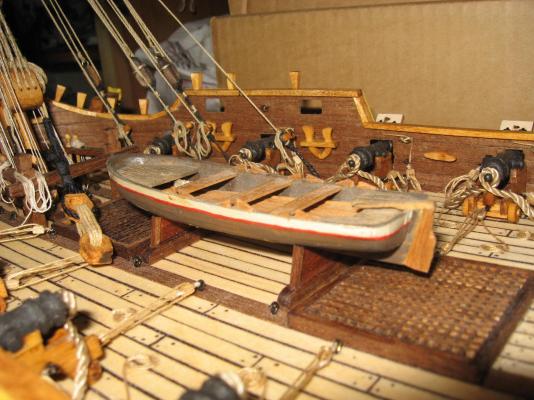
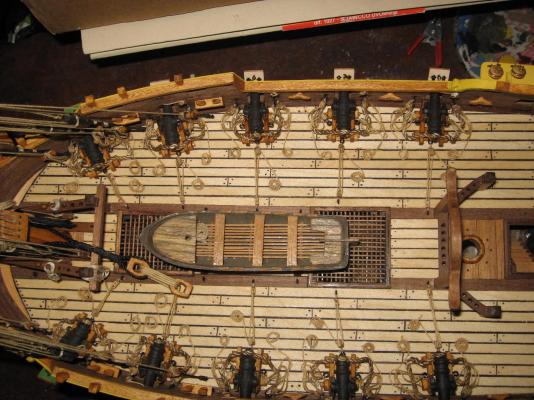
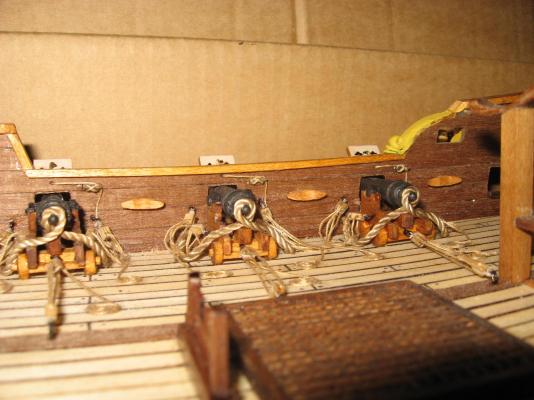
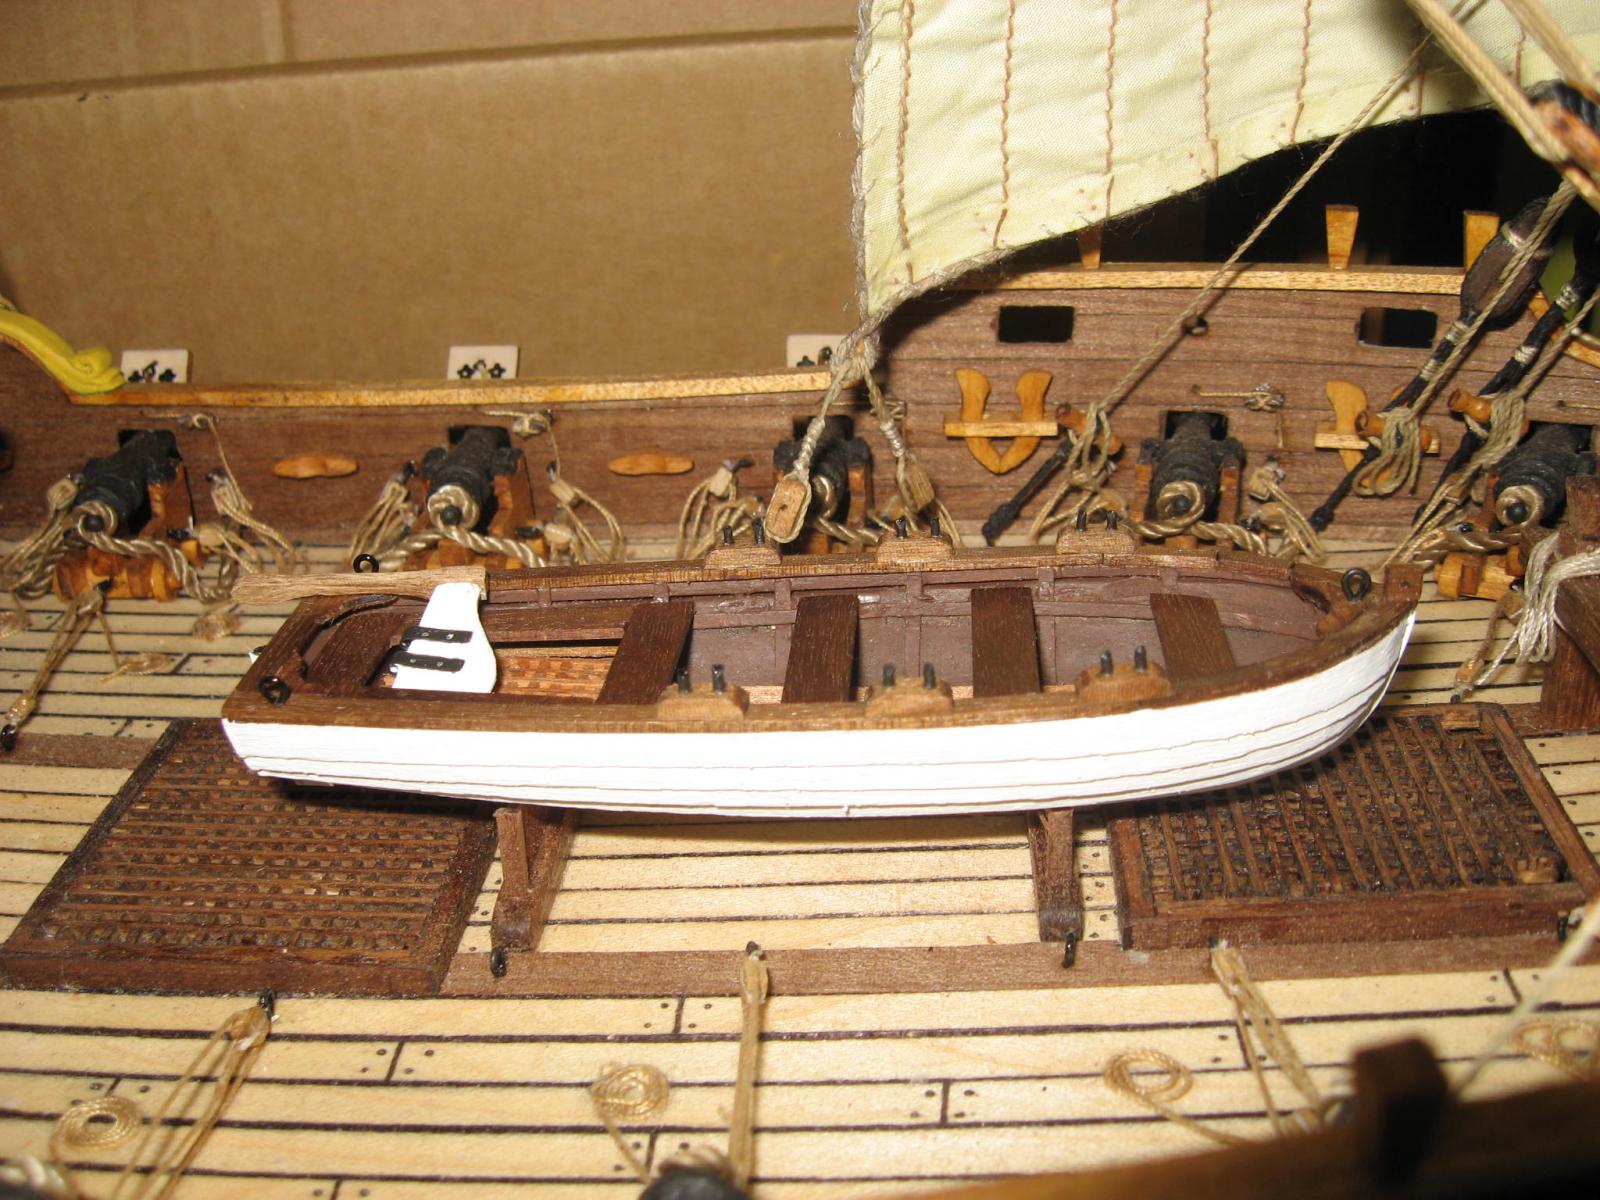
First of all I want to thank my favourite "tool" (see first photo), which is of great help on saving time and on preserving my mind sanity...which can be loose sometimes rather fast when dealing with small objects! the updates now will be make less frequently. the reason is that I need to install I think almost all the remaining cannons, before proceeding with the main mast. And since I hate to install them, I must do it when I am with the right mood. And so the work will slow a bit. Returning to the update: I installed the supports for the service boat, which can be seen in another photo. I placed the service boat on them, but just to show the overall view, since it is not yet been rebuild (it is the old boat, so it must be completely modified). I added two more cannons to the ship. 10 done, 6 more to install.... :cheers: Before next Christmas I think I will complete the "cannon chapter"... I failed to shorten the cannon installing and preparing time: each cannon needs always more than two hours to be installed (including the gunport), so each time my patience is stretched to the limit....