Cristiano
-
Posts
423 -
Joined
-
Last visited
Content Type
Profiles
Forums
Gallery
Events
Everything posted by Cristiano
-
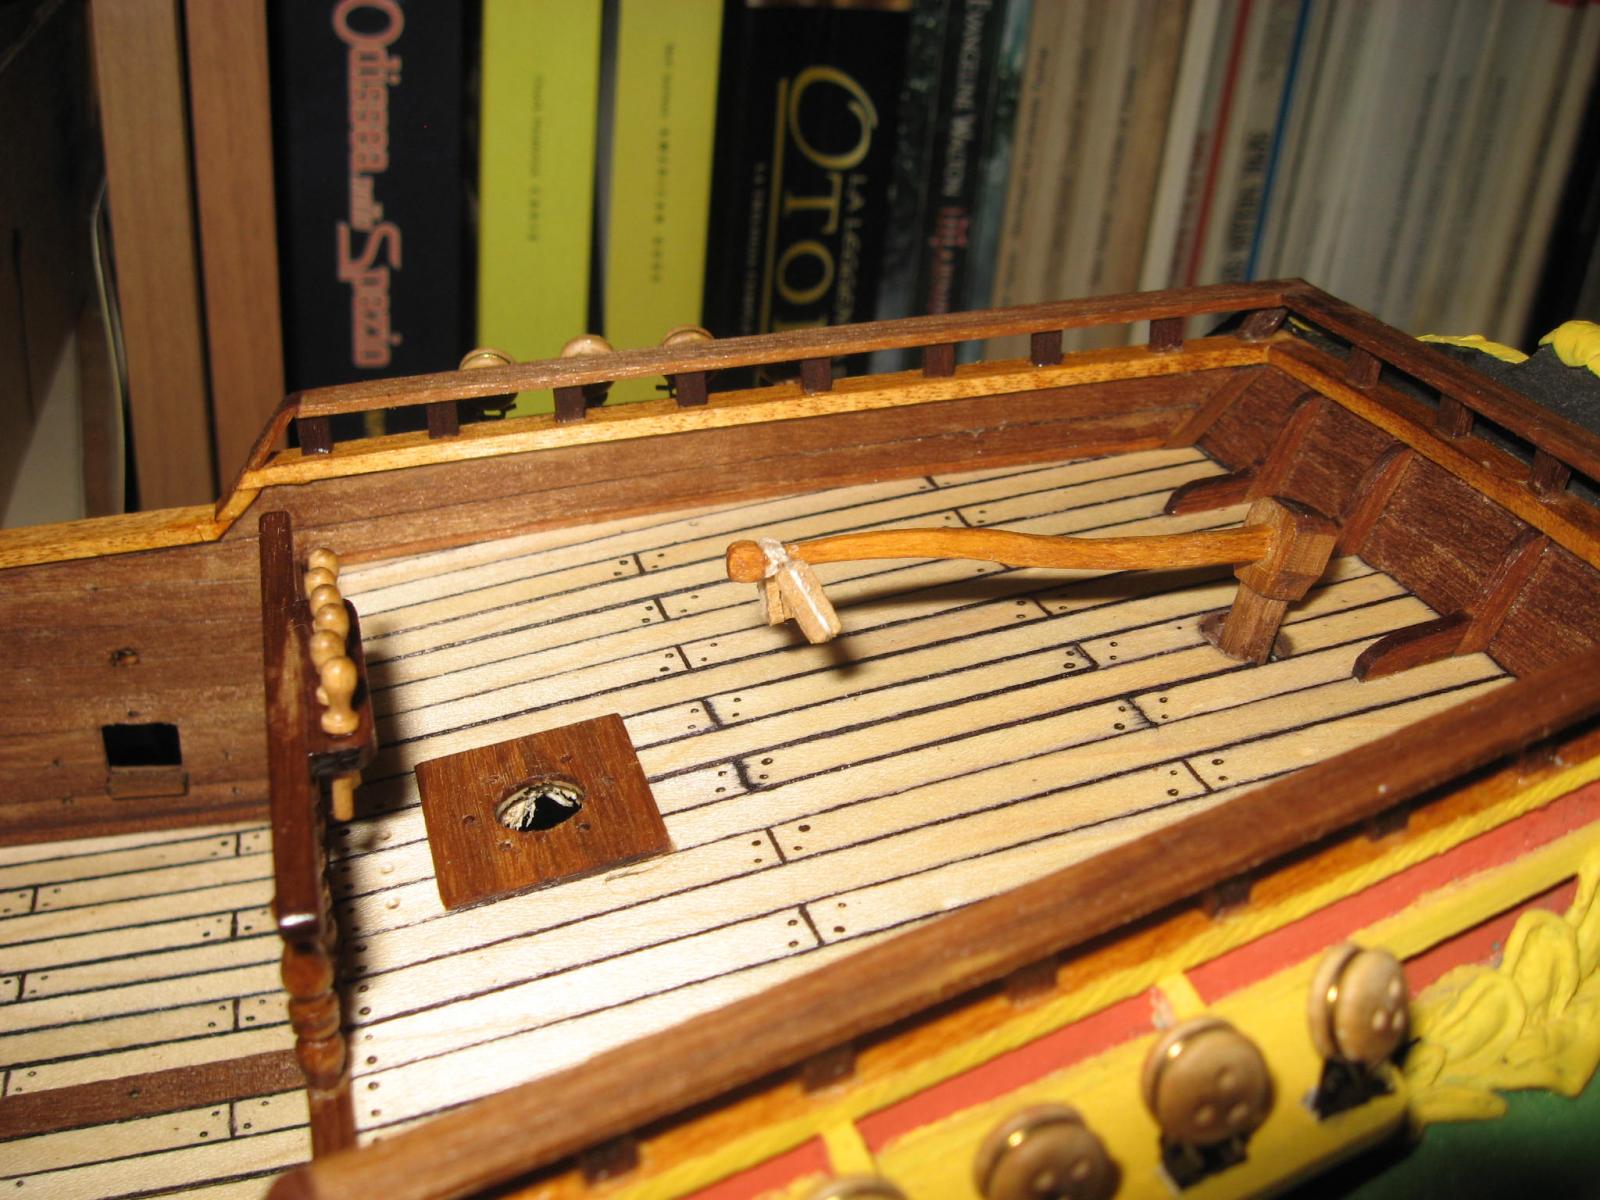
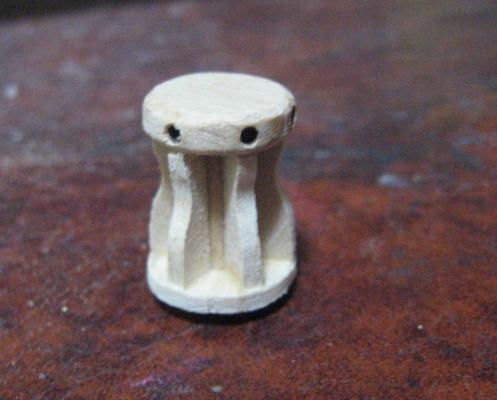
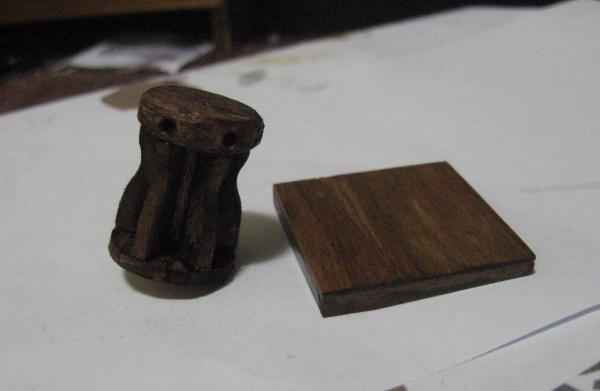
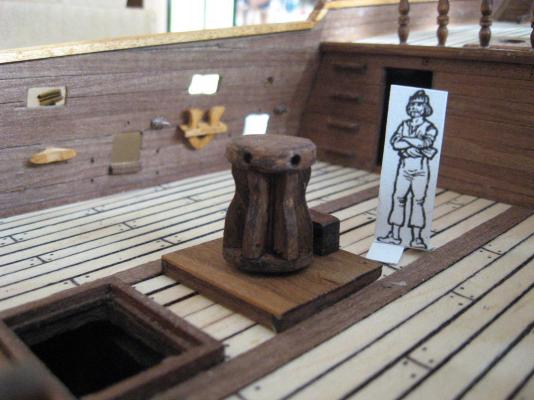
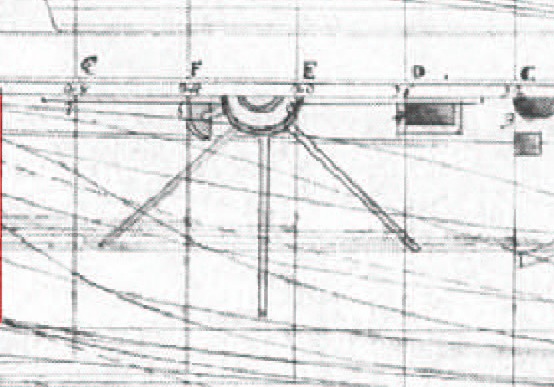
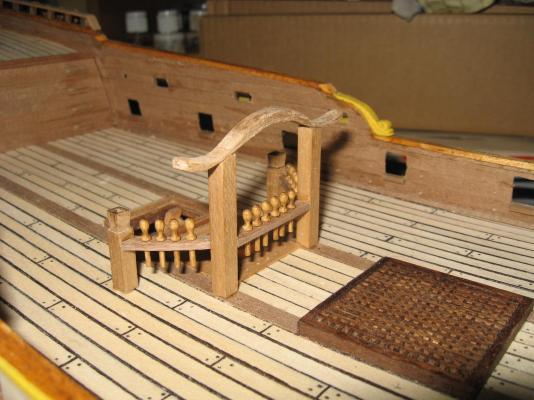
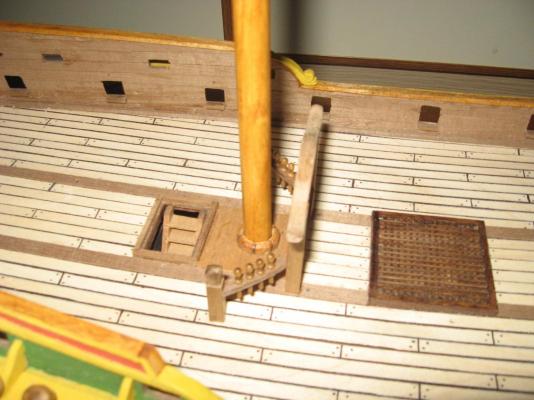
This week-end I made the capstan and other minor accessories. The capstain is more or less like the ones that I saw on some venetian drawings and models. I must admit that is not so detailed, so I am not happy of it. In some photos can be seen the pieces that compose it. I added a wooden basament, to compensate the deck sloping. I added a blocking system for the capstan, as can be seen in the original drawing. To complete the weekend I added two more cannons, too. I added the miniature to show the scale. The capstan is not yet glued, since it will make interference during other cannons installation. the program in next weekswill proceed with the following: -make the service boat support and install it; -install partially the big lateen sail of the foremast; -install other cannons.......... :( at least four are needed......... :( -finally install the main mast, in order to start to thinking about its rigging...
-
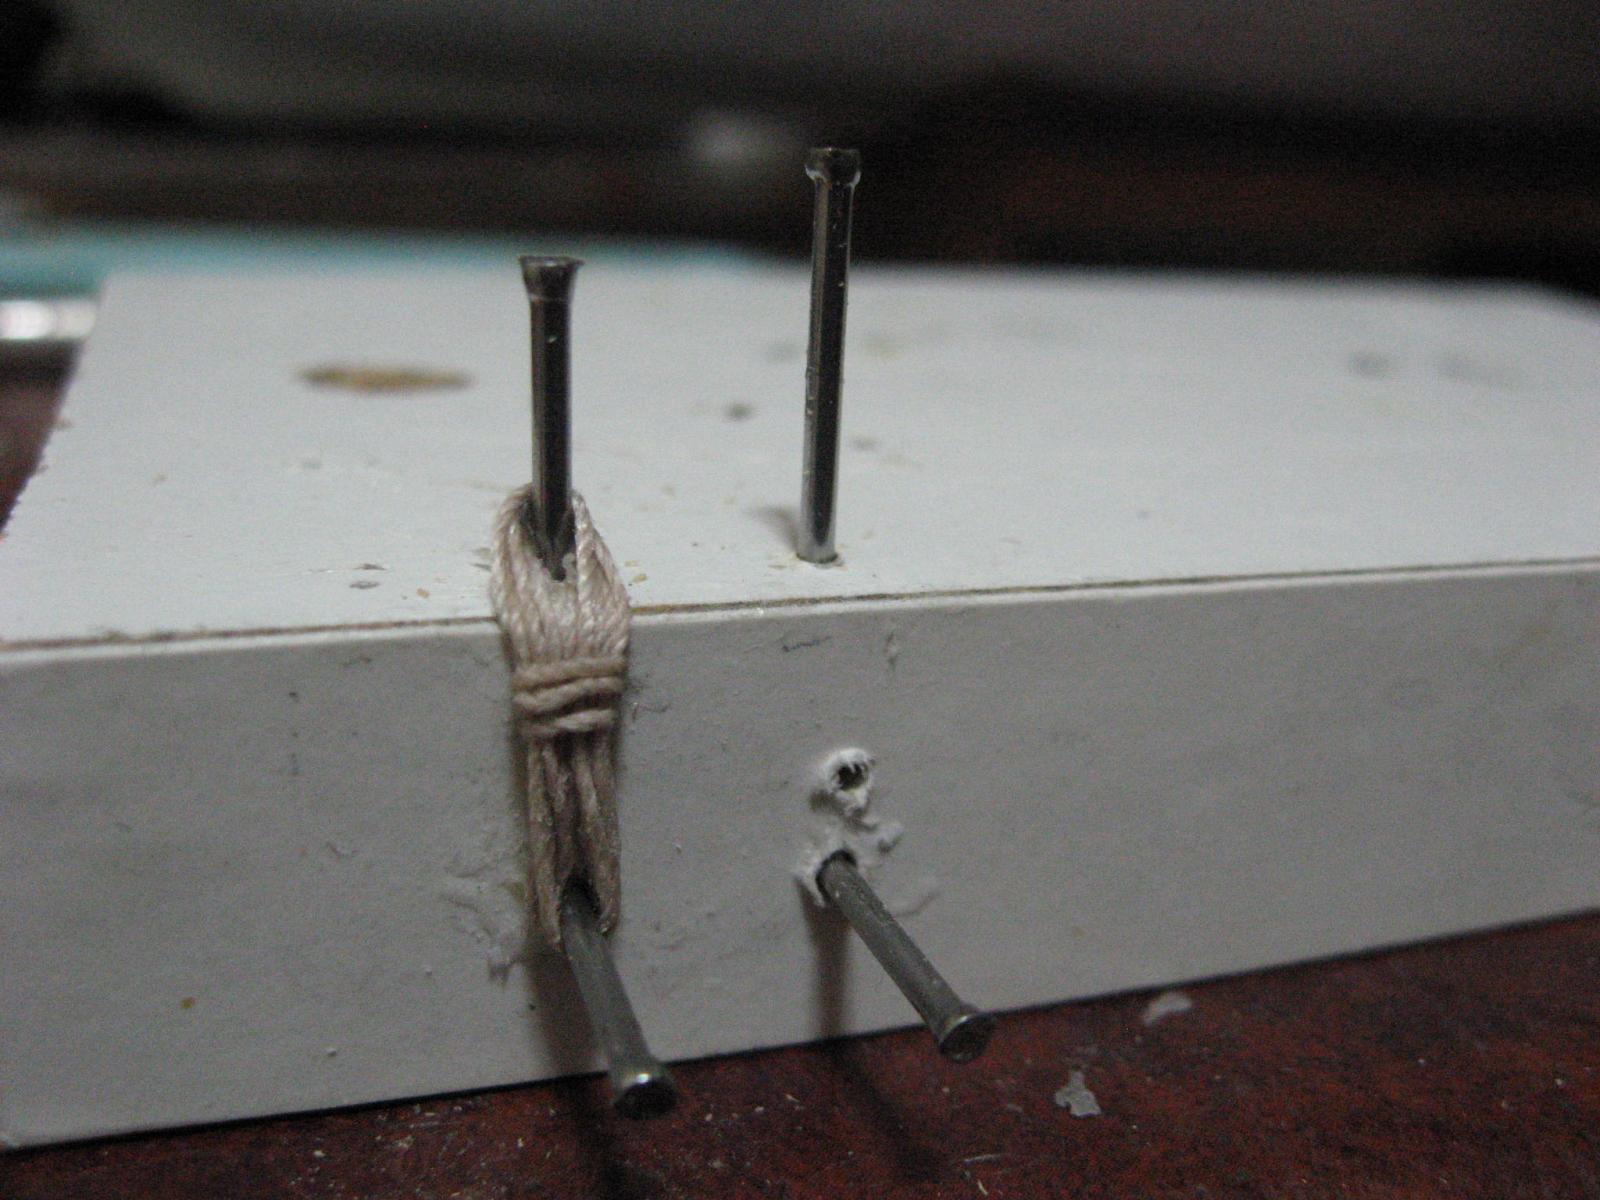
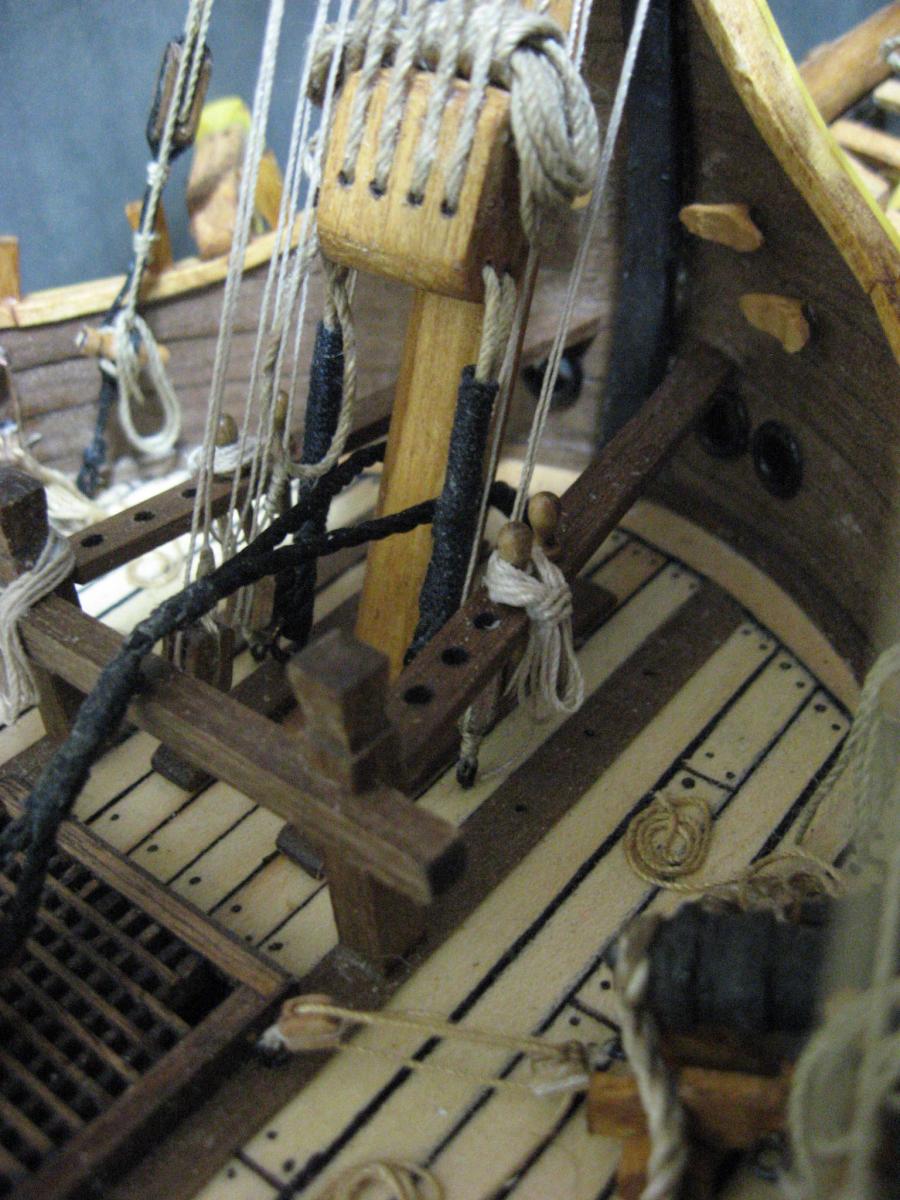
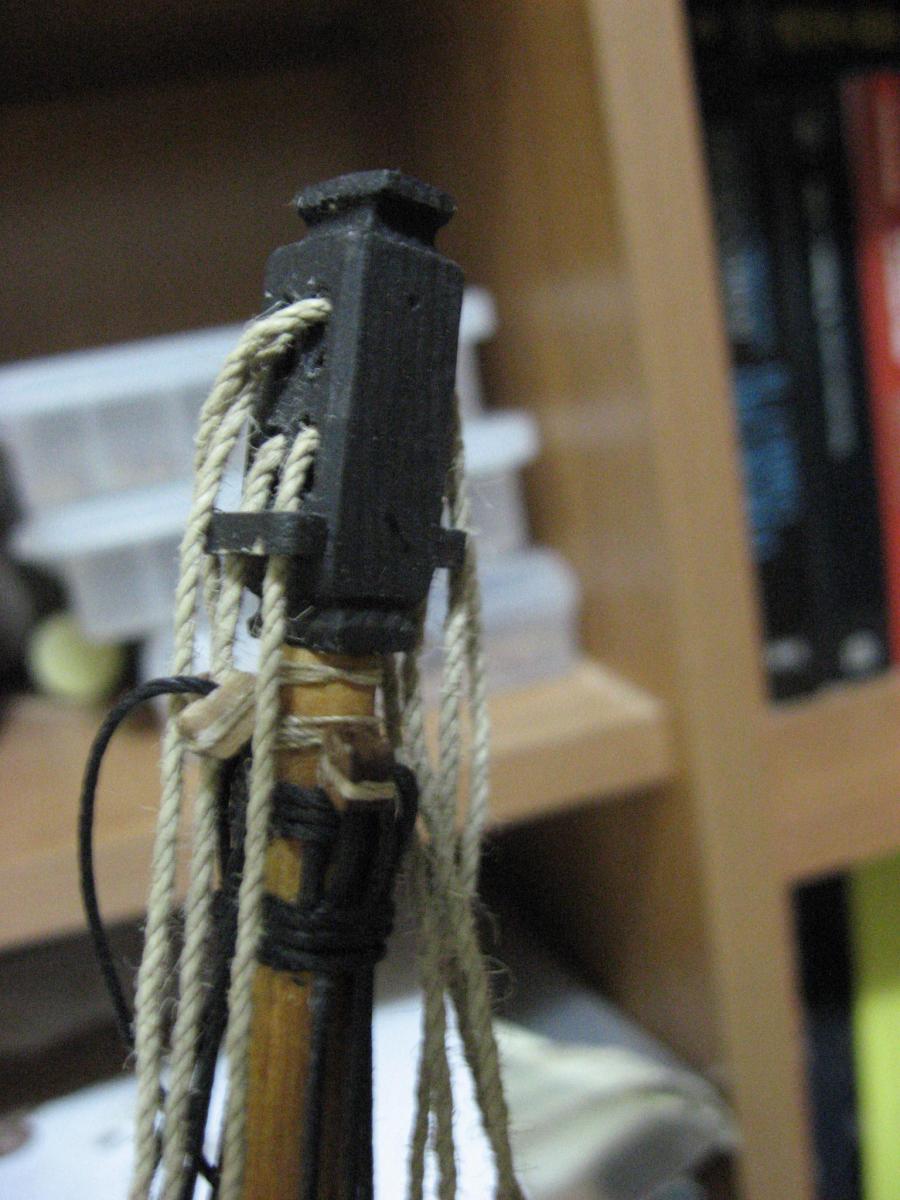
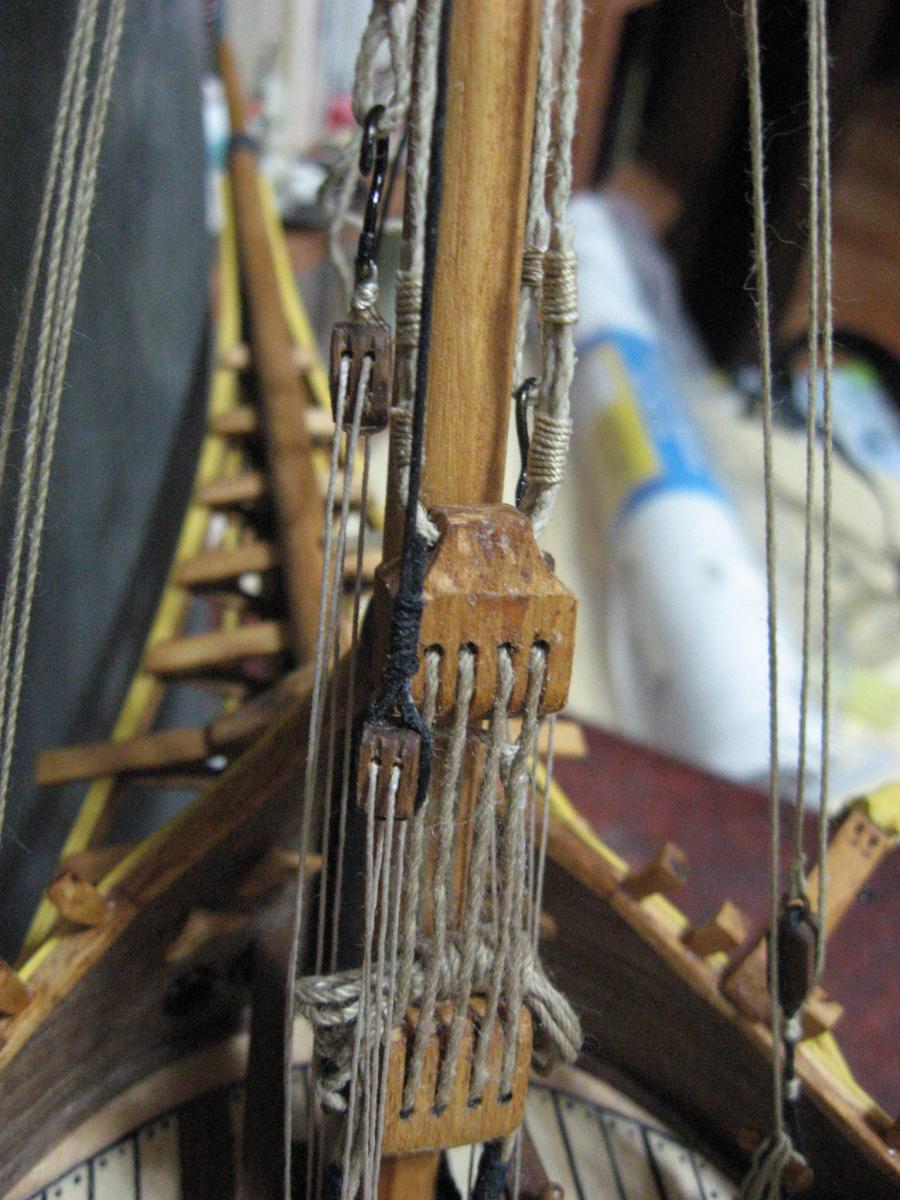
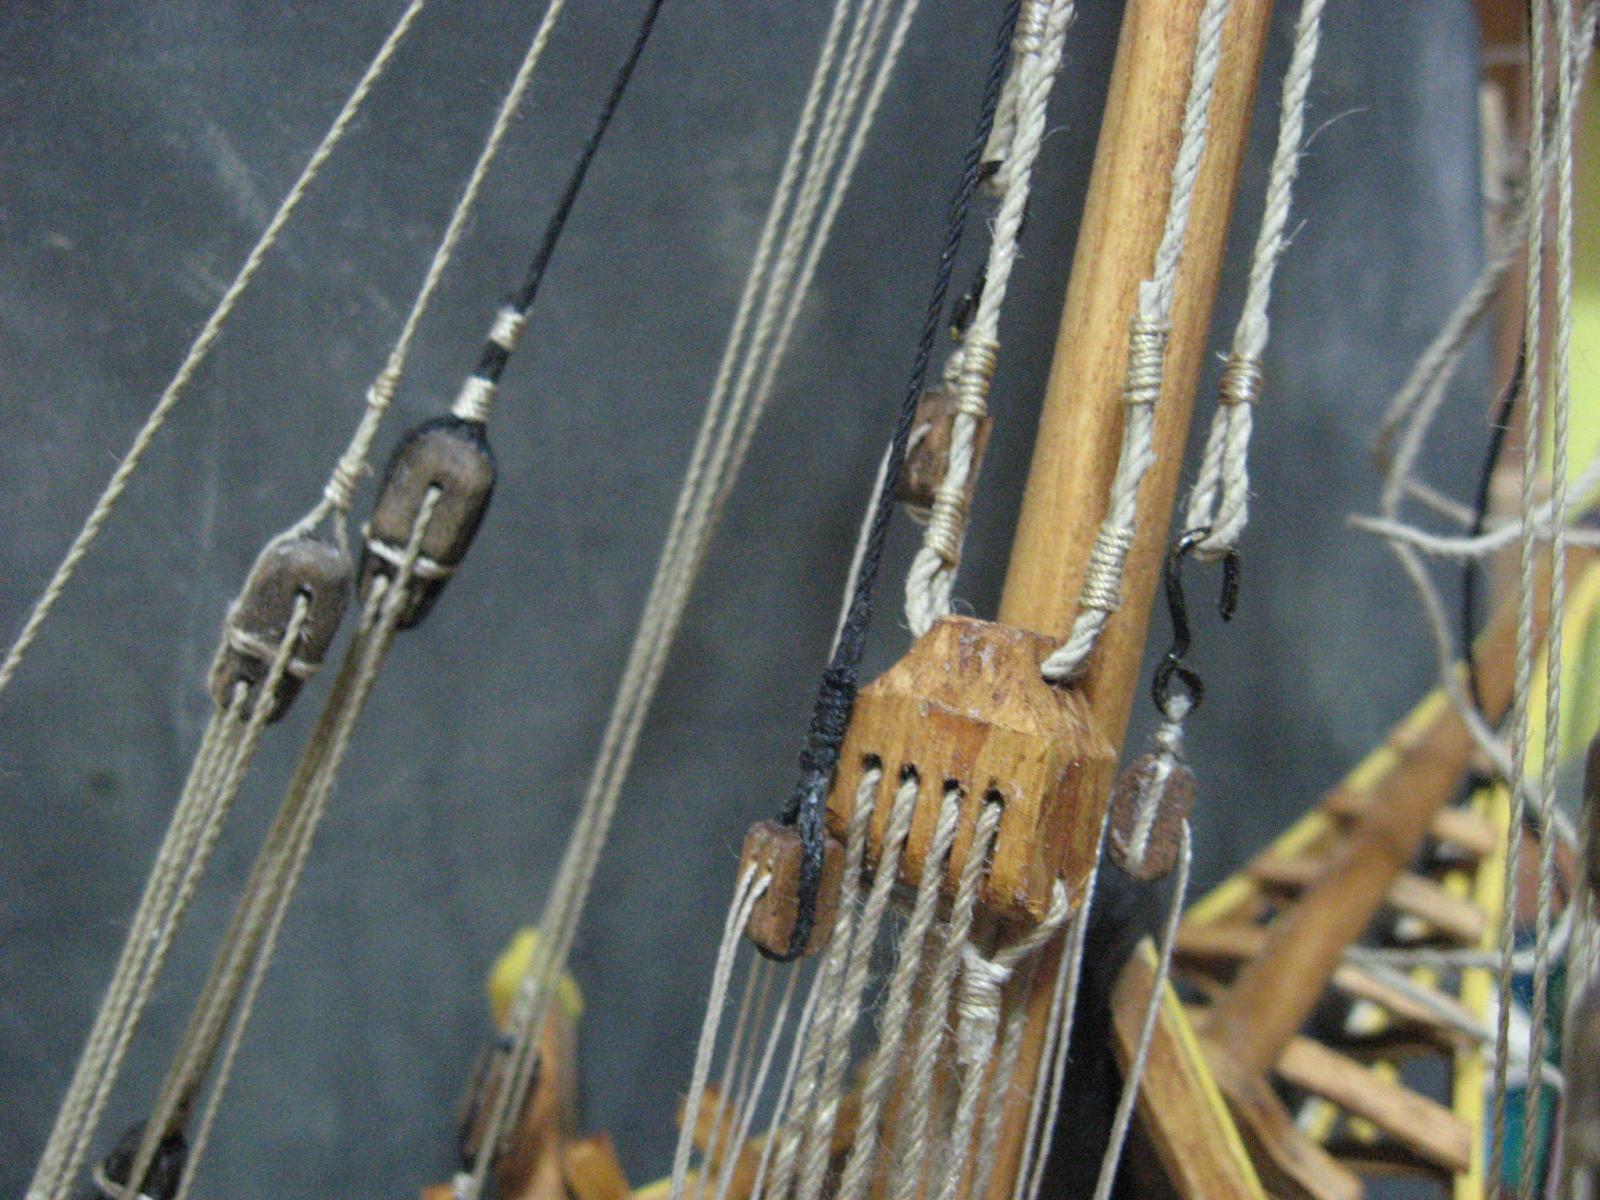
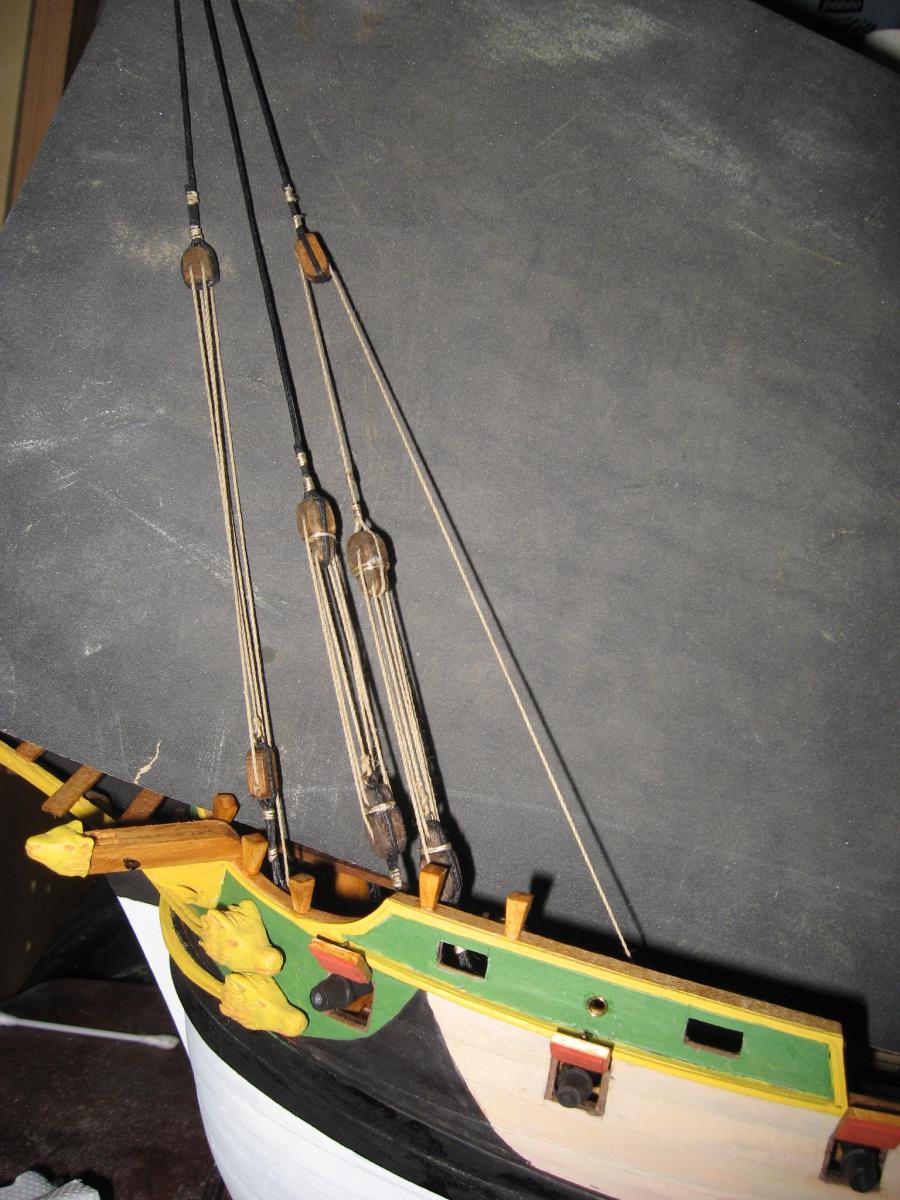
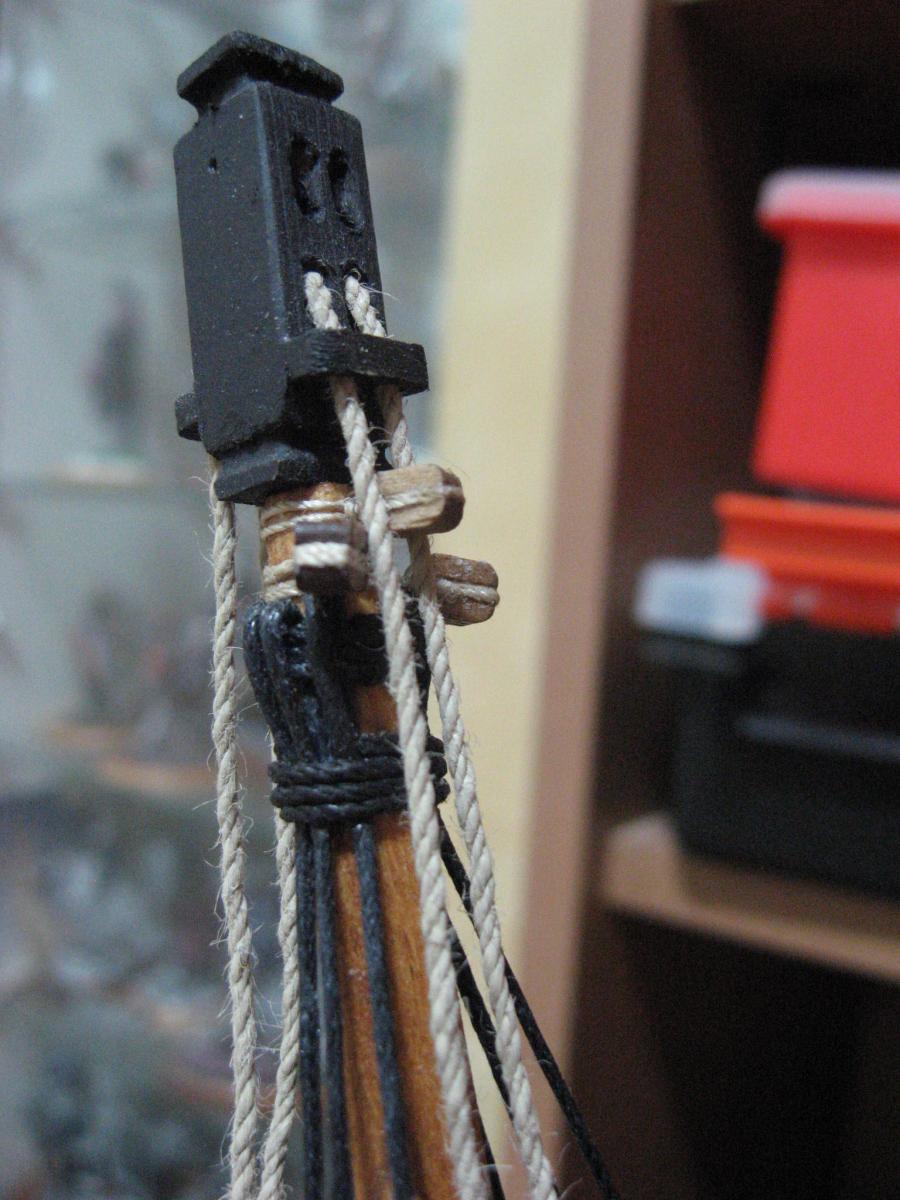
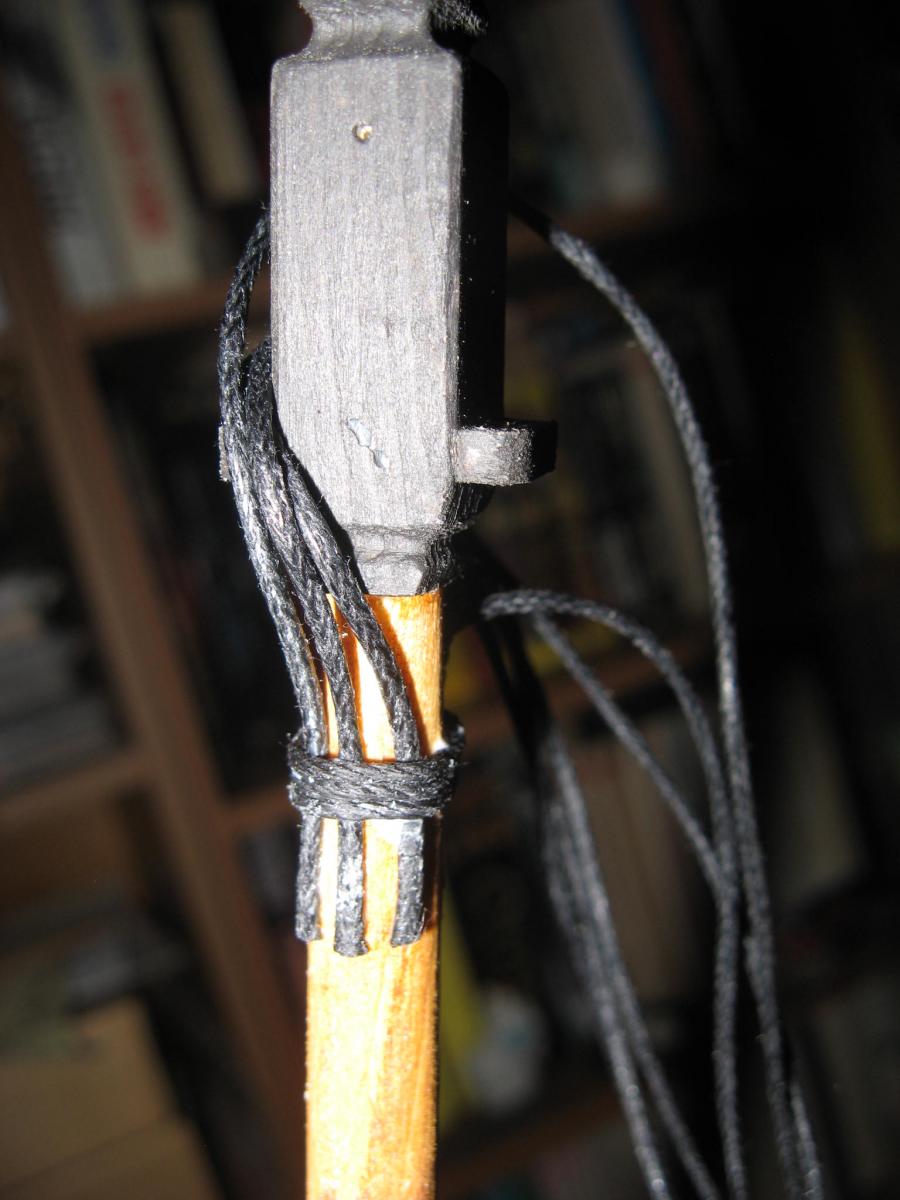
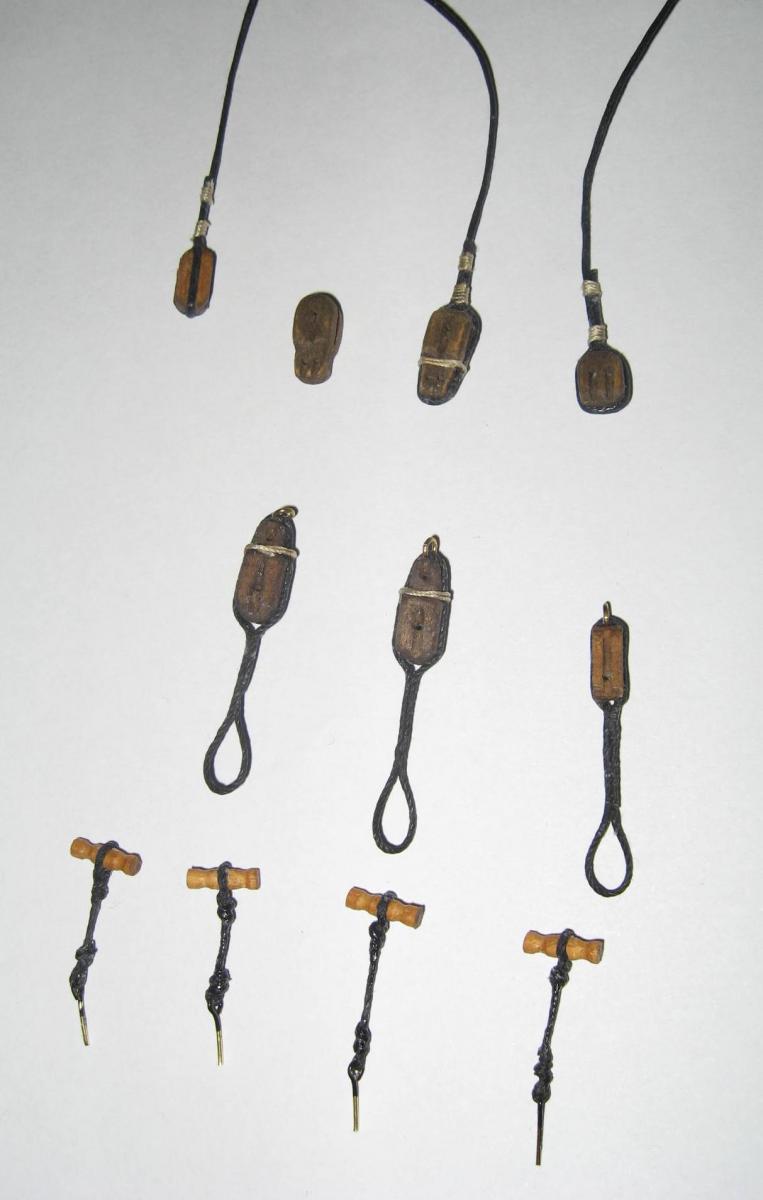
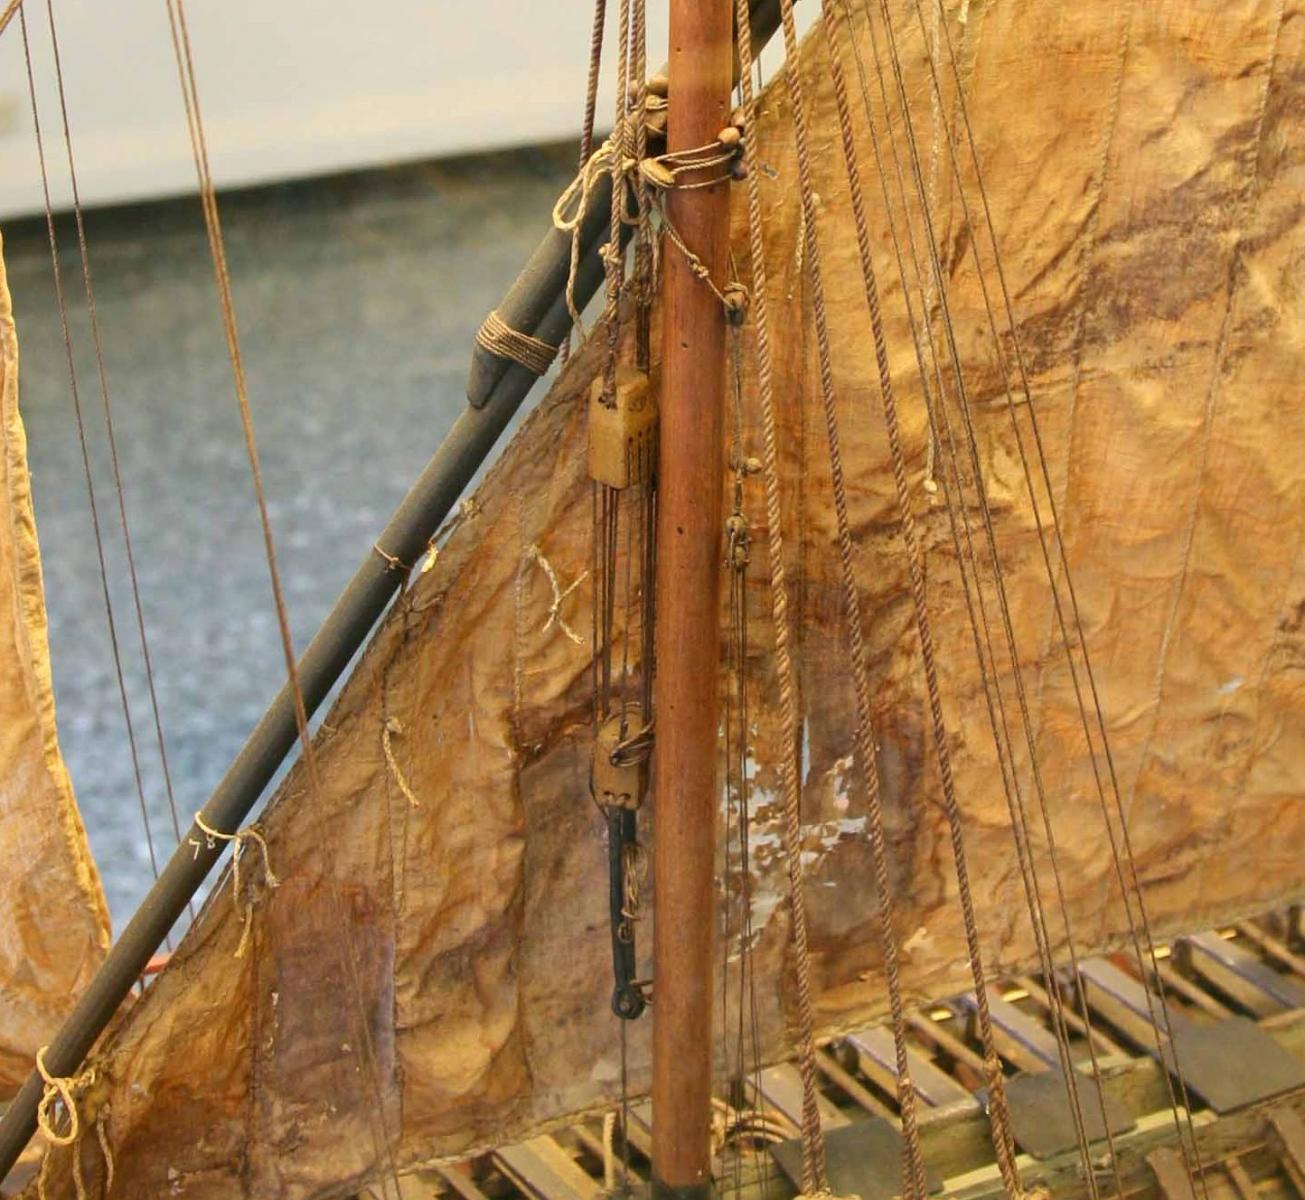
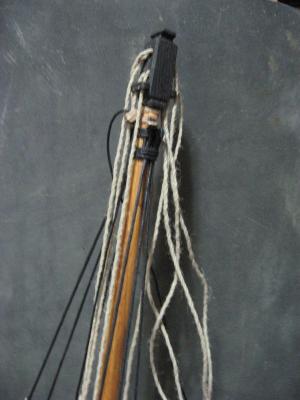
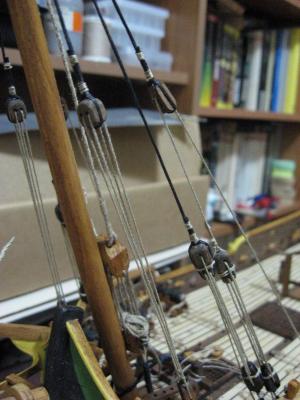
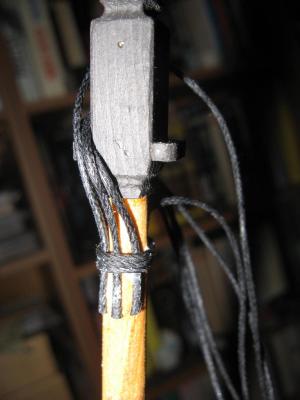
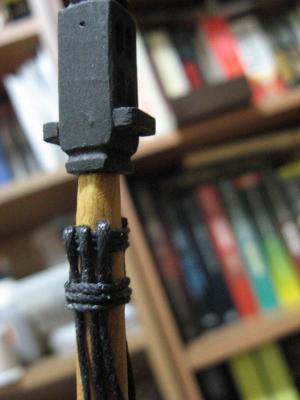
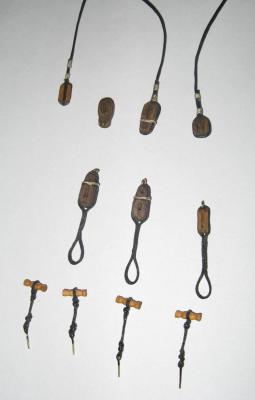
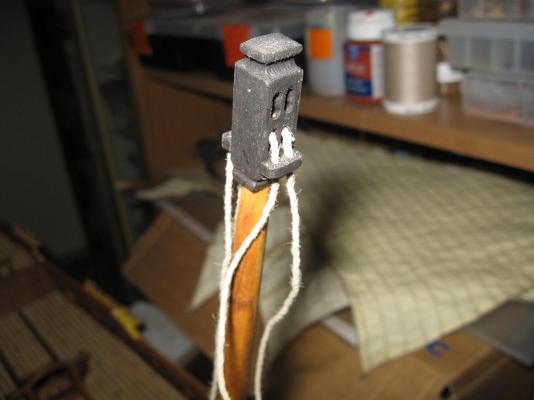
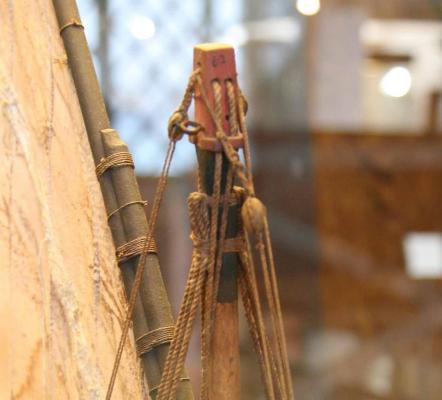
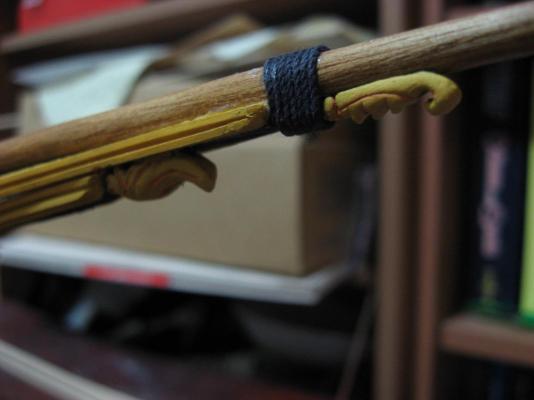
Due to various problems, I was forced to slow the model making. This weekend I focused on adding more running rigging to the foremast and making some accessories made of wood. I have positioned the two "baranzine" and the related double blocks, up to their belaying pins. In addition I added the hanks of ropes to the belaying pins. to do so, I prepare them before glueing to the pins, with a wooden block provided with nails, as in the first photo. In other photos can be seen those hanks attached to the belaying pins. Since the working scale of the model is quite large, I need some additional multiple block of large scale, so I prepared them. It is time to prepare the "trozza" for the foremast lateen sail. I think in English the term can be "Gooseneck" but I am not sure. For making the "trozza", I avoided the plastic components that are provided usually in some kit, since I found some wooden spheres that fit the purpose (other photo). I prepared the mizzen mast, but it is not complete, so it doesn't worth a photo. The other photos are various views of the two baranzine and the multiple block where is connected the Main-top-gallant-stay (hope the term is right), which can be identified by the black rope. None of these ropes are tight, as can be seen by the various loose ropes at the top of the foremast.


-
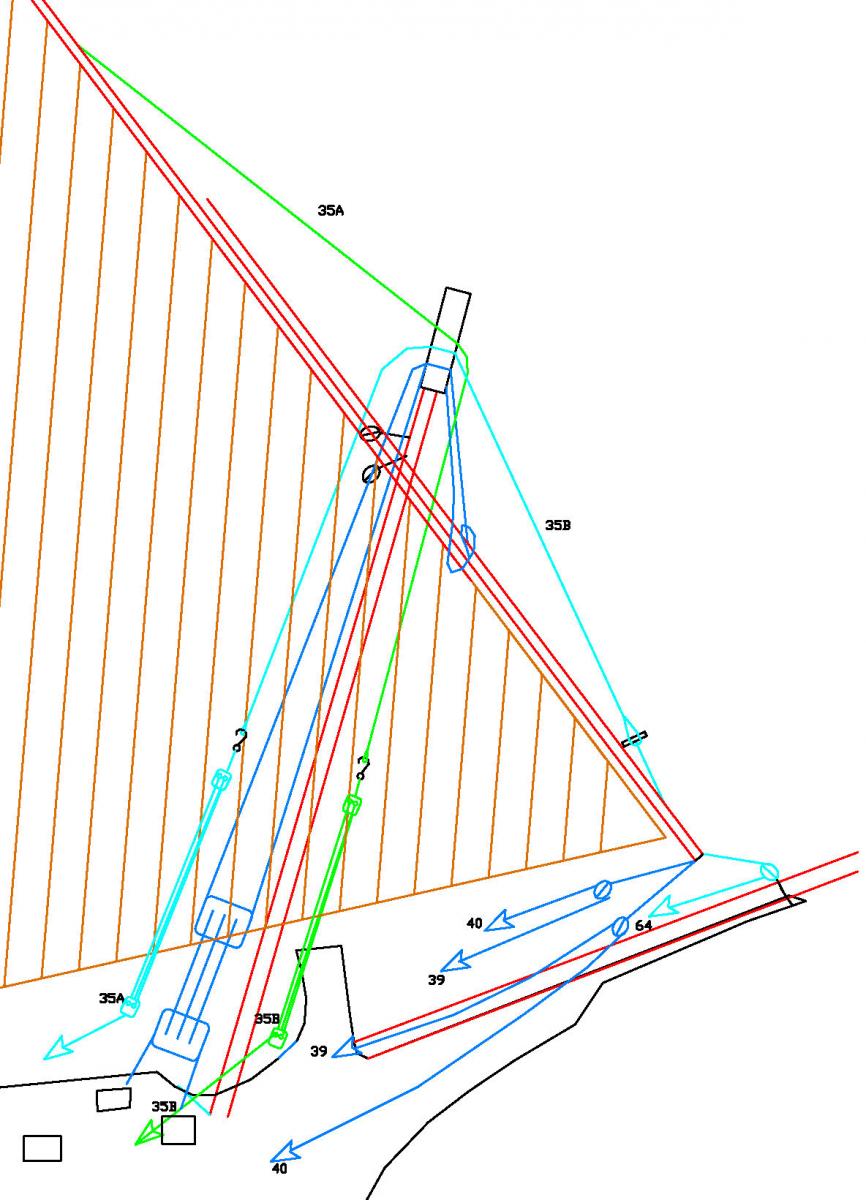
Thank you Buck! A tiny update. I prepared two more cannons for the installation (which will be done maybe in the weekend) Finally I decided some additional detail of the running rigging of the foremast. In the drawing can be seen some of them (only some). Now, before proceeding further I need to attach the cables and related blocks named 35A and 35B to the mast basement. later the basement will be too much complex to be reached with fingers, so I must do it now. I will stop to the hooks at the moment. the cables 35A and 35B should be called in Italian "baranzina della penna" (35A) and "baranzina del carro" (35B) but absolutely I don't know how to translate in English! The Penna is the higher part of the lateen sail "antenna" and the Carro is the lower part of it. The "antenna" is the lateen sail yard. I need to prepare more toggles to complete it, too.

-
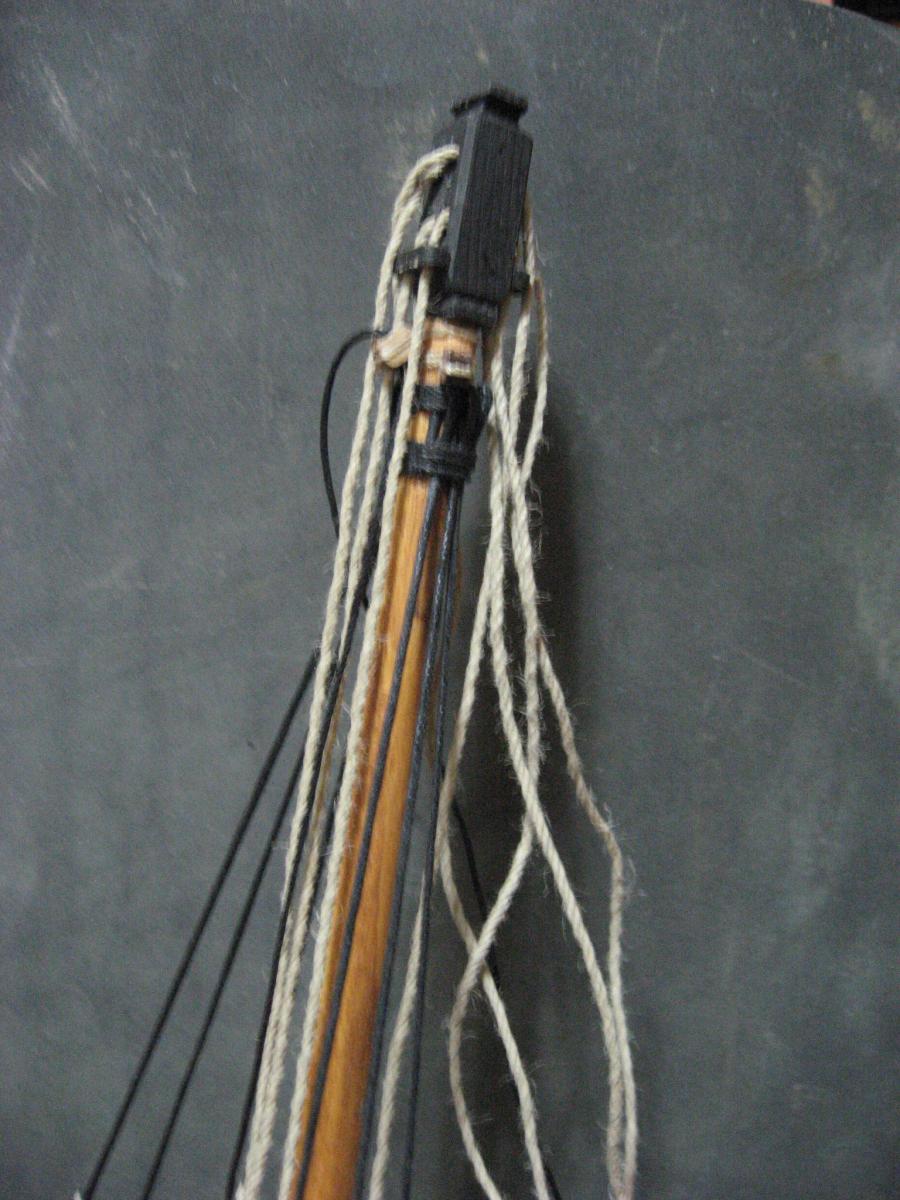
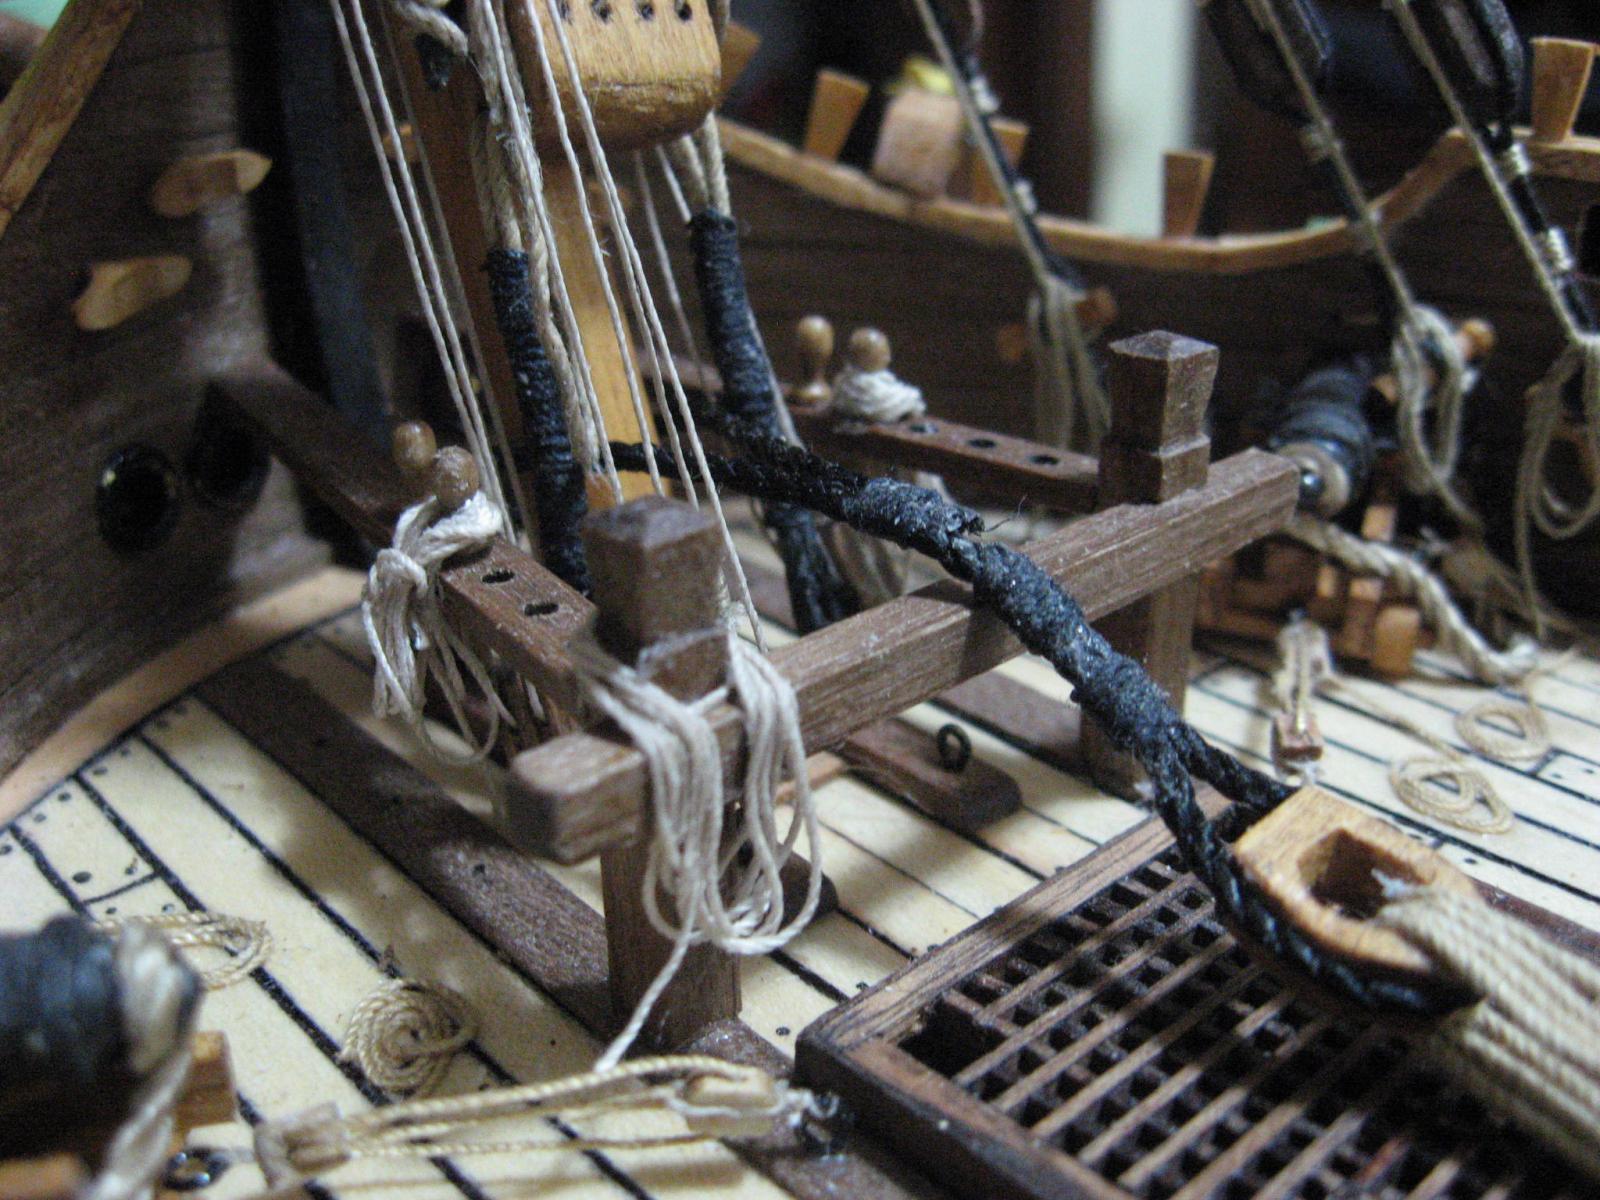
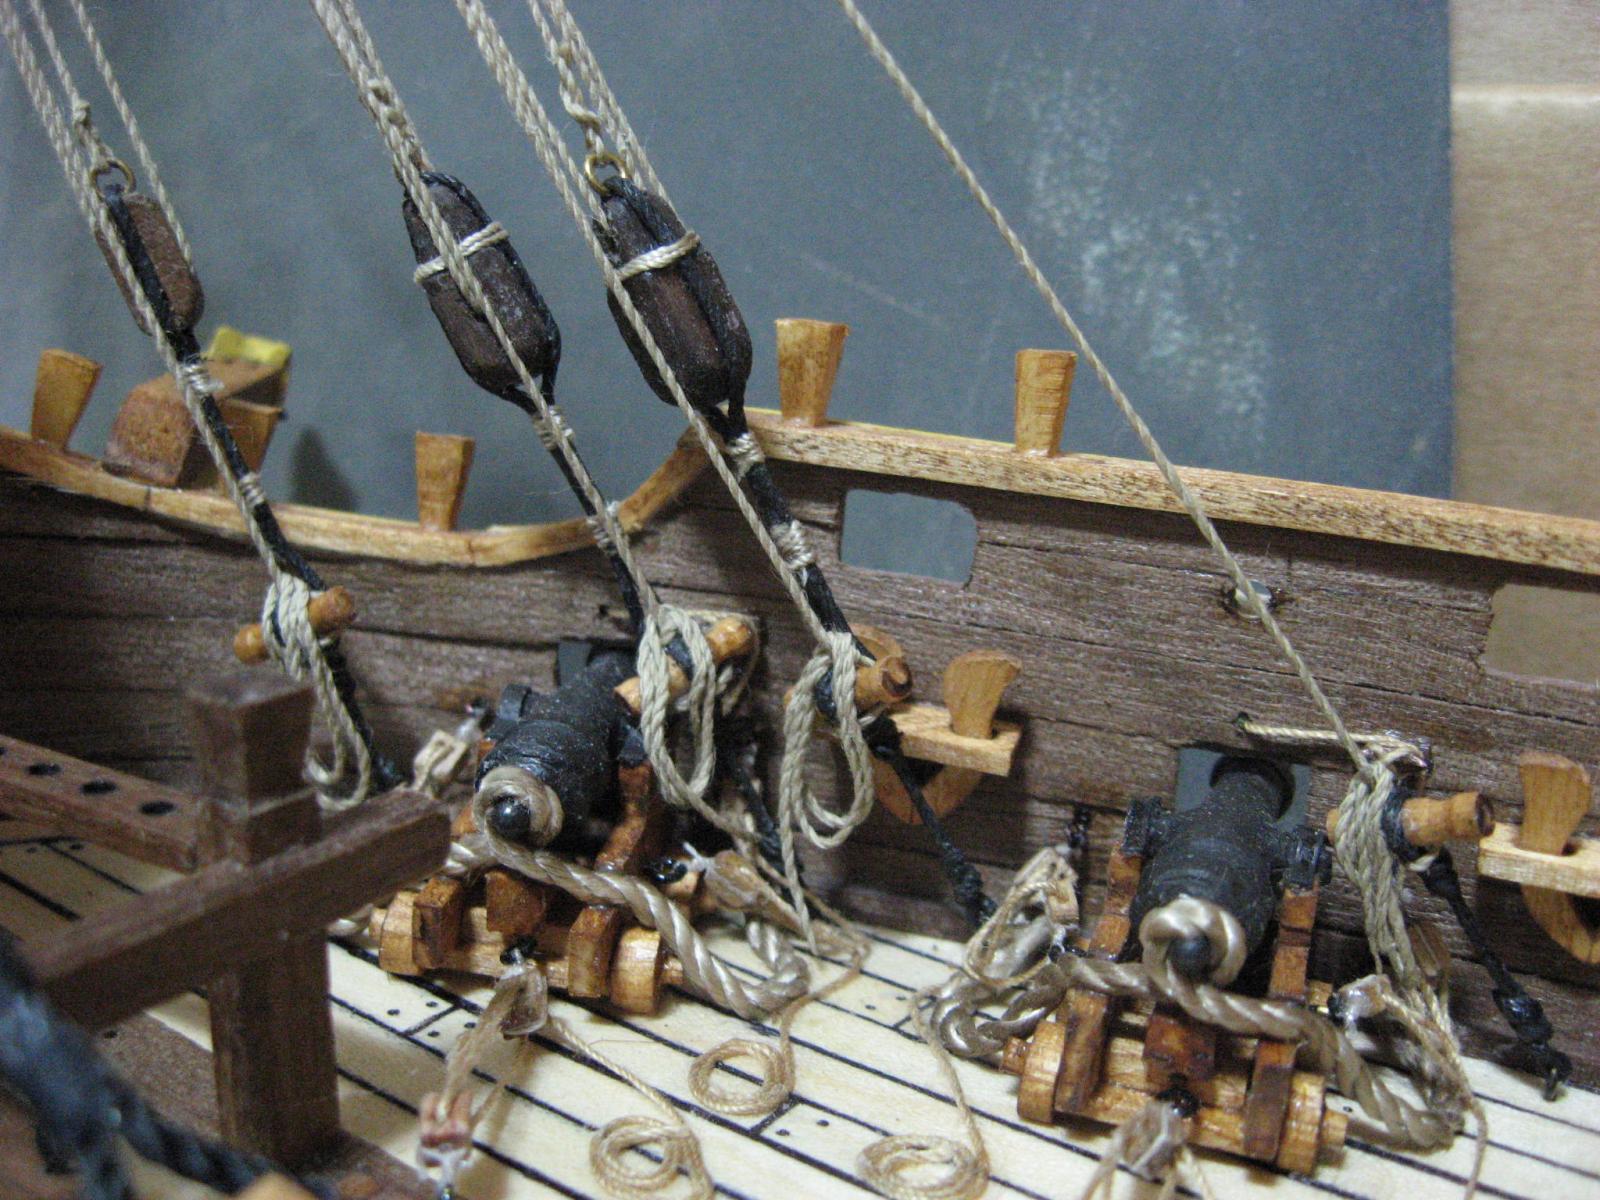
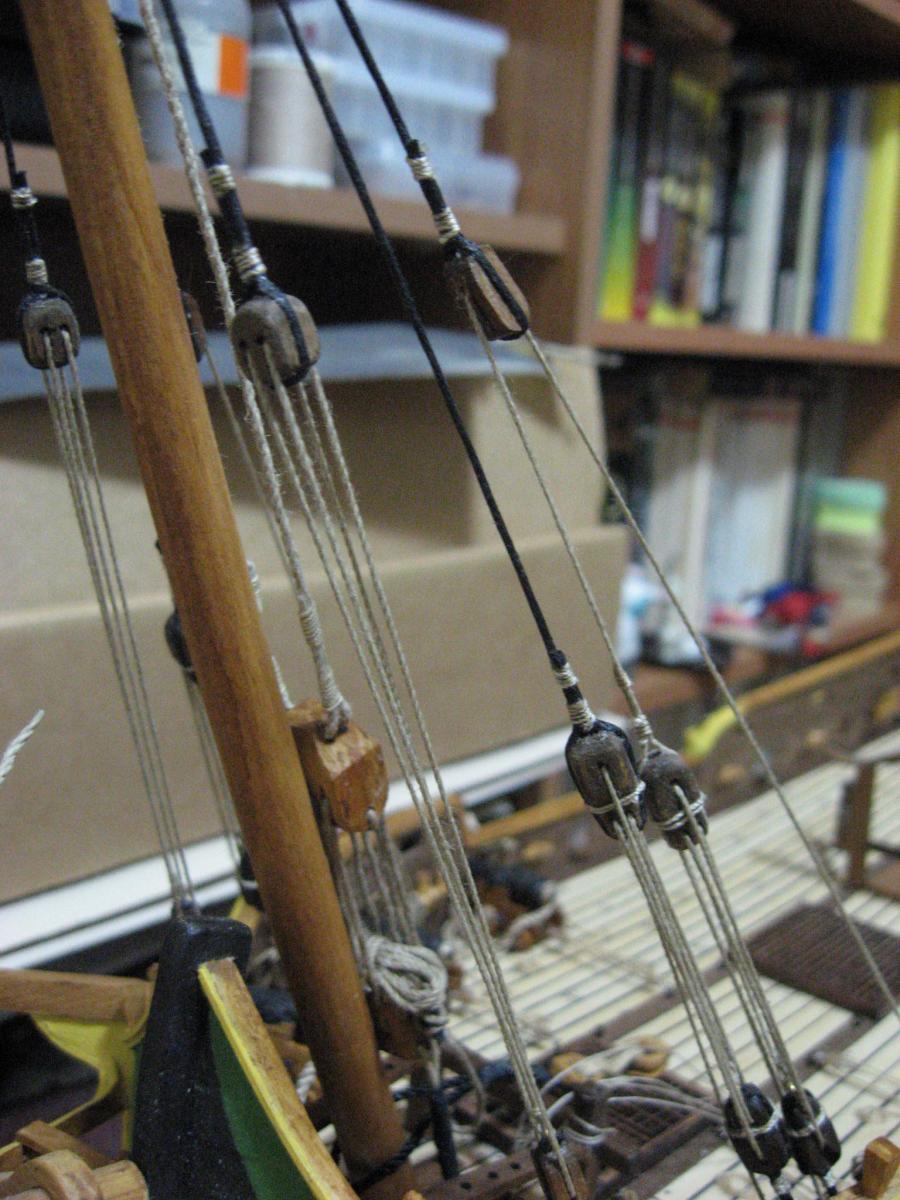
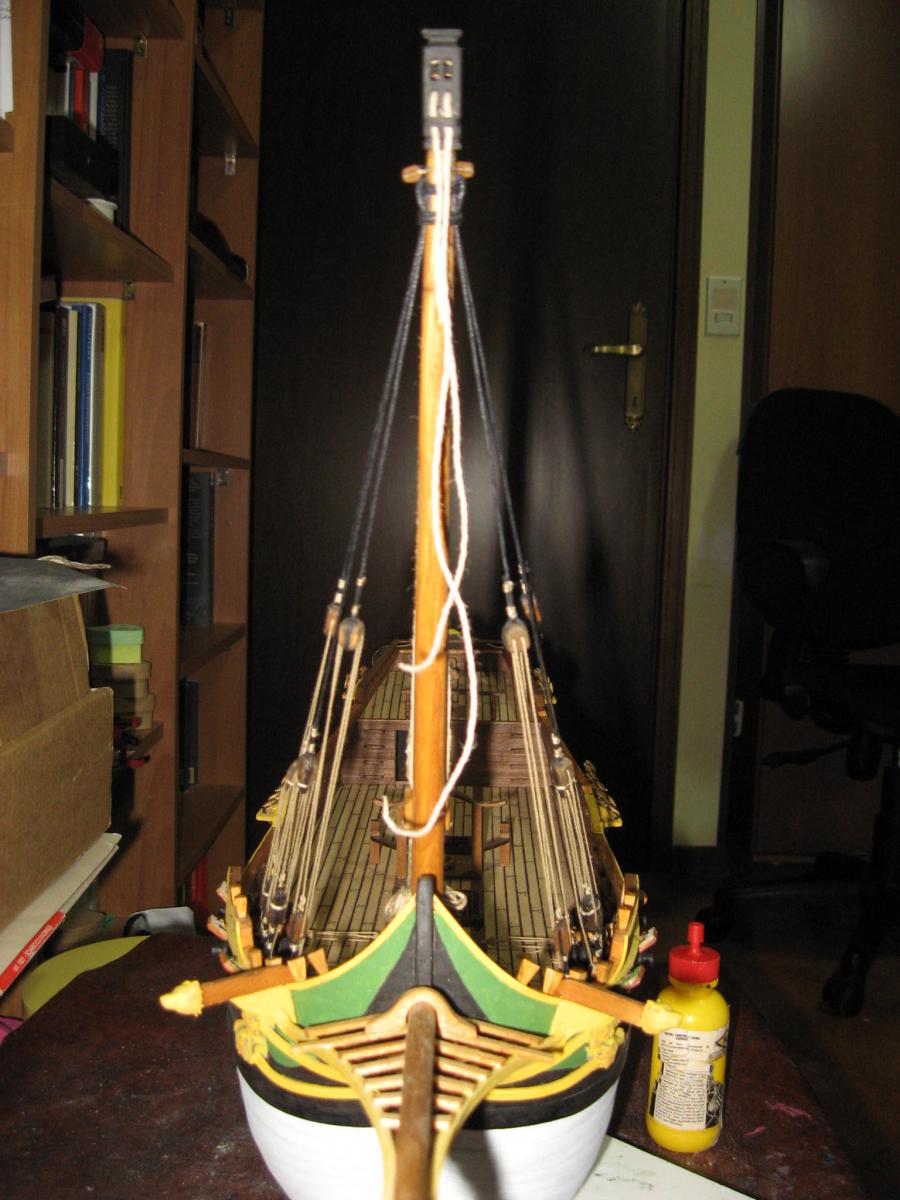
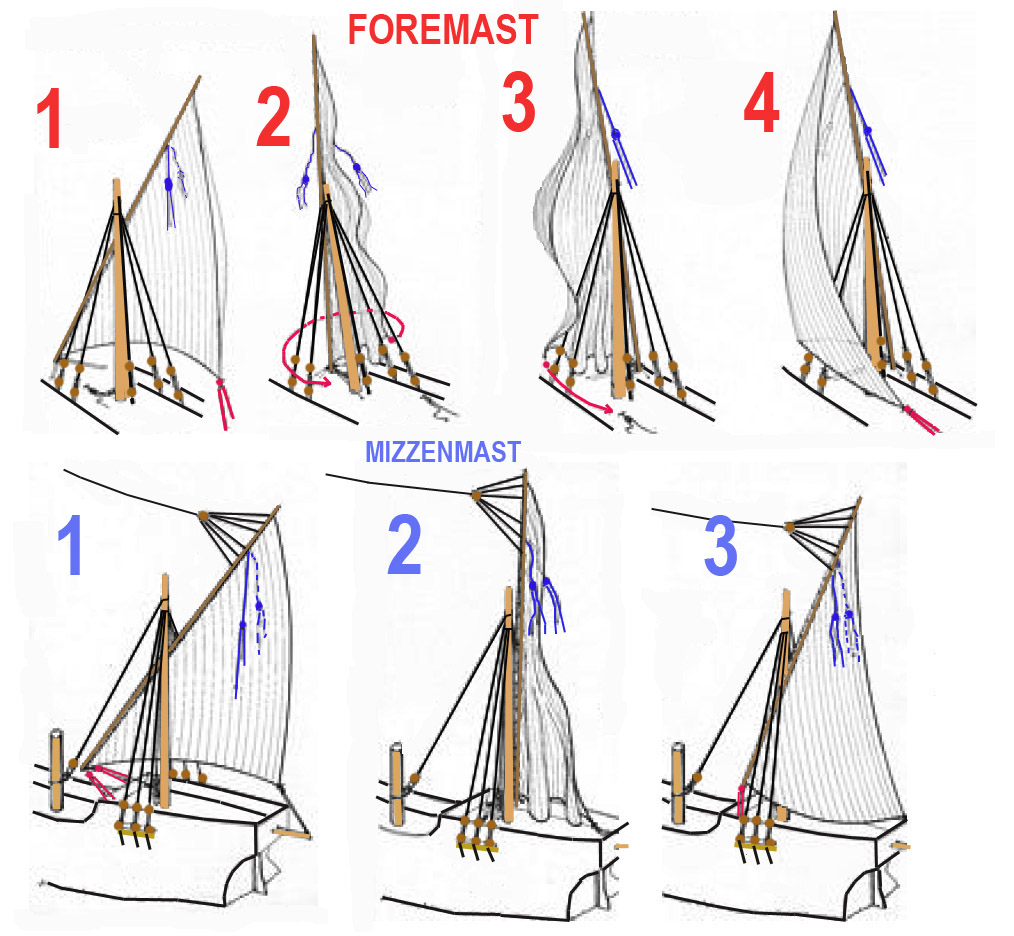
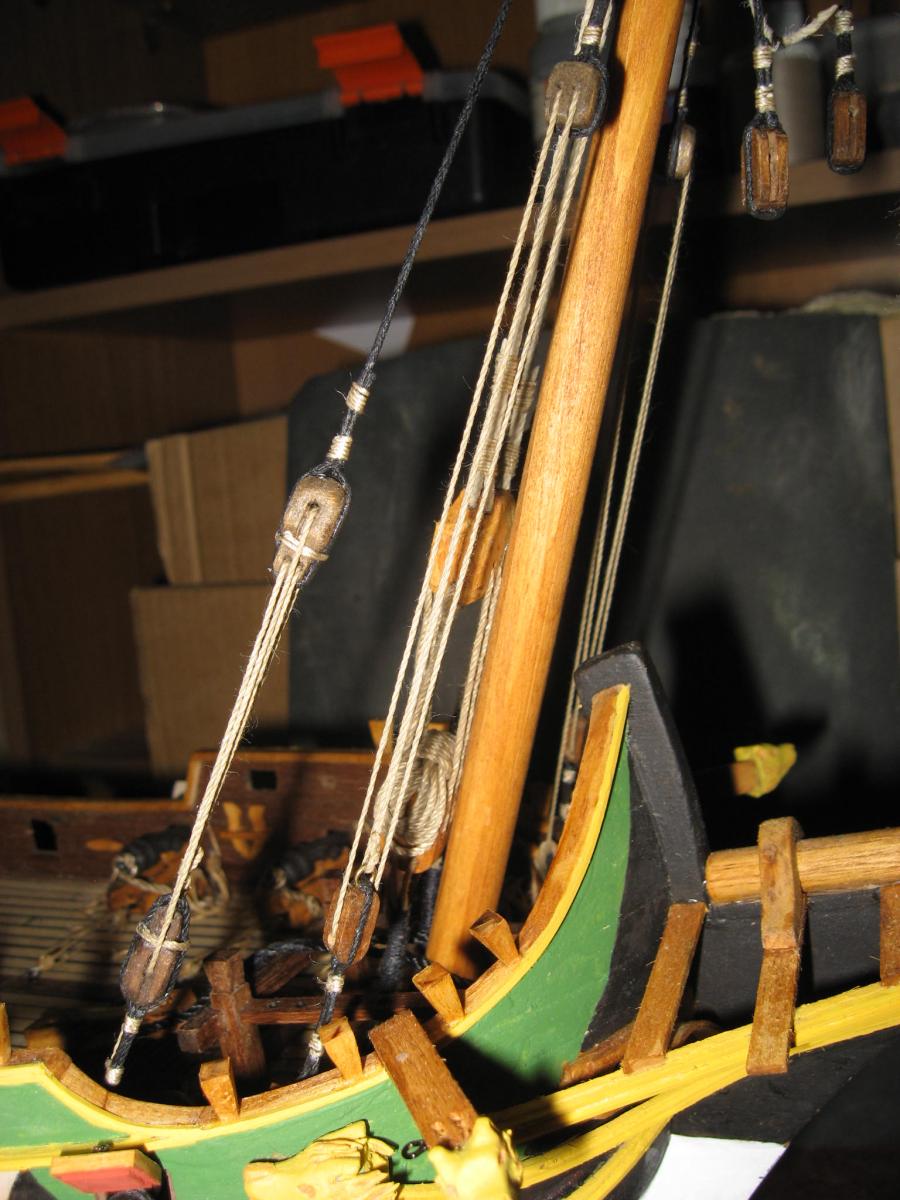
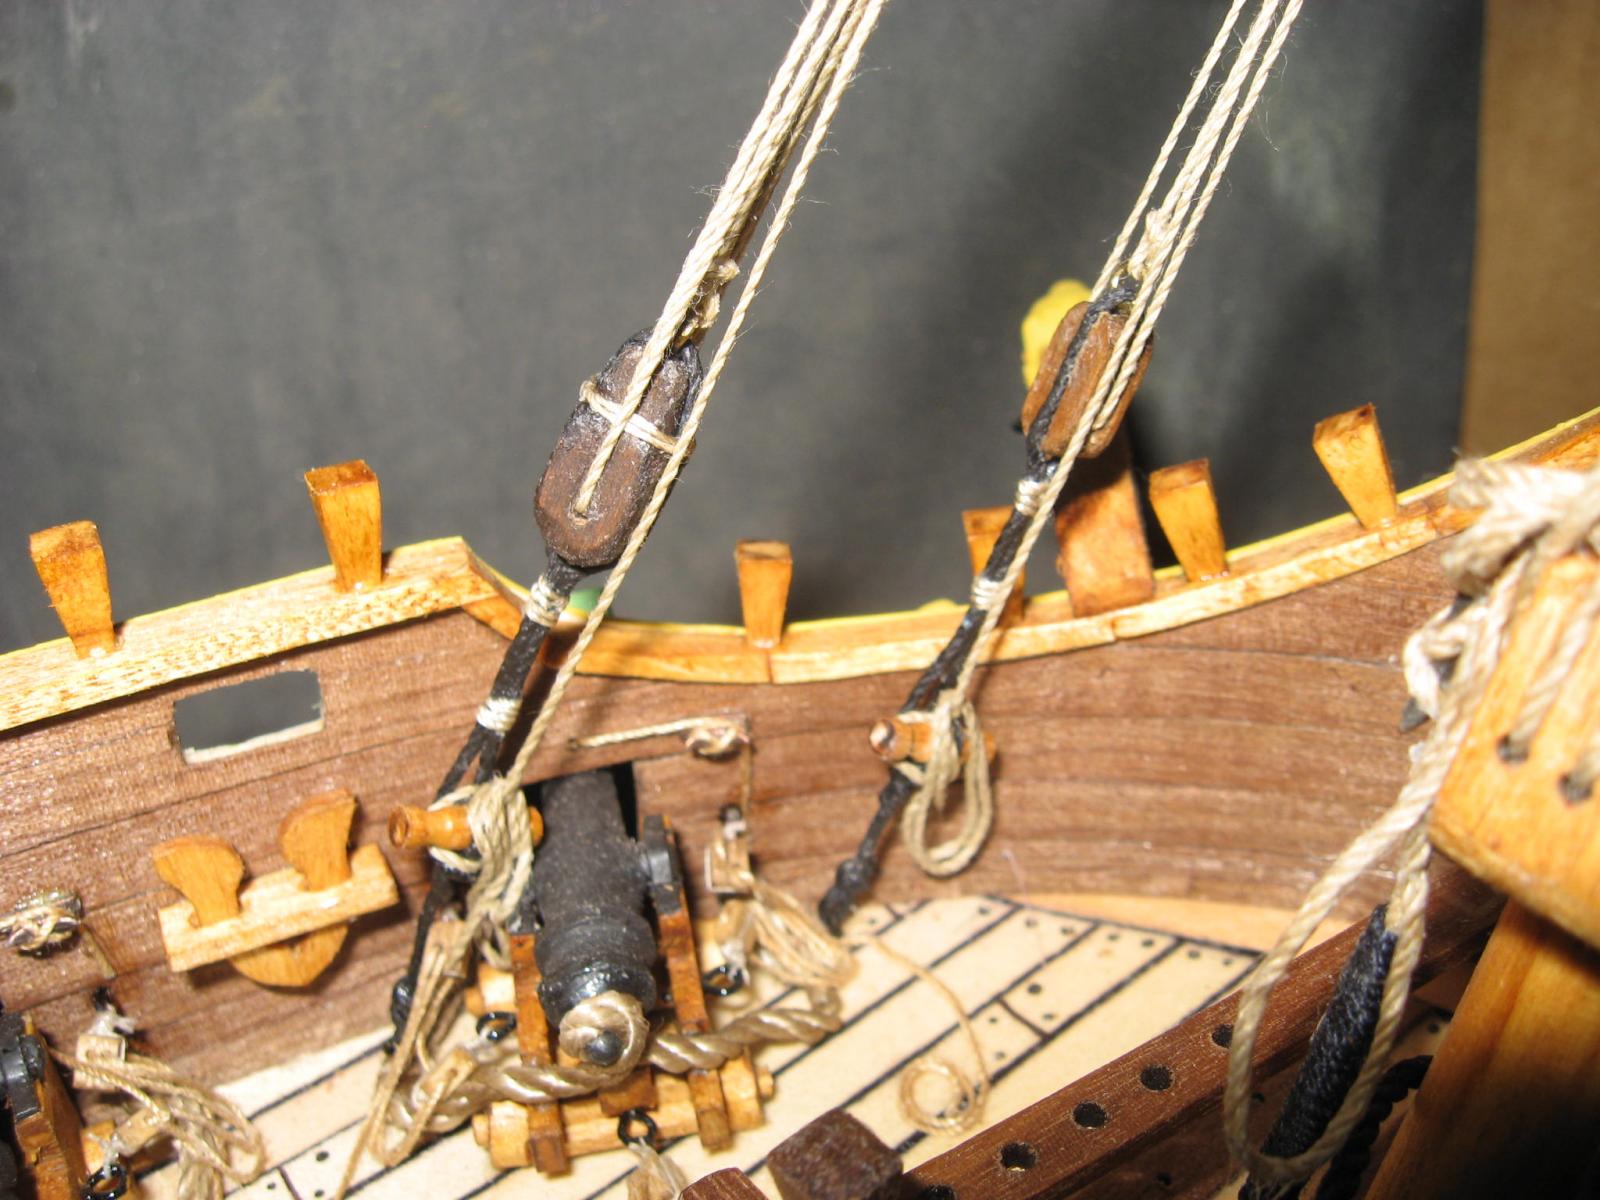
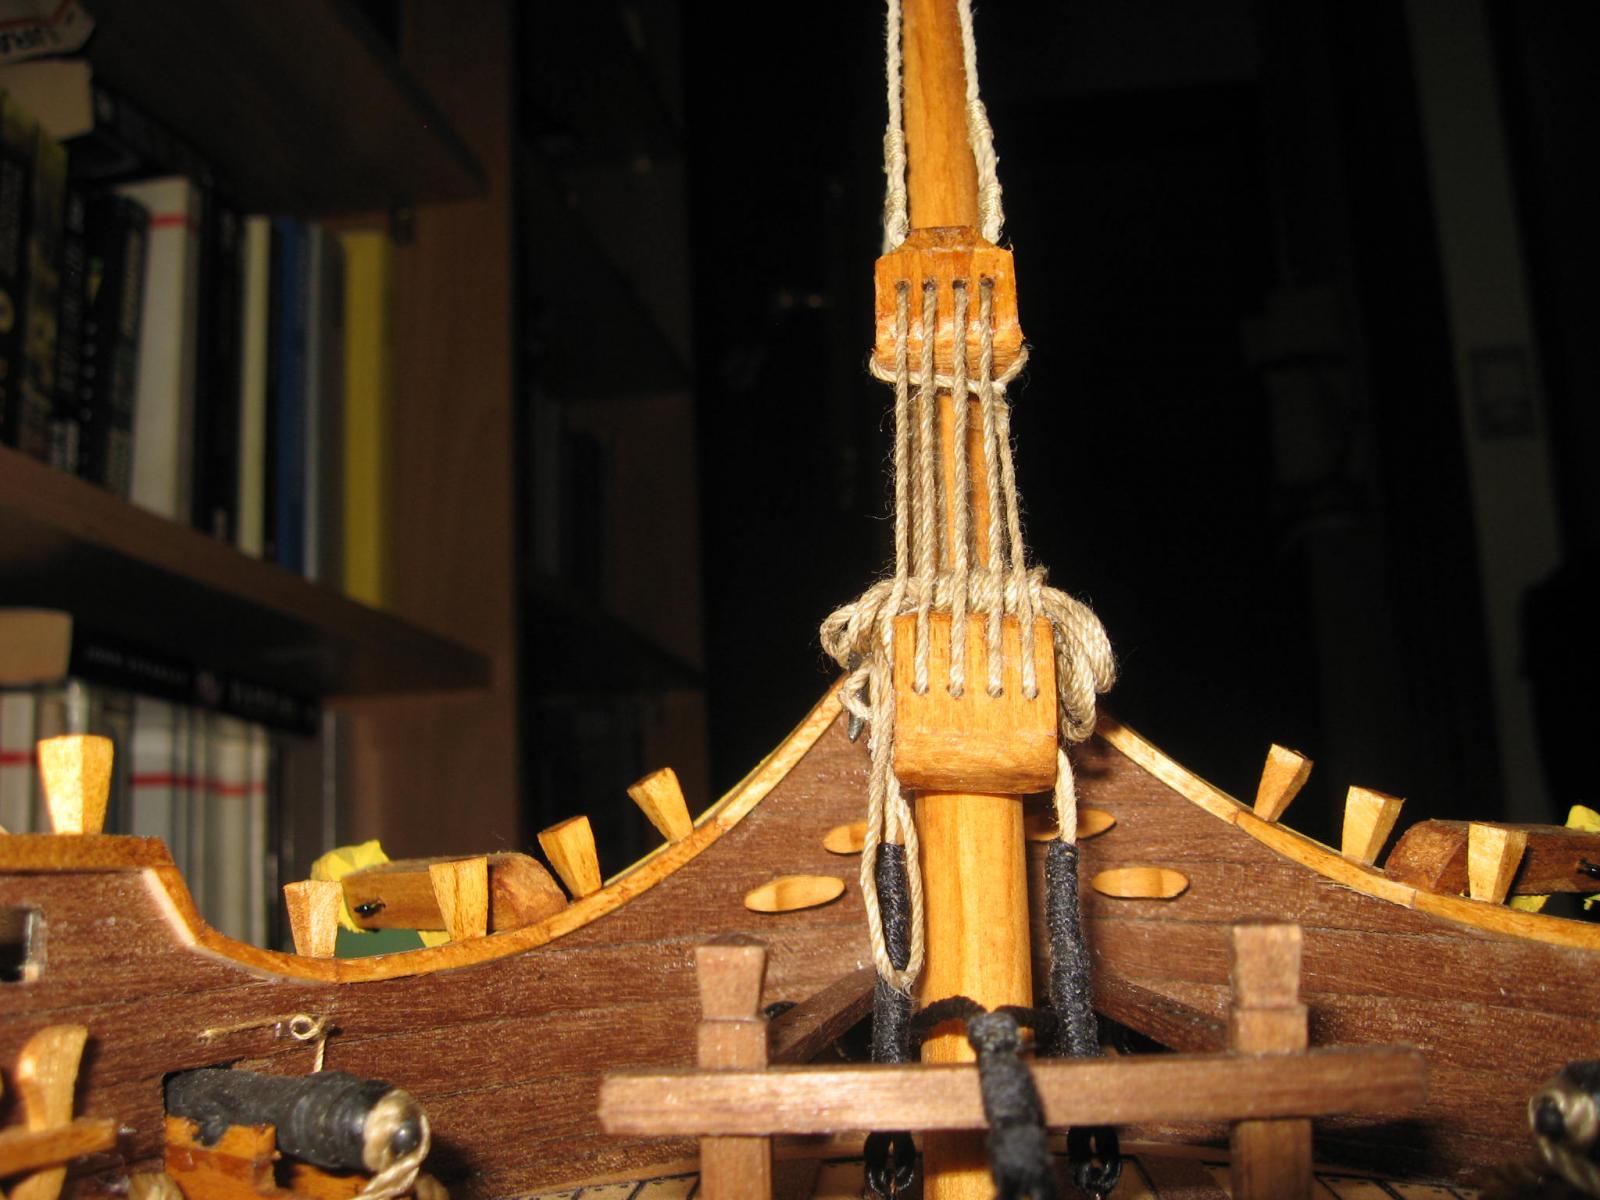
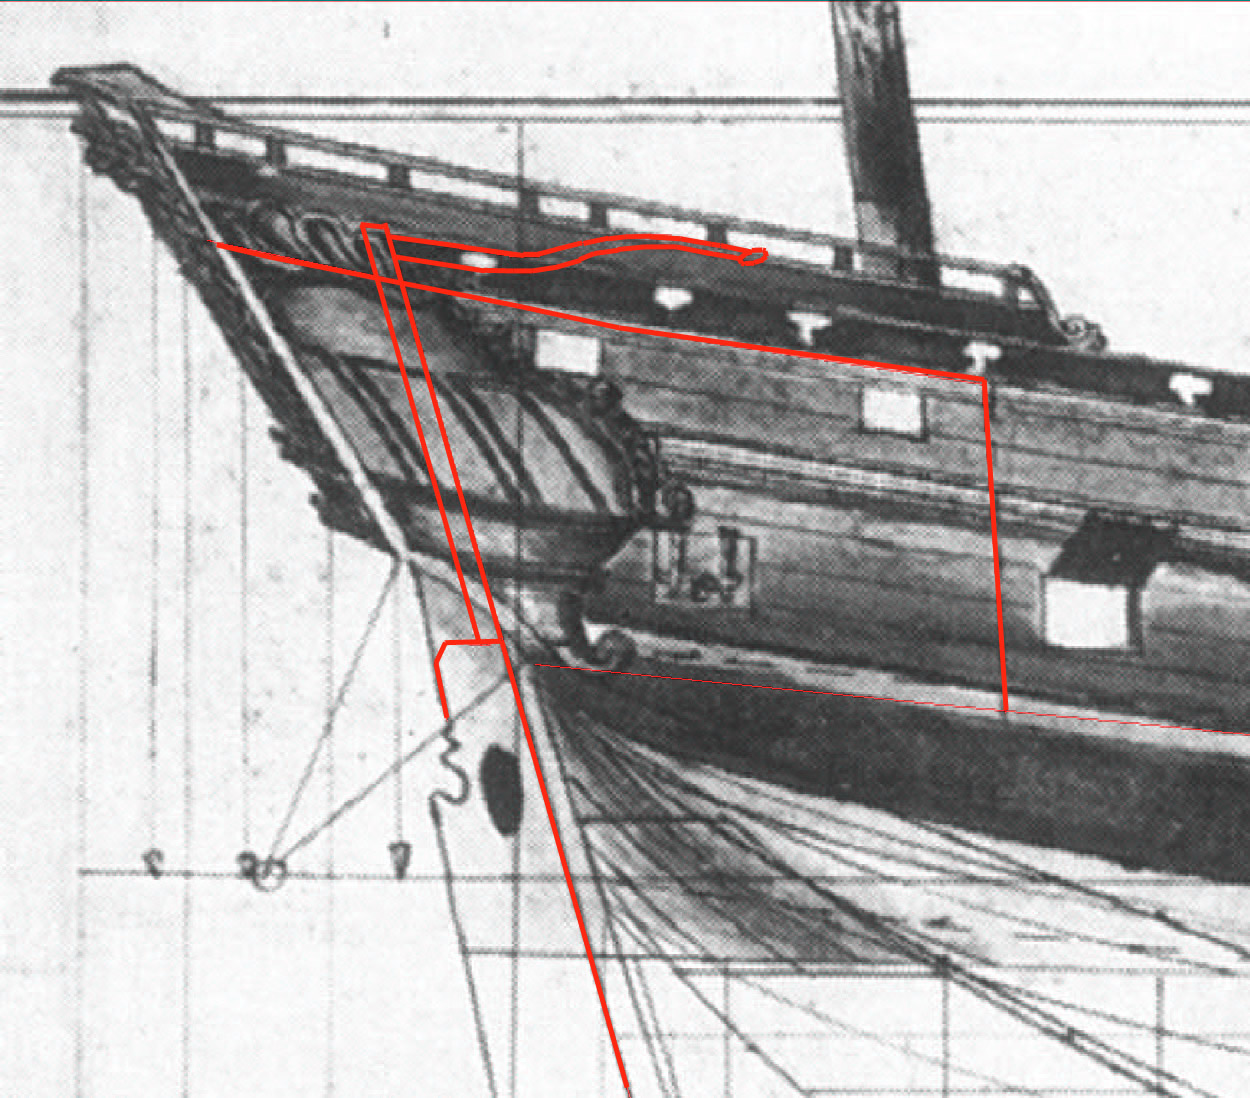
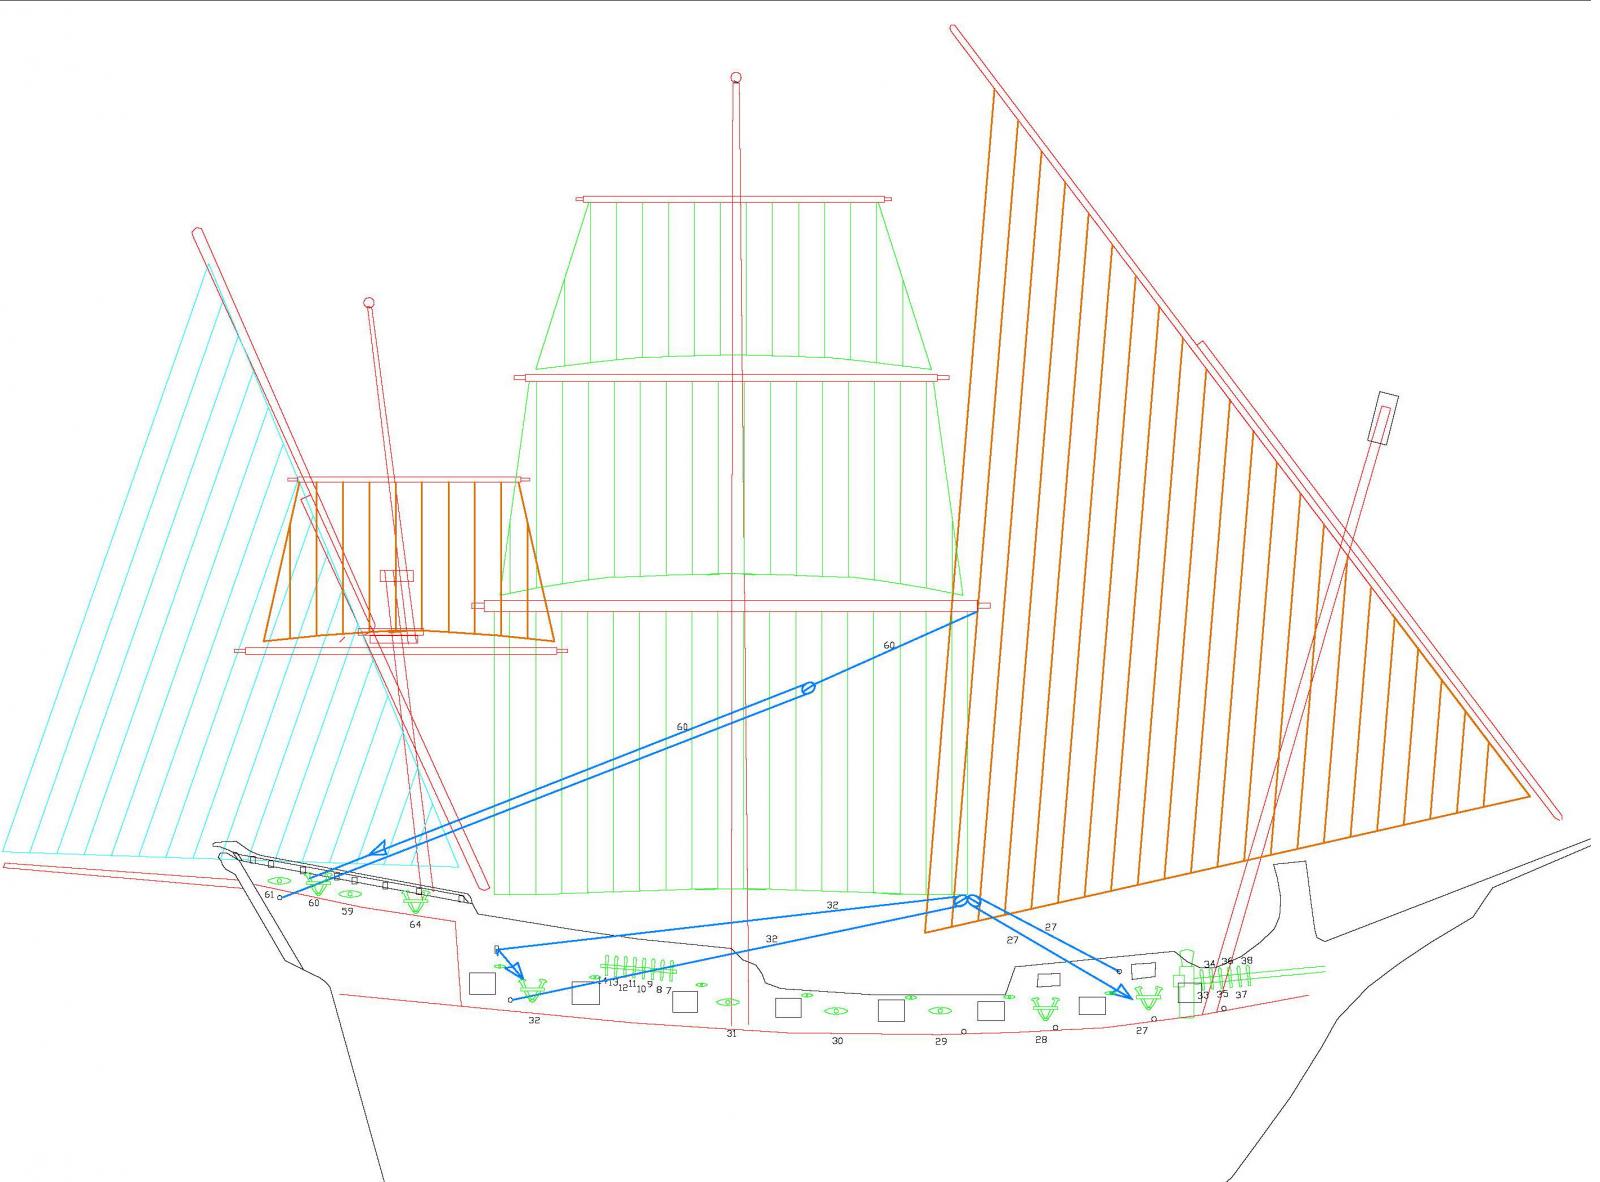
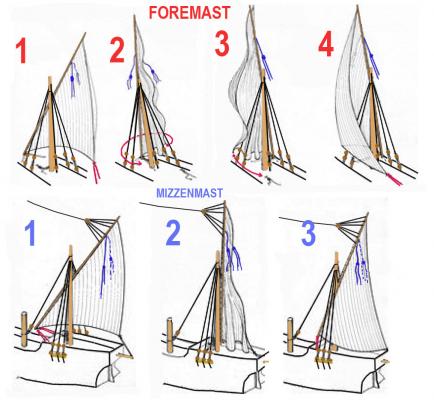
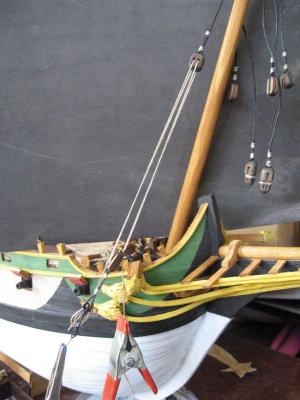
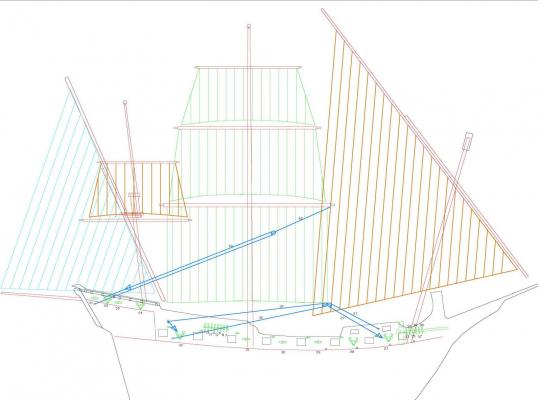
Another update. I finished the standing rigging of the foremast. In one of the photo I placed a dark paper behind one side, in order to let understand better the type of arrangement that I made (otherwise it can appear a little confusing). In another photo there are the terminal points of the rigging, on the deck, using the toggles (and it can be clearly seen what a mess of cables surround and cover the cannons!). I made other photos from other views, since by PM I know that there is some modeller that is interested on building this model. Since later can be difficult to reach with the fingers the base of the foremast, for blocks placing, I am installing them now. Some will be involved in the running rigging of the main mast and some for the foremast, but in anycase I must place them now. I prepared a drawing ( I modified a drawing taken from a book), that explains how the lateen sails of this ship must change their side. This is very important for making this model from scratch, since I am projecting the possible rigging, and that cannot be made without understanding how those sails must be controlled. The following are the key points: -From all the drawings and paintings the big lateen sail results OUTSIDE of the standing rigging; -The small lateen sail fo the mizzen mast usually is INSIDE the standing rigging; -This is a polacre, so some of the running and standing rigging of the main mast will "produce interference" behind the foremast; -This polacre is of mid XVIII century, so the rigging is more standardised. So all the rigging is made accordingly to the above points. I want to remark that everything related to the rigging of this model is just my approach, based on my knowledge. So it can be partially wrong. But surely I am trying to stick as much as I can to the possible real configuration of the rigging of this ship.


-
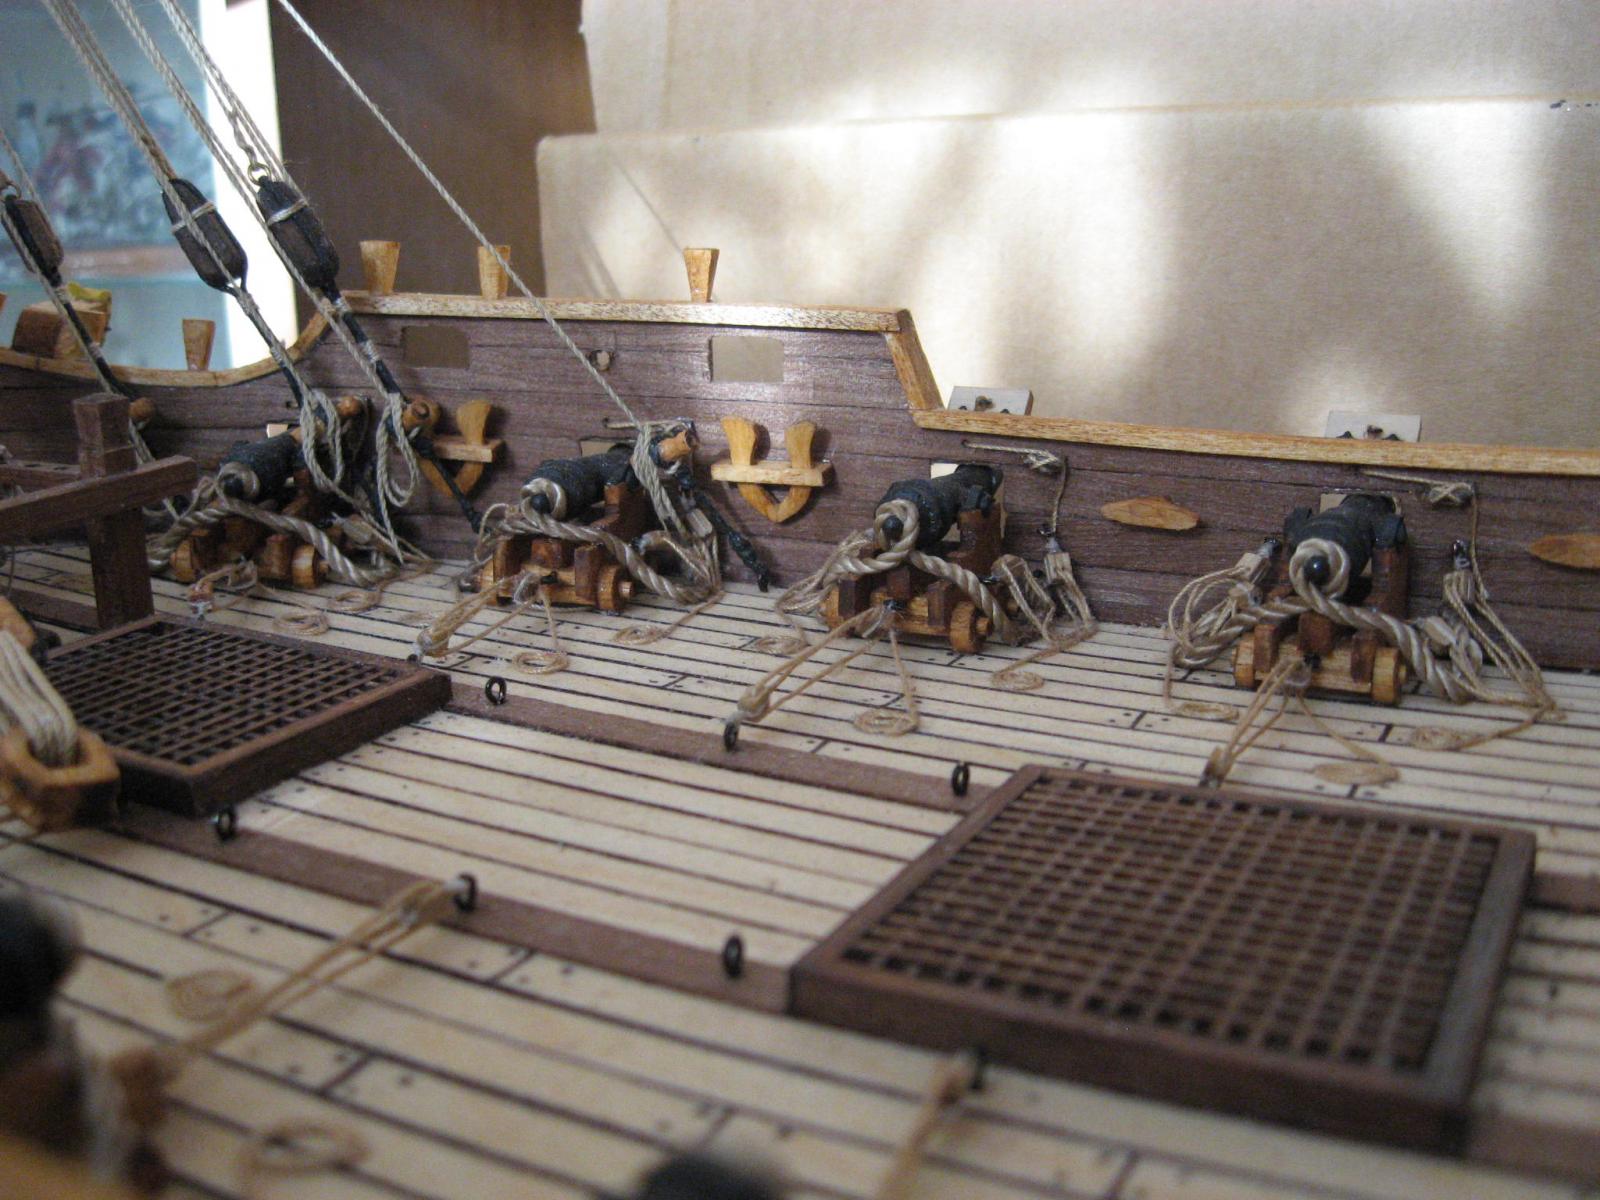
My shipyard is open again! Now I am focusing on the standing rigging of the foremast. -I installed two other cannons (10 more to be installed). In one of the photos can be seen the single, double and multiple blocks that are needed for this section (one side only), in addition to the toggles for securing them to the deck. -In other photos is shown how the cables of the standing rigging are secured to the top of the foremast. I followed the various xebecs and galleys ancient drawings and models. In the other photos are showed some of the them already installed. In order to do so, I needed to prepare the ropes and blocks almost completely, before glueing them to the deck (other photos), otherwise the space available for making the various knots was not enough. More will follow in the next days.


-
Thank you Carl! I usually proceed on building from bow to stern, in order to have more "free space" for my hands. So for completing the rigging of the foremast, the first six cannons (three for each side, starting from the ship's bow) must be already in place. The other cannons must be placed before starting the main mast rigging. So I am slowing the cannons installation (and the related boring parts) for the above reason.
-
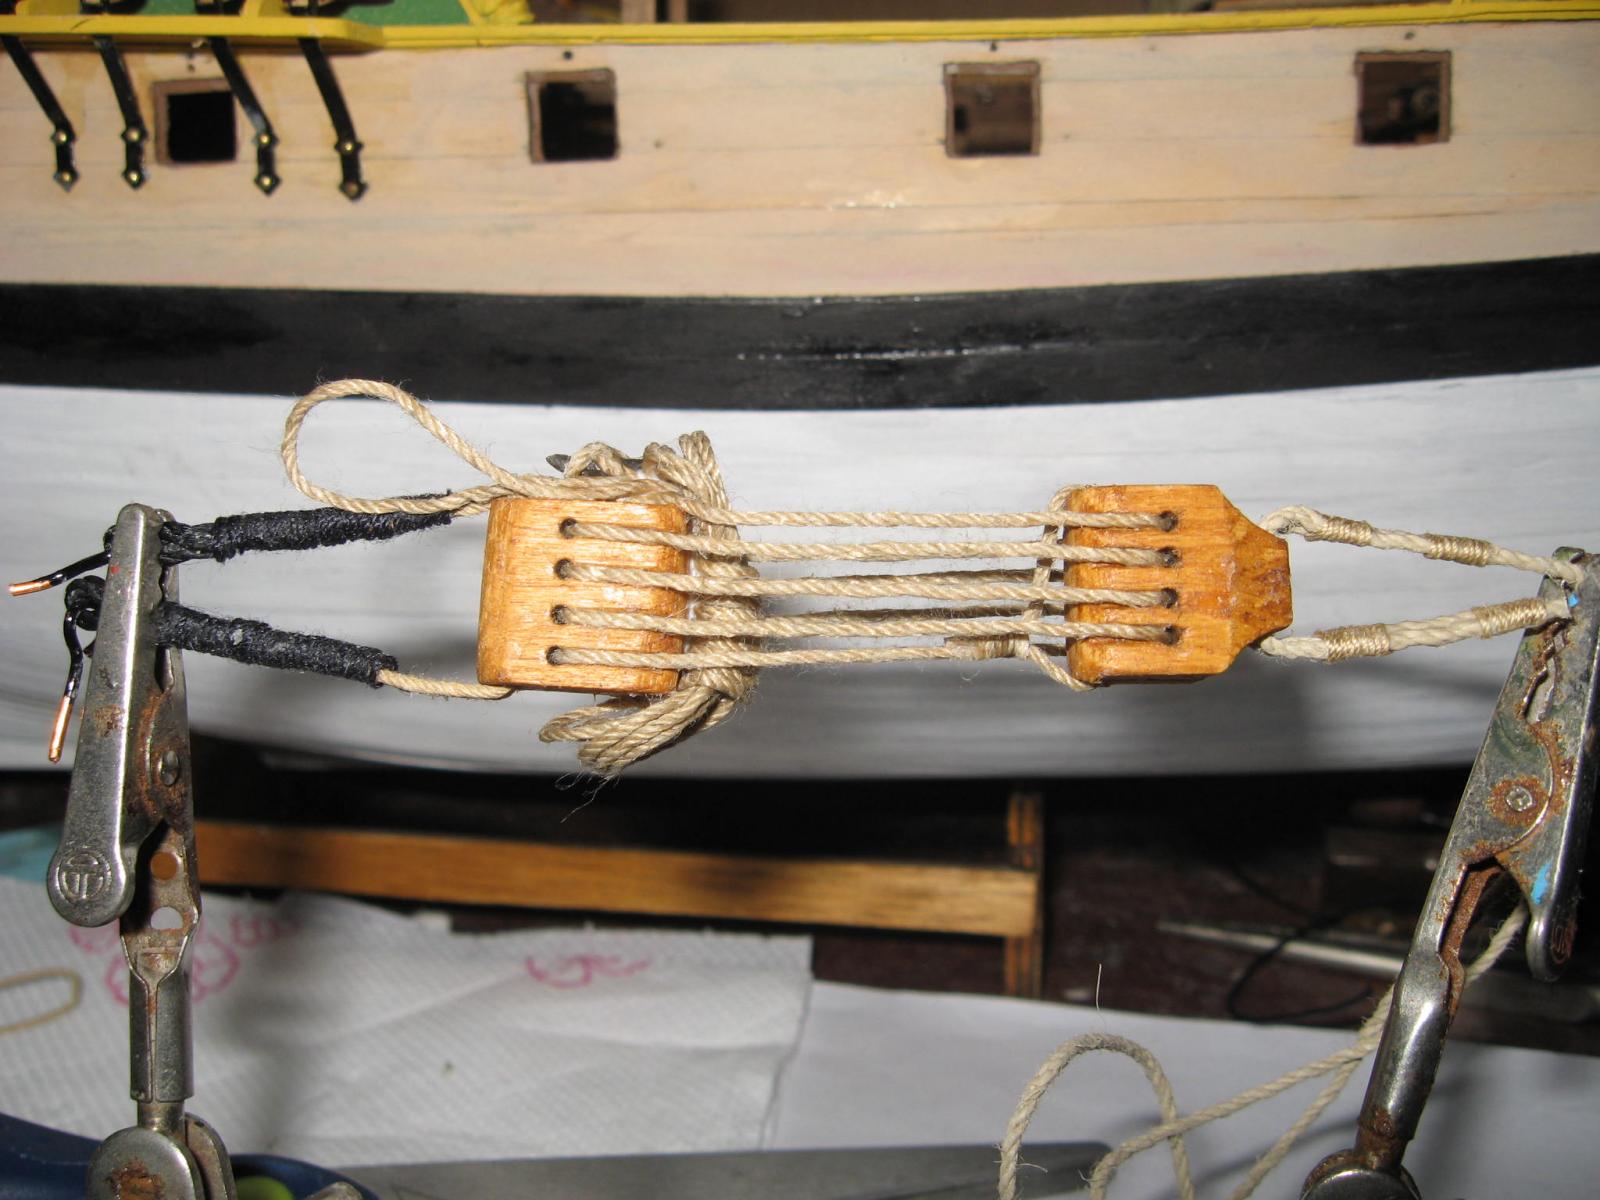
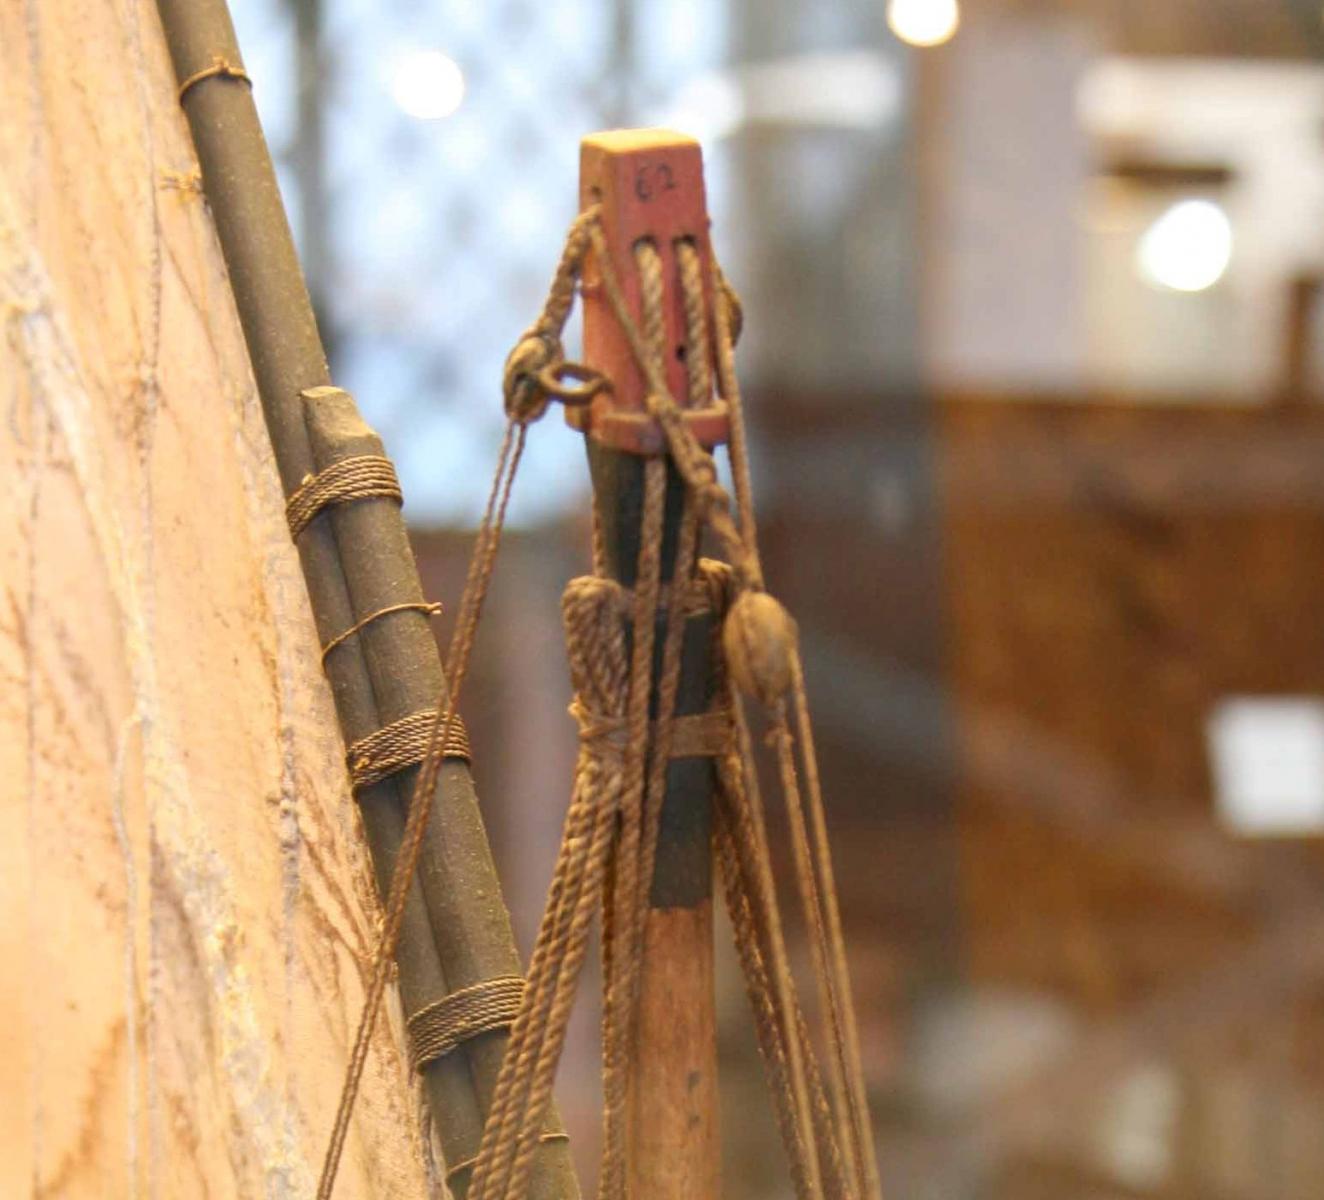
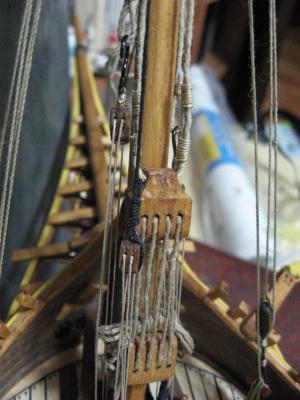
Due to various other matters, I slowed a bit the ship construction. Below the photos of this update: -I added two more cannons (still 12 to be installed! ); - I added the main mast stay, which is intended only the first part of it, since the main mast has not yet installed. But due to the various components that will be added to the foremast zone, I must made this operation now. I stopped to the second "heart". -I added the multiple block of the foremast lateen sail, which it needed a more complex study than it seems, since I tried to be more likely to the Venetian "approach", which is different than (for example) the french xebec models multiple block. The multiple block is positioned high, in order to permit the passage of the main mast stay. In another photo can be seen the multiple block of an original Venetian galley contemporary model. Now I will start the rigging of the foremast, which it will need a bit more study.


-
Hello Dick, Have you heard of this book? it seems it fit perfectly with the historical period of the ship that you are building. "Sveti Pavao Shipwreck: A 16th century Venetian Merchantman from Mljet, Croatia"below the link of the book http://www.oxbowbooks.com/oxbow/sveti-pavao-shipwreck.html
-
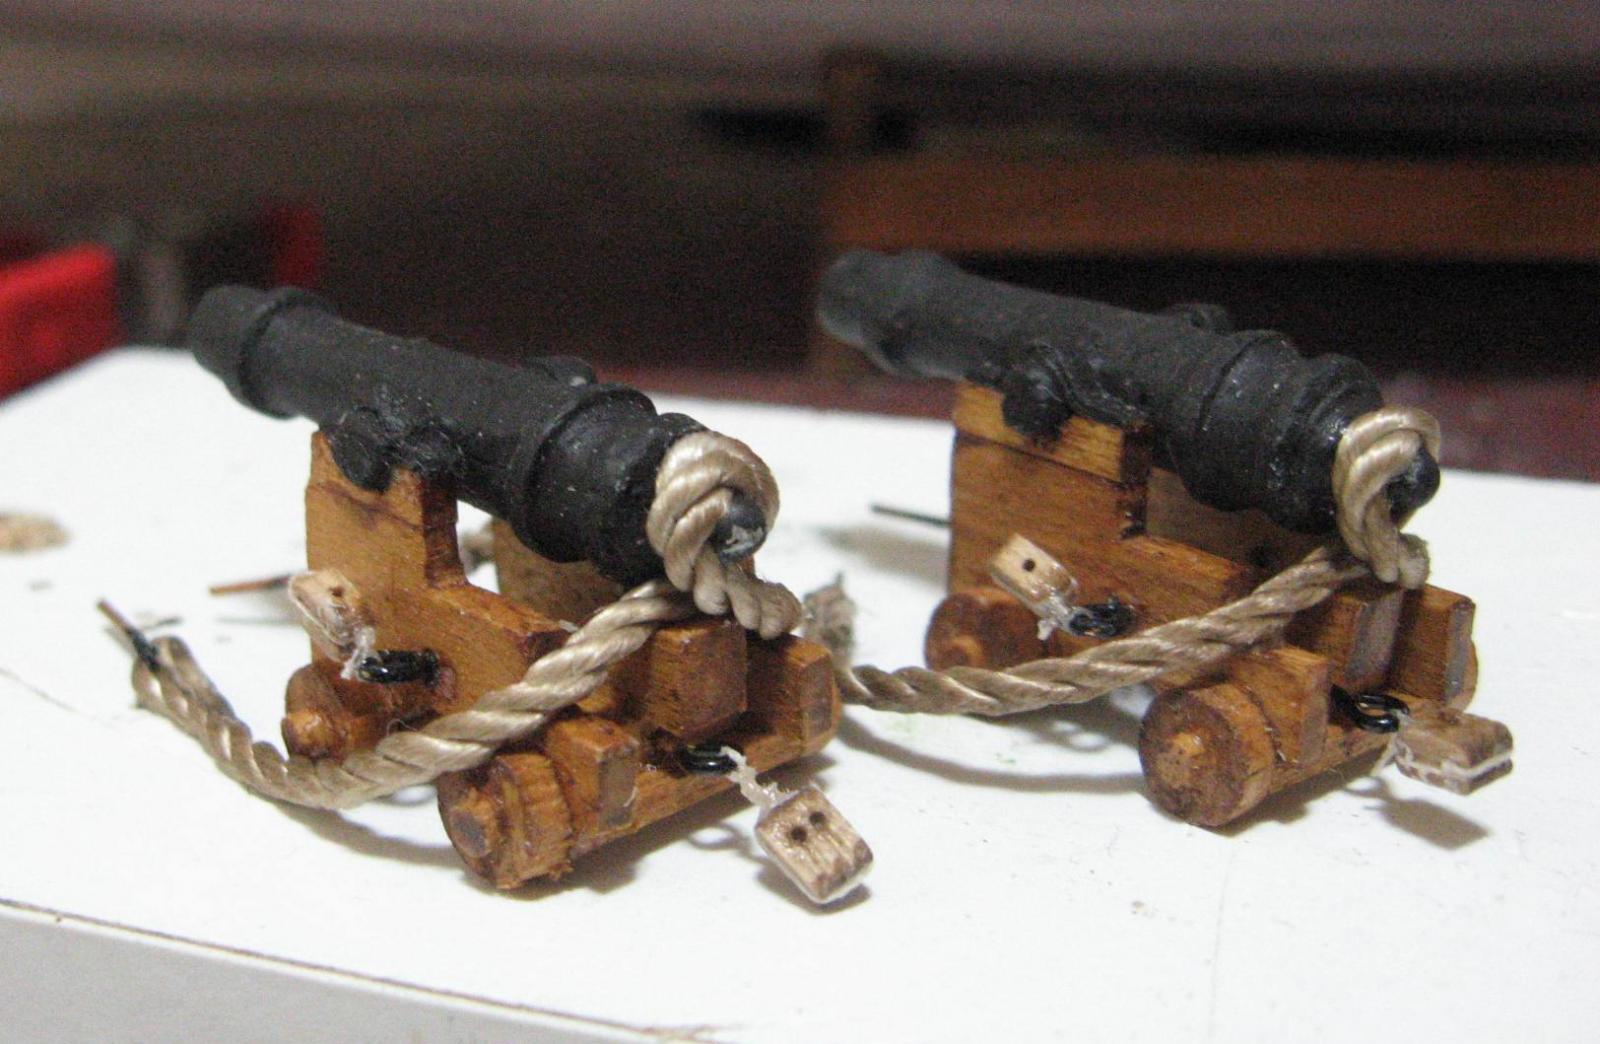
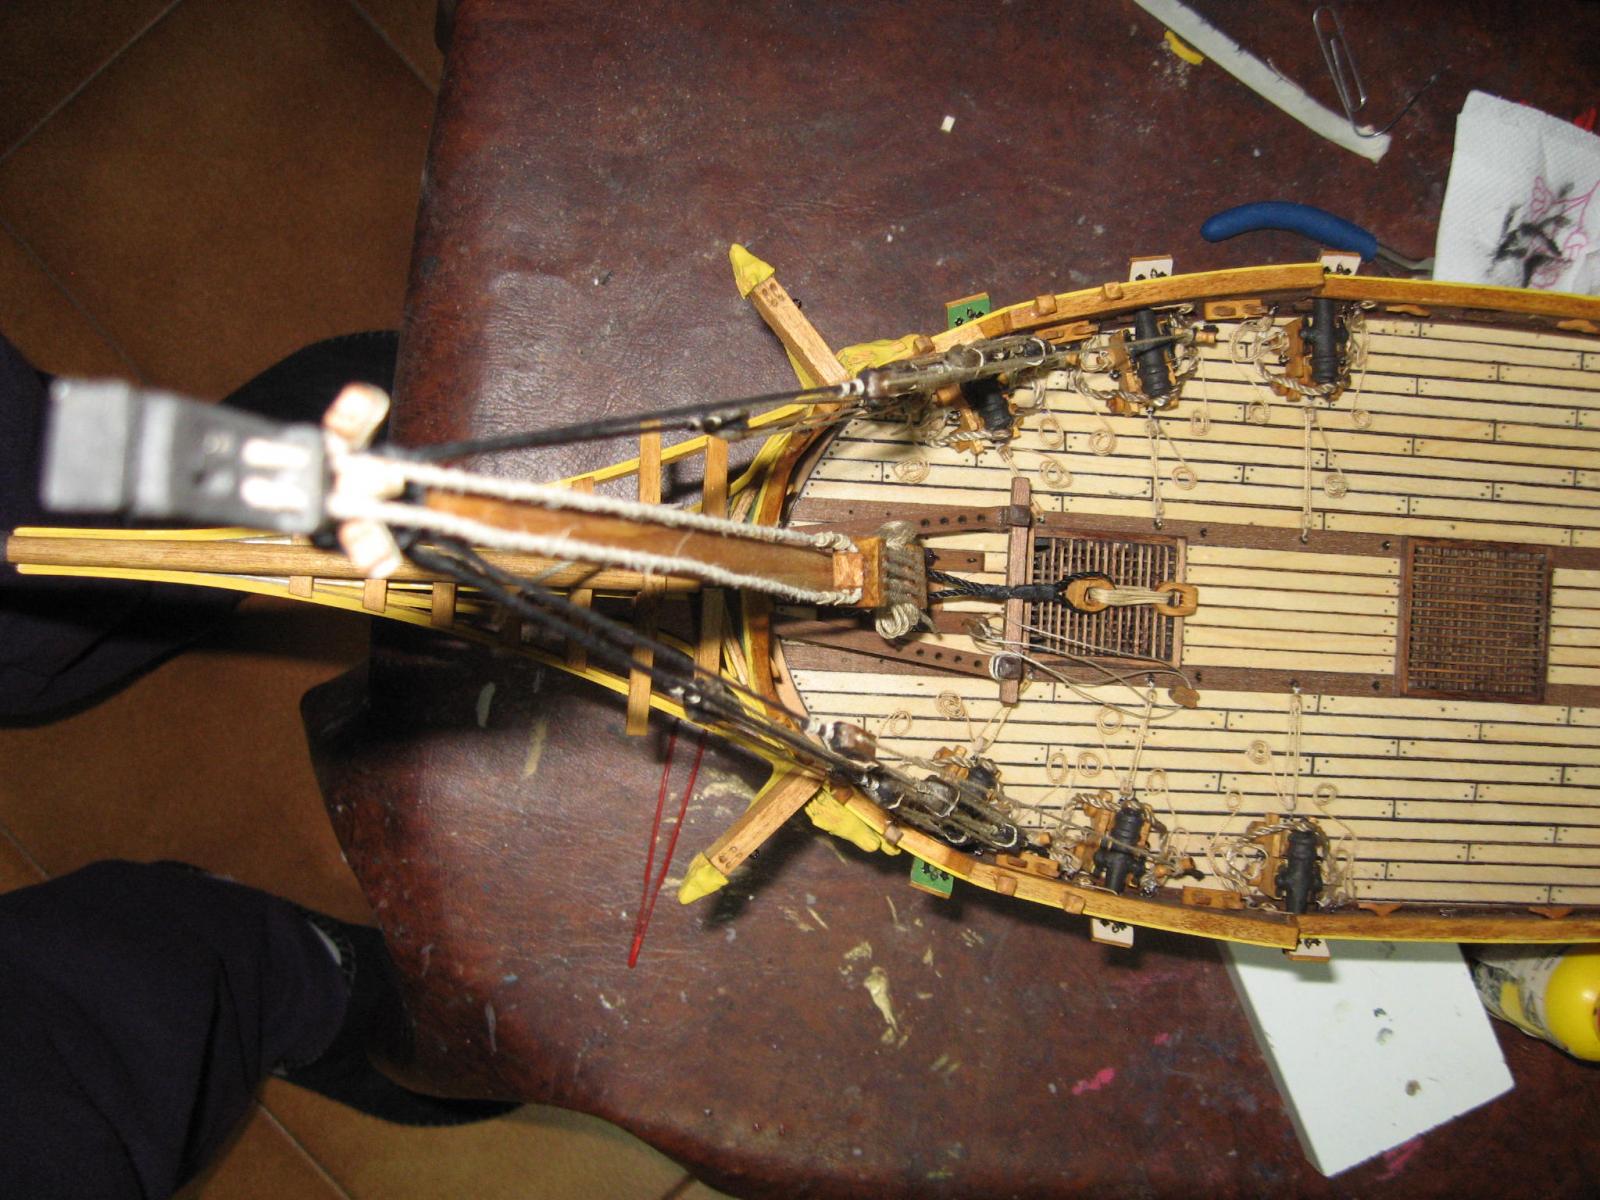
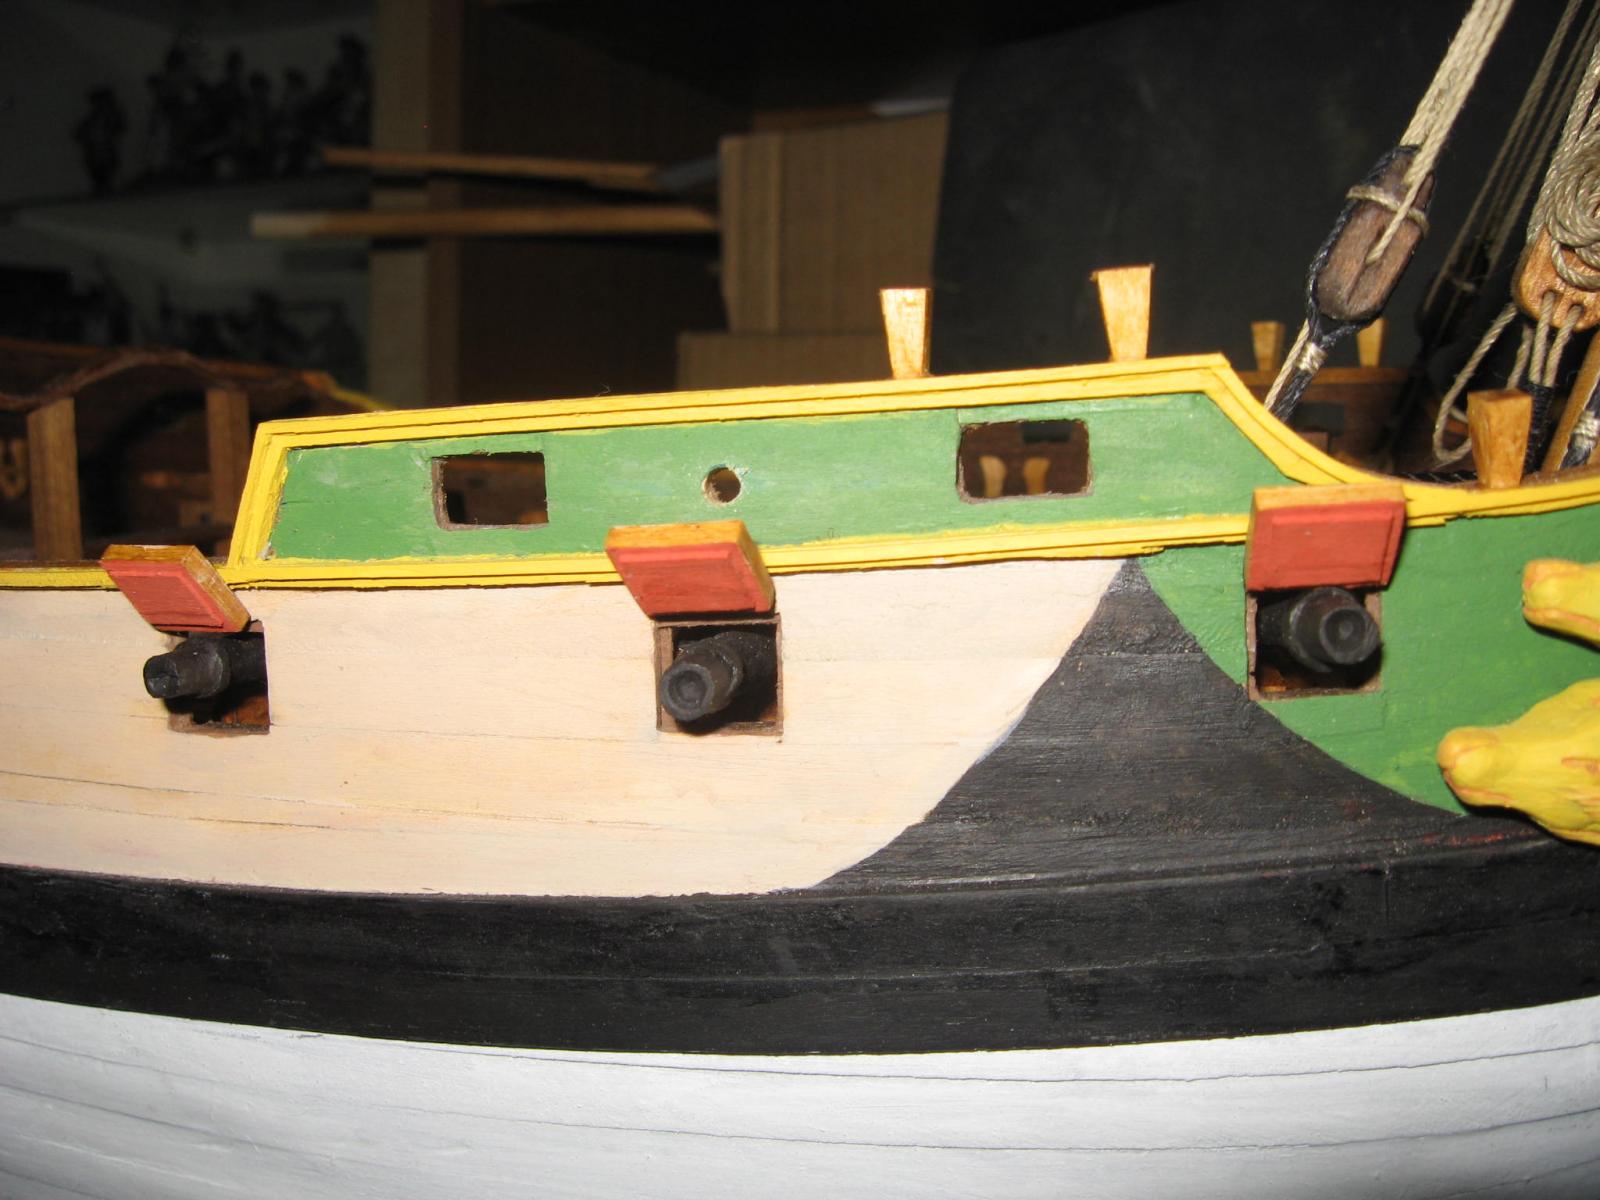
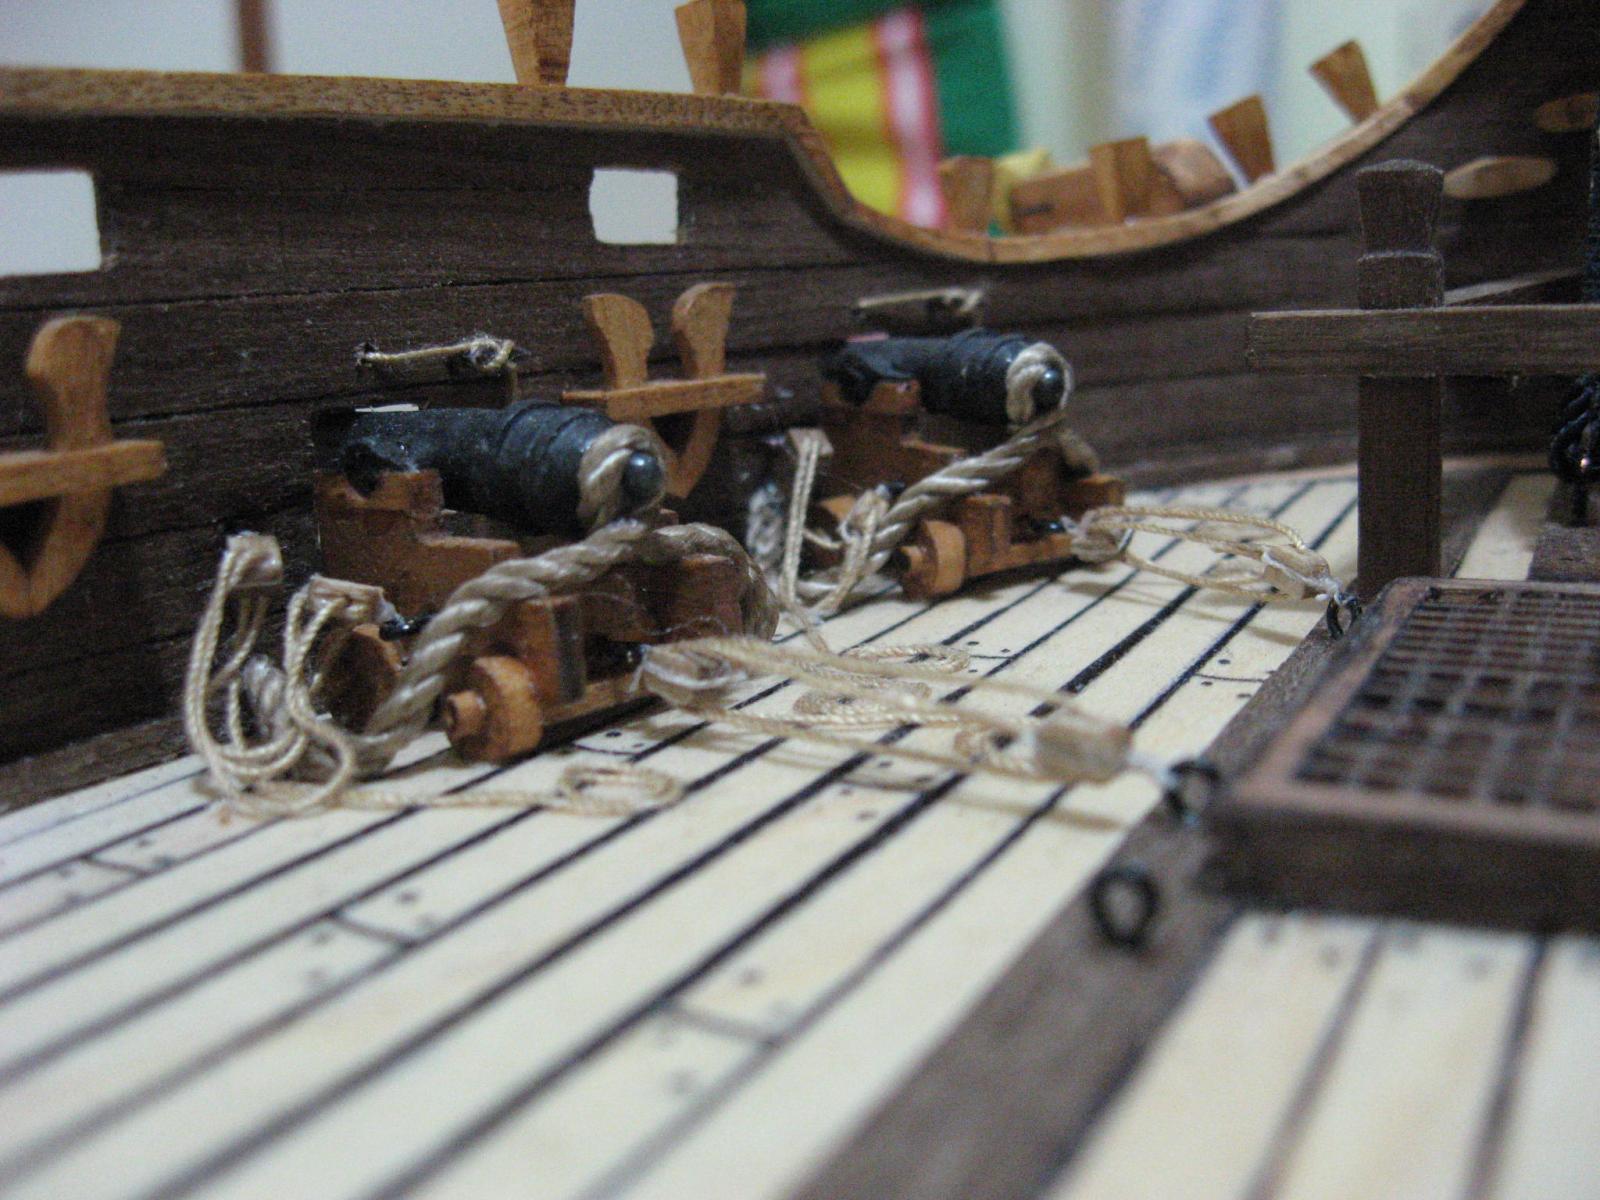
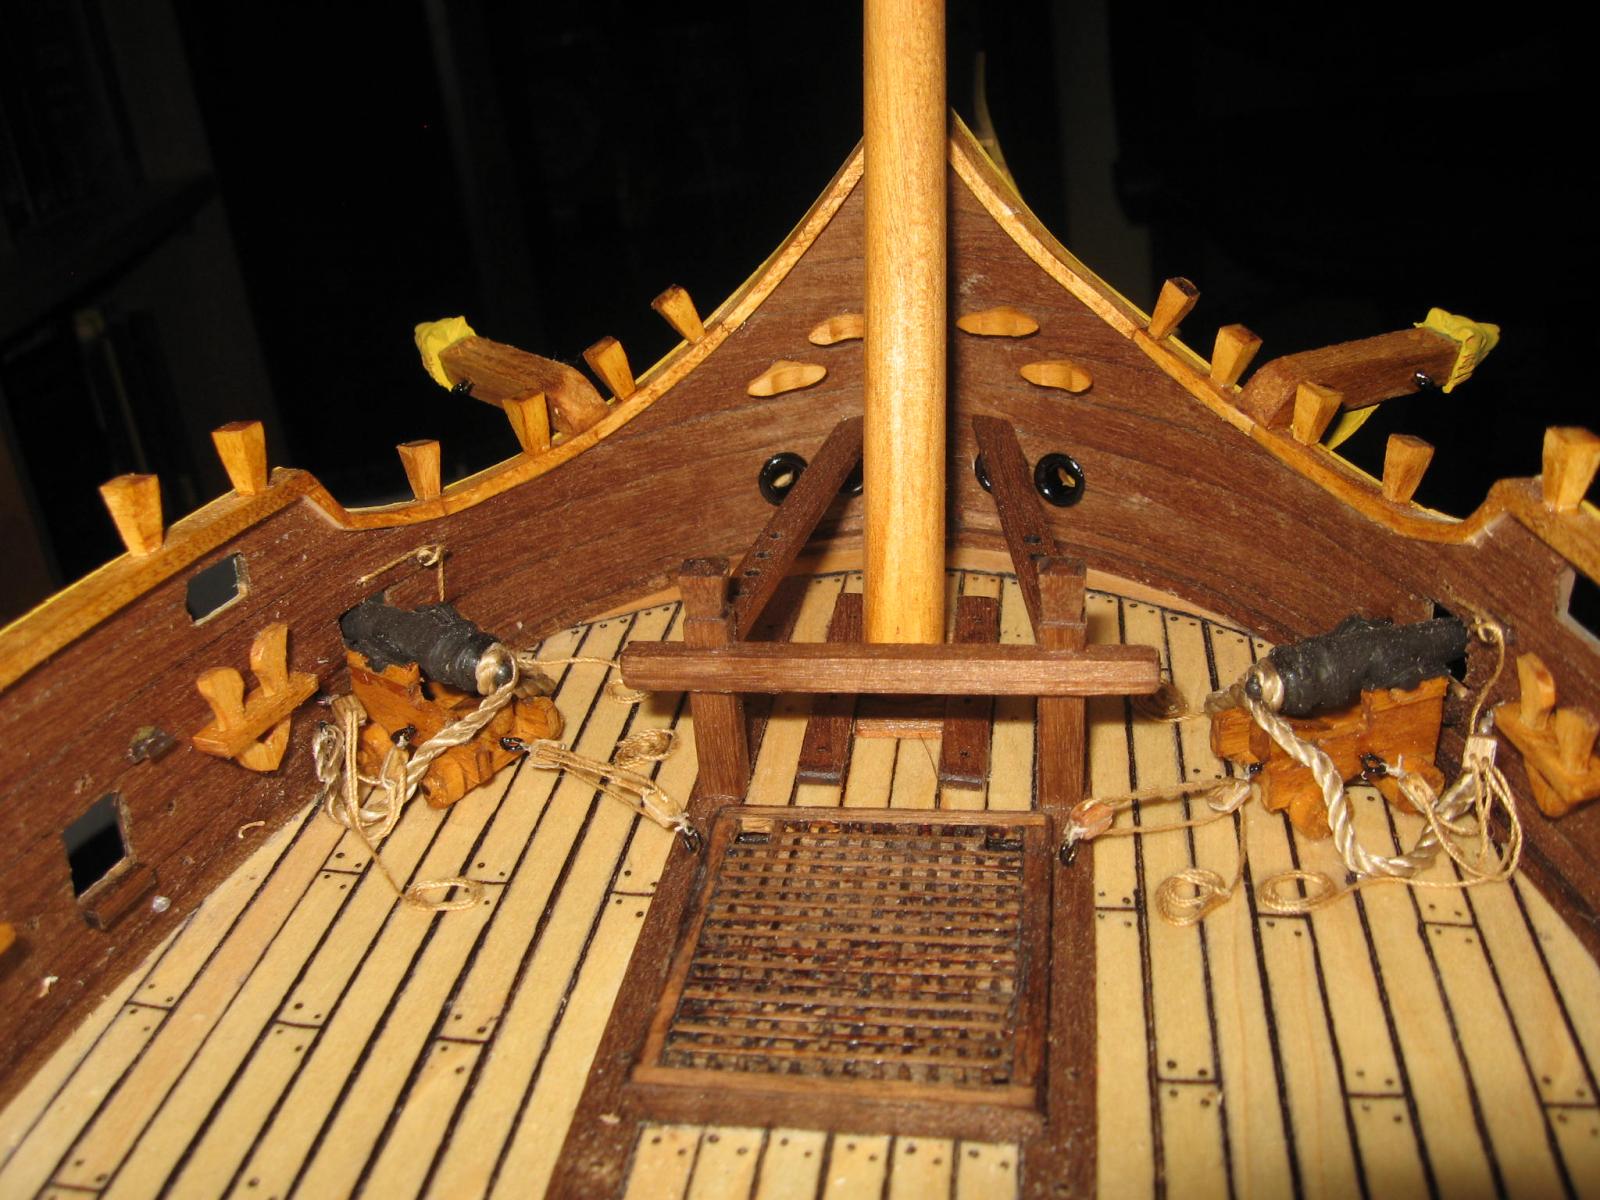
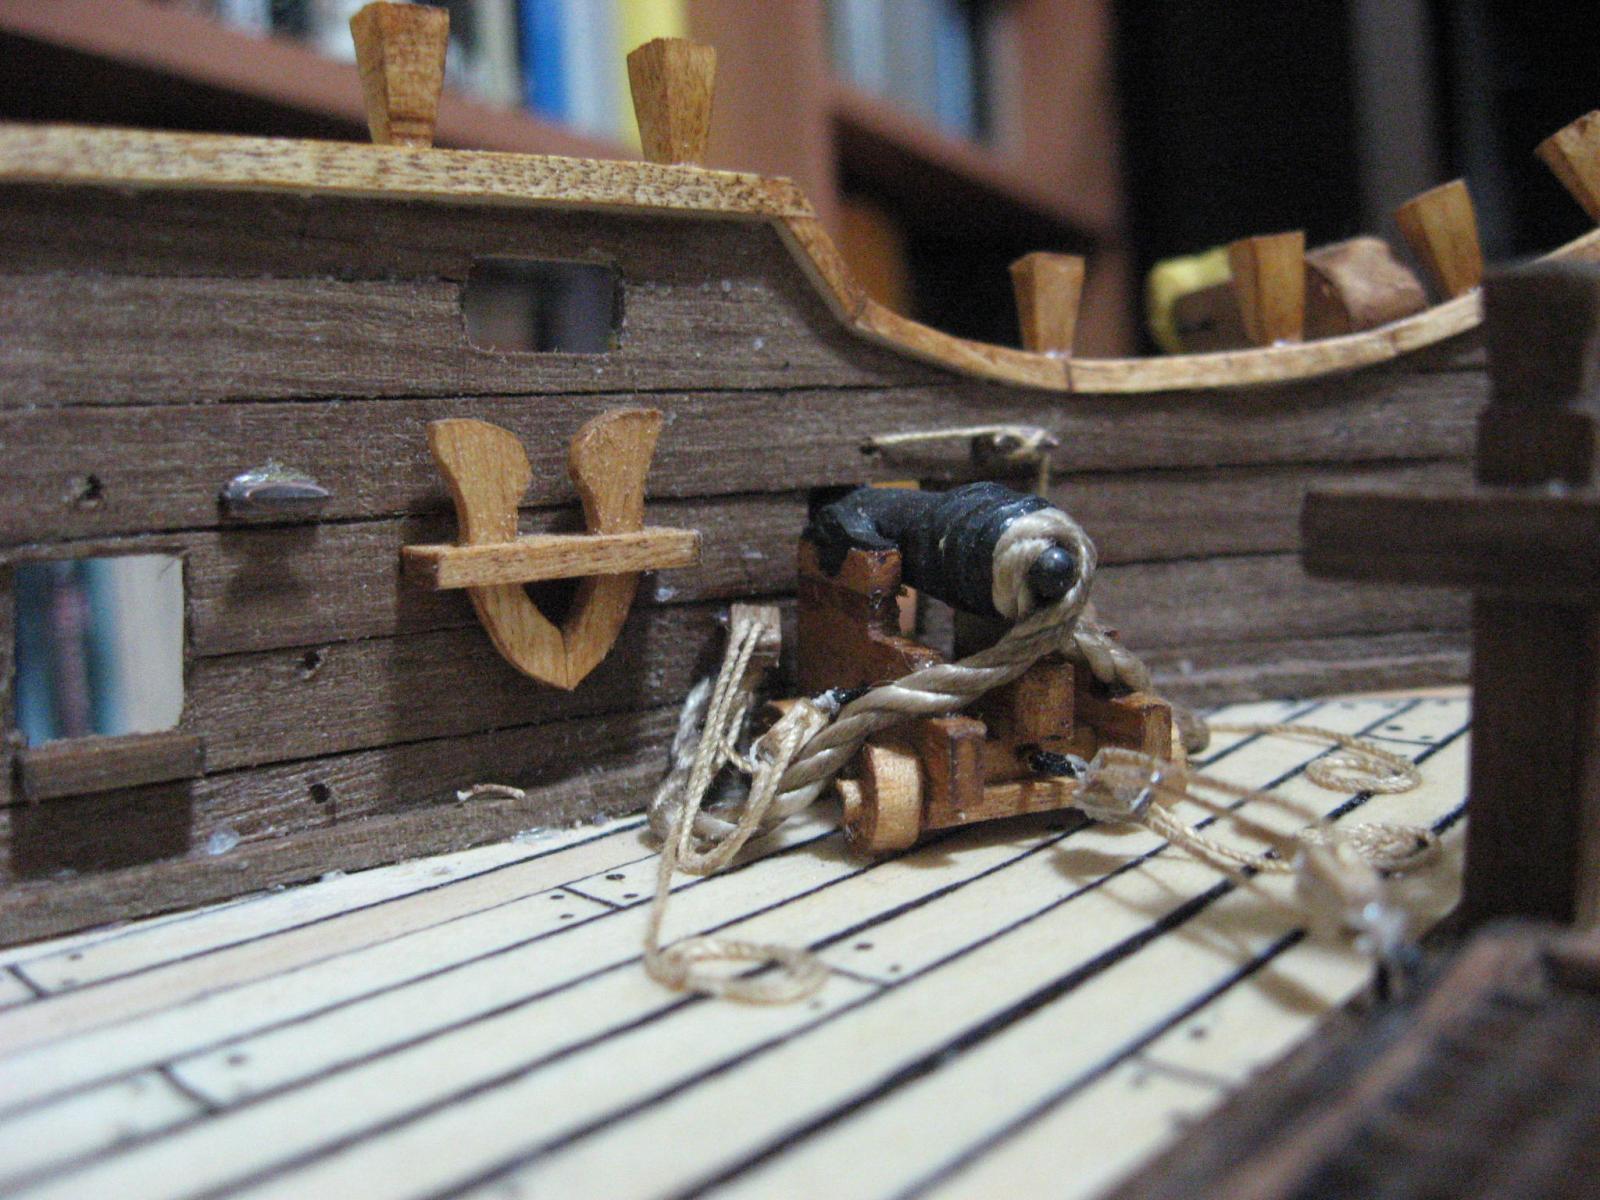
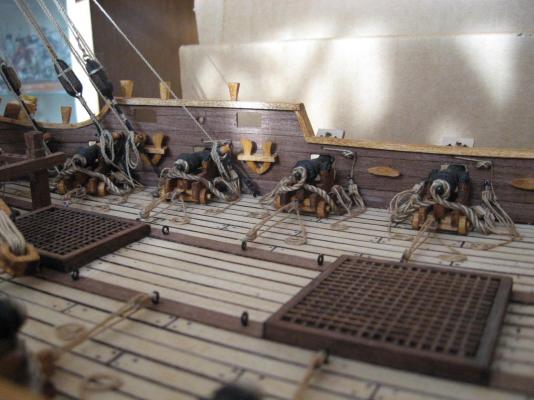
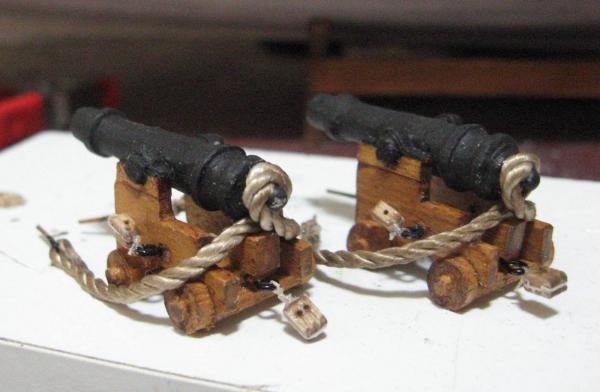
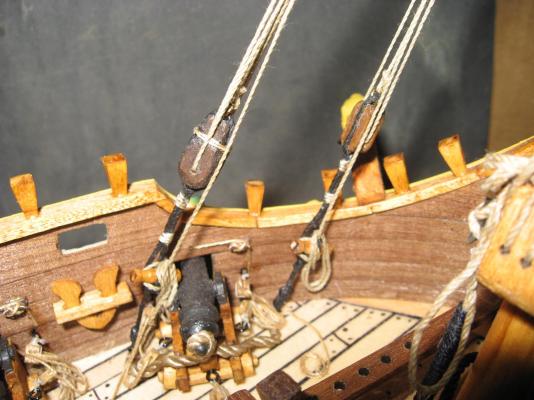
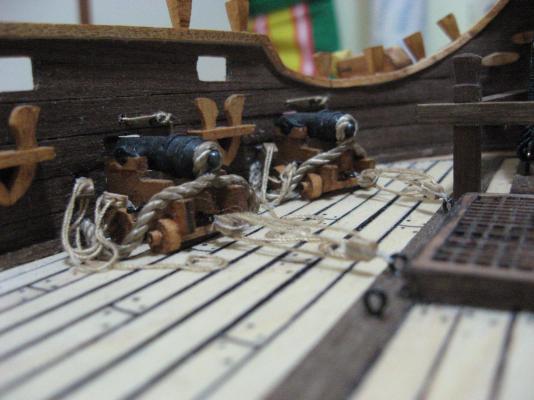
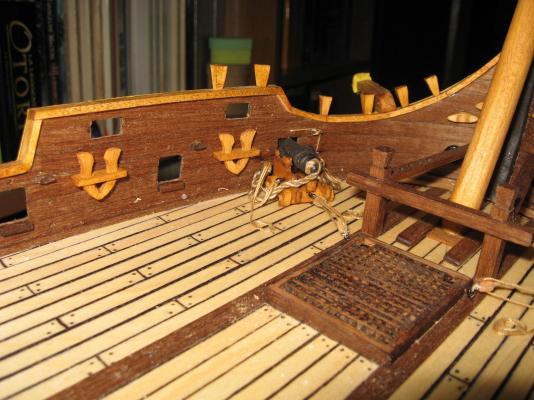
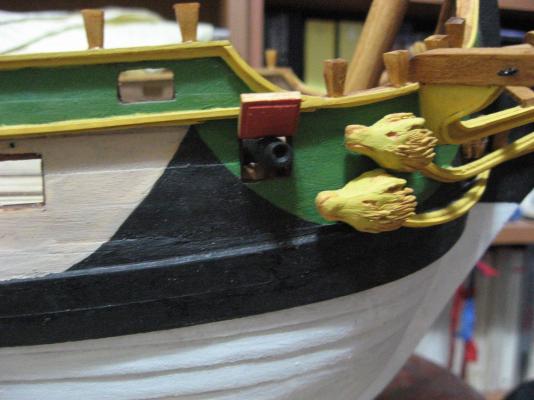
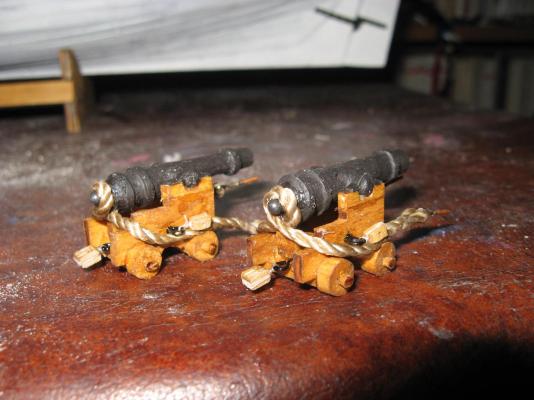
I am starting to attach the cannons to the deck! The first two cannons in place! The first cannon took around two hours to be placed, due to the difficoulty to glue the small rings to the bulwark. The second cannon took... 1 hour and half. So I must consider a lot of time for complete that operation (still 14 cannon, that means 21 hour of duty around those). I forgot to say that I have not yet finished to prepare the rigging of all cannons. Definetly a small nightmare.... In anycase I will place only some cannons for the moment, just to have the deck prepared for the rigging of the foremast. I like the result, all that loose ropes that surround each cannon give me a good overall impression. I am preparing the gunports, too, as can be seen in another photo. The gunports are made by many pieces, so that process too, is long and boring. I prepared other yard for the mizzen mast, as it can be seen in another photo (I must use the "noisy days" wisely). I think that the "noisy operations" that remains are very few: -some customised block for the main mast and mizzen mast; -the mizzen mast; -support for the service boat.


-
Thank you Tom! I appreciate your compliments! Tomorrow I will post a new update, since I am almost ready.
-
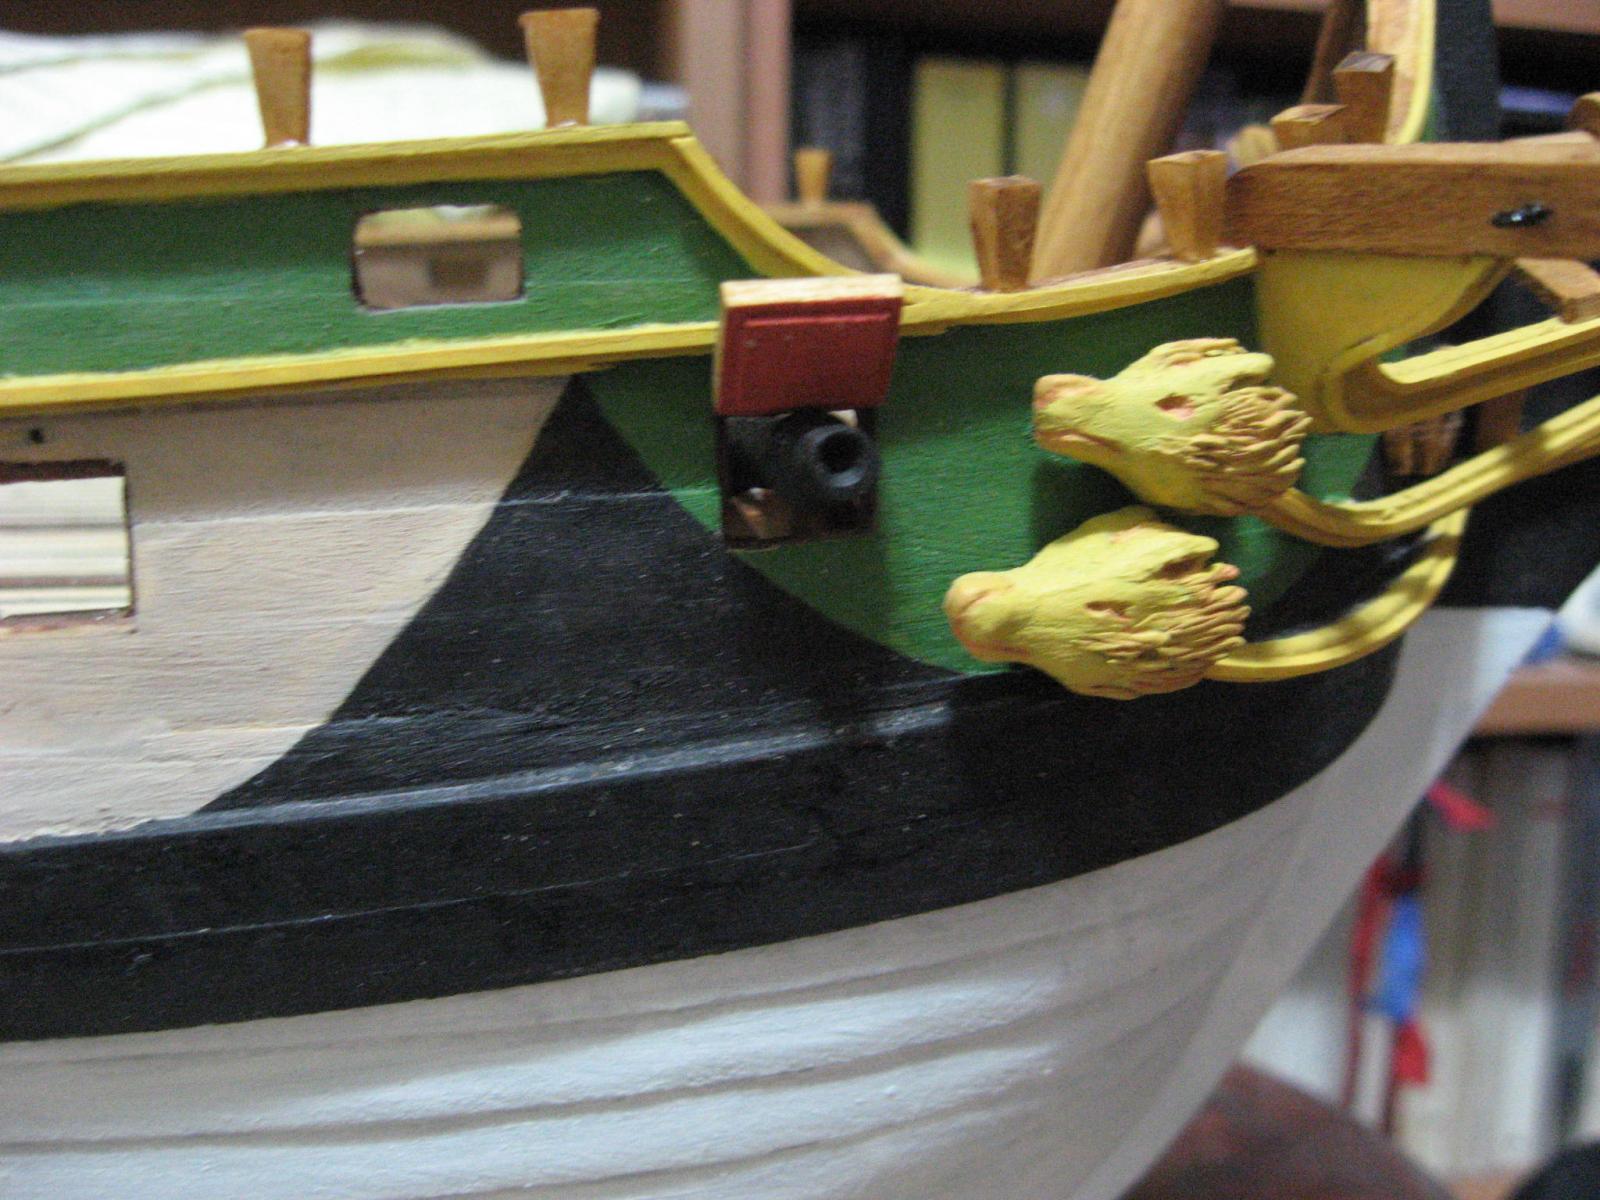
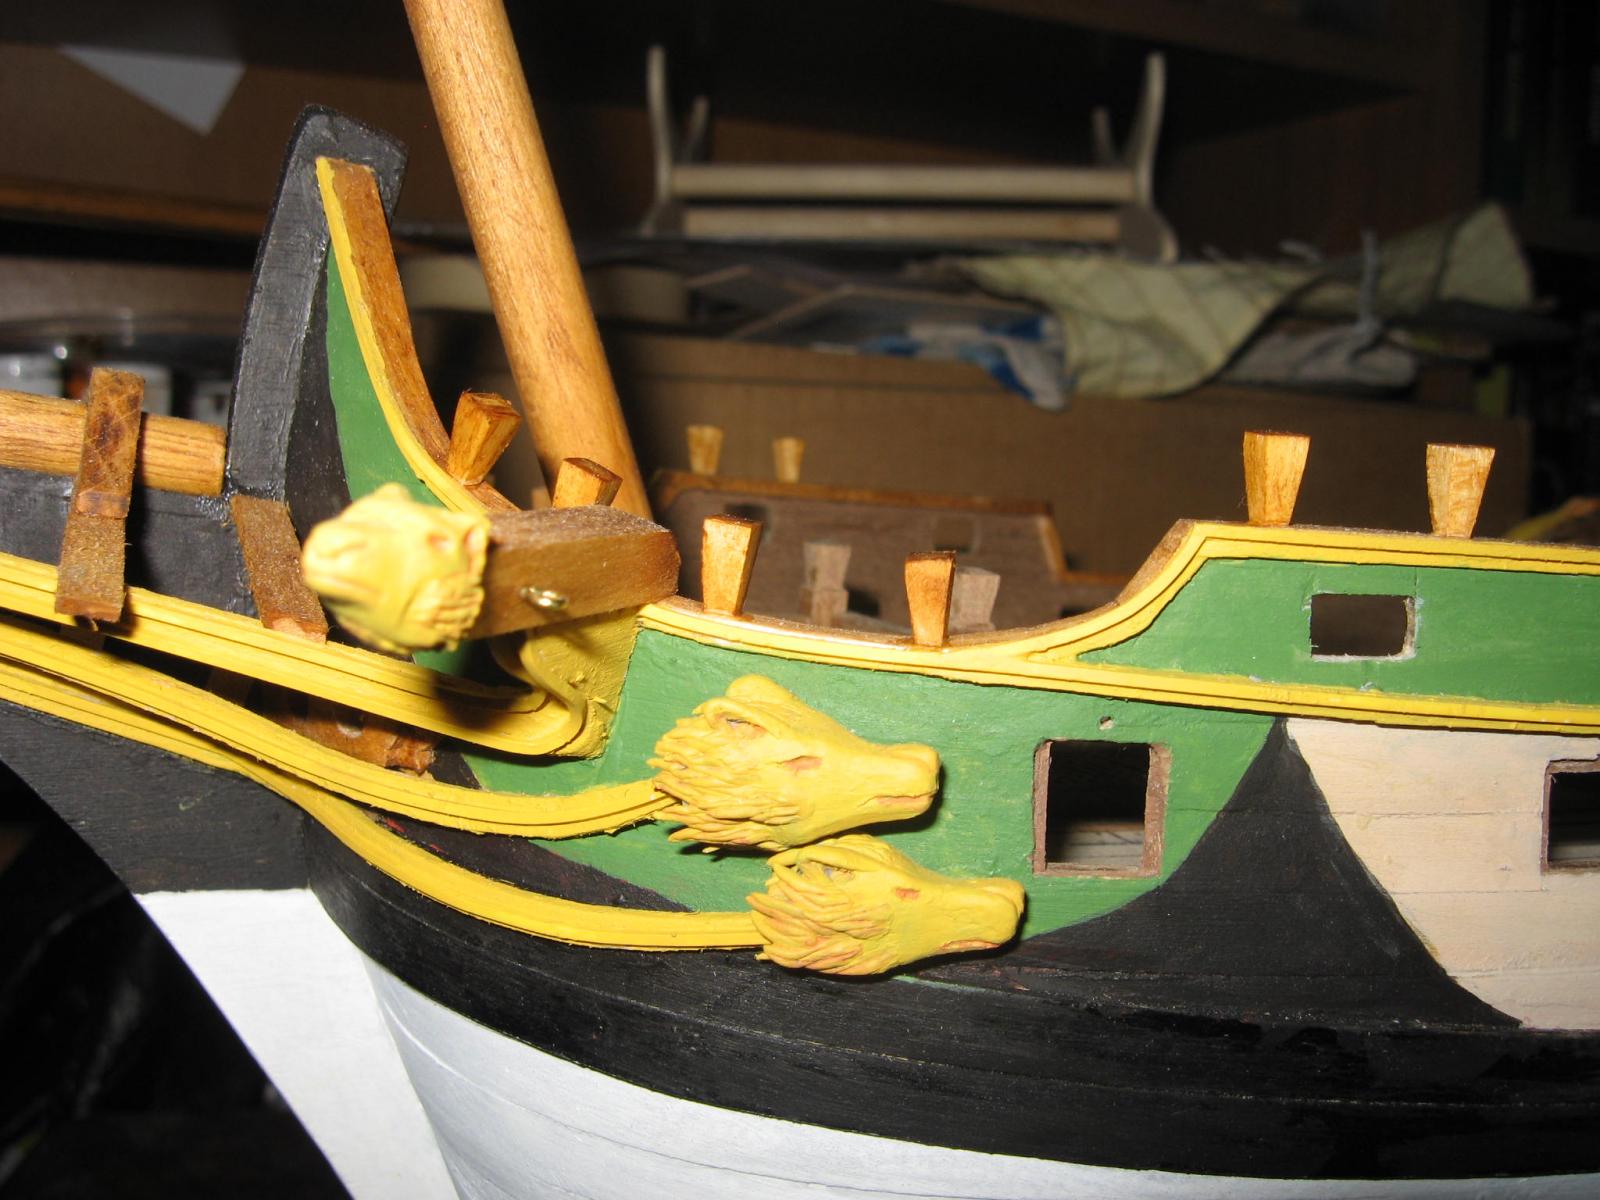
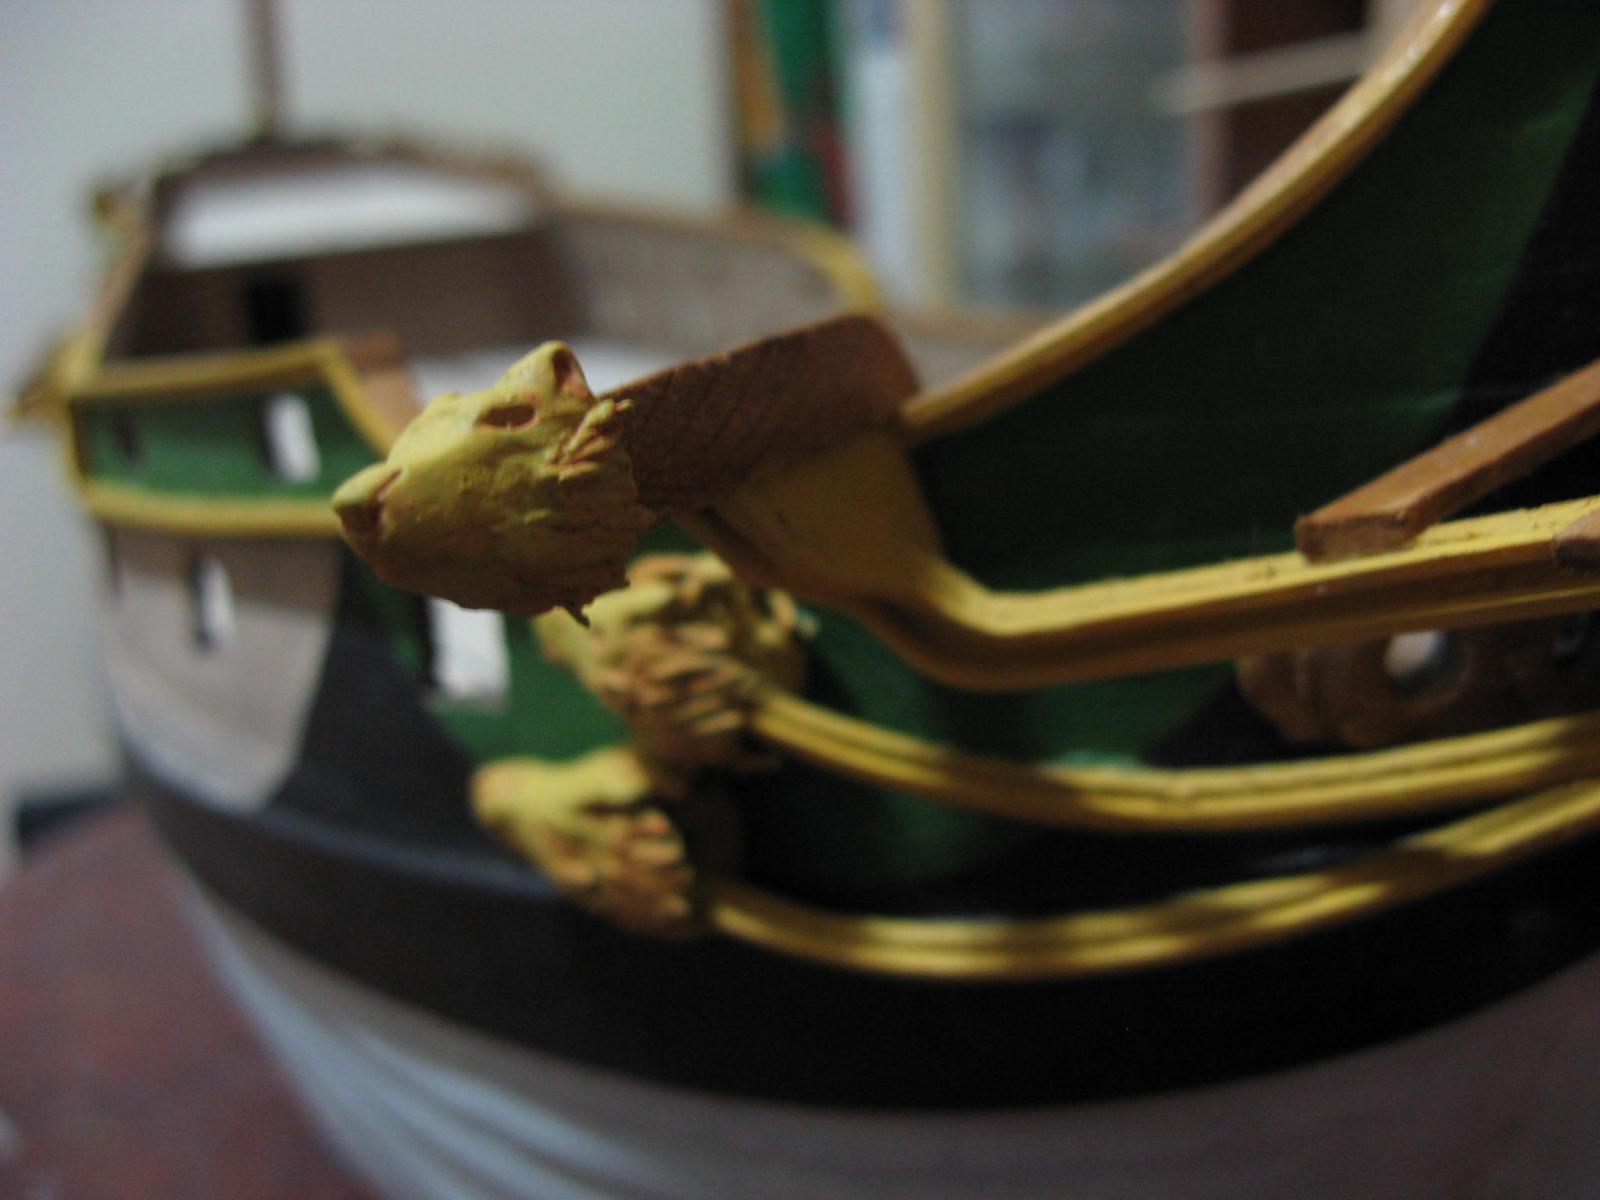
Thank you Hans! I appreciate your compliments! Both! I used "not noble" materials for this decorations. The small heads of the catheads has been made completely with green stuff (Kneadatite, commonly used in plastic model making). The big heads have been made as follows: -main body wood made and loosely carved; -painted with spray primer; -details (fur, ears) made with green stuff; -again painted with spray primer before painting it with common acrylic decoupage paint. The first layer of primer is mandatory, since the green stuff can be modelled on the head only if maintained lubricated with a small amount of water. If the wood is not protected, it become wet and the green stuff detach from it (a big problem). The stern decorations has been made in the same way: a wood frame primed, glued to the stern and later I added the green stuff on it. Something can be seen in some old posts. I know that is a untraditional way of proceeding, but for me at the moment is the only way to preserve the...fun on the work I am doing!
-
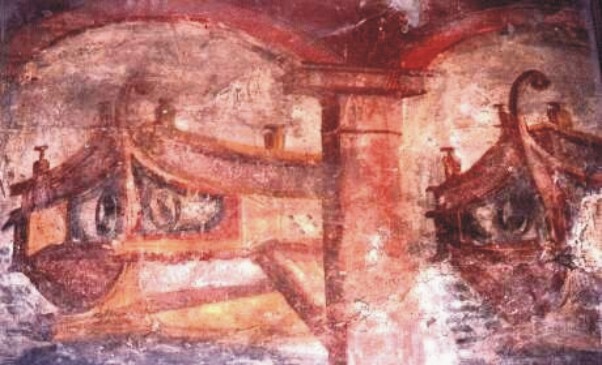
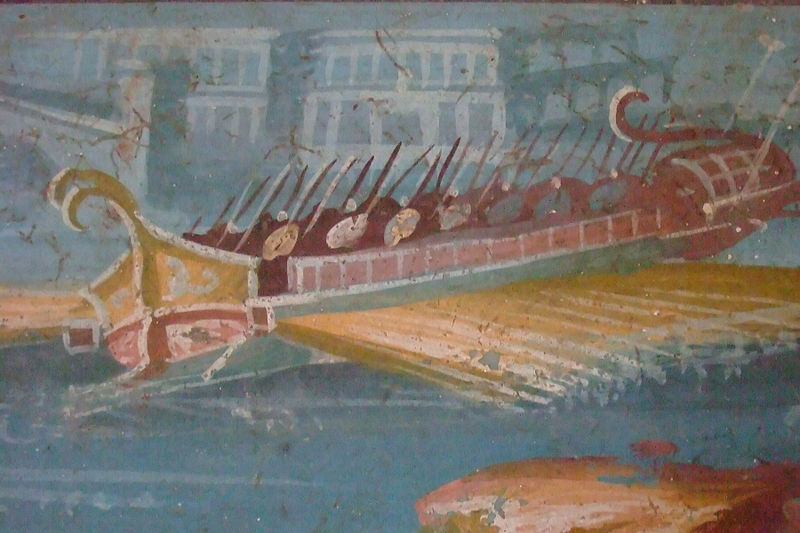
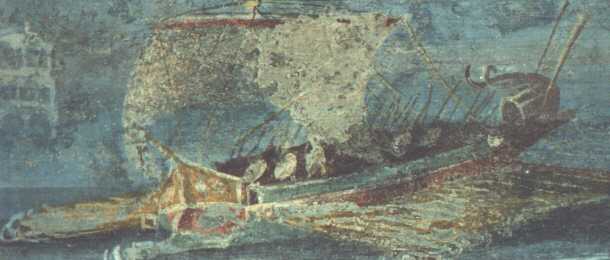
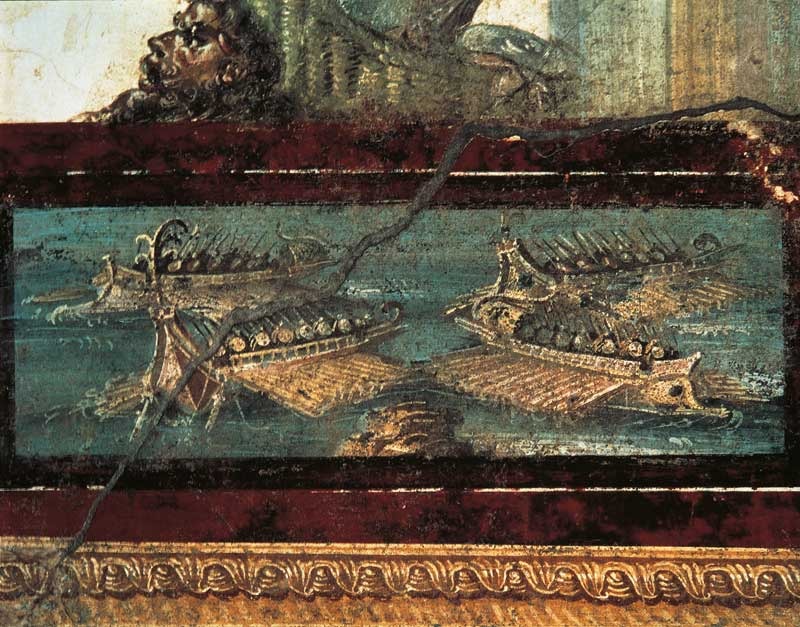
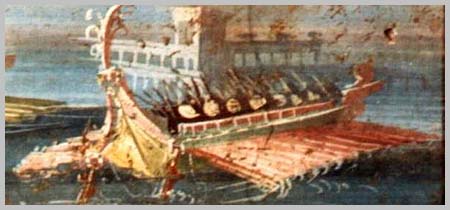
Hello Hans, very good technical approach, I appreciate it. Regarding the colour problem, as for as I know, the only contemporary colour paintings of ships are the ones in the Pompei frescos. Unfortunately they were all related to "Naumachia" games, so probably the ships were highly coloured for games purposes. in the attached files, the photos, coming from: -Casa dei Vettii; -Tempio di Iside; -Terme suburbane.


-
Thank you Row, it is exactly this!
-
Sometimes the english terms that I use are not so clear. the linseed oil is the type "cooked" (hope the term is right). the type "not cooked" doesn't have the same effect. it can be find easily in the Supermarket, since is used for maintain the wooden forniture. the oil is very light and in few minutes is completely absorbed by the wood. The wood remains completely dry, so i can glue something else on it. it gives a dark yellow tone to the lime-tree strips and darken the walnut strips. generally it exalts the wood grain.
-
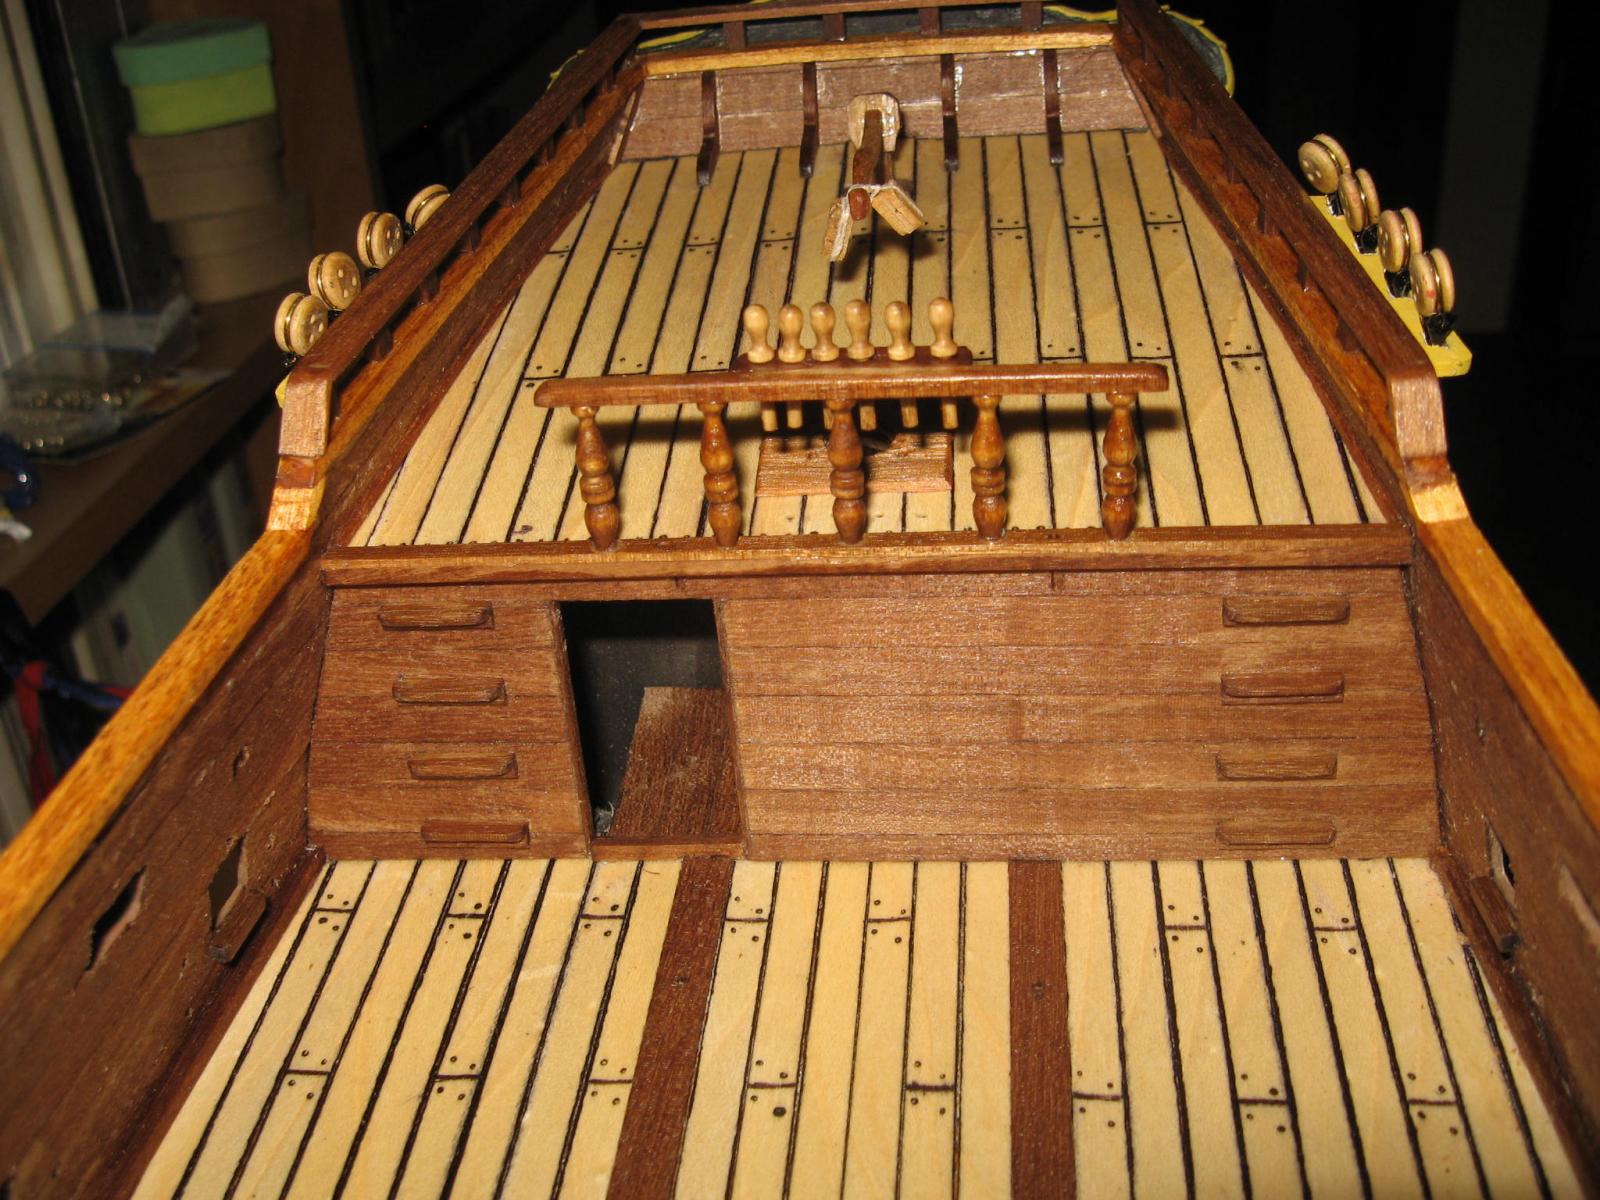
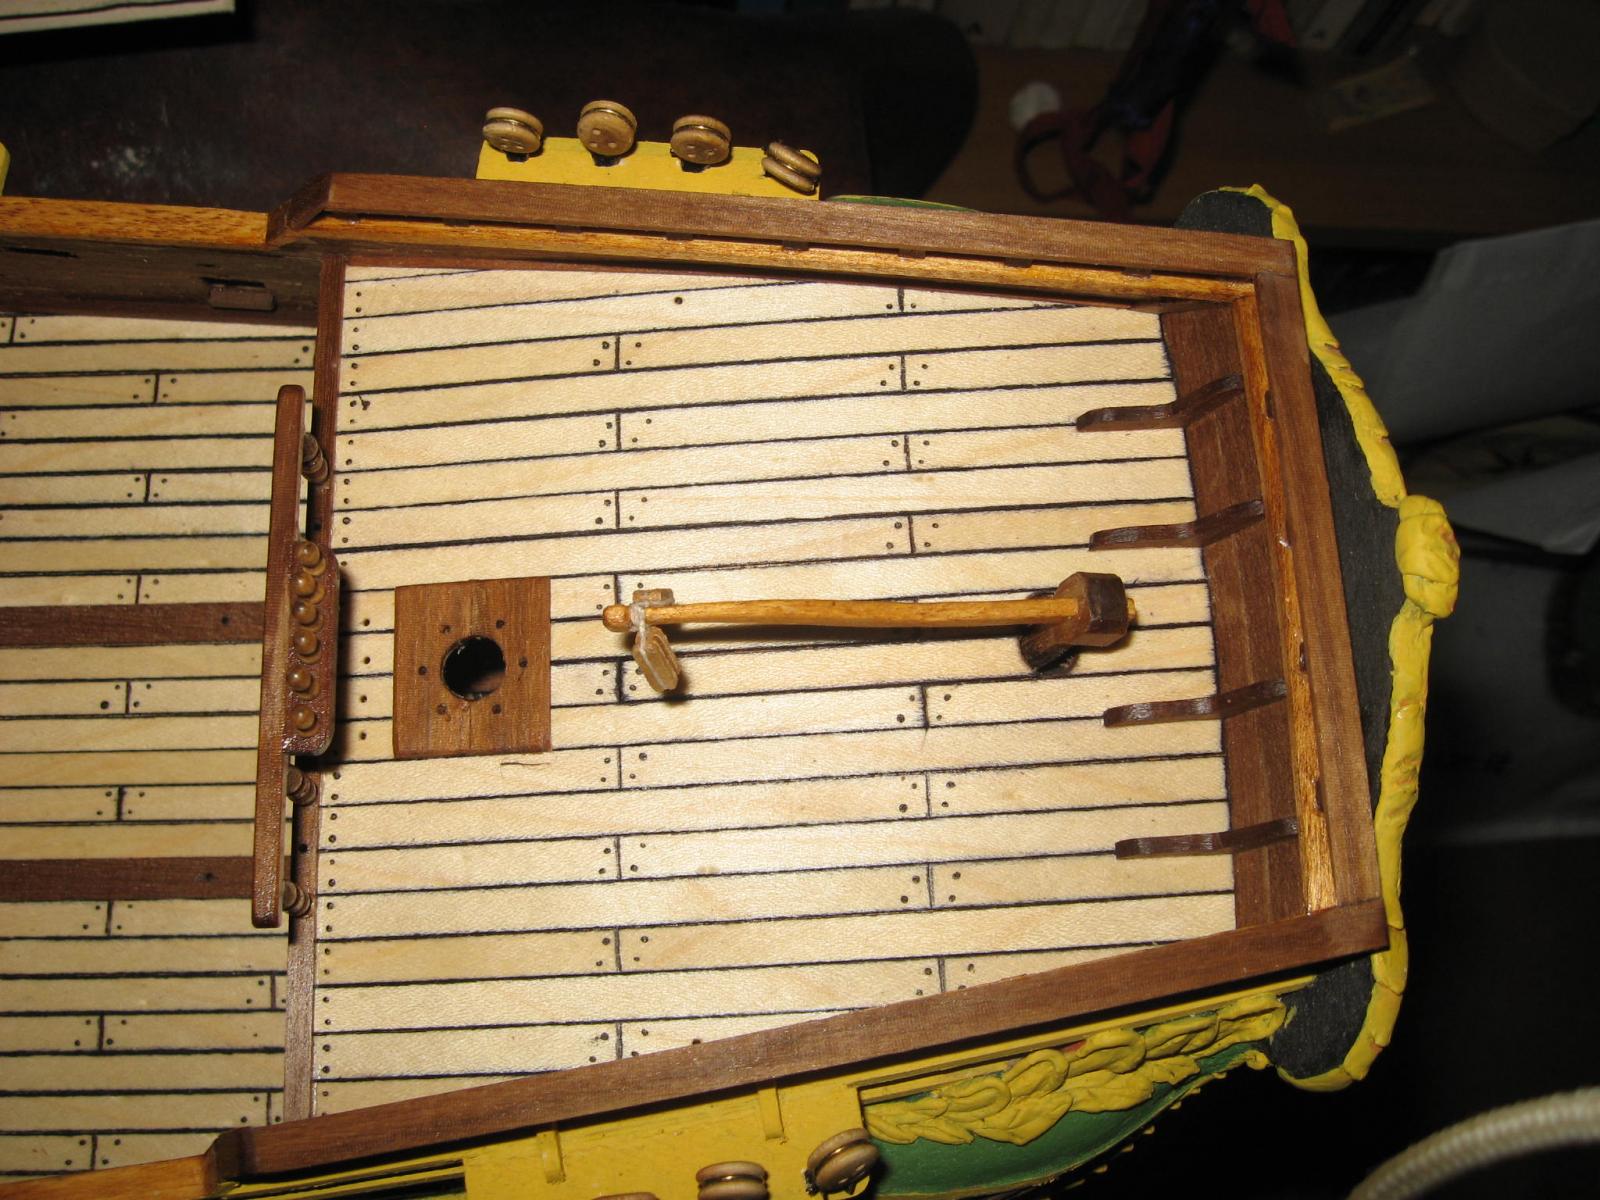
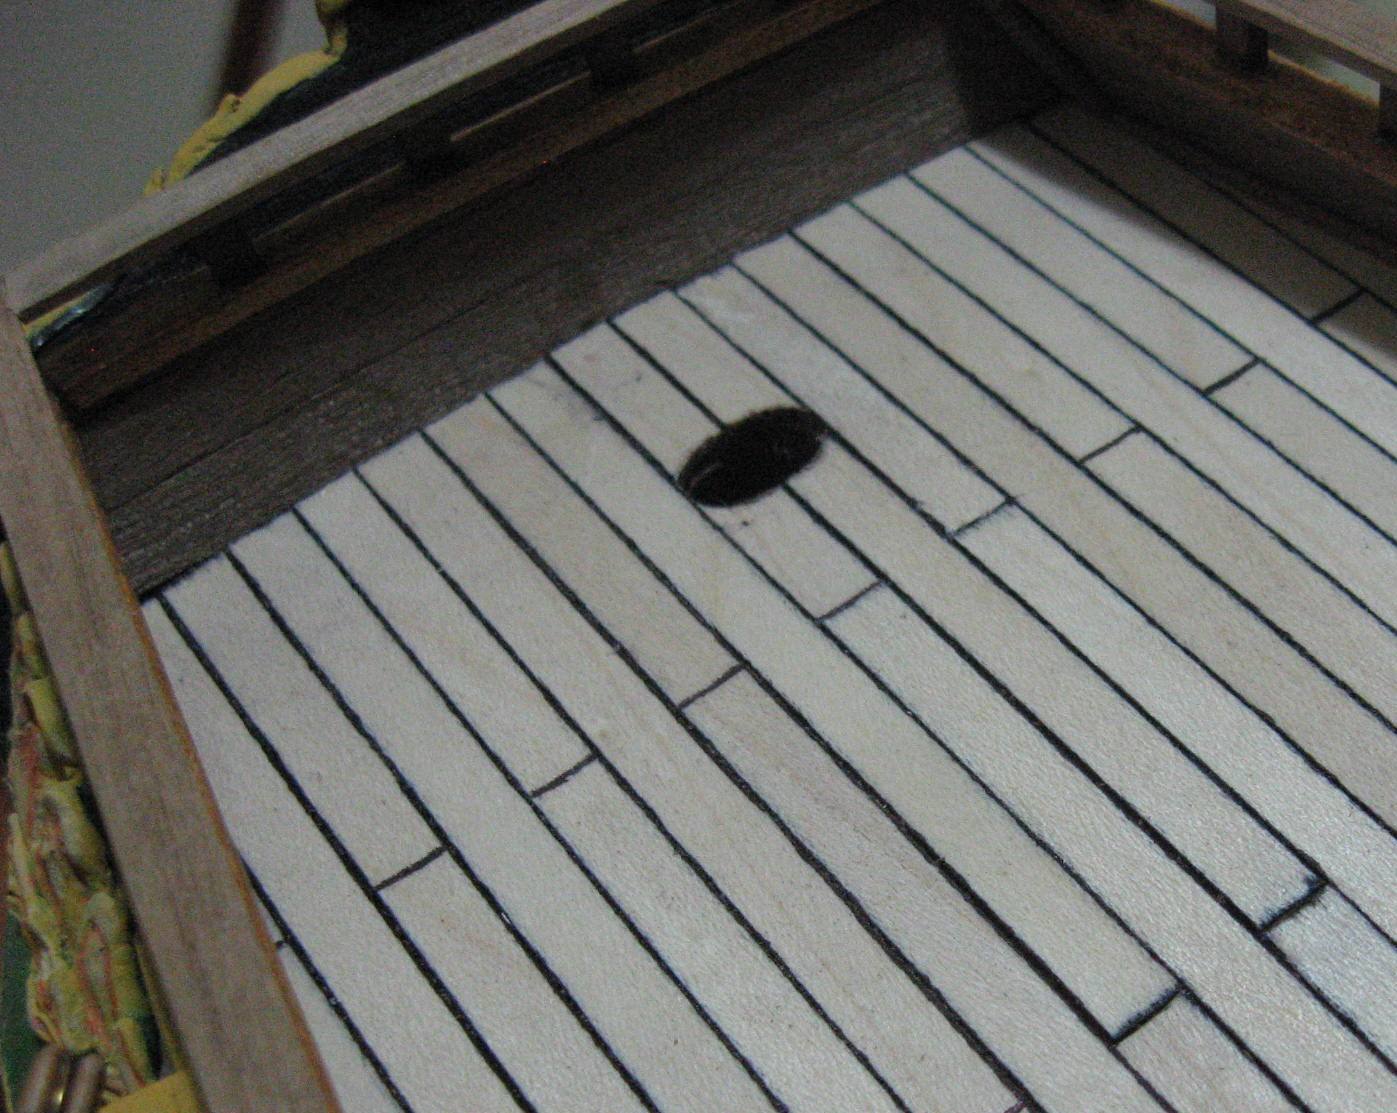
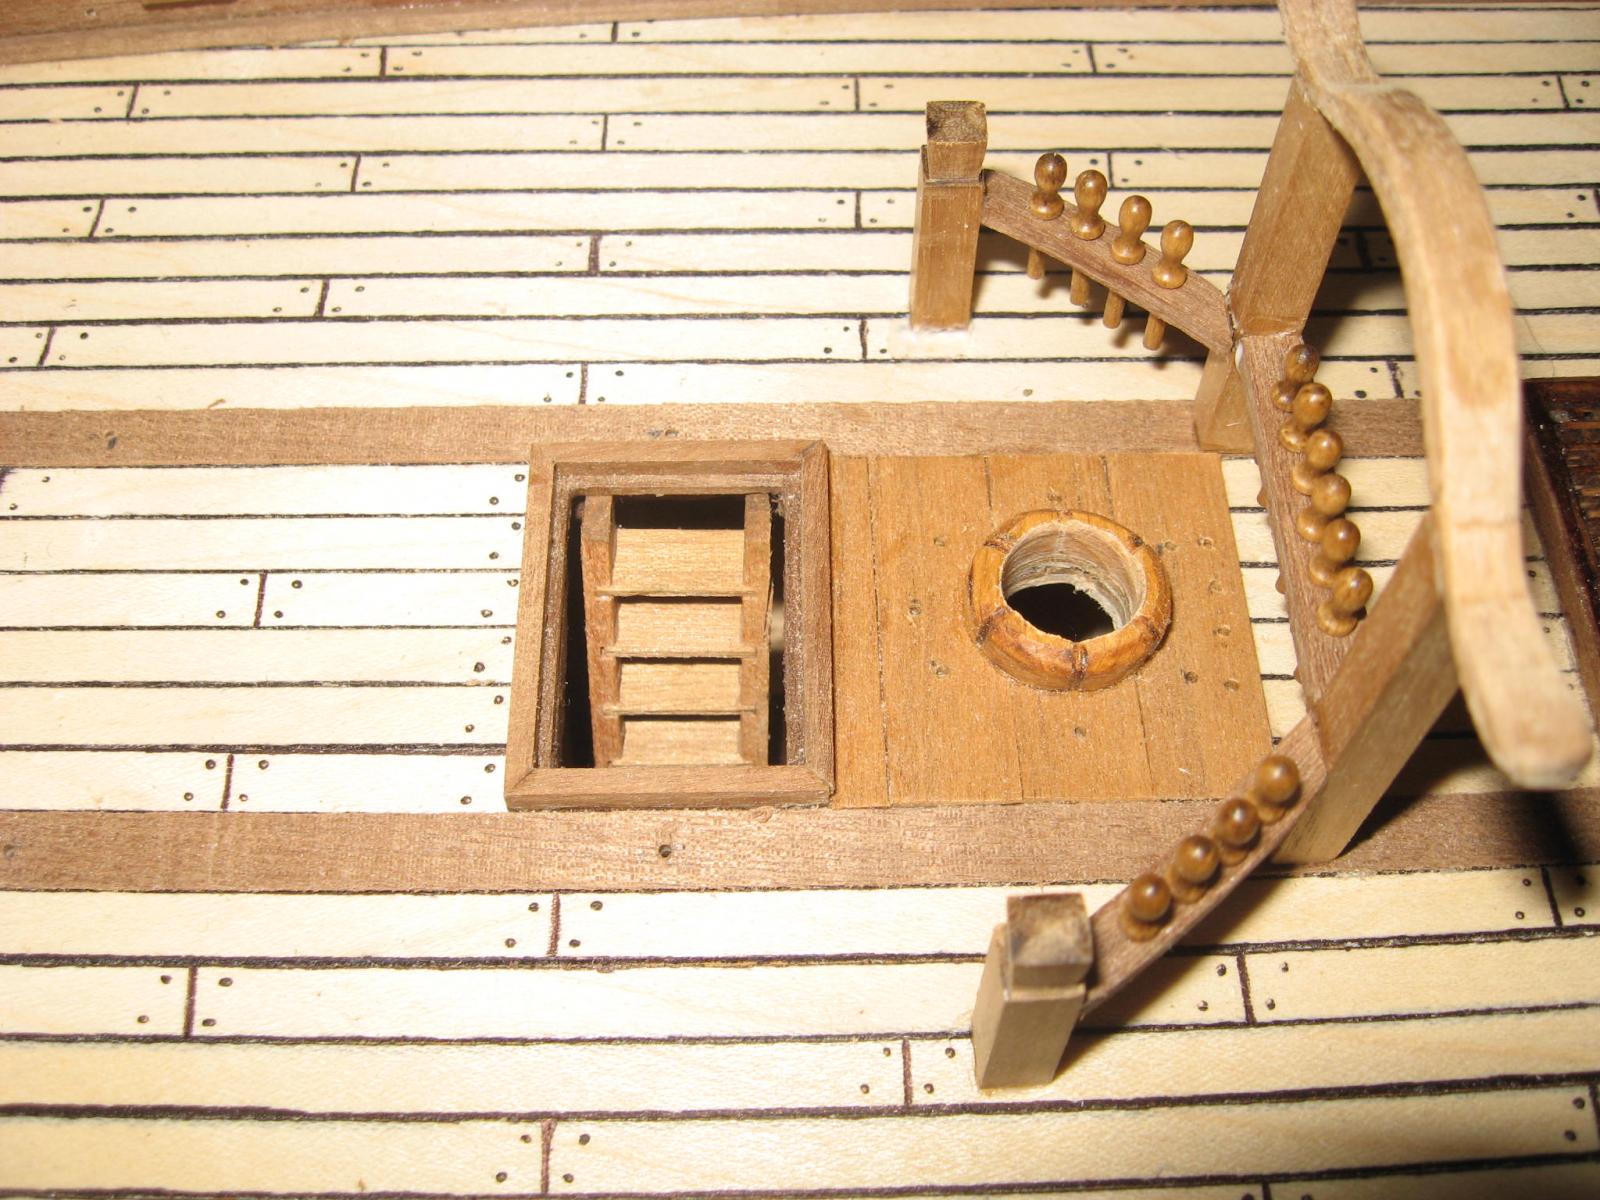
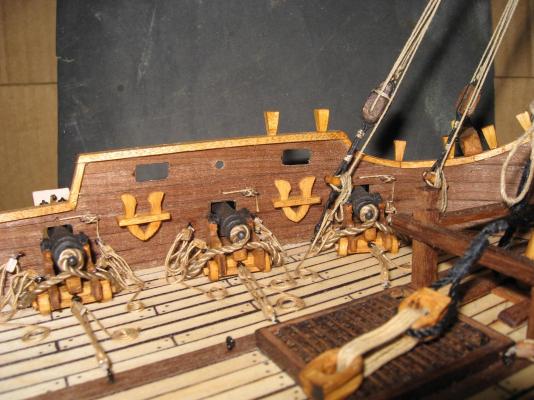
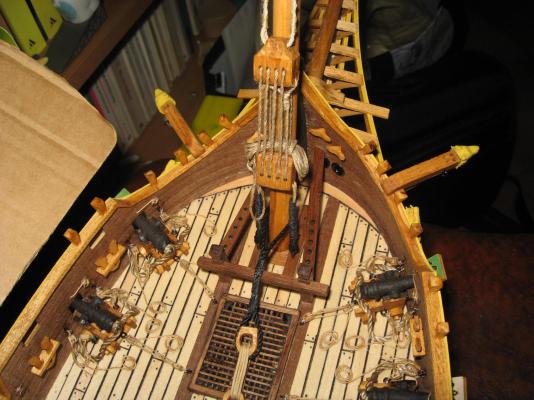
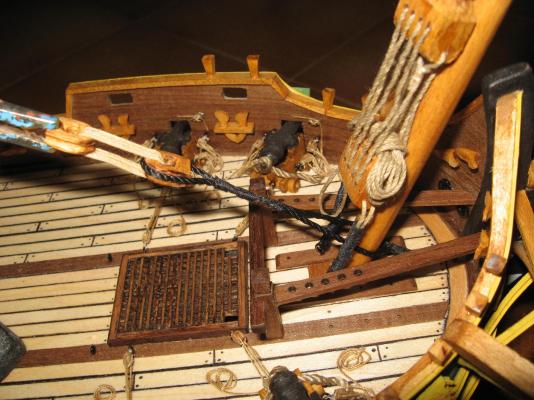
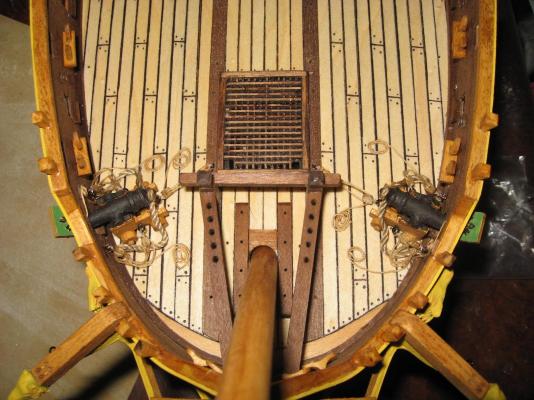
This time I focused on the stern deck. I rebuild the upper part of the rudder, as it can be seen in the photos. In the meanwhile I prepared the railing of the deck, with the related belaying pin rail (hope the terms are right). I made all the holes needed around the mizzen mast, too. Well, I worked a lot around the stern deck. But again, since no drawings are available, the largest part of the time has been passed on thinking and evaluating............. I stopped at the moment the cannons rigging, since I am definetly bored by that part. I started to make the gunports, and I am almost halfway of the complete duty. Before gluing cannons on the deck, I painted everything with linseed oil, which exalt the wood characteristcs and darken a bit all the type of wood. now the deck colours are more "warm". All the photos are made after the oil treatment. In the meanwhile I prepared all the yards of the main mast, as it can be seen in the last photo. now only the mizzen mast and related yards remain to be made. I have no excuses anymore, I must focus on cannons rigging and gunport, for proceeding further!


-
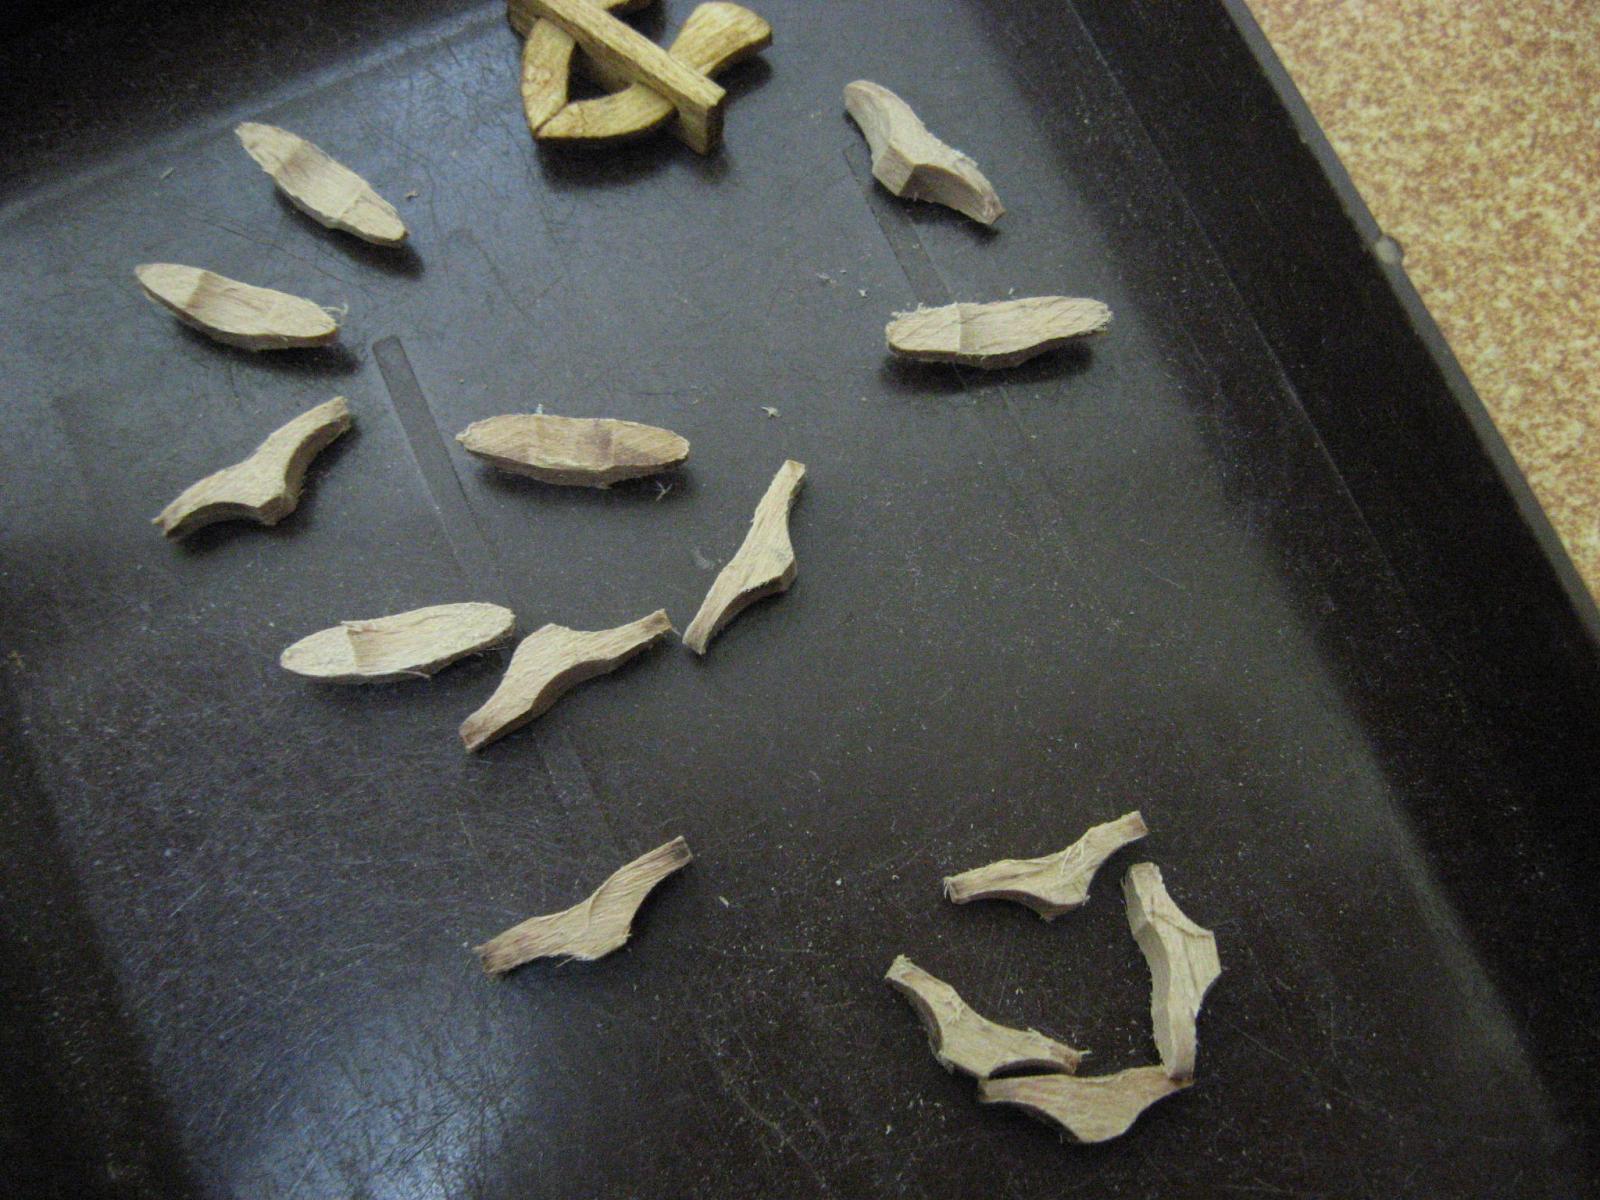
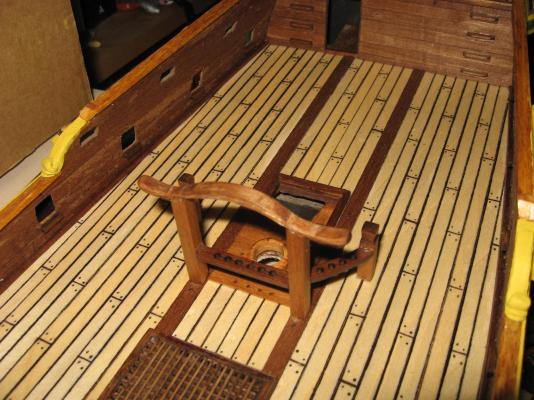
This weekend has been dedicated to....thinking. I never been completely convinced by the utilization of the whipstaff in this type of ship, since in my hopinion is too small to justify such steering method. In addition, it is a ship with only one poop deck and nothing more, so the rudder can without problems reach the upper deck. In addition, the steering mechanism when the whipstaff is used remove too much precious space in such ship. We must consider that the cabin can host two additional cannons too, so the space must be used wisely. Since the rudders enters directly in the cabin floor, it must excluded the "purchased drawings" hypotesis, shown in the photos. it remains two ways of steering: directly, with the tiller on the poop upper deck and with the whipstaff, but with the tiller forced to be placed near the cabin roof. it cannot be placed near the floor, since it doesn't allow the cannons to be operated. I excluded the second option and chosed the first. So I modified the upper deck accordingly, as it can be seen in the photo. now I must make a tiller and the second part of te rudder. In this weekend in anycase I made the needed cleats for the ship (only the big ones), see the photo. more to be made. I started to make the gunports, but are not yet finished.

-
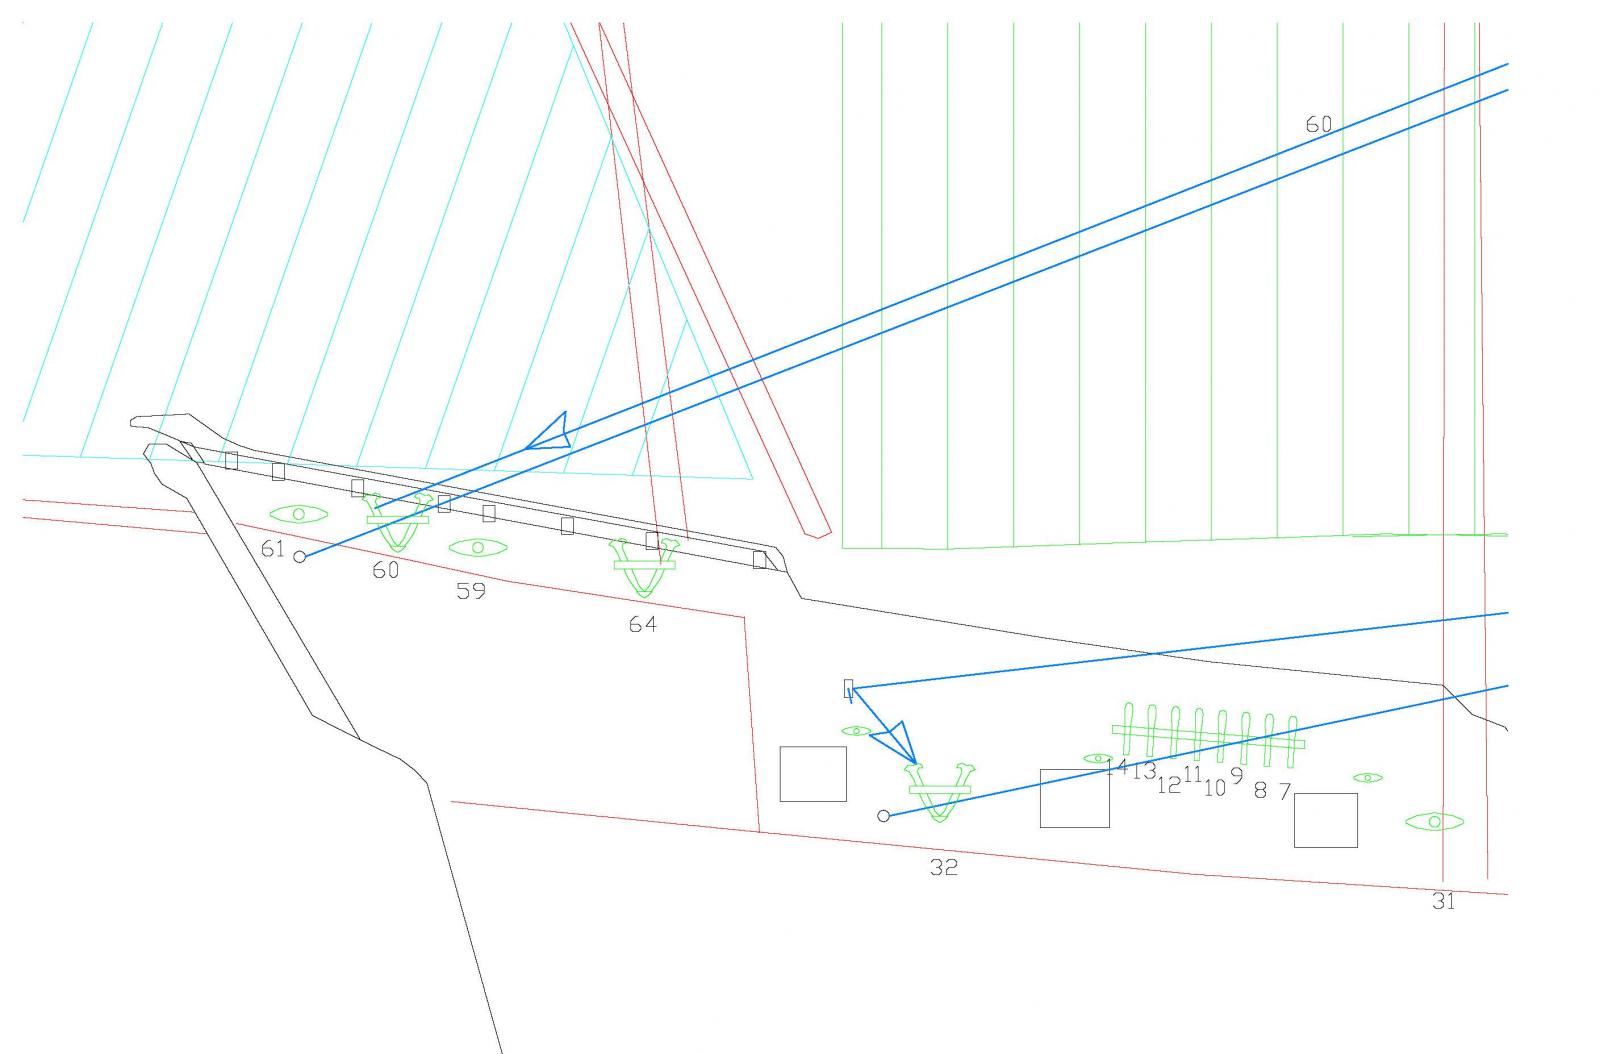
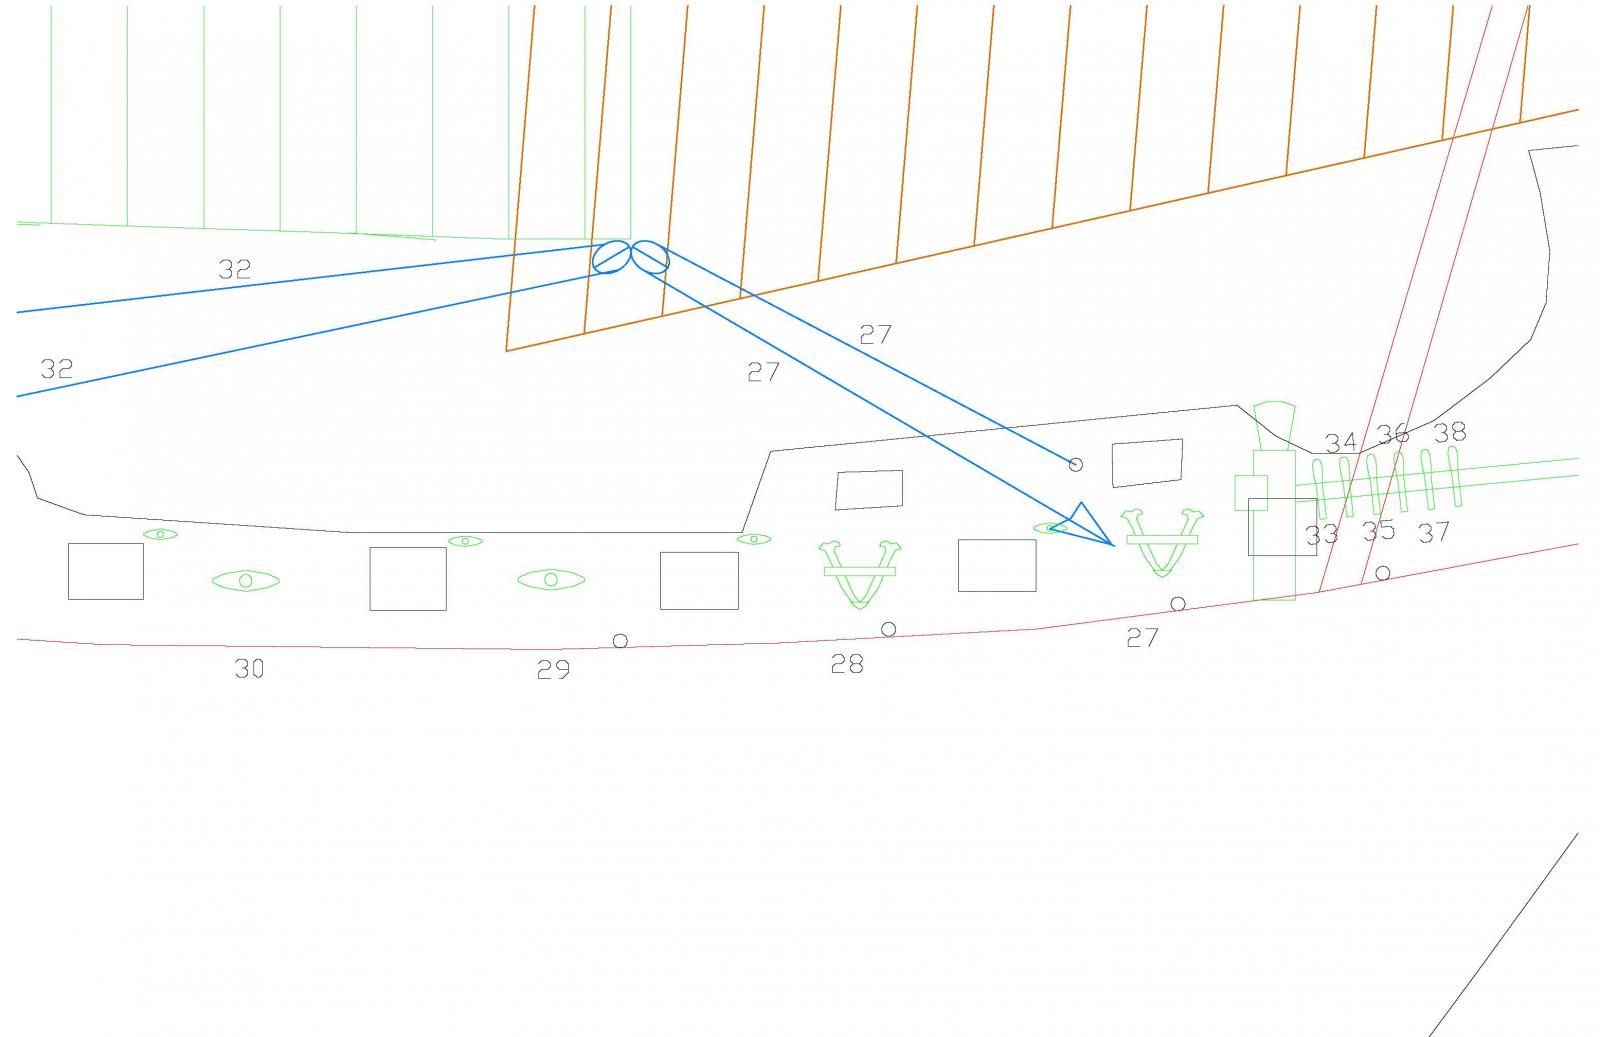
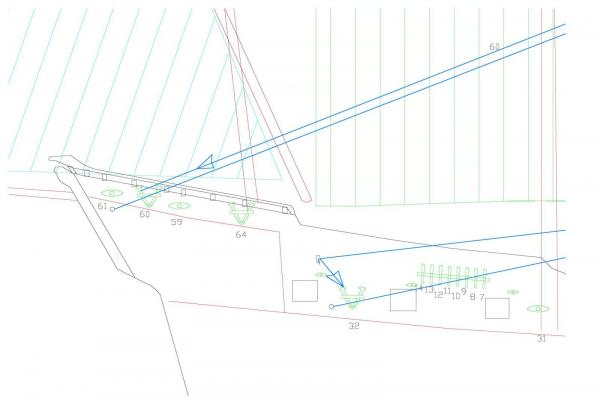
Due to the decision to lower the quantity of kevels in the ship, I made some modifications to the rigging plans that I made. In the attached drawings can be seen the kevels and cleats theoretically present, after yesterday modifications. Other cleats are present, around the masts and in other positions of the ship, but are of smaller size. I have still the doubt if the kevels number 64 and 28 can be technically useful. But I though that in anycase there must be always some spare positions for emergency use. At the moment I will follow this arrangement. That means use 10 out of 12 of the prepared kevels. But now I need to prepare some big cleats. This ship belong to a rather “mature” period of the sail rigging technics (1750), so nothing strange or odd or specific can be imagined for their sails. We should consider that in the XVIII century the Venetian Republic has got a good exchange of technical informations with the Great Britain (British naval architects worked for the Venetians, too) and Holland (due to their common problems of depth of sea) for improving its own ships. So I suppose that some type of rigging for squared sails of a Venetian ship will be the same of more or less the other Countries. The exchange of informations with countries like France was not so good. Any comments or critics to my hypotesis are always welcome.

-
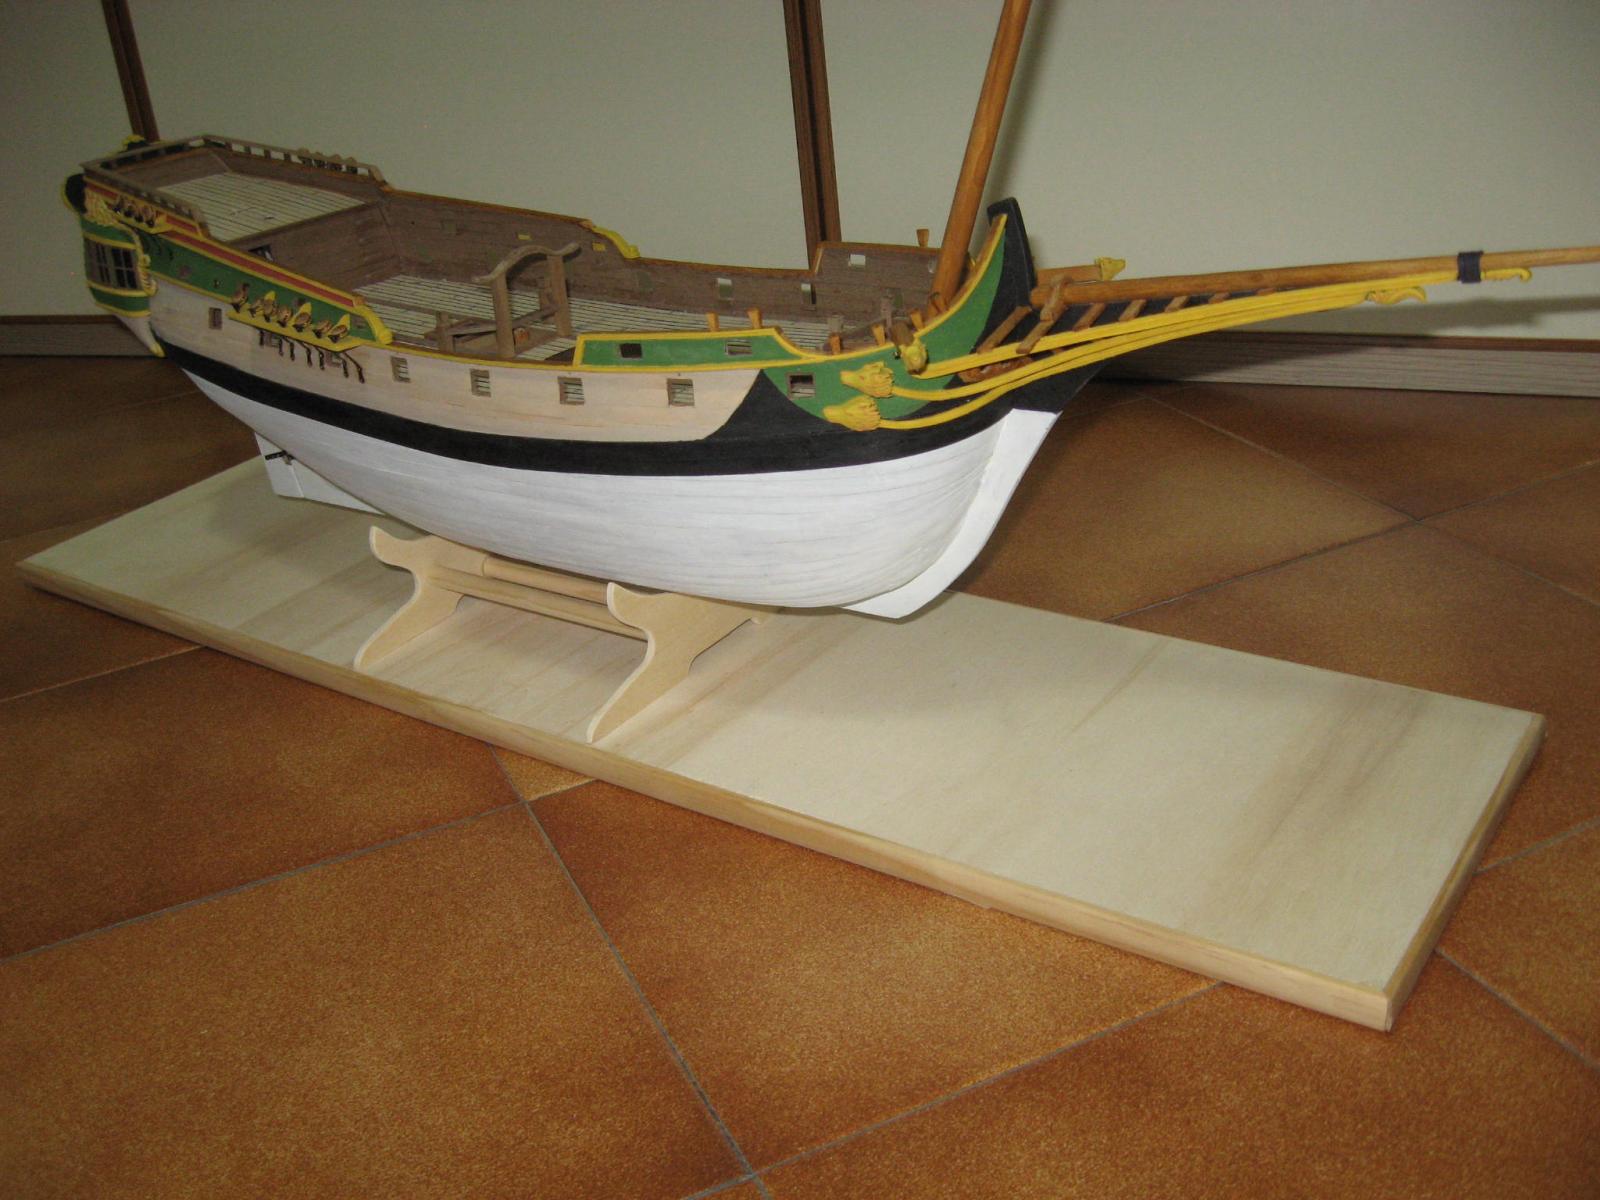
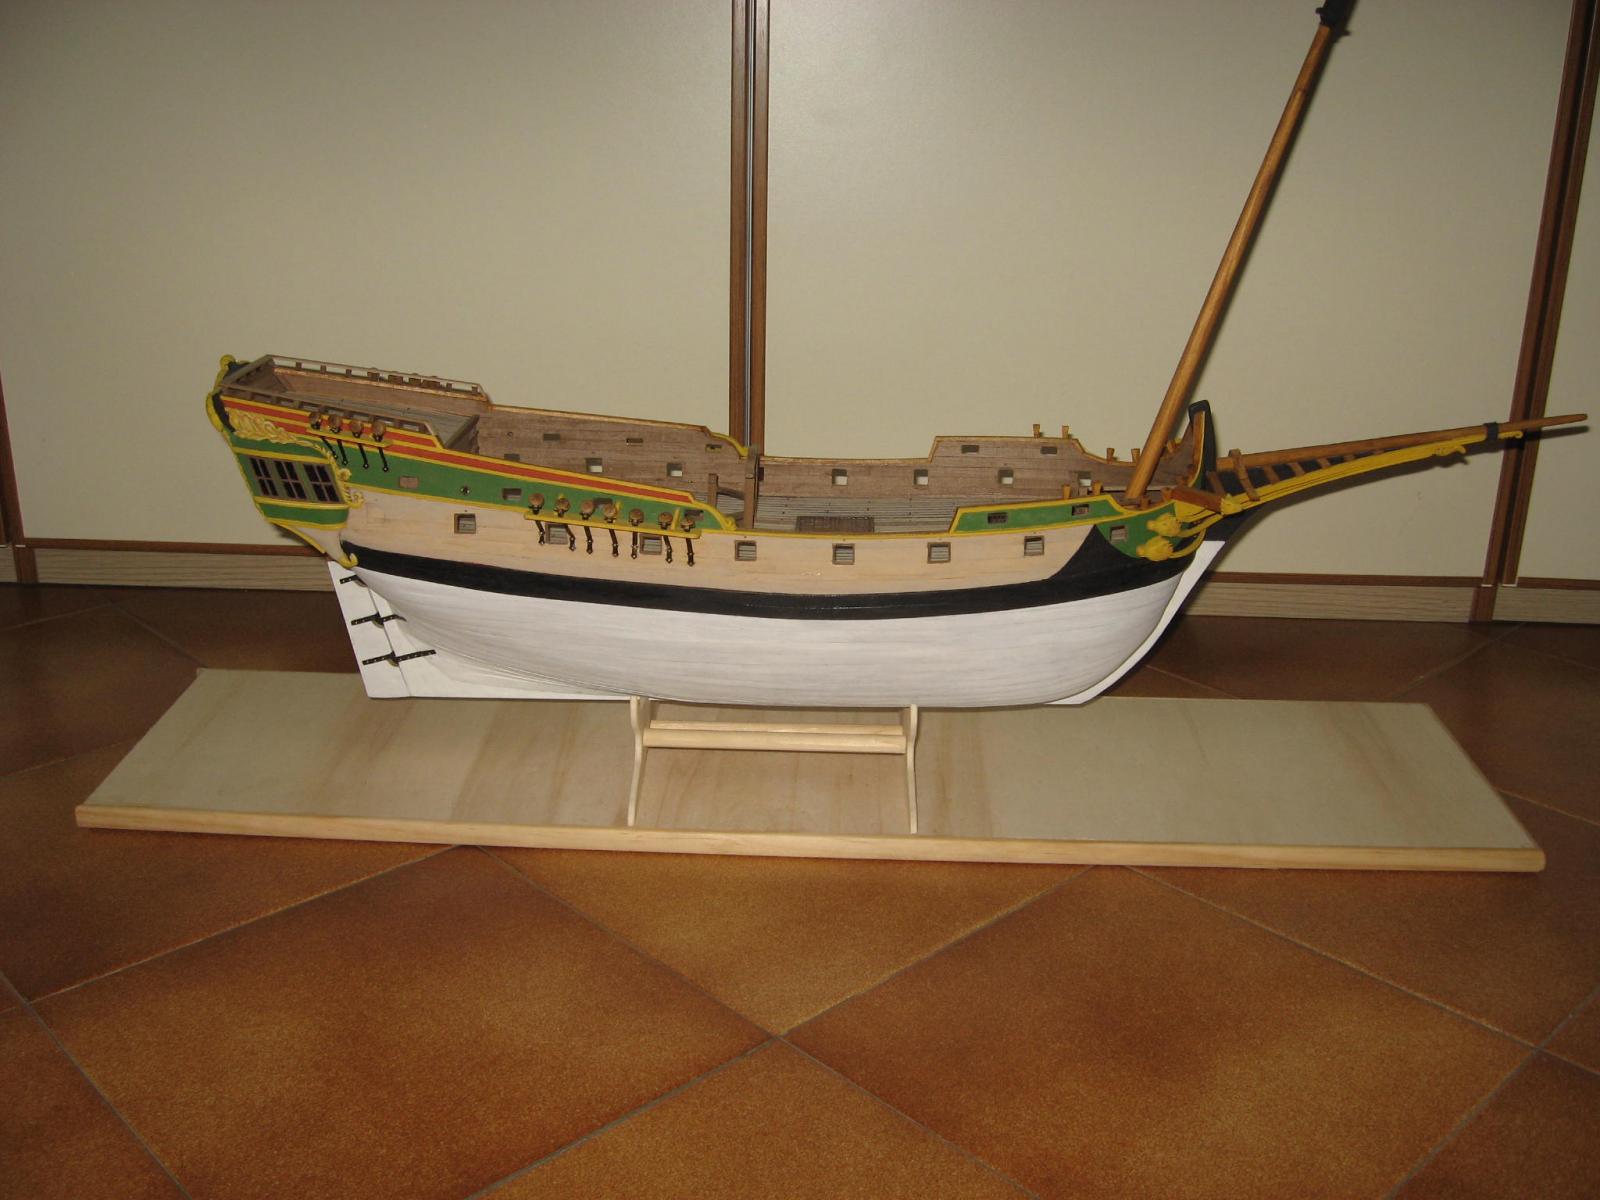
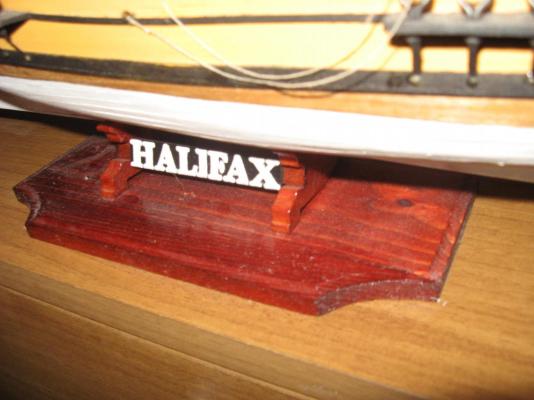
I proceeded further with the pedestal. I almost finished the basement. In the photos can be seen the result. It is a simple approach (I am lazy ), but with a simple pedestal the eye attention is only for the model, so it fits the purpose. The pedestal is not yet glued to the basement, since the basement has not yet been completed with its frame. The reason of starting now the basement is due to the fact that I want to paint it with mahogany essence. The essence smell will disappear only after several weeks, so I need to start everything now. After the essence, I will paint it with transparent varnish (again some weeks of bad smell). After the above operations, the pedestal will be placed in my home's cellar (?) until I will be sure that even the traces of bad odour are disappeared. Theoretically the final result should be like the pedestal of my Halifax (see photo). Additional note: The development of my model theoretical rigging is continuous. In the past I prepared 12 kevels, 6 for each side of the ship, but I decided that only few of them will be used. Technically are not needed so much "heavy duty cleats" in that ship, even if the "purchased drawings" showed such quantity. At the moment I decided for 4 kevels in the poop deck (2 for each side) and 4 kevels in the main deck 2(2 for each side), placed between the main mast and the cabin. Eventually I will reduce the poop deck's kevel to 2. The others positions will be filled with standard horizontal cleats. But probably I have not the ones of the right size, so I must build them... Now I go to prepare my DAILY cannon (my daily dose of pain )!


-
Thank you Steven, I appreciate your compliments. The painful/boring part is composed by 16 cannons, on which I must attach the related blocks and the cable for the recoil. In addition, other 48 blocks to be made and to be attached to the ship for securing the cannons. In addition, 18 cannon port lids yet to be made. At the moment I "prepare" around 1 cannon per day (average)... At least half of them must be attached to the ship before proceeding with the rigging of the foremast. So I am forced to do them now... Well, just like drinking a bitter medicine.... I think that is the only boring part of the construction that remain to be made.
-
Well, many things changed during these years in Bologna. The best is to make a virtual tour by feet using Google Stree view: https://www.google.it/maps/place/Bologna/@44.4935289,11.3431311,3a,75y,90h,90t/data=!3m4!1e1!3m2!1sJpliyLAeo21TalpwSvN6Rw!2e0!4m2!3m1!1s0x477fd498e951c40b:0xa2e17c015ba49441 (hope the link works) from there you can eventually check if the restaurant still exist...
-
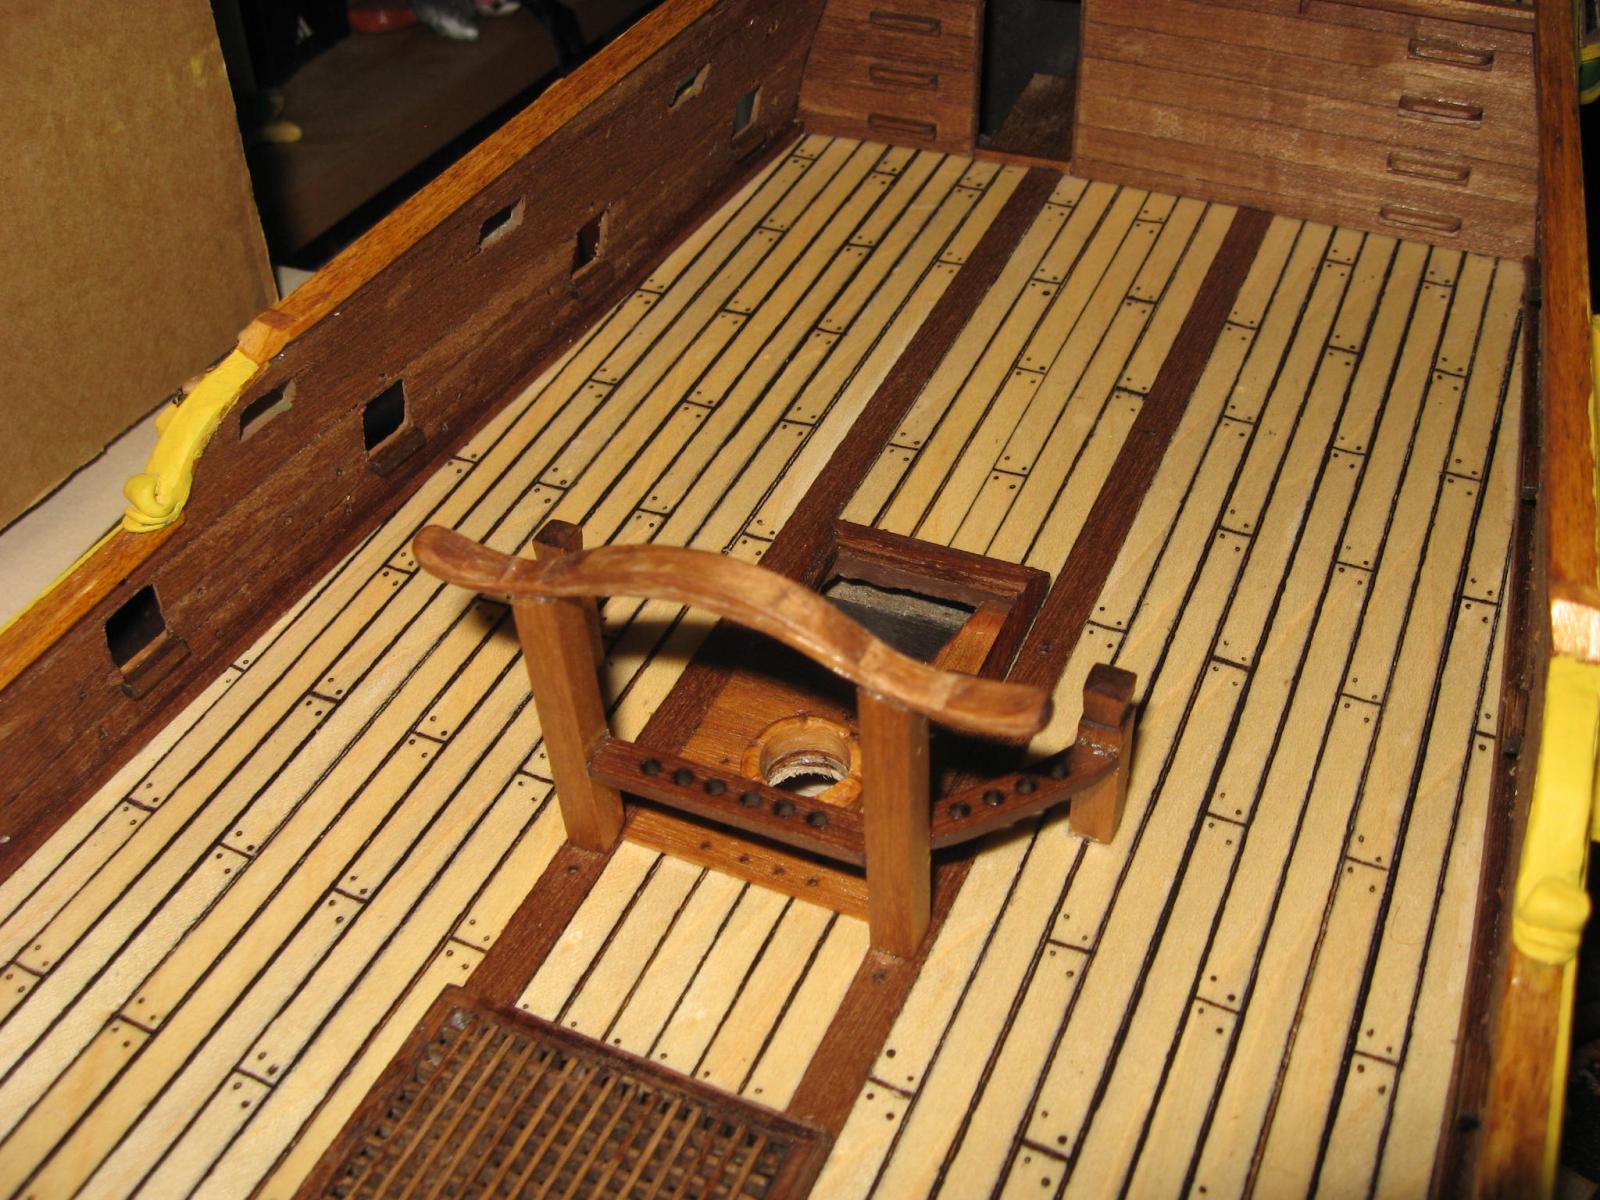
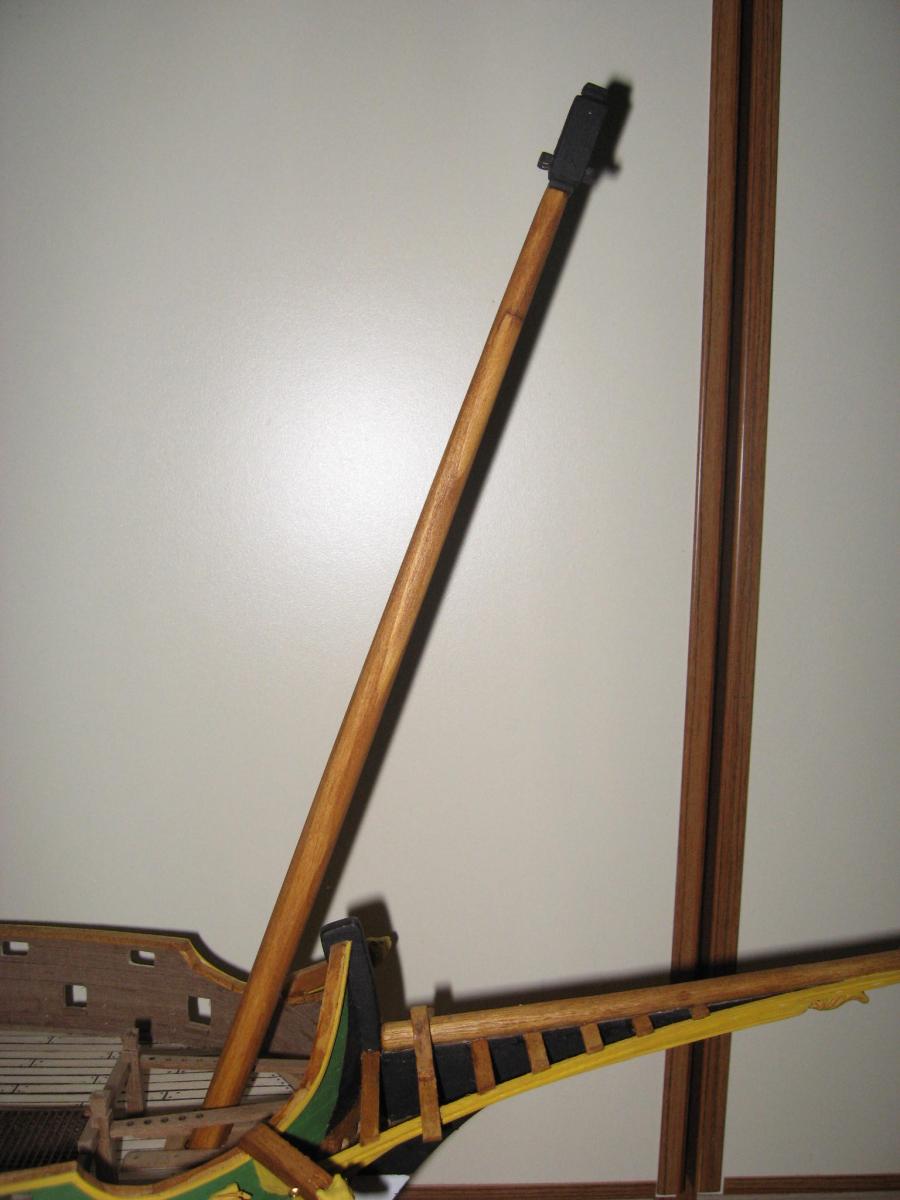
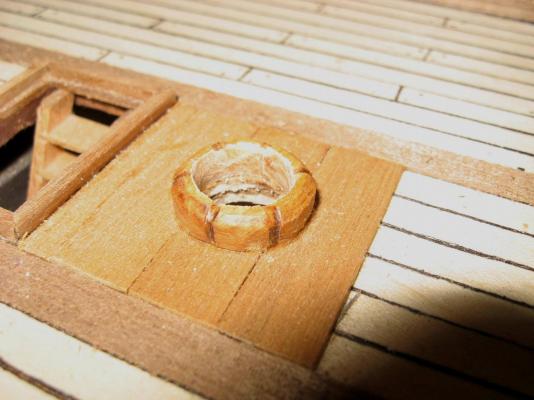
Due to lack of time, during the week I didn't worked often around the model. I made the rigging of two cannons, but other 14 still needs to be arranged, so it will become a nightmare... When all the cannons will be ready I will place them on the deck. I can proceed with the rigging of the foremast only when the cannons are definetly placed, since it will be difficult to do that before. Making the cannons rigging is rather boring and a slow duty. I don't yet find a fast way to do it. In the meanwhile the weekend arrived and so the "noisy days"! Saturday and sunday are the only days when I can really make noisy operations, so again I concentrated there the crafting of many components, that more or less will be used many weeks later. this weekend has been very profitable: -I attached the various bitts of the bow section; -I made the wooden pedestal of the model; Later I will add a basement, with a lenght that cover the largest part of the ship. The pedestal and related basement will be later painted with a mahogany essence. - I made the belaying pins support of the mainmast; Before doing that I needed to decide the correct positions of the various blocks and rings around the main mast. That decision was needed due to the fact that the related holes needed to be done before (as usual). Sadly I noticed that the mainmast basement zone will become very "crowded". Probably a more accurate study was needed and the manole needed to be moved a bit more far from the mast. Now it's too late... the two bilge pumps needs to be placed between the manhole and the mast, so it will be a tricky affair place them. The belaying pins are placed just for the photo purposes. I used the "noisy days" in a wise way, so remained time for making the main mast! That is a single piece mast, as can be seen in many drawings, paintings and models. It will not be glued in place for the moment. It has been placed just for photo purposes.


- 190 replies
-
- 11
-

-
Hello Ronald, Check this previous topic, where more informations regarding the differences between De Agostini kits and traditional kits are explained. http://modelshipworld.com/index.php/topic/7993-artesania-latina-hms-surprise-148-deagostinimodel-space-vs-artesania-latina-hms-surprise-148-age-of-sail/
-
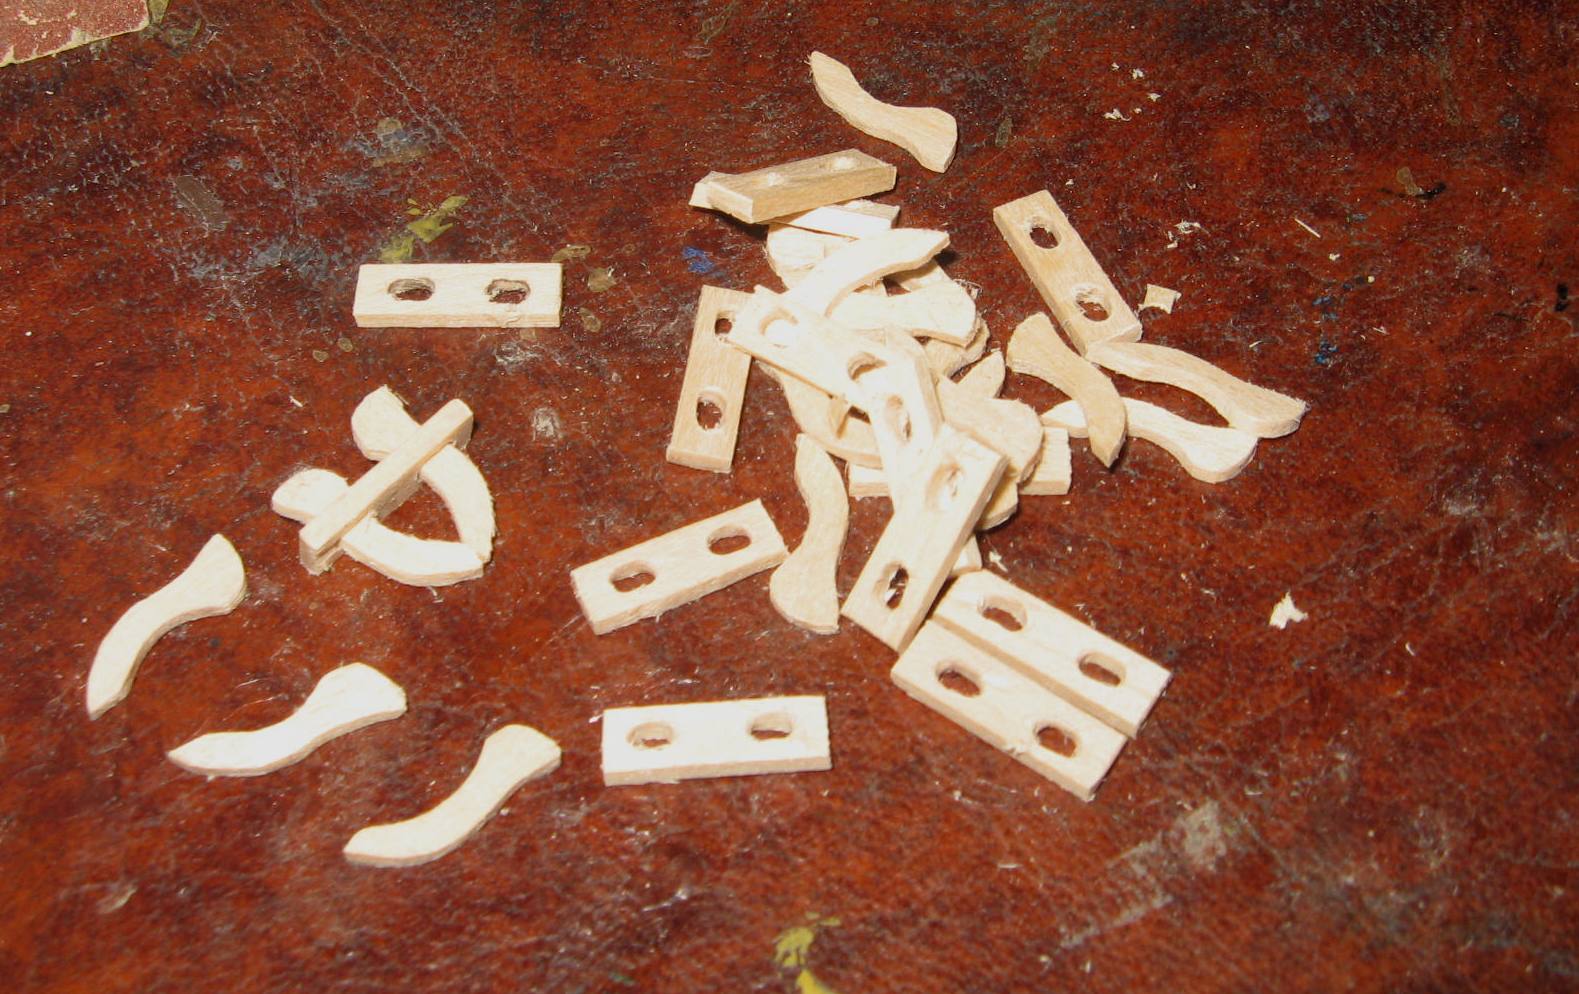
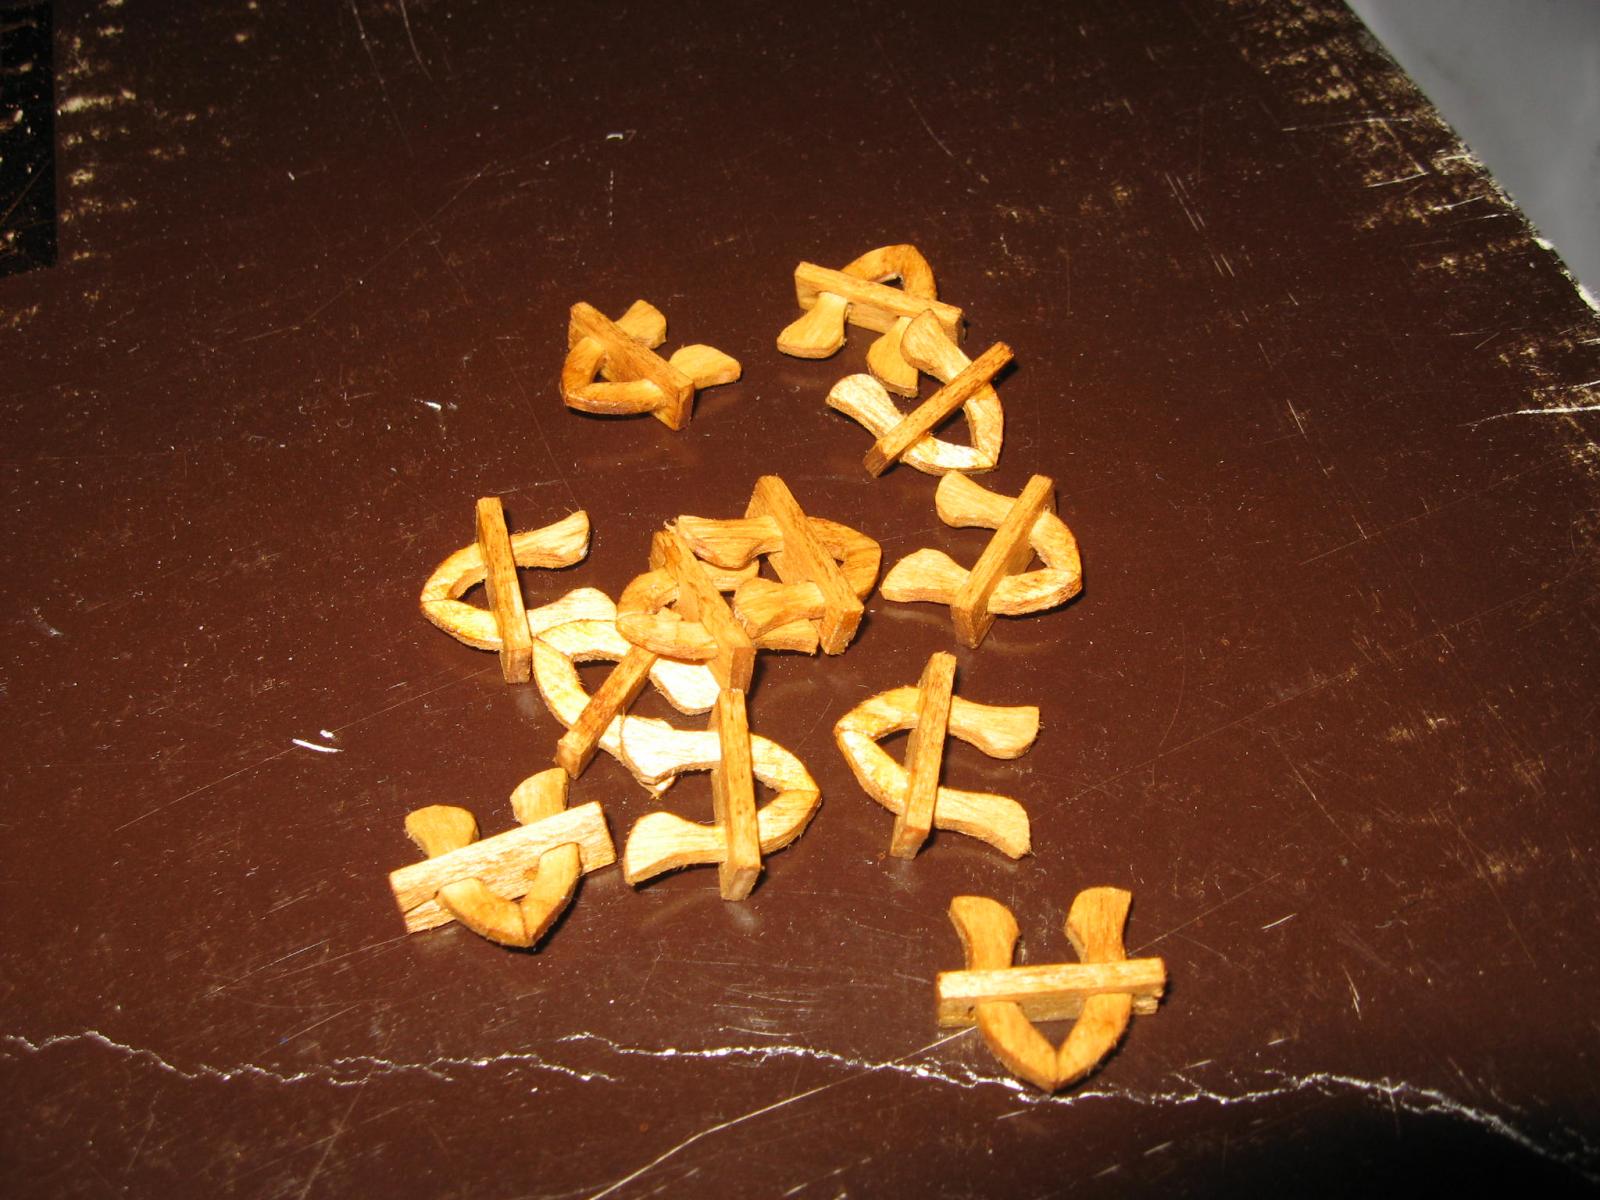
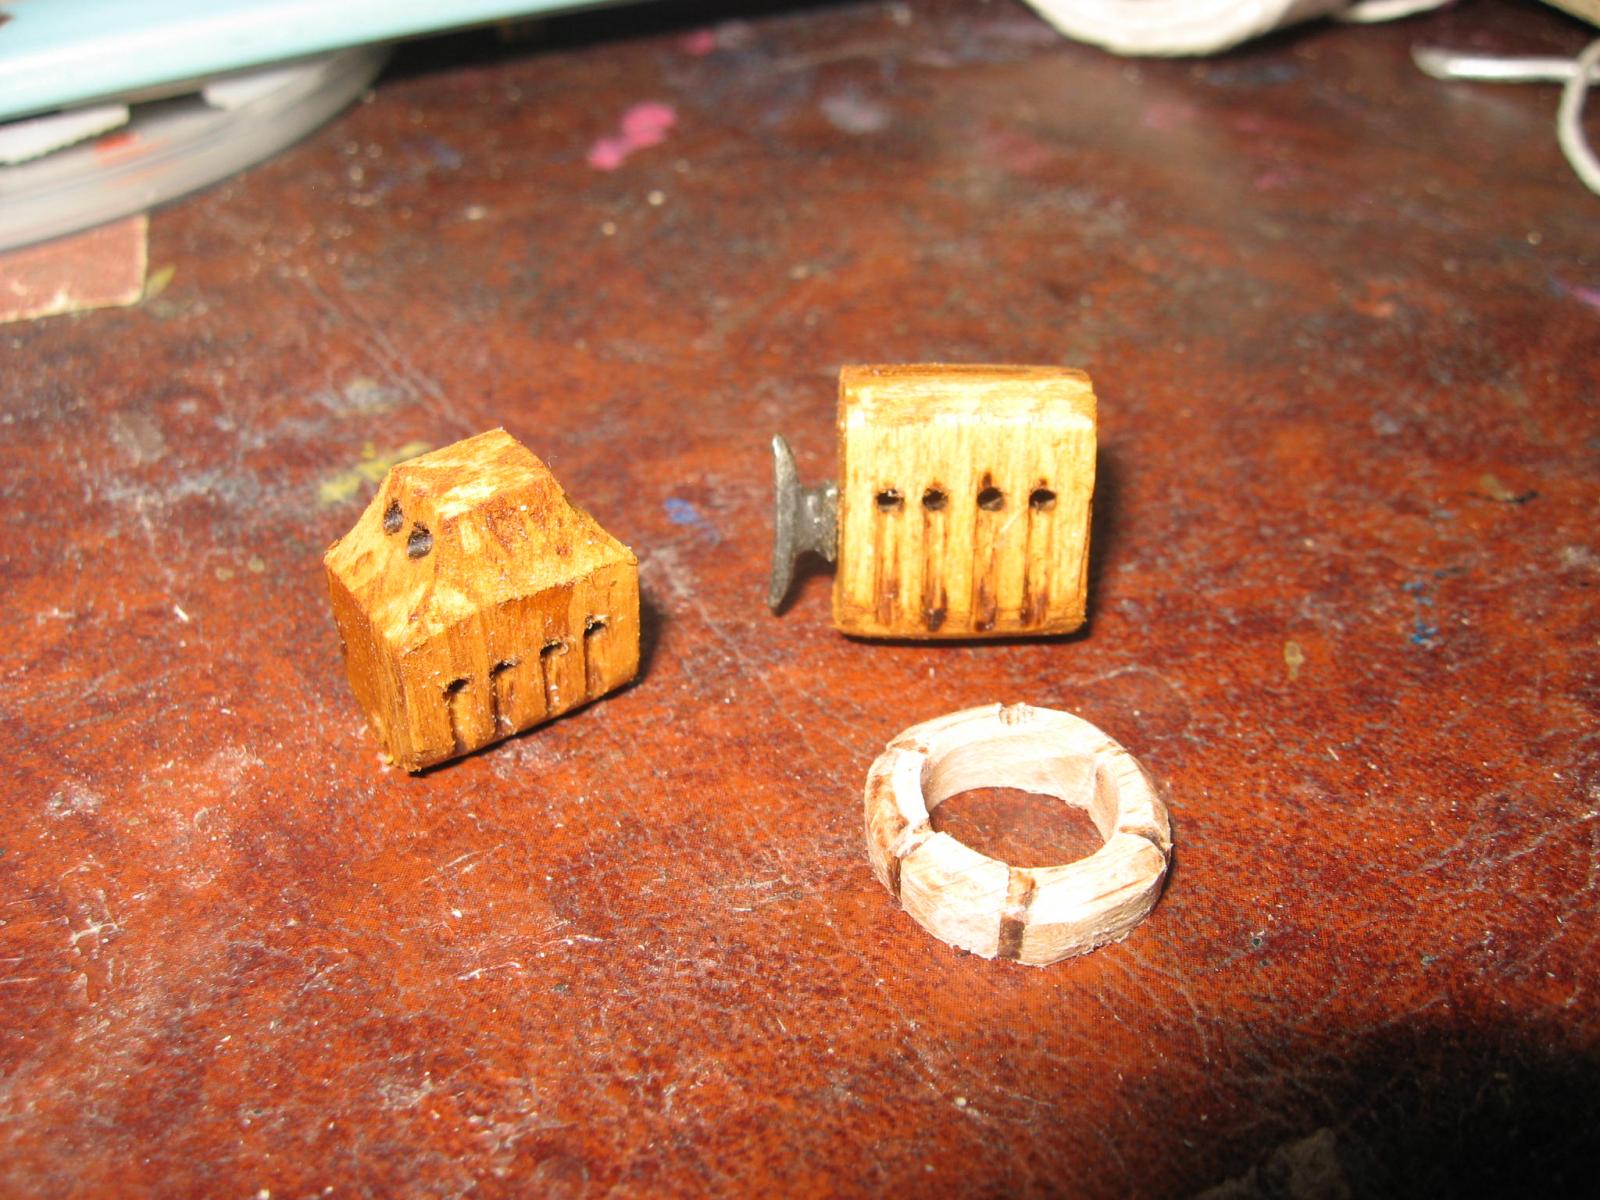
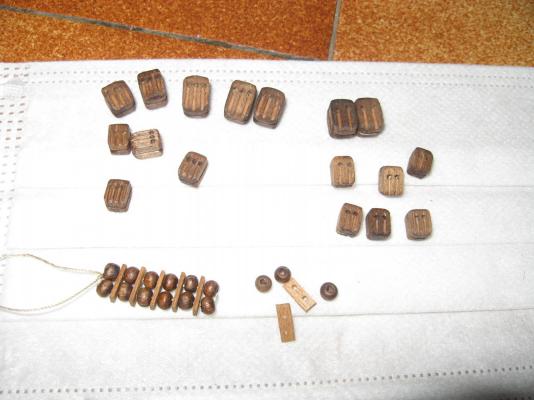
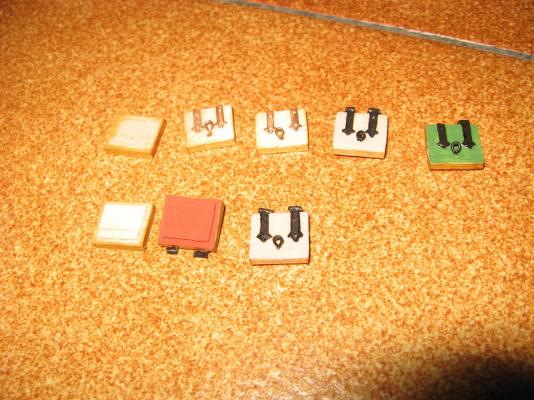
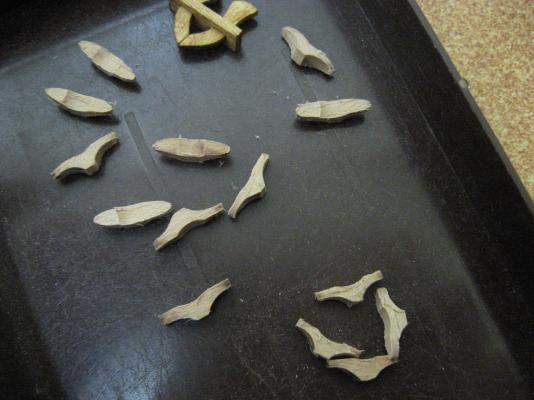
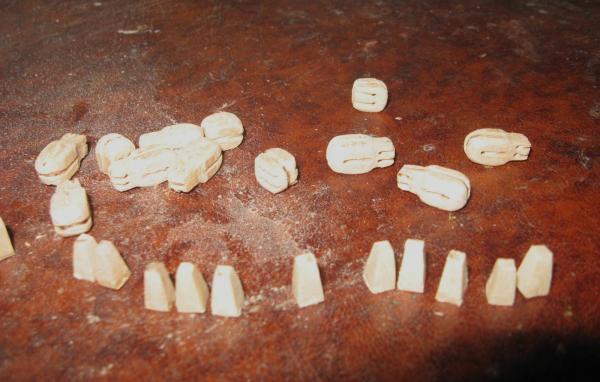
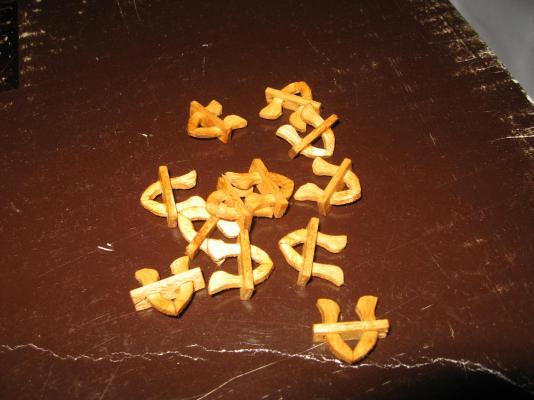
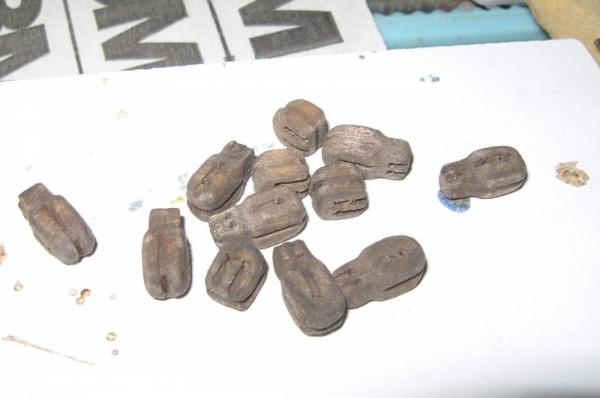
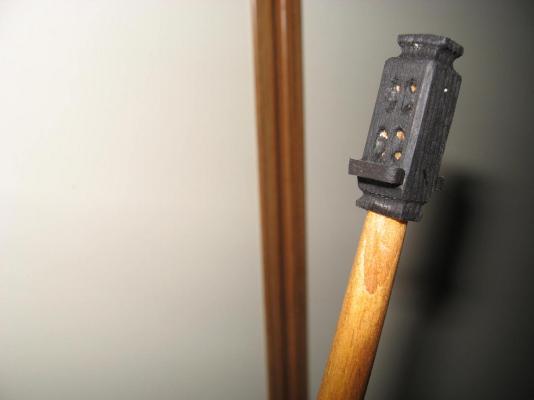
This week has been dedicated to the construction of accessories fo the deck. Specifically: "boring accessories"! I made 12 kevels, each composed by three pieces, as can be seen in the photos and later I painted them with light walnut colour; I made all the customised blocks needed for the standing rigging of the foremast (in the photos can be seen before and after the treating with dark walnut color). I made the "multiple blocks" (I don't know the english term ) for the halyard of the lateen sail of the foremast. I made 10 bitts for the bow section. I made minor accessories related to the main-mast, too. In addition I made all the holes needed for attaching to the ship the rigging of all the cannons. I finally installed the foremast and its "lantern" or "calcese" or....(it is called in many ways), painted black. So, really, it has been a very very boring week! But the pain it is still not ended. Before proceeding further I need to prepare and attach all the rigging of the cannons, otherwise I have no idea of the available space for placing the other "materials" on the deck. Unfortunately, working without a commercial drawing force me to give priority to some boring steps. So the next week will still be a boring one....


- 190 replies
-
- 10
-
-
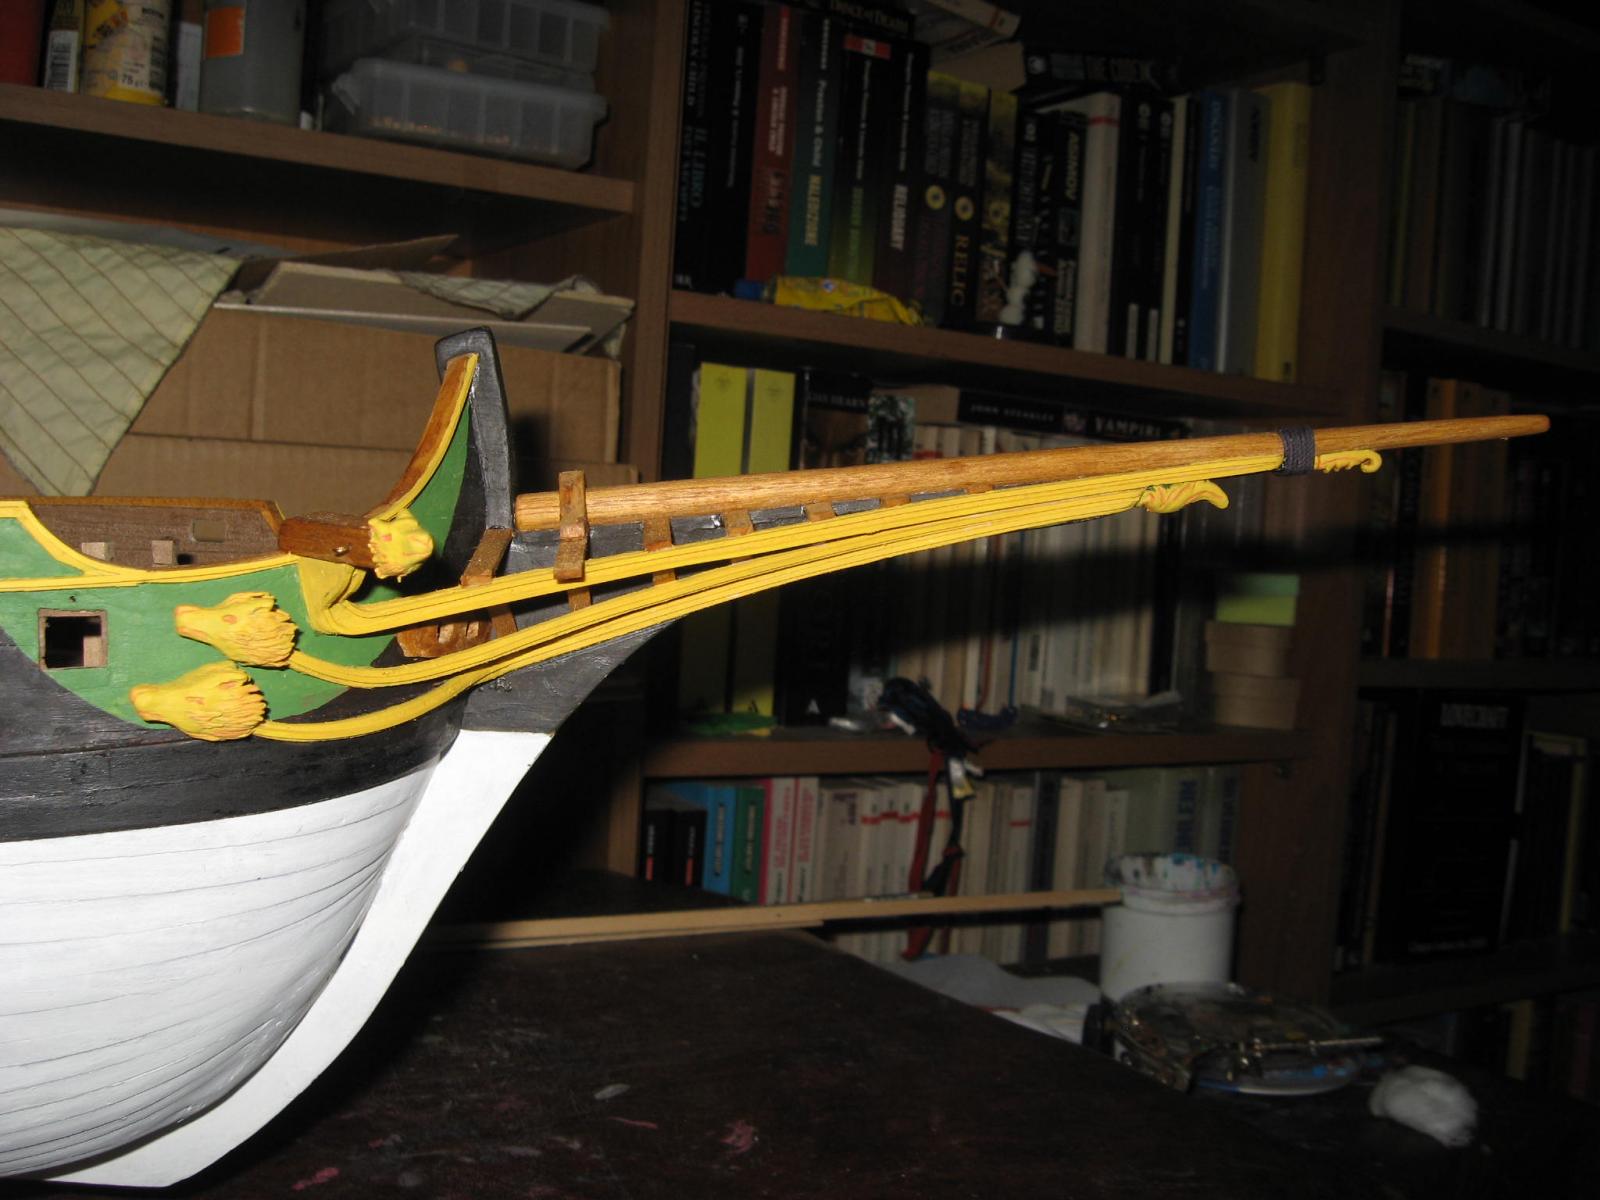
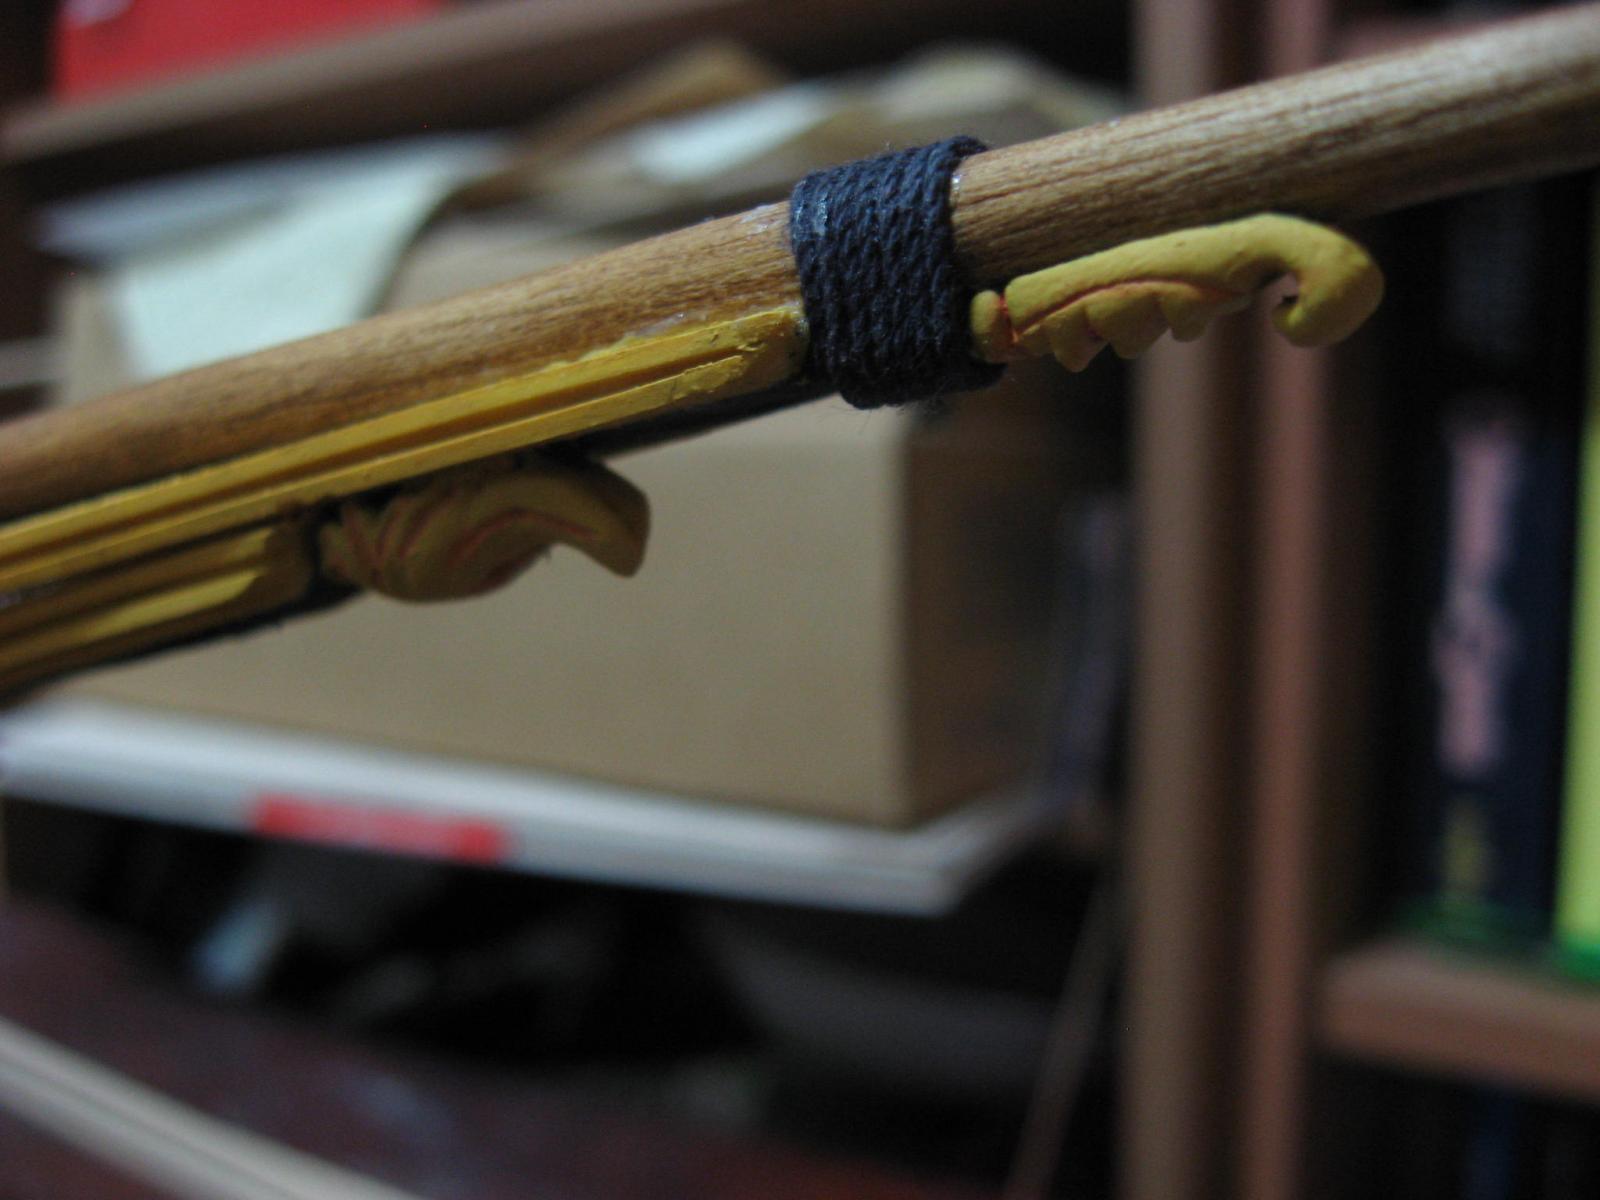
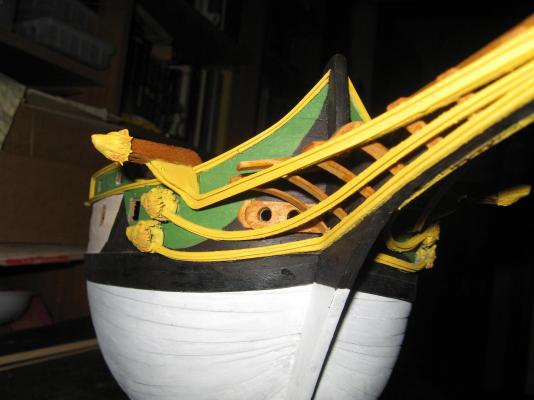
A substantial update: I finished the decorations and everything related to the bowsprit. It lacks some bits, rings, hooks and standing rigging of the bowsprit, but the most important part has been done. I finished the two wolf's heads of the catheads, and the two small decorations of the bowsprit. In that way I had the possibility to add the rope that secures the bowsprit to the bow (see related photo). Honestly I was rather bored of all these decorations... But at least 90% of the ship's decorations has done at the moment. Now before proceeding further i need to: -make at least 10 up to 12 customised kevels; -Make at least 8 customised double blocks (in italian, violin type) for the standing rigging of the foremast; -Make at least 10 bitts for the bow section of the ship. So a lot of "boring work" is waiting for me... This work is a "noisy work", so it will be difficult to proceed during the week, but mainly during week-end.


-
Thank you Mark, finding the right nautical term in english language is not always easy for me. I usually try to reduce everything to masts, bitts and sails but this time is not possible!