


jack.aubrey
-
Posts
1,268 -
Joined
-
Last visited
Content Type
Profiles
Forums
Gallery
Events
Posts posted by jack.aubrey
-
-
Tuesday January 10th, 2012
After a long pause due to Christmas holidays and some additional health problems, I resumed the work of the Soleil Royal and today I have something new to show you.
The work was focused on applying the second planking, chestnut and mahogany veneer. Now I reached a reasonable point on both sides and the most critical and boring area to plank, around the gun ports, is over.
Here below some images I shot today . .
01 P1070924.jpg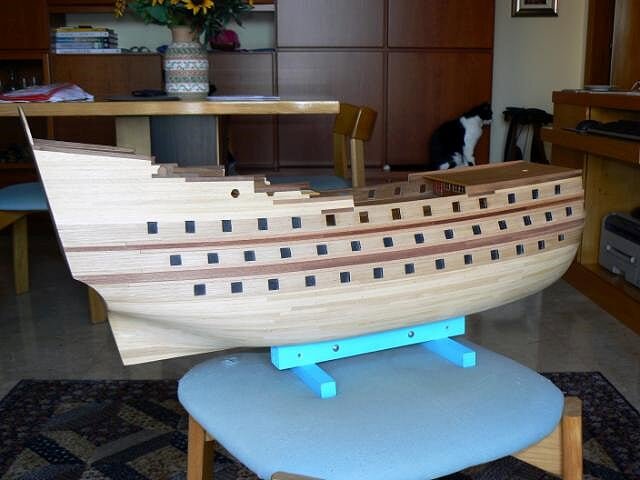
02 P1070926.jpg
03 P1070930.jpg
04 P1070931.jpg
05 P1070934.jpg
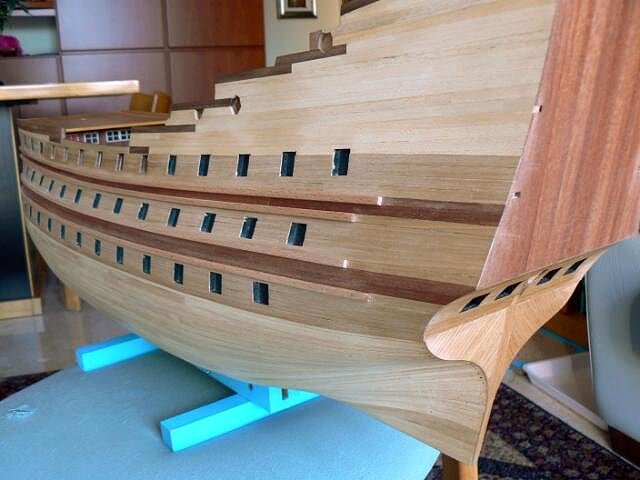
Now I can decide to continue upwards or to start planking downwards. To proceed downwards I need to install new wales. I will decide how to proceed but I'm thinking to continue downwards.
Cheers, Jack. -
Now there are many other elements to apply on the quarterdeck, both on the deck and inside of the bulwarks. Regarding the external side there are also new pieces to build and install.
In the latter case there are in particular to build and install the gunport lids.
The kit supplies metal frames where the lids can be fixed, but this is absolutely unrealistic, a genuine invention of the kit manufacturers to simplify the matter; this wasn't the way the gunports and the gunport lids were built.
So I decided since the beginning to avoid this "solution" and to "scratch build" them as they really were. It should not be a huge work, in total there are only 12 gunport lids to build. The quarterdeck has no lids. This is one advantage of a cross section model compared with the complete model . .
Having in mind the future activities, I will install them not so early. I'm defining a plan to put in the right sequence all the tasks needed to finish the hull; may be this job will remember me when I was employed as project manager . . . my preferred software of that period was Microsoft Project !
I take advantage of this message to insert new photos . .
01 Cross%20Section%20Santisima%20Trinidad/P1060016.jpg
02 Cross%20Section%20Santisima%20Trinidad/P1060017.jpg
03 Cross%20Section%20Santisima%20Trinidad/P1060018.jpg

Cheers. Jack. -
Saturday December 12th, 2009
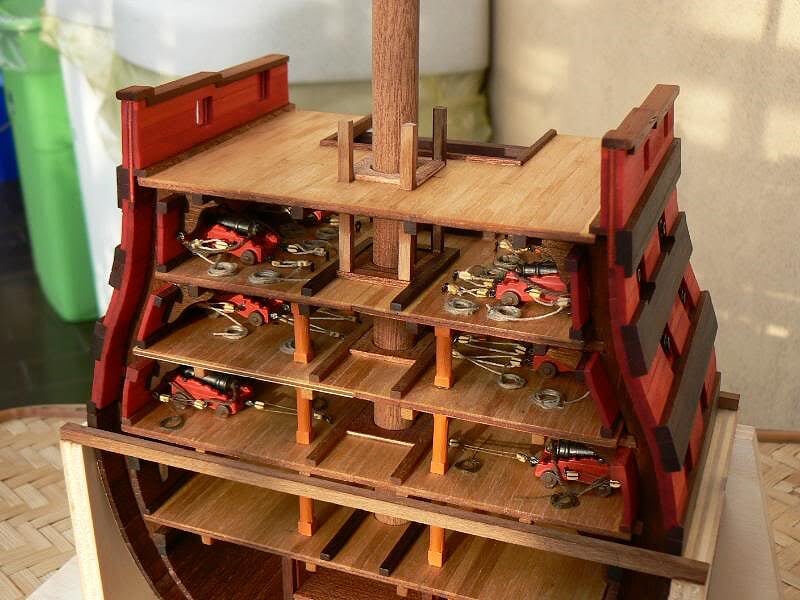
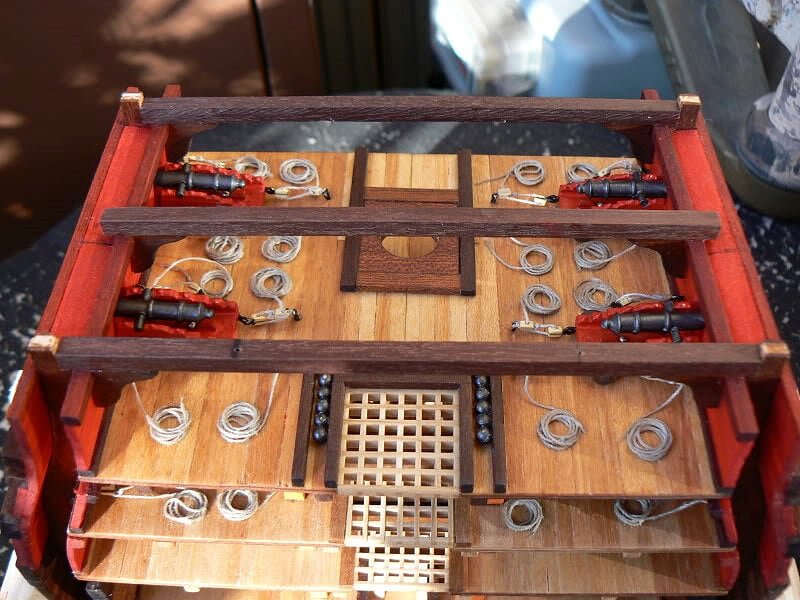
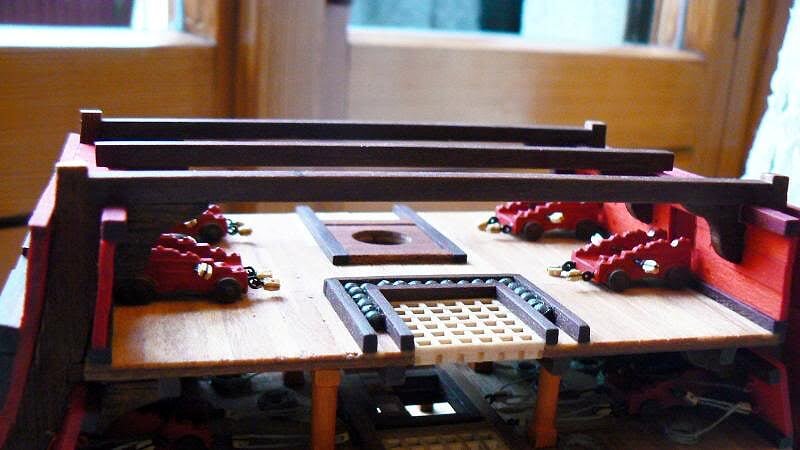
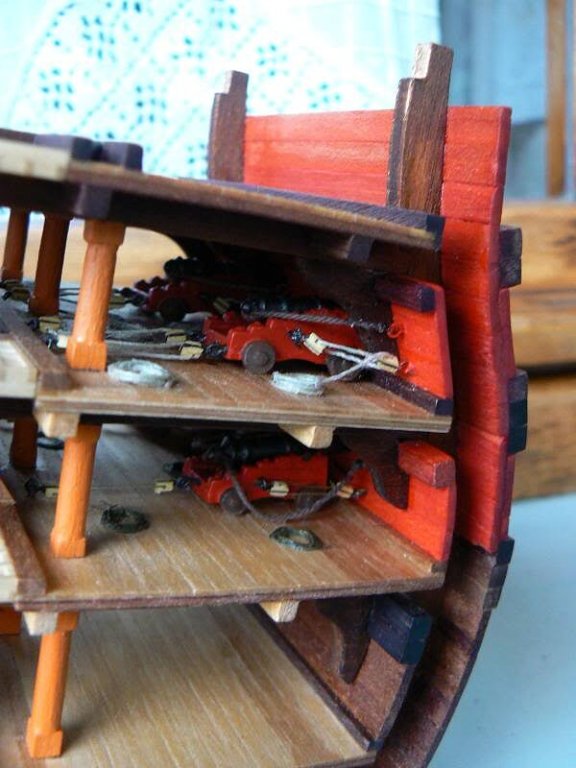
Finally I reached the roof ......After eight months of strong working (euphemistic term because honestly I never worked strongly) I finally installed the last deck of my cross section and I built over it the final bulwarks. Shortly, it is the same milestone as during building an house when you reach the roof level. In the images contained in this message you can view the relevant steps achieved in this last week.
The last deck, that will be fully visible, is now in place and the relative sides are finished, with four gunports and, over all, the gunwale. I am very satisfied of the work done during this week. The mast, or better the piece of wood that will become the main mast, is in place to check its proper positioning and it also sounds good.
An overall view of the fore side . . .
01 Cross%20Section%20Santisima%20Trinidad/P1060012.jpg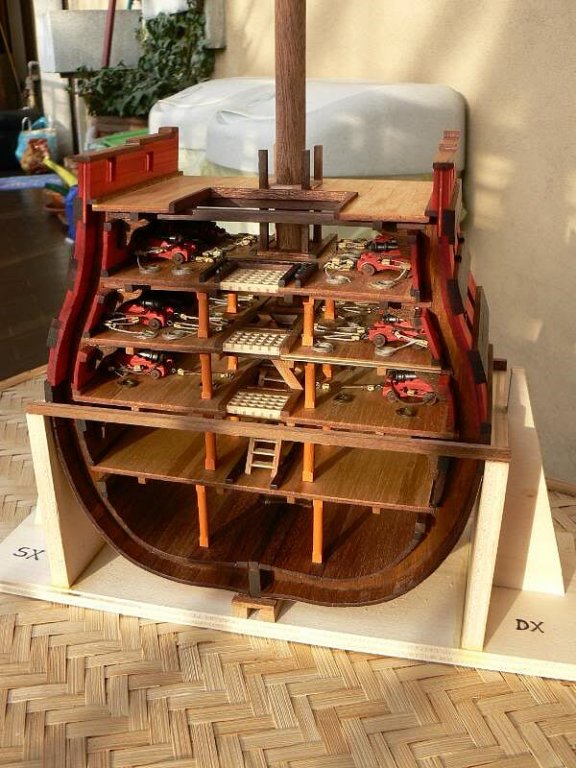
A close view of the quarterdeck . . .
02 Cross%20Section%20Santisima%20Trinidad/P1060013.jpg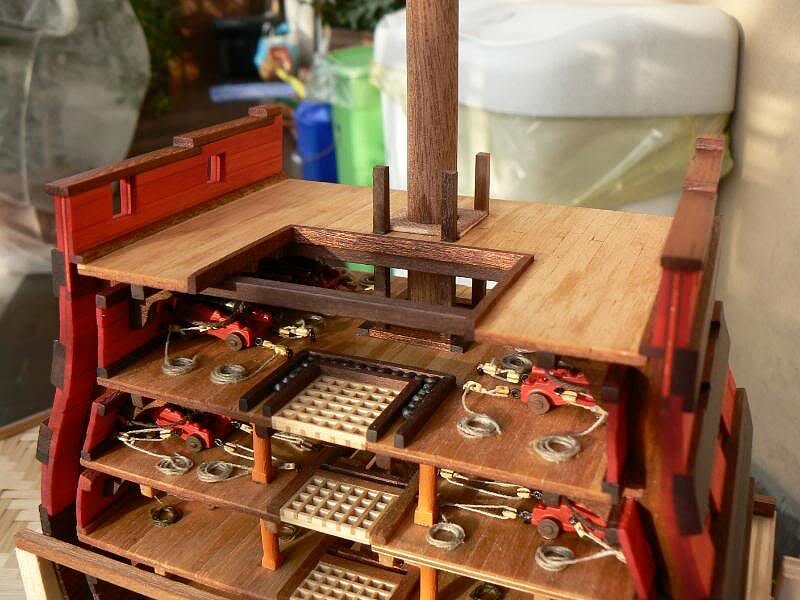
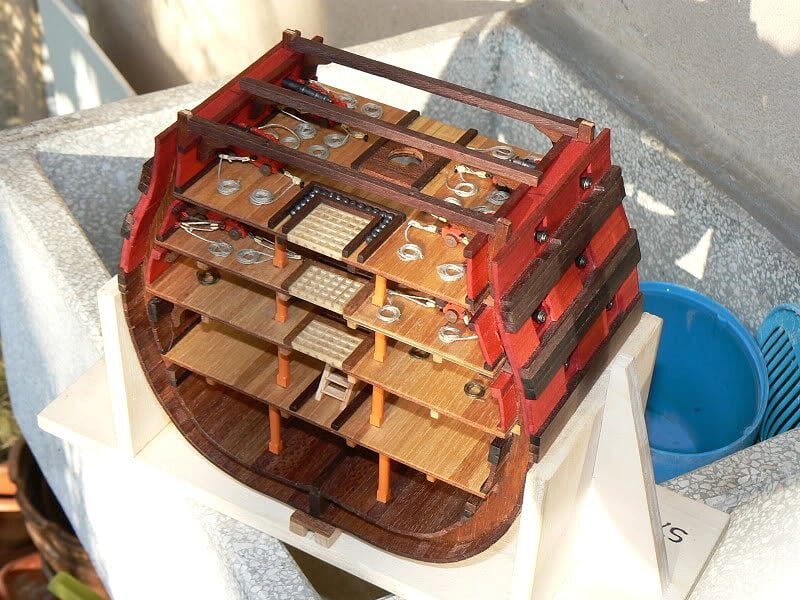
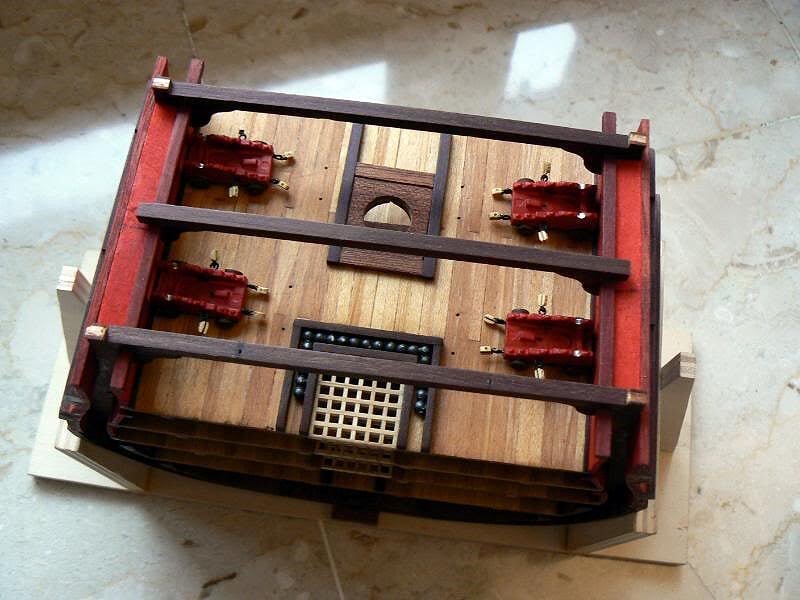
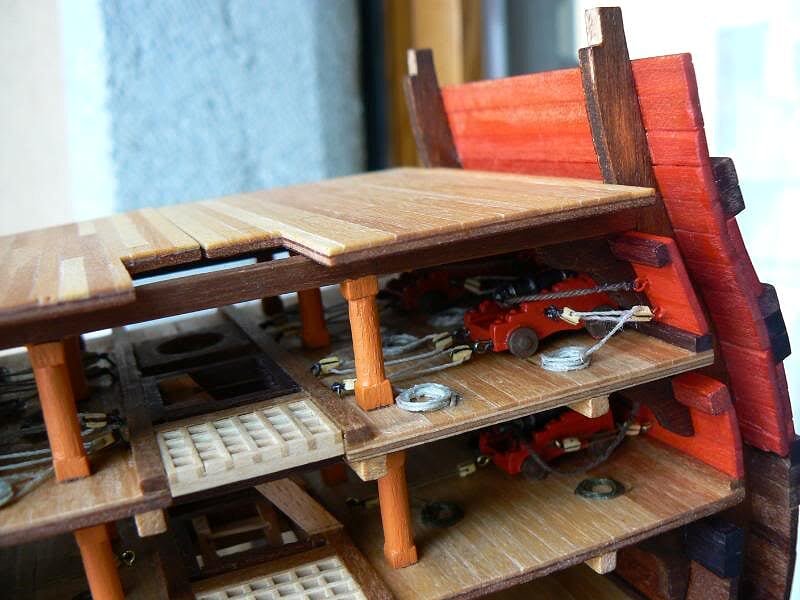
A couple of images showing all the wales . . here, again, I am very satisfied of the general looking . . .
03 Cross%20Section%20Santisima%20Trinidad/P1060014.jpg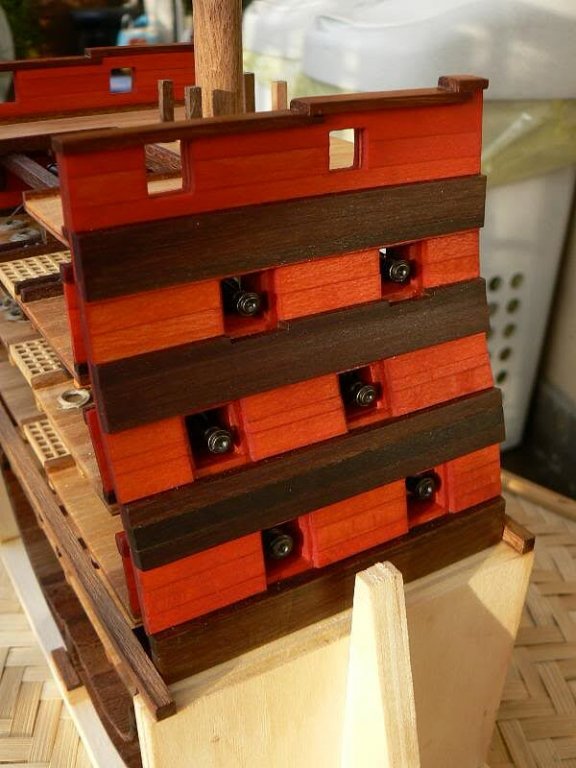
04 Cross%20Section%20Santisima%20Trinidad/P1060015.jpg
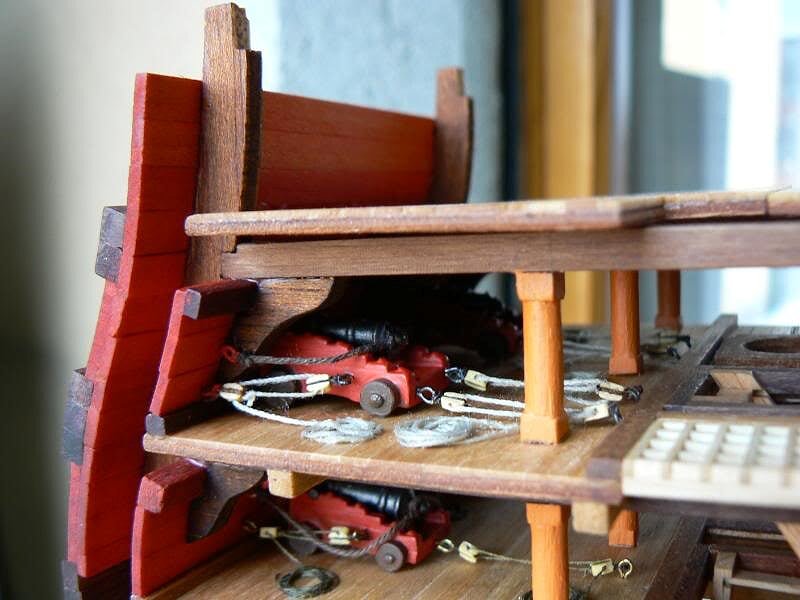
Finally an important consideration: until now for this model I haven't used either a milligram of paint or something similar (excluding the guns and their trucks). I used only oil for wood, the same I described in this topic on Friday May 8th, 2009. Additional images will follow. Kind regards, Jack.Aubrey. -
Saturday December 5th, 2009
Comparing with my previous message I have 90% finished the installation of the 18pdr (or 12pdr) guns of the upper gun deck. Only some small details are still missing. It may seem a small advancement but there is a lot of work to do around the guns. The remaining was then finished by Sunday afternoon and I spent some time to install the last deck.
Images of this step will come in the next message.
Here below the pictures of saturday status..
01 Cross%20Section%20Santisima%20Trinidad/P1060008.jpg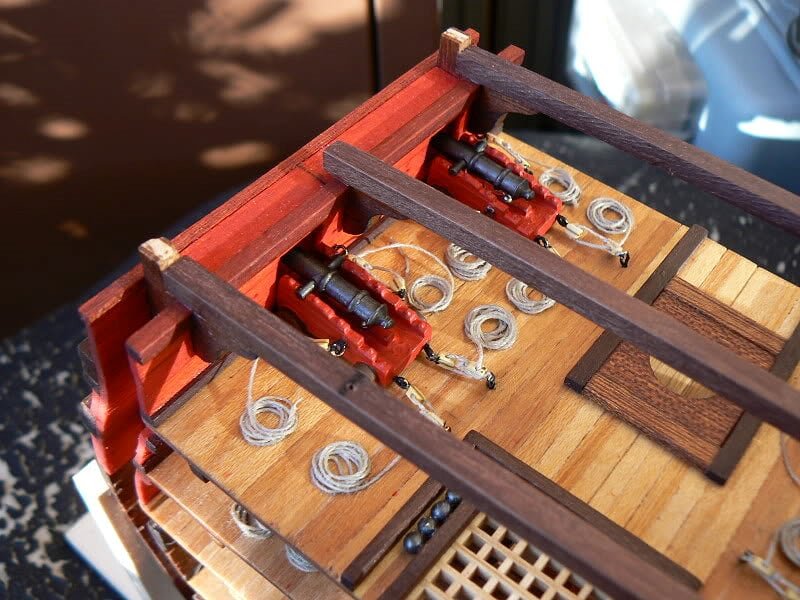
02 Cross%20Section%20Santisima%20Trinidad/P1060009.jpg
03 Cross%20Section%20Santisima%20Trinidad/P1060010.jpg
04 Cross%20Section%20Santisima%20Trinidad/P1060011.jpg
I had the opportunity to test the strength of the mounting of the gun over this deck . . very, very satisfactory.
PS: works for the workshop should be completed next monday. The inauguration is now near, at this point I believe will be done just before Christmas. Thinking positive, Jack.Aubrey -
Friday November 29th, 2009Three new images . .
01 Cross%20Section%20Santisima%20Trinidad/P1050965.jpg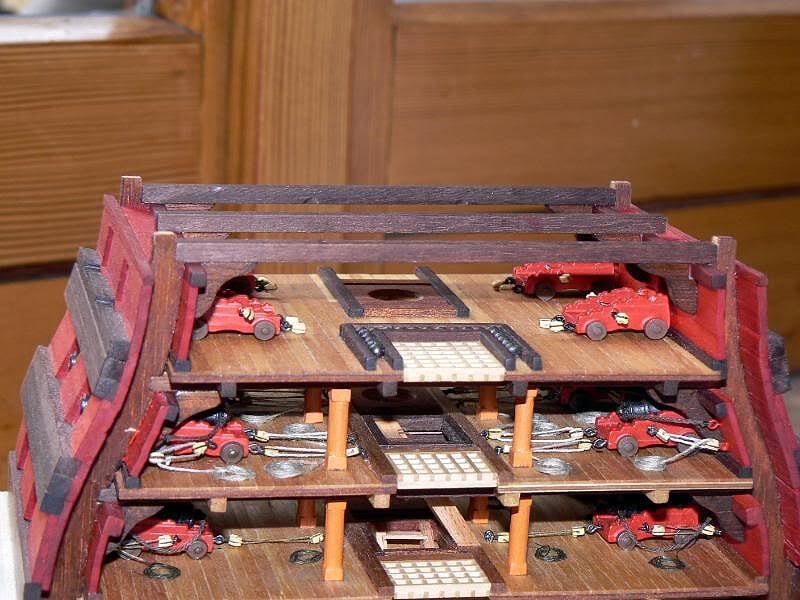
The last deck is now ready. Here it is only positioned.
02 Cross%20Section%20Santisima%20Trinidad/P1050966B.jpg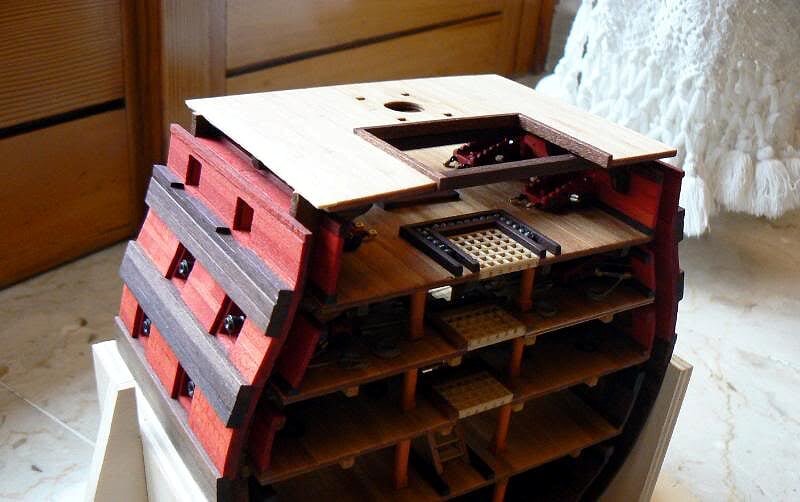
03 Cross%20Section%20Santisima%20Trinidad/P1050968.jpg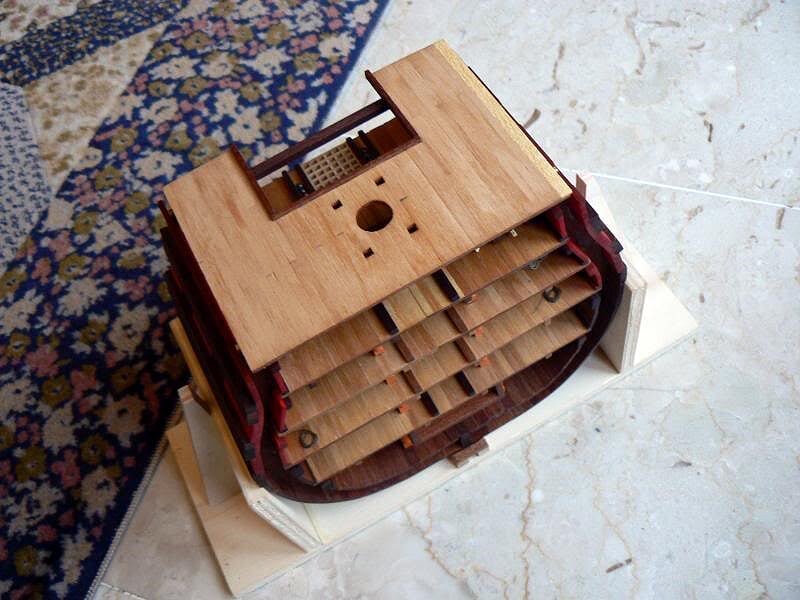
I'm confident to be able to show new things soon, but in this period my priority is the workshop. Cheers, Jack.Aubrey. -
Friday November 27th, 2009
Two months are past since my last message showing some progresses on the cross section. Few things were done since that message. During this period I was deeply involved in the restructuring of my workshop. Here below two images of the status of these works. Images are not the best but it's possible to understand what's happening.
01 Cross%20Section%20Santisima%20Trinidad/P1050972.jpg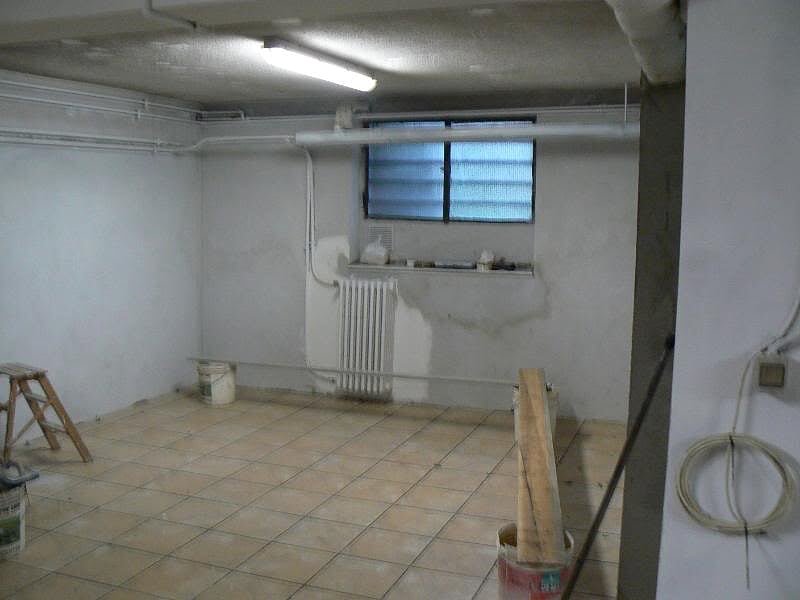
02 Cross%20Section%20Santisima%20Trinidad/P1050975.jpg

Anyway something was also done for my Santisima Trinidad section and this few things are worth to be shown.
Here you can see again the guns . . this happens at every deck. This time I used a new method to fix them on the deck. I have bored the trucks and the deck to insert a nail. Then I used the epoxy glue instead of the cyan. The combination of both is powerful.
03 Cross%20Section%20Santisima%20Trinidad/P1050962.jpg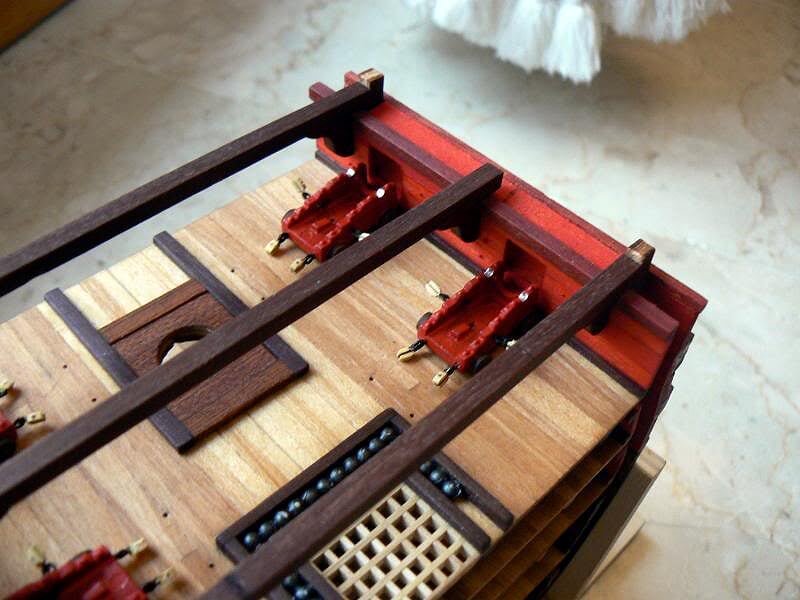
04 Cross%20Section%20Santisima%20Trinidad/P1050963.jpg
05 Cross%20Section%20Santisima%20Trinidad/P1050964B.jpg
See you next time, Jack.Aubrey -
in this day and age you would think that a kit supplier would provide you with the information required to place the whales, nearly every measurment on my build seam to revolve around them, . . really looking good
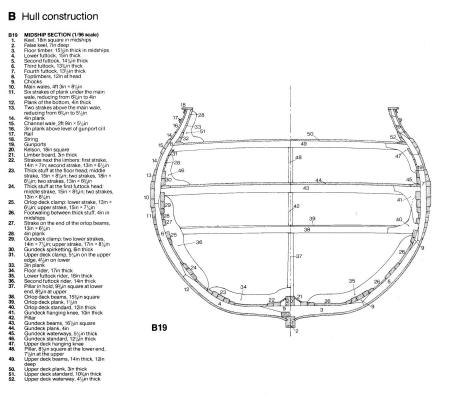
Hi Kevin, perhaps I don't understand well your message but it seems you don't have clear in mind what is a WALE (without H) on a ship of the line.
I attach an image, its title identifies the source, where you can have a visual explanation of the term WALE by looking at the elements from number 10 to 15.
May be I'm misinterpreting you, if its true I beg your pardon. Cheers, Jack.
-
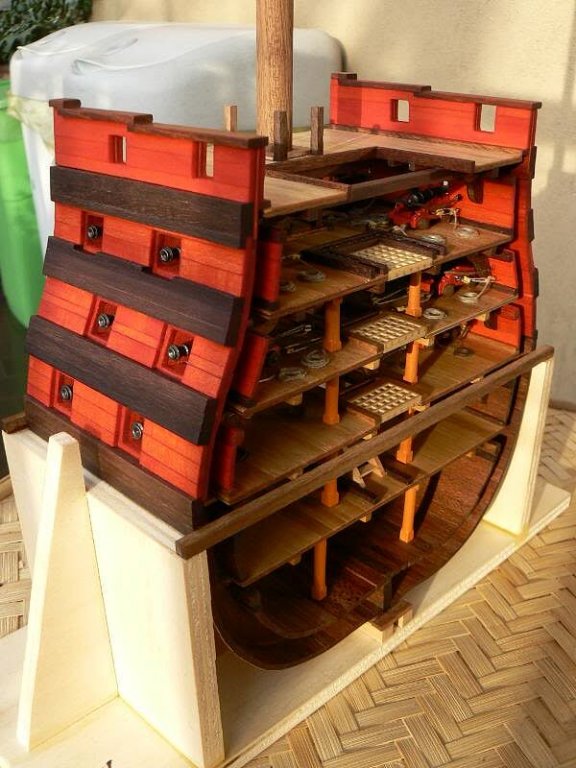
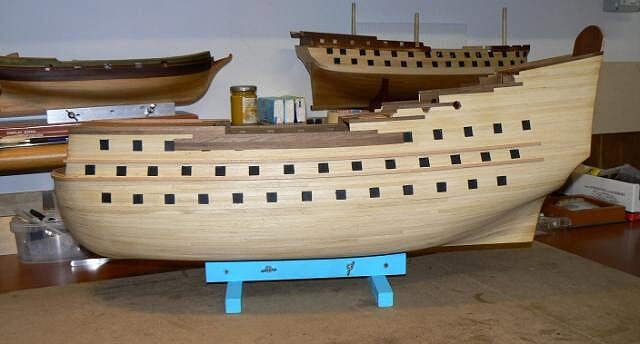
Sunday November 20th, 2011 - current status
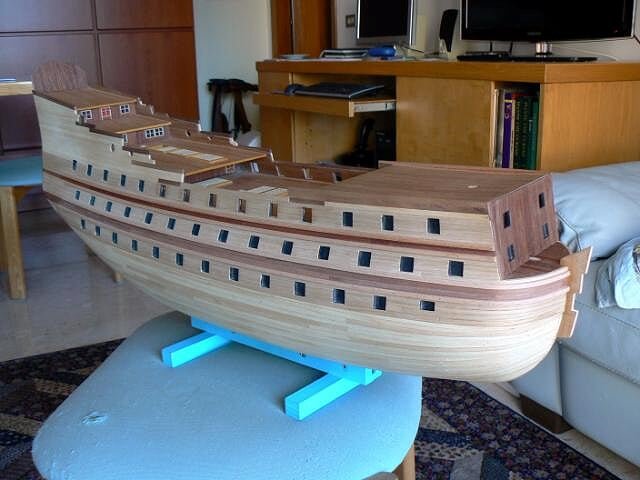
Two additional images, same date as the above message. In the background you can see two other models I have currently on build: the dutch privateer Dolphyn, from Corel and the spanish 74 guns ship San Juan Nepomuceno, later HMS San Juan, from Artesania Latina.
Sometime I will finish them too. . .
01 P1070914.jpg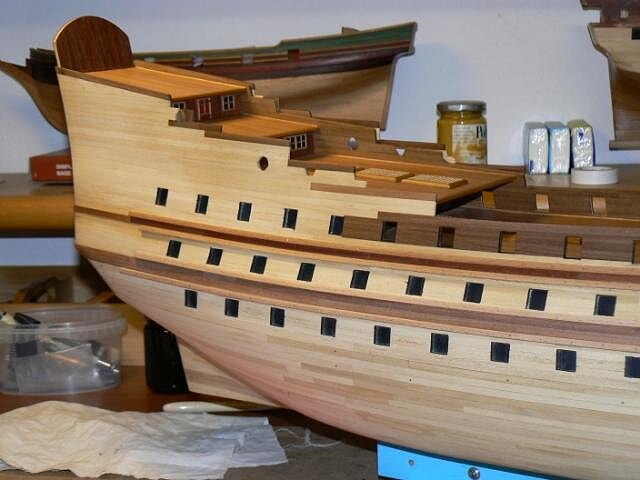
02 P1070915.jpg
-
Sunday November 20th, 2011 - current status
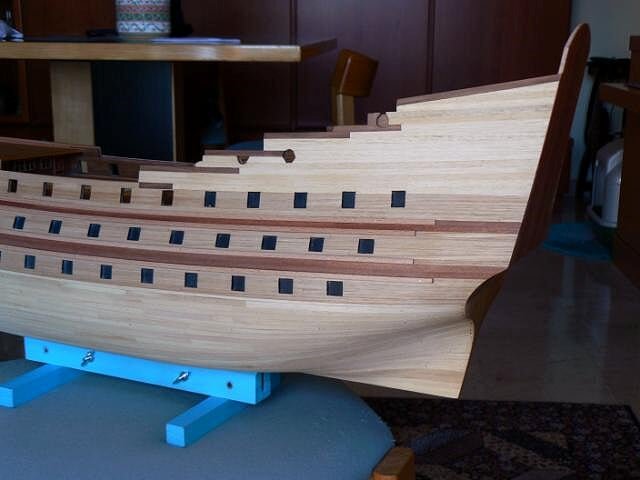
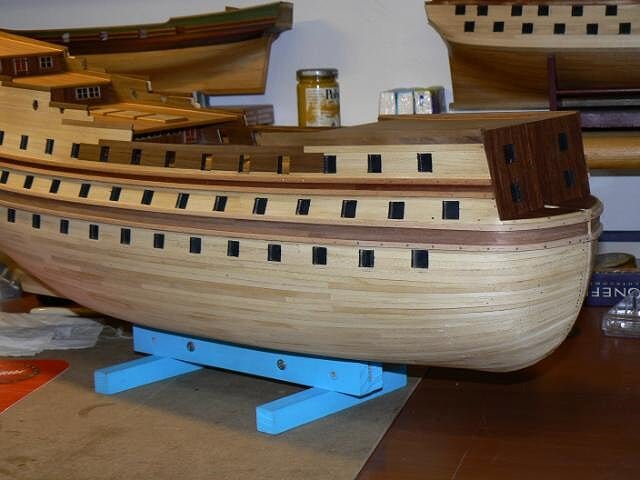
After a long period of absence due to health problems, I am back now to show something new. To be honest there are few new things, in september I started with renewed passion working on this model but then I had to face with my health. It is only today that I was able to take photos but what you can see here is the status by the end of september.
The health problems are now gone and I think optimistically to restart as soon as I will recover better.
Compared with the status of my previous message (19/9/2011) I added two new wales per side and I planked with mahogany veneer the area without gunports within the wales. Surely you can better understand looking at the images.
01 P1070911.jpg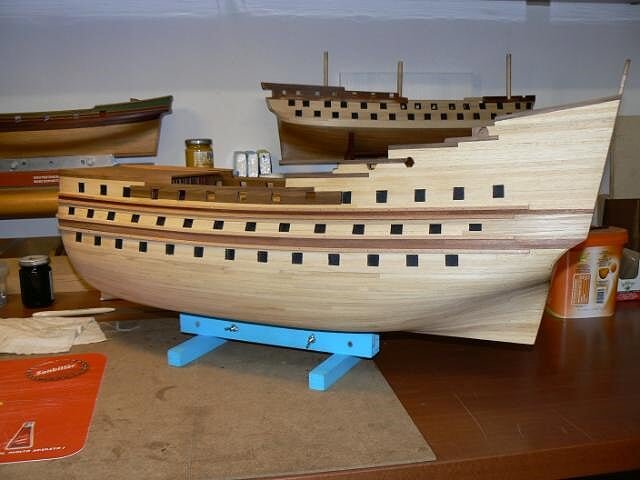
The differences in colour within the same woods are done by the oil I applied to see the difference before and after.
02 P1070913.jpg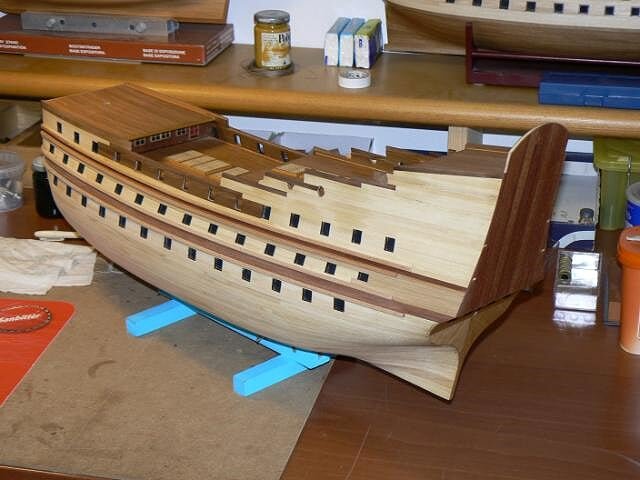
The headnails in the new wales are not yet removed and may appear out of scale if you look them at the high resolution images. but they will sound better after being smoothed.
03 P1070916.jpg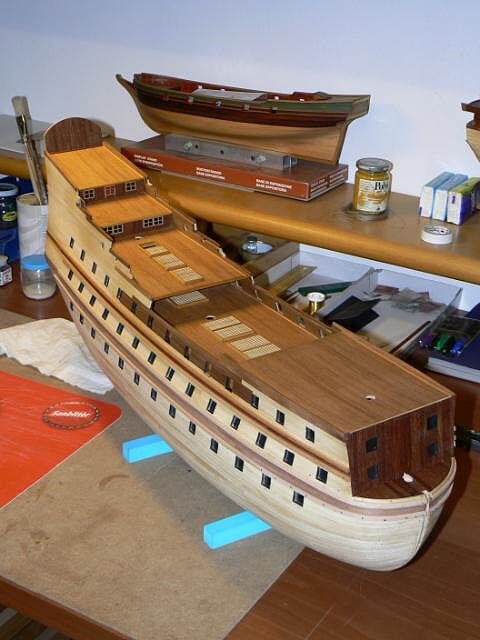
I also started to install the area where the gunports are with the chestnut veneer, but at this point my work was interrupted . . the few work done is shown here below.
04 P1070917.jpg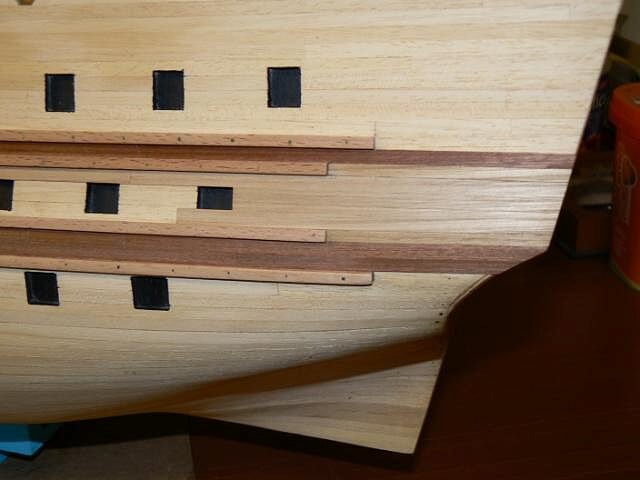
-
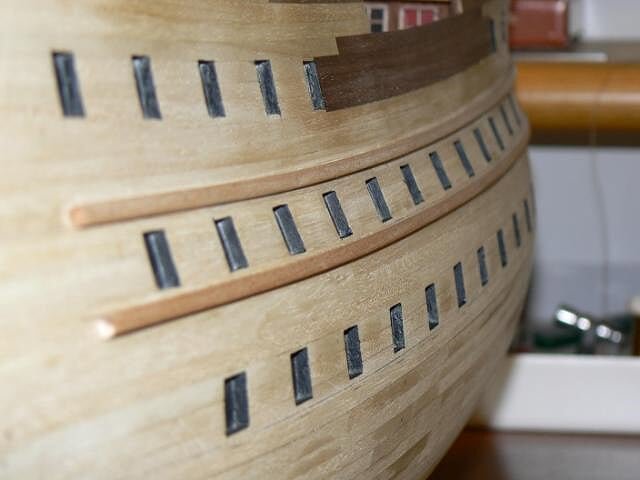
Monday, September 19th, 2011 - Wales
During this weekend I installed the wales I built some days ago with my table saw. The major problem for this task was to define the right position of the first wale to be installed.
This was not an easy task because De Agostini does not supply the kit with plans and the instructions do not show precisely the position of them. But I found a great help by looking at the SR plans from Mantua/Panart Models.
Using these mixed sources of informations I was able to reasonably determine the proper position of the first wale to install on each side.
The first wale, whoose position was defined by using this empiric method, was located above the gun ports of the intermediate deck. This wale was also easier to install because did not need to be curved at the bow. By the help of a masking tape I delimited the area where to fix the wale and I applied it with vynil glue, but helping the process by also using thin brass nails, with a very small head. To do so I bored in advance the wale before installation.
Once the glue was dry, the day after, I leveled the headnails with a file, leaving the remaining piece of the nails in place.
Image 01 here below shows in detail the result.
01 P1070797.jpg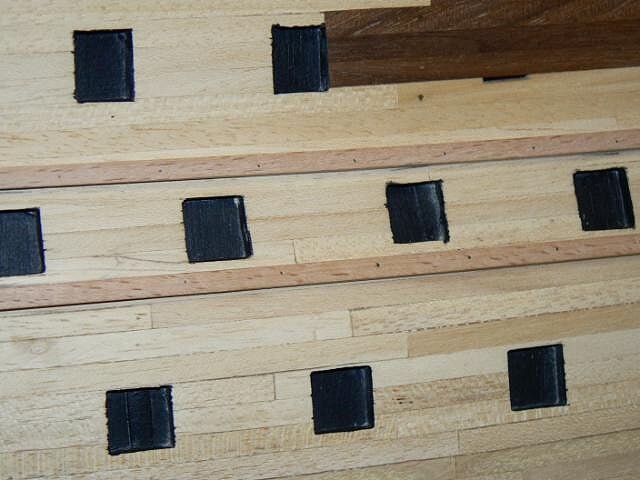
Later I have installed the wales below the intermediate deck gunports. The process was the same and to apply them parallel to the first ones I used some spacers applied properly with a double adhesive tape.
Another problem was that these wales had to be curved at the bow but this was not a real problem. I soaked the wood in hot water for half a hour and this was enough . . thanks also to the beechwood that is particularly recommended in this situation.
Next three images show the first two wales on a side definitely applied to the hull.
02 P1070792.jpg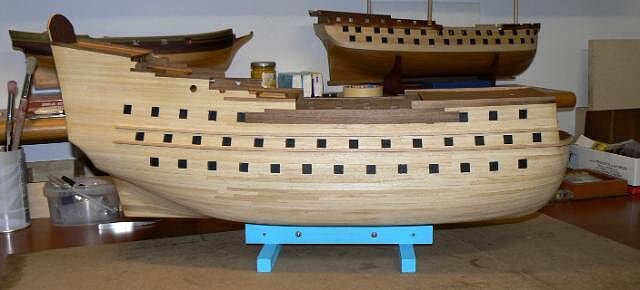
03 P1070793.jpg
04 P1070800.jpg
Kind regards, Jack. -
well done, can i come to yours - so as to show me how to use my PROXXON saw table
My table saw is the Proxxon FET: I made some experiences and the first lesson I learnt was that for every cut you have to select the right blade. As you can see from the link here below this saw can mount some different blades:
http://www.proxxon.com/eng/html/27070.php
But it may also use all the blades available for the smaller model, KS230, described here below:
http://www.proxxon.com/eng/html/27006.php
They have a smaller diameter and can be used for other applications. Another point to know for usages with different blades is the need of many sawing cap covers adapted for cutting very small parts. When you buy the saw you have only two of them but you should find to obtain more. I wasn't able to find them here in Italy so I built some of them using as template the one supplied and making them with (high quality) ply wood. Another alternative may be a metal such as aluminium or some kind of plastic.
Anyway, for learning to use it well the only way is to use it several times . . (and after having read the user's guide to become confident with the tool).
But be careful to your fingers, because the saw blade protection supplied can be used in very limited applications for a ship modeler, in the mayority of the cases I experienced it is near to impossible to use it.
Regards, Jack.
-
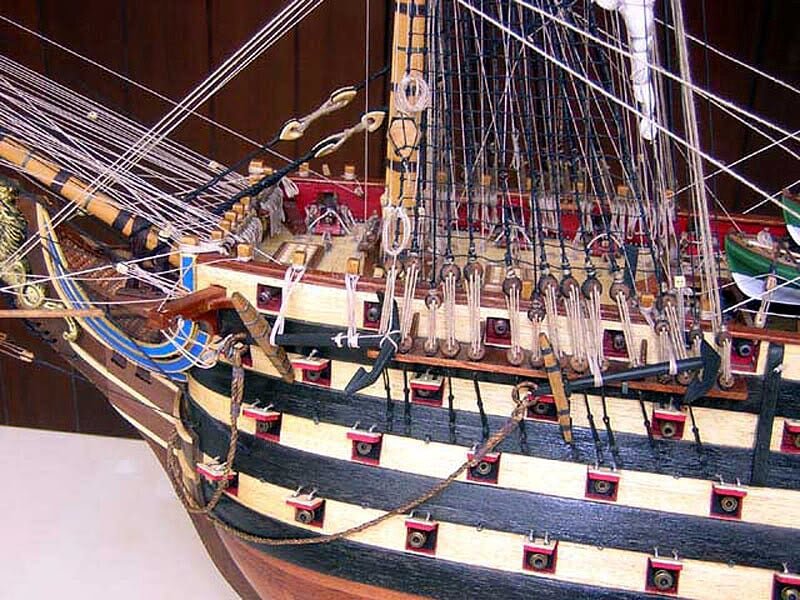
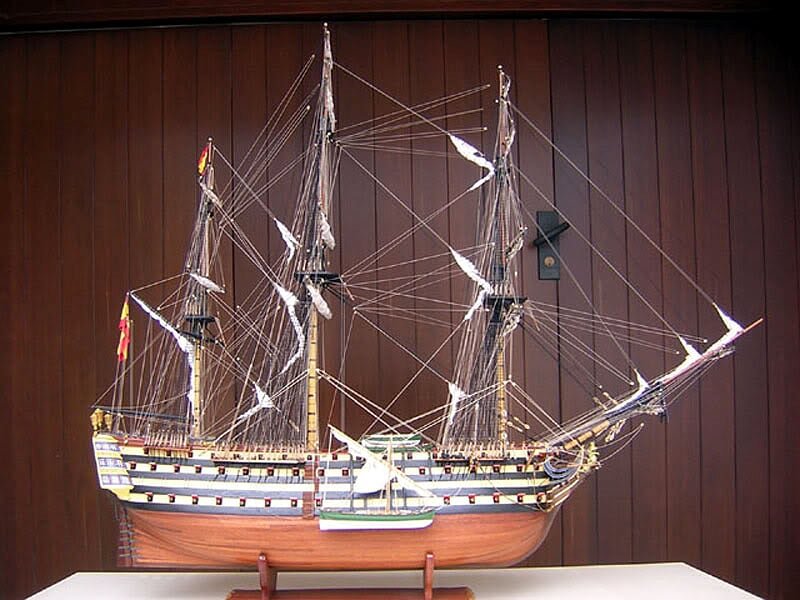
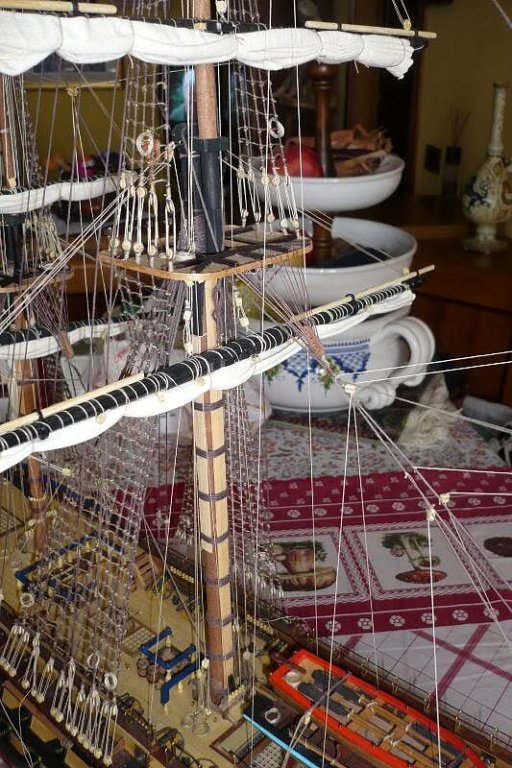
I publish here below the last five images of this beautiful model, with some highlights of the pinnace (or longboat) and, in the last image, a detail of the bow.
01 11L.jpg
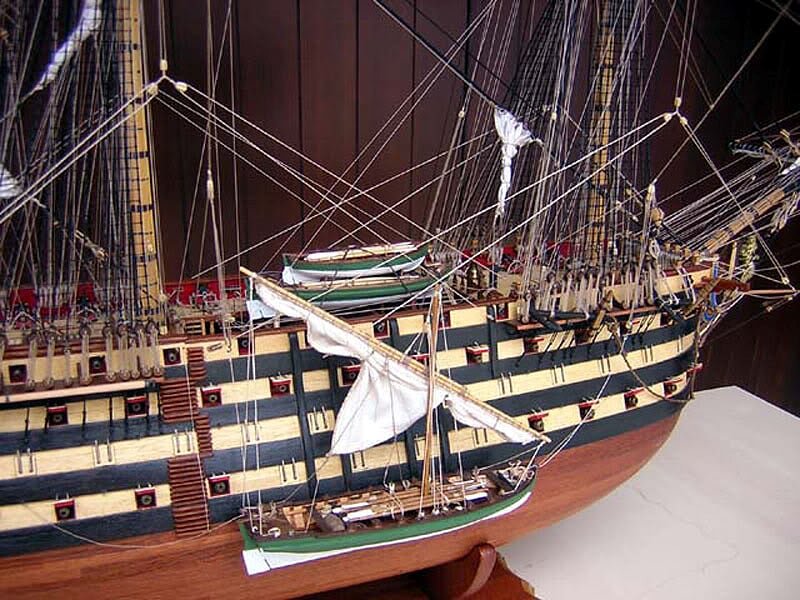
02 12L.jpg

03 13L.jpg
04 14L.jpg

05 15L.jpg
 The builder of this model is Andrea Manera, a italian modeler who lives in a city near Milan.I have to admit that Andrea is a GREAT modeler and this work requires a VERY GREAT recognition to its author.Cheers, Jack.Aubrey
 -
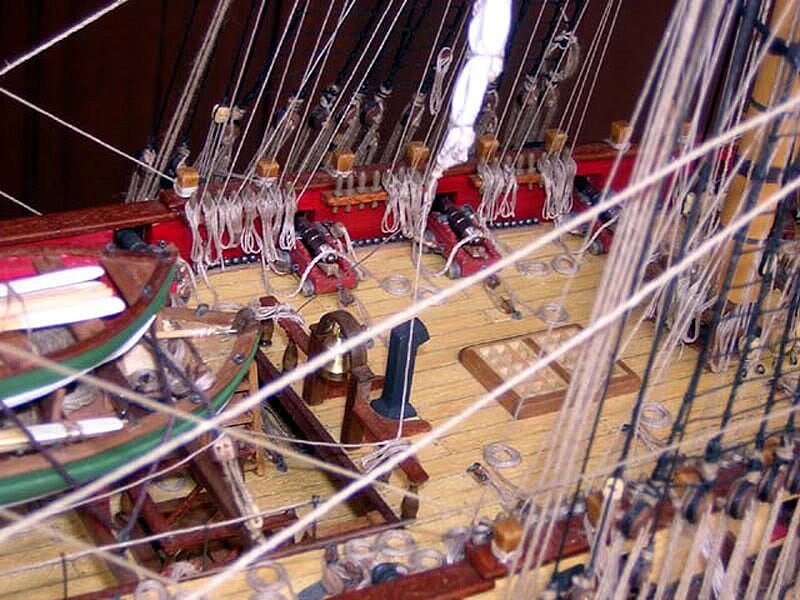
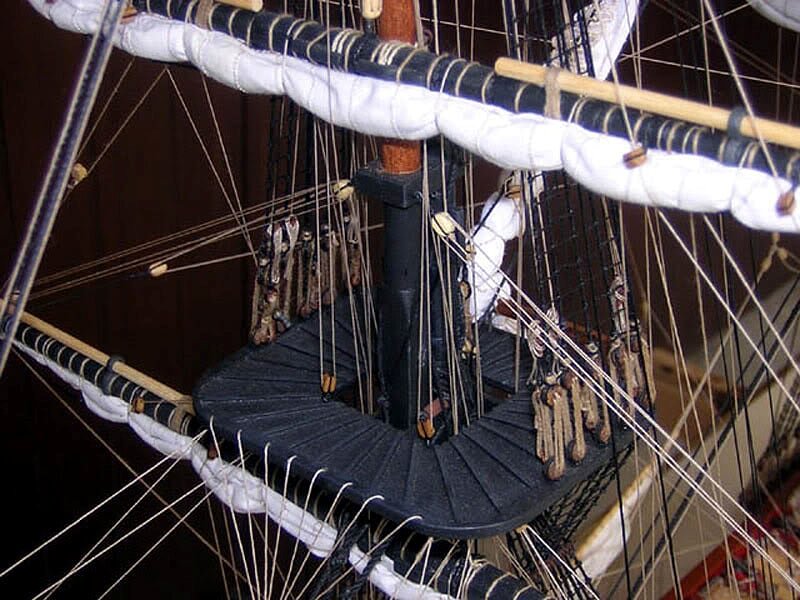
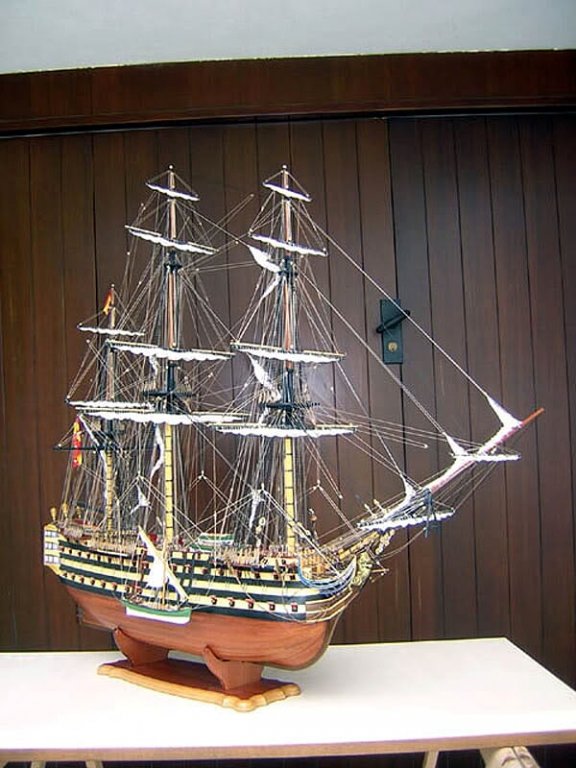
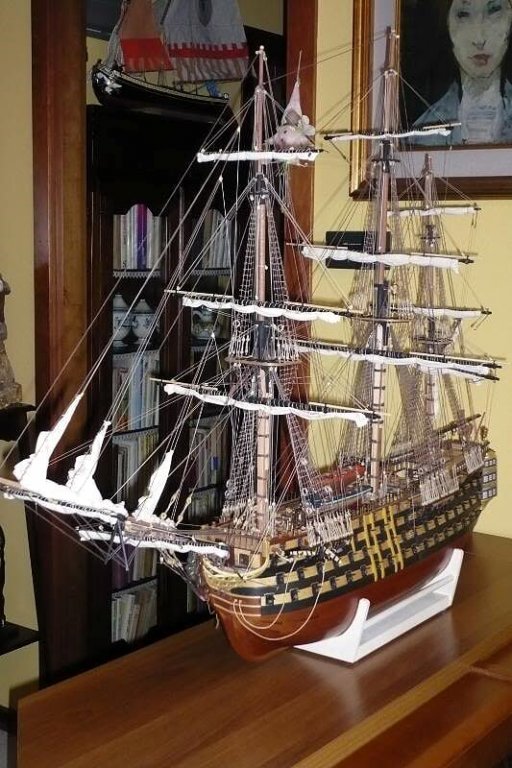
Five other images of my friend model . .
01 06L.jpg
02 07L.jpg
03 08L.jpg
04 09L.jpg
05 10L.jpg
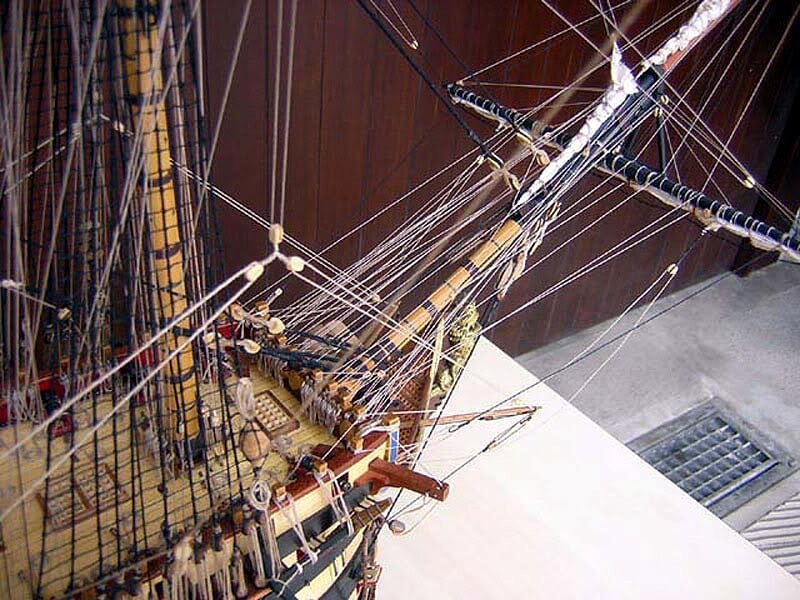
To be continued . . . Jack.Aubrey
-
November 22nd, 2009
It is some weeks I have other things to do and I was not able to work of the cross section regularly. So I have nothing to show and write about this model. The main part of the time I didn't spent on shipmodeling was related to the activities to setup my long awaited workshop. Let's say a "WORKSHOP in capital letters: it measures 4,5 x 3,5 meters, with all the comforts needed and not needed such as heating, daylight and artificial light, privacy, space, bath, beer, music and more . . launch planned just before Christmas, fully operational from mid January.
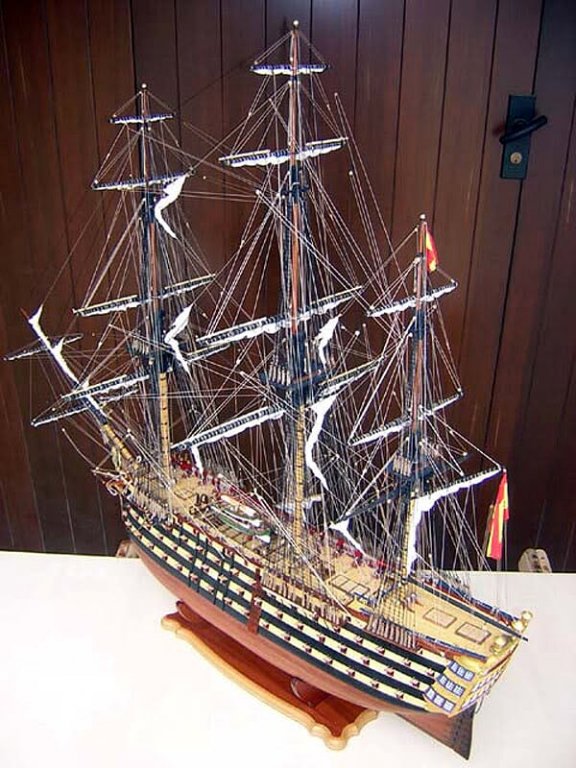
So, I have nothing to show, but I thought to honour a ship modeler friend that has finished some weeks ago this huge spanish vessel starting from the same De Agostini kit.
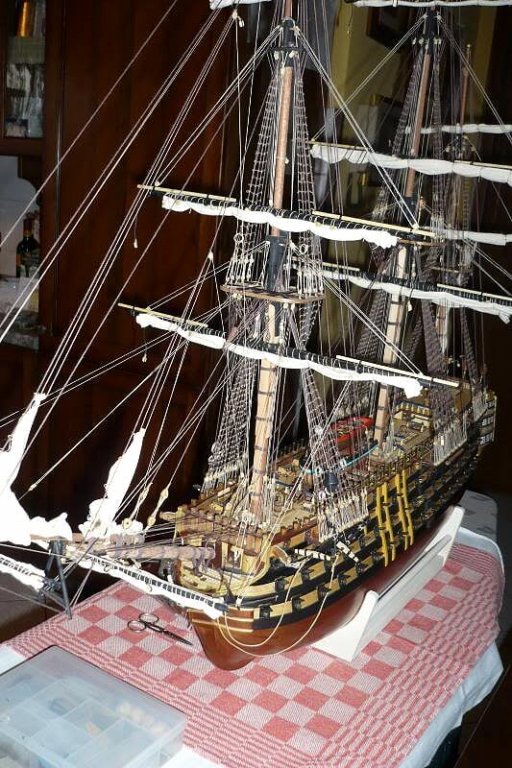
These images demonstrate that it is possible to build high quality models starting from kits: what is important is to have the right talent and skill, to read up and find the maximum informations about the model and find and implement the right enhancements that may be identified for the model. And this is what has been done with this model, in particular way for masting and rigging, taking documentation from important books such as "Historic Ship Models" by Wolfram zu Mondfeld or "Rigging Period Ship Models" by Lennarth Petersson.
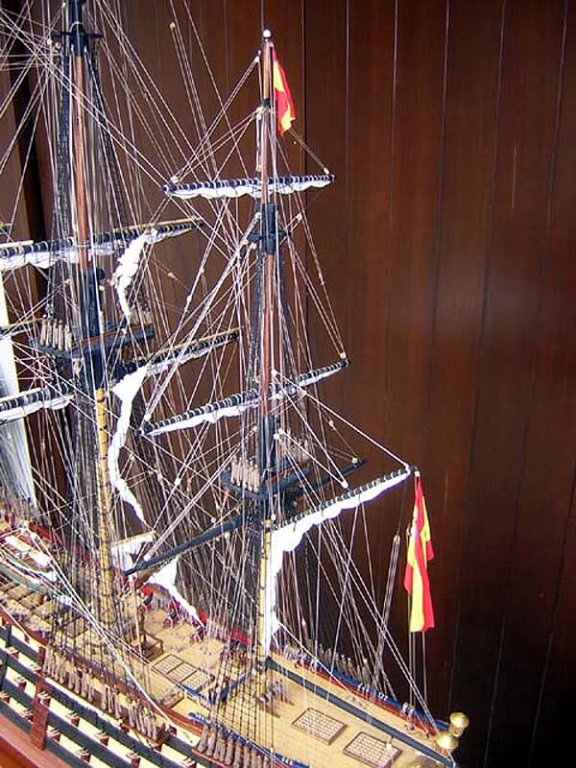
The result is here below, the rigging is particularly highlighted in these images by the dark background.
01 01L.jpg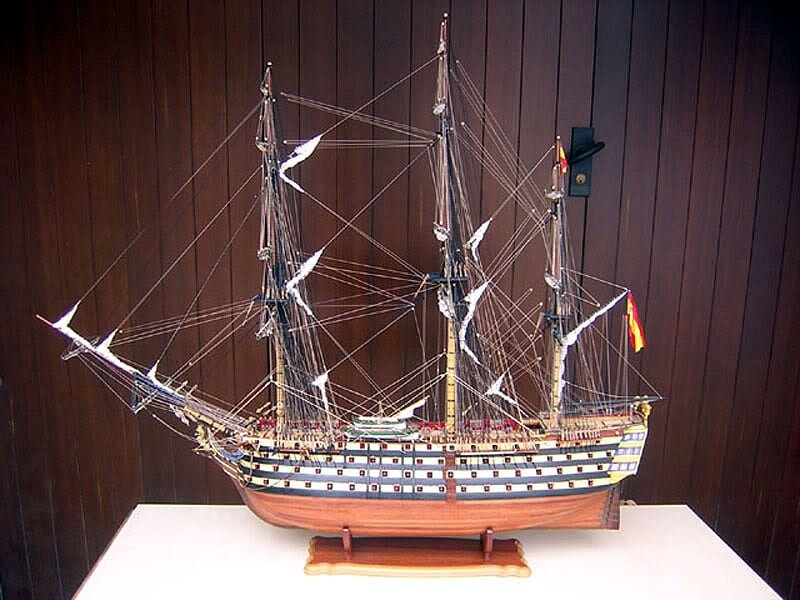
02 02L.jpg
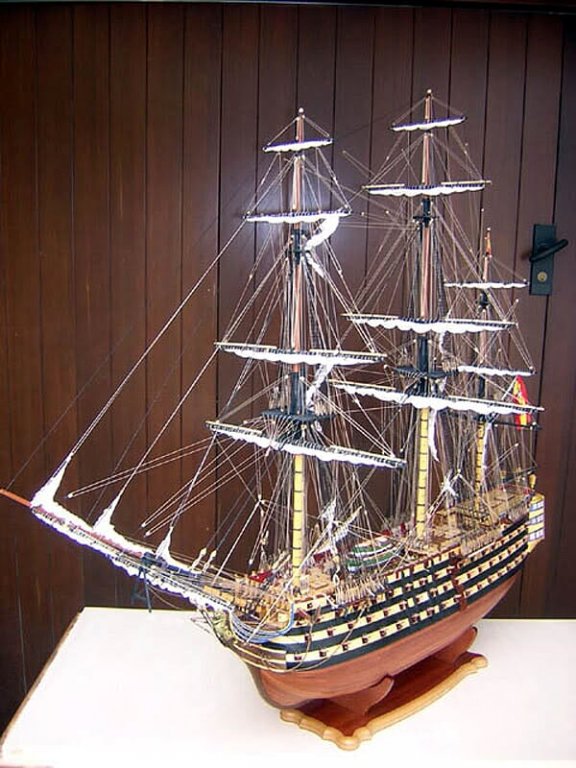
03 03L.jpg
04 04L.jpg
05 05L.jpg
-
September 15th, 2011 - WalesThis morning I went to a couple of hobby model shops looking for "long" strips of walnut (or similar) of 3 x 4mm to be used for the wales instead of the strips supplied with the kit, 2 x 4mm, that are only 25cm long.The additional millimeter I'm looking for can be explained by the fact that I want to install the wales directly over the first planking, and the chestnut strips of the second planking will reduce this by half a millimeter. By this way the wales will bend out of +/- 2,5mm.Unfortunately I did not find was I was looking for, so this afternoon I decided to do them by myself using my circular saw from PROXXON and a table of beechwood I had in my stock of wood. The maximum length of these "home made" wales is +/- 80cm.The cutting of these wales was a very interesting experience. I had the opportunity to practice with the circular saw for several hours, learning many new tricks and methods and also changing the blades, a kind of operation I never did.And also the reult was for me fantastic: probably it may be the luck of the beginner but I obtained simply perfect wales . . . Very satisfatory experience !I had some wasted wood, and especially I had a lot of sawdust. Instead of discarding the sawdust, I collected it for future use and, with the wasted wood, I made other strips of various sizes that probably will become useful for the future. Then I needed to clean my workshop with a vacuum cleaner. . three hurrah for the inventor of the vacuum cleaner . . cheeers, Jack.Aubrey.
-
And now let's discuss about the following: how to proceed with the second planking on both sides of the hull. I'll try to explain better.The instructions from the kit manufacturer suggest to install first the mahogany strip and to plank all the hull, then to refine and level the planks and finally to install the wales, using walnut strips 2 x 4mm, over this second planking, in the right position.On each side of the hull, from the waterline to the top, wales should be installed as follows:
- - 2 wales below the gunports of the lower gun deck;
- - 1 wale over the gunports of the lower gun deck;
- - 1 wale below the gunports of the intermediate deck;
- - 1 wale over the gunports of the intermediate deck;
- - 1 wale below the gunports of the upper deck;
- - 1 wale over the gunports of the upper deck. This last wale seems to be smaller than the other listed before, but I have not yet received the issues where this is explained.
My plan is to change this process and proceed in the following way:- - install the wales of 1) to 5) using strips 3 x 4mm and, perhaps for 1) 3 x 5 directly of the first planking;
- - install chestnut veneer strips between the wales that contain the gun ports;
- - install mahogany strips between the wales where there are not the gun ports;
- - the remaining parts of the hull will be planked with chestnut;
- - the keel will be, when installed, of mahogany instead of stained plywood. The latter is the material supplied for the keel by De Agostini.
After this complex script, I recognize that probably someone may not understand what I have in mind, If you have any question, please do not hesitate to write.Regards, Jack. - - 2 wales below the gunports of the lower gun deck;
-
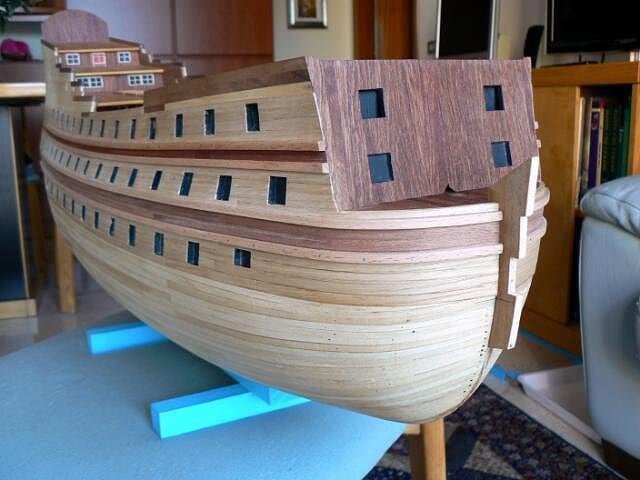
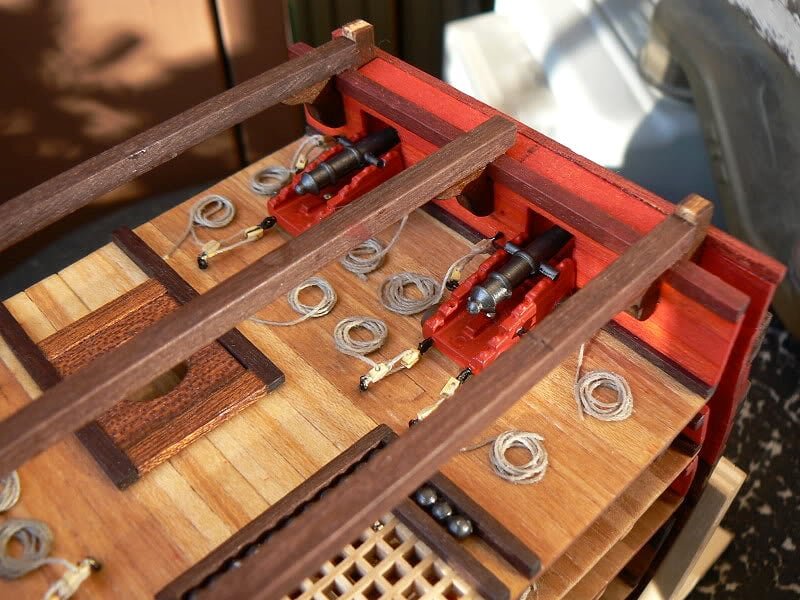
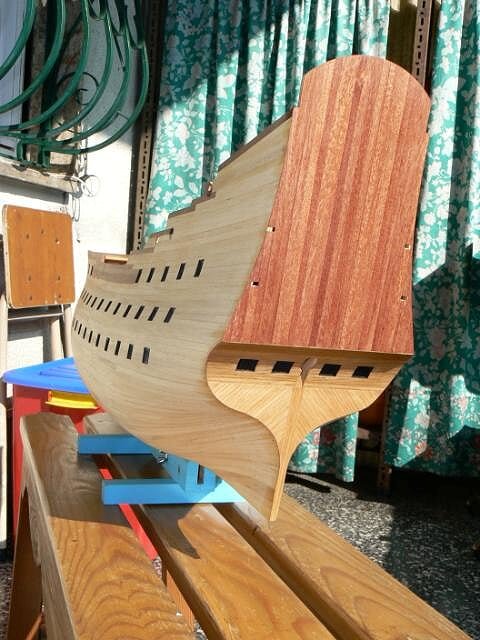
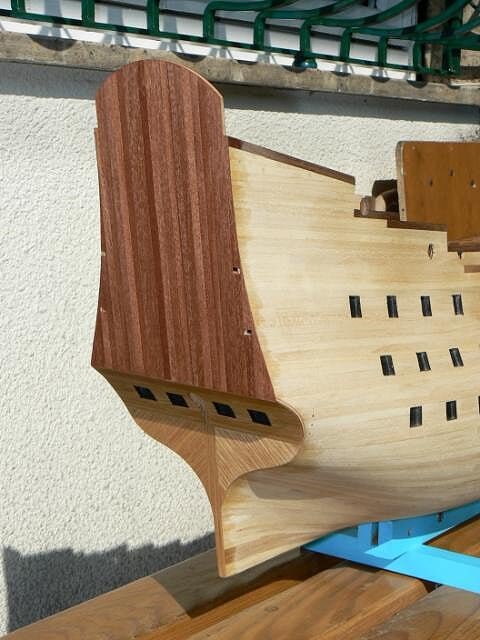
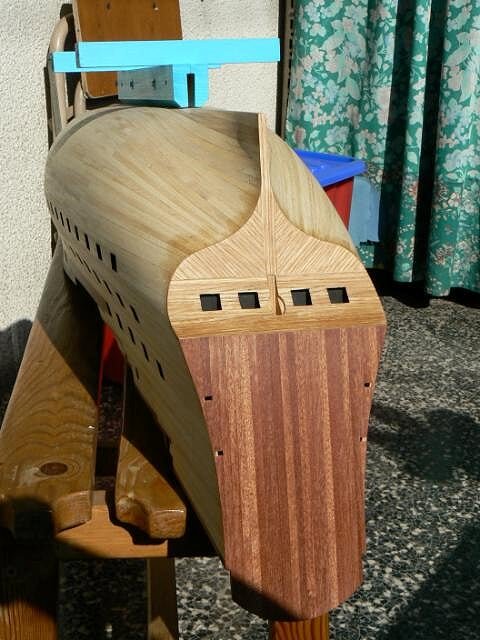
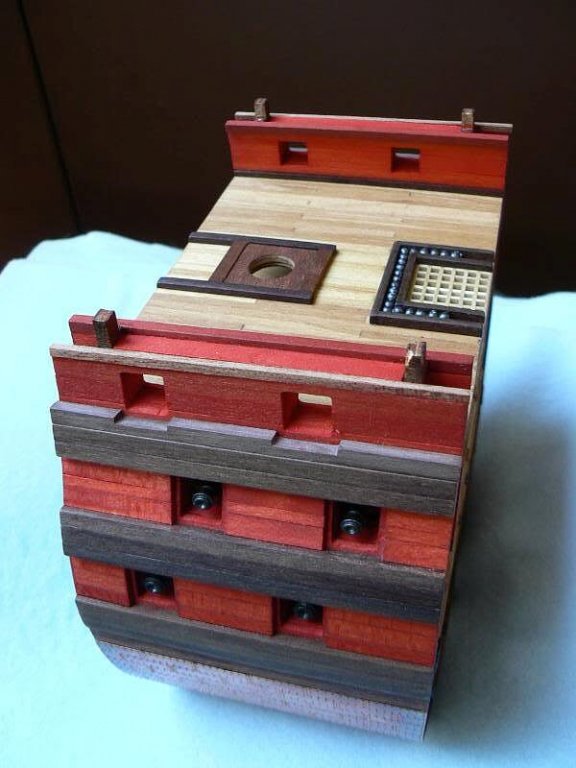
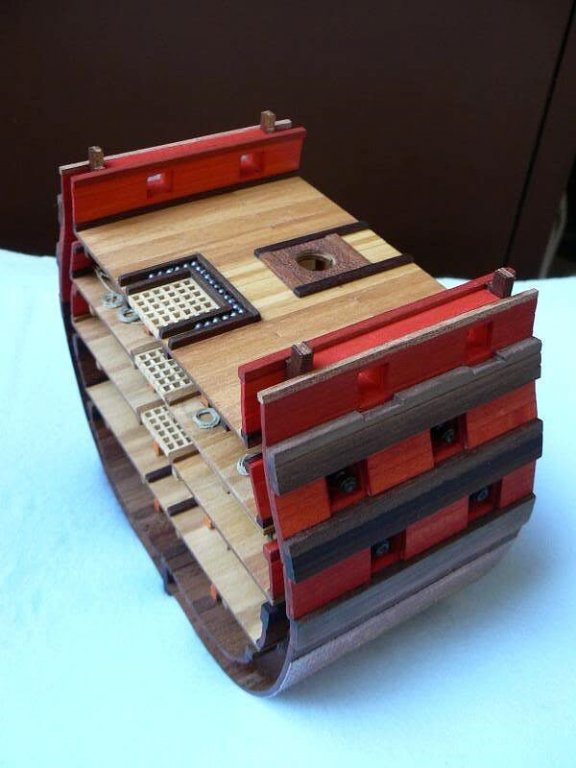
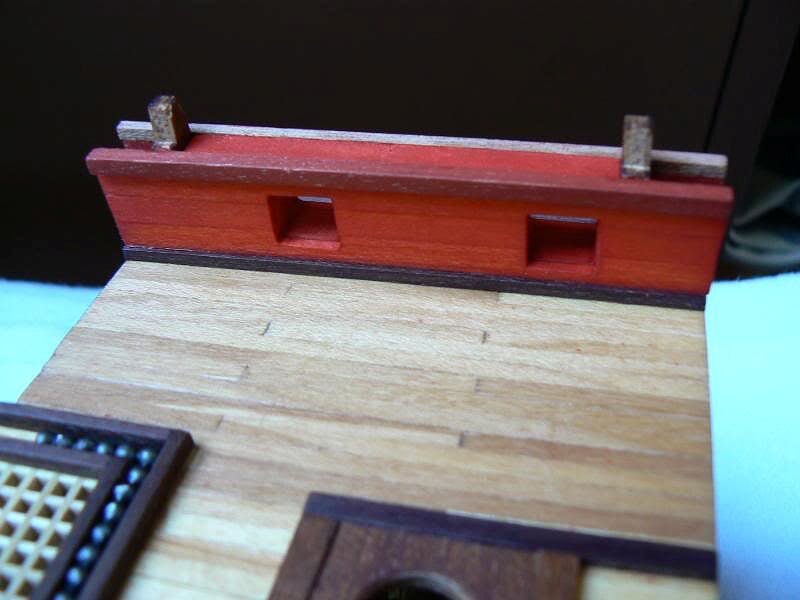
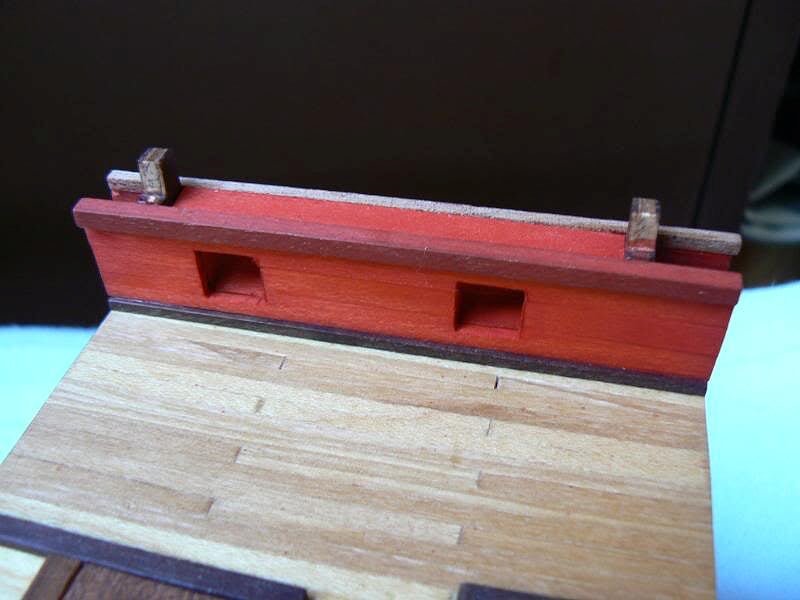
Wednesday September 14th, 2011 - Poop
After +/- two months I resumed my Soleil Royal and now I want to show the work done in the poop area and at the transom. I used the mahogany strips supplied with the kit for the upper part of the poop and the "home made" chestnut strips for the transom. Mainly the reason of this behaviour was to understand the differences between the two kinds of veneer and definitely decide if my idea to use the chestnut was good or not. The mahogany strips proved to be very different in colour between them, while this did not happened for the chestnut. The way to work with them is practically the same but the differences in colour of mahogany are too evident. I made this knowing that the upper part of the poop will be 90% covered by decorations and should also be painted in blue. But this experience was enough for me to decide for the chestnut.
Coming back to the chestnut veneer, I was able to obtain the strips very easily and, thanks the the paper/fabric layer on one side, the cutting is greatly facilitated and precise: you can use cutter or scissors and you have a great flexibility to obtain strips of the needed height.
The next four images do not need comments. Before planking I coloured with black paint inside the four gun ports here located.
01 P1070785.jpg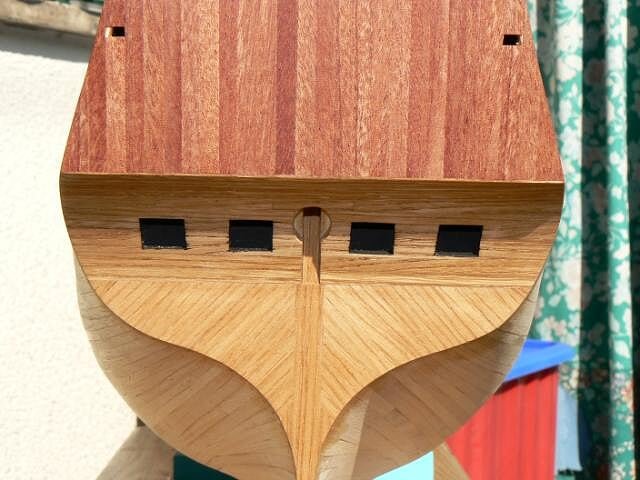
02 P1070786.jpg
03 P1070784.jpg
04 P1070789.jpg
-
Sunday July 10th, 2011 - Some reflections about second planking(advice: keep in mind the date inside the message, other you may misunderstand.)
Some months ago, more precisely in April, I finished the first planking of my Soleil Royal. After that date I stopped any activity for it because I decided to finish another model. So, my Soleil Royal is now over a shelf, waiting to be resumed.
In the meantime De Agostini provided every week new materials and instructions and this week I received the 77th issue of this collection. During these past months, while I was working on the other model, De Agostini started to provide strips for the second planking. These strips measure 5 x 0.5mm and are 25cm long. They are the same mahogany strips De Agostini distributed in two previous collections: Santisìma Trinidad and USS Constitution.
They are absolutely good for second planking but I get bored of them . . I developed in these years of shipmodeling a kind of dislike for mahogany (or sapelli, a kind of mahogany but less expensive) and also for walnut. Why: they are too dark, I prefer light/medium colour woods such as beechwood, oak, chestnut and tanganica (I don't know the english name, may it be the same ?).
Having this propensity I took the following decision for MY Soleil Royal: instead of using the supplied mahogany strips I will produce them by myself using chestnut veneer. I found it some days ago in a wood store. This veneer is sold in linear meters, wide 20cm and thick 0,5mm. On one of the two sides there is a very thin layer of a kind of paper or fabric. Its presence maintains the veneer integer and makes easier to manipulate and cut it, while doesn't interfere with the glue. If you give a look to the following images, particularly the high resolution images, you can better understand how it is.
01 P1070686.jpg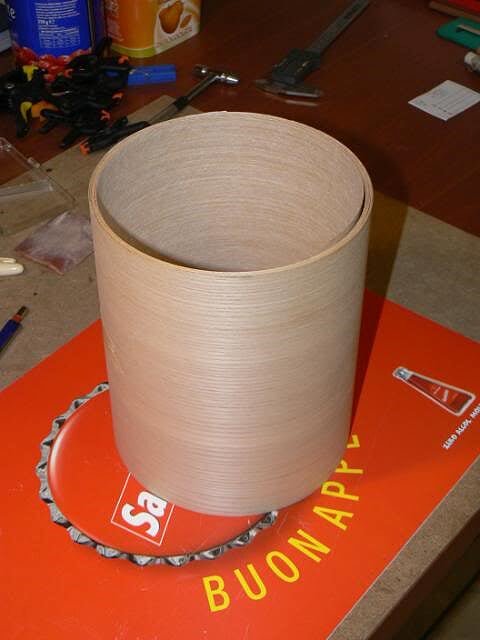
02 P1070687.jpg
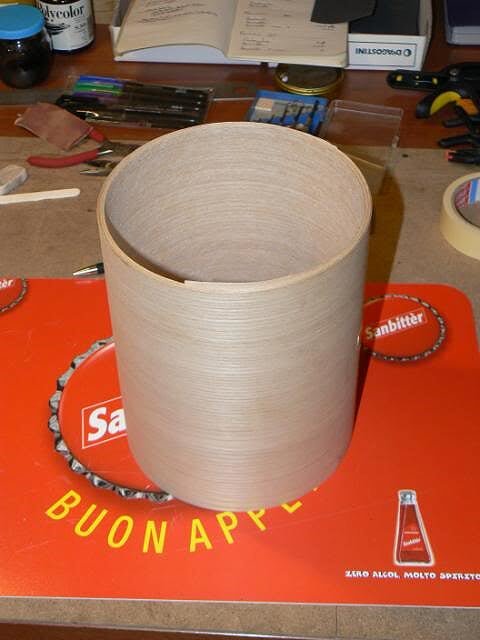
The idea is to use strips of this veneer, of a given length that simulates, in scale, a plank of 7-8 meters and apply them following a pattern similar to the one used for the decks. I have also built a jig to cut these strips all the same.
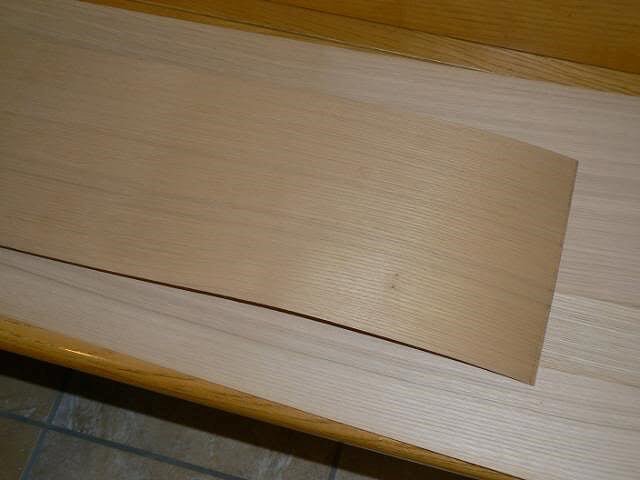
Here below two other images of the veneer, chestnut in the foreground and oak in the background. Images 01 and 02 show the chestnut veneer. I purchased four linear meters, I think will be enough . .
03 P1070688.jpg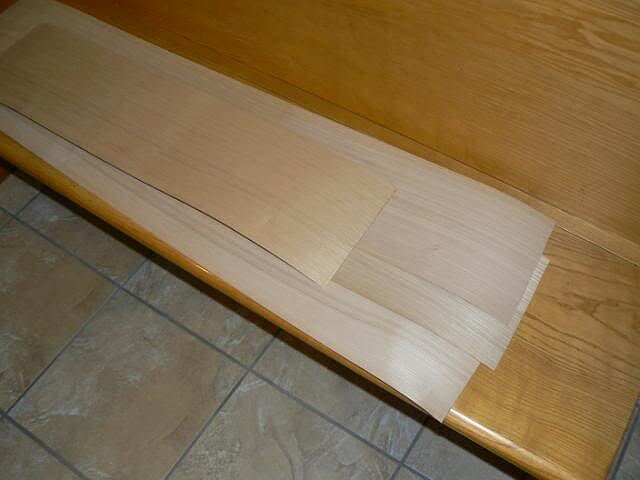
04 P1070689.jpg
To conclude this message, I don't know when the shipyard will be reopend, I'm still working on the other model, but, surely, the second planking will be the subject of the future activities on my Soleil Royal. Kind regards, Jack. -
Continuation . . .
01 Cross%20Section%20Santisima%20Trinidad/P1050957.jpg
02 Cross%20Section%20Santisima%20Trinidad/P1050958.jpg
03 Cross%20Section%20Santisima%20Trinidad/P1050959.jpg
04 Cross%20Section%20Santisima%20Trinidad/P1050960.jpg
That's all for now, see you soon, Jack.Aubrey. -
Thursday October 15th, 2009
During these past ten days I did not work too much about ship modeling. I had too many things to do and, on the top of them, there was the planning for setting up a workshop for me. I have found the way to modernise a floor in the house of my mother in law (it is a single-family home/villa on two levels), more precisely the lower level or basement. It is near where I live and I think it is the right solution for my needs. The floor is 100 square meters and my plan is to modernise it and to setup a room of +/- 16-20 quare meters as my workshop.
Anyway, while organizing this major task I found some time to progress a little, by preparing the sides of the upper deck using the same method applied till now. Here some new images of the model as it is now:
01 Cross%20Section%20Santisima%20Trinidad/P1050957.jpg02 Cross%20Section%20Santisima%20Trinidad/P1050958.jpg
03 Cross%20Section%20Santisima%20Trinidad/P1050959.jpg
04 Cross%20Section%20Santisima%20Trinidad/P1050960.jpg
to be continued . . . -
The following image shows how the quickwork should appear if aged with winegar and sand. I had this info by a friend and works in the following way: mix up in a glass winegar with sand; then "paint" with this mixture the copper plates and leave to dry. I was suggested to wait 24 hours and then to repeat this application several times until you reach the wanted result. Another method instructs to add some salt . .01 P1050948.jpg
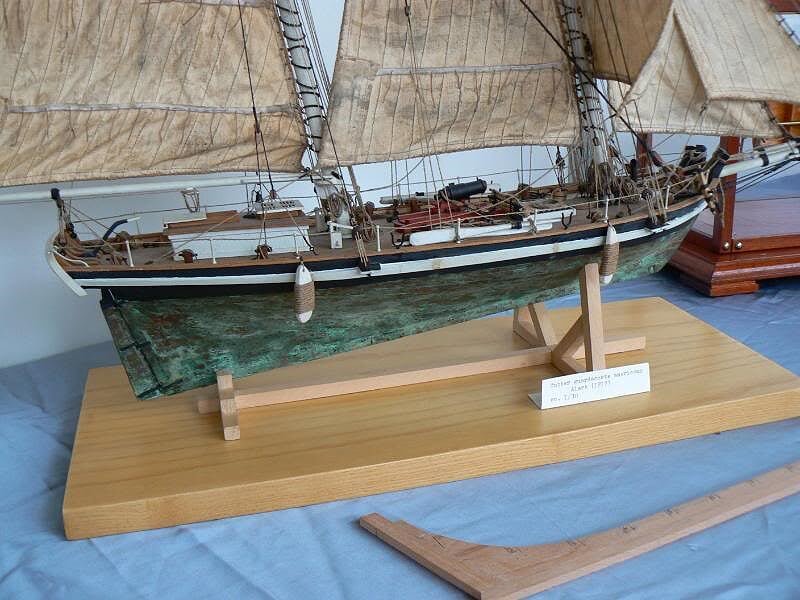
The image was taken Friday September 25th, 2009 at a models exibition near Milan, Italy. Cheers, Jack.Aubrey. -
Monday October 5th, 2009
As anticipated today I can shoot some images of the section with the upper gun deck definitely applied. These images are not the maximum in terms of creativity, by now they seems all the same. But the model is not too big and the focus of the photocamera embraces totally it, so there is few space for fantasy. Anyway it is only in this repetitive way that I can show the changes happened, changes that often are minimal but in this way recognisable.
The lower side of the deck is finished in the same "admiralty looking" of the others . . nothing new here, if you want to go in deep on this matter please review my older messages.
01 Cross%20Section%20Santisima%20Trinidad/P1050952.jpg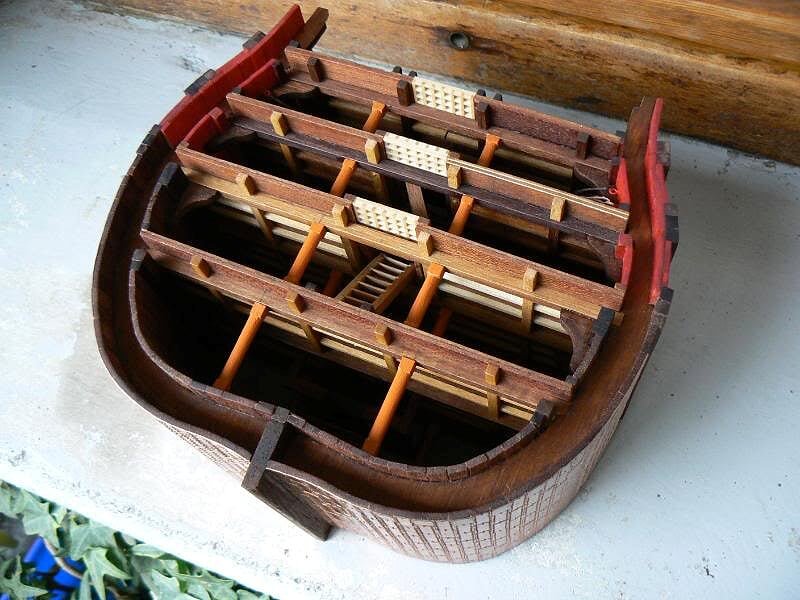
In this second image I begin to find a certain flaw that, now that I'm approaching the top of the hull, becomes more visible. I don't point it out but I invite the readers to find it . . and to comment at will.
02 Cross%20Section%20Santisima%20Trinidad/P1050953.jpg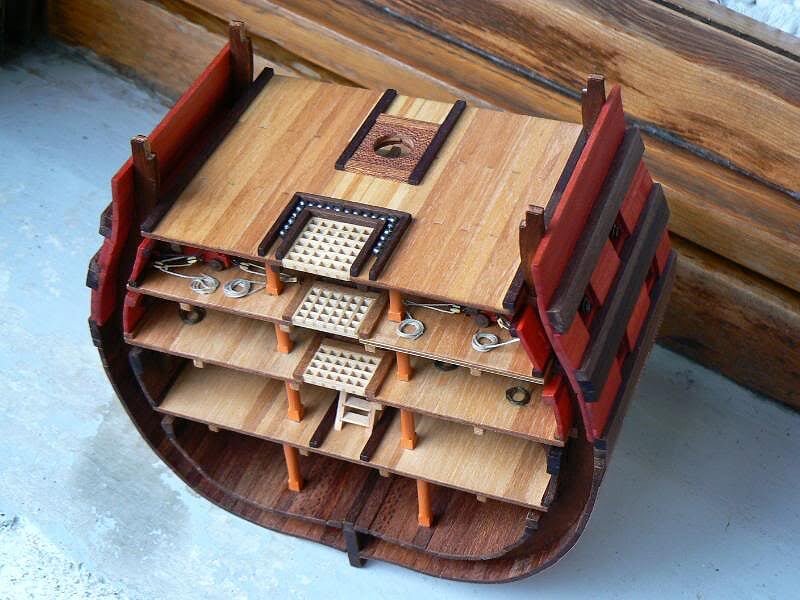
Here below it is also possible to see some copper plates, until now not artificially aged at all, that start to change naturally . . some time is passed and I'm curious to see if the natural ageing can become the best solution. If not I will use an ageing technique I was told by some italian ship modelers.
03 Cross%20Section%20Santisima%20Trinidad/P1050954.jpg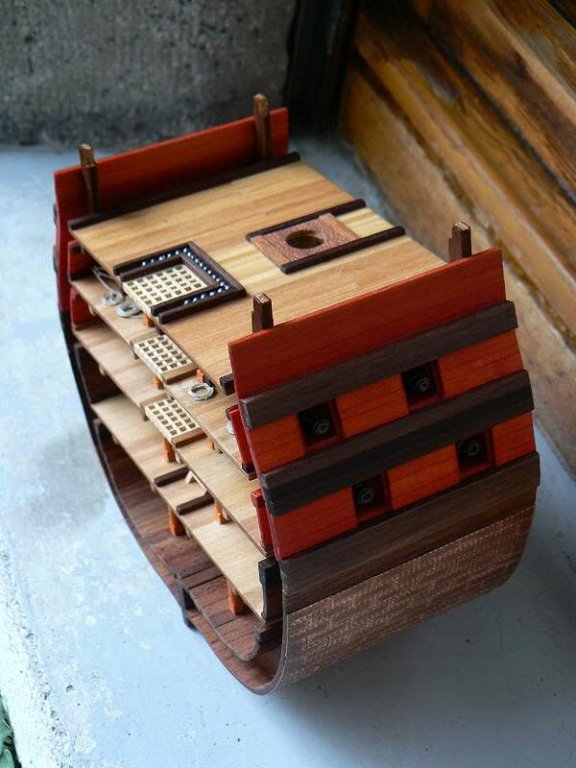
I have to find some pellets, probably in a shop for weapons, the number supplied with the kit are not enough . .
04 Cross%20Section%20Santisima%20Trinidad/P1050955.jpg
05 Cross%20Section%20Santisima%20Trinidad/P1050956.jpg
Greetings, Jack.Aubrey -
Friday September 25th, 2009
The two planked ply woods that make up the upper gun deck are now completed and I show them here below only positioned. This just to see/show the look and to understand what will be visible and not on the underlying deck. This look will allow me to eventually adjust something. As I supposed, it is possible to see only a few part of the big efforts I lavished . . but what it really matters is to know that they are there, also if you don't see them . .
01 Cross%20Section%20Santisima%20Trinidad/P1050934.jpg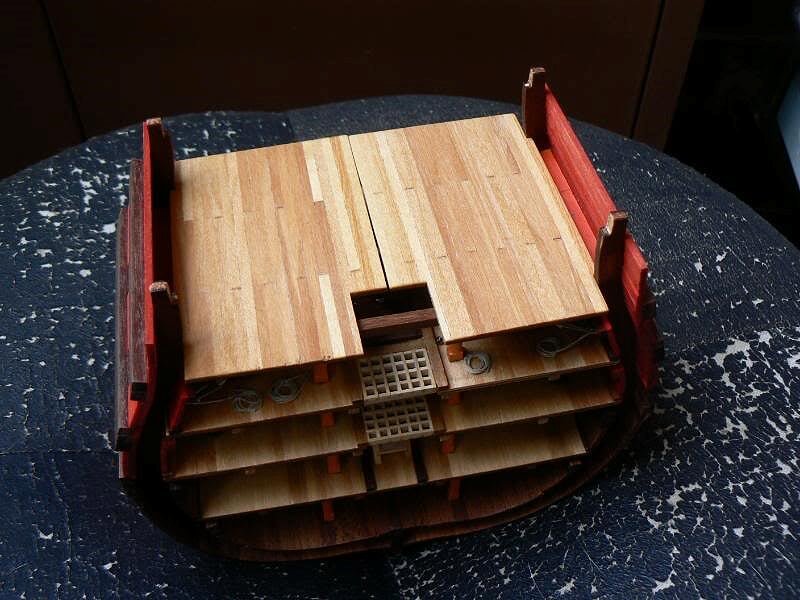
02 Cross%20Section%20Santisima%20Trinidad/P1050935.jpg
03 Cross%20Section%20Santisima%20Trinidad/P1050936.jpg
In the next message I will show the deck installed and finished. This work was done during the weekend but I wasn't able to get photos. See you next time, Jack.Aubrey. -
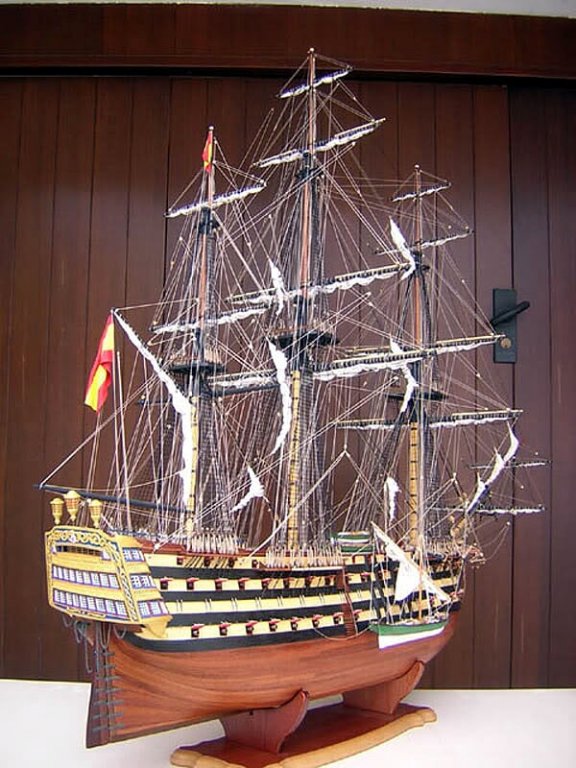
Before starting the Santìsima Trininad's cross section I worked for about a couple of years on the entire model, always from De Agostini. But, when I arrived to finish the hull of this model, the missing things were "only" masting and rigging, I decided, for a crazy idea I had for another project, to sell it. I had quite no difficulties to buy it to another modeler that said to have problems to build the hull (space, location, dust, etc) but was very interested to continue from the point I left it.
Next week this modeler sent me some images of the finished model, completed with masts, sails and rigging and I am happy to share them with you. The model is completed 99%, but I believe the remaining 1% are very few details.
The entire models sounds very well to me, although the images don't allow a complete review of the smallest details. I have only some concerns about the sails that should be presented in a more realistc way. I suggest for this task the book from Lennarth Petersson "Rigging Period Ship Models", Chatham Publishing.
So, my sincere congratulations to Andrea, the ship modeler that cempleted this huge vessel. Cheers, Jack.Aubrey.
01 Cross%20Section%20Santisima%20Trinidad/Immagine001.jpg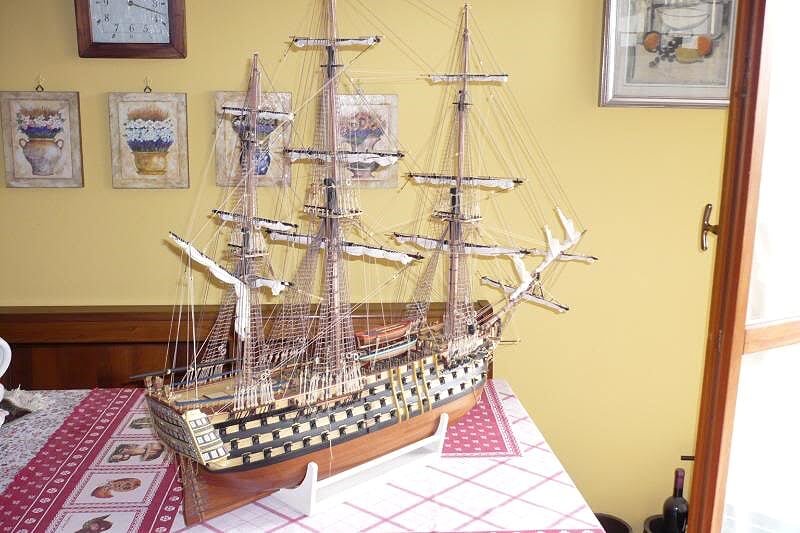
02 Cross%20Section%20Santisima%20Trinidad/Immagine002.jpg
03 Cross%20Section%20Santisima%20Trinidad/Immagine003.jpg
04 Cross%20Section%20Santisima%20Trinidad/Immagine004.jpg

Le Soleil Royal by jack.aubrey - FINISHED - De Agostini - Scale 1:70
in - Kit build logs for subjects built from 1501 - 1750
Posted