


jack.aubrey
-
Posts
1,268 -
Joined
-
Last visited
Content Type
Profiles
Forums
Gallery
Events
Posts posted by jack.aubrey
-
-
I discussed with the site staff about the problems that arise to me by merging the two logs and we agreed to make an effort to quickly align this unique log to actual date and only when this goal is achieved, start showing the new progressess.
To do so I need to add a lot of messages and the only viable way to do it quickly is to keep the comments to the minimum, letting the images speak instead of me.
I will comment only where needed for clarity.
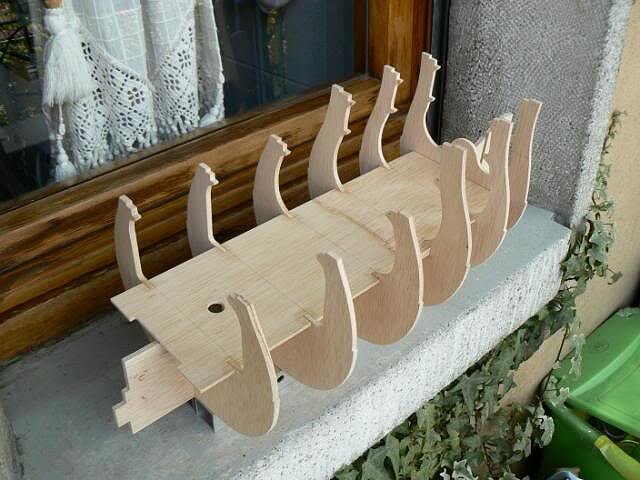
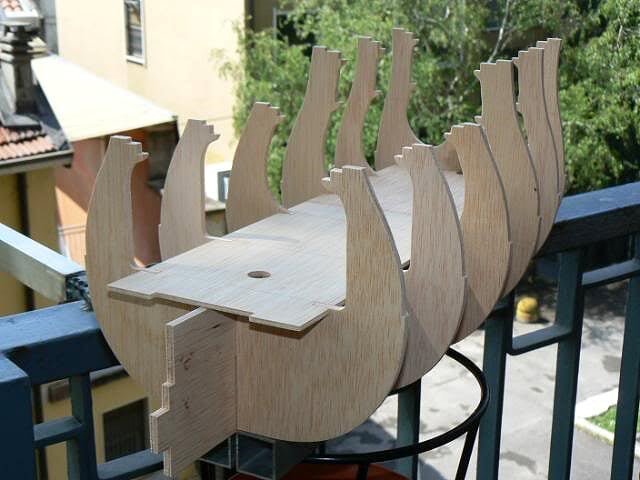
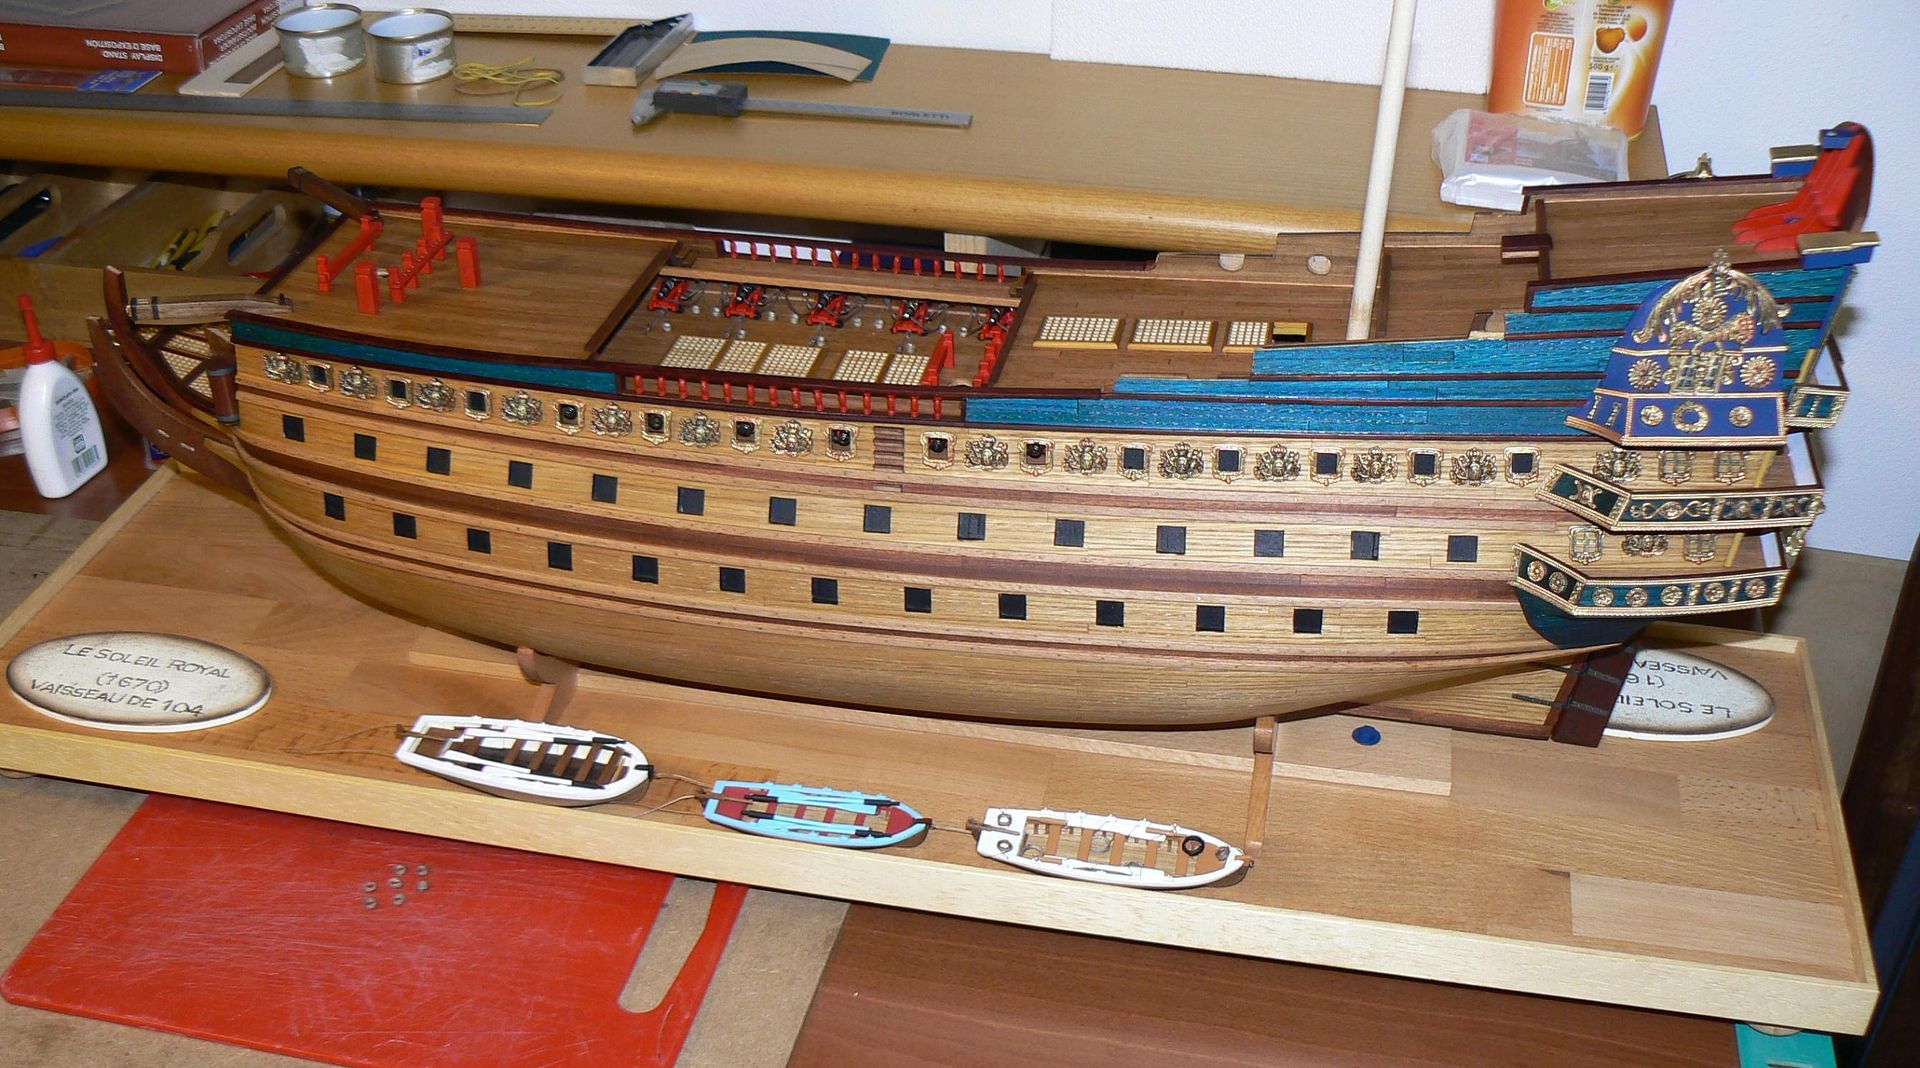
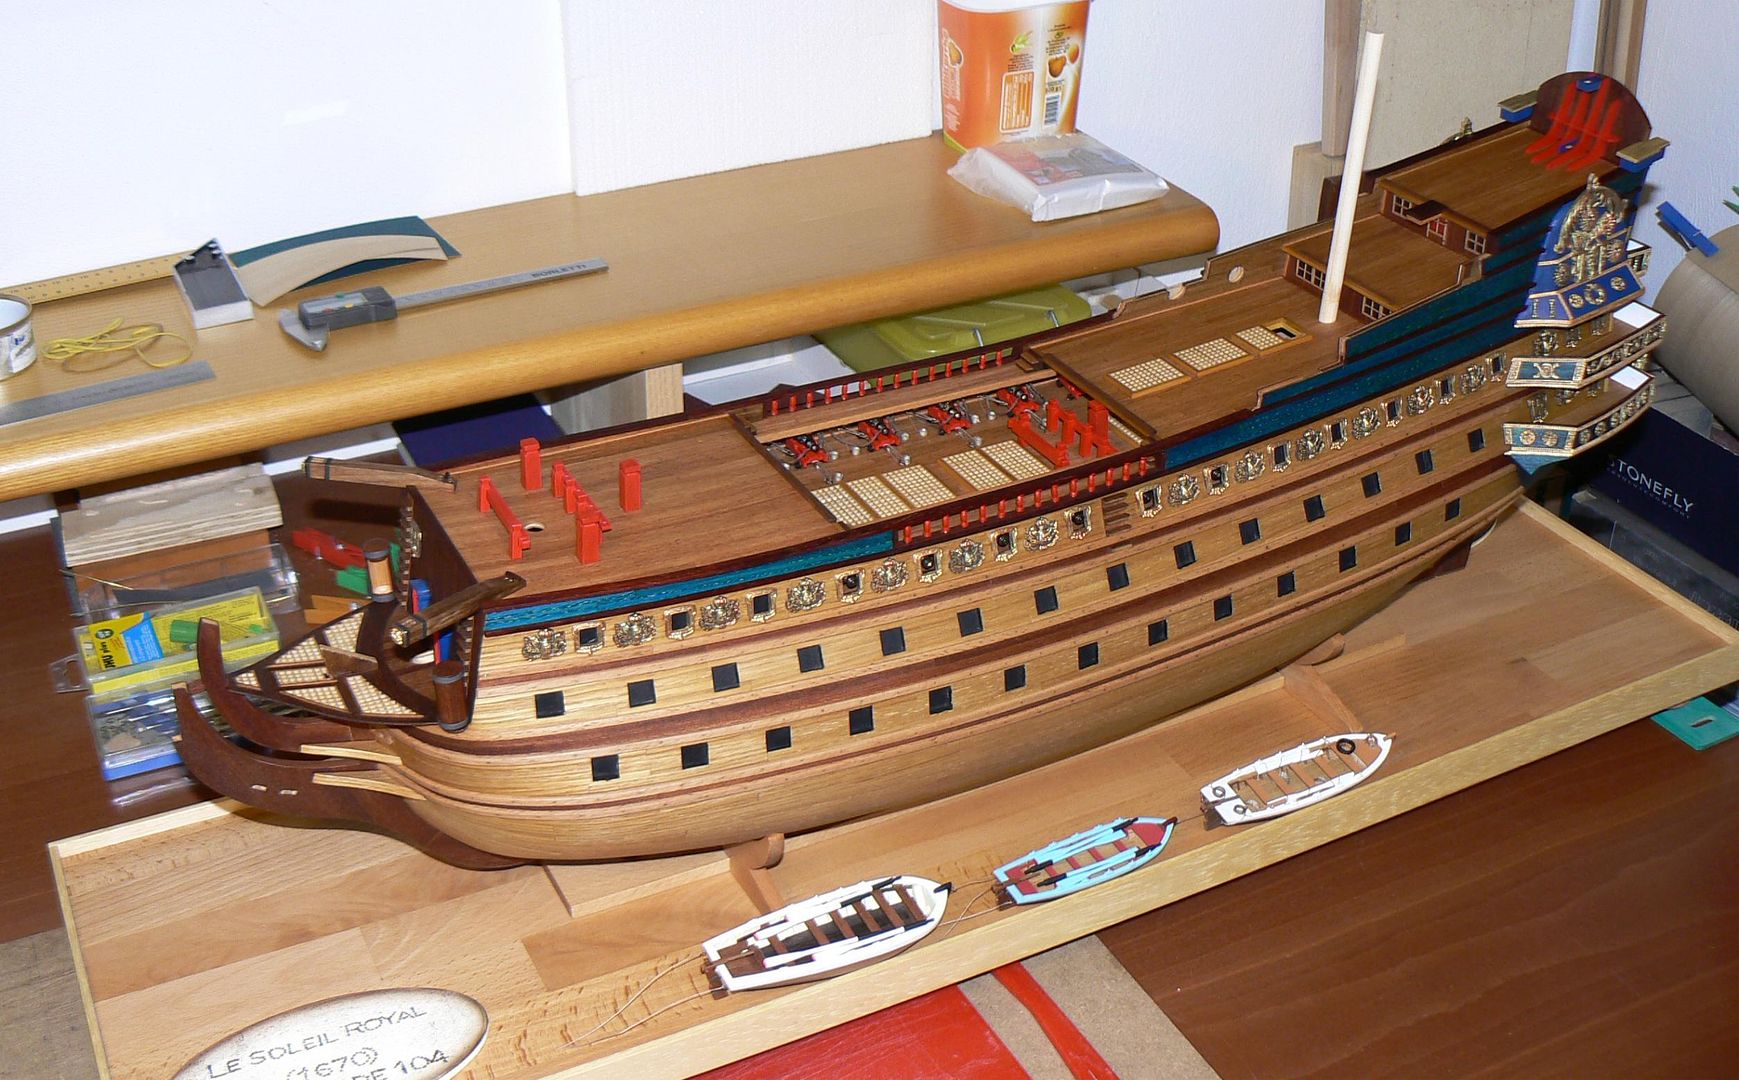
Here below some new images belonging to April 23rd, 2010 with new details.
01 - P1060212.jpg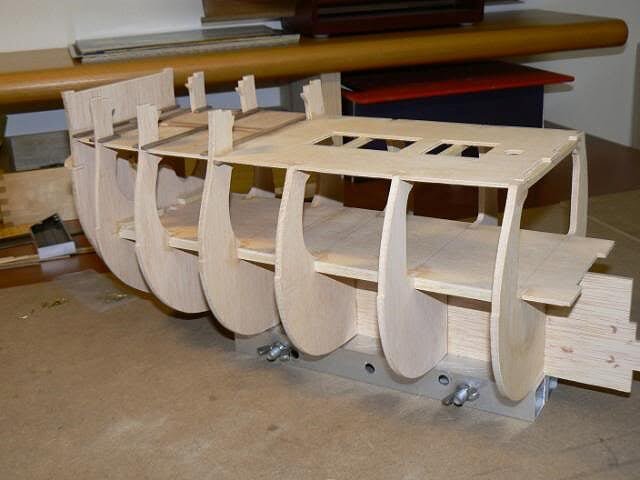
02 - P1060213.jpg
03 - P1060214.jpg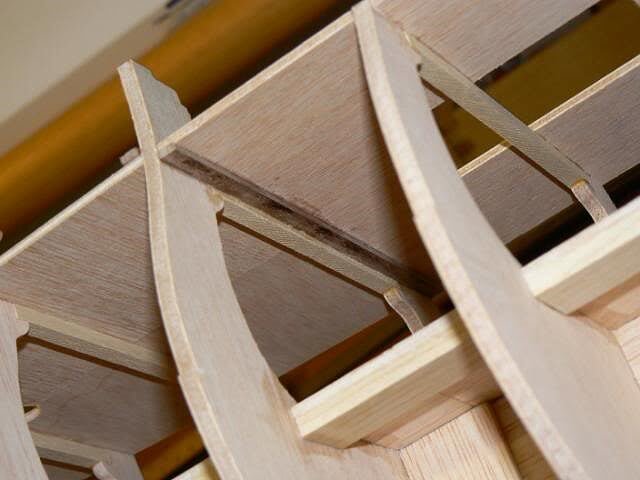
04 - P1060215.jpg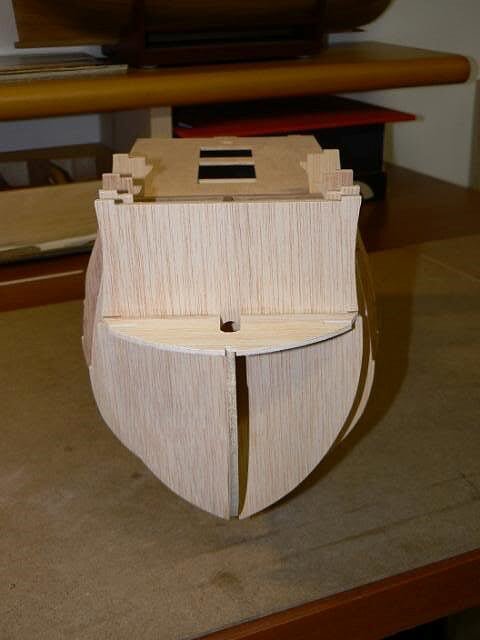
05 - P1060207.jpg

Next time I will try to explain the method used to check the alignment of the hull, kind regards, Jack.Aubrey -
Friday, April 23, 2010Regarding to some reinforcements to the ship structure: I previously had an interesting experience with the model of the Santìsima Trinidad, by De Agostini. That model had a keel-bulkhead-deck structure similar to the Soleil Royal and I learnt that the false deck, shown in my previous images and having the main function to make stronger the whole, was also a perfect point for seizing in my hands the model during the recurring manipulations I made during the planking tasks.
The experience was that, after many and many manipulations and with the growth of the structure weight, the false deck was beginning to unstick and crash . .
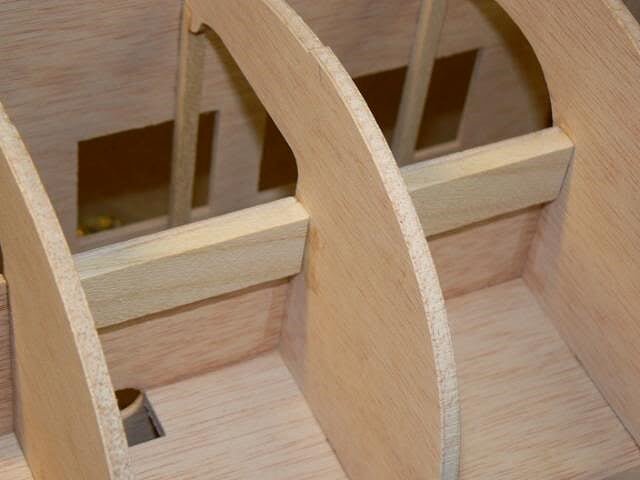
So I had the idea to strenghten this element by applying, as visible in the next two images, a wooden reinforcement. To do so I used a lath of 20 x 5mm, cut to pieces with my Proxxon circular saw, of the proper lenght and glued in the position shown in the pictures.
Result: I believe I will be able to manipulate the whole without any danger of crashing or unsticking and, once it will become unuseful, it will be totally invisible . . and it has also been used to glue definitely to the false deck the bulkhead number 2, that if you remember, wasn't not yet fixed because it wasn't perfectly aligned. With this trick I aligned it to the rest of the structure with complete satisfaction.
01 - P1060205.jpg
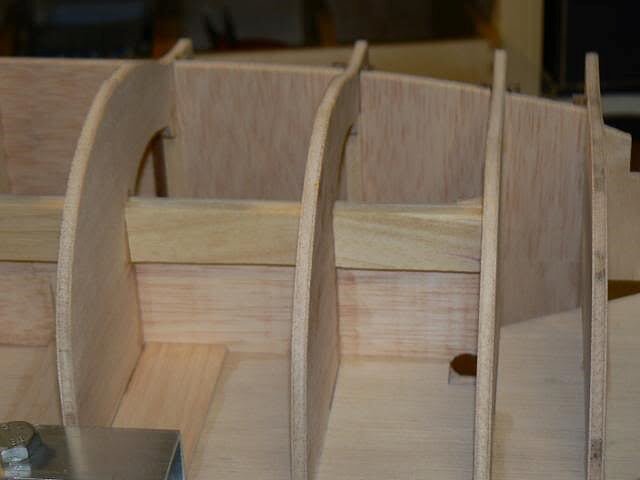
02 - P1060206.jpg
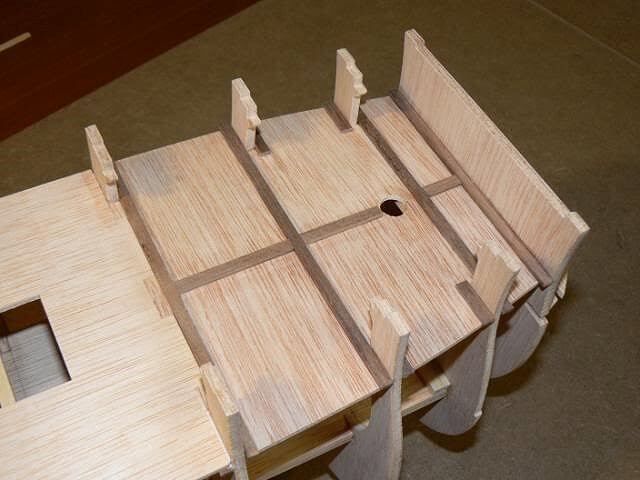
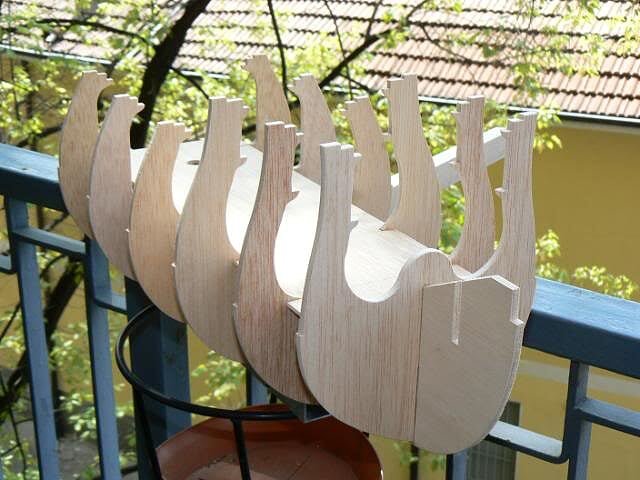
Then I moved forward and I prepared and installed the needed beams (5 x 5mm) to support the first visible deck. This deck should match exactly with the naval term of upper gun deck, in a three decker. After a preliminary test the alignment was regular and i fixed all of them with glue.
. . When the glue was dry I have then installed the elements of the upper gun deck (for the moment there are only three pieces available) and I have also mounted the number 1 bulkhead, having once again a lot of care to obtain the proper alignment.
03 - P1060209.jpg
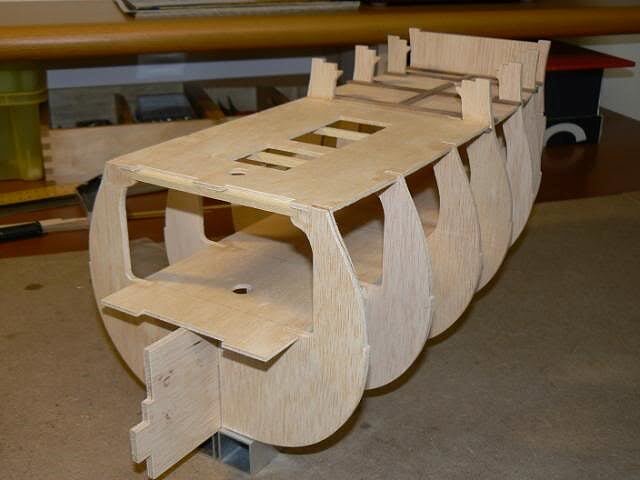
04 - P1060210.jpg
As last step, I have installed the small, rounded deck in front of the number 1 bulkhead (i don't know the nautical term) very well visible in the above image. In the next message I will show additional details.
For now that's all. Cheers, Jack.Aubrey.
05 - P1060211.jpg
-
Many thanks for your comments and appreciations . . Really speaking Calci and Pisa are nice locations, although I will have to leave within two months. Anyway my younger daughter lives here and I can return here when I like, but not for long periods of time. Kind regards. Follow my log, if you like, about this model for the past here: http://modelshipworld.com/index.php?/topic/1044-le-soleil-royal-by-jackaubrey-de-agostini-scale-170-build-log-from-18042010-to-08032013/
-
Sunday, April 18, 2010The shipyard is officially open !!
Before starting any activity on this model I preferred to wait to have in my hands at least 8-10 issues. This in order to have more informations and materials to better decide how to proceed. In effect at this date I have the issues fron 1 to 9 and this Sunday I decided to start. I prepared in advance my individual plan, with the intention to follow in a customized way the instructions.
The main reason for this choice belongs to the fact that these instructions are prepared in a way to made the beginner shipmodeler to start, since the first issue, to "mount something". But this approach is not what I like, first of all because I am not a beginner and secondly, because there are some minor dangers or problems that can raise if you indiscrimitately follow this intricated approach.
For example I do not understand why I have to mount an anchor today, another within two months, the third after an year and so on. I prefer to build and finish them all togheter, I think it is a more efficient and reasonnable way of working. This is just an example of how the weekly issues approach makes you work . .
Finally, before definitely mounting any component I have "dry mounted" them, to see and test all the joints and to make proper adjustments.
First I would like to list two points about this model that it is worth to highlight:
- The size of the ship hull, I'm building another model (Dolphyn from Corel) and if I look them together, the difference is very great. The Soleil Royal is fatty, potbellied, rounded. And this makes this ship pleasing to me . .
- The precision of the pre-cutted material supplied by the kit manufacturer. Some pieces of the pre-cutted material were twisted and I had to spend some time to correct them but after they are very precise. Every joint is right and I didn't adjust anything. I made a lot of controls but everything was perfect. So I decided to definitely glue them. I imagine these pieces were cutted starting from CAD plans.
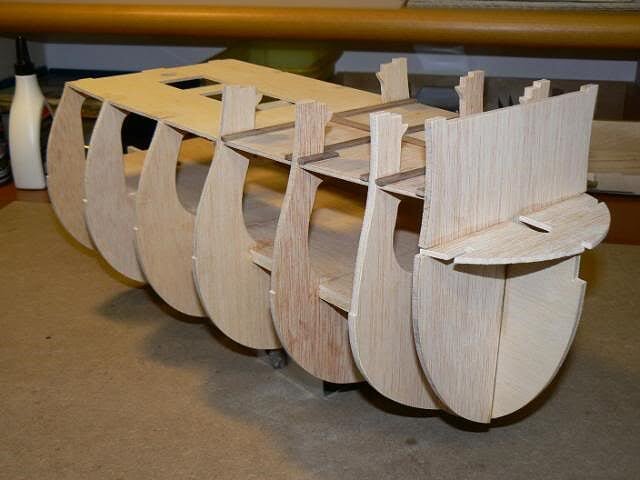
Now let's start to describe the process . . first, as I wrote, I didn't follow the instructions. This is an approach that I don't suggest to everybody, but only to shipmodelers with a minimum of experience. Personally I follow my instinct . .- The keel is made of up to three segments. At the moment I have only two and I have mounted them together. Great care was made to obtain a perfect alignment. Anyway a simple task.
- There is a false deck made up of several pieces . . I have mounted the first two of them perfectly aligned. They will keep in place the bulkheads from number 2 to 7.
- Then I have installed all the bulkheads from number seven to three with the vinyl. After each bulkhead I put in place the false deck to keep right positioned the new bulkhead for some 10-15 minutes. Then I repeated the same process for another bulkhead until number 3.
- Then I have definitely fixed the false deck and . .
- As last task I have installed the bulkhead no. 2 without glueing it to the false deck. This because there was a small problem with the keel (a little twistly, +/- 1 mm) and I think to solve it when I will install the bulkhead number 1.
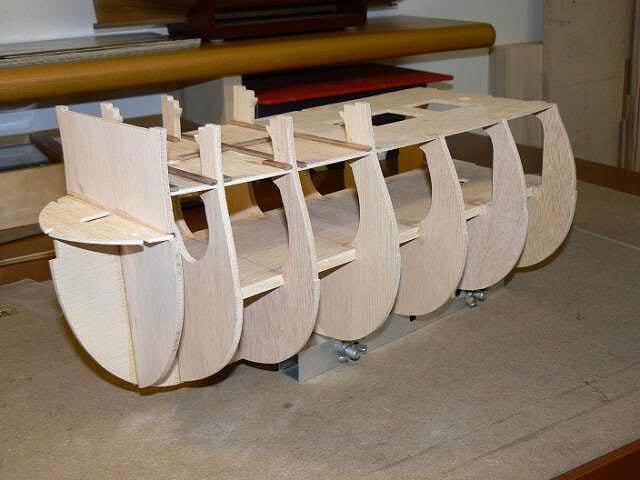
In this way I have achieved the goal to mount a structure that is perfectly aligned between the bulkhead 7 and 3, alignment that will become my "point of reference" to mount all the other elements. Last: The lower part of the keel has two protrusions that allow the keel to be inserted into an home made "keel clamp" made with two aluminum bars and two iron bolts.Here follow four images of the work done today (remenber to consider the date on top of this message, not the date the message is published)01 - P1060197.jpg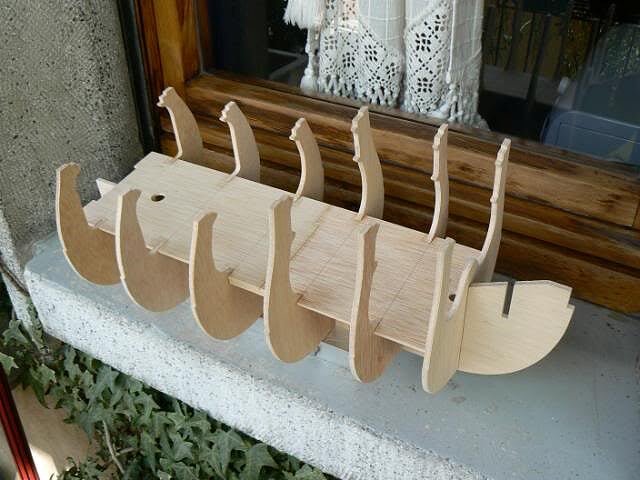
02 - P1060198.jpg
03 - P1060199.jpg
04 - P1060200.jpg
See you soon next message. Jack.Aubrey
-
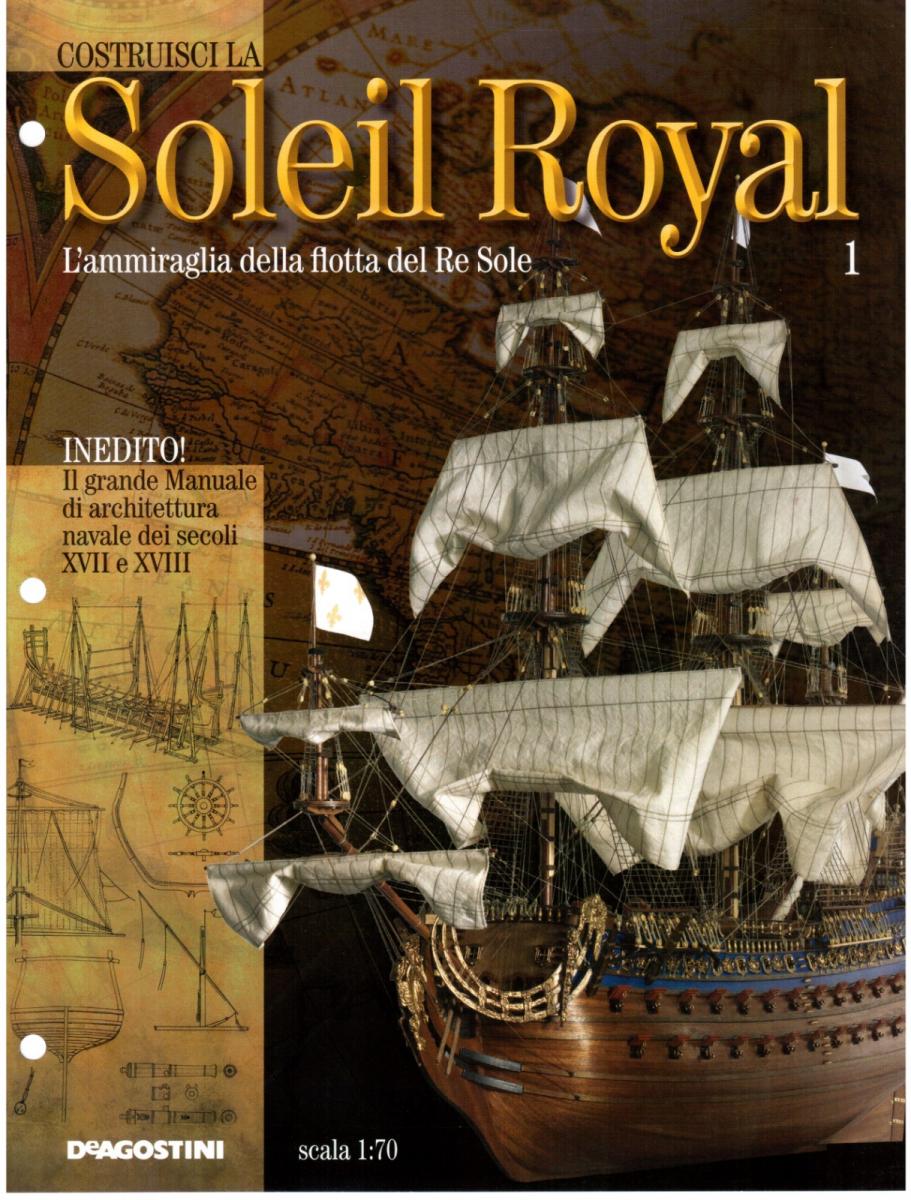
De Agostini Soleil Royal
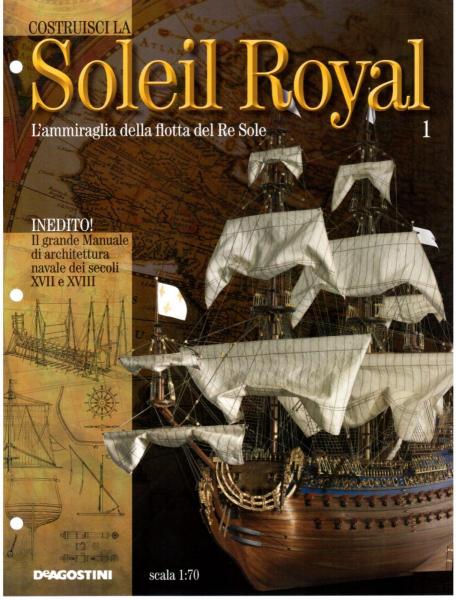
This ship is a model kit that is supplied, on the Italian market, by De Agostini starting from the beginning of 2010 and lasting after 140 weeks . . .
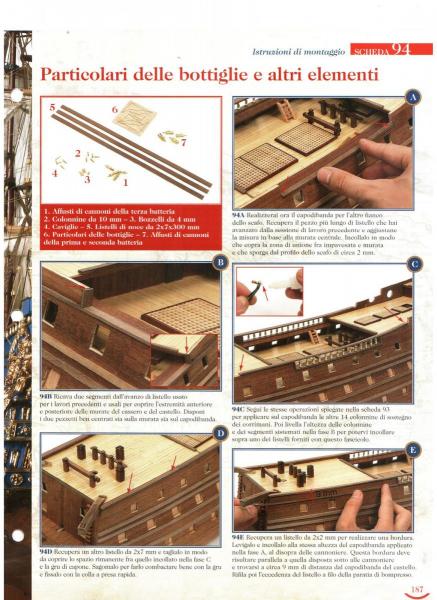
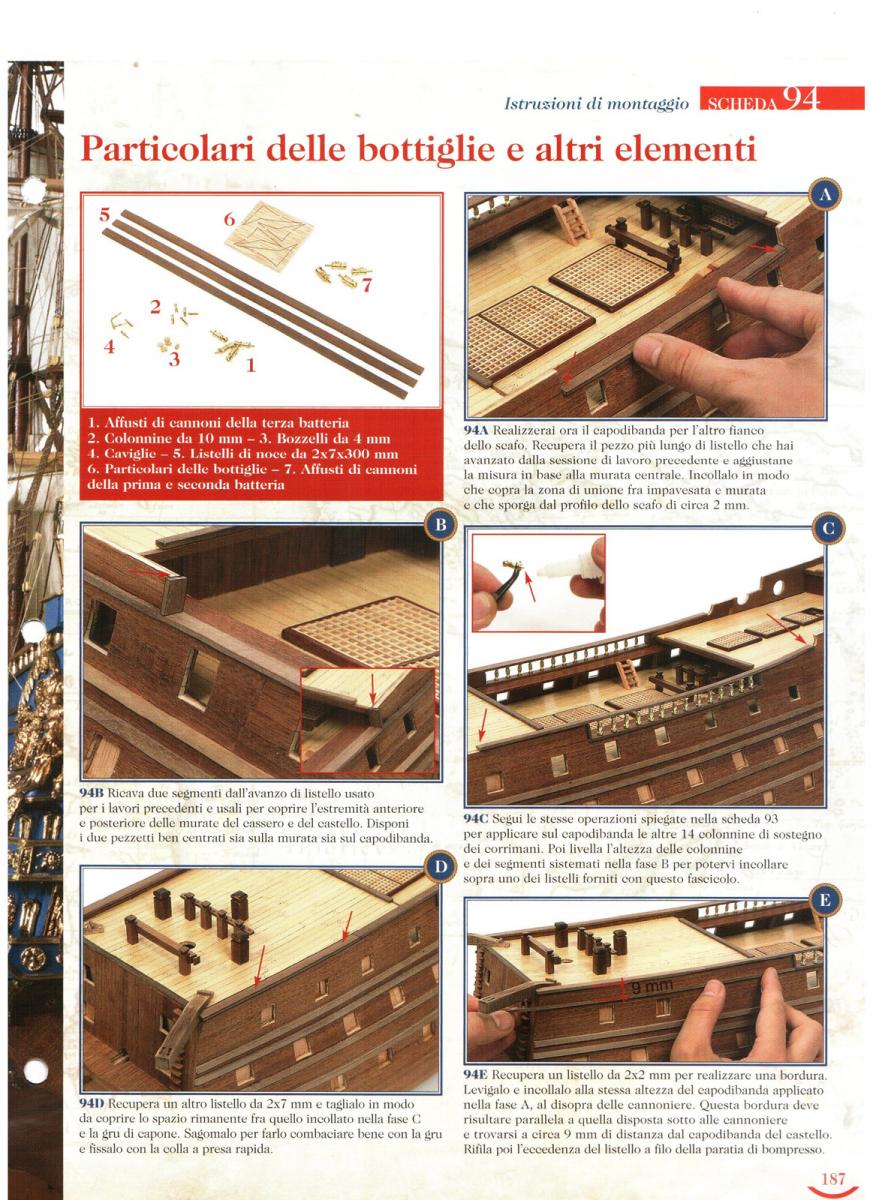
Each issue contains some pieces to build the model, while the booklet contains two different sections: the most important section contains the building instructions, that drive the modeler, step by step, during the building of its own model. A sample is shown here below.
The front side of the instruction sheet (issue n° 94):
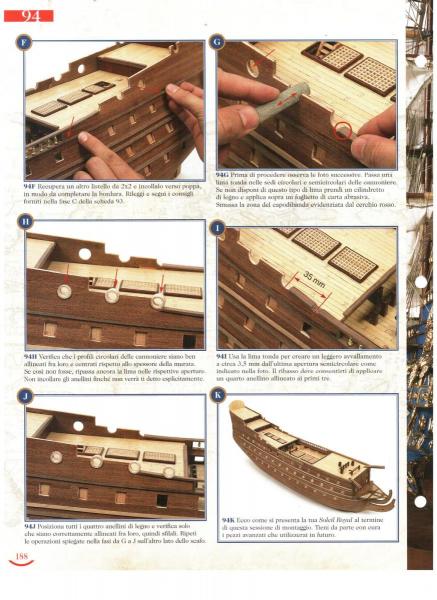
The rear side of the same:
The second section contains a very interesting Manual (or Treatise) of Naval Architecture. In total two sheets with a written explanation or introduction and many pictures. At the end of the collection, the resultant book is very, very interesting and covers all the architectural aspect of shipbuilding in the age of sail.
The cover of each issue is like the following:
-
Tuesday December 18, 2012 - Some images from my new location
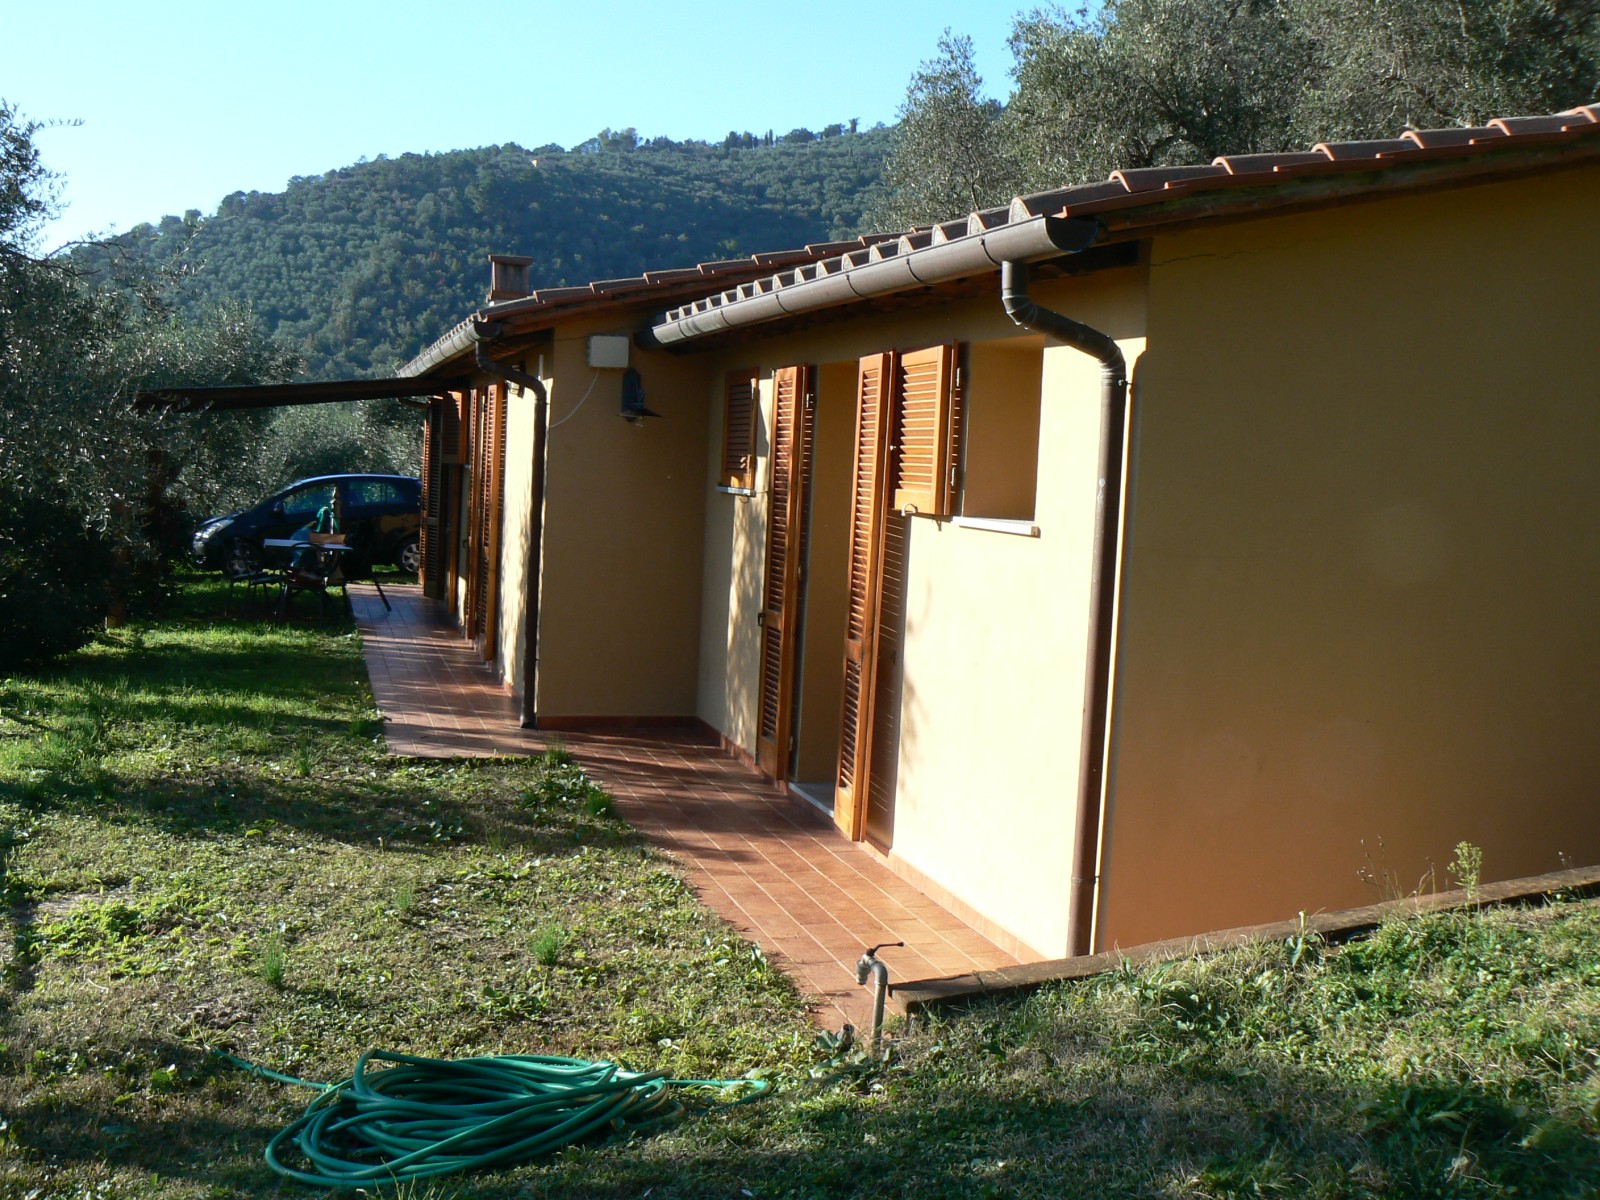
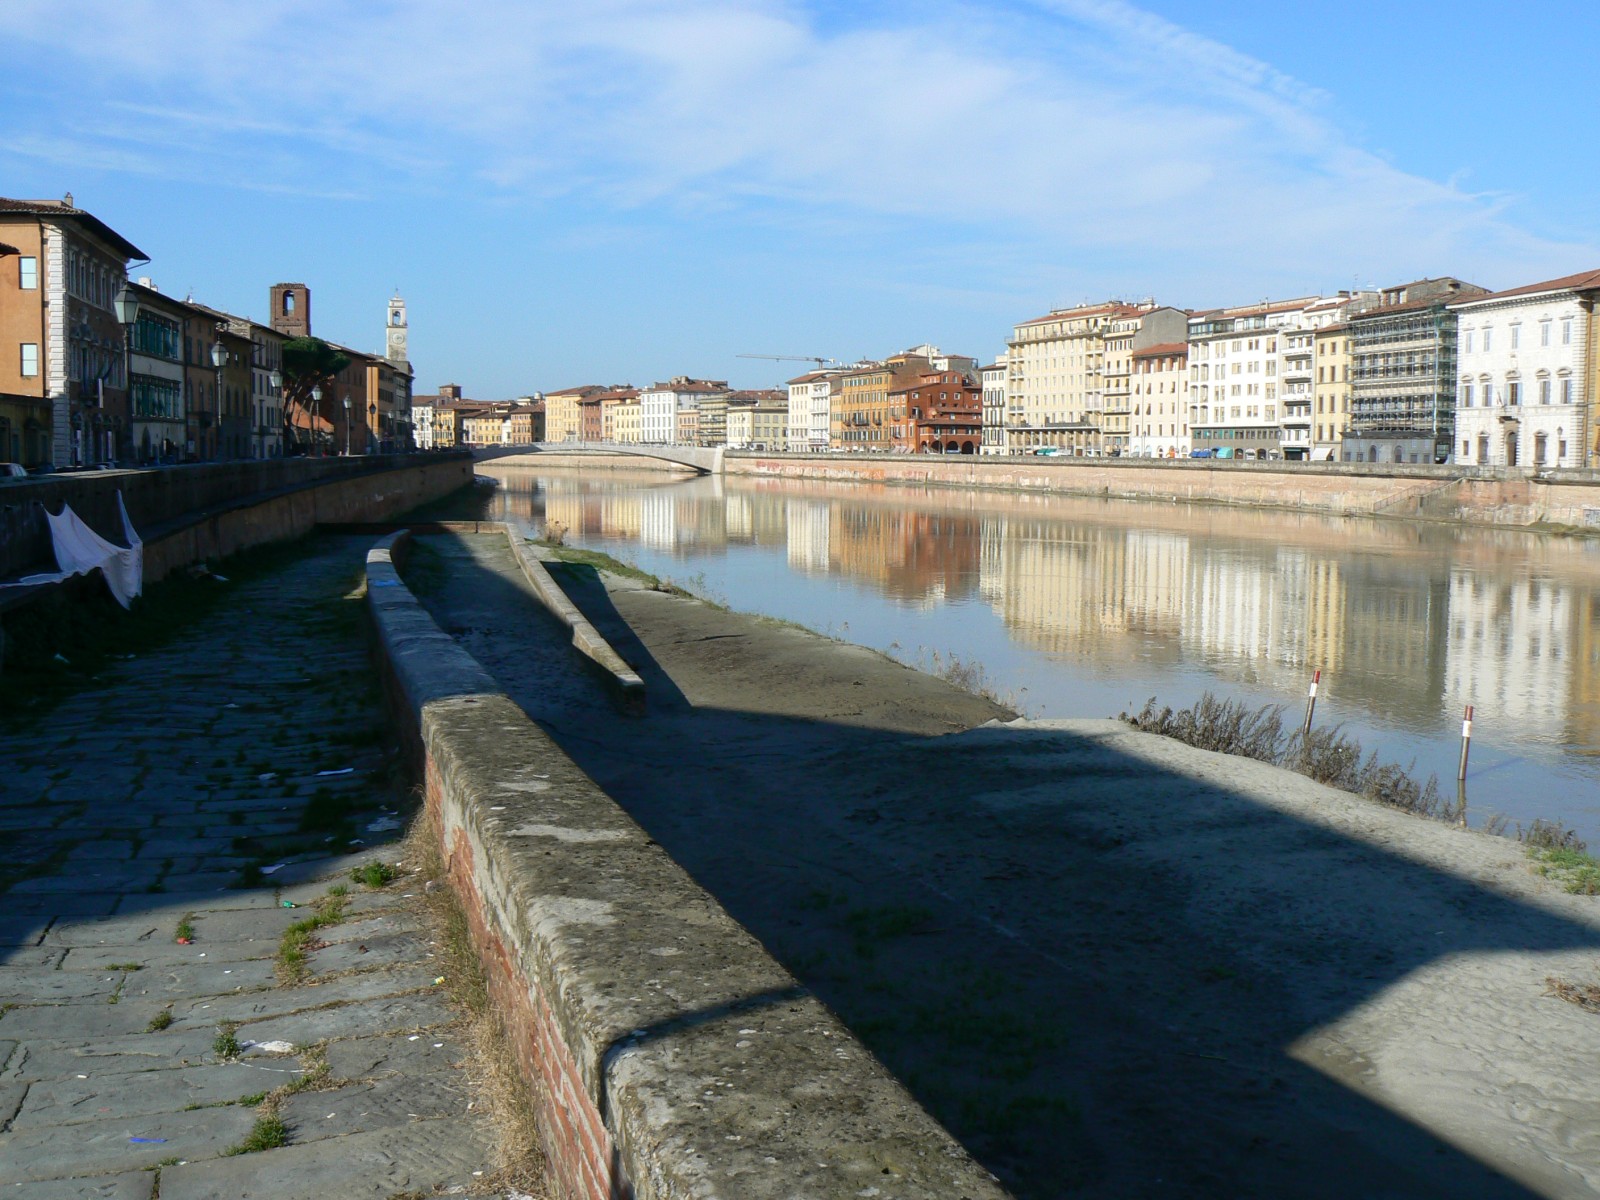
It is more o less 20 days I moved from the foggy Milan to the sunny Tuscany. There is a big difference: instead of living in a relatively big town (+/- 90.000 people) now I live in a place that counts 5.000 people, near Pisa. If needed, within ten minutes I can reach Pisa and visit and enjoy the monuments and the near sea.
Here below I post some images just to pause this discussion until I will resume the shipmodeling activities in May.
A last comment before I leave the images speaking instead of me: this winter is, for me, the best of my relatively long (!!!!) life. Here the weather is warmer and the food is very good, people are pleasant and kind and a lot of other interesting things.
Kind regards, Jack.
01 - The cottage where I live:

02 - The cottage is located in a wood of olive trees, there are 7.000 of them:

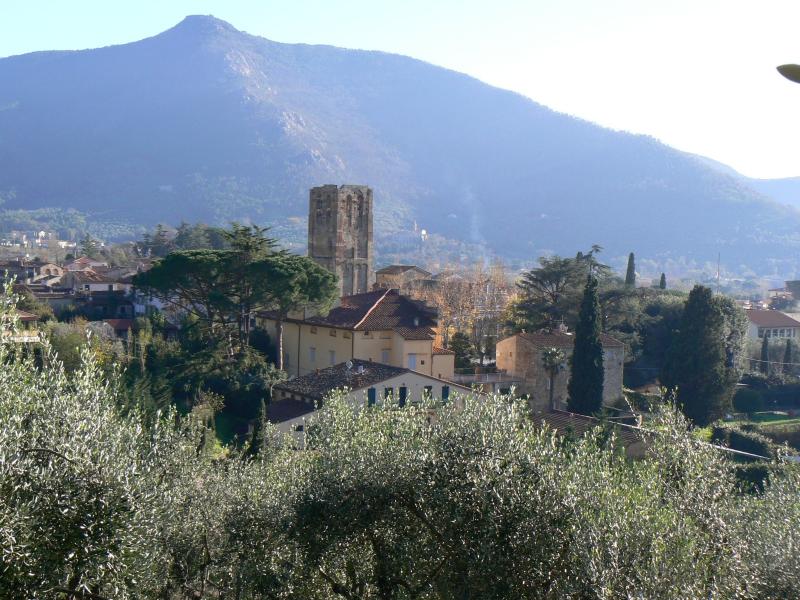
03 - This is the country where I live, Calci, the tower is 9 centuries old:
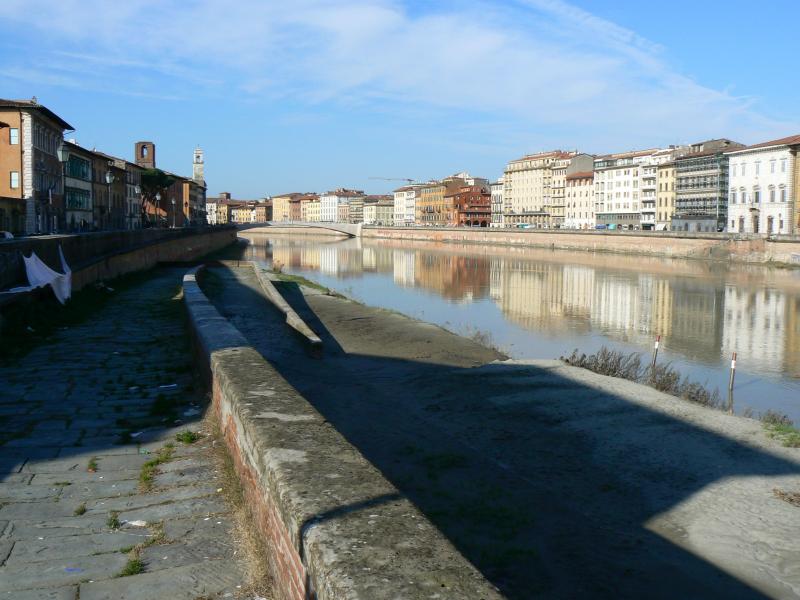
04 - This is the Arno river, in Pisa:
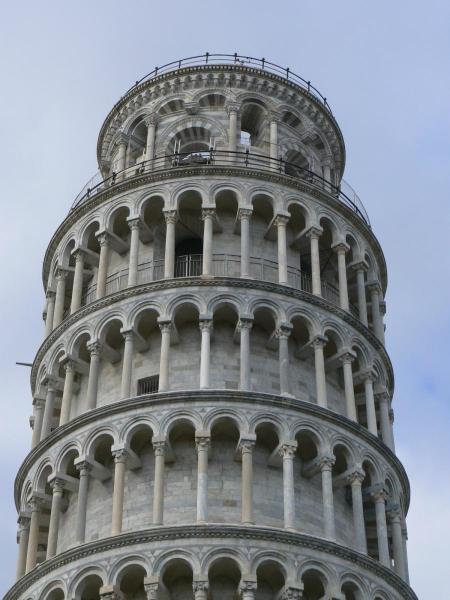
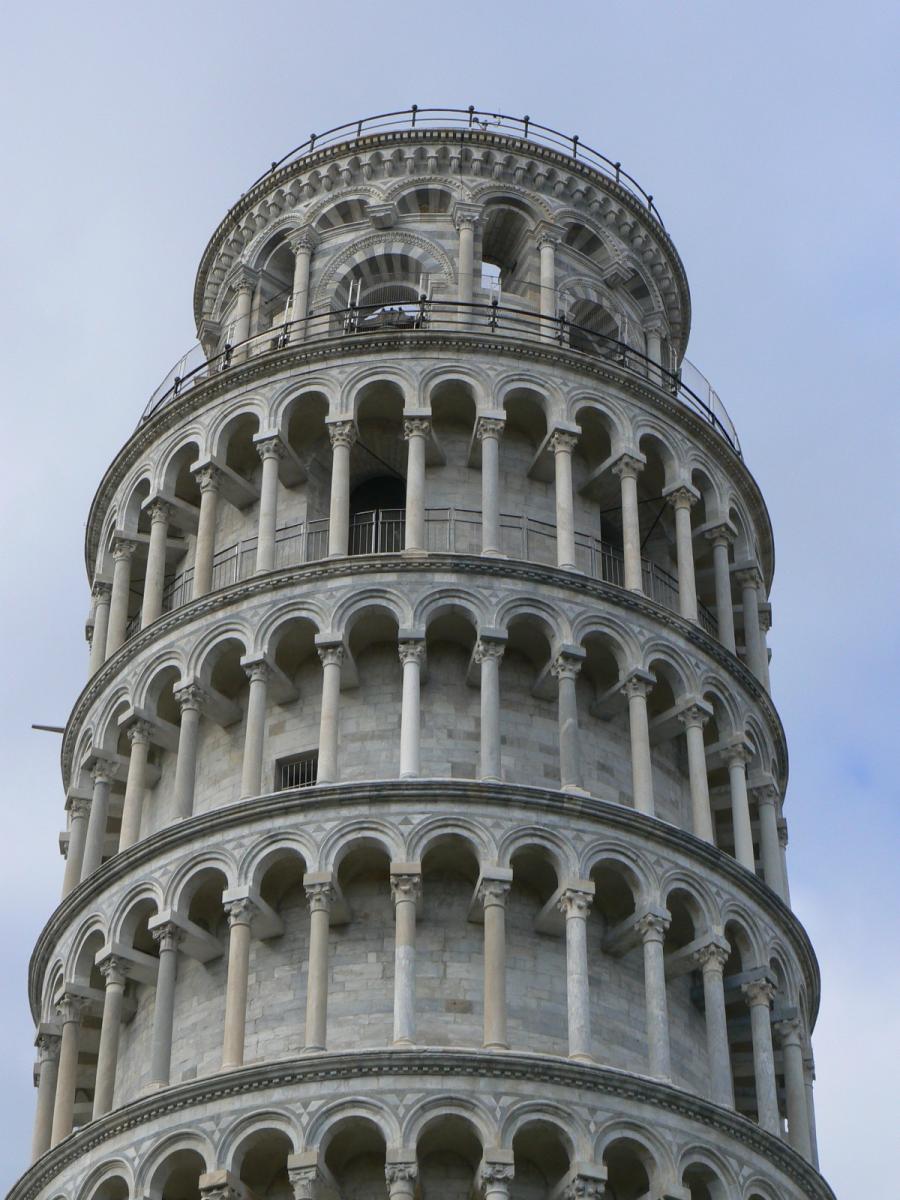
05 - And this is the famous Tower of Pisa:
- tarbrush, avsjerome2003, Polux and 1 other
-
 4
4
-
Just a very short comment: be patient because there is a lot of material to translate, altough I think to have enough time till now to add messages.
Today I started to add something about the current status in the other log, but soon I will start with this one. Cheers, Jack.
-
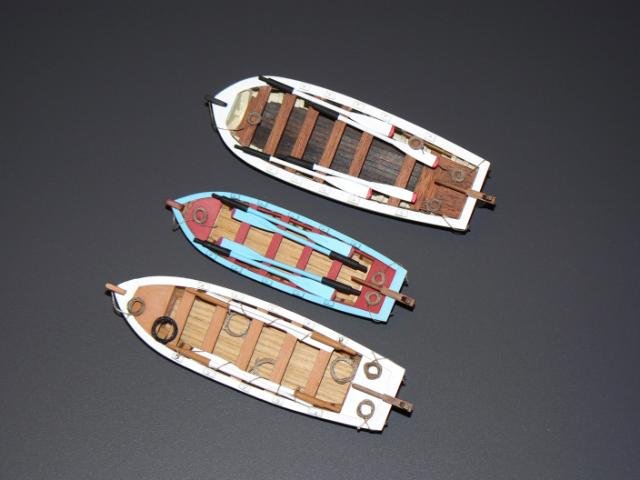
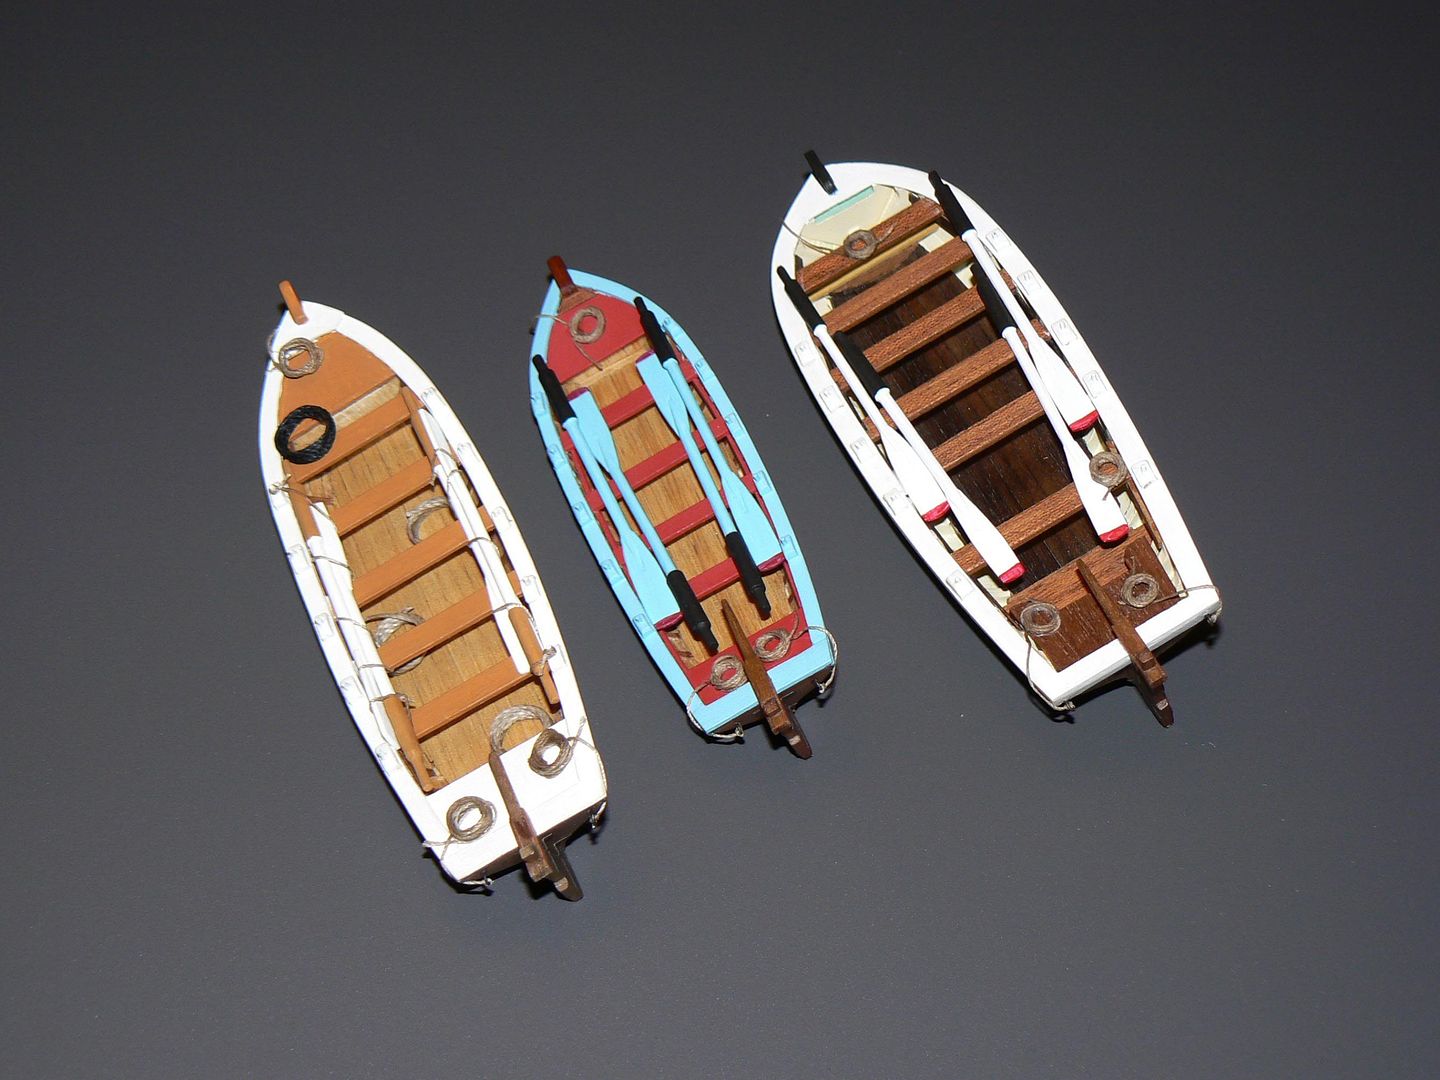
Tuesday November 13, 2012 - Ship BoatsHere are all the ship boats completed . .The boat in the middle of the images will be installed on board, above a cradle, ready but non yet installed.The remaining two boats (white coloured) will be installed on the display case basement in the proper location.01
 02
02 03
03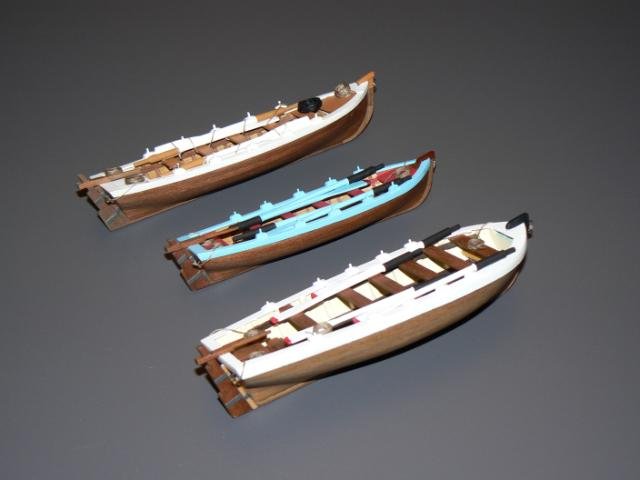 04
04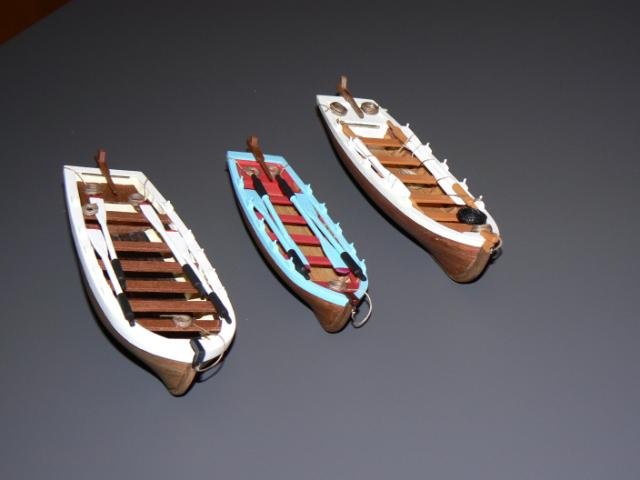 05
05 High Resolution Images:
-
Additional five images of the model . .Any question ?The model stays on the woodden part of the final display case I have designed and prepared for it. The transparent cover will be in plexiglass but I have to wait for it until I will know the right height of the whole.The model will be finished as an "Admiralty Board Model" style.01
 02
02 03
03 04
04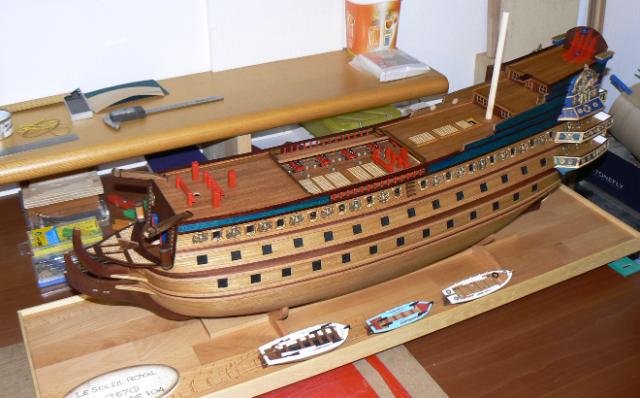 05
05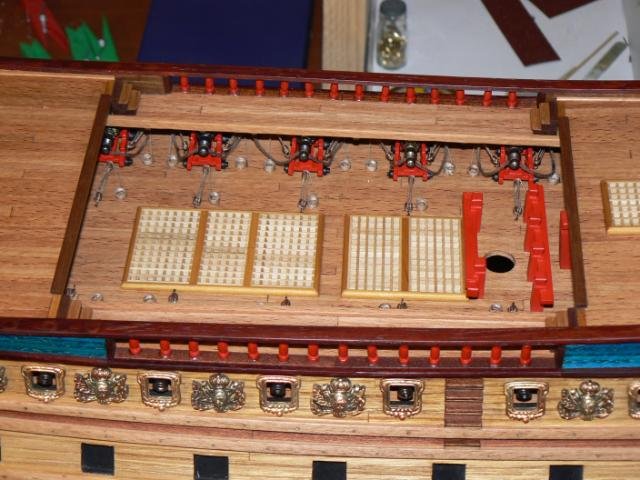 High Resolution Images:
- avsjerome2003 and Jason
-
2
-
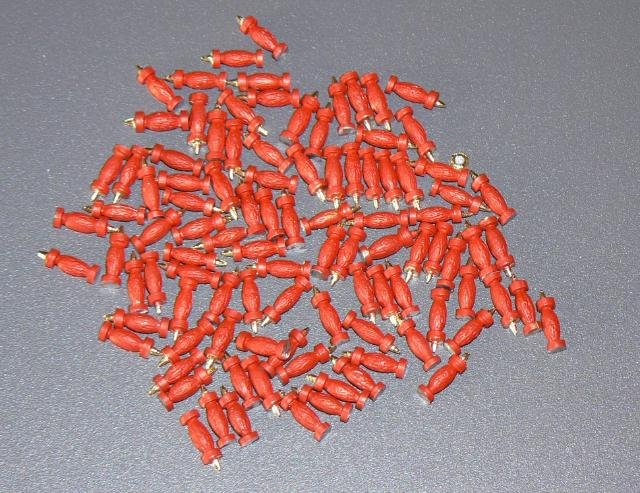
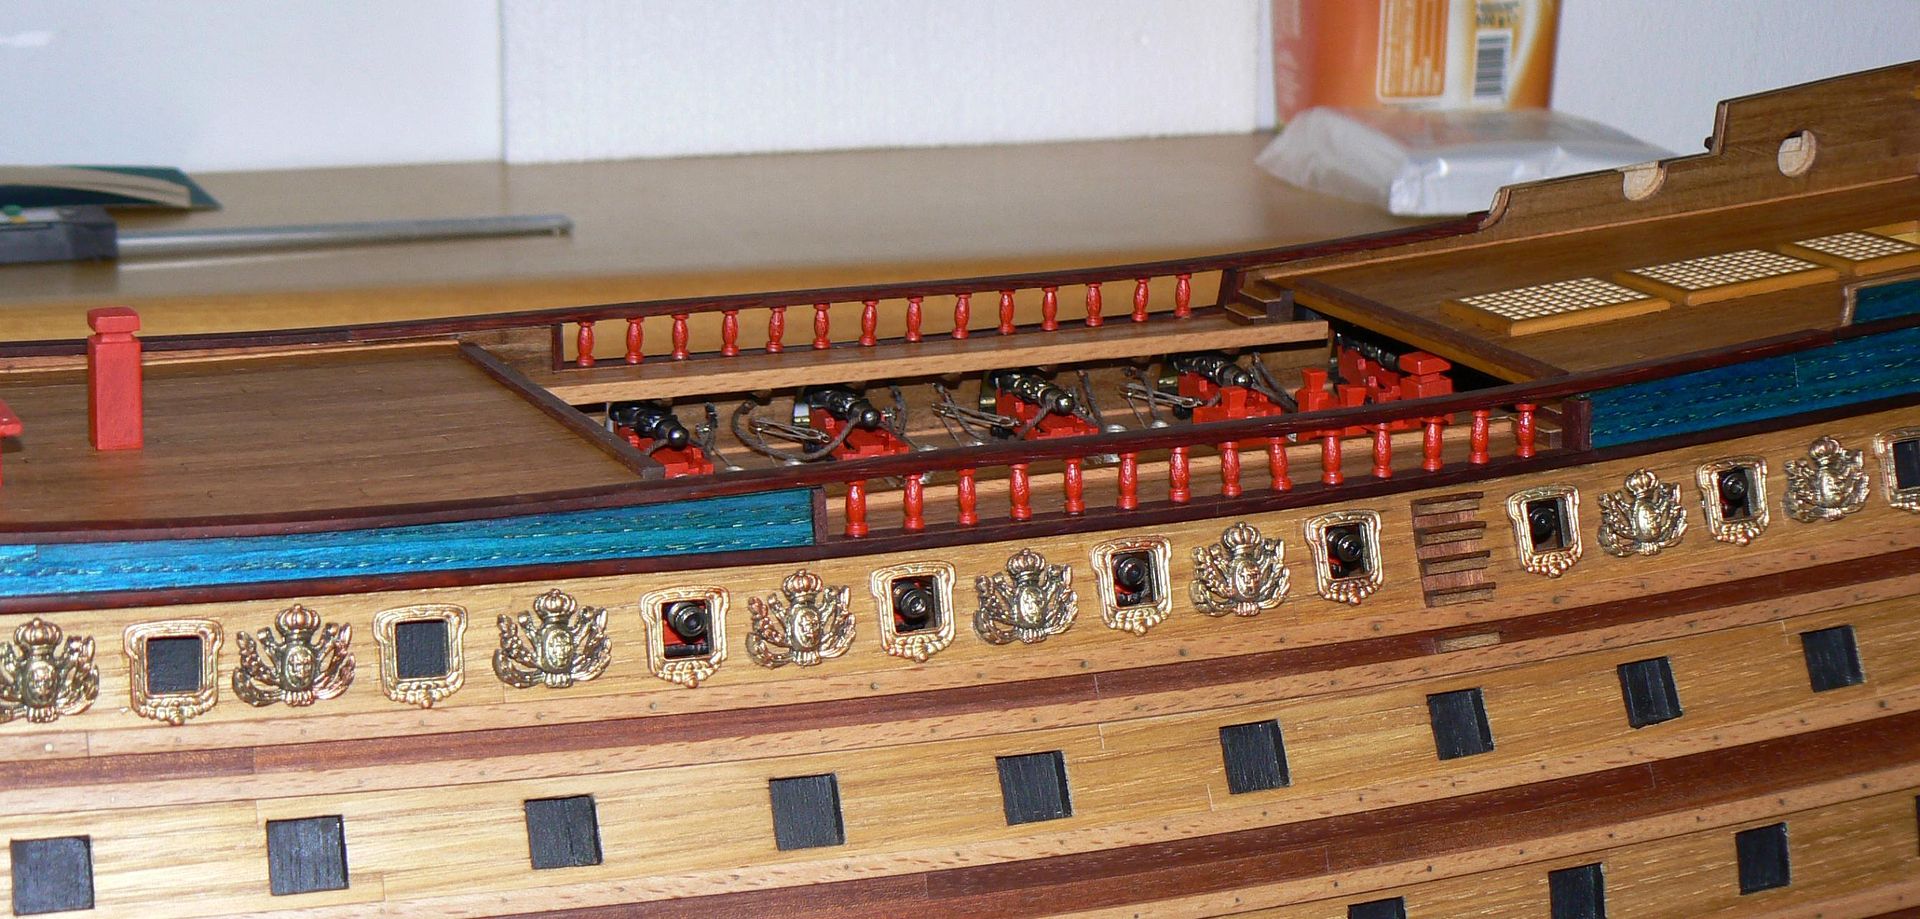
Monday, November 12, 2012 - Something last before closing the shipyard . .Just some days ago (remember the date above), while I was preparing to move myself and my family to Tuscany, I found some free time and I did some new work on my Soleil Royal, with the main objective to achieve new experiences useful for the future, when I will have to do the same on other remaining pieces of the hull.So I decided to build a segment of the gunwale, more precisely the gunwale just above the third gun deck. This detail is made with metal die cast pillars that I have previously coloured with a red polyurethane enamel. Here below an image of these pillars.
 I prepared a specific working plan to achieve this step and I got the conclusion to:
- Use the epoxy glue (two-components) to glue the metal pillars to the deck and to the hull.
- Adapt a plank (size 2 x 7mm) to the camber of the hull by adopting a trick consisting of using 2 stripes of 2 x 3,5mm glued together over a template reproducing the deck shape. The result should became a final plank of 2 x 7mm having the same curvature of the hull.
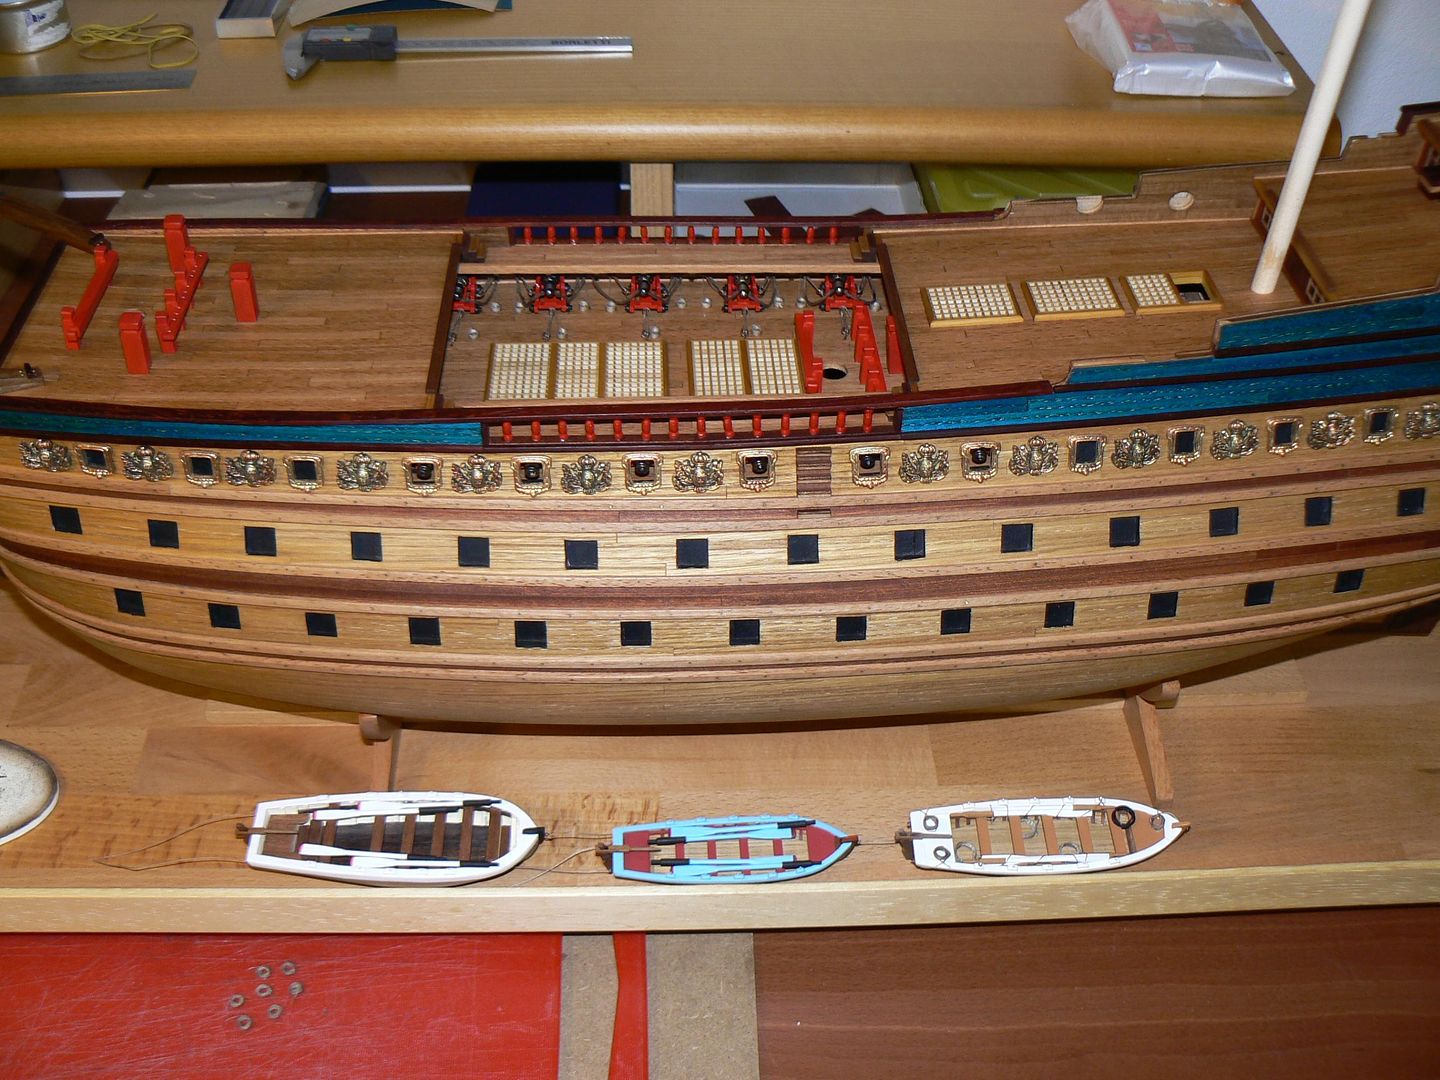
Because of the time needed by the epoxy glue to dry, I spent the first day to glue the pillars to the deck and the next day to install the gunwale prepared at the second point listed above. The pillars are glued to the gunwale with the epoxy while the gunwale is glued to the deck with the vinyl.I didn't found particular problems to solve: the only problem was that the pillars were non all with the same height and, after the first day and before installing the gunwale, I had to level all of them with a mini drill and a lot of care . . .The third day was dedicated to refine the previously done work and to complete some components of the three boats (rudder, ringbolts, rope rolls, etc.). These small components will be installed soon on these boats to finally have them "really finished".Here below five images of the work done . .they also show my Soleil Royal as it is today . . I spent more or less three years to land here . . .01 02
02 03
03 04
04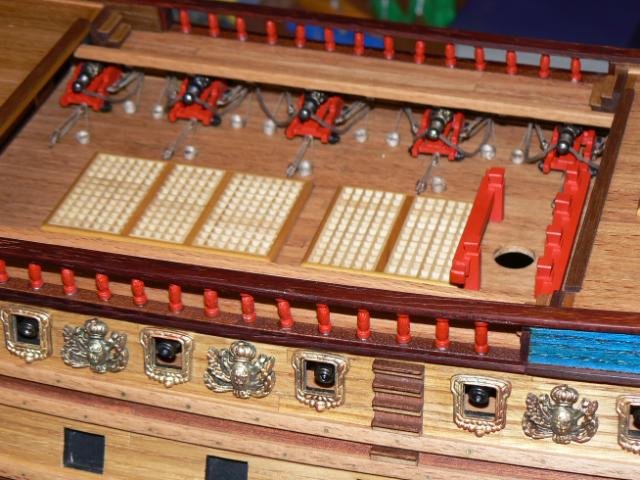 05
05 High Definition Images:
 -
Hello to everybody
 ; before starting another important explanation . .
On December 1st, 2012 I left my home near Milan to come in a small town near Pisa (Tuscany) named Calci. I am still living in Calci and I plan to come back to Cinisello Balsamo, where I usually live, at the end of April 2013.
My workshop is located in Cinisello Balsamo, so, I stopped at the end of November 2012 any activity about shipmodeling and I will resume them in May 2013.
I think the best way to start this building log is to show the situation as it was in November, just to give you an idea of how my Soleil Royal appears now, by inserting in the next messages some of my last messages I wrote in November, just a couple of weeks before I closed the "shipyard".
I will insert in every message the real date the message belongs, this in order to maintain a chronological sequence.
In the meantime, until when I will resume the work, I will maintain the other building log; log that will contain all the work done in the past. This log is located at http://modelshipworld.com/index.php?/topic/1044-le-soleil-royal-by-jackaubrey-de-agostini-scale-170-build-log-from-18042010-to-08032013/
See you soon, Jack.Aubrey
-
Hello to everybody
.I introduced myself in http://modelshipworld.com/index.php?/topic/1044-le-soleil-royal-by-jackaubrey-de-agostini-scale-170-build-log-from-18042010-to-08032013/
I'm working on a model of the french "Le Soleil Royal", from De Agostini.
This is the second segment of the Build log about this model, covering the activities that I will start since tomorrow until the end of this project.
See (or better read) you soon, Jack.
-
Hello to everybody
.My nickname is Jack.Aubrey and I was in the past a strong follower of ModelShipWorld, both with my own logs and as a normal, simple but very interested reader . .
I knew some days ago what happened to the old Modelshipworld forum . . it was a big loss, a dramatic loss. I hope for the future this will never happen . . anyway I have decided to participate actively to this new adventure.
I'm working on a model of the french "Le Soleil Royal", from De Agostini.
I started this new project on Sunday April 18, 2010 and I have maintained a personal WIP on http://www.deagostinipassion.com/forum/posts/list/24639.page since that date.
Unfortunately it is in italian language so it may be probably difficult if not impossible for somebody to follow it, so i decided to translate part of it here, starting from the beginning.
In order to have the possibility to post the past and the present, I have decided, if accepted by the forum staff, to split the log in two segments, the first is this one, where I will post my work from the beginning until now and a second one where I will put the messages of the work I will start tomorrow until the end.
In this way I think to show easily my work, without to wait to complete the past before starting with the present and future.
See (or better read) you soon, Jack.


Le Soleil Royal by jack.aubrey - FINISHED - De Agostini - Scale 1:70
in - Kit build logs for subjects built from 1501 - 1750
Posted · Edited by jack.aubrey
I'll try to explain the method I used: if the hull is well aligned, the four angles corresponding to the first and the last bulkhead should be totally parallel. So if I overturn the hull and I put it backwards on a perfect horizontal plate (i.e. a glass plate or something similar) the hull must be perfectly stable, without any unstability. In practice it is as you take a table or a chair and you check its stability: if it is stable and doesn't move it means the four legs a right.
01 - P1060218.jpg
Now I check the support of the last bulkhead: there are no points of unstability on both sides . . .
02 - P1060216.jpg
Now I do the same with the first bulkhead, Here too the alignments are right . . .
03 - P1060217.jpg
In my mind this means that both are parallel and consequently the hull is aligned. And the other bulkheads ? Simple, I have taken measurements of their distance from the plate, on both sides, for each bulkhead and if it is the same (as they luckyly are) it should mean that they are parallel to the first and the last bulkhead . . .
04 - P1060208.jpg
See you soon, Jack.Aubrey