

bensid54
-
Posts
531 -
Joined
-
Last visited
Content Type
Profiles
Forums
Gallery
Events
Everything posted by bensid54
-
 This is why guys like you Micheal can do restoration so well you can see the tiniest details and it shows your true love and interest in this hobby. I looked at those pictures and couldn't spot any difference other than they were in different locations. The thing that stands out the most for me is it's too bad the original builder didn't make those windows on top more realistic, then again are they windows?
- 749 replies
-
- 4
-

-
- albertic
- ocean liner
- (and 2 more)
-
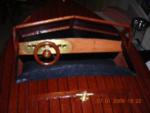
Looks great, it's truly a pleasure to admire your great work.
- 749 replies
-
- 3
-
-
- albertic
- ocean liner
- (and 2 more)
-
Don't mean to change the subject, but what is that very nice setup you have for holding parts. Did you make it yourself?
- 749 replies
-
- 3
-
-
- albertic
- ocean liner
- (and 2 more)
-
Colin most people that are not modellers would consider your workshop one of a pack rat. I must admit I am guilty of the same sort of housekeeping, but like you I know where everything is! Nice job on the boat by the way.
- 749 replies
-
- 3
-
-
- albertic
- ocean liner
- (and 2 more)
-
For me overkill is best with something like that beauty.
- 749 replies
-
- 1
-
-
- albertic
- ocean liner
- (and 2 more)
-
I realize this repair is way out of my league but I do have a suggestion that someone likely mentioned. Bolt the display to the table and bolt the table to the floor, that's it that's my two bits worth now I'll sit quietly and watch the progress.
- 749 replies
-
- 5
-
-
- albertic
- ocean liner
- (and 2 more)
-
Thanks Pat, that boat took about two weeks worth of head scratching to figure out how I was going to do it. Getting the oars to enter and exit the water with little splashing and as human like as possible was the big challenge. This is a video of the mechanics that sit below deck.
-
Dan I plan on having him paddle around in pools and ponds on a calm day. Yes the Charon most are familiar with does use a pole to push himself across the river Styx but I don't have any shallow rivers to pole across. He will be remote control when I'm done and hopefully before the end of summer this year if not then summer next year. Here is a video of my last project.
-
Something that never crossed my mind Mark regarding the clothes a good idea if I make a fisherman in a row boat which I have given some thought to. The time of Charon was a time when robes were the norm so he will end up with a black cloak. Pat I was thinking about that and I'm thinking about using dowels around his arms and legs but still not sure what to do with his back. Basically I plan on only having his face and hands exposed.
-
I've done more work such as lowered his left arm so he doesn't smack himself in the teeth any more. Any suggestions as to how I can fill his body in to look more human than Terminator he looks like now. Keep in mind it has to be easy because I failed art class.
-
Did some more work on the weekend. I machined a sleeve to connect his head to the servo then mounted the servo to a bracket soldered to his back, the video will give you a better idea.
-
I think you are right Mark. The faster speed was after his morning coffee
-
Charon's final frames first video. Any suggestions as how to improve his paddling would be greatly appreciated.
-
Not sure about the eyes yet. Thanks for the compliment I will put in the video of him in action tomorrow.
-
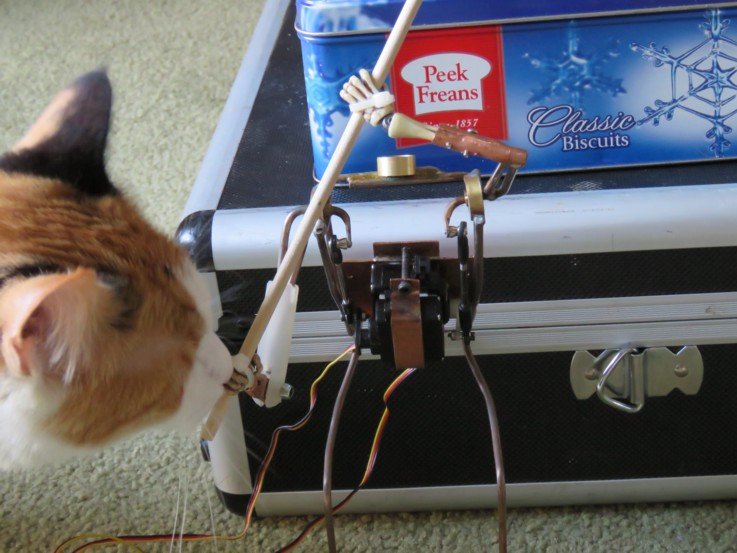
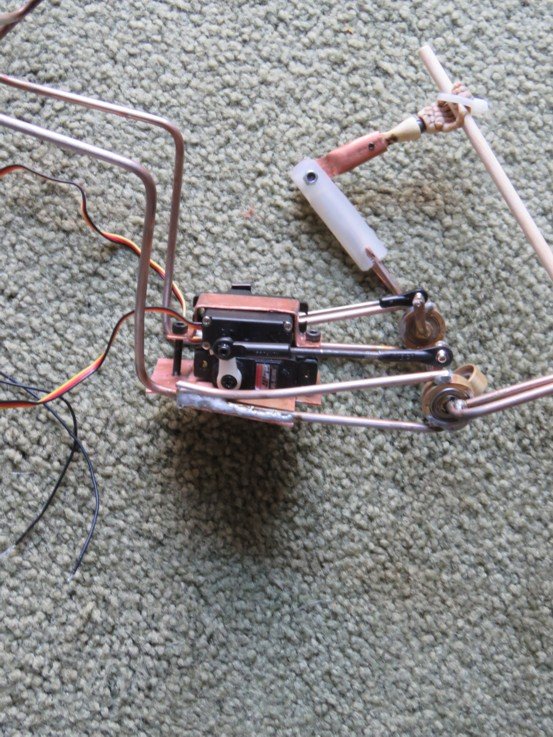
Linkage made and installed. One of the rods had to be cut down and cut to 3 mm with my little die plus I had to drill out the ball link and thread that to 3 mm. In one of the pictures you see the savage beast I had to save Charon from when she was trying to eat his wire. Next will be a video of him in action.
-
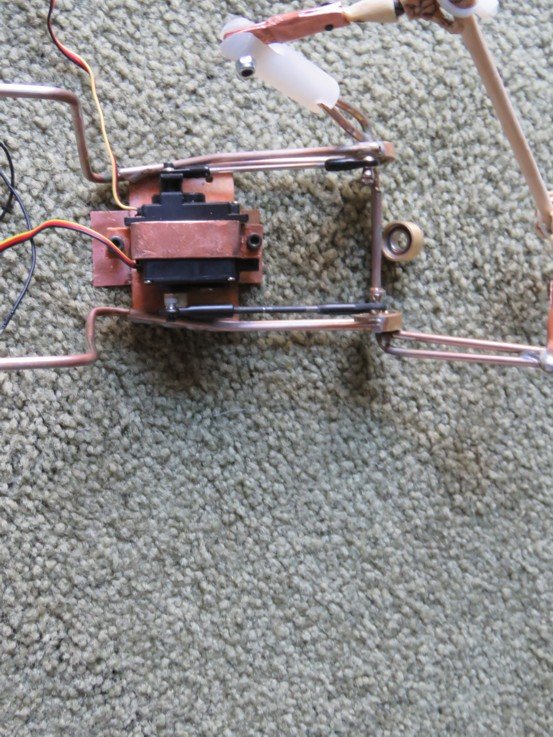
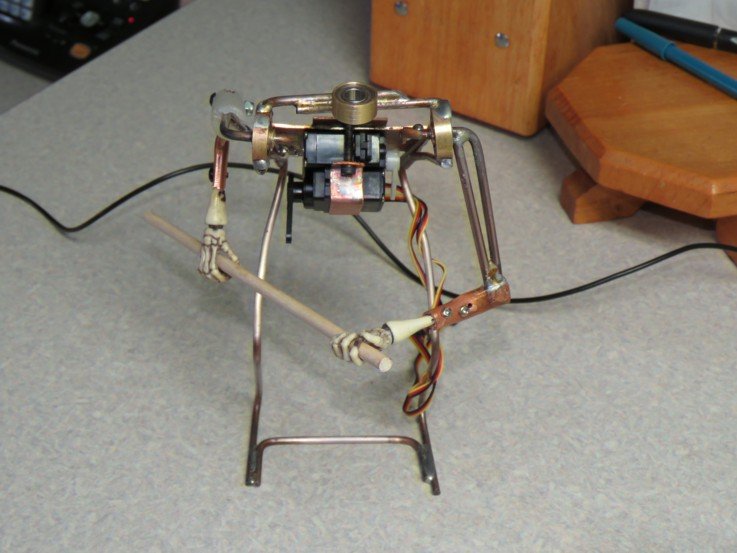
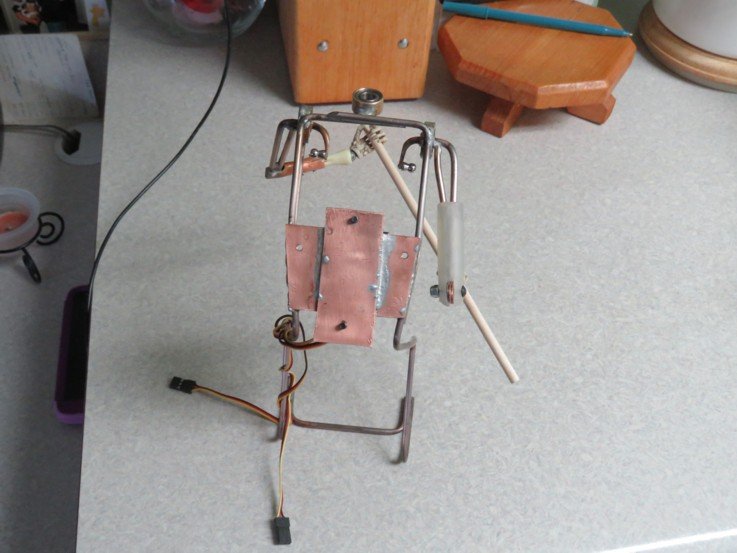
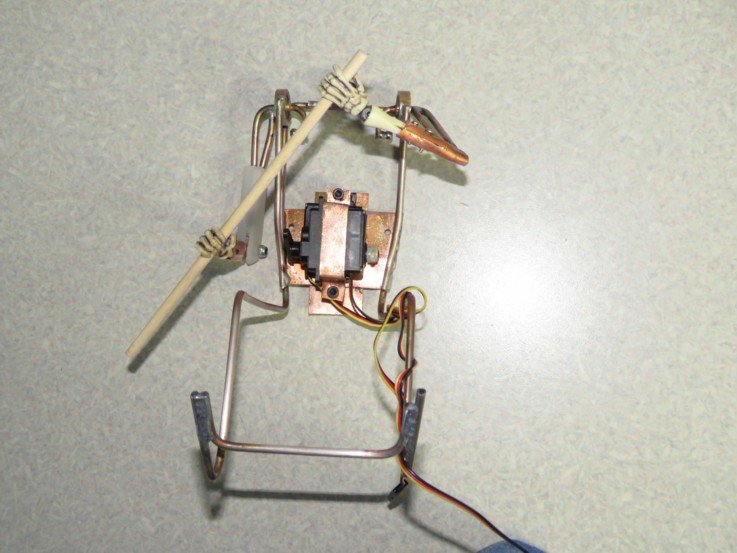
Roughed in servos and mount. Next will be to clean that up then build linkage and after that I'll figure out the angles so my extremely intelligent and modest friend in the UK can program the board for me. The servo with the arm hanging down won't stay that way I just have to remount it.
-
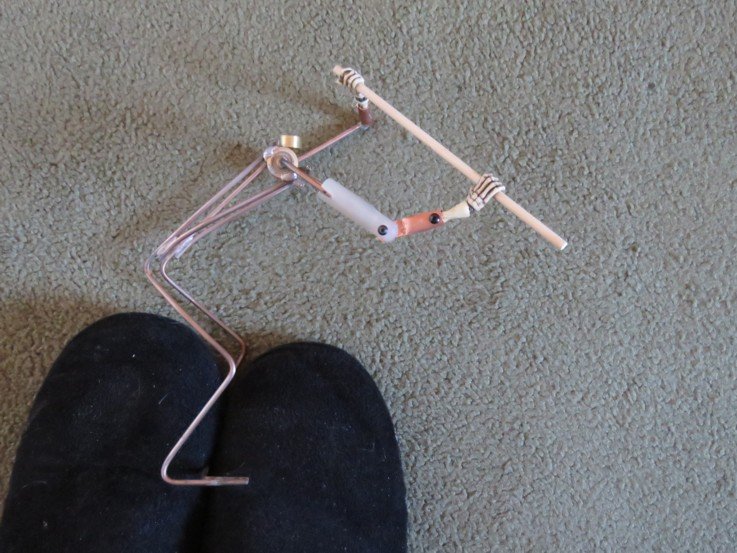
Return stroke.
-
Paddling stroke oar in water.

-
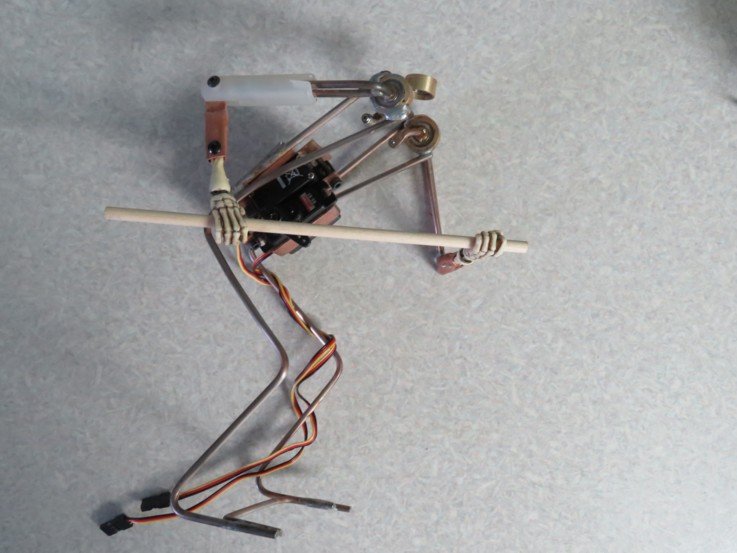
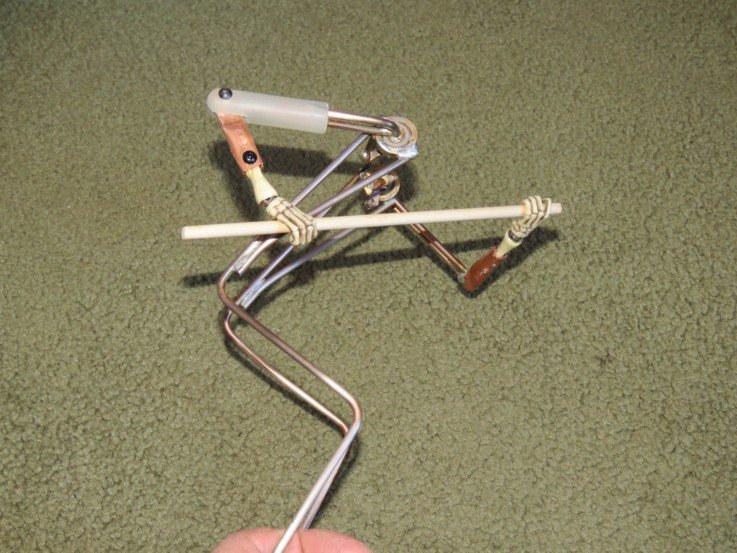
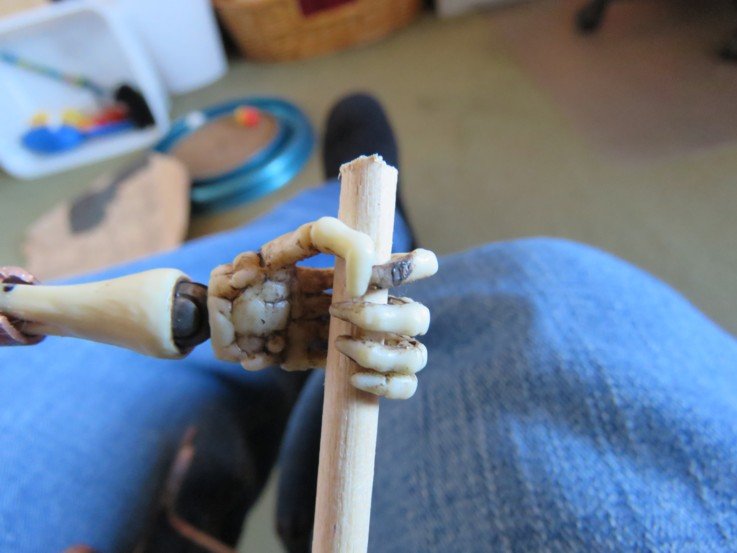
The oar as it will fit his hands and a front shot of him holding the oar. Next steps will be mounting the servos but the size of them is still up in the air.
-
Thanks Nils. The paddle will be set at an angle to offset the tendency of Charon to go in circles. The angle of the paddle will have to be determined once I get him in the water. Yes I will have a rudder at the bow in the form of a break in the keel (I think) to steer the vessel and help compensate for him wanting to paddle in circles and to direct his course.
-
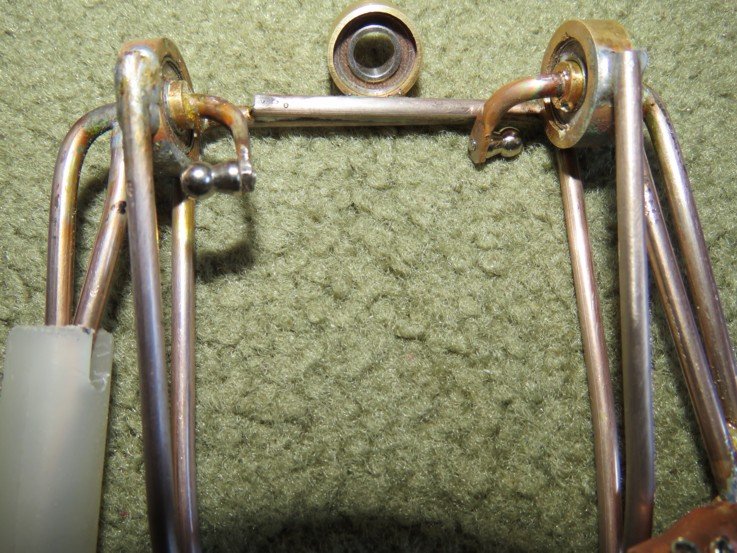
The ball links installed for both arms.
-
Thanks Pat I'm starting to get into this build so the posts should be often until he is finished. You know I'm not sure whether it's rowing or paddling I think it takes two oars to row but I'm not sure about the definition of paddling.
-
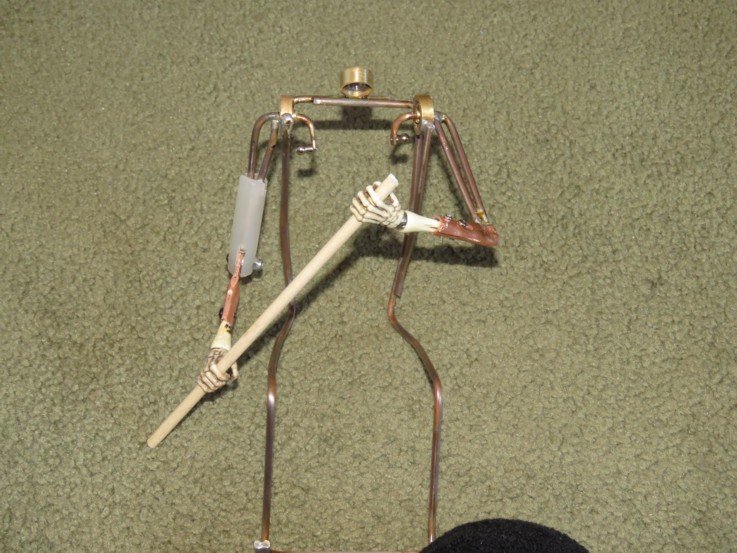
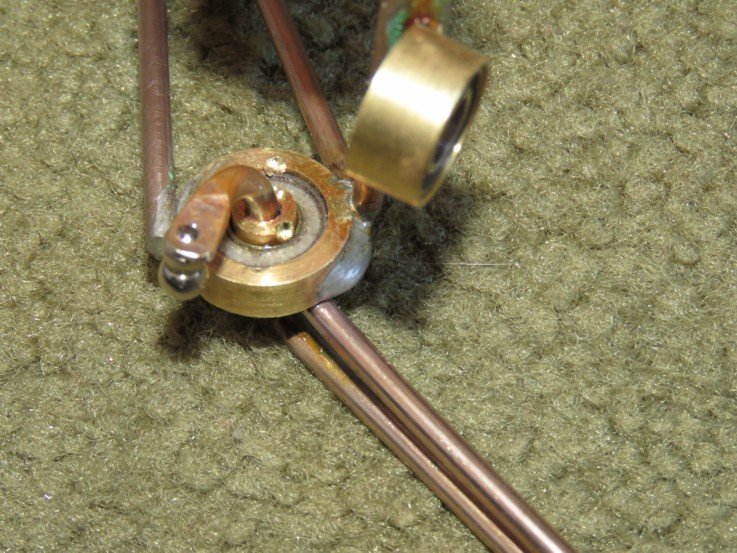
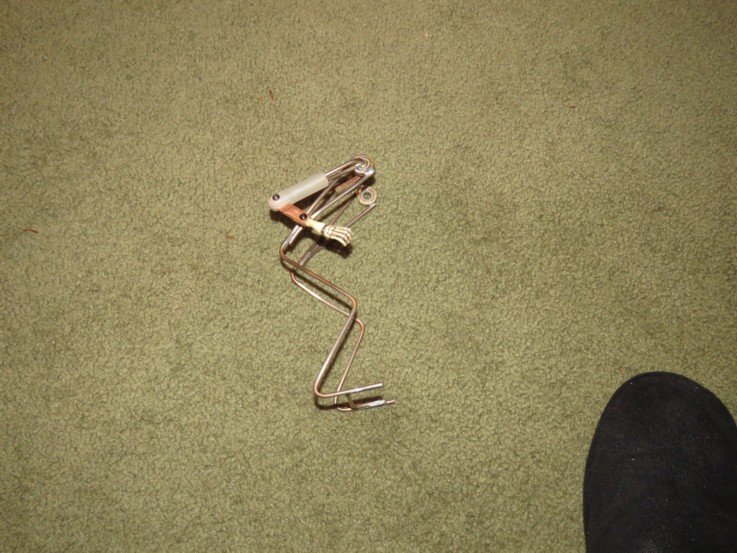
Left arm structure completed. The body and arms will all be finished with putty or something I can form around the moving and non moving parts. The second picture is the shoulder bushing in the shoulder bearing and staked to stop it from sliding out.
-
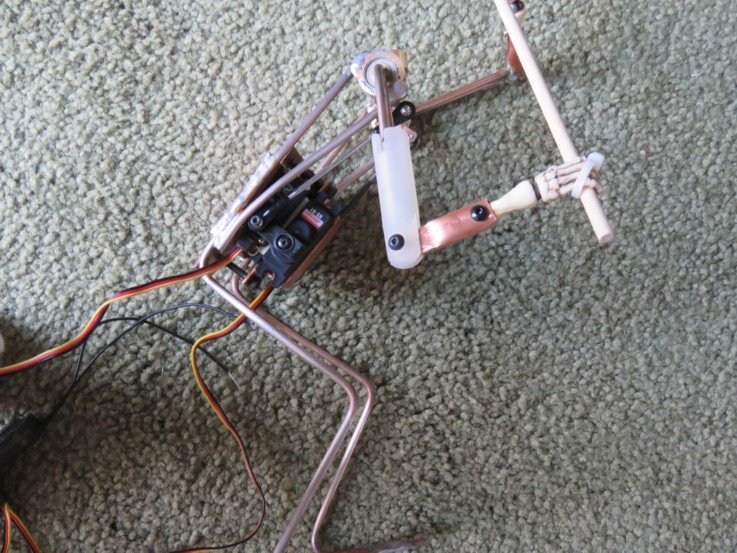
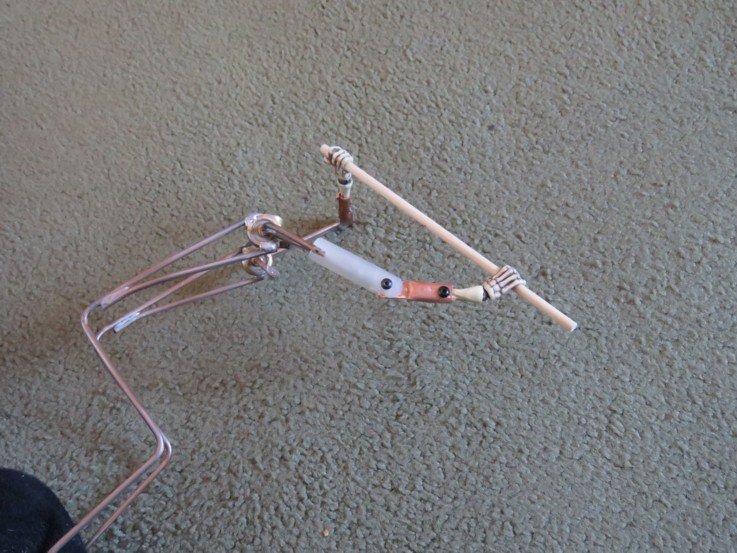
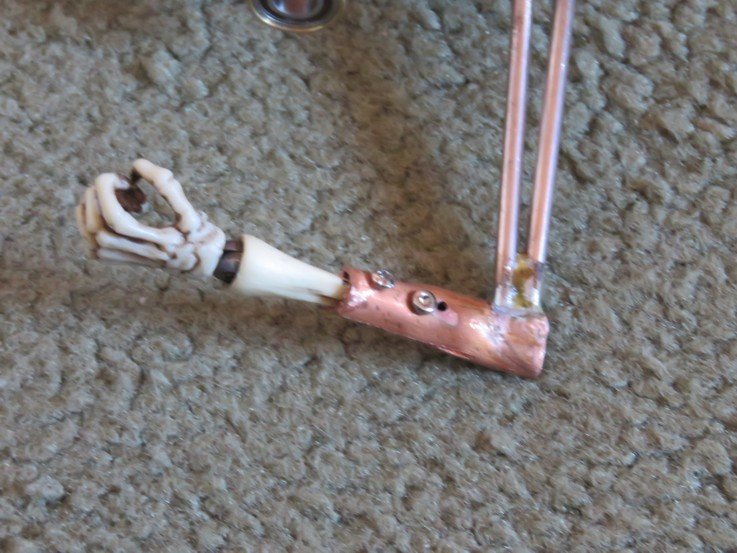
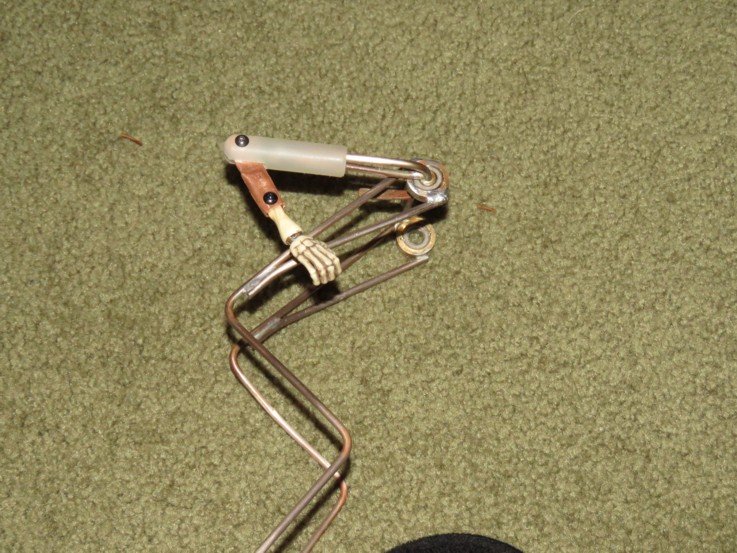
The right arm and it's rowing motion. The arm is not finished yet, it is still too long at the upper arm and rather crude looking at the forearm. I had to heat the plastic skeleton arm and twist it 90 degrees to get the proper bend of the wrist while in motion. I squeezed the copper tubing tight onto the forearm drilled through the tubing and skeleton arm. I tapped one side of the tubing then passed a screw through the untapped side and into the tapped side then I was able to clamp the skeleton arm securely in the tube. The nylon part was turned on my lathe and drilled in the centre up to where the elbow joint is. I milled the area where the forearm would swing during the rowing motion then drilled the nylon tube and forearm to create the elbow.
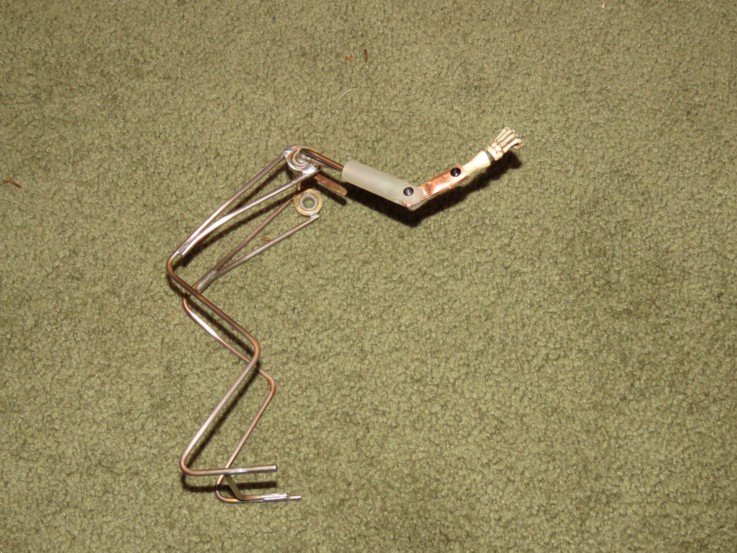
-
Because the arms will be covered by the arms of his cloak they won't be seen unless I lift the sleeve. I agree with you Banyan regarding the look but that will only be seen during the build. The right forearm will actually be free moving between the wrist and elbow and will operate on the same principal as a piston, rod and crankshaft. The only powered part of both arms will be at the shoulders. The left arm will be static from the shoulder to the hand except for the shoulder, it's job is to be the fulcrum of the oar and to raise and lower the oar. The right arm will be powered to move the oar fore and aft and to allow the forearm and oar to float up or down depending on the movement of the left arm. The arms of the cloak will cover the mechanics, plus I intend to put putty or something of that nature to help with his physical shape. I was going to make a nylon sleeve of a sort to slide onto the upper arm then use the tube with a drilled flattened end to insert the skeleton forearm into. So far the vote has been 75% in favour or using nylon.