HOLIDAY DONATION DRIVE - SUPPORT MSW - DO YOUR PART TO KEEP THIS GREAT FORUM GOING! (Only 20 donations so far - C'mon guys!)
×


mkmossop
-
Posts
109 -
Joined
-
Last visited
Content Type
Profiles
Forums
Gallery
Events
Everything posted by mkmossop
-
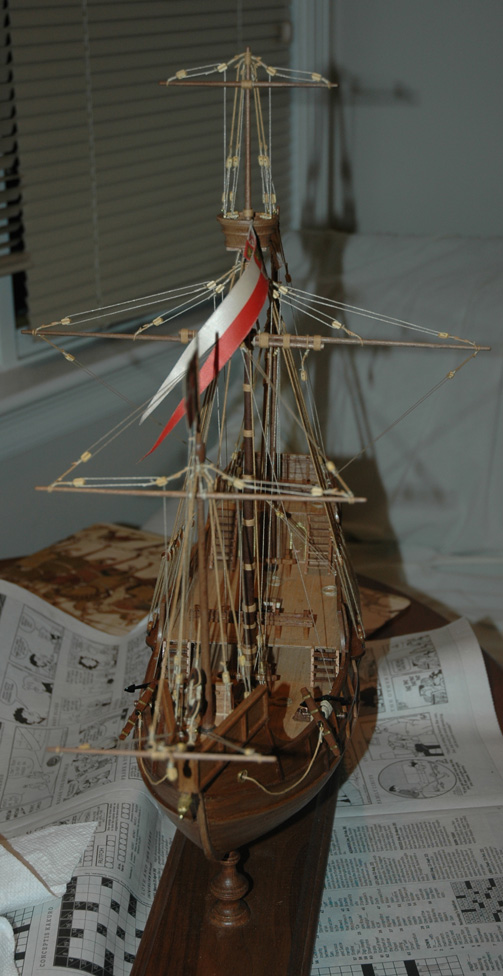
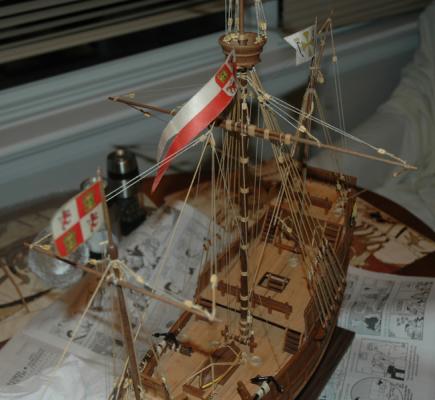
Finally got them done... had to redo them a couple times to get it right. I think it looks far better than the first time I did them. Still need to trim the loose ends of thread. Thanks for the help!
-
Thank you for the replies. I wish I had an iron on decoration but I don't. I had to paint them on, so hopefully it's ok to sew over. I will be adding some ropes around the edges for sure. Is there a specific stitch to use for fastening the ropes around the edges of the sails?
-
I don't know I never considered not sewing them. On most of the ships I've seen the sails are sewn I guess is why.
-
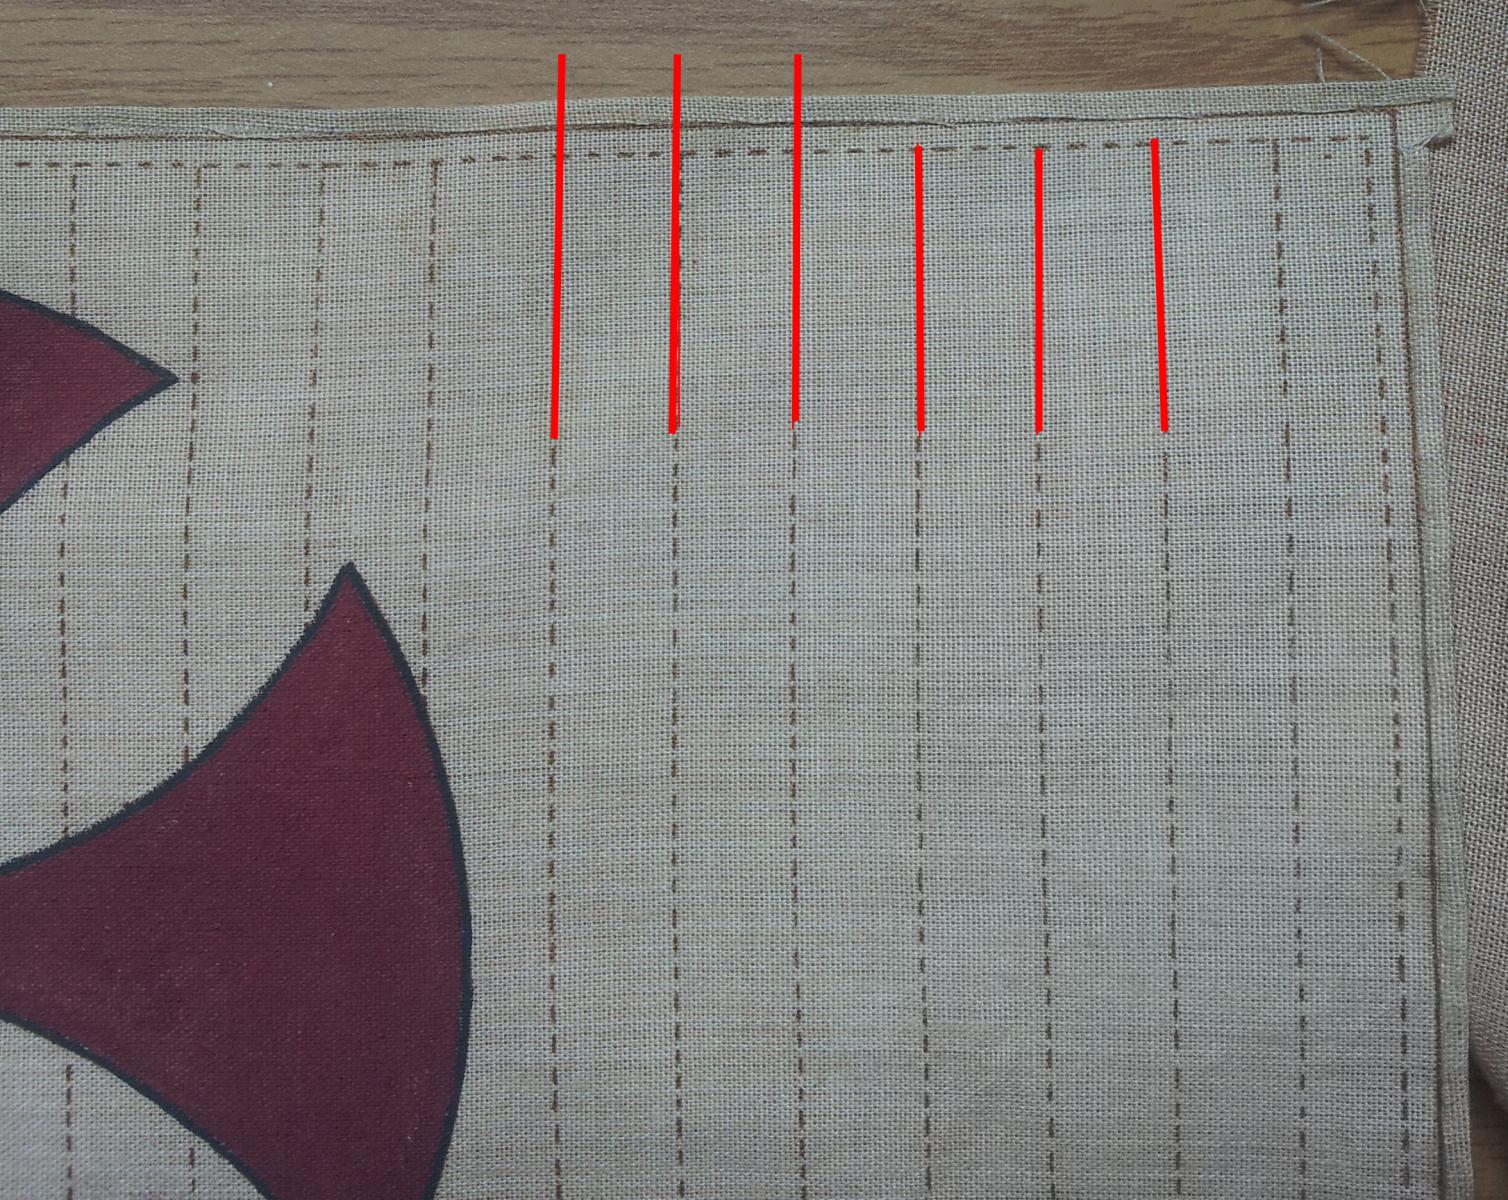
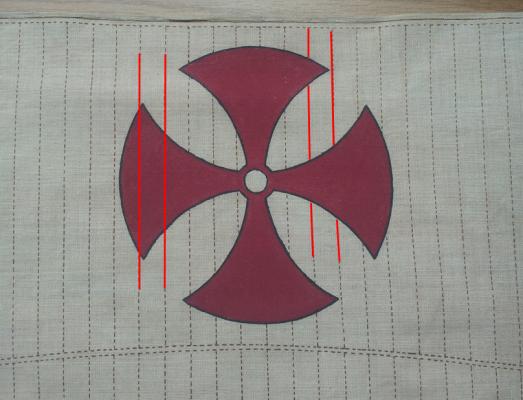
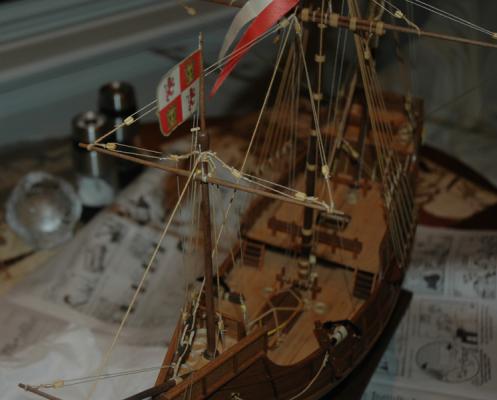
Here are a couple pictures of my sails. I've painted the emblem on the front already. My first question is, do I sew through the emblem (like the red lines on the left), or do sew just to the edge, and then stop and start again on the other side (like the red lines on the right)? If I sewed through them I would paint over the thread to blend it in. Second, on the second picture you can see where I've folded over (and glued) the edge of the sail to prevent the thread from fraying. I'm going to fold it over once again and then sew over the folded edge. So basically from the dotted line to the edge of the sail will be half of what it is now. Is this too small a distance? Other sails I've seen it's much larger. There was a line near the edge of the sail and I just took it as the distance I should use. It's too late to change it now since this is my third attempt at the sails and I'm not buying another set. Thirdly, when sewing the vertical lines do I stop when I hit the horizontal lines near the edge (red lines on the right... second picture), or do I continue to sew straight over the edge of the sail (red lines on the left)? Then I would fold over the remaining part of sew it shut horizontally. Hope this makes sense.

-
Thank you for the help again. I'll use diluted glue I think. Will post a pic in a few days.
-
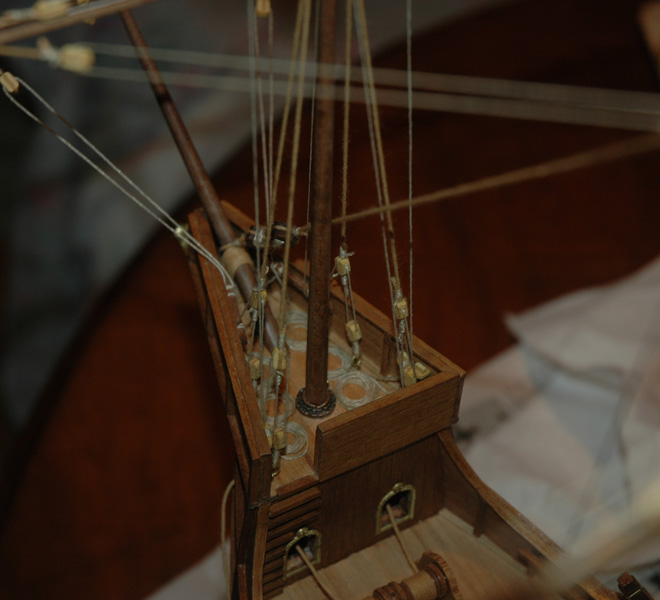
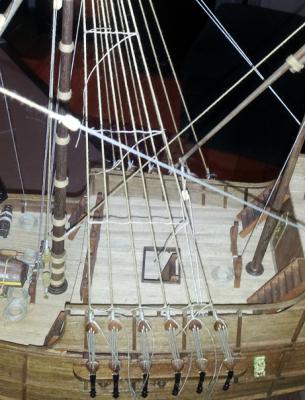
Couple more questions... 1) What vertical spacing should you use between ratlines? I've basically just been doing what I thought looked good. 2) What angle should the ratlines be on? Should it be in line with the deck / railing below? 3) Do you normally cut the loose ends of rope on the first and last clove hitch flush with the shroud? In most pictures there's no loose rope hanging off.
-
Clothespins... of course... why didn't I think of that. Thanks! Great tip... thank you . Yes I was doing first and last as well. I may try the varnish since the glue tends to show a little bit.
-
Any tips on getting this done? I found it difficult to keep the paper in place while drawing lines along the shrouds. Any pressure whatsoever against the shrouds and they would move out of alignment. I just thought I would get some wax on my fingers and get it on the thread from there. Thinking about it though, I'm going to redo it again with thinner rope again. Also, do people generally glue the clove hitch after tying it? I find the clove hitch on either of the outside shrouds always gets loose if I don't put some glue on it.
-
I don't think it would make a huge difference, but maybe a little. It's like getting them wet... all the tiny fluff that comes off goes away and it looks a little thinner. Anyway... why do you think it would be so difficult?
-
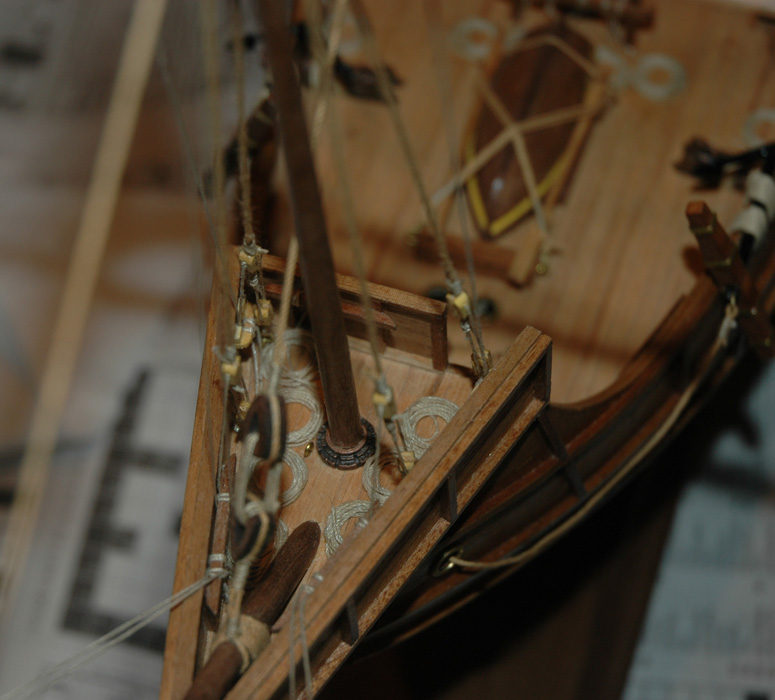
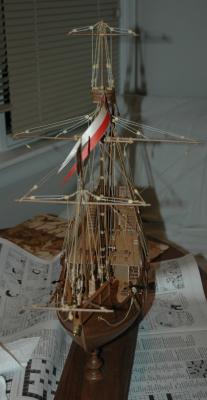
Interesting... thanks for the pics. I decided to redo the shrouds as well as the ratlines. I think it looks way better with the deadeyes closer together like this. Seeing how they were before looks kind of silly now. Anyway, I did every fifth ratline, and that seems to have worked to help me keep things straight. I'll fill in the others tonight hopefully. The ratlines may be a tiny bit thick still, so I was thinking of waxing them to make them look thinner. What type of wax would I use to do that?
-
Thank you for the tips everyone. I think I'll redo them using thinner string, and will use some of the tips suggested. The next thinner thread I have is significantly thinner, so I hope it doesn't look silly. I'll post a pic when it's done.
-
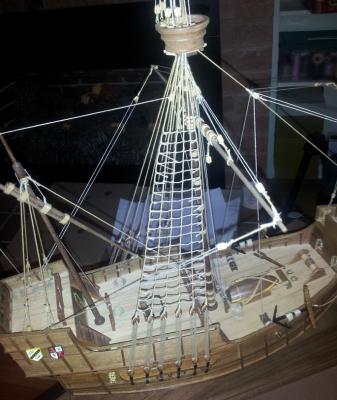
I just started the ratlines of my Santa Maria model and am very unhappy with how they look. I don't know if I'm just being obsessive, but to me there are major problems. I wasn't expecting this at all so I didn't prepare for it, but the ratlines seem to actually push the shrouds out to the sides so they don't make a straight line. I didn't consider that the strength of the string would be enough to change the alignment of the shrouds. It could look worse, but to me it's very noticeable that the shrouds aren't straight. It's especially noticeable at the top, however I think this will be fixed a bit when I put a few more ratlines on. I think one of my problems was that my shrouds weren't tight enough. I had issues when rigging them to get them really taught, and I think the looseness allowed them to become misaligned. Also, I notice that some people put up lined paper behind their shrouds to do the ratlines... I didn't think that was necessary as they were straight before the ratlines and didn't expect them to get pushed over. Anyway... I don't know what I'm asking. I guess there's no way to fix this without redoing them? I would really prefer not to... and especially don't want to redo the shrouds (although I know they also start way too high up). Other question... if I'm going to redo these, should I make the ratlines thinner?
-
Hmm ok I may try that... thanks .
-
The same as in the second photo? I'm looking for the one in the first photo.
-
Thanks .
-
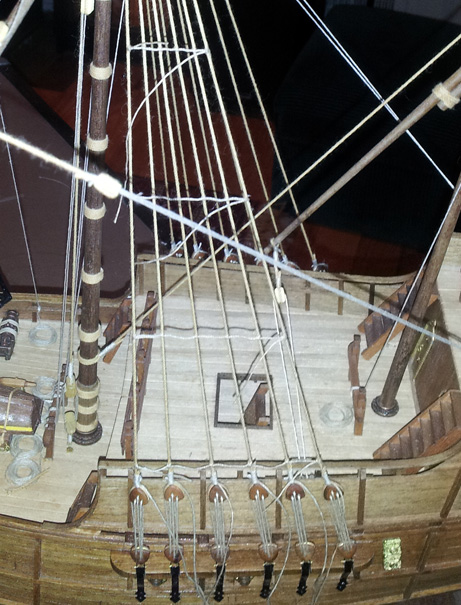
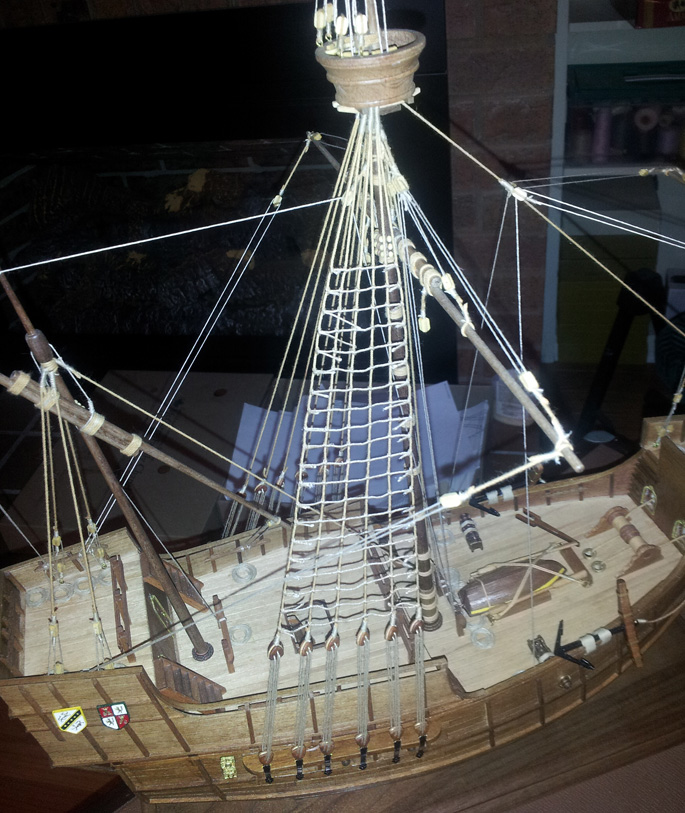
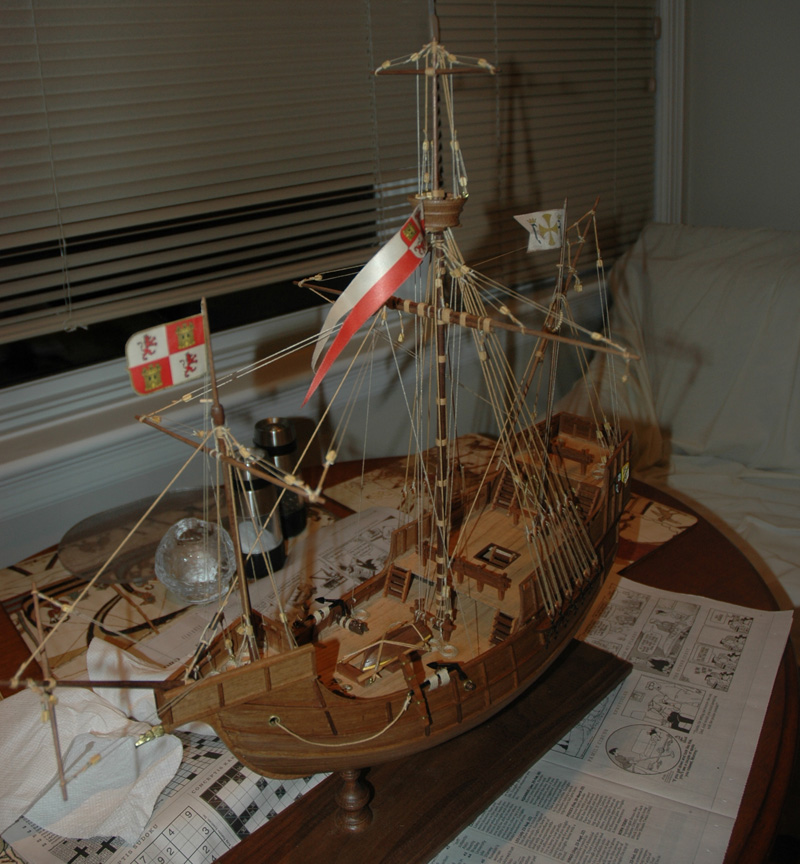
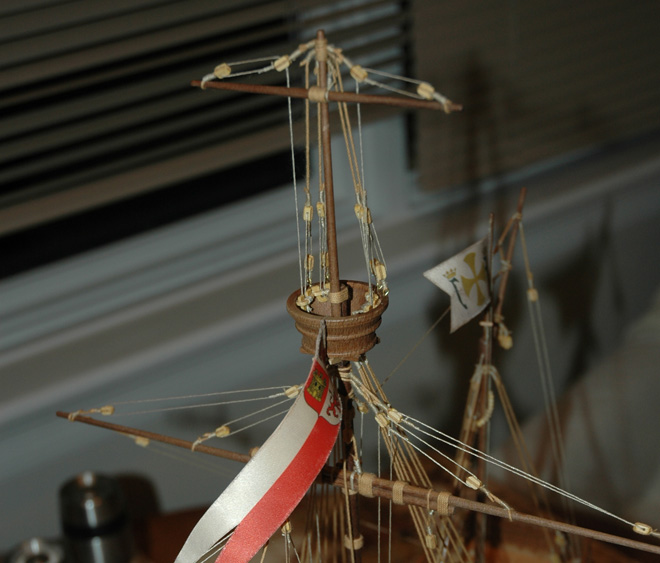
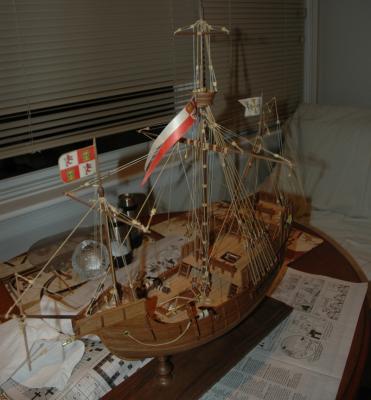
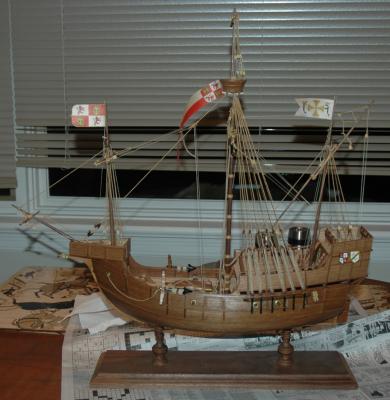
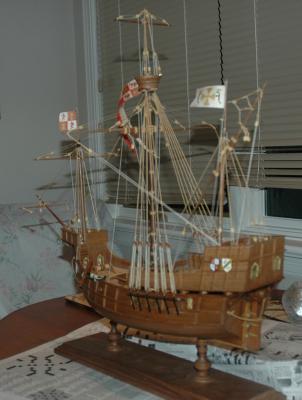
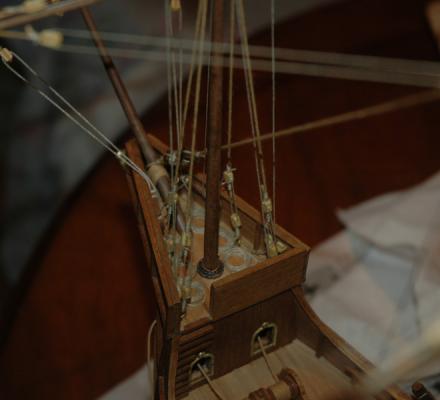
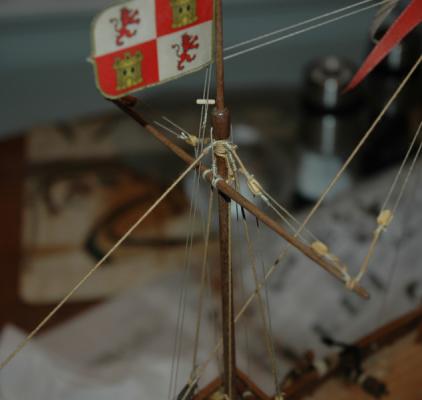
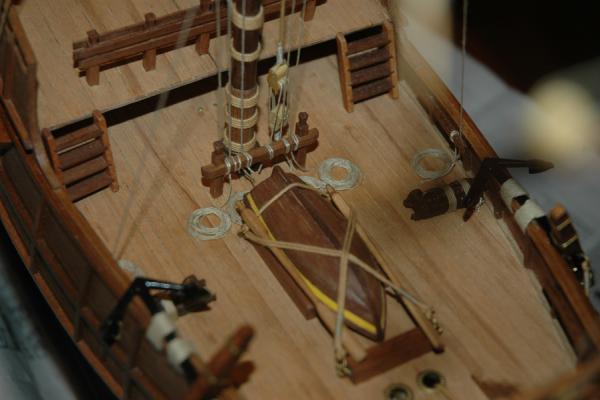
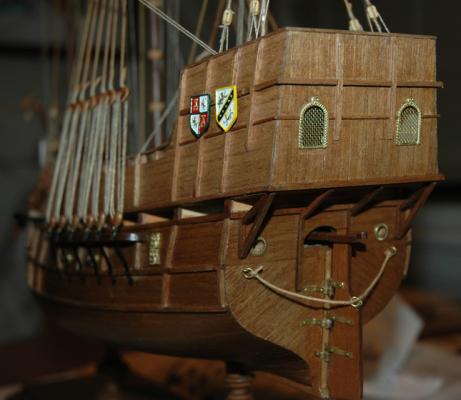
Got a bunch more rigging done this summer... hopefully this post isn't too picture heavy. I decided I'm gonna redo the flags because I rushed to get them up and the edges are frayed from when I cut them. Pictures are bigger if you click them.


- 29 replies
-
- 5
-

-

-
- santa maria
- amati
- (and 1 more)
-
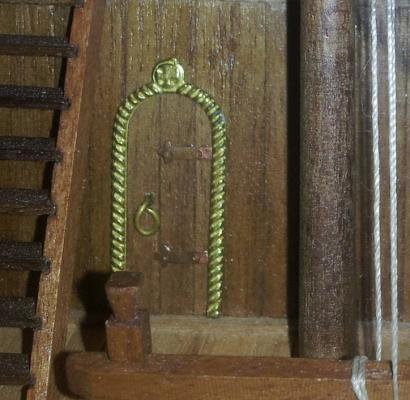
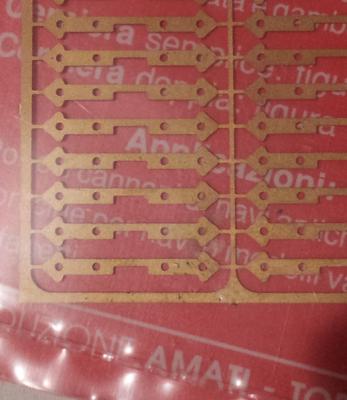
That's actually one of the places I bought the hinge from, and they sent the gold ones. I bought from there and from agesofsail.com. Maybe Amati doesn't make them like the one I got in my kit anymore, which sucks because I'll always be missing a hinge. I bought the kit maybe ten years ago. I guess I could try filing it, but I don't like the gold colour at all.
-
The water-glue mixture doesn't discolour the flag? Anyone else have any other methods? Edit: Just found this method, which seems like it would give good results: http://www.modelwarships.com/features/current/flags/flags.html
-
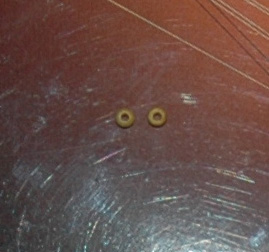
I'm looking for a replacement hinge for my boat. The picture I've attached isn't that clear, but you can see it's a copper colour, and has a clover-shaped head. It's an Amati kit and I've bought these Amati hinges from a couple different places (which looks the right part from the picture), but what I get is what's in the second picture. The head is triangular and it's gold in colour. http://www.agesofsail.com/ecommerce/fittings/am4130-gunport-hinges-no-pins.html Does anyone know where I can get the hinge I need? I'm not sure where else to look.
-
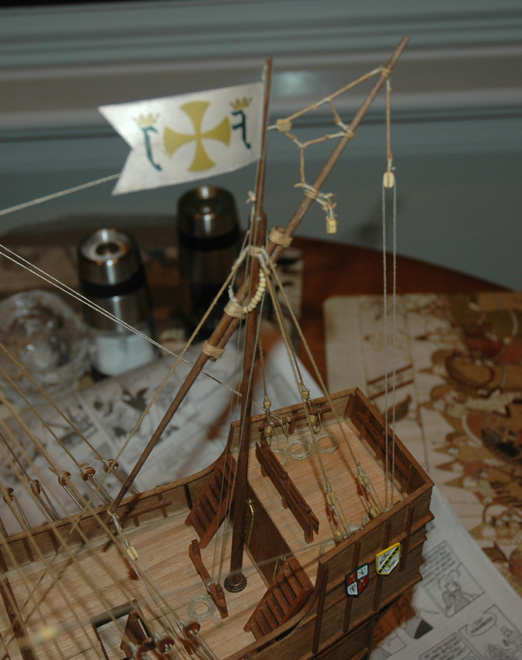
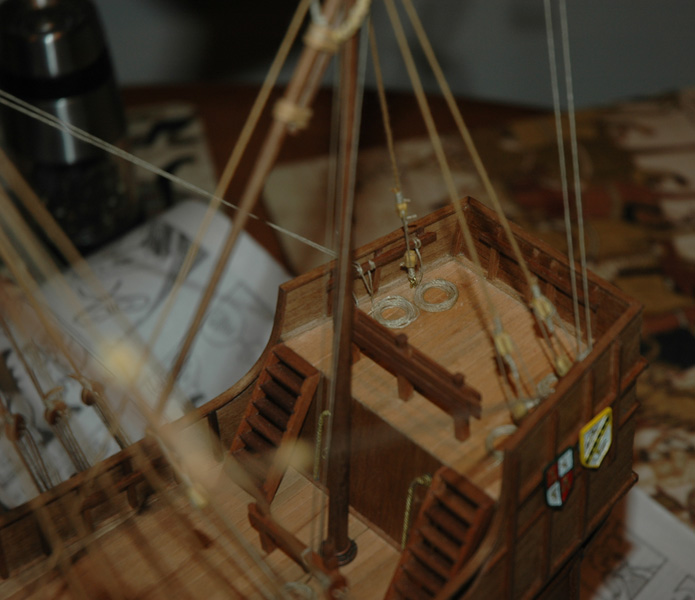
Thank you all again... very helpful... especially the pictures. Here is what I got done. I made the toggles myself since my kit didn't come with any... I'm not sure if they're too big. I haven't attached a toggle to the end of the halyard to put through eye of the flag yet but I will. I wasn't totally clear on how to rig to the truck. I tried attaching a brass ring to the mast but it kept falling out, so I ended up just drilling a hole through the mast. I'm in a hurry to get this done as I'm leaving town for several months in a few days so I just rushed it. I don't think it looks too bad like that anyway.

-
I was under the impression that the rigging line from the flag went through the hole in the ball. If the mast goes through that hole then where do I rig the thread through?
-
Thank you for all the replies. So... those wooden balls I posted in my first post would seem to be to scale to fit as the truck. So how would I attach them to the top of the masts? Just glue them on? Also how would I attach one to the "top" on the main mast? Im having trouble visualizing what popeye posted. I dont believe my kit comes with any toggles, so basically I thread the rigging from the top of the flag through the truck on top of he mast, loop it around through something attached to the deck back through an eye splice at the bottom of the flag? Im having trouble visualizing it I need to see things to really understand.
-
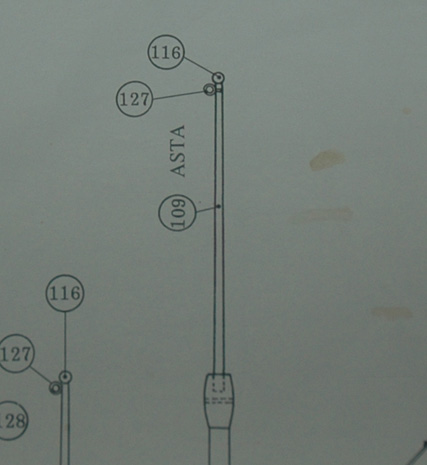
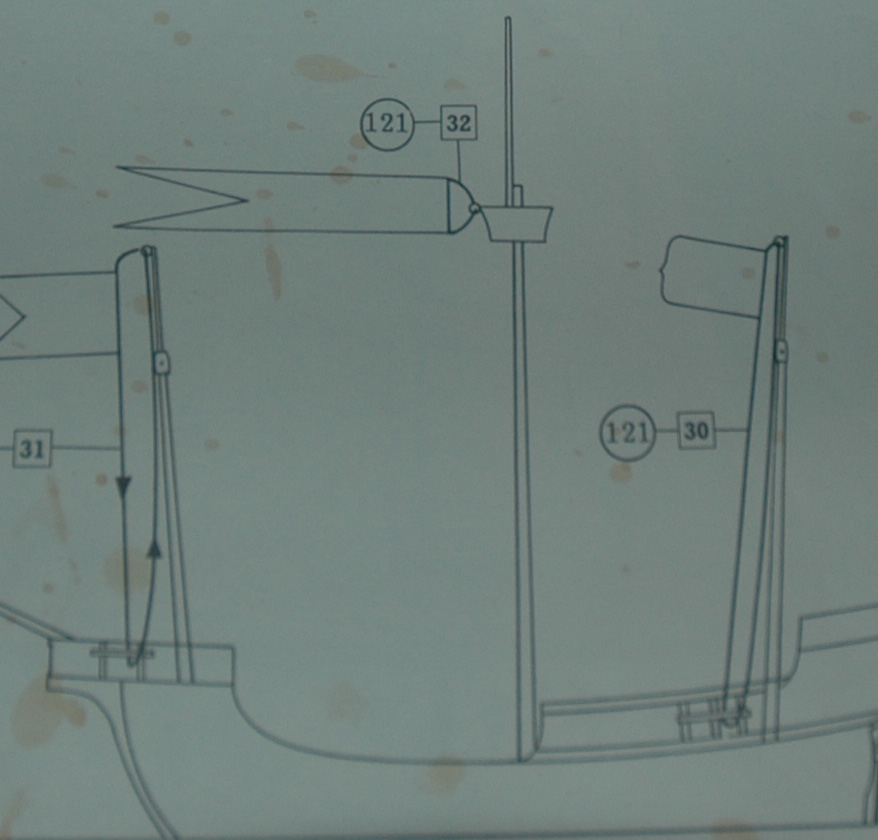
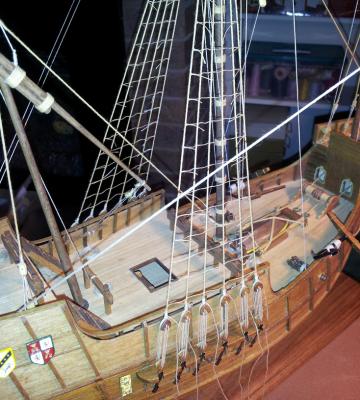
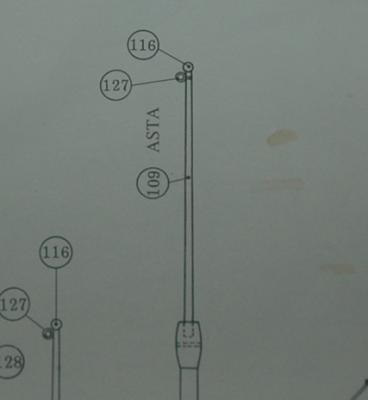
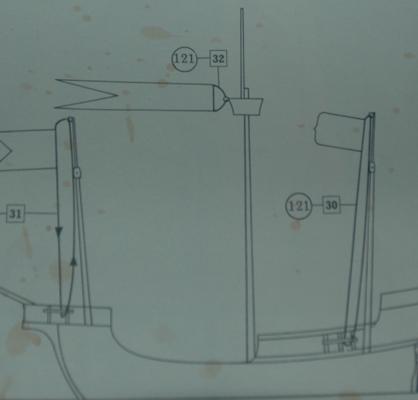
I've attached a couple pics of the plans in my model kit (Santa Maria) for flag rigging. In the first picture I'm not sure what 116 and 127 are. I assume at least one of them are the wooden balls shown in the third picture. But how should I attach these to the mast? Just glue them straight on? Or tie them on with thread? Also how would I attached them to the main mast on the top? Also why do I need two of them per mast? Going by the second picture I loop the rope from the flag through one of the balls and attach it to the ship. So what is the second ball there for? Also should the rope from the flag not actually be tied to the ship? In the picture it's just a continuous rope which is I guess tied to itself? Thanks for any help!
-
Zheng He's Massive Ship from Ming Dynasty
mkmossop replied to mkmossop's topic in Wood ship model kits
Yes I've read this and that the ship is possibly only half the length of what is depicted here. So I'm not really sure what's accurate. -
Has anyone ever seen this thing before? I just came across this on Reddit. This is to scale apparently beside the Santa Maria... both sailed at the same time. Does anyone know what the ship was called? I wonder if there's a kit out there and how much it cost.