HOLIDAY DONATION DRIVE - SUPPORT MSW - DO YOUR PART TO KEEP THIS GREAT FORUM GOING! (Only 20 donations so far - C'mon guys!)
×


mkmossop
-
Posts
109 -
Joined
-
Last visited
Content Type
Profiles
Forums
Gallery
Events
Everything posted by mkmossop
-
Cool thanks so much for the replies that helps a lot! I don't think I got the correct rope in my kit to do the ratlines so I'm going to have to buy some. I've bought some before though and it's frustrating because it's not the exact same rope (different colour/texture) and I don't know where to get the same stuff from.
-
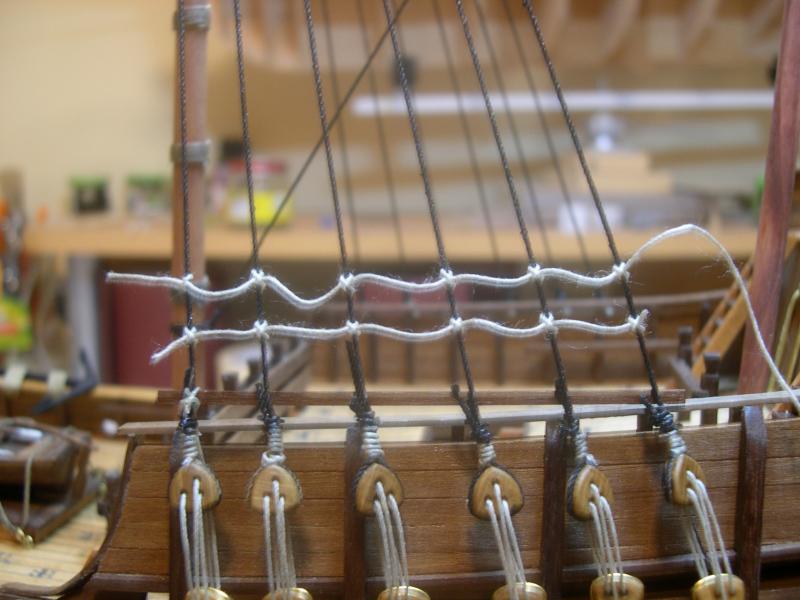
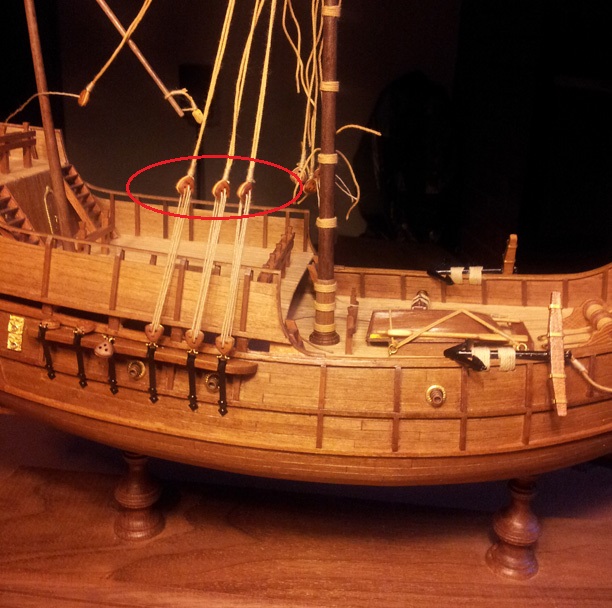
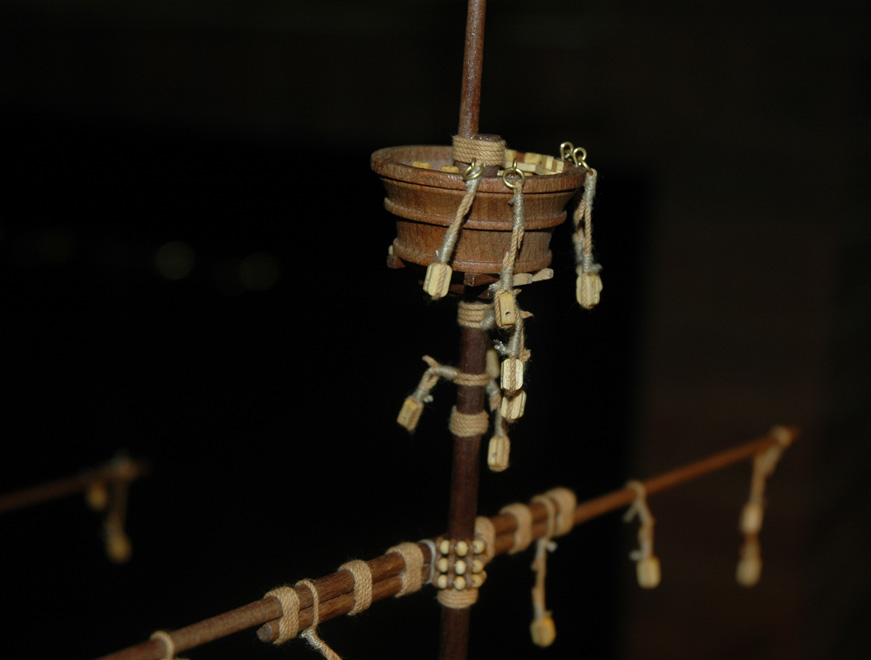
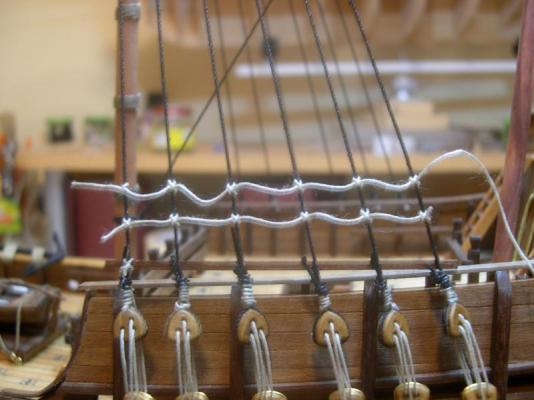
So I need help with the rigging of the ropes circled in red (don't know what these are called). What sort of technique do I use to tie on the sections which pass horizontally across these? Also in the pictures I've seen the horizontal rope seems to be thinner than the vertical rope, but I'm not sure. Should I be using thinner rope for this section? Thanks for any help!

-
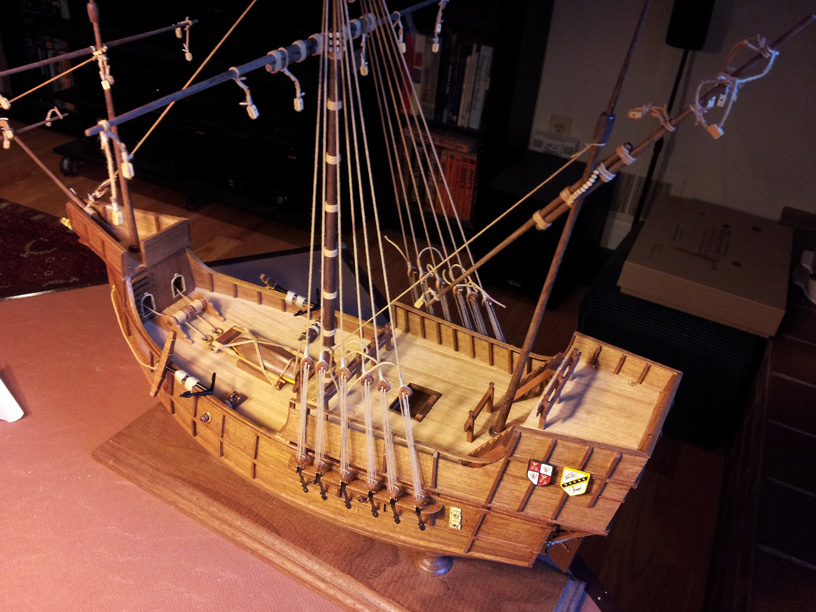
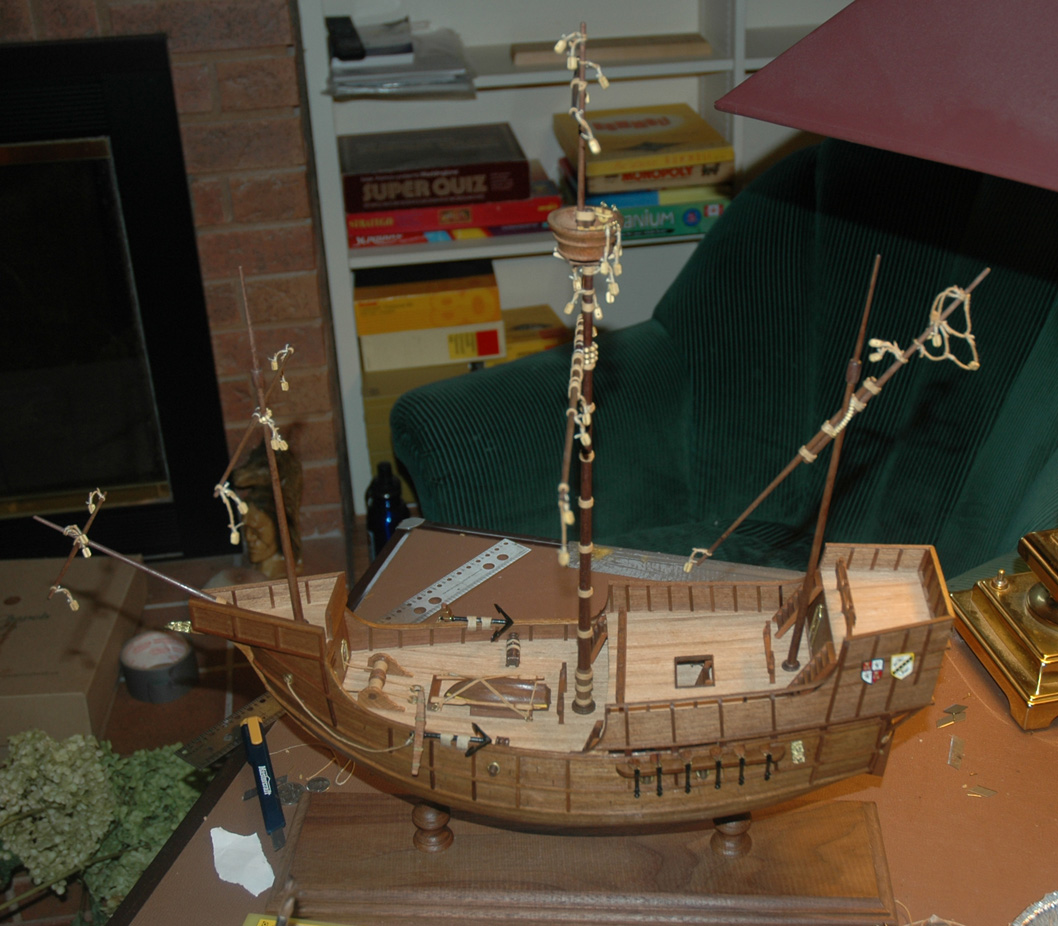
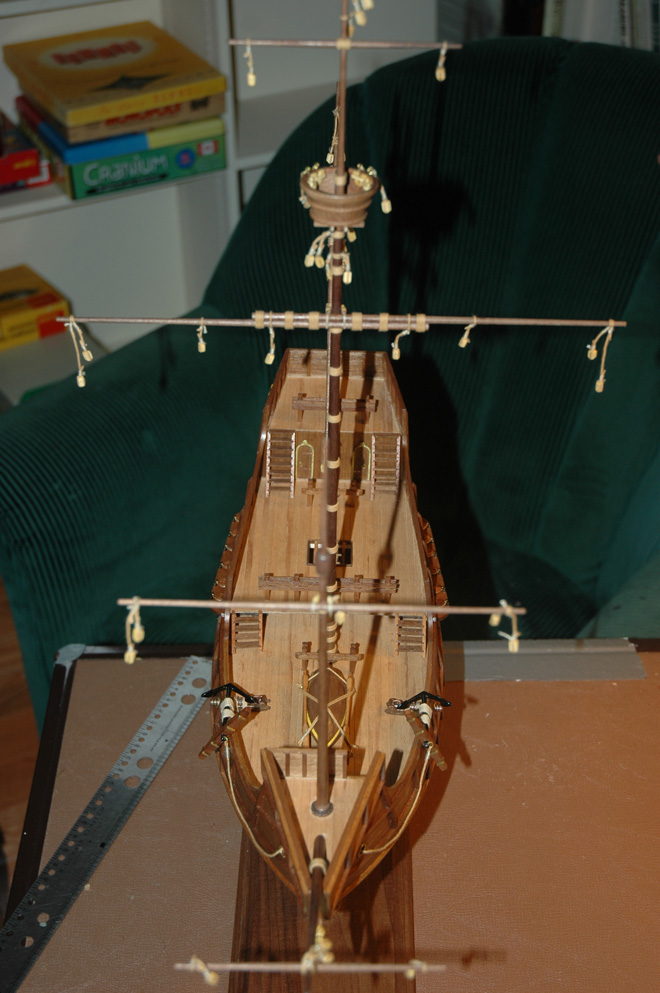
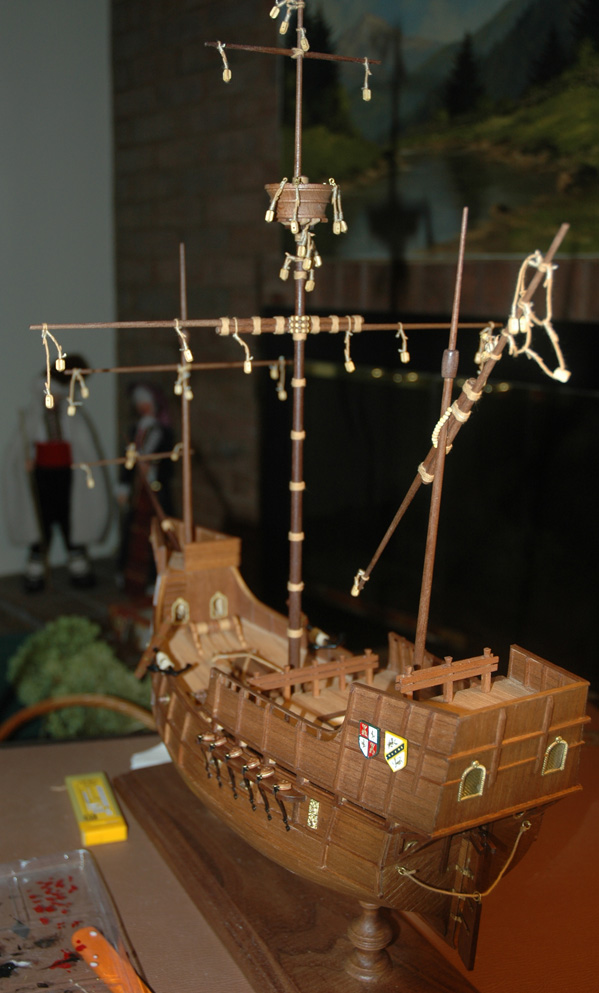
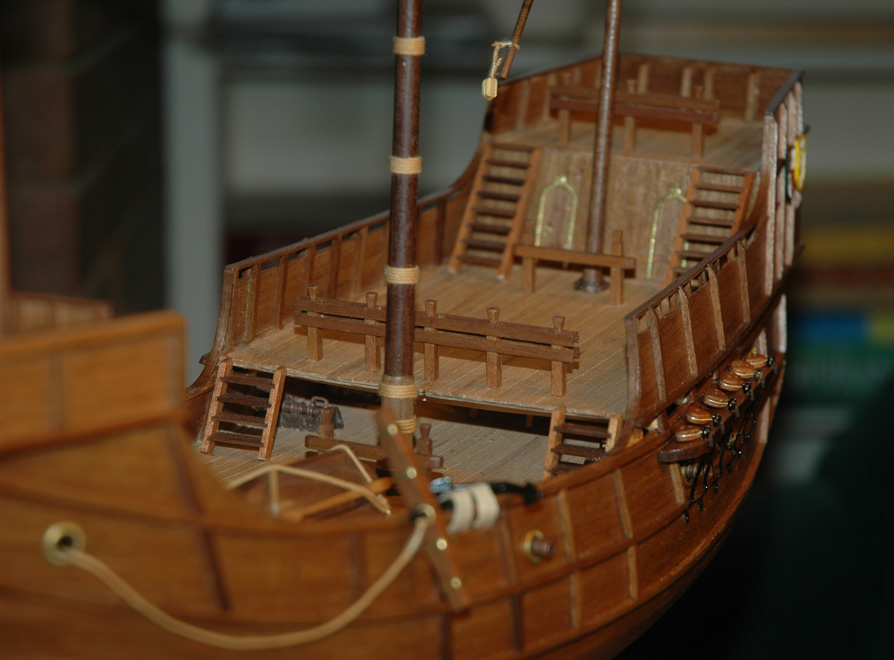
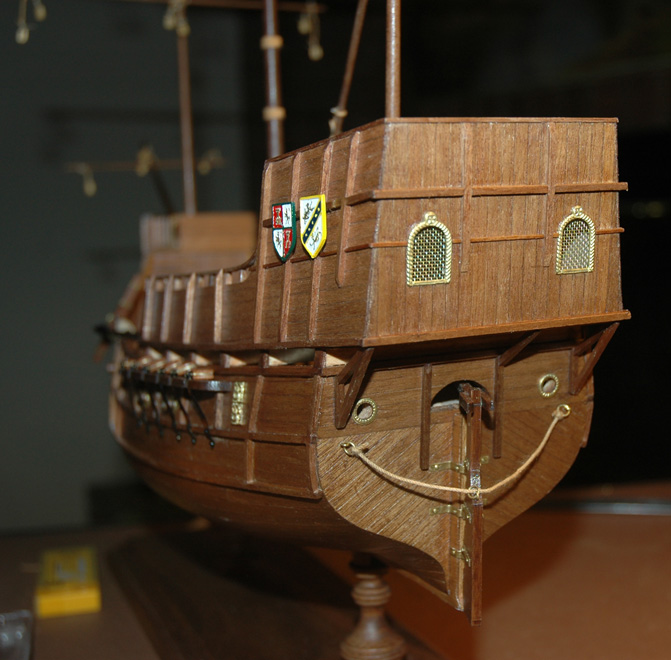
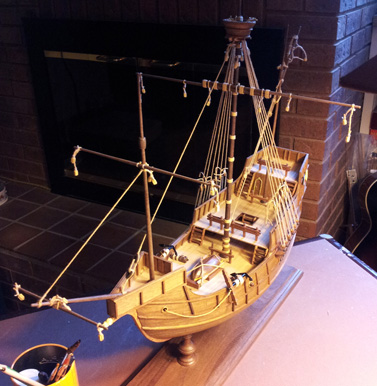
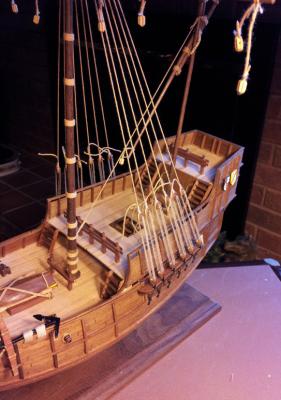
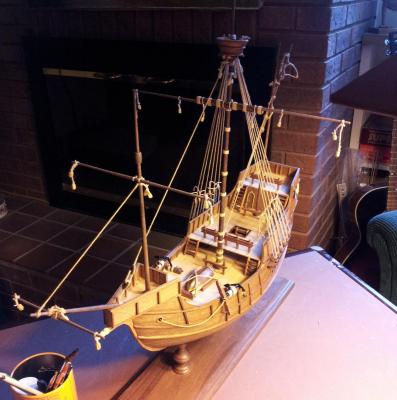
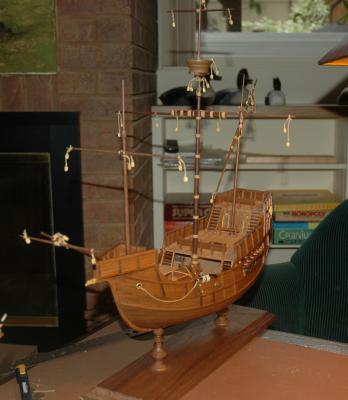
Yes I notice that every model of this ship (even from the same kit) look very different. I tried to make mine look as similar to the one on the box cover as possible because I think it looks awesome. It looks different (and much better) than how it looks in the instruction booklet. Anyway here are a few updated pics. I need to take some better quality, more detailed pics.


- 29 replies
-
- 2
-

-
- santa maria
- amati
- (and 1 more)
-
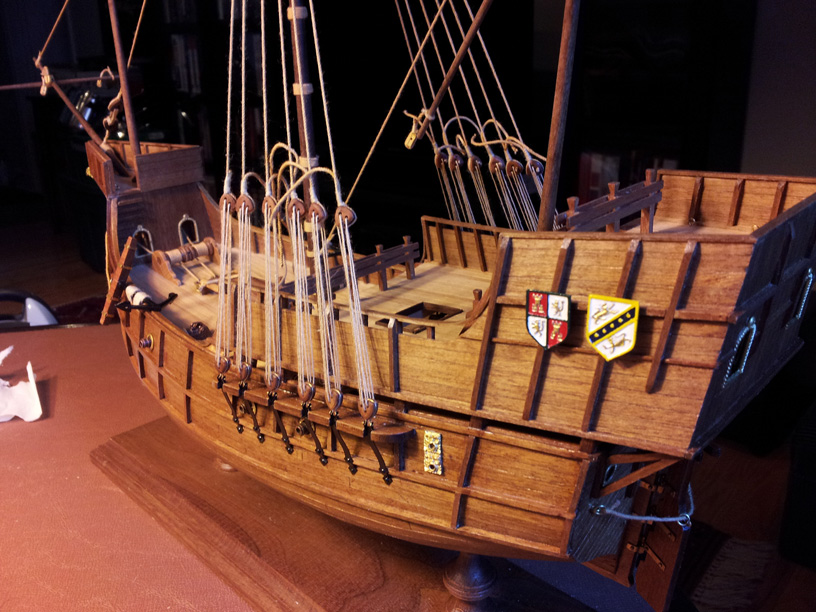
I have no idea why, but when I did the other side none of the deadeyes twisted... and I used the exact same method. I may try putting a piece of wood across the ropes above the deadeyes and tying them on to untwist... that should work. Also what type of knot or tying sequence do I use to attach the horizontal pieces of rope? (as shown in the pic attached on another model) I tried to do what was shown there but it didn't quite look right. Also is the rope between my deadeyes waayyyyy too long? Everywhere else I look (for example in the pic below of another model) it's way shorter. On the box cover of my model it's the same length I have though. I think it looks better this way.
- 29 replies
-
- 1
-
-
- santa maria
- amati
- (and 1 more)
-
Sorry where exactly am I putting the glue?
-
I'm having a bit of a problem I hope someone can help me with. I'm doing some of the rigging and can't get the pieces circled in red (no idea what they're called) to sit straight (parallel to the ones on the bottom). The rope pulls them crooked so they face forwards. I guess it's no big deal, but I'd like them parallel to the others if possible. The tighter the rope, the more crooked they are. I don't like the look of them being super loose though.

-
Thanks for the comments . Not planning on the Nina or Pinta right now. I still have the sails to do on this one which will take me a while I'm sure. How long in general does it take someone to finish one of these? I've been working on this one for years... really, lol. Although I did take a long time off building. If I were building consistently and spending a few hours every night though I'm sure this would still have taken me a couple years to finish.
-
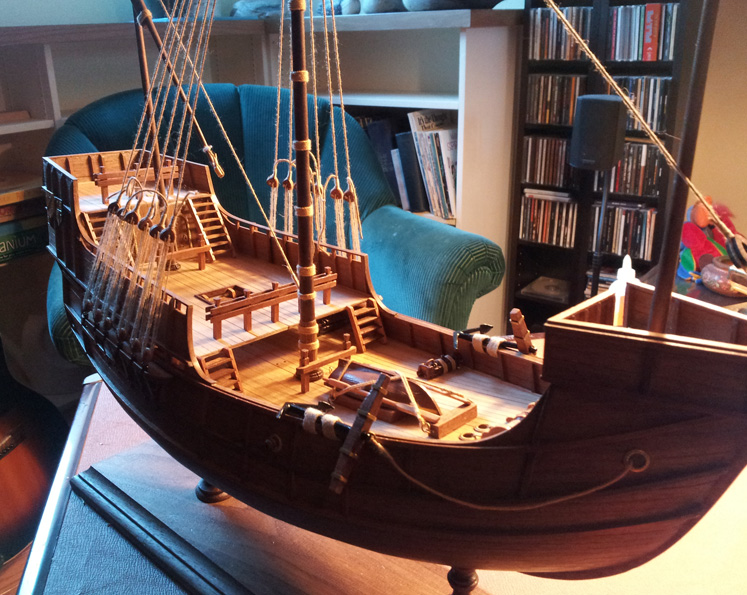
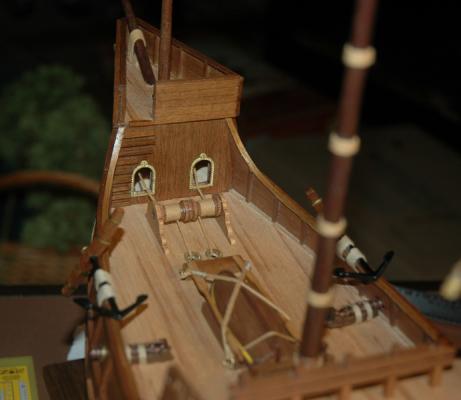
This is my first build ever, which I've been working on for a looooooooooooooong time now. I've had so much trouble building this thing, and I'm not 100% satisfied with it, but I think its turned out pretty well so far. I've finished basically everything now other than putting the sails up. I lost a bunch of pictures I had of the progress of the build, so I don't have nearly as many pictures as most people here. Since my older pics aren't great I'm only posting pics of where the build is at now. I won't finish any more for a while since I'm going away to school tomorrow. Hopefully I can get something done around xmas.


- 29 replies
-
- 6
-
-
- santa maria
- amati
- (and 1 more)
-
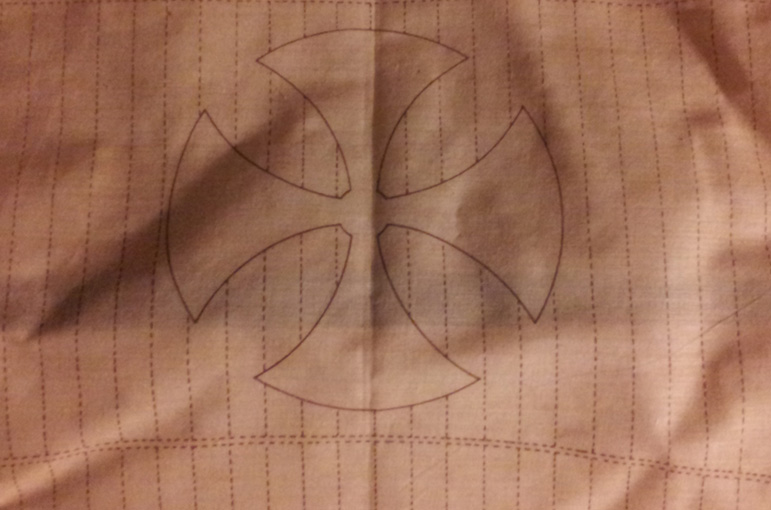
To clear things up... I'm going to paint the emblem on for sure, I'm just not sure if I should sew through it. If historically they emblem is sewn on, then I'll just sew around the edges of where I painted.
-
Ok that's one vote each way... anyone else?
-
What the f... you seem to be incredibly good at building model boats for never having built one before, lol. I'm doing the same model and it doesn't seem to be going nearly as smooth as yours. Also did you polish the brass pieces on the rudder with something? I scratched mine up a bit while trying to get them on straight.
-
How to Attach the Mast to the Yard?
mkmossop replied to mkmossop's topic in Masting, rigging and sails
Whoa cool thanks... that helps . -
Ok so I know what type of stitch etc I'm going to use on the sail, however I'm not sure where exactly to sew. I'm going to paint the emblem where the outline is, and after that, do I sew through the emblem? The dotted lines don't pass through it, so I'm not sure if that means I'm not supposed to sew through it. On someone else's model I think they sewed around the entire emblem outline. Thanks for any tips!

-
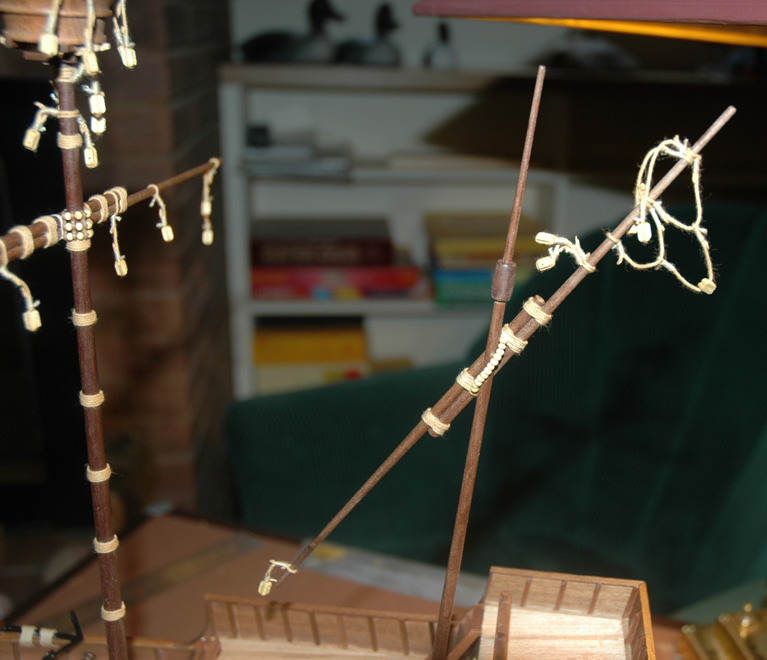
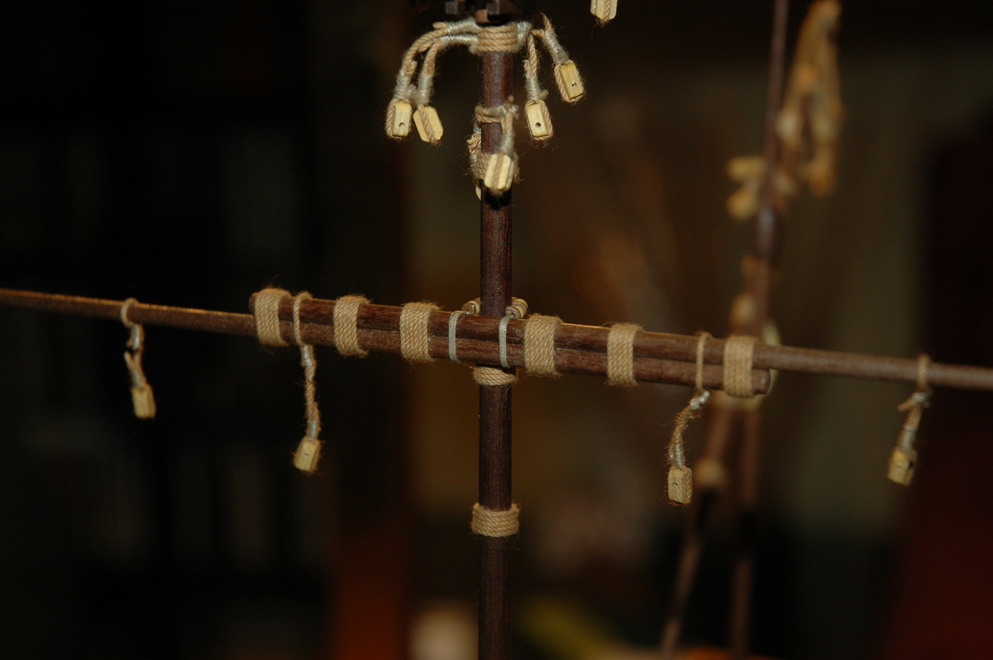
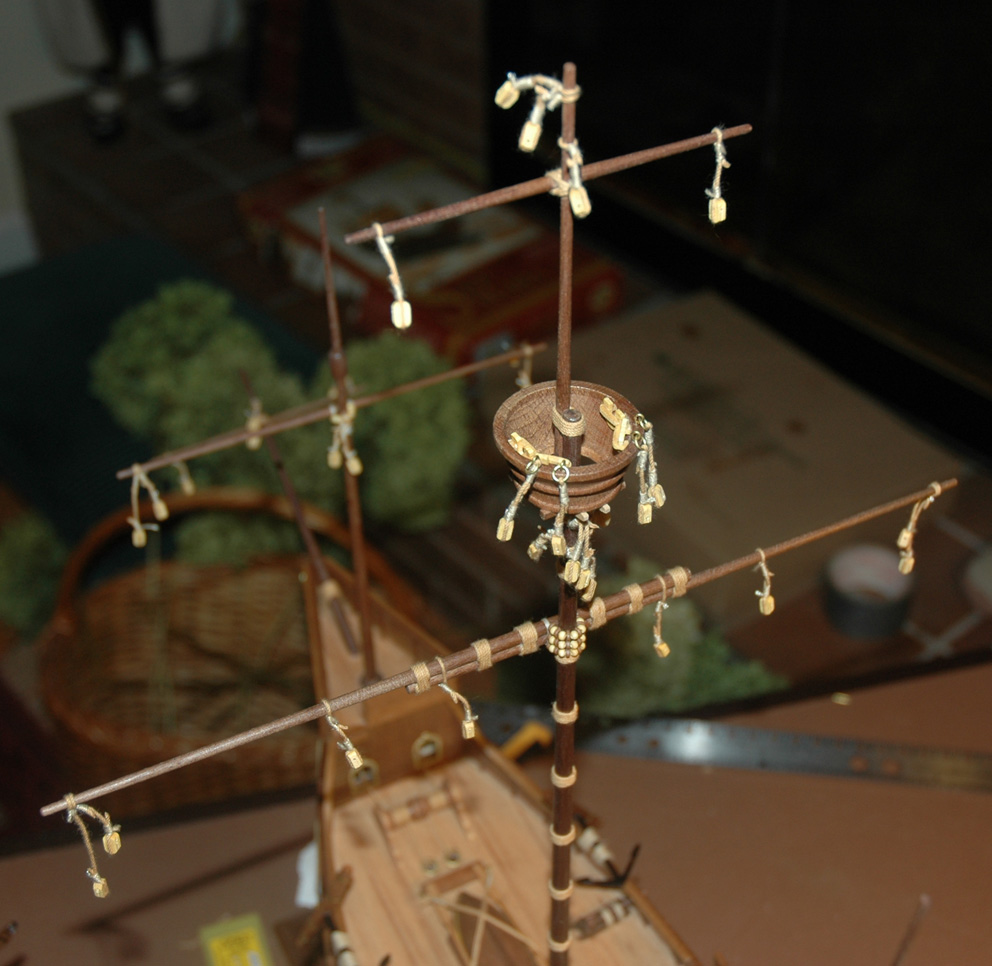
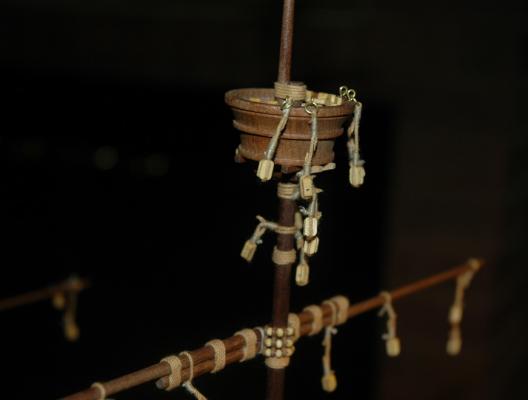
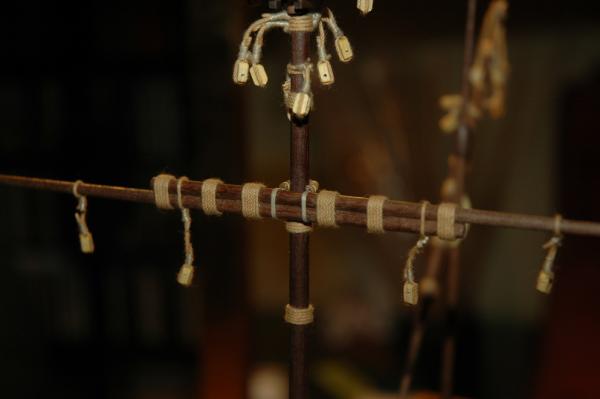
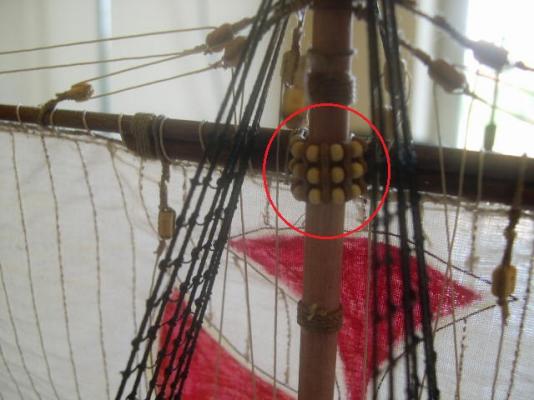
I'm not sure how to attach the yard to the mast. I've attached a pic of someone else's model with the part I'm talking about circled in red. So I thread some of those ball thingies and then loop it around the mast and then... how do I attach it to the yard mast? Just turn it around a couple times and then tie if off? Does anyone have a detailed picture of this?\ Thanks for any help!


-
Hey thanks for the reply. Sorry haven't checked this for a while as no one was replying. Hmm I think I need a visual on this to see what you're talking about. Maybe I'll just play around with it and see how it looks, or will post this again in another forum. Thanks .
-
Wow cool good work. I'm working on the same model right now so I'm very interested to see how it turns out.
-
Thanks . I think I've left it too late to open one now... I don't have any pics of anything up to this point. Wish I had started one before but oh well. Another question... Am I supposed to sew through the design on the sail? There are no sew lines, and I saw on someone else's model that it wasn't sewn through, however it seems like it should be. And would this be done before or after painting it? Also I'm not sure how to attach the horizontal mast (I'm sure that's not what it's called but I don't know its technical name) to the vertical mast. I've attached a pic of someone else's model with the part I'm talking about circled in red. So I thread some of those ball thingies and then loop it around the vertical mast and then... how do I attach it to the horizontal mast? Does anyone have a detailed picture of this? Thanks for any help!

-
Thanks . And I put the hole further away from the strop... I don't know why. It's not a huge deal to me if it's not 100% accurate to what a real ship looks like though.
-
I tried splicing it... I think the rope is too fine... I couldn't get it to work. I got what I was trying to do done though. I'm not sure why I had such trouble before. It was difficult still but I managed... I think they look ok.
-
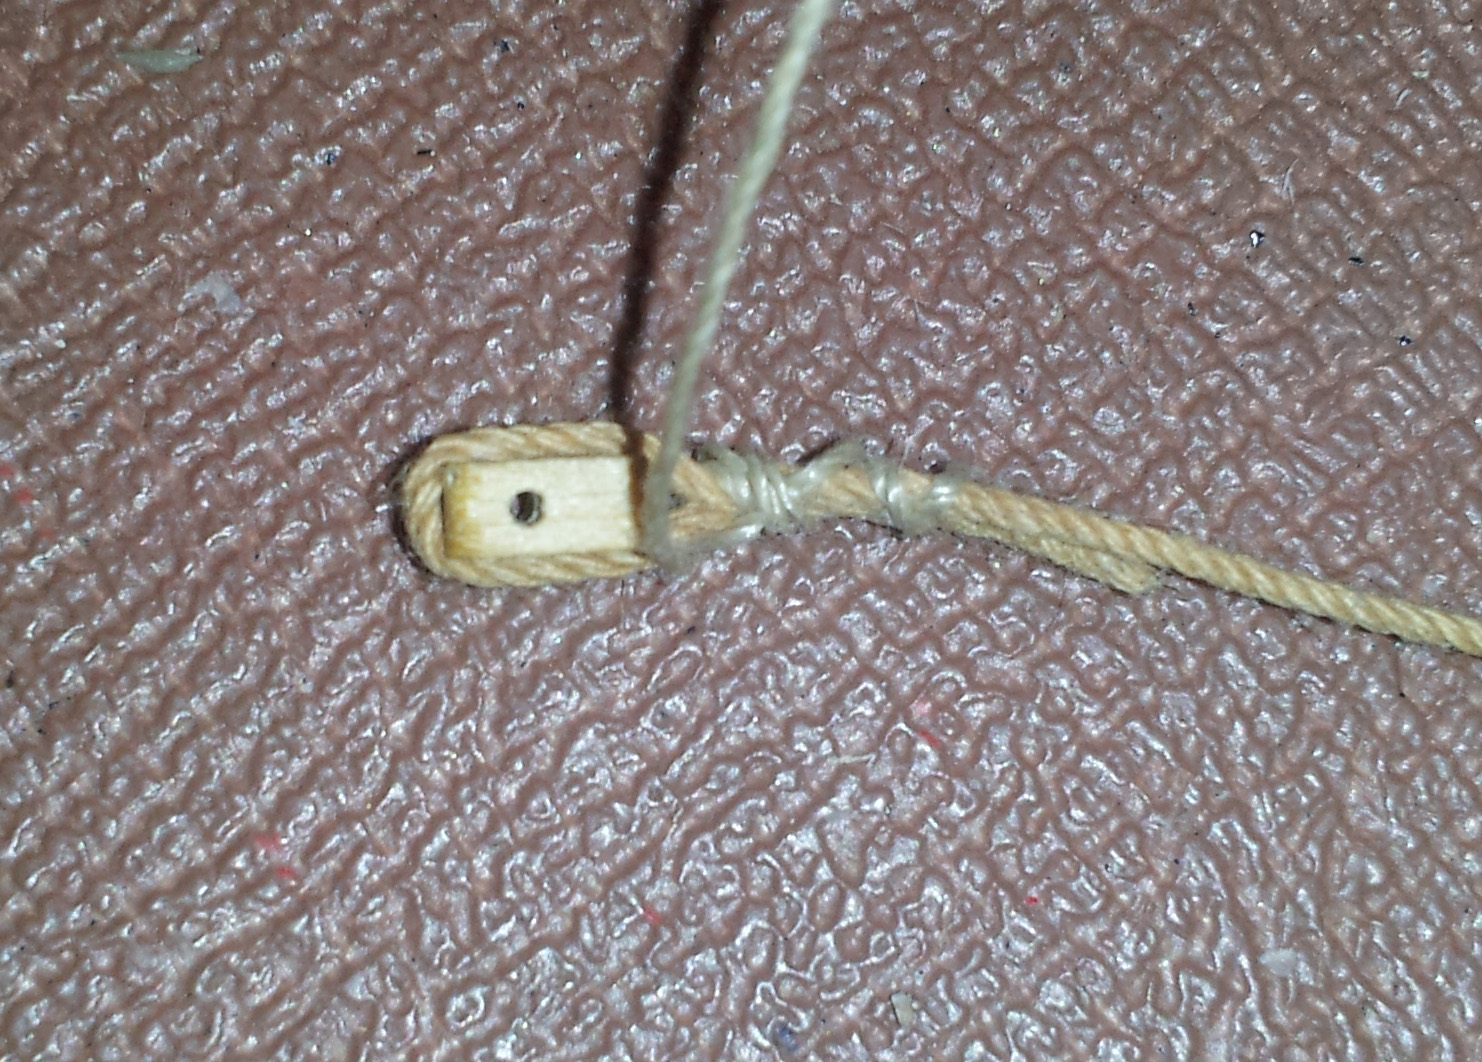
I got it done with one of the methods mentioned above. It's not perfect but I'm satisfied with it... the lump wasn't too bad. I'm having trouble with something else now. I have to do the same thing but on some of the rigging components rather than the mast. There's a pic attached to show what I mean. I'm not having trouble hiding the thread ends since it's so thin, but I spent probably over an hour last night trying to get a nice clean wrap around the rope without success. It's very difficult to do when you're not wrapping around something solid or the rope isn't taught. The wood piece would fall out or the rope would get all messed up. Anyway I have a whole ton of these do to... is there a specific method to get them done?
-
Hmm nailing is an option too... I didn't think of that. Thanks for the image as well I'm gonna try those out. The other method I tried left a bit too big of a lump.
-
Oh right ya I get it now. I feel with the rope I'm using it gonna make a huge bump in the middle but we'll see. I'll practice tonight.
-
Thanks for all the replies! Cool a video would be great if you have time . Ah cool this is great thanks. I'm a little confused at step 4... where does the second loop come from?
-
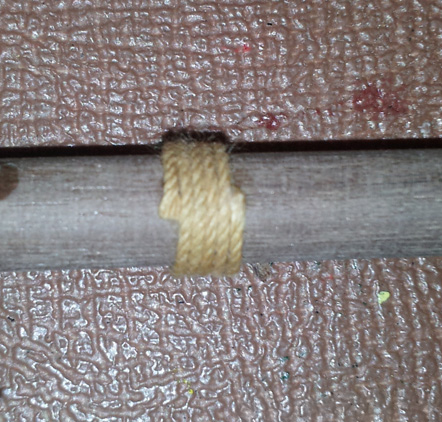
In the plans for my ship there are a bunch of sections of the mast which have rope wound around it, but I don't see any loose ends of the rope. Is this generally done how I've done it in the picture below, or is there some technique used to hide the loose ends? I just glued each end to the mast. I think it looks kind of funny though.

-
I used the dowel-in-drill trick tonight and it worked very well and was quick. I used a rough sandpaper to get it down to size quickly, and then a much finer one to finish it off. It may not be as accurate as some people like, but it did a good enough job for what I want.