palmerit
-
Posts
1,090 -
Joined
-
Last visited
Content Type
Profiles
Forums
Gallery
Events
Everything posted by palmerit
-
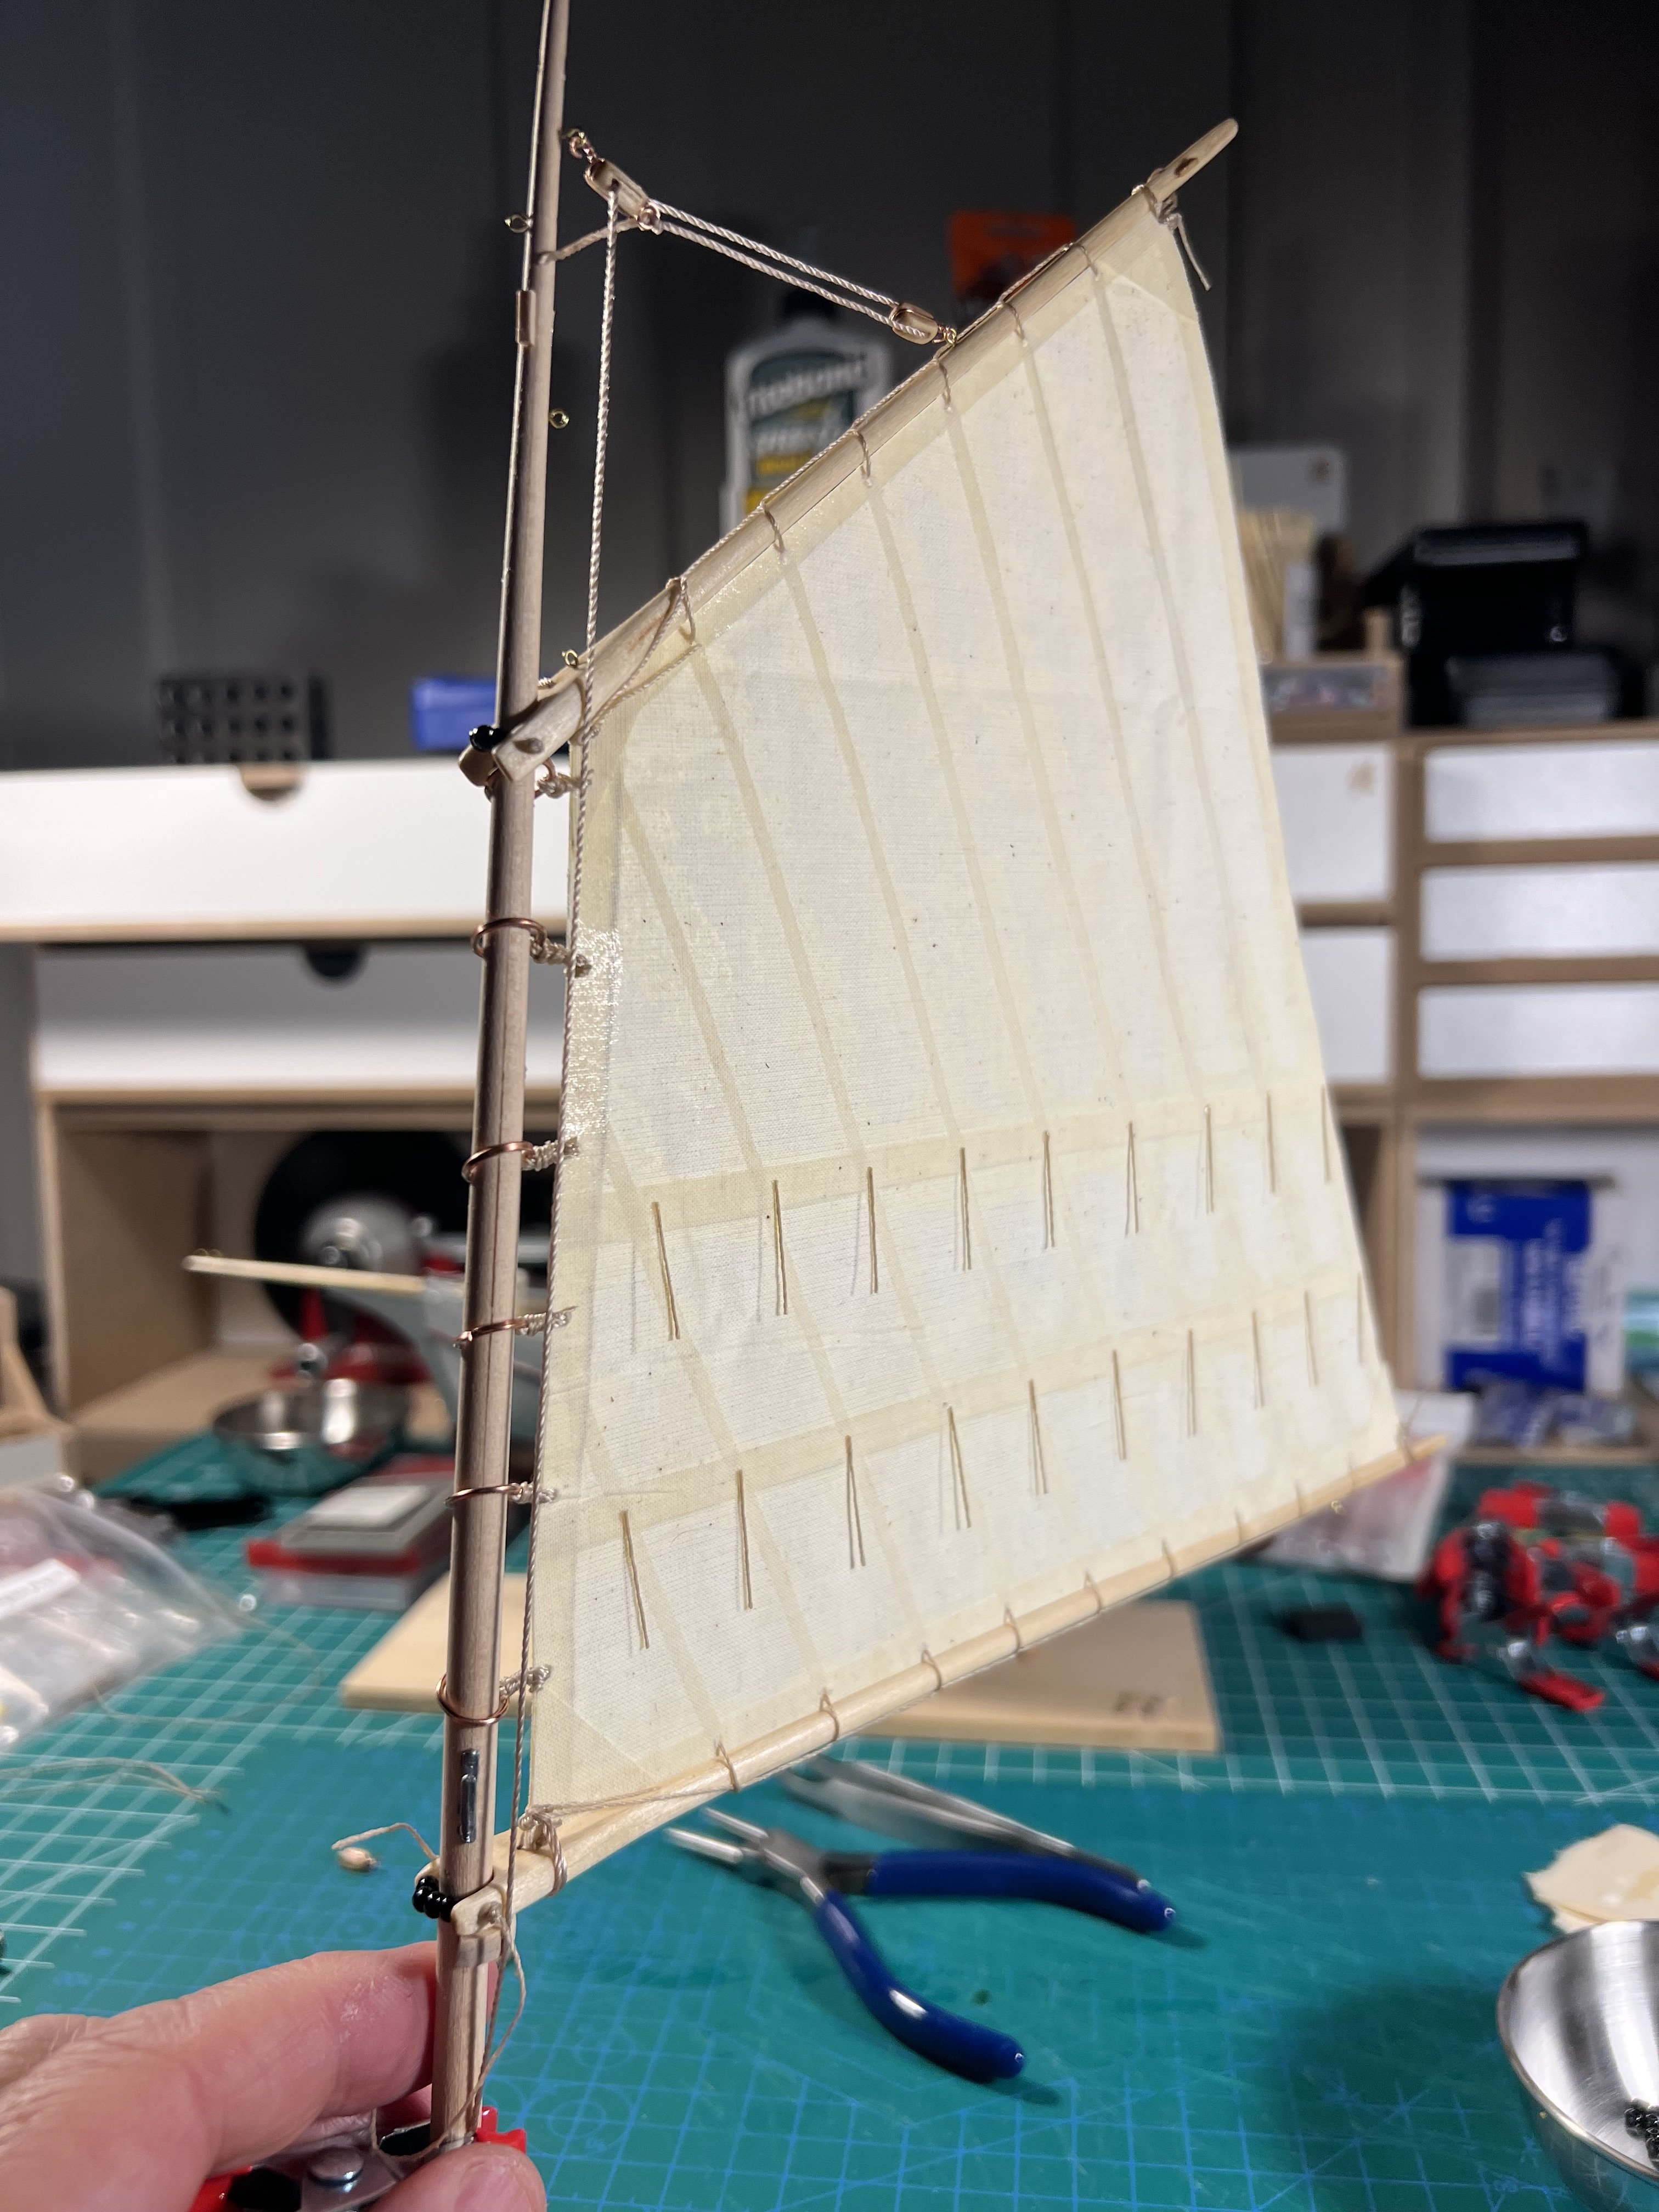
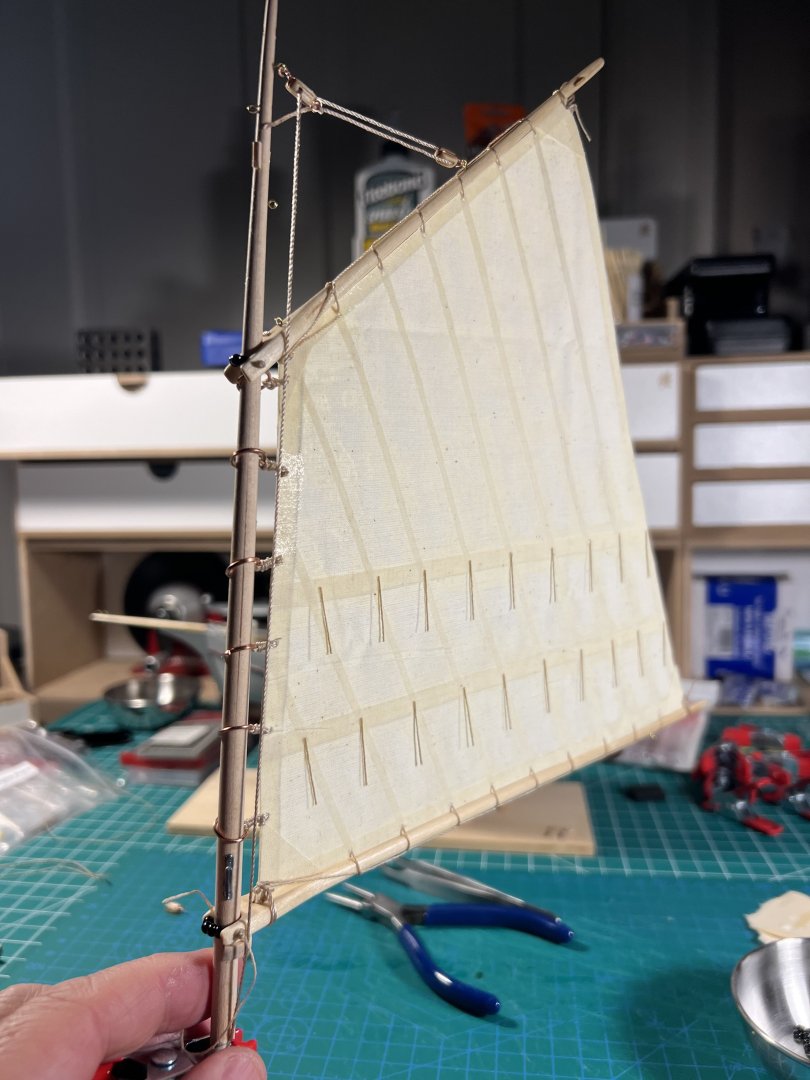
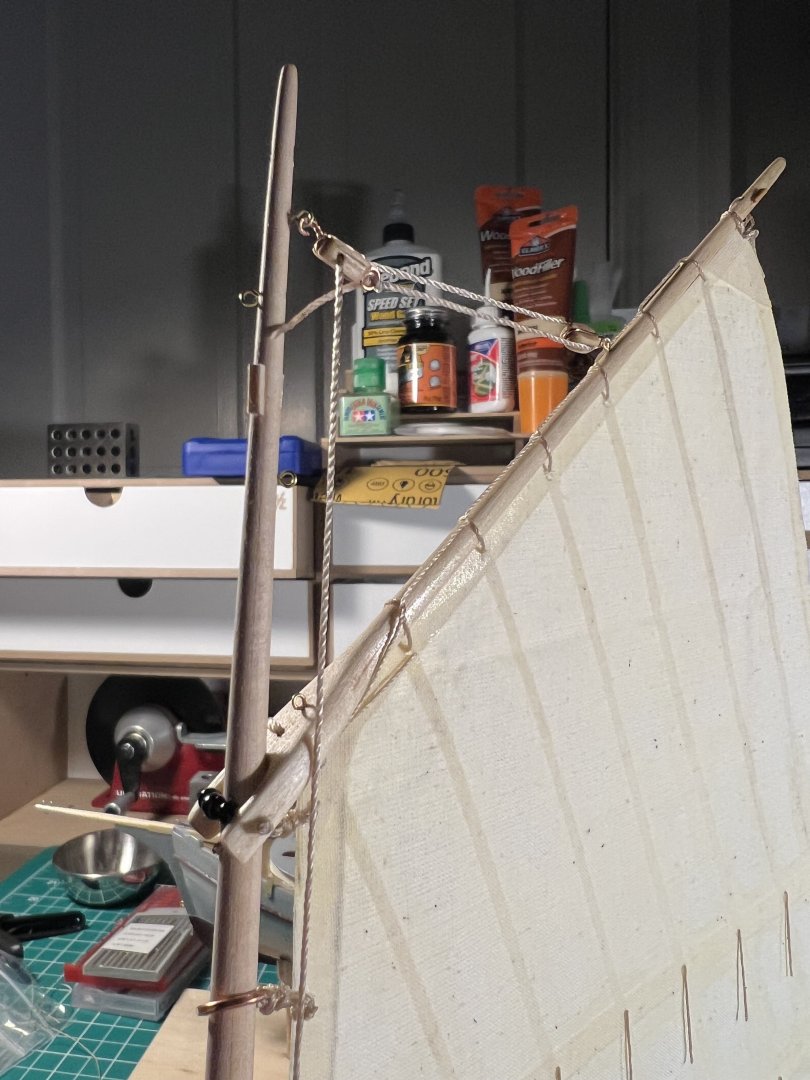
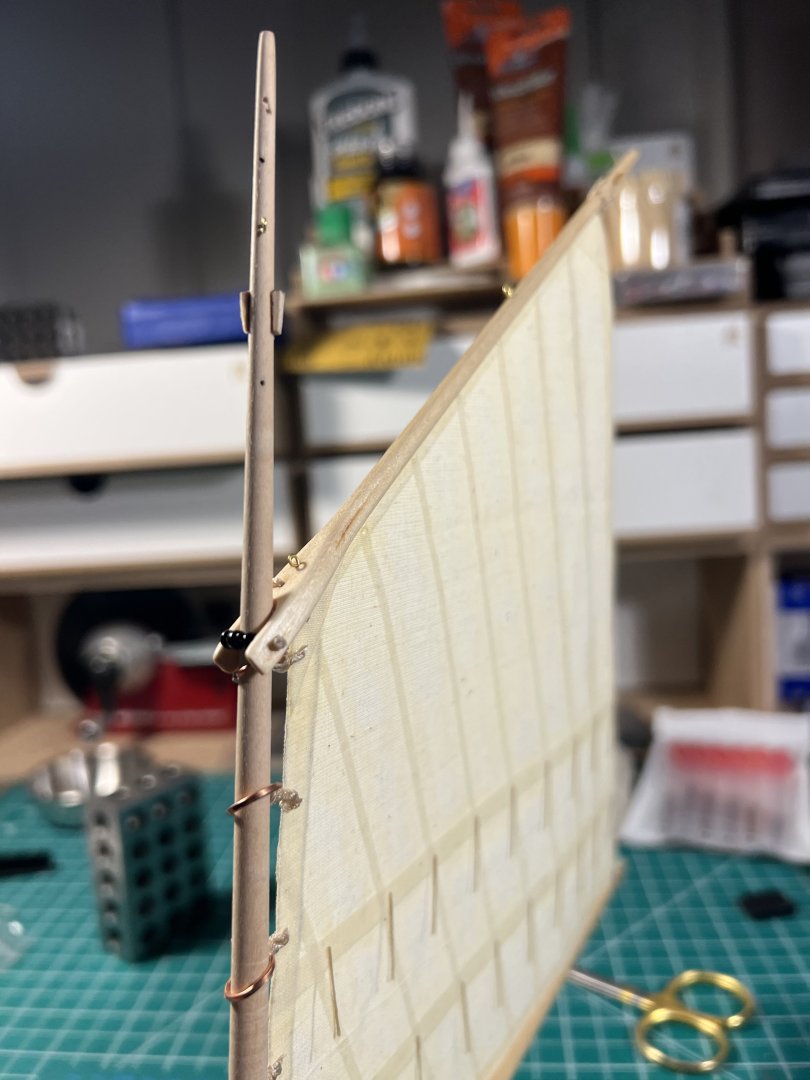
More progress on the sail and rigging.

- 59 replies
-
- 5
-

-
- muscongus bay lobster smack
- Model Shipways
- (and 2 more)
-
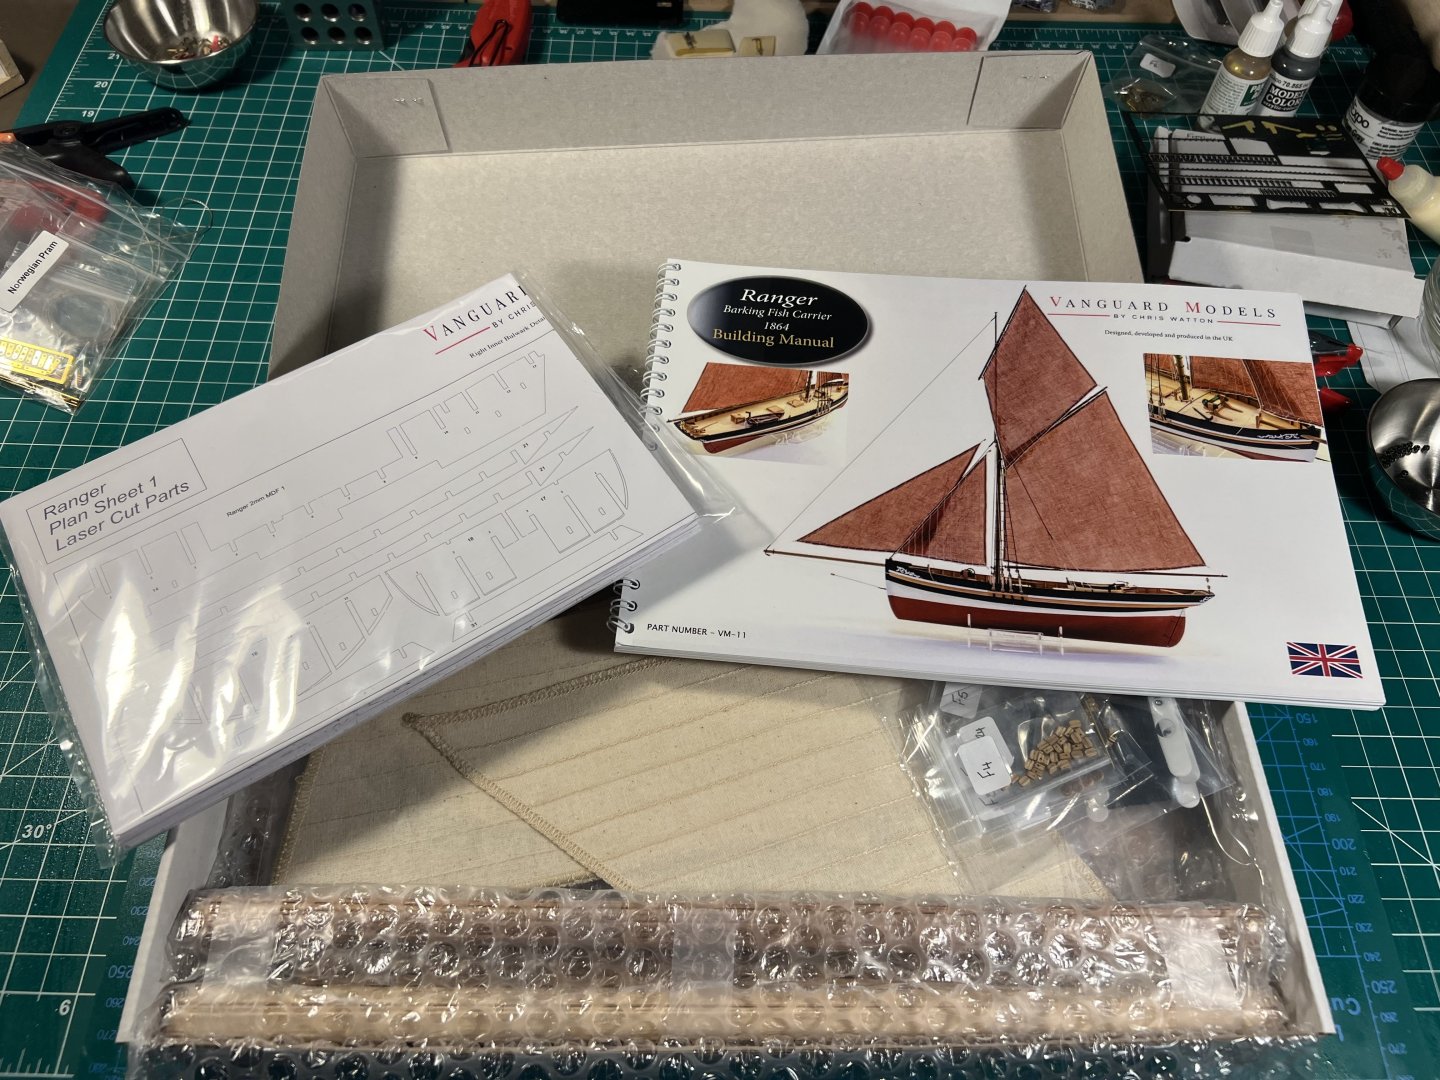
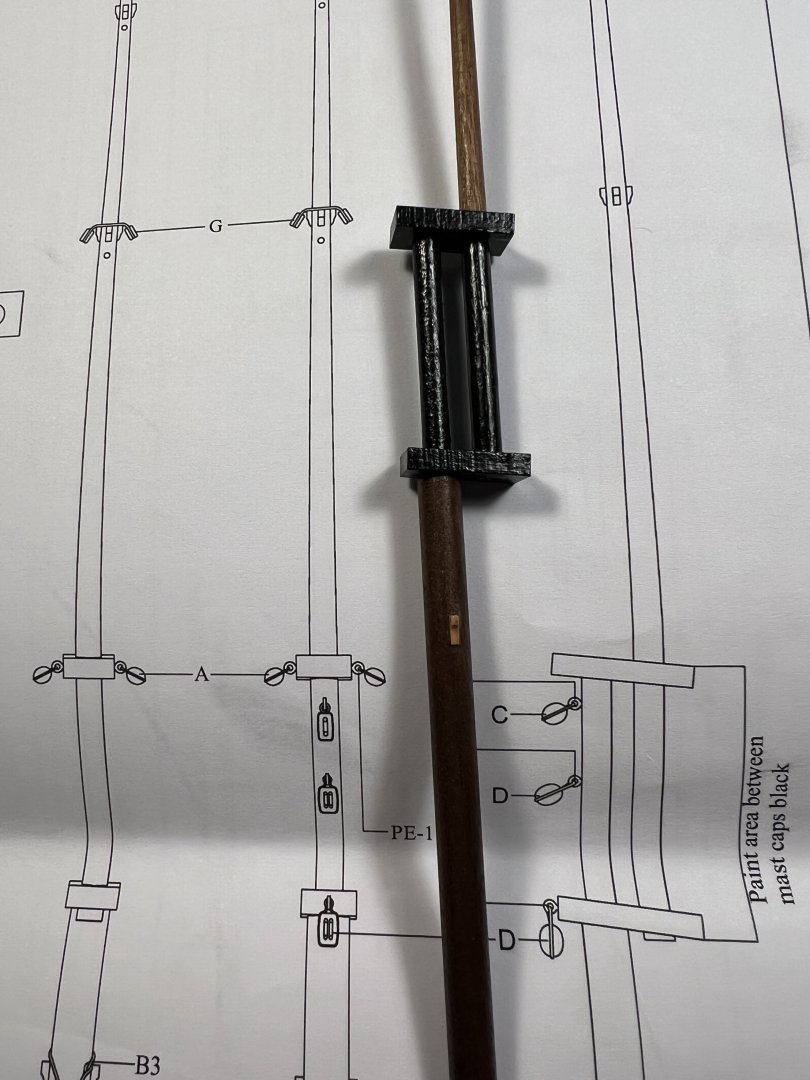
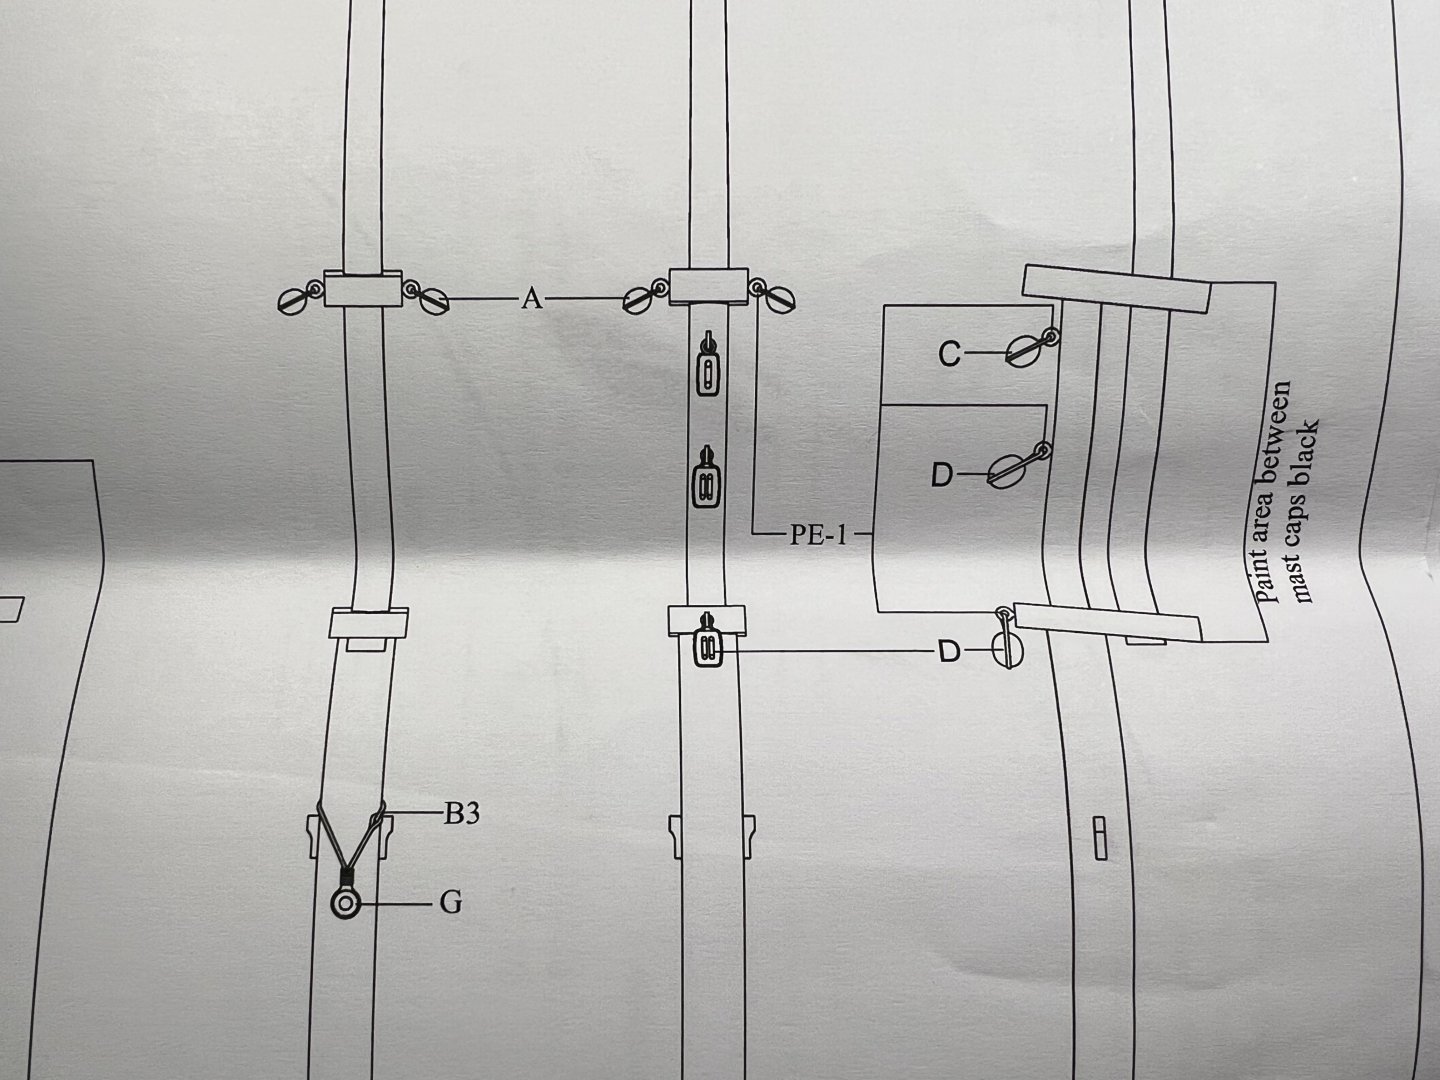
One thing I'm trying to do before starting this is ordering paint for the model and dye for the sails. I won't be getting to the sails any time soon, but painting the hull will be potentially weeks away and sometimes it takes a bit for the paint to arrive. I've found scalehobbyist.com has good prices and a good selection of Vallejo paints. I really like Vallejo Air paints. They work well with my Iwata Airbrush - or at least I've figured out how to use them. The Ranger instructions recommend spray cans, I think of enamel-based paints. I have an airbrush booth in my house, but I know from the couple times I used some enamel spray paints (Tamiya primer on PE), even with the spray booth fan running full speed, it still was too strong for inside. I might need to experiment a bit with mixing some Vallejo colors to find something close. For the white, I'll use the Vallejo Air Off White (Creamweise) 71-270, which I used for my Sherbourne - I think Chris Watton recommended that one. Unless someone recommends something else, I'll go with that. For the black, for now I'm planning on the Vallejo Air Black 71-057, which I also used on my Sherbourne. The opening instructions call for a "Black Red-Brown paints (recommend either Humbrol, Vallejo or Tamiya)" but then just refer to "matte black" later on. I have some other black shades I bought for other projects that I can play around with if I want something that has a red/brown shade to the black. I wasn't sure what "Black Red-Brown" might be. The opening of the instructions does not note that a flat green is also used later on for the windlass and what looks to be an exhaust port of some kind (I'm sure that part has a real name) - I noticed it when skimming the instructions. I think I'm going to order a Vallejo Air Pale Green 71-095 and a Vallejo Model Game Air Angel Green 76-123 and see if some mixture works ok. There wasn't really a good match with in the Vallejo Air paints (https://acrylicosvallejo.com/en/). I was going to maybe try the regular Vallejo (which would need to be thinned quite a bit) Splinter Green 70-756 but scalehobbyist.com does not seem to carry it. The toughest is finding a replacement for the "Red Oxide (Hull below waterline) (Recommend Plastikote Red Oxide Primer)" in the Vallejo line. I've found a few options that hover around that color, but it's probably going to take some experimenting in mixing to get a shade I like since nothing really seems to match. Vallejo Air Red 71-102 (which I have already, and would need to be mixed with something browner) Vallejo Air Red (Rot) 71-269, which oddly seems to have the same name, different number, and a somewhat different shade (a bit more "red oxide" than the other red) Vallejo Game Air Scarlet Red 76-012, which definitely would need to be mixed with other reds Vallejo Game Air Nocturnal Red 76-111, which also would need to be mixed Vallejo Air German Red Brown (Rotbraun) 71-271, a browner, more oxide-like, but not red enough I also have some regular Vallejo colors that I could use as mixers (like Vallejo Red Leather 70-818, also not red enough). There was also a blue used as trim around the small deck boat (which is 3D printed). I had bought Vallejo Air French Blue 71-088 and Vallejo Air Magic Blue 76-021 when I thought the Duchess would be my next model. I think one of them would work well. No idea what shade to use to dye the sails - not that that step is coming any time soon. The instructions don't say. I saw in the instructions for another Vanguard fishing boat, the Lady Eleanor, that it said "You can use any dye of your choice, but for prototype, this is the product we used" and it shows a Rit dye in Wine (Bordó). The only other Ranger build (aside from James's prototype) was one by @DB789 who said "Decided on a colour for the sails, RIT dye tan (mixed quite strong) and after that the sails dipped for a minute or two in weak RIT dye scarlet mixture, the latter to give the sails a less bland brown colour."
-
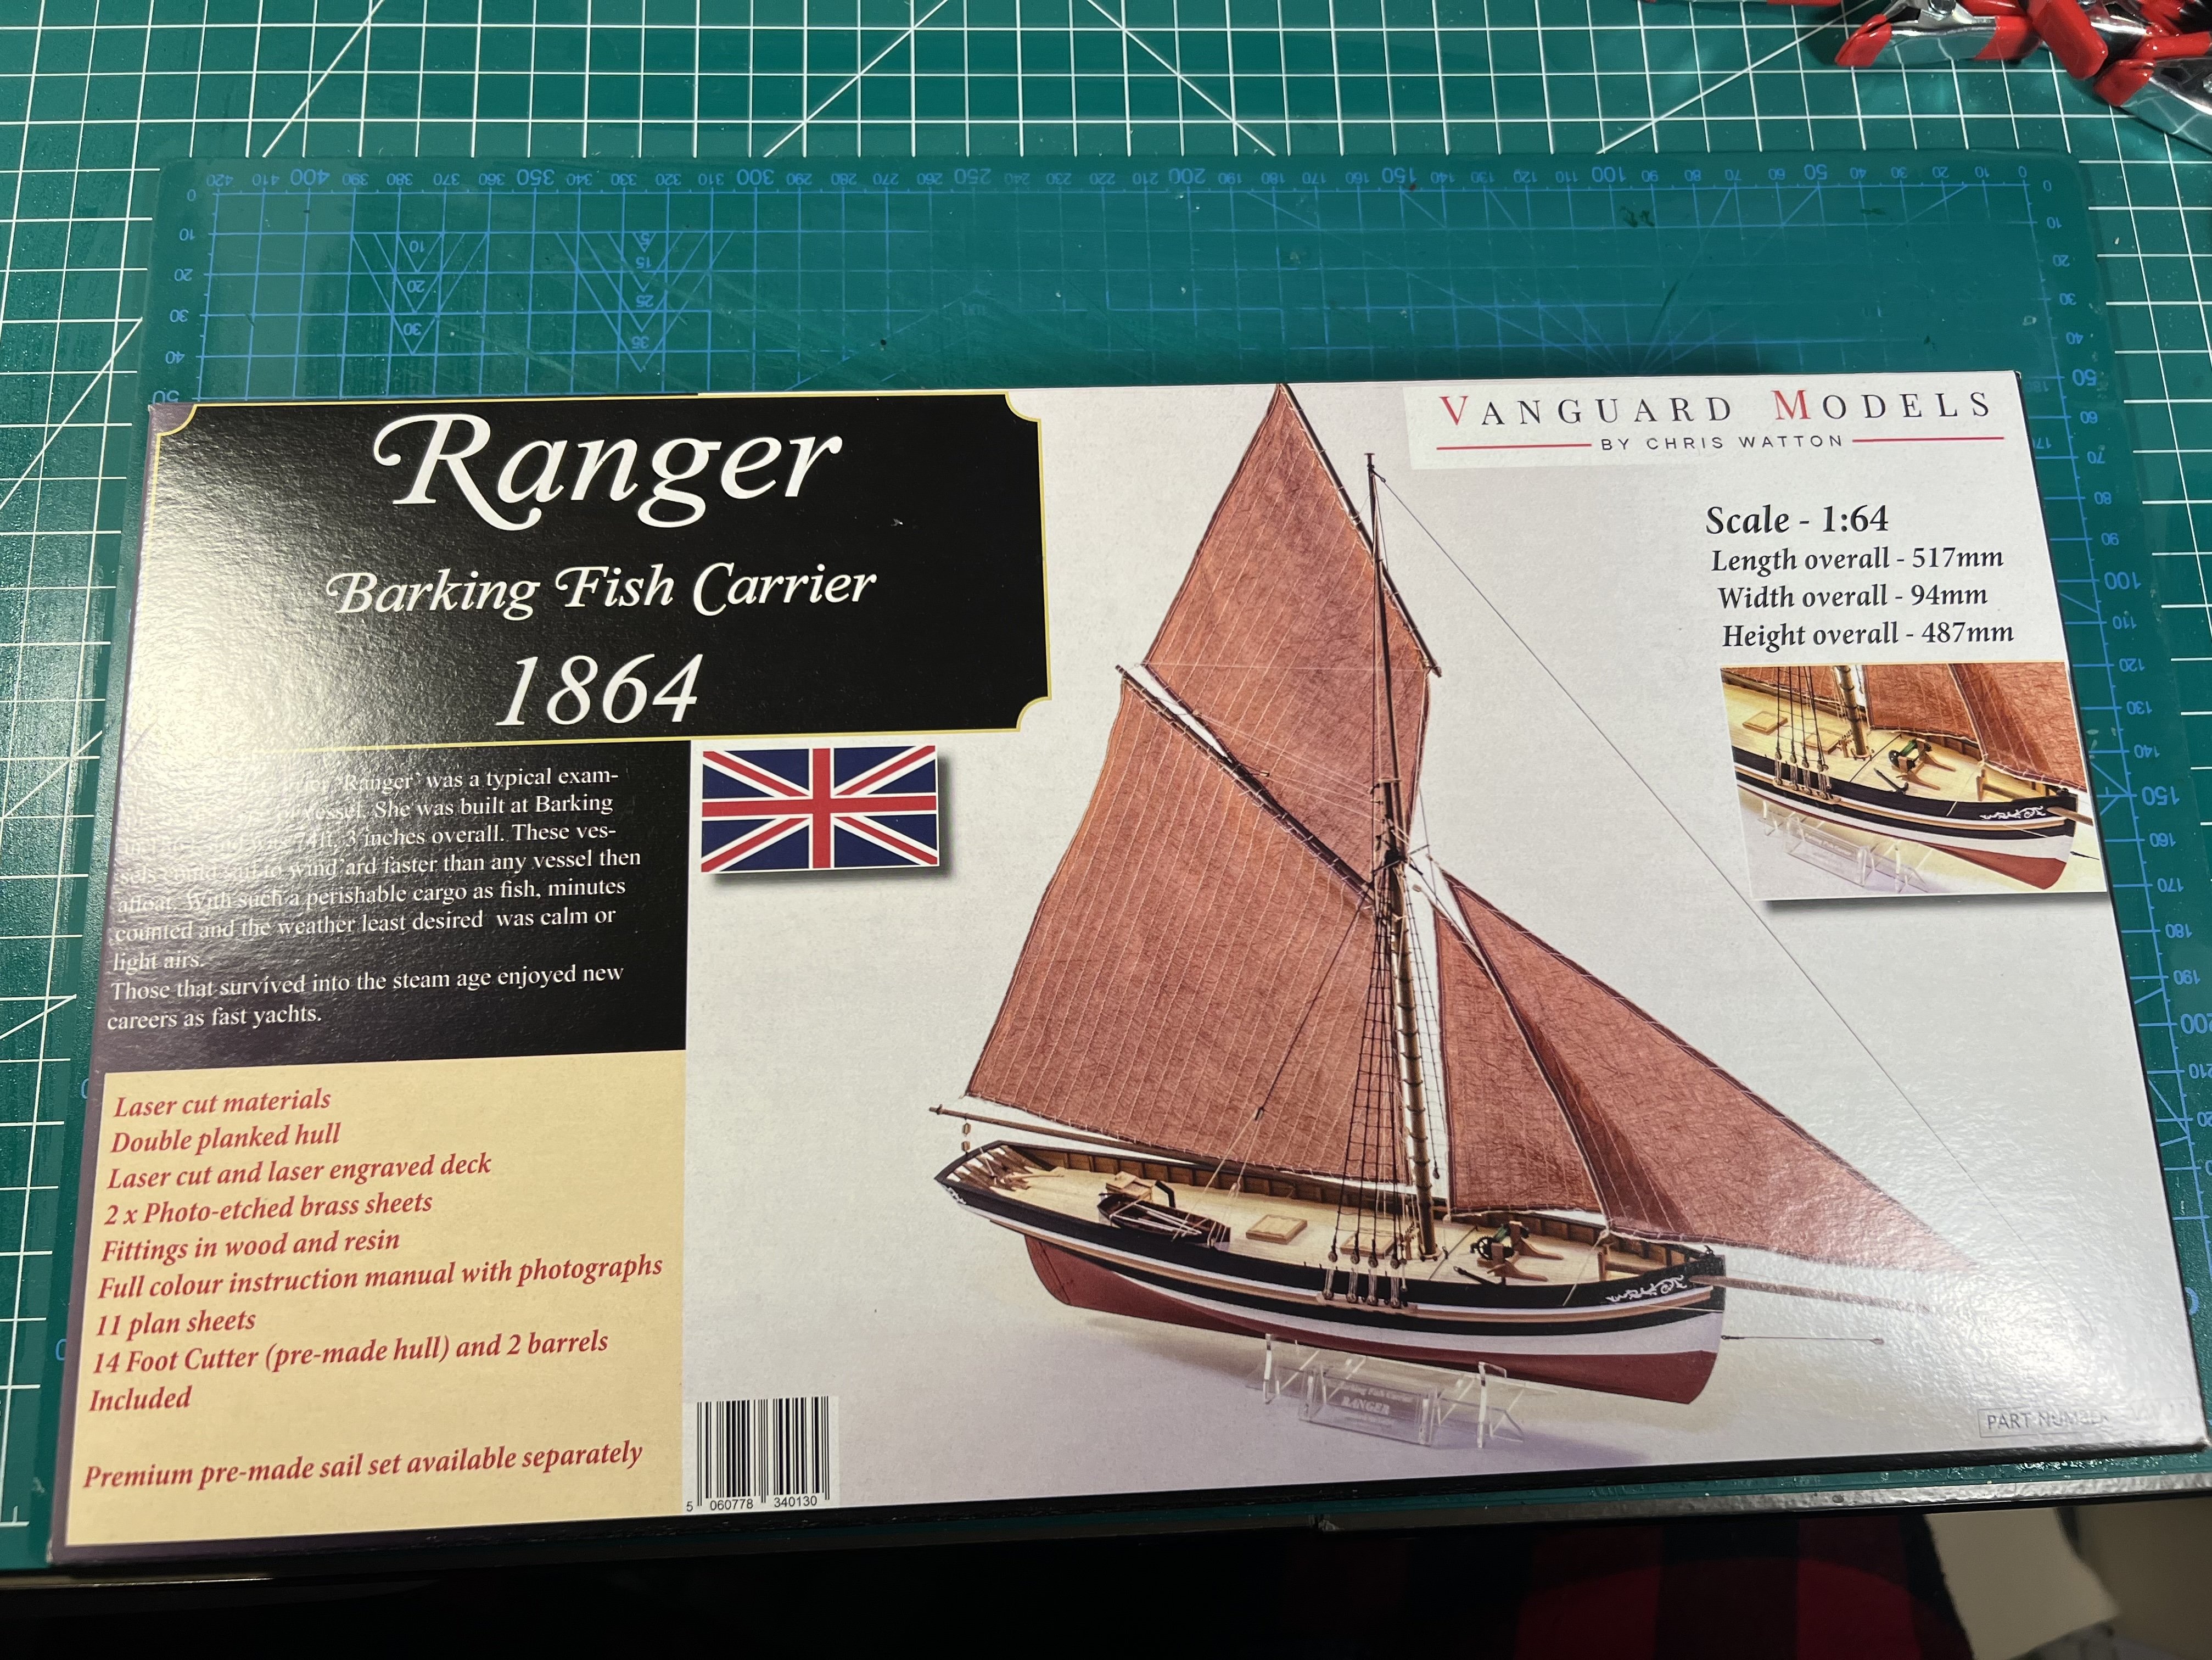
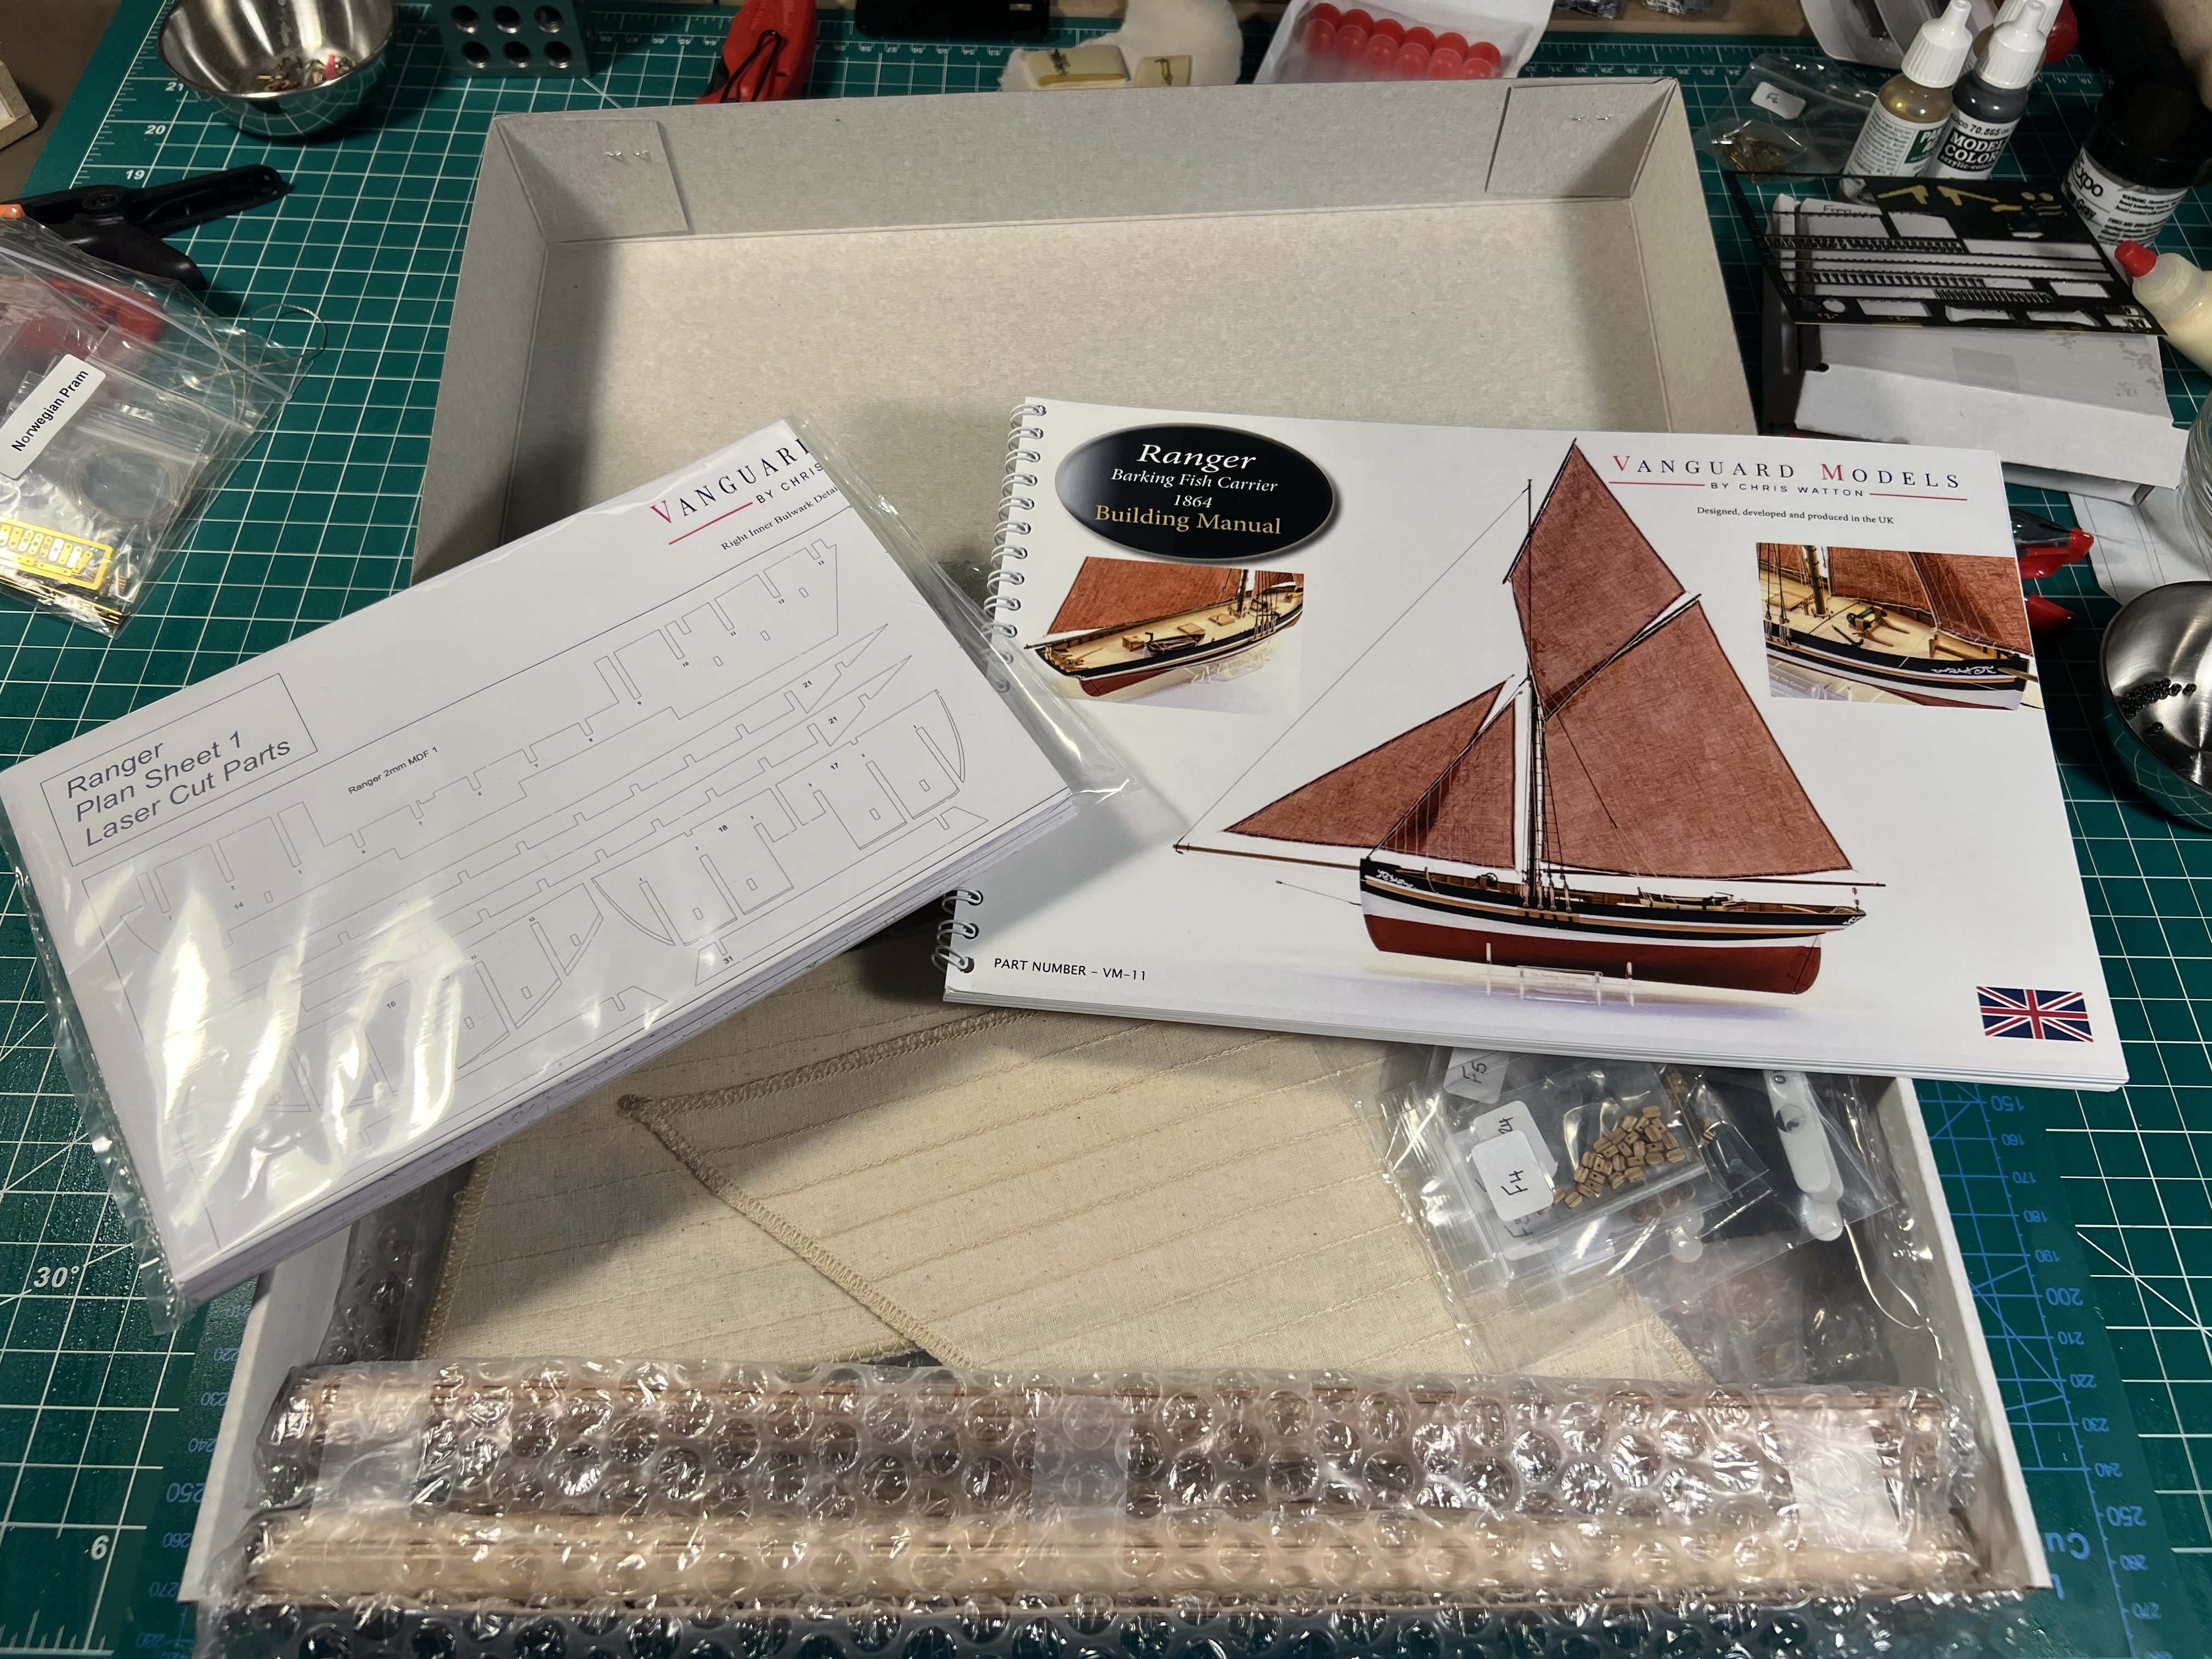
Well, about 30min after finishing my Pram, I've decided my next build: The Vanguard Models Ranger - Barking Fish Carrier - one of several fishing boats Vanguard offers. Months back, I thought my next model would be the Vanguard Duchess of Kingston that I bought, which I originally intended to be my second model after the Sherbourne. But then I realized that I wanted to get more experience with some smaller boats before tackling a larger and more expensive model ship like the Duchess. My first step was getting the Model Shipways Shipwright Series, having completed the Dory and Pram, with the Smack nearly complete. I also snuck in the NRG Half Hull after realizing I also needed some more planking practice. Then I discovered some builds of the Vanguard fishing boats. Seeing a nice Black Friday sale at agesofsail.com back in November I decided to buy the Ranger, Zulu, and Erycina. The Ranger and Zulu are Level I Novice builds, the Erycina is a Level II Amateur build. Someone who built all six models noted that the Ranger, Zulu, and Erycina are larger models, with the Saucy Jack, Nisha, and Fifie their somewhat smaller cousins. There are only a handful of build logs for the Ranger.

- 133 replies
-
- 7
-
-
- Ranger
- vanguard models
- (and 1 more)
-
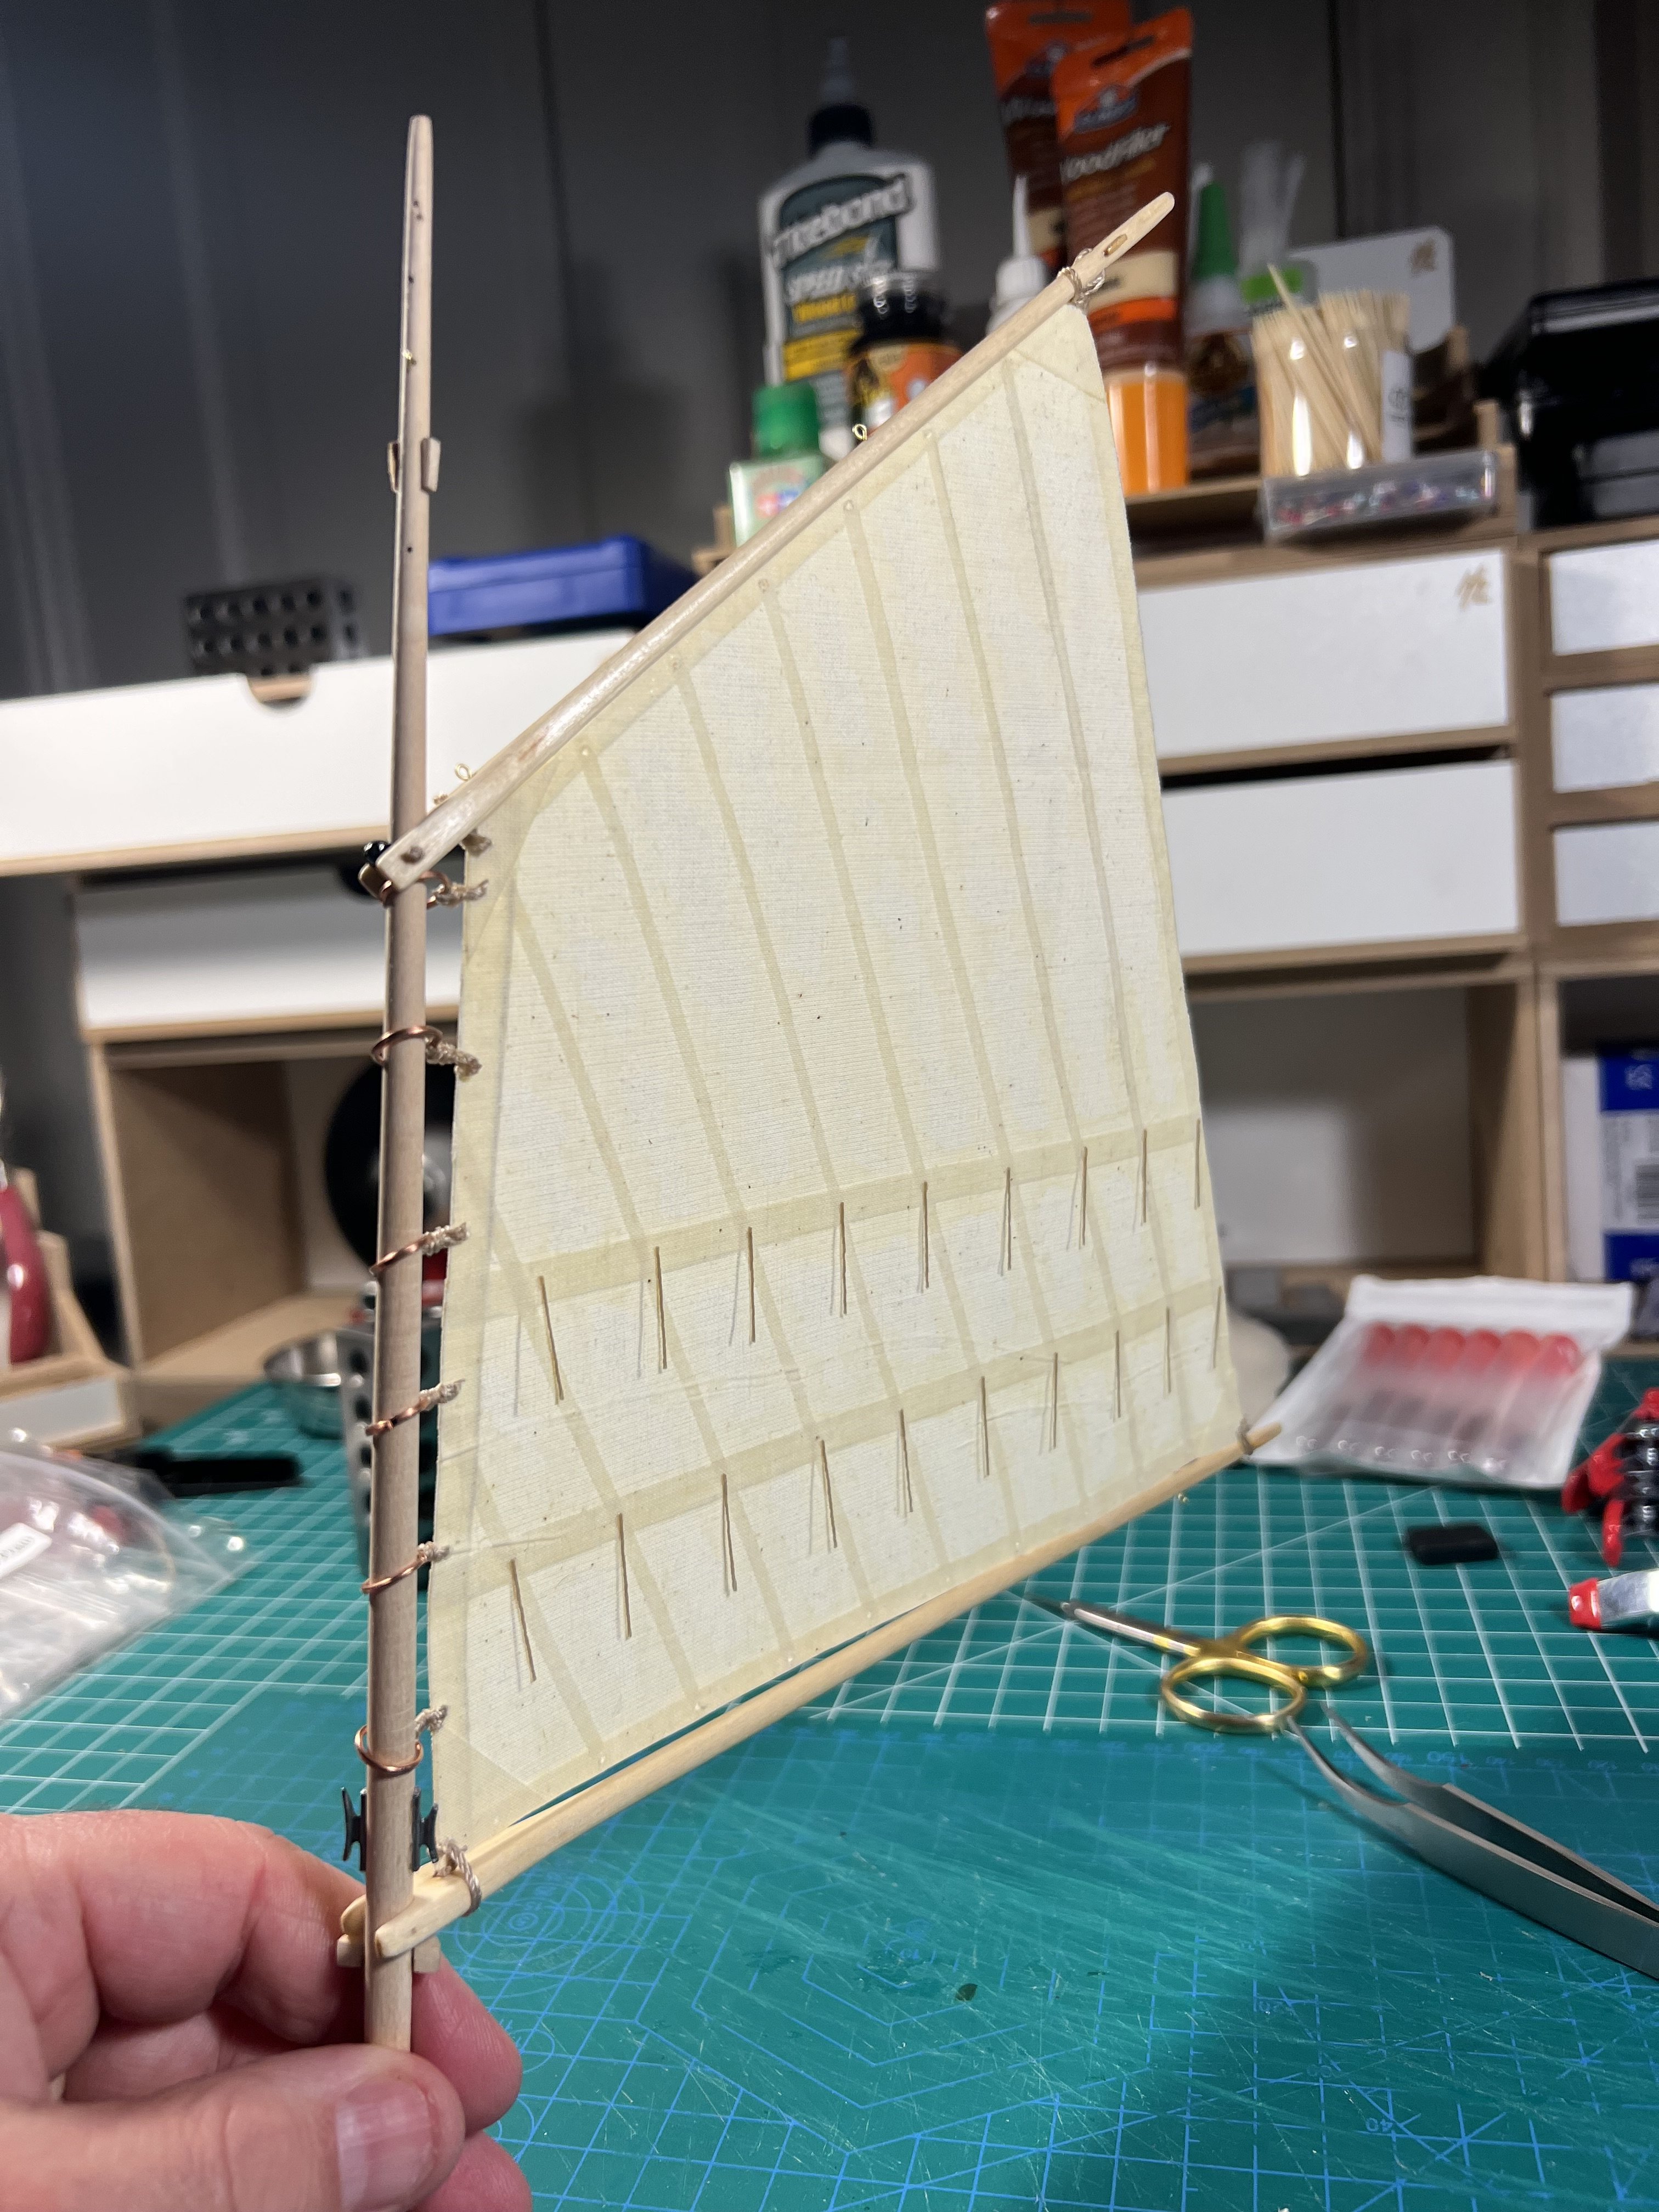
More progress on the sail. Learned some things after finishing my Pram.


- 59 replies
-
- 7
-
-
- muscongus bay lobster smack
- Model Shipways
- (and 2 more)
-
I gotta finish my Smack (almost done) and my Sherbourne (was waiting to do the rigging on the Pram and Smack before getting to that). I have more models in the cellar on a shelf than I can count. I was probably going to go peruse them in a bit and pick the next one. I decided I'm going to wait to begin the Duchess, which I had said would be my second model. Then I decided to do the Dory, Pram, and Smack, and the NRG half hull. Then I got caught up in Black Friday sales and decided to buy some of the Vanguard fishing boats since they were easy models. And I somehow late at night pulled the trigger on some other models. Oh, and I inexplicably ordered the Pavel Nikitin Oseberg v3 last week. What was I thinking? I literally have about 10 years of models. I need to stop. Or take a pill.
- 63 replies
-
- 4
-
-
- Norwegian Sailing Pram
- Model Shipways
- (and 2 more)
-
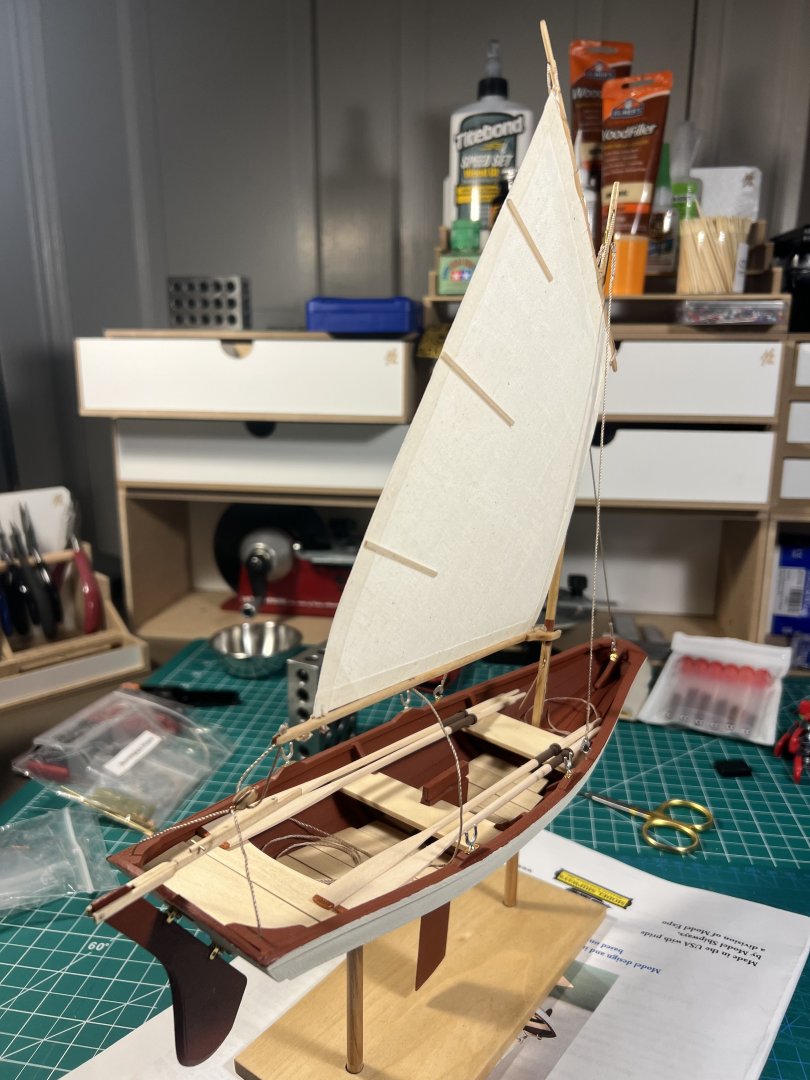
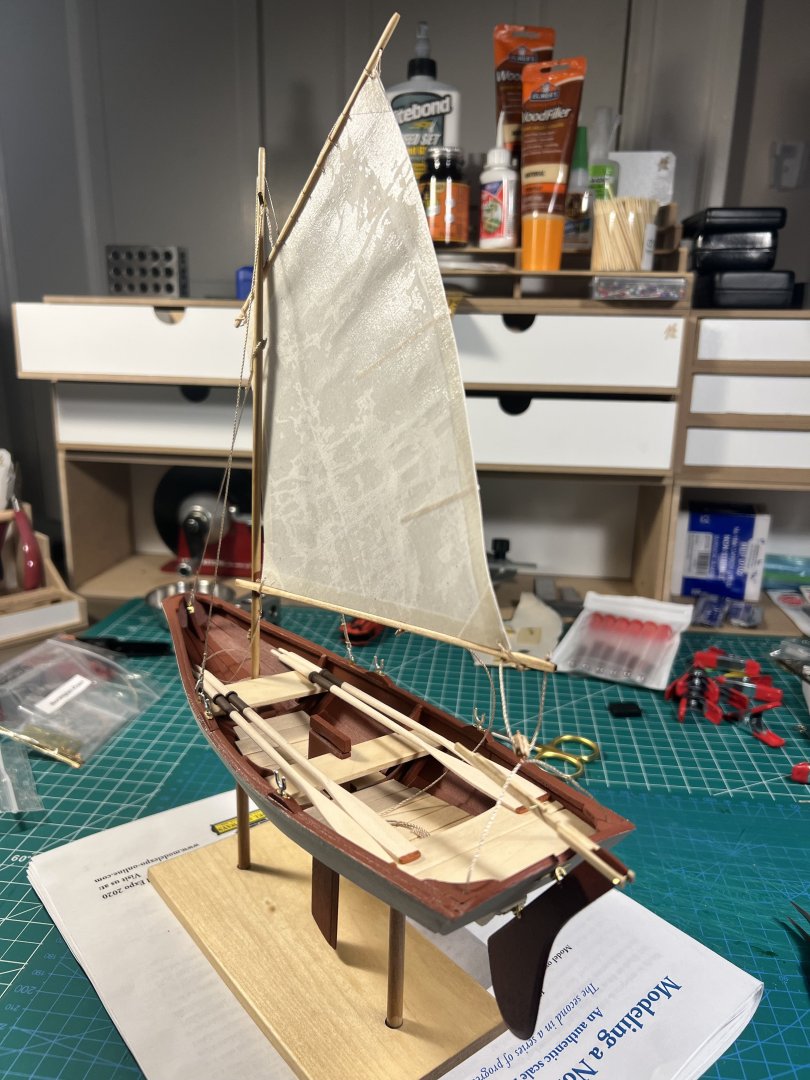
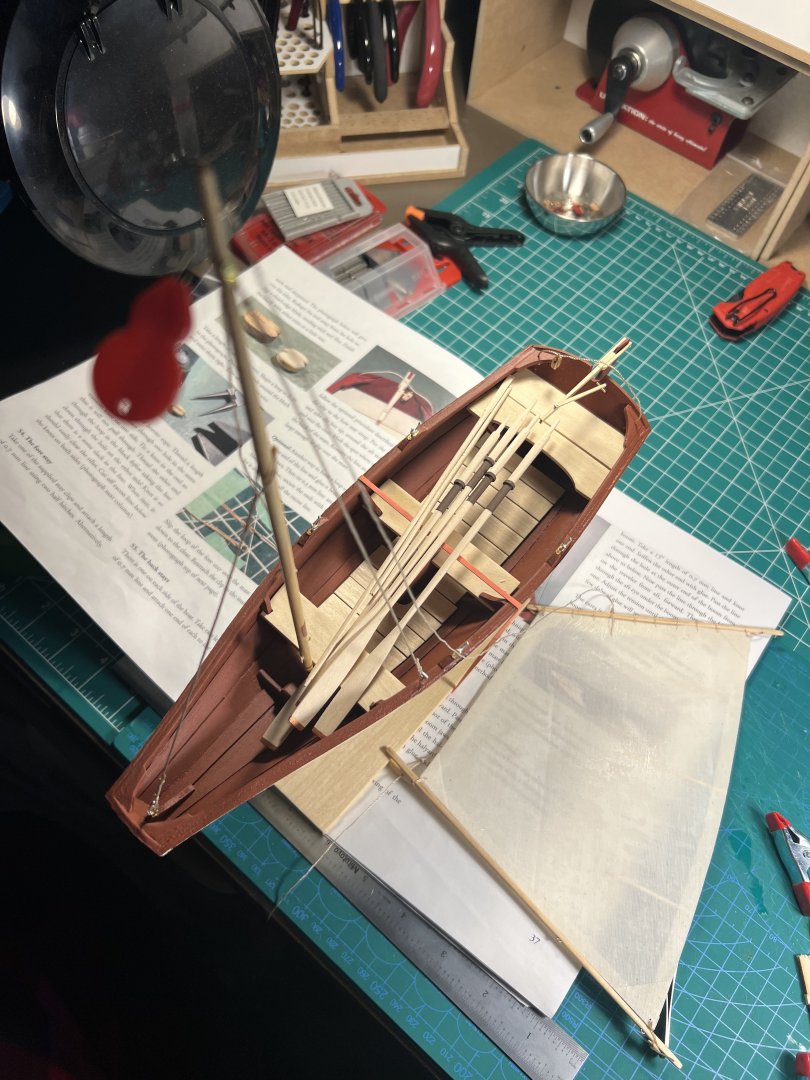
My Pram is done (or should I say I’m done with my Pram).


- 63 replies
-
- 11
-
-

-
- Norwegian Sailing Pram
- Model Shipways
- (and 2 more)
-
Yeah, this model really needs to be fared pretty aggressively at the bow and stern (at least compared to what I had to do on the Sherbourne). Even after an aggressive faring, I realized later that I probably could have (should have) done a bit more, especially near the counter at the stern. Having the thin basswood for the planking has the advantage that they're easy to bend and shape. But it also has the disadvantage that, because they're thin, they cannot take much sanding. If the faring is not done right and there are bulges or pockets you cannot fix that by sanding the planks - as I learned when I sanded through and had to replank in places. (I can hold my hull up to the light and see some places where the planking is nearly paper thin.)
-
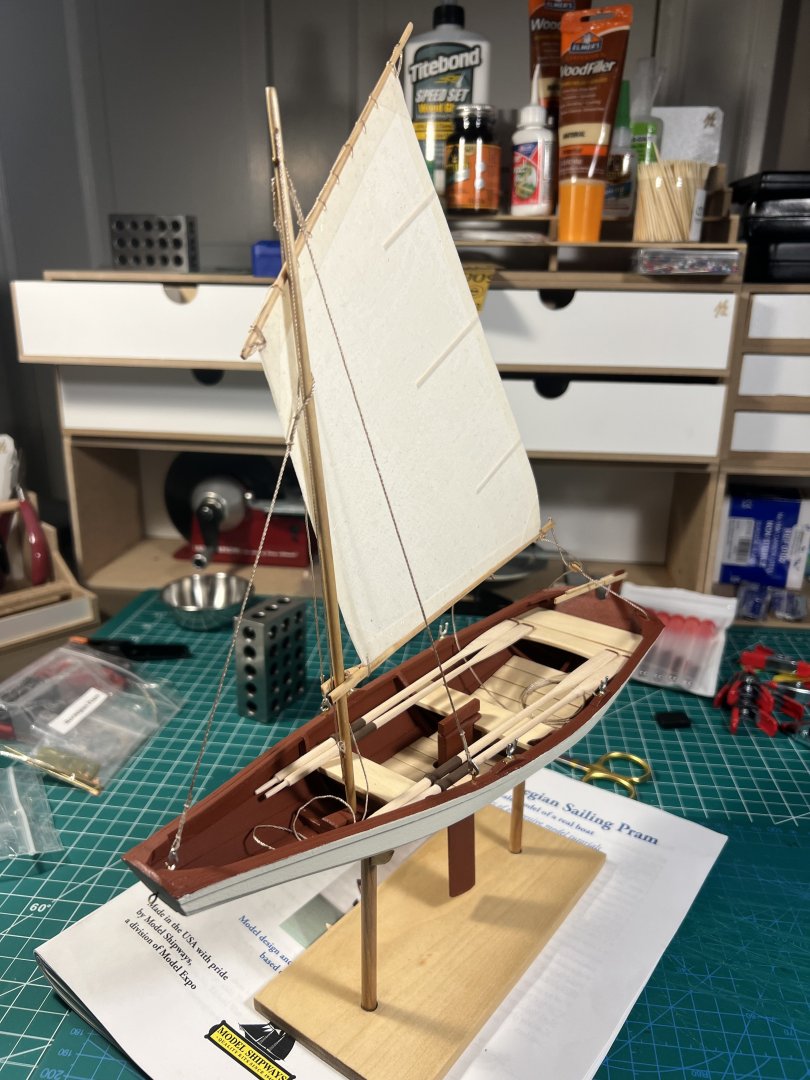
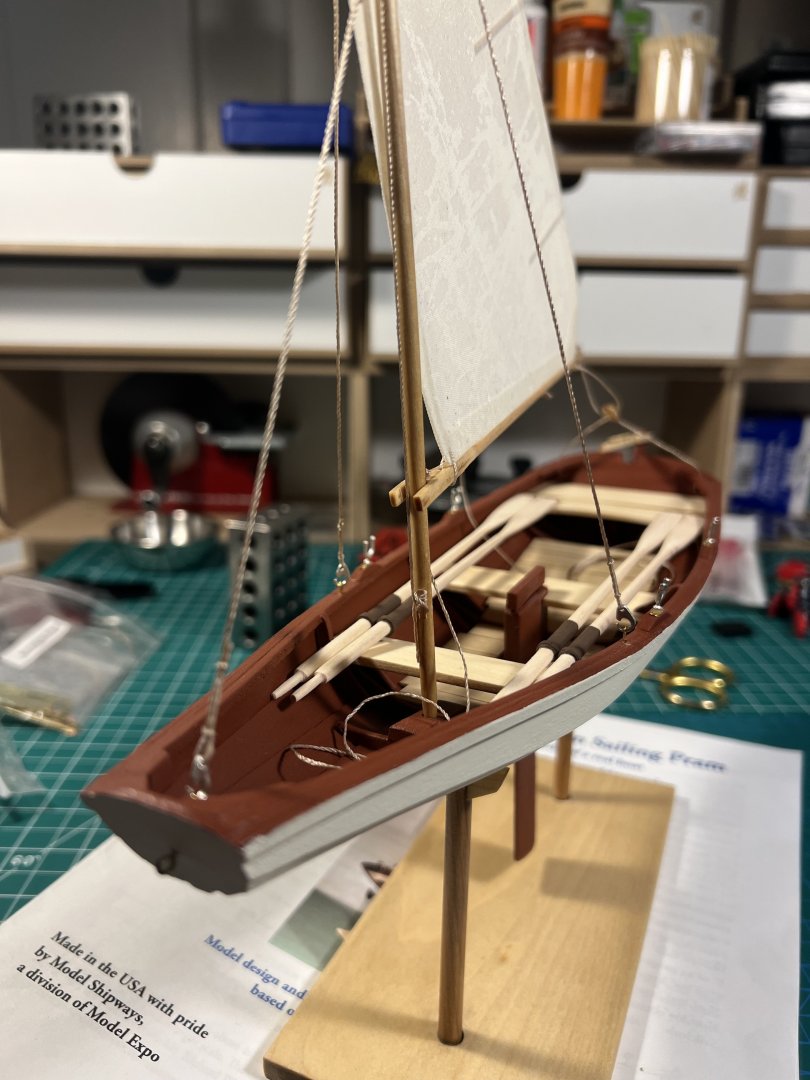
Starting to raise the sail. I think I understand what to do. I originally thread the halyard through both holes at the top of the mast then realized it went only through one. It seems odd to me that the halyard and downhaul lines are both secured on the same cleat. I would have thought there’d be separate cleats for separate lines.
- 63 replies
-
- 4
-
-
- Norwegian Sailing Pram
- Model Shipways
- (and 2 more)
-
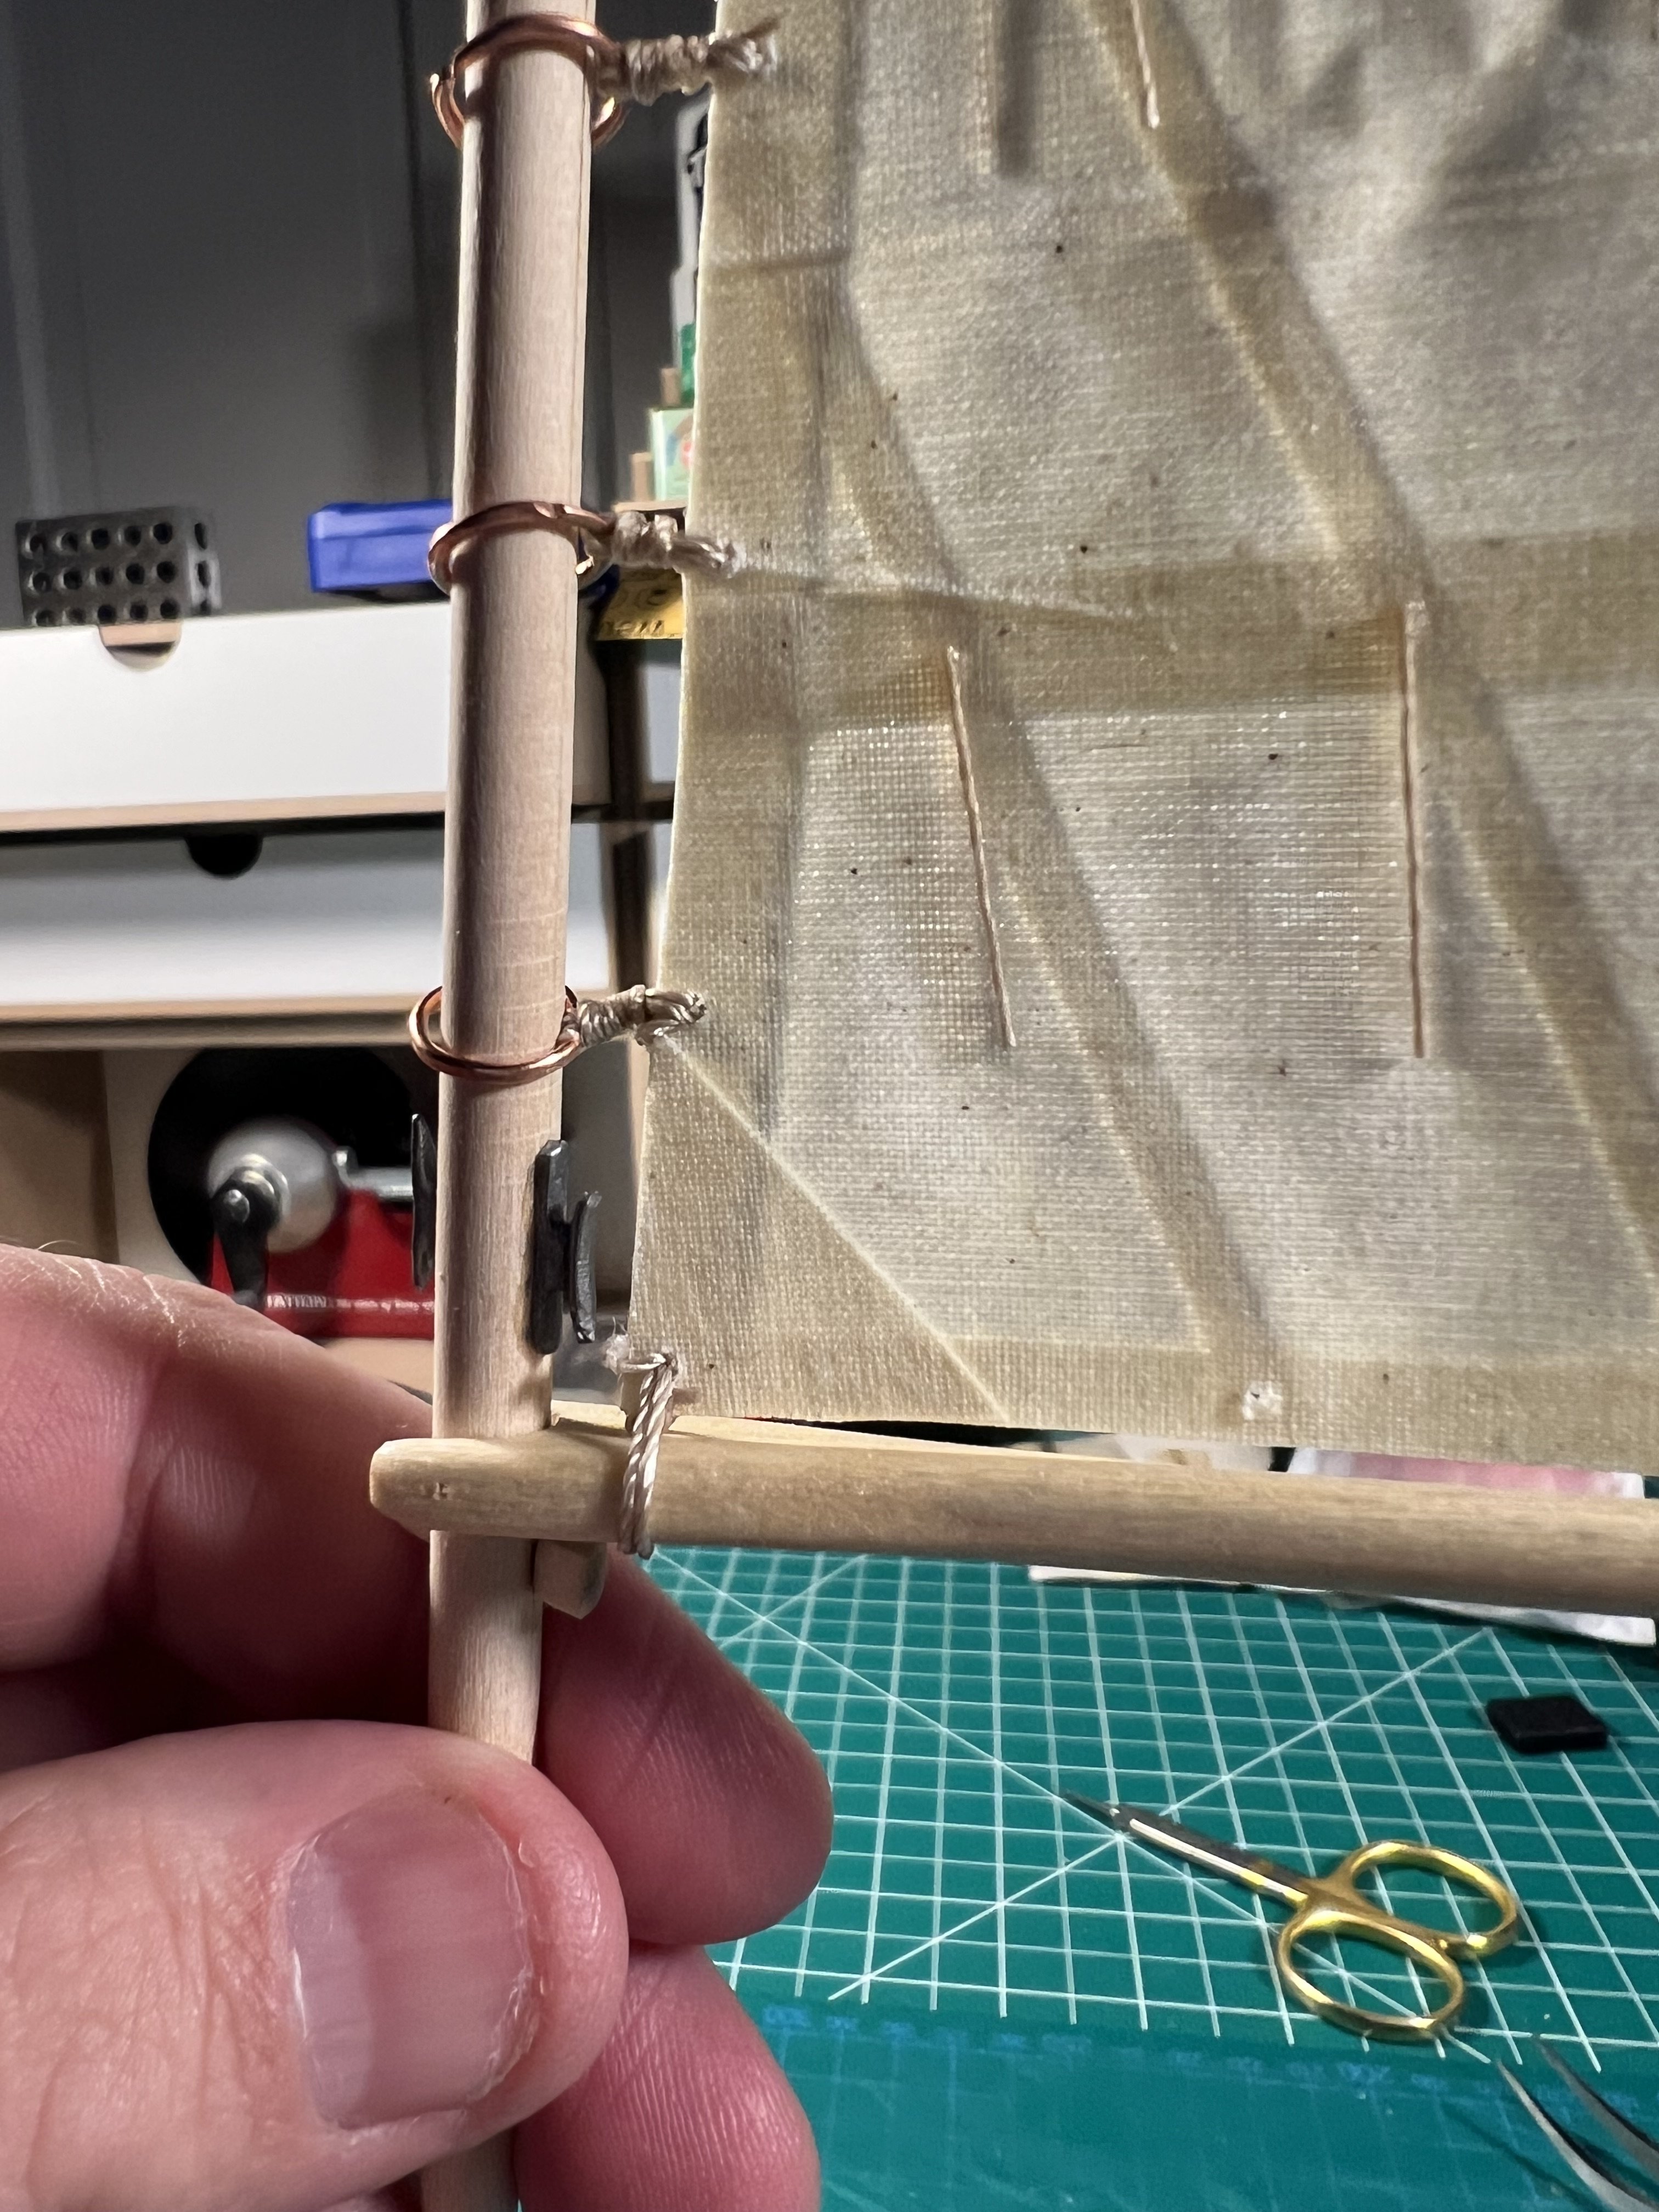
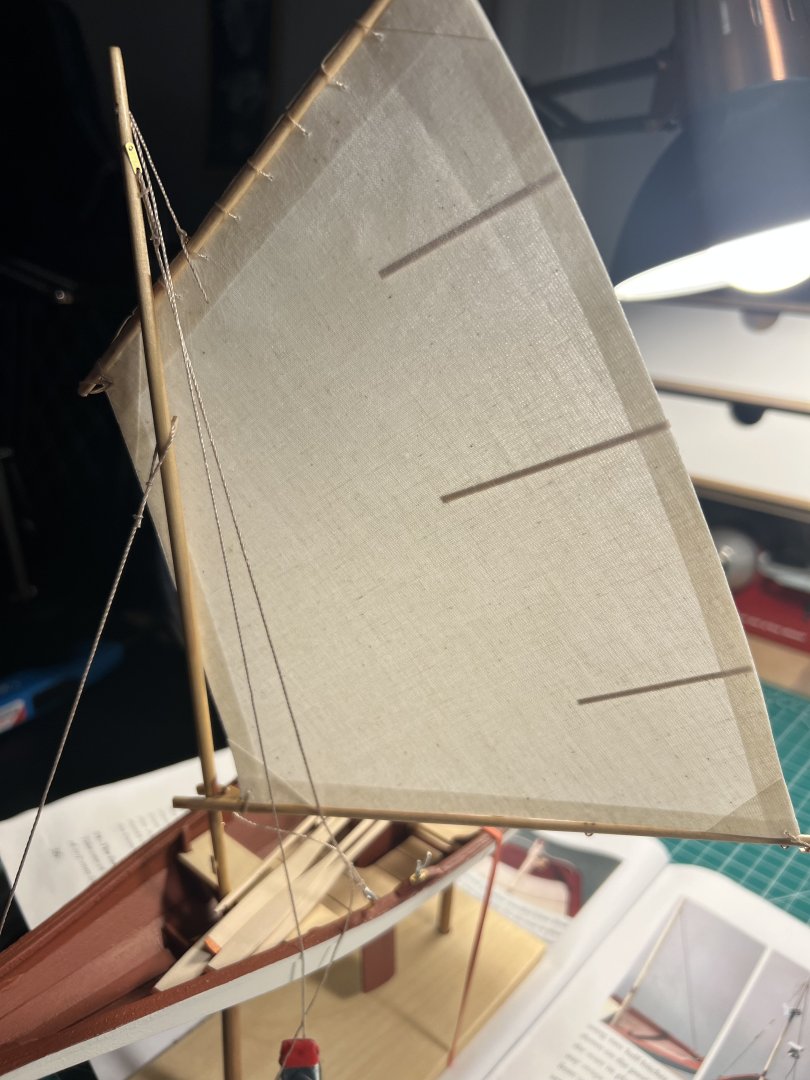
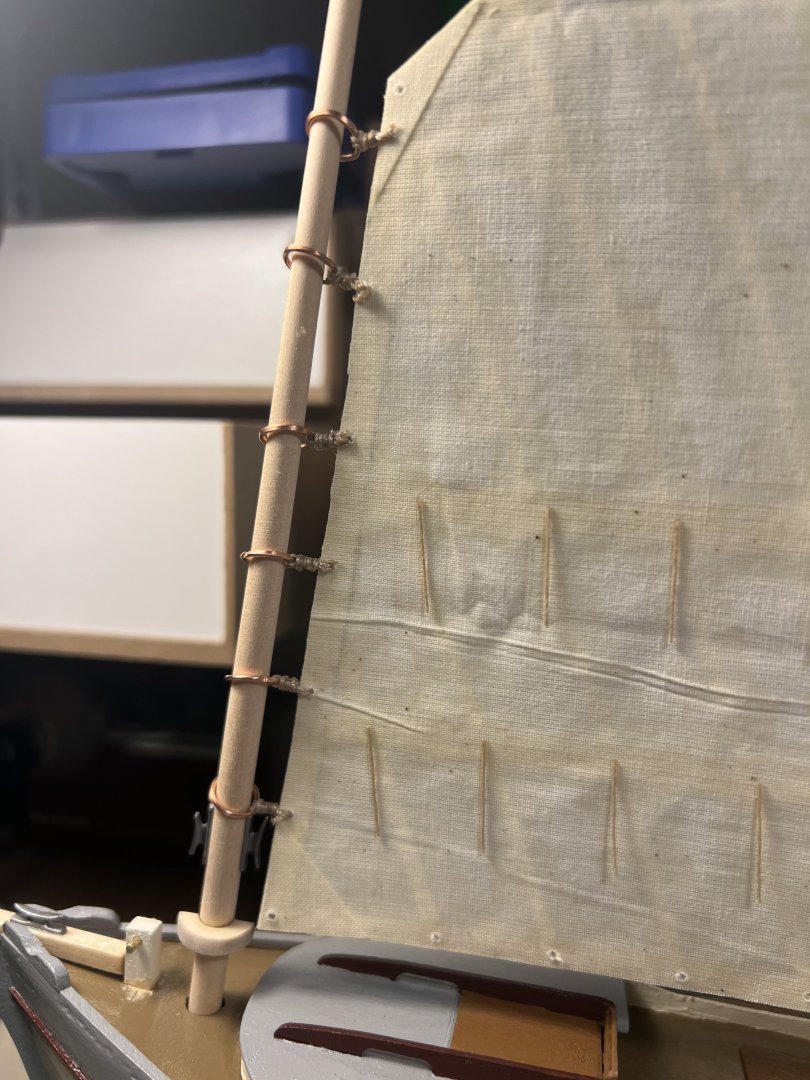
Lashed and laced the top of the sail (still need to trim the ends of the lines after the Glenn put on them dries).
- 63 replies
-
- 6
-
-
- Norwegian Sailing Pram
- Model Shipways
- (and 2 more)
-
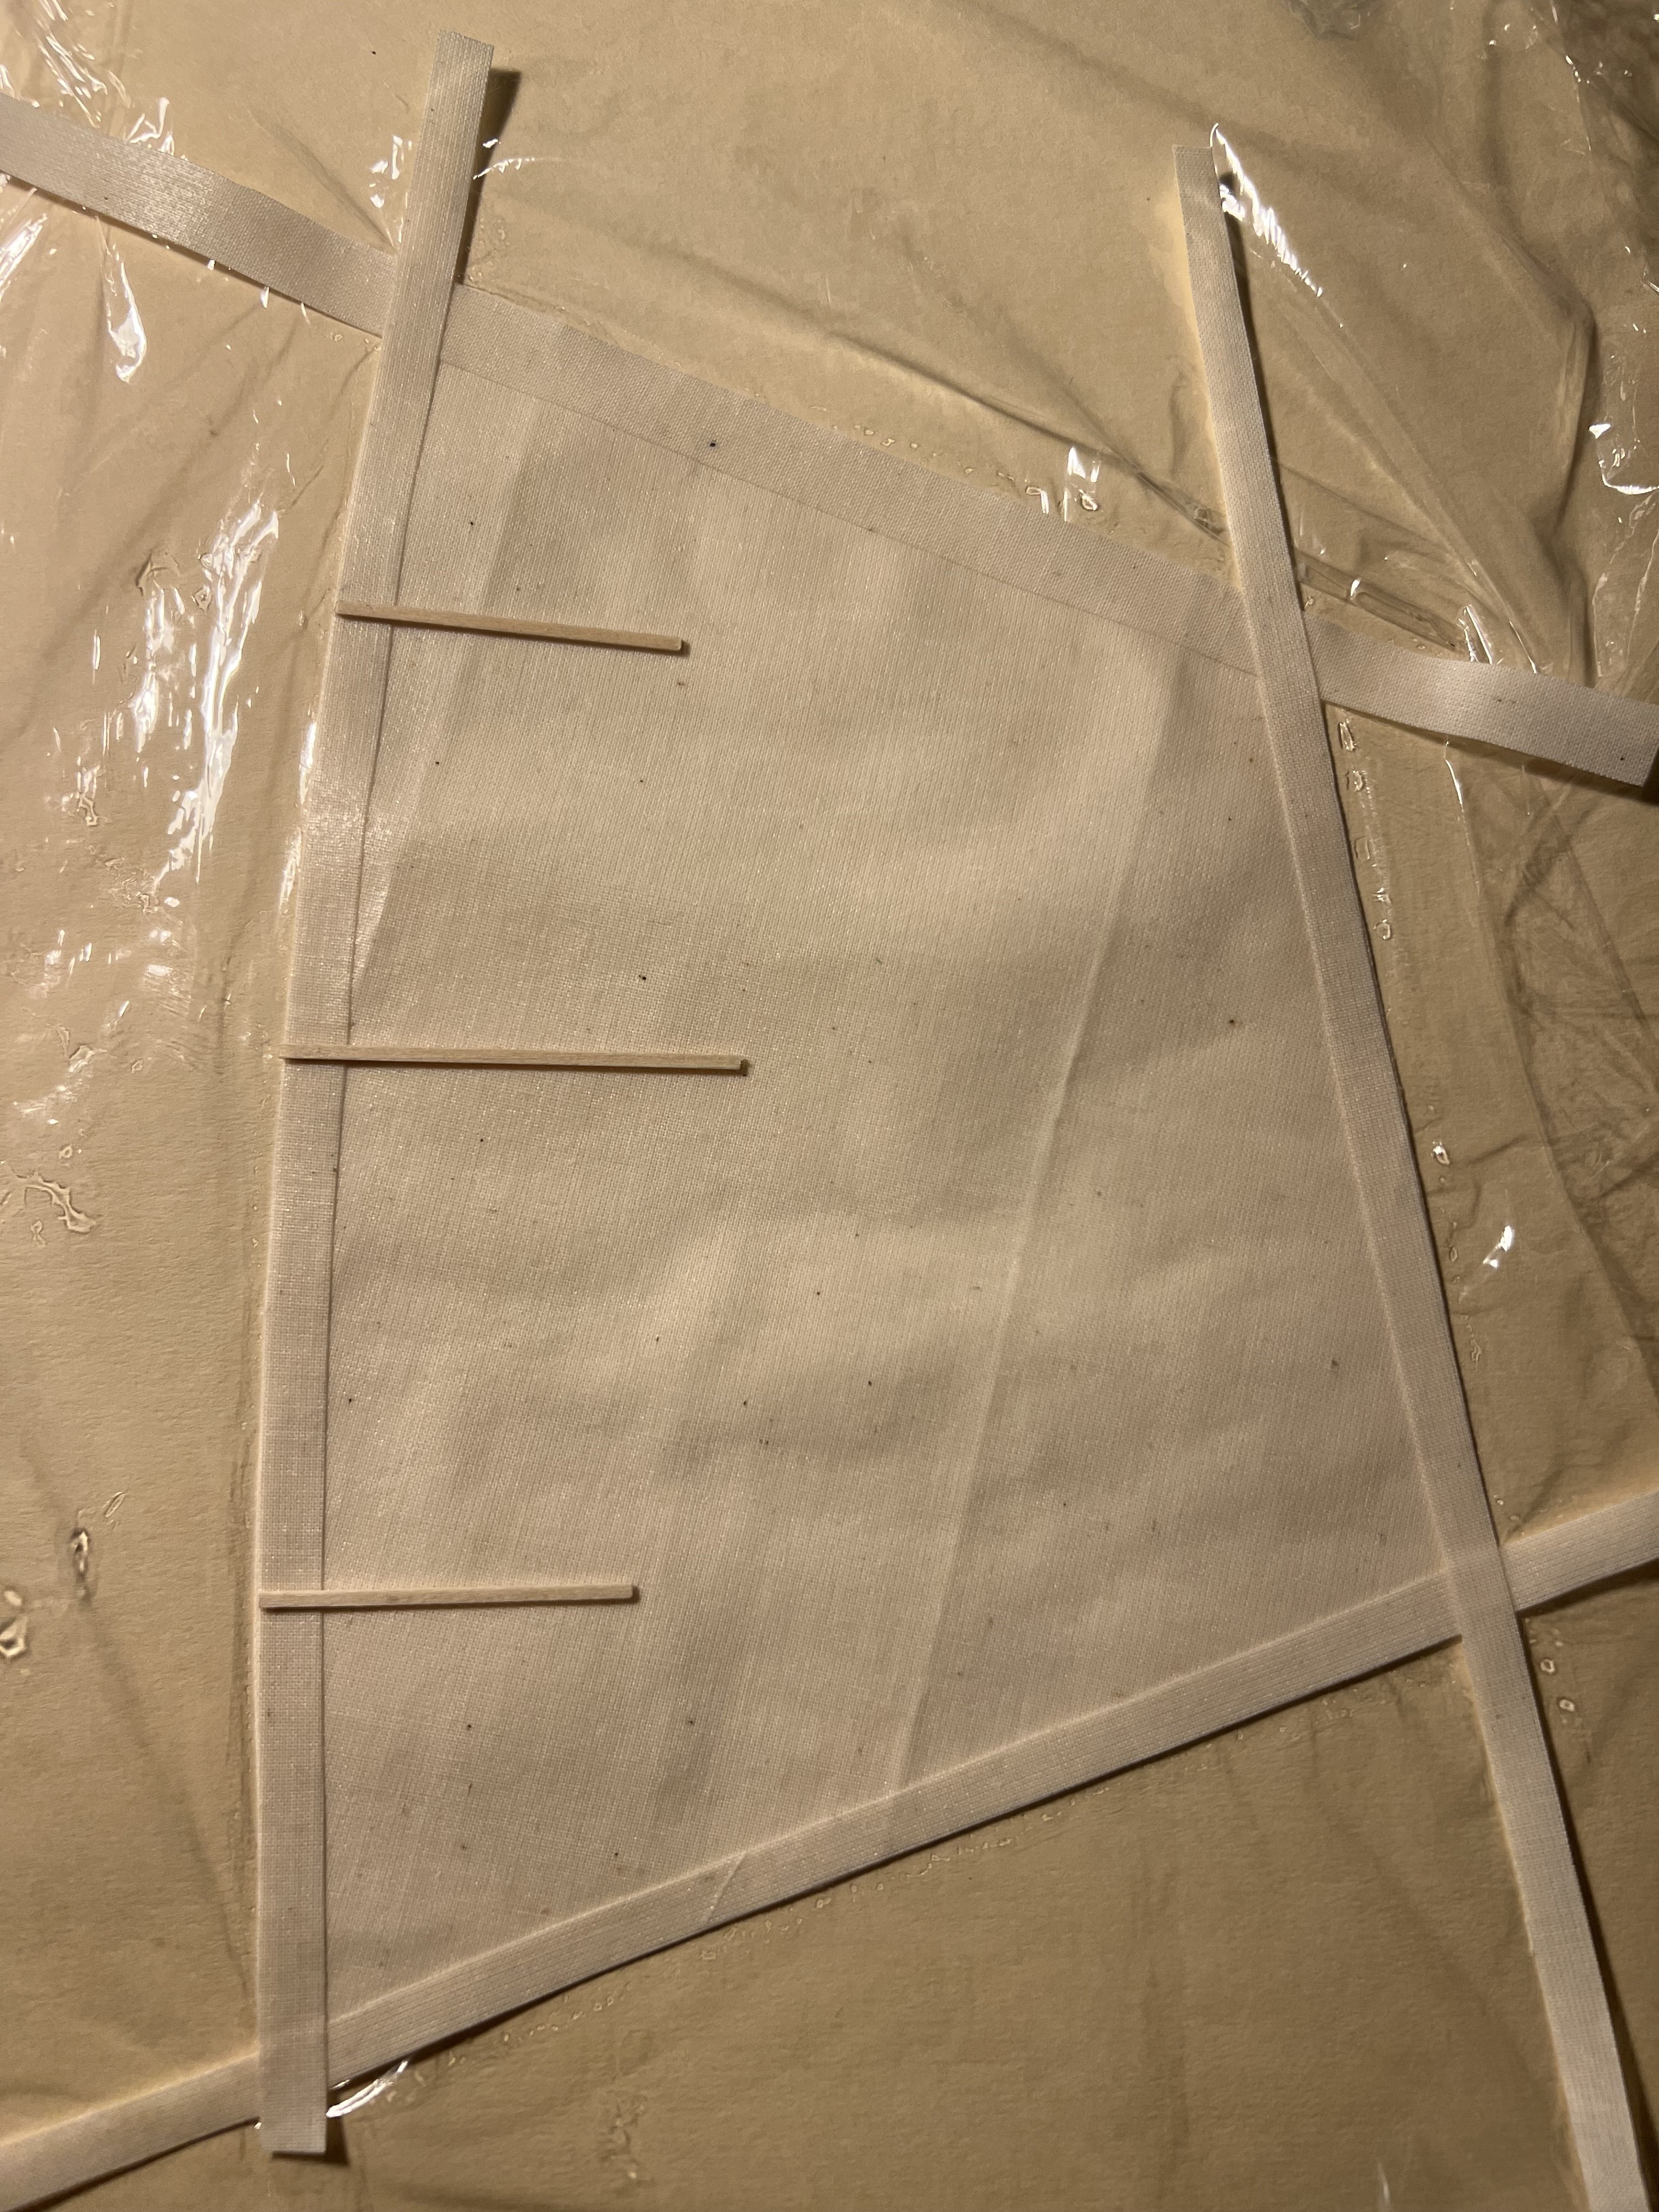
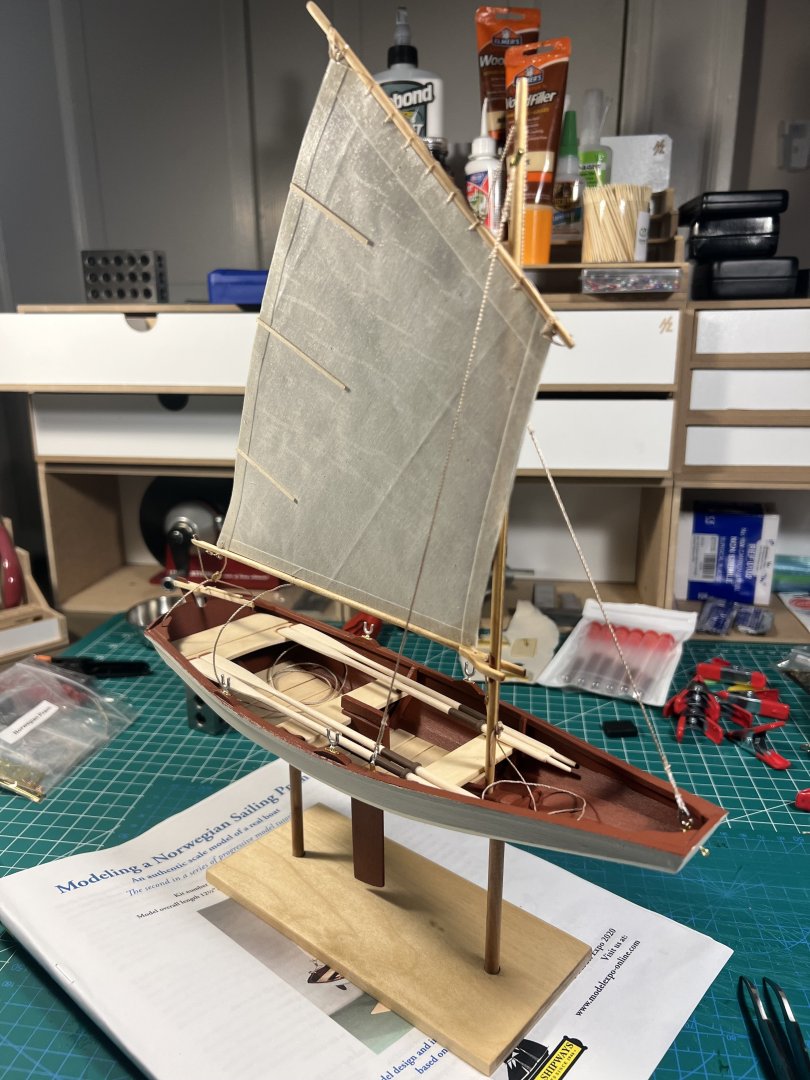
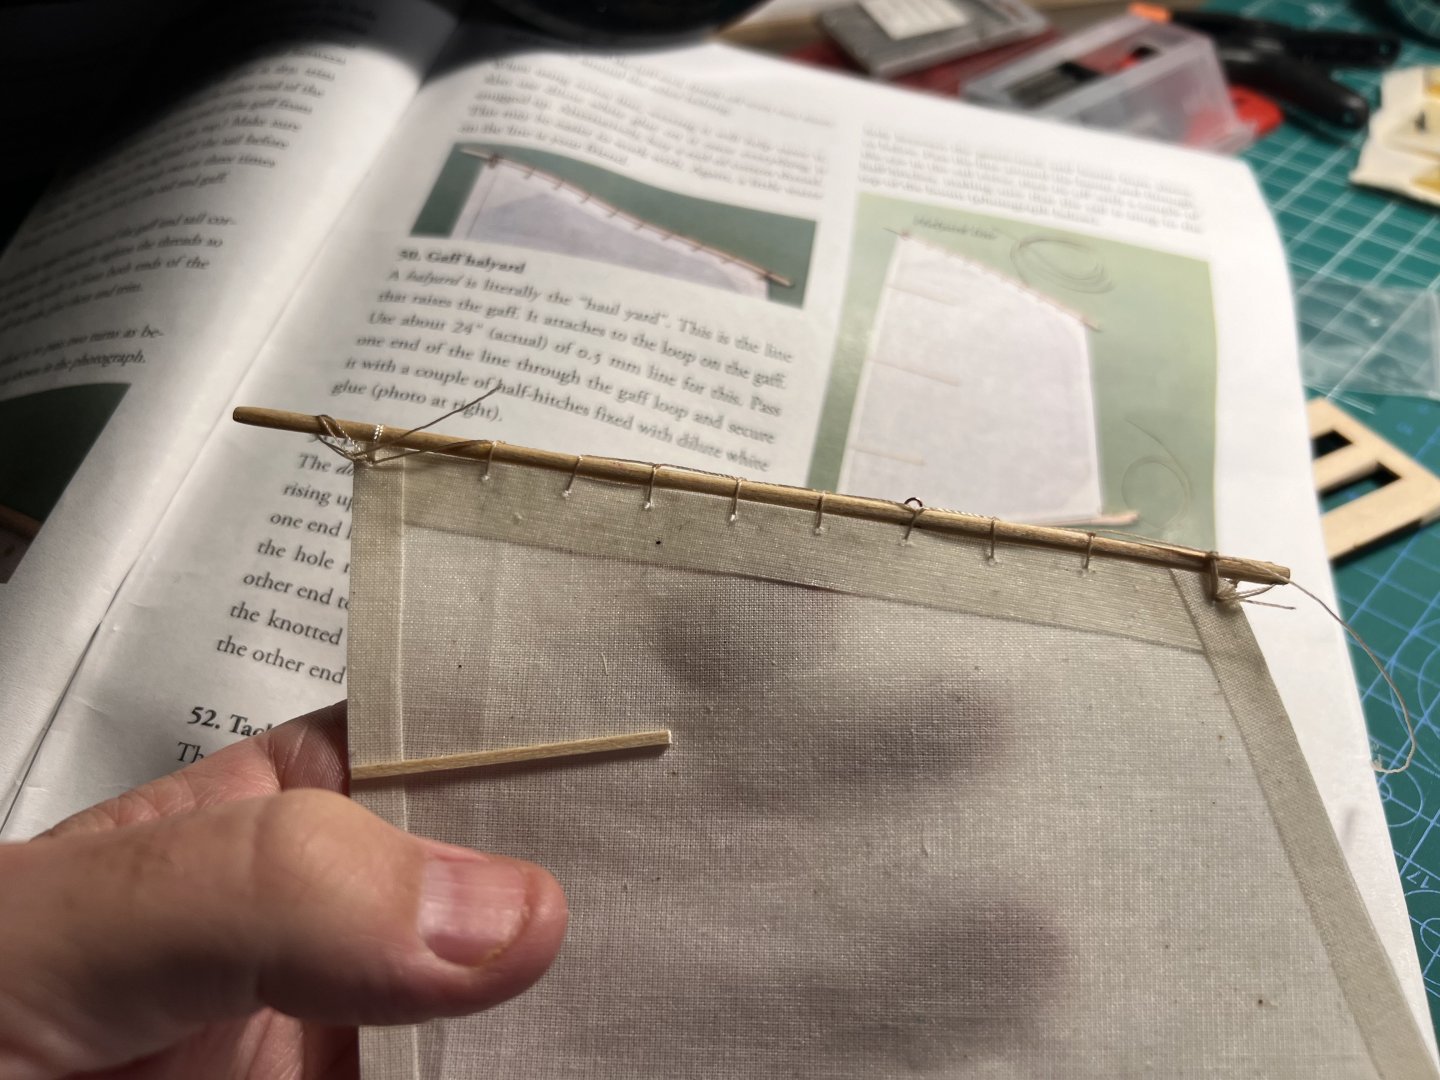
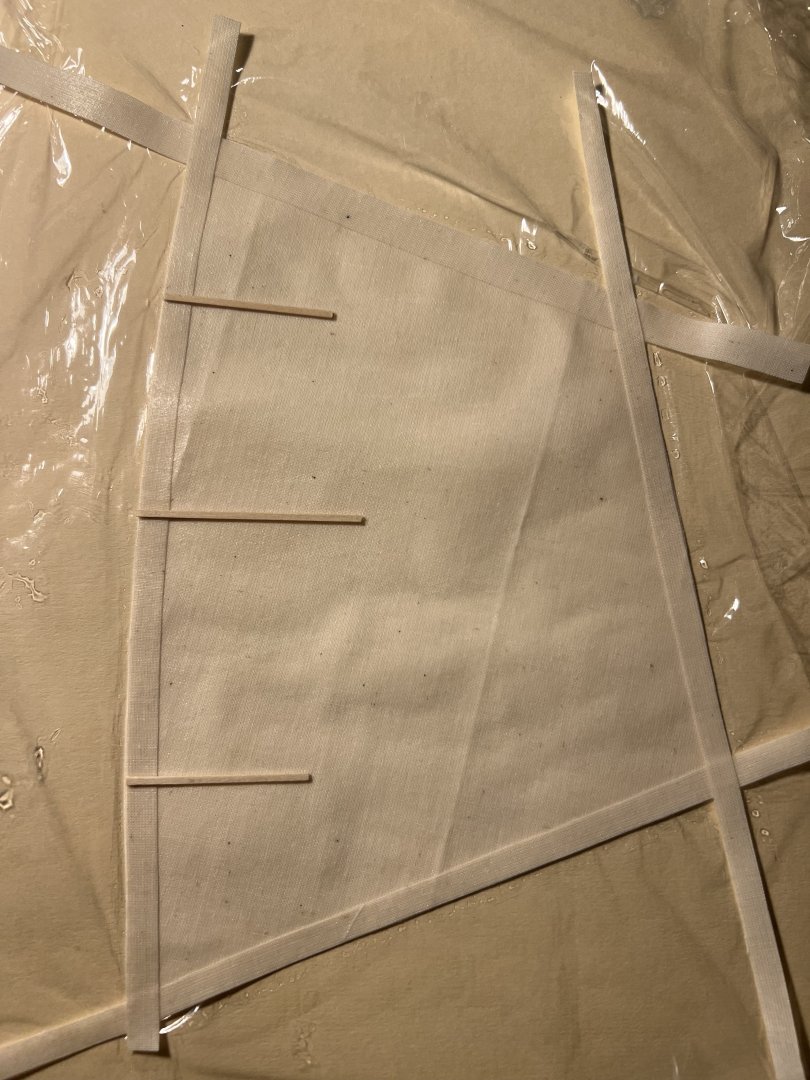
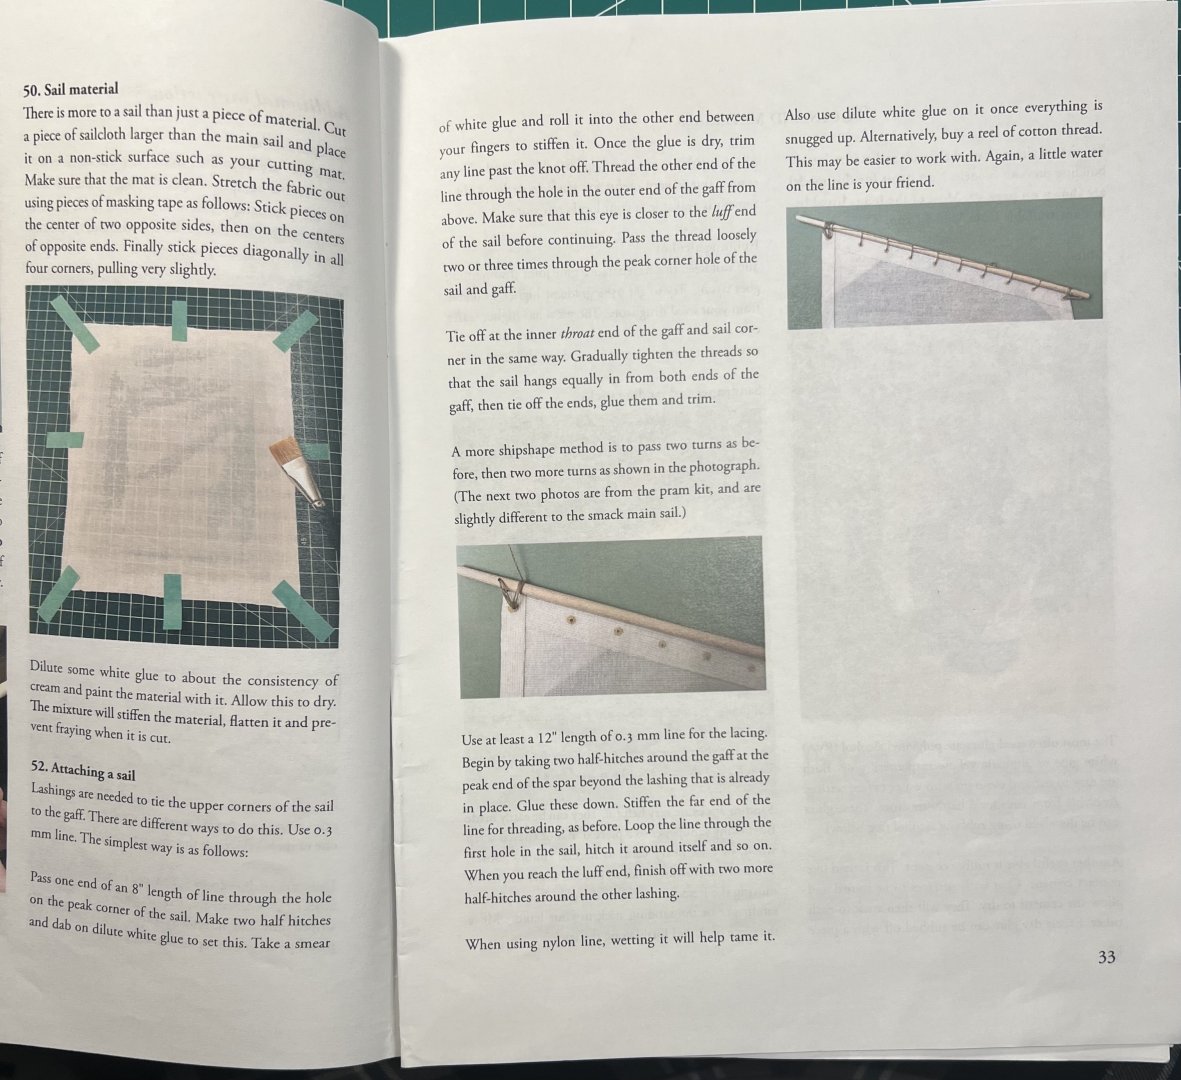
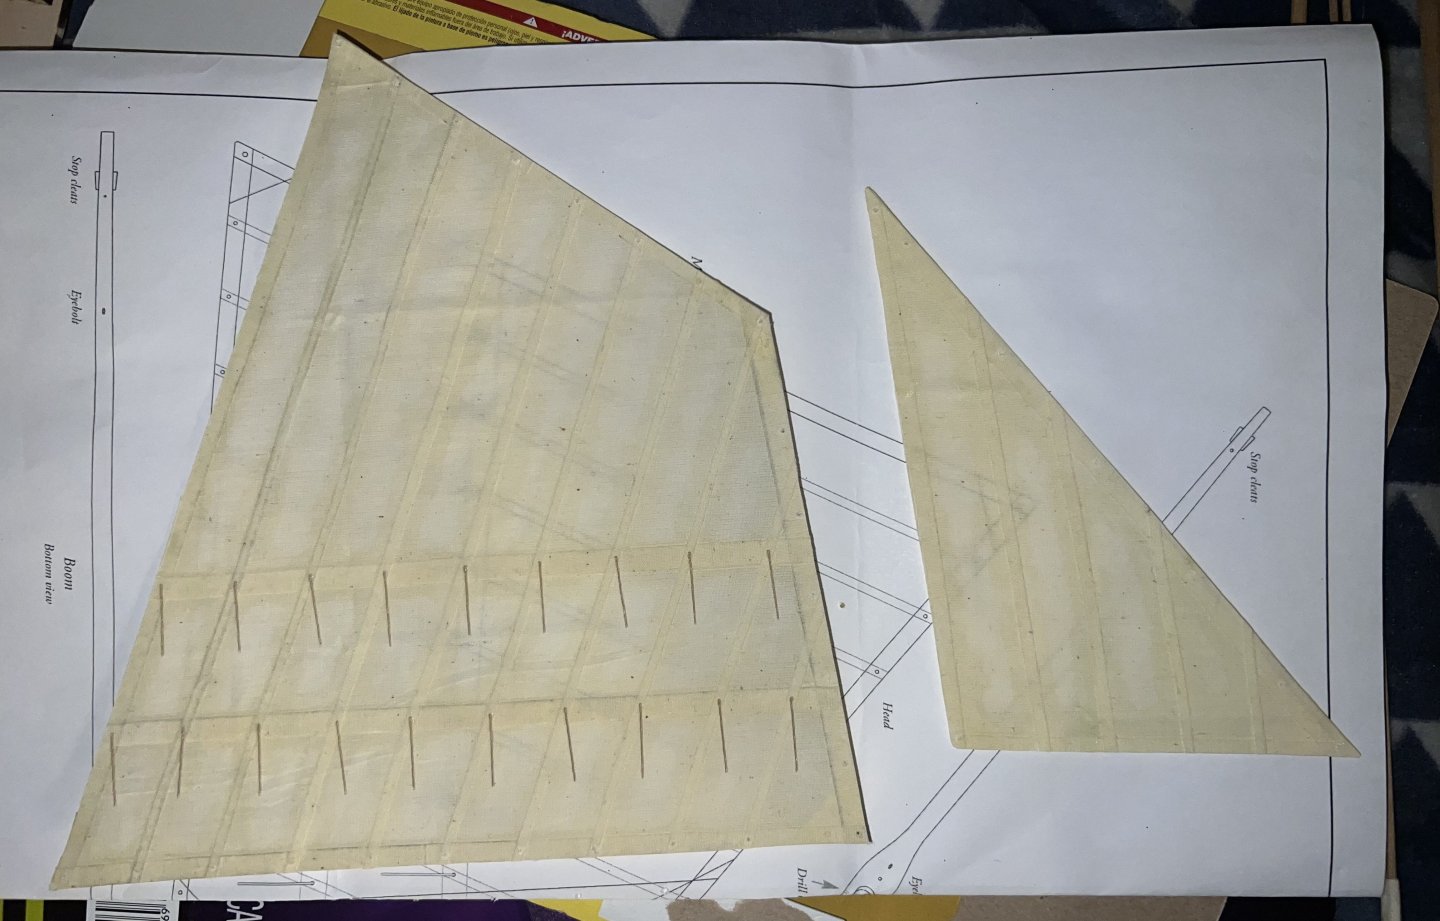
Take two making a sail for my Pram after getting a new sail from Model Expo. It took a couple email pokes, but it was finally shipped. Take one I made a couple mistakes. First, I used yellow PVA glue (did the same on my Smack) which naturally gave the sail a yellow tone. This time I used a white bookbinders glue. Second, I had taped my sail to my green cutting mat. It was clean but because it had been cut up a bit, some of the green stained sail. This go around, I put Saran Wrap down first. Tomorrow I’ll add the corner stays, and when they’re dried I’ll drill the holes for the line, and then try to figure out how to attach it. The instructions from the Pram are a bit more extensive than they were for the Smack but still not very clear.
- 63 replies
-
- 6
-
-
- Norwegian Sailing Pram
- Model Shipways
- (and 2 more)
-
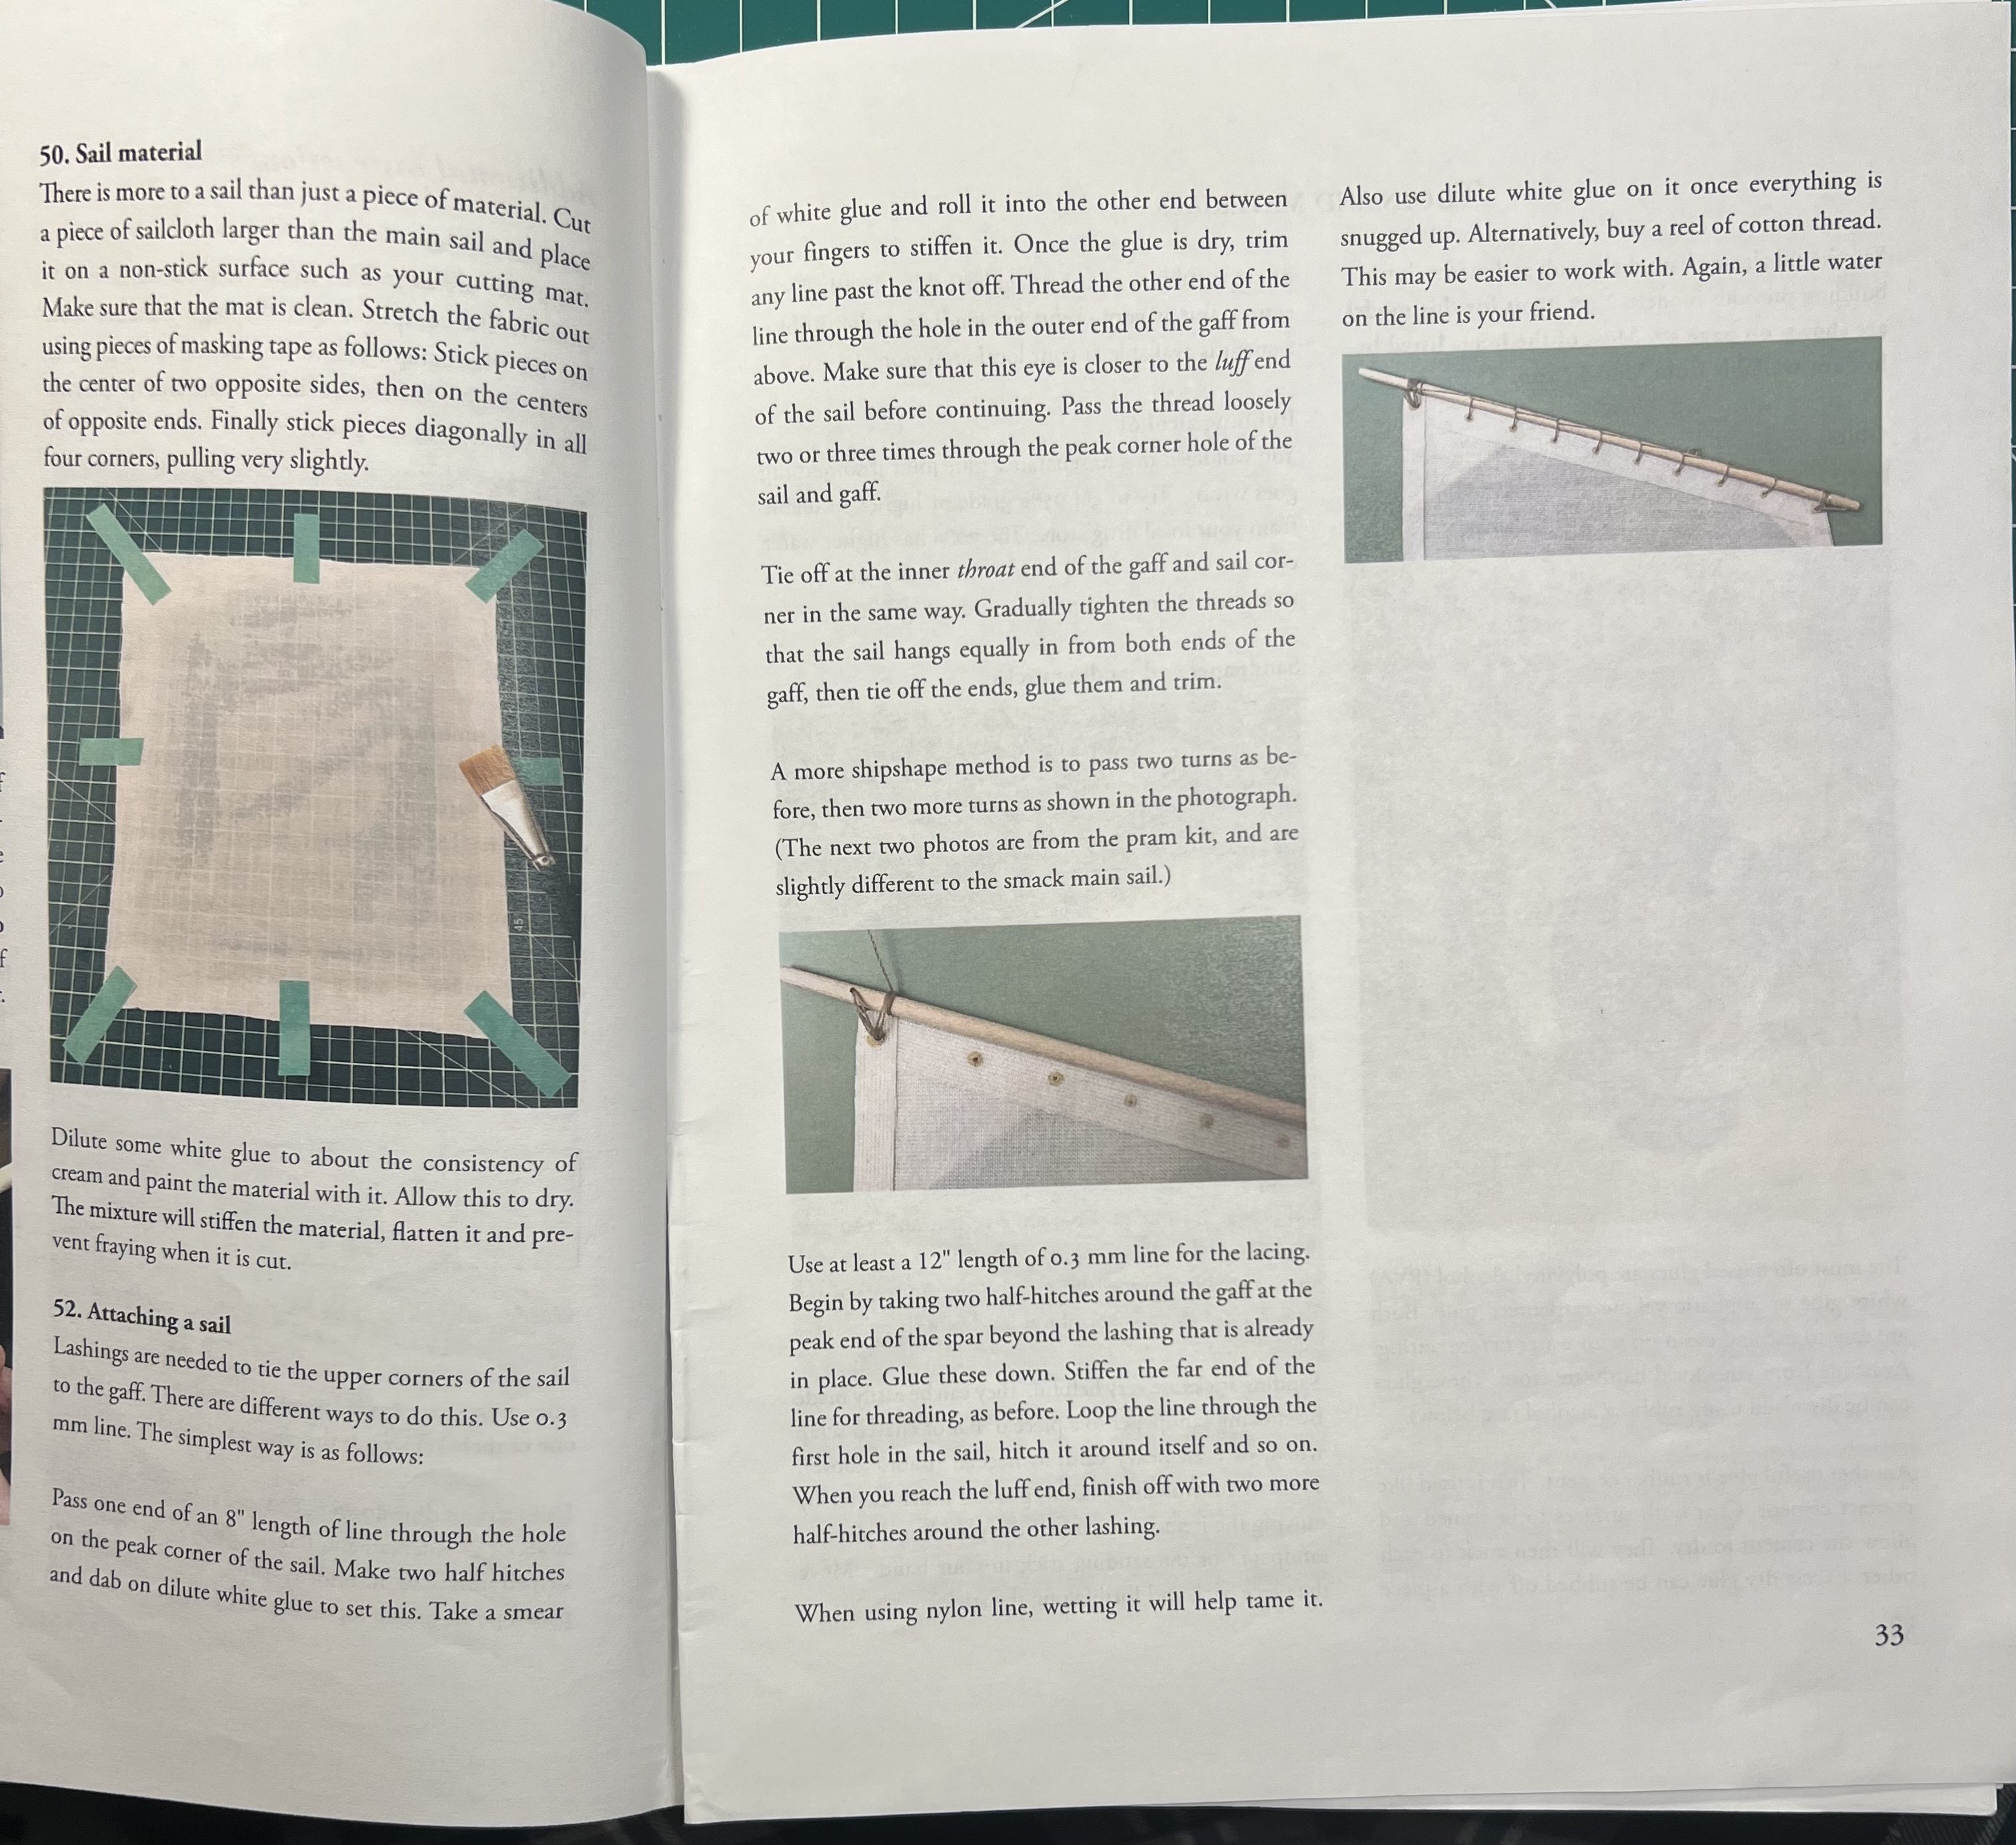
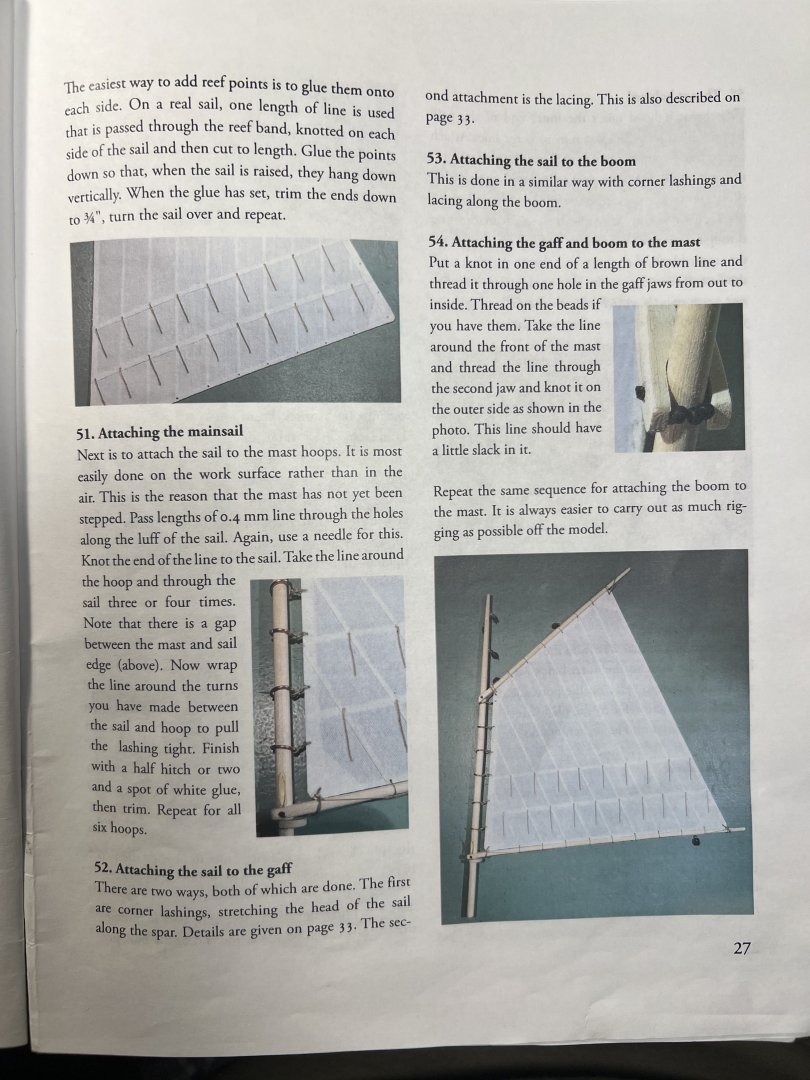
I was able to attach the main sail to the main mast. But I was really struggling to figure out how to attach the sail to the gaff and the boom. The main instructions are pretty spartan. The appendix explanations are incomplete. They kind of describe the lashings. But don’t describe the lacing. Then I looked at the instructions for my Pram. I hadn’t finished that yet because I was waiting for a new piece of sail material to arrive from Model Expo. It just arrived today. I looked back at the instructions for the Pram and the description of how to add the sail were much more complete. Now that I have a new sail, I’ll finish the Pram, then turn to the Smack.
- 59 replies
-
- 3
-
-
- muscongus bay lobster smack
- Model Shipways
- (and 2 more)
-
Kit review 1:25 Drakkar ‘Oseberg’ V3 - Ships of Pavel Nikitin
palmerit replied to James H's topic in REVIEWS: Model kits
Maybe not surprising that dry dock models and parts (on the MSW banned list) sells this kit for *more* than what it would cost to buy directly from Pavel Nikitin and pay the shipping fee from Ukraine.- 14 replies
-
- 1
-

-
- Pavel Nikitin
- viking
- (and 2 more)
-
Kit review 1:25 Drakkar ‘Oseberg’ V3 - Ships of Pavel Nikitin
palmerit replied to James H's topic in REVIEWS: Model kits
Very cool. Who sells this in the US? -
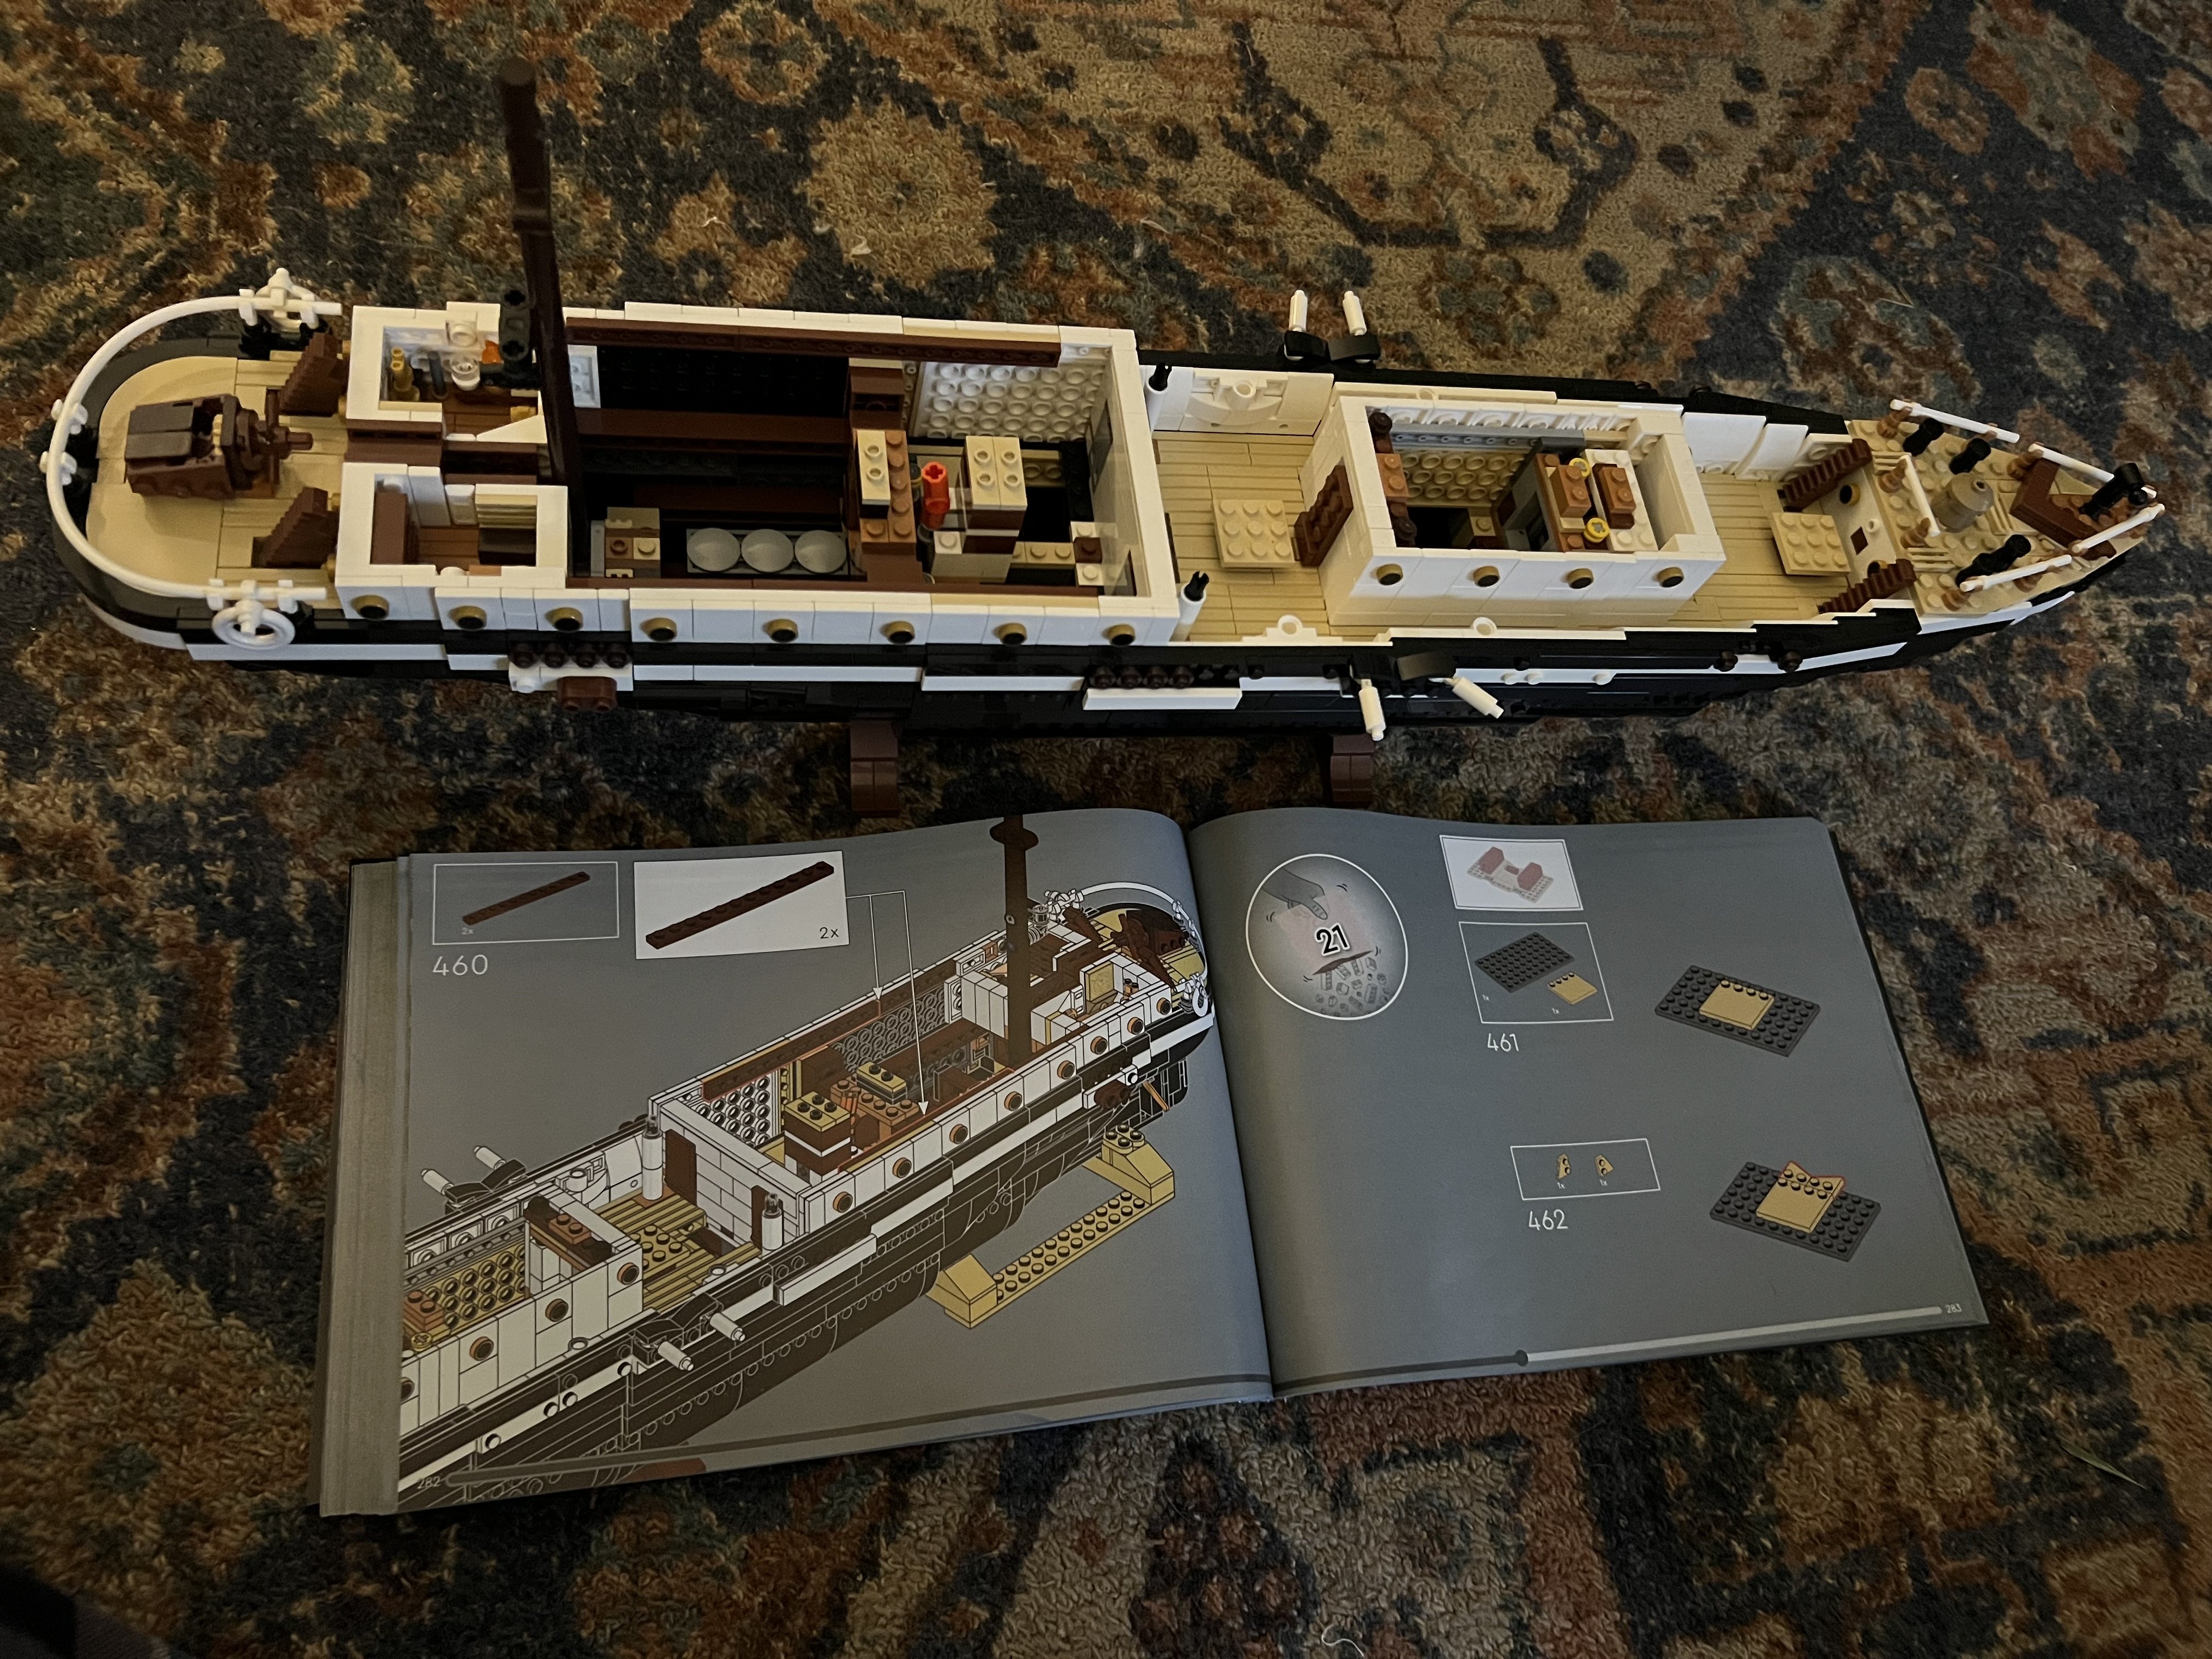
Catching up to on this one while watching the pregame. Bag 20. The rudder works.
-
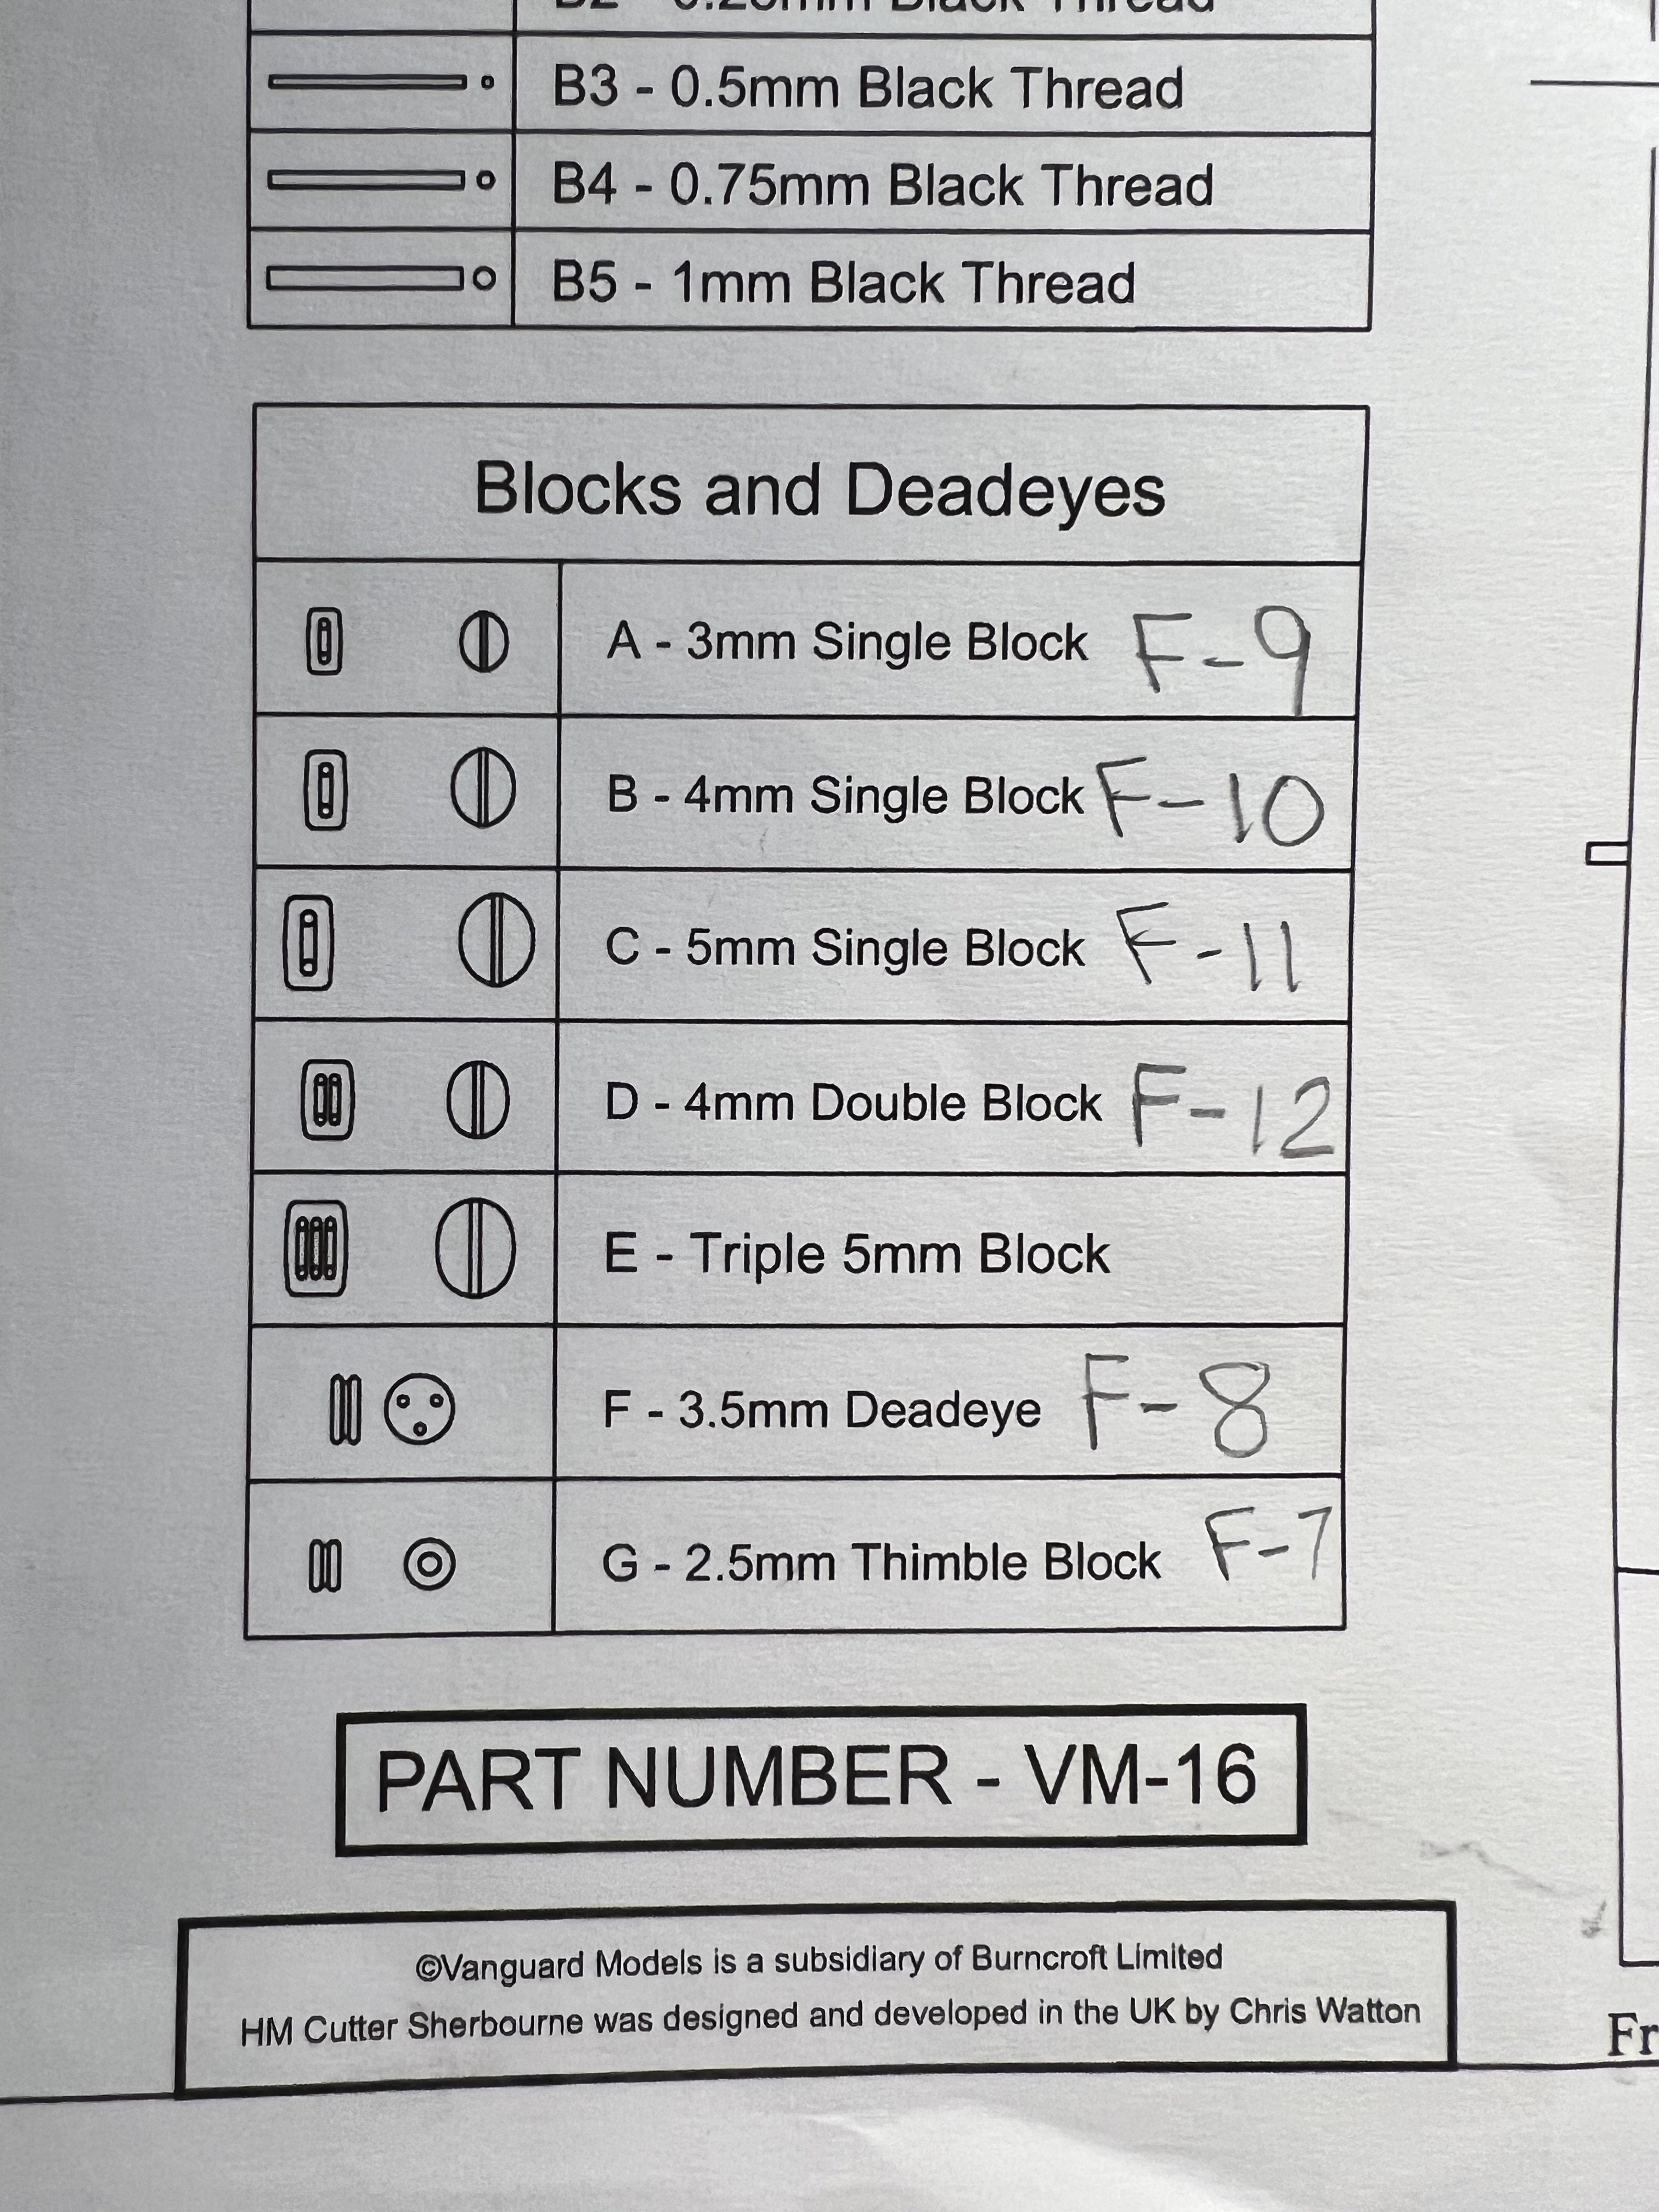
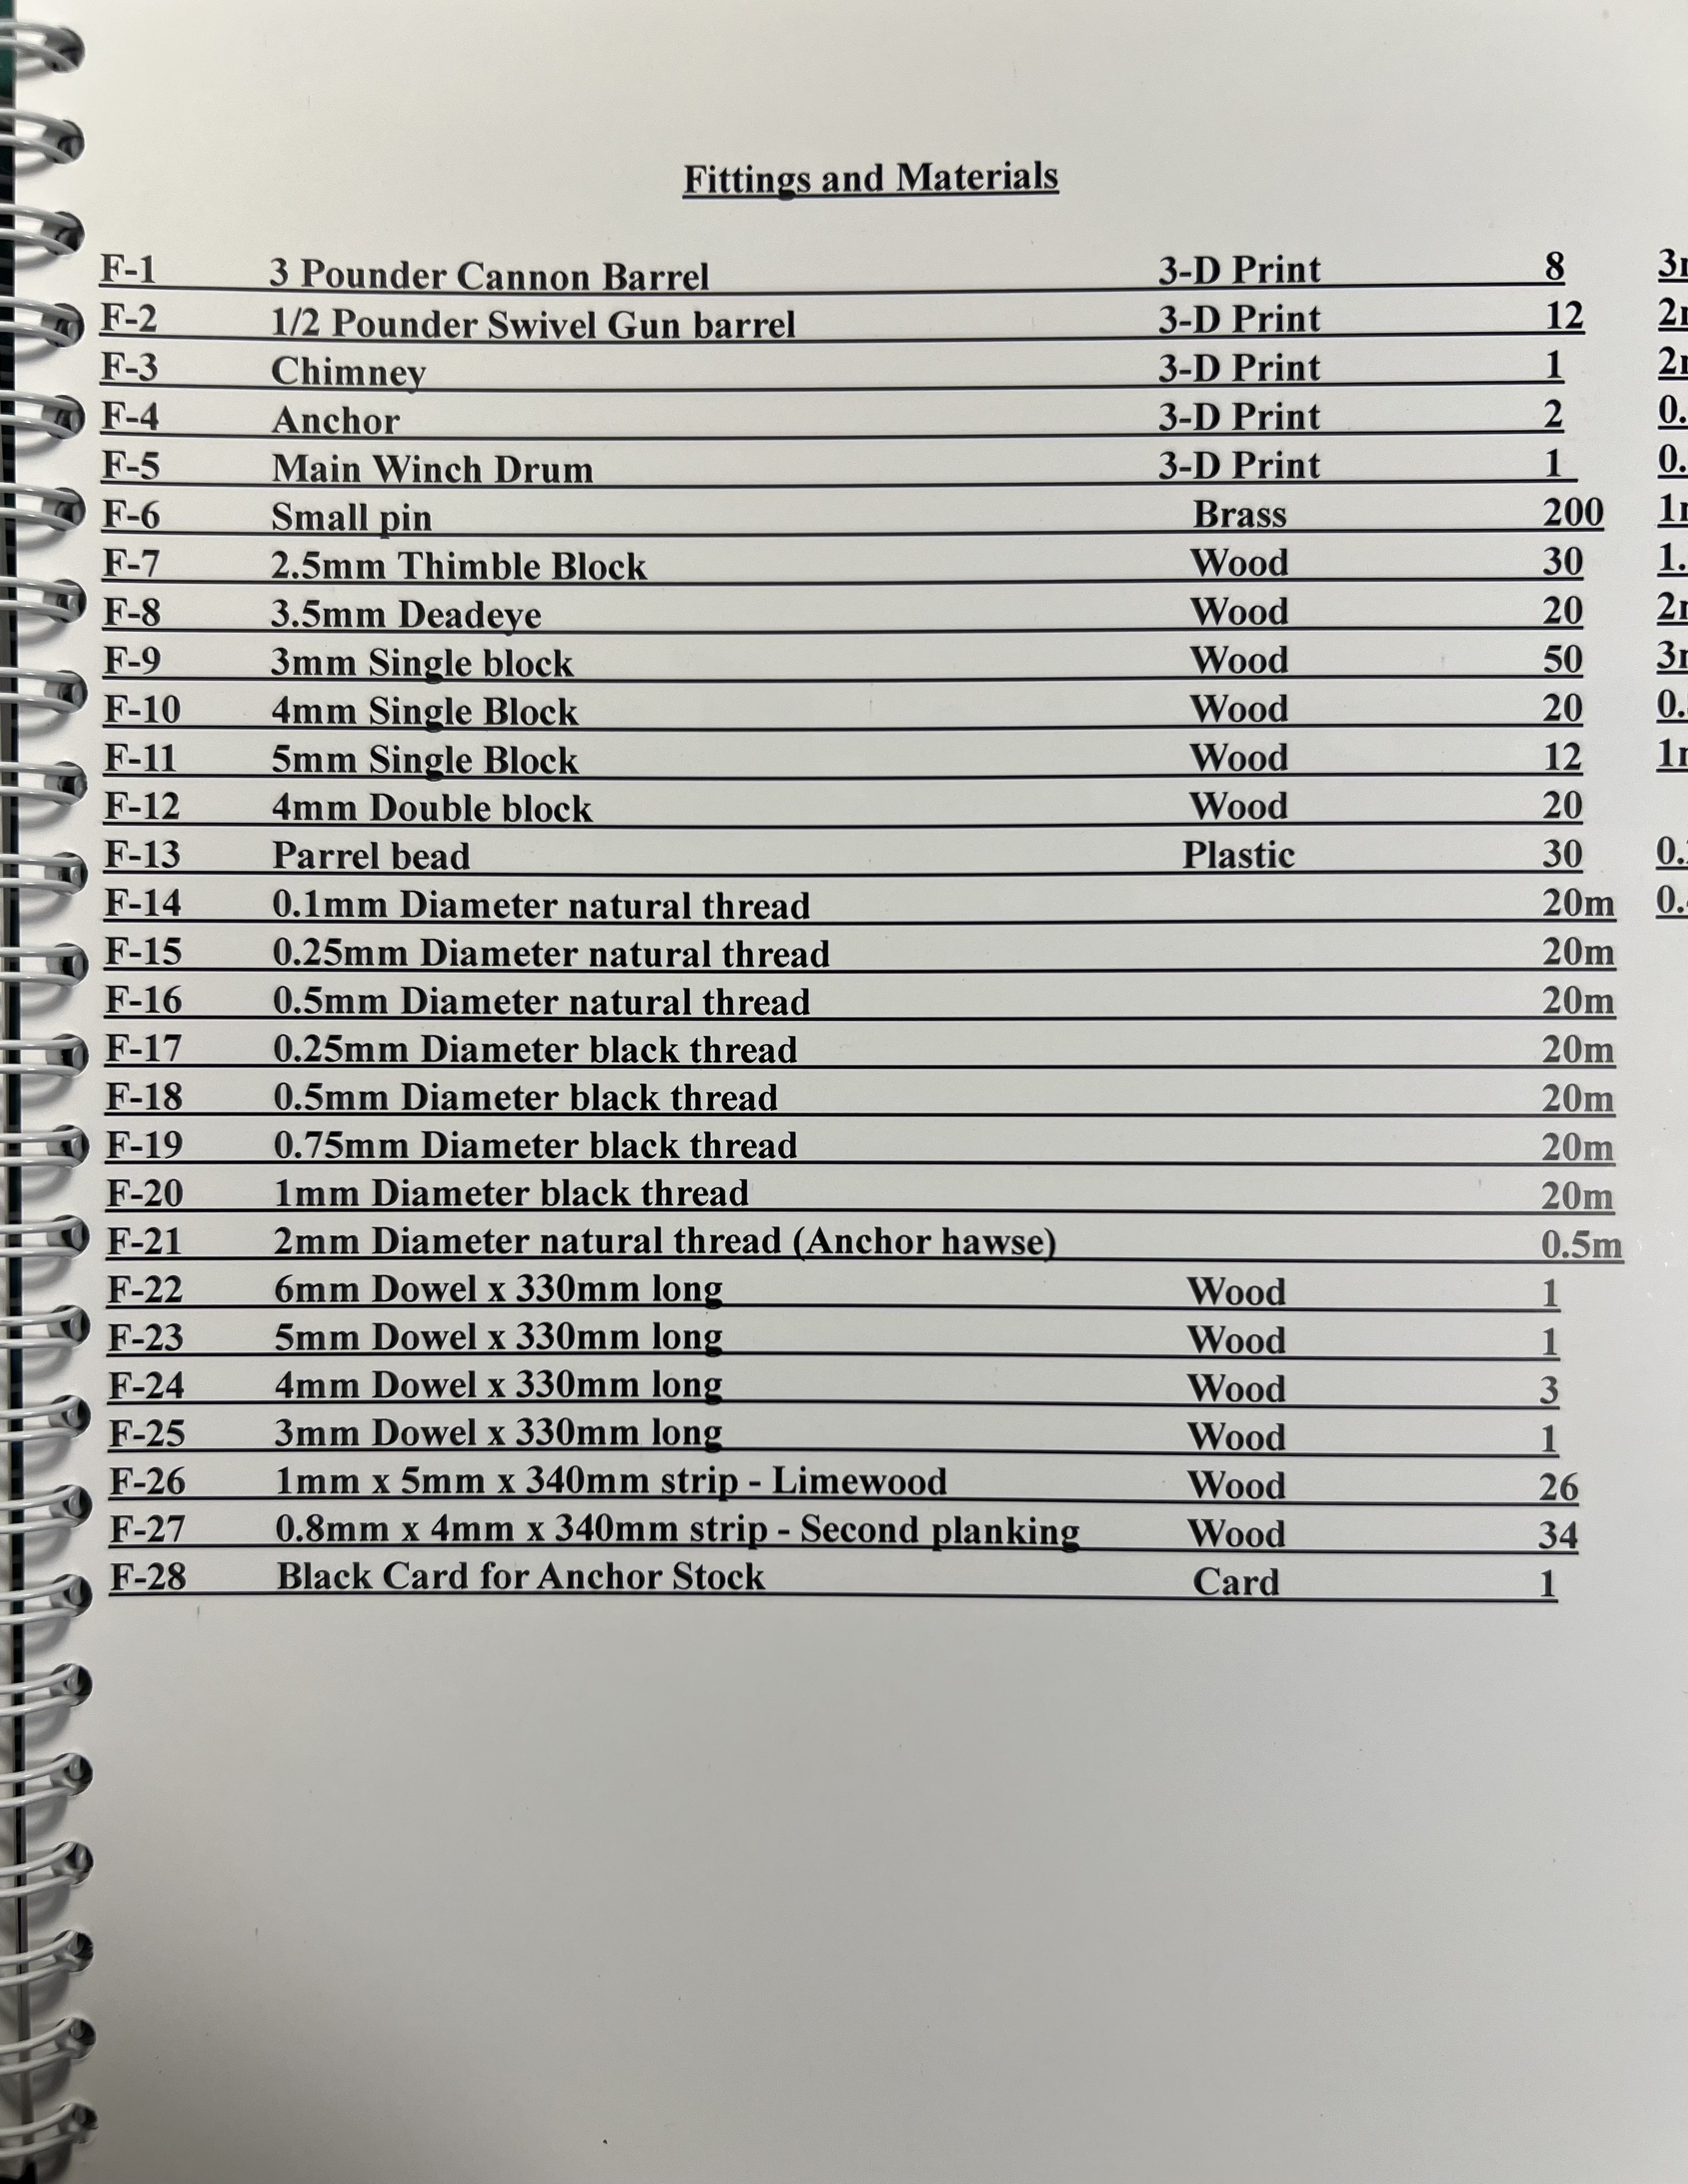
I put together two 4mm doubles (there are no 5mm doubles). Thanks for the suggestion.
- 177 replies
-
- 3
-
-
- Sherbourne
- vanguard models
- (and 3 more)
-
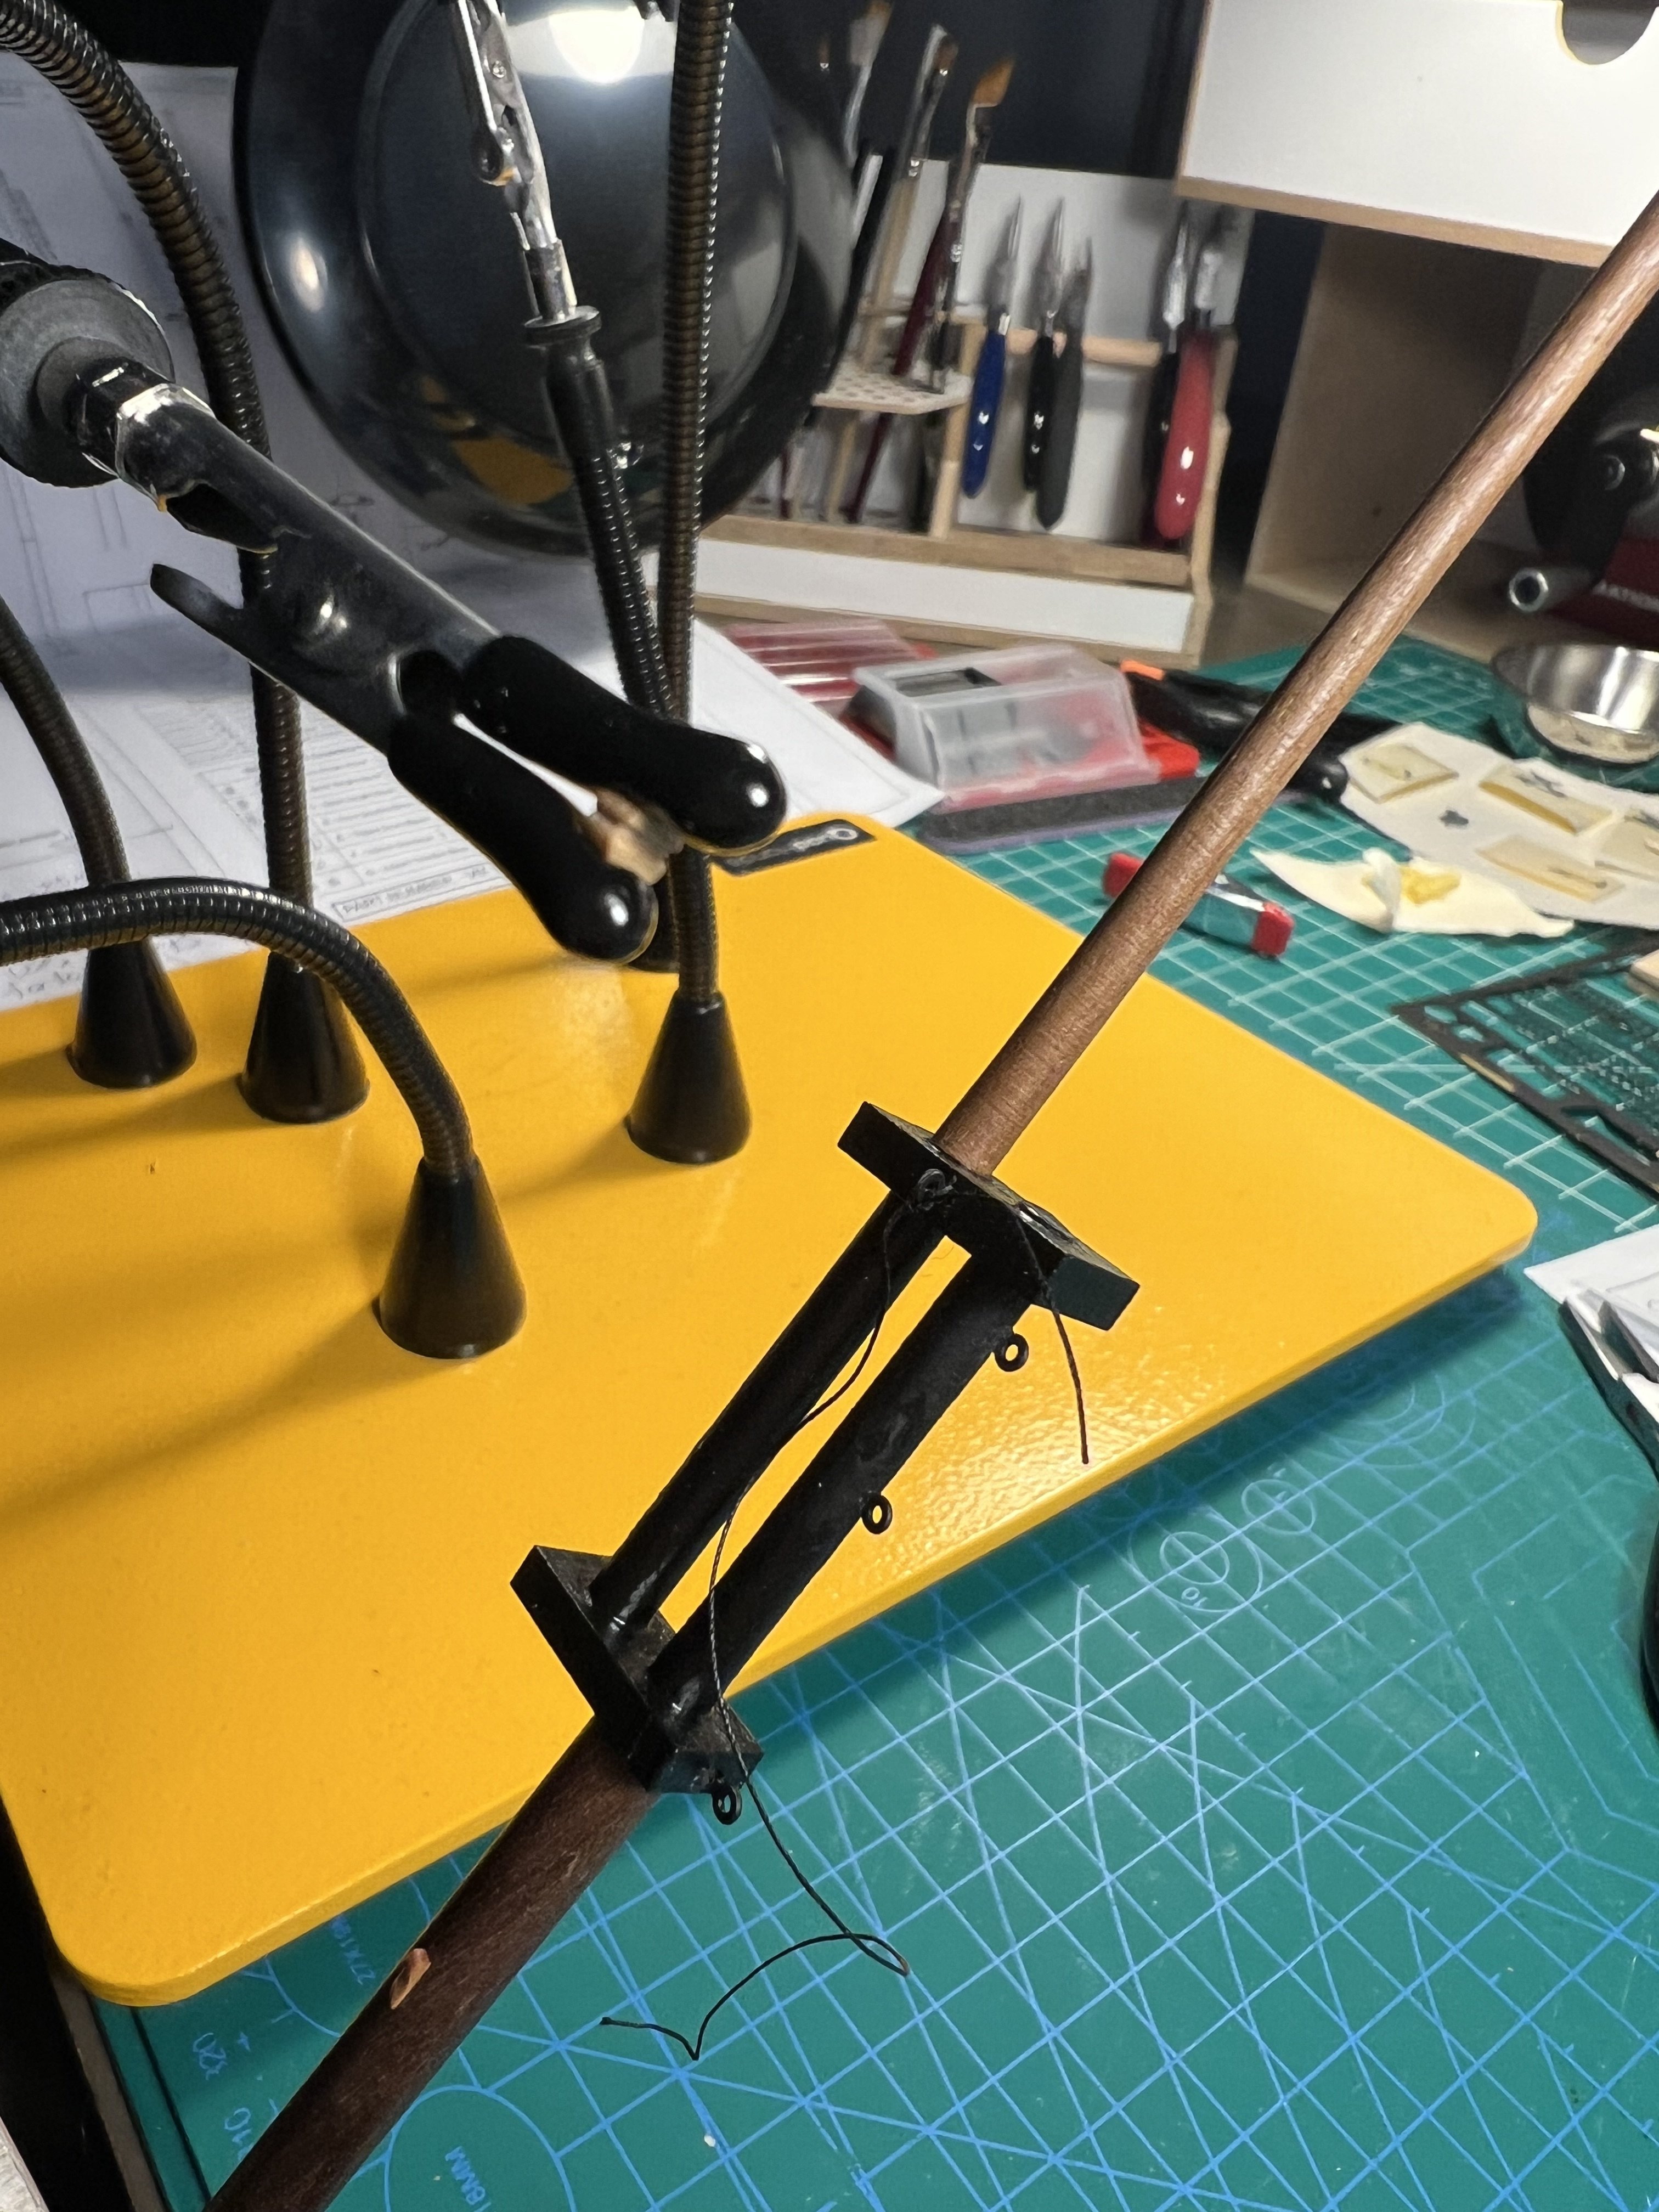
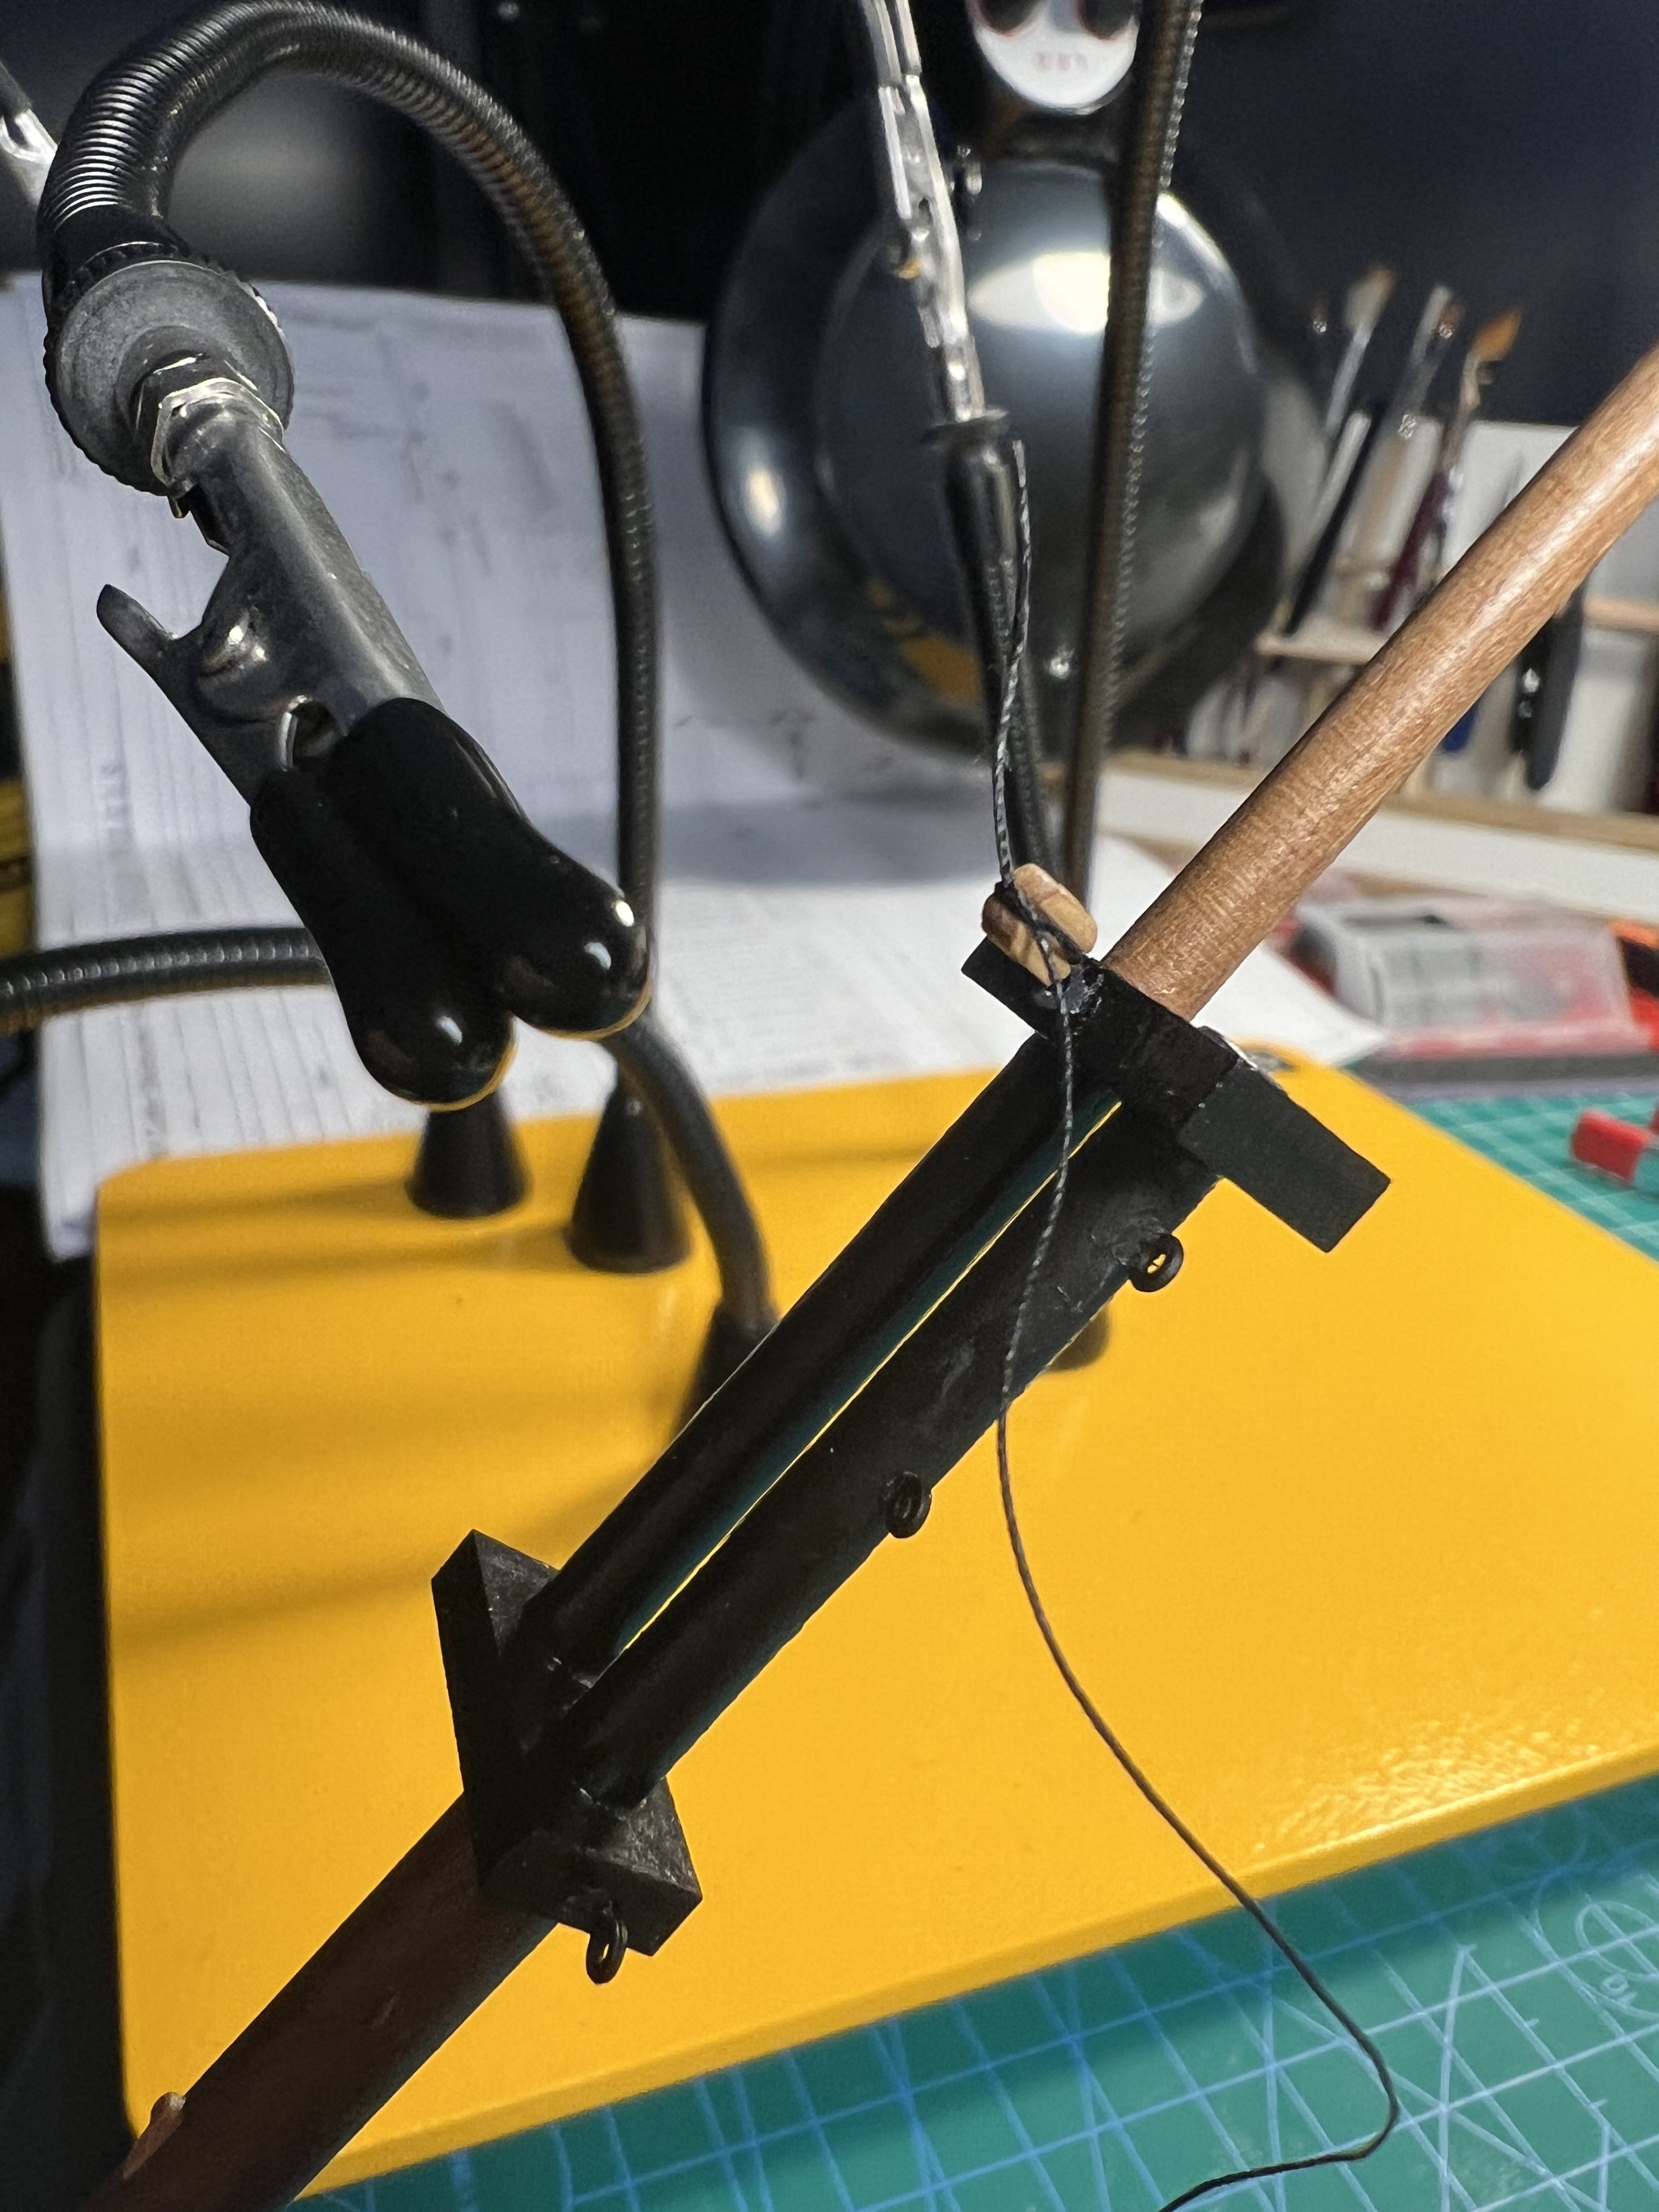
The Quad Hands really make it easier (far easier) to rig the blocks. I was trying to tie in the block without using them and failing completely until I pulled out the Quad Hands. I’m guessing there’s a way to do this without them but I couldn’t figure it out.


- 177 replies
-
- 5
-
-
- Sherbourne
- vanguard models
- (and 3 more)
-
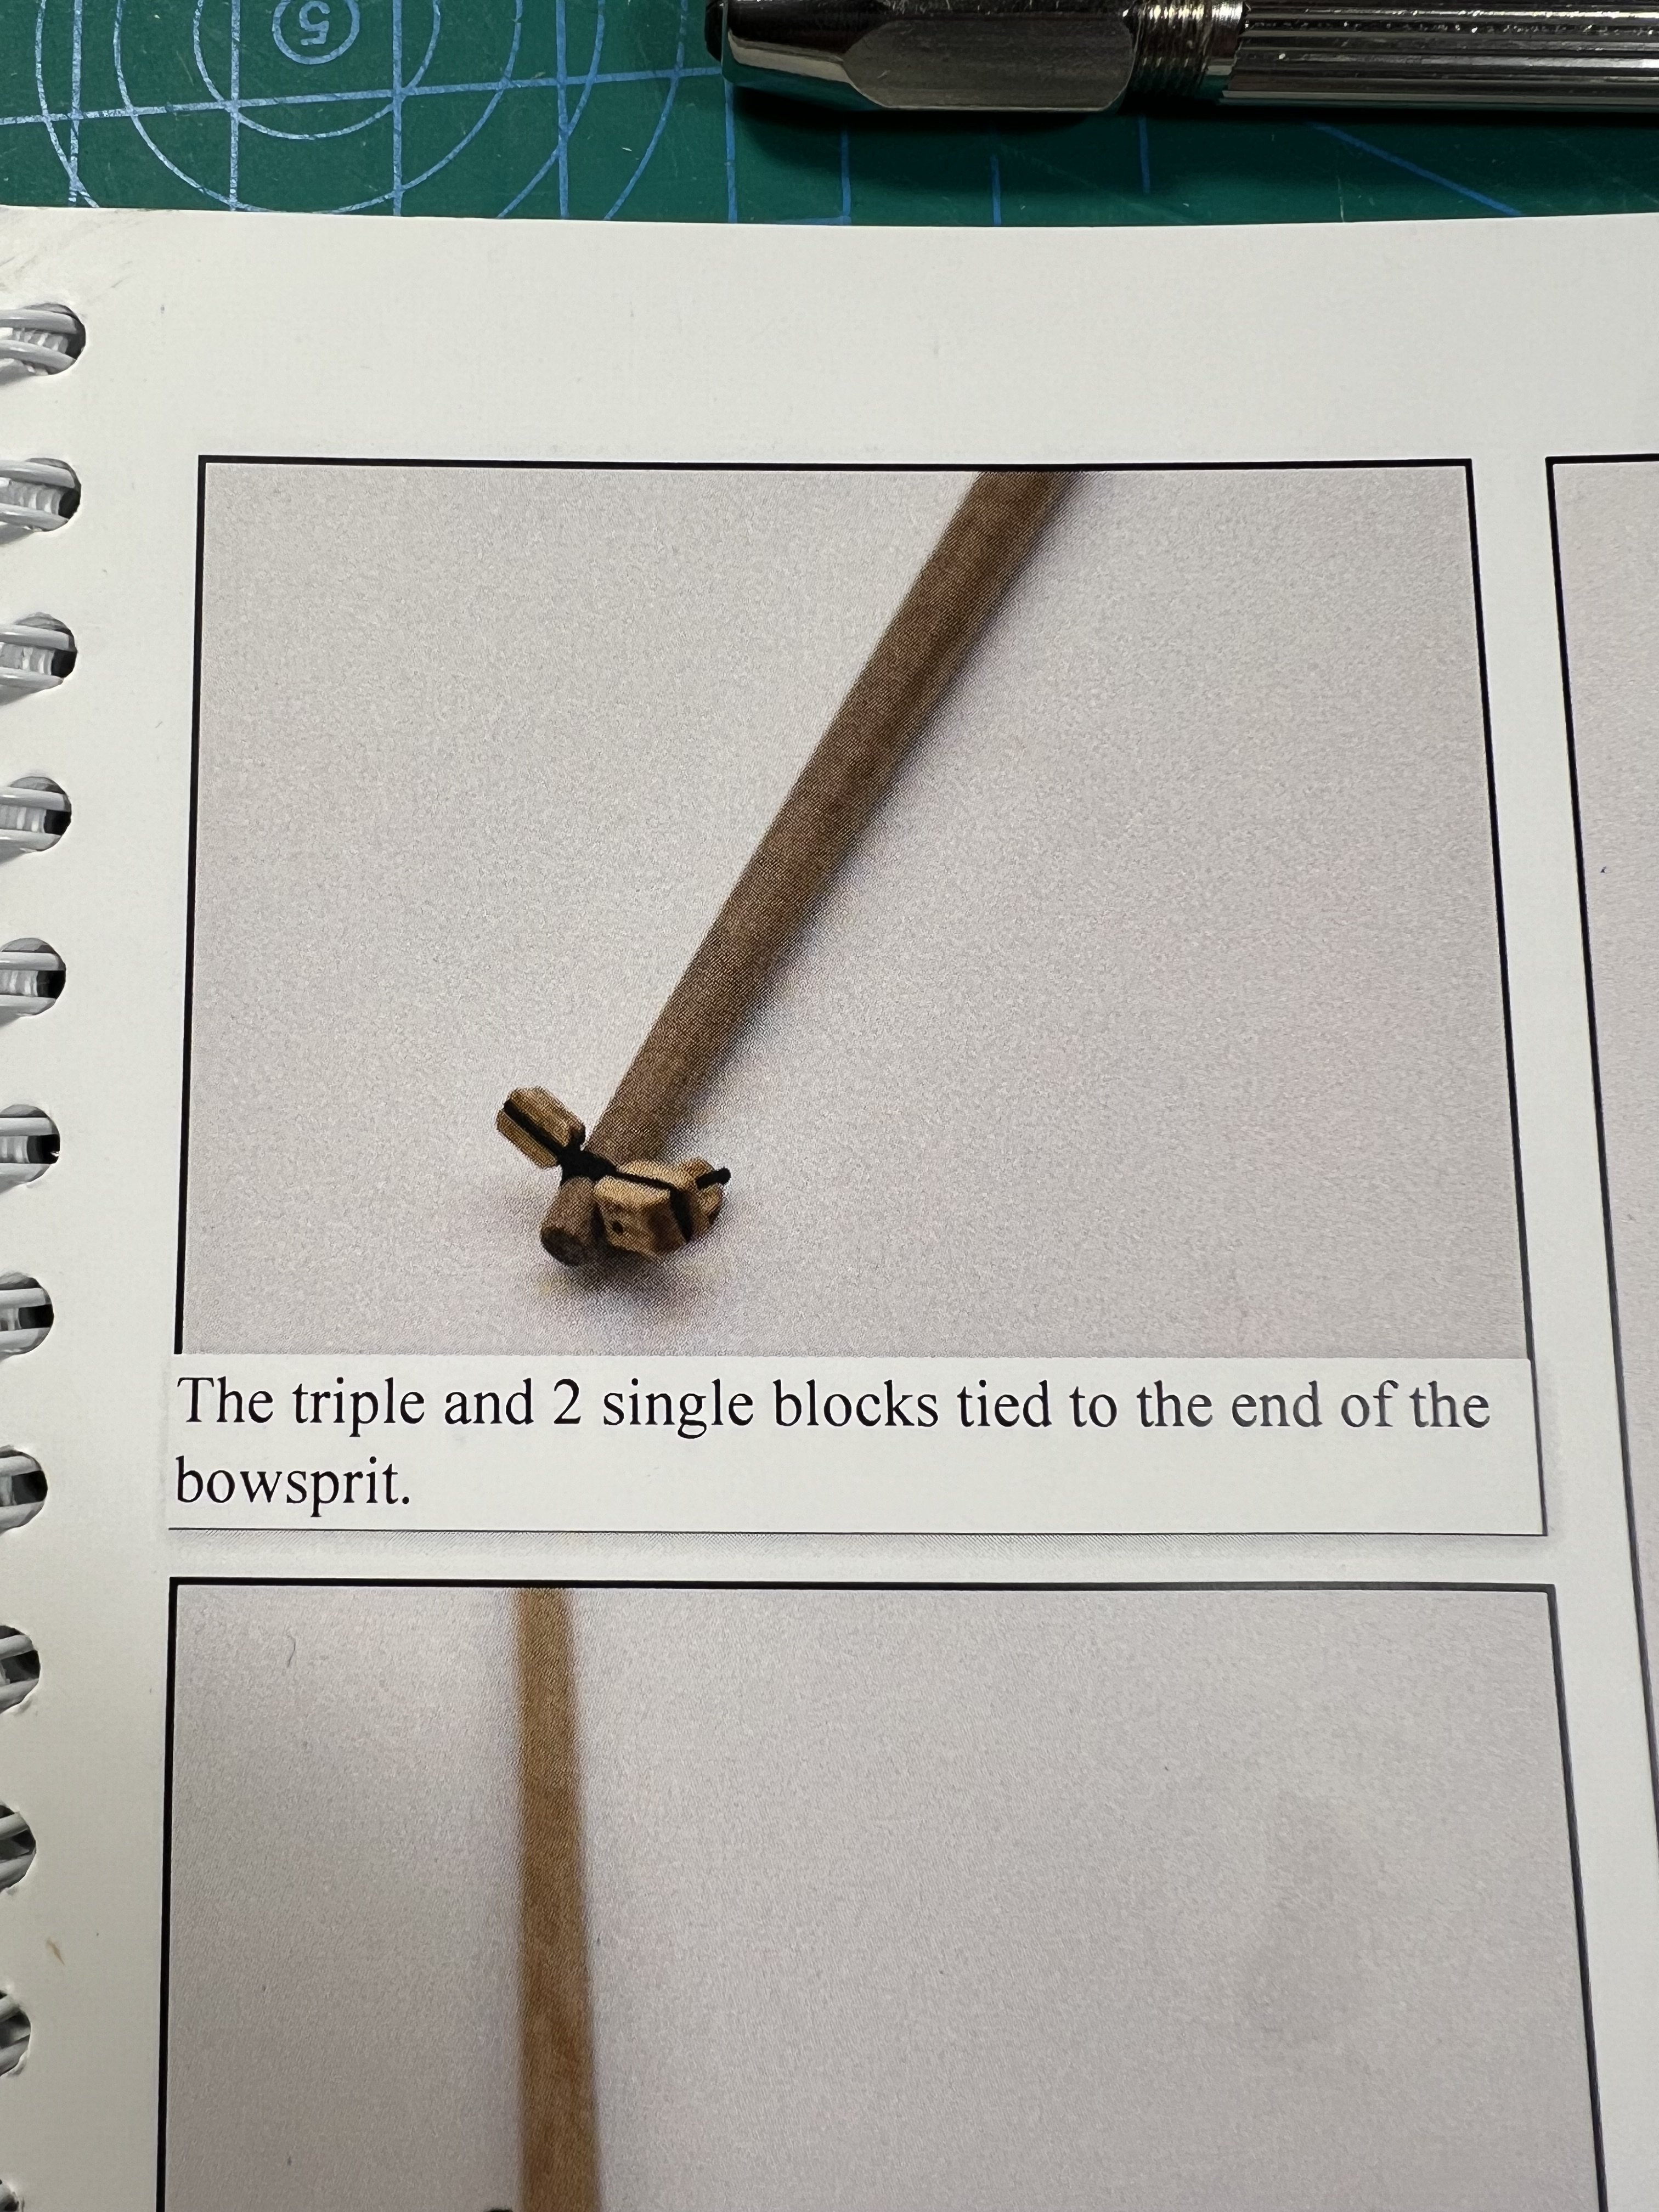
The plans and instructions have a triple 5mm block that goes on the bowsprit. I can’t seem to find it. I think there’s only one needed.


- 177 replies
-
- 1
-
-
- Sherbourne
- vanguard models
- (and 3 more)
-
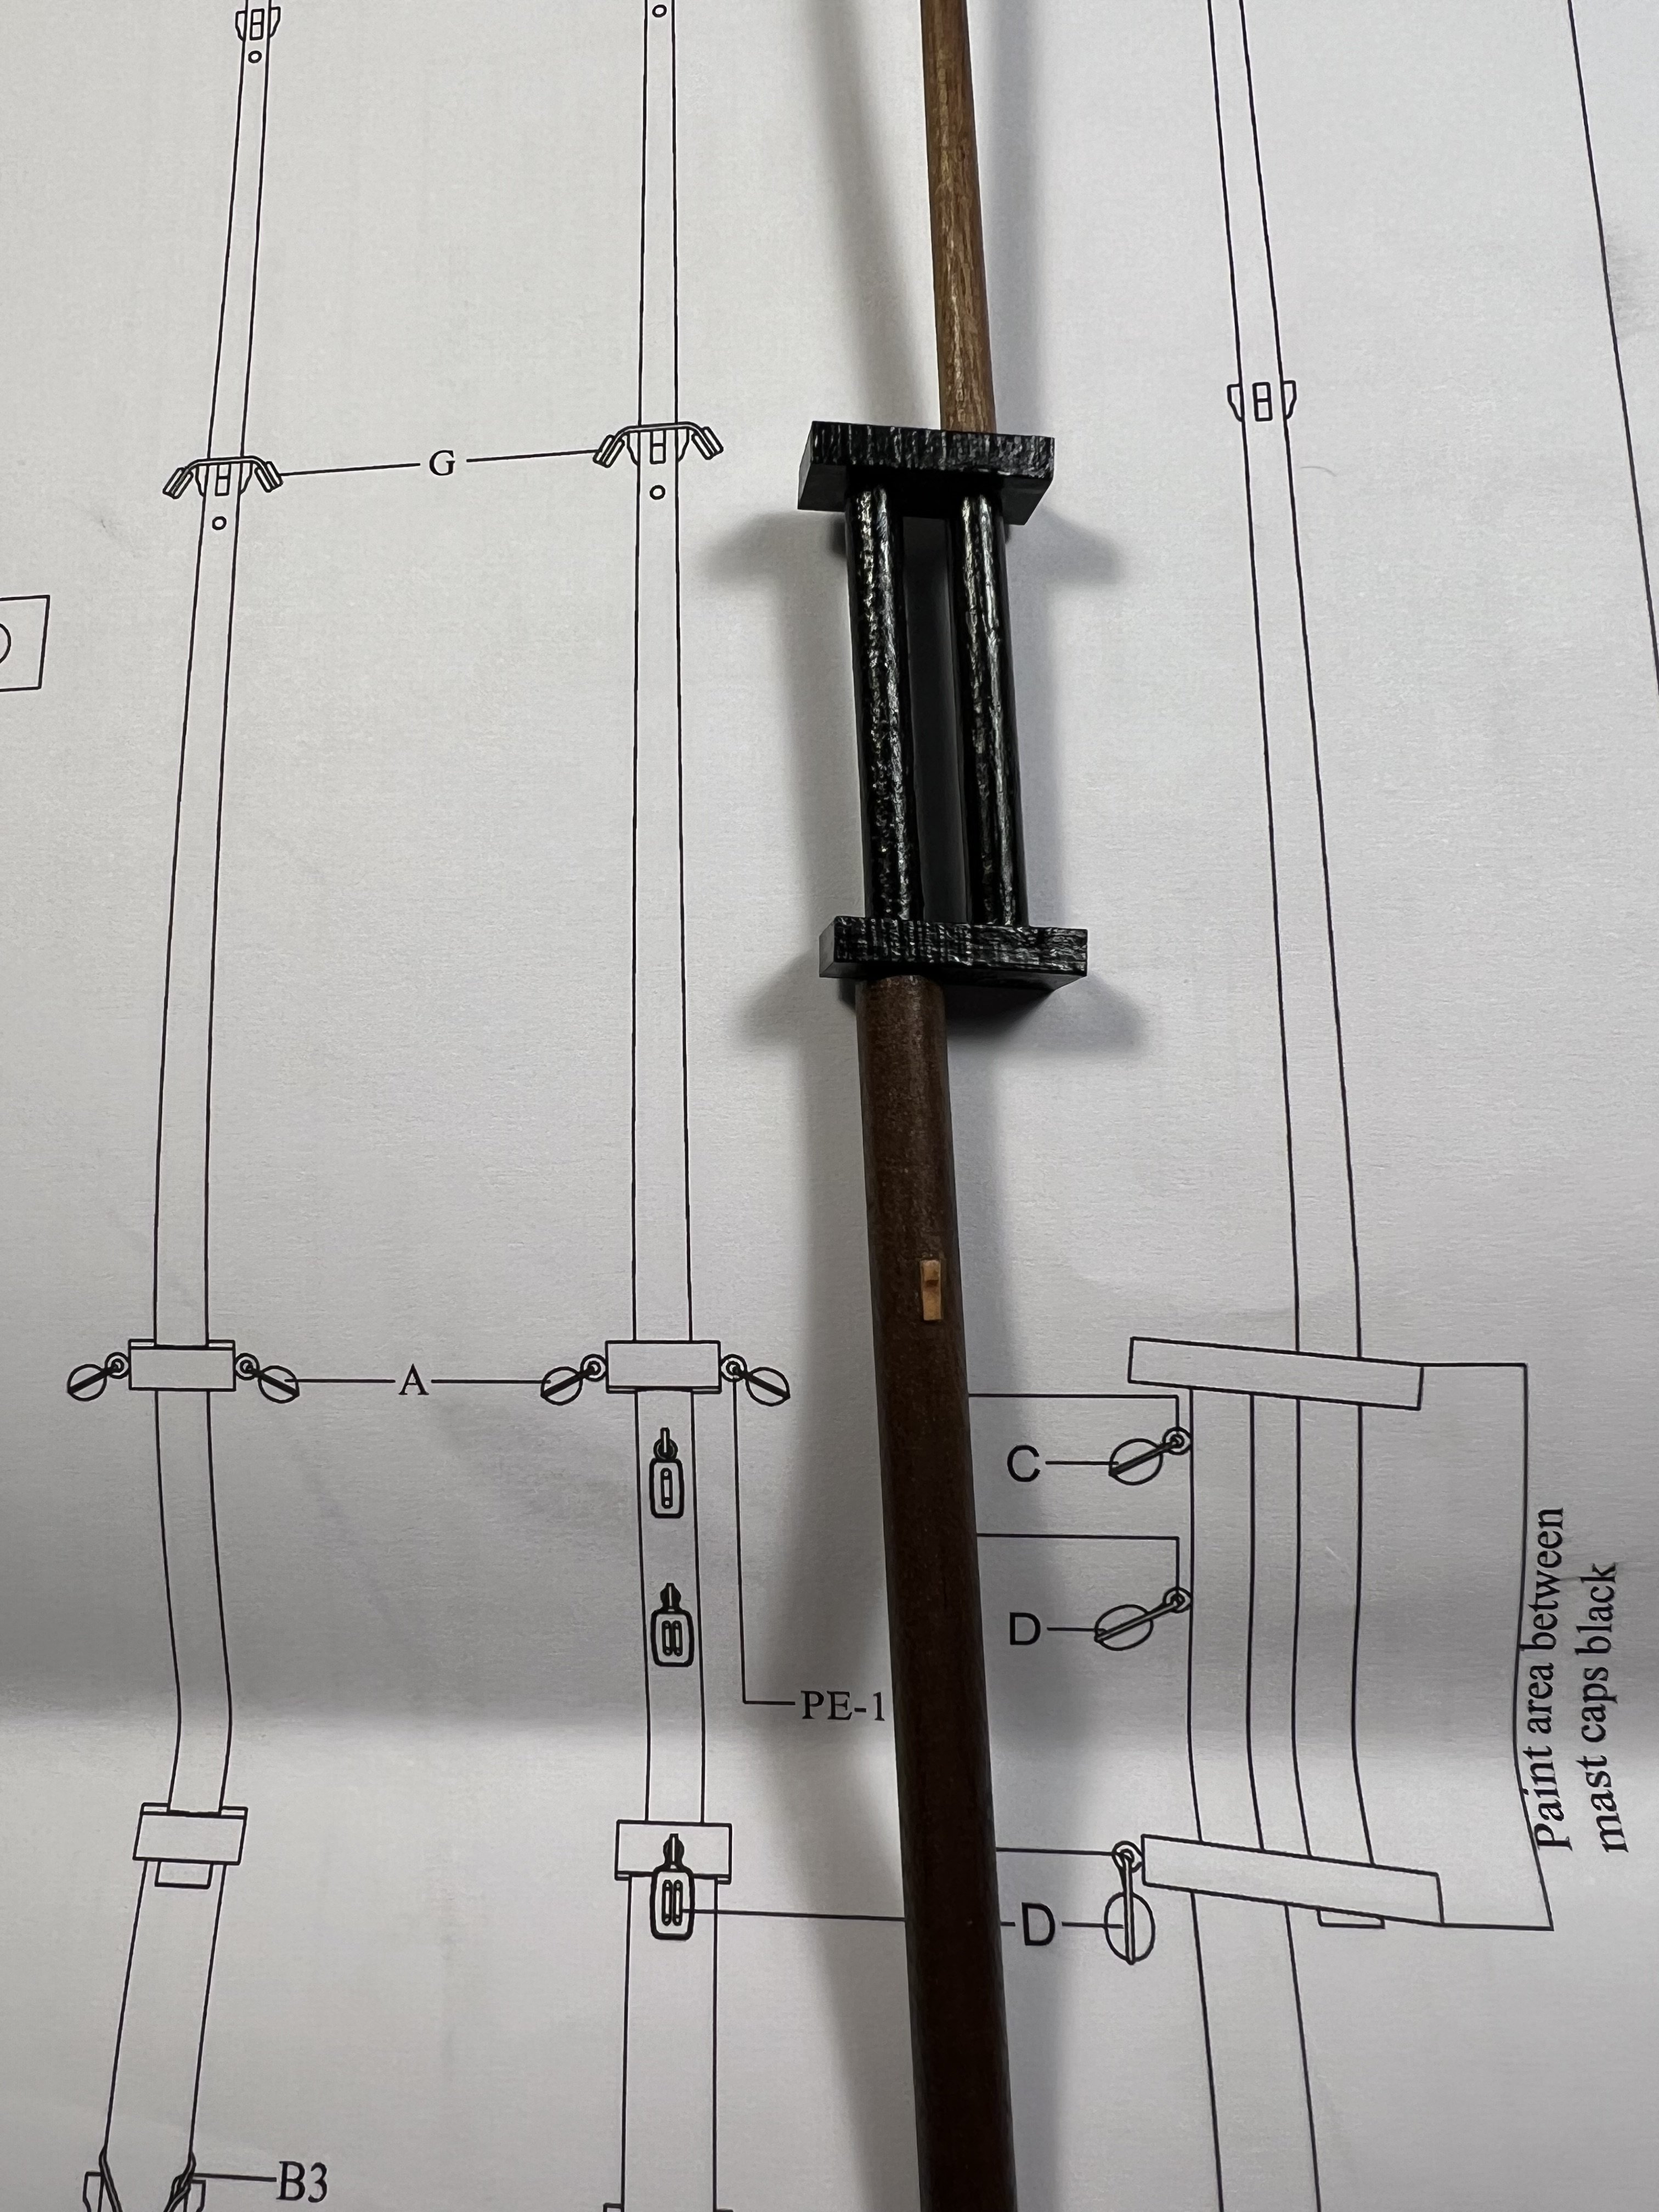
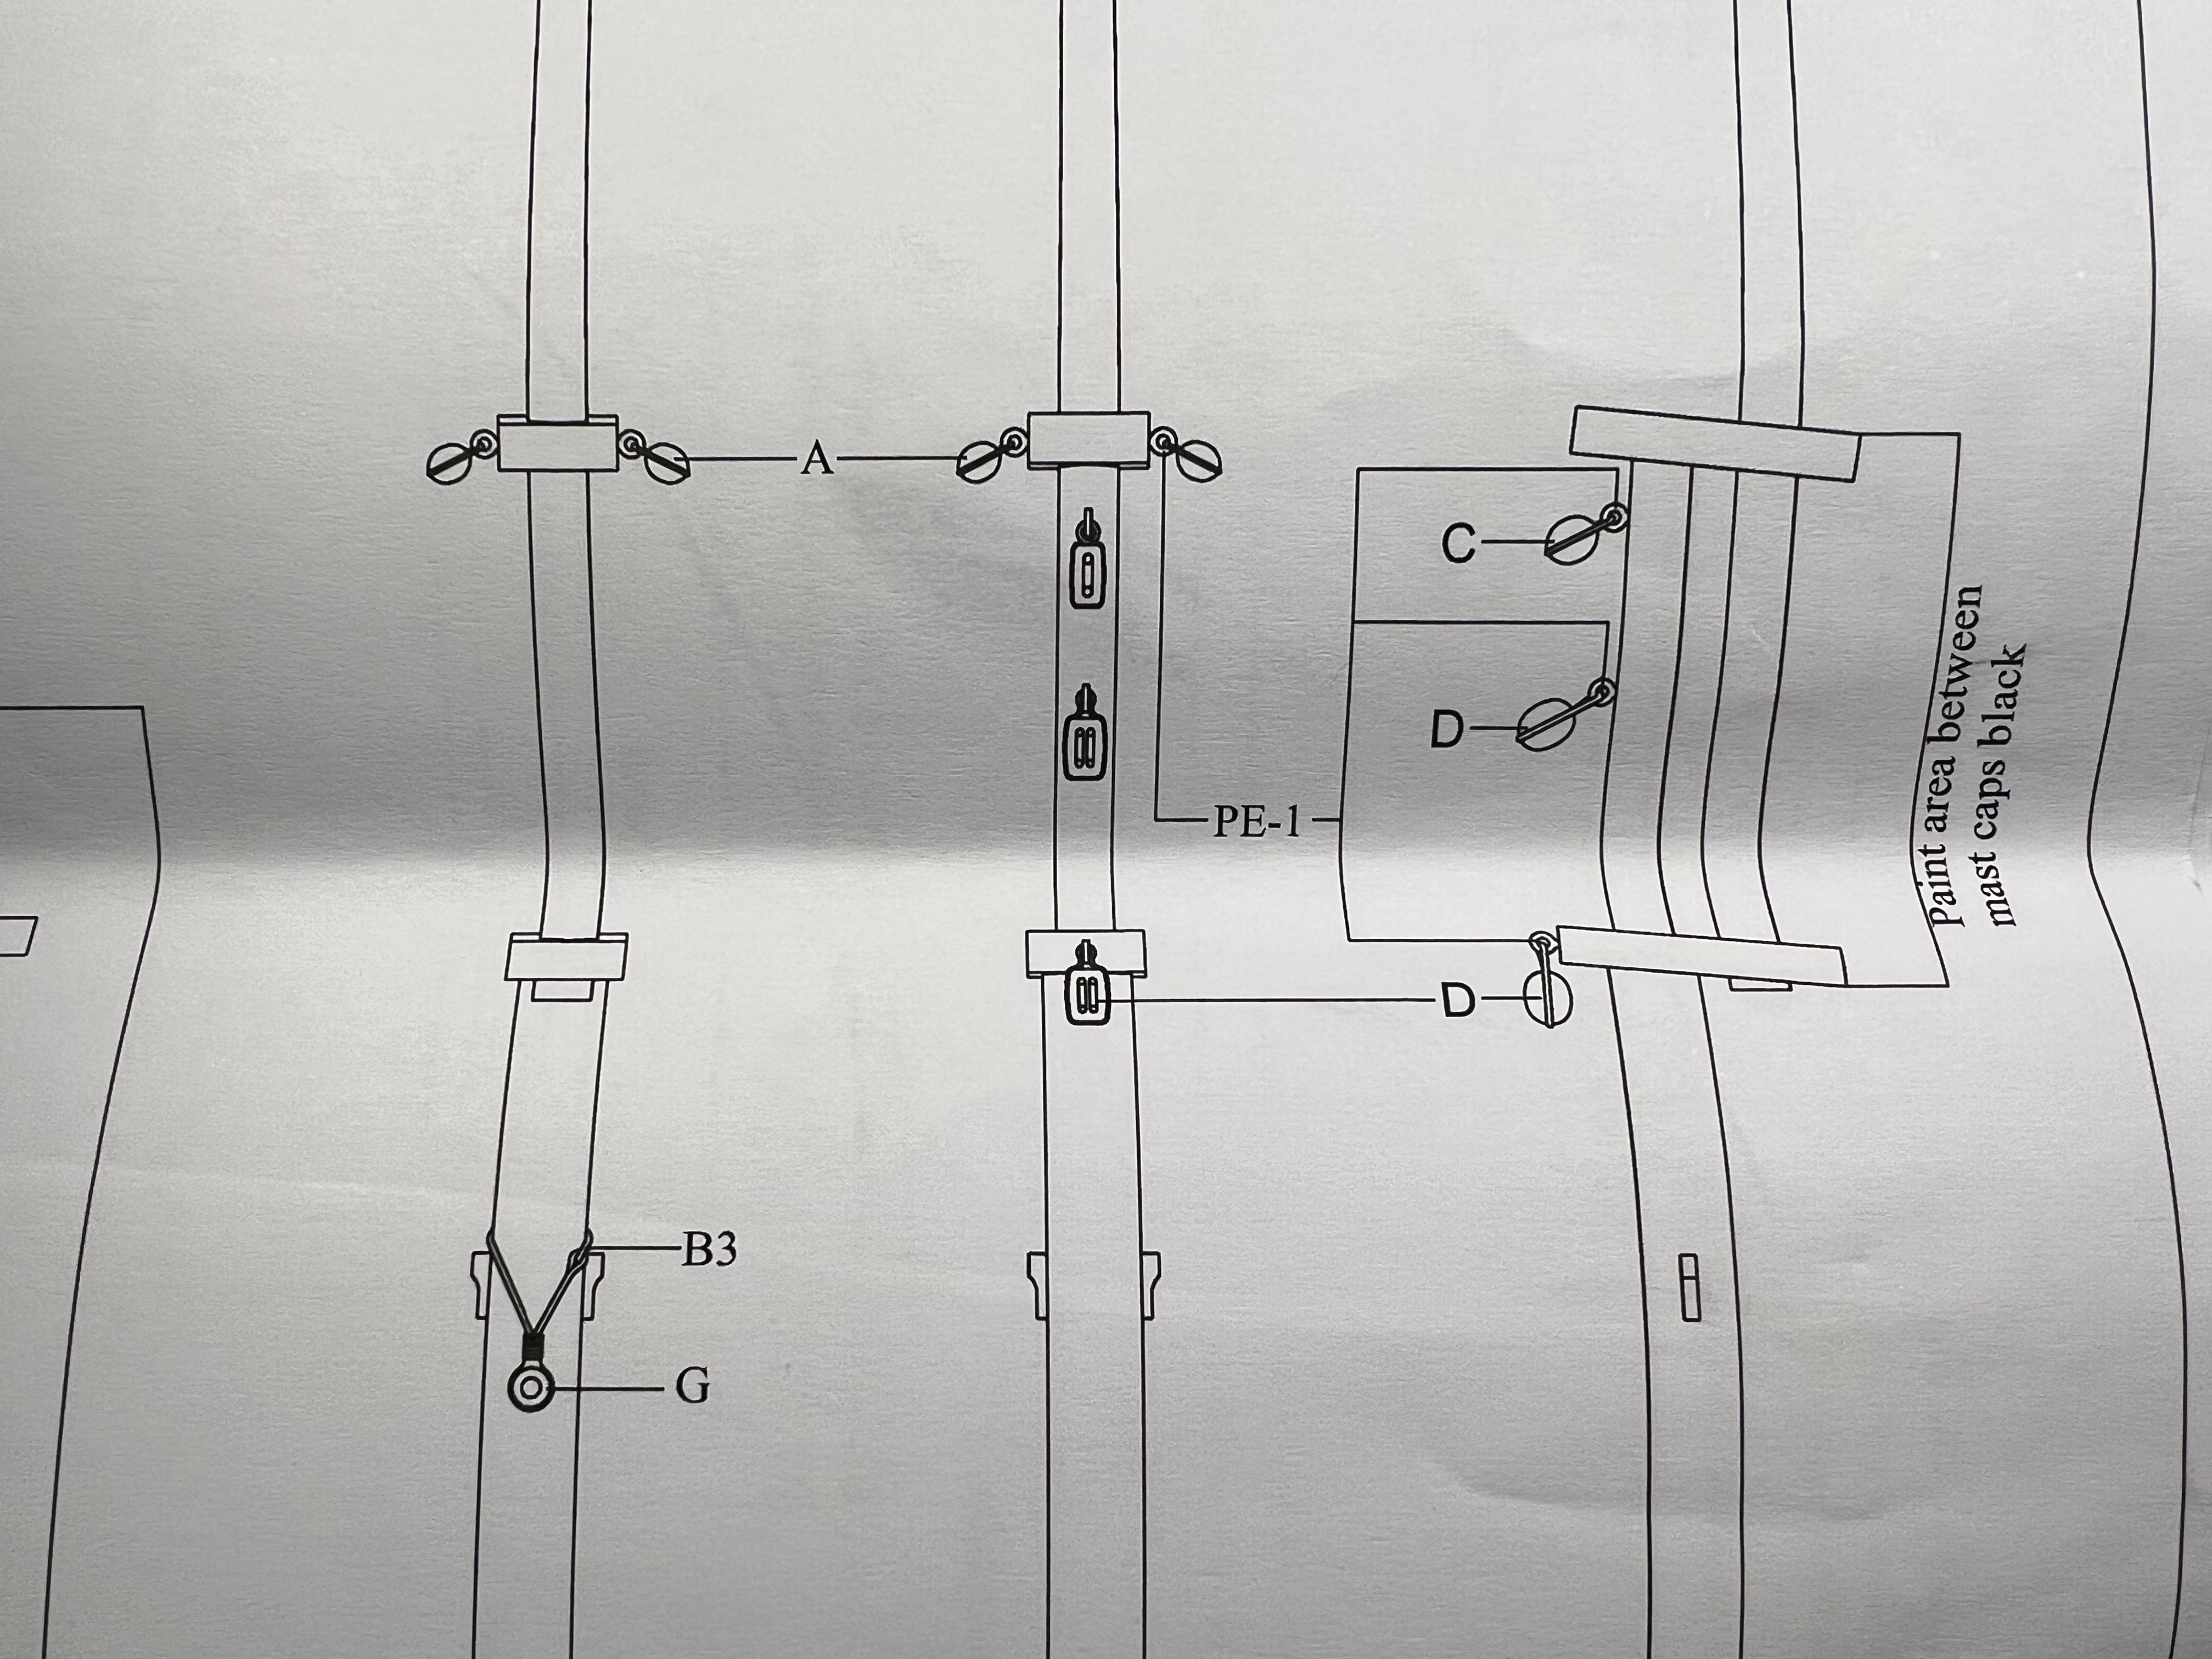
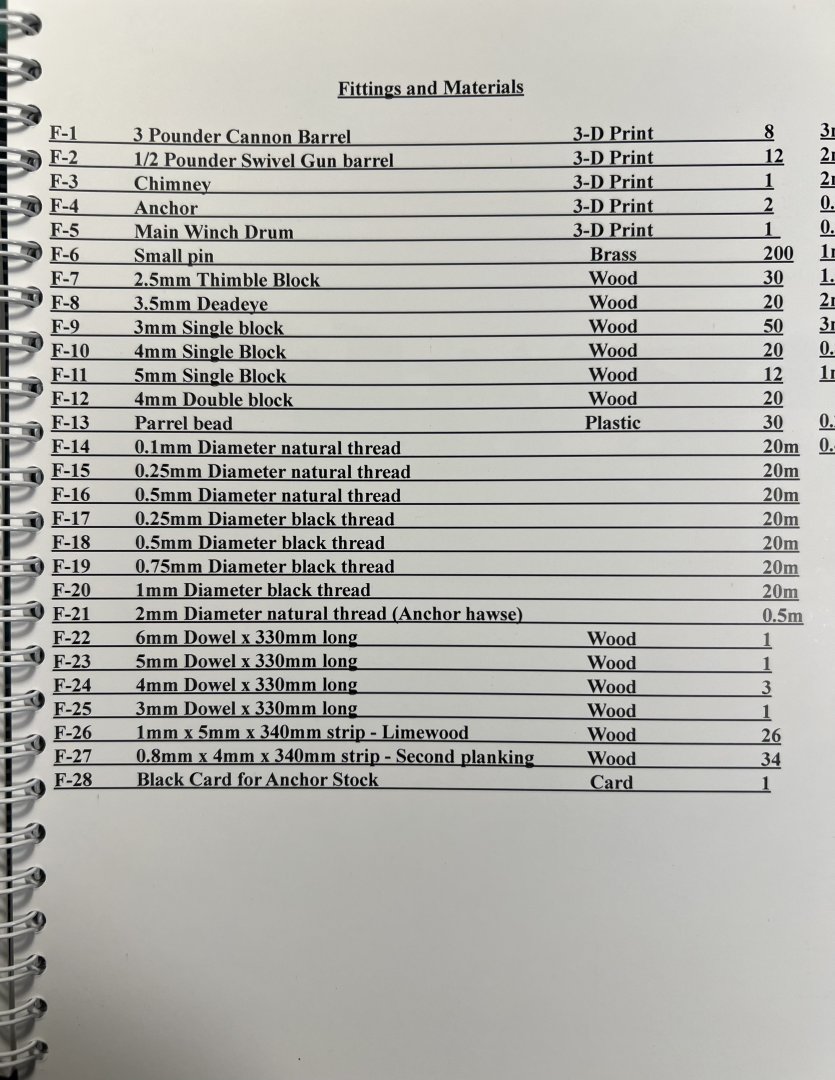
Another thing I’m unsure about is what to do with the PE-2 eyebolts (they’re larger than the PE-1 eyebolts that I used in lots of places in the kit). I’ve yet to use a PE-2. I must have missed where. I don’t think I have enough of the PE-1 to add eyebolts to the main mast. I lost a couple PE-1 eyebolts (they’re small and can fling off a set of tweezers). I don’t know if I missed where I was supposed to use the larger PE-2. There are a bunch of them. I’ll probably need to use the larger PE-2 on the mast. I ended up using the PE-2 eyebolts.
- 177 replies
-
- 2
-
-
- Sherbourne
- vanguard models
- (and 3 more)
-
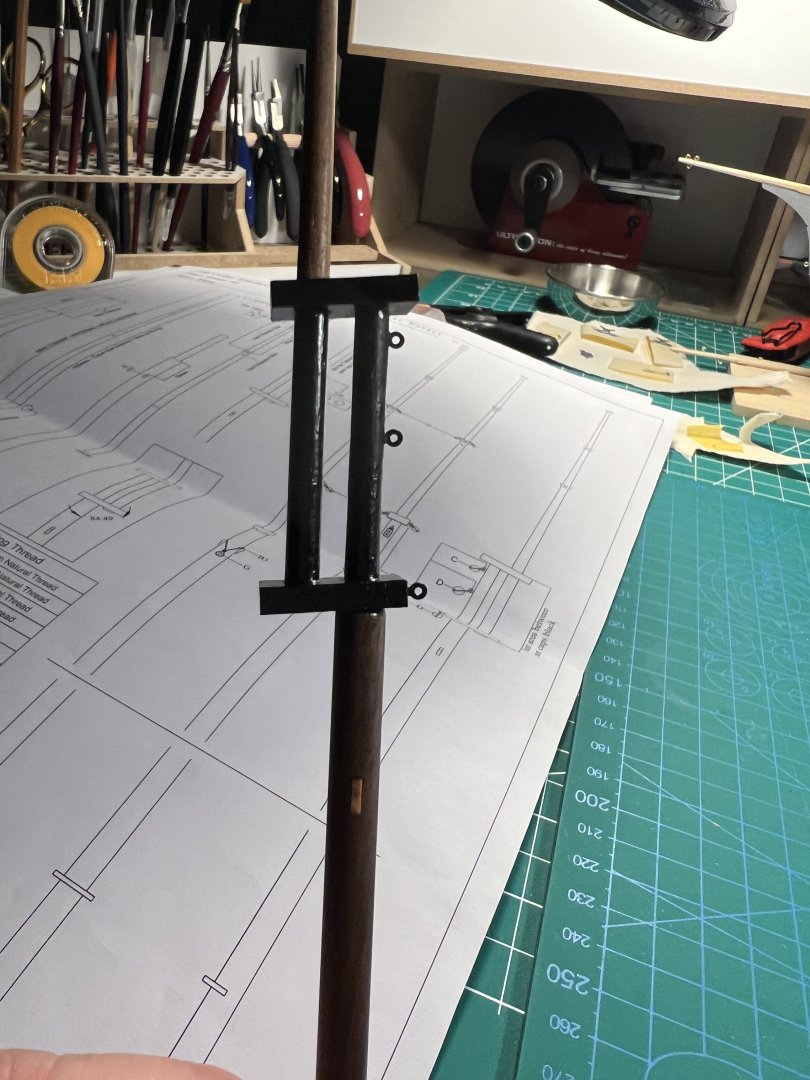
Finally starting to do the rigging. I need to add eyelets to the main mast. Should I assume that the eyelets marked A that are attached to the sides of the upper rectangular mast cap would go in the middle of the mast cap? The plans show where they are located on the front and rear view but don’t show their position on the side view.
- 177 replies
-
- 2
-
-
- Sherbourne
- vanguard models
- (and 3 more)
-
Finished the sails. Just need to add the reef points to the other side of the main sail.
- 59 replies
-
- 2
-
-
- muscongus bay lobster smack
- Model Shipways
- (and 2 more)
-
I had to buy more basswood because I ran out because of the number I cut, sanded and shaped, and then didn't like, and started over.