palmerit
-
Posts
1,090 -
Joined
-
Last visited
Content Type
Profiles
Forums
Gallery
Events
Everything posted by palmerit
-
Definitely Tamiya tape. It's not only worked for me but I've found Youtube videos doing comparisons. Way better than frog tape (or regular masking tape). It's pricey but you don't use much of it. As noted, it comes in a bunch of widths. I use the narrow for curves, wider for when I just want to mask areas off. I opted to buy an Iwata Airbrush and have used Vallejo air paints. I also have some Vallejo brush paints. Airbrushing is a luxury (and if you're inside you want a booth to exhaust fumes) but it really does a nice job making a smooth coat. I've been working on a Vanguard (Sherbourne) model and painted some of the wood that had etchings on it and the etchings with airbrushing show perfectly. I'm sure someone with a deft hand could achieve that with a brush (especially if you thin the paint and do multiple layers). It's easier with an airbrush (once you learn how to use it). An airbrush is probably in the same category as a lathe (or a mill) in that it's certainly not necessary but nice to have (I have yet to splurge on a lathe or mill but have bought some other "unnecessary" toys). You definitely want to research the right primer for painting PE parts - lots of models come with them. You can't just use regular primer. I researched a bit on YouTube (the Fine Scale Modeler channel has a comparison) and on their recommendation got Tamiya Surface Primer (even though I use Vallejo paints). Regular acrylic primer doesn't work on PE.
-
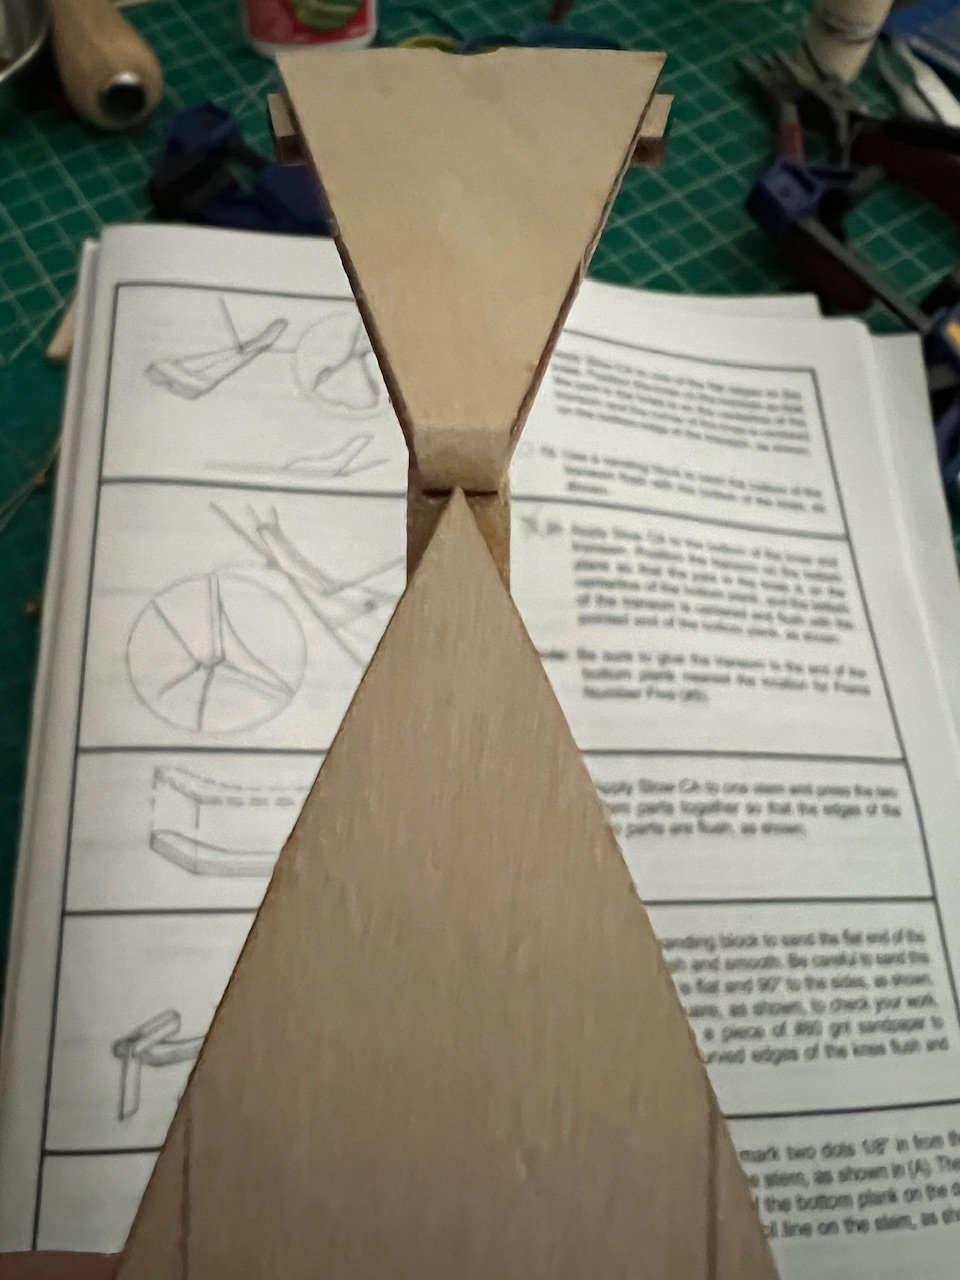
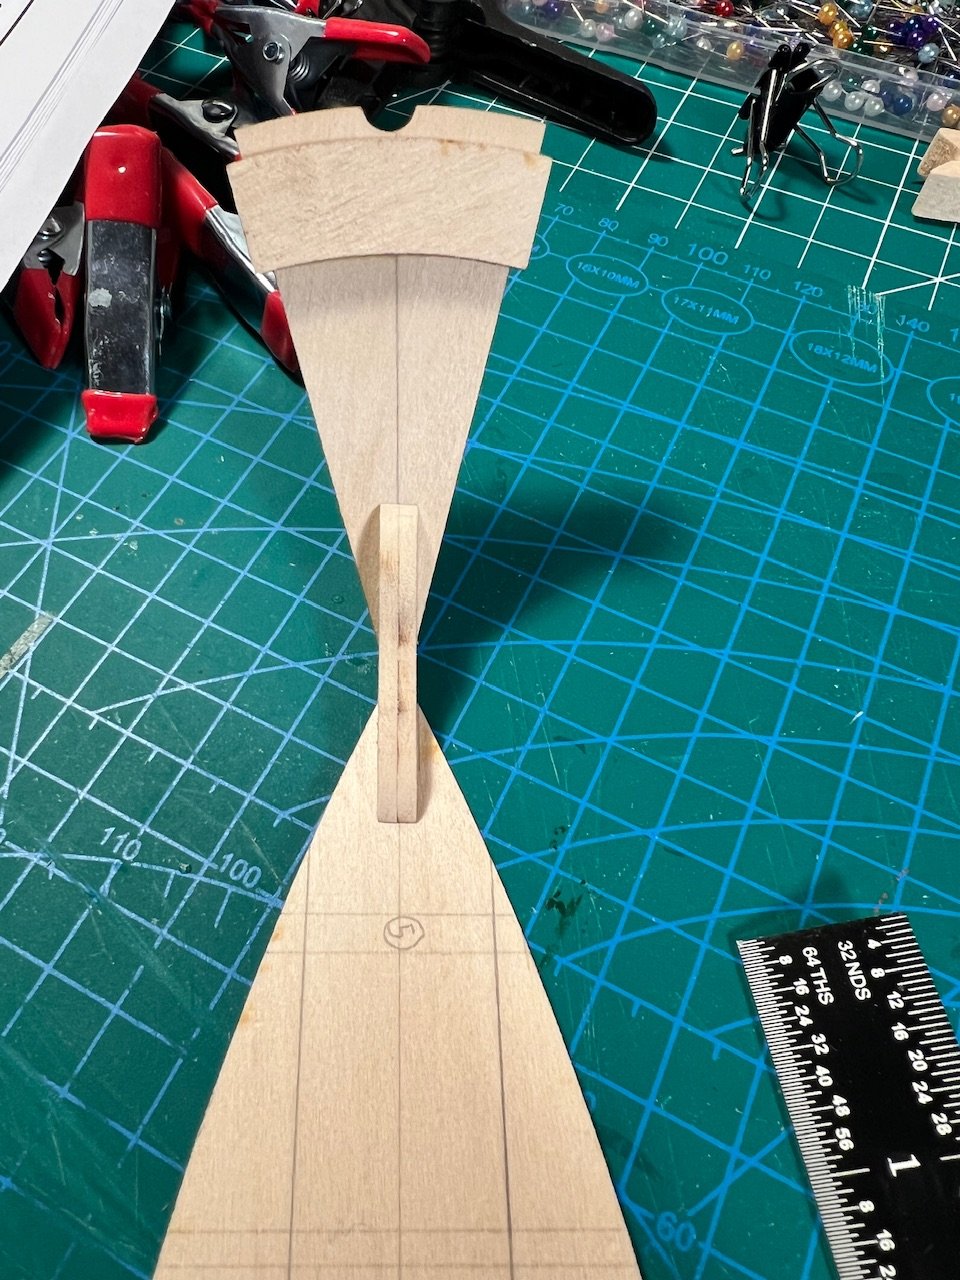
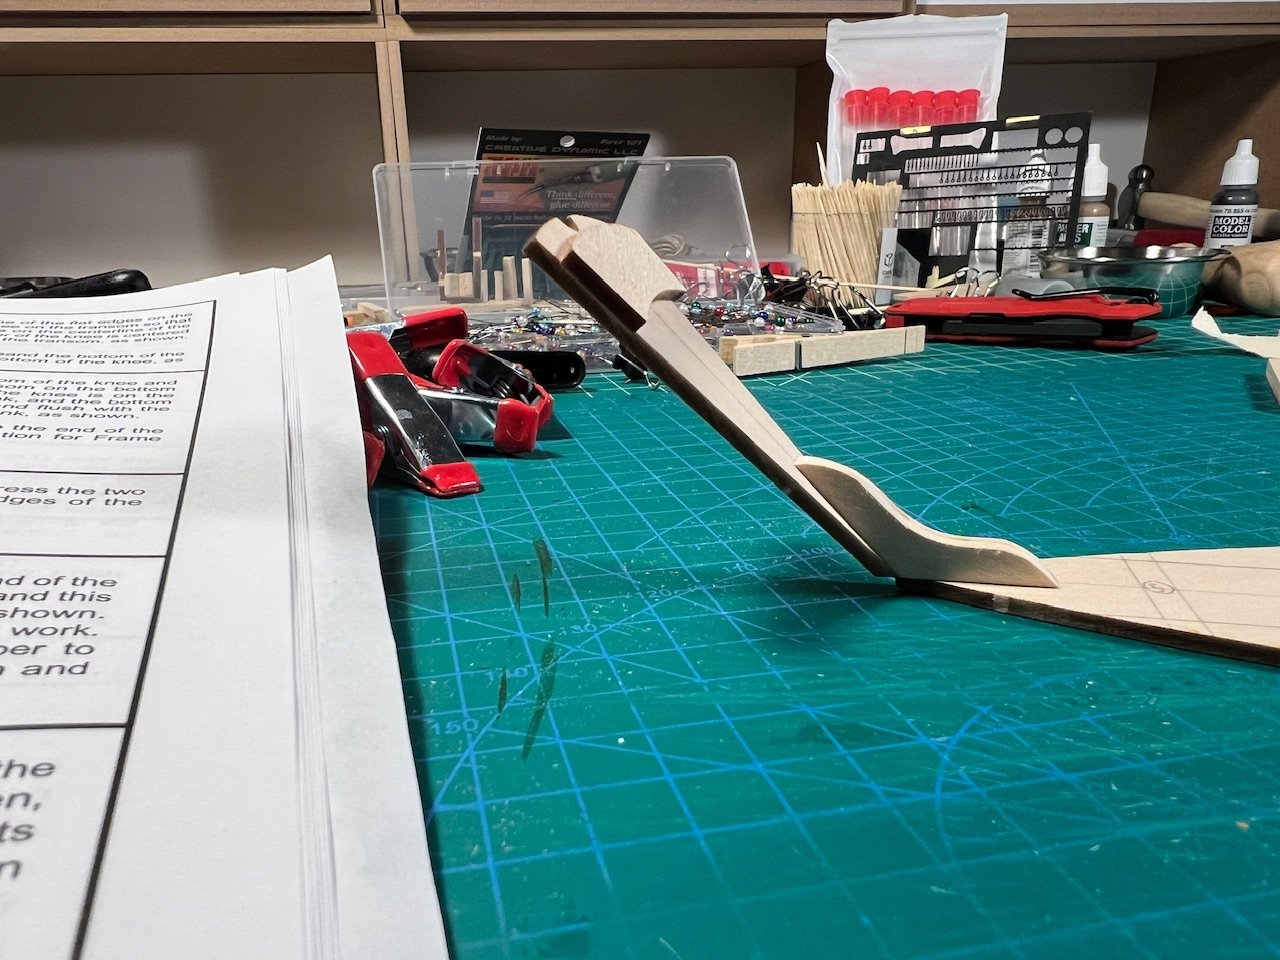
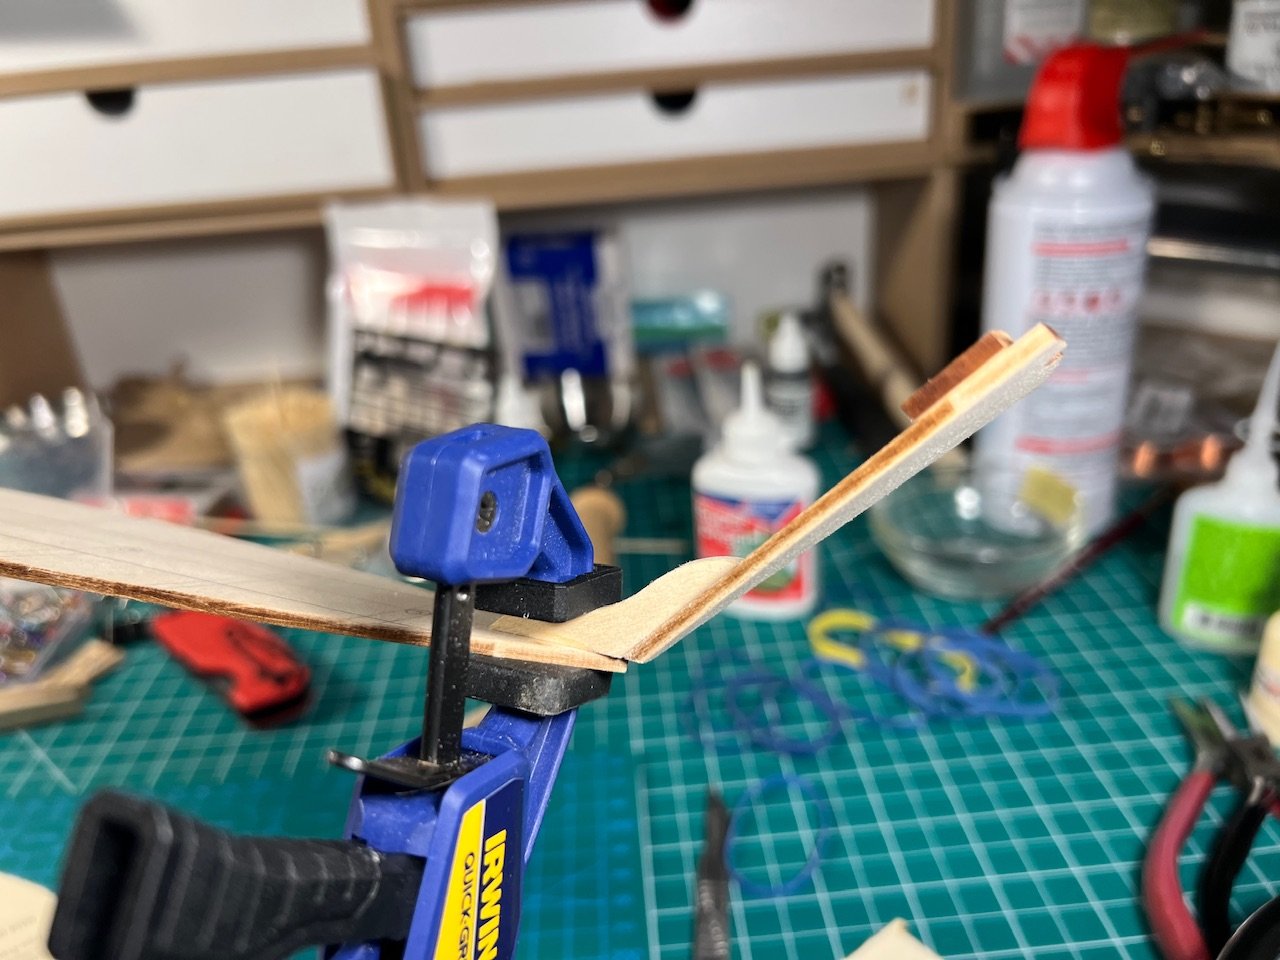
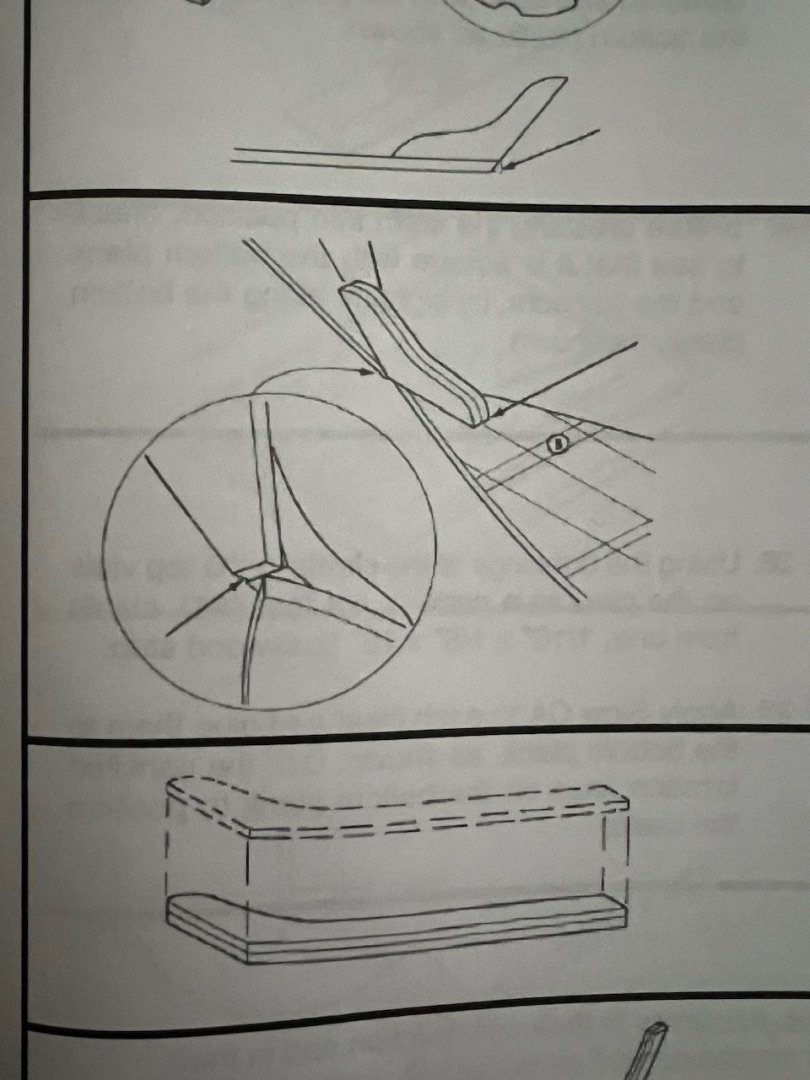
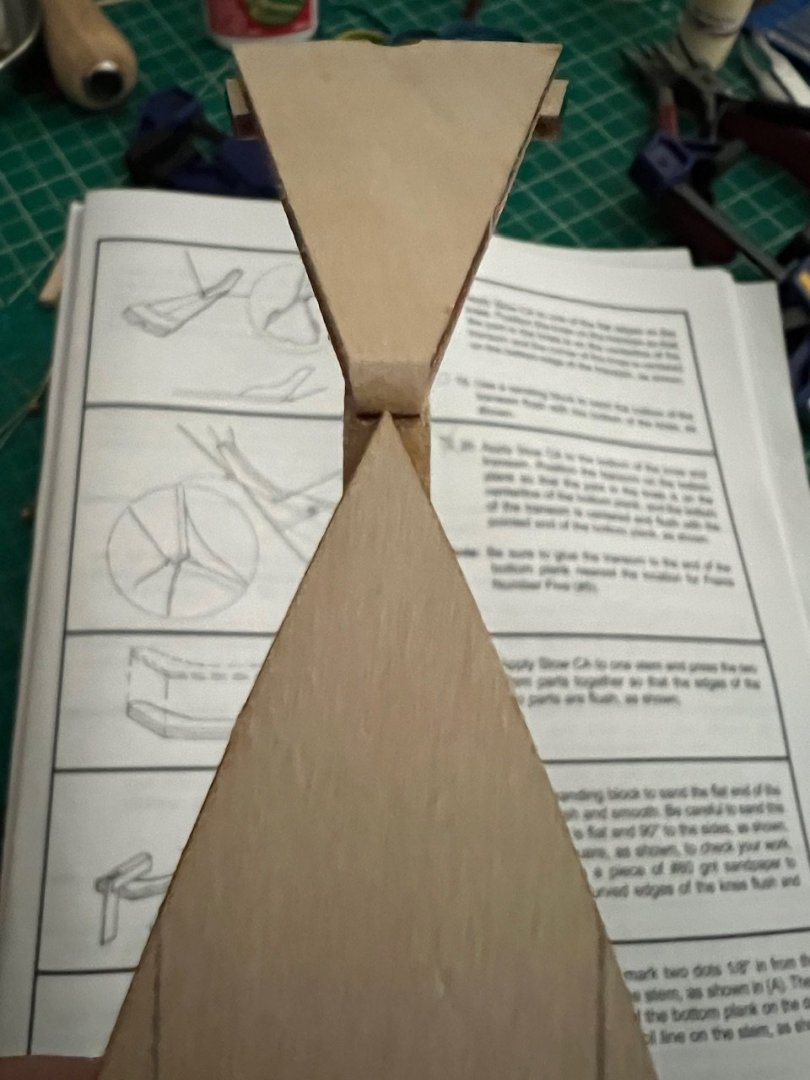
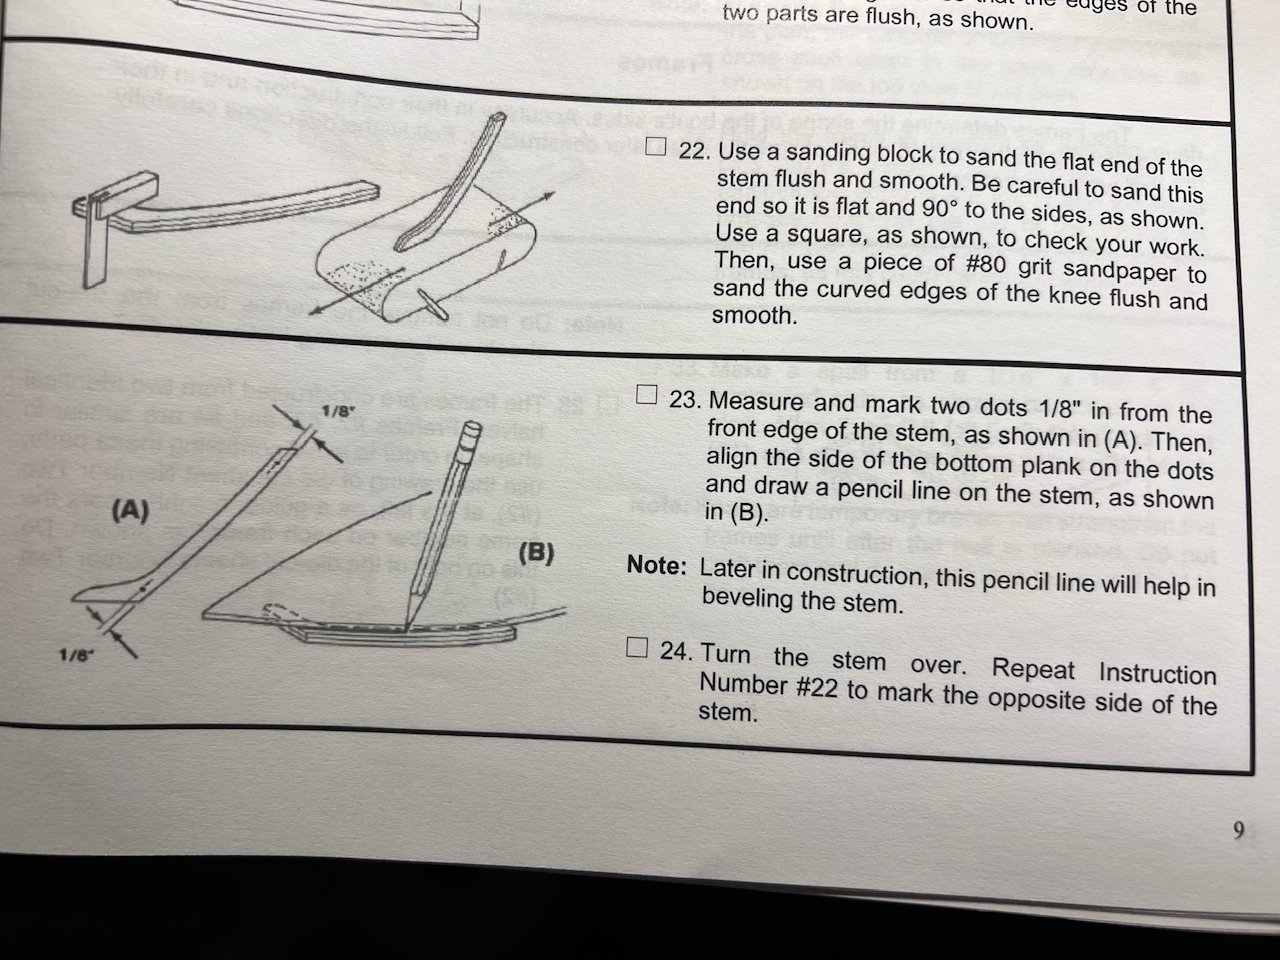
Do you mean where the knee is attached relative to the point at the bottom? The instructions provide a drawing that I tried to follow.
- 71 replies
-
- 2
-

-
- grand banks dory
- midwest products
- (and 2 more)
-
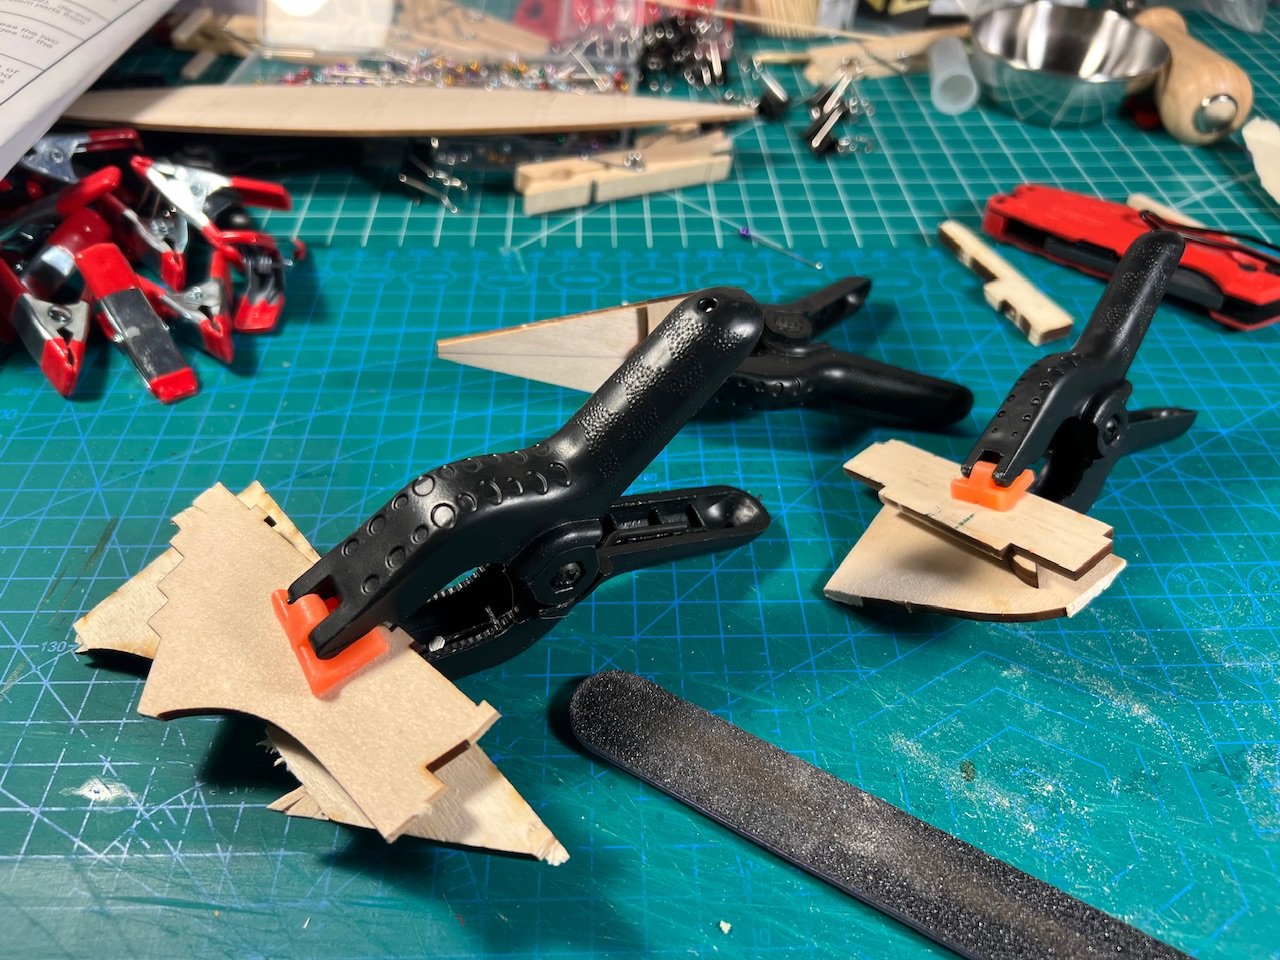
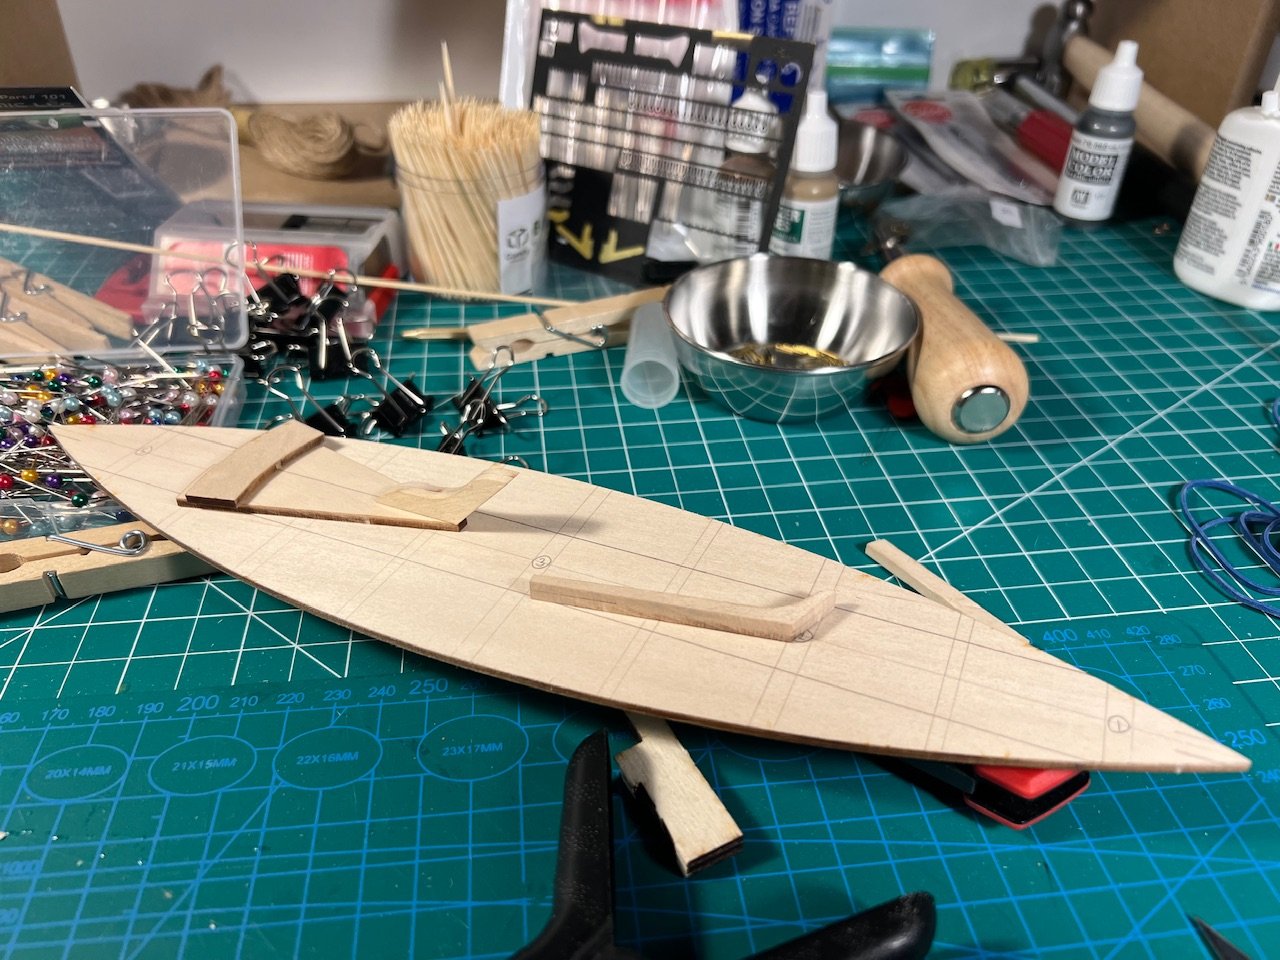
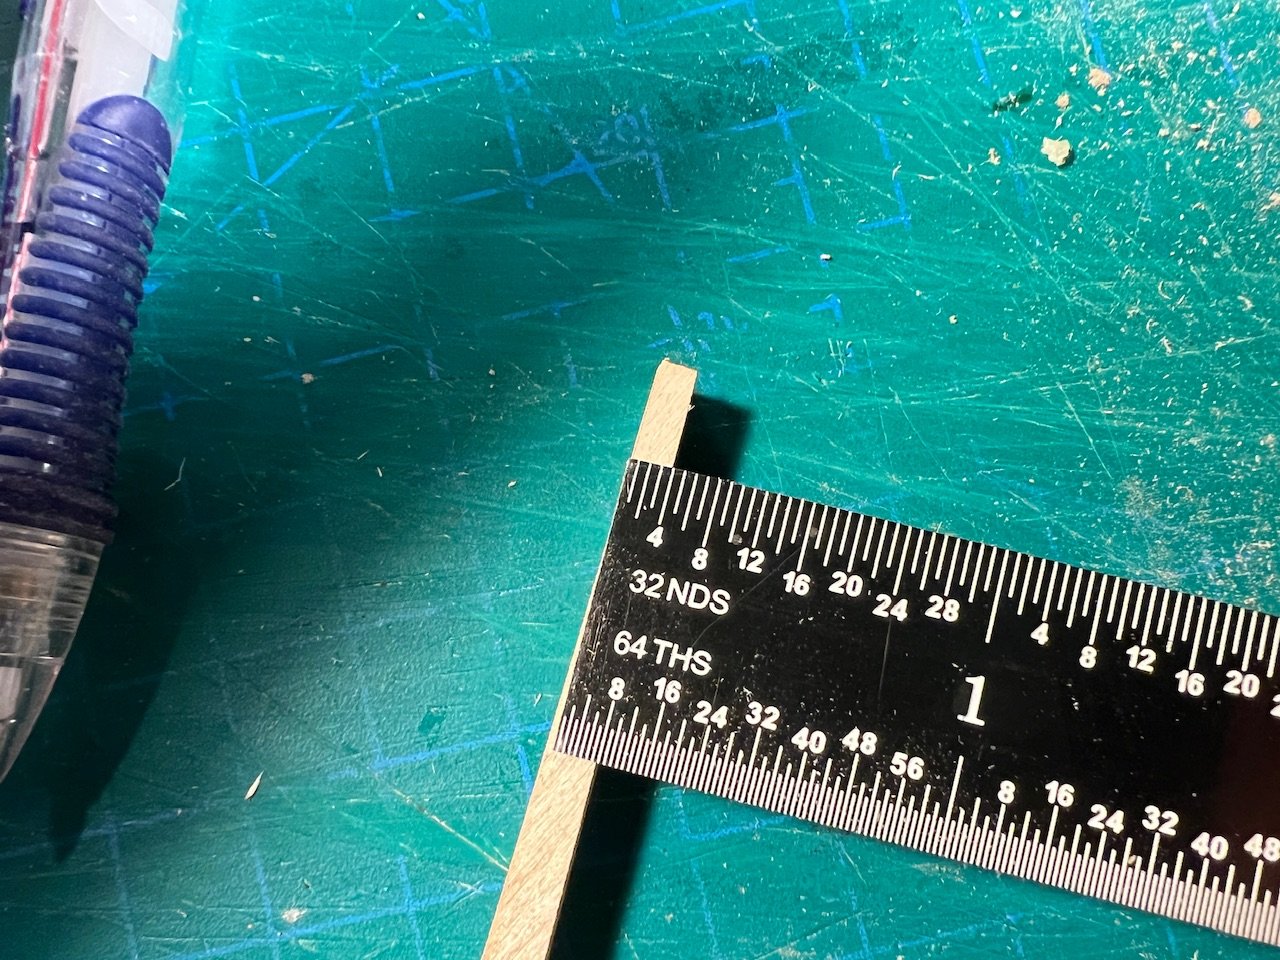
The stern and bow knees are made by gluing two pieces together. After drying overnight I sanded off the char and glued the stern knee to the stern transom. The instructions for the front stem knee require measuring and marking two dots 1/8” inches from the front edge of the stem. But the stem is in total 1/8” wide. So I’m guessing it should be 1/16”. The instructions unfortunately don’t specify how far from the top and bottom to mark these two dots.

- 71 replies
-
- 3
-
-
- grand banks dory
- midwest products
- (and 2 more)
-
Whats the best book on rigging for a beginner?
palmerit replied to Stuka's topic in Masting, rigging and sails
I'm with you on that. I want something between just tying a plain knot and doing some intricate realistic rigging that you'd never even notice at 1:64 scale (let alone be something that I'd probably never be able to pull off, even at a far larger scale). I've seen some good videos on Youtube for doing ratlines (including using a clove hitch, which is pretty simple). I've also seen some videos on how to seize/whip a line (I bought a fly fishing tool for seizing but I haven't tried it yet). Please post if you find any of the books especially useful. -
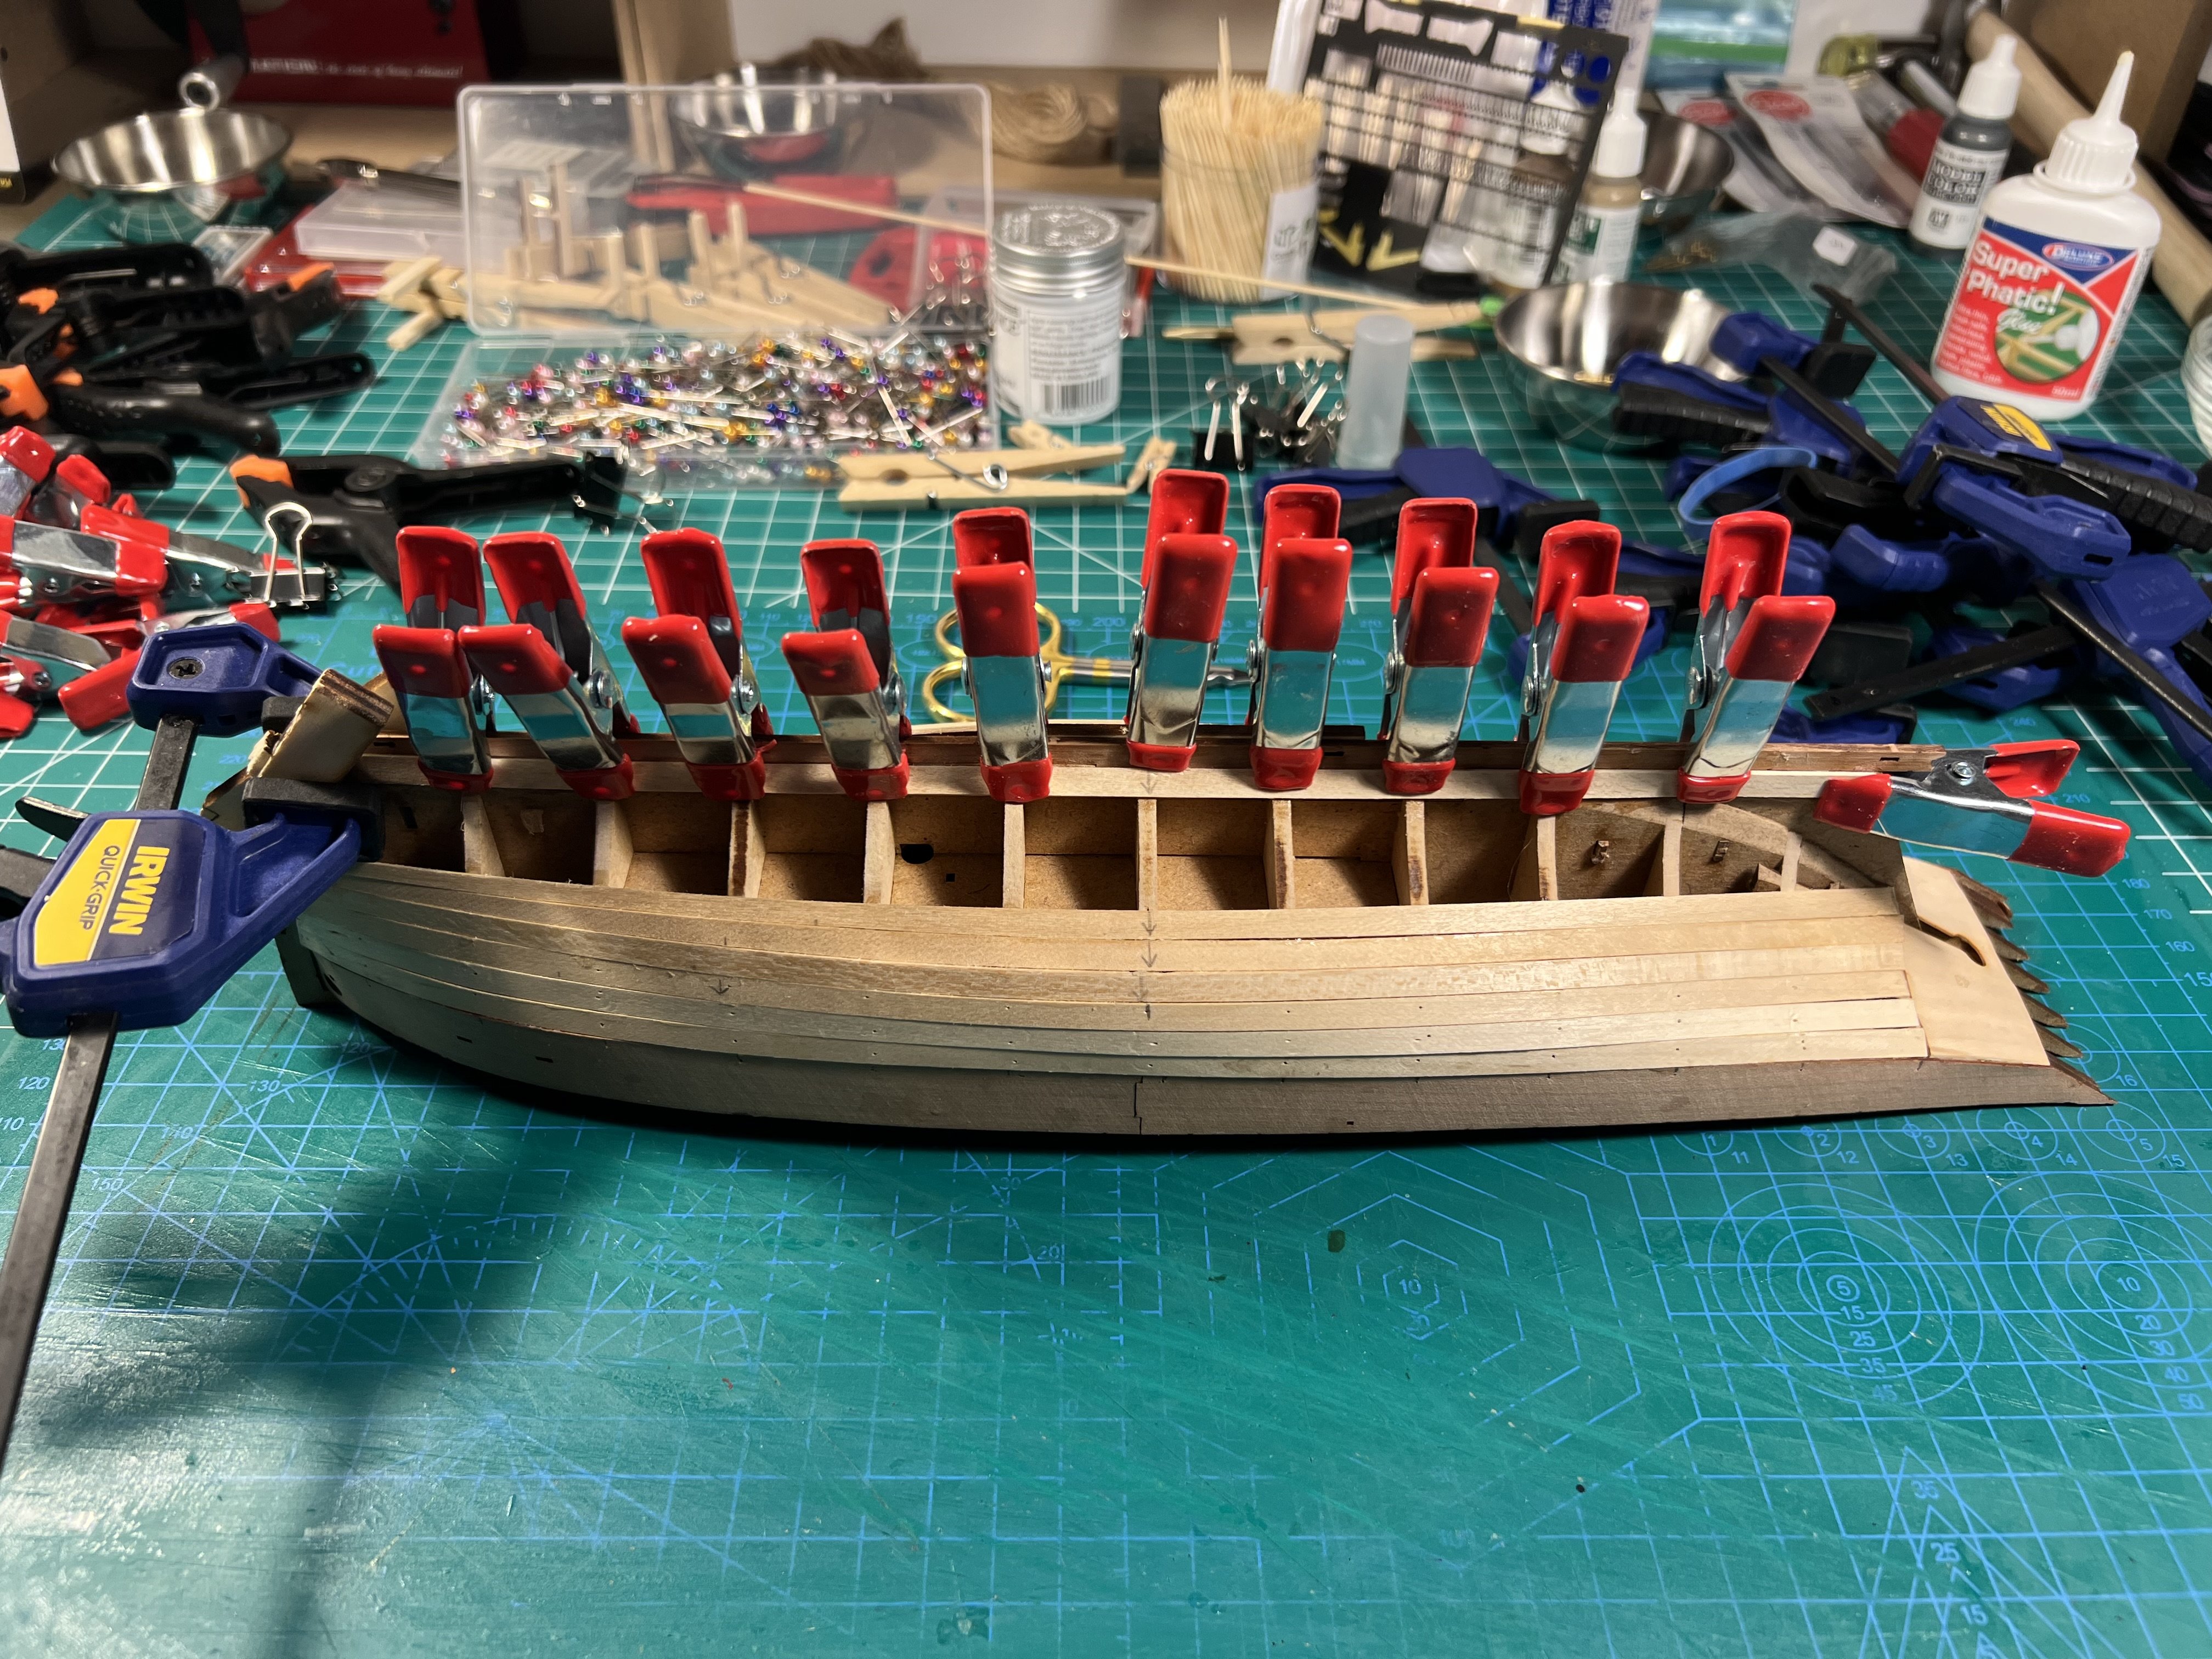
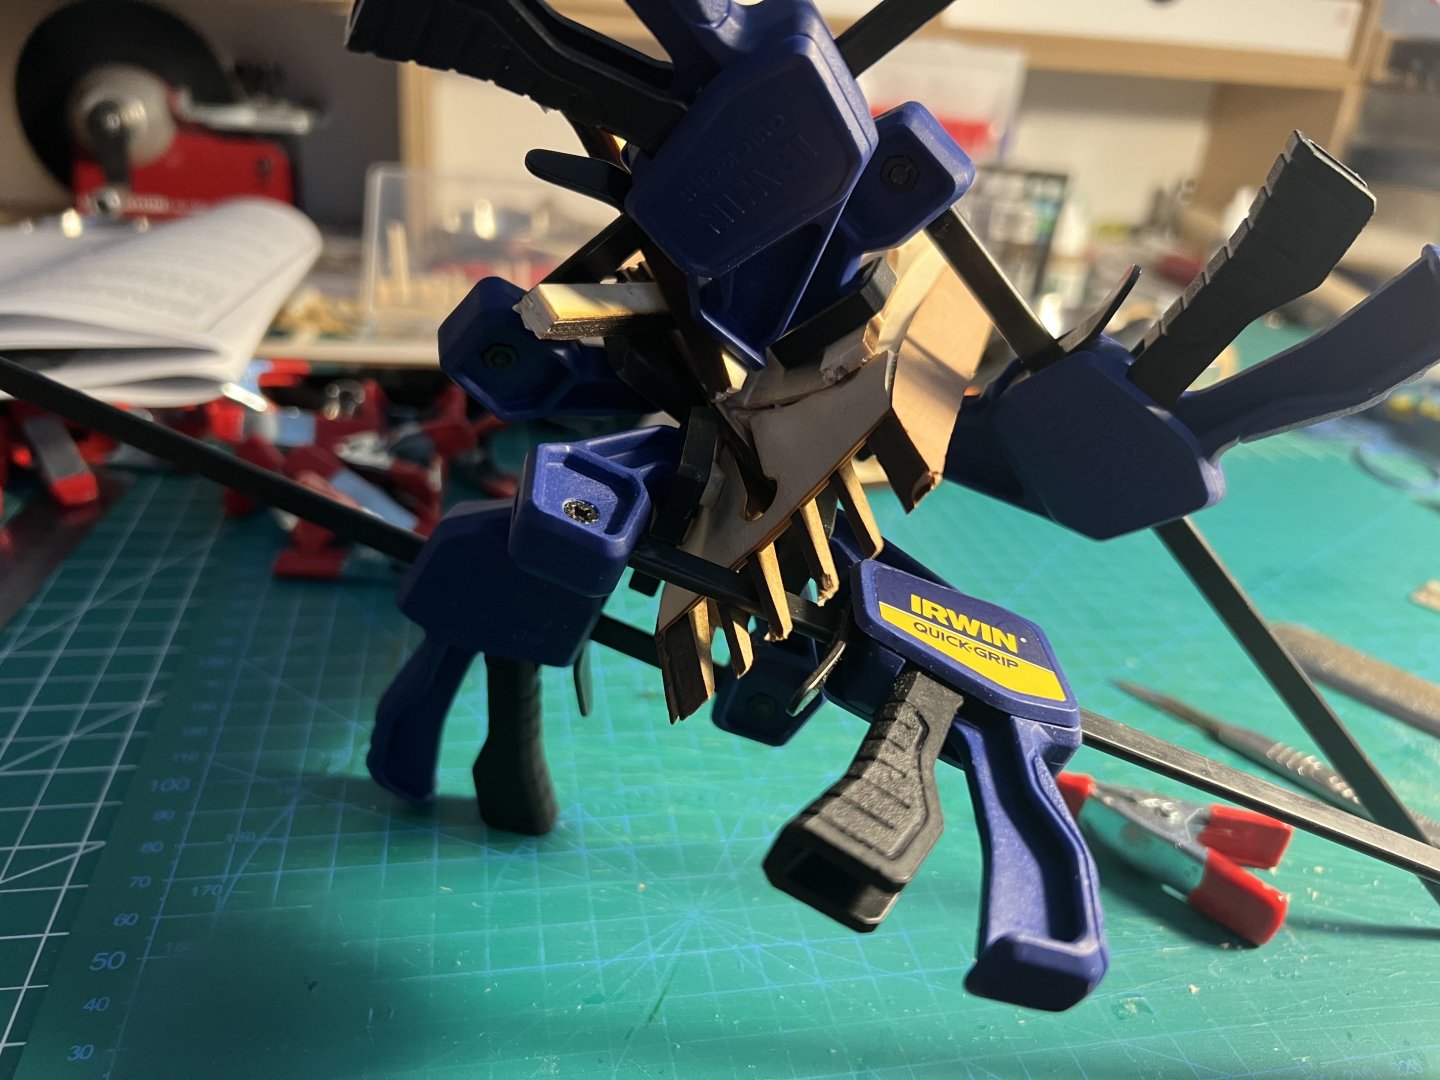
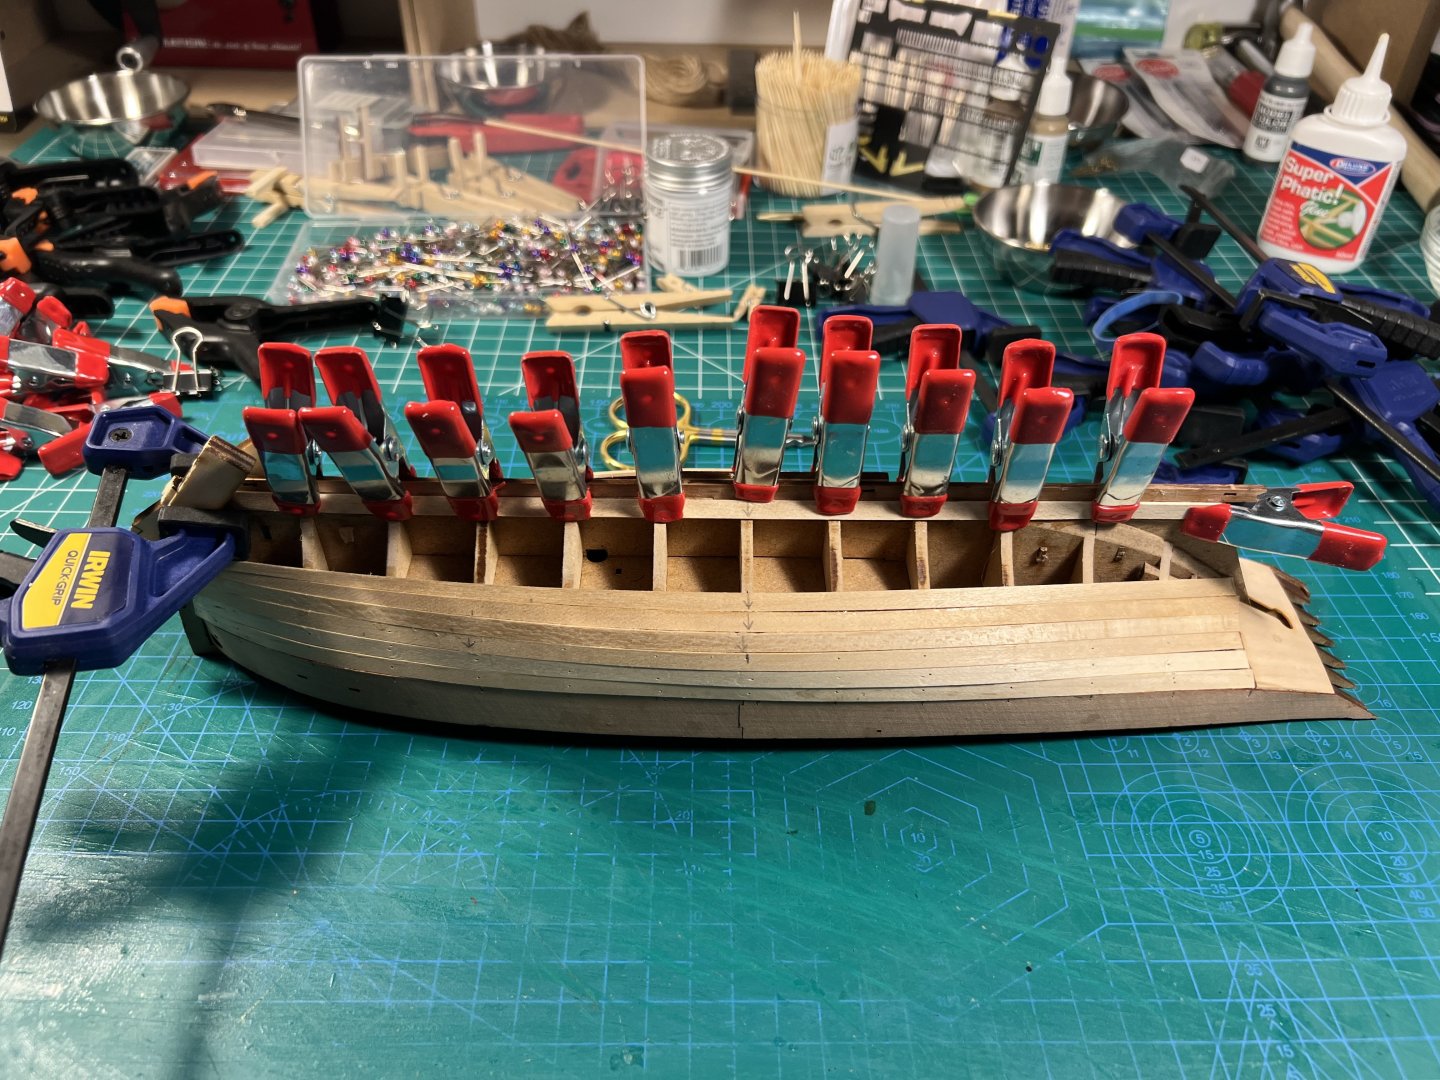
Some of the planks at the stern were not laying flat so I used my trusty clamps. I know I could have sanded and filled, but I’d rather try to get everything to lay flat as much as possible before sanding and filling.
- 133 replies
-
- 4
-
-
- Ranger
- vanguard models
- (and 1 more)
-
I’ve found that clamps like these can use useful.. https://www.amazon.com/dp/B00004SBCO?ref=ppx_yo2ov_dt_b_fed_asin_title&th=1
-
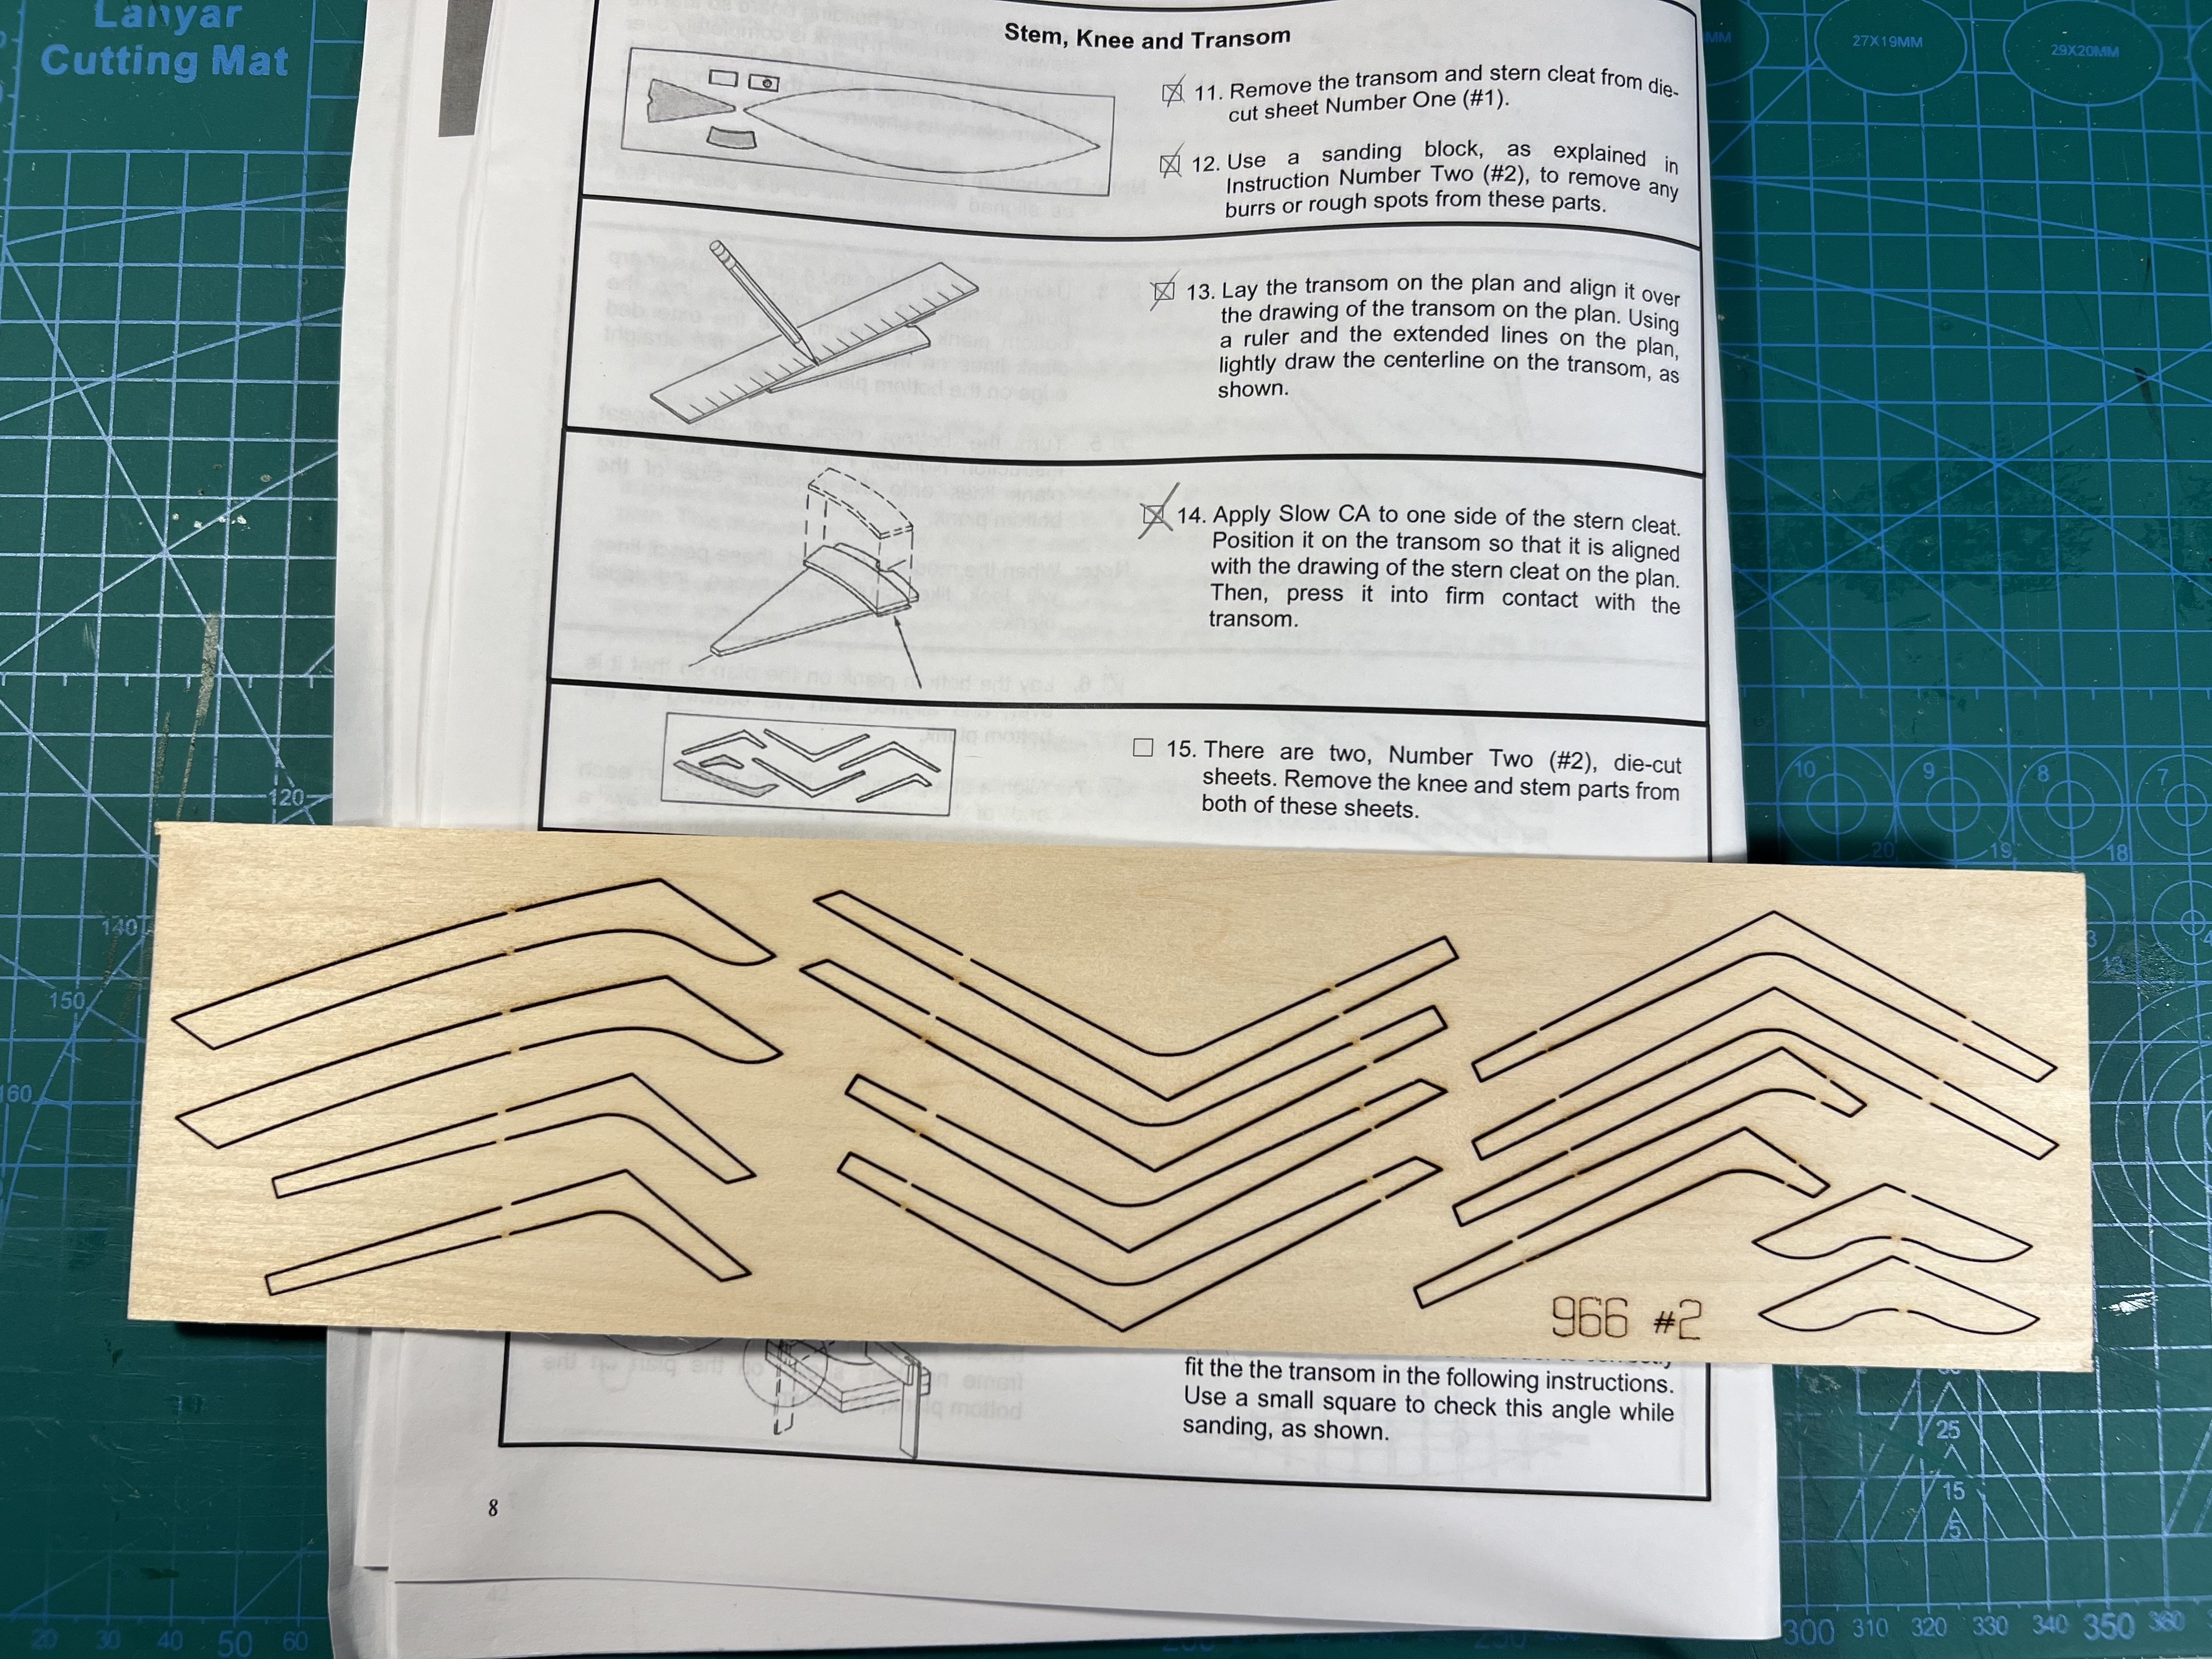
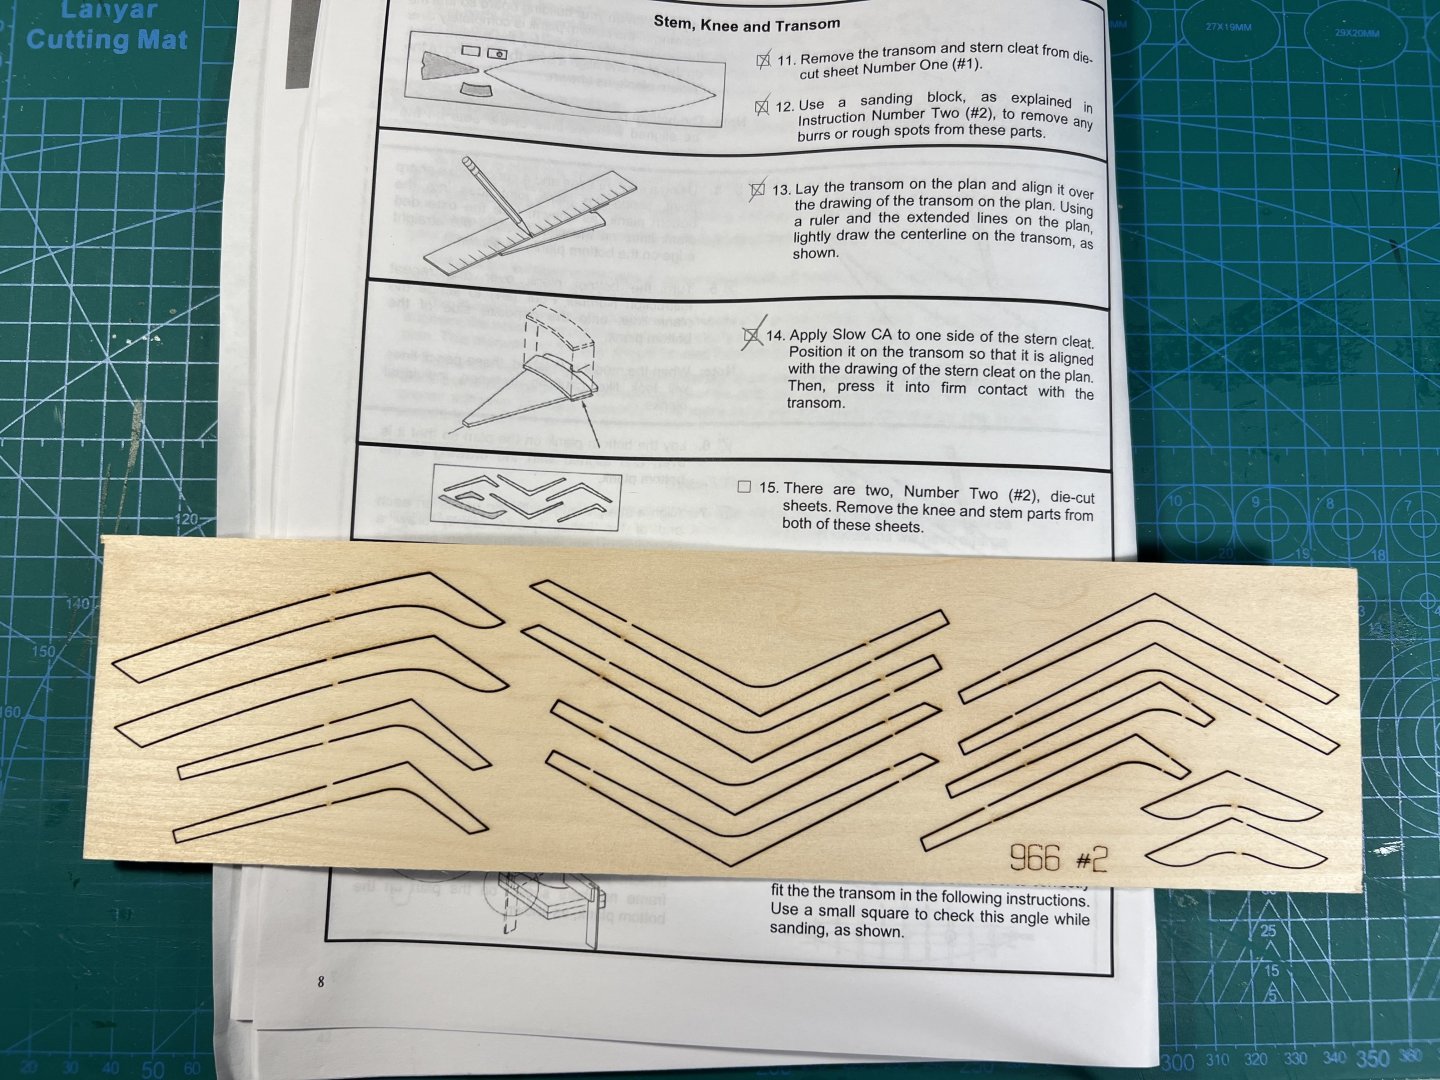
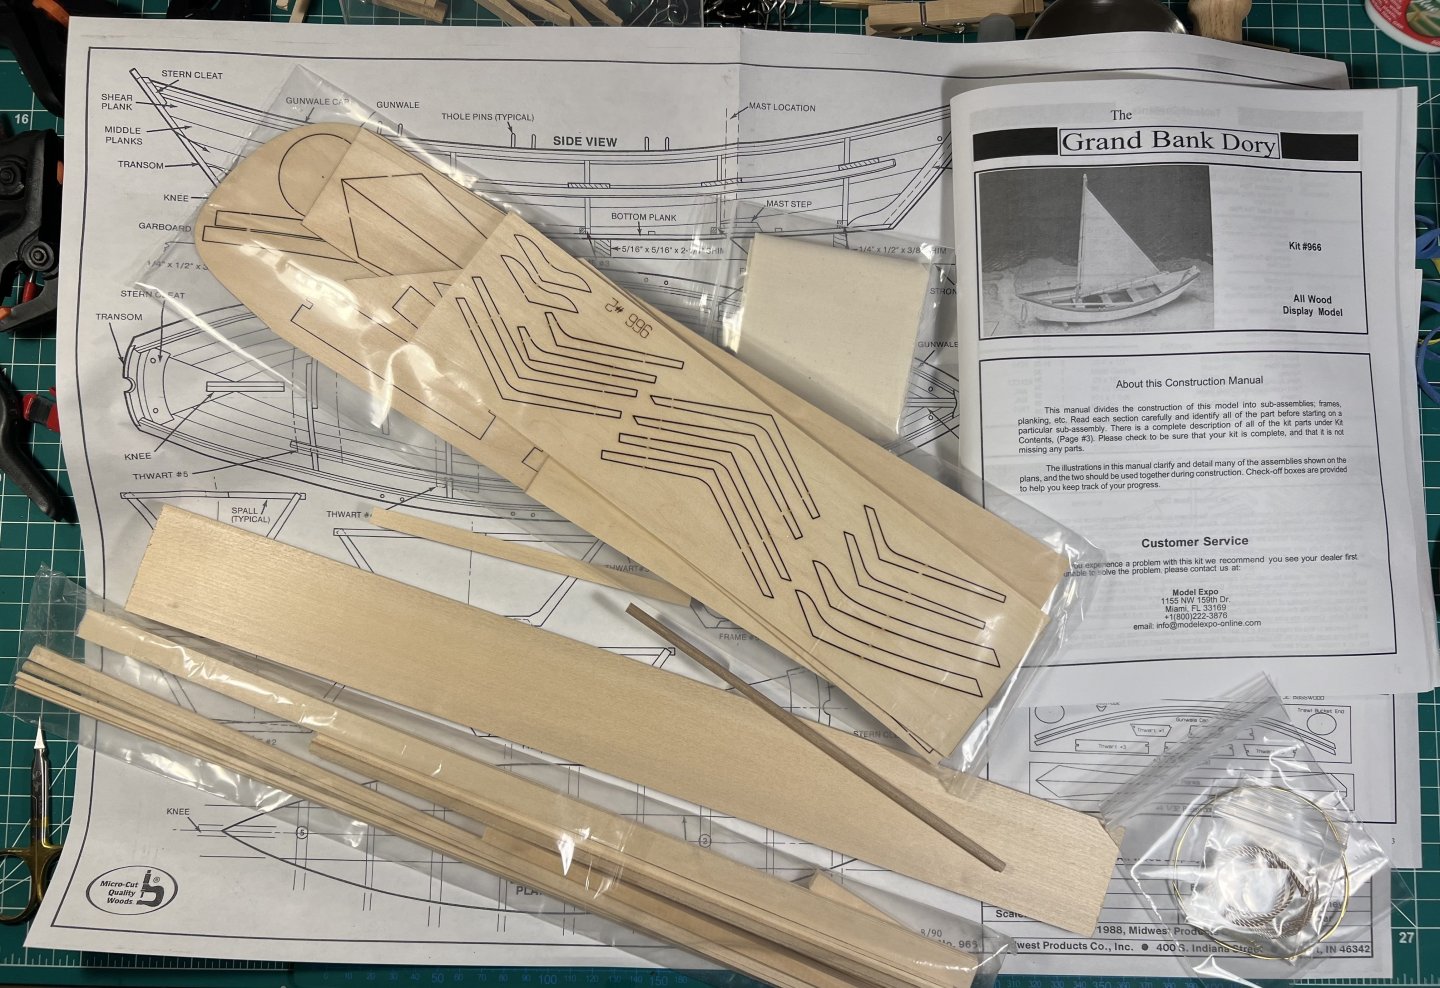
Instructions say “there are two, Number Two (#2), die-cut sheets”. There’s only one #2 with twice as many parts.
- 71 replies
-
- 2
-
-
- grand banks dory
- midwest products
- (and 2 more)
-
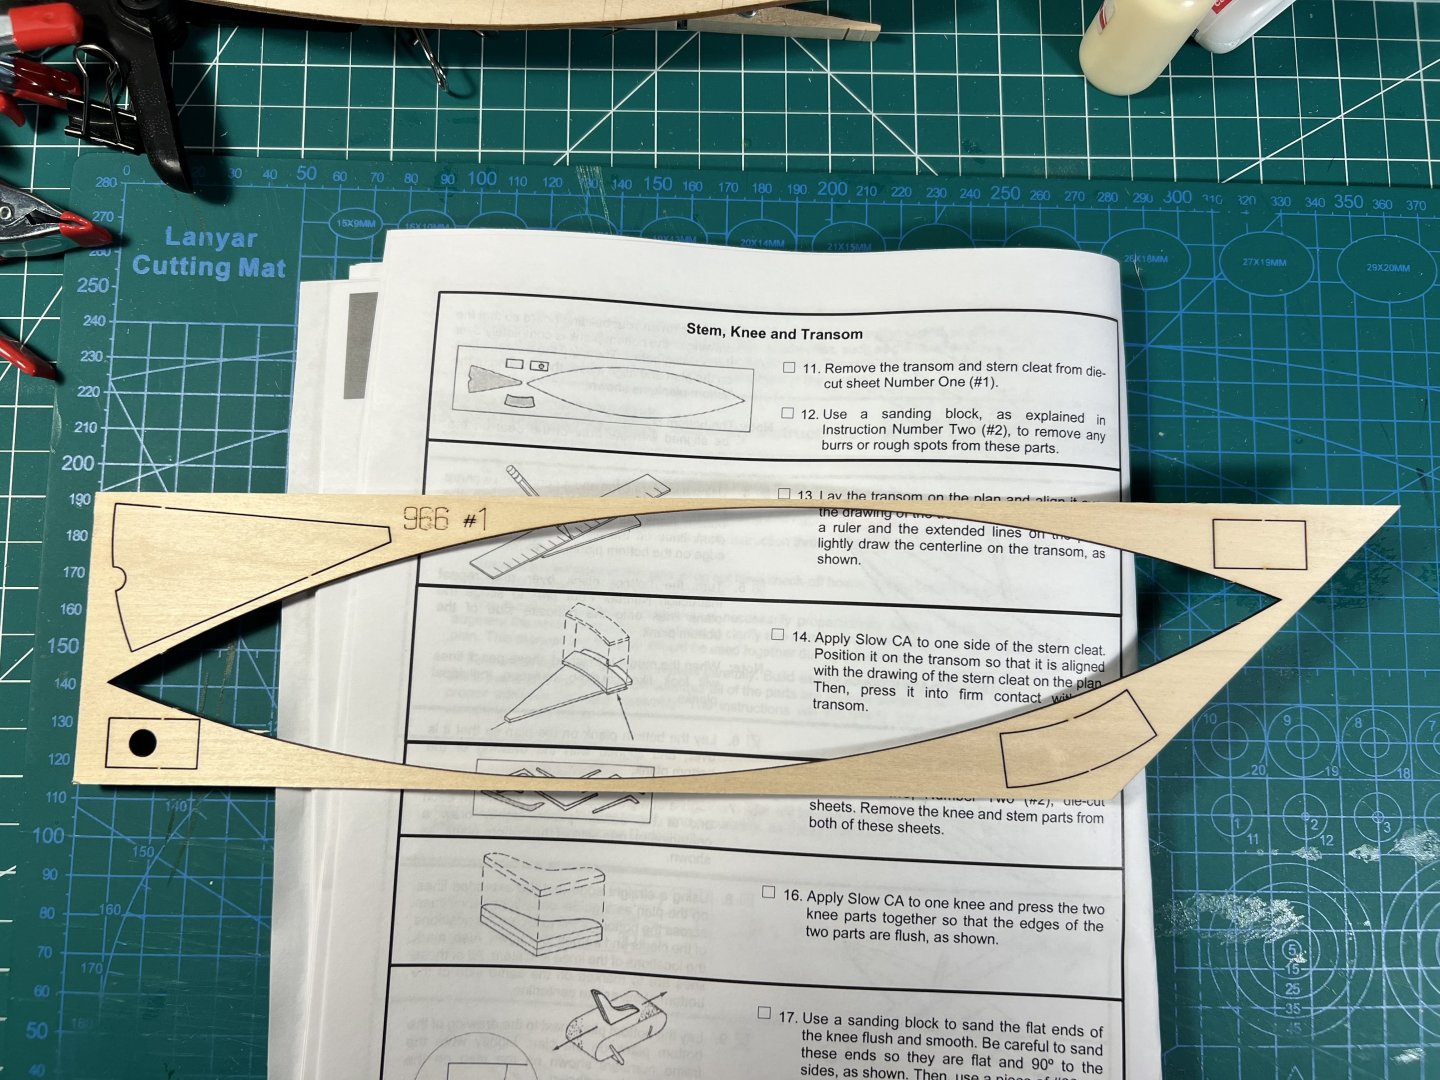
The instructions show the layout of sheet #1 and shade in the transom and stern cleat but the actual sheet is organized in a different way.
- 71 replies
-
- 2
-
-
- grand banks dory
- midwest products
- (and 2 more)
-
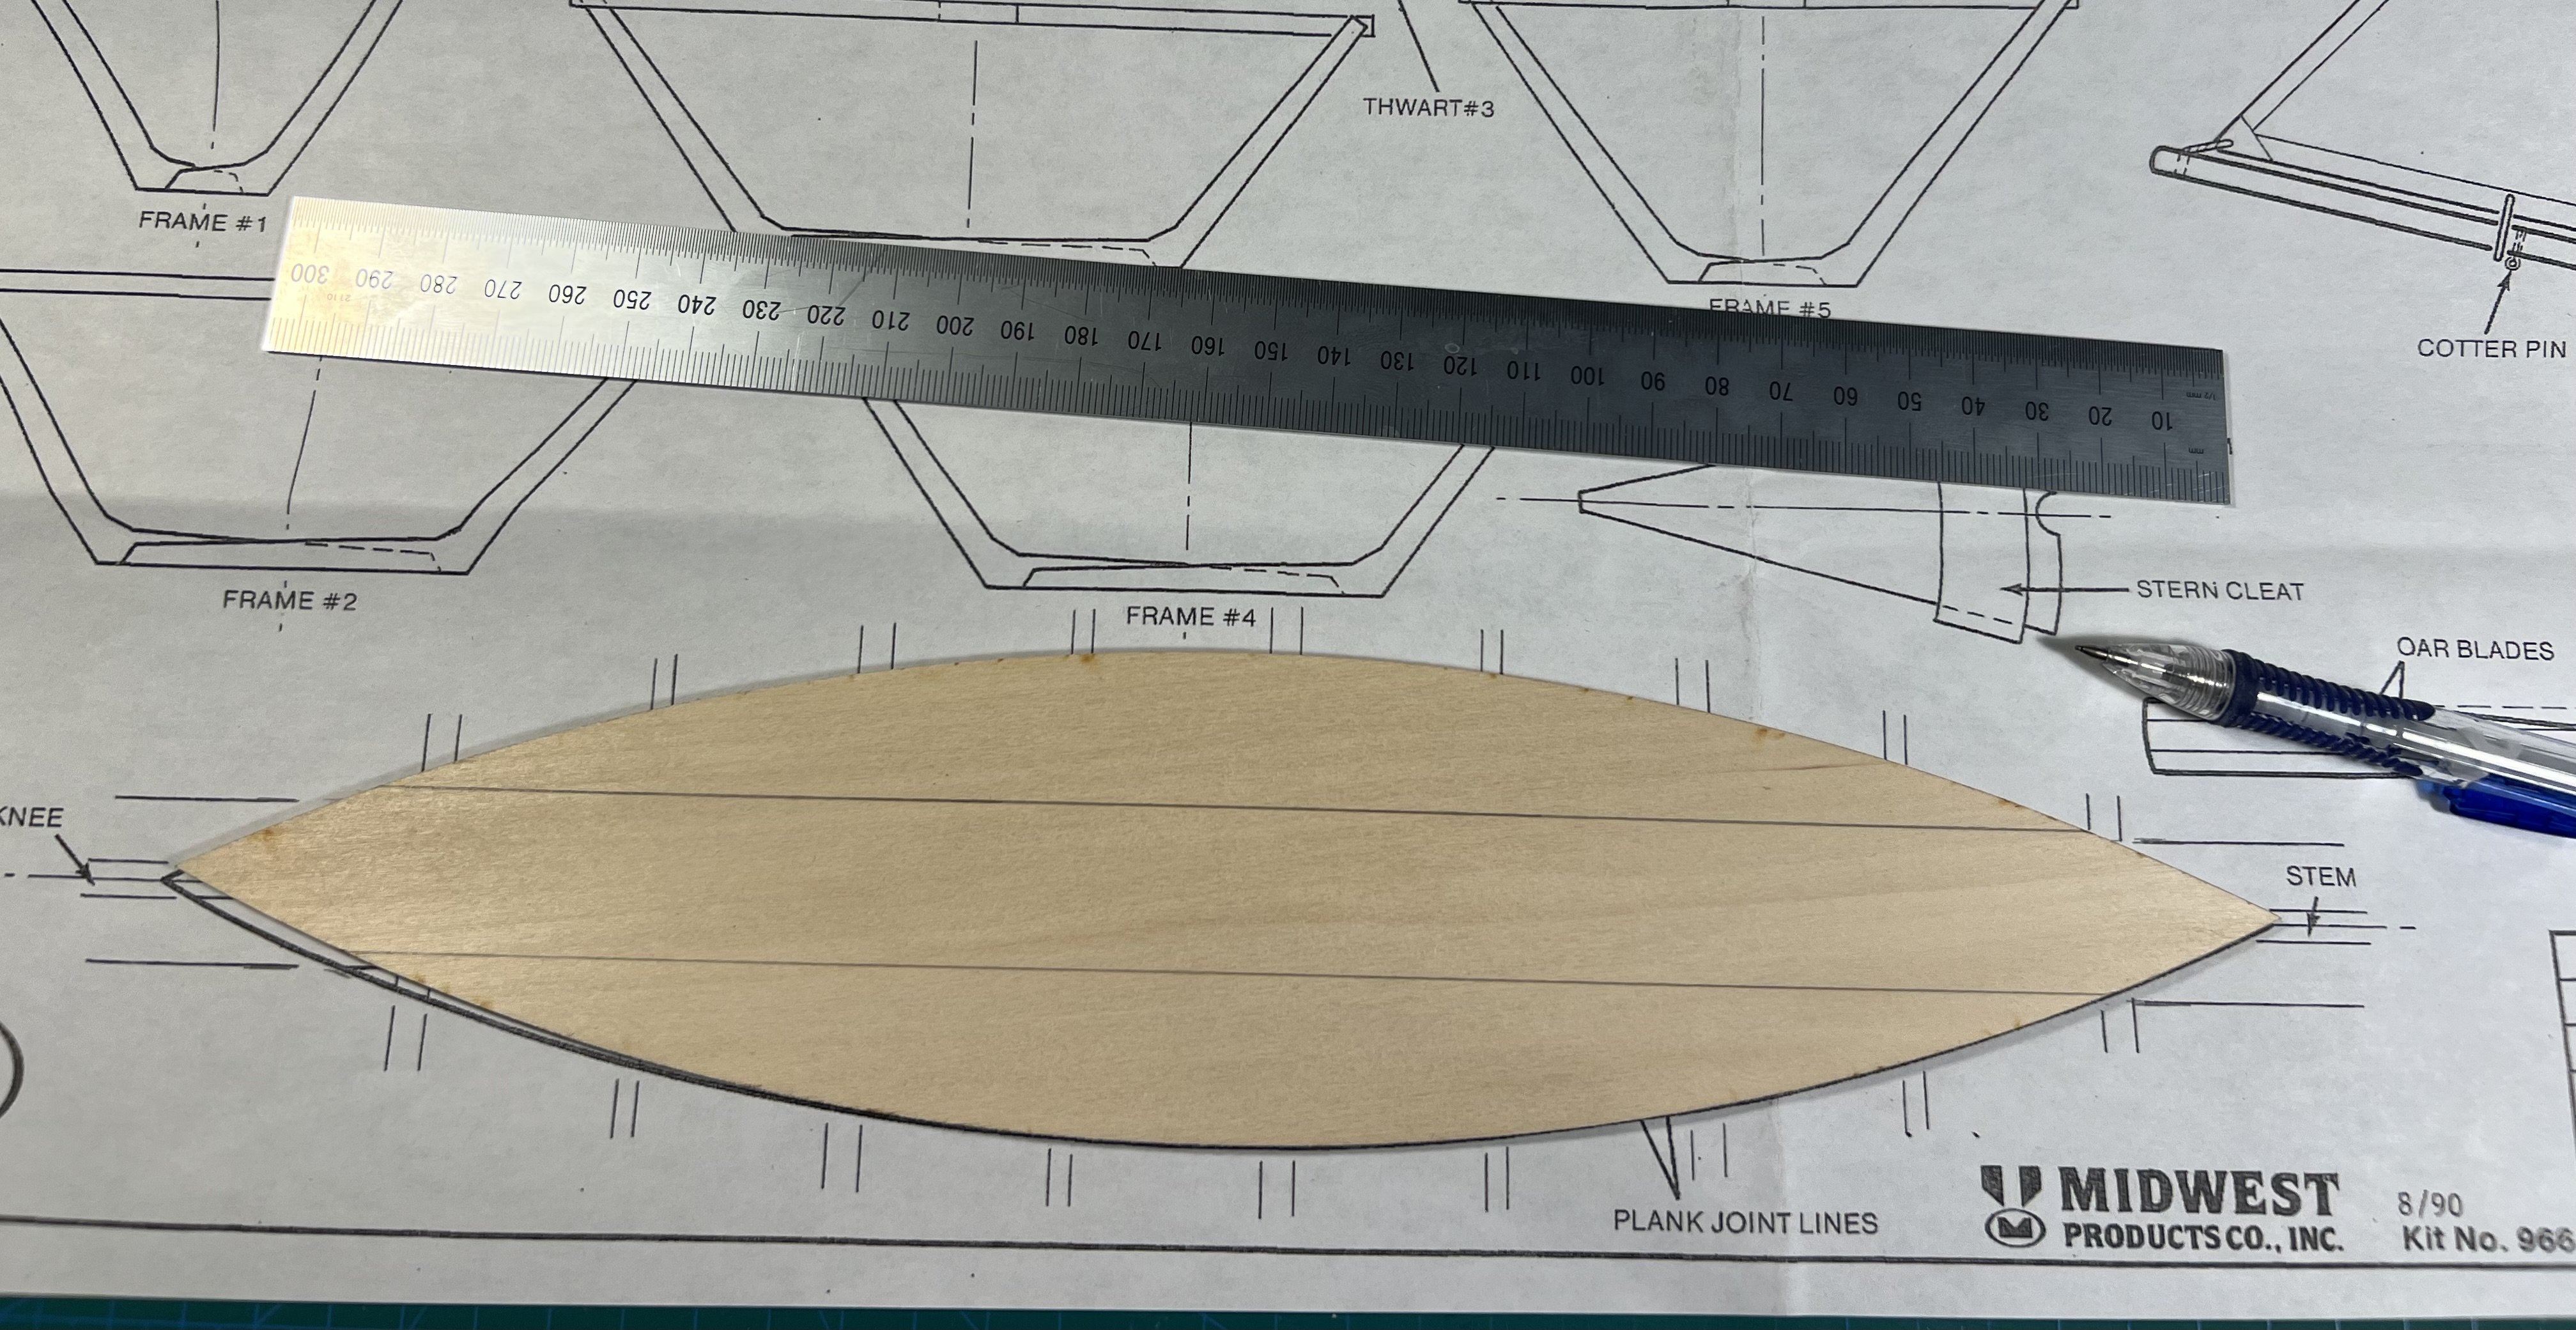
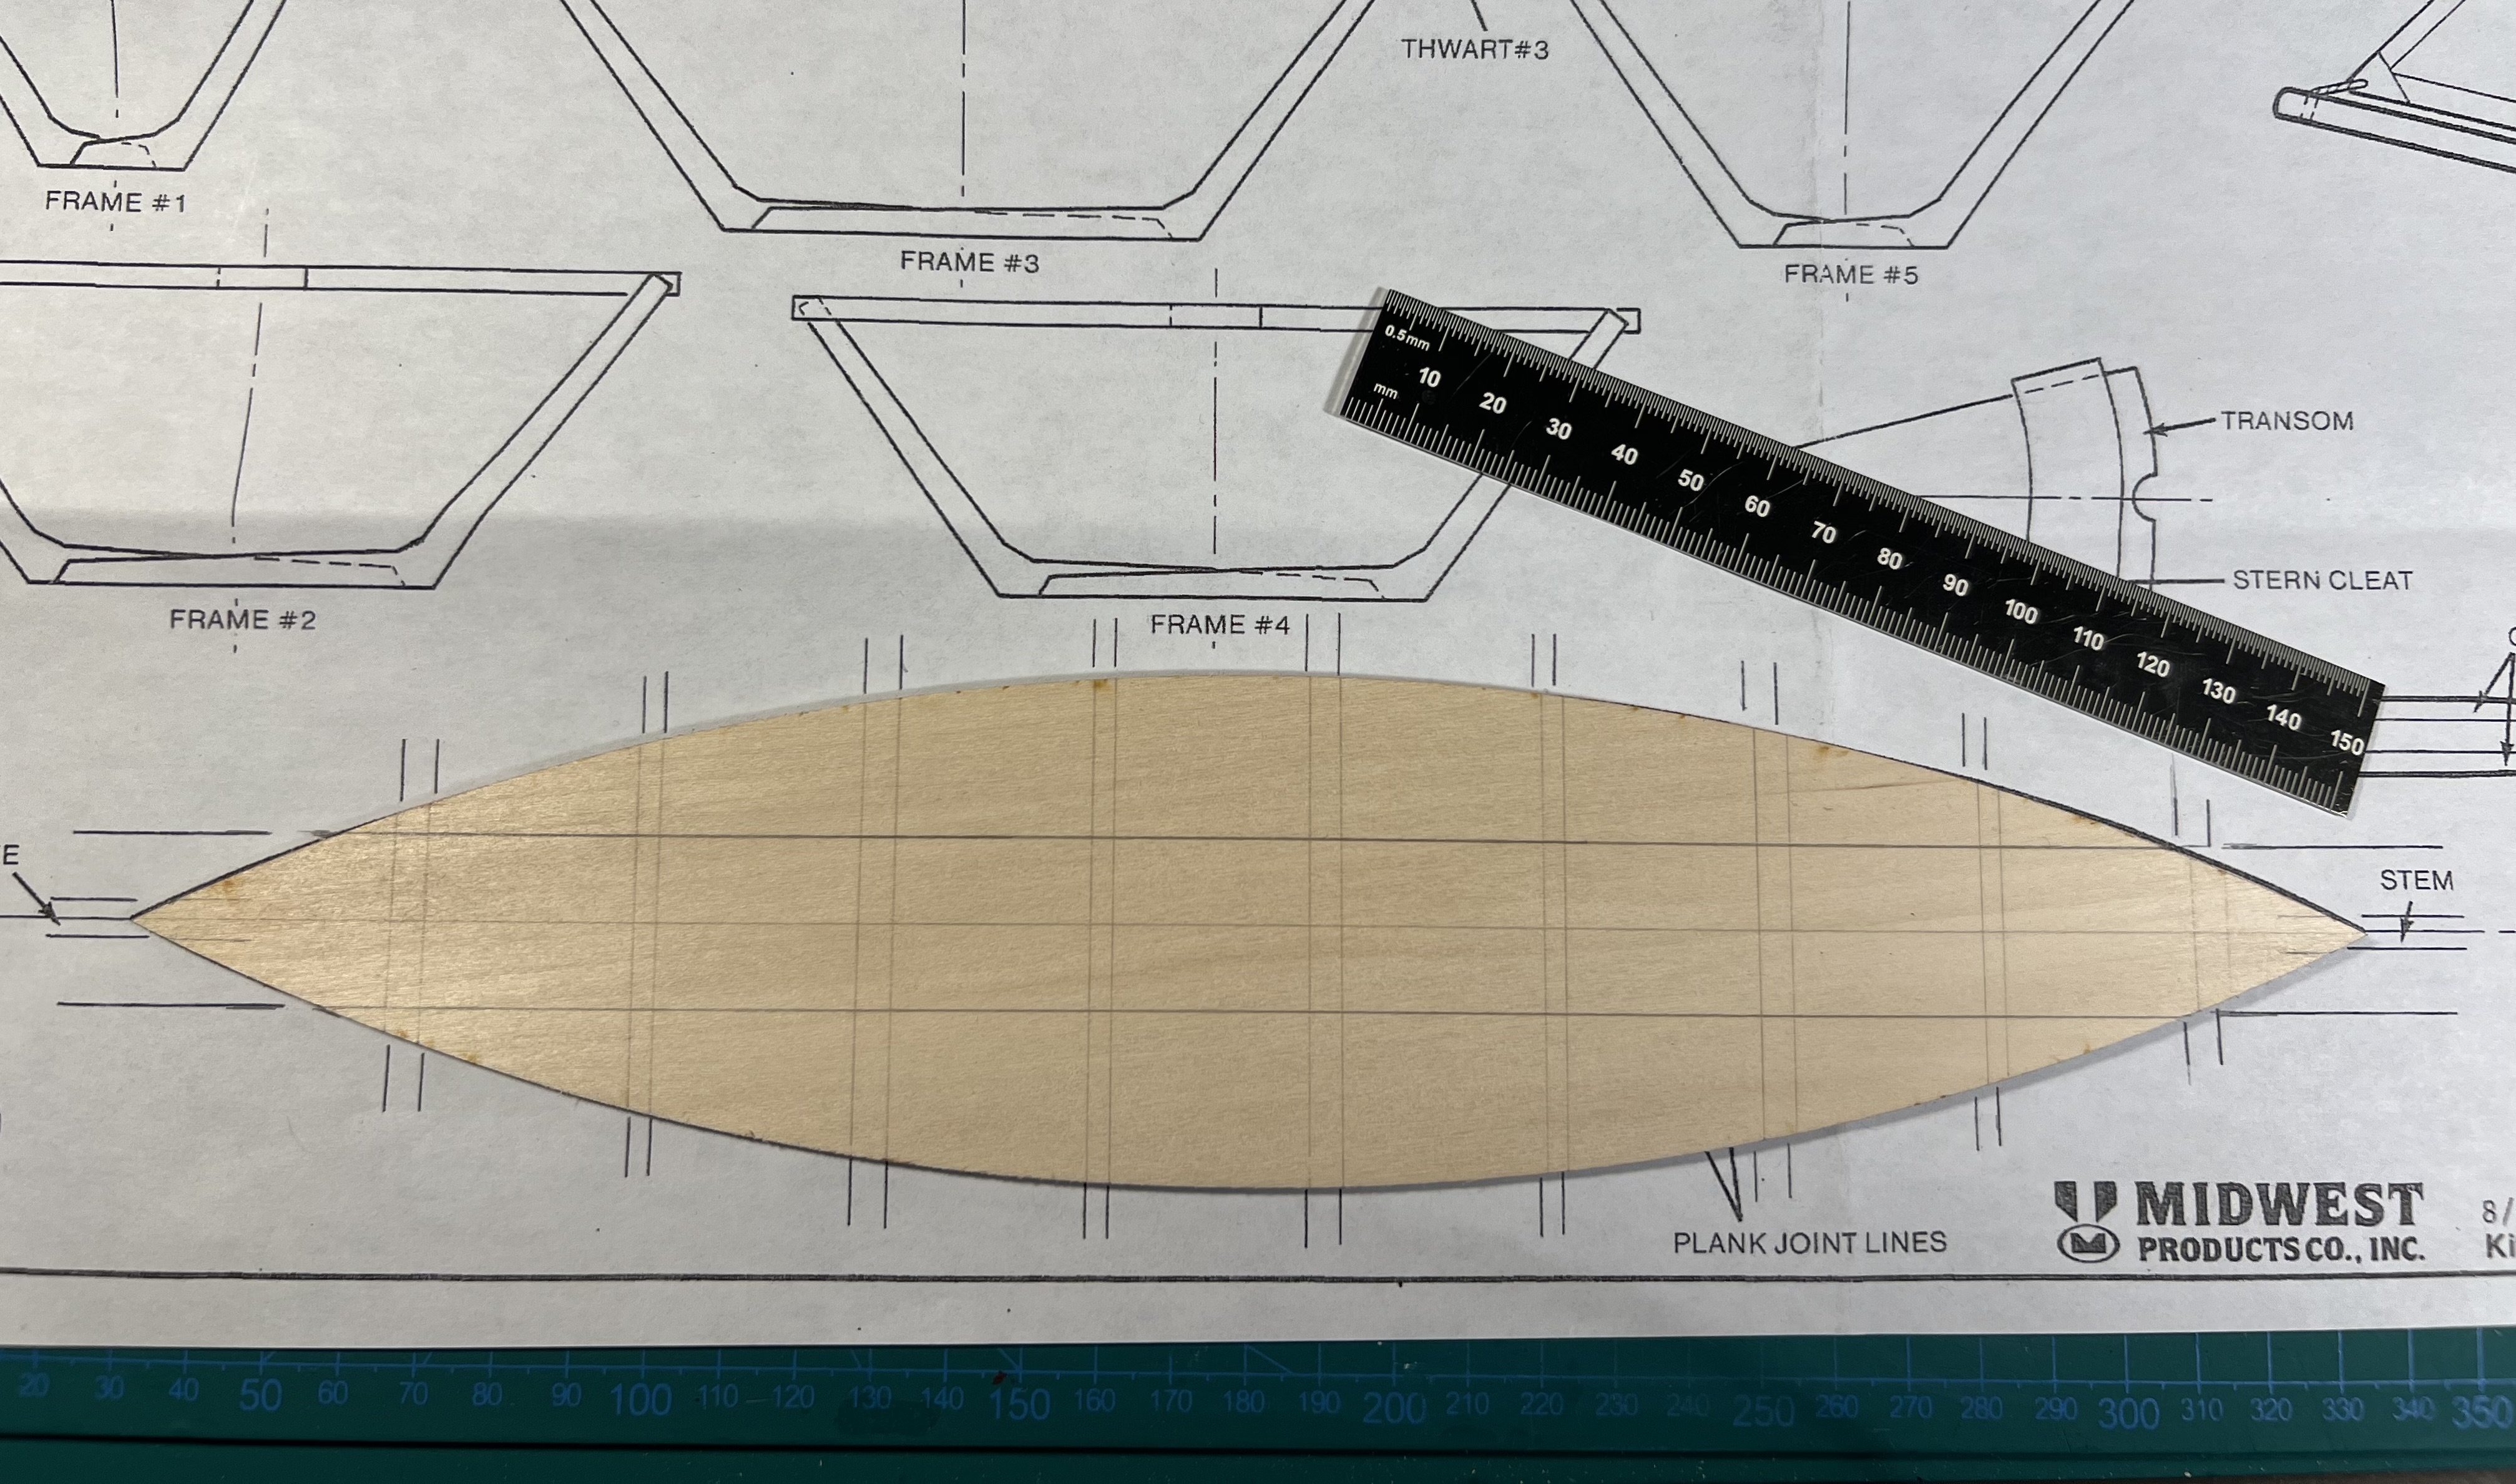
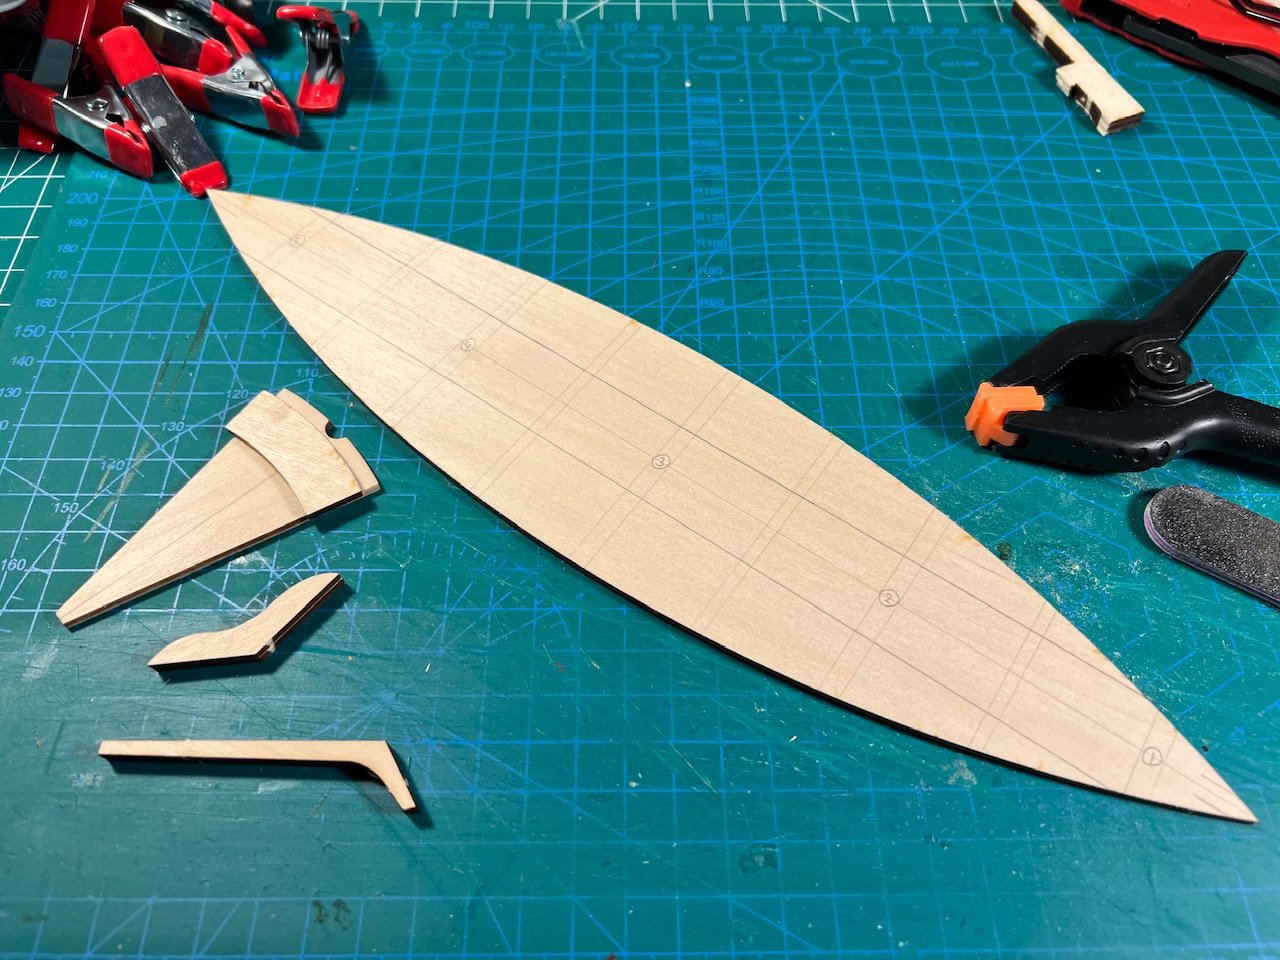
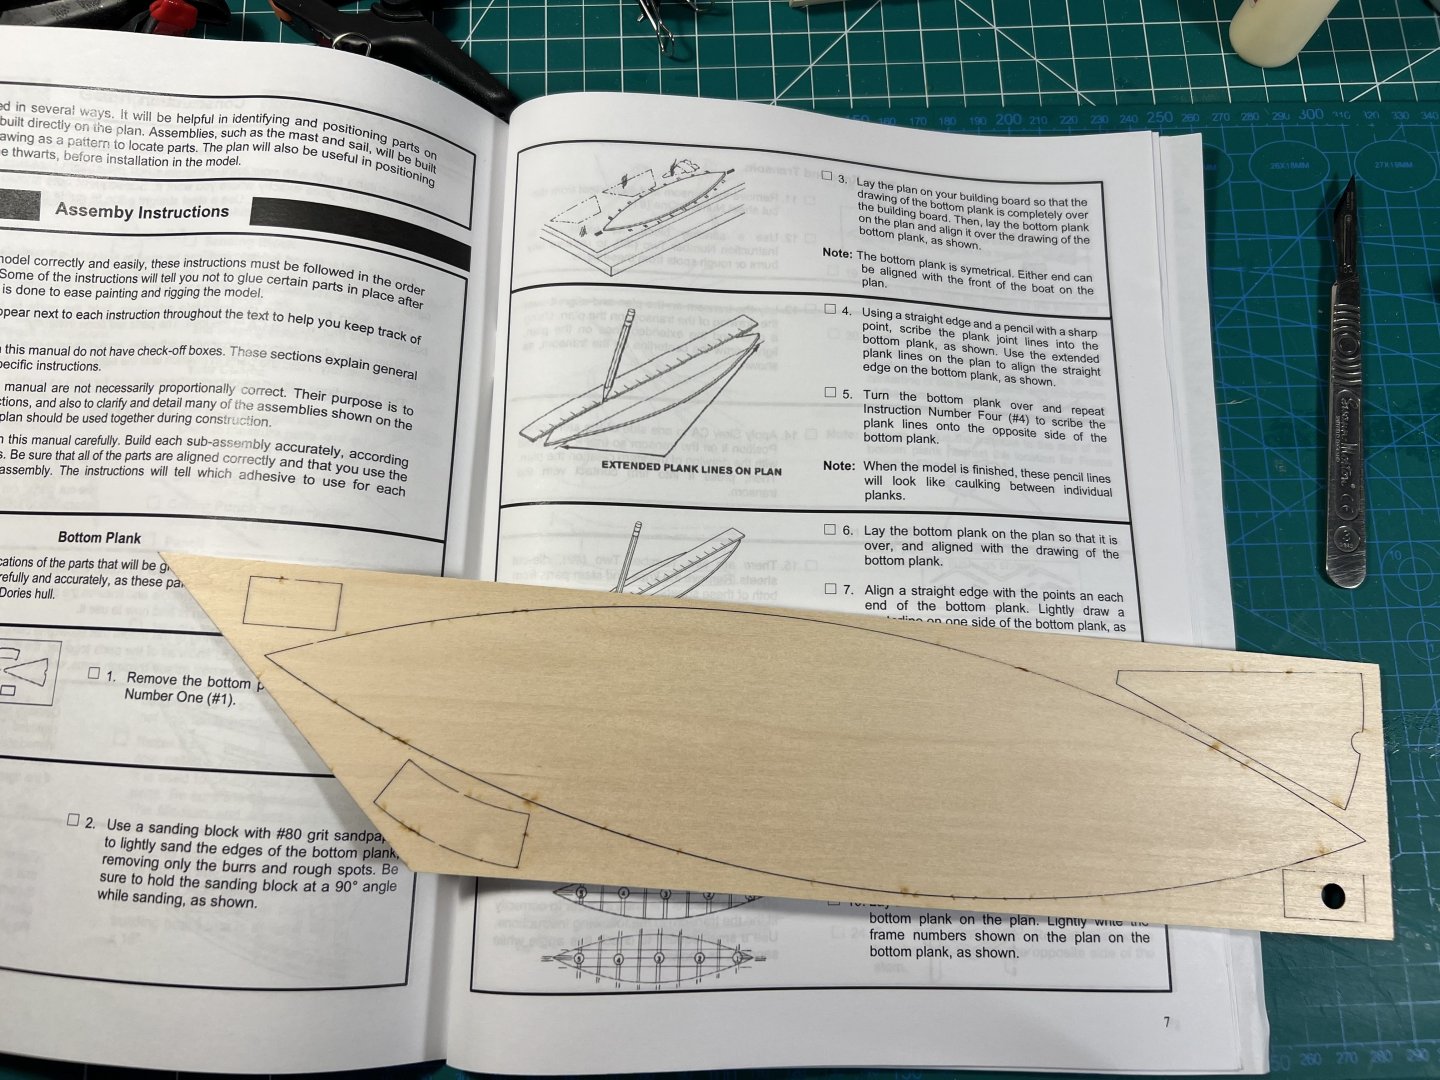
Scribing lines from the plans onto the bottom plank.


- 71 replies
-
- 3
-
-
- grand banks dory
- midwest products
- (and 2 more)
-
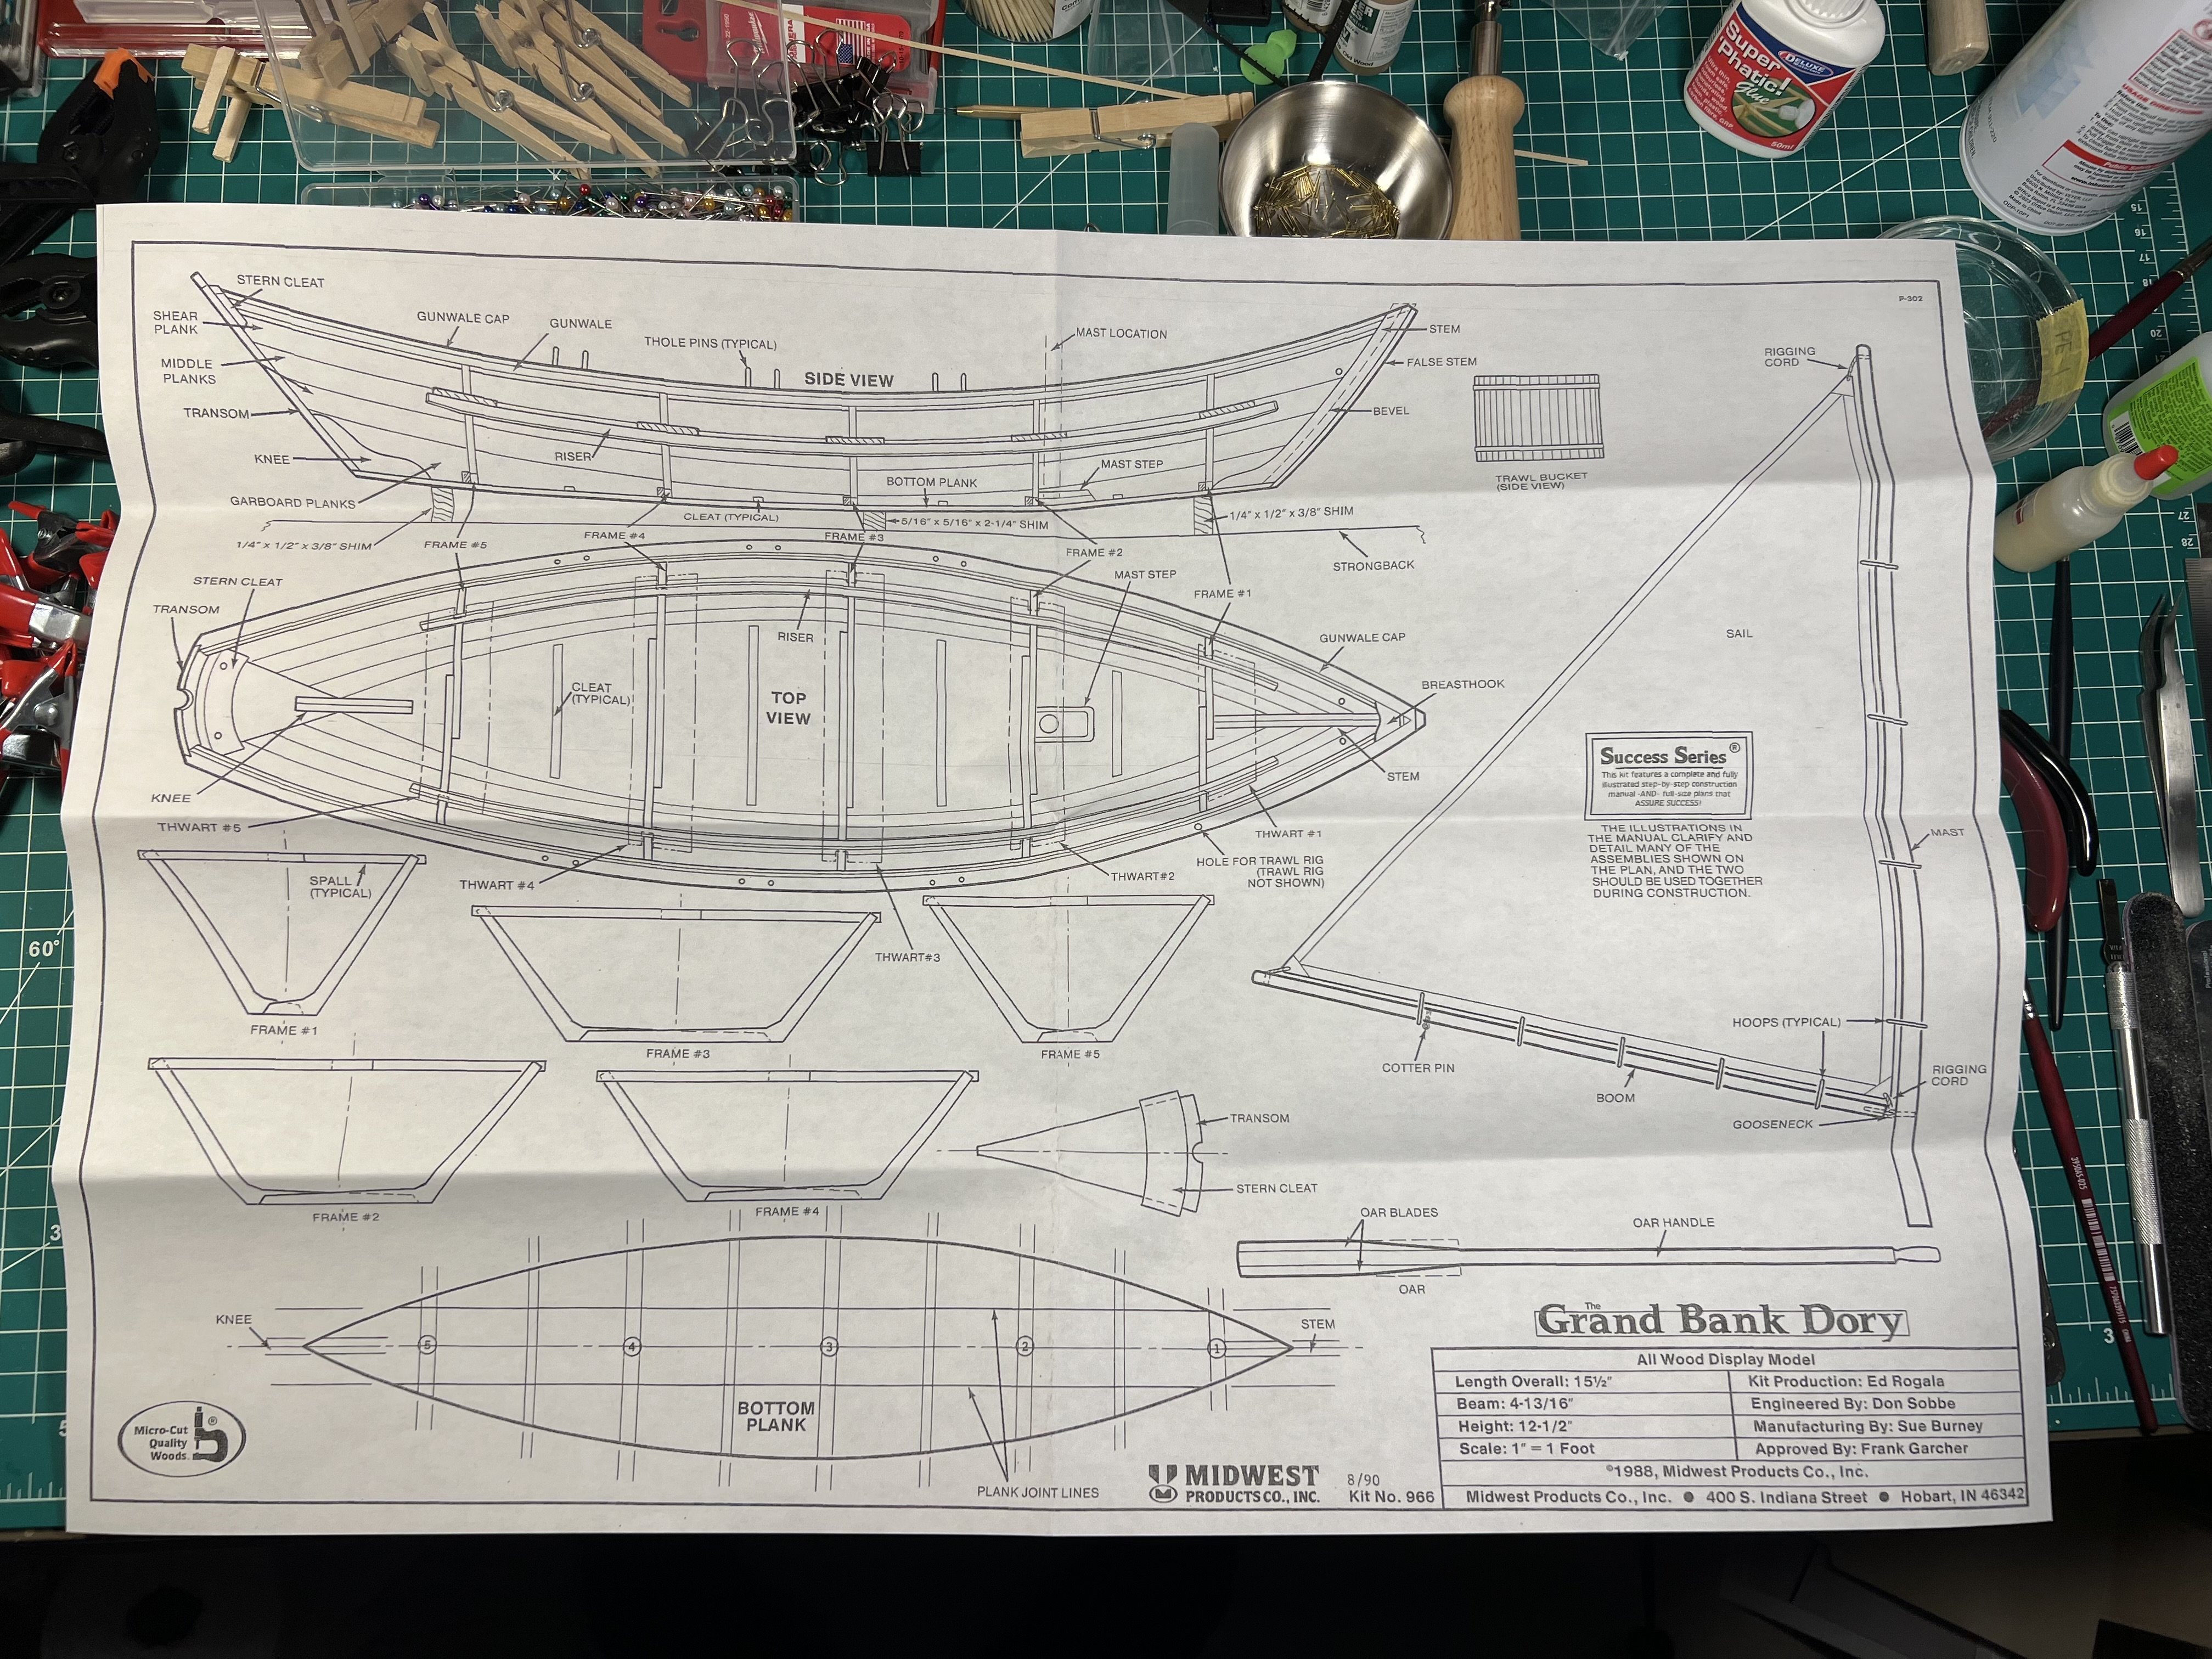
The instructions and other build logs seem to require using the plans to line up pieces for gluing. So I took the plans to the FedEx near my office and had a couple copies made for around $5 (I probably only needed one copy).
- 71 replies
-
- 3
-
-
- grand banks dory
- midwest products
- (and 2 more)
-
Has anyone used Pavel Nikitin Rope? I see that it's on deep discount at Model Expo. I was thinking of maybe getting some to replace the rope that comes with a couple of my Model Shipways / Midwest Products model kits. I saw that for the Midwest Dory kit I have that it lists on the parts list rope as: #6 x 3 feet #24 x 1 foot What does #6 and #24 translate into in terms of inches or mm when it comes to rope? I thought maybe it was like machinists measurements, but a #6 would be 5.1816mm and I'm pretty sure there wasn't a rope in the kit that thick (I'm at work, not at home, so maybe I'm wrong). Any ideas?
-
And this had some photos of a real Dory:
- 71 replies
-
- 2
-
-
- grand banks dory
- midwest products
- (and 2 more)
-
There are a couple other build logs of the Midwest Dory (more of the Model Shipways Dory, which is part of the Shipwright Series; there is also a Bluejacket Dory):
- 71 replies
-
- 2
-
-
- grand banks dory
- midwest products
- (and 2 more)
-
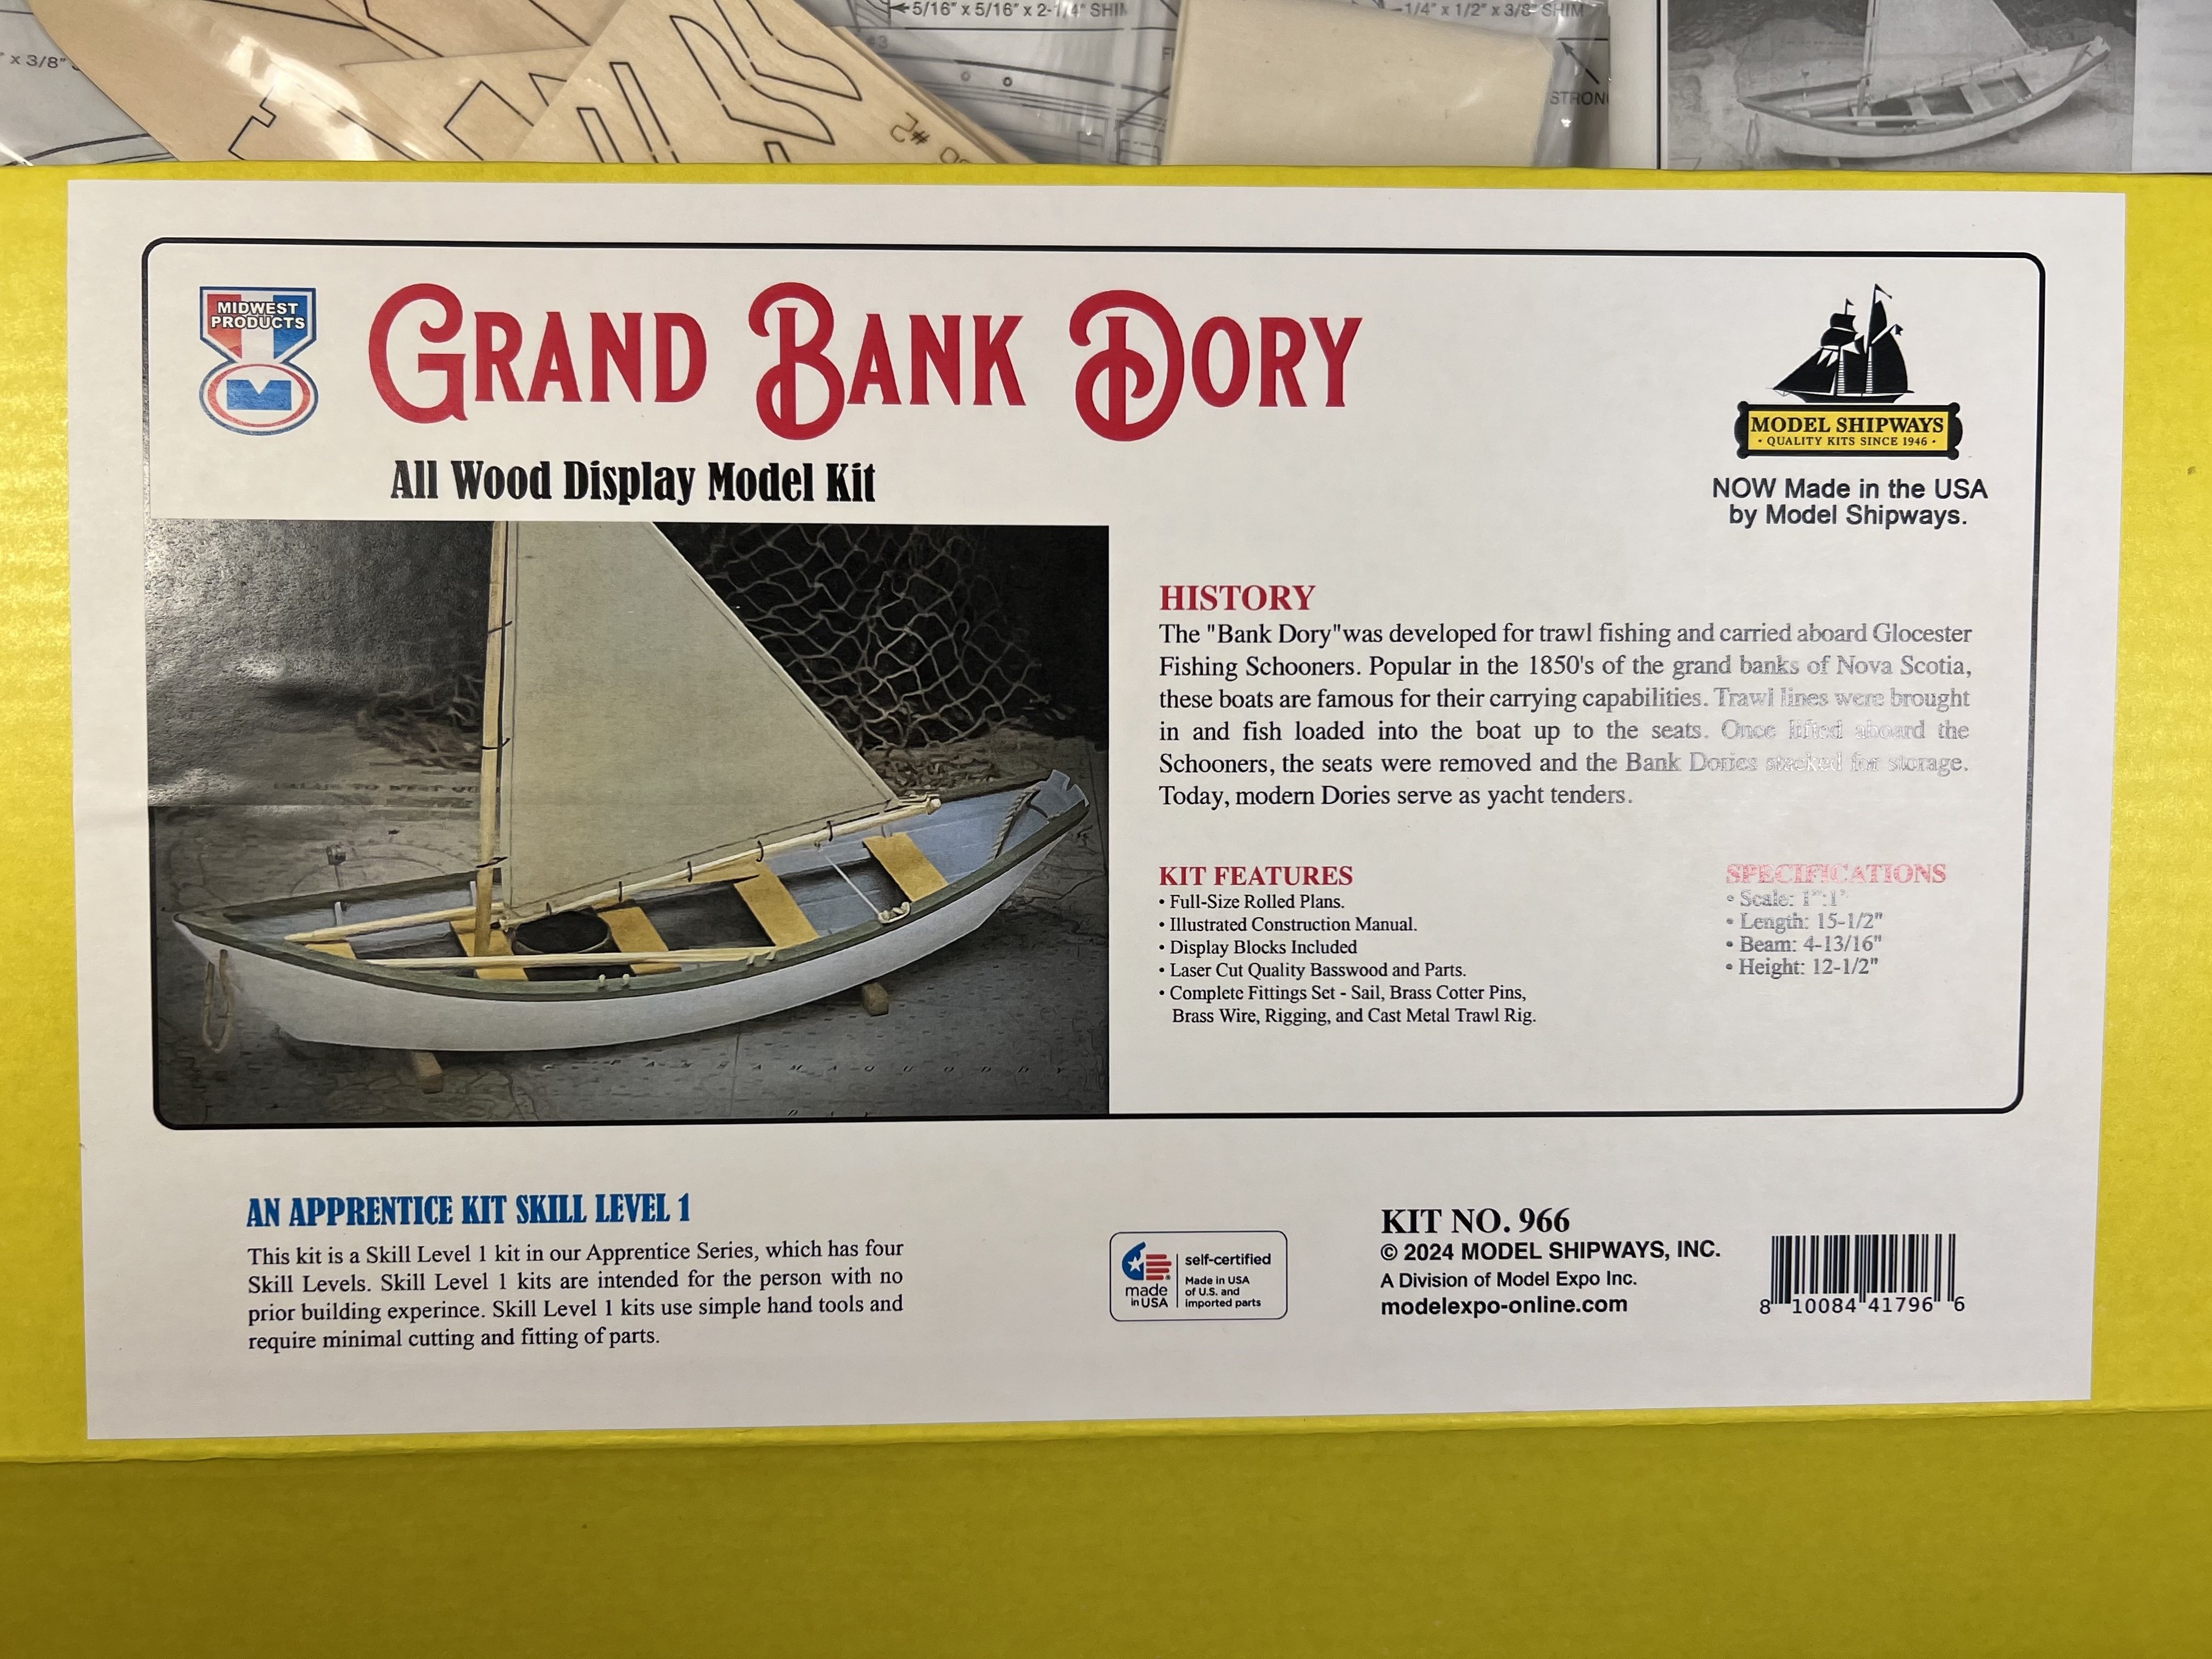
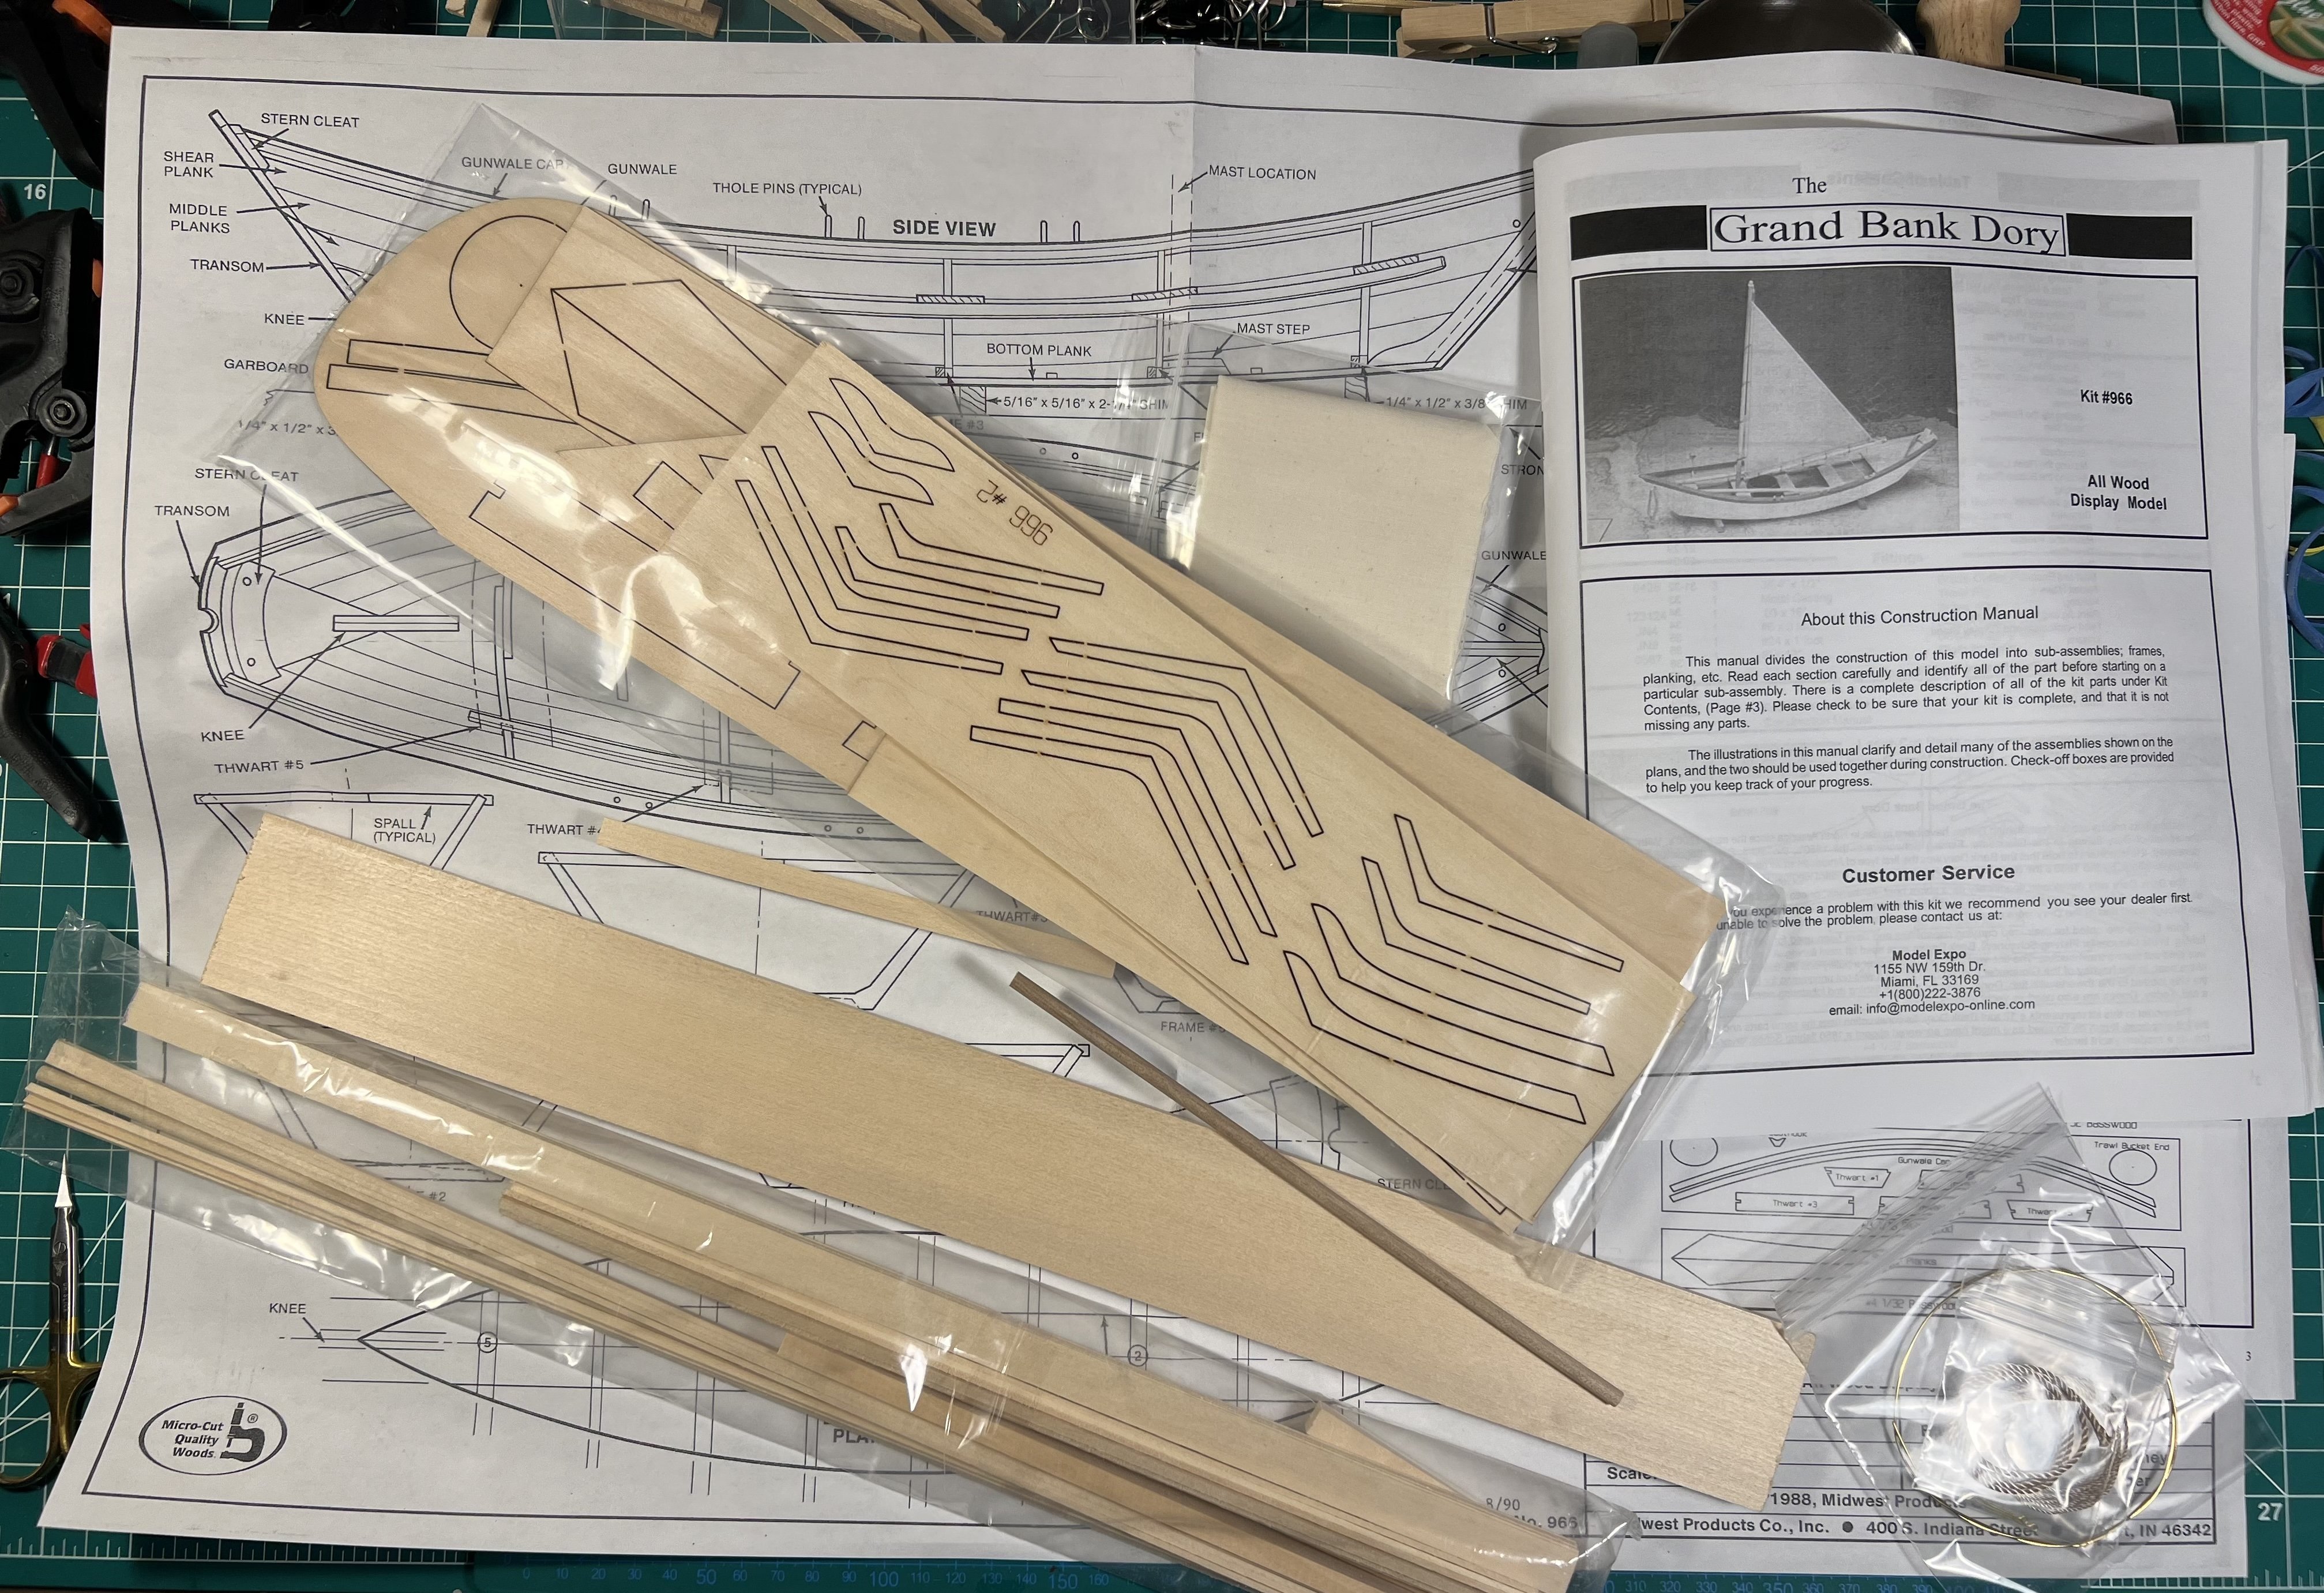
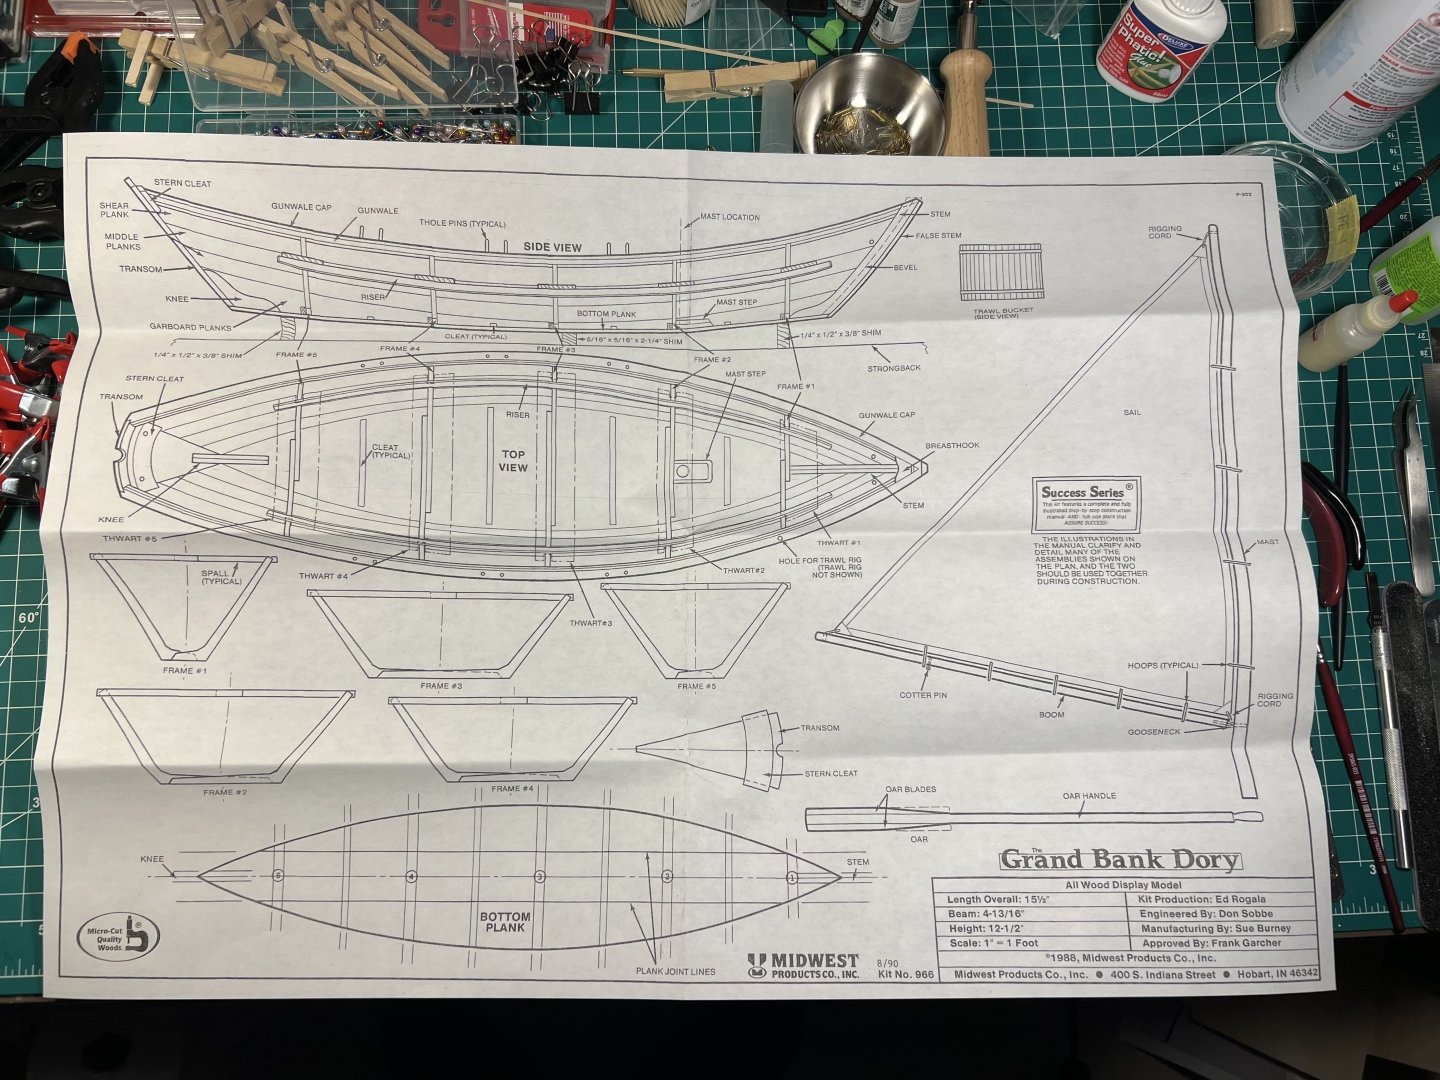
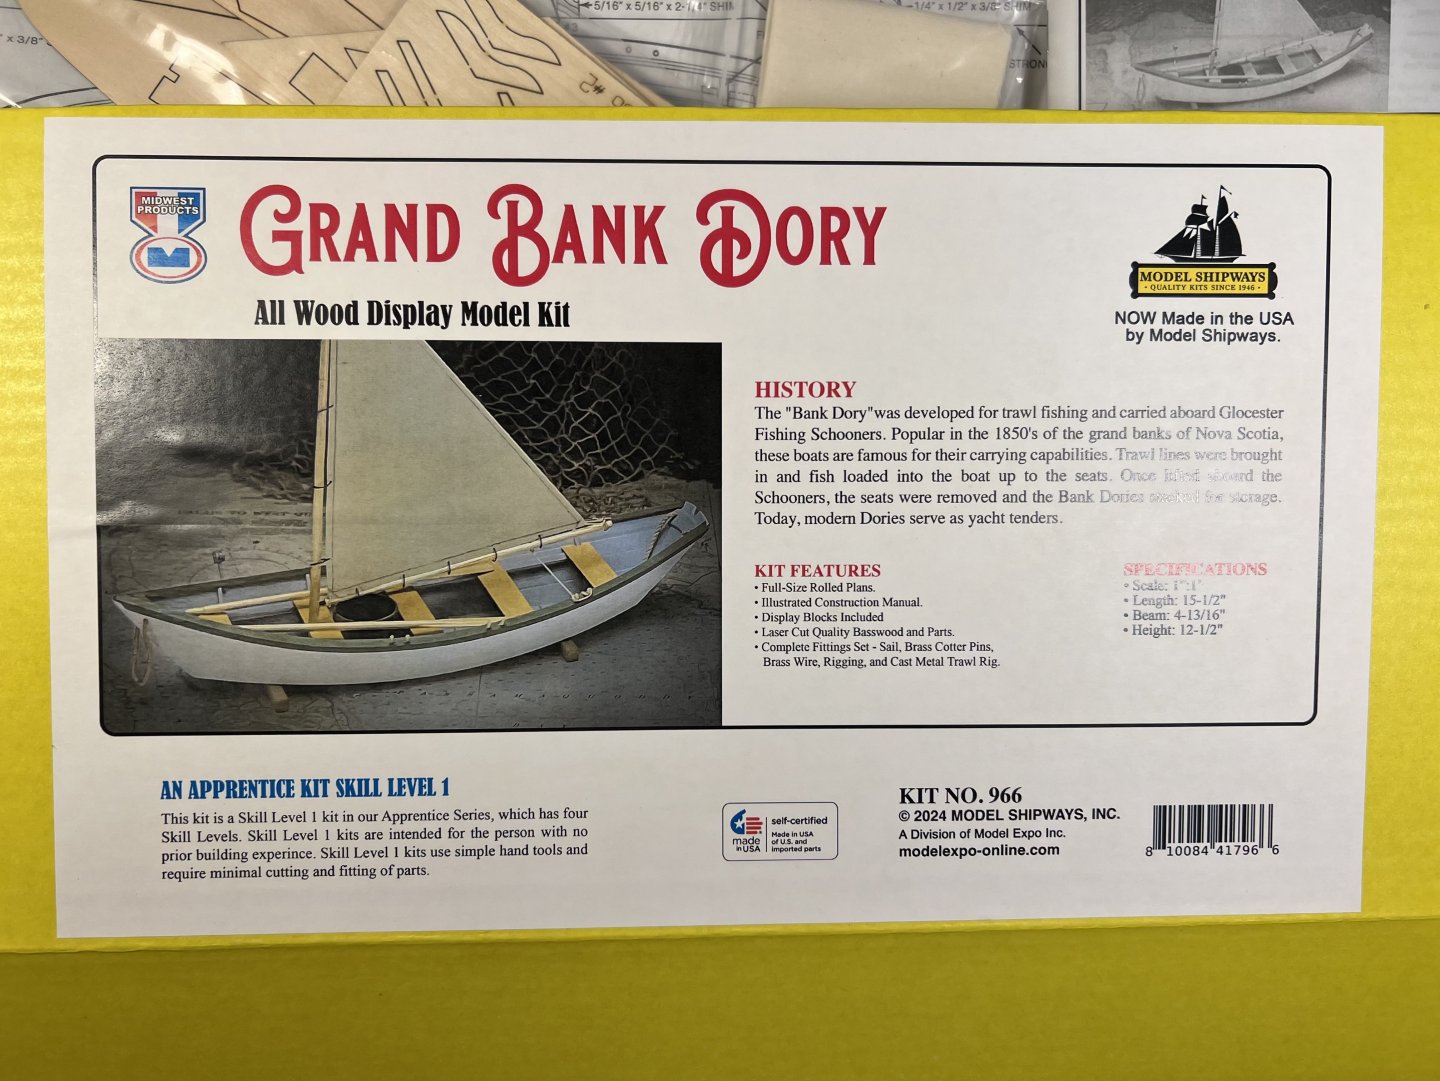
I am starting to build another Dory, this one from Midwest Products (a division of Model Shipways / Model Expo). I think I read that Model Shipways / Model Expo bought the designs for the Midwest Products kits and have been reissuing them with better materials. I think I also read somewhere that the old Midwest Products kits might have used balsa wood - this one uses basswood - but I don't know how long ago that was. I'm planking my Ranger slowly and researching and reading how to rig my Sherbourne. I didn't want to start another complicated kit and remembered that I had bought this kit in my buying frenzy during a Model Expo sale in the fall. It will be interesting to see how this build differs from the other Dory I build. Unlike the other Dory, this one is larger scale (1:12 instead of 1:24) and has a sail. These easy kits can be completed quickly and let me try out different approaches that I likely will be able to use on more complicated kits, and maybe be able to make progress more quickly on those than I might if I had just plunged into larger complicated kits more quickly. Like some other builds, I'm putting some notes here about this kit for future builders: - Like the Model Shipways Dory (and other Model Shipways kits) the written instructions don't always match the supplied materials. I imagine that the instructions were written years ago and that over the years the suppliers have changed and the methods used to cut the wood have changed. Unfortunately, the instructions are rarely updated to reflect those changes. So it's easy to be confused and to make a mistake. - Unlike the Model Shipways kits (or the Vanguard kits), in this Midwest kit, there are neither written (laser etched) labels or numbers on the sheet identifying the parts. The only way to know what part is what (and lots of parts are pretty similar, especially the frame pieces and the stem), you need to rely on the instructions. Well, when the instructions don't match the parts, you have a problem. - Before I realized the disconnect between the instructions and the materials, I was adding the stem (made from two pieces glued together) and was following the instructions that indicated that the stem piece was next to the transom on the sheet. Well, later when I was starting to work on the frame pieces, I realized that the instructions didn't match the sheets and I had inadvertently used frame pieces as the stem pieces. The stem was on the opposite corner of the sheet from the transom, contrary to the written instructions. - I did then discover that the sheet in the box that listed the pieces in the kit also at the bottom had a map to the parts on the sheets. If I had discovered that earlier (and had paid closer attention) I made not have made that error. - Also, be careful around sharp blades. After I made my error and had to loosen the glue using some alcohol, I was using a flat-bladed hobby knife to loosen the part some more and the knife slipped and went into my hand. Thankfully I was able to avoid a trip to the emergency room. - It is interesting how two kits (Model Shipways and Midwest) of the same boat (albeit at different scales) can be constructed so differently in many ways. Doing both gives you a sense of the degrees of freedom that come with kit designs and how things can go together.
- 71 replies
-
- 3
-
-
- grand banks dory
- midwest products
- (and 2 more)
-
Continuing with the planking a little at a time. This is why I work on multiple models at once; I’d rather get something glued in place carefully and let it cure than struggle to get multiple pieces (especially of planks) added at the same time.
- 133 replies
-
- 3
-
-
- Ranger
- vanguard models
- (and 1 more)
-
For anyone following (or finding) my build log - and for future me trying to remember - there’s a useful discussion of rigging here:
-
That’s perfectly to fine with me. Thanks for posting.
- 133 replies
-
- 4
-
-
- Ranger
- vanguard models
- (and 1 more)
-
Whats the best book on rigging for a beginner?
palmerit replied to Stuka's topic in Masting, rigging and sails
If you get the Antscherl book, please post comments about it here so I know if it's worth it. -
Whats the best book on rigging for a beginner?
palmerit replied to Stuka's topic in Masting, rigging and sails
While Vol. IV of Antscherl is out-of-stock (out-of-print maybe) you can get an electronic version (or this and the other volumes) for $70: https://seawatchbooks.com/products/the-fully-framed-model-rigging-a-sixth-rate-sloop-of-war-1767-1780-volume-iv-revised-and-expanded-by-david-antscherl https://seawatchbooks.com/pages/collection-bundle It would be helpful to hear from others if it's worth the $70. You can see a preview, but it's only the first few pages, so you can't really see an example of what it shows wrt rigging and how-tos. -
On another thread, someone suggested this book as another source on rigging (as in really rigging a ship): https://maritime.org/doc/steel/ And volume IV of TFFM by member David Antscherl. https://seawatchbooks.com/pages/collection-bundle And "The Riggers Apprentice" by Brion Toss.
- 177 replies
-
- 1
-

-
- Sherbourne
- vanguard models
- (and 3 more)
-
Yeah, I got about a dozen of those. They've been great on other parts of my builds. I started with two then ordered four more than more. I also bought some of the larger clamps they make for when I need a deeper throat. They're great. I haven't been able to make them work on the Ranger. I don't know why. Maybe I'll futz with them again tonight when I'm home.
- 133 replies
-
- 3
-
-
- Ranger
- vanguard models
- (and 1 more)
-
The photos in the Sherbourne instructions book at the end for the rigging are actually from a different (similar but not identical) model ship (maybe the Alert, I don't know) - the instructions do say that. You need to follow the plans (with the photos in the instructions book just for some other reference points). I think all the rigging could just be done with regular knots. There is a photo in the instructions showing what seems to be a regular knot to tie a piece of thread to an eyelet and they you tie another knot around the block. I think everything else in principle could be done using just regular knots. I'm trying to figure out what other options there are to decide how much more detail - if any - I want to add (and to learn more about what the rigging actually does and how it would be on a real ship). I'm just not sure how to do the other pieces of rigging. The photos seem to show something more than just simple knots. Maybe since this is a pure novice model ship (and the photos were from a model a step up) they just wanted people to not worry about that level of detail and just tie basic knots. Having a novice ship that required seizing lines would have made a beginner's head explode I think.
-
Whats the best book on rigging for a beginner?
palmerit replied to Stuka's topic in Masting, rigging and sails
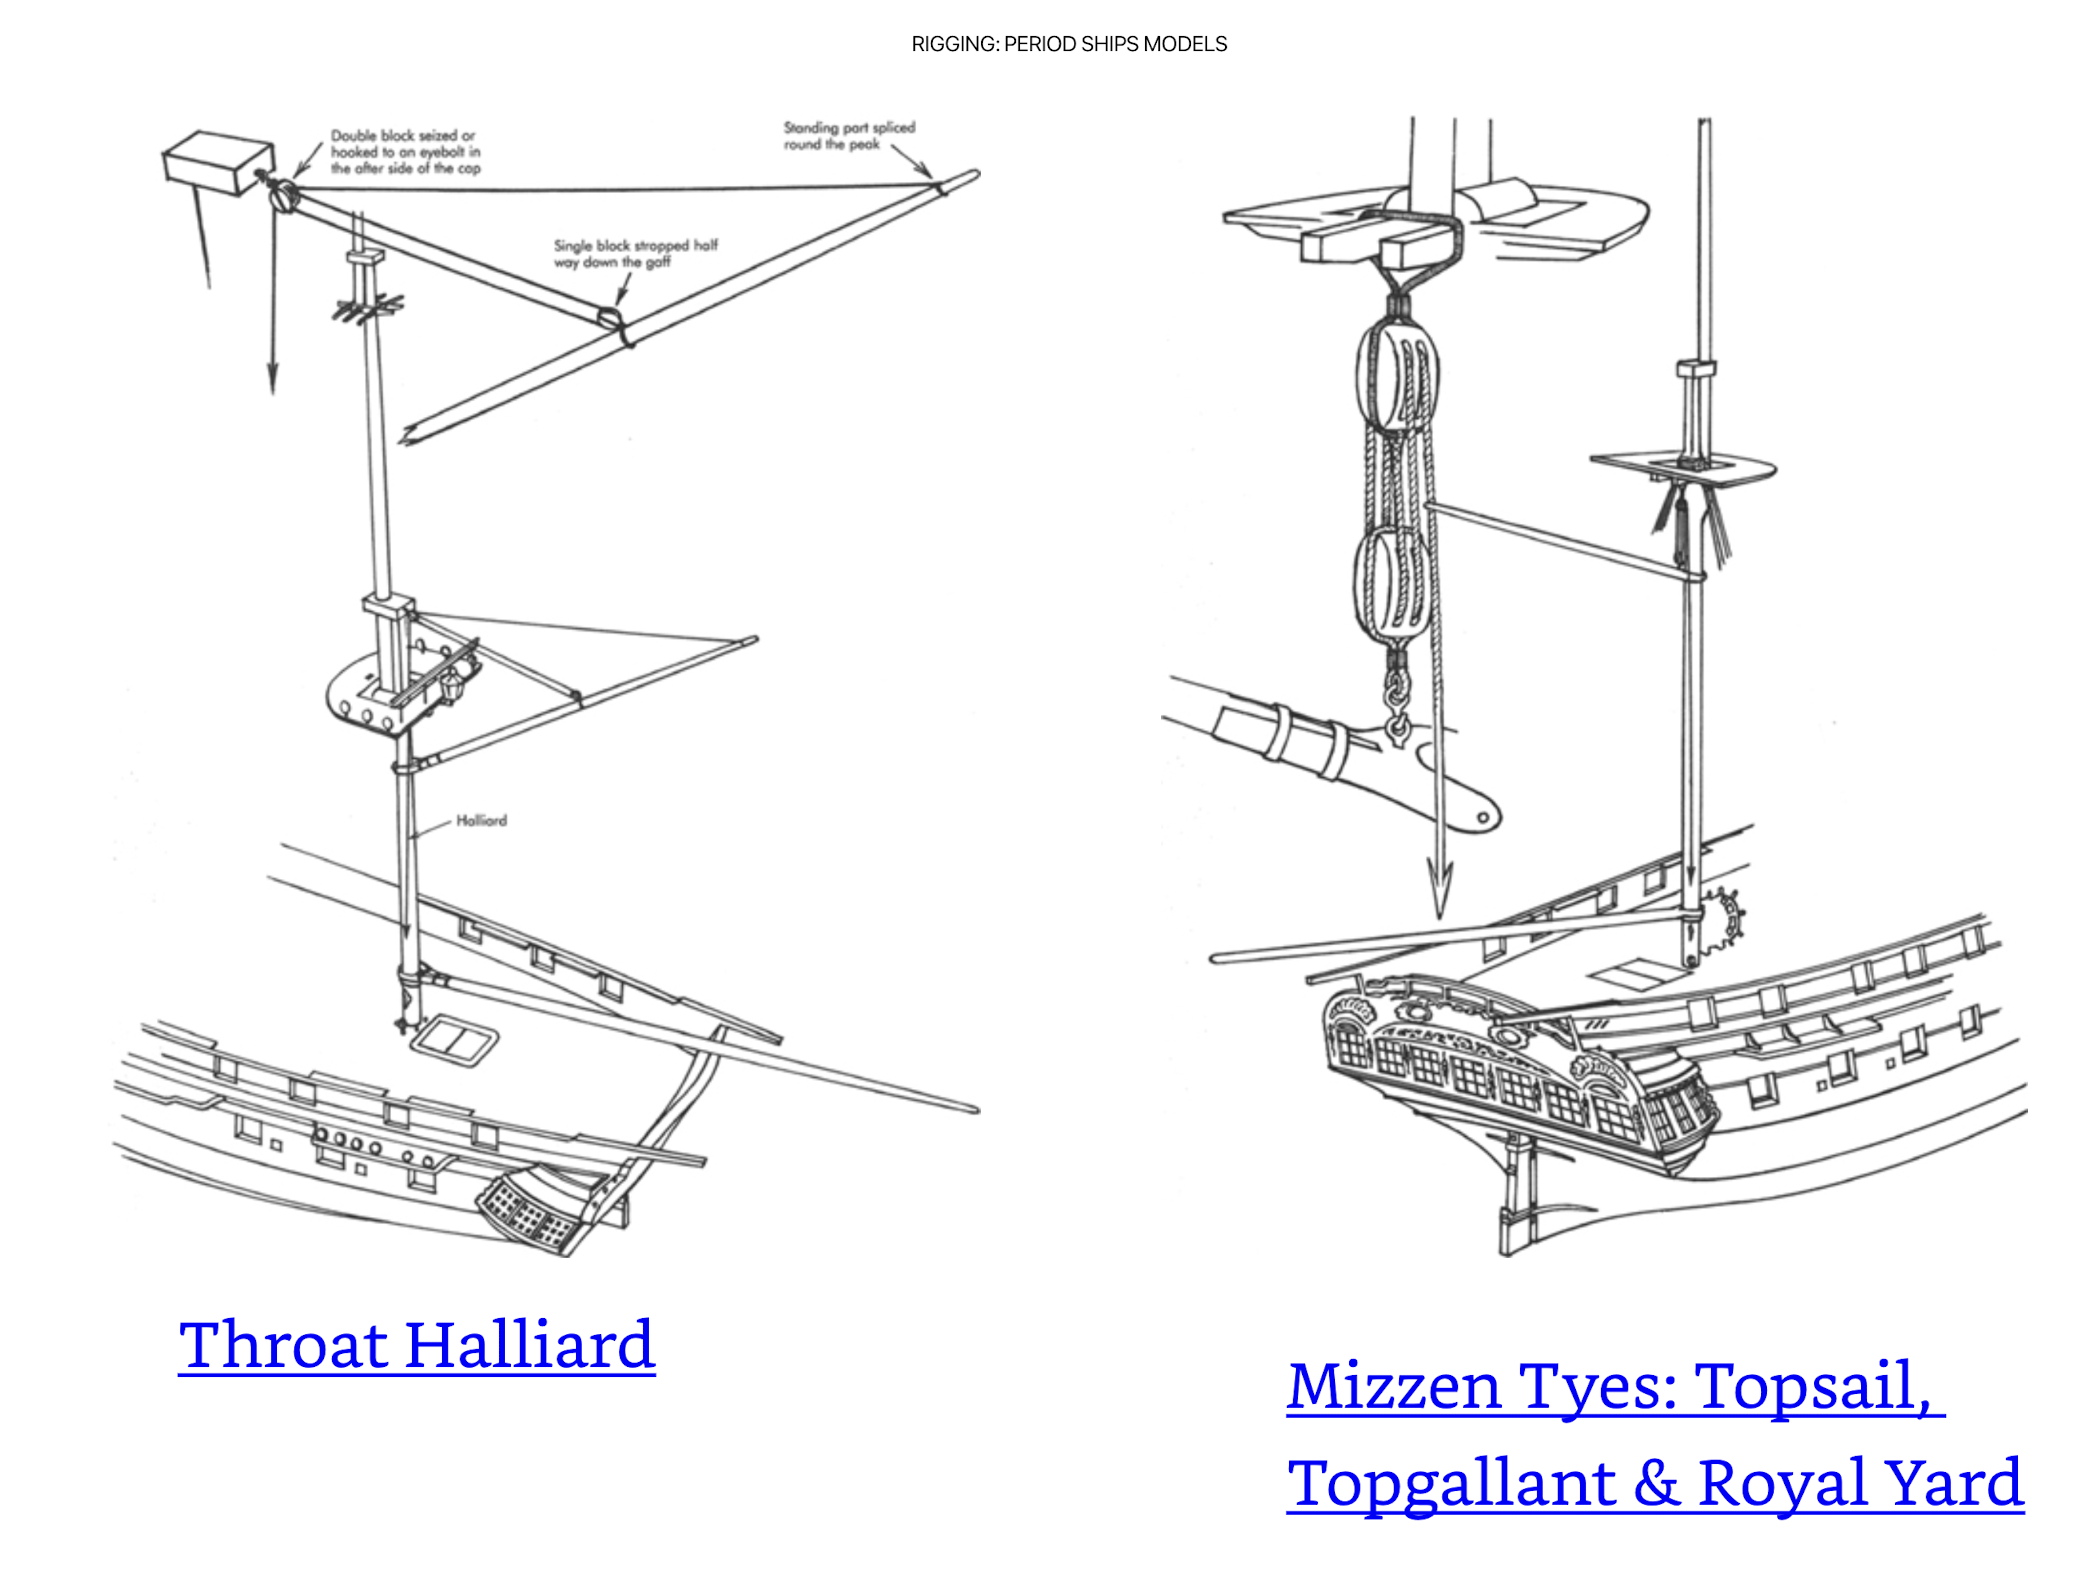
Just know that the Petersson book is not really a "for beginner" book as in telling you how to tie things off or explaining things to a beginner. It's a blowup of some aspects of rigging. I've attached a screen shot from one of the pages. It's pretty cheap if you get it as a kindle book. This is another (free) source for just about every possible knot that's ever been envisioned: https://archive.org/details/TheAshleyBookOfKnots Chapter 40 of Ashley has a some knots related to model ships (probably way more detailed than you'd ever try on a 1:64 scale model). I'm following to see if someone else has other suggestions. I know that this forum has everything you'd need to figure out how to rig a ship, but it is sometimes hard to navigate the language and know what you're searching for. Usually if you know what to search for you already know the answer. I know I've seen some good YouTube videos on model ship building. I've seen a bunch on rigging ratlines. I haven't (yet) found any on tying off other aspects of the rigging. If you see any, please share. I'll try to share things I find on my Sherbourne (and other) logs.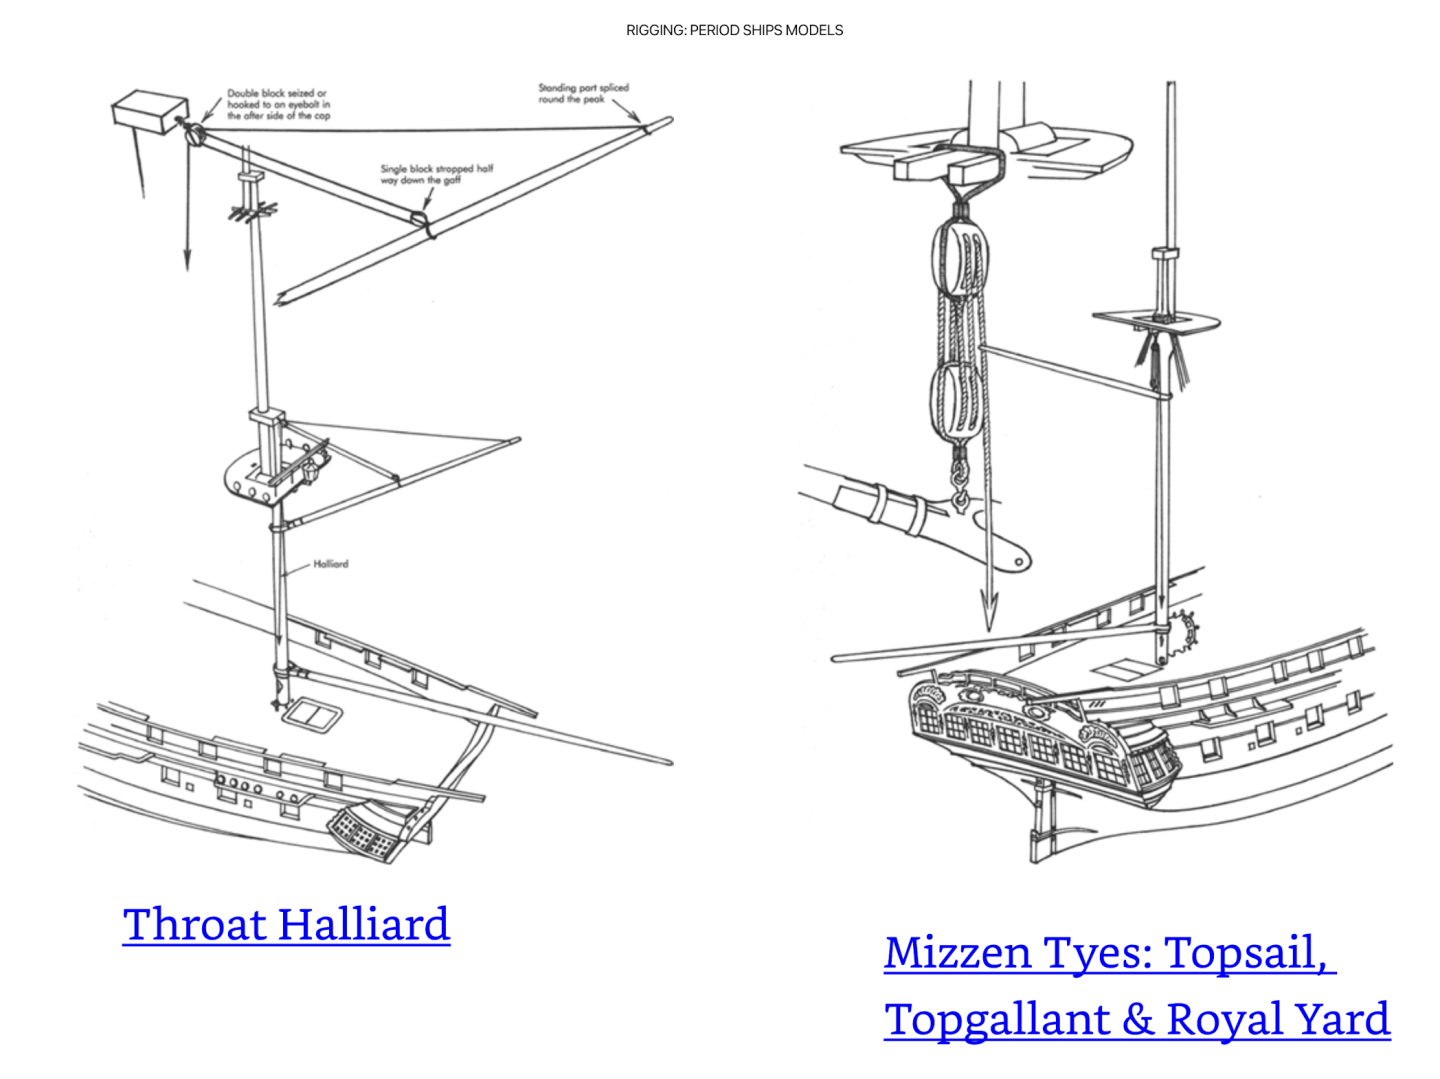
-
scissors, shears, cutters for rigging
palmerit replied to palmerit's topic in Modeling tools and Workshop Equipment
@wefalck I found another site that sell this that lists the following for this other varnish https://www.naturalpigments.com/conservar-isolating-finishing-varnishh.html: ("Isolating Varnish" is a mixture of sandarac and mastic. "Conservar Isolating/Finishing Varnish" is a colorless, reversible varnish comprised of an aldehyde resin (Laropal A81) in an aromatic and aliphatic solvent blend with a UV light stabilizer. It can be used both as an isolating varnish and a final varnish.) 1. Distillates, petroleum, hydrotreated light 30 - 40 % (weight) 2. Solvent naphtha (petroleum), light arom Concentration 30 - 40 % (weight) 3. Urea-aldehyde resin Concentration 20 - 20 % (weight), Trade secret