palmerit
-
Posts
1,090 -
Joined
-
Last visited
Content Type
Profiles
Forums
Gallery
Events
Everything posted by palmerit
-
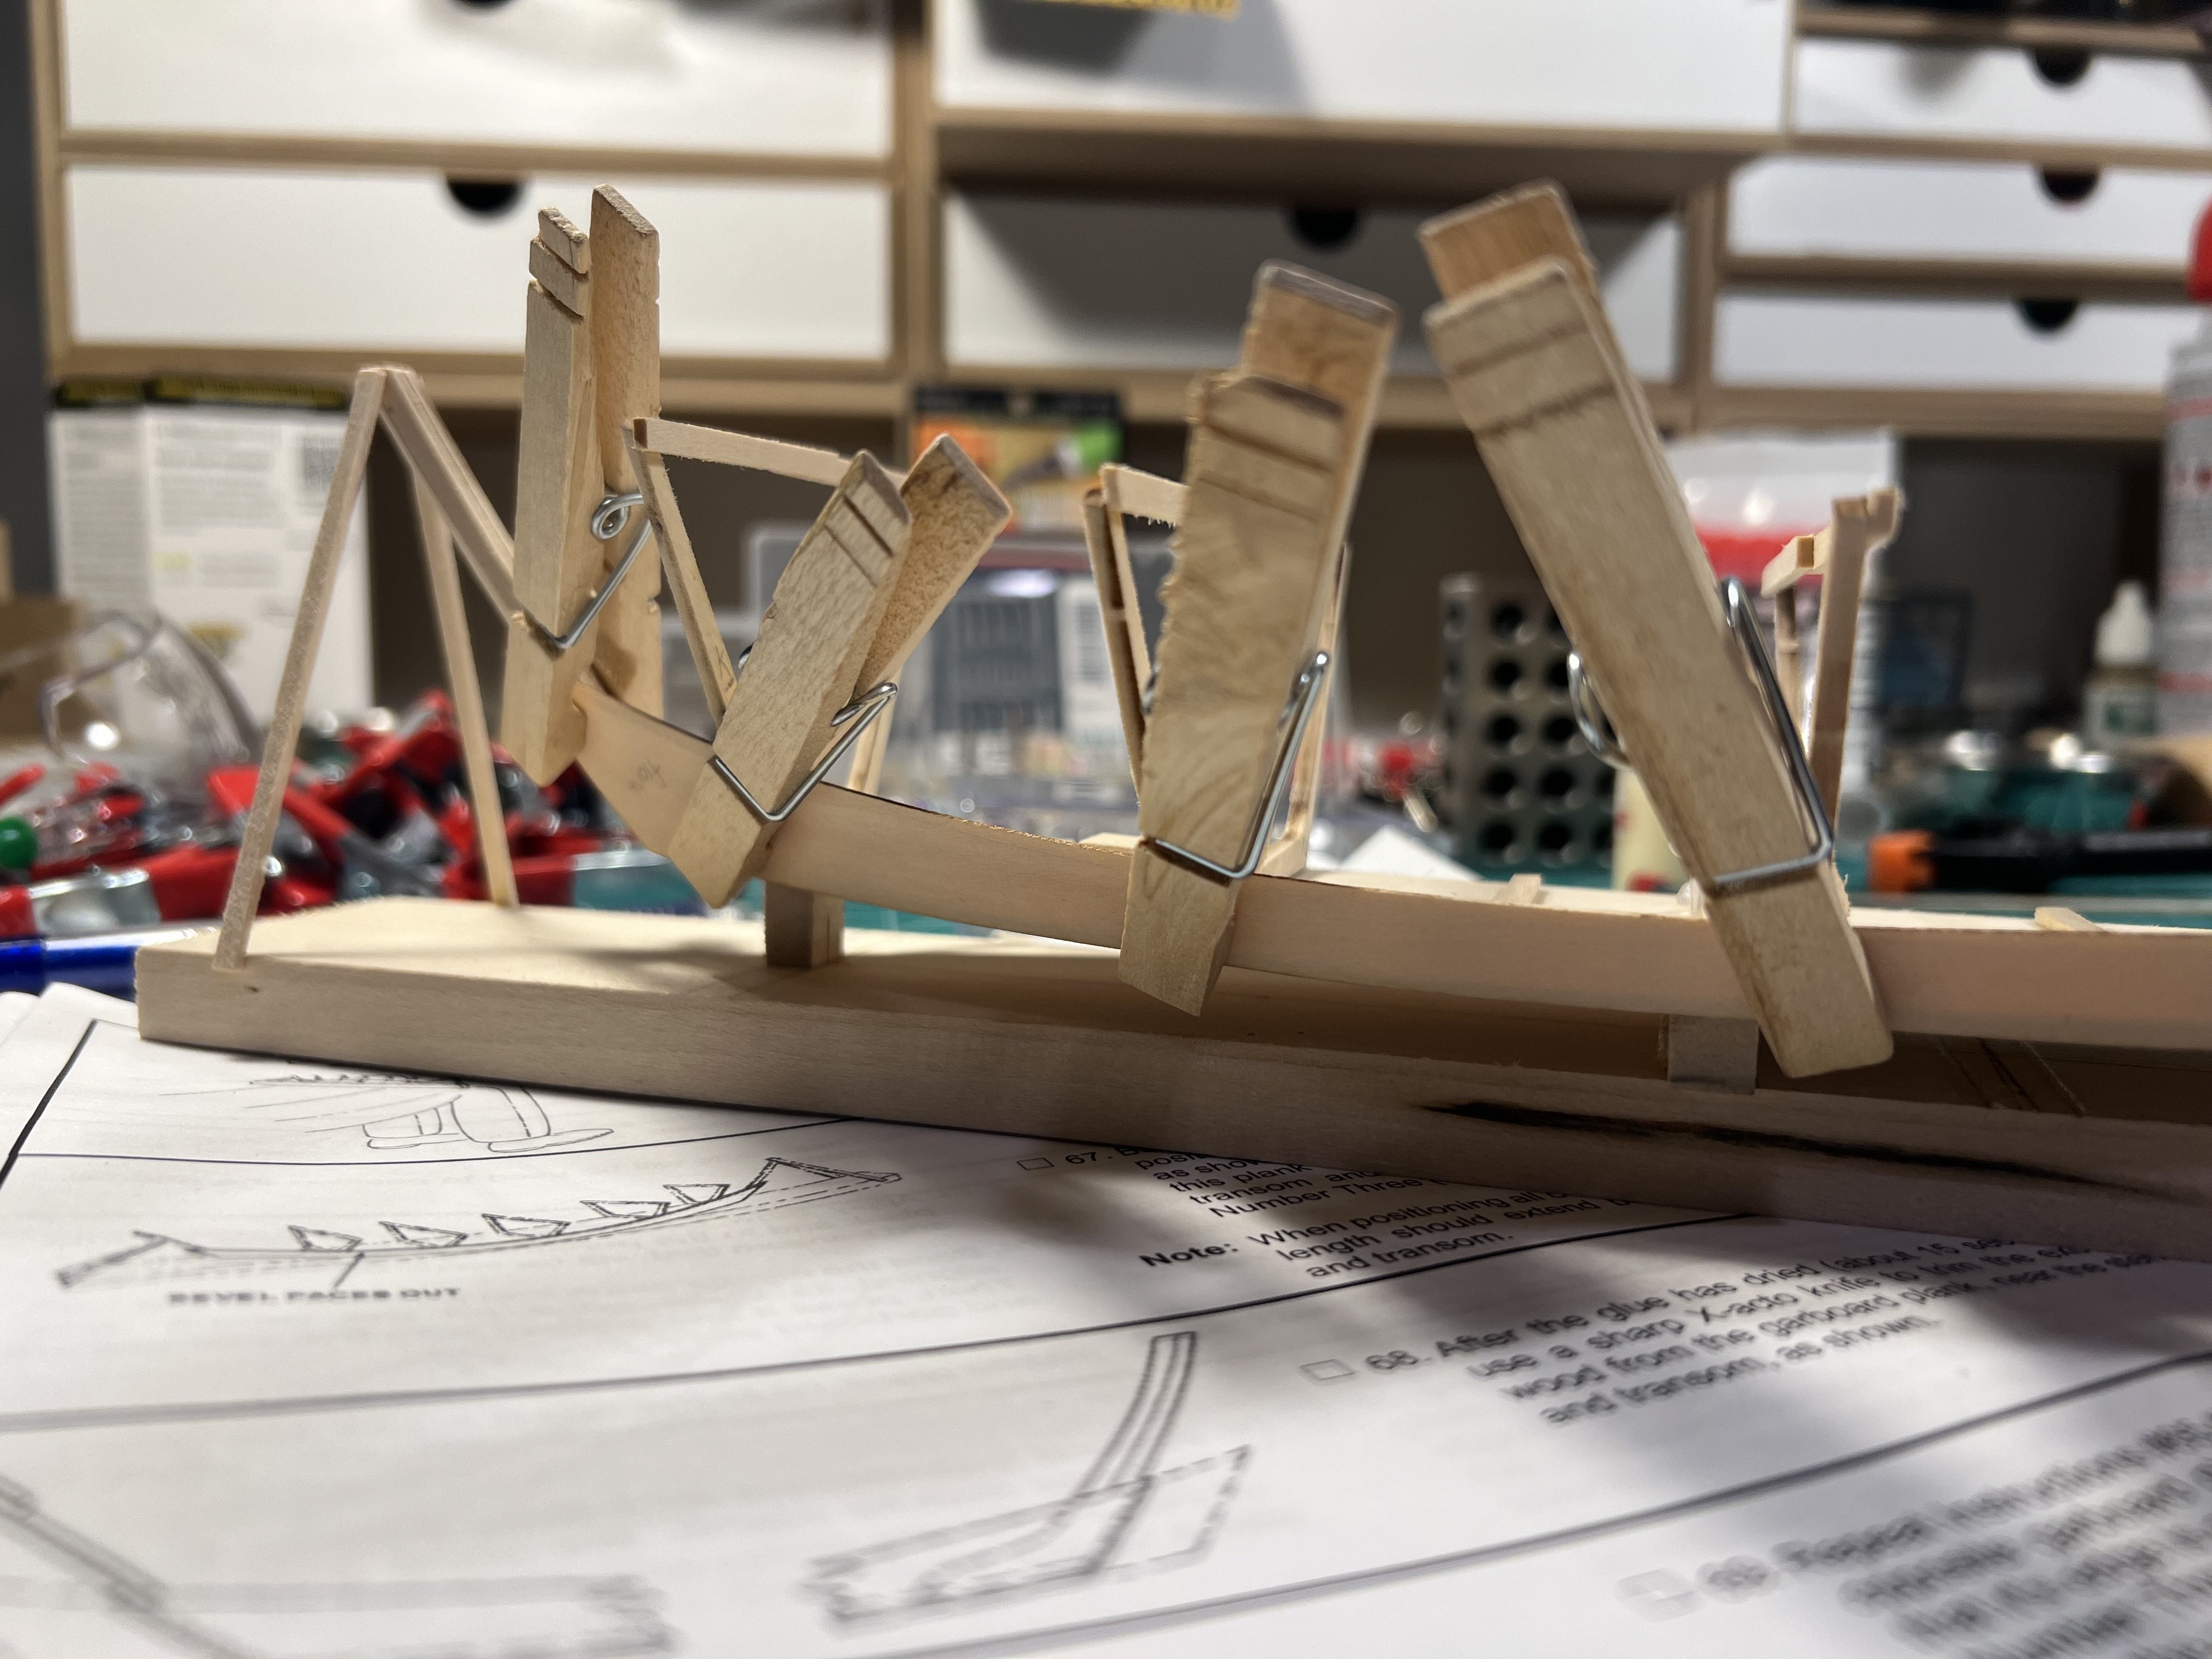
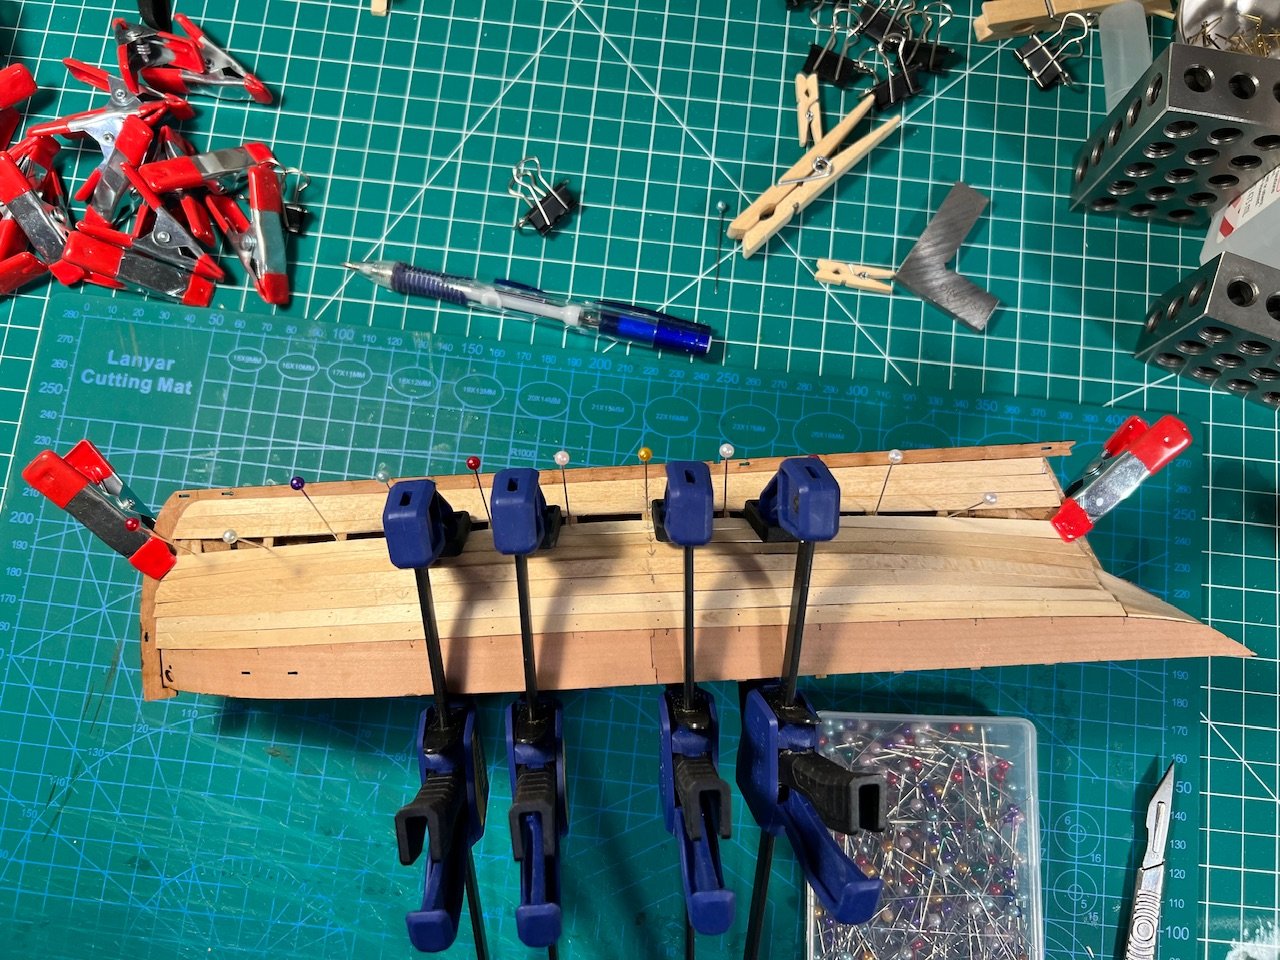
The kit has you add temporary supports to stiffen the frame on the build board while planking. Adding one of the garboard planks (after beveling the upper end). Will let the glue dry before adding the other garboard.
- 71 replies
-
- 2
-

-
- grand banks dory
- midwest products
- (and 2 more)
-
I'm still a novice. I thought the garboard strake should not make a "smiley face" (curving up) but be flat with the keel. Not true?

-
I haven't gotten back to doing the rigging. I was finishing up a couple other things and now I haven't been able to find a block of time to spend. When I've had a moment to model a bit I've done a straightforward step on another model. And now my son is back from college for a week and he has his bedroom back, so I'll be a bit. I'm probably going to try to follow the plans as close as possible. I've still puzzling a little bit over some of the ways the rigging should be done - I need to read over some other build logs (for the Sherbourne and related models).
-
Depending on the kind of paint and the color, and the number of layers of paint, the laser burn will affect the color after painting. There are model painting techniques that actual exploit this by painting a dark or light undercoat before painting the surface color.
-
I used the Model Shipways supplied paint on my Dory, Pram, and Smack - even though I do have an airbrush and a bunch of Vallejo Air paints. The MS paint is not the greatest. I ended up watering it down and painting multiple coats. If painted in its "full strength" I'm sure I would have had globs and streaks. In some ways since the Dory, Pram, and Smack are all work boats, the rougher consistency (and relatively large scale) are probably okay. I can't imagine using their paints on a larger ship (at smaller scale like 1:64 scale).
- 86 replies
-
- 4
-
-
- Model Shipways
- Norwegian Sailing Pram
- (and 3 more)
-
Vanguard Models (https://vanguardmodels.co.uk) has nice kits that are excellent quality materials with great instructions (and a bunch of build logs here). I'm in the midst of the Sherbourne. I also have some of the Vanguard fishing boats (currently working on the Ranger, and have the Zulu and Erycina in the queue). All of these (except the Erycina) are novice kits by Vanguard's ratings. The Vanguard models have more steps (and more detail) but are also easier in some ways because of the excellent instructions (and materials). Some of the Model Shipways models (even their beginner ones) can be difficult because some of the instructions are confusing in places and because there's often a mismatch between the instructions and the materials (I've seen the same with a Midwest model from them). The Vanguard models are constructed like tanks. See some of the build logs. You can also freely view the instructions on the Vanguard web site. The hull frames are really solid, which makes it easier to manipulate them when planking. The Model Shipways models are "old school" and require carefully squaring the bulkheads and adding supports and you need to carve rabbets and the like, which can get tricky. The Vanguard models are engineered to avoid some of that complication (making it unnecessary because of how the kits are designed). The Vanguard models are planked using wood strips (I'm guessing the Model Shipways Rattlesnake might too), which is quite different from the way planking is done on the Dory (and Pram and Smack). I'd suggest reading some of the resources under "Modeling Techniques" on the main menu at the top. The Vanguard models are a bit more expensive than some others but the materials and instructions and detail make them well worth it I think. I ended up doing the Model Shipways Shipwright series (Dory, Pram, and Smack) and I'm now doing the Midwest Dory. I also did the NRG Half Hull. I'm also in the midst of both the Vanguard Sherbourne and Ranger. For me, having multiple models going at once lets me do a step in one model (or lay a plank on one hull) and let the glue dry and then do a step in another model. Or I can do something on one model that might be easy if I don't have the time to do something more complicated on another model. I did the Pram and Smack in part to get a little rigging experience before doing it on the Sherbourne. I haven't gotten back to the Sherbourne rigging because I haven't had a big enough chunk of time to work on it. It's easy to spend 30-45min laying a plank or two on a model. It's harder sometimes for me to find the few uninterrupted hours (at a time when my mind is on it) that I'd need to take up some rigging steps on the Sherbourne. A big model like the Rattlesnake might take a couple years to build. I bought the Vanguard Duchess of Kingston to be my second model. It's on my shelf now. I decided I wanted to first build some smaller models where major mistakes wouldn't mean undermining a year or two of work. And I wanted to do a range of kinds of models to exercise different modeling muscles. There's also something satisfying about completing a model in a couple months. I know I'll at some point I'll get to some models that take 500-1000 hours, but even when I get there I'll probably have some parallel smaller models to work on.
-
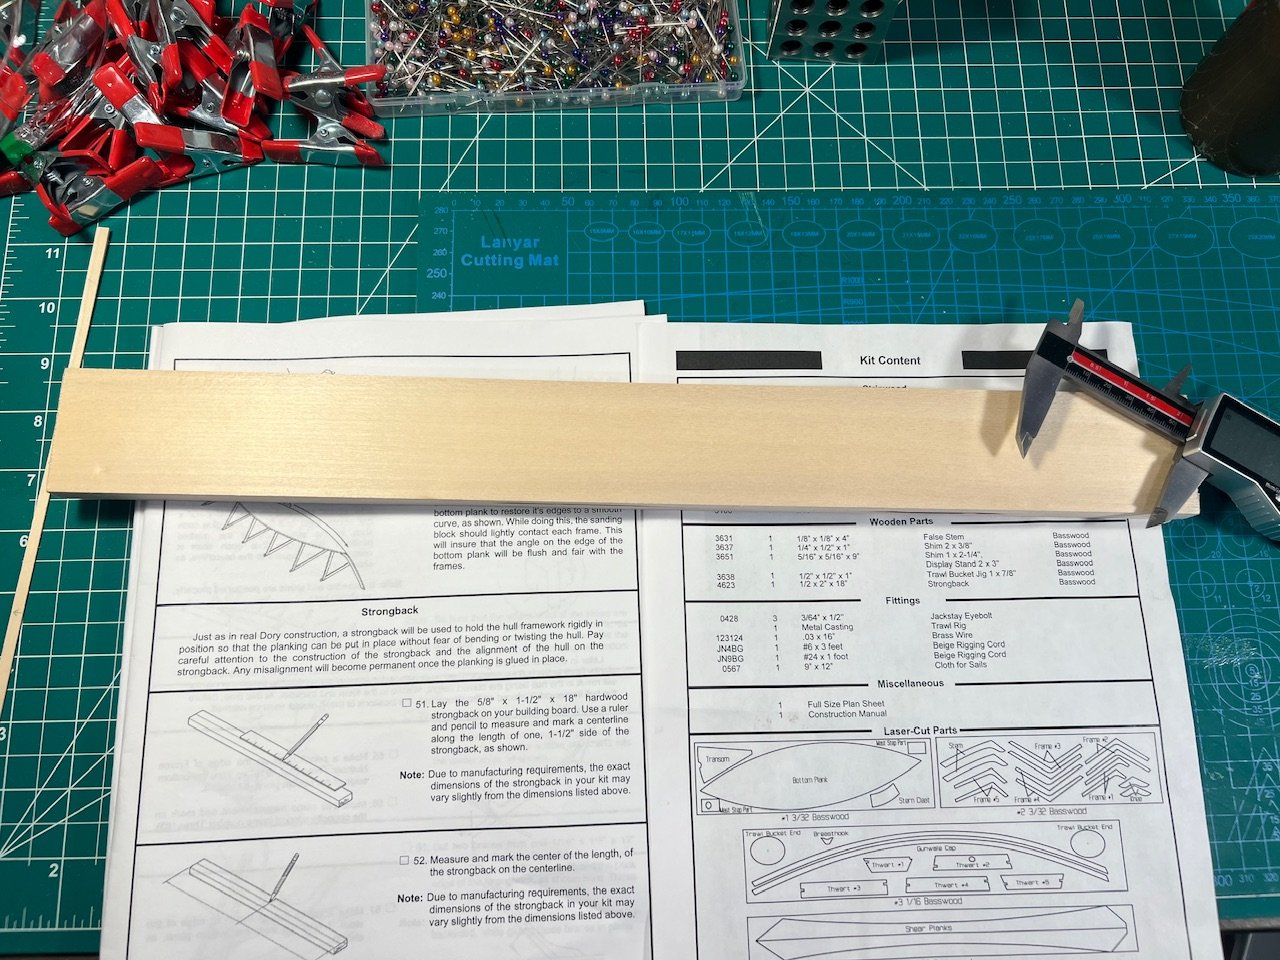
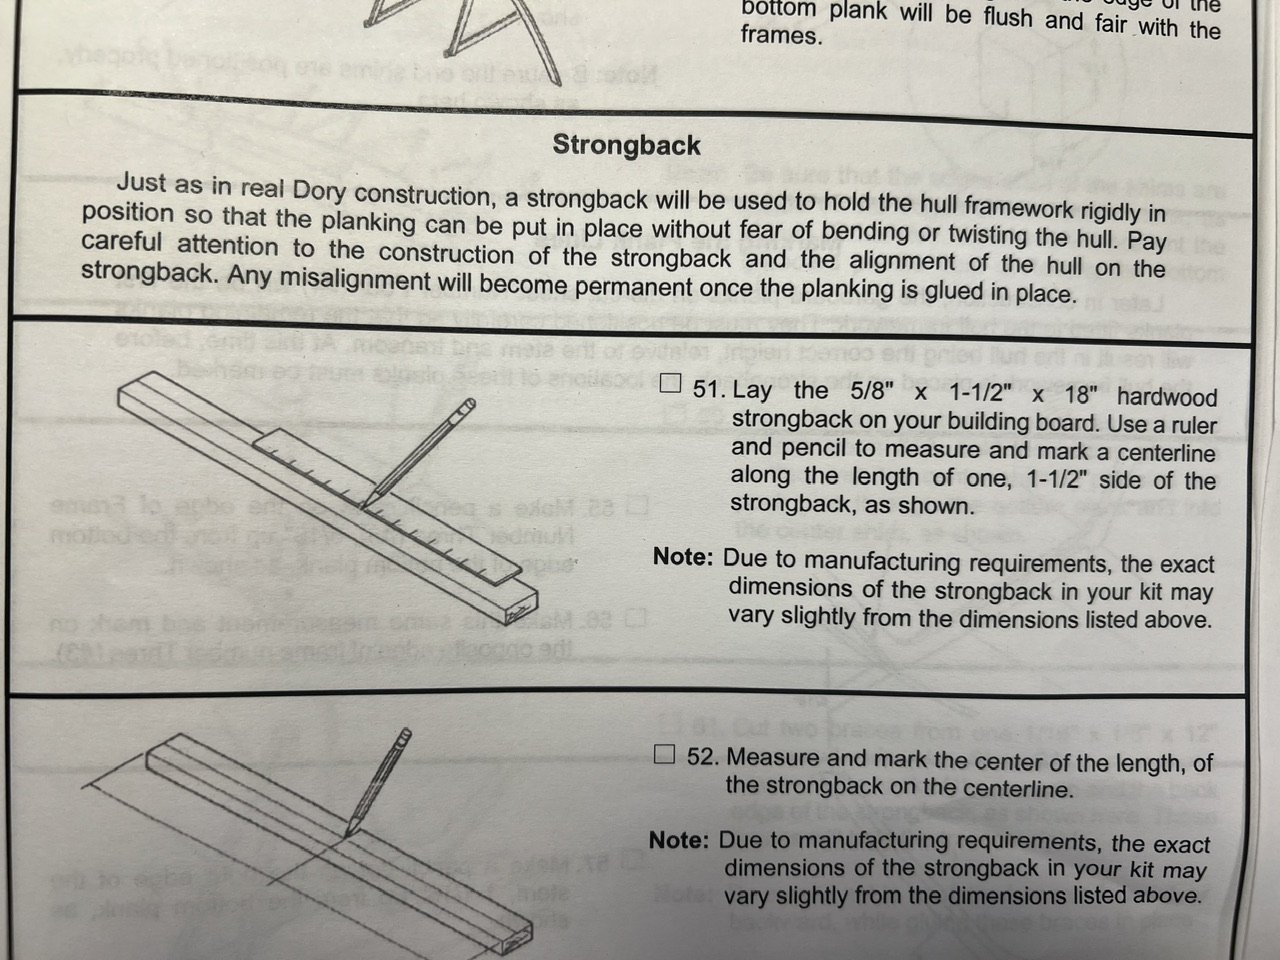
Another mismatch between instructions and materials (cleared up by looking at the kit content sheet). The actual strongback in the kit has different dimensions from what’s supplied.

- 71 replies
-
- 4
-
-
- grand banks dory
- midwest products
- (and 2 more)
-
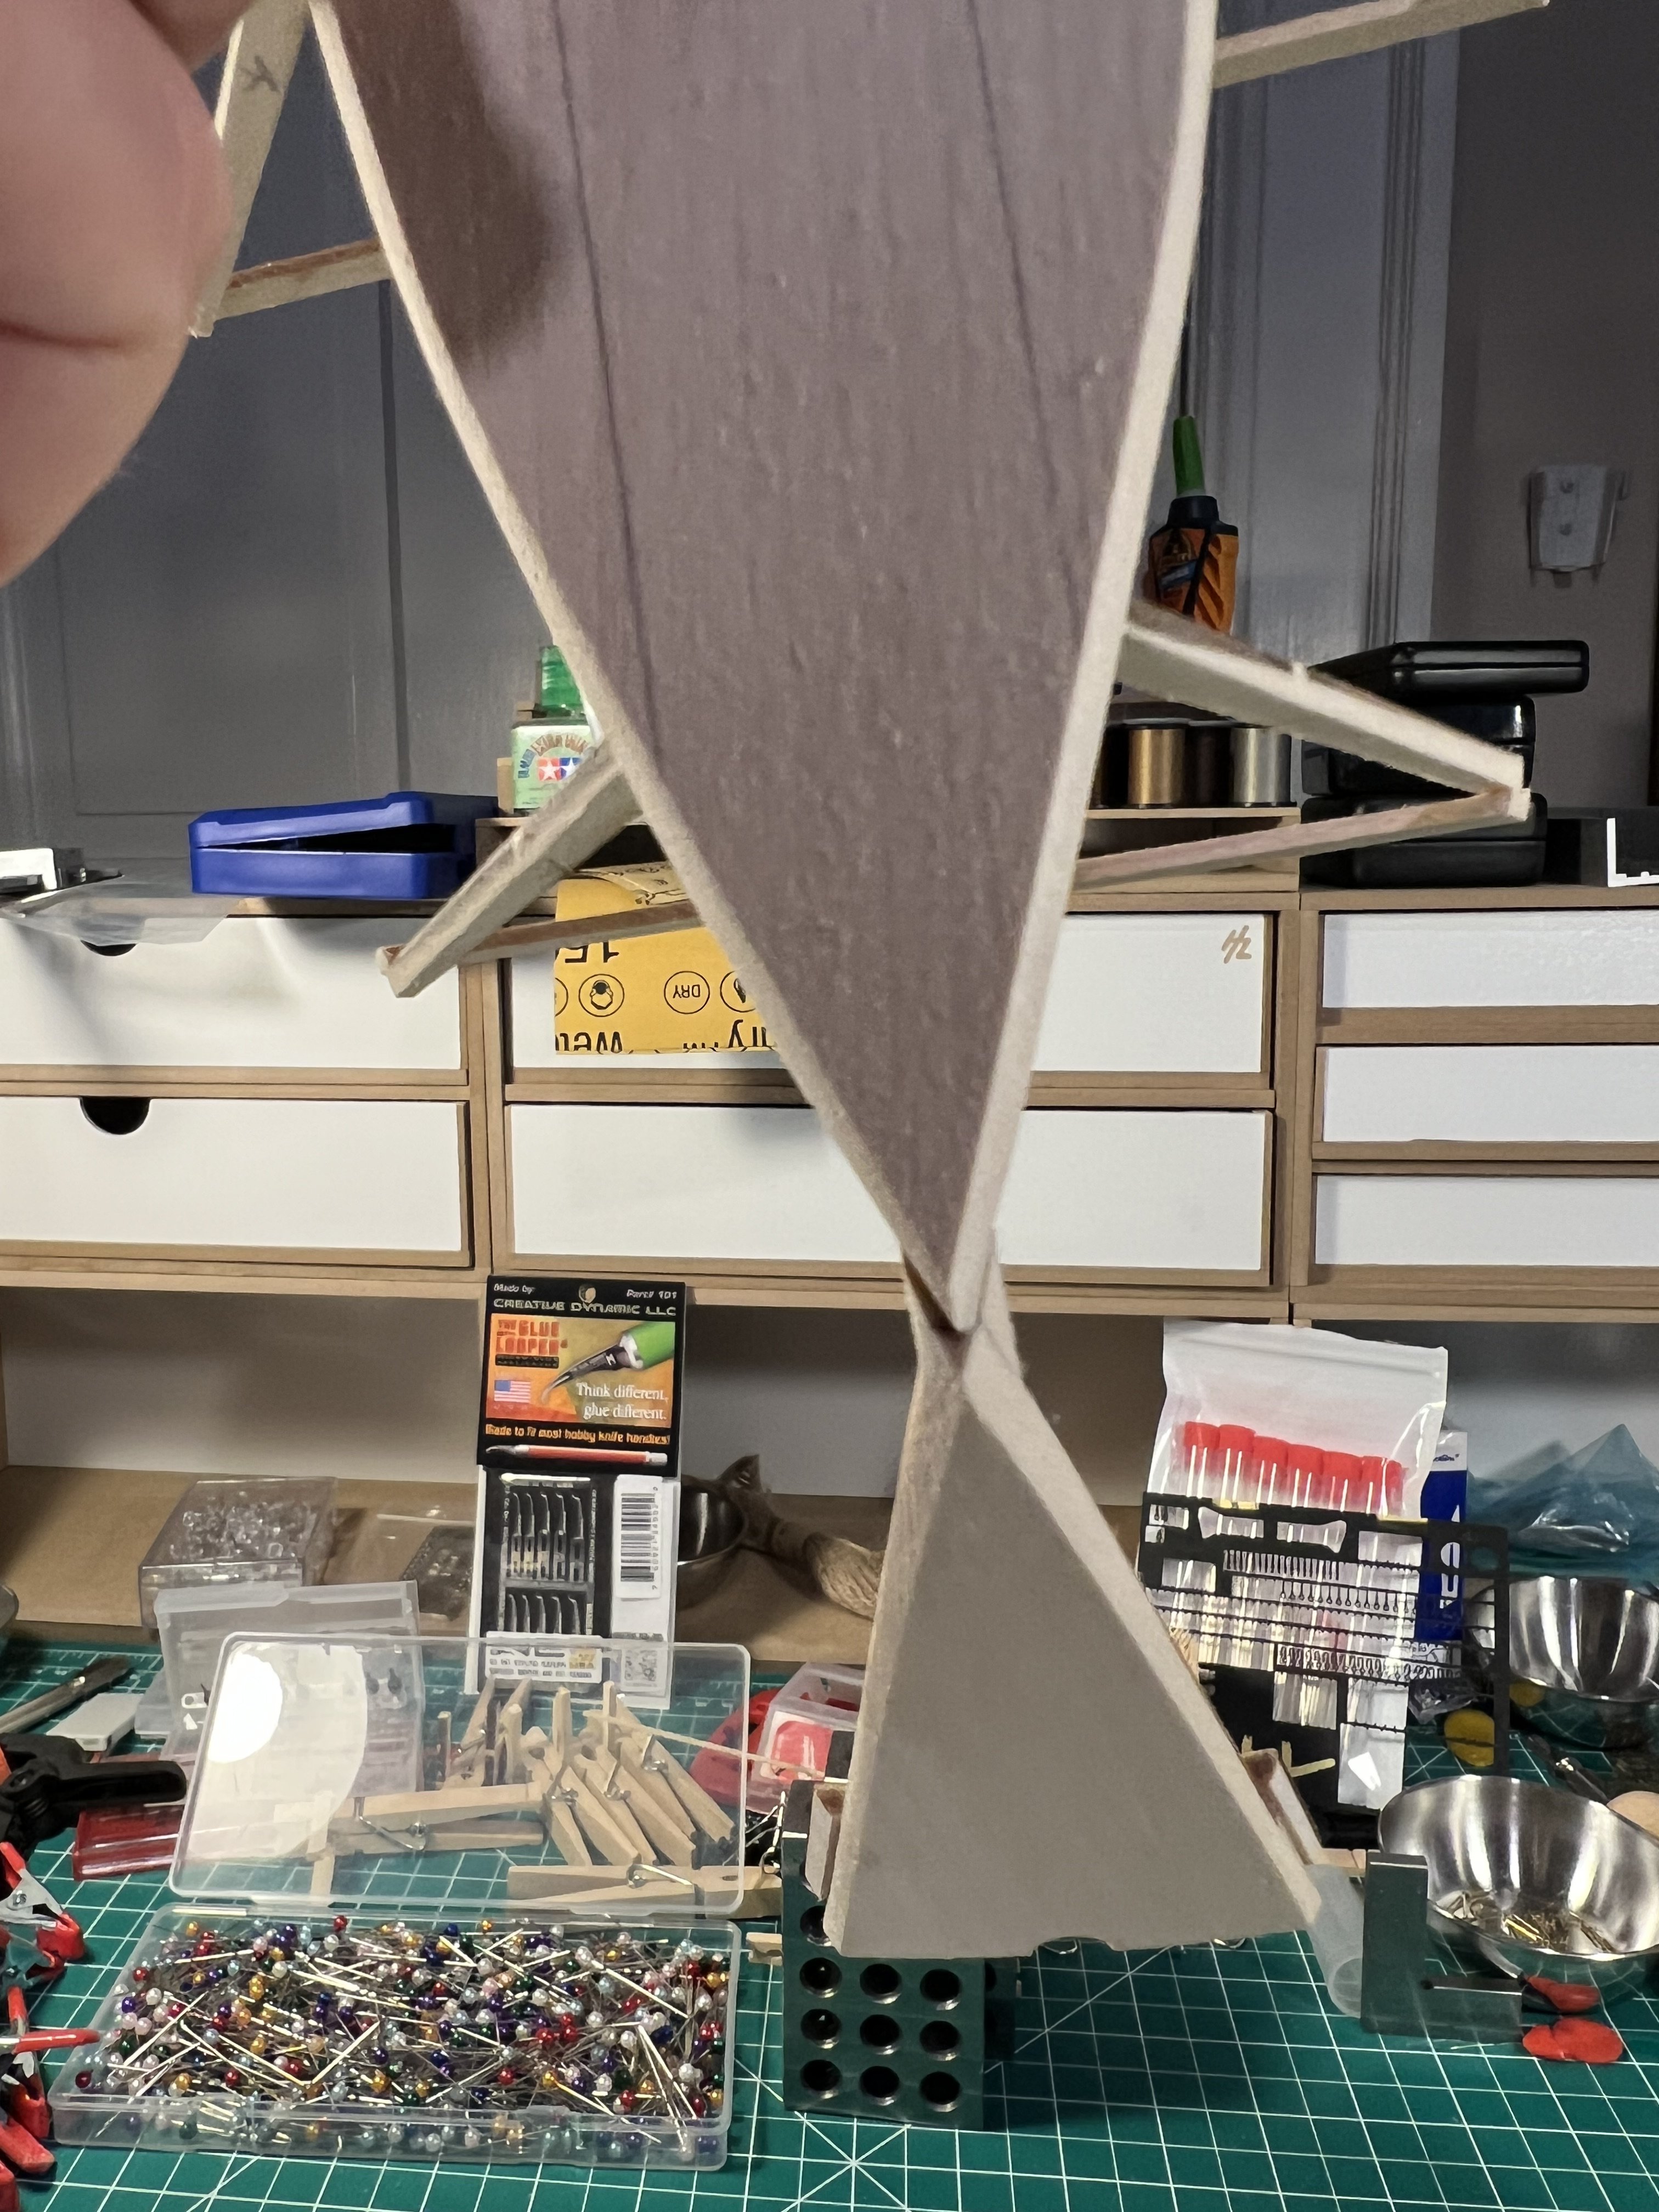
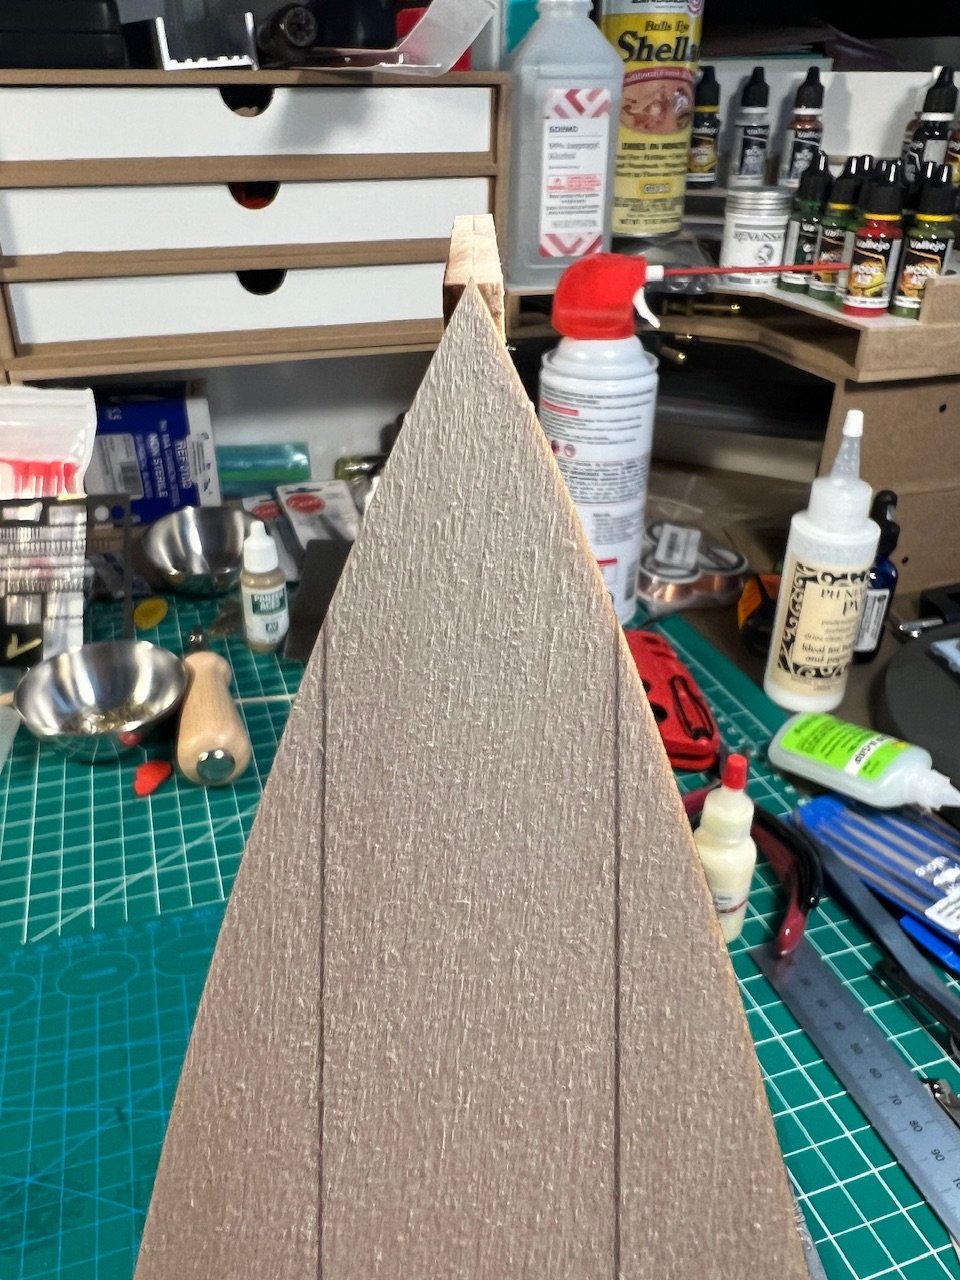
Faring the hull took quite a bit of sanding especially at the stem and transom and sanding the frames was a bit of a delicate process.


- 71 replies
-
- 3
-
-
- grand banks dory
- midwest products
- (and 2 more)
-
Ugh. I do know that from other models but somehow completely flaked on this. That's what I get for working on a model late at night.
- 71 replies
-
- 2
-
-
- grand banks dory
- midwest products
- (and 2 more)
-
While the instructions say you don’t need soak and bend planks, I had to as I got near the end of the first planking.
- 133 replies
-
- 4
-
-
- Ranger
- vanguard models
- (and 1 more)
-
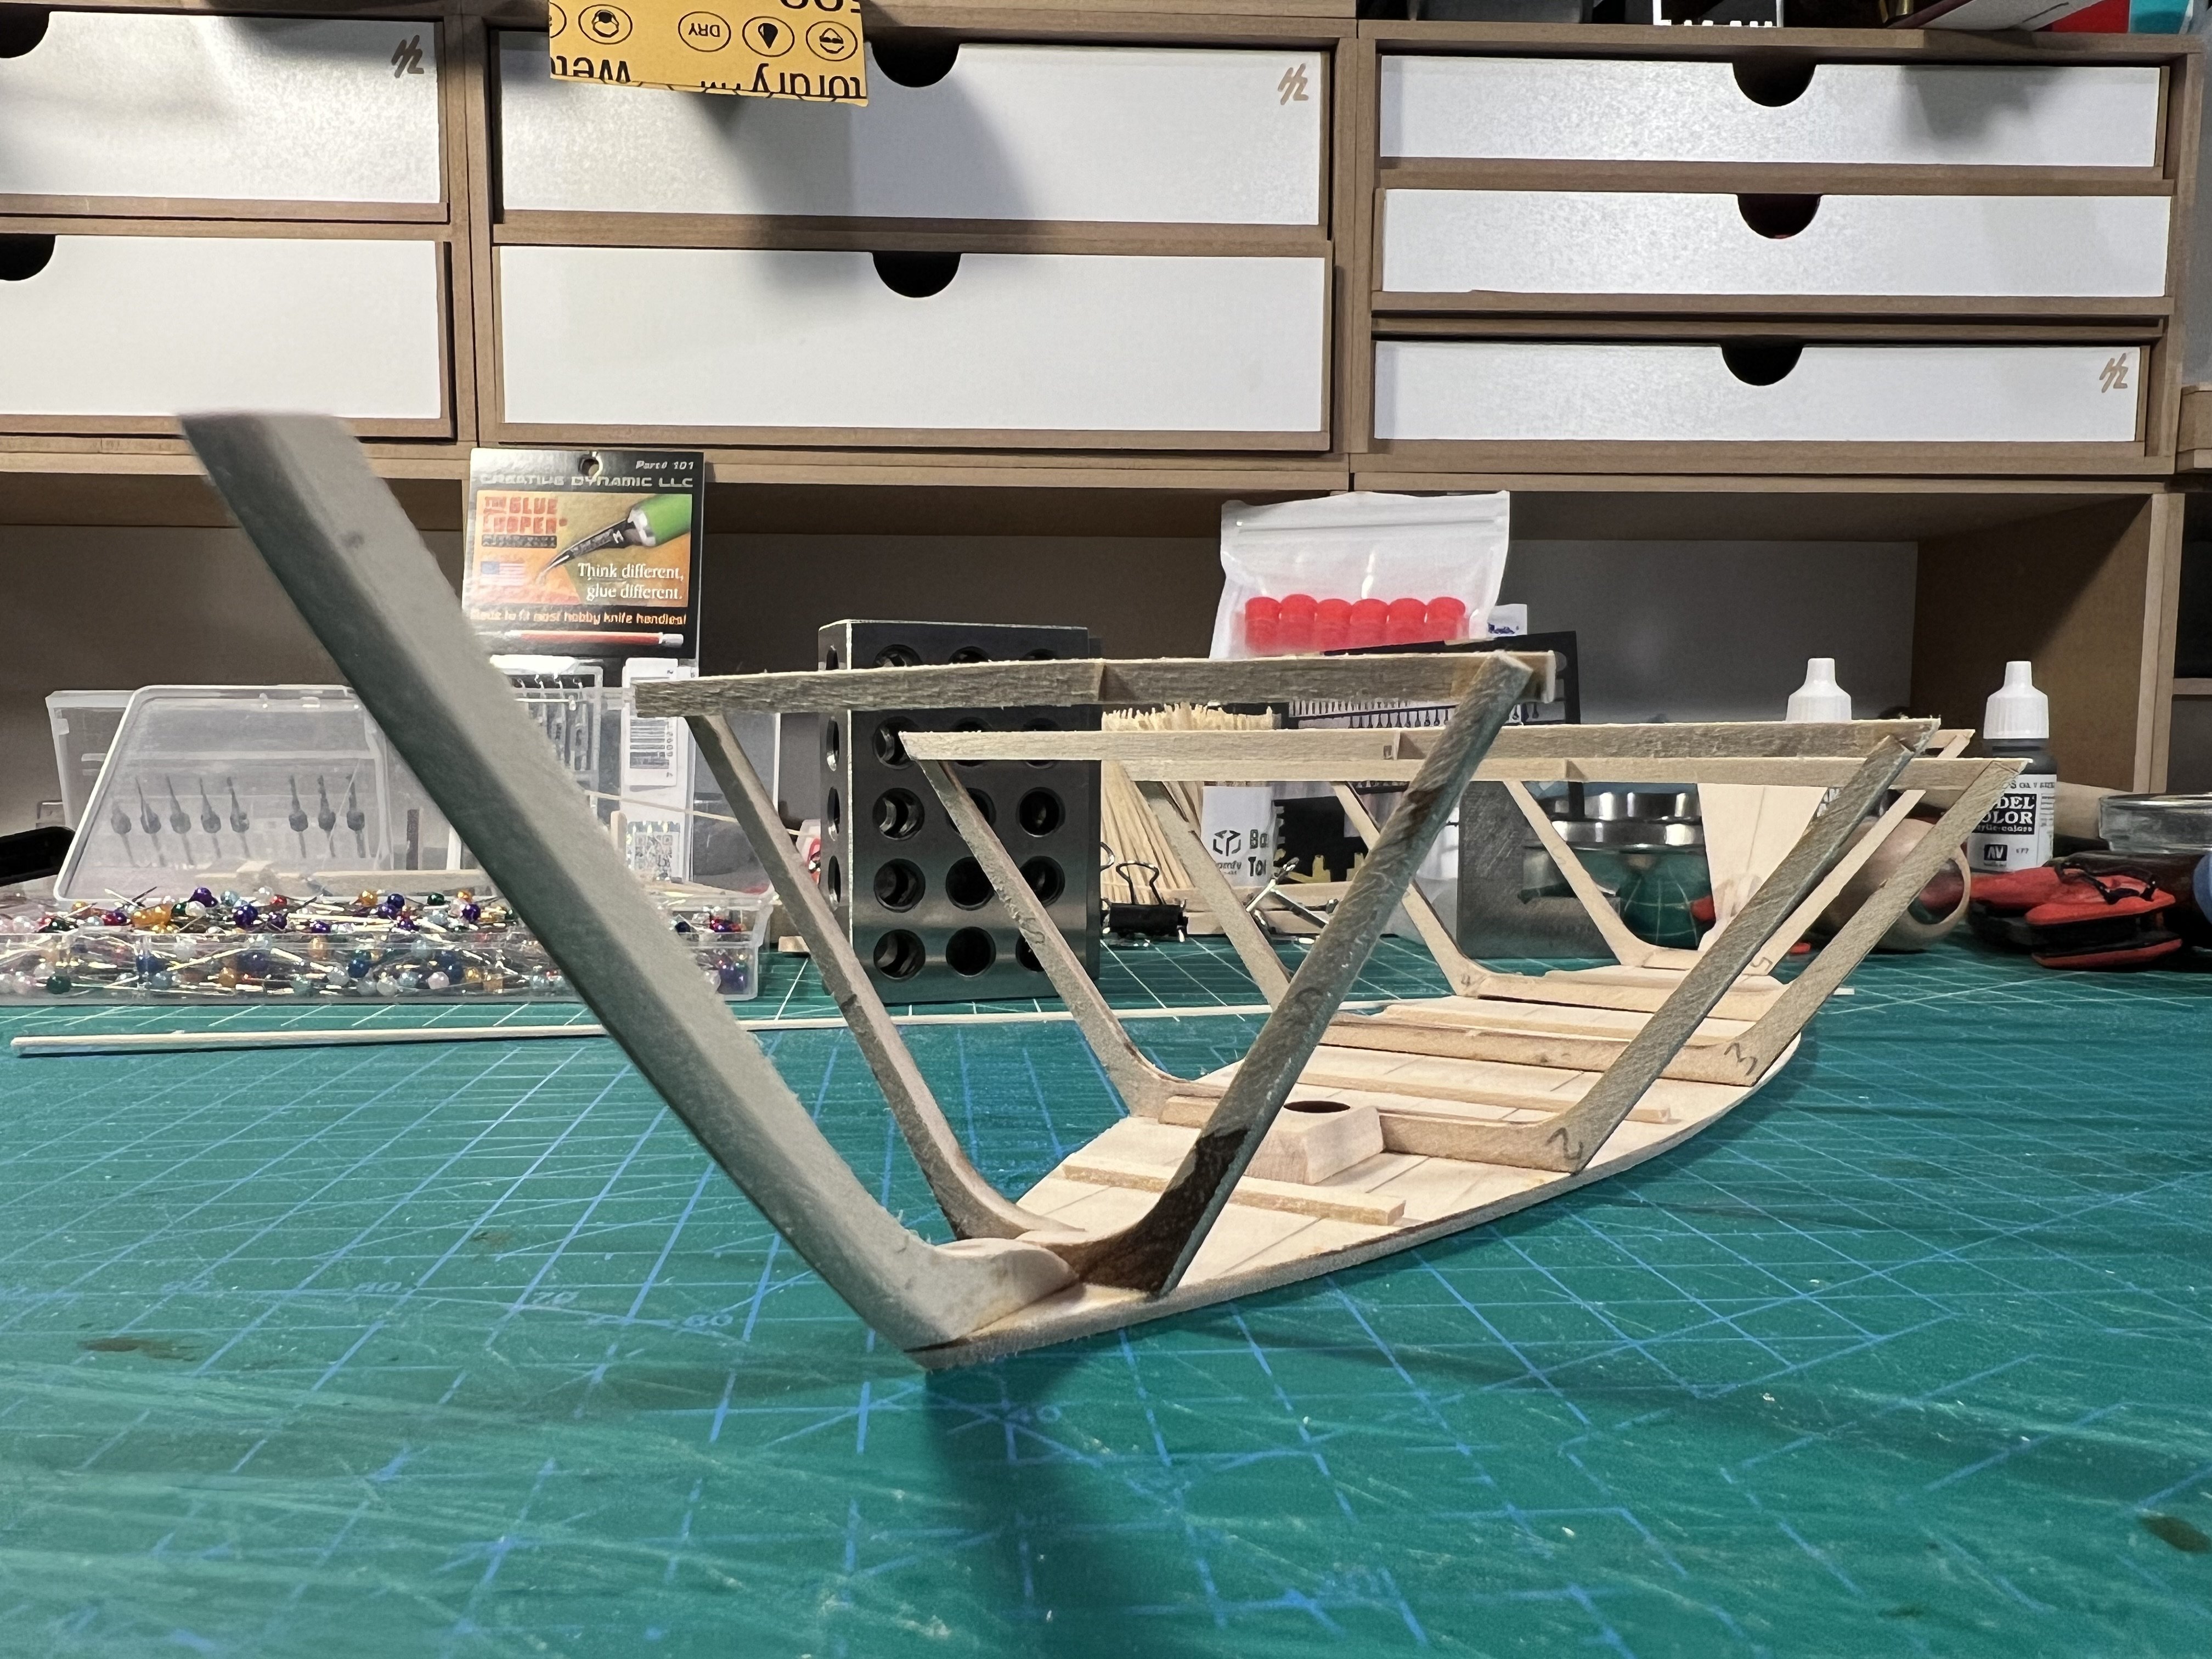
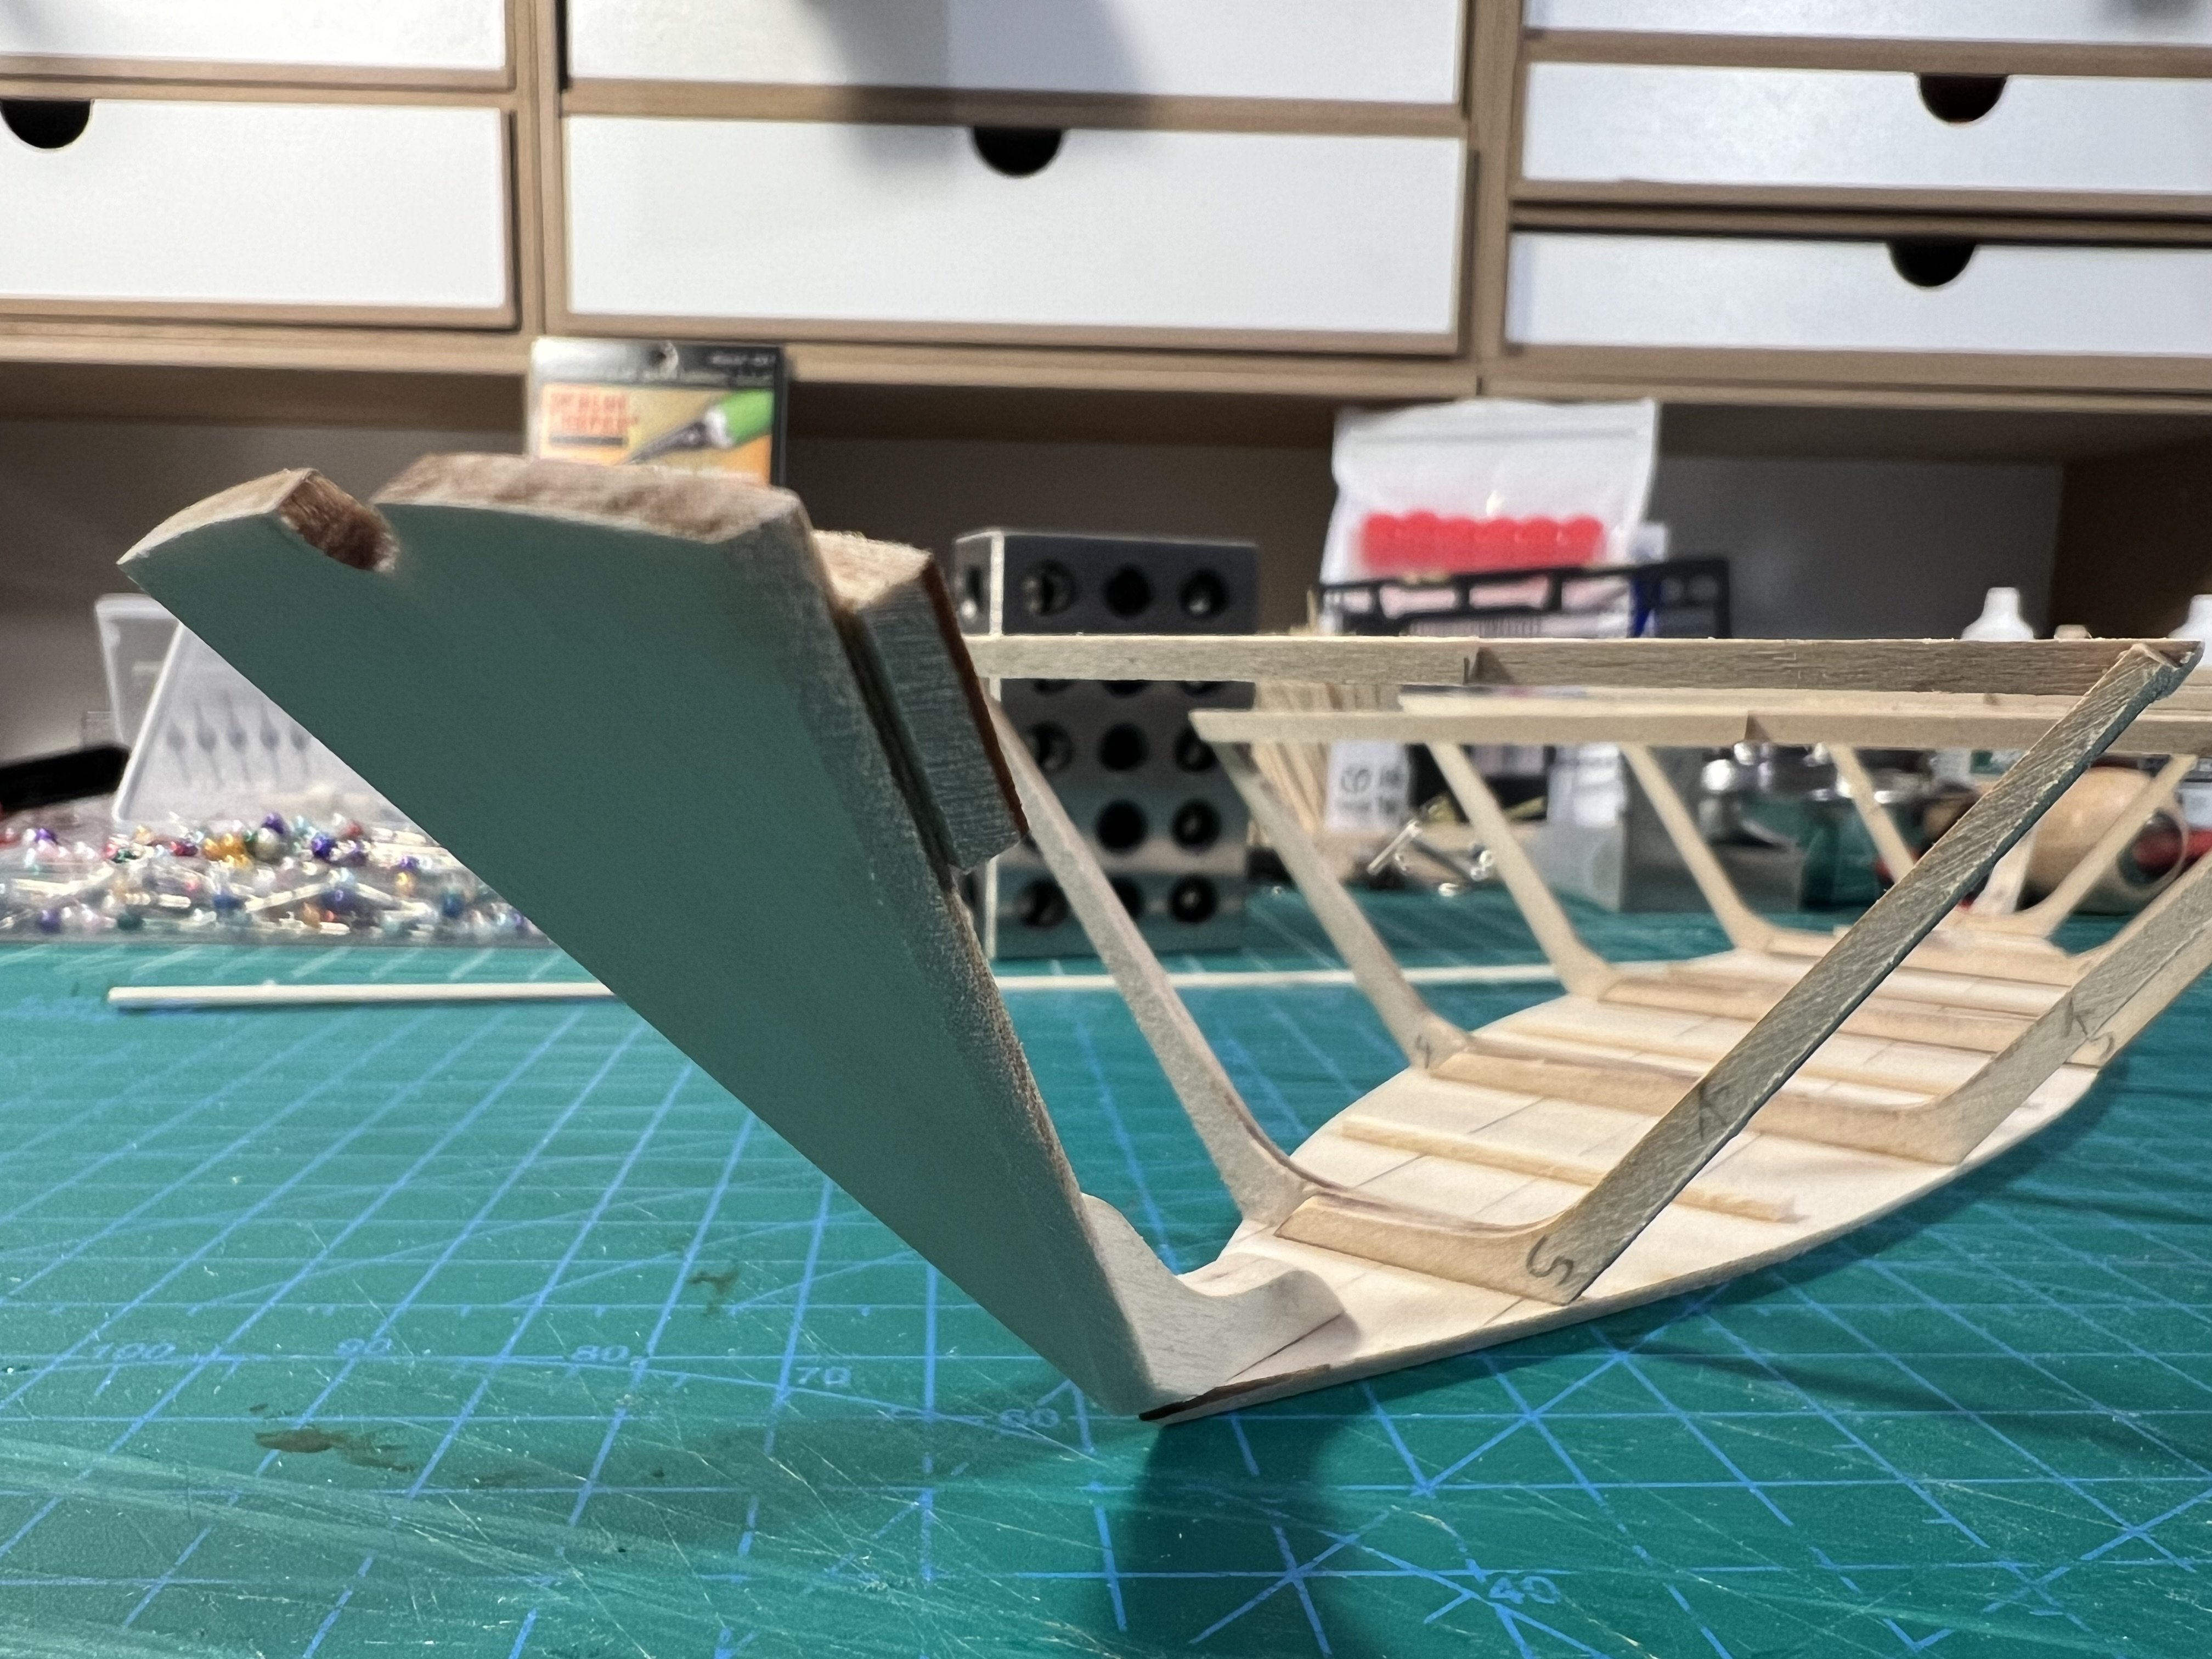
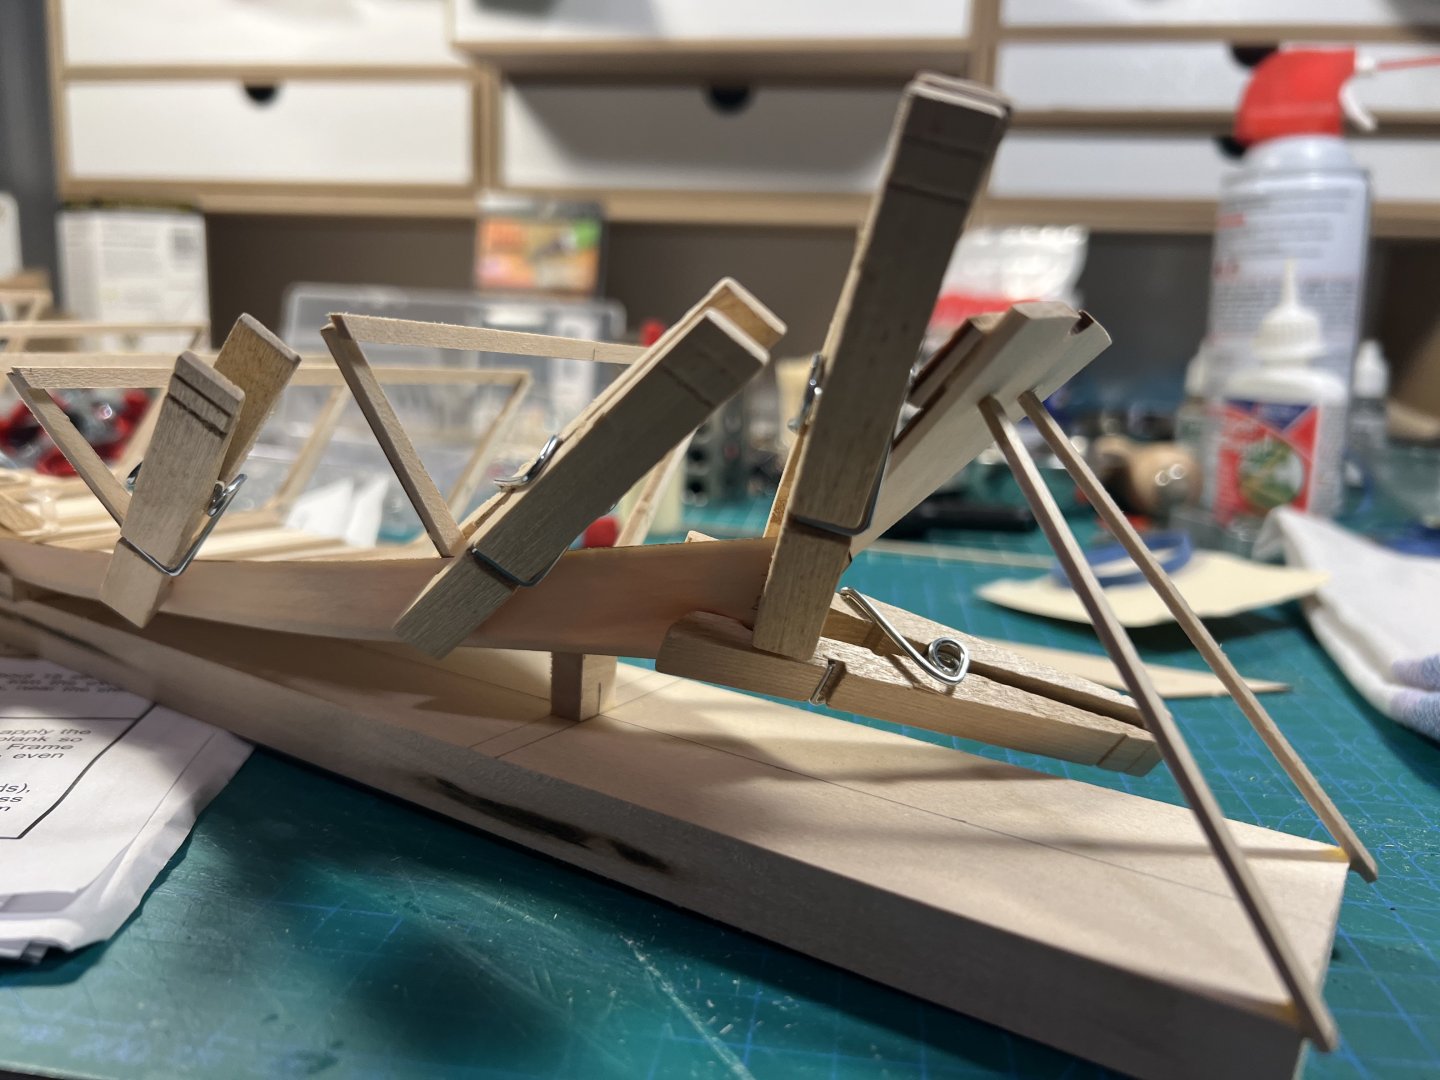
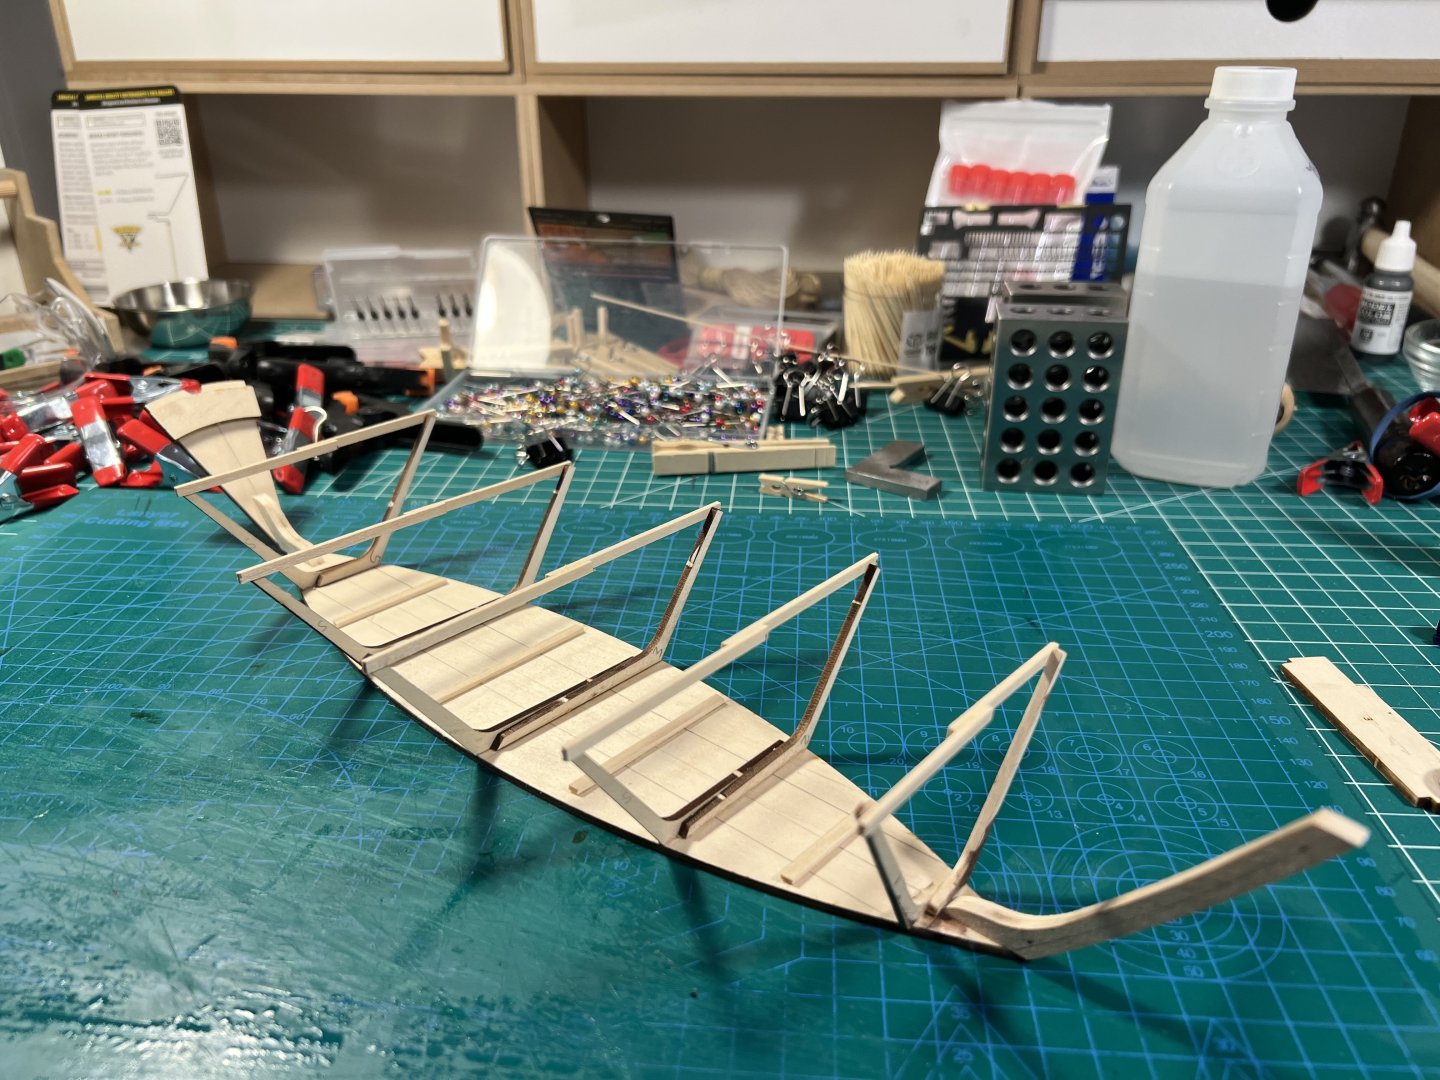
Adding the frames. Only the center frame is vertical. The others need to “lean” a bit because the bottom will be bent later. It wasn’t clear how much to allow them to bend.
- 71 replies
-
- 3
-
-
- grand banks dory
- midwest products
- (and 2 more)
-
As noted above: Vanguard Models (https://vanguardmodels.co.uk). Maybe a little more expensive than some others, but the instructions are great and the material is great. Given how much time someone spends on a model ship, it's worth it.
-
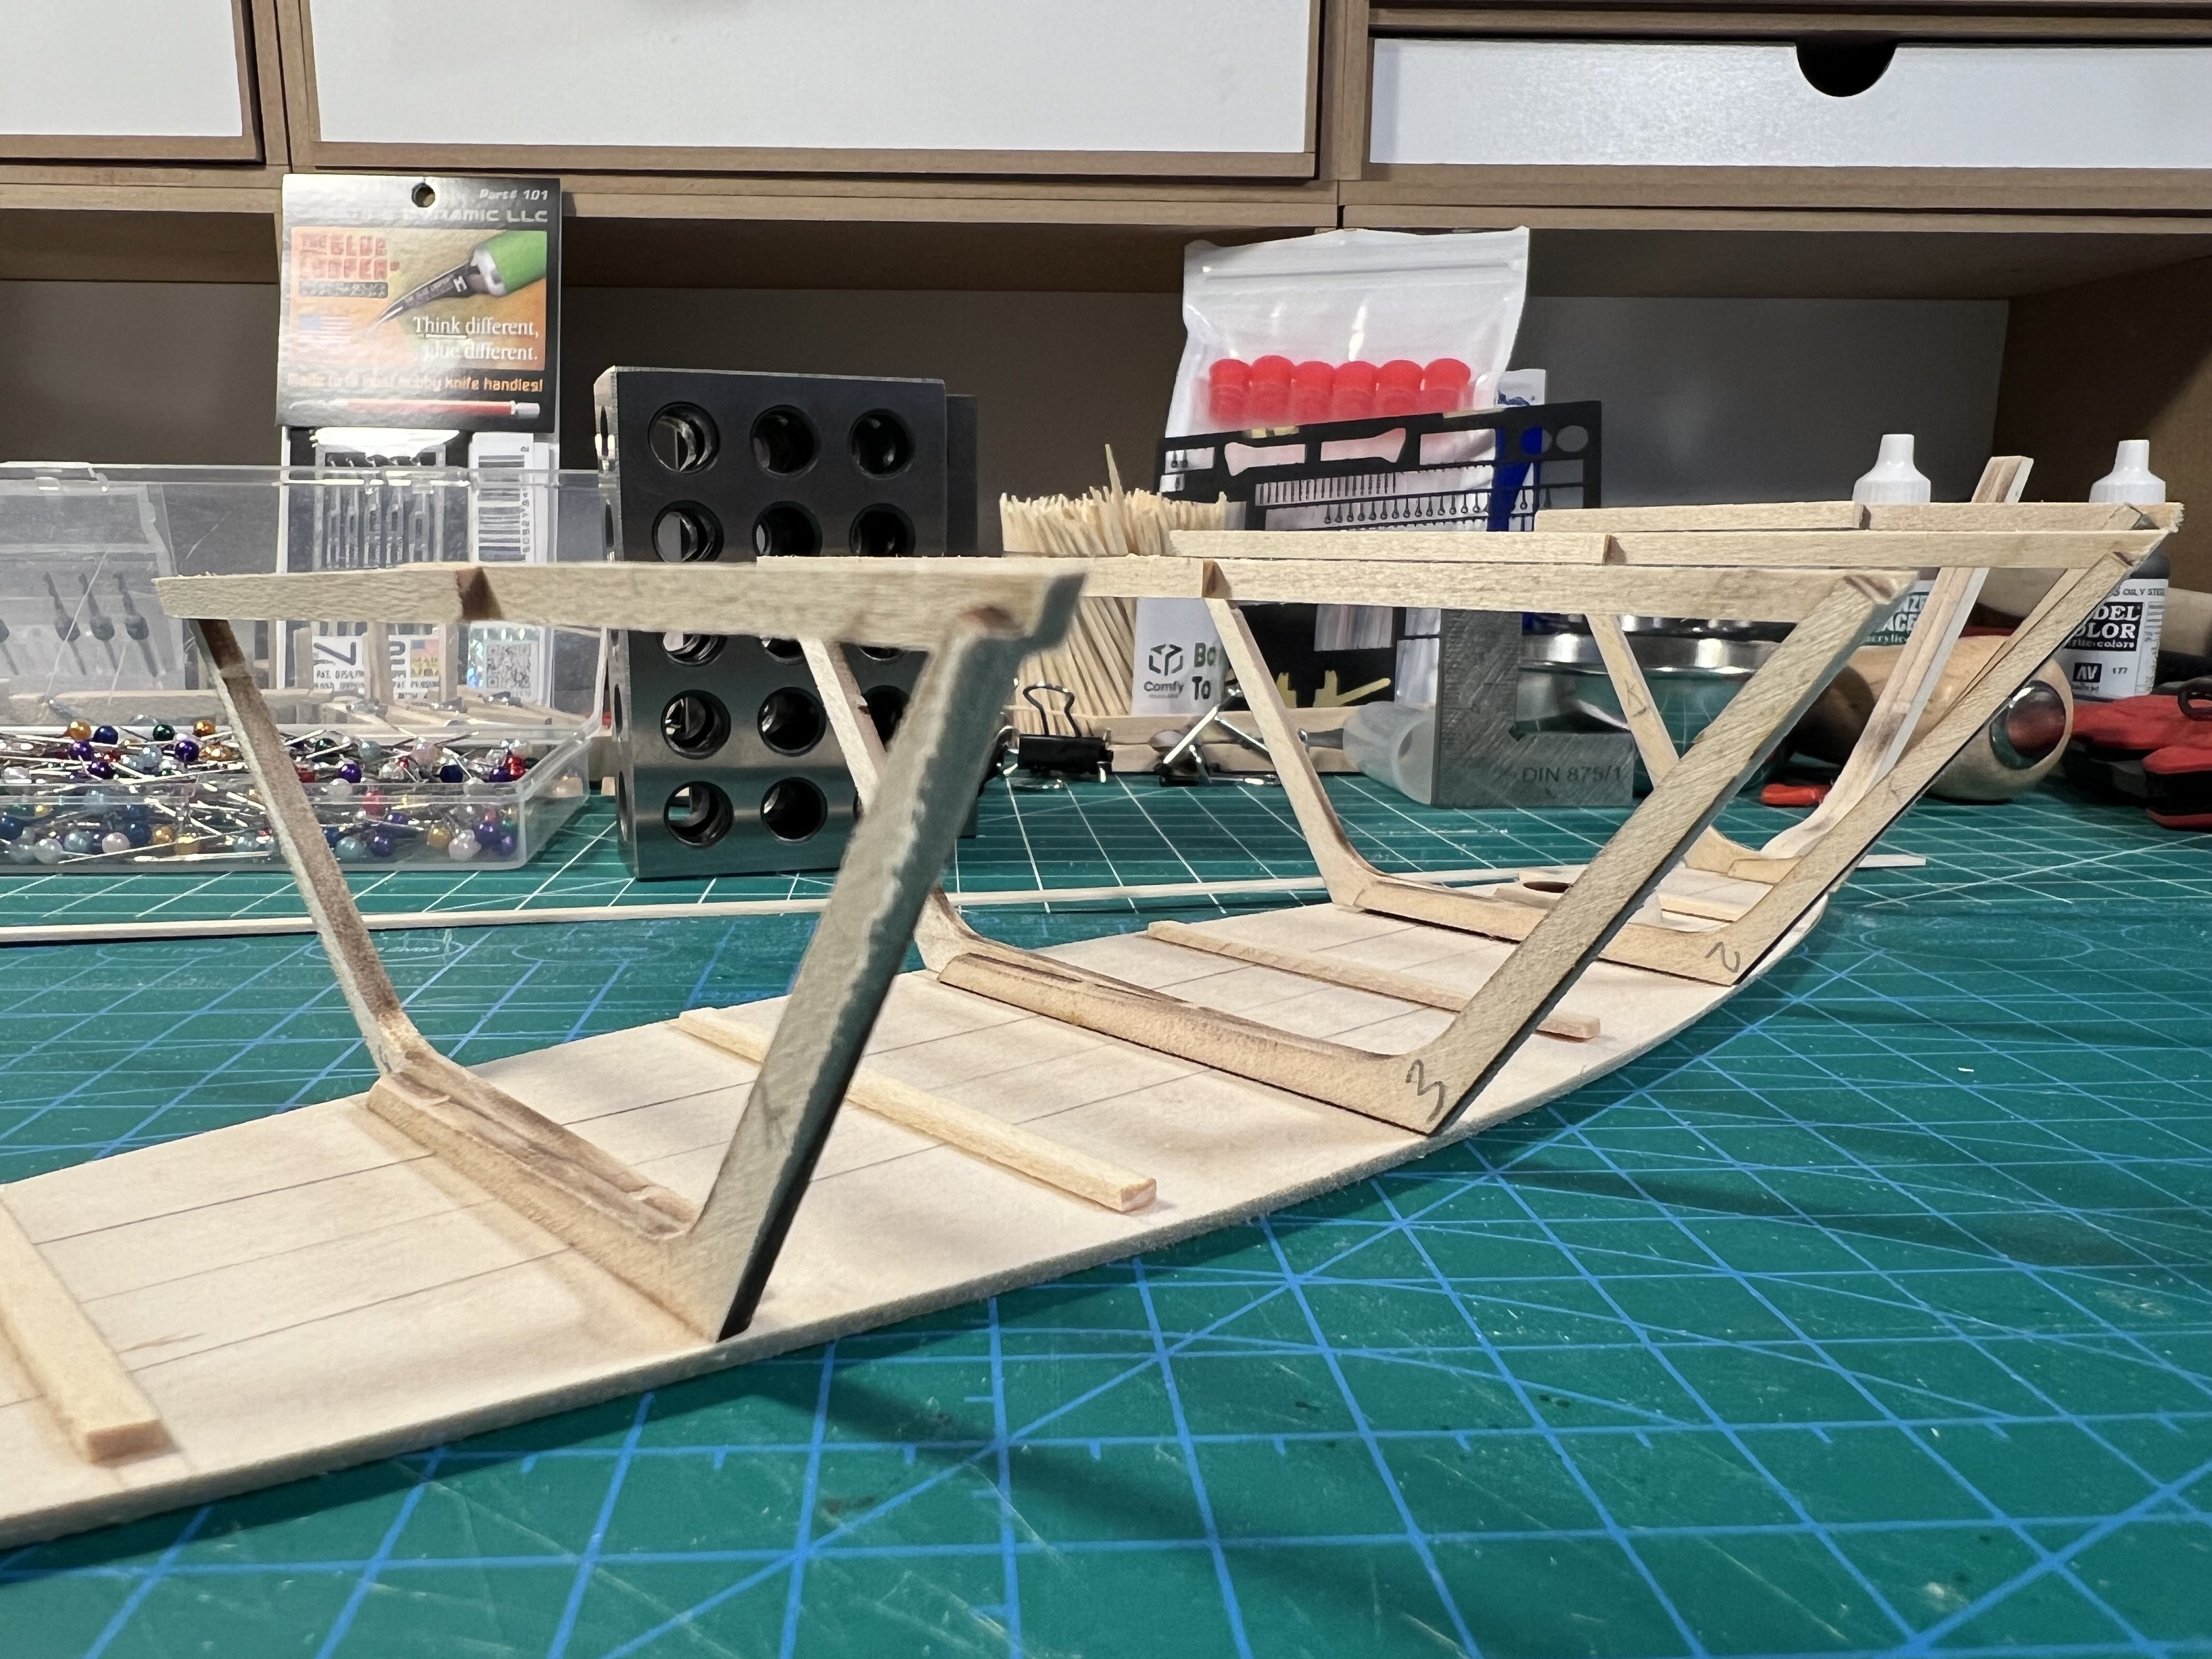
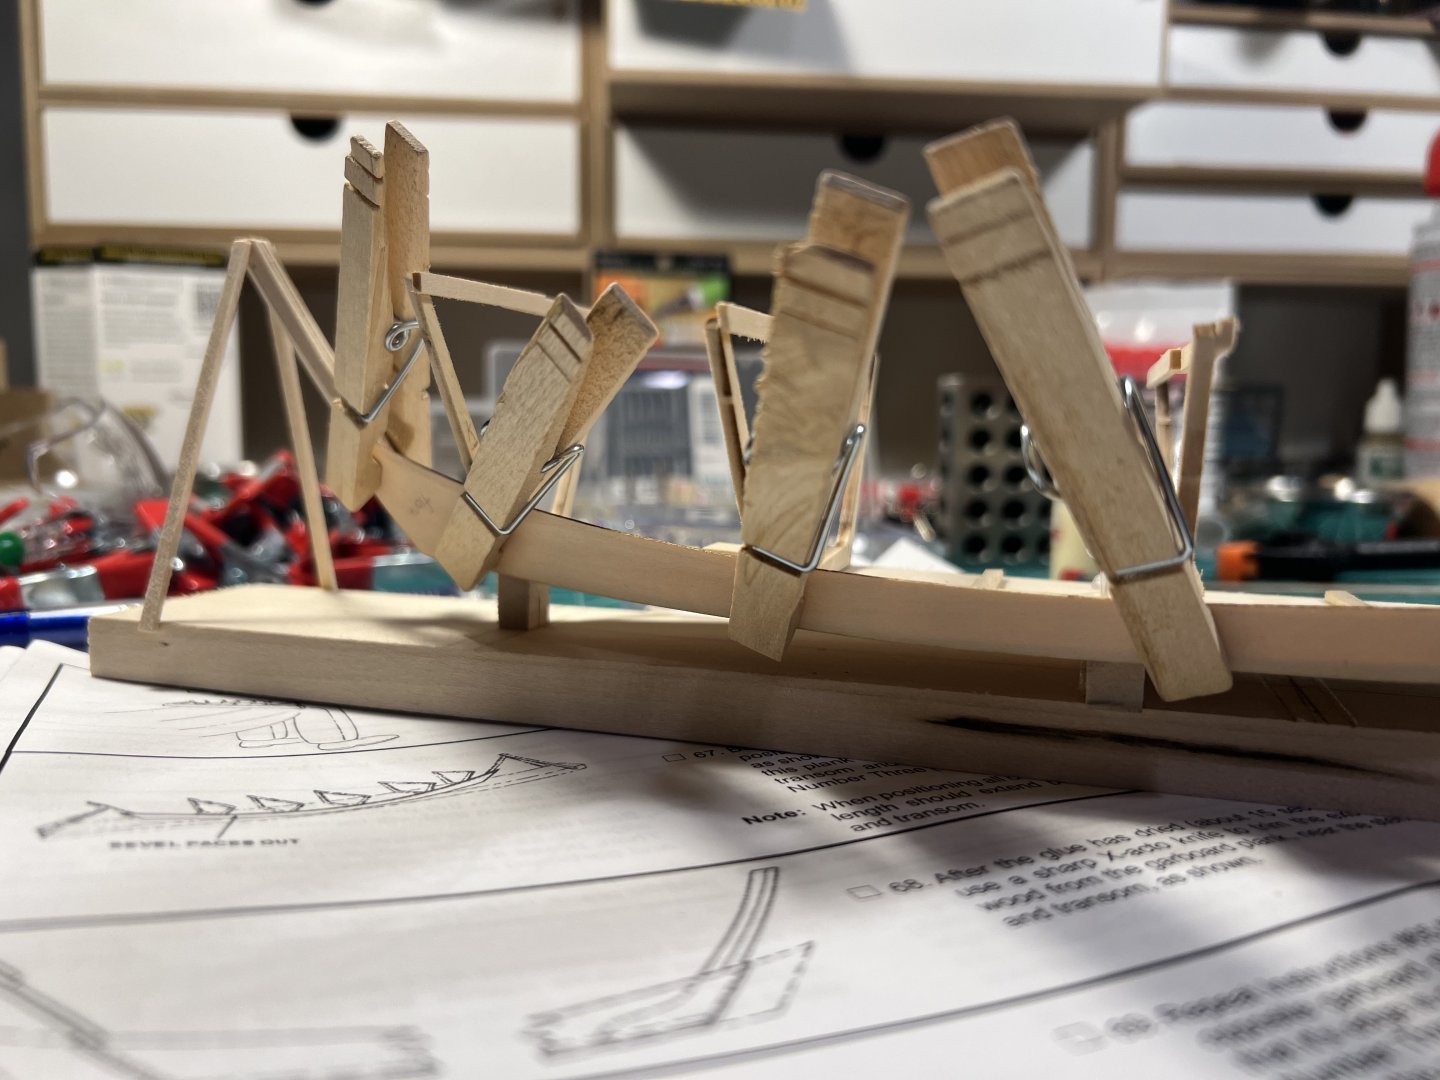
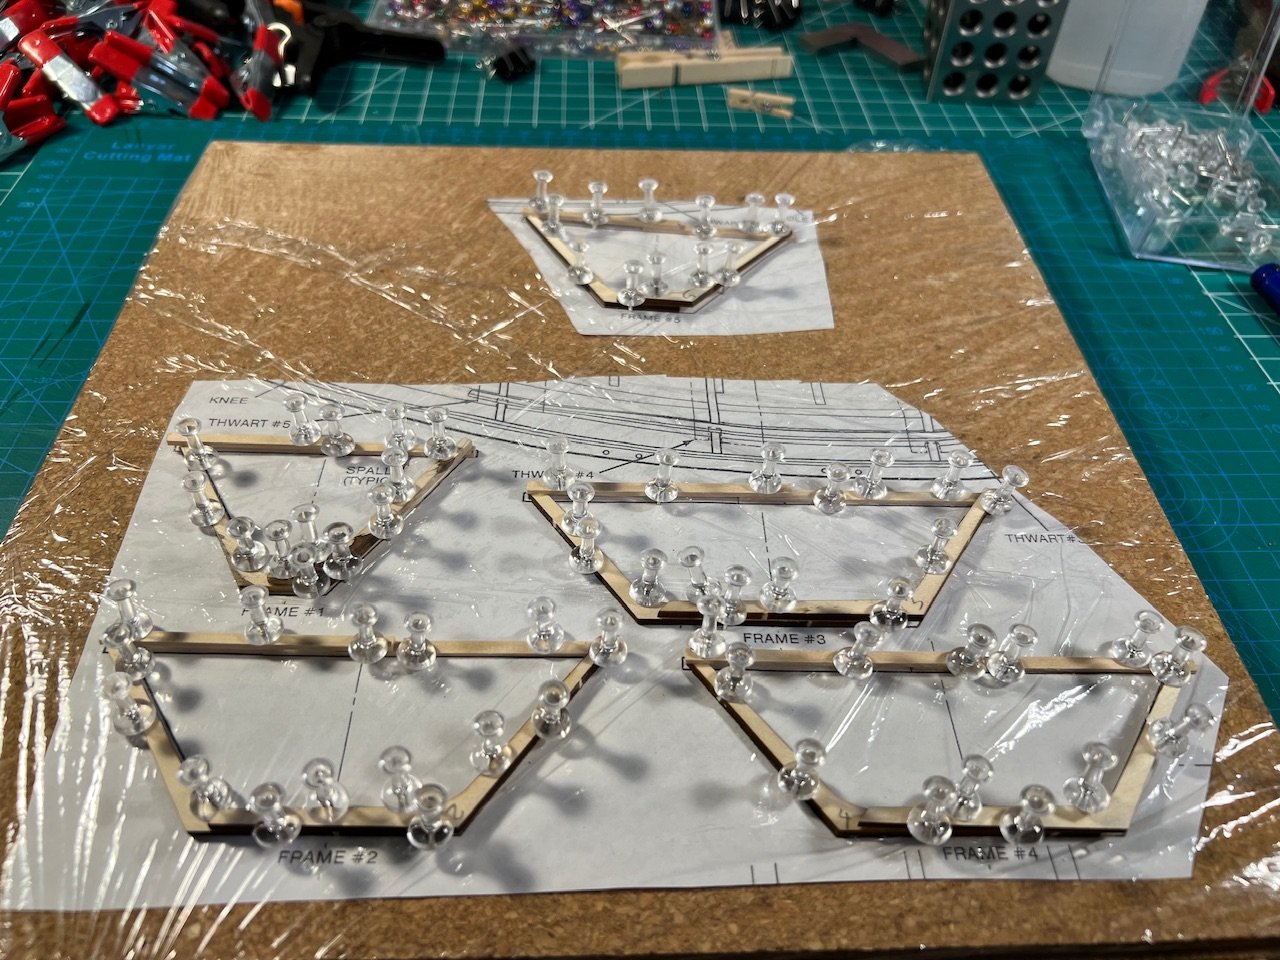
Got the frames in place to glue. I had made a couple copies of the plans so I could cut them up as needed. It’s nice to have plans to scale. The Model Shipways plans in the instructions books were unfortunately a few percent off.
- 71 replies
-
- 3
-
-
- grand banks dory
- midwest products
- (and 2 more)
-
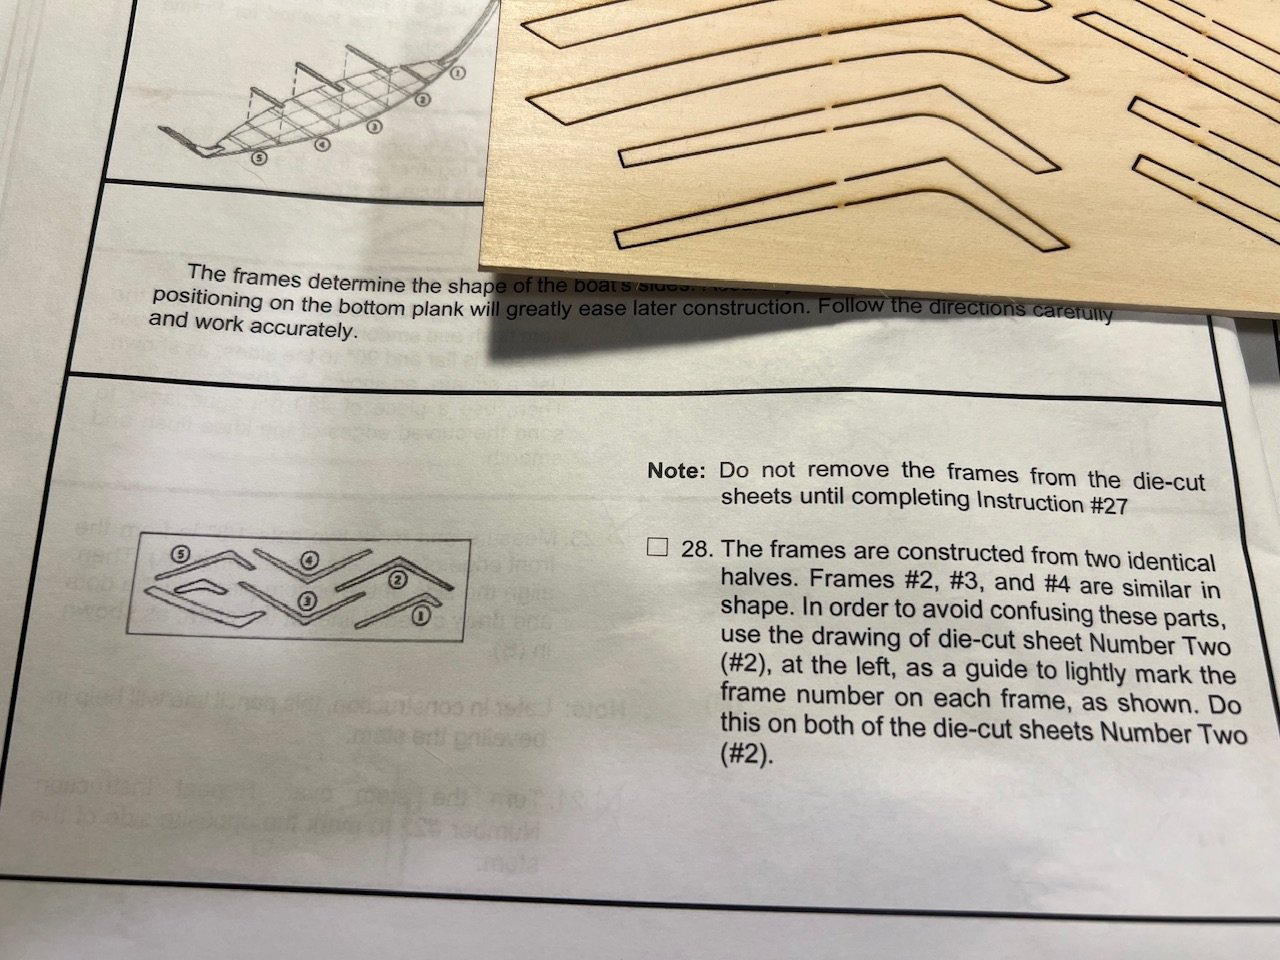
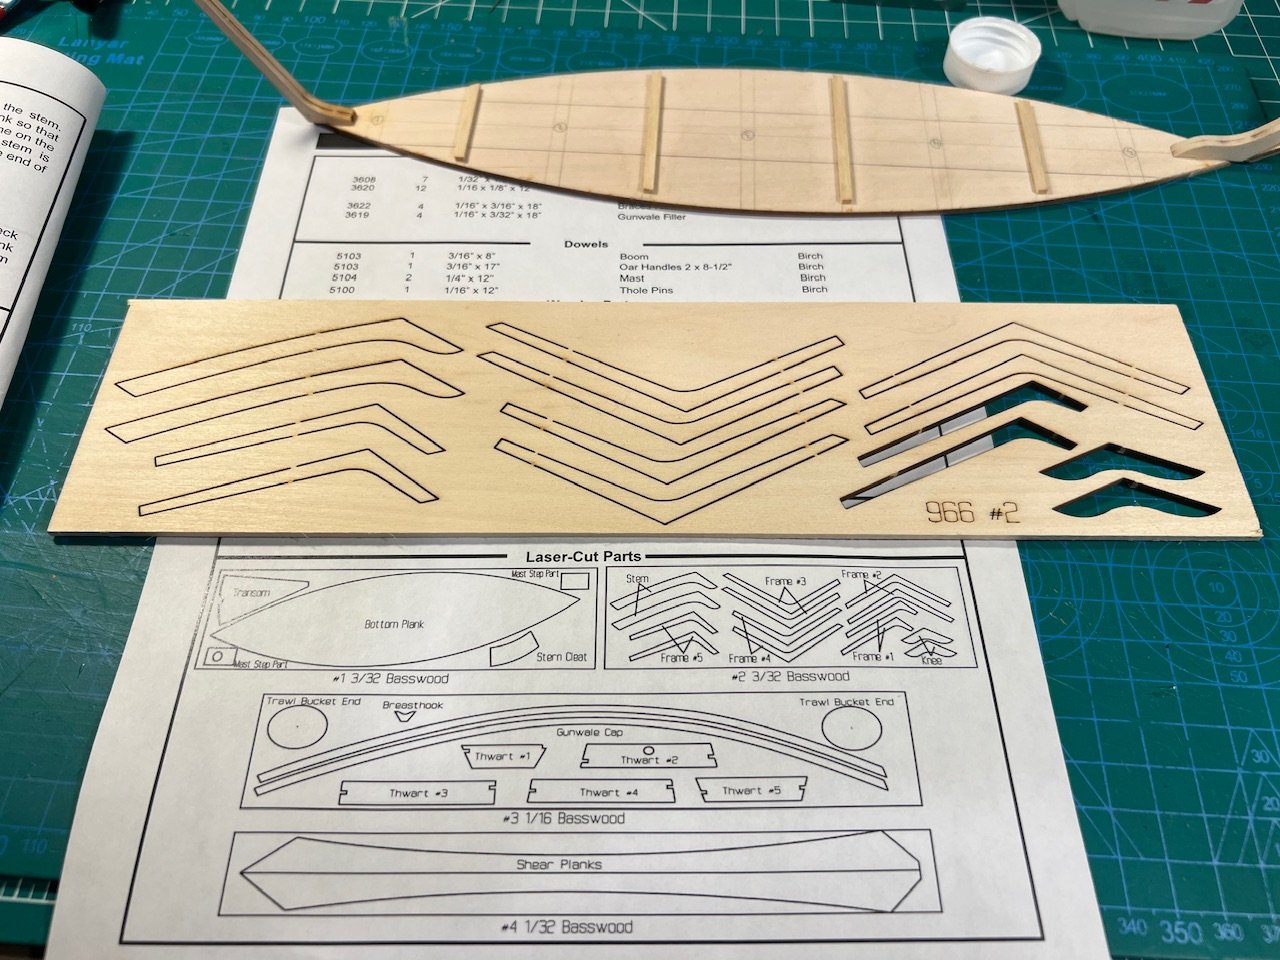
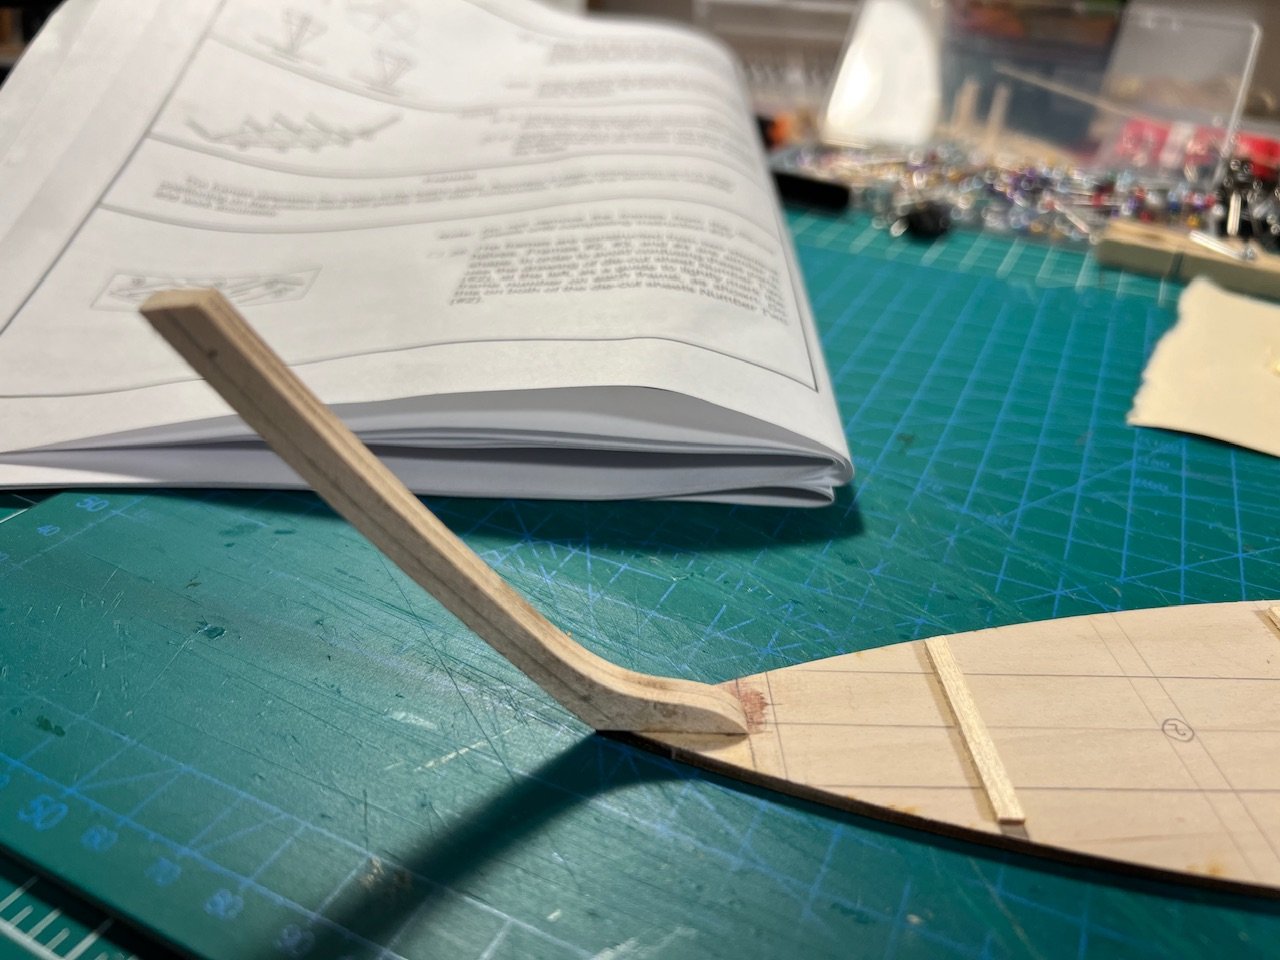
Okay, so we have a case of modeler error (actual two errors) and kit error. In the previous post, I lamented that the stem didn’t seem to be the right size given the illustration. Then as I was getting the frames together (next steps) I noticed that the illustration in the instructions showing where the numbered parts are on the sheets (the sheets do not have part numbers like the Vanguard models or part labels like the Model Shipways models). The instructions say that there are three sheets with frames but in the kit there is only one (larger) one. So now I was confused. How was I going to figure out which frame was which on the sheets now. Well I discovered that there was a kit contents sheet in the box that didn’t only list the parts but also illustrated the layout of the sheets (with part labels). I then discovered that the parts I had cut out and glued on wasn’t the stem (from the previous post) but was one of the frames. Earlier in the instructions, it showed a sheet that had the knee and stem next to each other on one corner of the sheet. So I assumed the knee (which has a district shape) and stem were next to each other. Well no. The stem was actually on the opposite corner of the sheet. Because of course it would. Ugh. In my defense, the stem pieces and the frames pieces are very similar. So now I had to first unglue the parts I thought were the stem. Thanks to a few applications of alcohol, the glue started to soften. I was wedging in a flat square tipped hobby blade to loosen the part, which then slipped and stabbed me in the hand. I’m now like the kid in Bad Santa who painted the carved wooden pickle he made for the Billy Bob Thornton character. Thankfully, I didn’t have to go to the emergency room and was able to get the bleeding to stop. The “stem” now had to be separated back into the two frames. I left the pieces in a small bowl of alcohol overnight, was able to (safely) separate them in the morning and add the actual stem pieces to the model.
- 71 replies
-
- 4
-

-
-
- grand banks dory
- midwest products
- (and 2 more)
-
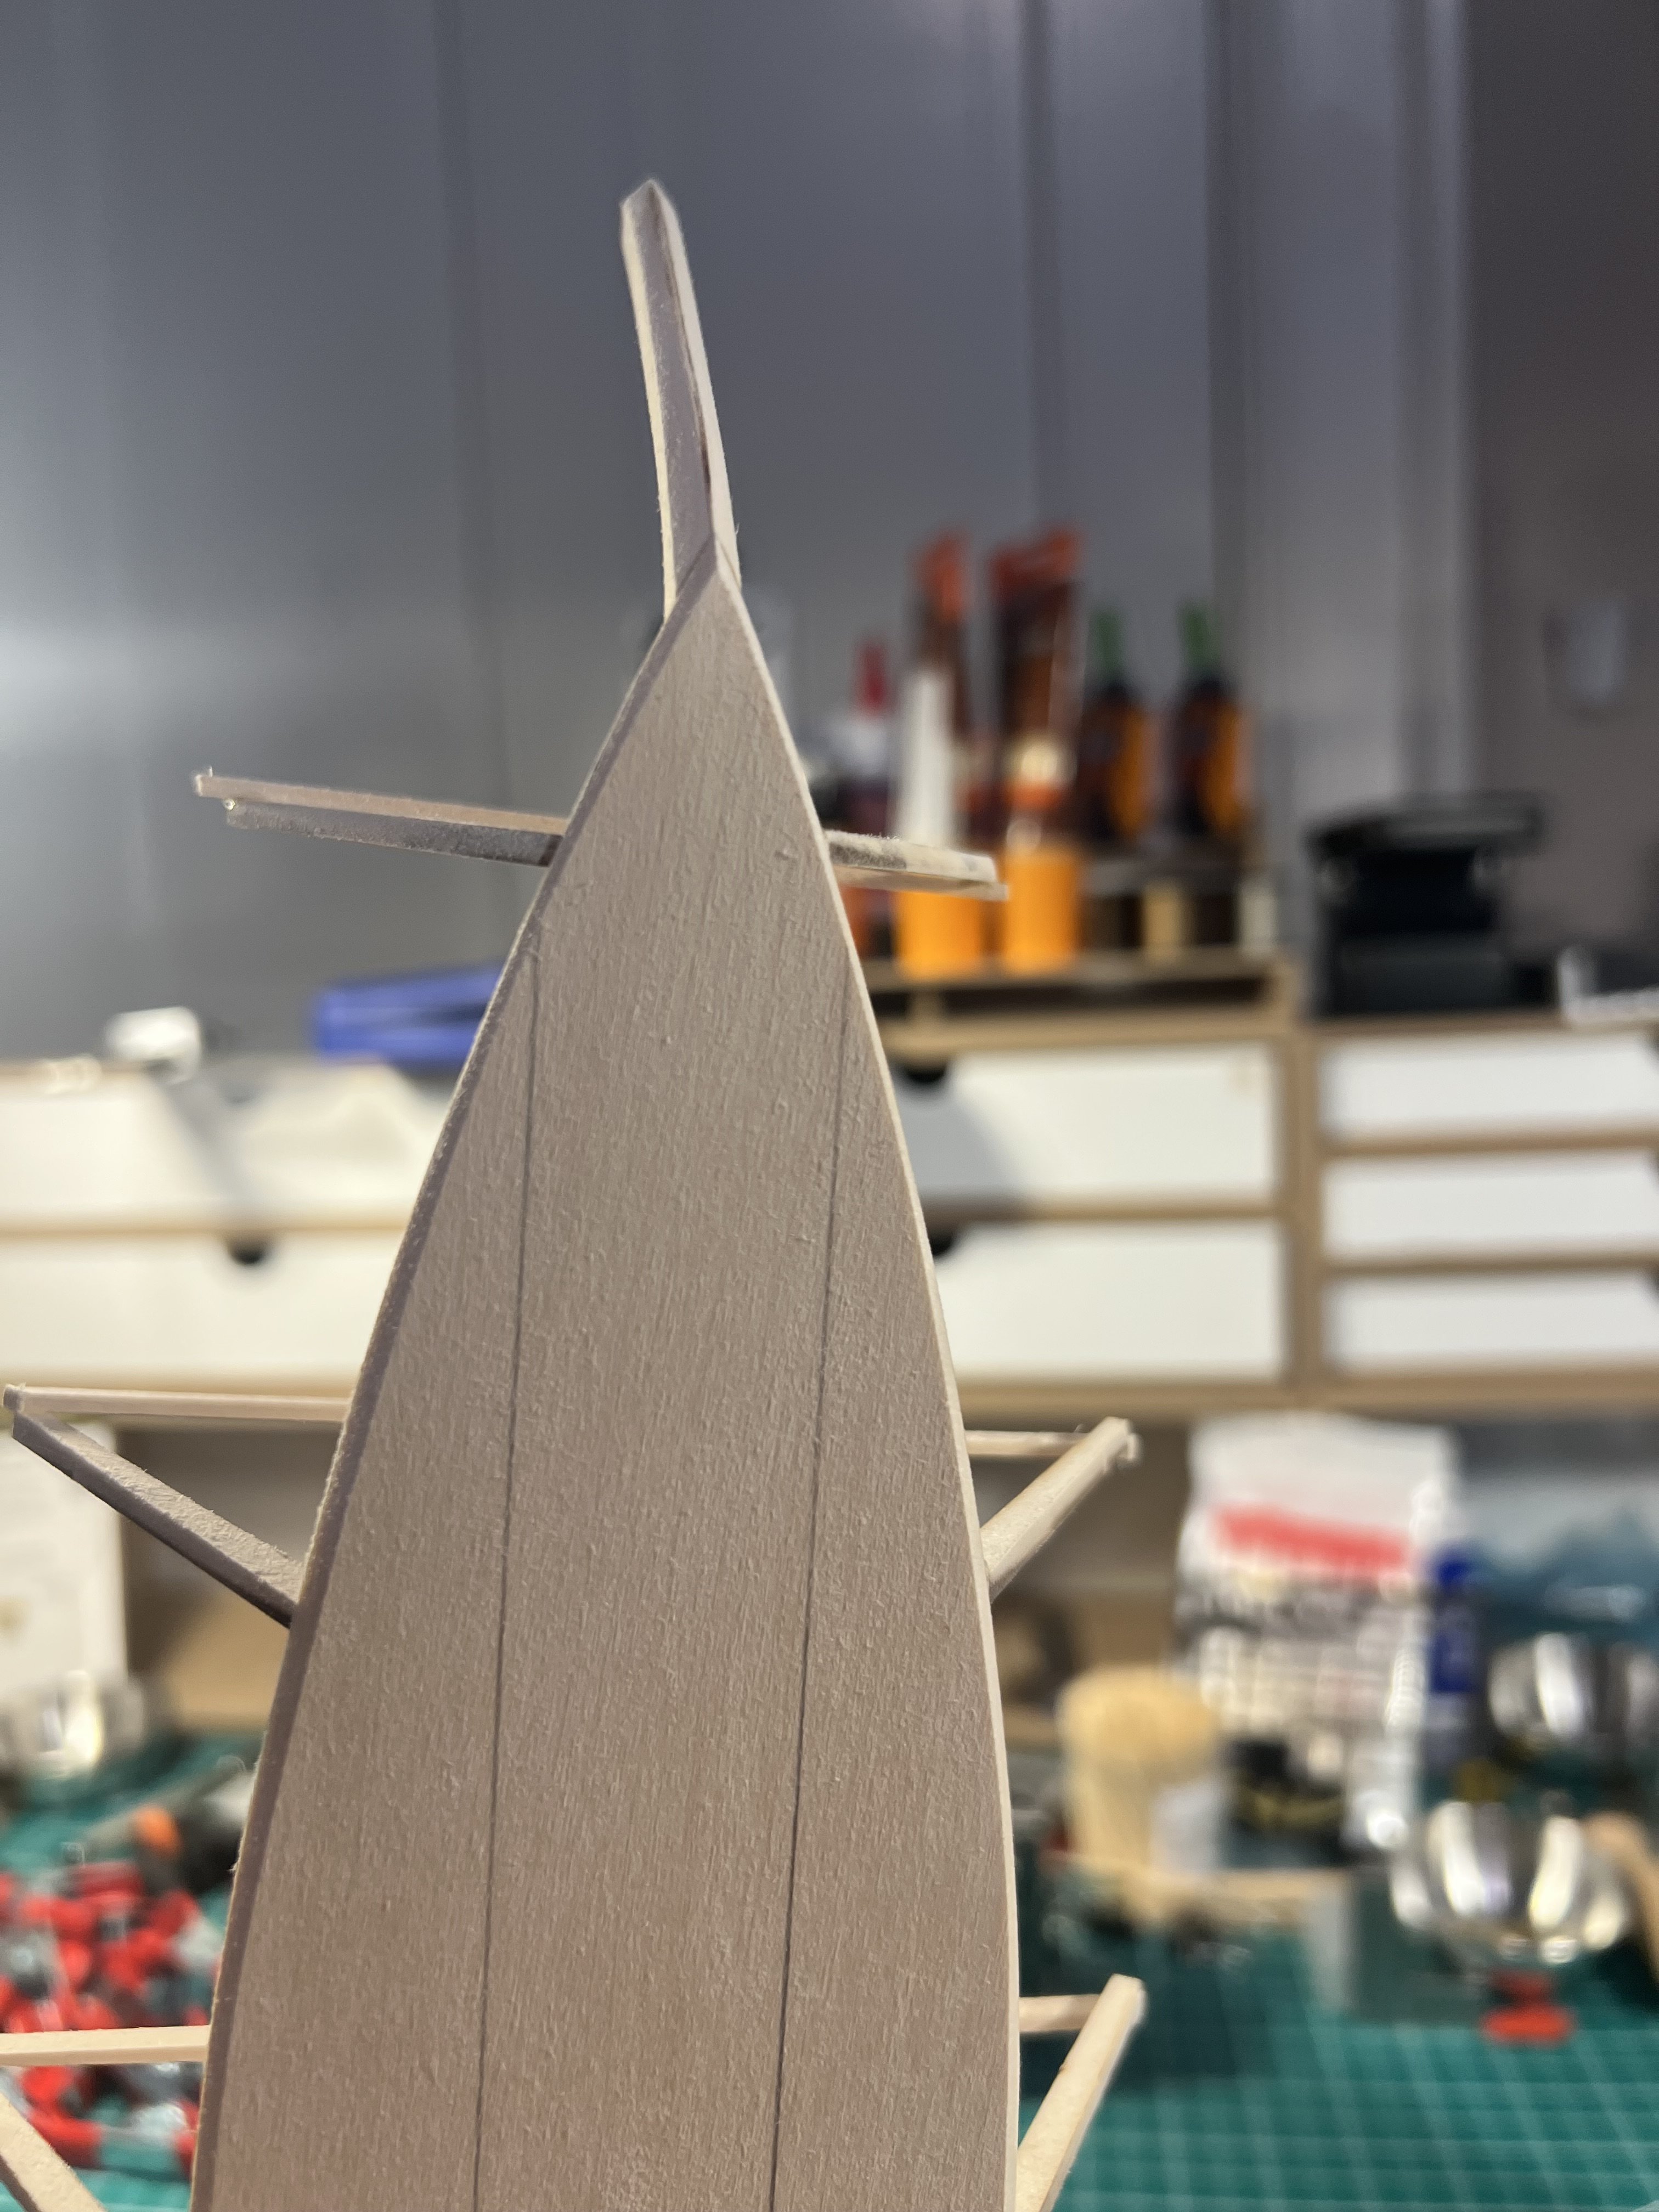
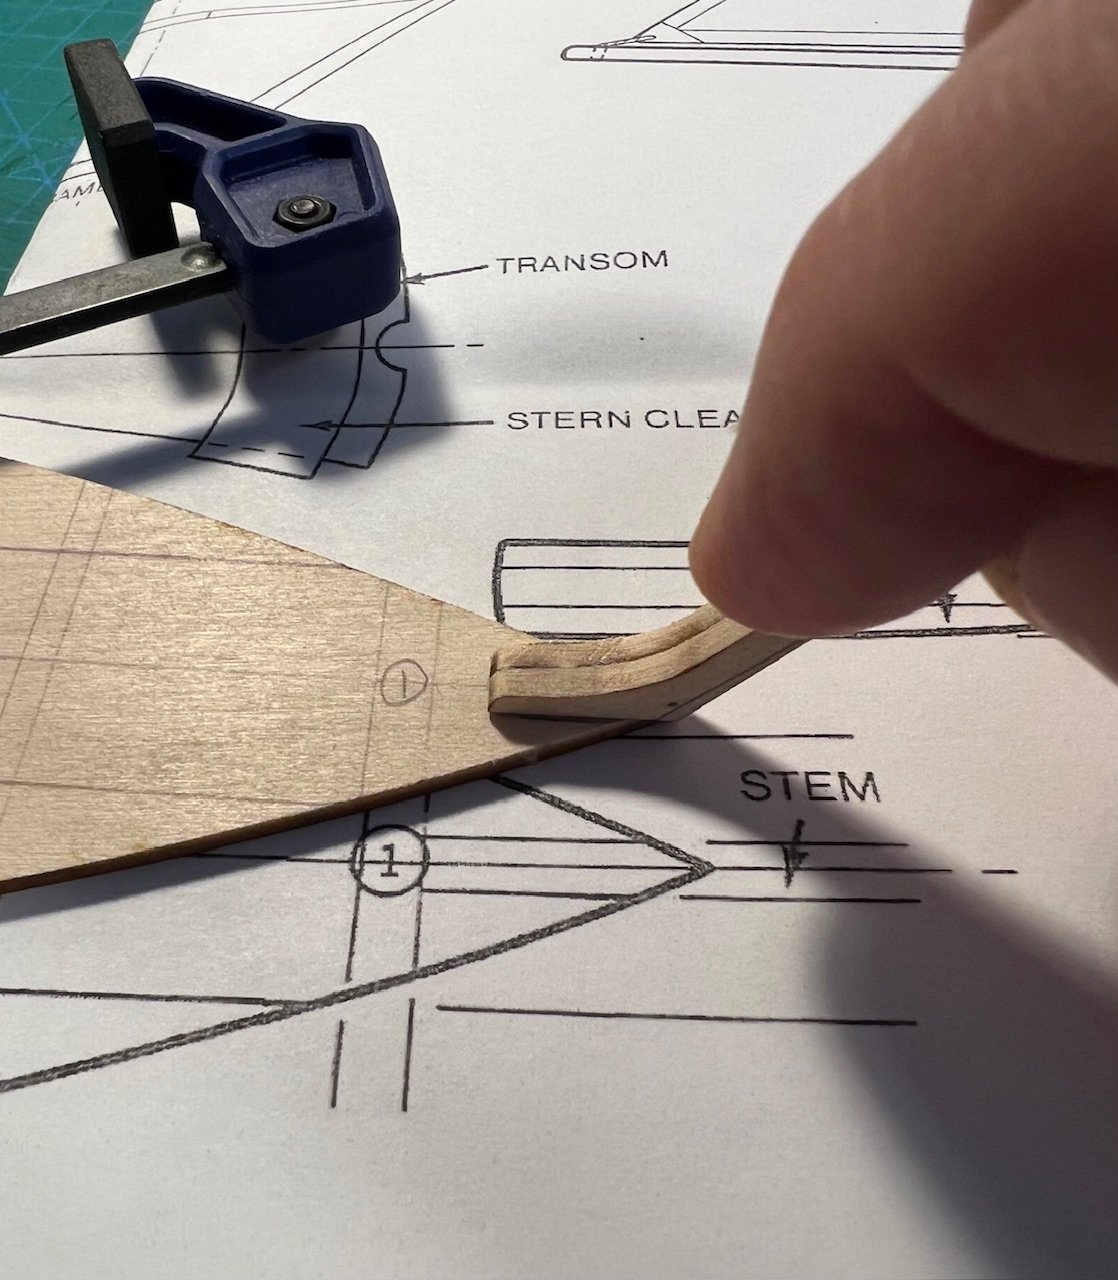
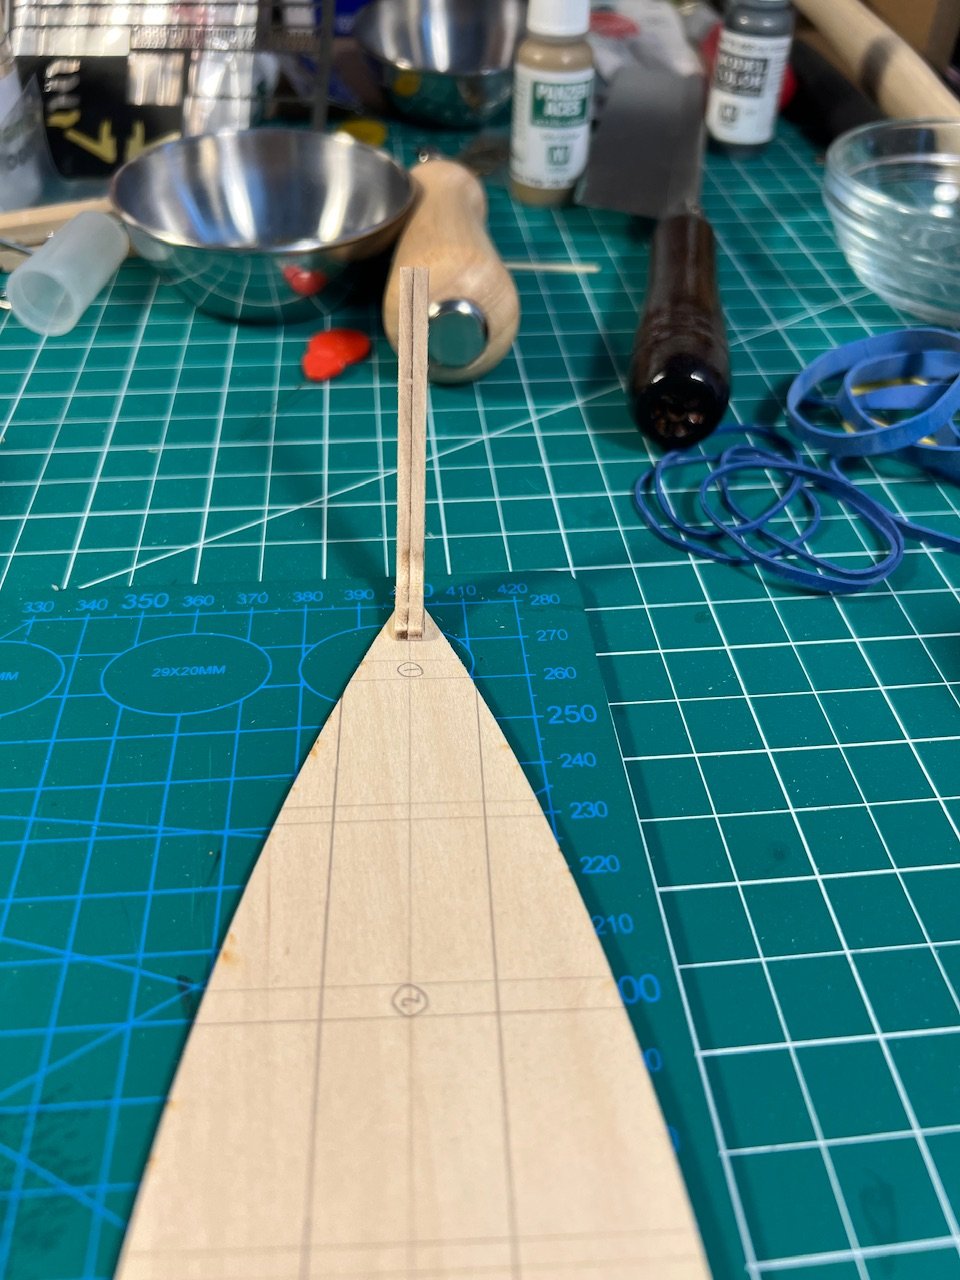
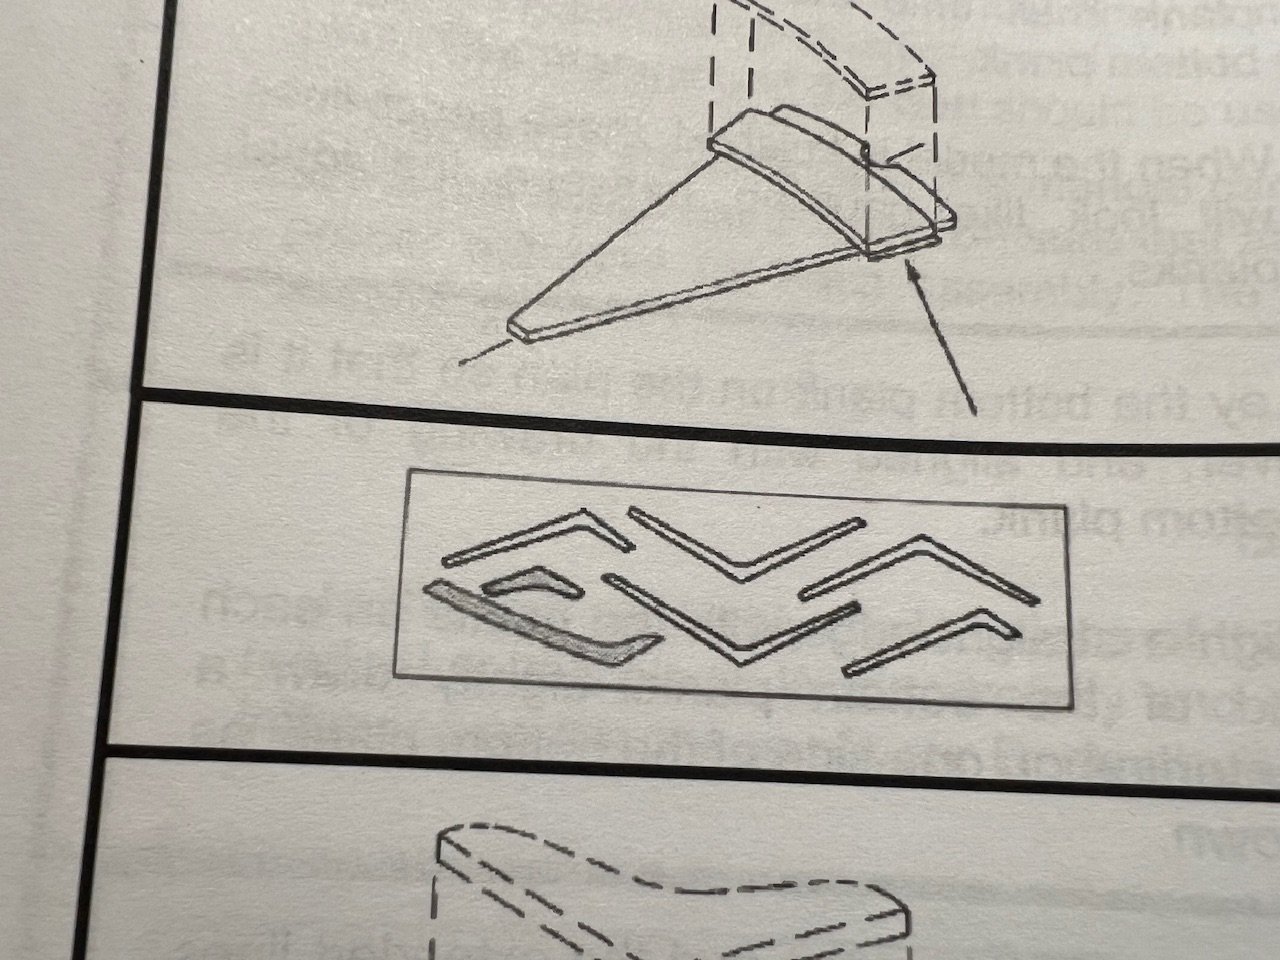
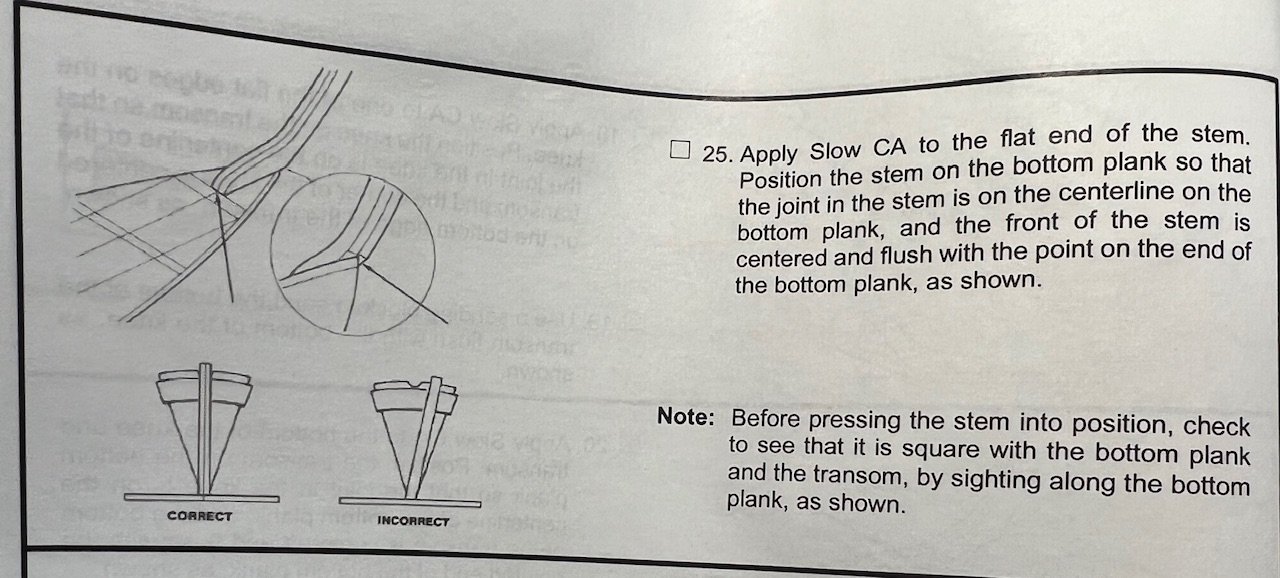
Another bit of a mismatch between parts, plans, and instructions. This Dory does have somewhat clearer instructions, better drawings, and far better plans than the Model Shipways Dory. But the drawings show that the stem should run up against the lines for the (1) cleat I drew before (the matched the plans). But clearly it won’t. So I’m going to follow the instructions and the inset drawing to have the stem flat flush with the point of the bottom (which is what I also did on the other end.


- 71 replies
-
- 4
-
-
- grand banks dory
- midwest products
- (and 2 more)
-
You could try rebooting your iPhone. You could also try using a different browser (e.g., Chrome instead of Safari or vice-versa). Don’t know if those might work, but worth a try for something simple.
-
Sorry. I didn't know where to put it. And I don't know how to move.
-
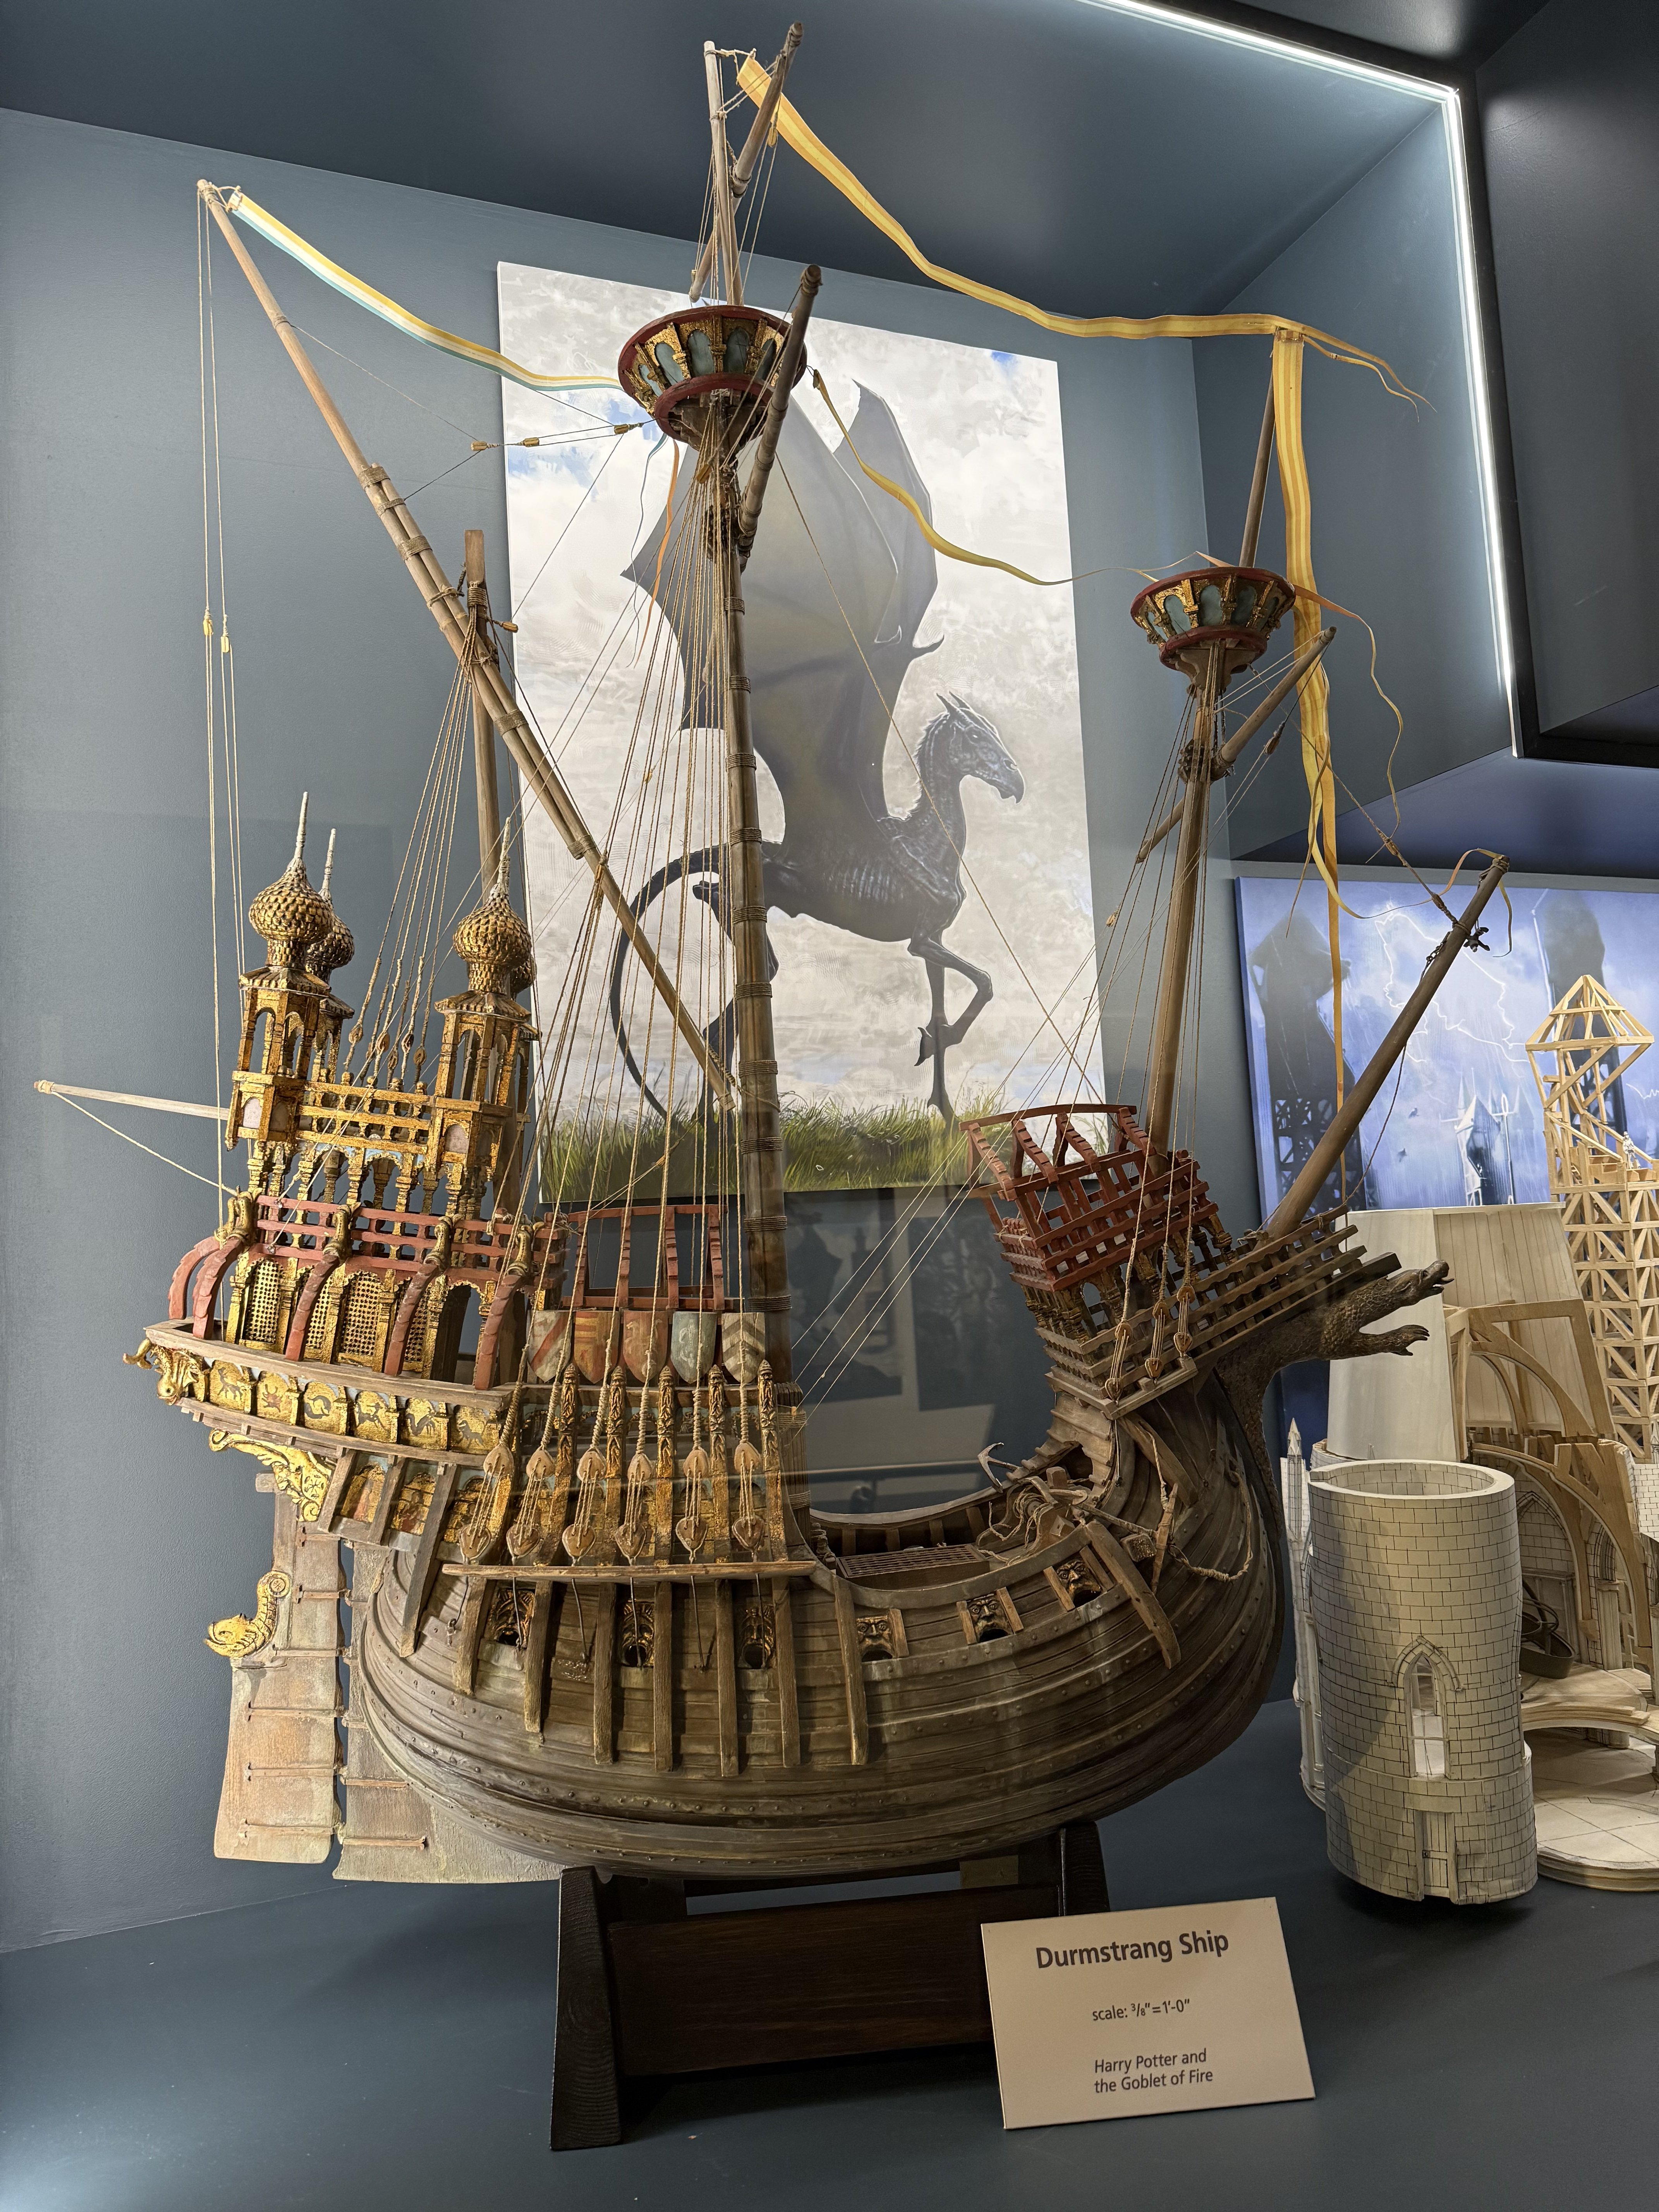
My wife snapped this photo of a model of the Durmstrang Ship at the Harry Potter Museum in London today.

-
Definitely check other build logs. You’ll see mistakes you can avoid. And you’ll find problems that are commonly experienced. Some model instructions are confusing or incomplete. Sometimes the model parts have changed a bit but the instructions have not.
-
Final planking.
palmerit replied to serpe's topic in Building, Framing, Planking and plating a ships hull and deck
You probably don't have to copy photos to your computer before uploading here. If you have a browser on your smart phone you can just post from your phone and upload photos. If you don't like typing long entries from your phone, you can still upload your photos to a post from your phone and then hop on your computer and edit your post to add more text from your regular keyboard. I always upload photos from my phone. I only just discovered that when you upload photos on an iphone there's a way to select what size you want to upload (I've been uploading the full size from my iPhone and they were probably too big) - there's an options button in the corner of where you upload photos from your phone and you can select full size, large, medium, small. -
I was also completely lost by the “gain” too. @Bryan Woods pointed me to the@modeller_masa build of the Pram that had some drawings. I didn’t understand what I was doing and why until I had it done (kind of) and it made sense.
- 167 replies
-
- 2
-
-
- Norwegian Sailing Pram
- Model Shipways
- (and 1 more)
-
Just wondering what color combinations make sense. I usually use Vallejo air brush paints.
- 71 replies
-
- 1
-
-
- grand banks dory
- midwest products
- (and 2 more)
-
Anyone have pointers on paint color options for a Dory? The Midwest kit doesn’t come with paint. I might have some paints I can use, but if I want some new colors I’d like to order so I have them in hand when I’m ready to paint.
- 71 replies
-
- 1
-
-
- grand banks dory
- midwest products
- (and 2 more)
-
@JacquesCousteau I haven't heard about the "burnish the edge" trick. Is that after it's laid down on the surface?