palmerit
-
Posts
1,056 -
Joined
-
Last visited
Content Type
Profiles
Forums
Gallery
Events
Everything posted by palmerit
-
Another option for a child as a gradual introduction to wooden models is a model by UGEARS (https://ugearsmodels.com). No glue, no shaping, more like lego than model shipbuilding, but wood. A few of their models are trains and ships: https://ugearsmodels.com/collections/all?filter.p.m.custom.topic=Trains+and+Ships
-
Just go here to order parts from Model Expo: https://www.modelexpo-online.com/products/parts-request?srsltid=AfmBOop9v8v6X6RxdCmMFv6zJ-fdSqjpHcNBOM4MzgaonSUkxhW-MXkx They’ll send them, but it could be a few weeks before you get them.
-
I don’t know, the first post was asking what the oldest book on ship modeling was. The one I saw in the Art Gallery of Ontario might be one of the oldest. The photo of the book was included in a post about their model ship collection, which included this book. The text of that book is available online if anyone is interested: https://quod.lib.umich.edu/e/eebo2/A50859.0001.001?rgn=main;view=fulltext
-
Cutters, Choppers, Guillotines, Slicers
palmerit replied to MintGum's topic in Modeling tools and Workshop Equipment
One thing I've seen - can't remember where, maybe I'm misremembering - is that with some of the cheaper cutters that are made out of less study materials, the blade (the blade itself being just a razor instead of an upholstery blade) and the arm can bend a bit when cutting thicker material, which could produce a less than clean cut. With the Ultimation, I think the need to do two cuts with thicker stock is just a property of the material itself (not the cutter); not quite sure the physics (or biology, being wood) but I would think that the second cut makes a cleaner cut (on thicker stock) because now that small (<mm) end you're cutting off is just tiny strands of wood fiber (so the ones on the cut off end deform rather than the ones on the long end you're keeping). That's why I'd think the same issue (perhaps compounded) would be true for other cutters. I haven't tested and don't know the precise physics/biology/botany at work. -
Cutters, Choppers, Guillotines, Slicers
palmerit replied to MintGum's topic in Modeling tools and Workshop Equipment
I think that's a peculiarity of this kit / this manufacturer. In kits I've built with strips and dowels so far it's never been the case that I have to precisely cut those pieces up into 1/3s or 1/4s with no wiggle room. They're always longer (and there's more) than I've needed (with few exceptions) - but I've only built Vanguard, Model Shipways, Midwest kits so far. I've always ended up with extra bits of strips and dowels. Maybe that's not true with other manufacturers. -
Cutters, Choppers, Guillotines, Slicers
palmerit replied to MintGum's topic in Modeling tools and Workshop Equipment
If it’s thin deck planks, I don’t even know if a double cut on the Ultimation is necessary. I rarely double-cut with mine. I could imagine that other choppers that use razor blades could benefit from a second cut on thick stock, but that’s just a guess. -
Cutters, Choppers, Guillotines, Slicers
palmerit replied to MintGum's topic in Modeling tools and Workshop Equipment
Not having built an Occre or AL kit I guess I don’t understand the question since I’ve never built a model where I would require planks (for a hull or deck) exactly X mm in length. And most strips I’ve gotten with kits have ends (and sometimes middles) I would not want to use anyway. my strips for hull and deck planking are always different lengths. For my next kit I’m going to make sure I buy extra strips so I can be pickier about what strips I use and do I can trash a plank I don’t quite taper or cut exactly right. The extra cut that’s recommended on the Ultimation is to get a perfect cut on thicker stock. I often don’t do the extra cut when I’m dealing with thinner stock (like the thin pear wood for the second planking with a Vanguard kit). I remember seeing some strange recommendations for doing planking in I think either an Occre or AL build video, like showing inserting planks cut to a triangular point at the end that you’d never see recommended. So maybe they recommend precise lengths too. I don’t know. -
Wood Plank Benders - Edge Bending
palmerit replied to MintGum's topic in Modeling tools and Workshop Equipment
I discovered I could use the metal base of my quad hands as a platform for edge pending. It’s raised so I can get clamps under it. It’s metal so a hot soldering iron won’t damage it.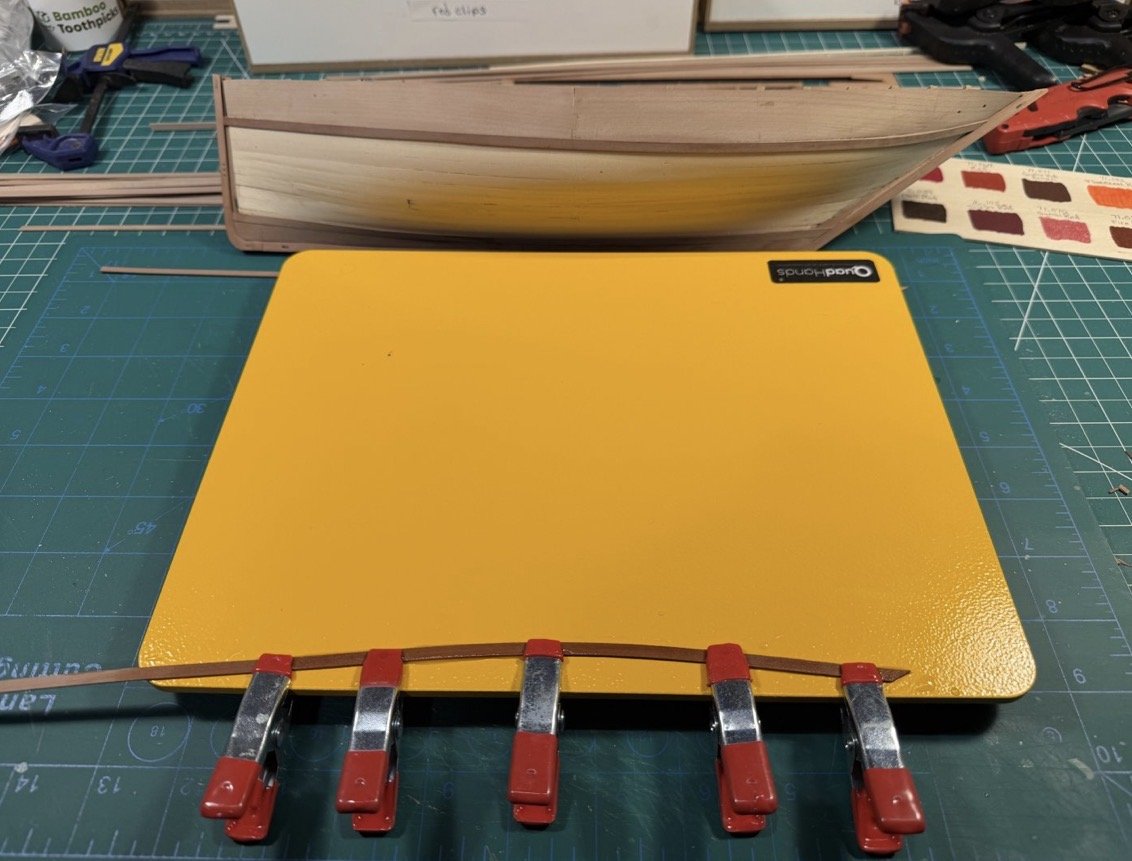
-
Cutters, Choppers, Guillotines, Slicers
palmerit replied to MintGum's topic in Modeling tools and Workshop Equipment
Here’s a review of the Ultimation slicer and sander: -
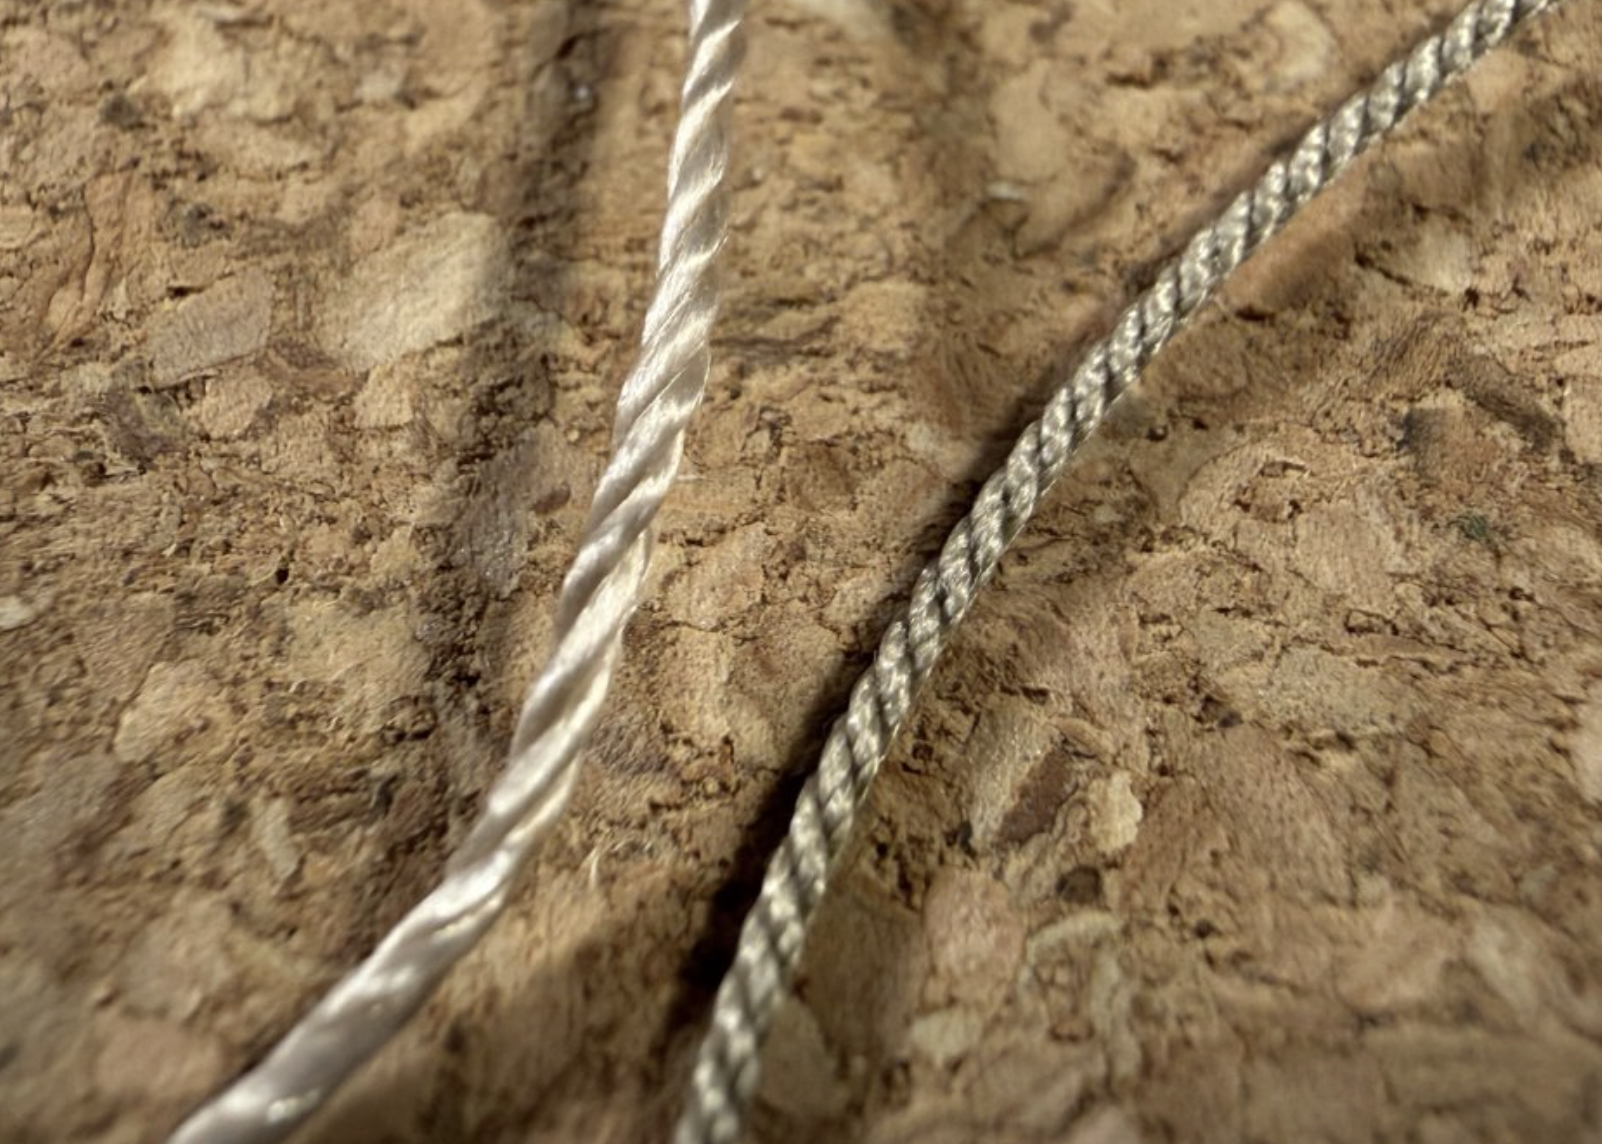
This is from a post I made on my Chesapeake Bay Crabbing Skiff build log. Left is the kit-supplied rope (Midwest Models). Right is rope from Syren.

-
Possibly, but I have no experience with shellac. My thoughts are you just need something which is clear when dry and will provide some level of adhesion when as it dries. I might experiment with some scrap pieces of PE and wood when I get back home.
-
I know nothing about that calculator. I would need to have way more experience building model ships to be able to do a whole-scale replacement of rigging without either using a kit or another source to start. Assuming the kit does not tell you how thick their rope is: A trick I learned here is to wrap the original rope 10 times around a dowel, snugging the rope wrappings together, then measuring the thickness of the 10 wrappings with calipers and dividing by 10 (do it a few times and take the average). That gives you the diameter of the rope you need to order - you'll never find an exact match, so pick something close. There were times when I had two ropes with two different thicknesses that were closest to the same thickness of the rope to order and I just ordered two ropes one step in diameter apart. Some people find other sources to replace the rigging. Some kits might come with 2-3 different thicknesses of rope - I remember seeing someone post that a kit of a fairly large ship inexplicably had only a single thickness of rope - where the actual ship might have had a dozen different thicknesses of rope or more. It definitely makes a difference in the final result having a variety of different thicknesses of rope. I recently saw some posts on a ship modeling Facebook group with someone doing ratlines from a kit that had one thickness of white rope with shrouds and ratlines the same thickness of fuzzy rope (they said they were going to dye the rope when they were done). The rope from Syren is excellent. As are their blocks and thimbles and other pieces. So many kit-supplied ropes are fuzz monsters. Syren's is perfectly clean and lays naturally. Vanguard's ropes are nice, not nearly as nice as Syren. Model Shipways' and Midwest's ropes are okay but are not so great. I've seen posts from other kits that seem far worse than either. It certainly adds to the cost, which is why kit manufacturers do not generally supply rope (or blocks etc.) of ultra-high quality. Easy to spend $100+ on a several packs of rope, blocks, deadeyes, thimbles, belaying pins to replace what's supplied in a kit (though you'll likely have left-overs for the next kit). I bought several plastic organizers to store (and organize) all the rope and blocks I have (that I bought and that were left over from other kits). Vanguard has sometimes had a Master Shipwright version of one of their models that is around $175 more than the regular kit that includes better blocks (I think the rope was the same).
-
Do you think using shellac would work just as well?
-
Cutters, Choppers, Guillotines, Slicers
palmerit replied to MintGum's topic in Modeling tools and Workshop Equipment
This is the Ultimation web site: https://ultimation.ca/ (There are some other "Ultimation" sites.) -
Novice: AL Sanfrancisco II or OcCre San Martin?
palmerit replied to Arnie-75's topic in Wood ship model kits
Some (maybe all) Occre kits have videos to supplement the printed instructions I believe. I know for some of their kits you can view their videos. -
Cutters, Choppers, Guillotines, Slicers
palmerit replied to MintGum's topic in Modeling tools and Workshop Equipment
The Ultimation slicer uses a very sharp upholstery-style blade so it can cleanly cut through a fairly thick plank. It’s a really sturdy piece of machinery all metal (except for the rubber disk). That said, doing two cuts produces a clearer result (if you’re asking what I think you are). I’m out of town and can’t check the specs on mine. It’s a small company and you might be able to ask them. -
Cutters, Choppers, Guillotines, Slicers
palmerit replied to MintGum's topic in Modeling tools and Workshop Equipment
Ultimation tools are great. Everyone I’ve seen review and discuss them here says they’re great. I have both the slicer and sander - bought them as a set that includes accessories. These are really well-engineered, solid, great tools. More expensive but you get what you pay for. I haven’t tried others, but I know with other tools (for modeling, for DIY around the house) I prefer having ones that are high quality. Are the Ultimation tools worth paying 3-4x the cost? No idea. -
Novice: AL Sanfrancisco II or OcCre San Martin?
palmerit replied to Arnie-75's topic in Wood ship model kits
In addition to which model you like the most, especially as a relative novice at wooden model ship building, I’d check the quality of the instructions and the number and quality of build logs here that you can reference. It’s also great to have a YouTube video you can reference. (On those dimensions, have you checked out the Vanguard Models Sherbourne - great detailed instructions, a Modelkit Stuff build on YouTube, and lots of build logs). -
Recommended First Machine
palmerit replied to vvvjames's topic in Modeling tools and Workshop Equipment
Have you considered the Ultimation tools - sander and slicer : https://ultimation.ca They’re high quality but non-motorized. They both small and light enough that you can easily take them on and off a workbench. Lots of uses of a power sander are easily done with the Ultimation sander and the slicer is great for cutting planks. I use both of them all the time. The total for both tools I think is around your budget and worth it I think. This set solves the problems you highlighted about keeping your part cut and sanded at 90 degrees. I’d recommend these first and then move on to power tools that will need a dedicated area. With the Ultimation tools I can do everything from my work table in the house, keeping the slicer and sander right under the table. For me, a power sander (or mill or lathe or table saw) would have to be down in the cellar. -
There are some peculiarities with the kit. These are re-issues of Midwest kits that are decades old. The instructions are detailed but describe techniques that haven’t been used for years and there are mismatches between the instructions and the parts as re-issued. I ended up modifying the kit a bit, adding some interior trim pieces to correct for where the pieces left gaps, and added a skirt around the open section because there were inexplicable gaps in the thwarts.
- 33 replies
-
- 2
-

-
- crabbing skiff
- Chesapeake Bay crabbing skiff
- (and 1 more)
-
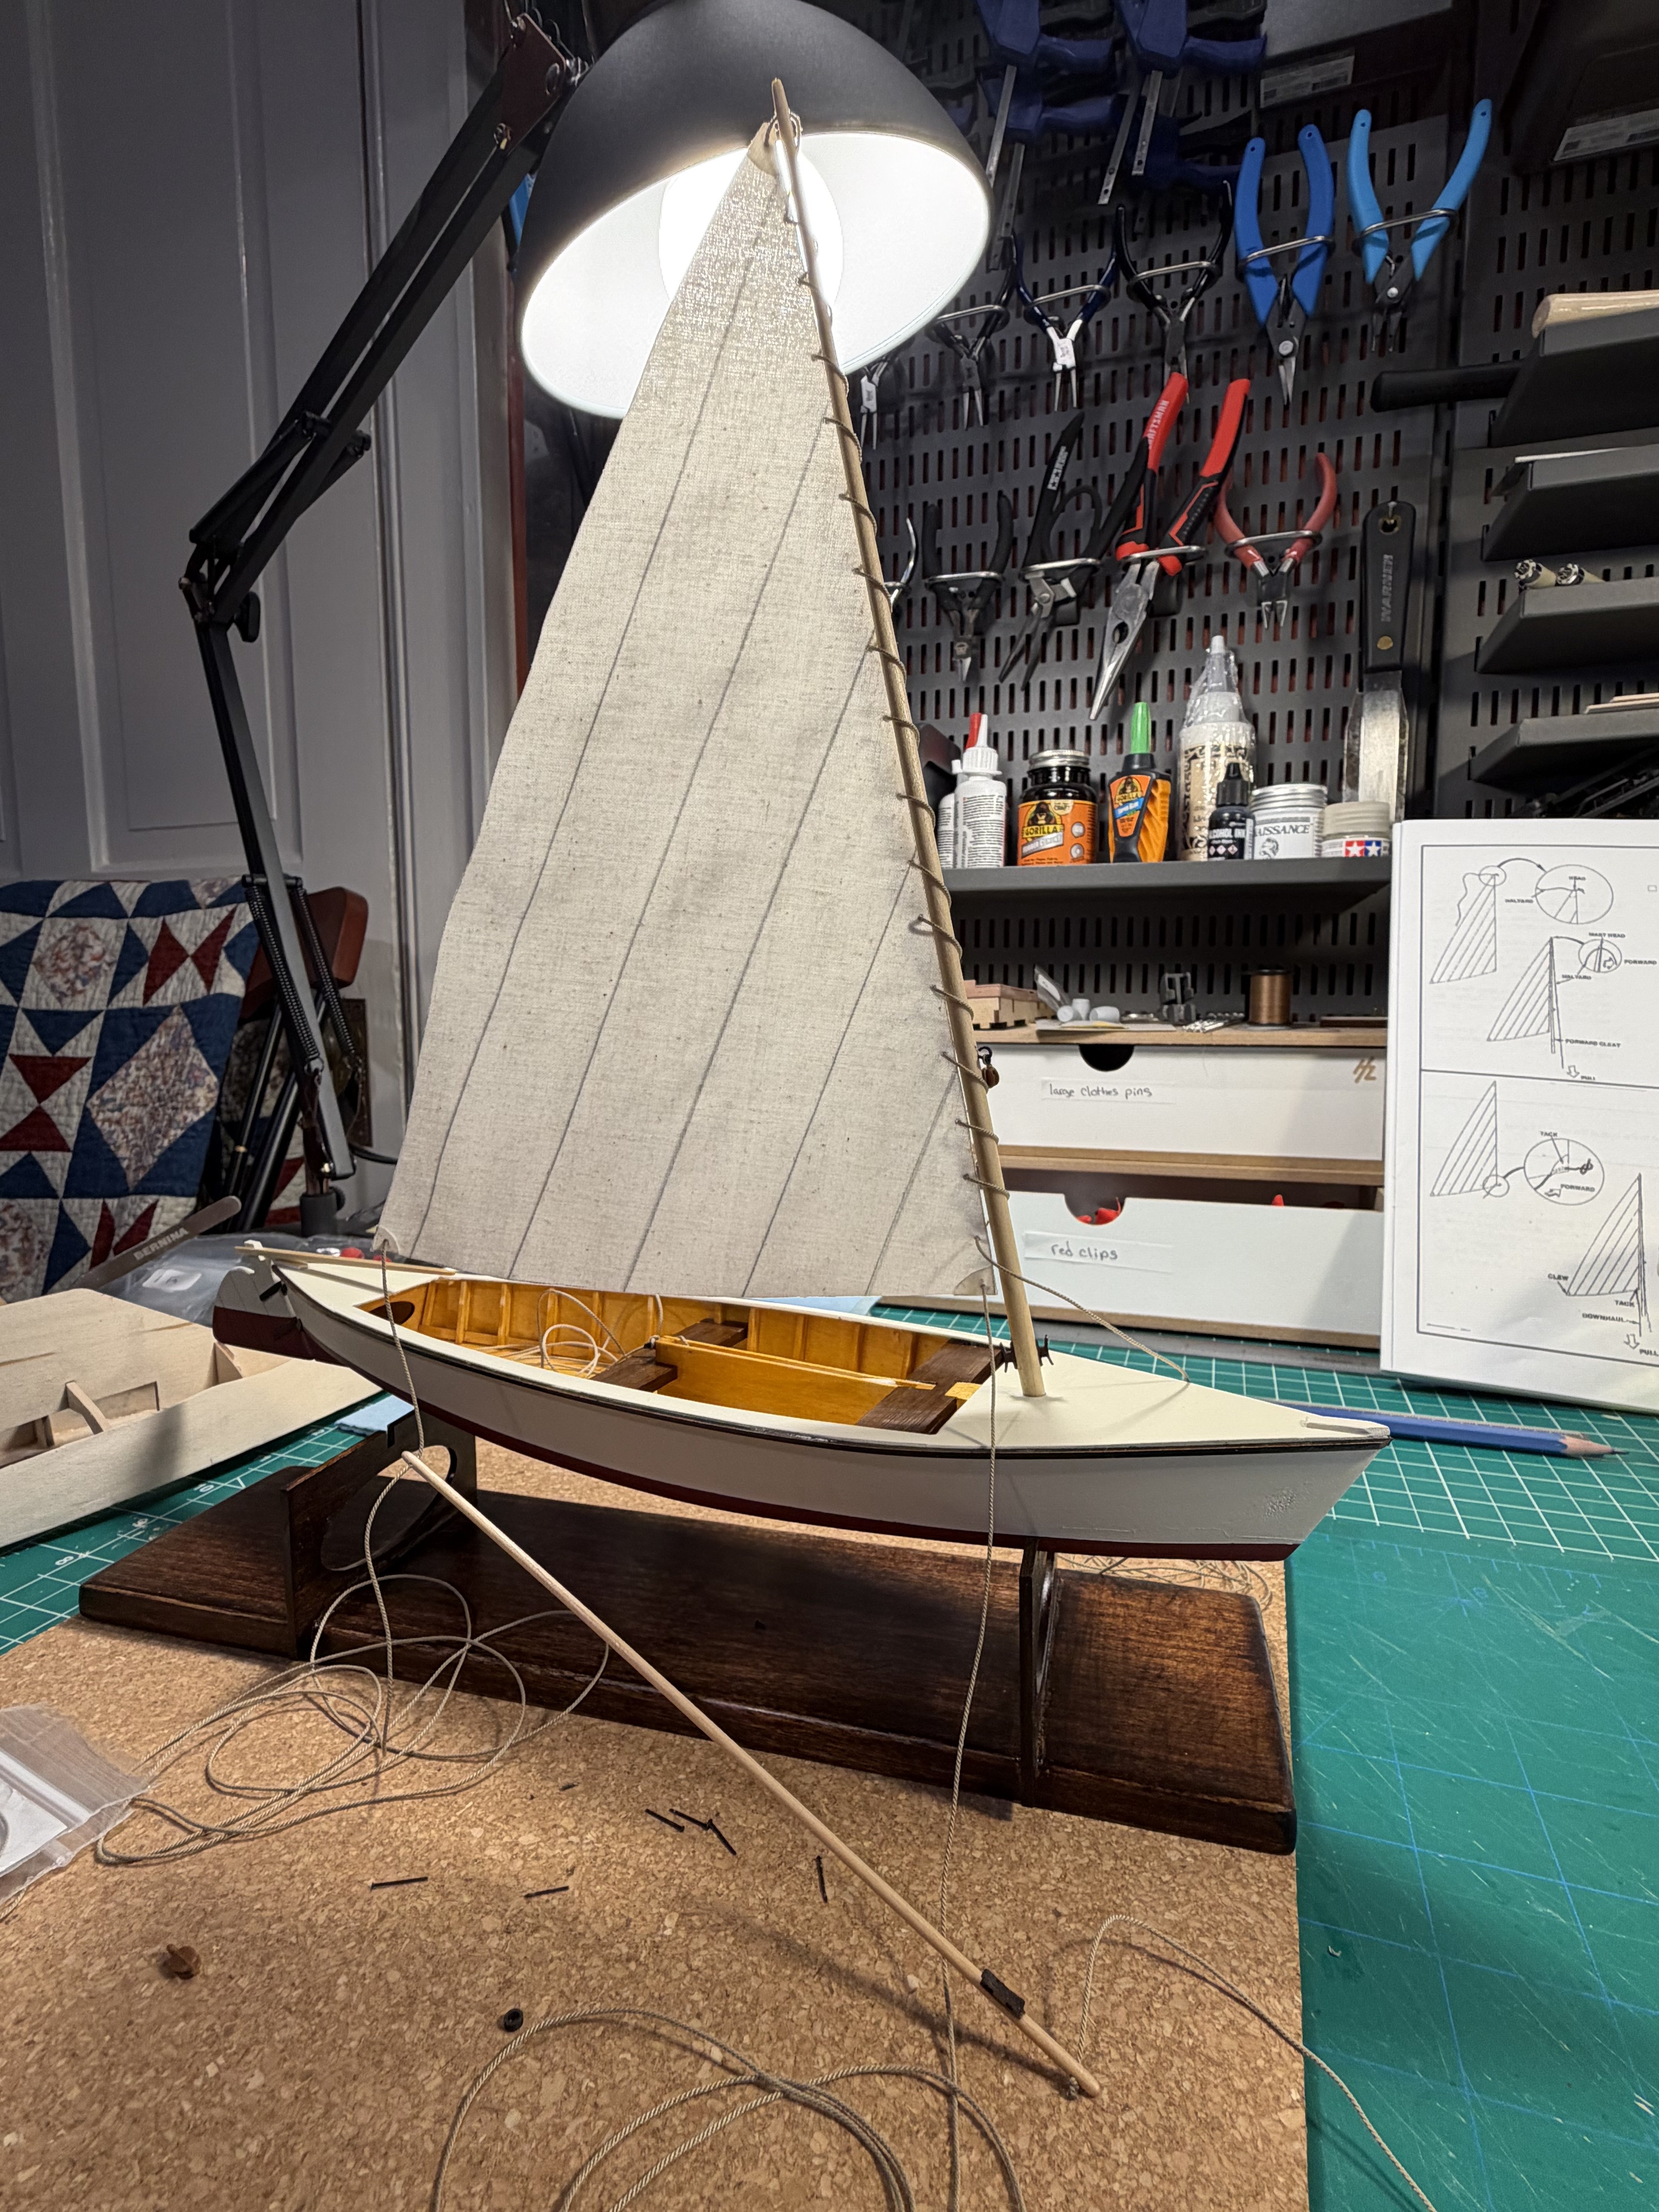
Some simple rigging on this one. I might finish this kit tomorrow before leaving to go out of town to visit family next week.

- 33 replies
-
- 8
-
-
- crabbing skiff
- Chesapeake Bay crabbing skiff
- (and 1 more)
-
@Nickk I assume you’ve built a lot of models - can’t imagine taking on a ship the size and complexity of the Victory unless I had way more experience than I do now. And I can’t imagine building any kit of that complexity with poor instructions unless I could essentially scratch build a model without needing instructions. I agree with @Ronald-V that if I were going to take on the 1000s of hours to build a Victory that I’d want one with great materials and great instructions - and build logs and videos to turn to for help.
-
Take 2: left: original plastic piece from the kit middle: first attempt with thicker rope and a larger thimble (and a black seizing) right: second attempt with thinner rope and a smaller thimble (and a tan seizing)

- 33 replies
-
- 10
-
-
- crabbing skiff
- Chesapeake Bay crabbing skiff
- (and 1 more)
-
Thanks. Yeah, after doing it I was thinking the same thing.
- 33 replies
-
- 3
-
-
- crabbing skiff
- Chesapeake Bay crabbing skiff
- (and 1 more)
-
@DB789 how does the Grecian compare to the Adder? I’m thinking of doing both. I know the Grecian has copper plates, which is certainly something new for me and likely contributes to the cost difference. Is there any real difference otherwise in the complexity of the hull or the rigging between the Grecian and Adder (I know they're different, but would you recommend doing one before the other)?