-
Posts
325 -
Joined
-
Last visited
Content Type
Profiles
Forums
Gallery
Events
Posts posted by sport29652
-
-
Jcoby, Martin and Jpett- I'm going with the "fat" plank move. I'm a sucker for fat girls so this only makes sense. ill post it to get some feed back.
Scott and JSG- I've learned so many terms since I've started the Hobby. Its amazing how these terms fit into the modern dialect. I was schooled in naval terms in bootcamp, and thought I had a good grip on them, until I started this hobby and I have quickly learned that I know squat.
-
JS I'm still experimenting with different woods (cherry and maple). Will see which one looks the best.
As you can see my nibbing is not matching.
Not sure what the anchor board thing is called but is it made of multiple planks or was it one solid chunk of wood ?
Looking forward to your responses, and have a merry Christmas
-
Martin- I have a Byrnes draw plate it's great ! But it might be my choice of wood, cherry. Ill experiment with walnut and see what I get. I Leo have maple but I don't think that will have good contrast.
Jcoby- we'll put !
-
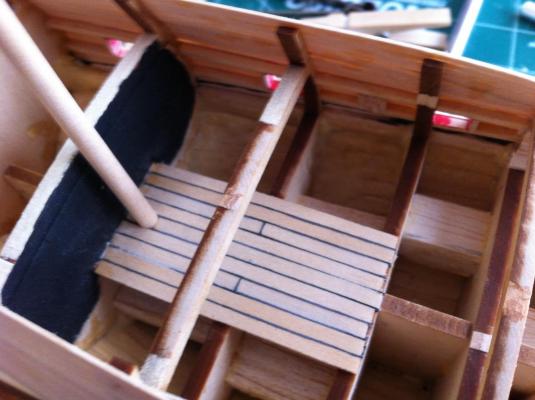
Ken Martin and Scott, thanks guys. I used paper glued to on edge then applied to the model. It takes longer but I like the look. I will plank the whole deck. Haven't installed the gun port hatches yet and with my luck I would loose one in their. Trying to make treenails now haven been able to get the wooden dowels small enough without destroying them. Will try the dremel method tonight.
-
Thanks Chris for the tip. On this build I'm sticking with the decals (already attached).
While I'm here a quick update
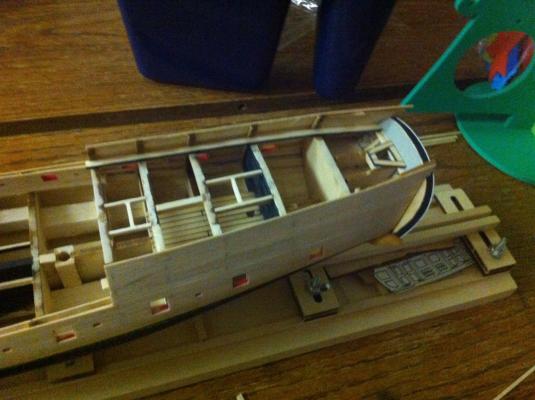
Have painted a little. The instructions state the inner bulwarks are grey. So went with that and .... I don't know that it looks all that great, but if it's historically accurate that's what I'll go with reguardless of looks. As you'll notice in the pictures I've planked the quaterdeck a little. I will be using cherry (milled on my new proxxon saw).
I wish I had marked the center lines better in the beginning ! It was tough trying to line up those hatches and I still think they are off. My planking only shows off this fact. Oh well it's onward and upwards from here. Will continue to paint and install my decking.
-
-
Scott- thanks for the praise. At this point in the build here are some fo the problems I have seen
1. the bulk heads should not be faired until after they have been installed. I followed the instructions and faired them prior to instalation so I ended up with some funky fairing.
2. the bulk heads are off, so be prepaired to add material. JPETT did a great job documenting this in his log. I had problems with at least 5 of the bulkheads.
3. the bulkhead extensions on the frames are very soft and will break (again JPETT documented this very well). I used some thin superglue to reinforce mine and had only a couple WTF moments.
I think some of the problems I have experienced were due to me not paying attention to the plans. Take your time fairing this model. look at it from every possible angle, and dont be afraid to ask any of us for help. Its a great group of people here and everyone is willing to help. I look forward to your log and welcome to the Rattlesnake family !
-
Zev- wanted to give you a heads up. It appears in your picture that the gun/oar port framing is shallow. Your framing meets the outer bulkhead perfectly but the inside does not appear to reach the inner bulk head. It needs to be wide enough to fill in between the outer and inner bulkheads or you will end up with a noticable gap after planking the bulkheads. Keep up the good work and Happy Holidays !
-
Do you mean Trex ? The composites they use on decks ?
-
So my work coninues. I have installed the quarterdeck waterways and hatch framing. I will plank the inner quarterdeck bulwarks and then put my attention to finalizing the paint.
Q: have been experimenting with sculpty and am considering using this for the transom "fashion" piece. Once baked does it sand or shape well ?
-
Shaz-The thread used on my kit sails is cheesy. Makes it look like a ship you could buy in a souvinier shop. I will rig it without the sails, but just like you said I had to step away. It was the sail making that frustrated the heck out of me. The only sewing experience I had was making a pillow in home economics back in high school.
- DesertWolf and Shazmira
-
 2
2
-
-
-
Thanks Wolf.
I guess that leads me into a bit of an update. I'll be finishing my model off without sails. I tried to make sails, but my sewing skills are not up to par. I actually lost alot of motivation to finish the san fran because of the sails. I hoping that a little time away from her will make me miss her and eventually finish what I have started.
-
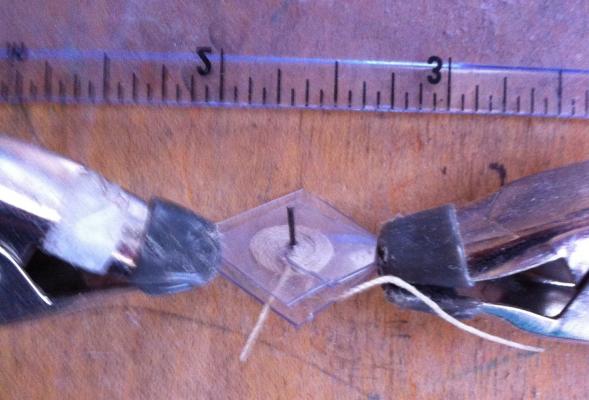
Yea, sorry about omitting that part. Wet the line with watered down Elmer's glue. Leave it in the jig to dry overnight. Here is a pic:

I used pieces of a baseball car protector. It's a thicker plastic and the Elmer's doesn't stick to it. The pin can be removed once the coil is made and the clamps are applied. PS this plastic is what I used for the windows on my rattlesnake. It doesn't fog up if you used superglue, which is my preferred glue.
-
I'm currious, what is that? It's great work just don't know what it is
-
JSG, thanks for the compliments. This bent my first build (hope to complete her soon but rigging it is a little frustrating). I coiled my ropes then spliced them into the blocks where the cut would be hidden. The coiling method I used I stole from someone here on MSW. You use two pieces of clear thick plastic to sandwich the roped and wind it around a pin stuck through the middle. Haven't tried to coil rope while it's on the model. I think that would be super difficult.
-
-
-
Martin that would be great ! I wish I could go with JS and use a saw but.... Don't have one. I have about $200 in my piggy bank and have been eyeballing the Syren. However it could be a really smart investment as I have the MS constitution to build next.
-
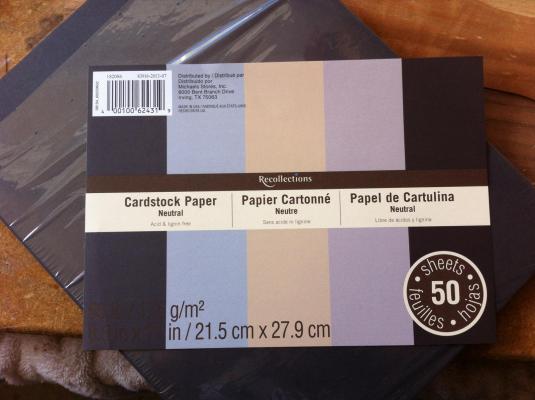
Let me know I could go for a package deal. I remember the post about using paper as caulking. Made a trip to the craft store and will begin to experiment with the method. I'll let you know how it works out. PS gonna use a dark brown paper or grey, will see how it looks.
-
I'm collecting chucks blocks and rope to use in this build, I dont know about throwing down another $100 on this build ? I've sent en email to MS we will see how long it takes for a response they have been great in the past.
-
Martin- the ports seem to be either a little angled or different sizes. I hopeing this dosent get magnified when I make the gun port lids, but I guess we will see. Your misshap made me cringe. I hope the damage is repairable.
J- you did a much better job at describing what I see with my ports. The black wall is for the quaternary deck steps that will allow a view below. So unfortunately not detailing under the quarterdeck, no extra cannons. I do have a question for you: what do u use for deck caucking ? And have have u tried to assemble the grating. My kit seems to be seriously lacking in enough material to do the grating egg crate style and not even enough to assemble them edge to edge ?
-
The detail is fantastic ! I really need to slow down as I have found a couple of issues with my build by examining yours. J keep it up its gonna look great !


Rattlesnake by sport29652 - Model Shipways - 1:64
in - Kit build logs for subjects built from 1751 - 1800
Posted
Martin- I too have made molding and hope
Mine turns out as well as yours did. I figure some boxwood vernier cut into planks should be the right thickness? The billboard should match the wales right ?