Check out our new MSW Sponsor Innocraftsman
×


adivedog
-
Posts
123 -
Joined
-
Last visited
Content Type
Profiles
Forums
Gallery
Events
Everything posted by adivedog
-
Keith, I thought about a binnacle too, but decided just to keep it as is. I do like the look though.
- 159 replies
-
- 1
-

-
- swift
- artesania latina
- (and 1 more)
-
Thanks Grimber I'll look into the solder tape. I never even heard of it. If I do the lead on the scuppers, I want it to be a dark matte colored to look like the old lead. The tape might be too shiny ?
-
Looking good so far. As for the bulkhead, I would use a shim, as you'll have to fair it out for the planking.
-
Hi hircsailor Yes as Dave said the lower decks are different, but the rest is pretty much the same. I think the new kit has some better wood, and the parts may be somewhat better. I know my keel was flat and even. I don't know if the old one had laser cut parts, but doubt it. Check out themadchemist log, he is doing the old kit. Take your time on the keel and frames. Make sure everything is straight and aligned, everything builds off of that. When you get the frames on, lay a plank across them and see how they line up for laying planks. Also, know the wood, especially the planks may not be to good, so you may have to buy some new ones. Good luck
- 159 replies
-
- 1
-
-
- swift
- artesania latina
- (and 1 more)
-
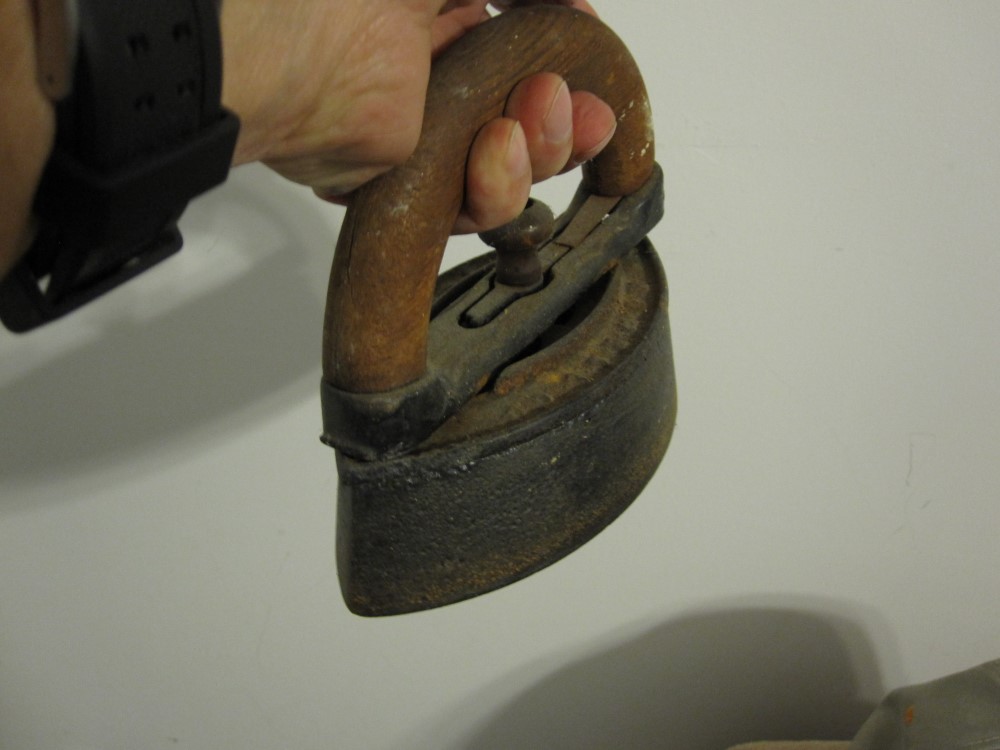
I was going to use this iron, but it was too much trouble to keep hot.

- 159 replies
-
- 1
-
-
- swift
- artesania latina
- (and 1 more)
-
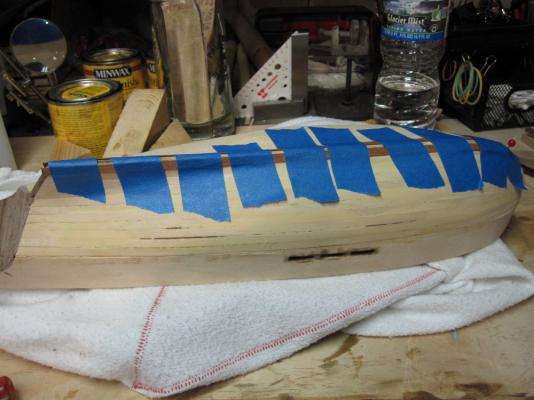
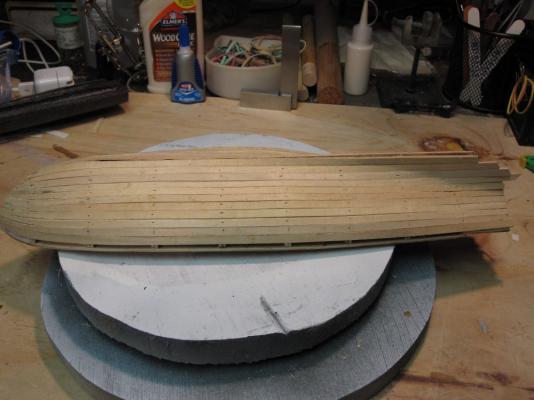
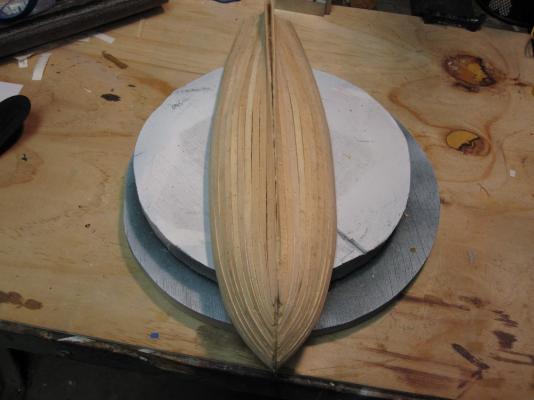
Finally, getting back on the Swift. Made and installed the new stern knees. After reading one of the logs about the knees being too narrow to drill the eye bolt holes, I made them 3.5 mm wide. The bulwark planking doesn't really fit with the worn look I'm going for, but will have time to worry about that later. Also, made new stern pin rails. ( not installed yet ) Today have been working on the second layer of planking. I think this is harder than the first planking. The planks are so thin, they are a bear to work with. I finally started using scissors to cut them, then lightly sand to size. Started the first garboard with tape to hold in place, then went to an old travel iron I had in a drawer. I ordered a sealing iron from Amazon, but it may not be here for a week. Should have went ahead and paid for the 2nd day delivery. But the iron is working out. If you used ca glue on the planks it would be easier to install, but I want to use pva, in case I have to remove one. Process of second planking. Am doing a plank on each side to try to keep it looking the same on both sides. Now, I see why none of the Swift build logs had much on the process of putting on the 2nd planking. As Keith talked about, applying the glue then using a heating iron to push on the planks and get the glue to set up quickly is the answer. I'm sure others have talked about it on some other builds but only checked the Swift logs. Or maybe others did talk about it and I just didn't pay attention. ? Which is very possible


- 159 replies
-
- 3
-
-
- swift
- artesania latina
- (and 1 more)
-
I thought I had problems, and I have a new kit Good luck
-
Keith, any progress on moving to the garage yet ?
-
Also, yes the bow does need to be beveled also. Would use wood glue whenever possible, it's a lot easier to get loose if you need to have a "do over'. I've had to take of several mistakes and re do them. Some of the parts can't be clamped so you'll have to use ca.
-
Hi Giantdog, you are right about the false keel. I was the same way about the planking, but it was easier than I expected once I got started. I used my dremel to bevel the false keel back to about frame 7. After the fact wish I had when ahead and beveled all the way back and went ahead and thinned the stern. ( which I did after the first planking was on ) Your math on the planking is right. If you plank first like I did, then you can sand the false keel down then. I also thought long and hard about the second planking. Whether to put the keel on before or after the planking. Most have put the keel on before. I'm going to put the second planking on before the keel and see how that works. Keith put in a rabbet on his to fit the second layer in, which would work also. I'm hoping with the second layer on, I can then sand the false keel down and the put on the keel. Hopefully, it will look right with the plankng being under the keel. That's one of the things in this kit AL really messed up on. They should have had a thicker keel, at least 6mm. I bought a piece of 1/4 " oak, and cut the keel pieces out with a band saw. Was going to stain it and use that, but decided to use the original keel. I've been slacking off this week, but should get back on finishing the second layer tomorrow. Then we'll see how it looks. Good luck with your build, will be glad to help in any way I can. There are a lot of swift logs and a lot of people that will help when you need it. You'll find out you will be spending a lot of time just sitting and pondering what to do sometimes, that's part of the build to.
- 159 replies
-
- 1
-
-
- swift
- artesania latina
- (and 1 more)
-
I may work on that some more later, it does sound like a nice touch though.
-
Thanks Keith, I read they use to put lead in the scuppers. I took some lead solder and took a hammer to it to get it thin and tried to fit in scuppers, but I think they'd be more work than they are worth.
-
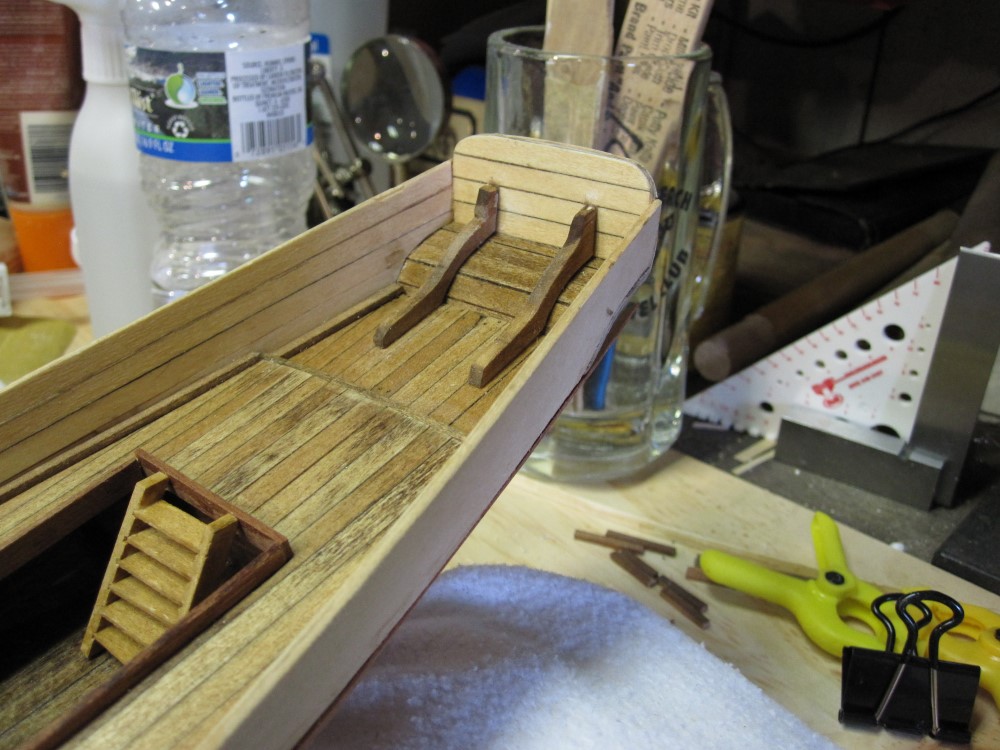
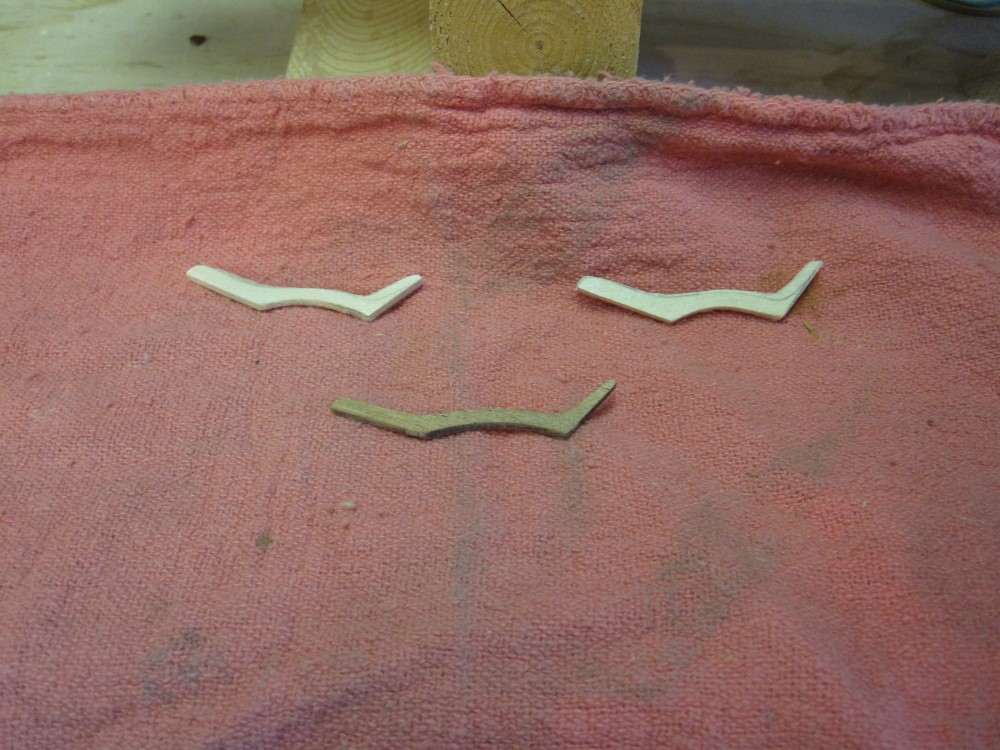
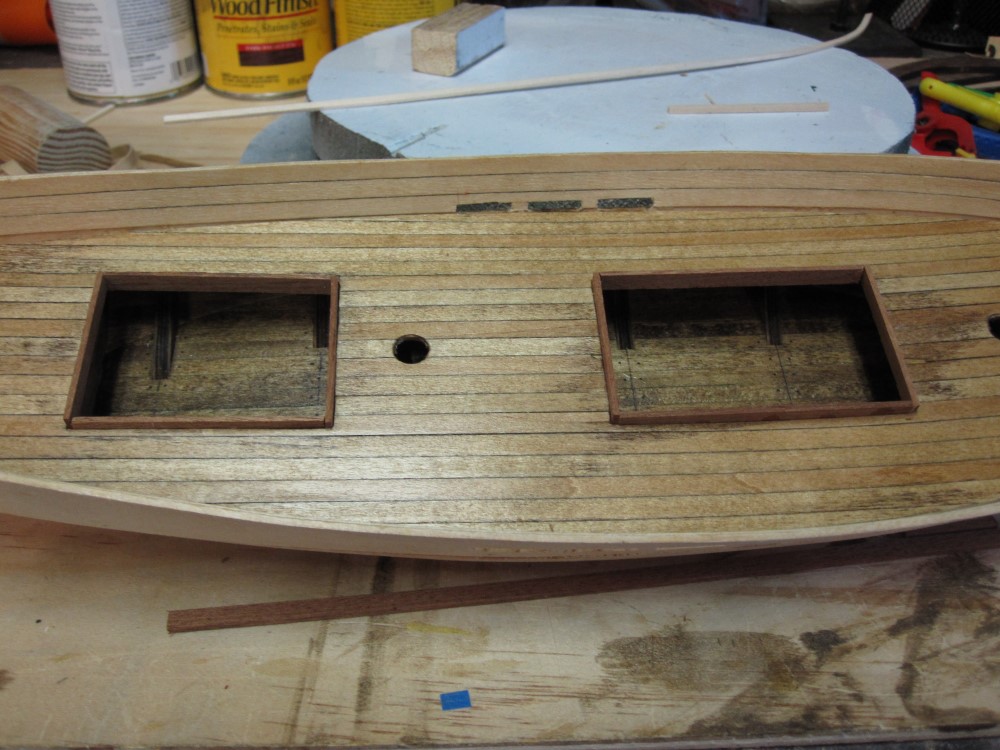
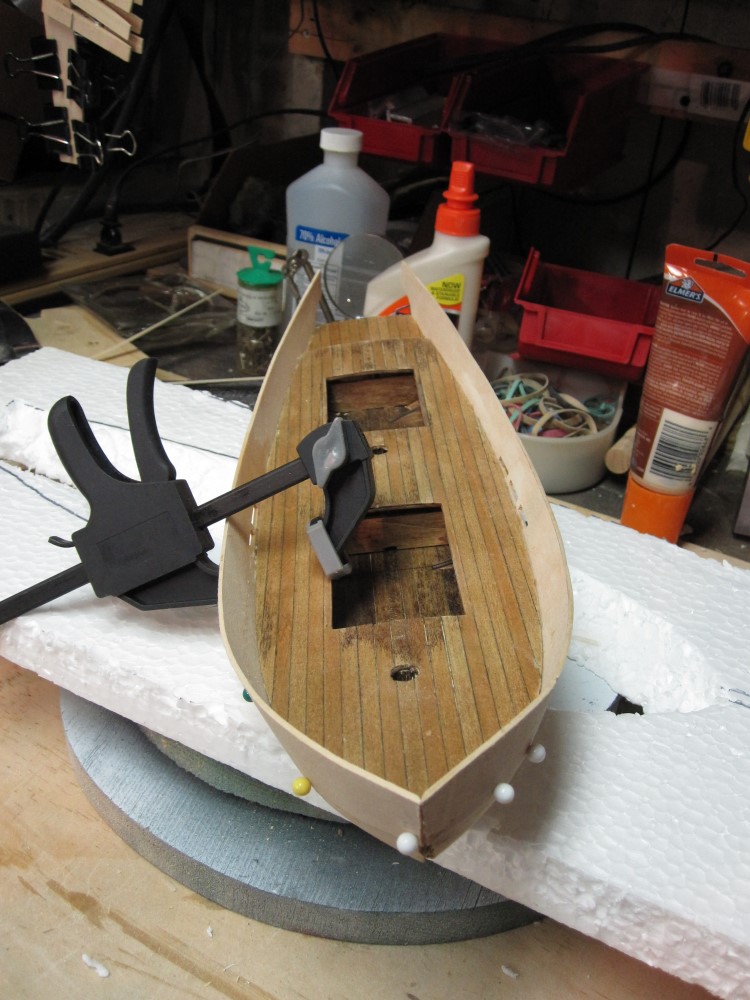
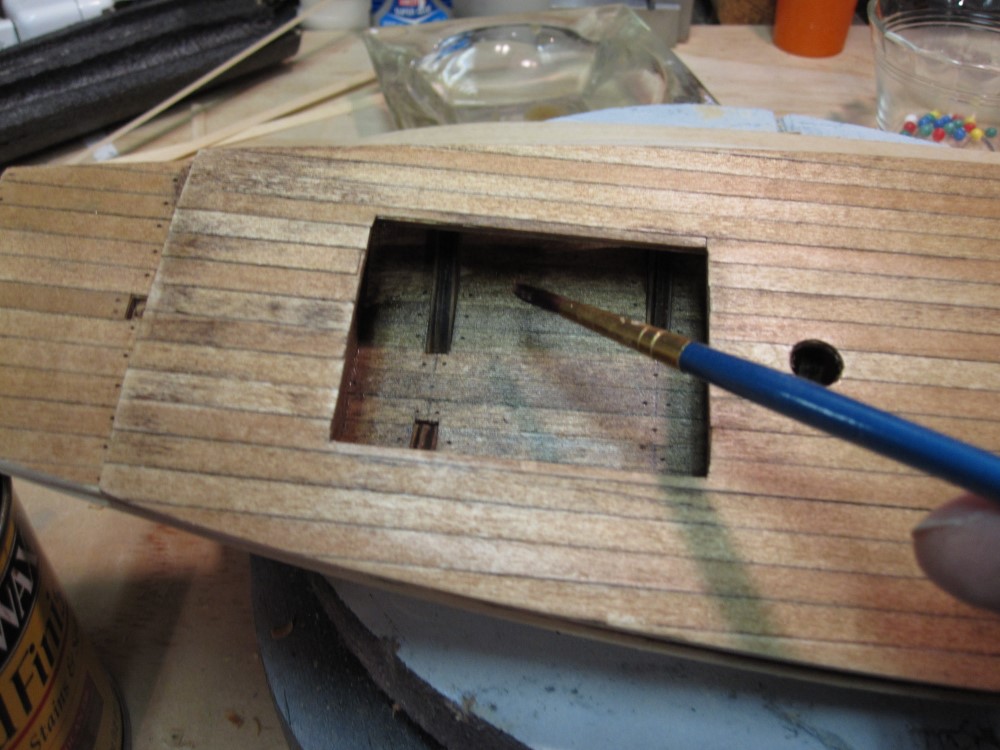
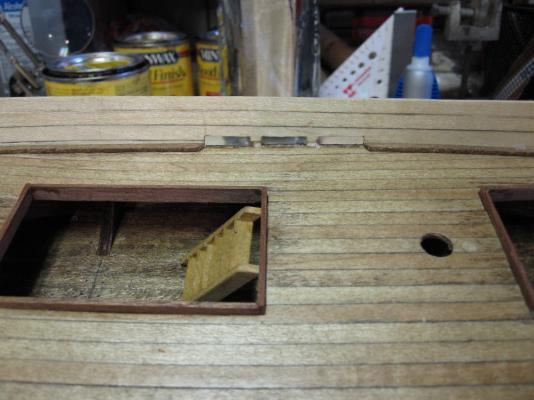
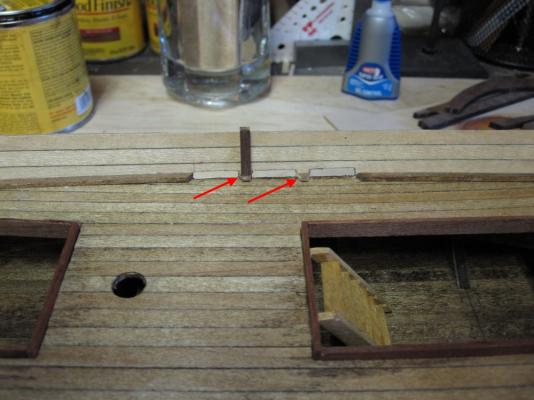
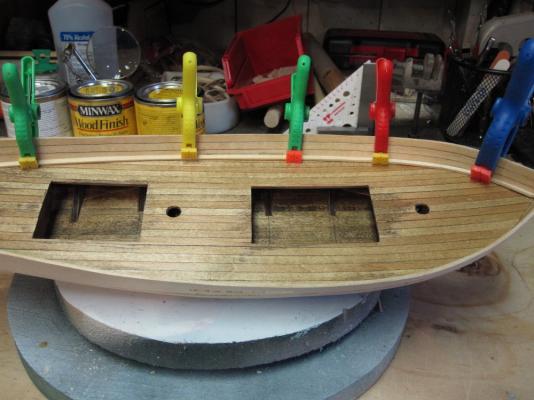
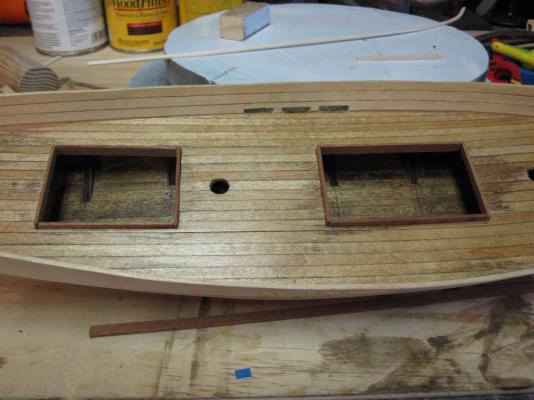
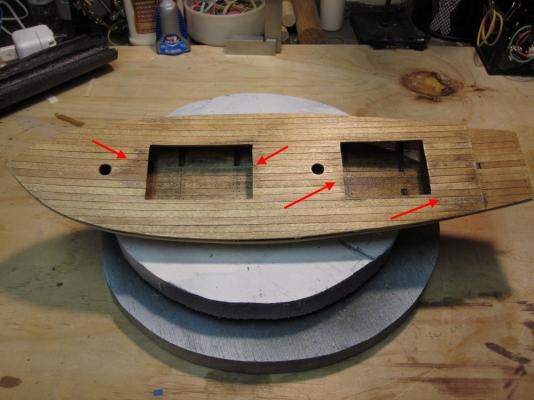
After watching all my teams lose this weekend, I decided to get back on the build today to take my mind off of the losses. Started by gluing in the ladders. Then the stern step. Finished gluing the stringers in. Now here comes the but. According to the plans, the layout and the pictures the stringers go all the way along the deck. If you were going to put in a deck the same thickness as the stringer I can see that, but the scuppers are there to drain the water coming over the bulwarks while at sea and for rain in port. So to me the scupper have to be at deck height. Looking at the plans and the ratio, the decks would have 4-6" of water on them before going out the scuppers. I cut the stringers at the edges of the first and last scupper and beveled for drainage. My question now is, how to finish it ? Here are two small beveled pieces of stringer between scuppers, then add timberheads ( futtocks ) ? above Or leave out pieces of stringer and just go from the deck. I still have to do some finish work on the scuppers, but these will give you an idea. Also ran into problems with the stern brackets. They didn't fit right, so had to make two new ones out of some scrap wood left over from the dinghy. Then I'll stain them.


- 159 replies
-
- 2
-
-
- swift
- artesania latina
- (and 1 more)
-
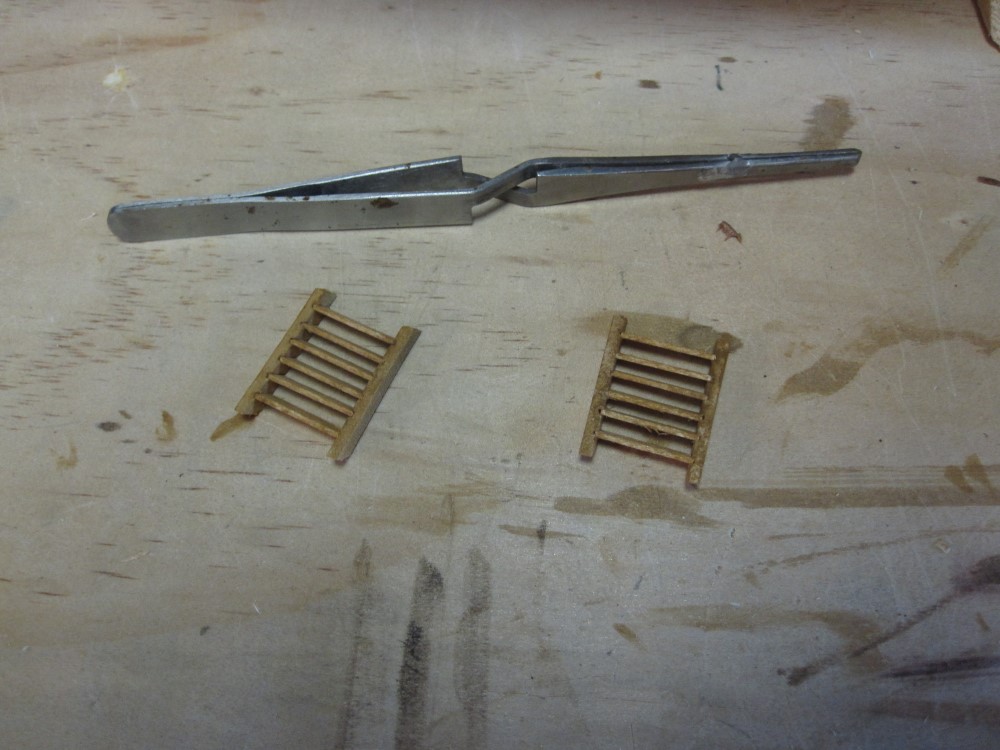
Haven't gotten a lot done the last few days. But thought I catch up on what I have got done. Got the lower stern done with the African walnut. I bonded some of the thin planking to the inside of each piece and stained same as deck. I beveled the outer edges for a better fit, then sanded the outside flush. Made new deck stringers. I stained the originals a color I didn't like. Did a lateral bend and am letting it form. Got the hatch coamings on today. Put together the ladders for the lower decks and stained them English Oak. I'll finish up the stringers next. Then not sure what after that. Since the Ryder Cup starts tomorrow morning, may not get much done.


- 159 replies
-
- 3
-
-
- swift
- artesania latina
- (and 1 more)
-
Thanks Russ, just keep learning so much everyday I work on it.
-
So true, in fact think there are a few more I could use.
-
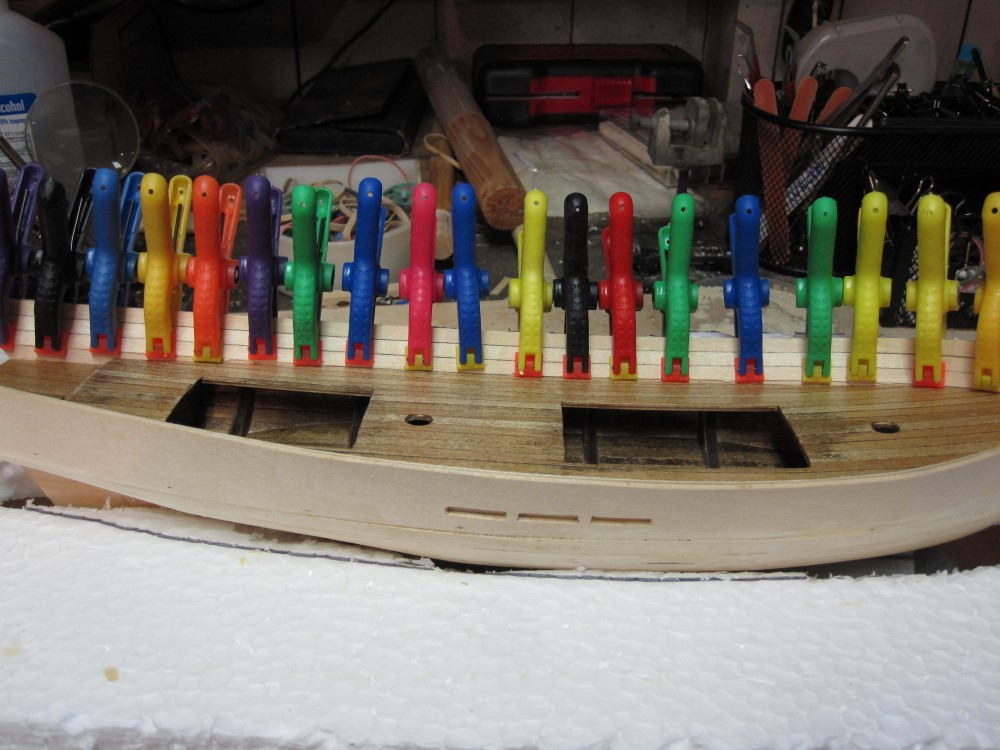
I finished planking the bulwarks yesterday. Since its a compound bend the planks didn't want to lay against the bulwarks, I had to keep adding clamps as I used pva . When I was sitting back looking at it, I thought it looked kind of humorous. No rubber bands here.

- 159 replies
-
- 3
-
-
- swift
- artesania latina
- (and 1 more)
-
Thanks Rich Russ, I decided to leave the deck as is. I want it to look like the work boat it was, not just a wall flower Thanks for checking back Keith, could be.
-
Thanks Keith, I'm leaning toward just leaving as is. First, I do like the color of the stain, just didn't like where the stain absorbed in a few places and made it too dark, two, I don't really want to redo the whole deck. Since this is my first build, figure it's all part of the learning experience.
- 159 replies
-
- 4
-
-
- swift
- artesania latina
- (and 1 more)
-
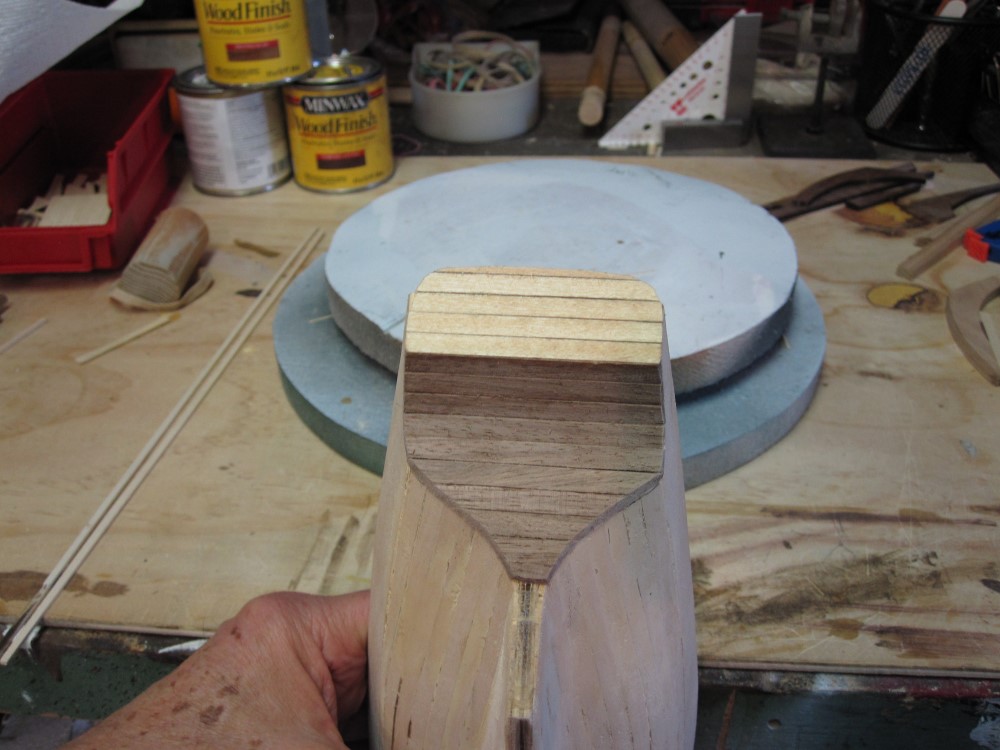
I did wind up having to cut new bulwarks out of basswood. I got in a hurry the other morning, didn't double check every thing and misscut the bow on the bulwark. Now have both bulwarks done. Test fit of the larboard bulwark While waiting for the glue to dry I noticed the hull planking on the inside of the lower decks needed to be stained. I think I'm going to plank the inside and outside of the bulwarks next. Then do the transom and lower transom.


- 159 replies
-
- 3
-
-
- swift
- artesania latina
- (and 1 more)
-
Keith, I already have some basswood sheets I got at Menards. I have been thinking about trying that. Won't be working on it until tomorrow, so will see then. Will probably cut one out to see how that goes ? I was able to shape the ones with the kit, but think they would be difficult to cut at the bow. I also made a template of the bow with a piece of the basswood, that will fit at the bow to mark the mid line. I'll attach a picture tomorrow morning. Haven't tried it yet, was waiting for the glue dry.
-
Thanks a lot Keith, that's a great compliment, I appreciate it. Am starting on the bulkheads and have found I need to do a little sanding and fitting so it will fit right. didn't realize I'd have to sand off some of the aft deck and some of the sides of the deck. I just put some pva on the aft section of the bulwark, then will try to set the rest. The main thing now is to cut the bow section so it's right.
- 159 replies
-
- 1
-
-
- swift
- artesania latina
- (and 1 more)
-
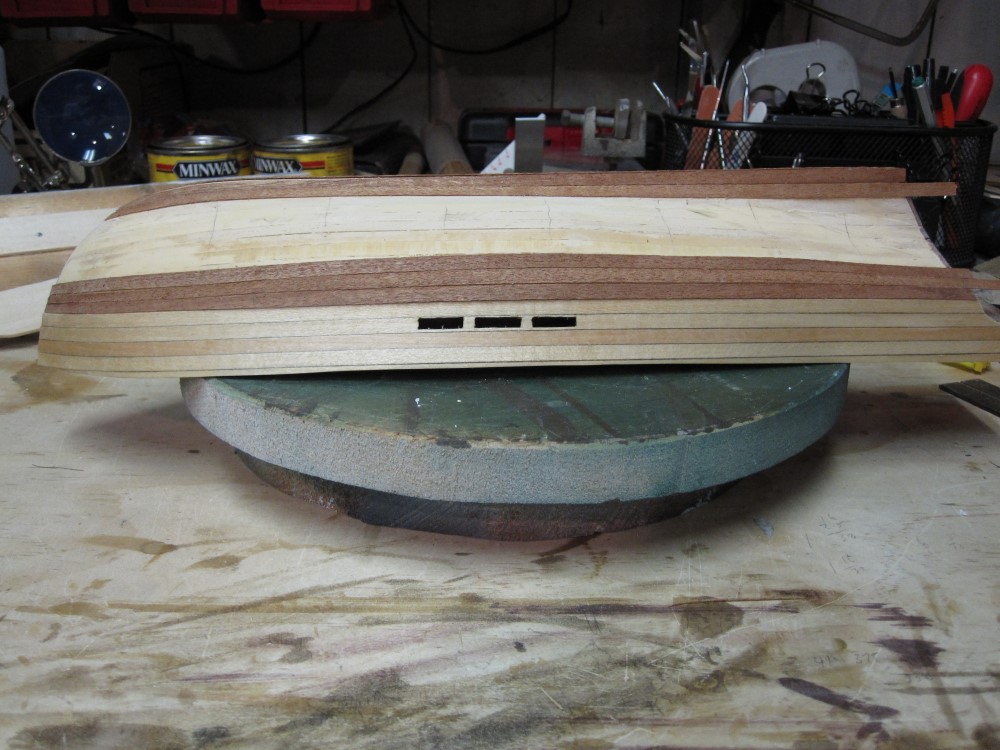
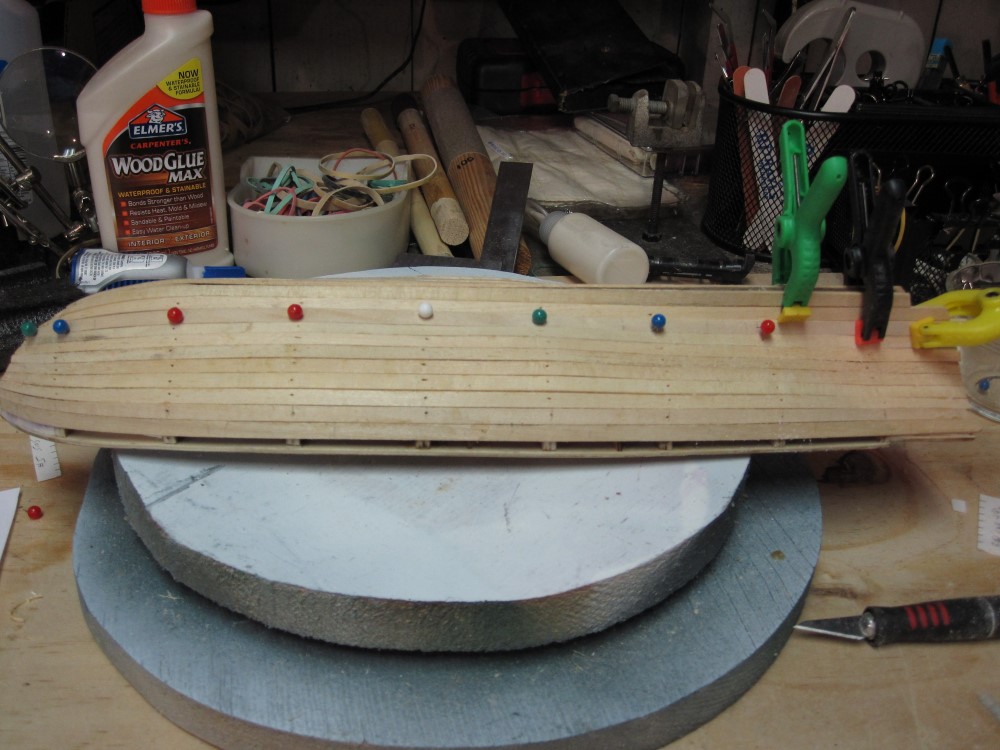
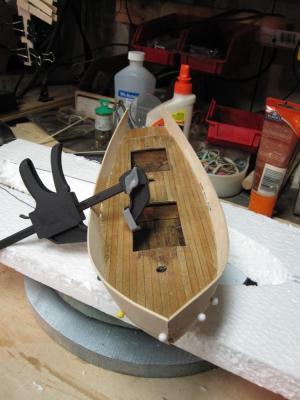
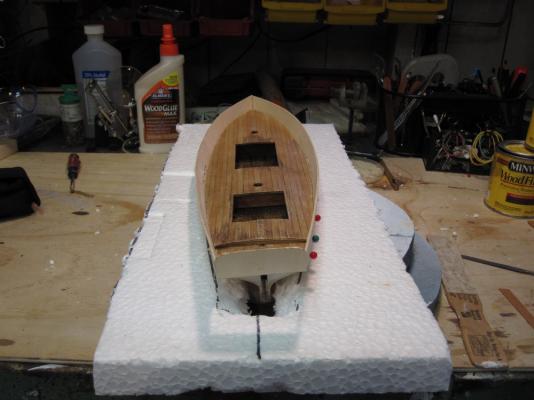
Just finished the first layer of planking. Quite an experience. When I first got the model unboxed and saw all the planks and parts, I thought " what did I get myself into", especially thinking about the planking and rigging. Now, am thrilled to death getting it done and having it turn out so well. Still not ready to try a single planked ship, but happy none the less. Ran into a little problem with the starboard side though. I used up all but two of the planks that were at least 5 mm wide, so as I got further along, I knew this side wouldn't fill in as good as the larboard. Most of the planks were 4.9 - 4.97. I had bought some 1/16 (1.5 mm) x 1/4 (6.5 mm) inch basswood at Menards ( like Home Depot ) right after I got the kit, just in case I needed them. When I got to the last plank, the gap on 5 & 6 frames were right at 6.5 mm so my purchase was justified. Had to sand a lot on both ends but it worked out. No gaps, no dropped planks. Tomorrow will put some poly on the main deck and get ready for the bulkheads. Shot of the last plank after glued. I use map marker pins I cut to about 1/4" to secure the planks and push them against the frames. Final product

- 159 replies
-
- 2
-
-
- swift
- artesania latina
- (and 1 more)
-
Thanks Dee Dee, I checked out your planking and it looks really good. I don't think I'm ready to tackle a single planked hull yet.
-
Great job Dee Dee. When I was doing all my measuring at first, I was planning on 5mm width on planks, only to find out later on in the planking the widths varied and were usually less than 5mm. So adjusted as I went.