


DesertWolf
-
Posts
130 -
Joined
-
Last visited
Content Type
Profiles
Forums
Gallery
Events
Posts posted by DesertWolf
-
-
Really nice work Hamilton. I can't wait to see further progress.
While reading through your log I had to smile at all the comments about Corel's instructions. Did you forget how bad the AL San Fran instructions are? Step 1 - open box. Step 2 - put hull together. Step 3 - make masts & yards and rig together. Step 4 - congratulations, you are done. I really don't know why good kits must be spoiled with poor instructions.
-
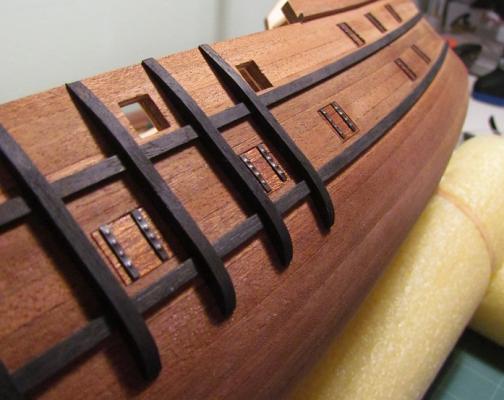
Thanks Randy & Hamilton.
Randy, I took your advice and created an ever so slight contrast on the gun port lids by not sanding them as smooth as the hull. I varnished the lids already to prevent any fingerprints or other stains from forming on the hinges. The varnish really brings out the rougher grain - and that makes the lids 'pop out' just a bit more. Thanks again for planting the idea in my head!
-
-
Based on on the good advice I got here I decided that I will blacken the hinges of the gun port lids (and the cannons and eyebolts one day). It took me a while to find a supplier of Birchwood Casey Brass Black. My hinges are made from copper and I was worried that their normal bluing chemicals (that are more commonly available here) will not work as well on soft yellow metals.
Well, I finally got the Brass Black and I went straight back to work.
Some pics of my progress so far. 13 gun port lids to go....


-
-
Your cannons look fantastic. Did you paint them or did you use chemicals to blacken the brass?
You did a fine job with the boat too. I hope mine comes out that well oneday.
Wolf
-
That's the problem Randy - 21 more gun port lids! The planking strakes are only 5mm wide midship, so you can't "mass produce" gun port lids. To get the planking lines right for gun ports at the bow and stern I'll have to file planks down to the exact width of the strakes at each gun port. And making those hinges will make me burn through my annual quota of swear words quite quickly...
 But I will probably continue down this path since I prefer lids that sit flush with the hull.
 TheMadChemist, I would like to blacken the hinges (and ultimately the brass cannons) but I don't know what chemicals to use. Paining the hinges black did not give a nice result. It looked a bit fake and you lose a lot of the rivet detail.
-
The hull looks fantastic. And I like your modifications. The doors look great and the hinges are masterpieces! Thank you for the set of hinges that you mailed to me... you say they'll be here shortly, hey
Wolf
-
Thanks Robbyn. I made so many prototypes that everything looks sub-par to me now. The encouragement really helps!
Wolf
-
-
I've been really busy with some other stuff lately and found very little time to work on my model (isn't that just annoying!)
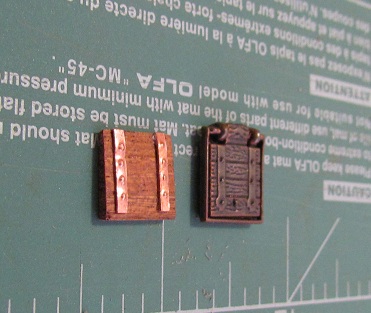
Making all the gun port holes took some time. I haven't drilled the foremost gun port on port/starboard side, since I'm not sure yet whether I should use the pre-cast gun ports supplied with the kit or whether I should make my own. If I decide to use my own gun ports, the foremost gun port on each side will not be square - as I would rather want the sides of these gun ports to be perpendicular to the waterline.

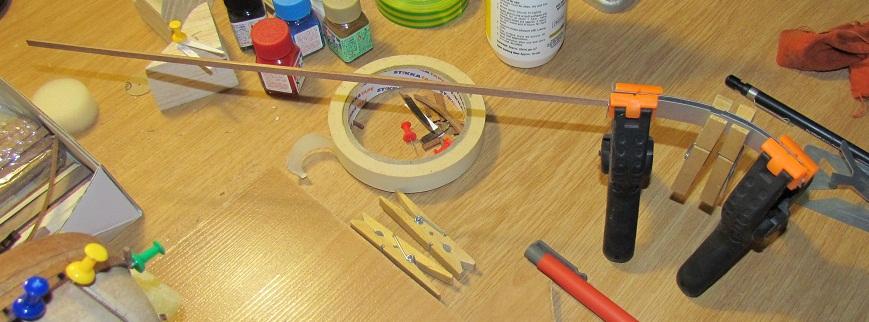
I experimented with various materials (including paper, brass and copper) to see if I can make a gun port hinge that looks at least half decent. The closest I can get is by flattening copper wire and using a punch to create the rivets. I had to build a special jig to keep the thin strip of copper straight while punching it. I'm not sure if I'm 100% pleased with the results. I will have to think about it some more.

-
Still drilling and filing the gun ports...
I want to replace the gun port lids with wooden ones. I experimented a bit over the weekend. I can't lay my hands on brass that is thin enough to make the hinges. I may end up using paper instead. I'm already moving at such a slow pace - and making a port lid takes longer than I expected. I'm not satisfied with any attempt yet and if I can't get it right I'll abandon the plan and stick the precast metal parts.
-
Excellent job so far! Keep it up!
Wolf
-
Good luck with the planking! Patience is all you need. I added a filler block at the stern as well - it made it a lot easier to get planks to sit flush with one another throughout the curves.
Wolf
-
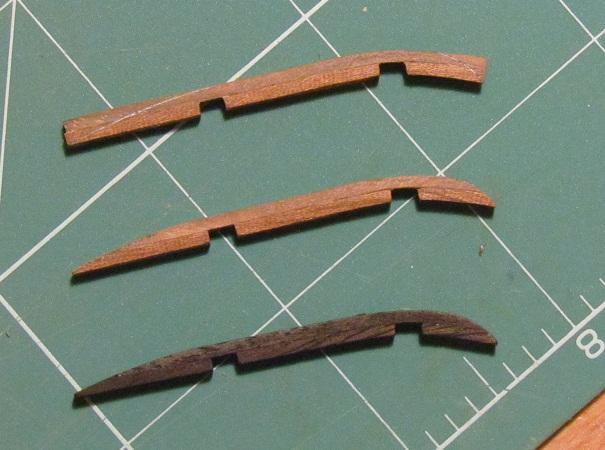
Nice job! The stain looks very natural.
I certainly don't mind if you stain your rubbing strakes. It just brings out the detail on the hull a bit more. I think you will be pleased with the result.
Wolf
-
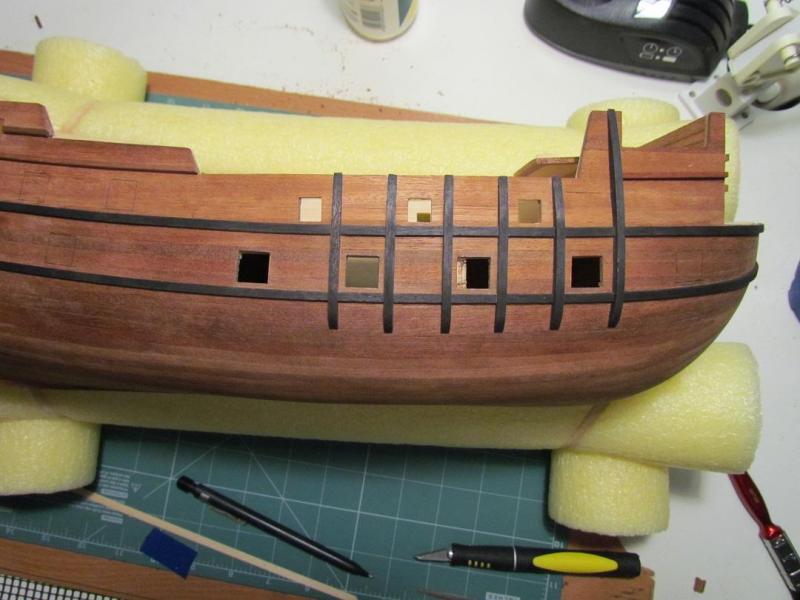
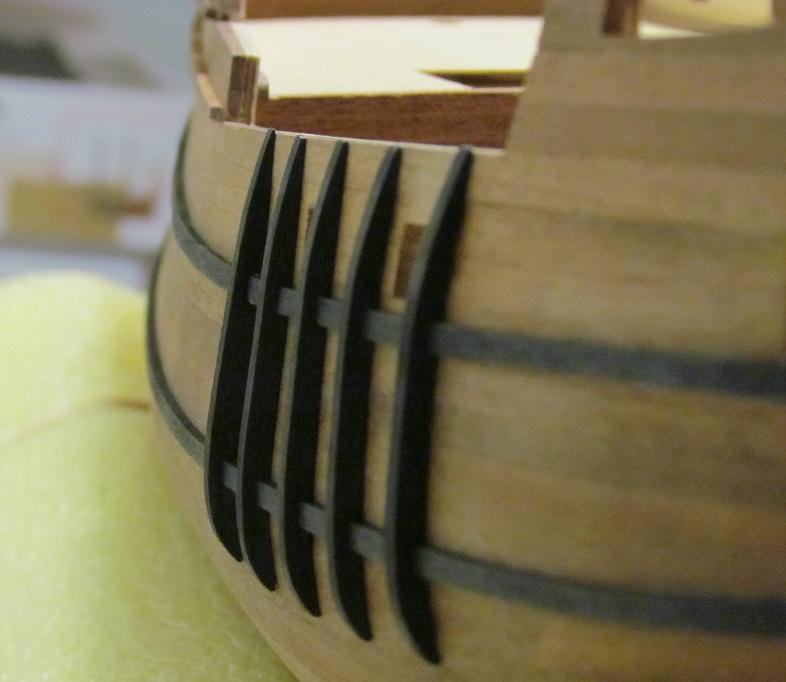
Not a lot of progress over the weekend.
I worked on the bow area a bit (it is fairly difficult to cut a door shaped hole in the bulkhead lining... I am not sure if I am going to repeat it everywhere)

Glued the last of the tracks...

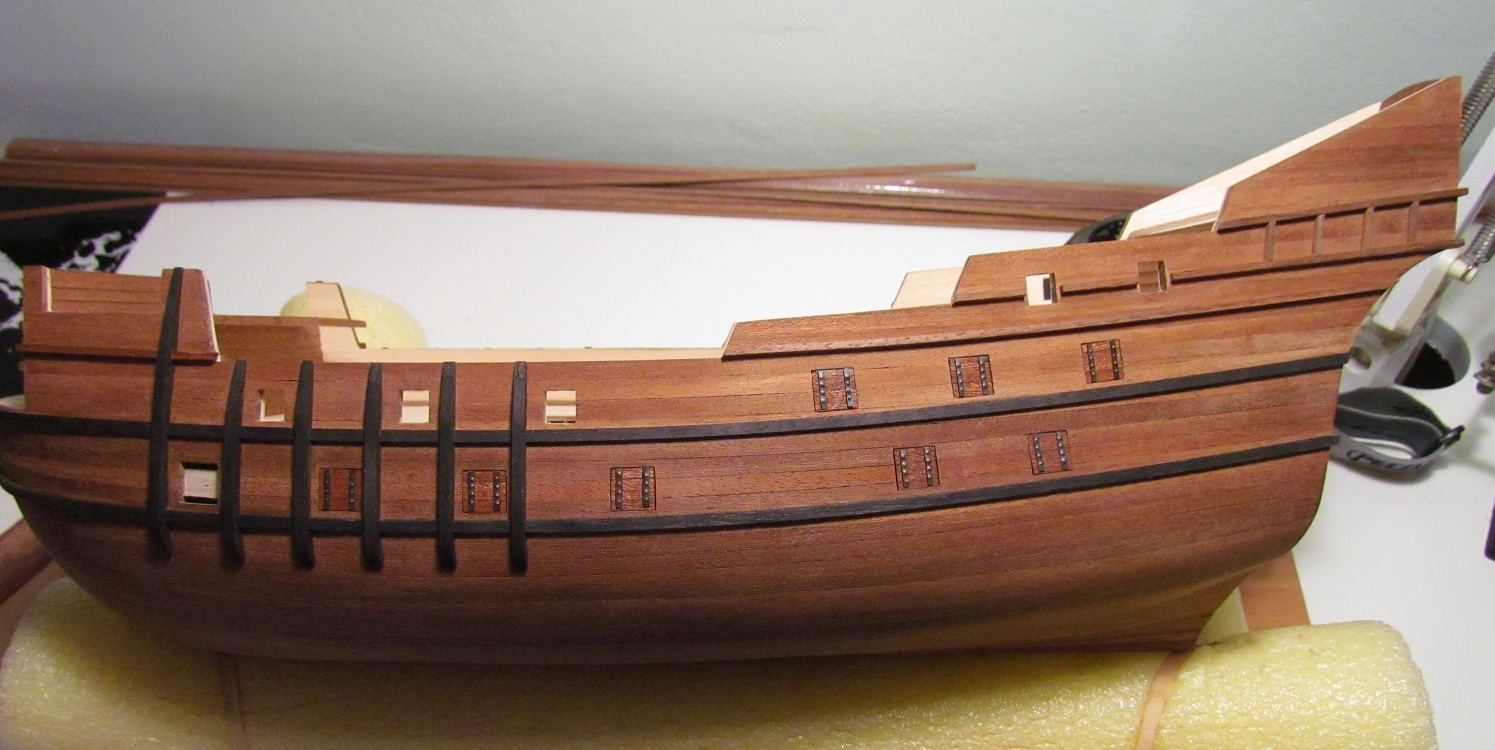
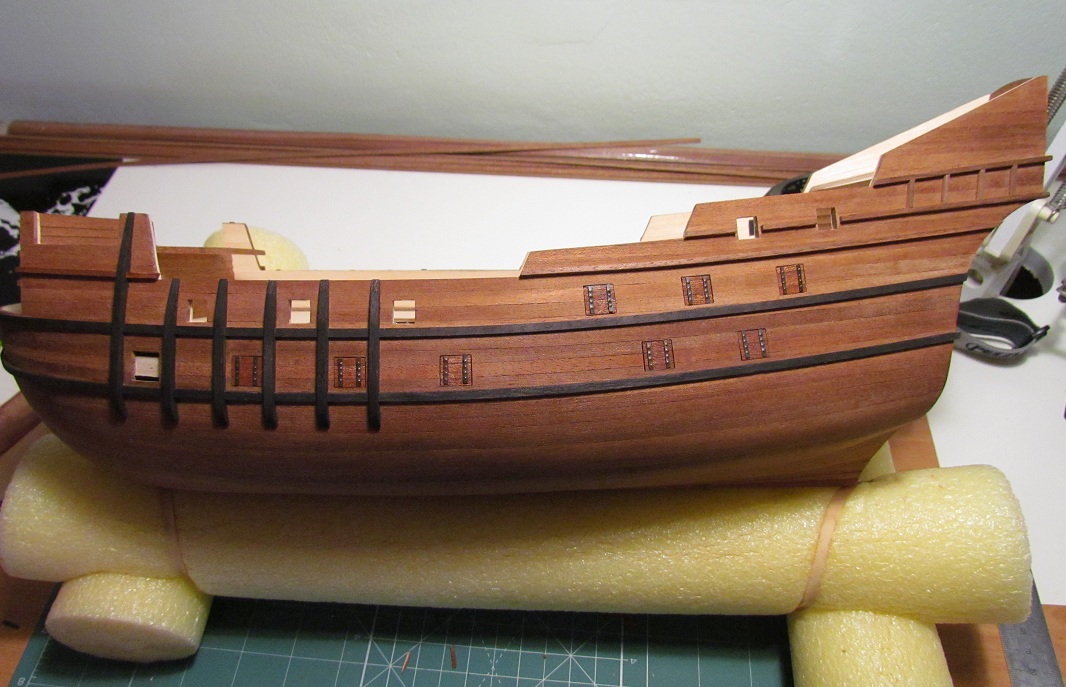
I marked the gun ports using a spacer and a template. I found that the ports need to be 11.5mm wide by 11mm high, else the metal port lids do not sit flush with the hull.

(Glad there's not a 100 gun ports. This is going to take a while!)
-
Your boat looks very good - a major improvement over the cast metal part in the kit. Nice work!
Wolf
-
Caroline,
It’s good to see this log back up again. For me, reading your log was just as insightful as reading the modeling books from masters such as Mastini, Roth, Julier and Petersson. It’s the definitive work on building the San Francisco.
(Now you just need to write the final chapter – How to explain to the Admiral why building your ship is more important to mankind than going shopping with her…)
Wolf
-
Randy,
You are off to a good start. Looking forward to seeing the progress. Very nice keel holder. Did you buy it at a hobby store?
Wolf
-
The planking looks real good. I quite like the light colour of the hull. Are you planning on staining the hull? The next step on my San Fran is also the cutting of the gun ports. I've been looking at the hull the whole week, trying to decide exactly where to cut them. With my first marked layout the railing of the stern gallery came dangerously close to a gunport and now I'm paranoid that I might miss something else.
Wolf
-
Thanks everyone for the kind feedback! I'll be sure to check out your build logs as well!
Aaron, I did not buy any extra planking strips. You are right, for proper spiling you usually need to start with a plank that is wider than the final hull plank. I'll try to explain my "spiling" technique with a crude sketch.
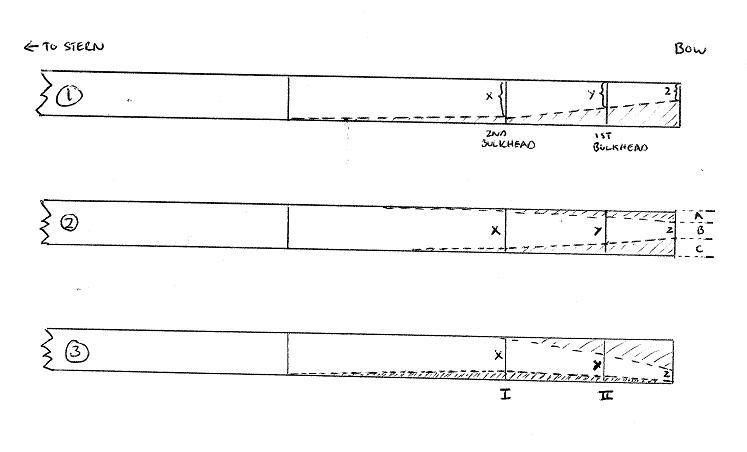
(1) represents a normal tapering procedure without spiling first. (The horizontal lines represent the location of bulkheads) The top straight edge goes against the bottom (tapered) edge of the previous plank. The bottom is tapered, based on the width the plank must be at each bulkhead. (If you haven’t yet done so, read Simple Hull Planking Techniques for Beginners by Dirk de Bakker/Greg Brooker – the pdf is on this website and it simply a goldmine of information for beginners!)
(2) is a representation of a plank that was first spiled at the top edge (shaded area ending in A). X,y & z are still the same length as in (1). As a result, you remove less from the bottom edge of the plank (shaded area ending in C). To make this work I had to break another golden rule of planking - the width of section B was frequently less than half the width of the planking strakes (i.e. I carried more planks all the way to the 1st bulkhead and unto the stempost - so that the width of each plank at the stempost was 2mm or less) If you use a lot of dropped planks in the bow area, the width at the stempost (z) of planks going all the way (to the stempost) may be more than the plank width (5mm) minus A!
(3) shows what I did for planks where spiling resulted in a "large" curve at the top end (mostly the planks mid way between the keel and the deck). X,y & z are still the same length as in (1), but because I measured the width required at each bulkhead from the new edge of the spiled plank, I ended up removing more from the bottom of the plank at I than at II (almost removing a triangle from the bottom edge of the plank). It looks weird when the plank is flat on your bench, but once the plank is curved around the bow, the bottom forms a straight edge again for the next plank to sit against.
Hope this helps!
Randy, I stained the rubbing strakes and tracks (ebony). The 3mm x 1.5mm planks that came in my kit are apple-wood or something and they show more colour variation than a pack of M&M's. So I decided to stain them. I wasn't sure if it would end up looking good, but I'm pleased with the result.
I can't wait to check out the other San Fran builds. Happy modelling!
-
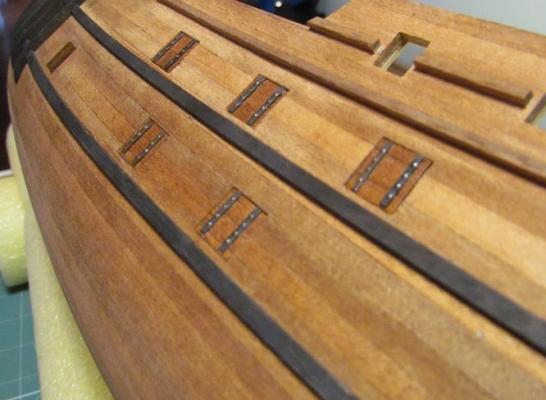
-
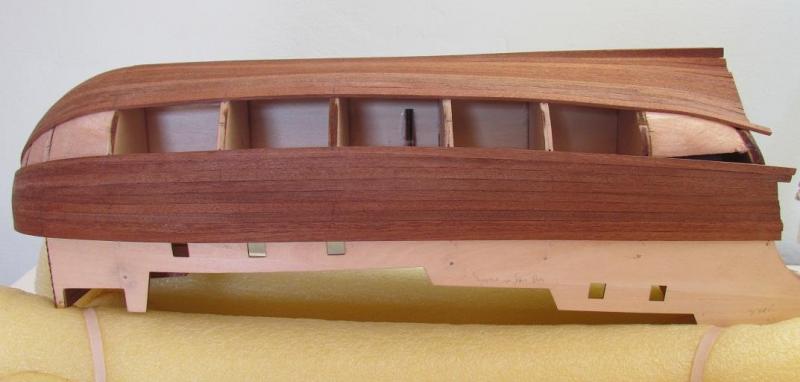
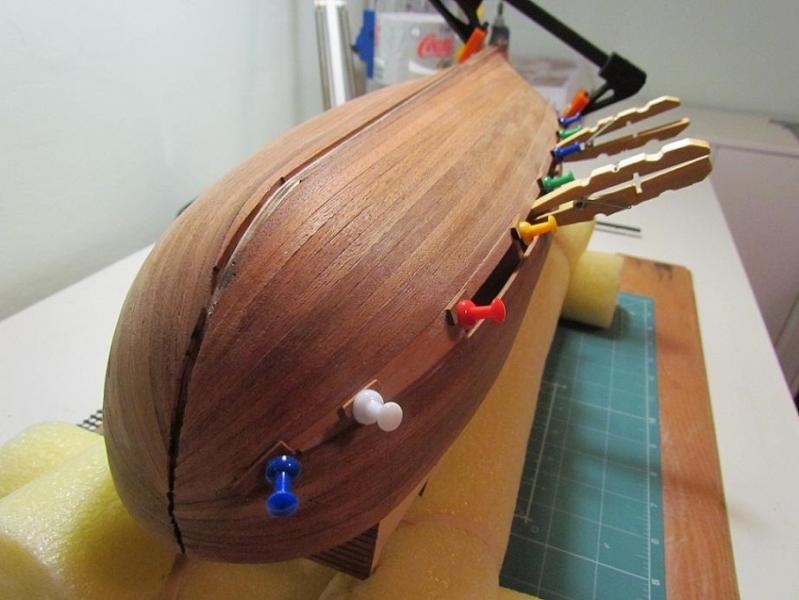
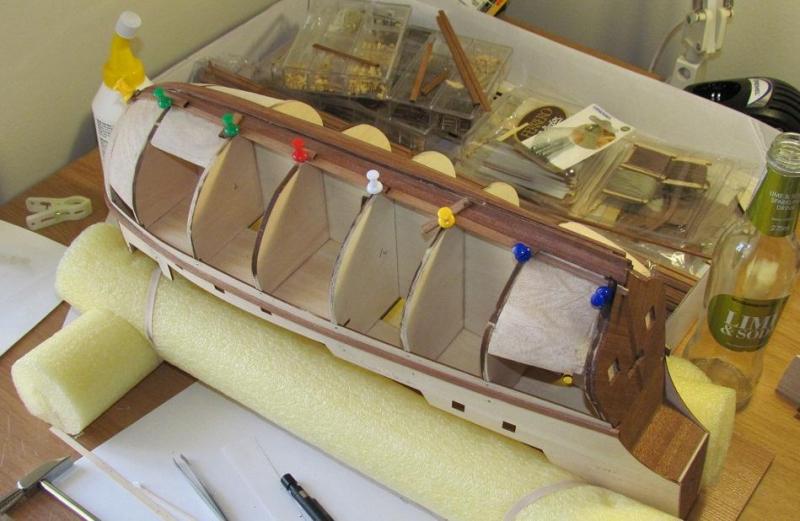
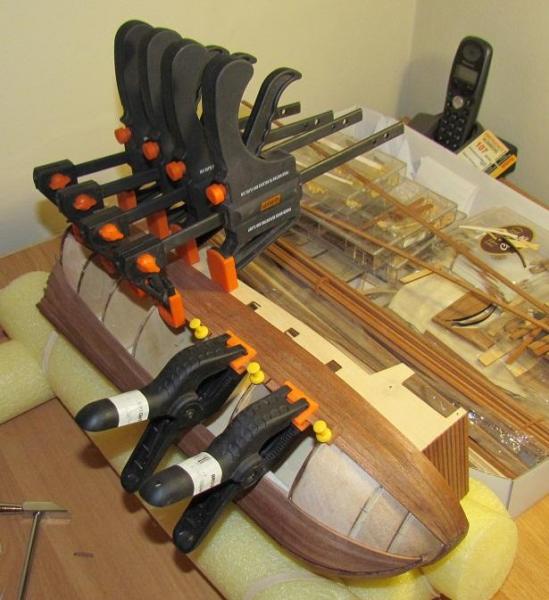
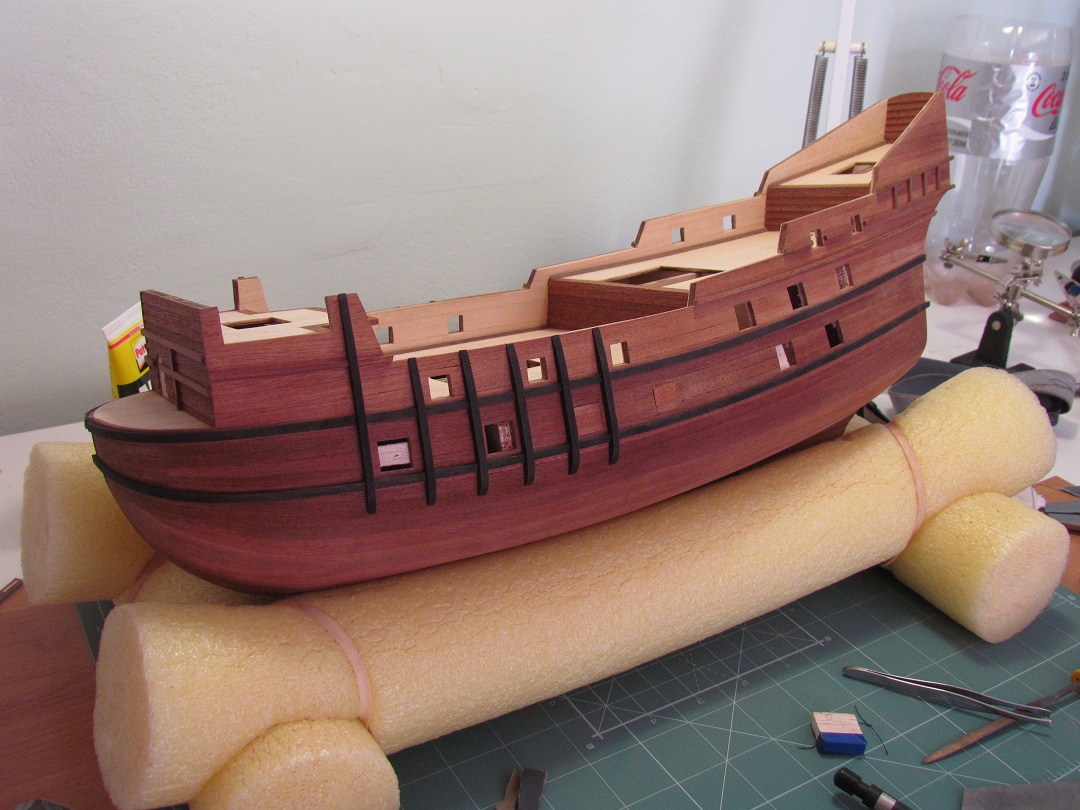
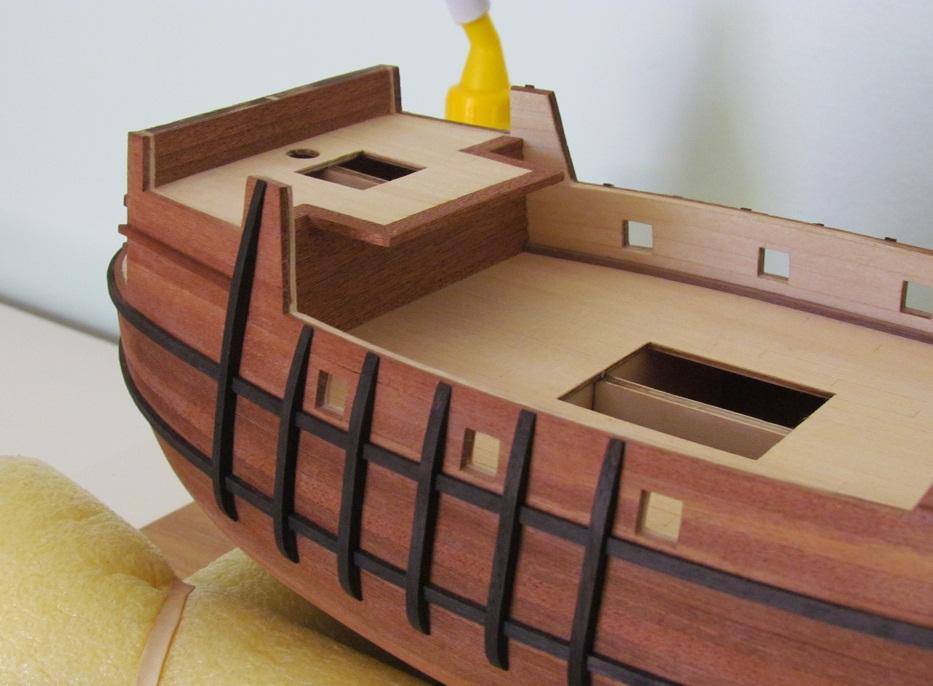
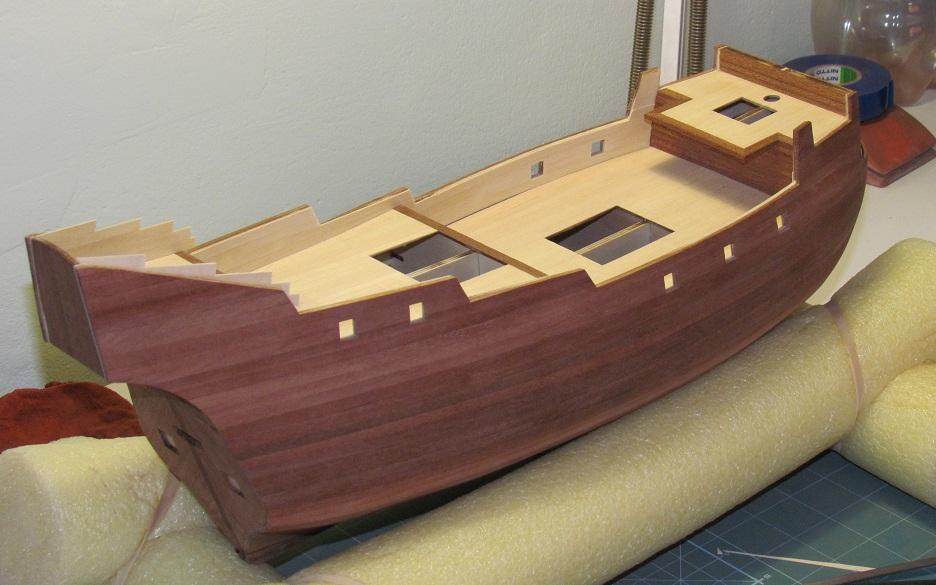
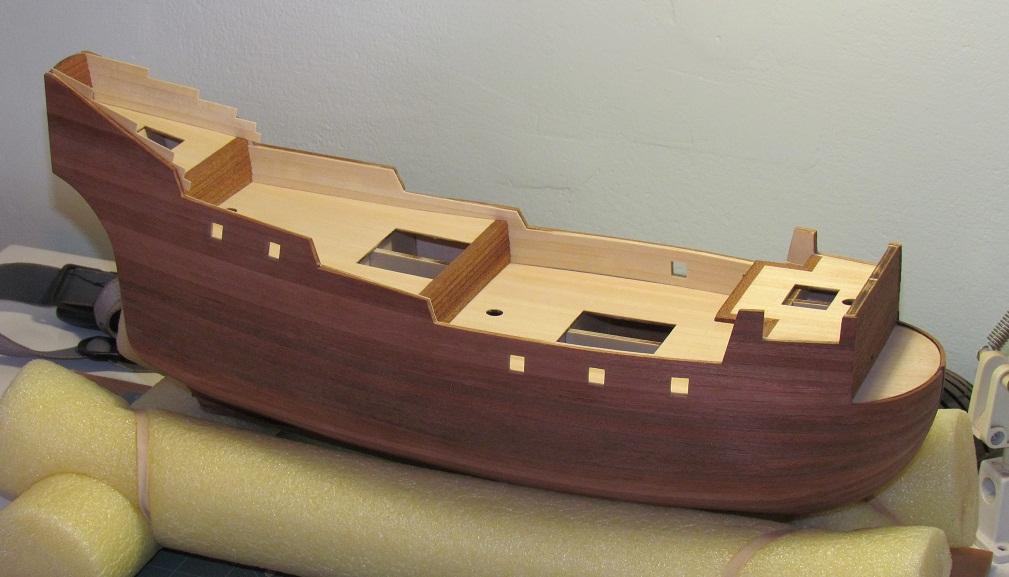
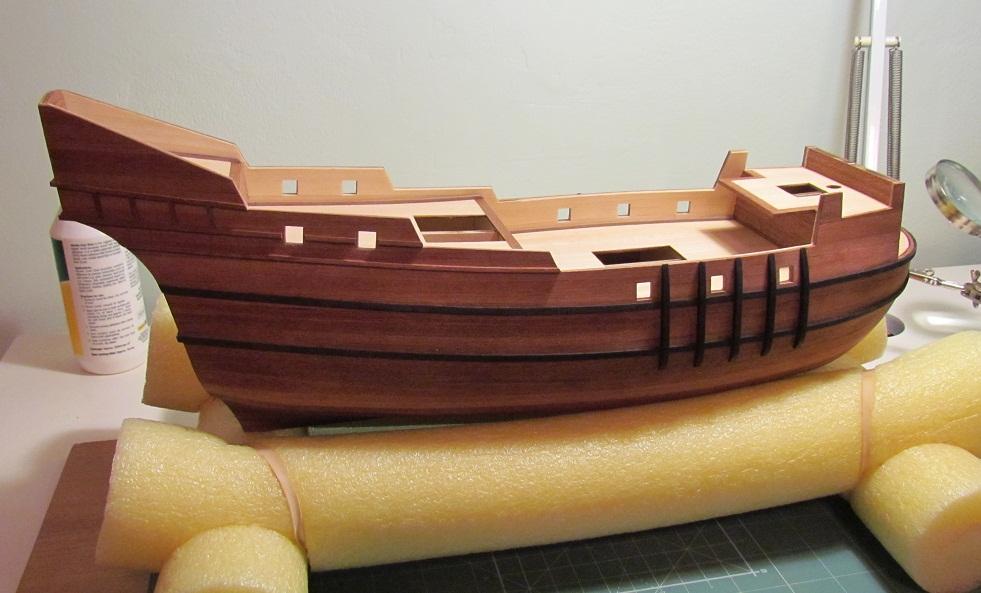
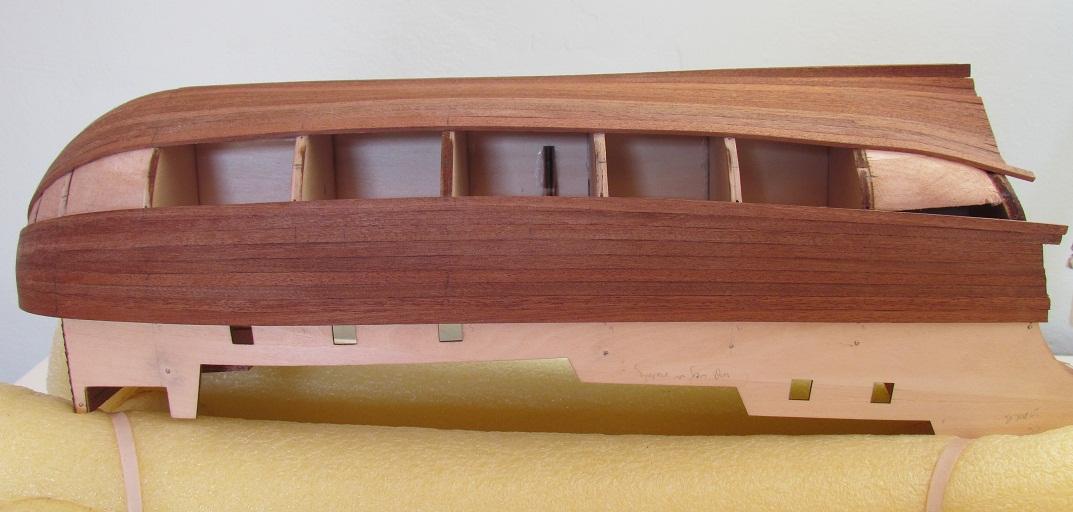
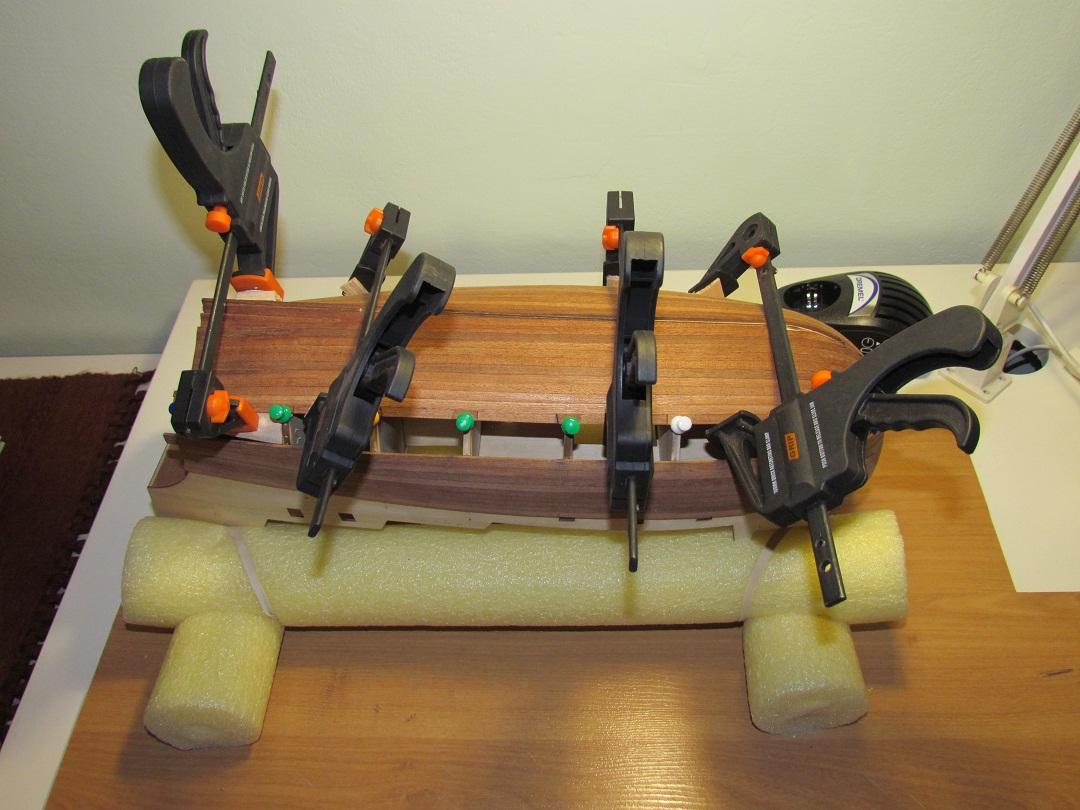
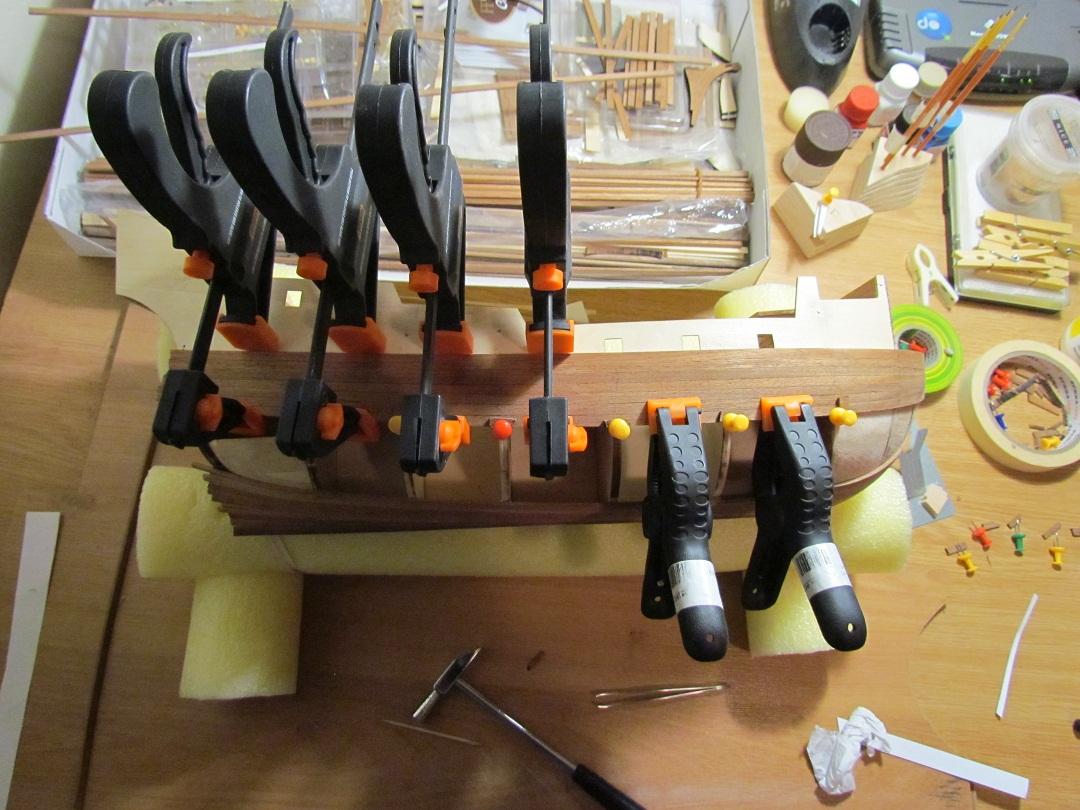
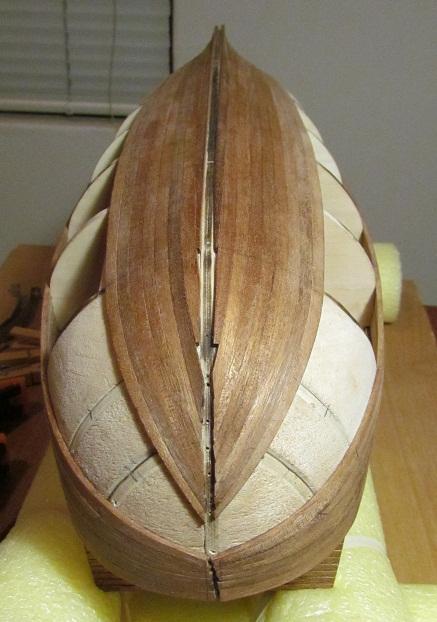
Some more pics of the planking...


-
This is my first attempt at building a wooden ship (or anything for that matter!). I just woke up one morning with an itch that I had to scratch, so I went to the store and bought the first kit I saw with lots of rigging and guns.
 I knew absolutely nothing about kits, planking, rigging etc back then and because of my ignorance I ended up with one of the few kits with a single planked hull.
I’ve been building for more than a year now, spending almost 8 months on the planking alone. But I’m enjoying every moment! And thanks to this website and the wealth of information shared here I’ve managed to avoid some major pitfalls.
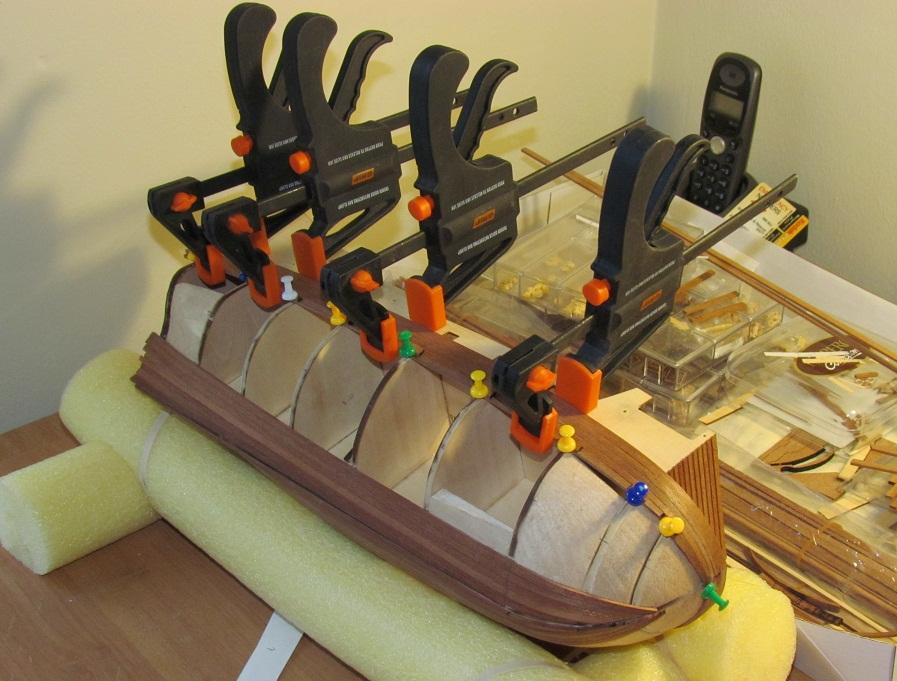
Some pictures of my progress are shown below. Planking took forever, as the hard mahogany strips were quite difficult to work with. I hardly finished 2 planks a week.
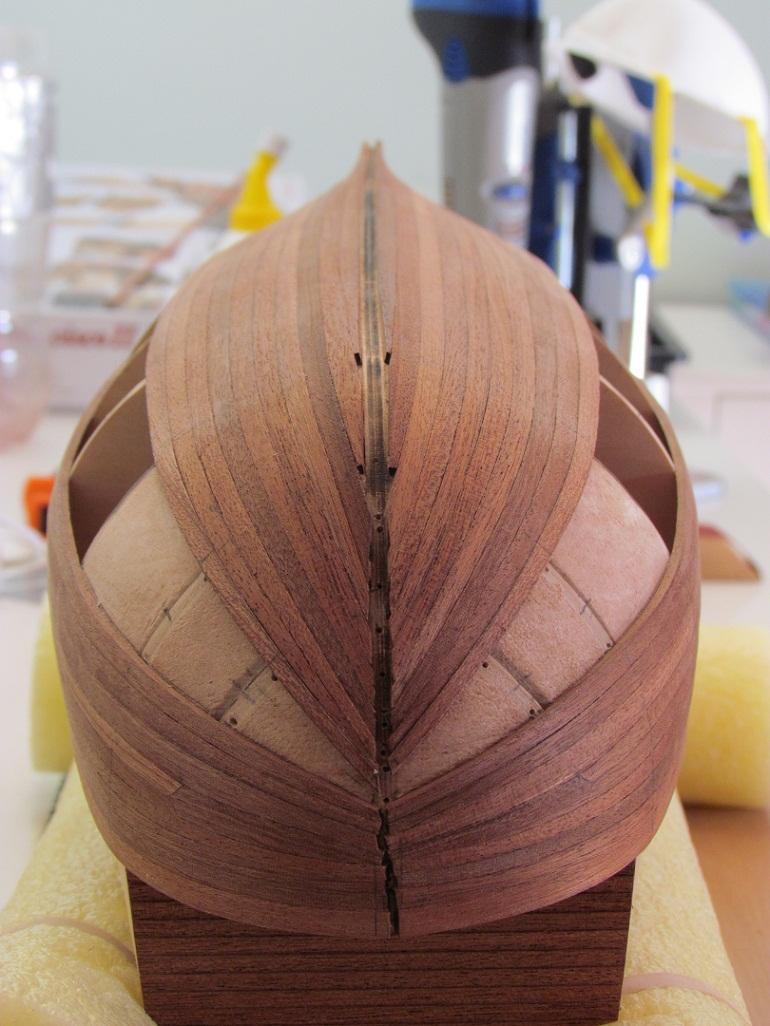
Every plank was spiled in the bow area, and key planks were spiled in the stern area as well.
Once spiled, the correct taper (at every bulkhead) was applied working from the new (spiled) edge of the plank.
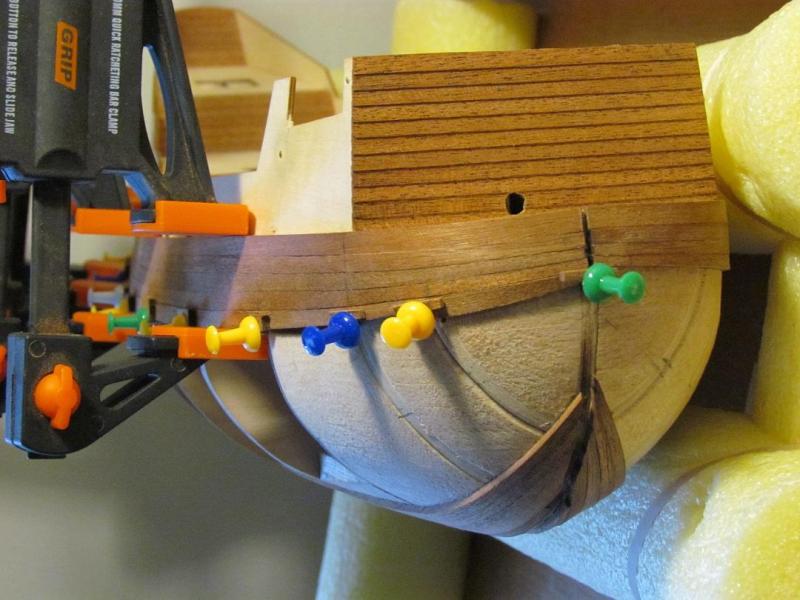
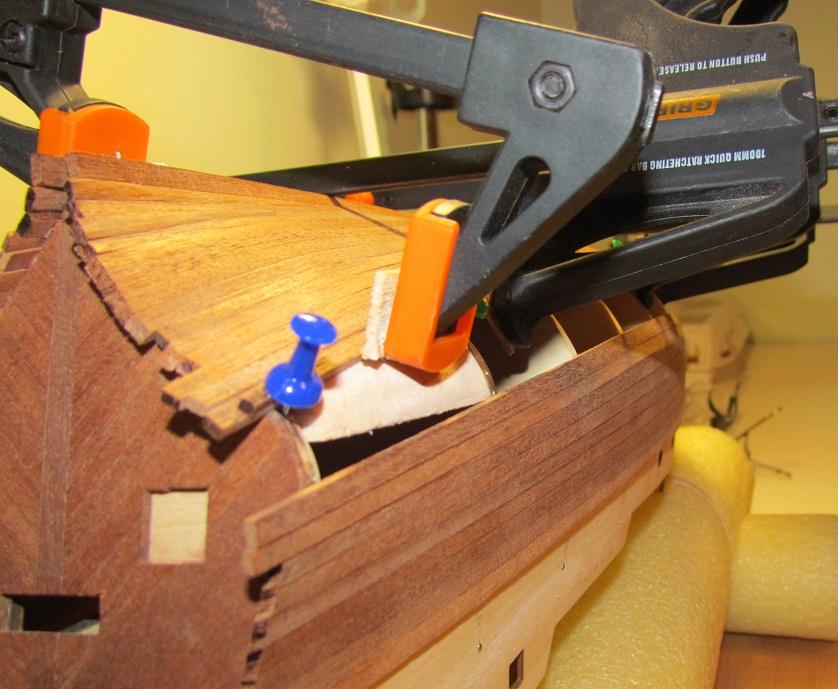
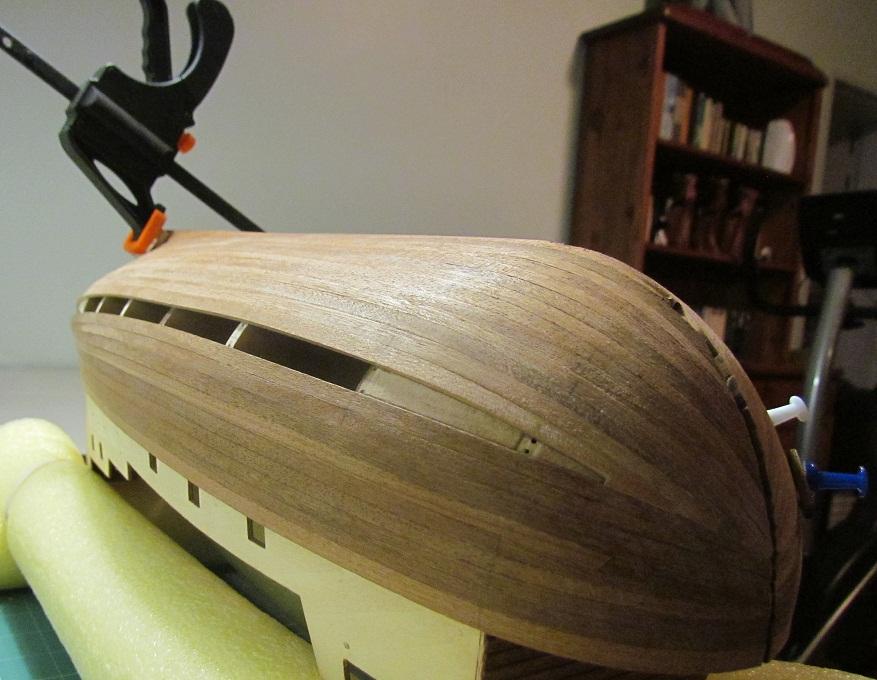
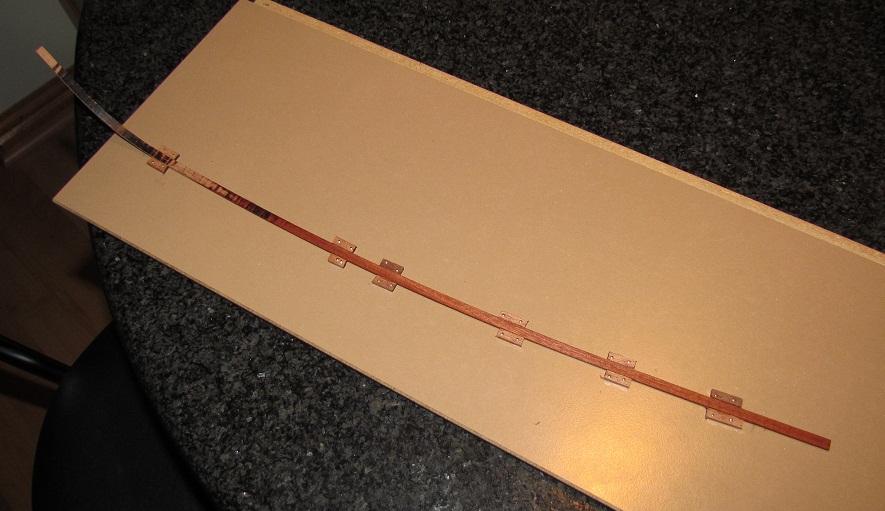
Next, each plank was bent at the bow end. For each plank, the curve was determined by bending a soft piece of aluminium to match the plank’s required curve at the bow. The plank was soaked (no more than 10 mins in cold water) and then heated & bent against the piece of aluminium using a solder iron (and lots of patience and beer!). Another piece of aluminium was bent to match the curve of the first piece and the plank was clamped between the 2 pieces of aluminium to dry overnight.

The next day, the plank was soaked again and “edge set” using a special jig – so that the plank, when viewing the hull from the side, curved upwards as you move from bow to stern (Dan Vad will hang me from the nearest yard, I know! I did this so that planks follow the same curve as the bottom of the bulwarks, which is similar to the curve the rubbing stakes eventually follows from bow to stern. Without edge setting, the planks curve towards the keel as it moves from bow to stern. The colour variation between the planks makes their path across the hull obvious to the naked eye and I thought it would not be aesthetically pleasing to have hull planks curve in the opposite direction as the rubbing strakes. )

The next day, the plank was beveled by pressing it against the previous plank and removing material with a needle file until it sits flush against the previous plank. The plank was soaked again (not the curved bow end though) and temporarily fastened to the hull to obtain the final shape (this helped in the stern area where a plank is sometimes almost bent laterally across its width).
The plank was left to dry overnight and then glued into place the next day. And then the process started again…


San Francisco 2 by fish - Artesania Latina
in - Kit build logs for subjects built from 1501 - 1750
Posted
Hi Aaron,
I also looked at the railings and figured they will be a pain. While I was planking over the bulwarks I realised that the slopes at different decks were not parallel and that the rails will not line up like the ones shown on the box or in that set of criptic notes more commonly referred to as the instructions. So I filed the bulwarks down in certain areas so that the slopes at the different decks are parallel where the railings overlap.