


DesertWolf
-
Posts
130 -
Joined
-
Last visited
Content Type
Profiles
Forums
Gallery
Events
Posts posted by DesertWolf
-
-
Hi Danny
Excellent work so far. Your planking looks fantastic. I'm always afraid that the pin nails will split the planks. Did you first drill pilot holes for the pins?
-
Bug
What a masterpiece! I'll be stealing some of your scratch build techniques - especially those pumps!
-
Matti
Fabulous work as always! Your cannons look fantastic. Can't wait to see them mounted on the deck.
-
Hi Vivian, thanks for dropping in. I've always liked the AL Red Dragon and I'll be following closely.
Thanks Augie. Don't get me started on tools! I've been drooling over Proxxon's circular saw and milling machine. But I can't find any suppliers in South Africa. That gives me time to work on my presentation for the Admiral, titled "500 things you can do with a milling machine that you cannot do with a dining room carpet"

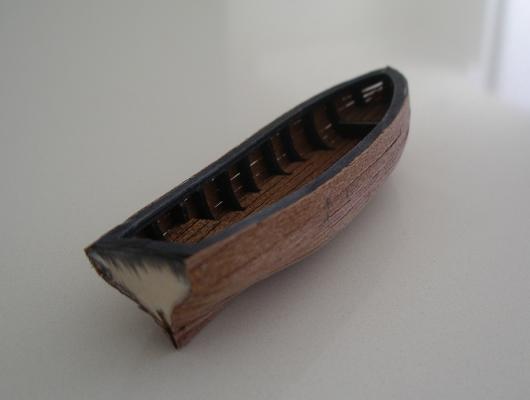
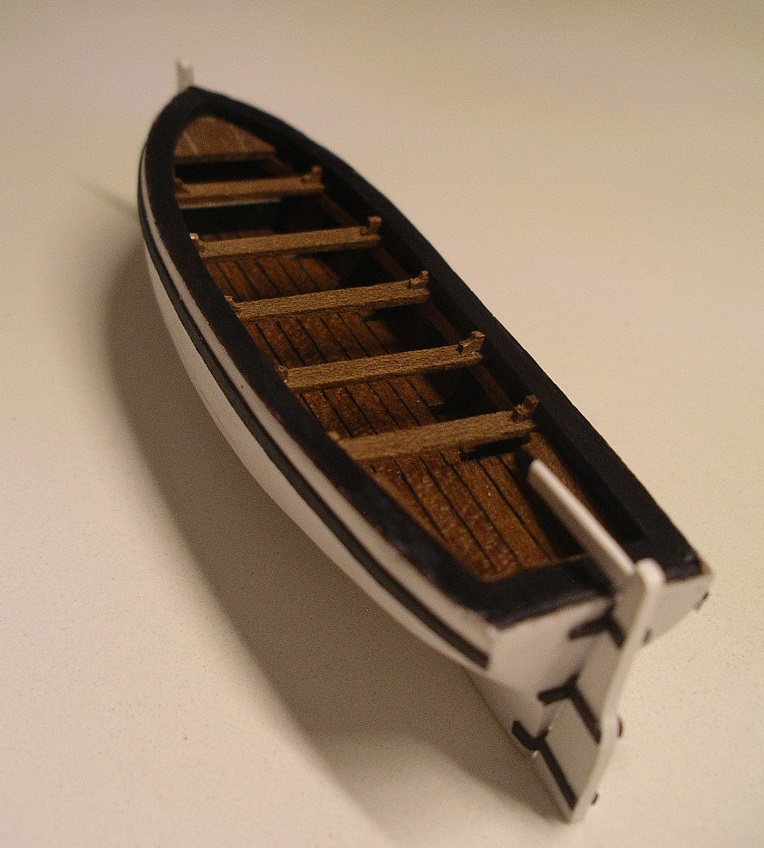
I finished the launch boat today. You know how you sometimes spend a number of days making a piece, only to mess it up in the final stages. You know you have to start over, but you already spent so many hours on the piece that you just can’t bring yourself to starting over. Then you waste another day trying to cover up the mess… only to give up and start over anyway.
That’s how it went with my boat’s rudder. When I glued the pintles in place on Saturday the glue dissolved the paint, messing it up completely. Naturally, I immediately downed two beers to calm the nerves (afterall, at 45 degrees (113F) in my work room you need to replenish your fluids frequently). But no amount of beer helped and I finally had to start over.
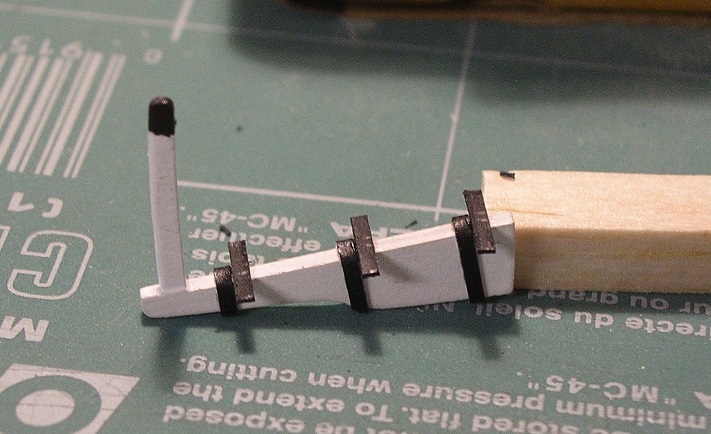
The 2nd try came out better anyway. The pintles and gudgeons are made from black paper. I coat the paper with some diluted varnish because I have a baseless believe that it will stop the paper from fading over time.

I added the whales to the boat (also made from black paper). The planking above the whales should have allowed for oar locks, but I realised that too late. I tried to make some that fits on the top rail, but it didn’t look right, so I decided to let things be.
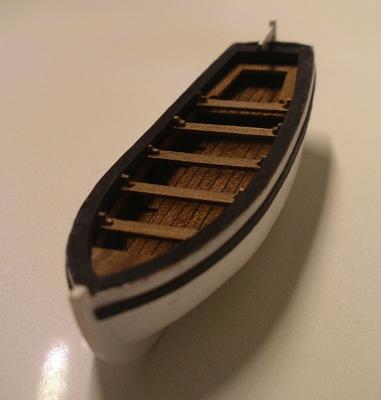
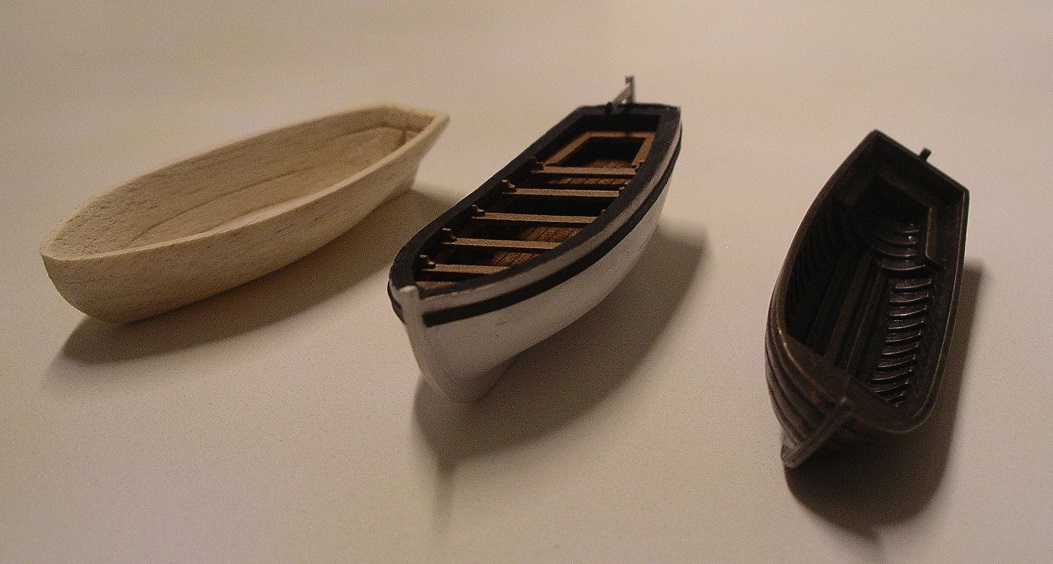
Below is a comparison with the AL cast metal boat that came with my kit. In all fairness, the kit allows for whales and top rails to be added to the metal piece – making it look semi decent in the instruction manual. The boat on the far left was my first attempt to scratch build the launch.

- canoe21, Aussie048, Vivian Galad and 4 others
-
 7
7
-
Augie
You have certainly mastered the art of planking… a flawless, perfect hull. Great work! And thanks for taking the time to explain your process in so much detail. I’m sure I speak for many of us here when I say that it is greatly appreciated. What a difference this will make when I plank my next hull!
-
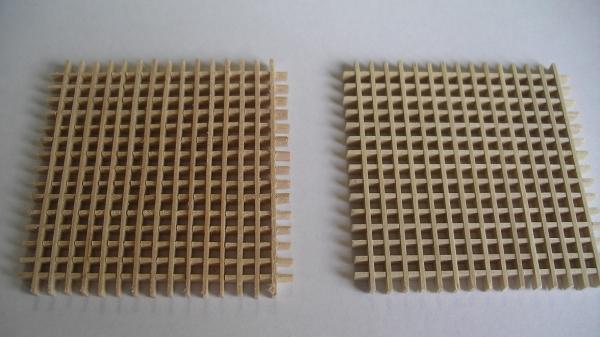
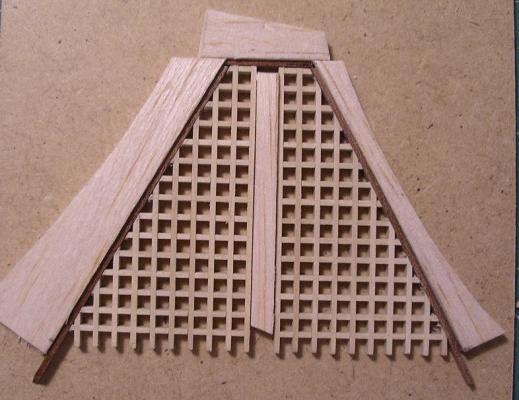
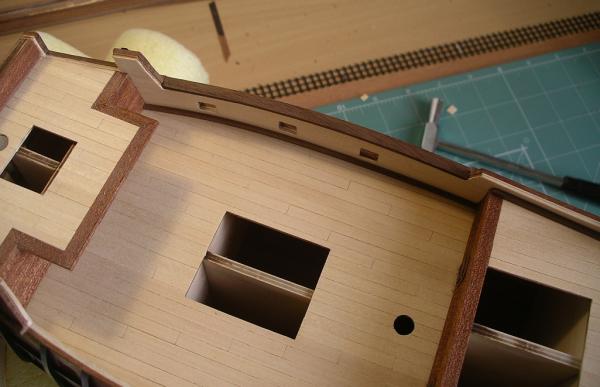
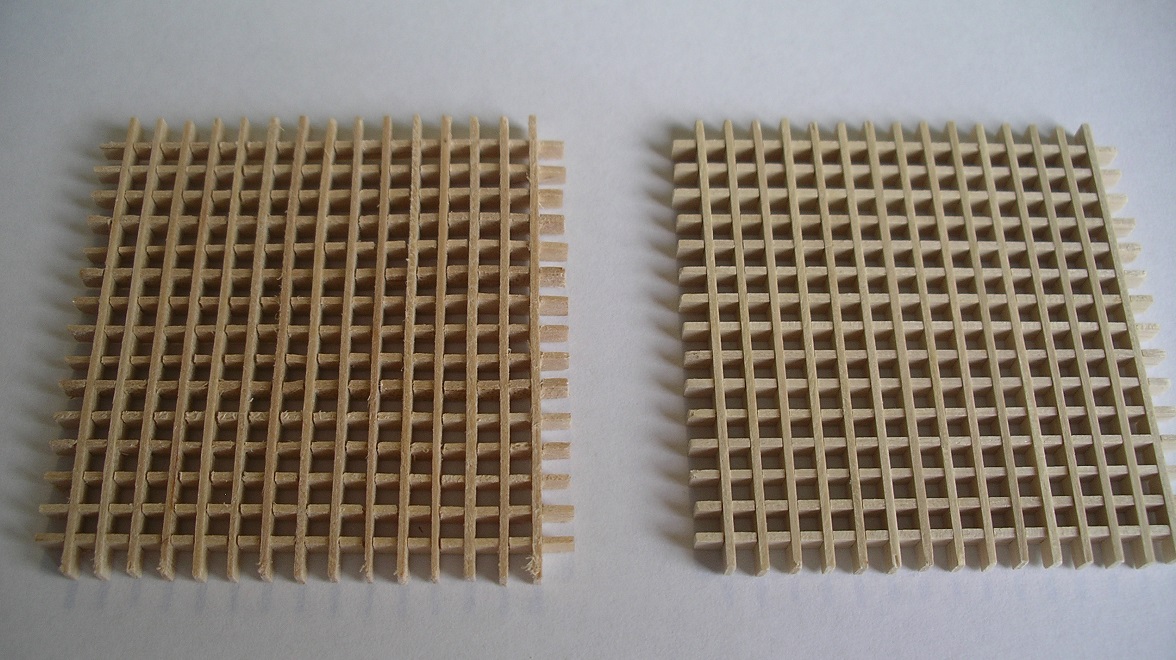
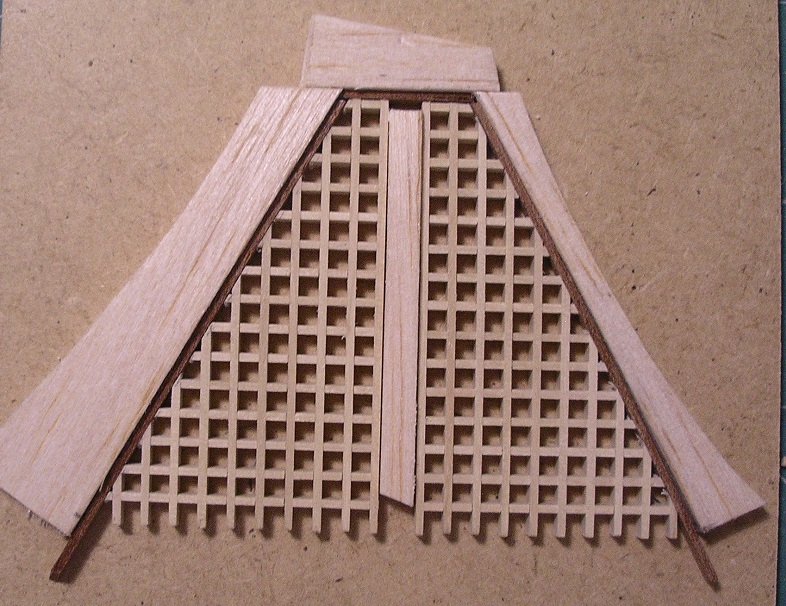
I also started with the gratings at the bowsprit deck. The quality of AL certainly deteriorated over the years. On the left is a grating made from the strips that came with my kit. The grooves are cut so poorly and unevenly that it is nearly impossible to form a grid. I certainly wasn’t going to put that on my ship! After a lot of trouble I managed to buy grating strips of an AL kit that was manufactured many years ago. That grating is on the right. They are as different as chalk and cheese…
To make the bowsprit grating, I first determined the shape of the grating by cutting a piece of paper until it fitted in the grating’s place.

I transferred the shape to a piece of spare wood and made a jig that formed a mold of some sorts.
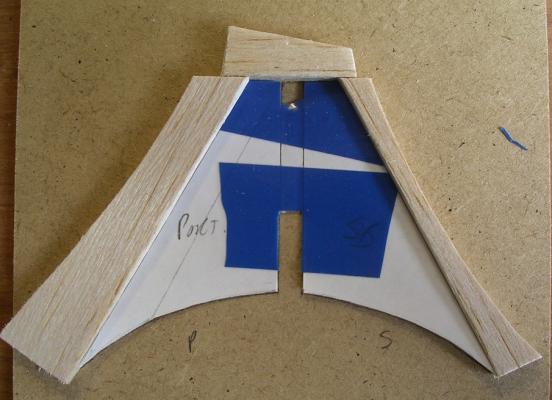
From here it was easier to cut and assemble the grating.
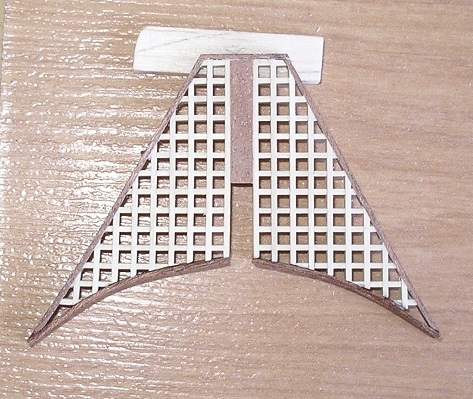
Dry-fitted grating – I still need to do some serious sanding and varnish the whole assembly.

-
Hey Robbyn, thanks for dropping in. I still want to sit down and read your whole Syren log. The last time I had some spare time on my hands I got so caught up in Augie's tool endorsements... uhh, I mean uhh... Confederacy log... that I didn't have time to read anything else.
Thanks for the kind words Moonbug. Much appreciated!
Hey Matti, I like the new avatar! Always nice to see you stopping by.
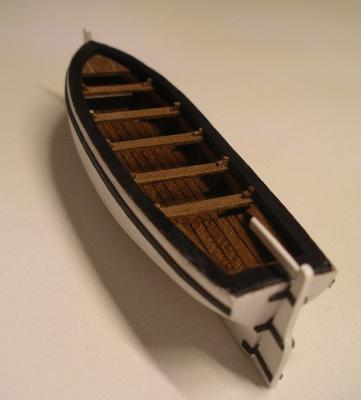
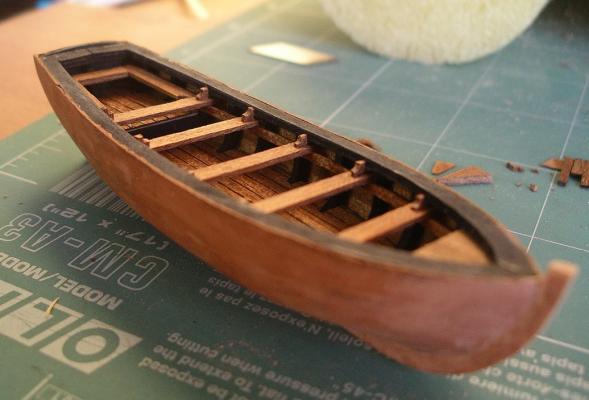
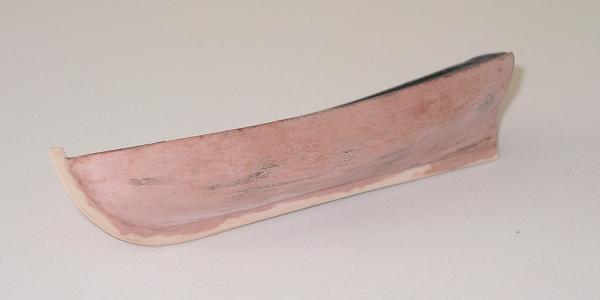
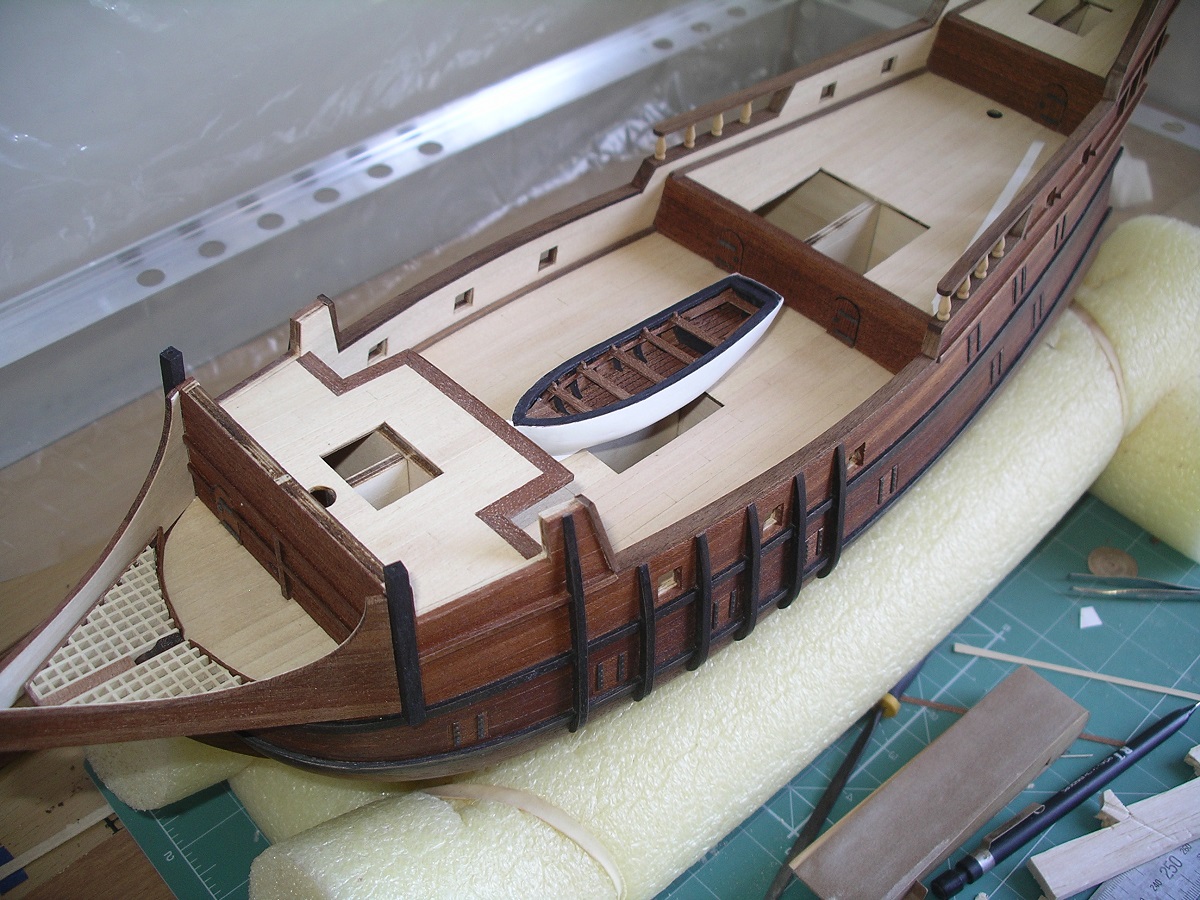
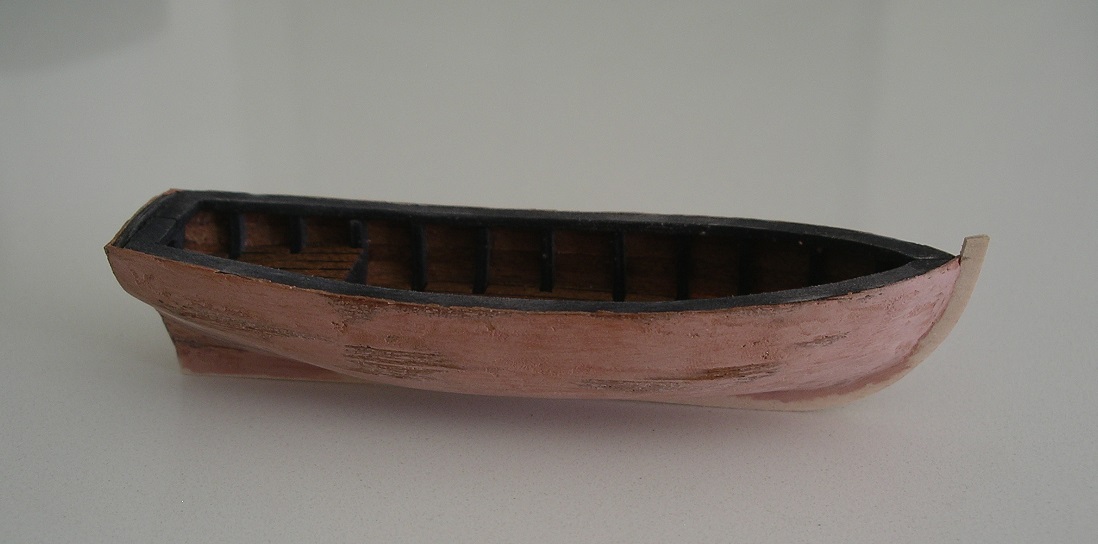
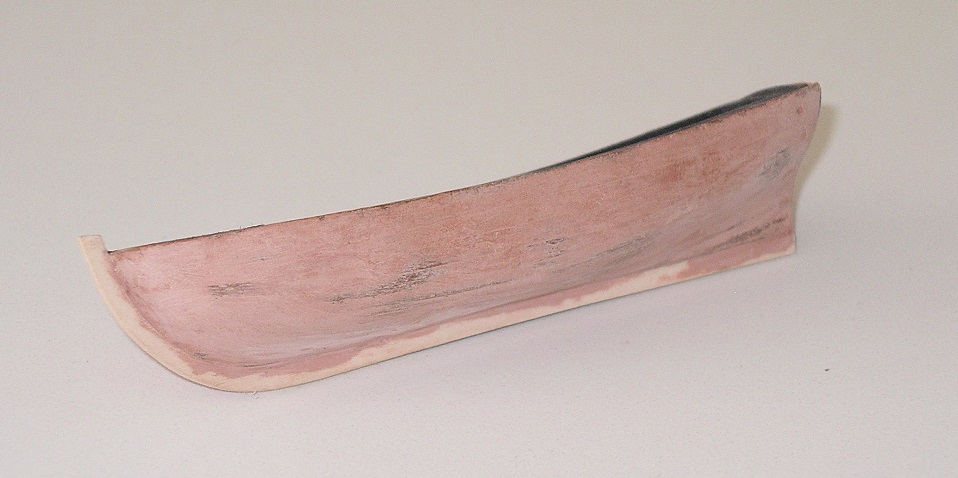
I finally got time to make some progress on the boat. I fitted the thwarts and thwart knees.

I sprayed the exterior hull white. I decided not to sand the hull absolutely smooth before spaying it. I wanted the final product to have a more natural, coarse look – and a number of test runs gave me the impression that a super smooth sprayed hull will look more like a fiberglass boat than like a wooden boat painted white. In hindsight I’d say the verdict is still out on that one, but I’m not too unhappy about the result.

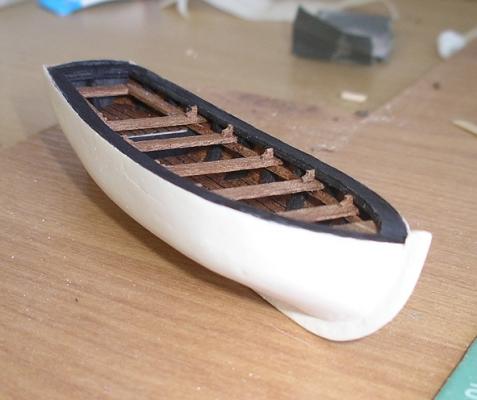
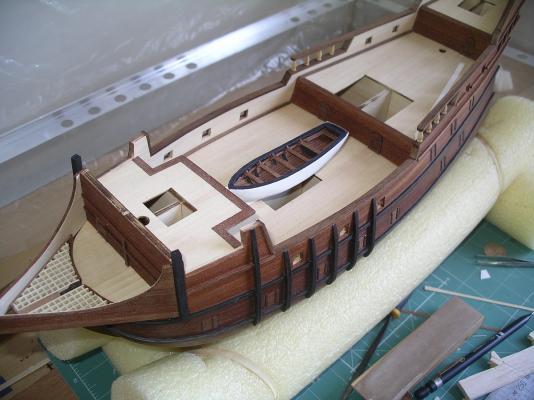
Next I’ll add the rudder and whales.
- hamilton, sport29652, themadchemist and 3 others
-
6
-
Hi Mike
I think your planking looks great. AL is about as skimpy on material as they are on instructions. My SFII kit has the exact amount of stanchions, blocks, eyebolts etc. needed. Not a single spare. It forces one to work really carefully and sparingly.
-
-
-
The progress over the last week –
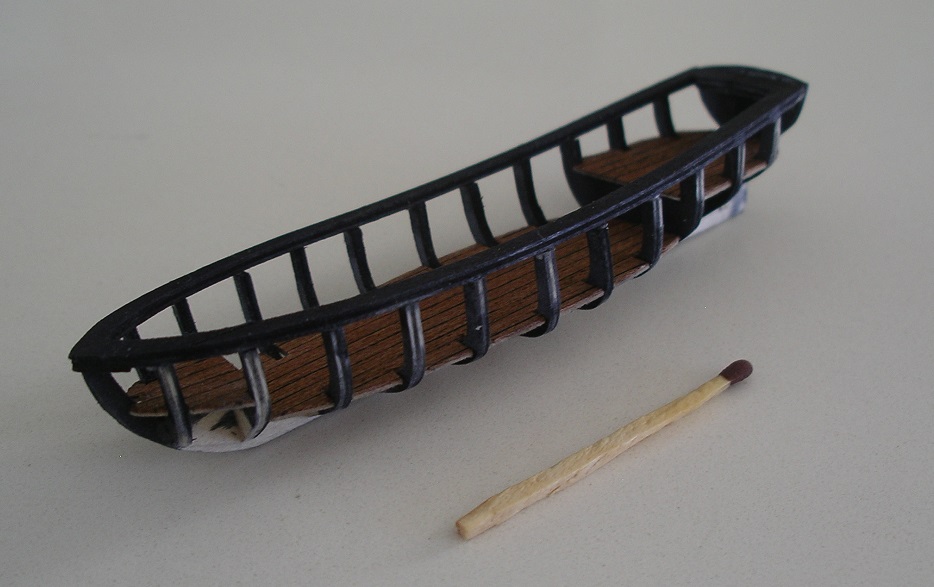
Glued rails on top of the frames (to make the whole assembly sturdier before planking) and chamfered all the frames as required. I’m going to leave the inside of the boat’s hull unpainted, so I decided to stain all the plywood frames black to make it less obvious that it is plywood.
Added filler blocks at the stem and planked the hull with 0.6mm veneers.
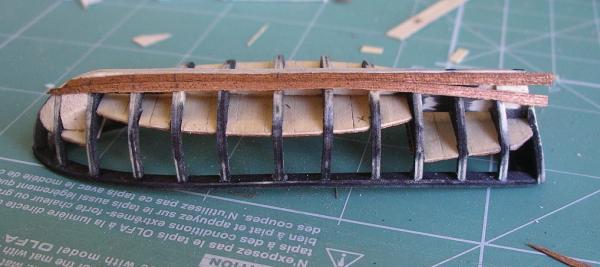
The veneers are just too thin to sand smooth and I realized early on that a perfect finish won’t be possible. To make things worse, it is very difficult to glue the thin edges of the veneer planks together, so the hull planks are essentially only glued to the frames and not to one another. I’ll spend hours determining the correct width of the hull planks, spiling them etc… just to see the thin veneer warp out of shape as the glue dries.
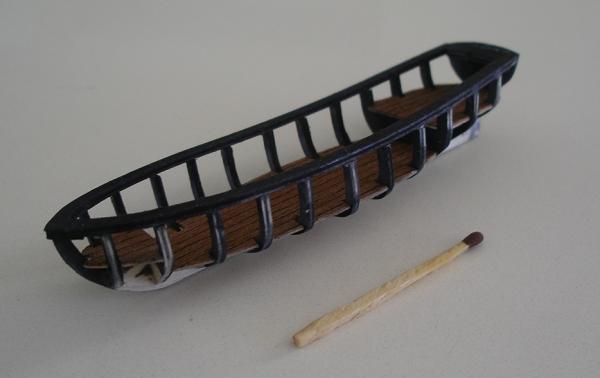
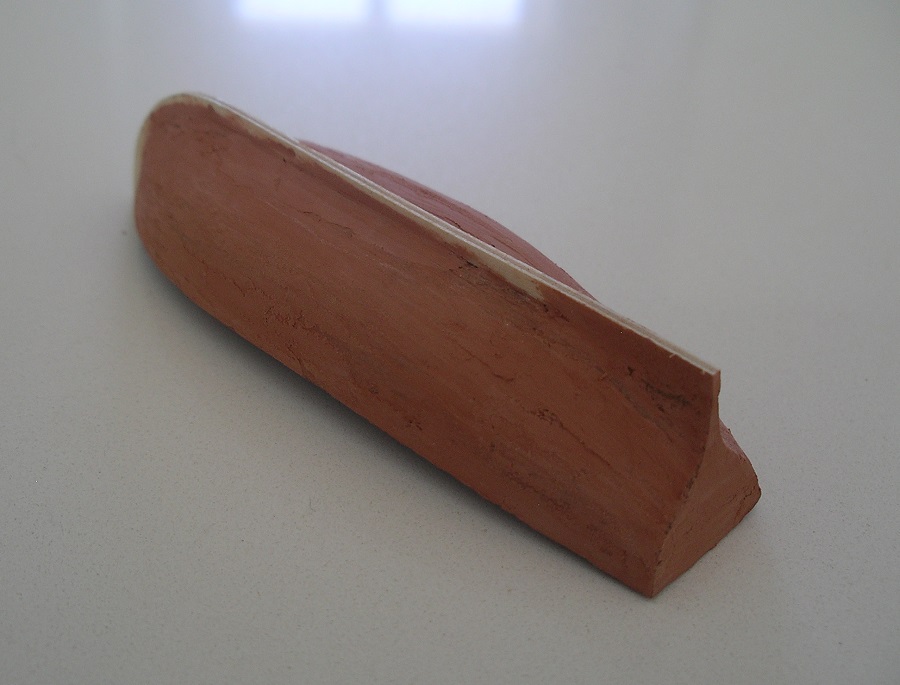
Planking finished
After planking I added the false keel and stem (one piece cut from plywood). I decided to cover the whole exterior with wood filler and to sand it smooth to get a prefect shape for the hull.


I turned out better than I expected.
Next up – painting the exterior of the hull white and adding the whales, thwarts, oarlocks and rudder.
- themadchemist, Ferit and NAZGÛL
-
3
-
-
-
Nice and tight planking Mike! After sanding, the finished hull is going to look fantastic. Good luck with the remaining planking.
-
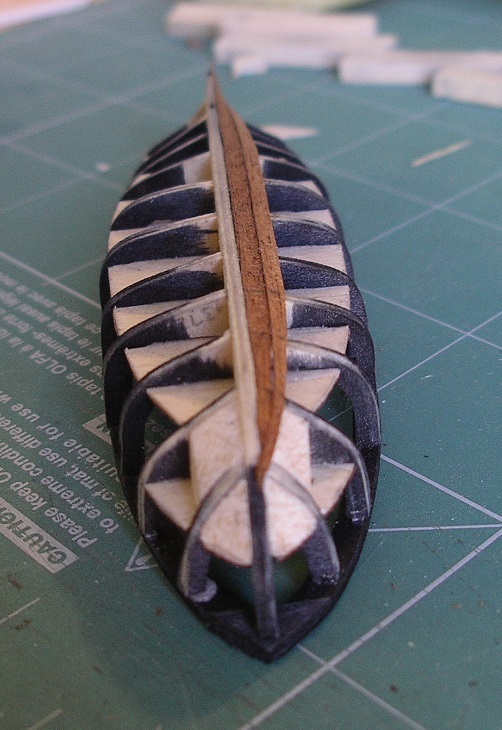
I started working on the ship’s boat in-between working on the side rails. Somewhere in a friend’s family an unopened AL Bounty is gathering dust in a cupboard and I was lucky enough to get my hands on a trace of the launch boat’s laser cut frames.
I scaled the drawing down to the right size in photocopier (the length overall of the SFII boat is about 10cm). I used 1.5mm plywood for the frames.
(AL metal boat vs scratch build)


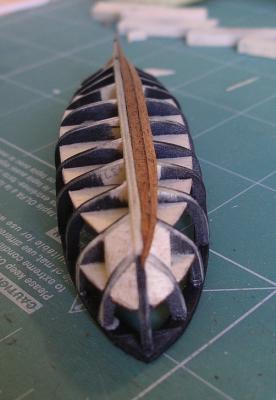
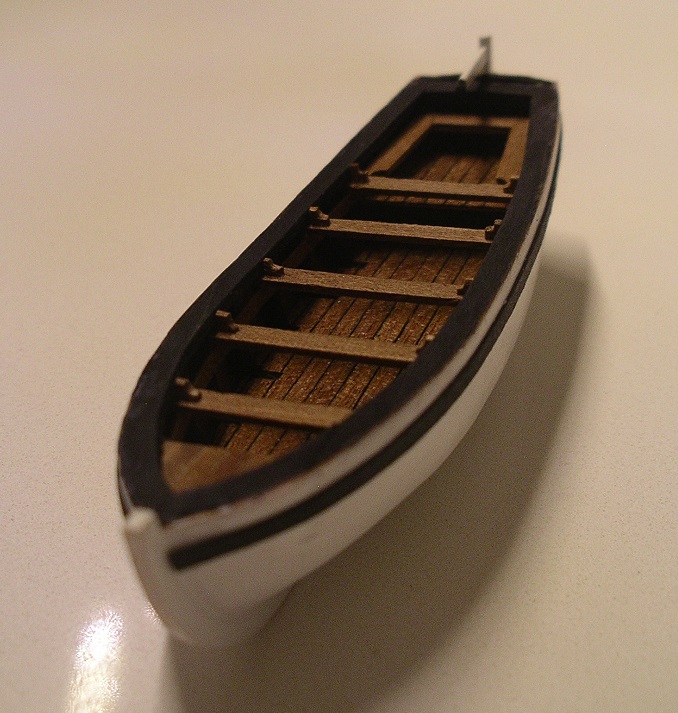
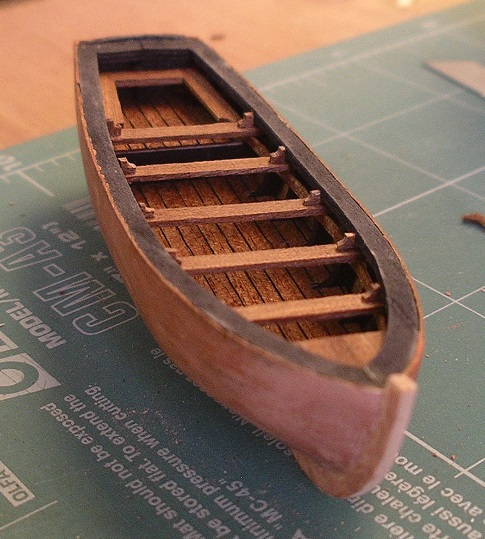
I have no instructions, so I’m just improvising as I go along. I made the floorboards from mahogany veneer, using some of my spare deck planking veneer as a backing.

I ended up cutting the 5mm mahogany strips in half, else the width of the floorboards seemed out of scale. My first attempt did not look nice, since it is difficult to see individual planks at this scale. The floorboards ended up looking like one solid piece. To make the edges of the floorboards more pronounced, I used one of the methods to simulate caulking – running a black marker along the edges of the strips before gluing them into place.

I have no idea how I’m going to get this boat planked. This 4’’ thing is flimsy. I’m also not sure if I should paint the hull white on the outside once it is planked. I’ve always liked the look of the white launch boats seen so often on later period models, but I’m not sure if it was done in the early 17th century. If you can paint the hull, your planking does not have to be 110%.
- themadchemist, NAZGÛL and Ferit
-
3
-
It is time for me to start building the launch boat of my San Francisco galleon. This made me wonder - in the late 16th century or early 17th century, was the hull of a galleon's launch boat painted white on the outside (as was more common in later periods), or wasn't it painted at all?
-
Thanks Keith. The SF1 head rails just look more natural (and isn't Caroline's model just superb!). This is certainly one area where the SF1 kit is clearly better.
-
Hi Mike
I had the same problem at the foremost bulkheads. I glued a piece of balsa wood to the bulwarks in that 'flat spot' (the piece came all the way to the top of the bulwarks). I then sanded it down to give the hull a smooth, natural flow and then planked over it.
-
Fantastic job so far! Very neat rigging.
Looking forward to seeing your home made sails. I agree, the ones supplied by AL are horrible. I'm not sure if I am going to rig my San Fran with sails.
-
-
Jeez Randy, I take a short hiatus and when I come back your San Fran is almost ready to sail! Your finished rigging is superb! (...and your photography skills as well). The words "museum quality" comes to mind.
-
-
Thanks Randy, Augie, Robbyn, Hamilton and Lawrence. Your kind words when you drop in certainly gives me more confidence to scratch build more parts. I have so many build logs to catch up on!
Cheers to you too Matti! I’ve been taking sneak peeks of your Wasa progress – she’s in league of her own!
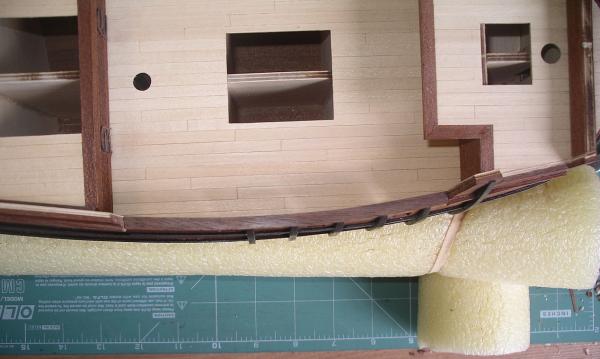
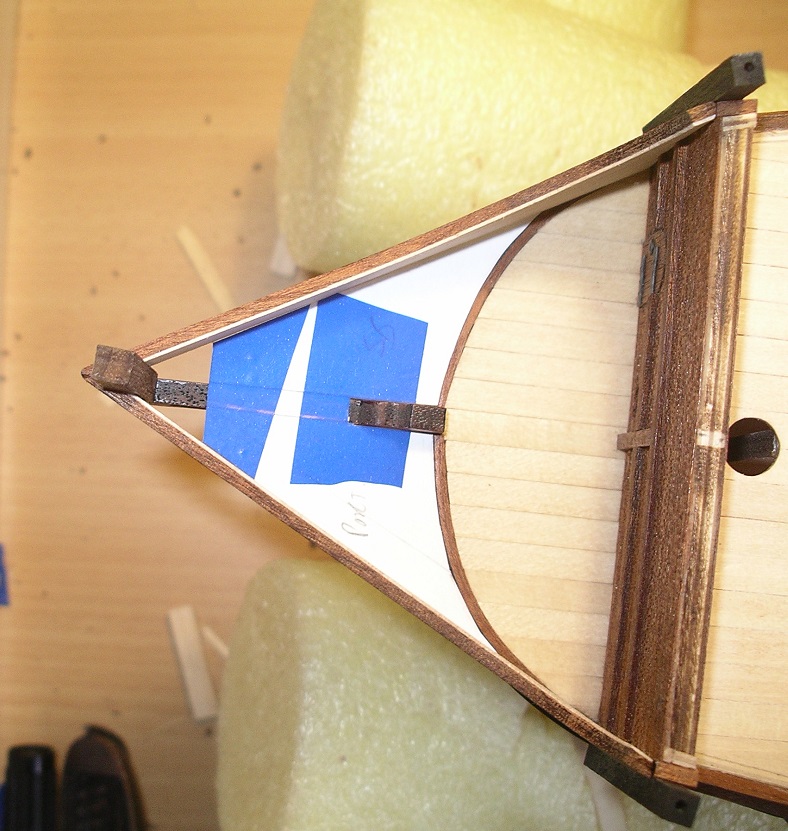
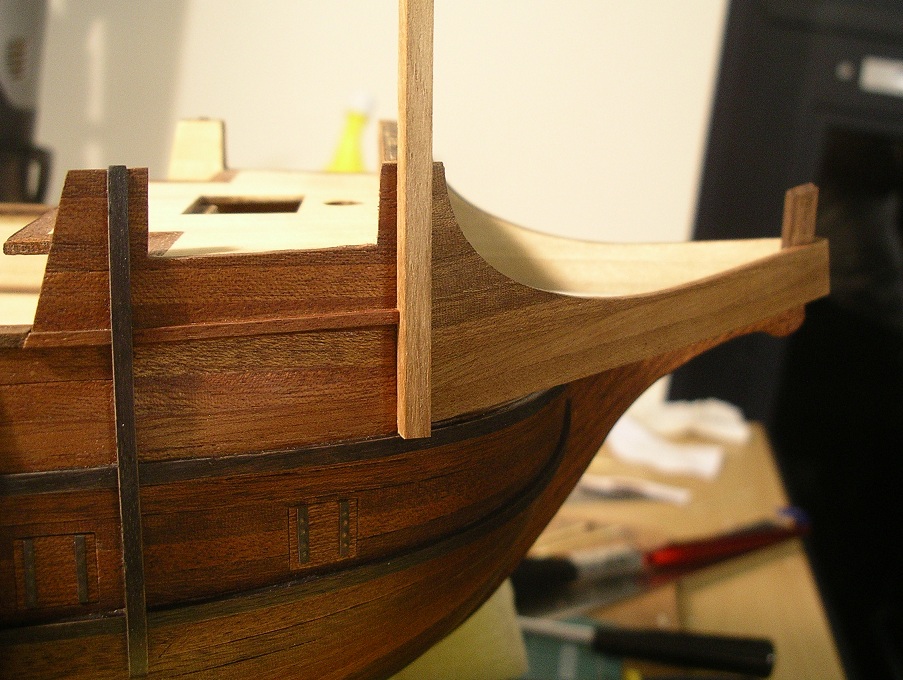
I decided to make my own head rails from off-cut hull planks. I’m running out of mahogany veneer and I still need some to use as deck planking when I build the ship’s launch boat, so I couldn’t simply line the precut pieces with veneer. I also wanted the head rails to tie in better with the “look” of the rest of the hull – and I hoped original hull planks would do just that.
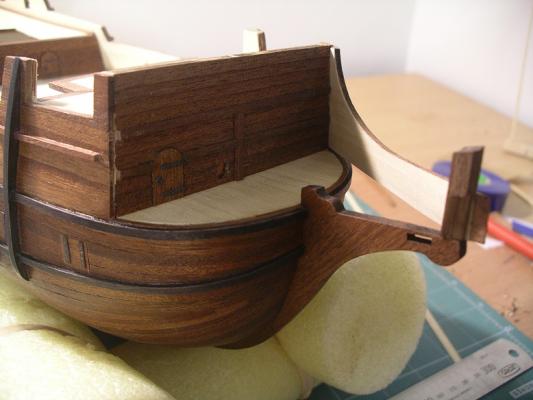

From the photos in the instructions it seems as if the head rails are glued to the side of the bowsprit bulkheads, with the riders covering the discrete step. That doesn’t seem right to me and I decided to glue the head rails in place so that there is a smooth transition from the side of the hull to the head rail.
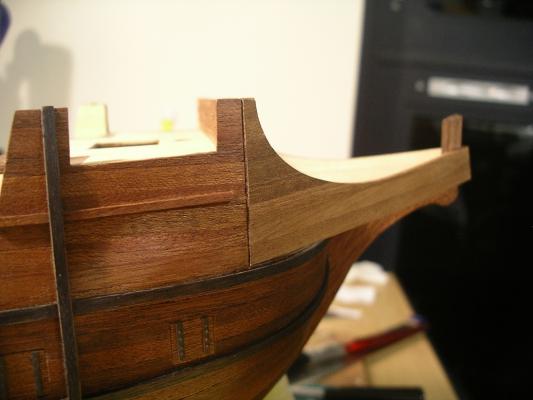
There is still a small gap at the joint, but it will be nicely covered by the riders later on. The head rail ends up looking like a natural extension of the hull, rather than a separate piece.

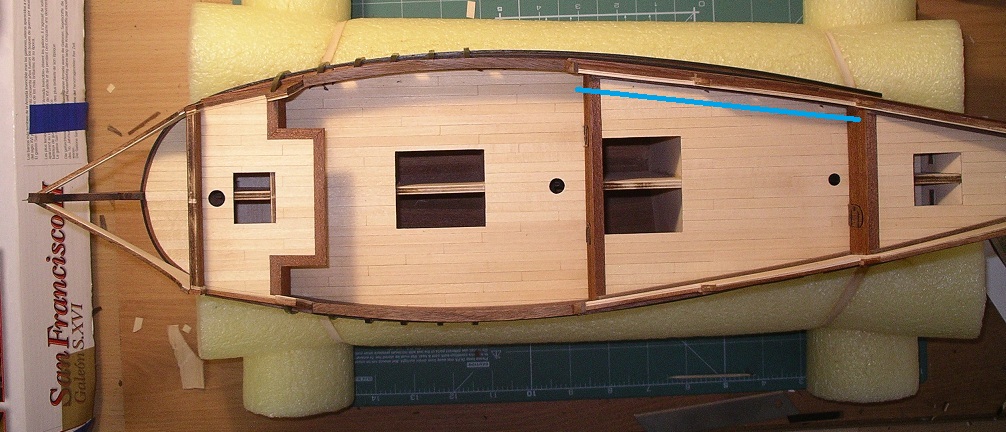
I continued working on the limber boards as well. There is one long piece that runs the length of the turquoise line between the bottom and top side rails. I can’t recall anyone else having this problem, but I will have to bend this piece laterally as well to conform to the shape of the bulwarks. If I use a straight plank, it will form a ‘top’ plank for the bottom side rail that does not fit snuggly across the stanchions.

-
The Admiral and I moved to a new shipyard, causing progress to halt for a while.
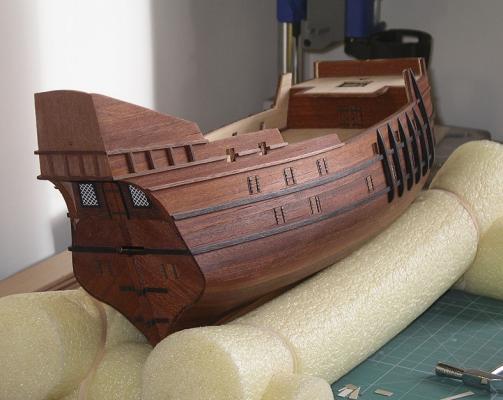
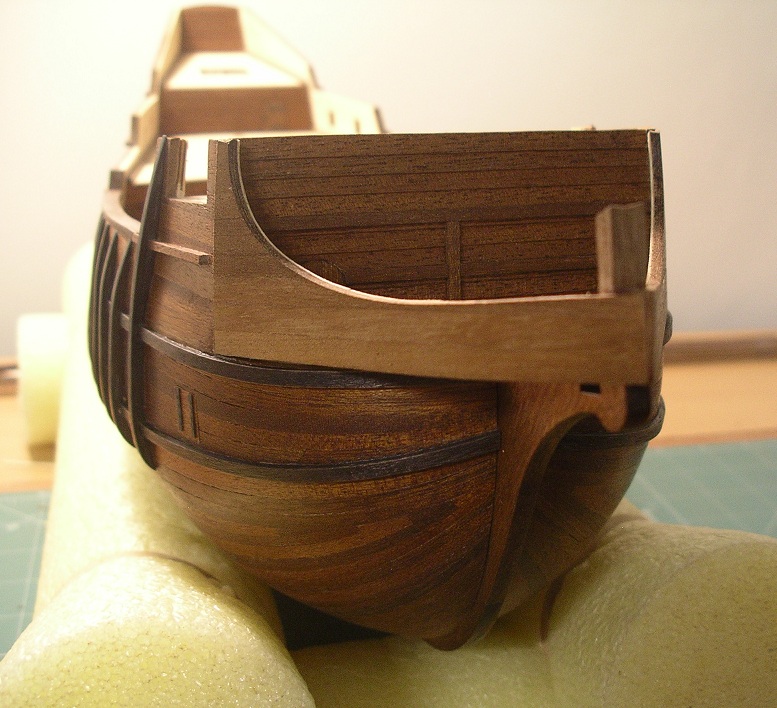
I started with the side rails. At the waist deck the planks must bent laterally to fit the curve of the bulwarks. I didn’t think it would be possible, but it turns out the 2x5mm planks can actually be curved that far laterally. I select a piece with a long, open grain, soak it for 20 min in water and then bend it in a jig. Success seems directly equivalent to the amount of beer consumed while trying the stunt.
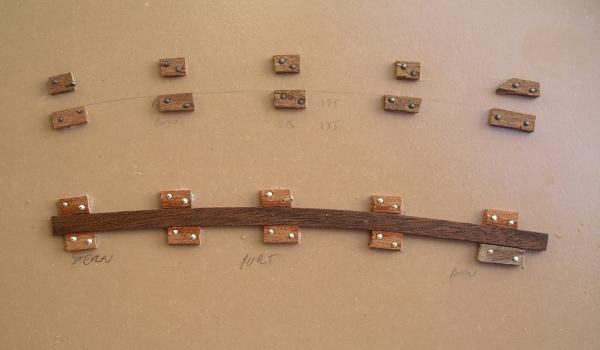
In the end it fits the top curve of the bulwarks nicely.
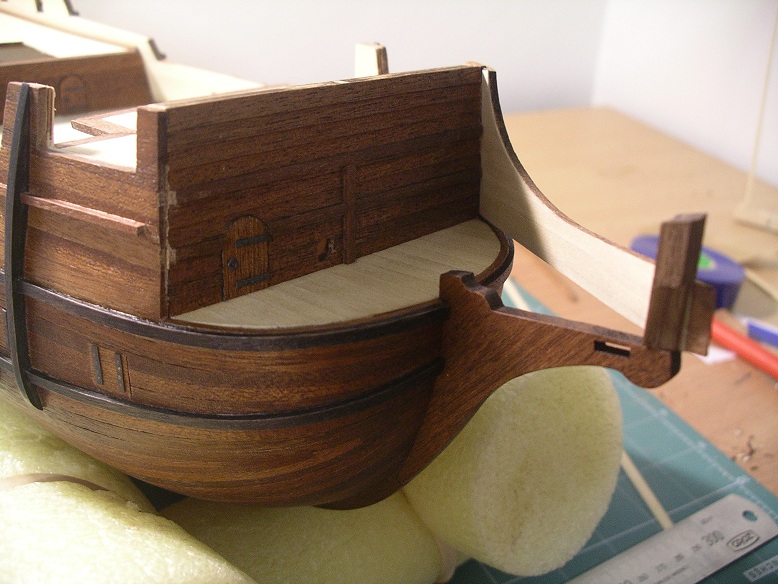
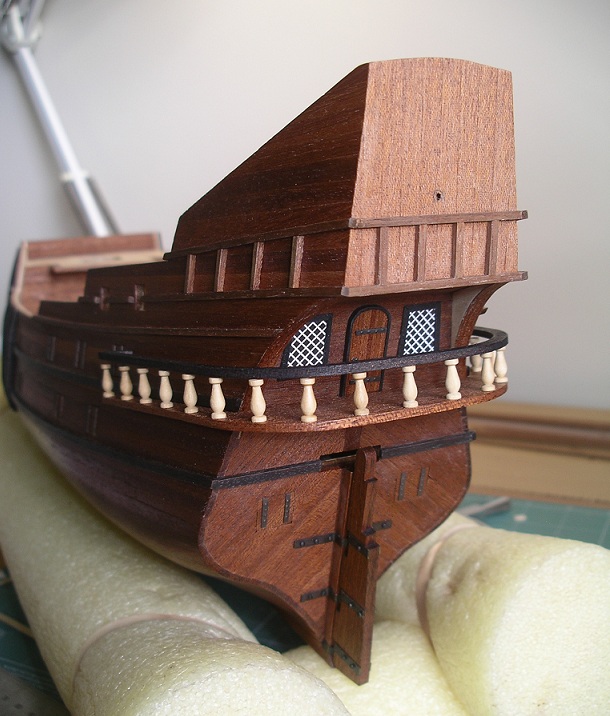
I did not use the other metal doors that came with the kit, so I made a door and two windows for the stern gallery as well.
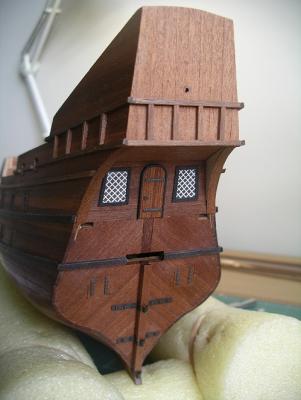
I finished the pieces for the stern gallery. In the picture below it is dry fitted. I still turn my SFII on her side a lot when I work and I’m worried that I will break the stern gallery in the process. I will glue it in place later. I must also make a tiller for the rudder.
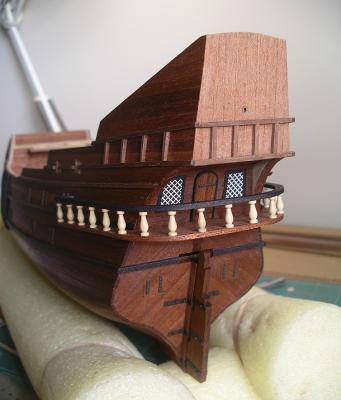
Next up (together with the side rails) is the head rails.


Red Dragon by Vivian Galad - Artesania Latina - 1:60 - modified
in - Kit build logs for subjects built from 1851 - 1900
Posted
Hi Vivian
There is something about these Chinese ships that makes you want to build one as soon as you see it for the first time. Very neat work so far. I just know this will be a masterpiece when completed!