DesertWolf
-
Posts
130 -
Joined
-
Last visited
Content Type
Profiles
Forums
Gallery
Events
Everything posted by DesertWolf
-
 Rigging is coming along slowly.
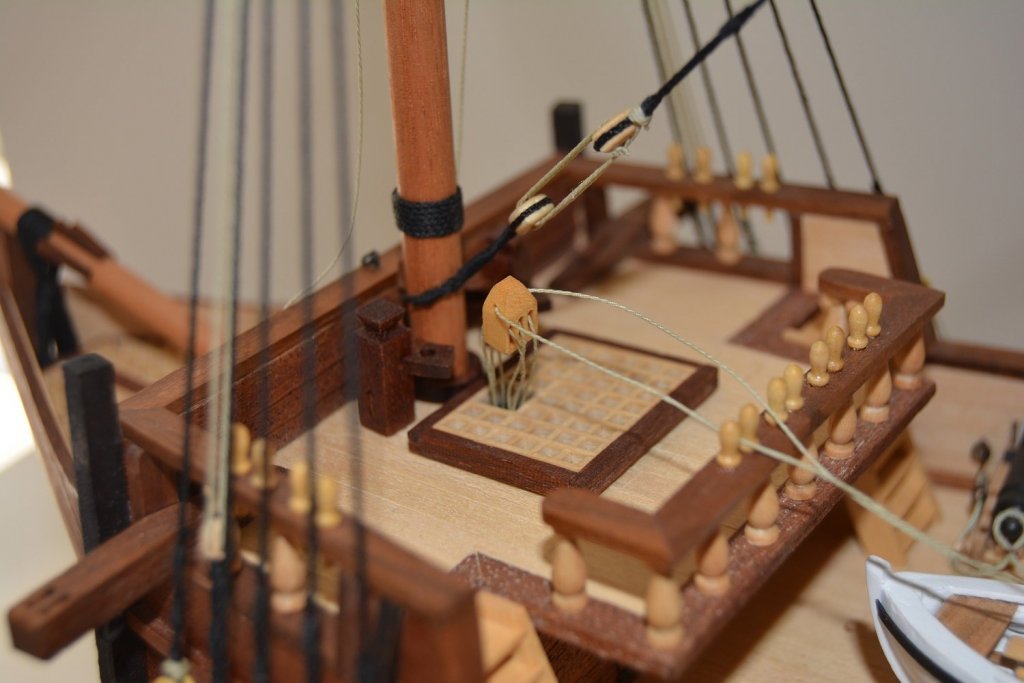
-
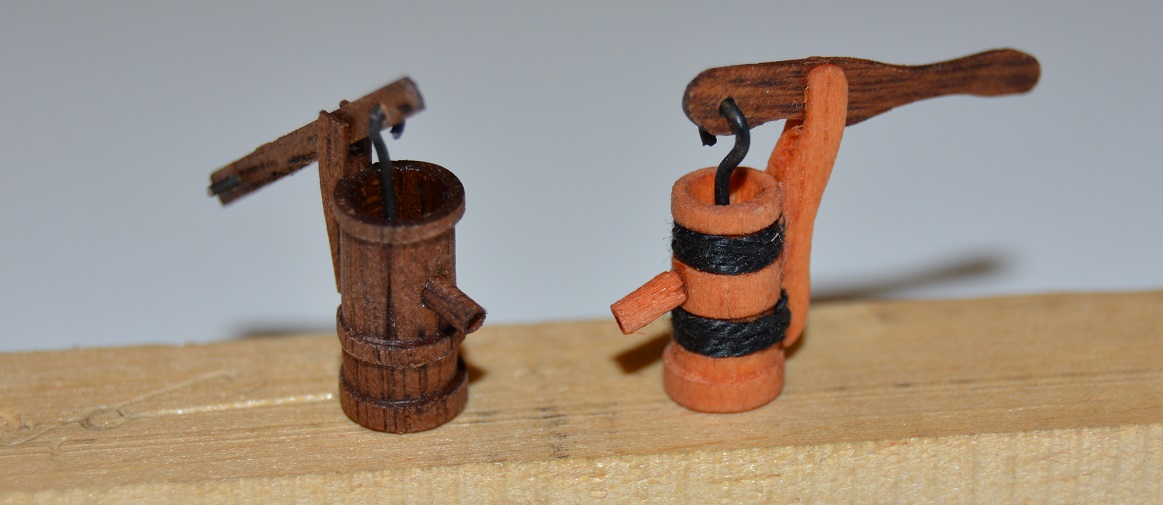
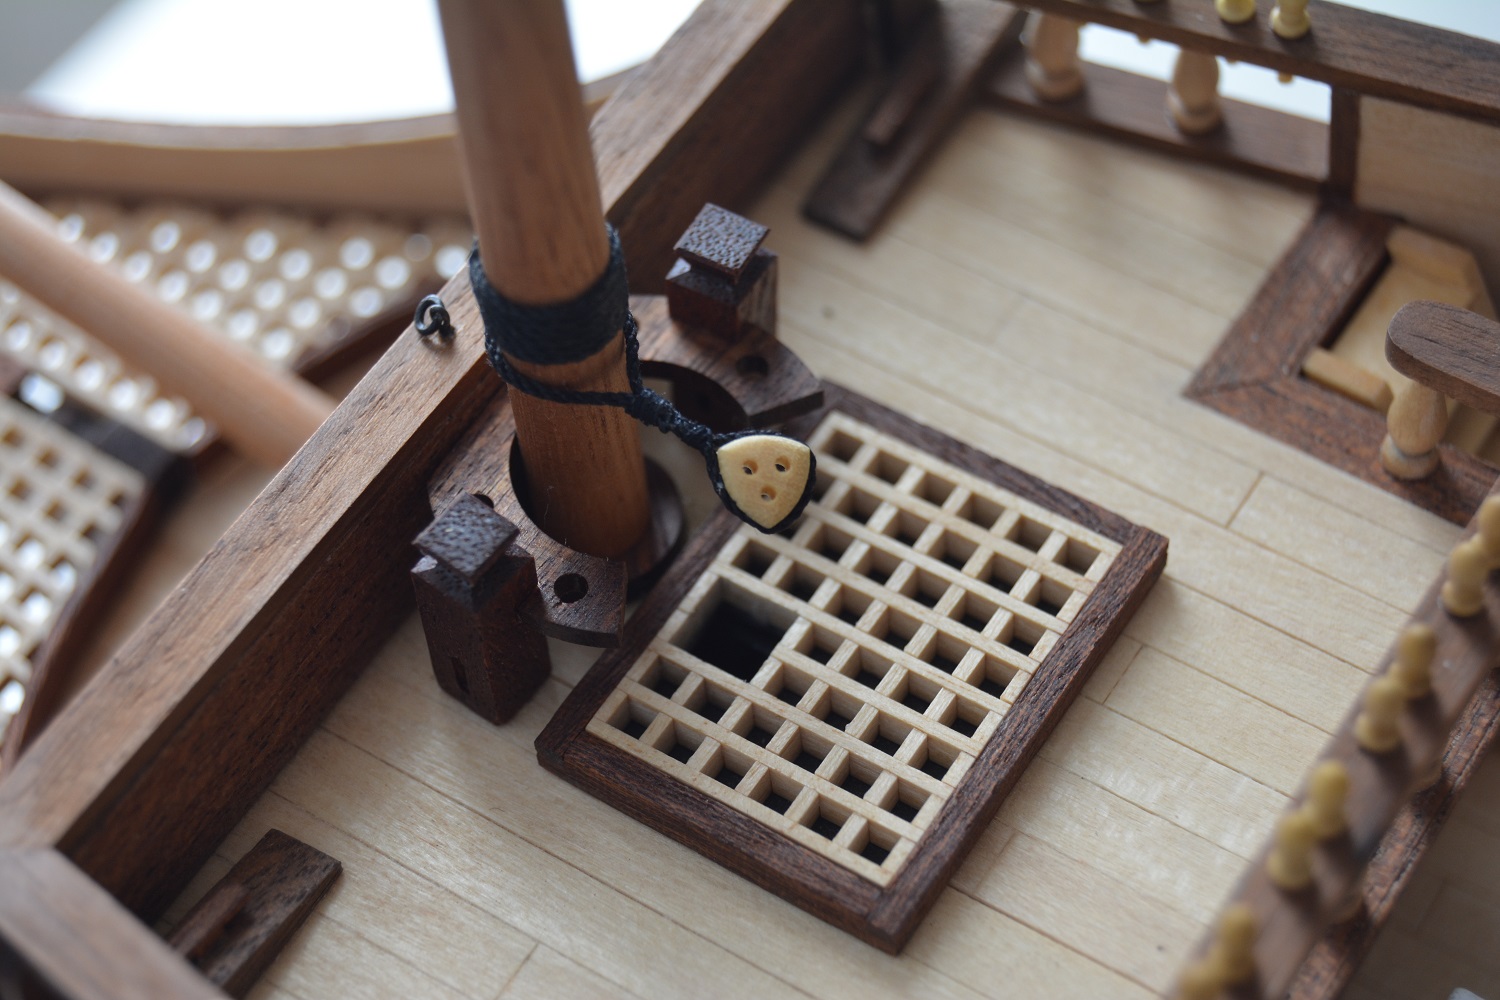
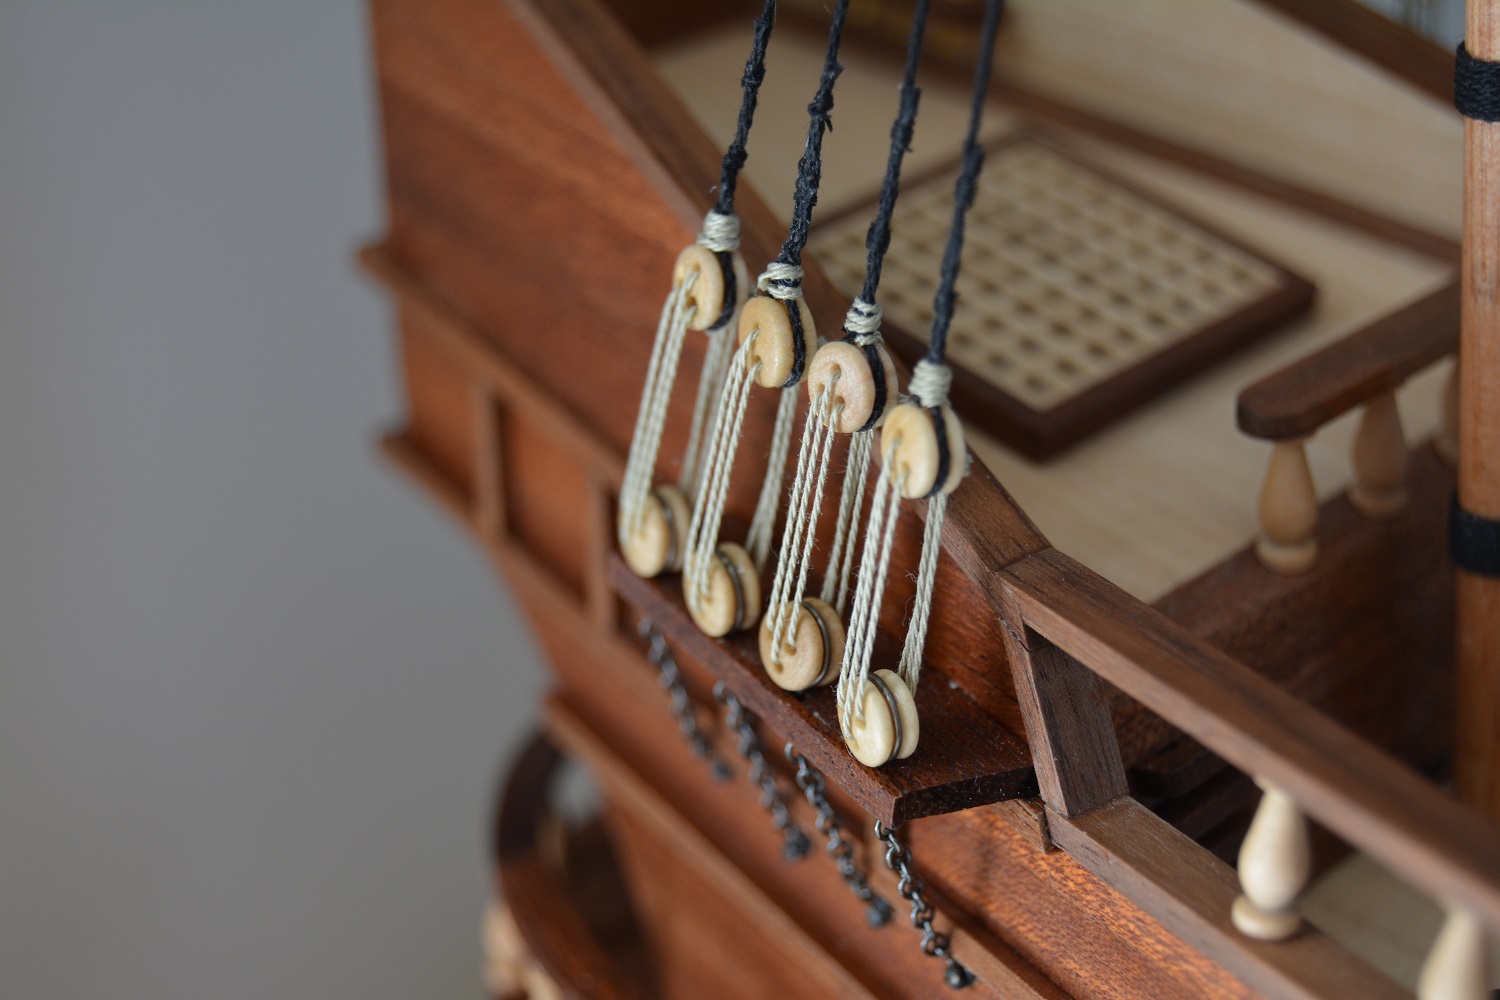
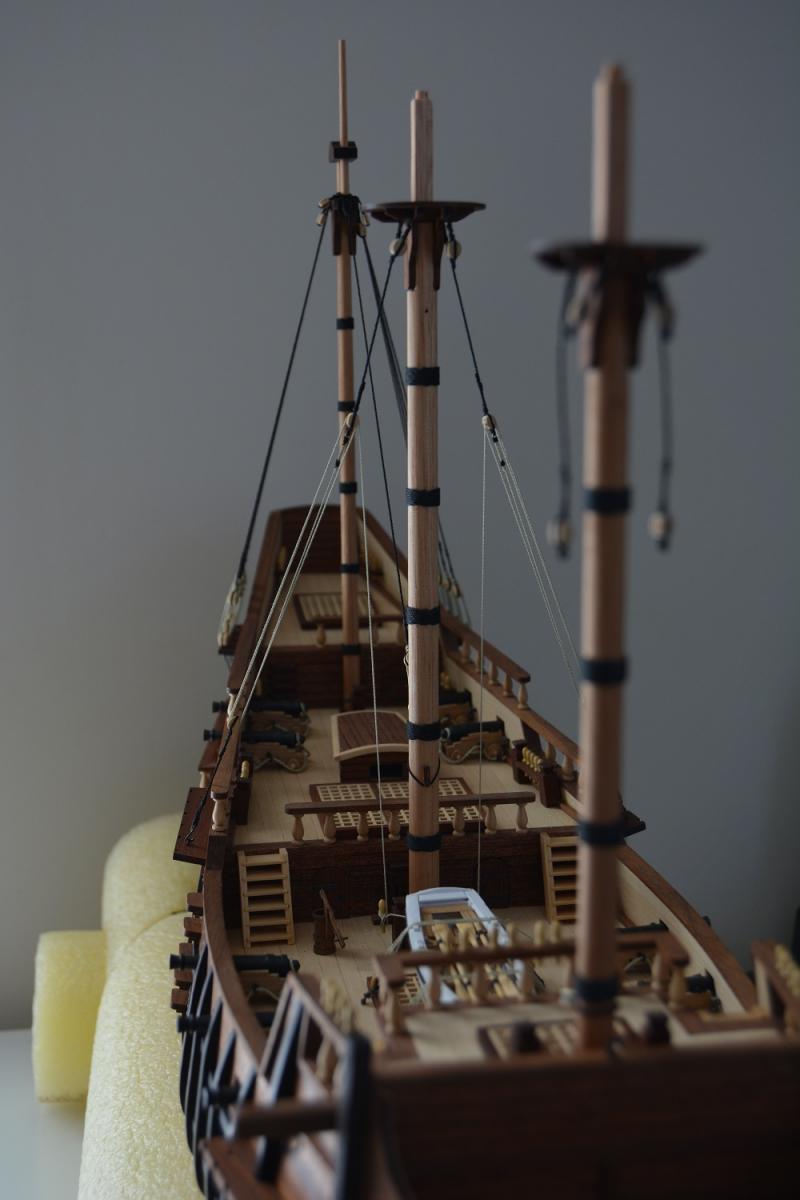
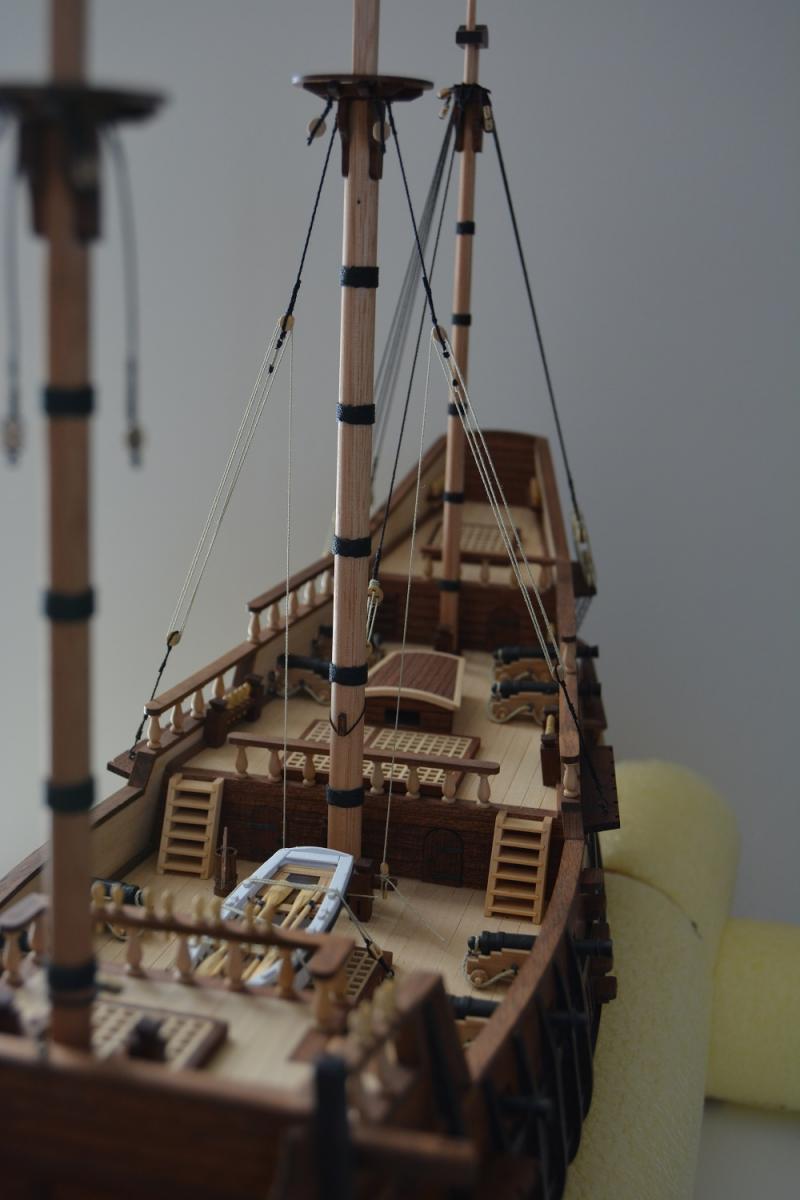
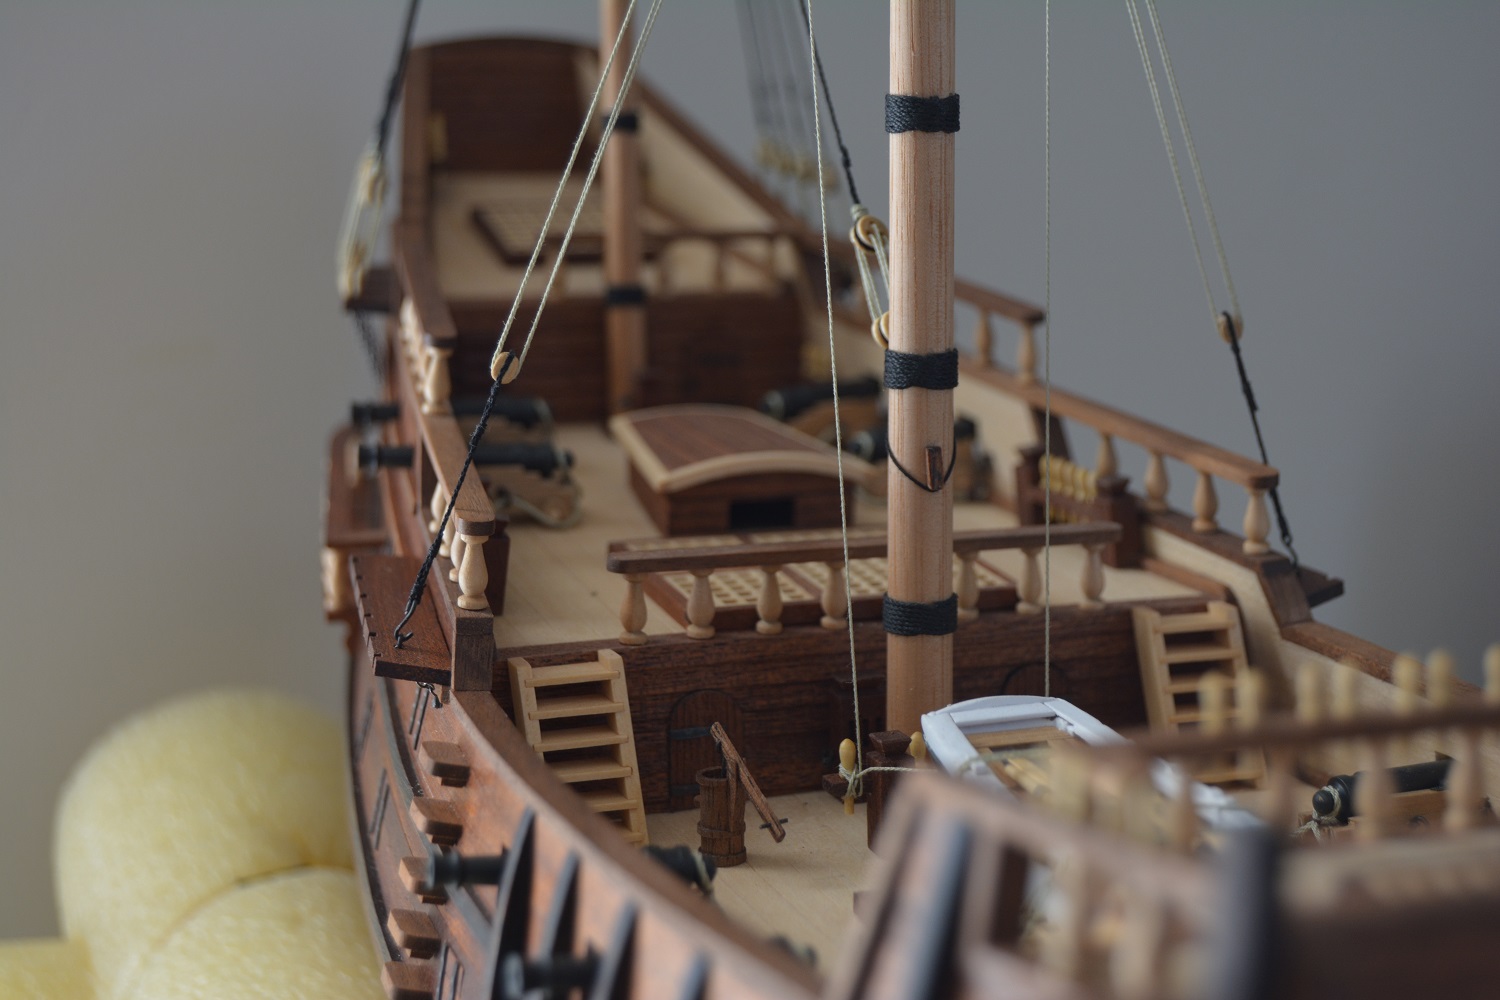
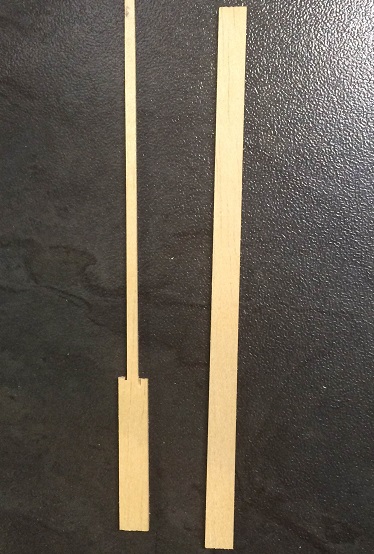
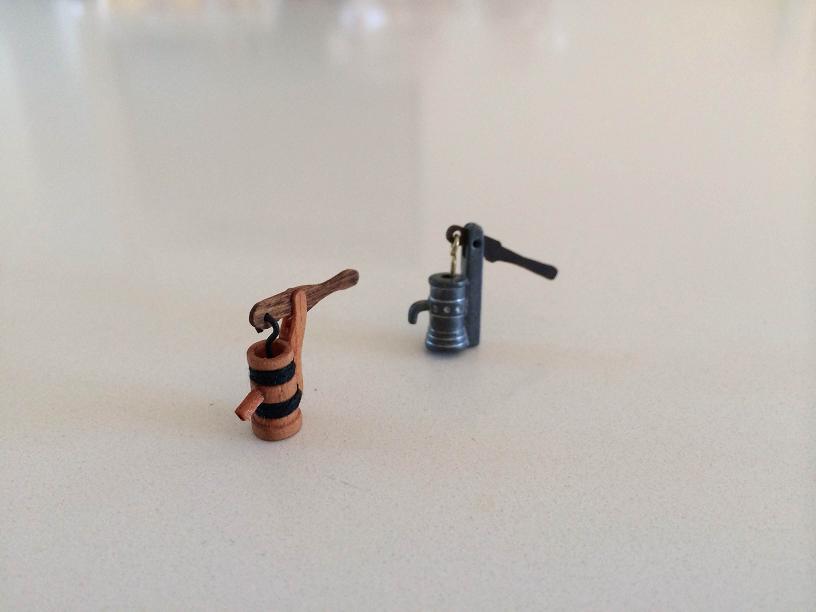
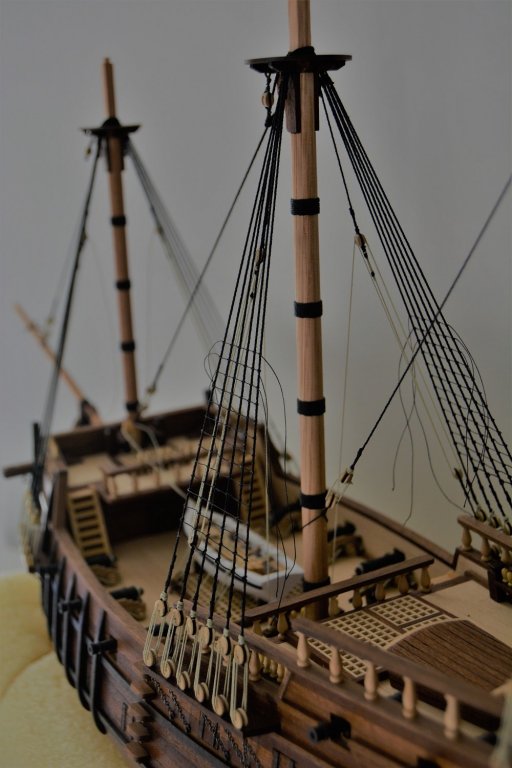
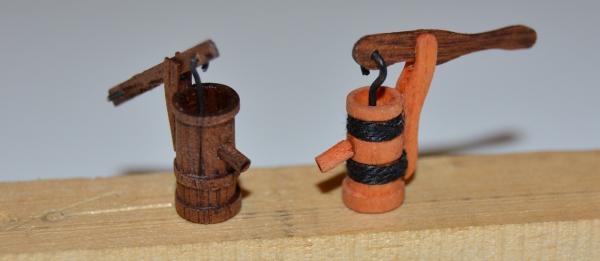
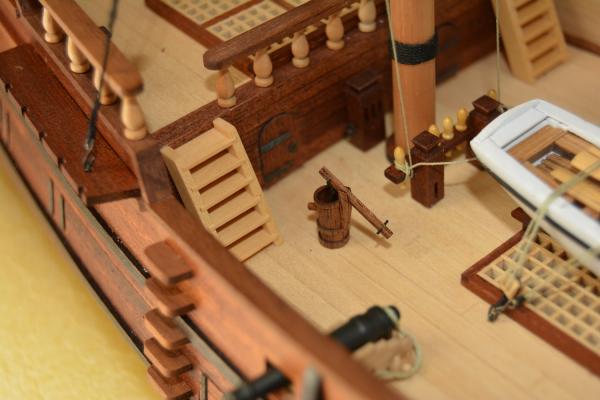
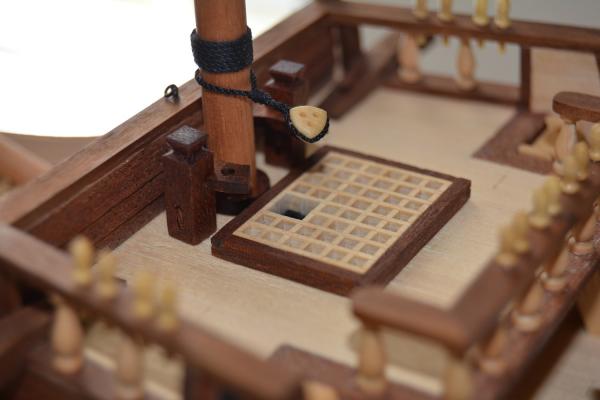
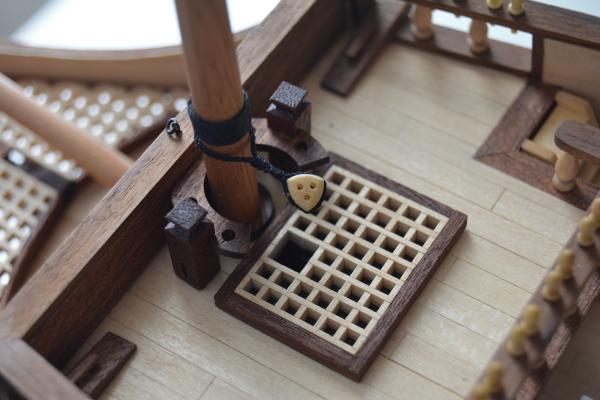
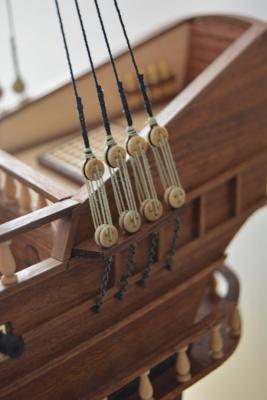
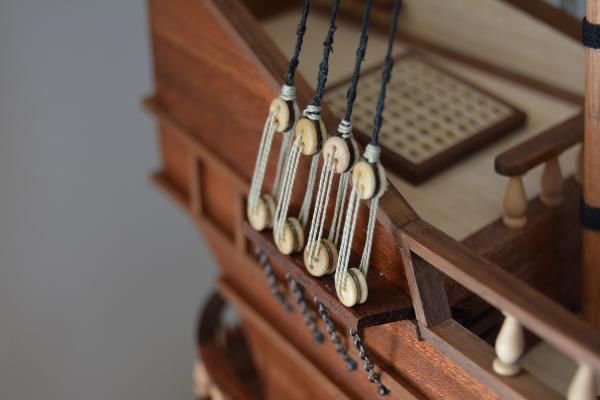
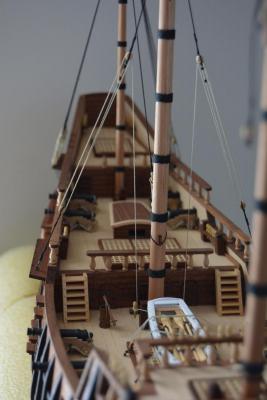
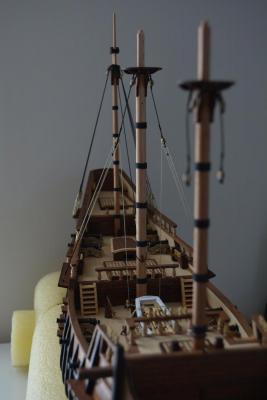
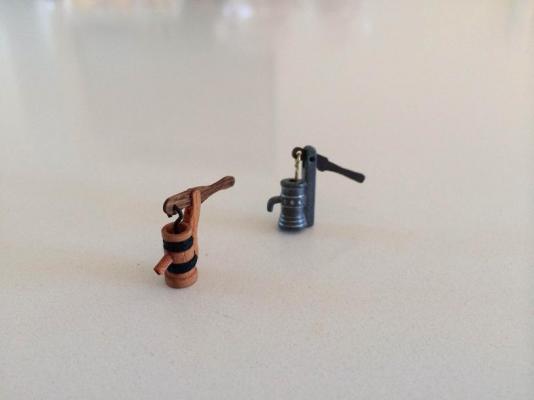
I started with the rigging. I decided to ignore the rigging plan that comes with the model and base the rigging in RC Anderson's book "The rigging of ships in the days of the spitsail" - so that the rigging is more accurate for the period. It is quite difficult to rig without a plan, so I have to plan each step carefully. I am also using the Mayfair instructions (from Chuck Passaro) to help guide my rigging. My biggest problem is that the SF II layout of knights and pinrails is not appropriate for my new rigging plan. I had to move some pinrails to locations on the deck that is not perfectly suited for the rails and as a result I had to make some modifications to my forecastle and ladder going to the poop deck. I decided not to pursue making my own blocks any further. It just took too much time and didn't look all that great. I ended up buying blocks from Chuck and no words can describe how incredible his workmanship is. His blocks (at such a tiny scale) are absolutely unbelievable! Chuck also went to an incredible length to ensure that I receive my blocks in South Africa. Thanks Chuck! I didn't like the first pump I made, so I made a new version (new left, old right). Mounted on the deck I'm please with the boat Modifications to allow for my revised rigging plan: a) I made a hole in the forecastle grating to simulate a move of the foremast knight to below the deck. The rams head will ultimately be rigged to an eyebolt that I installed below the deck (to simulate the knight below the deck). This is similar to descriptions from RC Anderson and the Mayfair rigging plan. There simply isn't any space left on the SF II forecastle to mount the knight in between the grating and the mast. I had to add some pinrails at various locations along the deck to ensure that rigging ends up belayed in appropriate places (following descriptions from Anderson). I ignored the location of the pinrails in the SFII plans completely. I needed belaying pins on the inside of the main shrouds, but the bulwarks of the SFII are of such a nature that you can't mount a rail to the bulwarks on the inside of the shrouds. I had to make separate rails that mount on the deck. Not ideal, but it's the only option I had. I changed the ladder going to the poop deck to make room for a pin rail just abaft of the mizzen. So far, I'm done with the mizzen shrouds and the main tackles. It really is a lot harder than what it seems to get the upper and lower deadeyes spaced evenly, no matter what tip/jig/tool you use! Well, at least for a newbie such as me. On the photos I can see a lot of fuzz on my lanyards that you can't really see by naked eye. But it still shows me I need to wax those lines a bit more. As she stand today


-
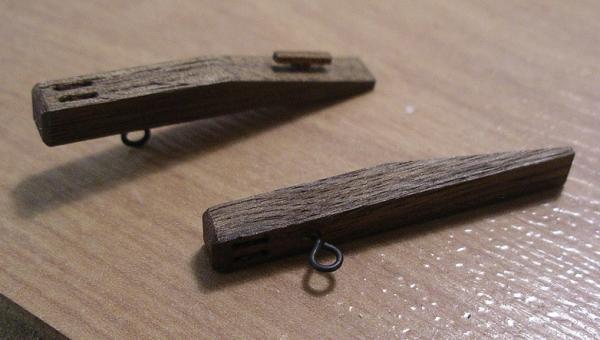
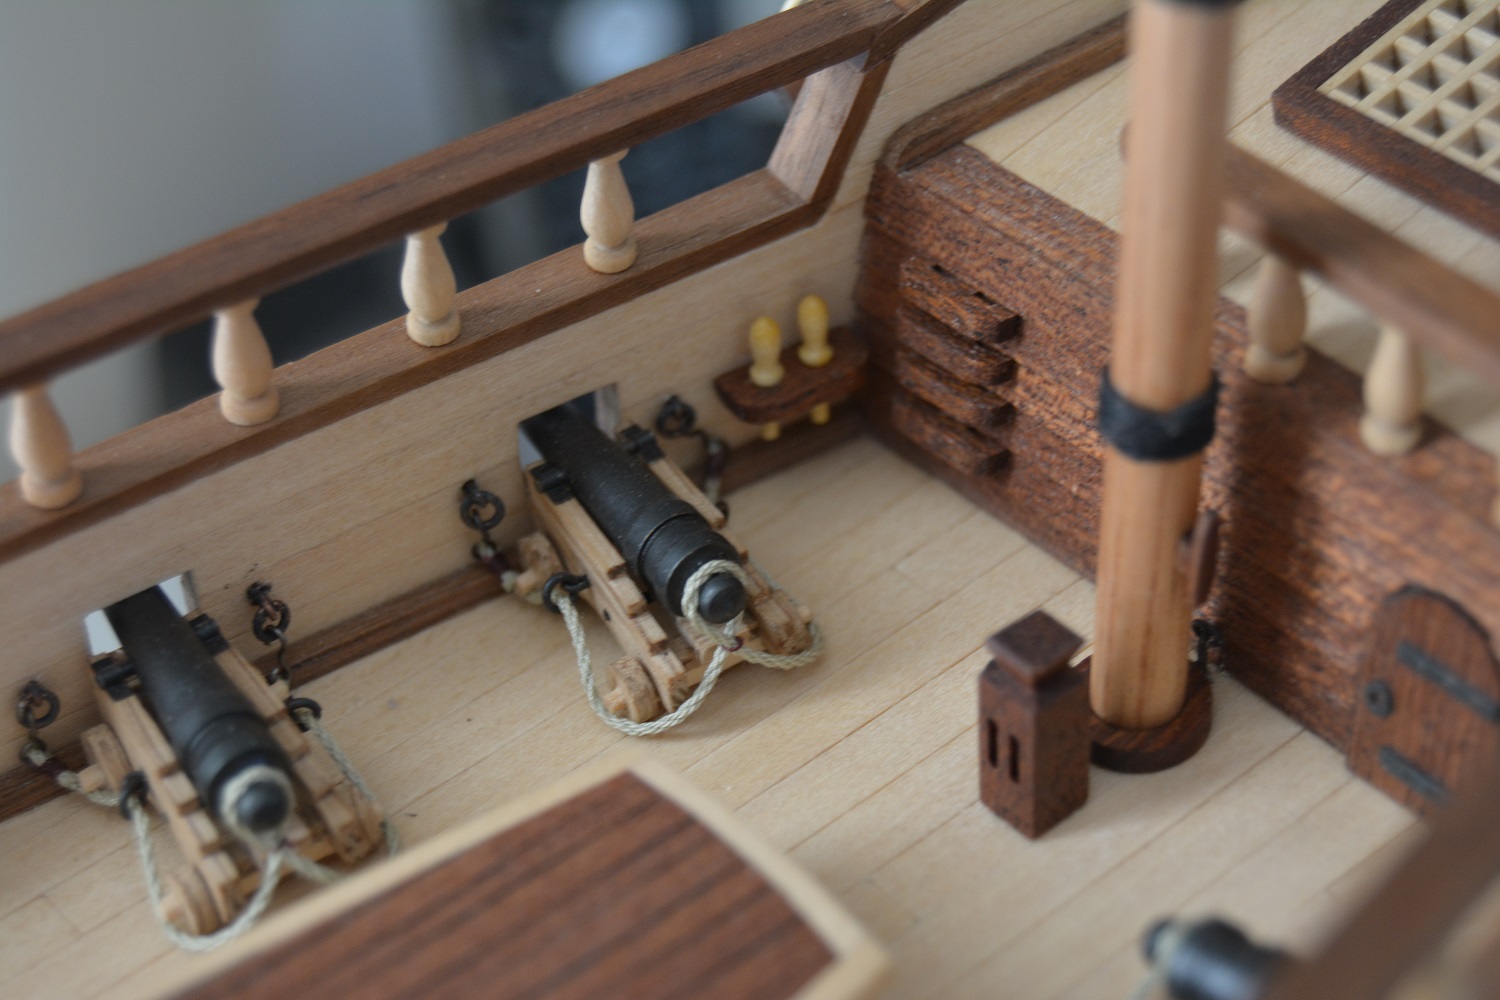
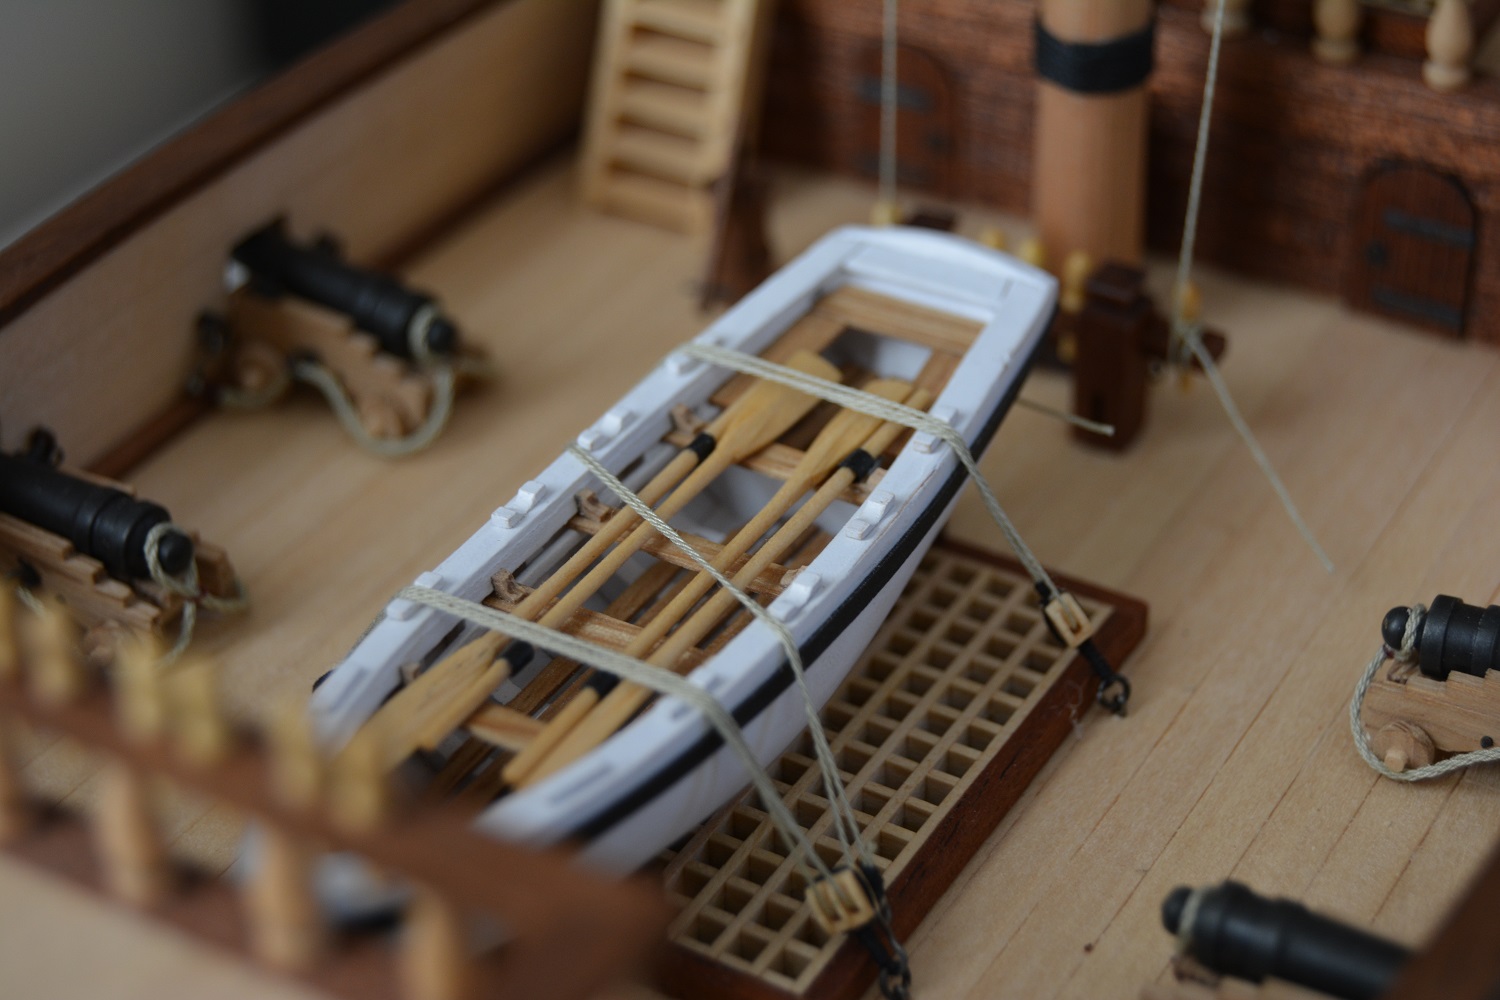
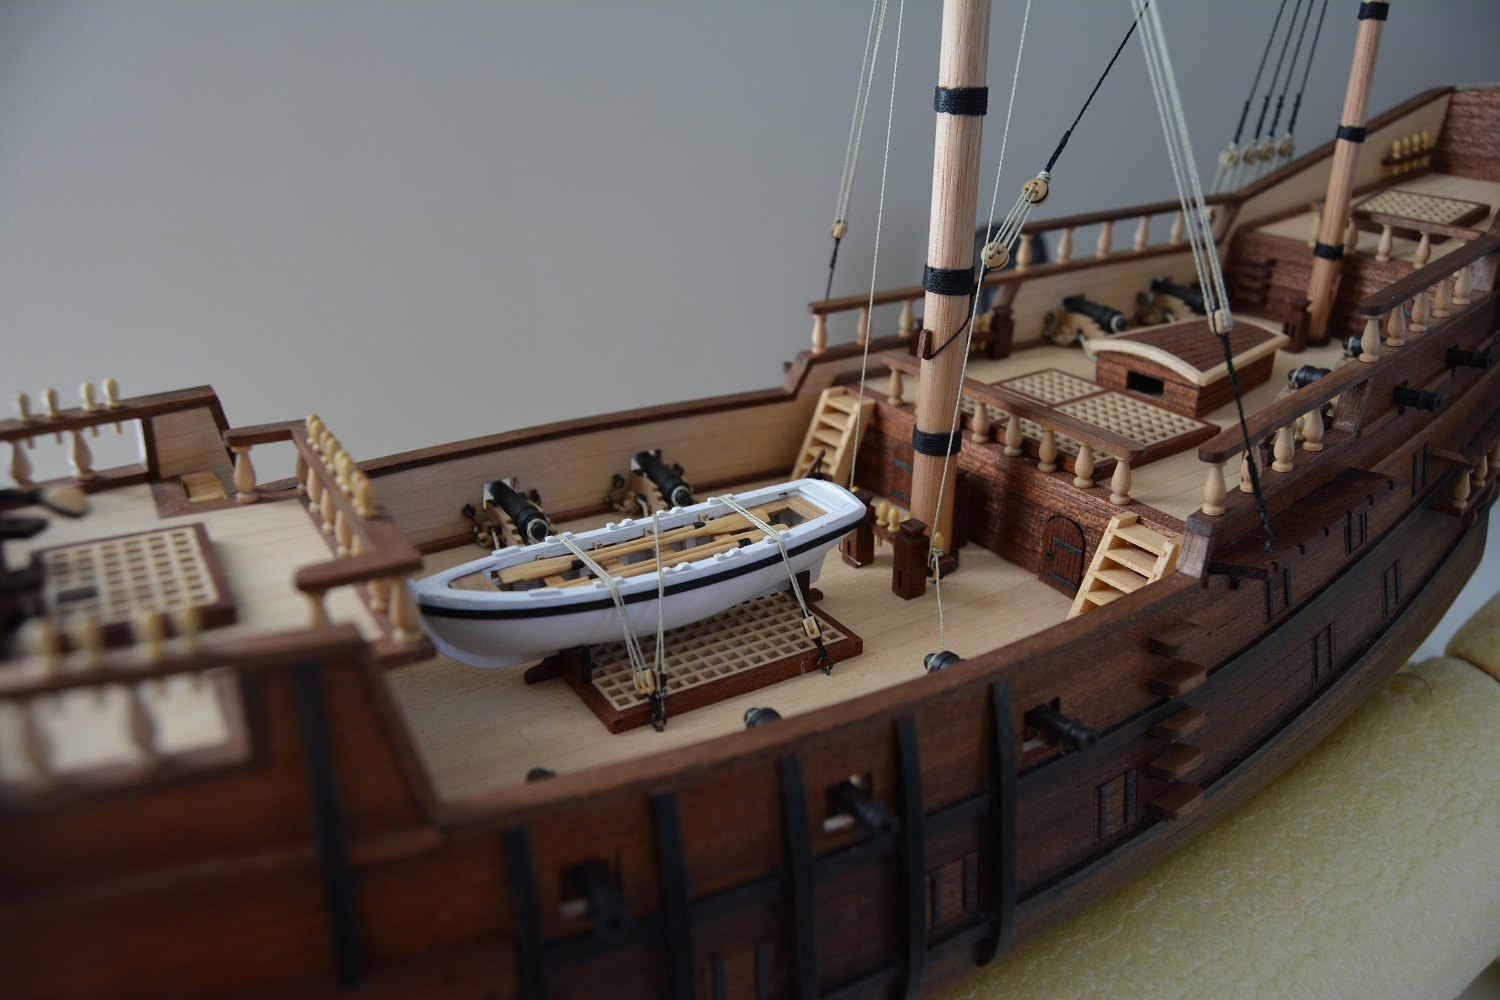
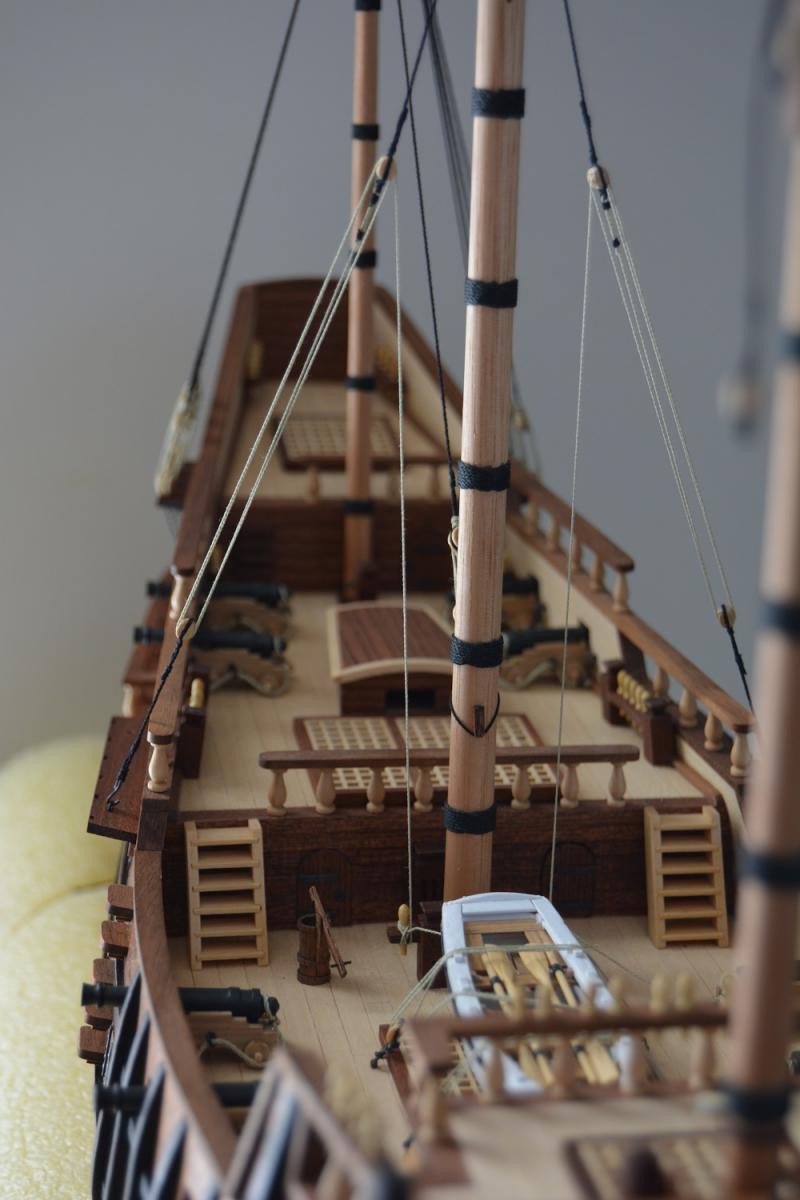
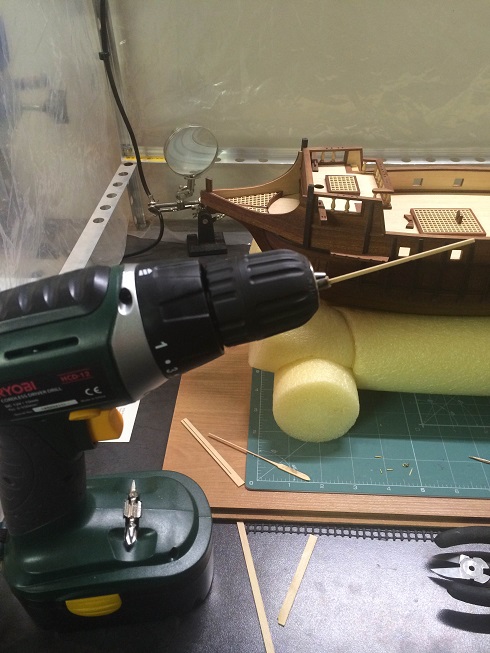
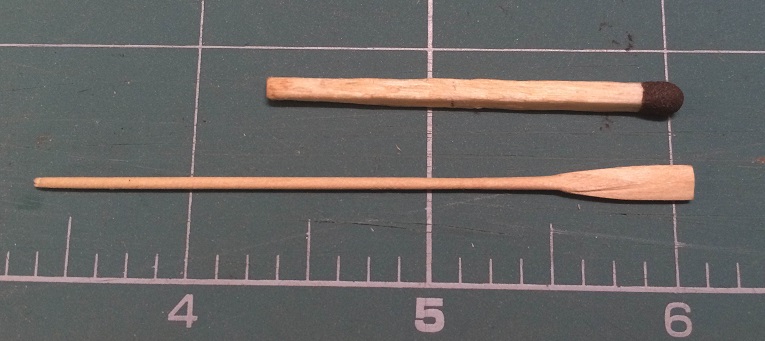
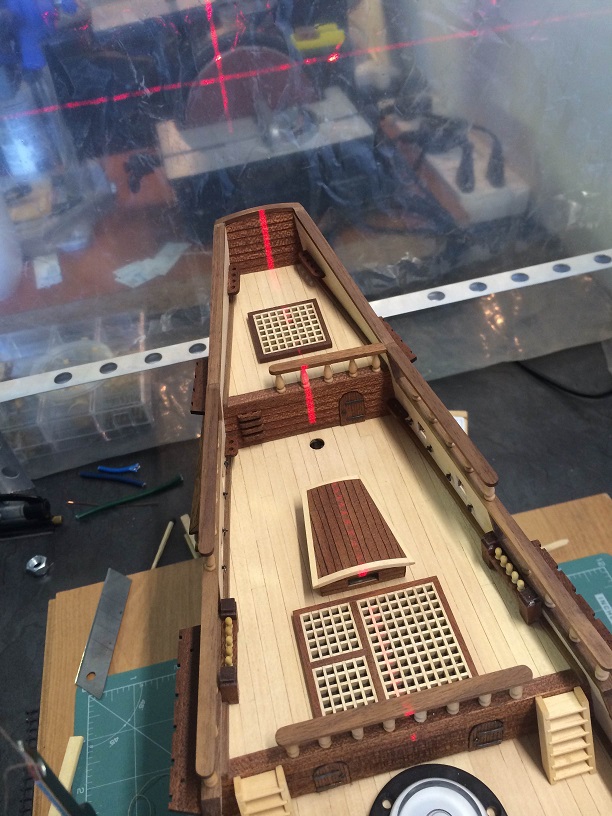
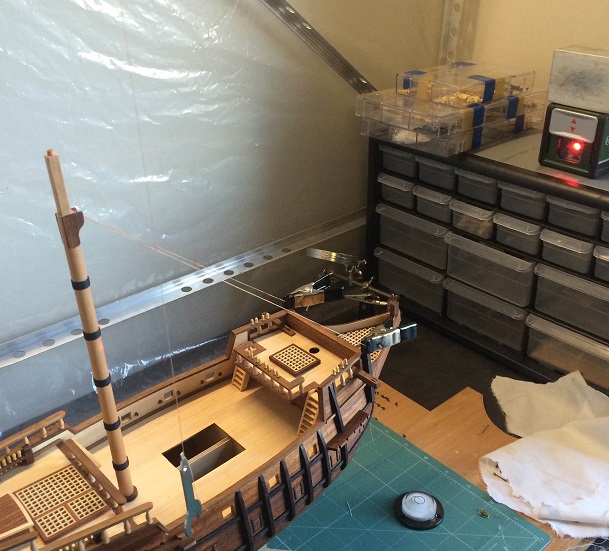
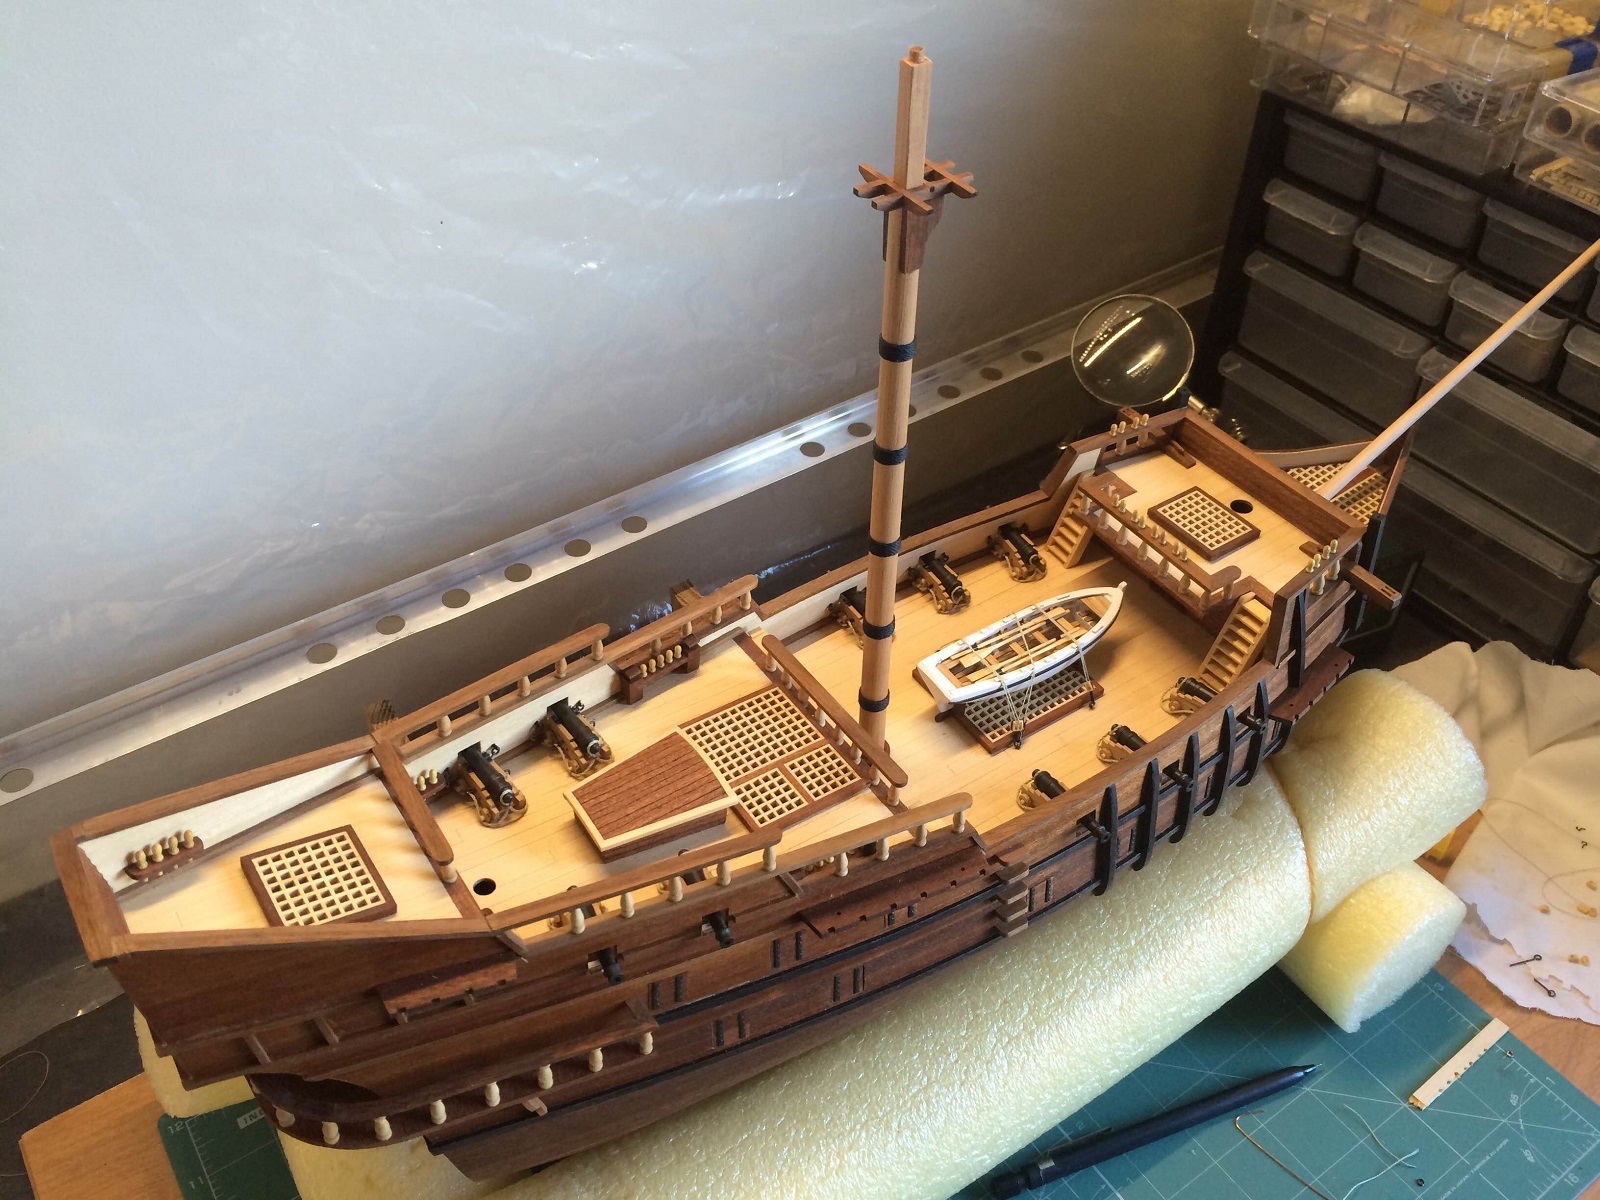
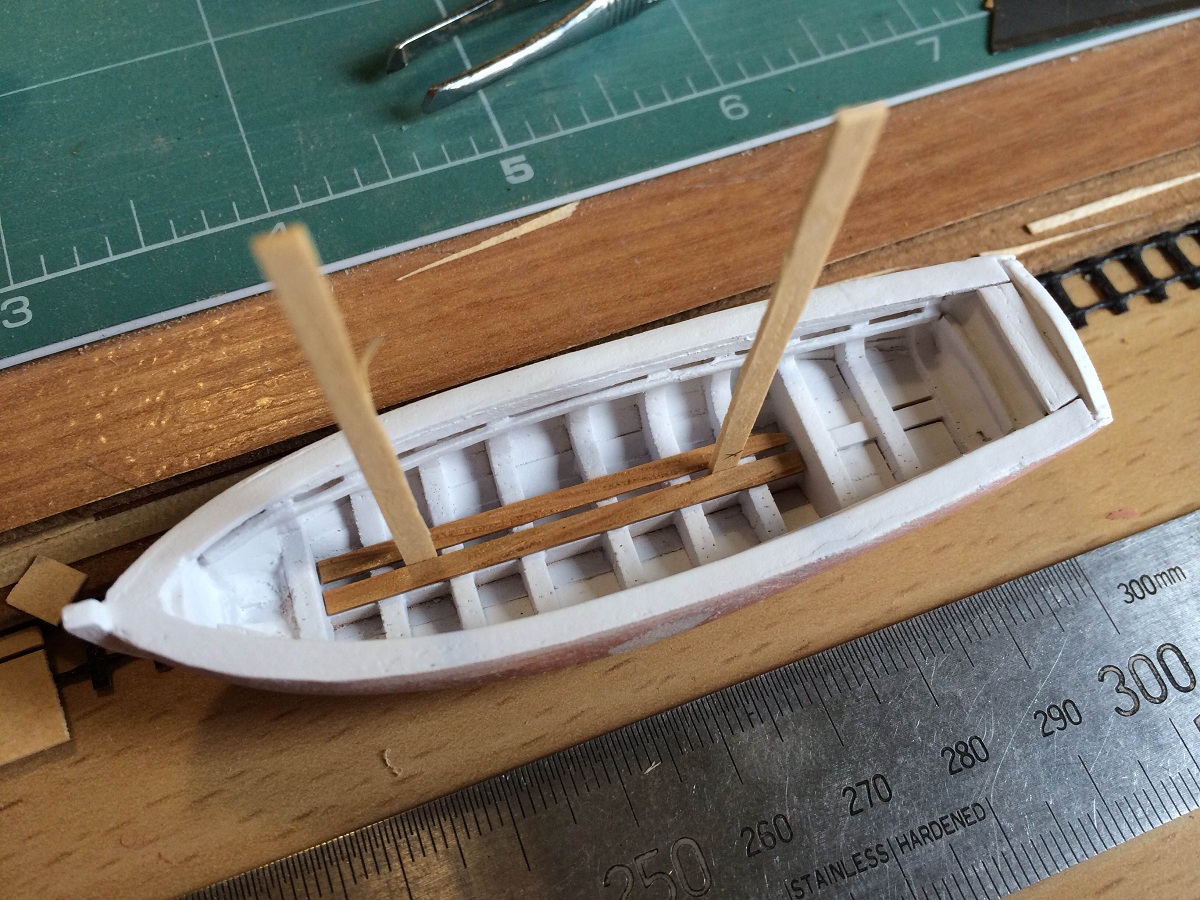
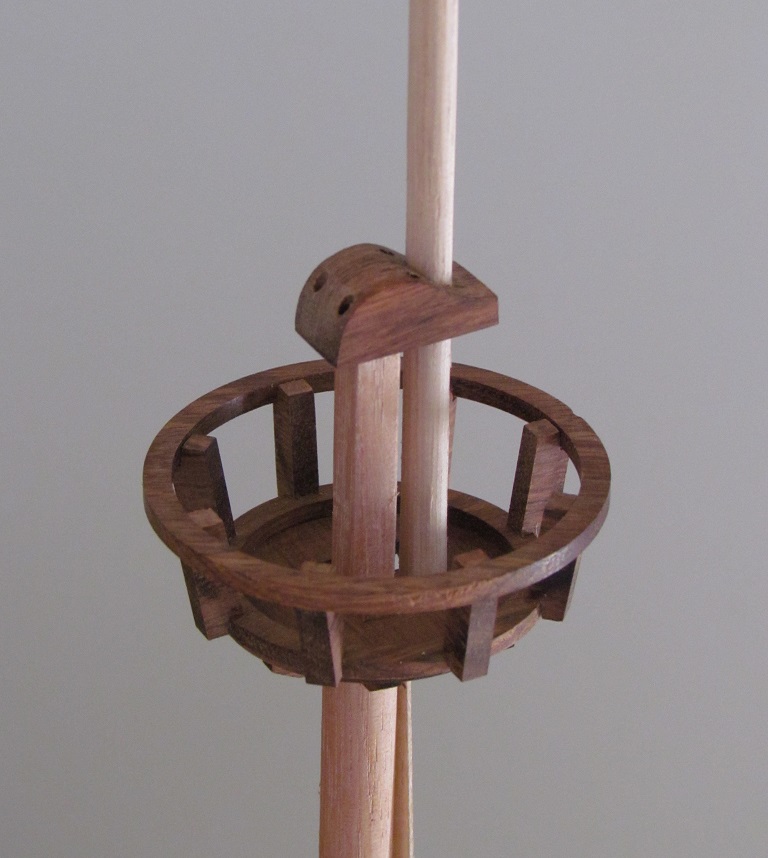
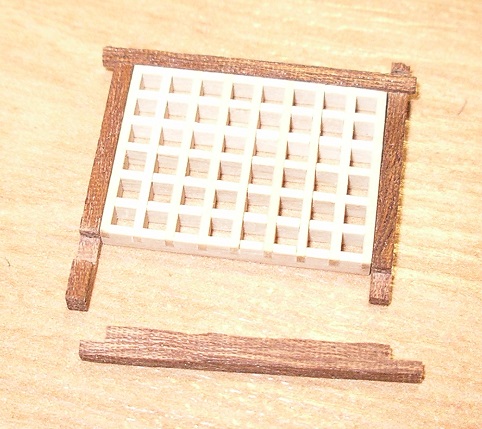
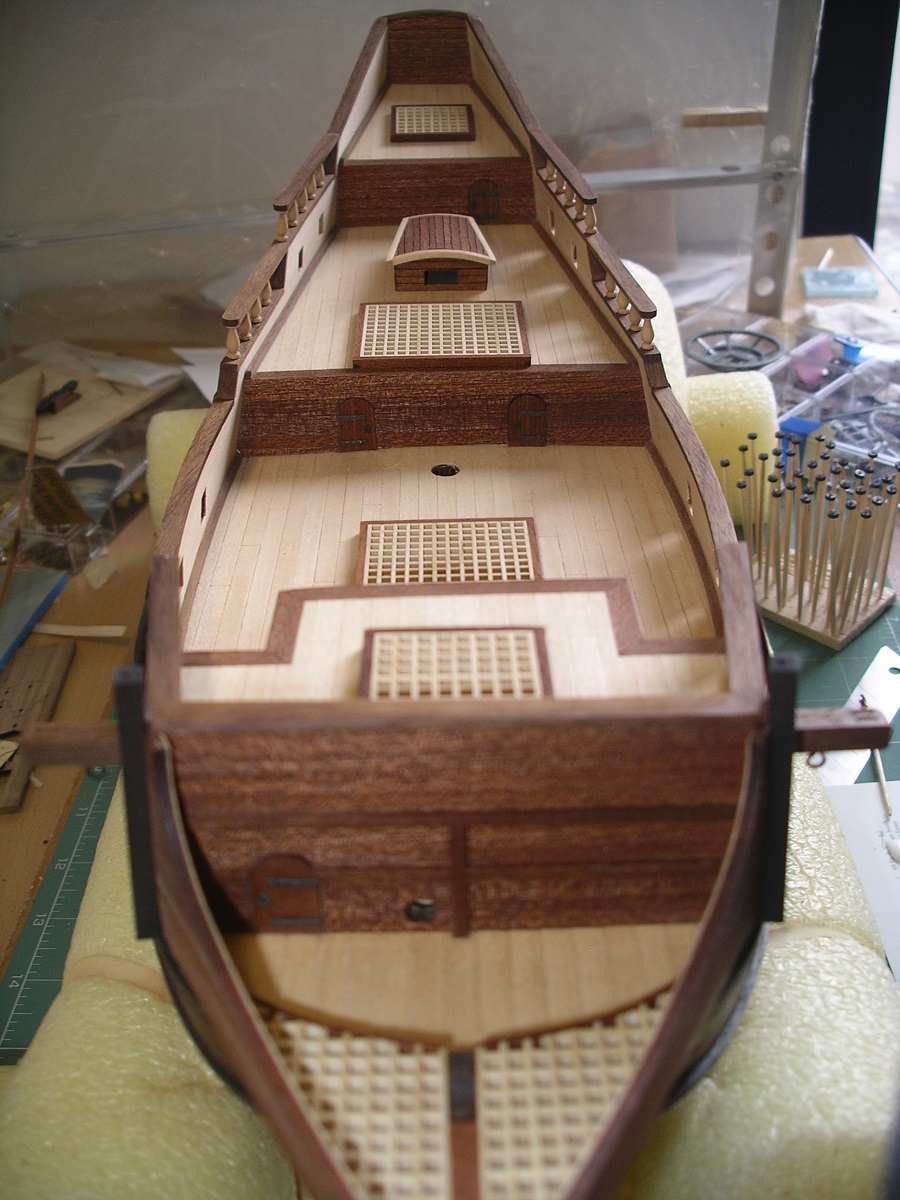
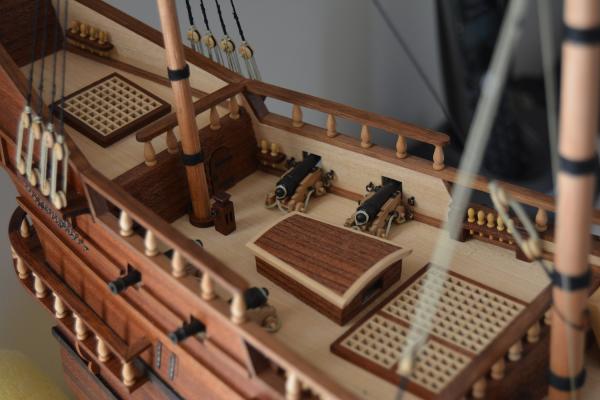
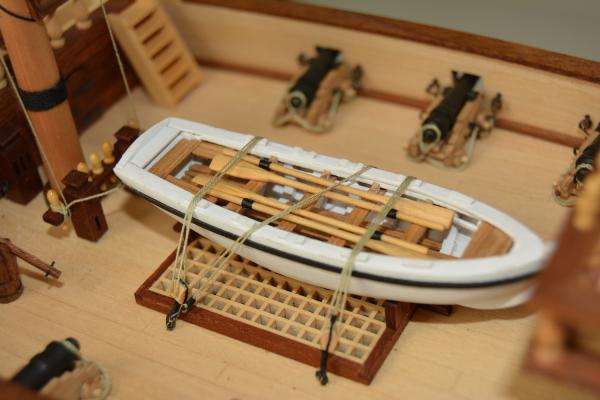
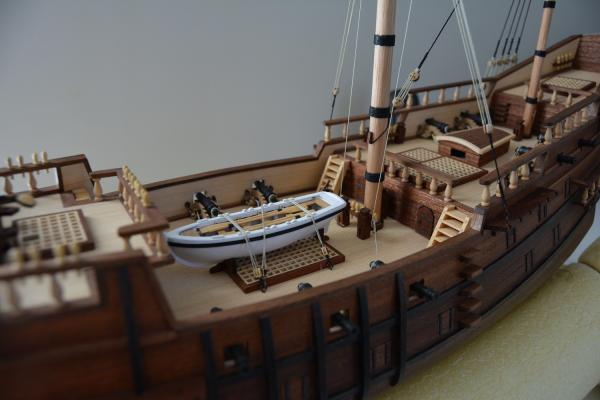
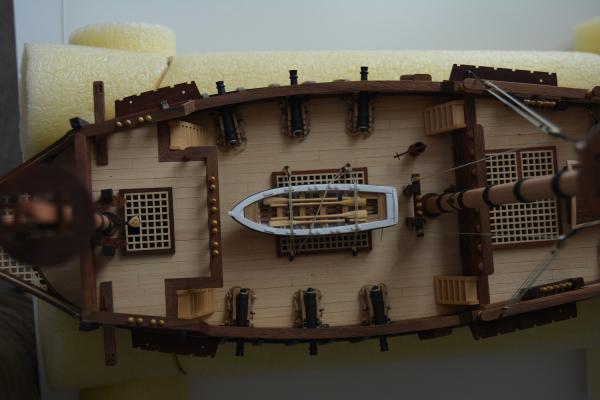
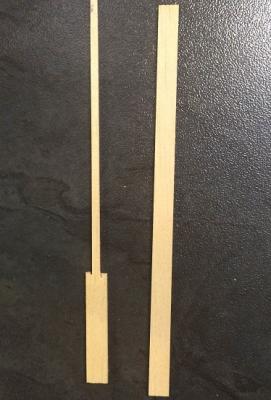
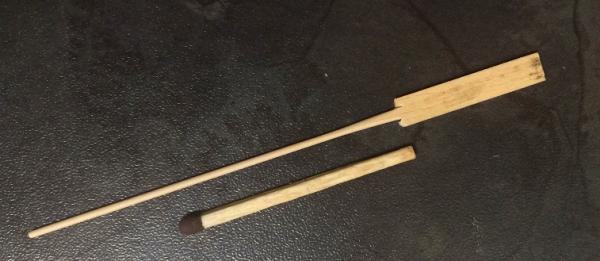
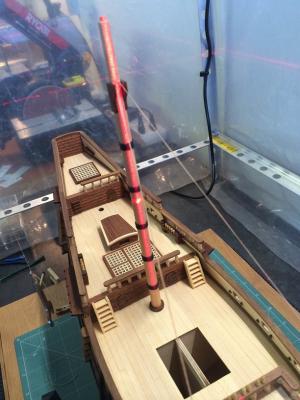
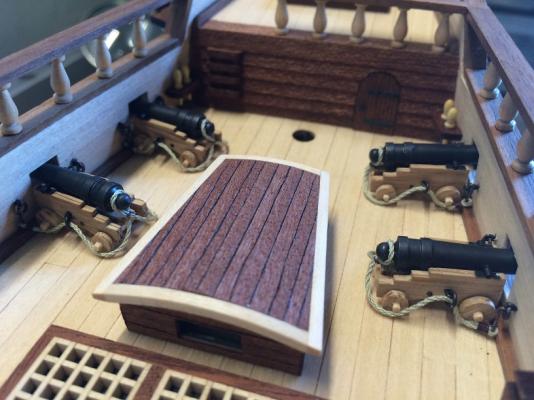
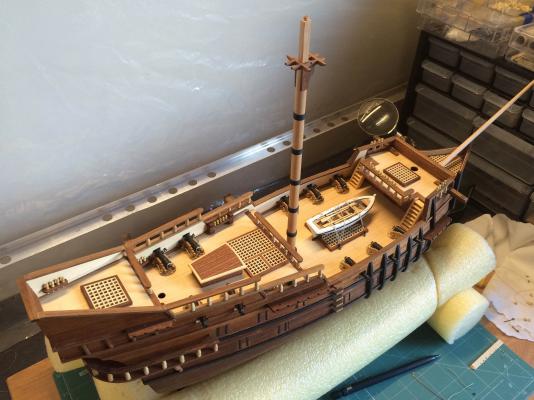
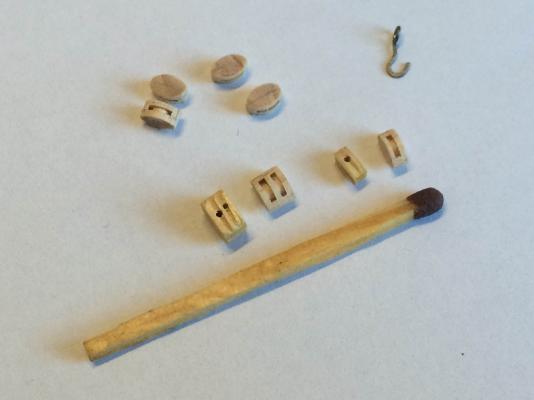
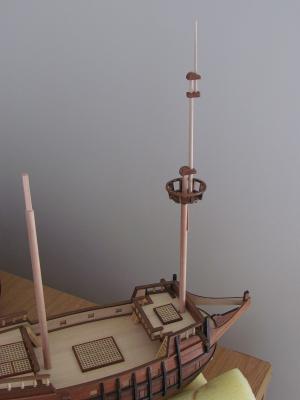
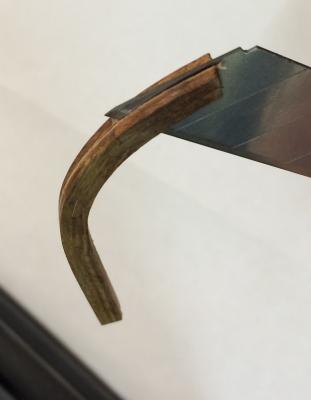
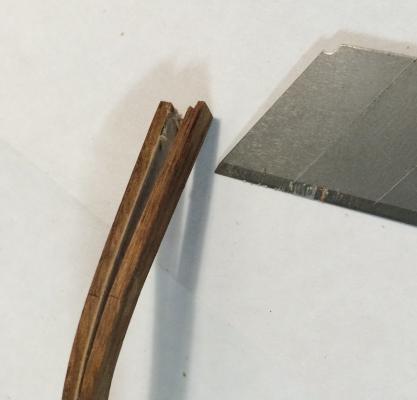
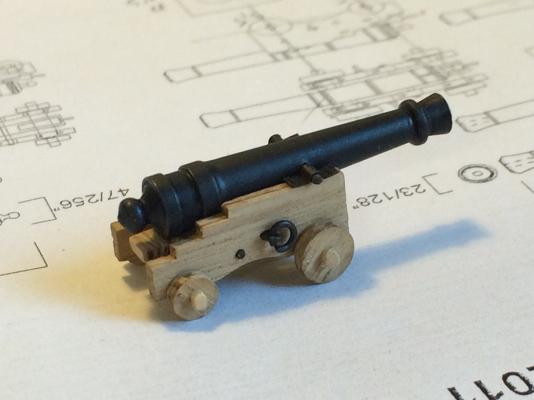
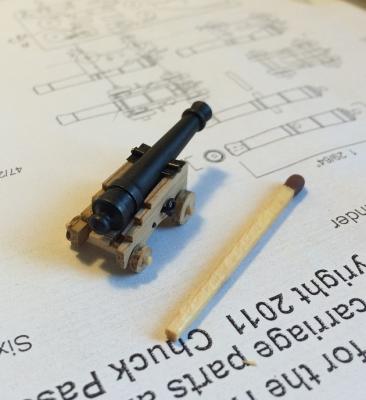
I made some oars for the ship's boat a while ago. I started by cutting blanks of the appropriate thickness. Then I removed some wood to end with a square shaft. With the blade already part of the shaft blank, it was too difficult to turn the shaft in a lathe, so I used the usual "stick it in the drill" trick and rounded the shaft with fine grit sanding paper. Finally, I shaped the blade with some needle files. To get my masts aligned, I decided to use a self-leveling laser. I chose a rather inexpensive one that throws a self-leveling cross (visible on the right in the pic below). I leveled the ship on my bench and then aligned the laser so that the vertical line runs through the center off all three mast holes in the deck. By aligning the mast with the vertical laser line, the mast is now perfectly vertical (doesn't lean to port or starboard) and all 3 masts are perfectly in line when viewed from stem to stern. You just need to set the desired rake by using a protractor. I also finished rigging and installing all the canons. I decided to rig the breaching rope only. I did many test runs with the full set of rigging, but the proportions of the rigging line and blocks just didn't look right to me and it ended up looking overcrowded and unnatural. (Thanks Augie for your tip on how to tuck away the excess breaching rope when the canons are out - I really like the way it looks) The ship's boat is finished and mounted. I don't like the blocks that came with the kit. Sure, they are mass-produced and will never look like Chuck's, but I'm sure all mine were made on a Friday afternoon 3 minutes before factory closing time (on the start of a long weekend). I'm going to try and make my own blocks. Below is a comparison of my first attempts with some kit supplied ones. Not a 100% happy yet, but it's a good start.


-
The instructions of my AL kit does not always focus on proper scaling & dimensions that rigidly. I was wondering - what is a proper height for the knights, especially during the 17th century? Are there any rules that governed the dimensions of knights in relation to other items such as the masts? For example, were the knights of the main, fore and mizzen masts different heights? Any help will be greatly appreciated.
-
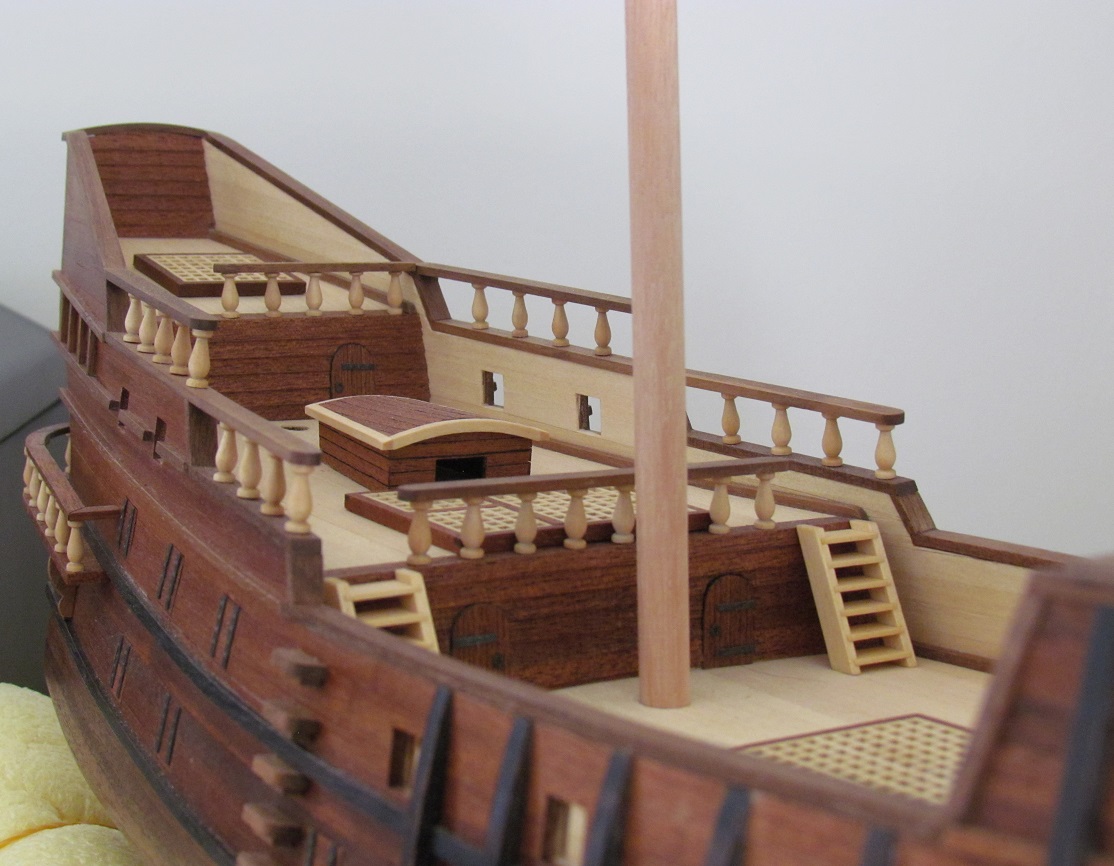
Your model is fantastic. I like the modifications that you made. The doors came out really well and your hatch with the ladder going below deck adds a sense of realism. The knees on the grating of the bowsprit deck is also a good touch. I always learn stuff while following your log. Good work!
-
Augie, I agree with your comments on the gun tackle that you made in your log. I tried rigging the cannons with more tackle but it looked horrible on this scale. The blocks are too big and the rope too thick in the scale I'm working on. That is why I will shamelessly copy your way of attaching the breeching ropes and leave the other gun tackle in this build.

-
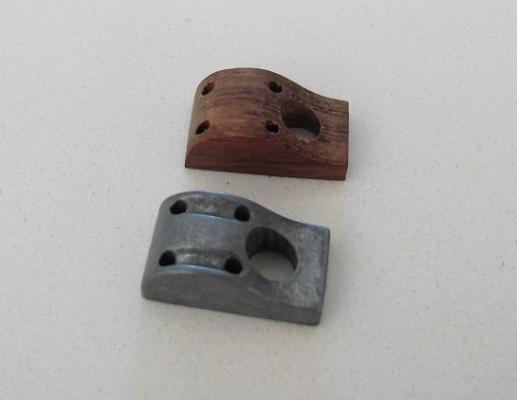
Thanks Augie, much appreciated! I blackened and finished it off with a coat of varnish. I experimented with some black spray paint, but the results did not have the "natural look" that I was hoping for. I don't think I have the patience to spray paint small stuff like eyebolts and rings either.
-
Superb, absolutely superb! The quality of your deck fittings are amazing. I think I'm going to copy the way you arranged the breeching ropes of your cannons. It looks a lot neater than having the excess rope lying on the deck next to the cannons. Is this the way it was actually done?
- 2,191 replies
-
- 2
-

-
- confederacy
- Model Shipways
- (and 1 more)
-
Hi Vivian I think your original planking looks quite natural and is already a job done well. It is certainly a brave move to redo some of the planking. I hope it goes well! I'll be following your progress closely.
-
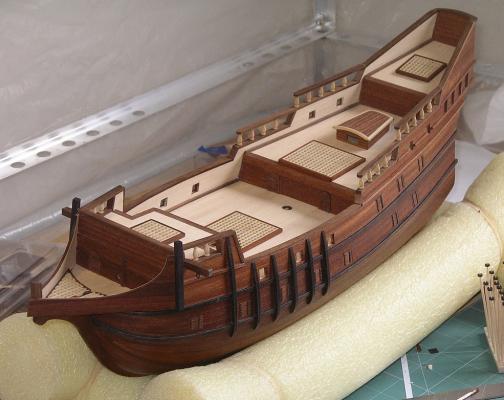
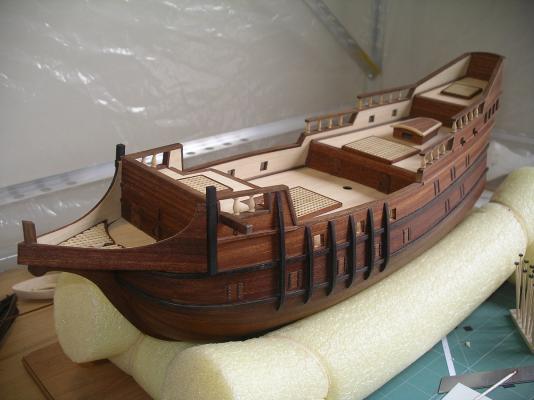
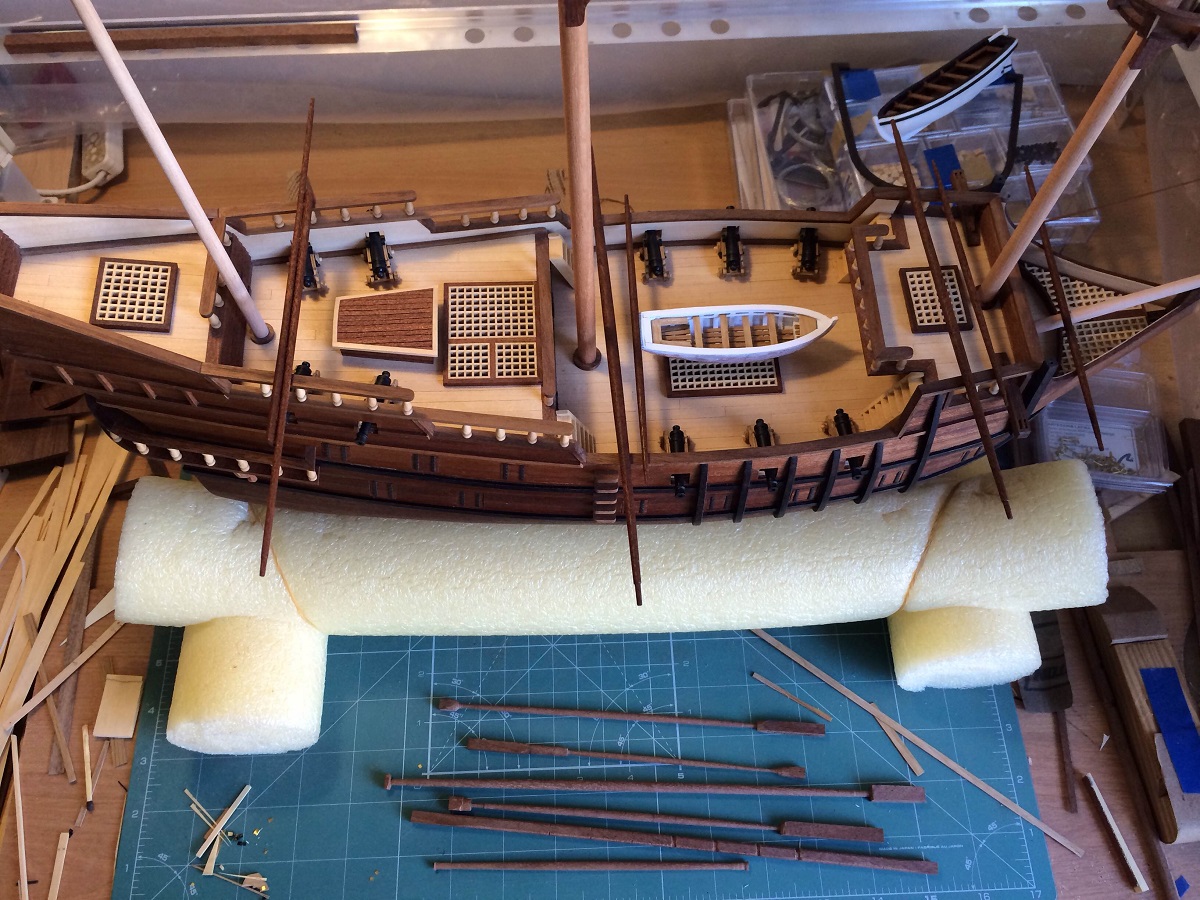
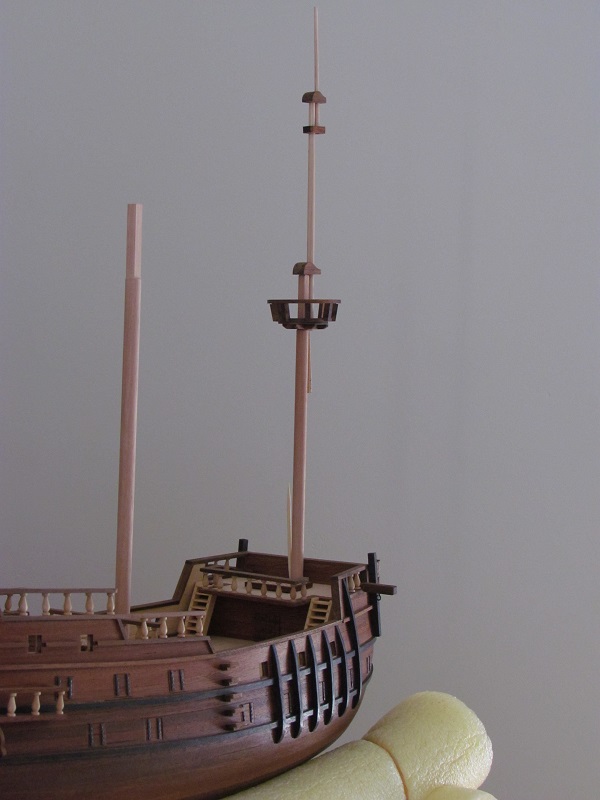
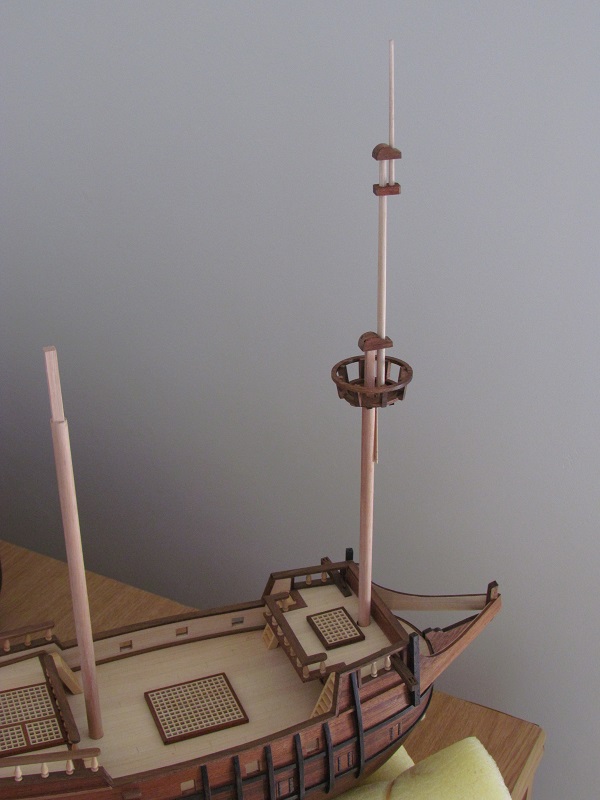
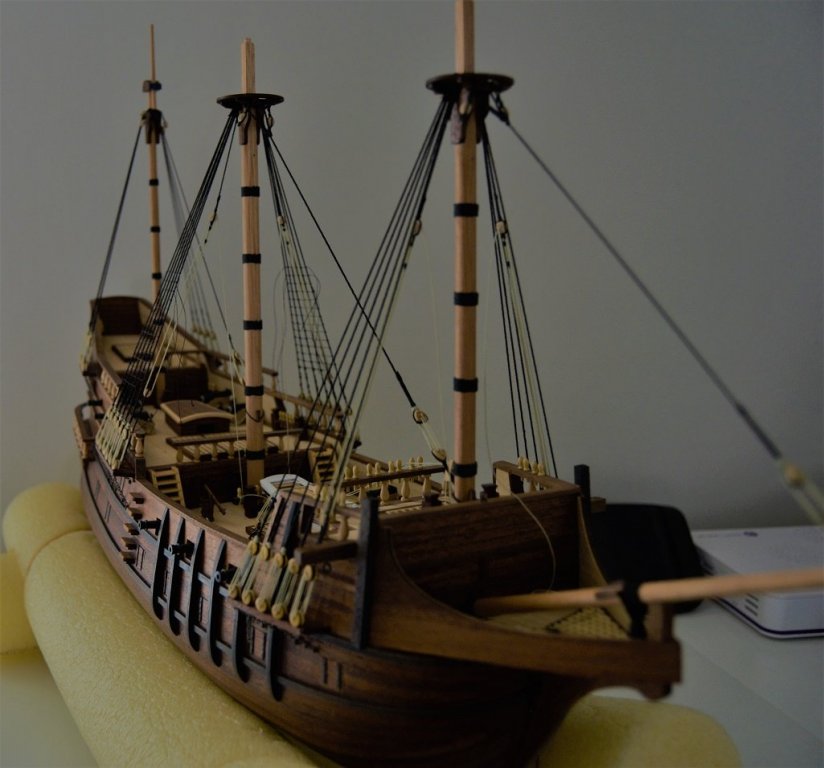
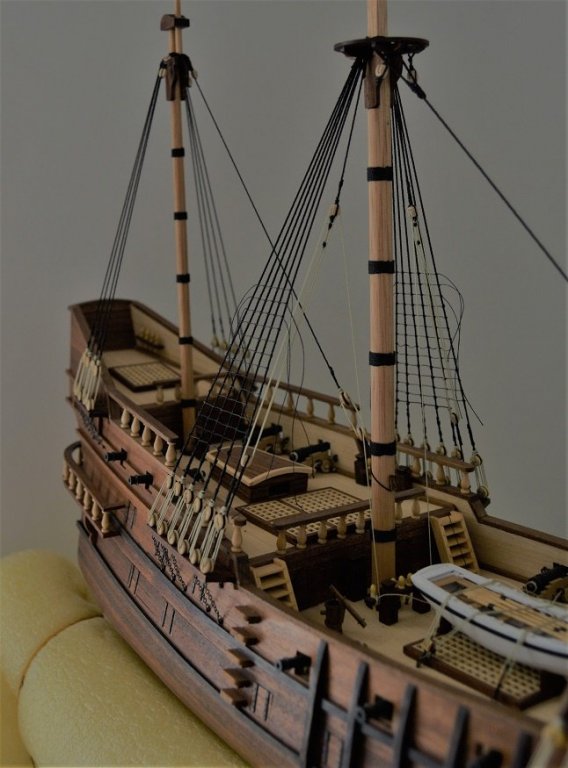
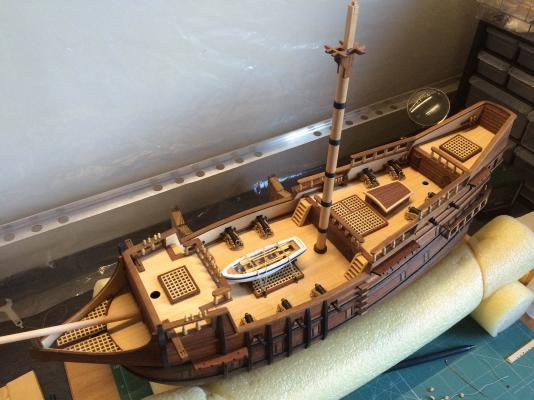
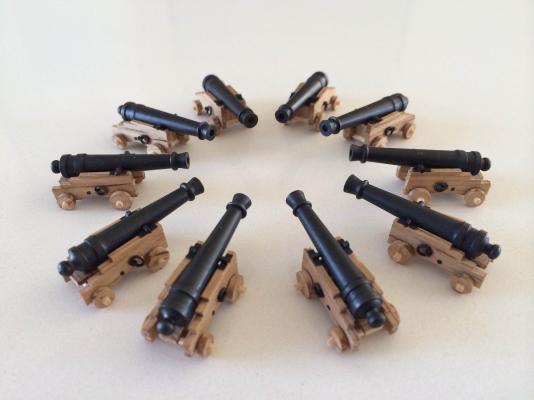
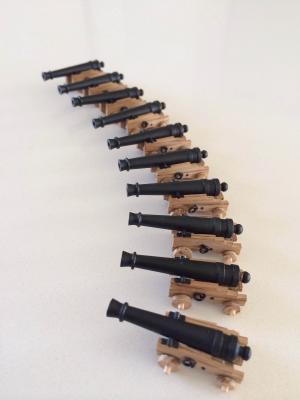
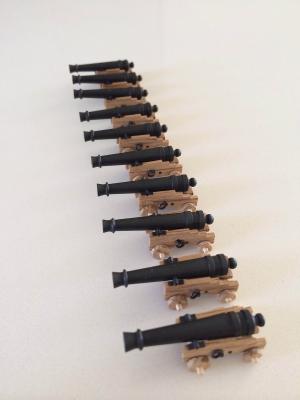
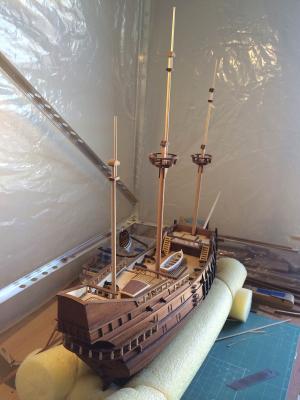
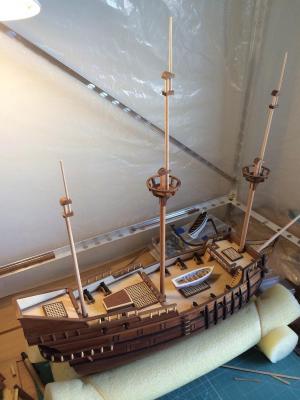
Thanks Augie & Vivian. Certain things you just can't hide with the "wall side" Whatever model I build next, I will make sure it is a model of an actual vessel for which I can find some proper scaled plans. In the end I did have some time to finish a couple of things over the holiday season. I finally assembled all the cannons. My SF II as she stands in the shipyard today. I started exactly 3 years ago. None of the mast pieces are glued yet. I first have to figure out how to glue all the sections of a mast so that they are perfectly aligned (not that hard I guess) and then how to step & glue the masts so that they are perfectly aligned from stem to stern and at the correct rakes. I will probably take a detour and build Frank Mastini's jig for this purpose, unless I can find an easier way (perhaps a jig that uses cheap laser pointers or something) I also finished all the yards. I've actually been busy with yard making since late October. I ignored the plans that came with the kit and decided to base (loosely) my mast and yard dimensions on the information given by Anderson in "The rigging of ships in the days of the spritsail". I believe it makes the whole model look more in proportion. I struggled most with the "arc of a circle" tapering of the yards. It's quite difficult getting the taper even on both sides of the yard (as all the failed attempts lying in front shows!)

-
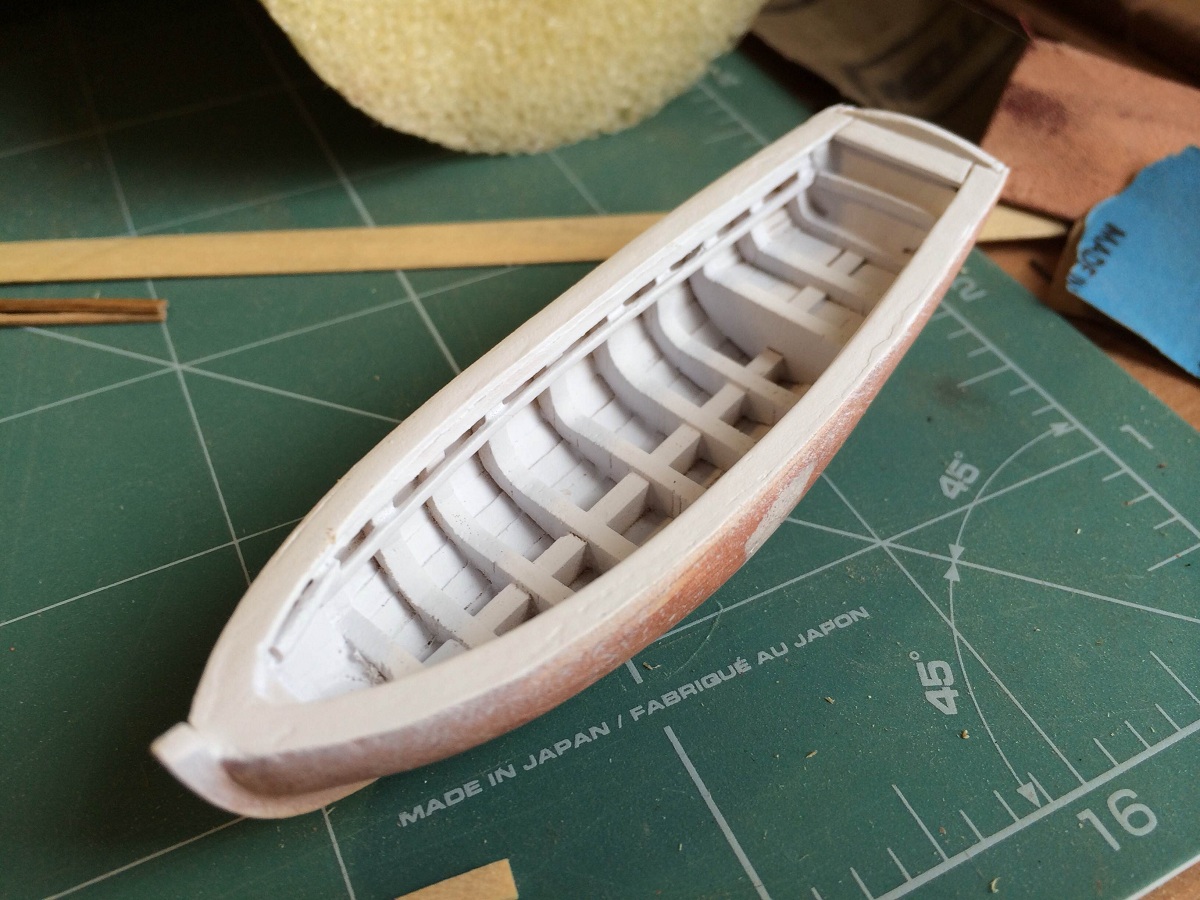
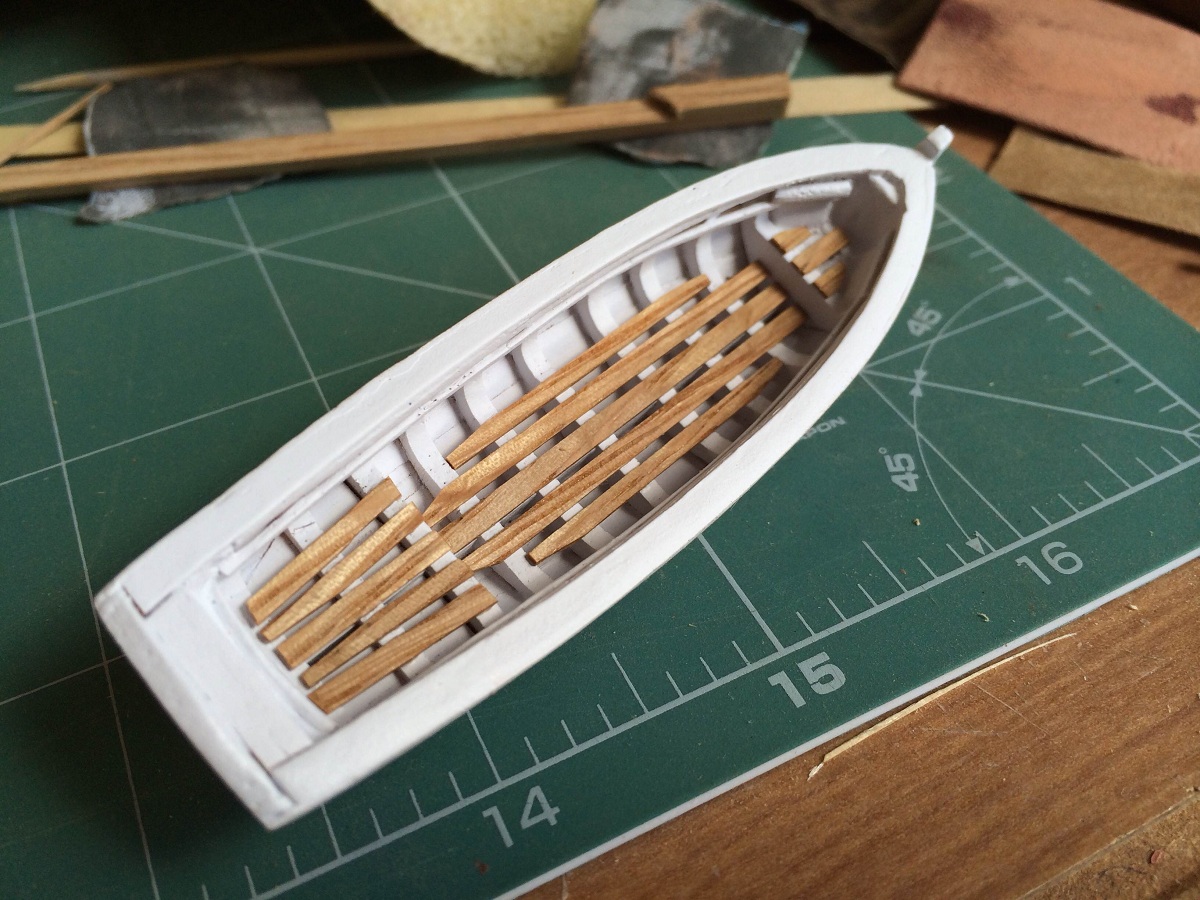
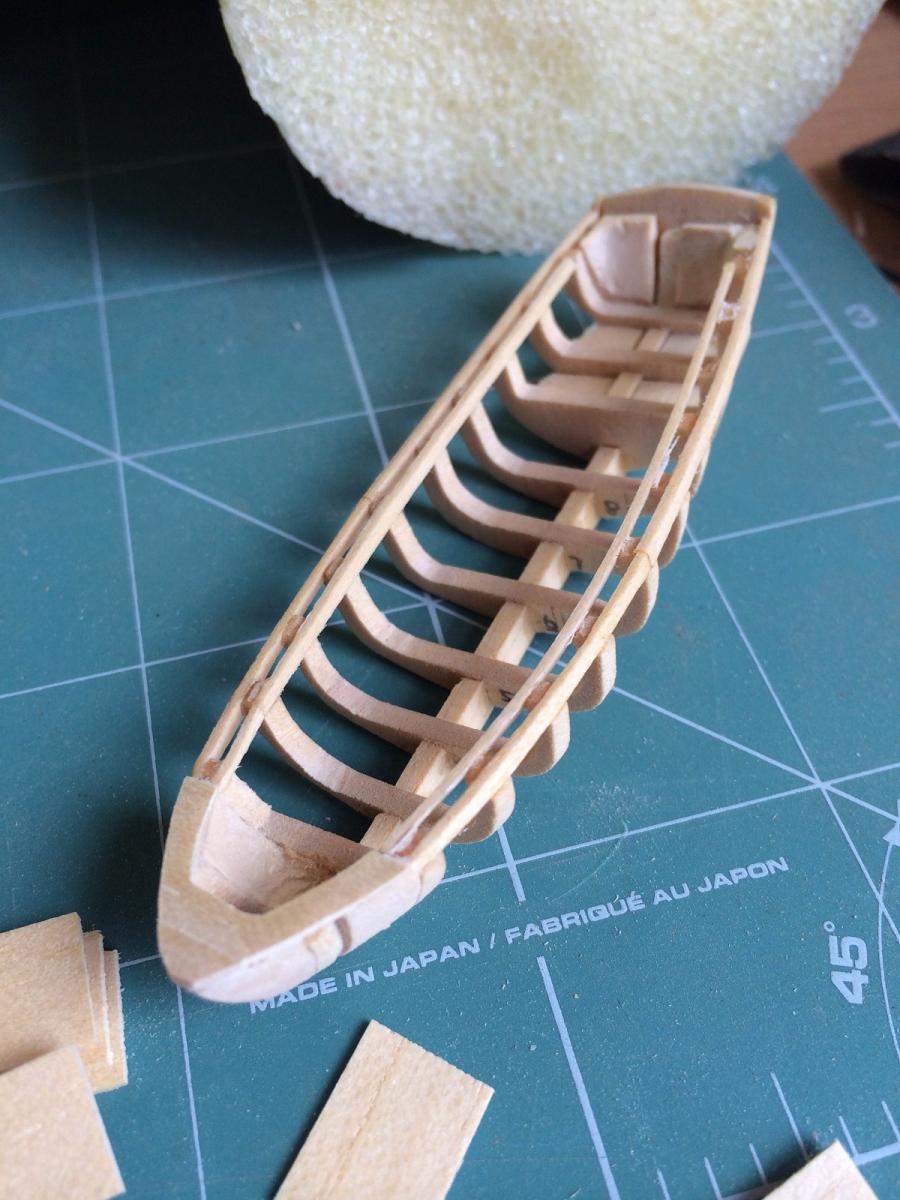
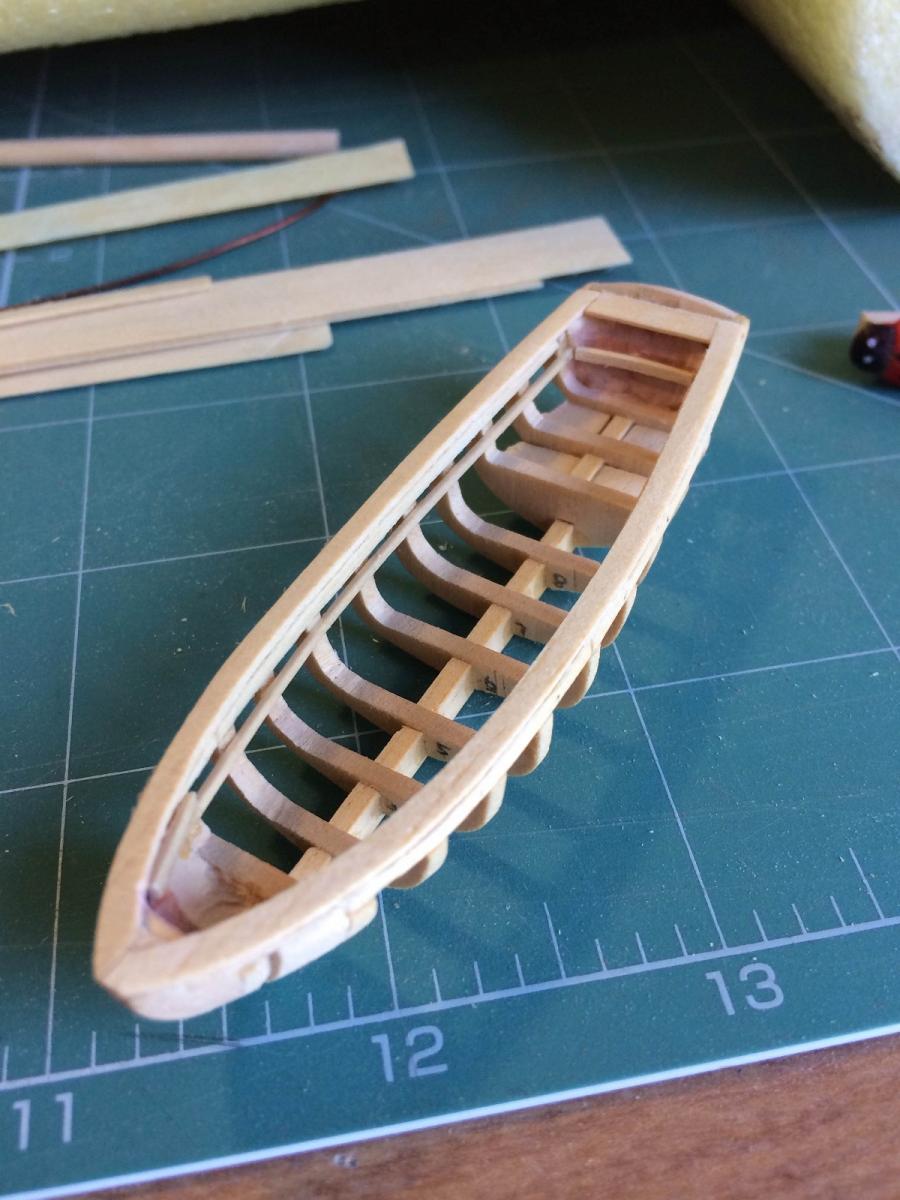
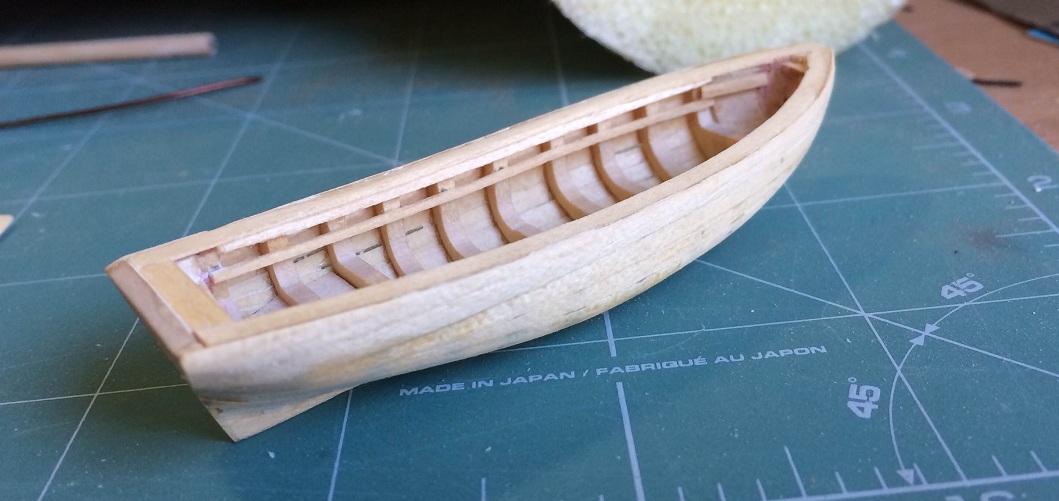
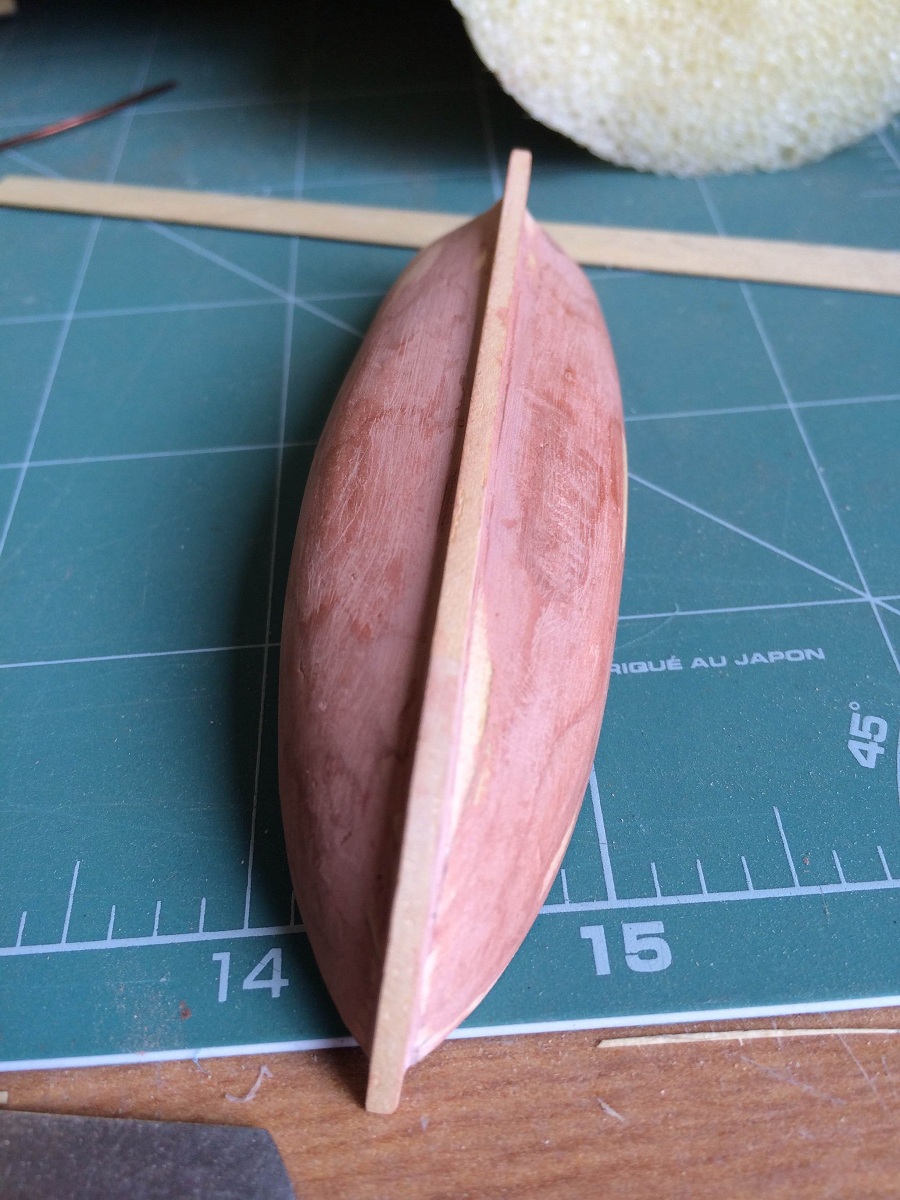
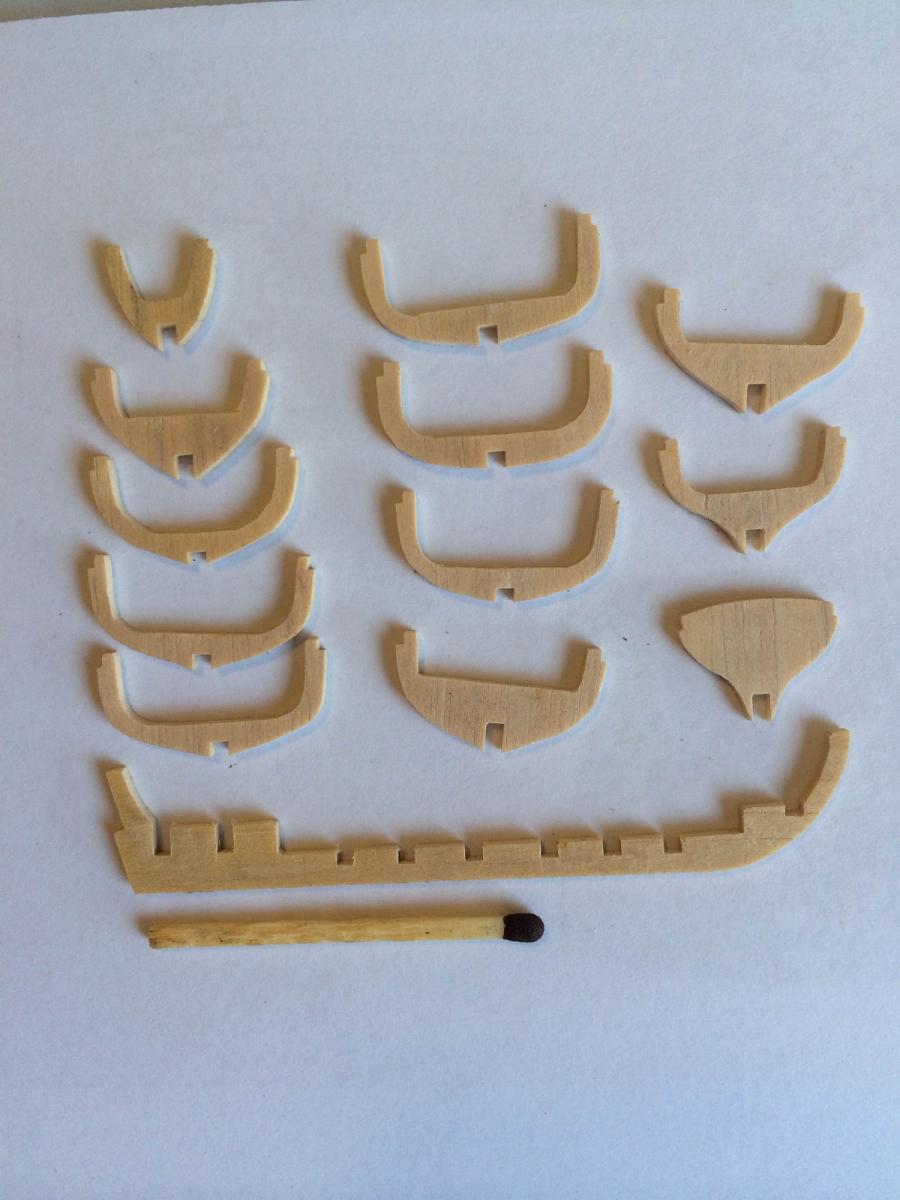
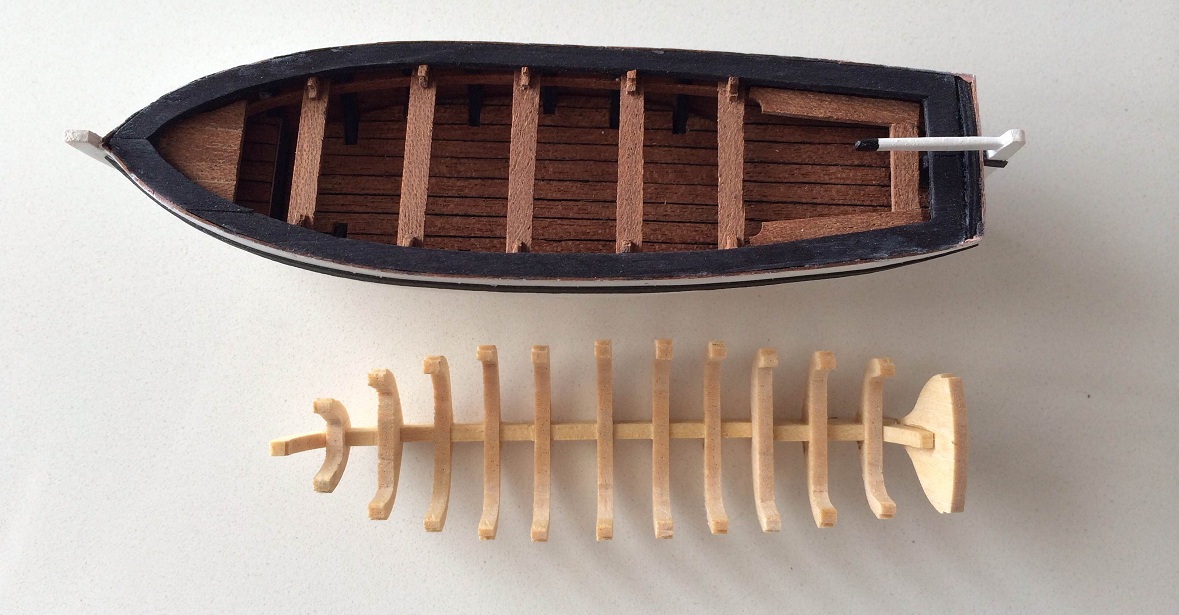
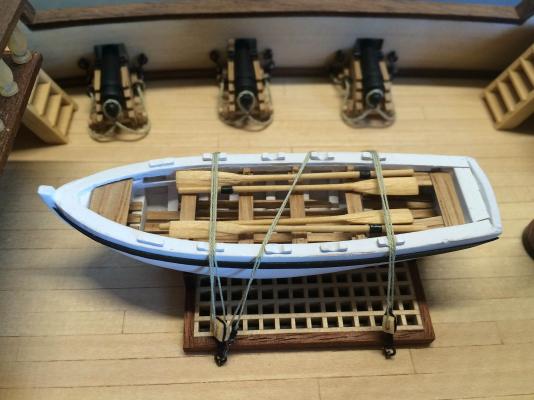
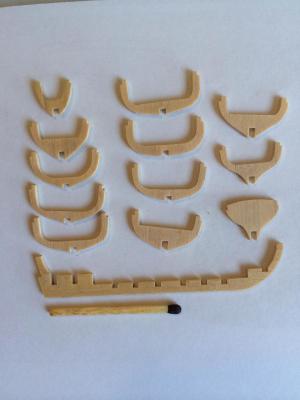
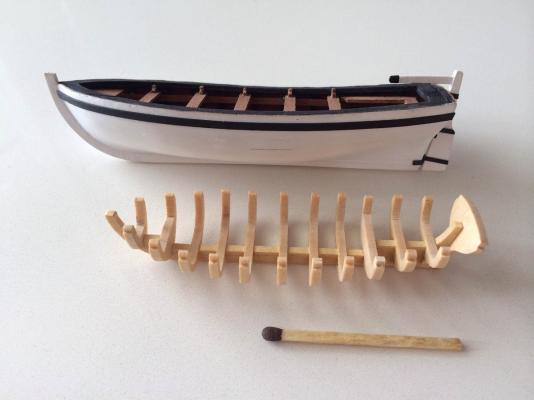
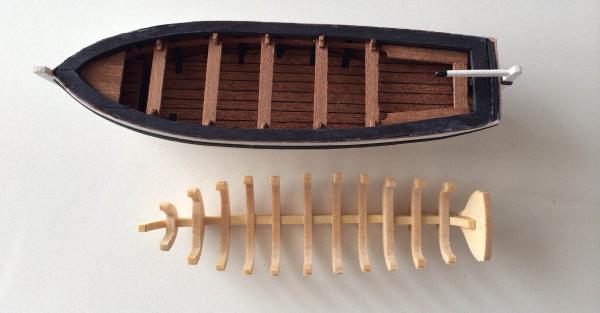
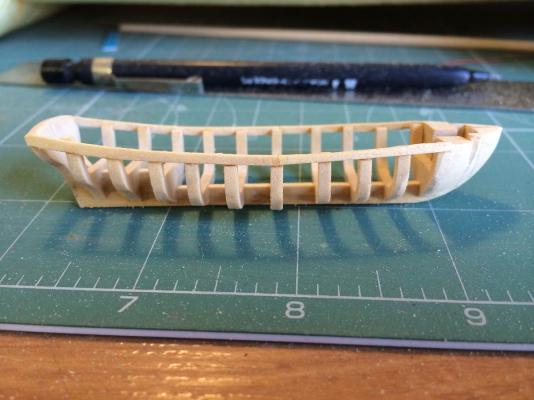
When I made the ship's boat a year ago I used the size of the metal boat that came with the kit as a reference. I never thought to check if it is appropriate or not. My scratch build was marginally bigger in the end, and to make matters worse I fixed the boat's rudder to its hull (the kit plans show the boat's rudder stored inside the boat). Although my boat fits on the deck, it looks out of proportion. With the rudder fixed to the hull the boat simply takes up too much space on the deck - leaving almost no space for the pin racks in front of main mast. My first thought was to remove the rudder, but even then the boat would still look out of proportion to me. I knew it would bug me every time I looked at the model and I would never be satisfied unless I started over. So instead of making masts and yards this holiday season, I worked on a new boat. The new boat is about 15% smaller than the previous version. I still need to install the thwarts, knees and oar locks, paint the hull outside and add the rubbing strakes. At the speed I'm going that will probably take another month

-
We all get that feeling at some point. I think if you have the right wood to work with things will be a lot easier. Give Country Woods a try. It's in the street behind Adendorff. They will do a lot of the hard work for you by planing planks to the right thickness - all you need to do is rip it up in strips.
-
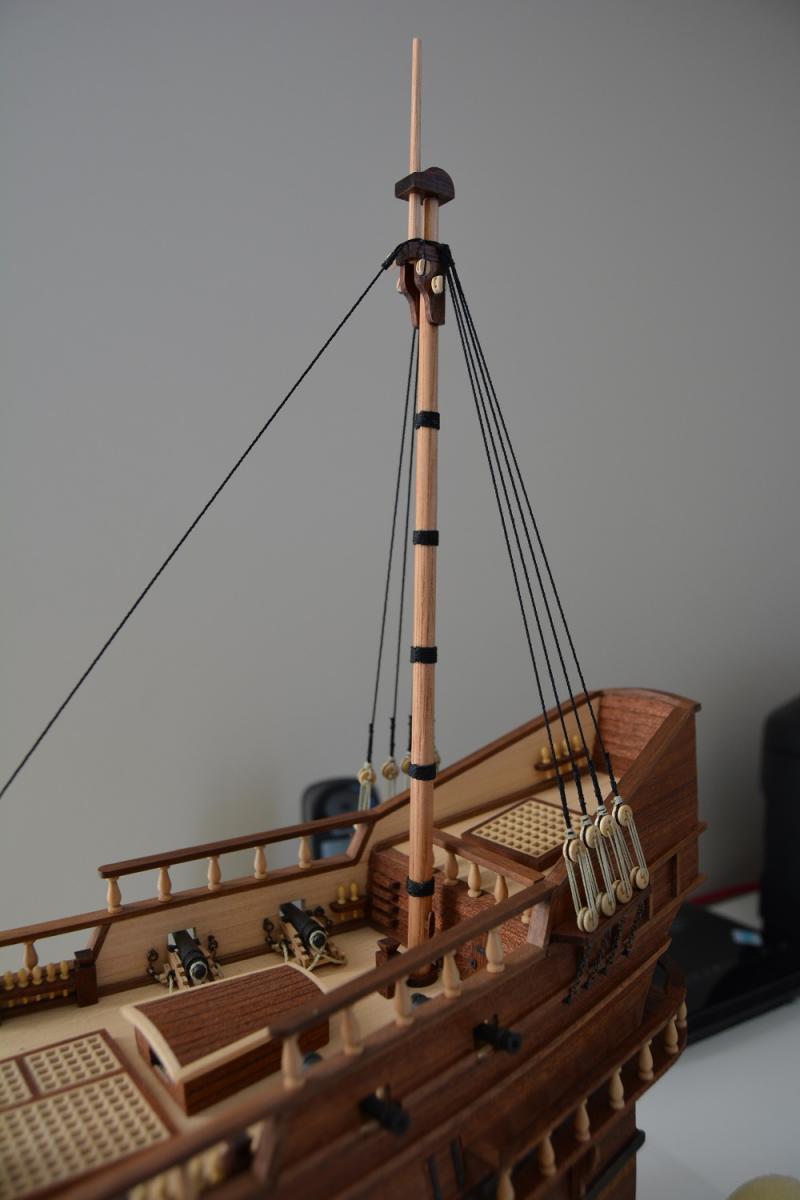
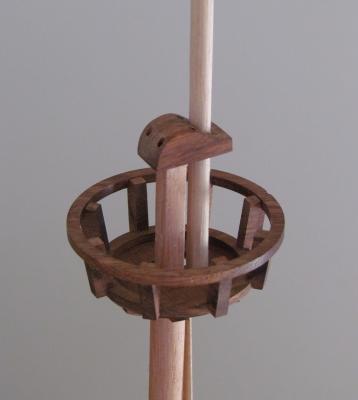
Amazing how one can get side-tracked during a build. After completing the first cannon I wanted to measure the length of breeching rope needed. This made me wonder if any of the bulwark-end eye-bolts will interfere with the pin racks. While fiddling with the position of the pin racks I started wondering if all the running rigging will actually run clear of my tops – since I planned to scratch build mine. So instead of just cutting a piece of rope I ended up making the whole fore mast, top and caps. Making the top I took more than one attempt to finish the first cap. Lesson learnt – first drill all the holes and then shape the cap. Else, keep some Band-Aids ready. Fore mast with everything dry-fitted. I can see that one would need to be very careful that nothing ends up crooked when you glue it all together. I finished some more deck fittings and the stern gallery some time ago.


-
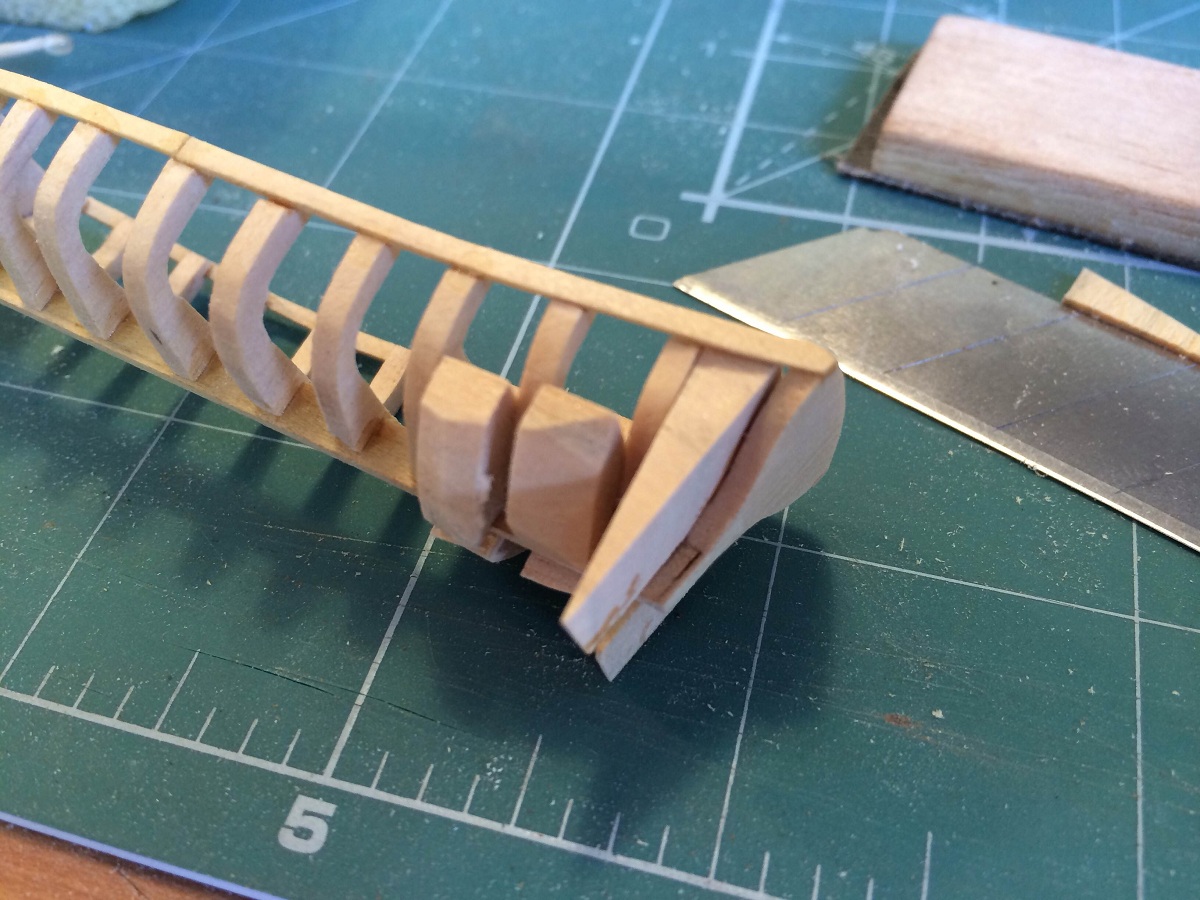
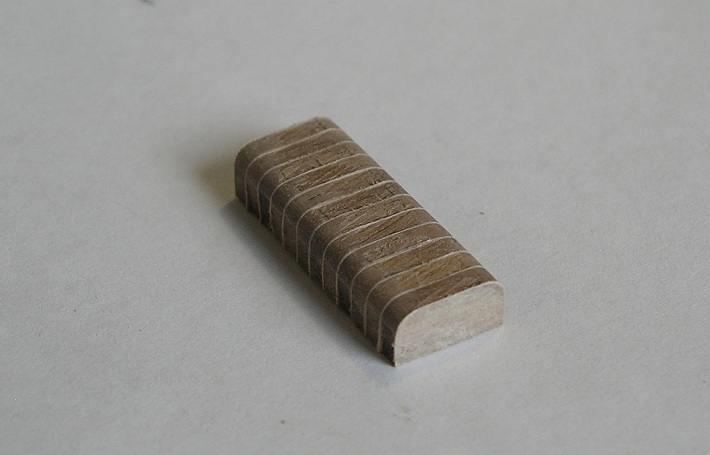
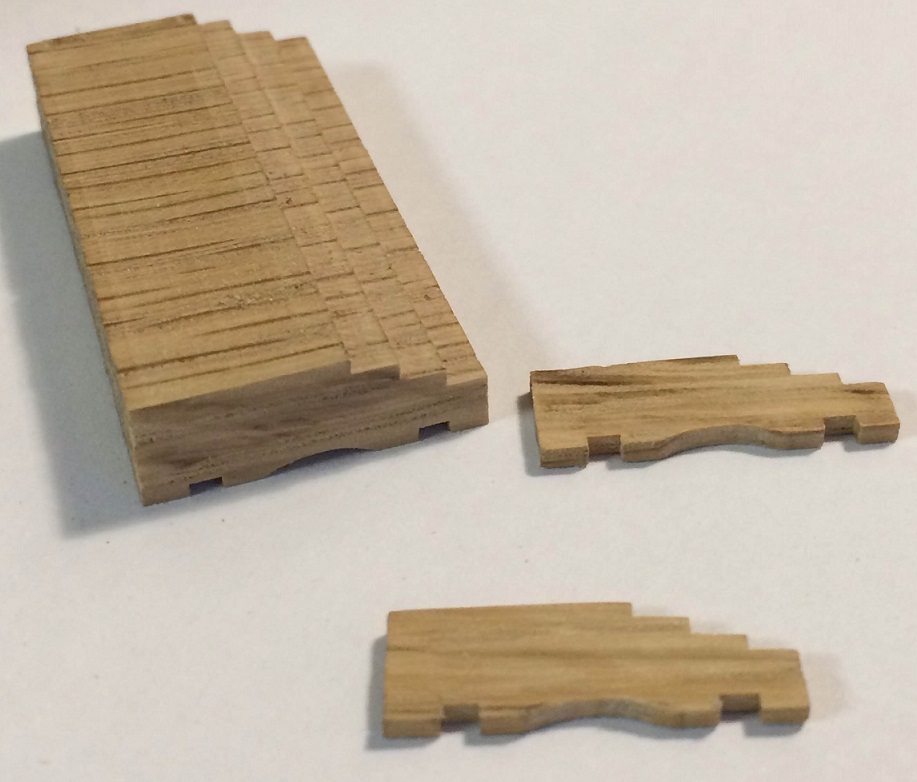
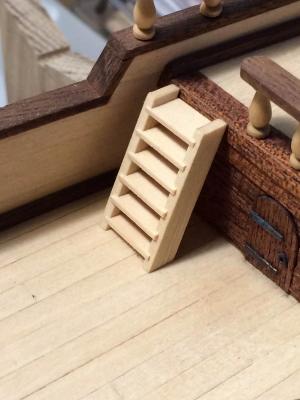
What I like most about this site is the encouragement you get from fellow modellers. It really carries one though the day when you have been crawling on the floor for 5 hours to find that part that dropped or you have to remake a part for the umpteenth time because you measured it wrong - AGAIN. Vivian, you have probably seen Caroline's (Vulcanbomber) SF build log. I think her cannons are true to the period. They are beautiful indeed. Augie, thanks for all the nice comments and encouragement. Much appreciated. Keith, there is no need to scrape the masking tape off since you don't glue the masking tape to your wood. You stick the masking tape on the wood and glue the masked sides together with PVA. Just make sure you wipe off any excess glue so that you don't accidentally glue your pieces of wood together (...yep, I've done that before...) Below are photos of the steps of my boarding ladders. I wanted to round the edges and to get carbon copies of one another, I lined the side of each step with masking tape, glued all 12 steps together, shaped the sides, separated the steps with a blade and simply pulled the tape right off. (and then probably spent 5 hours looking for one piece on the floor... ) Taped steps Steps all glued together and shaped Randy, good to hear from you again. Thanks for taking the time to show us your completed SF. It is a magnificent build - something you can be truly proud of. Thanks Lawrence. It's true what you say. It's hard enough finding the time to do some actually building, let alone reading all the wonderful build logs on this site and keeping your own one semi up to date. I cheat by following your logs on my phone whenever I have a spare moment, but it limits the commenting that I can do and that irks me.


-
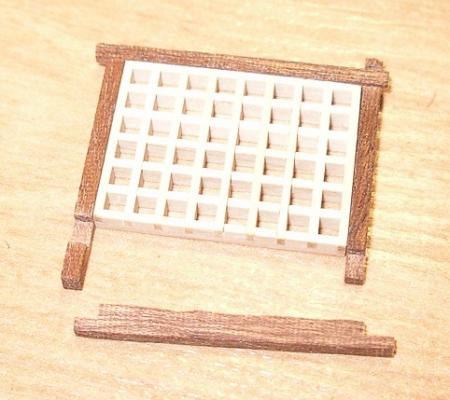
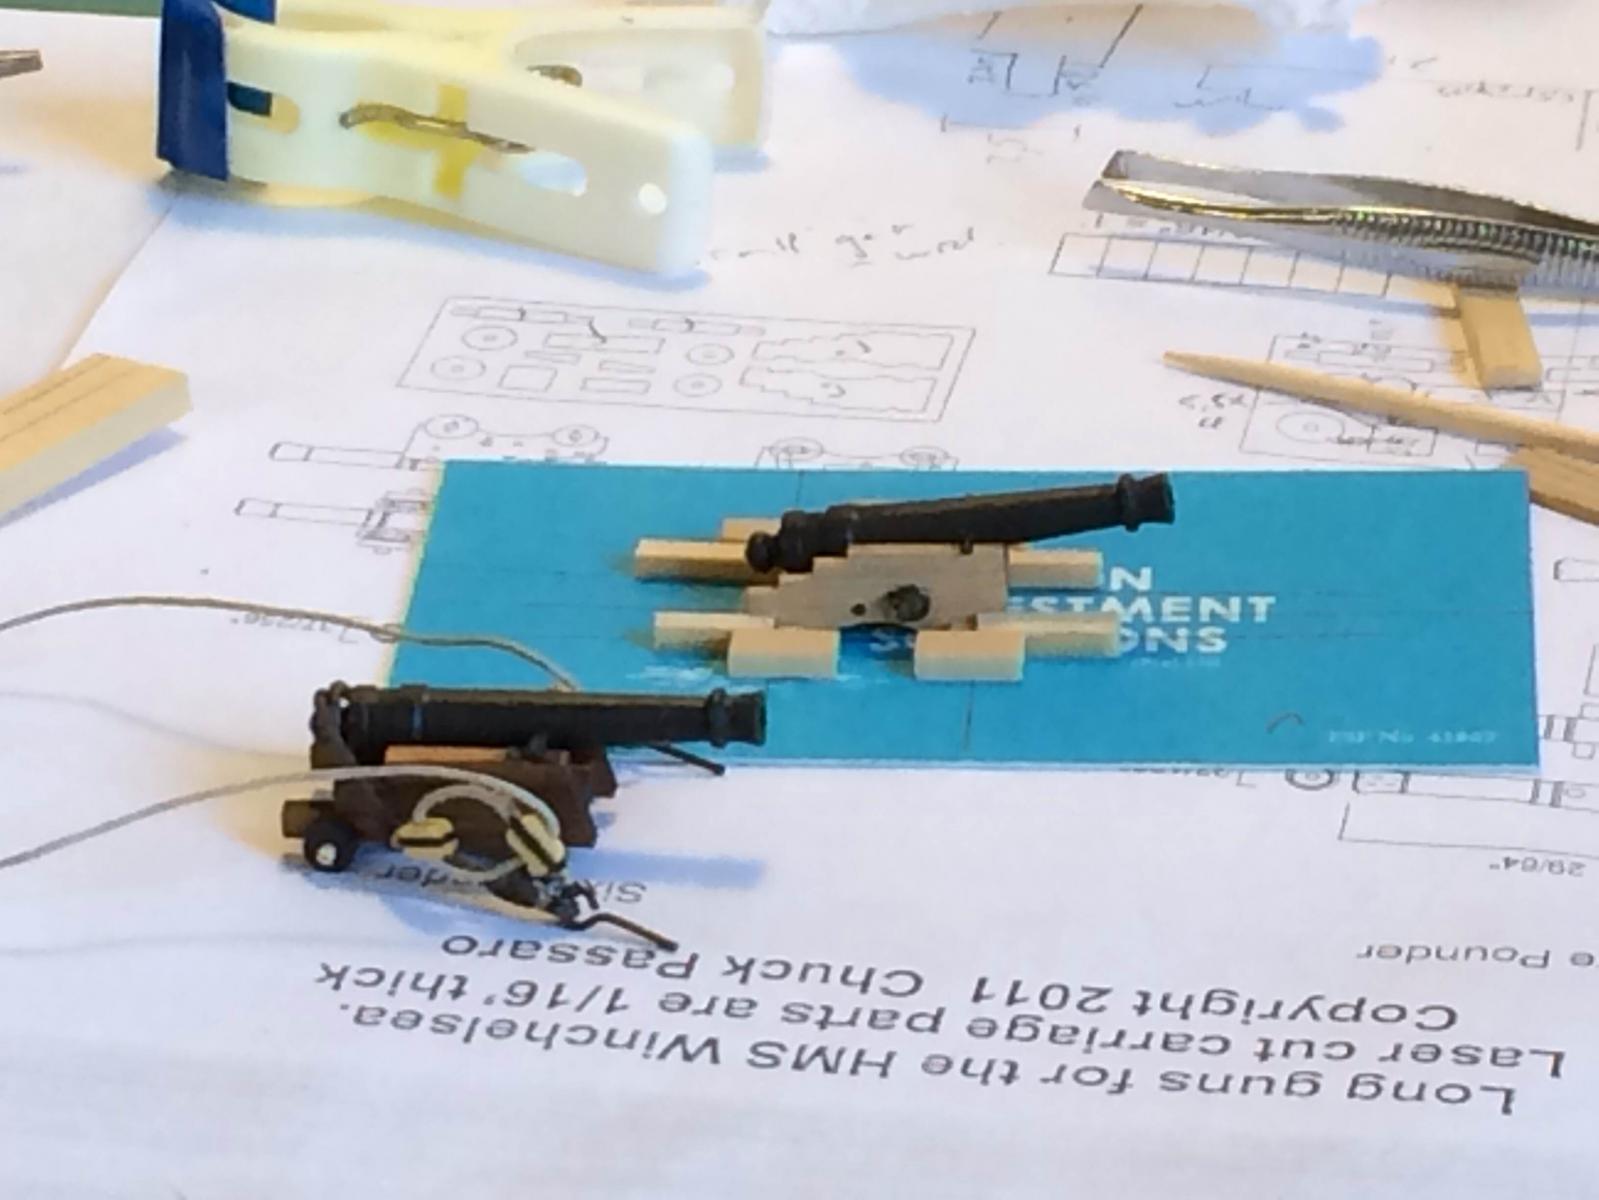
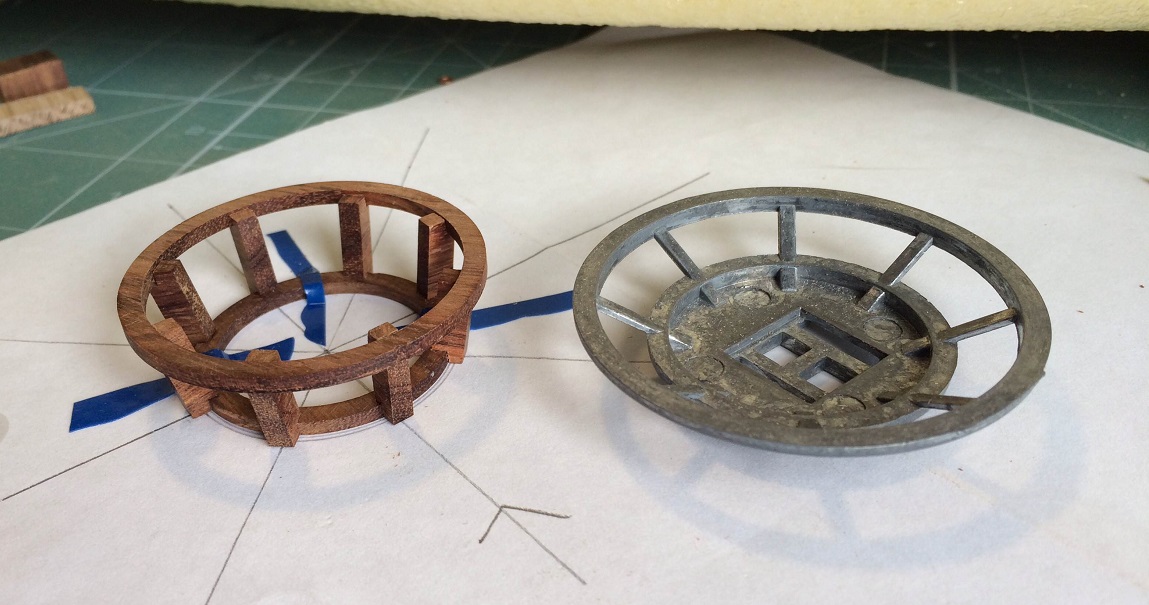
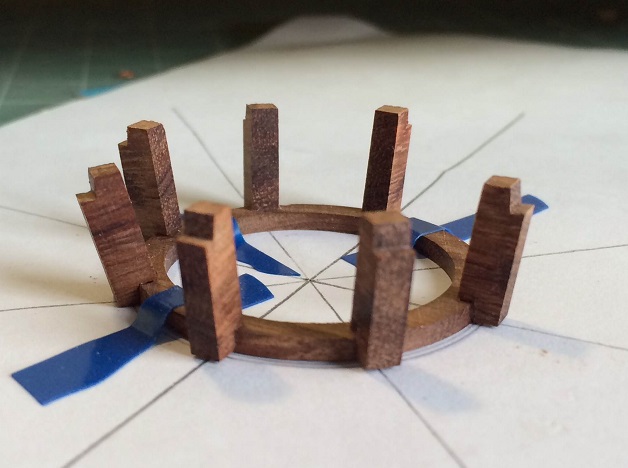
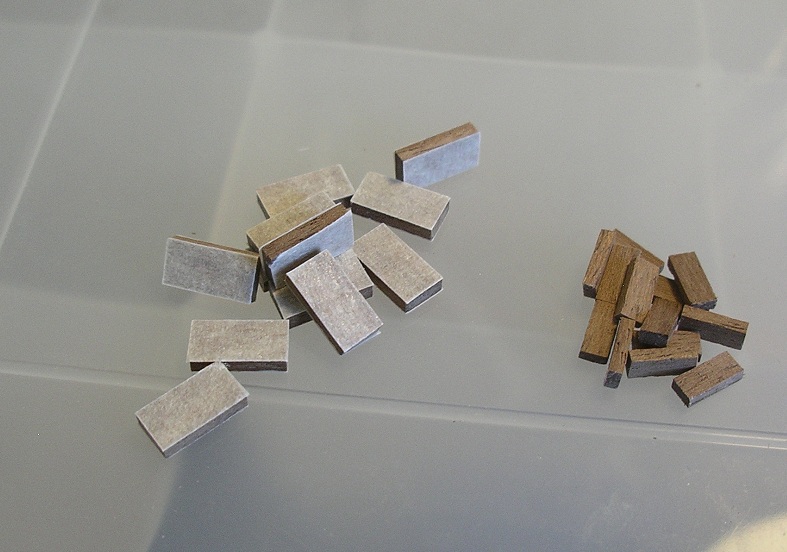
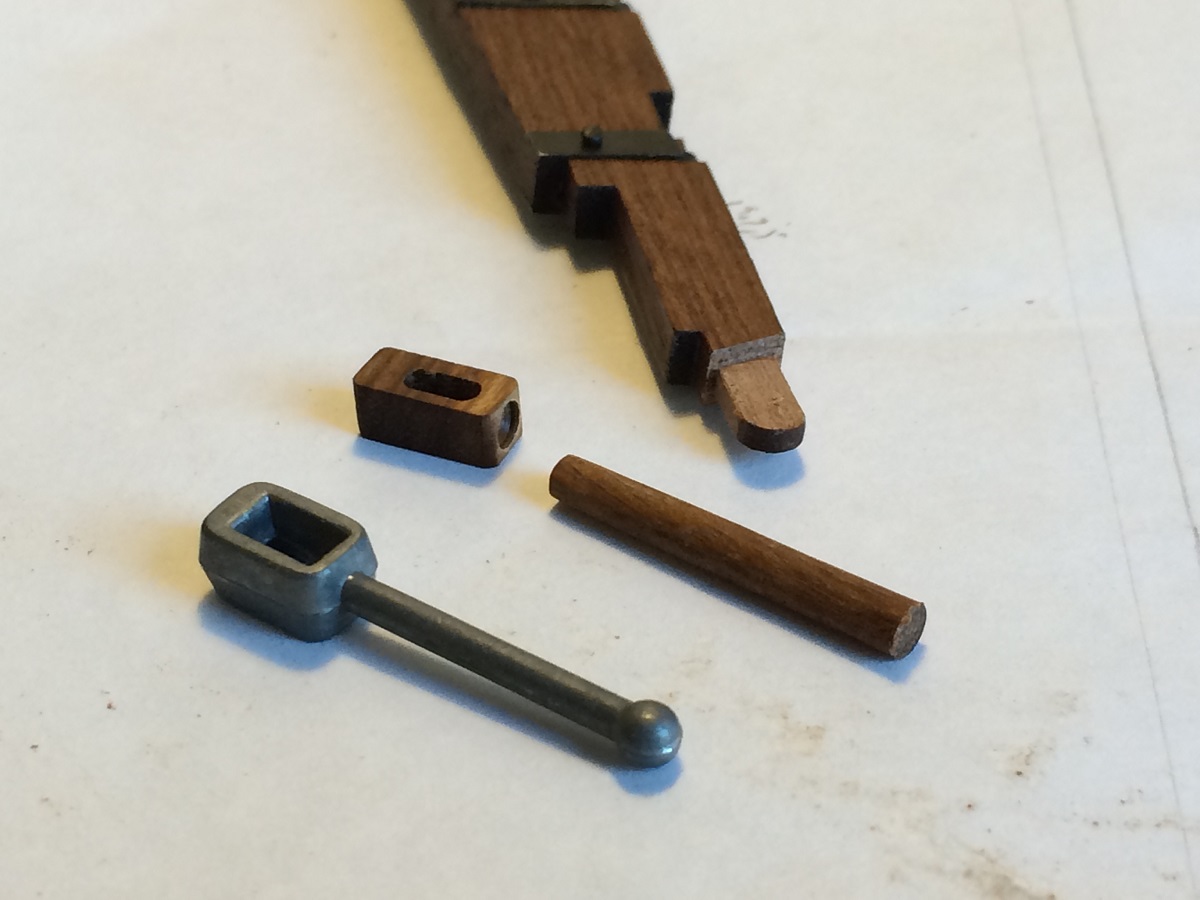
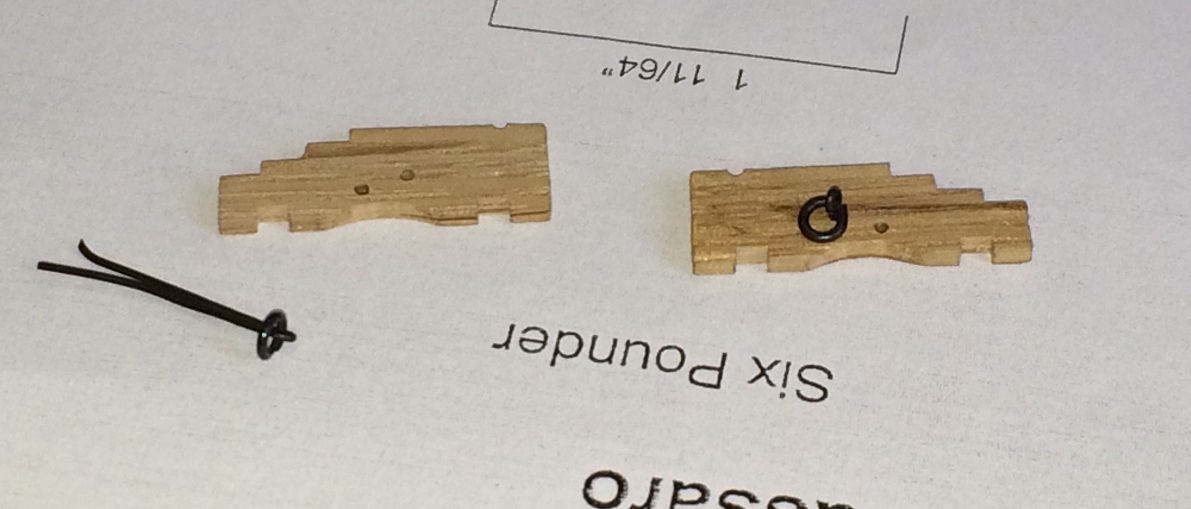
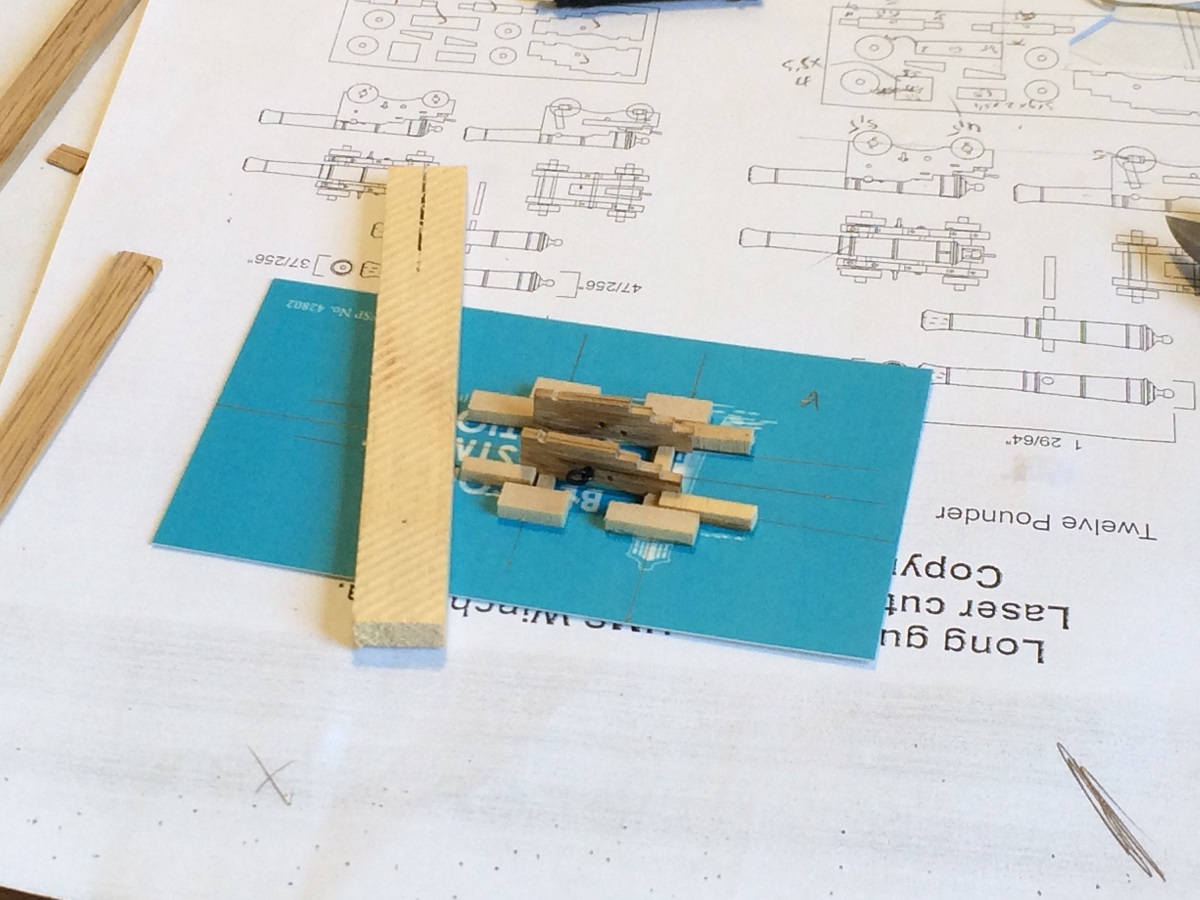
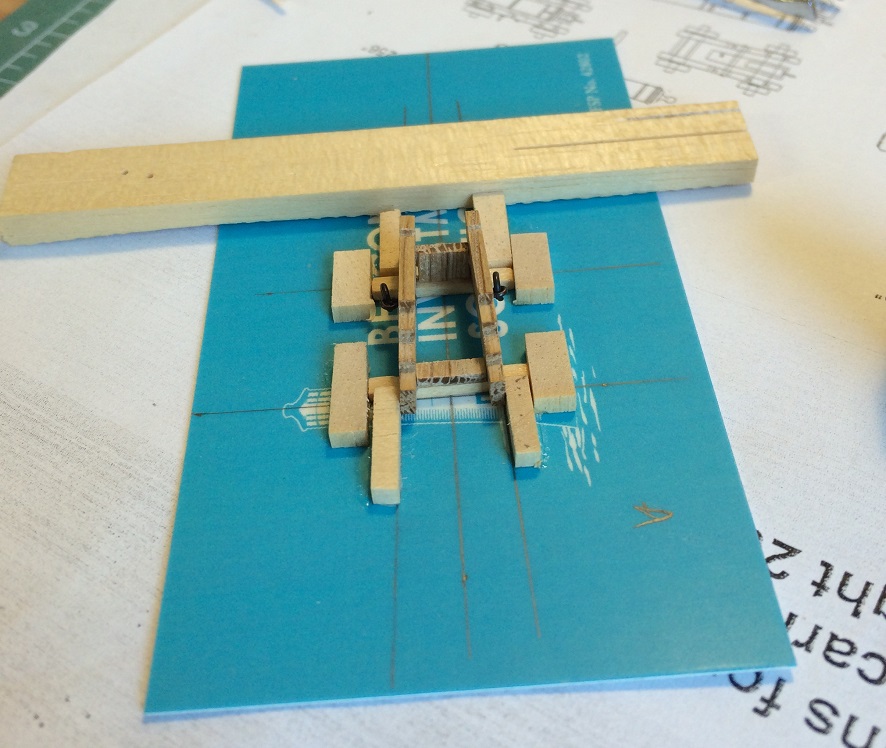
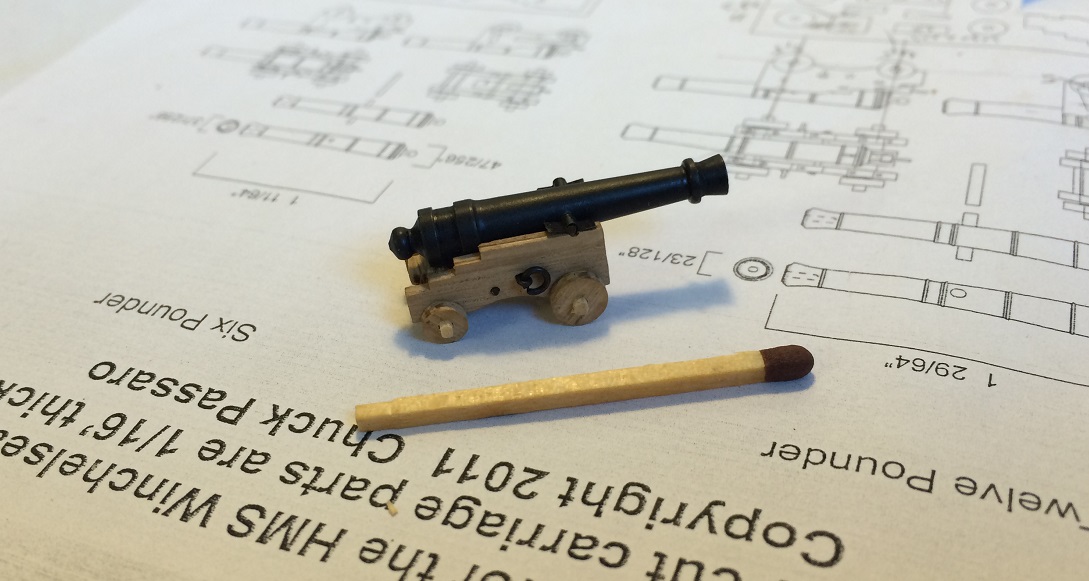
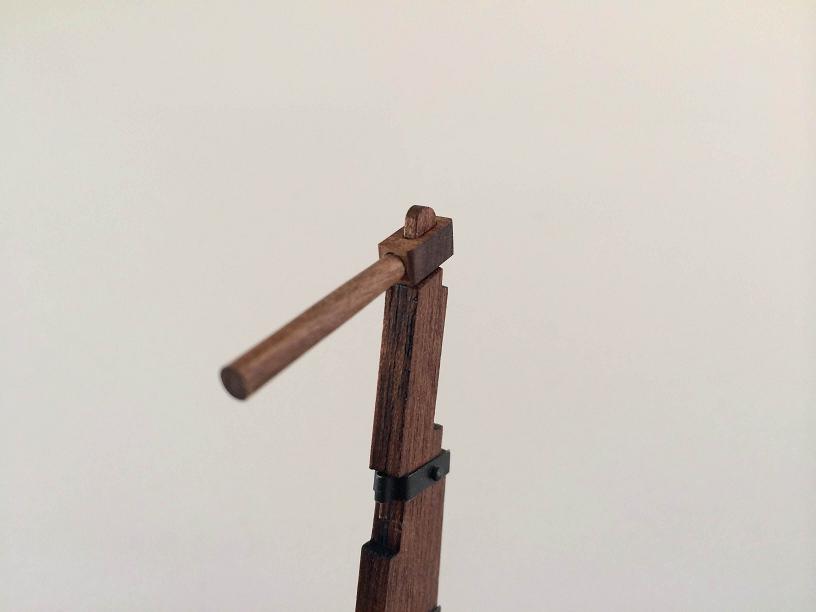
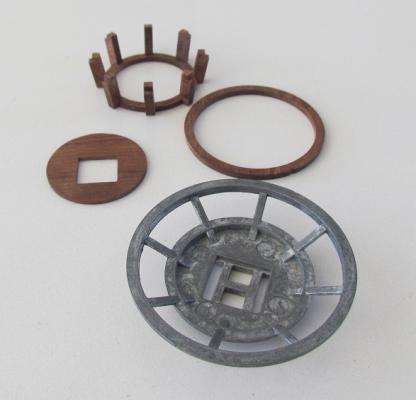
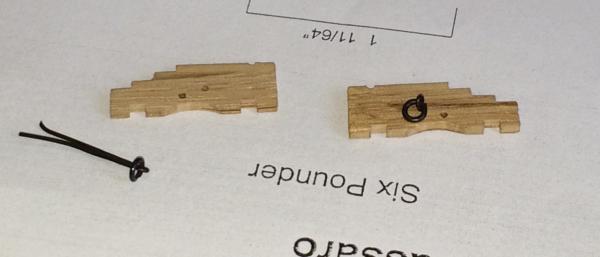
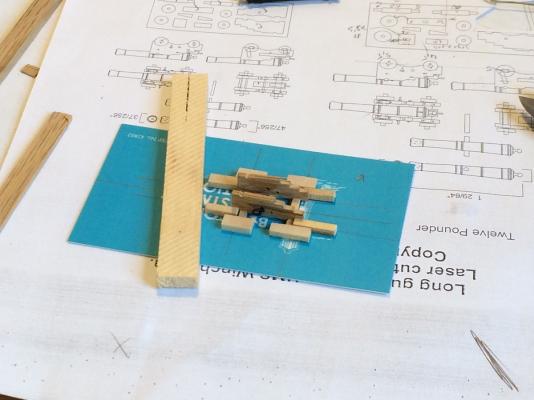
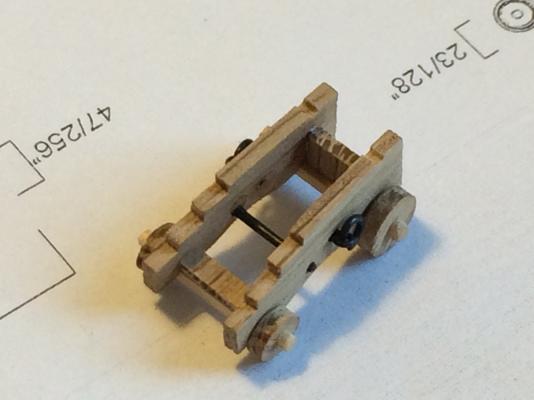
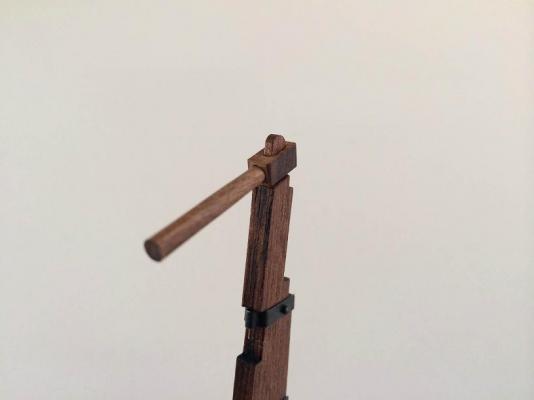
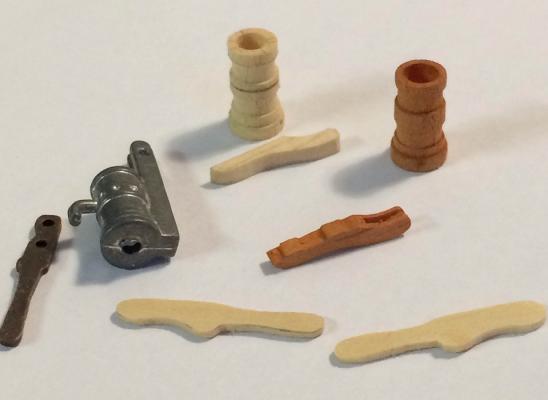
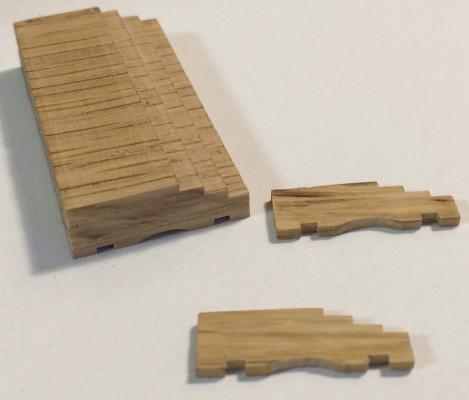
Thanks to everyone who dropped in since my last post and the encouragement through your 'likes'! I am jumping around a bit while I try to build most of my deck fittings and I am almost working on all the fittings at once. It will probably go faster if I focus on one thing at a time. I finished the pumps. There are one or two things I will do differently in the future, but I feel the end result is still better than the kit's metal pumps. The tiller included in the kit is also made of metal. I finished my scratch built version from some Chen Chen Rose wood. It turns really nicely. I am working on the top rail for the stern gallery. The kit's version is plywood that you have to cover with veneer. It actually worked pretty well, but I messed it up by staining it too dark. So I decided to make a new rail. It is always tricky to make more than one piece of something where all the pieces must be exact copies of one another. I usually do it by sticking masking tape on the one side of the wood from which the item must be cut. I then glue the taped sides together and let it dry completely. I then cut and shape the piece and when I am done I simply separate the individual pieces by cutting through the masking tape. That way you end up with pieces that are all perfectly similar. Top rail in progress: I have spent hours on the gun carriages. I threw away more prototypes than I can remember. I ended up using Chuck's plans that are available on this website. I know it's not representative of carriages in the 16th century, but neither are a lot of things in the SF kit. At least they look good! Making the sides - I attach the rings first while it is still easy to hold and work with the side piece: I created a jig to glue the carriage sides to the axles - to ensure that all the carriages will ultimately be symmetrical: Adding the transom to the front axle Next, the wheels and the wire on which the carriage bed will rest Finally I added the carriage bed and the cannon. One down, 9 to go!


-
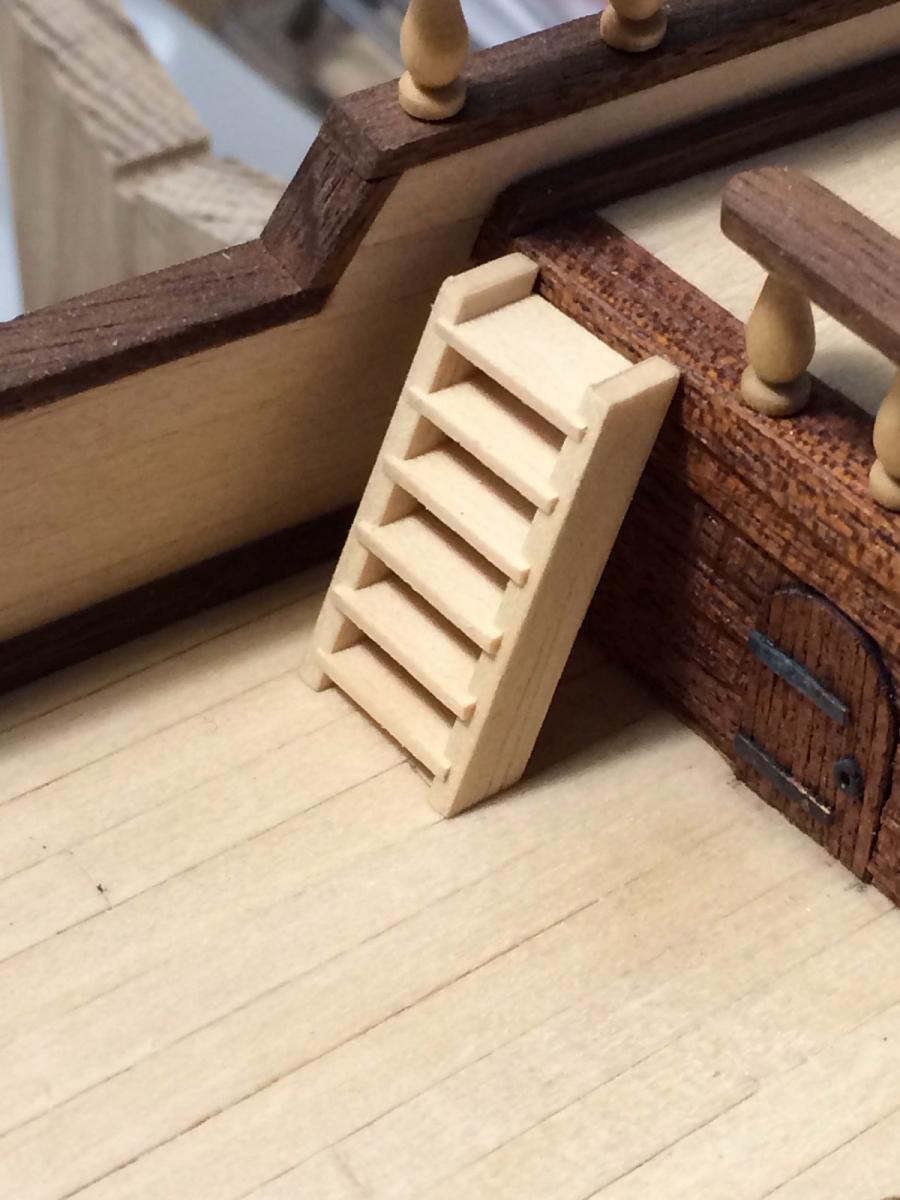
I'm busy scratch building all of my deck fittings. Most of the things I have to make 2 or 3 times over before I'm happy with the result - but I'm learning as I go along and it will certainly be easier going forward. Deck ladders - still dry fitted Pumps - still work in progress My second attempt at making the sides of the gun carriages for the canons.
-
What can I say thats not been said already. Fantastic work by a true master!
- 2,191 replies
-
- 1
-
-
- confederacy
- Model Shipways
- (and 1 more)
-
Hi Vivian This is such a fantastic build! The colours add such an amazing sense of realism. Well done!
-
I haven't posted an update in a while. I will try to upload some pictures in the near future. I'm busy scratch building all my deck fittings and I completely underestimated how much effort it will take, but it's great fun. I also spend a lot of time on building a stand (well, building many stands until I found one that I was happy with). Watching far too many soccer games during the world cup didn't help the build speed either.
-
Jislaaik Morné, if I knew you were going to attempt a 1:38 scale I would have suggested the Knysna forest and not Rare Woods in Cape Town! Forget my comments about the table saw as well - you will need a much bigger machine! I can't wait to see your progress on this project and I hope you make frequent updates.
-
Hi Vivian What a superb job you are doing. Especially that cabin! Glad to see I'm not the only one that needs to modify AL instructions from time to time.
-
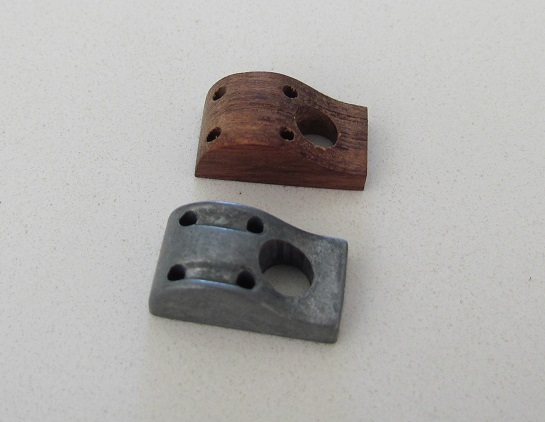
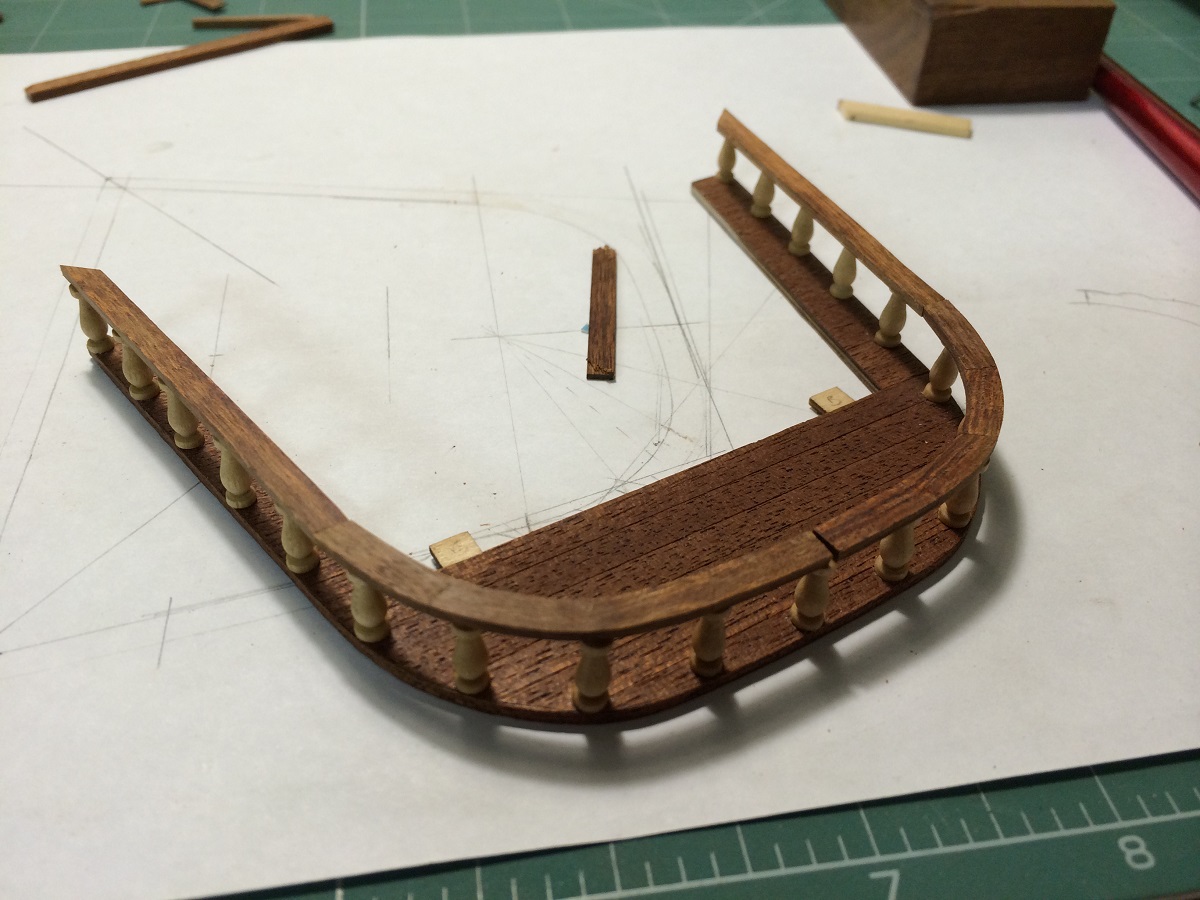
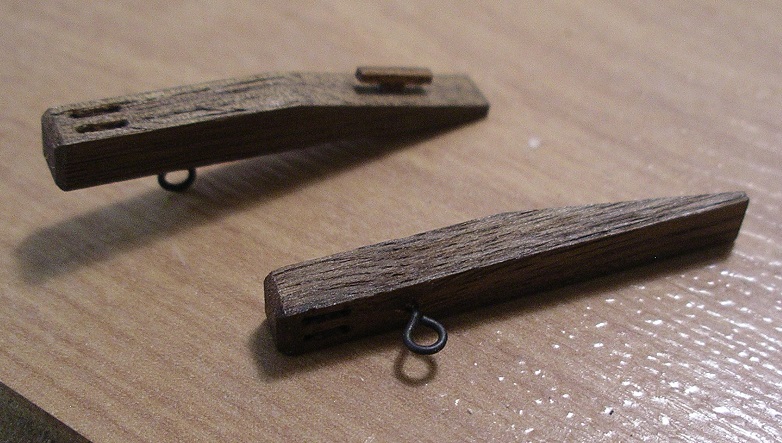
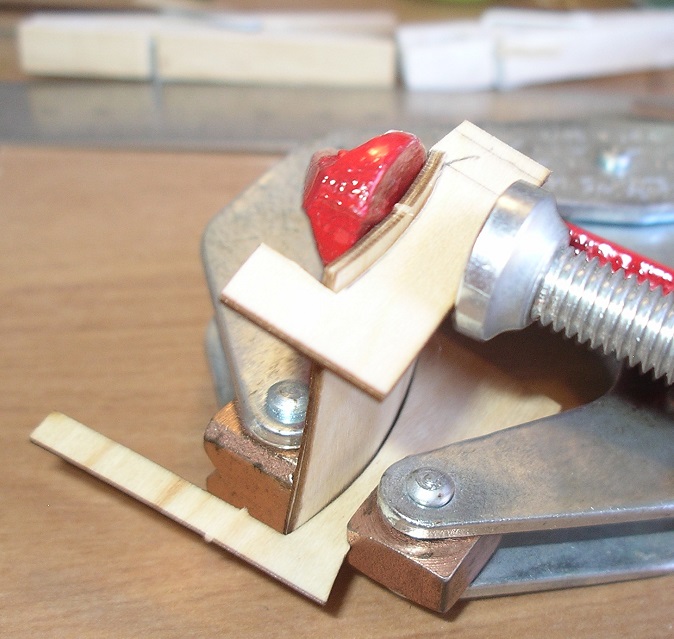
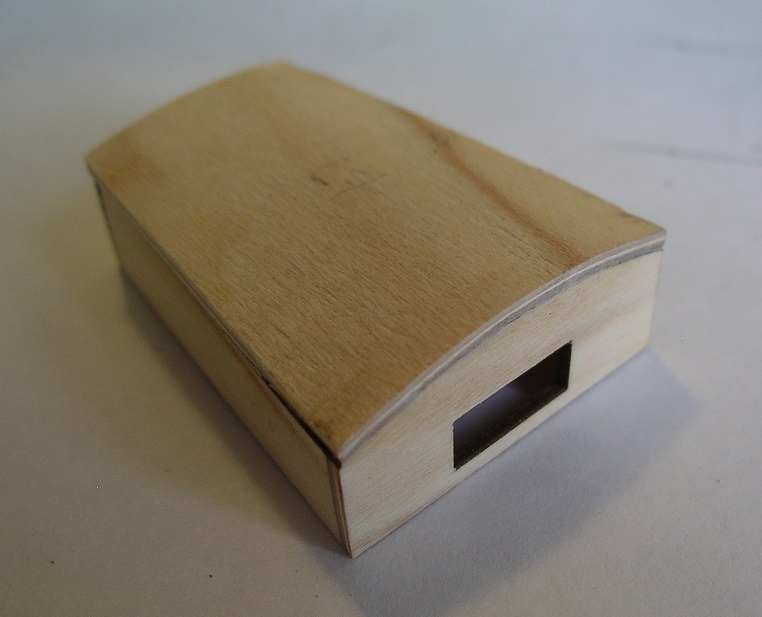
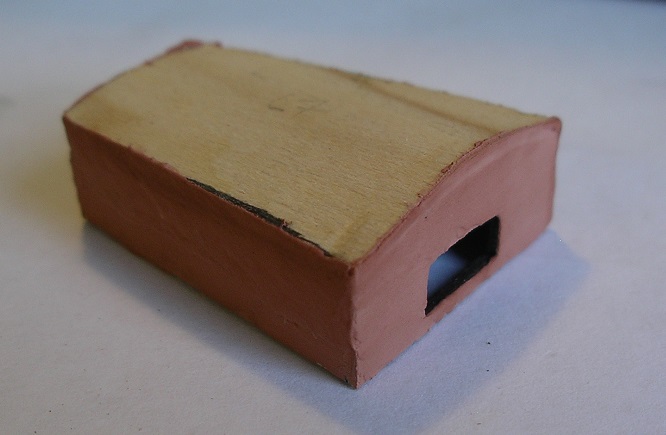
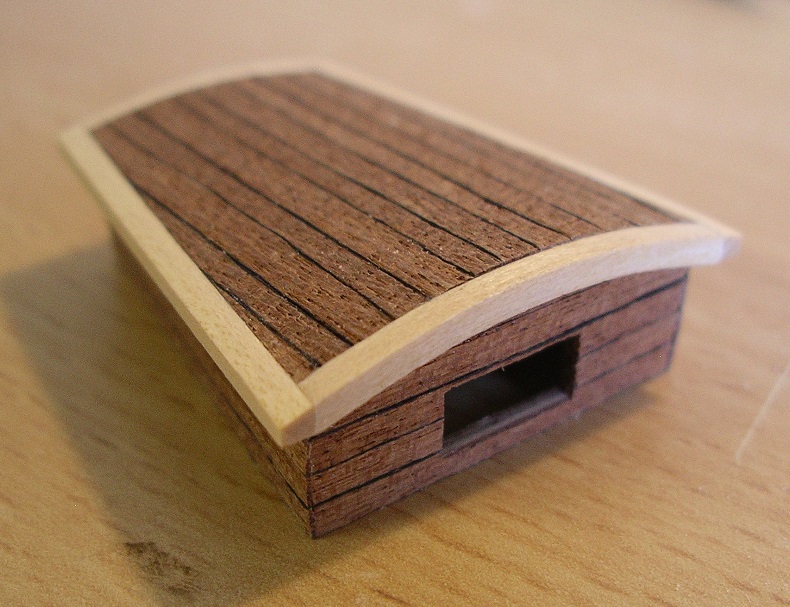
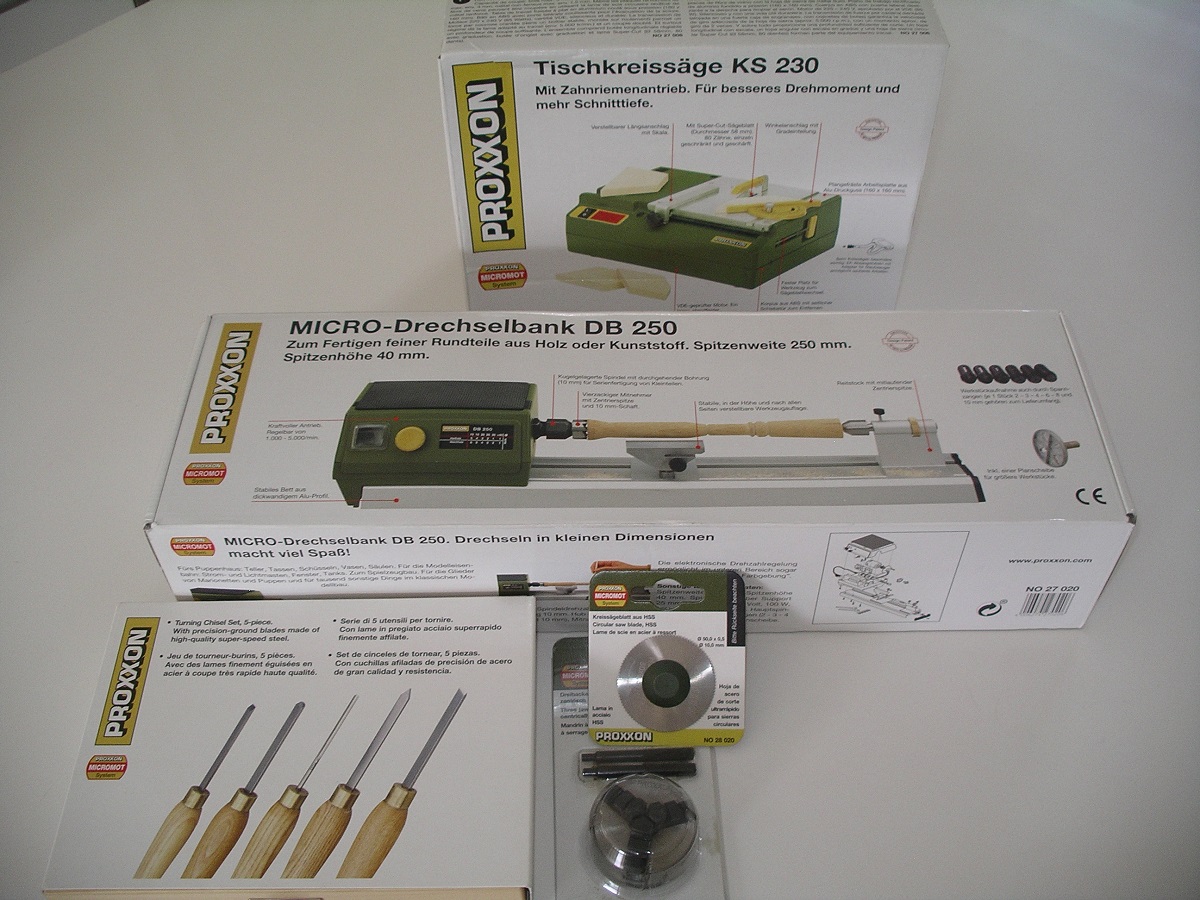
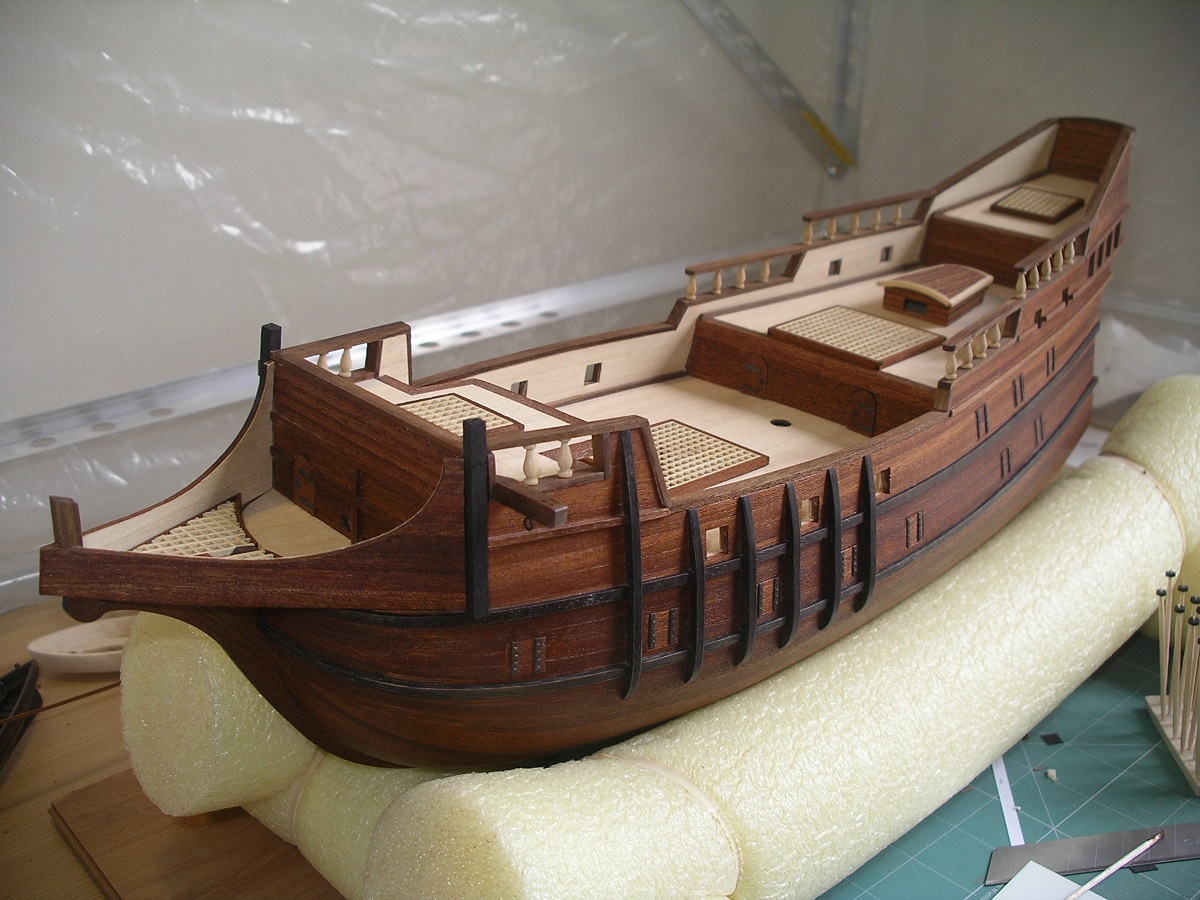
Work went slow the last number of months. I finished the sides of the main gratings with some off-cut planking strips. I first sanded the planks to same height as the gratings. I did not follow the instructions for the cat davits precisely. I did not like the idea of tying the rope that is used to hoist the anchors to an eyebolt on the deck, so I replaced that eyebolt with a cleat that I filed from some scrap wood. The other eyebolt was blackened and varnished first. The plywood roof of the helmsman’s cabin needed some pre bending. I traced the curves of the fore and aft walls onto some scrap wood, made a ‘negative’ cut out and used it as I jig to clamp and shape the roof. I sanded all the sides, but the joints between the walls and the roof wasn’t perfect. I covered all the walls with wood filler and sanded all the sides again to get a perfect finish. Finally, I lined all the sides with the mahogany laminate strips. I first cut the lining strips into thinner strips that had variation in their width. It makes the 'planks' look more natural to me. The admiral bought me some presents with my credit card. I’m looking forward to practising my lathe work before I start with the masts and yards. My San Fran as she lays in the dock now.