HOLIDAY DONATION DRIVE - SUPPORT MSW - DO YOUR PART TO KEEP THIS GREAT FORUM GOING! (Only 72 donations so far out of 49,000 members - Can we at least get 100? C'mon guys!)
×


CharlieZardoz
-
Posts
969 -
Joined
-
Last visited
Content Type
Profiles
Forums
Gallery
Events
Everything posted by CharlieZardoz
-
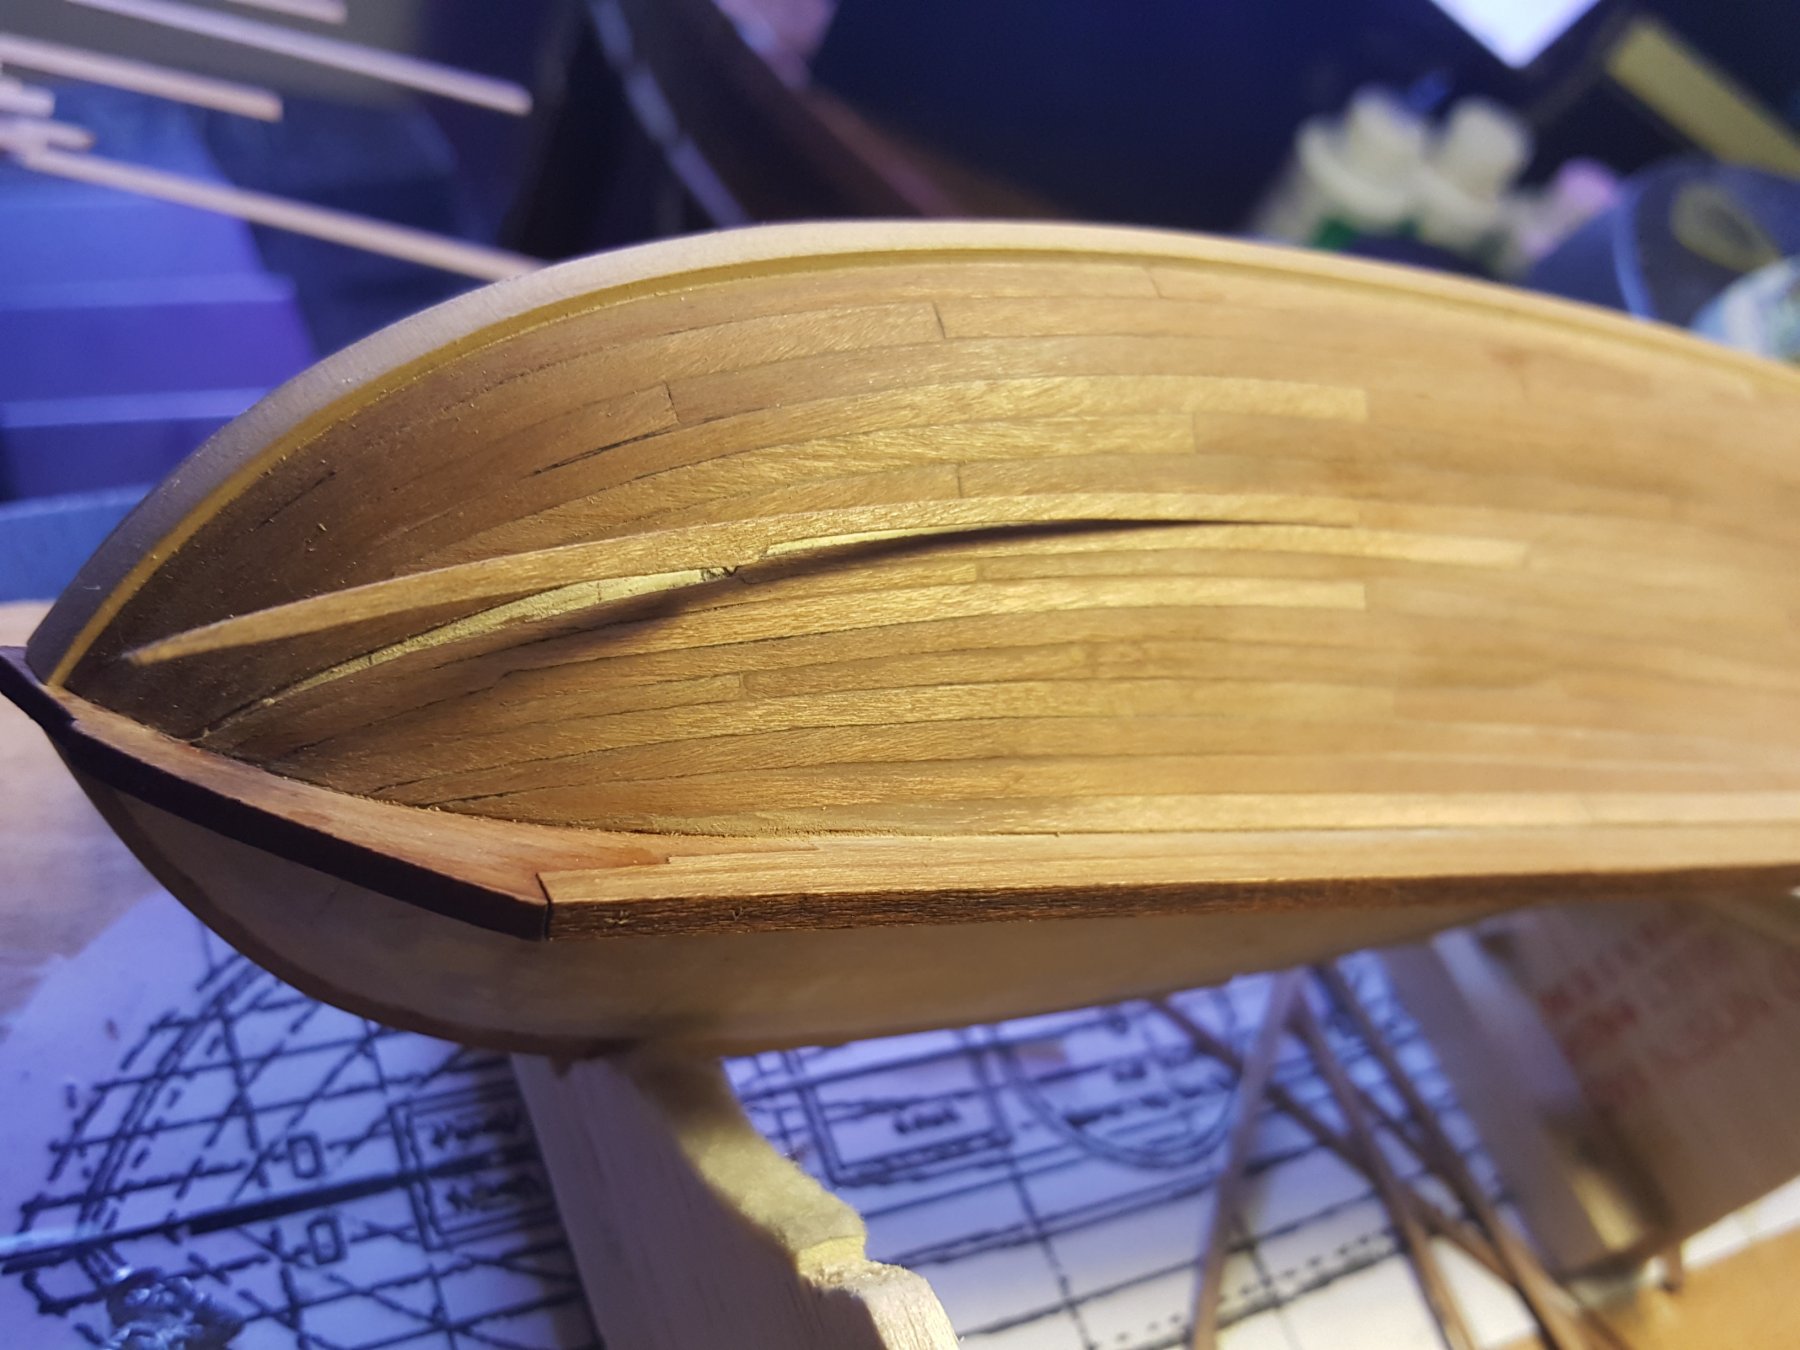
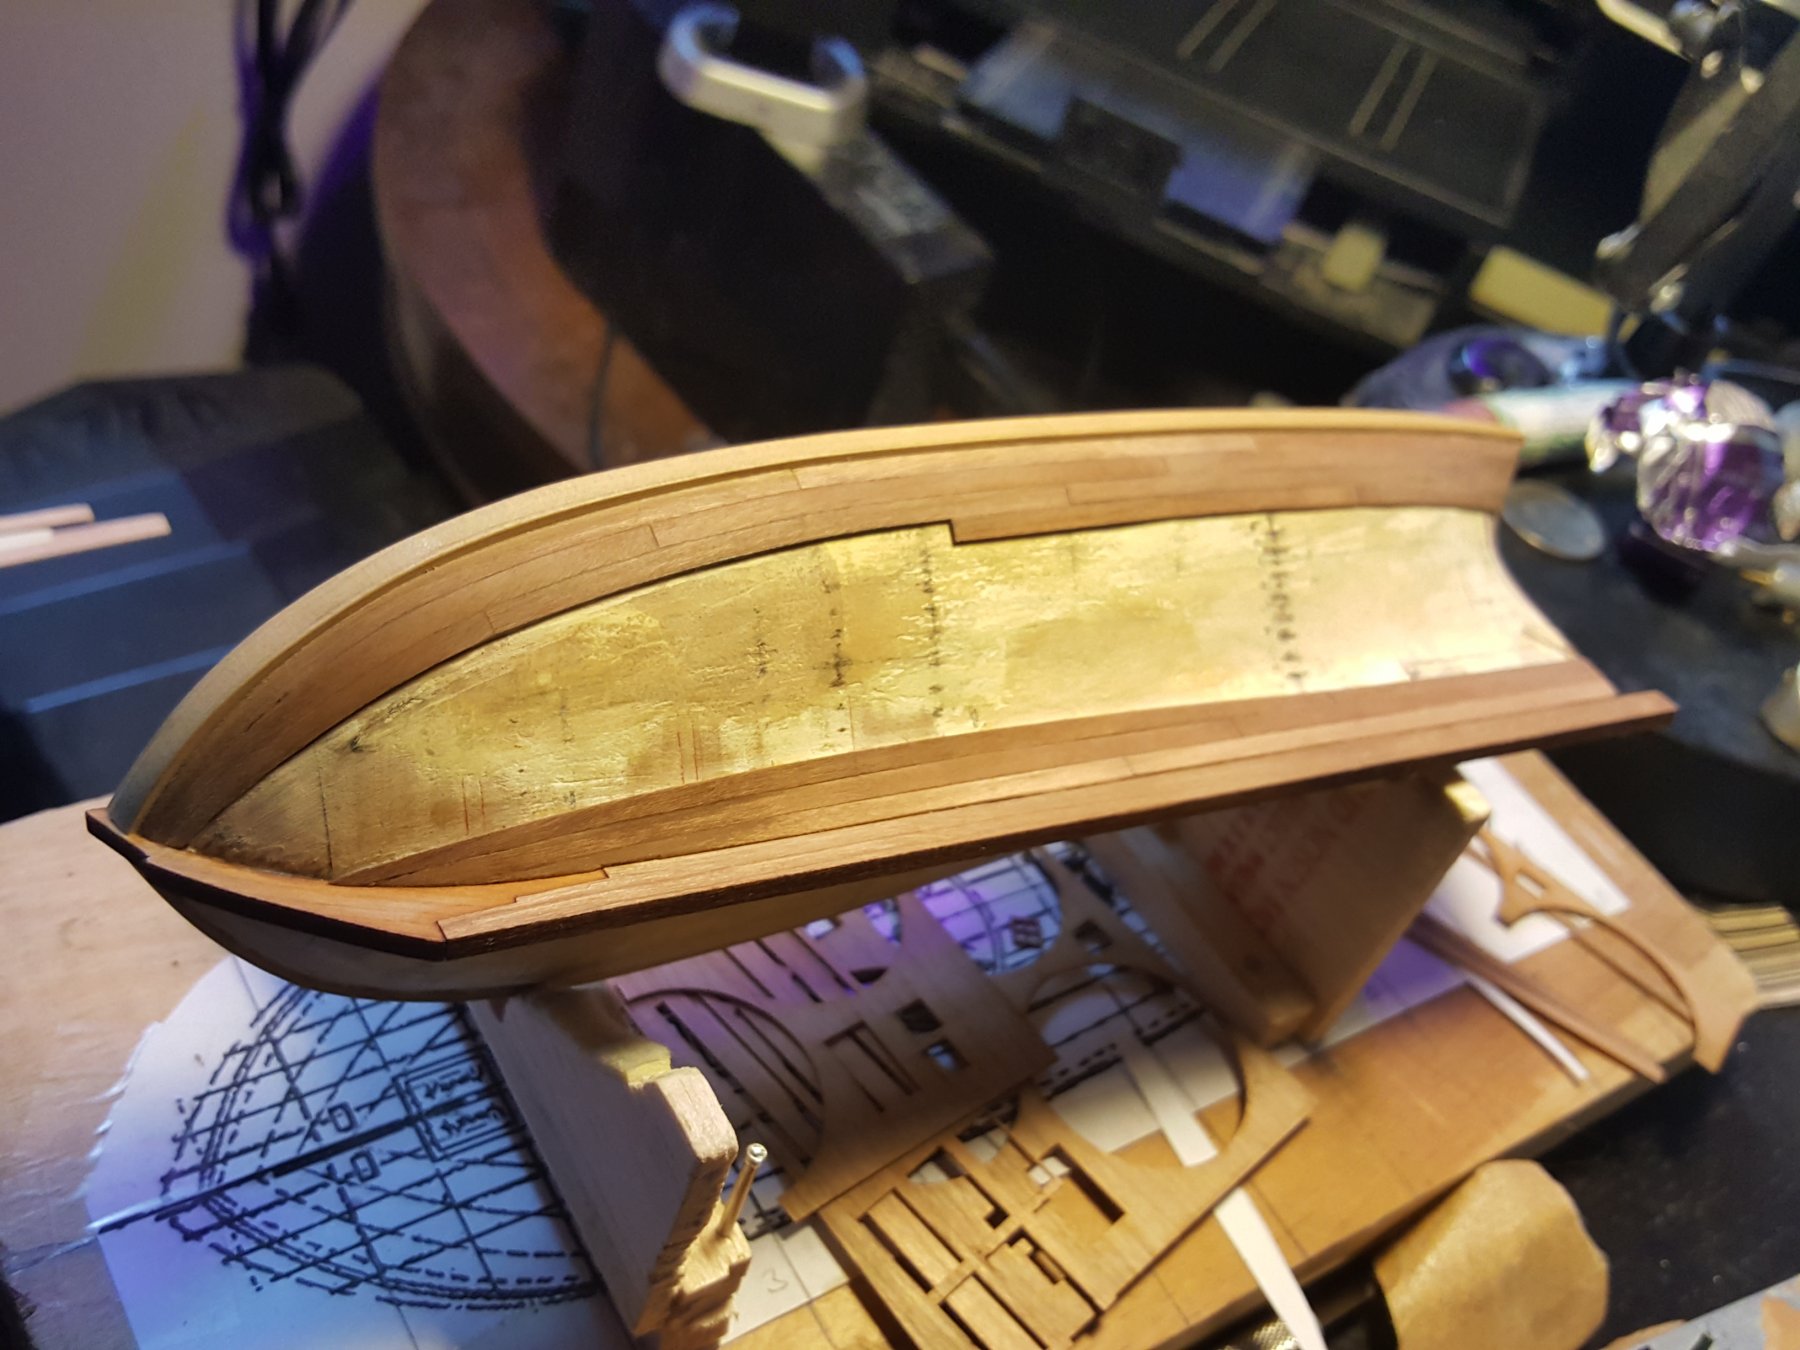
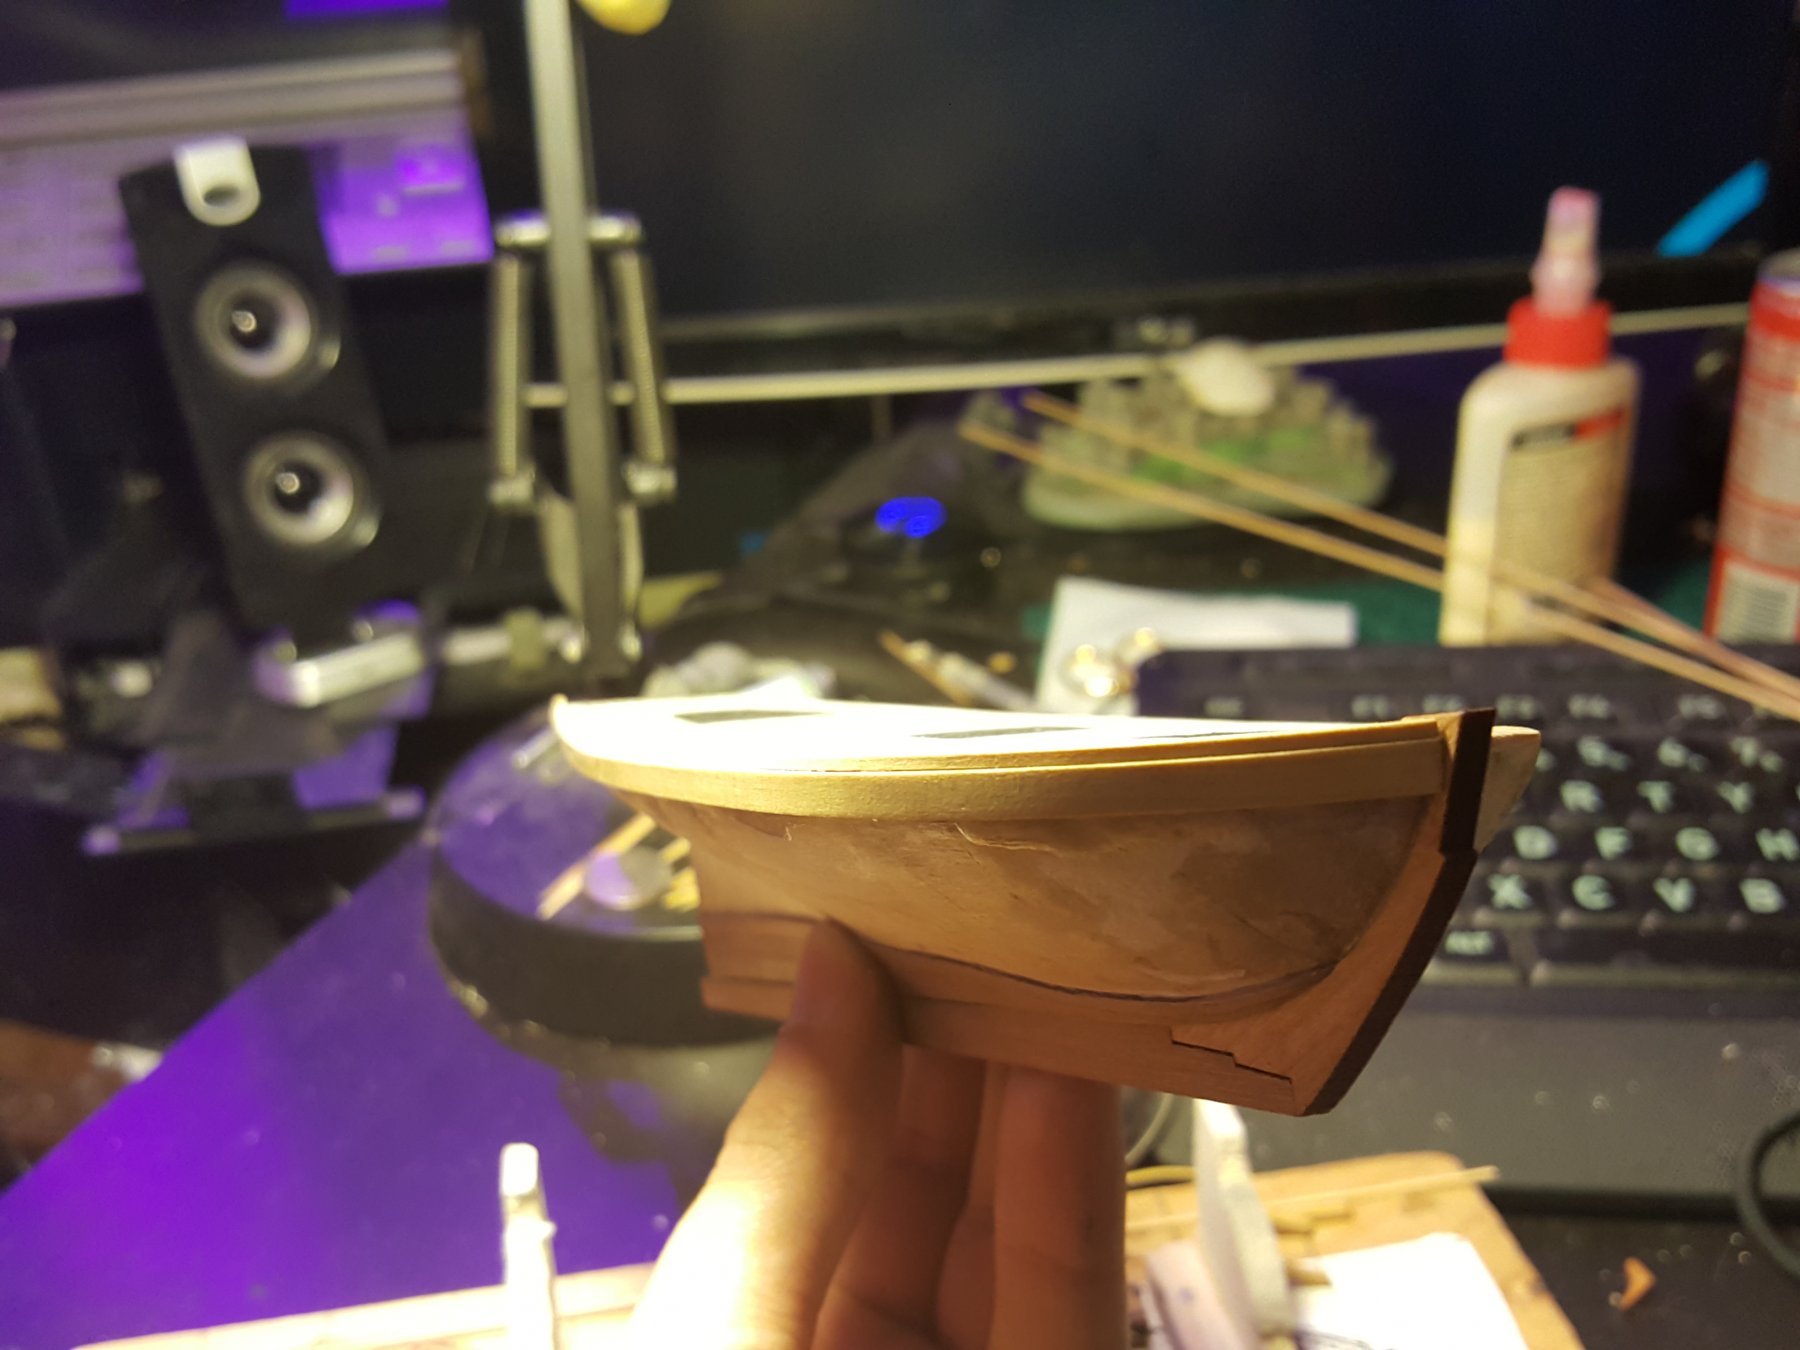
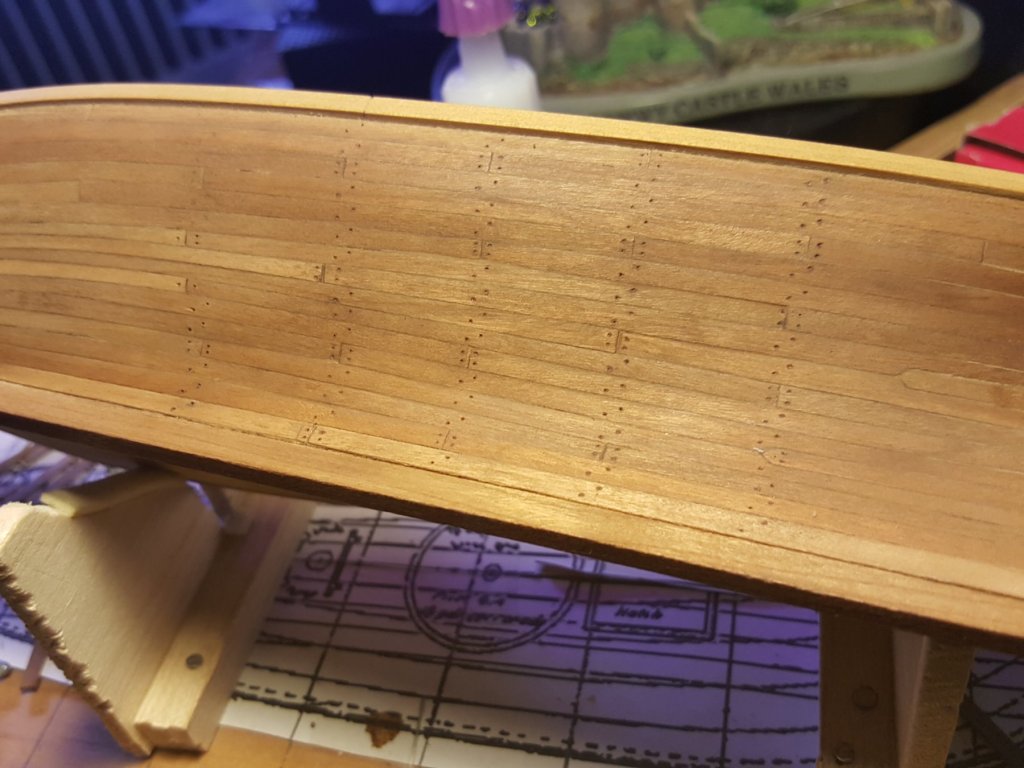
 Hi all! Sorry its been so long been toiling away on planking and just finished the left side. Since the shape is so wedge shaped on this boat alot of planks needed to be spiled. That said it taught me alot and I think I did a reasonably good job for a first timer. Now starting the treenails using an awl, colored putty to fill the holes then a color pencil to add some detailing. Got more to go but thought I'd share
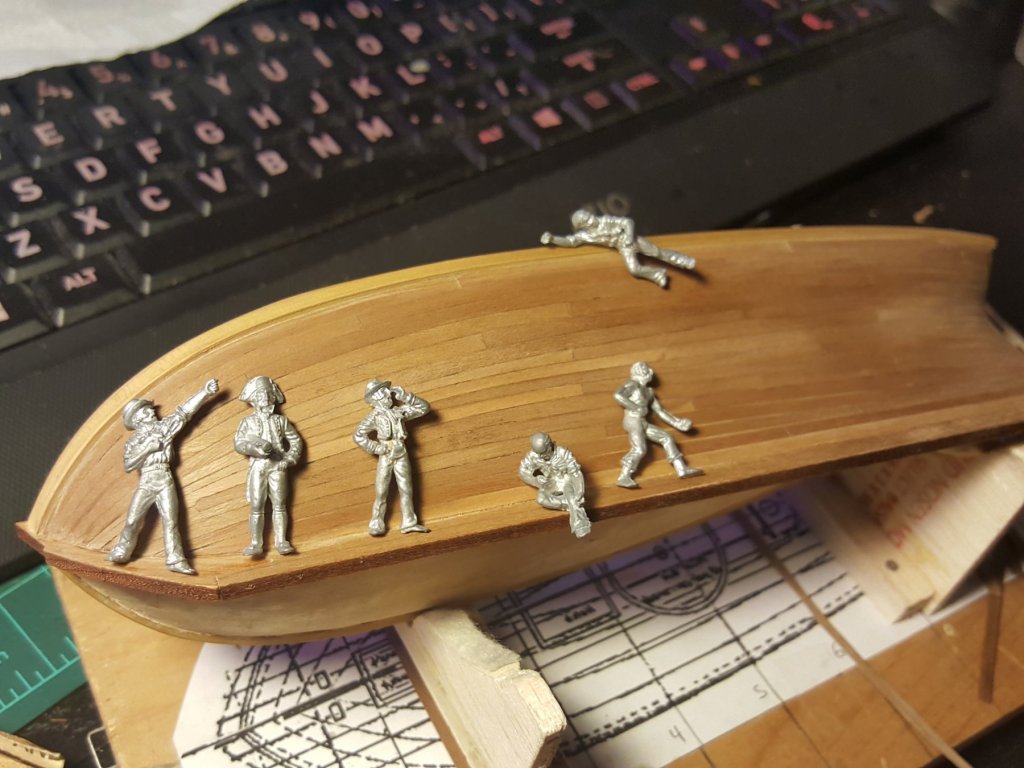


- 362 replies
-
- 10
-

-
- active
- revenue cutter
- (and 1 more)
-
Yeah in some ways you are right. However I think its relative to the subject matter. The larger 80 ton hull I have is pob and I simply do not have to worry about hull shape. However adding some balsa wood between the frames can be a nice way of adding structure after the shape is ready to go. But I do think solid hull helps the novice understand things about woodworking they may not if their only experience begins with plank on bulkhead. And especially for small hulls and simple hulls like this one it taught me alot.
- 362 replies
-
- 4
-
-
- active
- revenue cutter
- (and 1 more)
-
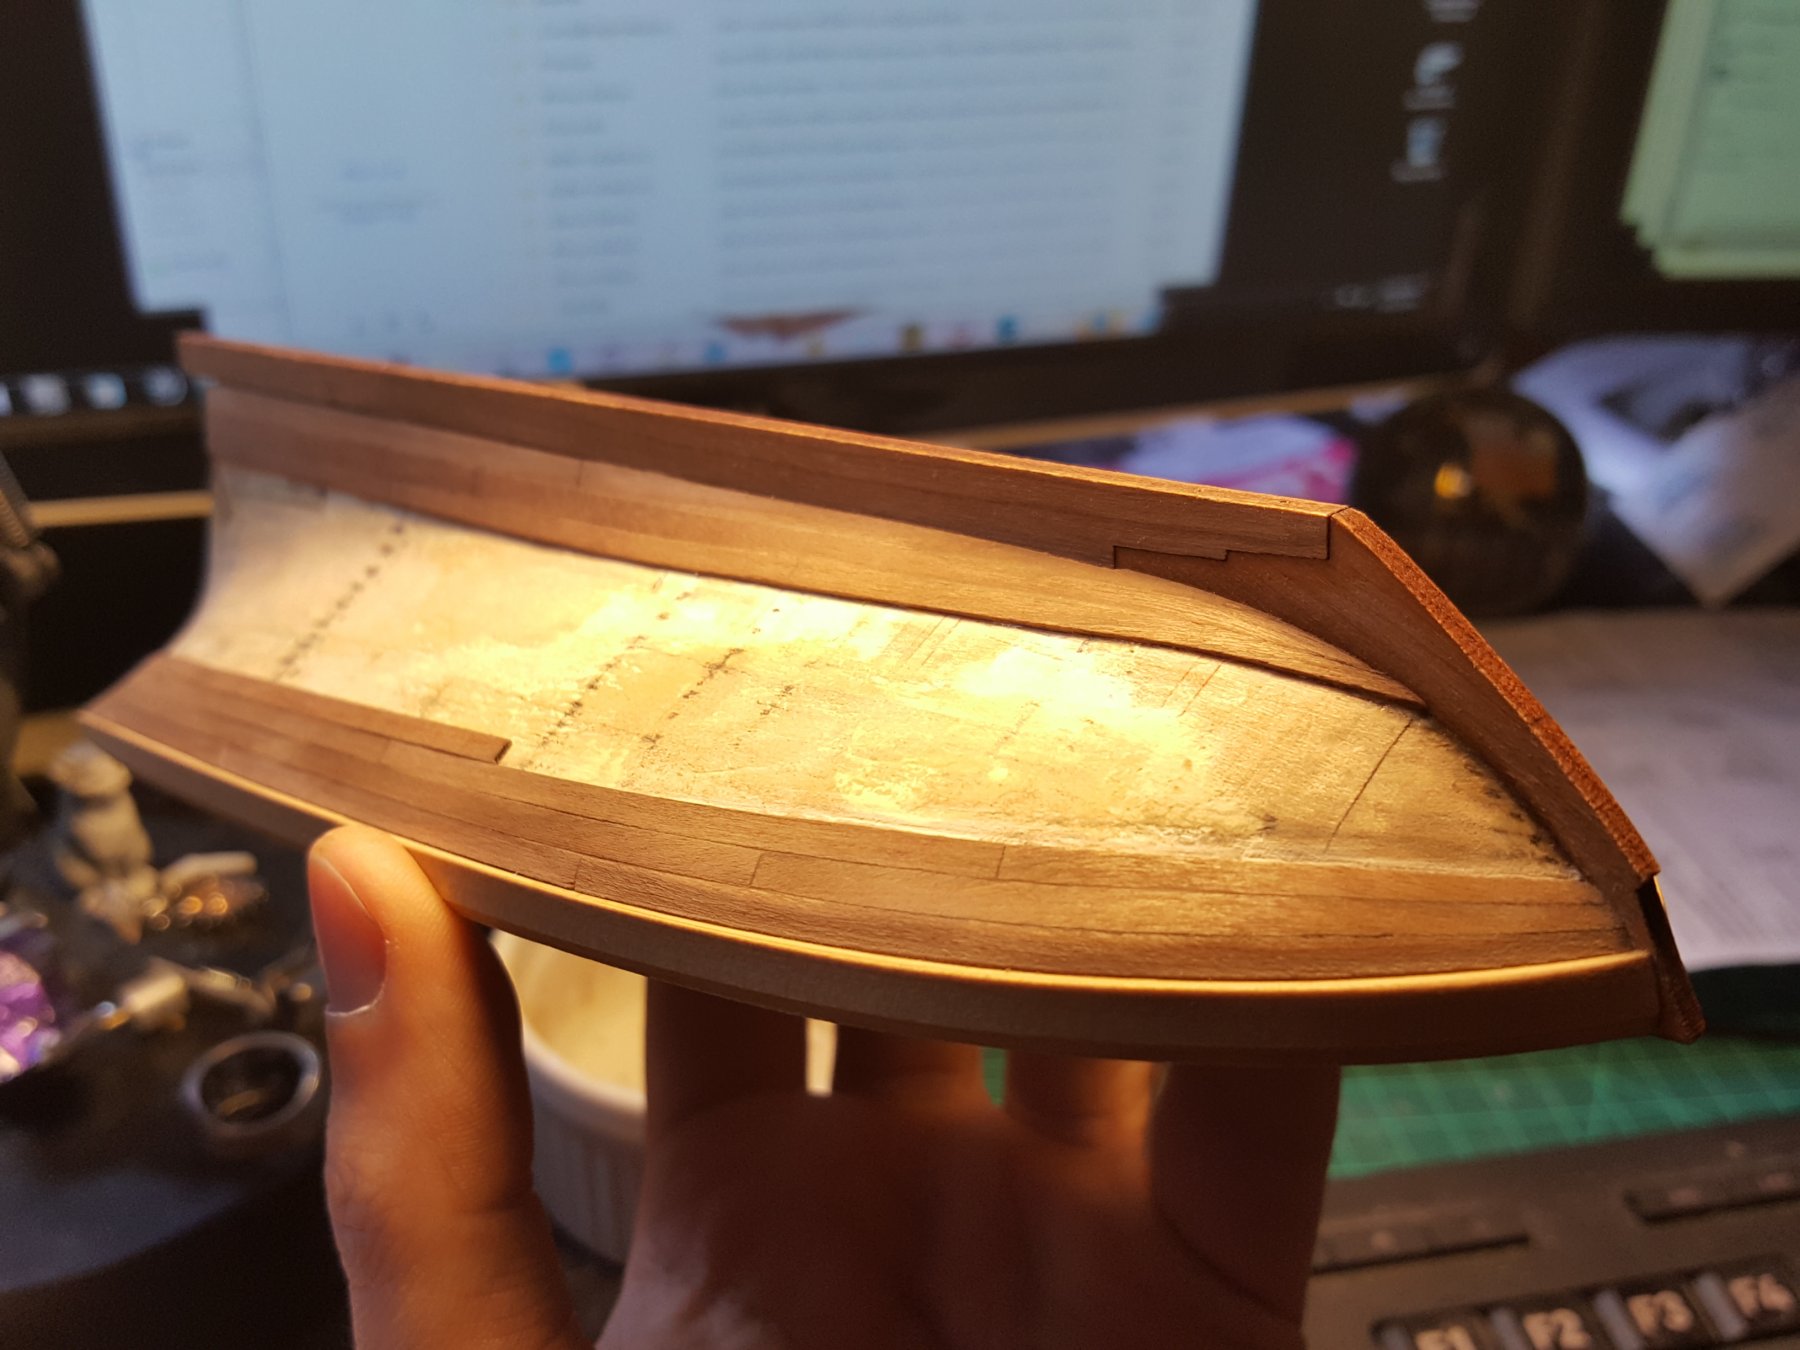
OHey msw folks! Thought it was time for a new update. Every day I add a few more planks you can see where I am now. The drop plank is in place at the bow and looking like I will need at least one more. I feel like there may be some minor crowding at the bow which I think is the result of such an extreme form bending the planks a certain way and assuming it looks as it should. Pretty much all of the bow are spiled planks so getting them just right is a learning curve as well. I initially layered the planks in a step fashion like you would a deck but looks like it was more random so going to mix it up for the last bit.


- 362 replies
-
- 6
-
-
- active
- revenue cutter
- (and 1 more)
-
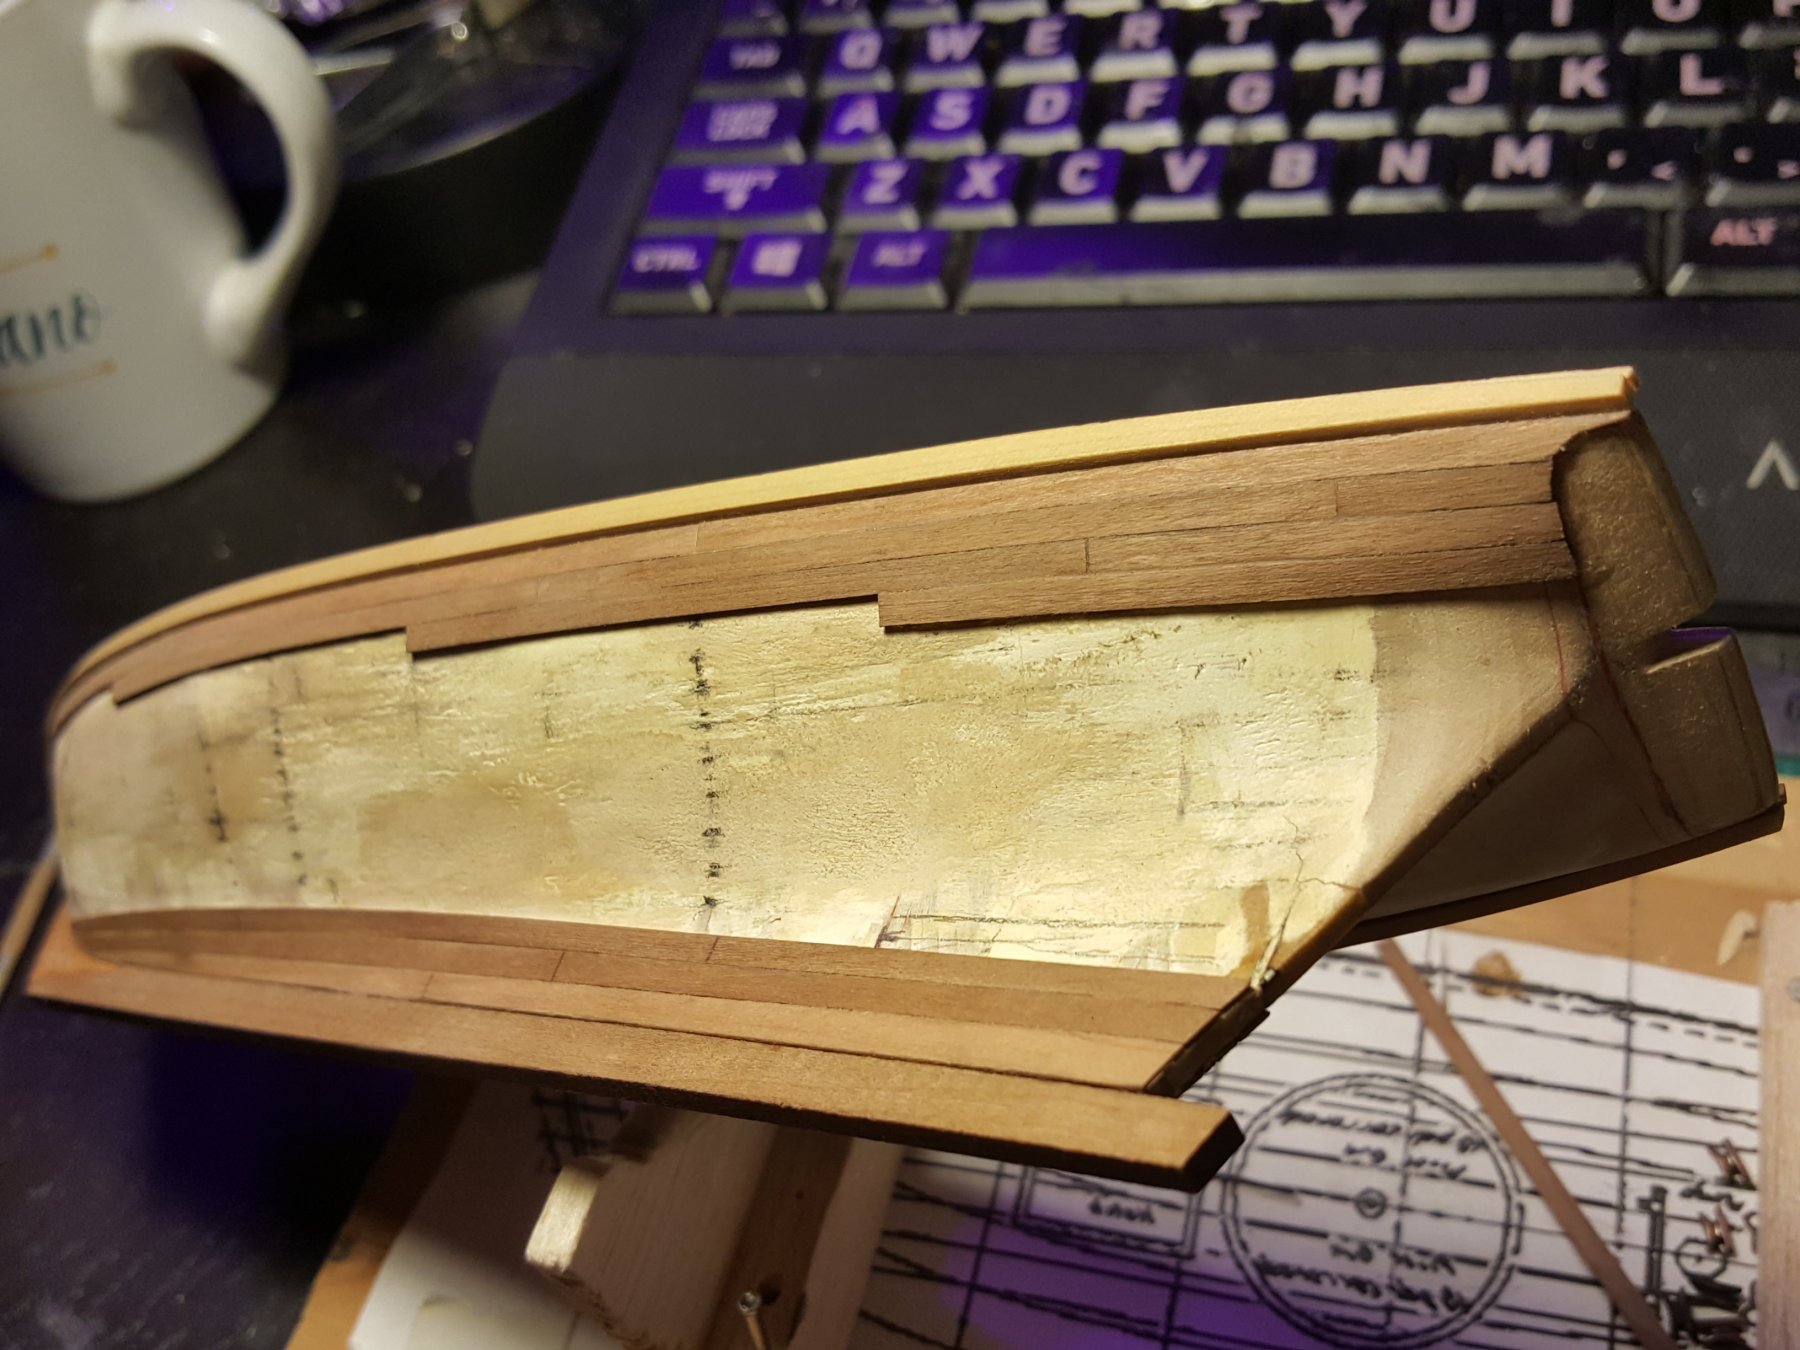
Ok so here is how I placed a steeler. The main planks are 7/64" thick so I used slightly thicker 1/8" inch and shaped the edges to meet. So basically the steeler and two surrounding planks were made together then assembled on the hull. Will do the same with the drop plank which is next.


- 362 replies
-
- 7
-
-
- active
- revenue cutter
- (and 1 more)
-
Ha! That's a nice one! Well here it is now with two new spilled planks and while I think I did a fairly decent job with the cardstock to wood I am noticing the planks look slightly thicker when curved toward the bow before tapering inward. I don't recall cutting them thicker so I think it may be the natural effect of wood curving and wanting to straighen out. That said I realize that drop planks will be necessary to avoid crowding. Likewise the inclination of planks at the back means a few Steelers as well. But overall it looks decent er I think


- 362 replies
-
- 5
-
-
- active
- revenue cutter
- (and 1 more)
-
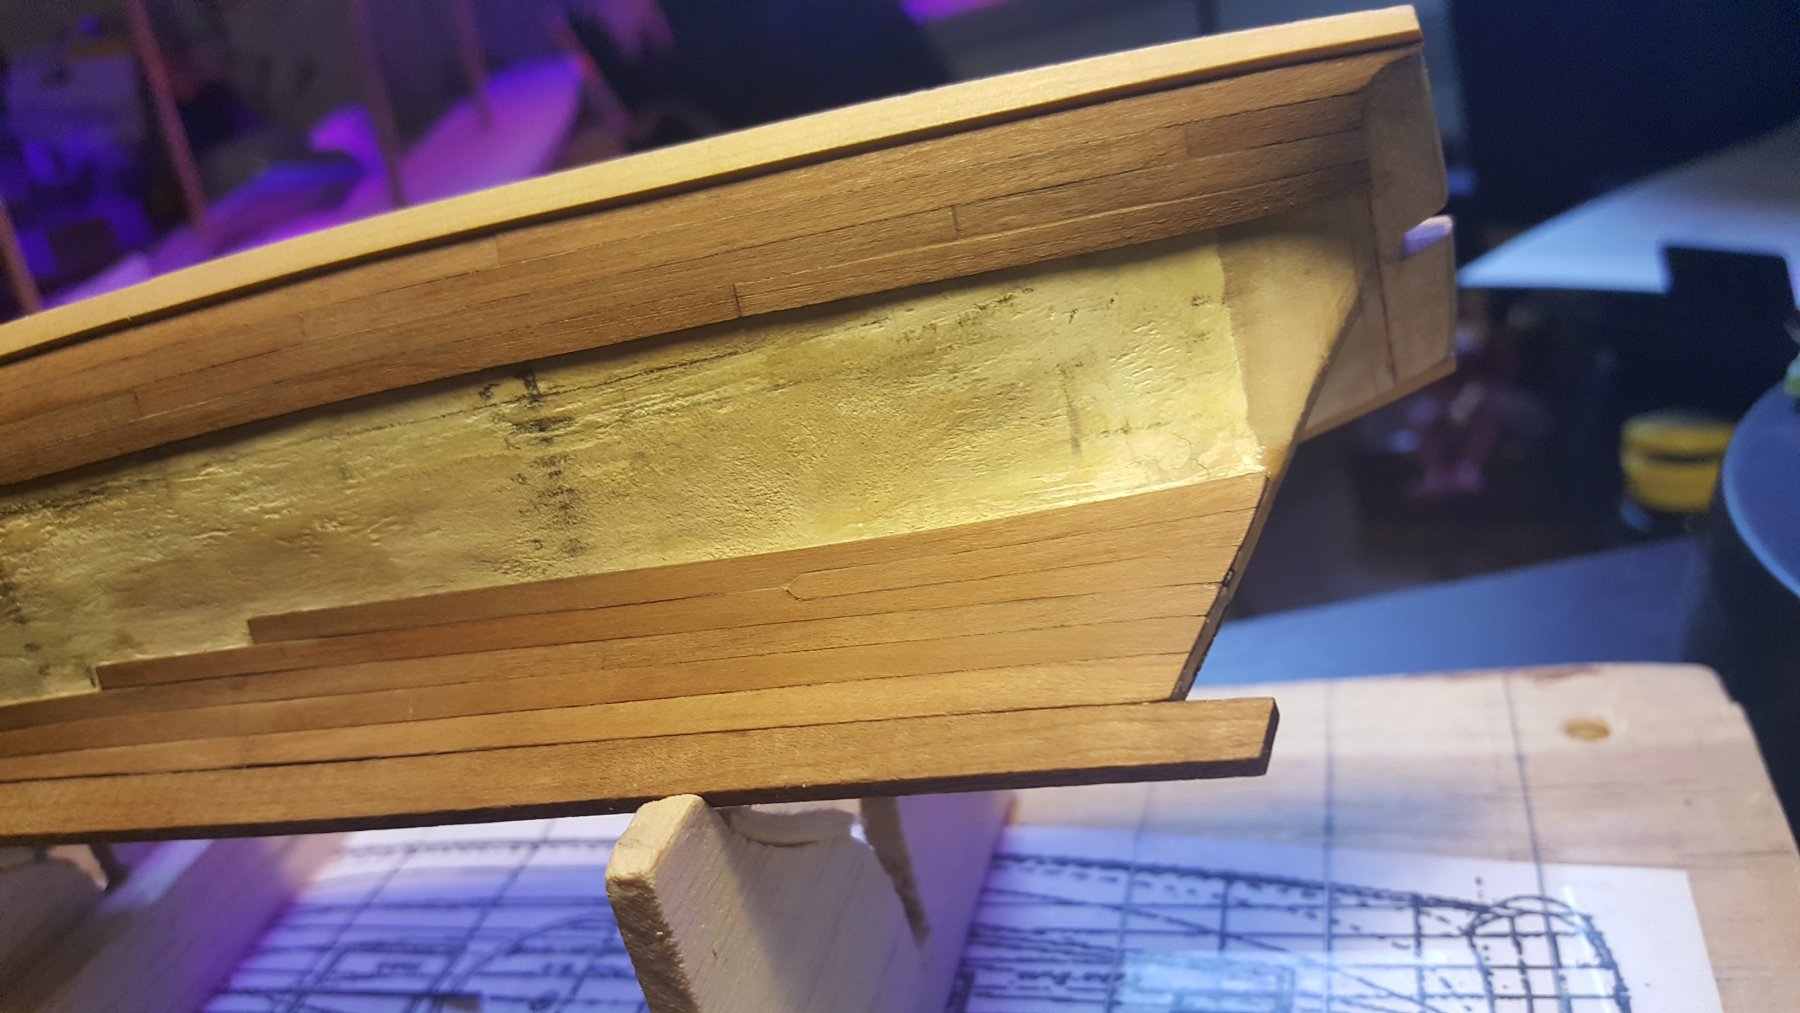
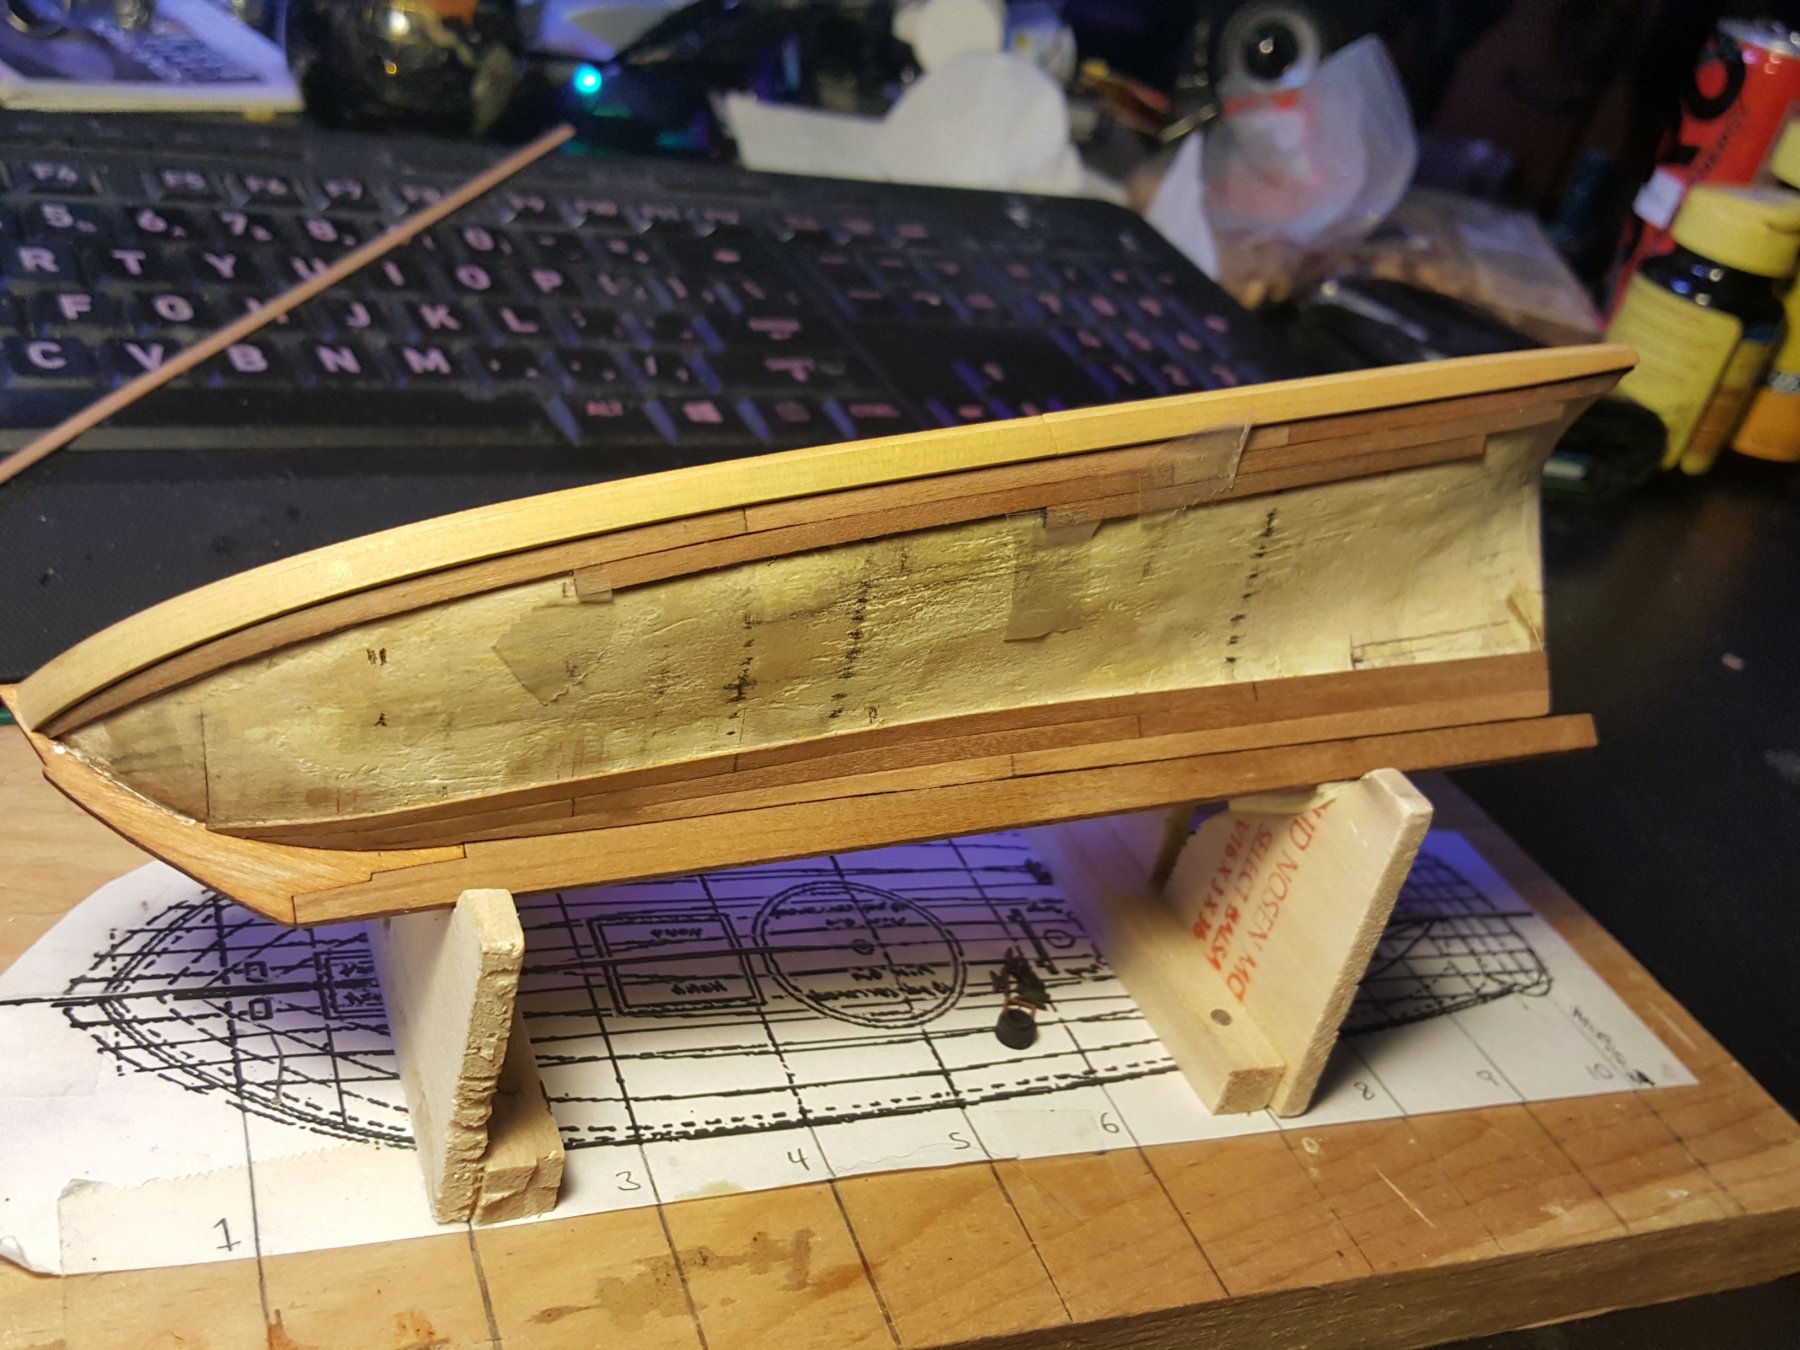
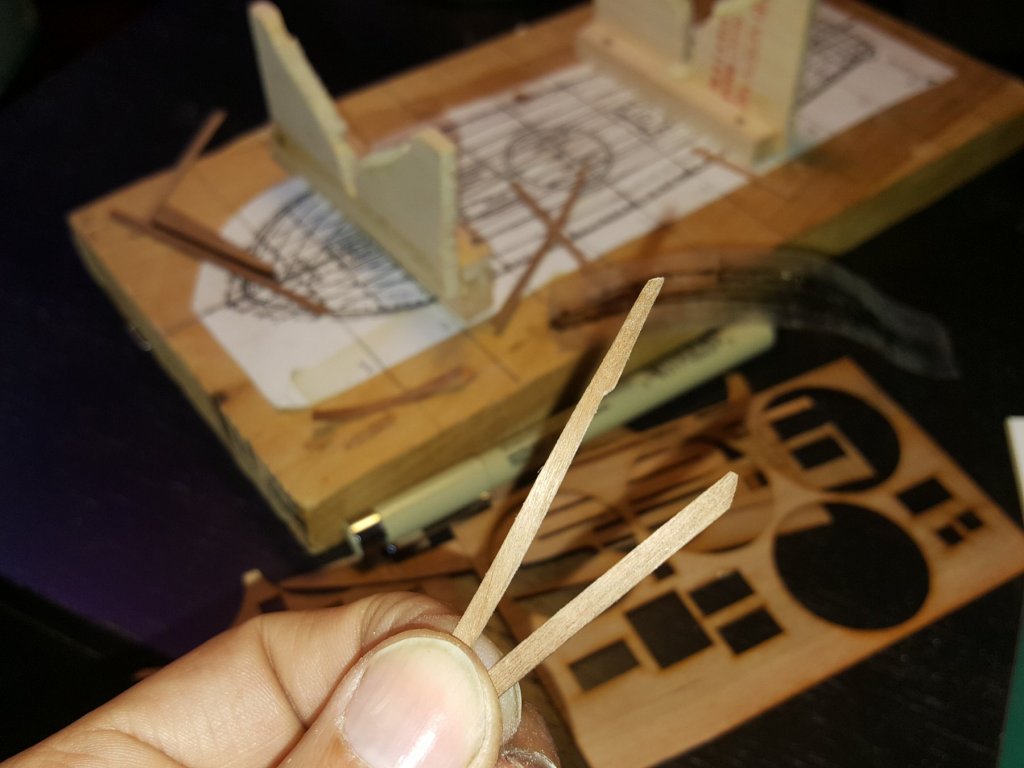
Thanks Mark. I am really liking the way its looking so far. Here you can see the curve up to where the transom pieces will be. Also using walnut shade wood filler I've been filling in any tiny spaces left between the planking. Thin it out with some water and you it does the trick. Next up is to finish the planks in the front. To make the spiled pieces I will use cardstock forst to make the shapes then transfer over on a veneer sheet.

- 362 replies
-
- 7
-
-
- active
- revenue cutter
- (and 1 more)
-
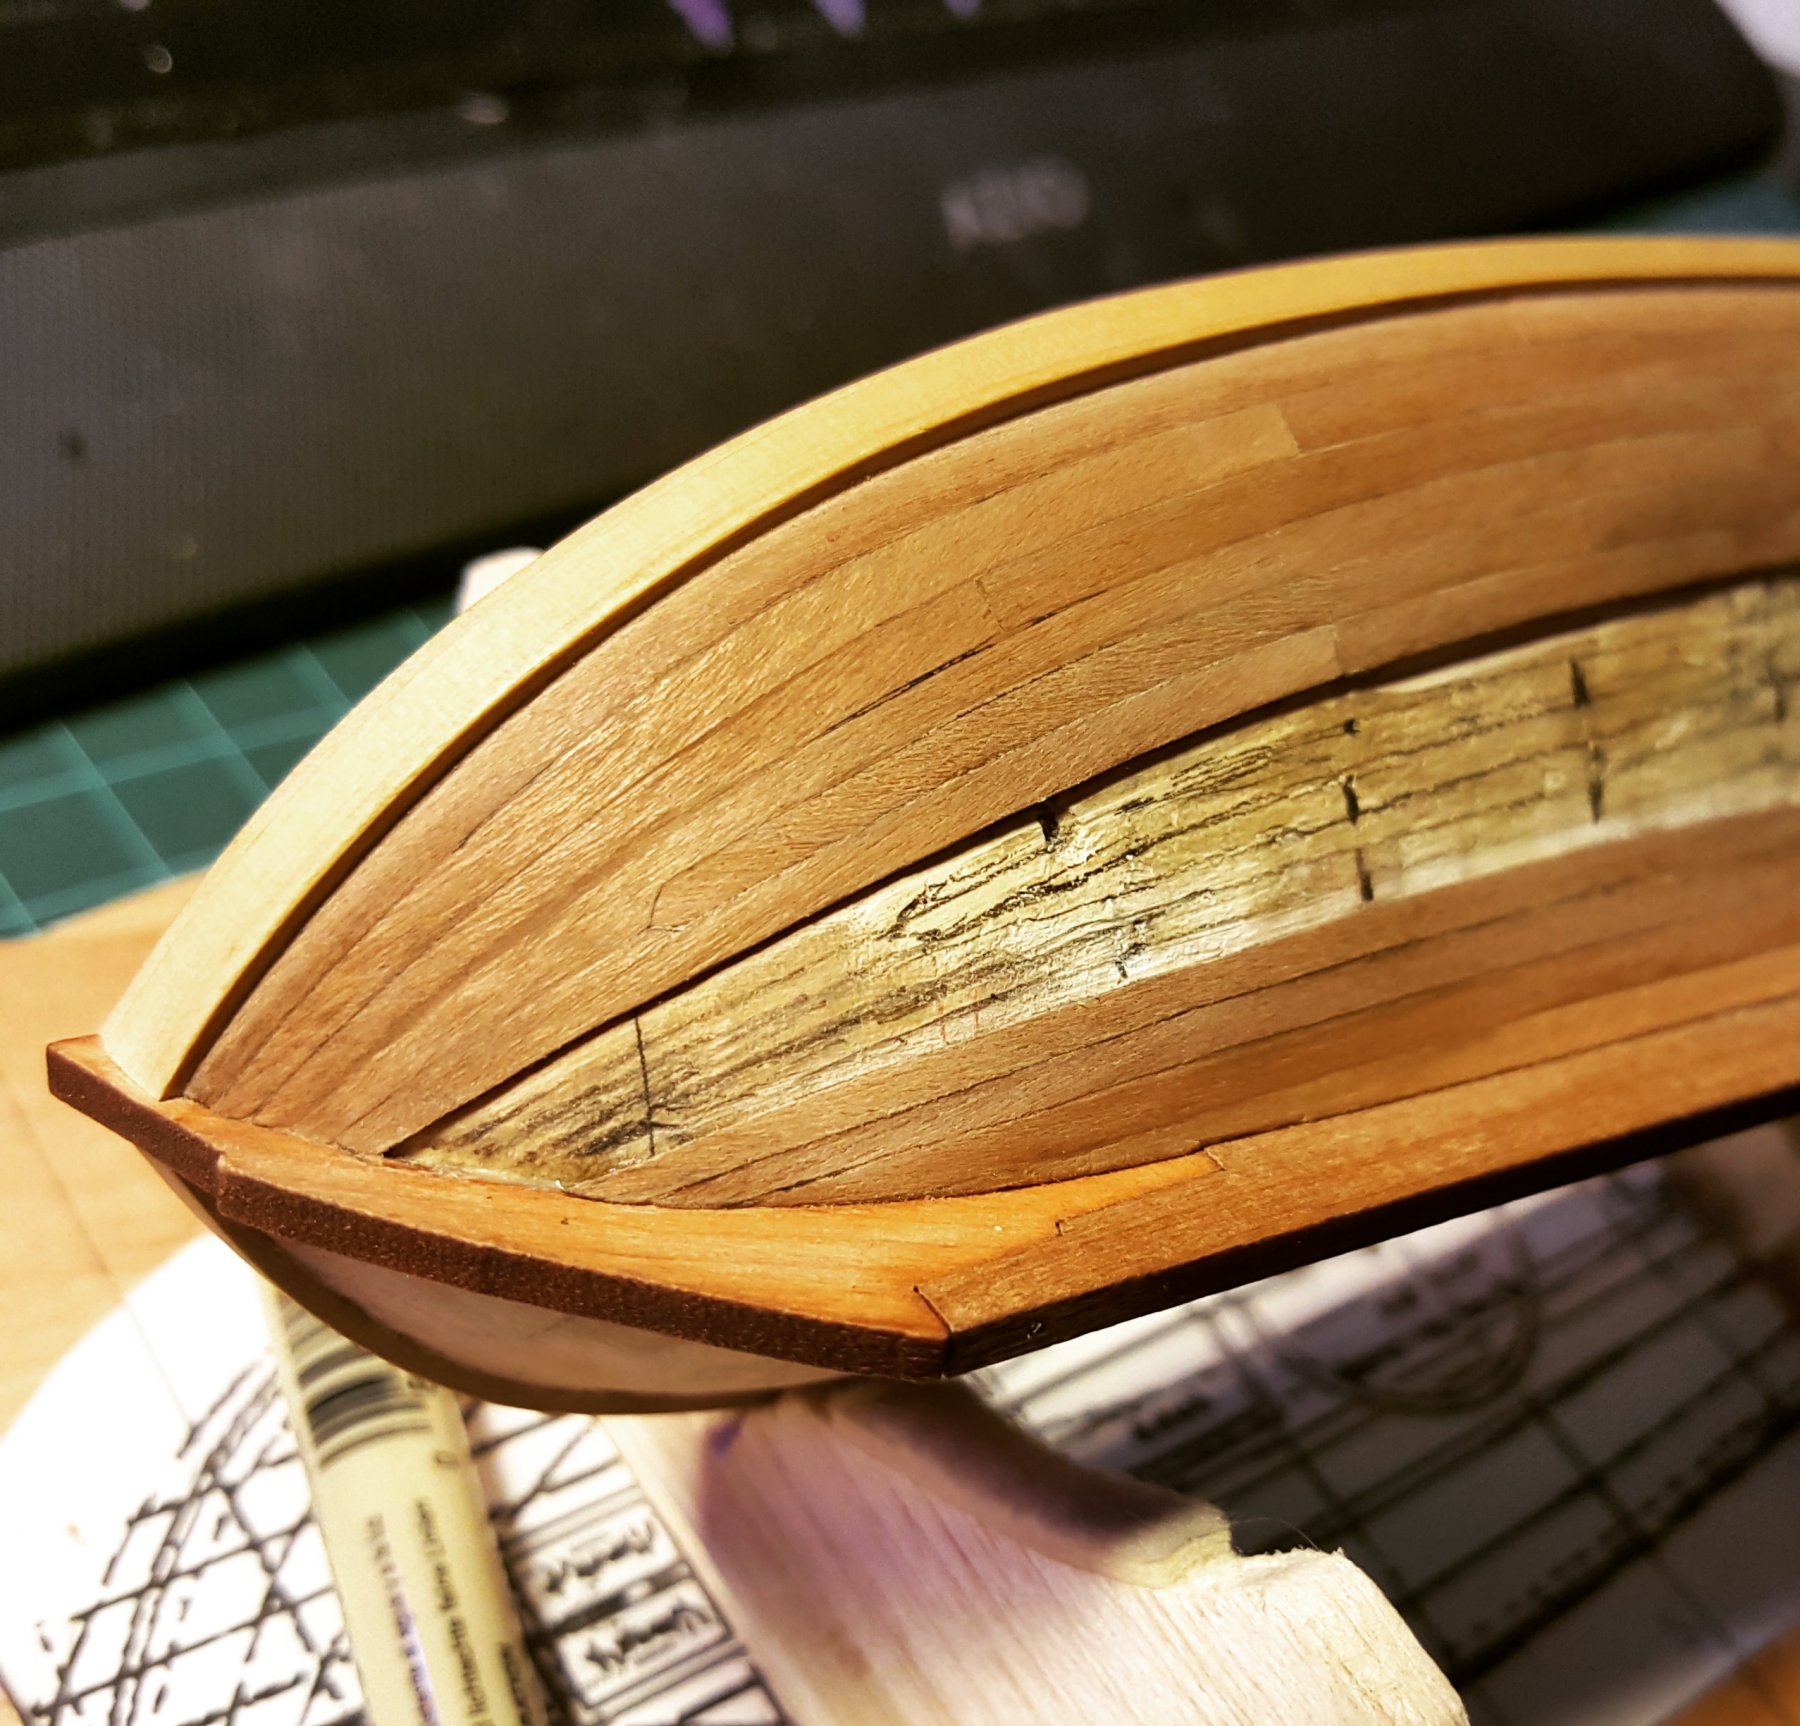
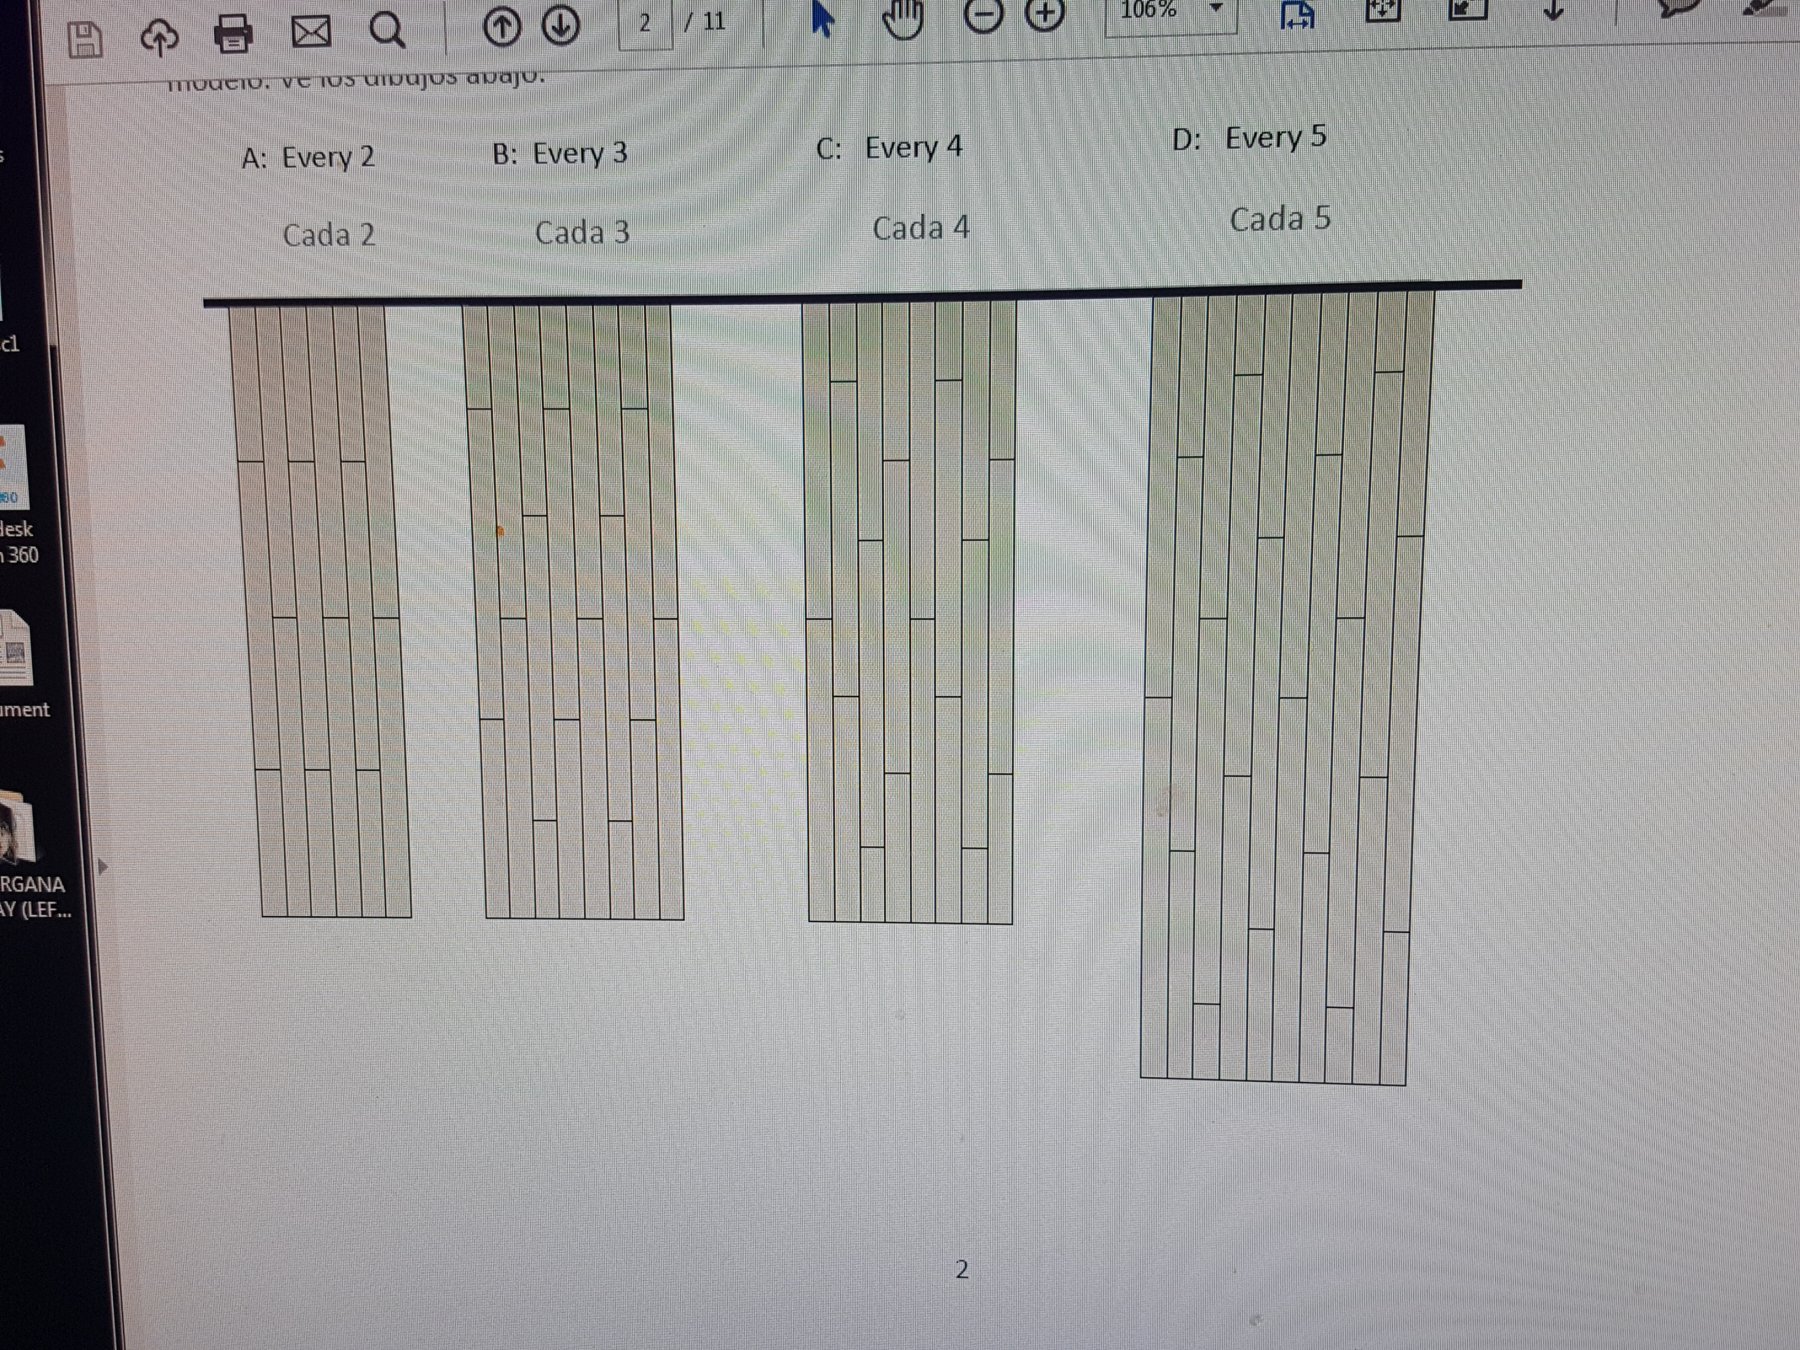
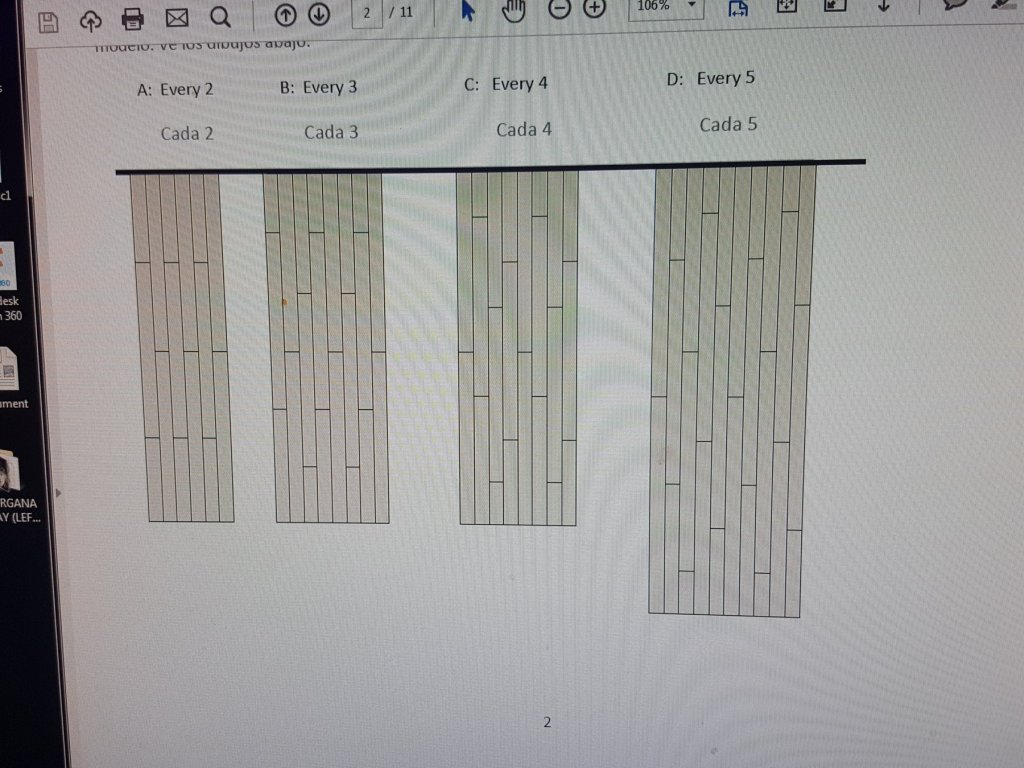
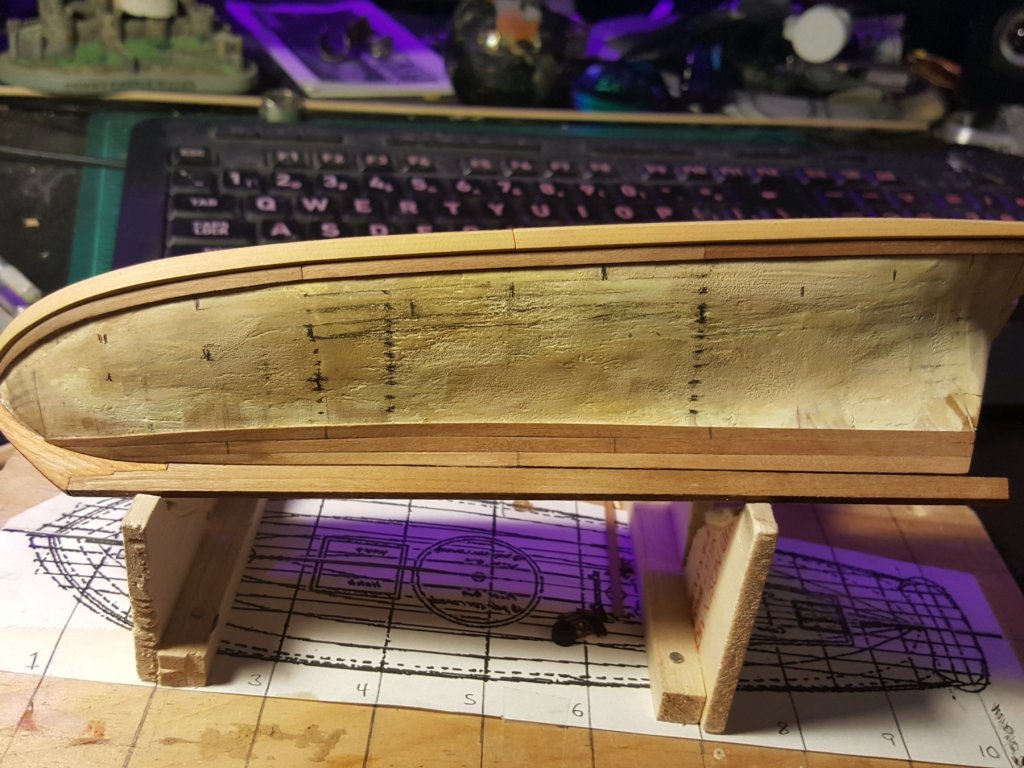
Here you can see the rough estimates of where I will have the planks end. I am using the rule of every 4th repeating via the diagram below. This makes an interval between planks of about 3/4" an inch or 4' maybe a bit small but thought doing every 3rd plank would not look as neat. The planks themselves as stated before are around 17' the lower planks are not cut since they will be covered in cooper however I did use pencil lines to get the overall planking pattern down so things look as they should. This is all very new for me so having the lower planks detailed like this means I can practice then potentially cover up my learning curve with copper plates
- 362 replies
-
- 5
-
-
- active
- revenue cutter
- (and 1 more)
-
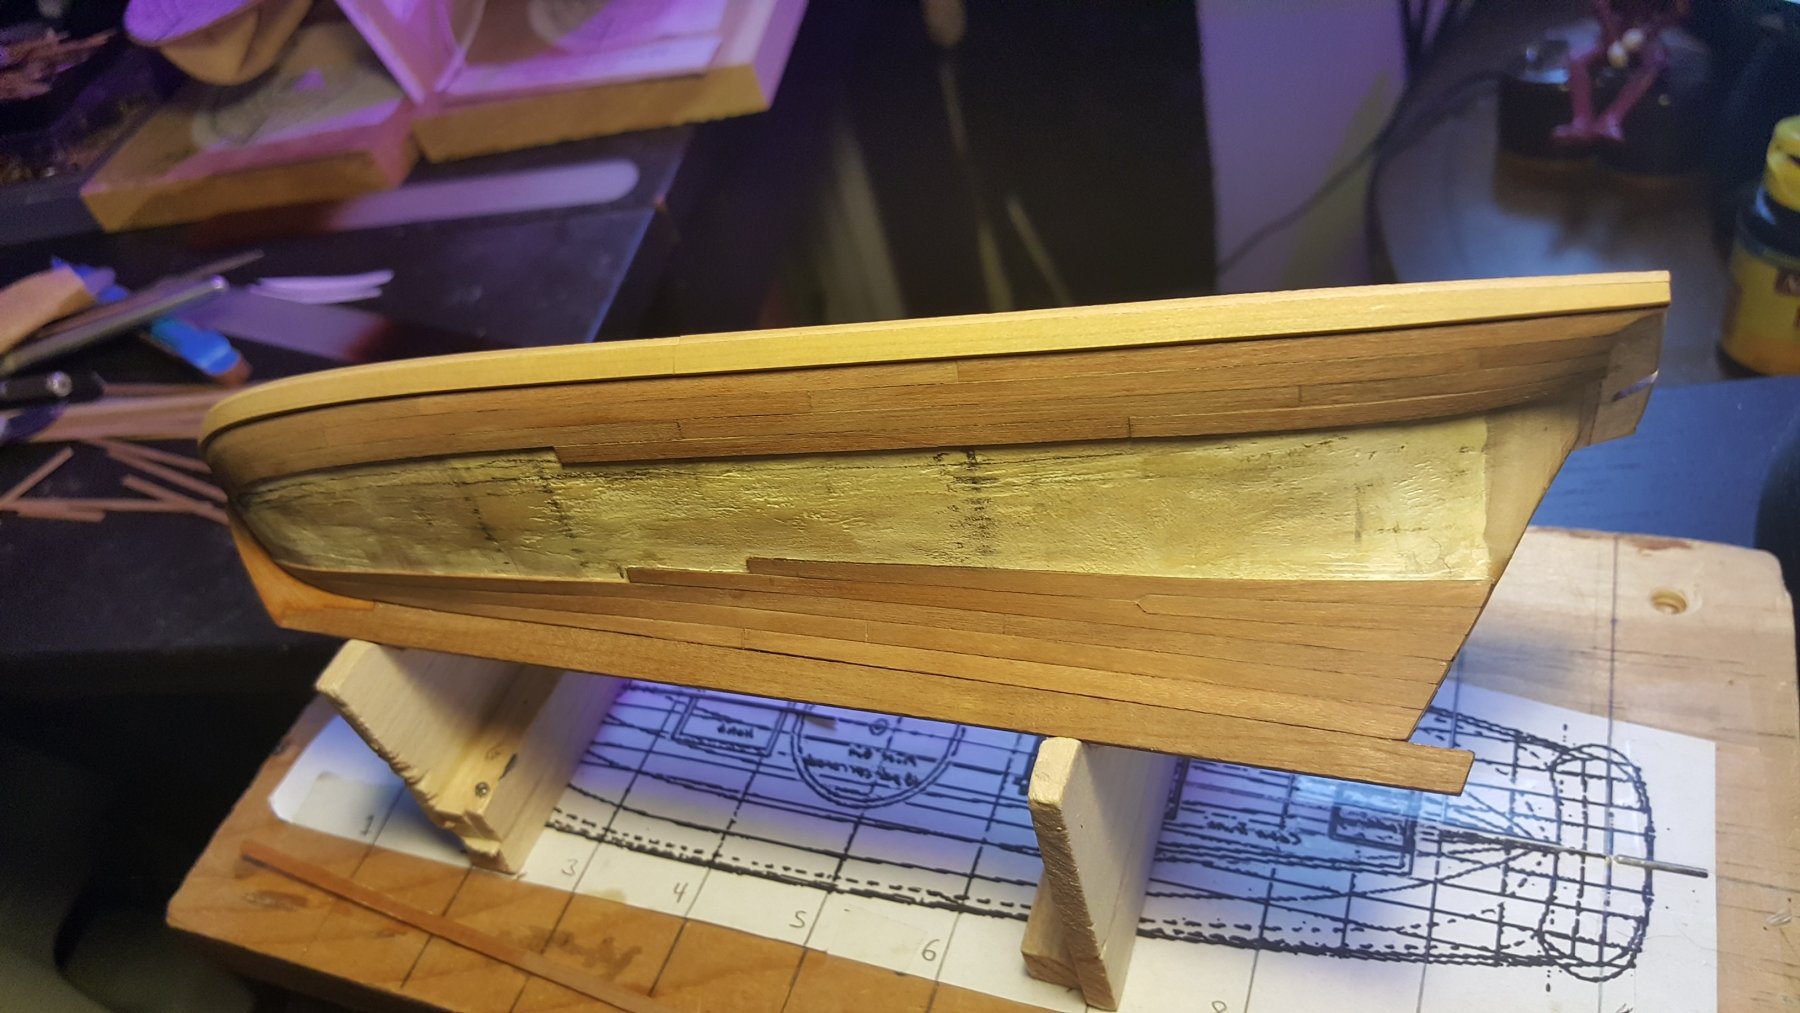
Hi all. So here you see the next plank below the wale is done and the wood strip was cut into 3 pieces each about 3 and 1/16" or about 17' real life. The front piece was spiled from a wider plank to get some shape to the hard curve the back was tapered slightly to make room for the transom. From this point itll just be a matter of the planks meeting in the middle. The stern definitely needs steelers/drop planks. The front will need more tapered spiled planks. I may modify the shape of the existing planks a bit depending on how the next strips naturally bend. The wale ledge to the planking material might be ever so slightly steep but I wanted it very pronounced since many issues I've seen with this model is that the wale is not raised enough and blends in. Since this whole area will be painted black that contrast should be nice and pronounced.

- 362 replies
-
- 5
-
-
- active
- revenue cutter
- (and 1 more)
-
Hi. In this instance I am treating the wale as one piece. In reality it probably would have been more though in my mind I was picturing a ledge and once the holly strip is laid over it, any indication will be covered up. I will stagger the holly piece and the decking but good observation!
- 362 replies
-
- 3
-
-
- active
- revenue cutter
- (and 1 more)
-
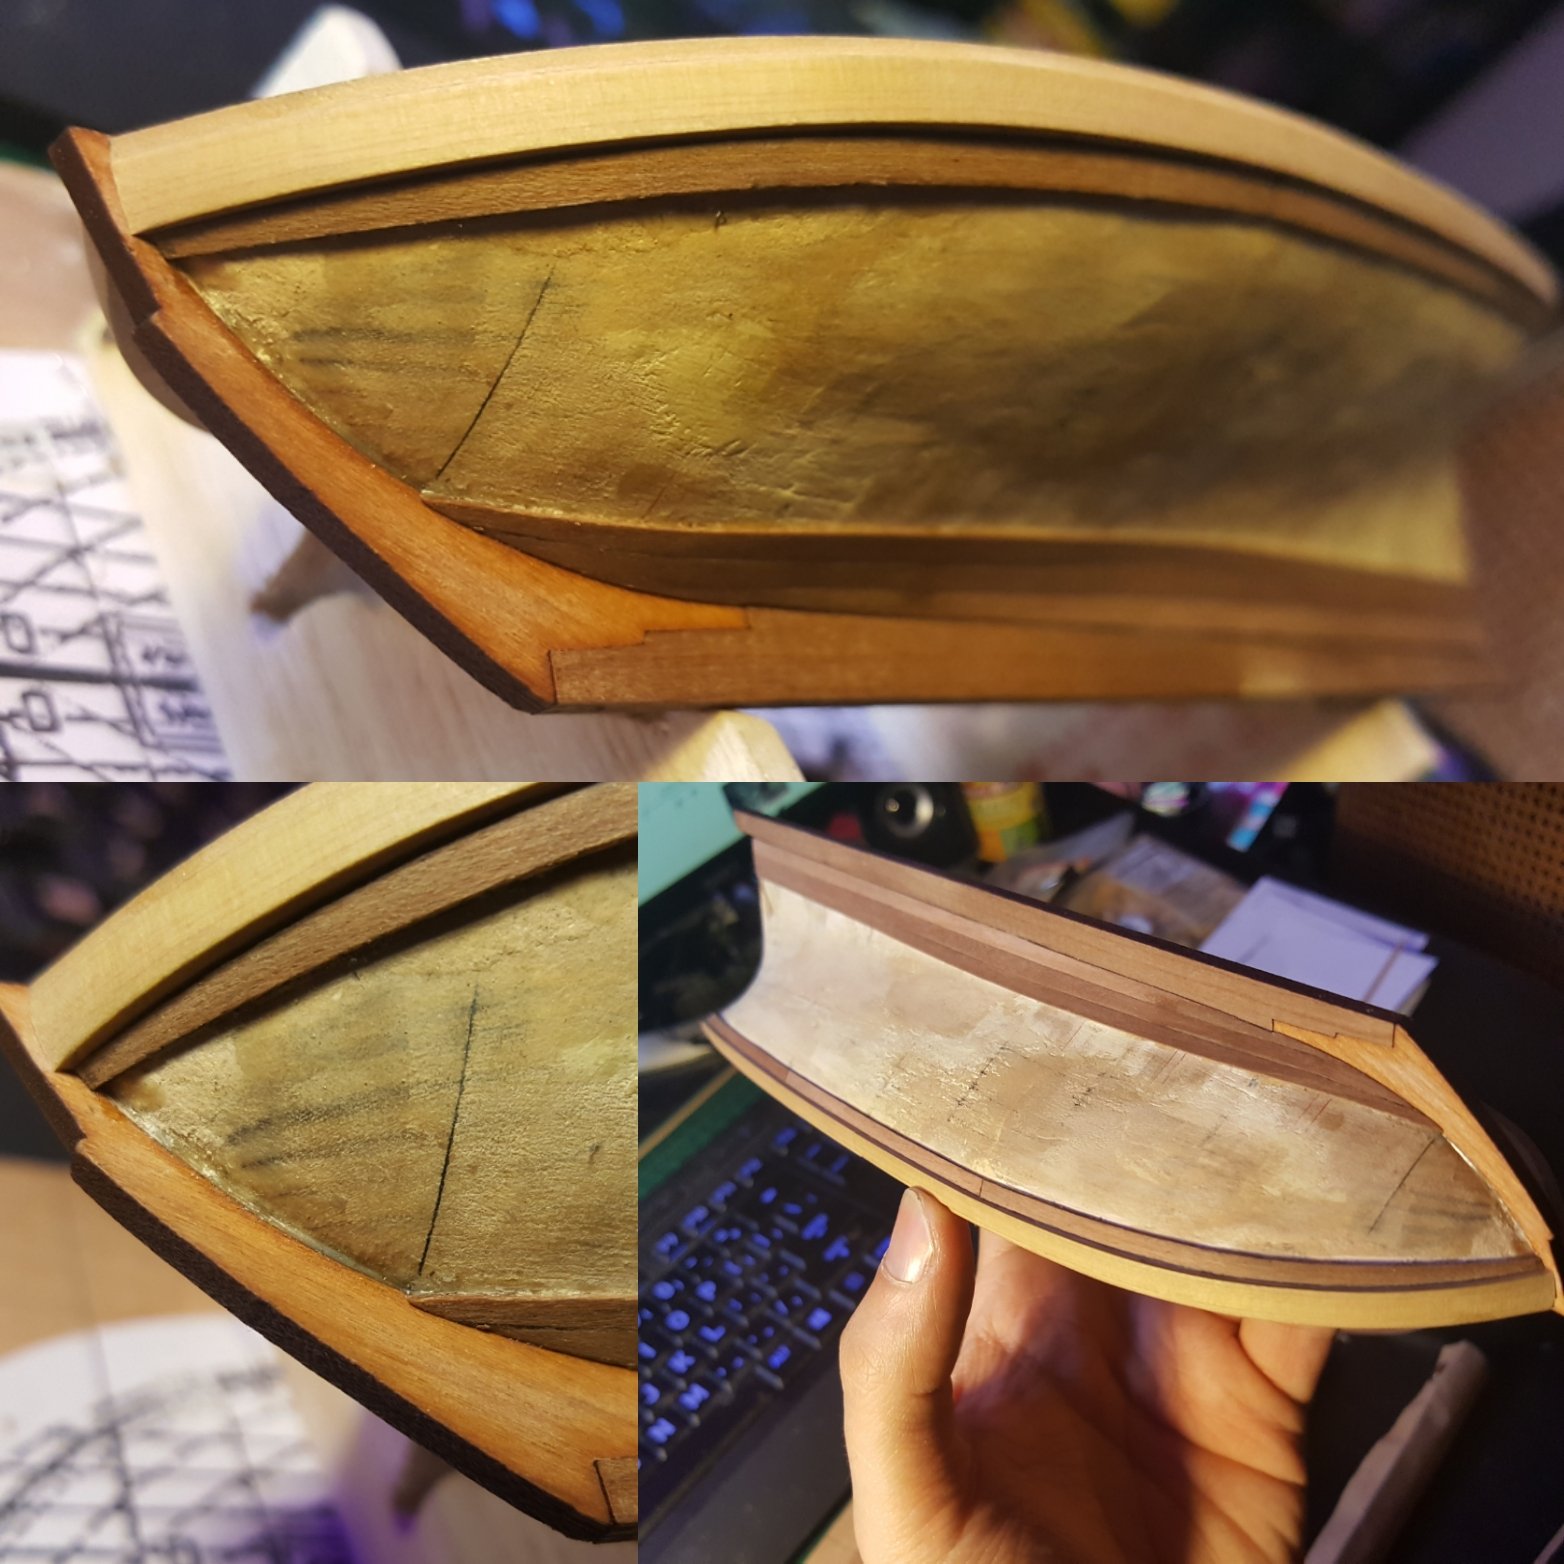
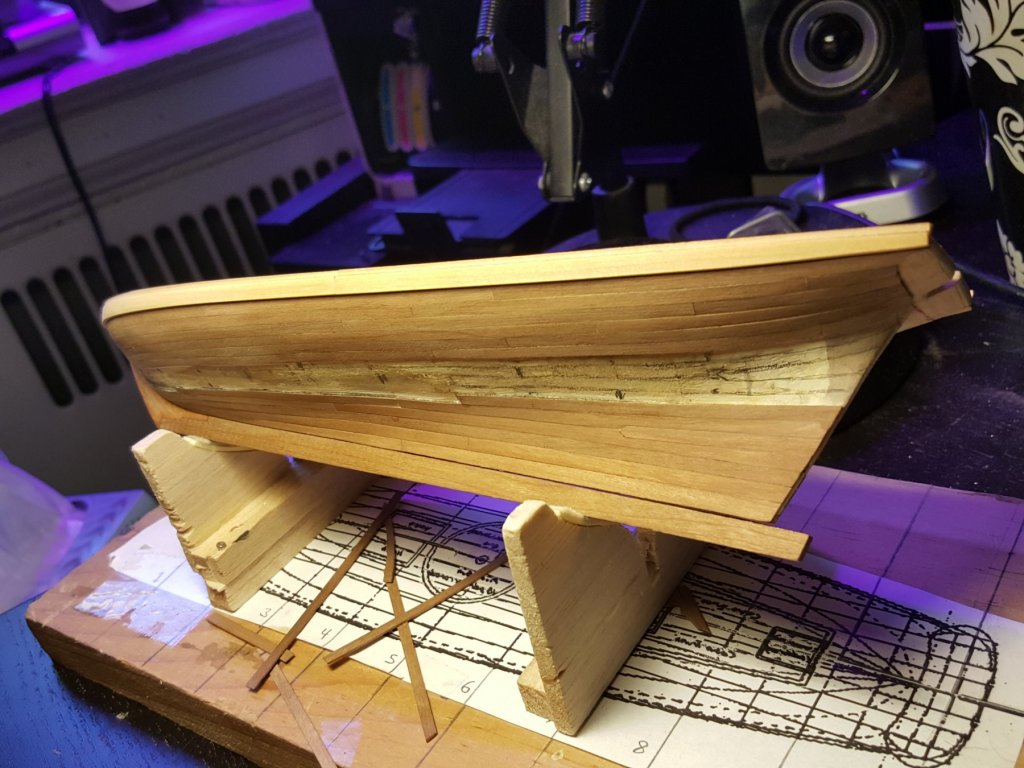
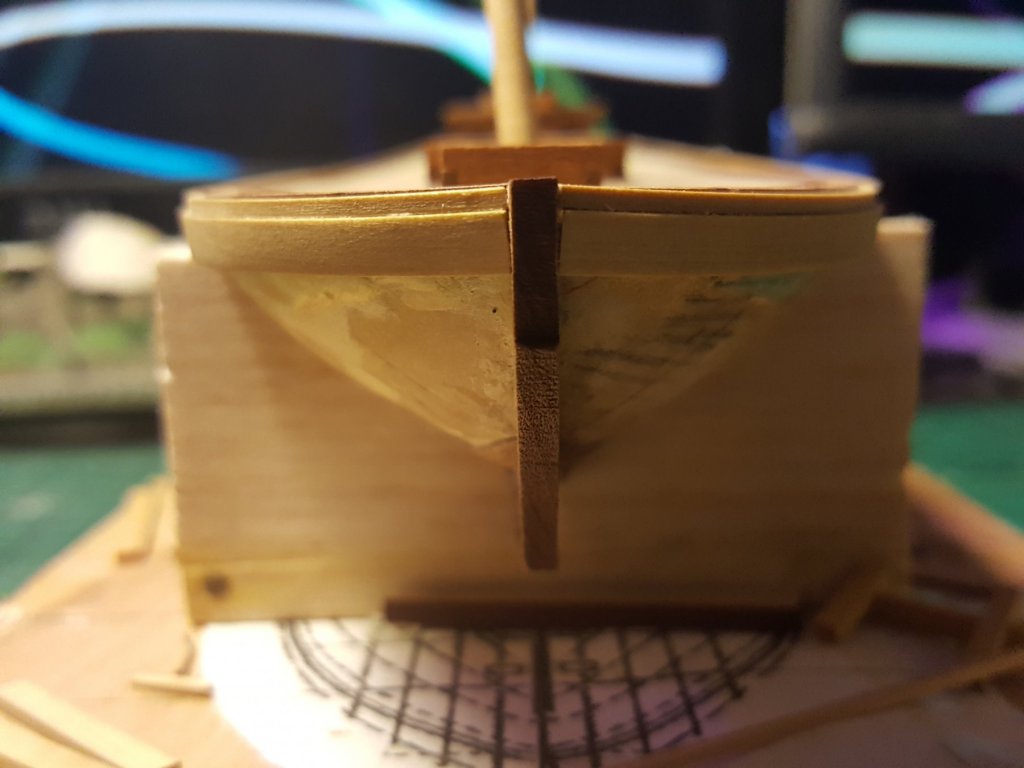
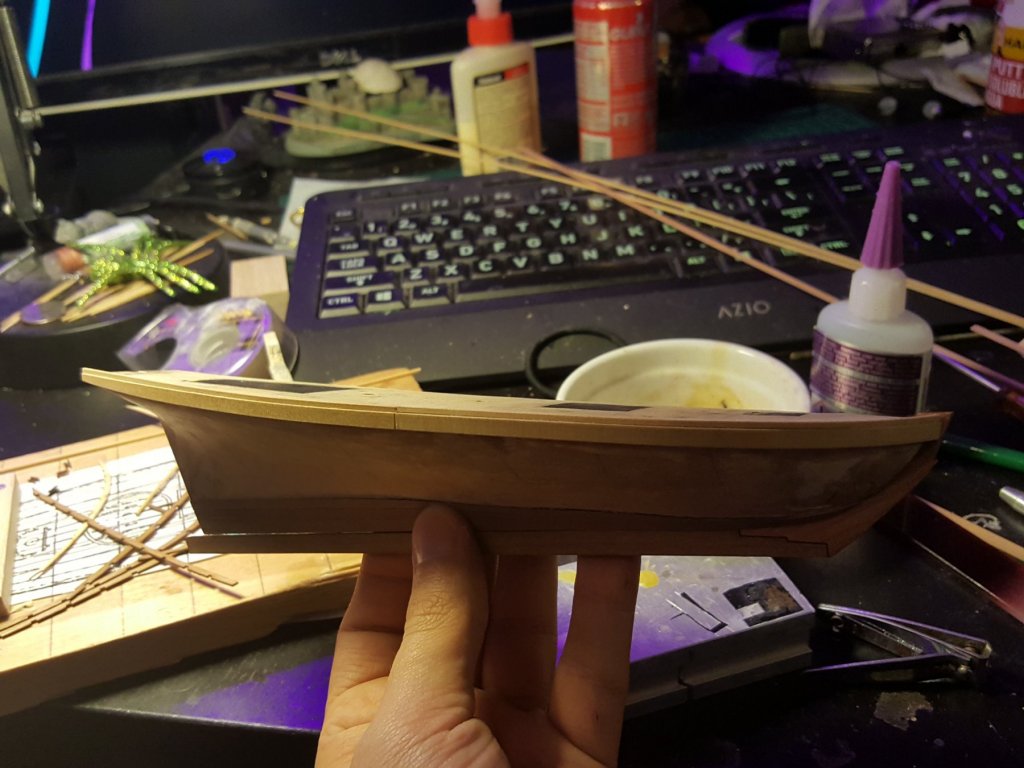
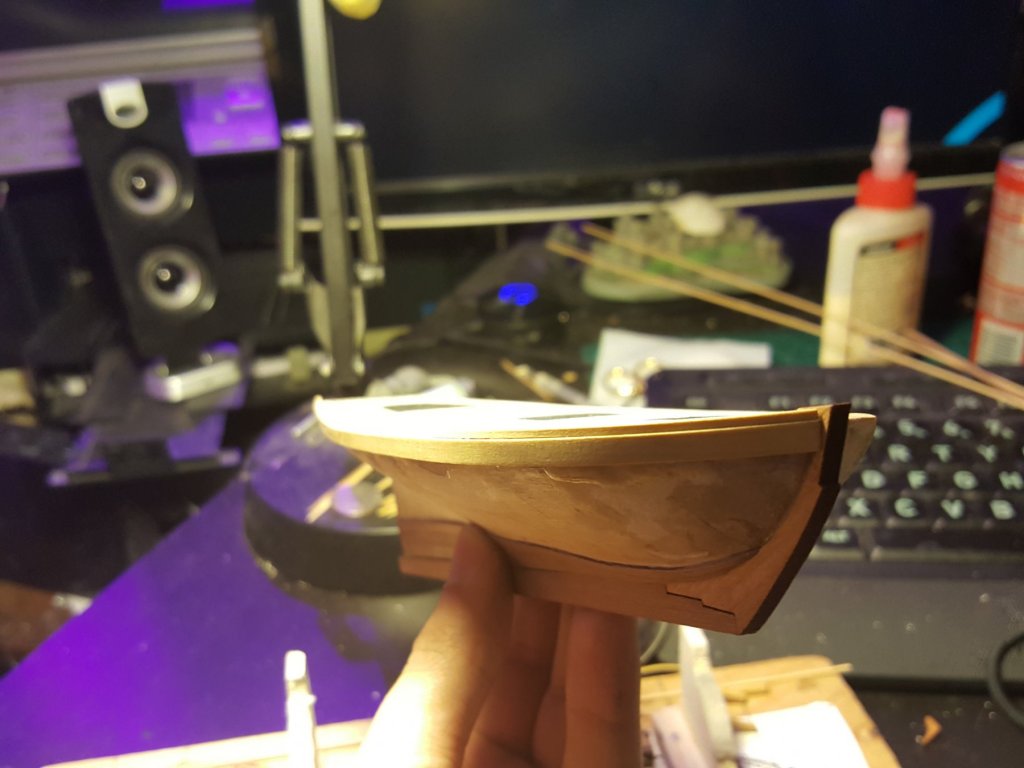
Good morning all. So thought I should give an update for the week. I finally attached the wale and true keel. This was quite a challenge as the wale was a 1/16" by 5/32" strip of boxwood so learning how to curve the wood on this very sleek hull shape was a challenge. I opted not to spile since I wanted to maintain the sharp shape of the strip and also its such a small model (the front half of the wale is 3"). Anyways it worked with a bit of assistance as you can see in the pics. So what you see below at the bow is the keel minus the beak. That piece will be added later. The keel and wale will be painted black so thought it neat to leave the beak tip unpainted to add contrast. The reason why I chose boxwood for the wale over cherry is so it doesn't splinter but also thought that even if painted there may be a slightly different grain texture to make the wale stand out. The back of the wale curves slightly upward and gets thinner at the stern. Also the wale is in 4 parts. Front and back halves which join at the middle but also an upper strip which is 3/64 by 3/64" boxwood. This made a little ledge at the top of the wale where I can place the deadeye channels and also a holly strip to add a white molding. The above railings and bulwarks I will add after finishing the planking to avoid banging them around and getting damaged. The bow image where the two wales meet shows a bit of spacing where the wale meets the keel. Did the best I could but will use some wood putty to fix that since it will be painted anyway.


- 362 replies
-
- 9
-
-
- active
- revenue cutter
- (and 1 more)
-
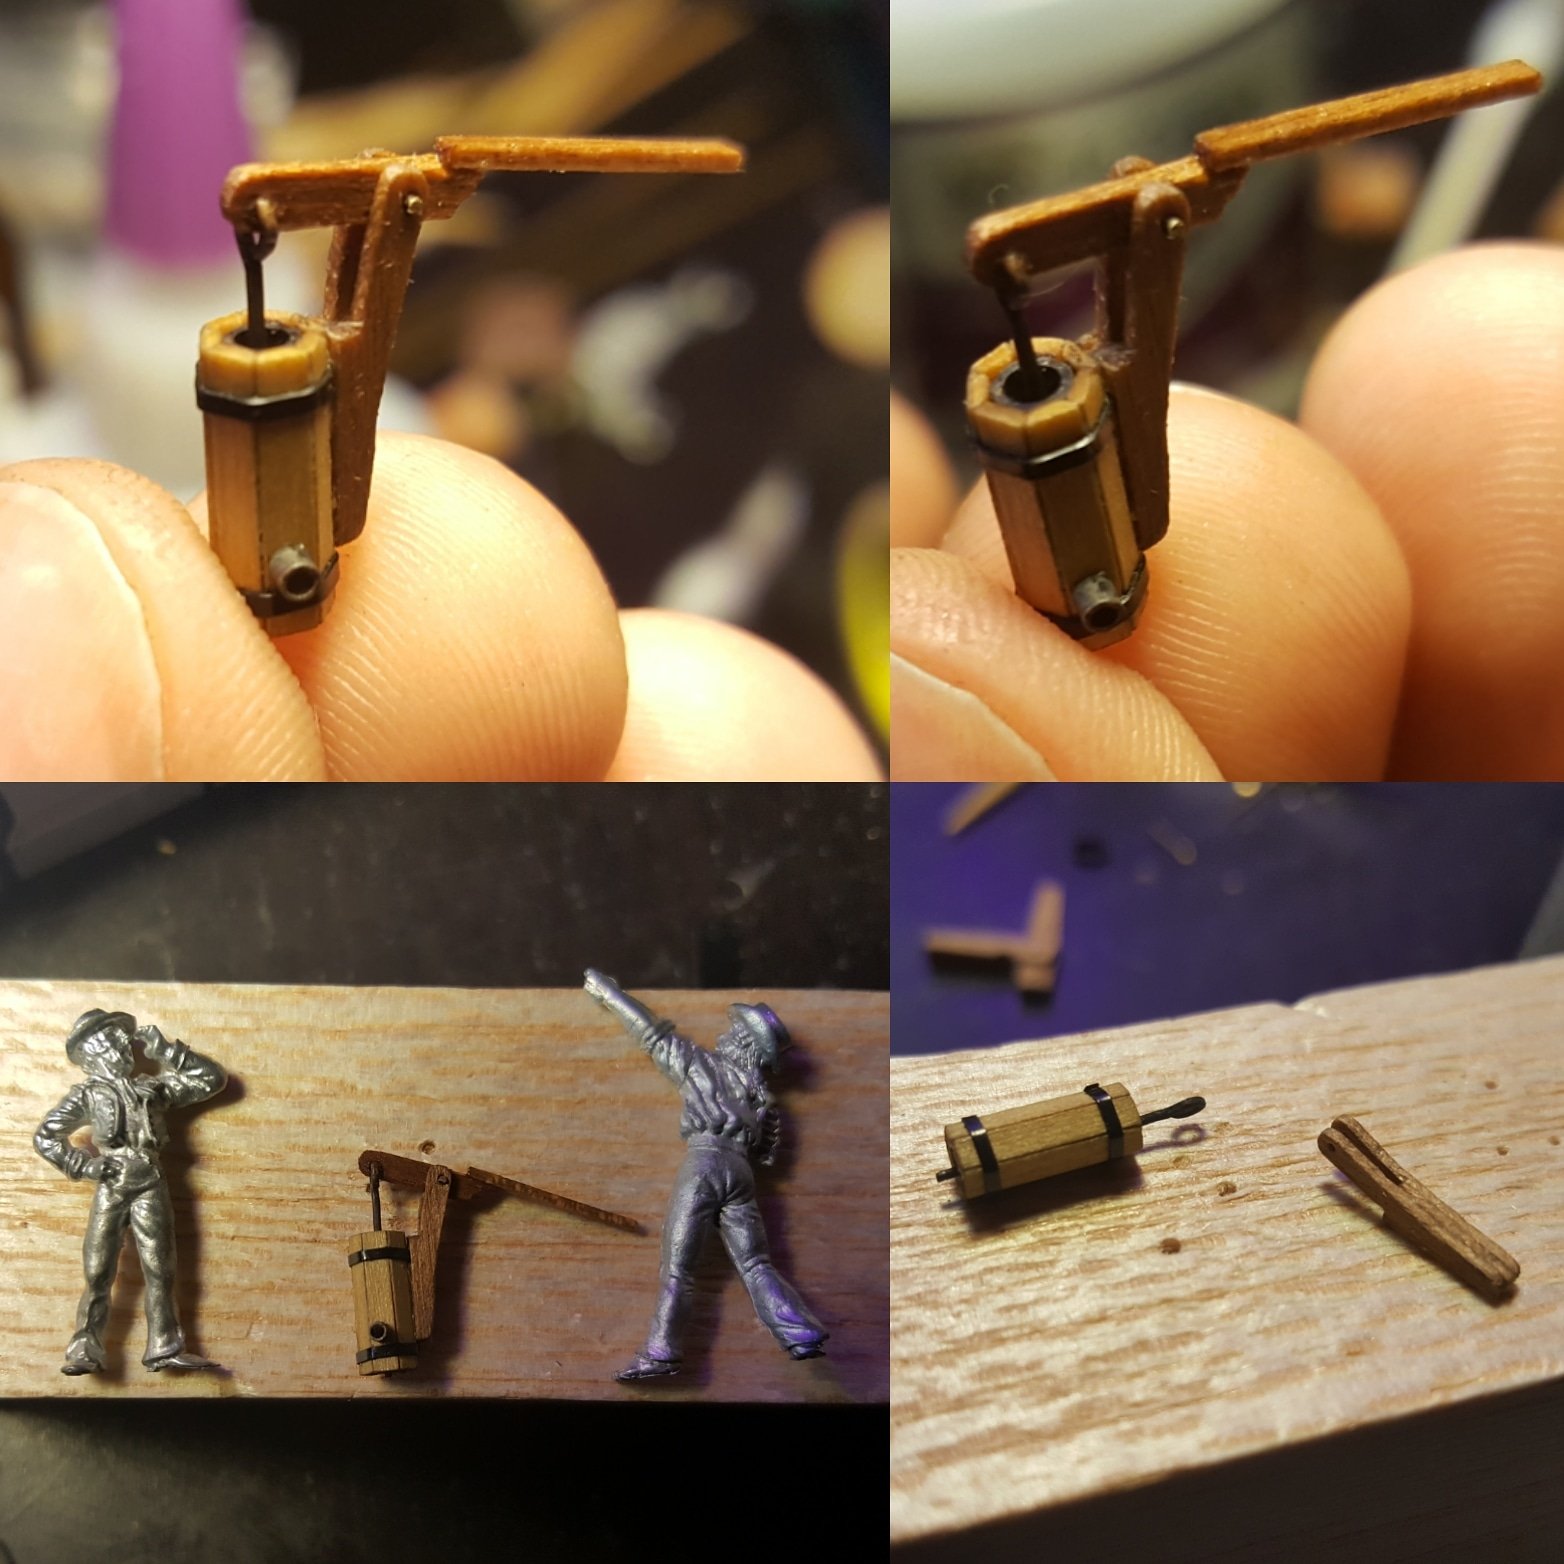
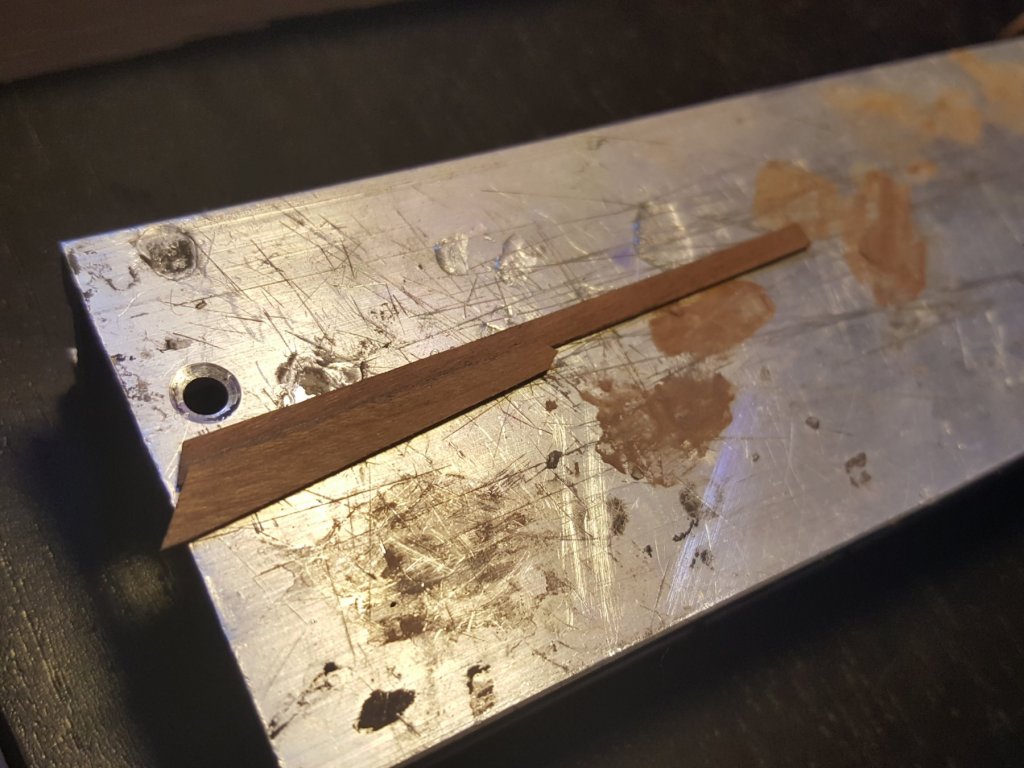
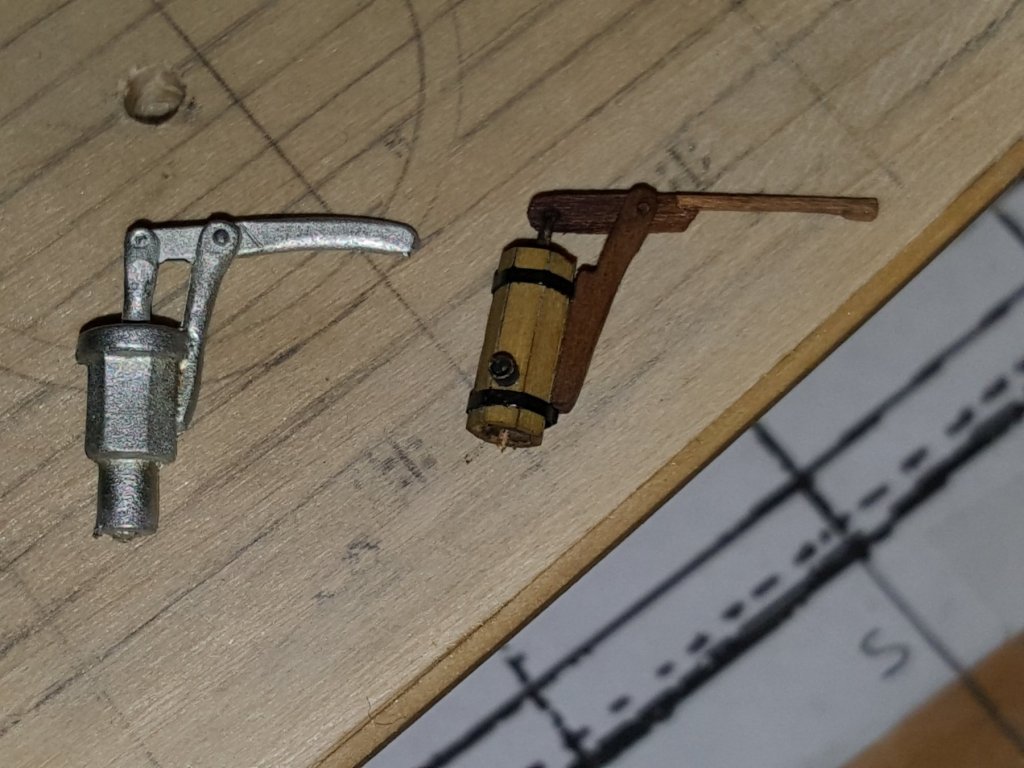
Believe it or not I've actually recarved the handle piece to something more curved as so. I didn't care for the thin handle this looks more like the diecast handle does and probably more accurate (length still the same though). Haven't attached it yet so didn't post a picture here it is overlayed on top of the old one.

- 362 replies
-
- 4
-
-
- active
- revenue cutter
- (and 1 more)
-
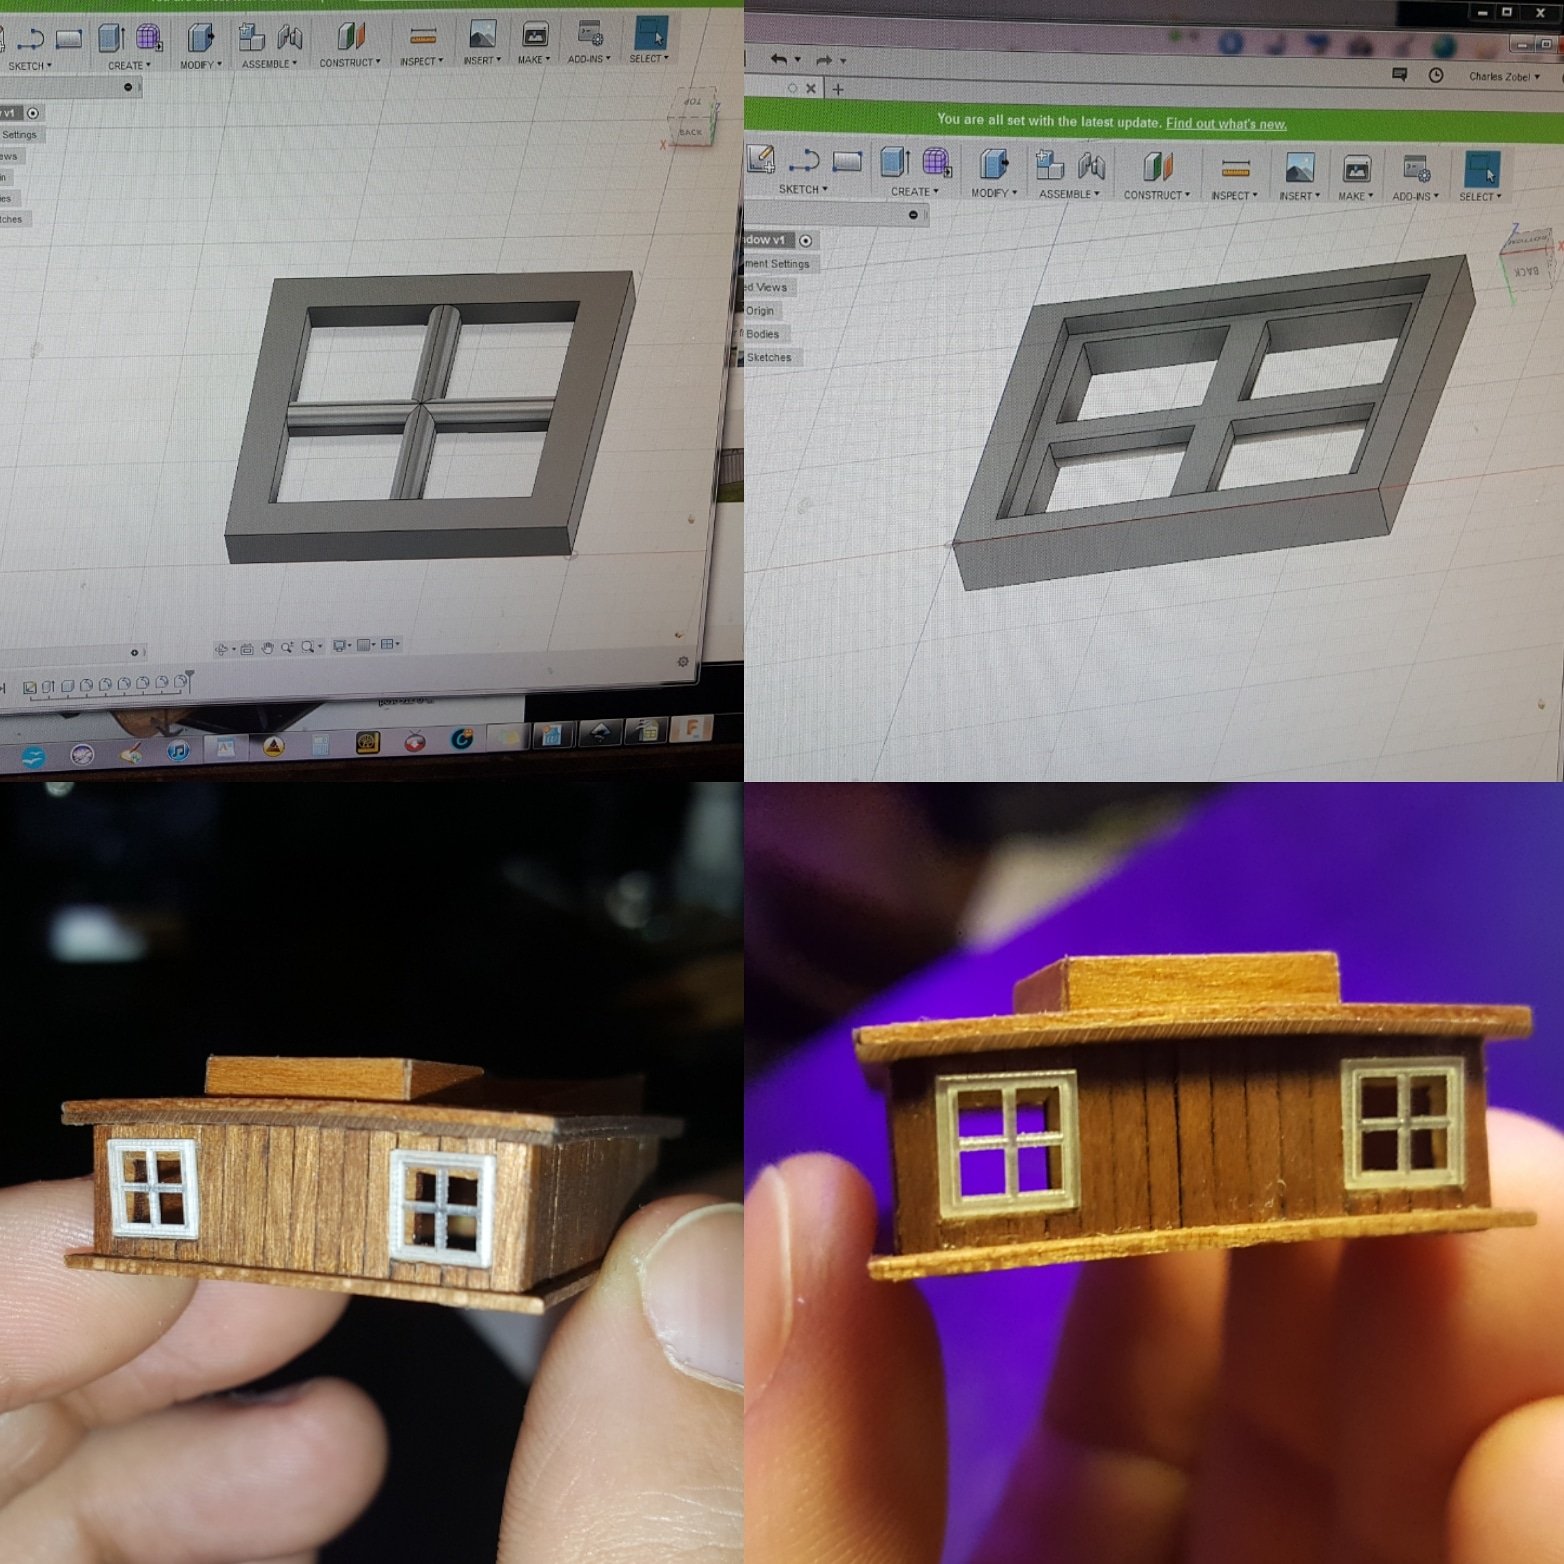
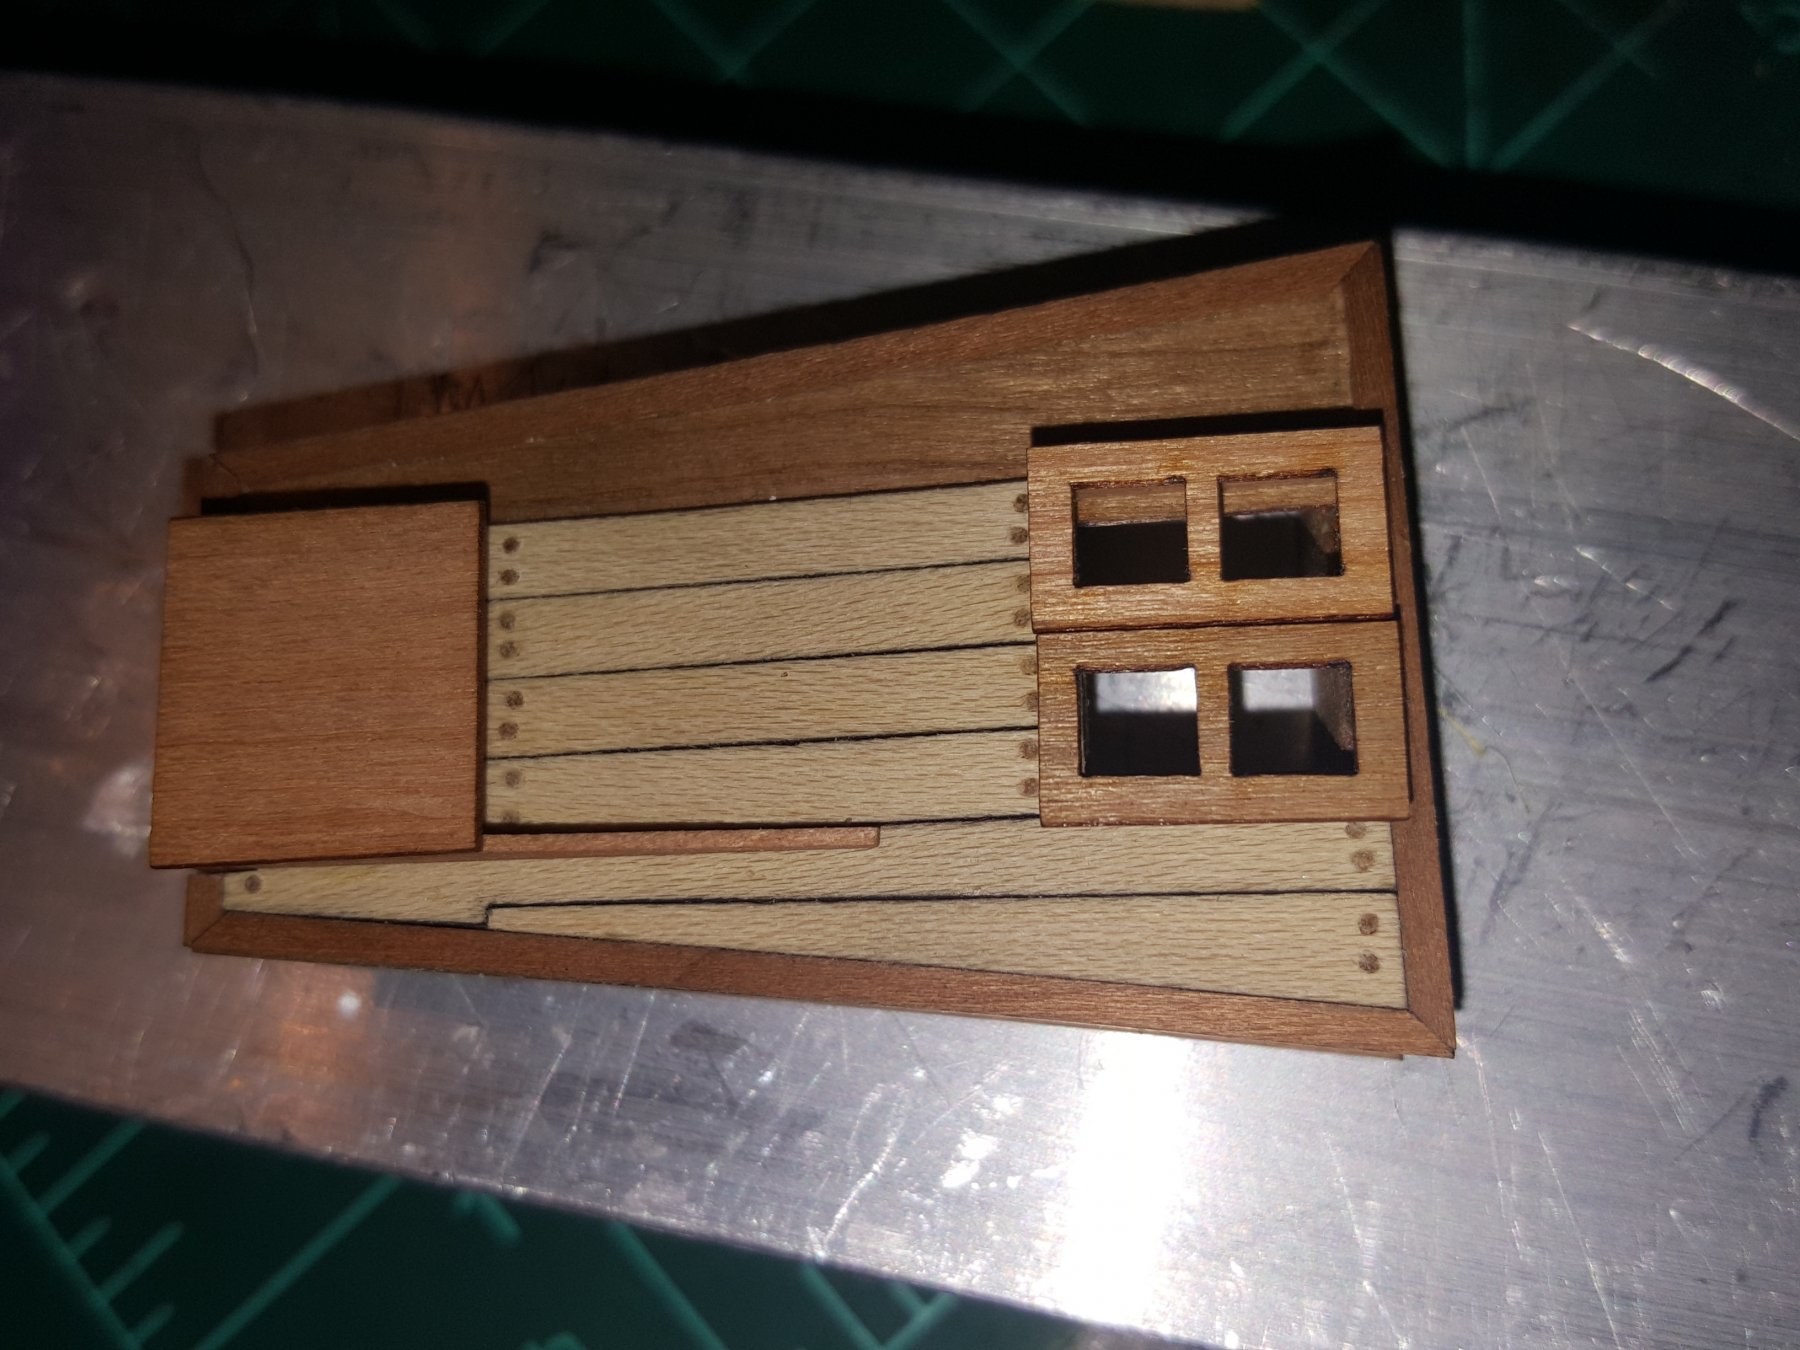
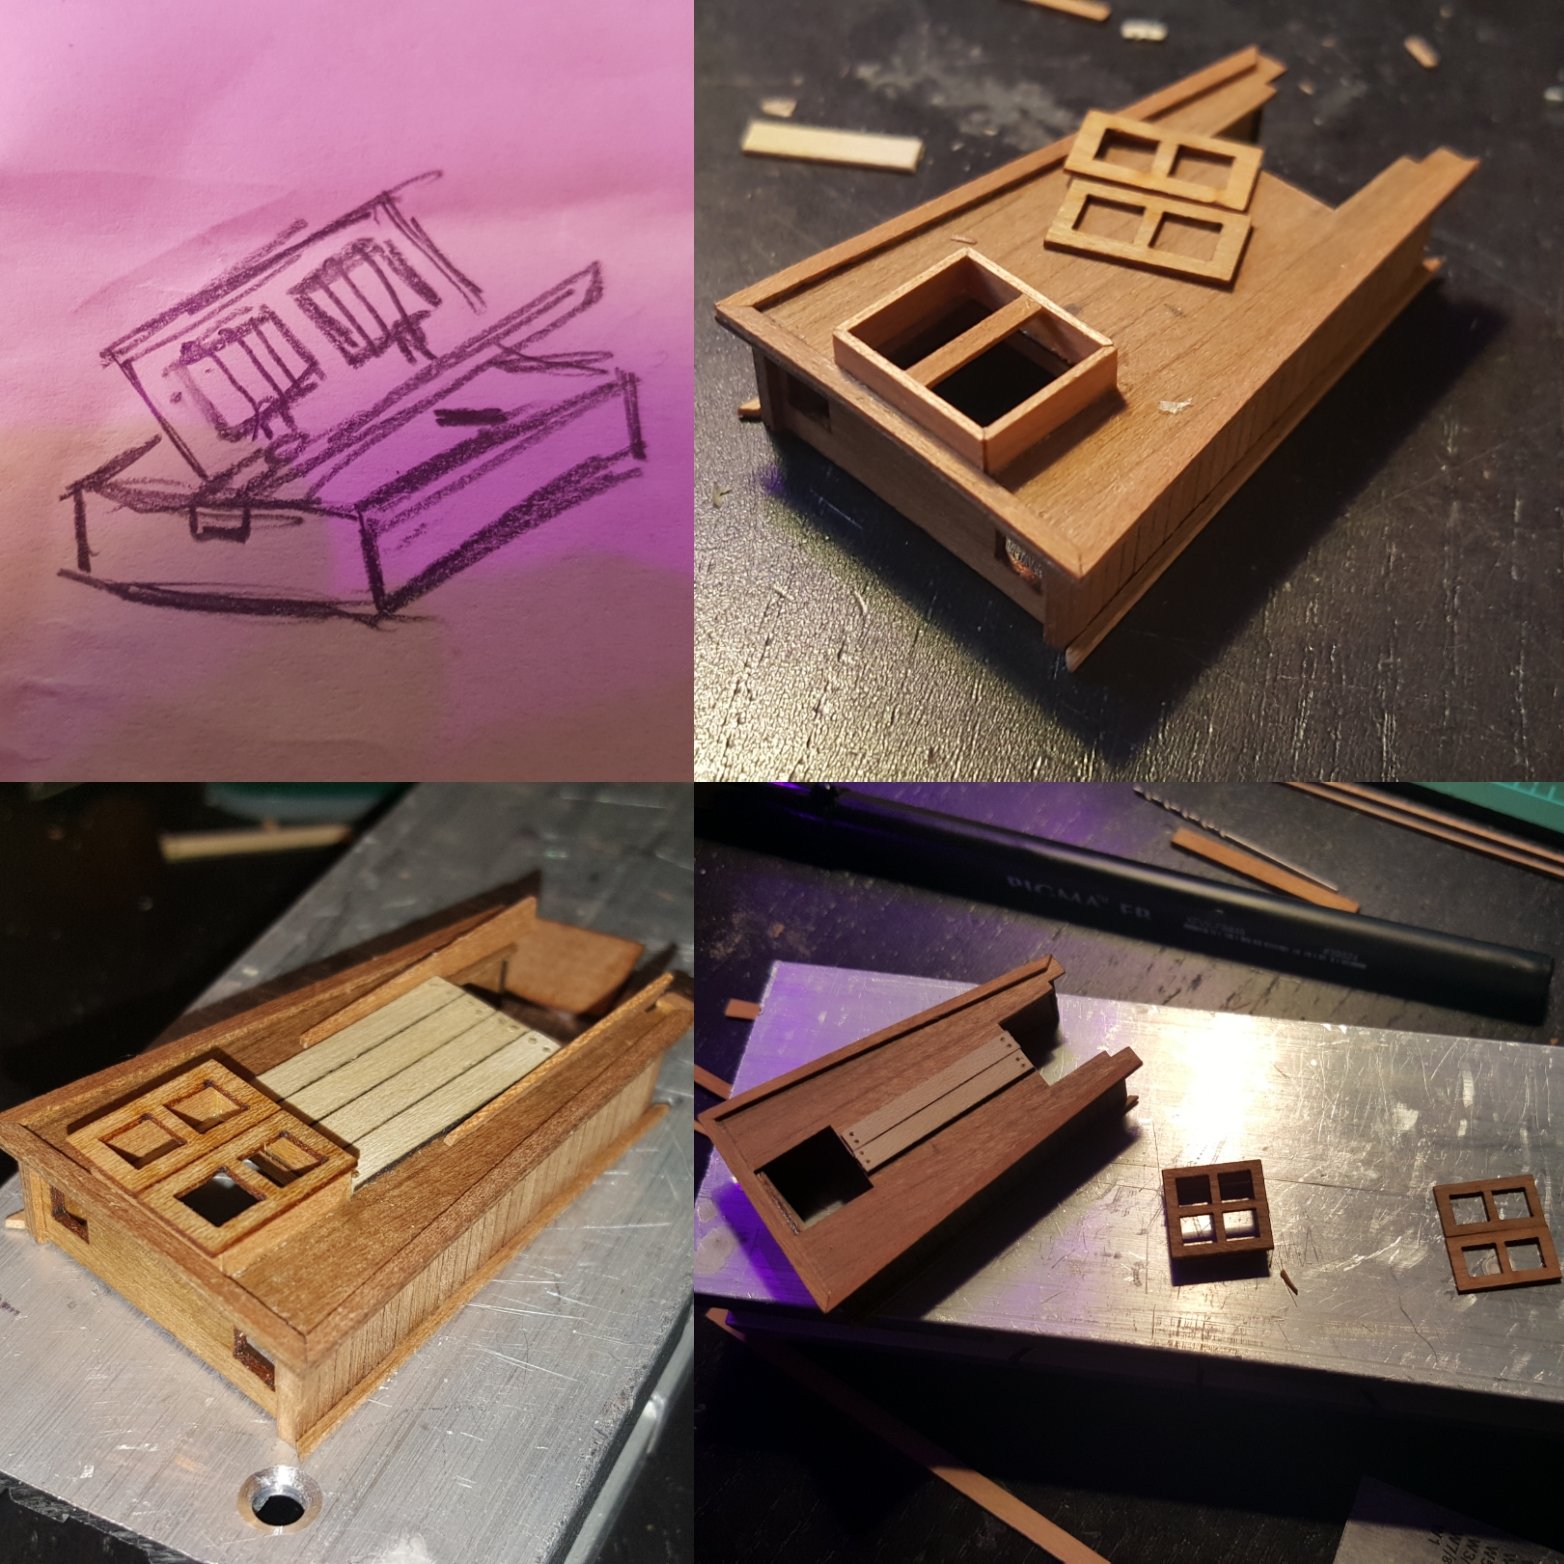
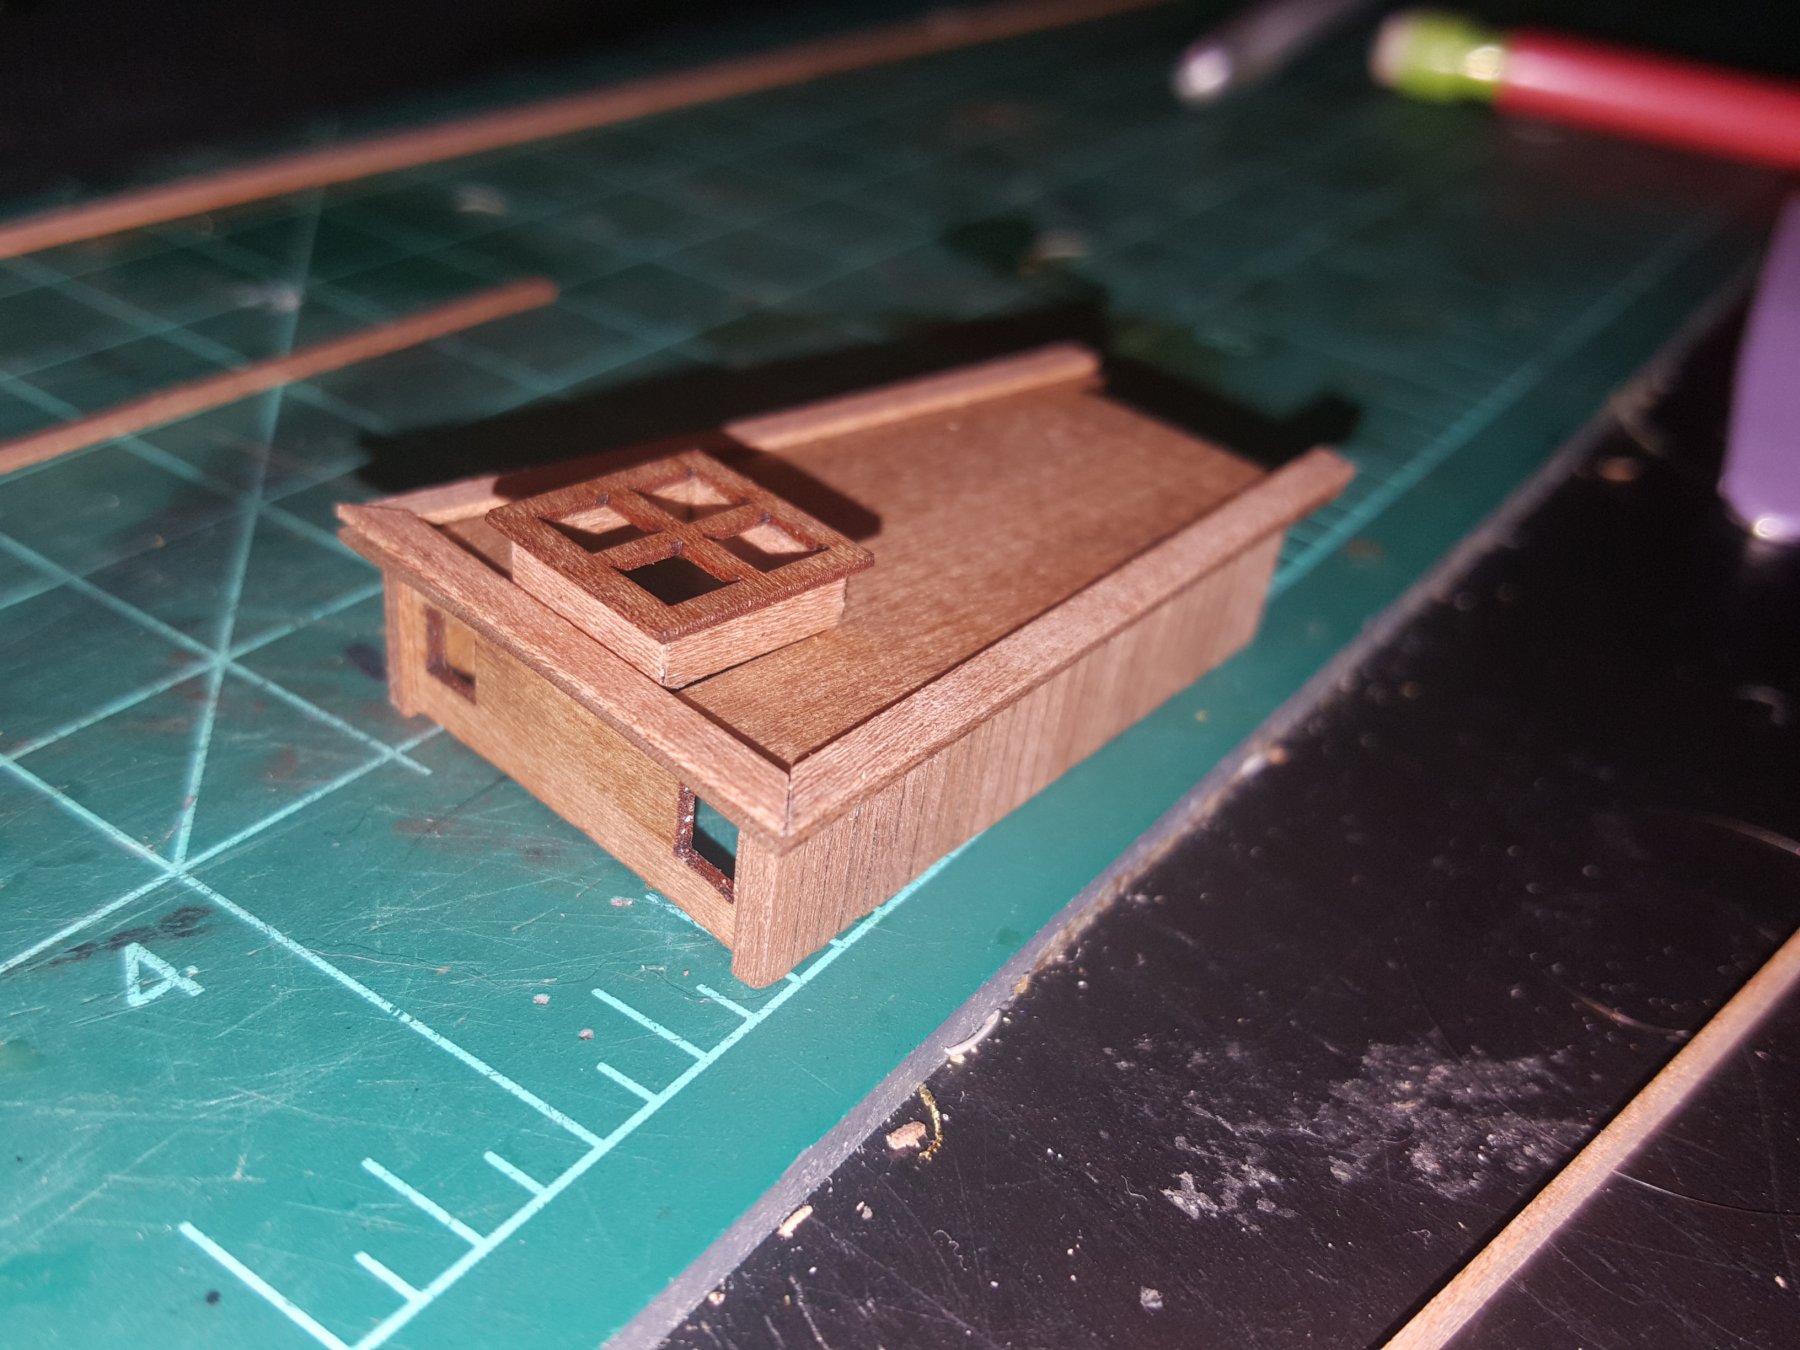
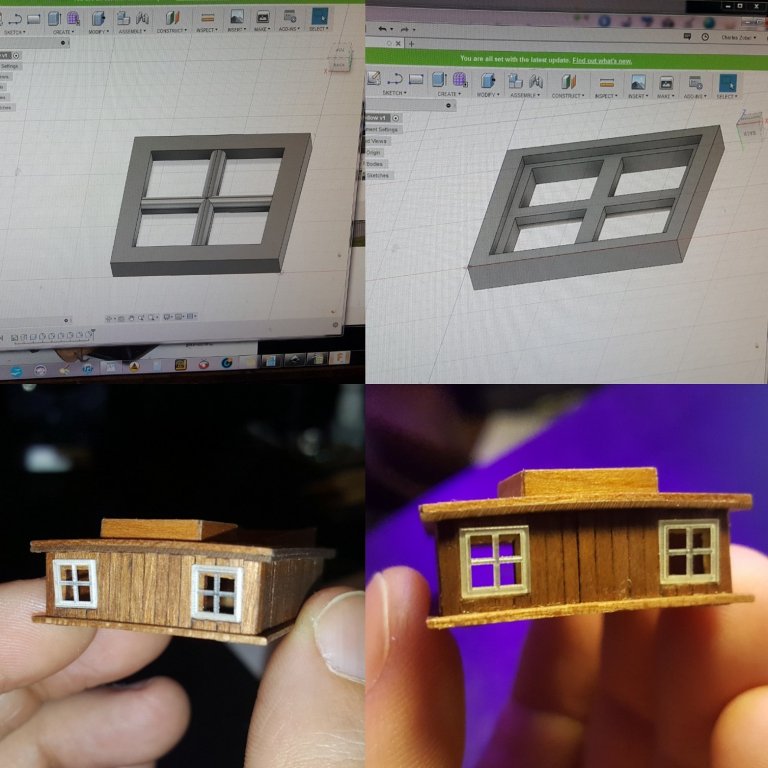
Using a 3D printed program I made little teeny windows for the deckhouse. The left upper image you can see the inner frame is beveled/rounded. The upper right image you can see a ledge where I can place a small glass or plastic pane inside. I also finished planking the front of the house.
- 362 replies
-
- 6
-
-
- active
- revenue cutter
- (and 1 more)
-
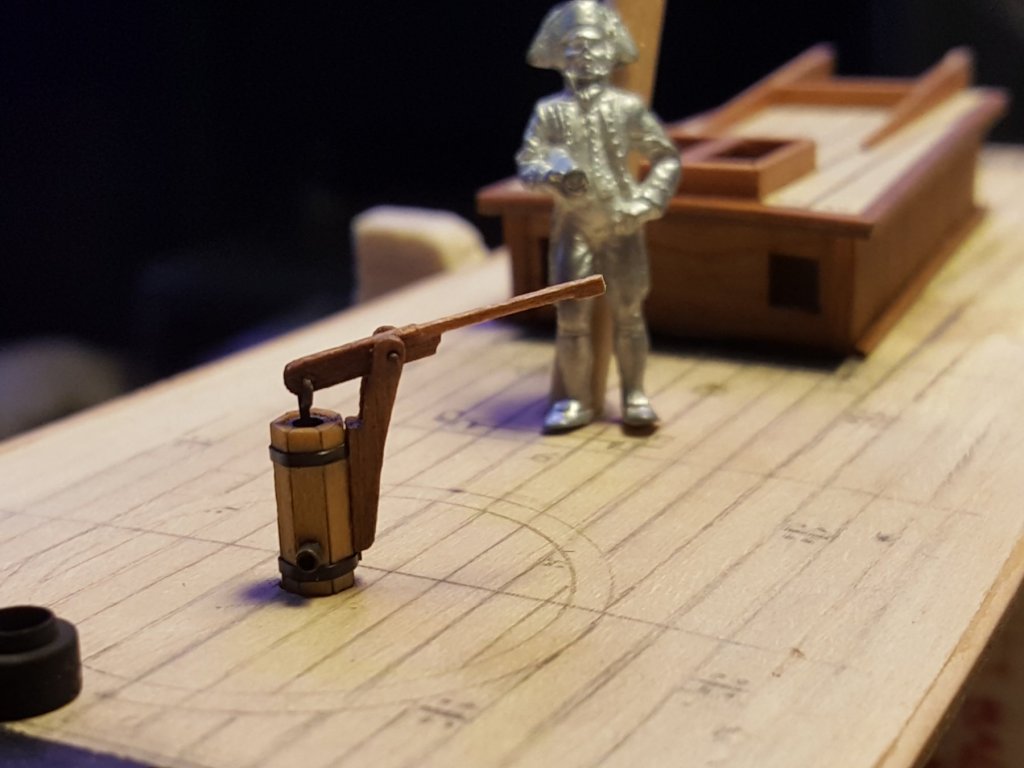
That's good to know. I've studied the cheerful pump plan and basically made a variation from a few that I've seen (hms Badger, AL's Dallas and the pump provided for Sultana). Also I re-measured and realized made a mistake the pump handle is 18mm not 12 which is about 3.75' (was late must've been high off tung oil fumes ), since Cheerful is a larger ship than this cutter I think the size is fair to avoid crowding on the tiny 16' wide deck. Oh also planning on smoothing out that pump at the handle... just a bit
- 362 replies
-
- 6
-
-
- active
- revenue cutter
- (and 1 more)
-
Eh I popped it off and shrunk it down a bit about 1/8" an inch. Now it looks right to my eye. I love this hobby in that you don't like how something looks you can just fix it. For me it was a practical space issue this is a very small ship so now it's 12 mm or 2.5 feet. (see correction it's actually 18mm/3.75')

- 362 replies
-
- 7
-
-
- active
- revenue cutter
- (and 1 more)
-
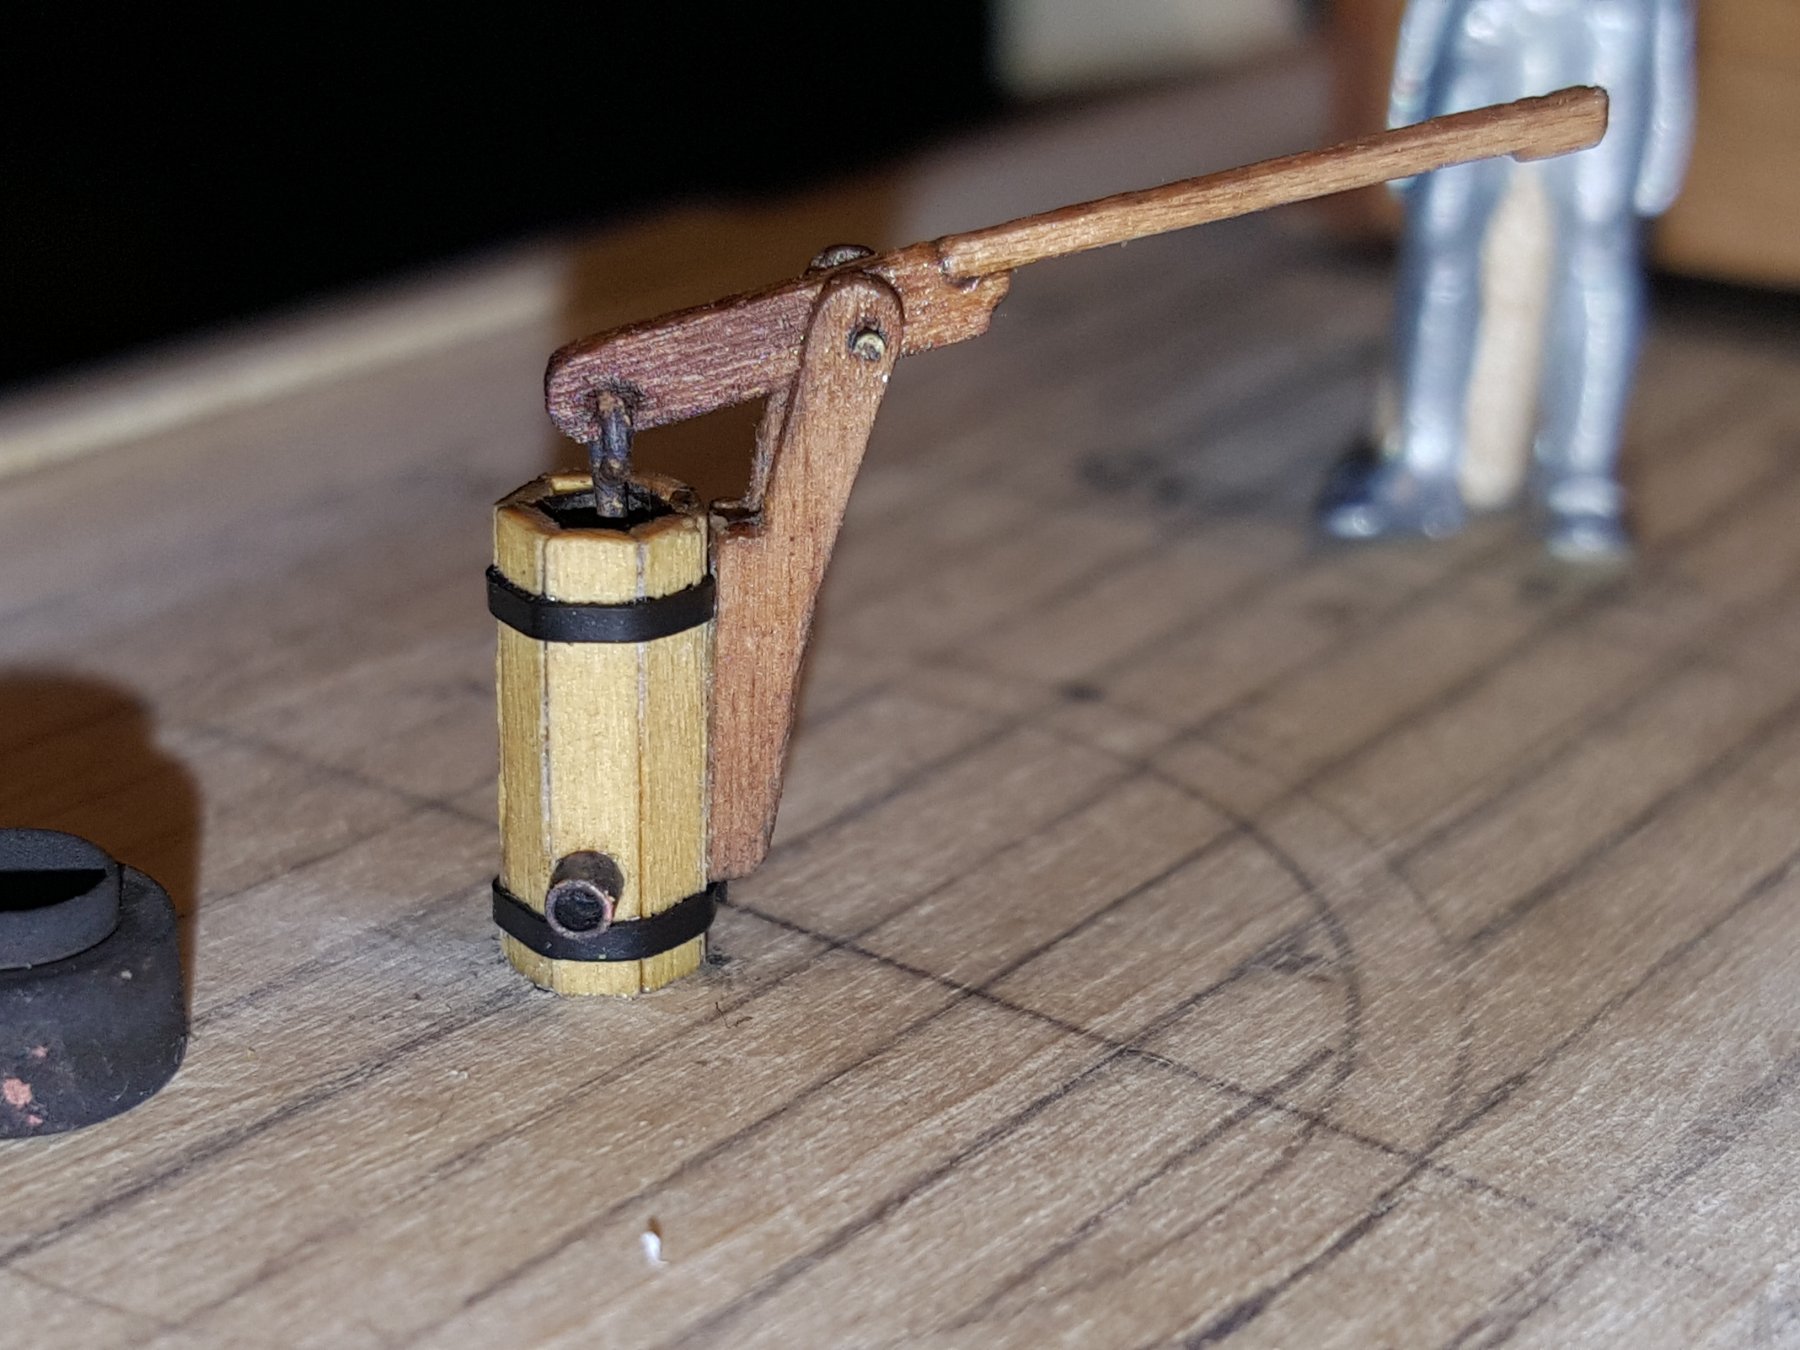
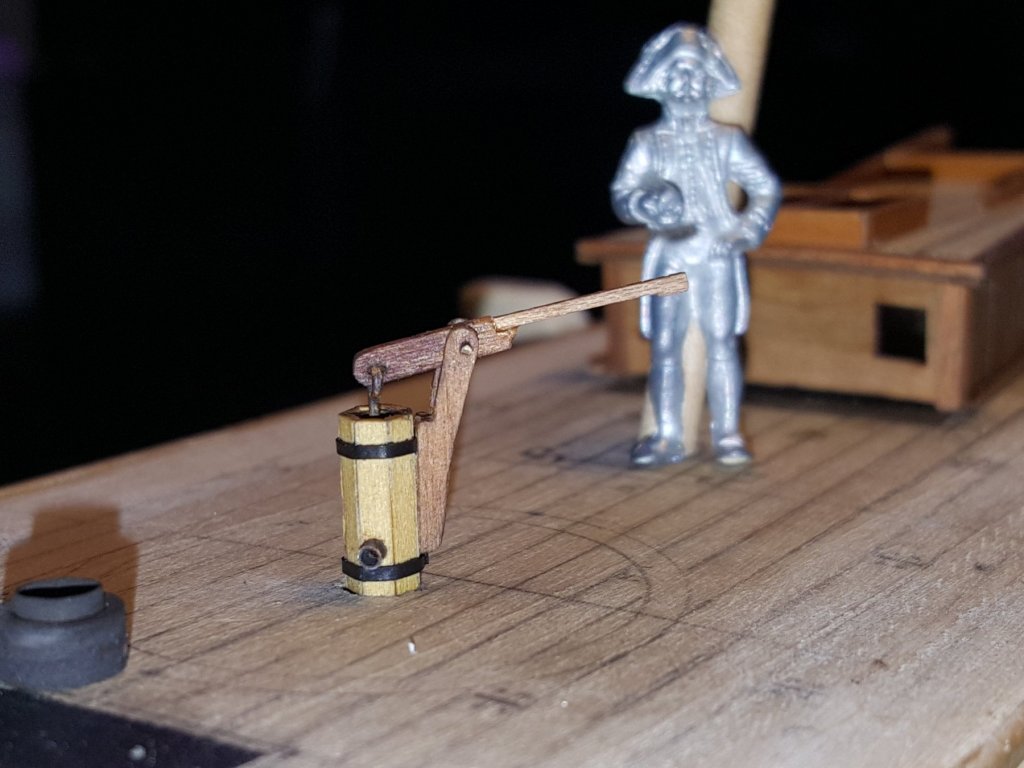
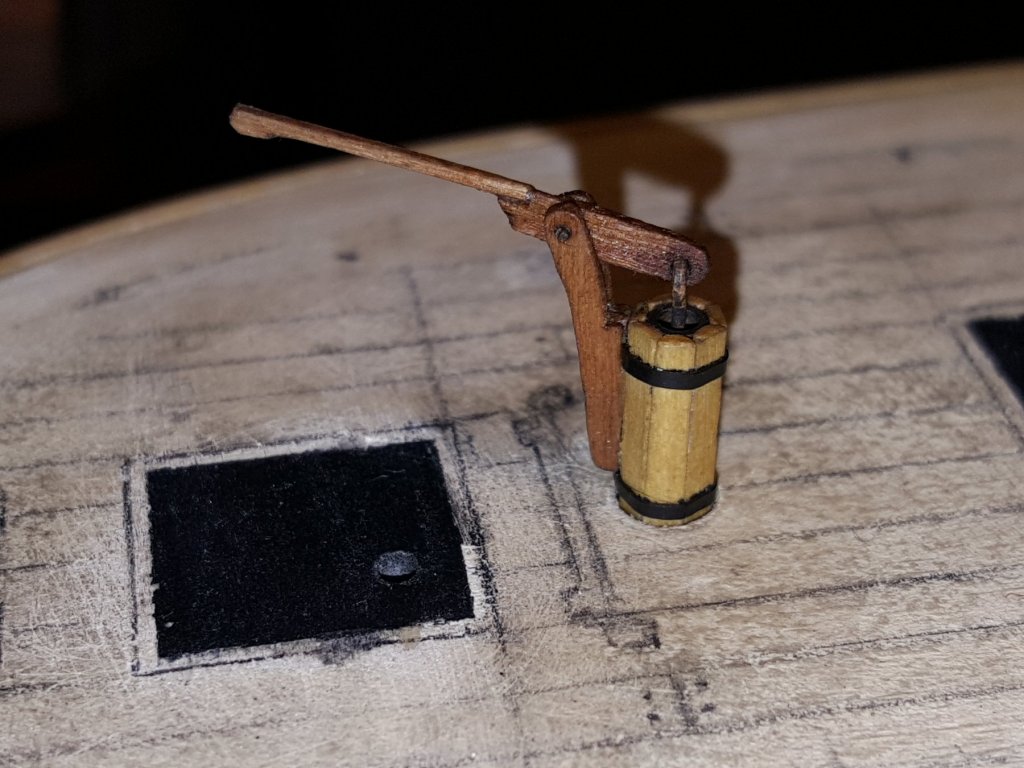
Handle update. Thoughts? I'm feeling it's too long. :/

- 362 replies
-
- 8
-
-
- active
- revenue cutter
- (and 1 more)
-
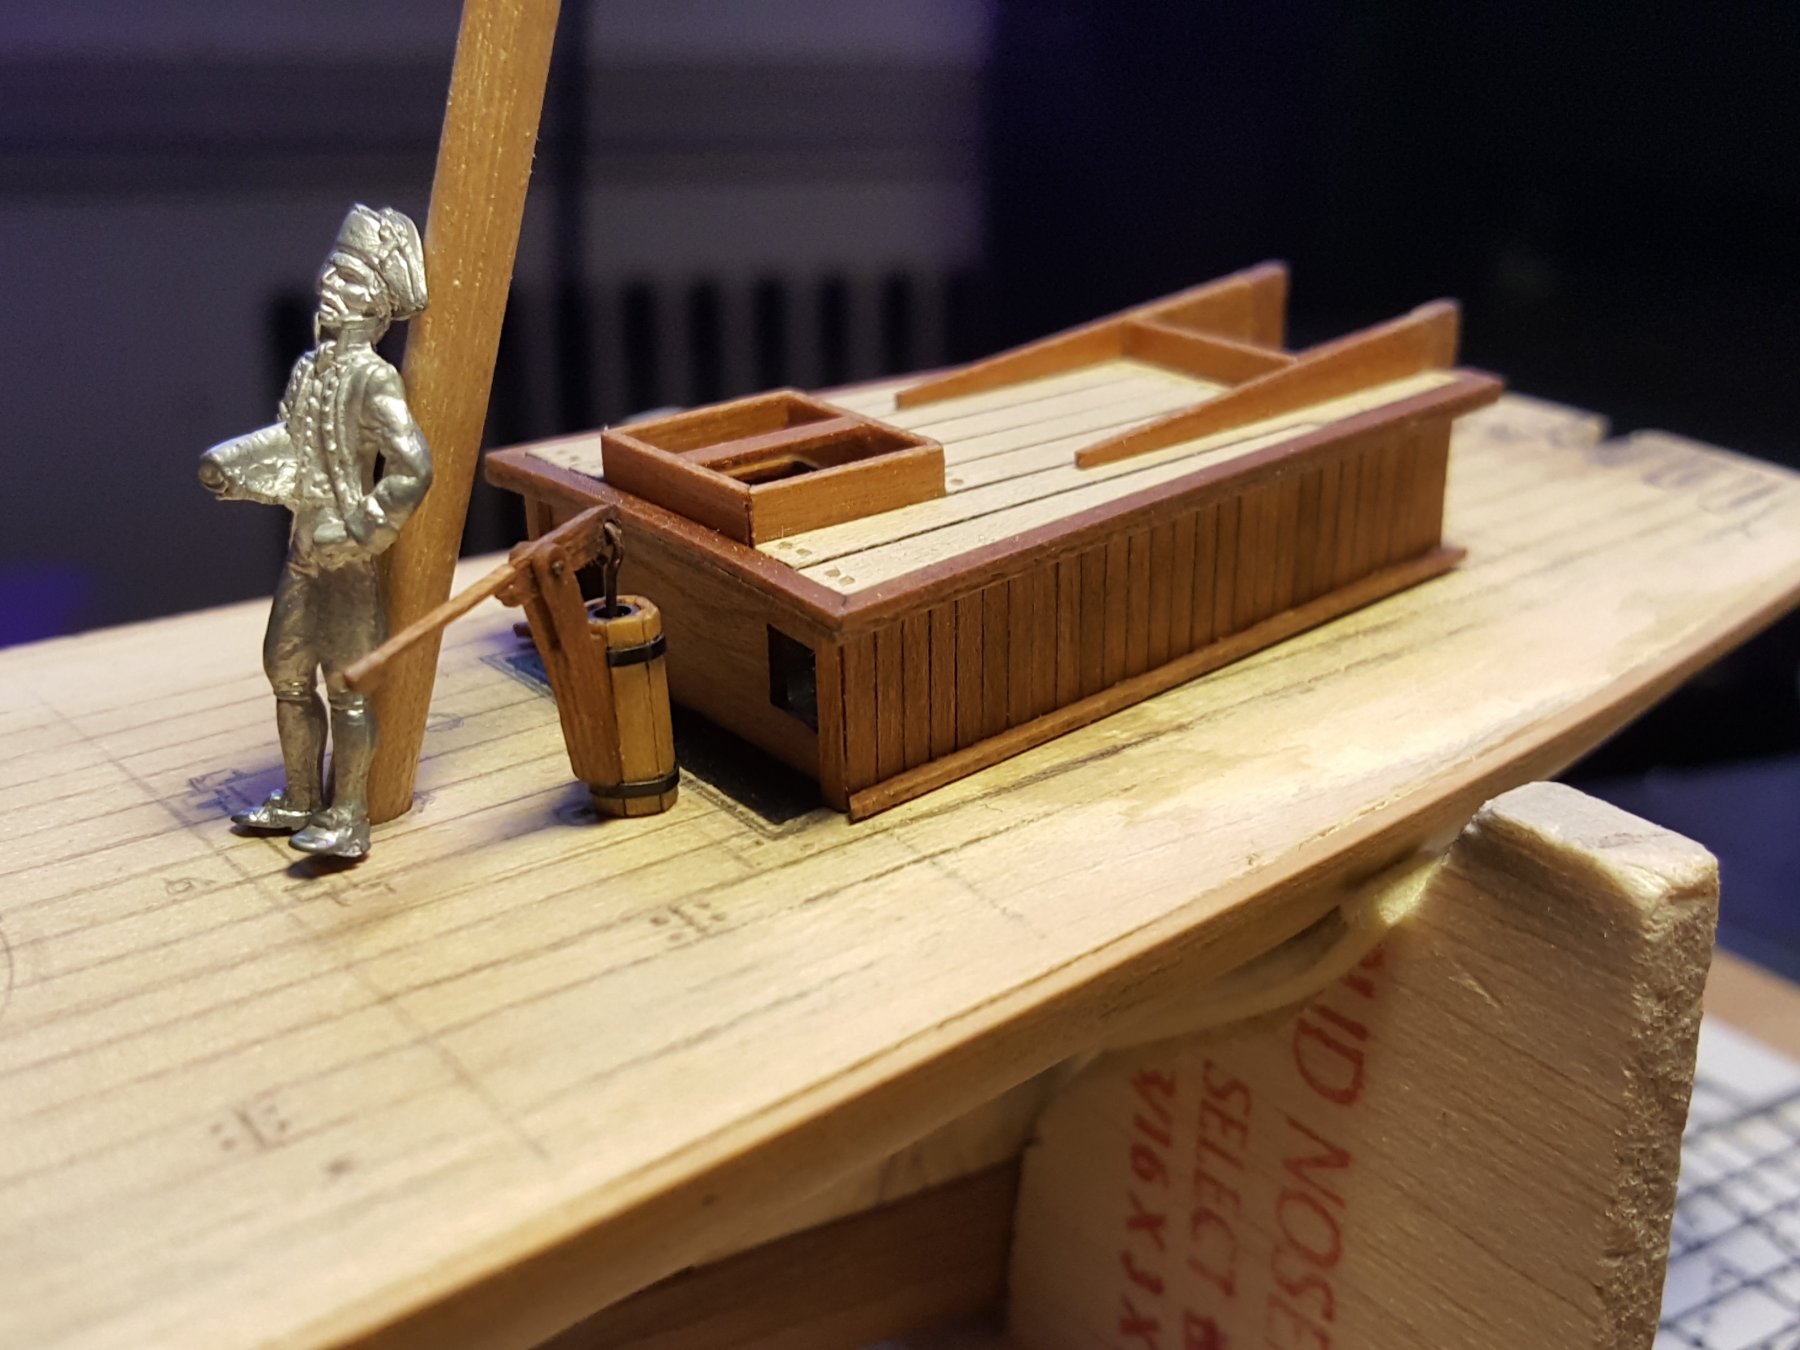
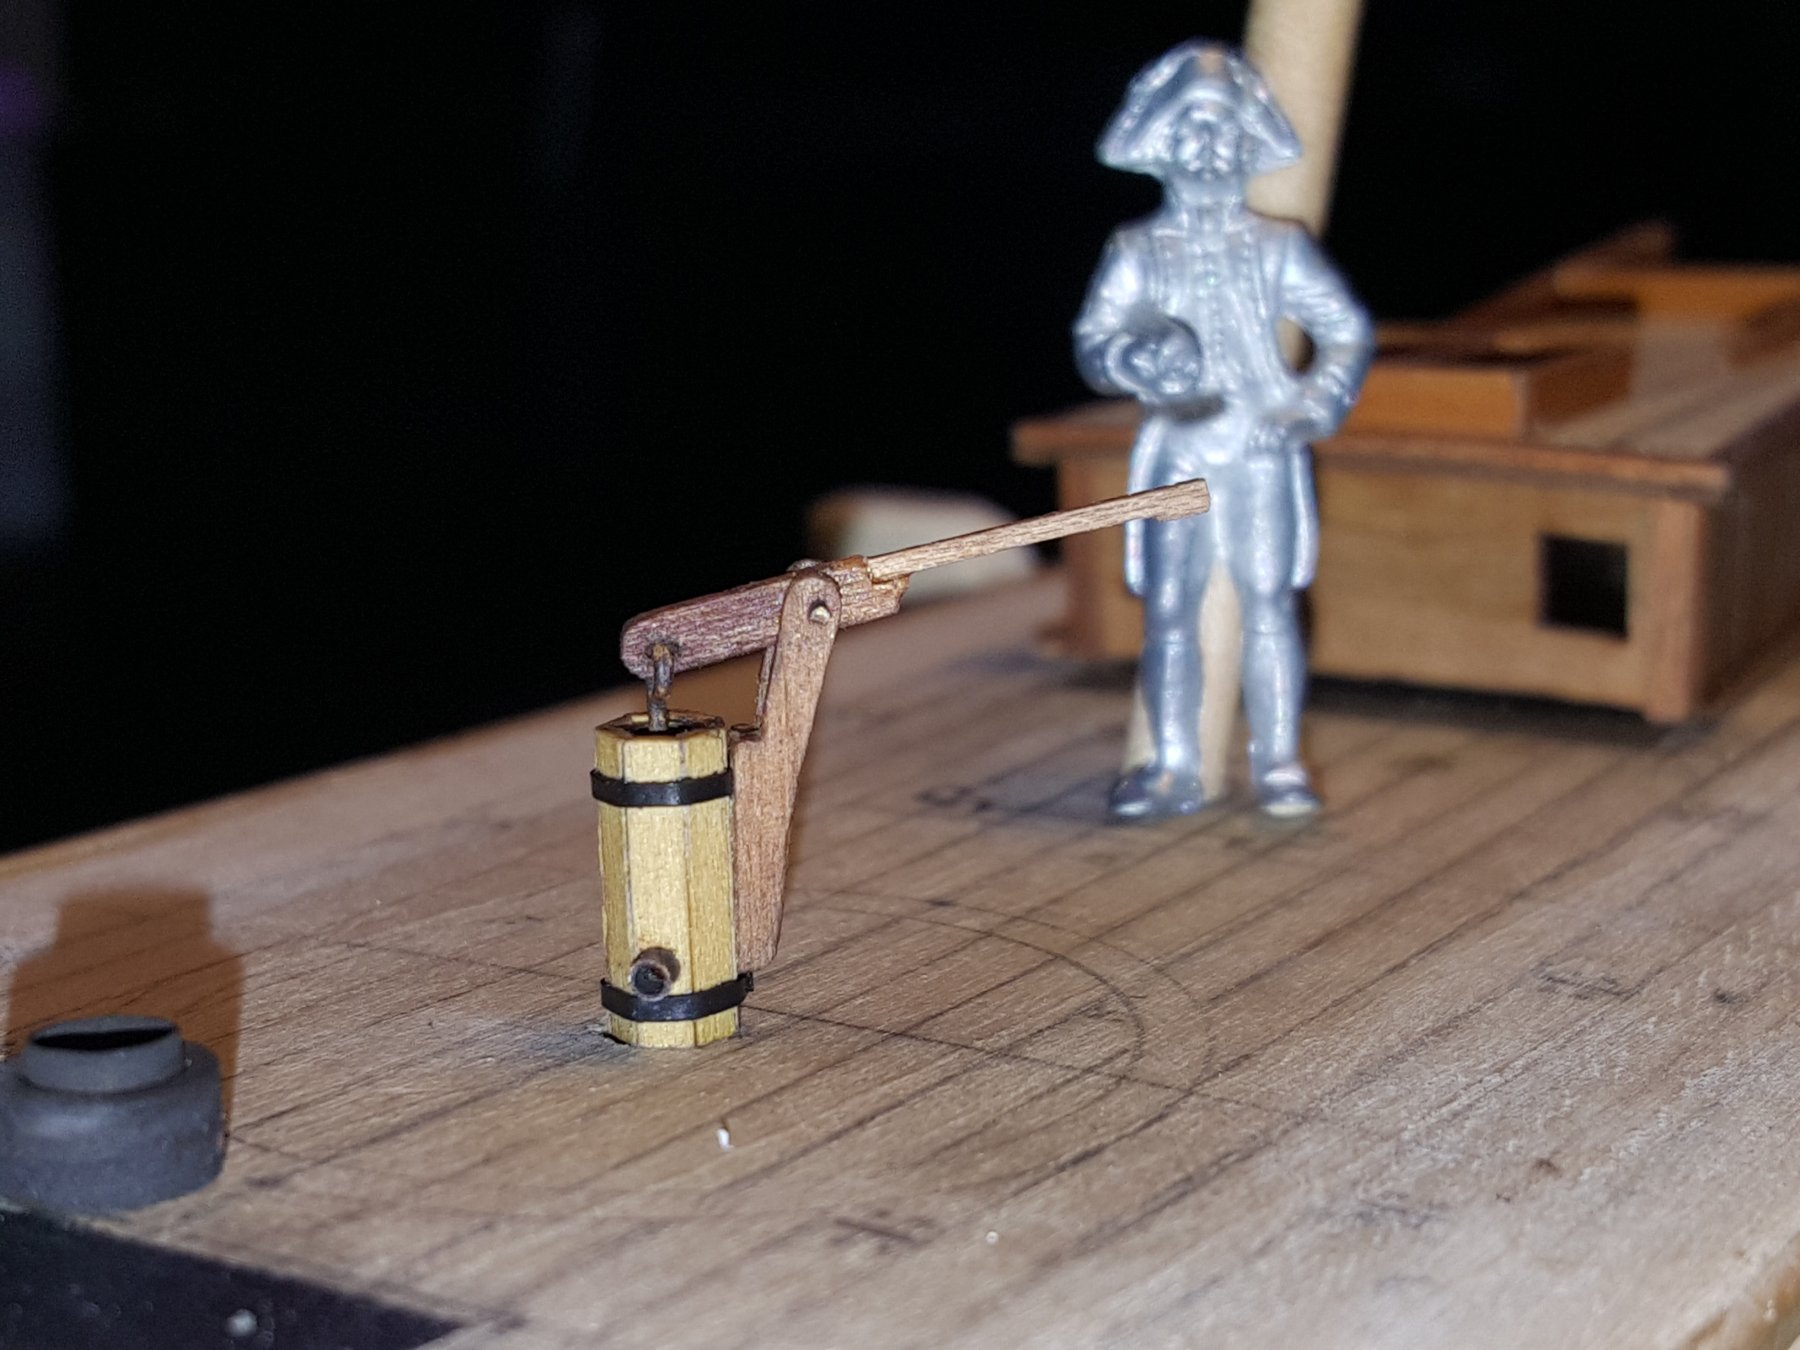
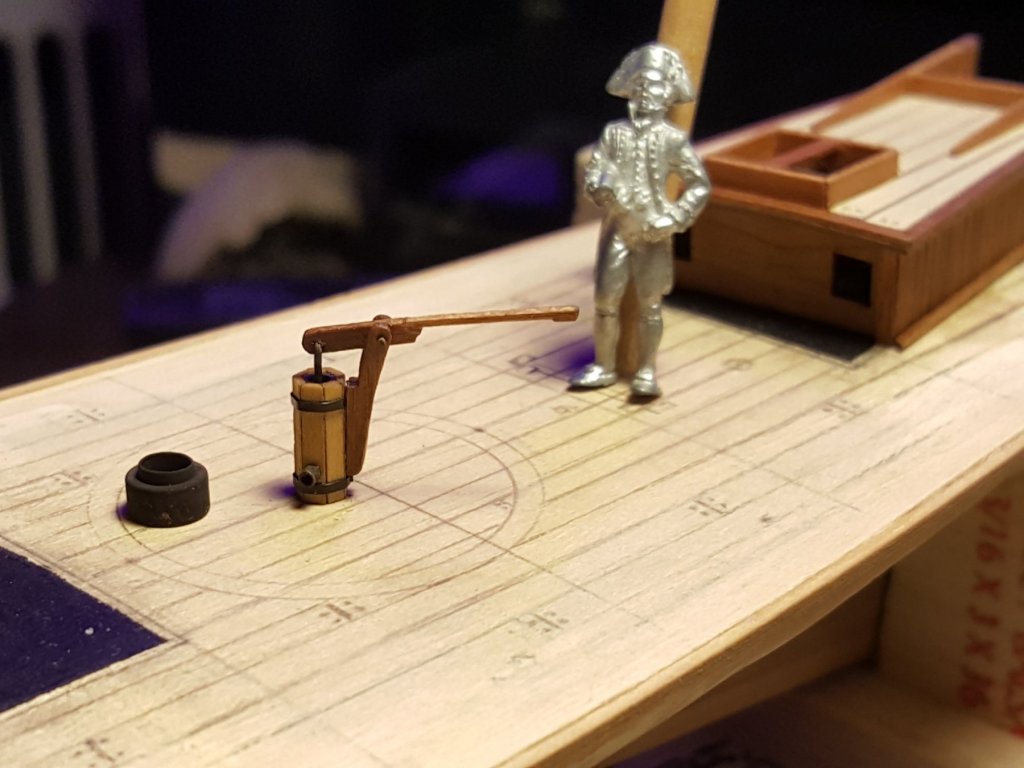
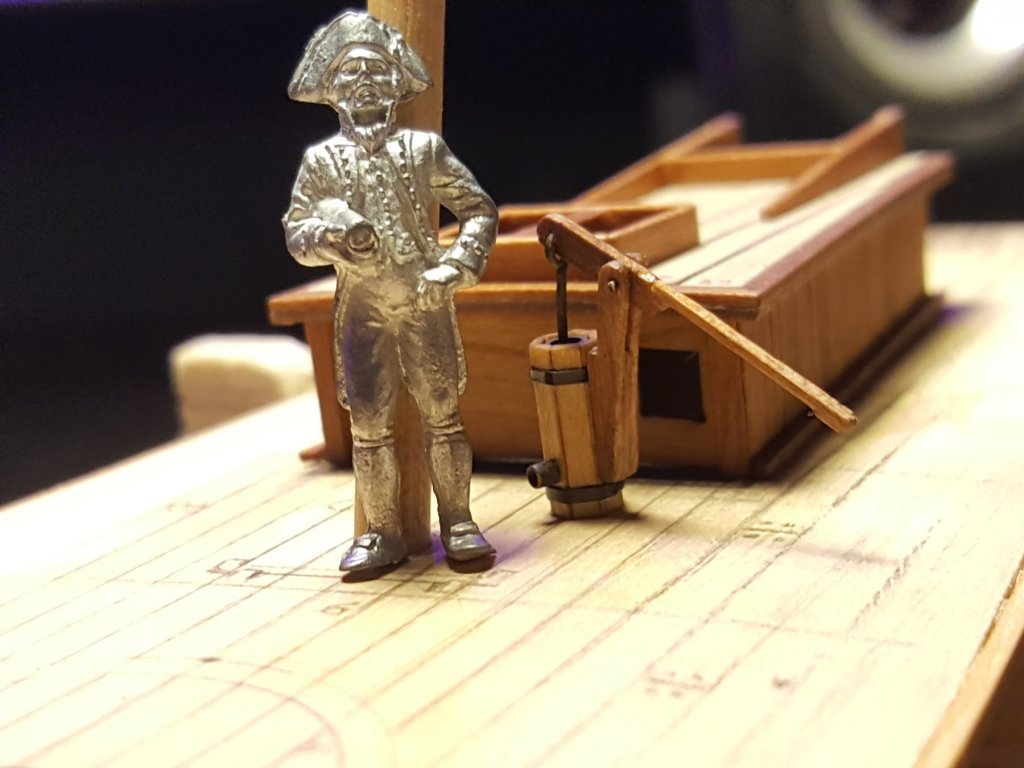
Here is the pump on deck. I am wondering of the handle is correct I wanted a bit of contrast but perhaps the top should be flush? Also you can see the brass axle for the carronade carriage and the cleats added to the deckhouse.
- 362 replies
-
- 11
-
-
- active
- revenue cutter
- (and 1 more)
-
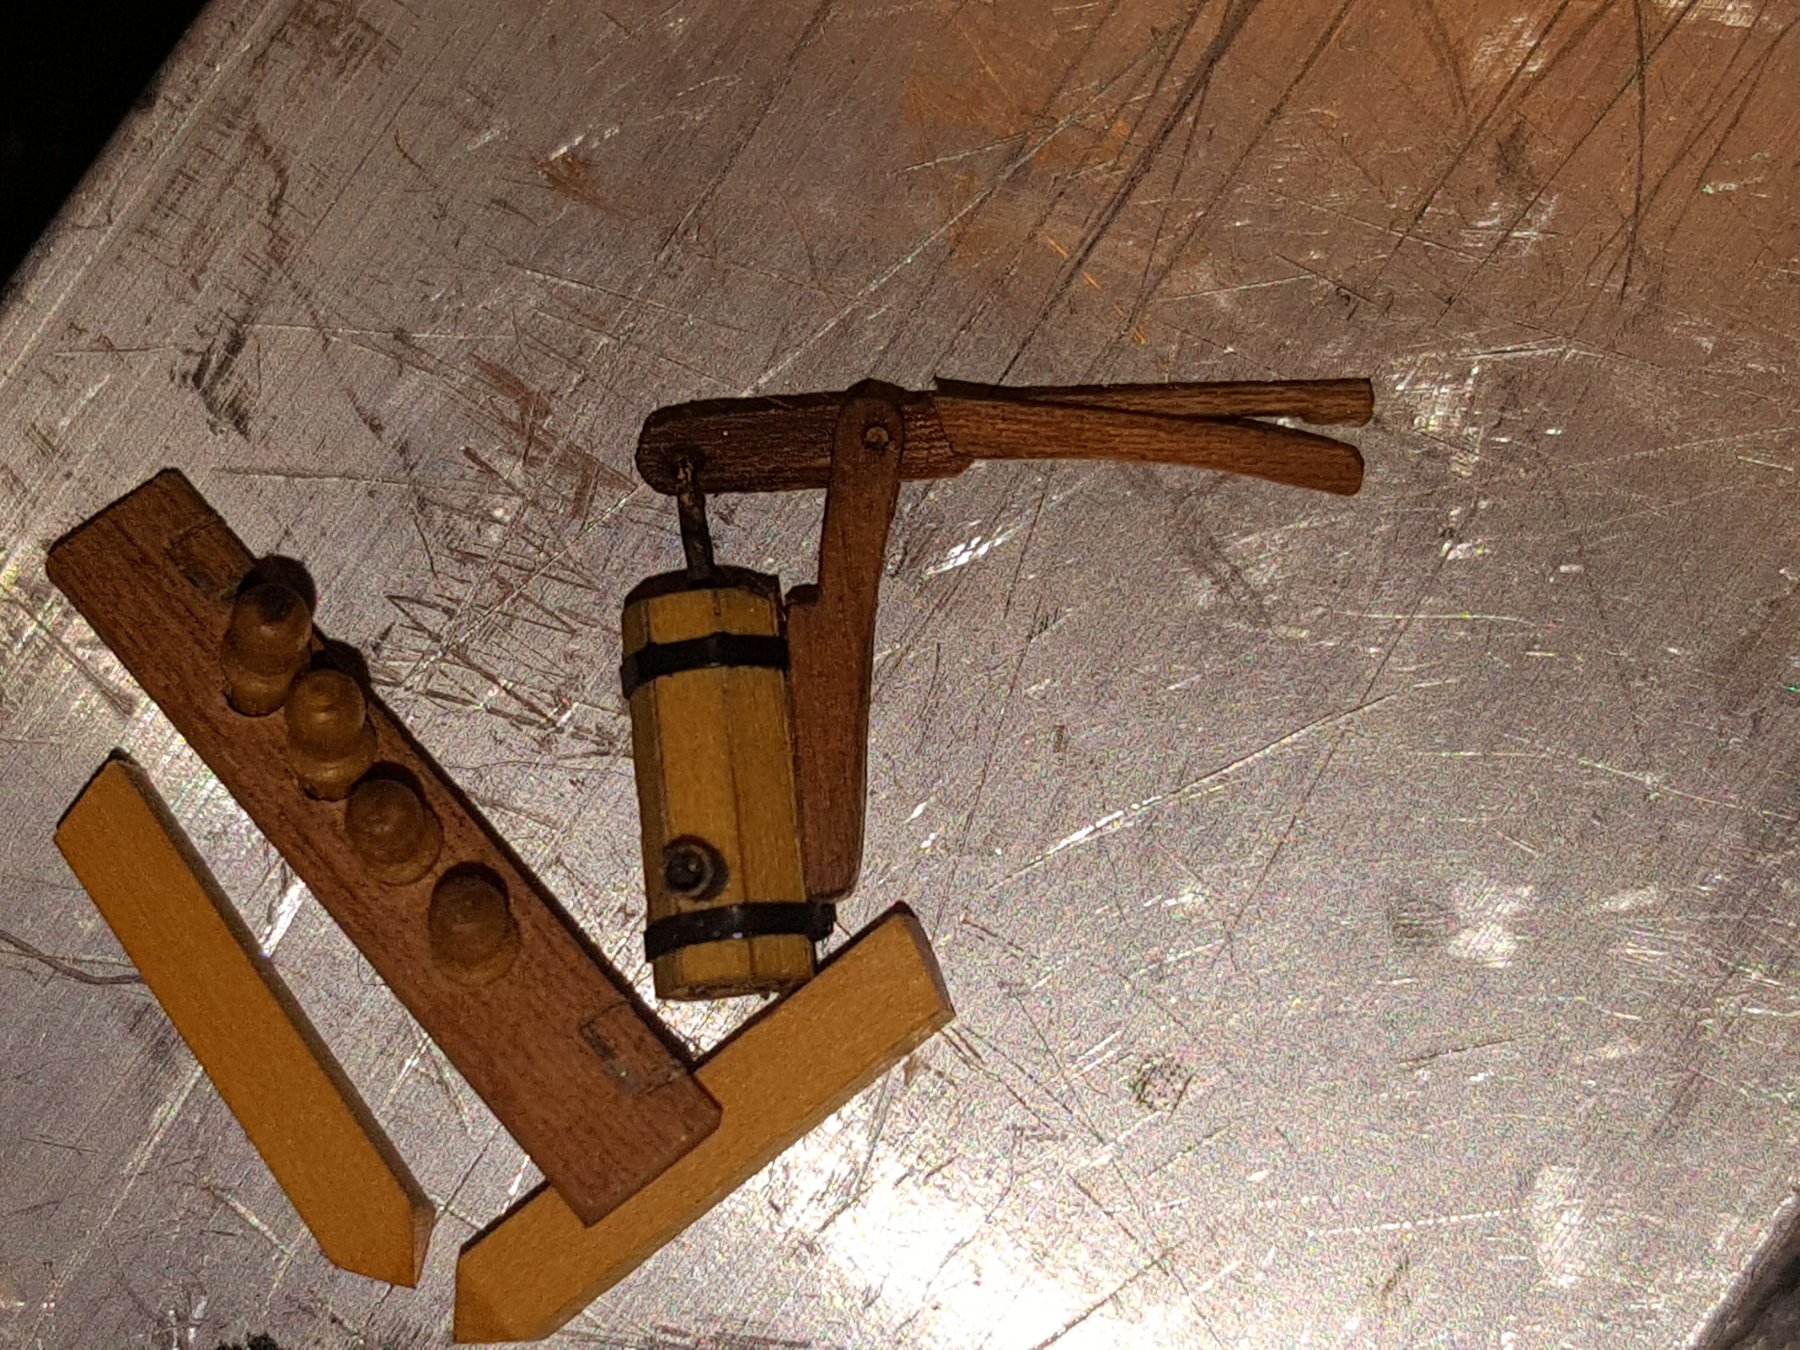
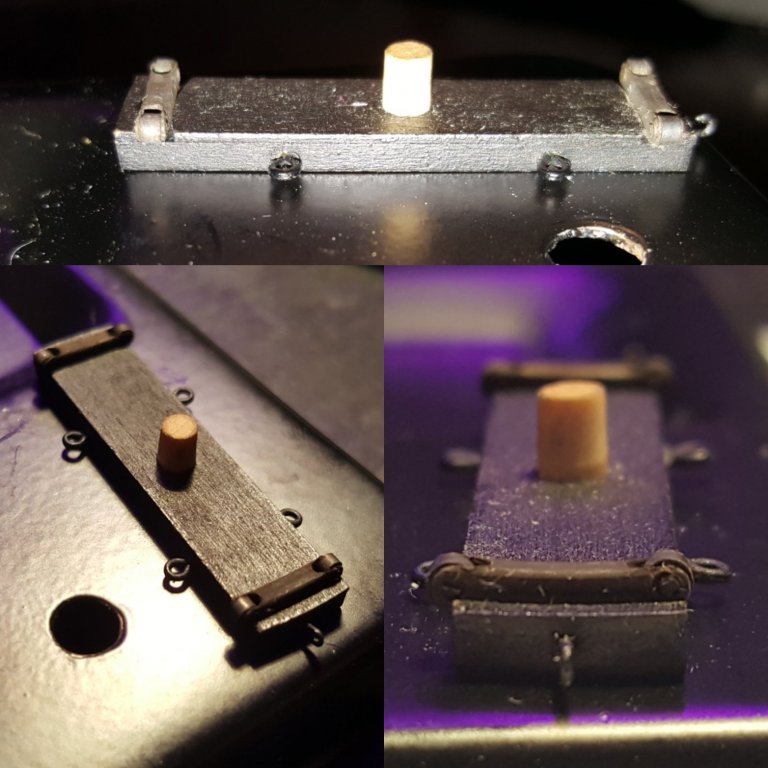
Hi everyone. A quick update. Decided to make a bilge pump since the ones available to buy are either too big or cast metal. I enjoy making tiny things that work. It's about 3/4" and all made from scratch. I glued wood strips to make the octogon shape and the nozzle at the bottom is a 1mm crimp bead. The black strips are electrical tape. The hinges are wire and can move the handle up and down.

- 362 replies
-
- 8
-
-
- active
- revenue cutter
- (and 1 more)
-
Thank you Steven! Yes the 30 ton cutter was only 48.6! That's smaller than even the Sultana and was effectively a pilot boat. I do plan on adding some swivels on the aft portion but yeah one gun pretty much. While I can't say for sure what the real Active actually looked like she did have one gun and was 38 tons. It seems that most of the other cutters were built on the 50 and 70 ton lines very few were this small (if any). The reports from Irving King Coast guard cutters book states that at the time Captain of the Active was in desperate need of additional ships to help combat piracy and a one gun pilot boat was hardly up to the task. By 1824 many more of the larger ships were added to the squadron and shortly after the Morris class took over and the issue was largely delt with.
- 362 replies
-
- 1
-
-
- active
- revenue cutter
- (and 1 more)
-
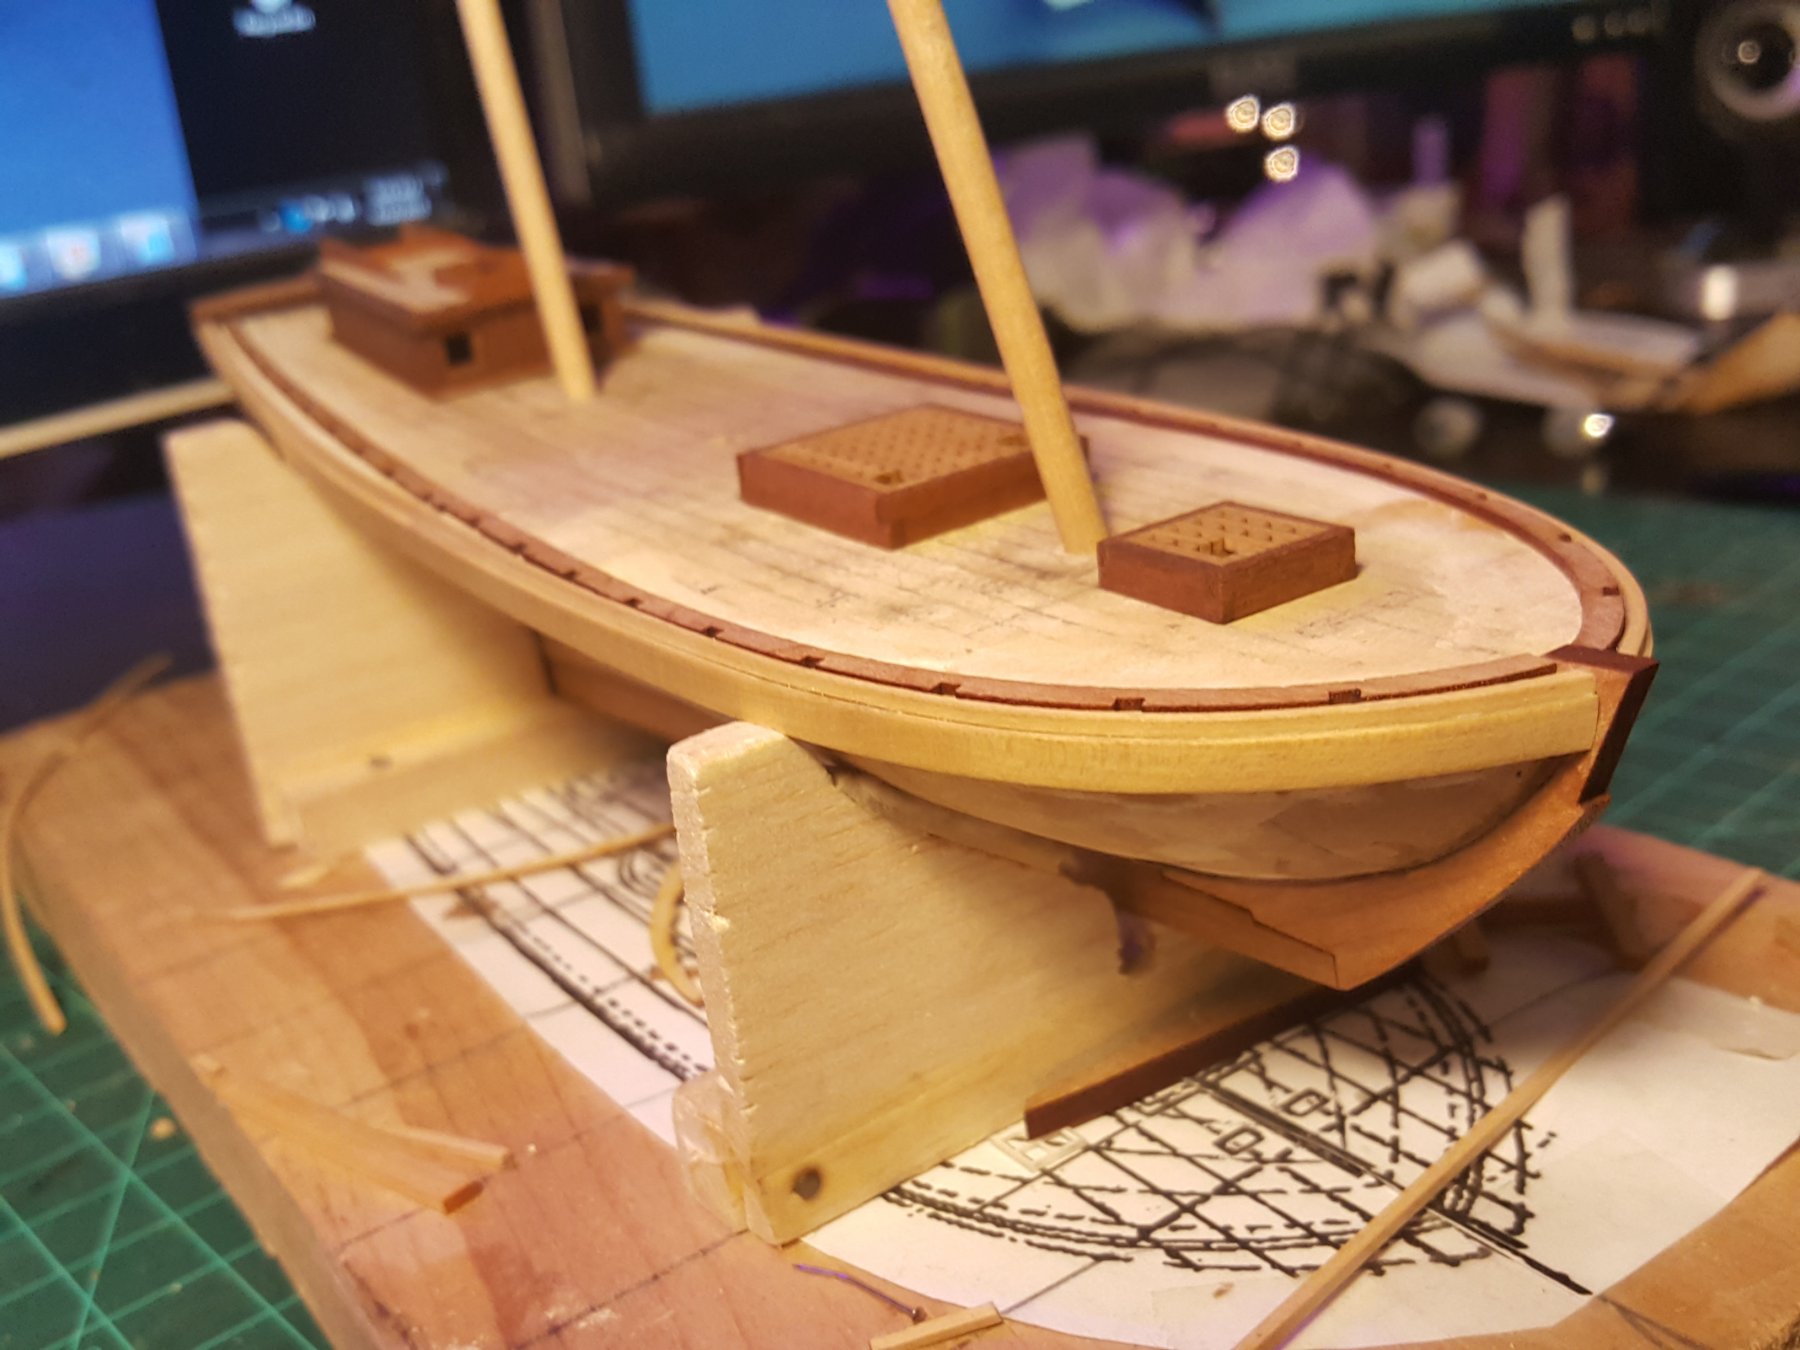
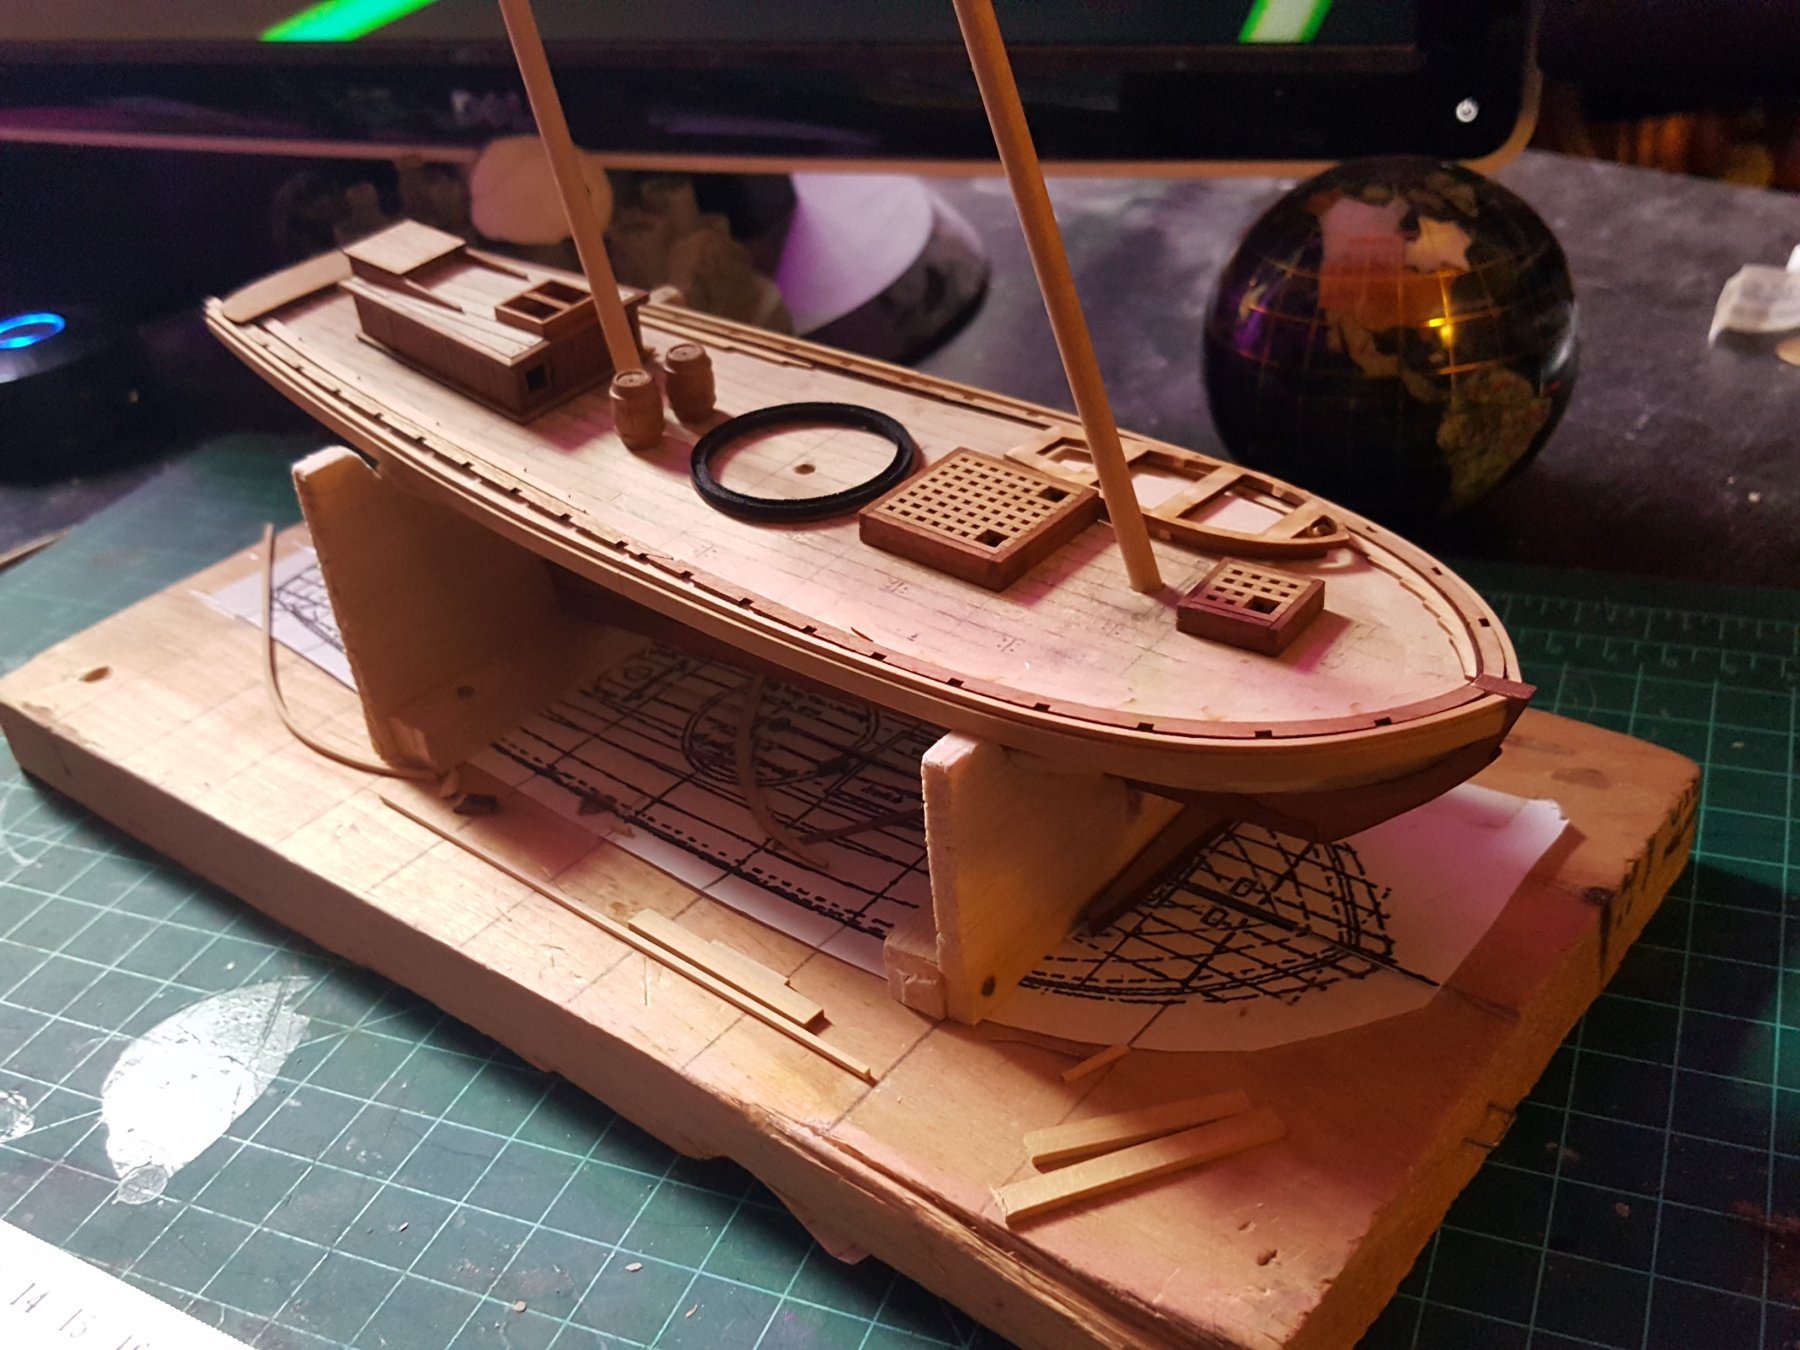
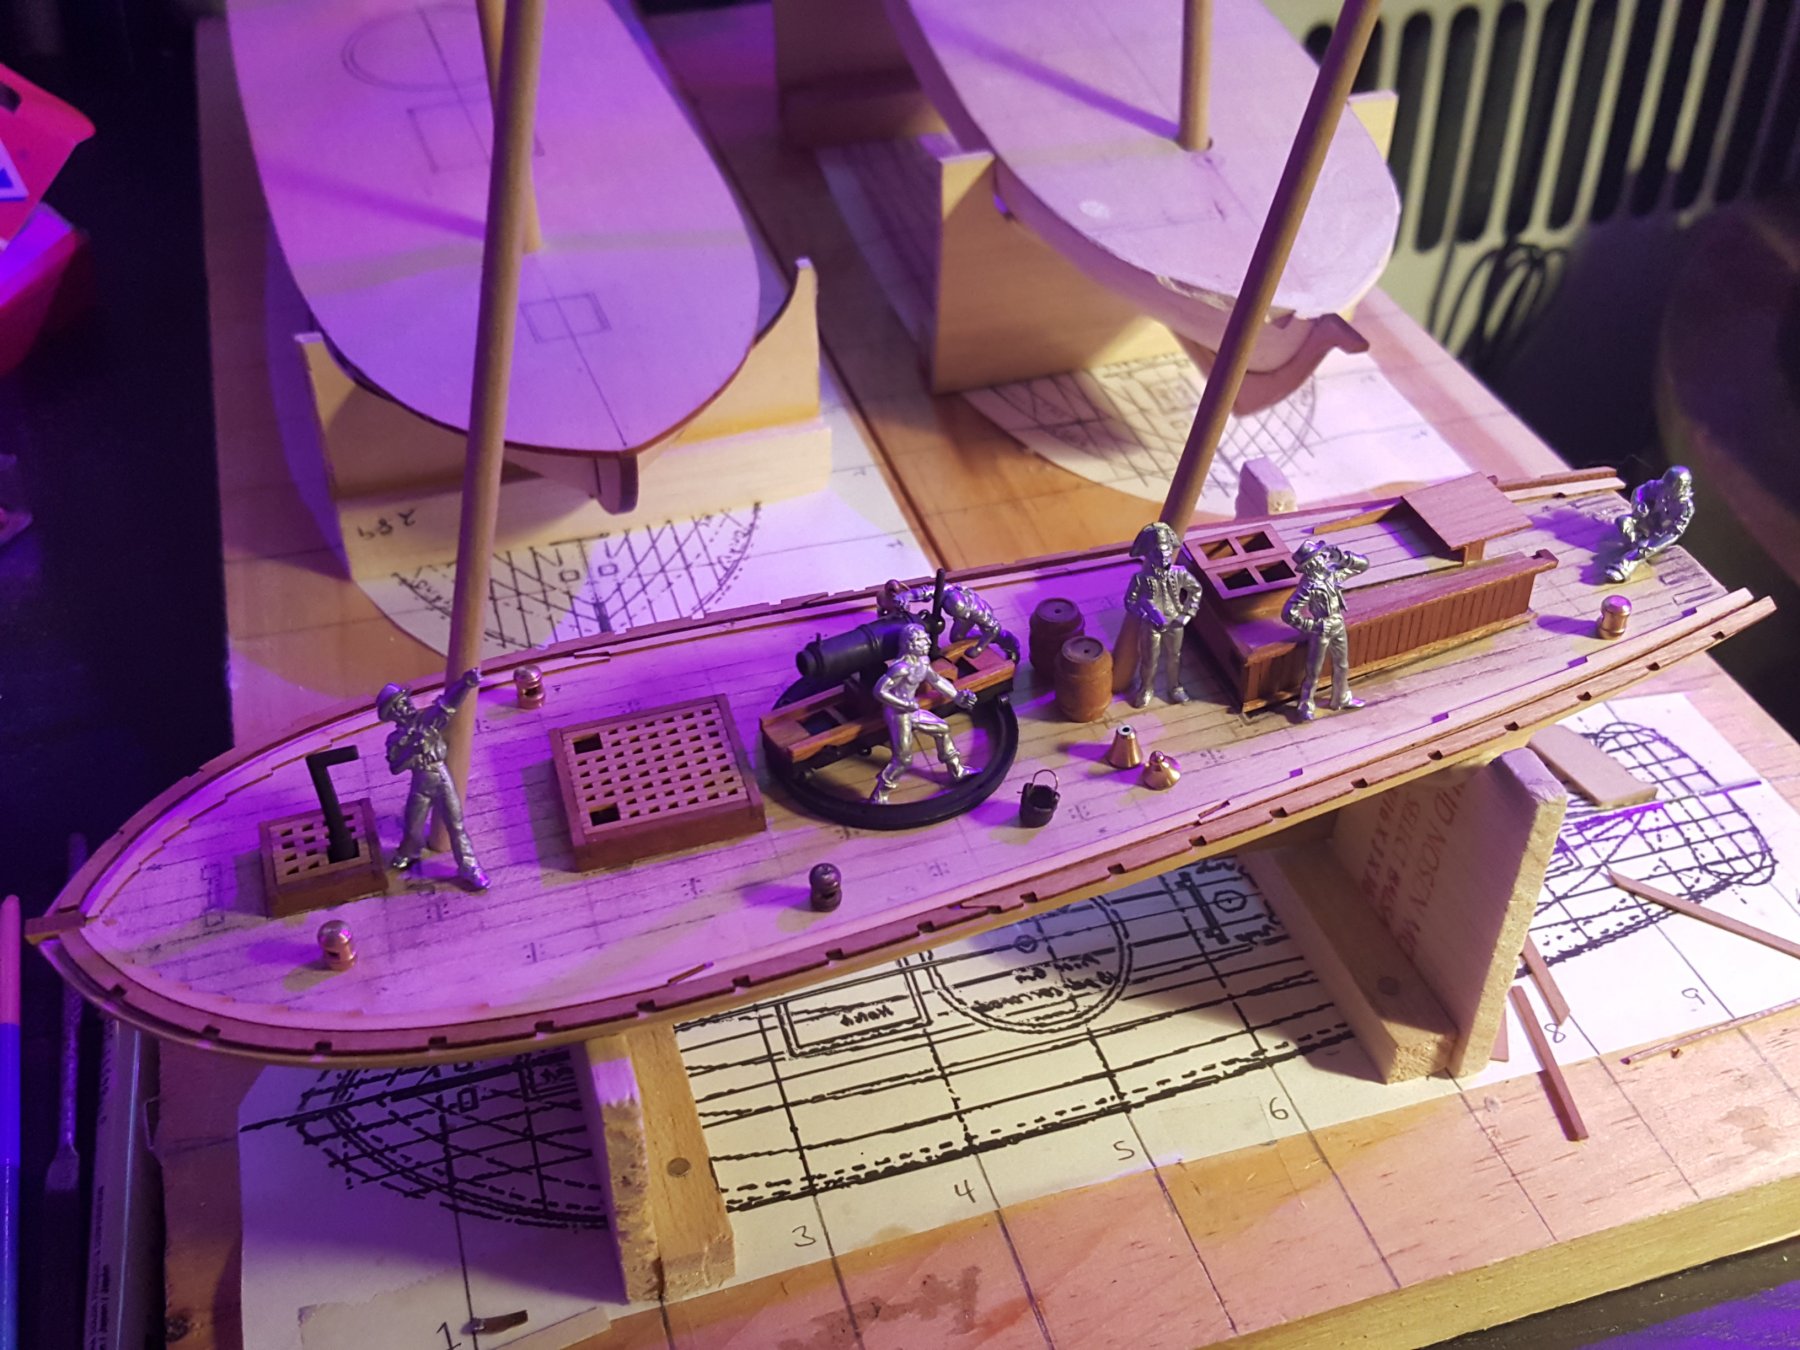
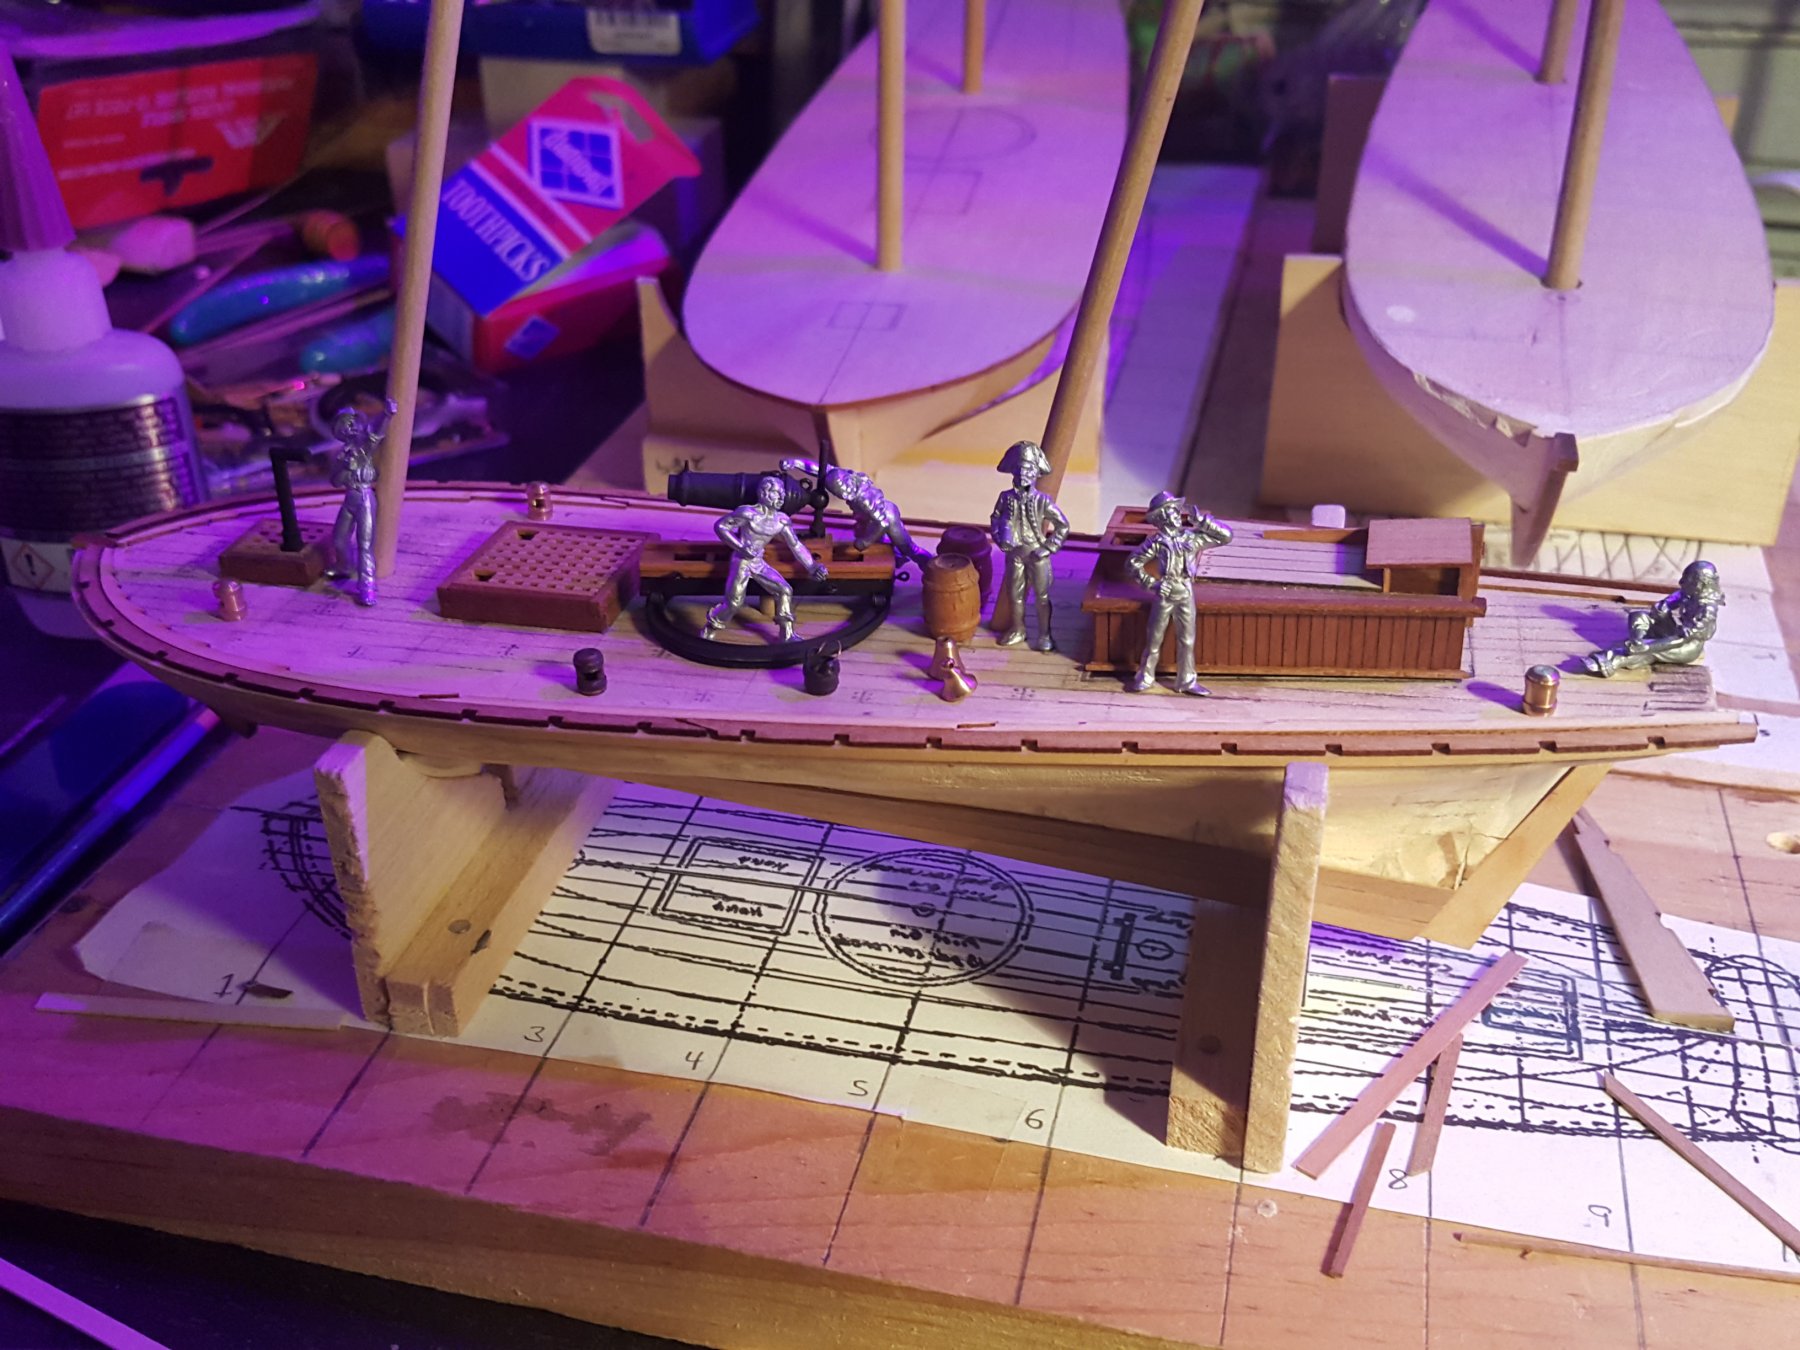
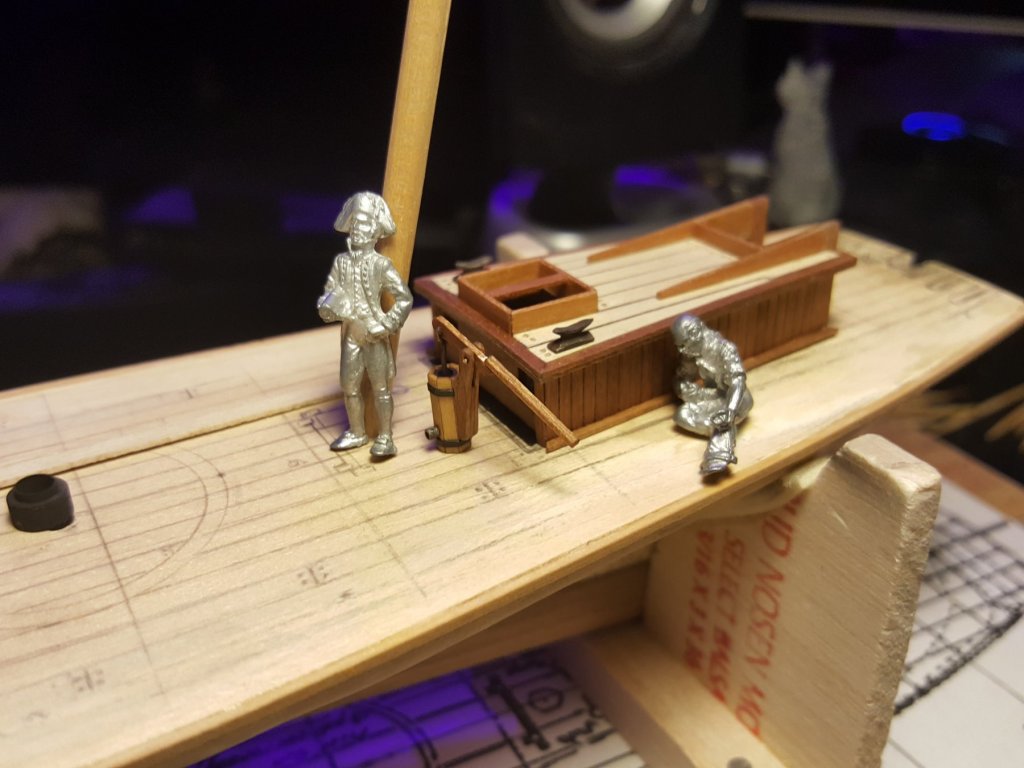
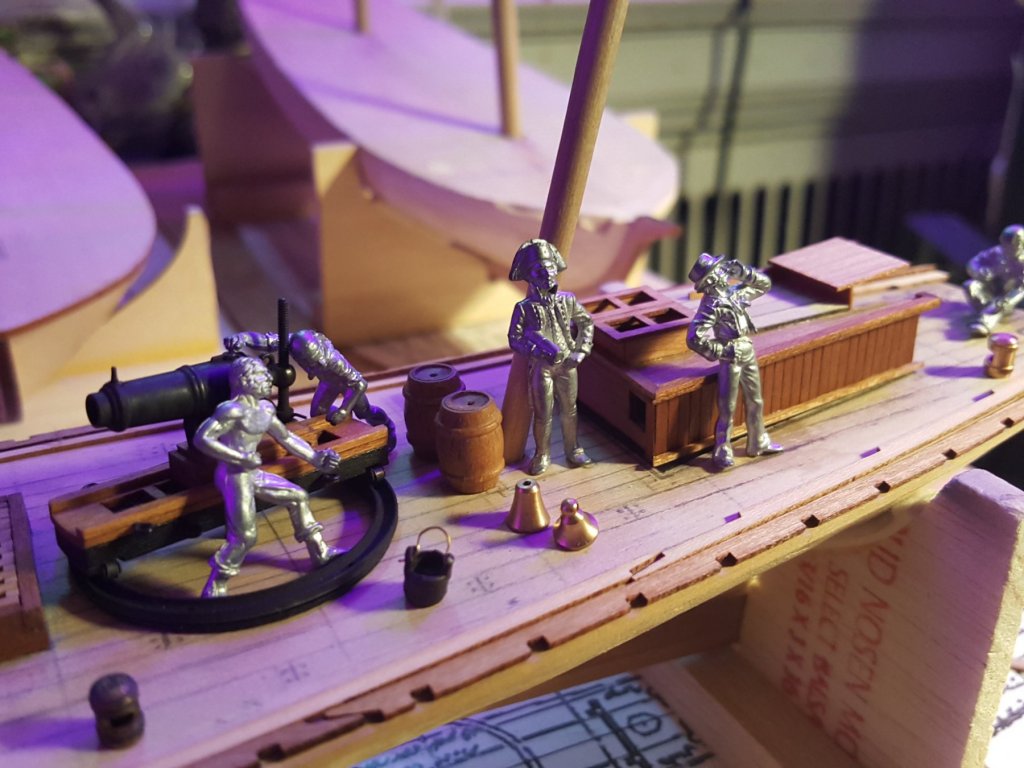
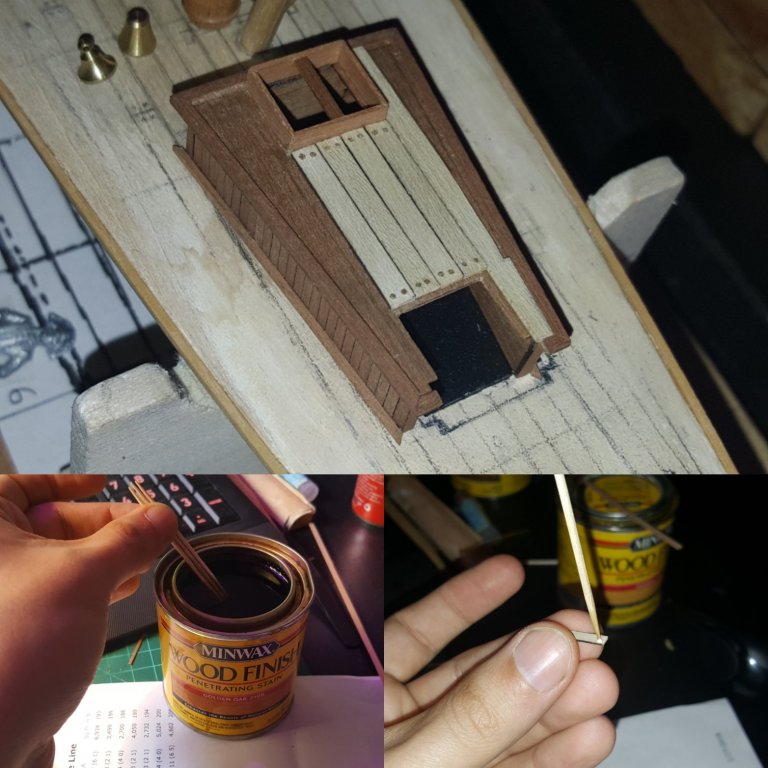
So today oI stained the deckhouse with Tung oil. Here's a few picks of the deck with everything on it. With the UV glowlights above looks like a party boat


- 362 replies
-
- 8
-
-
- active
- revenue cutter
- (and 1 more)
-
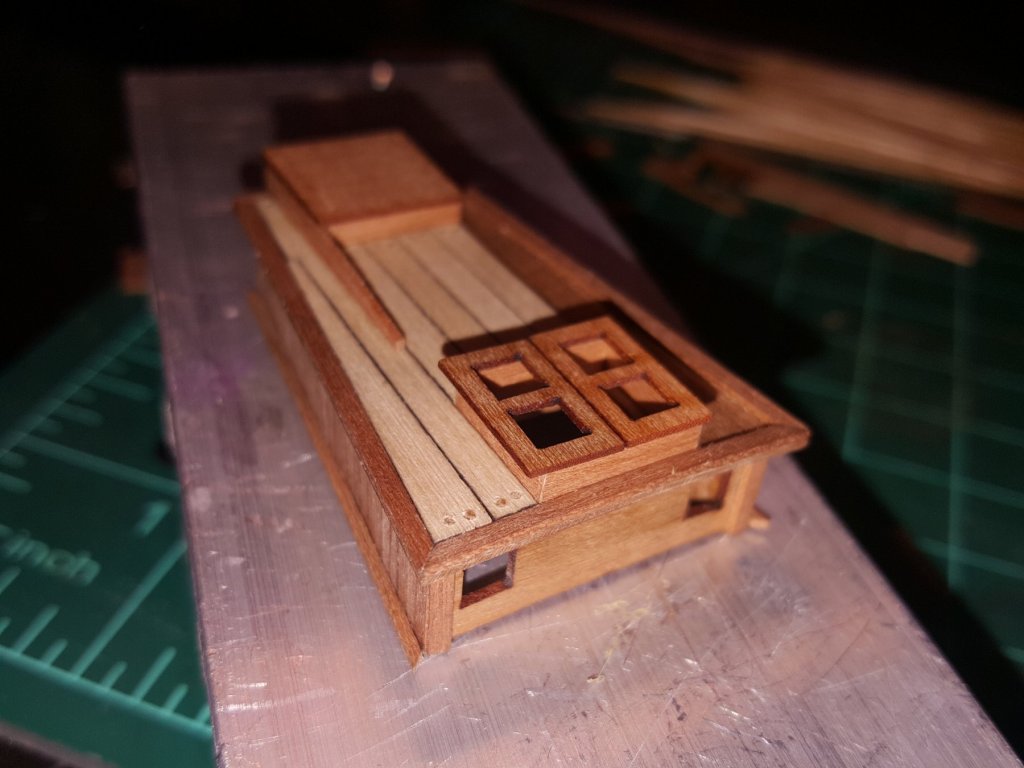
Thank you Patrick. I'm hoping the model is reasonably accurate but also from an artist's perspective I followed the techniques which got me to where it looks good. So here we are today I constructed more of the hatch and added the margin planks. Now have to do the other side.


- 362 replies
-
- 8
-
-
- active
- revenue cutter
- (and 1 more)
-
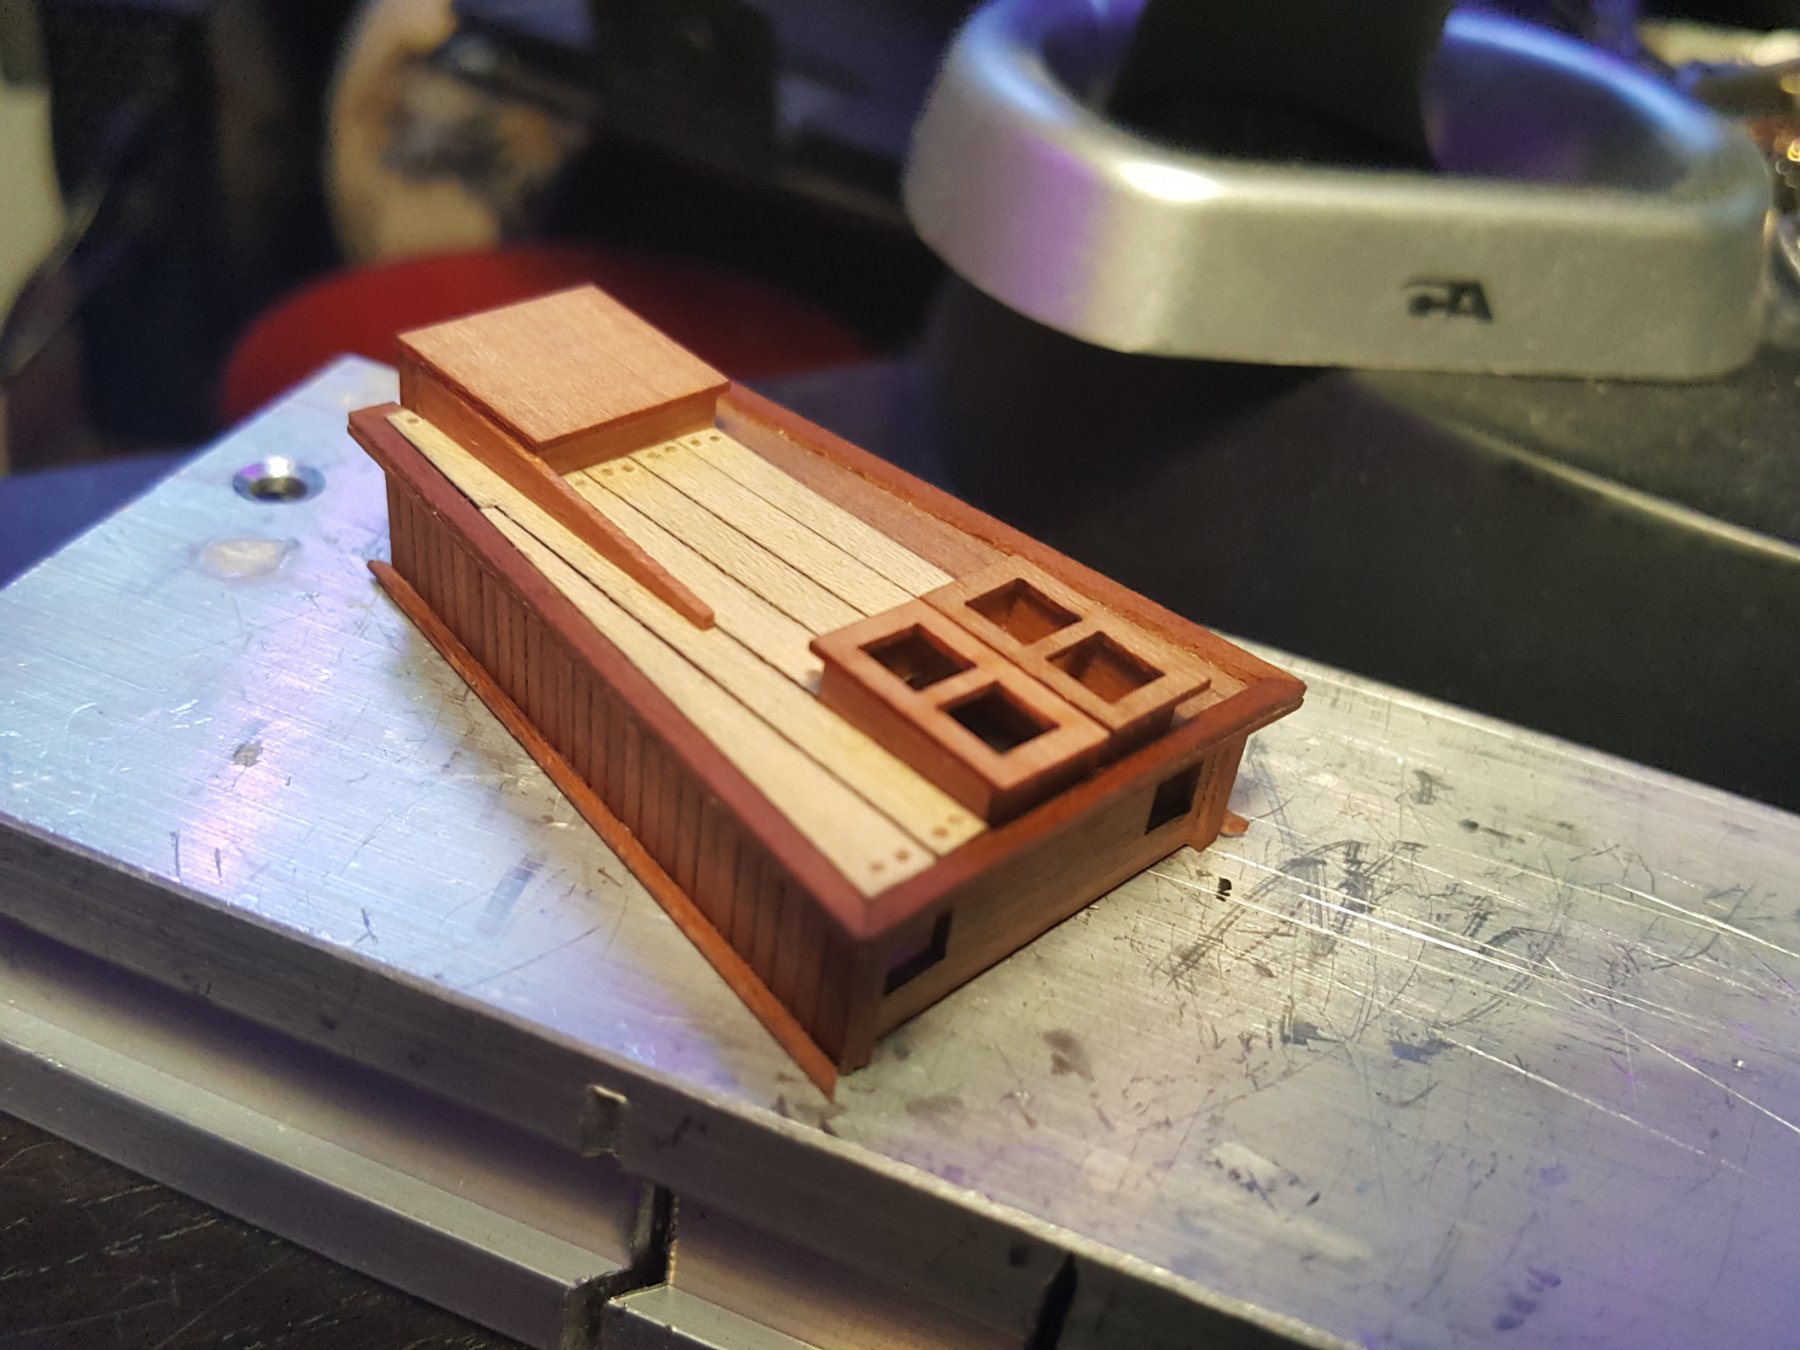
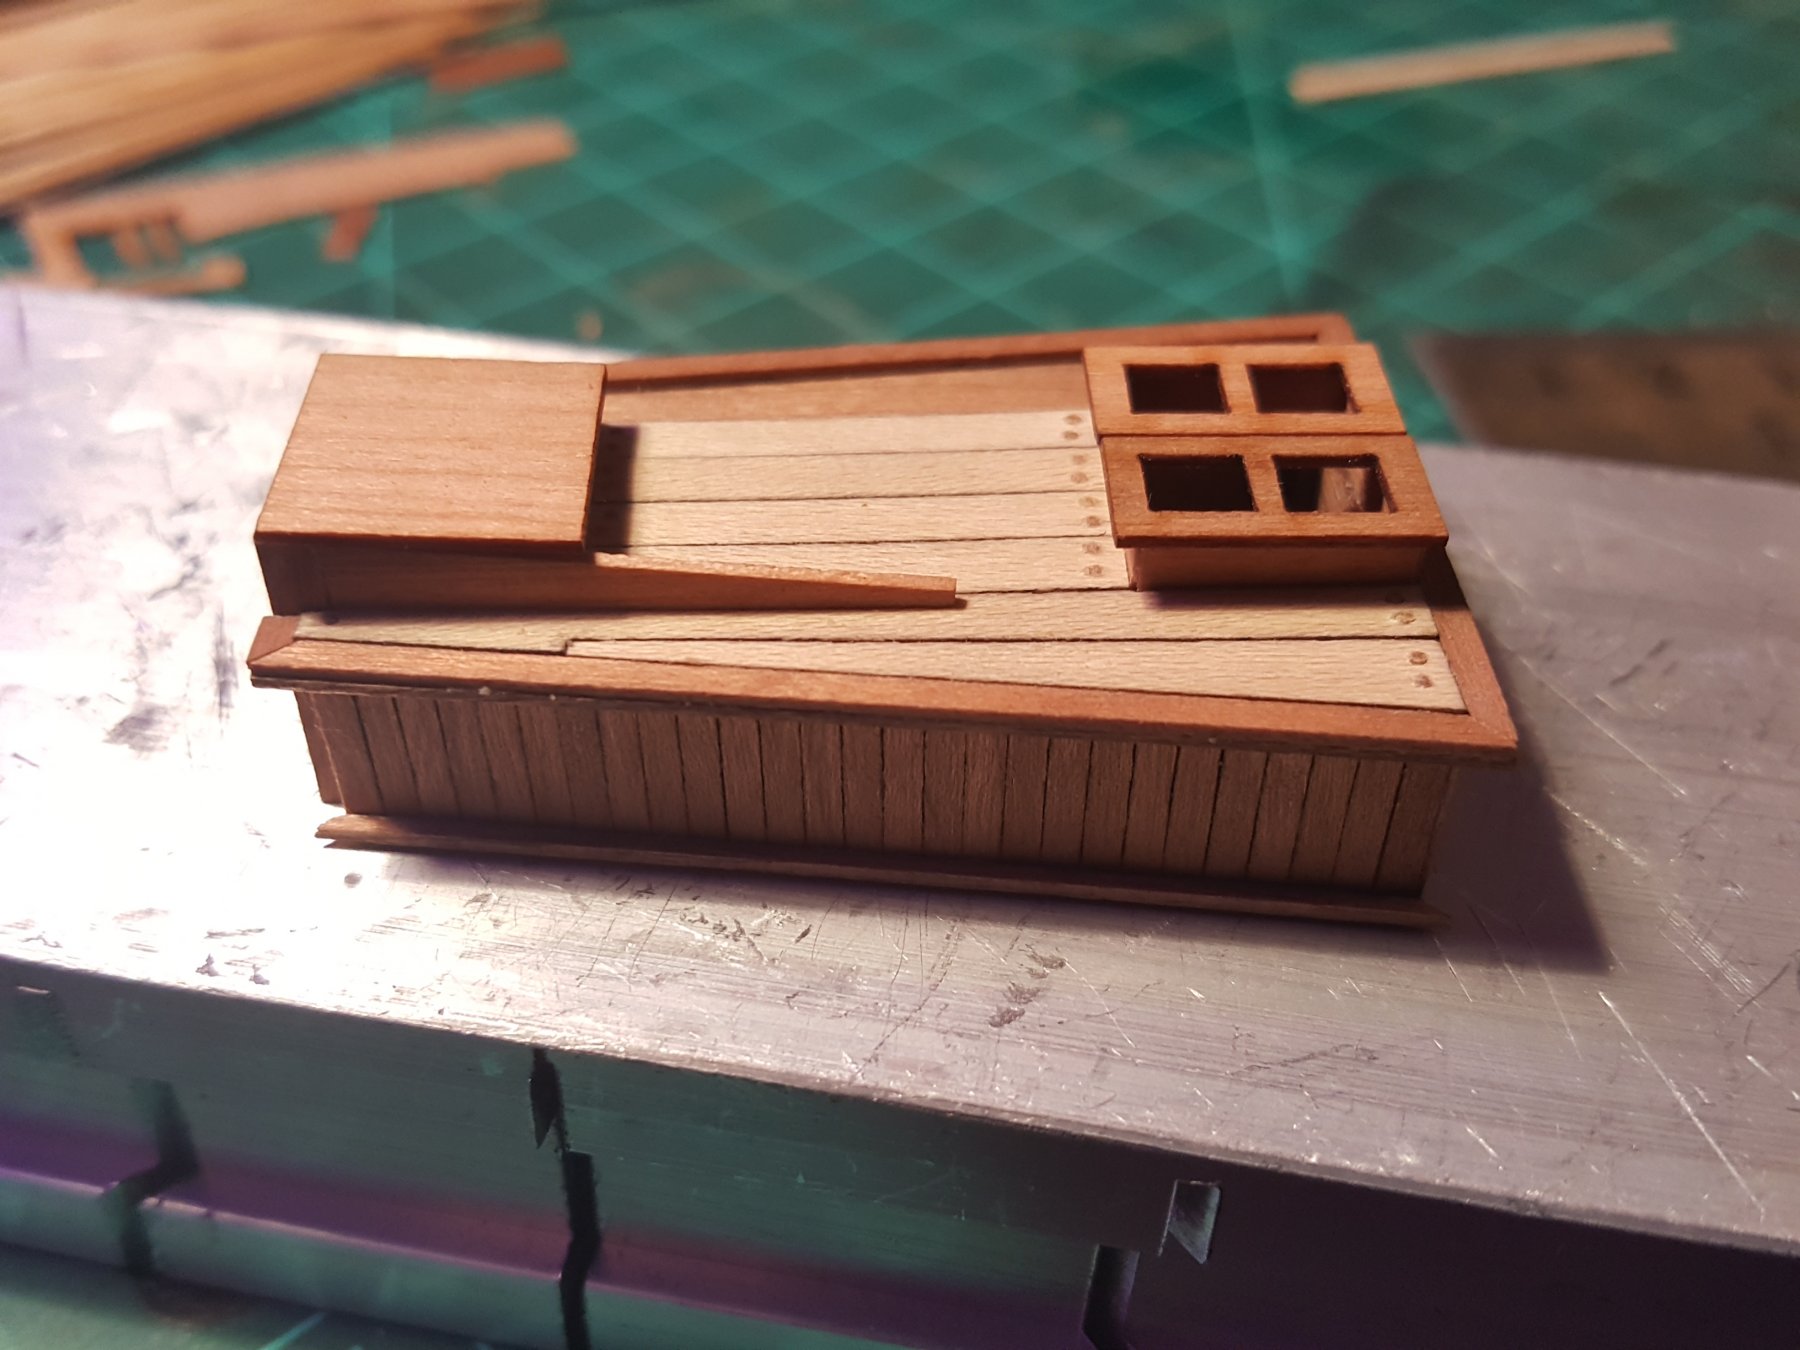
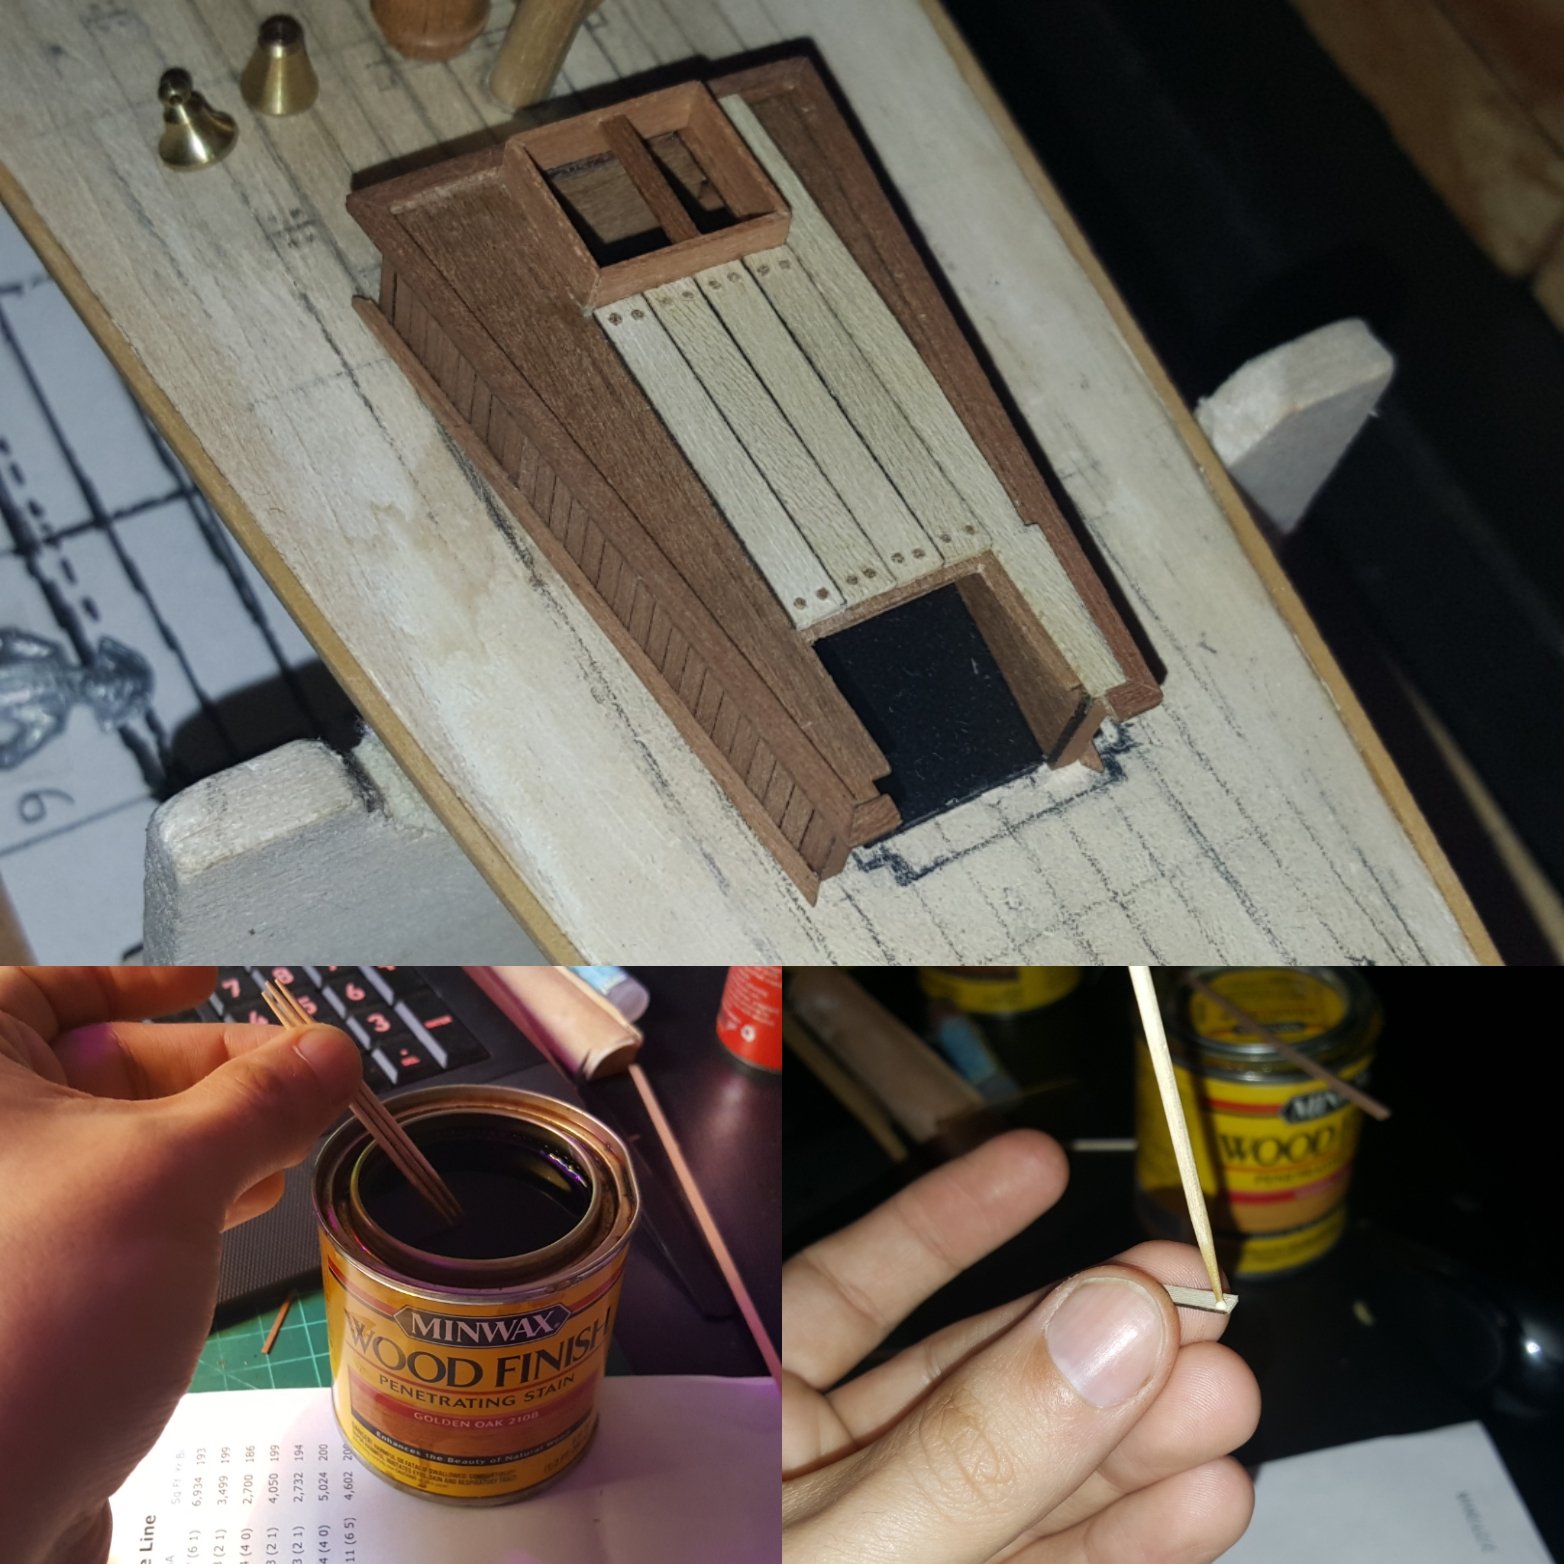
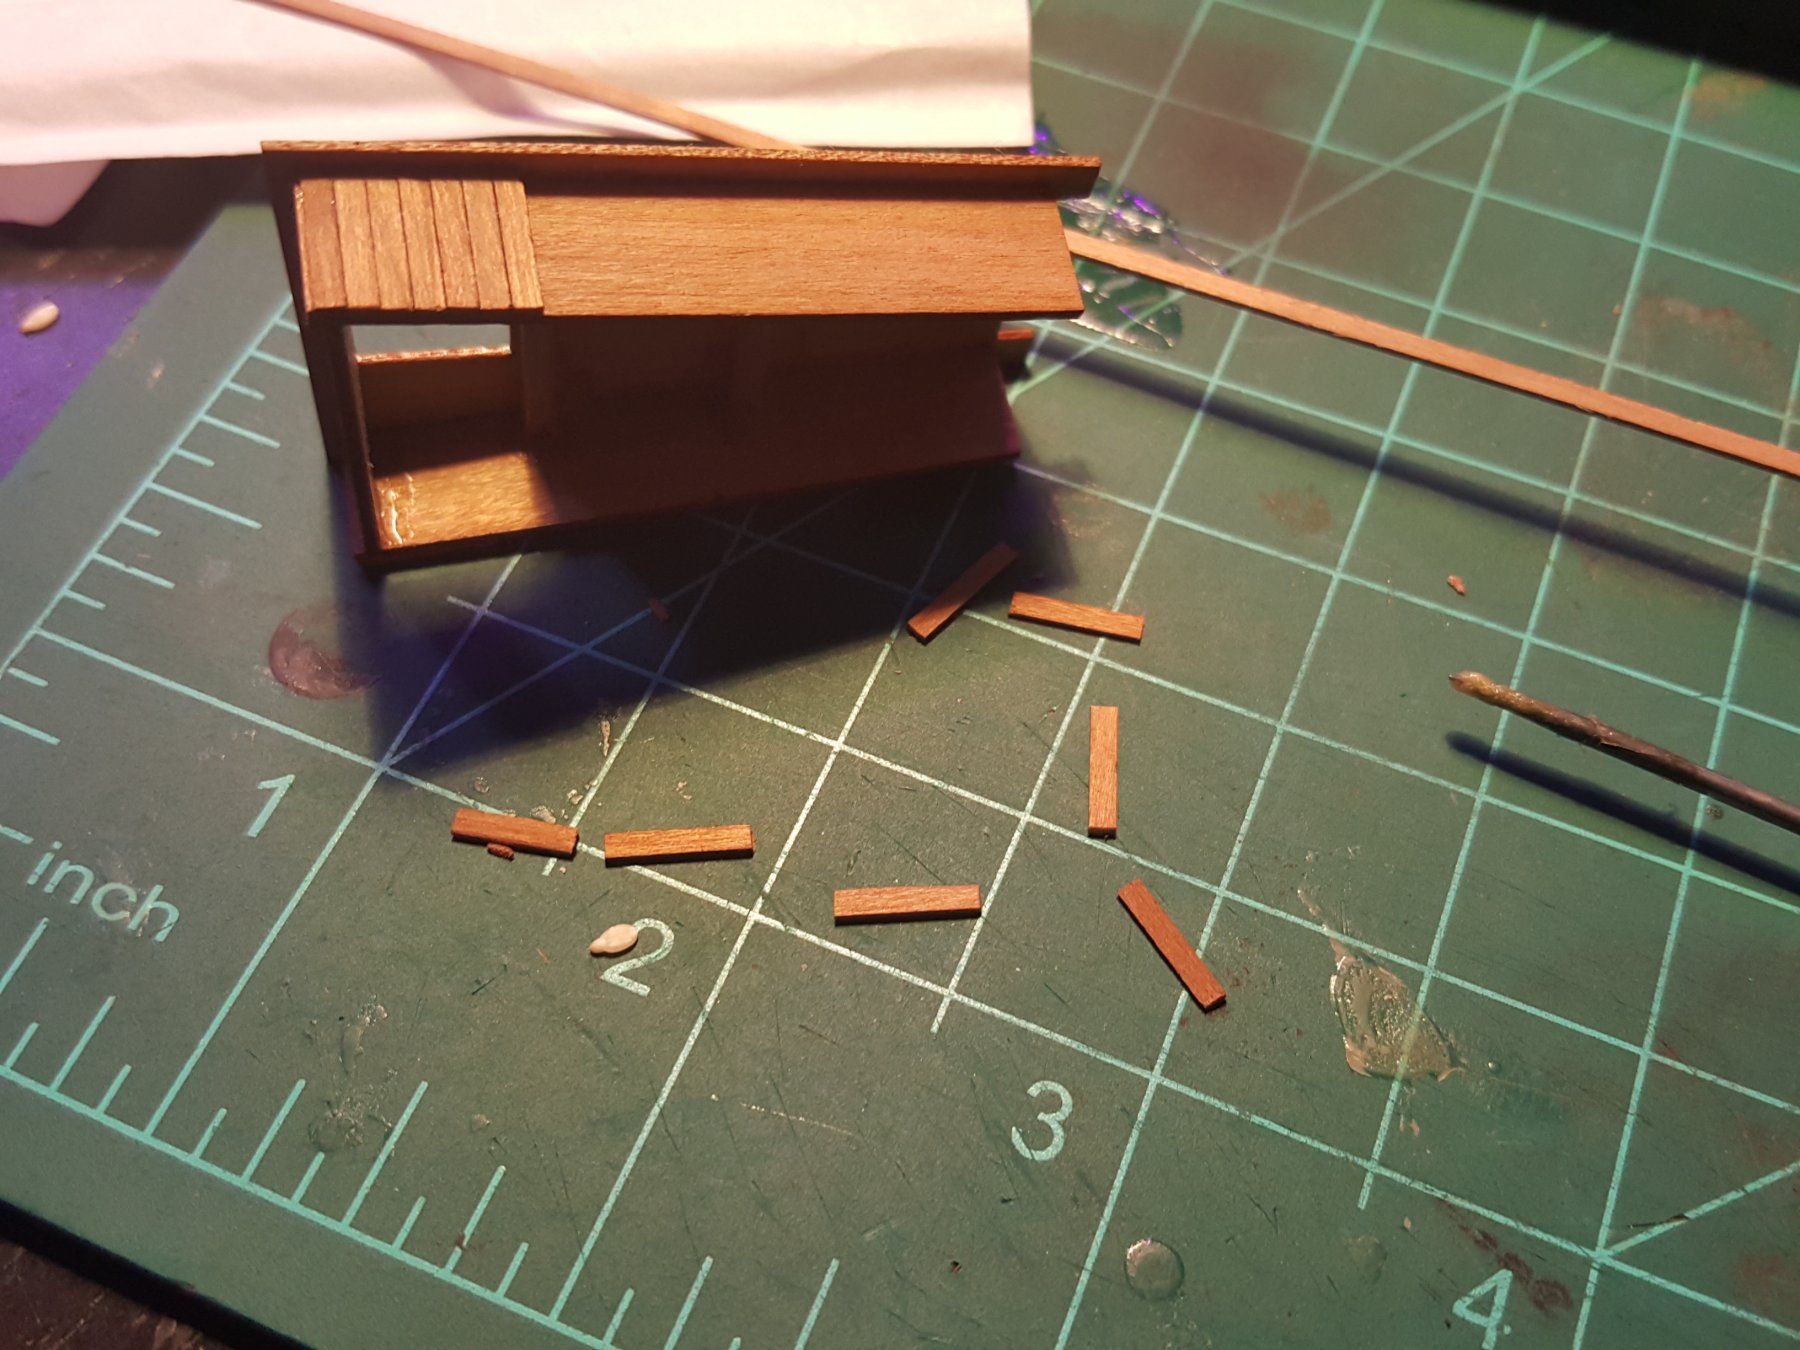
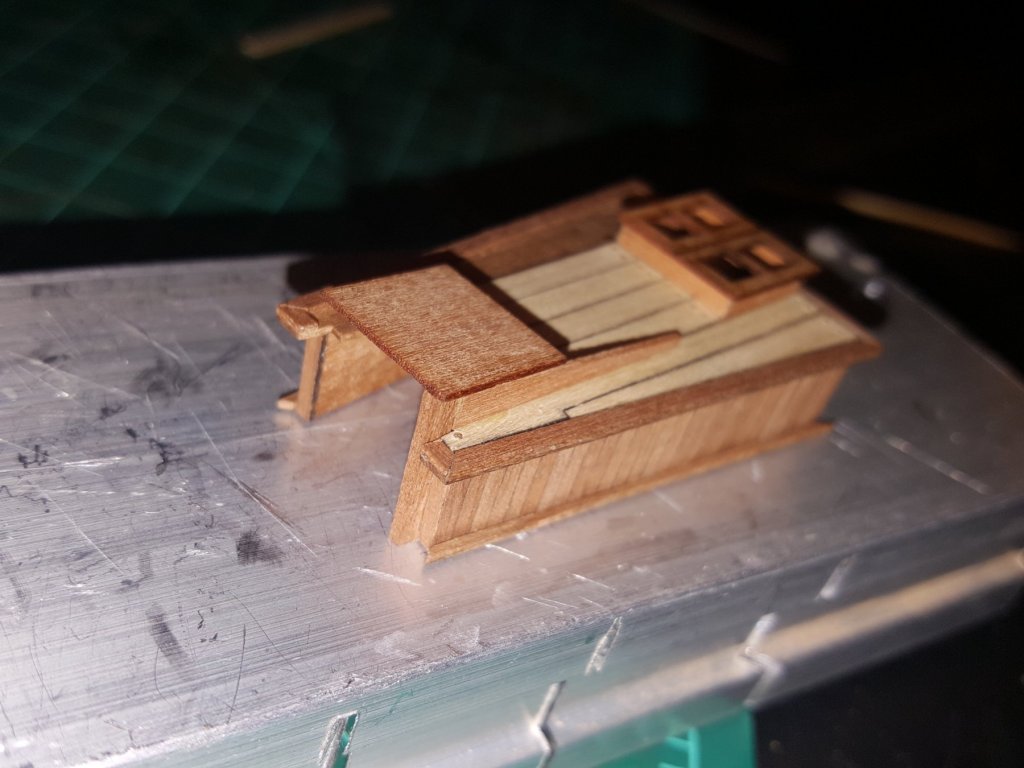
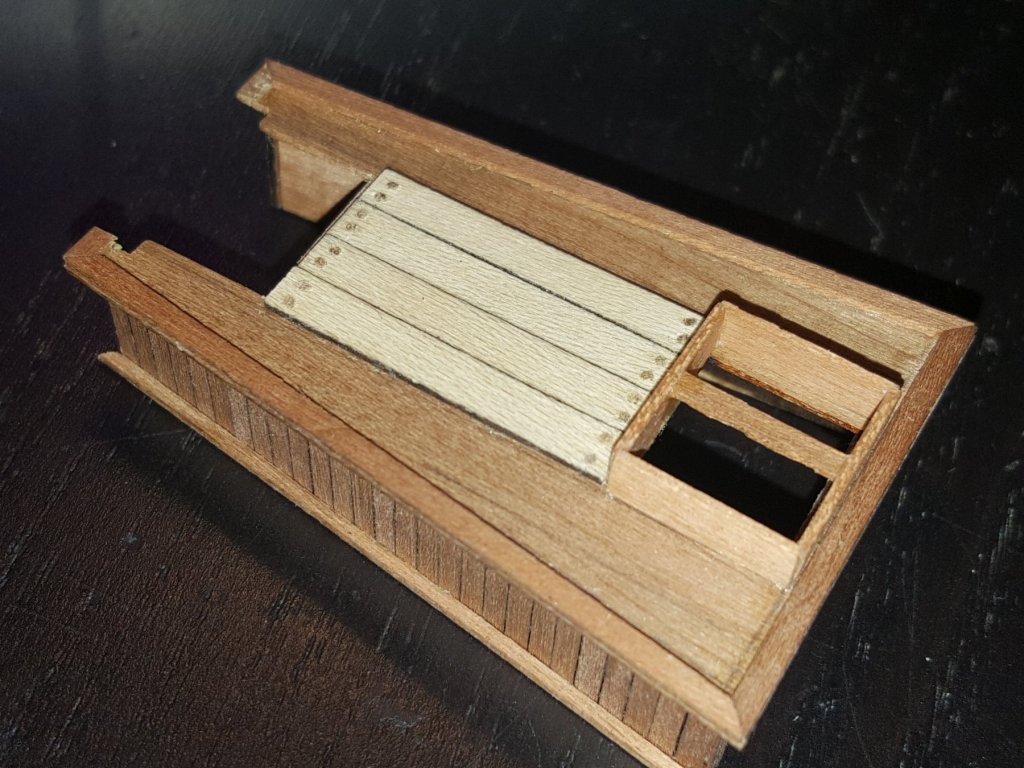
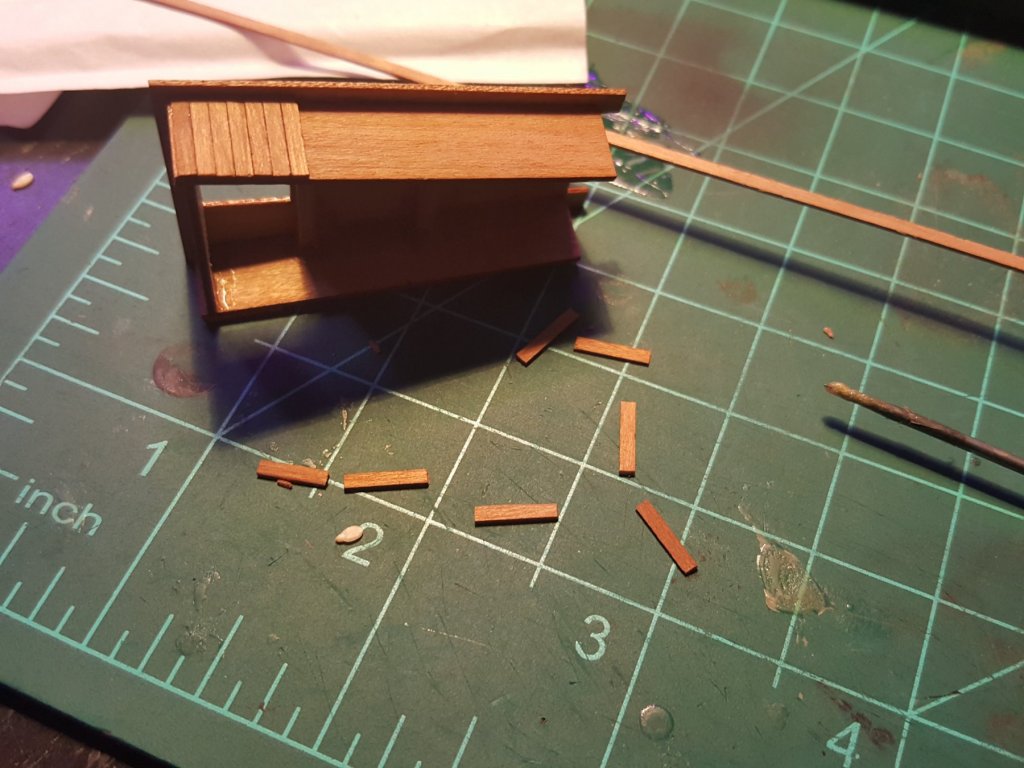
Hi everyone. Thank you again for the great feedback. Update as of March its been too cold to head to the laser cutter and finish the last bits of the carronade so in the meantime been working on the Stackhouse. Here you see I've finished the sides started planking the top so this will be my first time planking w decking material. The little plugs are done using toothpicks dipped in a mix of oak stain and natural. They are a tad dark in the pics bit initially I made them much darker so still managing to get the mix right. I like having them somewhat pronounced but then I plan on applying some weathering to the deck in time. Also note the edge plank has a margin. Im considering making thr skylight open from the sides not sure if this was historical or if I am embellishing but so far it looks neat. Next is the rear hatch which I am in the process of constructing. Stay tuned and let me know what you all think

- 362 replies
-
- 4
-
-
- active
- revenue cutter
- (and 1 more)
-
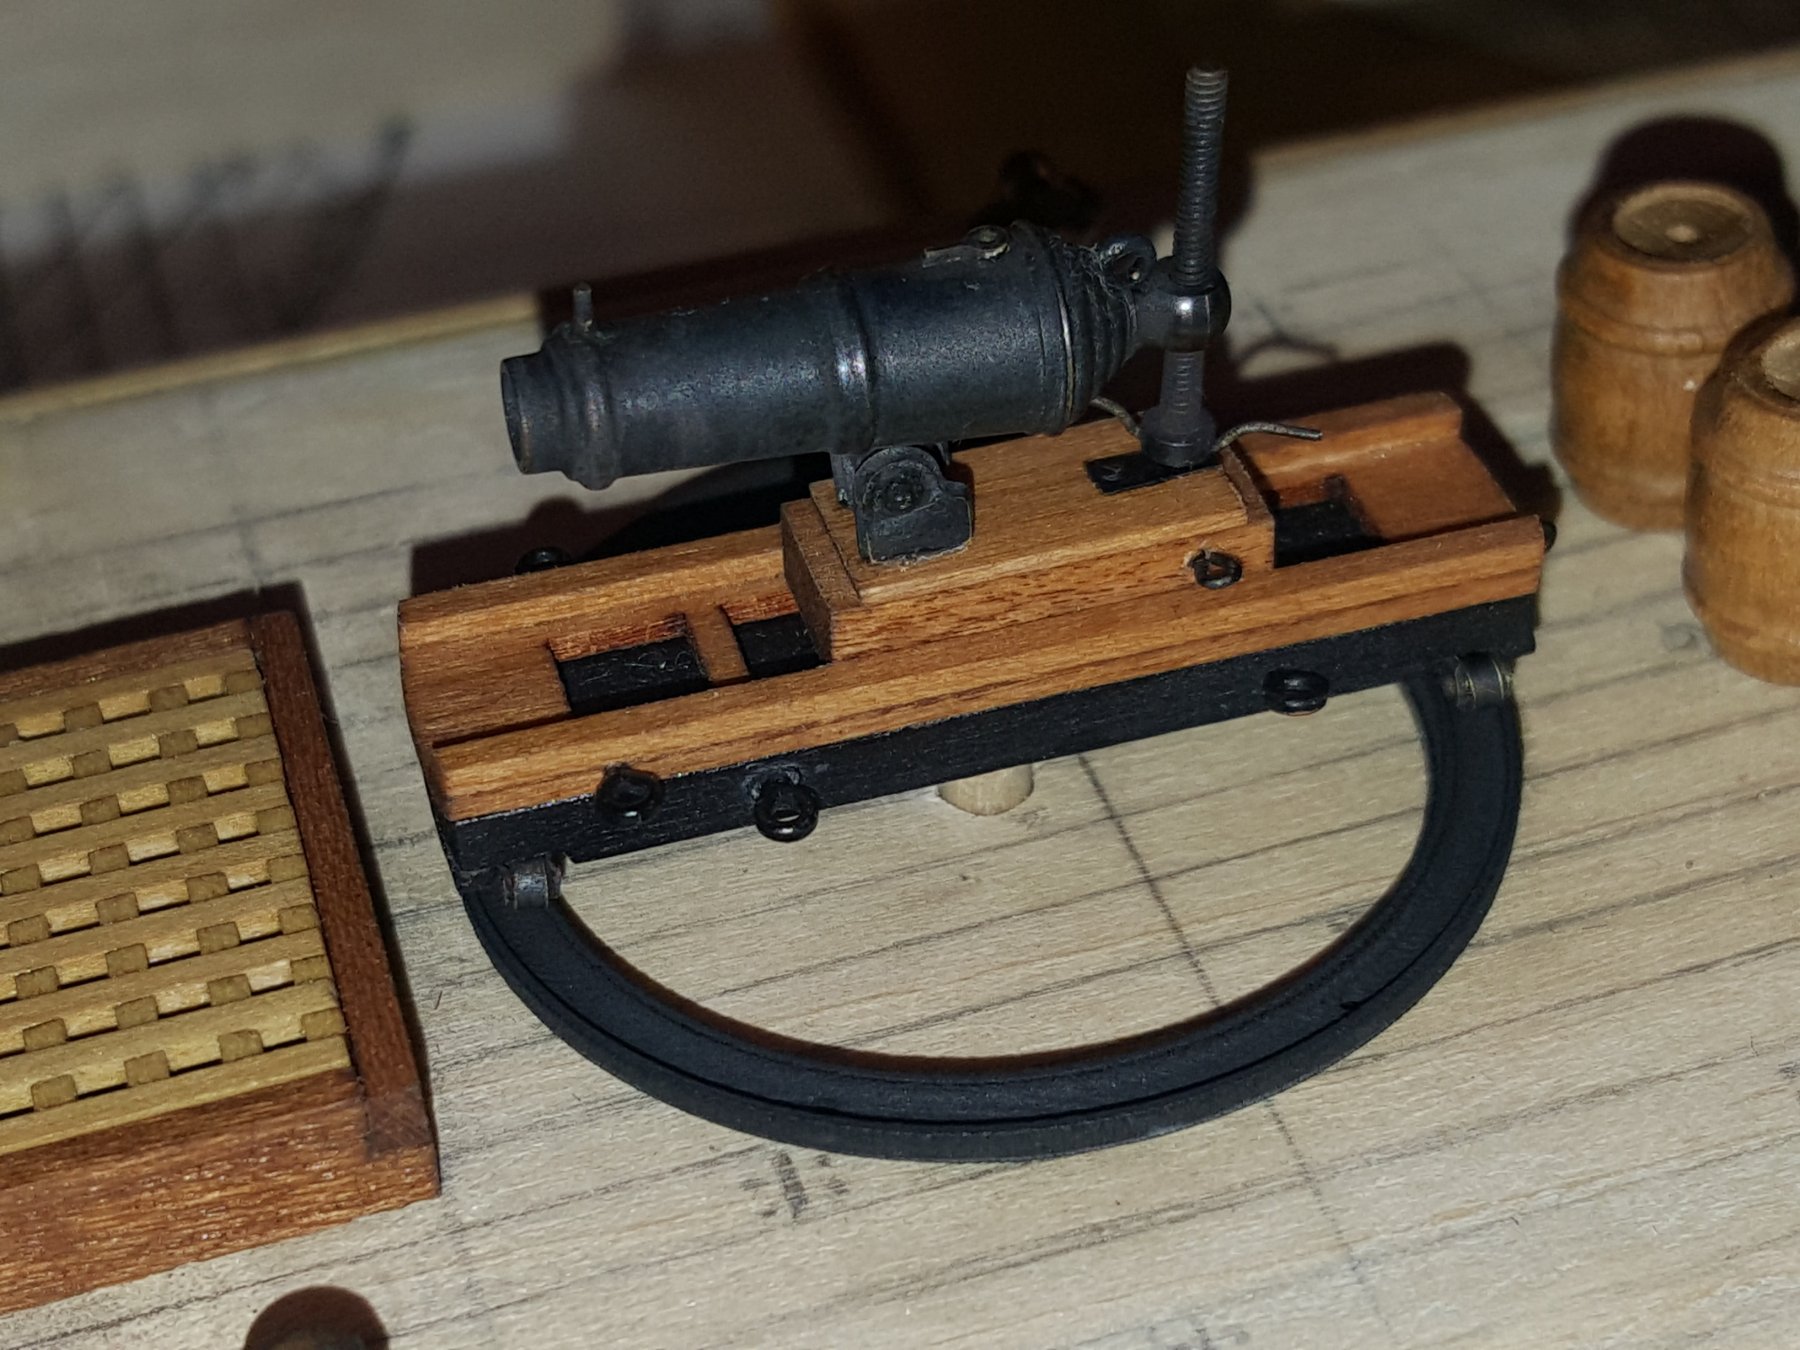
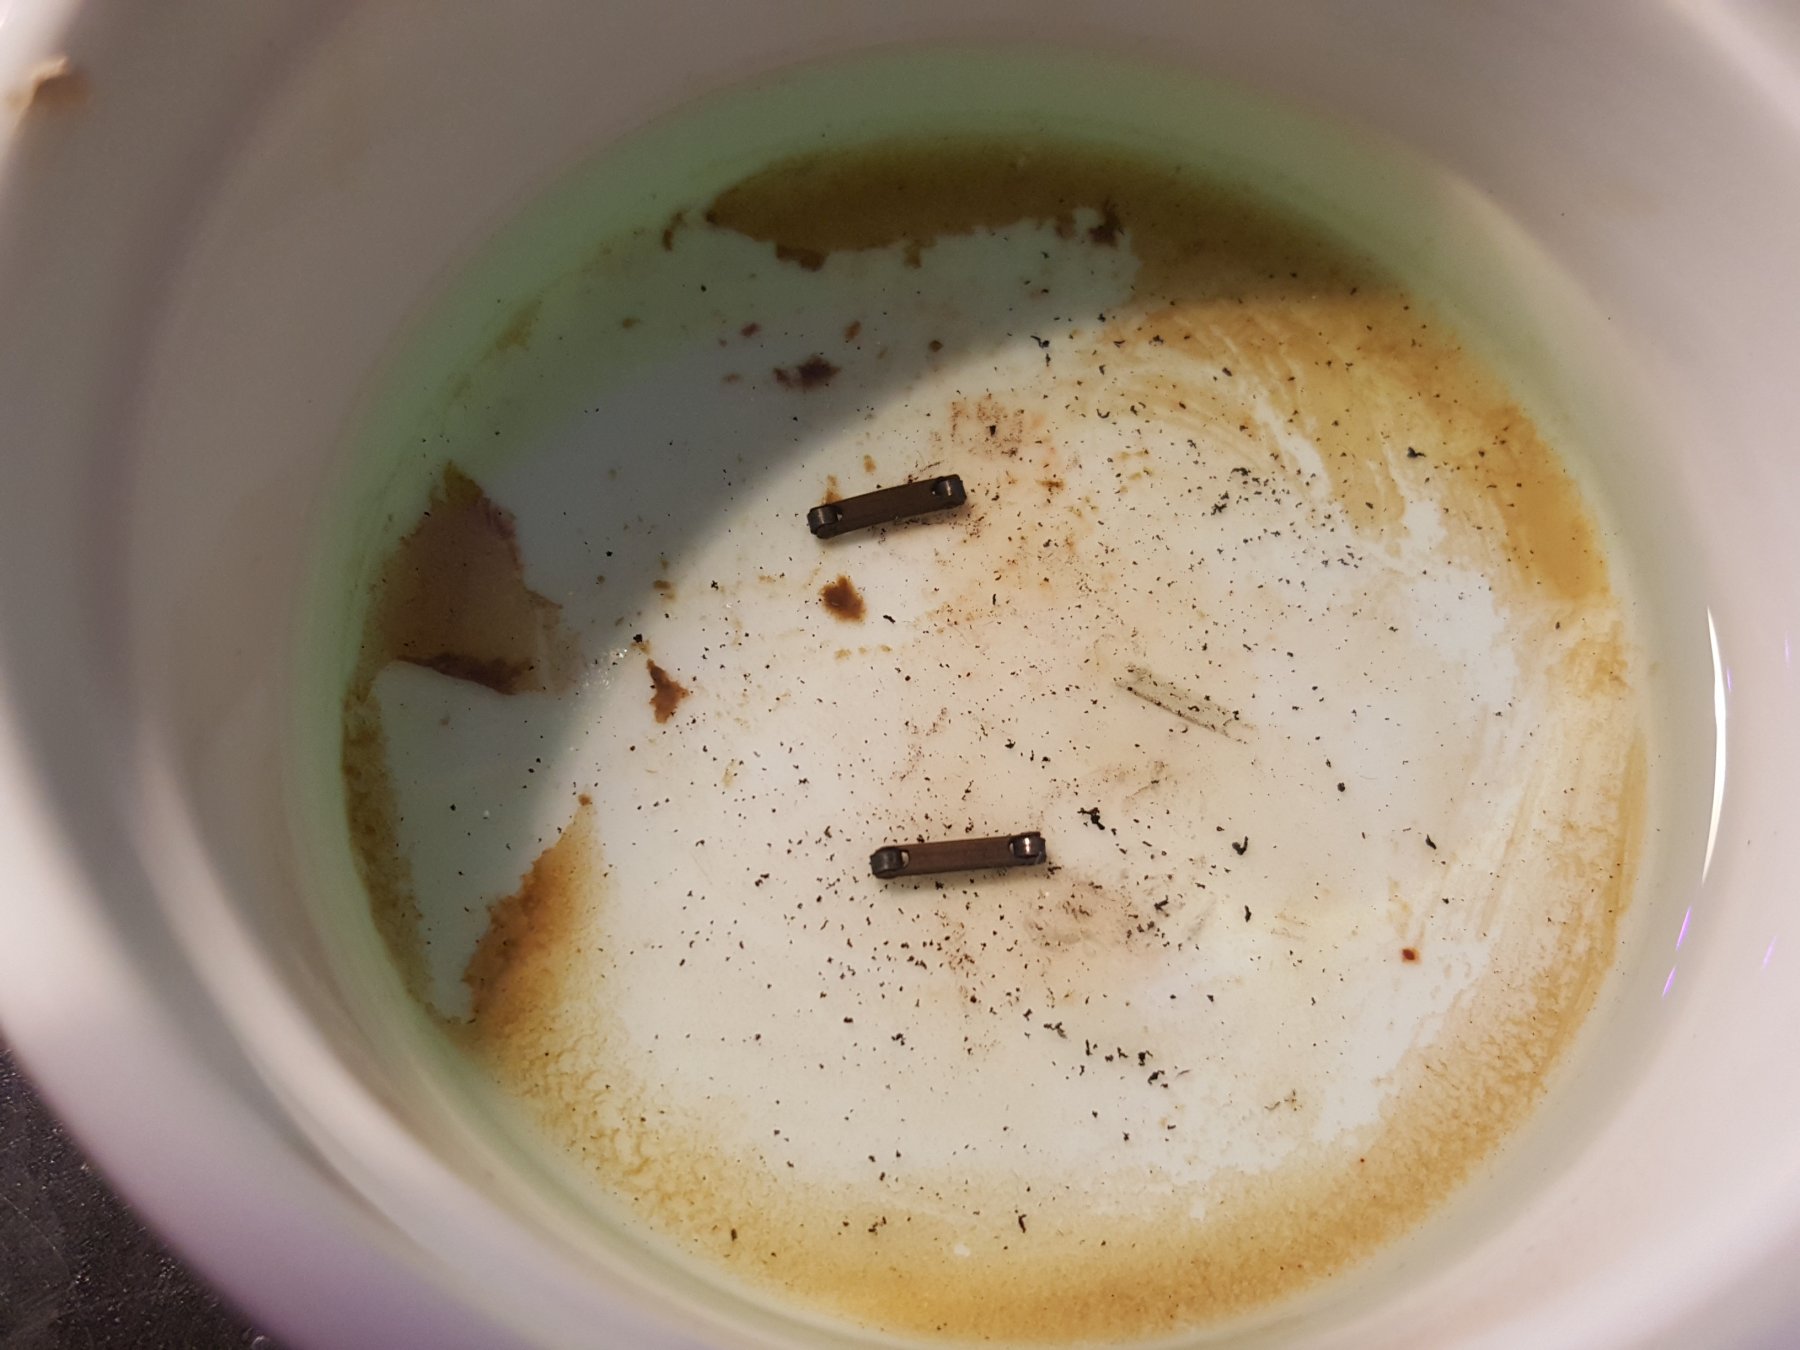
Good morning everyone. Here's a quick update I managed to finish the carronade and also painted the pivot ring. It still needs the wood treenails but you can get an idea how nice it looks and fits to the carriage wheels. The carronade was blackened rather than painted which maintains that metallic look. Also I've started working on the cabin/deckhouse planking the in sides and working months top bits. Overall very pleased


- 362 replies
-
- 14
-
-
- active
- revenue cutter
- (and 1 more)
-
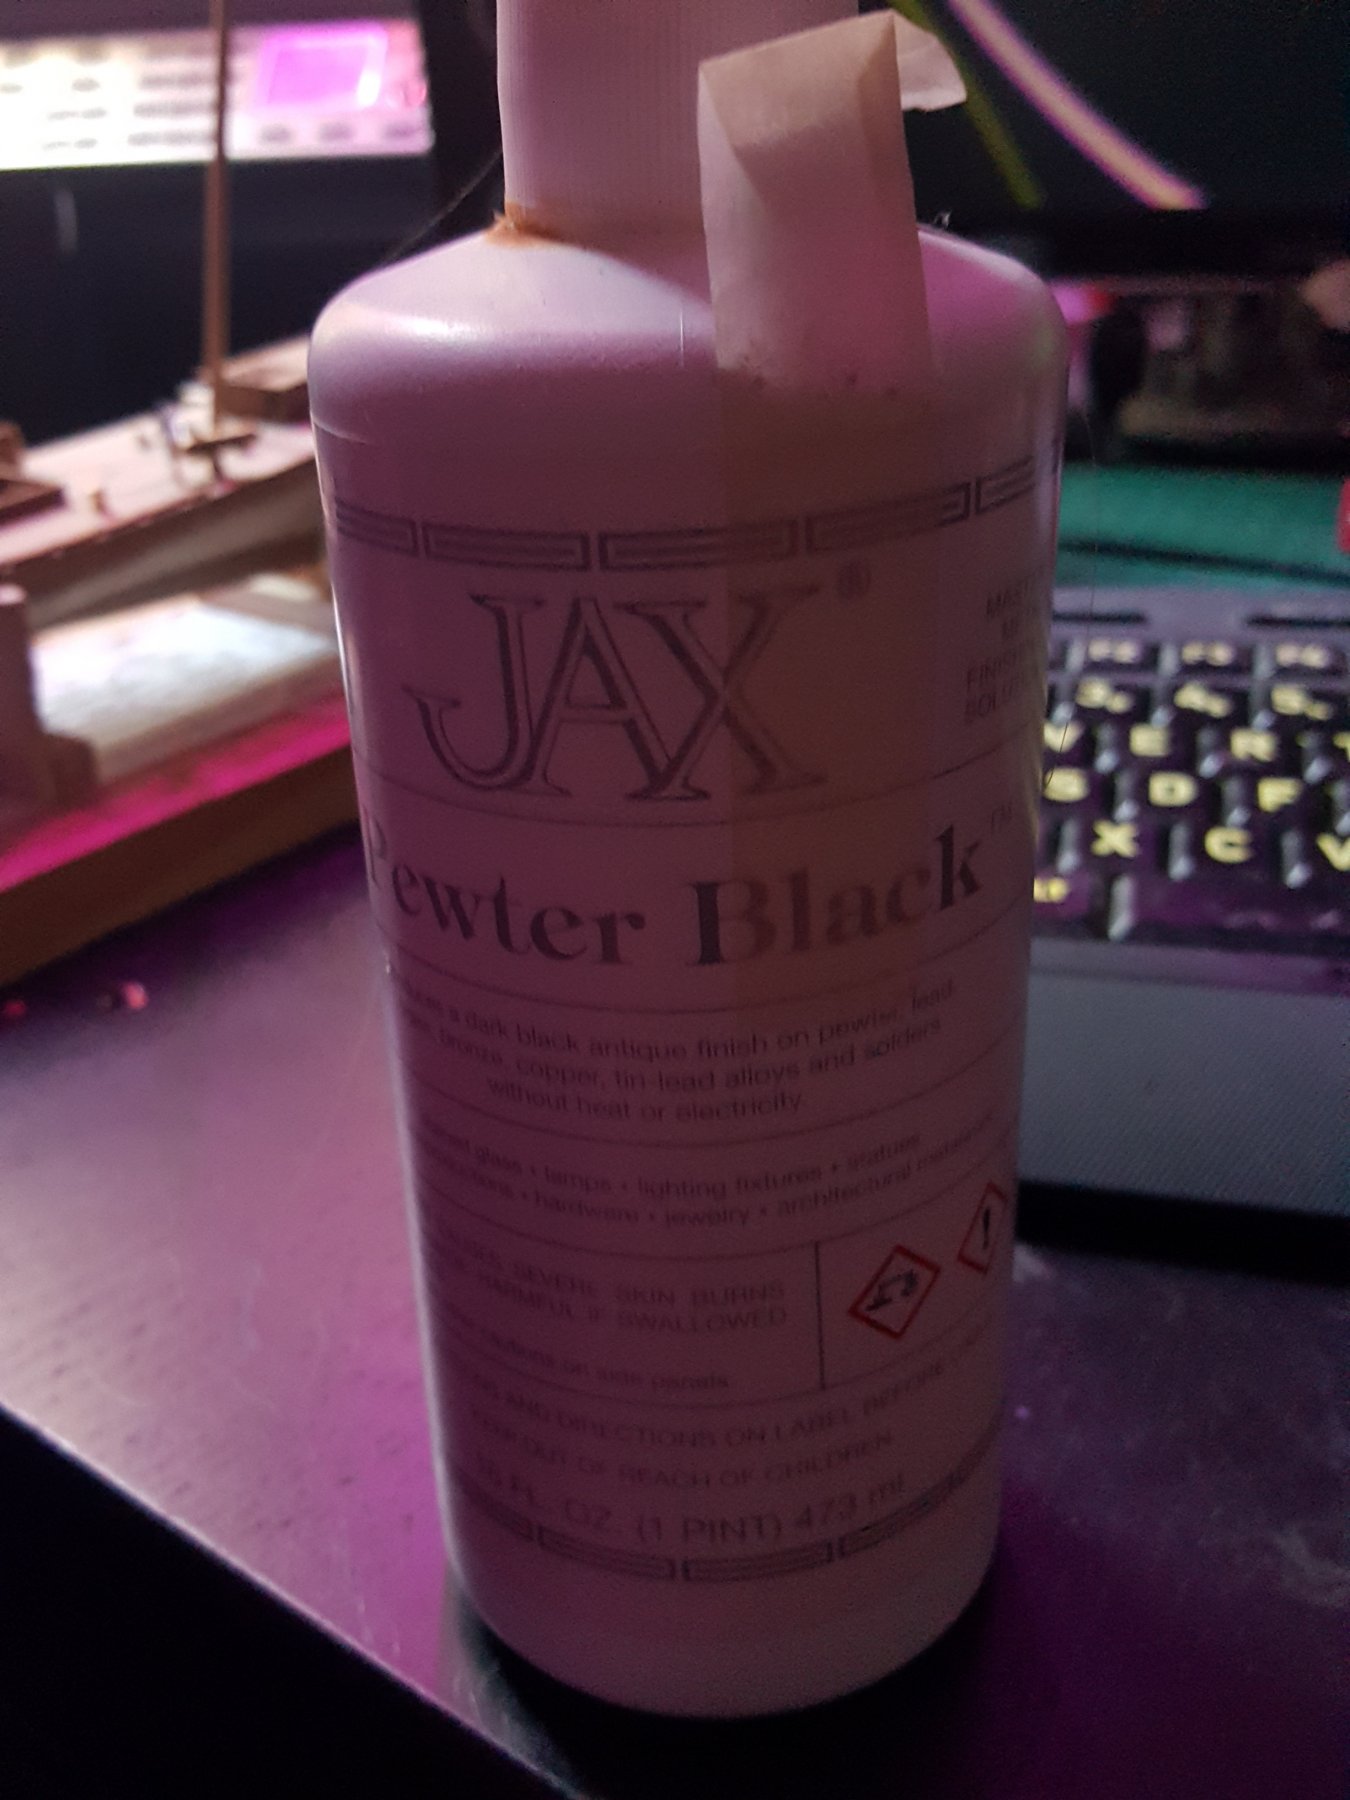
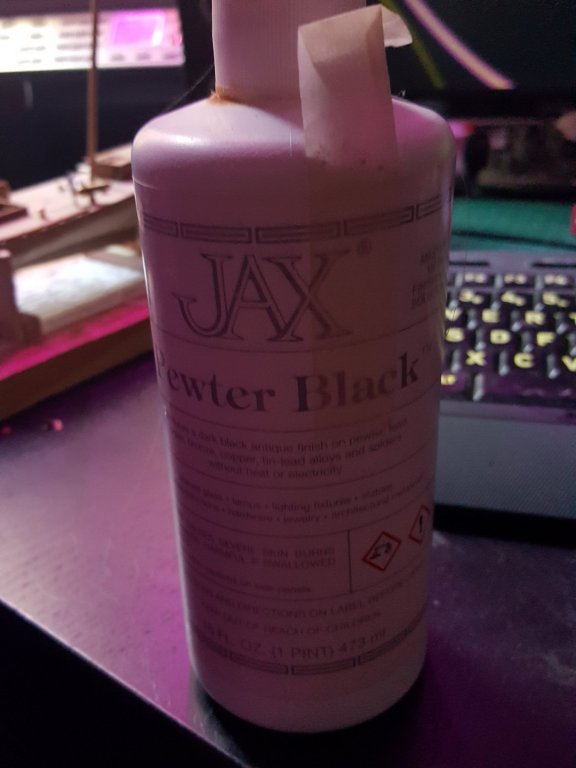
Thank you very much! You can see some progress was made I made the second wheel set and then used the jax blackening solution diluted which worked perfectly. Next step is to assemble the whole thing the carriage and carronade are almost done stay tuned!

- 362 replies
-
- 5
-
-
- active
- revenue cutter
- (and 1 more)