Supplies of the Ship Modeler's Handbook are running out. Get your copy NOW before they are gone! Click on photo to order.
×


CharlieZardoz
-
Posts
969 -
Joined
-
Last visited
Content Type
Profiles
Forums
Gallery
Events
Everything posted by CharlieZardoz
-
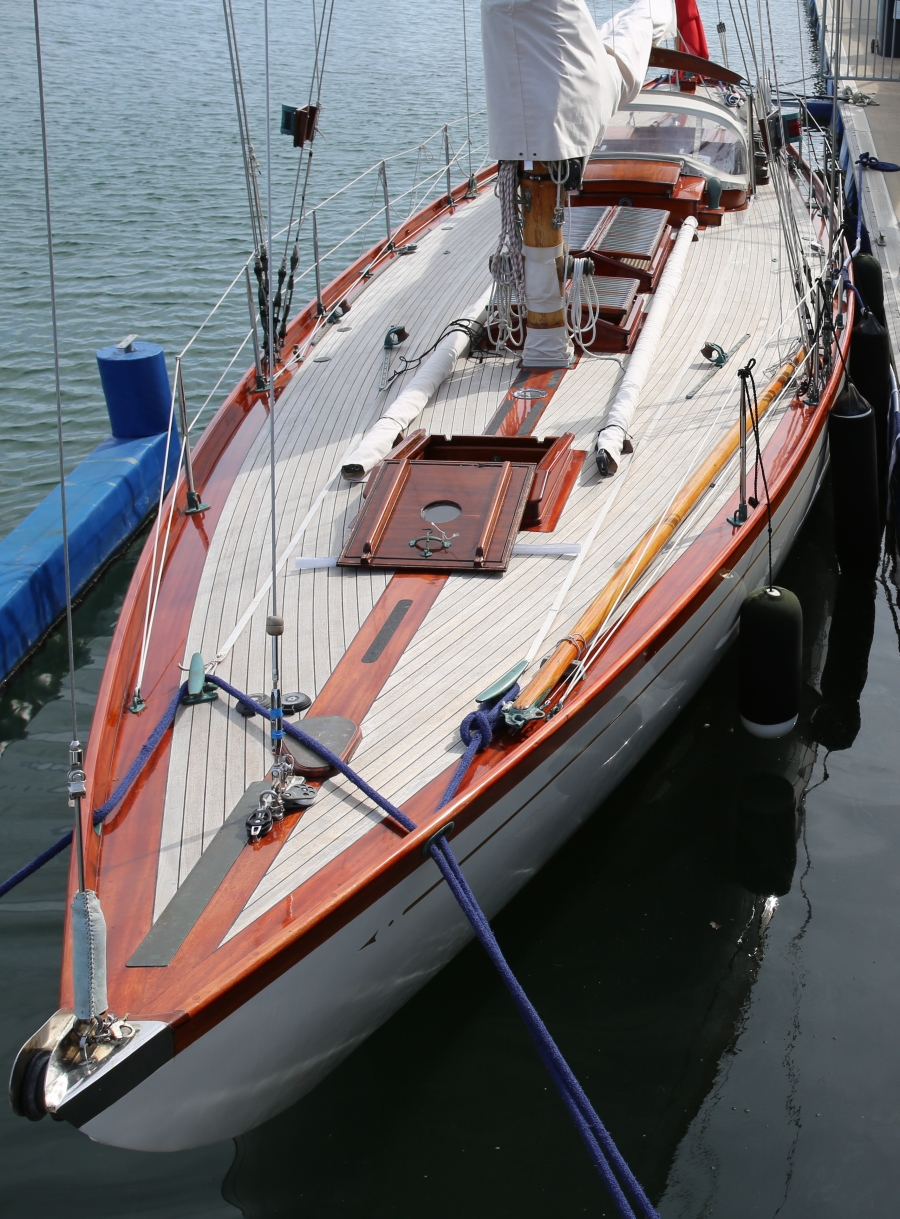
 Then you have option II which is the ship having a design more akin to a Baltimore Clipper (ship image is the Pride of Baltimore II). This is featured in the Lively model by Lumbreyard, the Krick and Mamoli kits as well with the stanchion posts not on the waterway but bulwark railing itself. Generally speaking I like this look a lot better and is how I am making my model look however I wouldn't mind some thoughts and how such a ship could have been set up why some models may have chosen one approach over the other there is still time before I am fully committed.
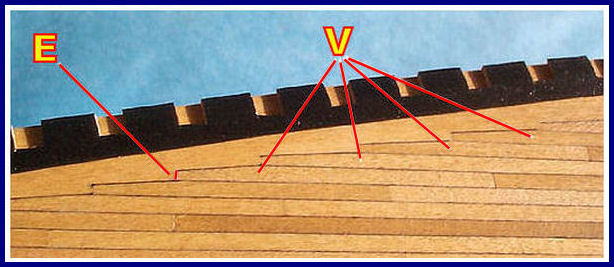
- 362 replies
-
- 4
-

-
- active
- revenue cutter
- (and 1 more)
-
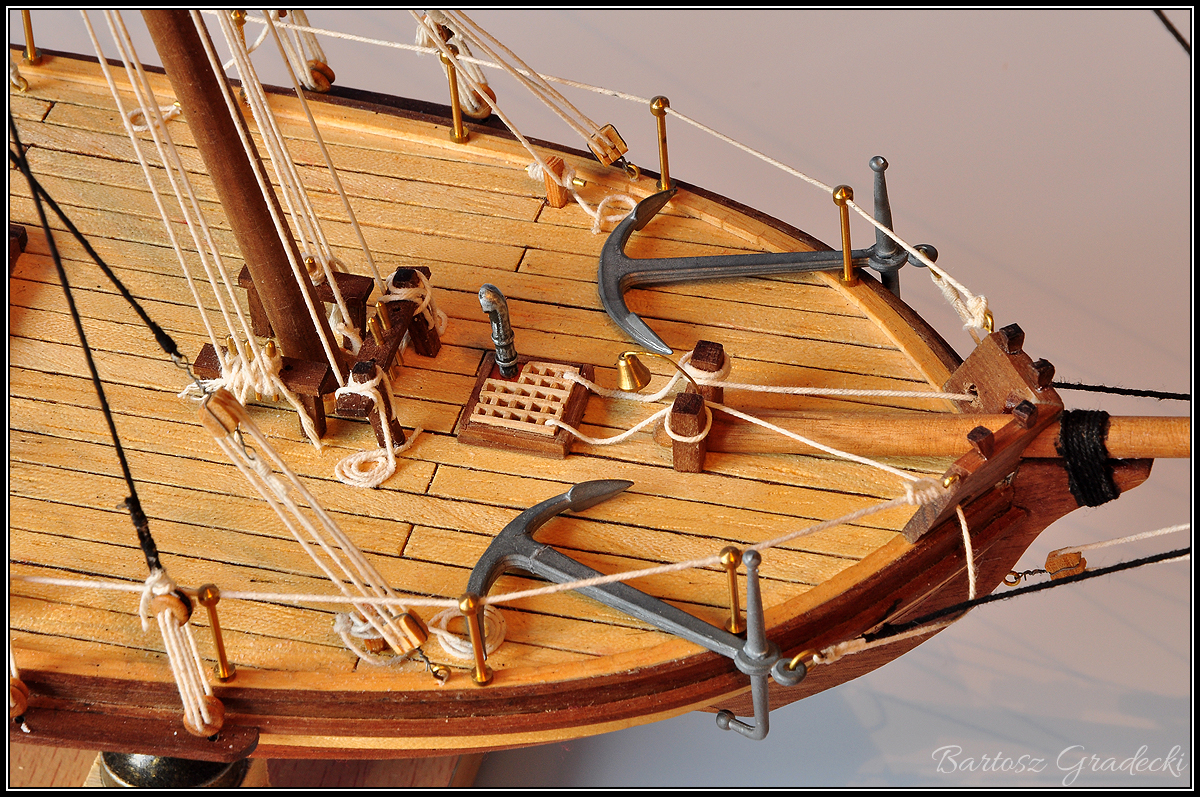
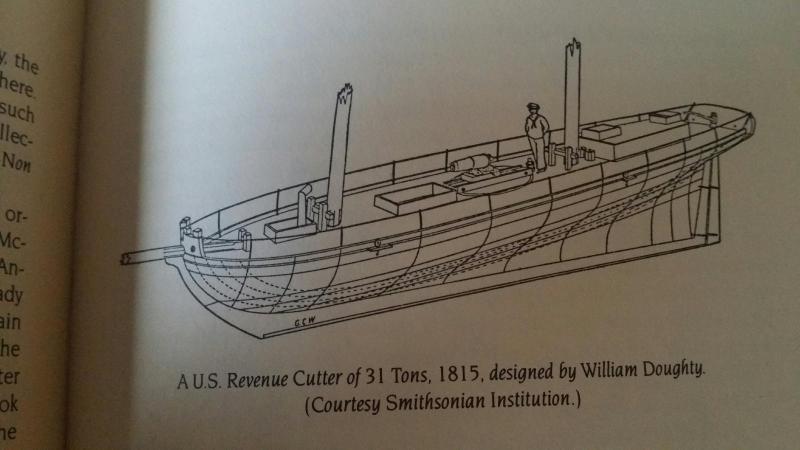
So here is my thoughts on the bulwark. Chapelle's "reconstruction" essentially sees the ship's upper works the same as a yacht or other small vessel. I've been looking at images of various boats out there and you can see a similarity just a small lip for a railing and the rails themselves lined up on the waterway. AL's Dallas and the Bluejacket kit follow this line but there is another way I've seen.


- 362 replies
-
- 4
-
-
- active
- revenue cutter
- (and 1 more)
-
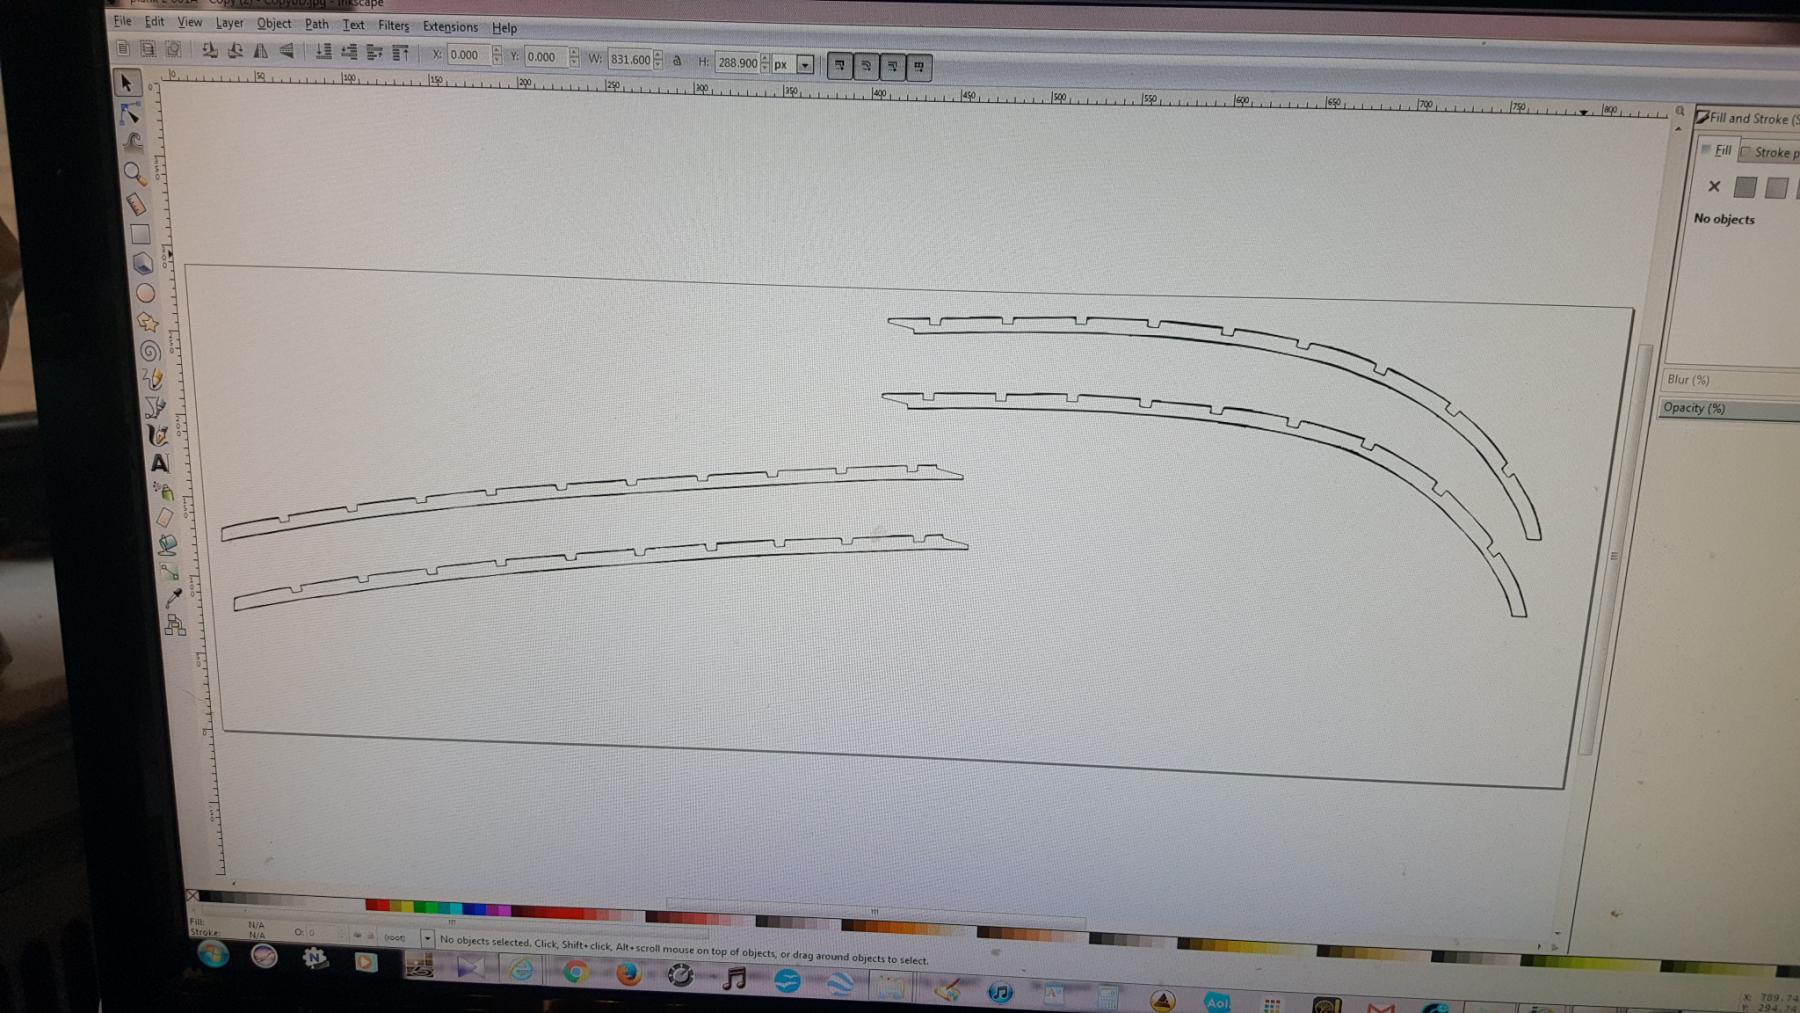
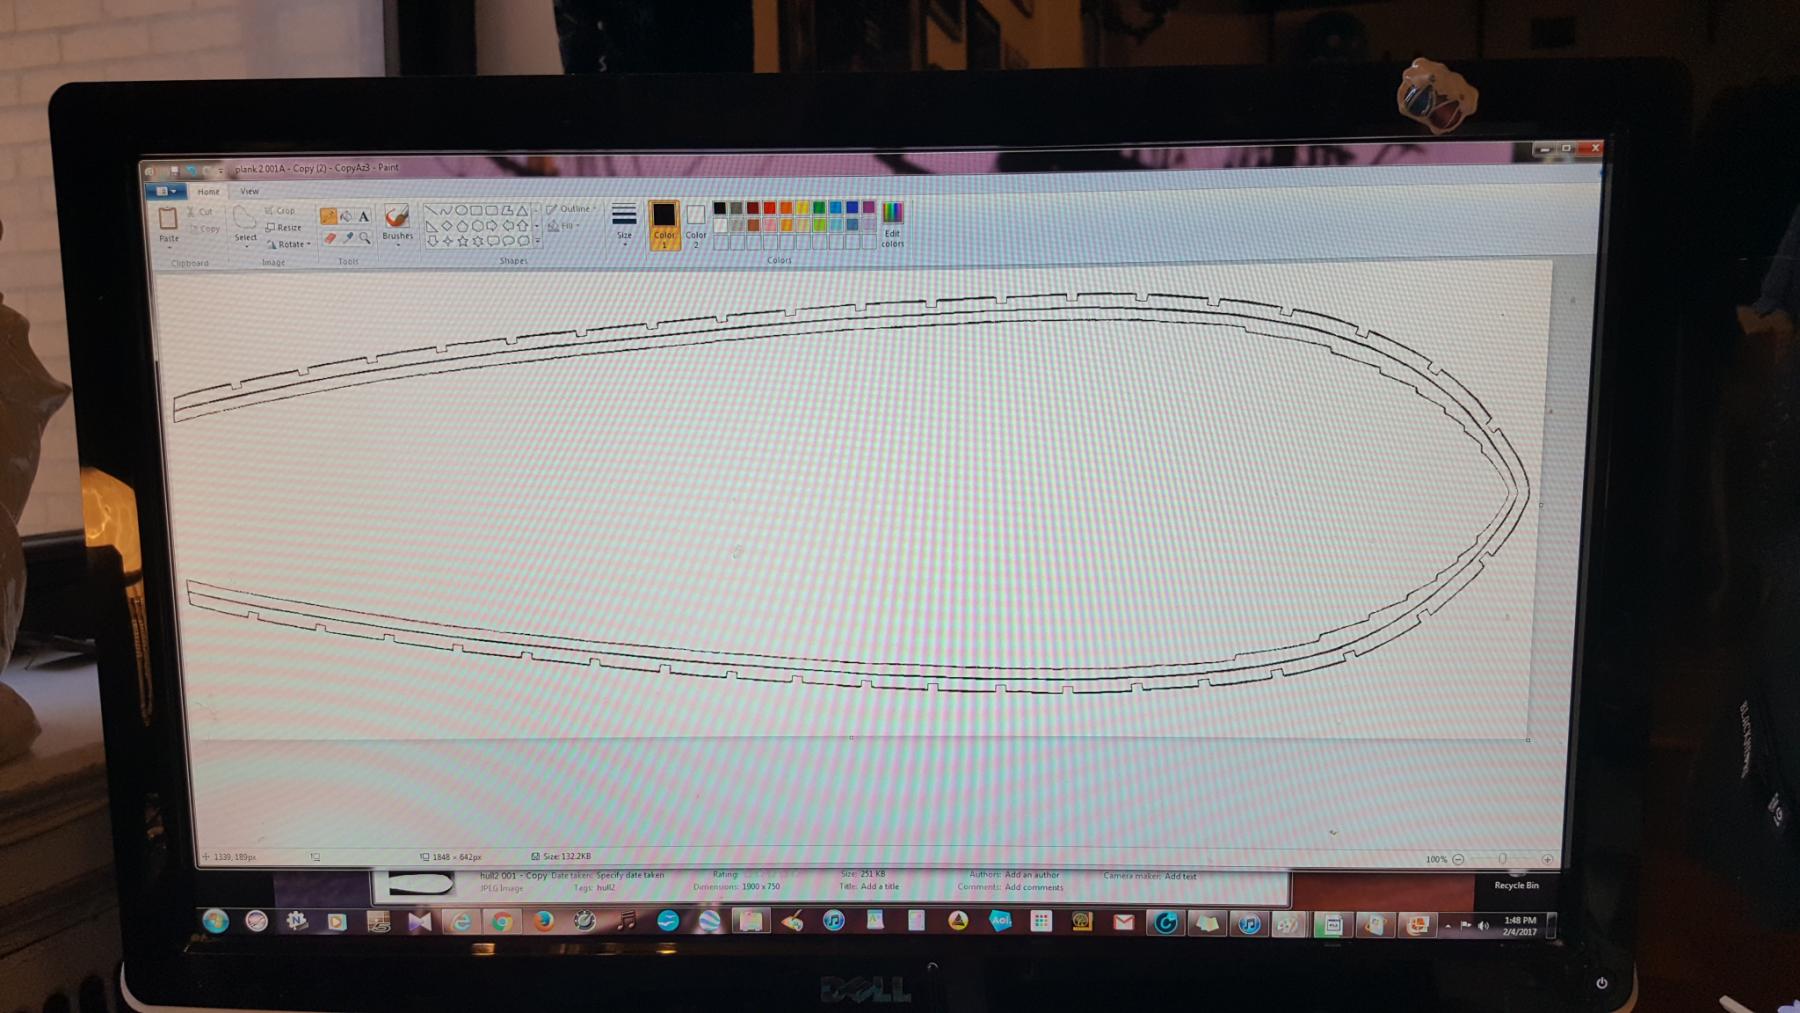
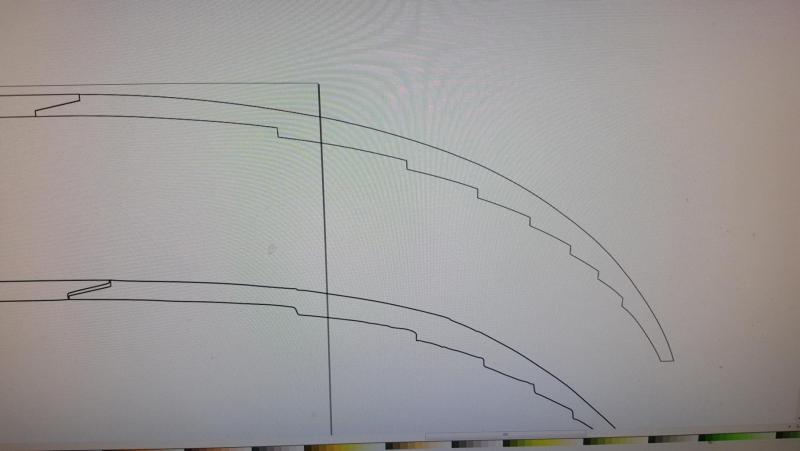
And remember always with laser templates A. overlap when you have joints and also add a pixel of extra length so that way the laser can burn off that extra amount and you will get the size you need!

- 362 replies
-
- 5
-
-
- active
- revenue cutter
- (and 1 more)
-
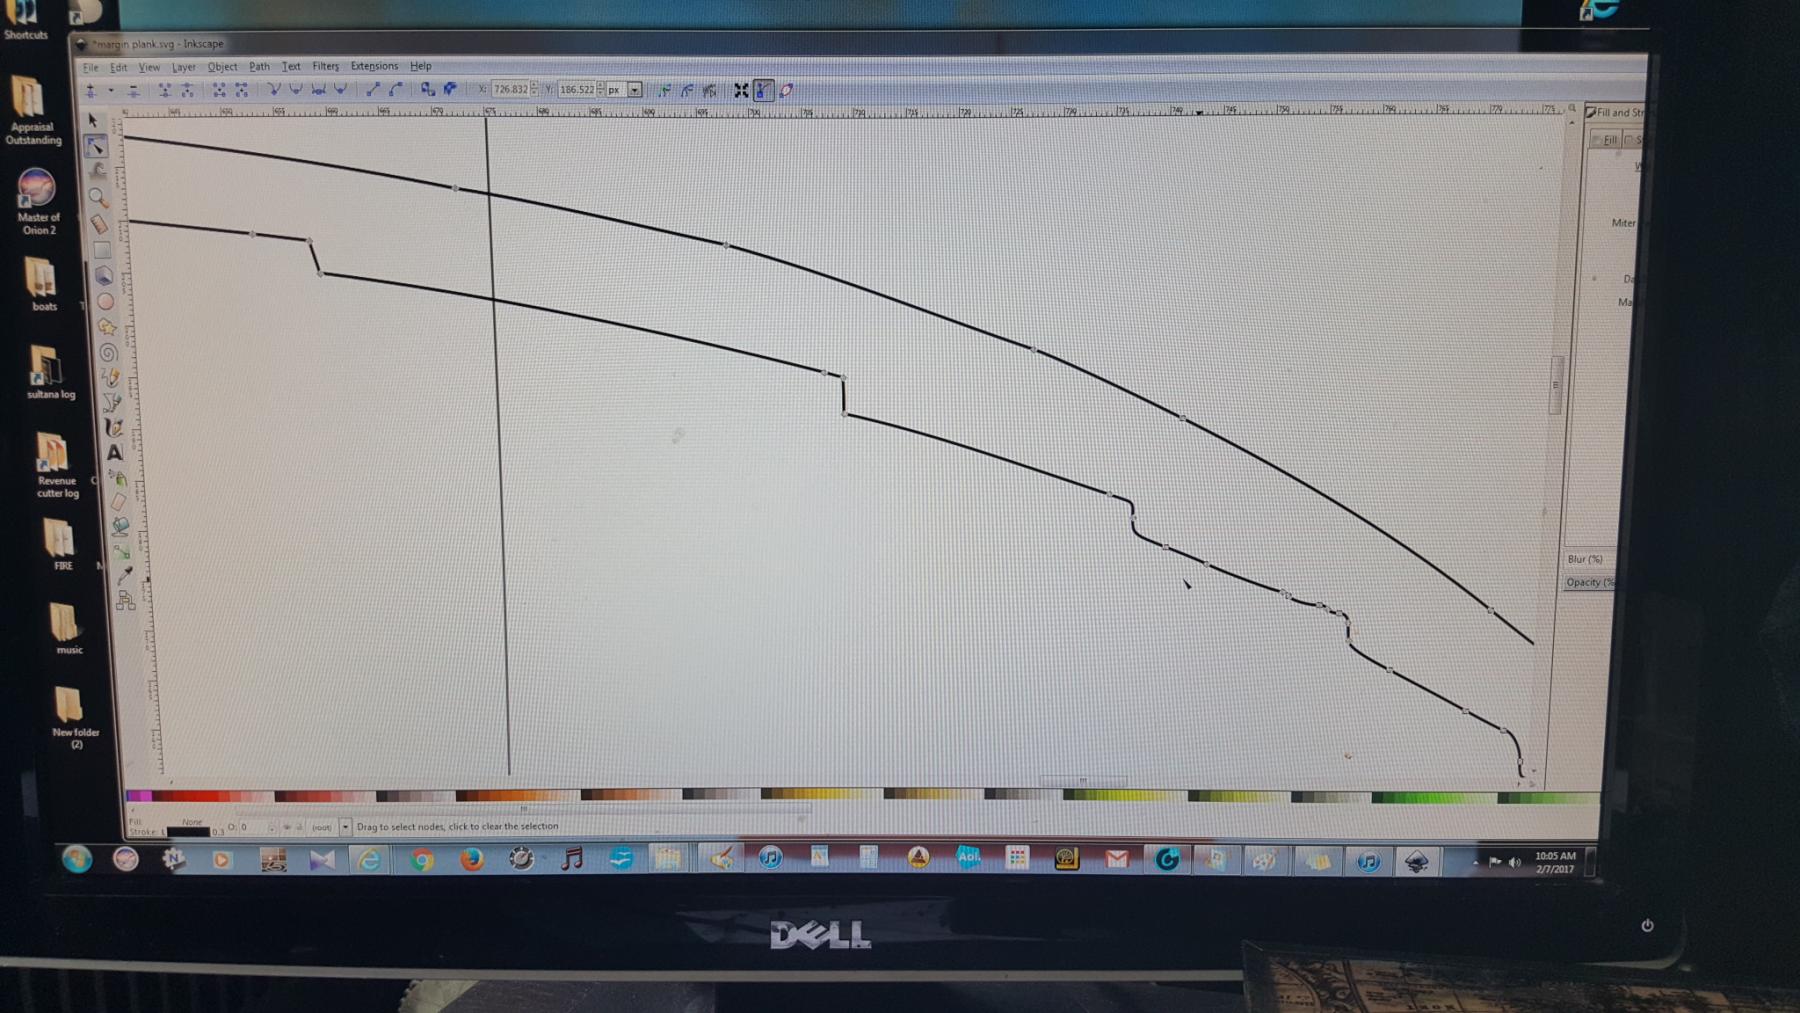
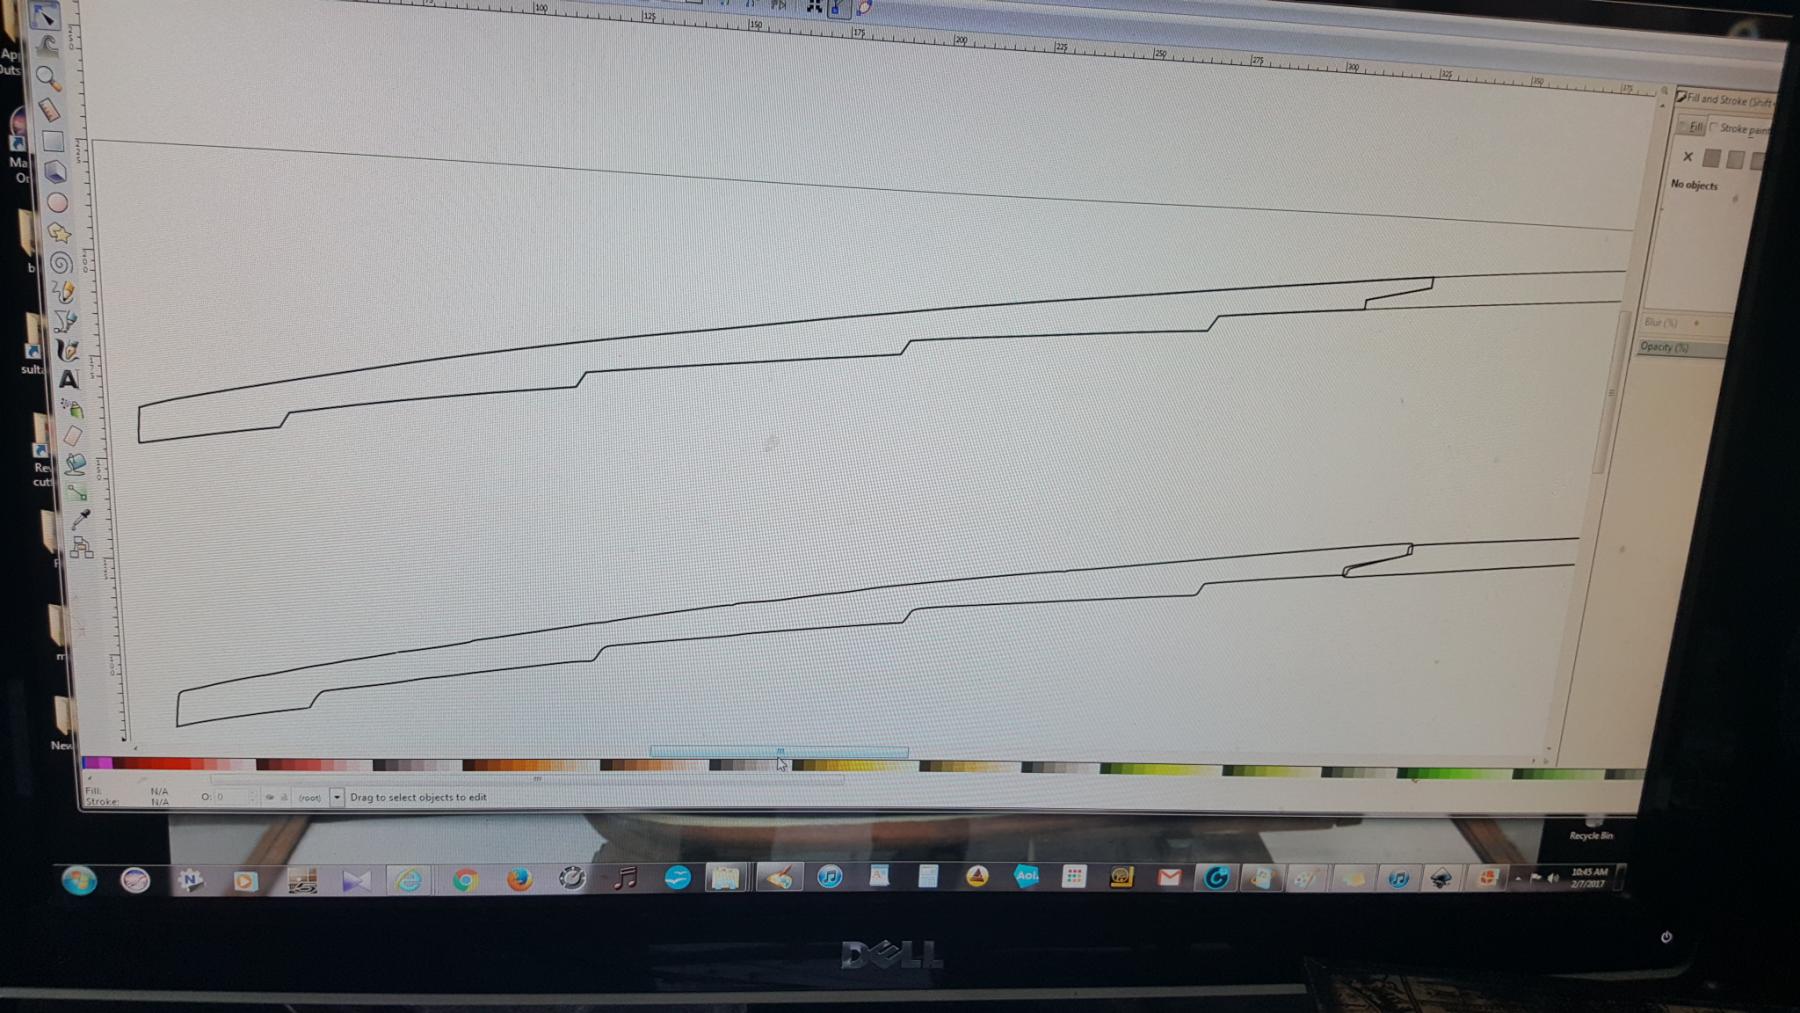
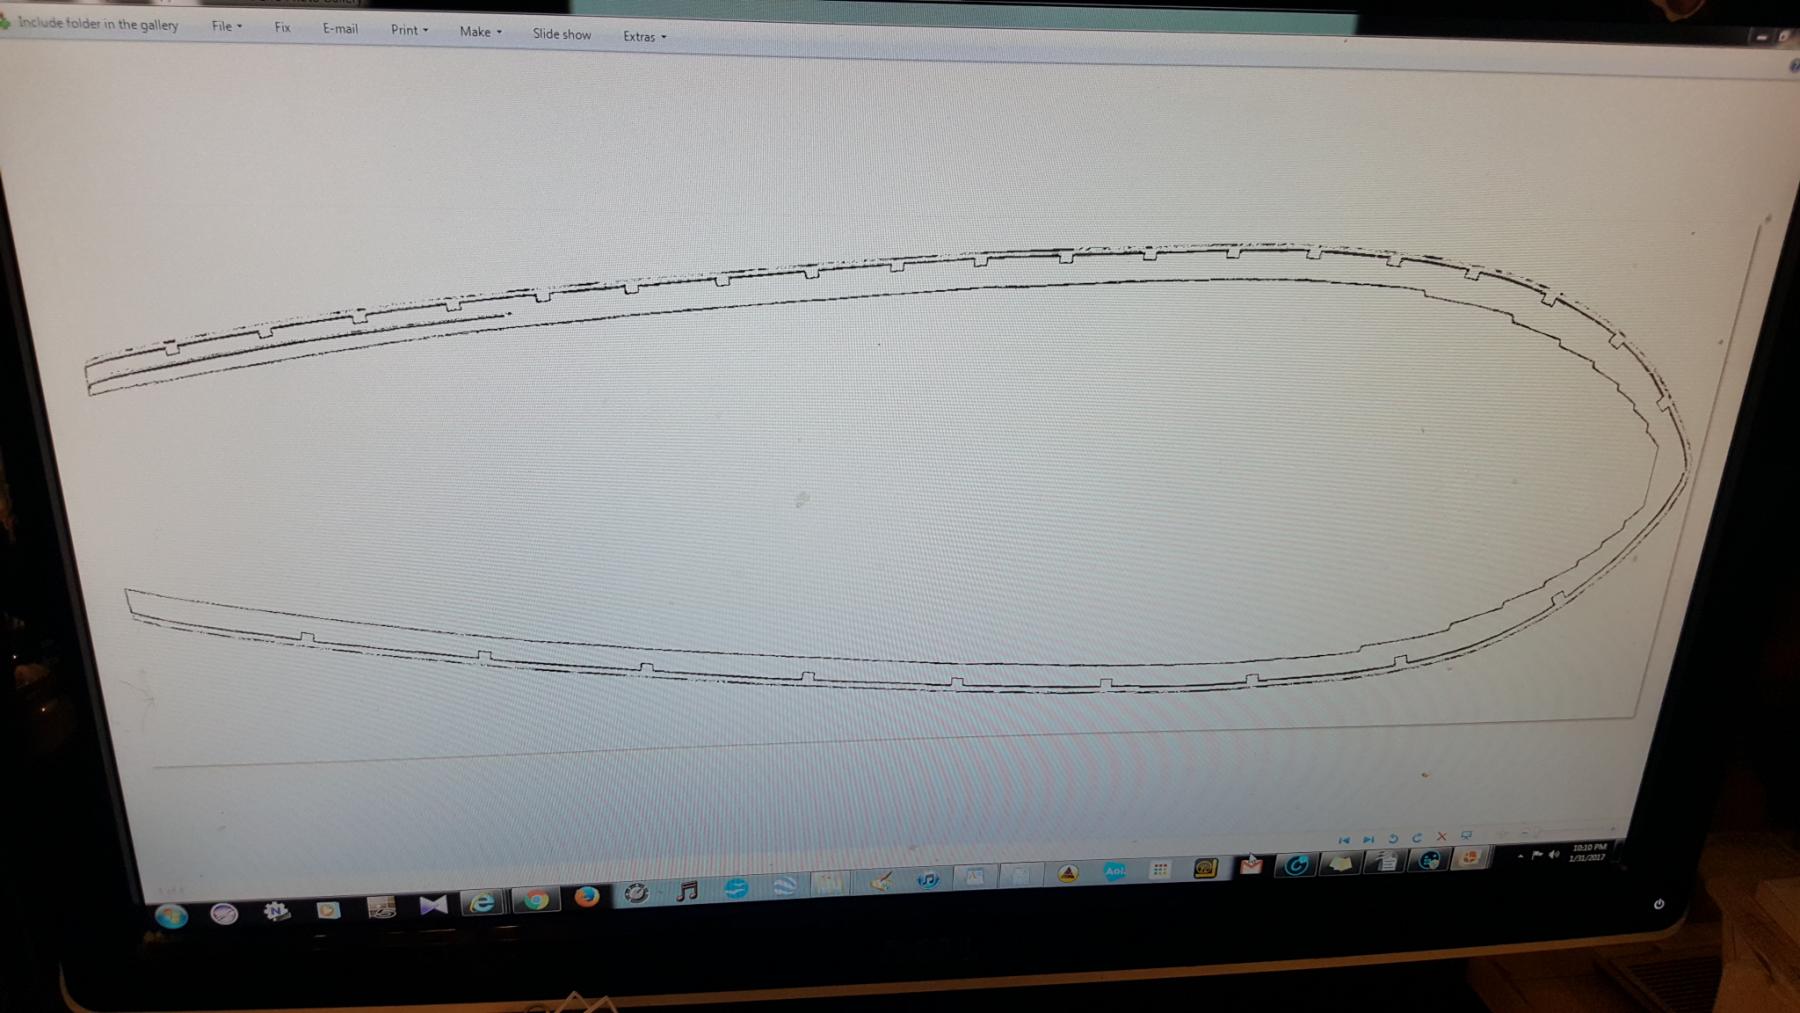
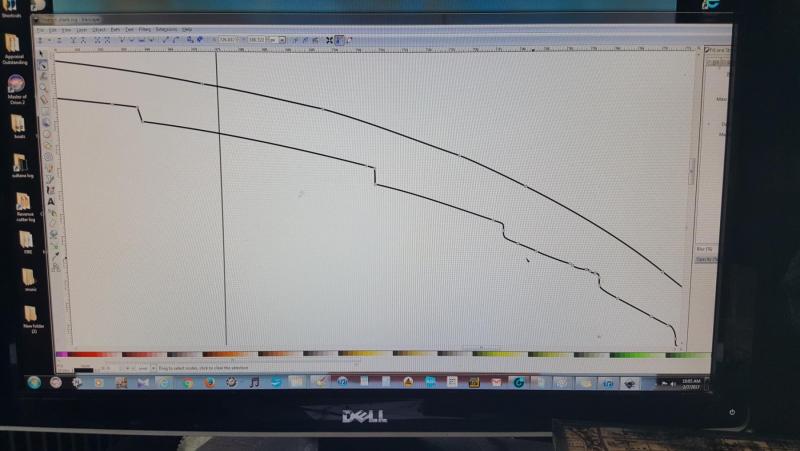
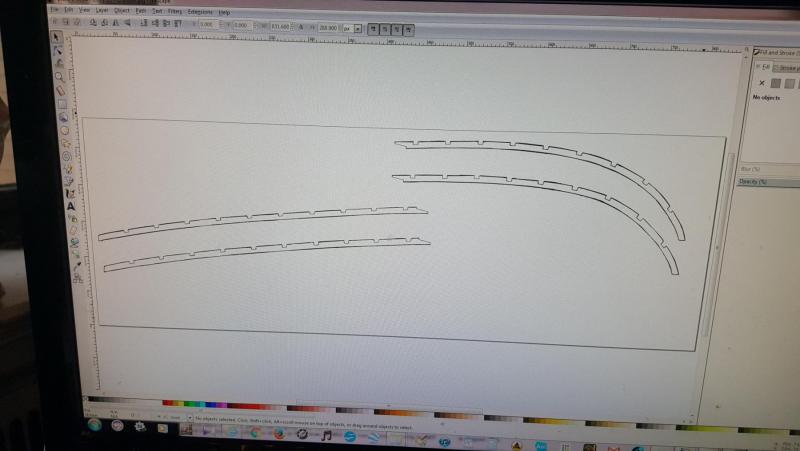
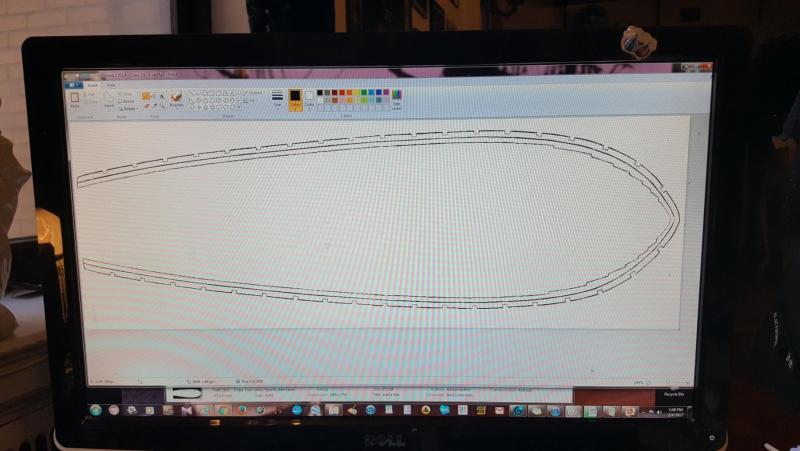
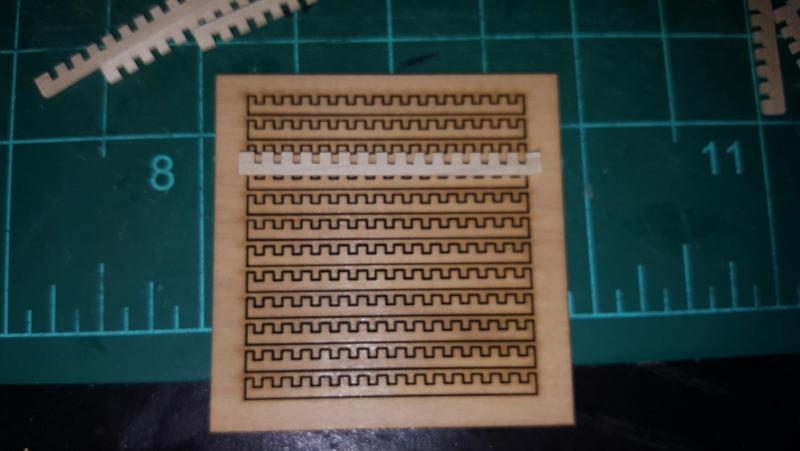
So here is what I've been up to in the last week. Basically getting the templates for the waterways and margin planks ready for the laser. The margin planks will be made from holly veneer and the waterways will be Cherry (like 1 mm or something a bit thicker) and painted white with the stanchion bits added to made a tiny bulwark. Here you can see a paper printed example of what it will look like on the model. You can also see I did a pattern for the treenails where each plank ends/begins. I think it looks ok the planks represent about 15' in length and I tried to follow the 1,3,5,2,4 pattern but there weren't many needed on this small ship.

- 362 replies
-
- 4
-
-
- active
- revenue cutter
- (and 1 more)
-
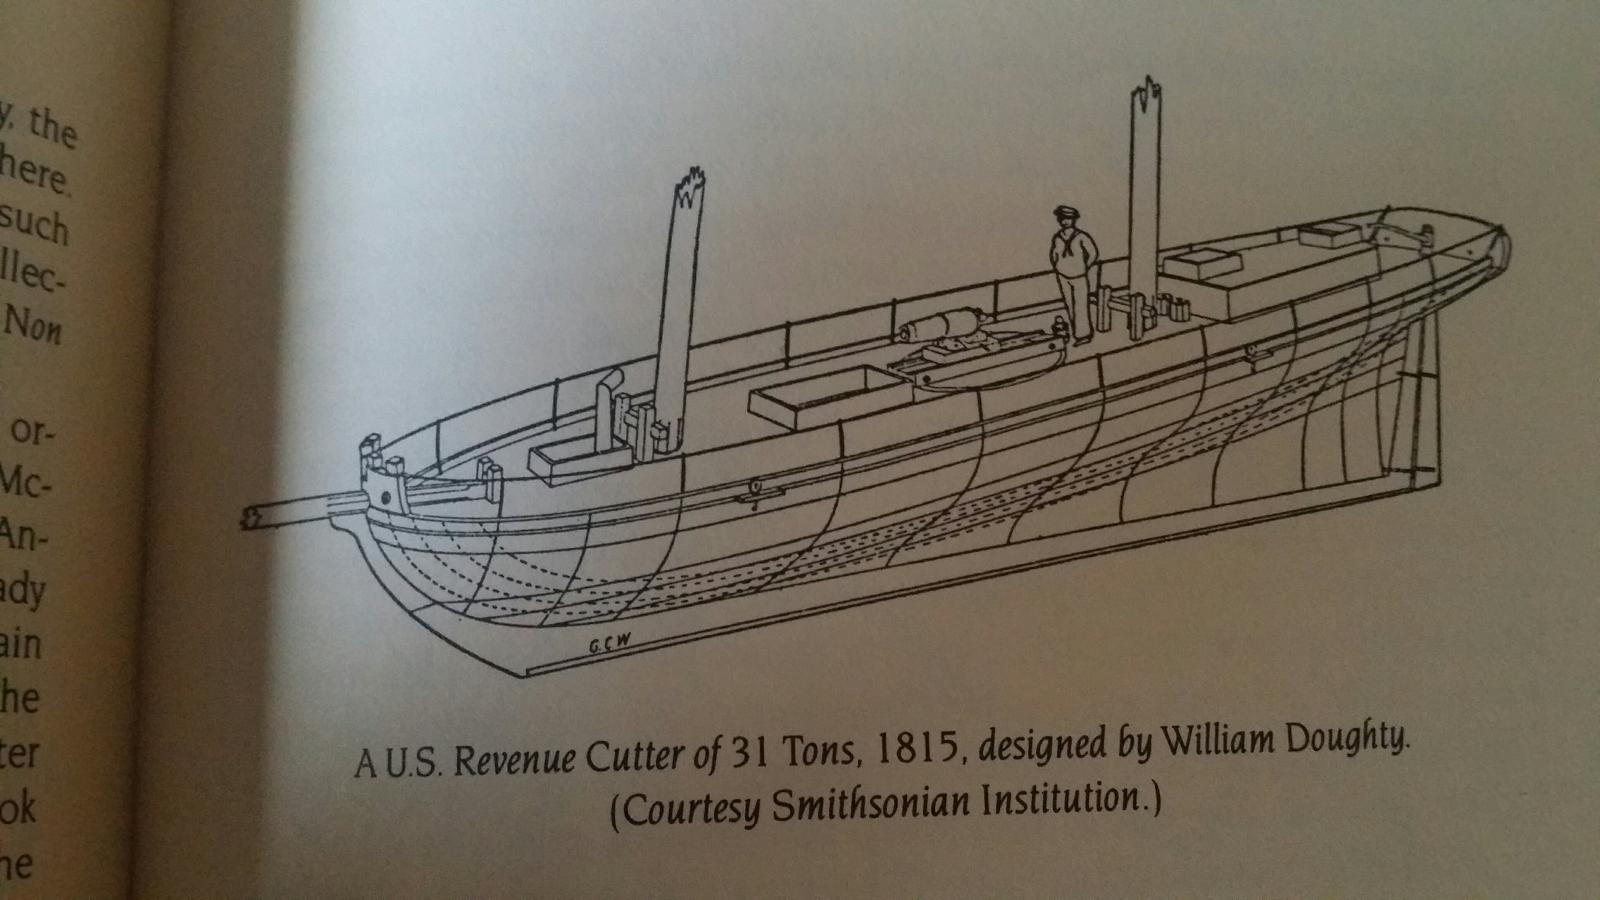
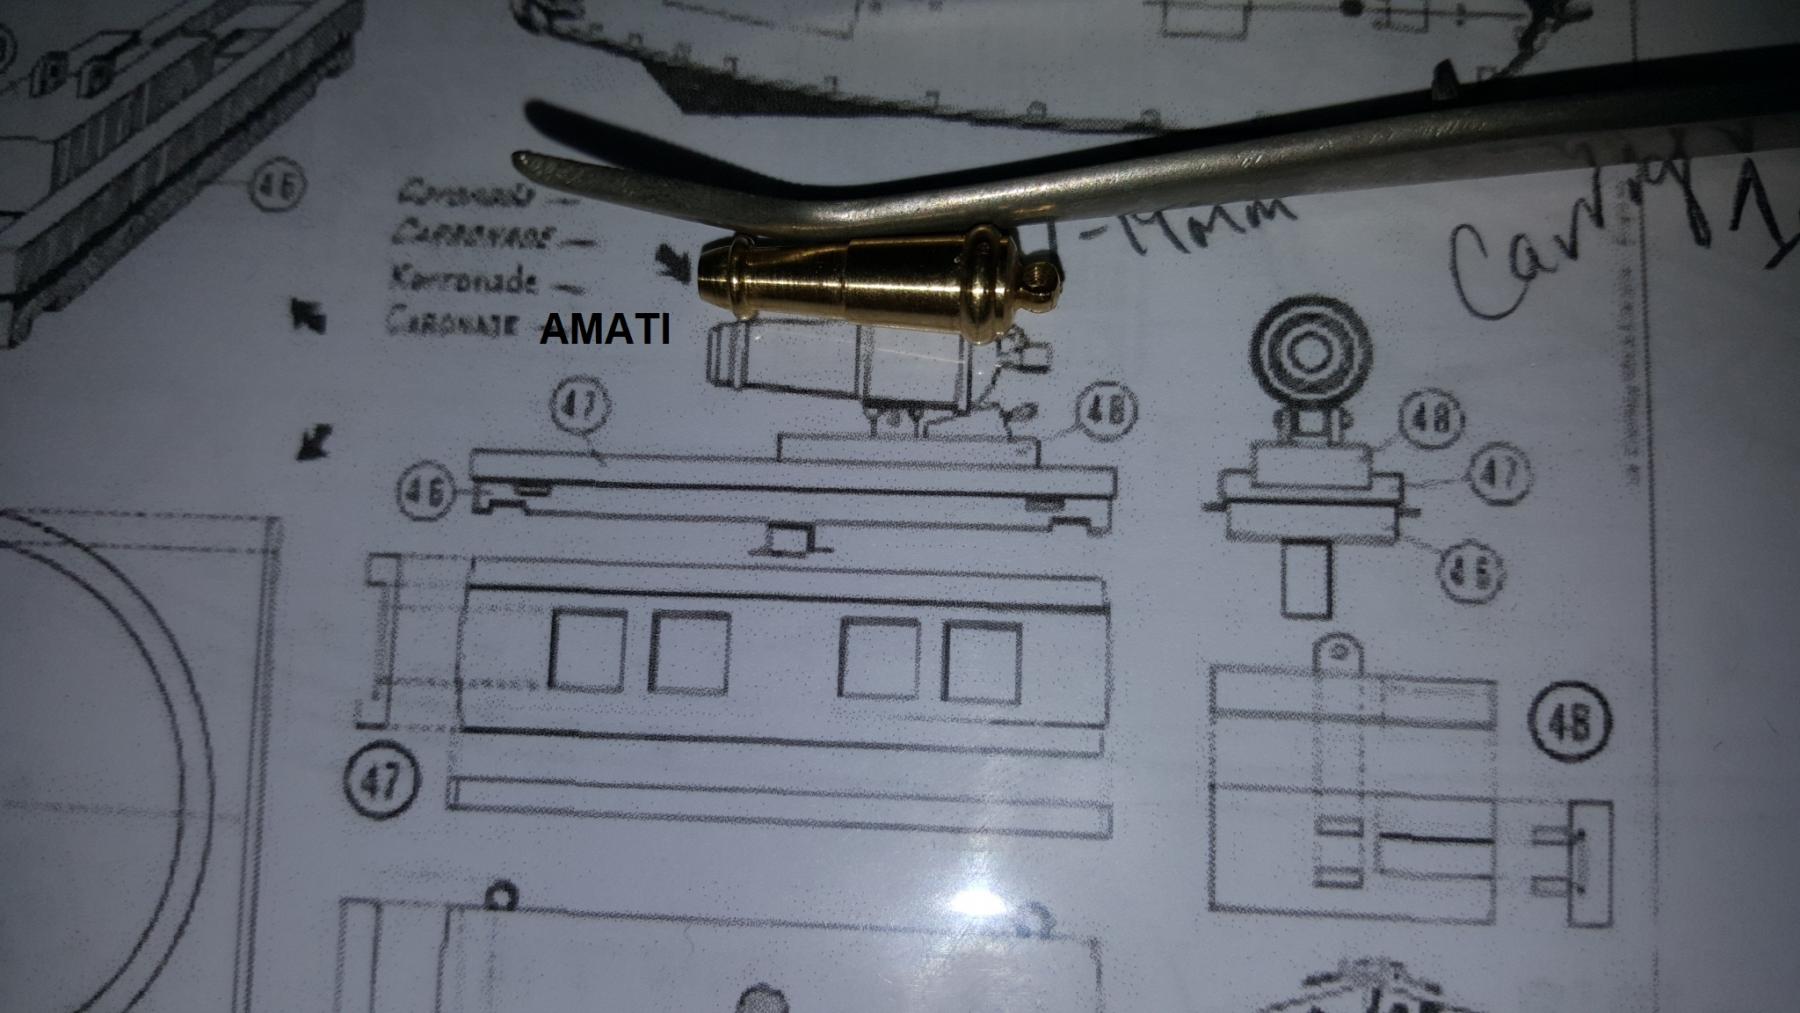
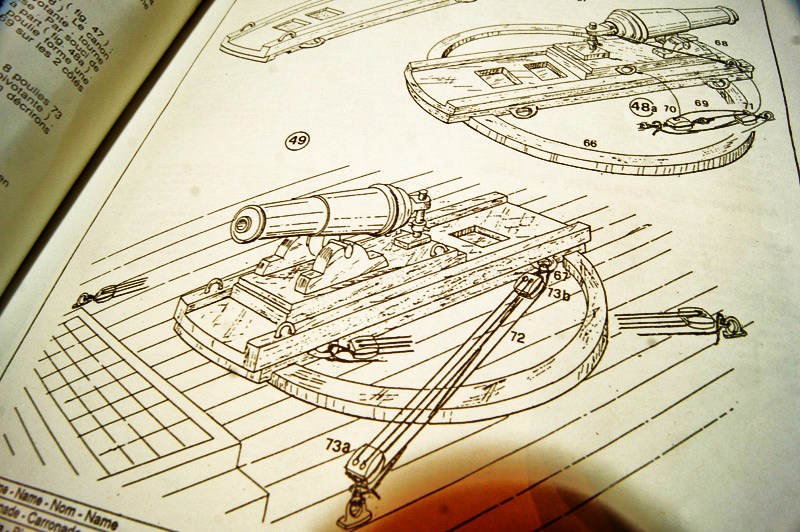
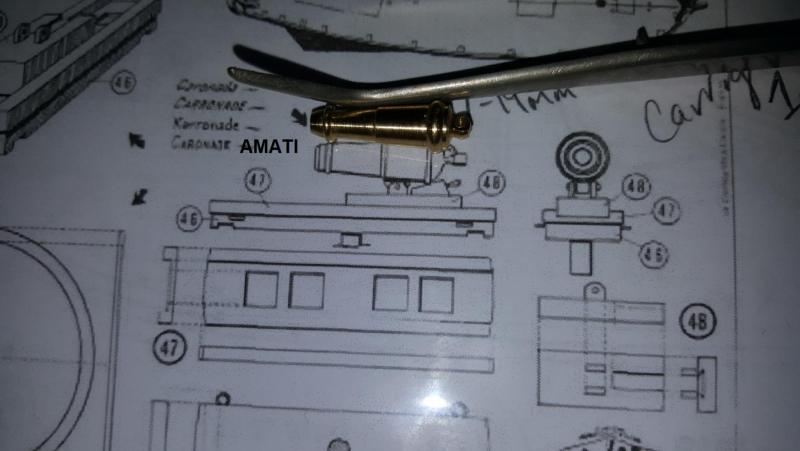
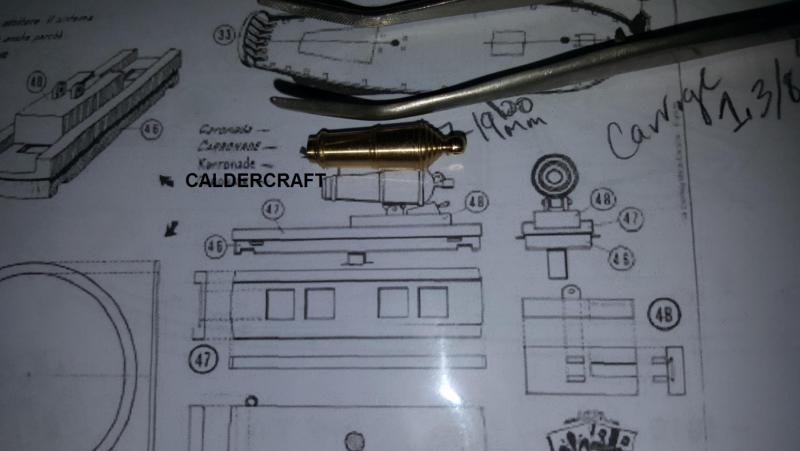
Hi guys! Sorry was a very busy week. I'm in the middle of building up my own appraisal company so that consists of connecting with new clients, opening sole proprietorship accounts and smoozing. So regarding the revenue cutter carronade, my reasoning for picking the screw over the "quoin" is simply due to availability of carronade kits with screws over the other and since this is a sliding carriage design from 1820 I think it should work. The only model of Doughty's revenue cutters which features a screw style carronade is the Corel Ranger so I'm looking at this photo of what Corel's plan shows for the carronade design (thank you Cathead), this is how I plan on building it. Regarding the carronade itself I'm going to modify the kits and bash the parts to get something like what the image shows. Now onto my next bunch of querries...
- 362 replies
-
- 3
-
-
- active
- revenue cutter
- (and 1 more)
-
My advice scratch model of her would probably turn better than a kit, nudge!
-
Prince de Neufchatel versus US Brig Syren
CharlieZardoz replied to Heronguy's topic in Wood ship model kits
With Syren you have Chuck's build log. With Prince you have less carvings and rigging to deal with. If it were me (and one day it will be) id build Syren first since more info is out there to work with. But both are on my bucket list -
Joel regarding that image you shared how do the lock joints figure in? I mean I want to make them out even but if the hatch is partially below the decking then won't the lock look a bit uneven?
- 362 replies
-
- 2
-
-
- active
- revenue cutter
- (and 1 more)
-
I like how you opted for the slanted coaming similar to the Armed Sloop/Patrick Henry. Makes for an interesting contrast as does the color contrasts in the wood
-
Hi Dave, yes I now understand the nature of the breech ring and what it does (do forgive my learning curve), and frolick I guess it is at that, though I'm more surprised I'm building a scratch model so early on. Kits don't have nearly as many judgment calls like choosing cannon sizes or heights of hatches etc. That said it's in my nature to question little details like the assemblage image Joel posted above. The reason why I postponed Sultana was that I realized too many details were uncertain to me and I want to be proud of each model I build. So went for something very simple this time basically a block of wood with no decks and still I'm solving lots of little puzzles. My approach to Sultana now will be much different now that I have worked on this cutter. But yeah I'd love to do a POB or even POF some day (after these solid hulls are done) but the thought of tackling a Hahn style build at this time ooof I can't imagine! People who start Victory as their first model do my head in, how on earth can one finish such a model as their first build?
- 362 replies
-
- 3
-
-
- active
- revenue cutter
- (and 1 more)
-
That's a great reference image Joel. With that being so, my approach the hatches probably don't need to be shortened the deck material with account for the difference.

- 362 replies
-
- 5
-
-
- active
- revenue cutter
- (and 1 more)
-
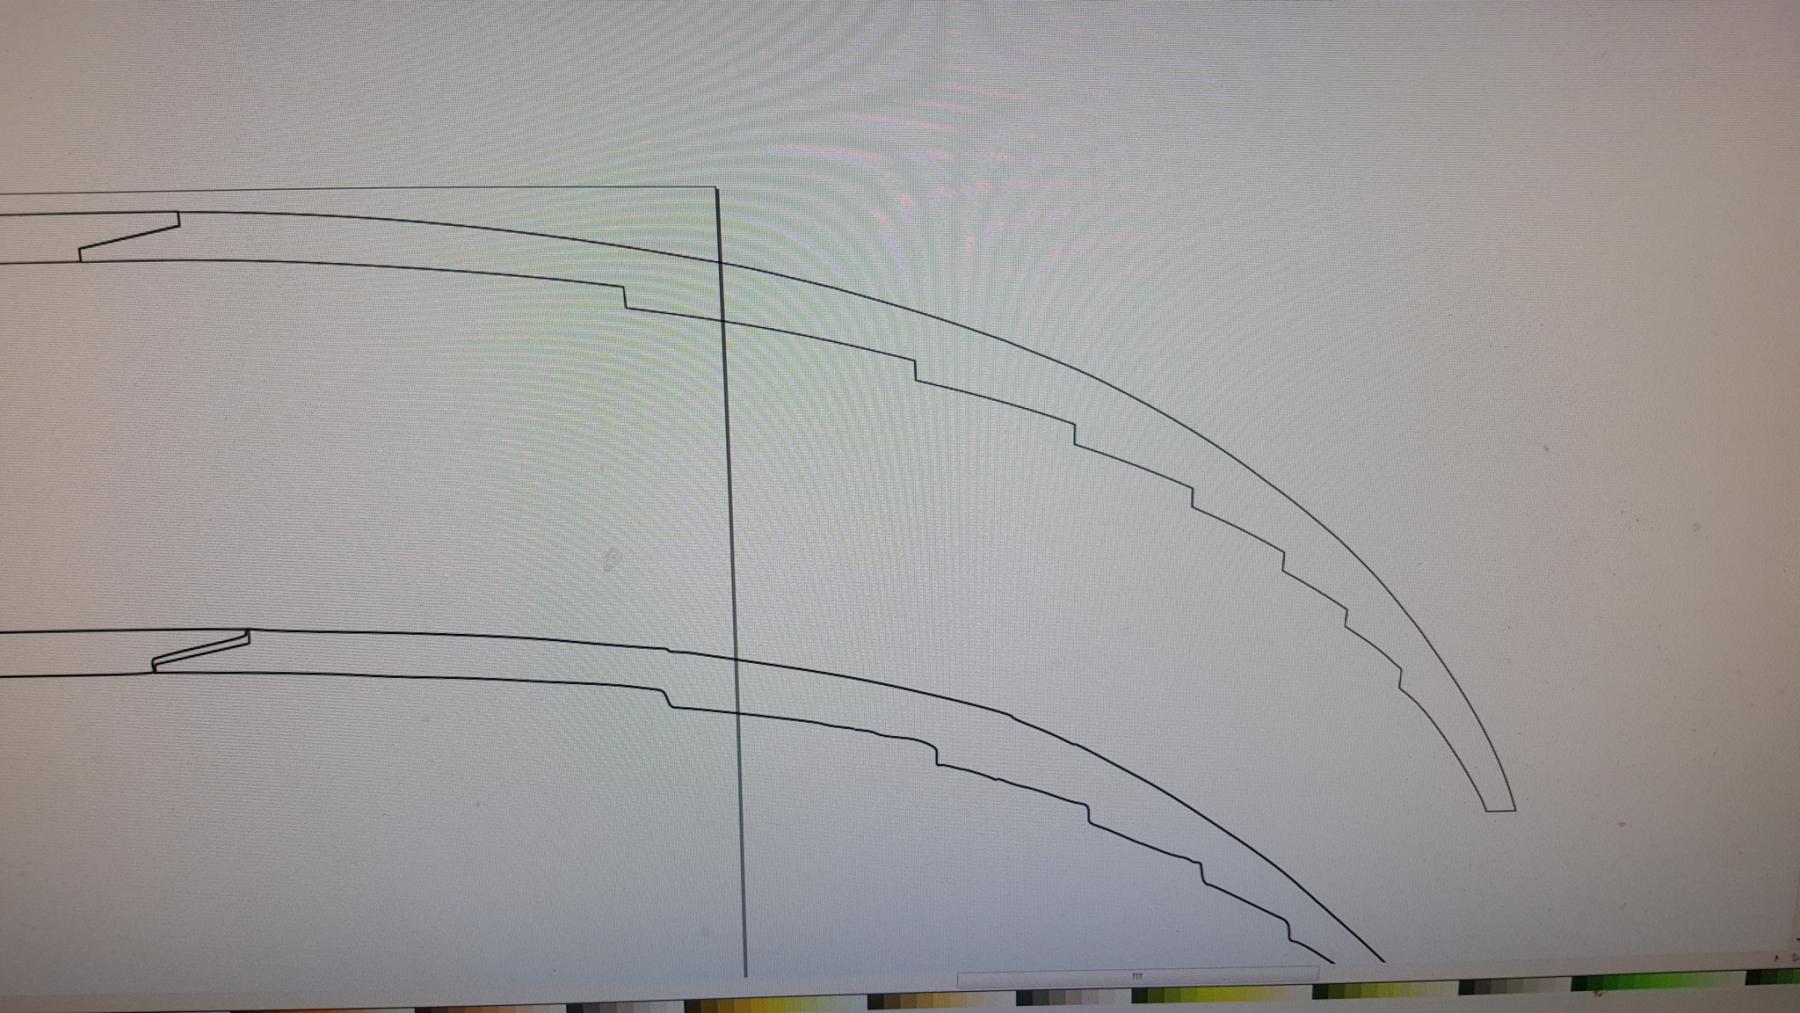
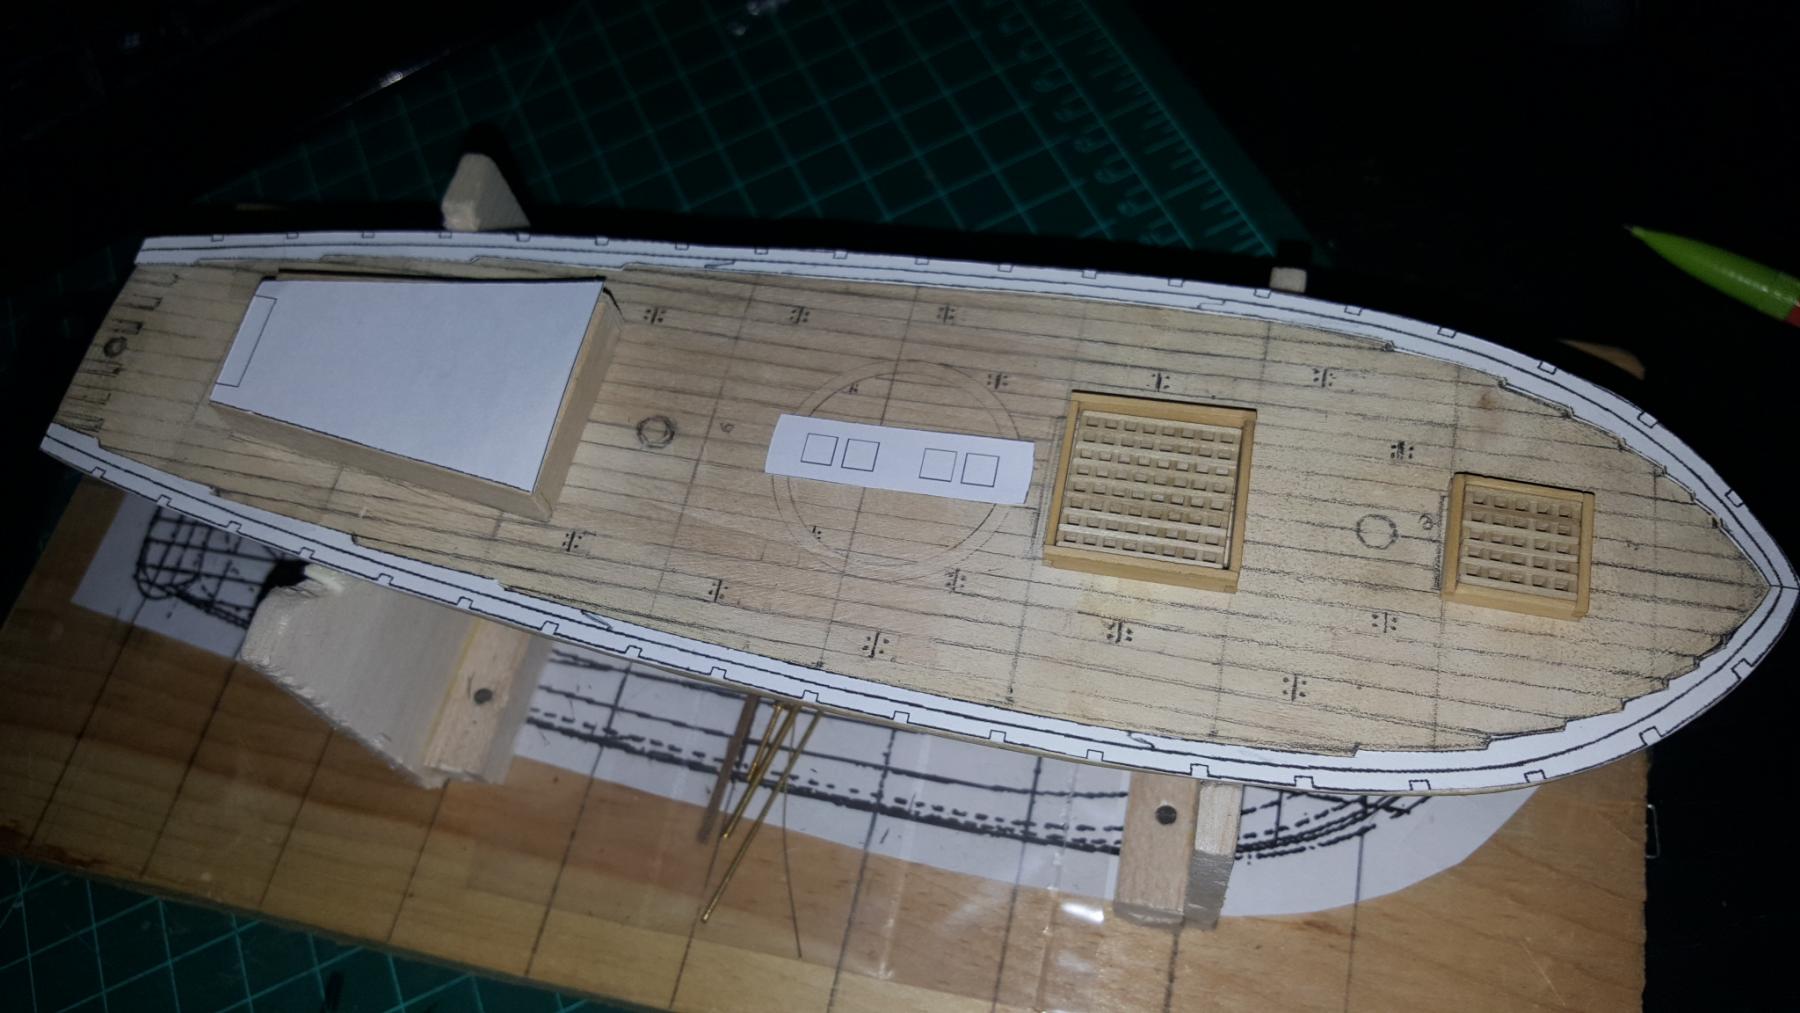
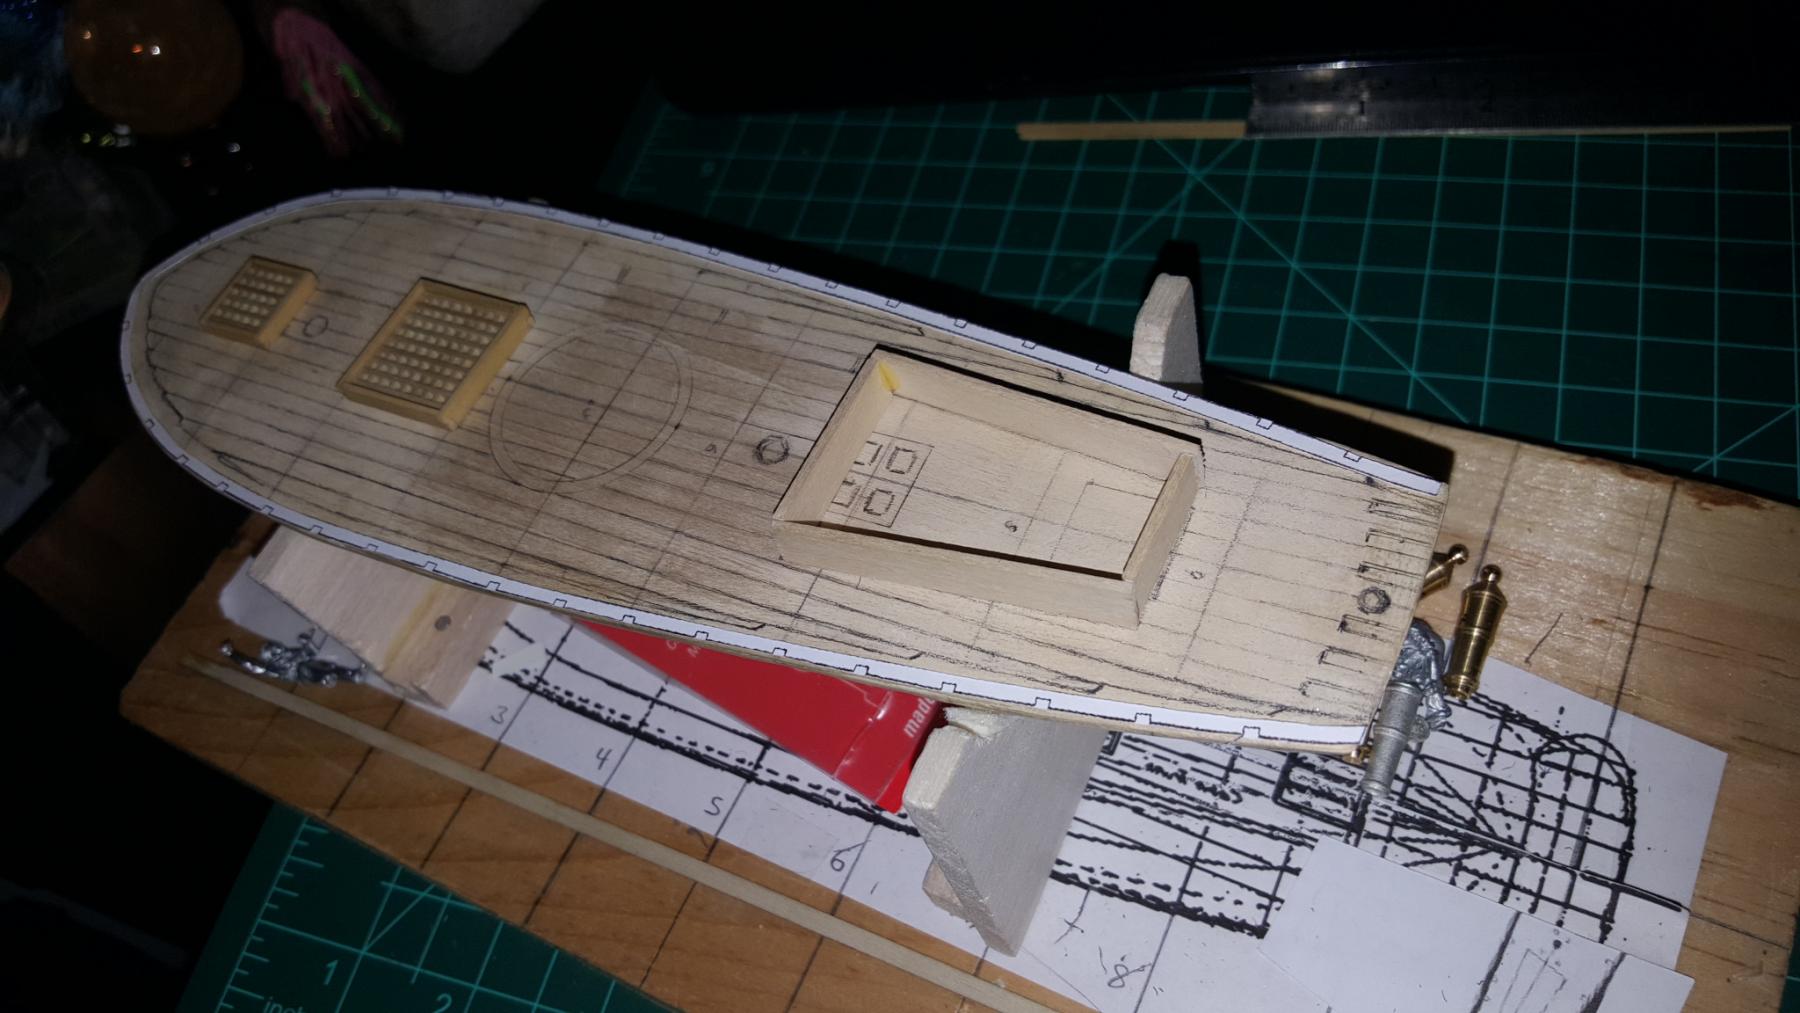
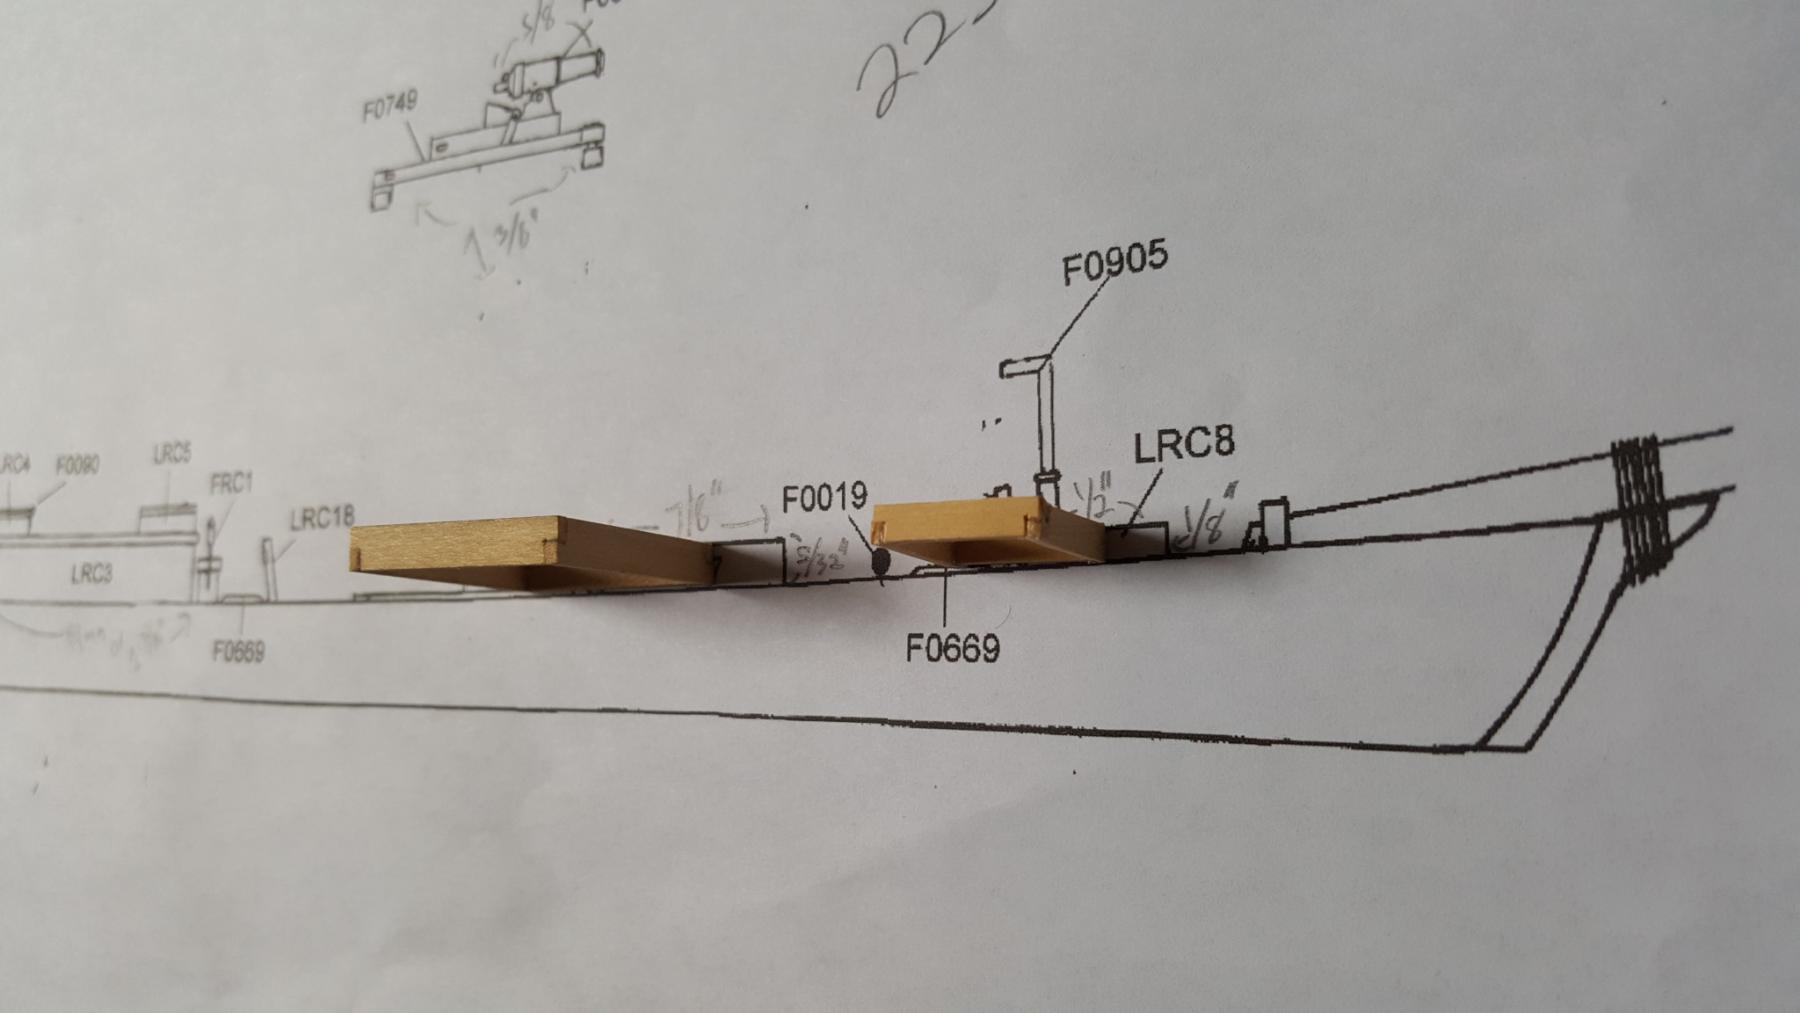
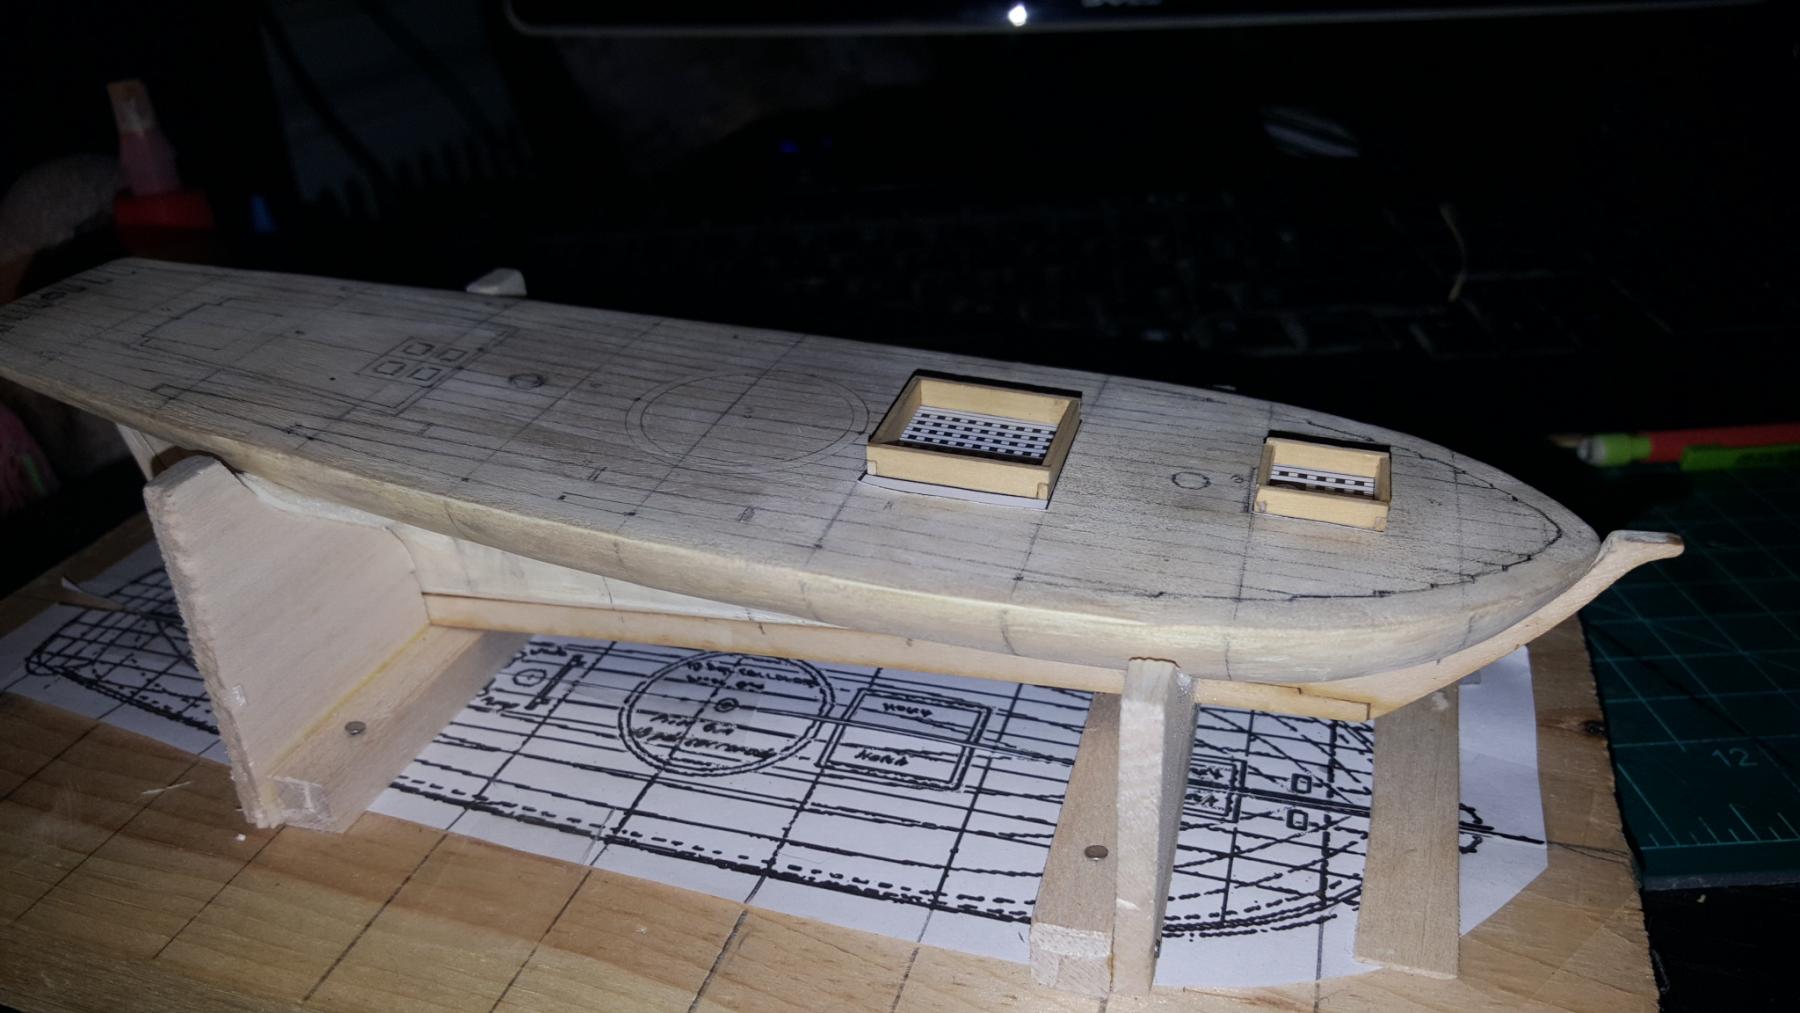
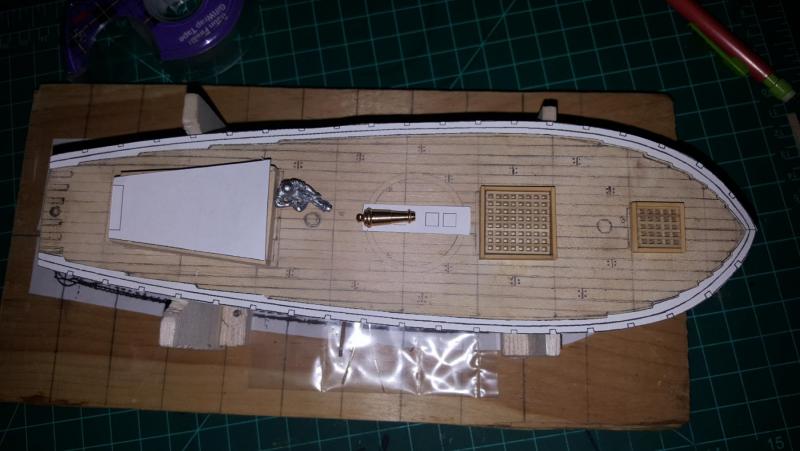
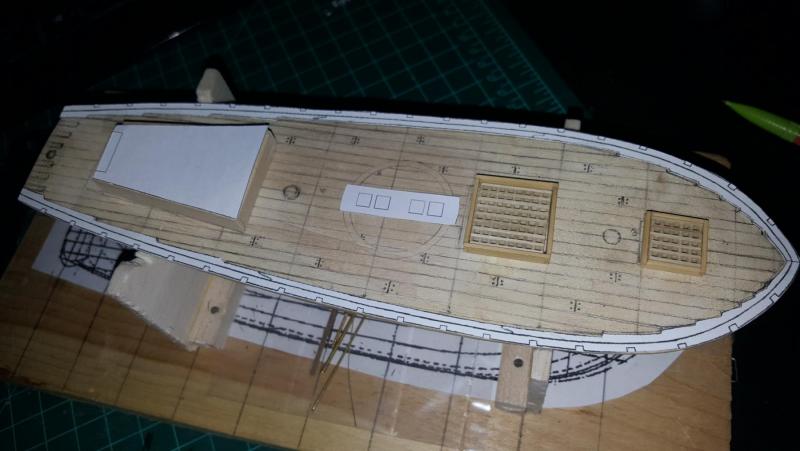
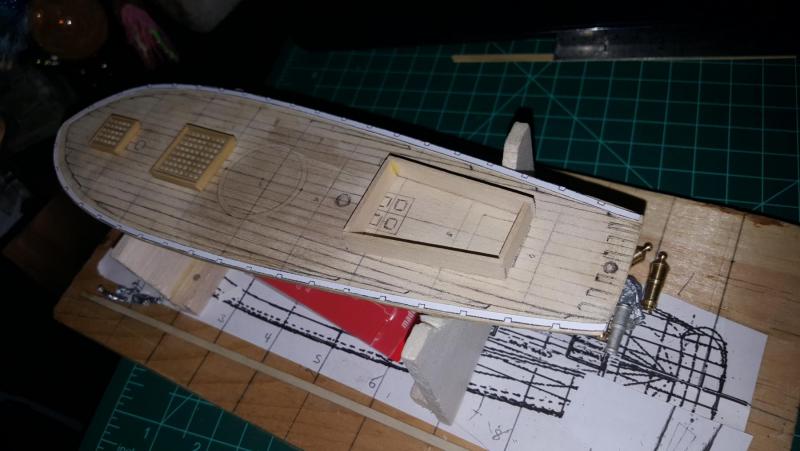
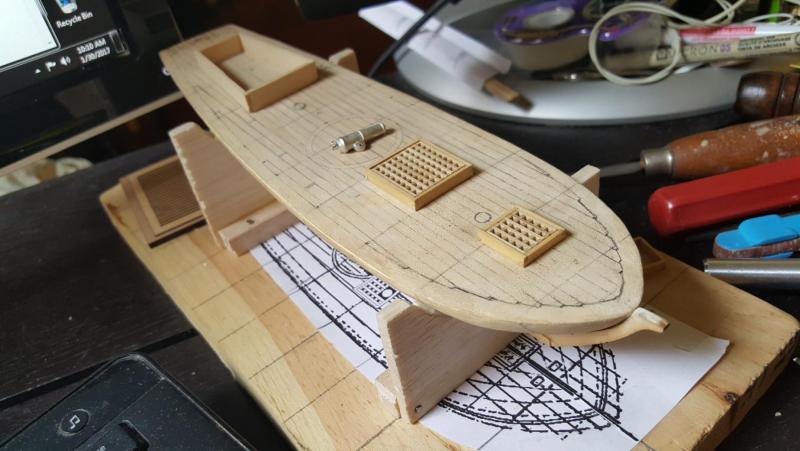
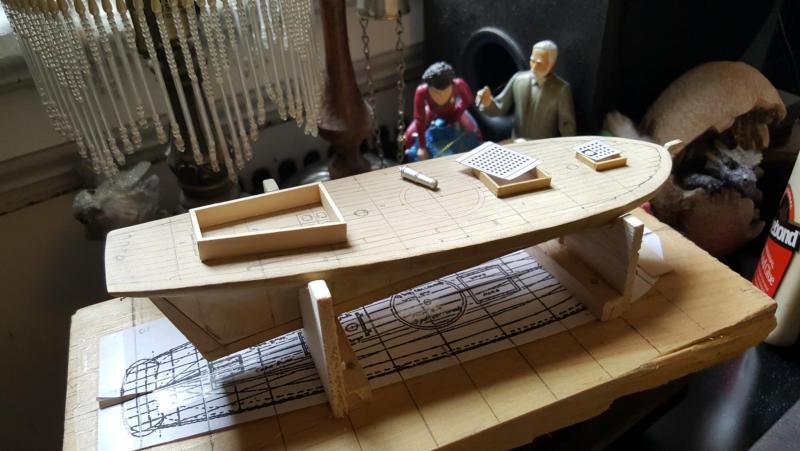
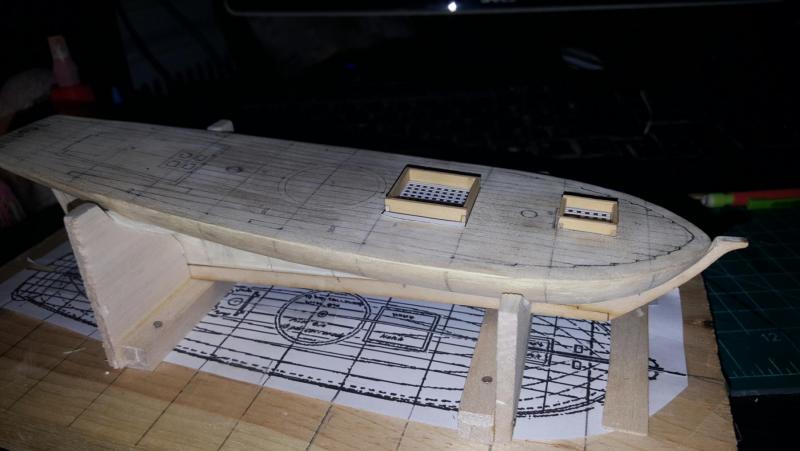
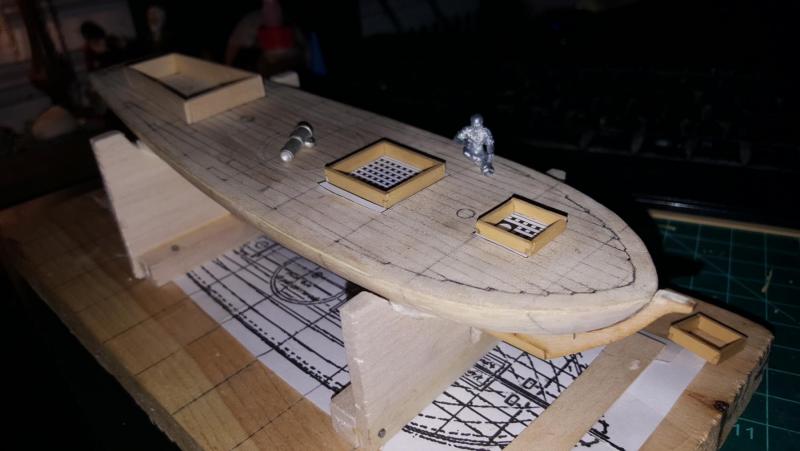
Great question Mark. As far as I know hatch coamings should lay over the deck once planked. Usually i've seen other builders paint a black square on the solid hull, add the planks around that space then the hatch over that. Similar to a real ship except the hatch depth is "implied". Regarding the deck Im slowly putting together a laser template for the ship waterways (the outer lines) and the margin plank (the inner lines) which will all come together shortly but will post more on that once the parts are made.

- 362 replies
-
- 4
-
-
- active
- revenue cutter
- (and 1 more)
-
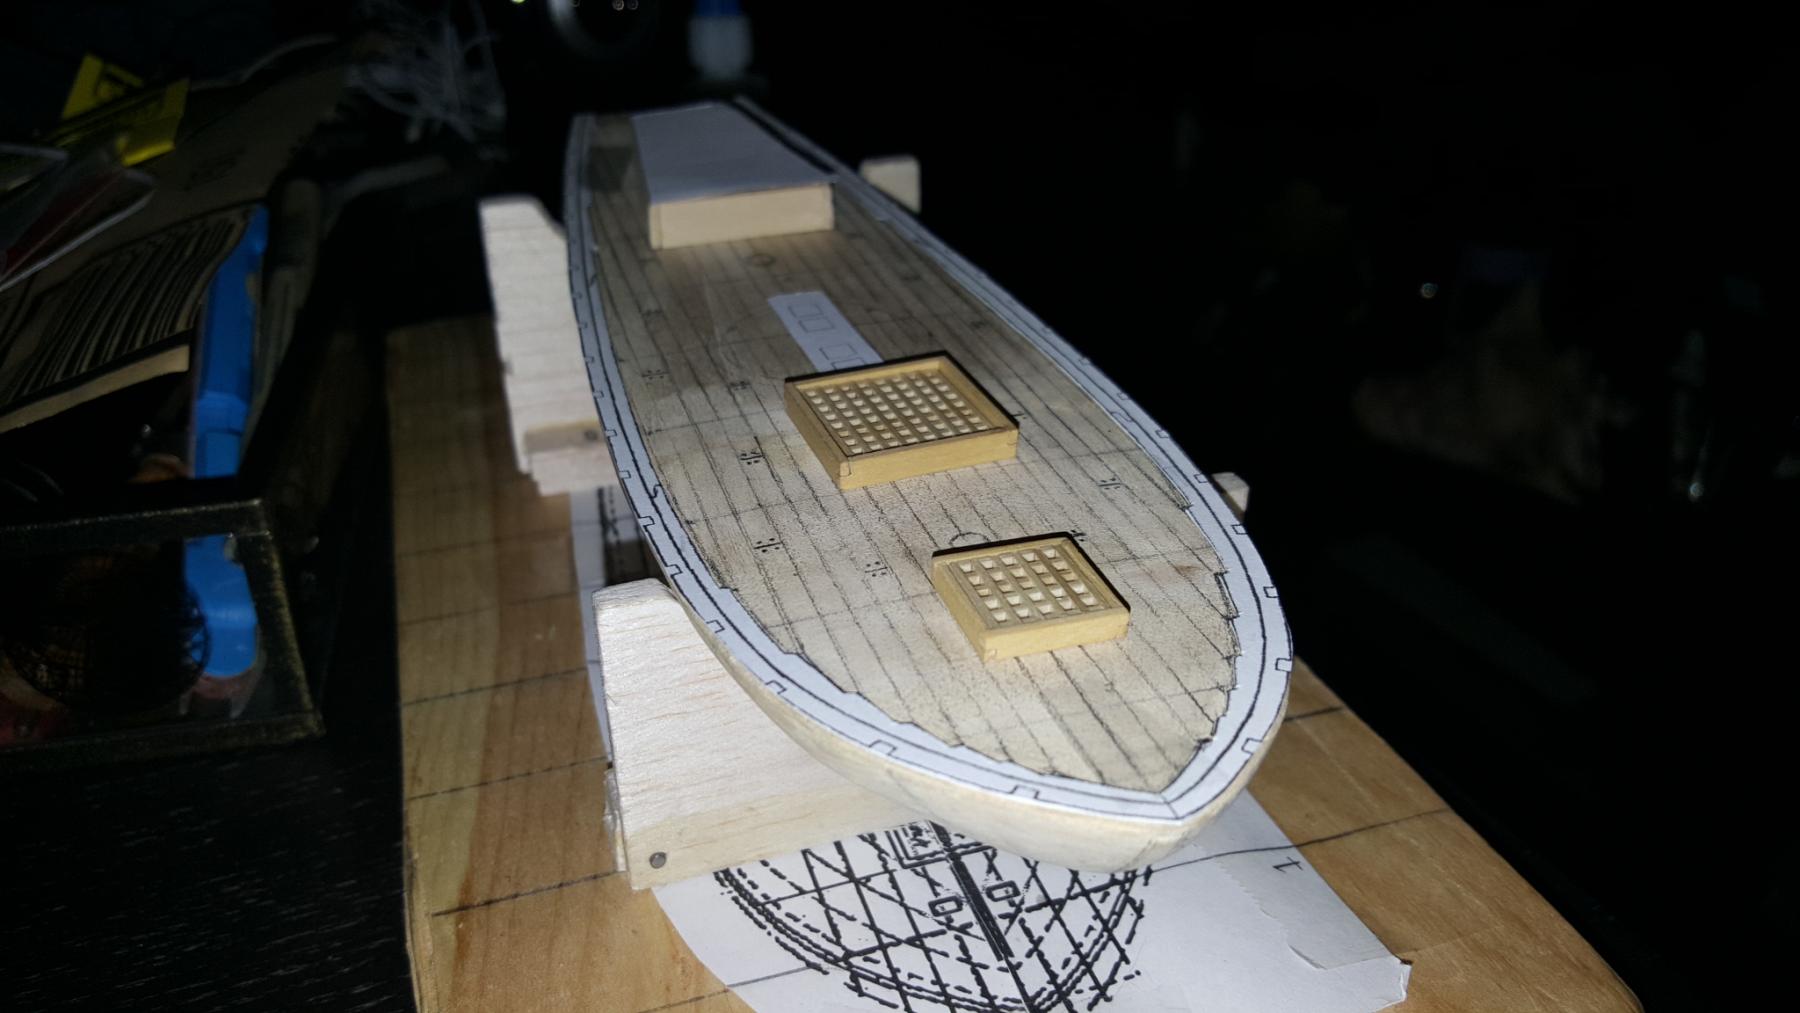
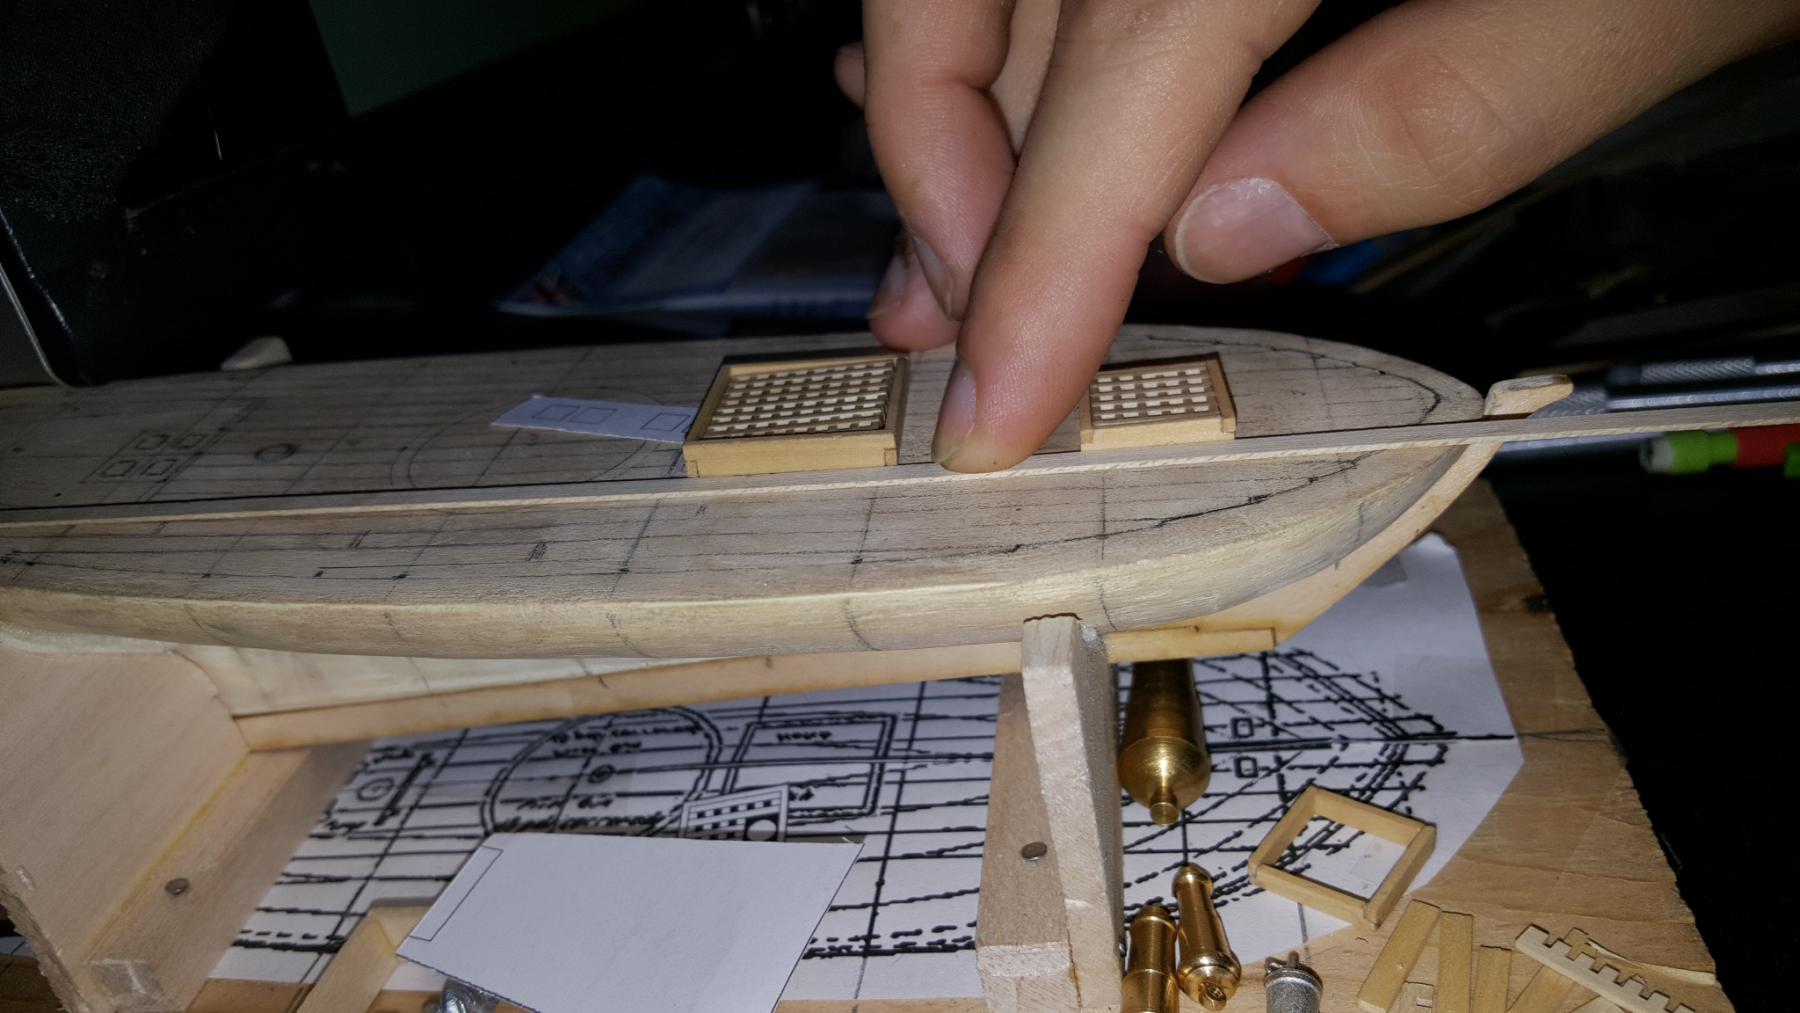
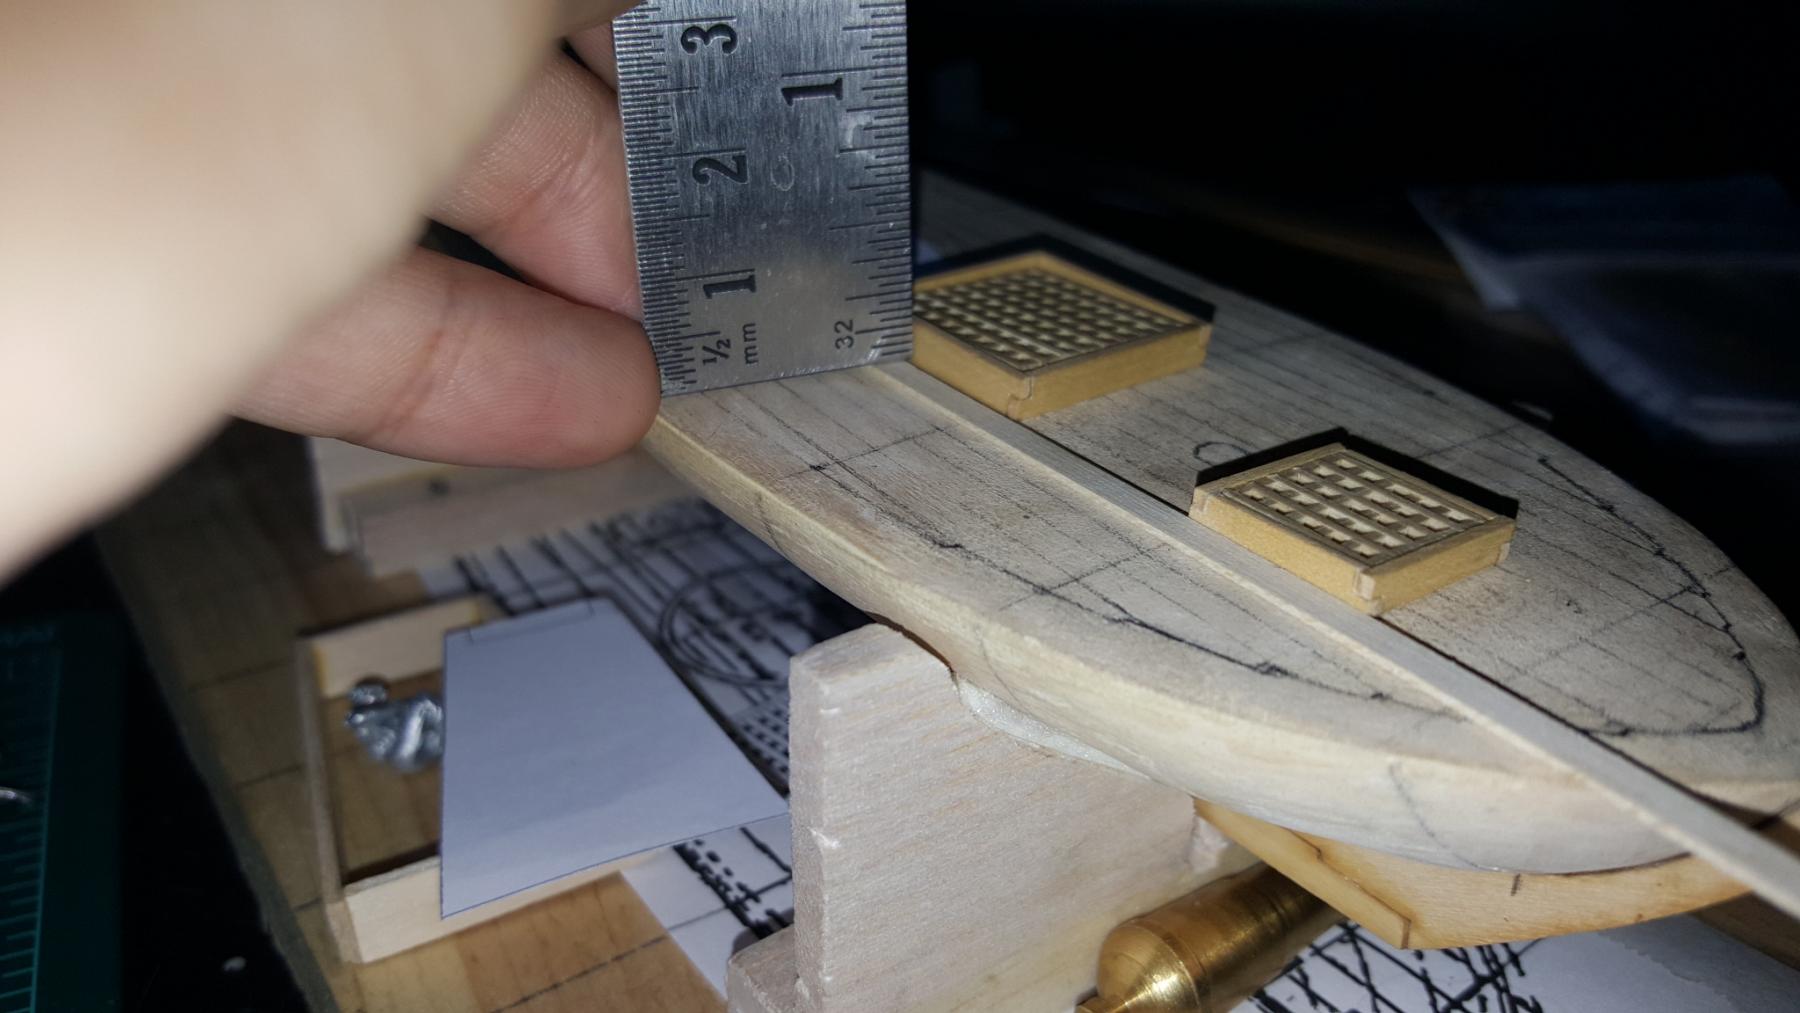
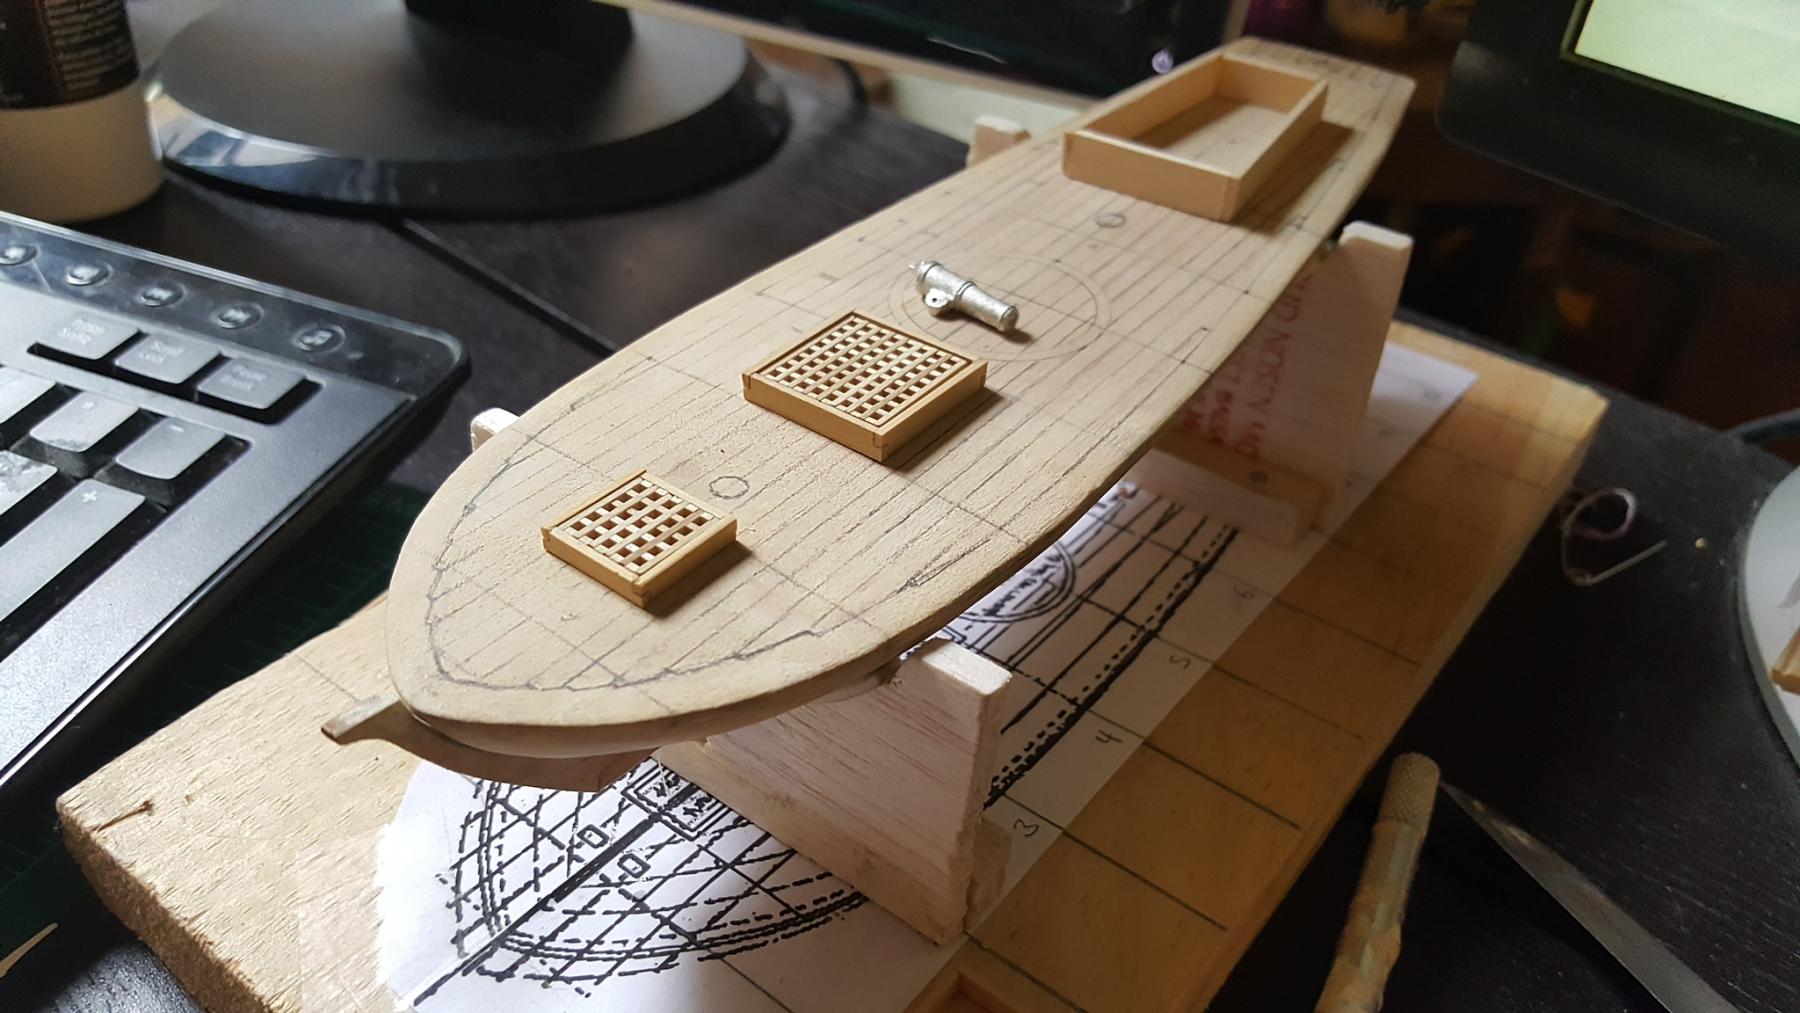
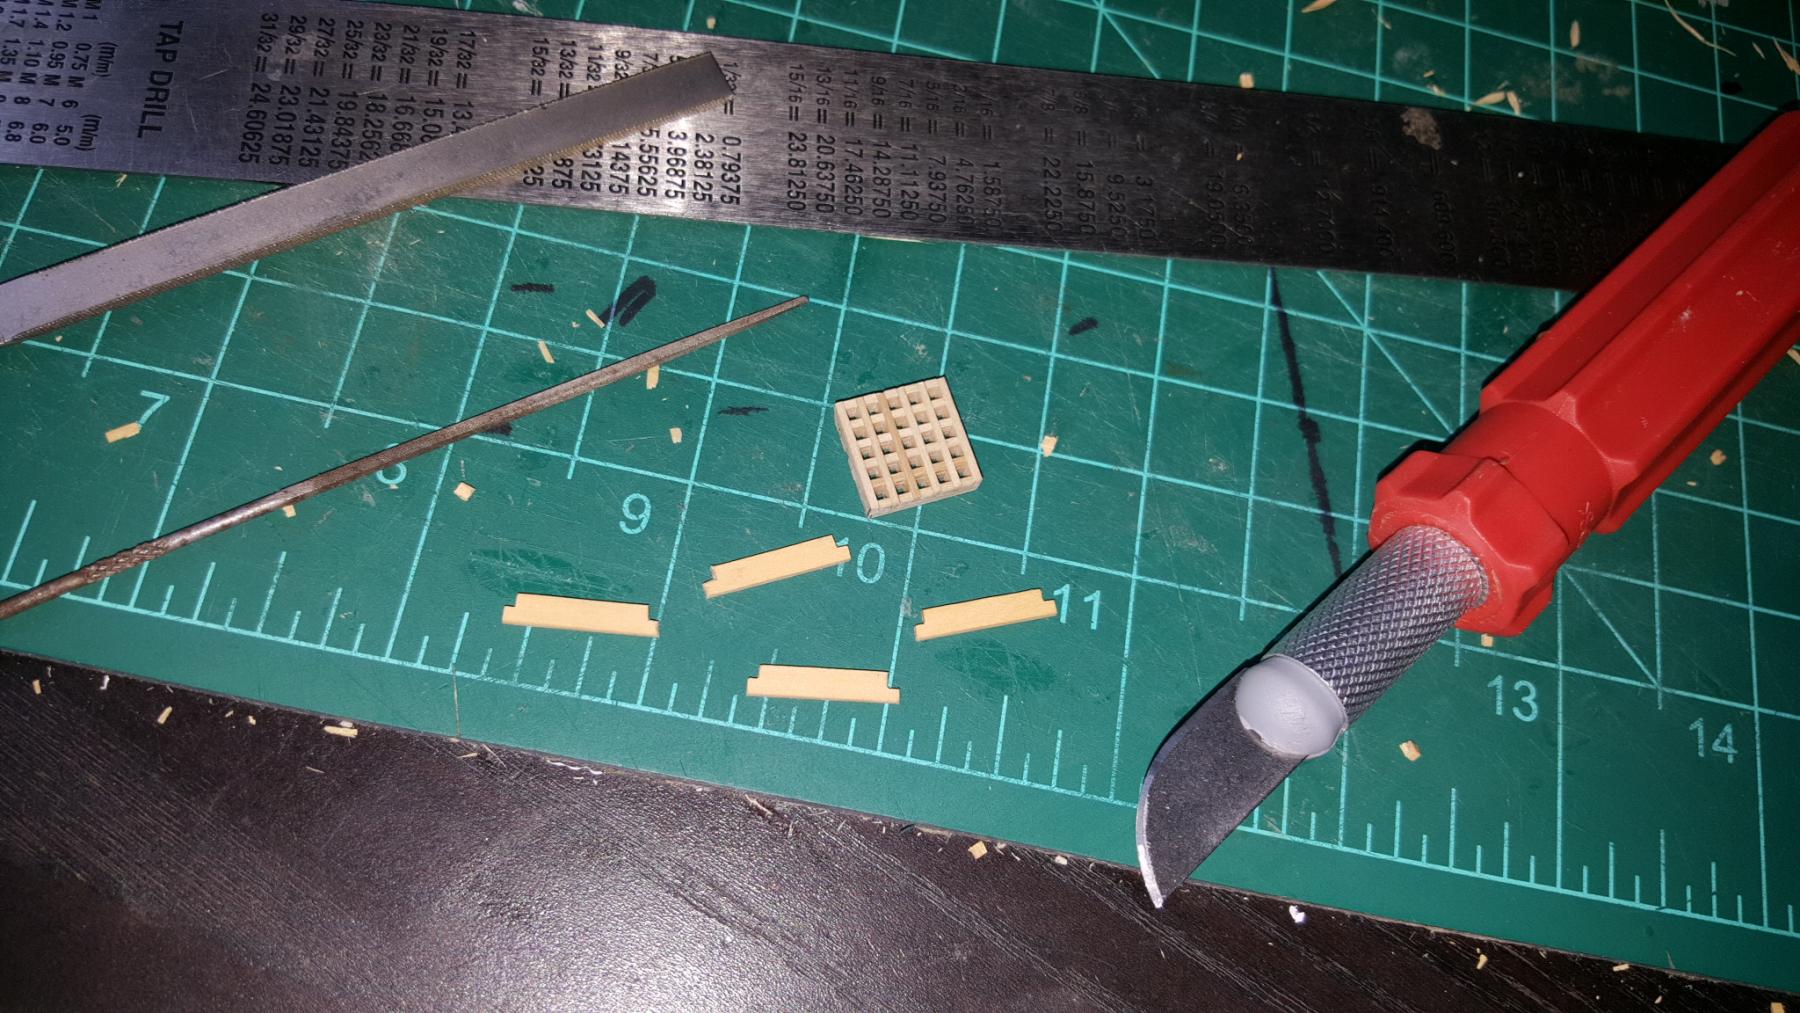
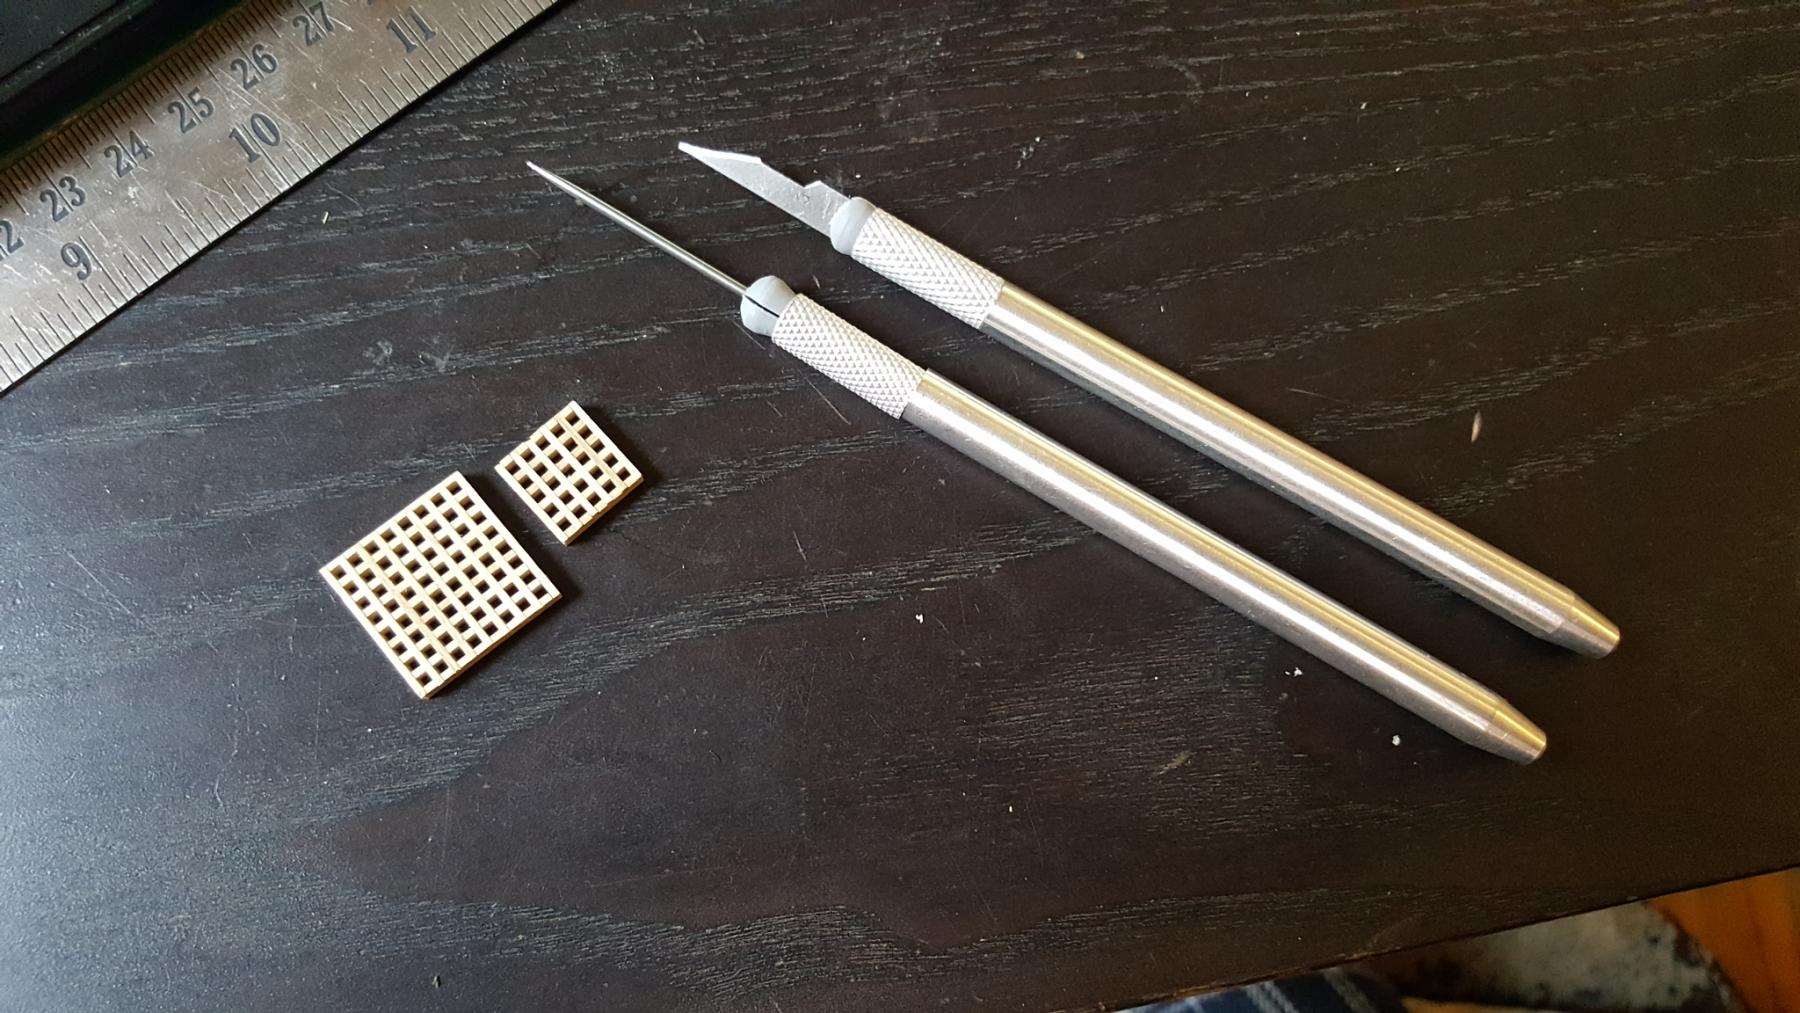
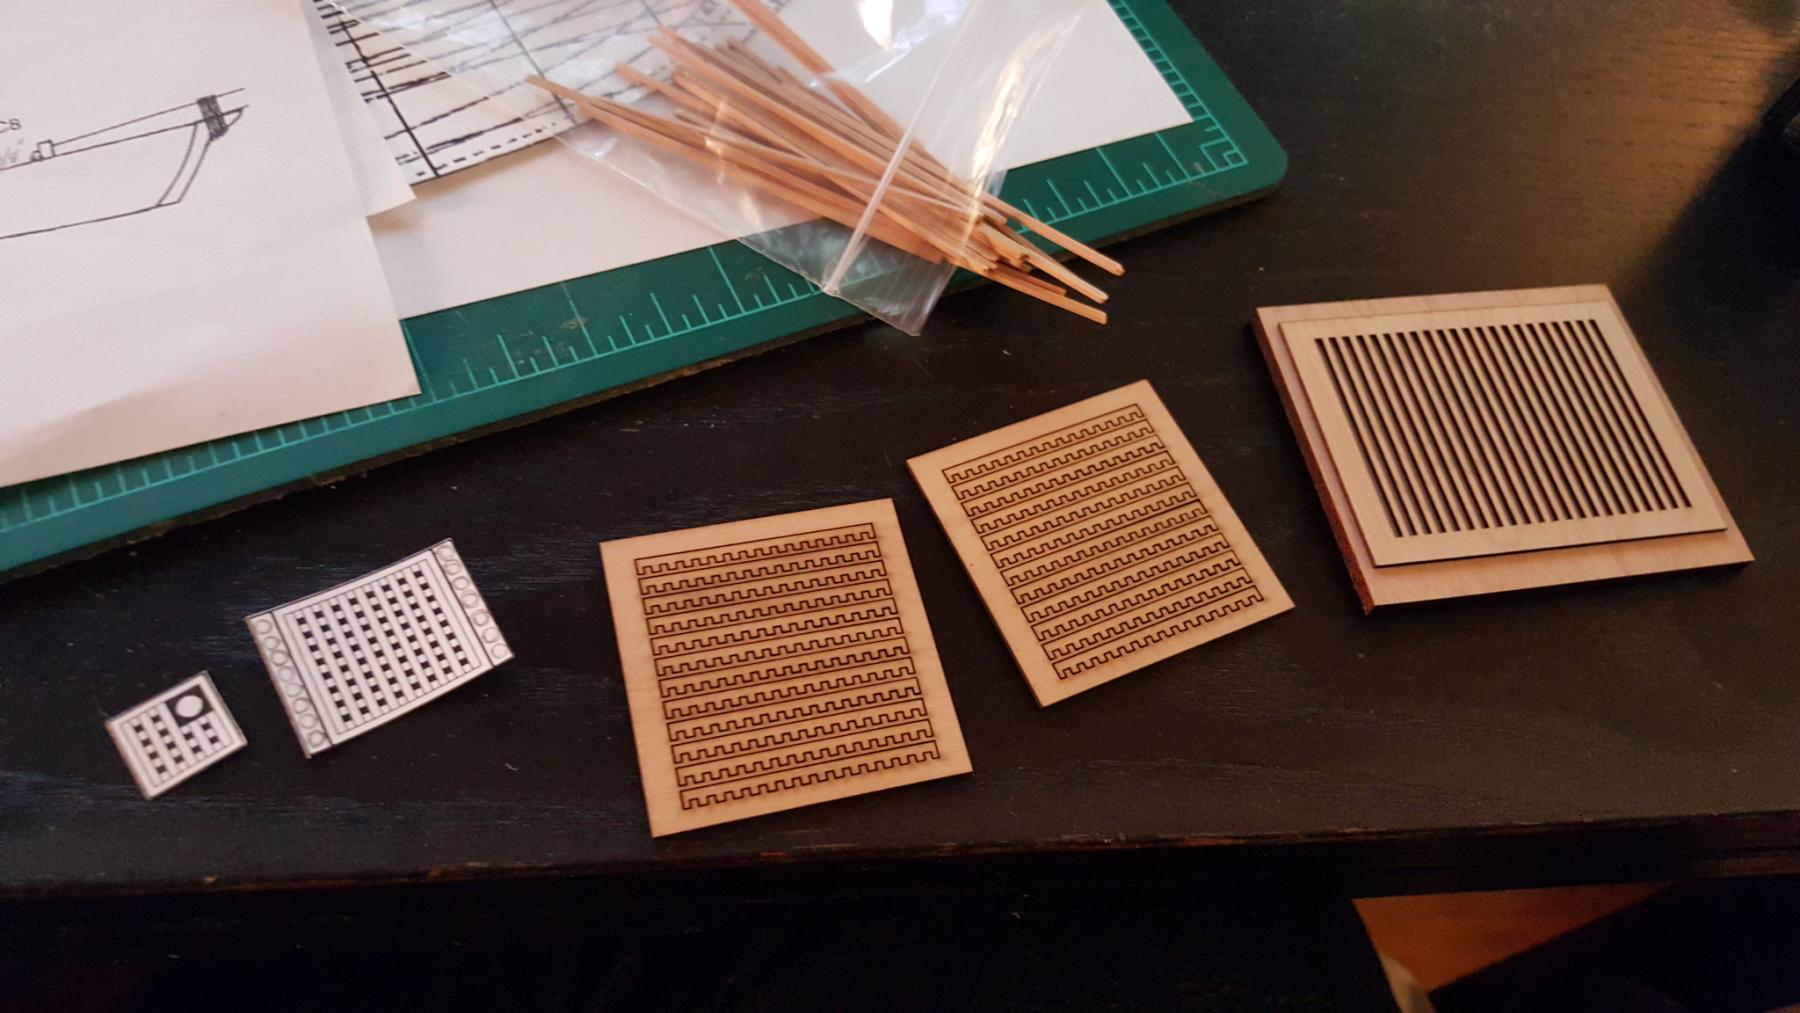
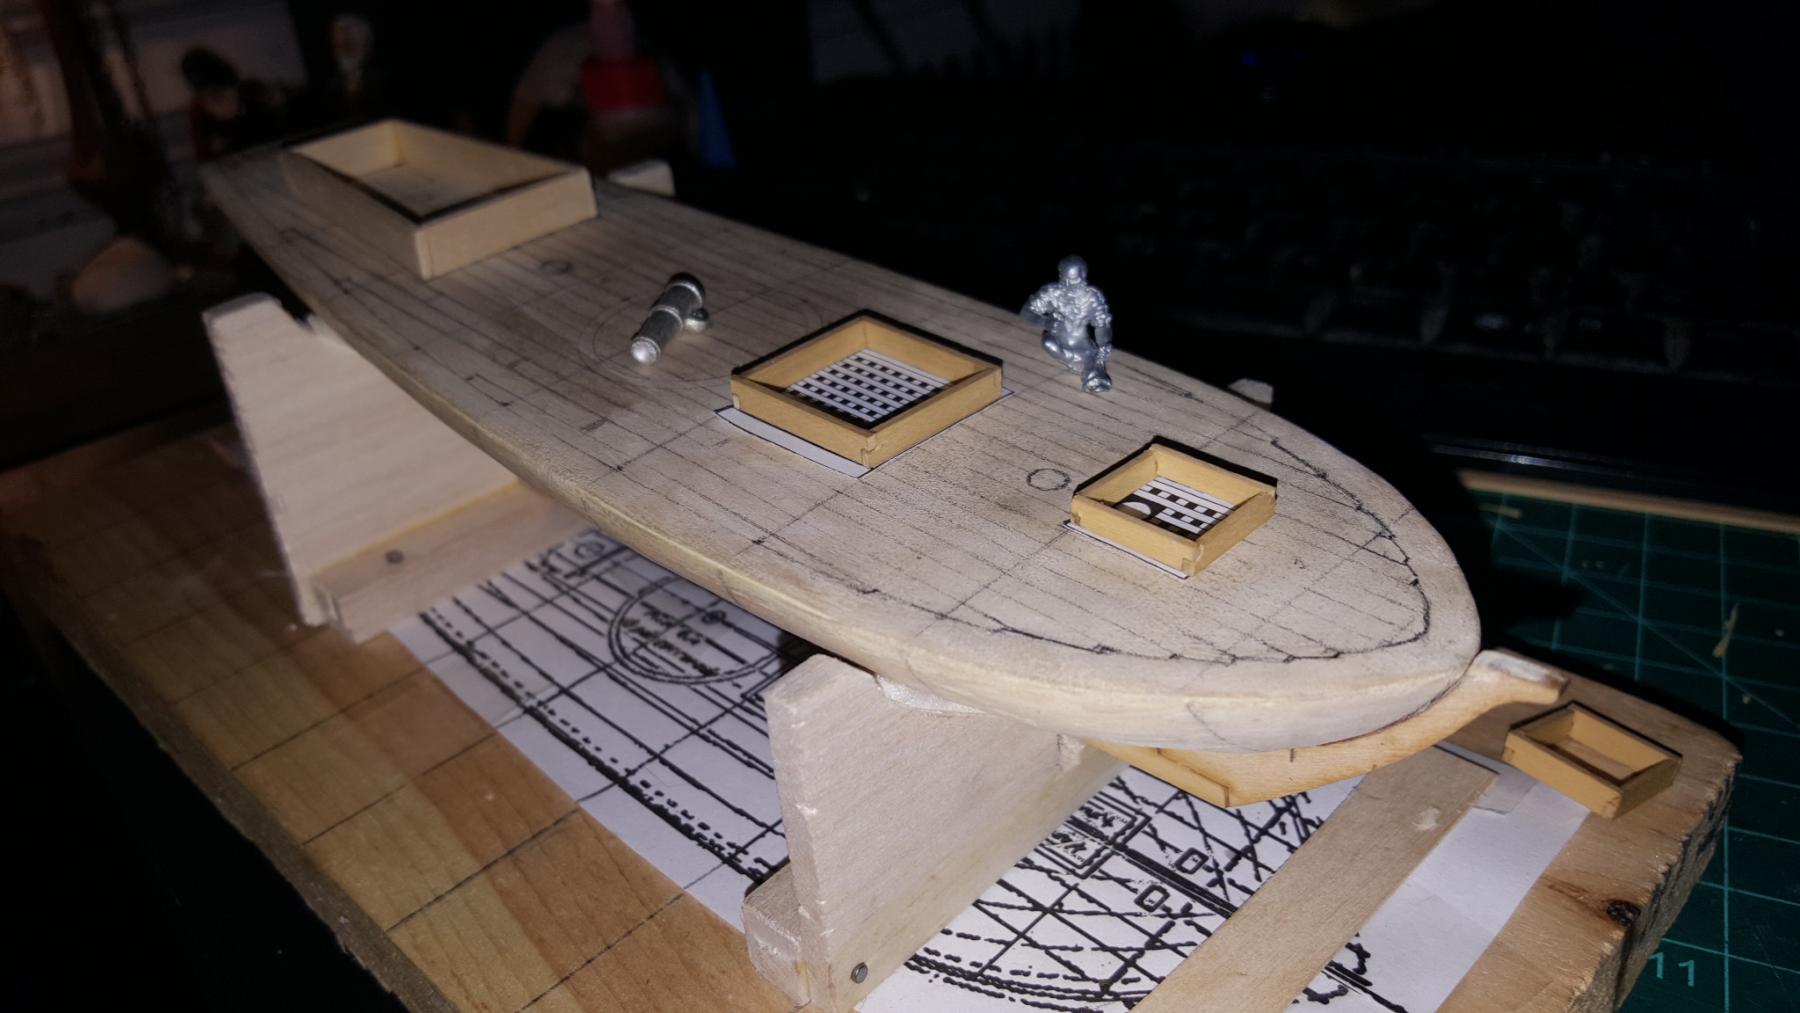
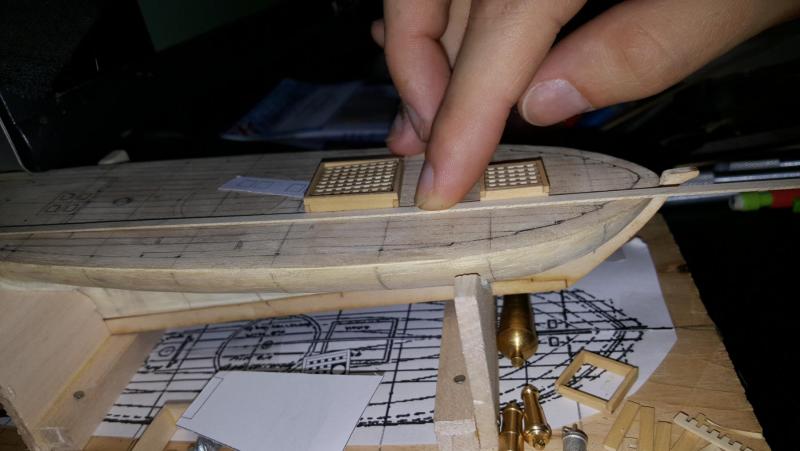
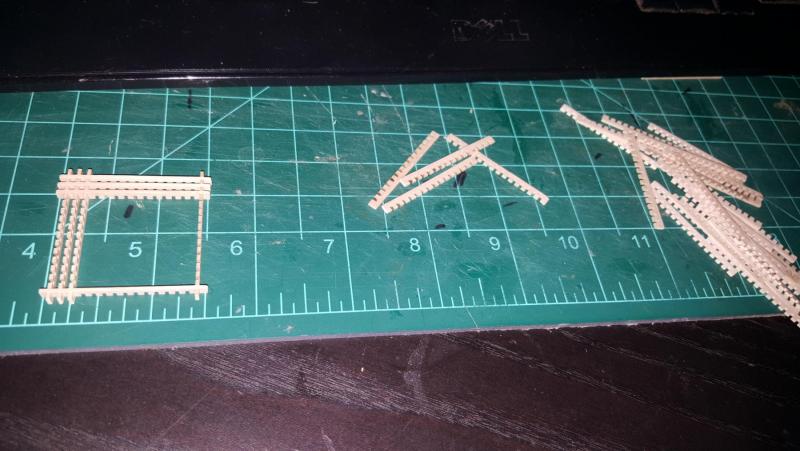
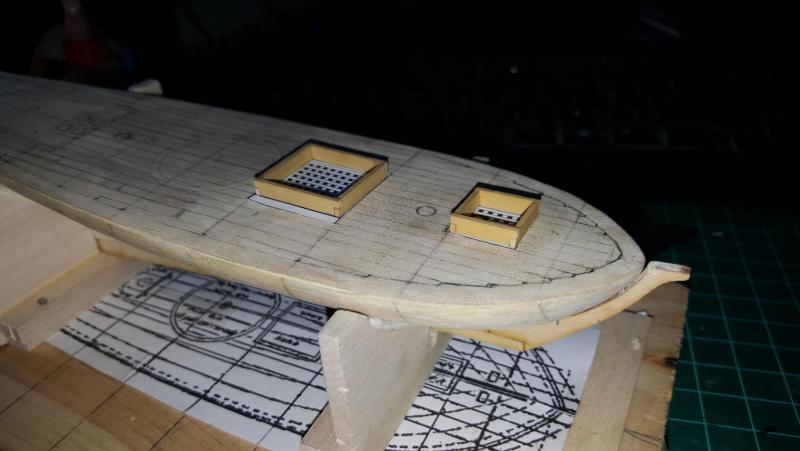
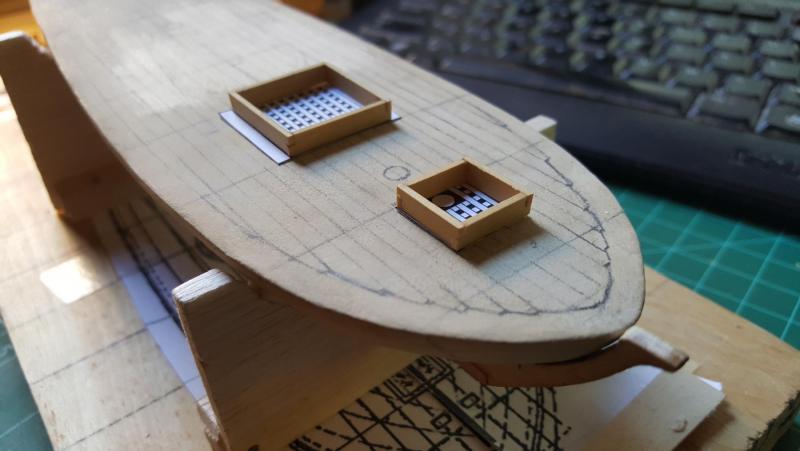
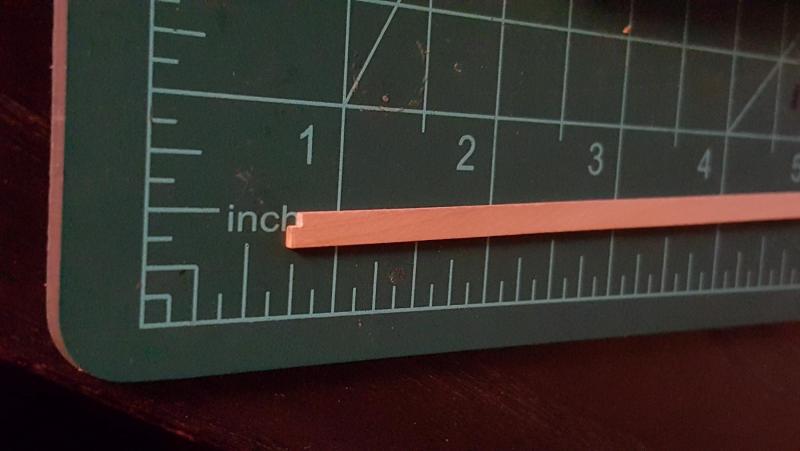
And here are the final test gratings. The larger one is a bit loose since that was an older version but these will be discarded for cherry coamings shortly now that I've gotten the hang of building them. I wanted to get a feel for the dimensions and there are things I can see in a photograph that doesn't come out at me during construction. I believe cathead is correct that they are too high so I will shorten them both by 1/32nd of an inch (I honestly couldn't really tell when looking at it in person). The hatch holes are a bit big but that will be corrected when using the Syren kit. What I am pondering is the thickness of the coaming it is currently 3/64" (or 1.2mm) the next step down would be 1mm but I feel that's making the coaming too thin. I've seen models with thick coamings and super thin ones so if anyone has a second opinion do let me know. For now I am waiting on some wood strips and will start the final hatch shortly. Stay tuned!


- 362 replies
-
- 7
-
-
- active
- revenue cutter
- (and 1 more)
-
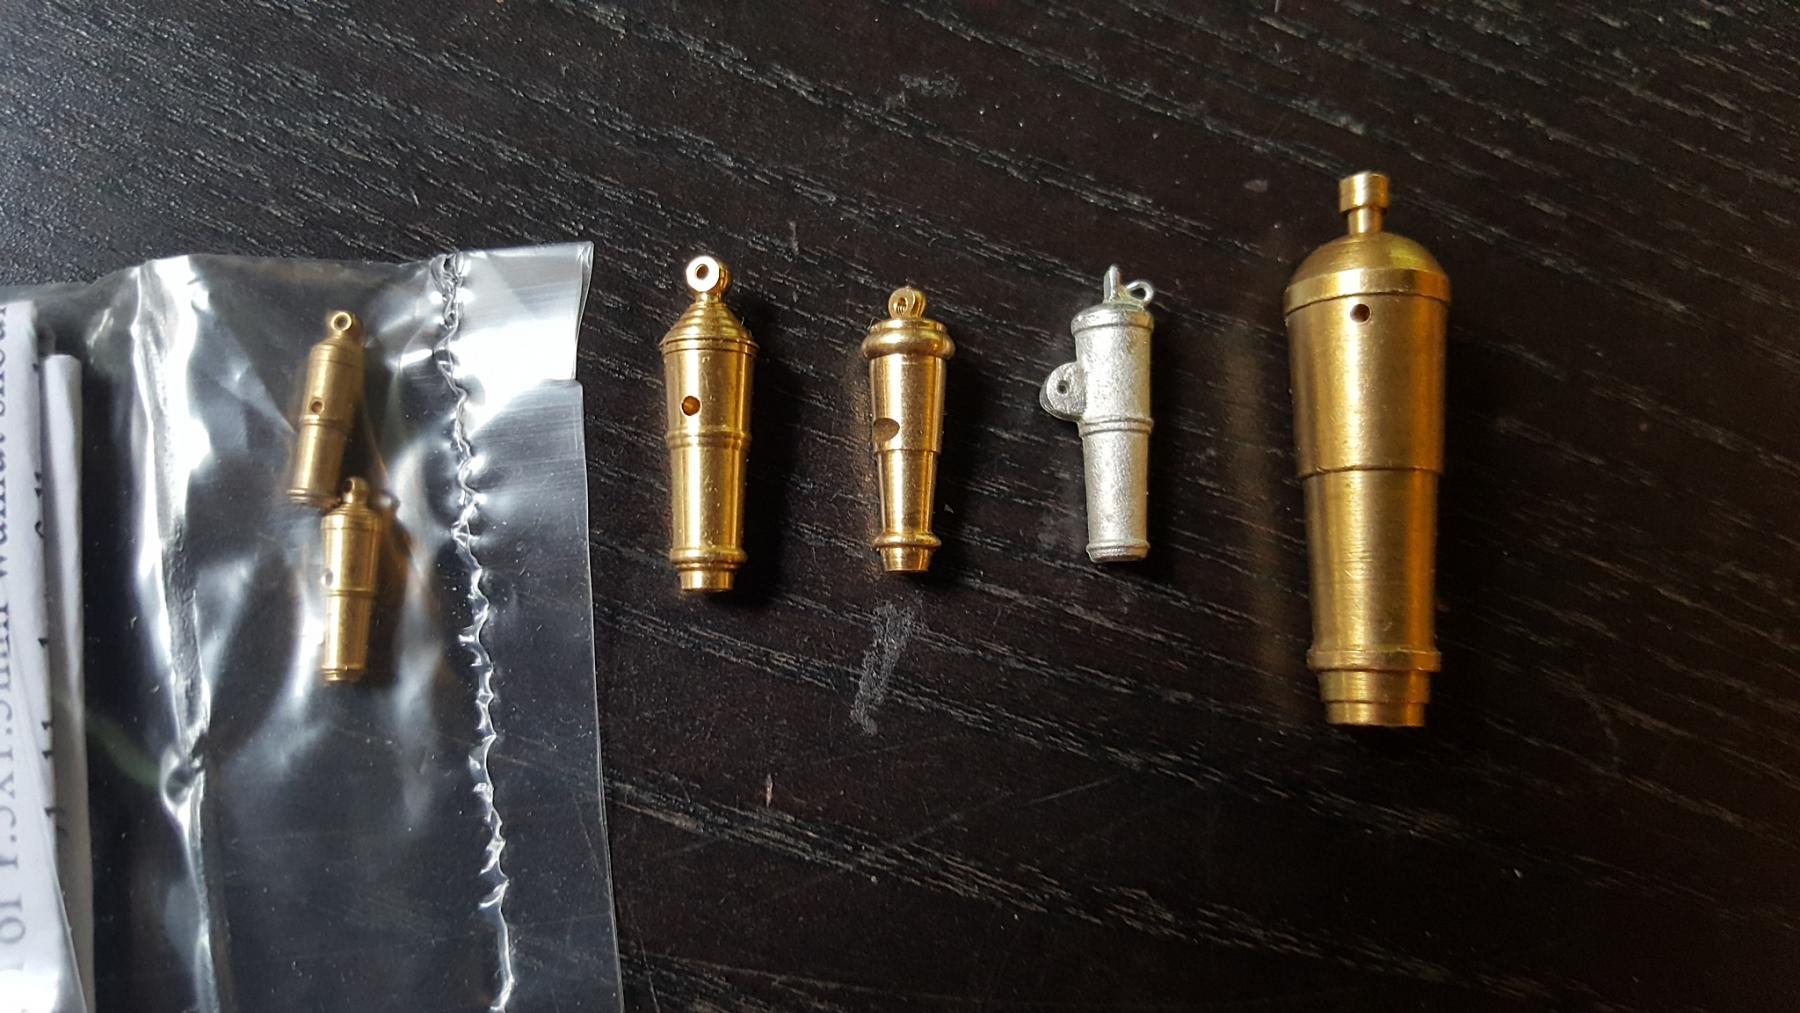
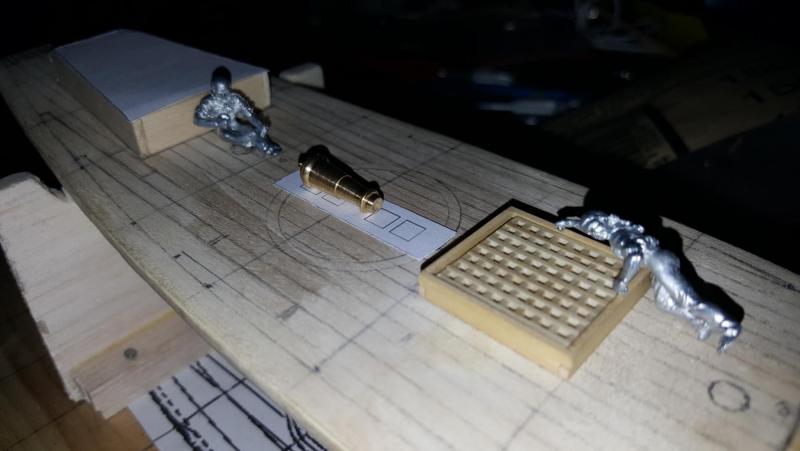
At the same time I went about purchasing some carronades. One of the main issues I've been having is that I can't seem to find any carronade out there between 17-19mm. What you see in these images from right to left is the AL Dallas carronade, then the bluejacket revenue cutter carronade (both supposed to be 1/48 scale?) then a carronade from amati 20mm then caldercraft 18 pounder at 1/64 scale 23mm and last caldercraft 12 pounder at 1/64 13mm (in the little bag). I am not sure why the 12 and 18 pound kit is so different in size especially when the Caldercraft 24 pounder is only 25mm and the 32 pounder 28mm but no matter. I shaved off a mm from the front of the amati carronade and now it's 19mm. It has a strange ring over by the breech bolt but it'll do. Any thoughts on this carronade? I could also use the Caldercraft 18 pounder though it's a tad bigger.

- 362 replies
-
- 2
-
-
- active
- revenue cutter
- (and 1 more)
-
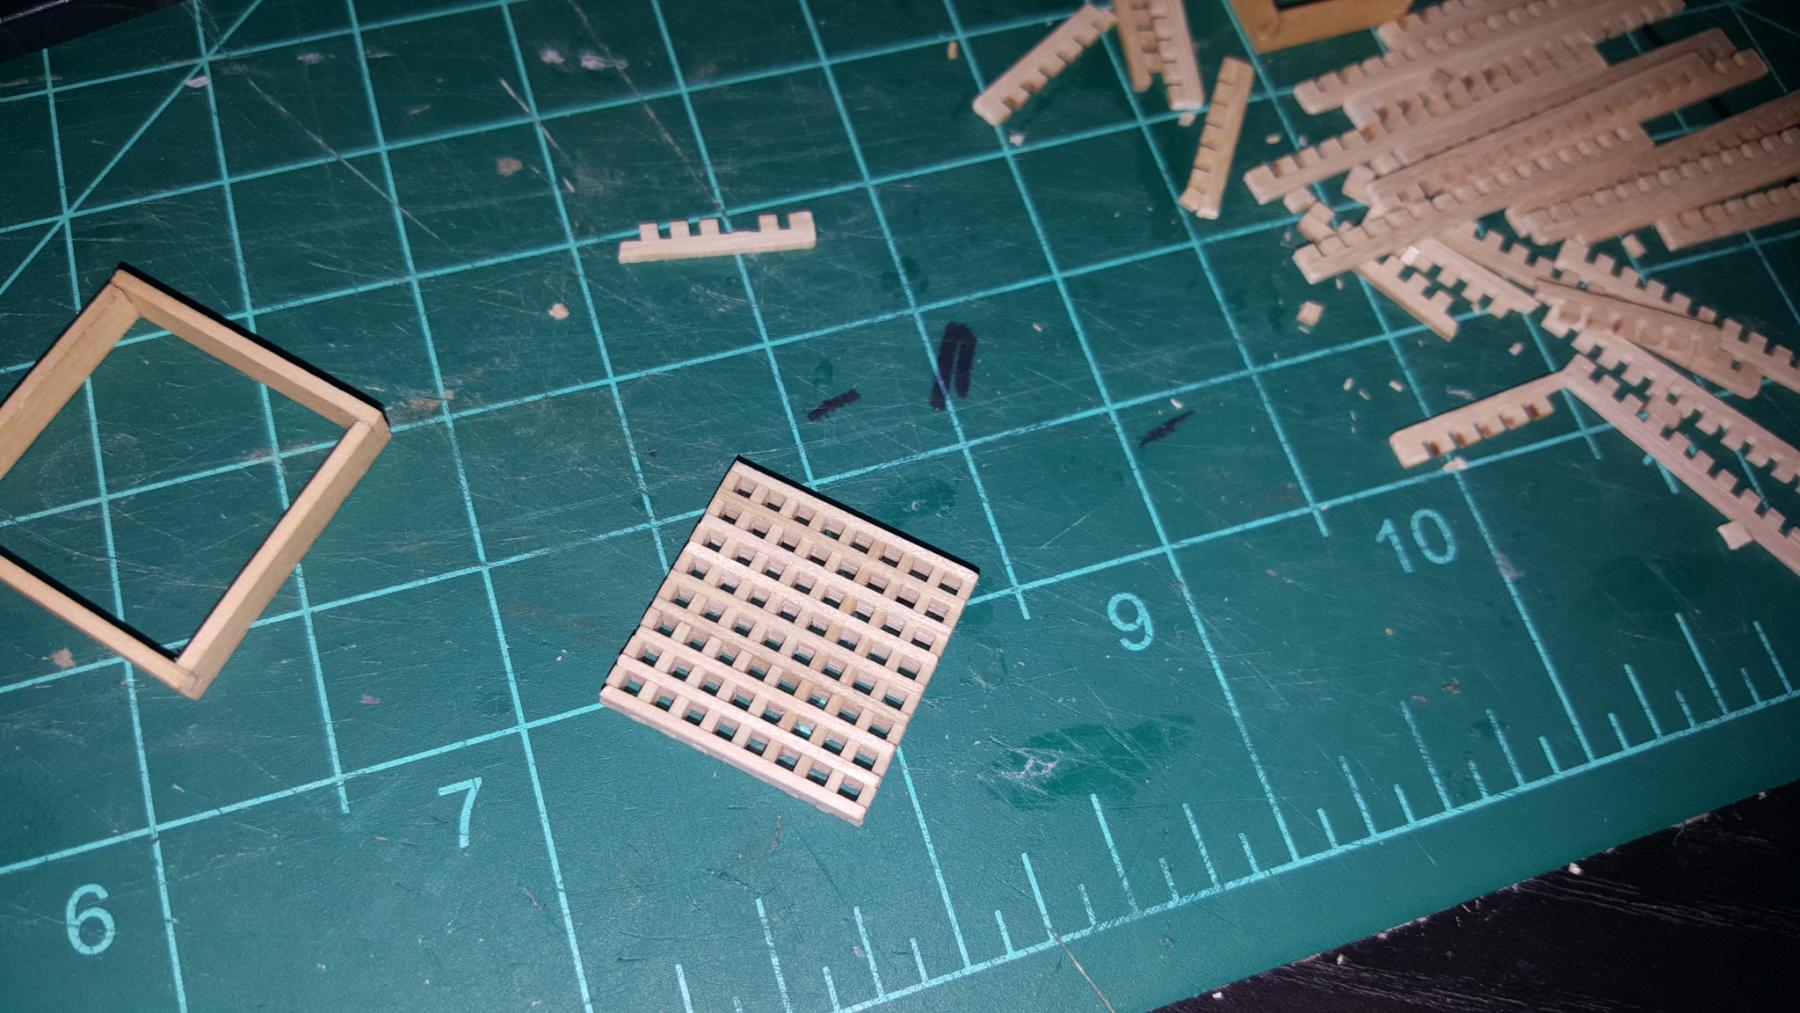
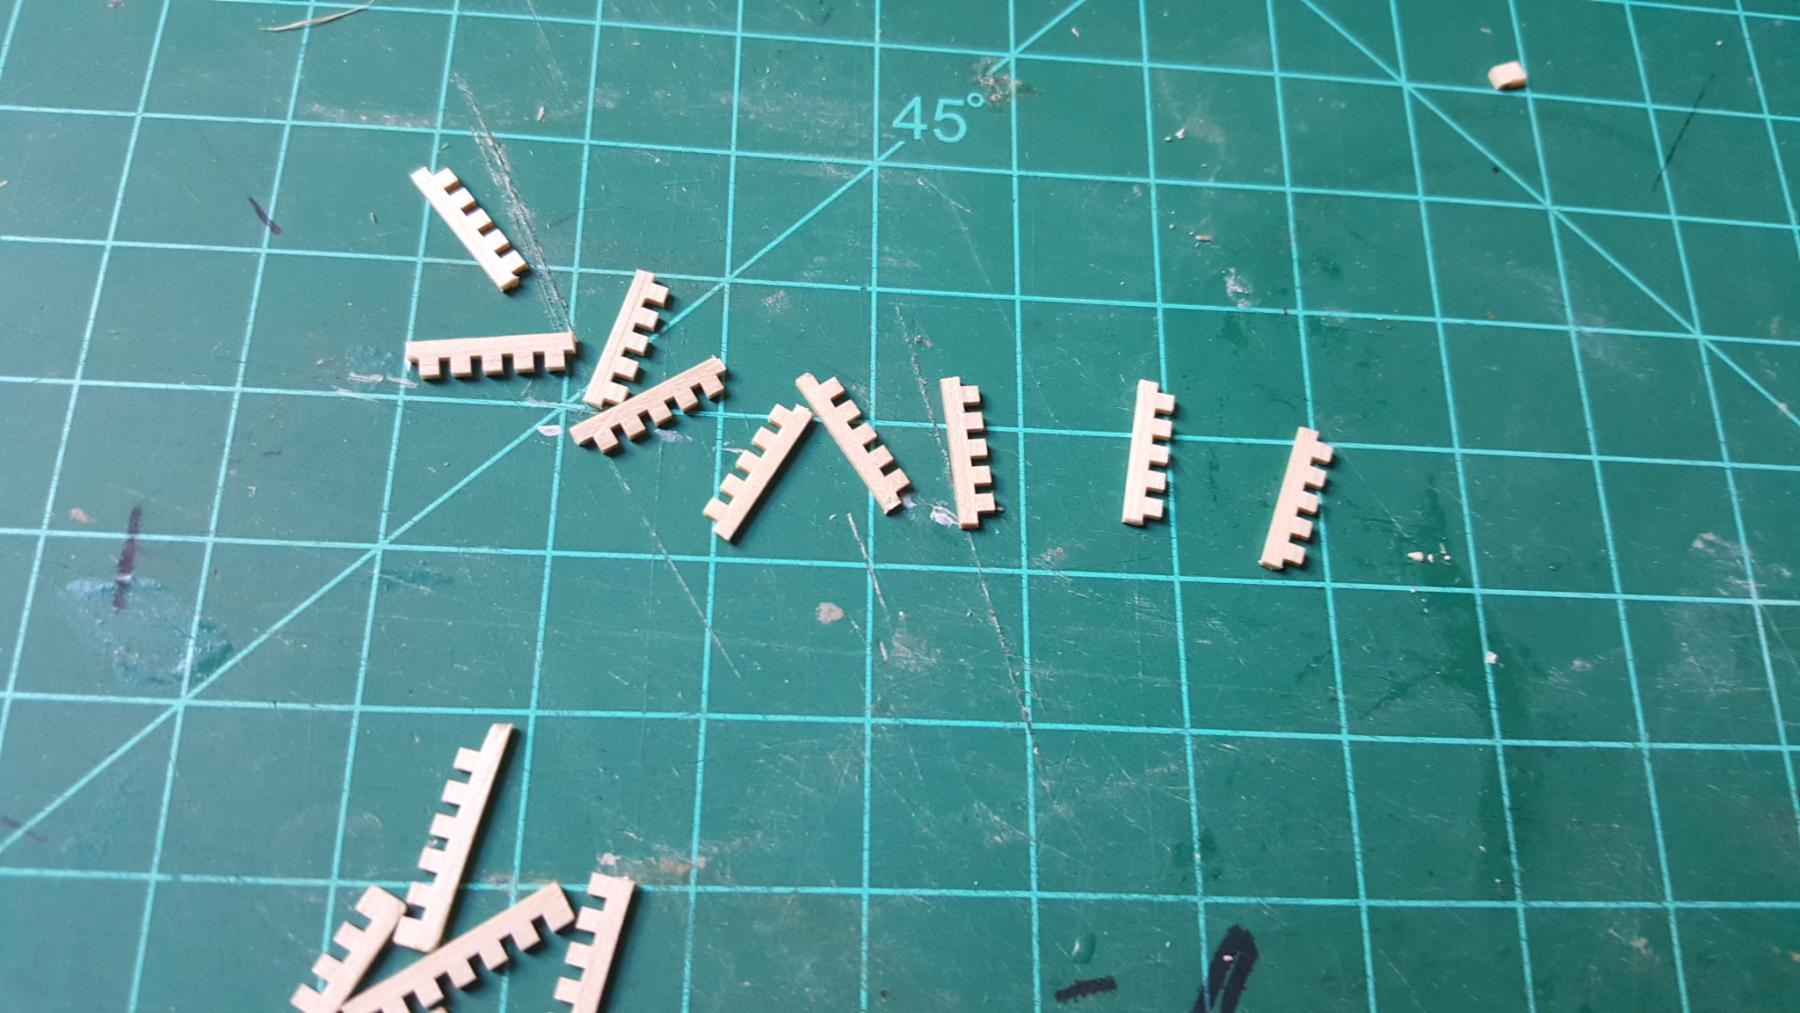
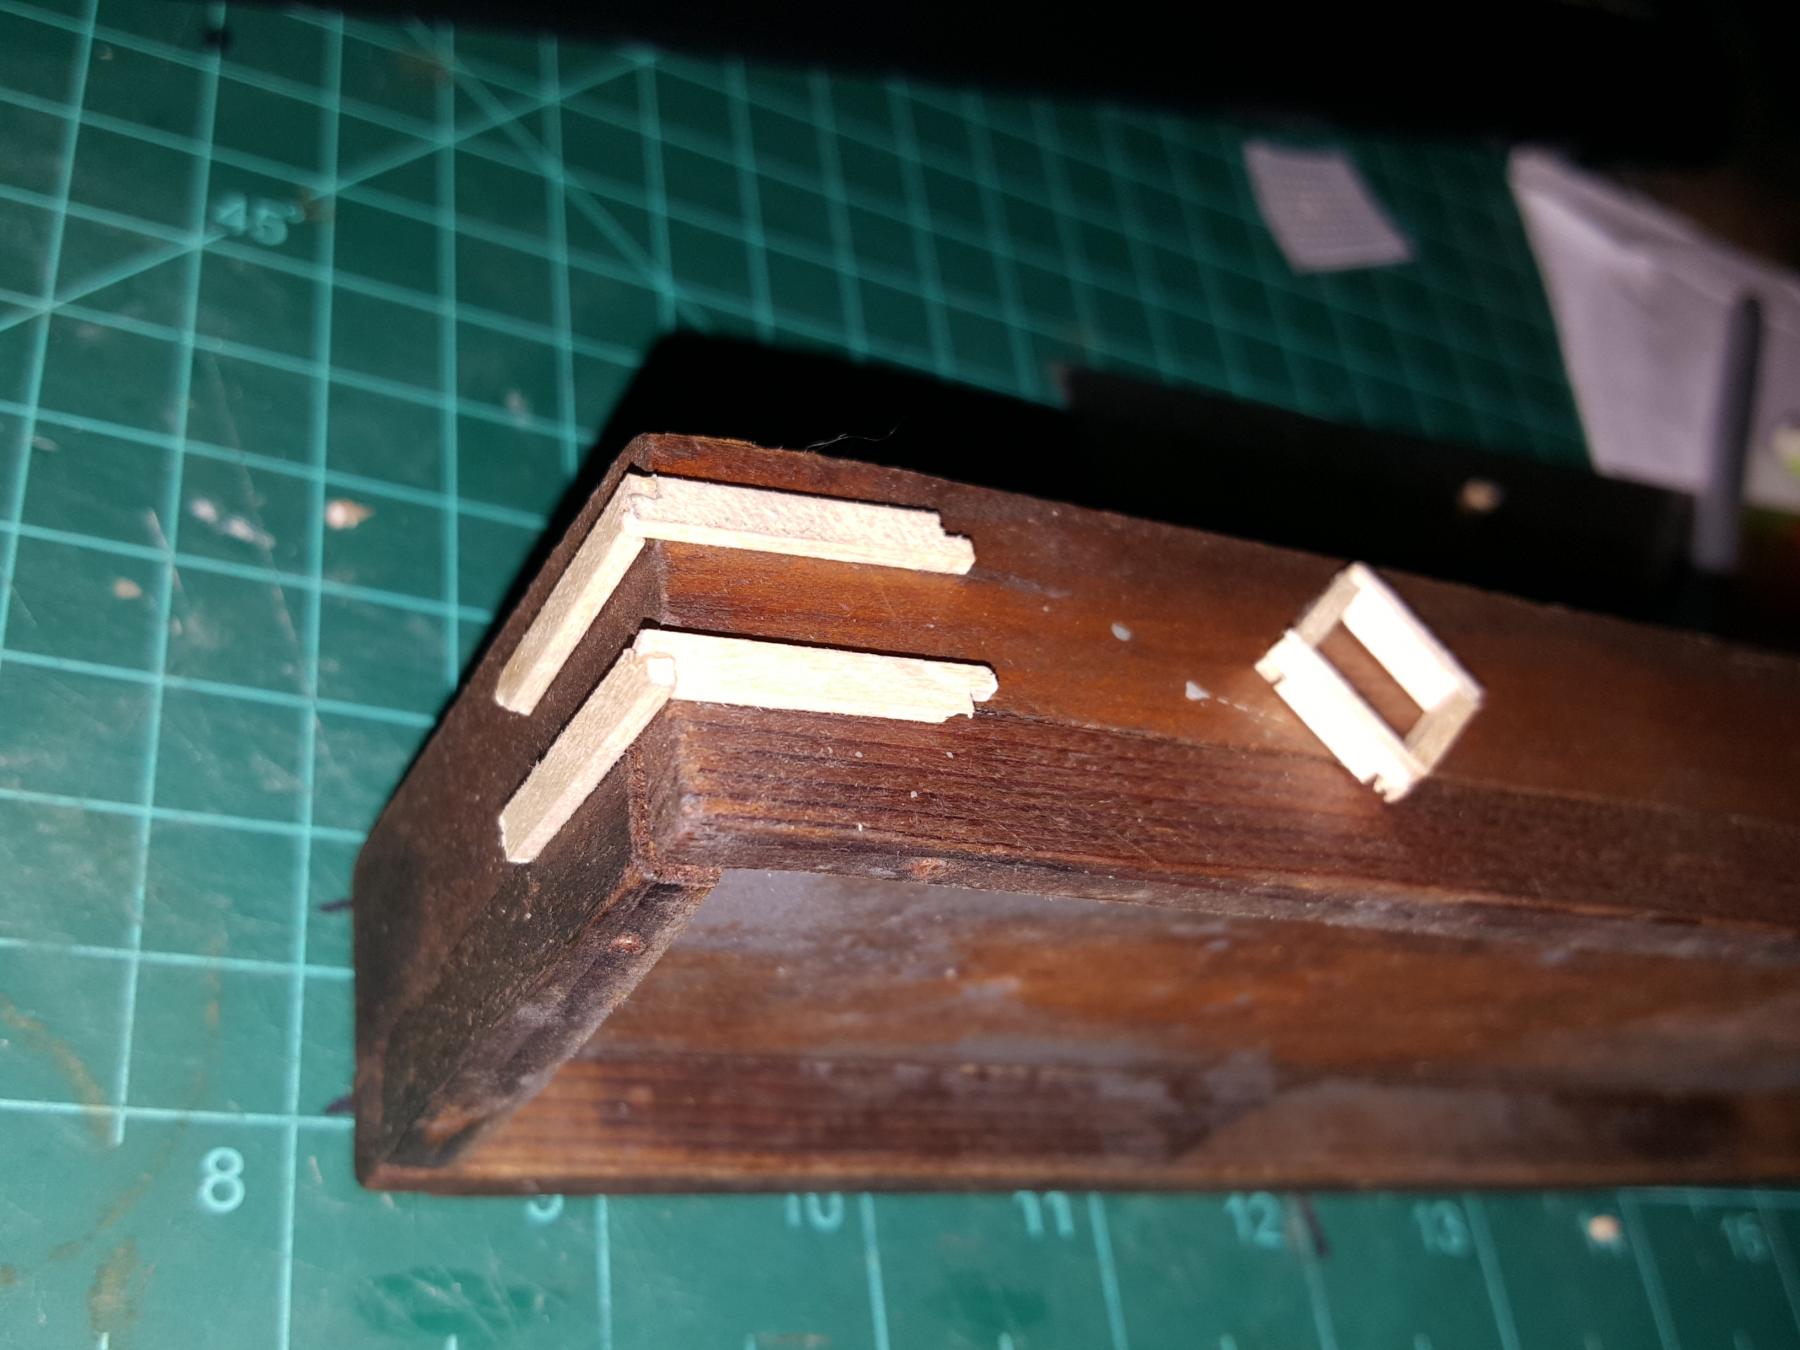
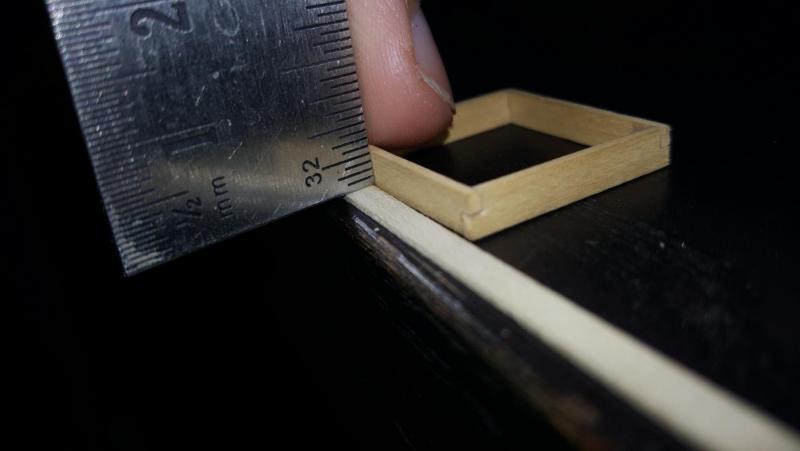
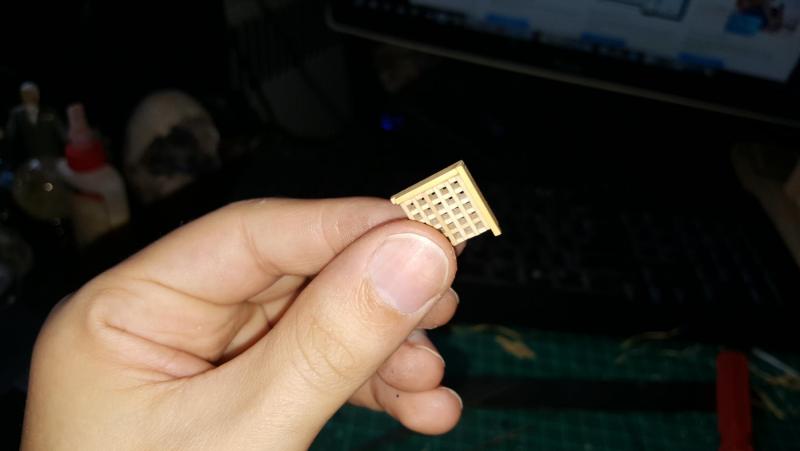
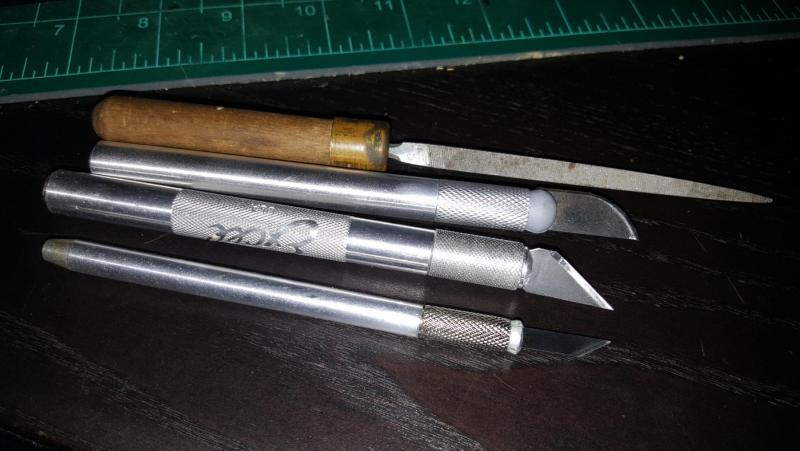
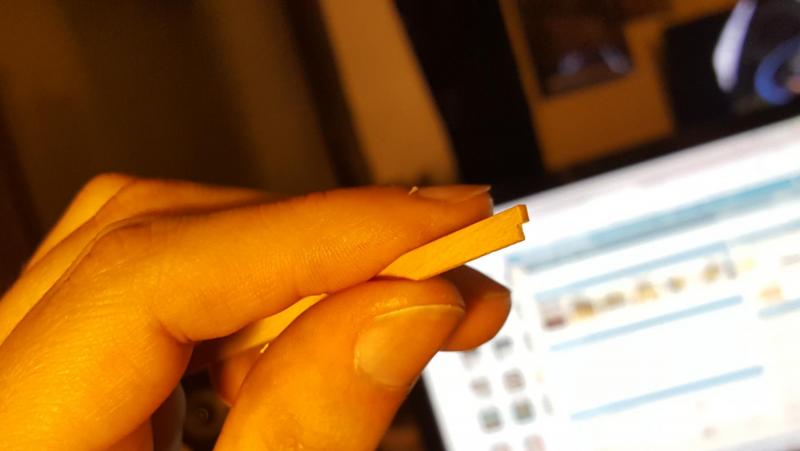
The curved knife I find is best for cutting the plank strip (you can apply a gentle rocking motion) and for shaving off any pieces of the lock joint that stick out after gluing. This time I built the coaming around the grating making it snug. I used a tiny needle file to help keep the lock joints square and even. Third time around and I am happy with the result.

- 362 replies
-
- 2
-
-
- active
- revenue cutter
- (and 1 more)
-
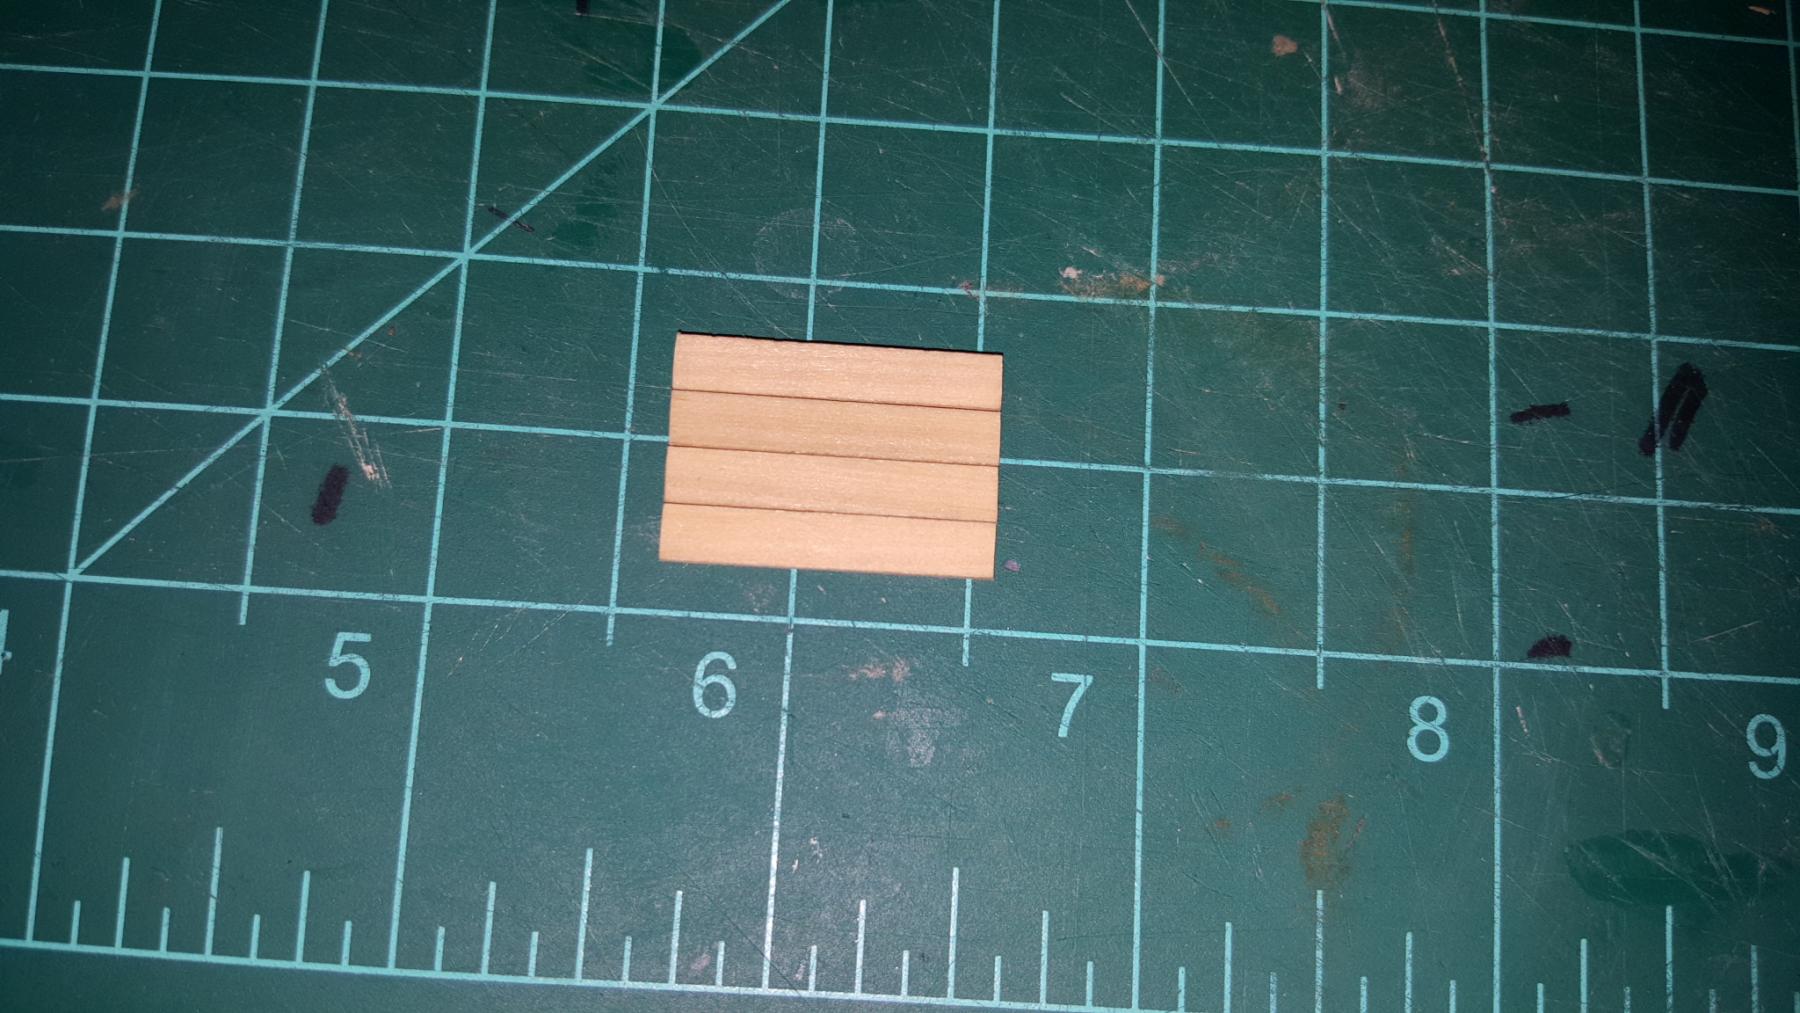
Greetings everyone! Another week another update and wanted to include you all on some of what I've been up to. Basically did another test grating and coaming this time using a spare grating kit I purchased from model expo a ways back before I knew of Syren's version. I didn't feel comfortable yet using the final version so I practiced on putting the basswood kit together learning a few things what not to do. I used the tools below to help apply glue and then scrape off anything that bled out into the grate holes checking at each layer before I put the next one down. I also determined that it is best (for me anyway) to cut the size I want out first and then glue those grating strips together as I noticed a few different methods. The model expo grating holes are about .1 mm larger than syren's so if the holes look a little large they will change in the final version.


- 362 replies
-
- 5
-
-
- active
- revenue cutter
- (and 1 more)
-
I agree Greg and for the next attempt I am going to put the gratings together first and then build the coaming around it. In this I will use the kit from Syren ship models

- 362 replies
-
- 6
-
-
- active
- revenue cutter
- (and 1 more)
-
Joel I have a few of those one or two sided files and it is a process for sure but a fun one. But I appreciate hearing what others use it gives me confidence that I am on the right track
- 362 replies
-
- 1
-
-
- active
- revenue cutter
- (and 1 more)
-
They sort of do but that could be due to the fact that they are still empty, also a camera trick. Looking at the plans which are traced right out of Doughty you can see the hatches are 5/32" and 1/8" in height respectively. I looked at many different ship models and they seem to be all over the map as far as dimensions go. However I will try a pair at 1/32" shorter just to see if I like that better. I'll just keep trying different things until I'm happy with what I see

- 362 replies
-
- 4
-
-
- active
- revenue cutter
- (and 1 more)
-
Here is pretty much the stuff I have which most closely matches your suggestions. I am going to try a third attempt and this time really get in close and see how it comes out. But I am enjoying the practice and the learning curve

- 362 replies
-
- 2
-
-
- active
- revenue cutter
- (and 1 more)
-
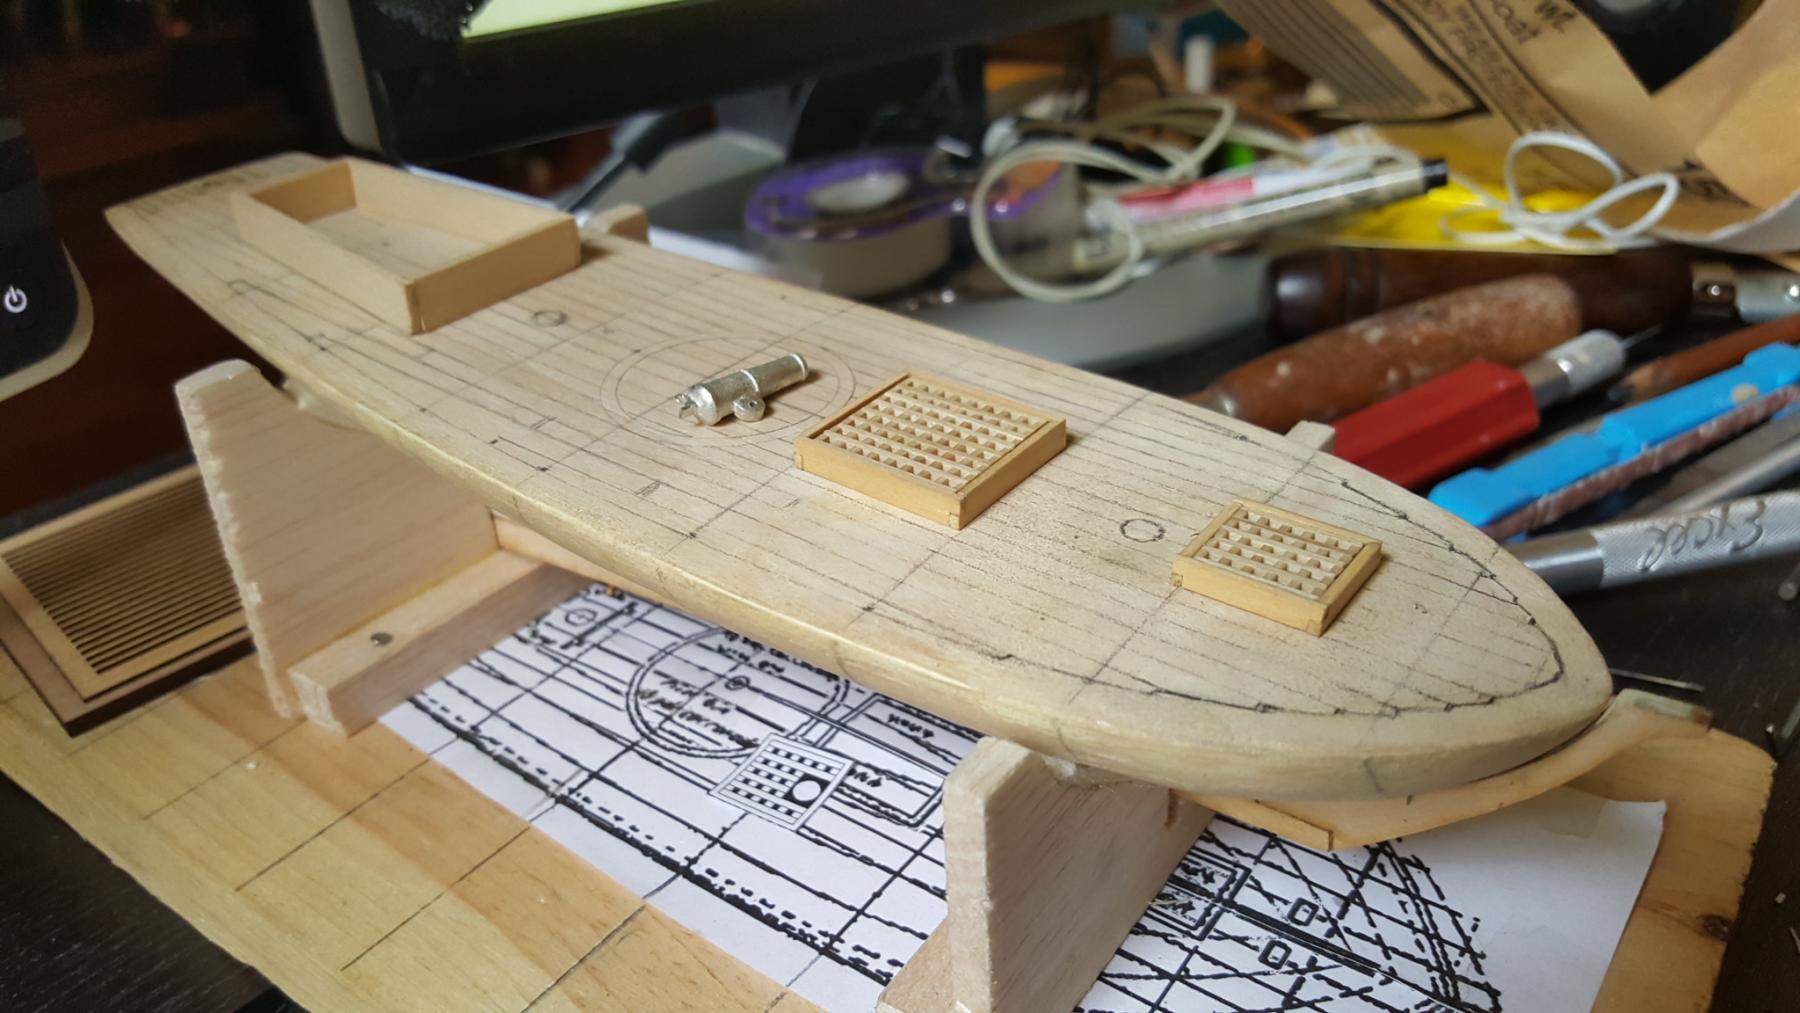
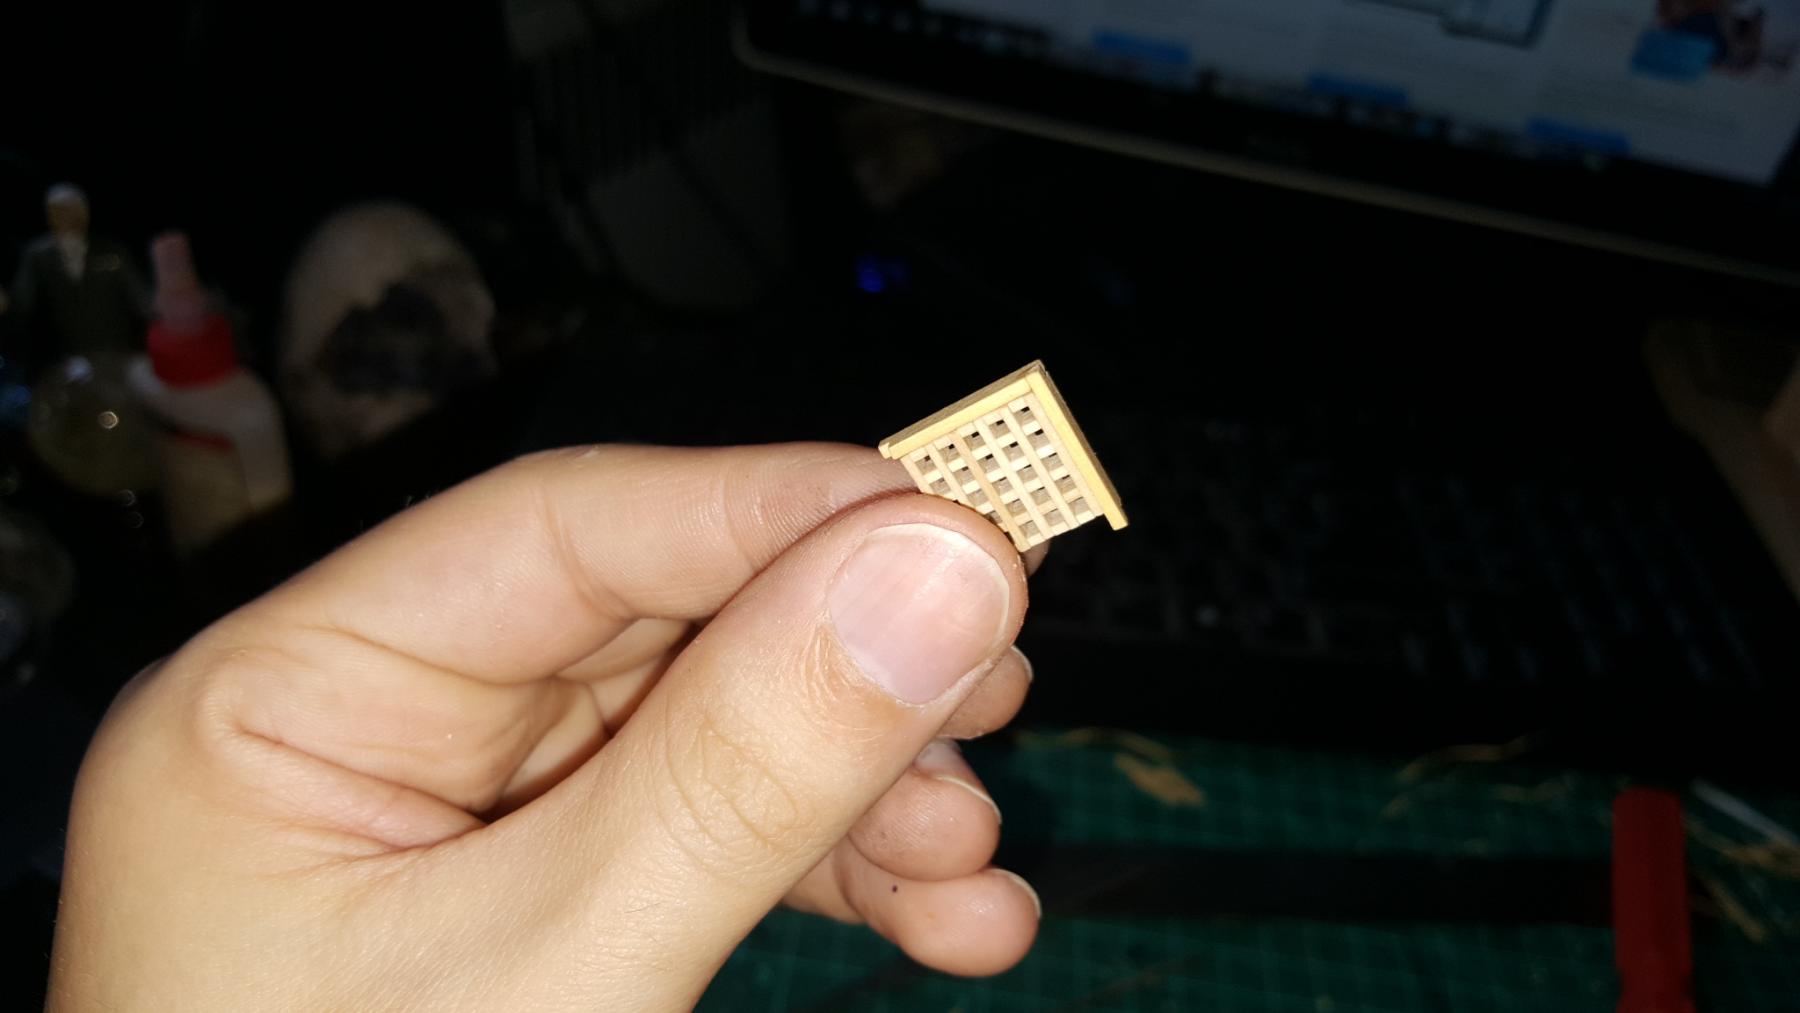
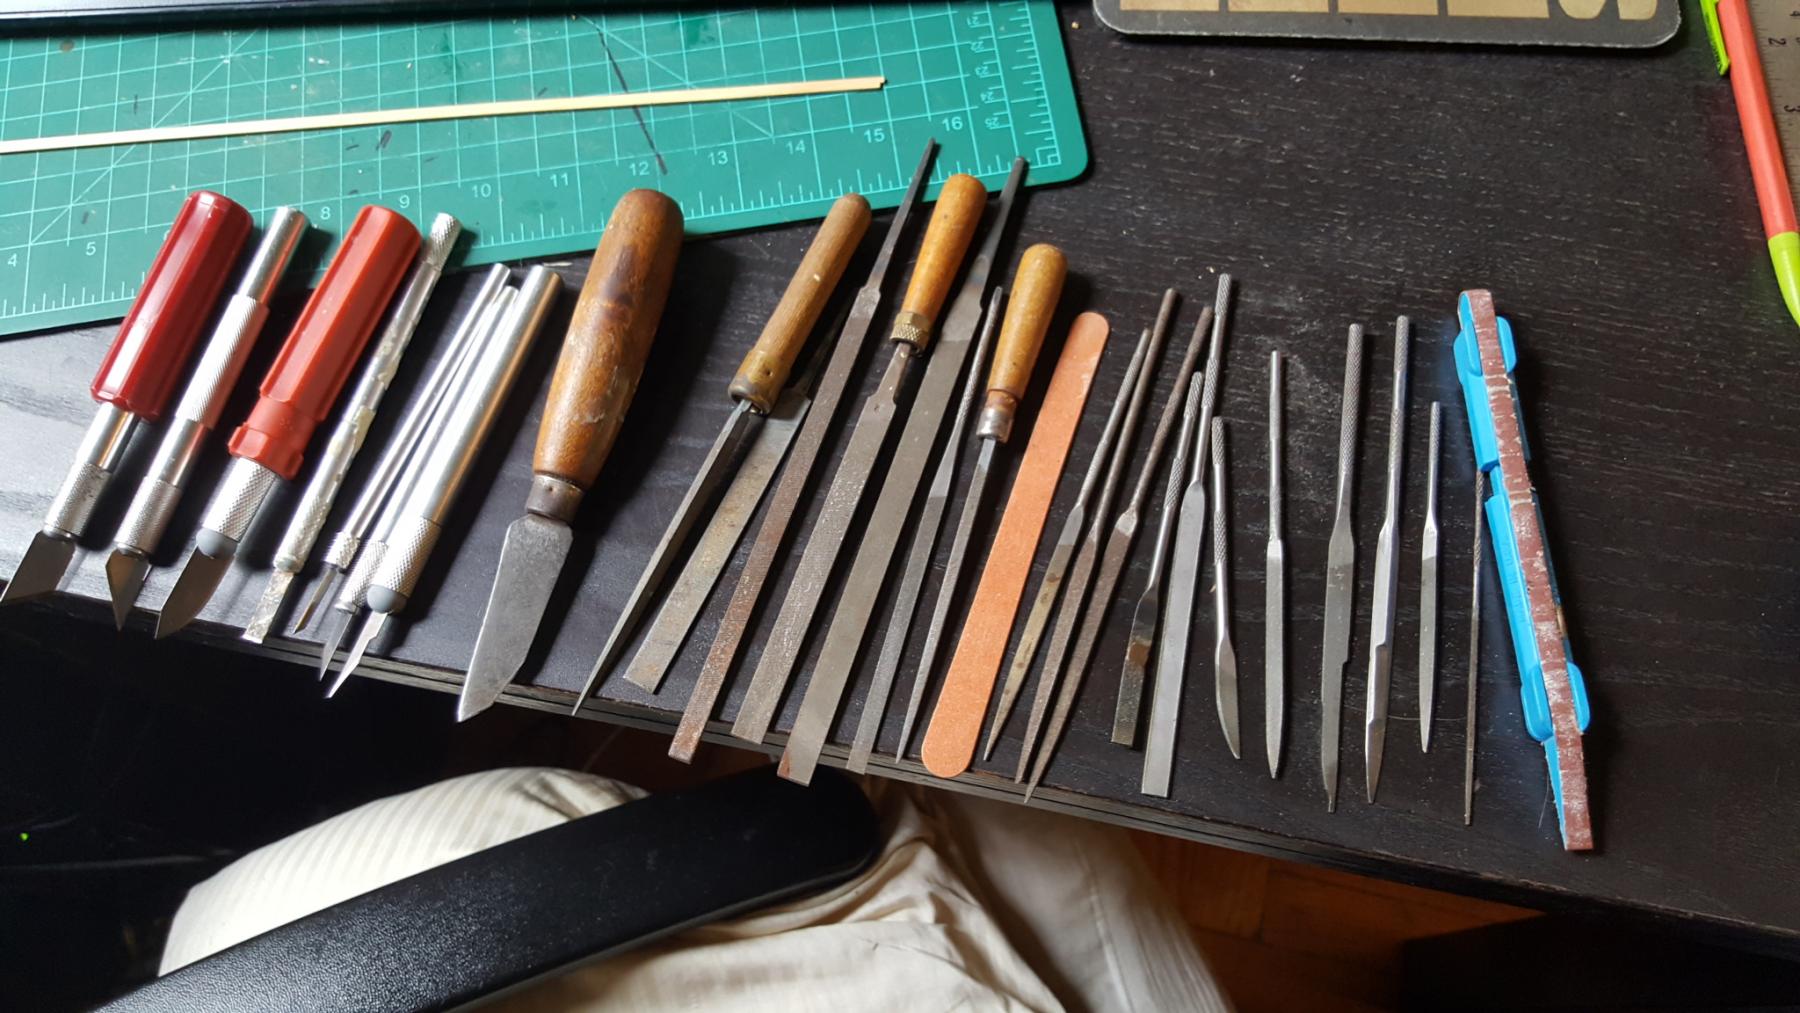
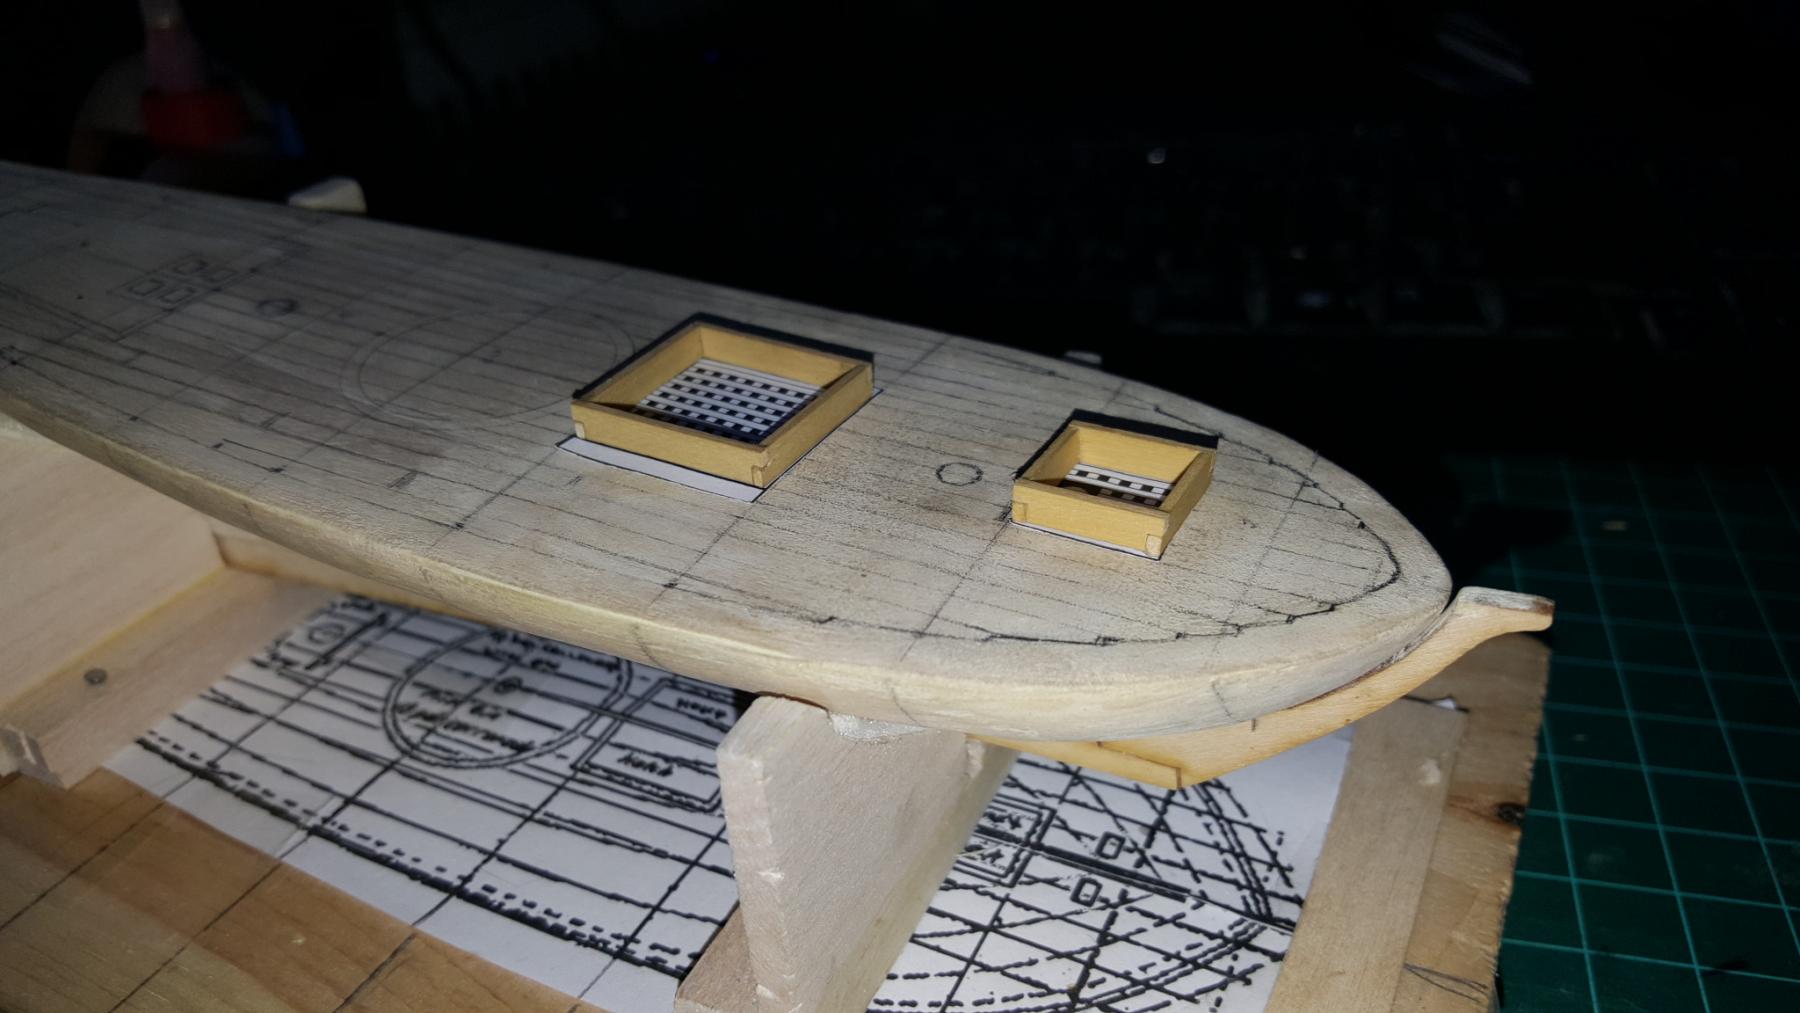
And here they are, just looks better in my opinion though if this is historically inaccurate do let me know. I've seen some models with different heights to their hatches and the Chapelle plan shows this as well so I am assuming it's perfectly acceptable. They are not 100% square yet but that wasn't my intention since when the time comes ill wrap the wood around the hatch grating so it is the correct shape. I wanted too see how they would look overall I think the thickness and heights look great! What I am still unhappy with is the level of precision between the lock joints. I feel it's my tools I am curious what some of you use for cutting very tiny and precise right angles, perhaps they aren't sharp enough or perhaps there is something better to use. Thoughts and feedback are appreciated
- 362 replies
-
- 5
-
-
- active
- revenue cutter
- (and 1 more)
-
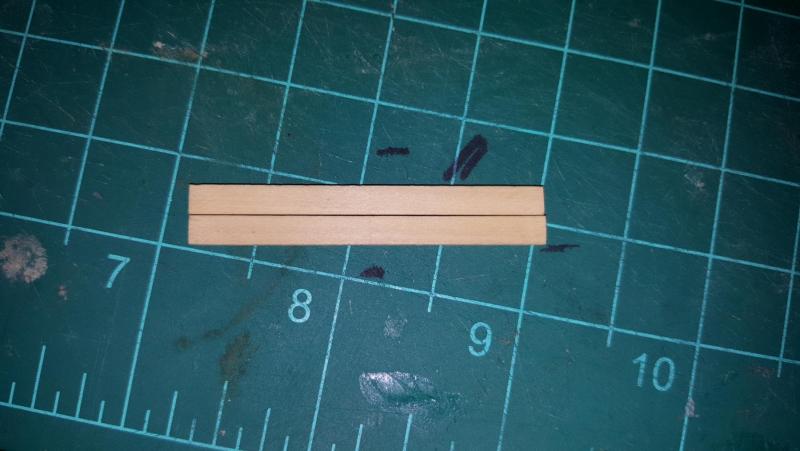
My first attempt was trash using 1/8" by 1/16" basswood too soft and ultimately the coamings looked too thick, second attempt I used boxwood 3/64" by 5/32" for both. What I found is that having them the same height didn't quite look right (look below). So next I chose to make the forward coaming 3/64" by 1/8" which looked much better.
- 362 replies
-
- 6
-
-
- active
- revenue cutter
- (and 1 more)
-
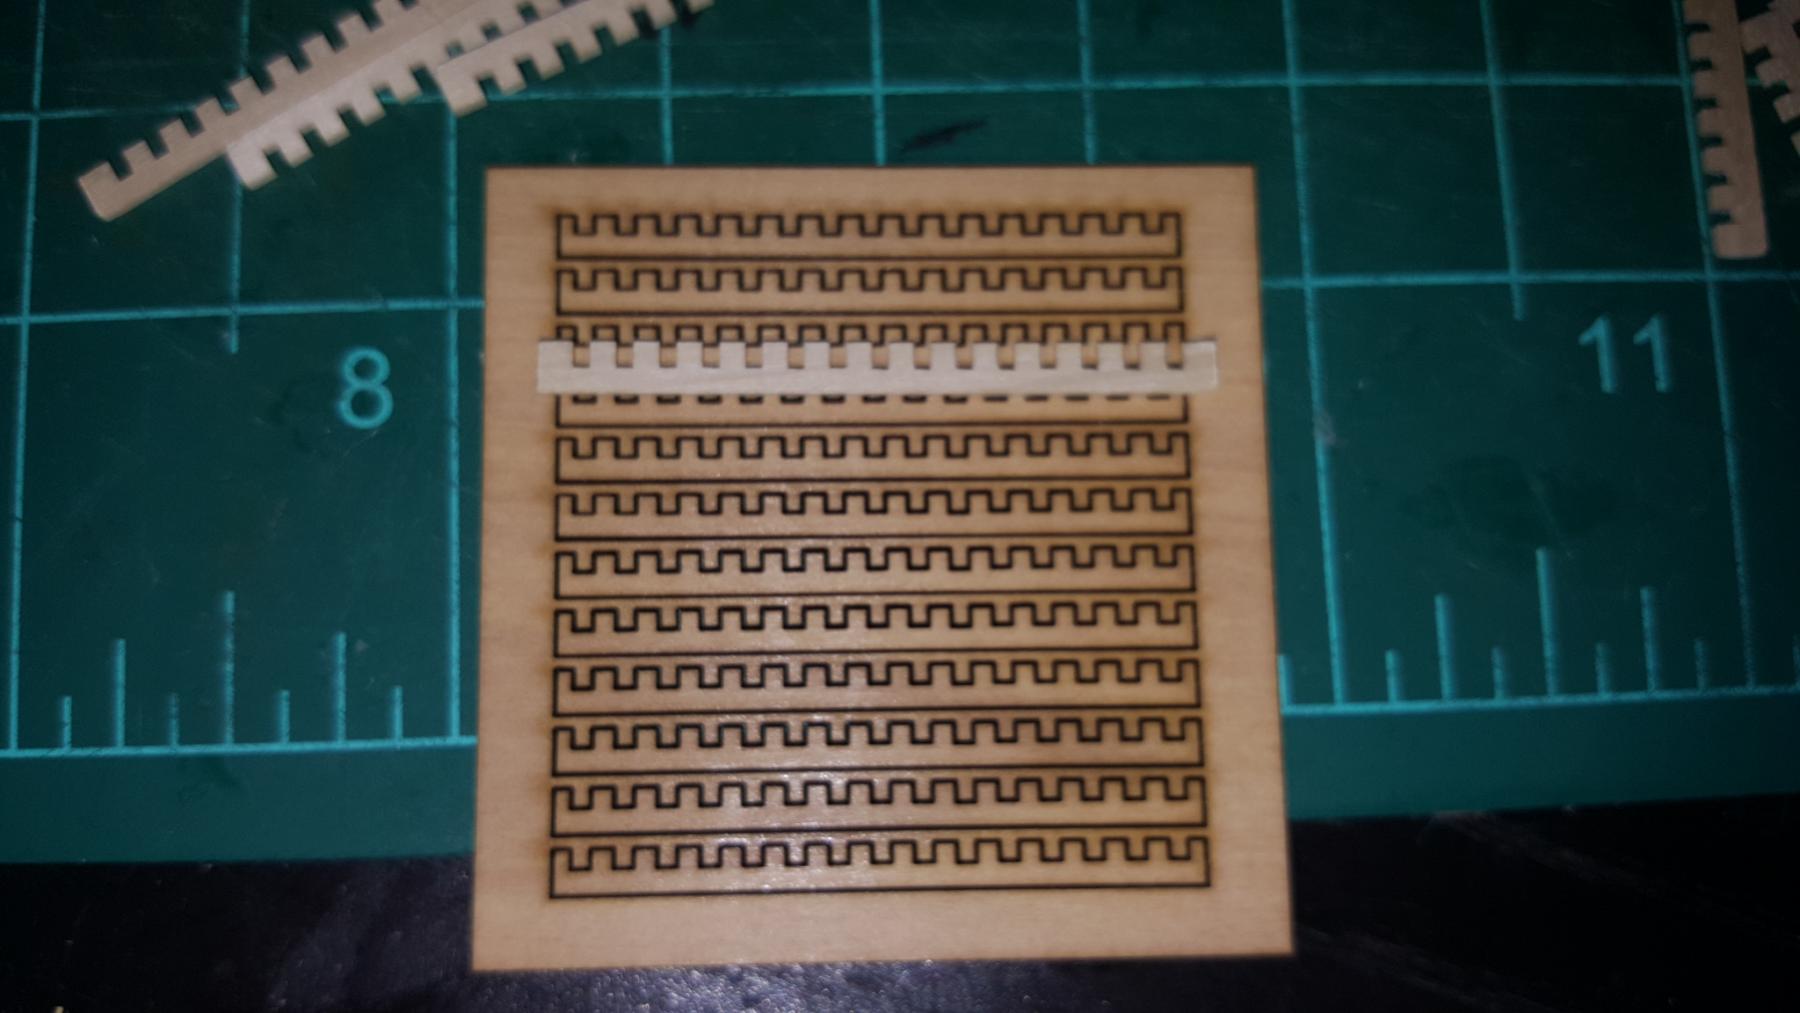
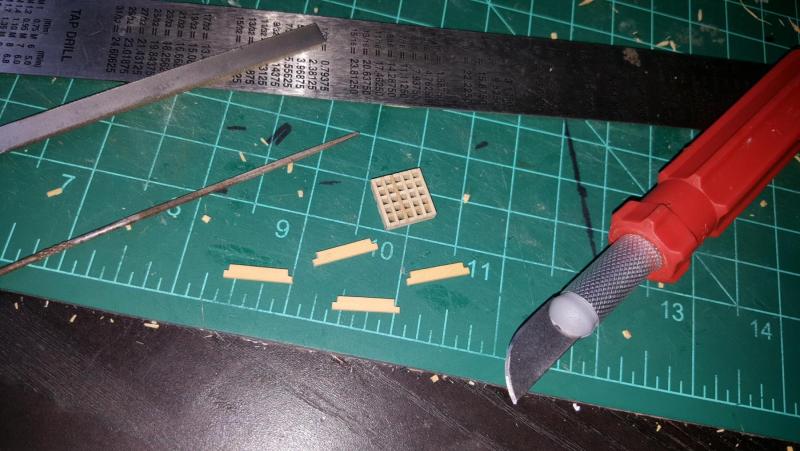
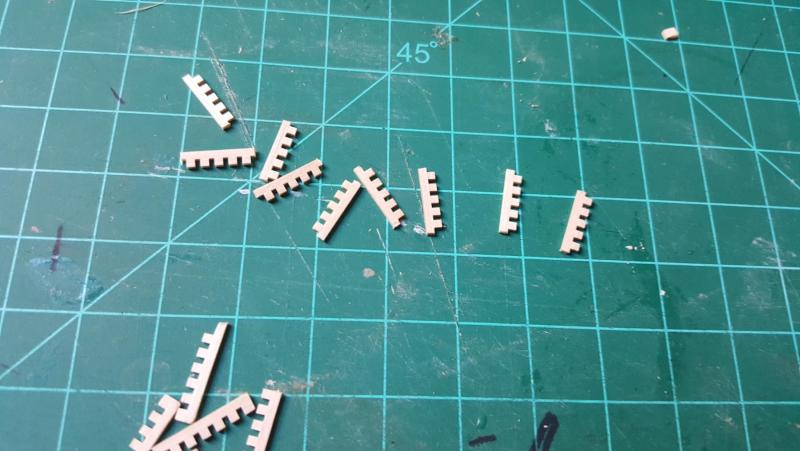
Hi everyone! So I decided I wanted something simple finished on the model and have been practicing on making the frames for the hatches (coamings). While I want to do the final frames in cherry so they are darker than the boxwood grating I have a large supply of boxwood so thought I'd play around and get the hang of using a hobby knife to carve wood. While lots of fun it took me a few tries to get a decent result. Below you can see my approach including a simple lock joint on the edges.


- 362 replies
-
- 5
-
-
- active
- revenue cutter
- (and 1 more)
-
Thanks! I took a break on this one to practice on the simpler revenue cutters but will get back to her after
-
Hi! Regarding bulwark colors the answer is it varied. The british preferred red and syren likely has red in alot of models due to her being a captured ship. The states used green but I imagine also red and in time white. Basically whatever was cheap and available. For more info on colors id recommend a copy of nrg's ship model shop notes II.
- 1,135 replies
-
- 4
-
-
- model shipways
- syren
- (and 2 more)