CharlieZardoz
-
Posts
964 -
Joined
-
Last visited
Content Type
Profiles
Forums
Gallery
Events
Everything posted by CharlieZardoz
-

Brig USS Enterprise 1799 info gathering
CharlieZardoz replied to CharlieZardoz's topic in Nautical/Naval History
Hi so the story of the plans is this. I gave up trying to go to the museum to find them at mystic then it came to my attention that in our brooklyn boat group had a copy and our head of group Dan Pariser gave his copy to one of our group members and made me a photocopy. So these copies are the only available version of the plan I know that are able to be sourced and not even sure where and when Dan got it from. -
Looking for plans or possible models of Magellan's ships.
CharlieZardoz replied to J11's topic in Nautical/Naval History
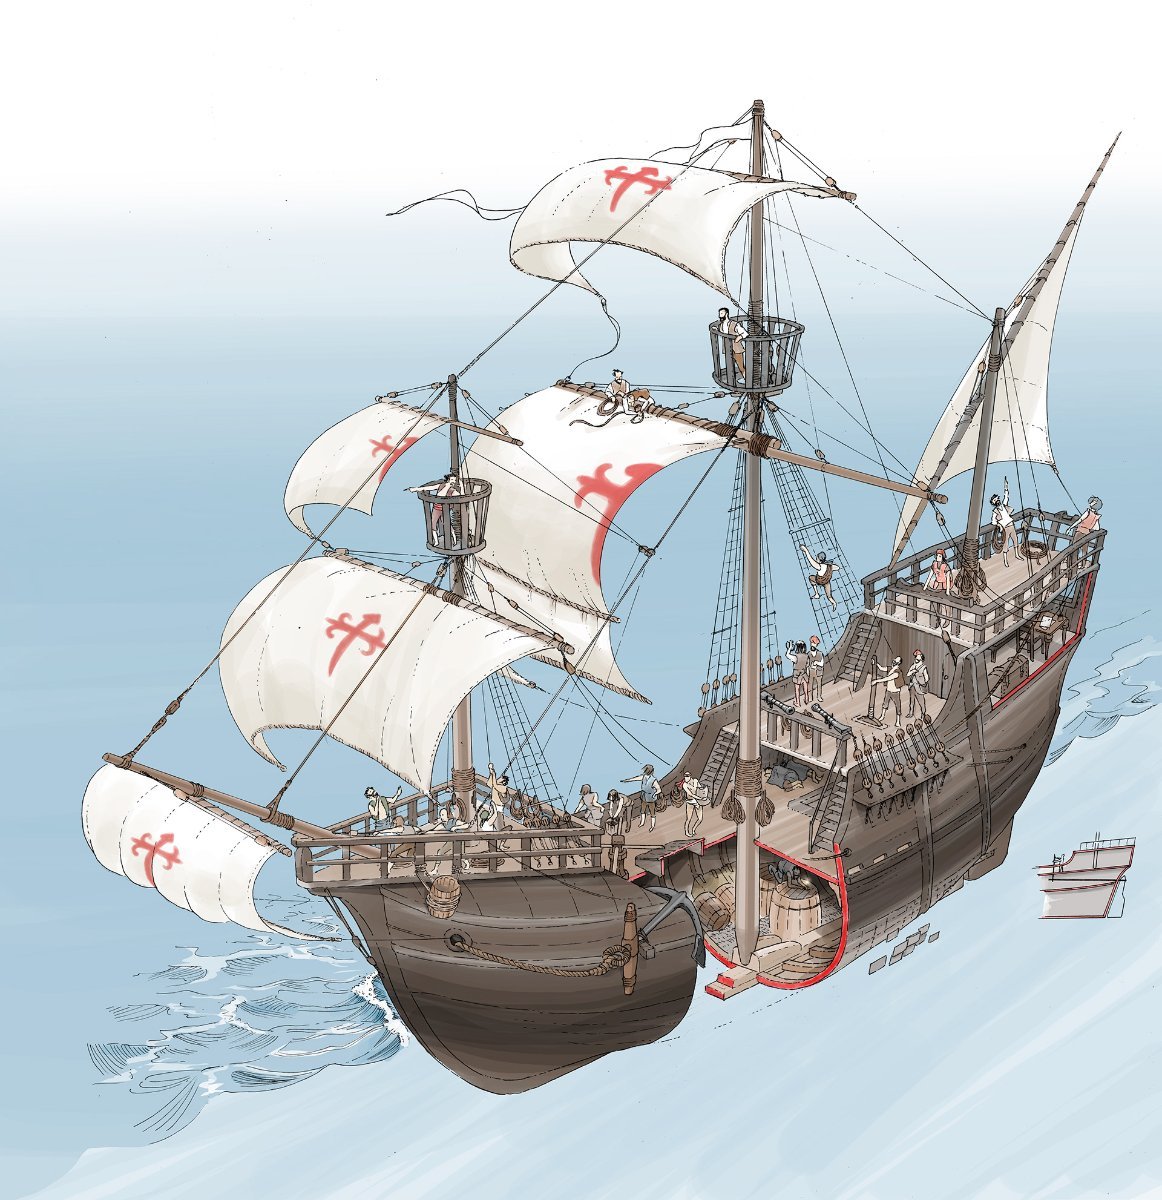
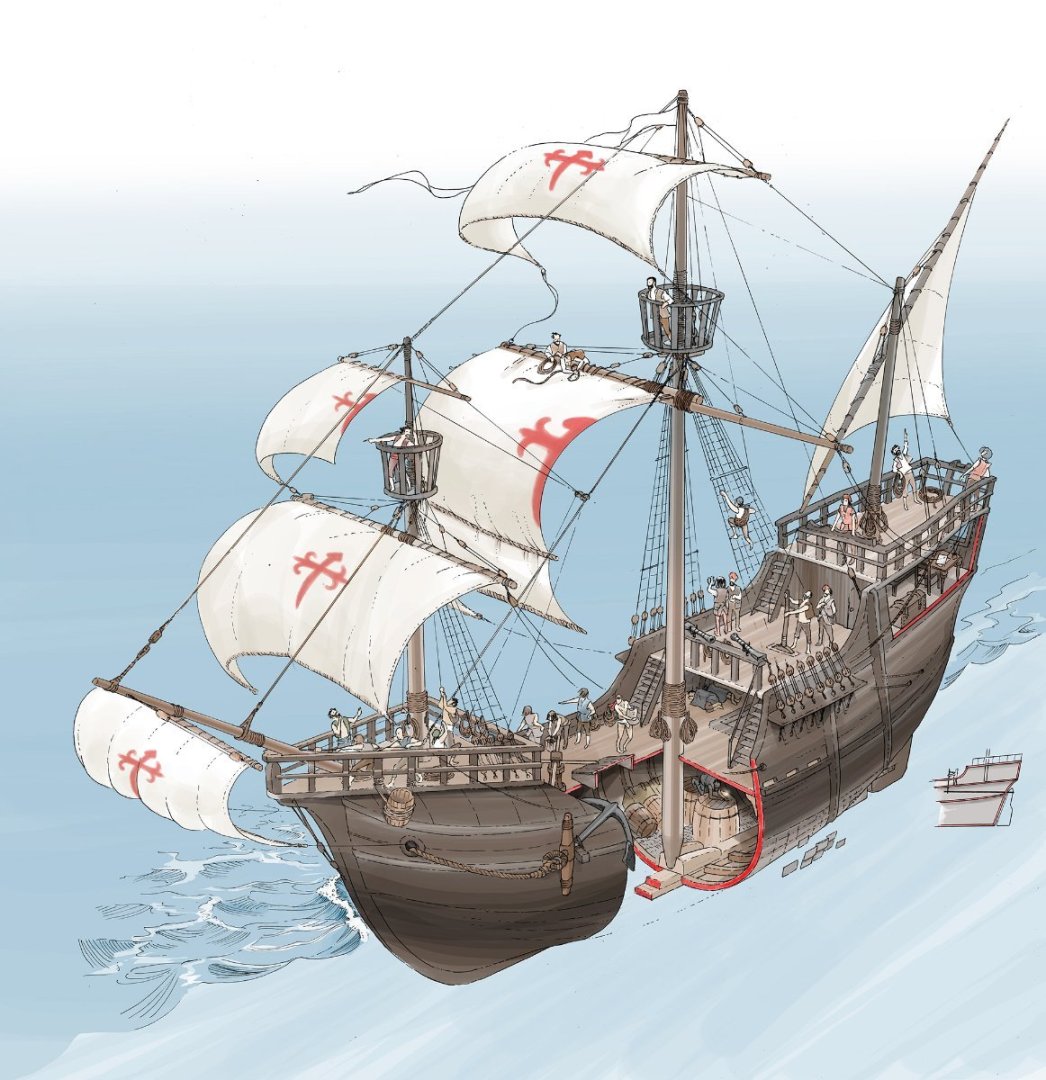
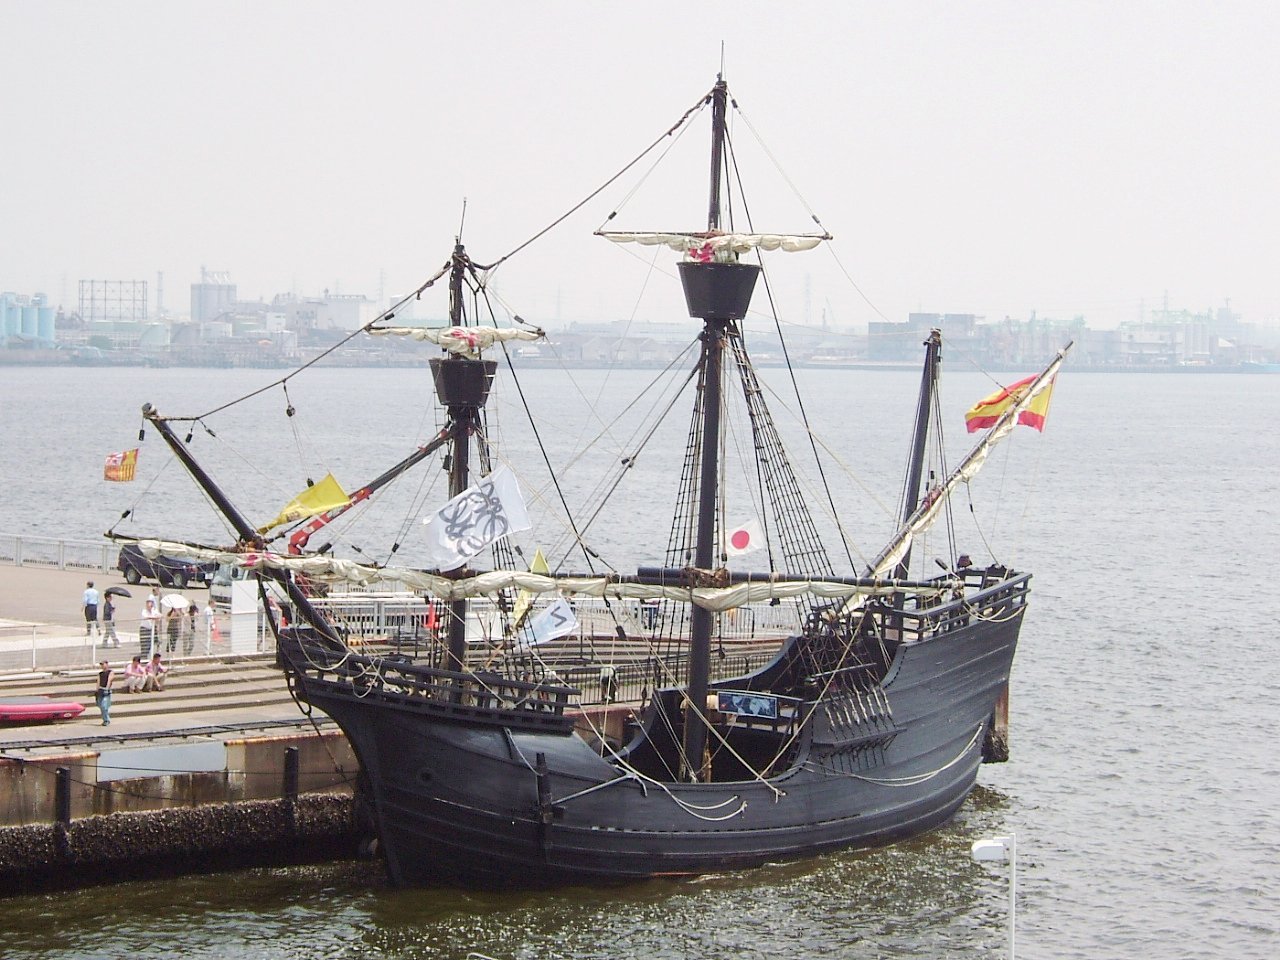
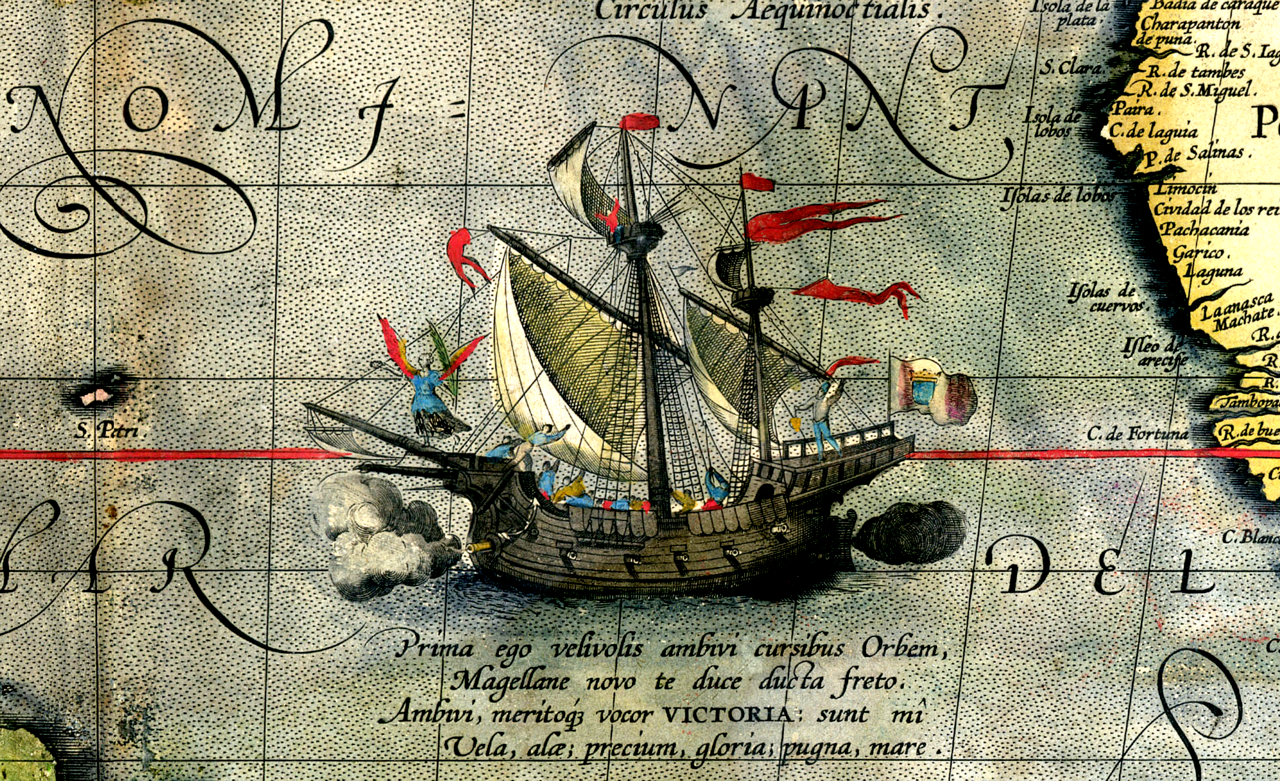
Hello and greetings! I always find the idea of trying to reconstruct ships with little to no historical references daunting but also challenging. With some awareness of the history involved one can make an "interpretation" of such vessels as Magellons. The main thing to be mindful of is to be very aware of the exact time the ship was in service as there are subtle differences in ship design even of that time that one can notice decade to decade and be aware of or stumble over if not researched properly (see above about that stern tuck for example). The other is taking into account tonnage as a method of determining size and function. The only ship which seems to have had a reasonable attempt at reconstruction is Victoria and you can see examples of the ship below. 85 tons about 65 feet +/_ She strikes me as being a bit longer and more slender than a carrack like Santa Maria if I were to attempt a model of her I'd likely use alot of this material for reference. As for the others... that's really a challenge. These weren't naval vessels so there was no commissioned design but of a type one could assume larger ships looked closer to galleons while smaller ones looked more like caravels such as Nina. Personally I feel the more drab and unspectacular and weathered they looked the more close to reality they probably were. Exterior was covered in pitch and a modeler might want to add some subtle paint and detailing to avoid boredom but also these embellishments were likely not the case and its doubtful each had very little to distinguish themselves from the other. At any rate an interesting topic I wish you luck on.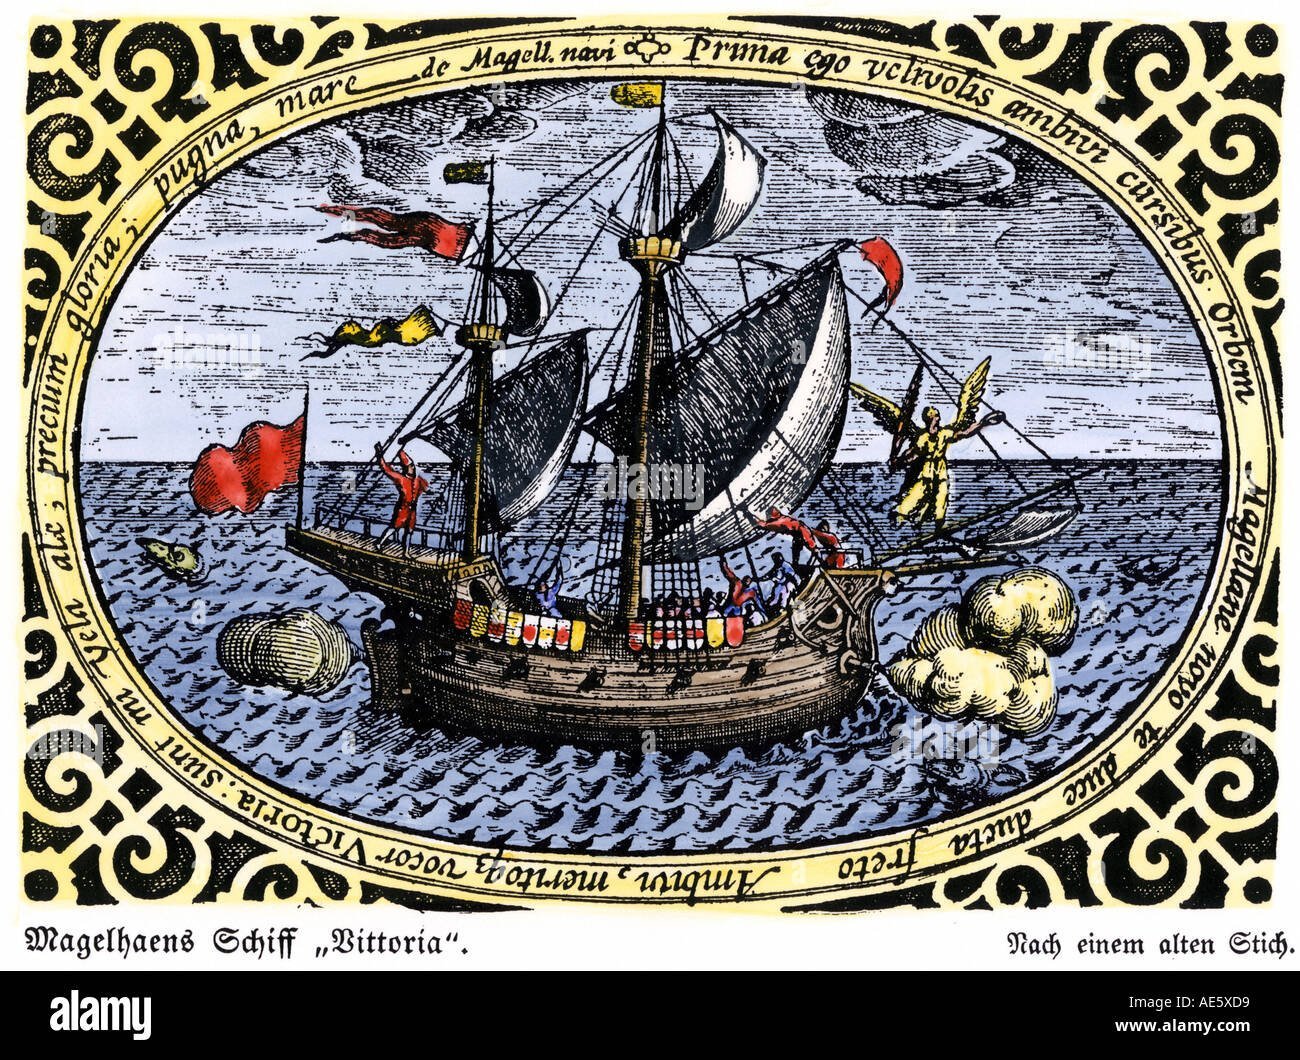
-
Brig USS Enterprise 1799 info gathering
CharlieZardoz replied to CharlieZardoz's topic in Nautical/Naval History
Well you know gunboats can always be altered and added as i suspect they were at times 👌😉 -
Brig USS Enterprise 1799 info gathering
CharlieZardoz replied to CharlieZardoz's topic in Nautical/Naval History
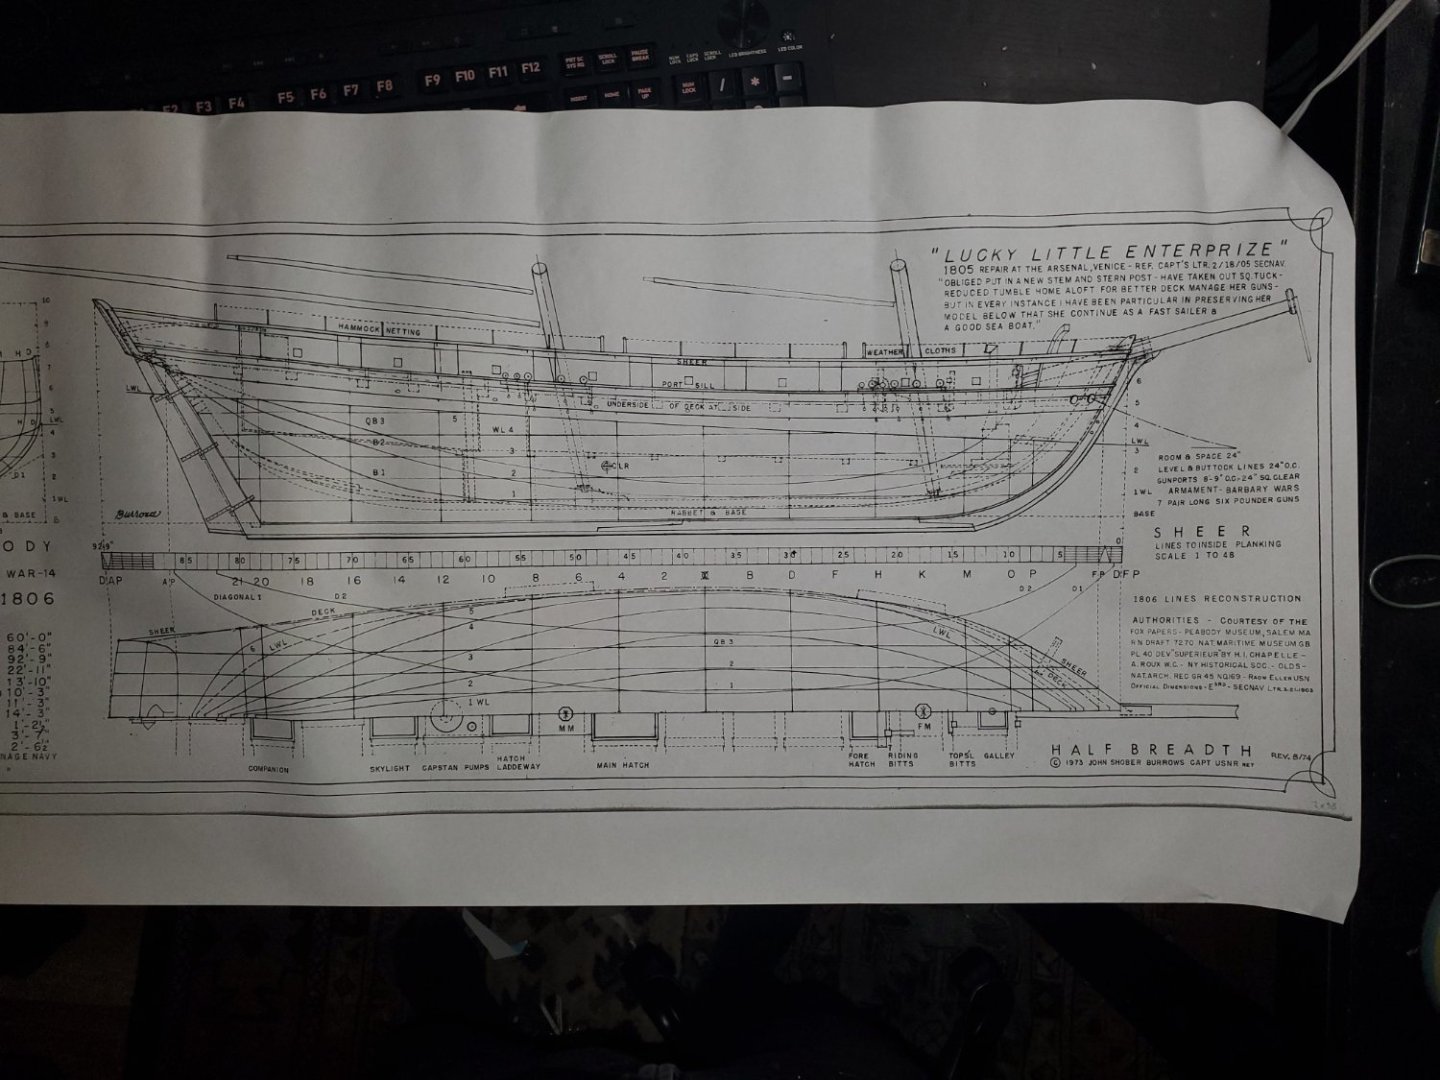
Yes thank you! You can see in that diagram how the Superior had lower bulwarks more typical to other Baltimore clipper style ships and how Burrows obviously used these lines as a basis. One could extrapolate that by the time.of her sinking Enterprize may have looked somewhat more like the Boxer class which was her replacement and that class of ship being a modernized version of the original Enterprize at least in style and function. -
Brig USS Enterprise 1799 info gathering
CharlieZardoz replied to CharlieZardoz's topic in Nautical/Naval History
I believe we mean this one yes? Also keep in mind Enterprize (with a z) had several rebuilds and hard to pin down exactly what she looked like at each turn. At some point she had a poop deck but not like the one from the constructo kit. That's poop circa 1776 not 1805 it was likely similar to what the cruiser class or frolic/peacock had and likely removed before 1812. The reason why the constructo/dikar kit looks like it does it because Vixen was ordered to be a ship of similar lines and displacement to the Enterprize however in truth she was a downscaled Syren and not at all the same type of ship.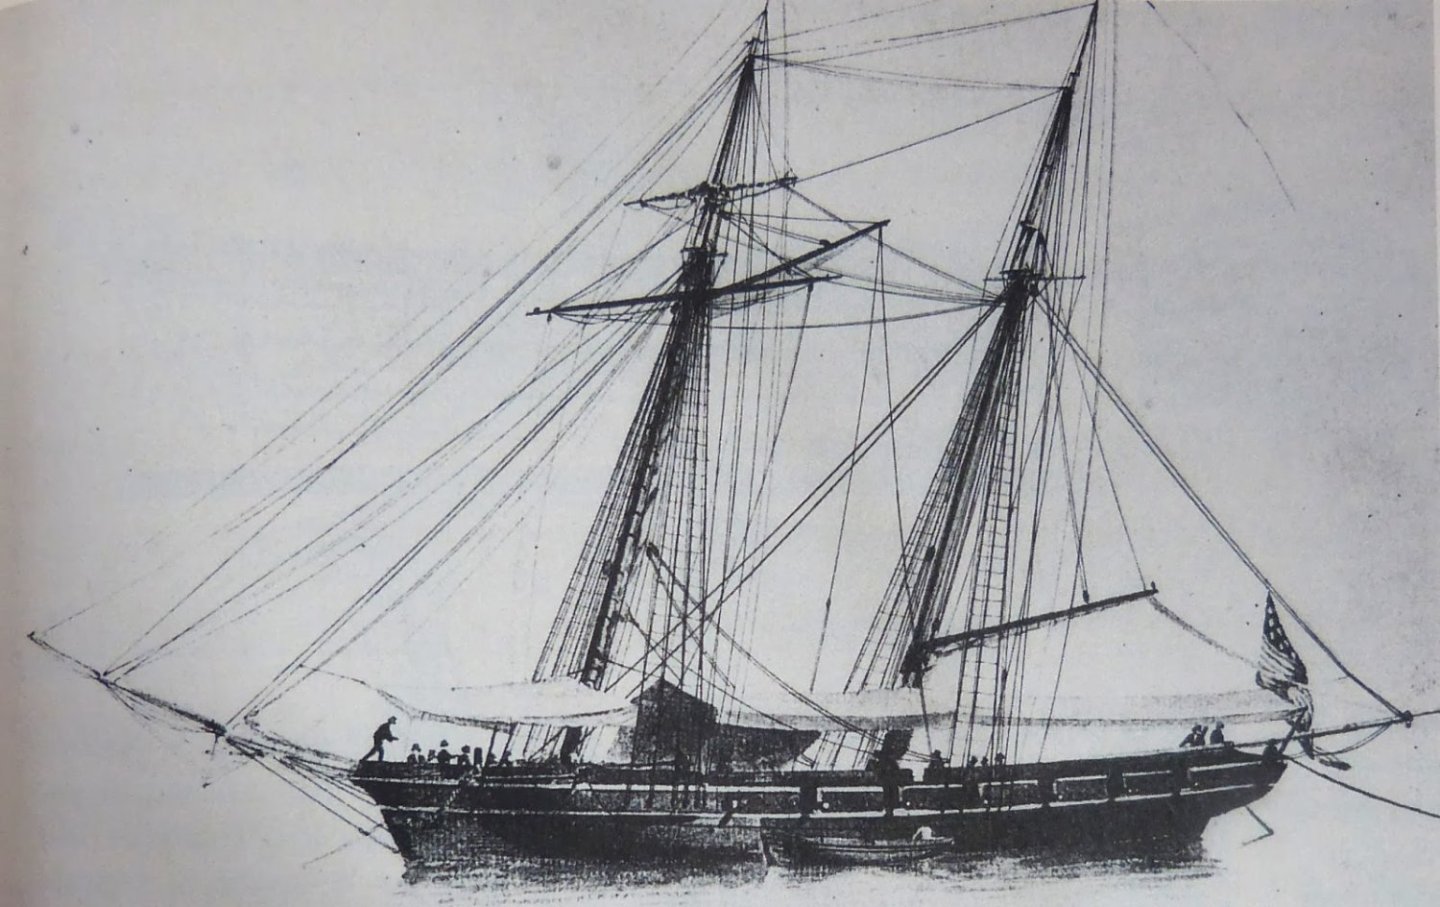
-
Brig USS Enterprise 1799 info gathering
CharlieZardoz replied to CharlieZardoz's topic in Nautical/Naval History
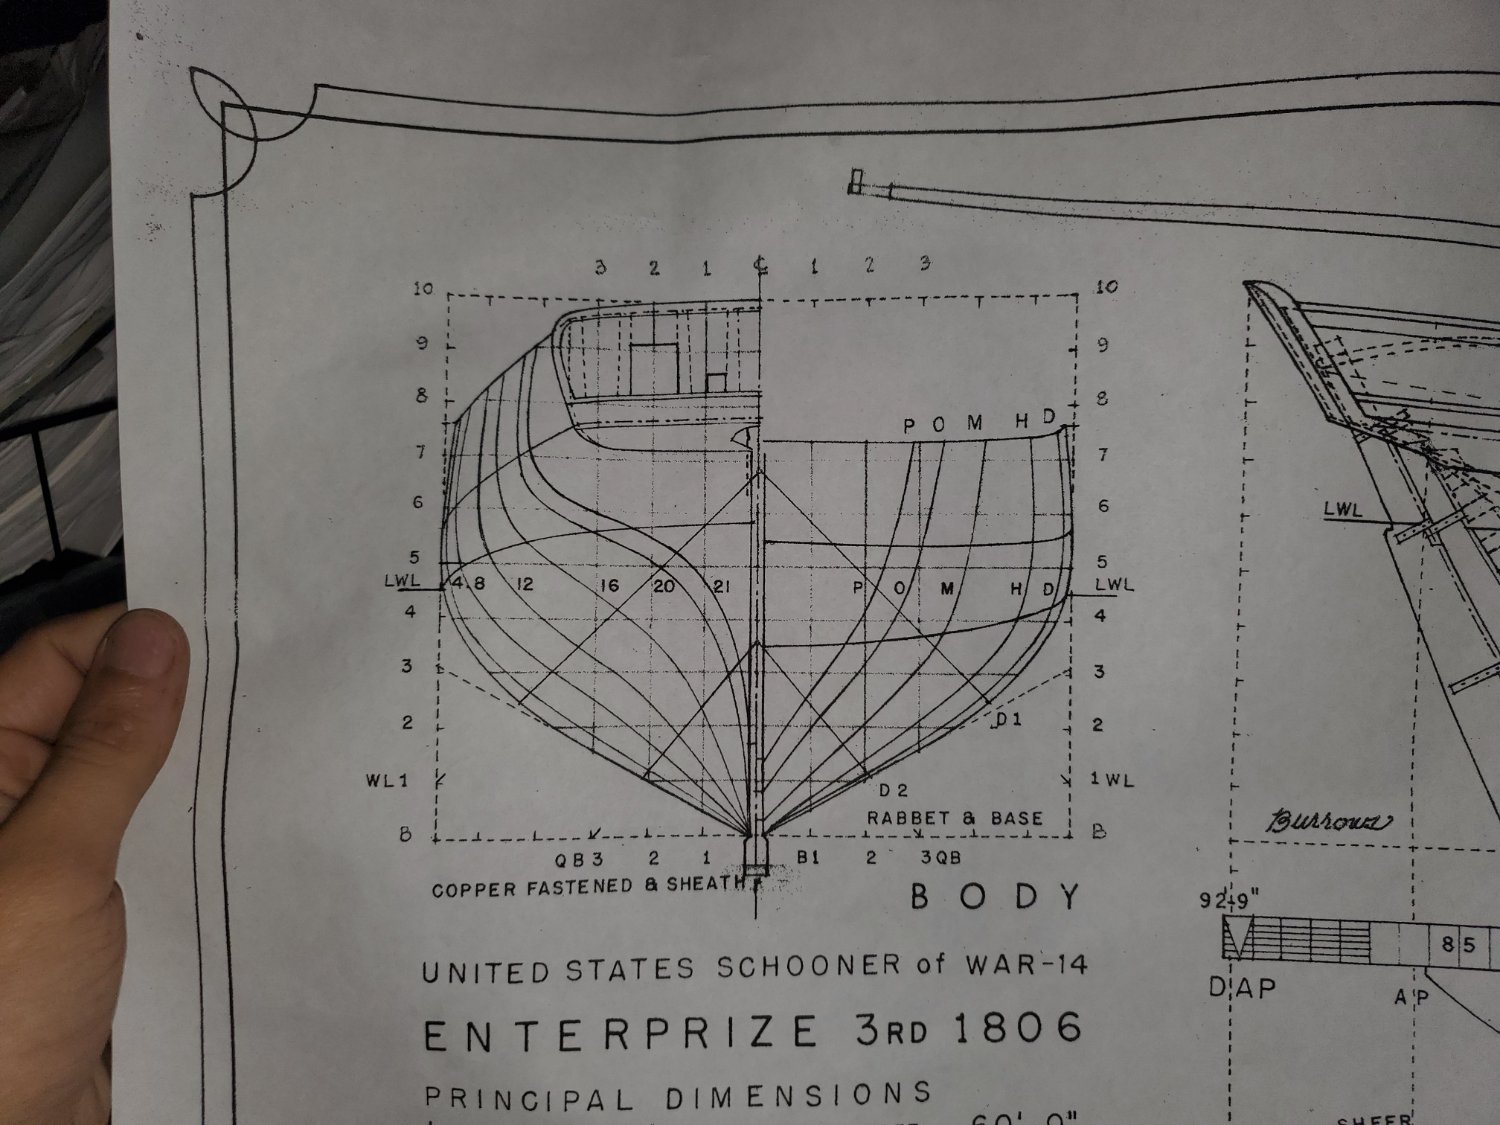
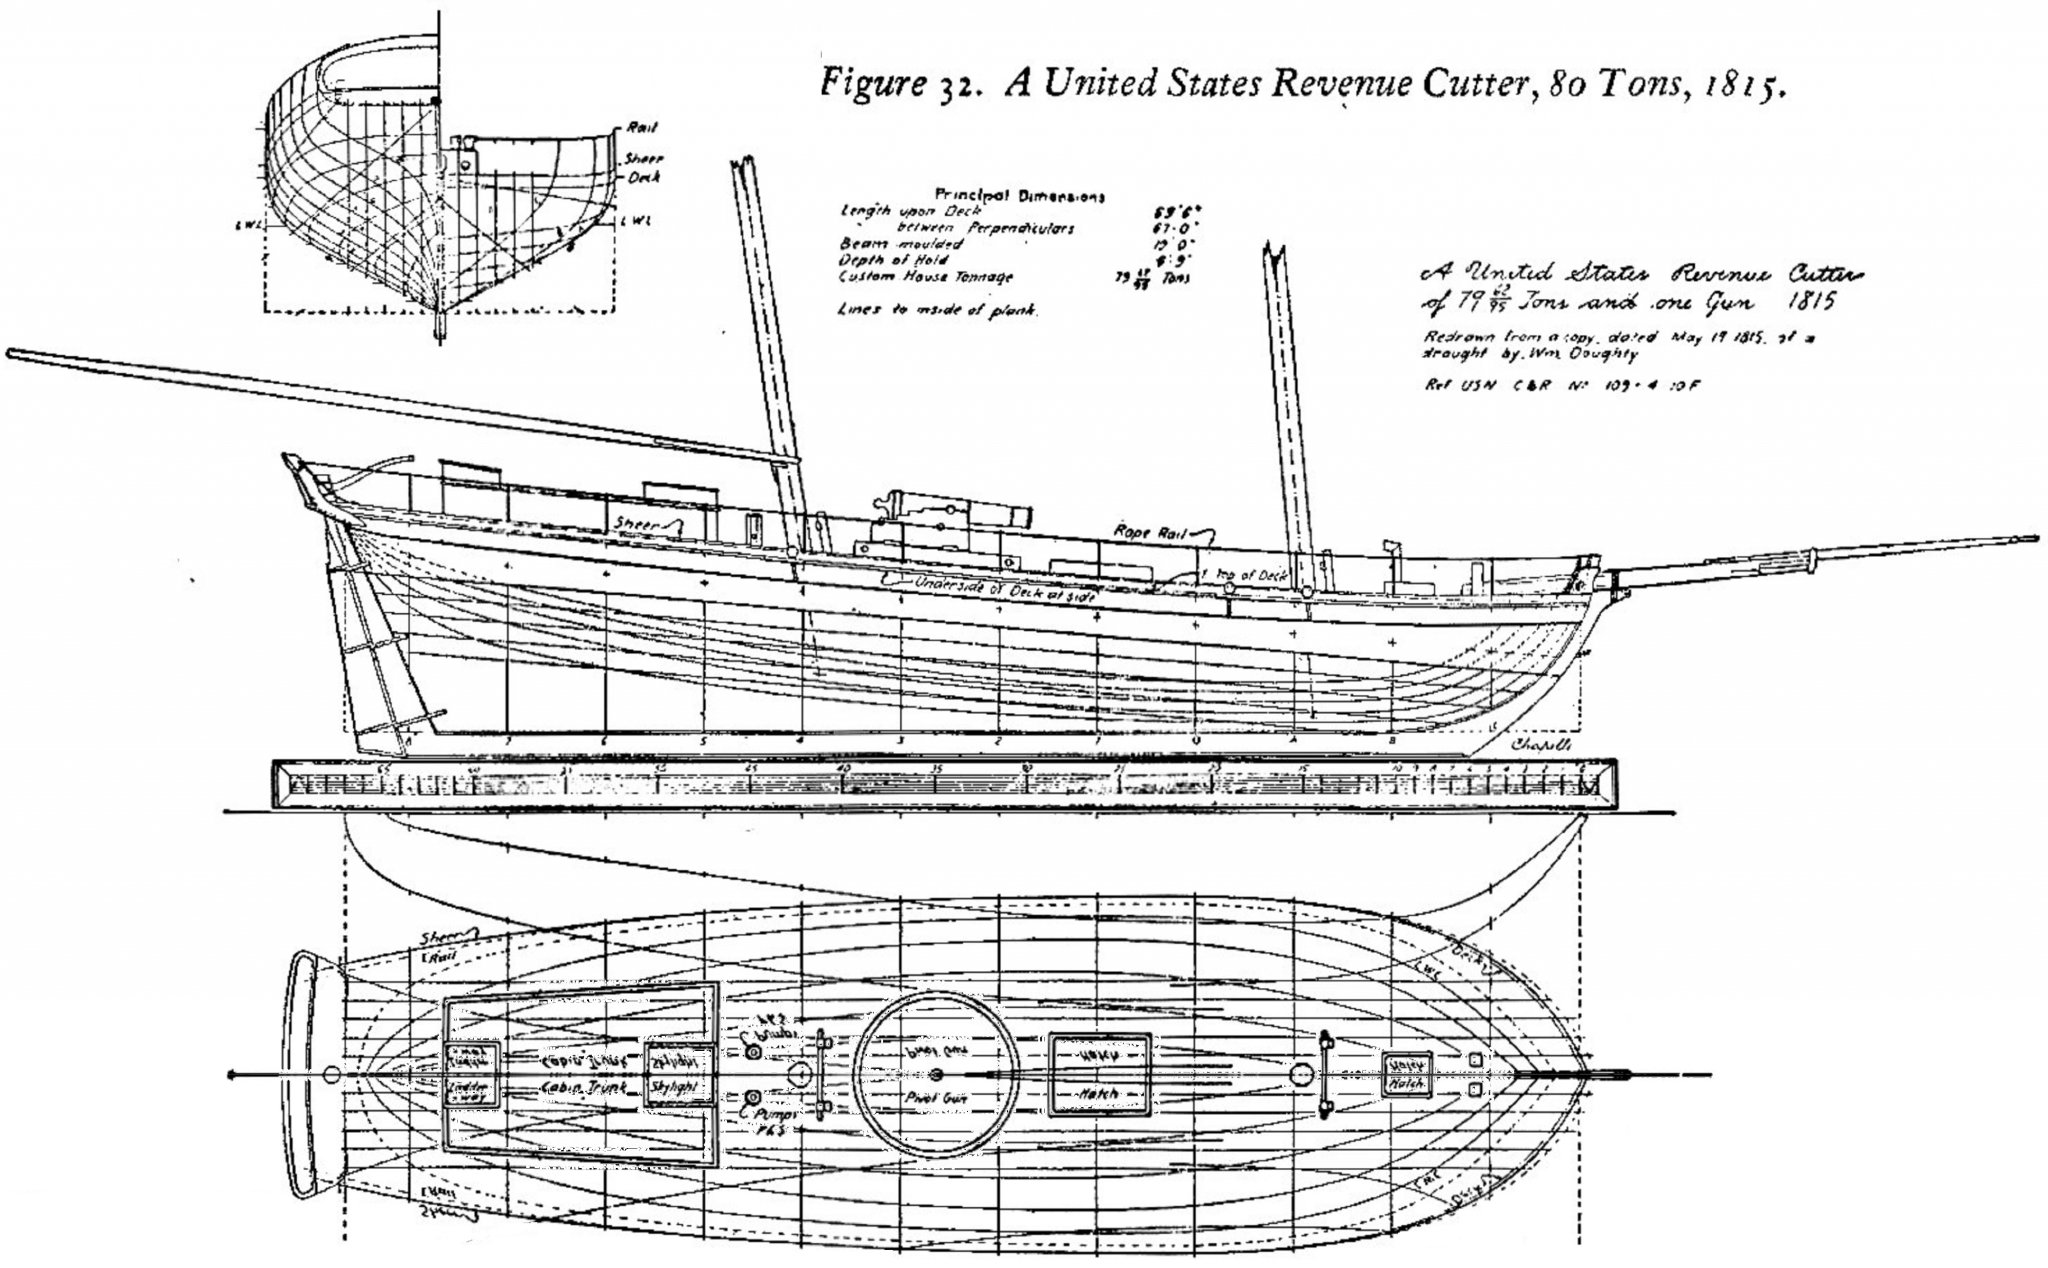
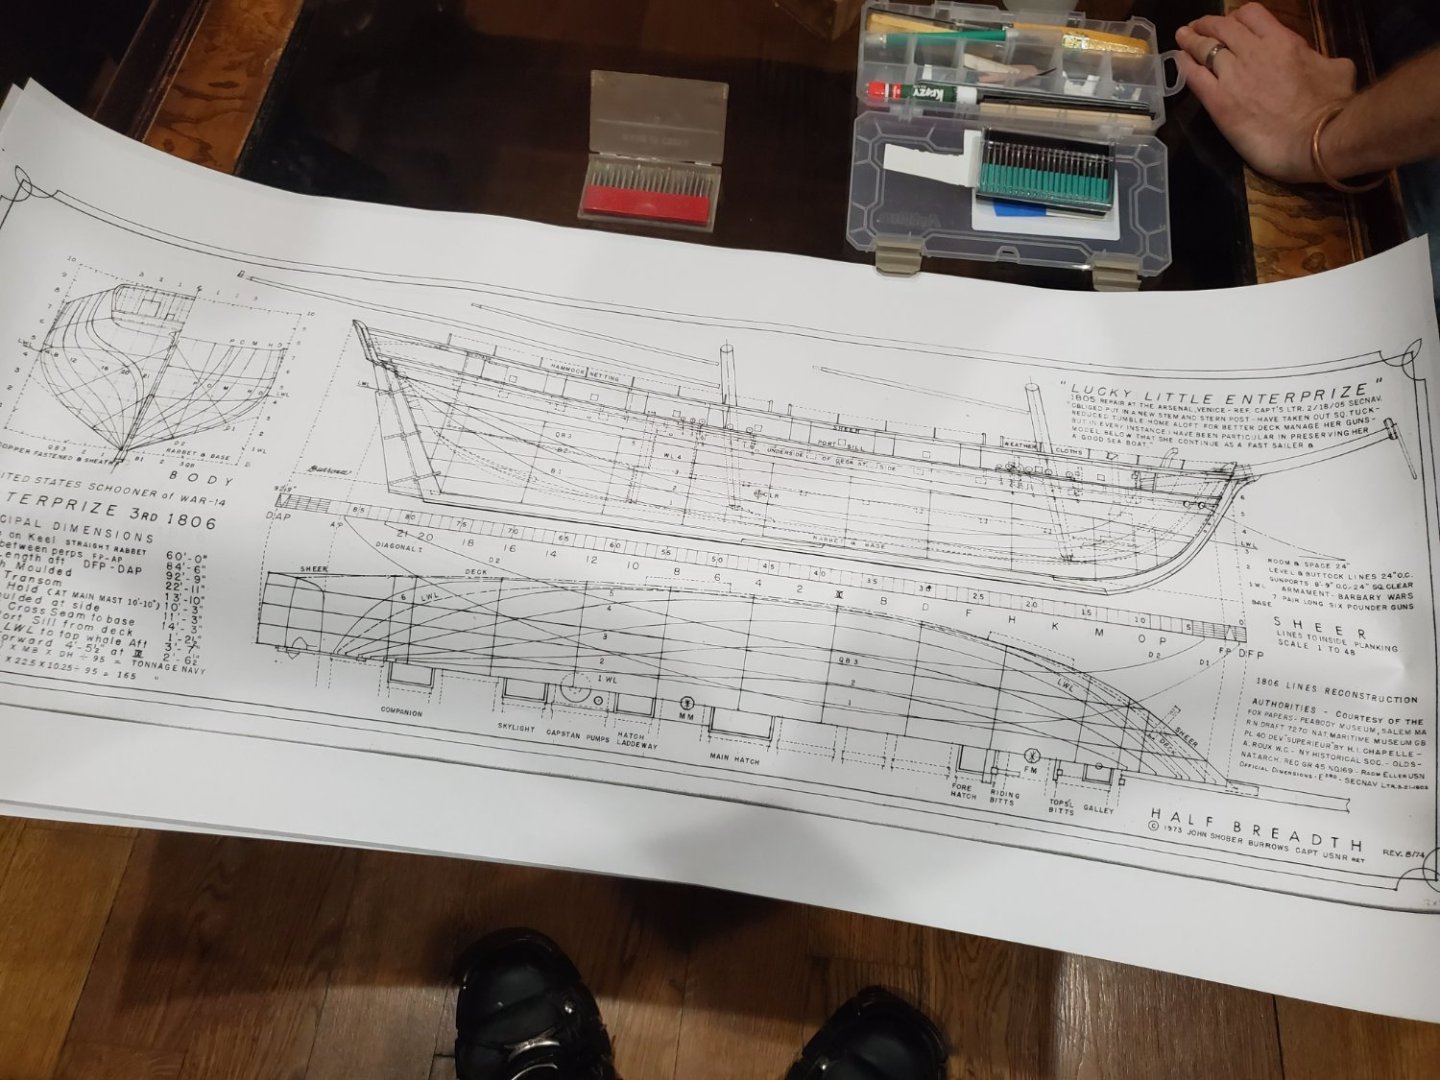
Hi yall. As the proprietor of this forum post I shall endeavour to answer. So the only real holy grail worth pursuing is this plan that was made by John Burrows supposedly under the supervision of Howard Chapelle ? It is basically a very well designed plan located at the music Seaport museum and there are actually 2 versions the 1799 and the 1805 version w the minute alterations. What you see here is not the vixen or anything looking like th constructo kit. It's a variation of the Baltimore clipper La superior which came from the same yard/builder or somesuch. It shows a far more shallow design but also high bulwarks like for a naval brig with heavier cannon. Did not have a bowsprit at least not in the early days and while this plan is conjectur it follows the design of the ship as depicted on the corne paintings of the battle at tripoli. As far as I'm concerned this is what Enterprize looked like pretty much.
-
Aha yes new year shift in goals. Back to boats. Nyc night life is fun but not like widdling 😛
-
I have been wanting to get some close up images of the models from this museum. I know that have several quality models including Cumberland, Congress, Merrimack etc. If I ever snap some pics I'll upload them here
-
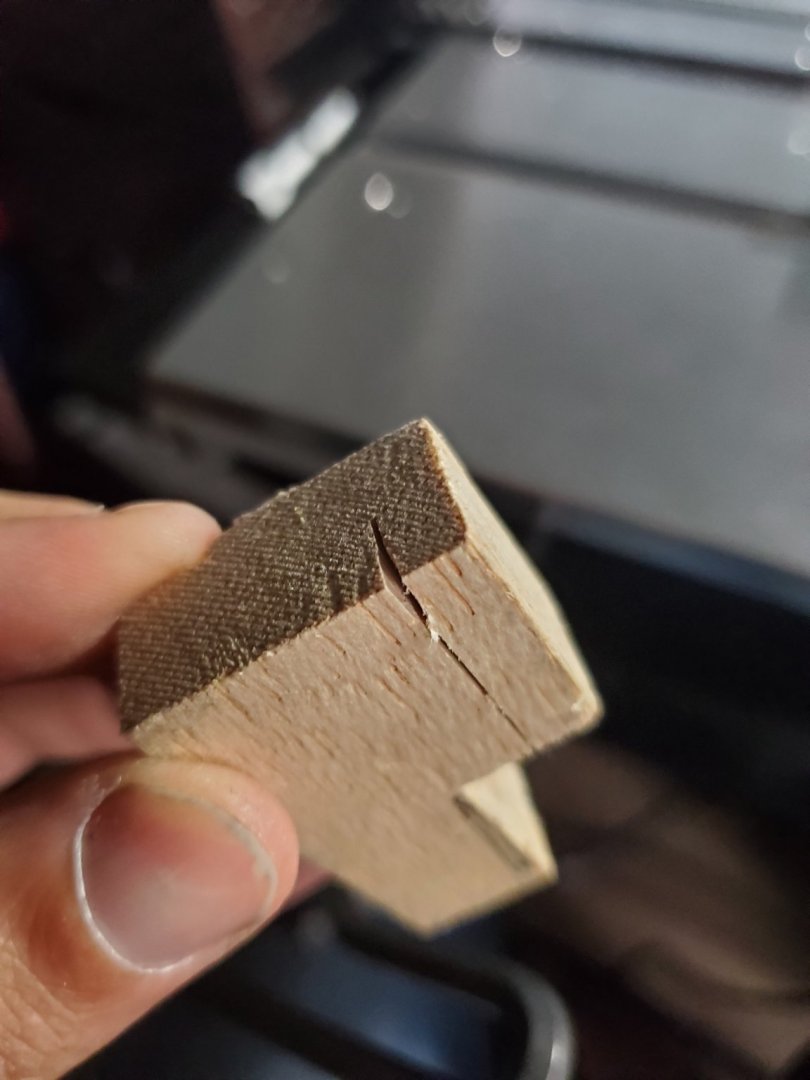
Thanks all! Will take into account for heat. Richard i used the smallest/finest blade in the set. I'll add a picture once I'm back home again.
-
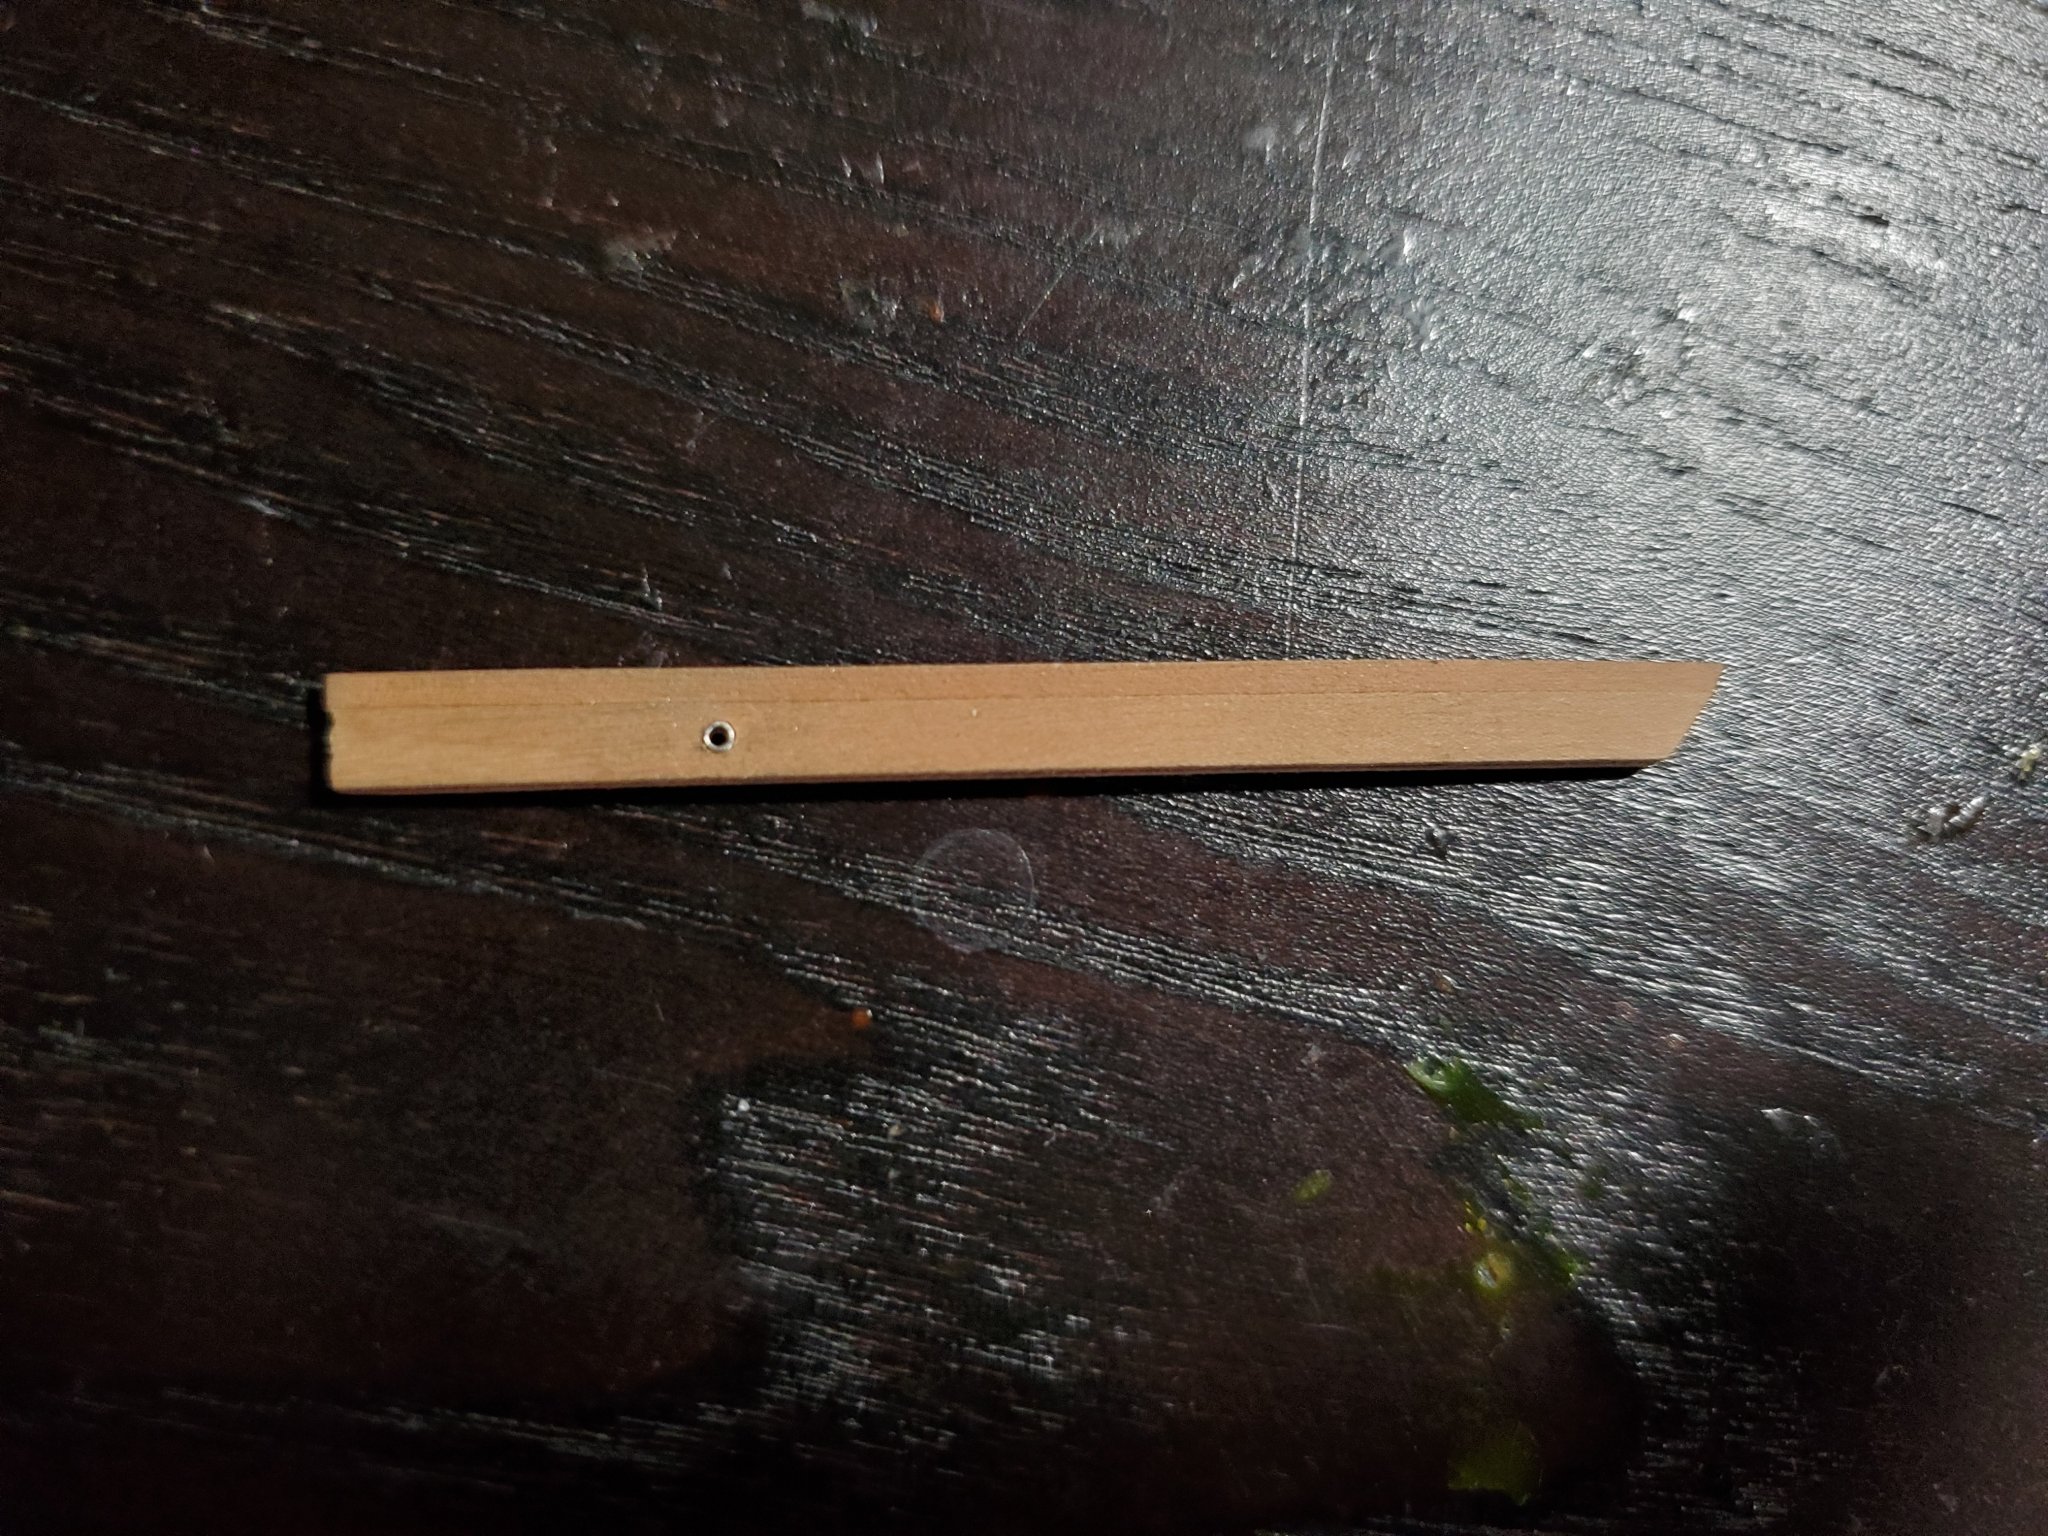
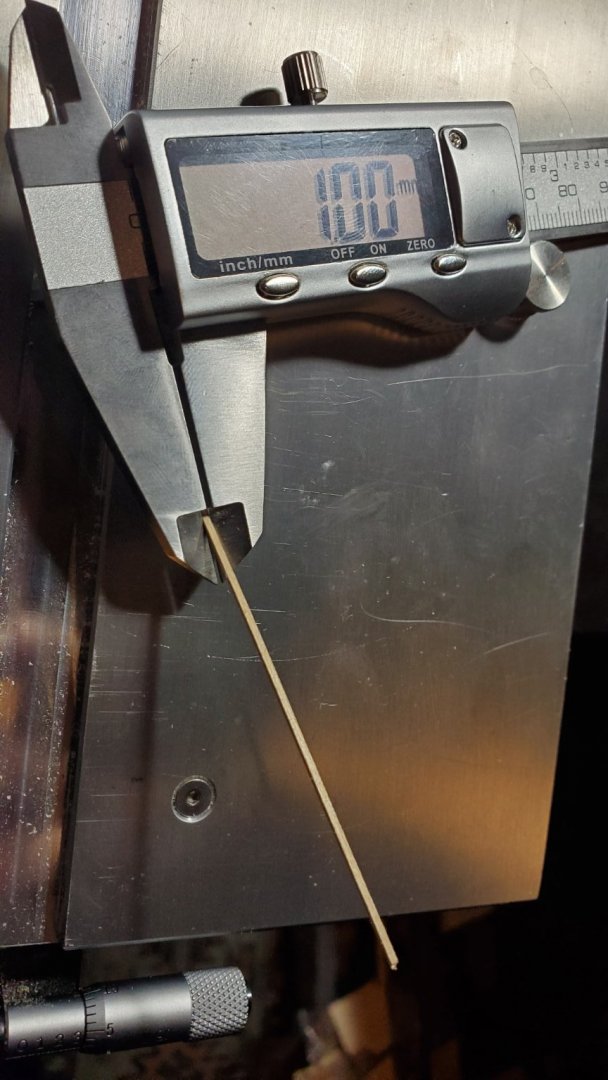
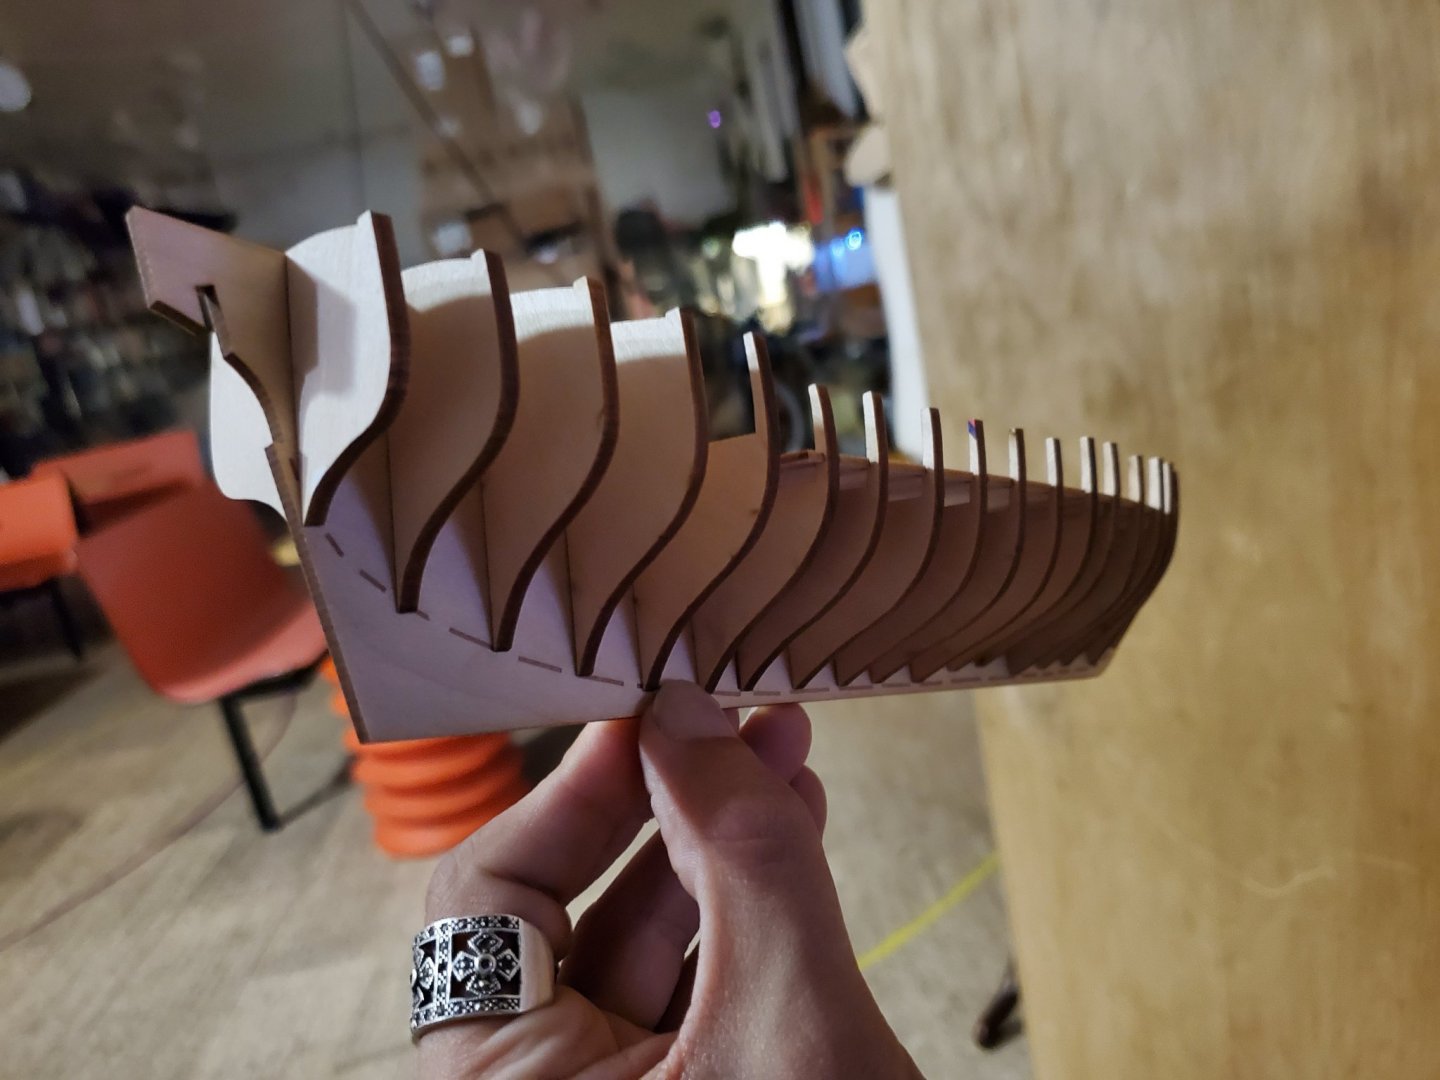
Hi everyone just an update, here it is a 1 mm strip! This one was made of basswood but if I was able to do basswood this precise, harder woods should be even easier. I followed the advice of 3/8" by 1mm and then cut the strip. I wouldn't say I'm great at it yet but I have the means now to keep at it and practice. Thank you all for assistance in helping me understand to usage of the machine. What a smooth cut! 😊
- 23 replies
-
- 12
-

-
Lou I have many sizes and types of milled wood already. So let's say I use a 3" by 1/8" wood piece and want to make several strips so yeah the method you mentioned sounds what I assumed to be. And what was said about the blades its simply a matter of practice and I am unsure how to make something so precise as a 1mm cut. Like what sort of push stick is used for something that tiny?
-
Ok i ordered the sliding table and tilting table attachments as well. I think that's everything. I'll add my progress on here until I get to my desired result. Thanks everyone for the support! 😊
-
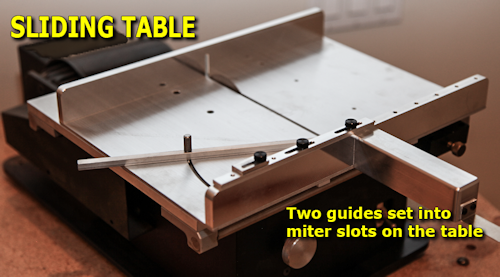
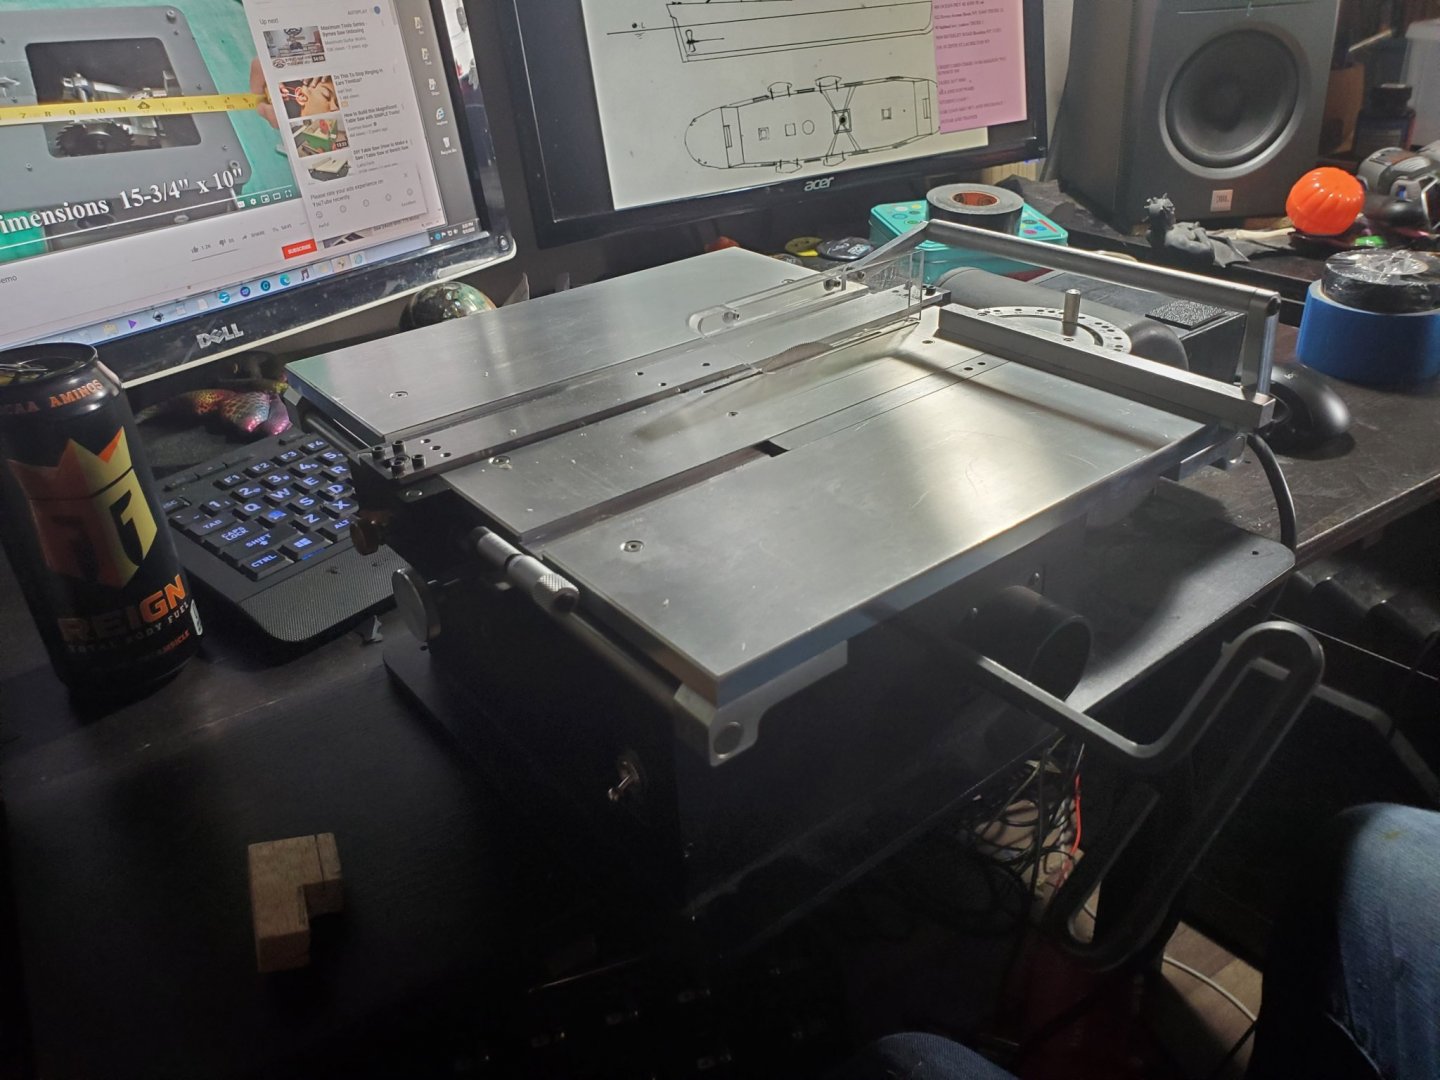
Thanks guys! Yeah all of this makes sense. Bob by sled do you mean this sliding table pictured? While I'm at it any other parts I should consider? I have many blades and the attachments you see.
-
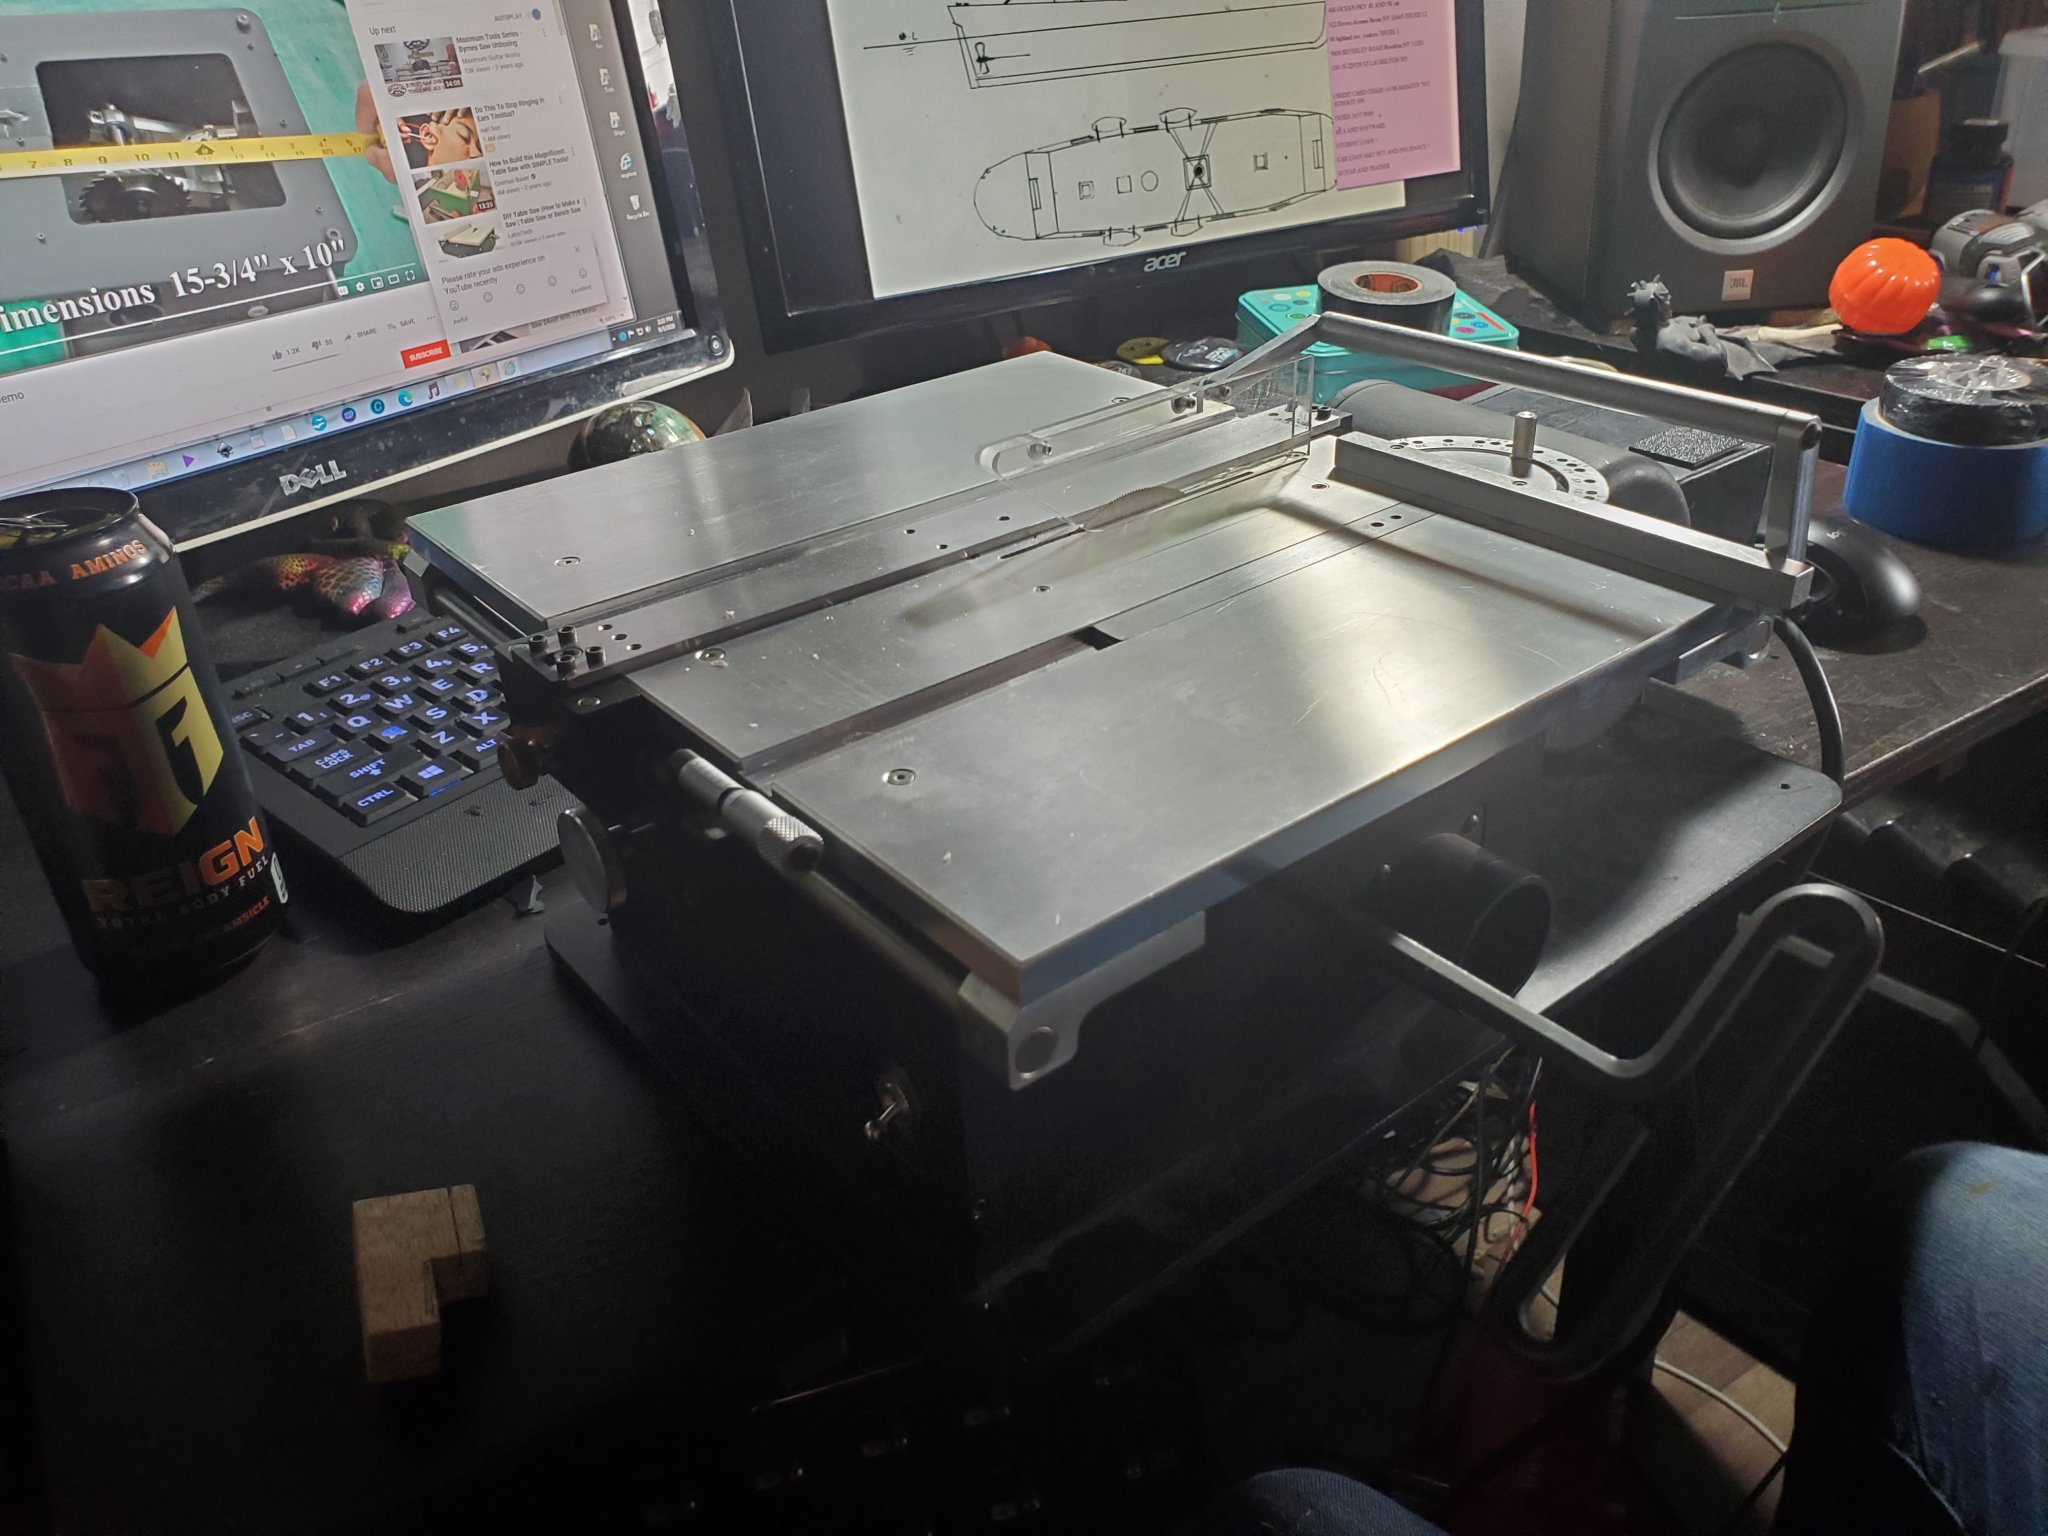
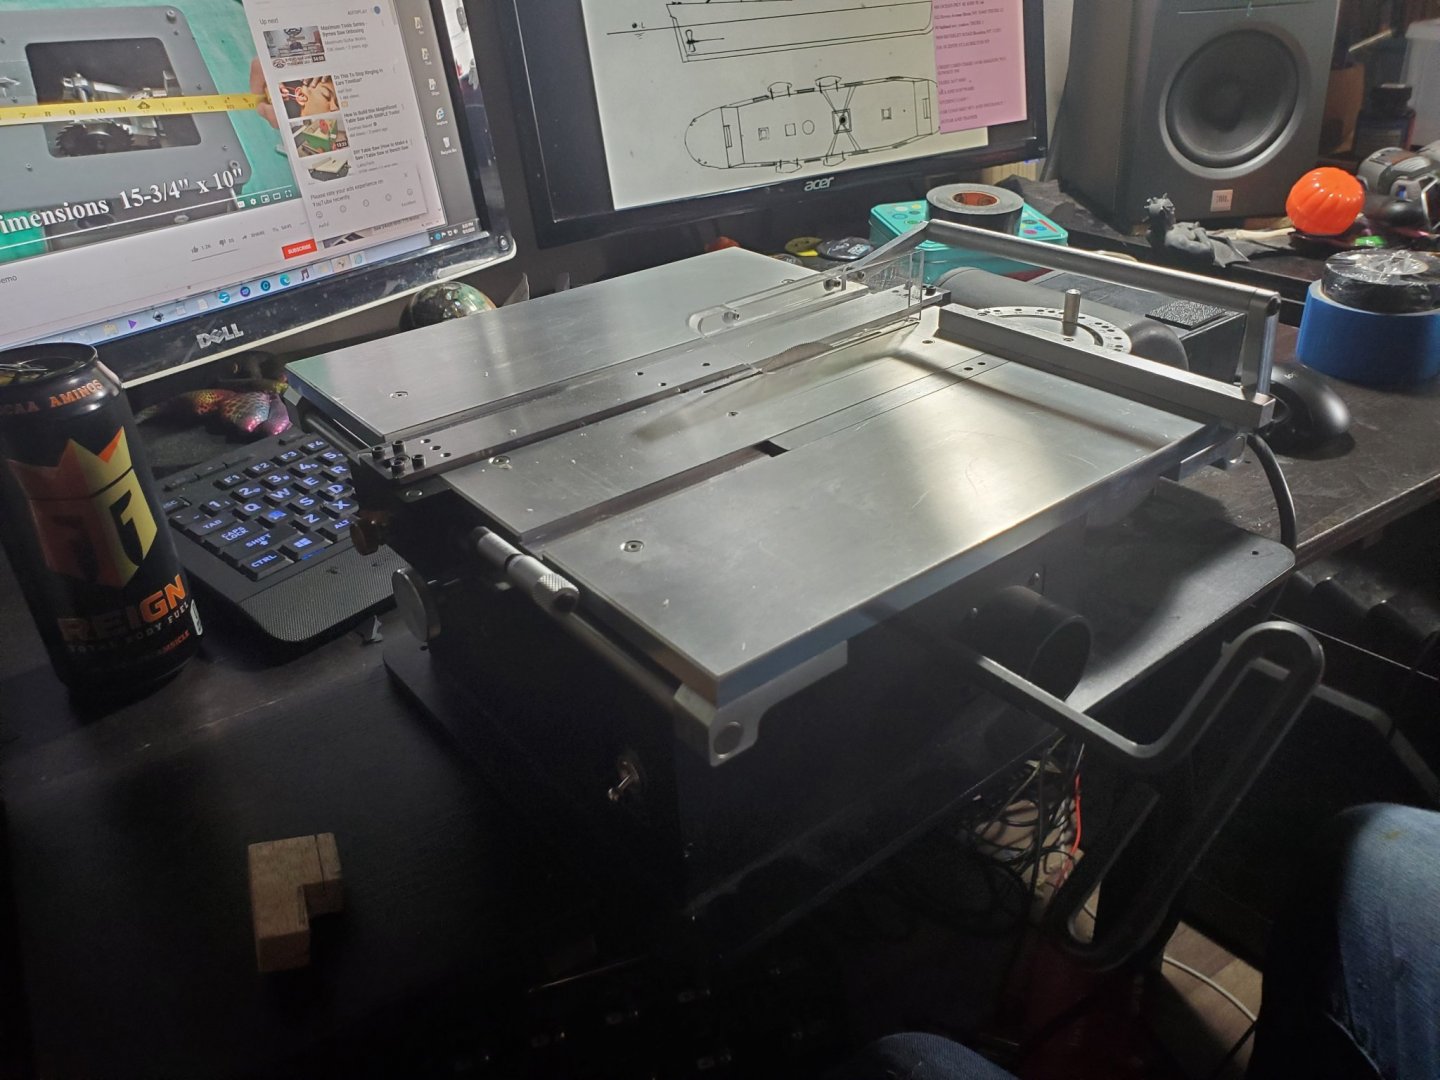
Hi all! So I now have a Byrnes saw and have very little idea on how to use it. Yay! The ultimate goal is to make fine precise wood strips 1mm by 1mm thick so the question is what is the process needed to get to such a specific and small wood strip? Like how should the machine be set up for something so small and precise? I'm open to suggestions and words of wisdom and experience resources to watch or read if i need a sliding tray, ive already ordered a calibre. Ill add pics of what I currently have (blades and otherwise) shortly.
-
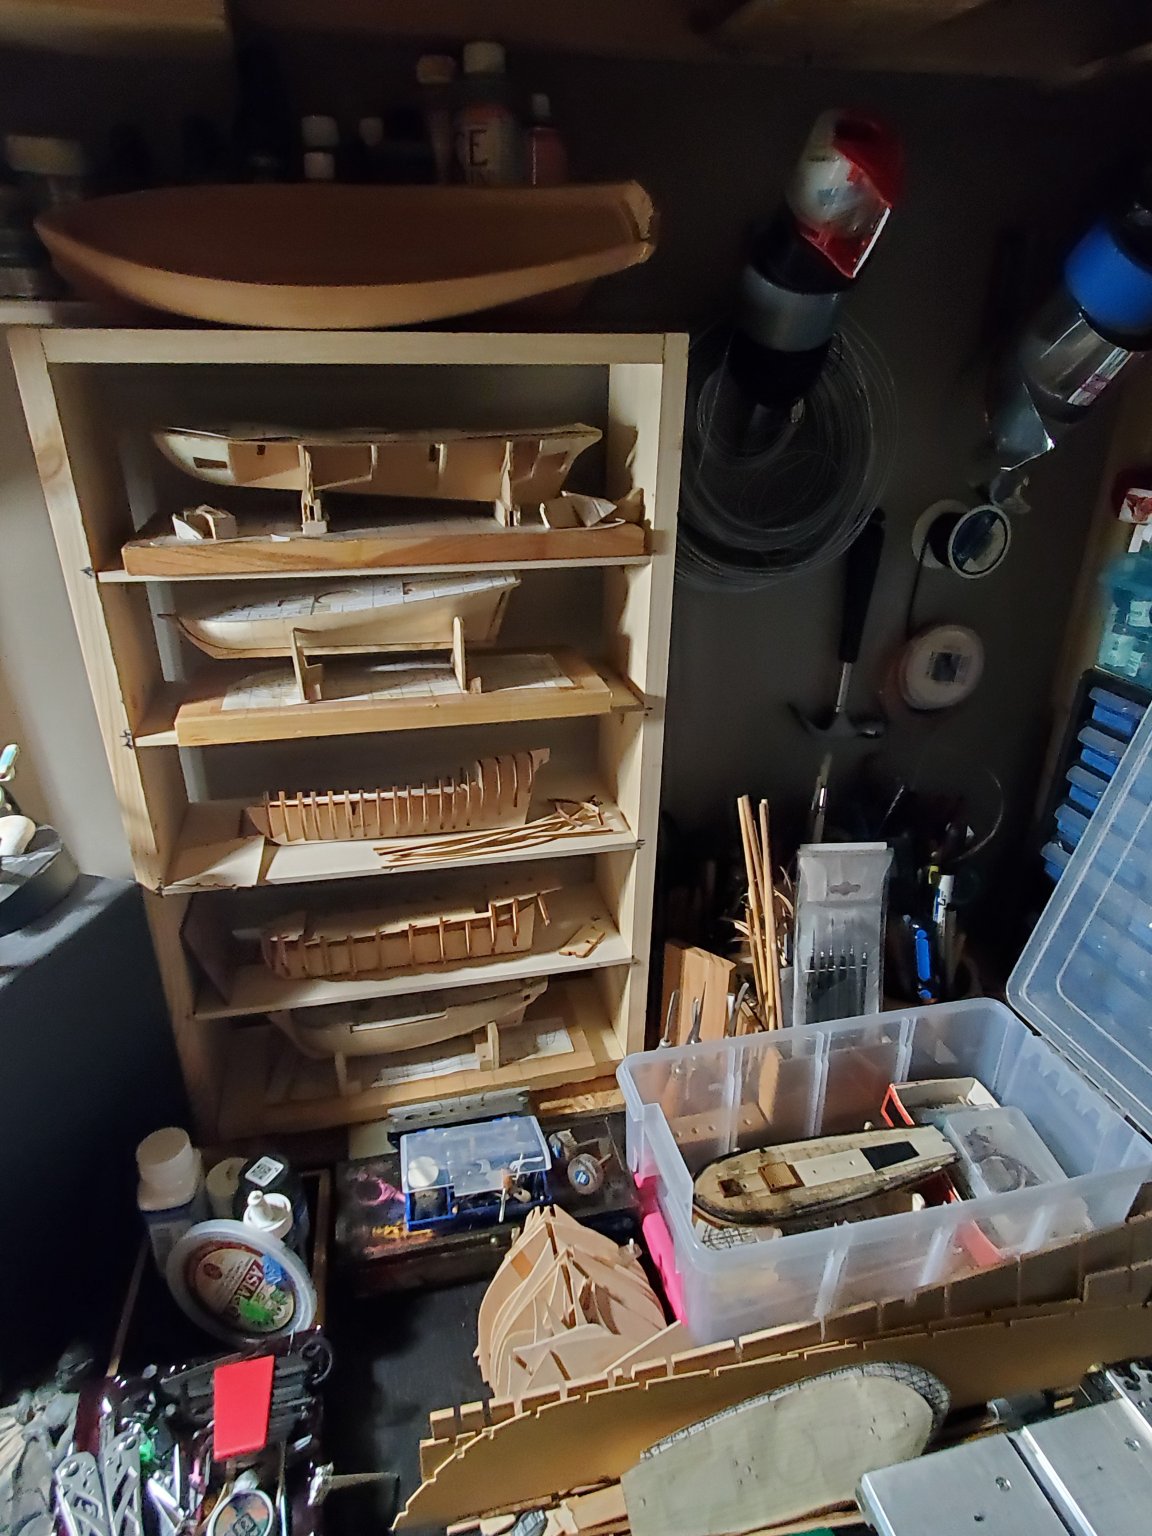
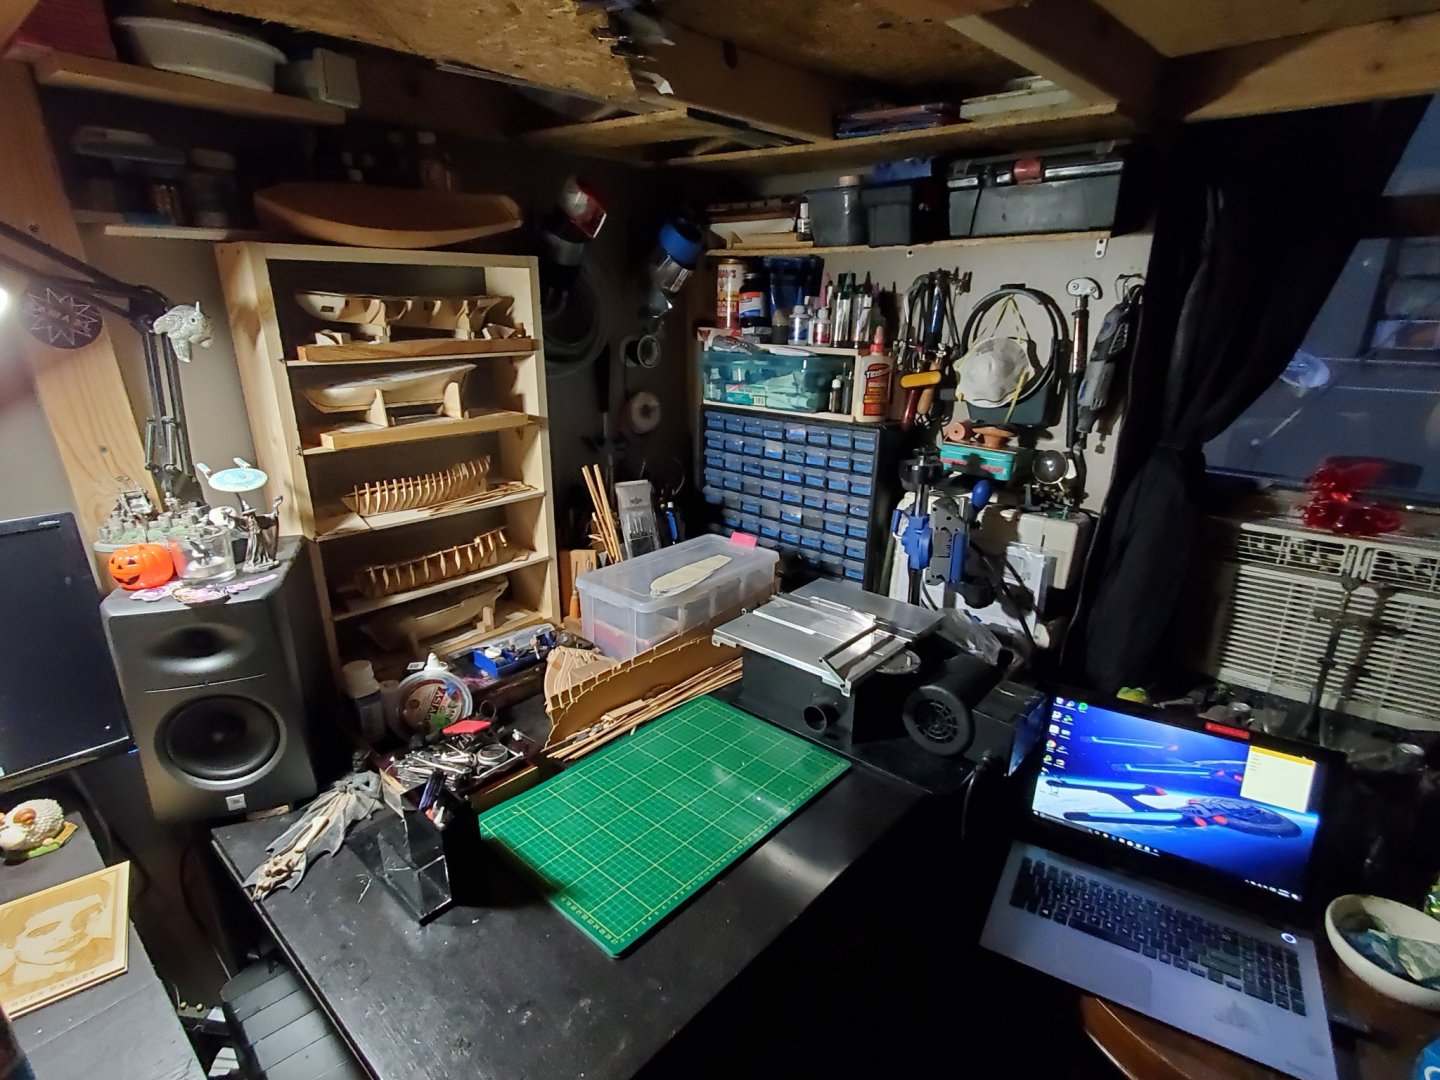
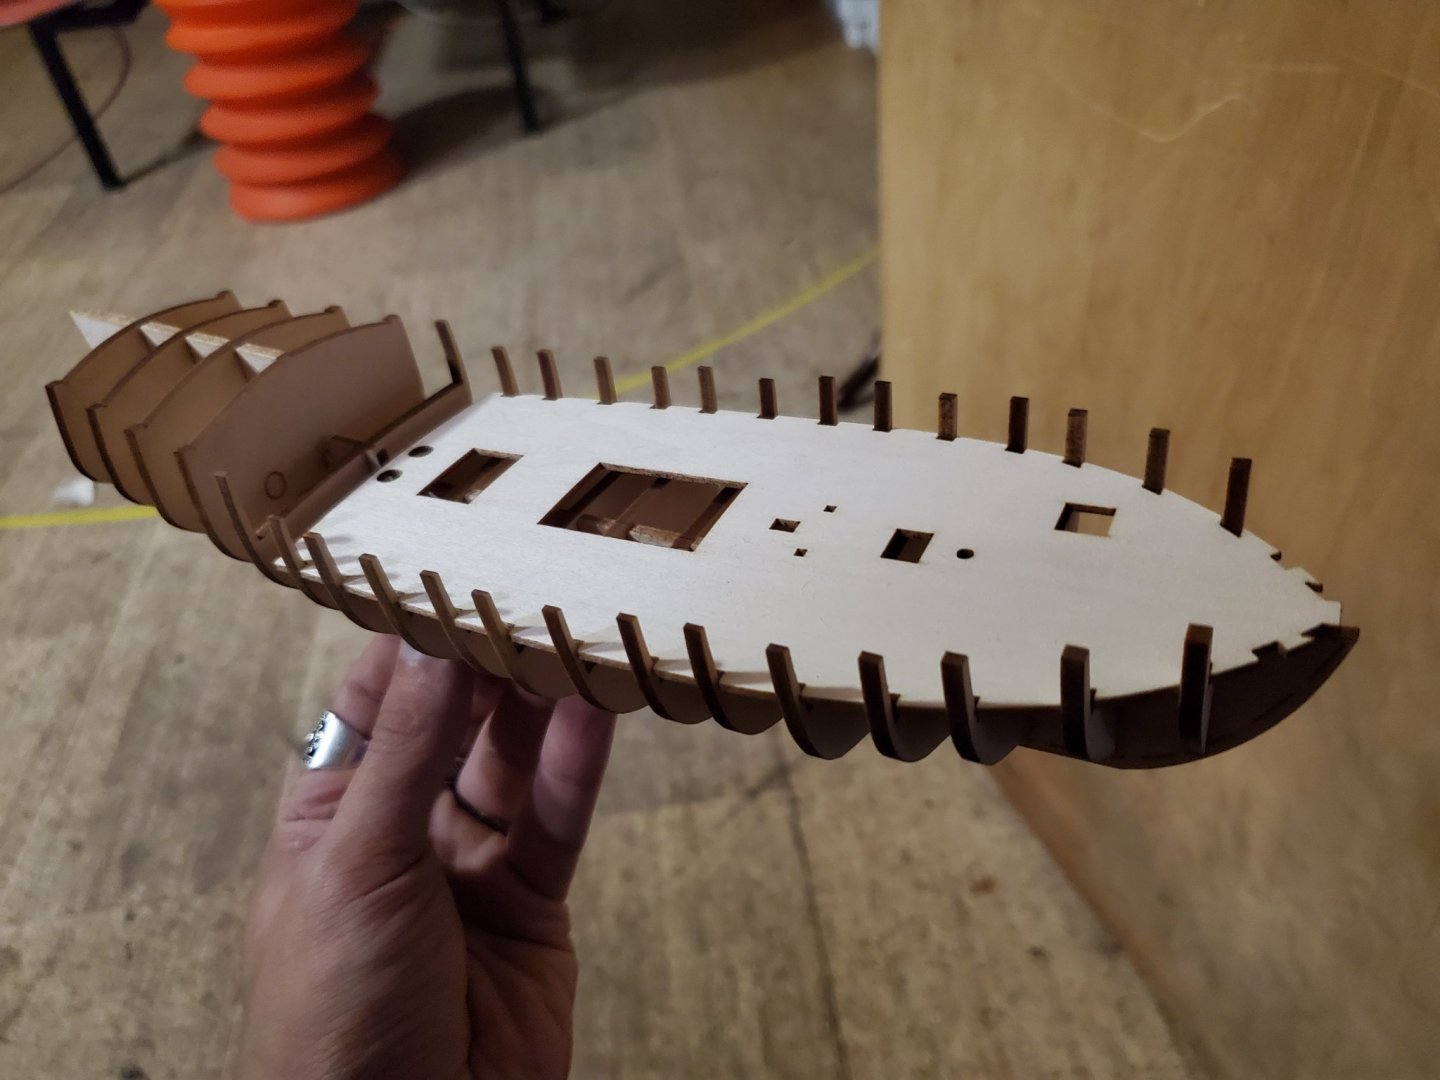
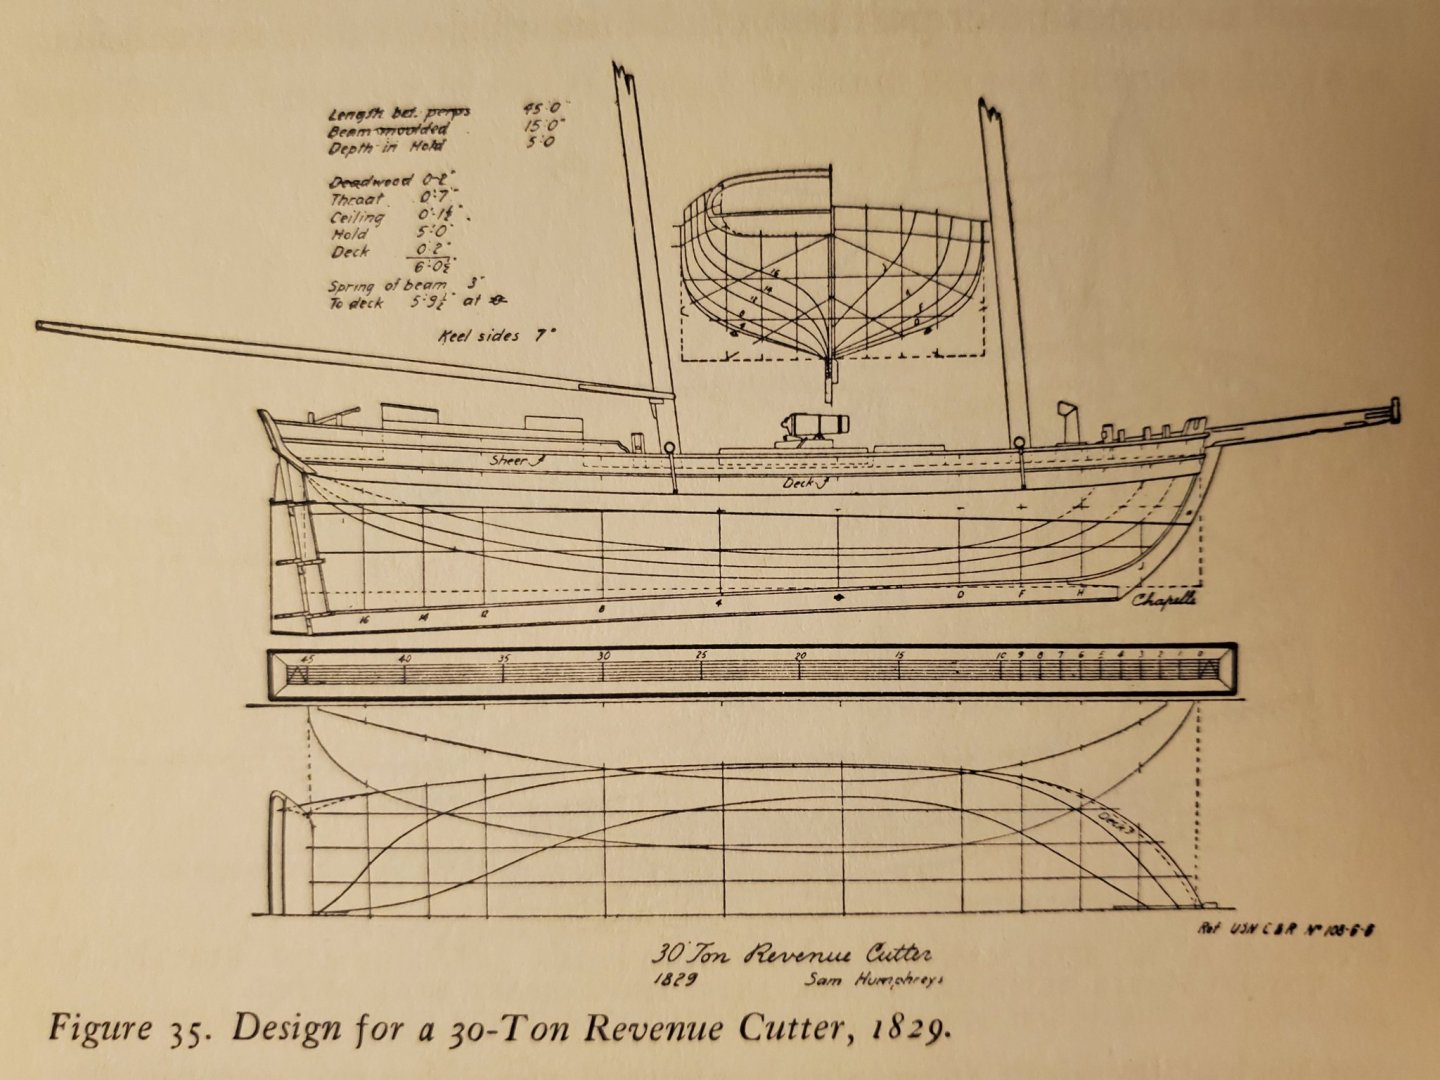
Hi all, this week has been about reorganizing my work space with the new tools provided. Part of this has been building a shelf for my various hulls. While I haven't posted this I actually spend alot of time making frames for various ships, modifying plans etc. The process is easy and in time while i plan to build them all my current environment doesn't give me alot of time and space for detail work as of yet. Hulls from bottom to top are 30 ton revenue cutter Active (in the box) Sultana Halifax Armed virginia sloop (just made based of ms purchased plans) 50 ton cutter (Monroe) And 70 ton (Vigilant) On the top marine model privateer which will probably become an Eagle class revenue cutter (in Chappelle's book the unidentified 75 footer of 1798). I also have 2 frames on table the constructo Enterprise (aka Vixen) and Dikar Lawrence which i will also add to the lot at some point. Overall this will be a much better space for crafts when time allows. New laptop also helps me create laser programs for ship parts on the go! 😉

- 362 replies
-
- 9
-
-
- active
- revenue cutter
- (and 1 more)
-
Why yes cotton swabs really caught the winds back in those days 🤭 Regarding the saw I swear most earnestly I tried to keep this build simple but in truth even the simplest boat model may require fine detailing and I am not one to leave something just so/so when I know I can do better. 😉 and she gleams so nicely as well I didn't expect to get one at a super deal I can't help but feel it was destiny. 👌🌈
- 362 replies
-
- 1
-
-
- active
- revenue cutter
- (and 1 more)
-
Hi all, just a quick update I realized that I kept coming into wood milling issues in an attempt to make the ship channels and subsequent cap strip. While I have a pretty extensive stock I can't account for all needed parts and with milled lumber suppliers now retired it was time for me to get a Byrnes table saw. I feel like I just brought myself a level forward.💪 While I will need time to learn its ways, I am so excited to have the freedom to mill at my leisure. The end goal is a 1mm by 1mm strip stay tuned! Thanks to Bob Hunt for connecting me to one that was made available 👌🙃🙏

- 362 replies
-
- 9
-
-
- active
- revenue cutter
- (and 1 more)
-
The vigilant was renamed the Dallas and was twice the size of Active which was 30+ tons. So likely there was a 51 and 69 ton Dallas.
-
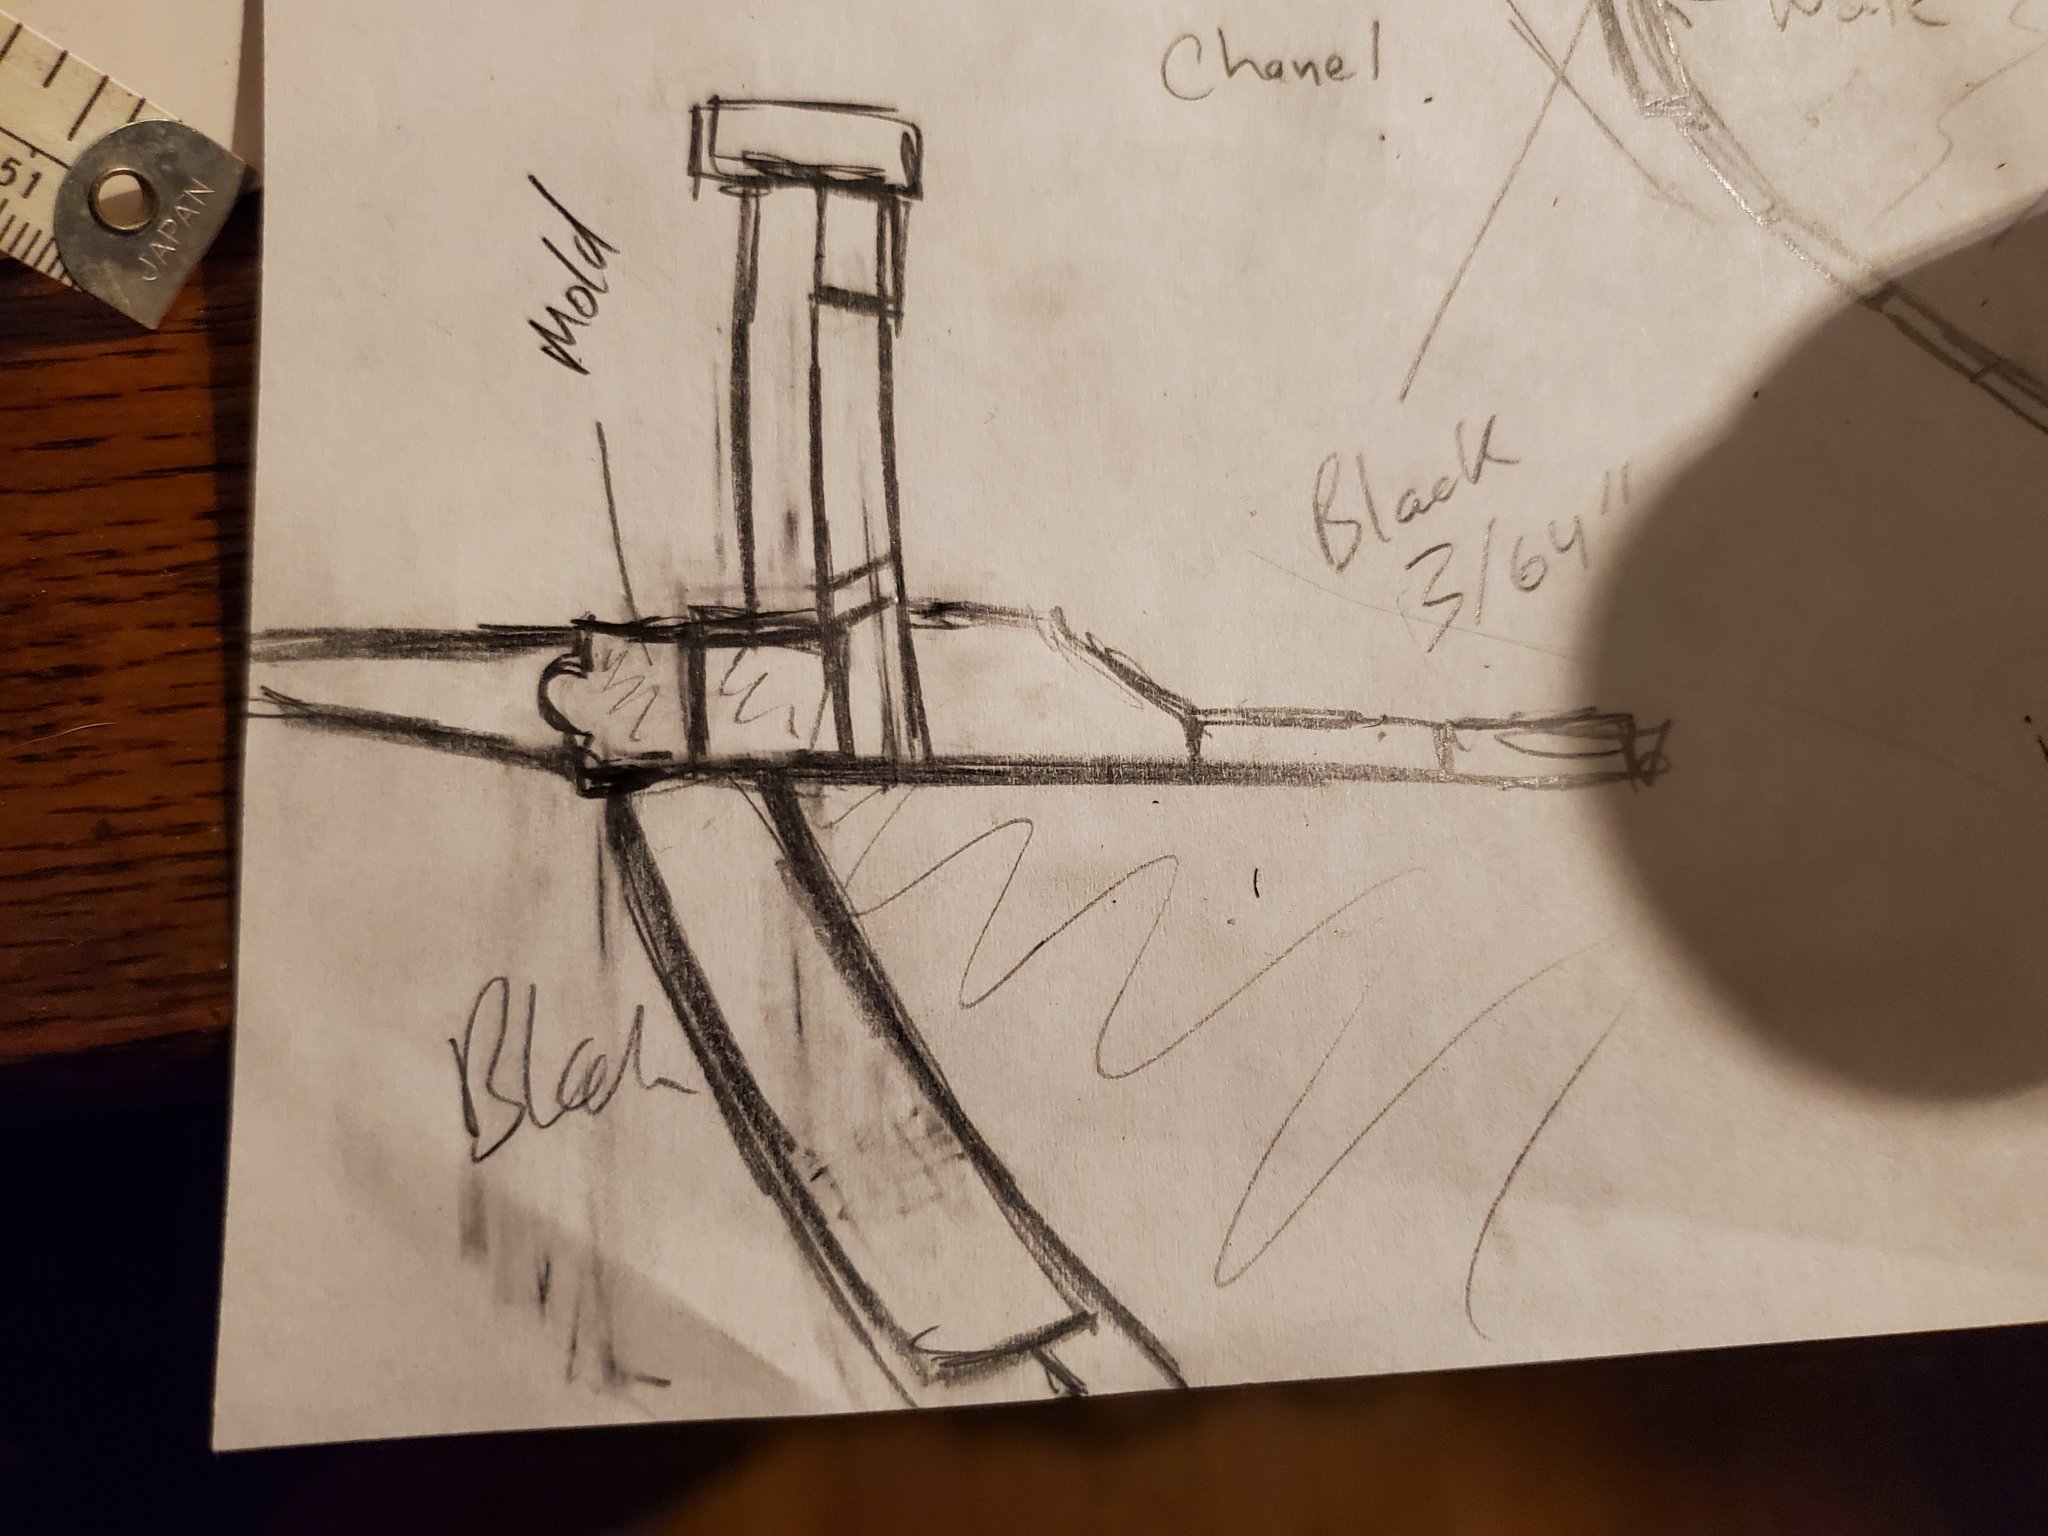
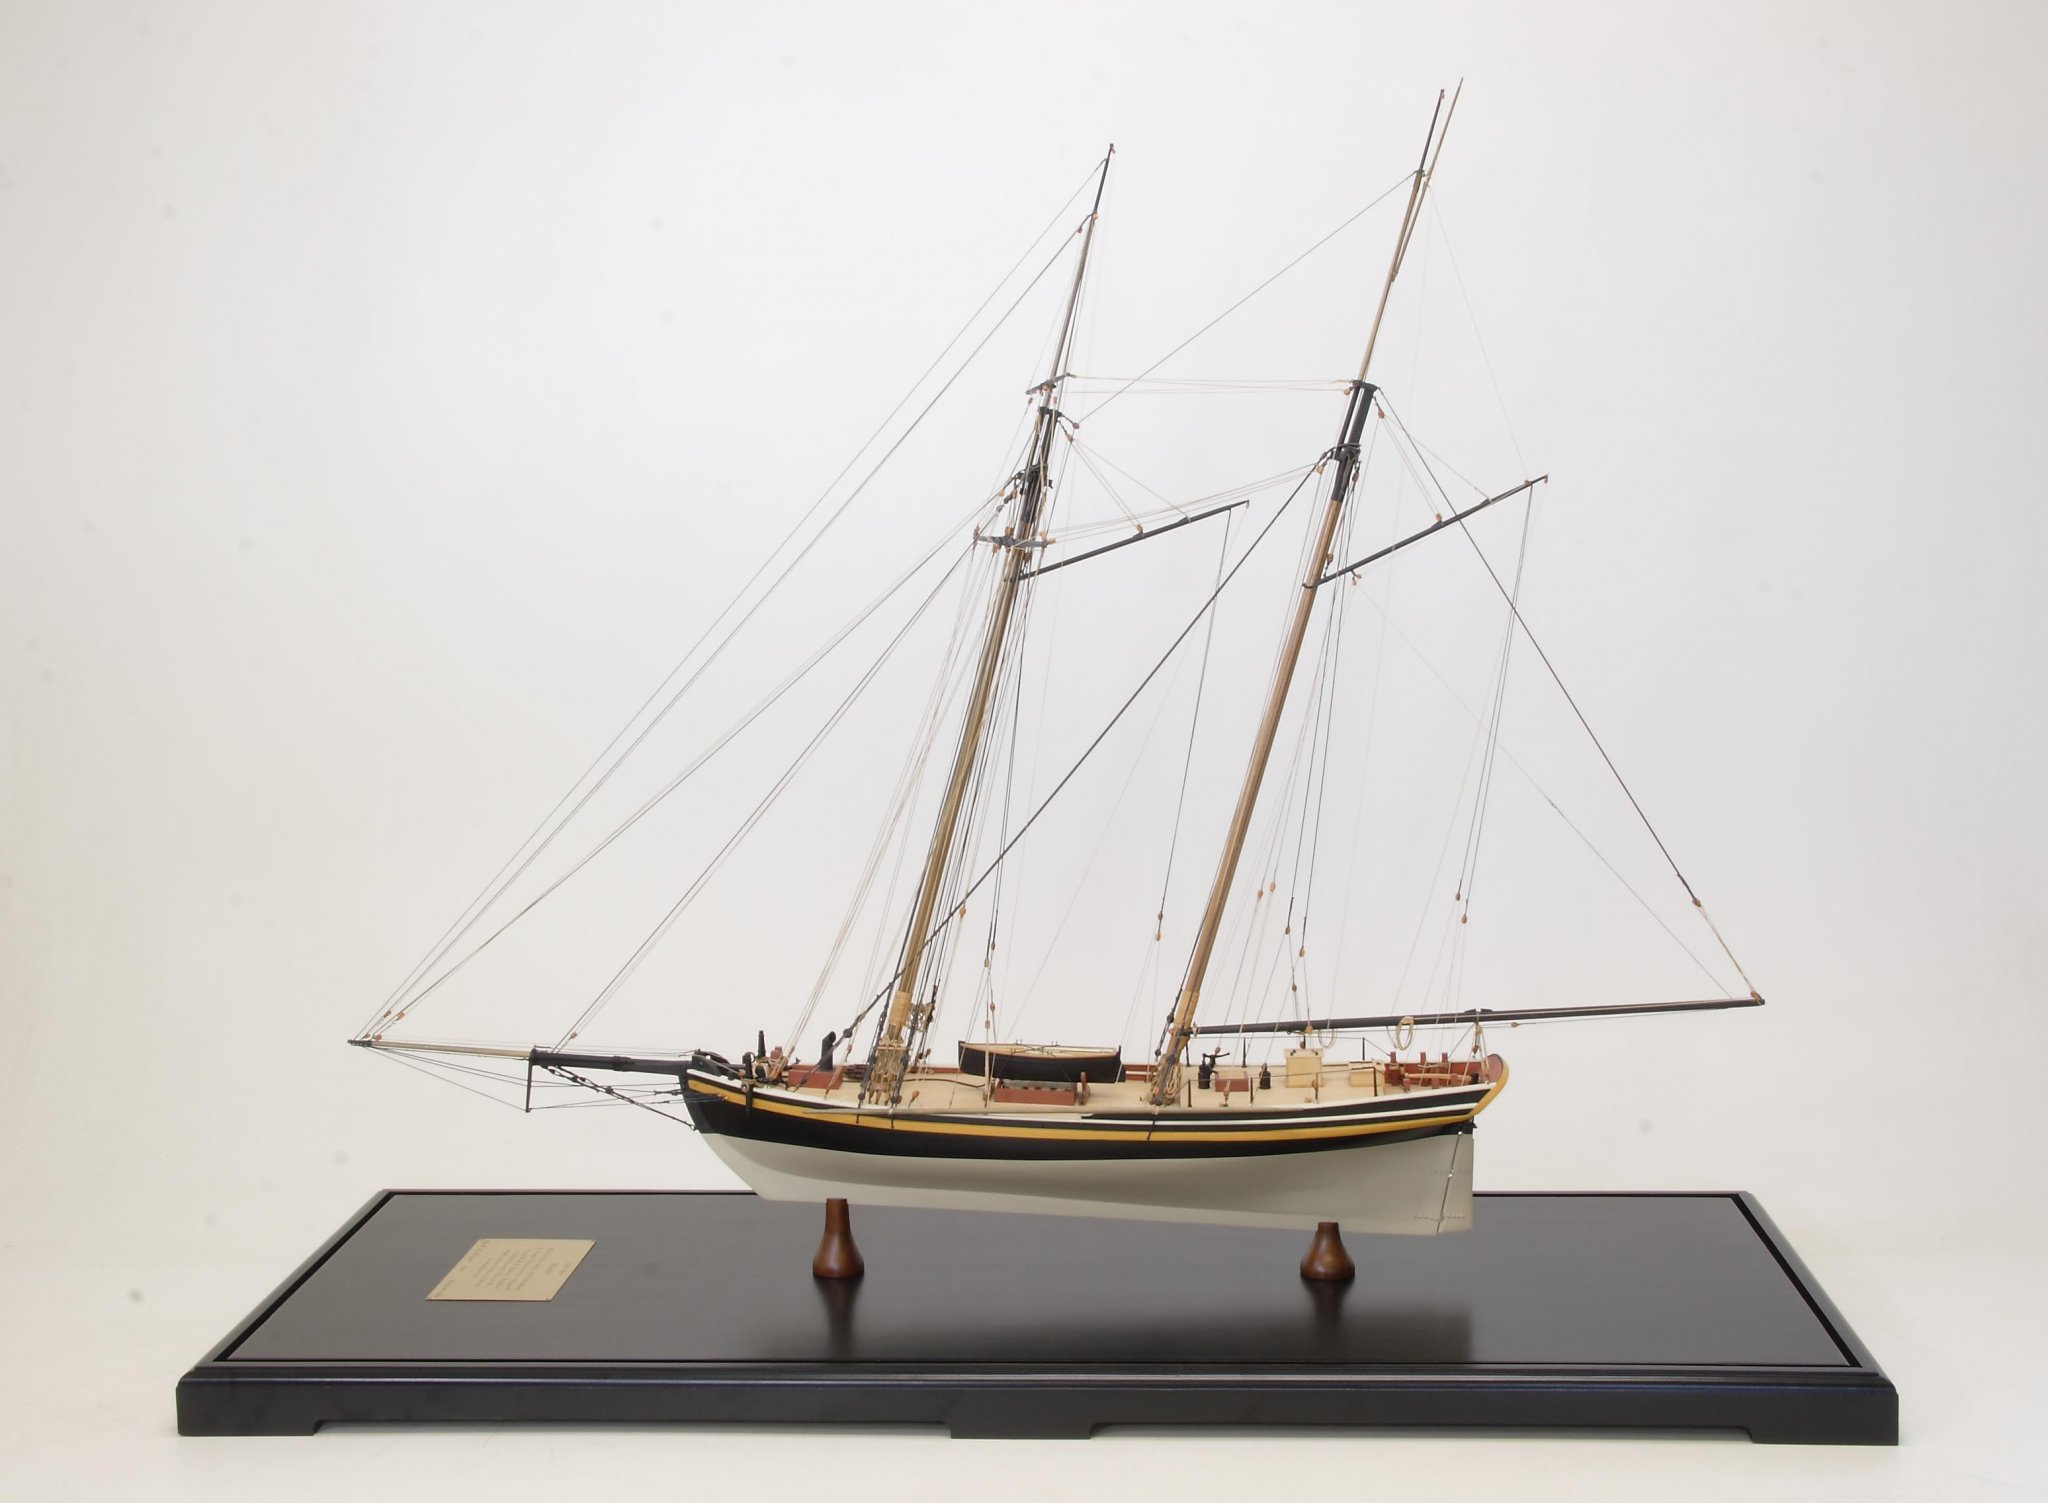
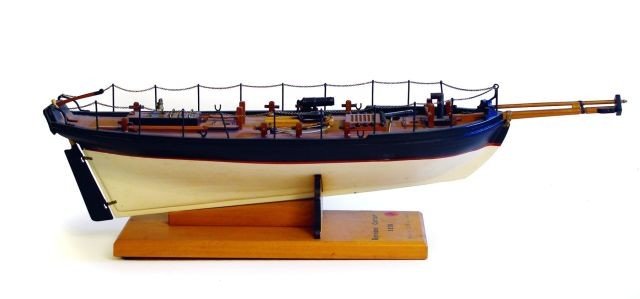
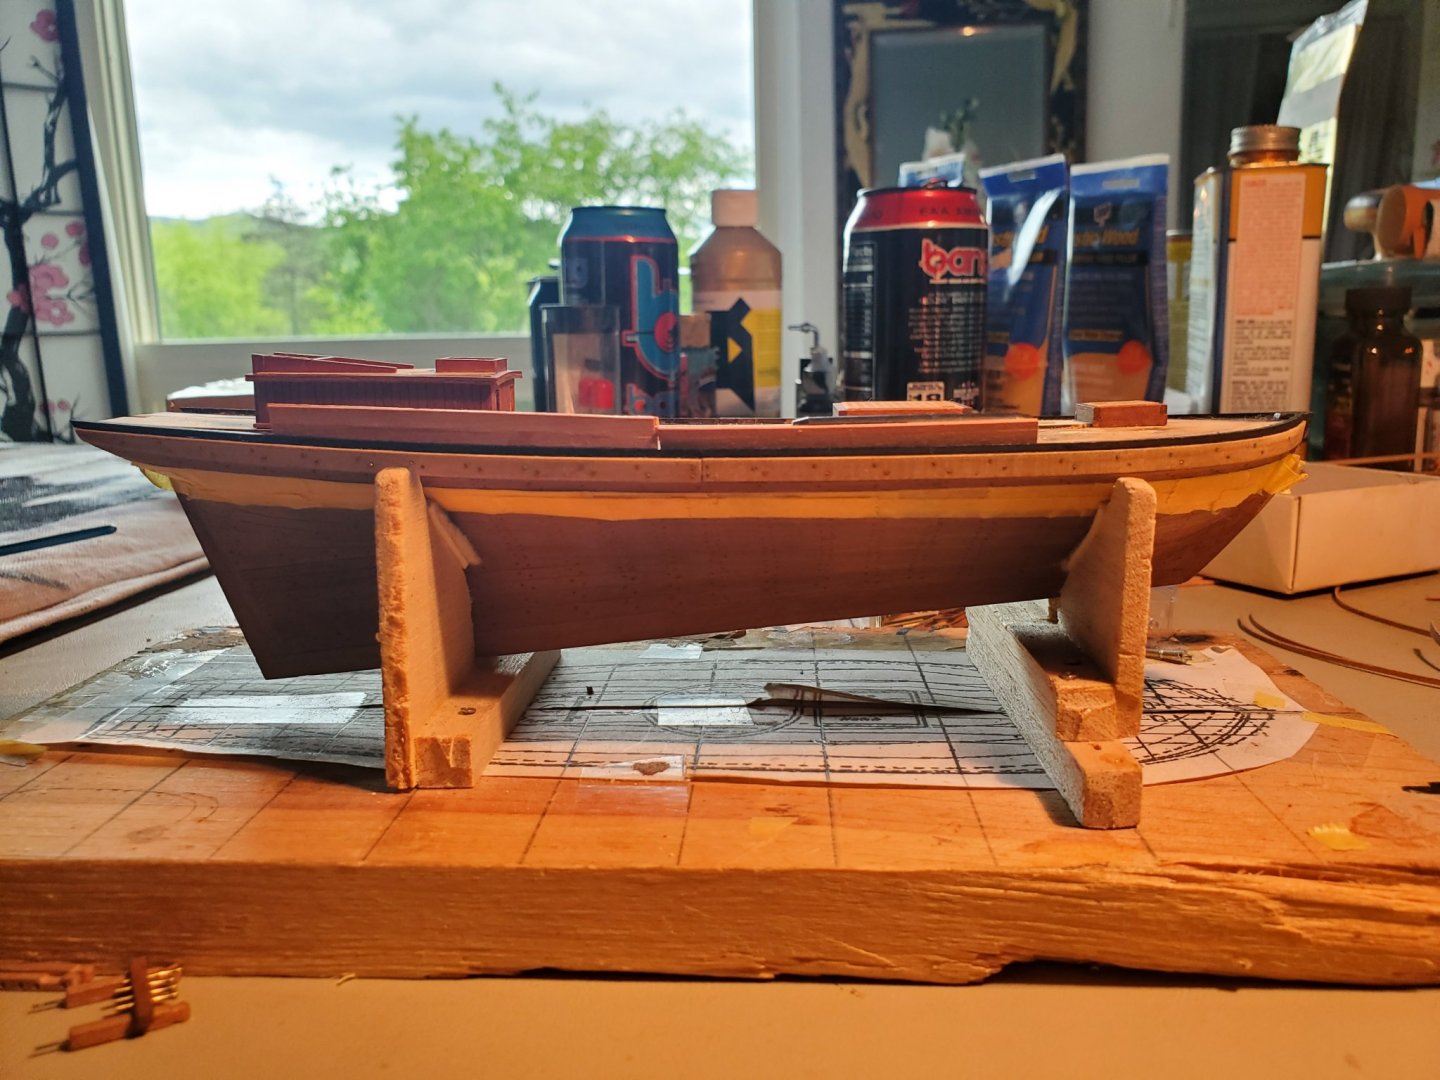
Aha thank you very much and appreciate the compliments on both counts 😊 Sadly theatre (yes to the "re") is on pause for this year but art creation is not. Ill post a new update shortly ive been mulling over the lifeboat question. Where would it go on such a ship? Not on deck it would interfere with the Canon. The back lacks enough structural support. If you look at this image of an 1829 cutter of similar design you can see the back had a higher rear bulwark. (the pilot boat Achilles also had this feature) and no doubt the back could support davits for a life boat. My opinion is that the Doughty cutters were likely highly modified after launch or at least their upper workings, so likely either the pivot gun or rope stanchion railings were tossed soon after. The increased bulwark on this 1829 cutter and less extreme bow also suggests this. Also they likely continued to vary as the years progressed 1815-1825? ones that launched later likely corrected the inadequacies of the earlier batches. The original design with a low toe rail and rope stanchion... And some variations with improved bulwarks below This one above has a full solid bulwark some swivels as well as a raised pivot canon. This one above has canon ports which was probably common on the larger 80 ton versions however doubt that pivot would still be relevant? And here's a version with a half bulwark added to the front. Which also would likely help with water washing on the deck. Another interesting variation. Since I have 3 to work on for this diorama I am inclined to mixing it up a bit. But not sure which will have what yet. Open to opinions on the lifeboat question. Other than just tugging it along possibly a half bulwark in the back and then i can have the swivels as well. Considering Active was alone for the period immediately following the war of 1812 she must have been overworked and highly adaptable to any situation they found themselves in. 🤔 One thing I am certain about it that the toe rail bulwark probably had a cap rail. All the models show this however the Doughty plans do not. Most of the models show oar locks so logic dictates that there would need to be enough surface area to support them. Here is me testing out some bulwark heights now.


- 362 replies
-
- 6
-
-
- active
- revenue cutter
- (and 1 more)
-
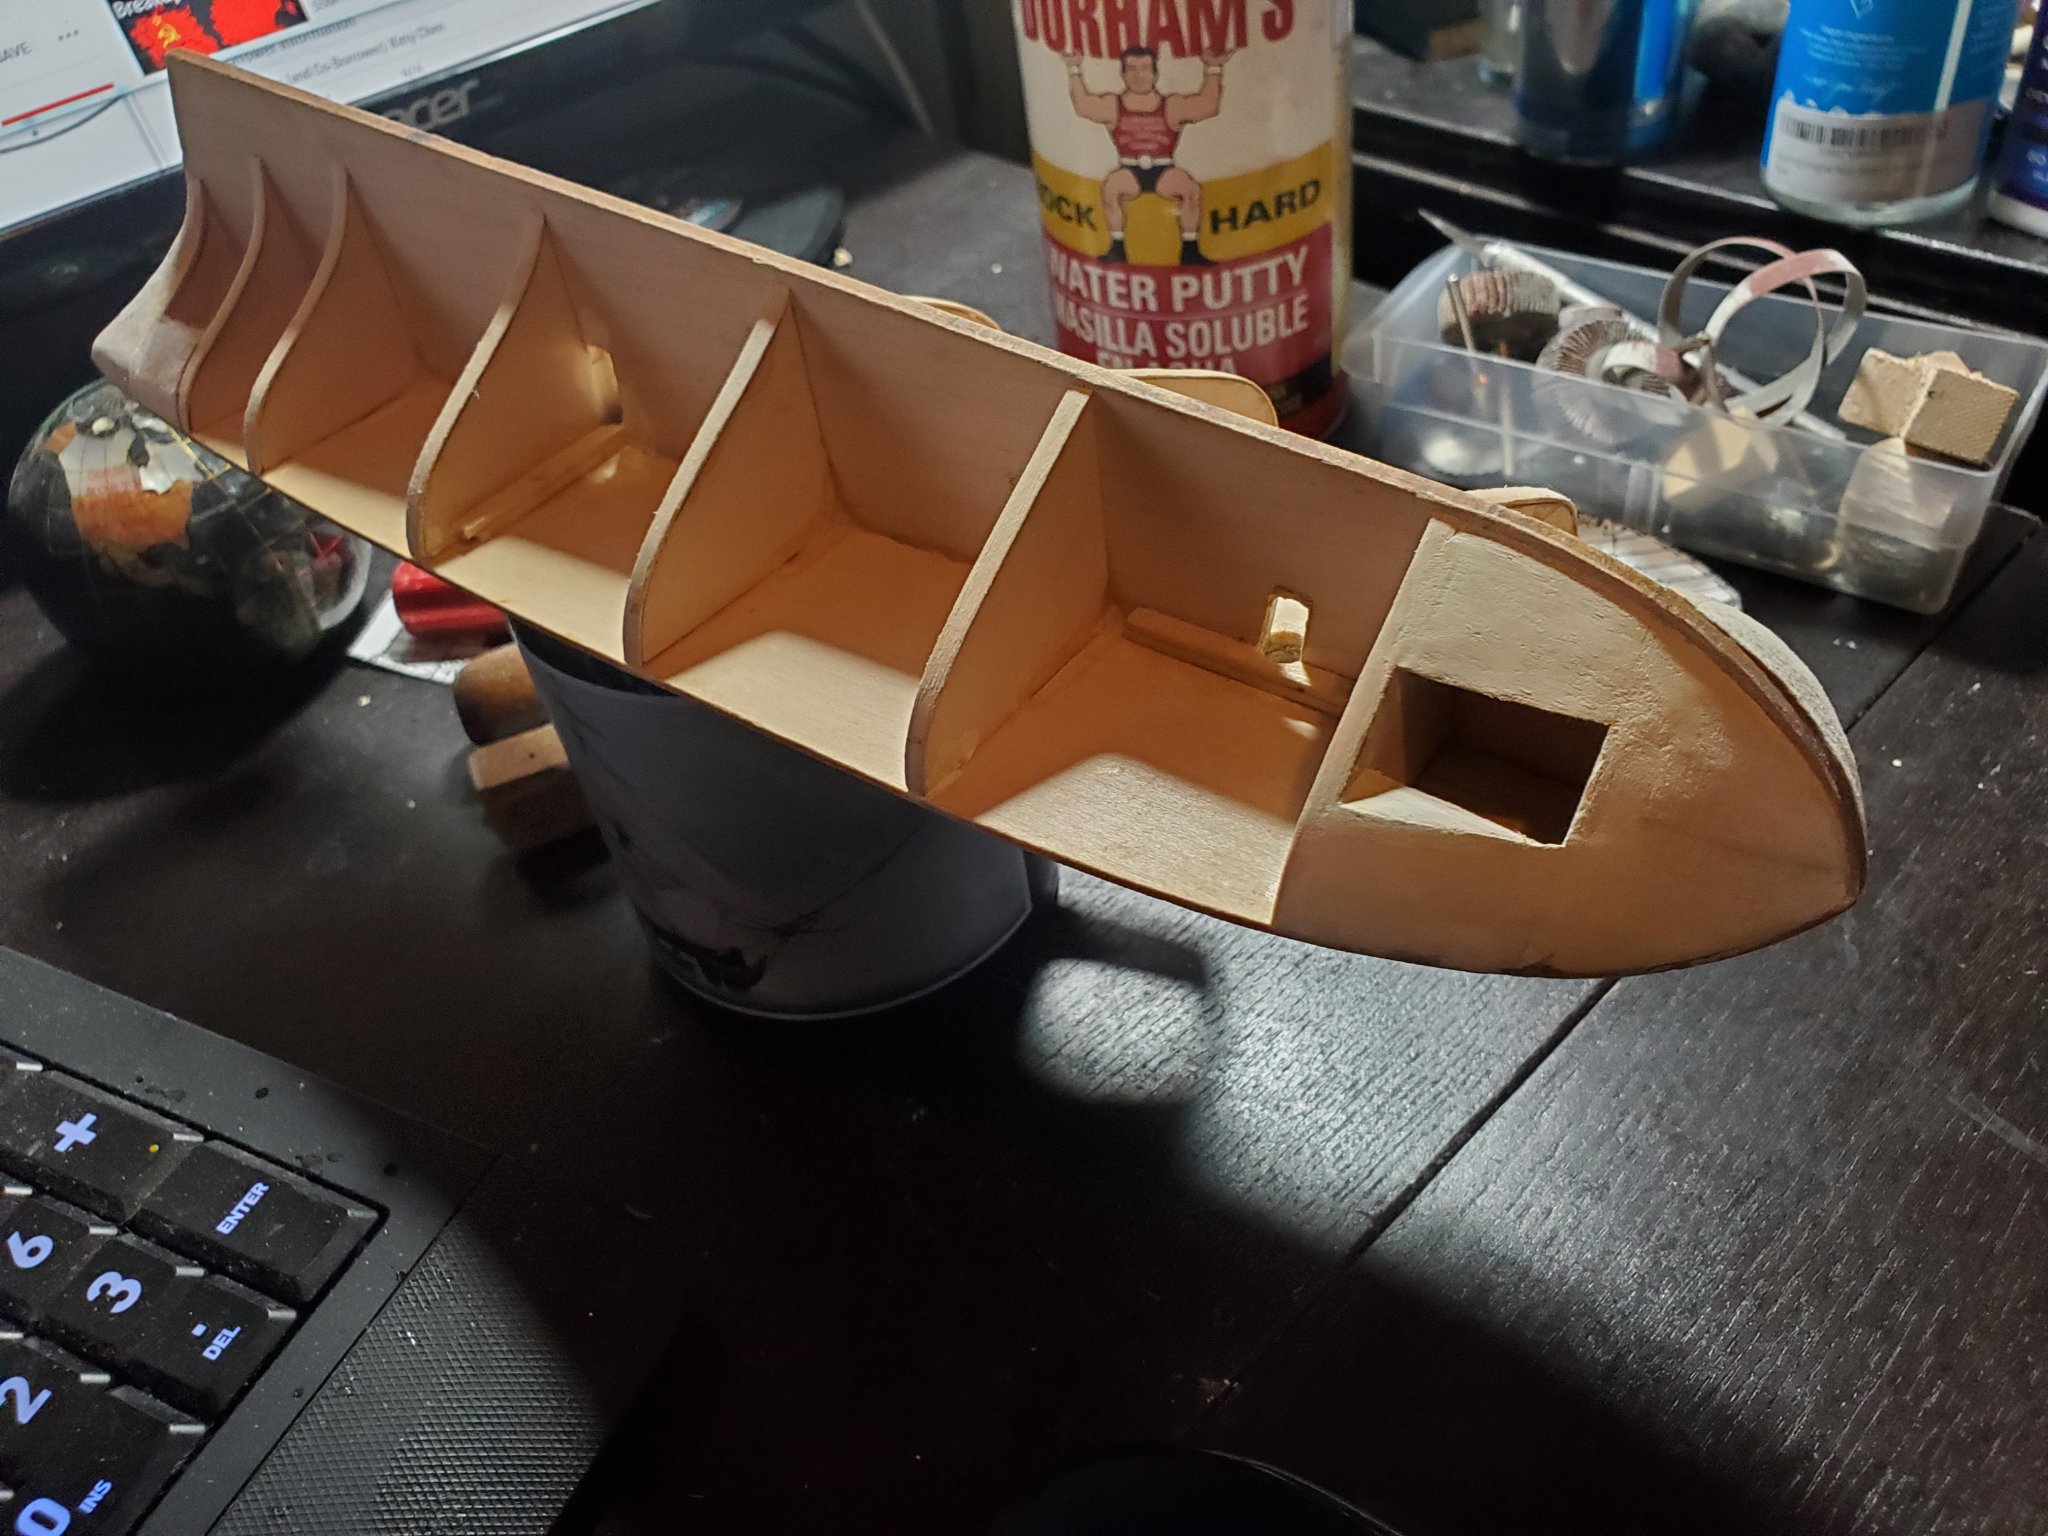
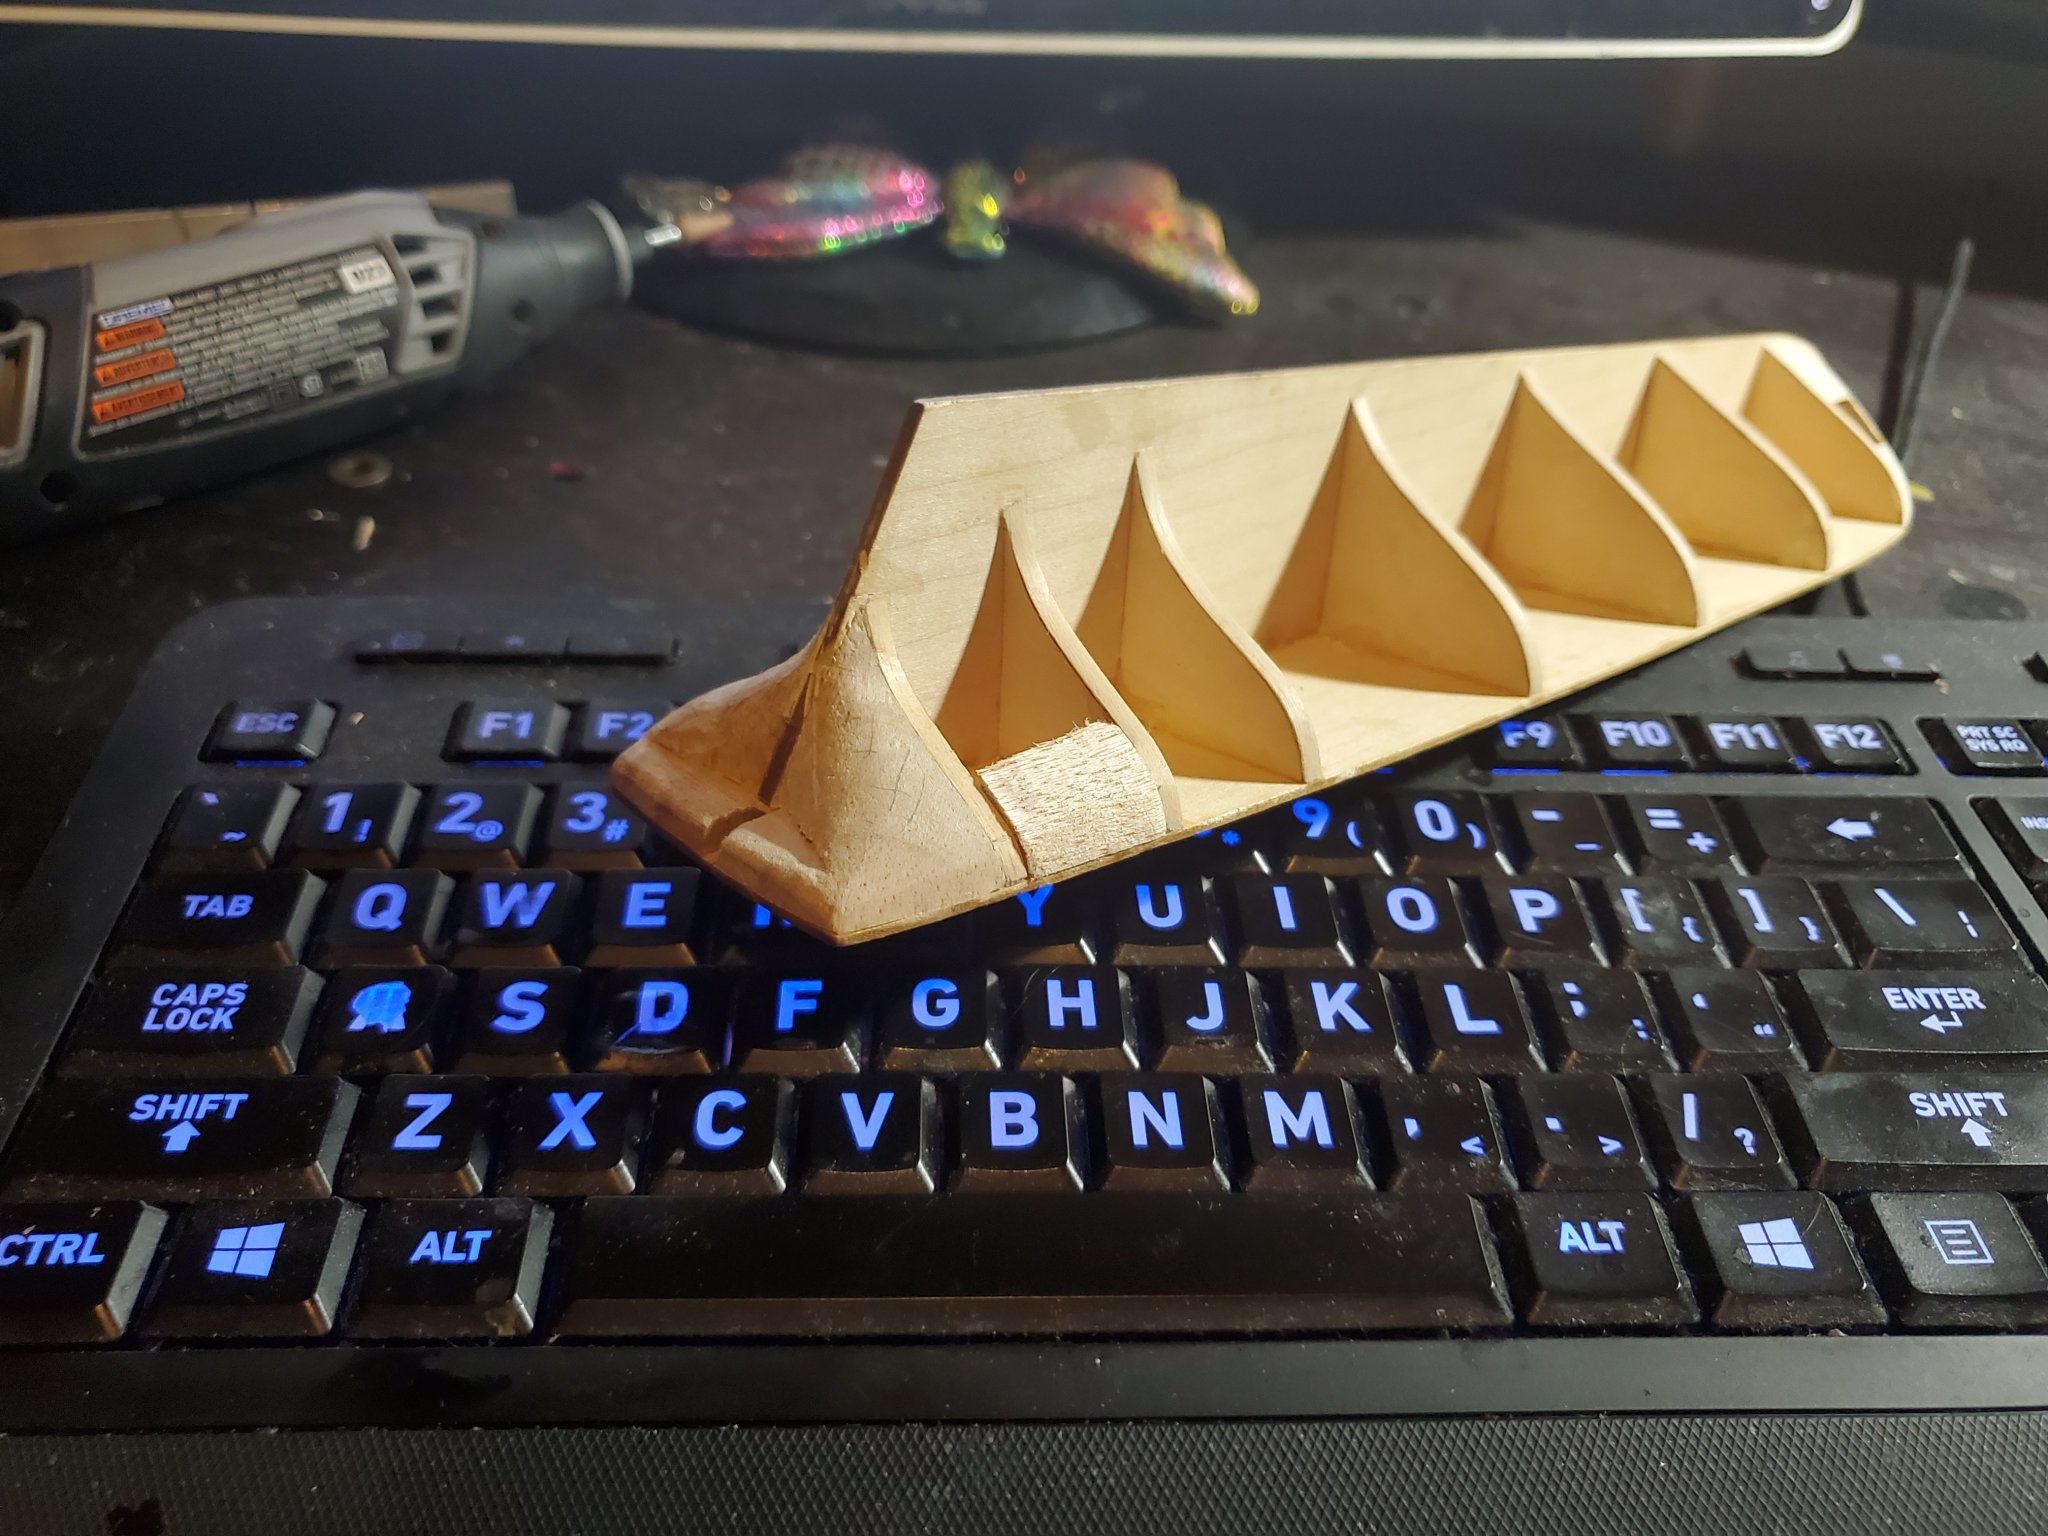
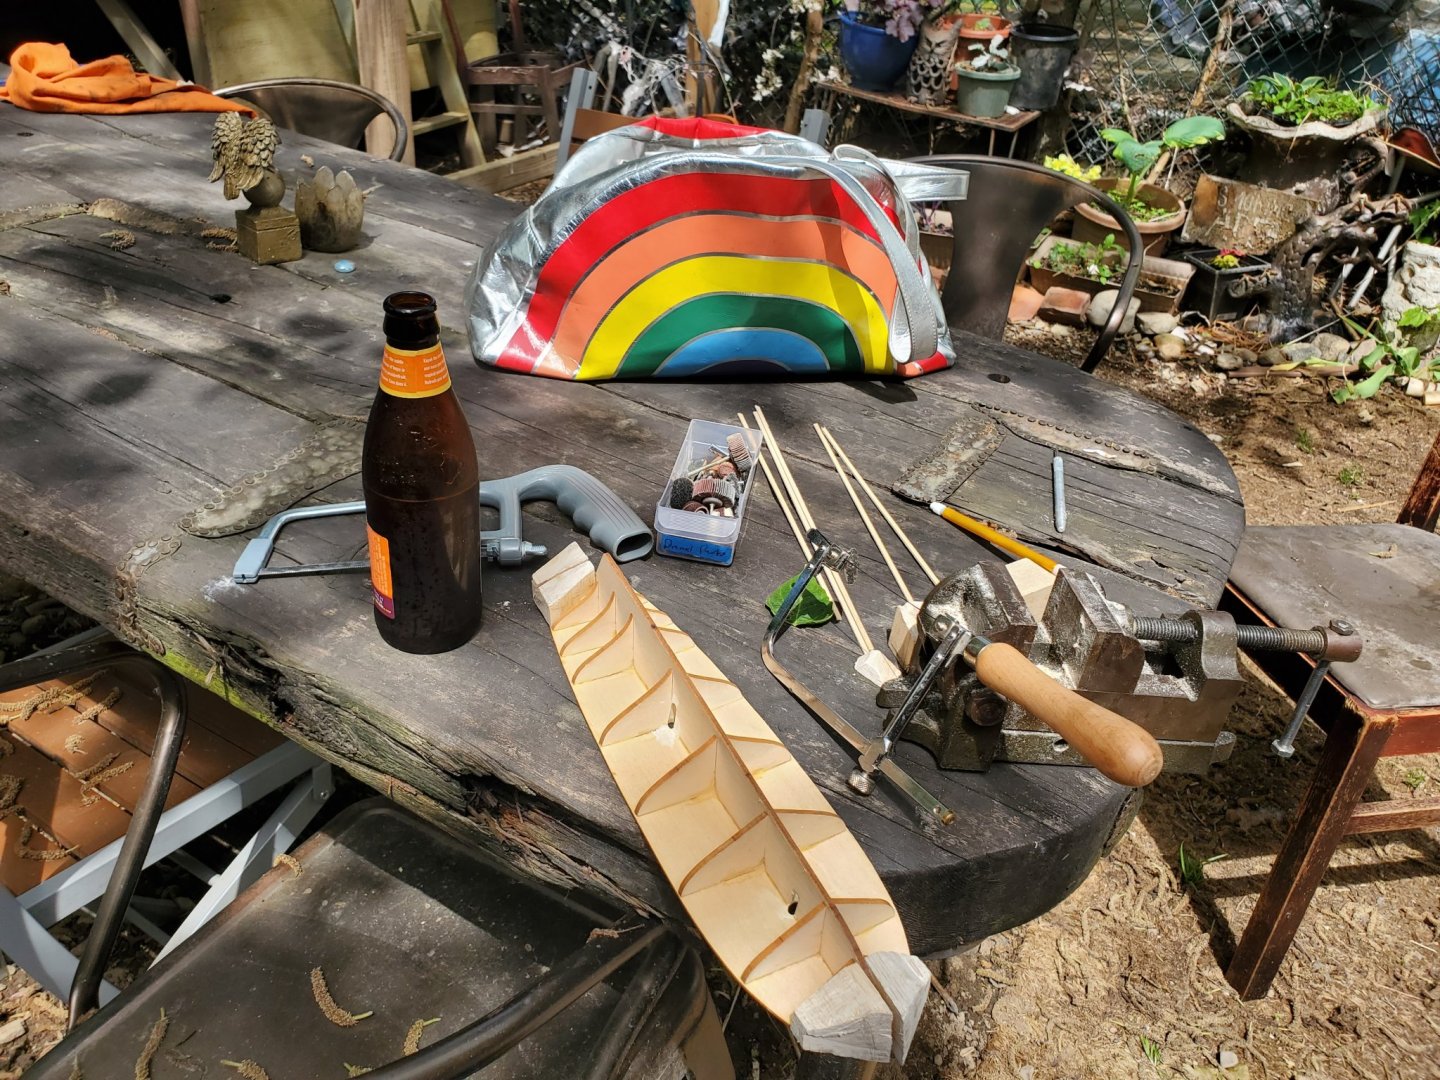
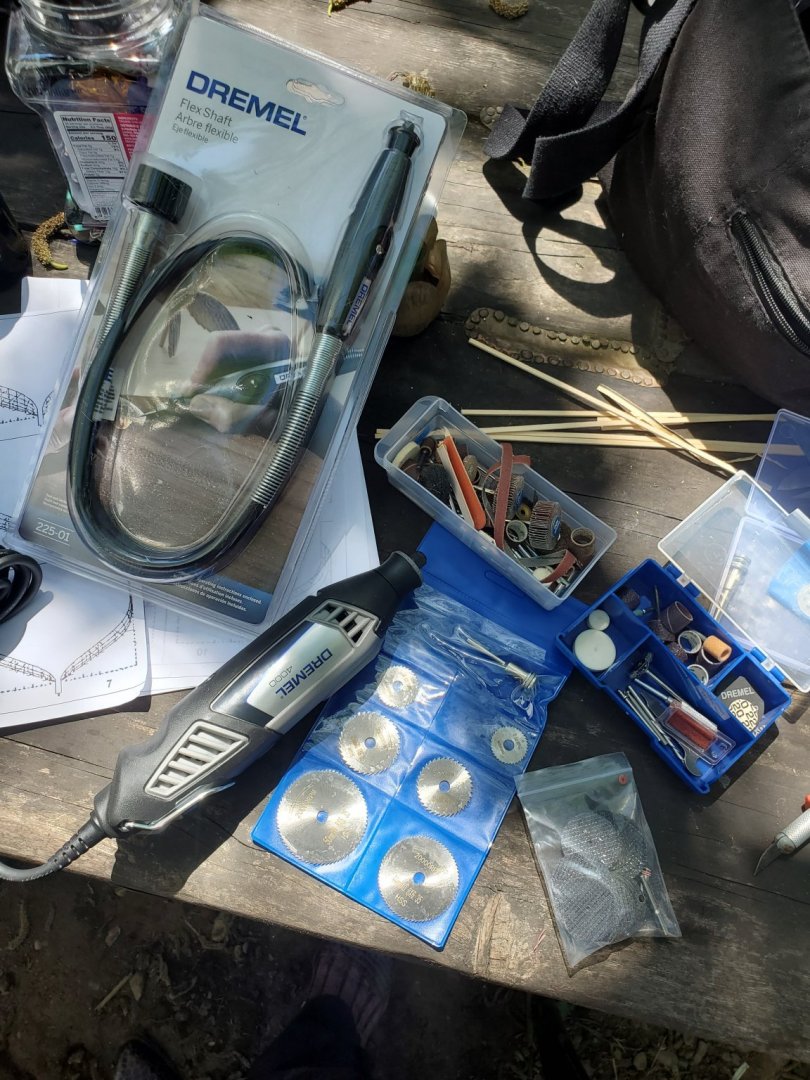
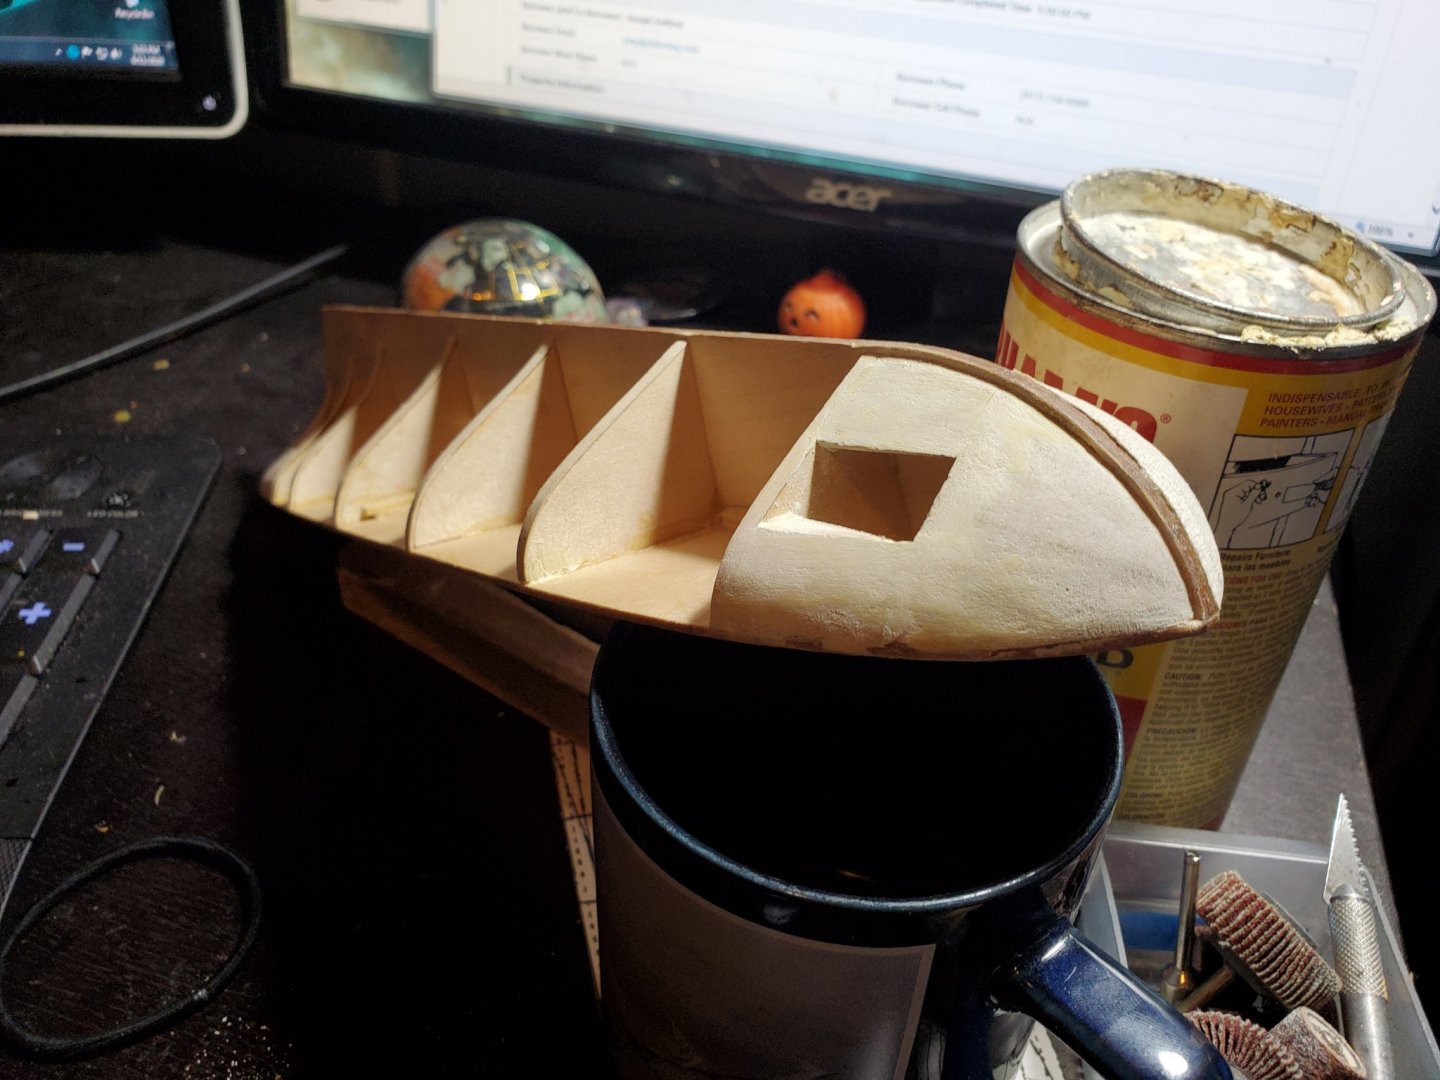
Greetings all! Here is my June check in. The weather is lovely and been out in the back yard alot helping my partner w her garden. As such I decided to switch gears from the 30 ton cutter to the 80 ton model whose frames I put together a few years back. This one will be the Vigilant which severed as replacement for Active and was described as "twice the size" Since none of these ships have much history I assume she was of the 80 ton design. Where the 30 ton model is 9" this one is 13". Part of the change was simple the need to send wood and work on something I can take around with me without being so delicate. All three will be part of my diorama so I plan to build them all! It's been nice to shift gears and have something to whittle away on. Even bought a new dremel! The shaper frames required an extra plank. I realized when I made them I didnt take into account the curve of the hull. I thought of remaking them w the laser but the shop has been closed. Figured adding a little strip of wood would do just fine. And last I added the bow and stern blocks and have been sanding them into shape. 😌


- 362 replies
-
- 7
-
-
- active
- revenue cutter
- (and 1 more)
-
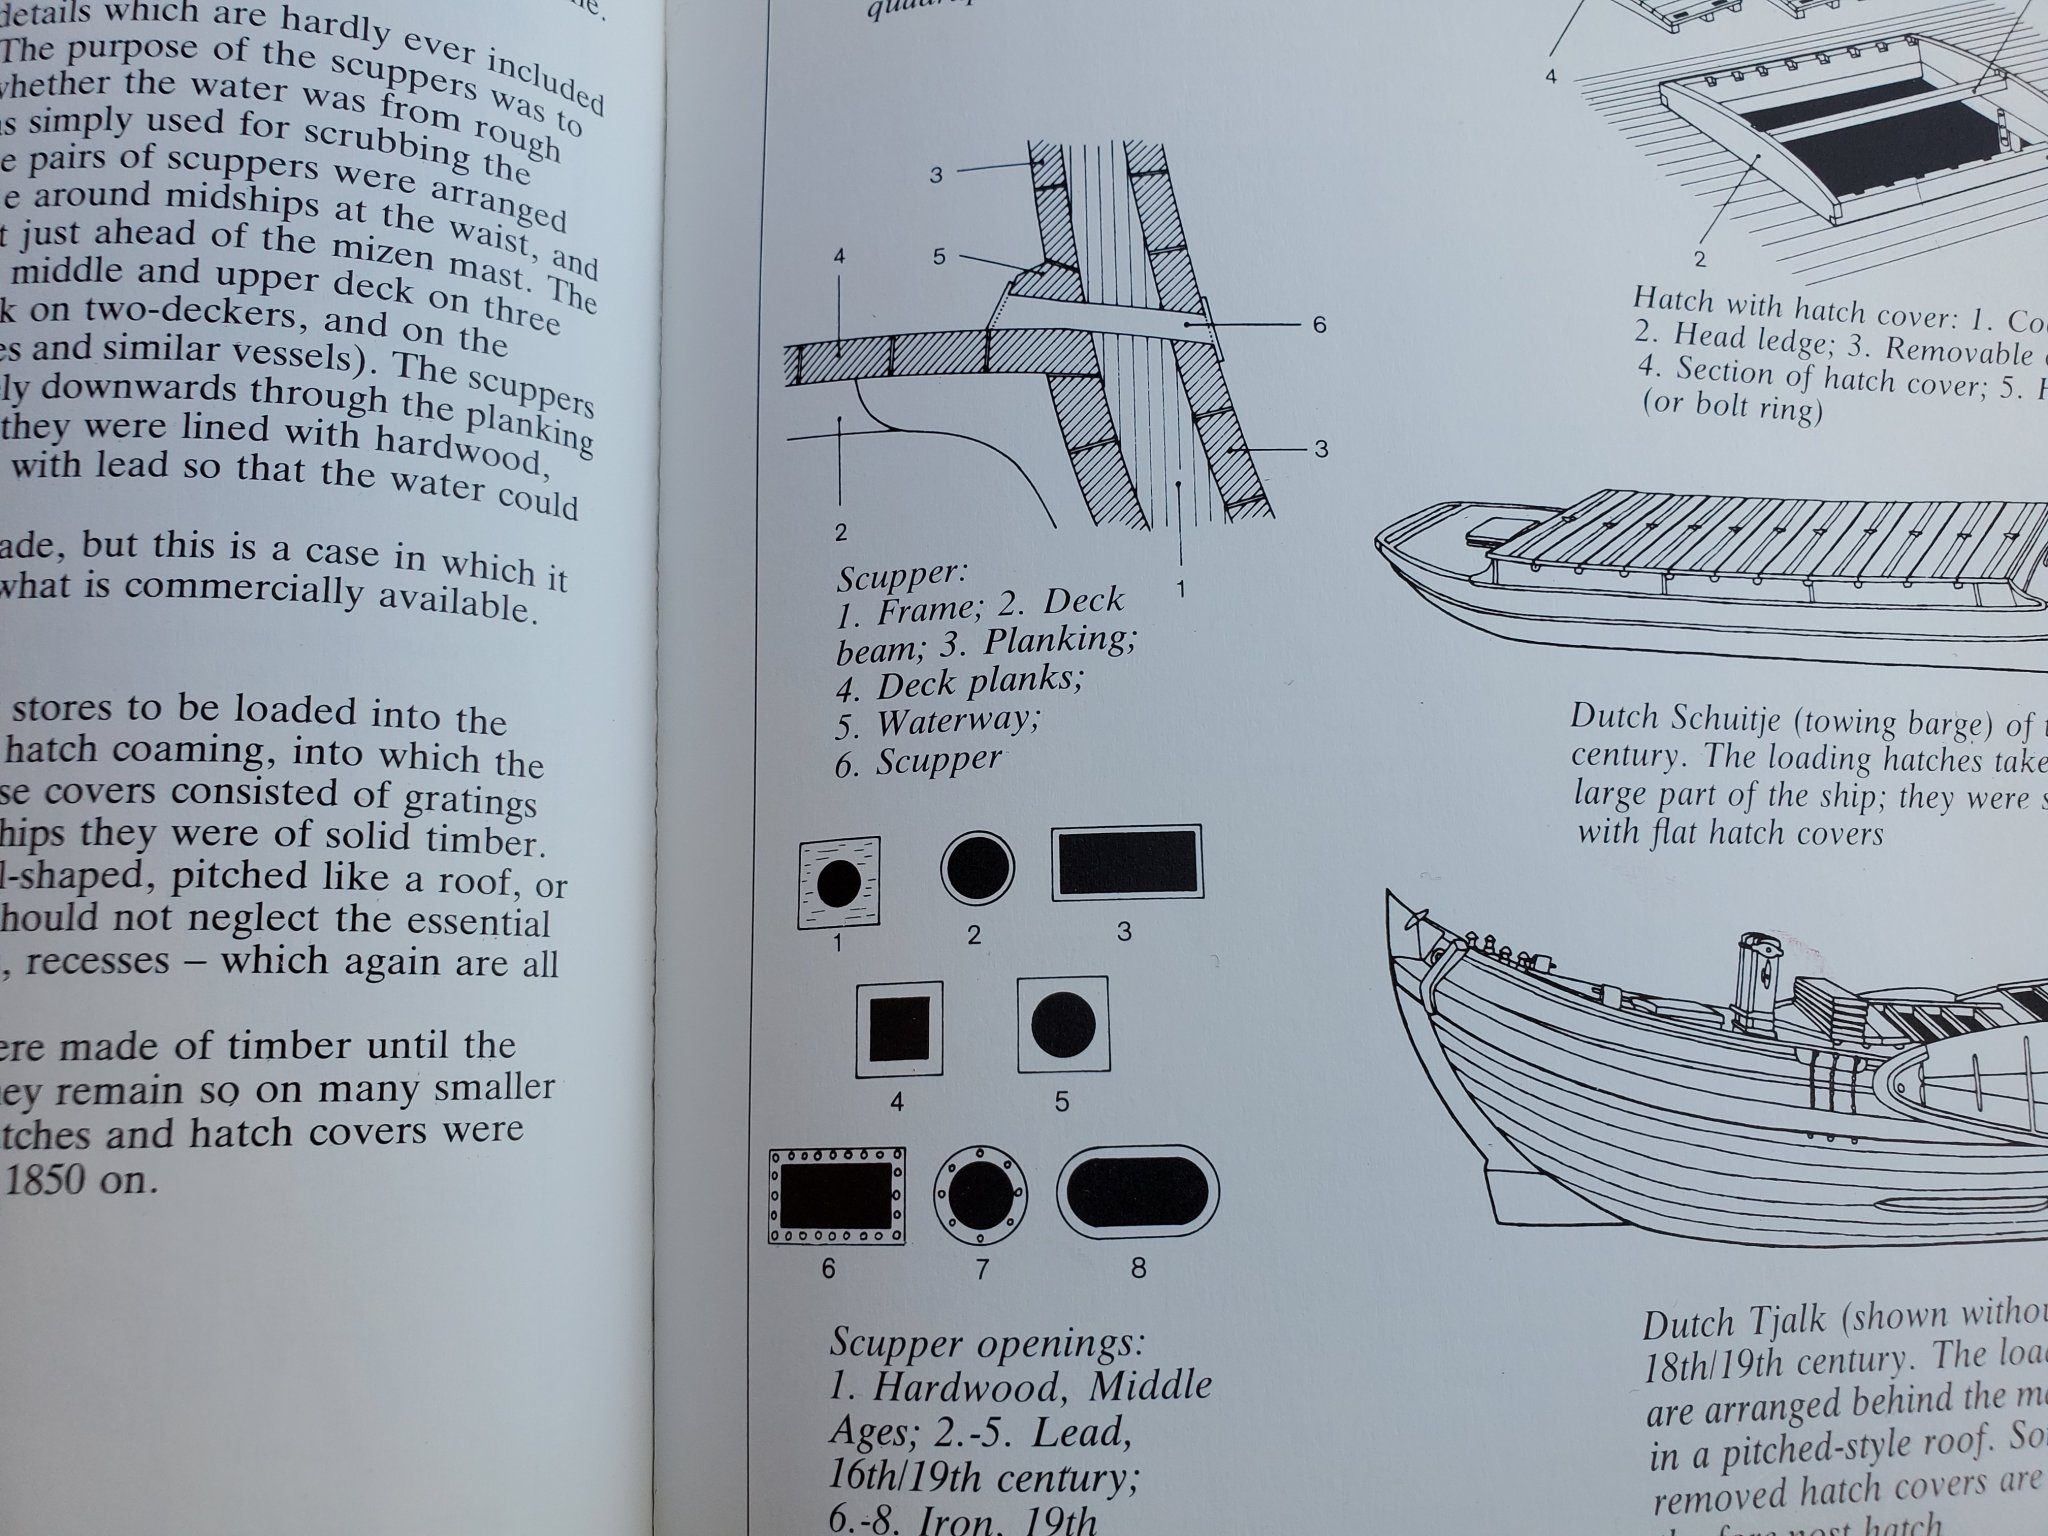
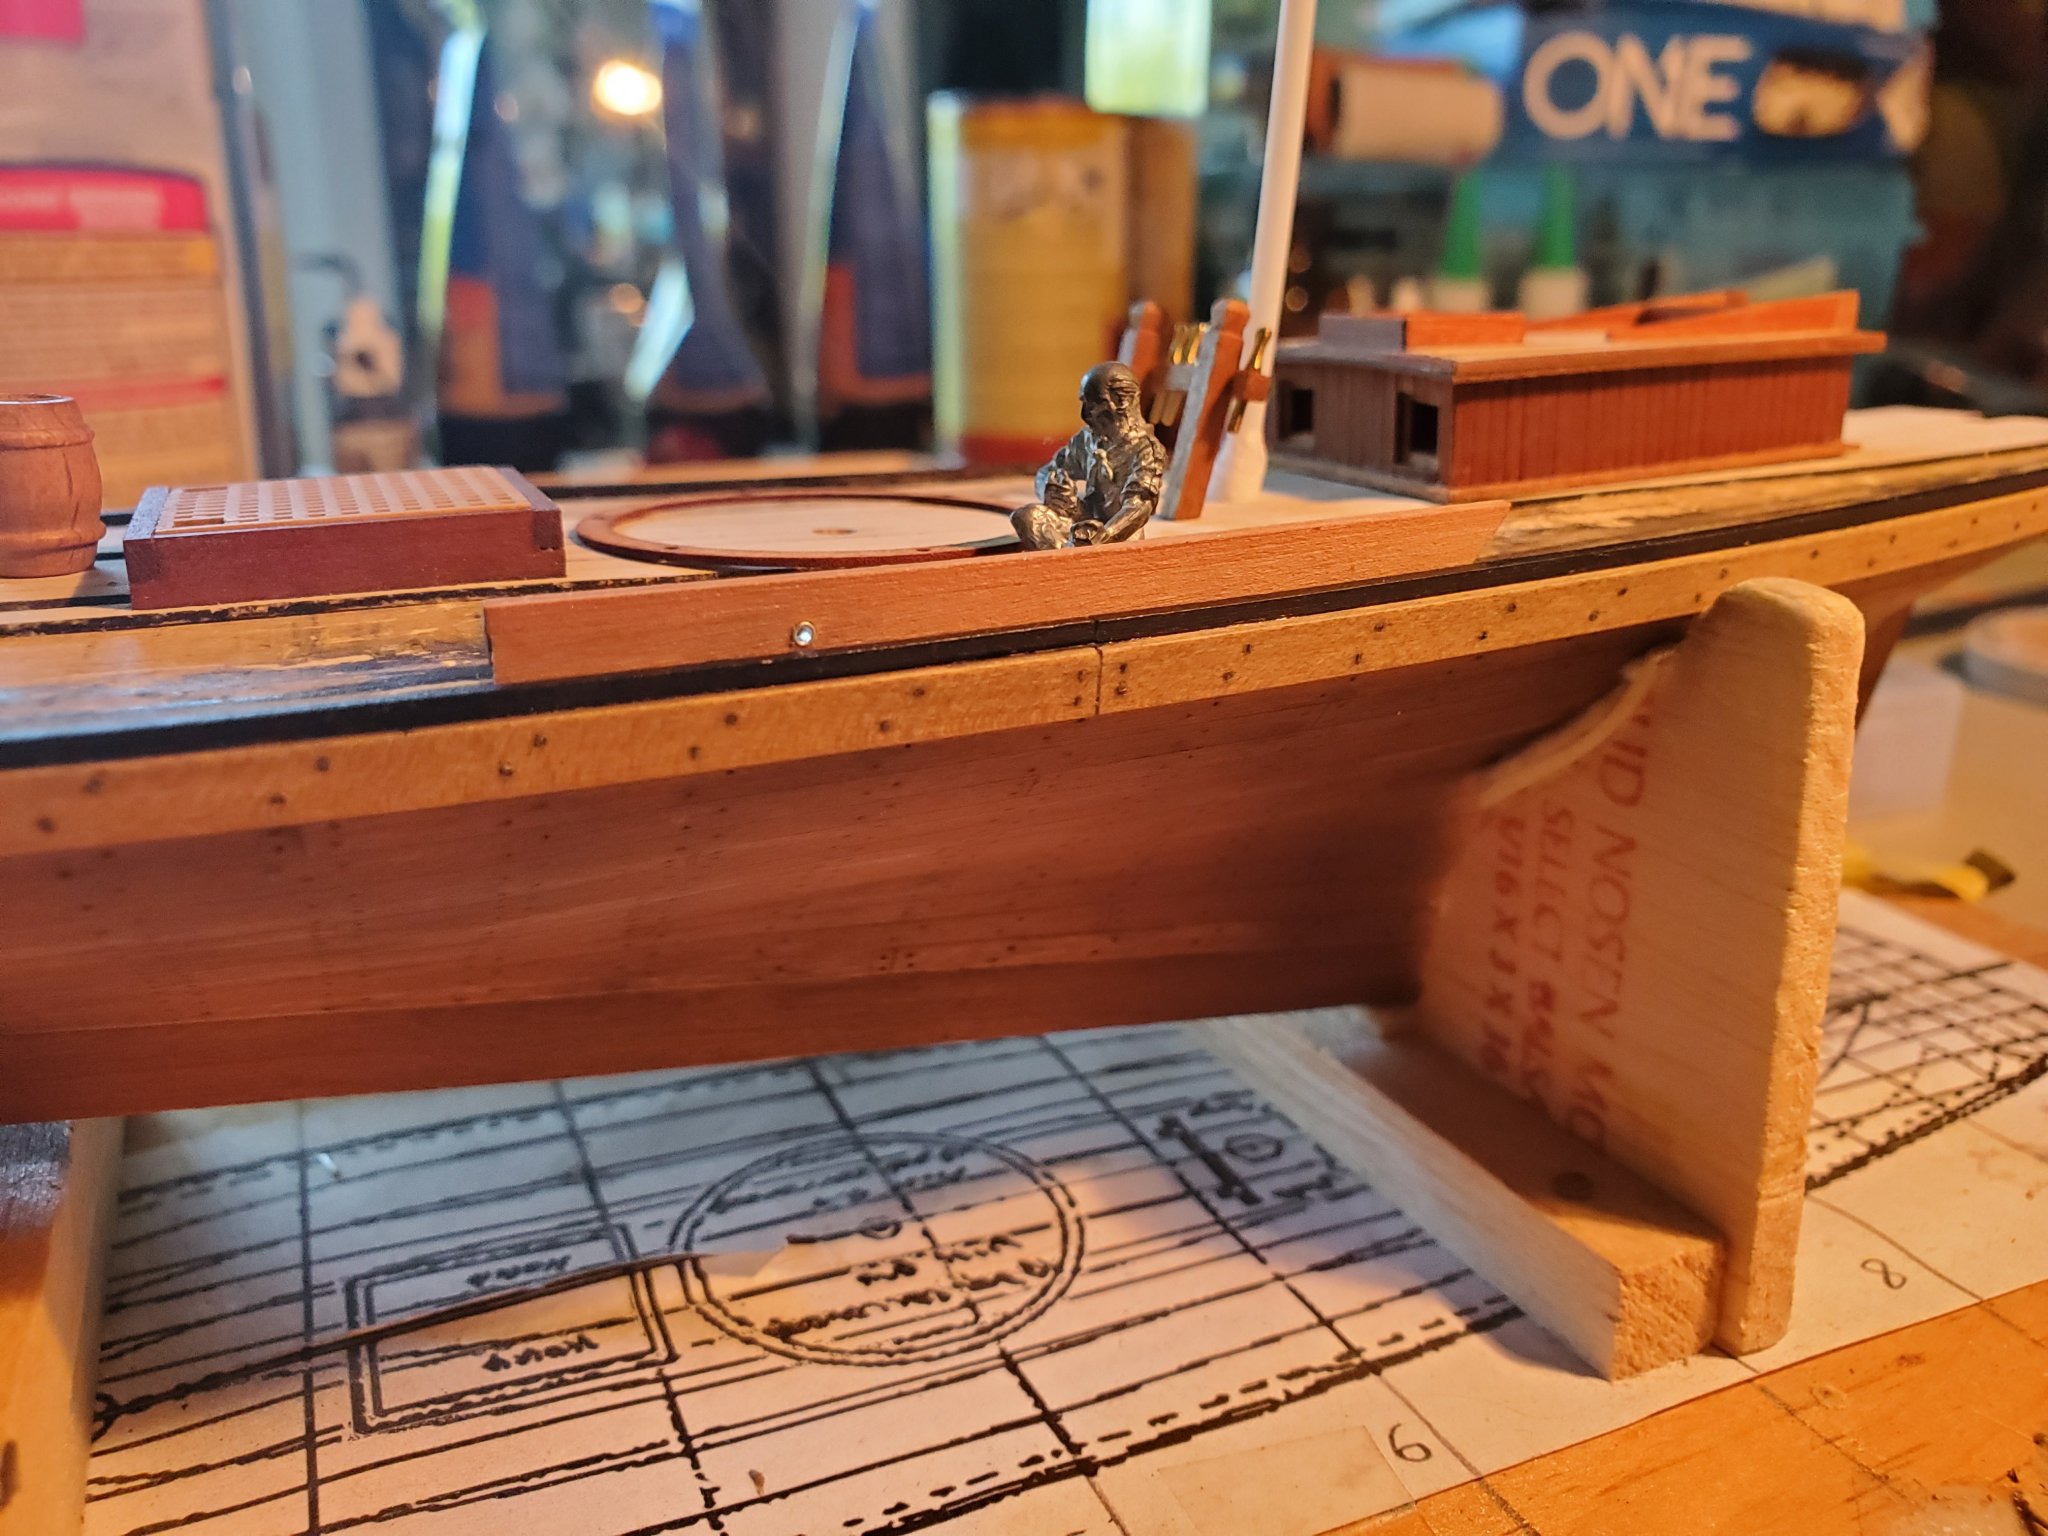
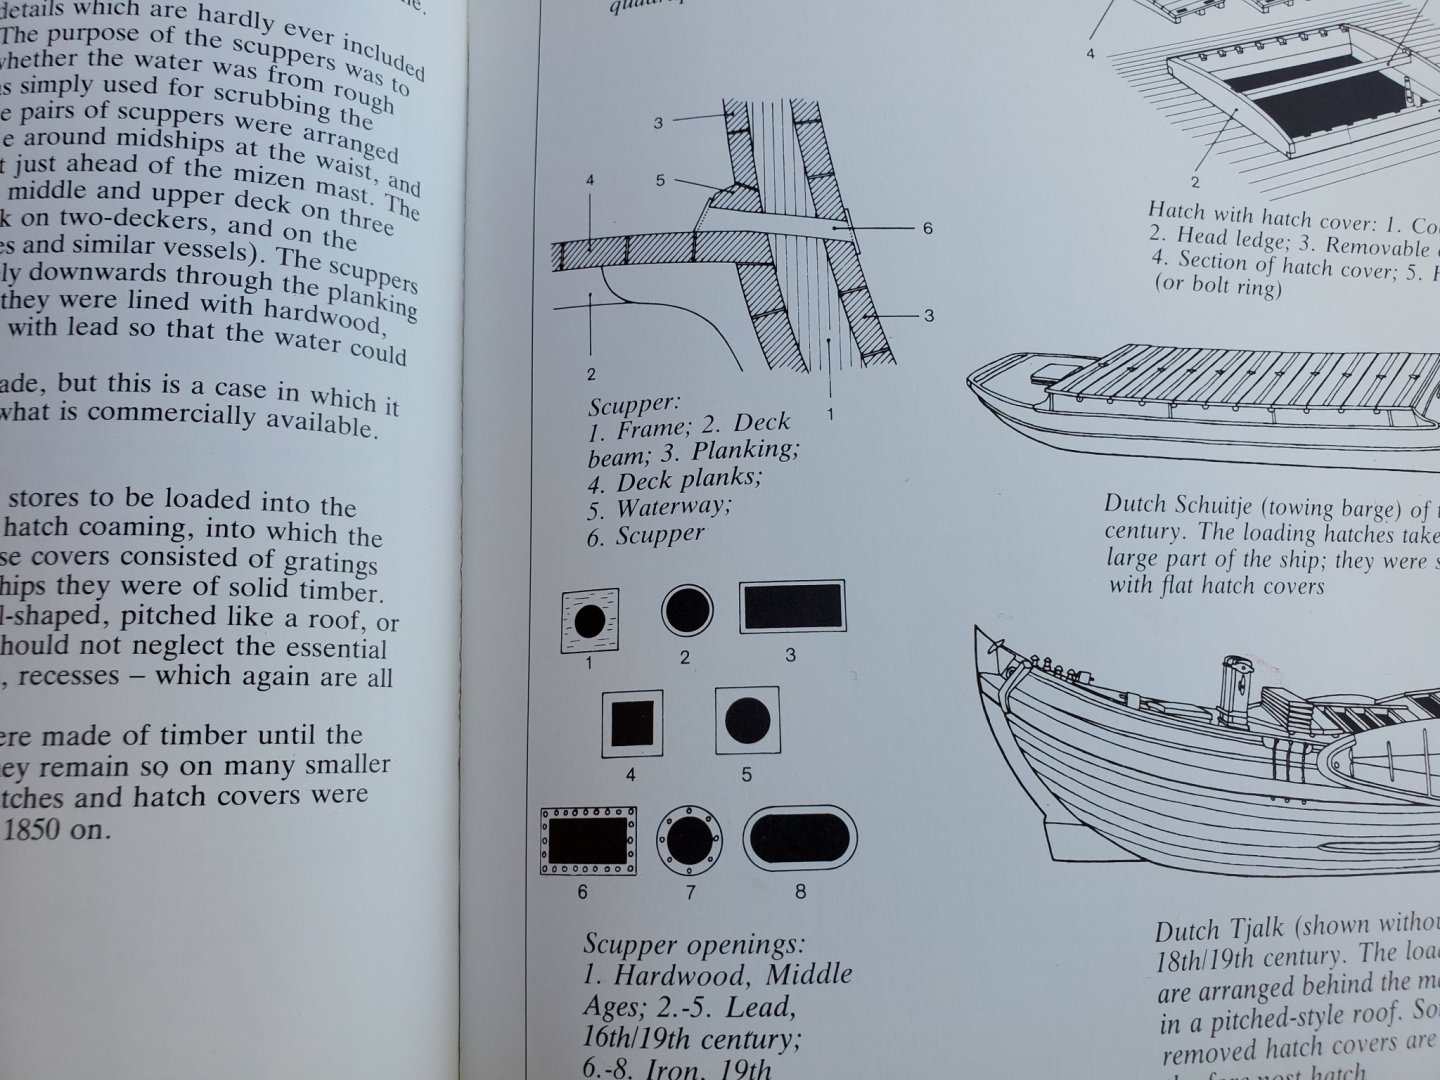
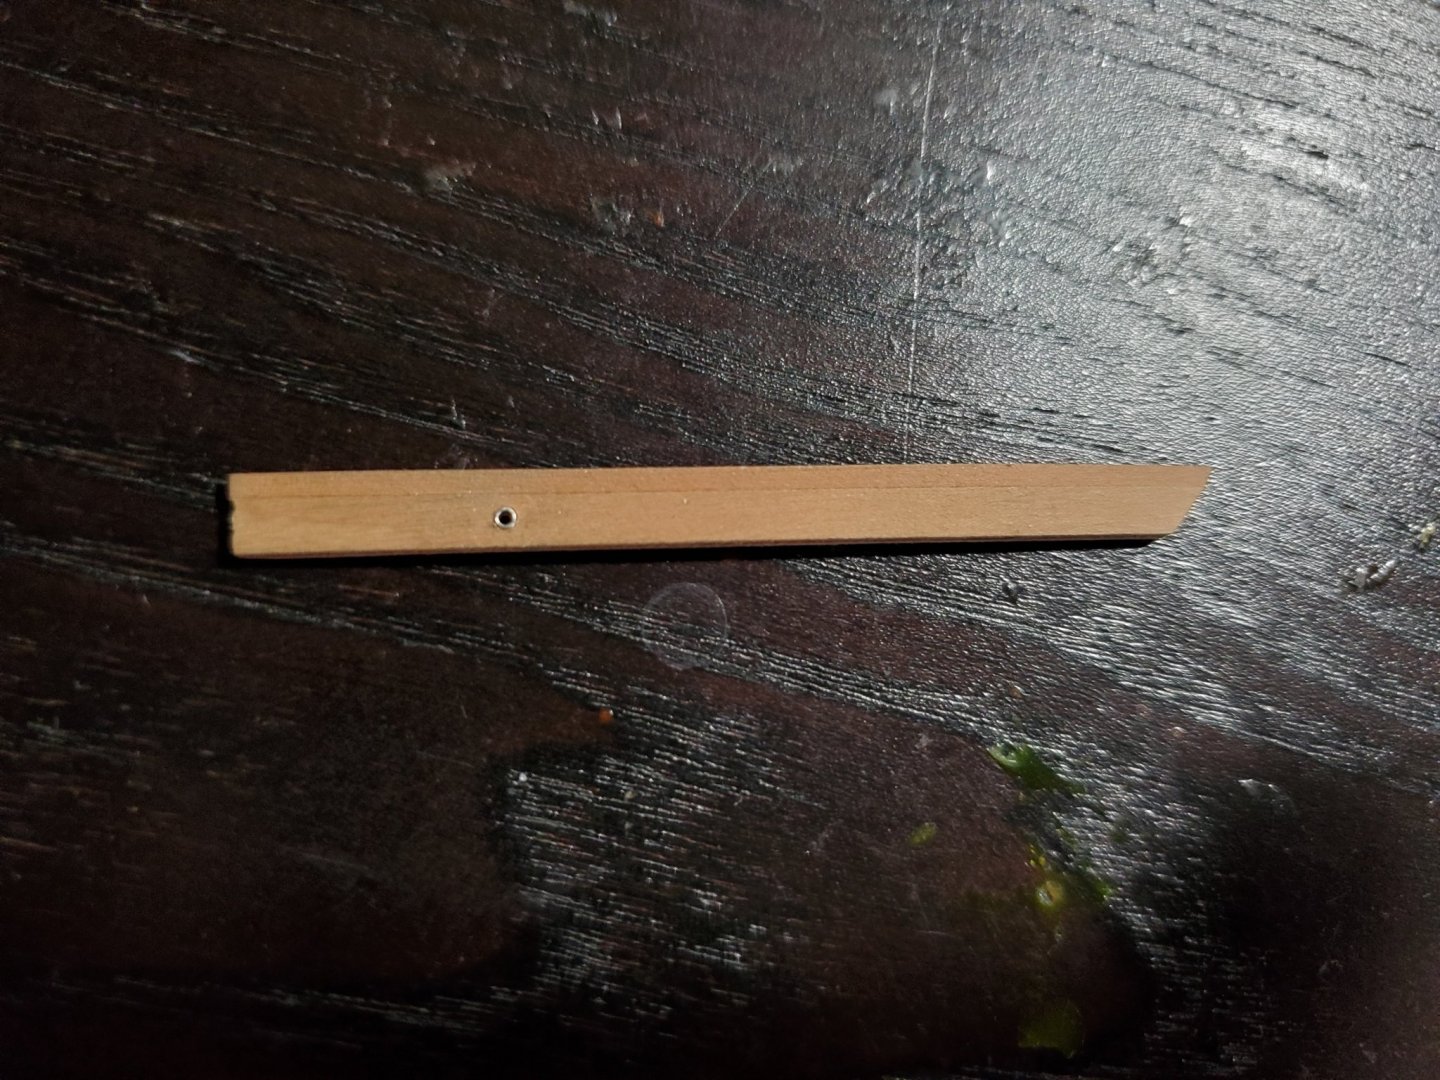
Next update was to recreate the small bulwark. To avoid making the same mistake last time I created a sample dummy piece that I could get a feel of how it would look completed. Part of this process led me to design the scuppers which I picked from a series of small crimp beads. Then drilled a hole and added it snugly. Overall looks good and ready to make the real bulwark. Stay tuned.

- 362 replies
-
- 7
-
-
- active
- revenue cutter
- (and 1 more)
-
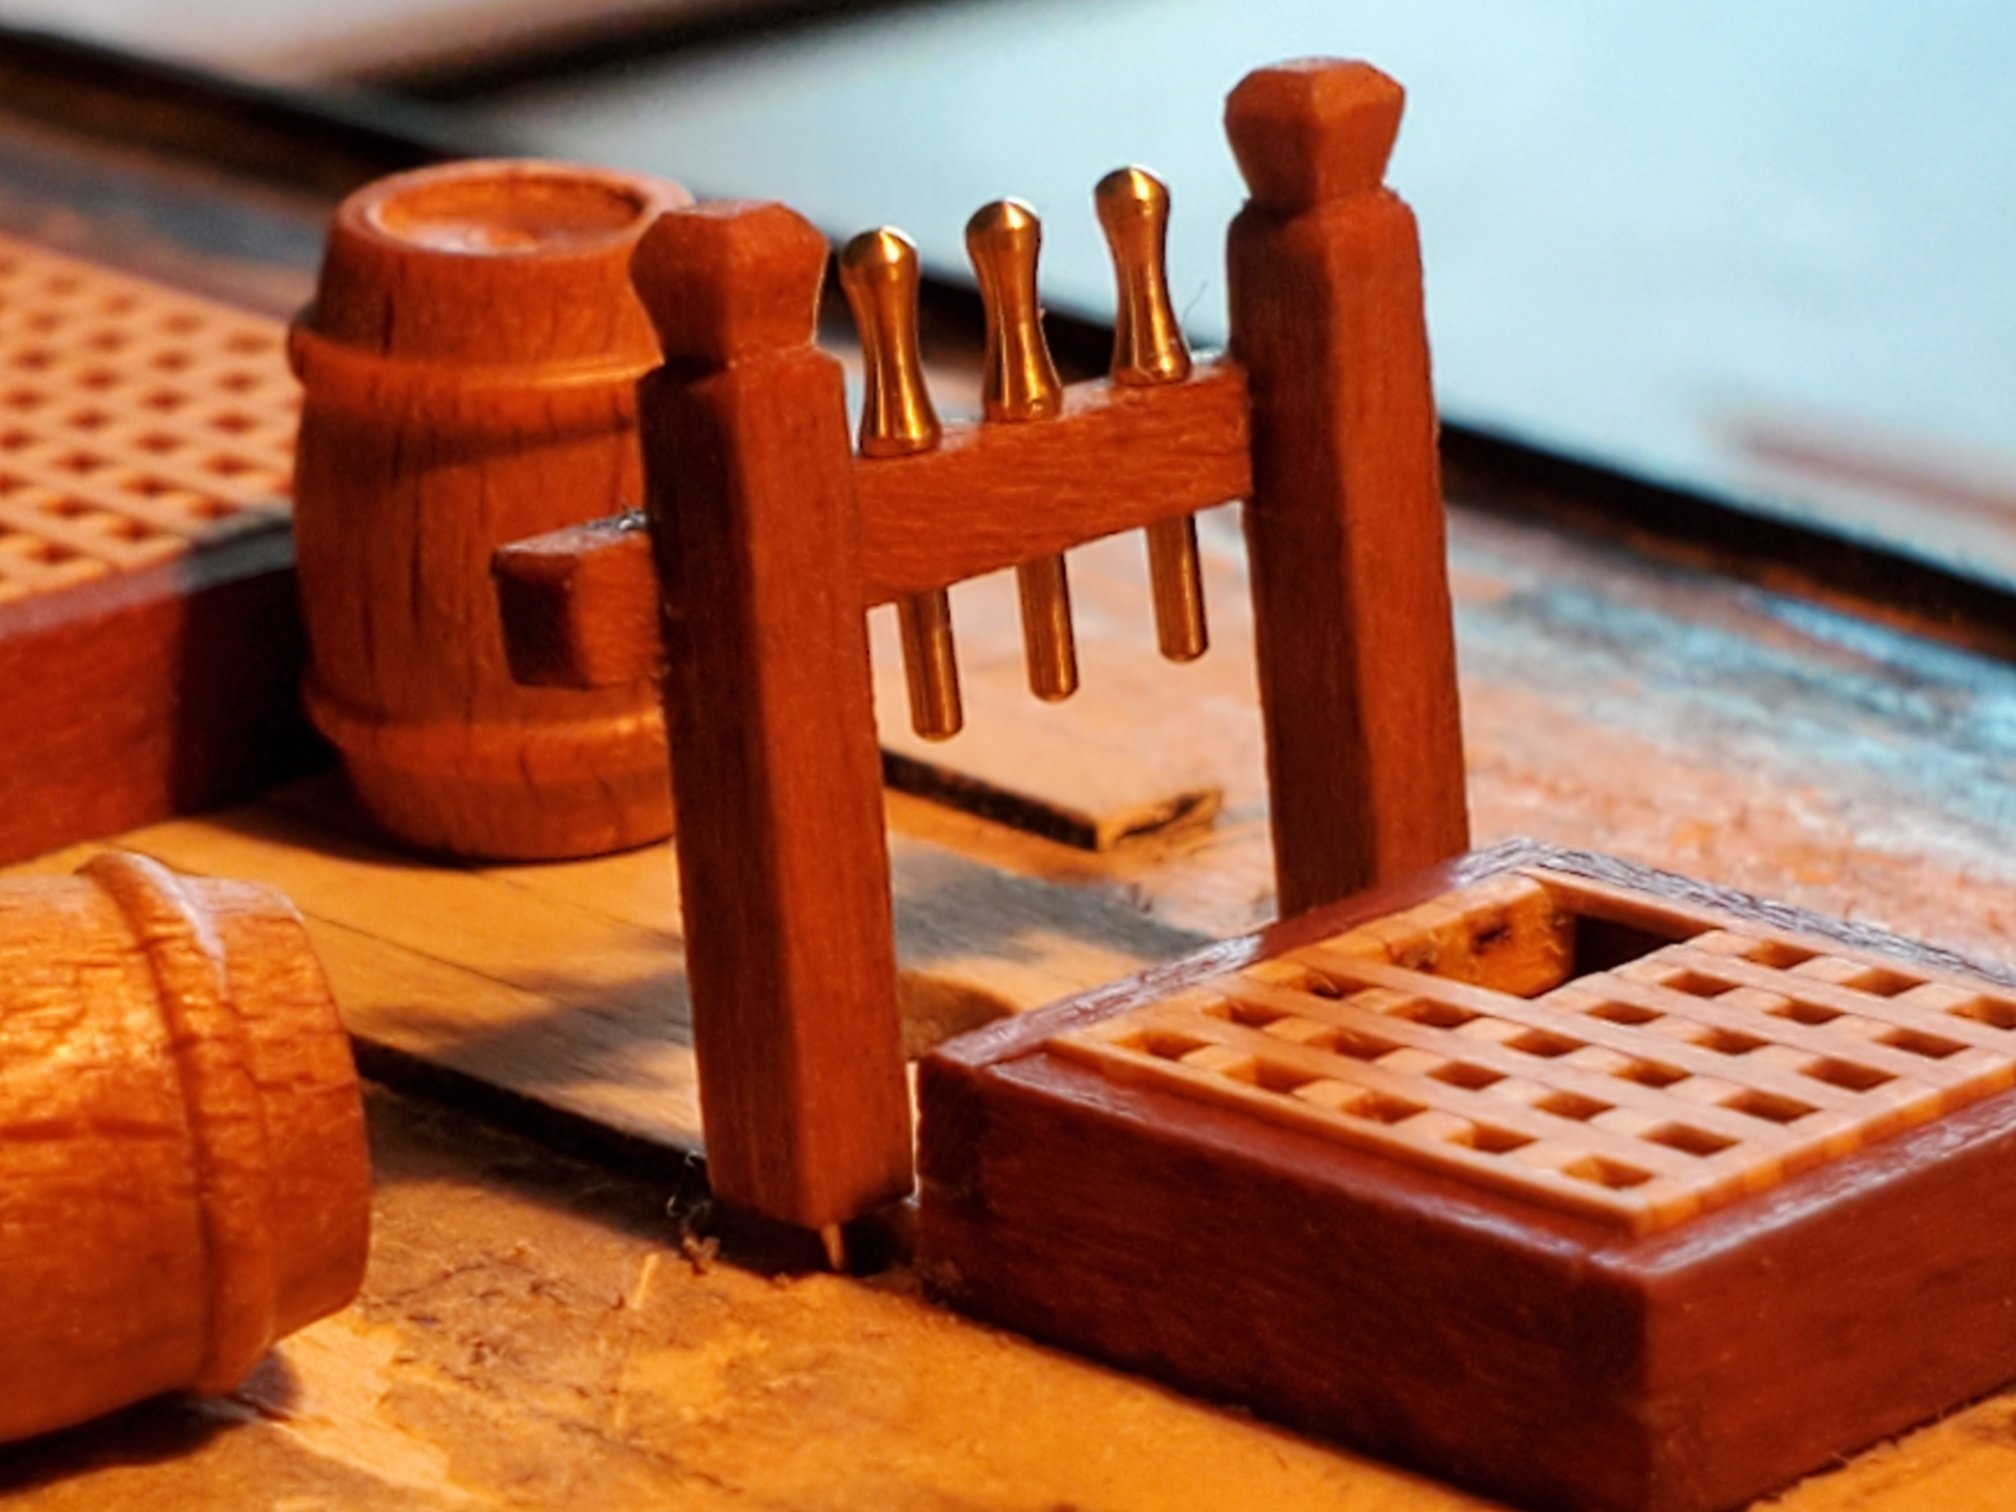
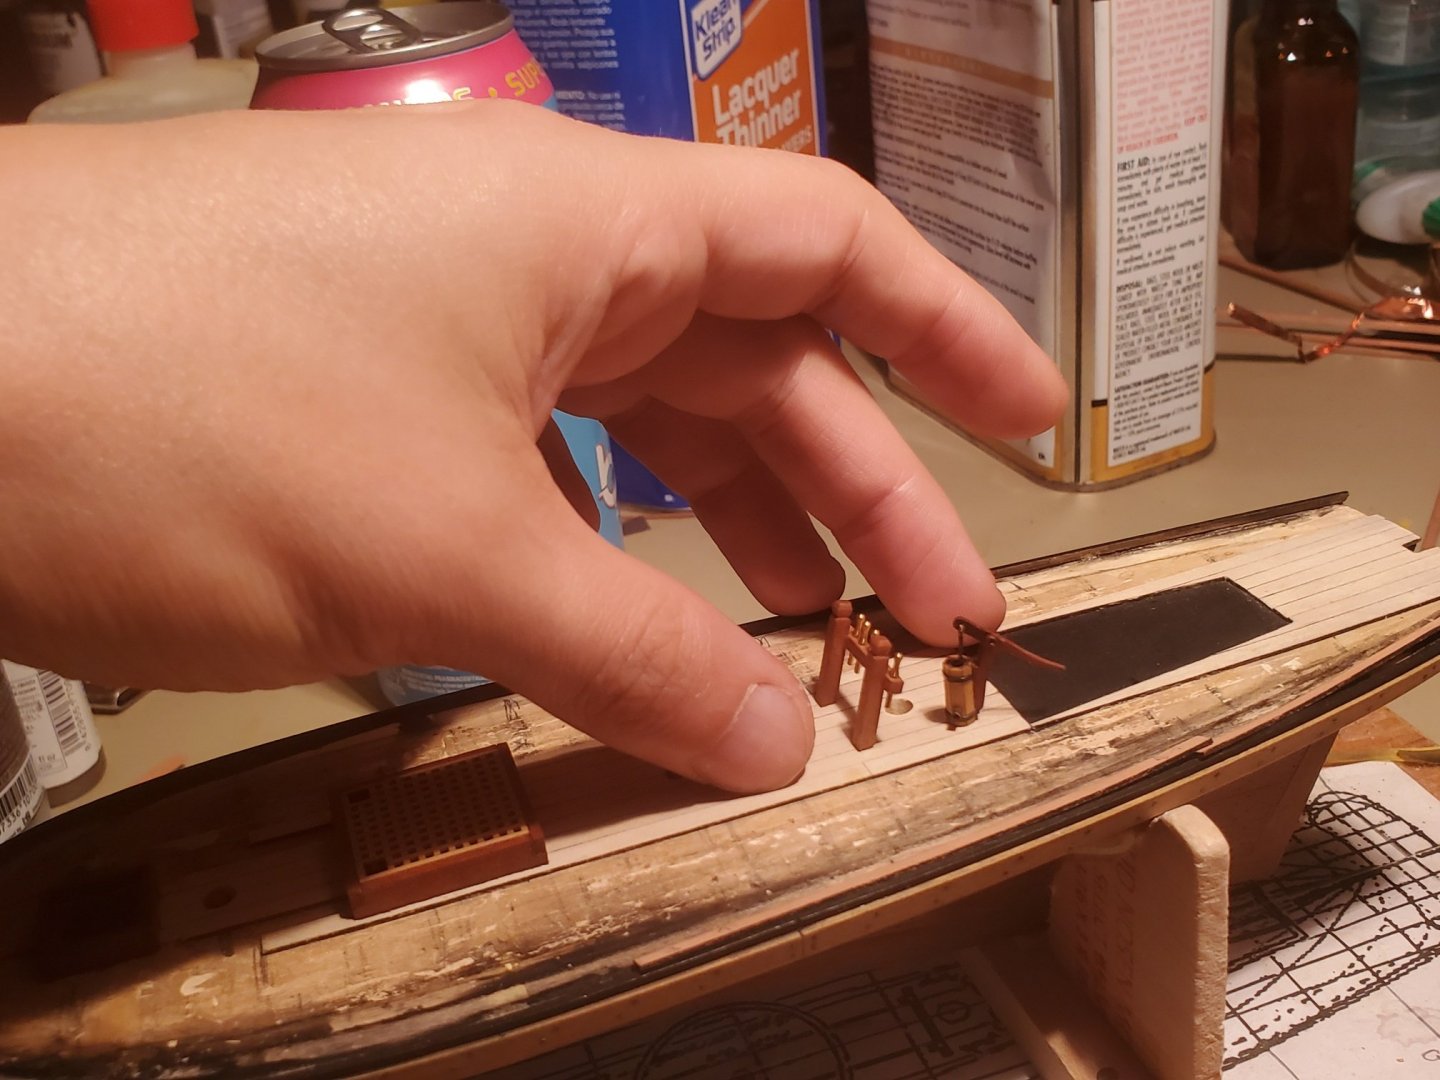
The only thing that's missing are a few wood peg bolt indentations that I will add to the points where the belaying pin rack meet bit block using an awl pointed bit. I'll get to those details on a bit 😊
-
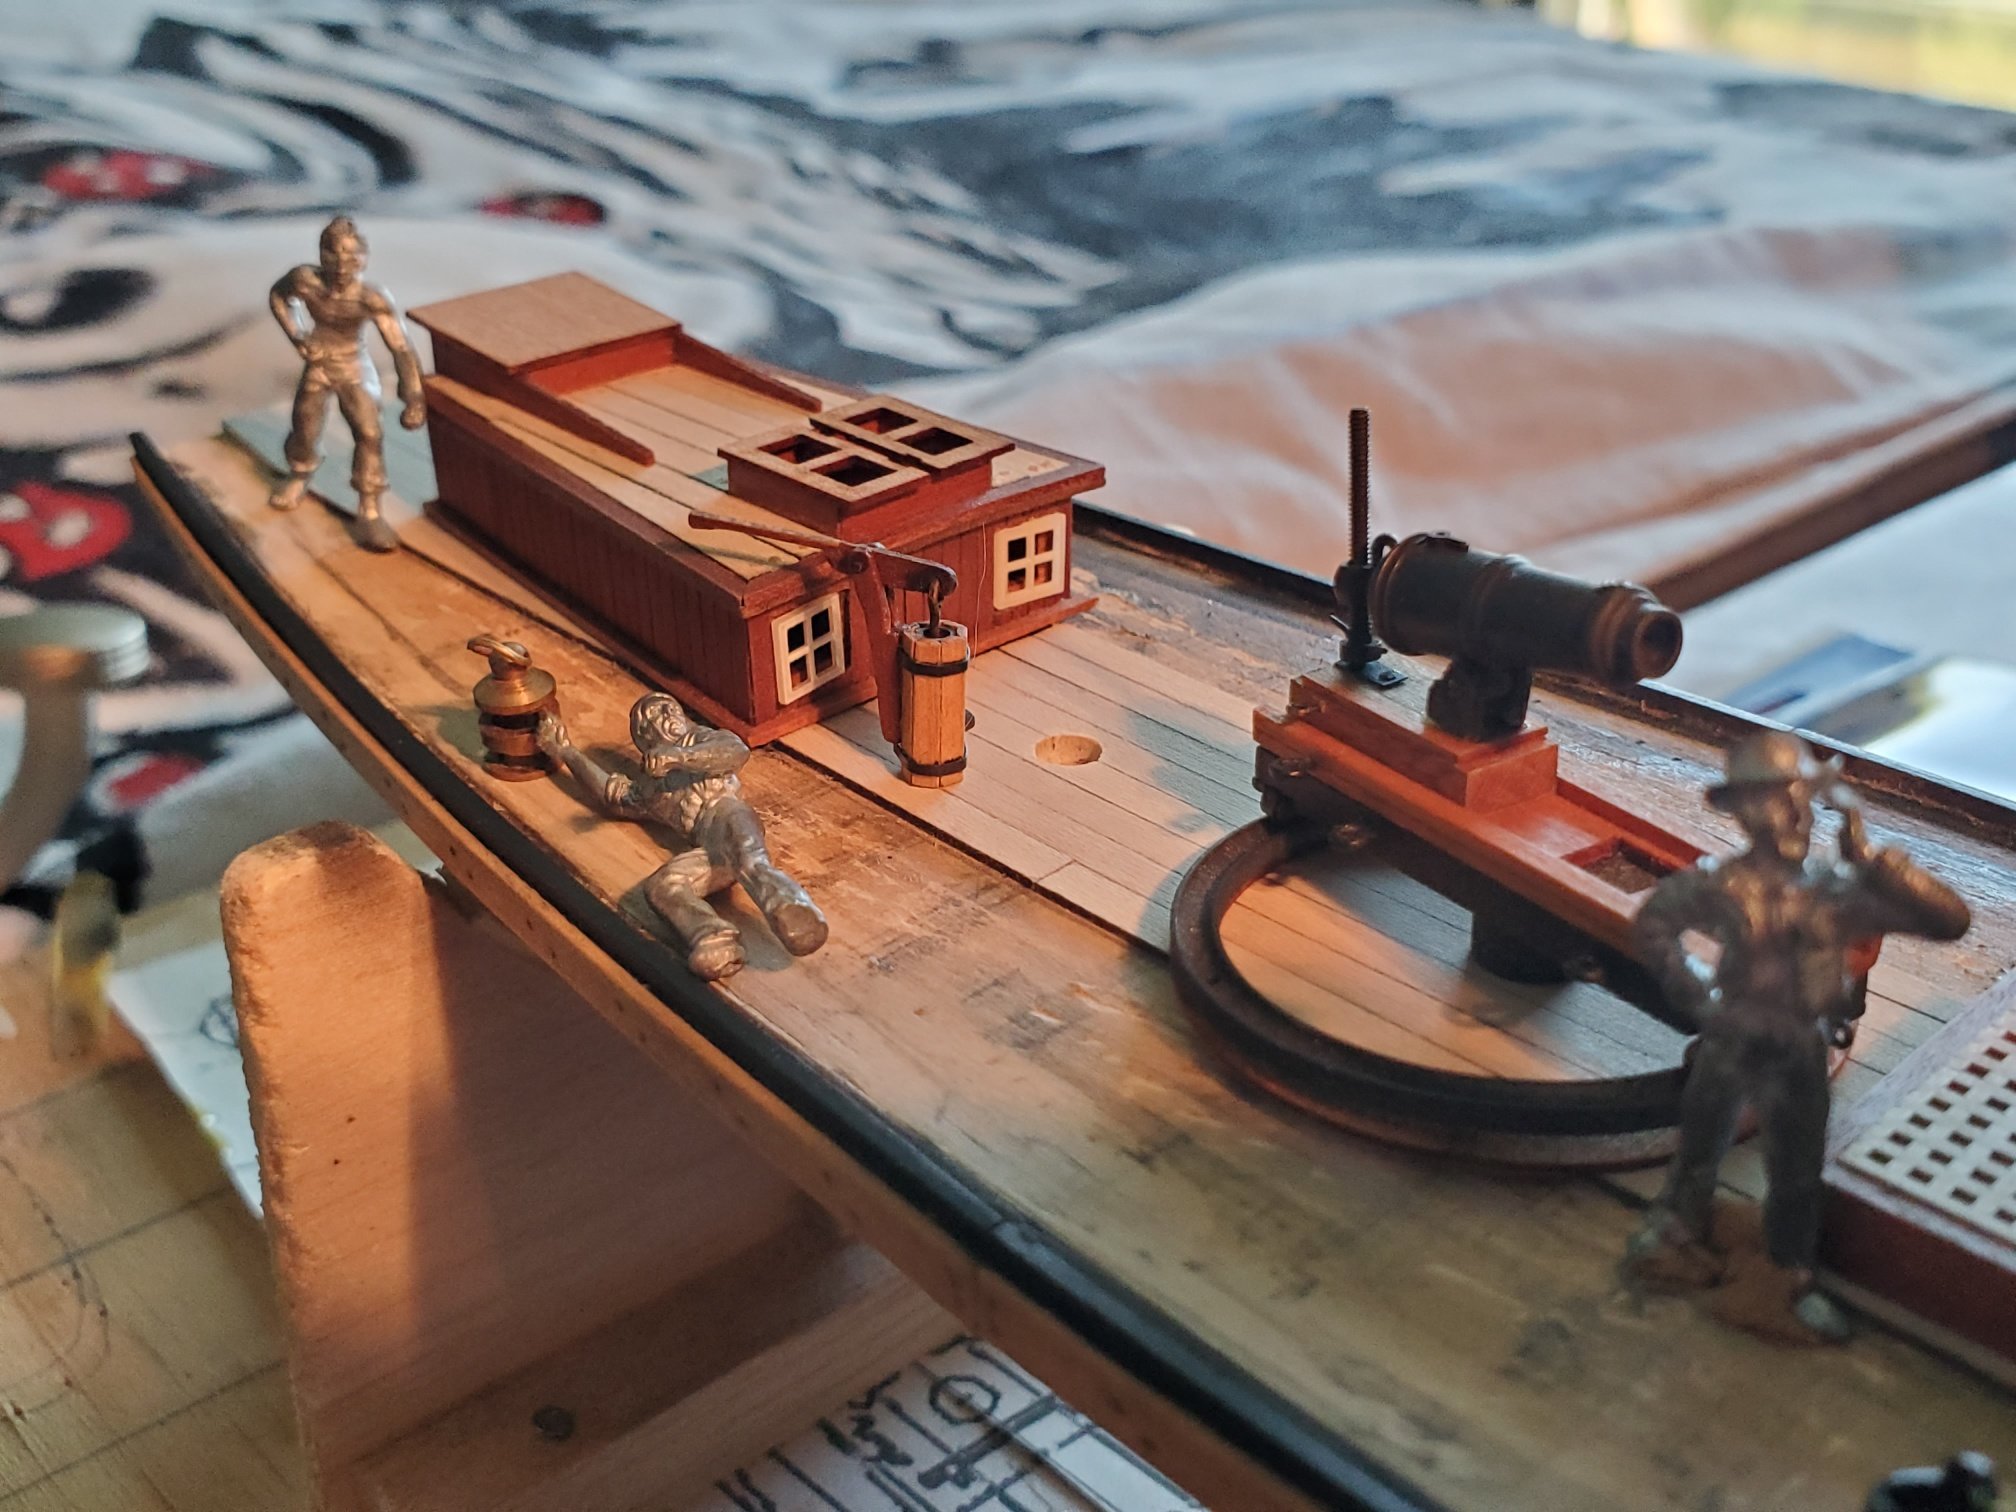
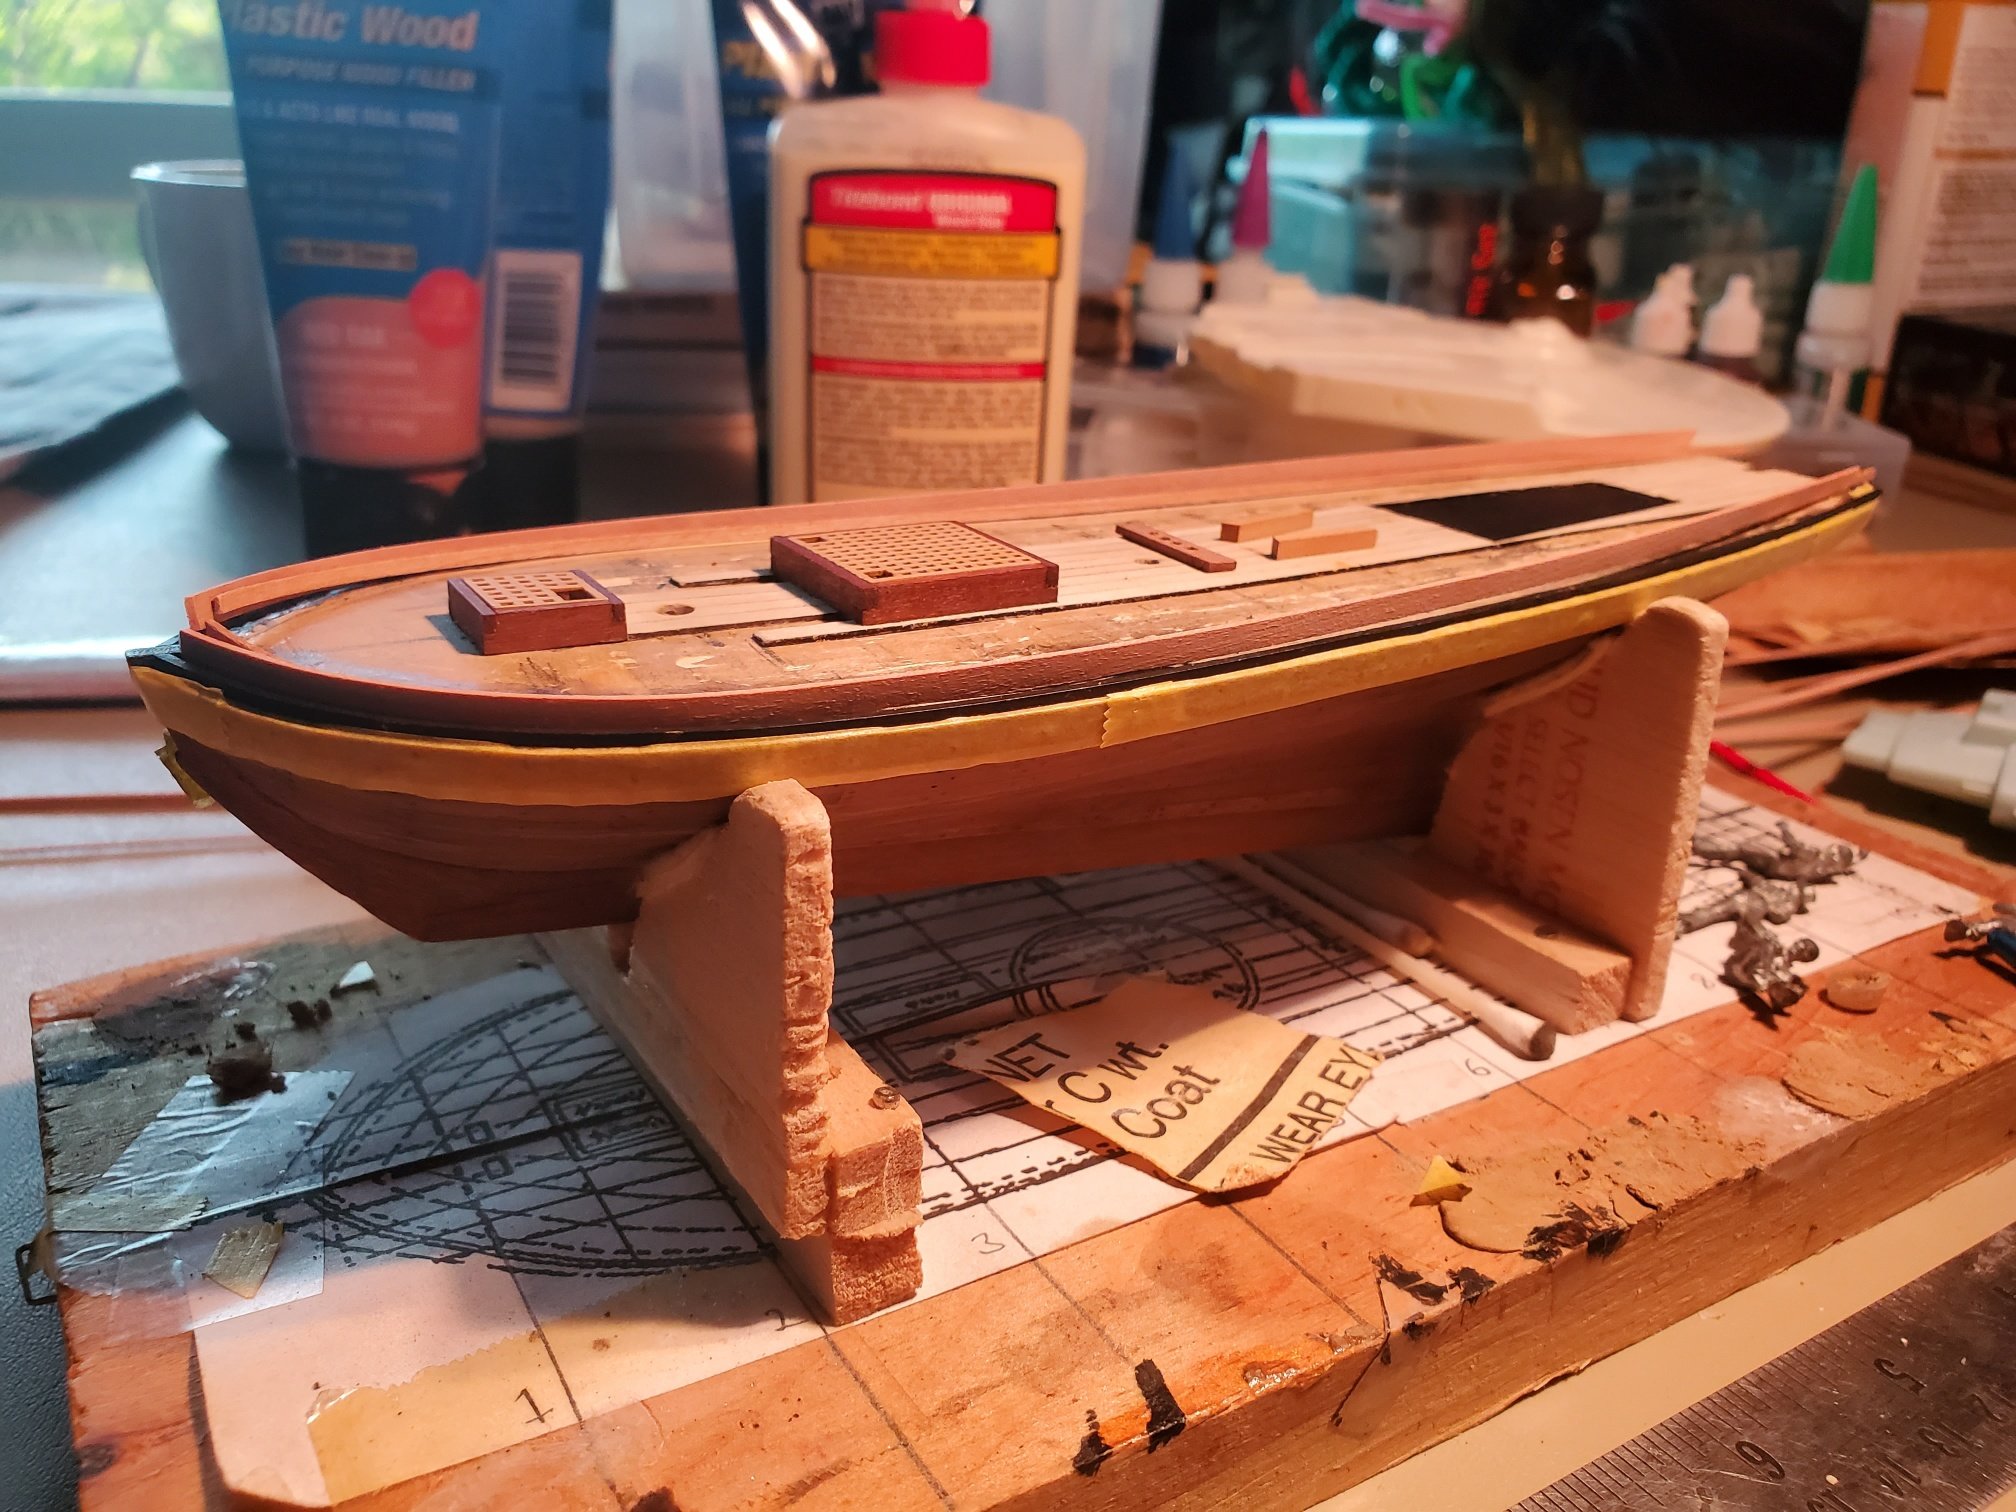
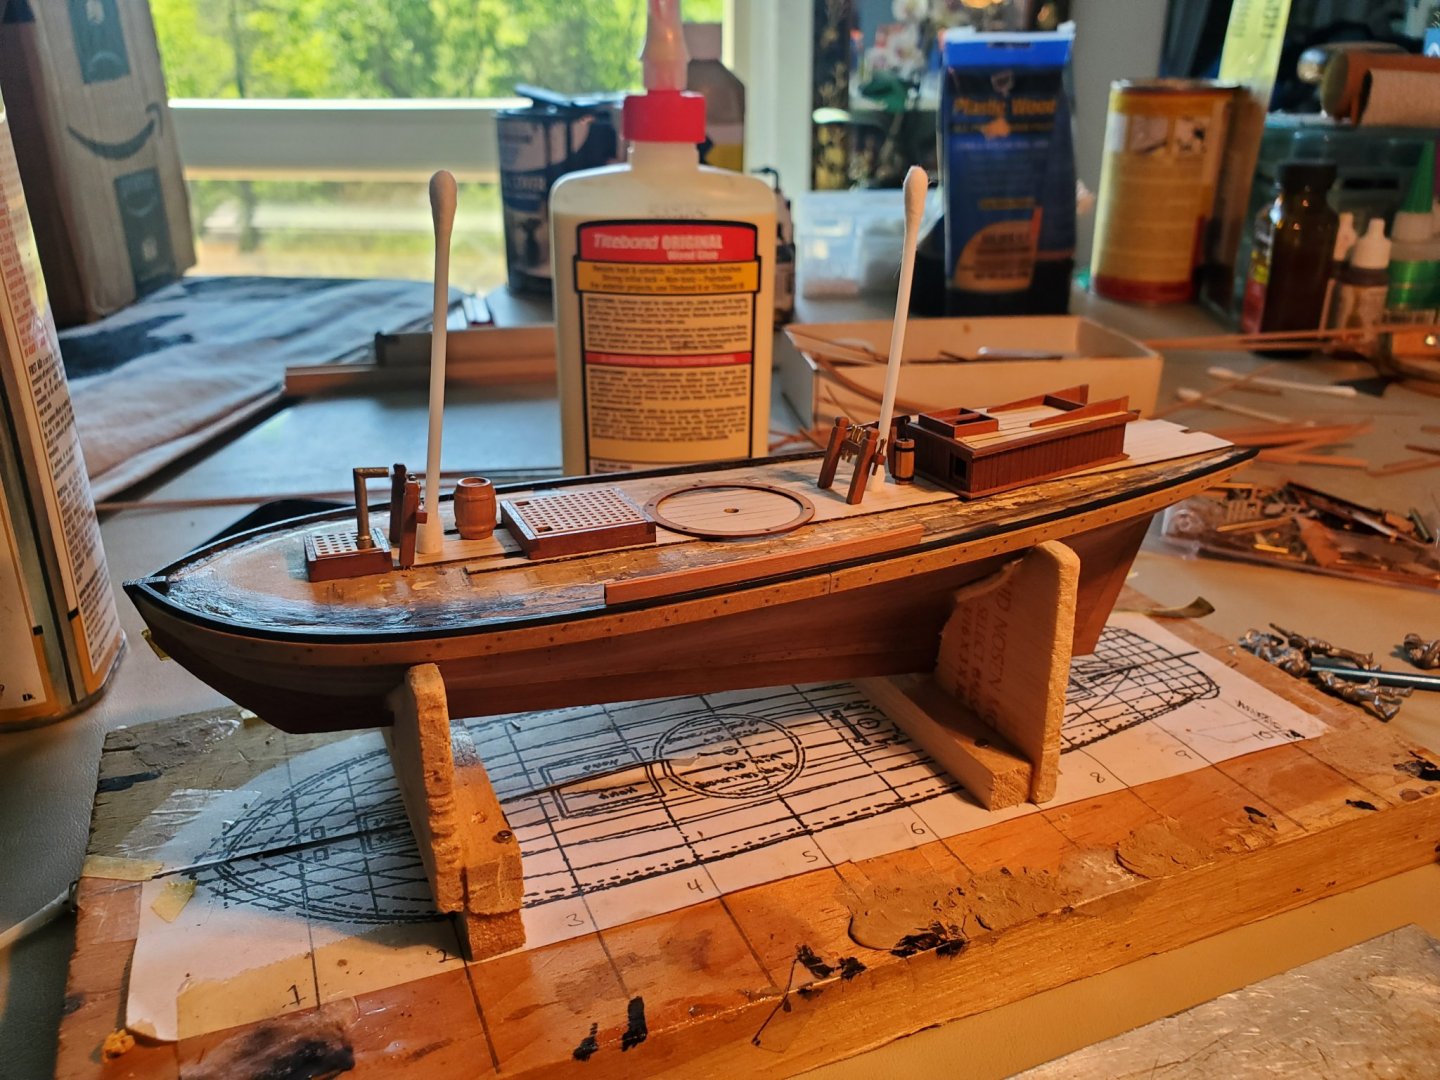
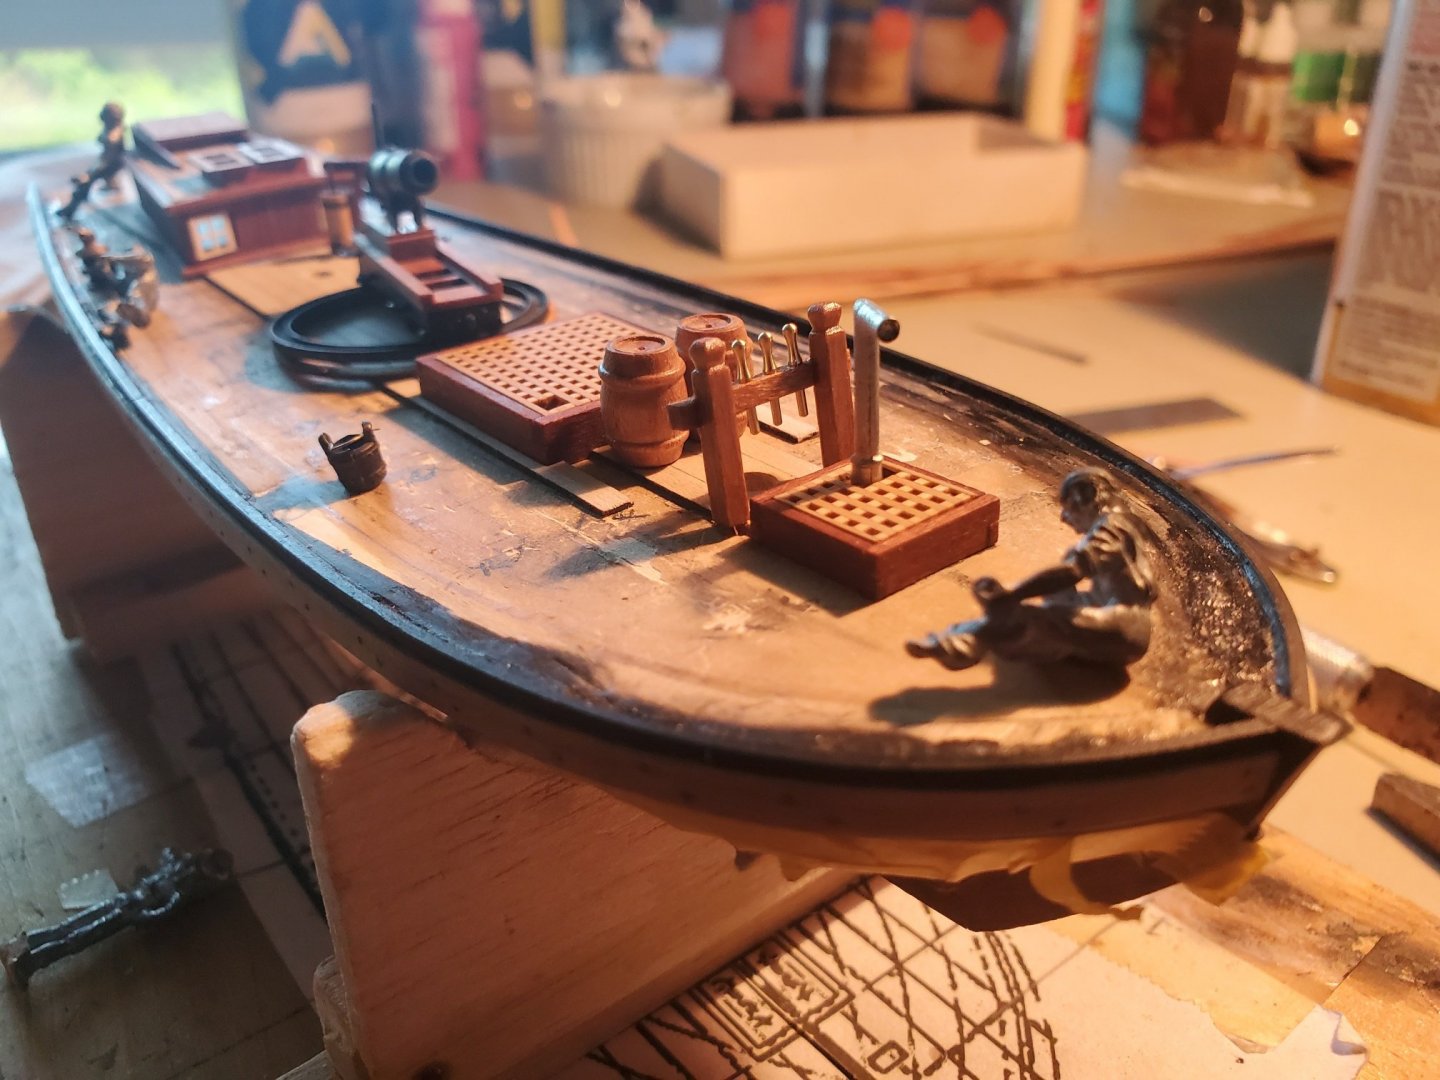
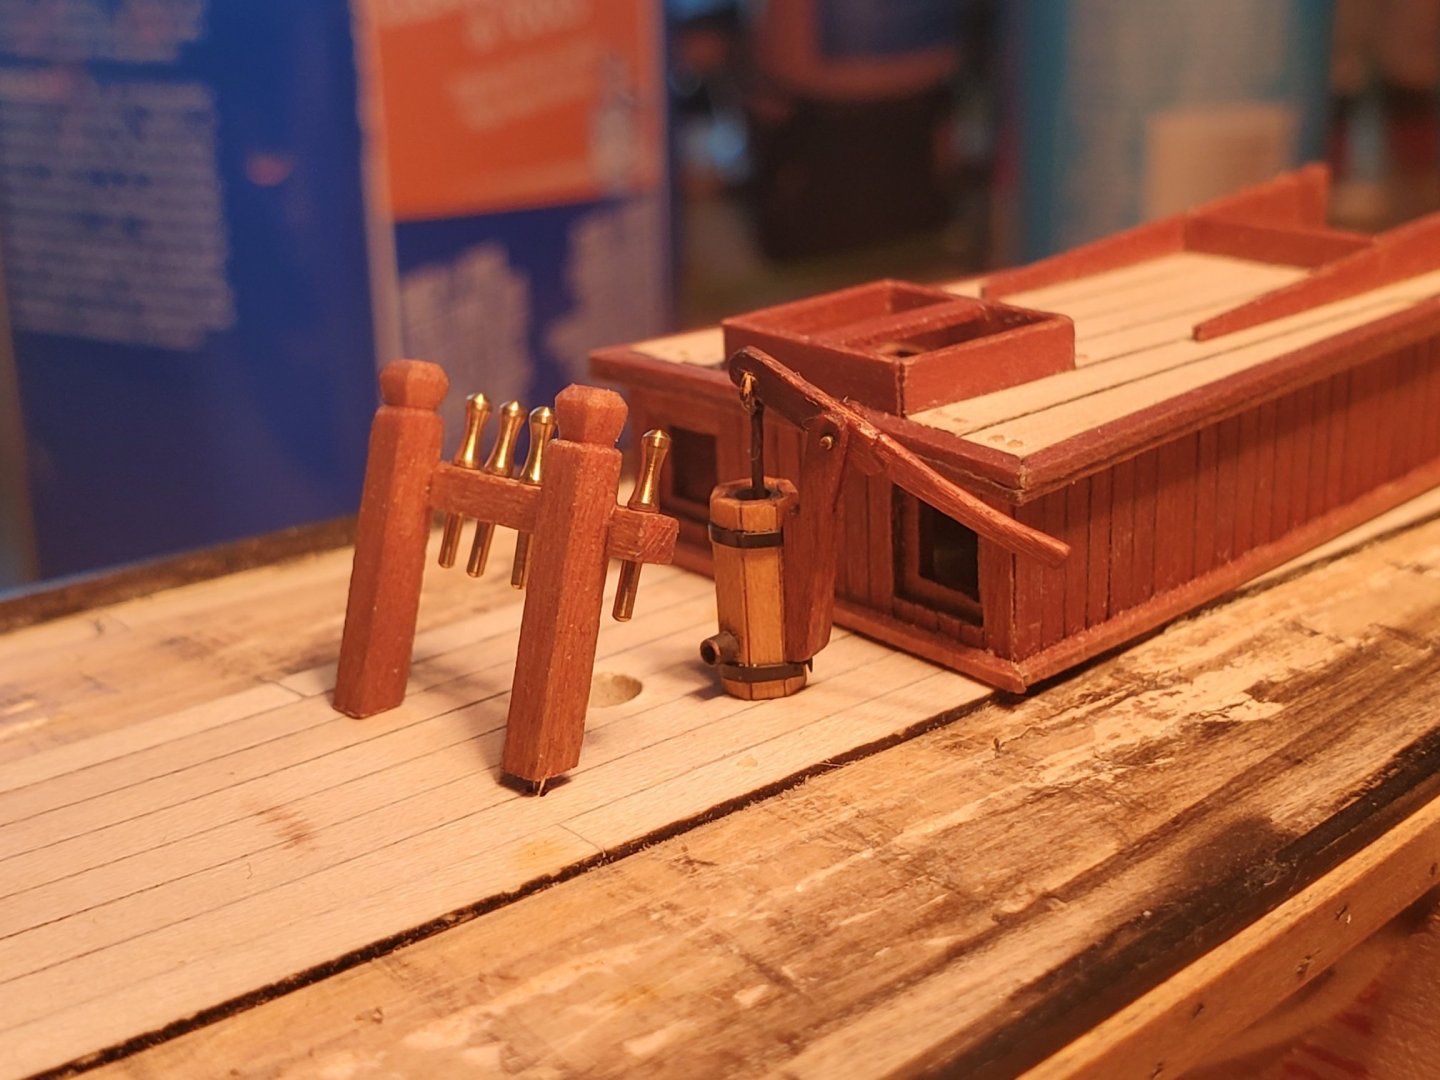
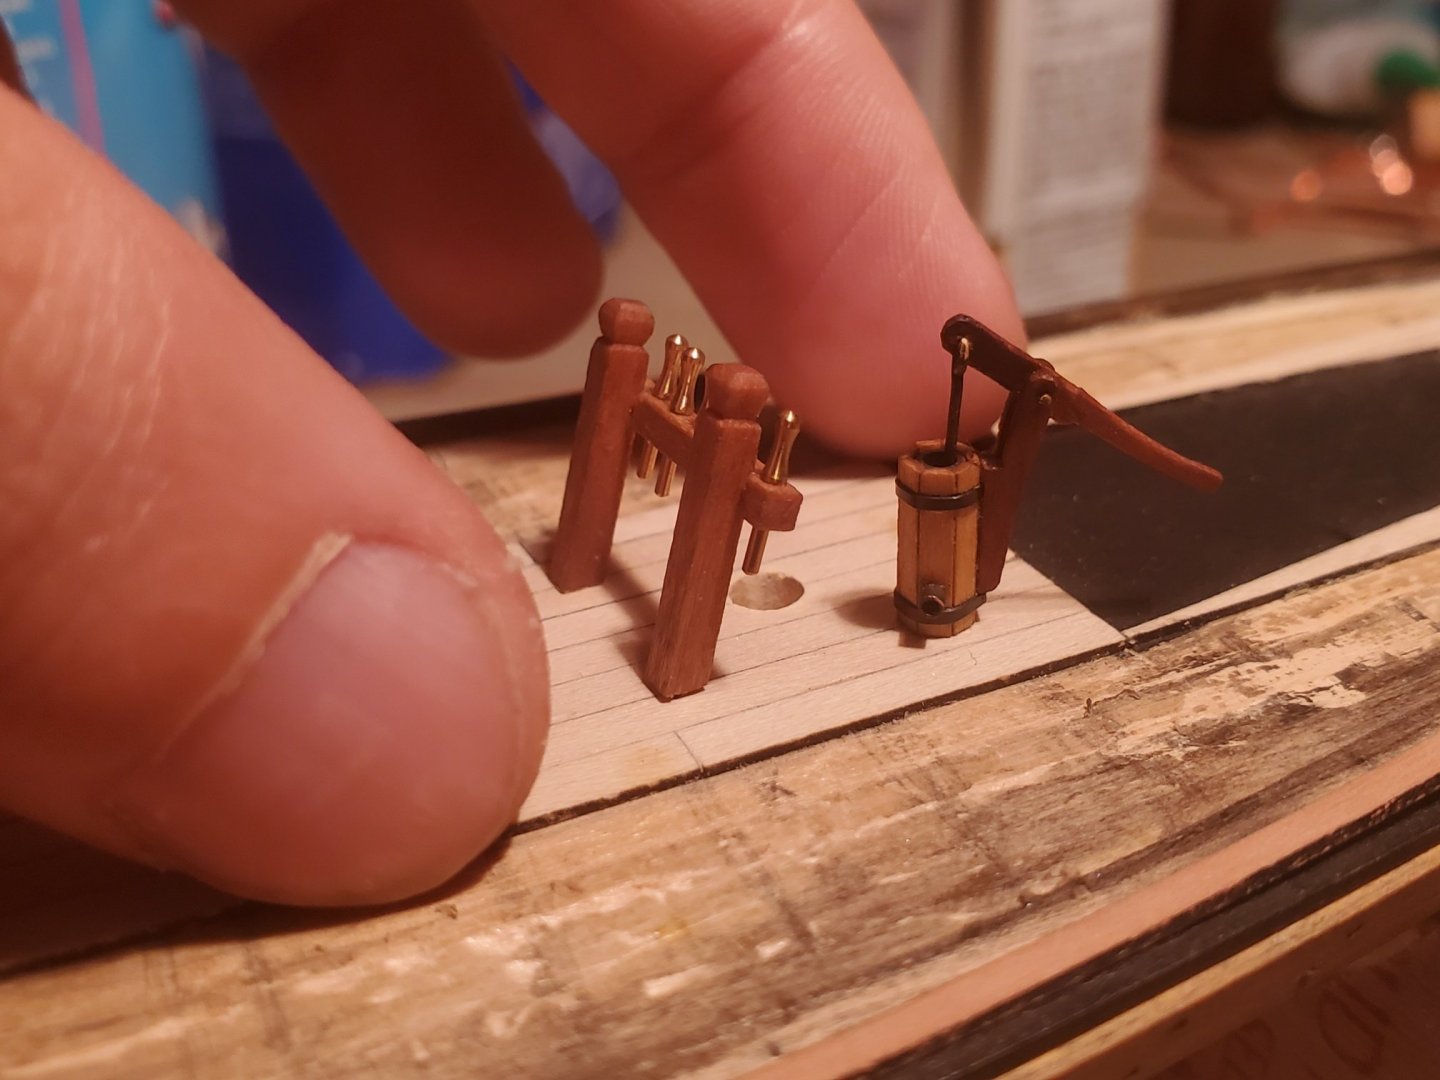
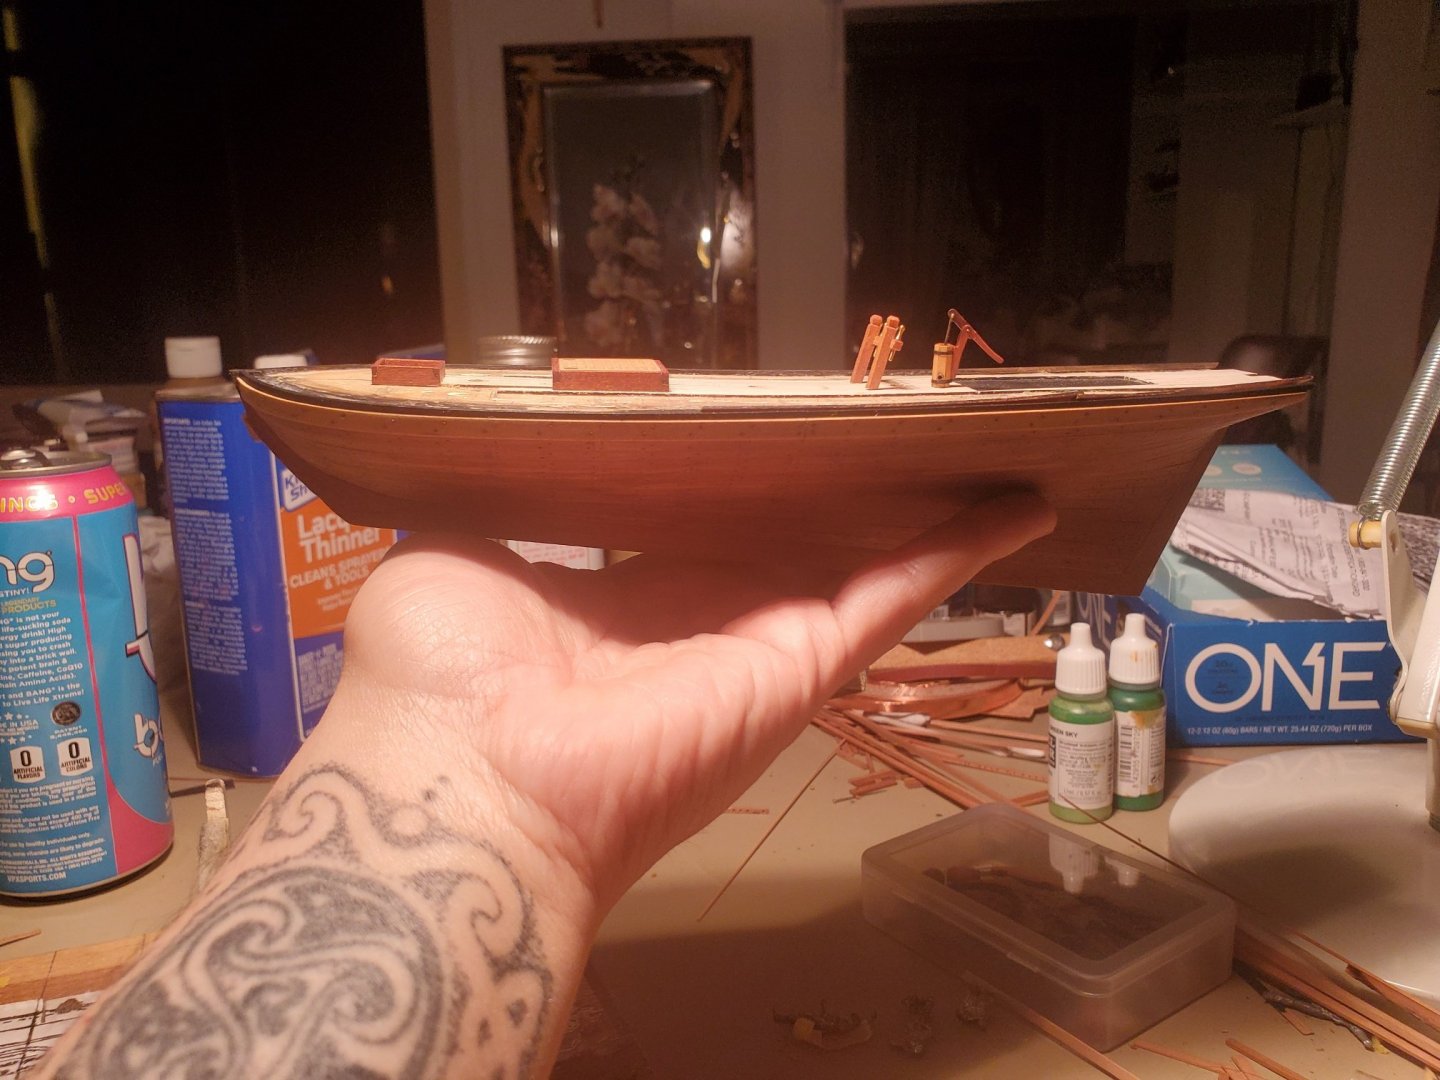
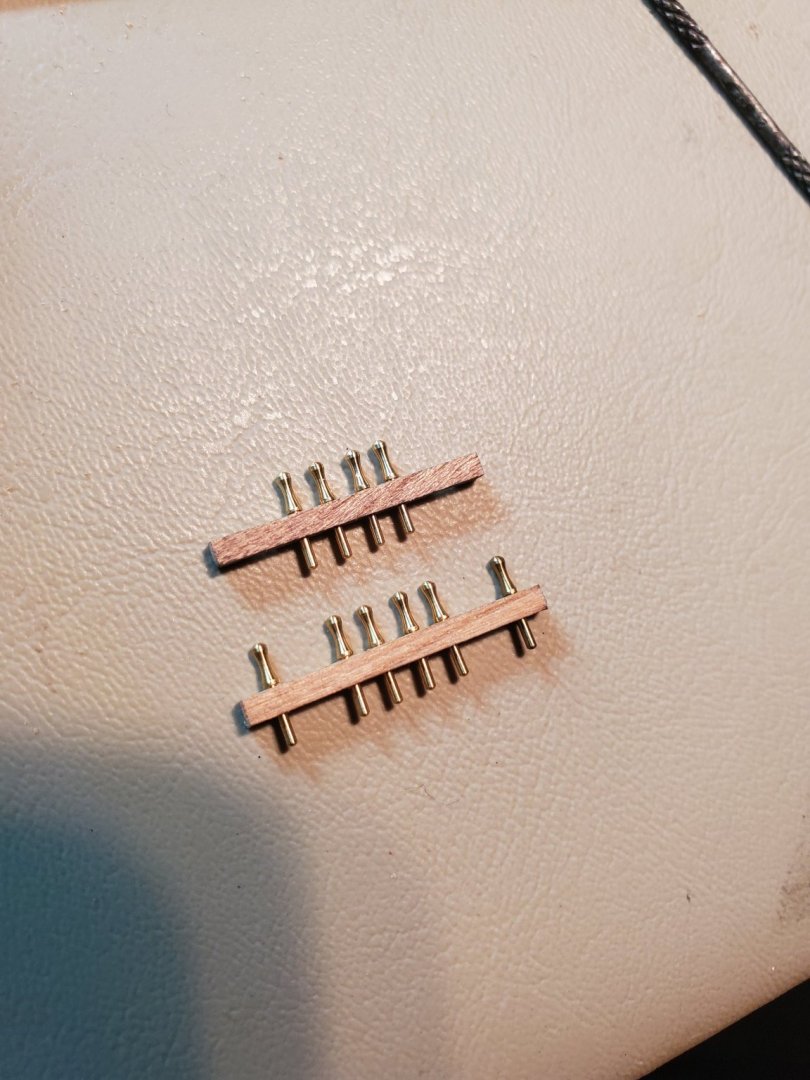
Before I decided on adding the railings I wanted to make a bit of ship furniture. So decided to make the belaying pin racks which as per usual 3rd times a charm. This was also done using the dremel drill press, strips of wood that are 5/64" by 5/64" and an aluminum sliding jig. I was especially proud of how I carved the top block. I also thought it time to add all the parts on deck so I could get a scale perspective. The height is about 7/16" and this rack was slanted to the degree of the mast! I also took the time to refurbish my little bilge pump and added a superior handle. Look at them all together now and also for scale you can see the boat on my palm. Only 9"!!


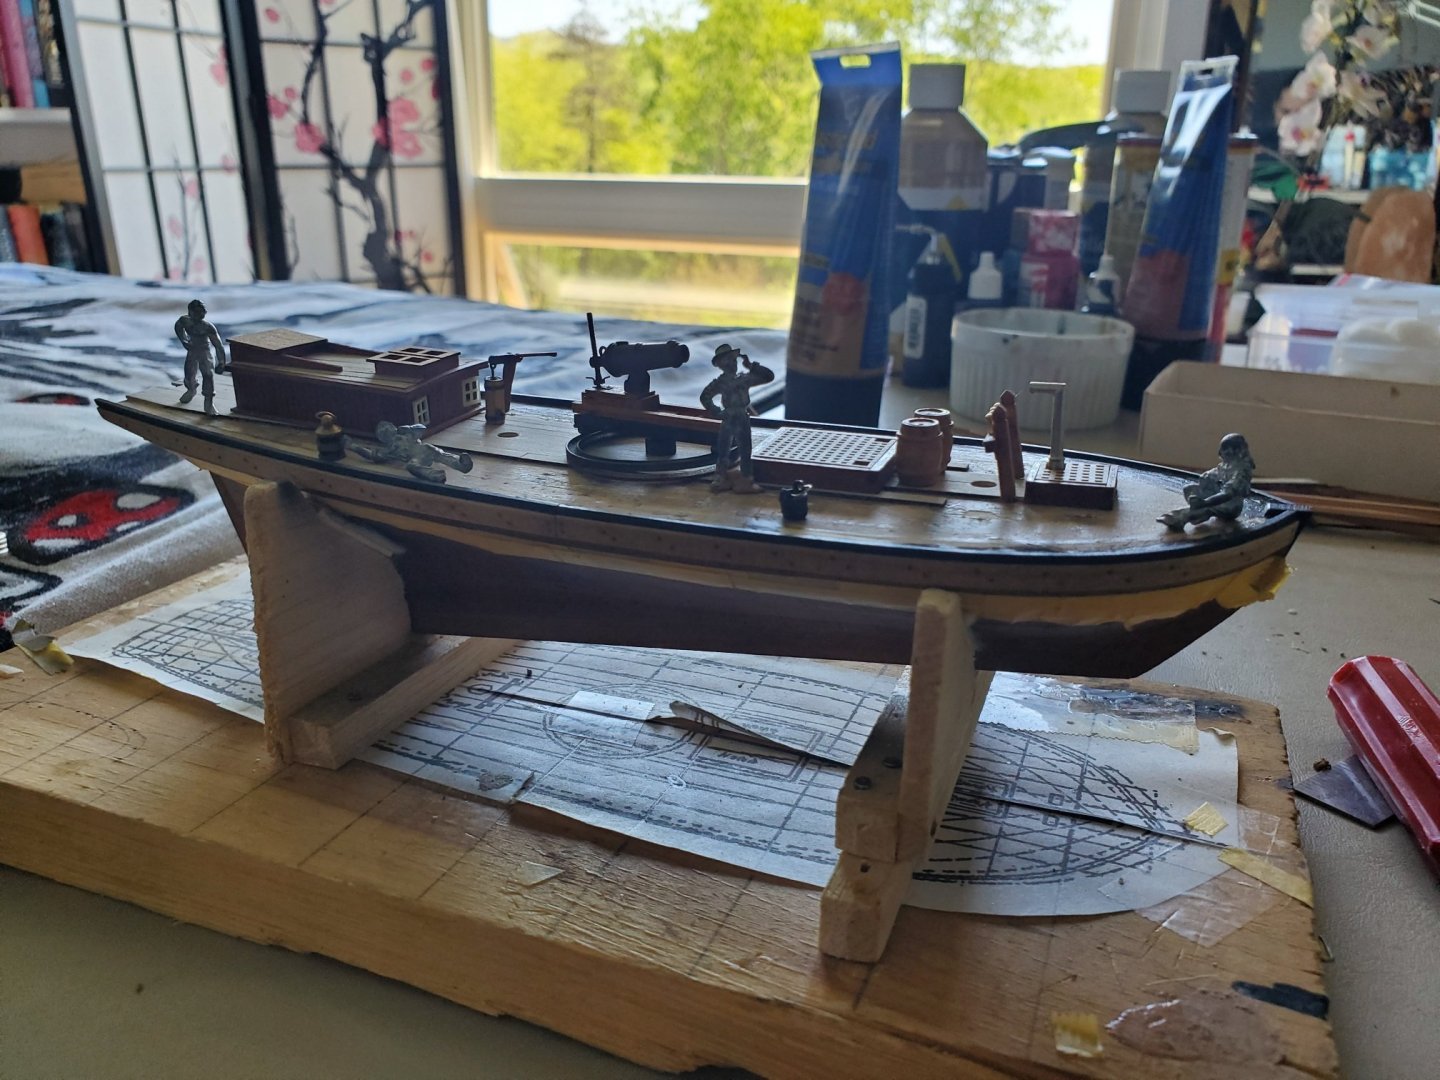

- 362 replies
-
- 10
-
-
- active
- revenue cutter
- (and 1 more)
-
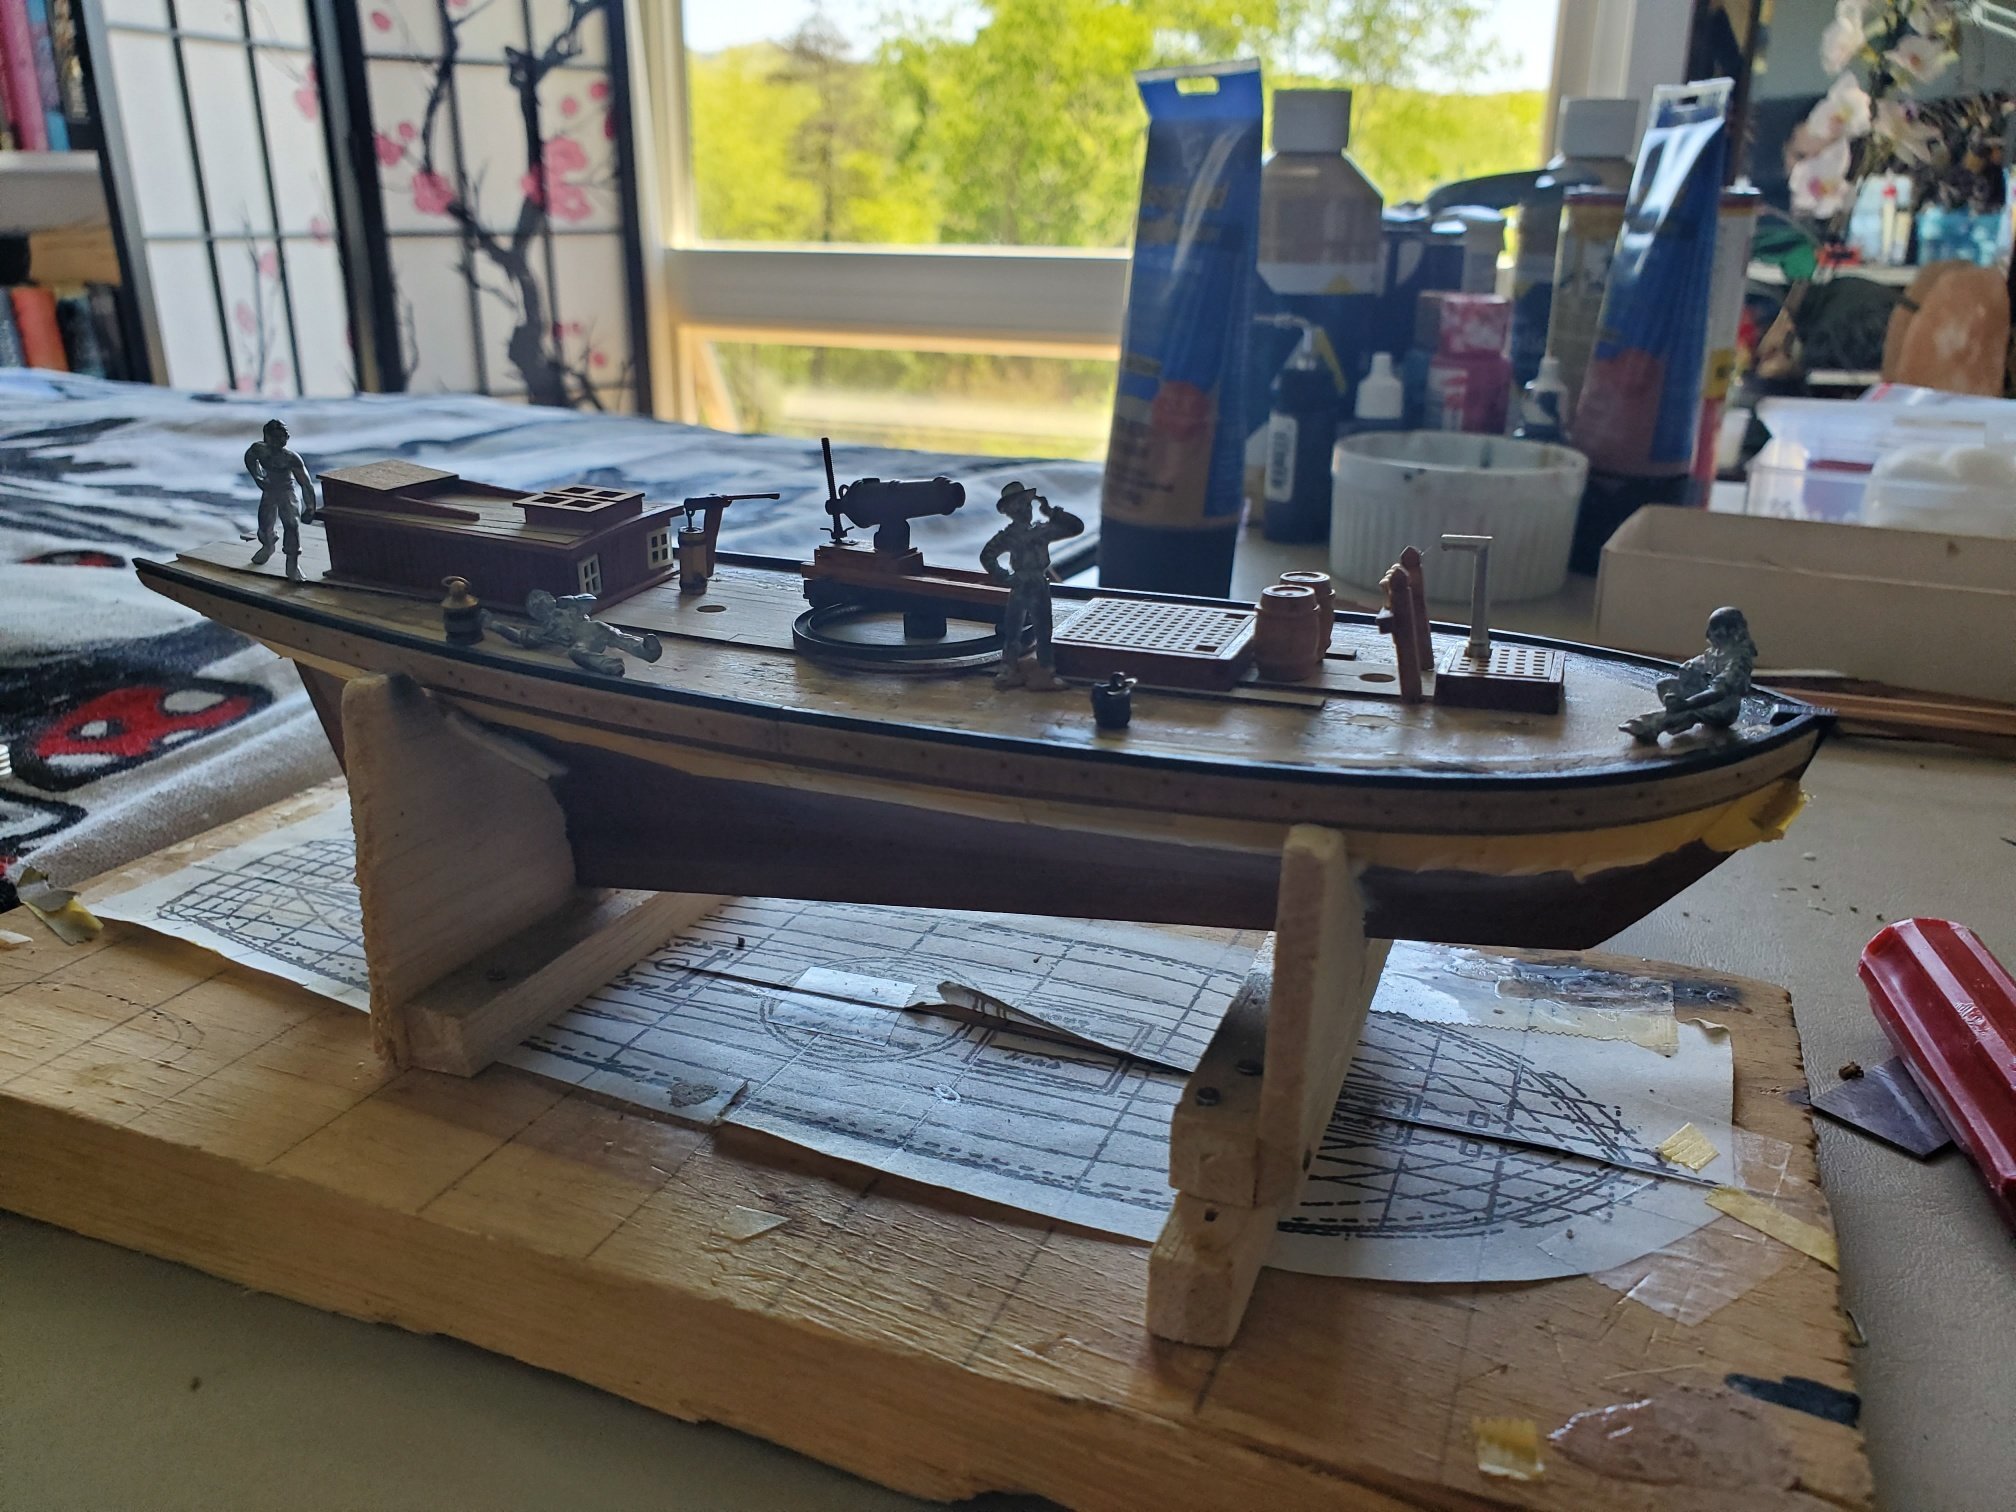
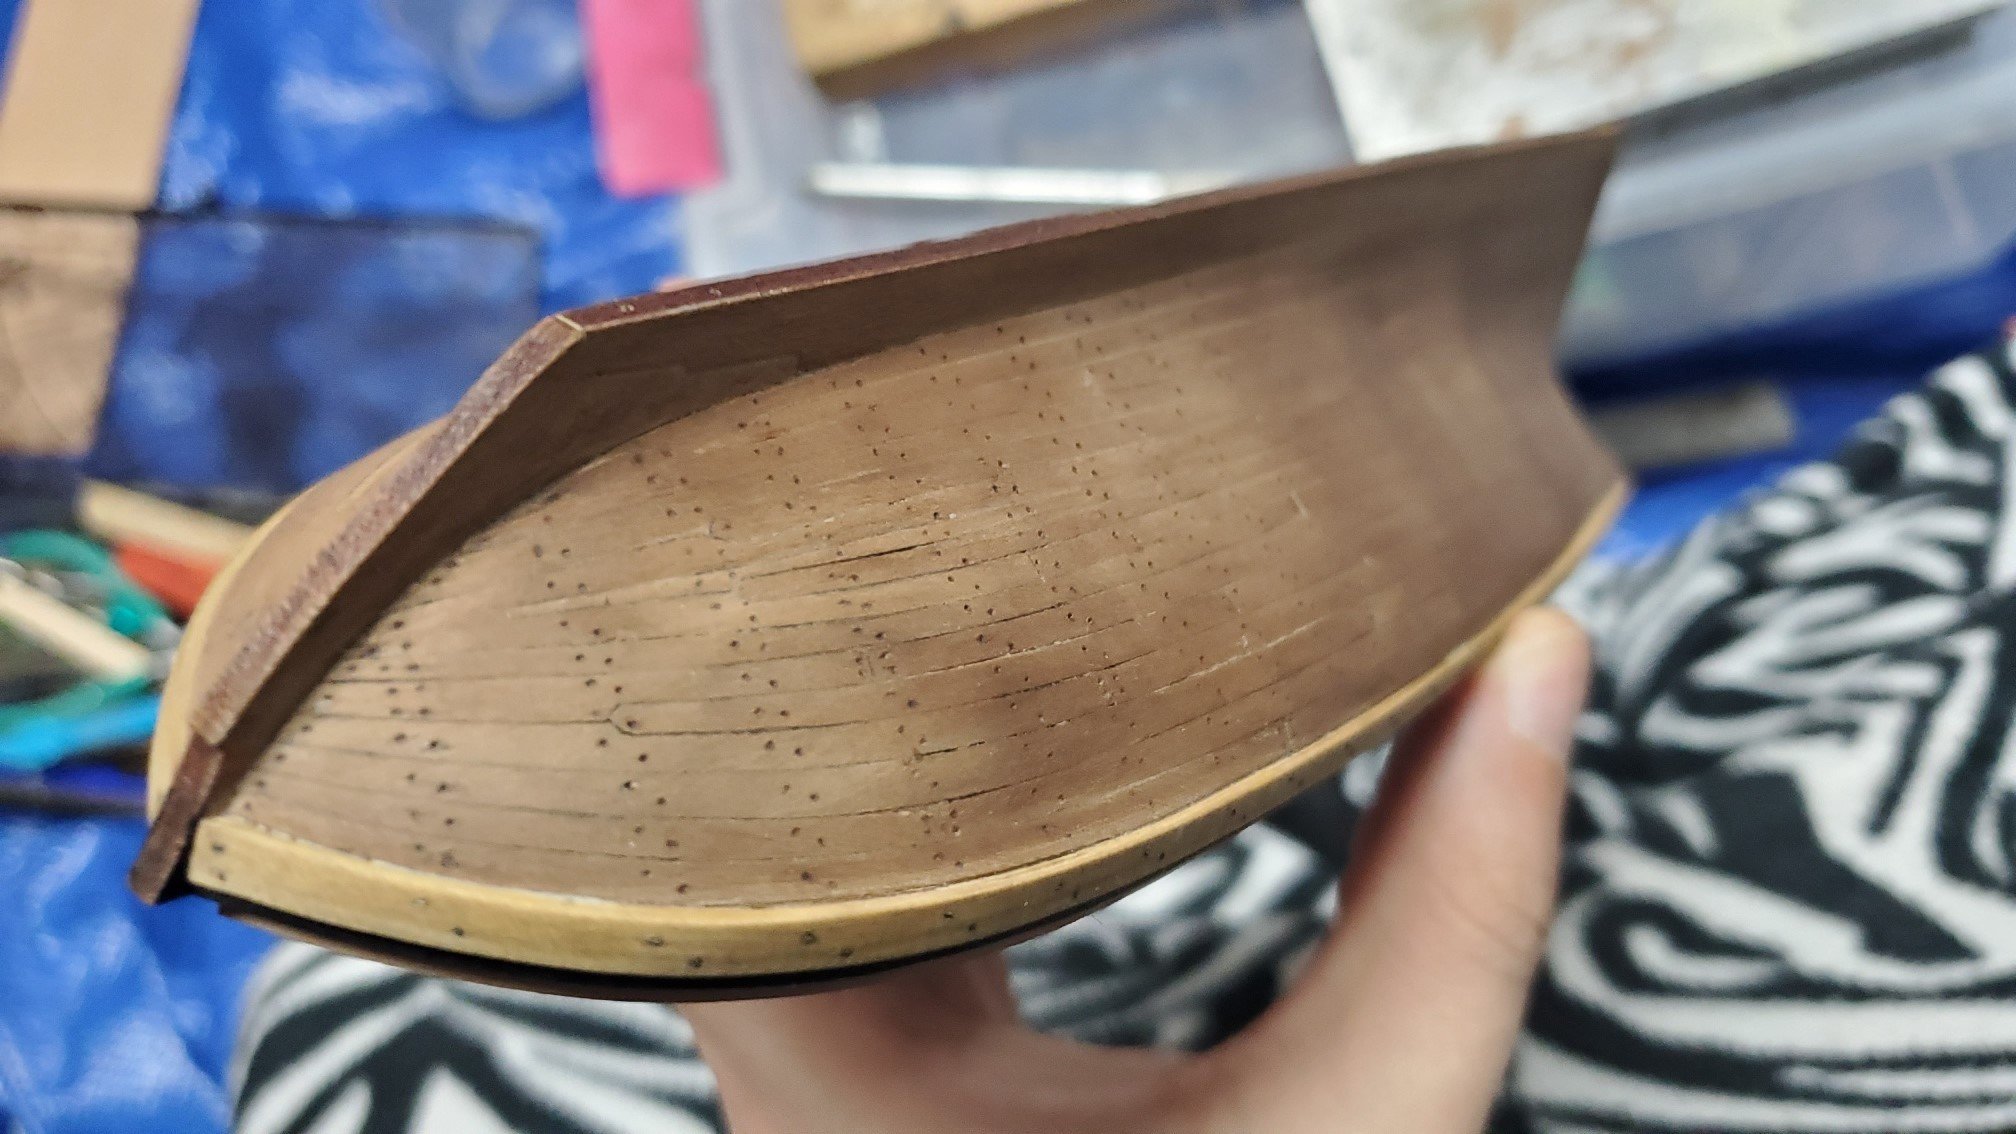
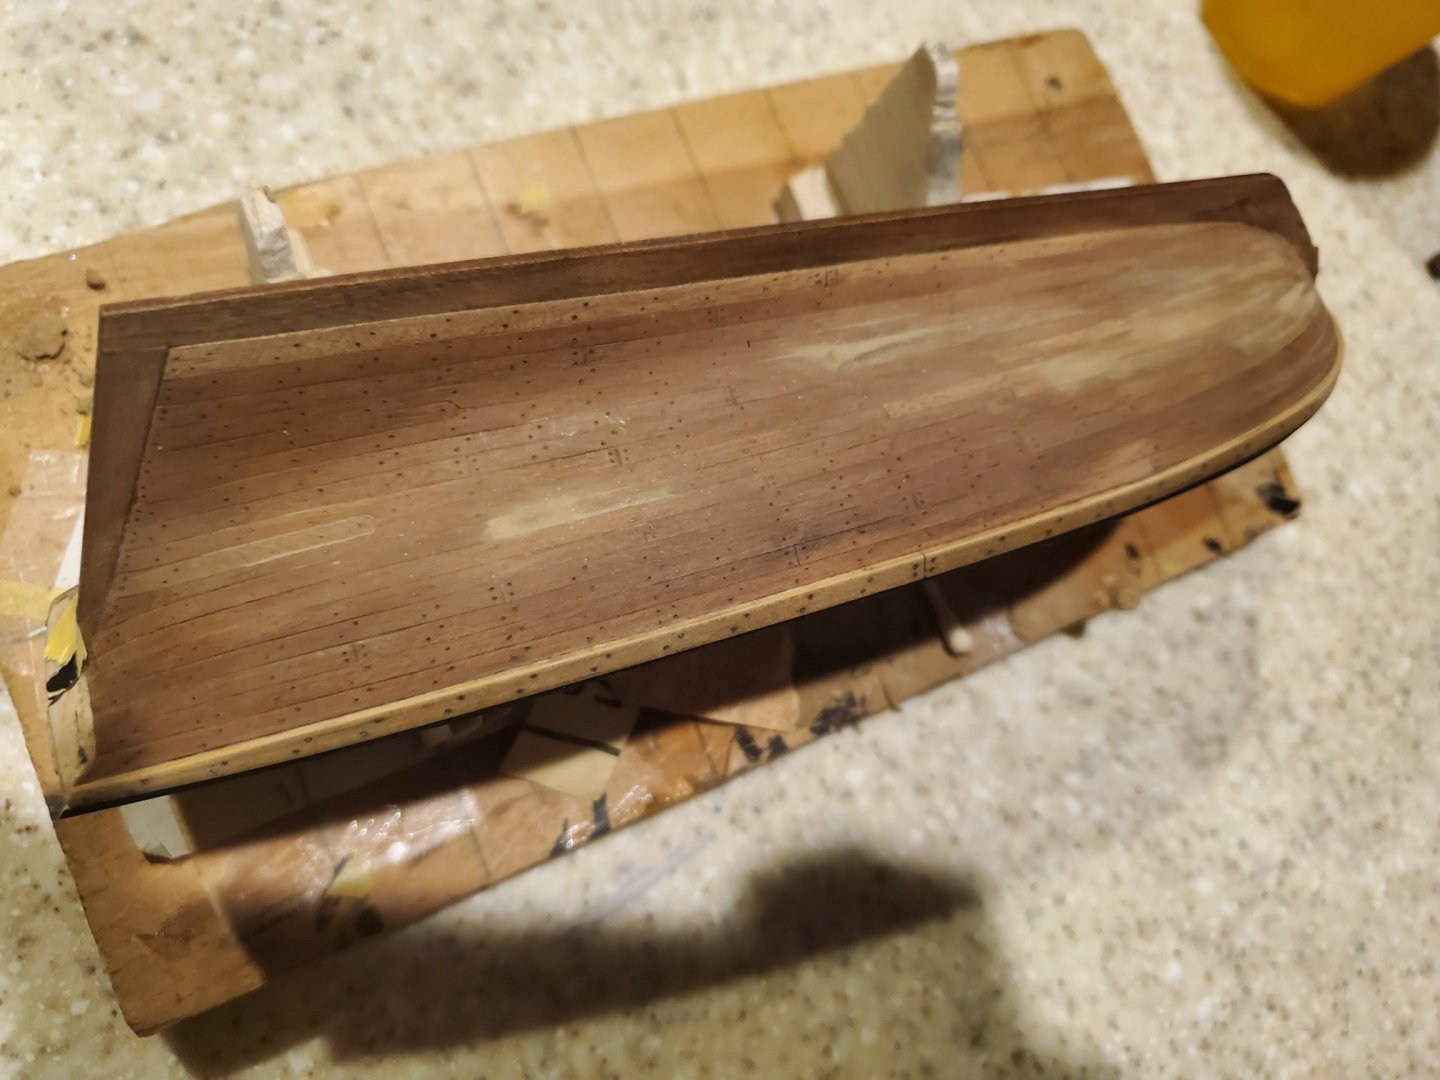
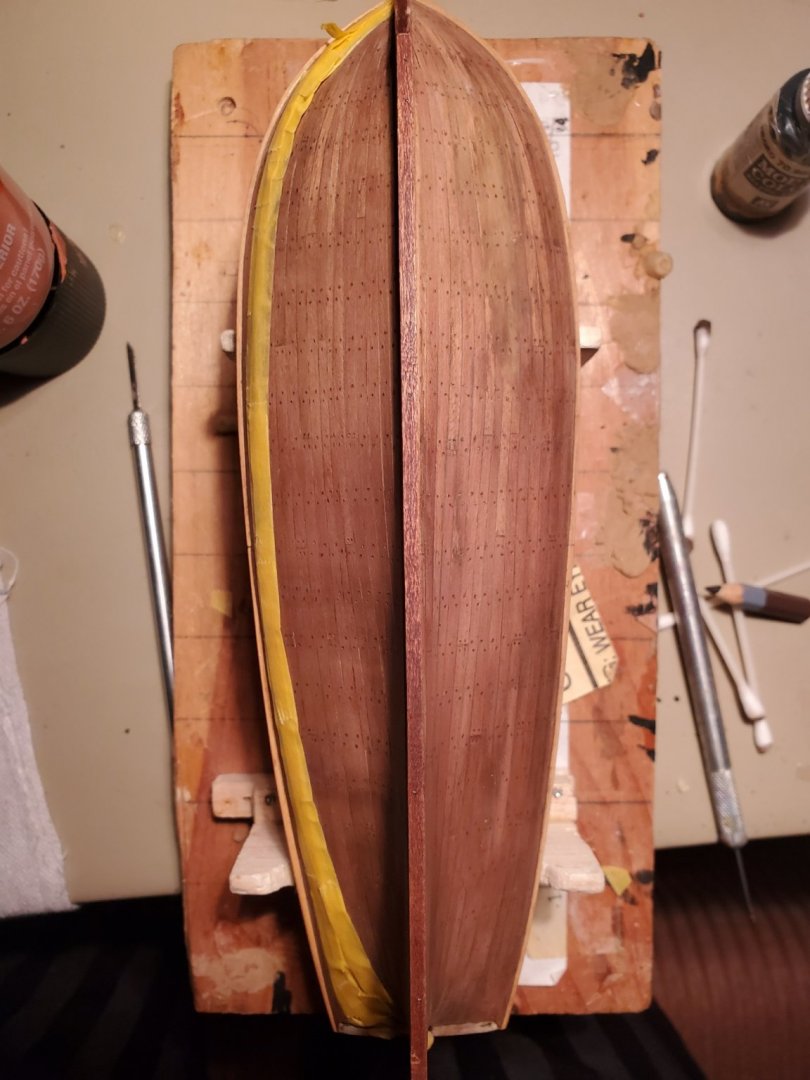
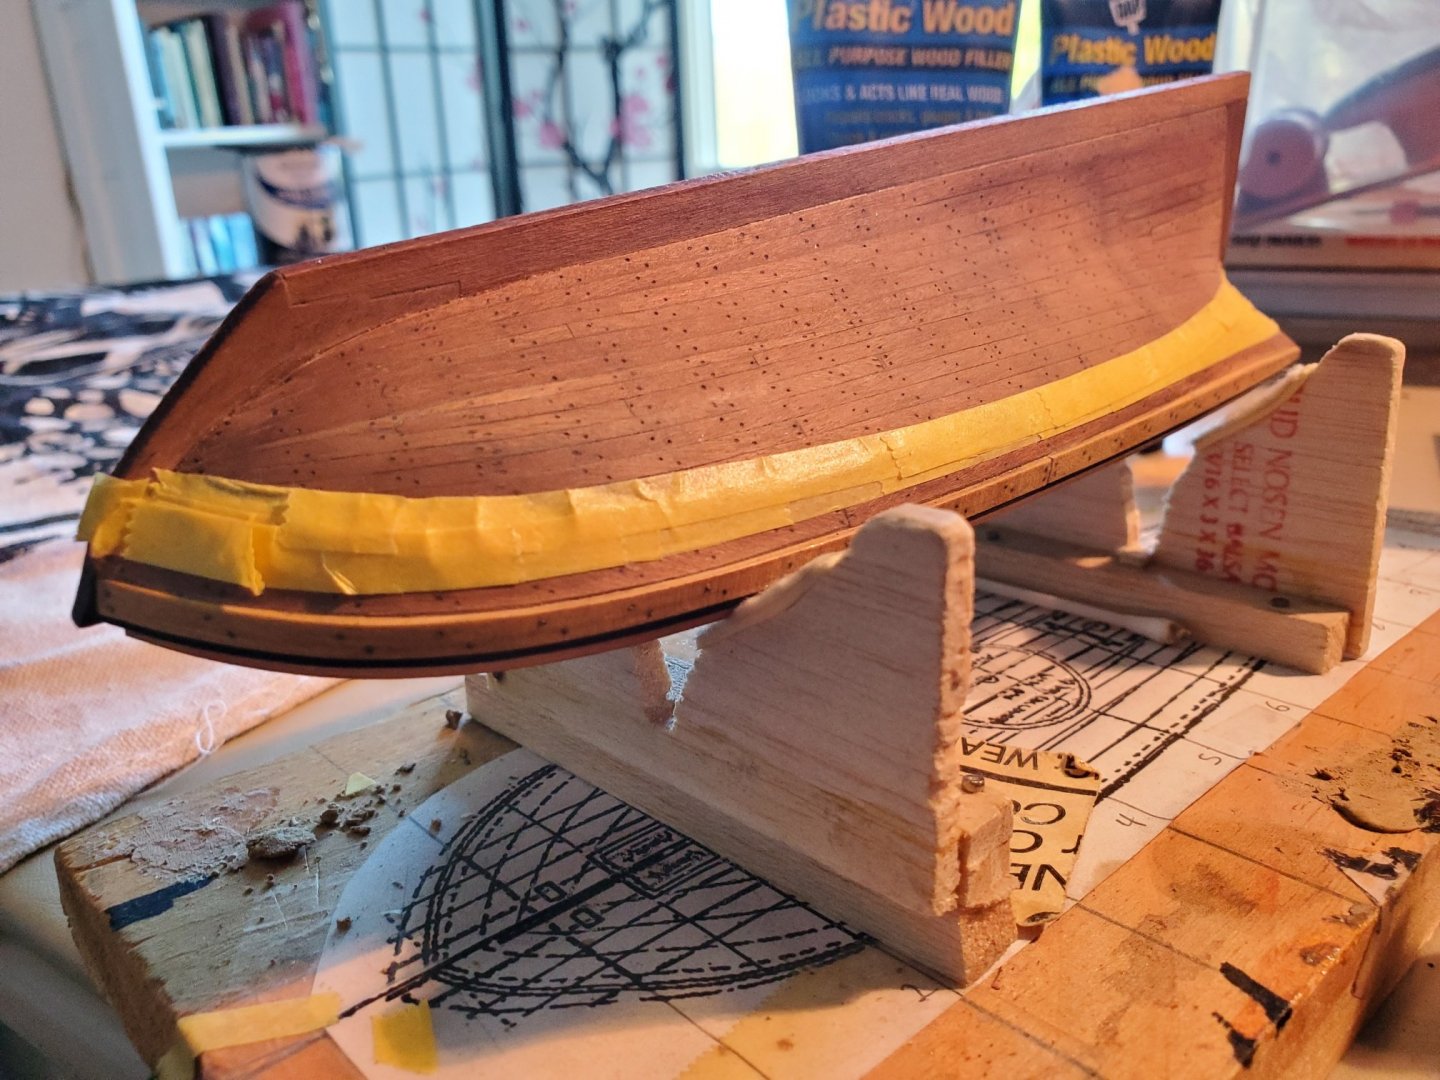
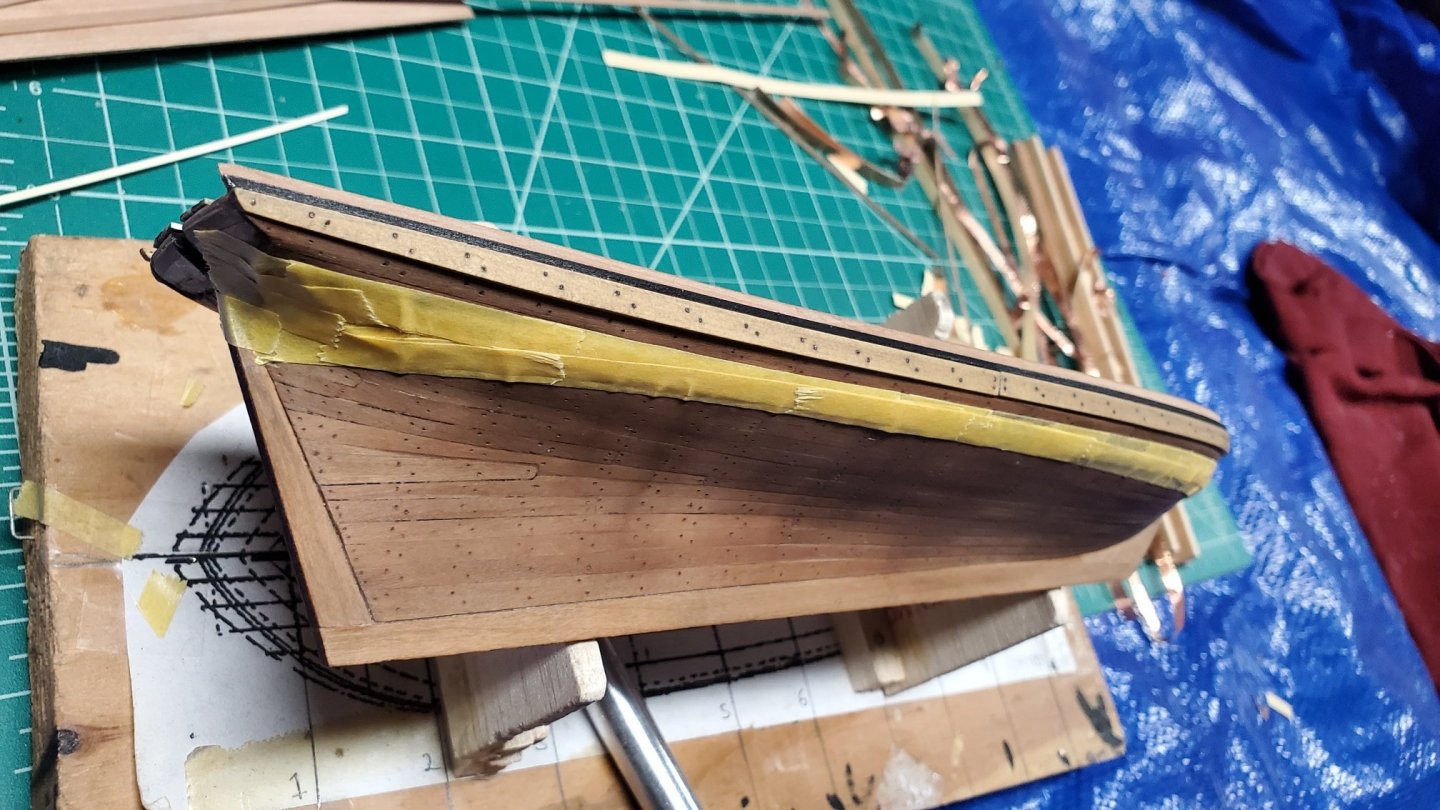
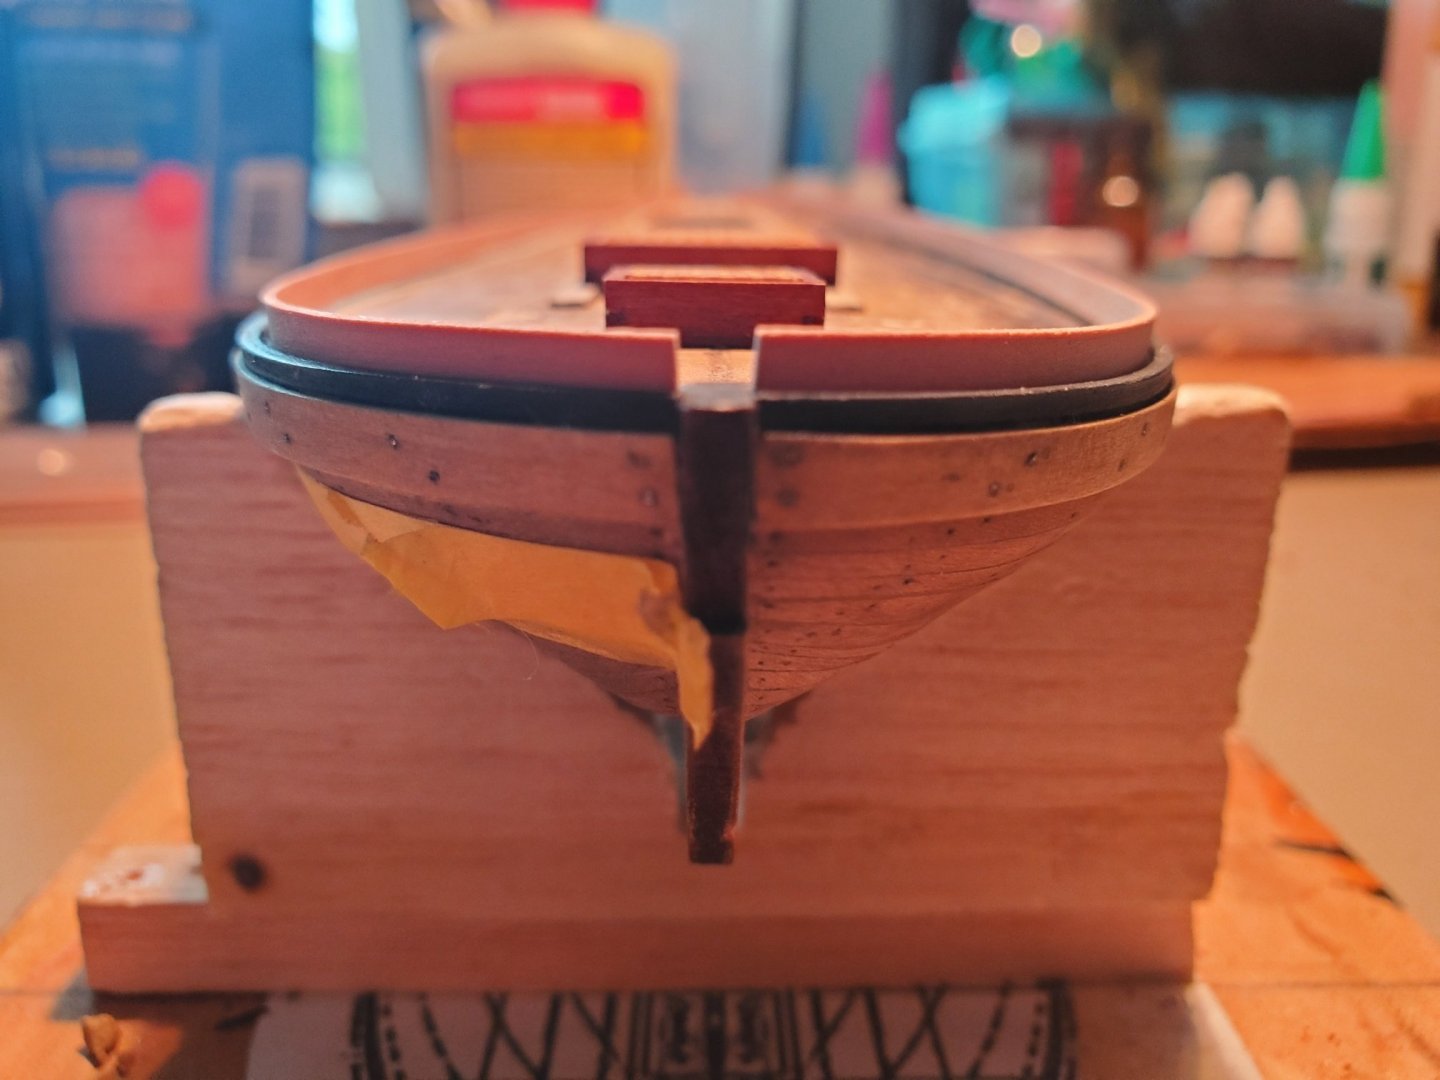
So once I made the jig I realized that the hull was not smooth enough for copper plates. After a years time heat and convention has separated and warped a few of the veneer planks. Wood expands and contracts that's simply a fact so I looked over the hull and decided to smooth out the rough patches and also fill in any spacings and gaps. The result meant I had to retail one whole side and also once putty and detailing was in place the model was not colored to the cherry wood so with a bit of paint and staining I did a little artistry to match. Since the lower hull will be coppered anyways it's no big deal but for my own sense of completion it looks like a nice weathering affect that actually came out nicely! Also of note is the masking tape. I ripped off my first toerail/upper bulwark which didn't set right and had taken some damage and repainted the black strip which is supposed to represent the top of the main hull. The strip had lost some paint over the years time. I also intend to add a little bit of black under the wale as well. Once that was done I made new upper bulwark strips using pear. Hence why they are of a reddish color than the sepia Cherry. These while shown in place will not be glued in just yet.


- 362 replies
-
- 6
-
-
- active
- revenue cutter
- (and 1 more)
-
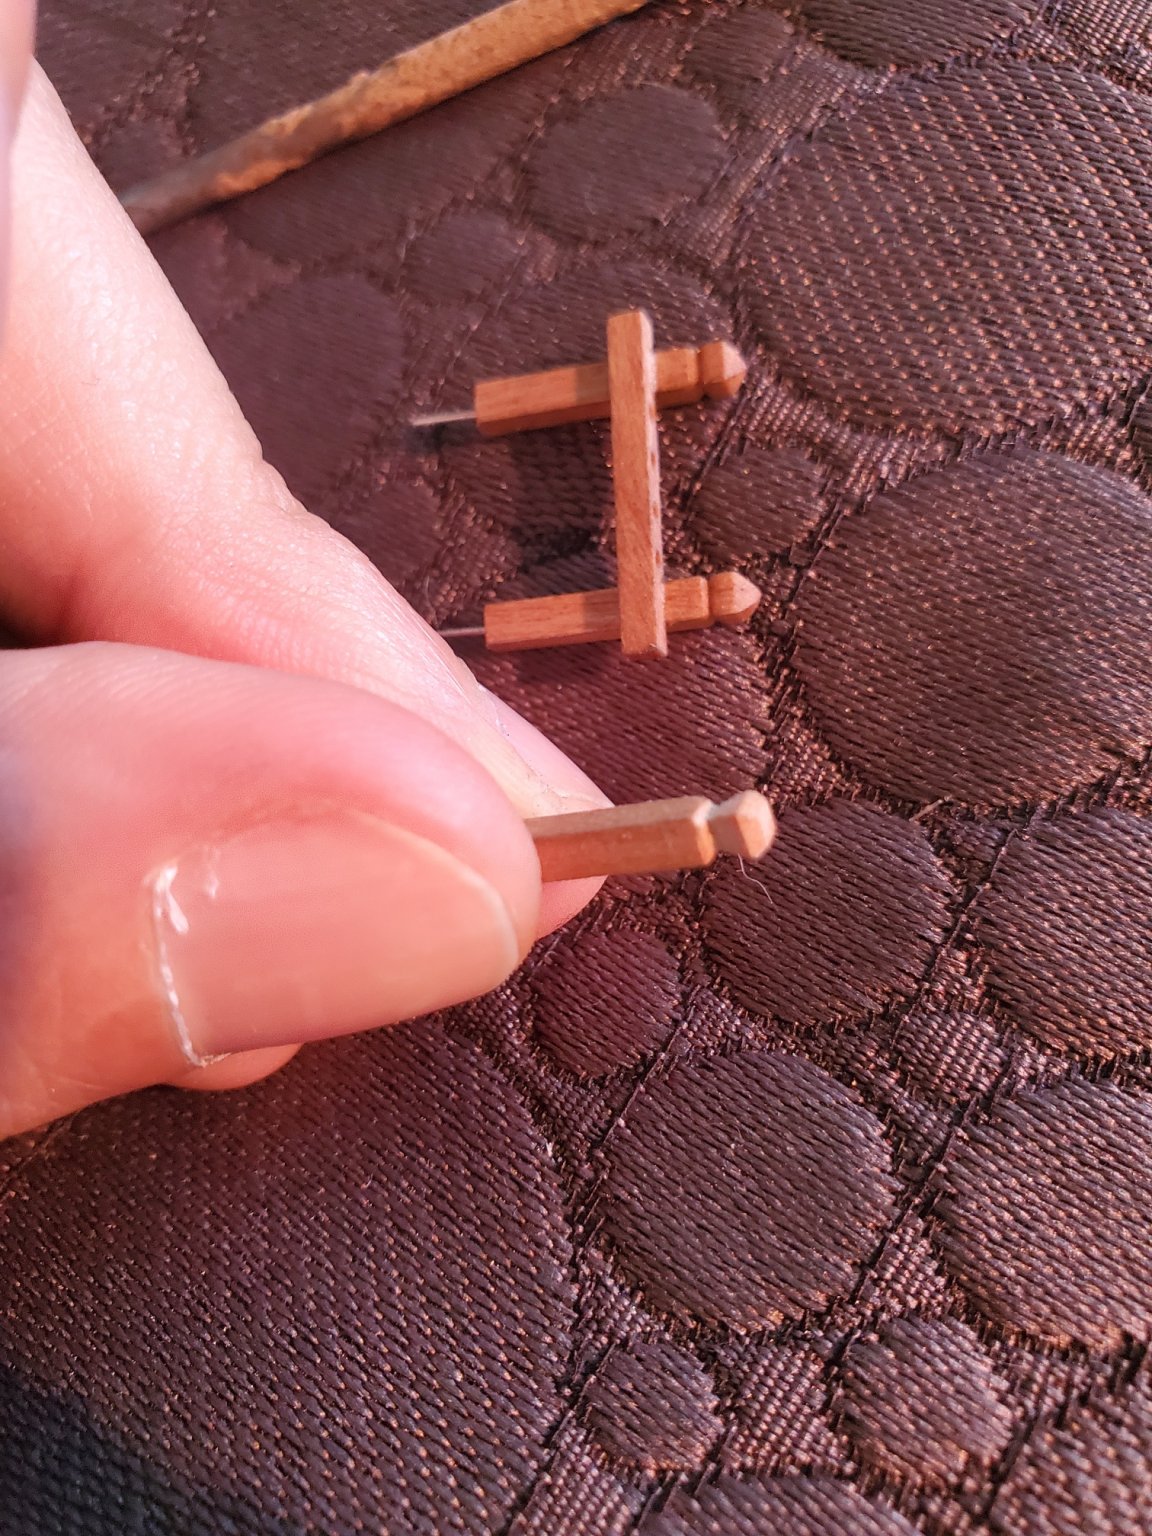
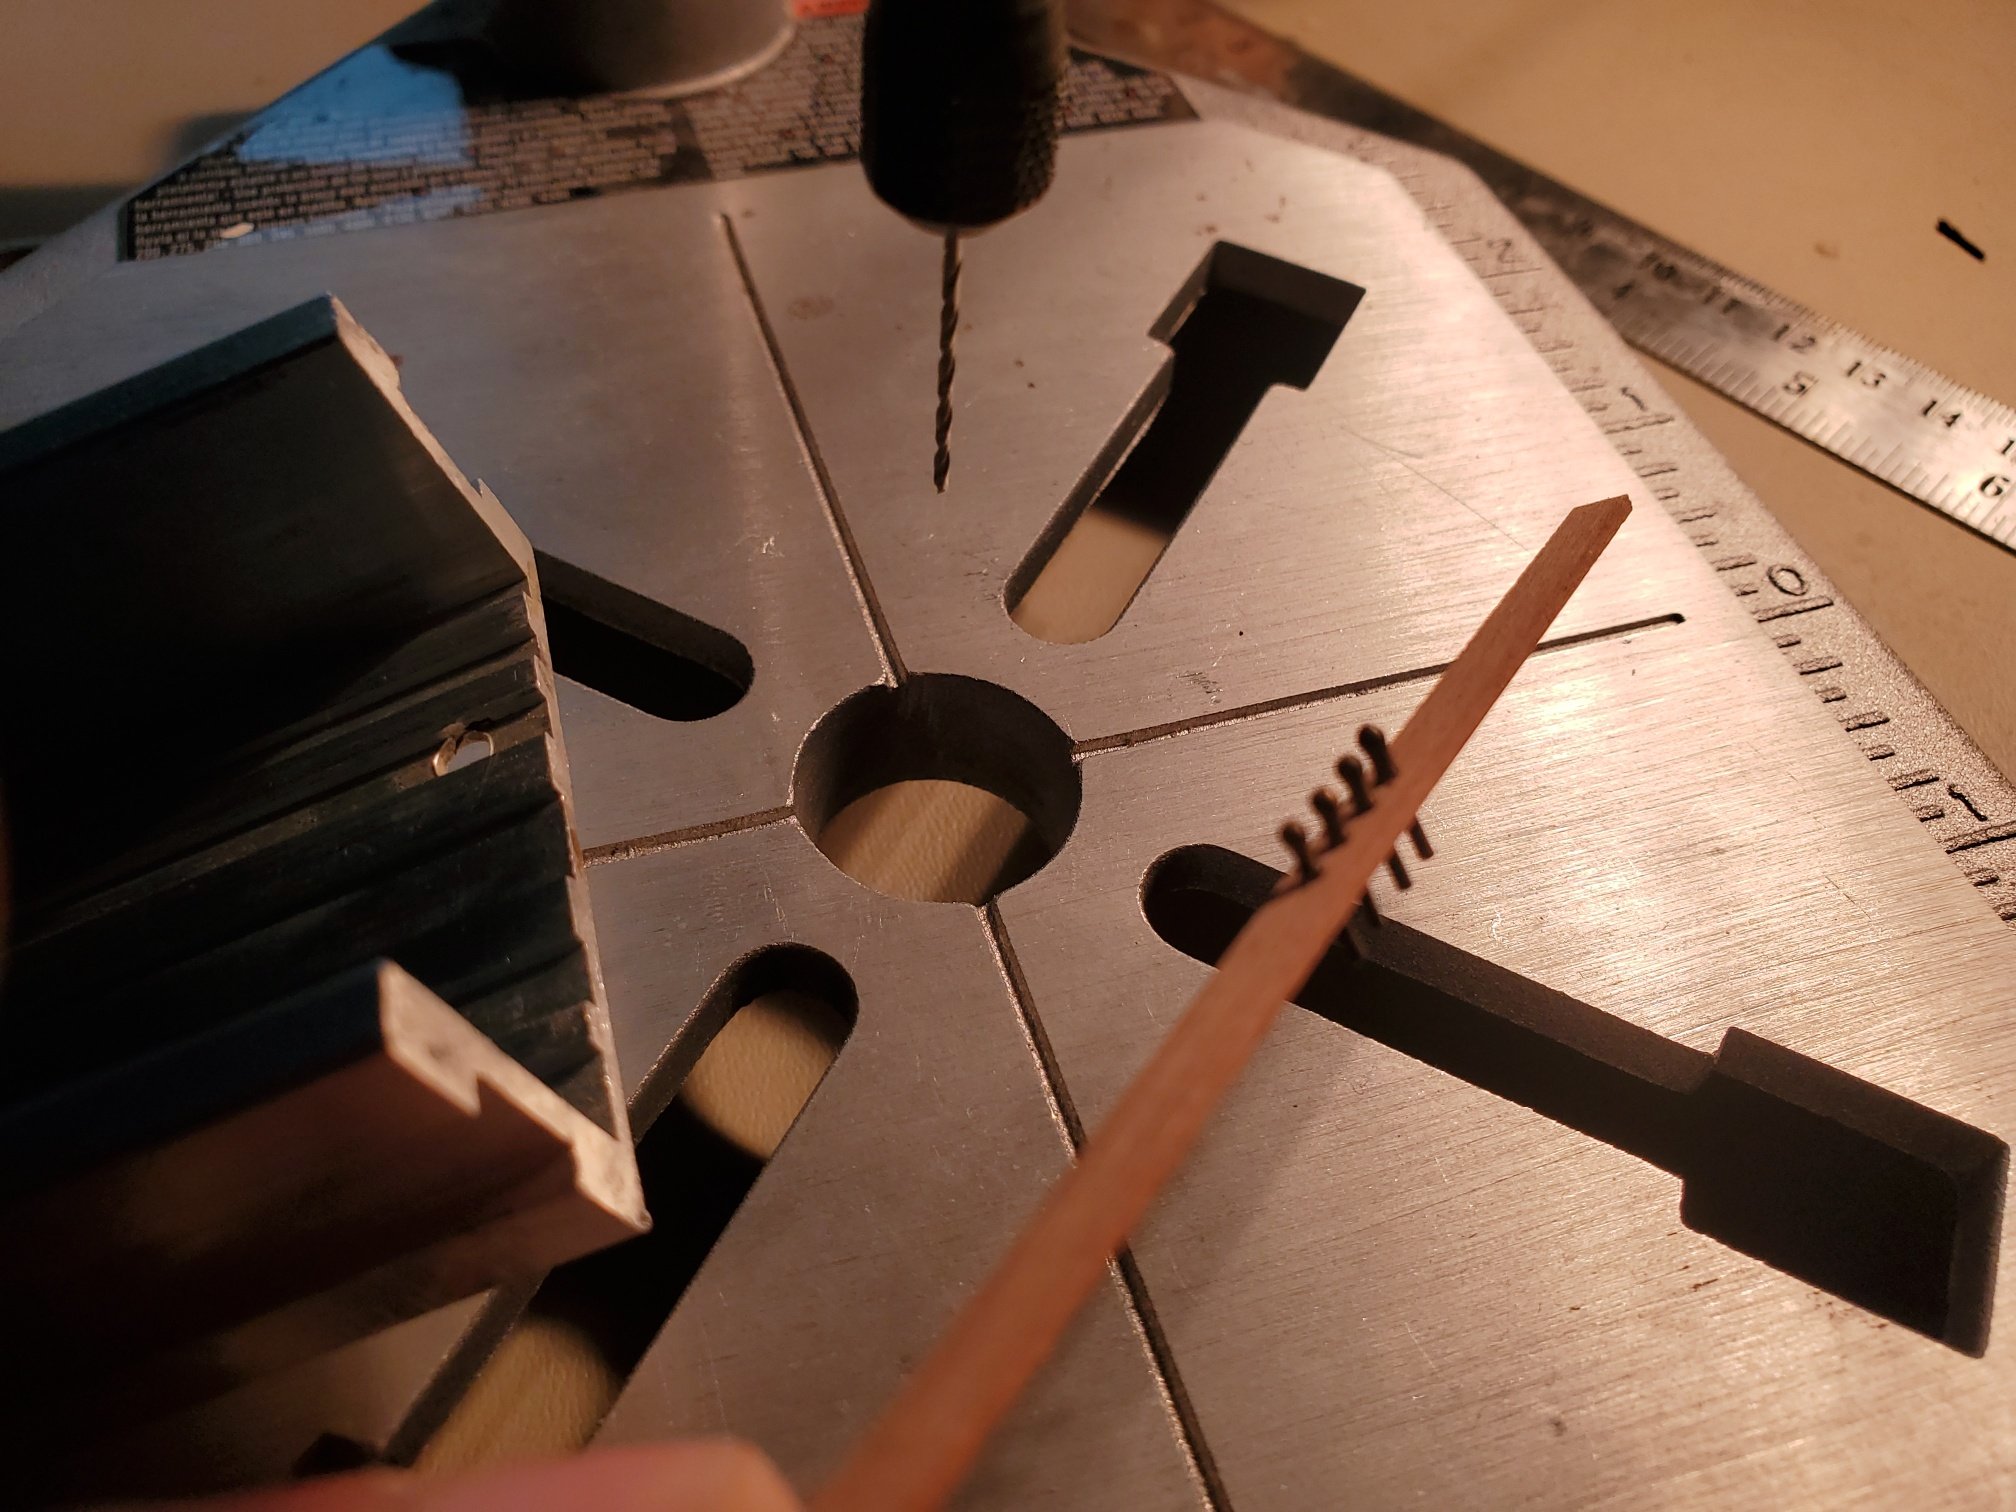
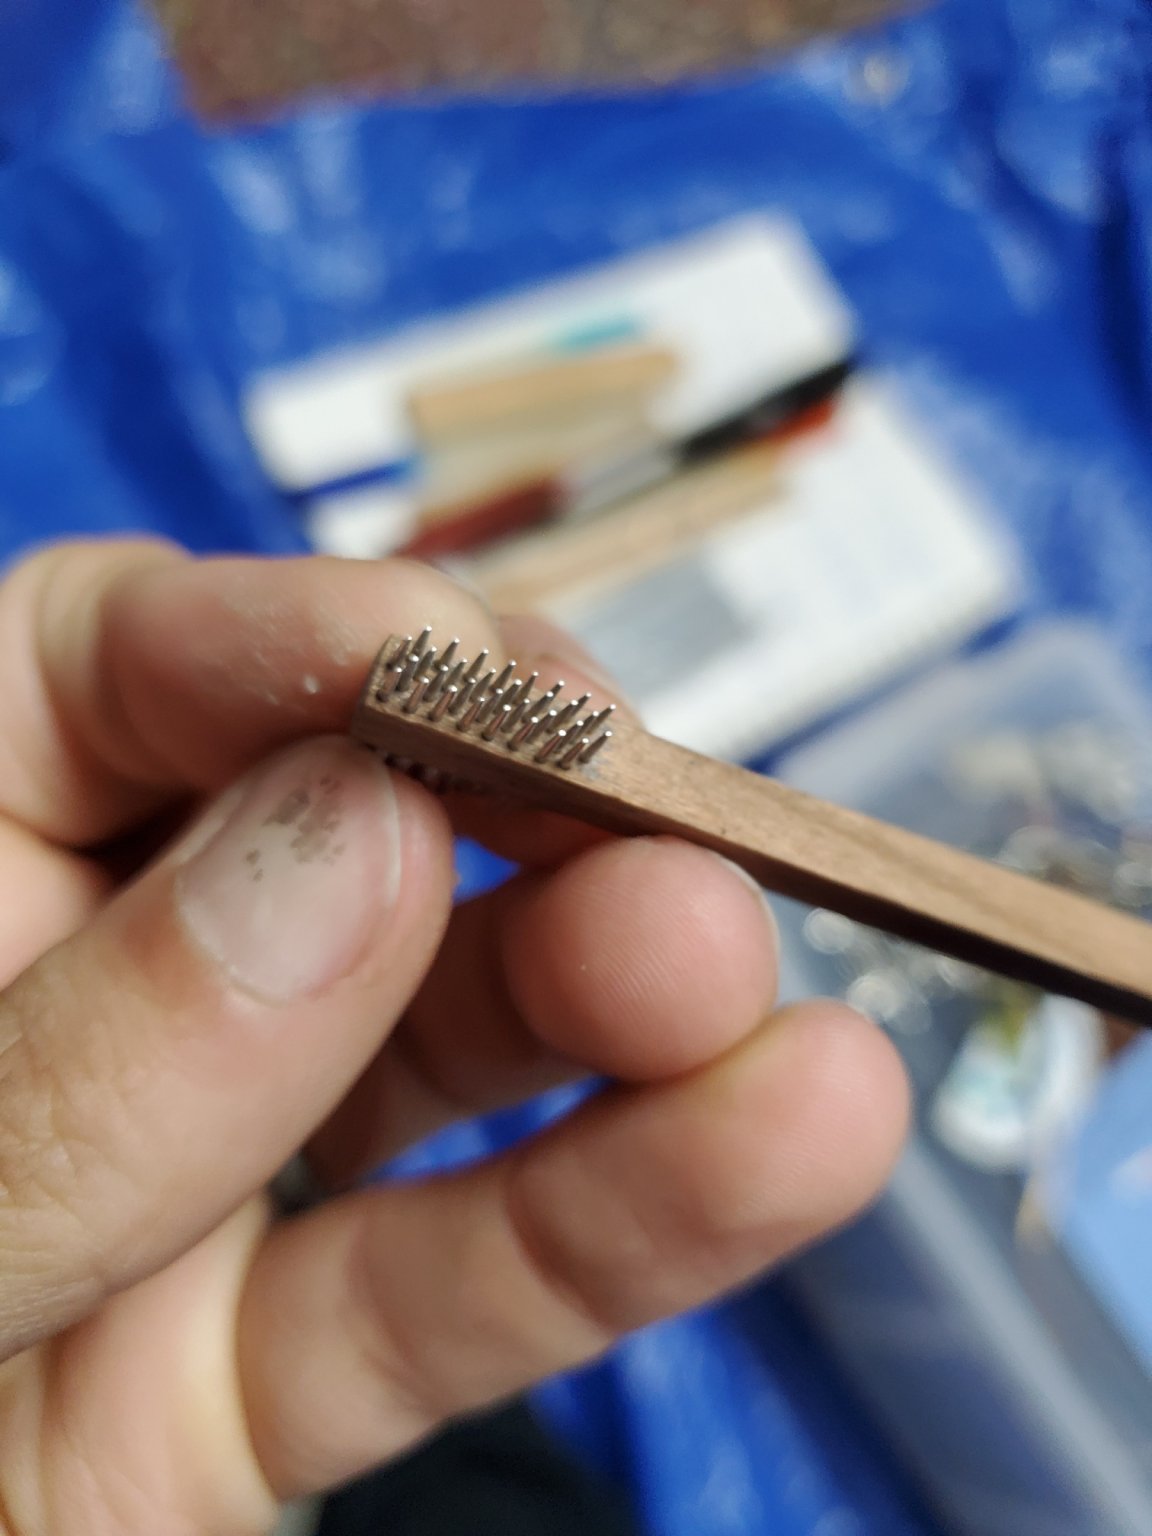
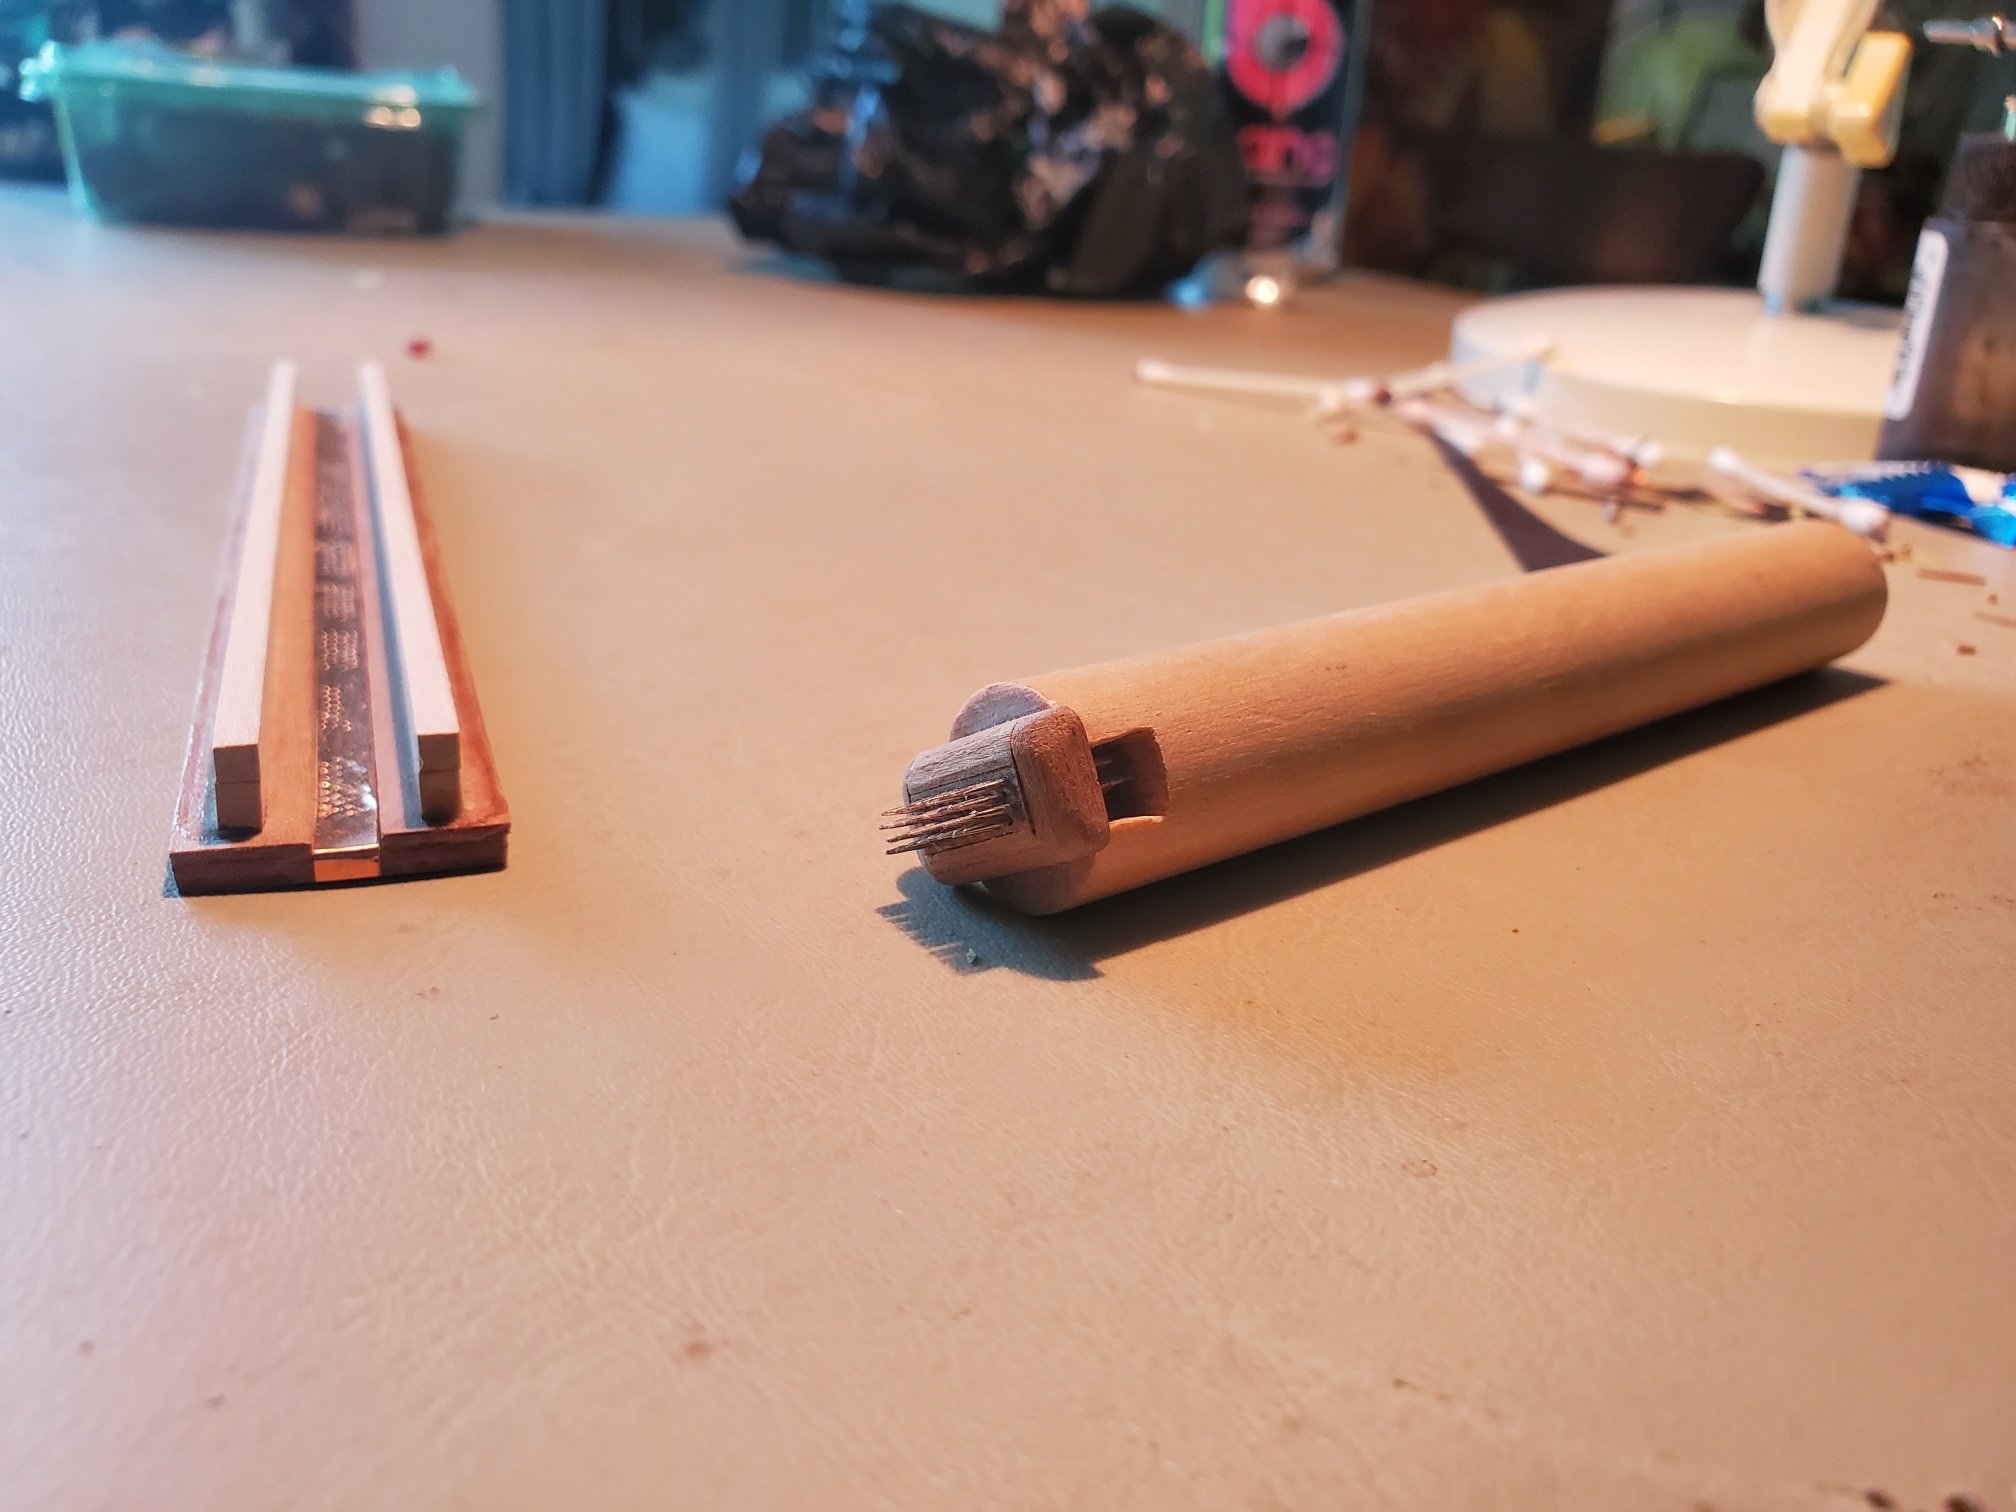
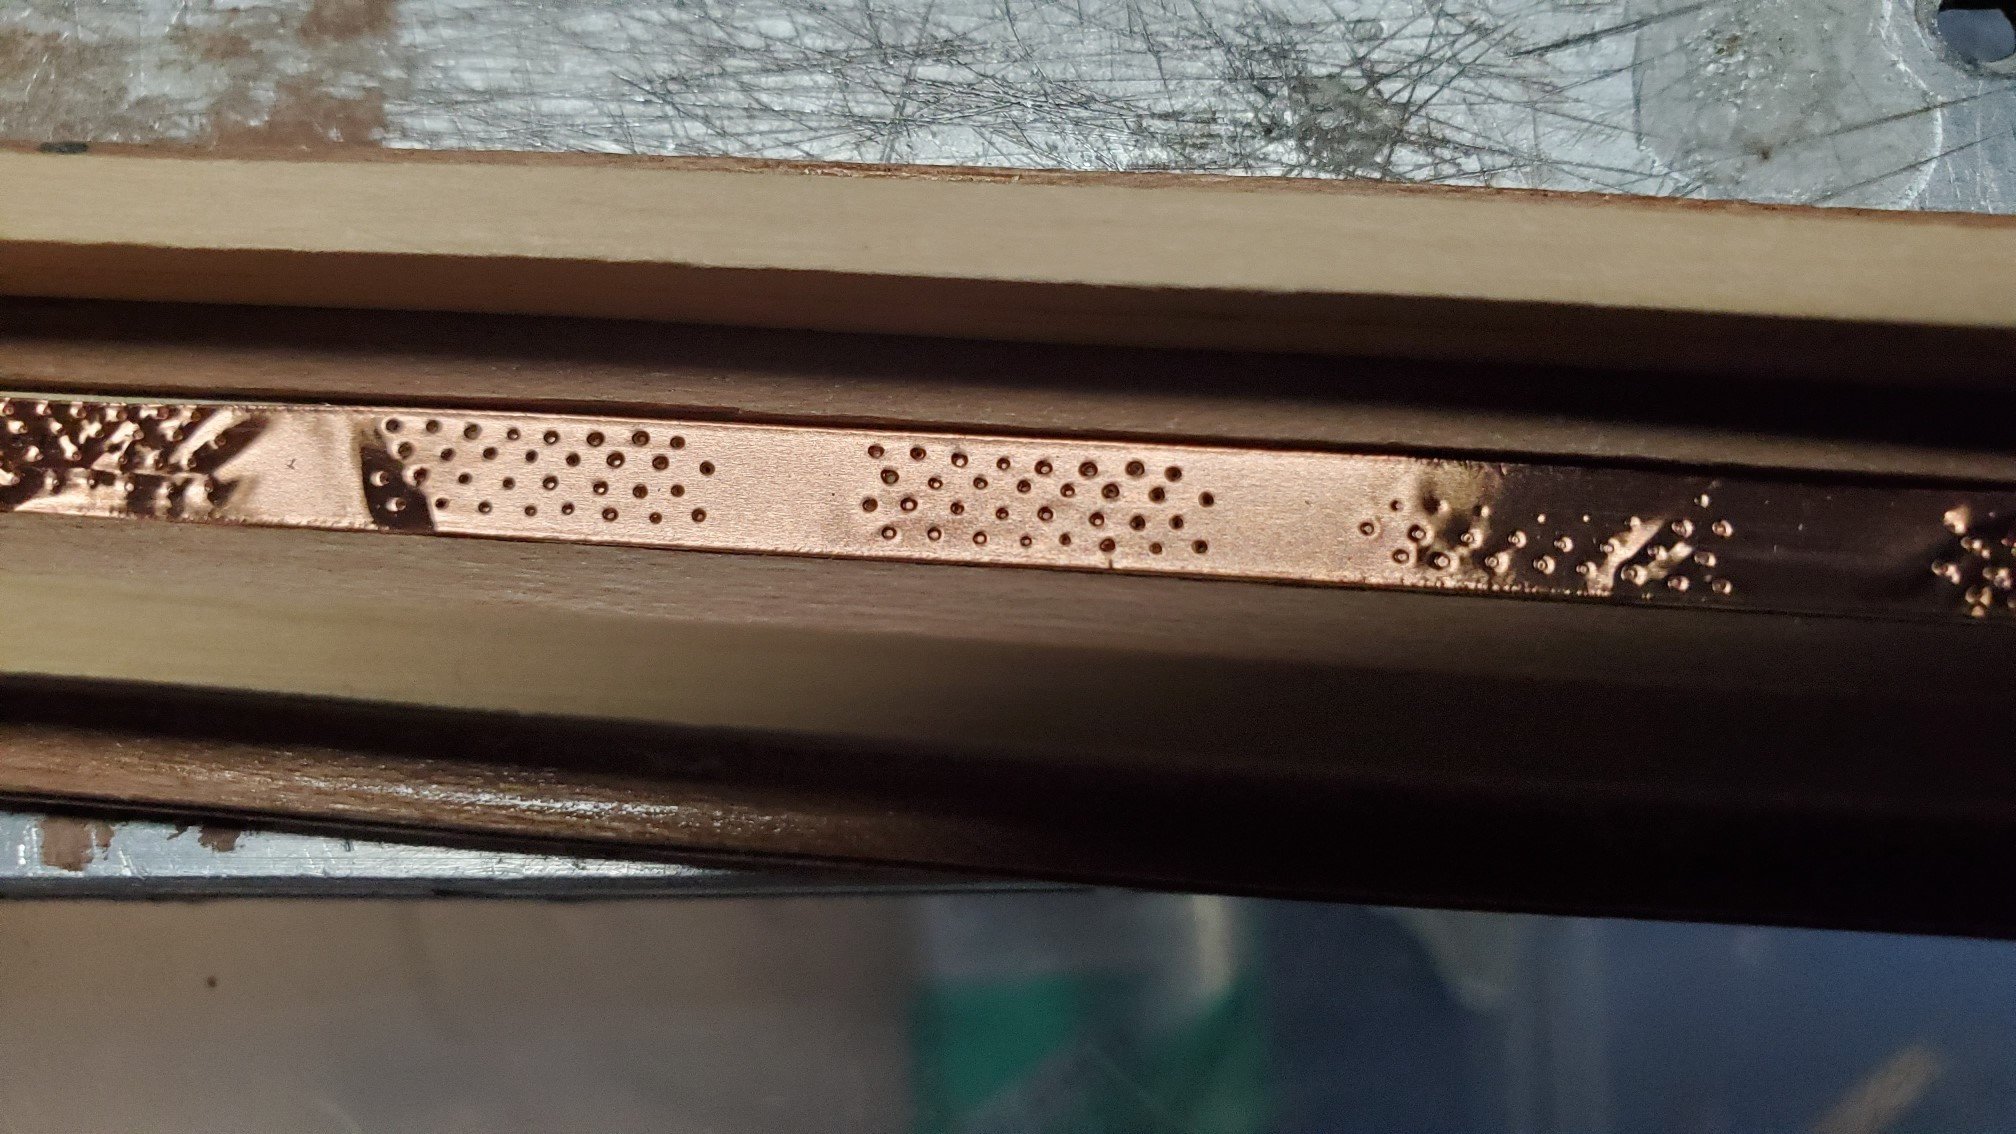
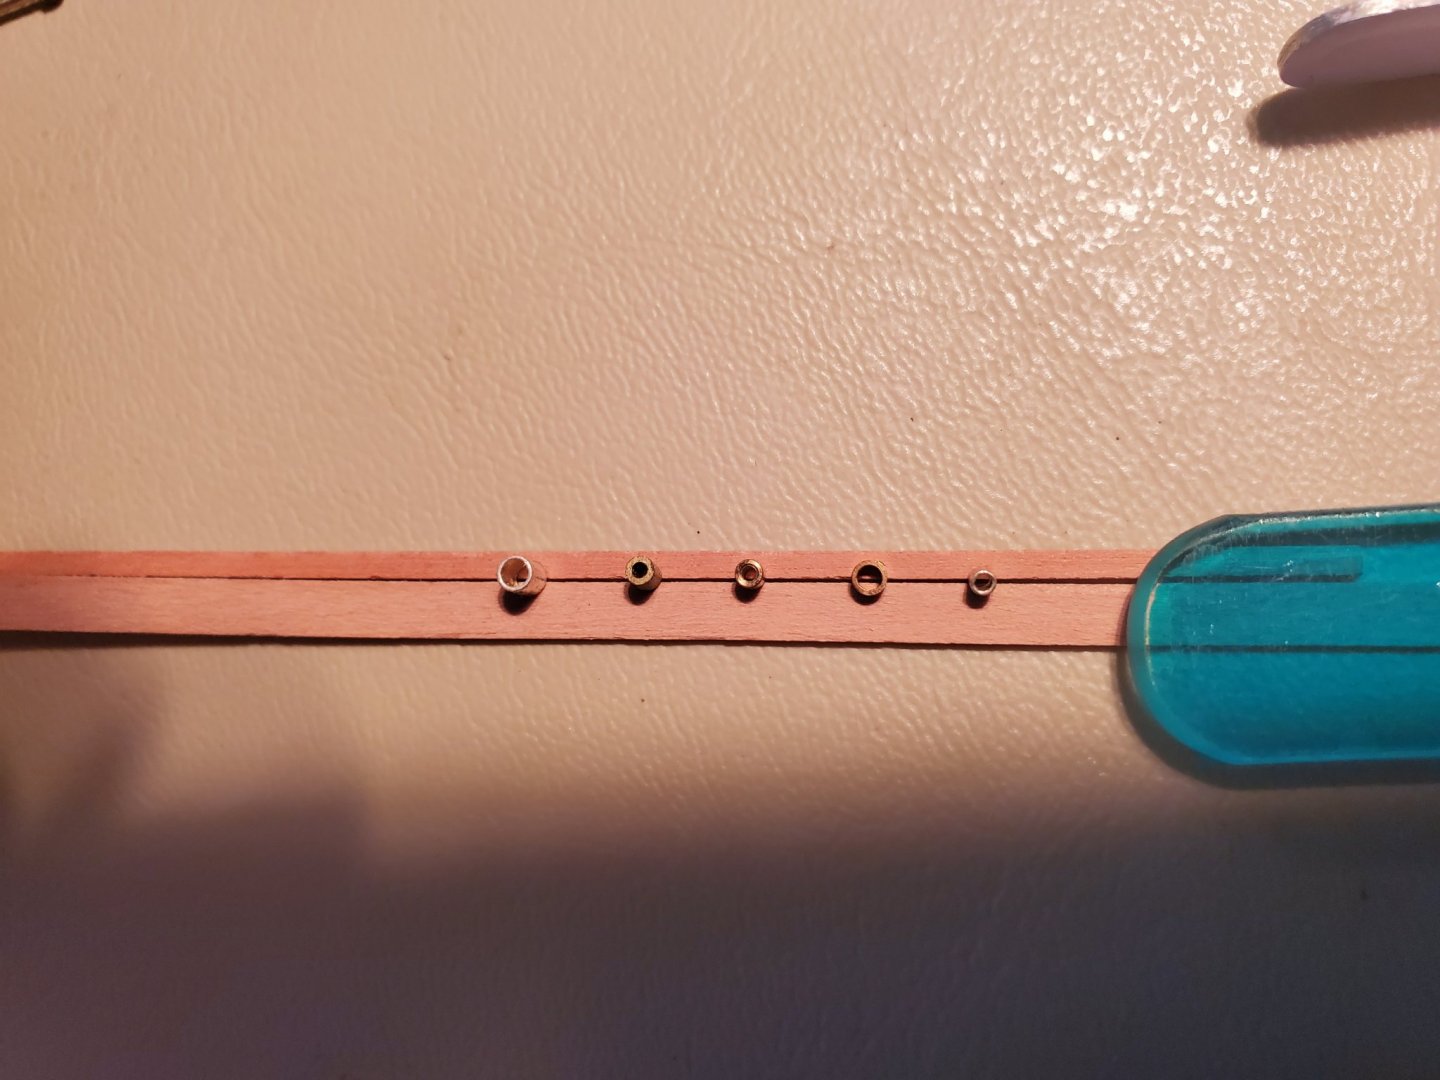
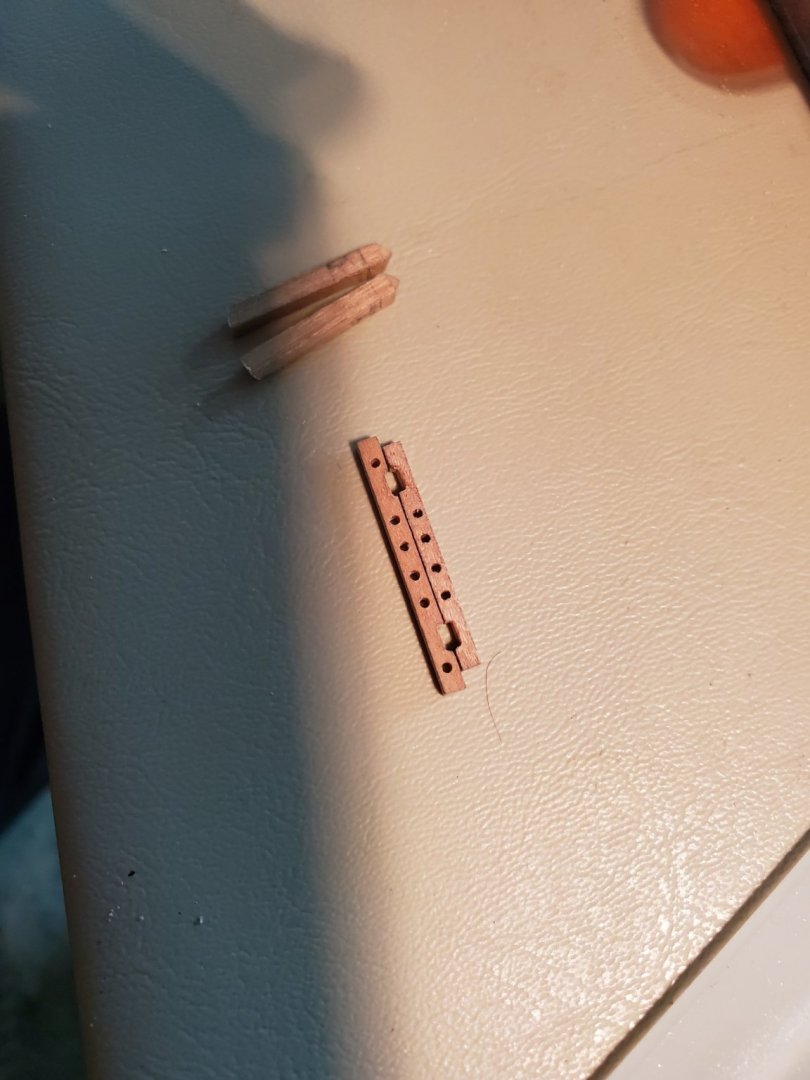
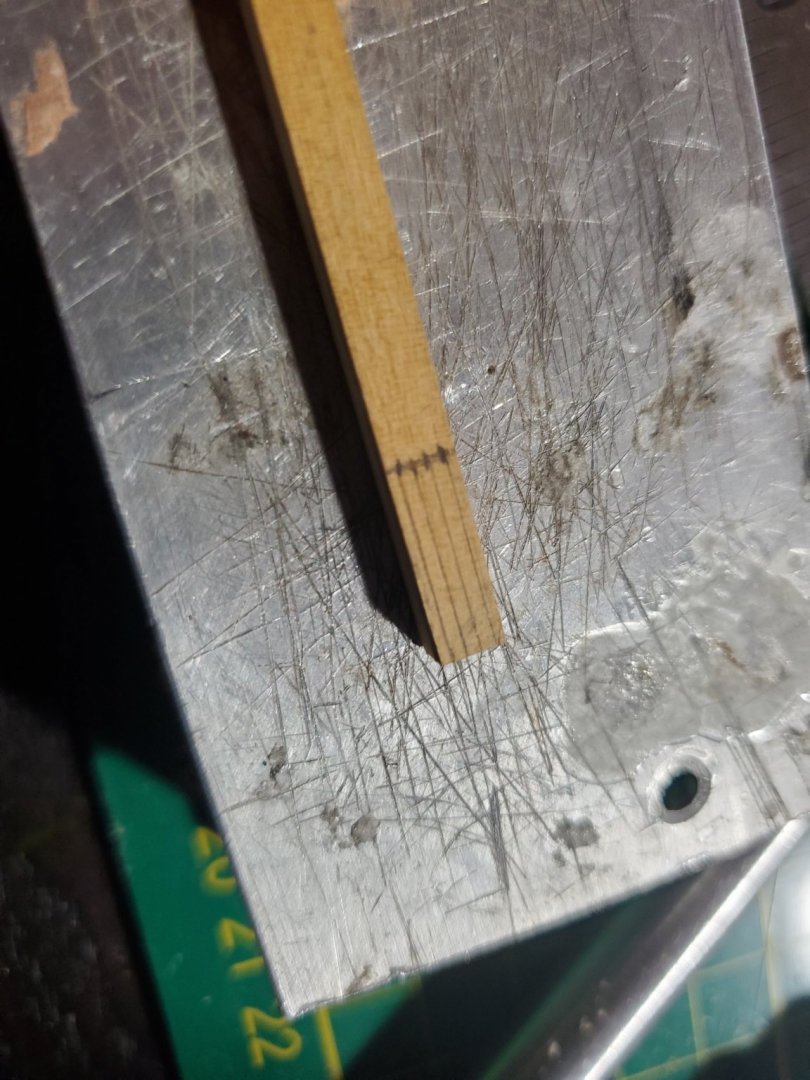
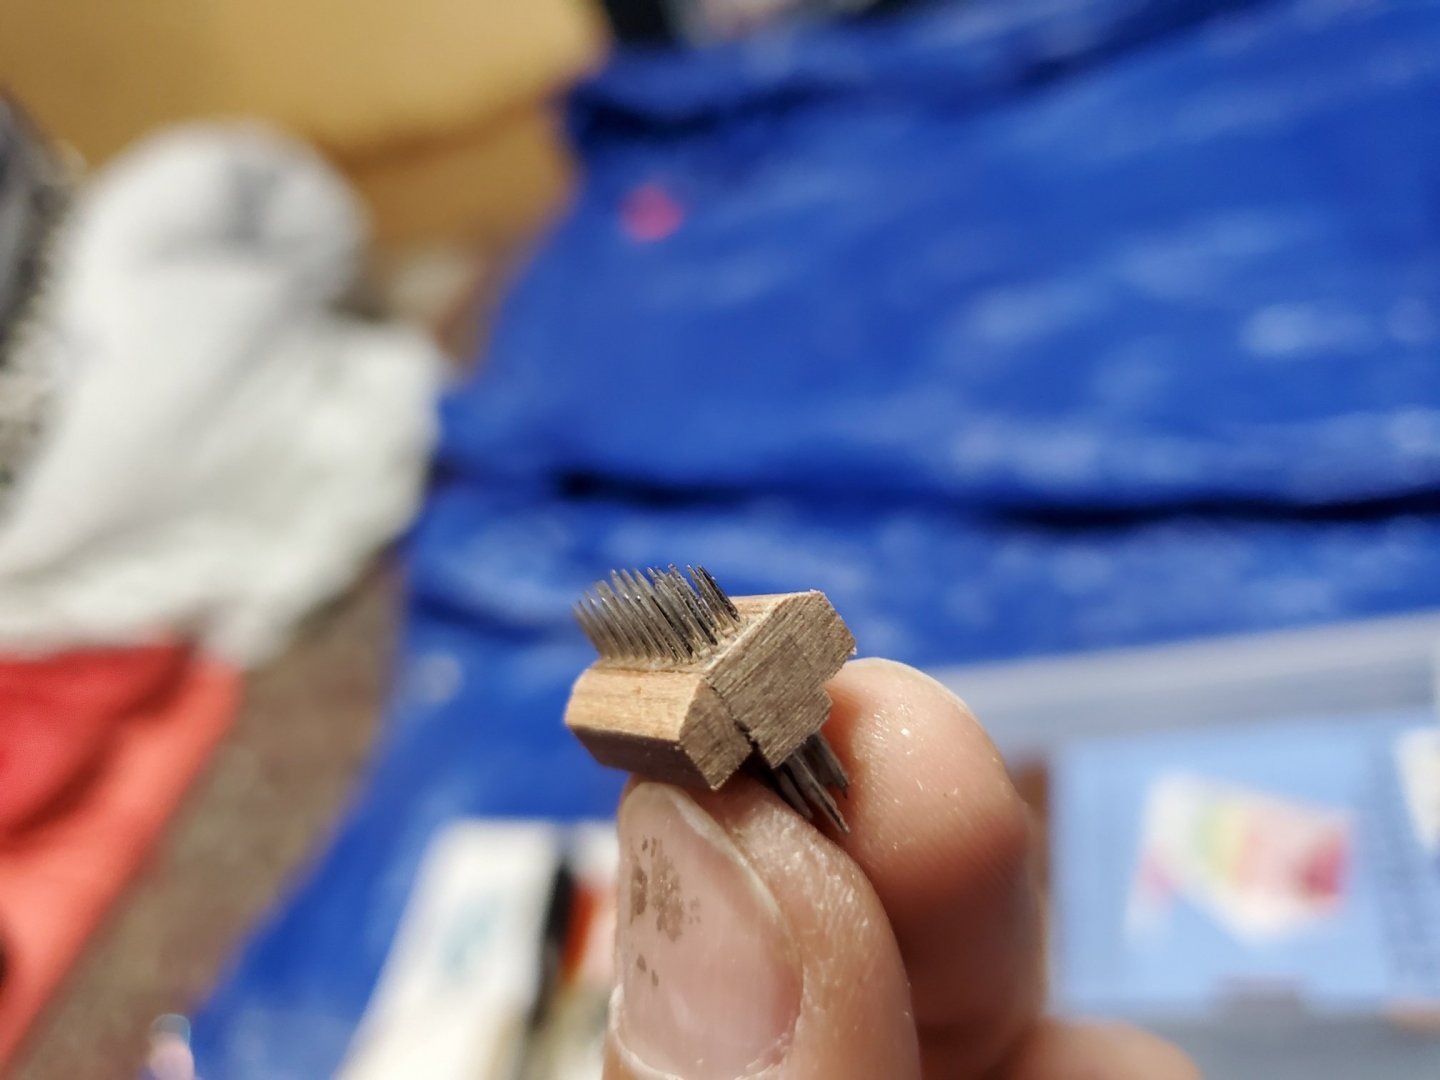
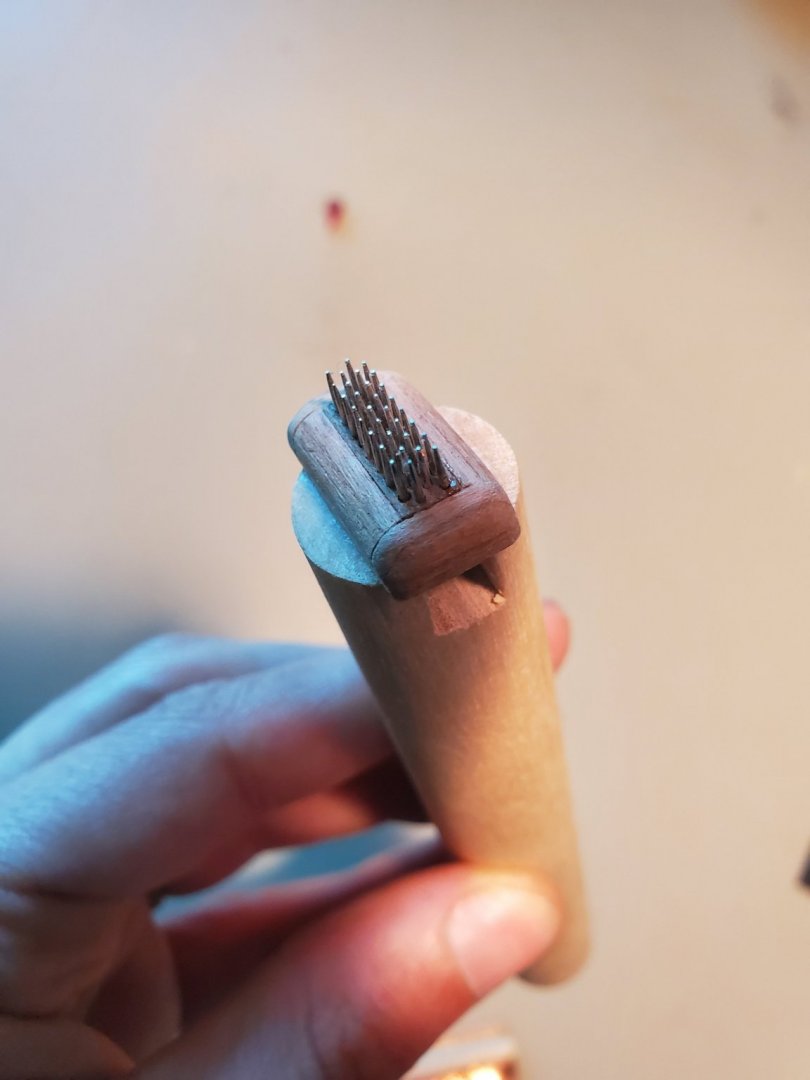
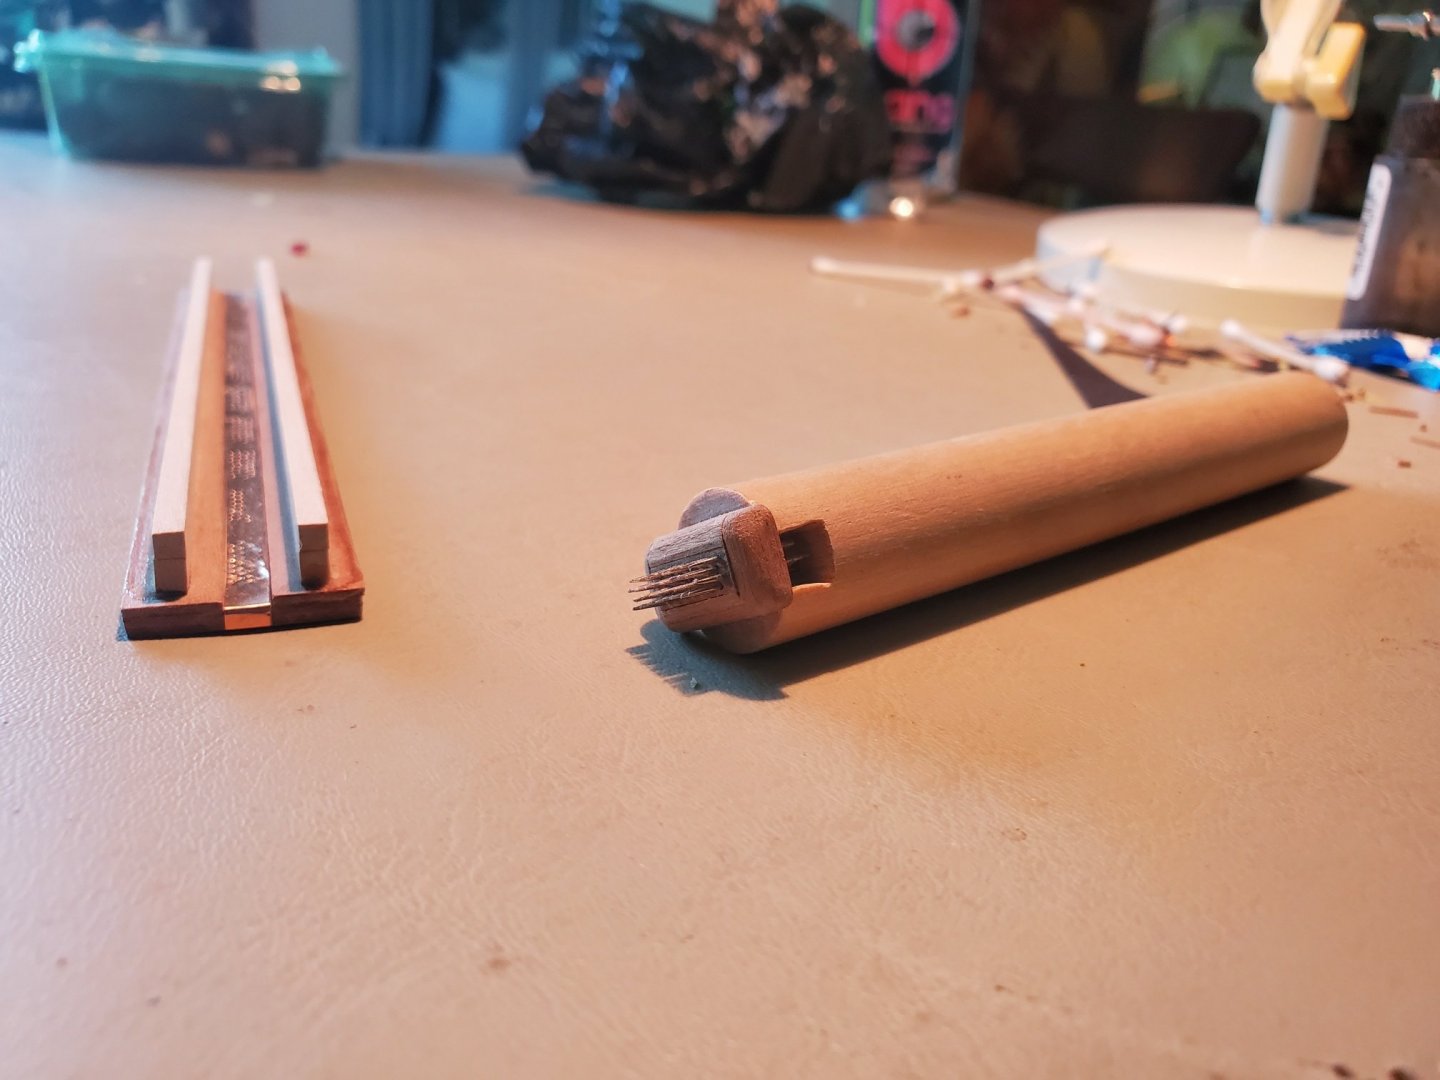
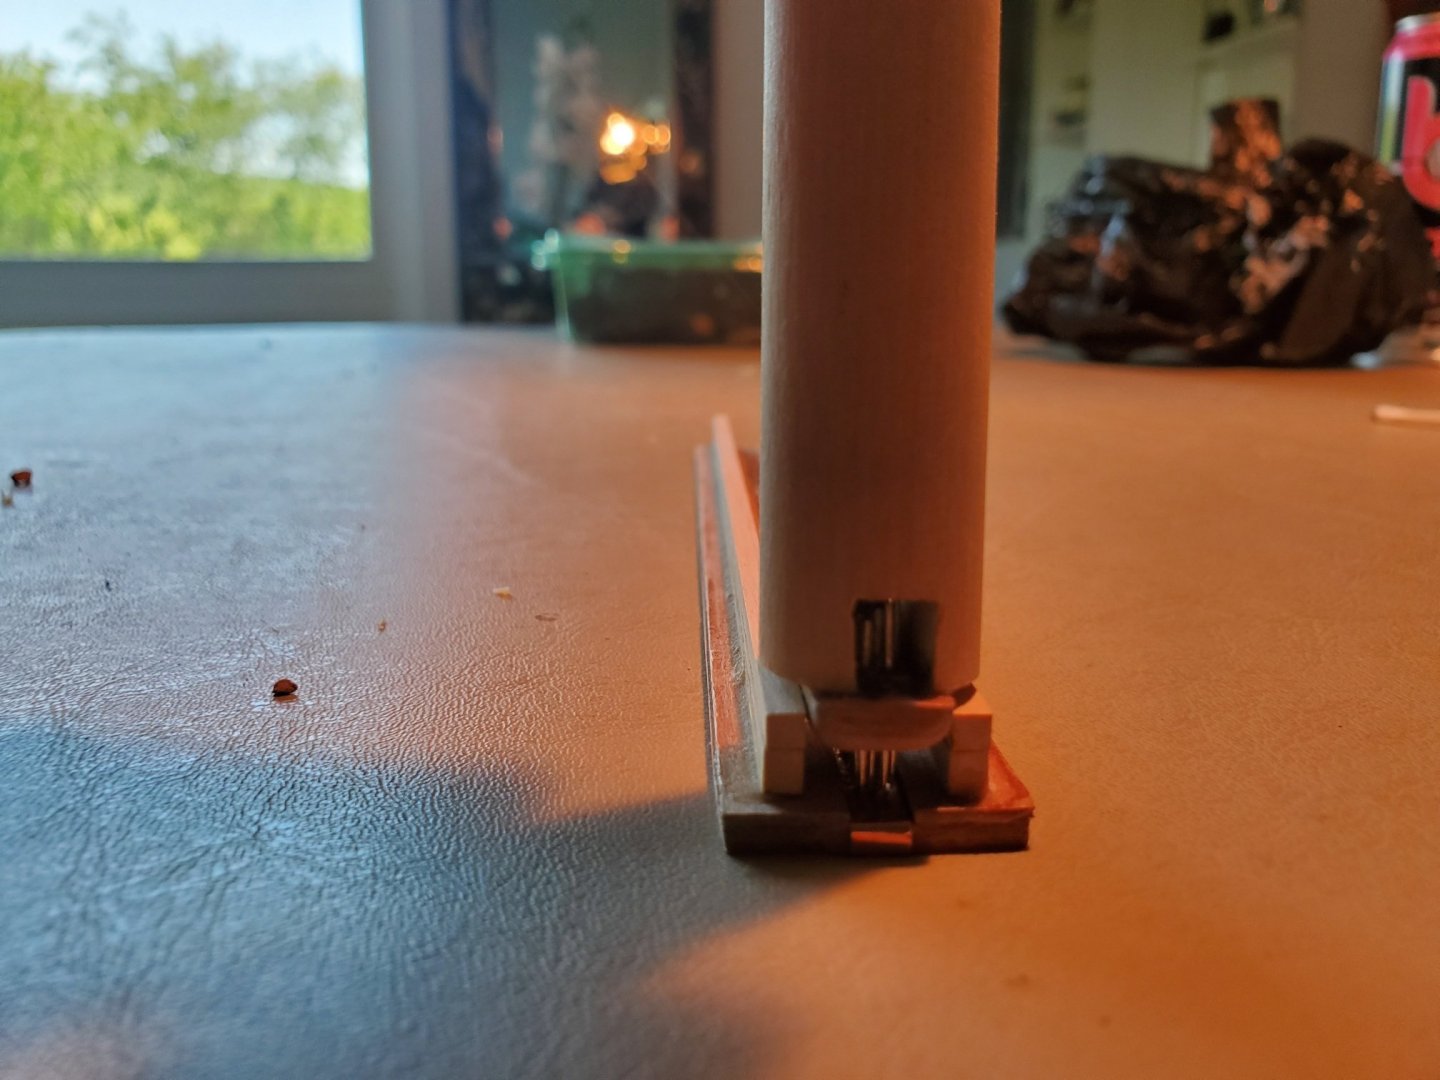
Ok so back to the USRC Active, the first order of business was the making of this very special tool as per Dan Pariser's direction. It was basically a tool designed to create the rivet patten for copper plates. It comprises of sewing needles warn down slightly and added to a jig. I built about 3 of these before it got precise enough for me to like the results. The matter of keeping the pins arranged in as uniform a pattern as possible required me to use my dremel drill press which has been the most amazing tool I could use right now! Once the jig was completed I felt a small sense of satisfaction that indeed building the ship would begin again! That said while I tested the pattern on copper tape, I have yet to add any plates but it led me to my next task. Refurbishing the hull! Kitten assistance not required by welcomed of course! 😽


- 362 replies
-
- 7
-
-
- active
- revenue cutter
- (and 1 more)