HOLIDAY DONATION DRIVE - SUPPORT MSW - DO YOUR PART TO KEEP THIS GREAT FORUM GOING! (Only 27 donations so far out of 49,000 members - C'mon guys!)
×


wernerweiss
-
Posts
206 -
Joined
-
Last visited
Content Type
Profiles
Forums
Gallery
Events
Everything posted by wernerweiss
-
Uploading pictures
wernerweiss replied to wernerweiss's topic in Photographing your work. How to do this.
Hello Mark, thank you very much for your comment......meanwhile I could fix the problem. Yesterday I found a post in this forum (see below); I rotated the pictures four times as described there and it worked!.thumb.png.ab586bd6bf0f28b463380e7fabb96d5c.png)
-
Hello Harshil, thank you very much - no, I do not plan to rig her. Regarding rigging a ship of this type and real size I´m a bloody beginner, and I like the admiralty style.
- 60 replies
-
- 2
-

-
- Confederacy
- Model Shipways
- (and 1 more)
-
Hello modelers, I made good progress with my model, and with this post I upload the latest pictures. I leave them uncommented but look forward to your remarks, comments and questions, don´t hesitate to ask.... Greetings Werner

.thumb.jpg.3f5400d37e3b2a3286d09371f656c16b.jpg)
.thumb.jpg.7f65e2c6b515add4abb77cb594cce767.jpg)
.thumb.jpg.792d61f24ec6a991d102f914a599d2ad.jpg)
.thumb.jpg.db9164fe010561c624c2b689d3357dae.jpg)
.thumb.jpg.651cb9817e924c073ef97245dc55fde4.jpg)
.thumb.jpg.d78bbeb9bc9a31127a6032d76bfa229a.jpg)
.thumb.jpg.b7a4cd1a47b7aa22e7aa8fb468cf3064.jpg)
.thumb.jpg.02c0739bdbe131deb44ac77eb88b6402.jpg)
.thumb.jpg.be026cbc71d7f62748fc7827f6ad0b7a.jpg)
.thumb.jpg.ed20effc870d753a26f0f8c8dcd7ba9a.jpg)
.thumb.jpg.ea809b0ea9fa77b80cdf5bcdd639a6cd.jpg)
.thumb.jpg.e5848a037c288e513c8dced82fc45c7c.jpg)

.thumb.jpg.15bb0d2df1cf813c236f3b3b53f98562.jpg)
.thumb.jpg.56d134e8184fbbe9a95e7138c8cfd87a.jpg)
.thumb.jpg.bfcb2a1316aa343b2366a7548a73de1b.jpg)
.thumb.jpg.eec77f1ce6b6d74e4a3386037ea98f55.jpg)
.thumb.jpg.27d1b4336908b75814a8e0ca75ddb0a4.jpg)
.thumb.jpg.a6e4b1f7d4ee7857522c649494656621.jpg)
- 60 replies
-
- 12
-
-
- Confederacy
- Model Shipways
- (and 1 more)
-
Uploading pictures
wernerweiss replied to wernerweiss's topic in Photographing your work. How to do this.
Hello Robert, thank you very much! Fact is that however I hold the smartphone, all pictures in the smartphone file and later on my laptop - via e-mail - have the normal orientation, and rotating them left or right is intentionally. The problem came with the upload to the forum, when to my surprise some pictures appeared upside down. What I tried was to rotate these pictures before uploading hoping they would then appear normal, but that was not helpful.... What I must say is that in another forum the upload of these pictures is not at all a problem.... Werner -
Hello at all, meanwhile I got the answer to my problem. I learned that the reason why pictures which appear upside down when posted is that these pictures were taken with the smartphone held upside down.....it is a matter of the rotation data. But what I also learned in this context is that in another forum in which I am registered all pictures are uploaded and posted unrotated......... The solution for my problem I finally found in this post here in the forum:
.thumb.png.559253f2ee48f53a4ff6aa5ac192ccd5.png)
-
Uploading pictures
wernerweiss replied to wernerweiss's topic in Photographing your work. How to do this.
Hello Gary, Dave, thank you for your helpful answers! In the future I will take care how I hold my smartphone when taking pictures.... Werner -
Hello at all, perhaps somenone can help me with a problem that occured today. I had already written a few words and uploaded the next pictures of the Confederacy, but before submitting the post I saw that a few pictures appeared turned upside down. I don´t have any idea why; in my general Confederacy file they do not appear "overhead", so what shall/must I do? Strangely in other forums this does not happen...... Greetings Werner
-
Hello at all, I just uploaded the latest pictures of my model of the Confederacy, but before submission I had to see that some of them appeared turned upside down - example see below -, and I absolutely don´t have any idea why. Can anyone help me? Thanks in advance Greetings Werner

-
Hello captain_hook, thank you very much....I got the inspiration for the interieur from a picture of ship model builder somewhere in another forum
- 60 replies
-
- 1
-
-
- Confederacy
- Model Shipways
- (and 1 more)
-
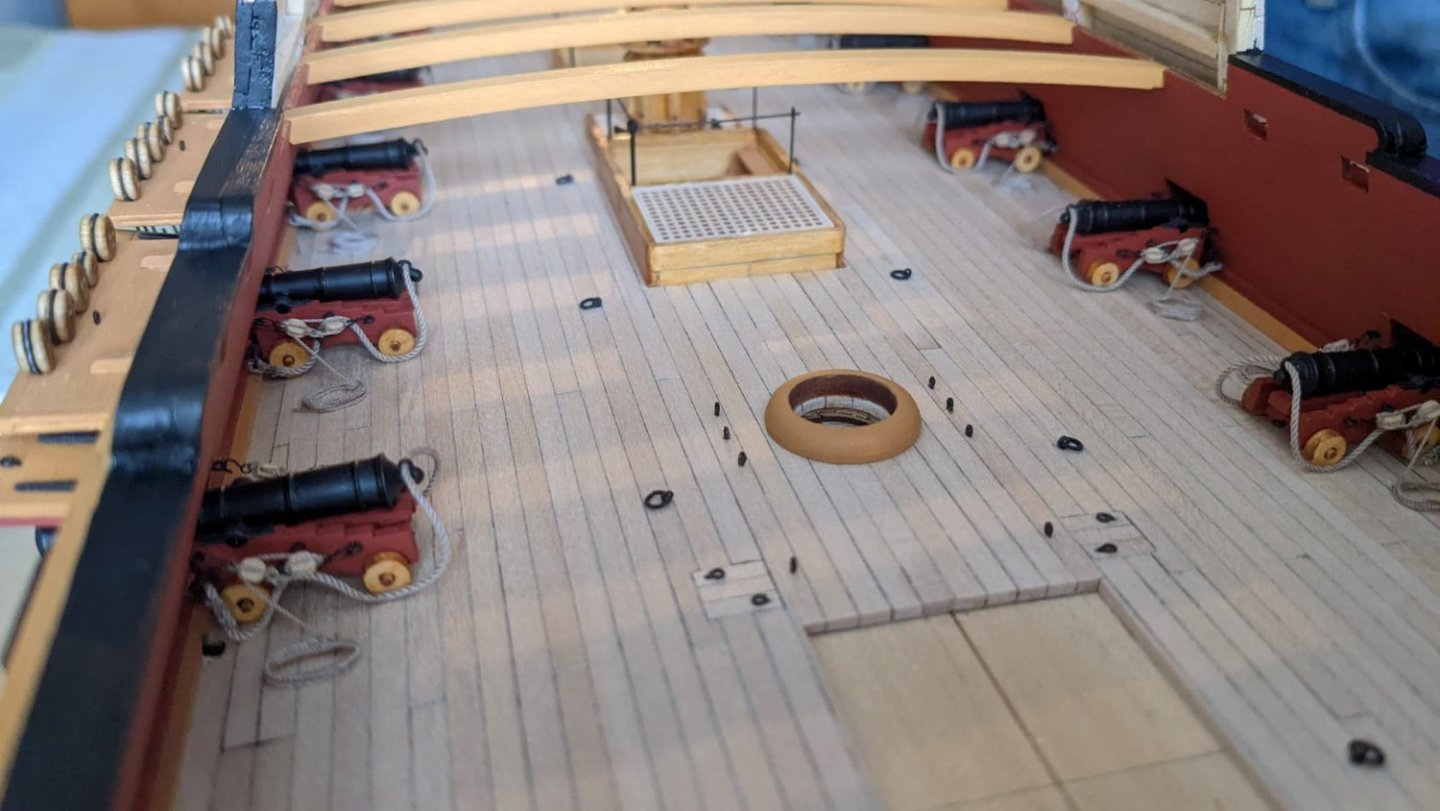
Hello Hershil, thank you for following my suggestion for the chessboard floor pattern. But check the forward edge of the template....it runs along the aft bulkhead, and the aft bulkhead must not sit too close to the hole for the speaking tube to allow enough distance for the deck coat at its base. I look forward to the progress of your model, and in the next days I´m going to upload the next pictures of my model which were taken just yesterday.... Strange that you had problems with the margin planks..... Greetings Werner
-
Hello Steve, Thank you very much, and there will be an update soon with all guns on deck and more deck equipment..... Greetings Werner
- 60 replies
-
- 3
-
-
- Confederacy
- Model Shipways
- (and 1 more)
-
Thank you very much!
-
Thank you very much for your likes!
-
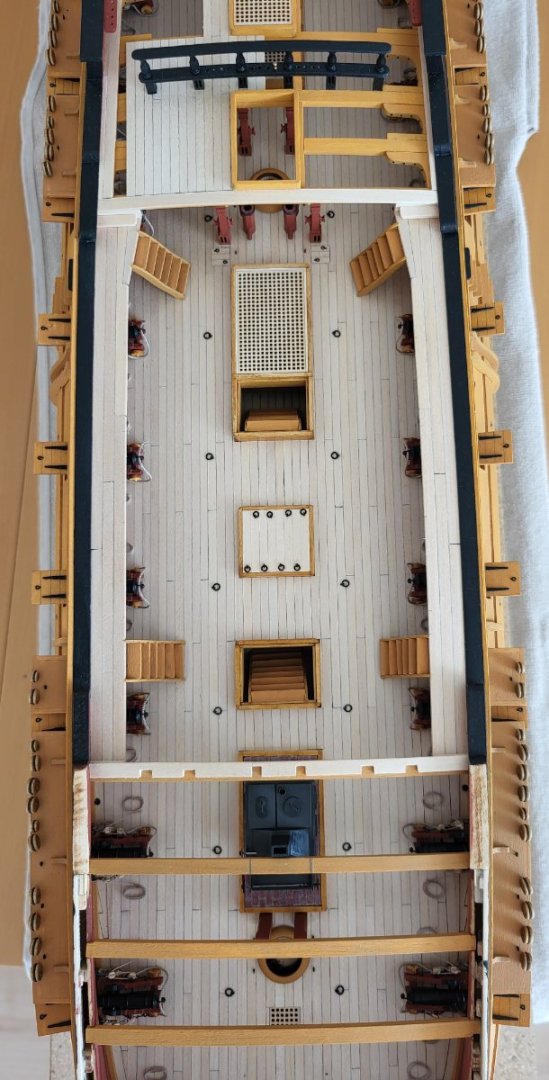
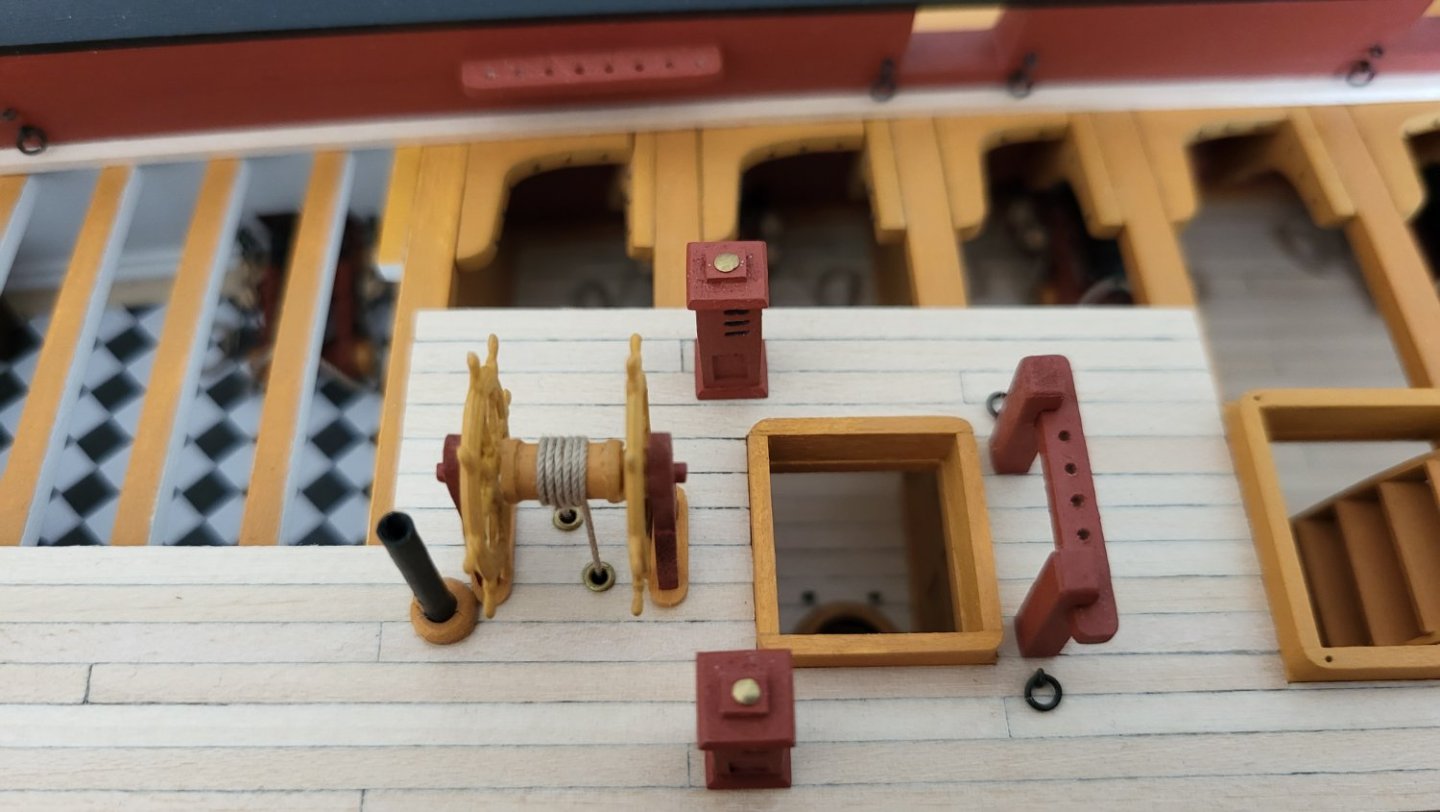
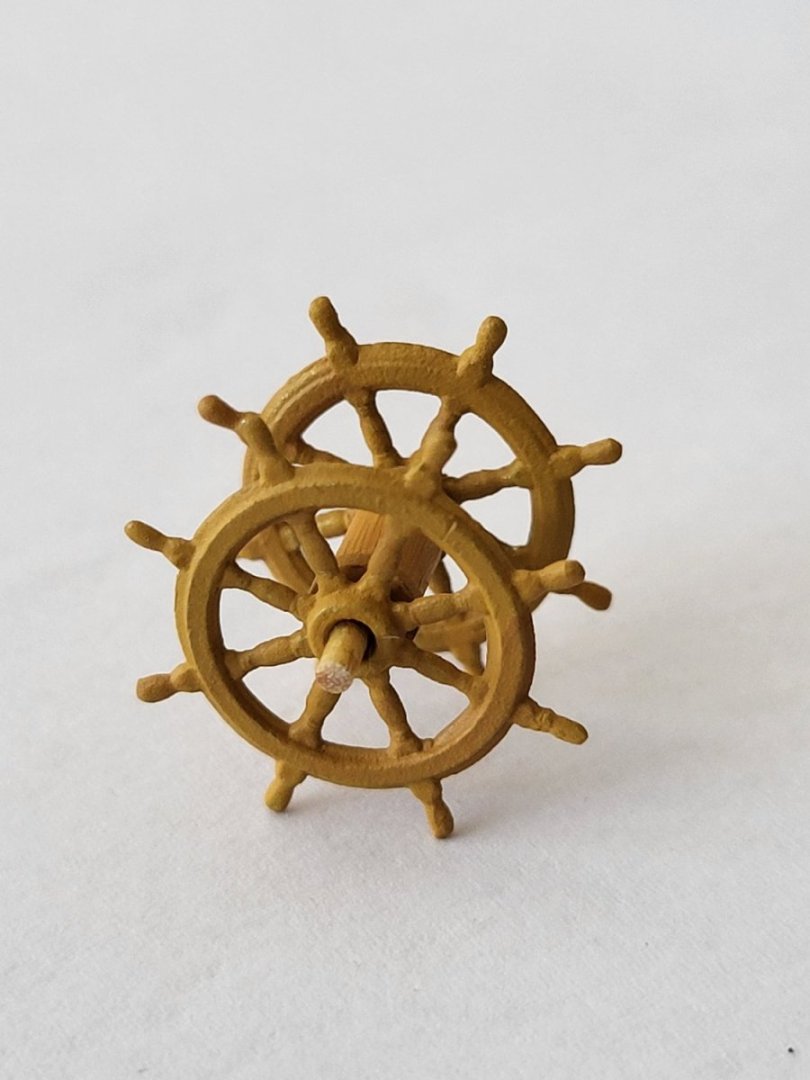
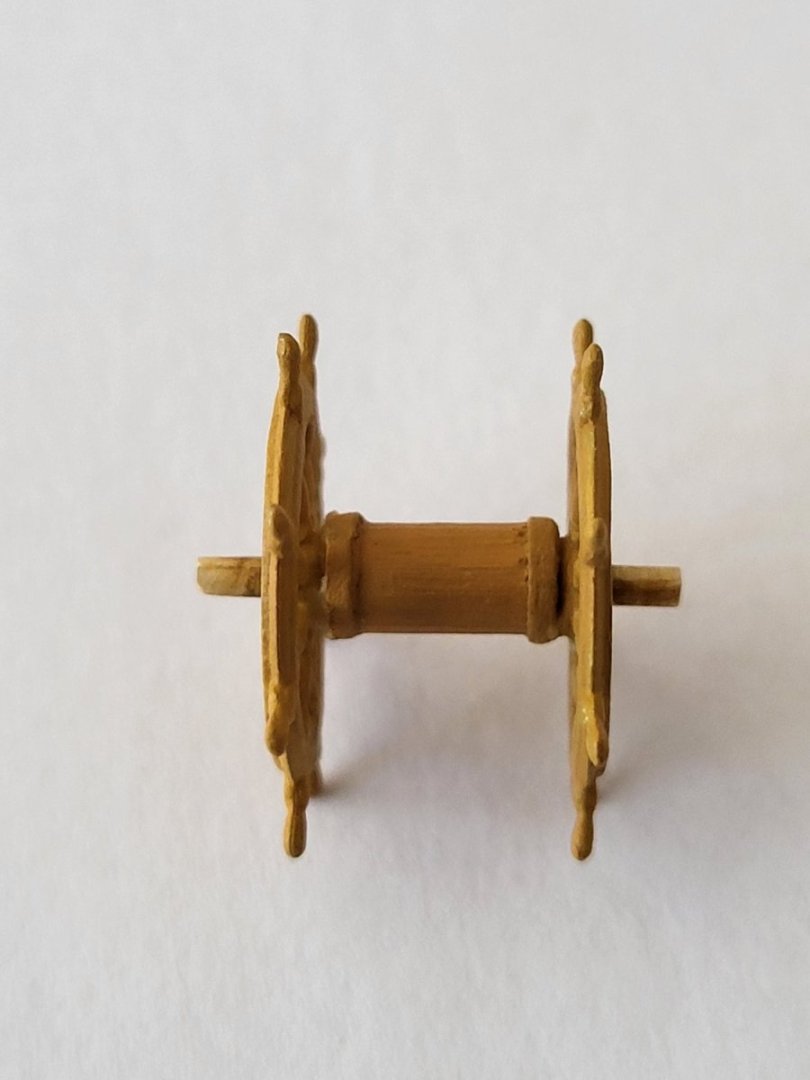
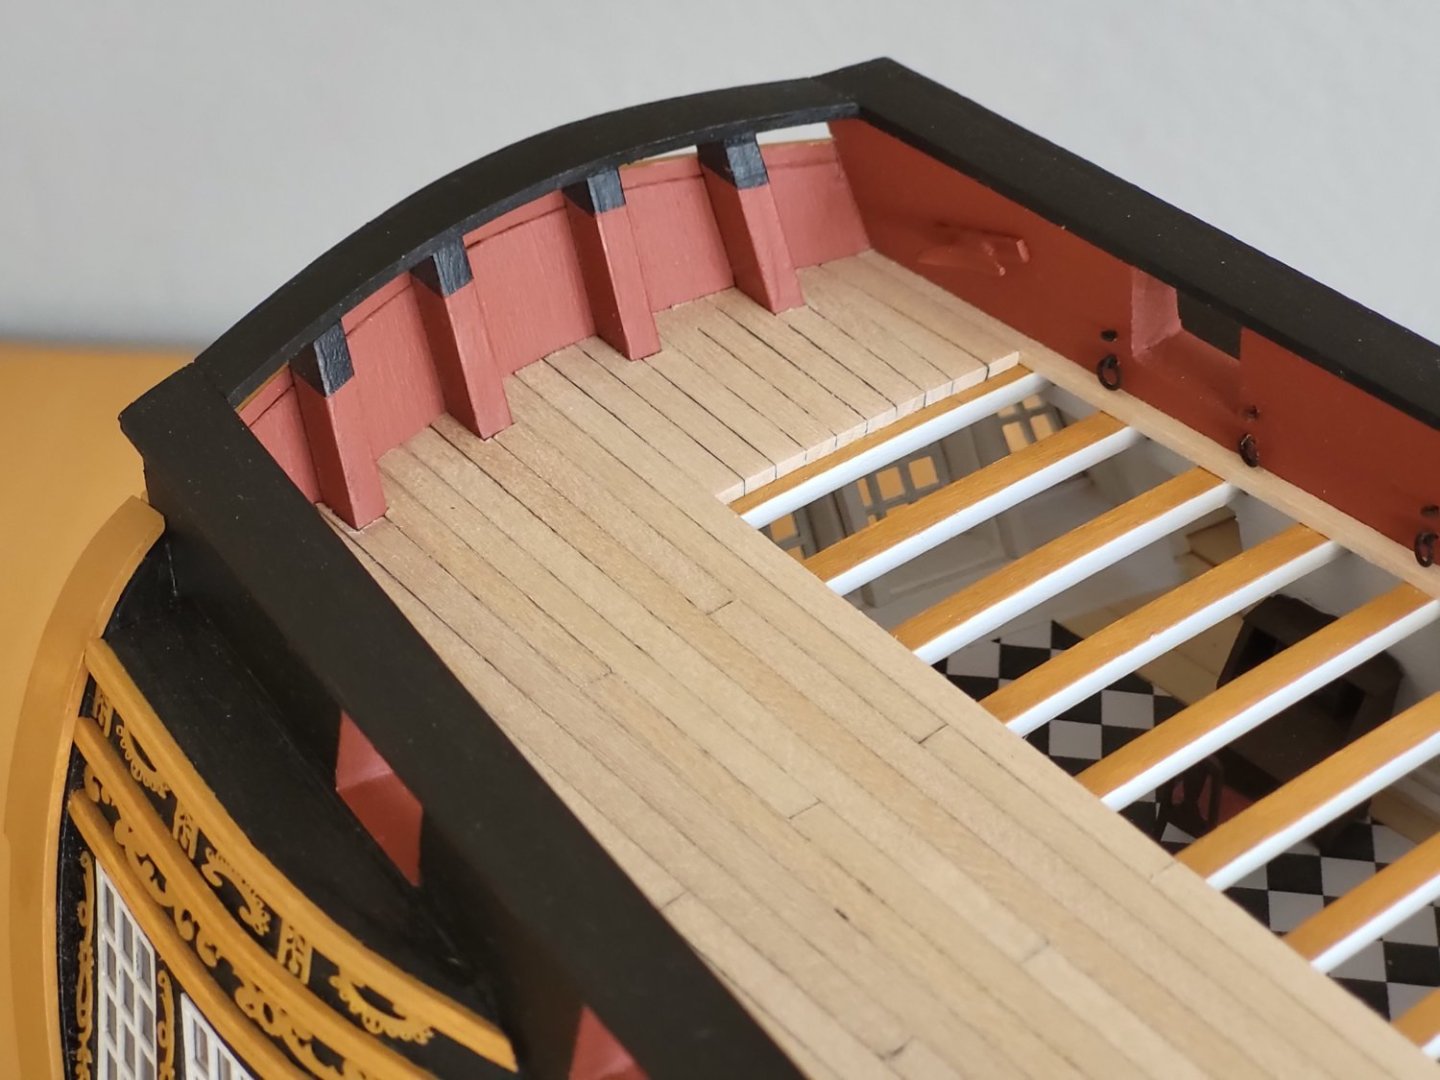
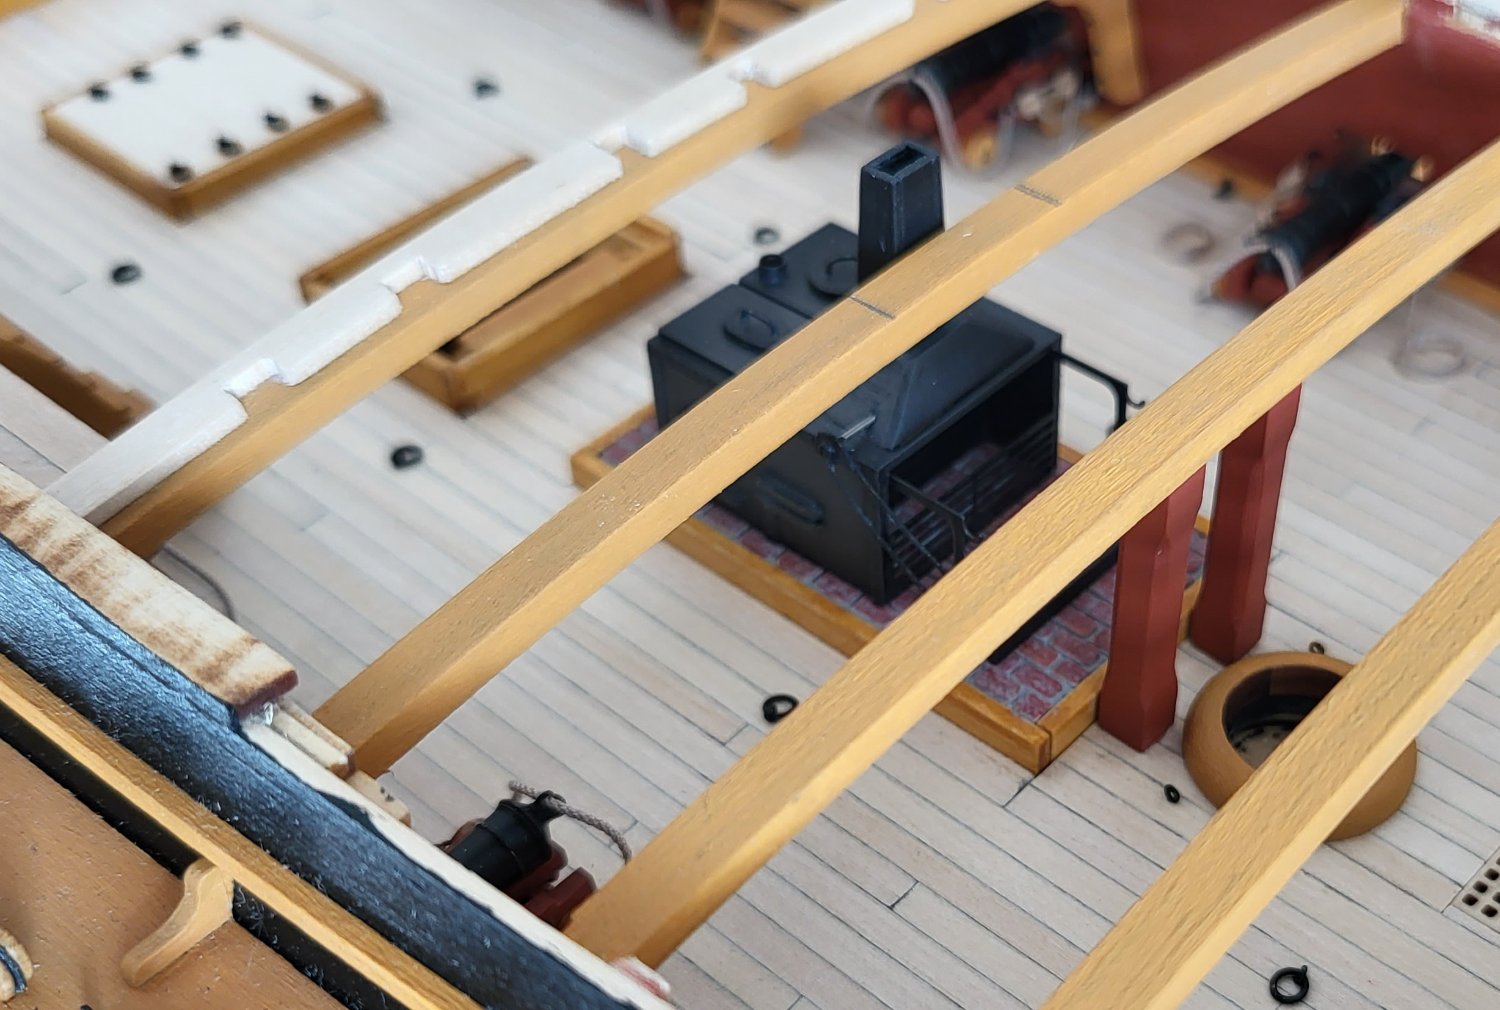
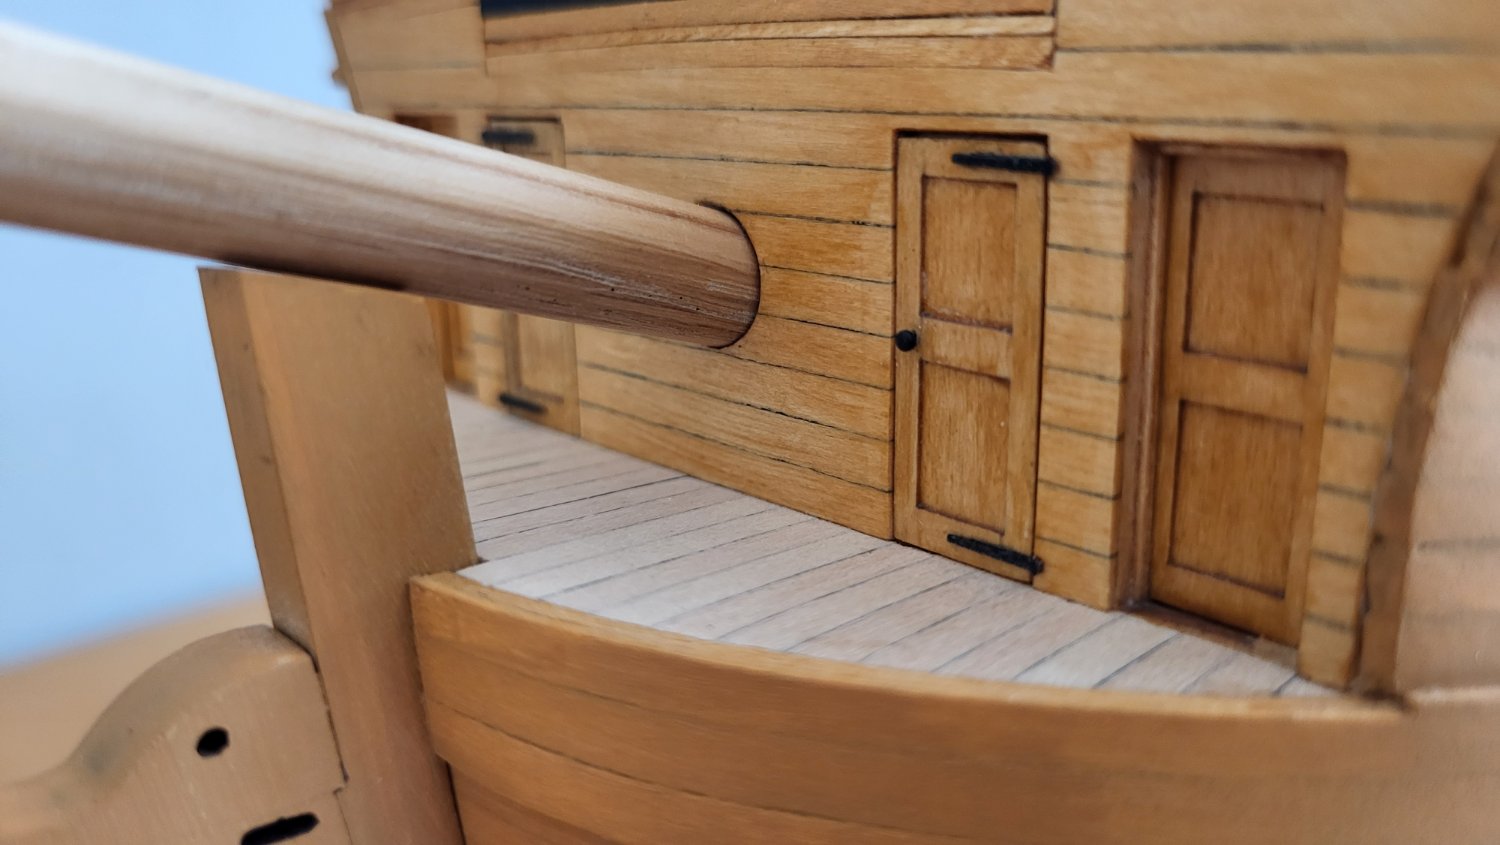
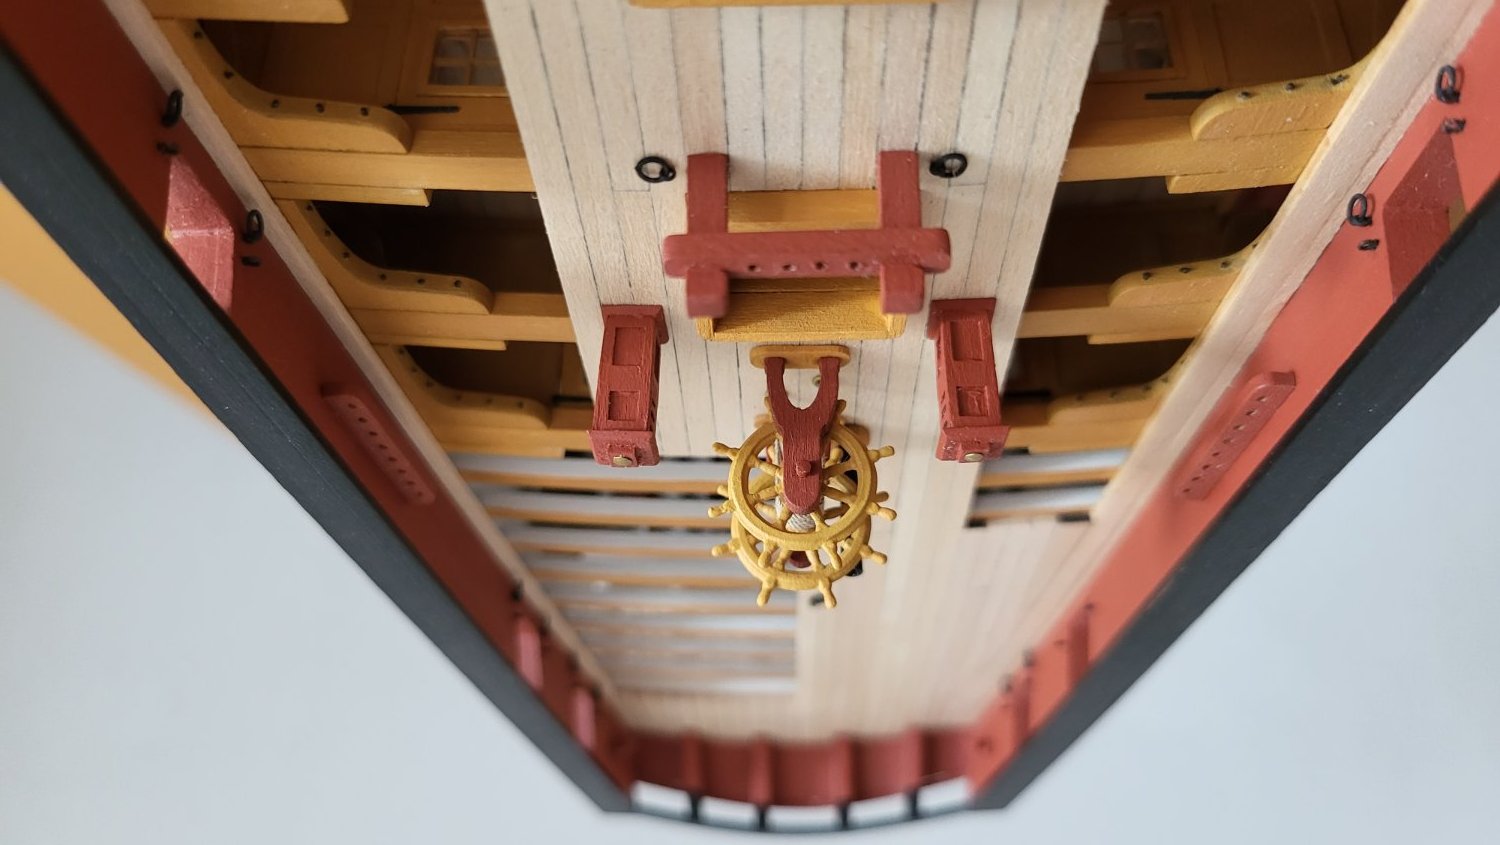
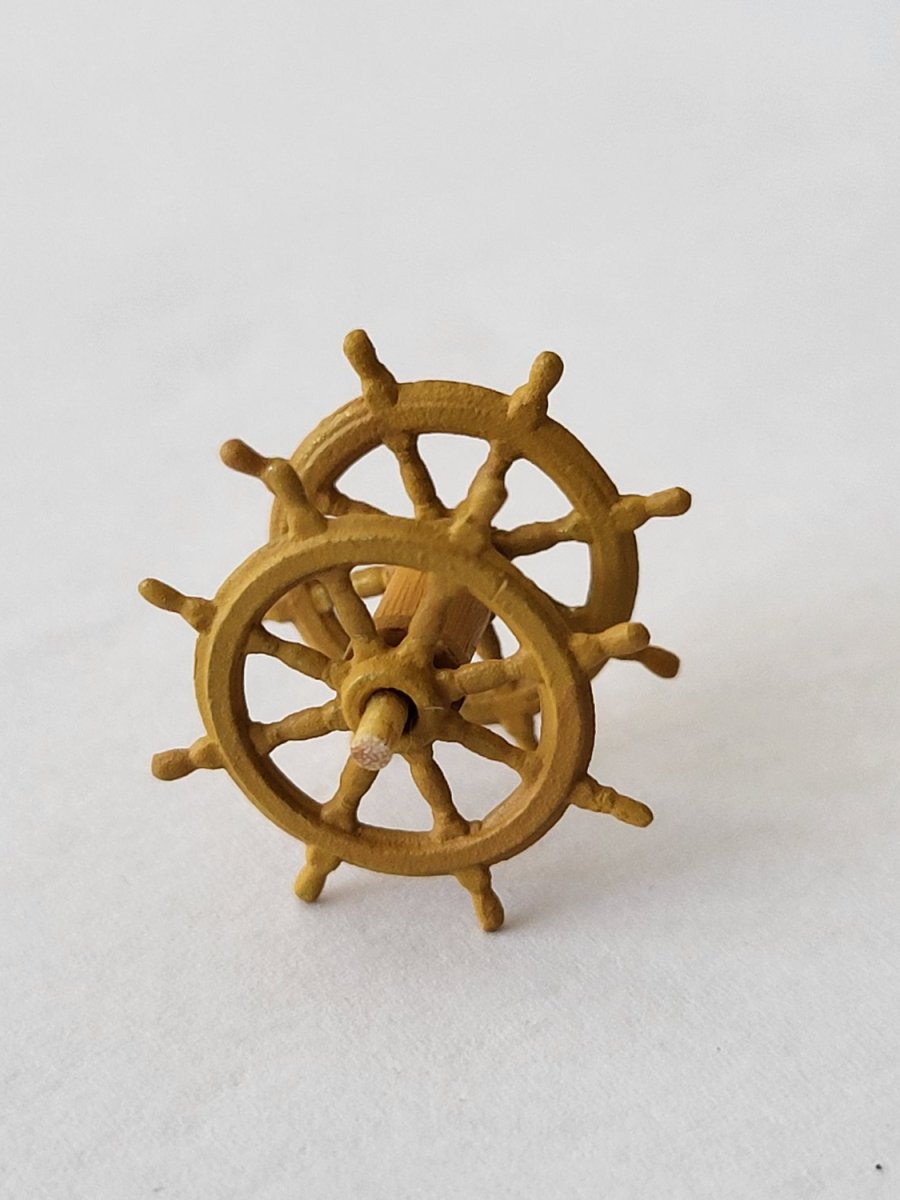
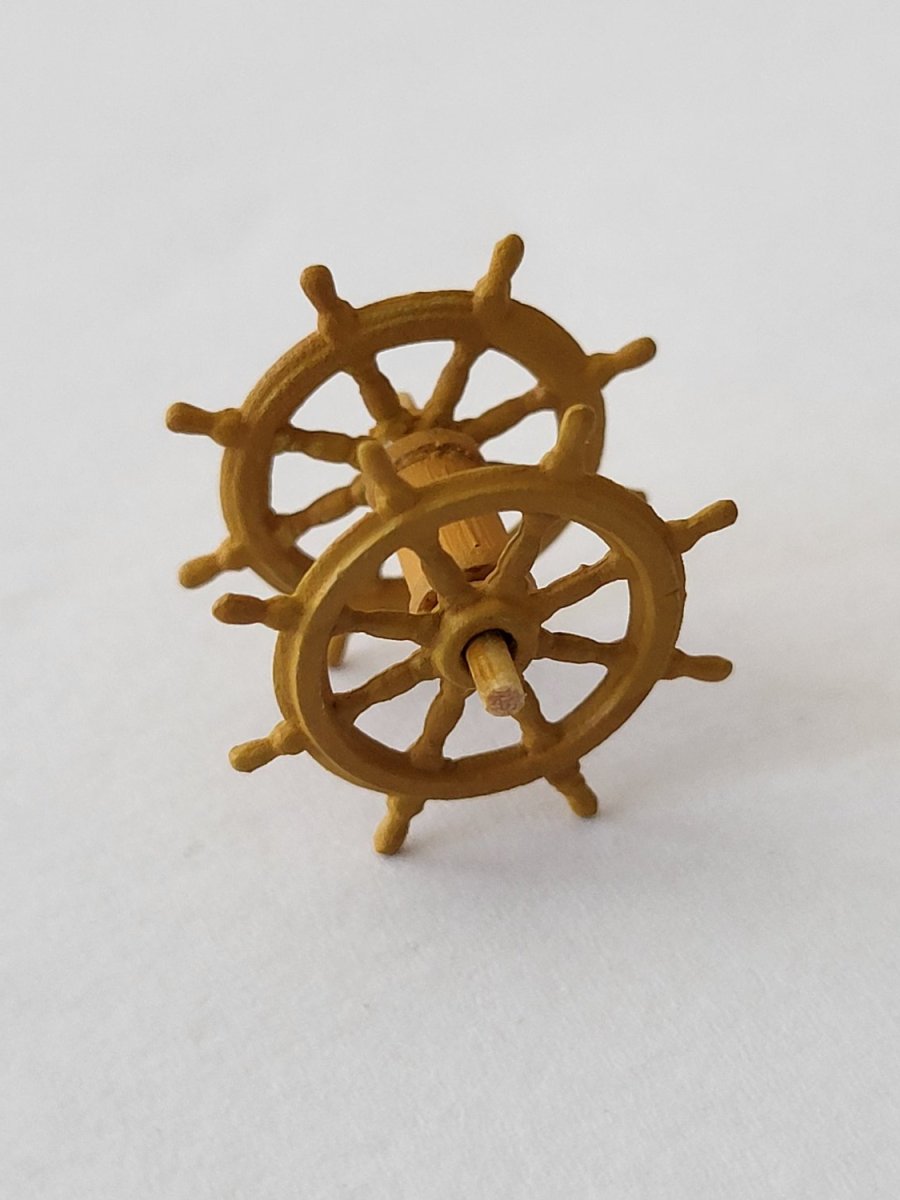
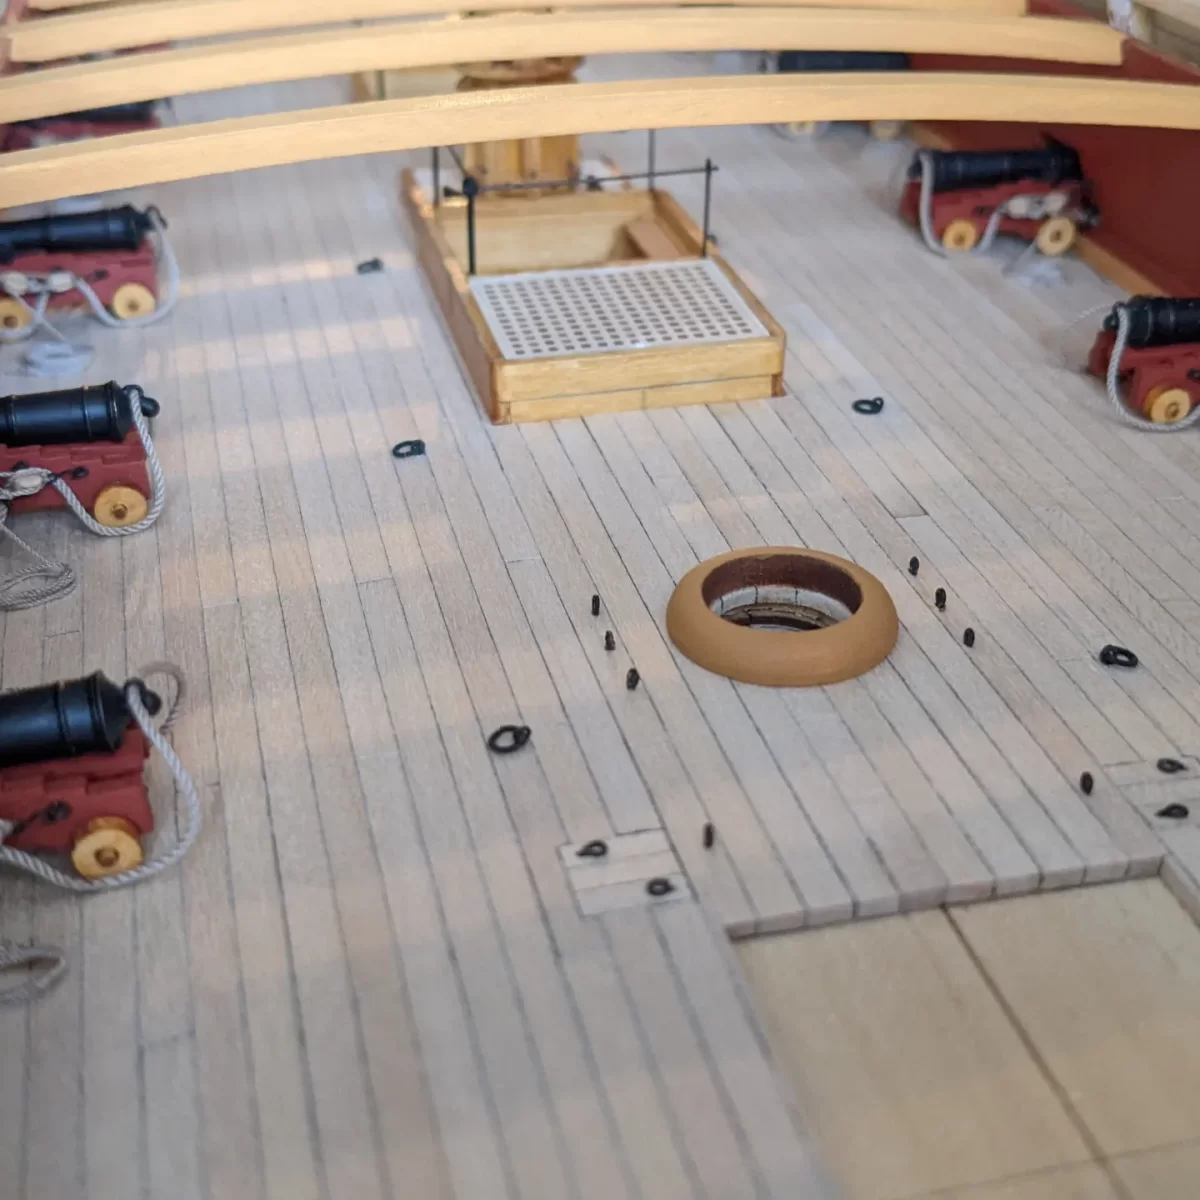
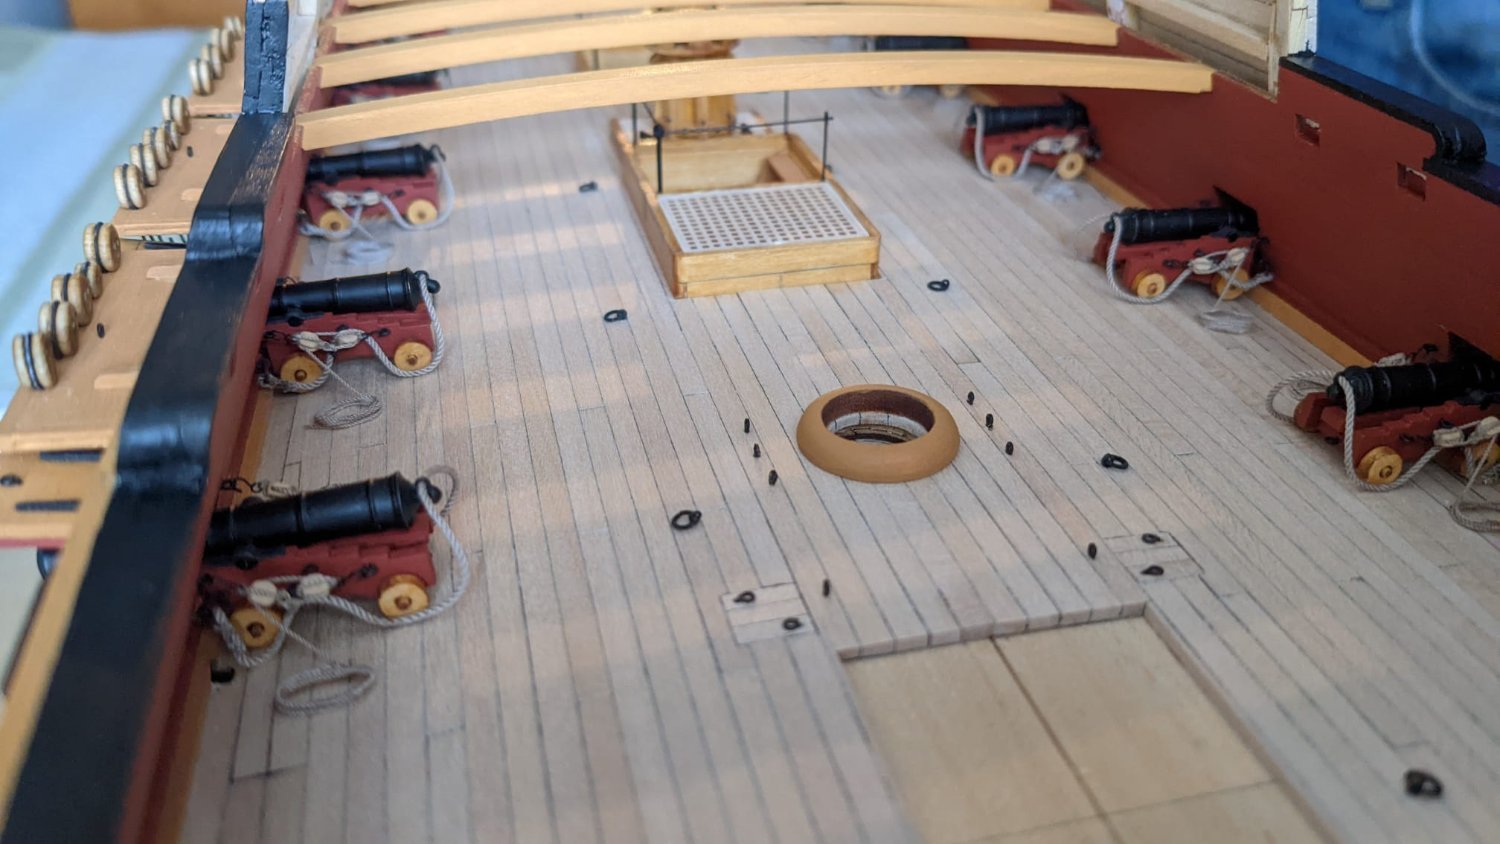
Hello modelers, in the past weeks I have been busy with building, but not before today I took the latest pictures which I would like to show. The planking of the quarterdeck is finished, and the quarterdeck fittings like the speaking tube, the steering wheel, the binnacles, the coamings etc. are in progress. There is still a lot of work to do..... Greetings Werner

.thumb.jpg.5c44799de9d809fef5143ae480a9e55d.jpg)
.thumb.jpg.ec248fee6e3aecee147fd025e516189d.jpg)
.thumb.jpg.33471af5ca3ad5ceb2088d6dc8151ee0.jpg)
.thumb.jpg.f1bca7c123d768be9fdbf3bbb9c2ac49.jpg)
.thumb.jpg.5e5c48761b74dd42a6bb2447cbcdcc23.jpg)
.thumb.jpg.a0ef8ddd3838e11365204559913e7098.jpg)
.thumb.jpg.f15d3ccf4bf82a423ab93c82989cae15.jpg)
.thumb.jpg.2277f5ccbb296d5ff5064f45844202ad.jpg)
.thumb.jpg.e95757a933c0cd3b967e24055da075d6.jpg)


- 60 replies
-
- 13
-
-
- Confederacy
- Model Shipways
- (and 1 more)
-
Hello Harshil, Clean and accurate work as always! Some remarks: 1. The different tone of color of the middle and side parts of the cap rail is the result of the different kinds of wood - the middle part from a stripe of basswood, the side parts from laser cut plywood. On my model, this did not occur because all wooden parts except the deck planks are painted with acrylic. 2. I looks as if there will remain a gap beneath the bottom white plank, but anyway you are perhaps going to use a kind of "washboard" along the deck edge. 3. To make the carvings yourself is very ambitious, and I wish you success! Werner
-
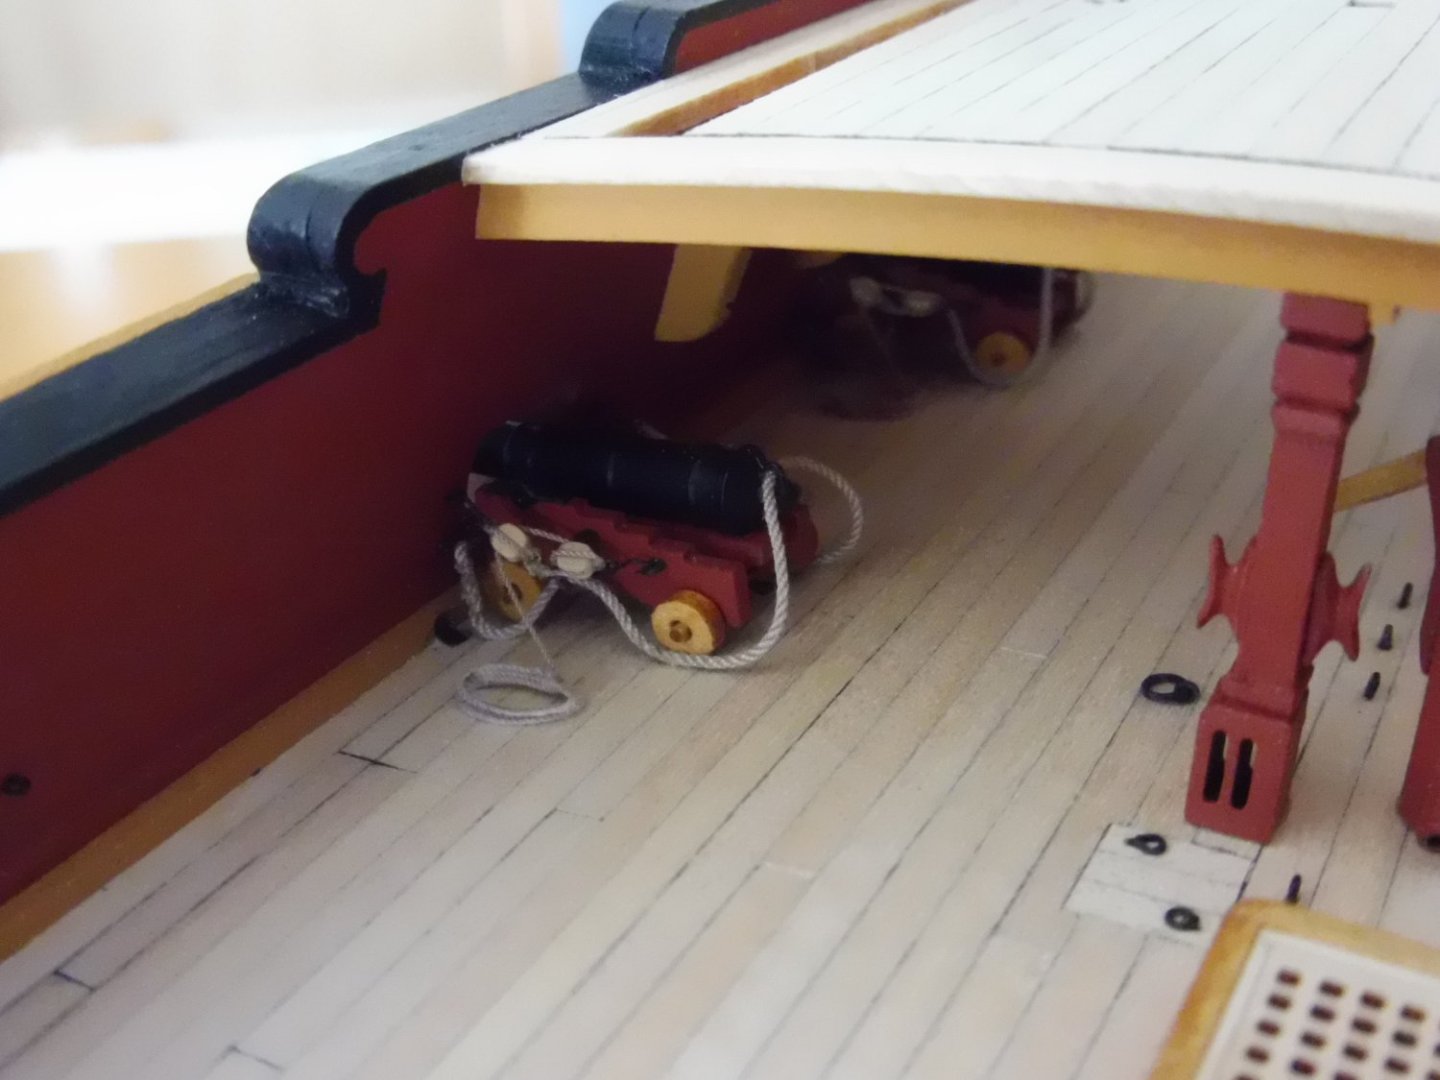
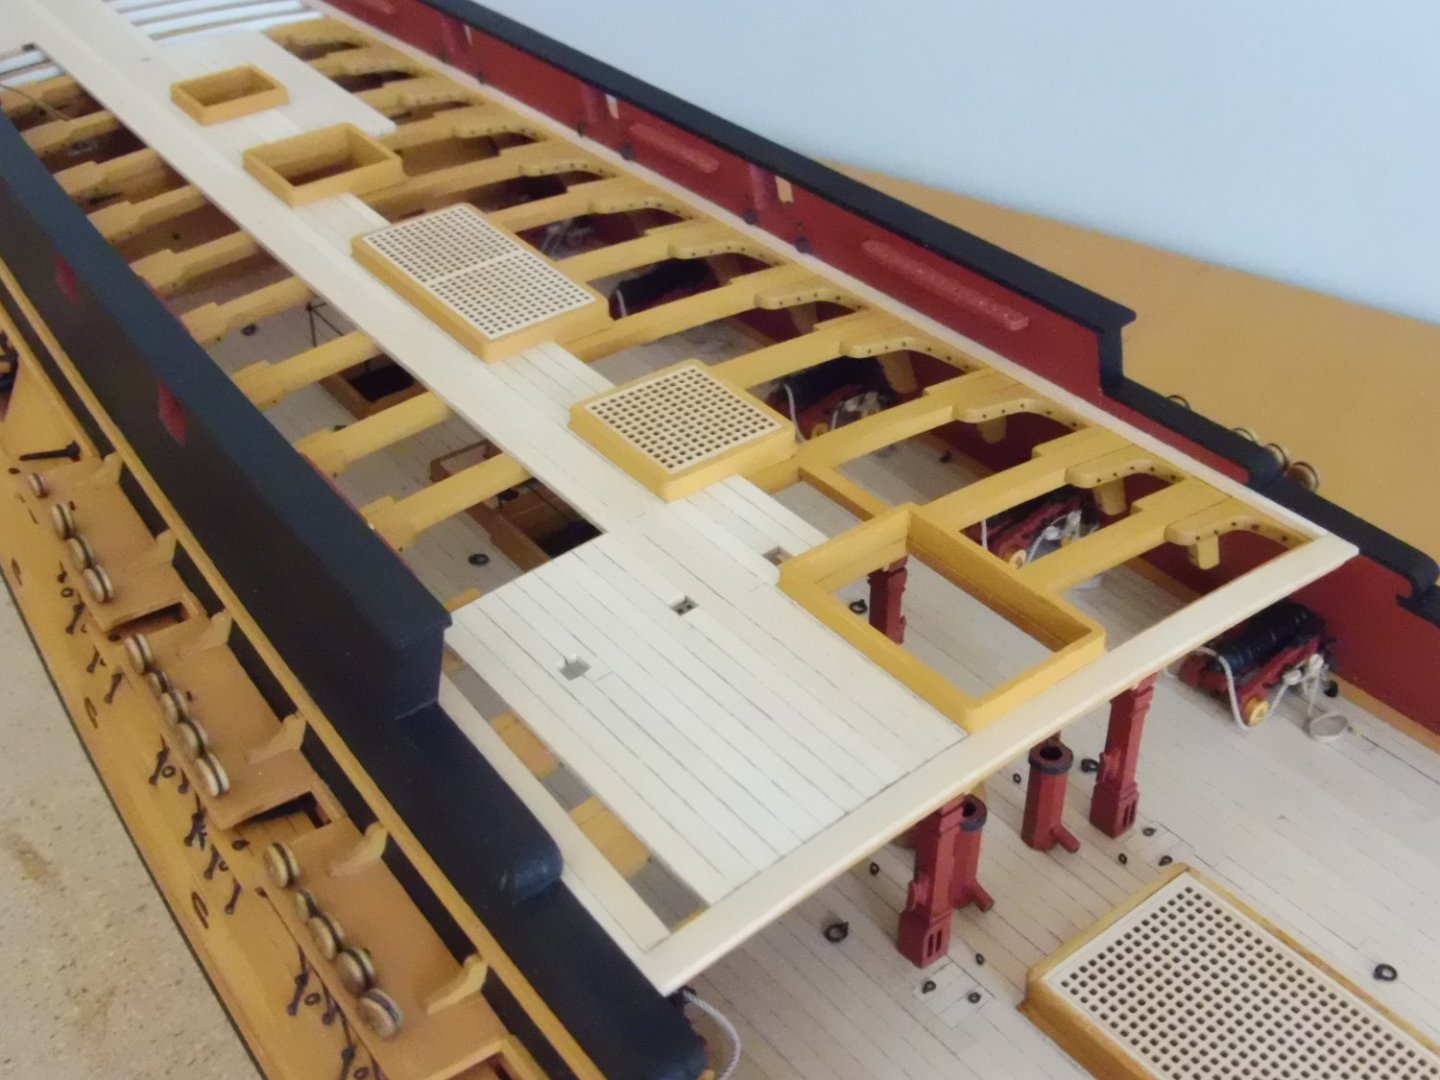
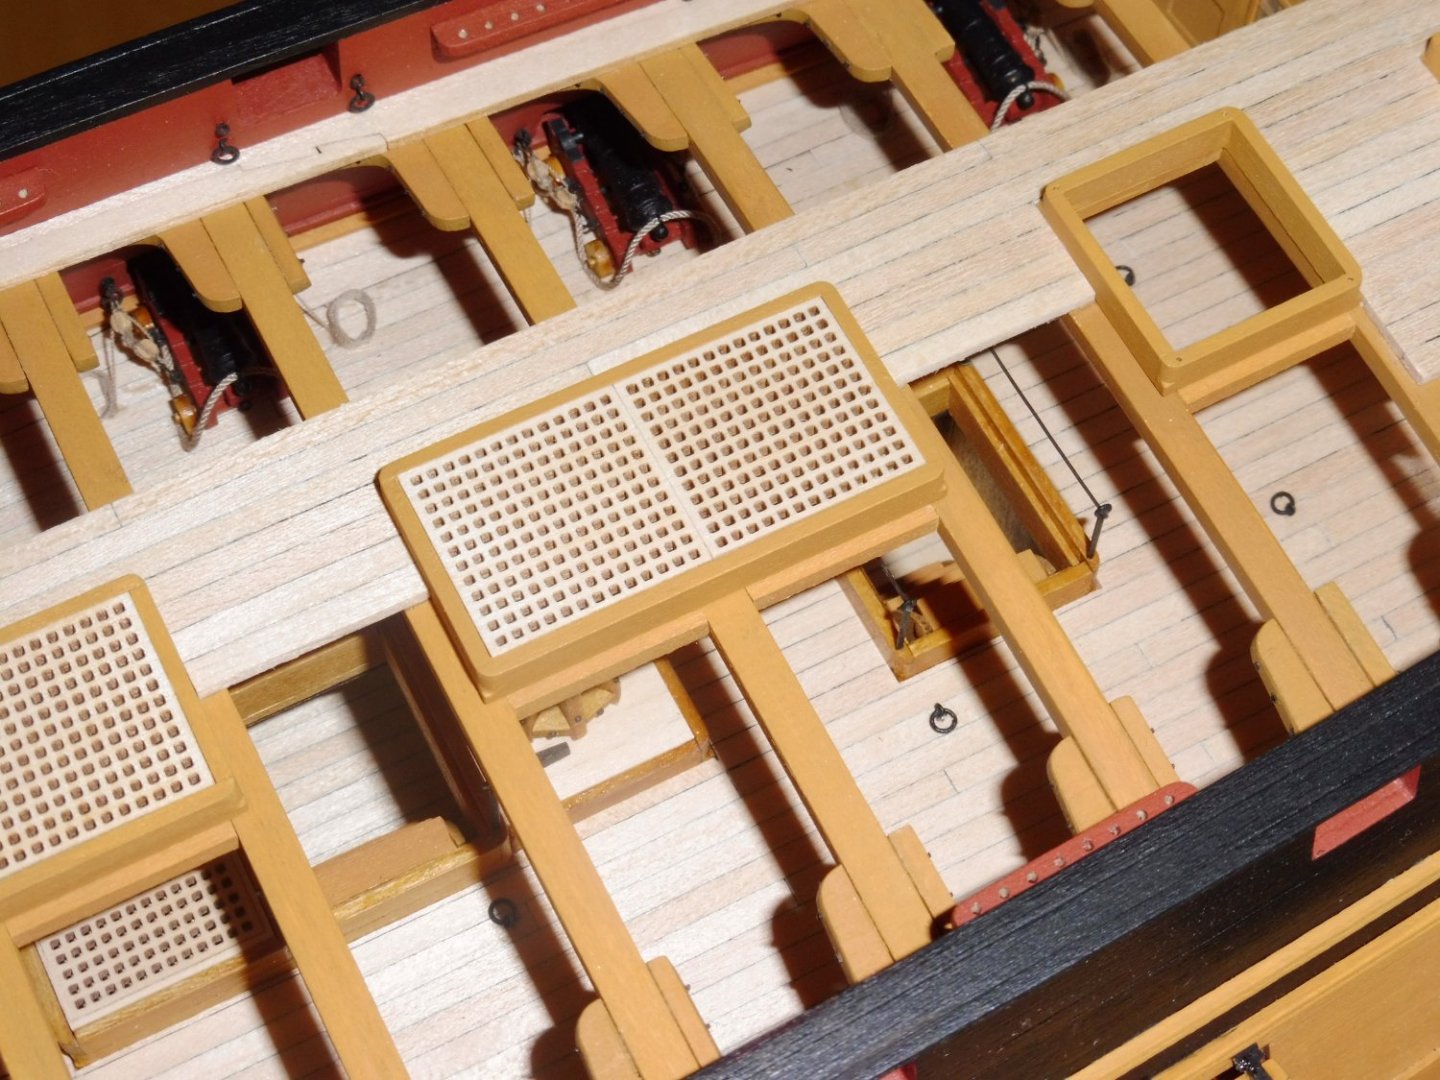
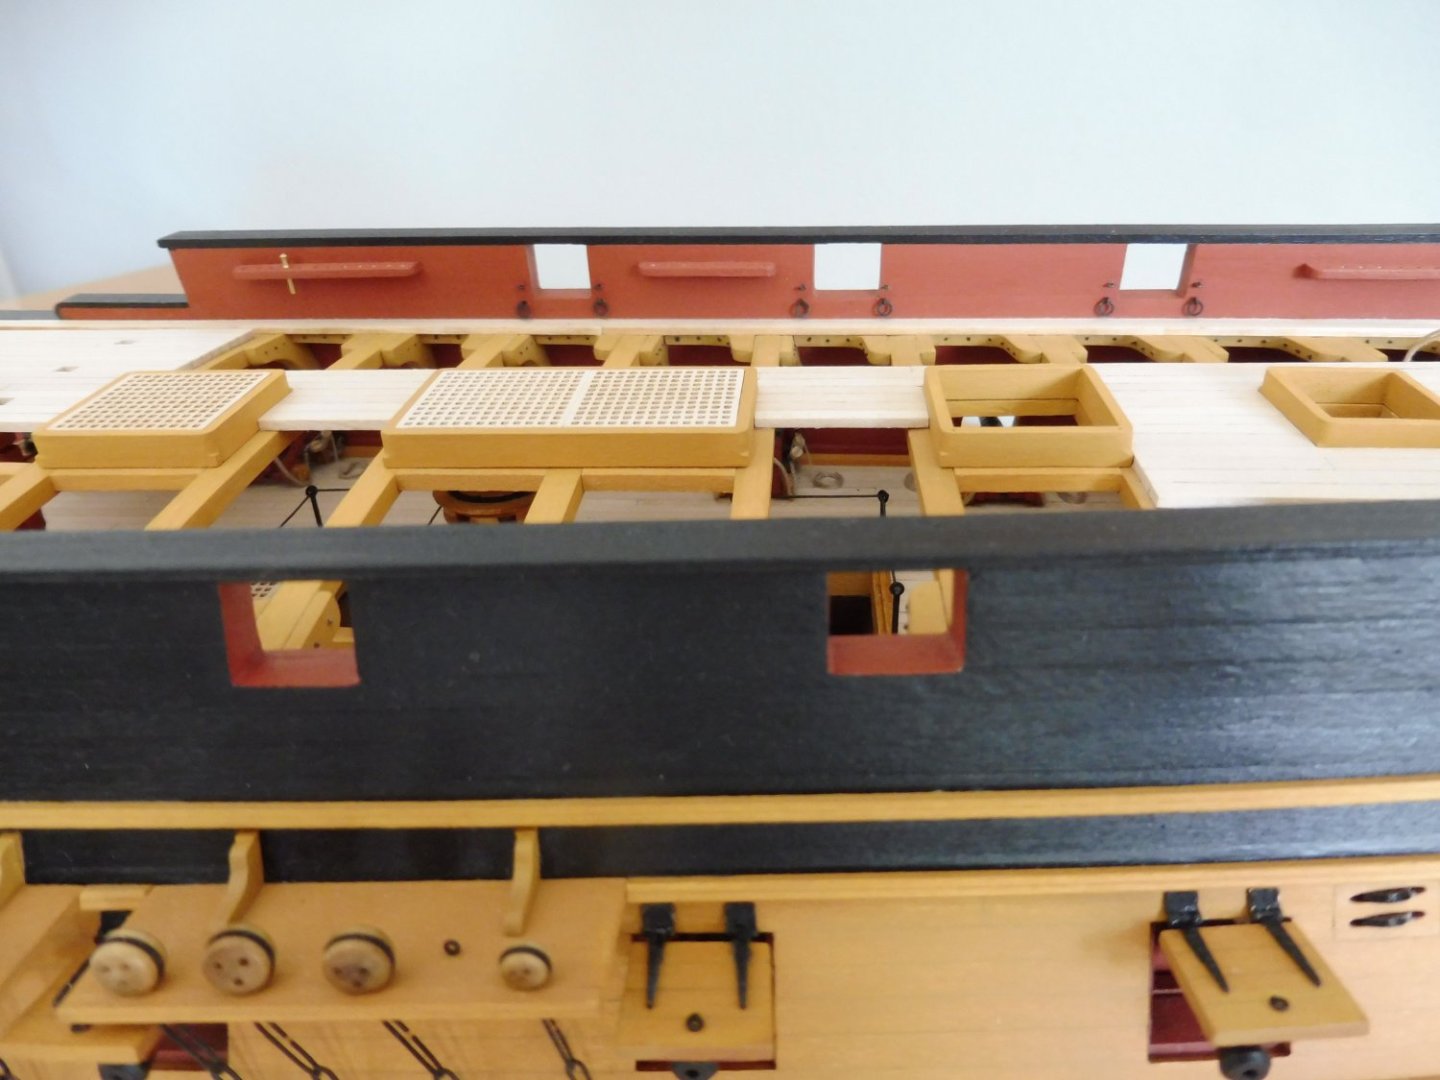
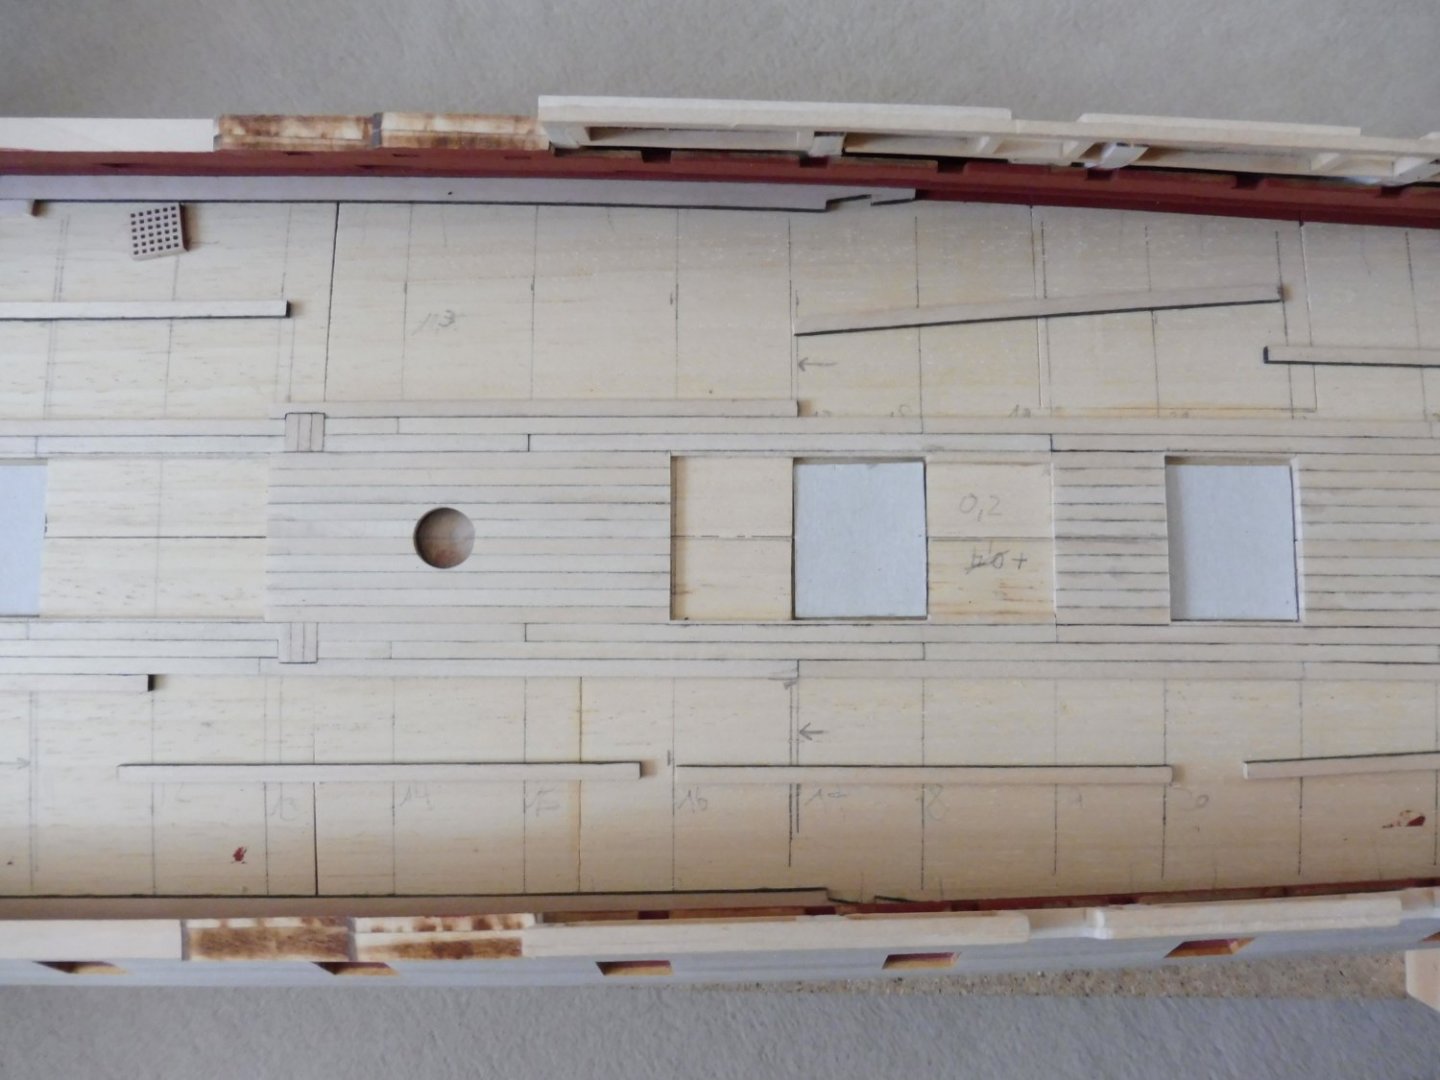
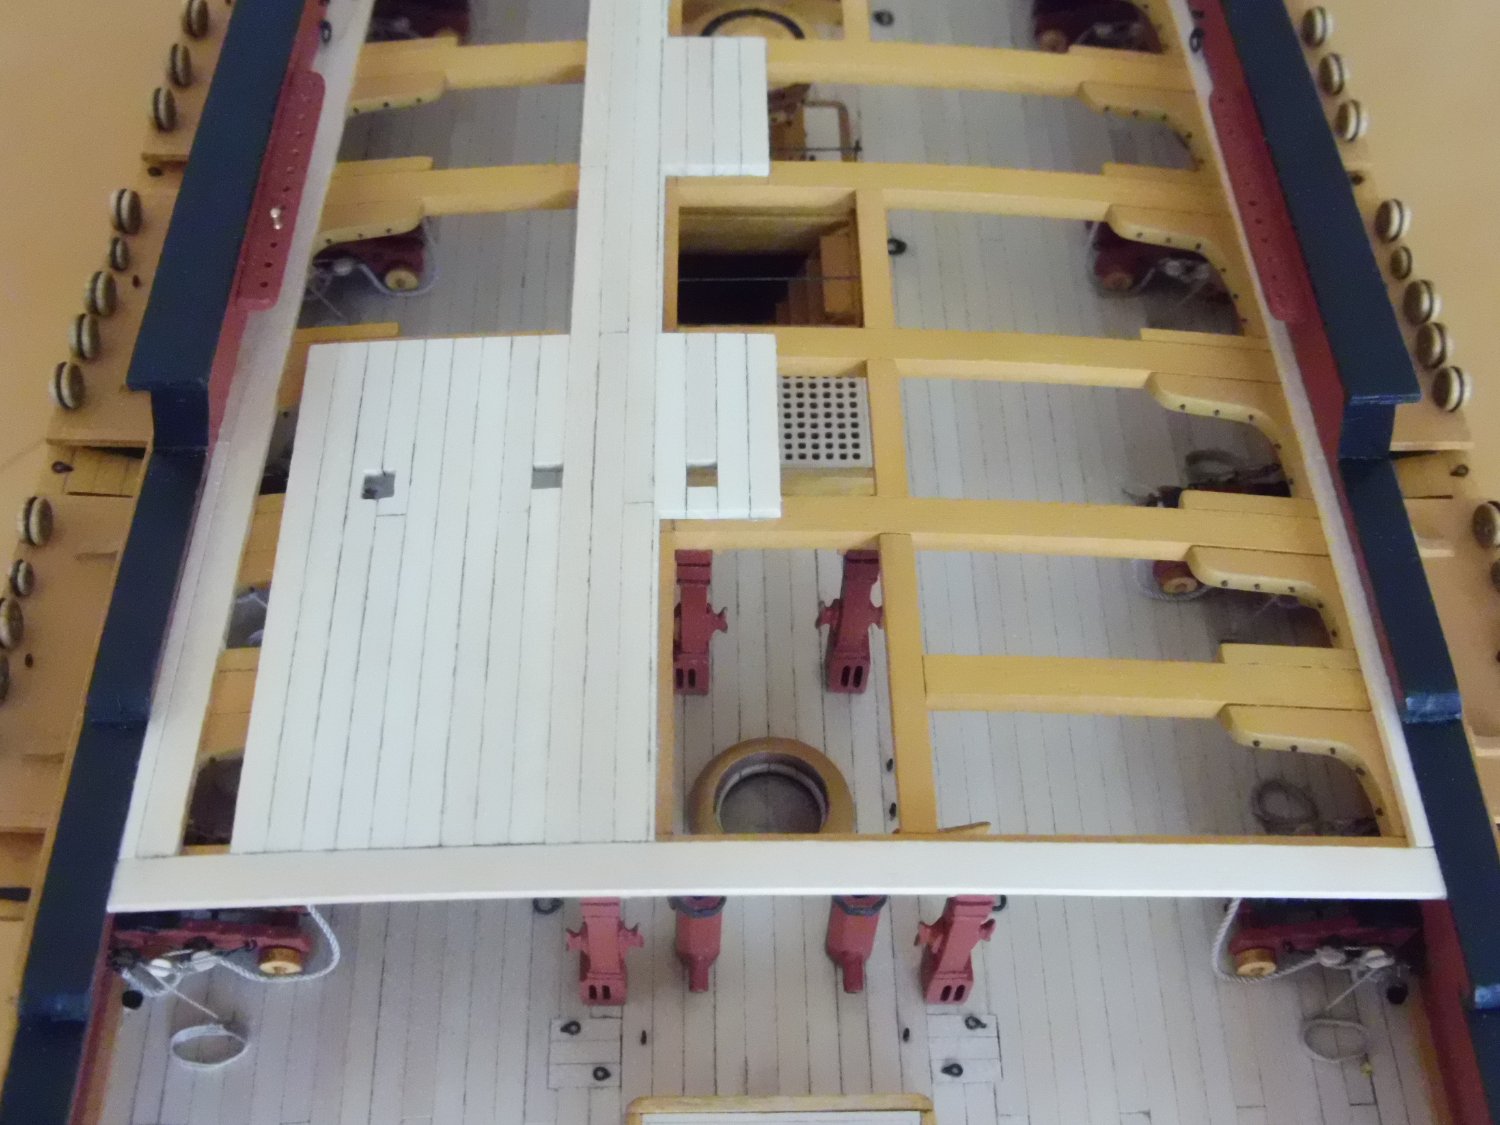
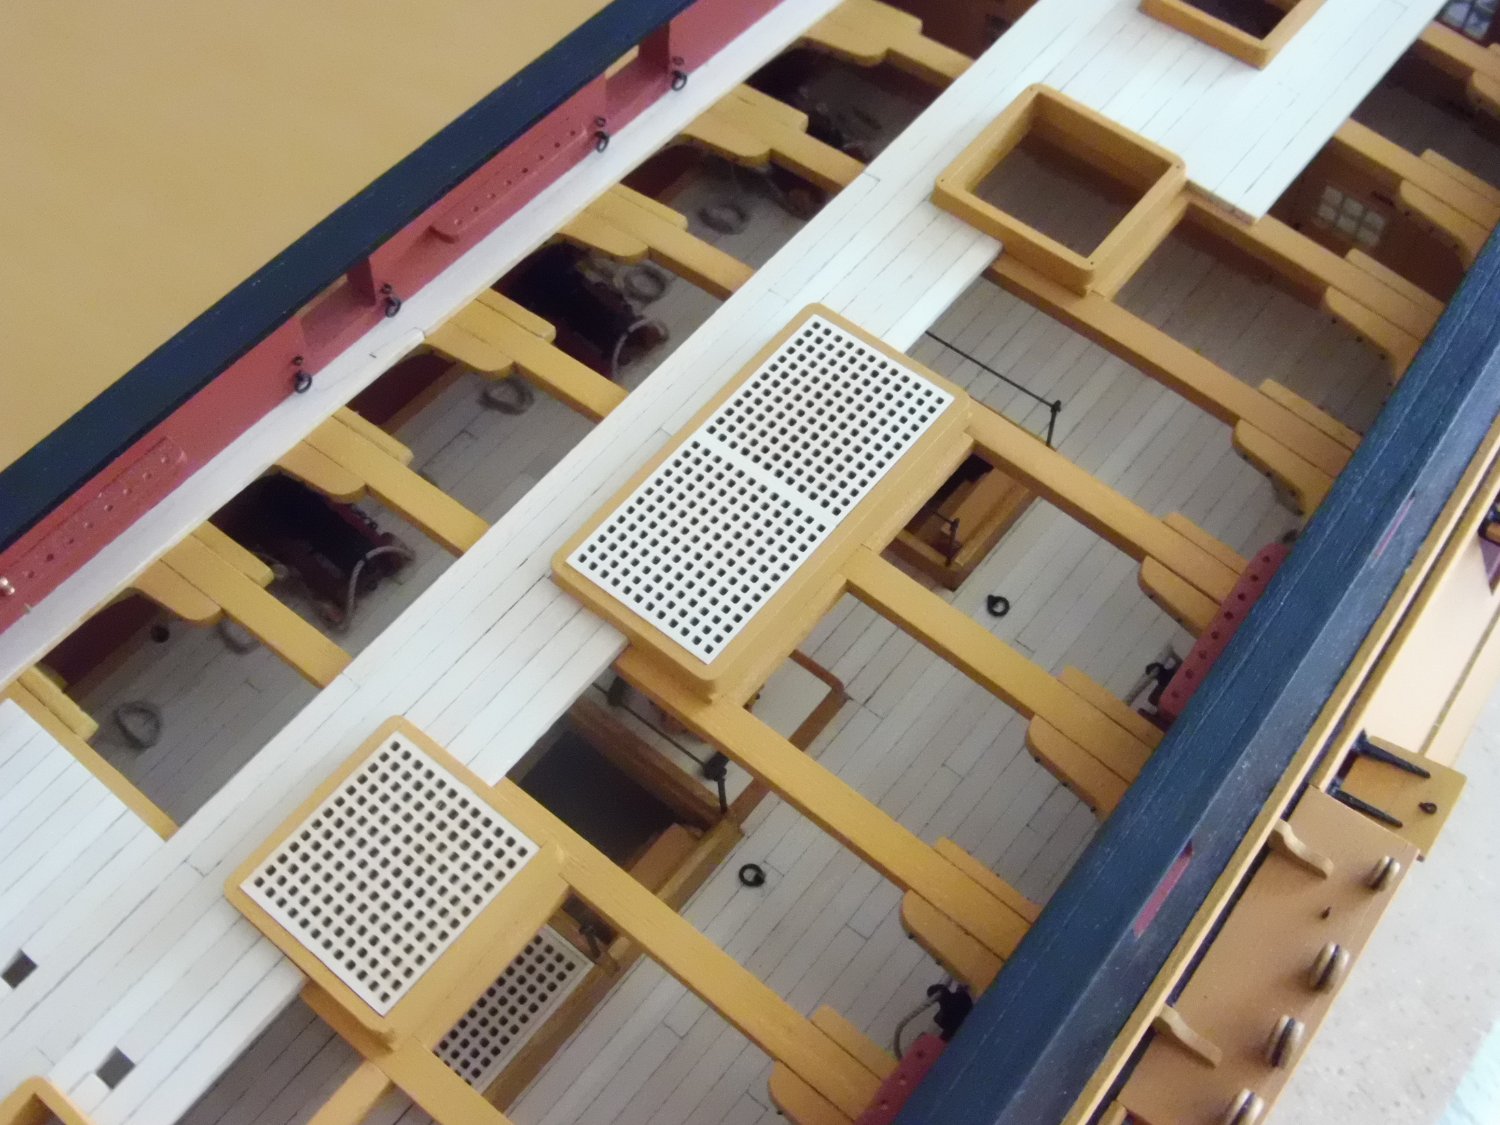
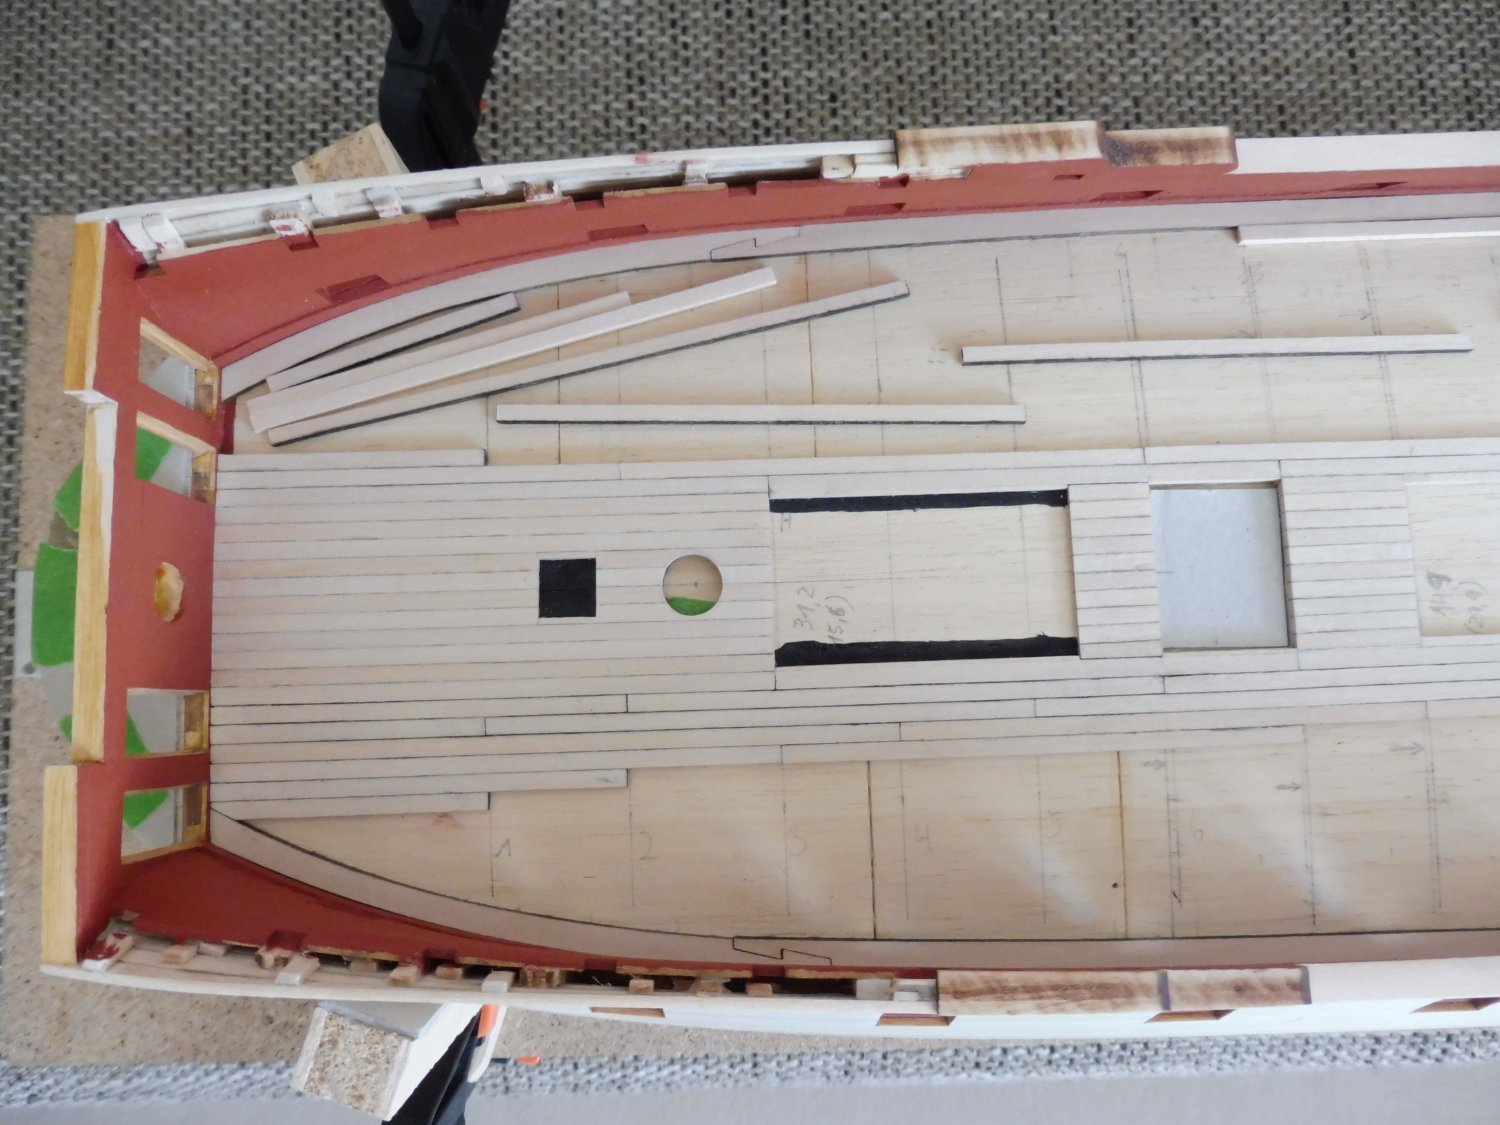
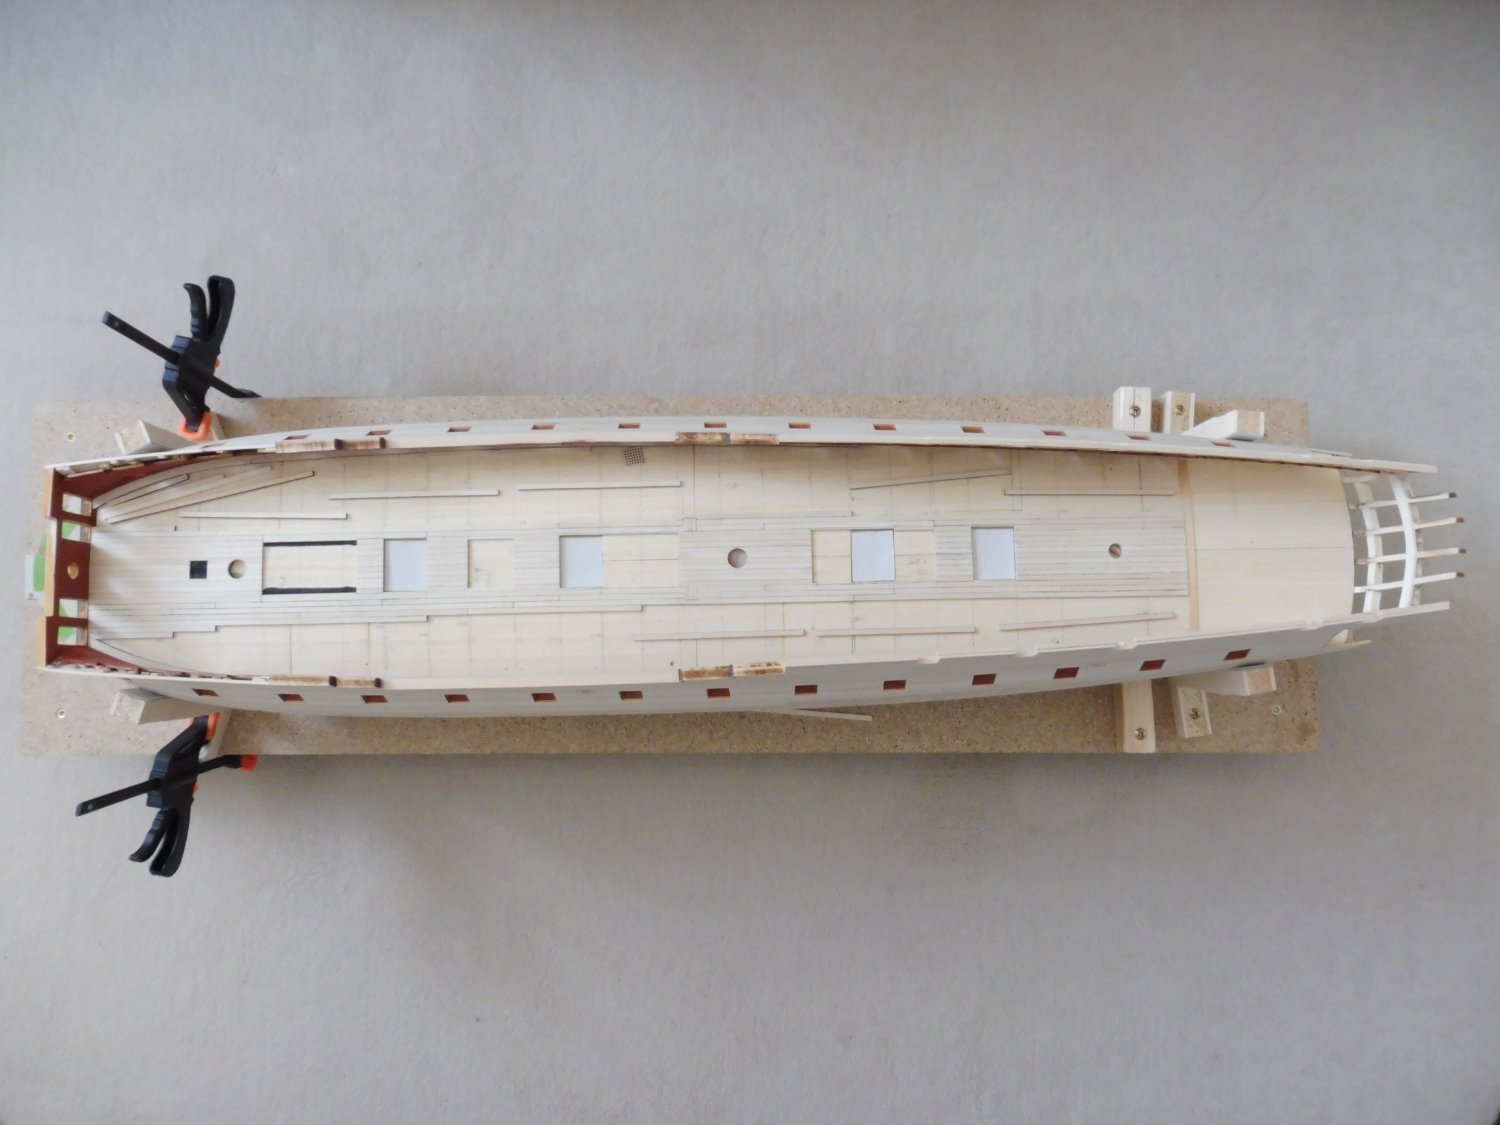
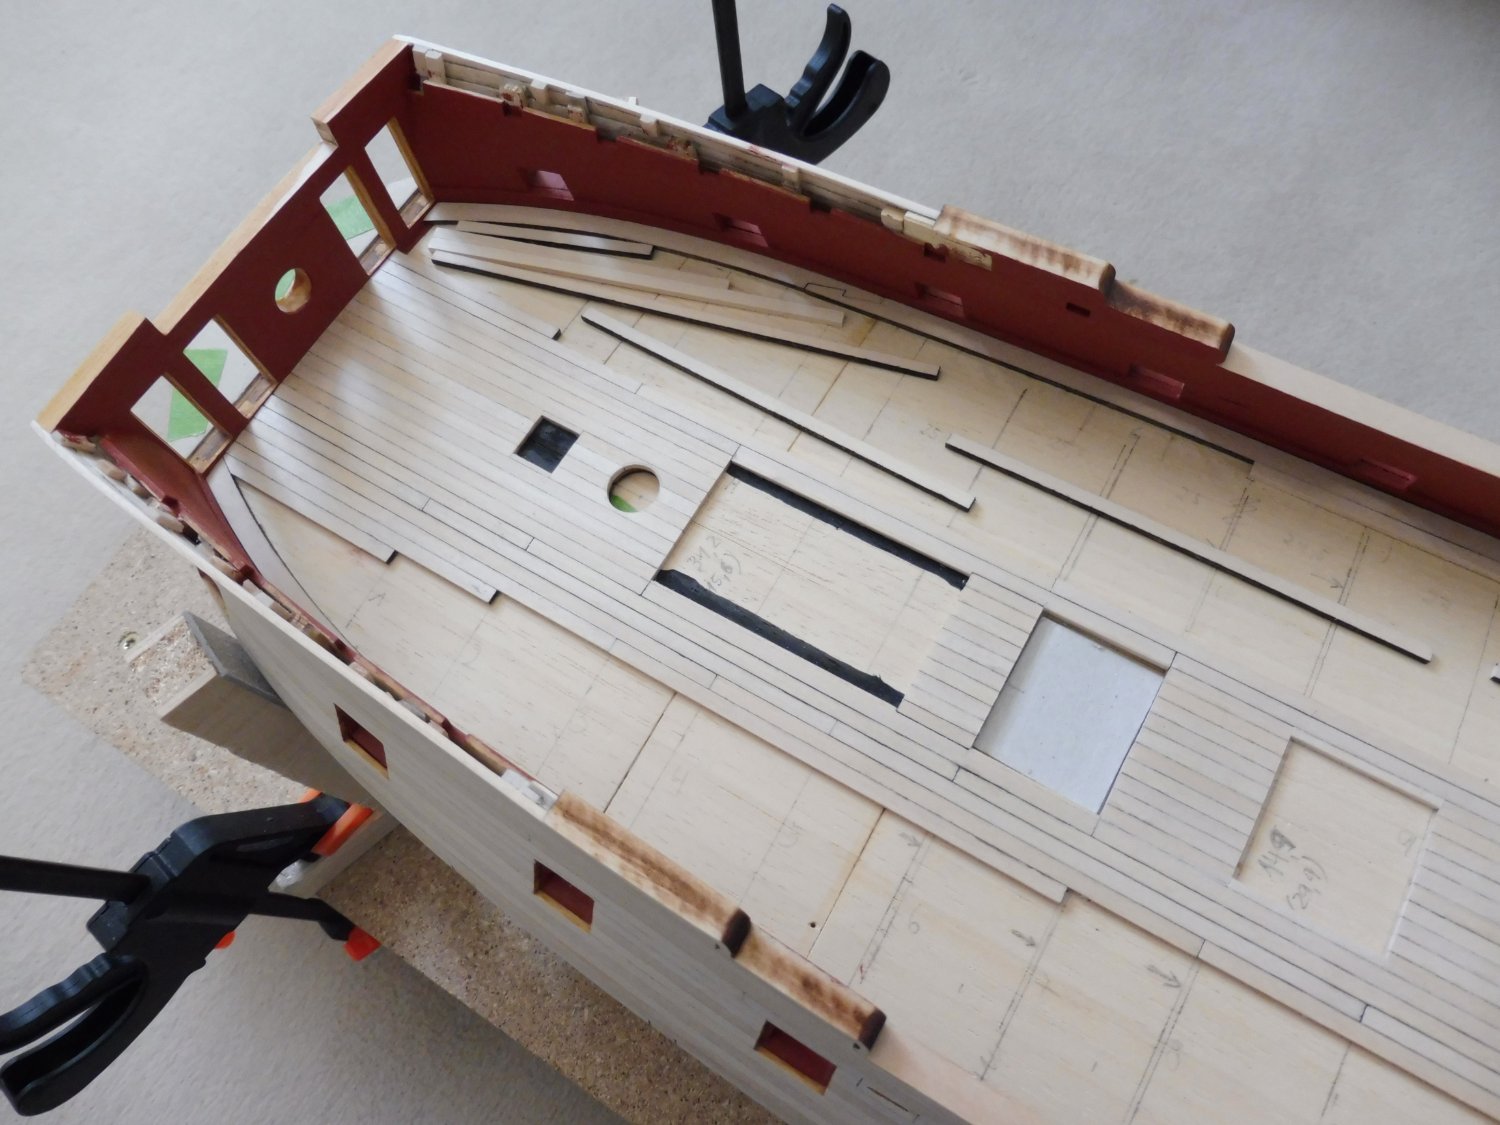
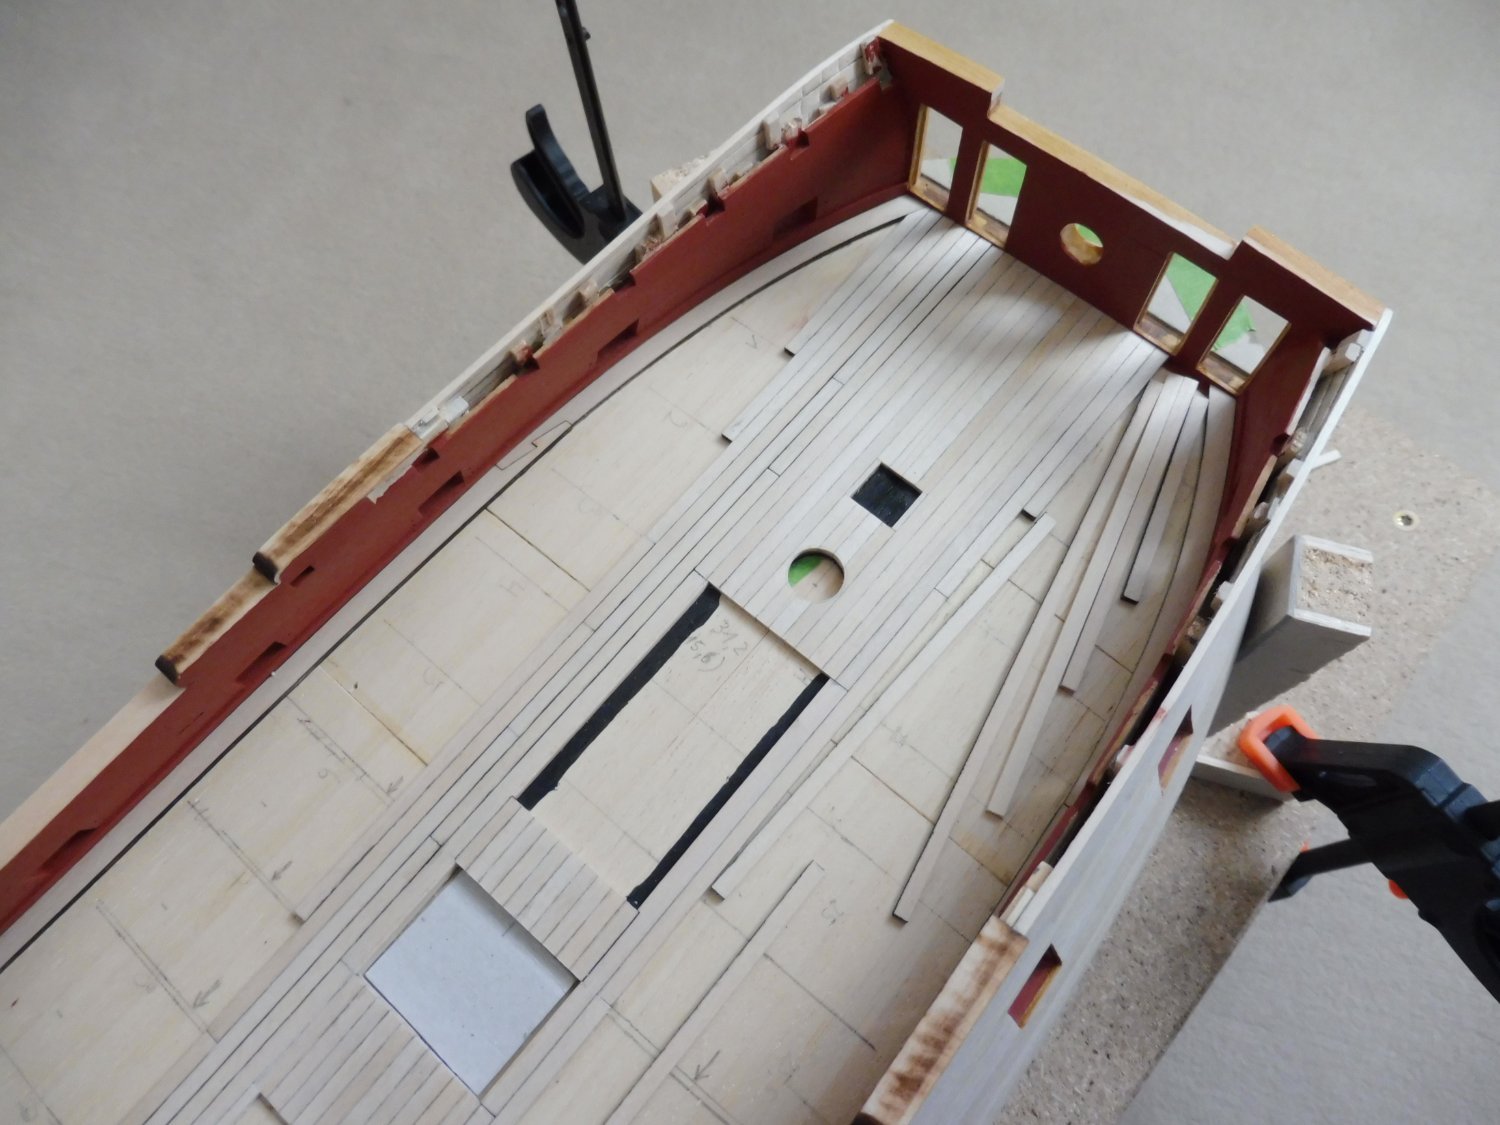
With the following pictures I go back in time .....some pictures of planking the gun deck.


- 60 replies
-
- 11
-
-
- Confederacy
- Model Shipways
- (and 1 more)
-
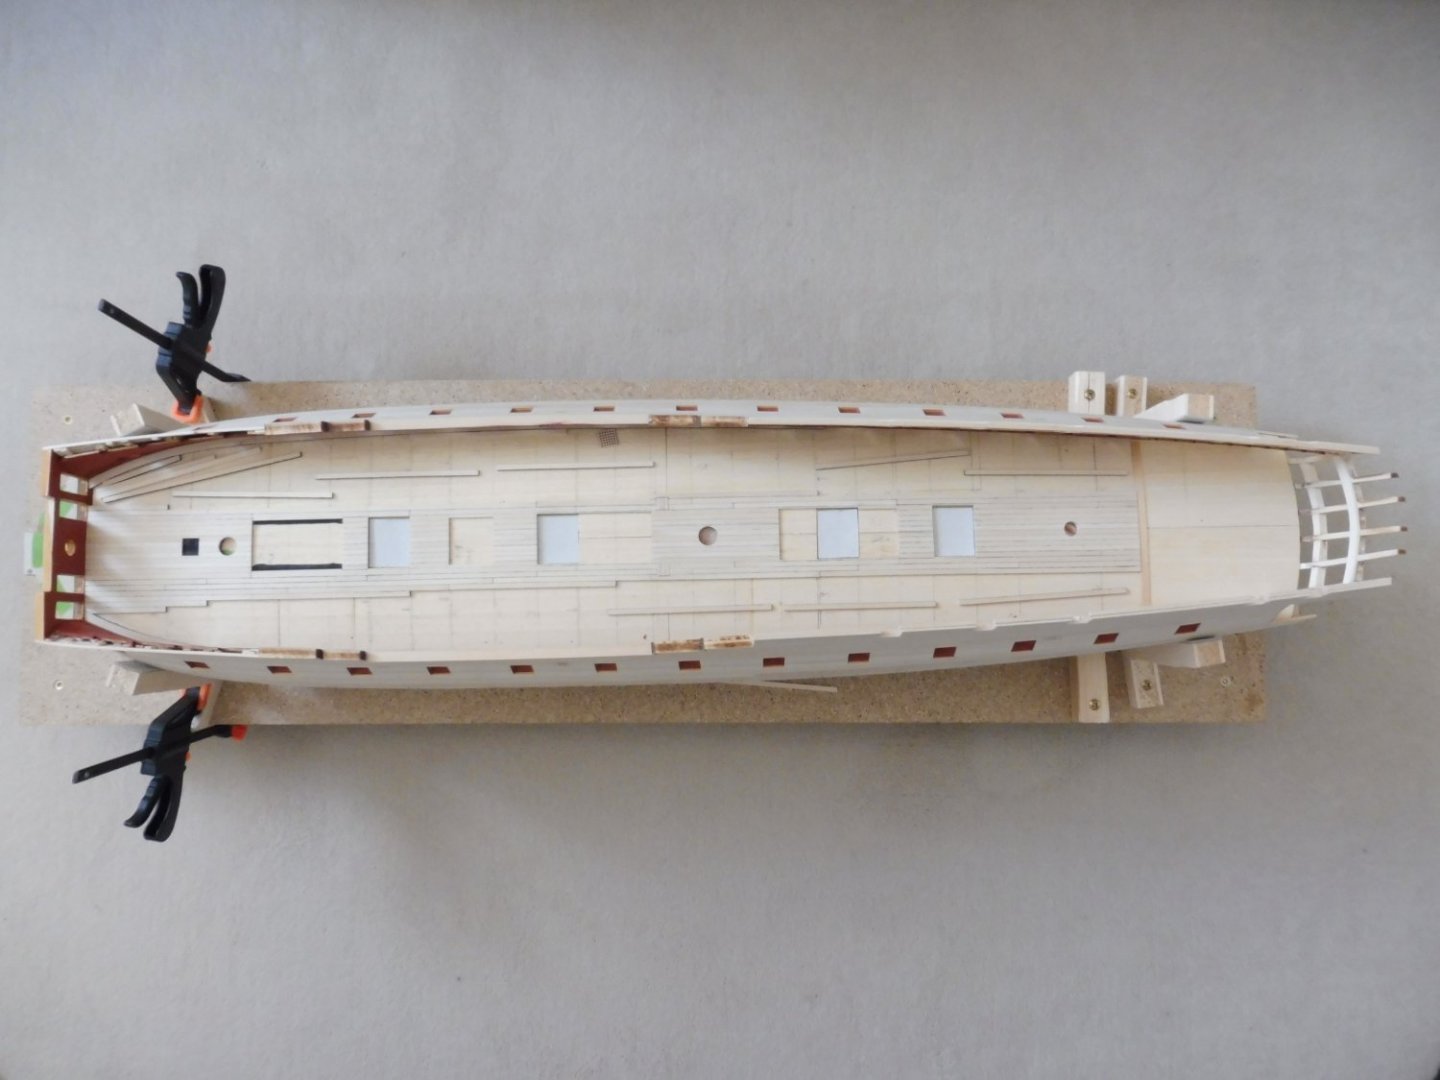
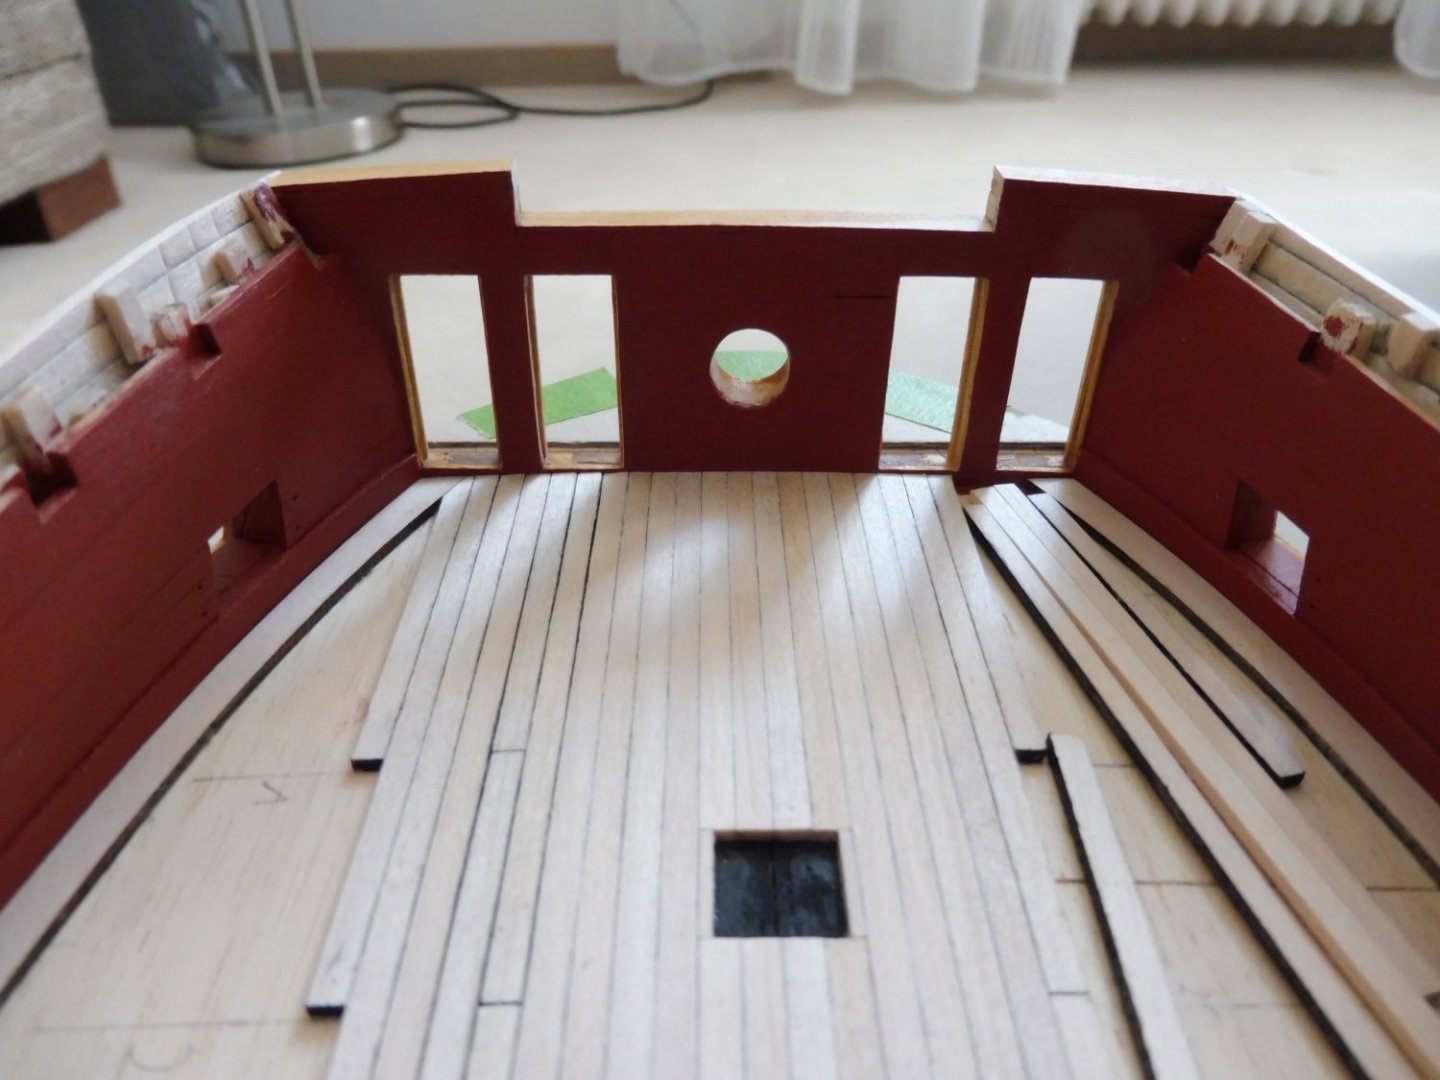
Hello modelers, some impressions from the "dockyard" as handy-snapshots about four weeks old. Meanwhile all deck beams and knees of the quarter deck are glued, and in the moment I´m planking the bulwarks of the quarter deck.

.jpg.14d9e691c90043638e26c22304815d87.jpg)
.jpg.31909e4745b4b728cefc6f9fd8be89fd.jpg)
.thumb.jpg.f31681be578f27a402405d705e6f0b79.jpg)
.thumb.jpg.40da1142fdfe3243810742468afc7ea0.jpg)
- 60 replies
-
- 10
-
-
- Confederacy
- Model Shipways
- (and 1 more)
-
It is always a pleasure to follow your log and to see how you deal with the challenges of the details. One point before planking the gun deck.....close the gap between the false deck and the stern lights with another white plank. I think the deck planking will be too flat (just 1/16) to close the gap.
-
Hello Harshil, the point is that this support is not mentioned in the instructions. To fix the problem I suggest the following: Carefully cut out both sides of the false deck along the fore edge of frame F and both sides of the bulkhead former. Then glue new supports in appropriate height along the fore edge of frame F, both sides of the bulkhead former and additionally on the beakhead bulkhead. Then you can glue the parts of the false deck on again. If you regard it necessary you can repeat this procedure between the frames F and E only on the port side. The gap between the false deck and the spirketting plank should then be disappeared.
-
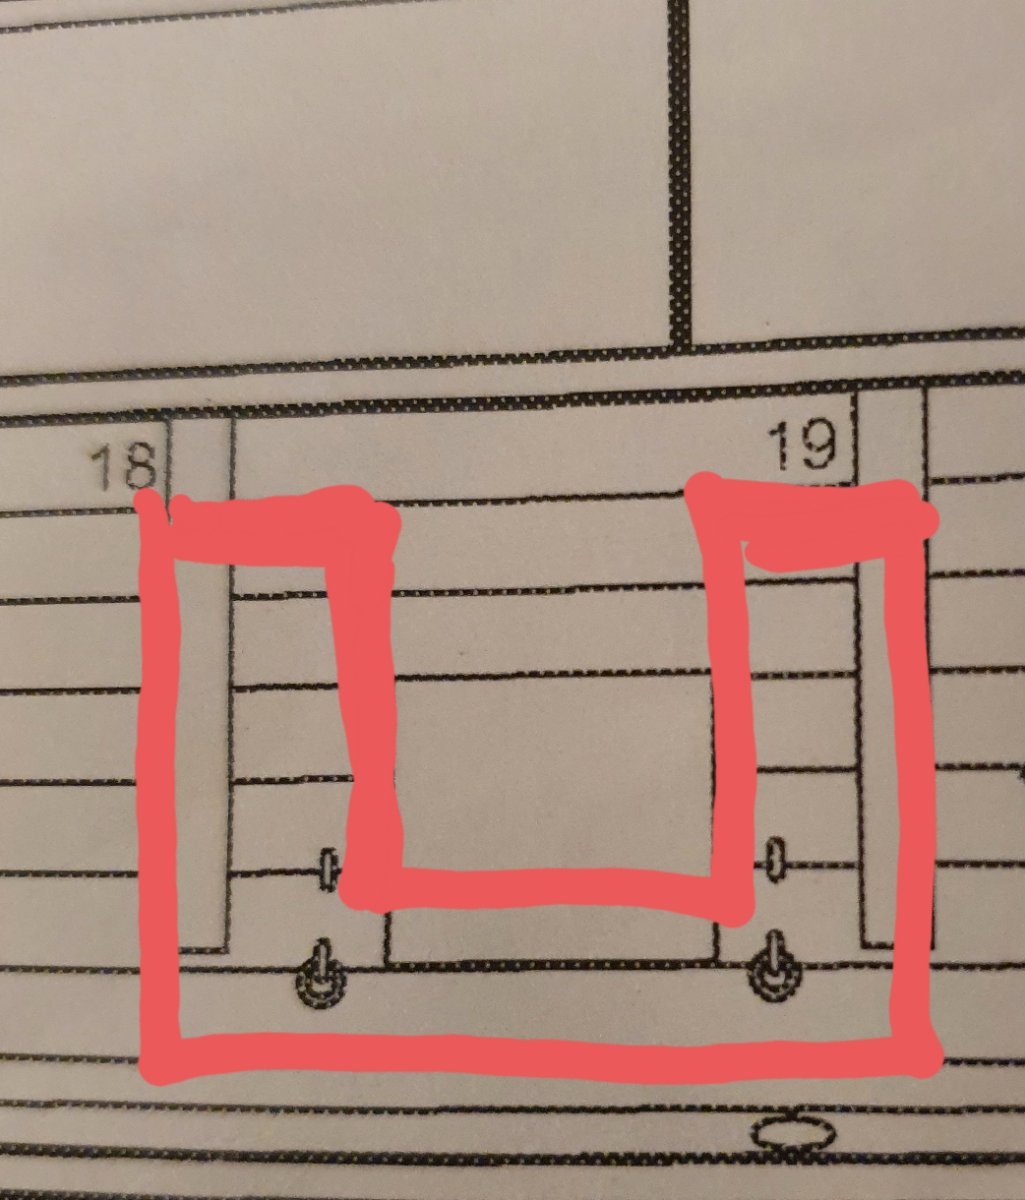
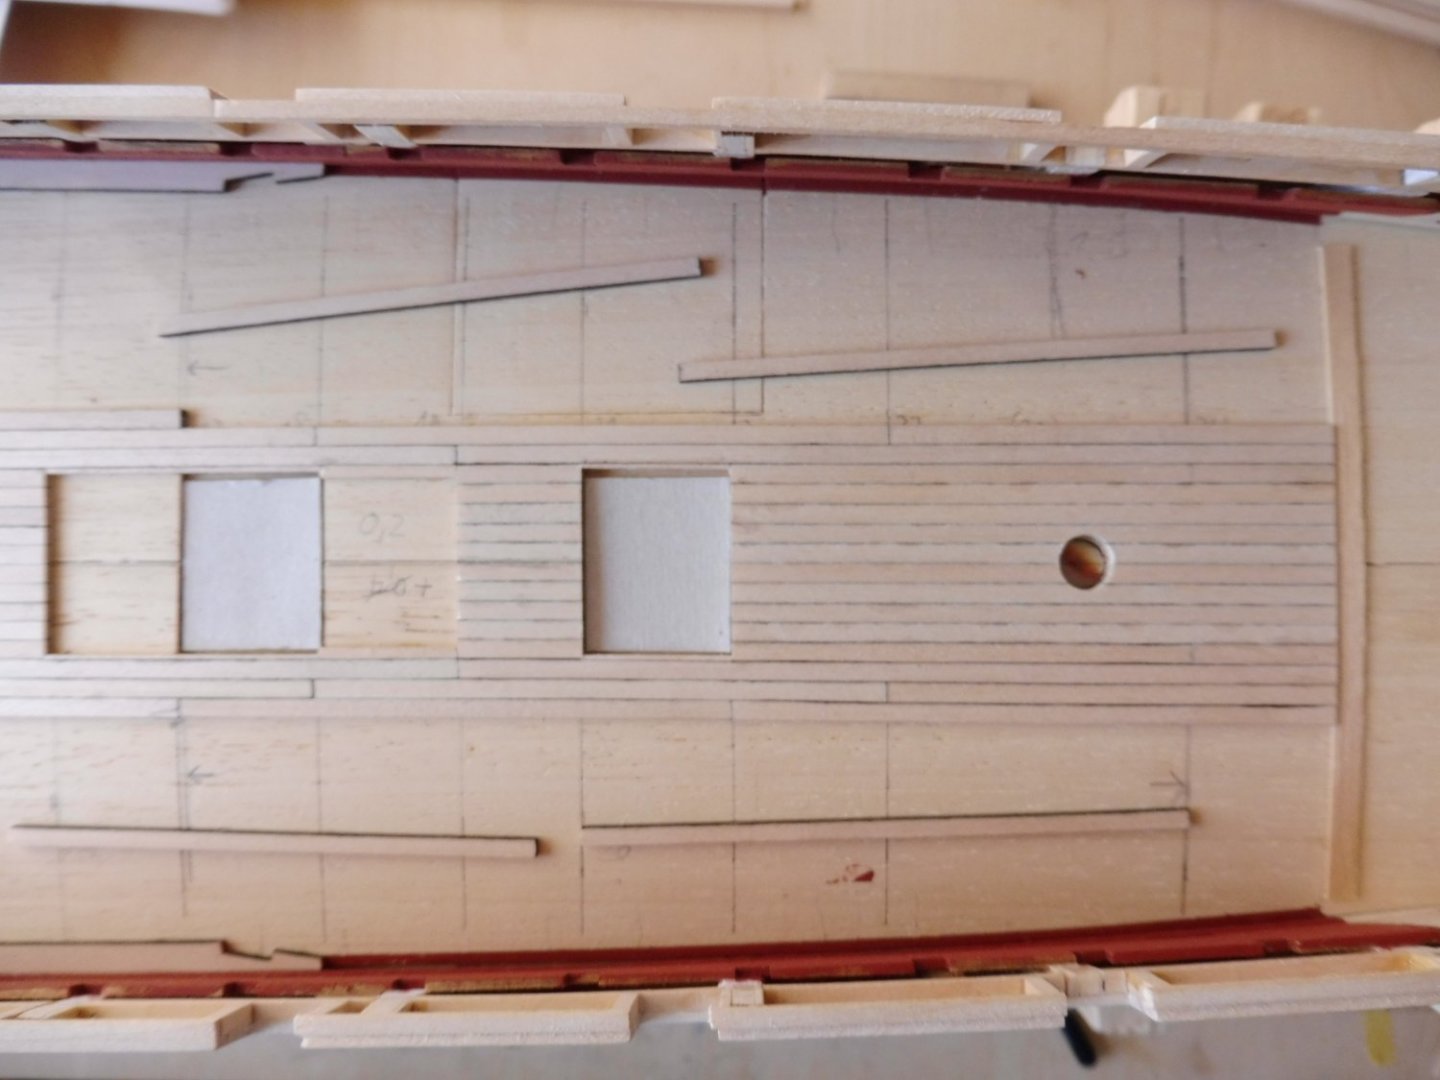
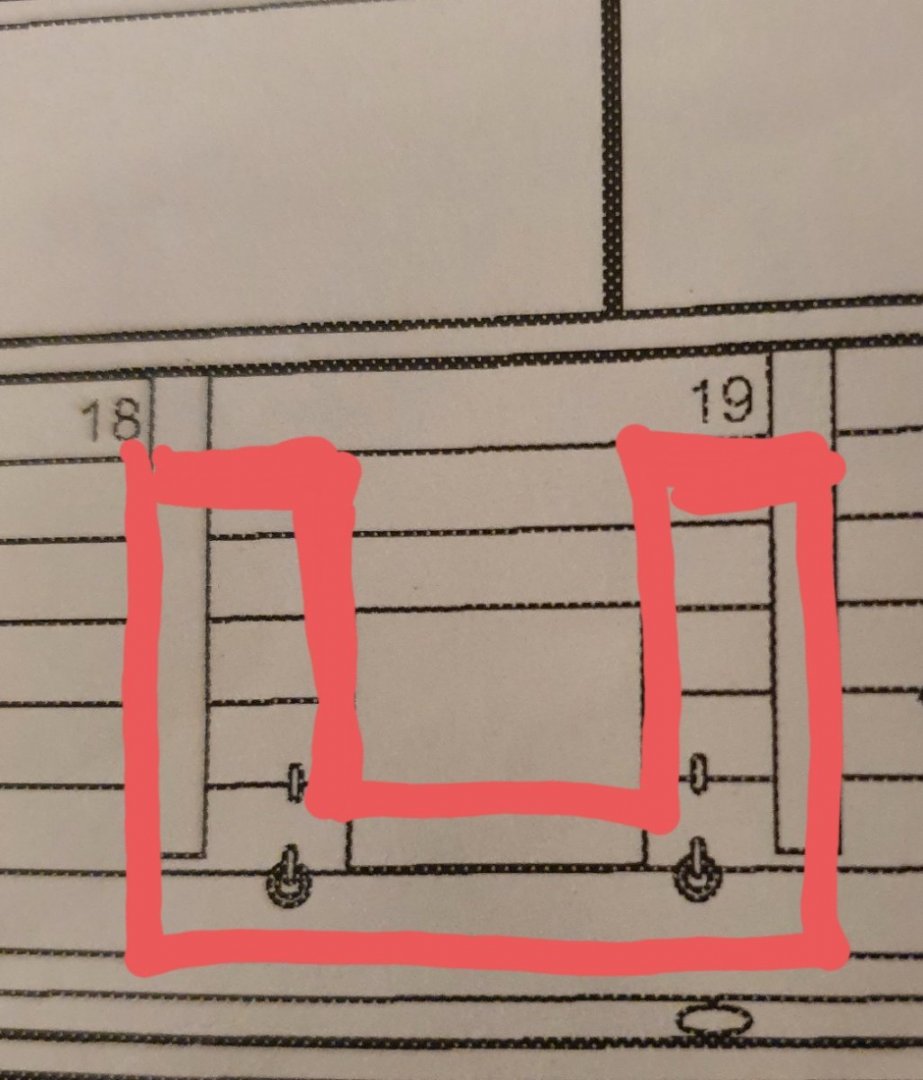
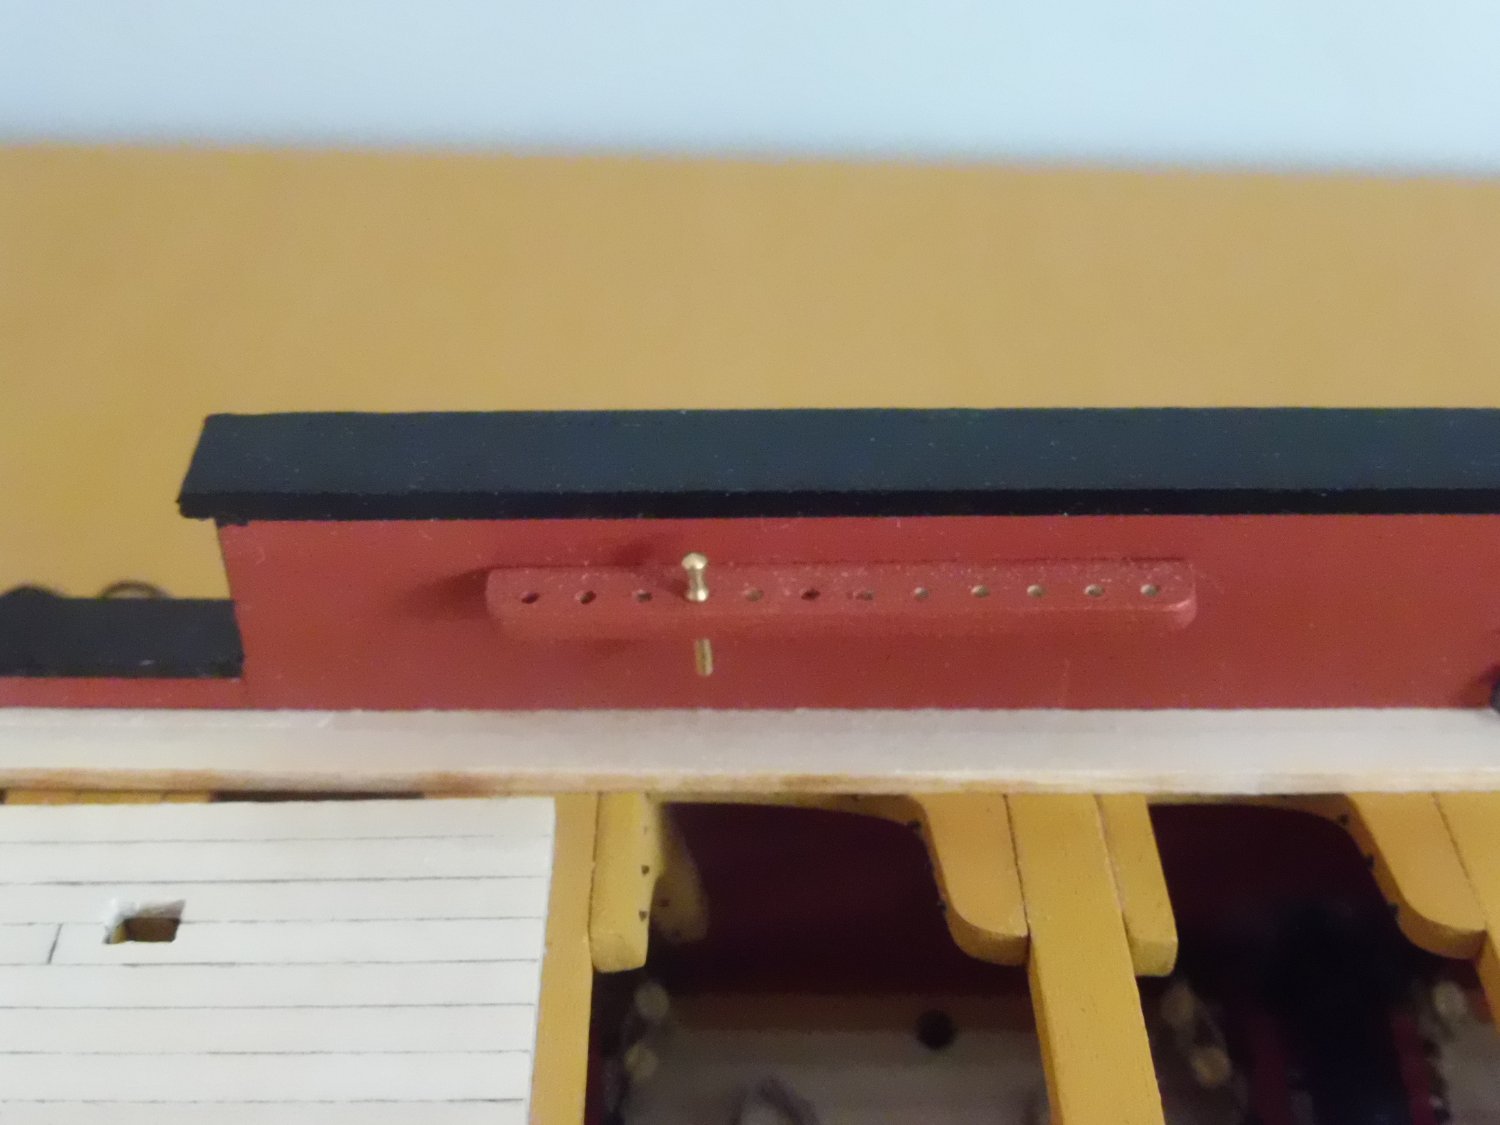
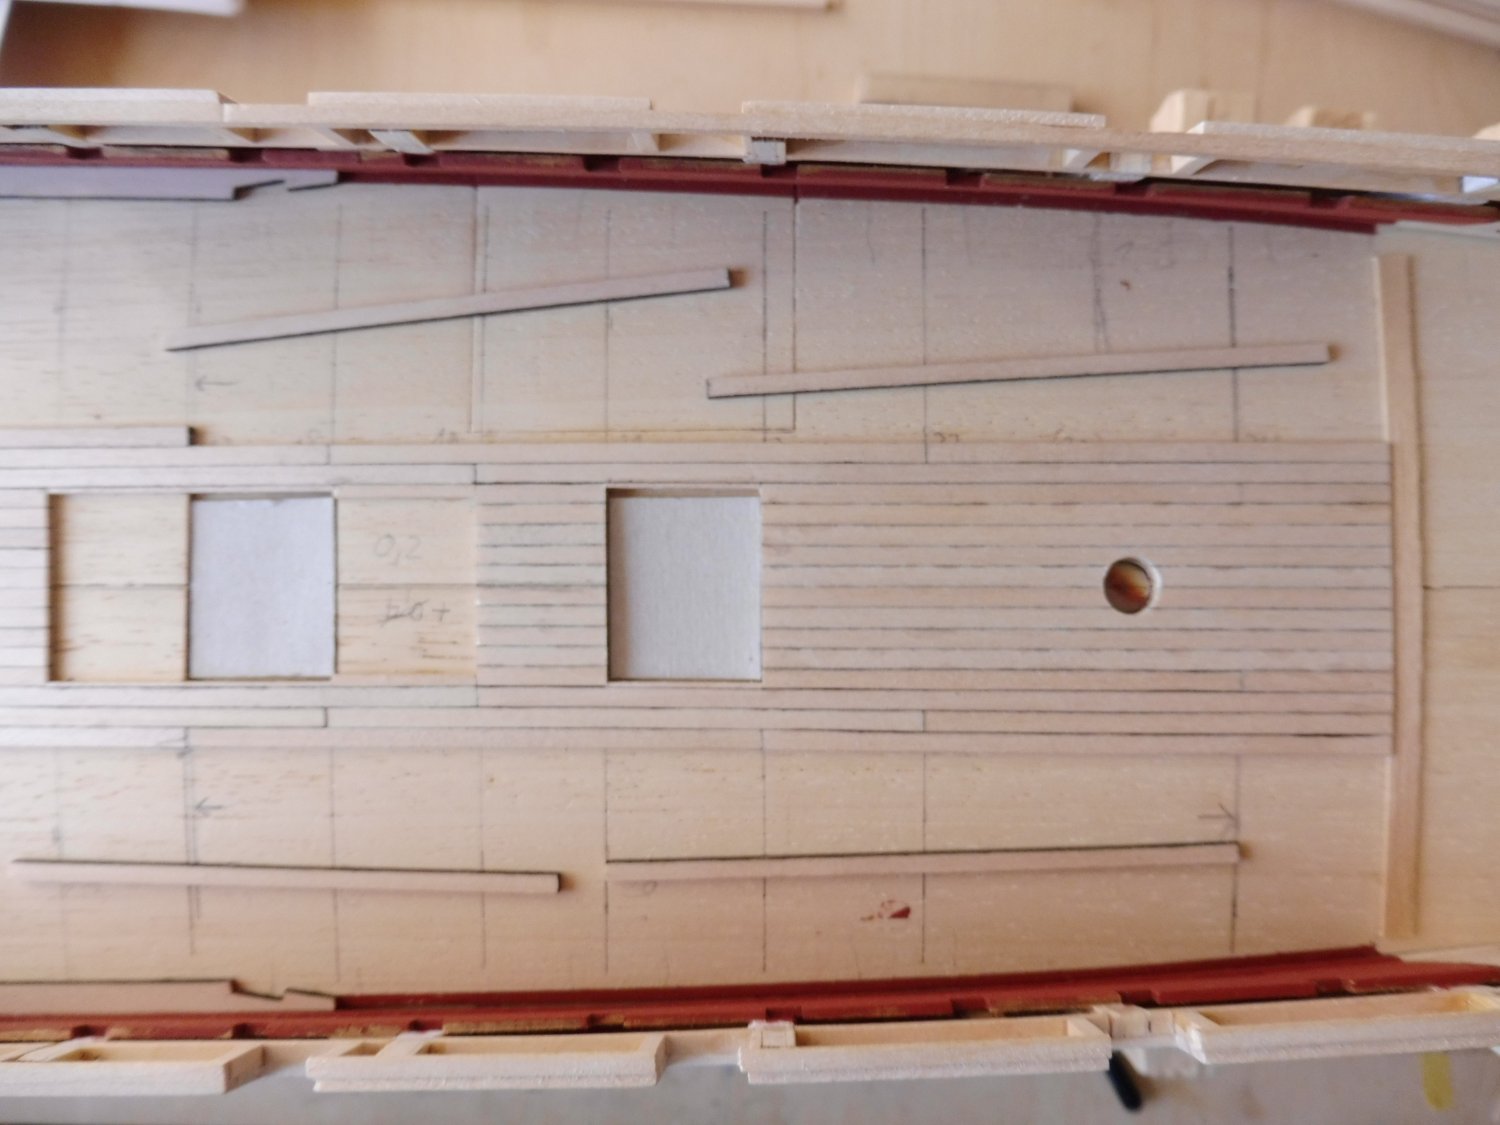
Hello Harshil, no, I don't have photos of the unplanked gun deck with the veneer pieces as a second layer in the "dips". I suggest to glue pieces of veneer reaching a bit over the "dips" and sand them down until you get a smooth transition to the original false deck. One question regarding the bow area: Did you glue a beam on the backside of the beakhead bulkhead as support for the fore edges of the false deck halves? I attach a photo of how I made the drill template. Just copy the area of the provided sheet and cut out according to the red line. So all you have to do is to put this template "over" each gun port and stitch through the middle of the depicted eyebolts. The bottom edge of the template just "sits" along the spirketting plank.
-
Hello Harshil, You make good progress with your model, and I would like to make some remarks regarding your pictures. 1. A good run of the spirketting shows the ups and downs in the run of the false deck especially at the edges. This was also the case with my model, and I adjusted the "waves" using appropiately downsanded 1,5 mm veneer as a second layer on the according areas of original false deck. (This is time consuming but worth the while because the waves will not disappear with the deck planking). 2. Before you paint the bulwarks I recommend that you drill the holes for the eyebolts for the gun riggings, that means 4 holes on each gun port. A selfmade drill template is very helpful. 3. I also used the provided shells, it works with a little trimming (but not on the aft edge because the space is needed for the decorative etch strip) Regards Werner
-
Hello Harshil, Excellent work so far, and I look forward to the pictures of the finished model! With the "shells" do you mean the "drops" below the quarter galleries? On my model, these parts also did not fit at all....the angle of the topside to be glued under the bottom of the galleries is wrong. However, I used these parts after correcting the wrong angle with putty. Regards Werner
-
Hello Harshil, your gallery counter and the painted-on ship´s name are excellent work! Let me draw your attention on the picture above (4th from the bottom) where you show the inside of the bulwarks on the port side of the bow area. What caught my eye is the shape of the gun port sills and lintels, the gun port uprights and the frames. Imo they are too much sanded and show a too deep concave curve, viewed from inside. Furthermore I think you tapered the frames too abruptly from the gun port lintels upwards, they should be tapered more gradually beginning on the deck level.
-
Hello WalrusGuy, what shall I say....you tried and the result is worth all the efforts! I myself didn´t even think of not using the etched letters, but you show that painting them on is worthy of imitation!
-
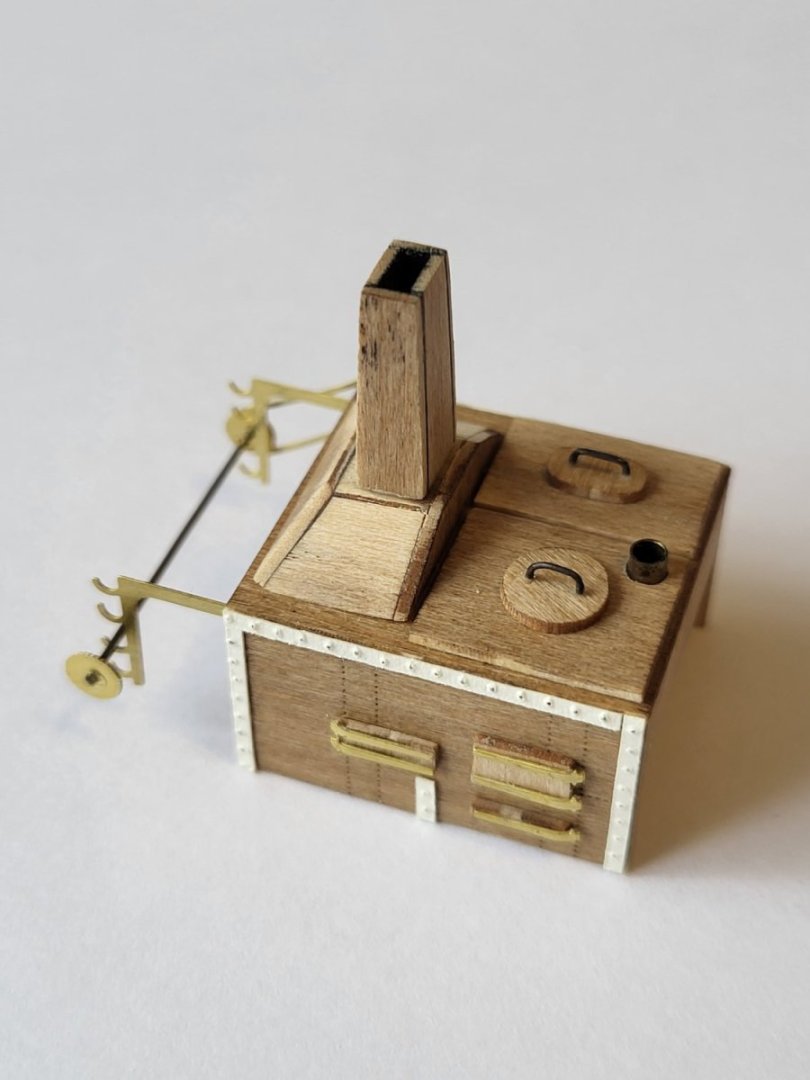
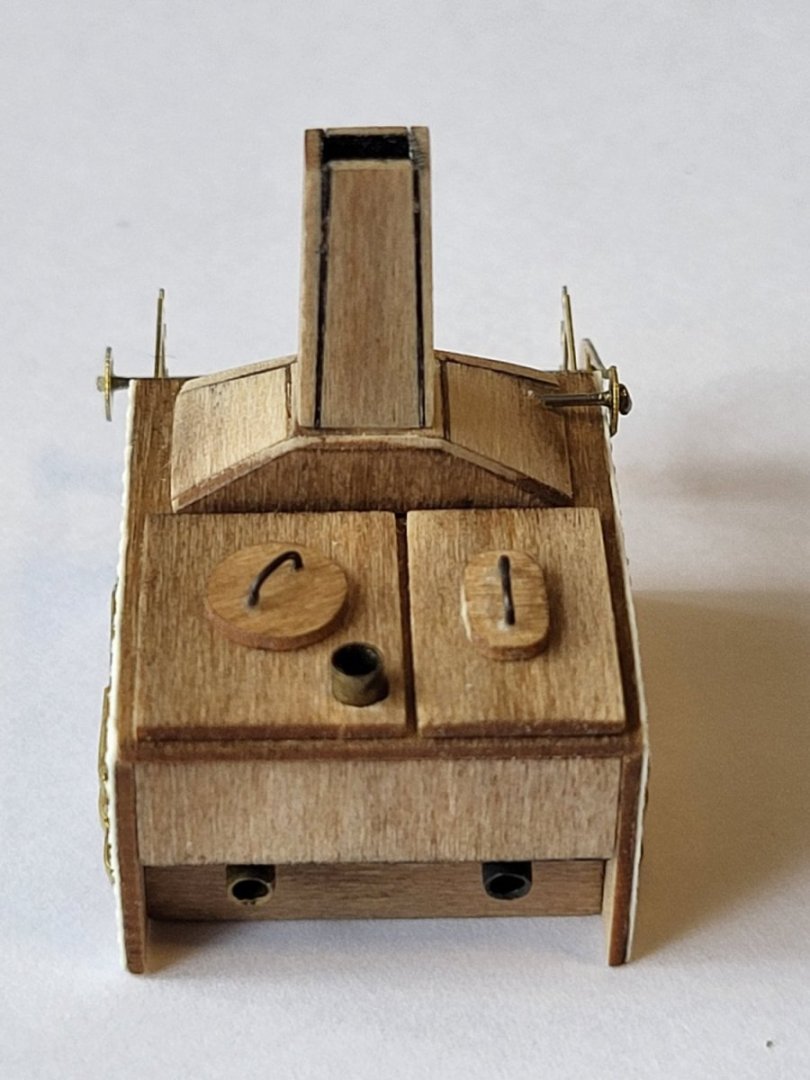
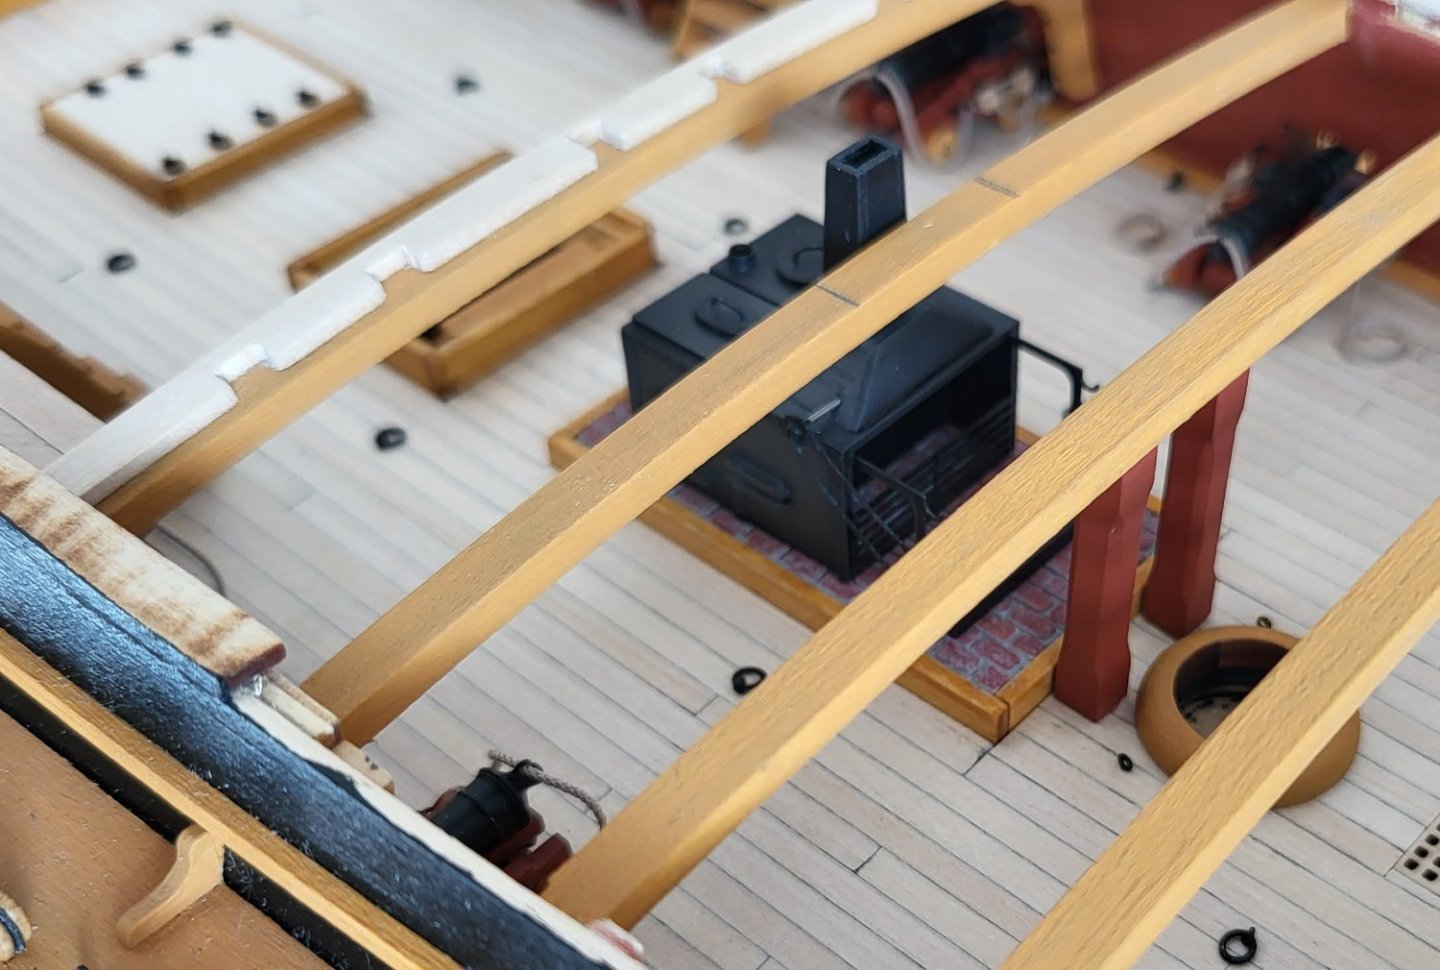
Hello Thedosius, thank you very much! I got the idea for the miniatur-furniture when I saw corresponding pictures of another modelbuilder....I thought it might look fine in my model and searched the net; what I found you can see in the links below https://3dwarehouse.sketchup.com/model/8f92d42bca234b7c470412e9b69c8933/Secretary-desk-small https://www.thingiverse.com/thing:13391 https://www.thingiverse.com/thing:15479 A friend of my eldest son had a 3d-printer which could make this furniture in 1:60 scale, which is not far from 1:64, so I was happy when he had them ready for painting....
.png.5c74592fbe9f1a98909119f94ba2a864.png)


.jpg.70b6007343d841342be09ace13538600.jpg)
.jpg.99b97ac2d8dd87c3cfabb917a8531122.jpg)
.jpg.6e94b9d8a195aa8cba06e0bd752f3470.jpg)
.jpg.2b071ab745493bce2751b8c576bd4e33.jpg)
.jpg.be41250135493ae54776ee86aa5b0f9b.jpg)
.jpg.4b4c1a01242530740462fefce4197a55.jpg)
.jpg.e5cabef8b6a2494a094601e85184843c.jpg)
.jpg.df055812645015cf4d235808ebf1ee8f.jpg)

.jpg.70ed569f8ce9de6aa648e42aa6fce1fd.jpg)
.jpg.0bbe4e7bc2ca9904ad52a0132a16ffd9.jpg)
.jpg.9fb6334cc2fbd7bc723d879ee4bb5a78.jpg)
.jpg.b9daed967c72b93192d817b9909d7038.jpg)
.jpg.deceed353d06e02b4be6a2f98a664d38.jpg)

.jpg.9cc89a4e2425126dbe46ab8481f8cc5d.jpg)
.jpg.38db8f50c43cbb7a255700b5c29cf820.jpg)
.jpg.31b269d4dc5b14c5508fa3ddabe808bb.jpg)
.jpg.f7633ab71aa4dd7bf9b1d974509a6b17.jpg)
.jpg.761a3a0974475c8ebac75debae6f95af.jpg)
.png.52a64cc1b1488ae7d0261514600c4808.png)

.jpg.d626454e2a402a8ac0755db13c9eb9df.jpg)
.jpg.9e68f06021d1319a2413e699a8182aa3.jpg)
.jpg.d3a5fcb81d1f3ca3901299e8ce48e769.jpg)
.jpg.ffe82a5d934813ab355a44cb5d3cbcce.jpg)
.jpg.72bbf870c47eddabfafaa01745e9baed.jpg)
.jpg.28507959e69e62ee96c999a7d6cdeaa6.jpg)
.jpg.78f57d83df47cfaa7419cf705f5bd09d.jpg)
.jpg.d0d7cb28a12b9c3a93eca02c4db959a3.jpg)
.jpg.8d2fb4a0af7825e1df112a5e37757c1f.jpg)


.jpg.f476aeabc094a87c9dd68dfab6d50895.jpg)
.jpg.16ee7df47e2249aea8875fcbc0bc0b41.jpg)