
HOLIDAY DONATION DRIVE - SUPPORT MSW - DO YOUR PART TO KEEP THIS GREAT FORUM GOING! (Only 24 donations so far out of 49,000 members - C'mon guys!)
×


wernerweiss
-
Posts
206 -
Joined
-
Last visited
Content Type
Profiles
Forums
Gallery
Events
Everything posted by wernerweiss
-
Hello Ian, you' re on the right way, the plan is quite simple....."just" fill and sand and fill and sand and....until the hull looks like made of plastic without the slightest indication of planks.... My way was as follows: when I was content with filling and sanding, I gave the hull a coat of parquet lacquer. When it was dry, I polished the hull with a polishing disc on a drilling machine Regards Werner
-
Hello Harshil, very good work, and gluing acetate with crystal clear is indeed an option..... Regards Werner
-
Hello Ian, The sheer from the center towards the bow is right and there should be a sheer toward the stern as well, but this is not as distinctive as the sheer forward. I would say there is no problem if you build a flat deck in the aft section. I suggest to have a look on the models of Peter Beisheim or Rüdiger Eschker for example....
-
Having just glued the head timbers on my Confederacy I will never fear sanding any more....😄
-
Hello Ian B, targa4403, I built this model a few years ago, you will find pictures of it in the gallery. Enjoy your build, Regards Werner
-
Hello Nate, as one of many builders of the Confederacy kit from Model shipways I look forward to follow your build of the 3D model. Best regards Werner
- 107 replies
-
- 1
-

-
- Frigate
- Confederacy
- (and 1 more)
-
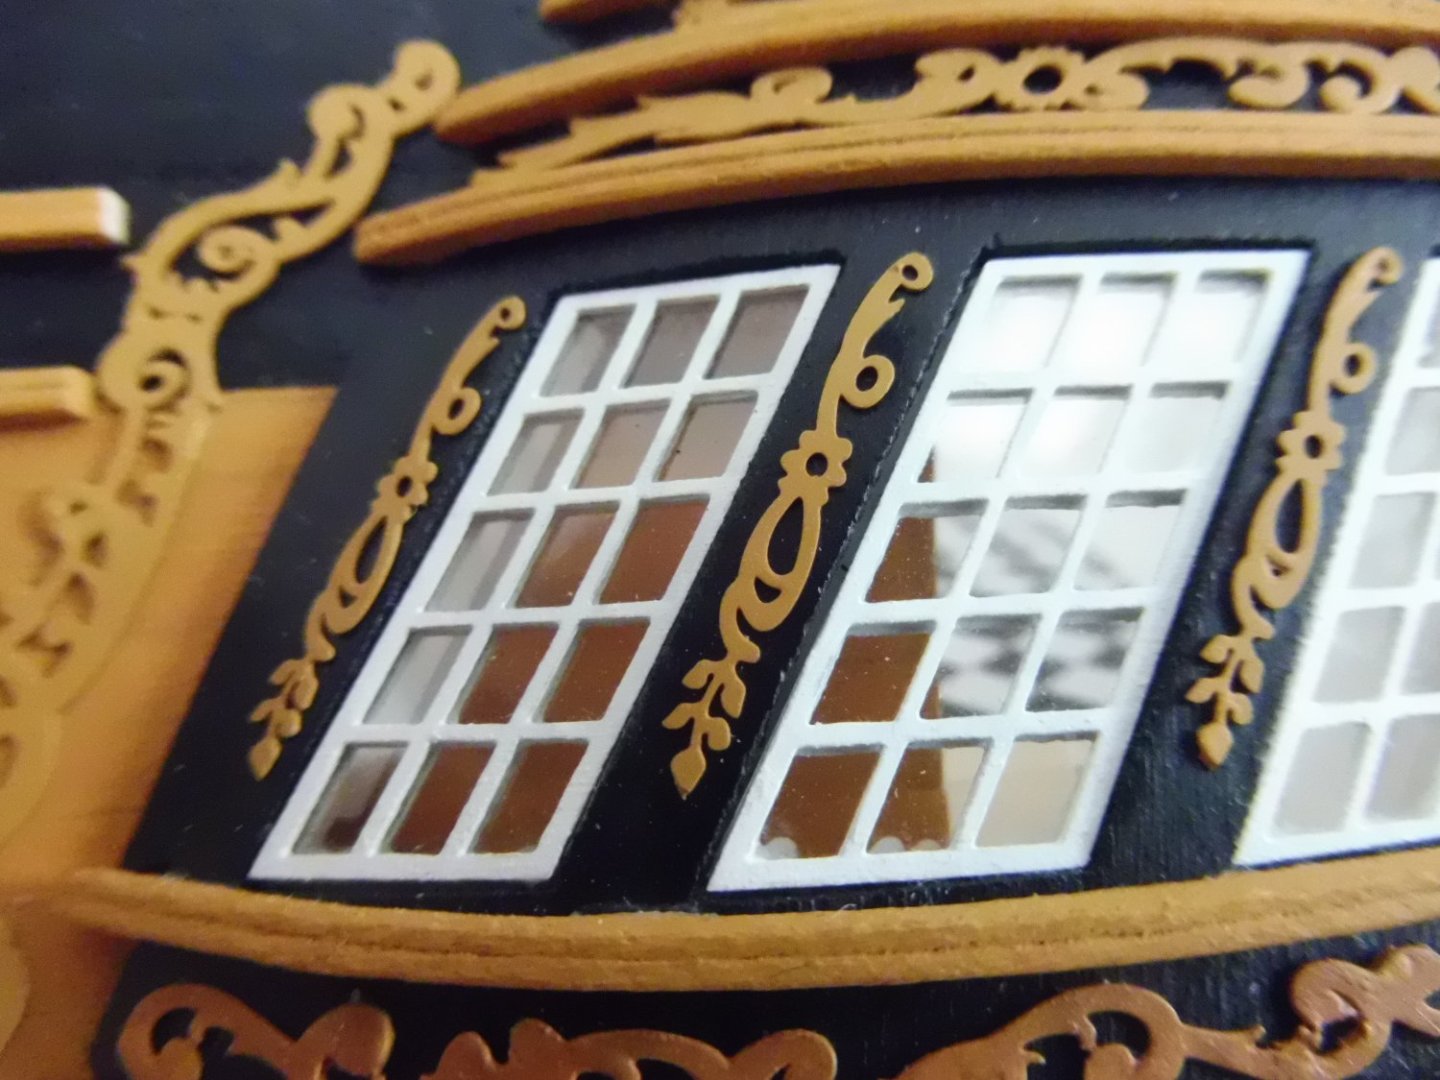
Hello Harshil, I agree that the window frames provided with the kit are not of the best quality, and I see that scratch-building them ist not at all a problem for you.... I accepted the provided frames as they fitted perfectly into the openings. What I did was to order another set of frames (thanks Model shipways) to double the frames of each stern and gallery light with the acetate inbetween. As you may see in the pictures showing the openings for the stern lights I glued a 0.5 x 0.5 mm stripe on the bottom and top edge (not visible) as a rabbet for the inner frames. They were glued first, then the acetate and last the outer frames. In other build logs of various models I saw pictures where the builder depicted the window glass with micro crystal clear, and I preferred the acetate..... Regards Werner
.png.c6758da8f426fd35c95d2d155fe91c64.png)
-
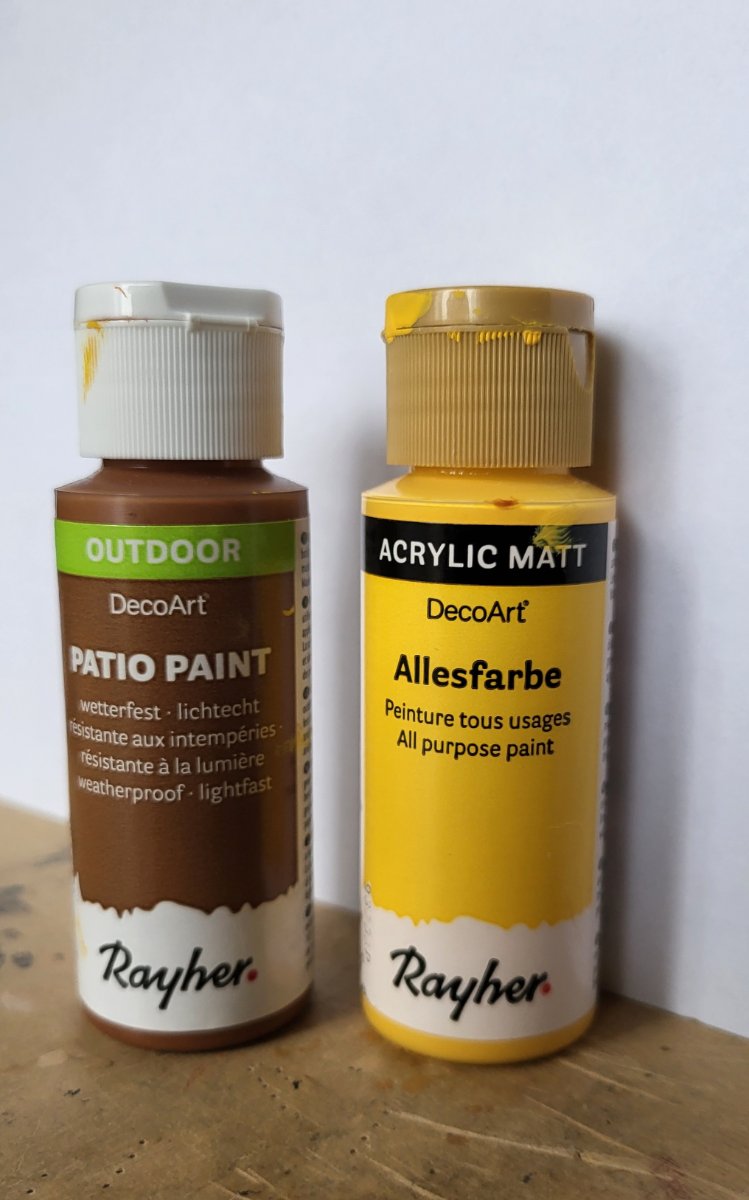
Helllo BenD, I used the shown basic colors mix ratio 1:1

- 60 replies
-
- 3
-
-

-
- Confederacy
- Model Shipways
- (and 1 more)
-
Hello Chuck, thank you very much for your personal appreciation! I would never have thought so far when beginning with the build...... Best regards Werner
-
@all, thank you very much for your comments and your likes!
-
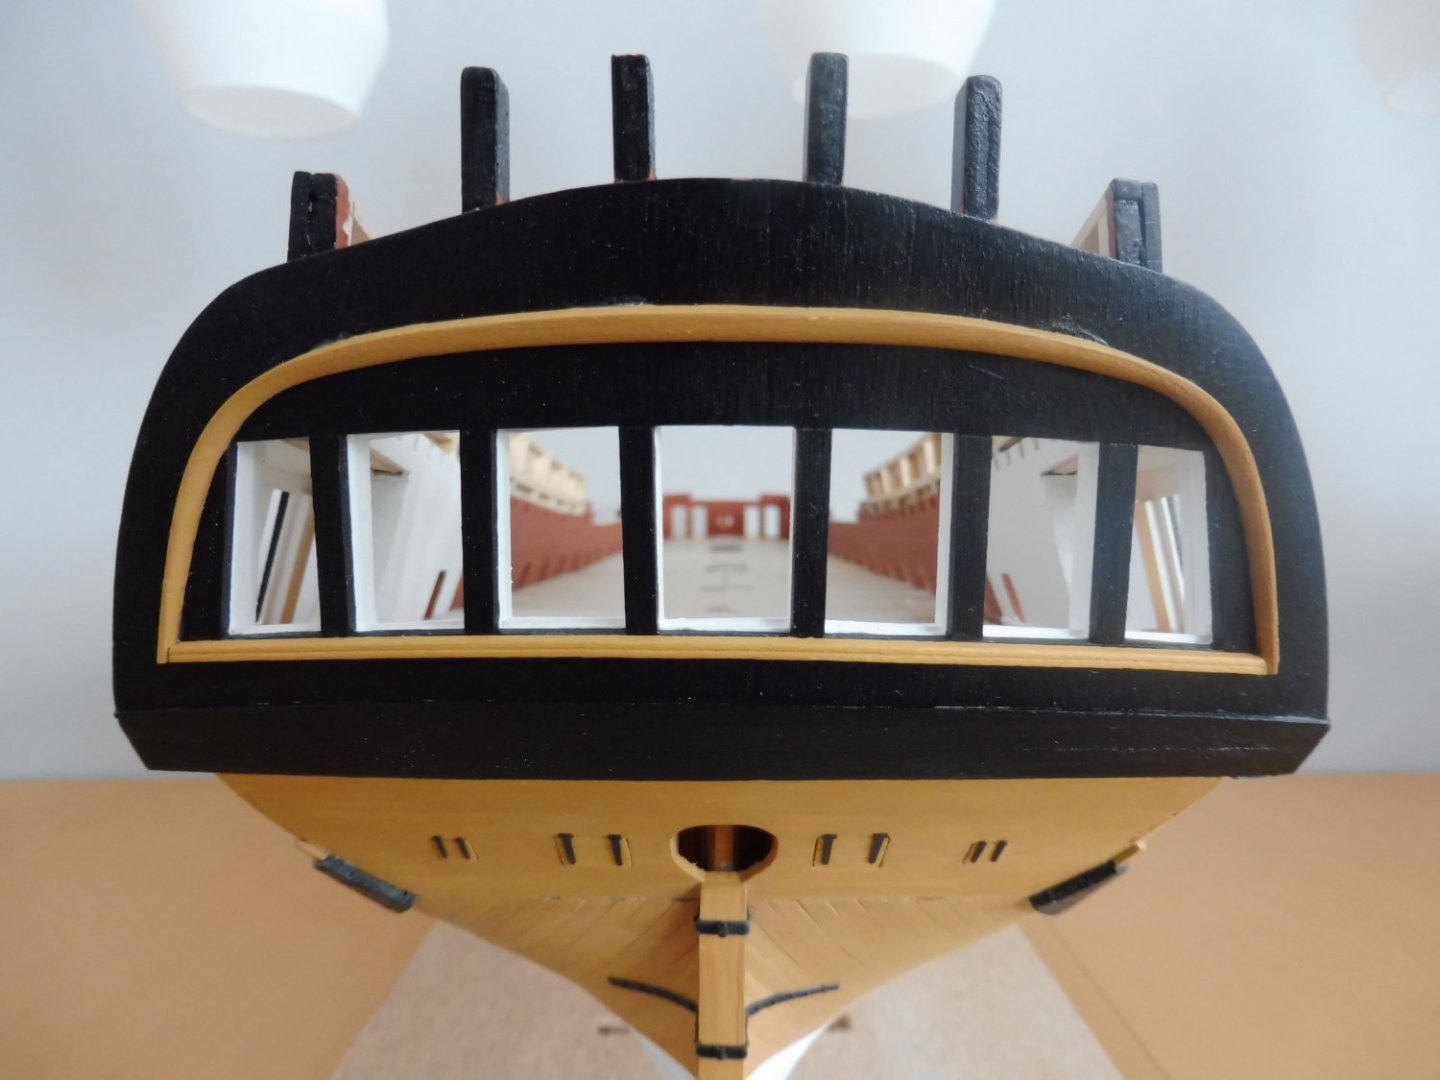
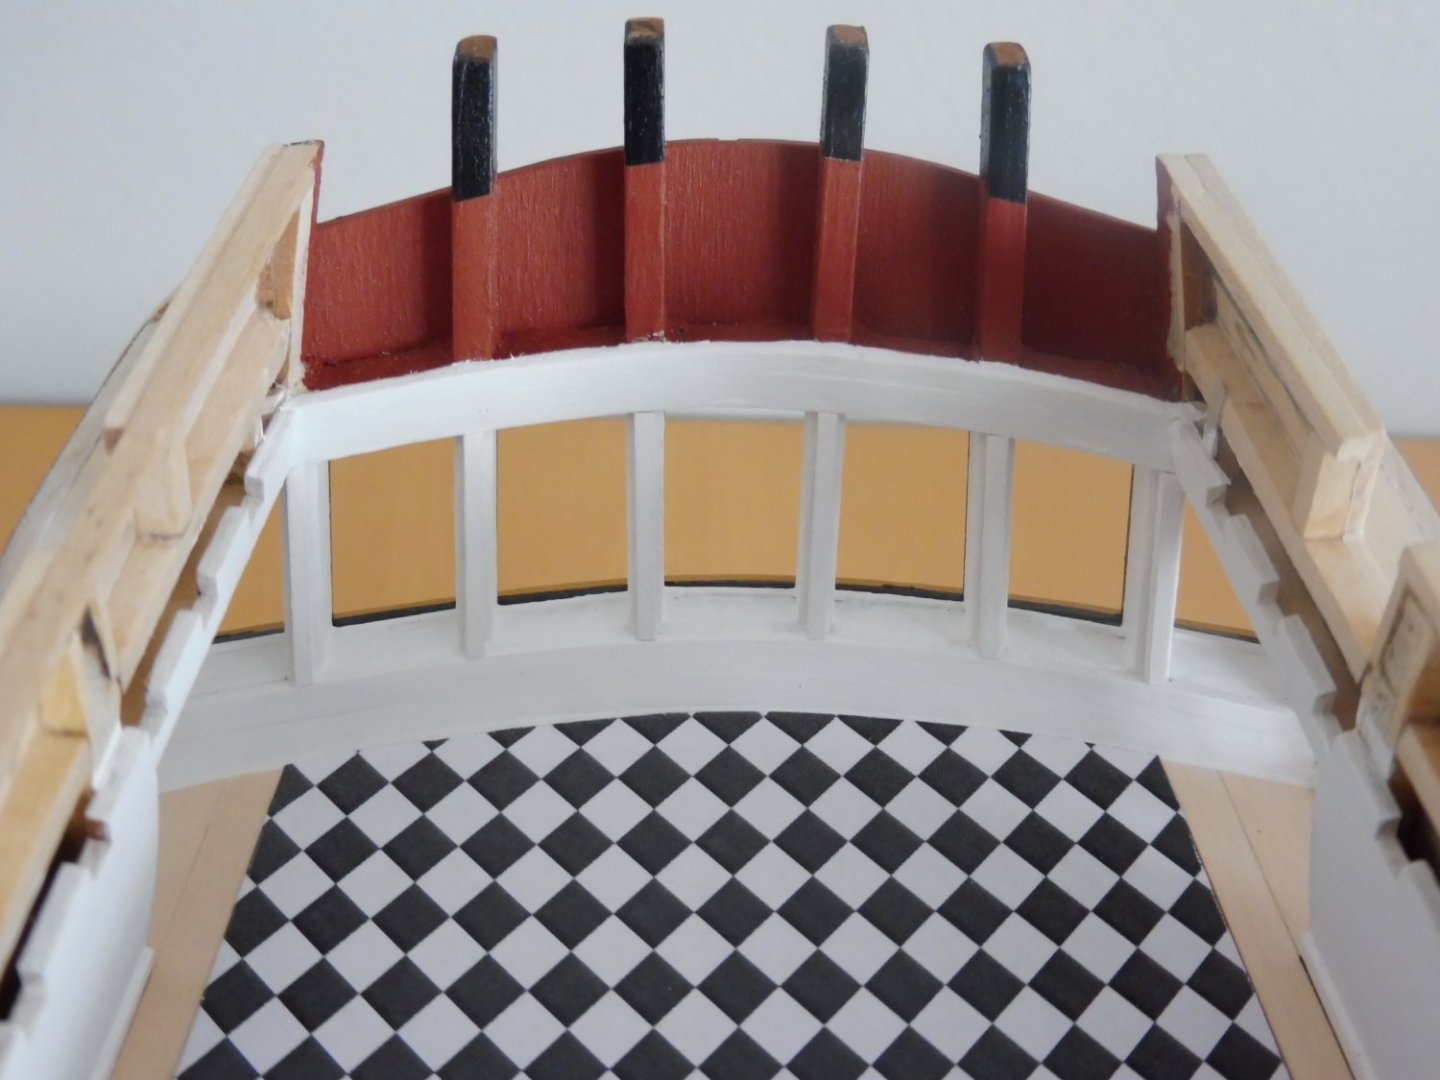
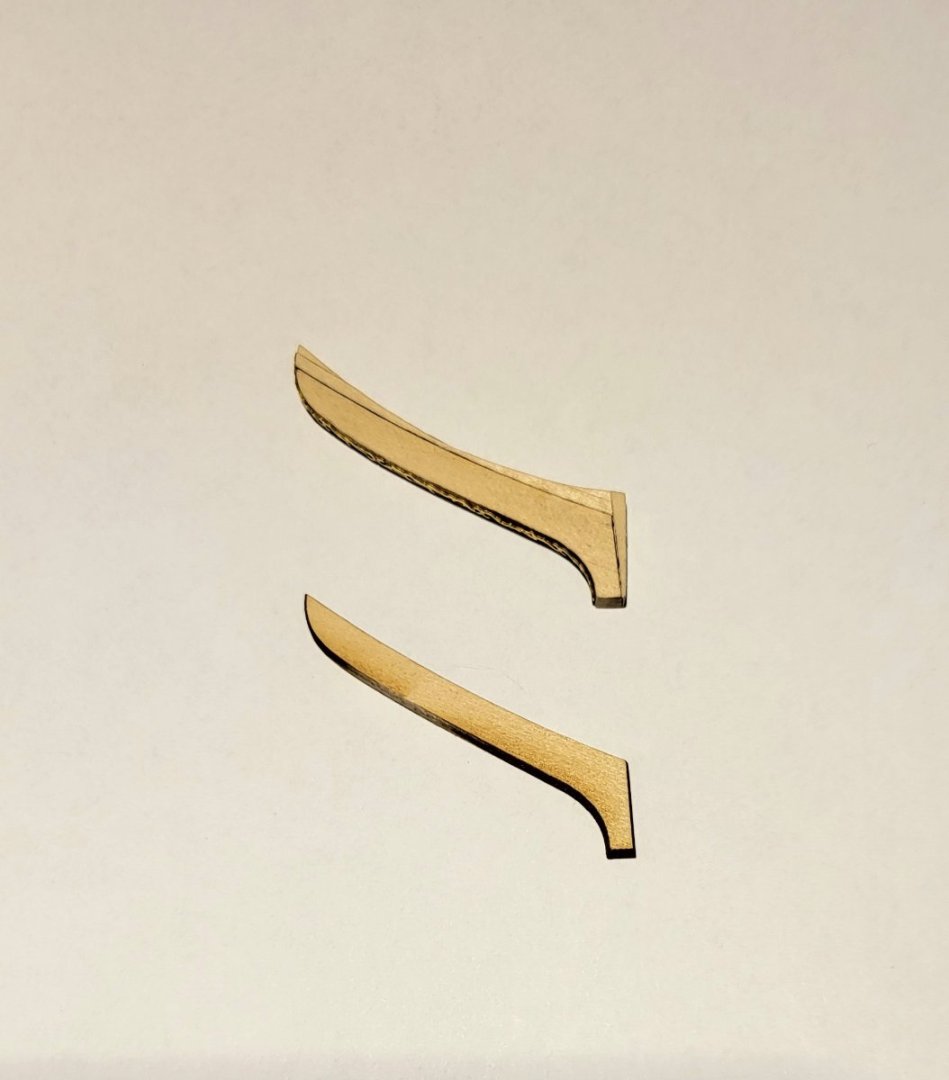
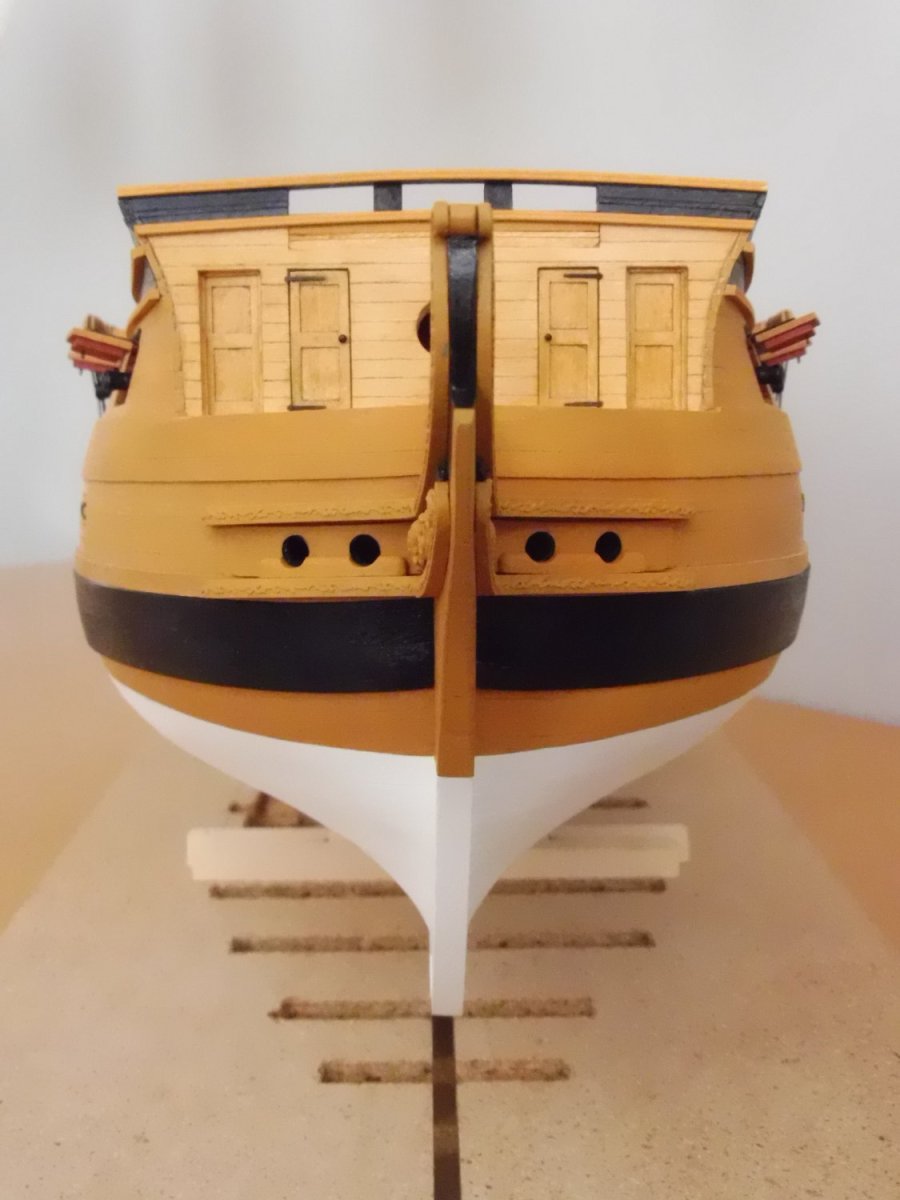
Hello modelers, with this post I continue the gallery with the latest pictures, but first some remarks: Even if you build very carefully, for example the bow curve of the finished hull may differ from that of the prototype. Due to the bow curve of my model I had to make the shown adjustments with the cheeks to fit on the bow curve. The laser cut cheeks turned out to be too straight, so I hat to reshape them with a rounder curve to fit to the hull. Regrettably the cast trailboards were not inversely equal. The starboard trailboard was a bit longer, thicker and wider than the port one. This is not what I would call high quality. My next step will be the installation of the main head rails. Between them runs the so-called head beam, and sheet one shows two knees connecting this beam to the main head rails. These knees are not mentioned in the instructions, so I have to decide whether to omit them or not. At the end of chapter 15 on page 134 it is suggested that the catheads are glued in place. I would suggest not to do so at this time. In the next chapter the main head rails are installed and for that purpose an appropriate angle has to be sanded at the corners of the beakhead bulkhead showing towards the stem. This is much easier without the catheads as an obstacle for the sanding tool. See yourself, questions and remarks welcome.
.thumb.jpg.2a29b19930cecd489e671ac77d4d3b01.jpg)
.thumb.jpg.bf6b6bacc2e3489409f56bfec7a9fecb.jpg)
.thumb.jpg.ad96f02d4b08658484ebebb6943a7054.jpg)
.thumb.jpg.44338953a381d158d847ee402232c92b.jpg)
.thumb.jpg.b0030db5ca5998bea4223703451b0270.jpg)
.thumb.jpg.ea3aef0aab4cda52c7f1ca00e54c7c8c.jpg)
.thumb.jpg.090cff9909b33f096bd43cbd402a2238.jpg)
.thumb.jpg.ecf0ac16a783f47f6d63e148f4613a85.jpg)
.thumb.jpg.03b795e090c7197116f2c08db0d5ec15.jpg)
.thumb.jpg.233134b1bfdffe3e27635bf9303d9ca5.jpg)
.thumb.jpg.b59eb03ae7742c6df8aa2d227273f17b.jpg)
.thumb.jpg.2e2d13a7e5b128bd01e5e4a397bc302e.jpg)

- 60 replies
-
- 16
-
-
- Confederacy
- Model Shipways
- (and 1 more)
-
Hello Harshil, everything looks very fine, and painting all floor surfaces white is a good idea..... I´m going to take the next pictures of my model today and continue my build log... Werner
-
Hello Harshil, Congratulations on this progress, excellent work as always! Yes, you have to be very careful not to spoil the great cabin' s deck with its pattern.....but so it is with the much bigger area of the gun deck, the basswood is very soft and does not forgive tools falling on it, but, as modelers we ARE careful.. I am going to update my Confederacy build log soon showing the progress of the forecastle deck and the bow stem Greetings Werner
-
A beading tool is in principle a nail with a grip......see Google
- 488 replies
-
- 6
-
-
- Indefatigable
- Vanguard Models
- (and 1 more)
-
Hello Harshil, thank you for your likes. But I was wrong when I said that regarding the lights there is work from inside the cabin.....maybe I remembered it wrong because I doubled the frames, but all work to glue the frames and the "window-panes" is done from outside.... Werner
-
However, I would recommend to finish the stern lights and the gallery lights first, because there is much work from inside the cabin, just to avoid scratches on the cabin floor
-
Yes, it is. Exactly, I had the pattern printed on a normal A4 paper sheet with a peelable back in a copyshop so I could glue the pattern on a piece of ca. 1,5 mm thick card. So I did not use a wood layer and glued the card directly on the false deck.
-
Hello Harshil, once again, very clean work! Yes, one has to be very careful once the cabin floor is finished, and later on there are two cannons and possibly furniture to be positioned and glued..... Did you print the pattern directly on the card? I printed it on self-adhesive paper (is this what you mean with label paper?) Werner
-
Hello Harshil, wonderful work with an amazing result - highly recommended for imitation! With this attention to detail I look forward to your finished model! I must admit that I was too lazy to paint the bricks in different shades..... It is a pity that most of the brick surface is later on covered by the stove.
-
Hello Harshil, regarding the gluing of the hatch coamings and the brick platform on the false deck I would highly recommend not to follow the instructions and plank the gun deck first. This makes it much easier to sand the gun deck all over its length because then there are no obstacles for your sanding tool....but maybe you already thought about it.
-
Hello Harshil, again, very clean woodwork...did you use the provided basswood or another kind of wood, e.g. beech? I cast the "bricks" with moulding cement and cut/sanded it to shape to fit in the wooden frame. Then I painted it red to resemble "brick". Afterwards I painted it all over with grey (not too thick) to fill the grooves and immediately dabbed the grey paint off the "brick" surfaces leaving a rest of grey paint....I think this method should also work on your wooden "bricks" (As the height of the cast didn´t match the height of the frame, I glued the cast on a piece of thick card) Werner
-
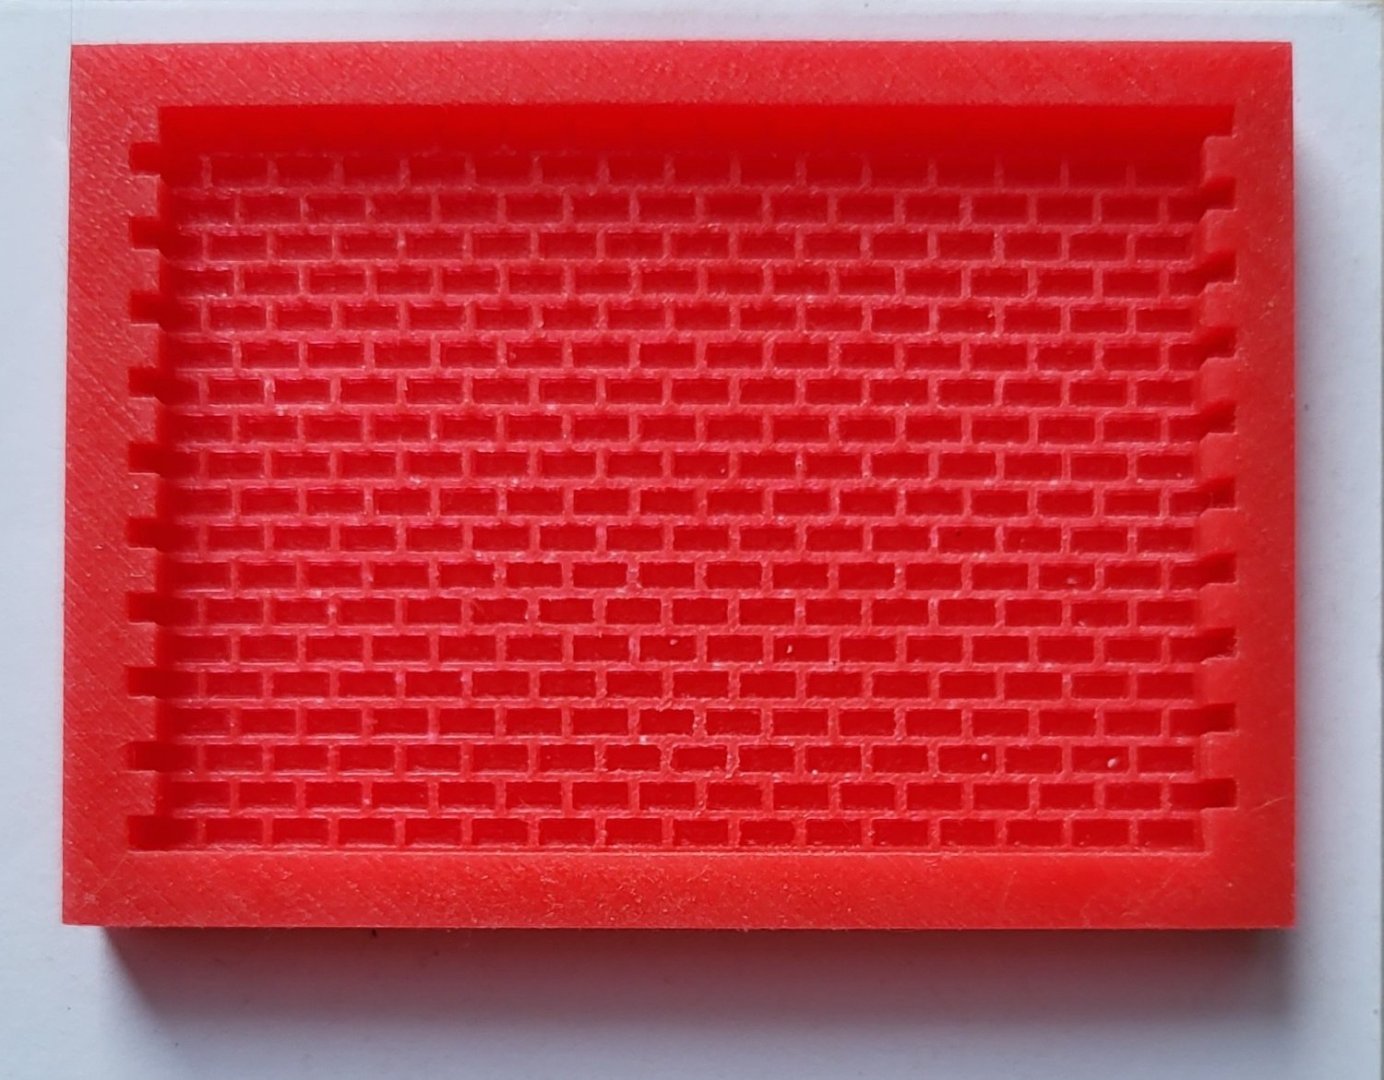
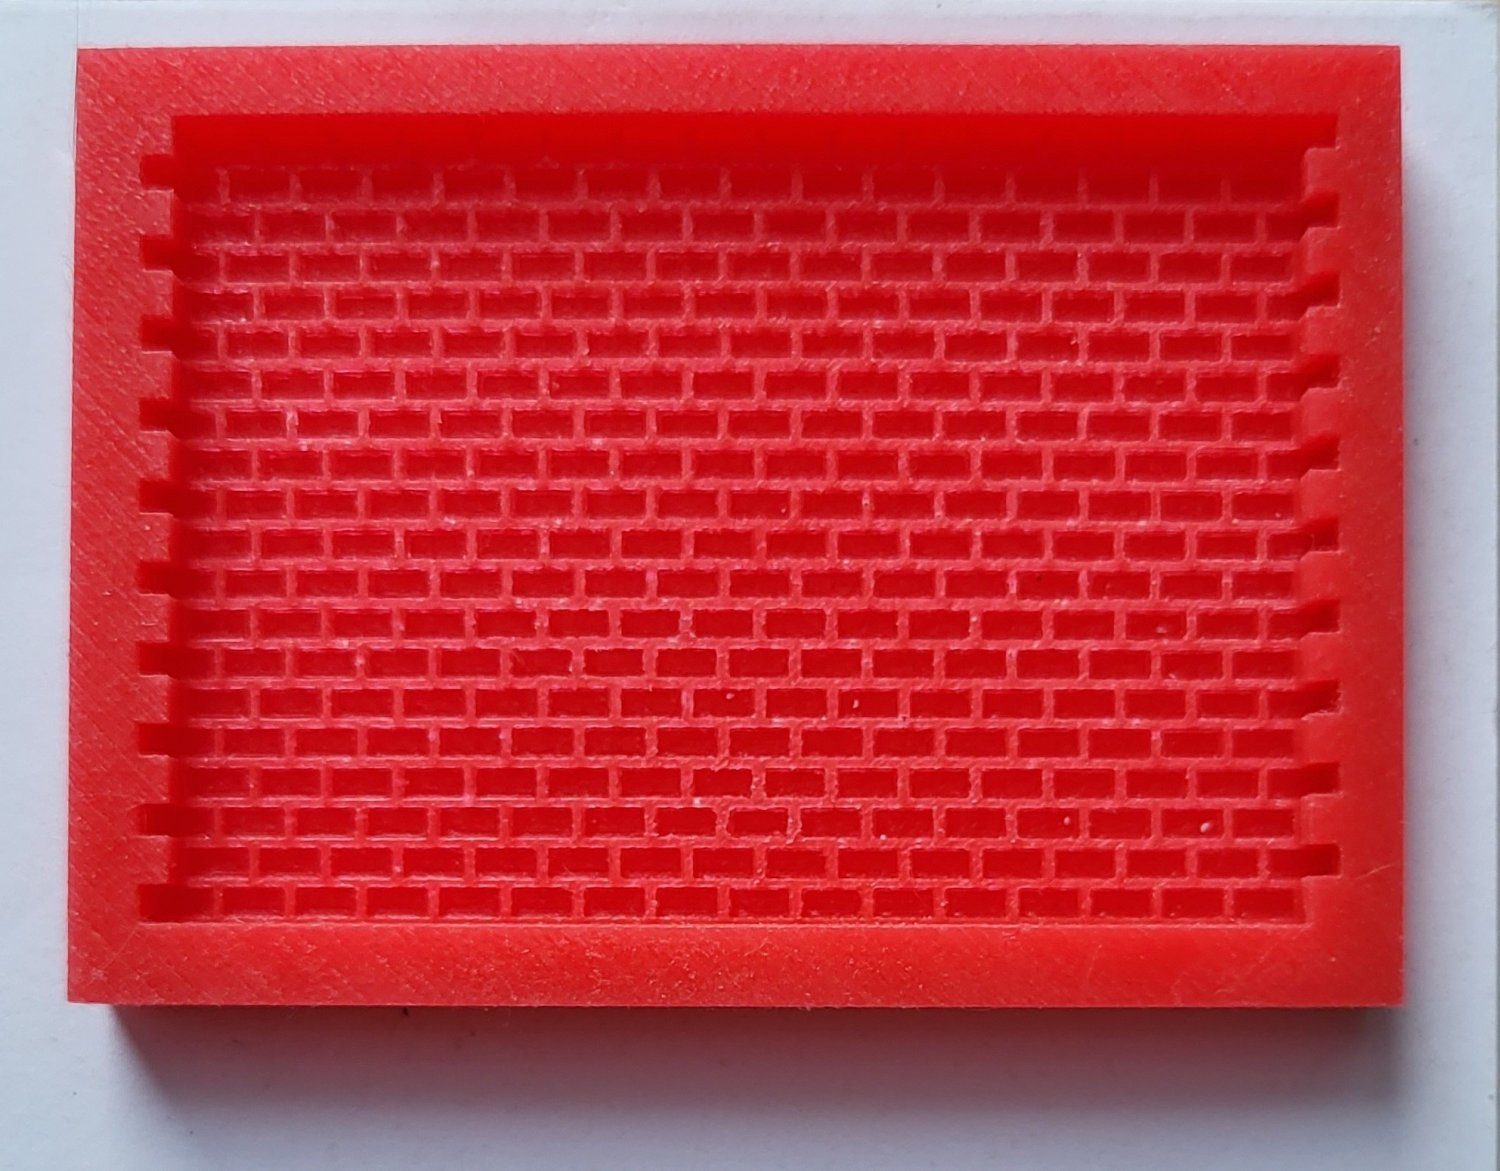
Hello Harshil, some remarks on the brick platform for the stove. In the building instructions it is made of provided wood strips which are grooved, glued together and painted to resemble bricks.....I didn´t like that at all and looked for an alternative. I found a silicone casting mould for brick walls for rail modelling. The "bricks" cover an area of 72 x 49 mm and imo meet the size, so I made a cast and was content with the result. The rest was cutting to length and width, painting red and "washing" with grey.....
.thumb.png.0b161435cb20fae644429a38d0489cf4.png)
-
Hello Harshil, Very fine and clean woodwork.....wish these coamings were on my model 😃 For my taste, I would not paint them black, too much contrast to the companionways if you intend to paint them in "oak".....but that is of course up to you... Werner
-
Thank you very much!


.jpg.4d8cf3f7f25f465f7e7a60e9d2464f91.jpg)

.jpg.ff54c496e92103aa12d30ada13360dc8.jpg)
.jpg.589eca1f57b3d1867d00275511fe5552.jpg)
.jpg.1e7784f4977e041fb0e693e12b616c40.jpg)
.jpg.c245b80af83e8de9d14a6082cc56d016.jpg)
.jpg.eecc33e49b0023ad687703d9812e2e45.jpg)
.jpg.6ab48e771b36315fdba874348de978cf.jpg)
.jpg.9d21e262a00580330fdf879c8ade07c2.jpg)
.jpg.df7412816148d6093e188ea9bd0f470c.jpg)
.jpg.0d35fdb4b77b83cd3e4518d5fad871a3.jpg)
.jpg.9069ded425b611358b3cf2fc61ccd4b9.jpg)
.jpg.fdd4e30088a3a1ec82ab8933ddee859f.jpg)
.png.705af26b342b8f58aeb5089117b2178f.png)