Andrew J.
-
Posts
96 -
Joined
-
Last visited
Content Type
Profiles
Forums
Gallery
Events
Everything posted by Andrew J.
-
 The book is absolutely incredibly helpful, I don't think I would have known where to begin without it! It outlines in detail the lofting technique to draw your full size lines to obtain your half station measurements and how to set up the building jig and all of that stuff. It's written specifically for amateur builders who are looking to build their own Lightning in their garage or backyard. (See above reply for the link). The specifications manual they provide free for download is also very helpful, as it's the only place I was able to find a specified measurement for the width the deck around the sides of the cockpit. https://s3.amazonaws.com/ClubExpressClubFiles/93488/documents/Specifications_287597677.pdf?AWSAccessKeyId=AKIA6MYUE6DNNNCCDT4J&Expires=1617910107&response-content-disposition=inline%3B filename%3DSpecifications.pdf&Signature=ExOzPsedzB40nAT%2FgwcLEprtL6Y%3D
 -
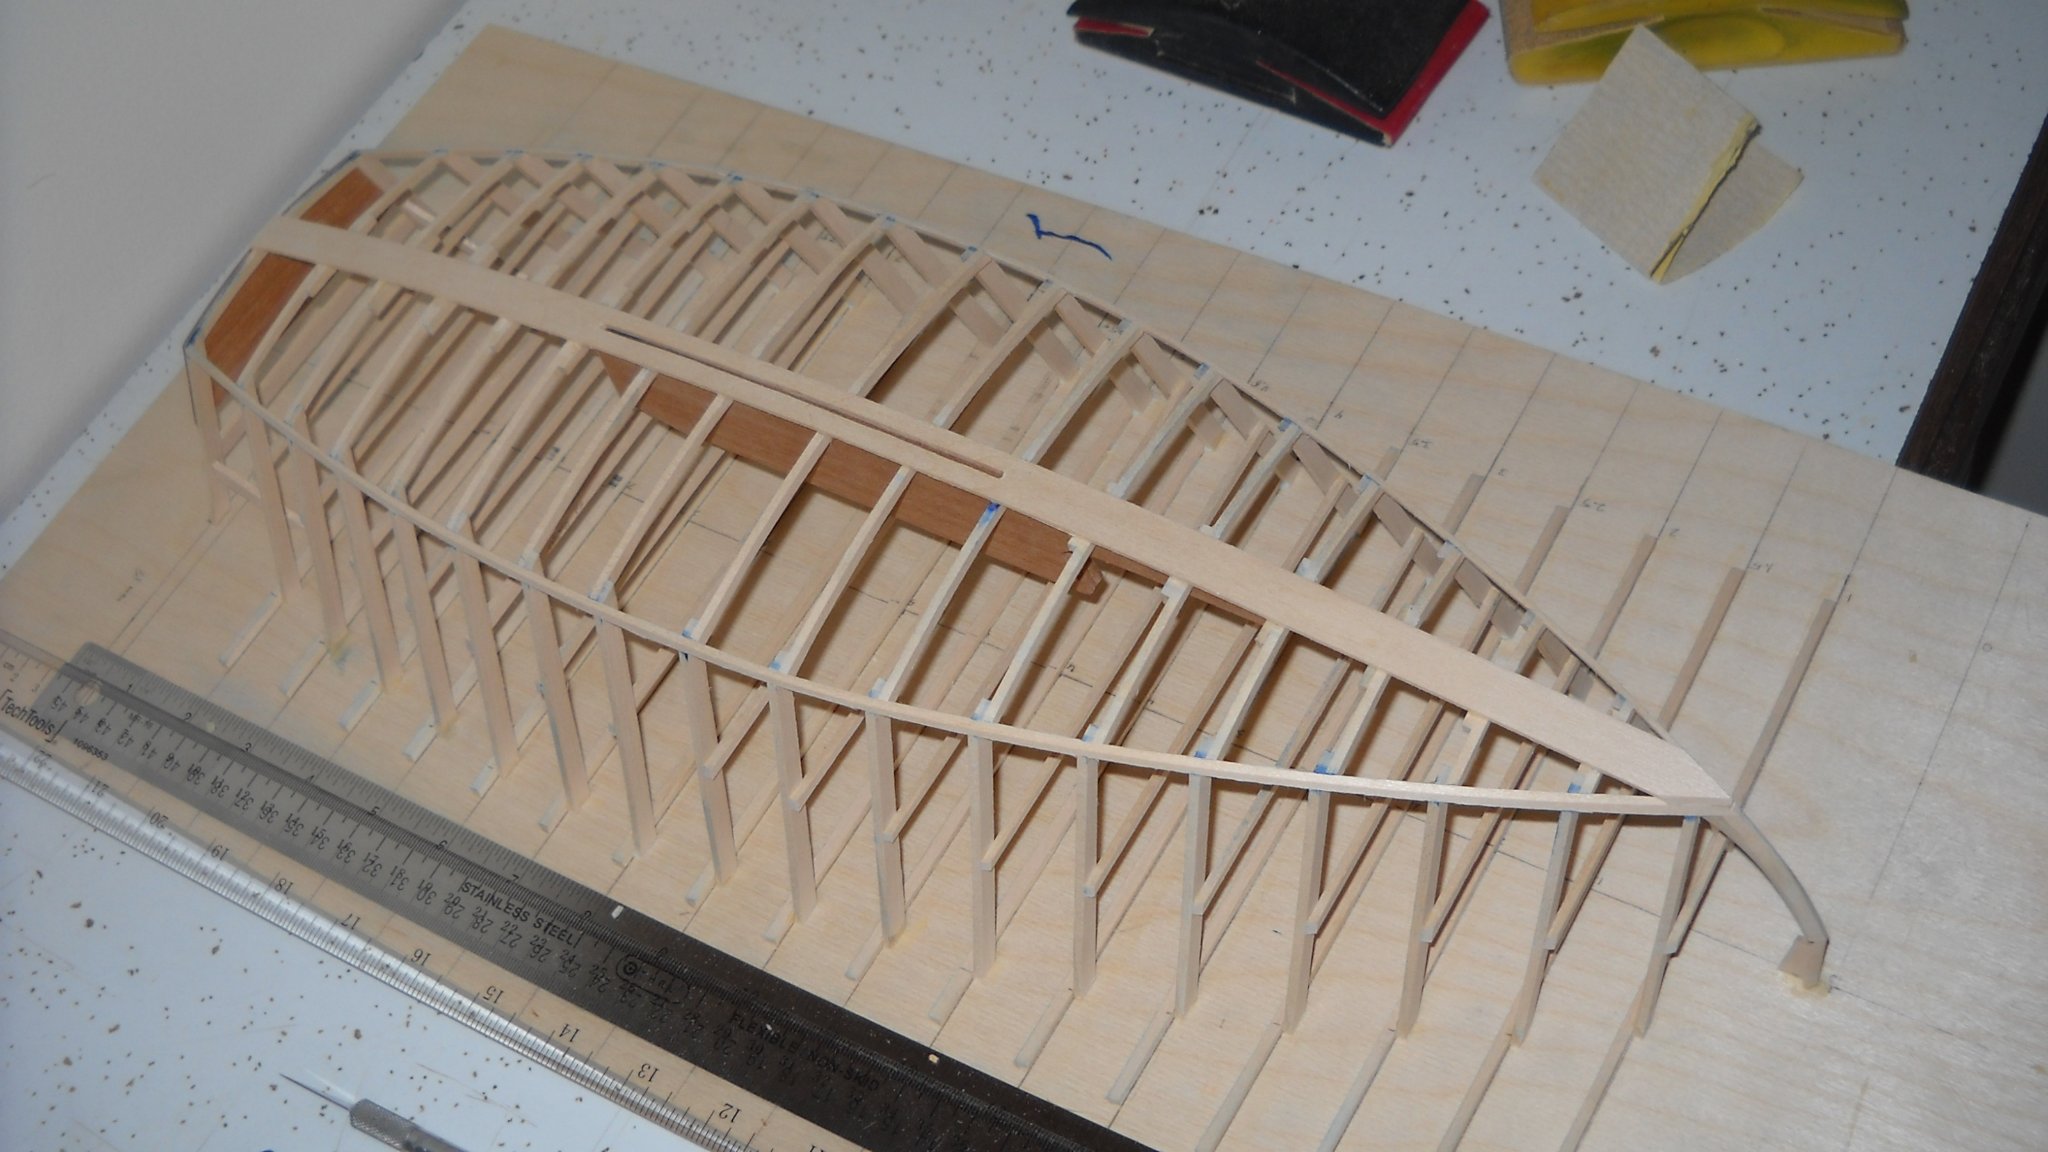
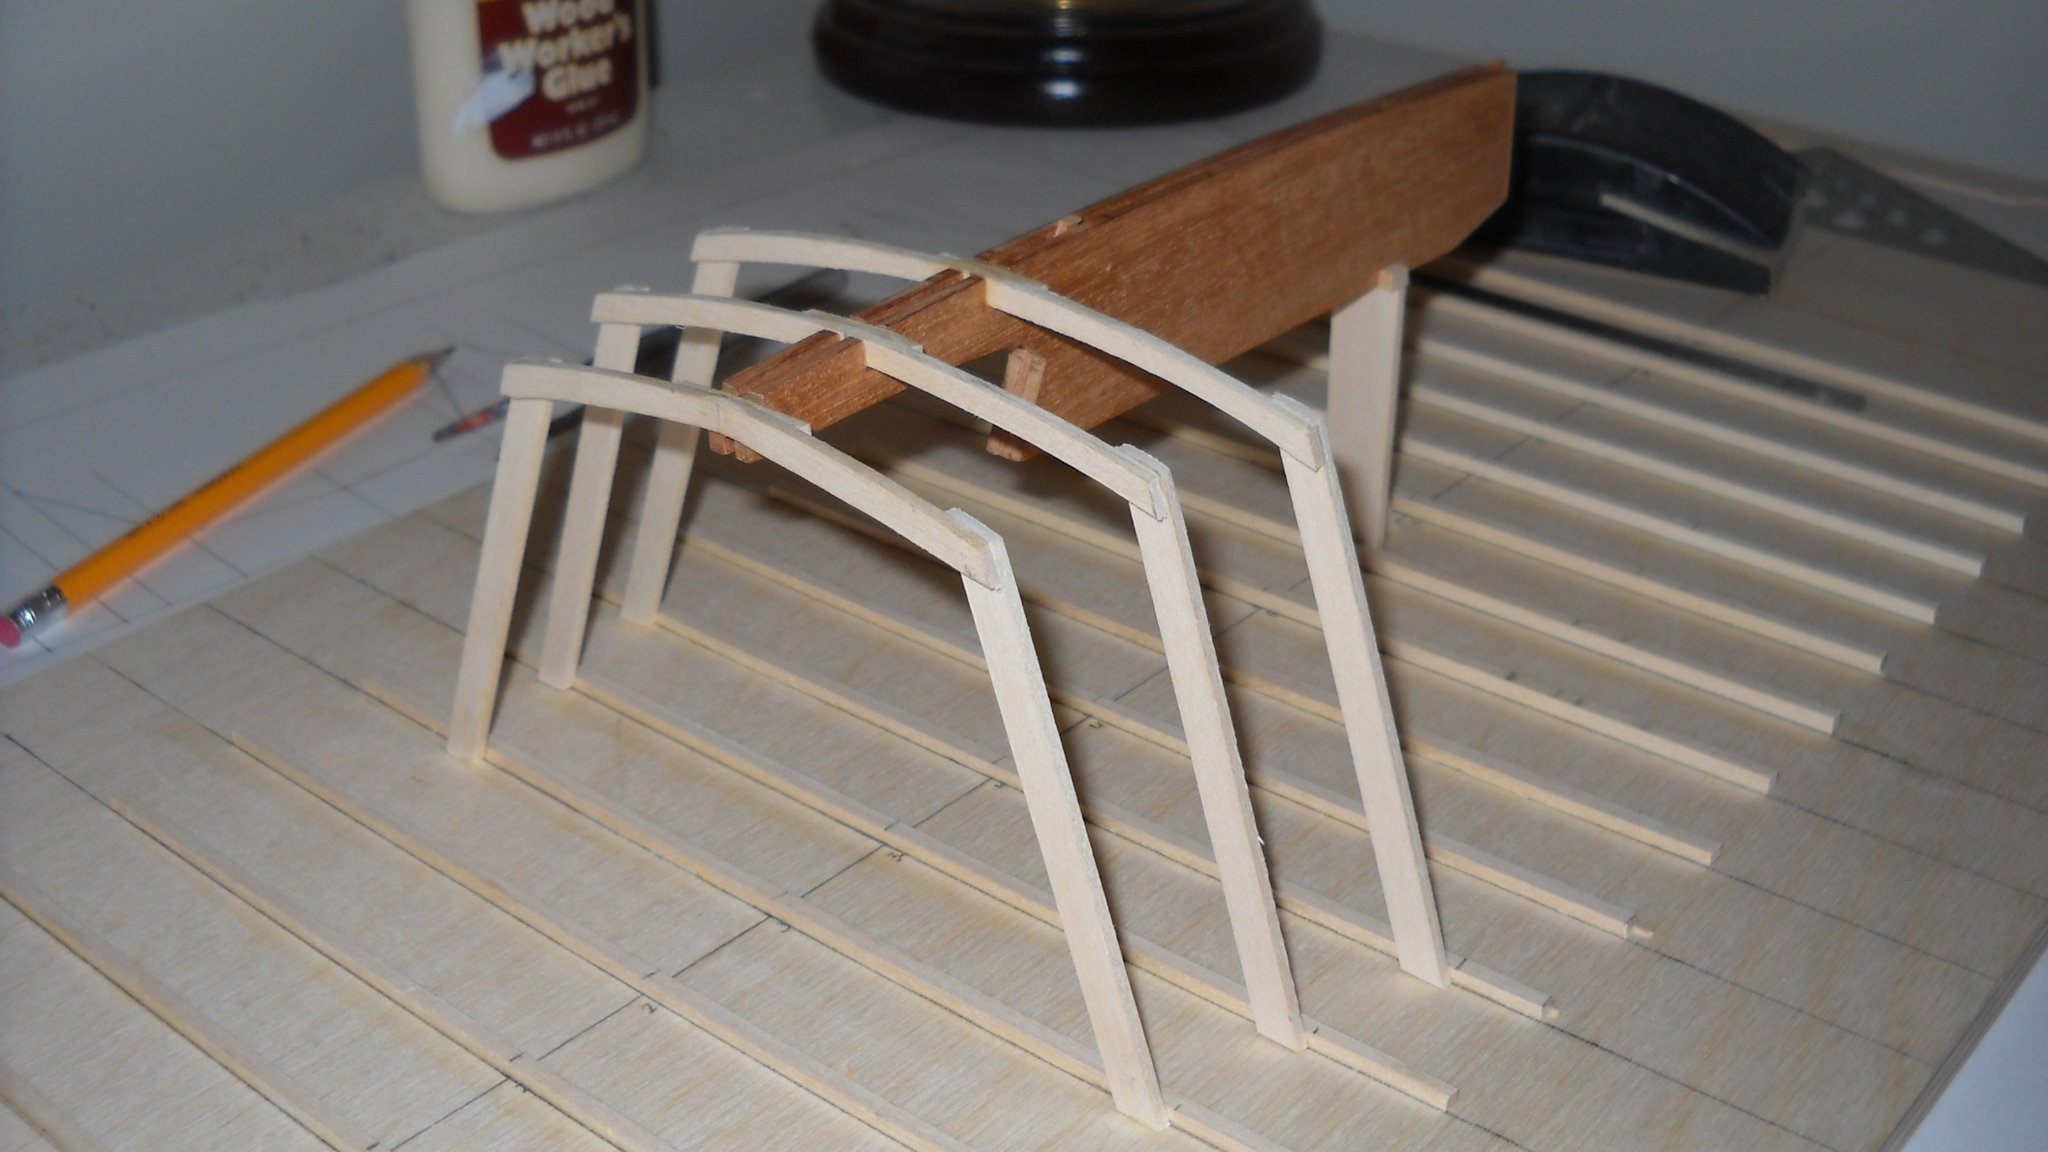
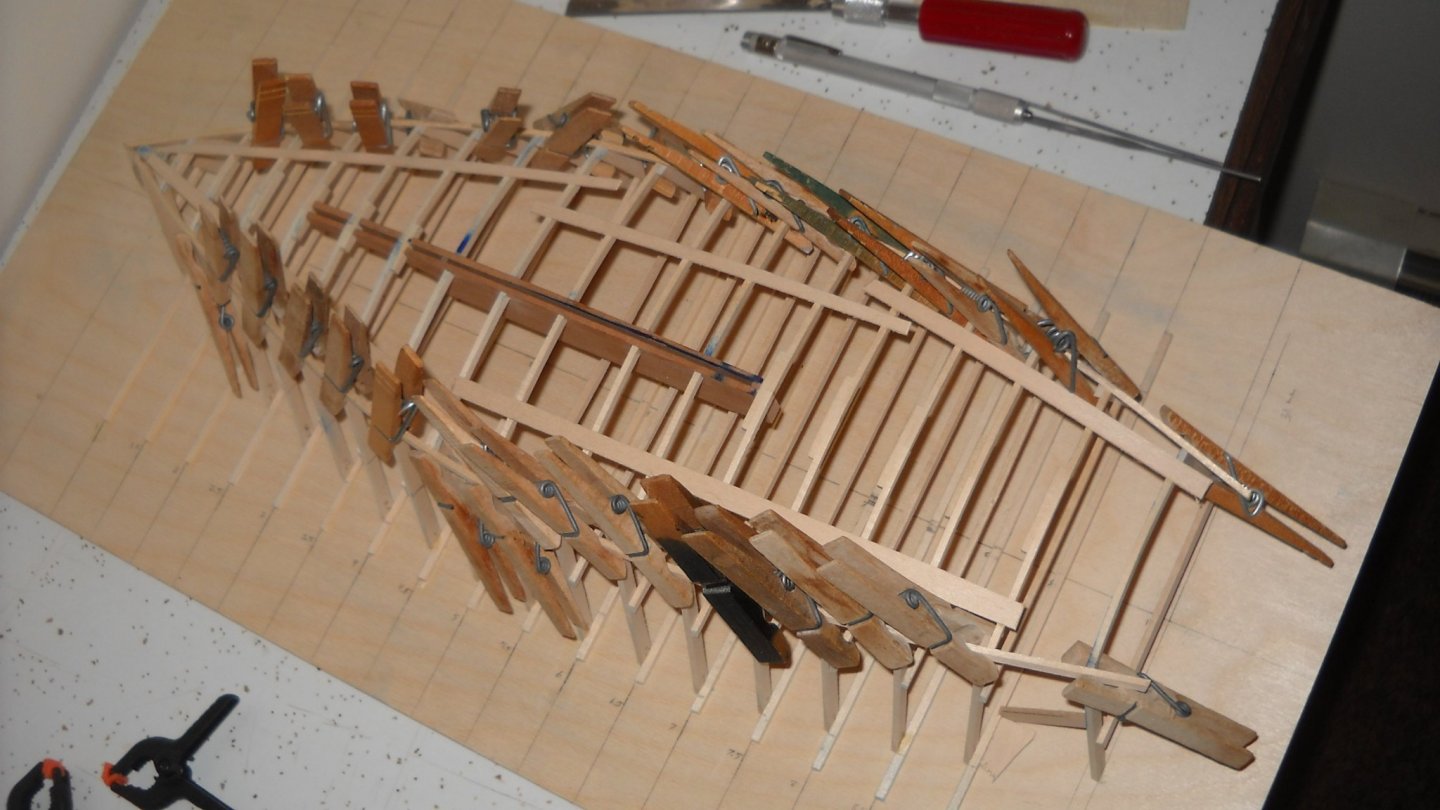
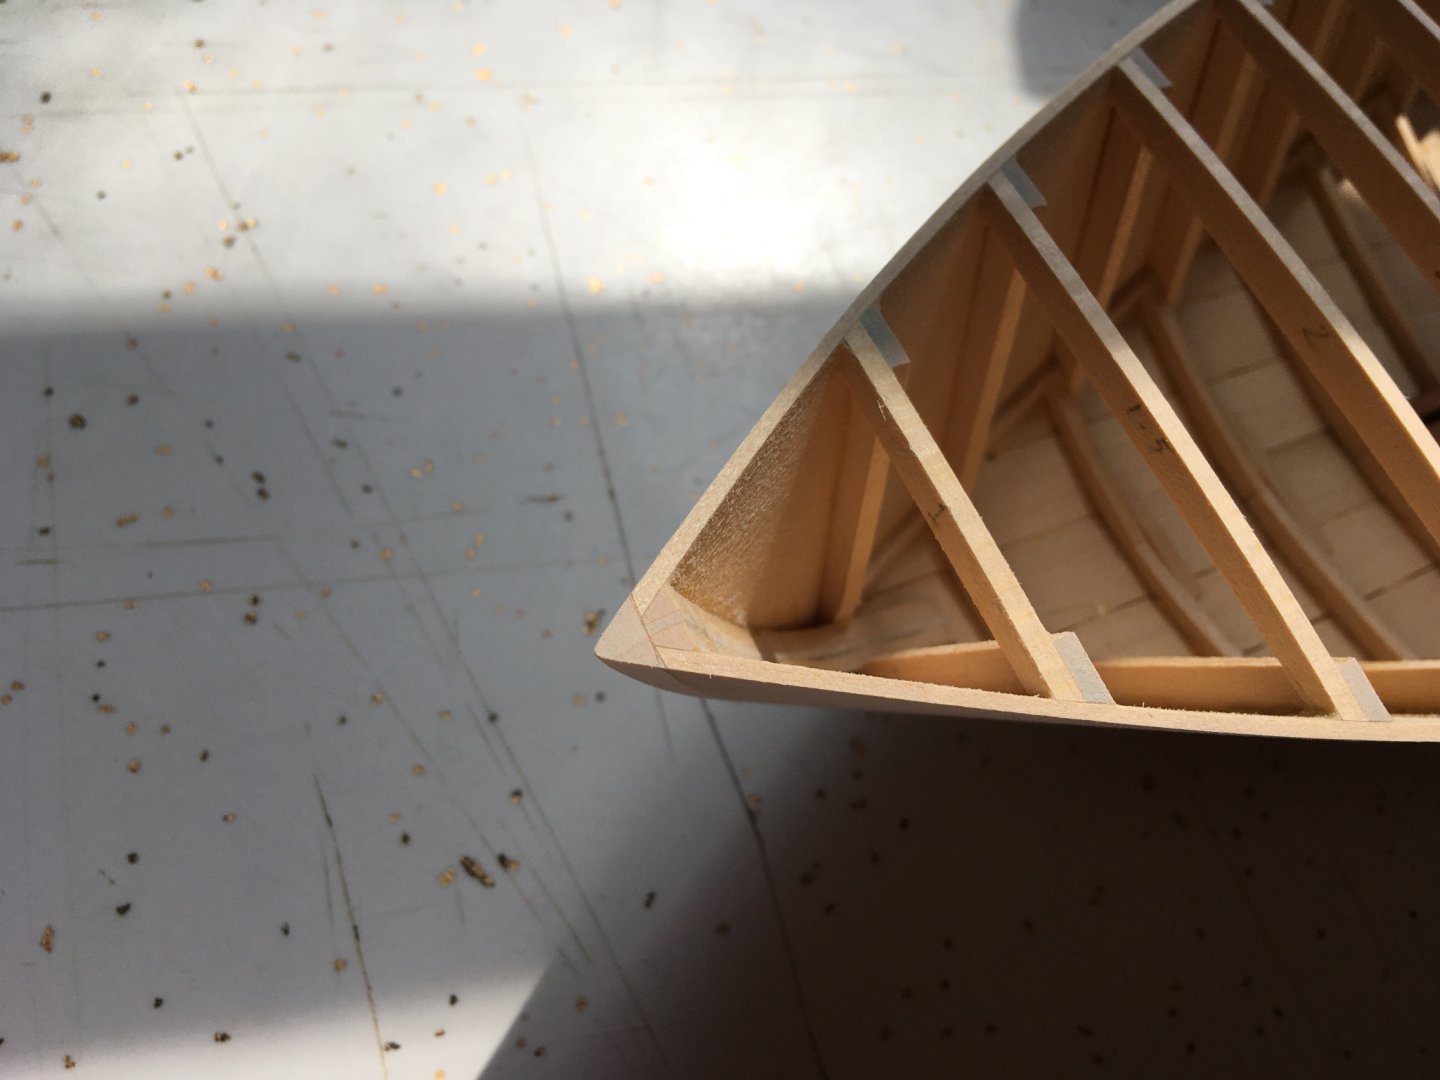
The ILCA has published a booklet, almost literally an instruction manual on how to build a wooden Lightning which is incredibly helpful! You can buy it here: https://www.lightningclass.org/content.aspx?page_id=586&club_id=93488&item_id=5905 Before I installed the chine logs, I think I was just extremely careful sanding along the lengths of the frames and was just incredibly lucky that nothing broke loose or became misaligned. In retrospect, I definitely should have put in some temporary spacer blocks between the sides of each frame. I would definitely recommend doing so to anyone else. I was just dumb and should have known better but lucked out anyway. And yes, I did cut the notches after everything was set up, and as far as I can remember, it was extremely tedious and tricky. It was over 4 years ago, but as far as I remember, I was just extremely careful with my razor saw and everything just happened to come out ok. I would definitely recommend cutting the notches in each frame before attaching to the jig. I guess I just didn't think that far ahead at the time and again got lucky that it worked out the way it did. (I'm sensing a theme here...)
-
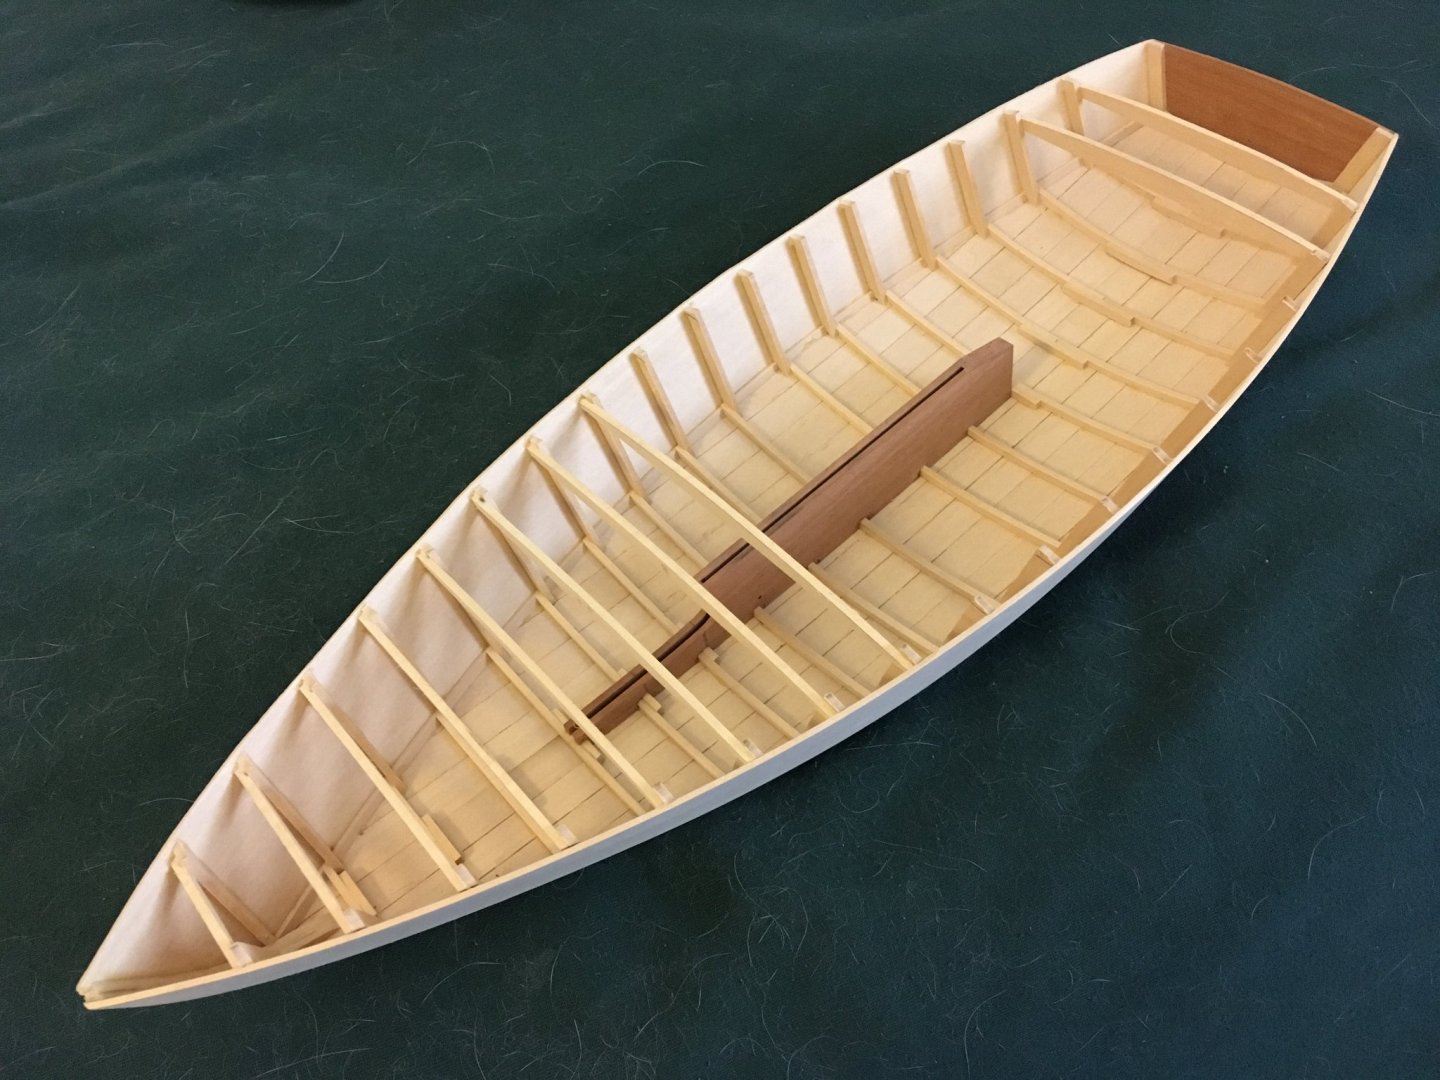
Thank you! No, nothing is painted yet, the basswood is indeed very light. I’m going to paint the inside a very light grey.
-
Thank you all so much for your encouragement as I've restarted this project! Now that it's officially underway again, I figured it was time to give it its own build log in the appropriate section of the forum. This log will of course be left as is, since there is so much excellent information and reference material here. So there is a link to this log in the first post of my new log, which can be found here: I hope all of you who have been following this log will continue to follow the new one. Thank you all again for your support!
-
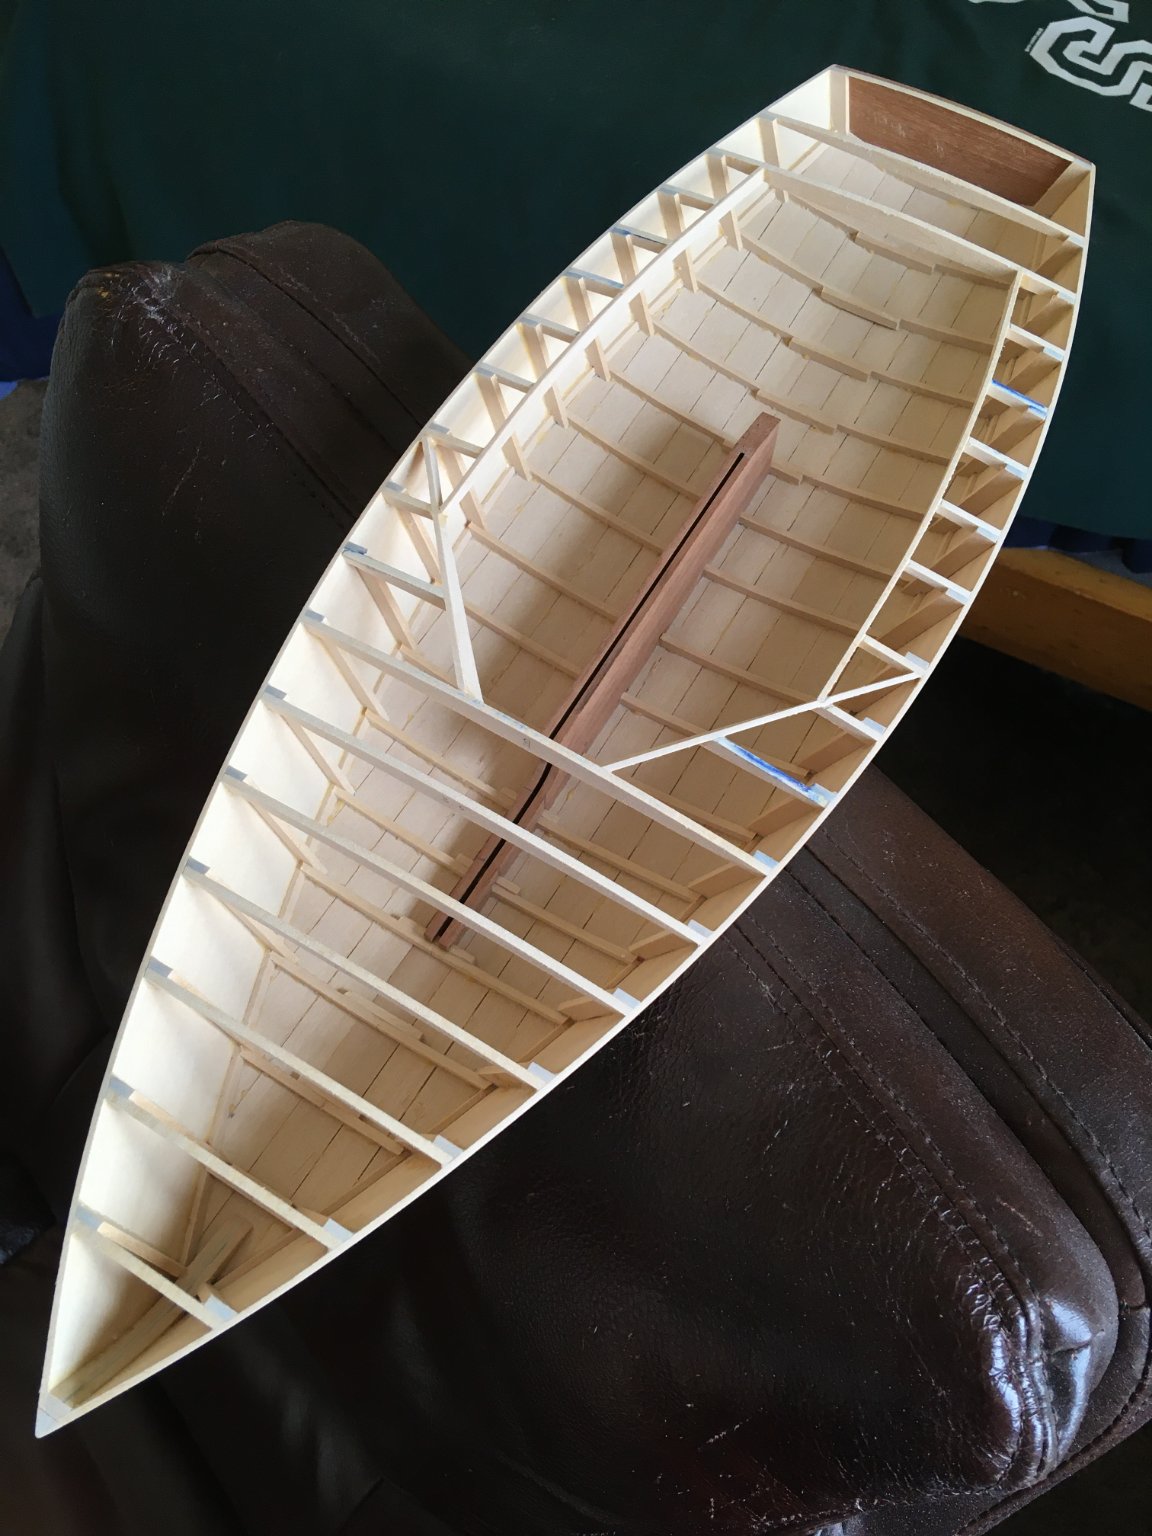
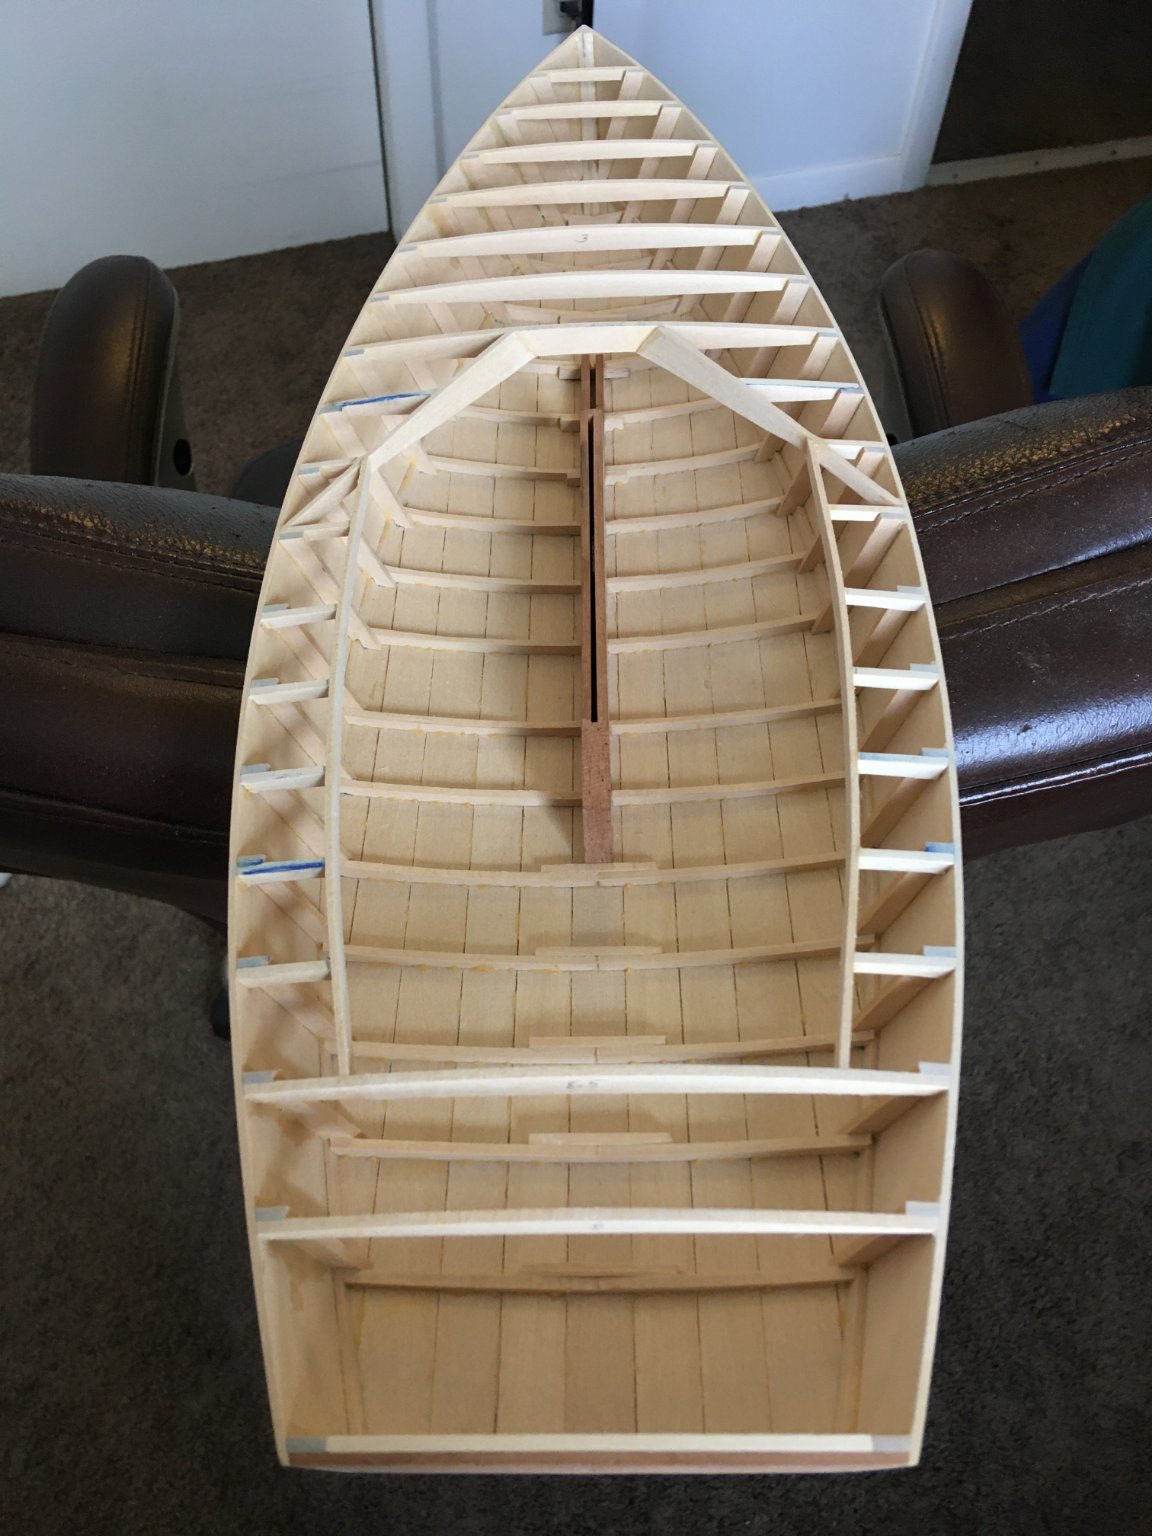
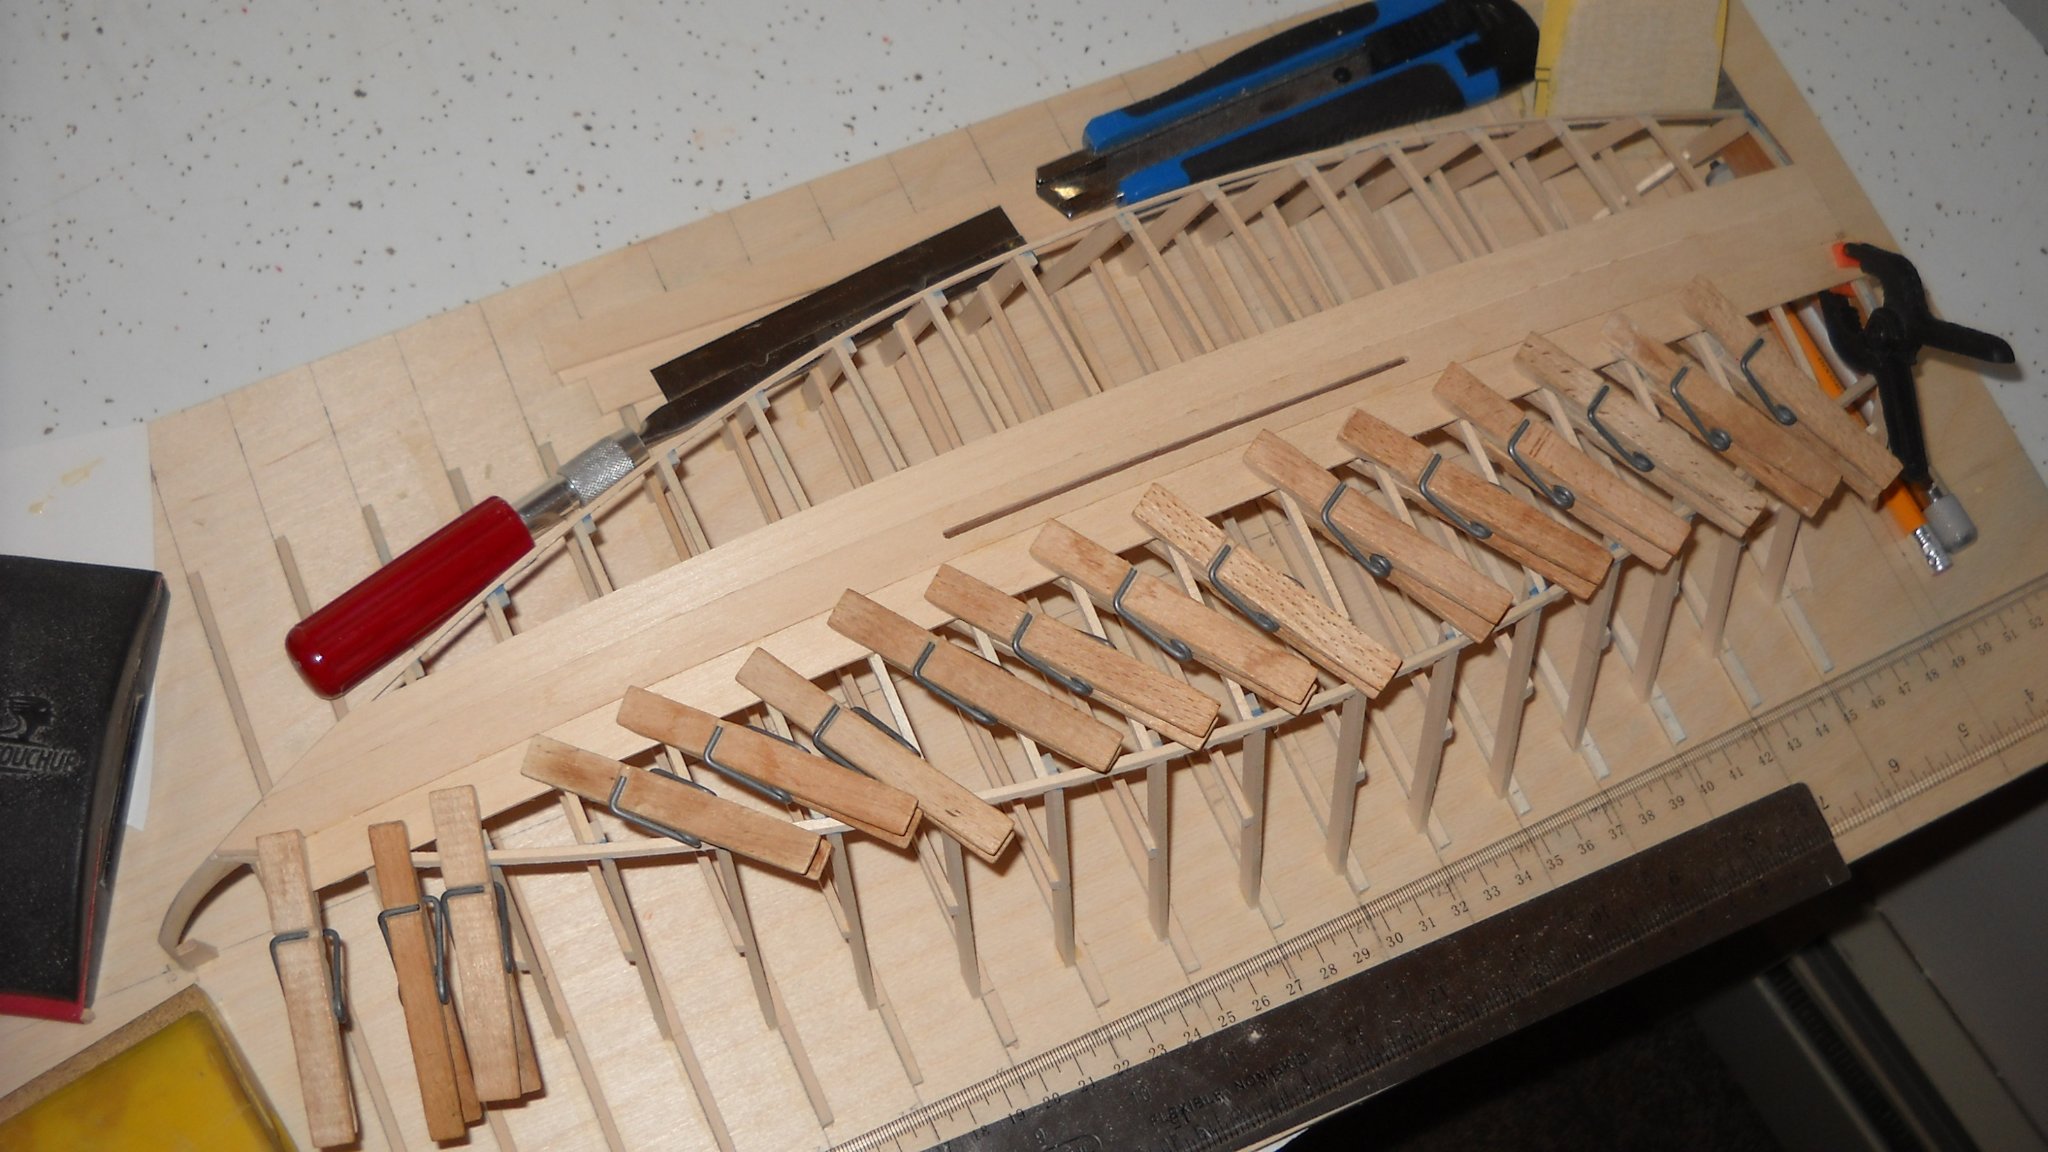
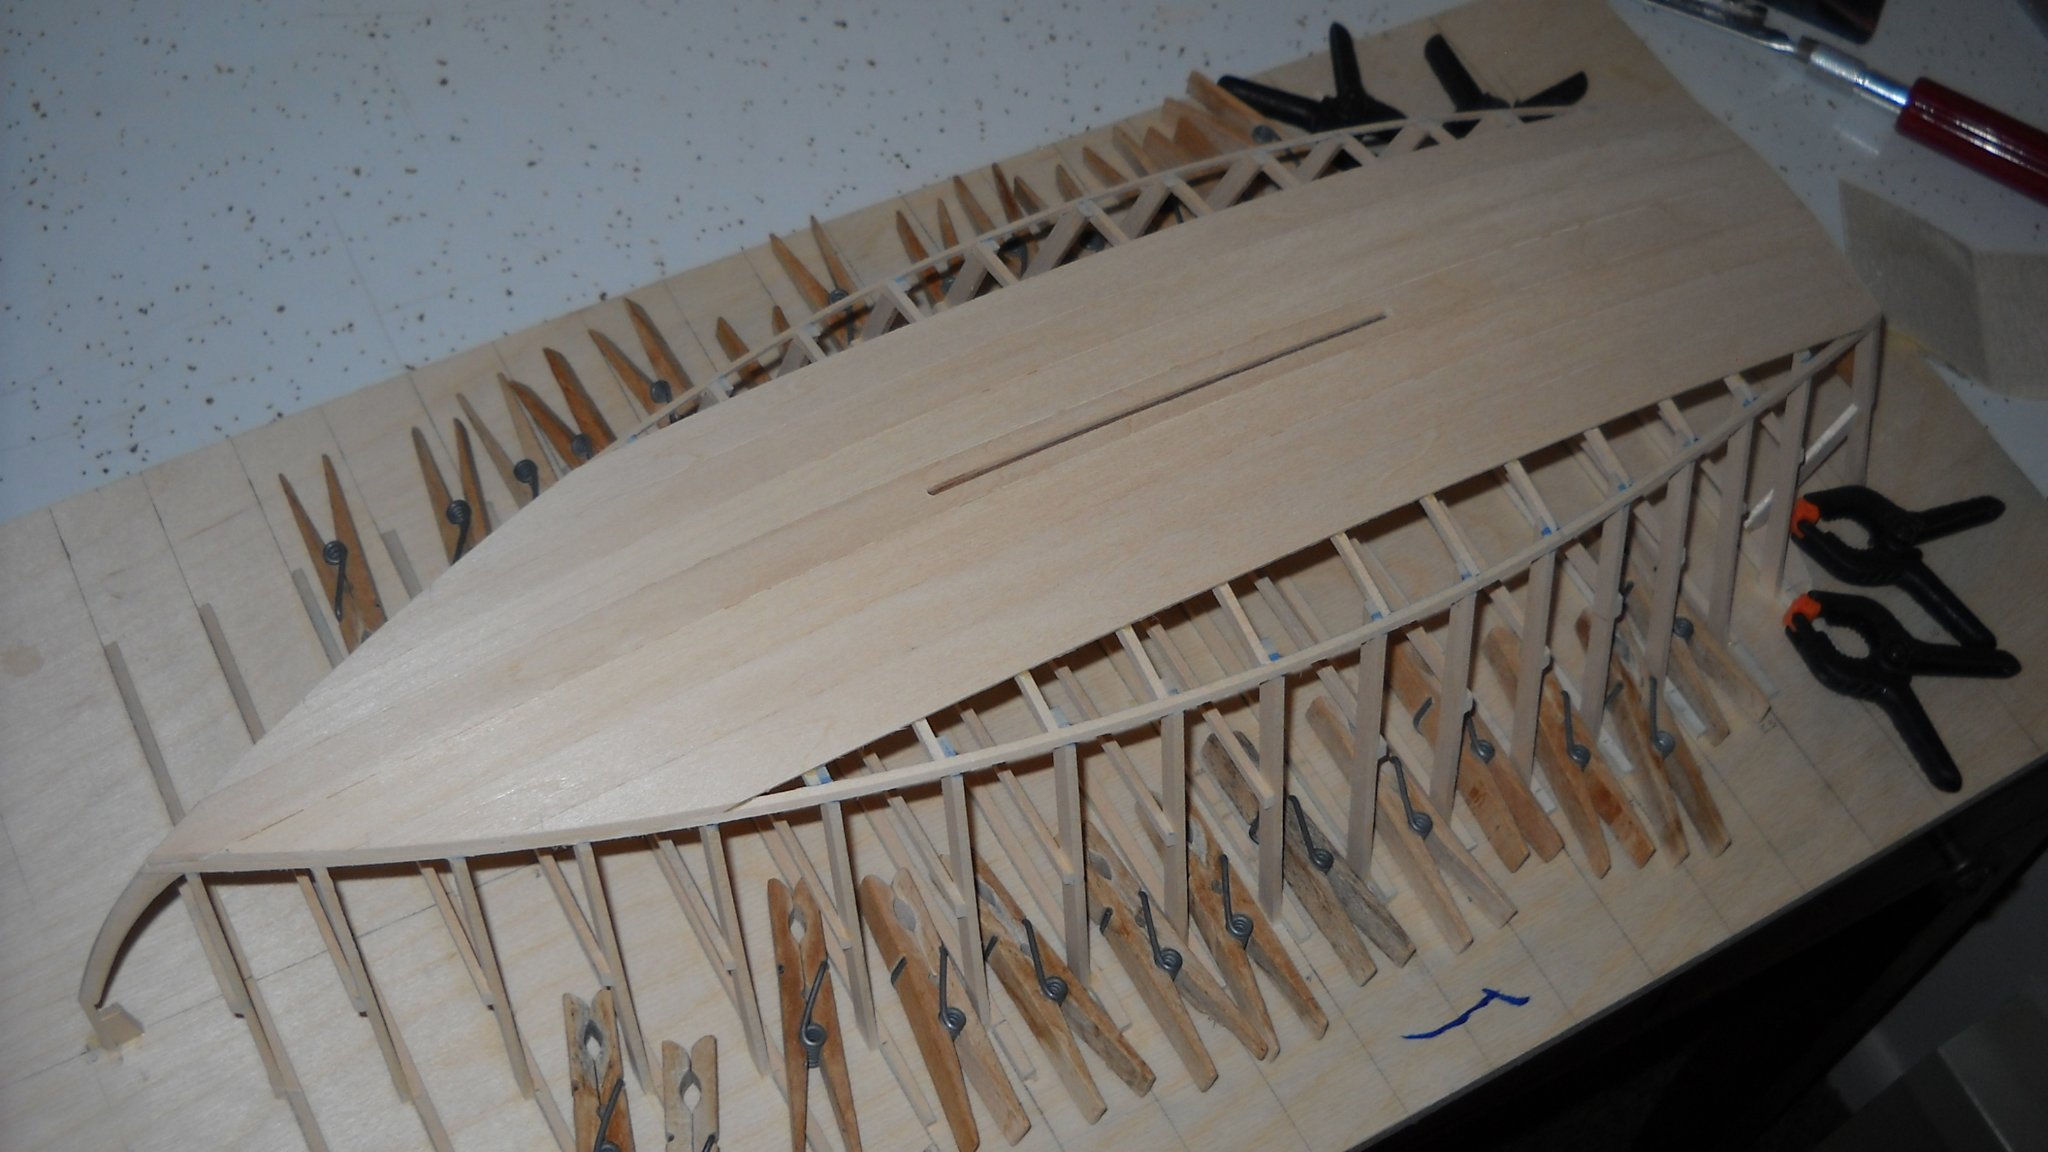
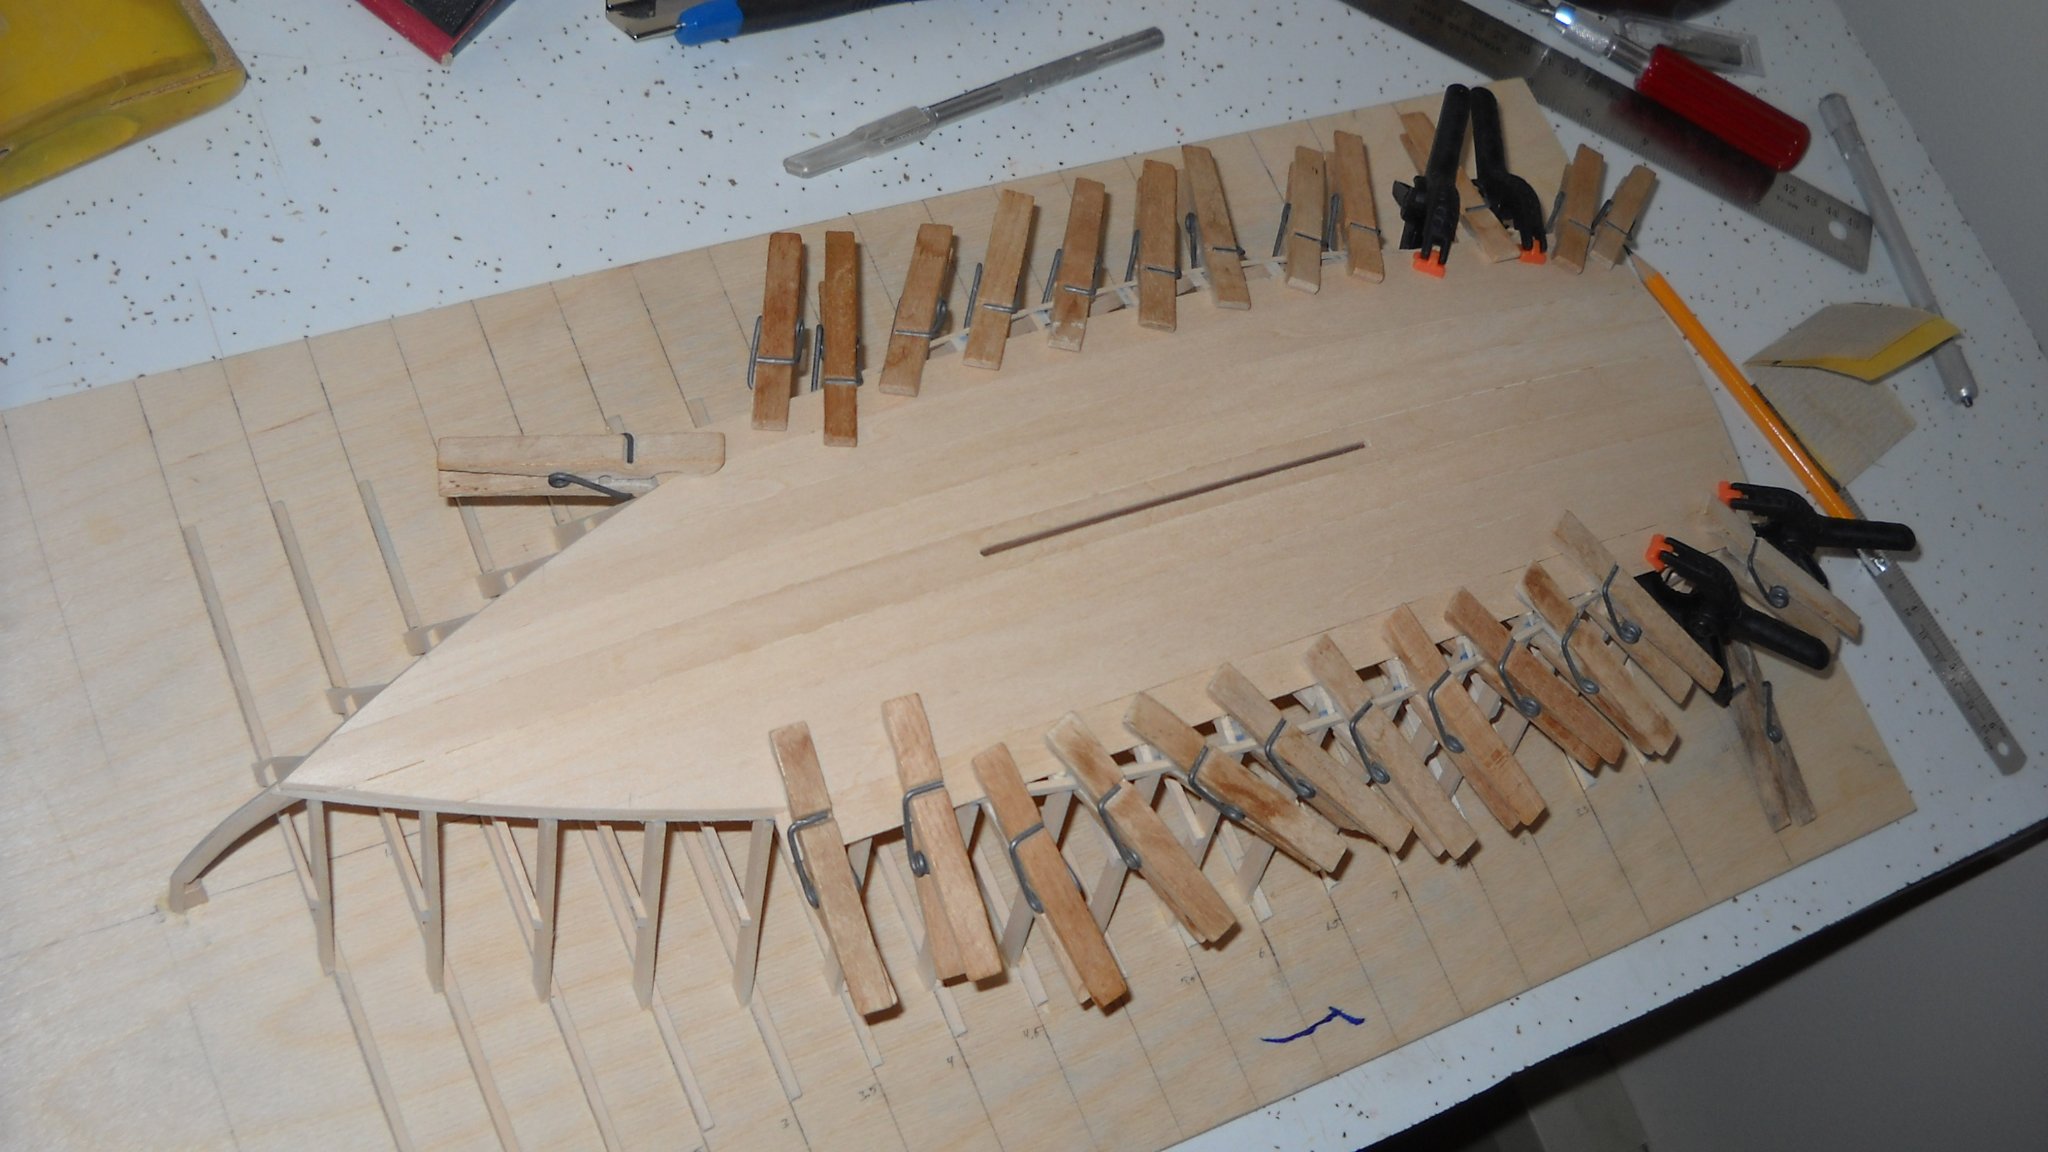
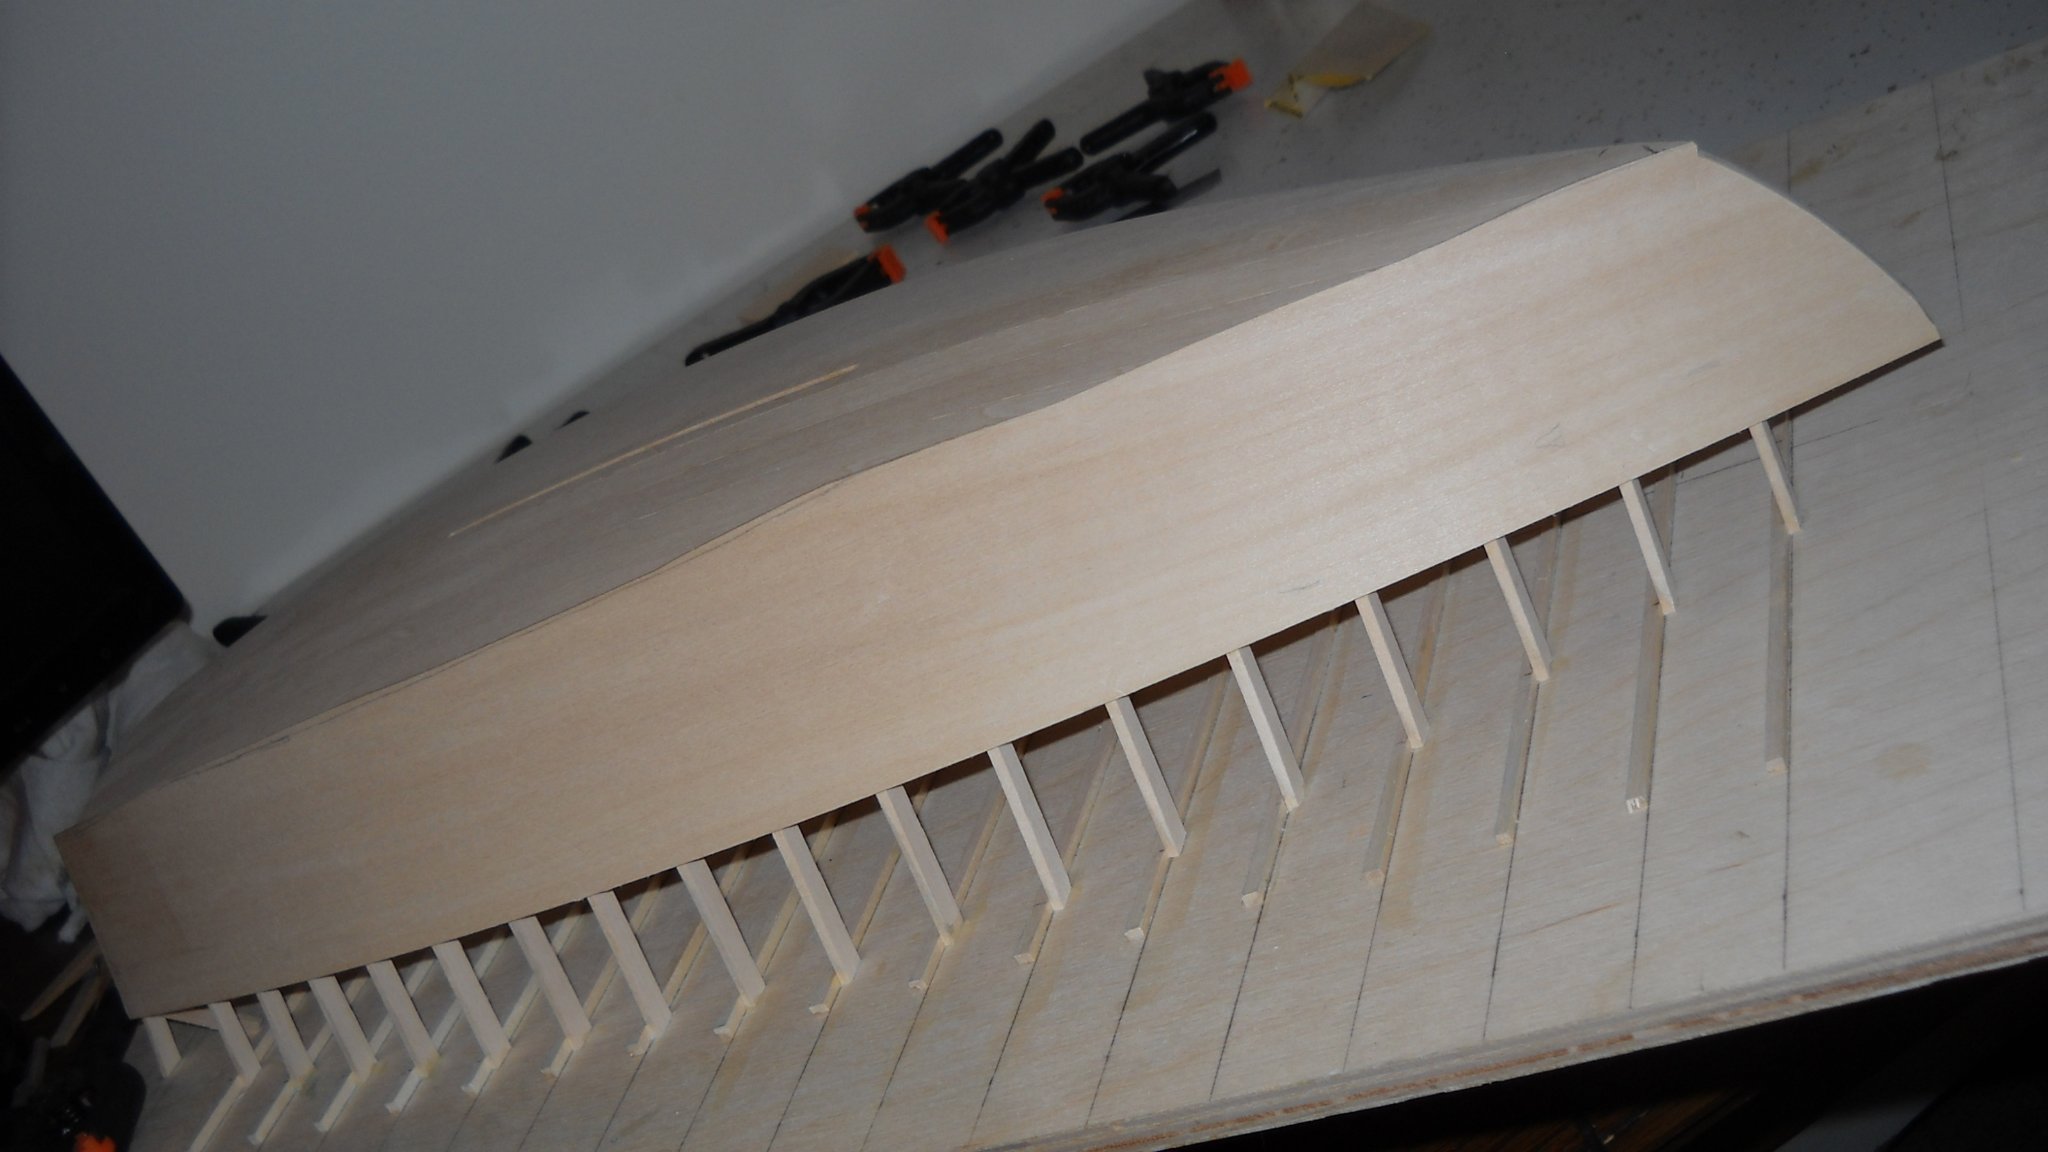
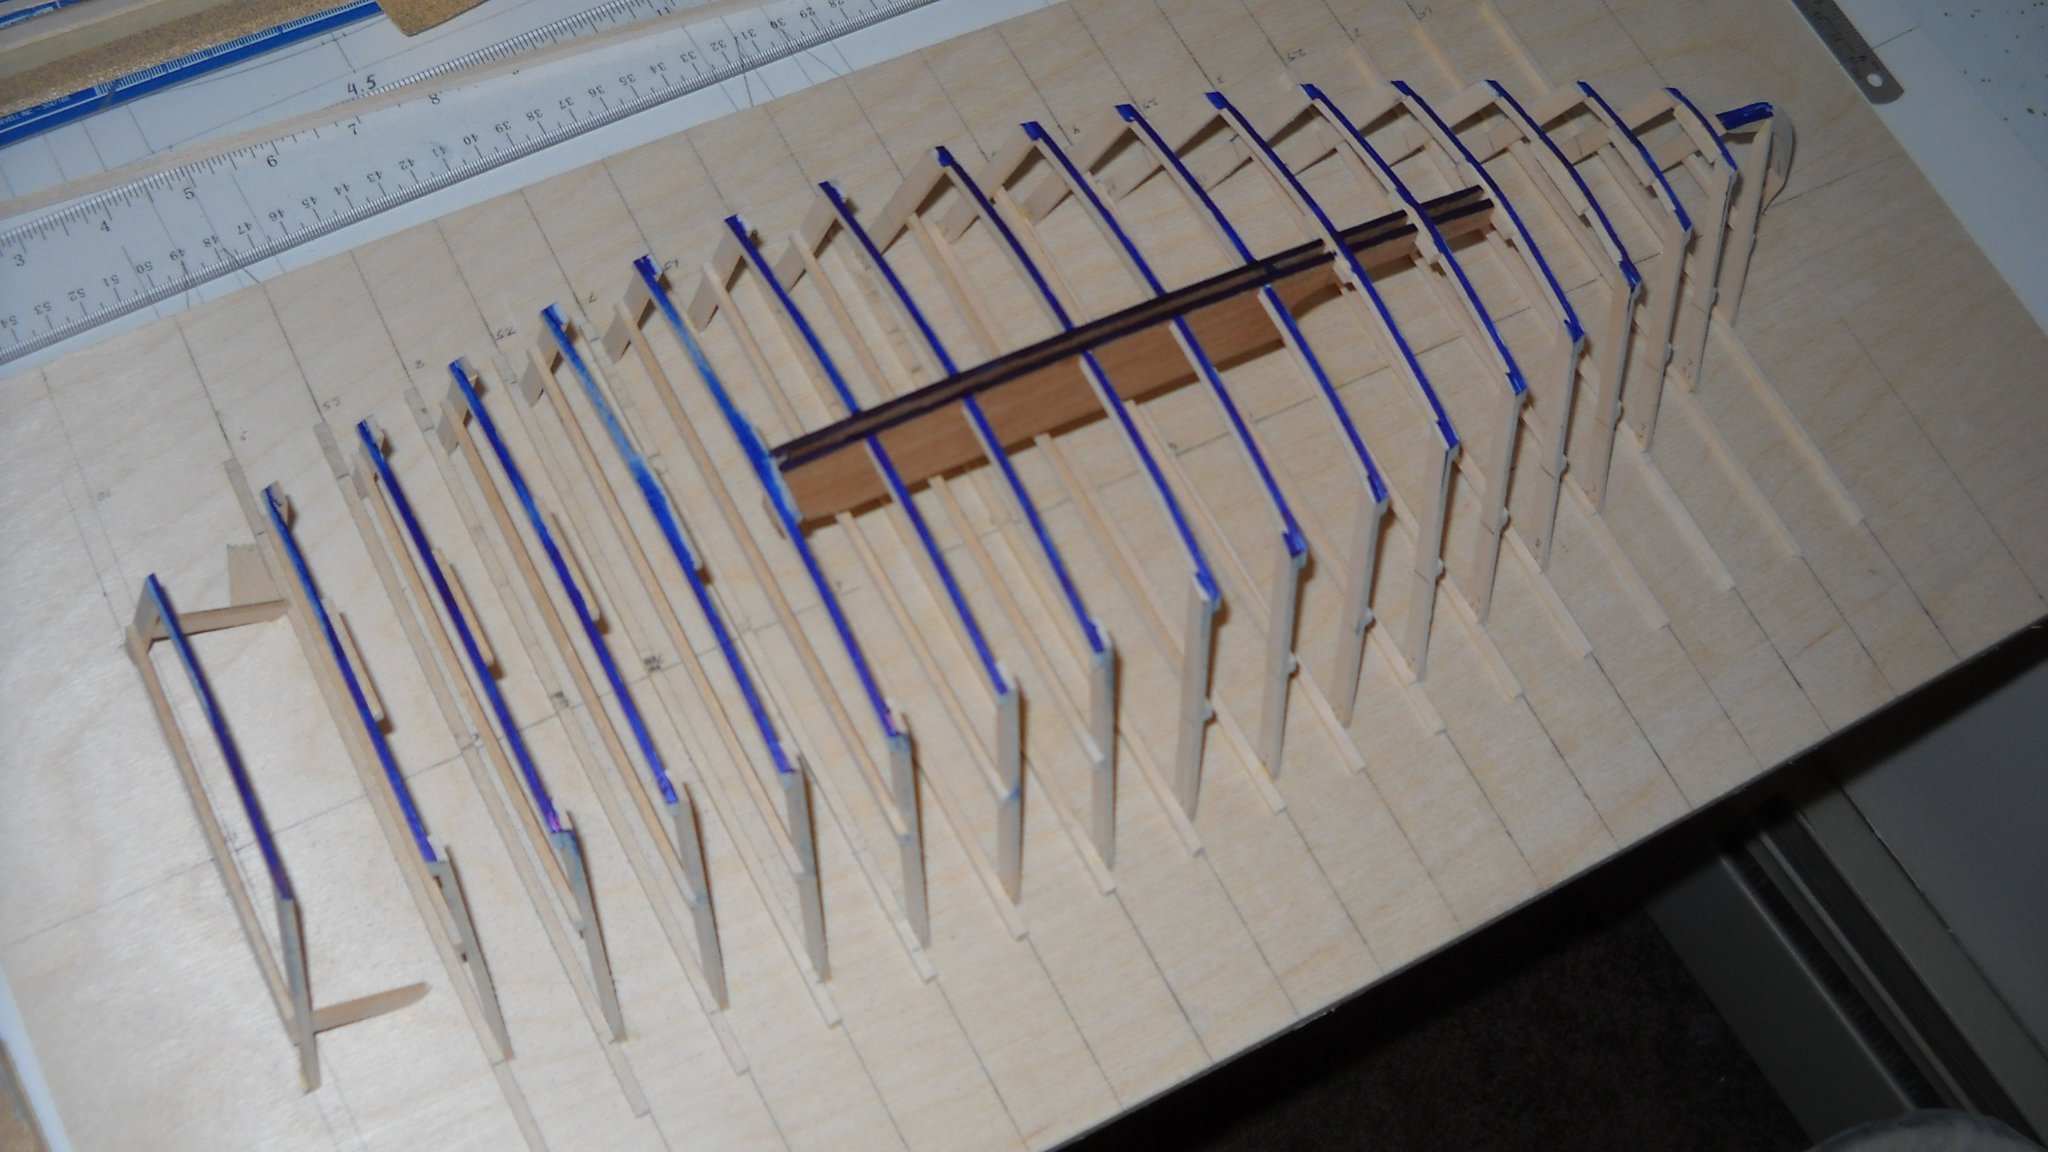
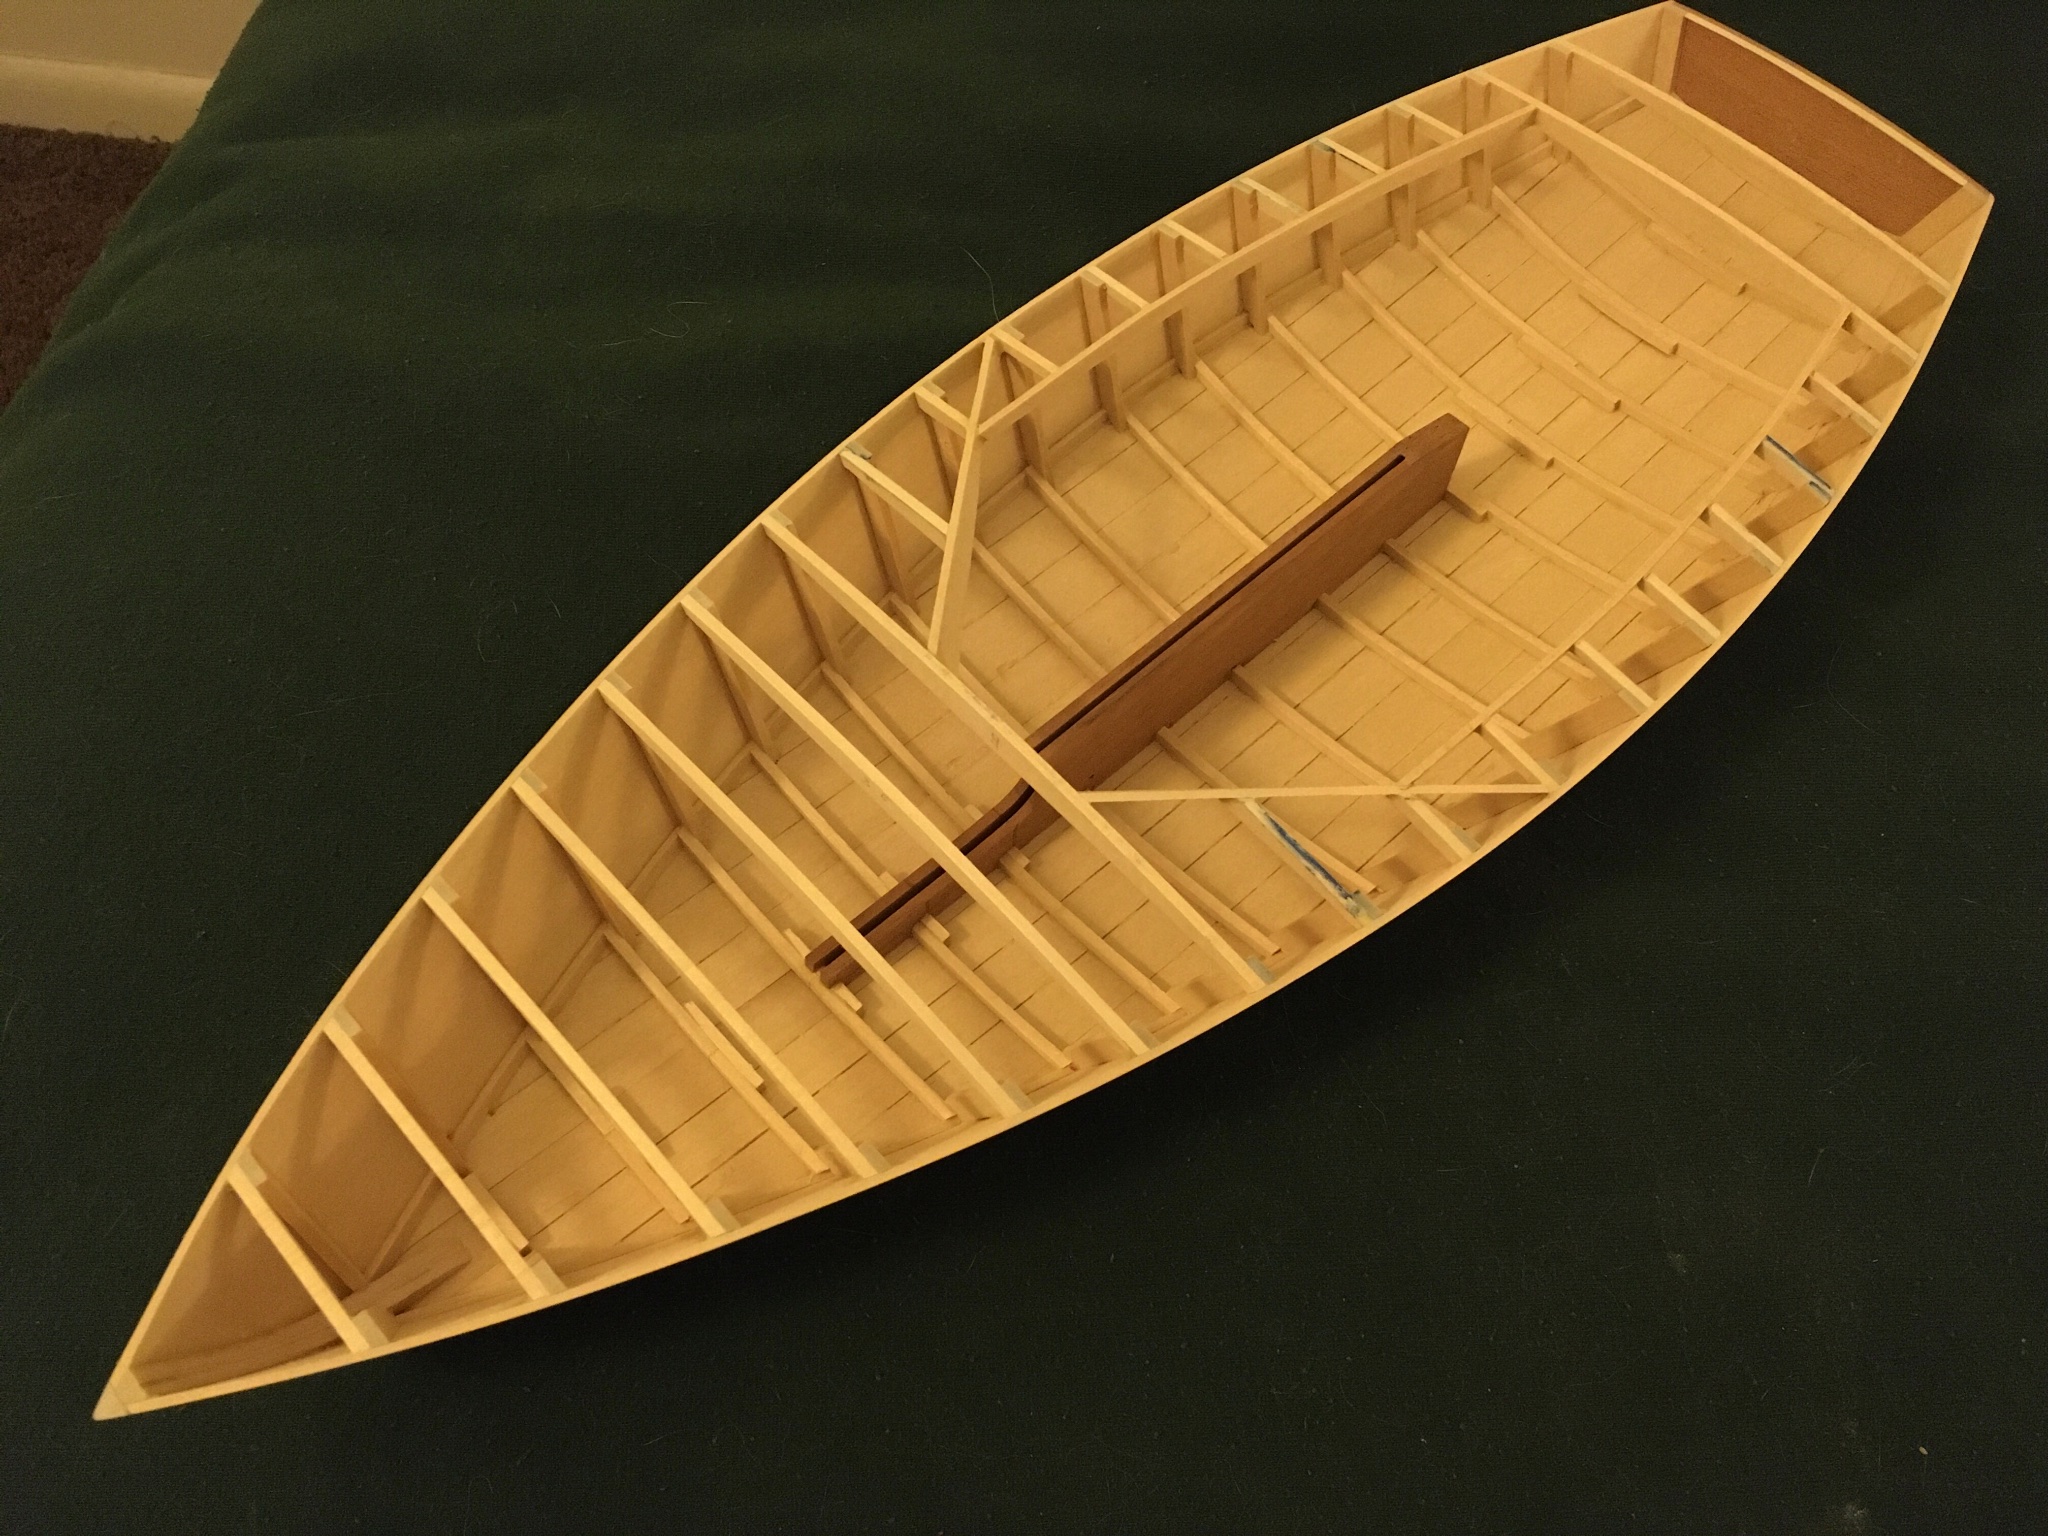
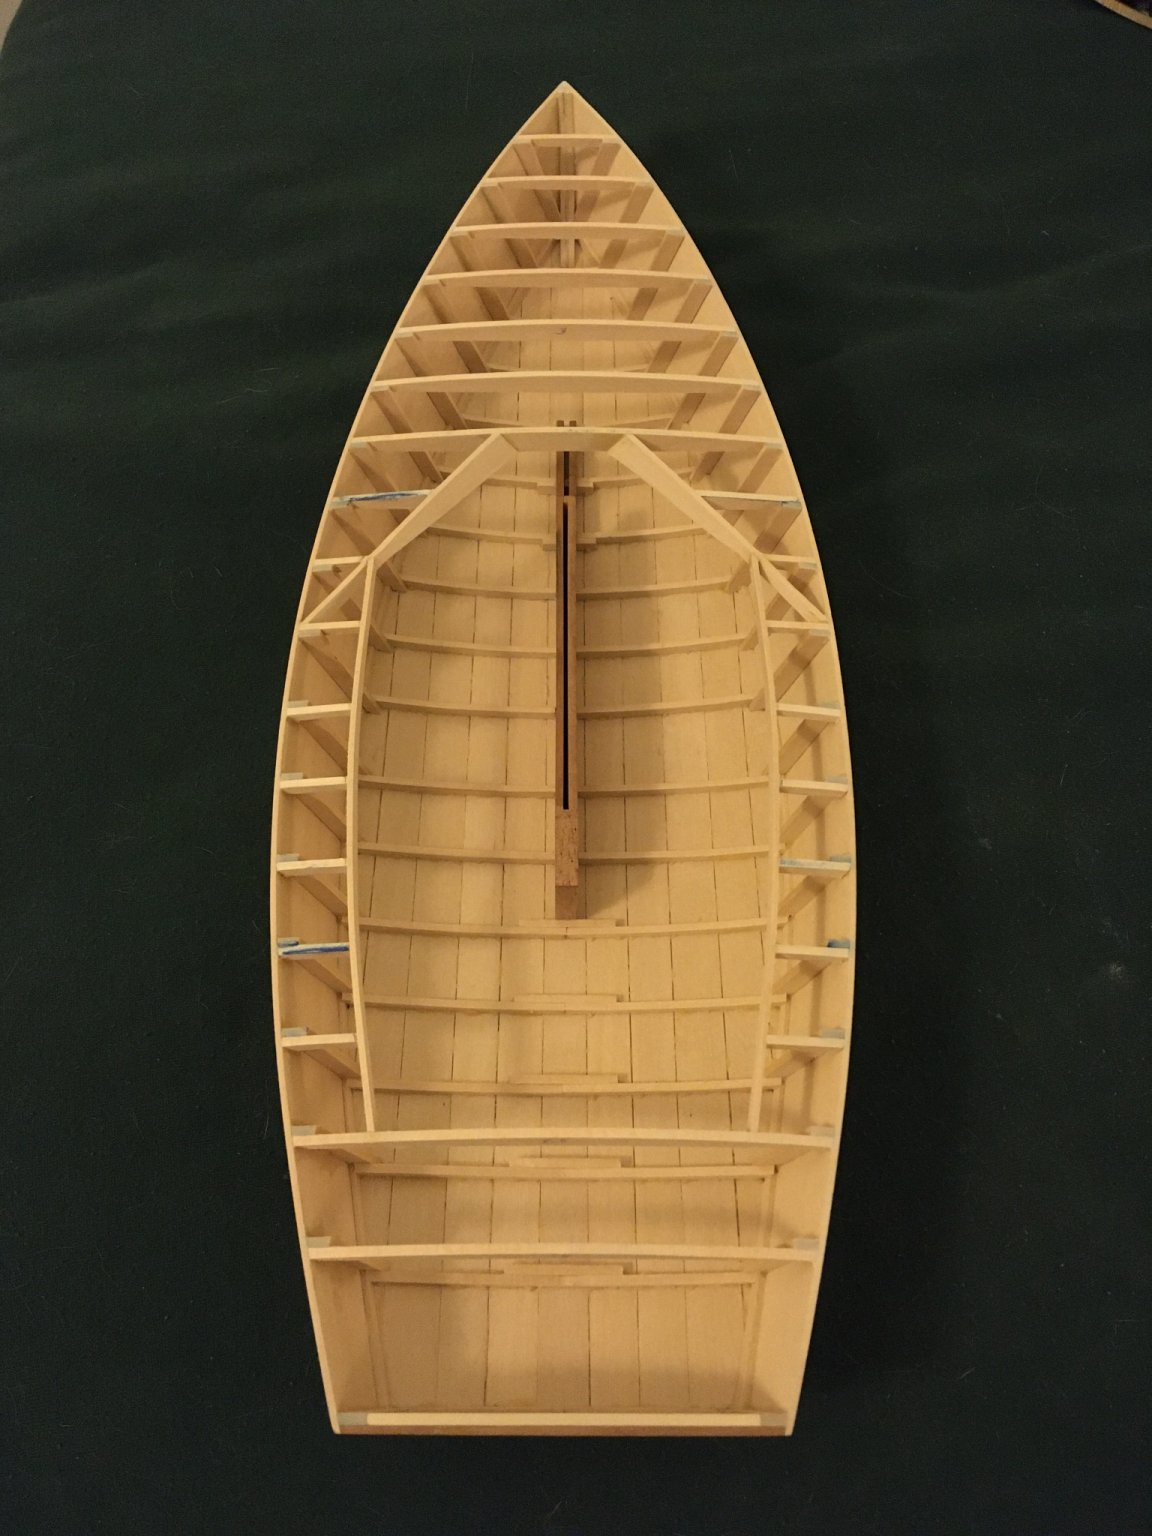
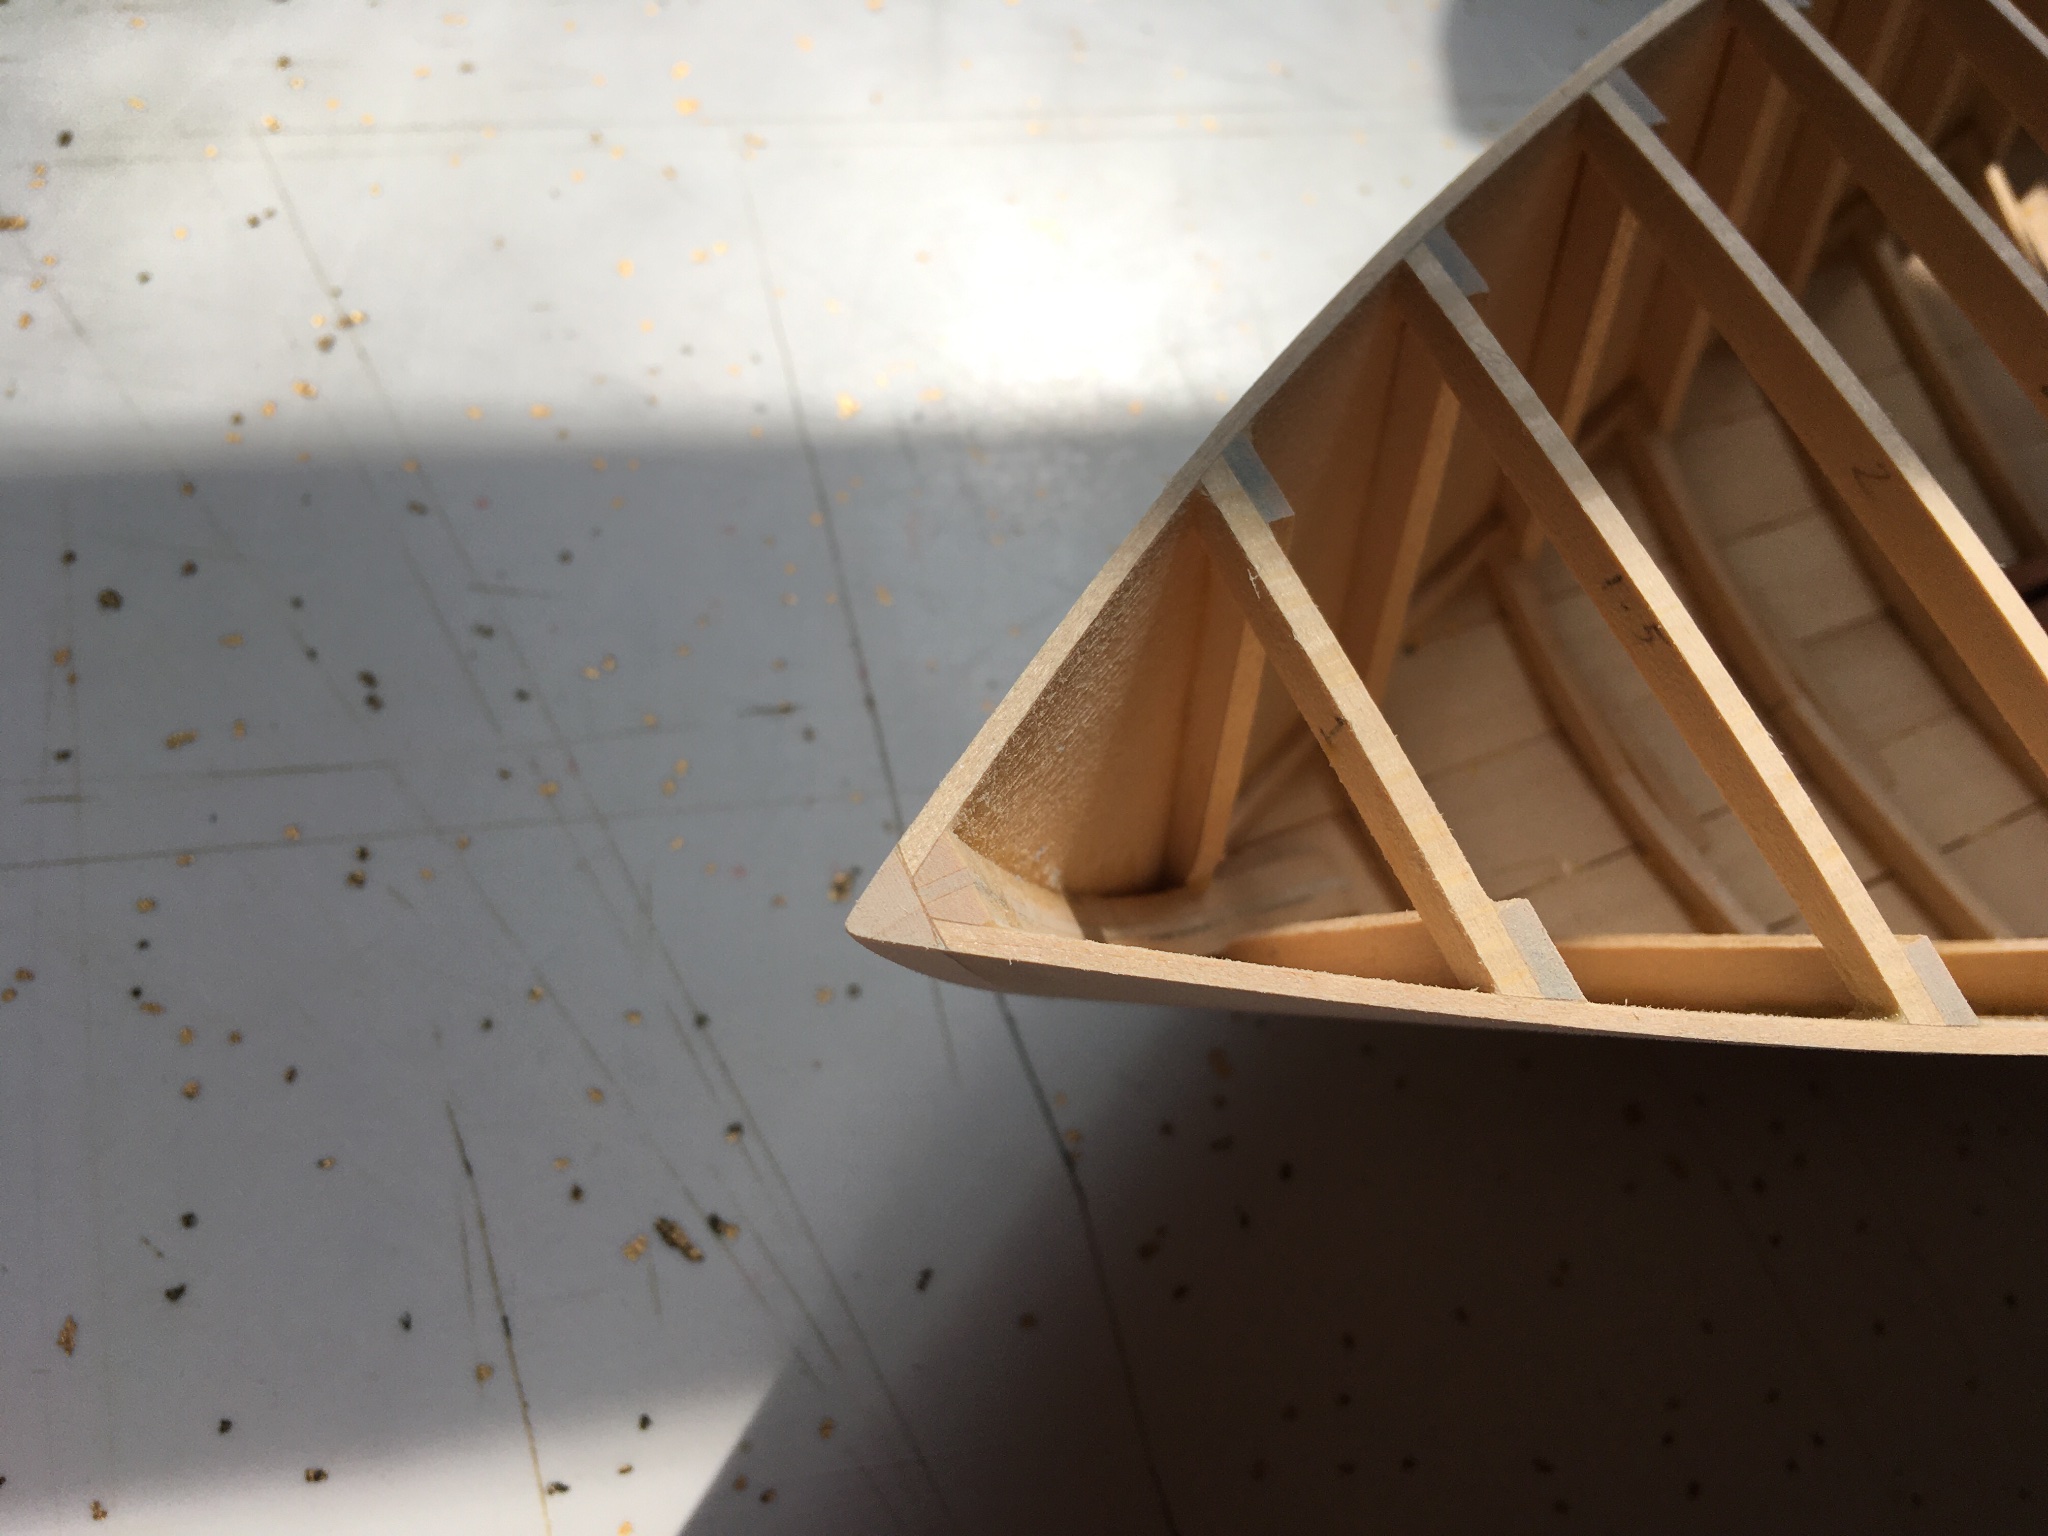
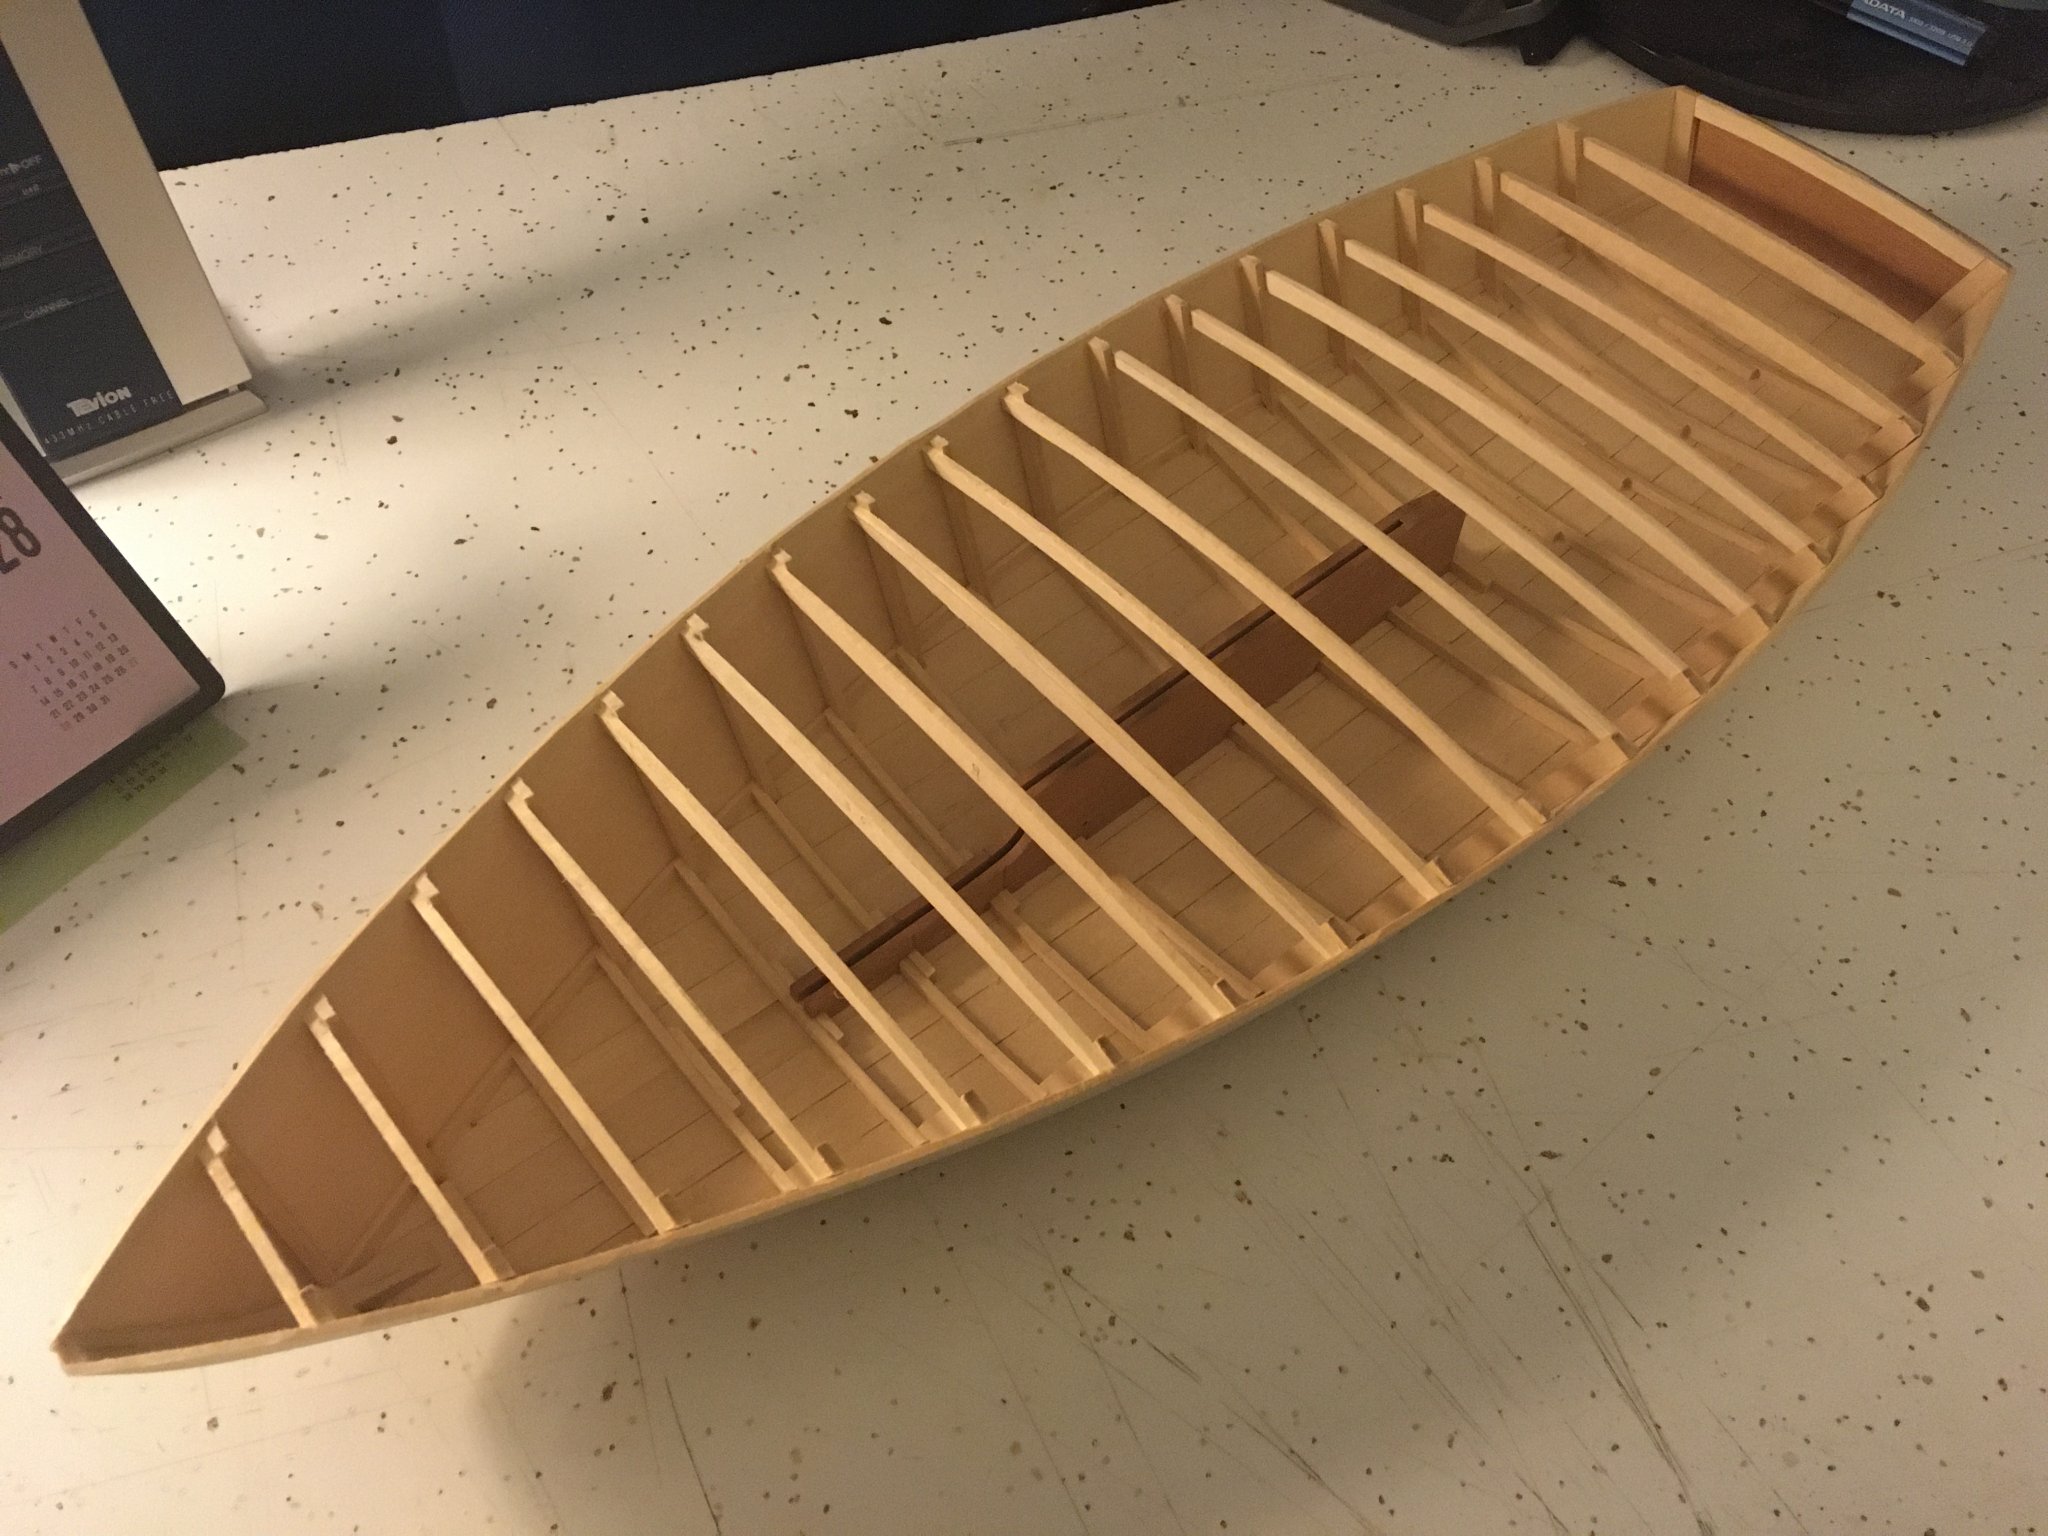
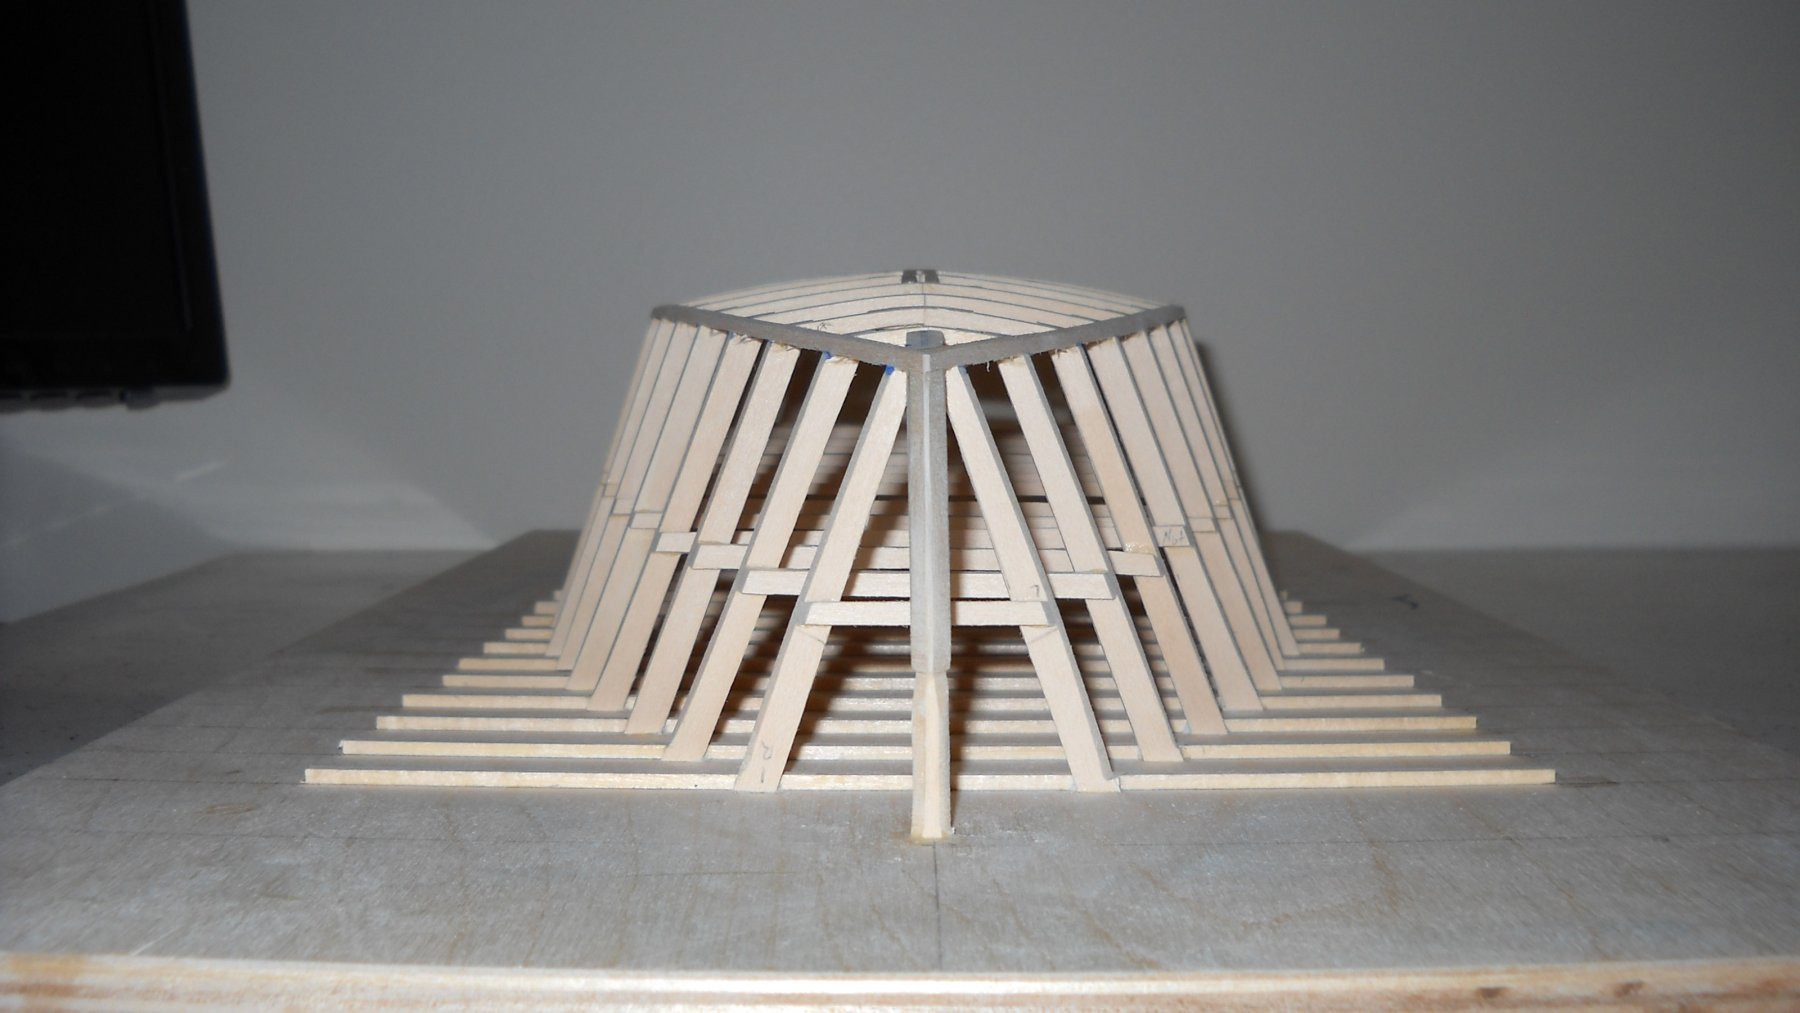
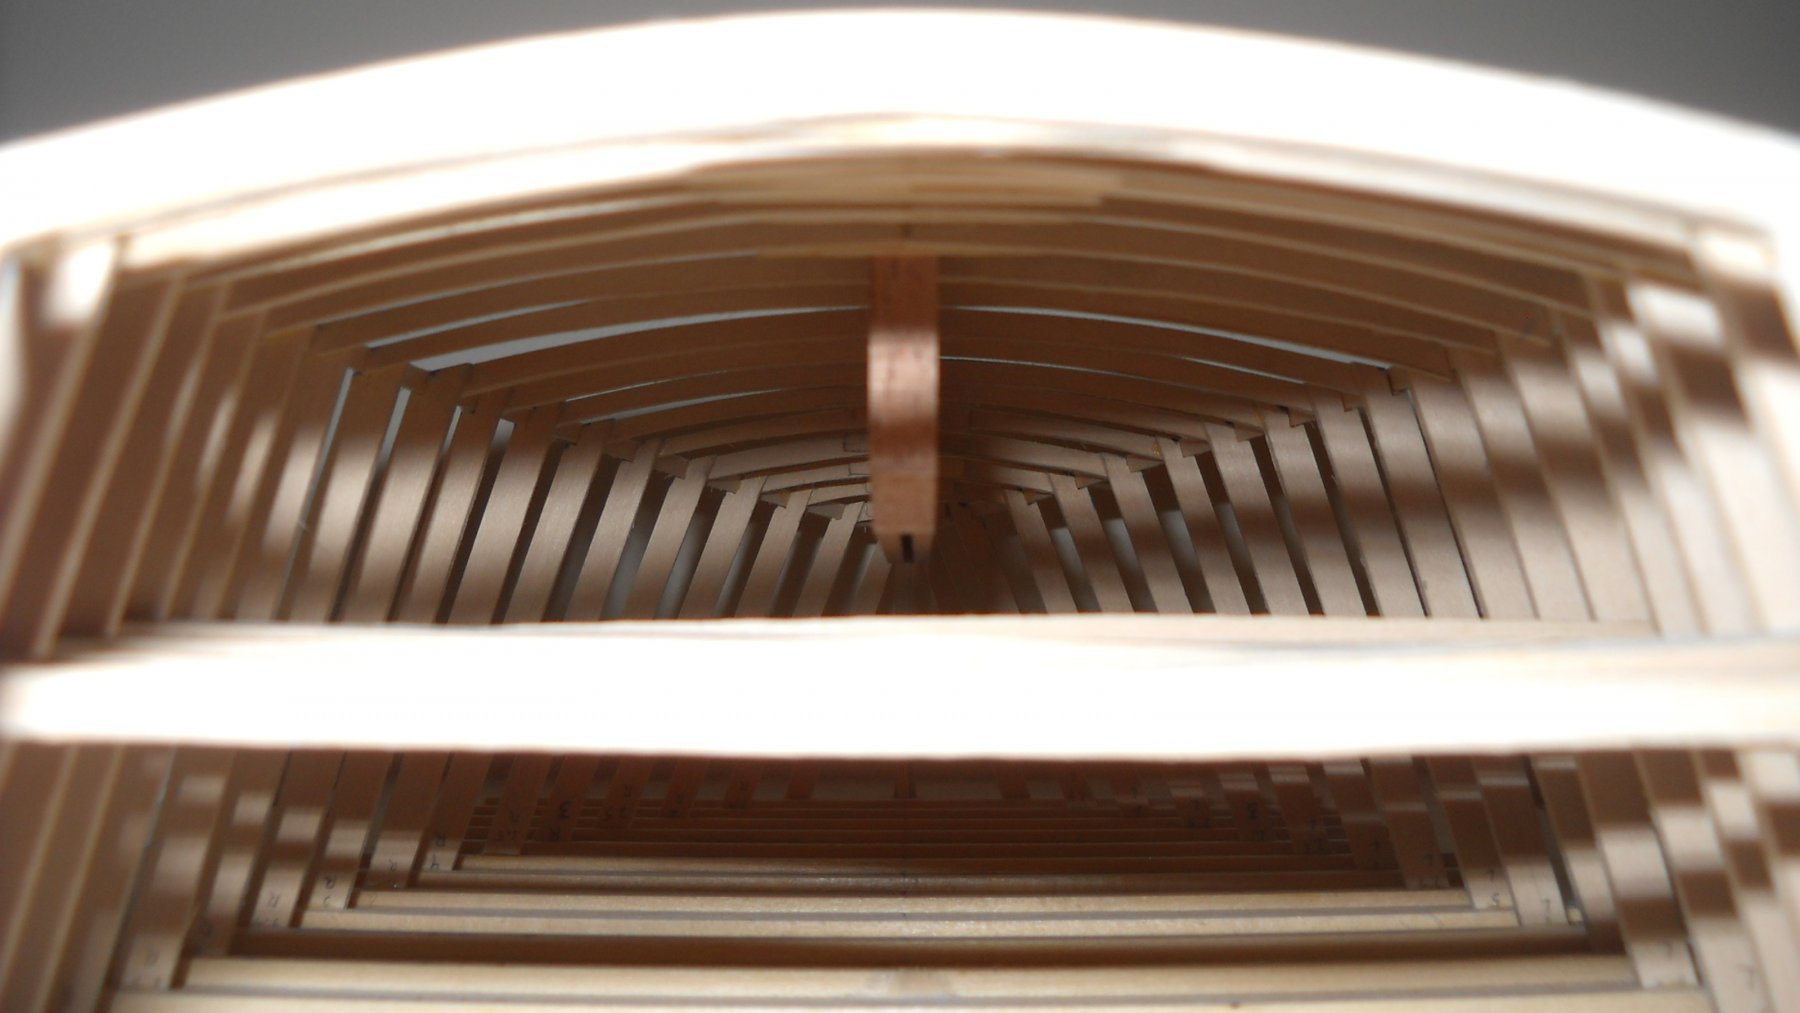
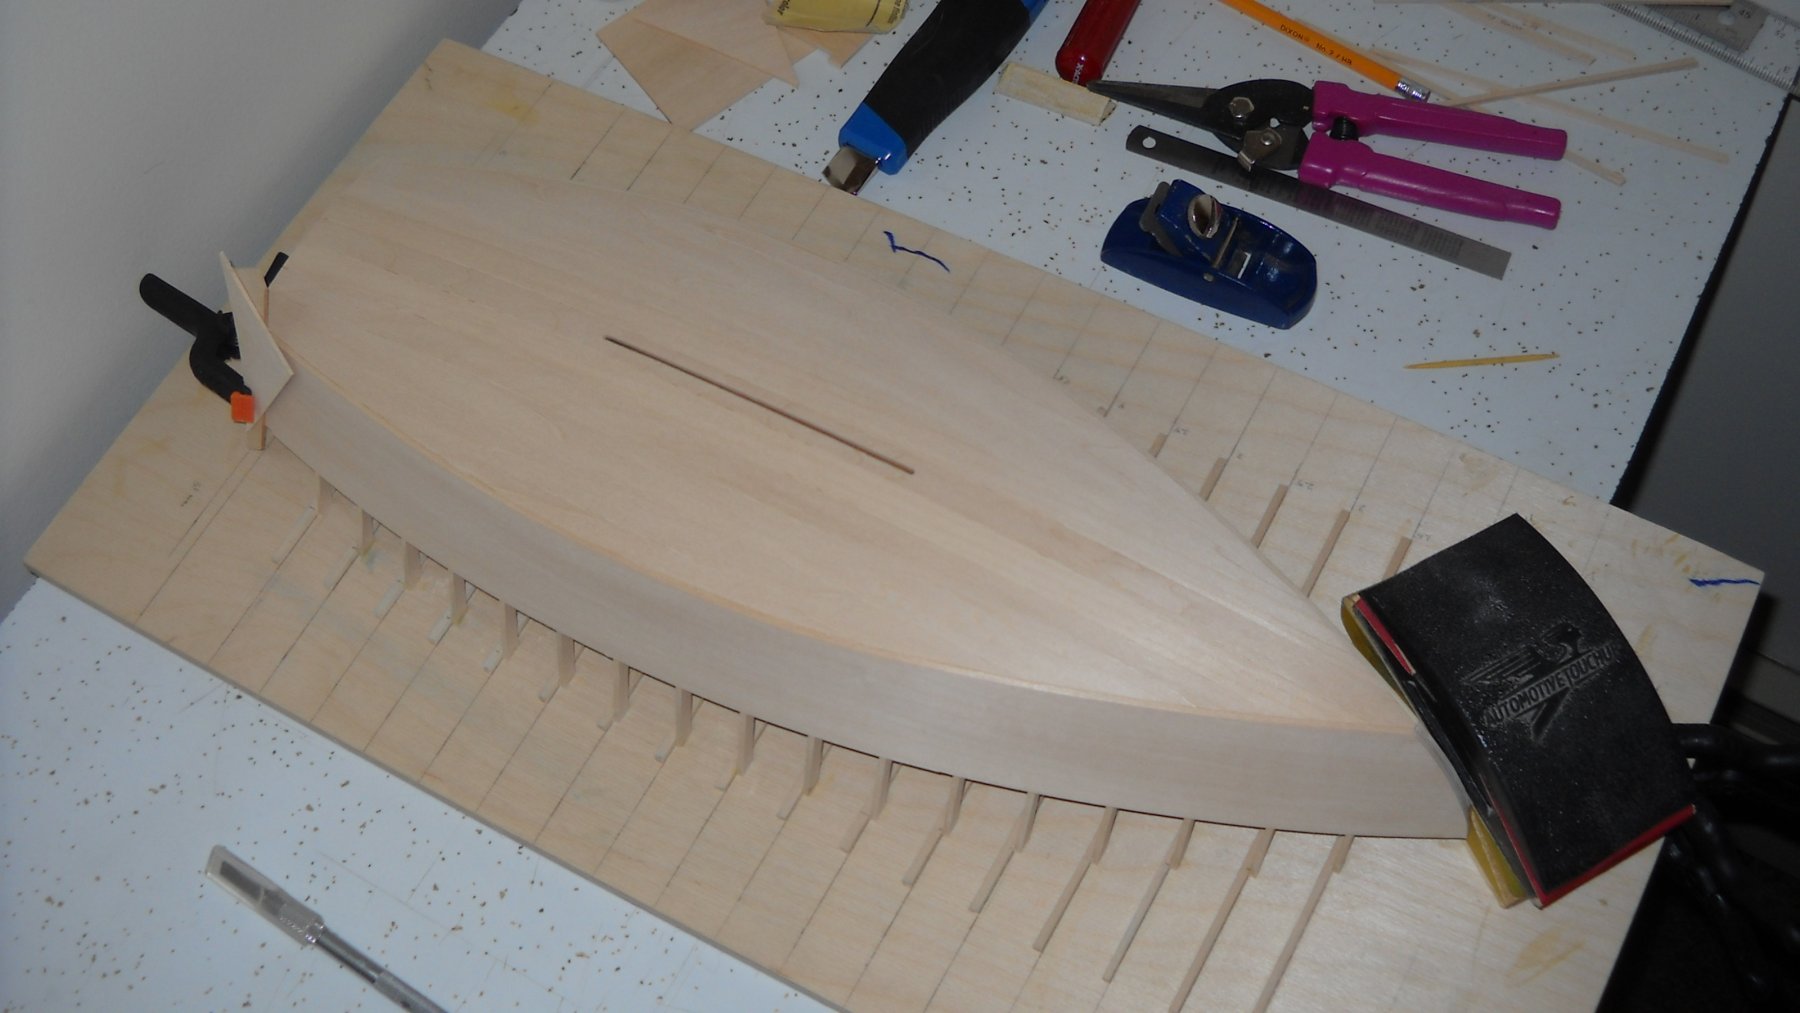
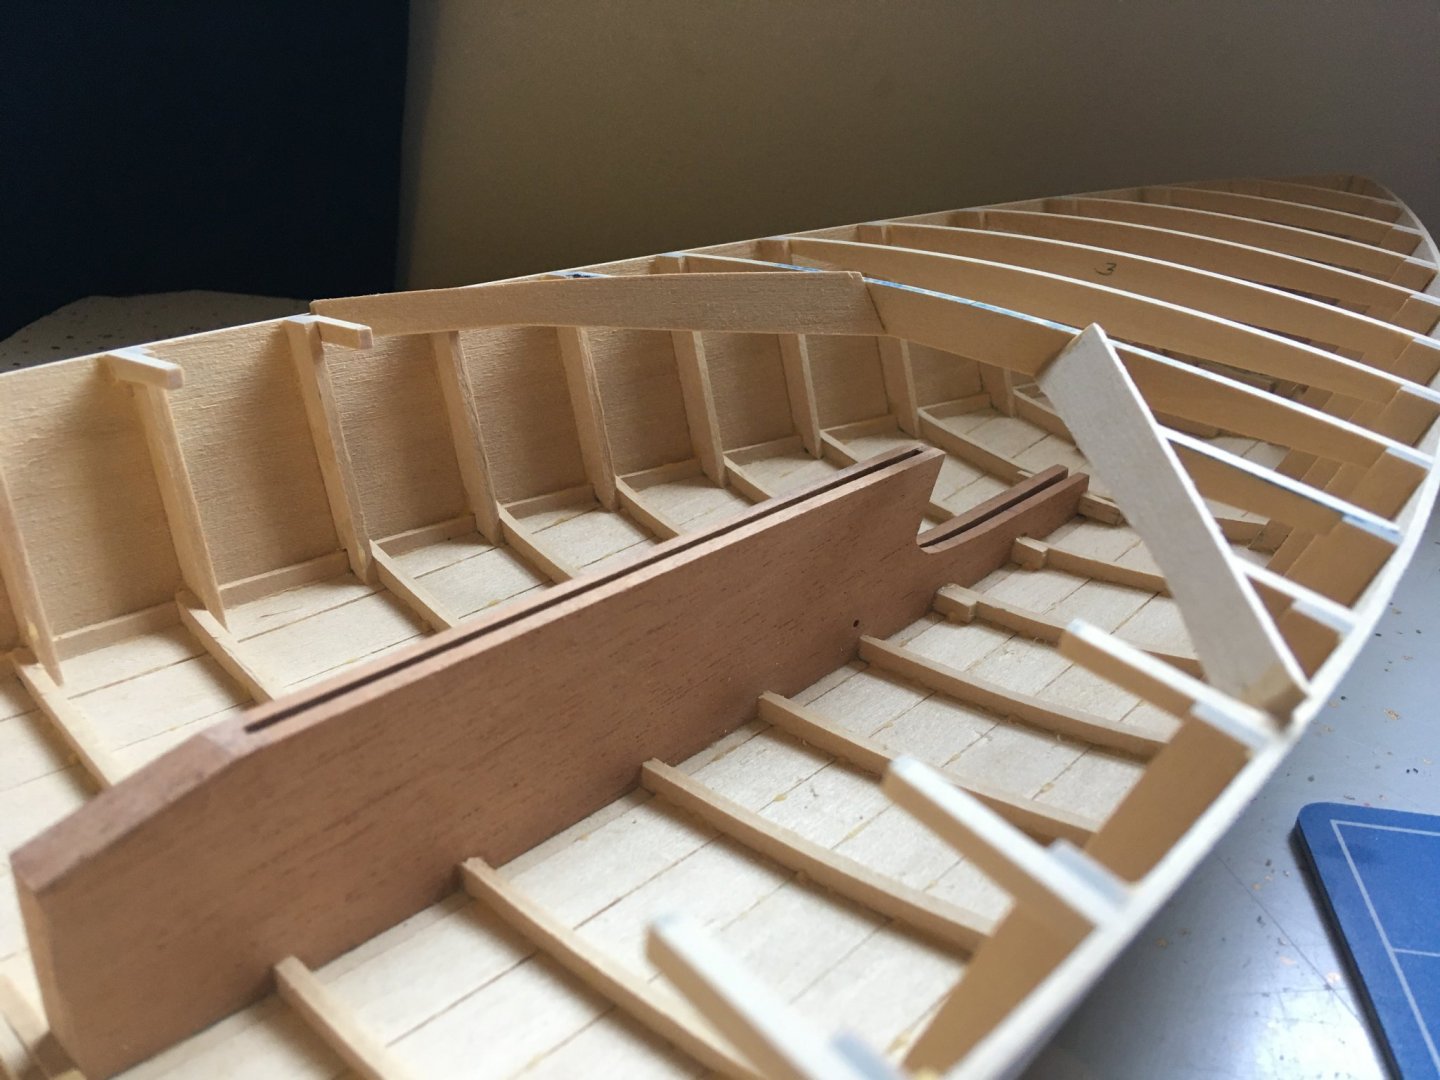
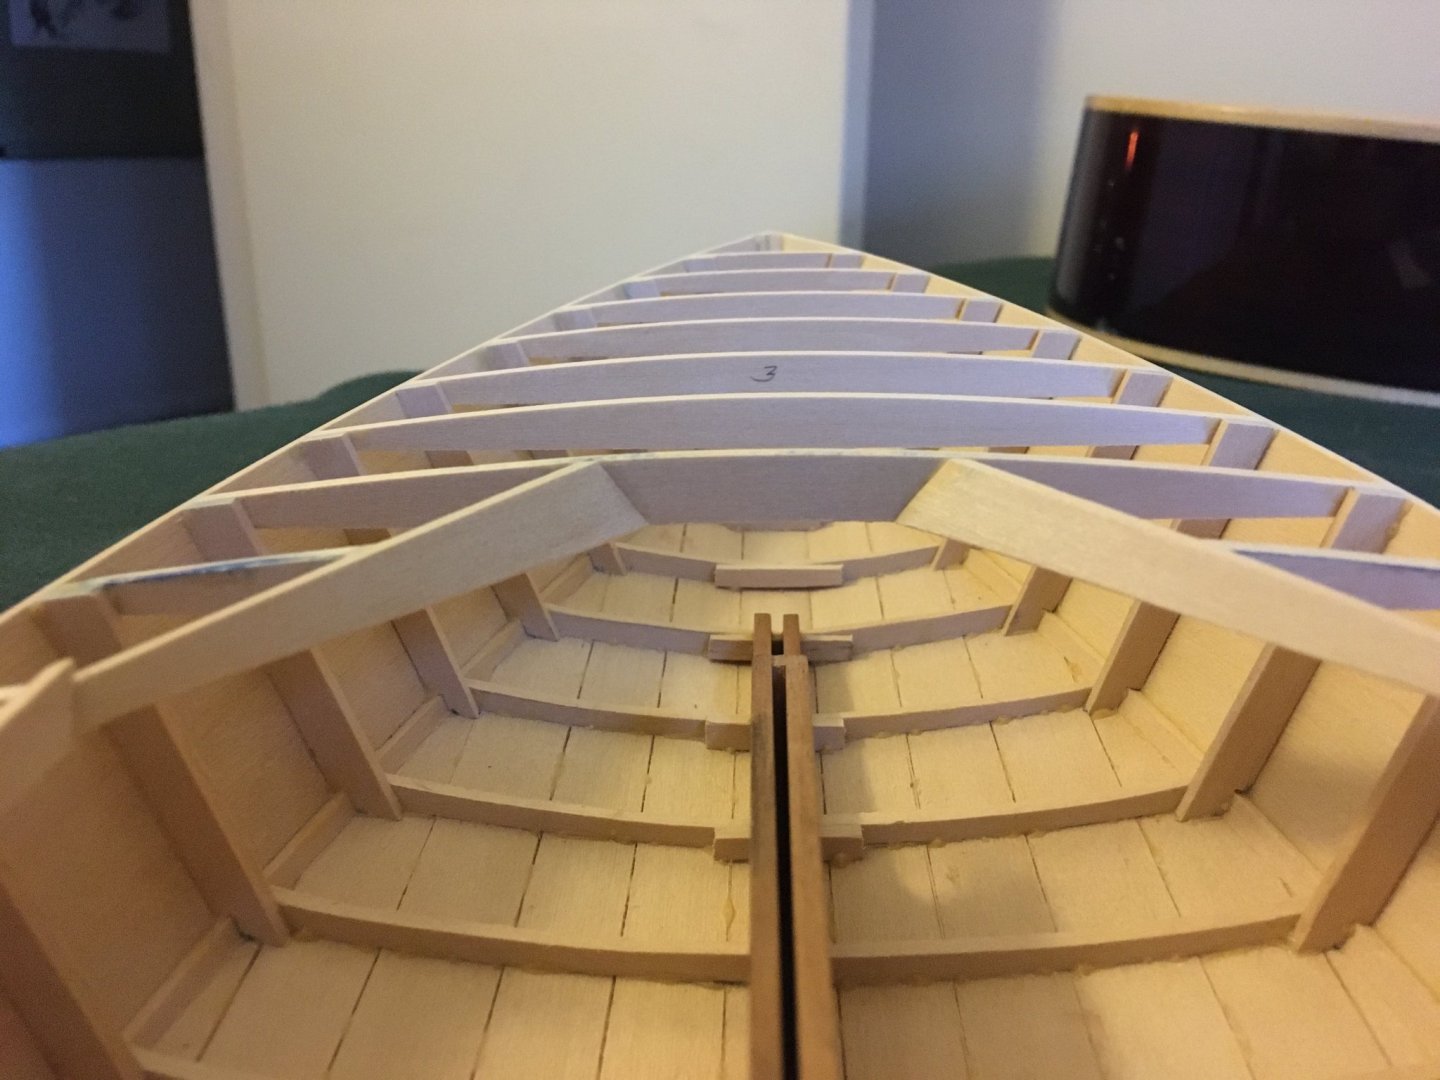
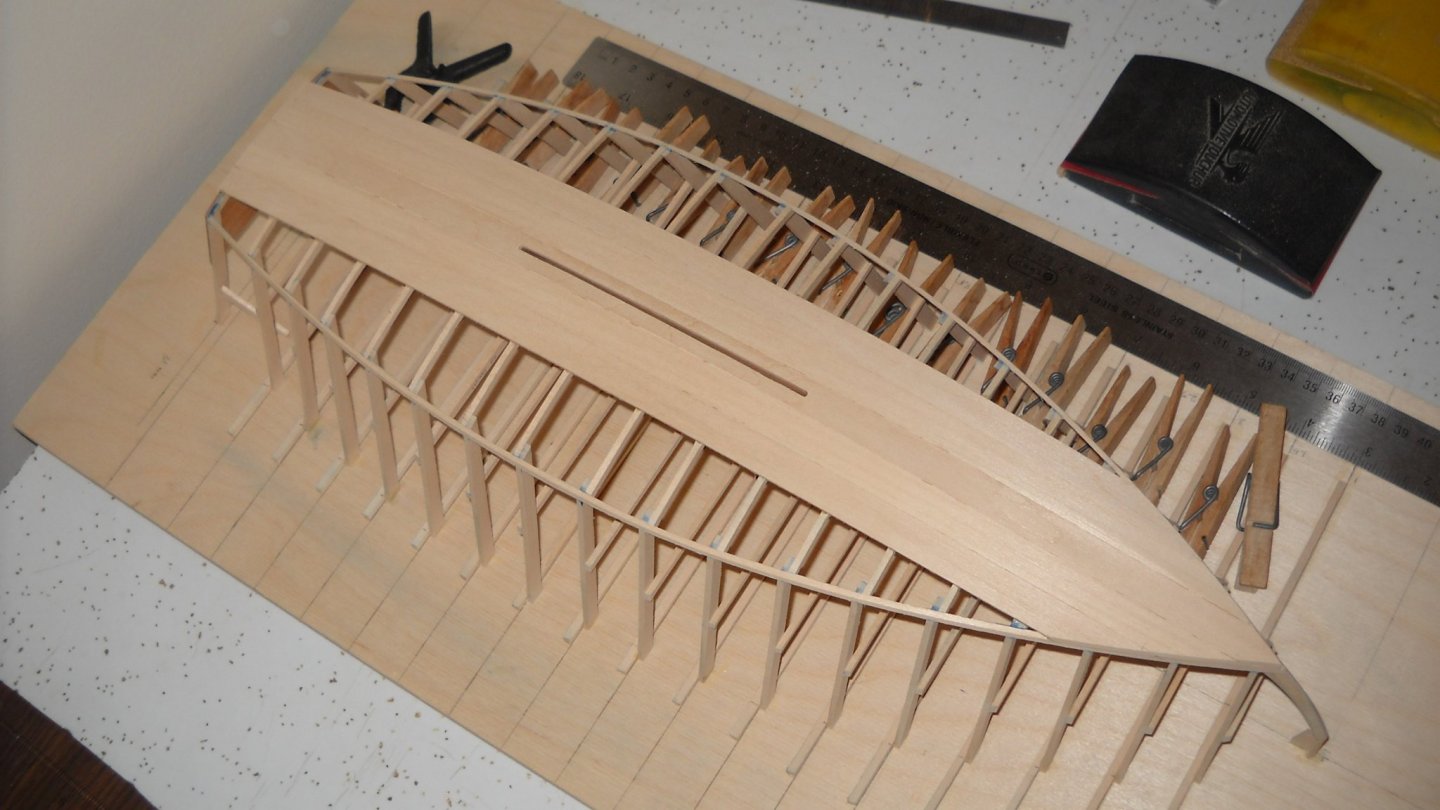
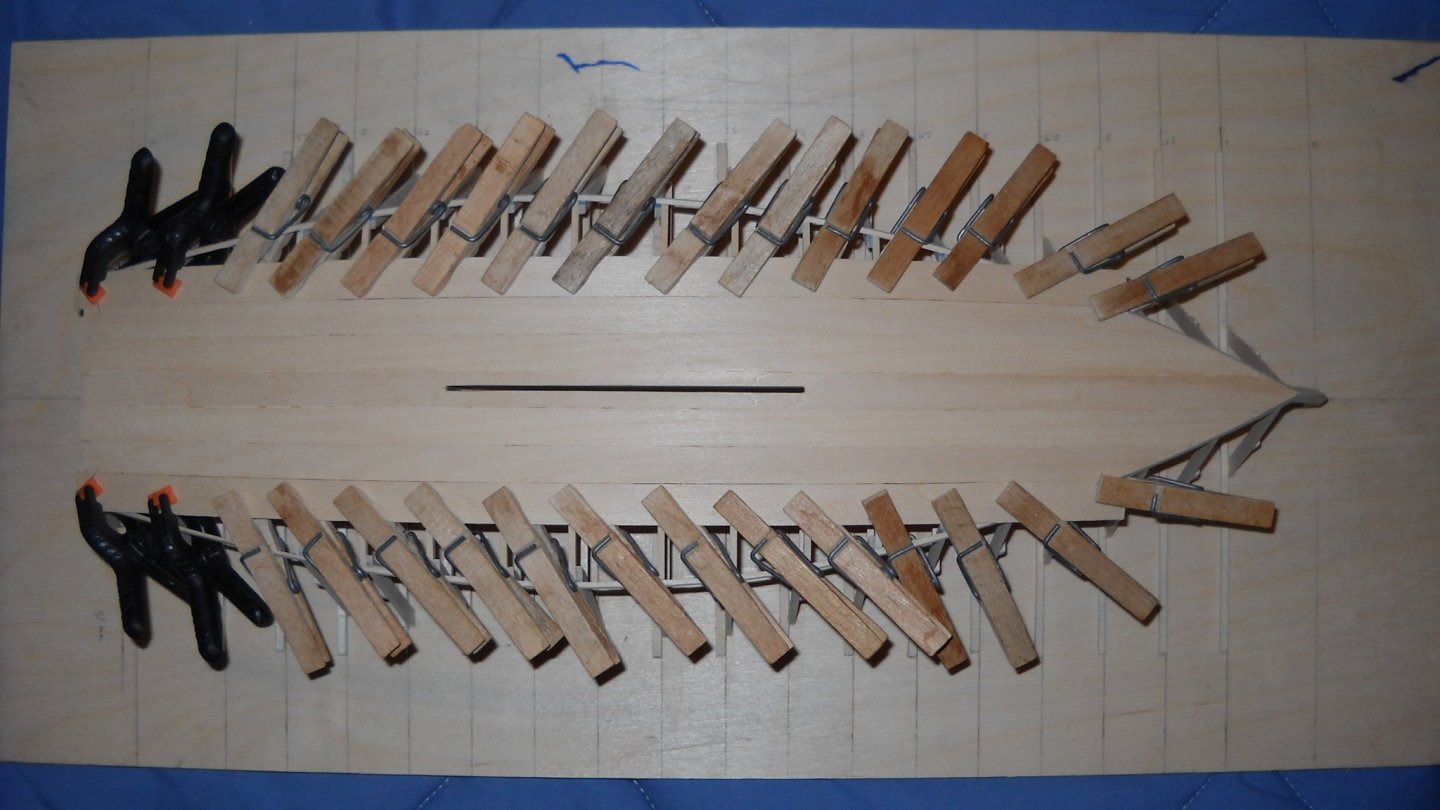
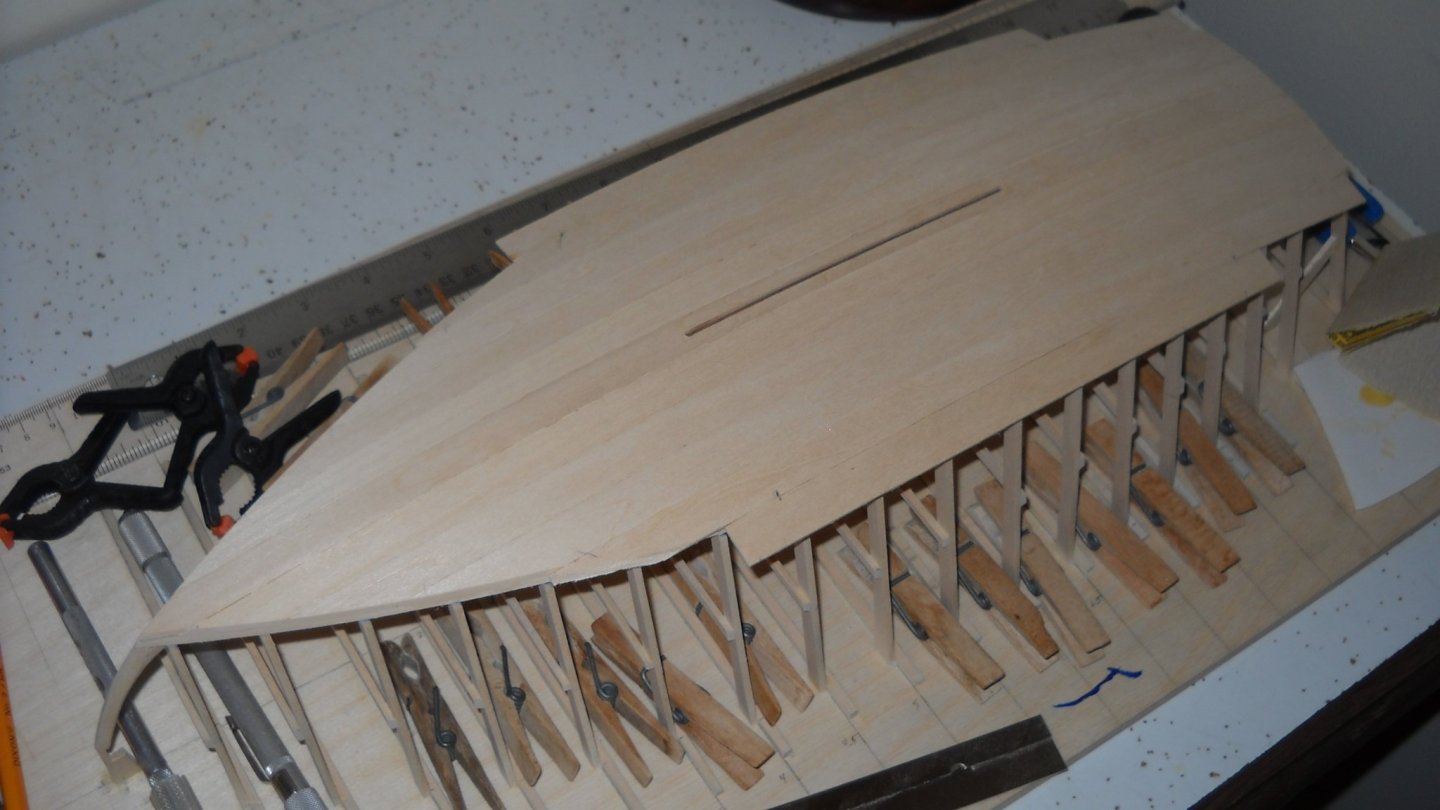
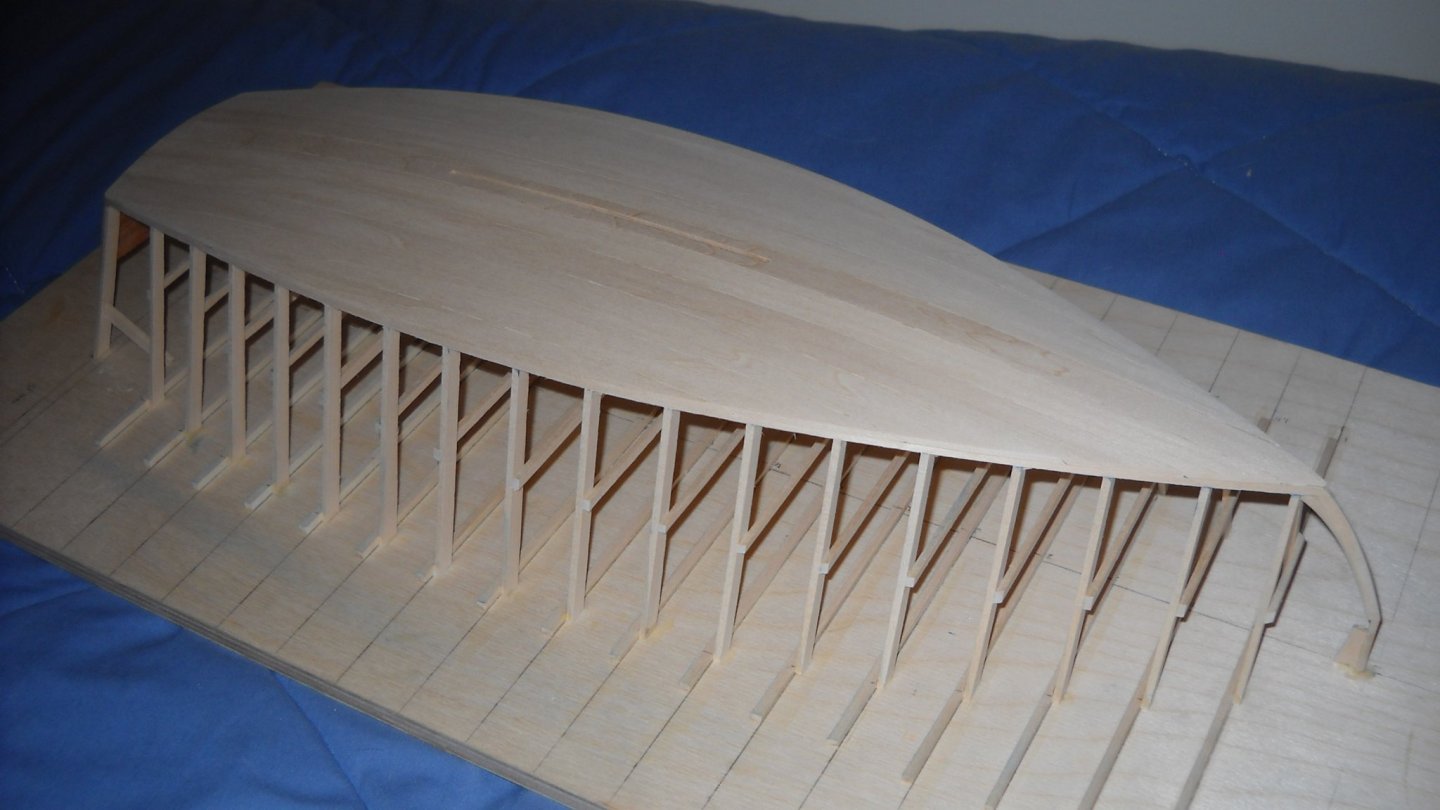
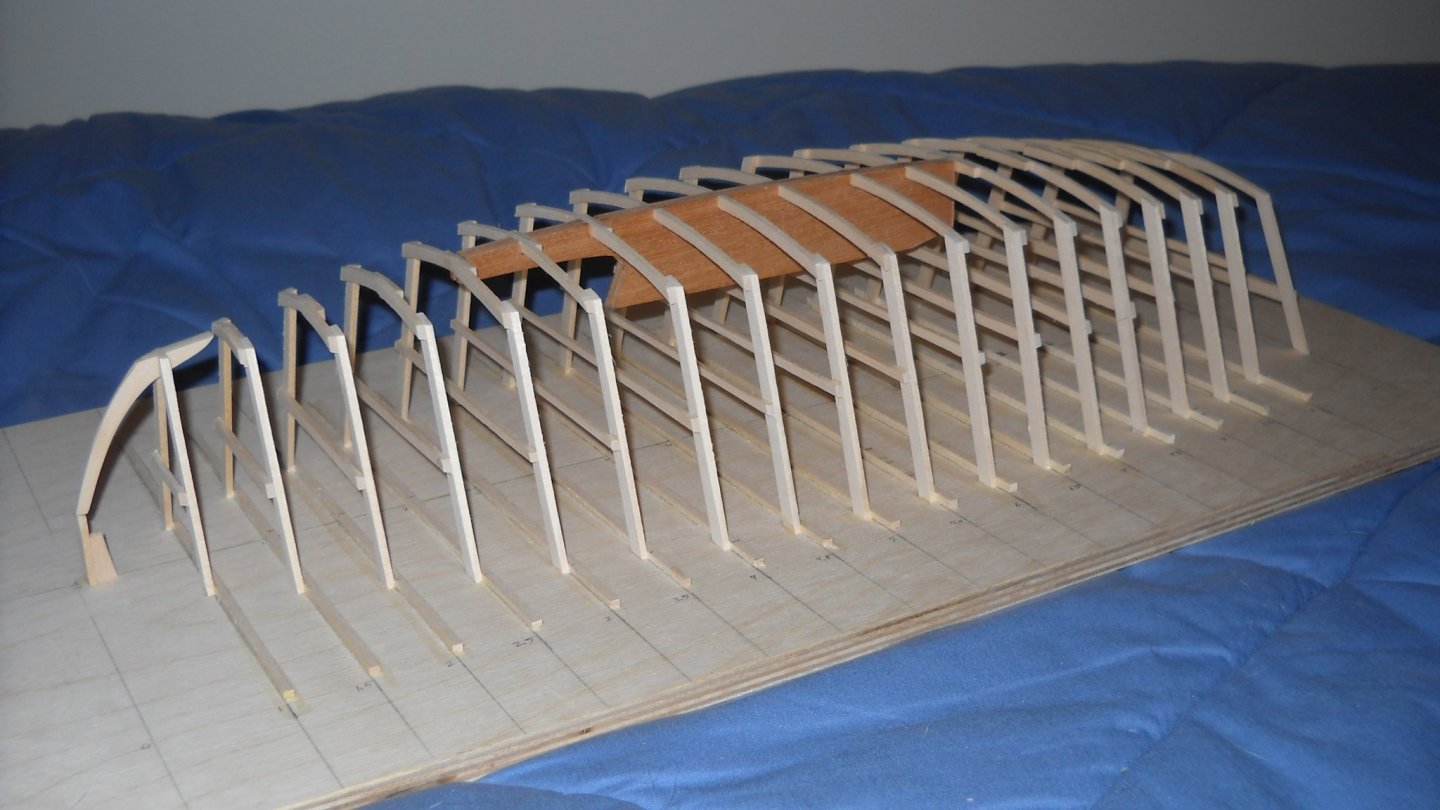
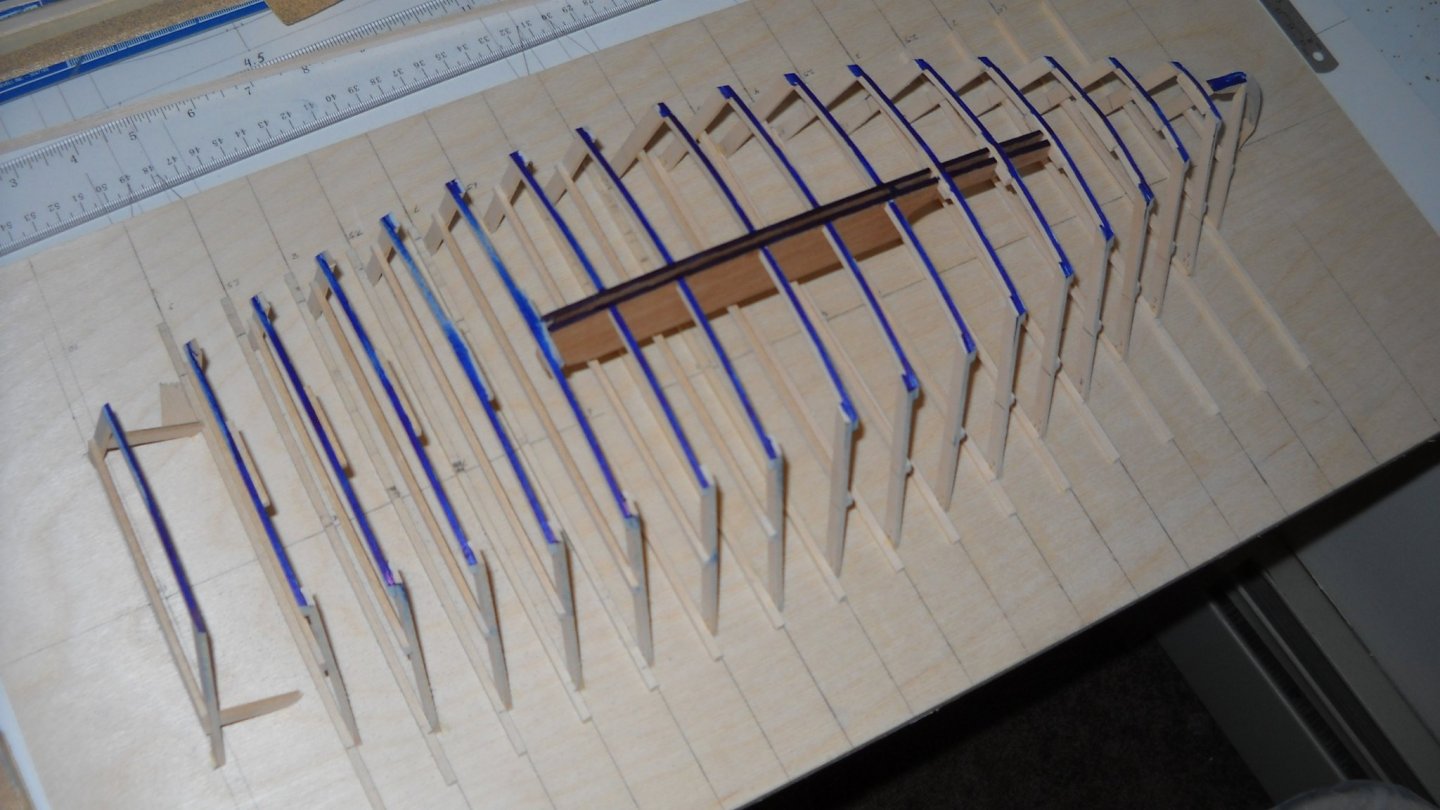
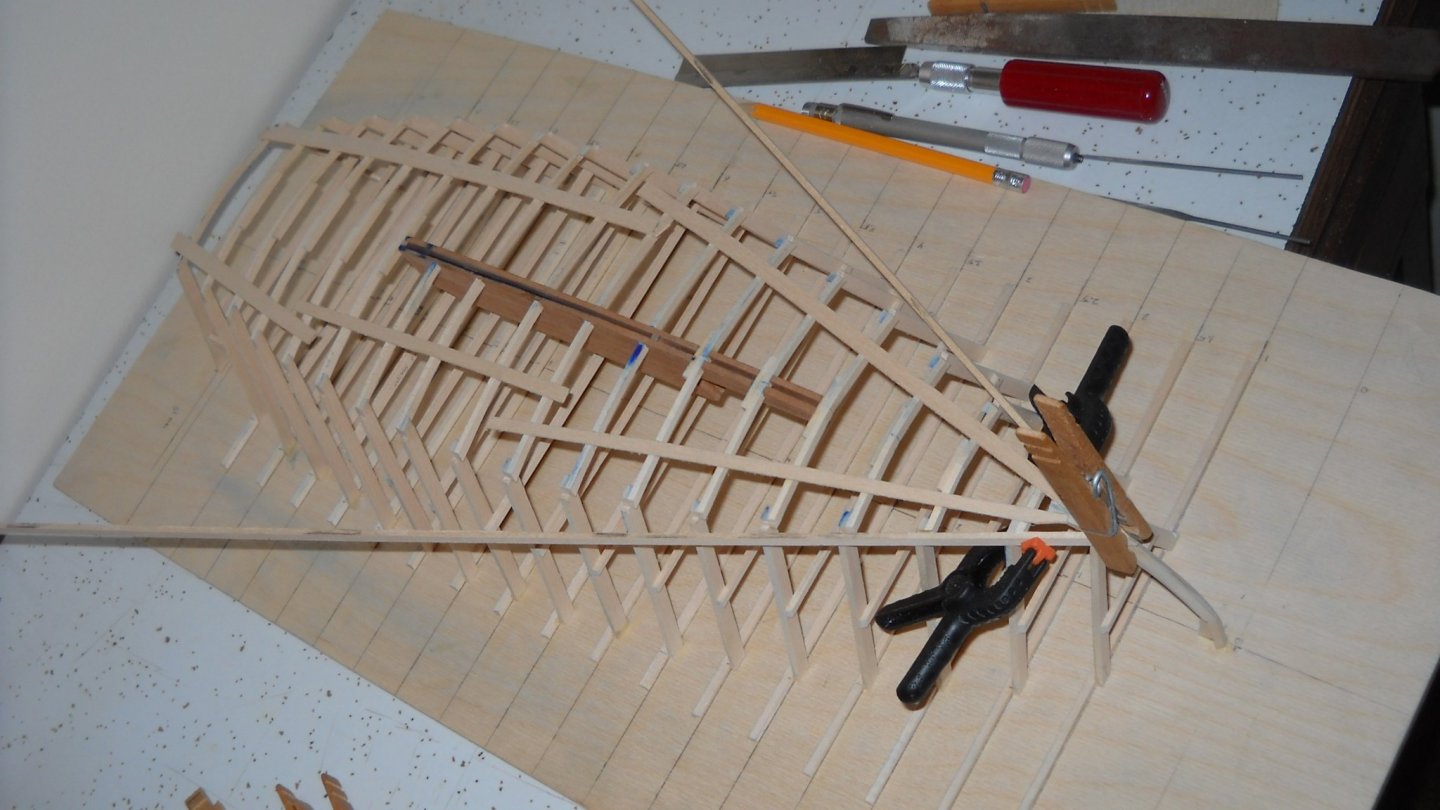
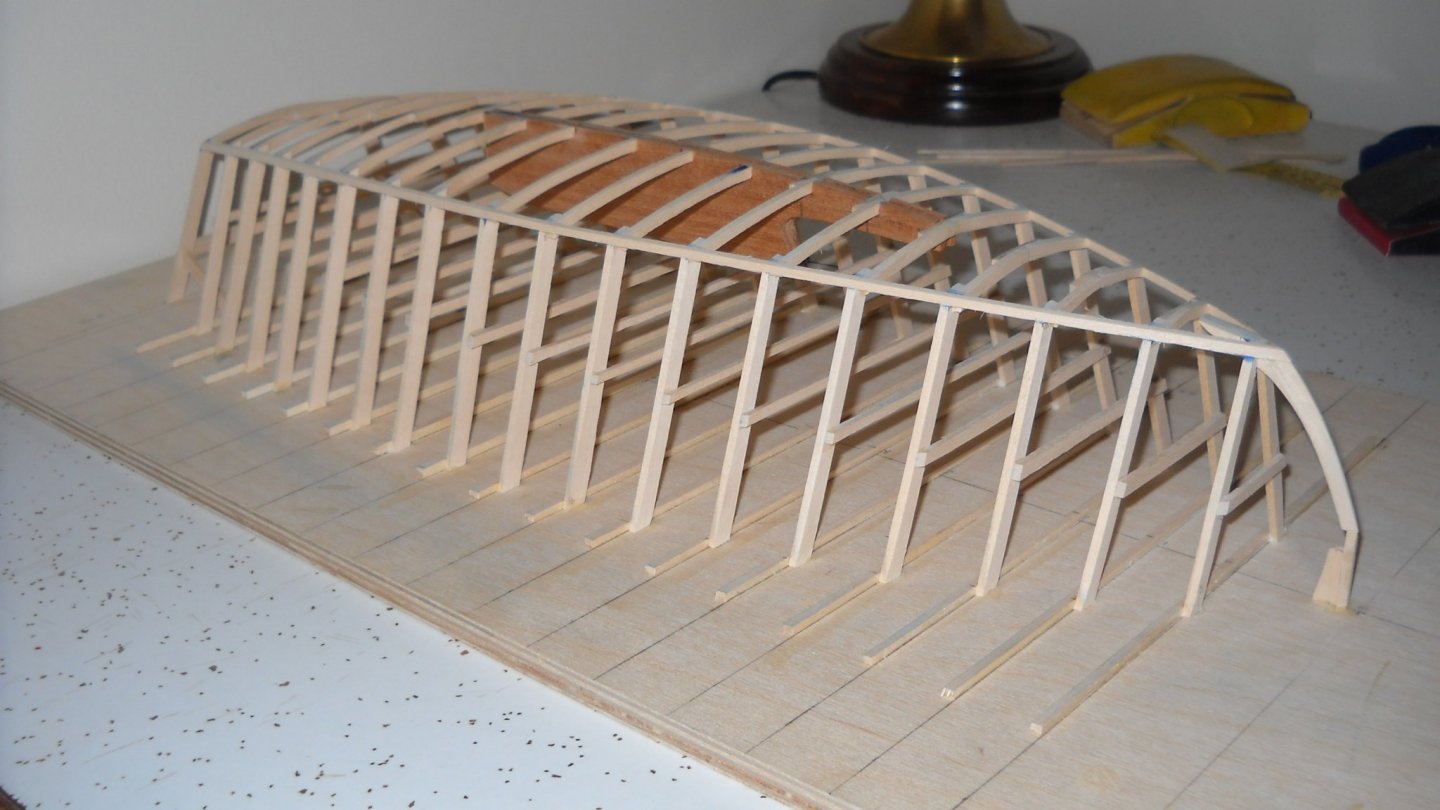
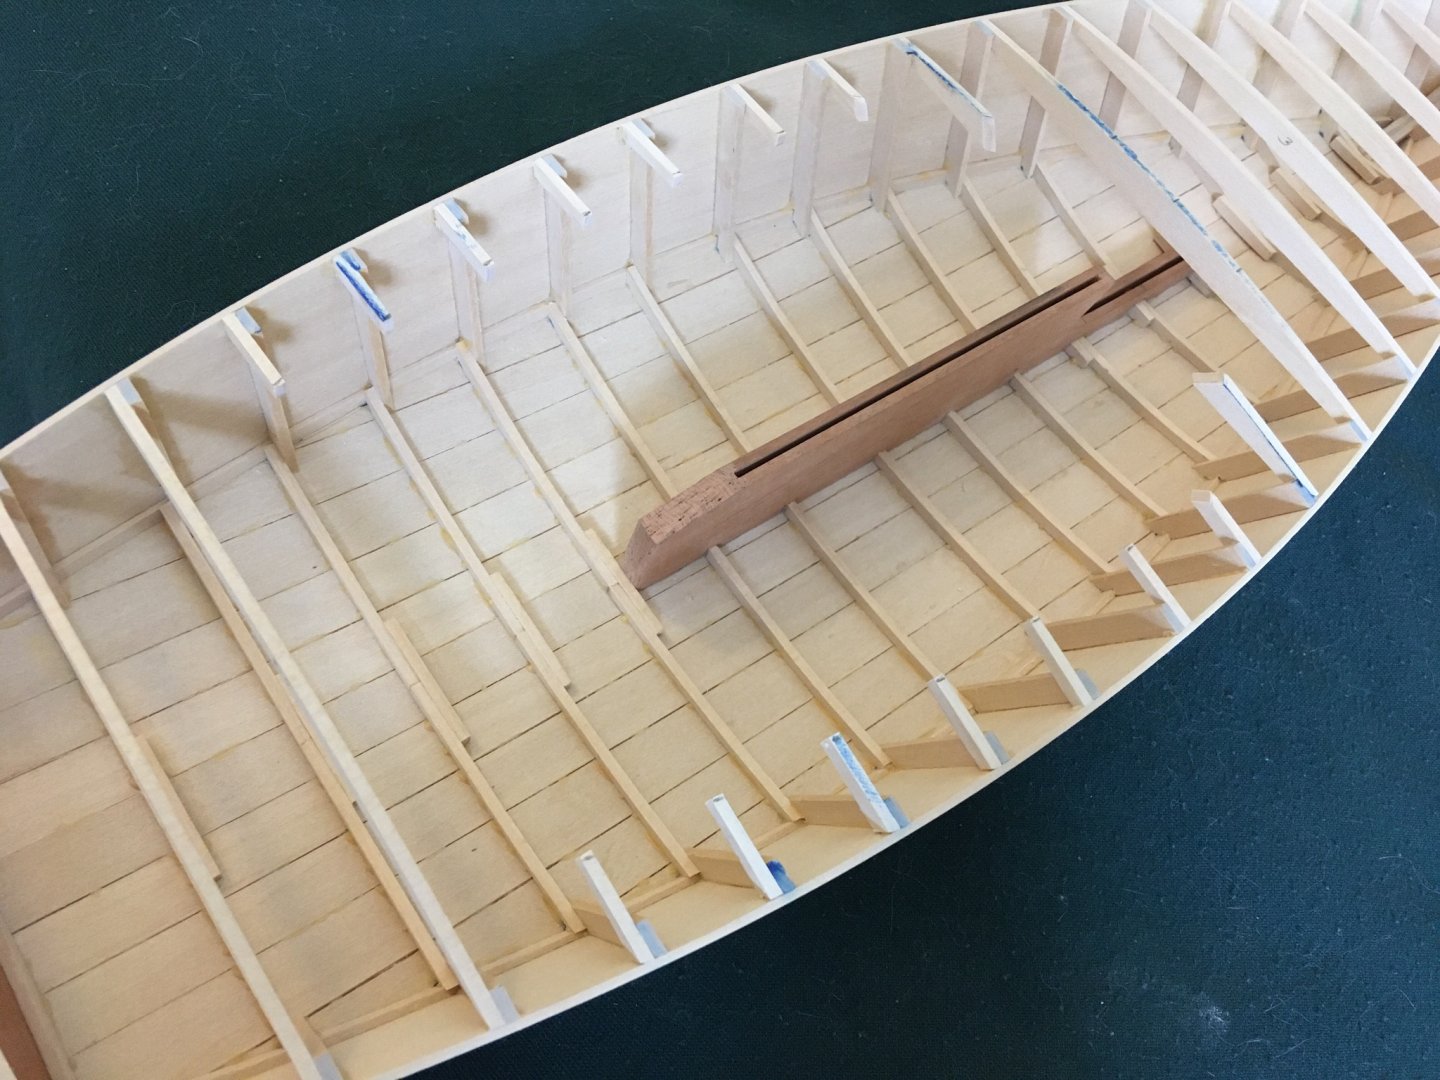
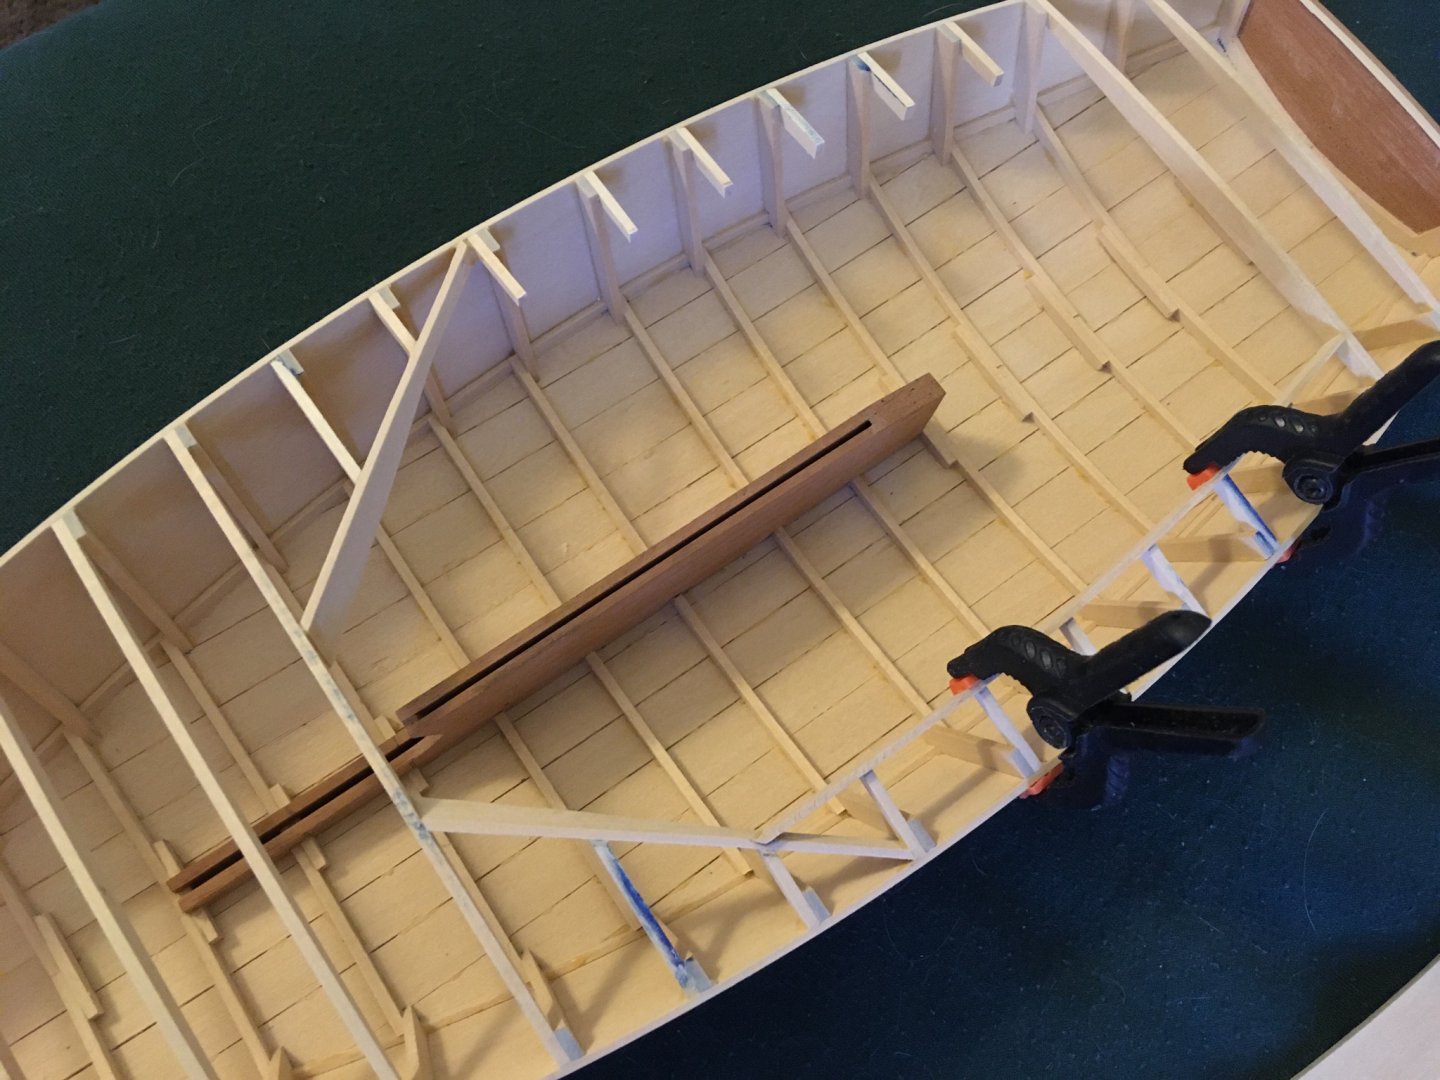
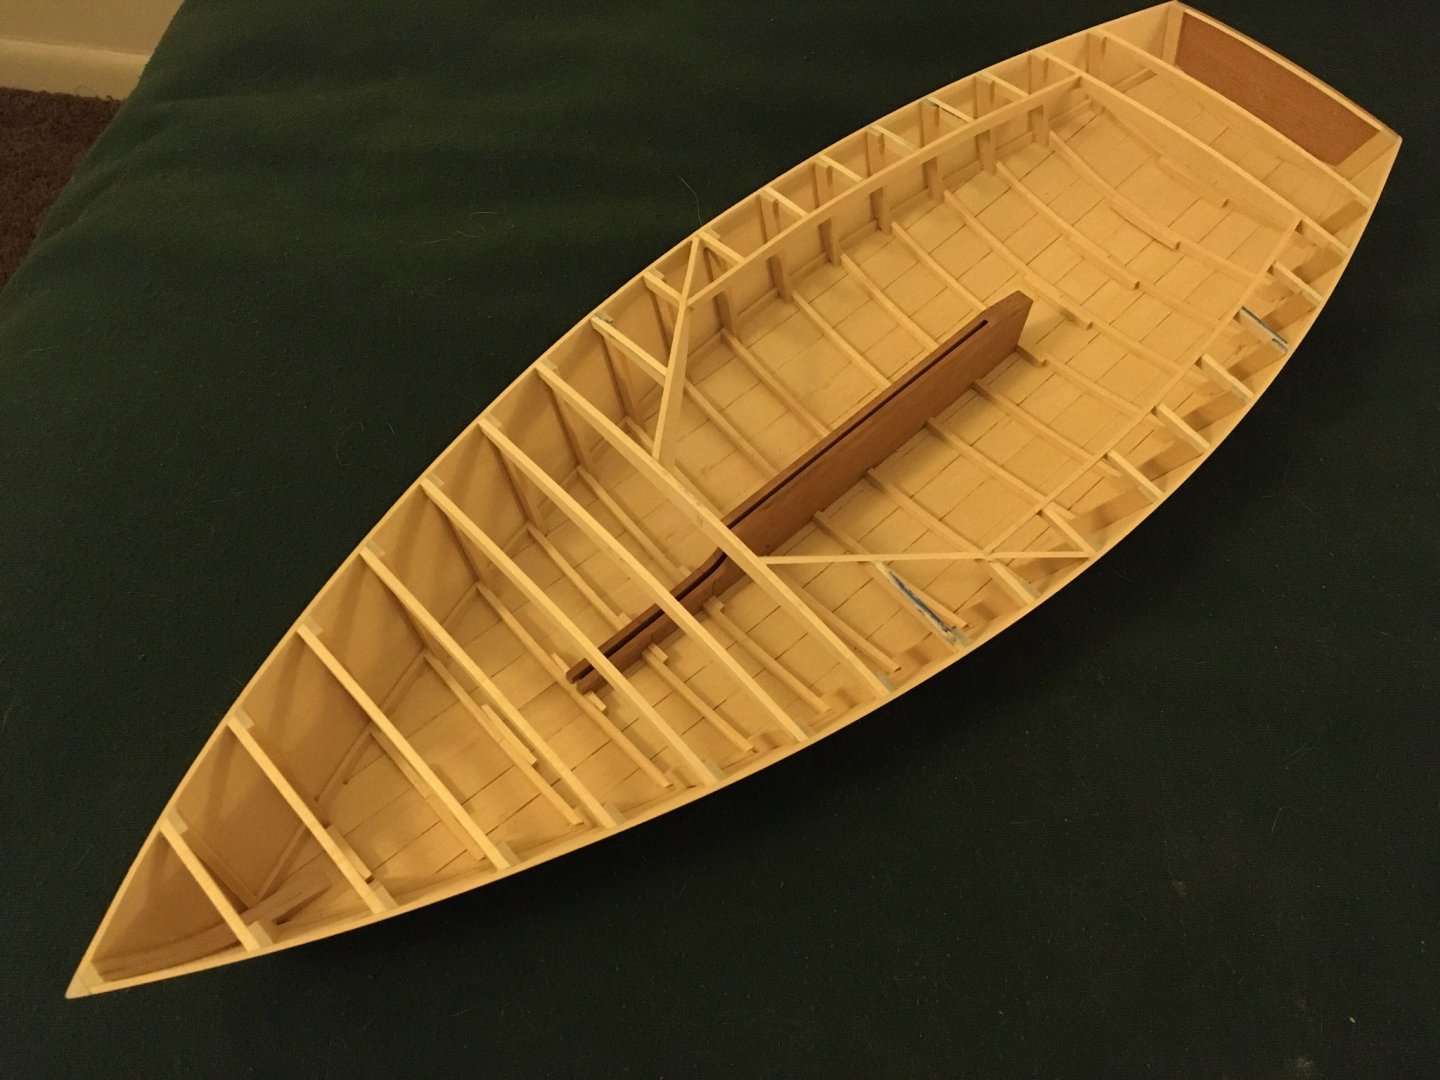
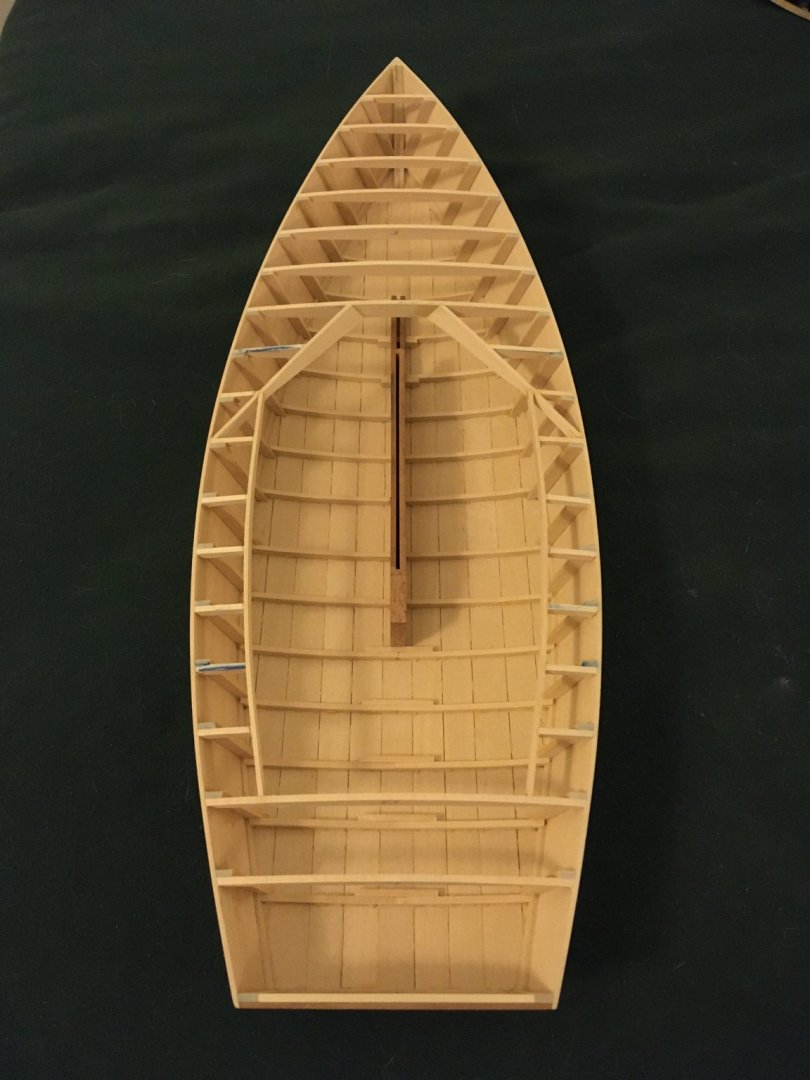
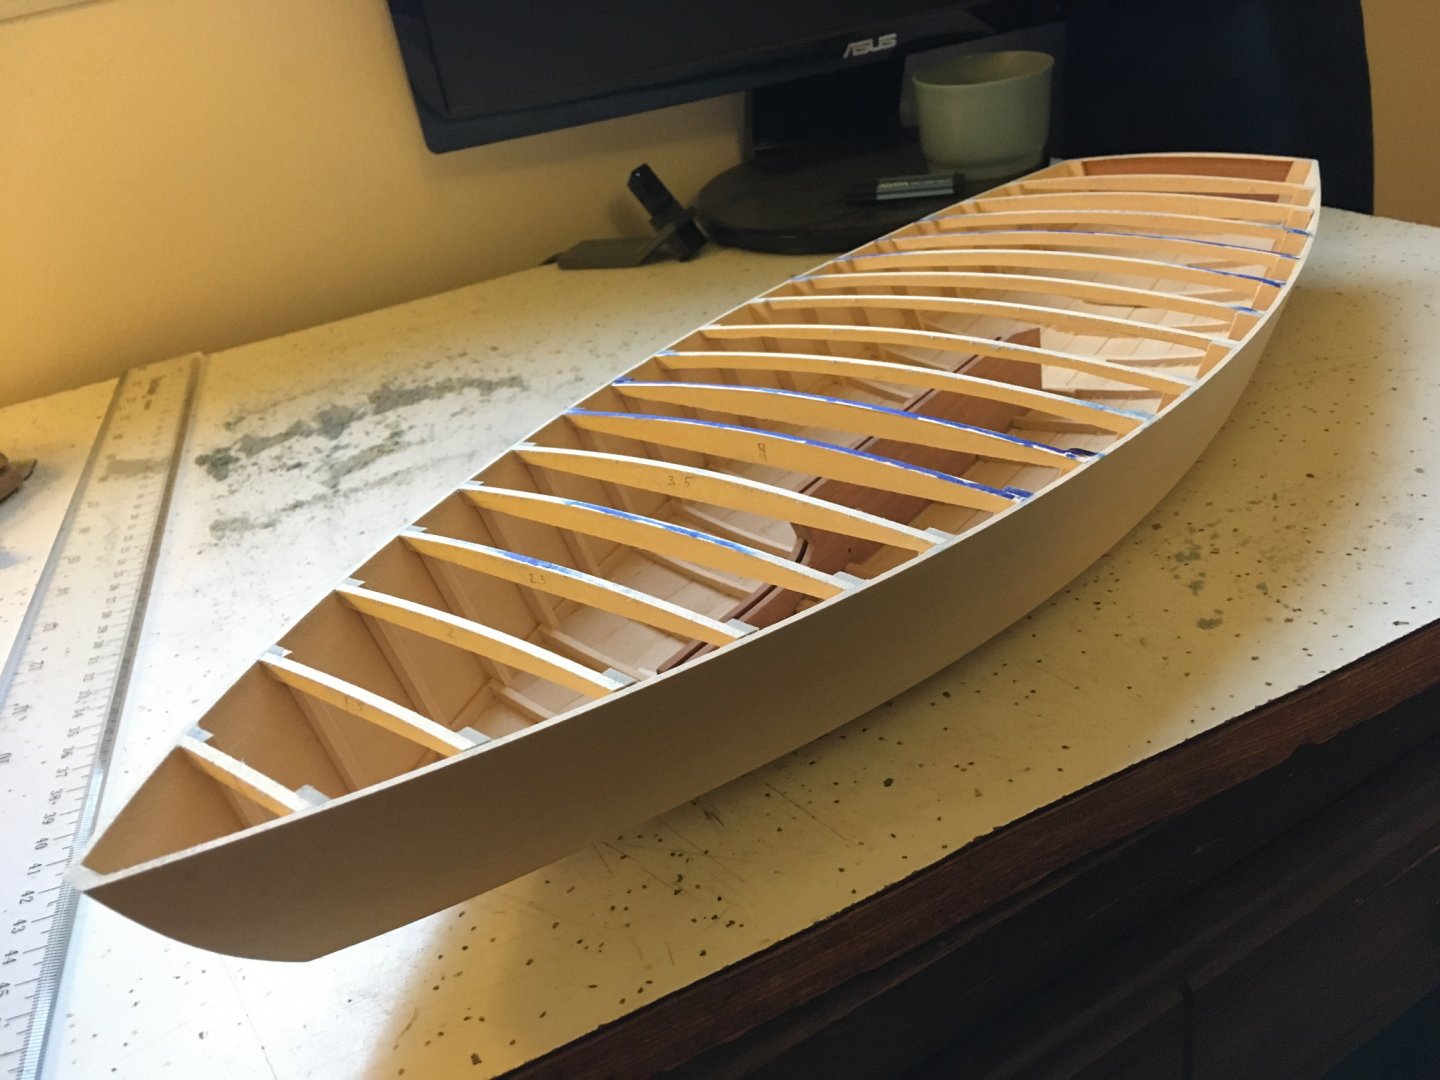
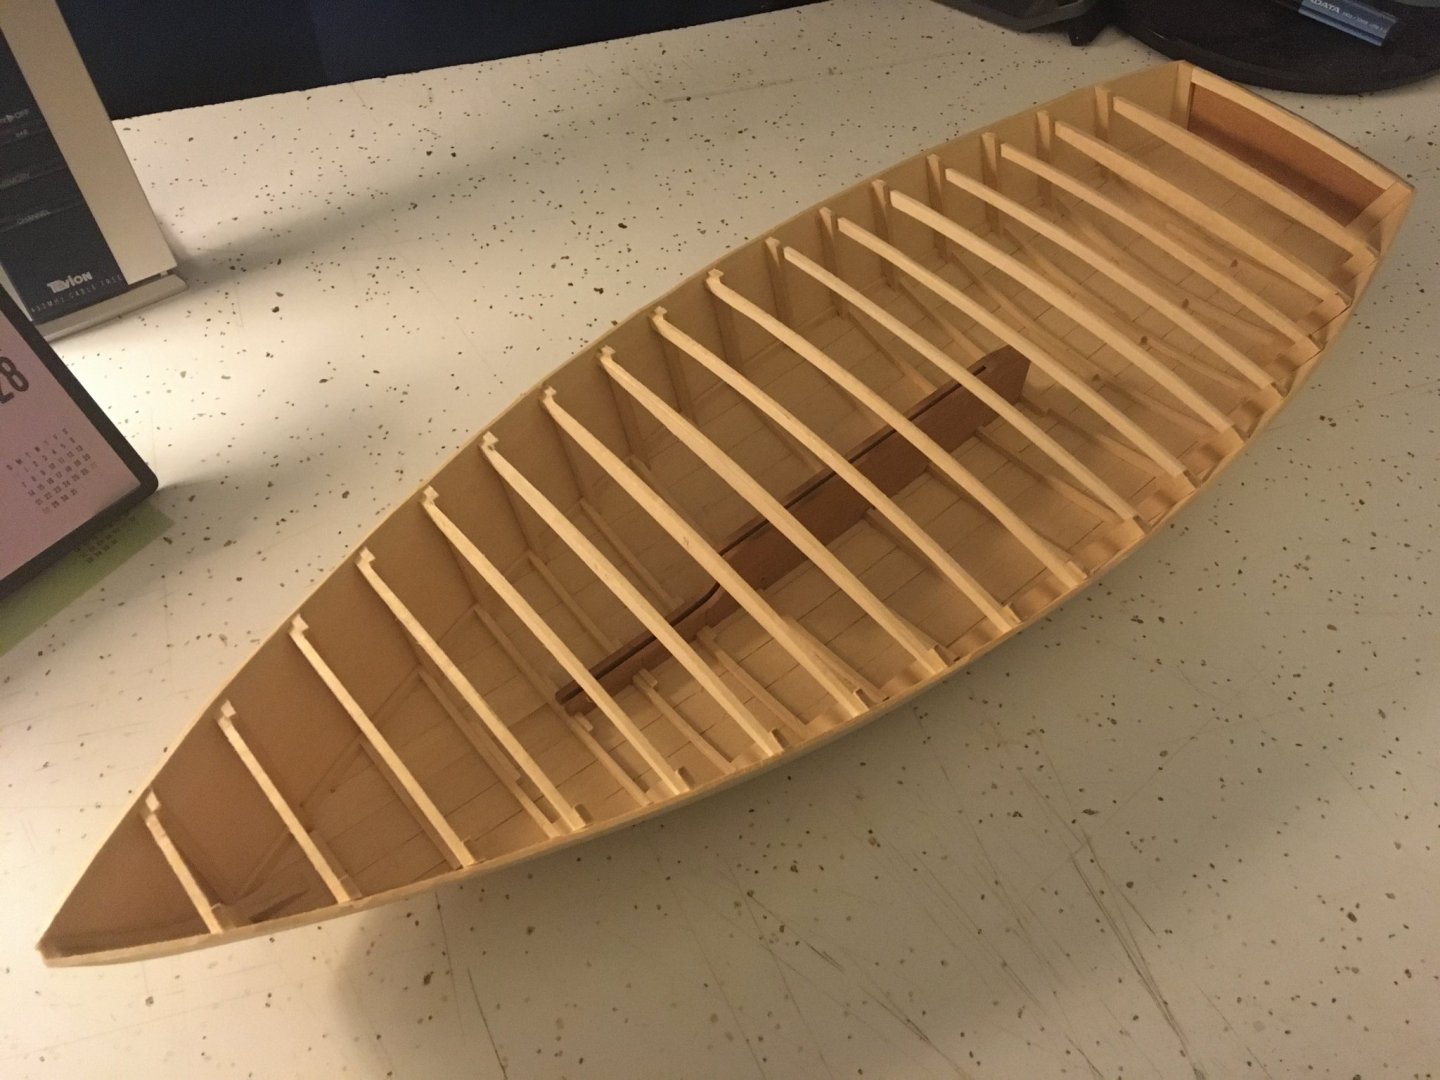
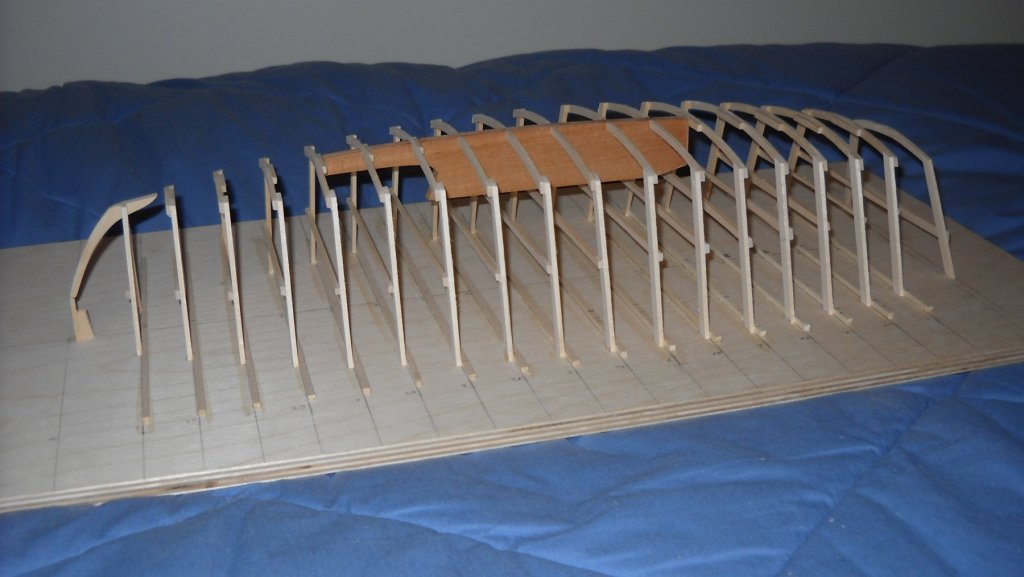
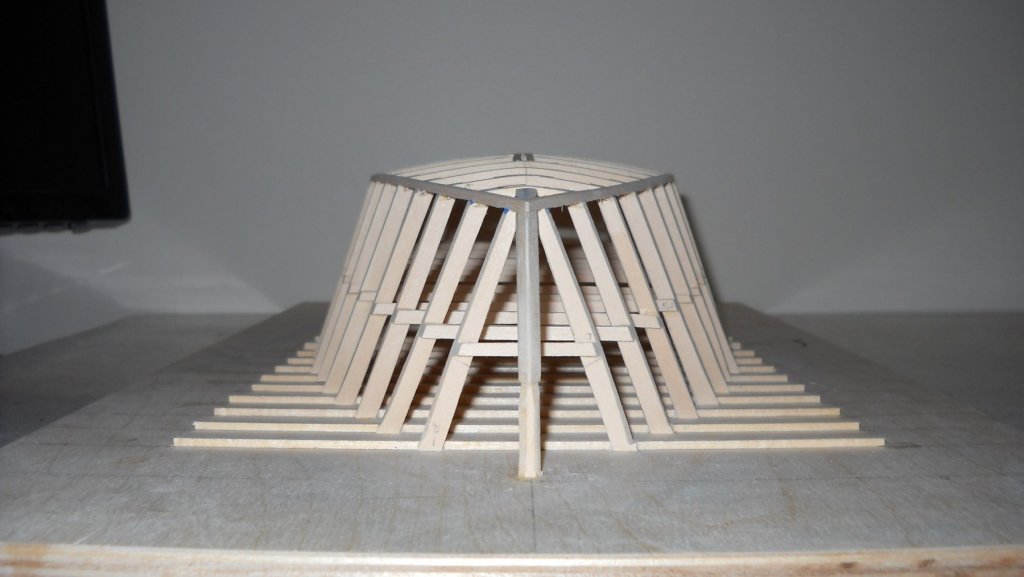
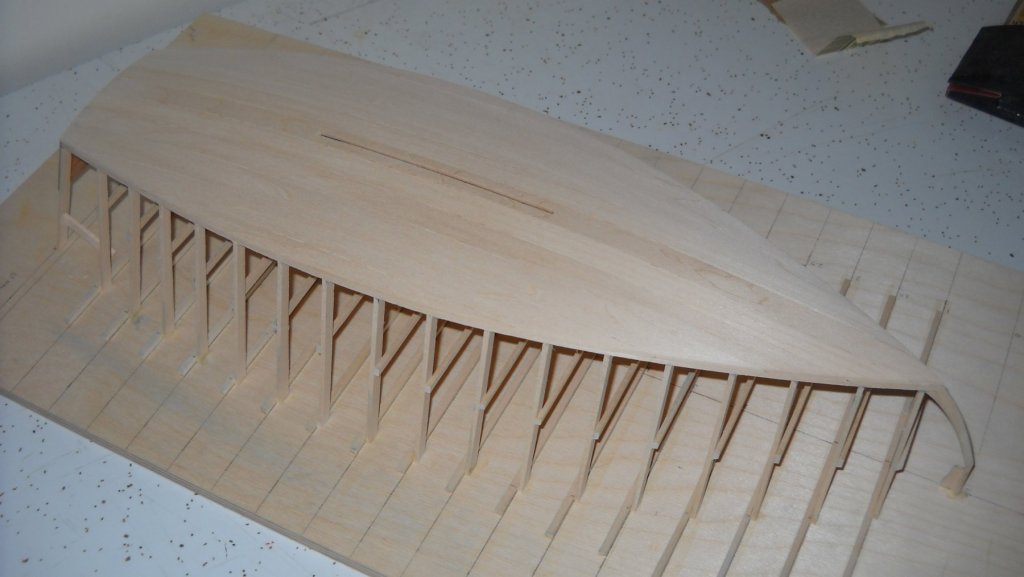
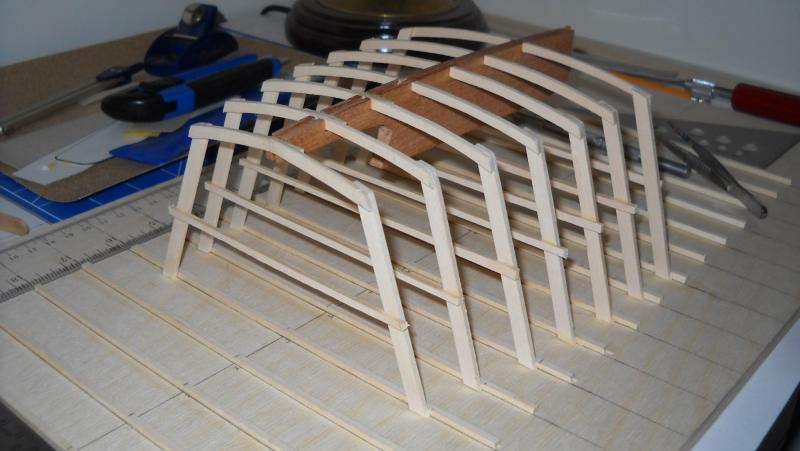
And then with some temporary deck beams in place, it was time to remove it from the building jig! And then just after that is where I got stuck. I didn't know what the best way to go about installing the deck and cockpit framing was, and got so hung up overthinking everything, I just stopped working on it. But fast forward 4 years, with my fresh inspiration and some more research and a little logical thinking, I came up with a plan of action. I decided the best course of action would be to install all of the deck beams at full width to give the form maximum strength and the most uniform shape for fairing. A brilliant design feature of this boat is that the deck is actually a straight line from the bow to the transom at the center line, and the sheer is determined by the intersection of the deck beams and side frames. The deck is a consistent arc, being that of a circle of a 20 foot radius, or in this case 20 inches. So when the time came to fair it, all I had to do was mount a sheet of sand paper to my work surface, flip the boat upside down, and just rock it back and forth across the sandpaper, constantly checking it with my deck arc template until everything was fair. My technique, as shown above with the bottom framing, was to lightly color all the frames with a blue Sharpie, so once all the blue was gone, I knew everything was fair! Then I proceeded to cut out the cockpit and install the stringers. The front stringers were two of the trickiest pieces I've ever made, being angled in both directions, but I got there eventually. I'd say they came out just about perfectly symmetrical. When it comes time to install the splash guard and cockpit coaming, it will be a similar process, but I suppose if I did it once, I can do it again! So that brings us up to now, as I finished the cockpit framing last night. I believe the next step is going to be painting the inside, which of course must be done before installing the deck, floor boards, and seats.


-
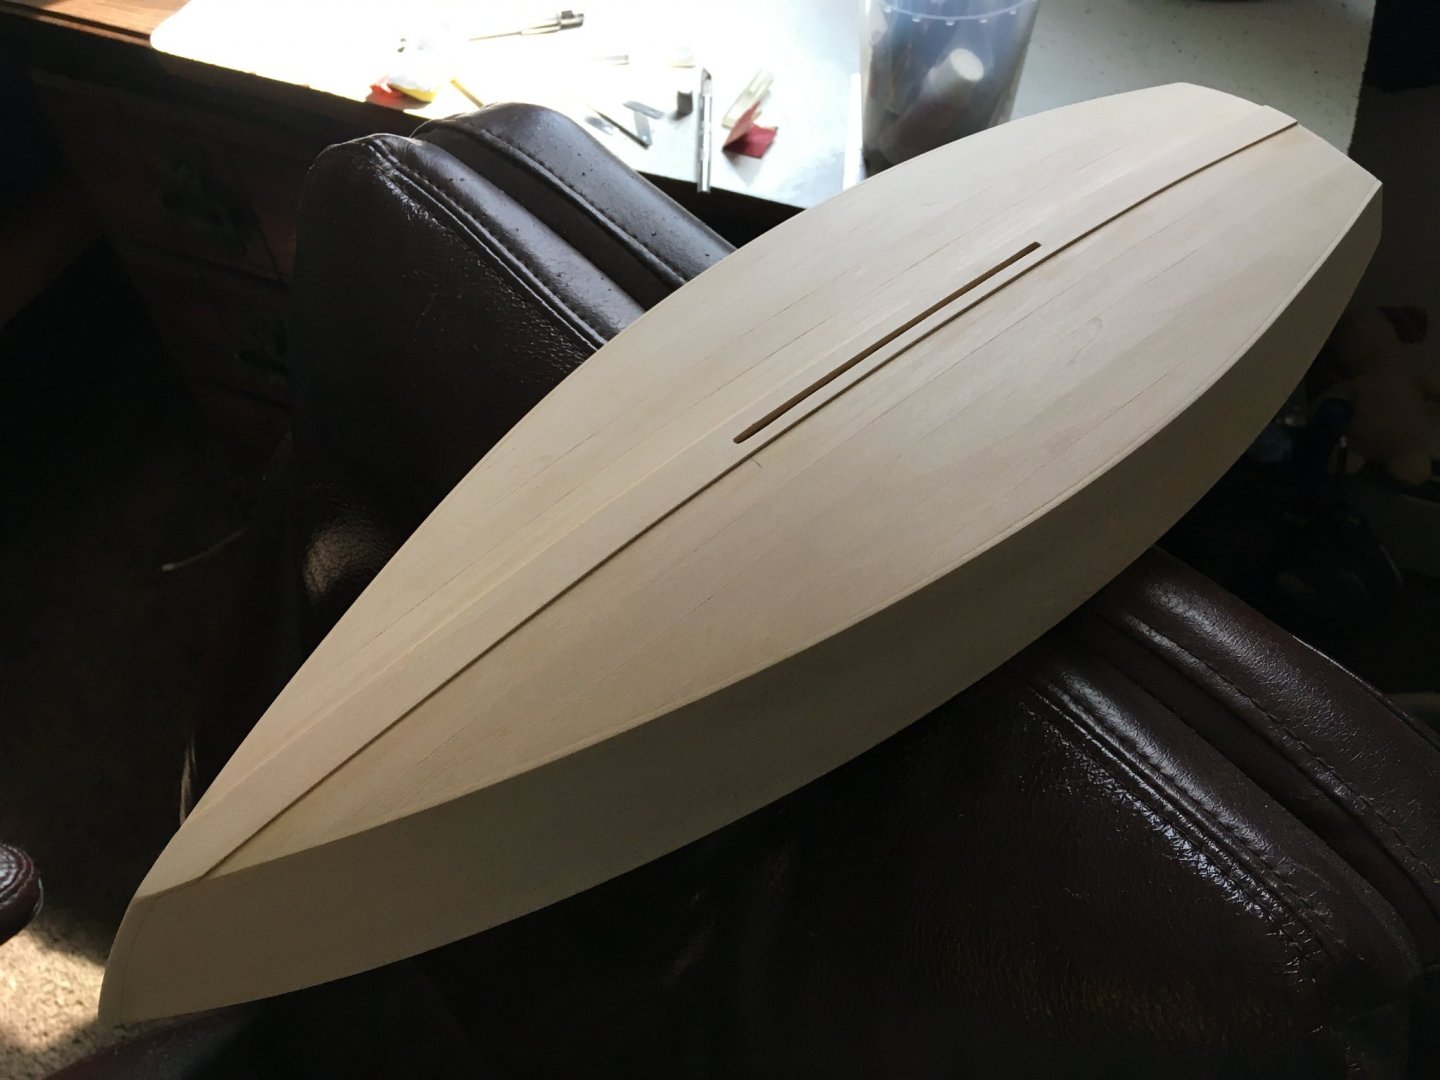
And then for the planking. The lines on this boat are so smooth and I think the hull has such a beautiful shape, it really made planking a breeze. Everything went together smoother than I could have expected.


-
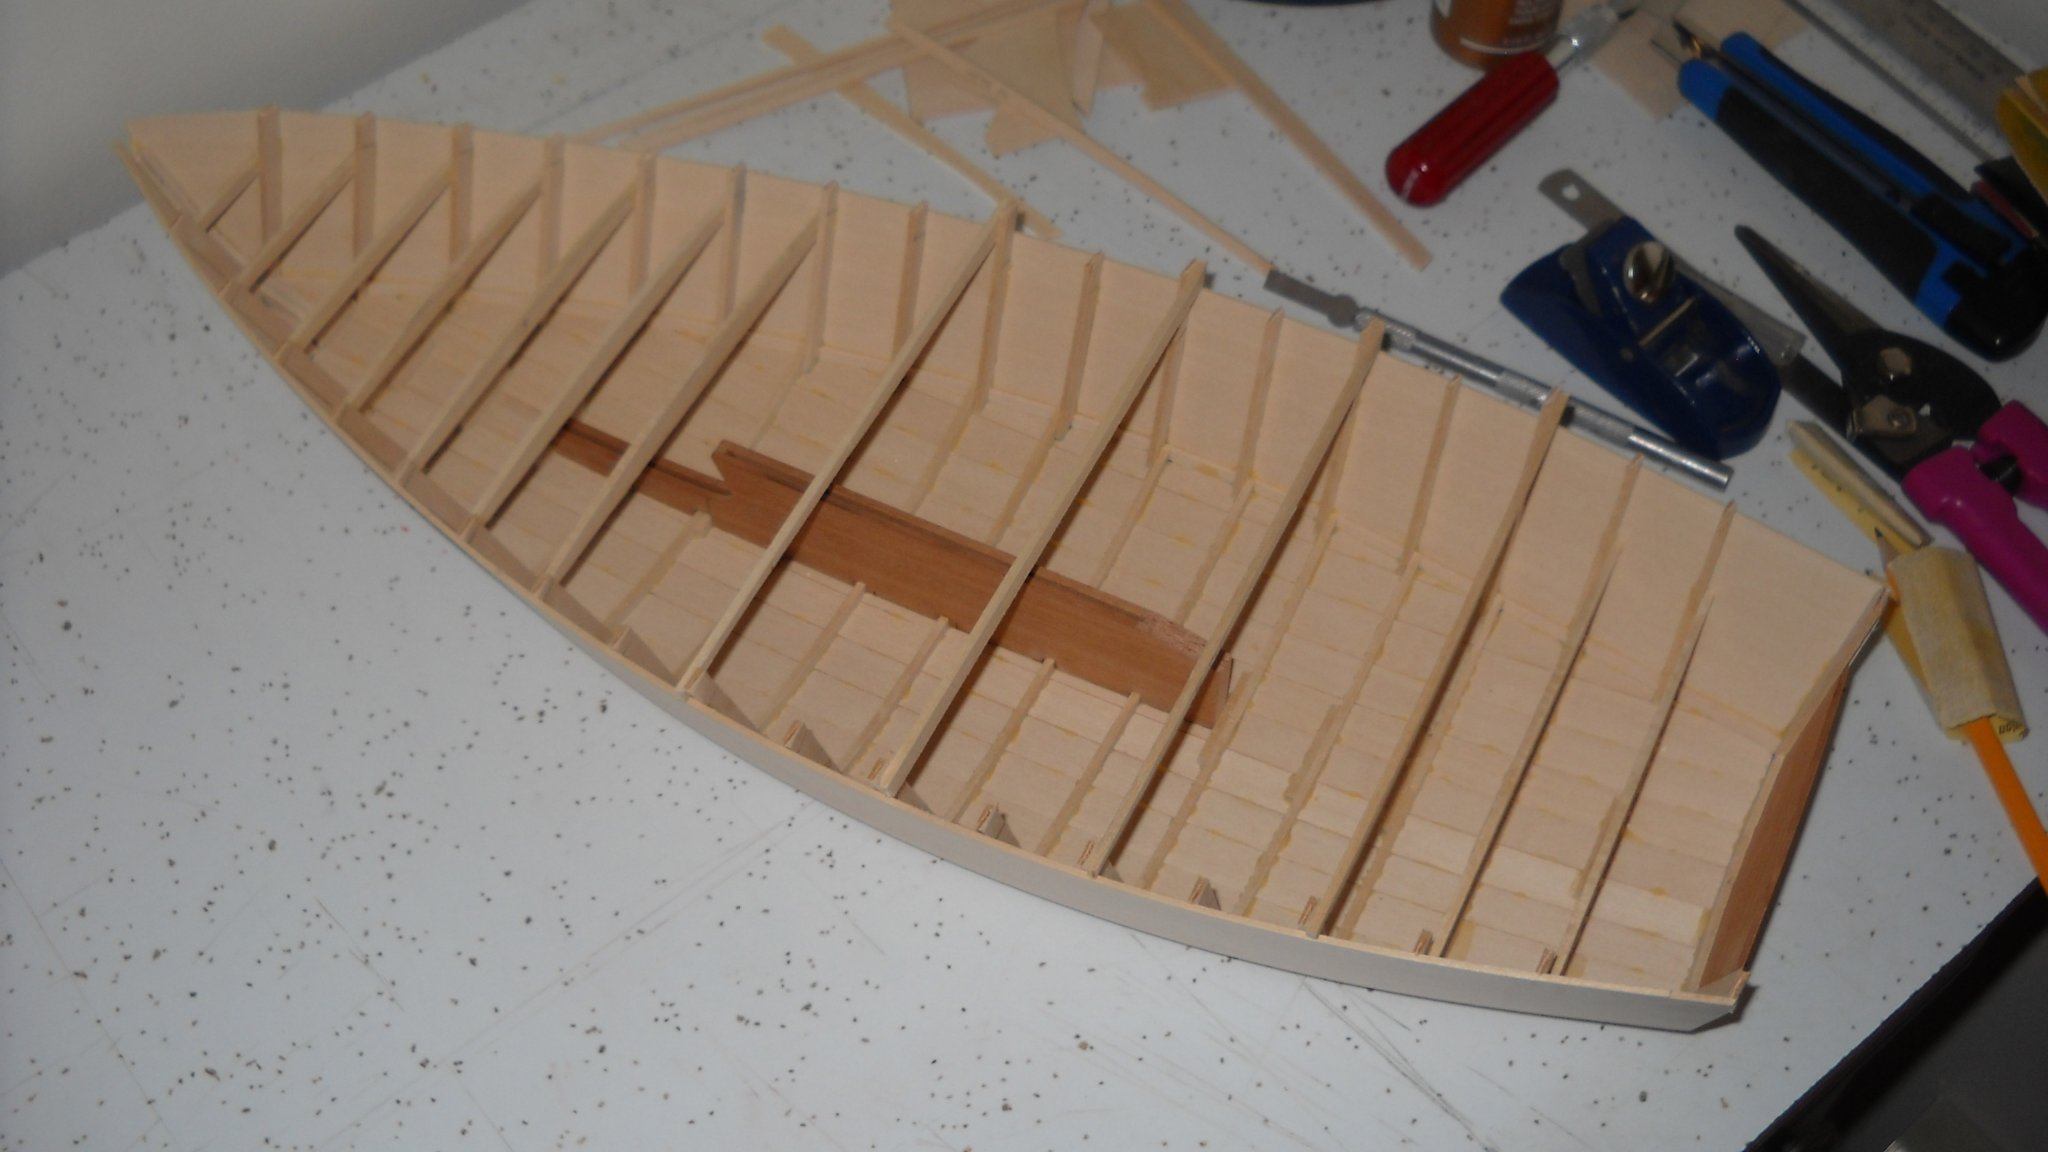
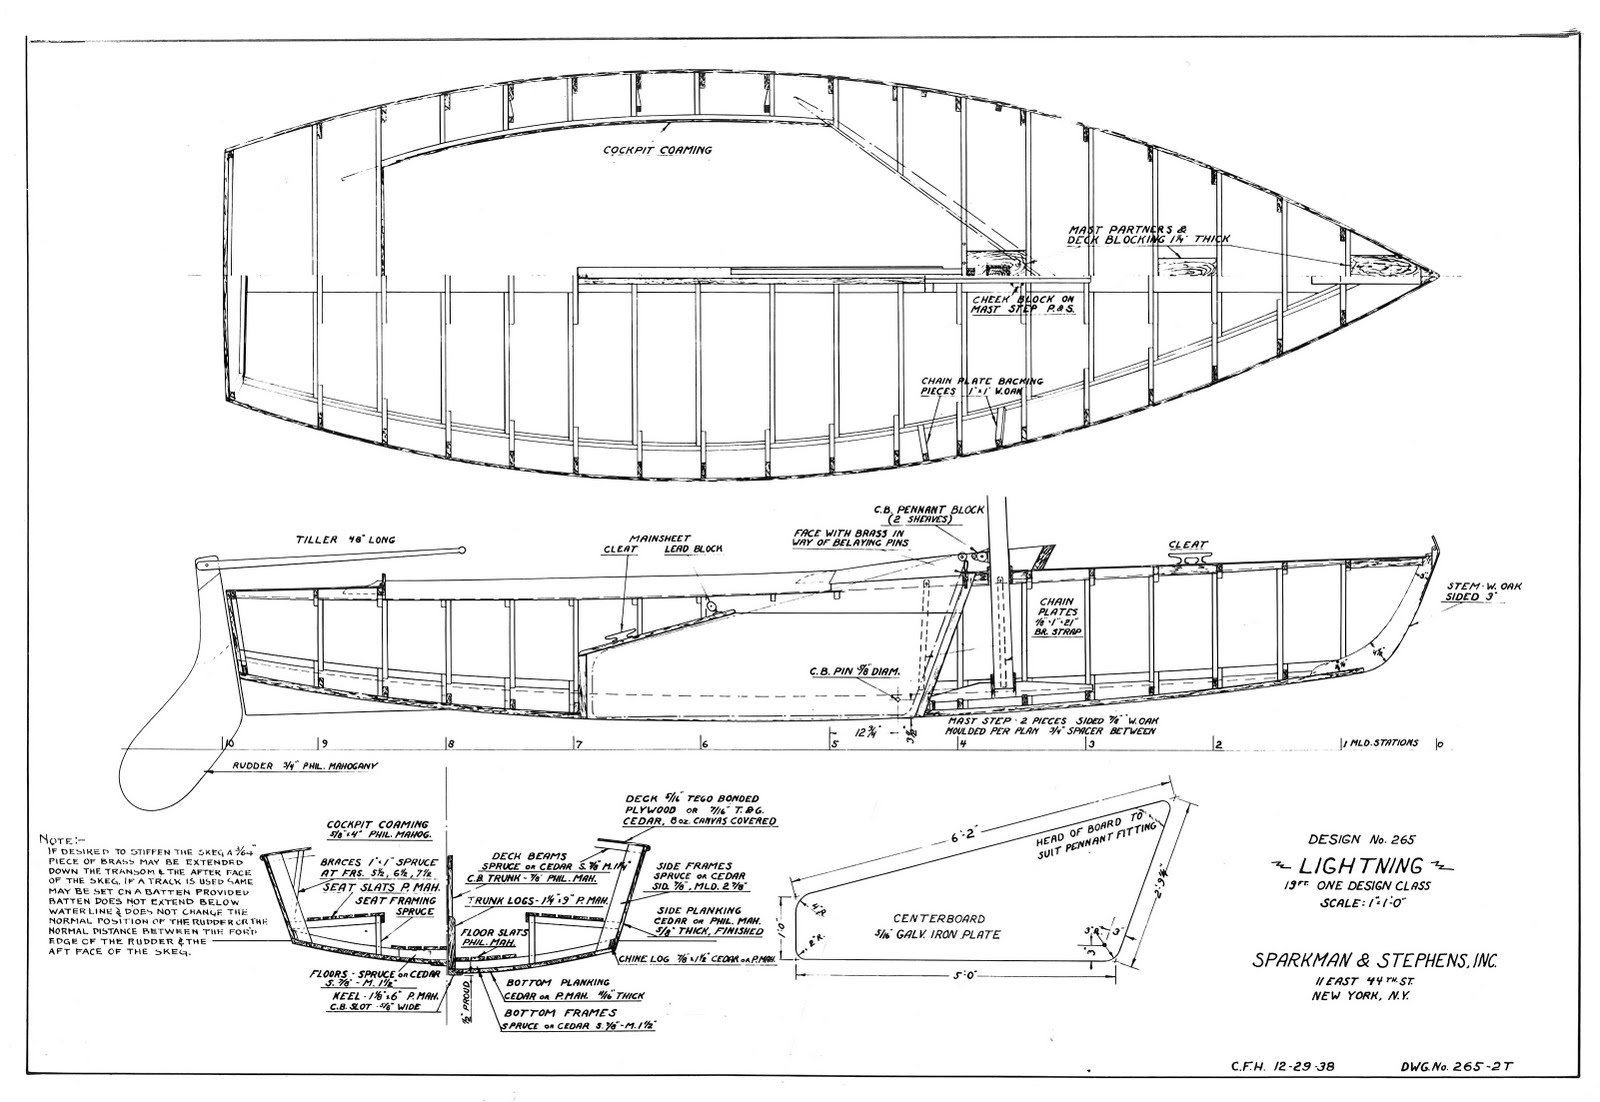
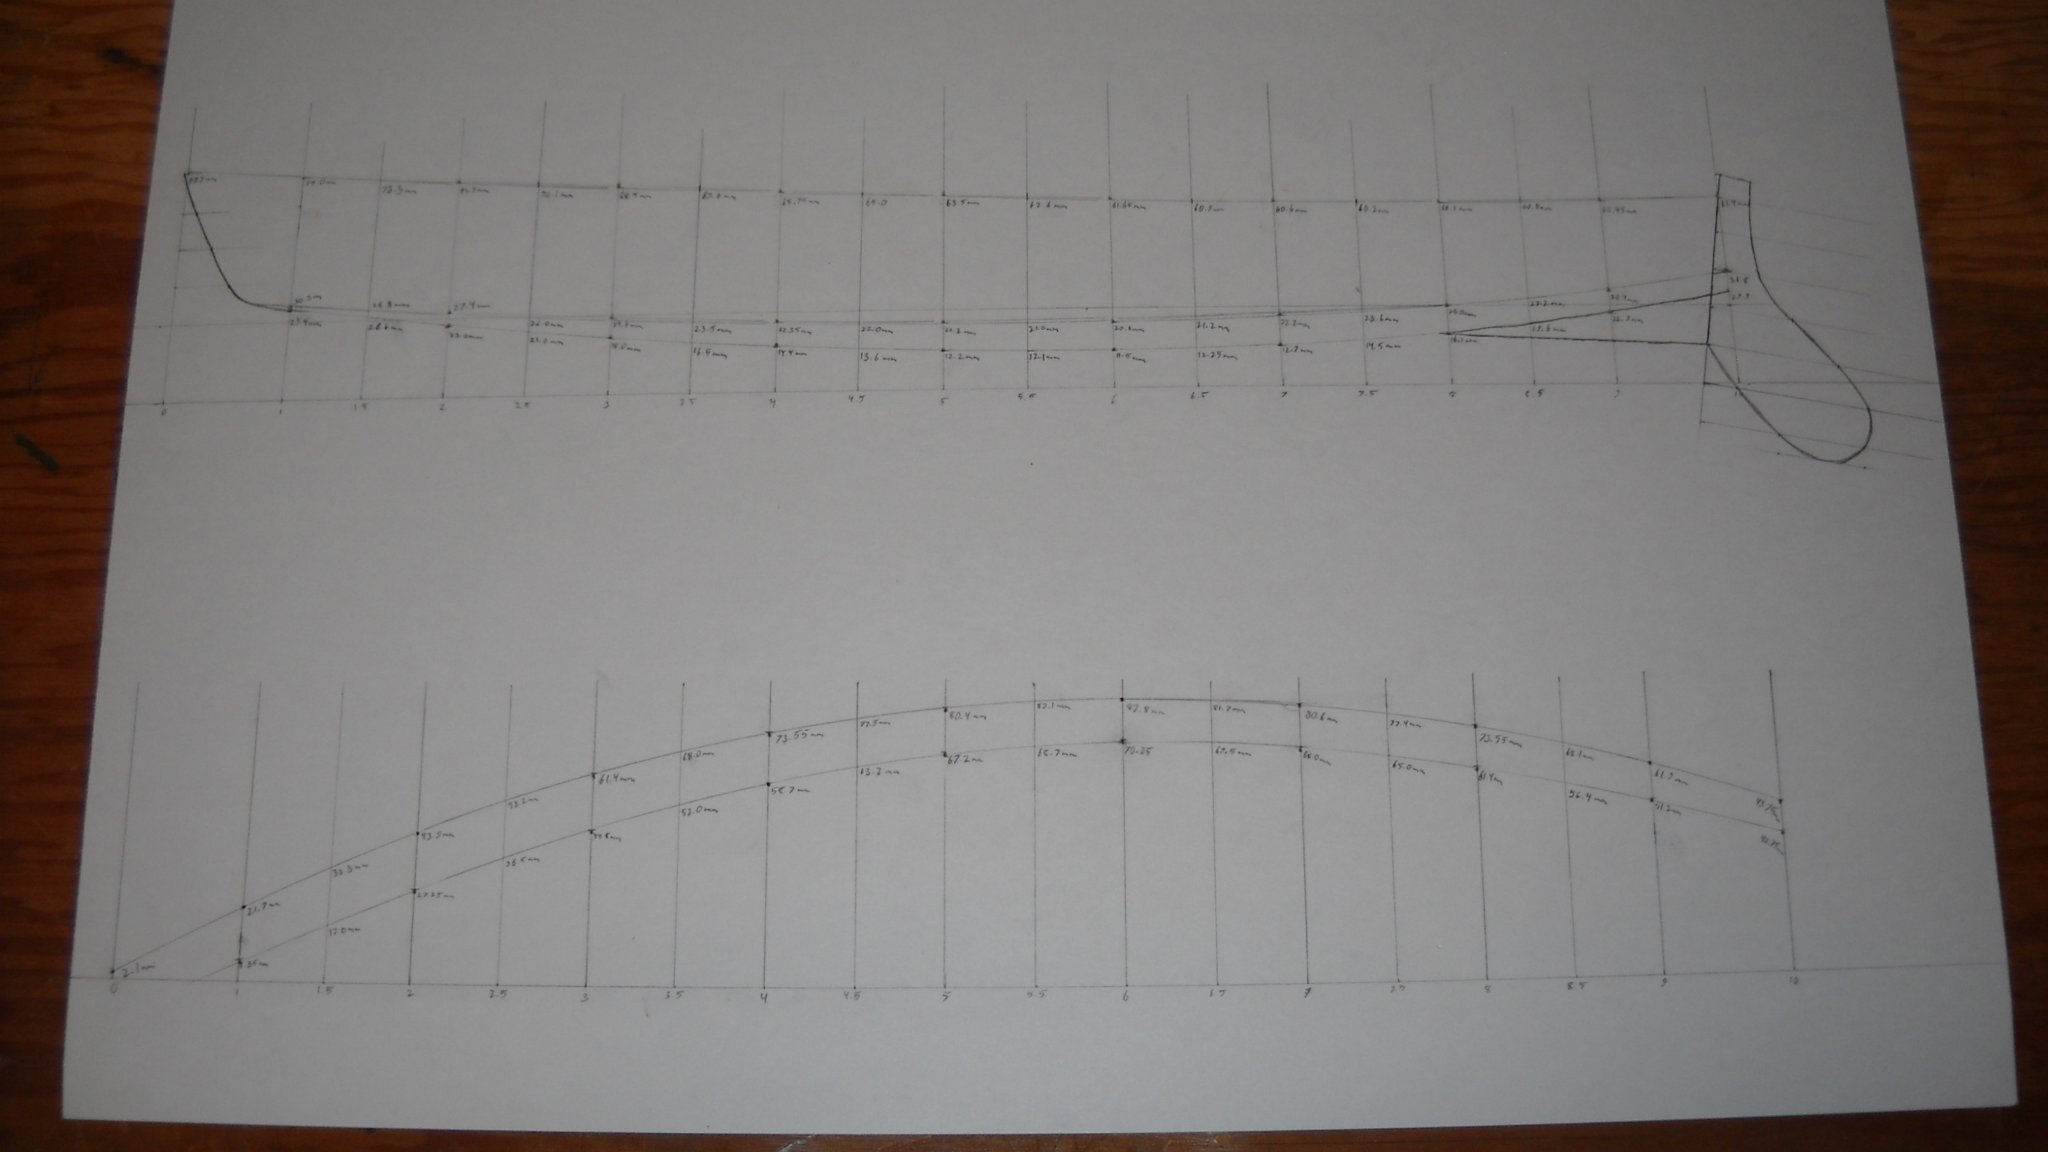
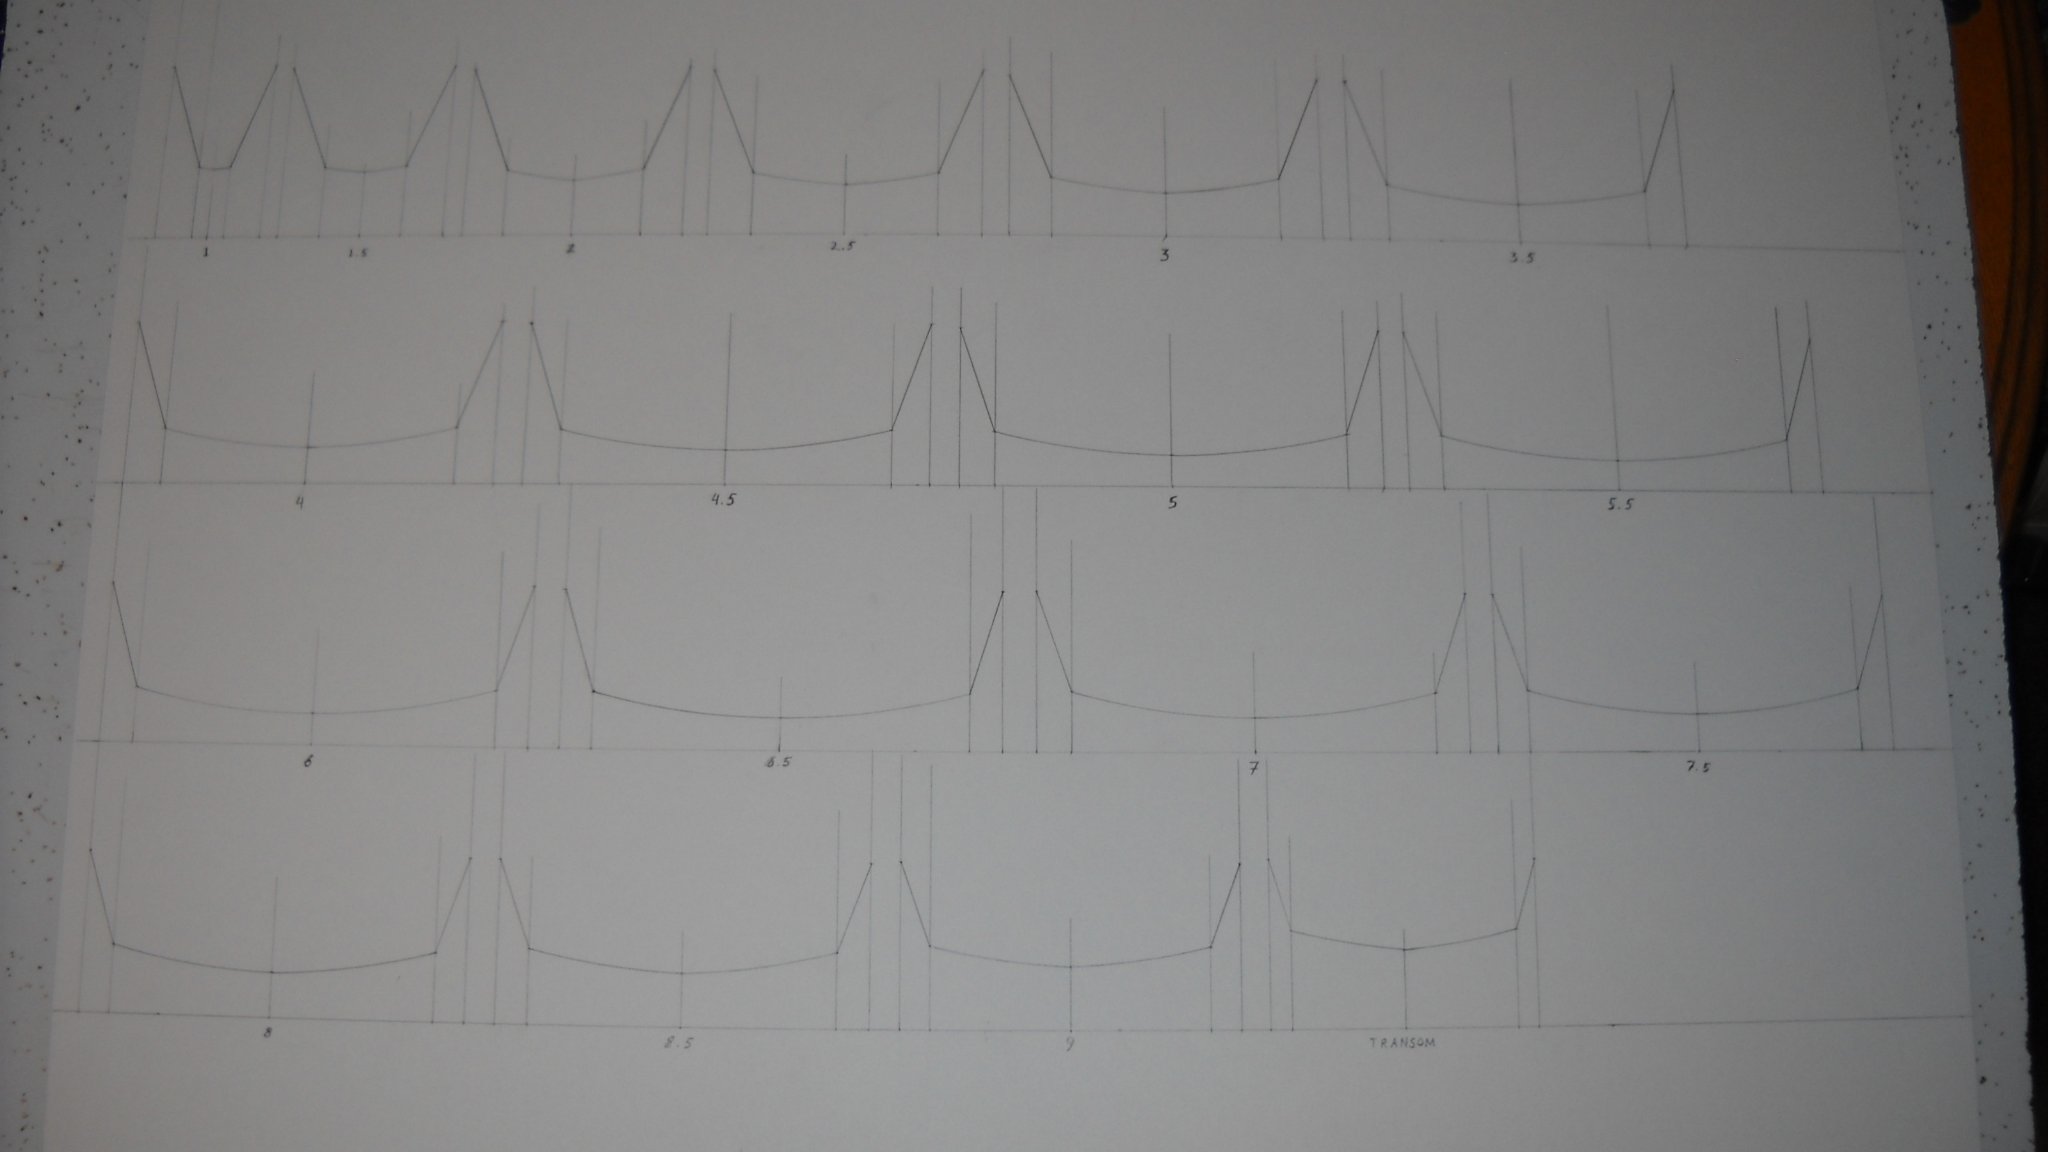
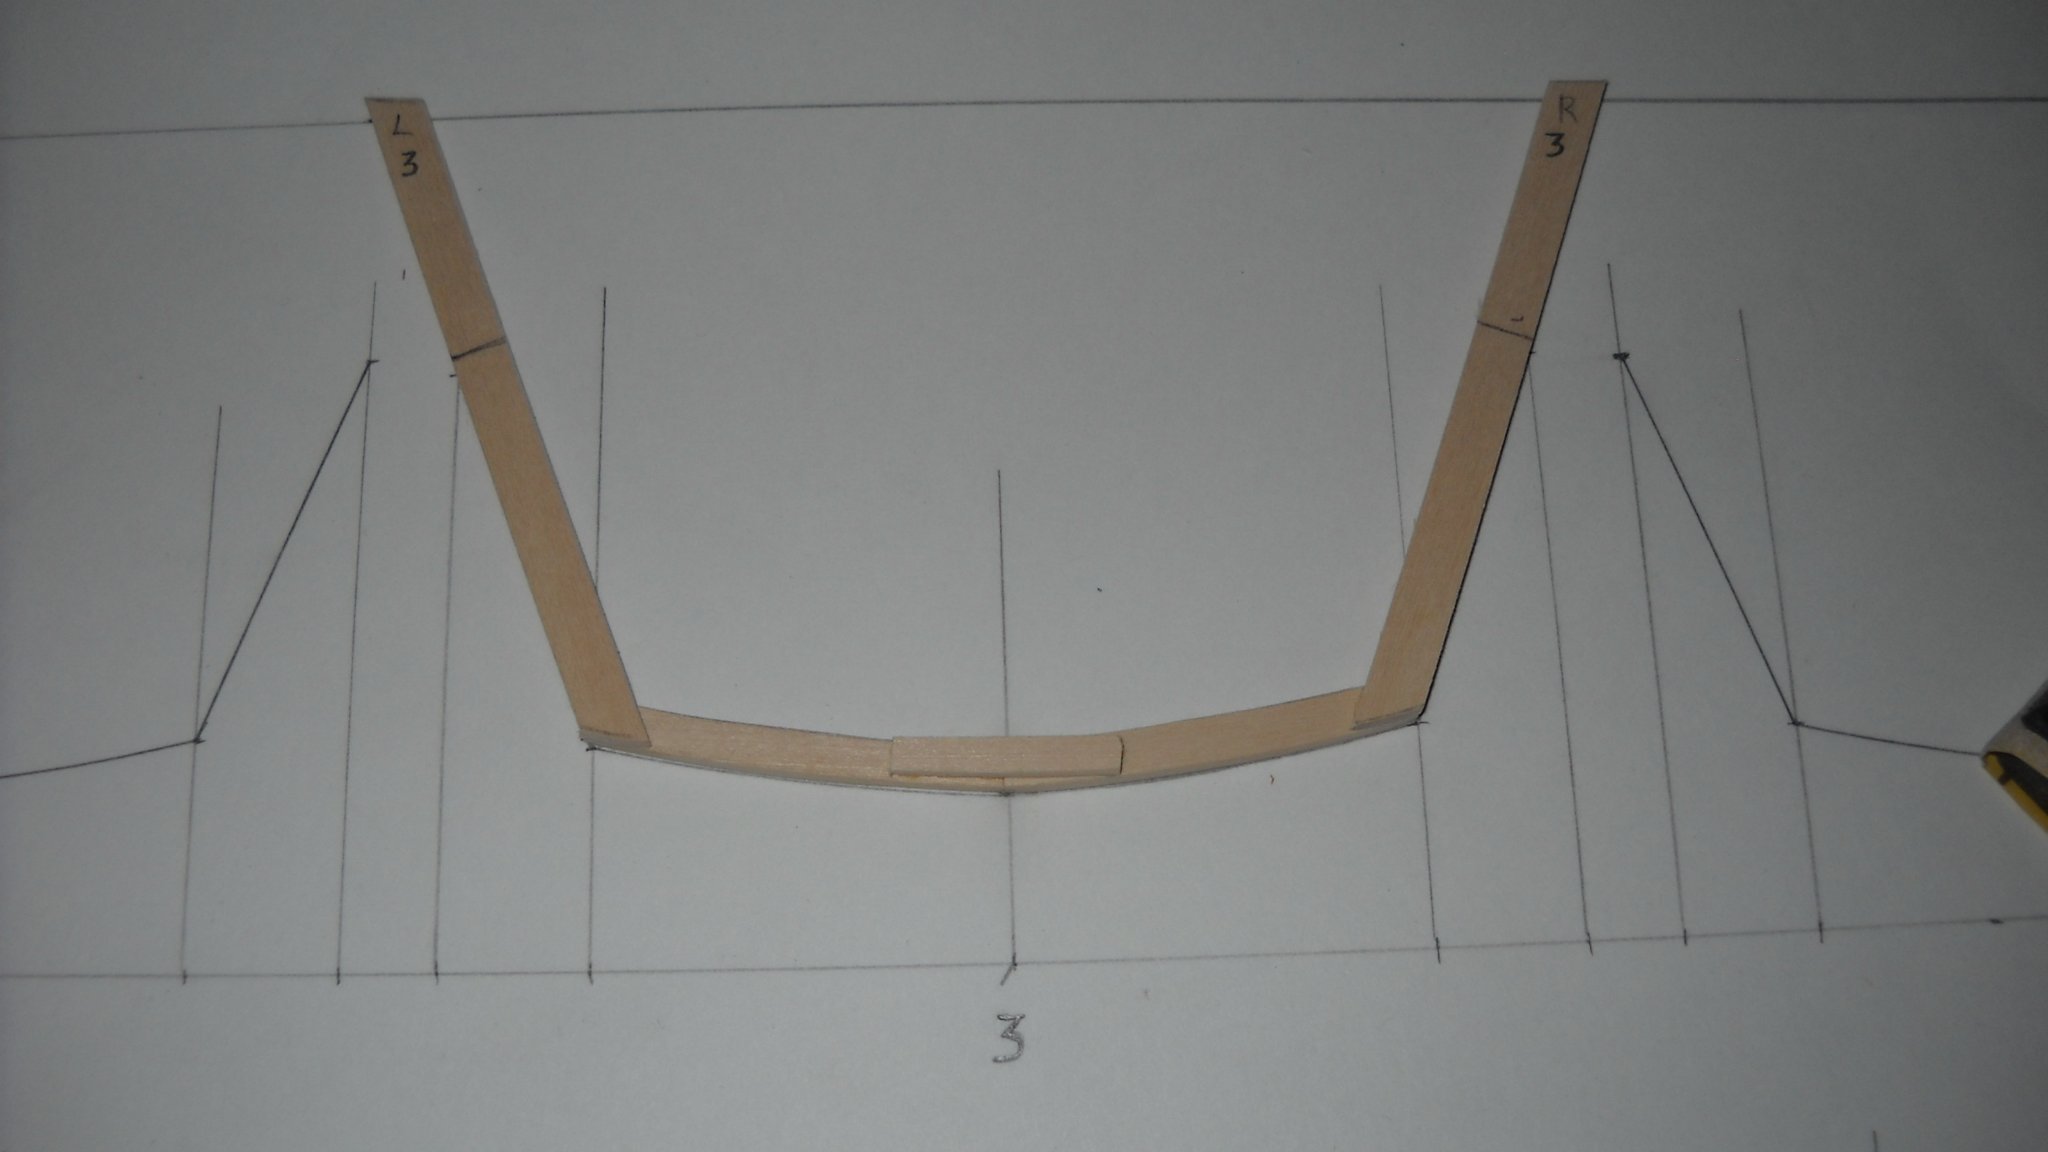
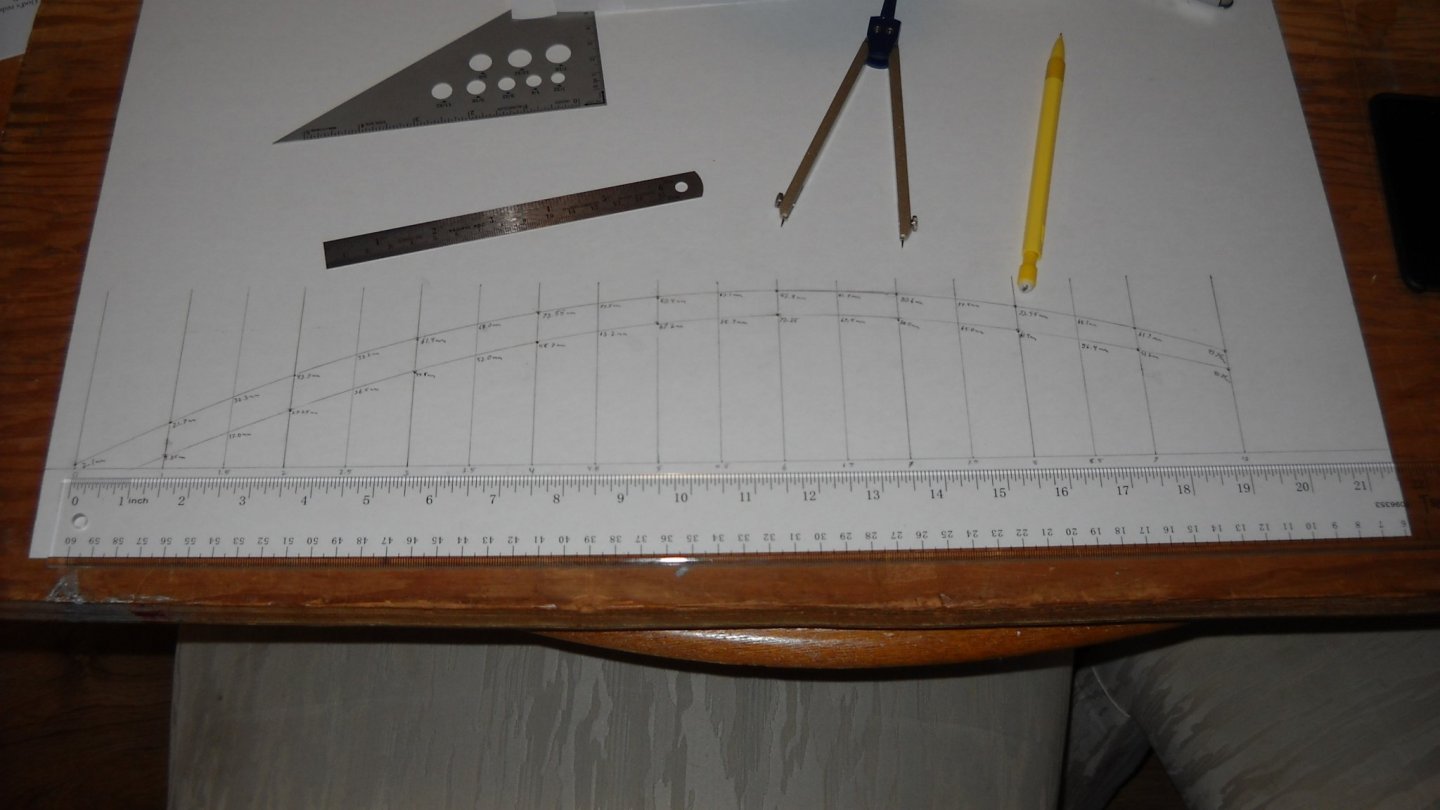
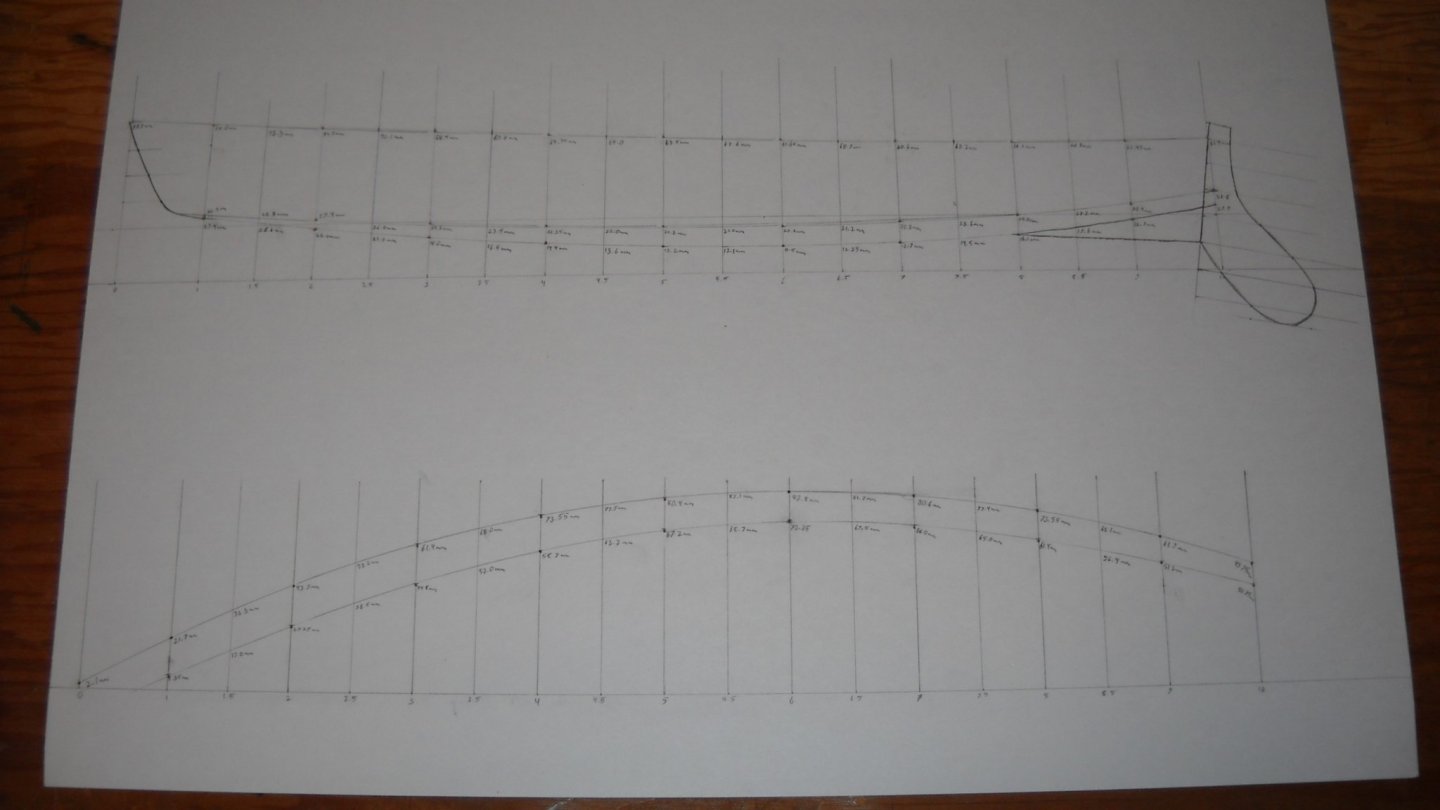
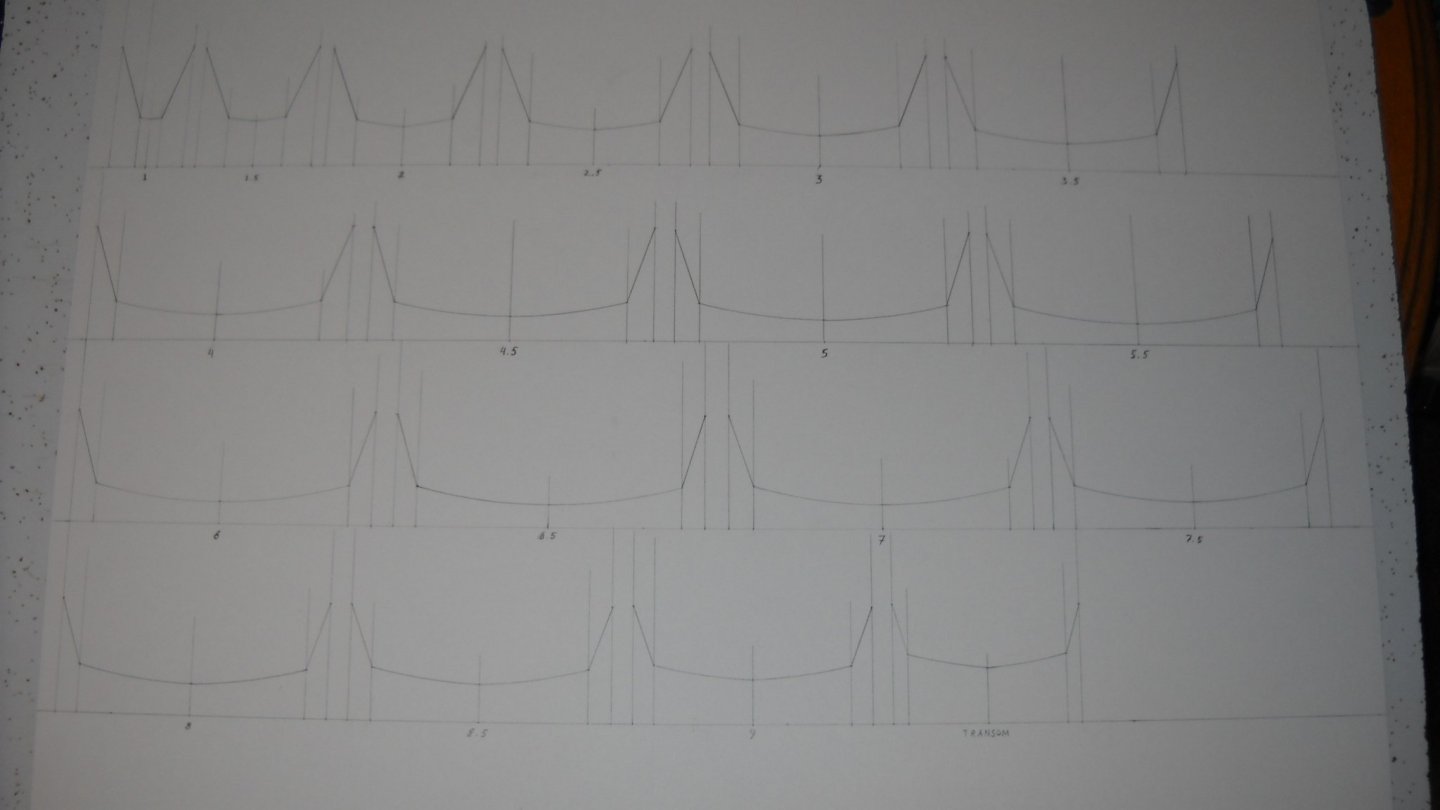
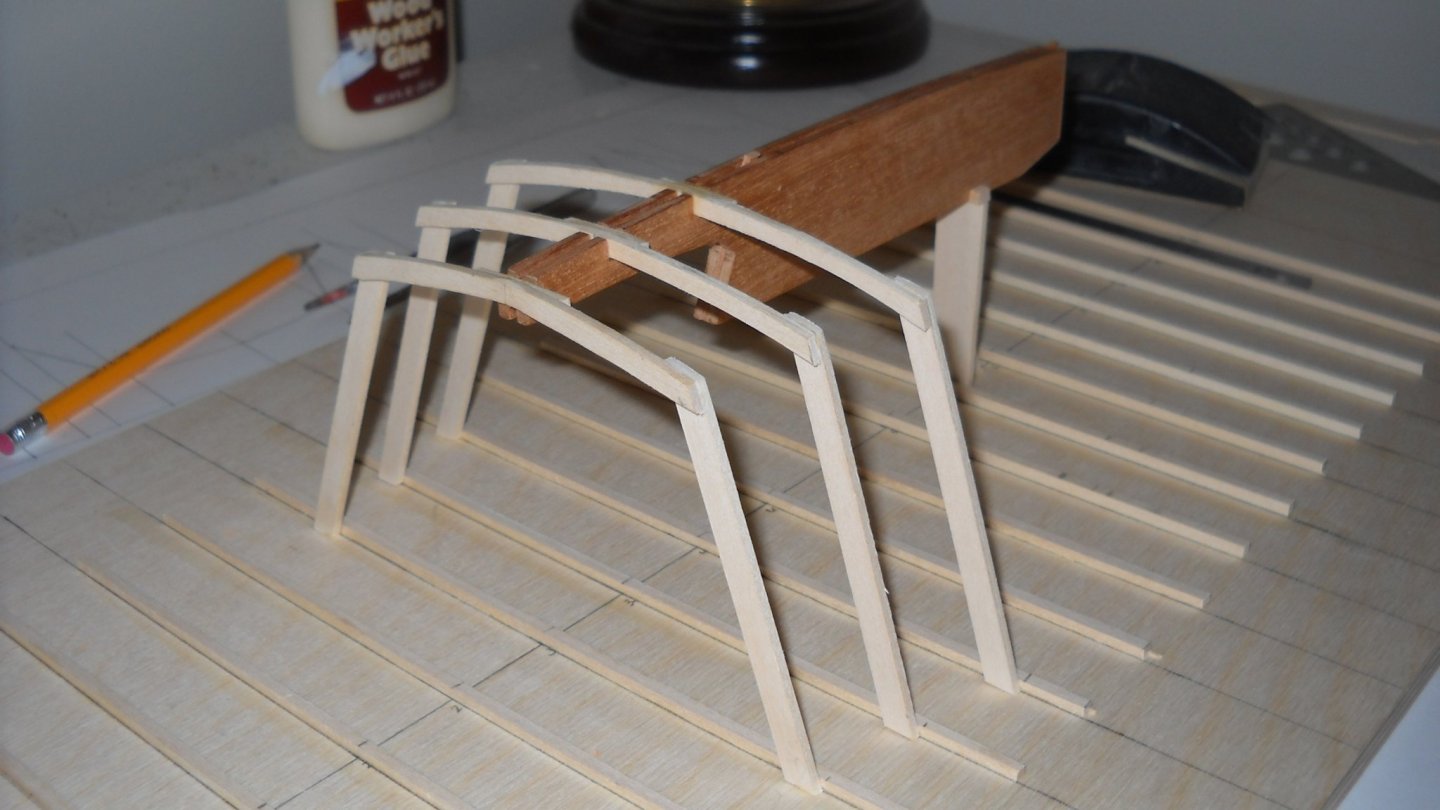
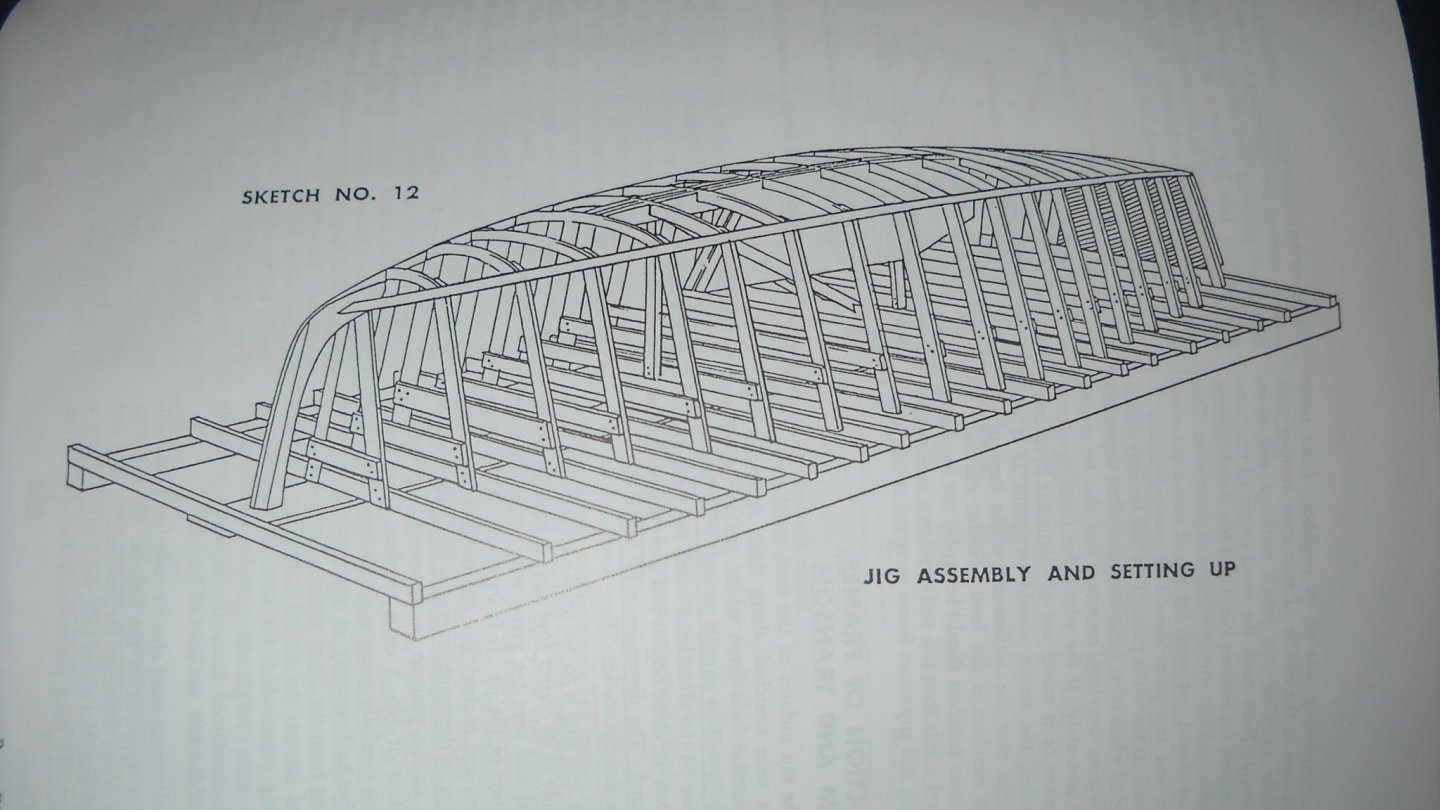
Using the original table of offsets, I scaled all the measurements down and lofted my plans. Then I made a building jig fairly similar to what would be used to build the full size boat.


-
Hello all, I think it's finally time to give this project its own build log in the proper section of this forum. For those who may be seeing this for the first time, here's a little info. The Lightning is a 19 foot centerboard sloop designed by Sparkman & Stevens, and first sailed from the Skaneateles Country Club in central New York in 1938. It quickly became an international racing class and there are now over 15,000 Lightnings sailing in hundreds of fleets all over the world. My initial interest came from working at the Skaneateles Country Club for a few years. Even though I have never actually sailed in one, or gone sailing at all, for the that matter, I found the Lightning to be such a beautiful boat, I wanted to build a model of it. A little over 5 years ago, I started building a Dumas kit of the Lightning, which you can find the log for here: There's a lot of good information and reference material there, particularly many pictures of Lightning #1 that I took for reference. That project eventually fell by the wayside when I decided it wasn't accurate enough for my liking (and later realized I hadn't done nearly as good a job with the shaping and fairing as I originally thought). So I decided to buy the plans for the real boat from the ILCA (International Lightning Class Association), scale them down, and scratch build a Lightning in the same way the real thing would be done. Once I had just about finished the hull, I got hung up in overthinking how the next steps should be done and the project ending up sitting idle for about 4 years. Fast forward to a couple weeks ago, I caught a sudden burst of fresh inspiration when a good friend of mine asked me what ever happened to that boat that I was building and I told them I still had it sitting safe and sound up in my closet. So I got it out and showed it to them and realized (not to toot my own horn too much) what a good job I had done so far and that I owed it to myself to continue working on it and prove to myself that I could finish what I had started. So for the past couple of weeks I've been sharing my progress in the Dumas build log. But since I'm not actually working on the Dumas kit anymore, this project needs its own log in the proper area of the forum.
-
I think the cockpit framing might have been one of the steps I was most apprehensive about and overthought too much back when I started building. I just wasn’t exactly sure what order some things should be done in, so I stopped working on it. Fast forward 4 years, with a fresh burst of motivation and some more research, and there we have it.

-
Would it be inappropriate to say that is one sexy hull? Sparkman and Stevens really nailed the lines on this boat.


-
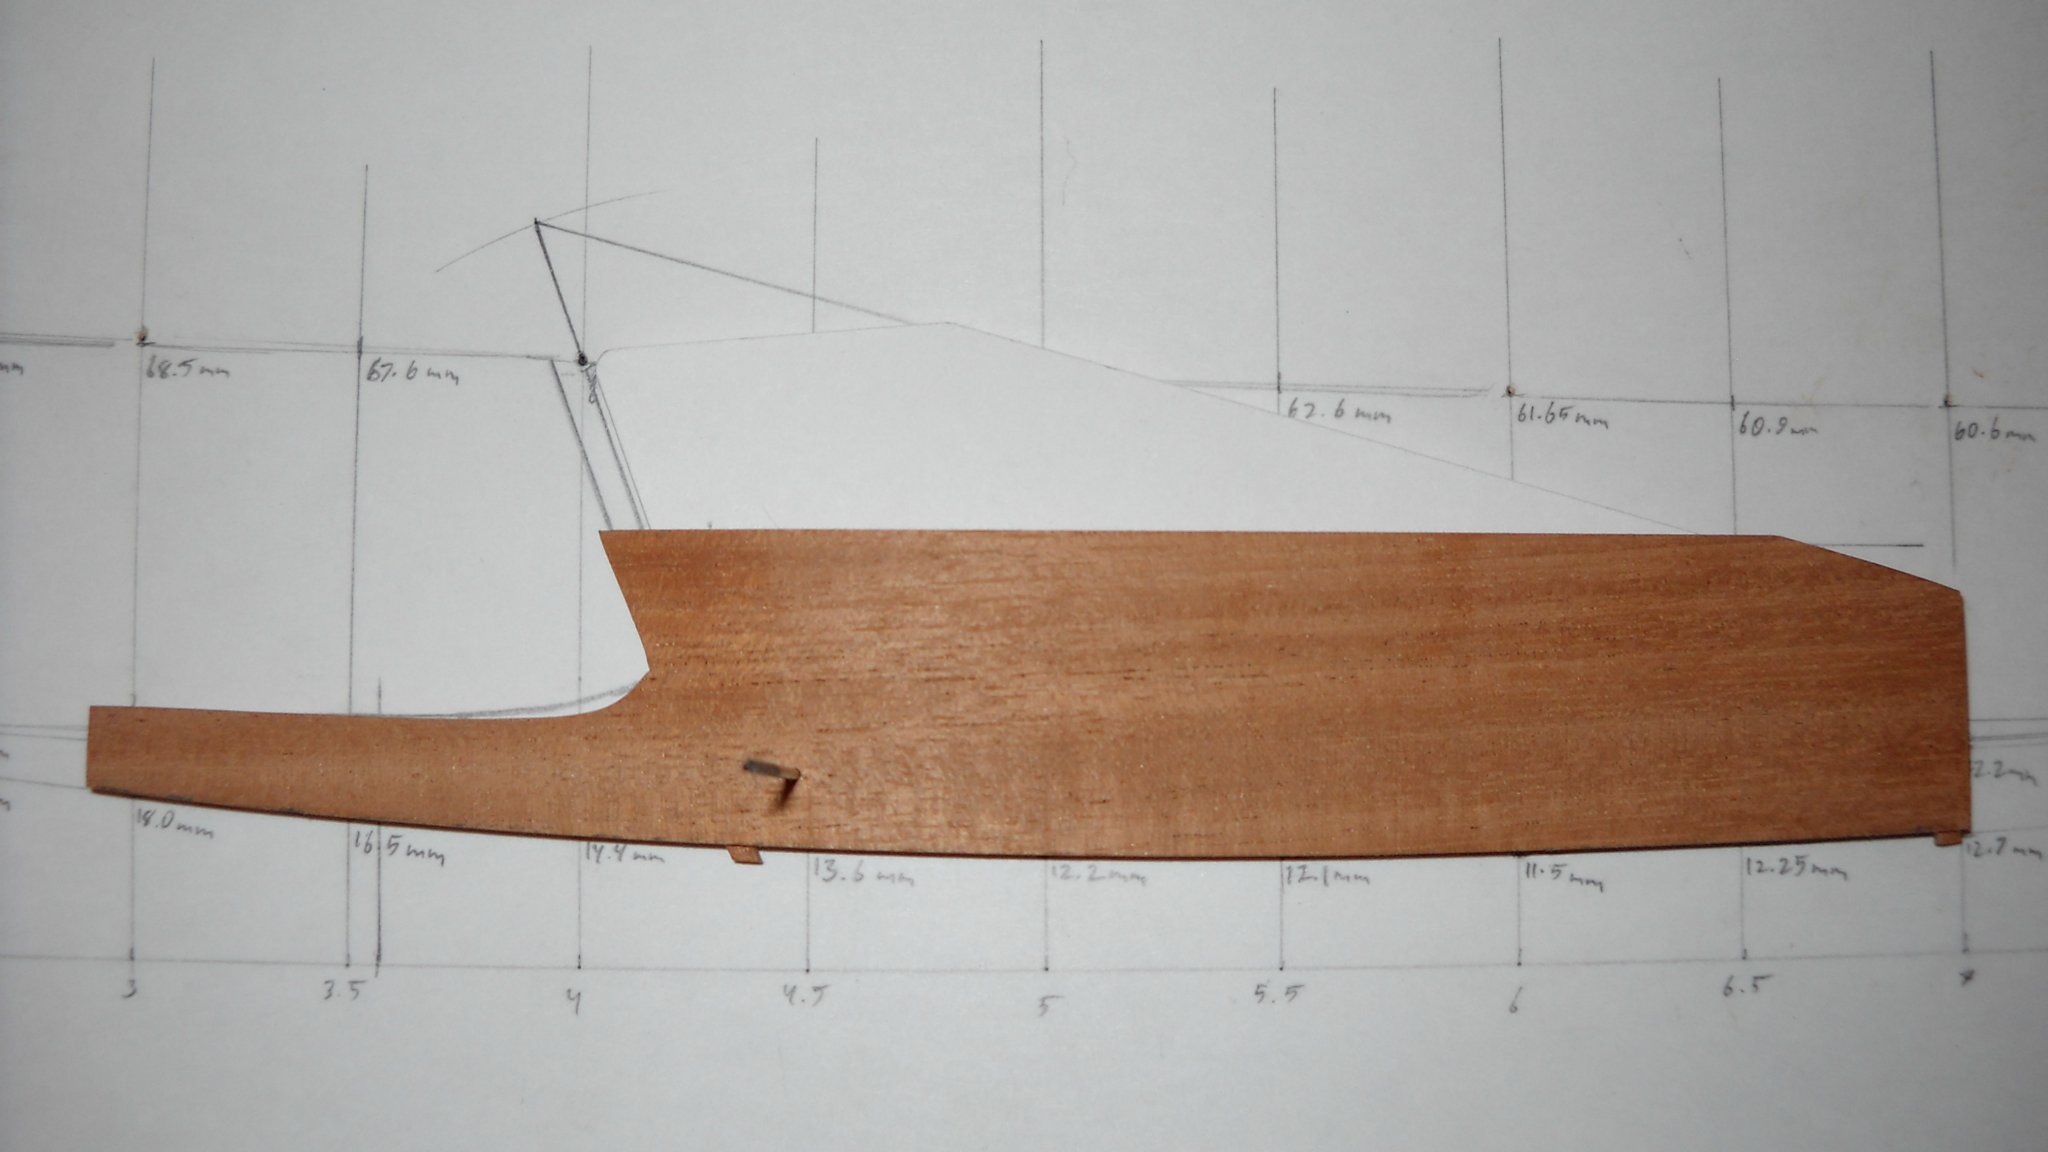
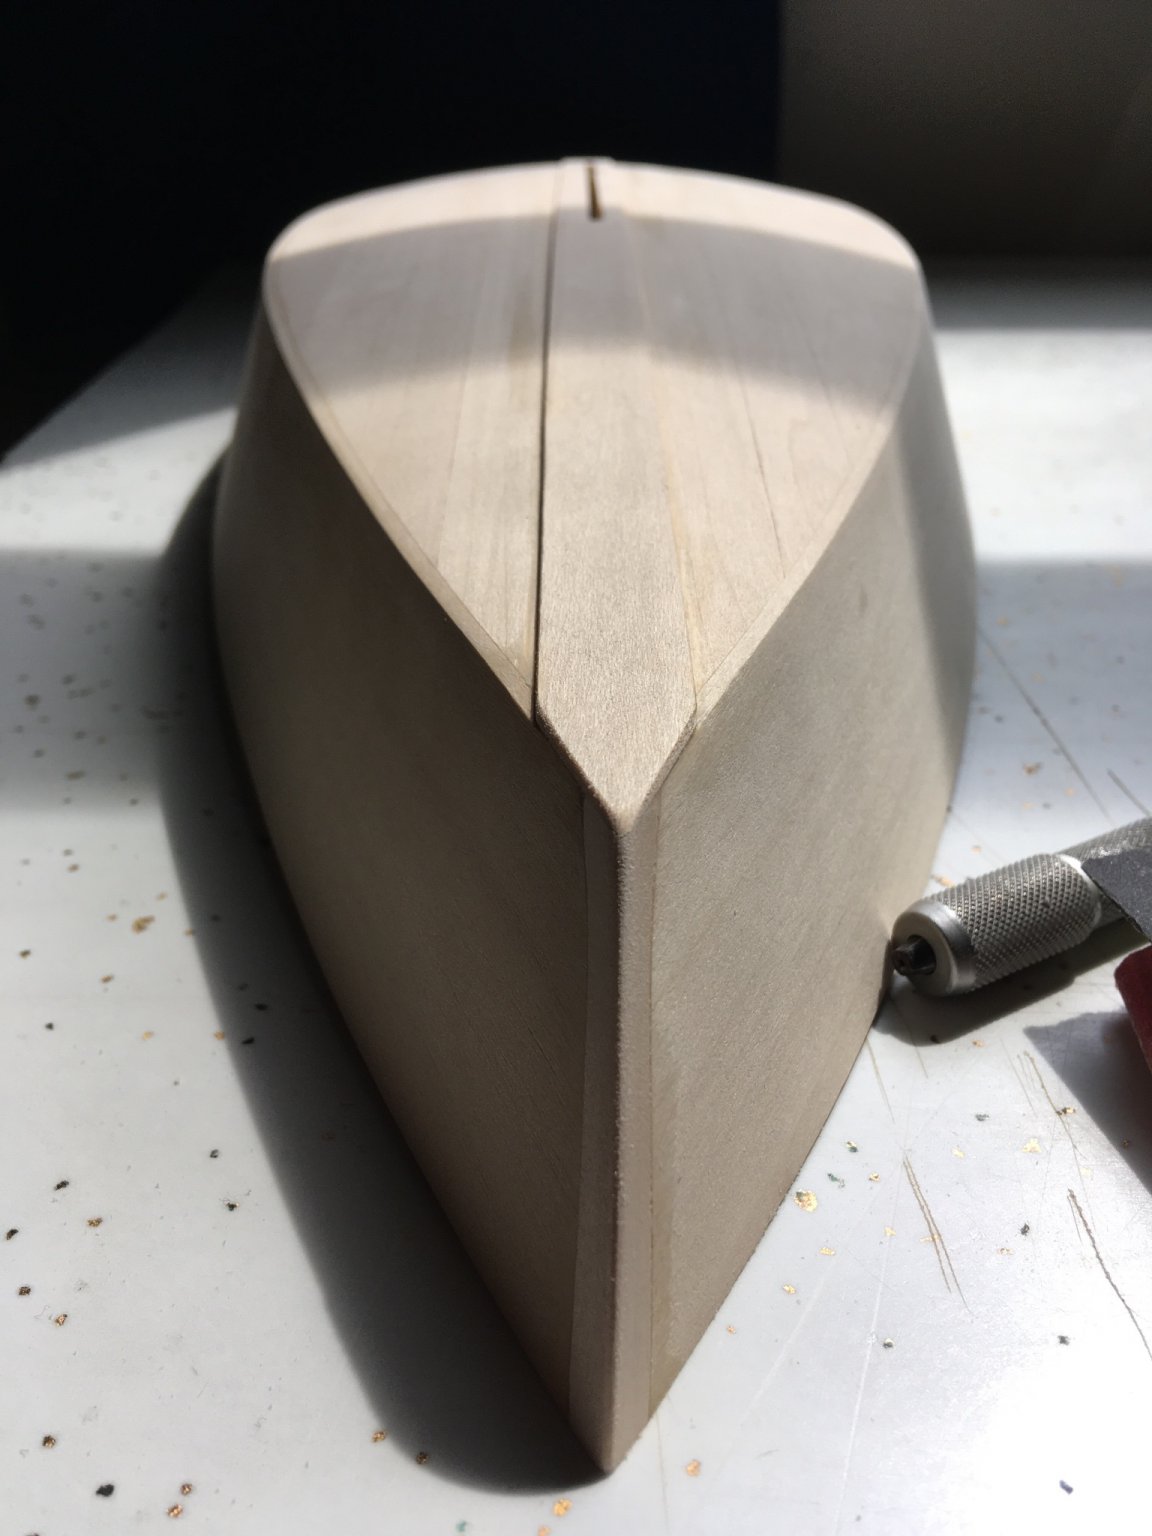
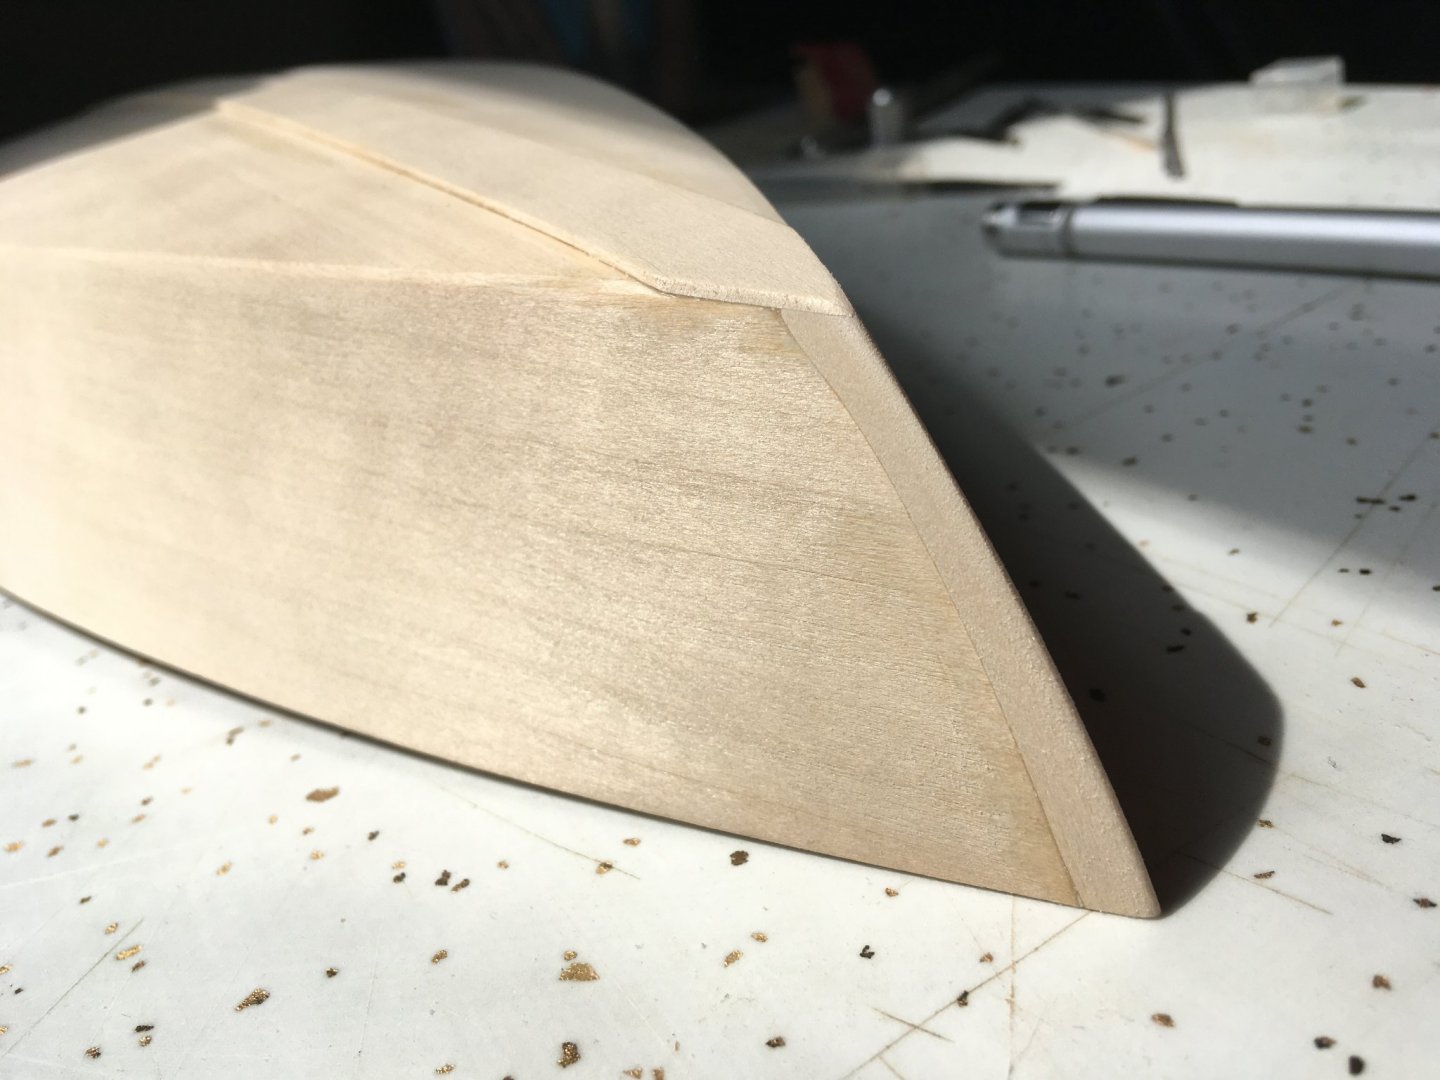
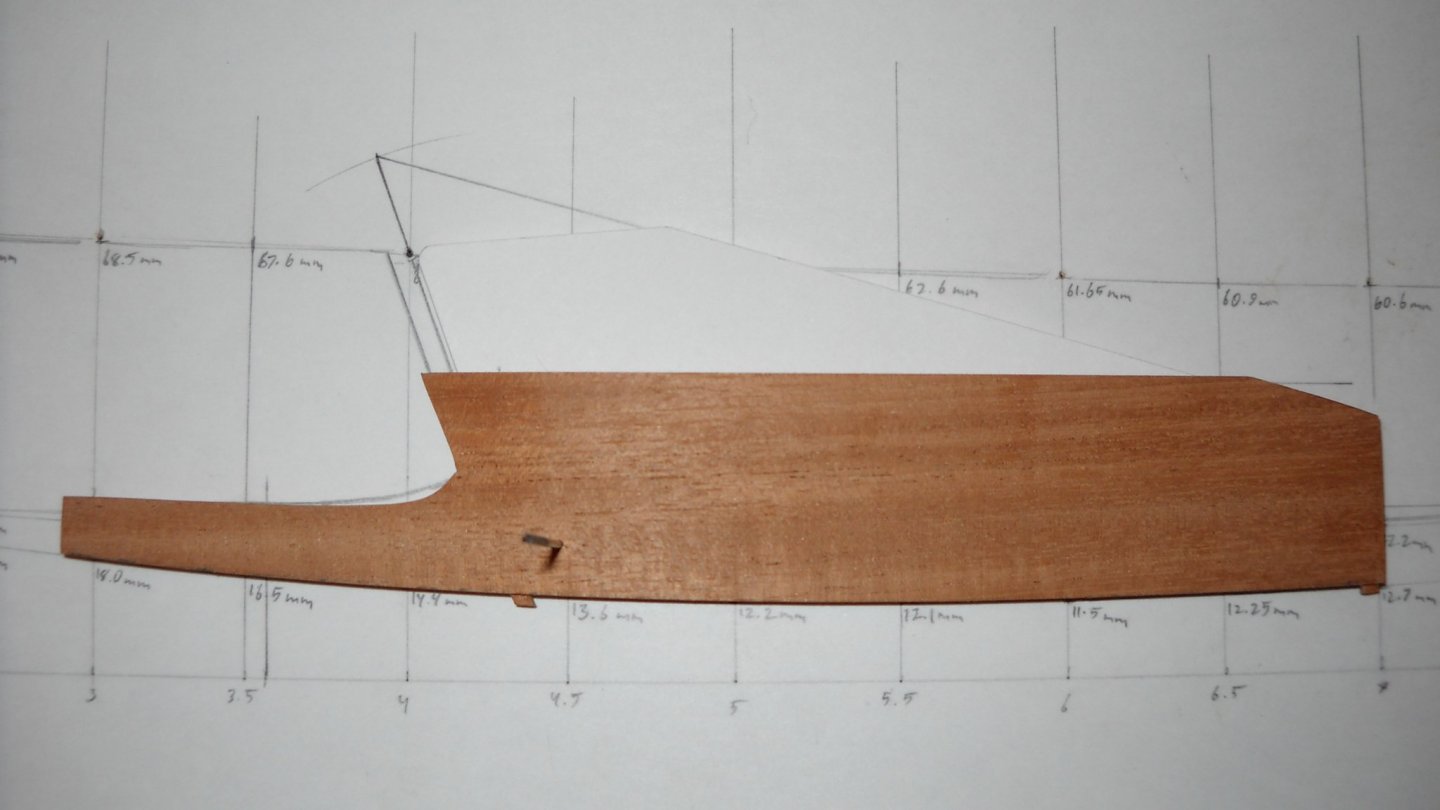
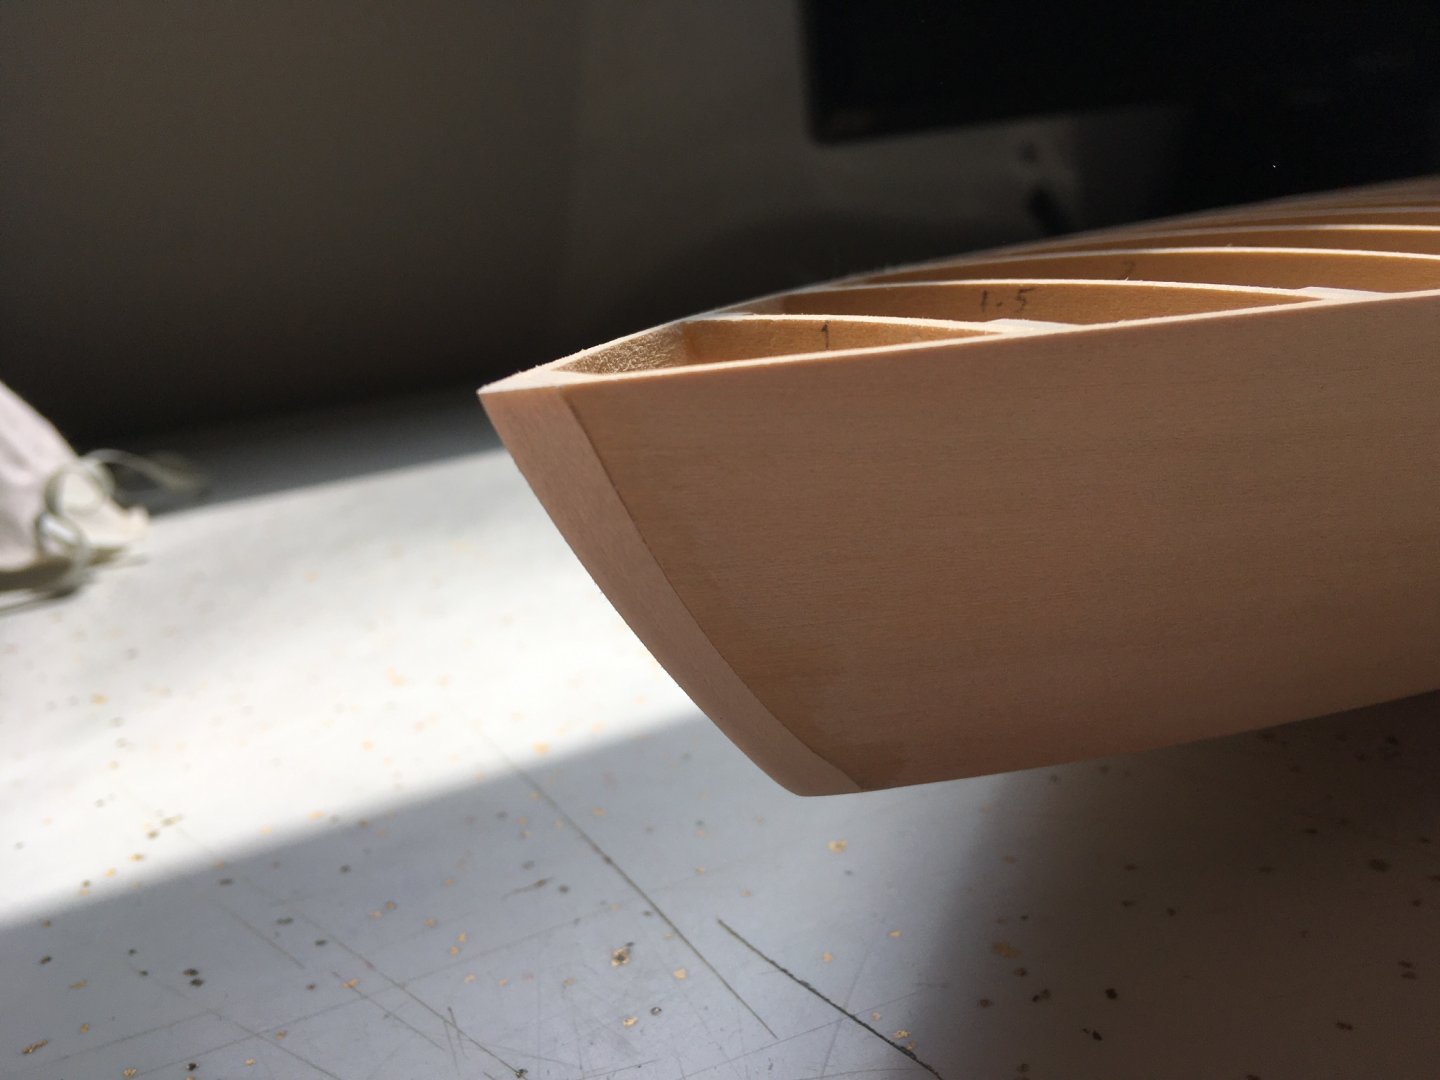
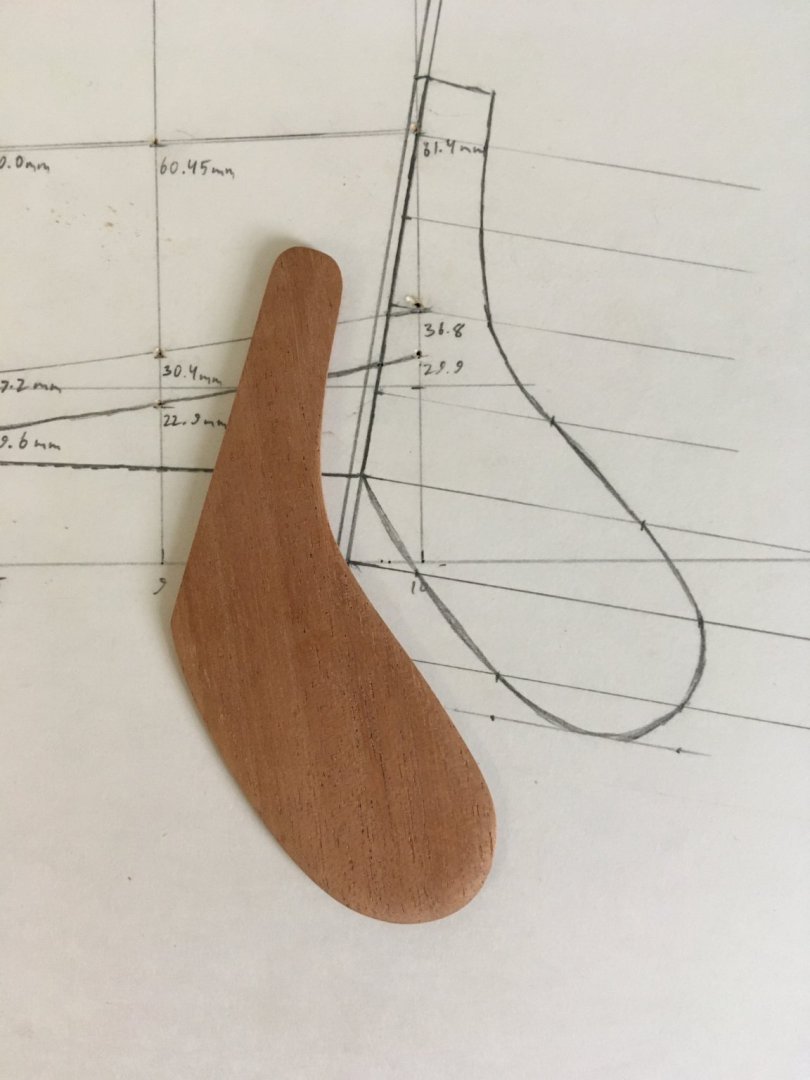
She finally has the front of her stem! I have no idea what happened to the front piece of the original stem, it may not have been worth saving. So I was able to carve a new one from 1/4” stock. It feels good to have a nice solid piece up front, rather than something laminated like I used for the rest of the stem. I guess I didn’t have a 1/4” piece on hand when I made it and didn’t feel like making a special trip to get one back then. But I did this time!
-
It’s 1:12 like the kit was, so 19 inches, and the beam is 6.5.
-
She’s getting there...
-
https://www.micromark.com/Flat-Head-Screw-Package-of-25 These are the screws I'm planning on getting to attach the chain plates; the 00-90x1/8 or maybe 1/4 I think should do it. Not completely to scale, but the smallest I've been able to find anywhere. Does anybody know of anything smaller? I imagine these would also be suitable for securing the various deck fittings?
-
So here's another update much sooner than expected! I finally finished installing the deck beams. I thought it made sense to just install all of the deck beams at full width to make it as strong as possible for fairing the deck framing, and then cut out the cockpit afterwards. Does that seem reasonable to everybody? Even though I have the "How to Build a Lightning" book, I'm still kind of winging it a fair amount because not all the steps for a full size build necessarily translate down to a scale model. So hopefully this will all work out in the end. Fairing down the deck framing is going to take some doing. I think I'm going to have to use a dremel with cut off wheel to cut most of the excess down from the side frames before I can begin sanding, so we'll see when I'll be able to get around to doing that.
-
I can't believe it's been 4 years since I last visited this thread. I'm amazed to see there's still some interest in it. I do apologize if I've let you down, those who had been following. I guess I just lost my mojo after I finished the bottom side of my scratch built hull and wasn't quite sure how to go about the next step. I do still hope to complete it some day, but rest assured, she's been kept safe these last few years and I still have all my supplies. I'm not sure what gave me the inspiration, but I got some things out of the closet today and was just in the mood to do some woodworking, so I took a whack at the rudder. I must say, I think it came out beautifully. I make no promises that I'll have any more updates any time in the near future, but I thought you all might like to know that she hasn't been entirely forgotten.
-
I'm not going to risk starting another build log just yet, but here are a few pictures of what I have so far.


-
I can't believe it's been so long since I posted or commented anything on here. I must admit the Dumas kit just wasn't cutting it for me as far as accuracy goes, so it fell by the wayside some time ago. However, I started a new scratchbuilt 1:12 back in September and got the hull just about finished, although I haven't worked on it in a few months, either. Seeing your finished model is a great inspiration, though, sailboat392!! It's absolutely gorgeous I'm hoping some time soon I will regain my drive to finish mine. I have to ask, is there any chance you made templates of your seats? They look absolutely spot on, so if you have any sort of pattern for them that you would be willing to share, that would really be fantastic!
-
Any more progress on this? I remember you said you wished to have it completed by the end of this year. I've been reluctant to start a new build log after my previous two fell by the wayside, but I have been making good progress with a new 1:12 scratch built lightning. I really hope you haven't given up on yours like I did with my previous ones!
-
Hi, Dave. It seems that maybe you haven't seen my first build log for the Dumas kit. Here I have posted many pictures of Lightning #1, which is on display at the Skaneateles Historical Society. http://modelshipworld.com/index.php/topic/11596-lightning-sailboat-by-andrew-j-dumas-scale-112/page-4 My own profile picture is actually one of my pictures of Lightning #1.
-
Thank you for starting a log! I can't wait to see pics of your beginning stages!
-
Those are sharp! I thought you meant that you were looking for belaying pins online. I know a couple people have suggested you start your own build log. I for one would greatly enjoy it if you did. Not that I have any problem with anybody posting their own pictures in my log, but I would really like to see more of yours. Do you have any from earlier in your build?
-
I just uploaded a profile picture. It's one of my favorite pictures that I've taken of sunrise over the SCC marina.
-
Yeah, blocks are tricky. I'm still looking around for those myself. I had ordered some single blocks from Cornwall Model Boats, but only found out when I received the rest of my order that they were out of stock. I had to google what a halyard lead block looks like, and from the looks of it, I haven't seen anything like them in any kind of scale either. I would have no problem with belaying pins, though. All you need are toothpicks or kebab skewers and a sharp knife.
-
It seems you already know your way around model ships, but it sounds to me like you're going about searching for parts the wrong way. Even though this is all new to me, I've found that you can get just about any fitting you're looking for; you just can't expect everything to be labled in the scale you need them in. That's why I took all the measurements that I could myself. Then I could just divide everything by 12 and find the closest size model fitting. I apologize for the lecture if you already knew all that, but that's how I went about finding stuff. I just wasn't able to get all the parts I need from one source.