HOLIDAY DONATION DRIVE - SUPPORT MSW - DO YOUR PART TO KEEP THIS GREAT FORUM GOING! (Only 13 donations so far - C'mon guys!)
×

Andrew J.
-
Posts
96 -
Joined
-
Last visited
Content Type
Profiles
Forums
Gallery
Events
Everything posted by Andrew J.
-
 This looks like it's going to be a beautiful boat. I look forward to seeing your progress. Anyway, as a fairly new member myself, I would like to give you some friendly advice; that being to take a look at the rules of naming a build log, before an older member yells at you for doing it incorrectly
 -
Haha, no, I just work here. I've never even been in a Lightning before. I just took that picture in the upstairs hallway.
-
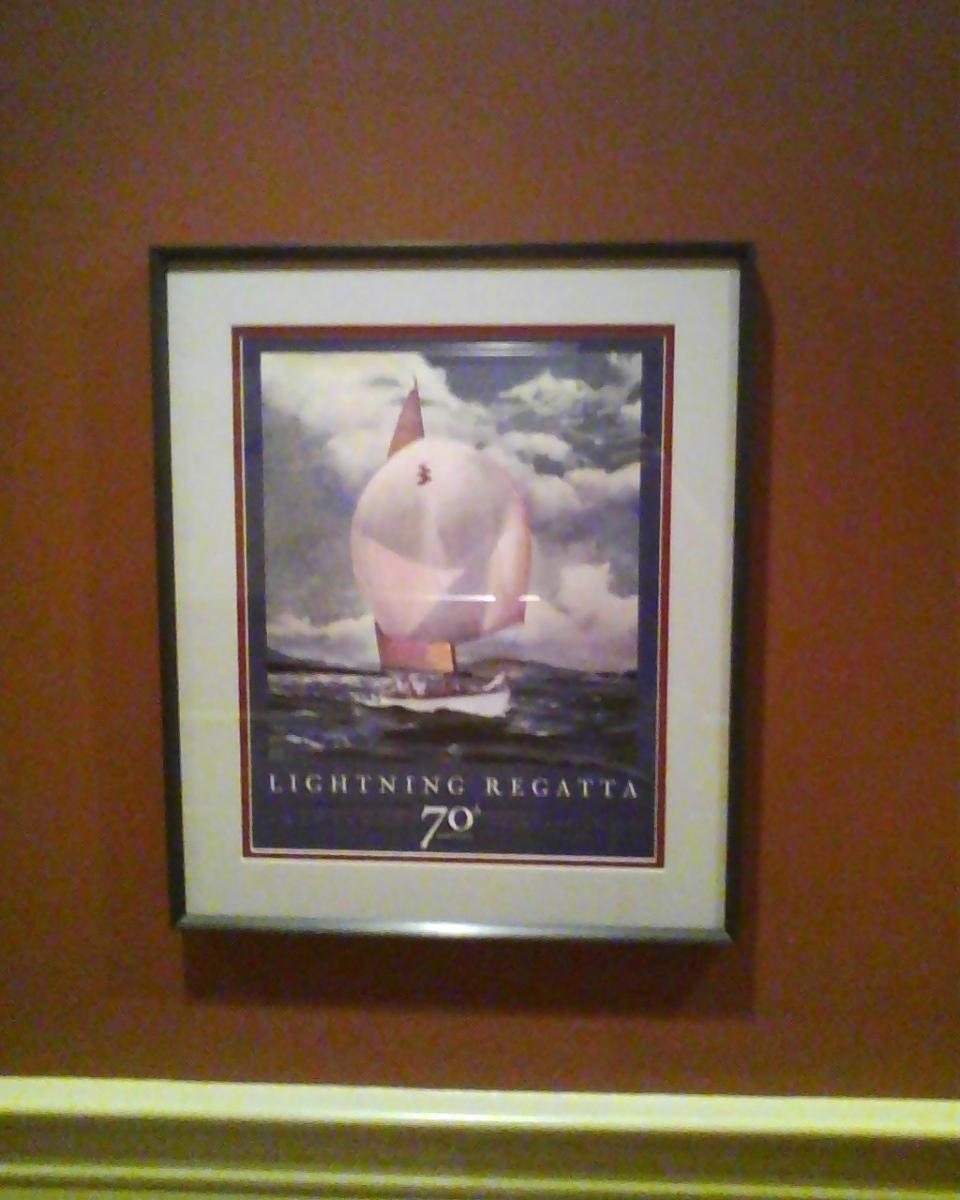
Here's the last one. I wonder if I'll still be working here when the 80th comes around?

-
I'm eating lunch at work right next to those posters now!
-
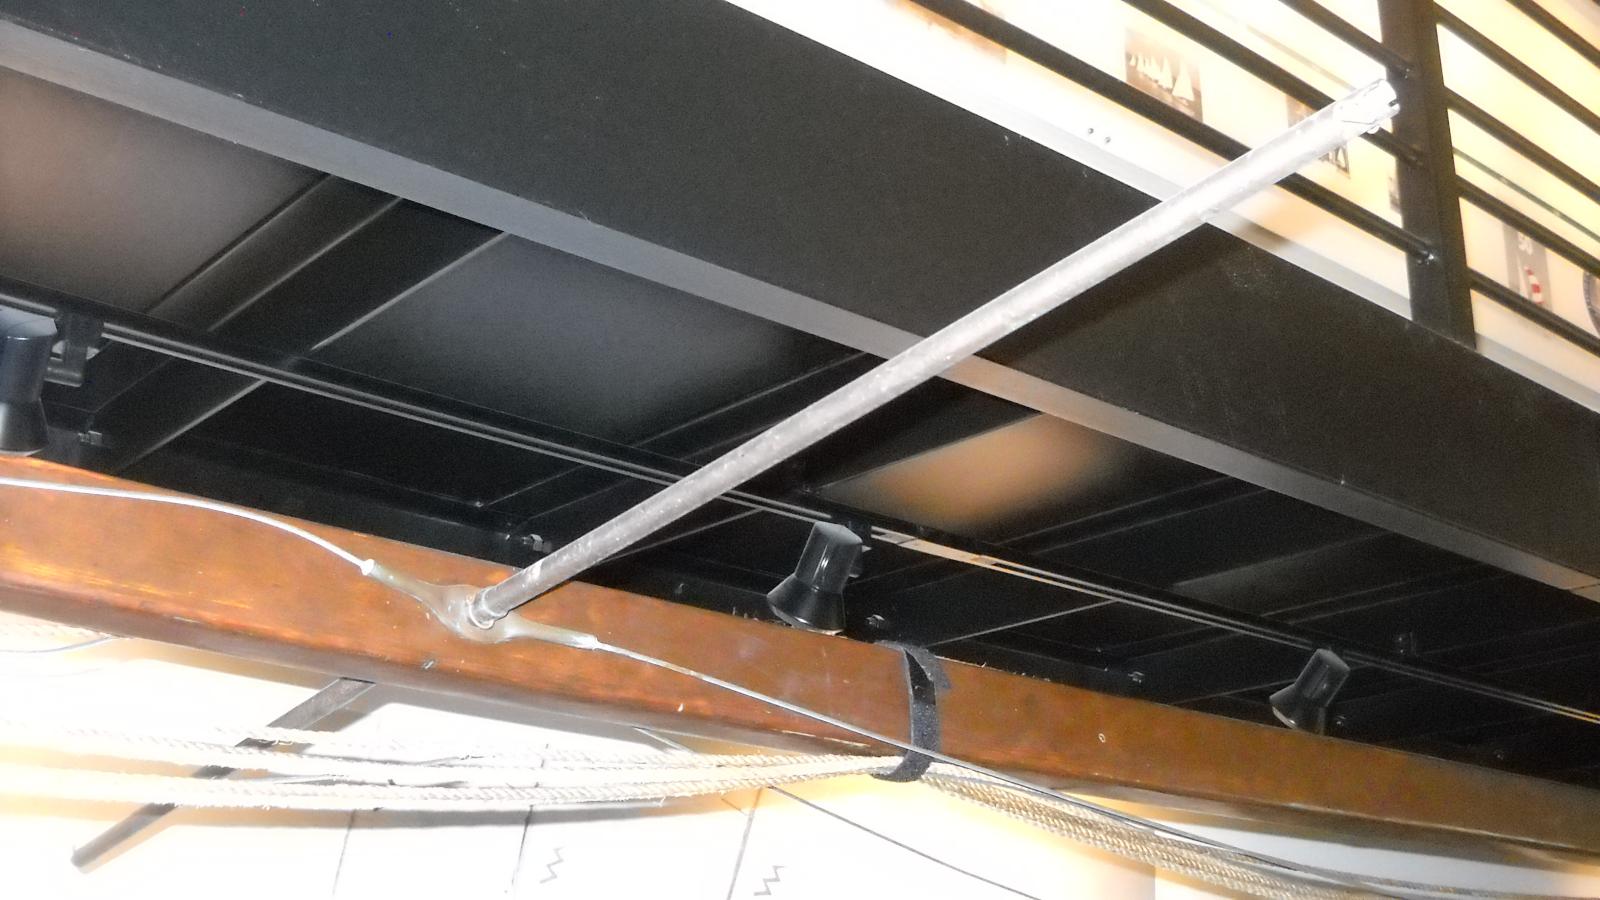
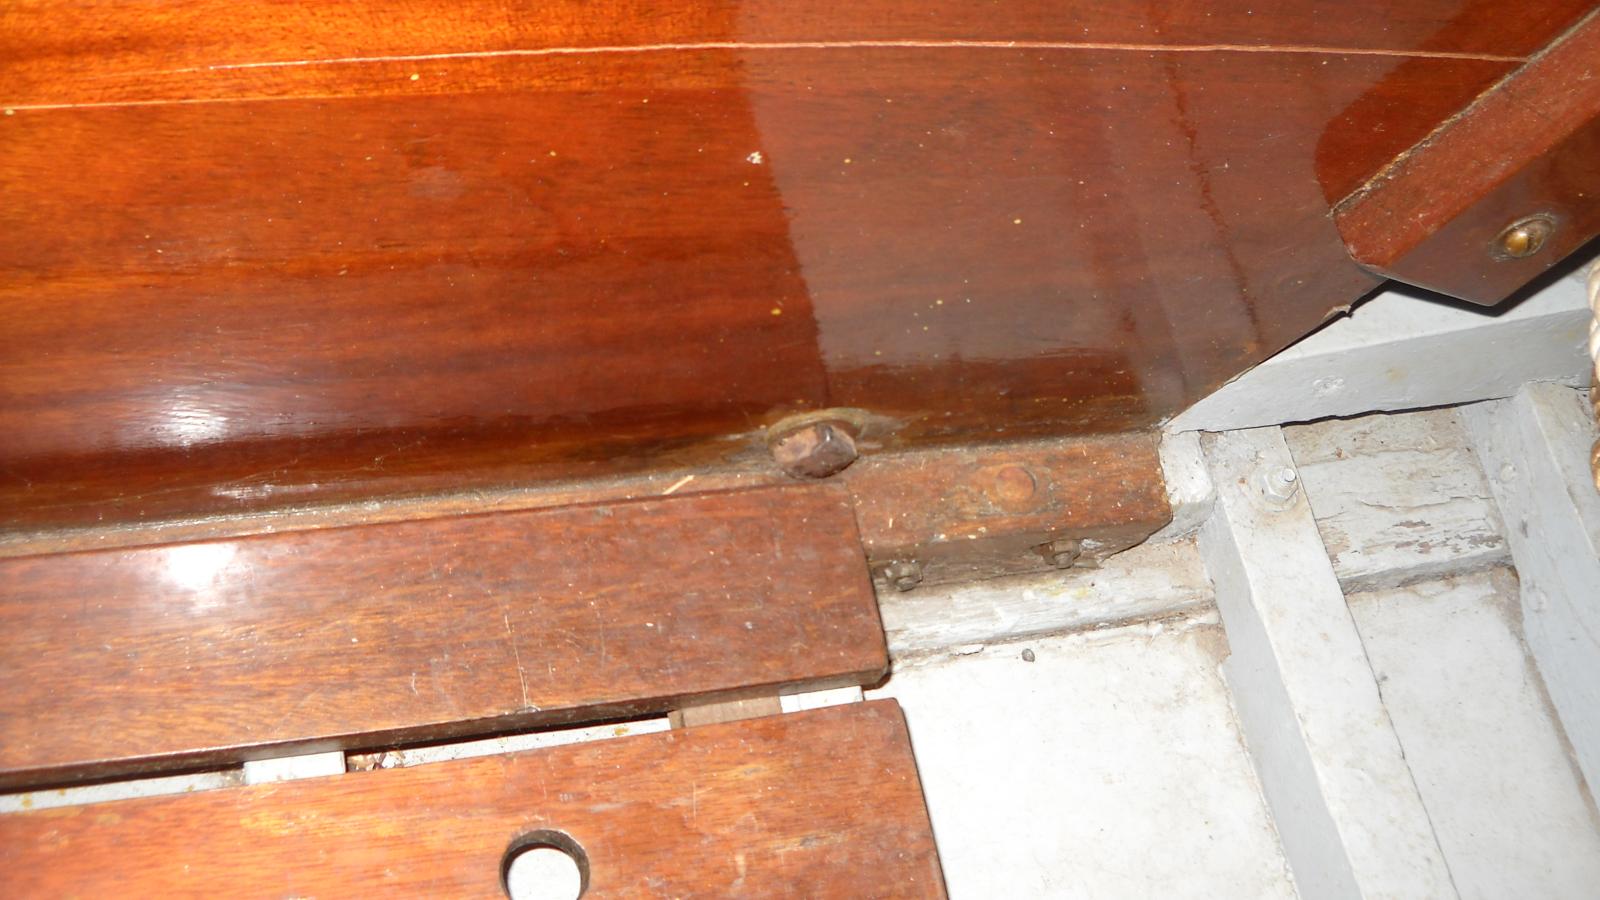
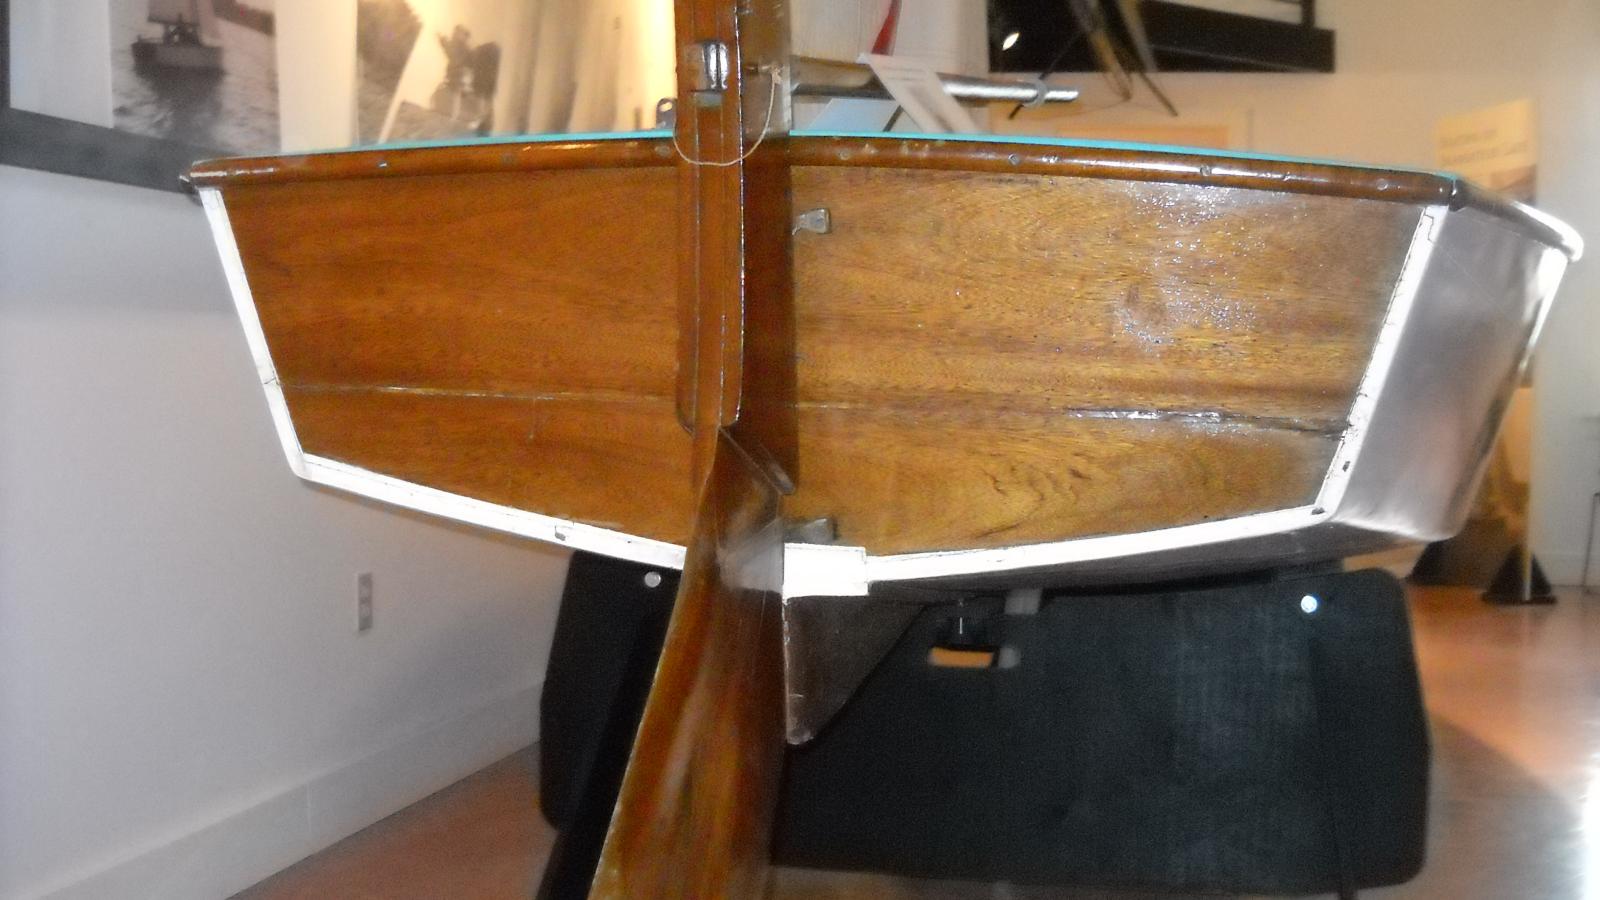
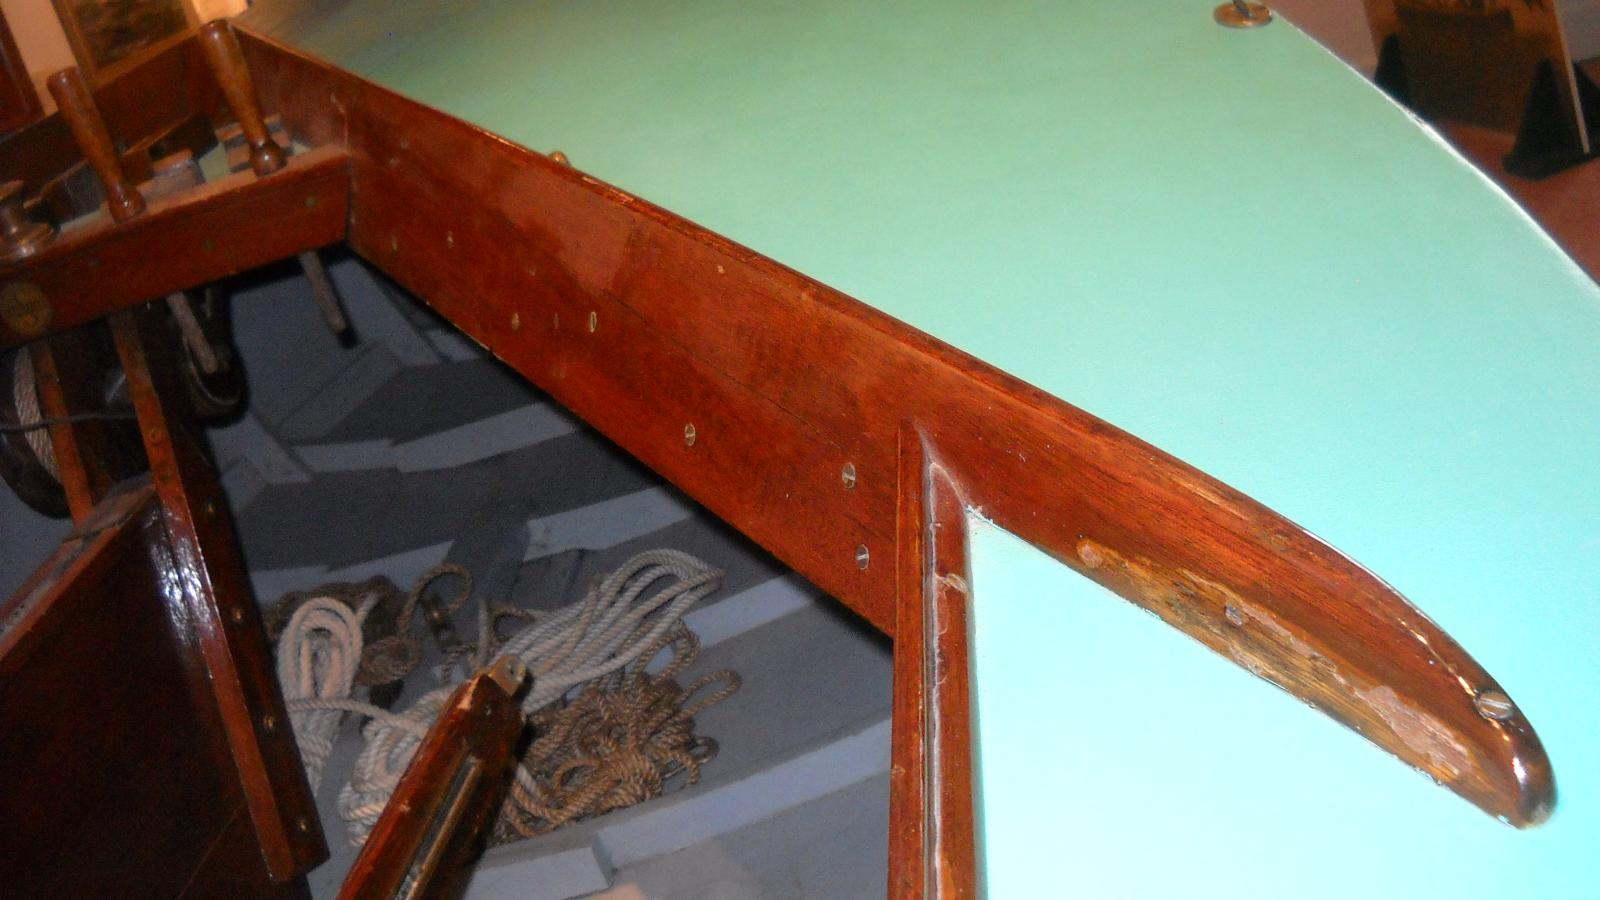
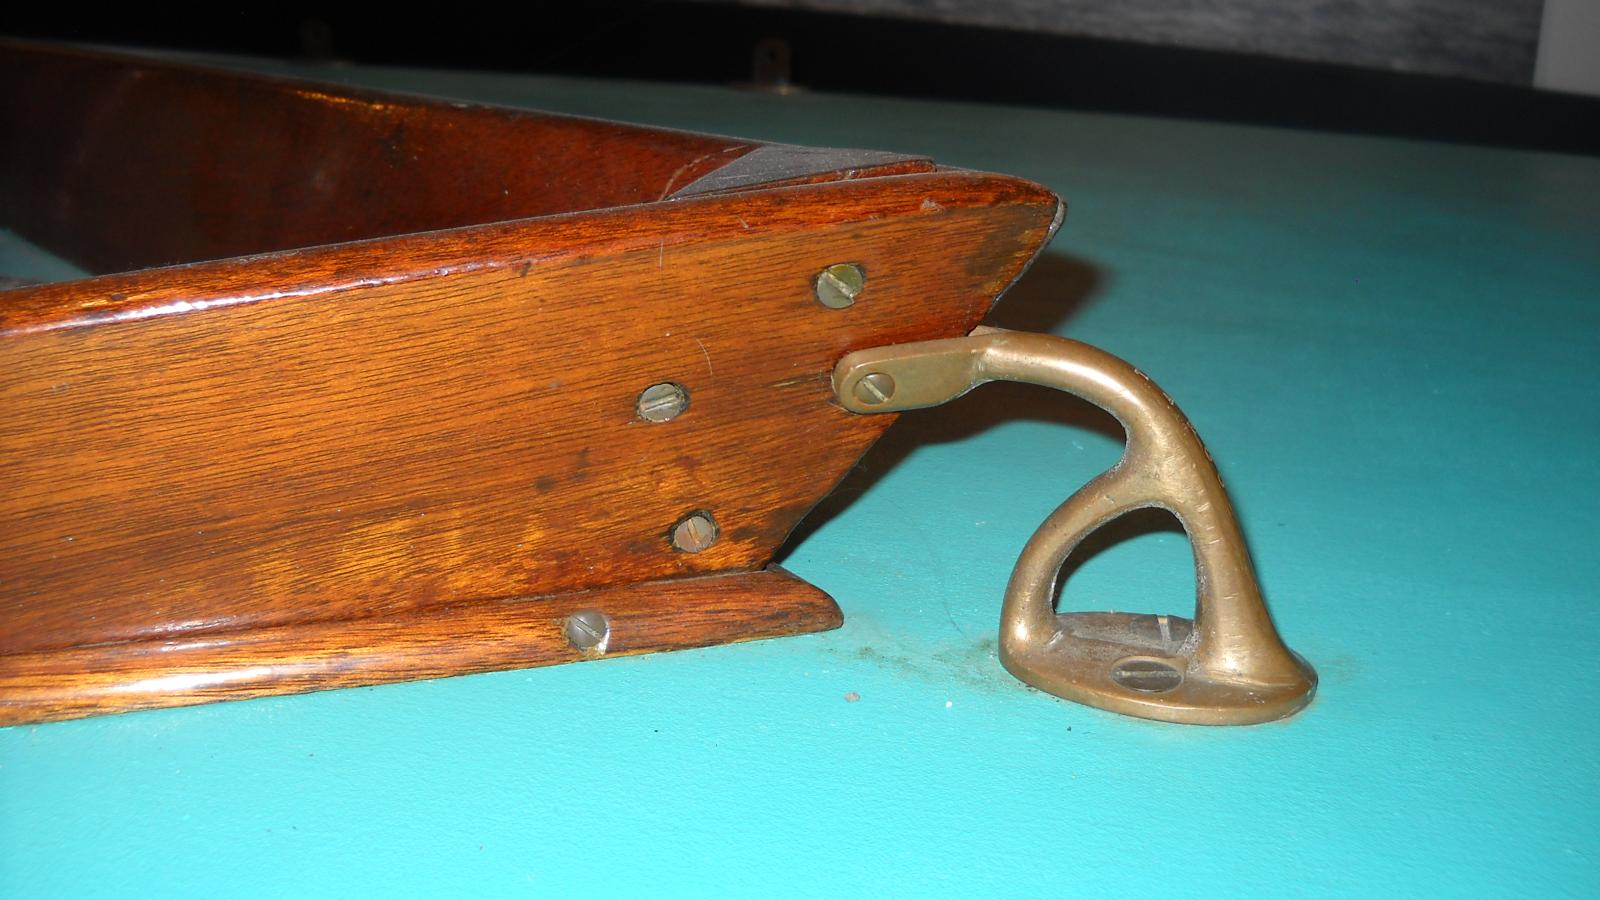
Last batch. These are only a portion of the pictures I took, but I think they are the best of the bunch and highlight all of the major areas.

-
A few more...


-
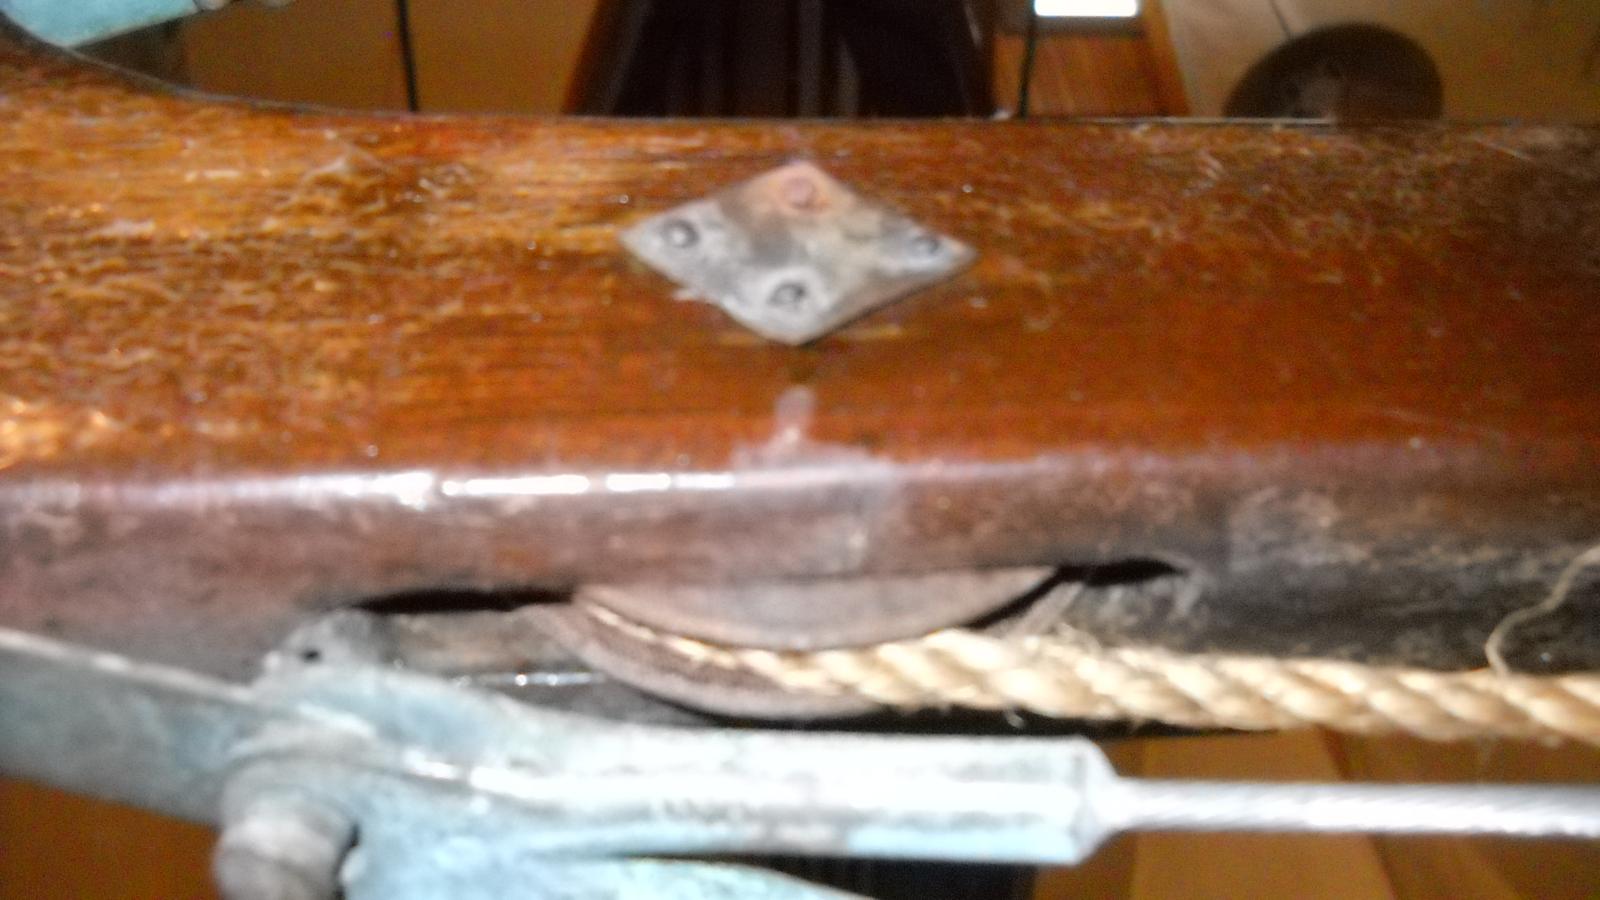
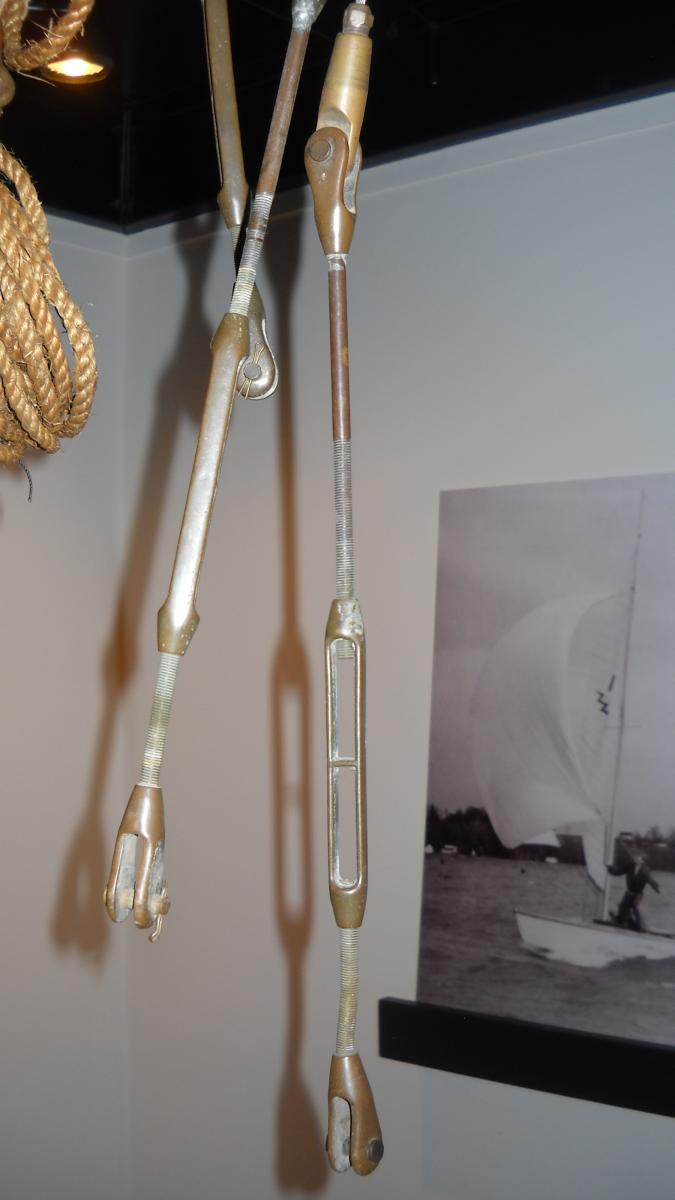
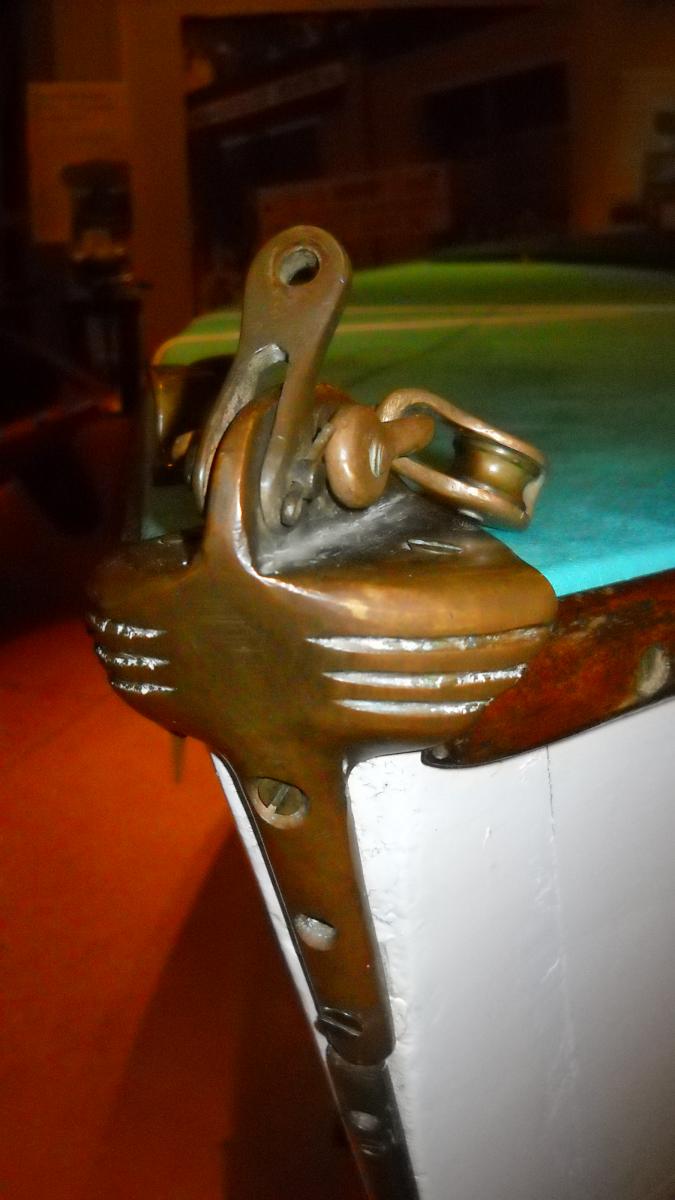
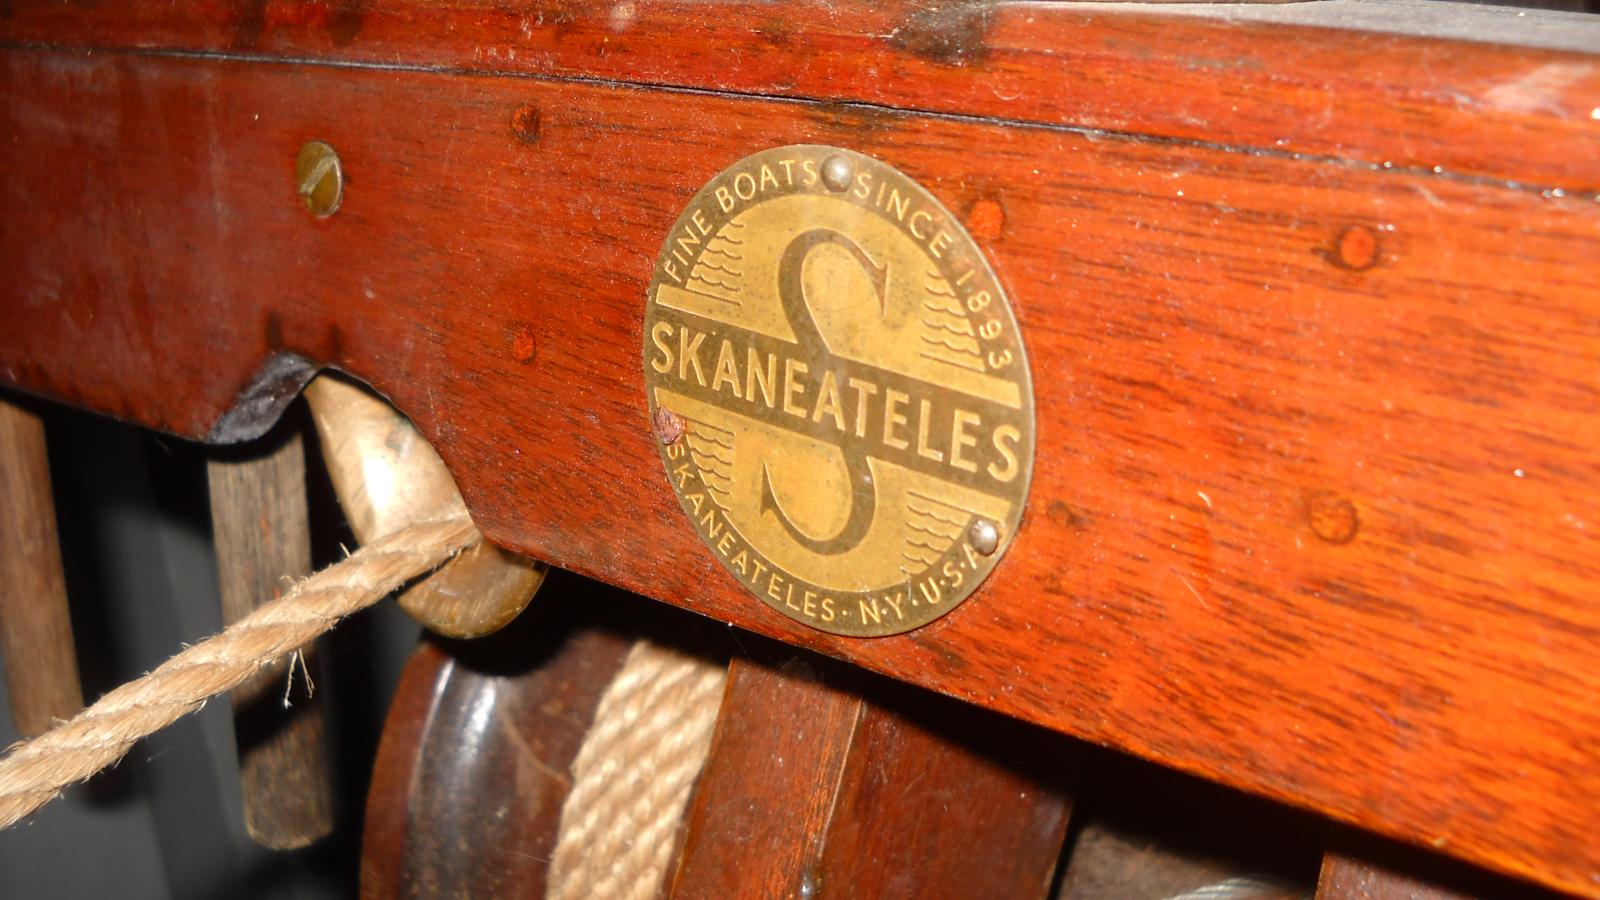
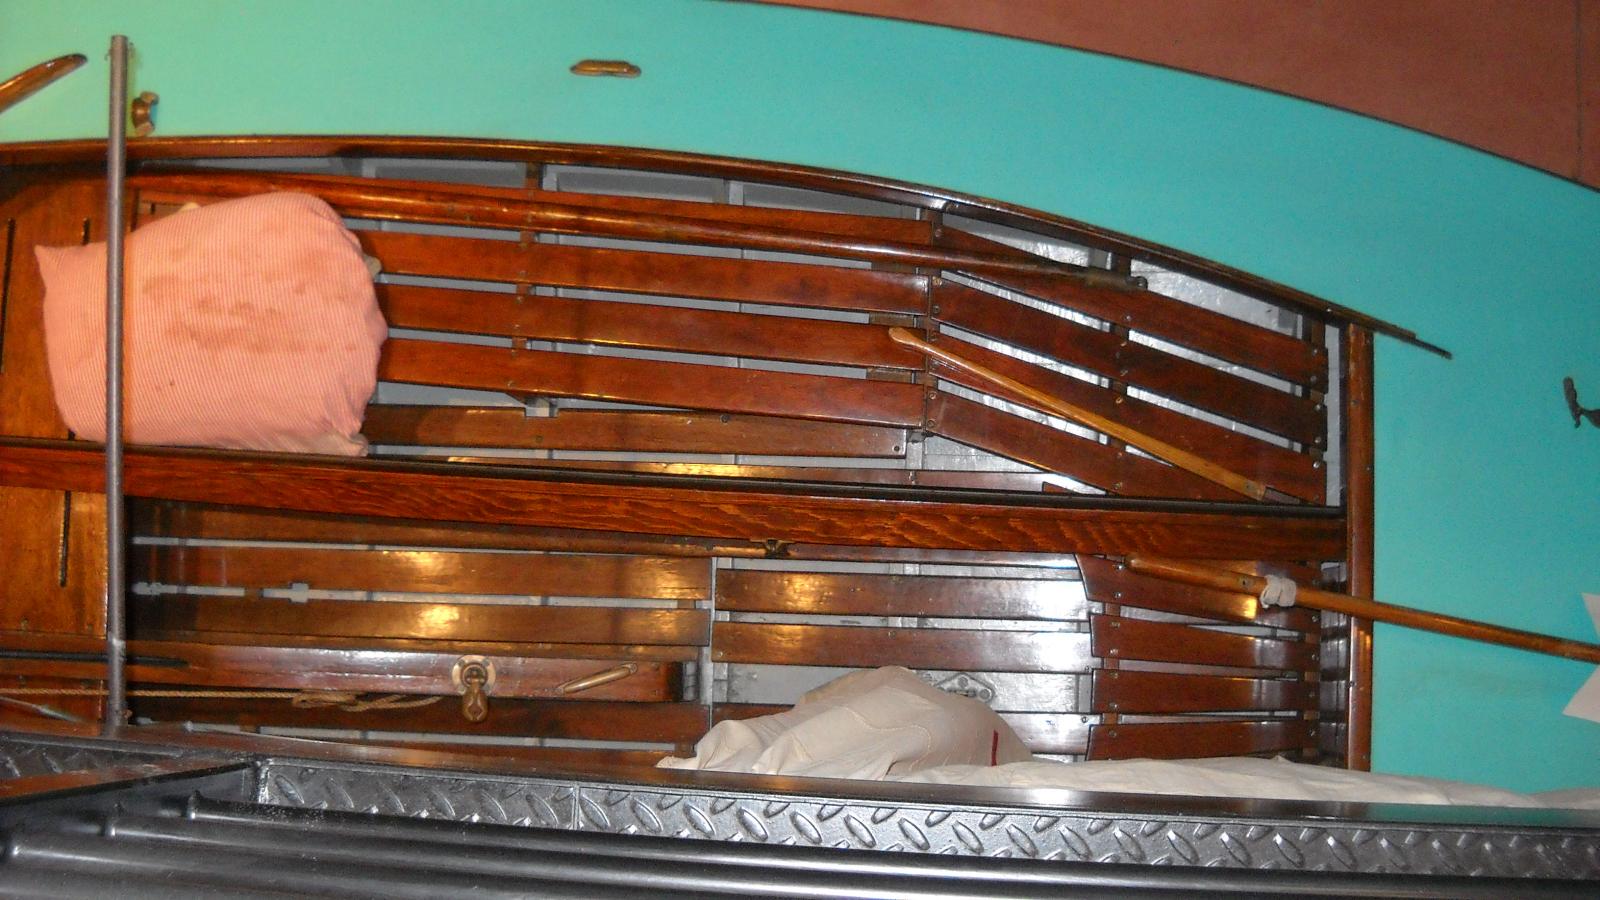
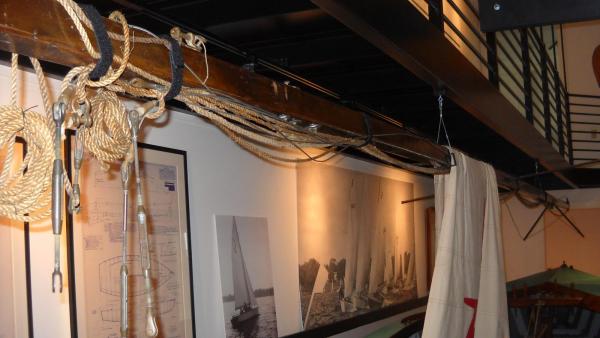
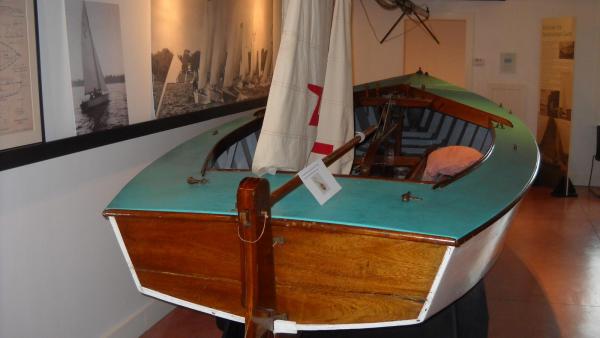
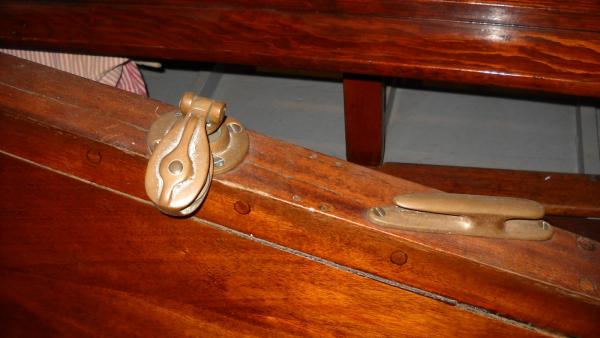
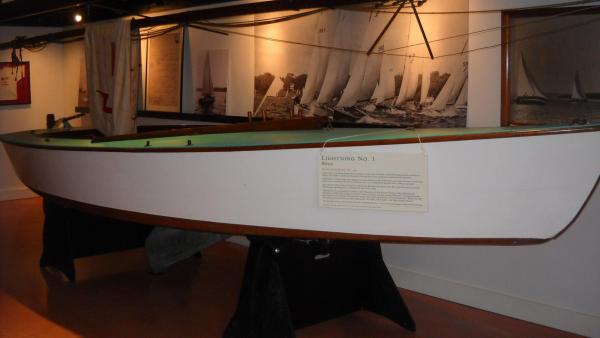
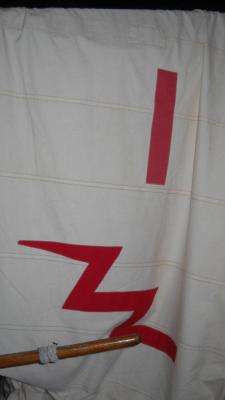
Thank you for your input, Dee_Dee, your memories are most valuable. Thanks for the link, also. I had skimmed through that article before, but only just now read the whole thing. Interesting stuff. That explains why an award plaque at the Club with a half hull model of #1 on it is shown in red and blue. Whoever made that one, however, apparently didn't know that #1's serial number goes above the lightning logo on the sail instead of below. Since several of you have asked for more pictures of #1, I'll post some more now. I don't know exactly what all the fittings are called yet, but I will do my best to replicate them when the time comes.


-
Good thing I have twice as many as I need...sorry sailboat392, even if you change your mind, I no longer have enough extra to give you complete set. In attempting to file the second one down more efficiently, I completely messed it up. The first try was the way to go.
-
One down, five to go.
-
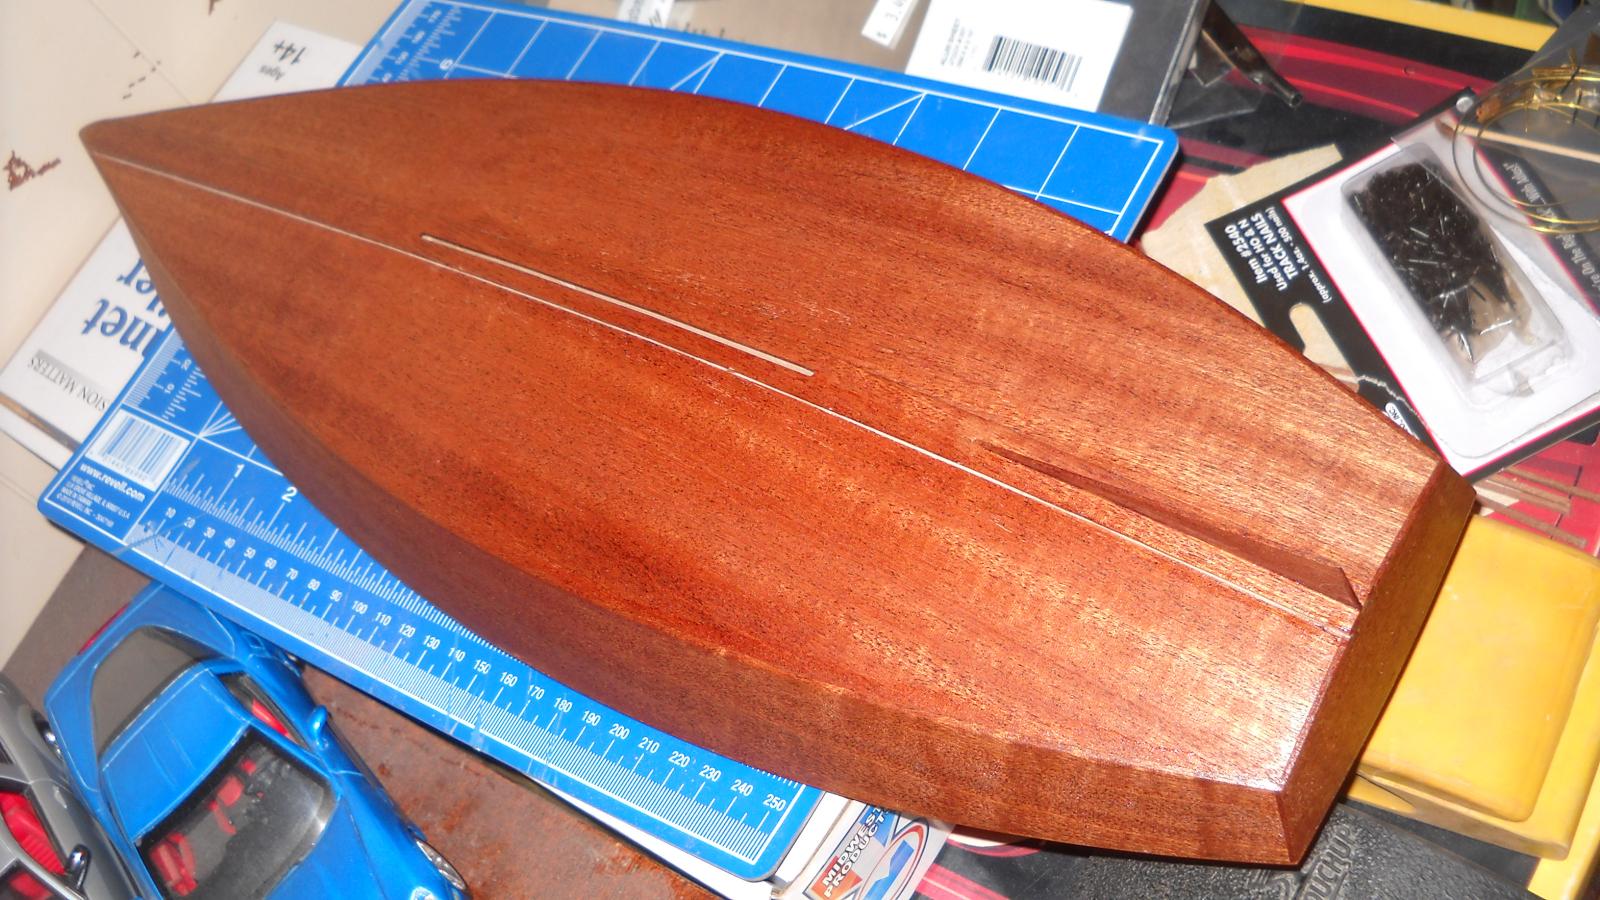
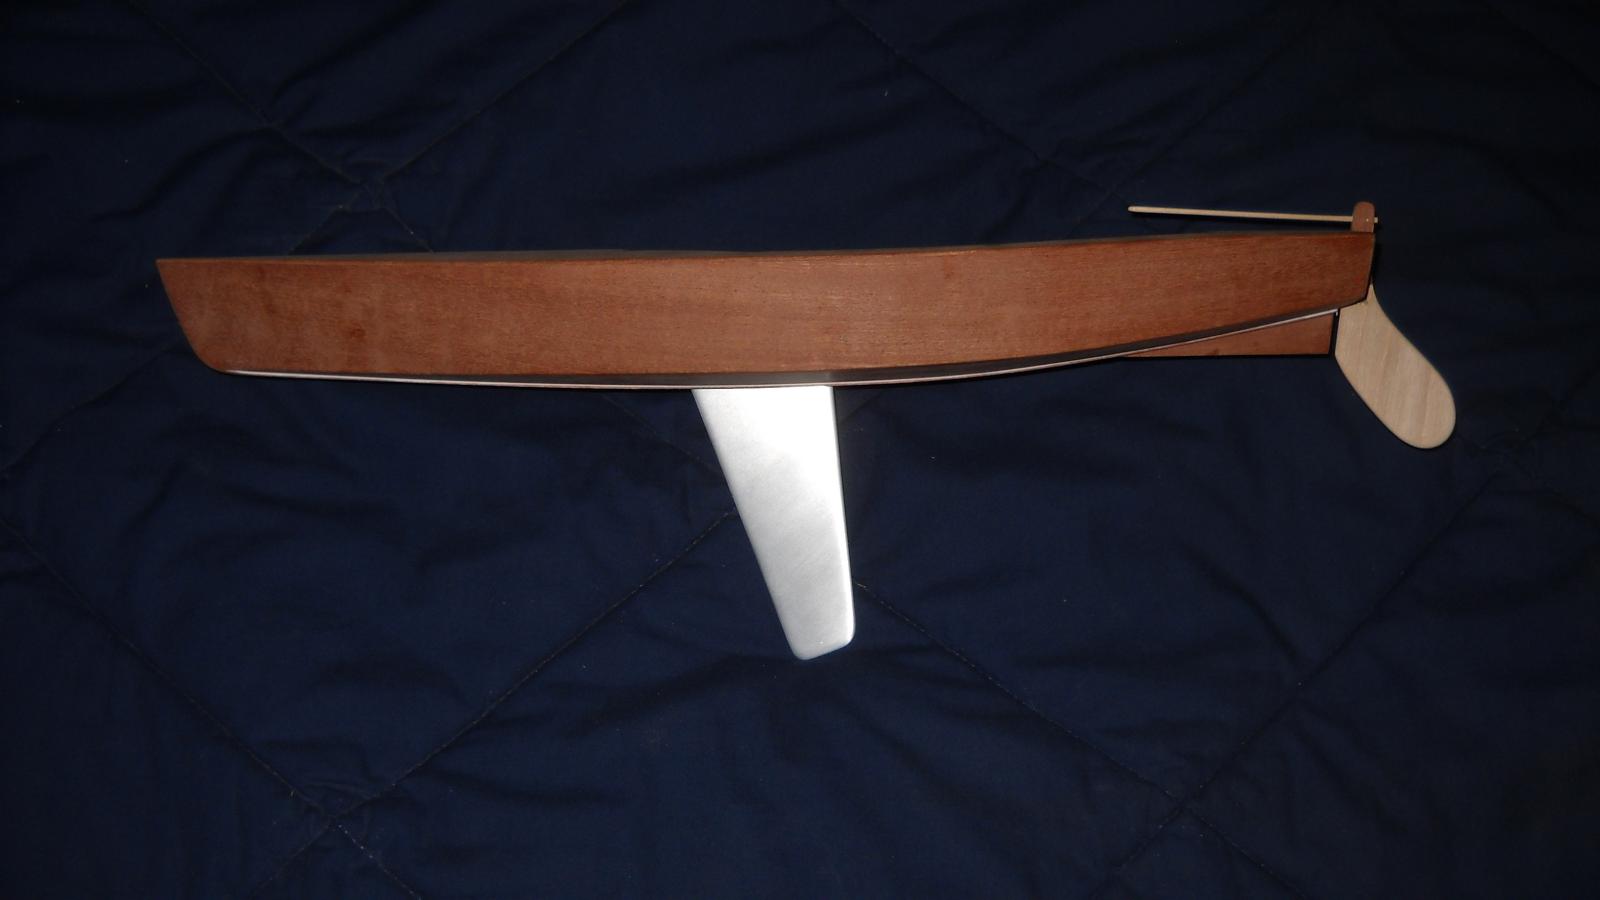
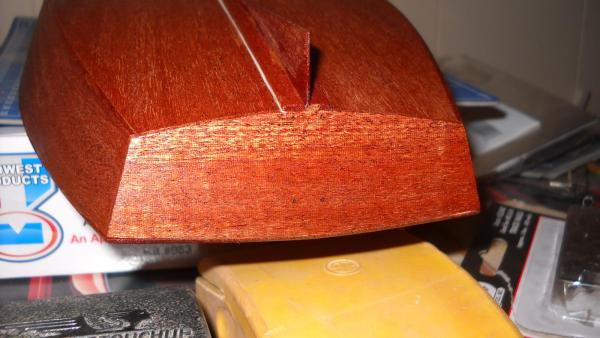
Really not much of an update, but I've done a little bit of work today. I've been working on the cockpit coaming, which is almost done. Also got the first coat of sanding sealer on the hull a few minutes ago. It really brings out the grain!

-
Brilliant! Thanks for the tip!
-
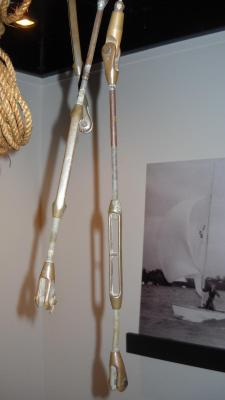
I completely agree with you about leaving the sails off. I like your idea of using the thicker line to represent the sail outline. I think I just might have to borrow that. When I build my #1 replica, I will attempt to replicate the sail, but will probably drape it over the boom, similar to how it is displayed at the Historical Society, although there it's draped over the mast, which is hanging above the boat.
-
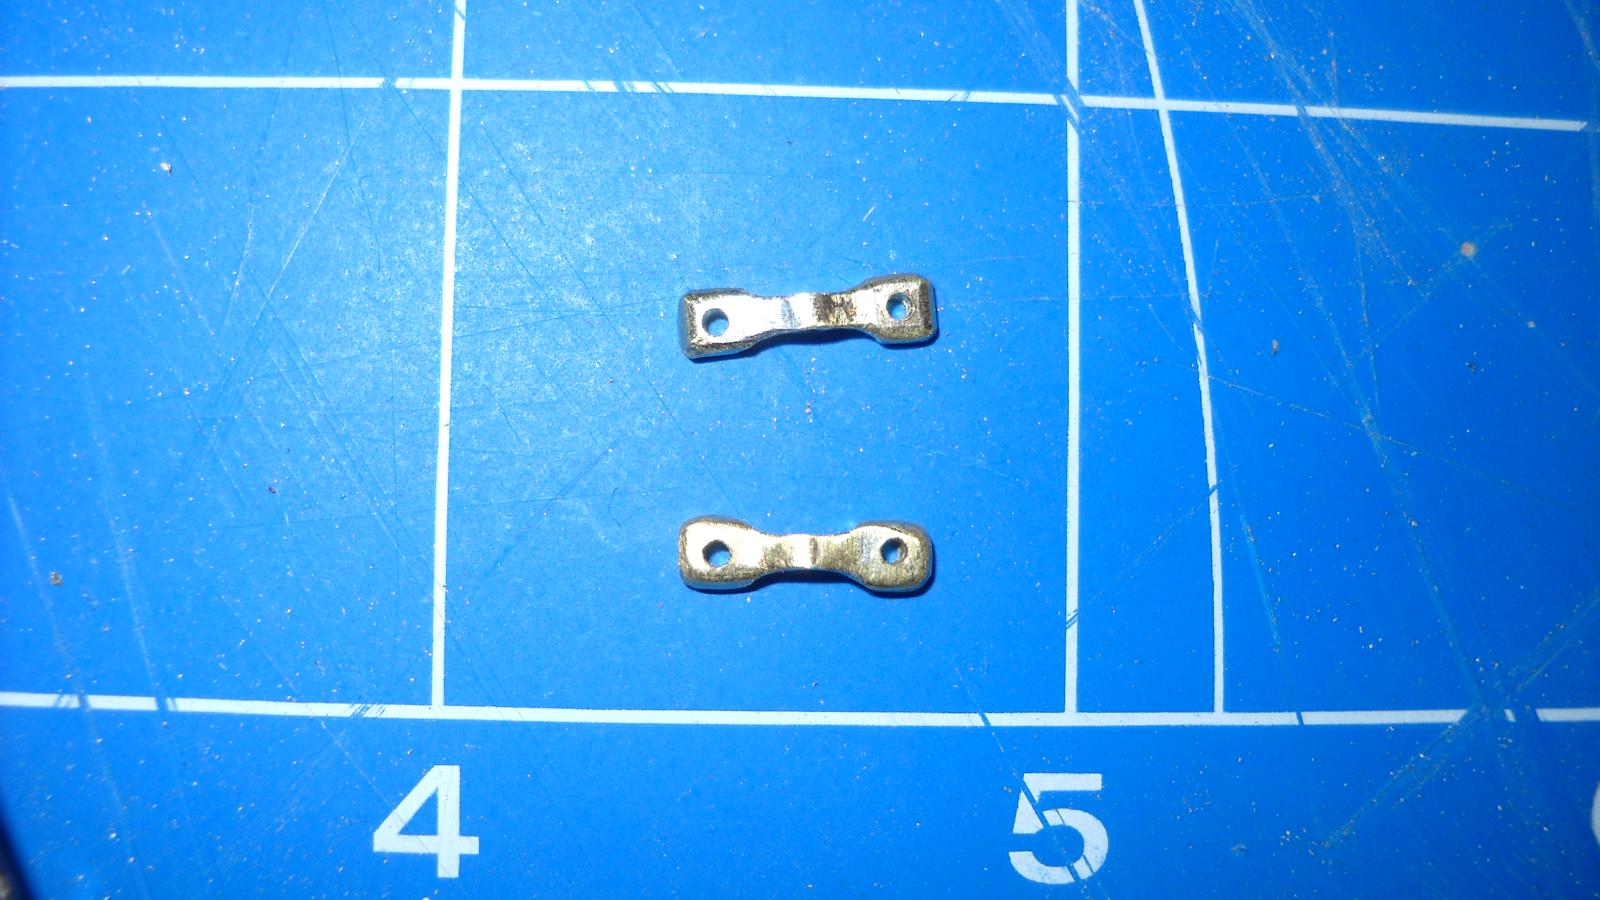
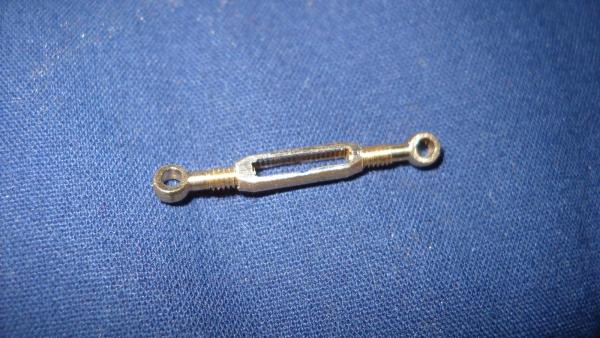
Thank you for all the awesome tips. I know those turnbuckles don't match, but they're the only type that I have found anywhere that fit this scale. This guy (http://www.modelyachtfittings.com/Pages/TURNBUCKLES.aspx) makes open housing turnbuckles, but the smallest one he makes is 1 inch long, which would only be correct on a 1:4ish scale boat. It seems if you want accurate turnbuckles, you'll have to scratch build them and forego functionality. The ones I have, however inaccurate, are fully functional, which is a trade-off I am willing to accept.
-
Thank you so much for your post, sailboat392! Those pictures are just about the best encouragement to finish my model that I could ask for. I hope mine will turn out as beautiful as yours. Did you replace the kit balsa for the frames and CB trunk with mahogany, or just stain it? You also said you canvased the deck. What did you use? I was planning on using either cotton sail material or a white cotton t-shirt. These are the turnbuckles I used: http://www.harbormodels.com/site08/turnbuckles2.htm They don't exactly look accurate, but they're the closest in scale length I could find (use the ones with a 10mm body). I actually have twice as many as I need here because at the time I ordered them, I had planned on scratch building my next one in 1:12, but am now planning on doing it in 1:8. If you're interested, send me a PM with your address and I would be more than happy to send you 6 of them for a discount from what I paid for them.
-
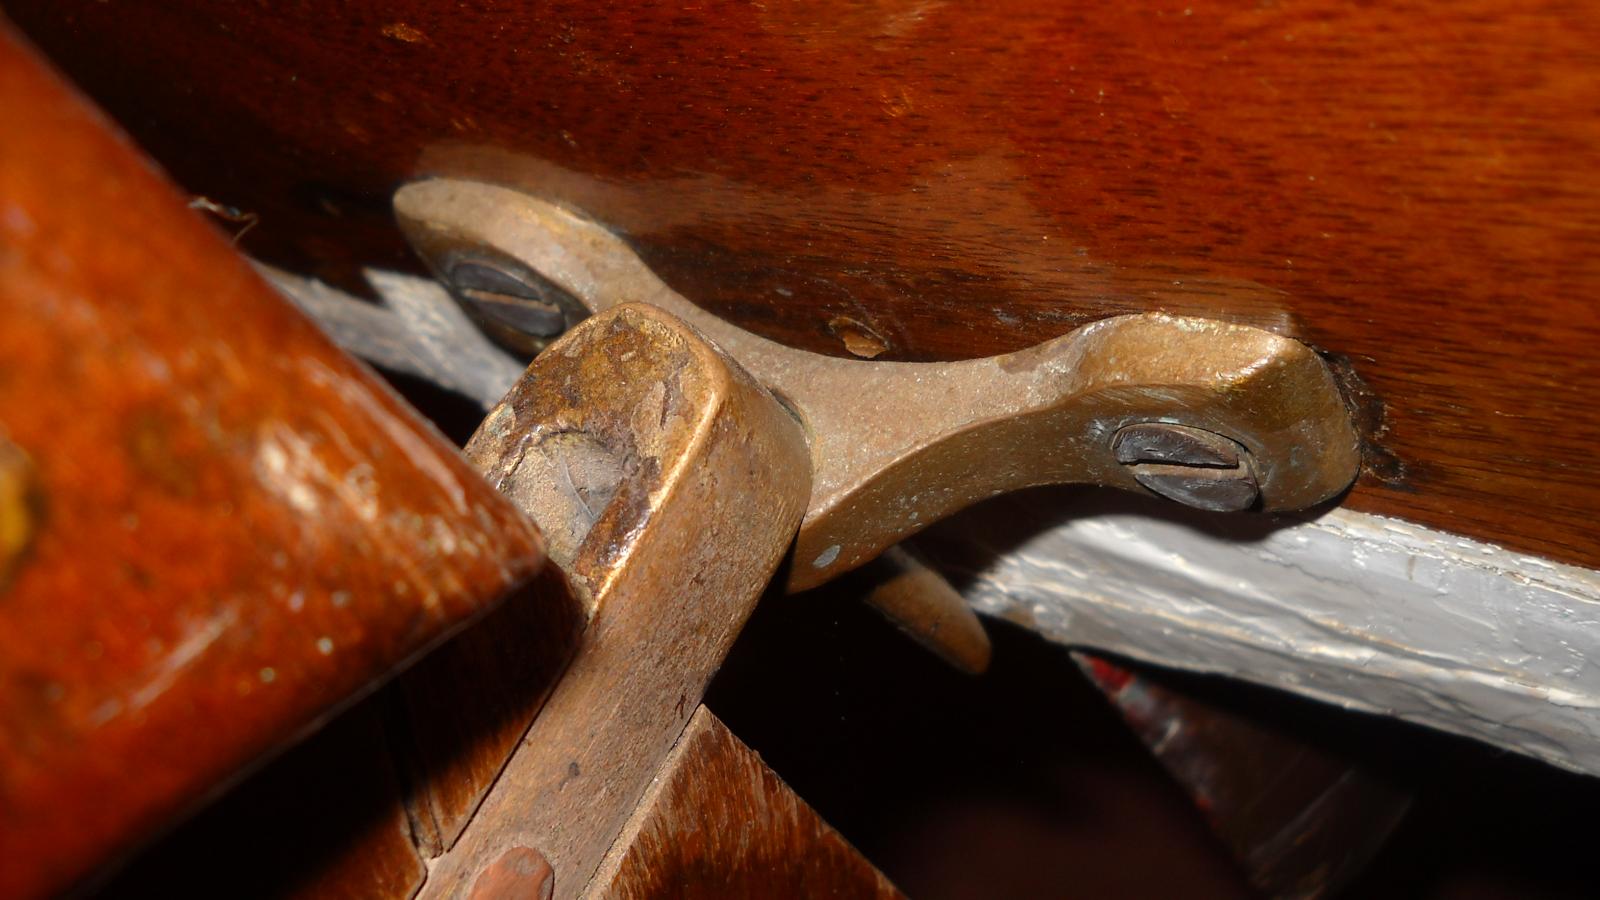
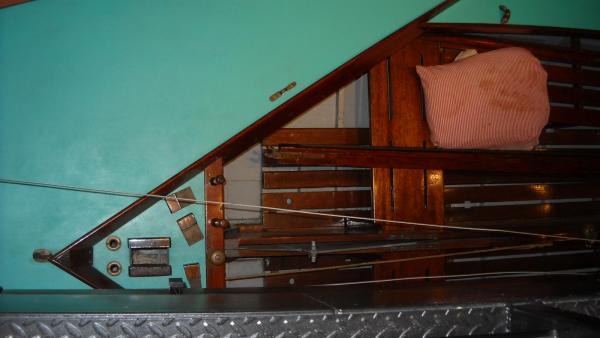
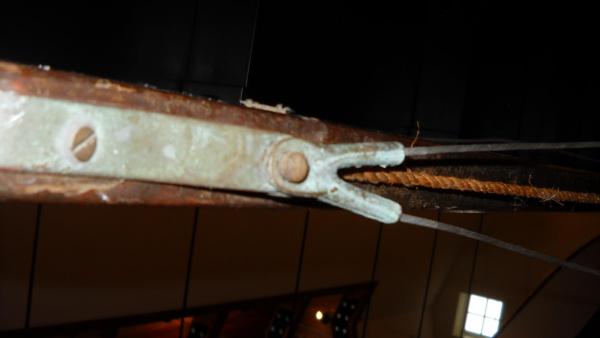
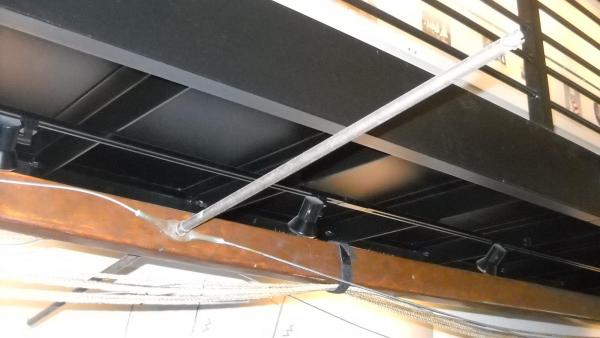
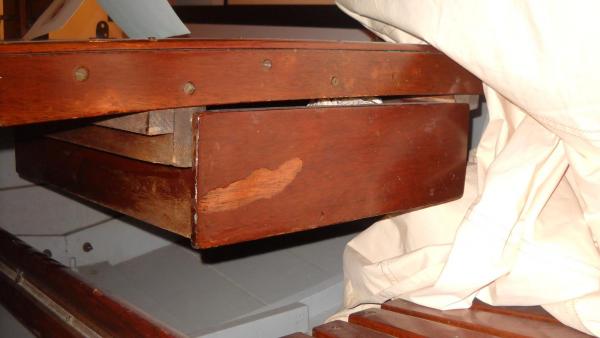
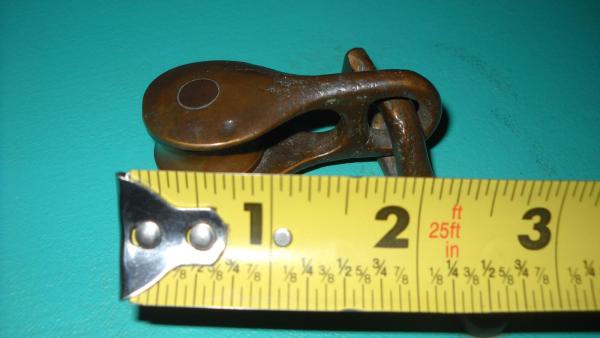
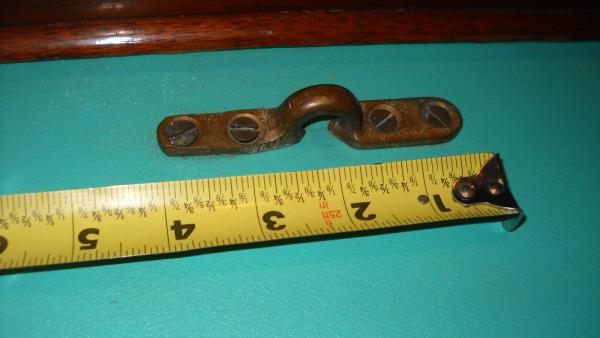
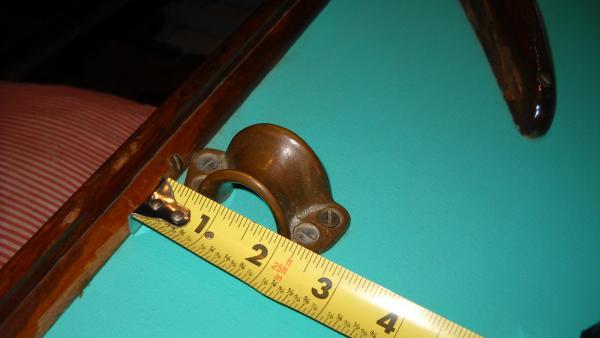
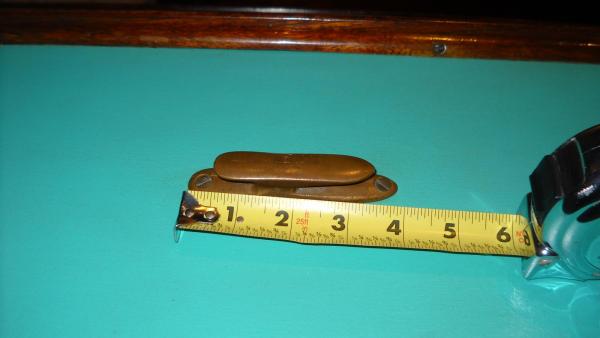
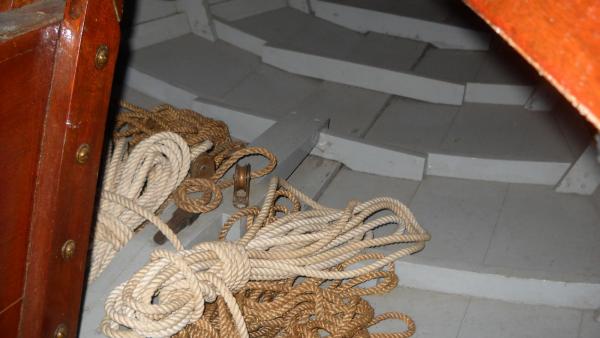
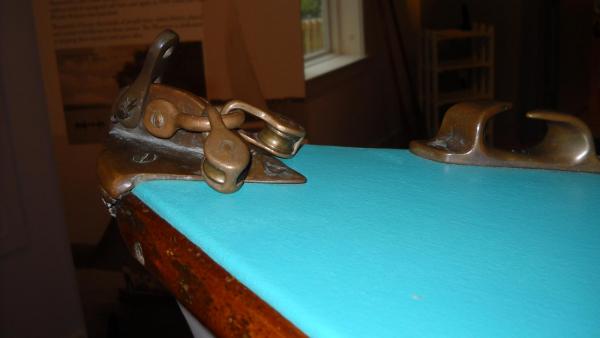
Is there any part of the boat in particular anybody wants to see? I have so many pictures and they're all so random because I didn't take them in any sort of order and I'm not really sure how many I should put up. You can't have my table of offsets, though; that's privileged information. Speaking of offsets, I was able to copy down the table from the blueprints displayed at the museum, and I also purchased the booklet "How to Build a Lightning" from the ILCA, as it was only $10. It is very well detailed and I'm beginning to think that between these resources, I might not need the full plans after all. There are just a few things the book doesn't cover very well, so I'll keep fishing around for used plans just in case.
-
You have read my mind, Michael! I have indeed been planning on doing my scratch build in 1:8. I would really love to do it in 1:6, but I think that would be a little too expensive, and I don't think there would be enough space for it in the spot I have in mind.
-
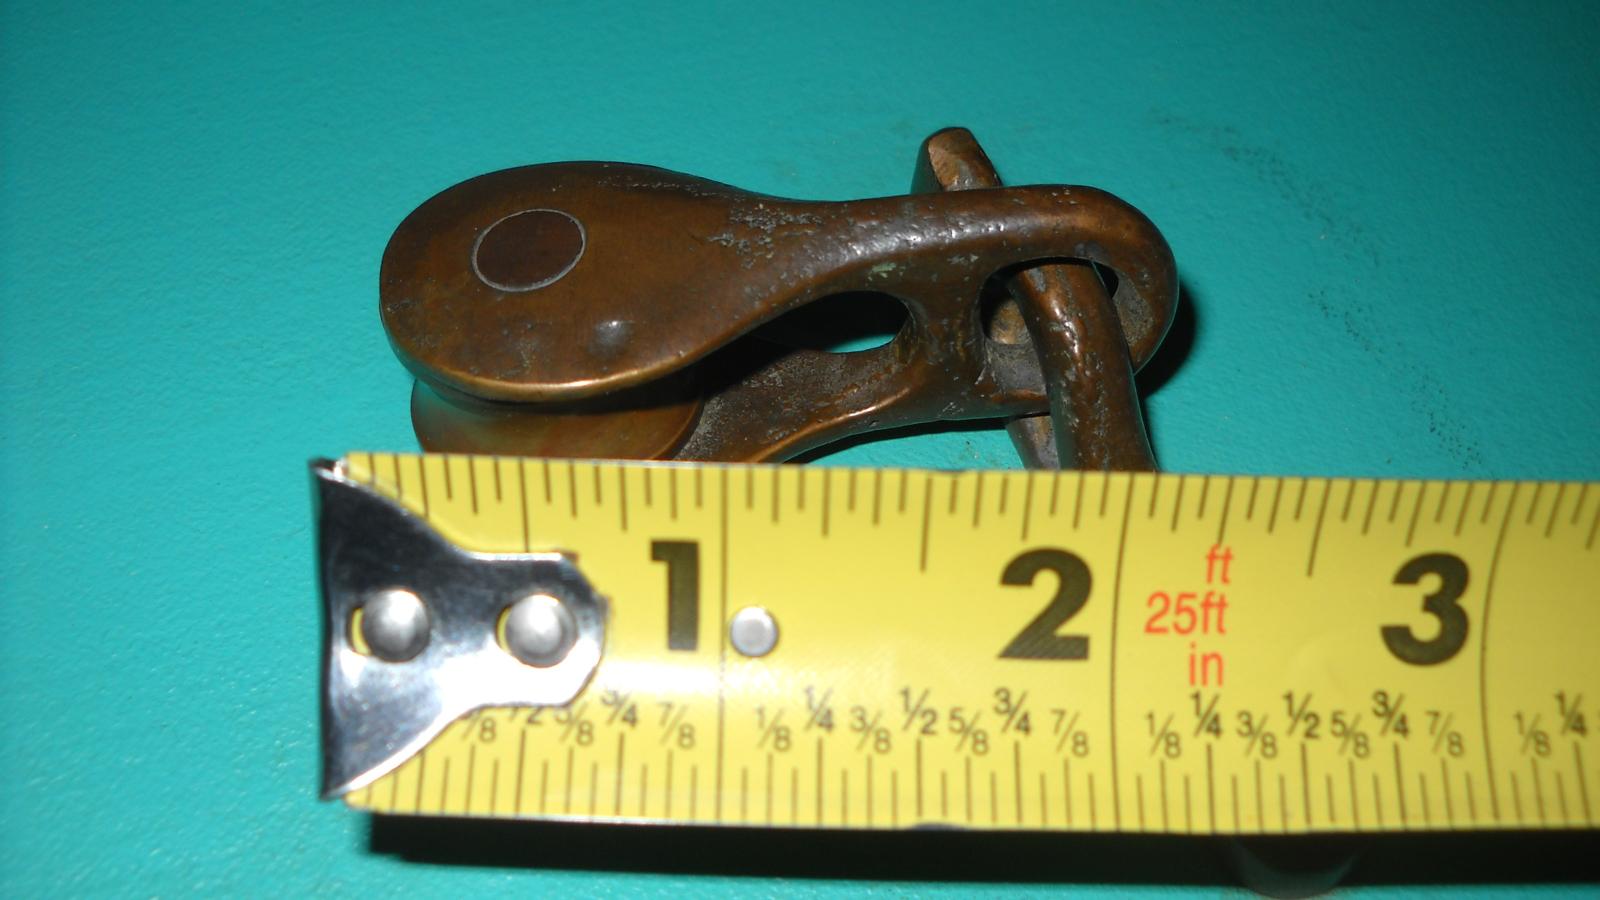
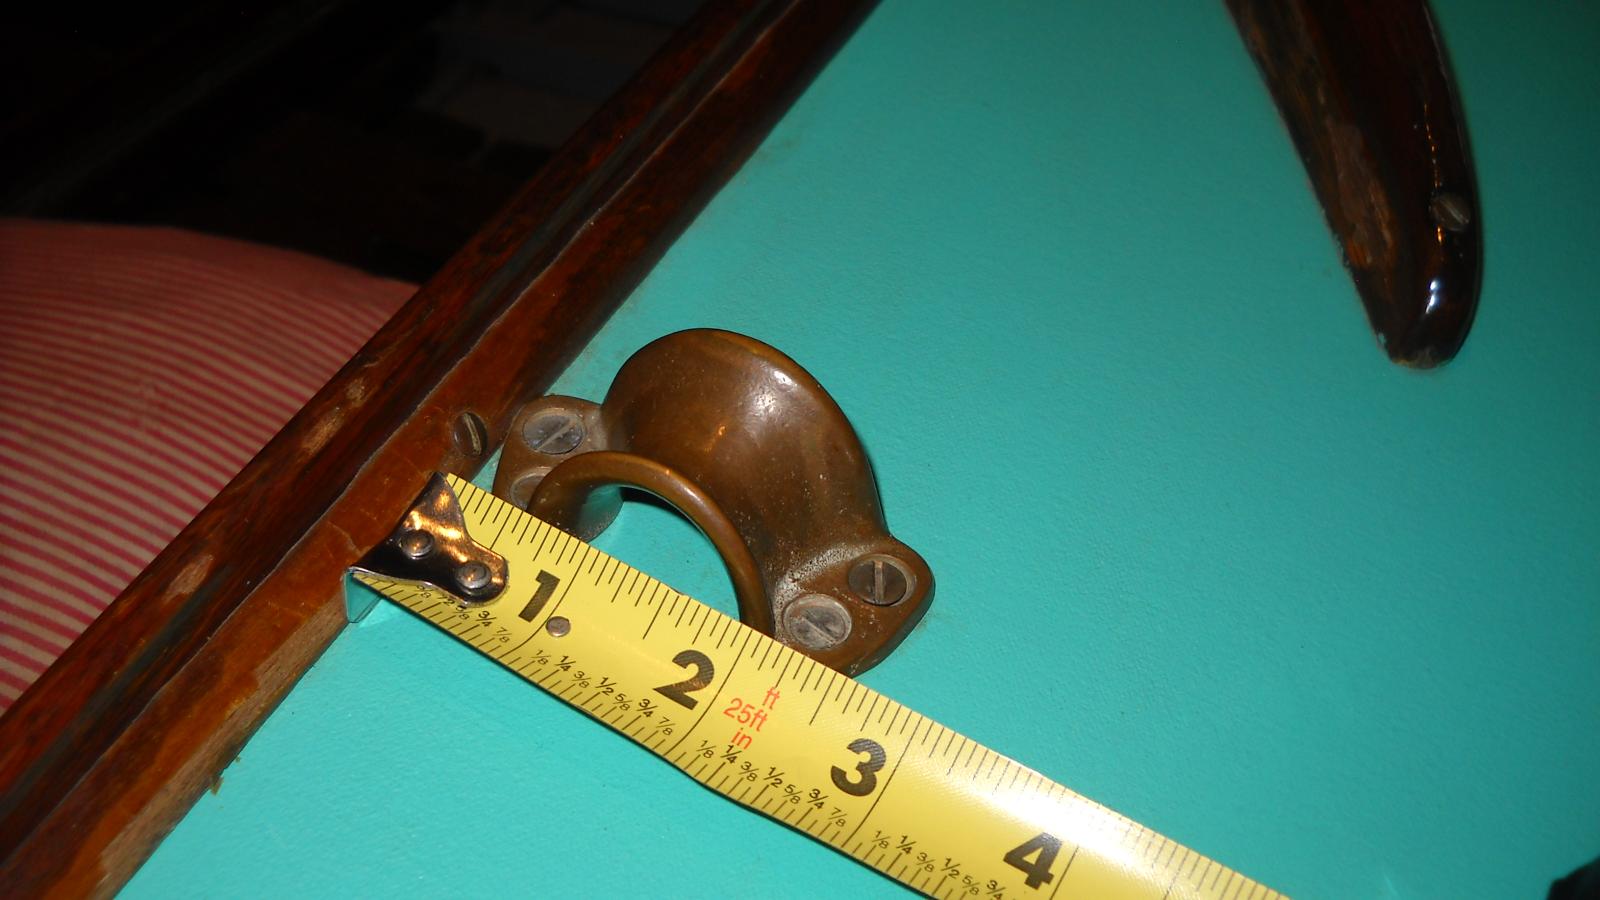
I suppose I could, but the rest of the pictures are just extreme close-ups of deck and mast fittings with a tape measure held up next to them. Really nothing terribly exciting.
-
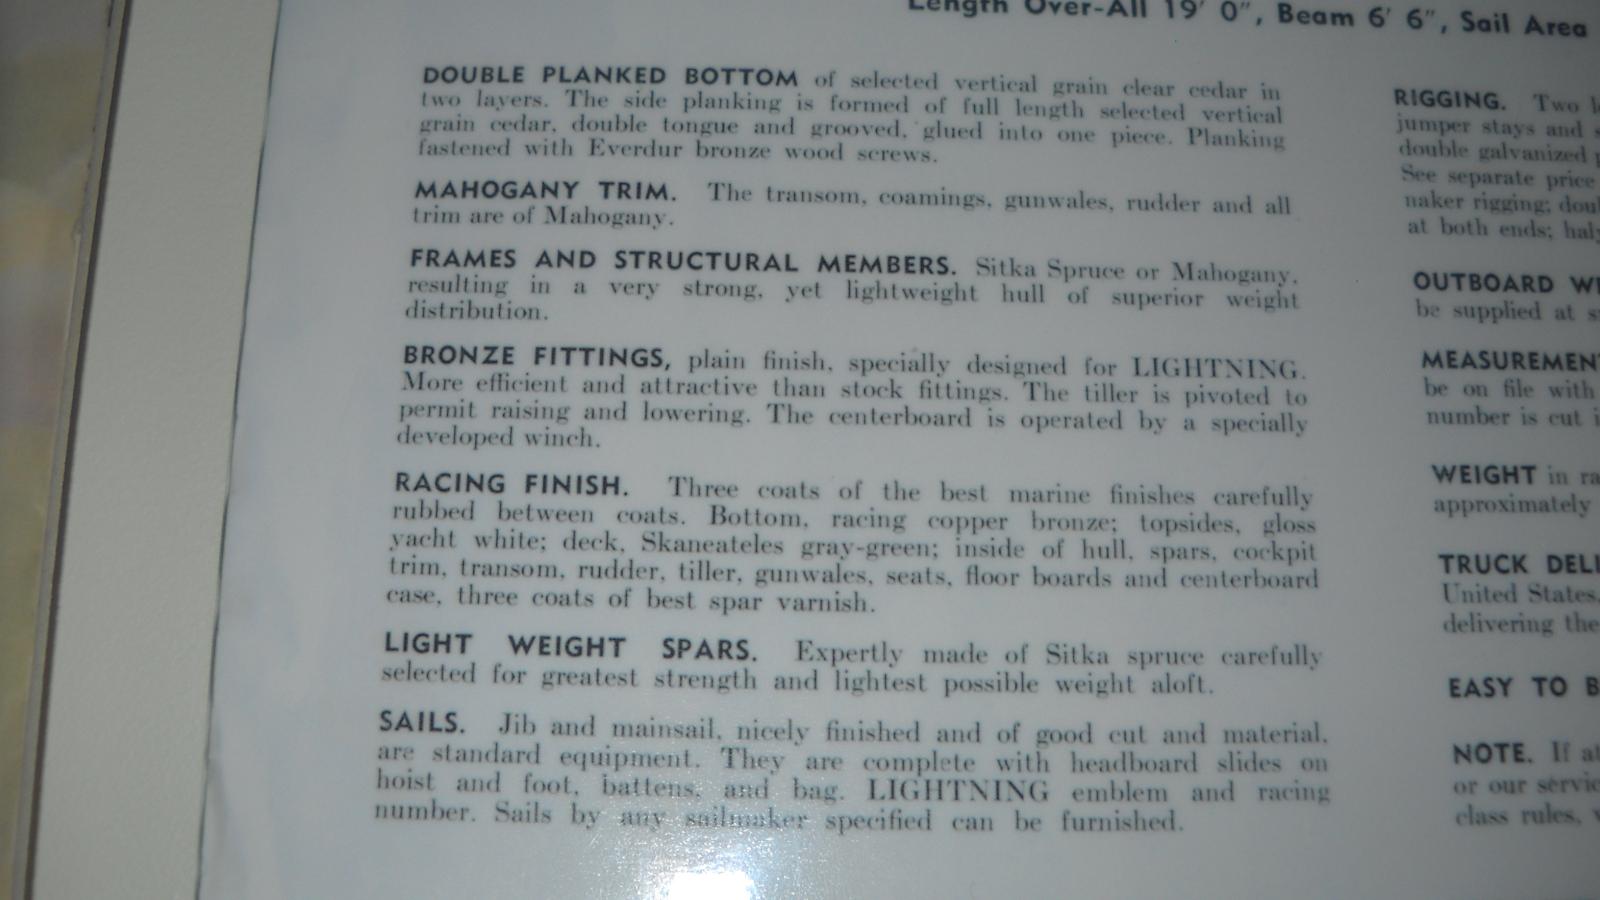
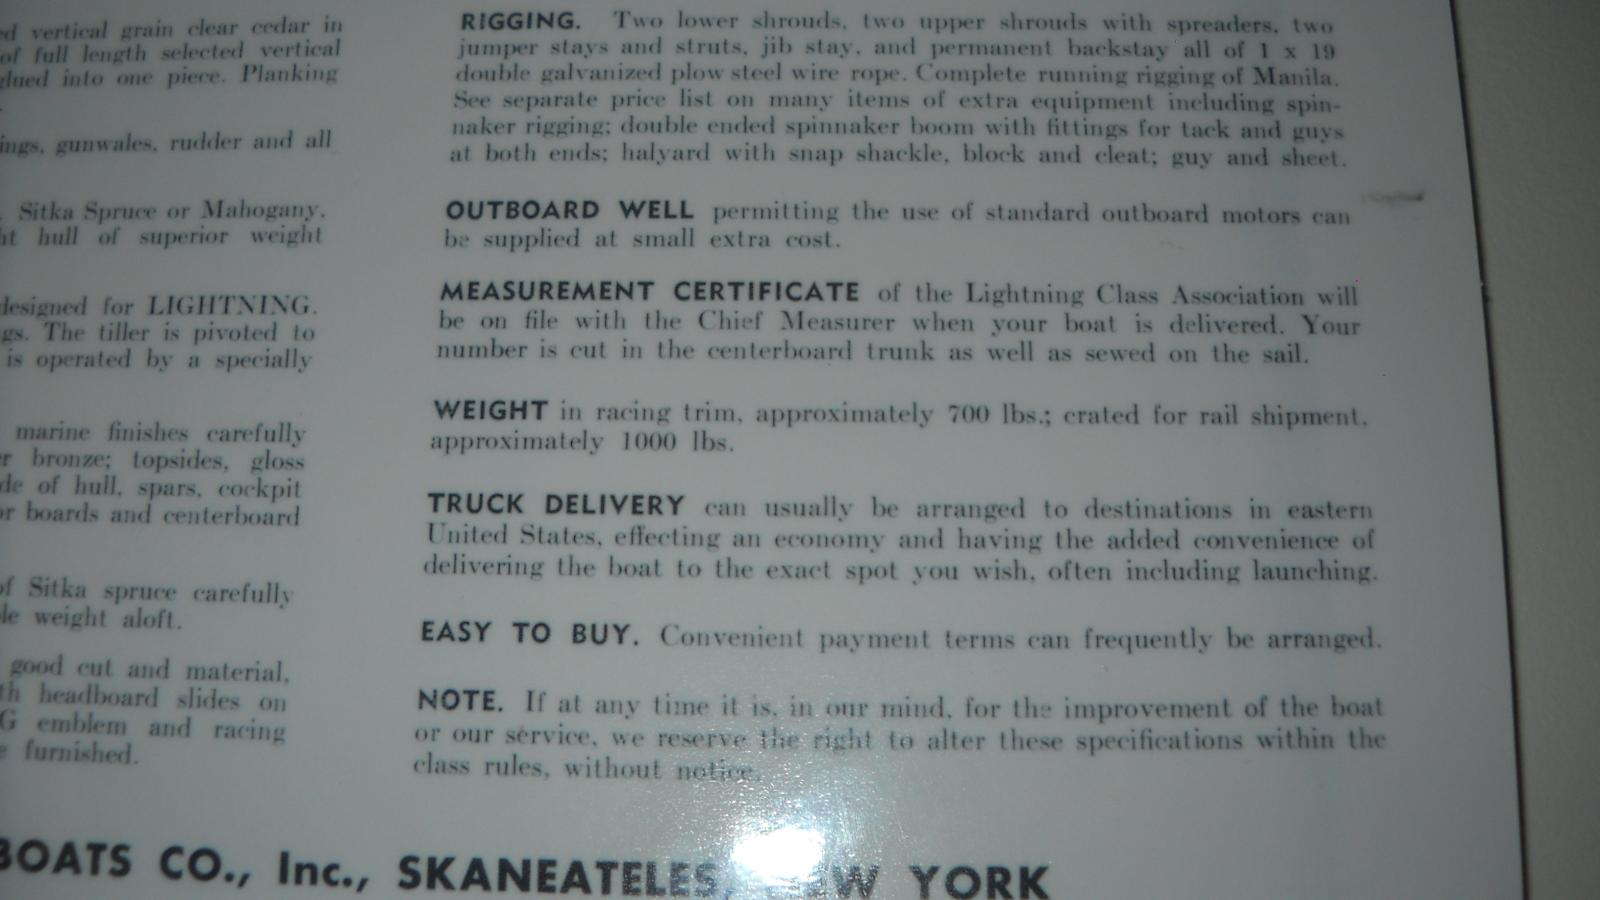
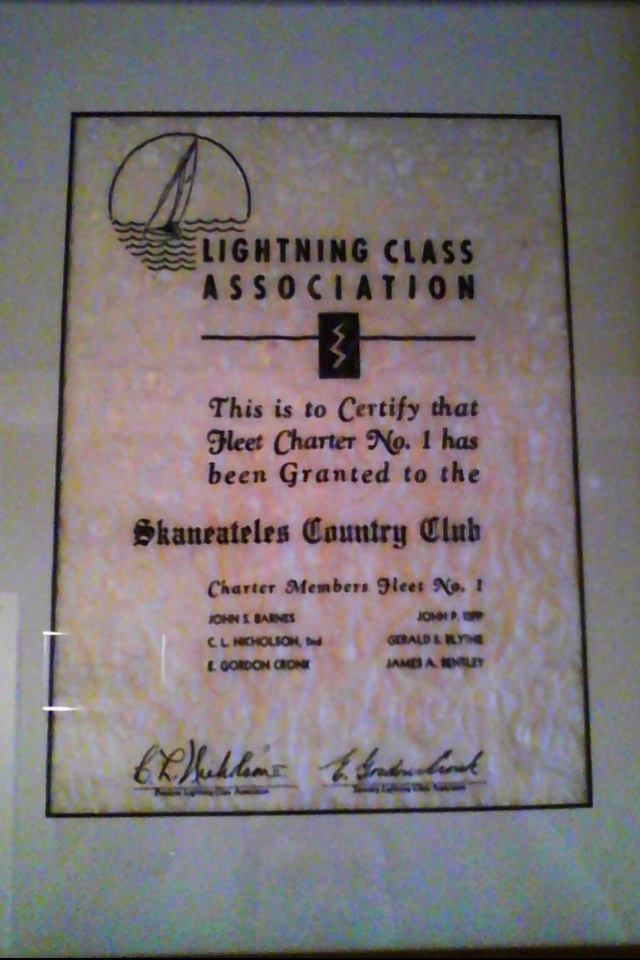
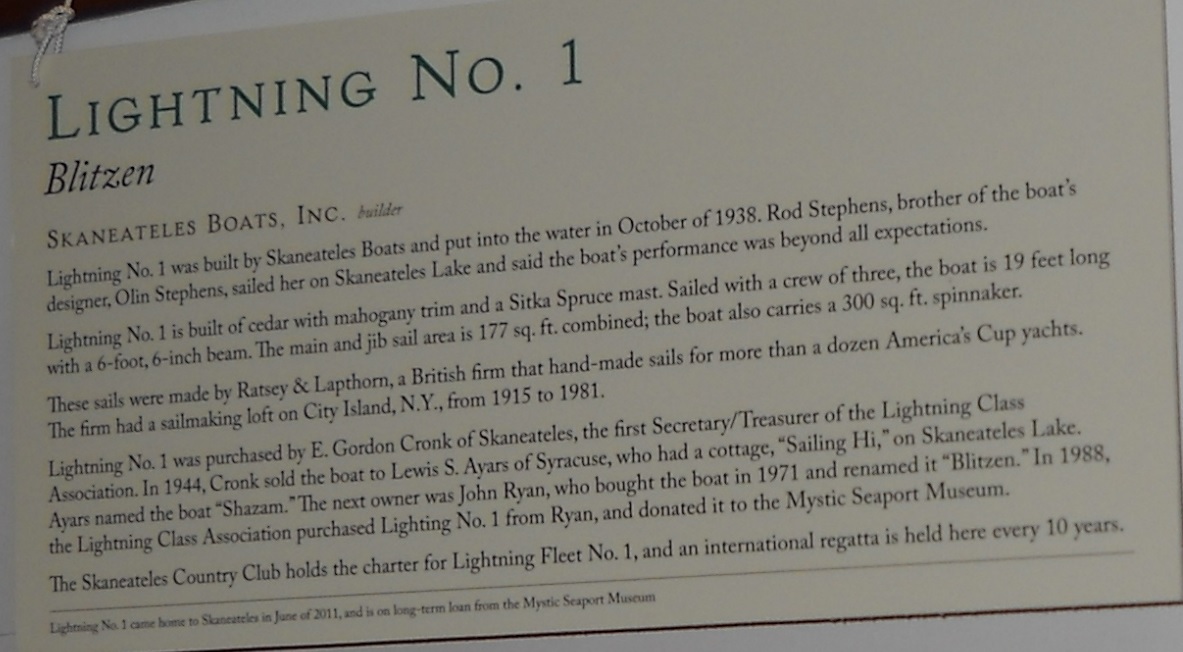
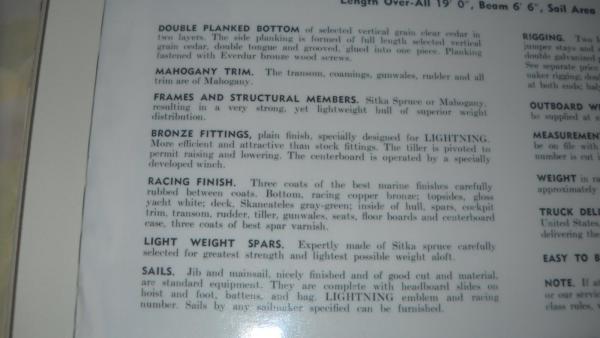
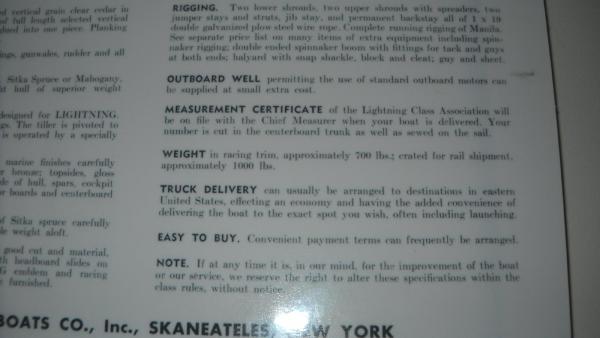
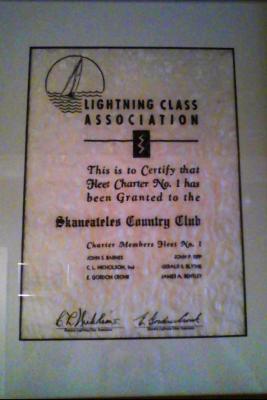
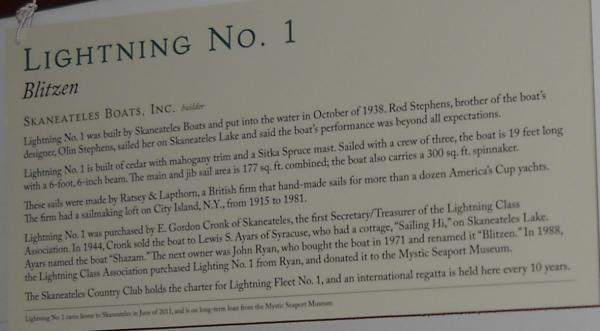
Sorry I haven't posted anything in a few days; I've been busy buying a new car. Well, not NEW, but certainly newer than my '98 Acura Integra. It's an '07 Honda Civic. Anyway, I thought I'd post a picture of this document that I thought some people might find interesting.
-
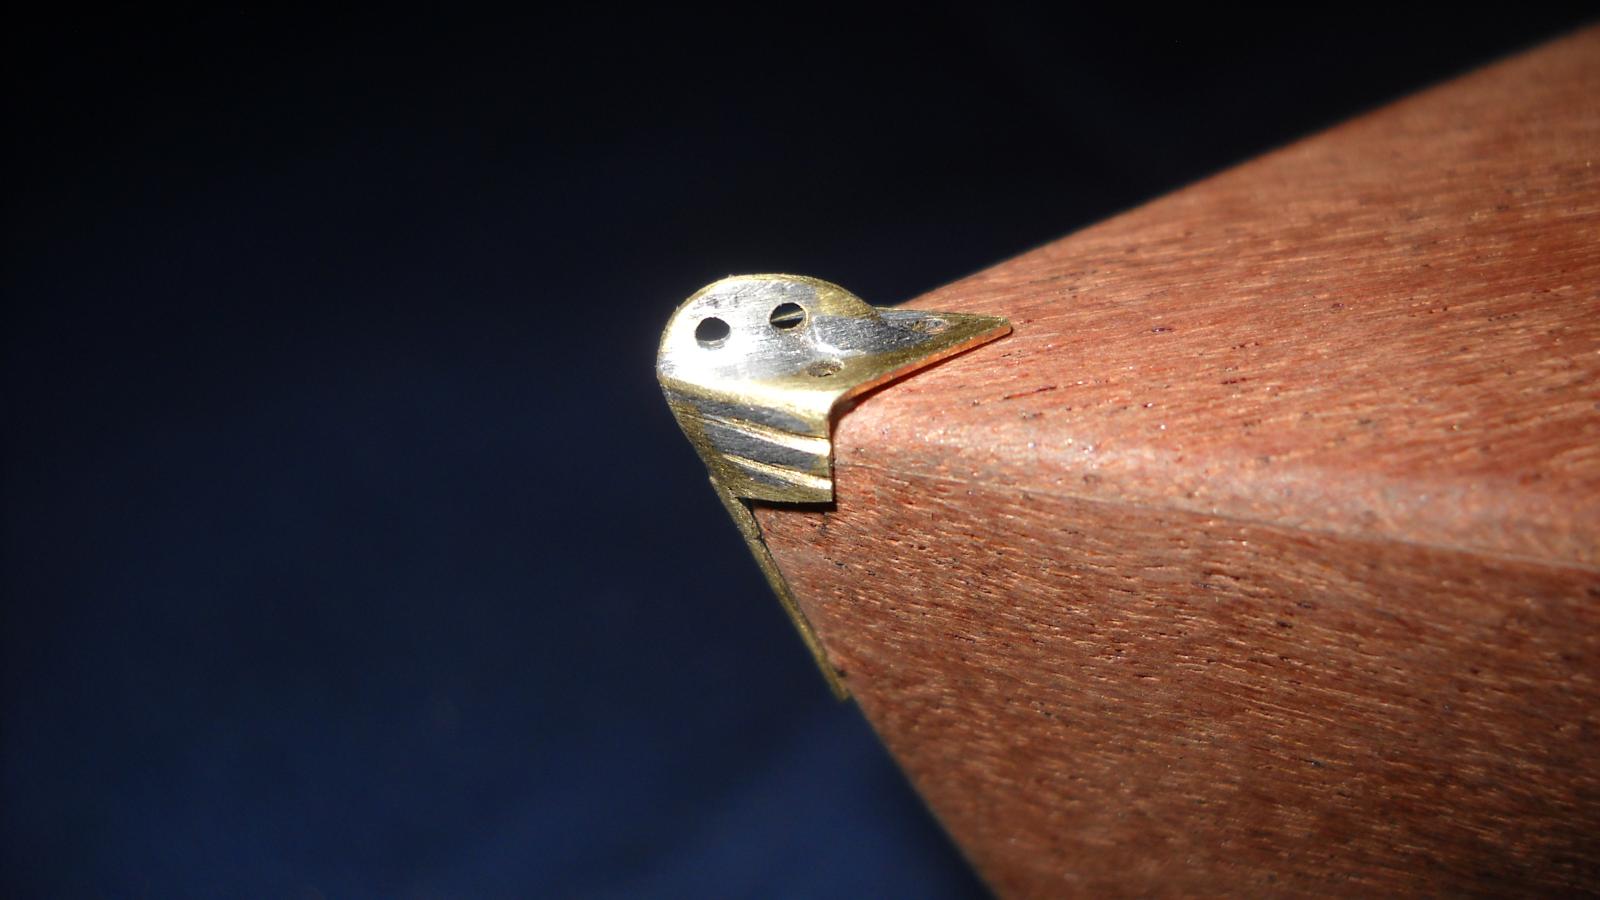
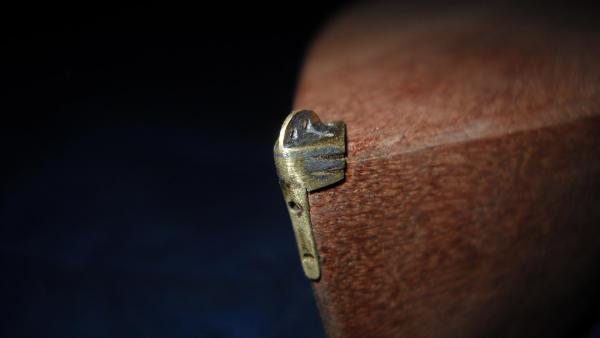
Ok, maybe I'll work on the coaming tomorrow. I was still kind of the mood to fiddle with brass, so I figured I'd take a whack at the headstay fitting. I think it was the single trickiest piece of a model of anything I've ever worked on. It's made of three pieces, and whenever I tried to solder the third piece on, the bond between the first two would come undone. It was a royal pain, but I eventually figured it out.


-
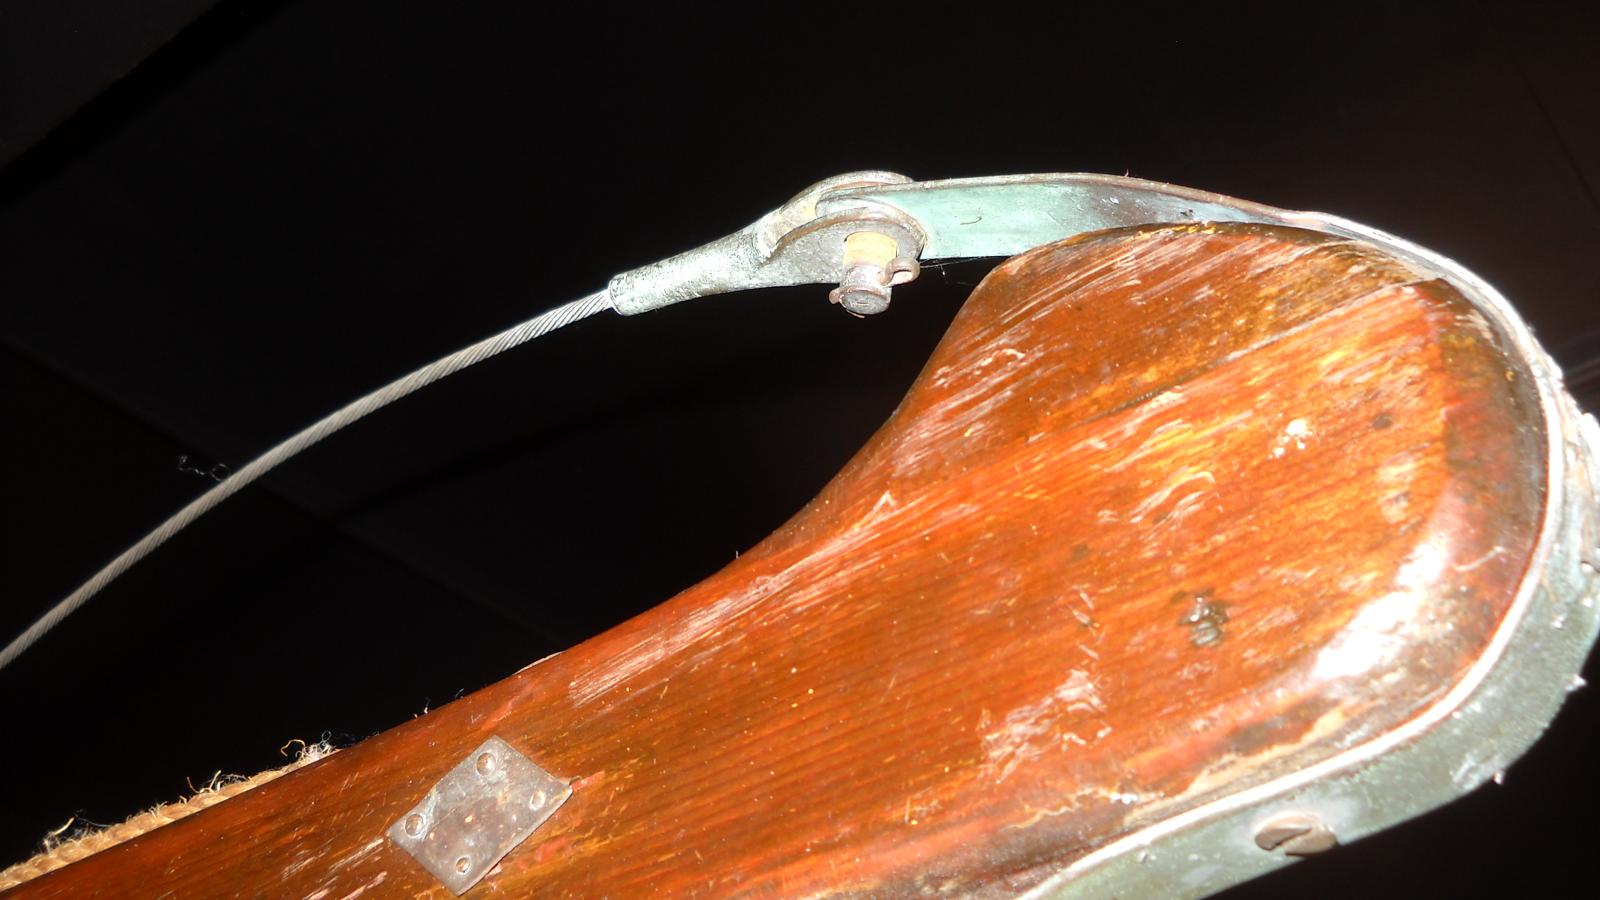
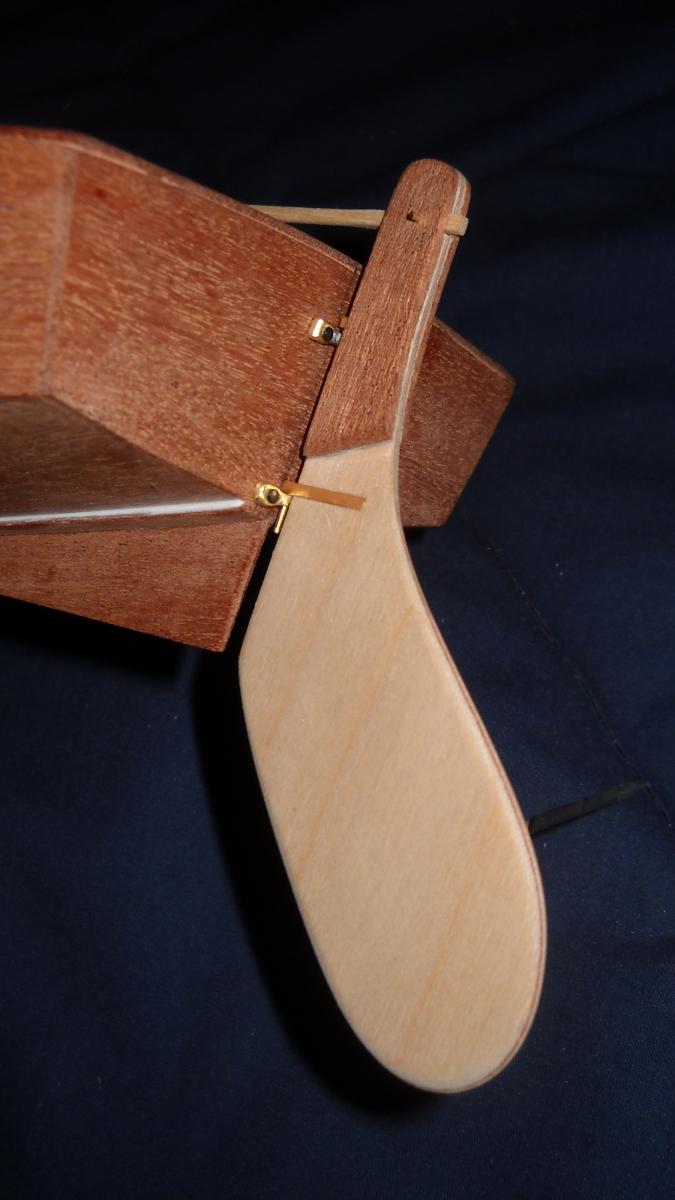
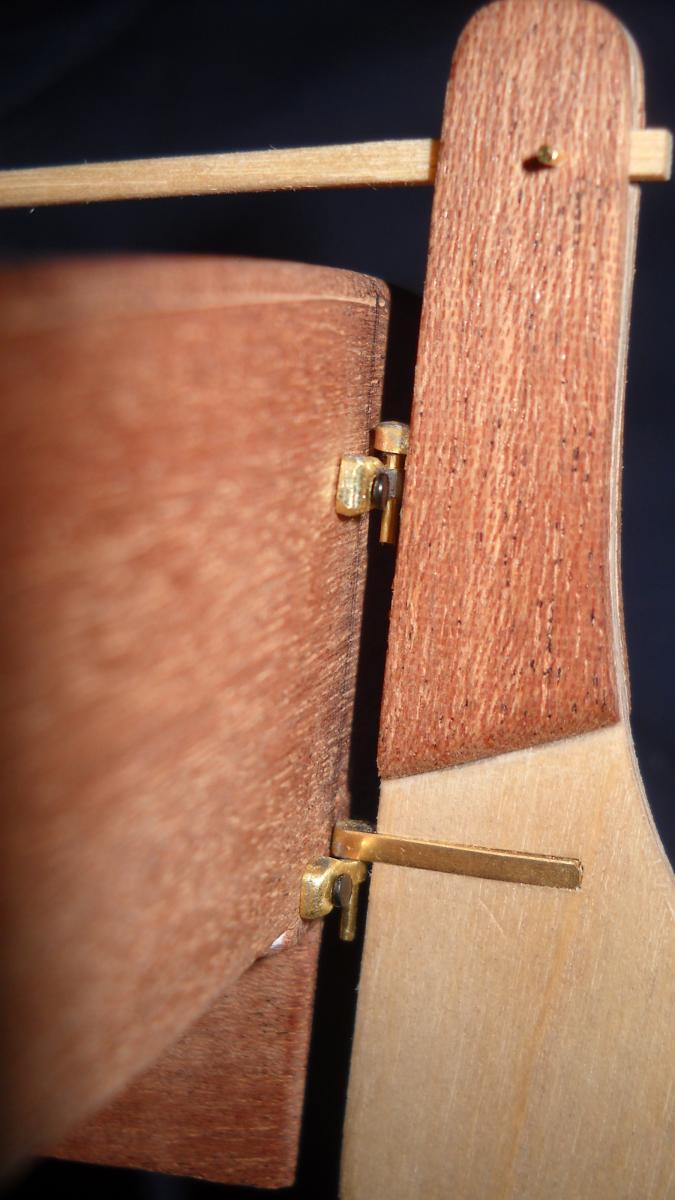
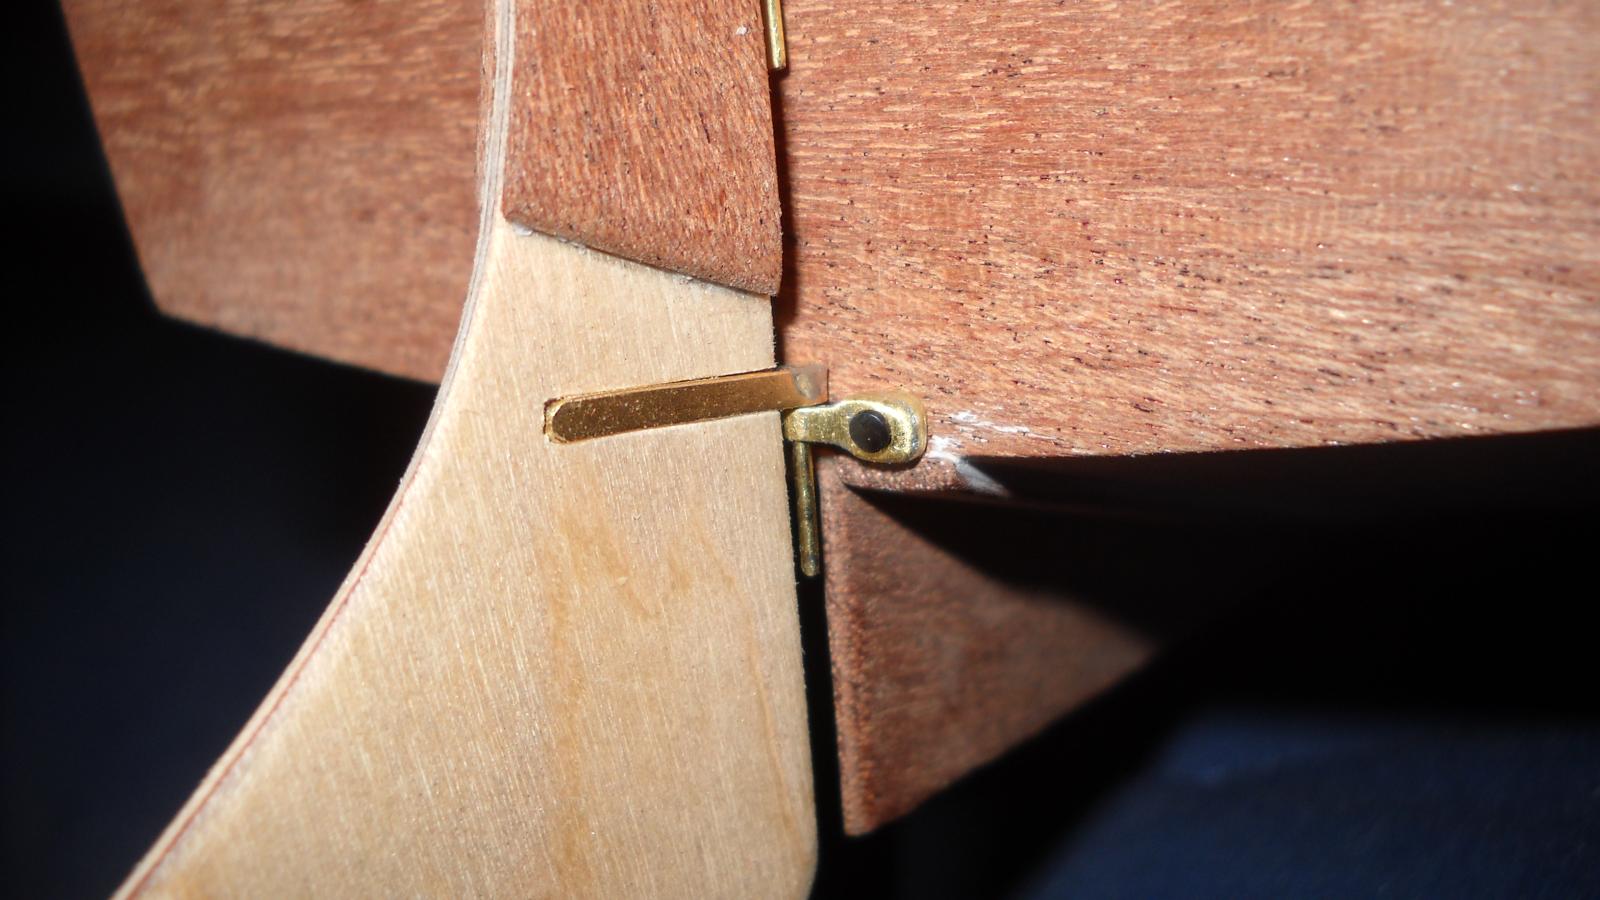
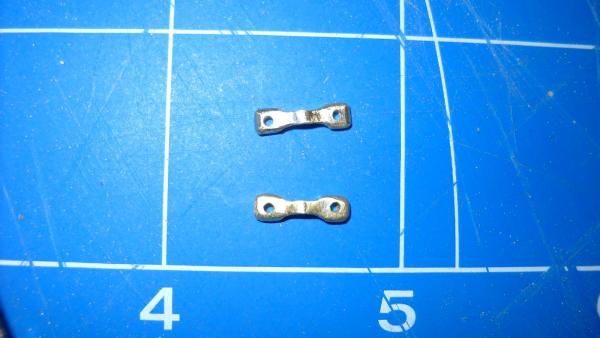
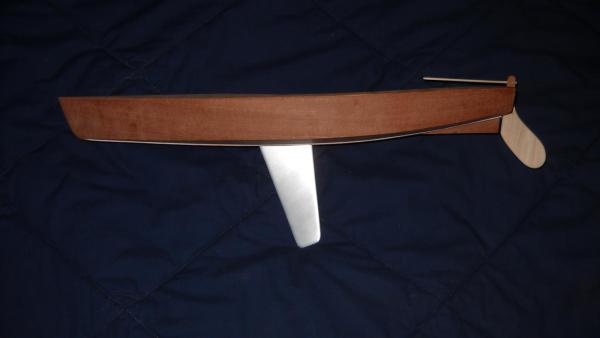
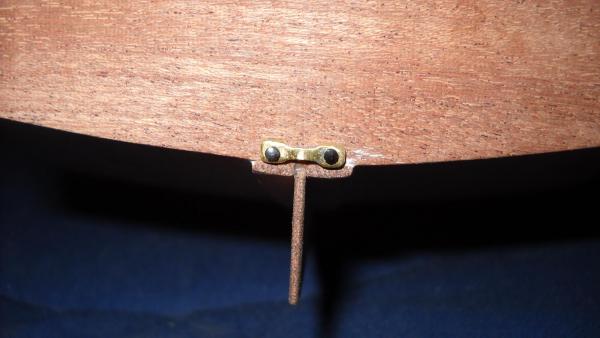
Both gudgeons done. The second one was a lot easier since I was able to piece it together in a more logical order. Since taking these pictures I have countersunk the nail heads, and on final assembly I will paint all the fittings bronze. Her silhouette is almost complete. The next step is to complete the cockpit coaming, which I got about half done a week ago, and then got distracted.


-
One gudgeon down, one to go. But now it's time for bed.

-
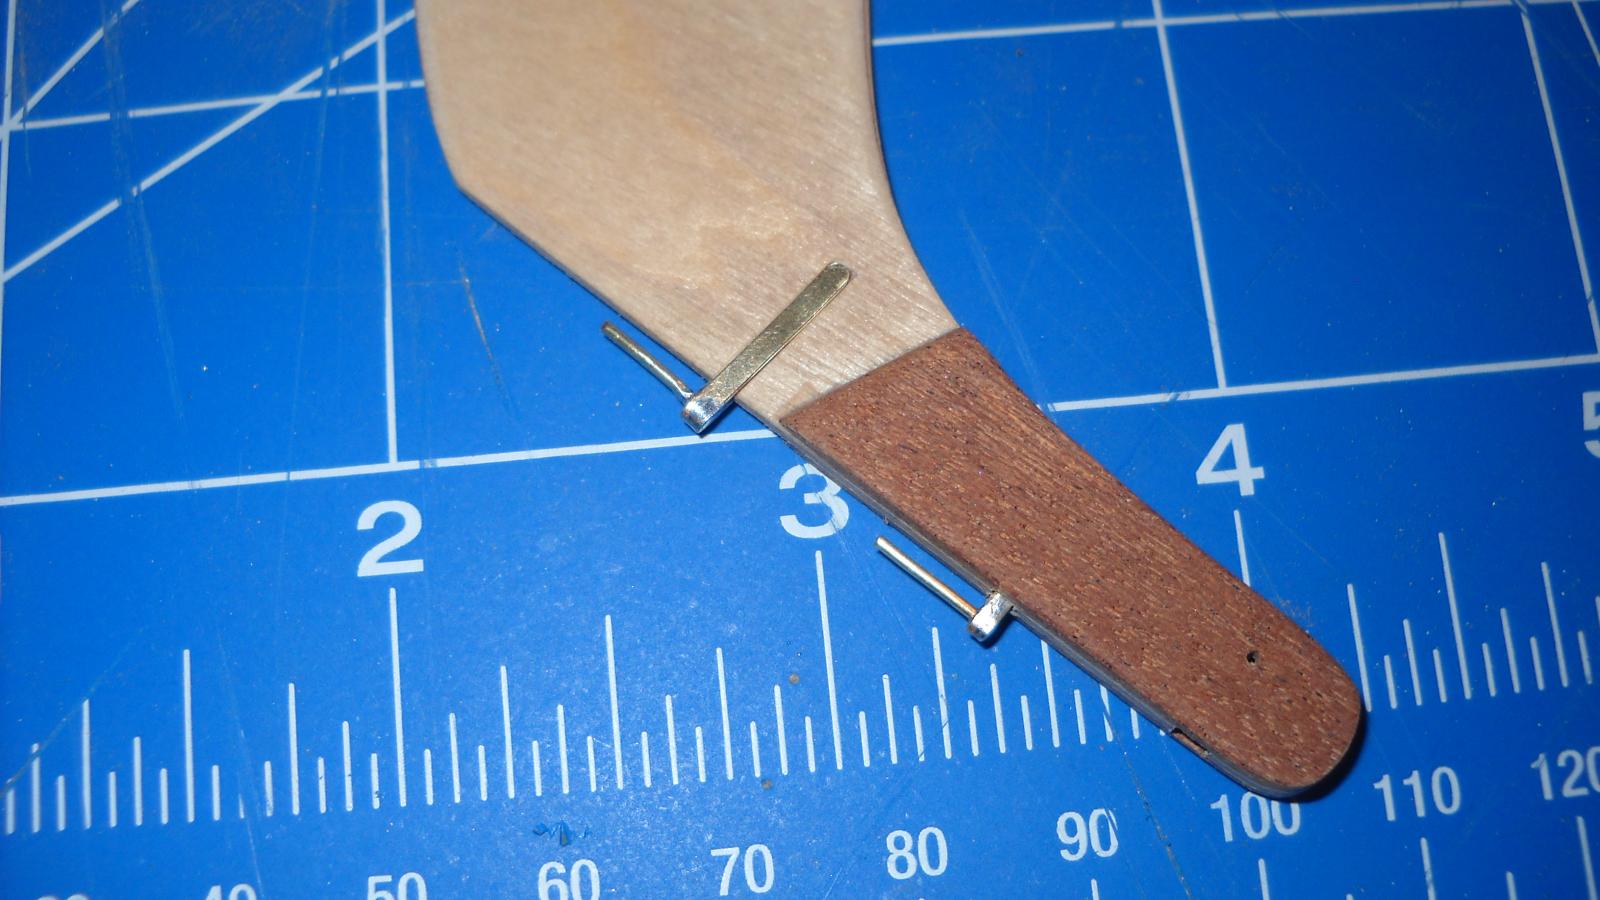
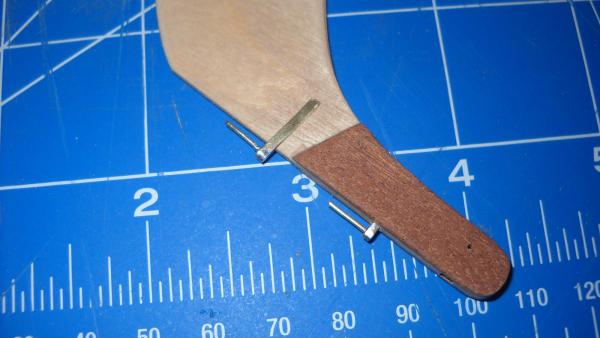
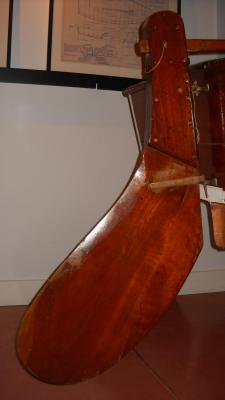
Adventures in soldering: my first pintles. I've done electrical soldering for years, but I've never worked with brass. I figured I might as well see if electrical solder would work on brass, and so far, it's worked just fine! So here's mine: And here's Blitzen's Since I decided this will be my practice model, I just used the birch plywood for the rudder, but when I build the Blitzen replica, I will use mahogany.

-
Good idea! I'll see what I can do.
-
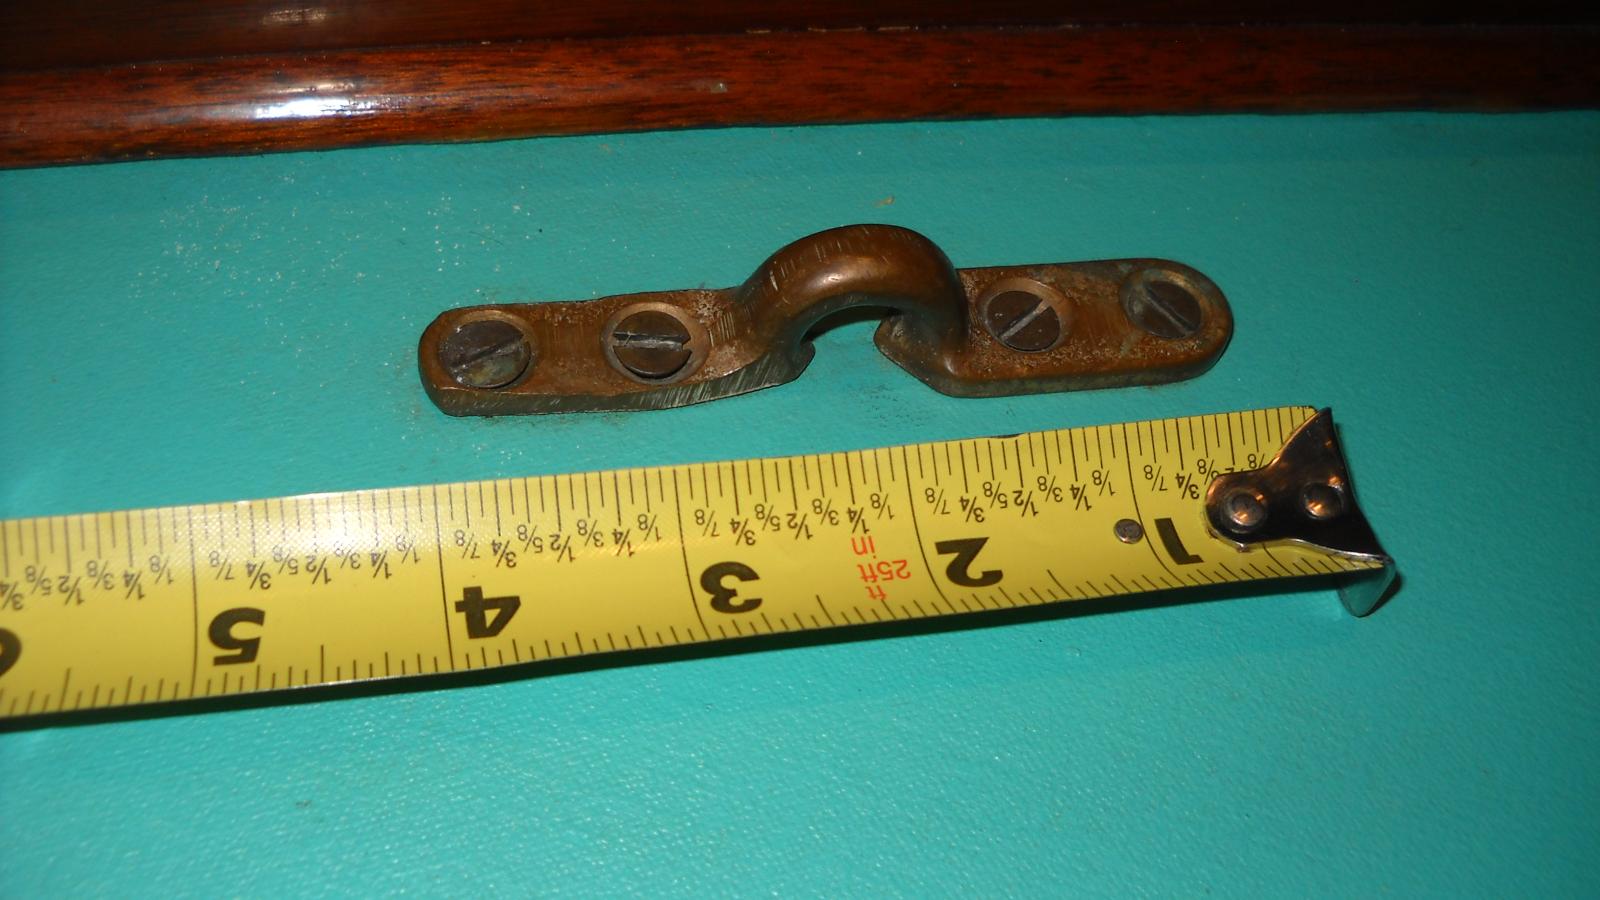
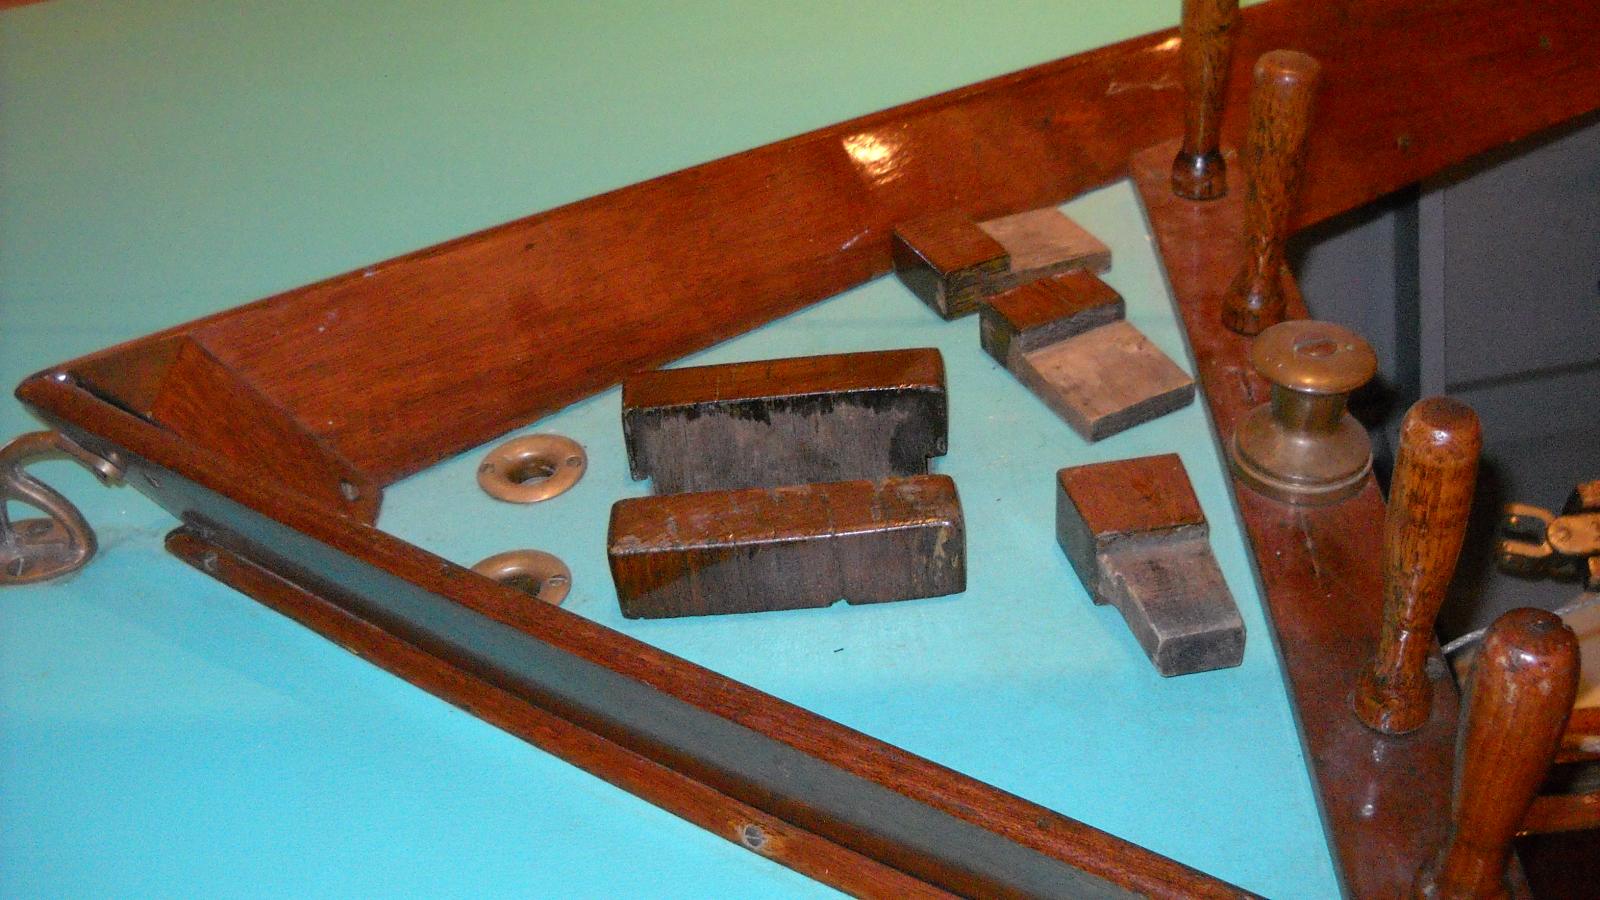
Well, I went to see #1 today! I took 114 pictures and I wish I could show you all of them, but that would be a little ridiculous, so I'll just upload a few. It's a big boat in a small space, so it was hard to get a good picture of the whole thing, but I was able to get all the pictures and measurements that I wanted. After seeing the real thing, and after some thought, I think it would be best to complete this model as a practice run and keep it for myself, due to all of the inaccuracies of the kit that I can do nothing about at this point (but that doesn't mean that I won't complete it to the best of my ability). It will then be my goal to scratch build another one, as I have mentioned, and model it after #1. That one I will give to the Country Club, where members who really do know their way around a Lightning can scrutinize it and appreciate its accuracy. Anyway, here are some pictures.


-
Thank you, Dee Dee for sharing your great wealth of information! Do you have this good a memory for everything, or did you just really cherish that Lightning? I am still planning on scratch building another one of these, so I will have to start building up a stash of my own wood, so I will do some research and shop around. I thank you for your kind offer, though. I will be visiting Lightning #1 tomorrow and will take as many high quality photos of every part of the boat as I can. I will also take measurements of deck and rigging fittings and such so I know exactly what aftermarket stuff to buy.