
highlanderburial
-
Posts
123 -
Joined
-
Last visited
Content Type
Profiles
Forums
Gallery
Events
Everything posted by highlanderburial
-
 I love this ship so I wish you joy of it! I will be building one at some point but my build log is a bit full right now! Can I ask where you got your references? I have been trolling both the national archives and the Philadelphia Historical Society to try and get more information on her.
 -
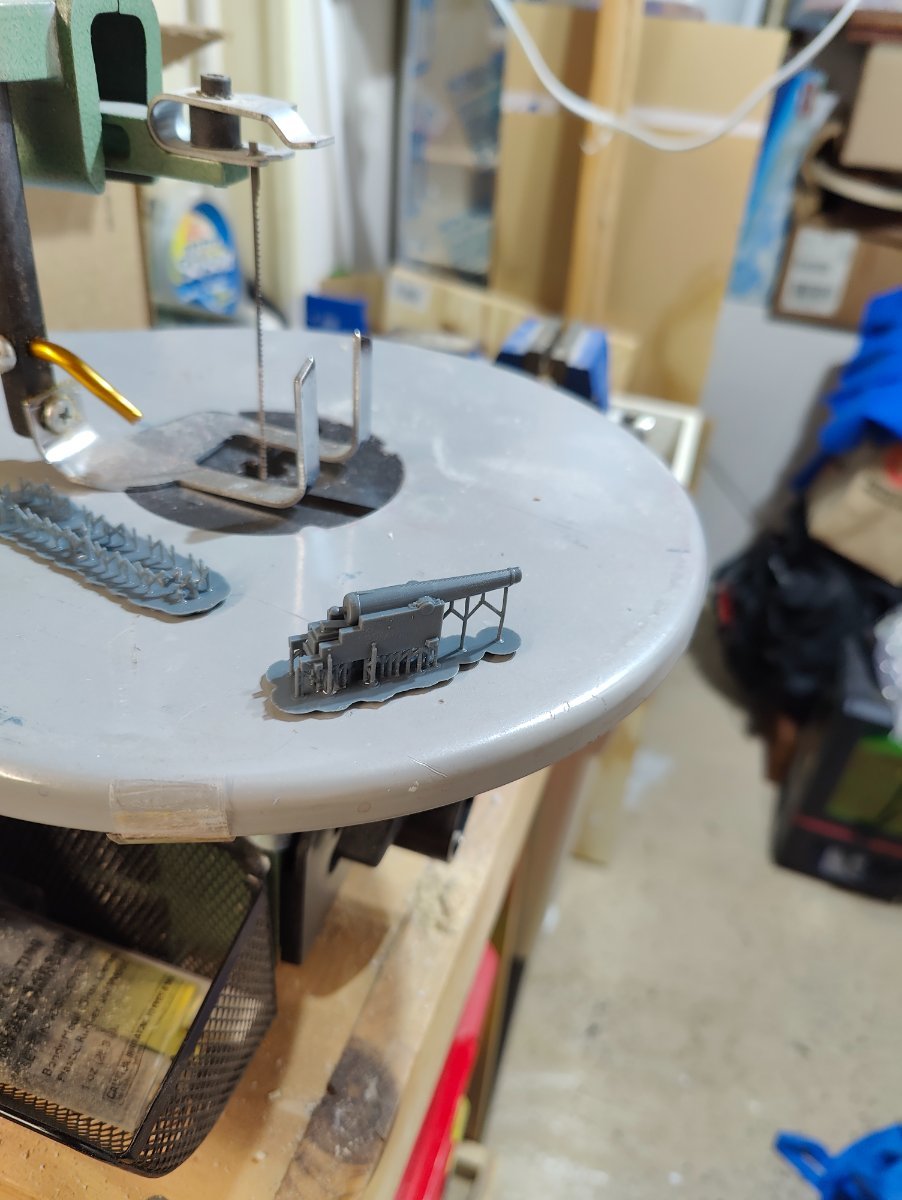
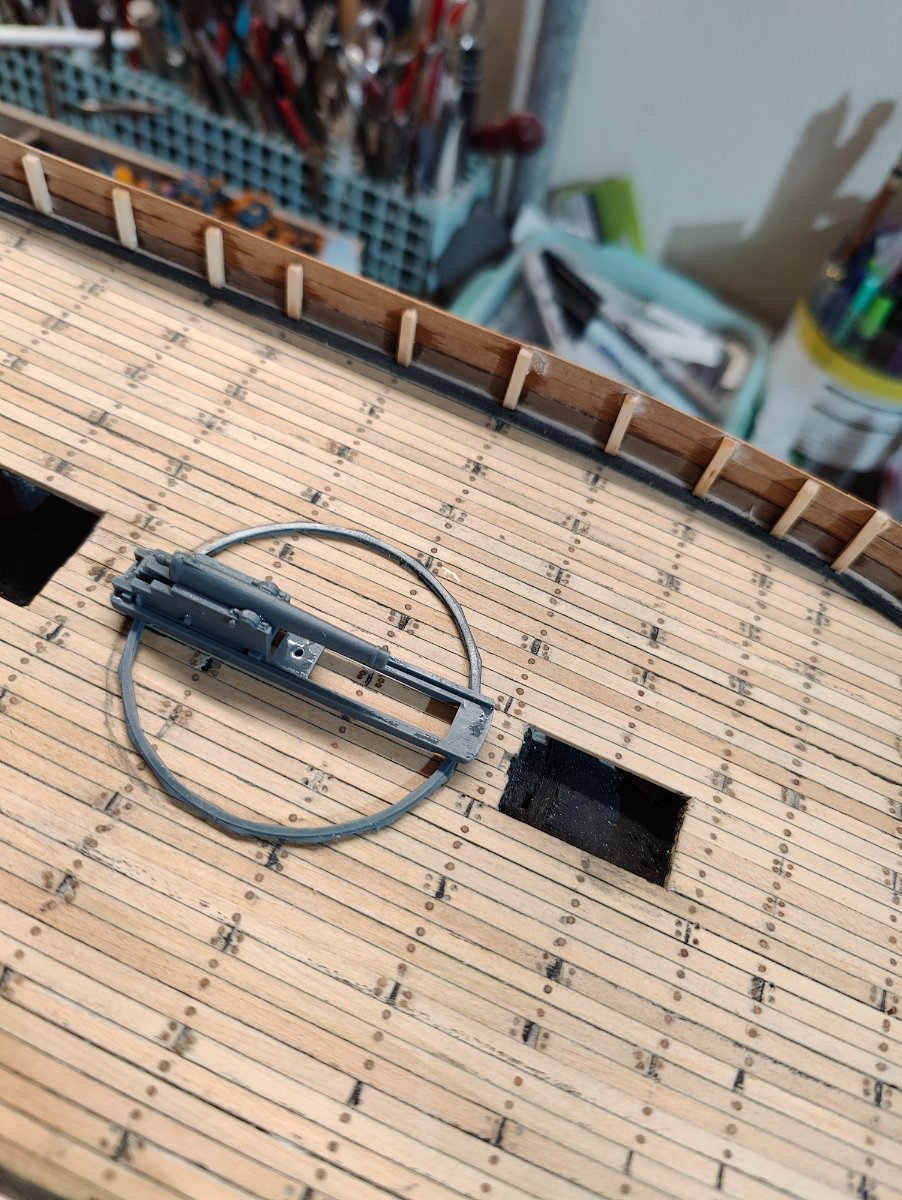
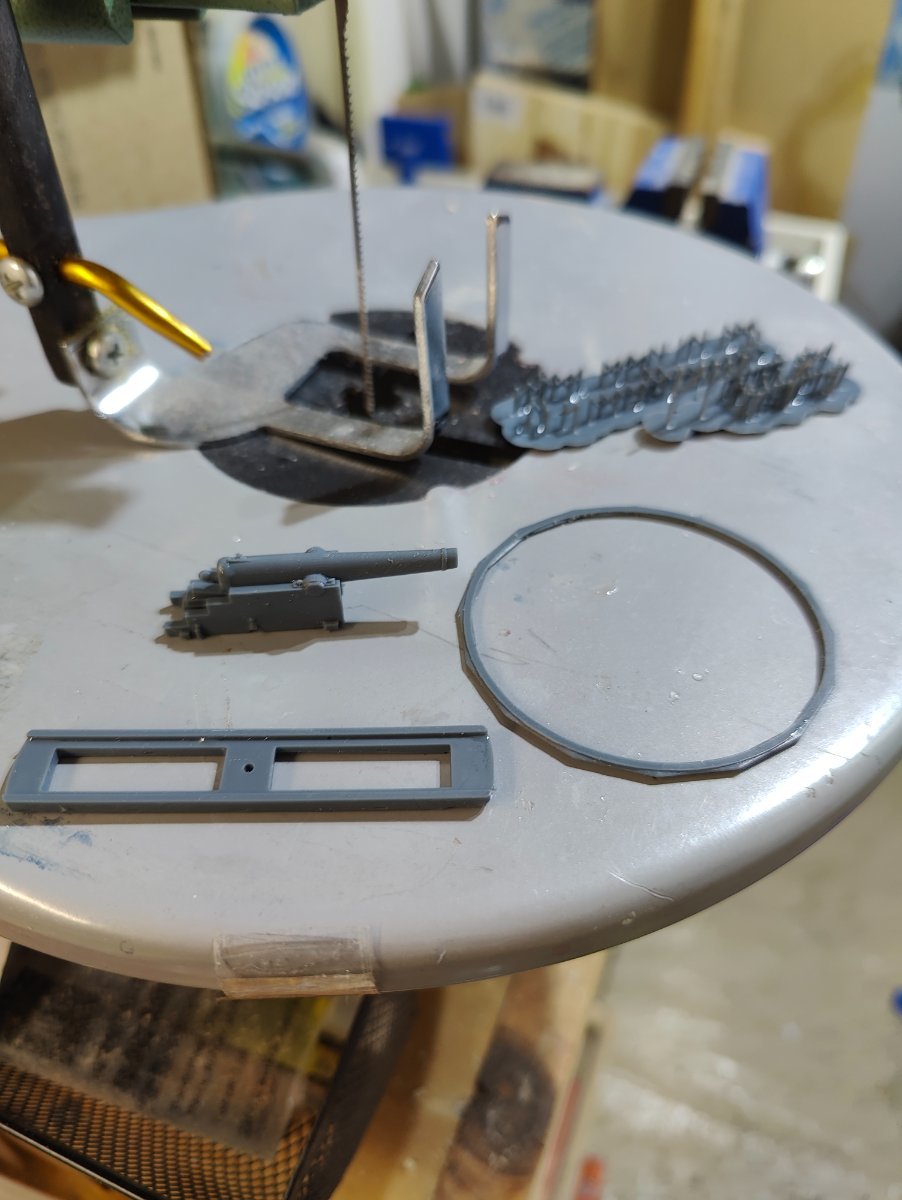
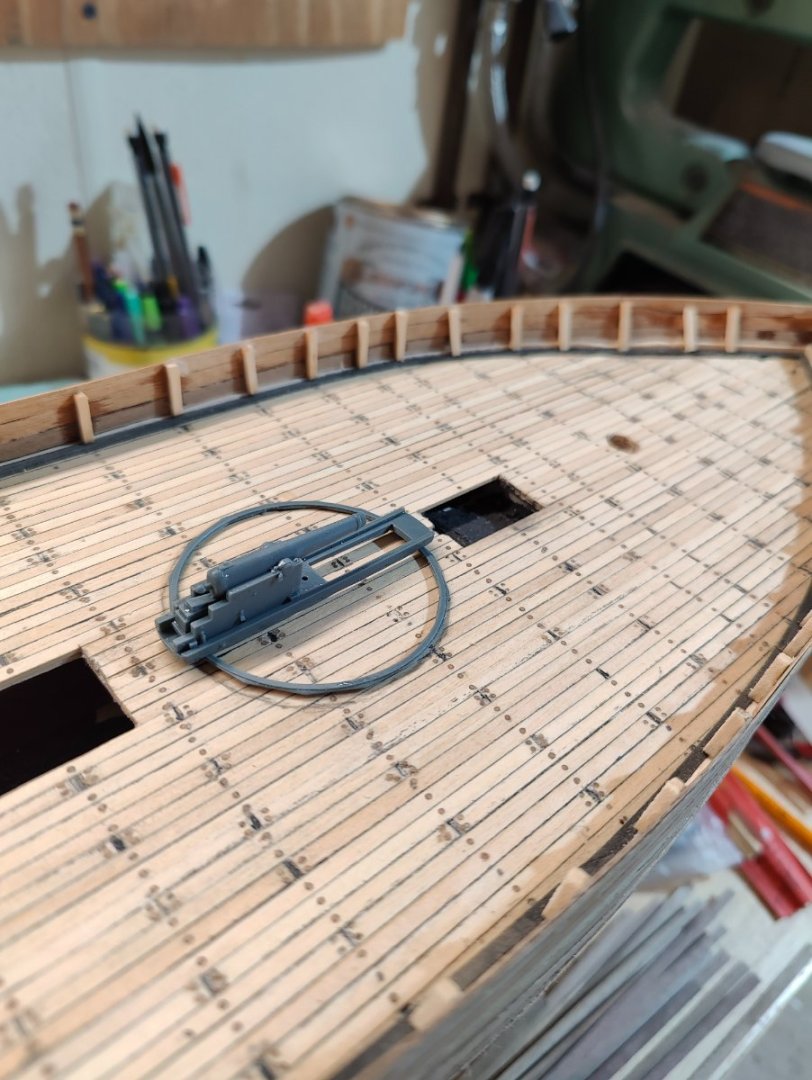
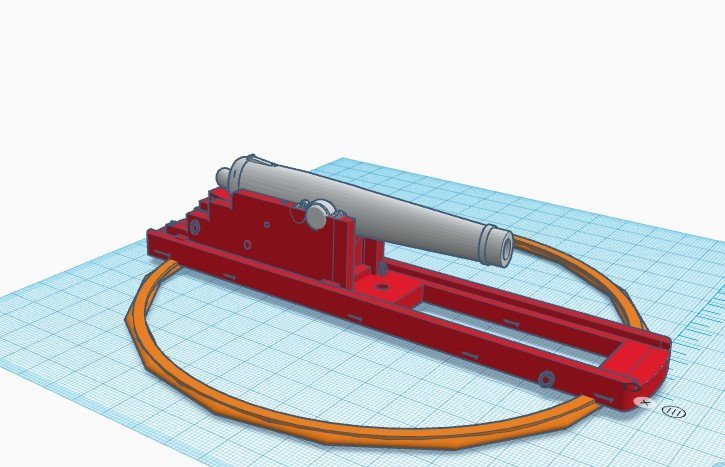
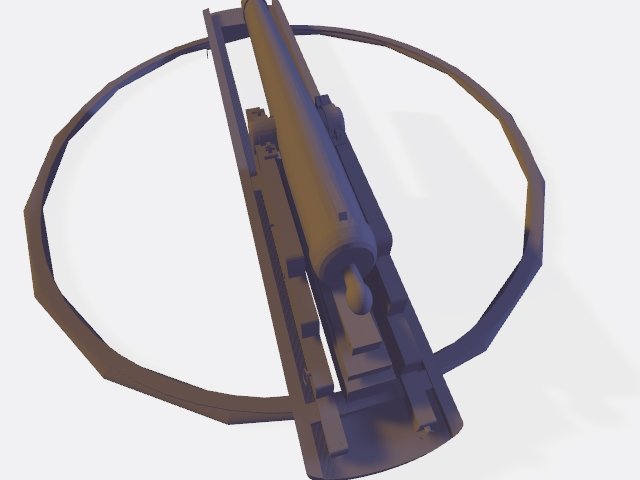
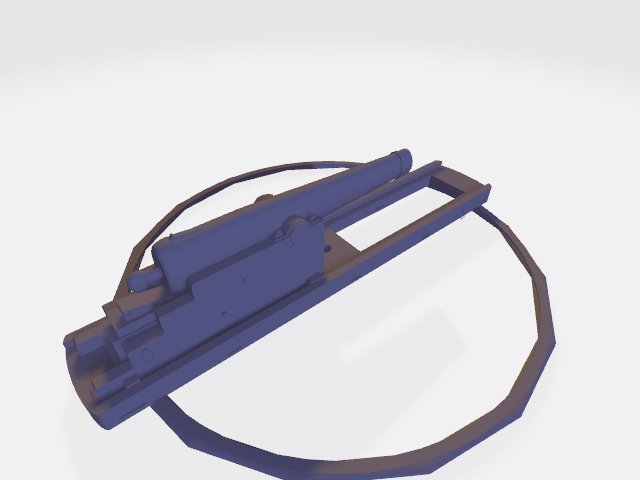
Lag on the project again. I got the 3d prints done. I needed to fiddle with the supports to get it to come out correct. No paint yet but the here is the prototype.


-
18-Pounder Pivot Gun
highlanderburial replied to AndyHall's topic in CAD and 3D Modelling/Drafting Plans with Software
That drawing is artwork onto itself. A very cool reference. Thanks for posting! -
18-Pounder Pivot Gun
highlanderburial replied to AndyHall's topic in CAD and 3D Modelling/Drafting Plans with Software
This was an amazing find. This is the reason I come to this site. The sheer amount of first-hand knowledge references and tips are awesome. Thanks for posting! -
18-Pounder Pivot Gun
highlanderburial replied to AndyHall's topic in CAD and 3D Modelling/Drafting Plans with Software
The final build on the gun looks great!!! Plus I love Revenue Cutters..... -
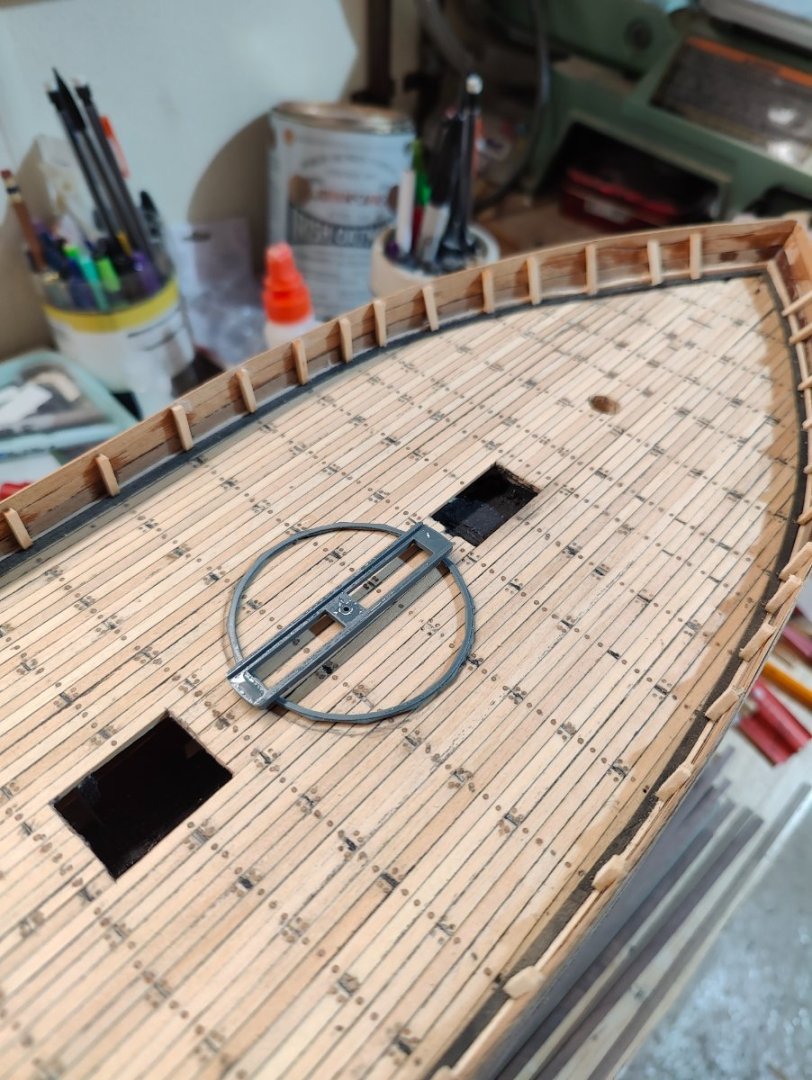
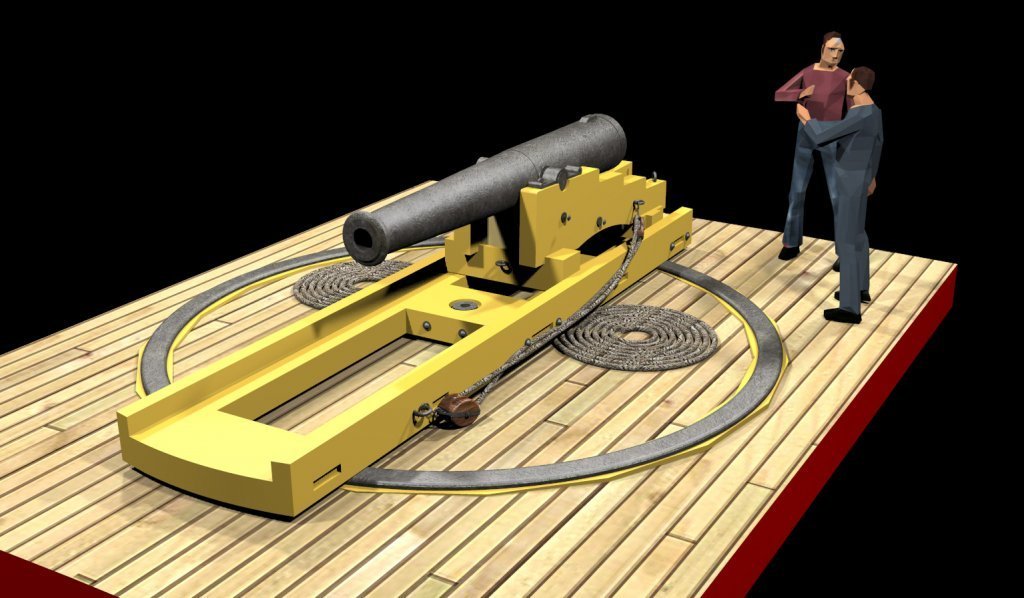
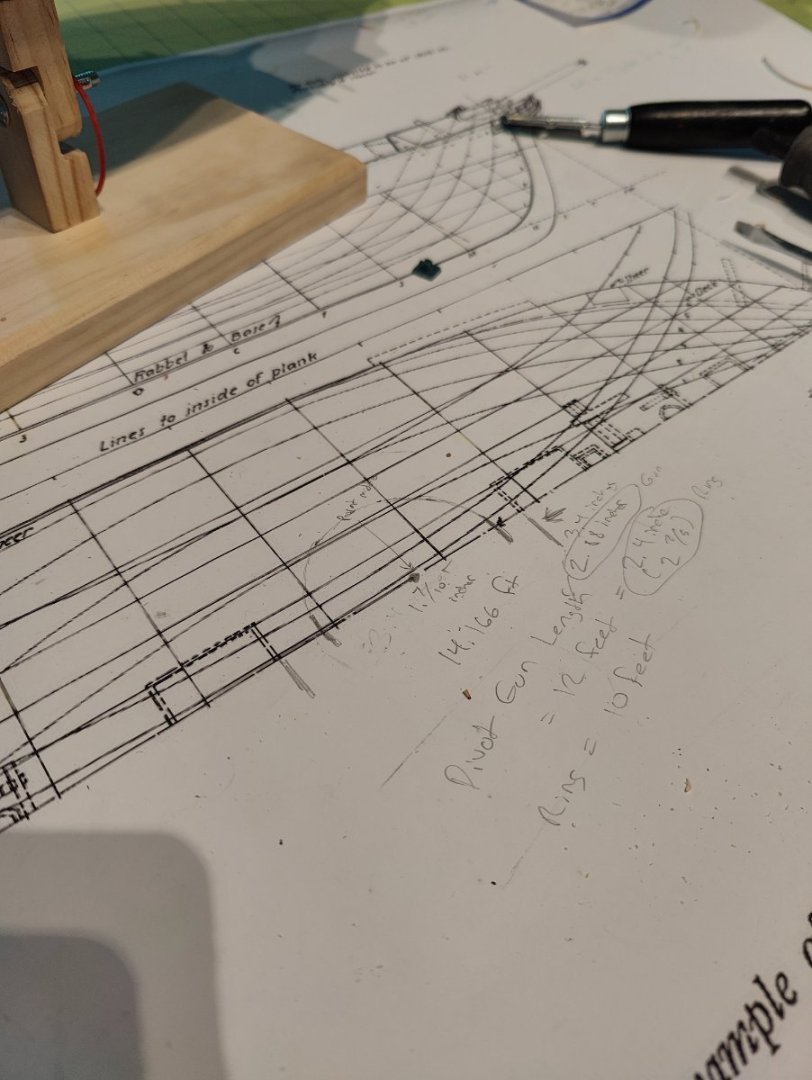
One of the major stumbling points on the project when I am not able to get down to the shop and work with wood is I wanted a decent pivot gun for the vessel. There really are none for sale that match this time period. On one of the forums here another user posted some amazing pics of a computer drawn version of the exact pivot gun I was looking for. Still there were no actual CAD files I could directly print from so I chipped away at sculpting my own. I finished modeling the gun, carriage and rail (with super challenging chamfer supports). Here are some pics. I have it on the printer right now and will post pics when complete. To be clear the last pic is not mine it is found by putting in a search on MSW for 18 lb pivot gun and you will see the thread.


-
18-Pounder Pivot Gun
highlanderburial replied to AndyHall's topic in CAD and 3D Modelling/Drafting Plans with Software
Thanks for your amazing rendering. I was able to build one out in a CAD type program using your pics for a visual. It is on the printer right now and I will take pictures when it is finished. I needed this for my scratch build. Simulating the chamfer deck supports under the rail was tougher than I thought it would be.

-
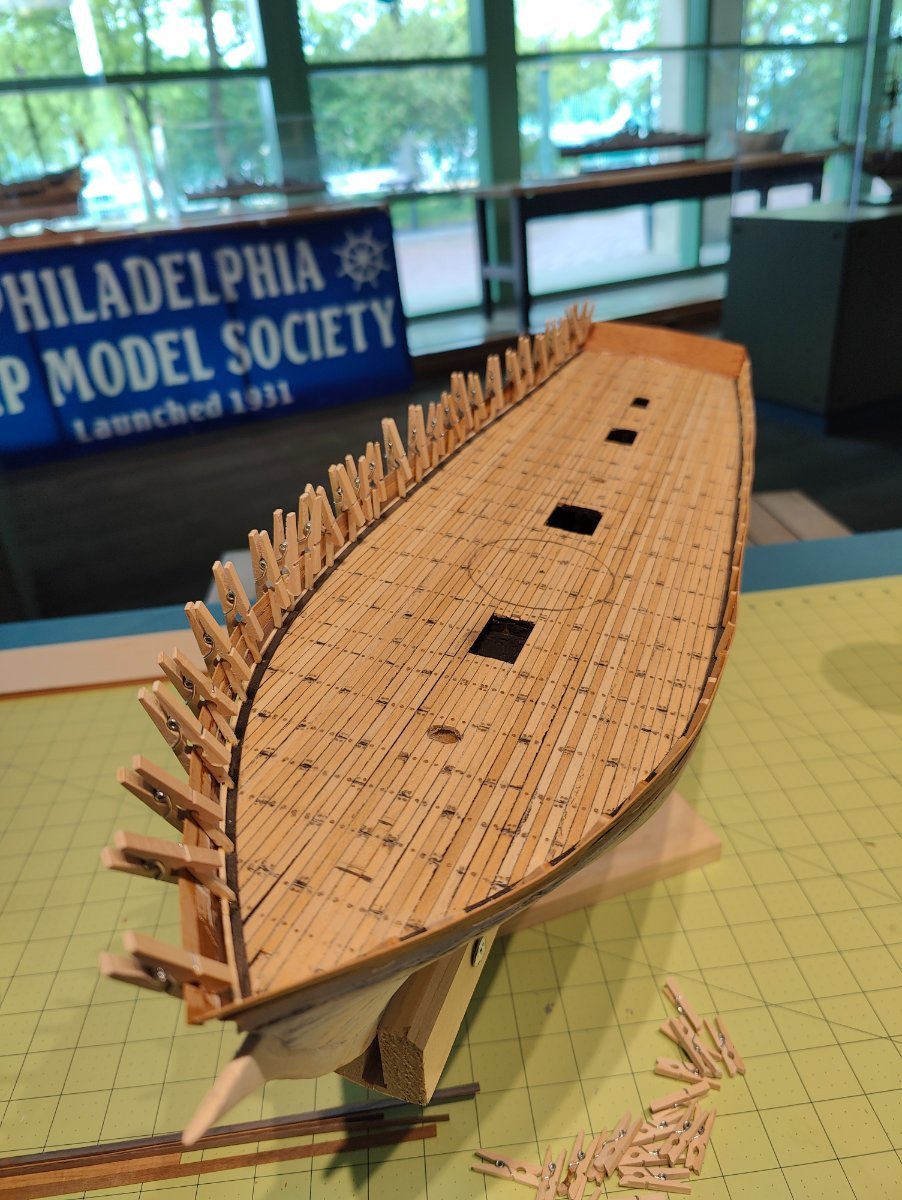
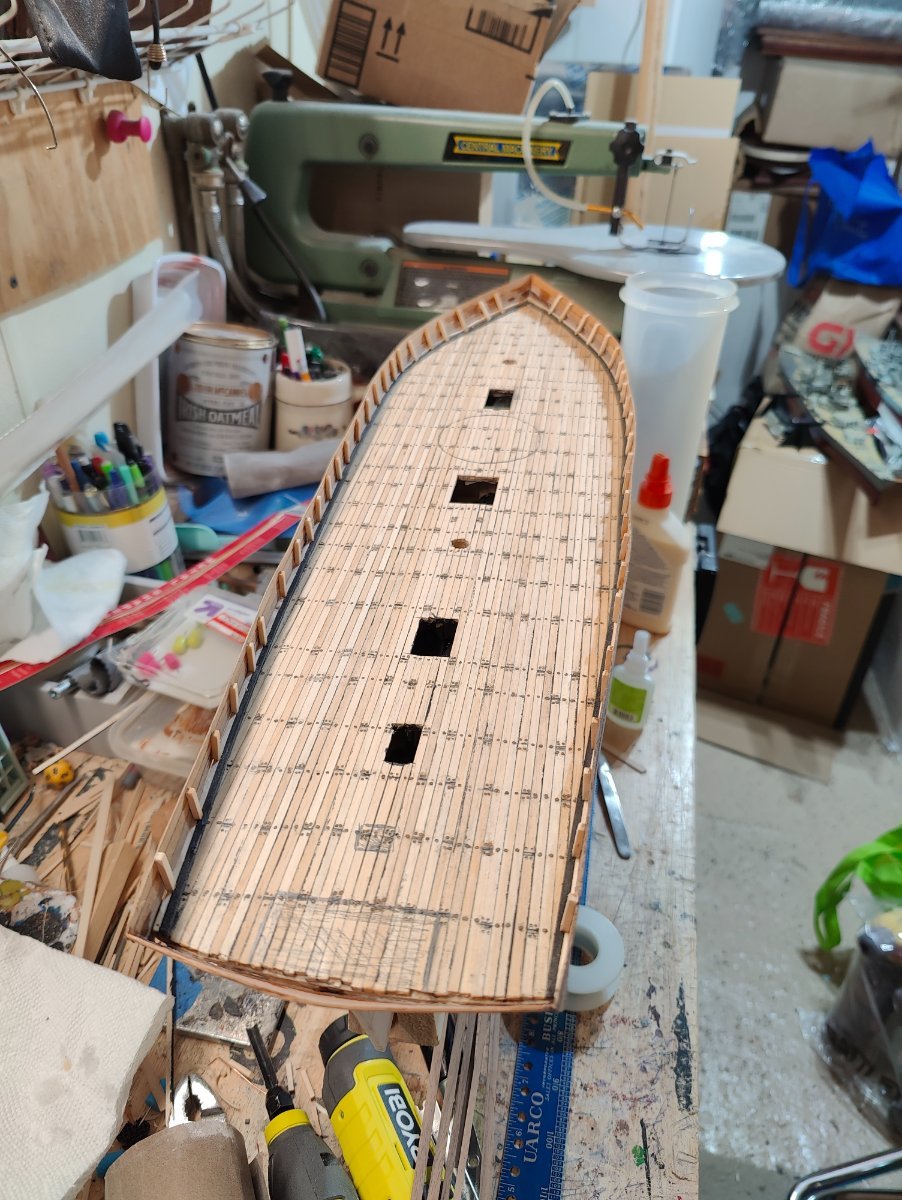
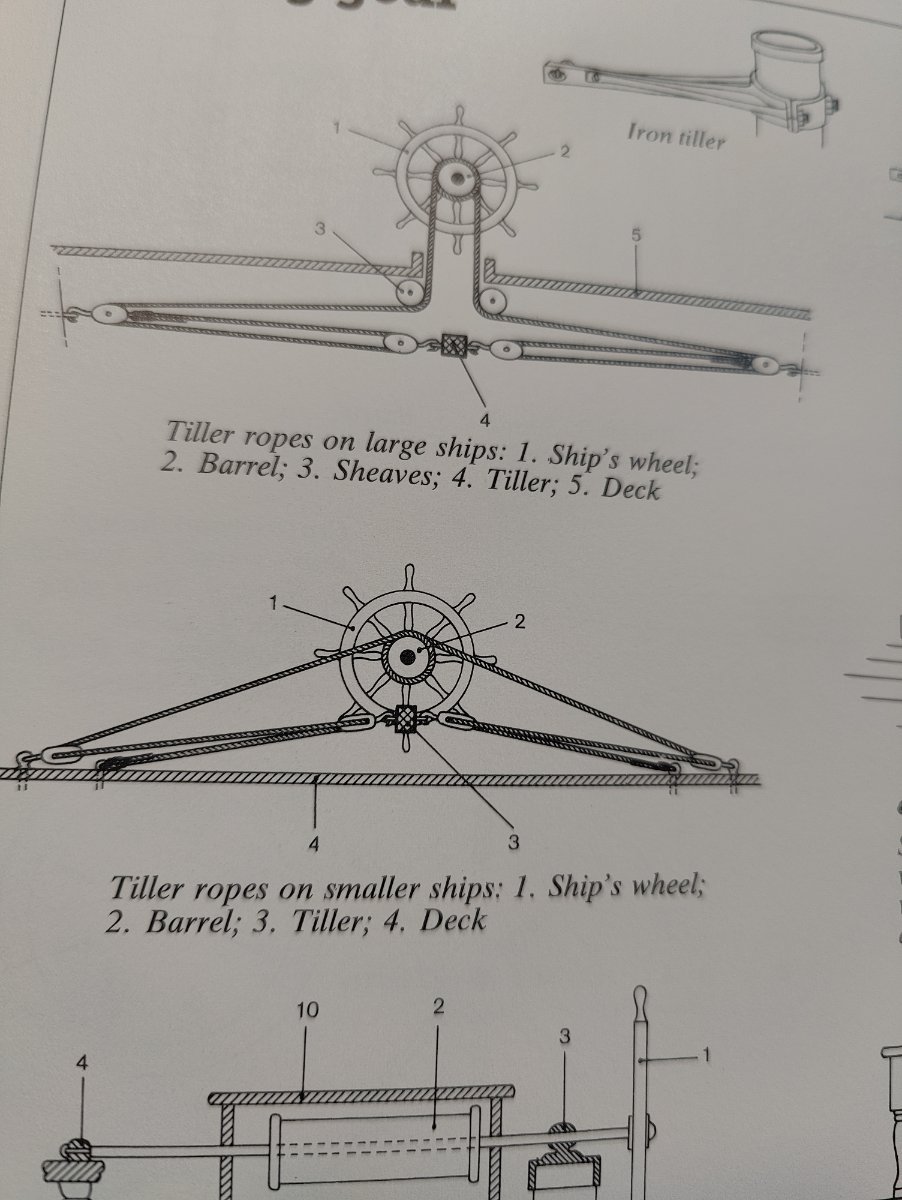
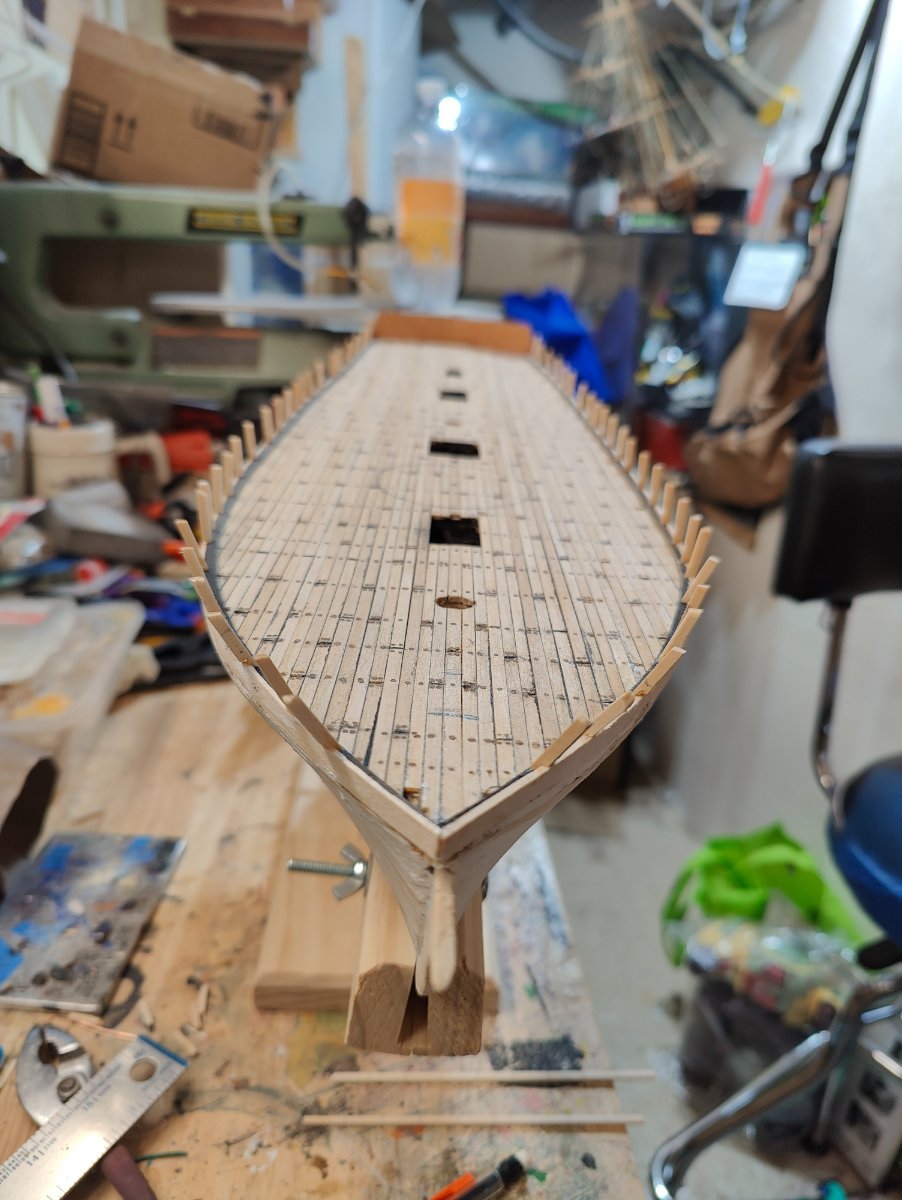
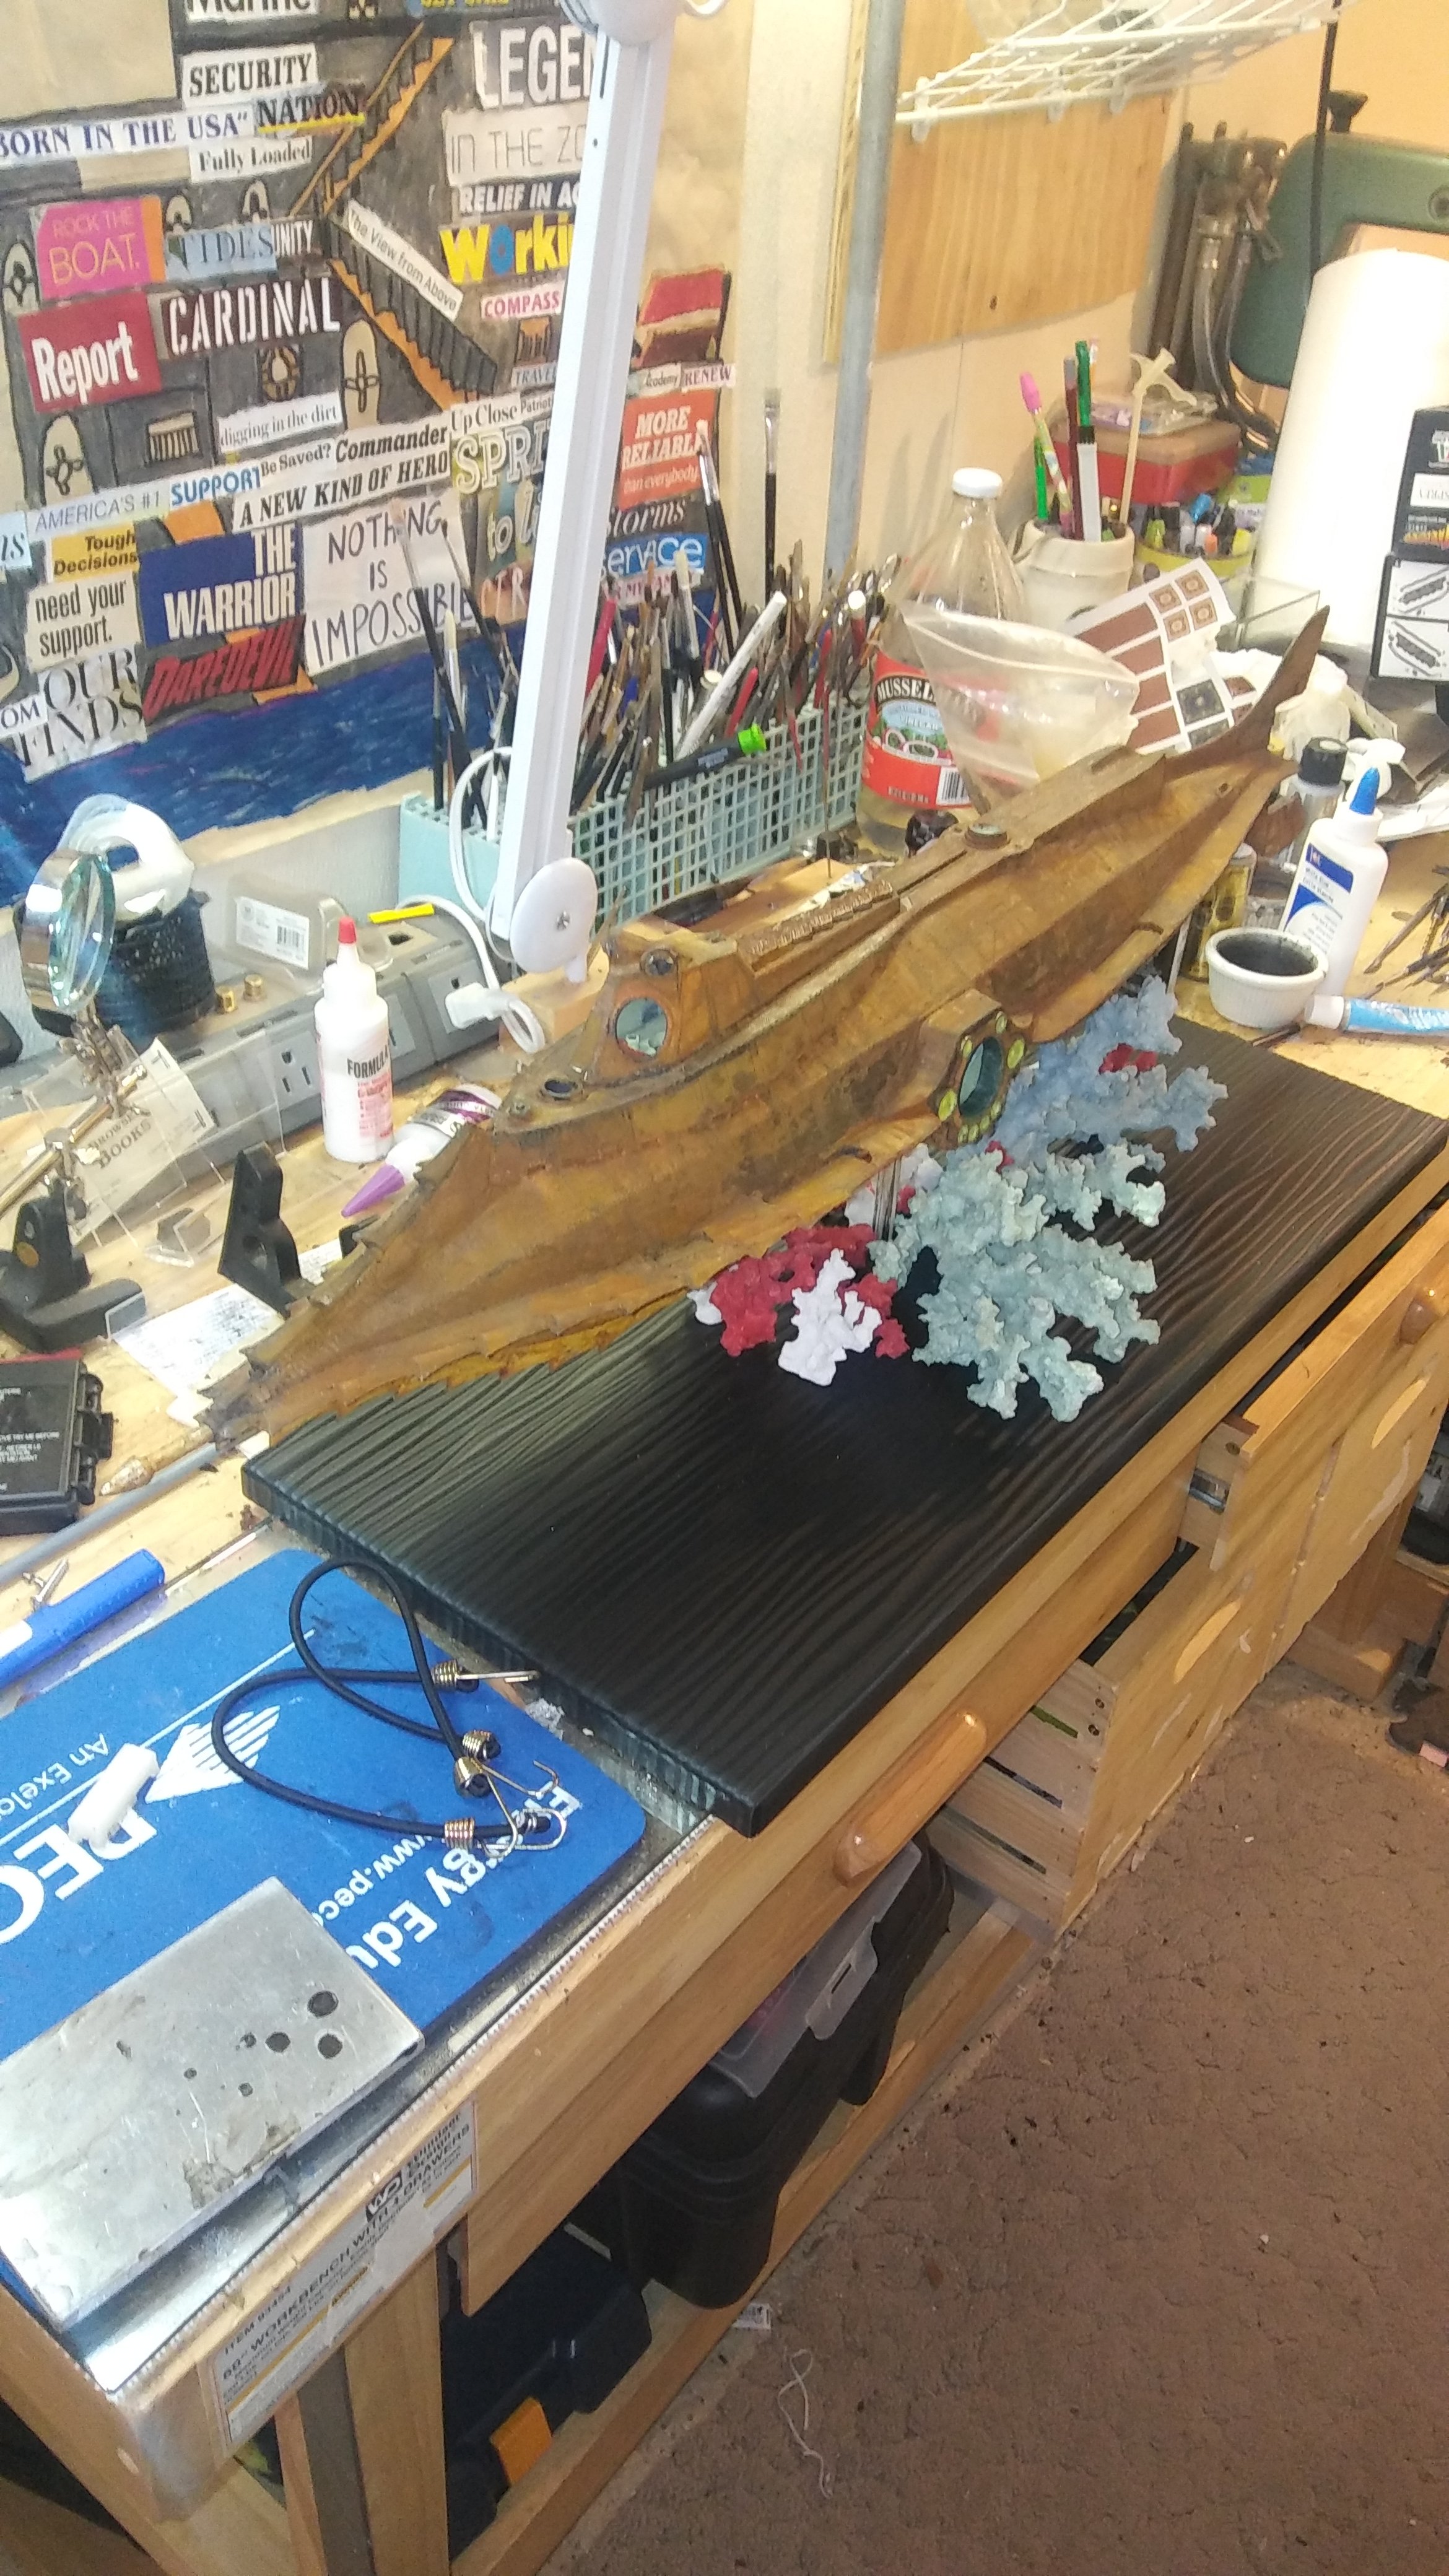
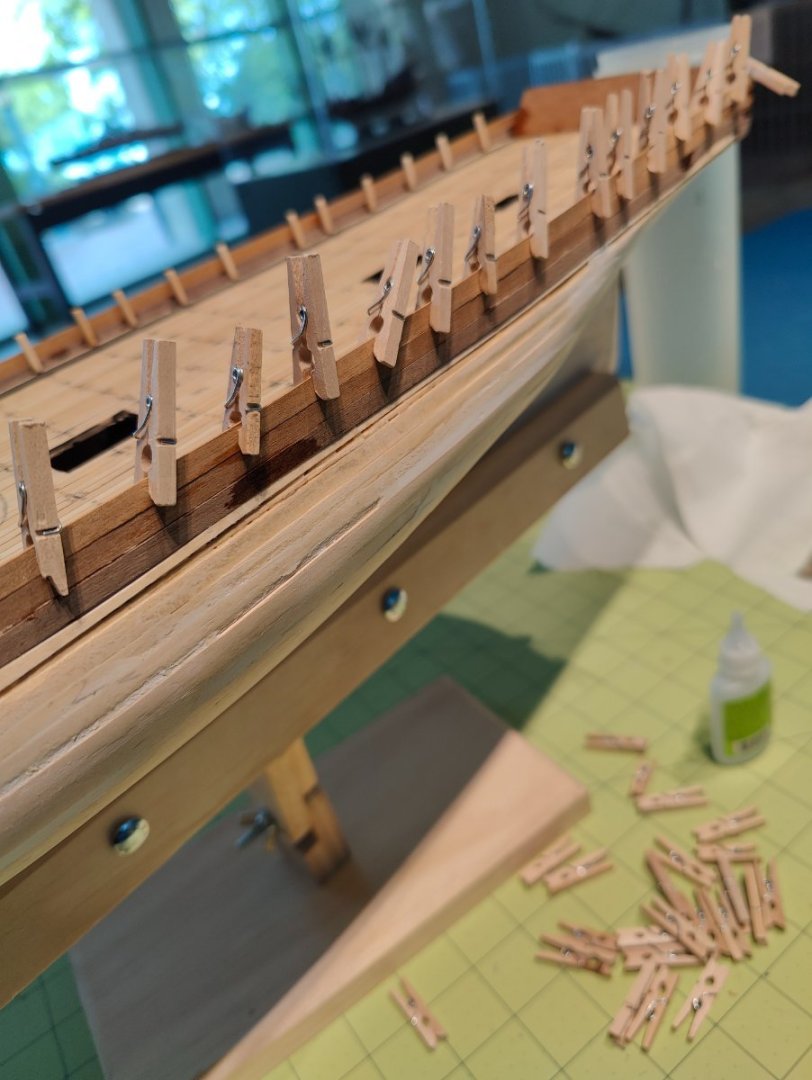
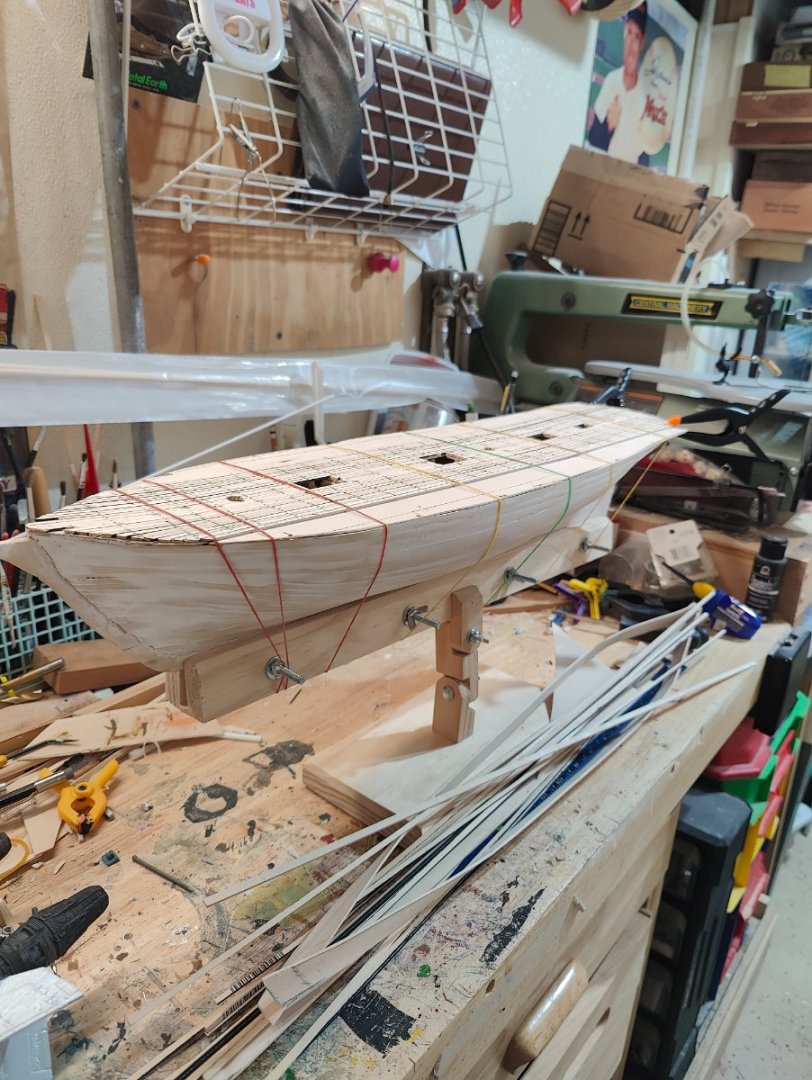
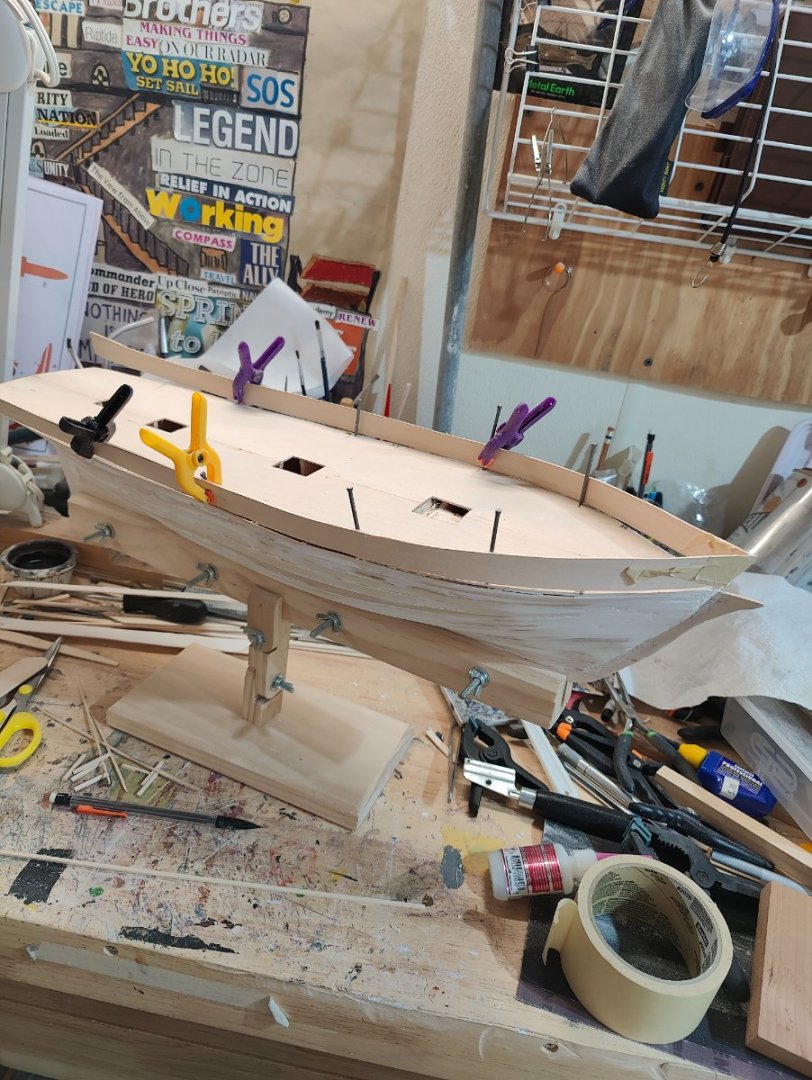
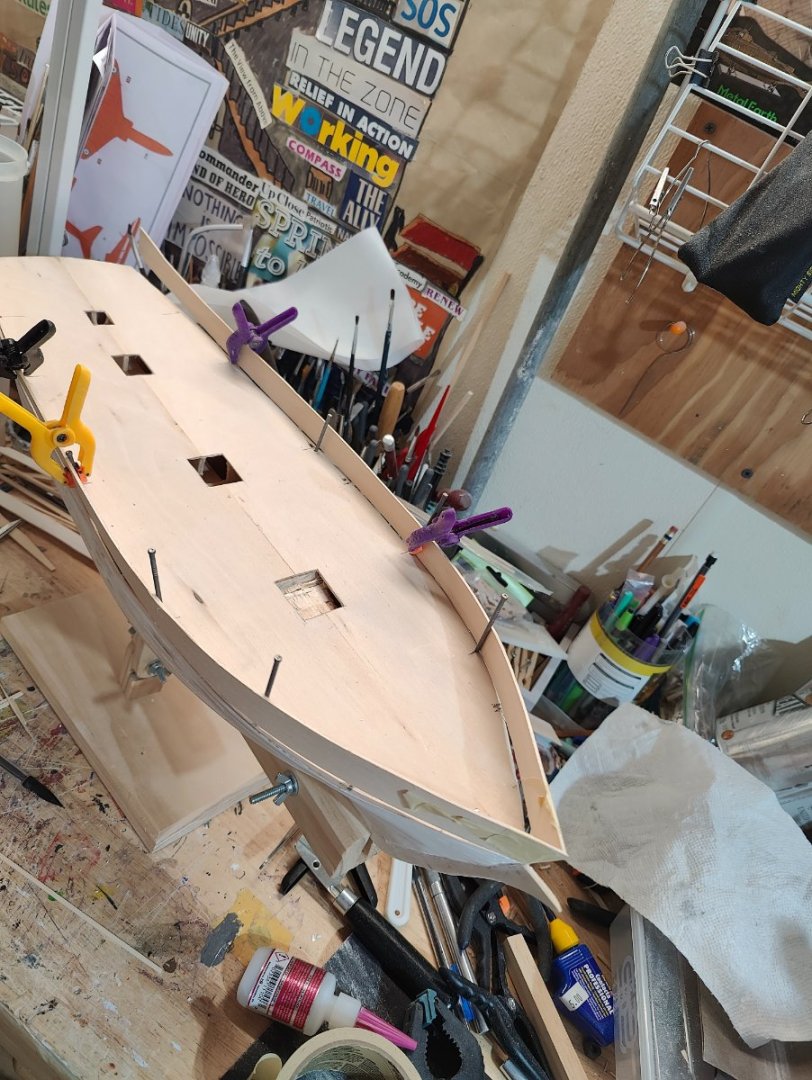
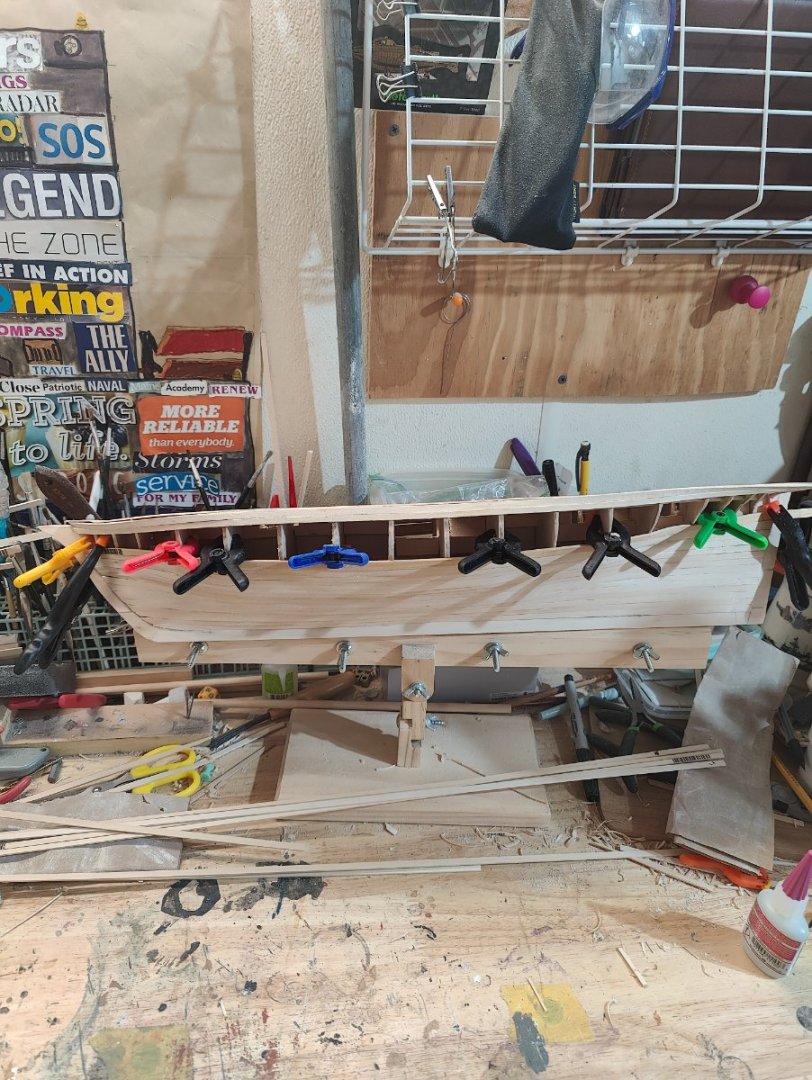
I got the initial bulwark planking in place. This was kind of a "do or die" for me on this model. Fortunately this came out well and I will be looking to build the cap rail soon. I also did a lot of lay out work on how the steering gear will work. This ship will have a wheel with drum and block tiller system. I noticed after looking at the plans several times that the cover on the steering tiller seemed pretty wide and oversized. I then remembered that this vessel has a stern launched small boat. This would be a platform that the crew could stand on while prepping the boat and staying out of the tiller swing radius. It also gives the crew a step up to get up to the davits. I also did some more sanding and prepped the hull for the next plank layer.


-
Slooooow progress... Bulwark beams finished and rough transom put in place.


-
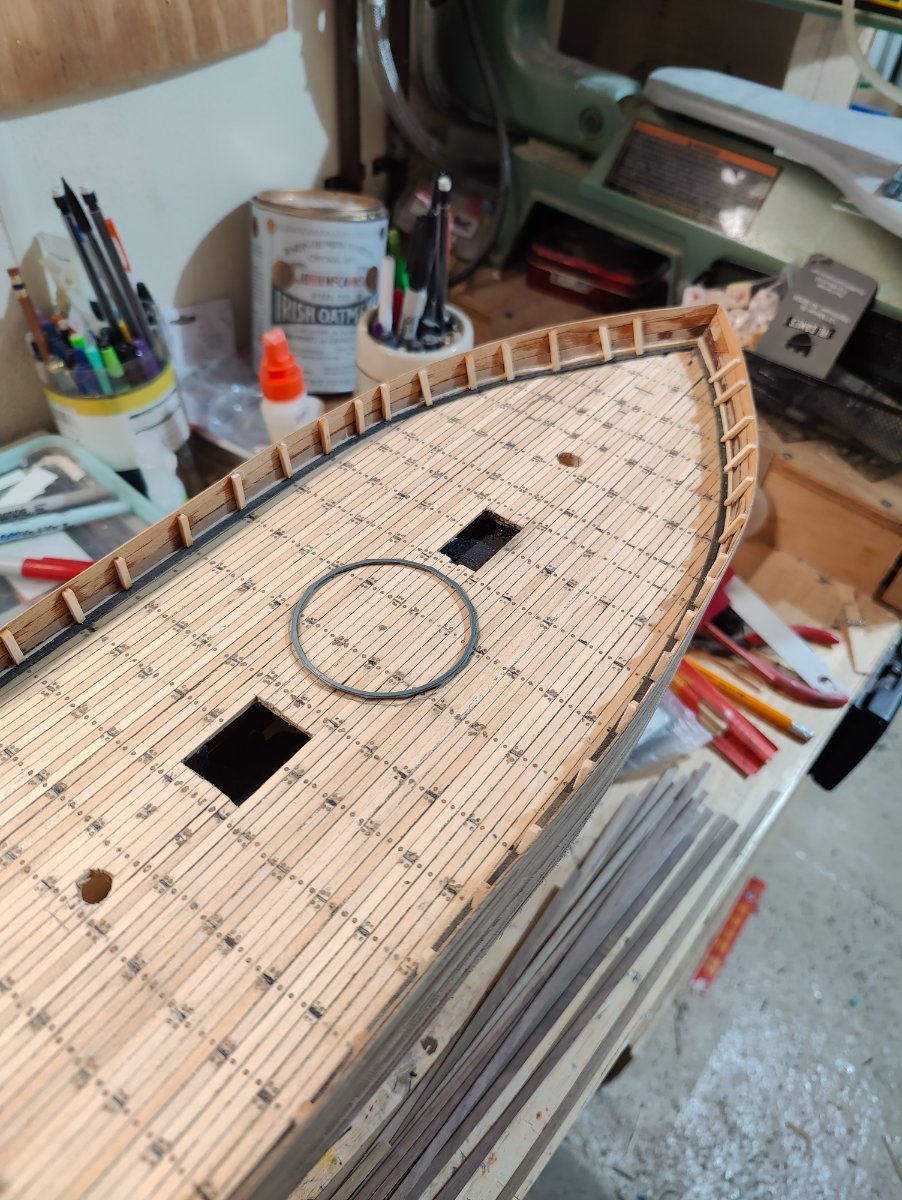
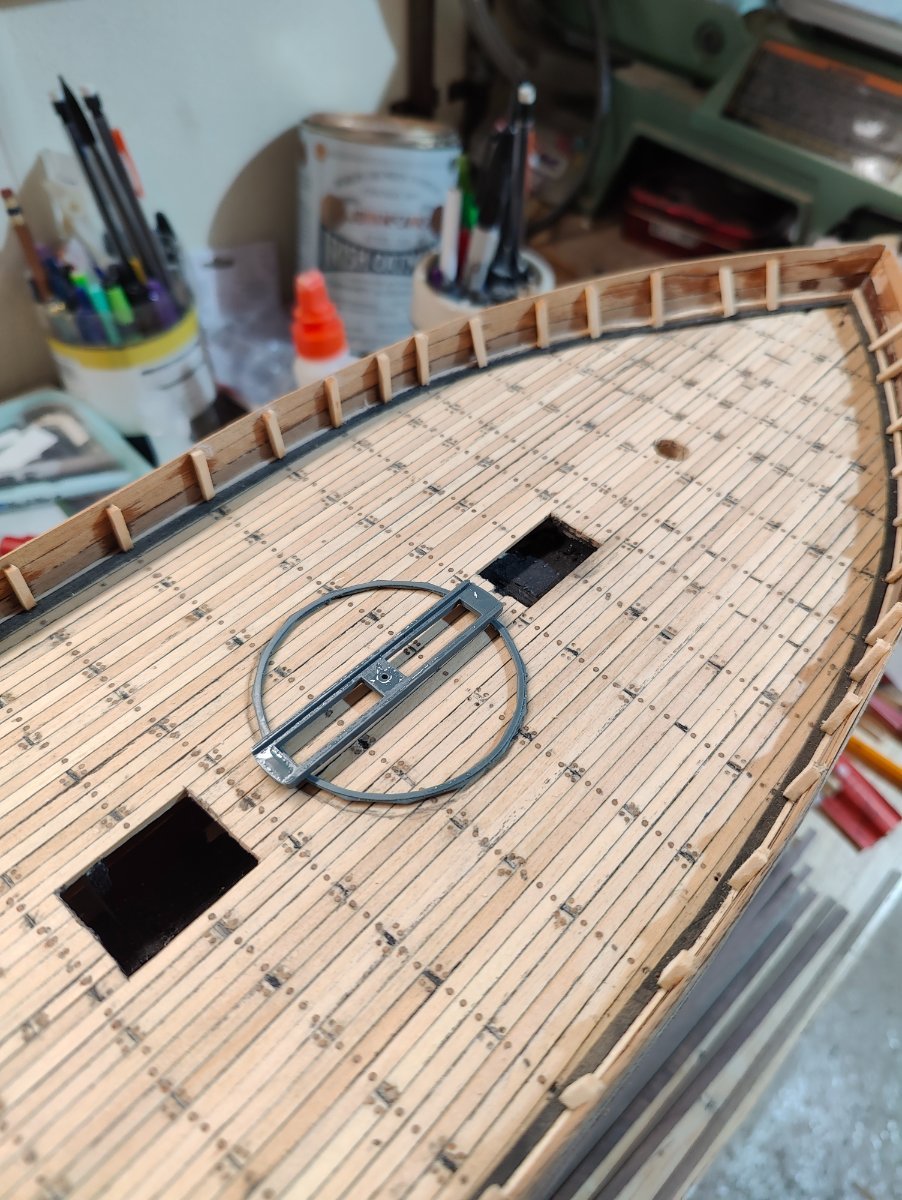
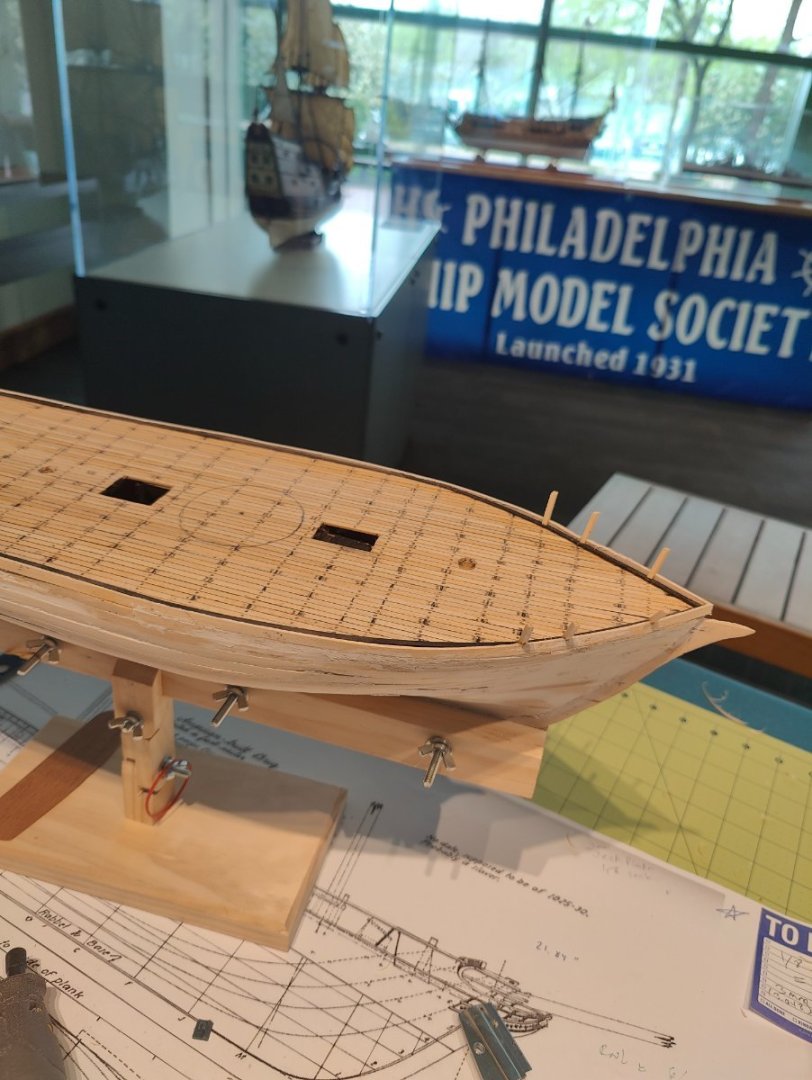
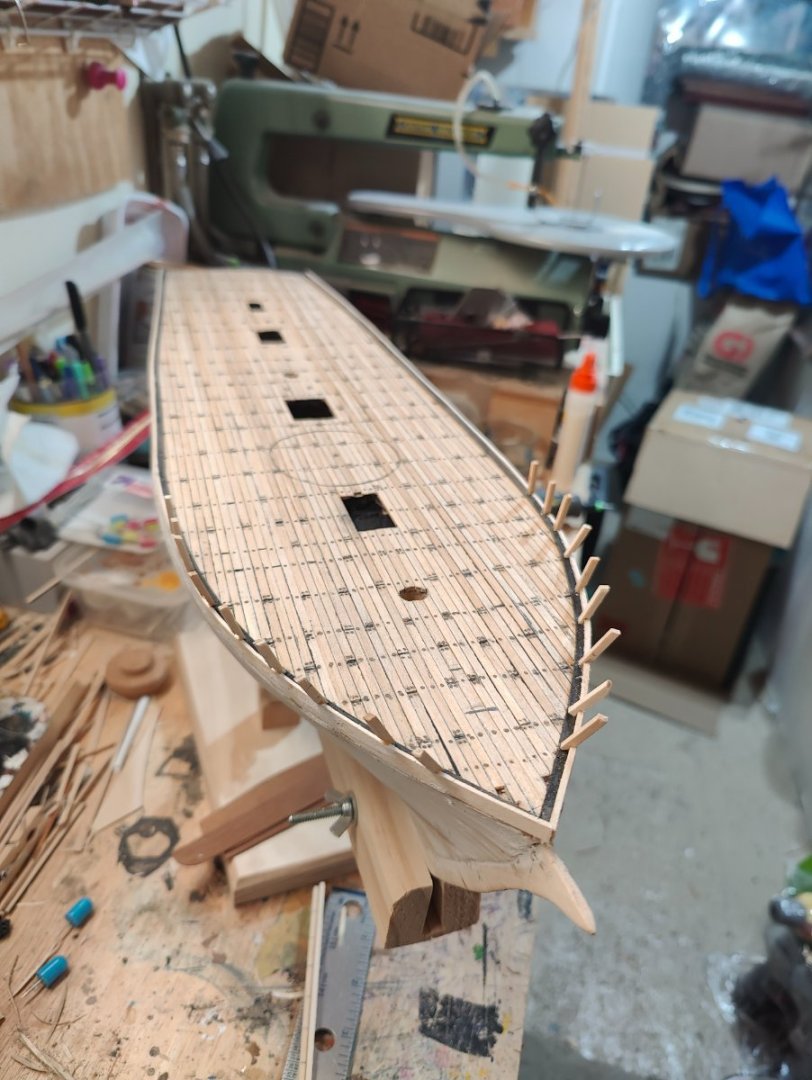
I got the channels installed Small jumps! I measured out the pivot gun ring and marked it on deck. I started on the bulwark frames.


-
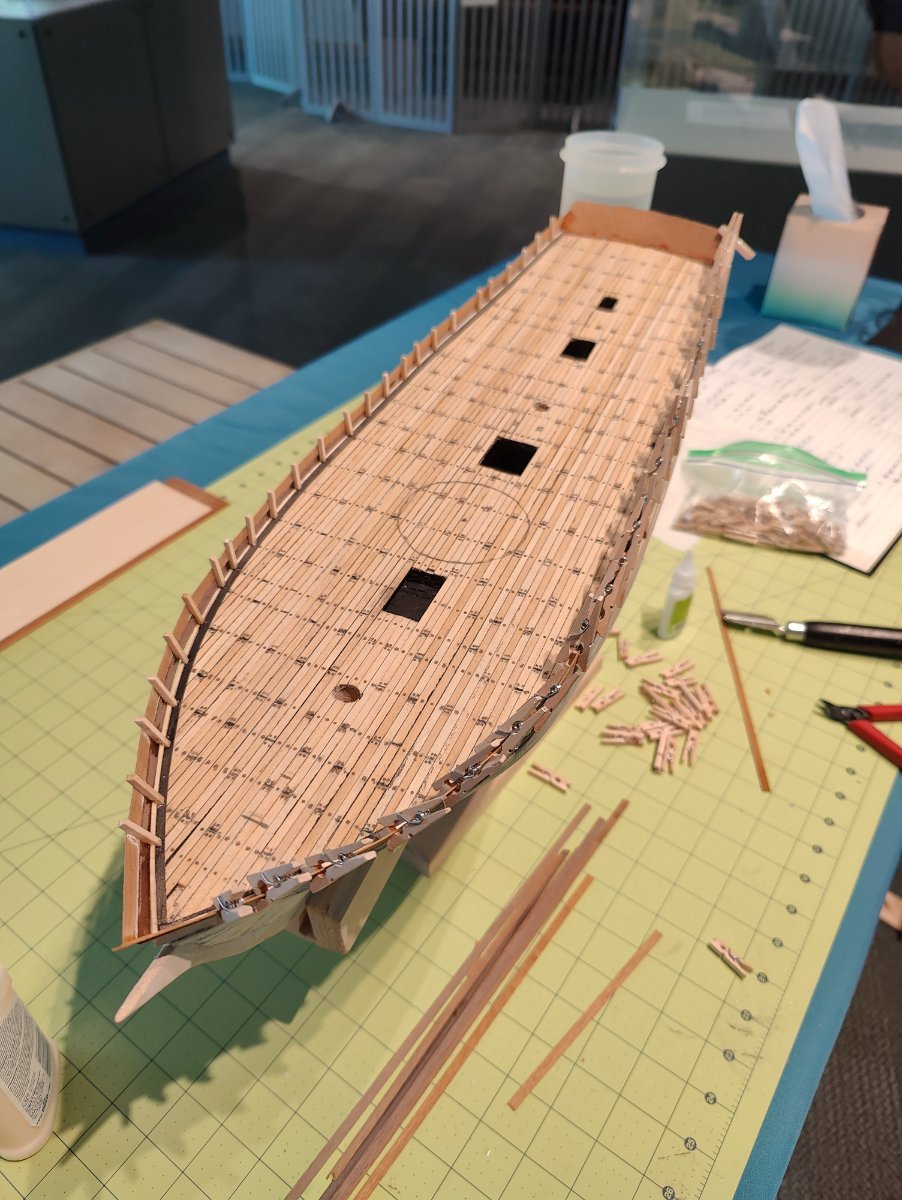
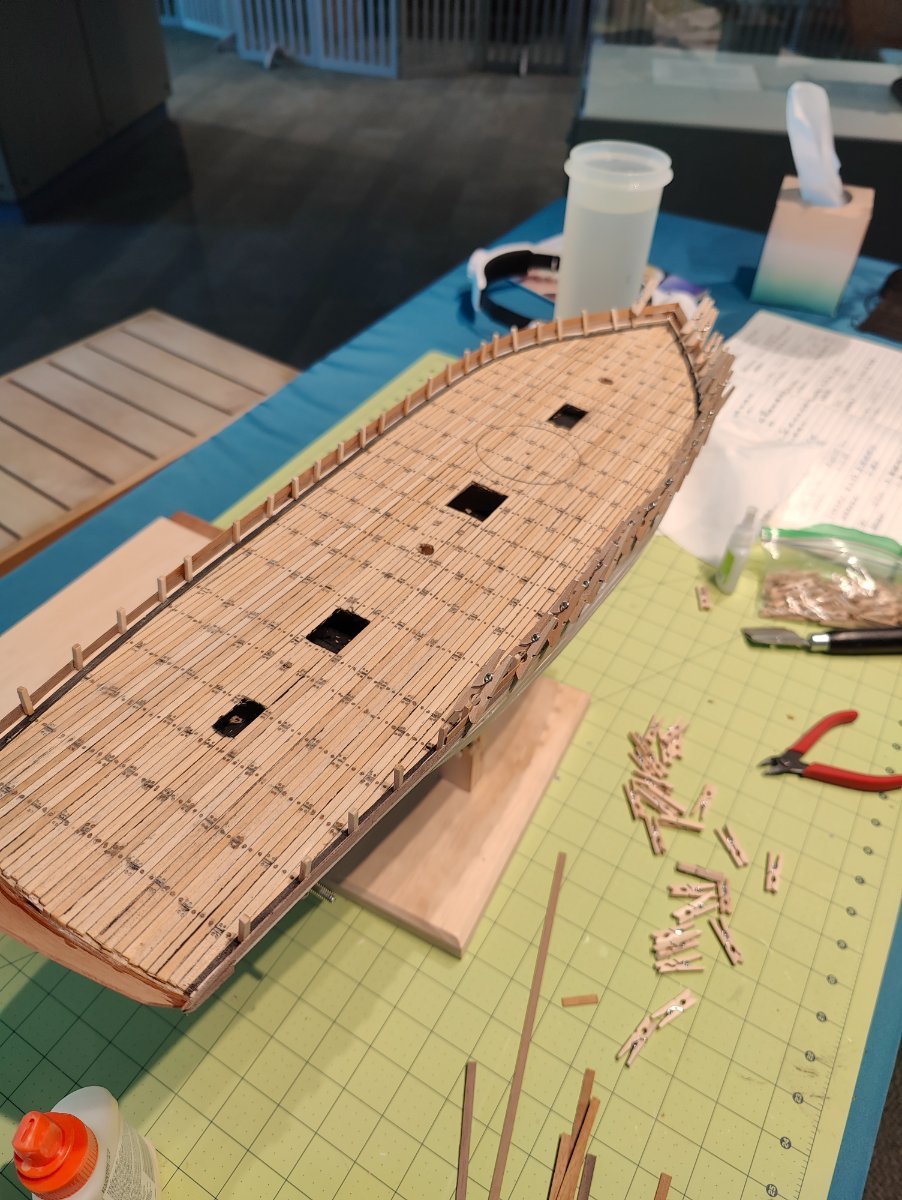
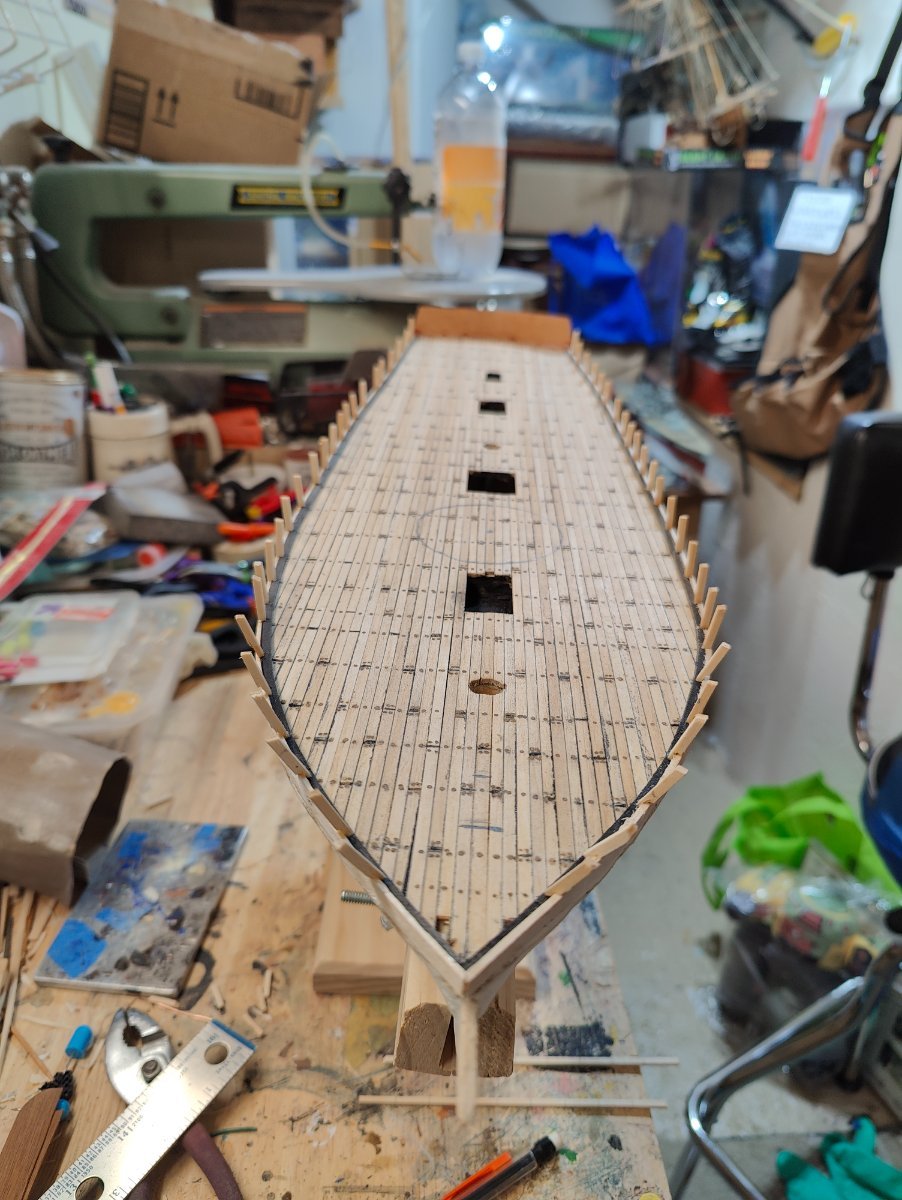
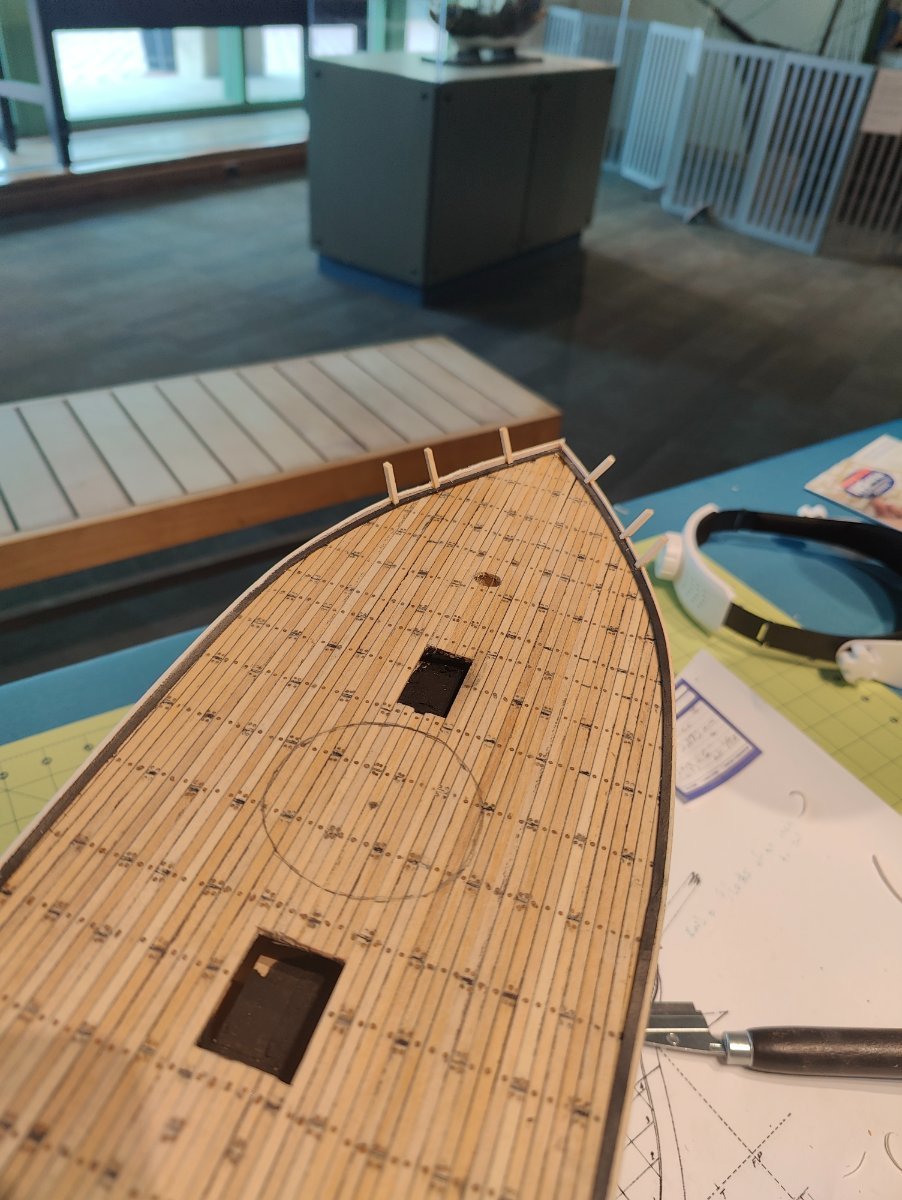
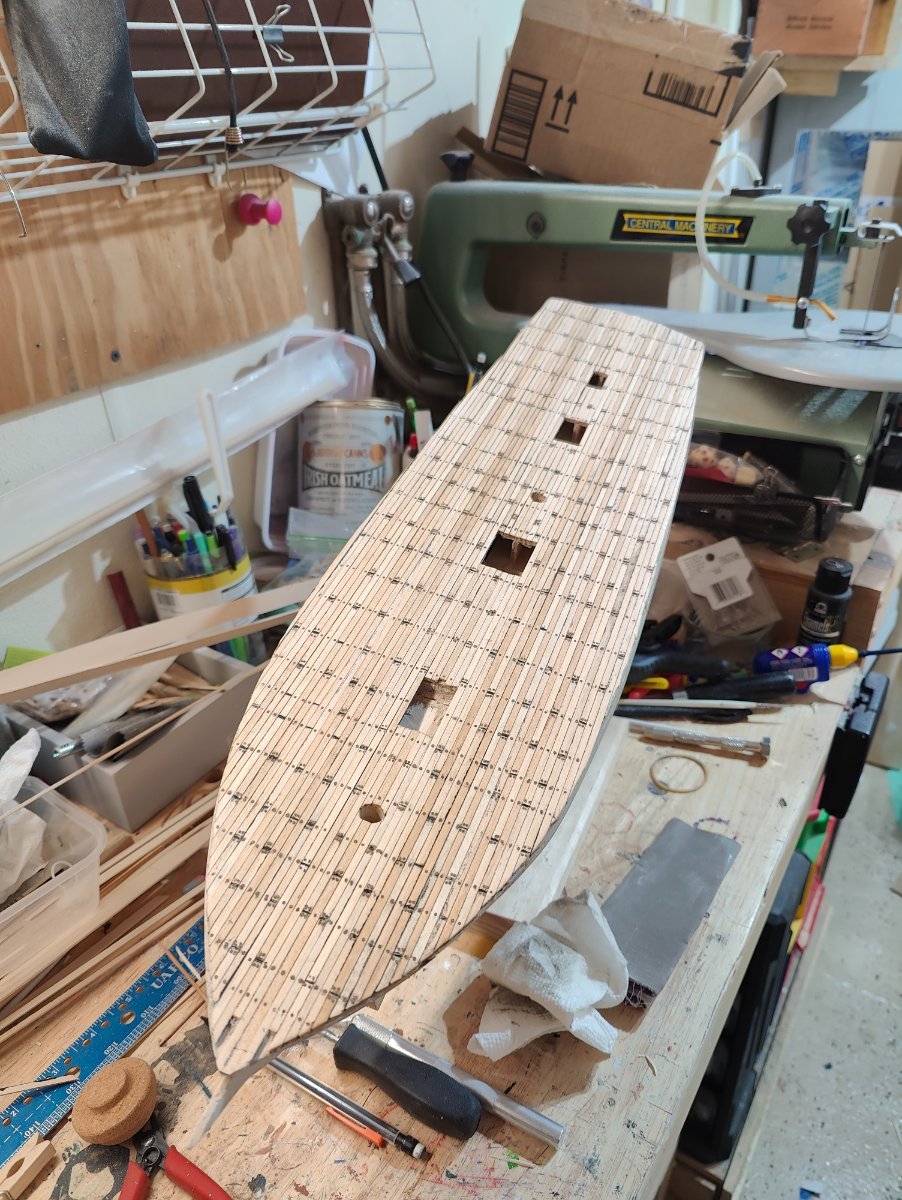
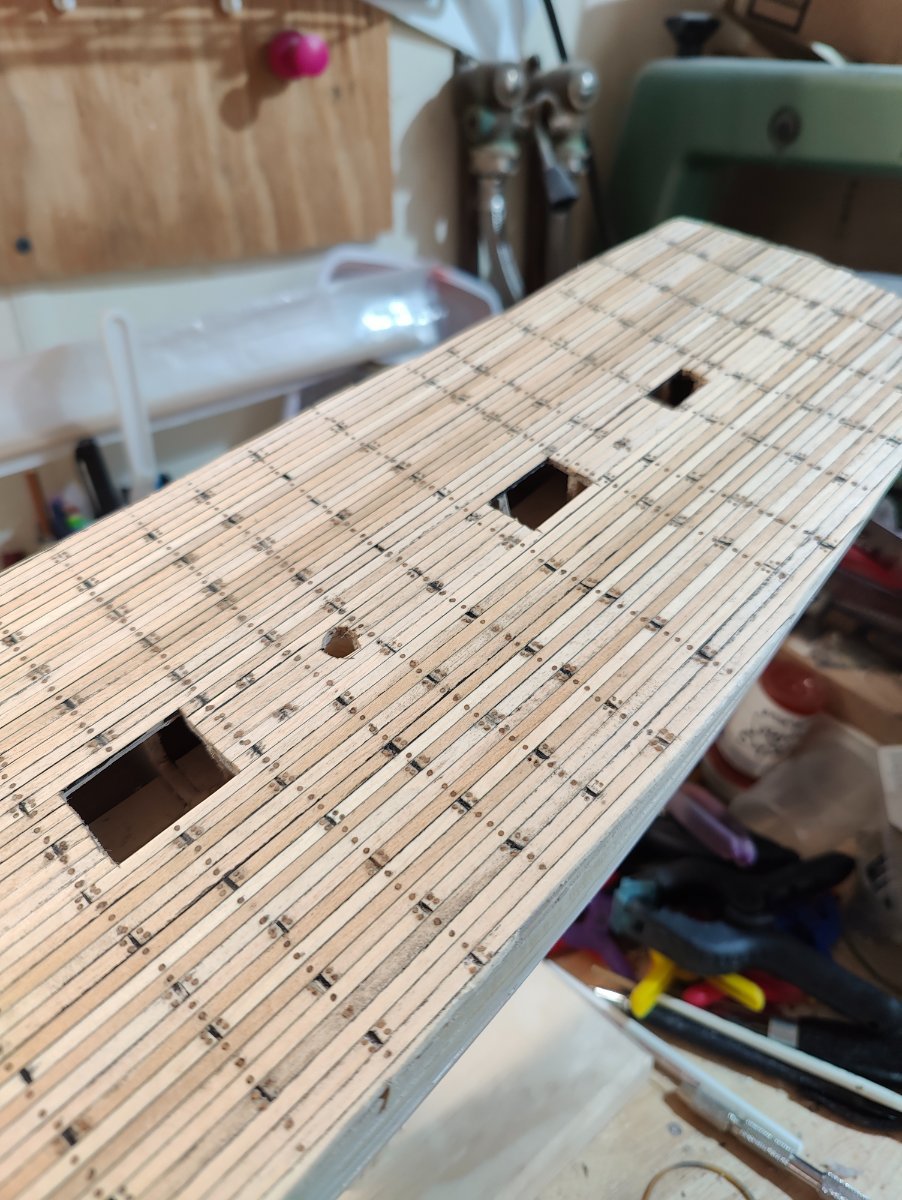
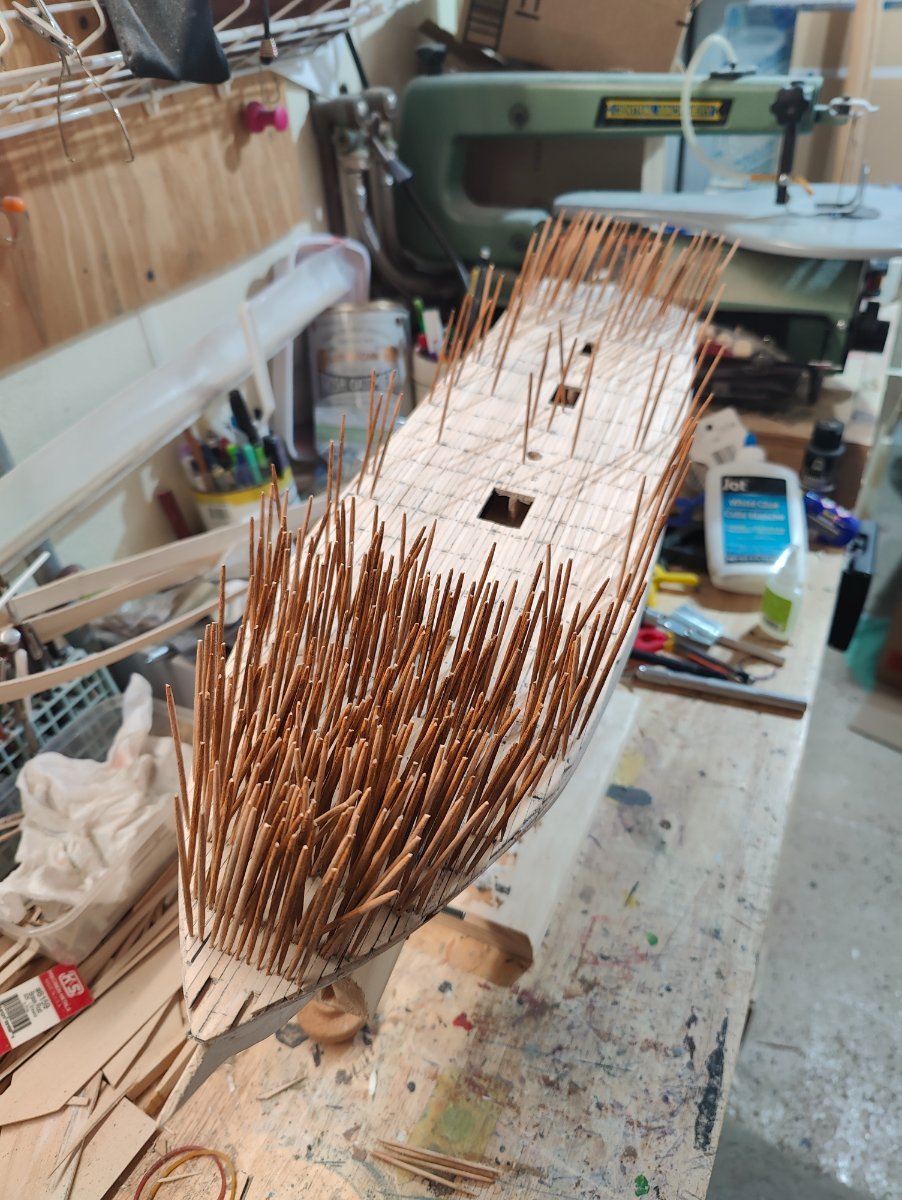
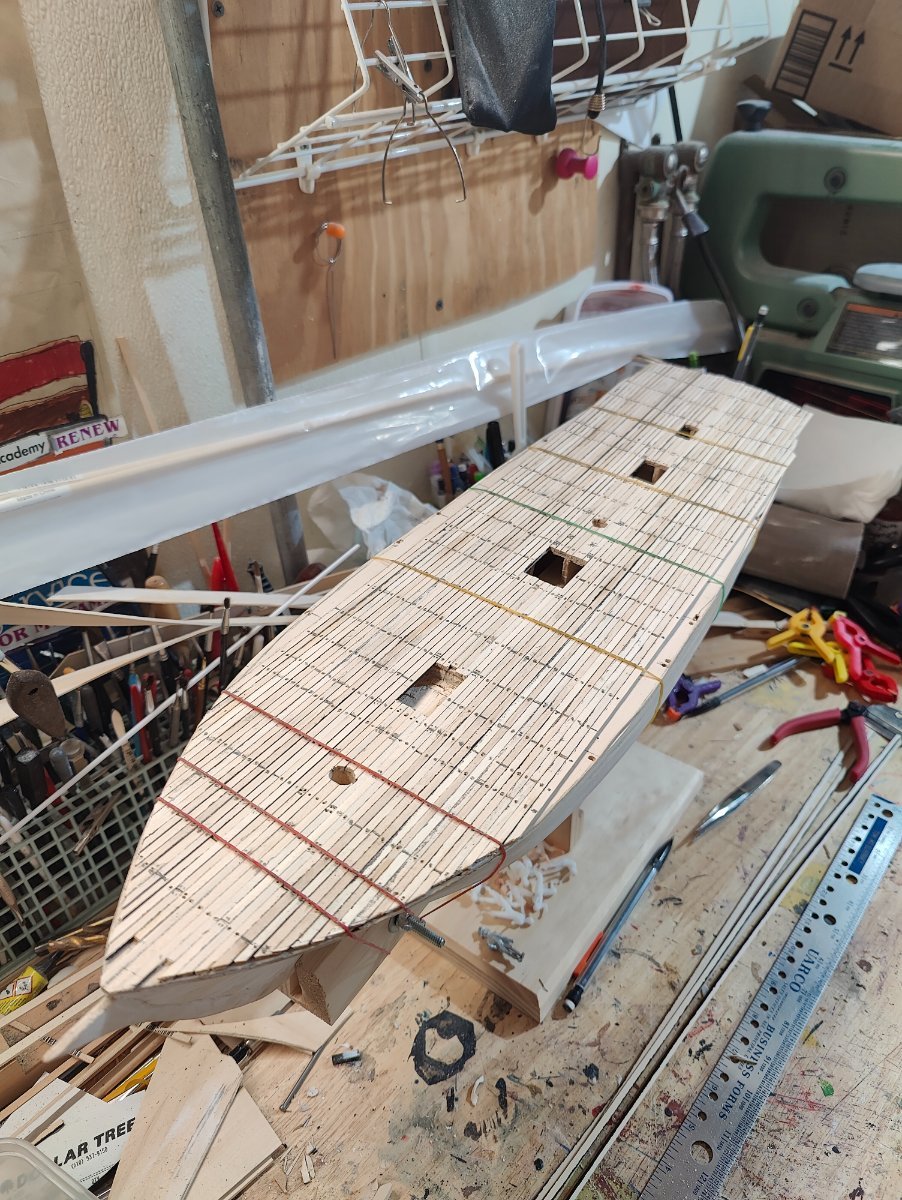
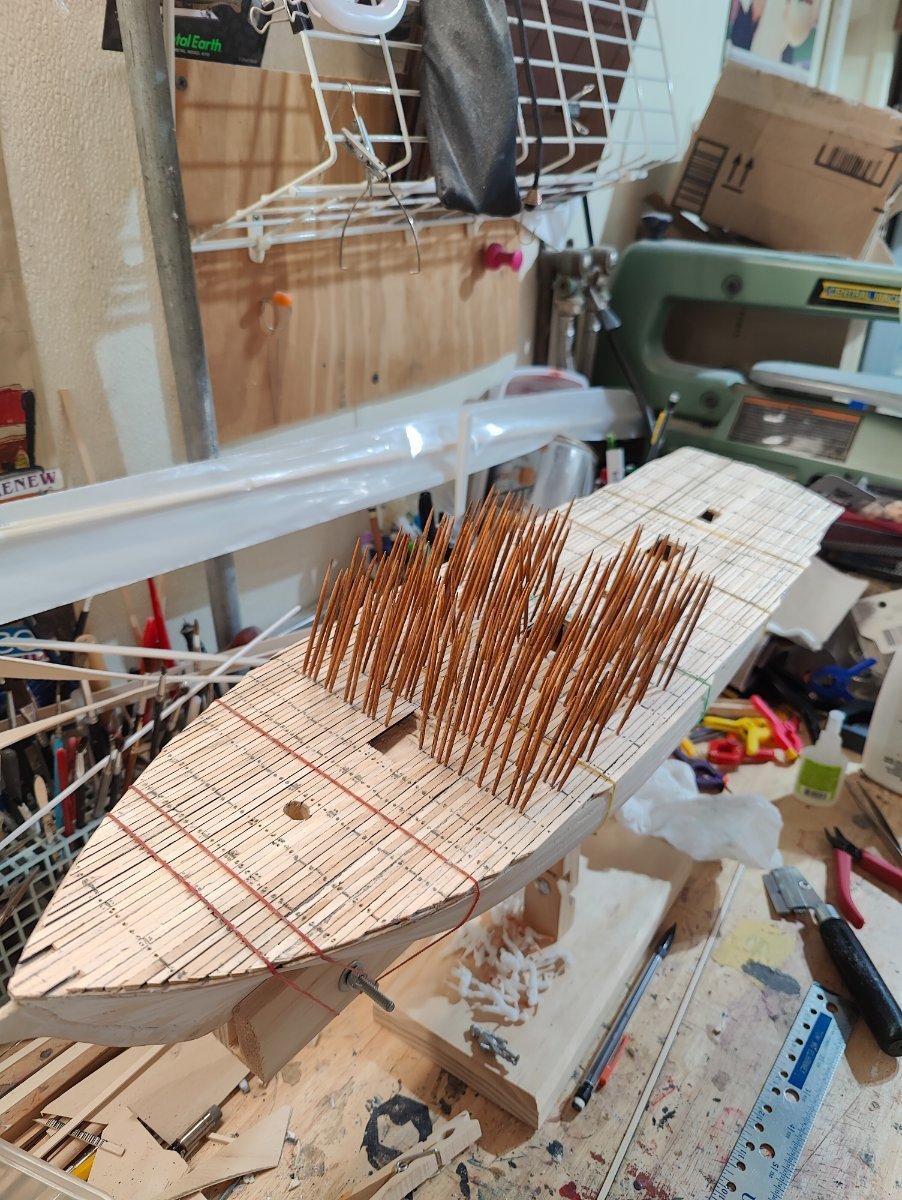
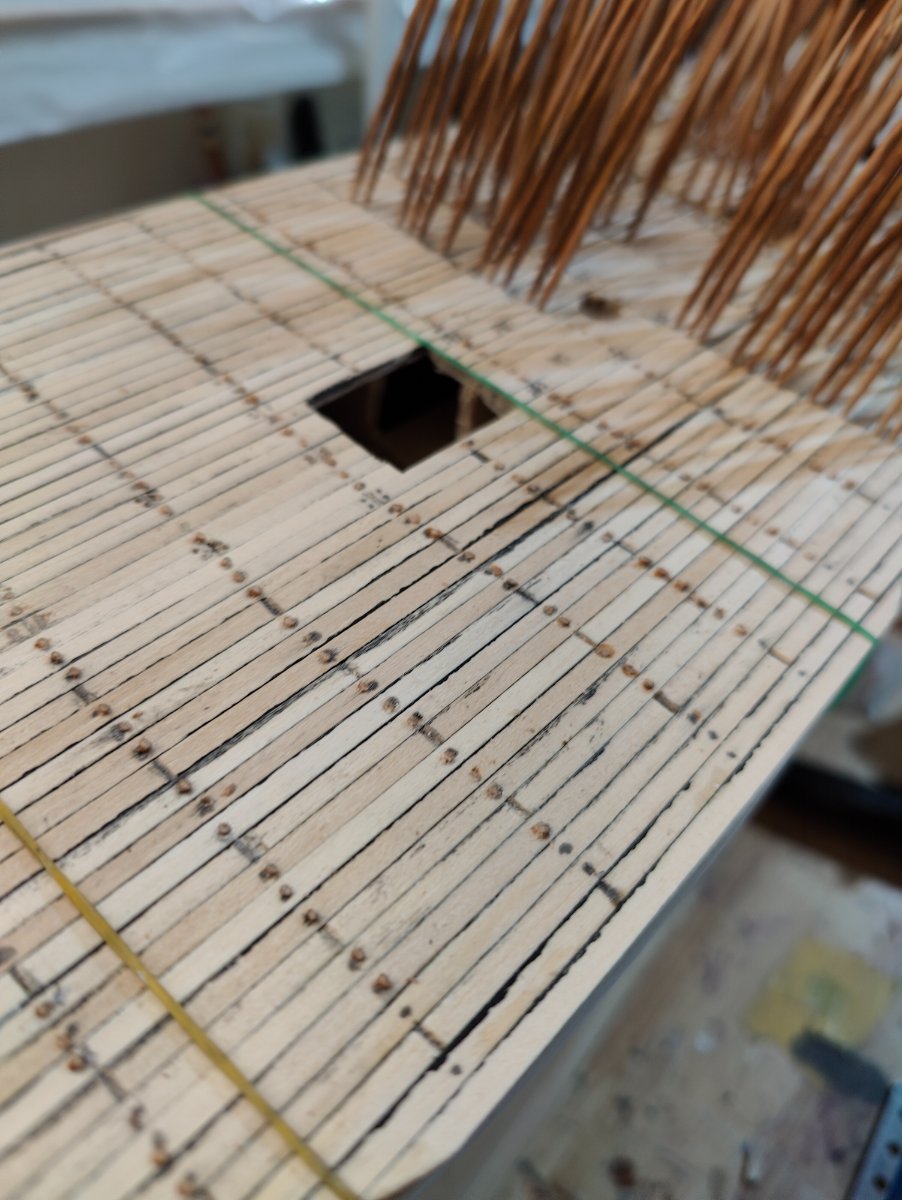
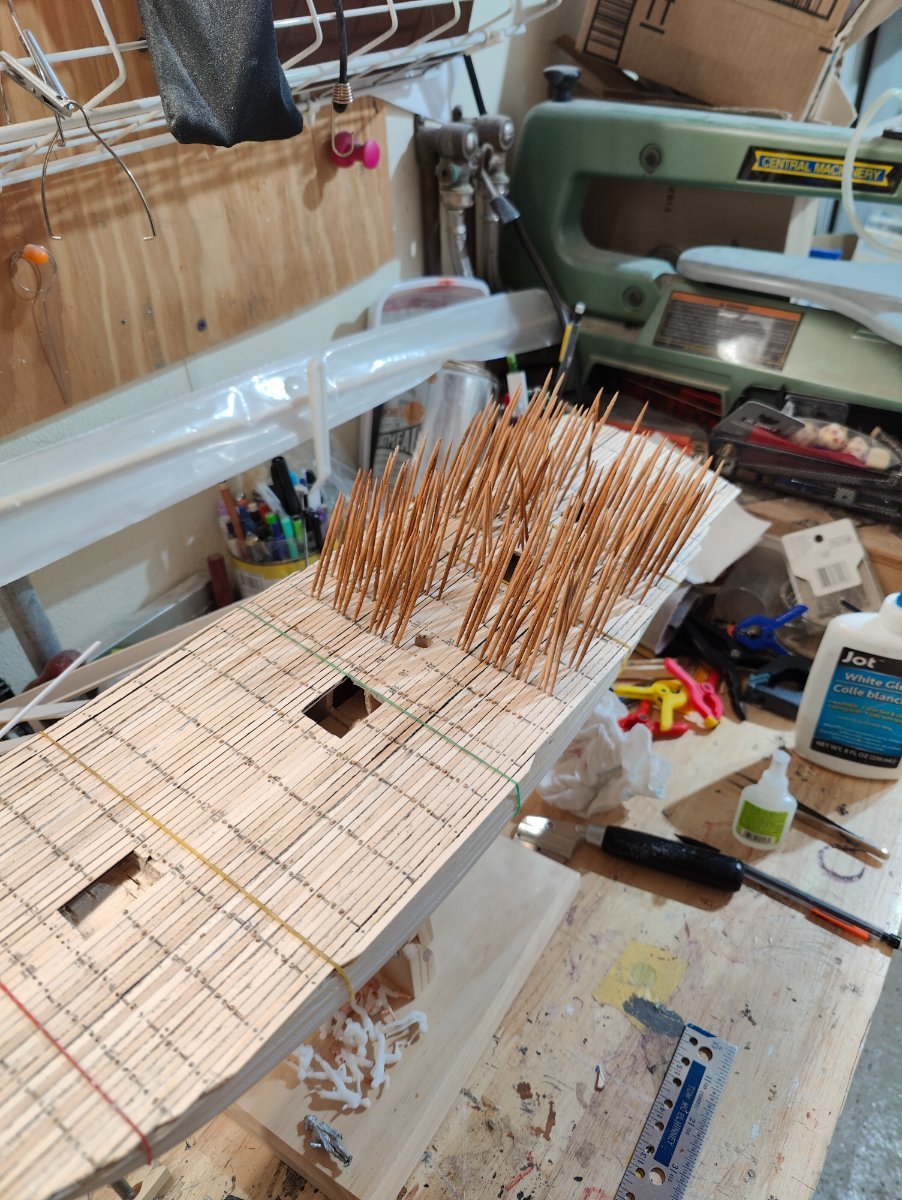
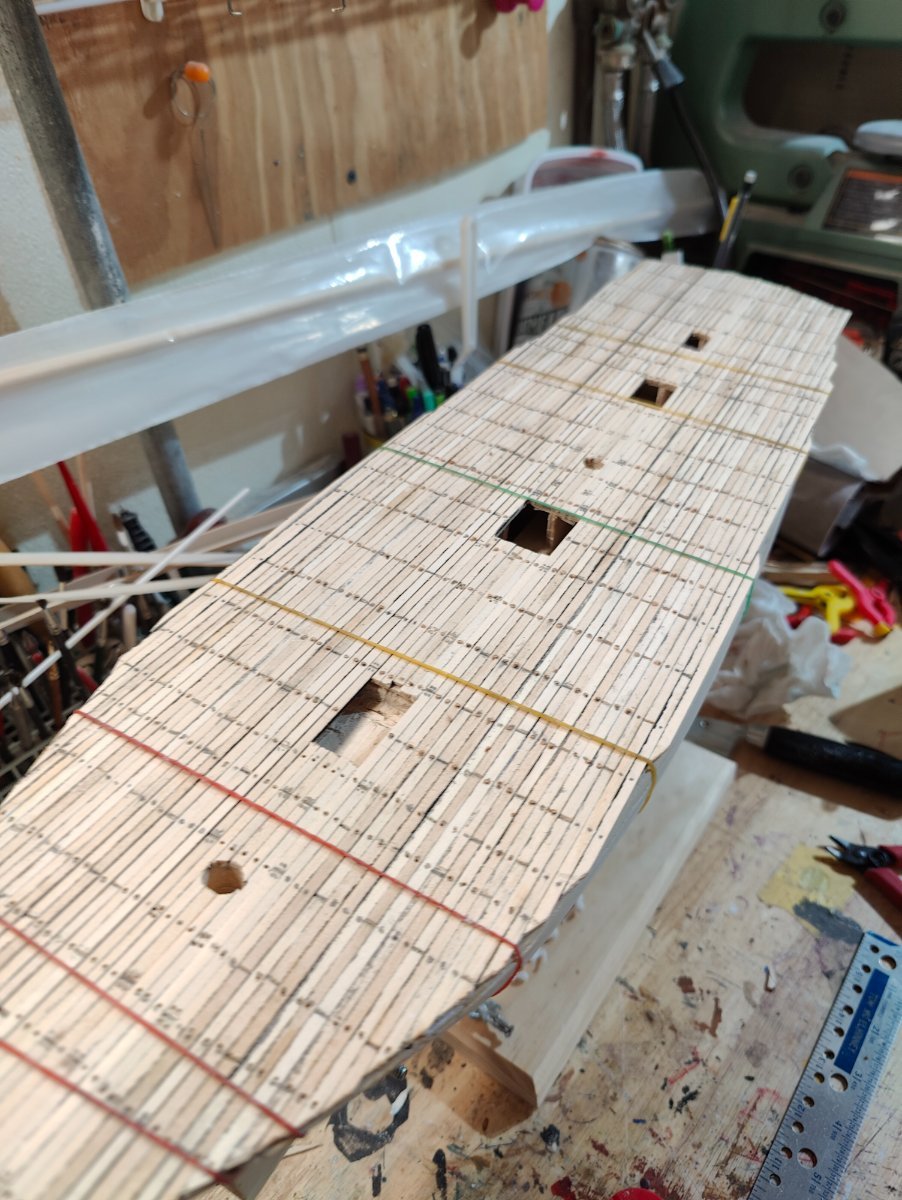
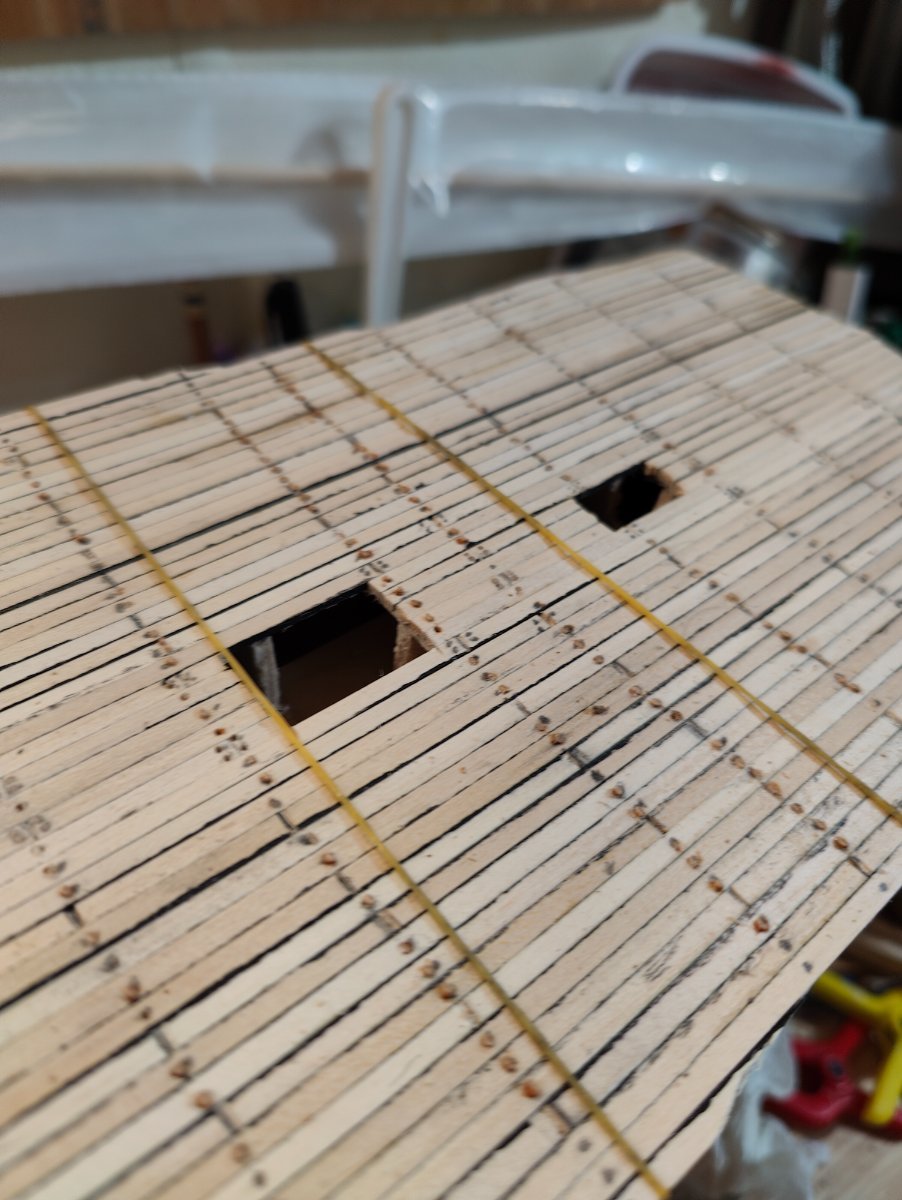
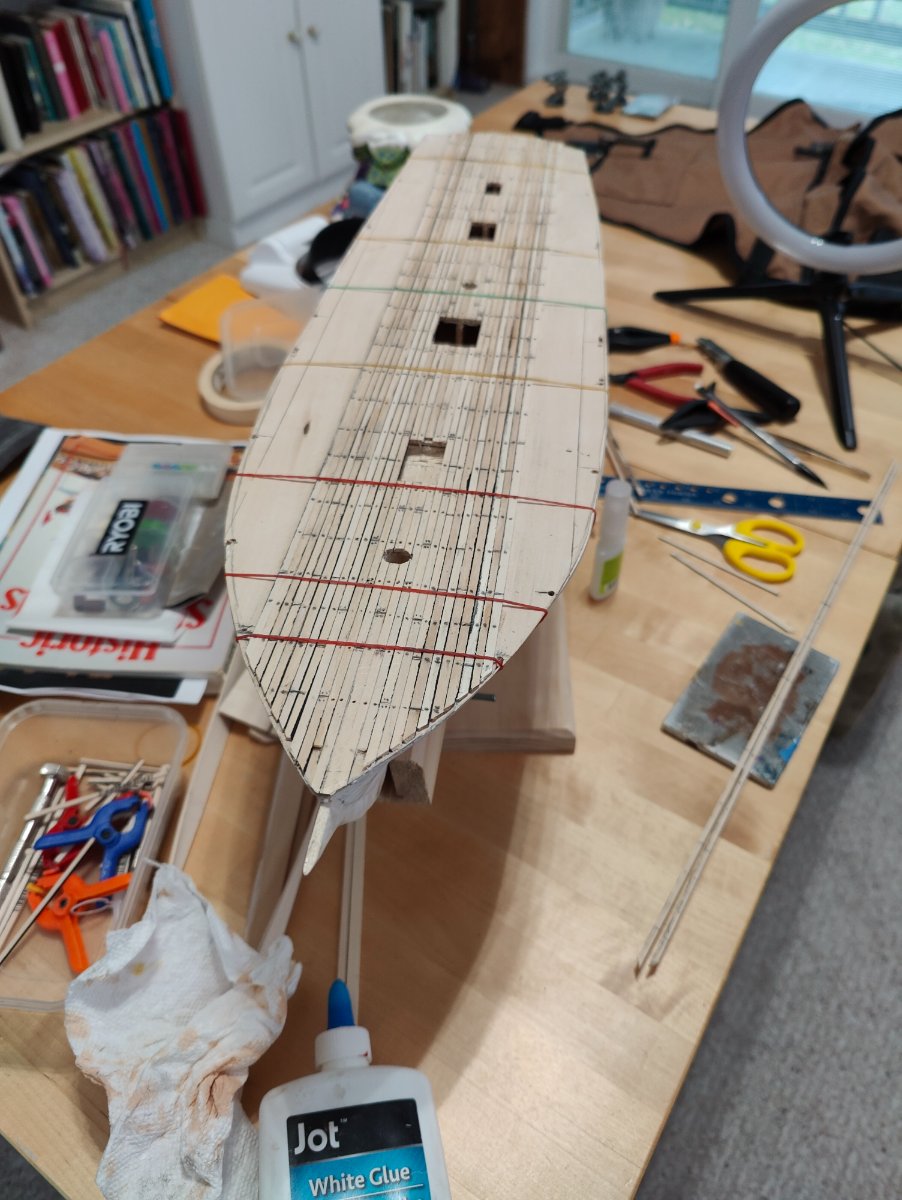
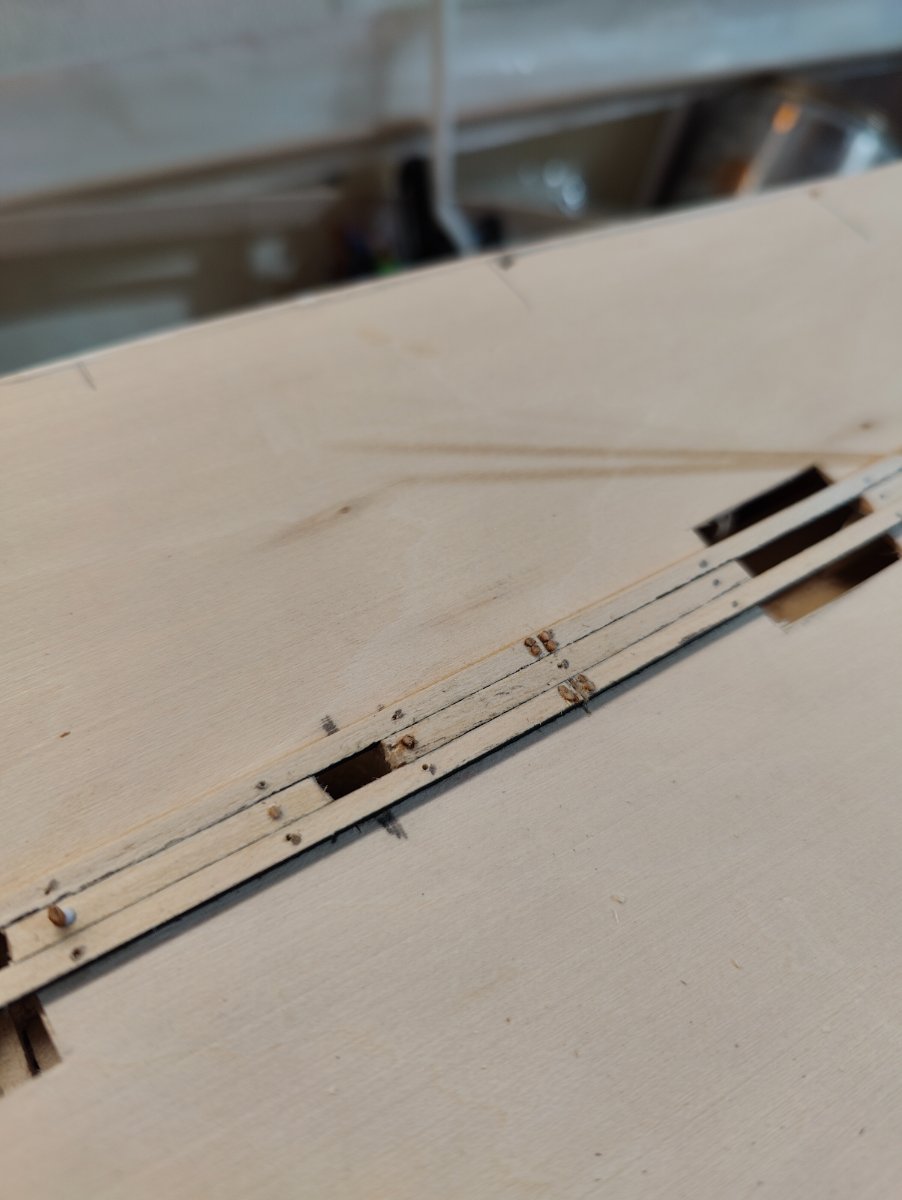
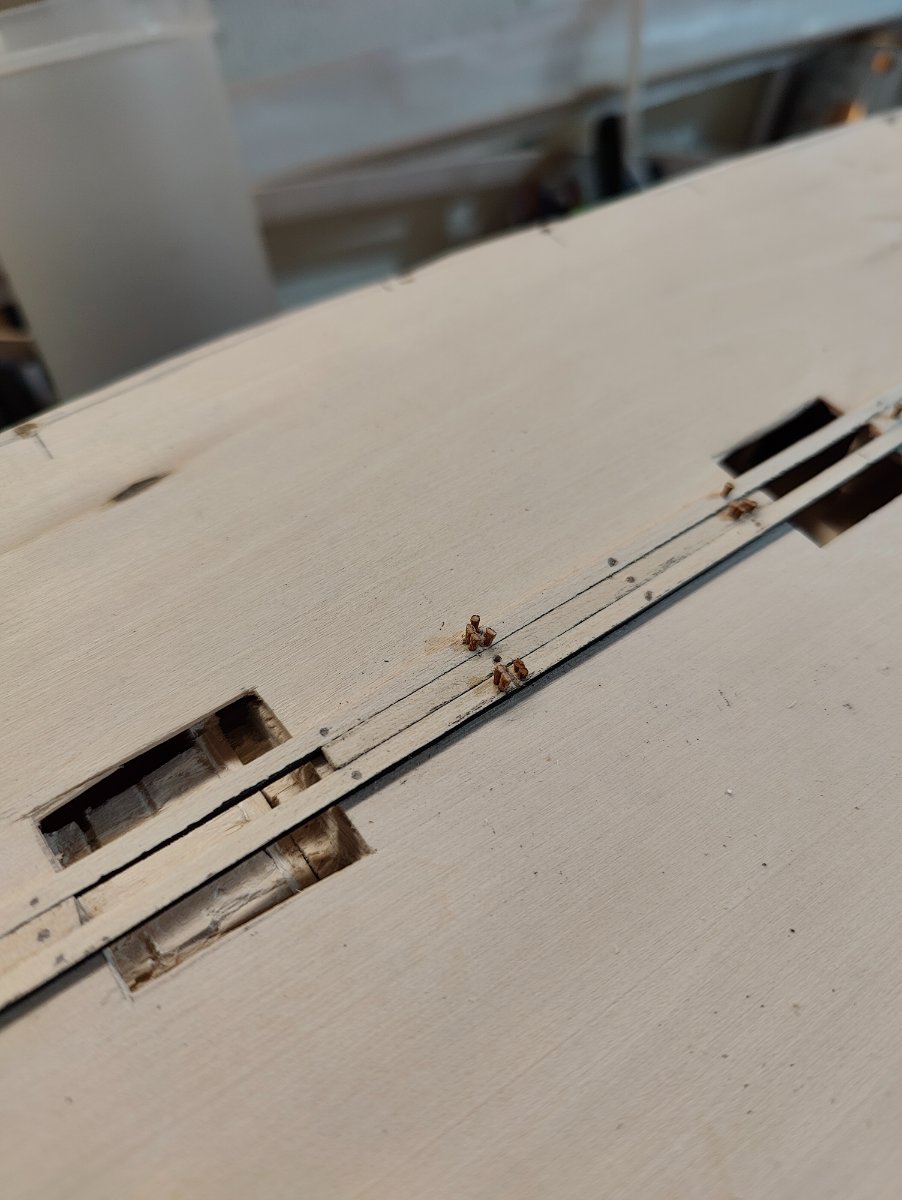
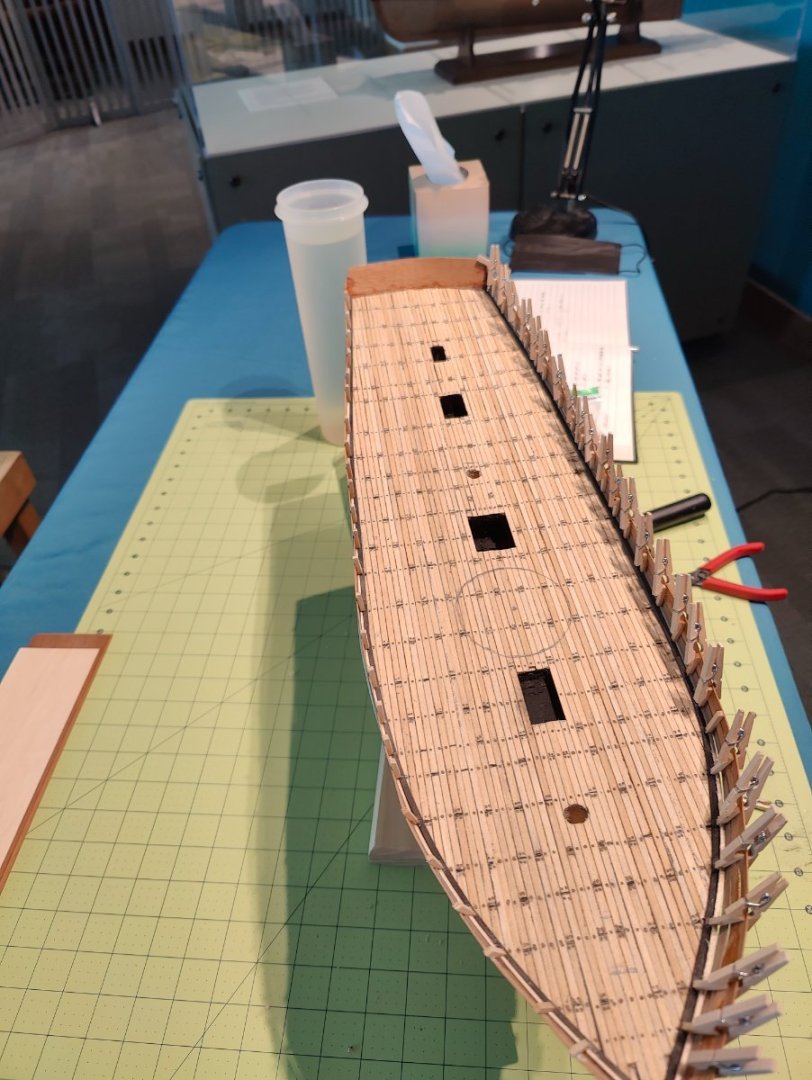
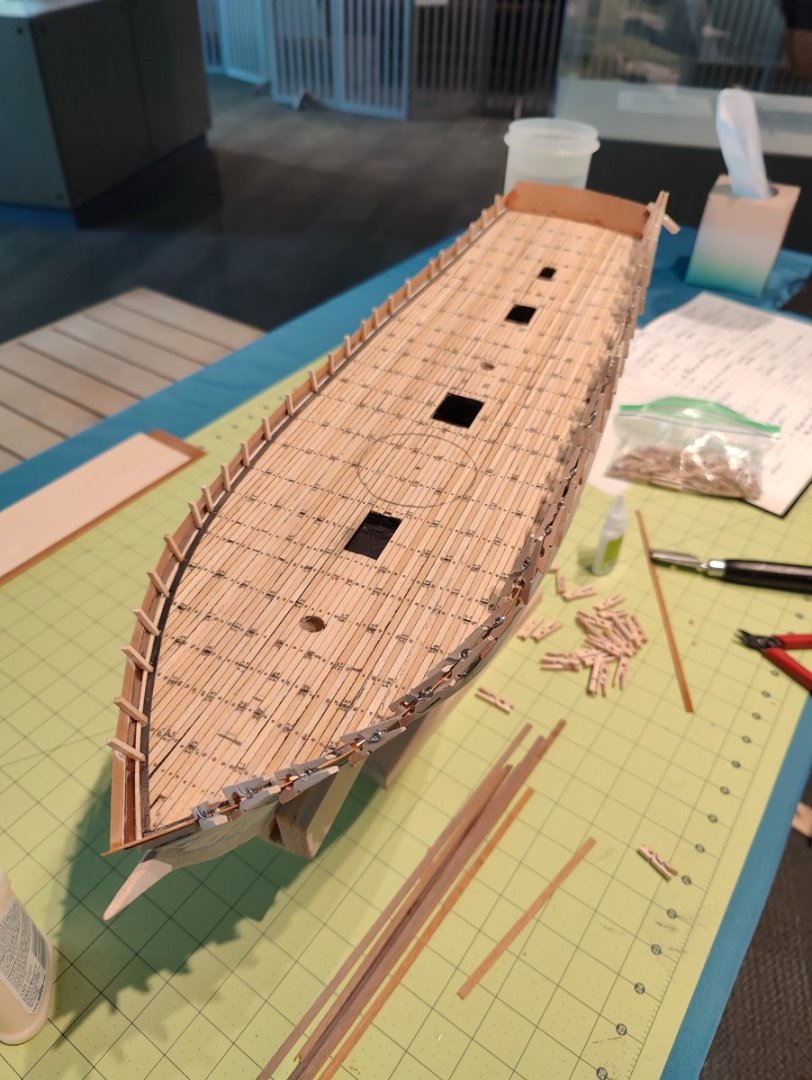
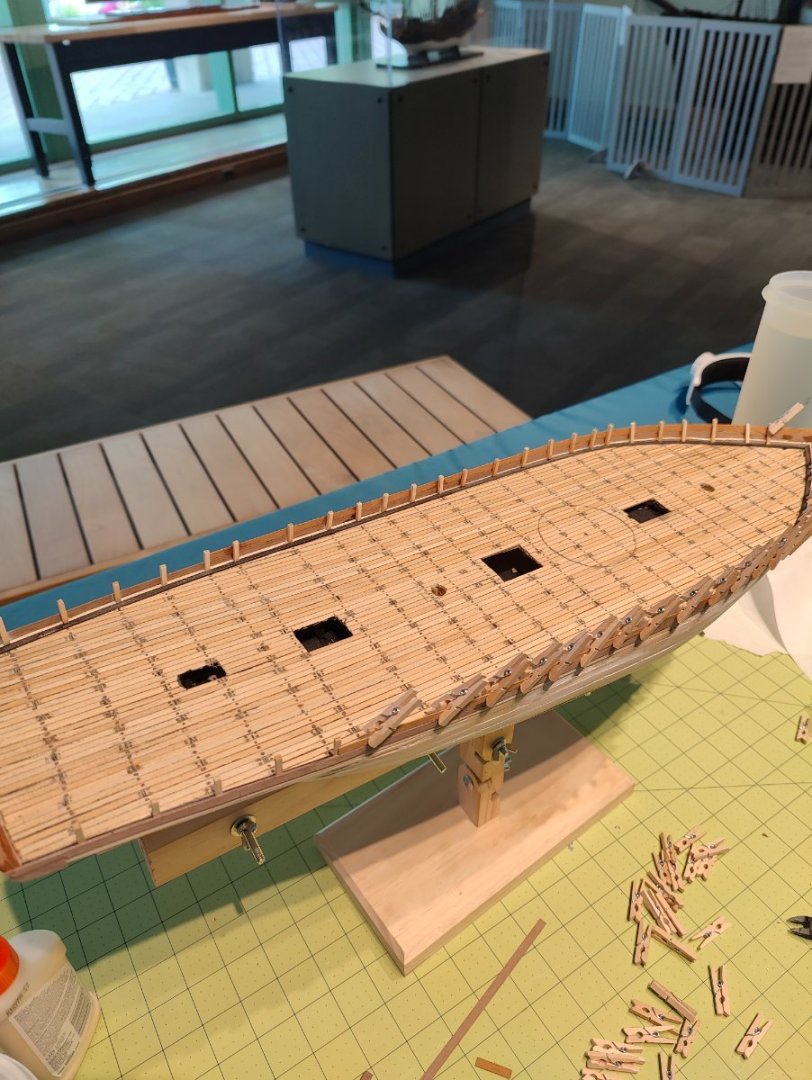
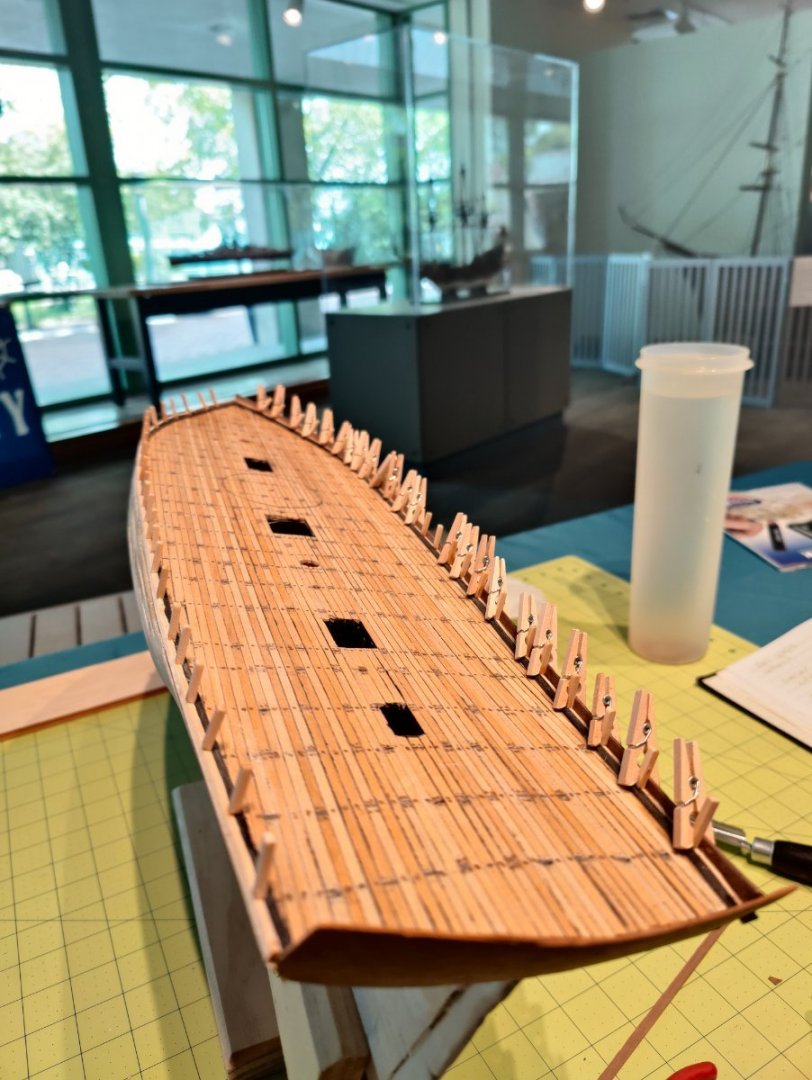
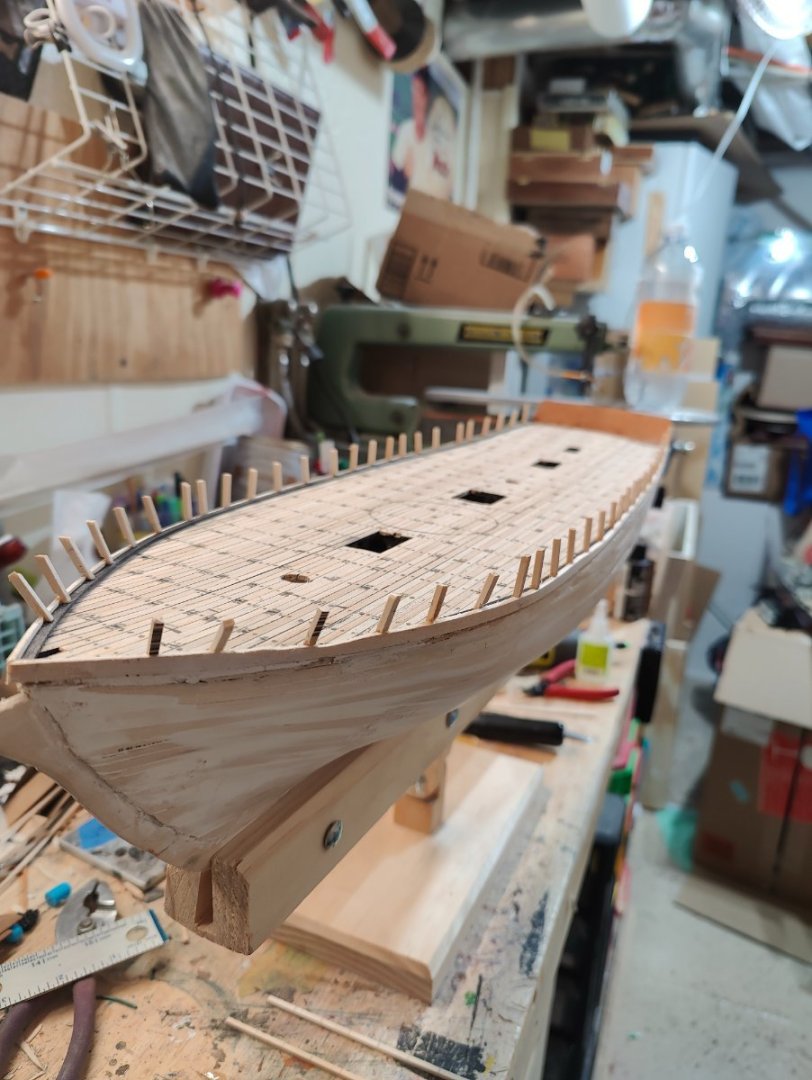
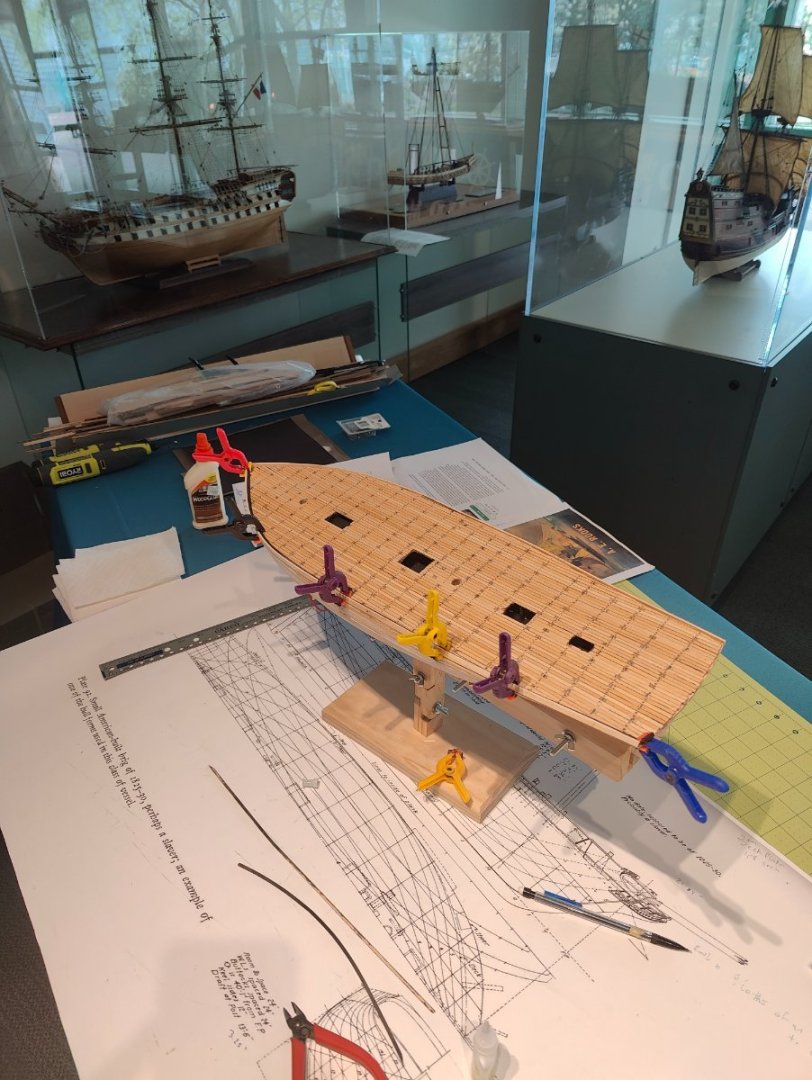
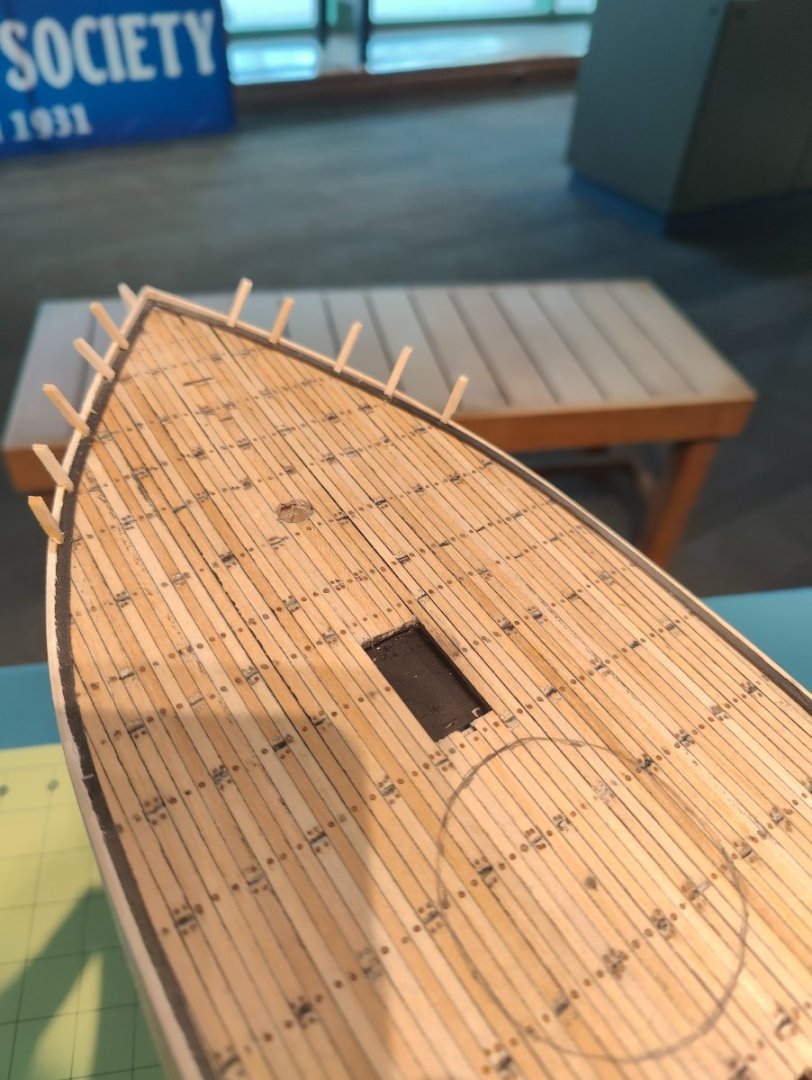
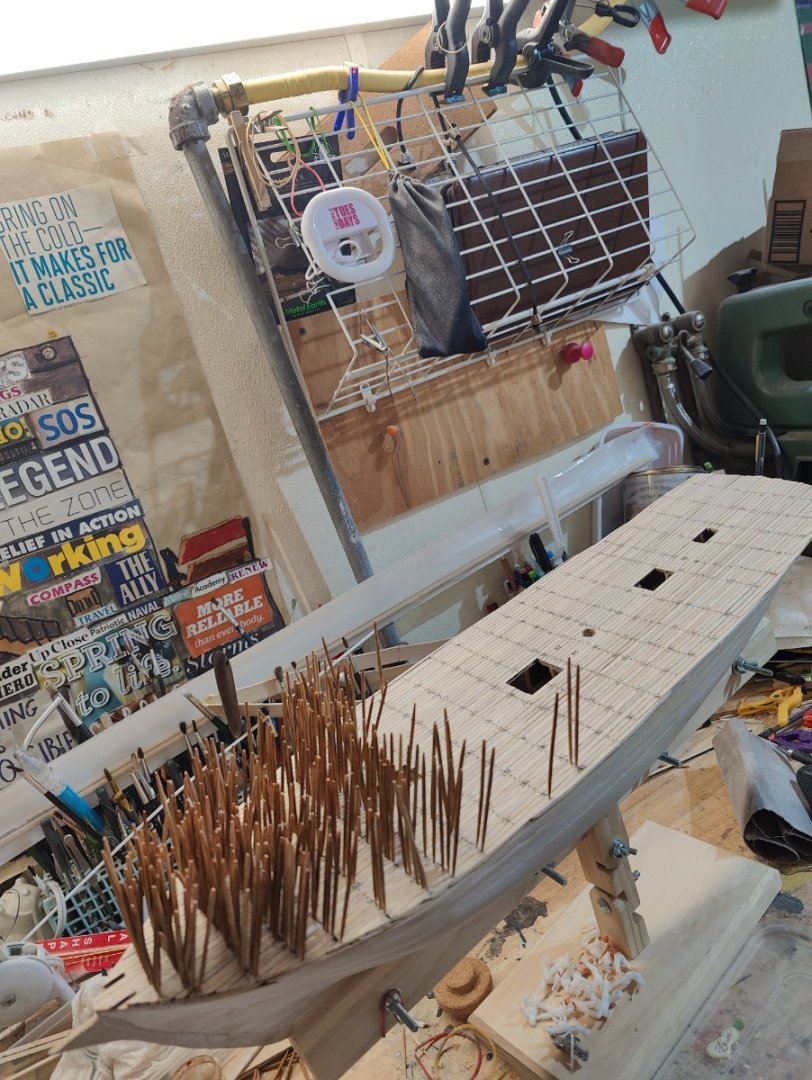
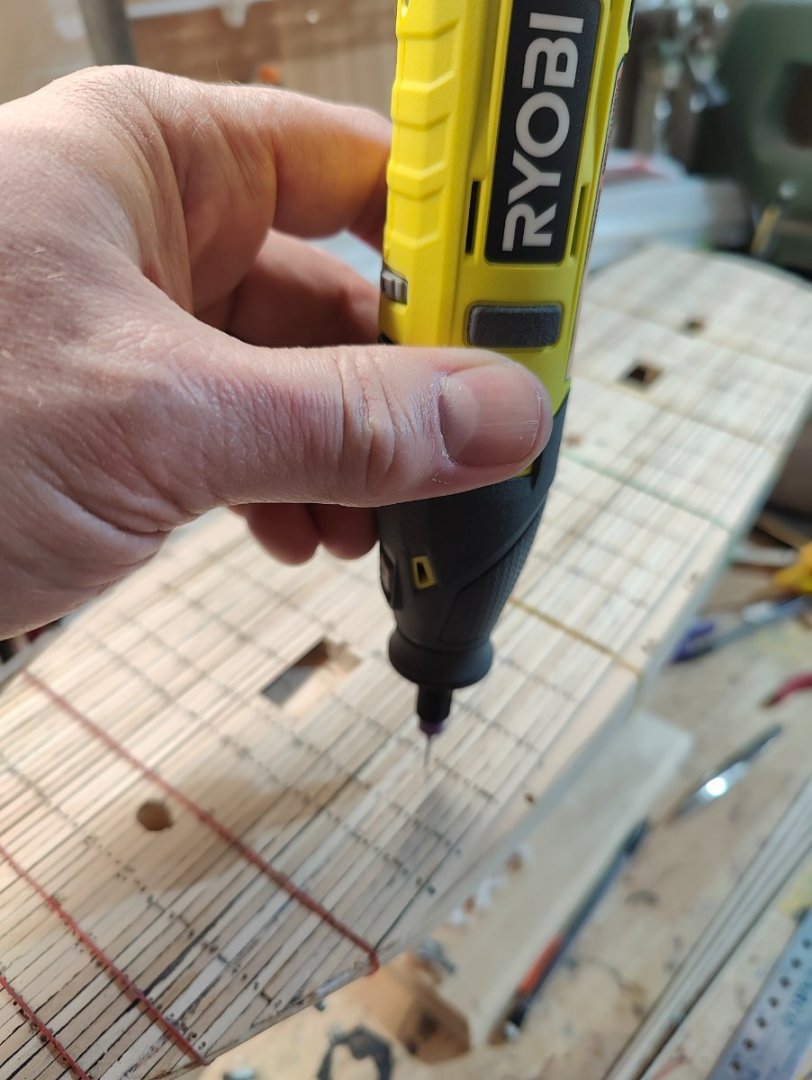
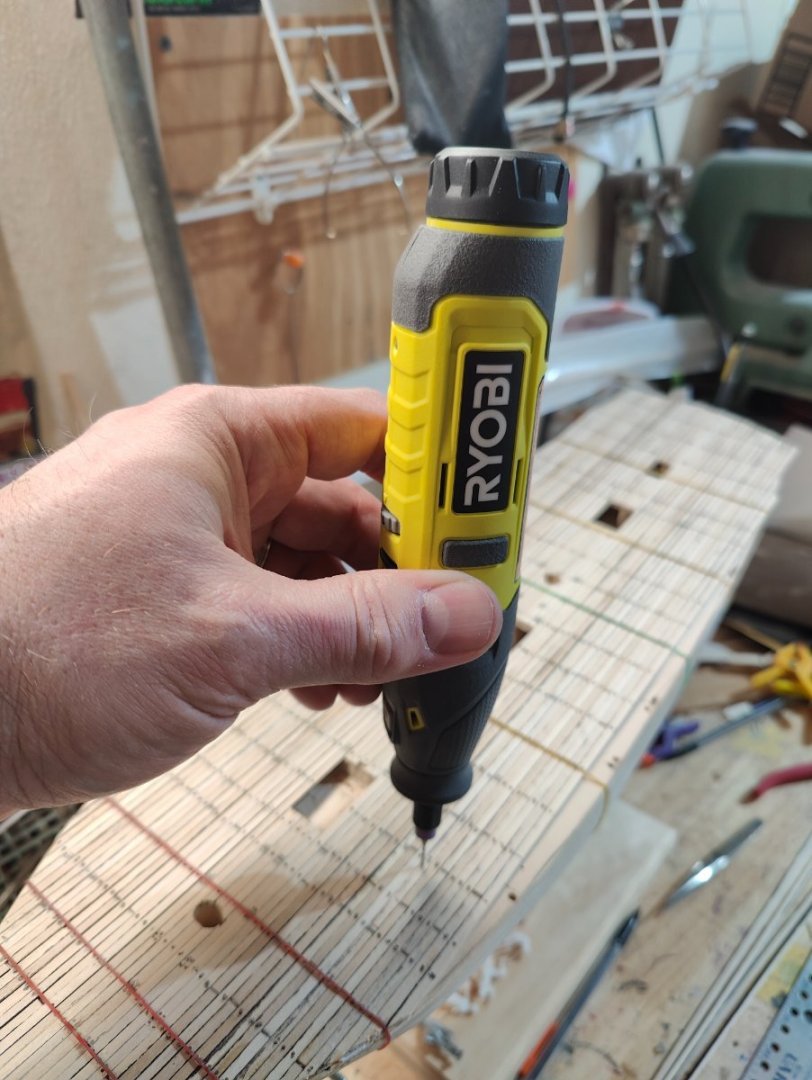
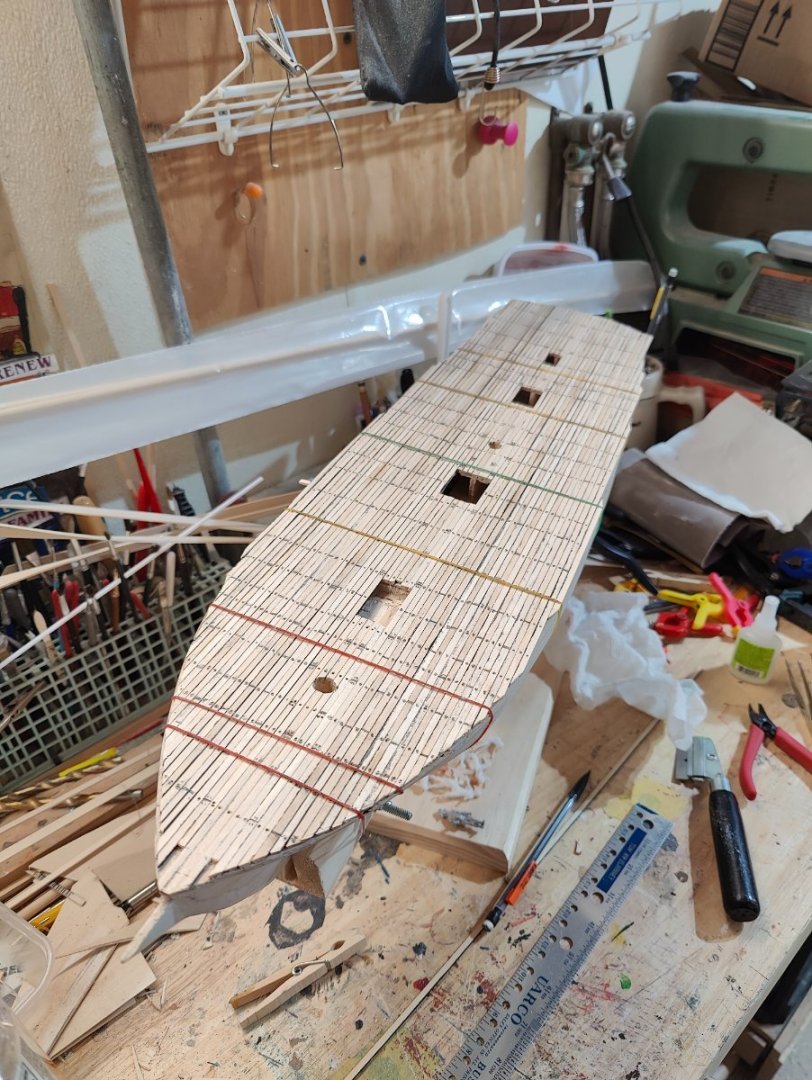
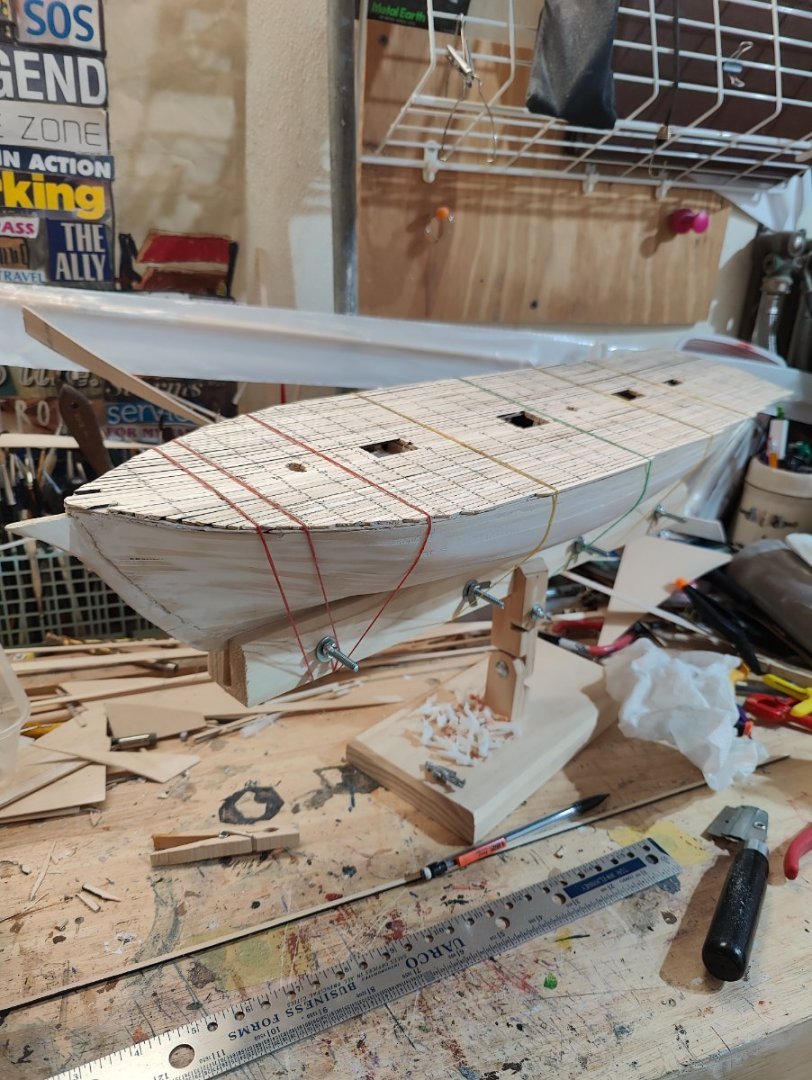
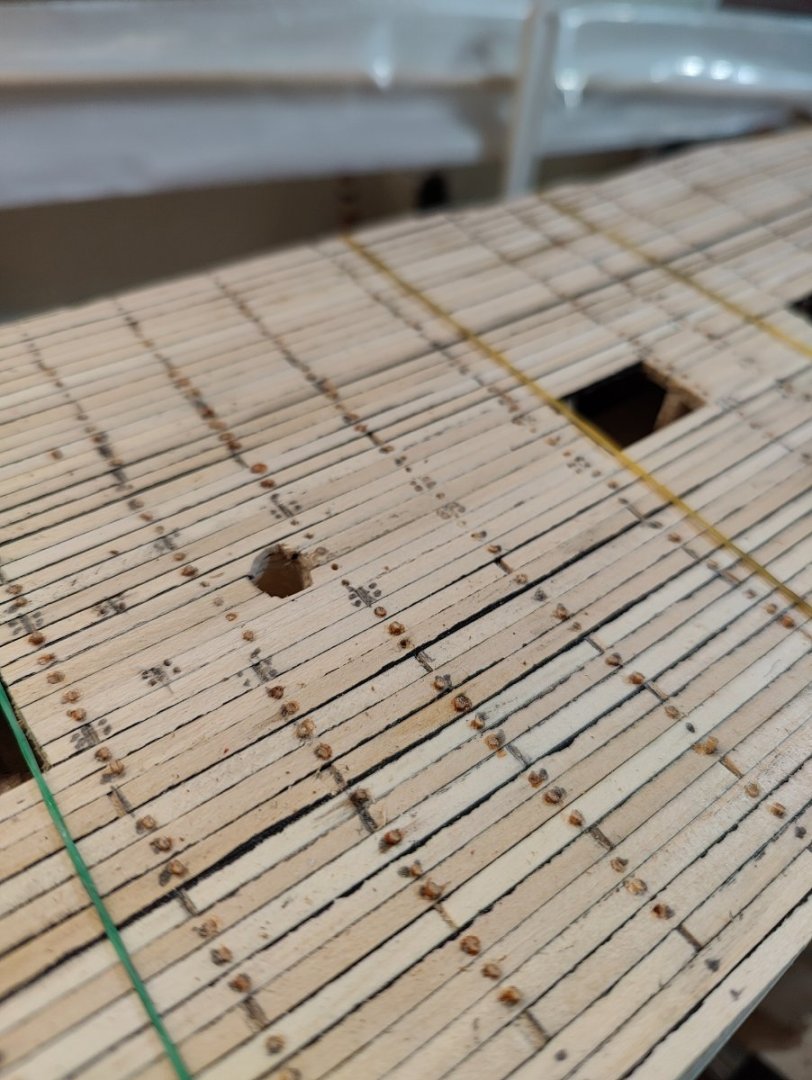
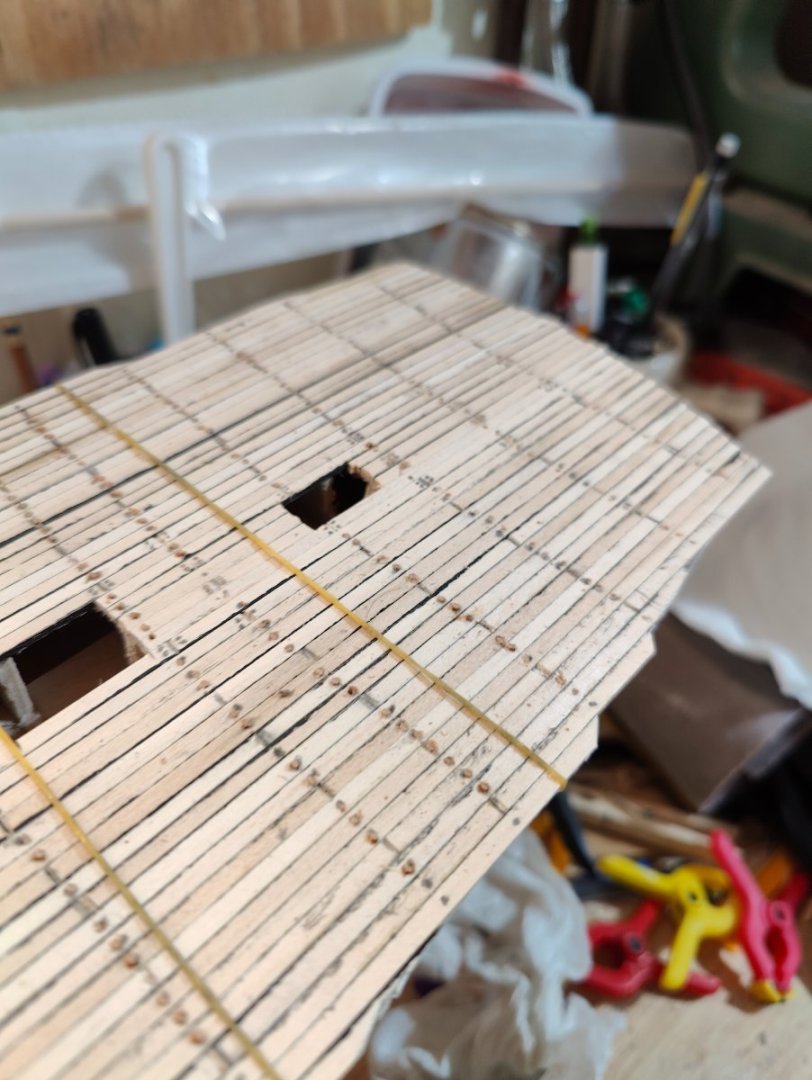
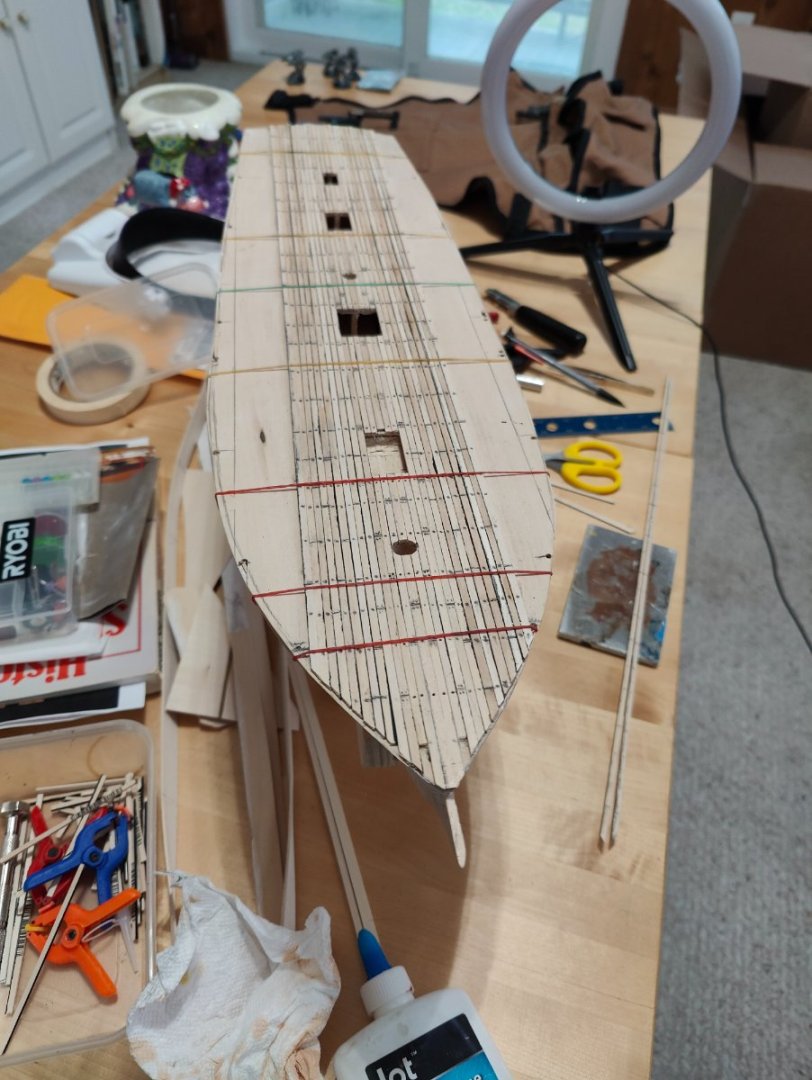
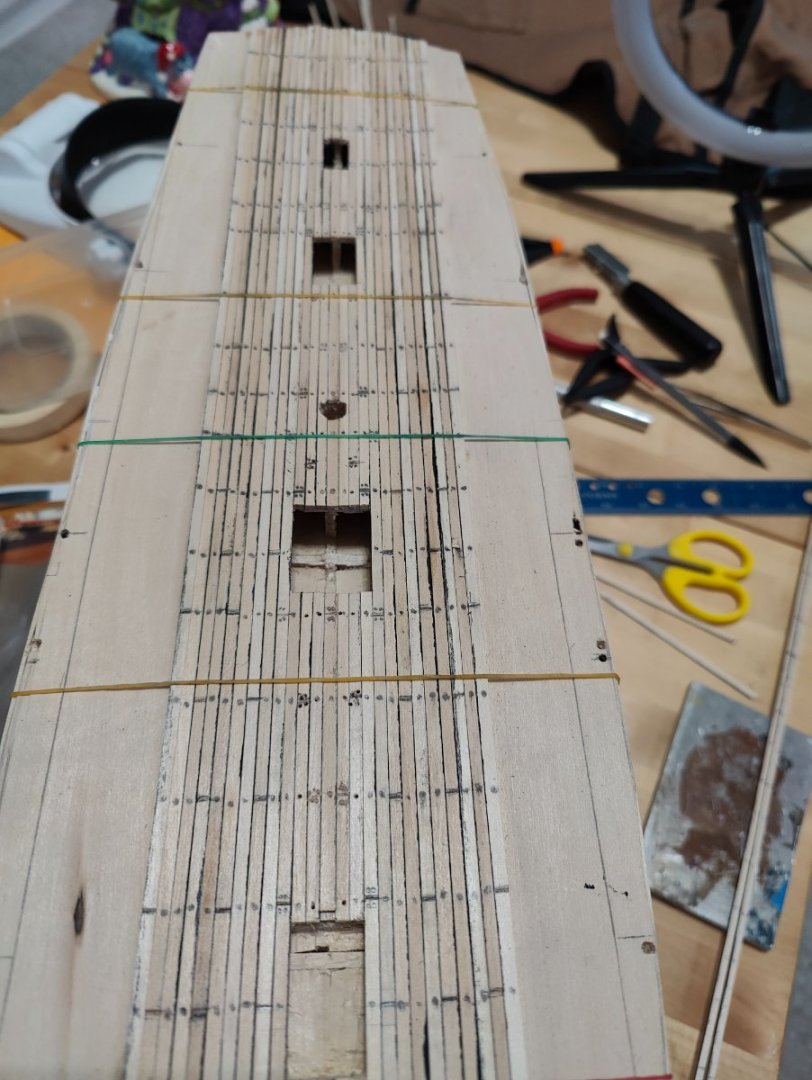
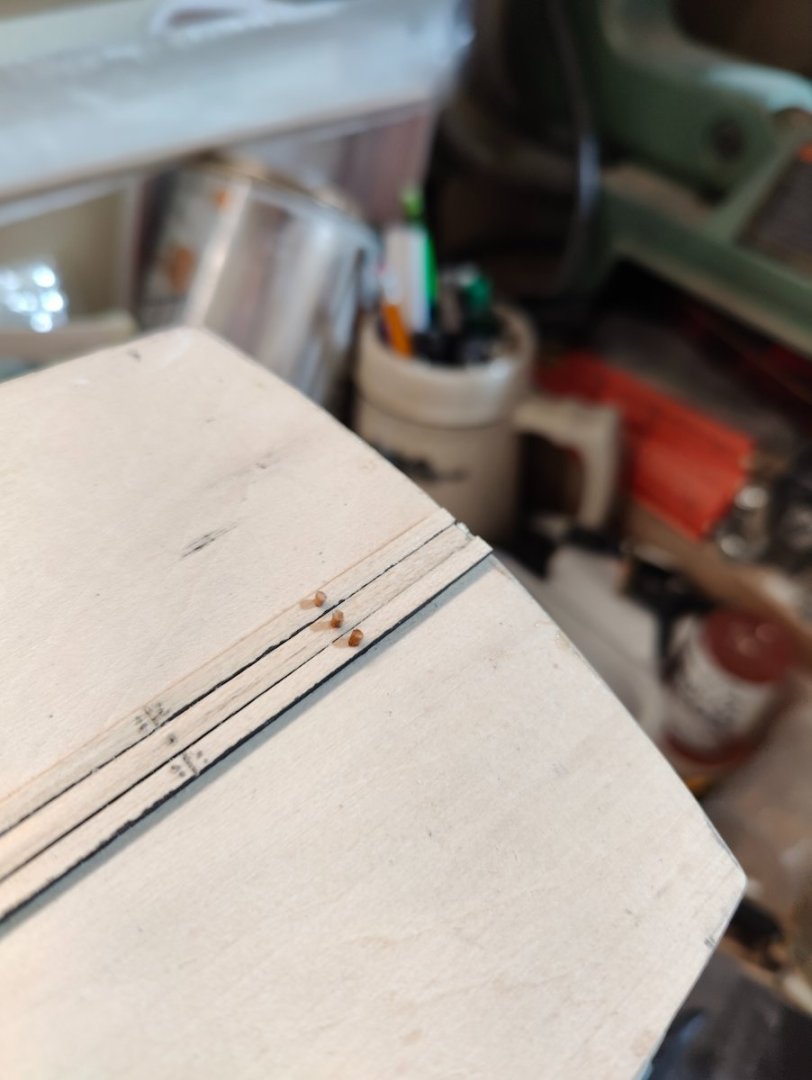
Slow and steady. I added a slew more treenails to the deck especially near the plank butts. I sanded the nubs down flush. I then took a rag with some thinner and actually got to see what it looked like. There are still several spots that still need some more nails but overall I am happy with the effect.


-
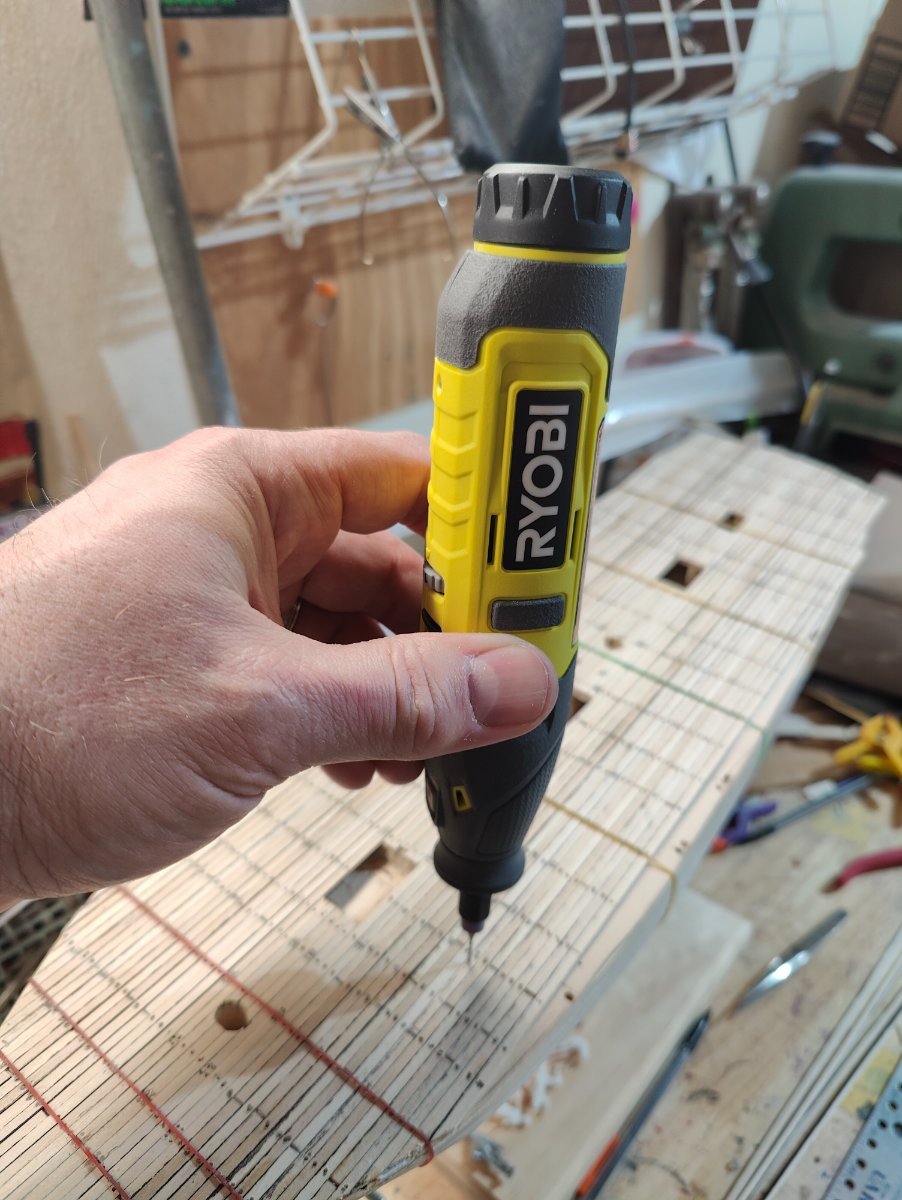
I think I was shooting for around 1 inch treenail heads. The drill bit is a .5 so the nails will likely be a skosh big for hitting .75. I would love to say I was factoring in for the white glue but I think this was the drill head I had at hand...
-
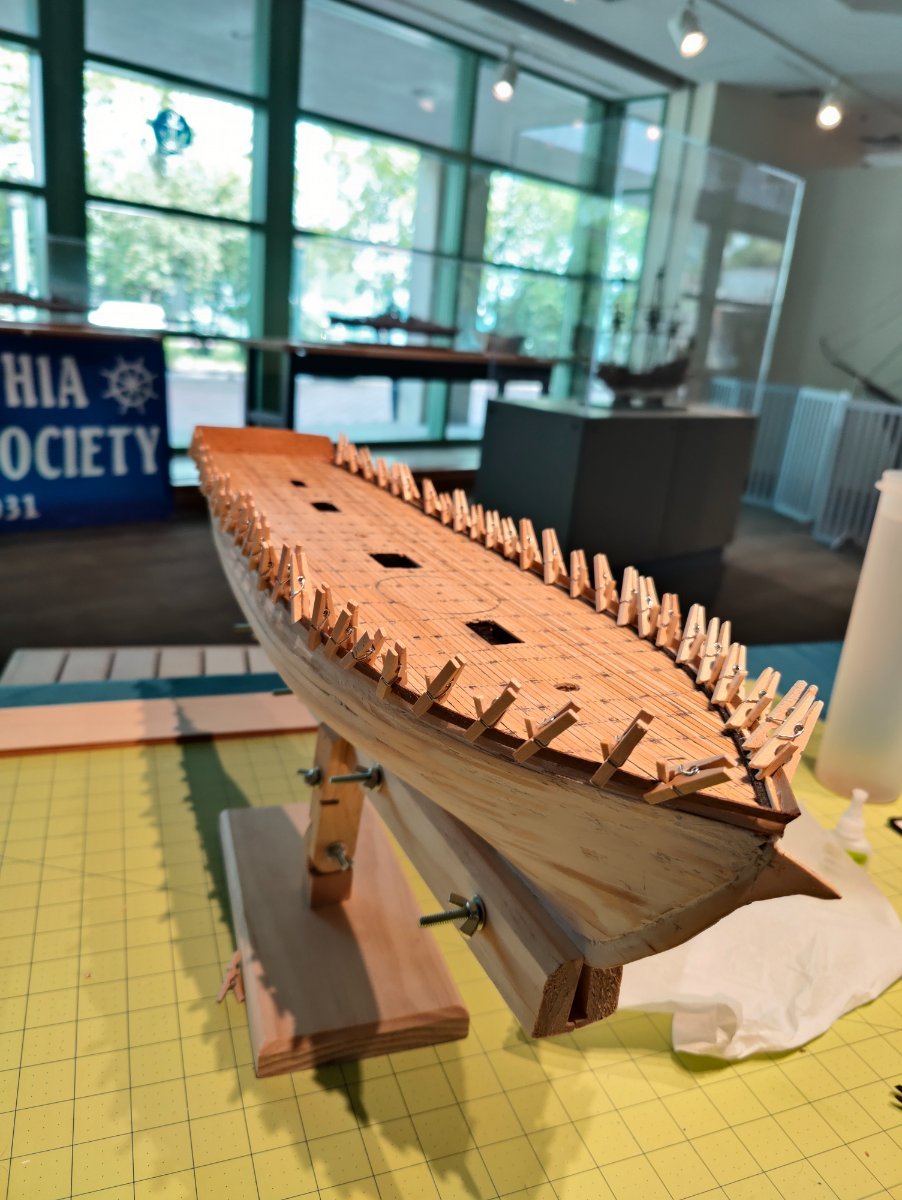
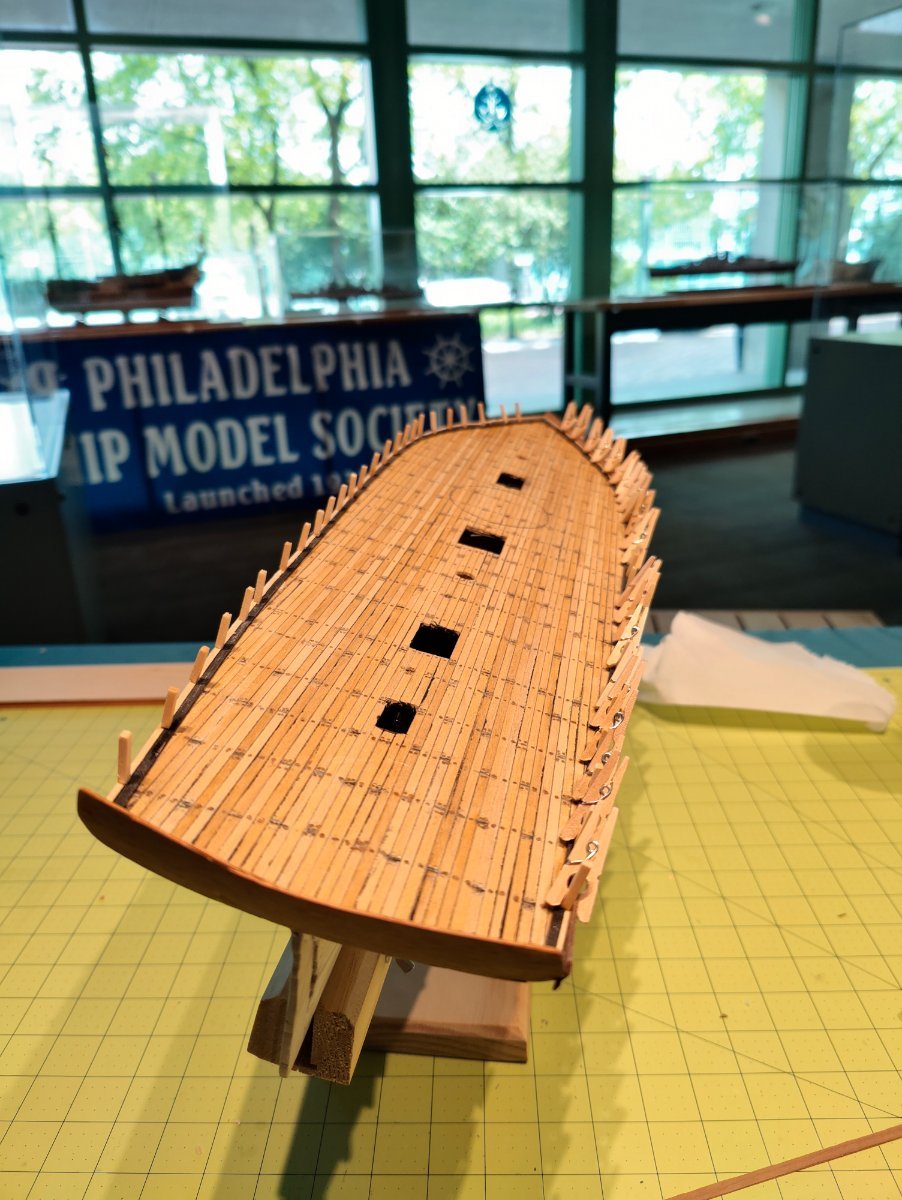
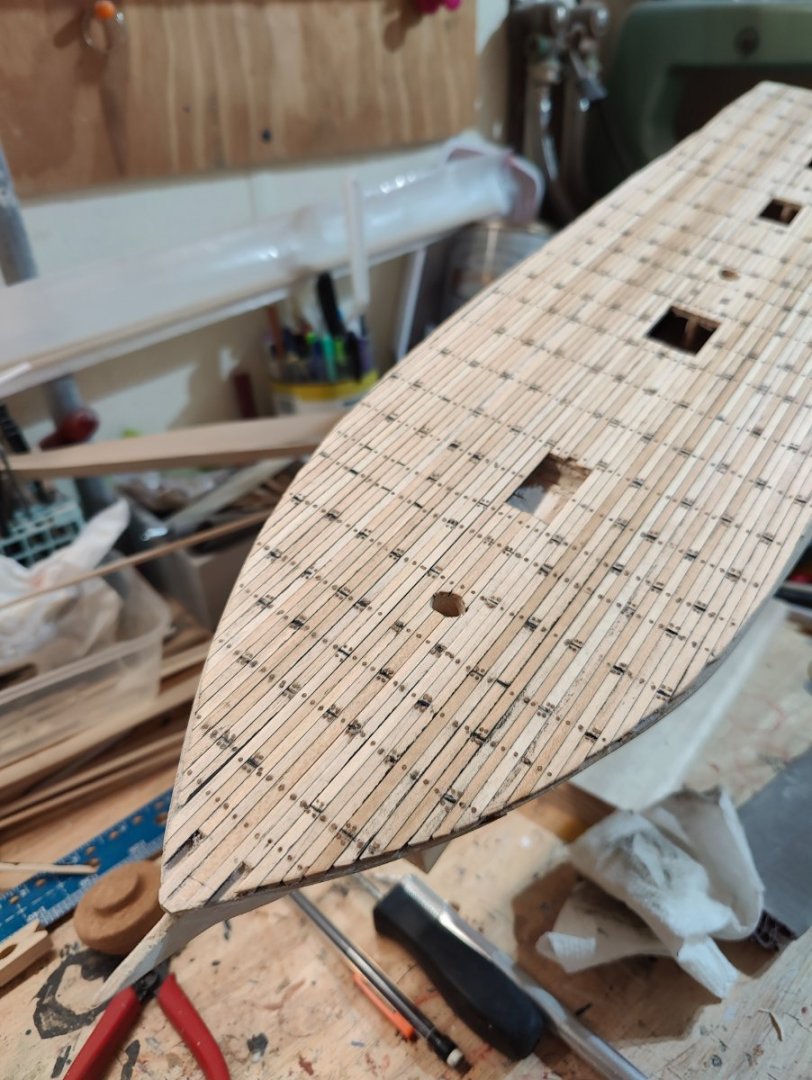
More planks more picks!


-
Yet more deck work at a grueling slow pace. I like it so far though.


-
More planks more progress. Sorry I have been busy outside of the hobby with work and home stuff.


-
18-Pounder Pivot Gun
highlanderburial replied to AndyHall's topic in CAD and 3D Modelling/Drafting Plans with Software
This is exactly what I was looking for. I was trying to find out what an 18 lb pivot gun looked like on smugglers/slavers/privateer vessels in the 1820s. They were mentioned but even with Chappelle's drawings I had a hard time visualizing it. Is this possibly available in an .obj or .stl file for at least the gun and mount itself? Regardless you have done me a solid with this one sir! -
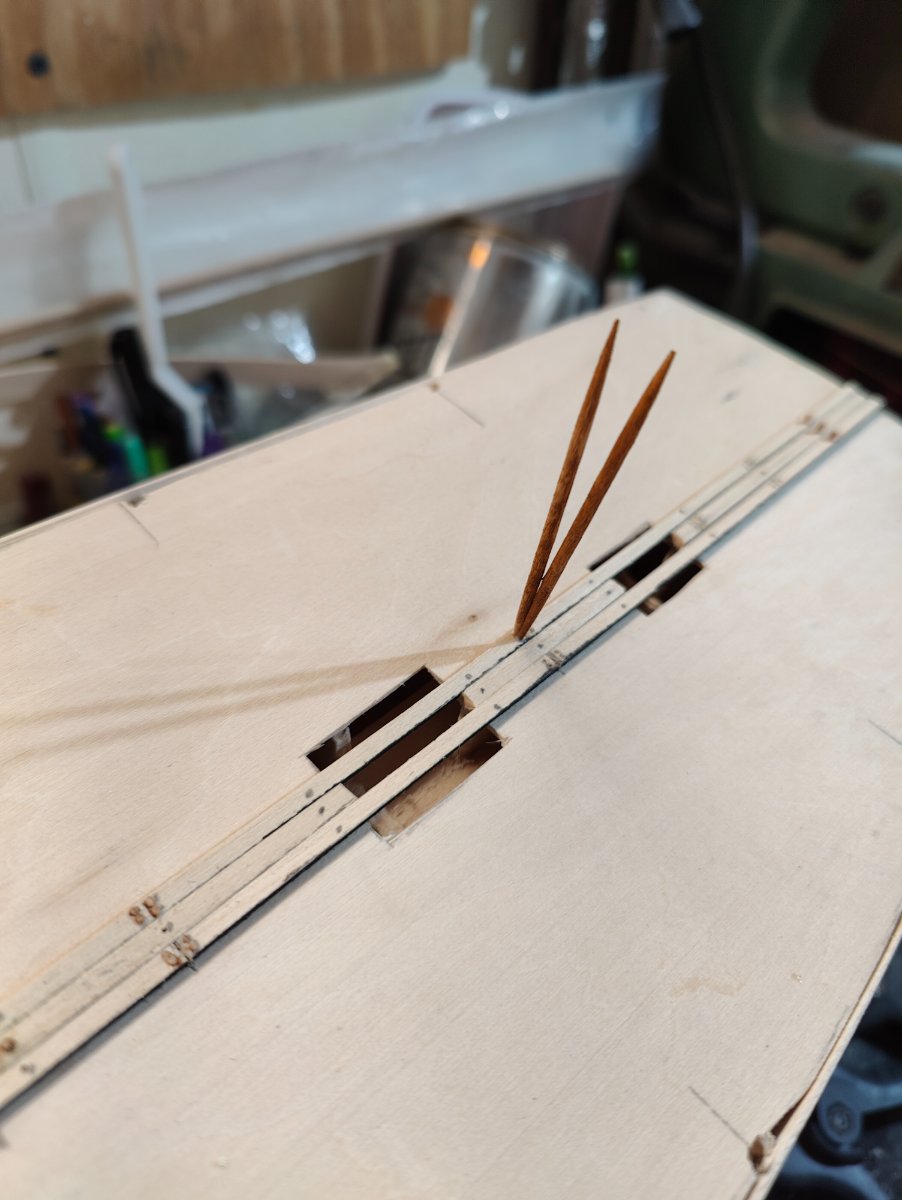
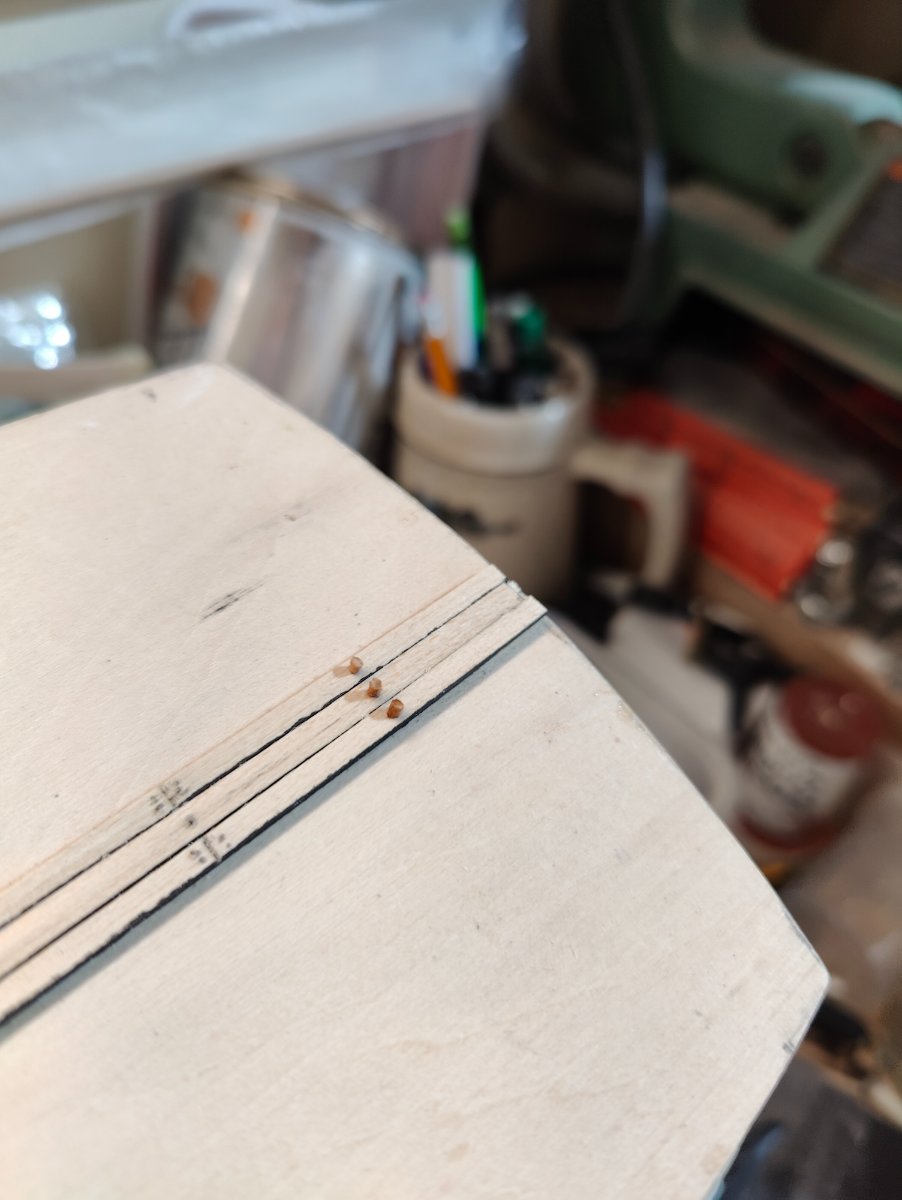
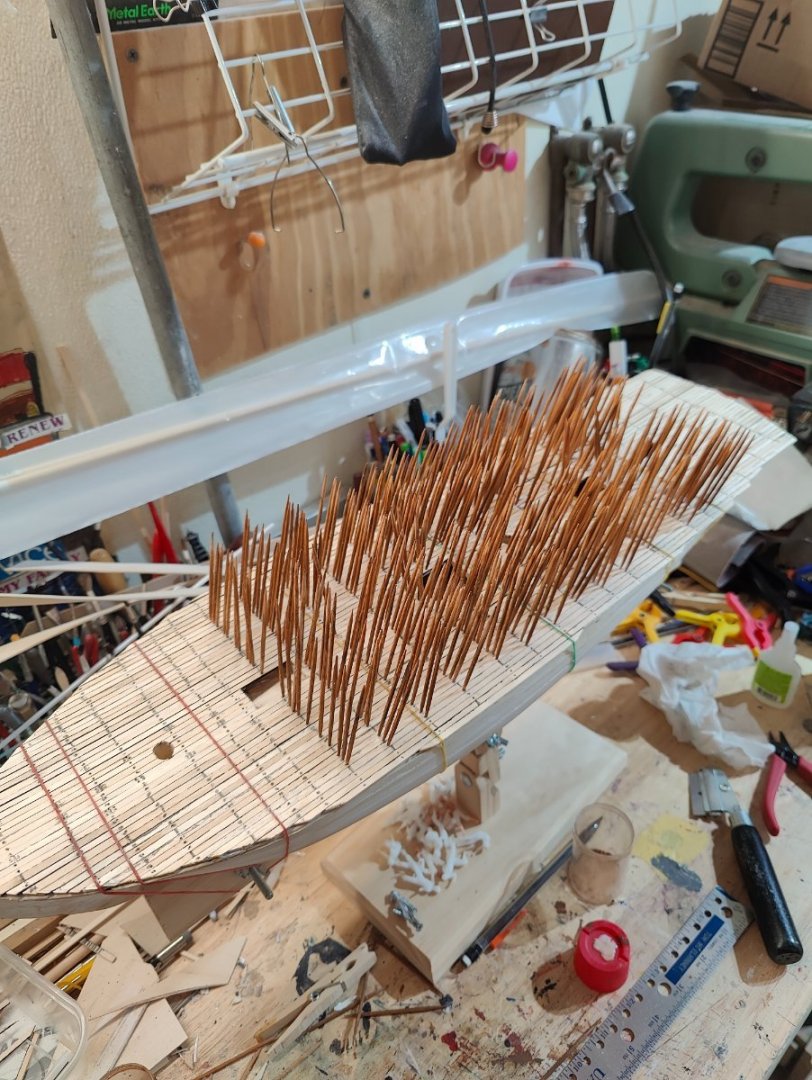
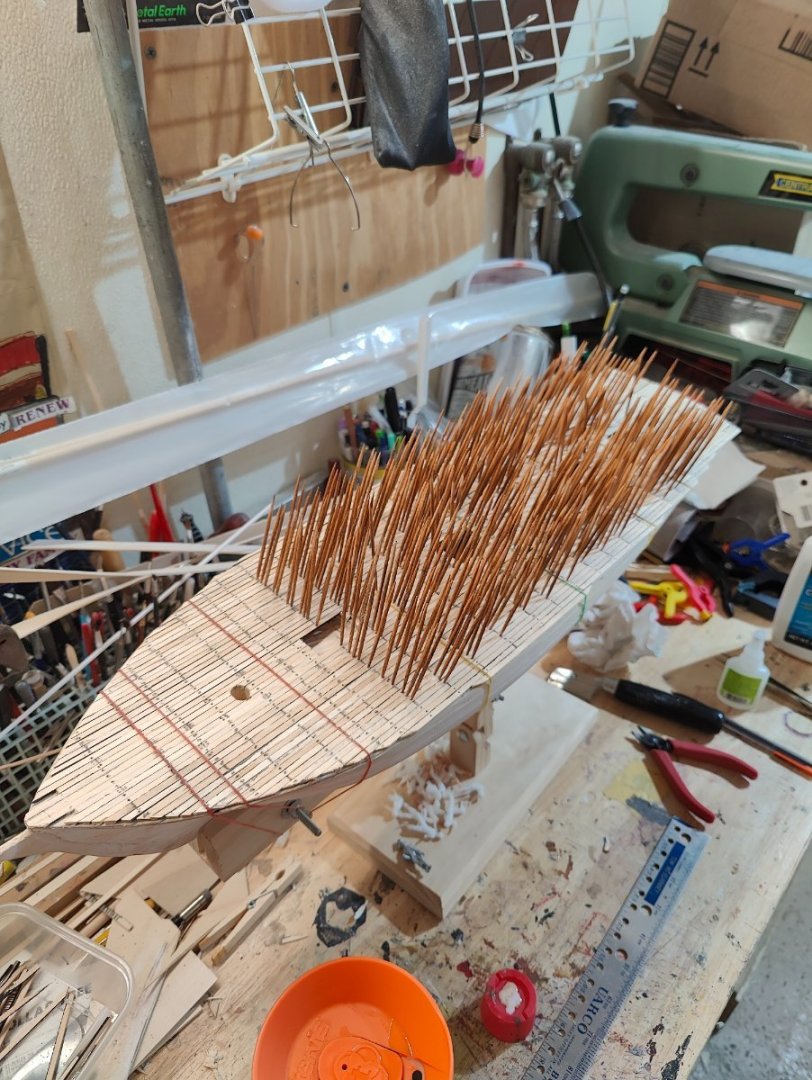
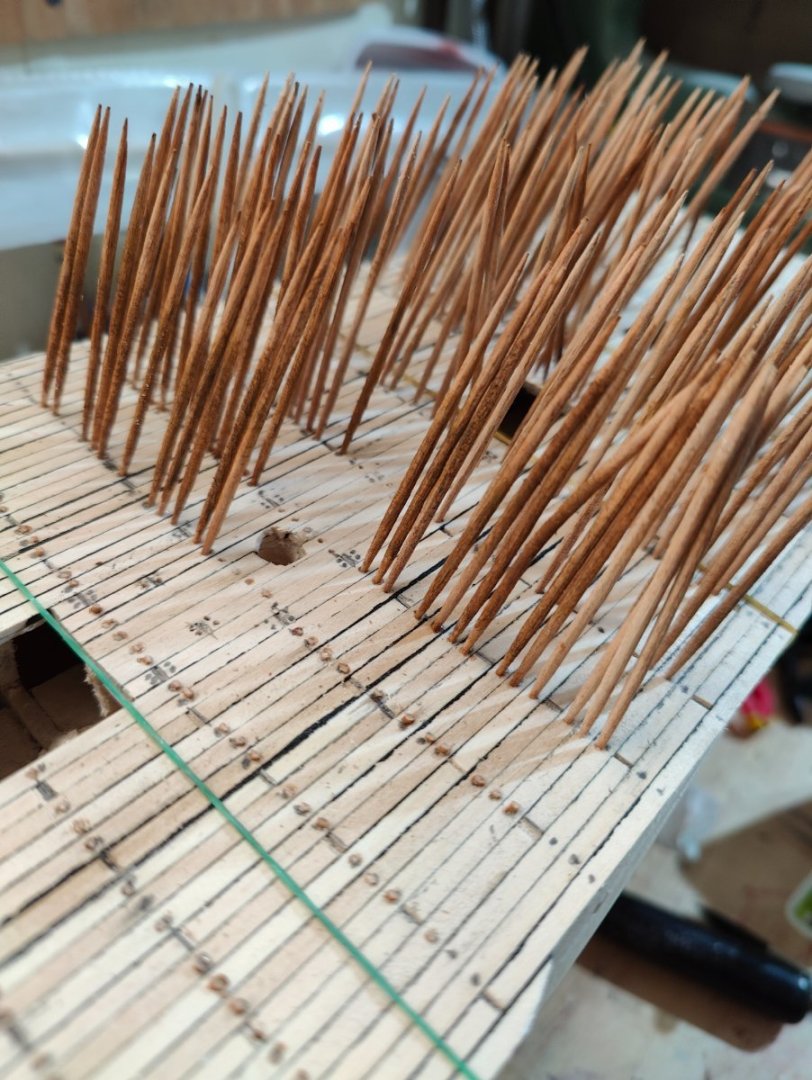
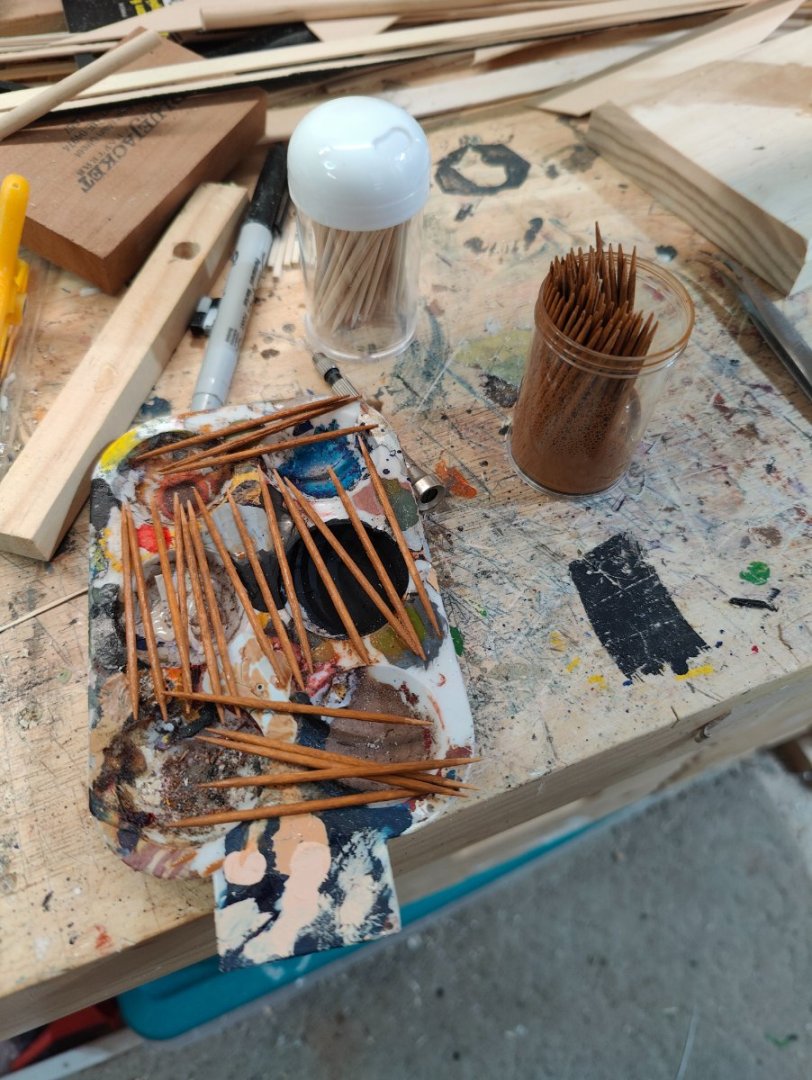
I wanted to try treenails so I dyed a bunch of toothpicks with light brown acrylic maple stain. So far it seems promising. I pre drilled the holes and stuck the picks in gently and then when both were inserted I used more force. I used some flush nippers to cut the picks off pretty close to flush. At first the stain looked drastic but after a quick sanding the effect was nice.


-
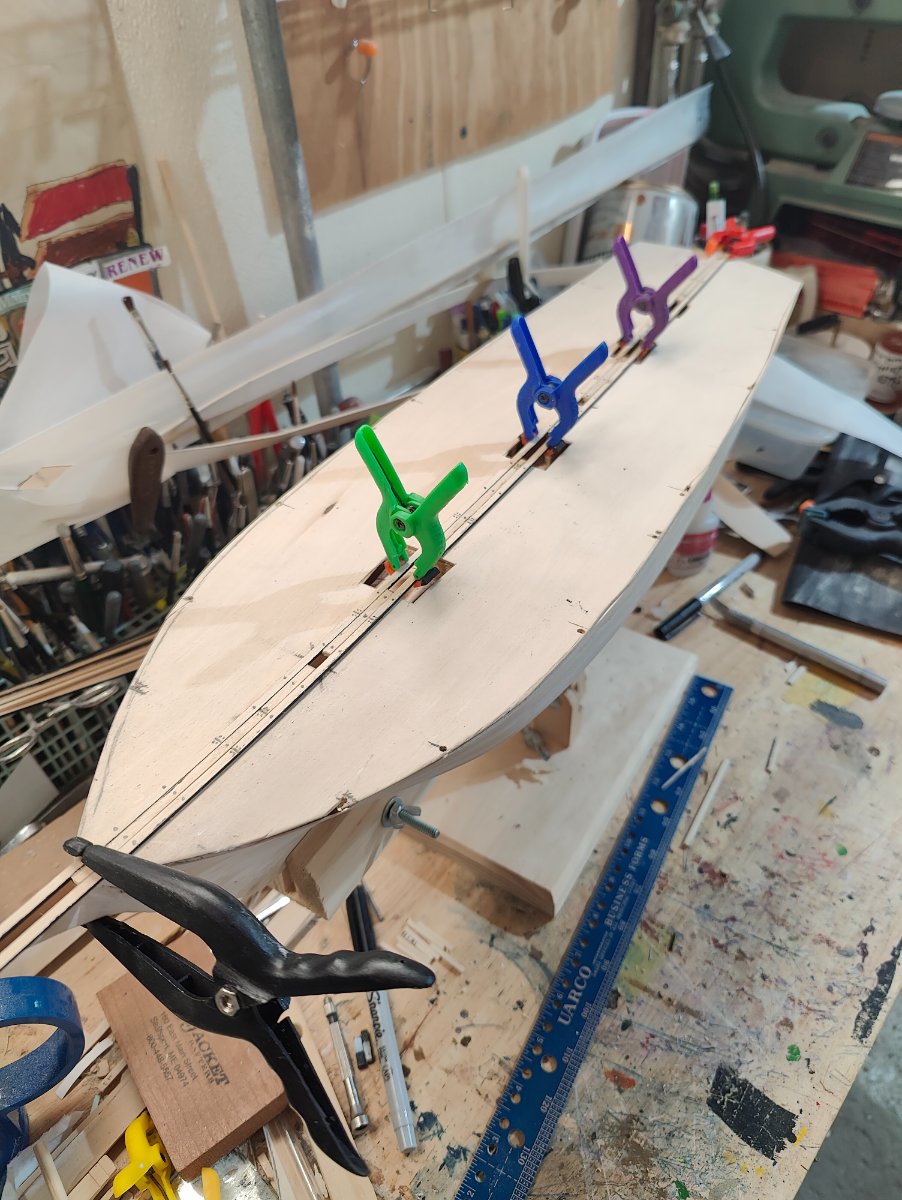
First row getting fastened. I will be using the American 3 offset plank with the 6 inch planks fastening scheme. I have cut the butt joints and will be drilling the fastener holes.


-
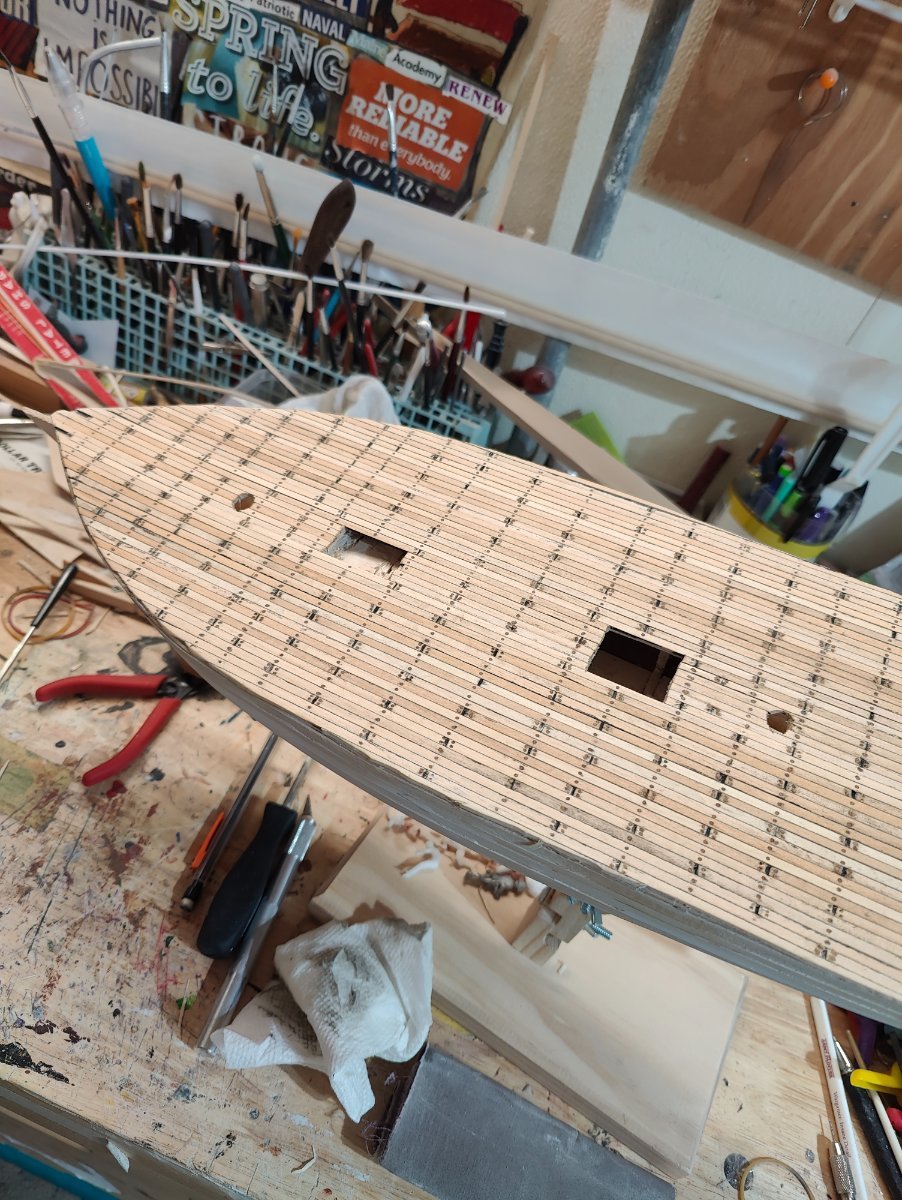
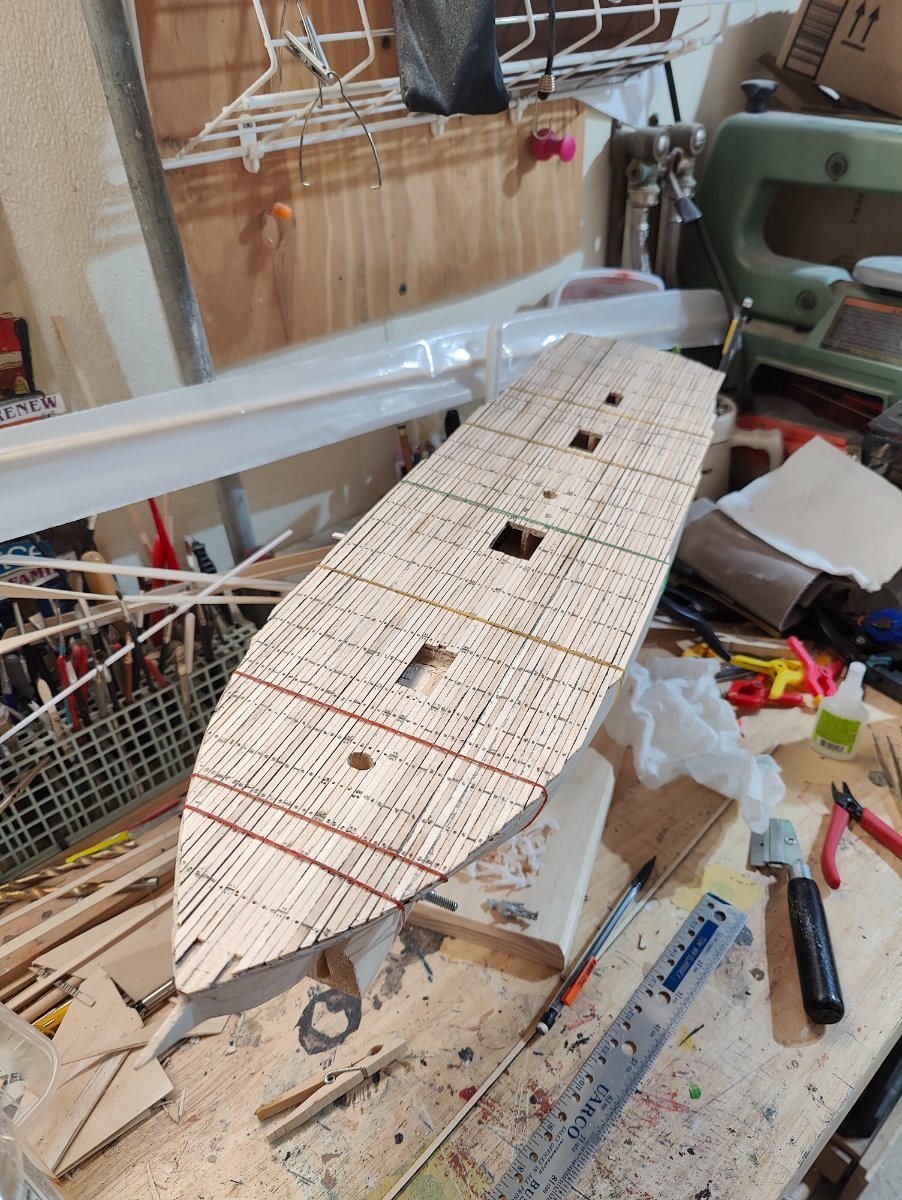
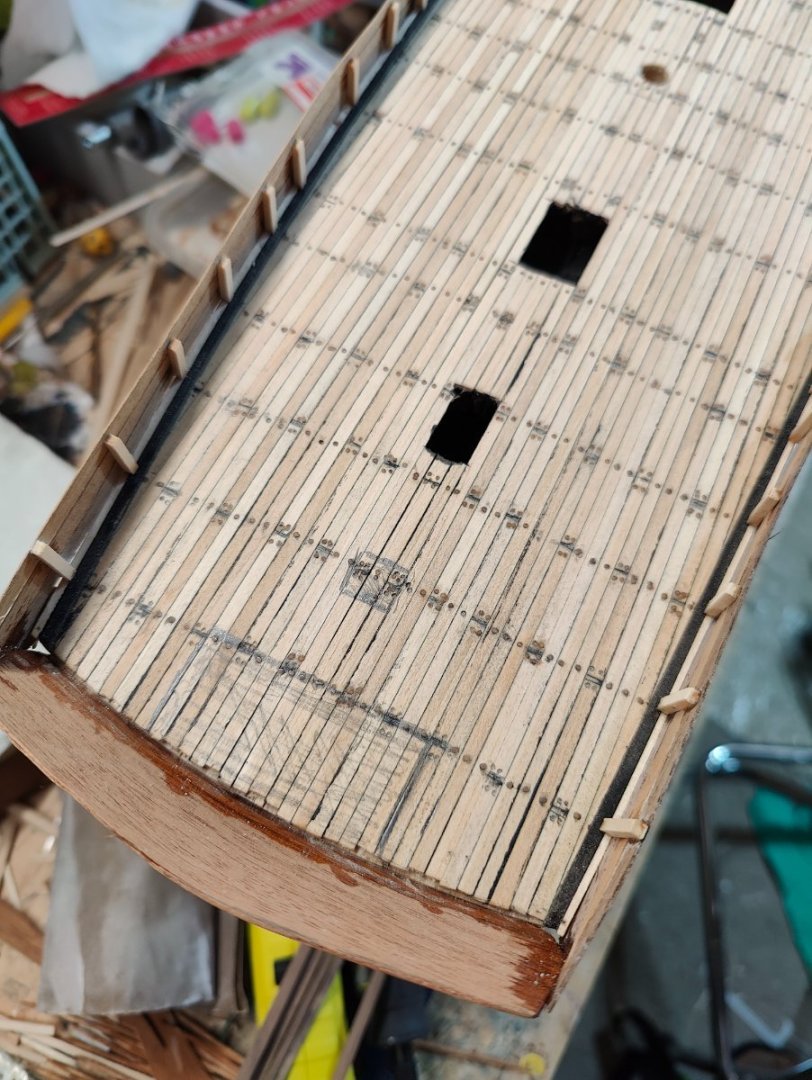
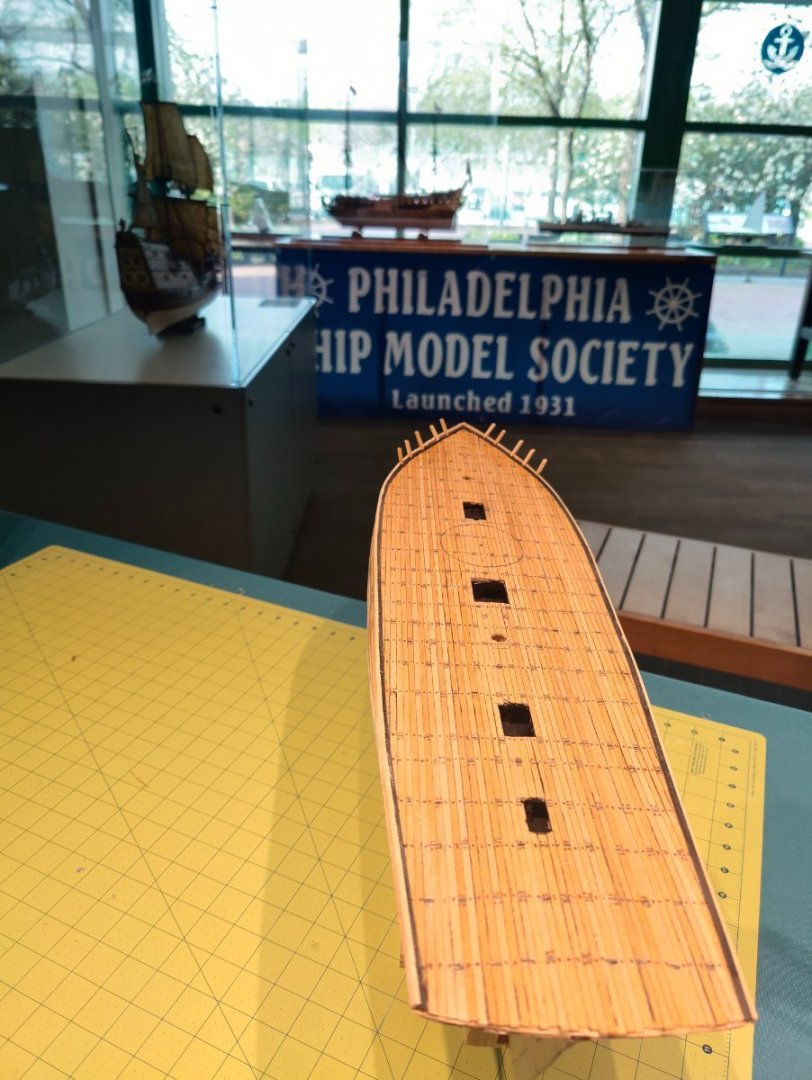
I opted for 6 ish inch planks as that seems to have been standard deck plank size on post 1812 Baltimore Clippers of the time period. This means the wood size is roughly 3mm. I am using basswood and painting one edge black. I have laid the king plank and drilled the mast holes. I am taking the planking slowly as I tend to screw this part up.

-
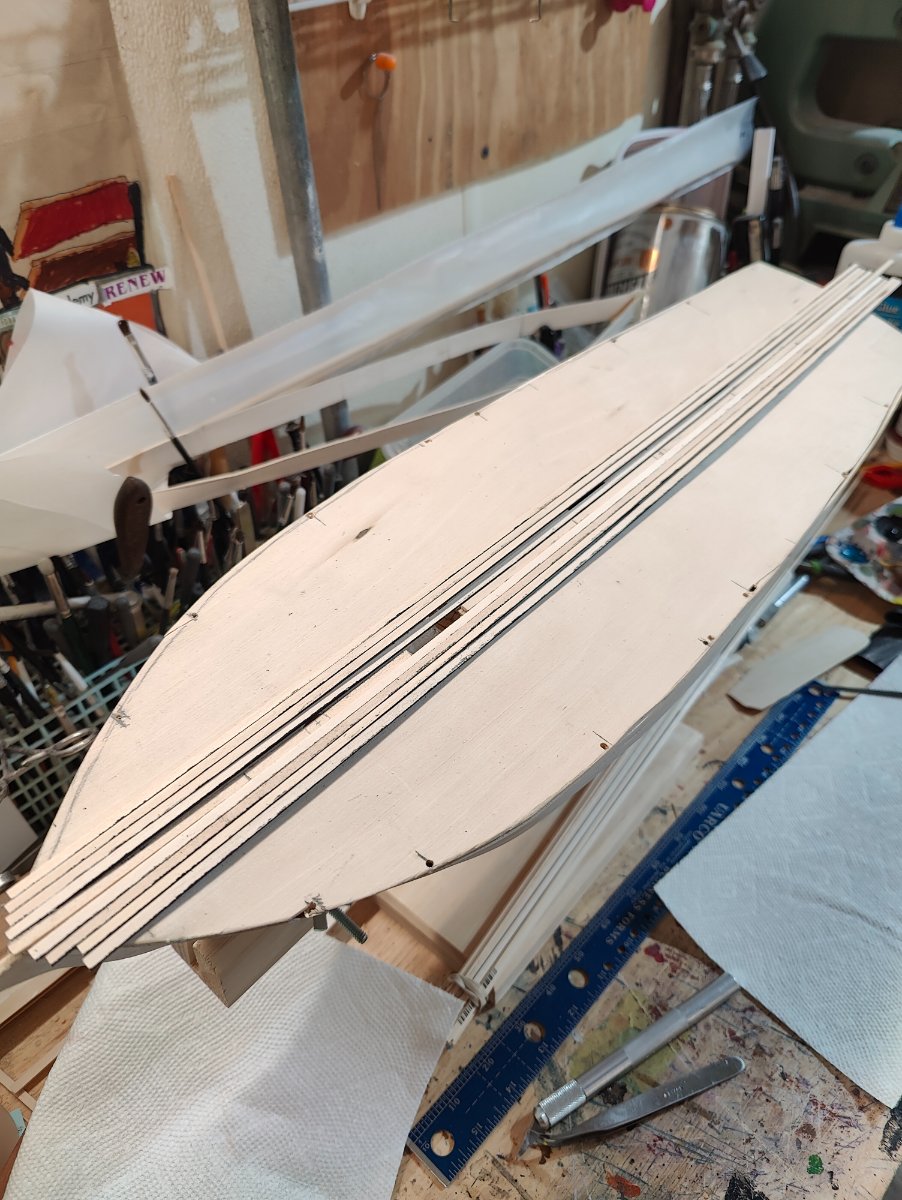
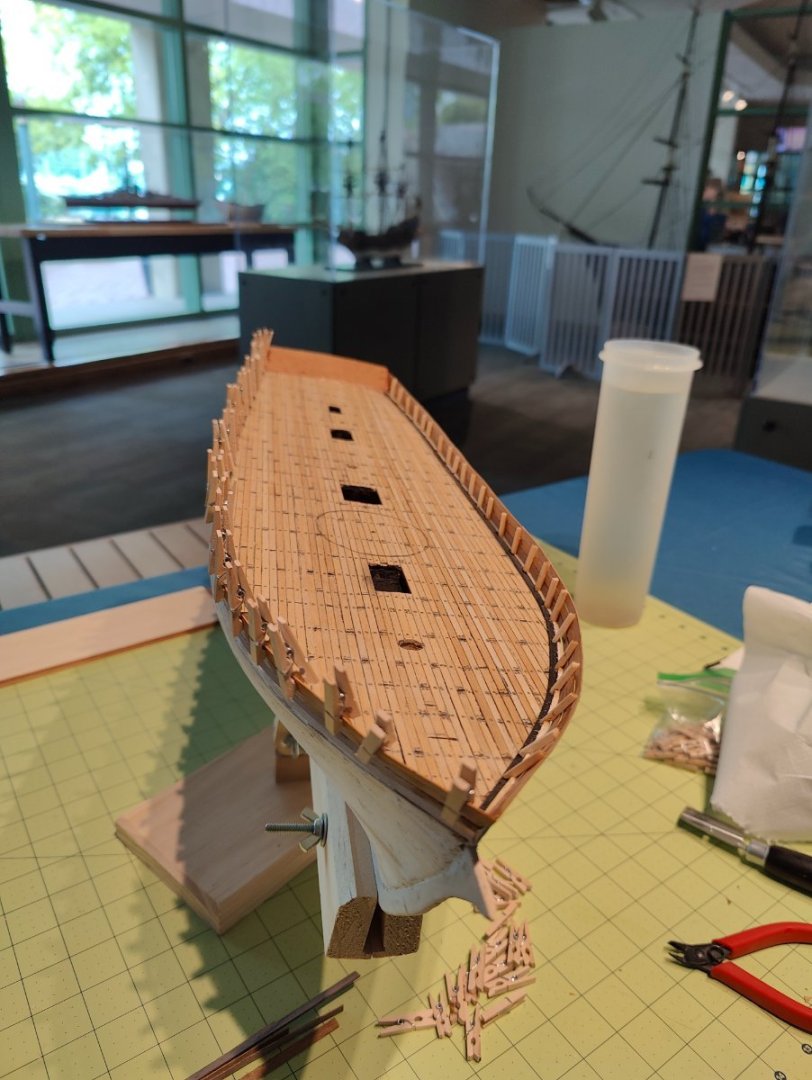
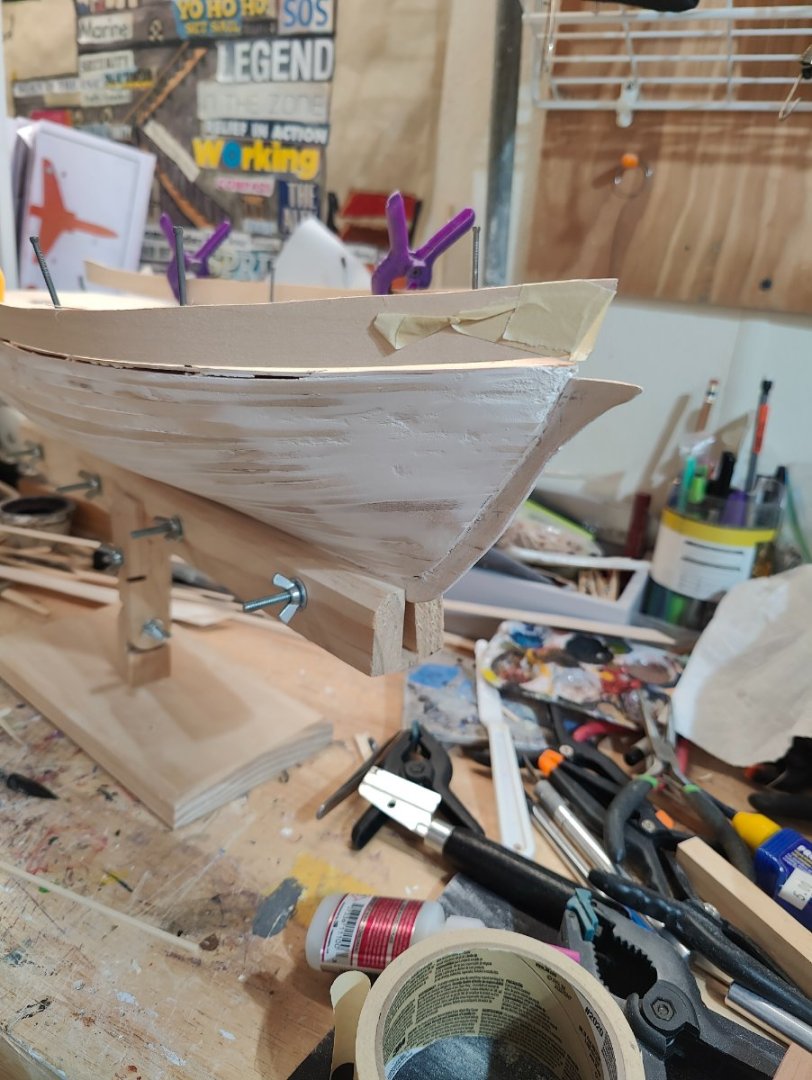
The initial hull is complete and shaped. I will be adding a "dressier" plank layer with copper. Overall the shape of the hull is fascinating with some serious tumble home on the very thin stern. It transitions much like powered craft would in a very "tear drop" fashion. It really looks like it should have a propeller. I have started shaping the bulwarks but will not be installing until the deck is laid. Yes those are nails. No I did not pound them in!
-
More planking and a thin deck veneer was added. I admit I did not plan this out as well as I should have!
-
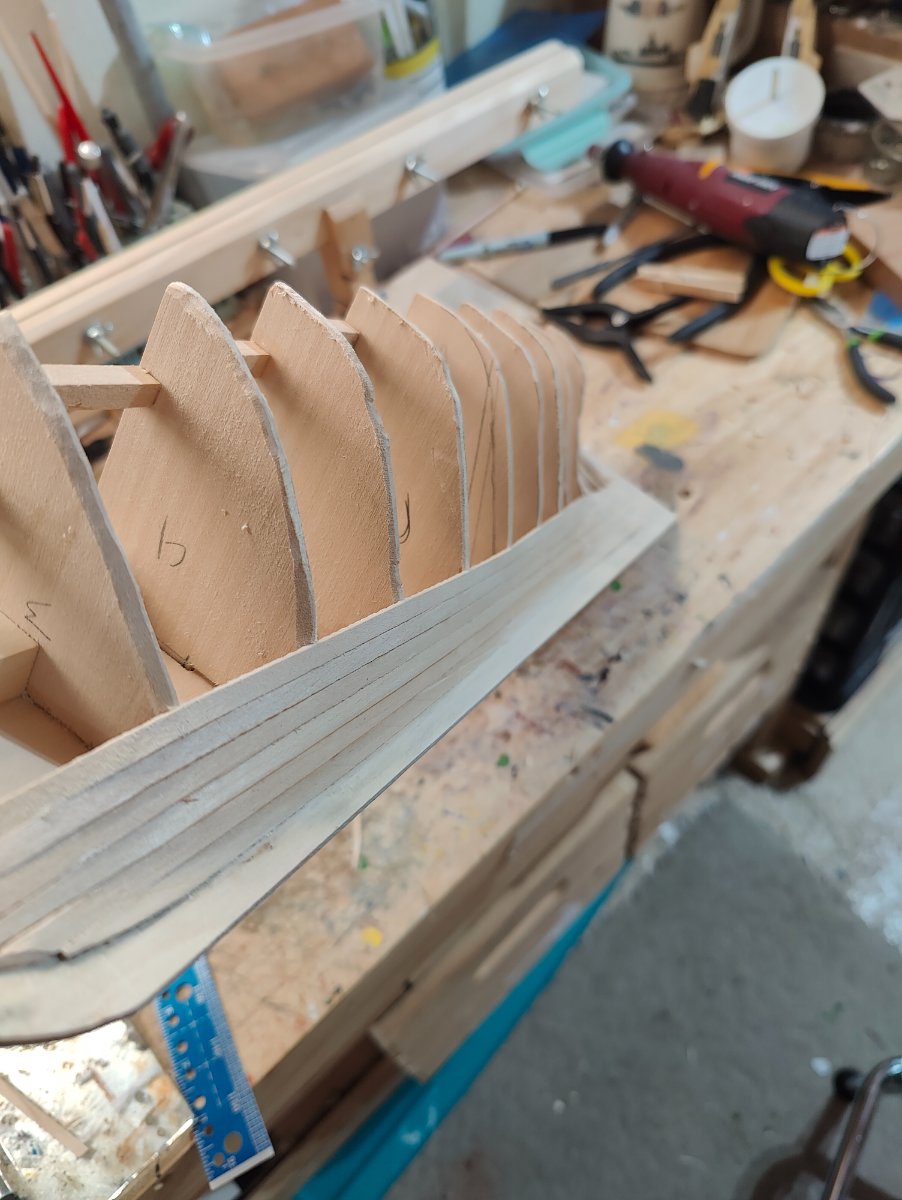
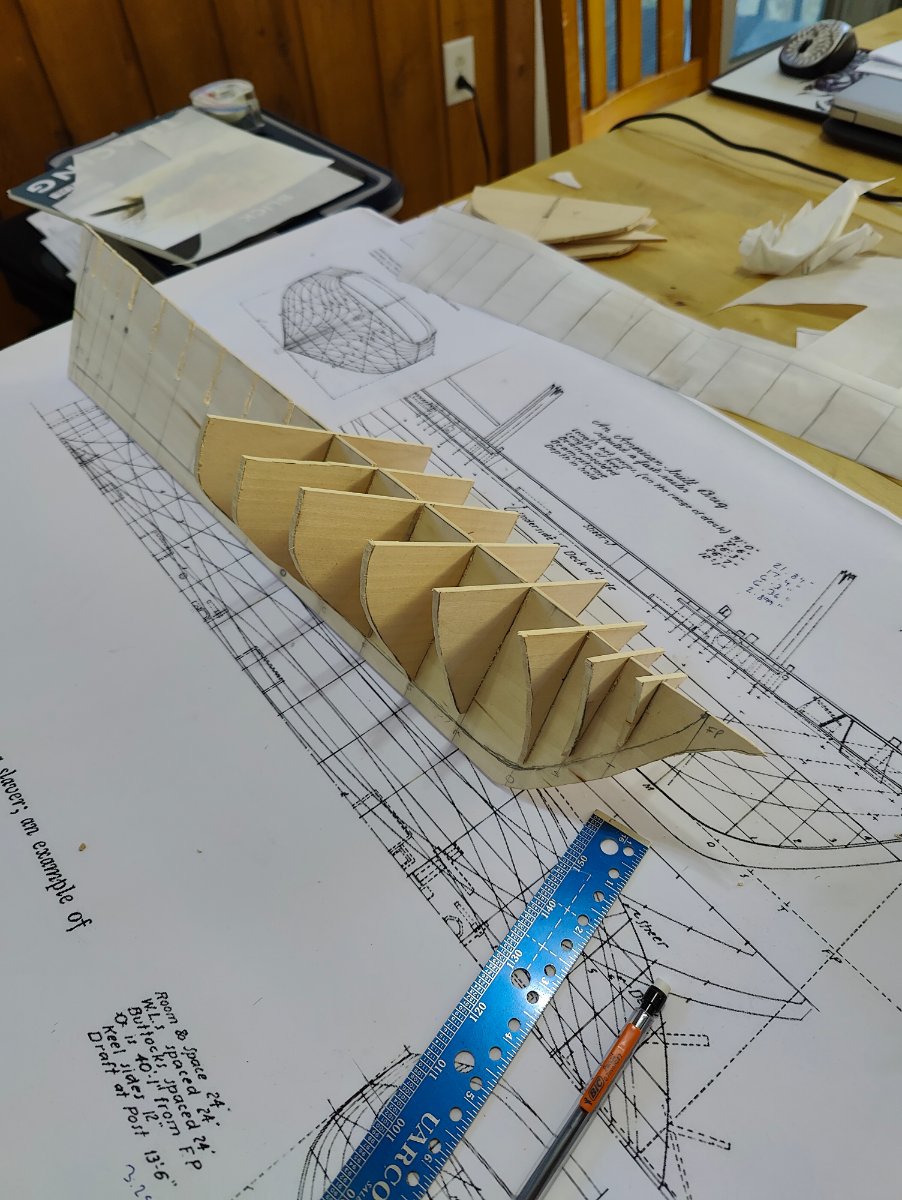
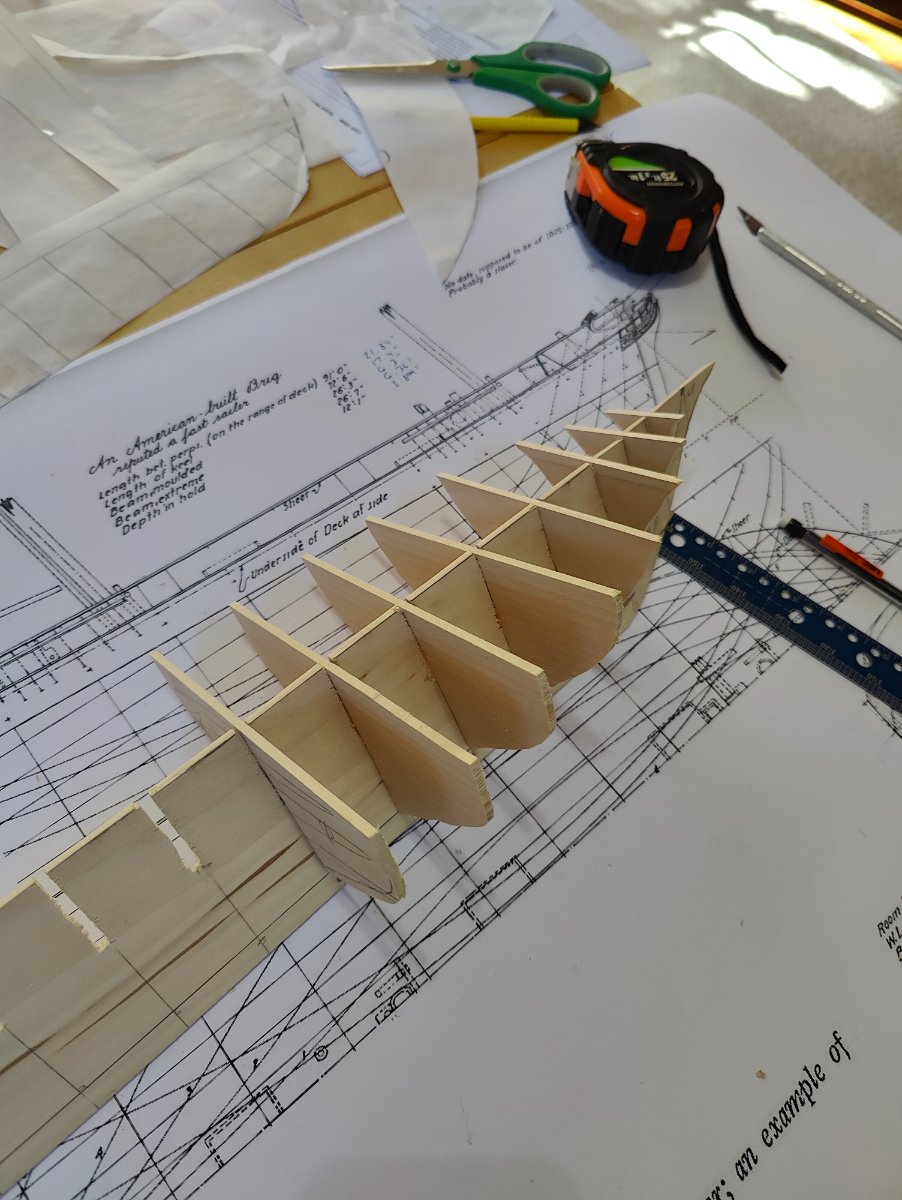
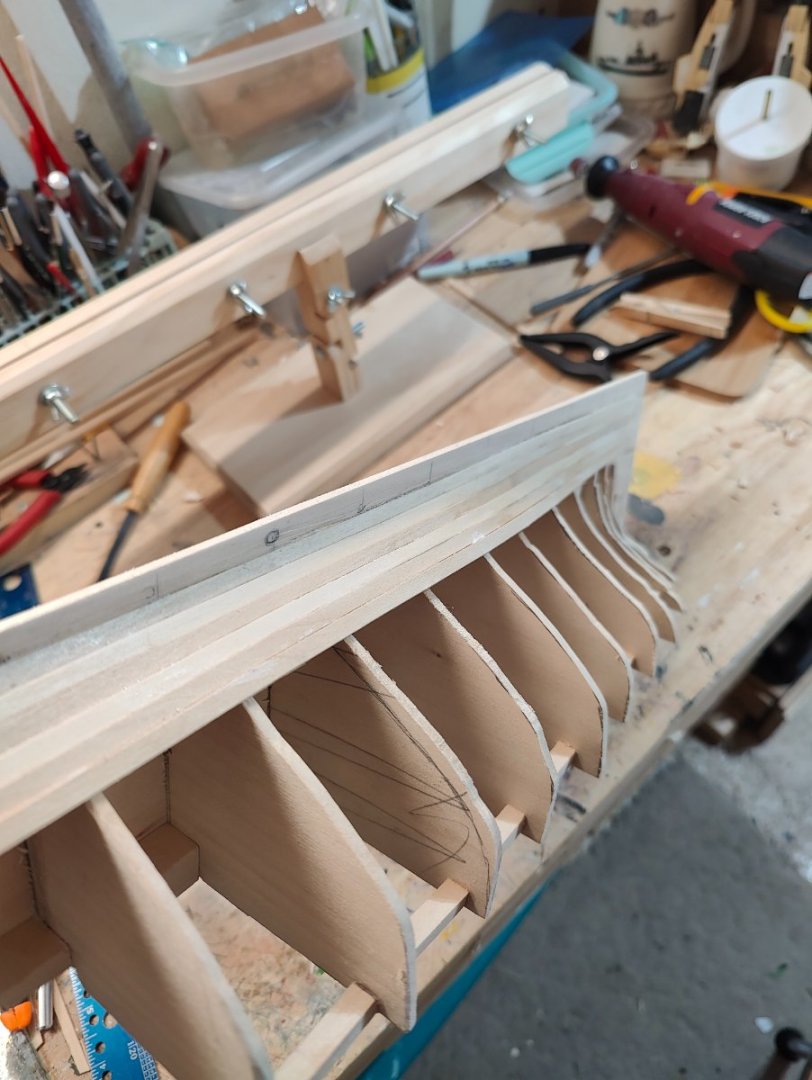
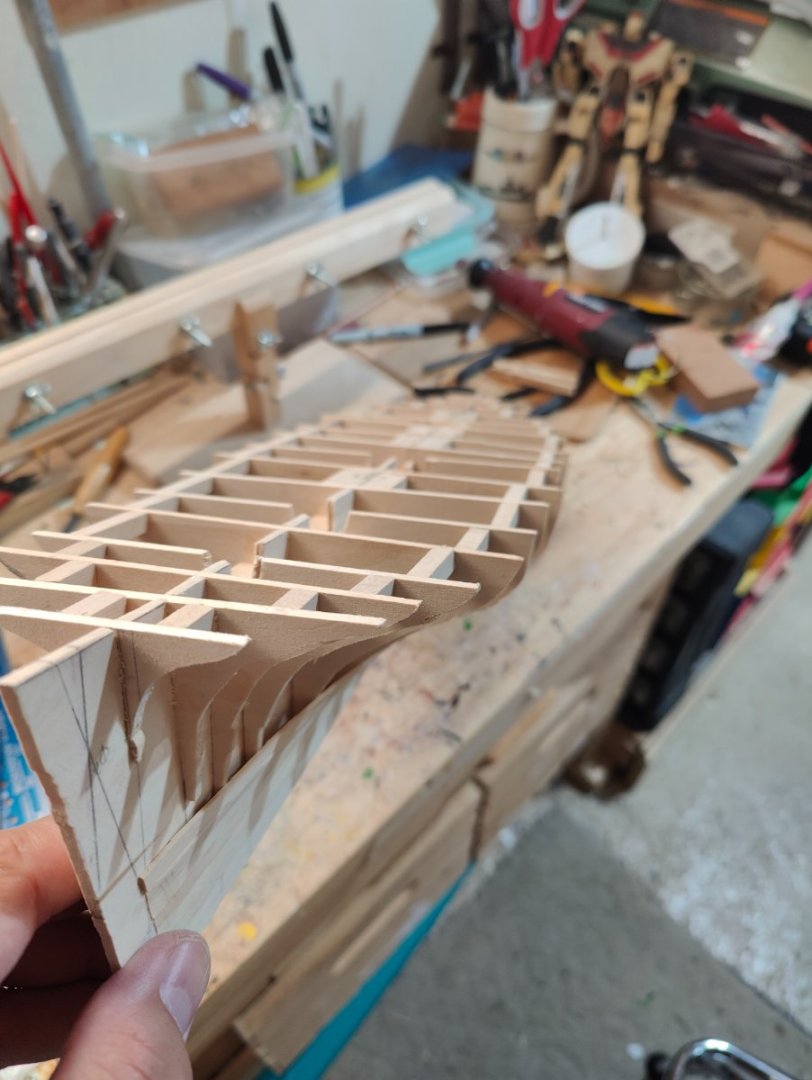
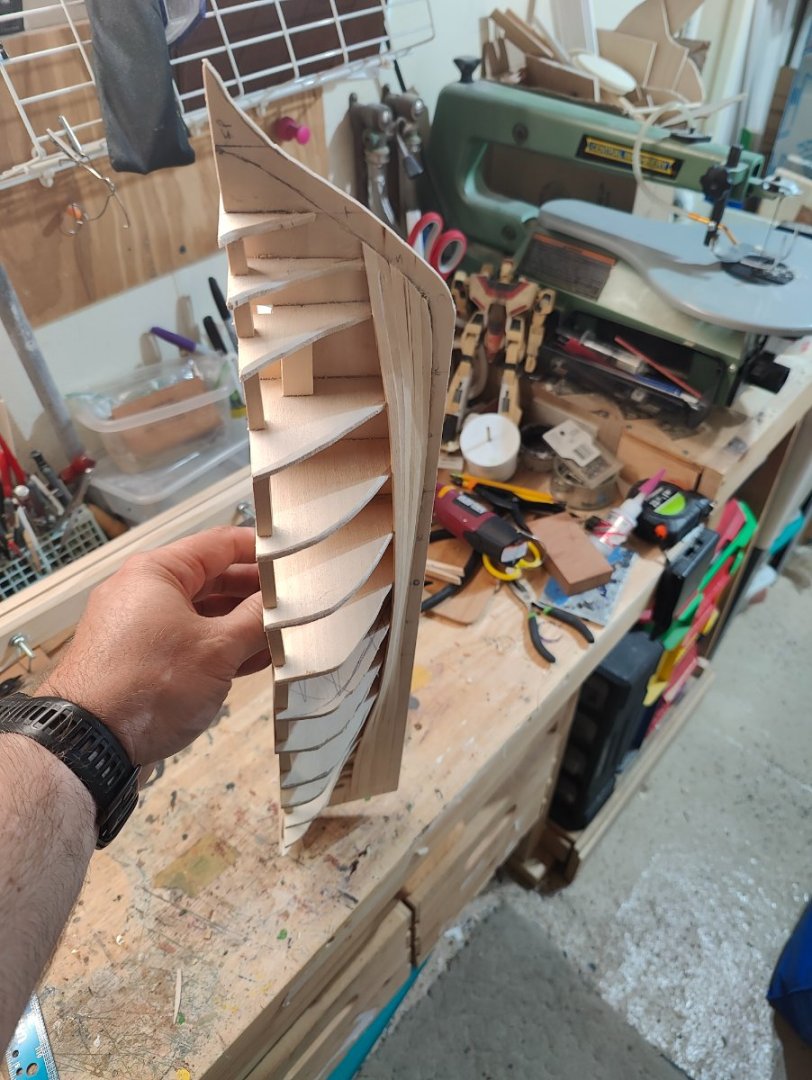
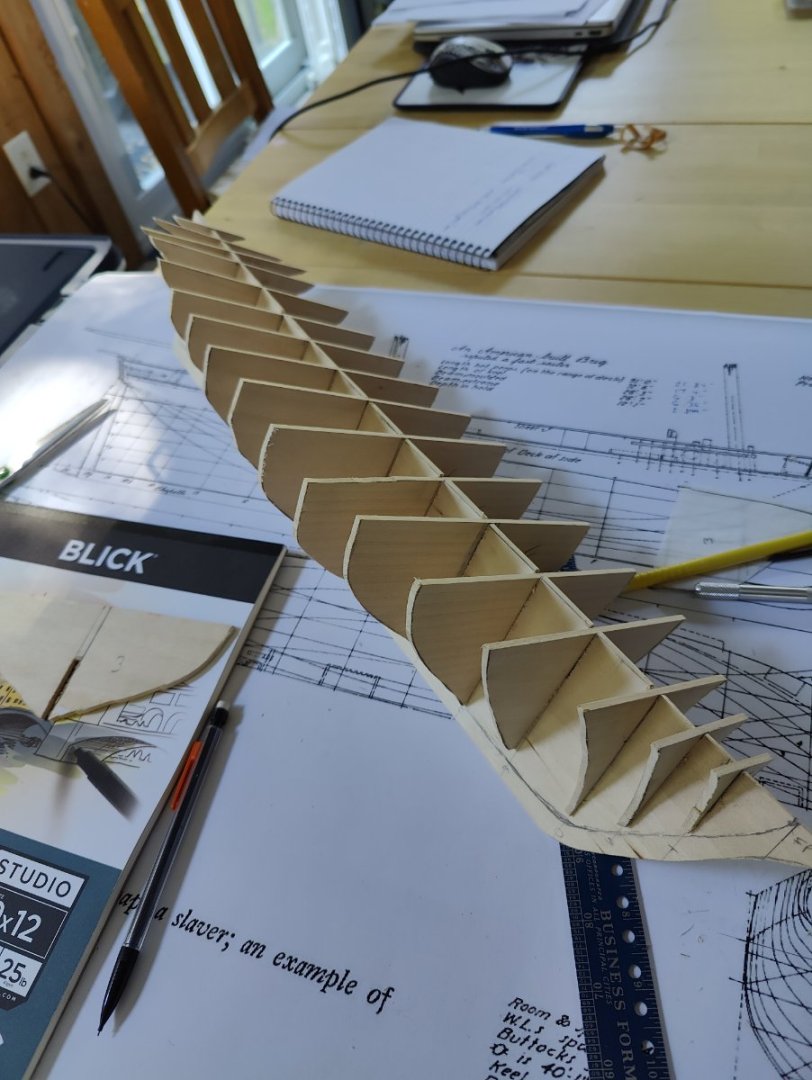
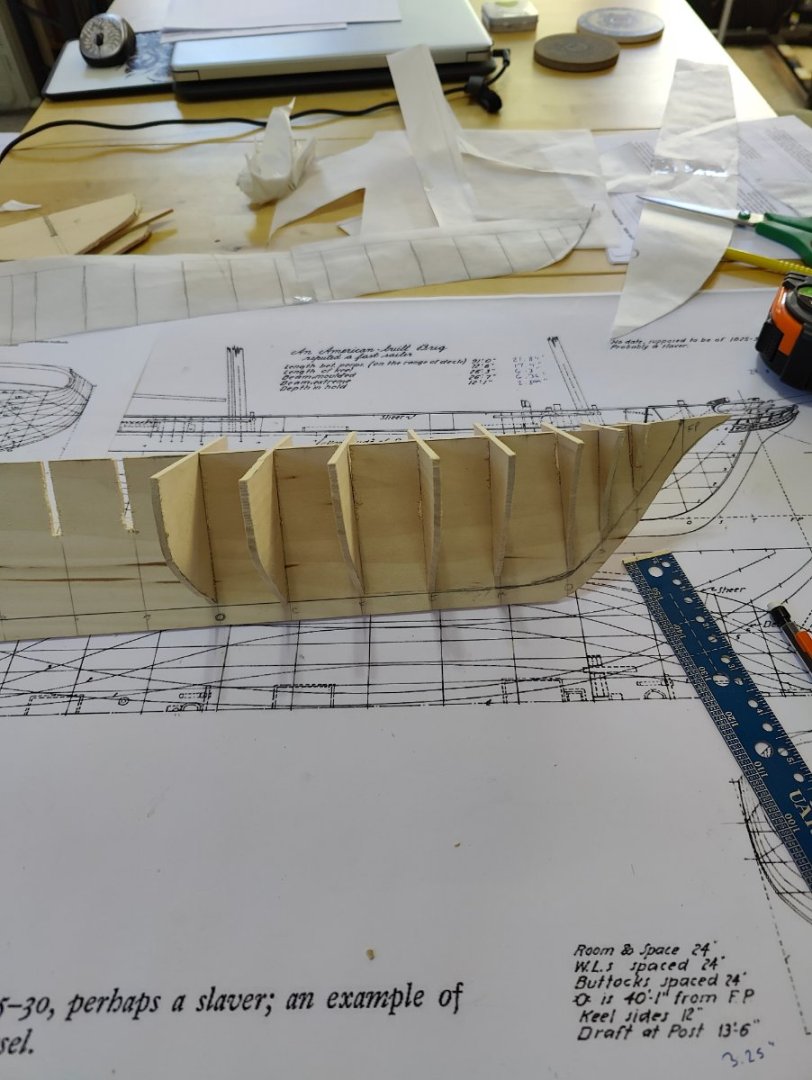
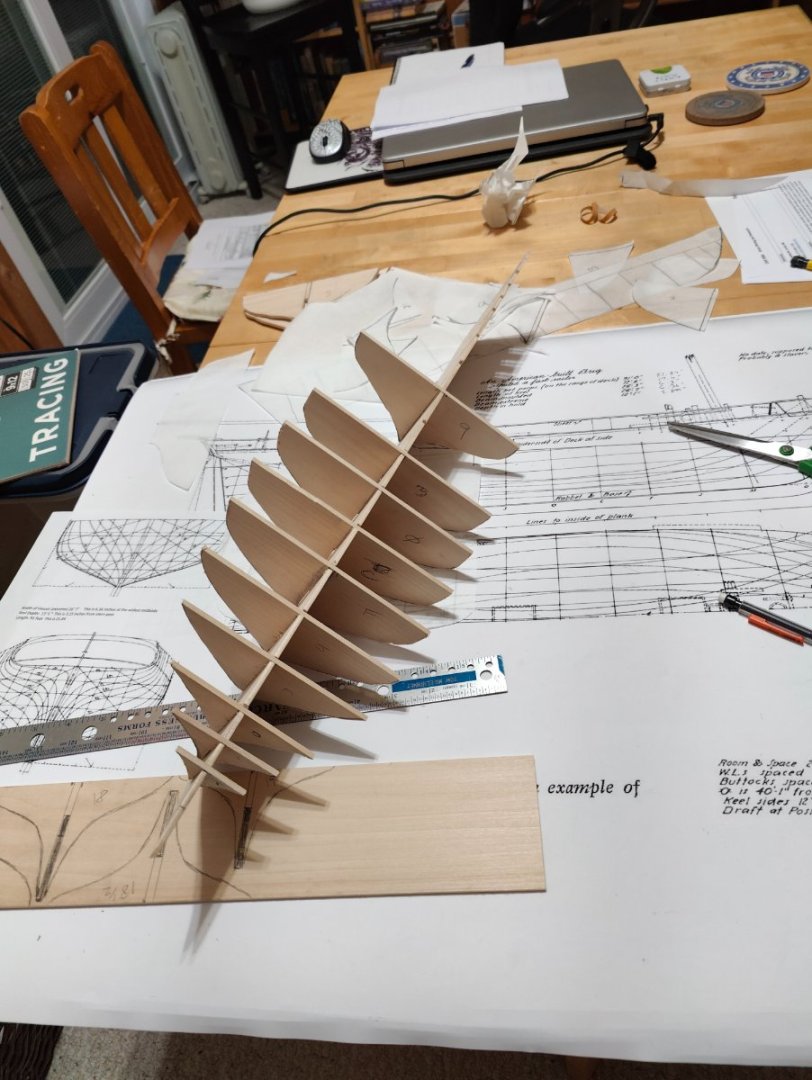
More work progressing. I added frame supports and under deck mast block wood. I had to plan out where the hatches were to lower the stiffeners. I also started beveling the frames and began the first layer planking near the keel to stiffen the frames prior to further shaping and sanding.


-
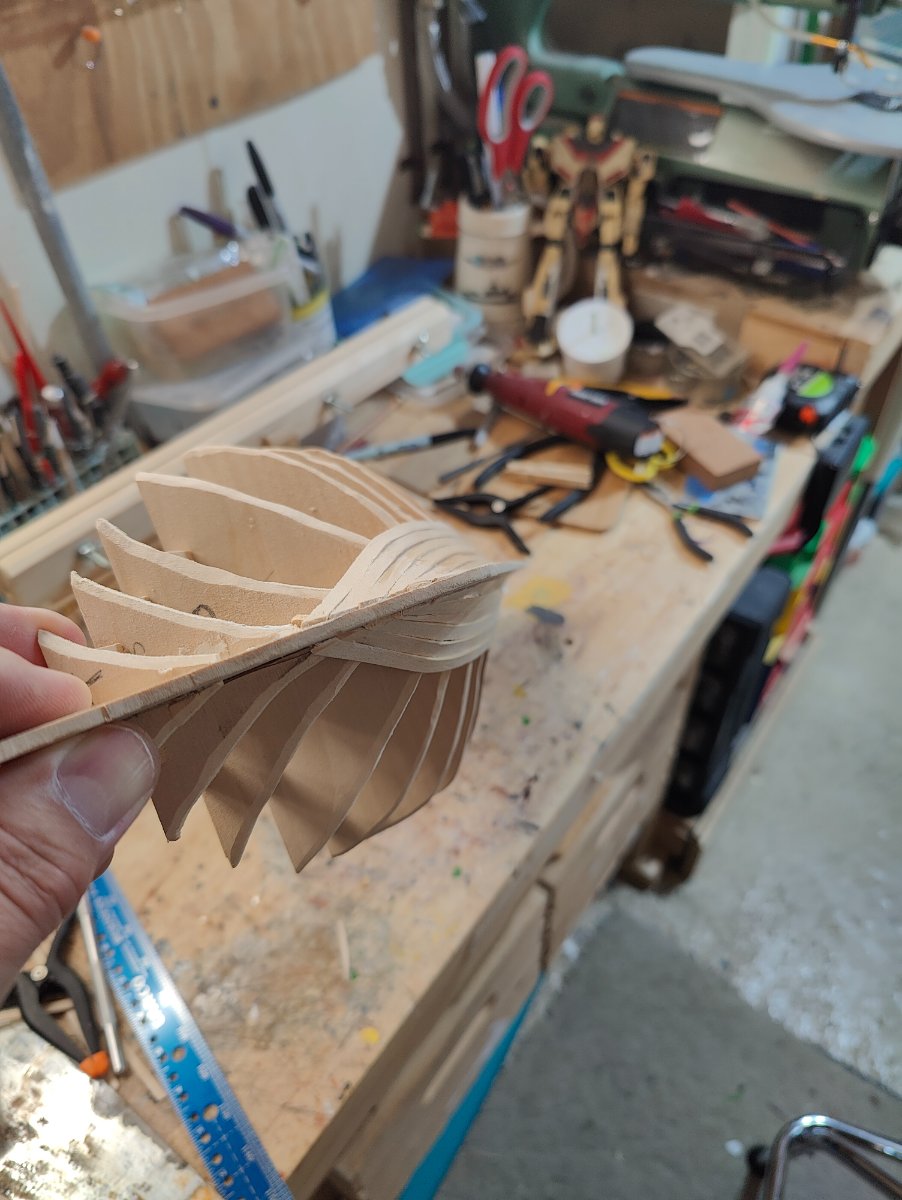
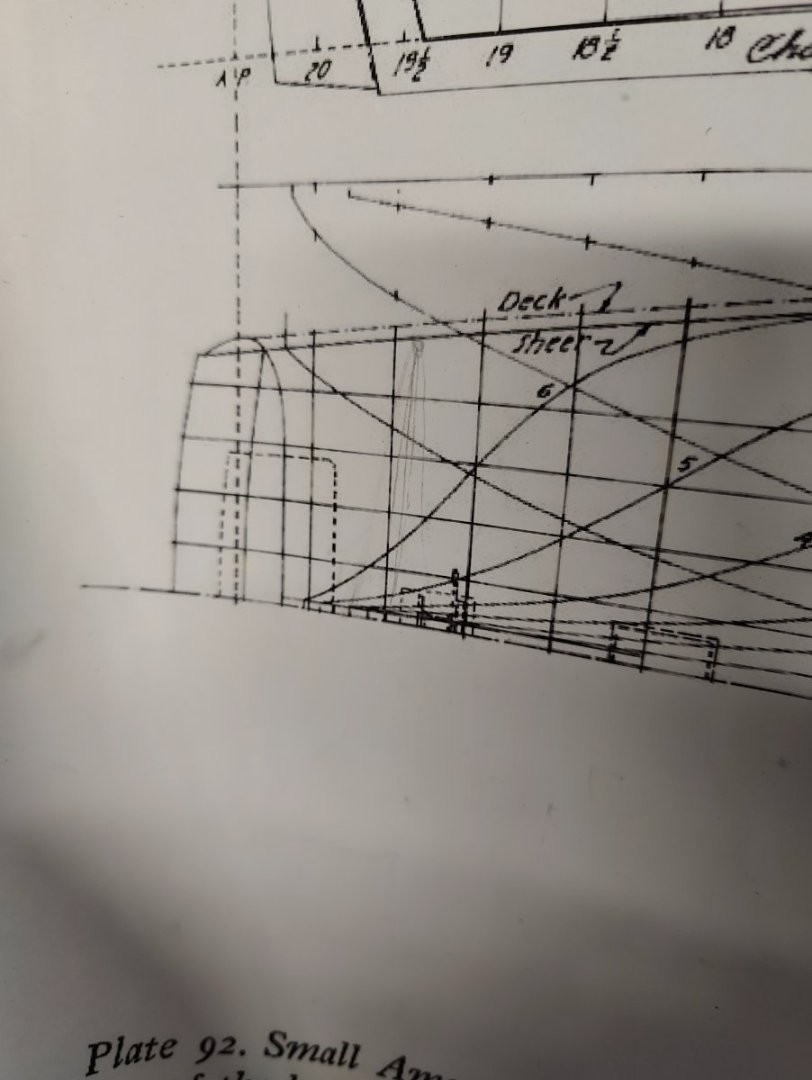
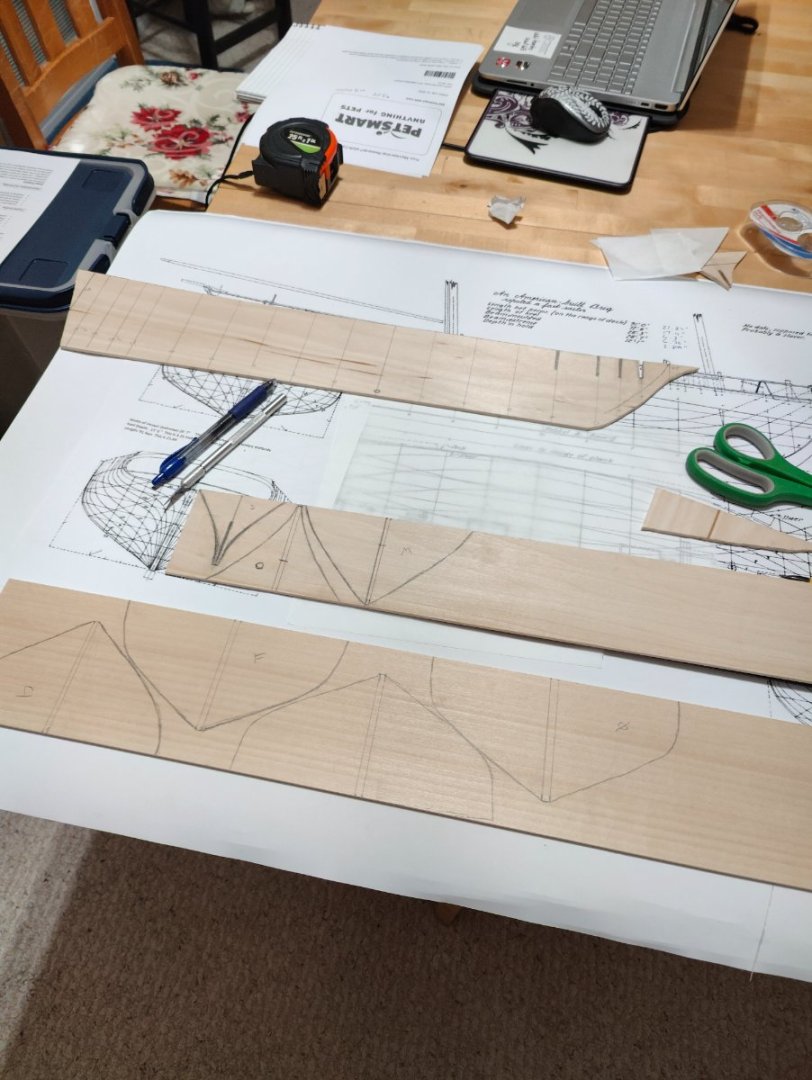
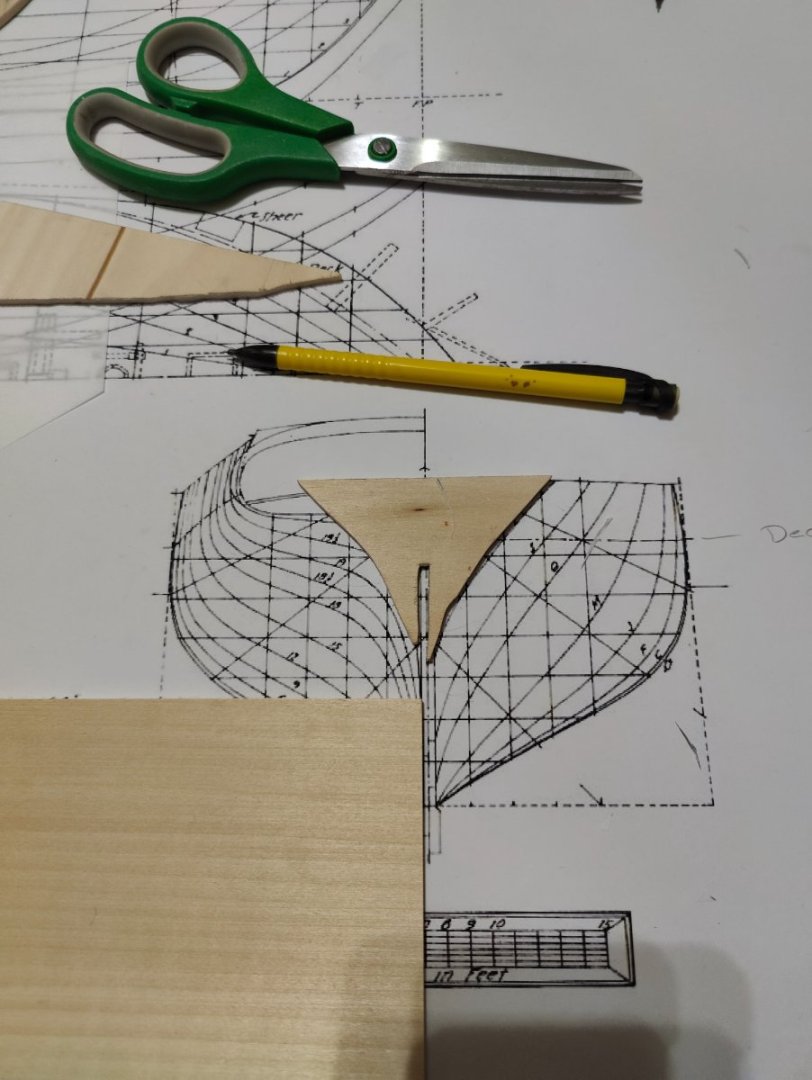
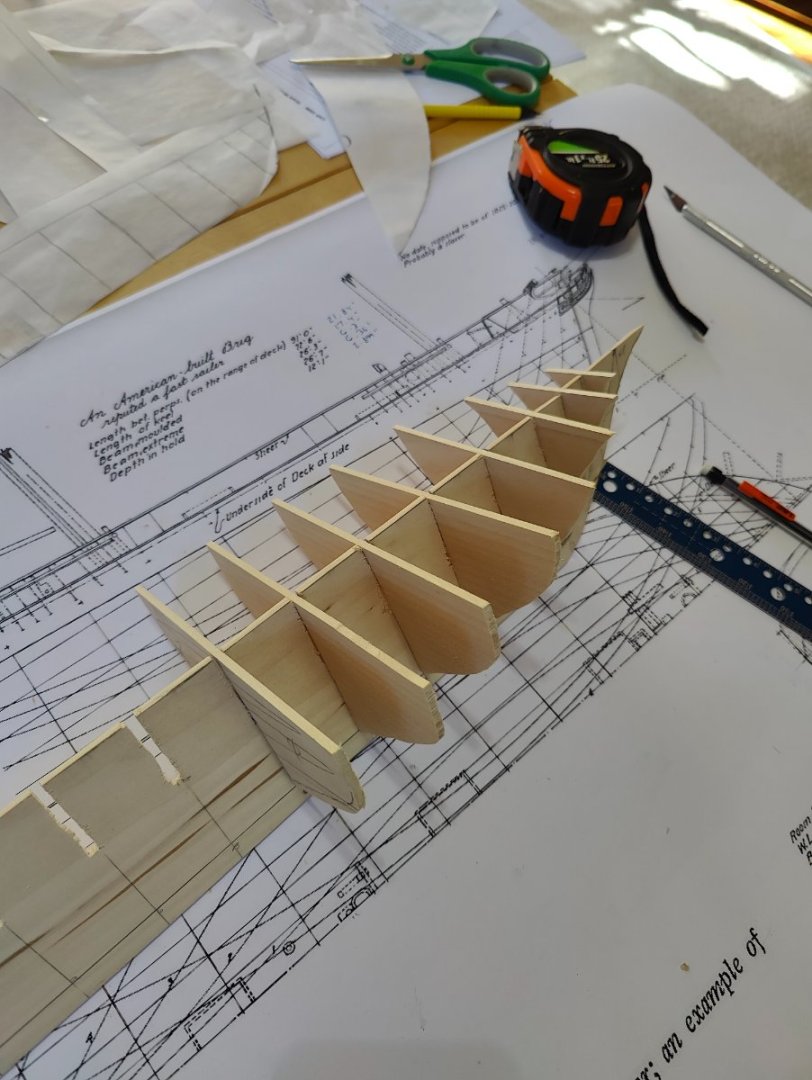
Bruce, This is my first true scratch for a wood from plans. Any help is ALWAYS appreciated. The plans showed me the underside of the main deck and I subtracted a microscopic amount from that prior to cutting the bulkheads. I freely admit that the guys in my club make this look FAR easier than it really is but even if this only goes this far I have already gotten over my apprehension of "lofting" bulkheads from plans. The stern looks like the most daunting part right now as the stern chine follows the sheer pretty boldly. In many of the books I have seen the ships had a gun deck so the stern seemed easier. I think I am probably worrying over nothing but I will collide with that bridge when I get there! 😀
-
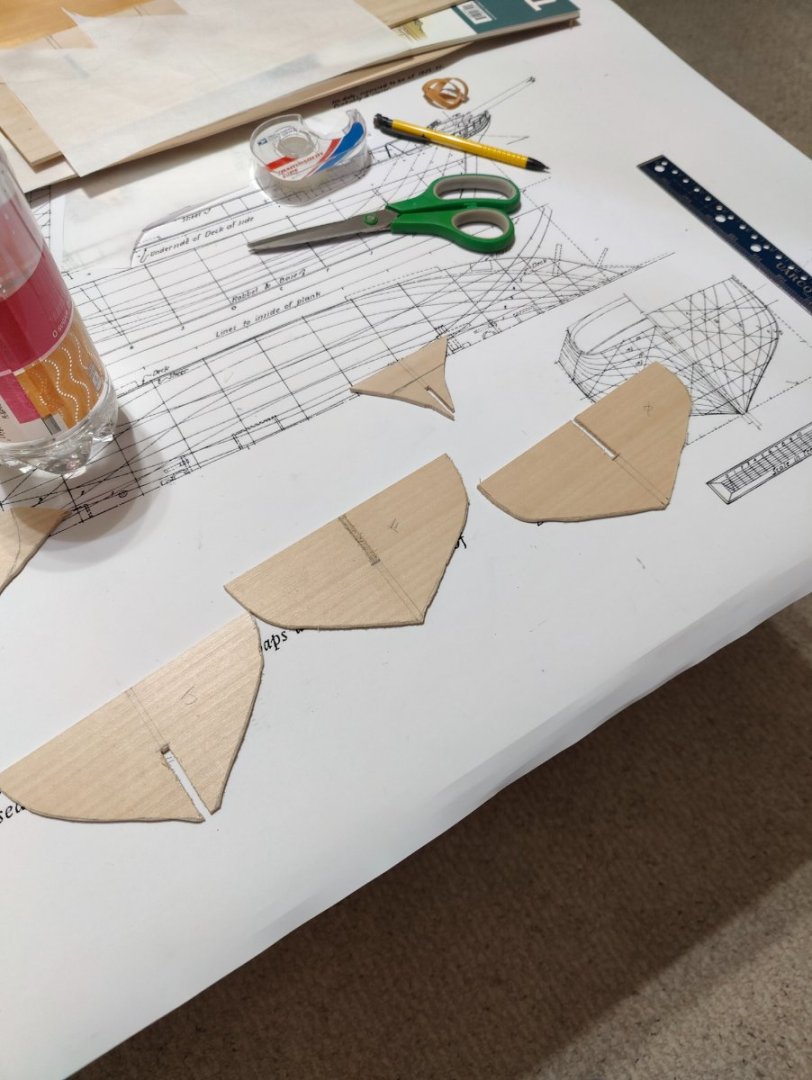
Some decent work cutting bulkheads. It can be tedious transferring it a couple times. I tried to save wood by flipping the frames but I ended up putting the groove on the wrong side. Measure 2x cut CORRECTLY The first time....

-
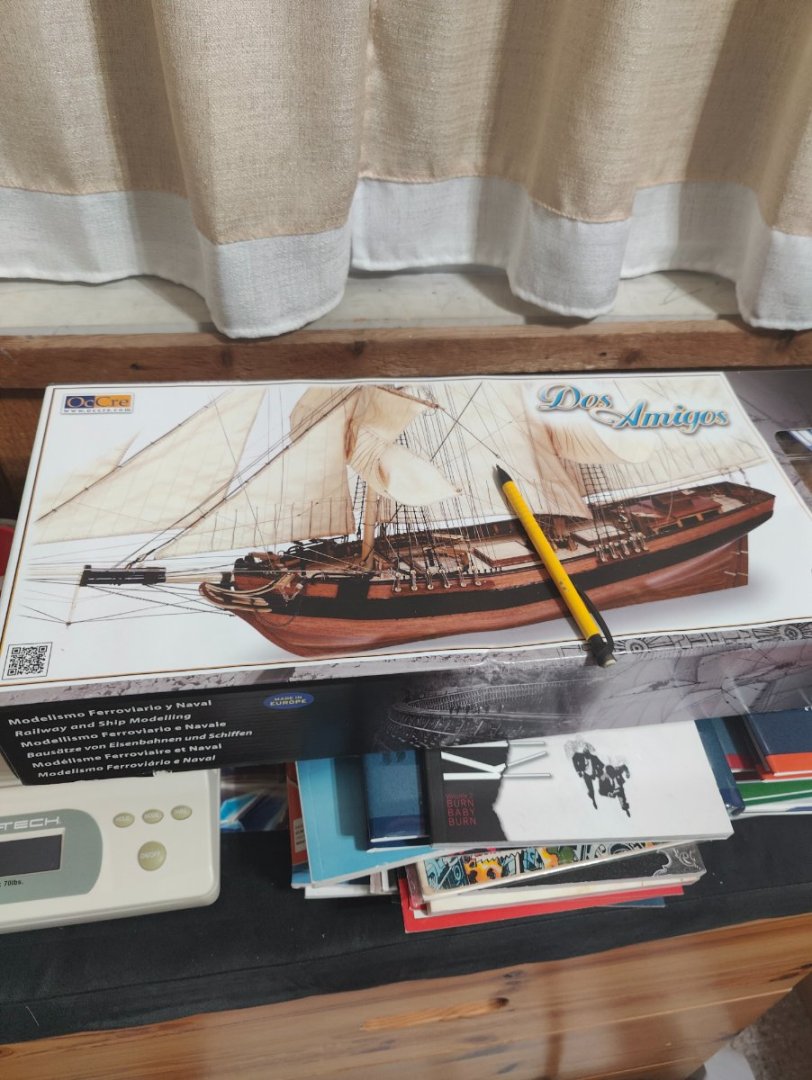
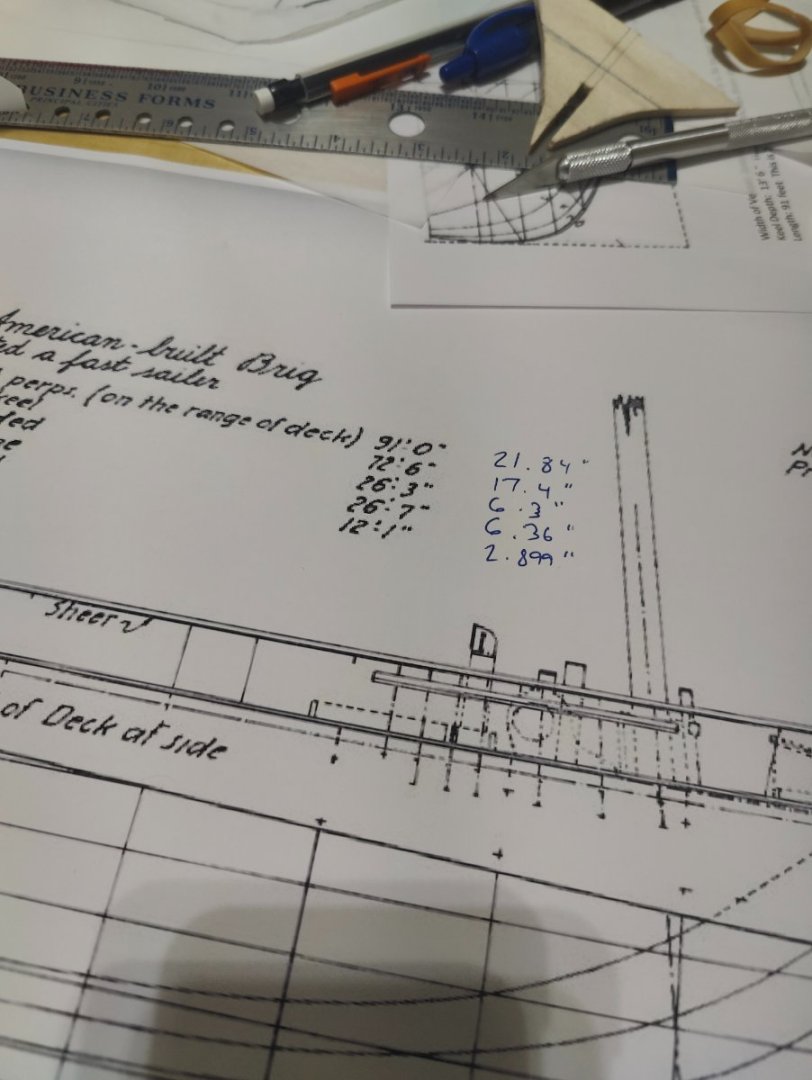
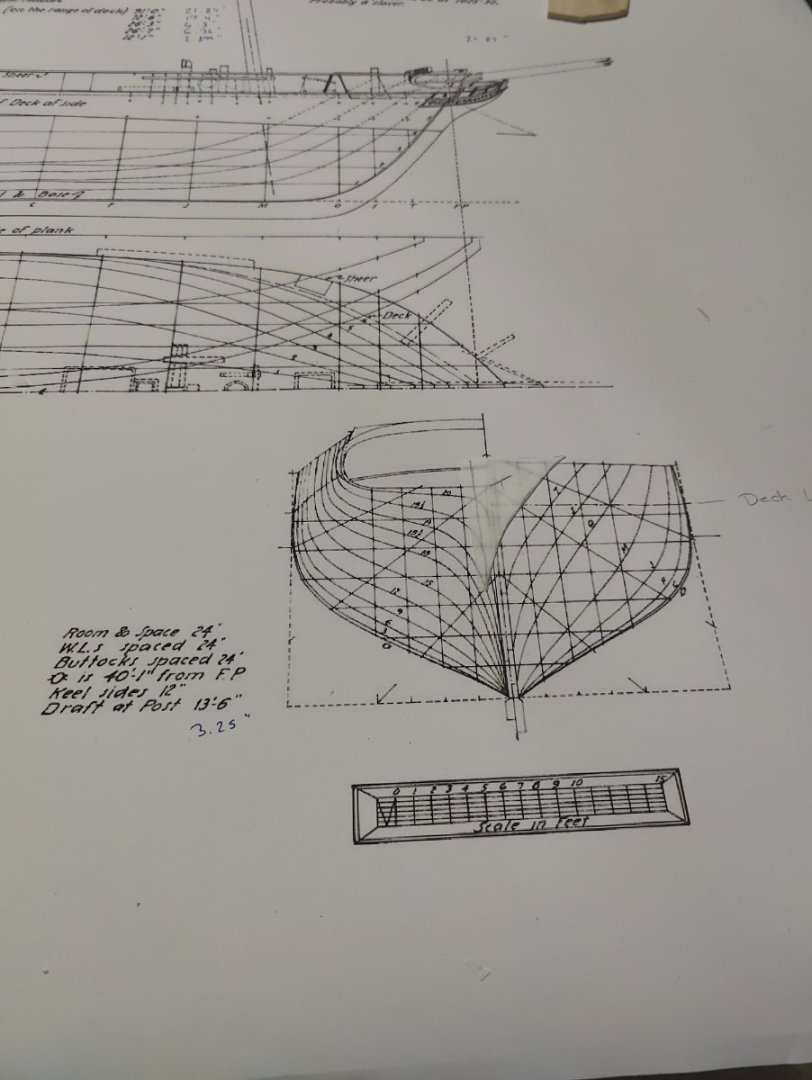
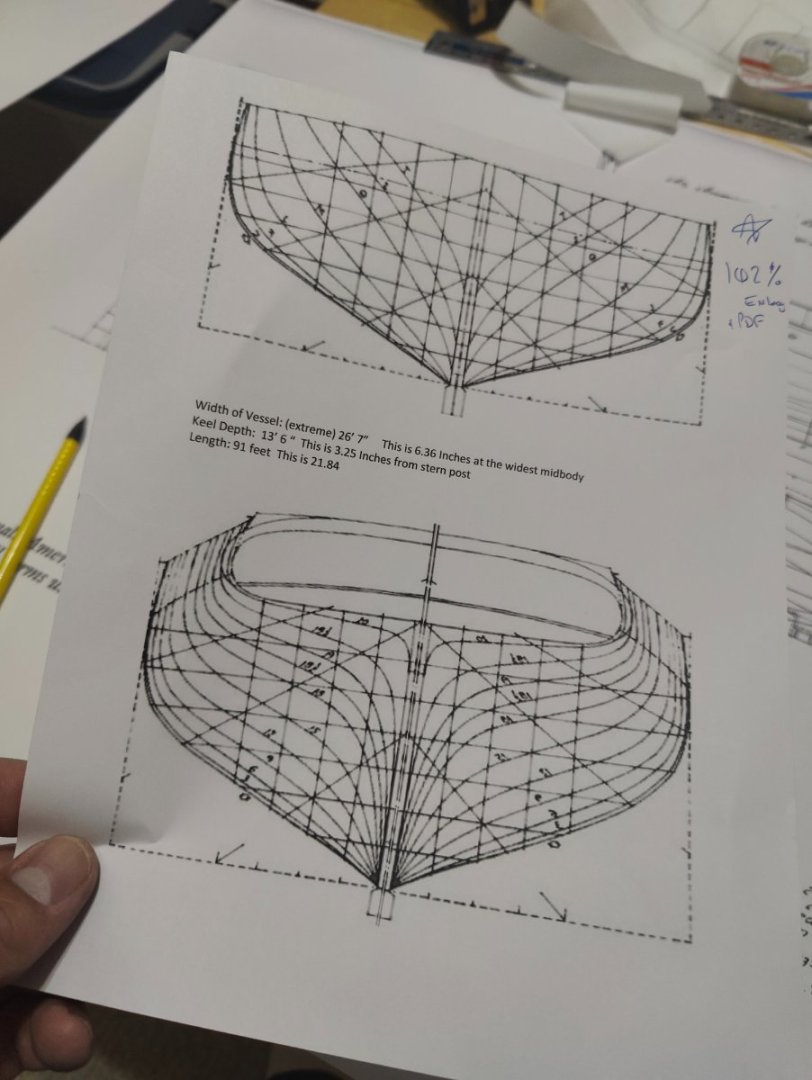
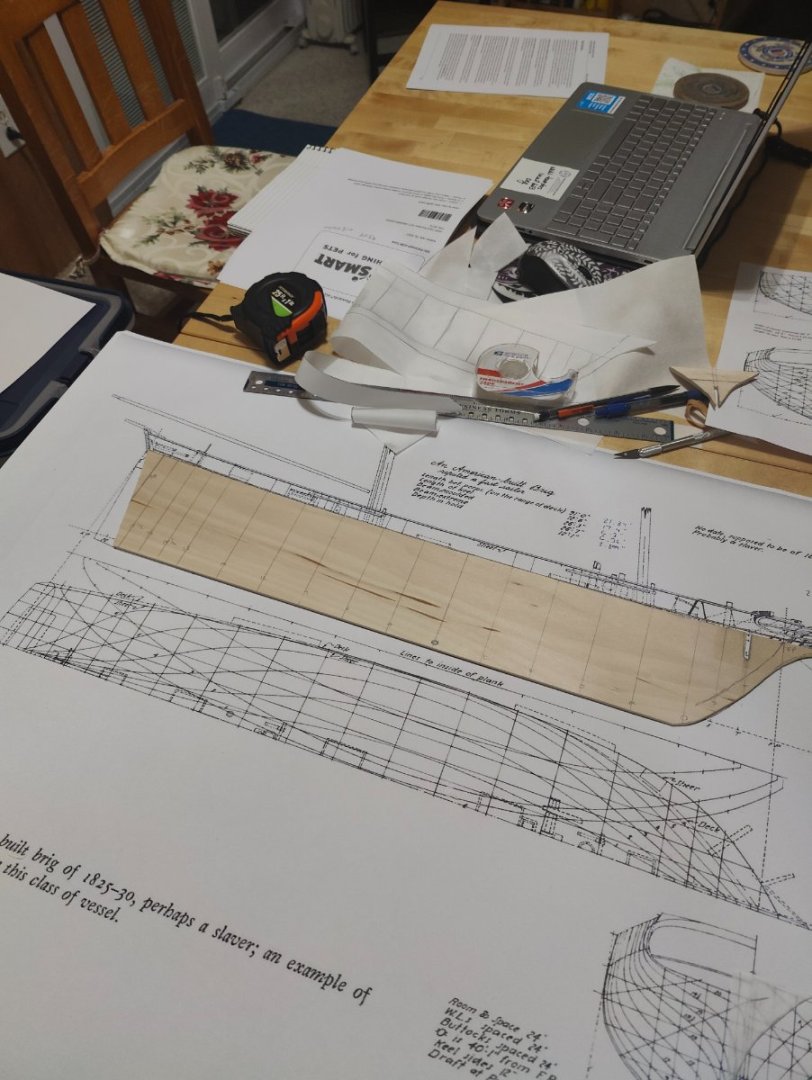
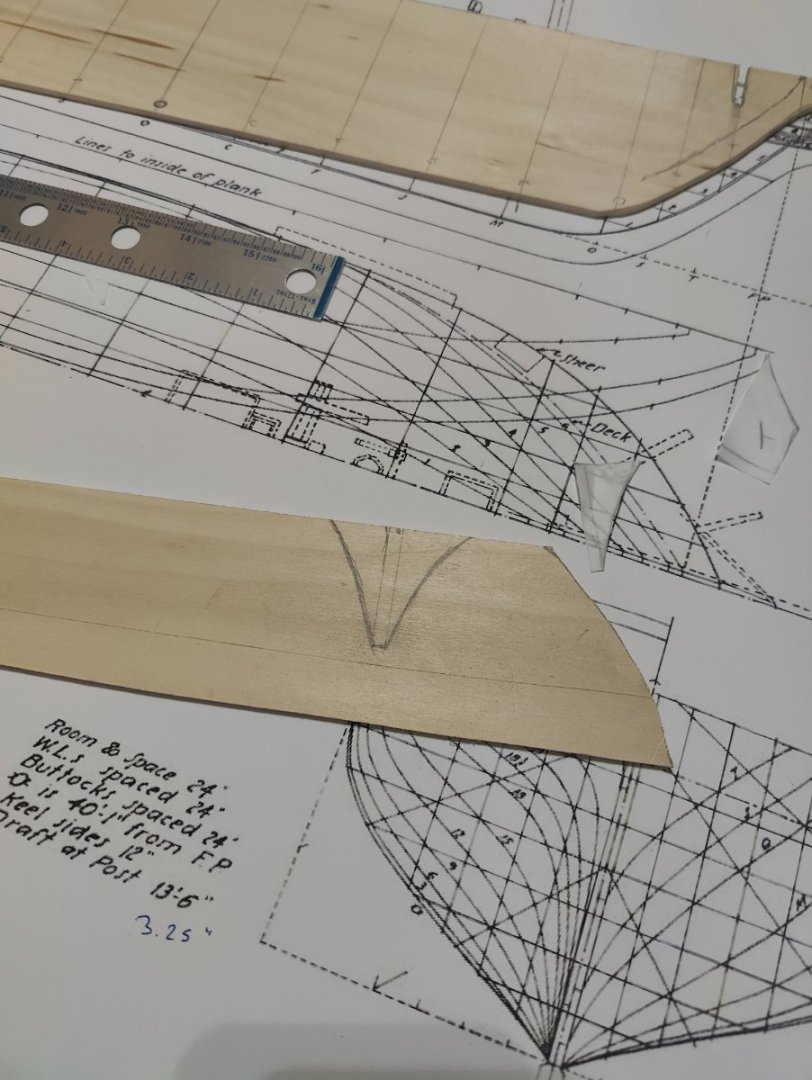
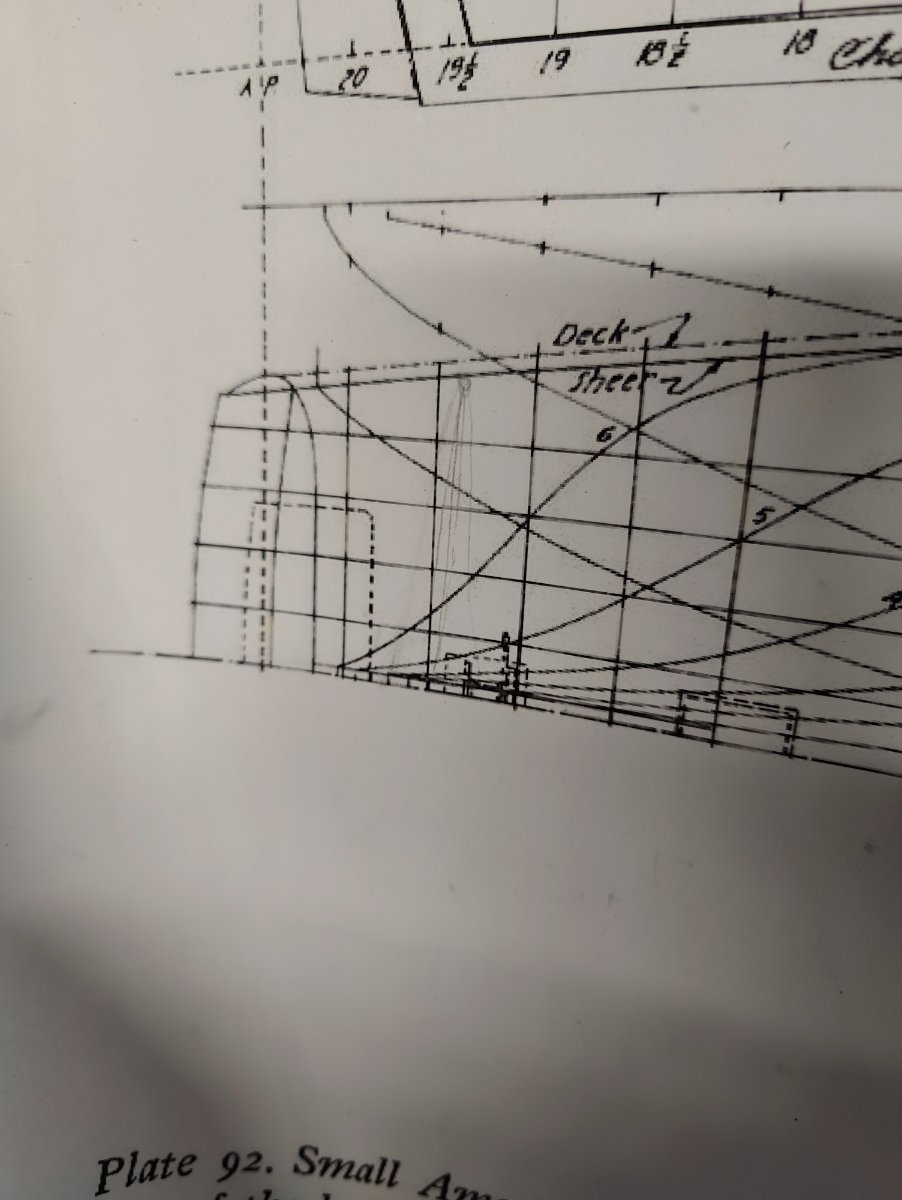
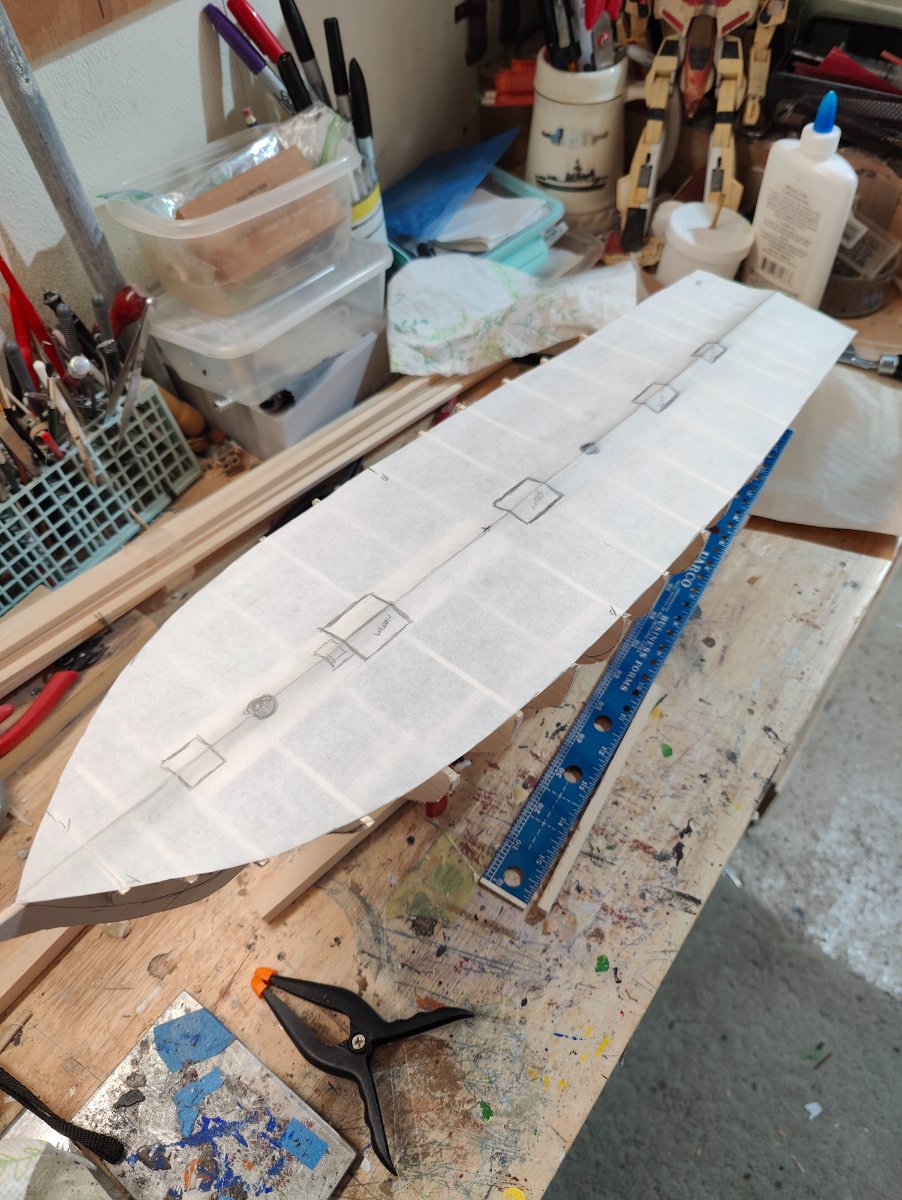
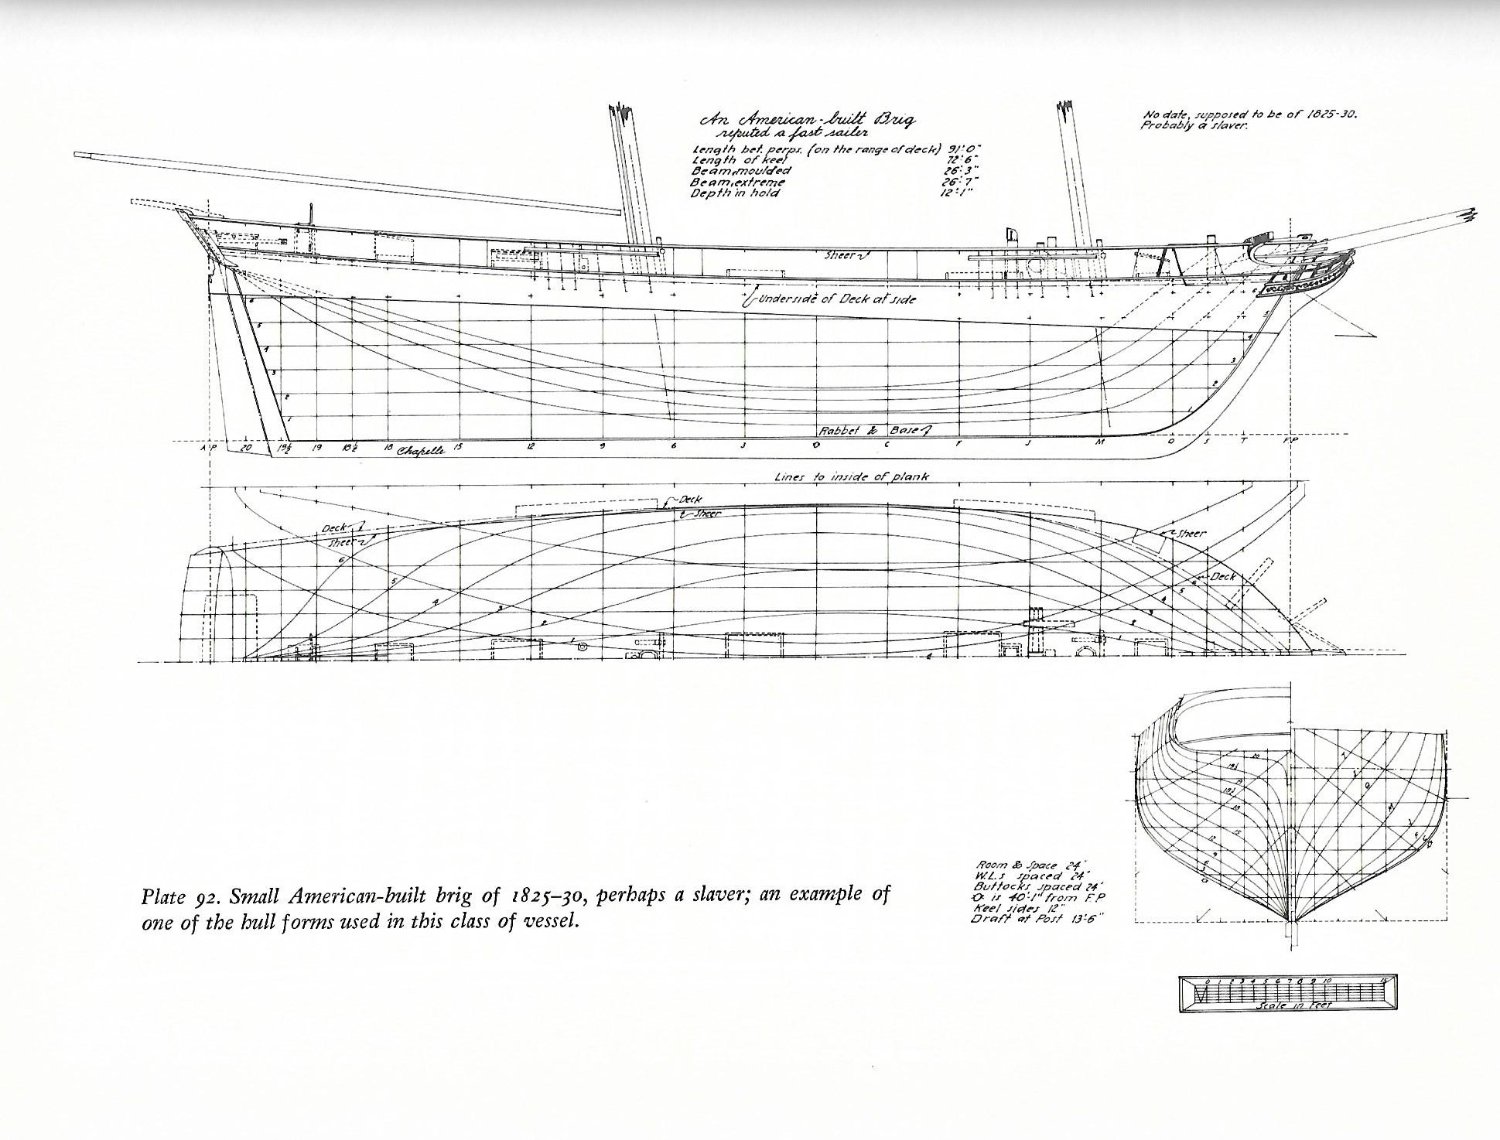
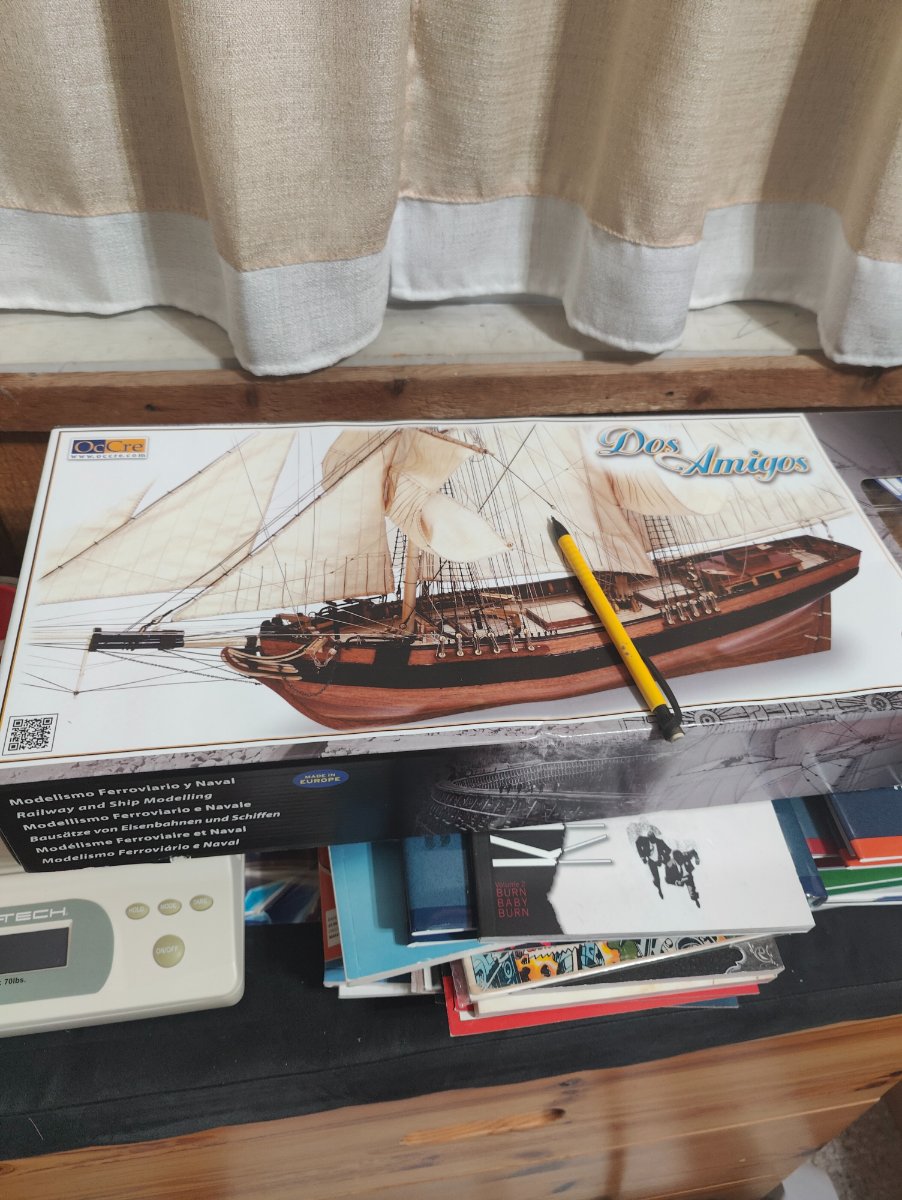
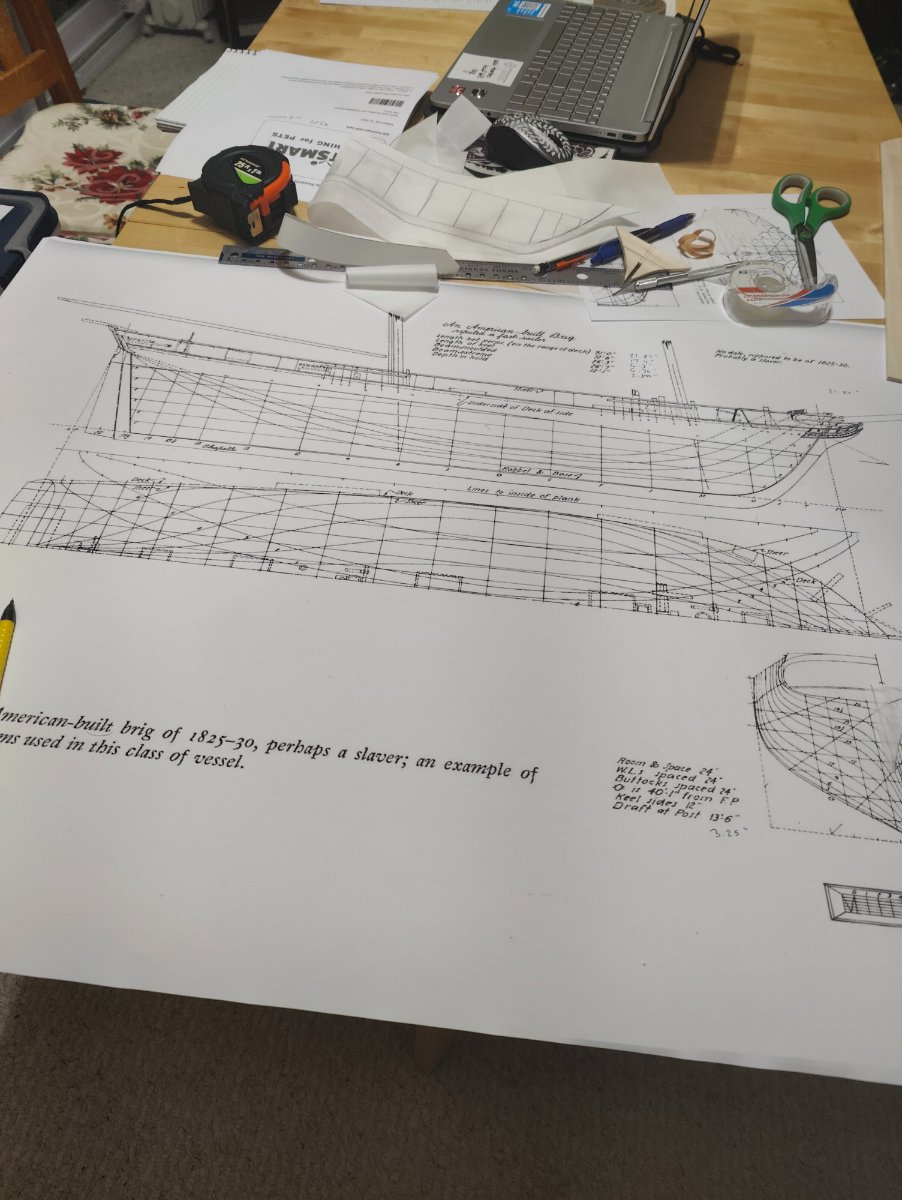
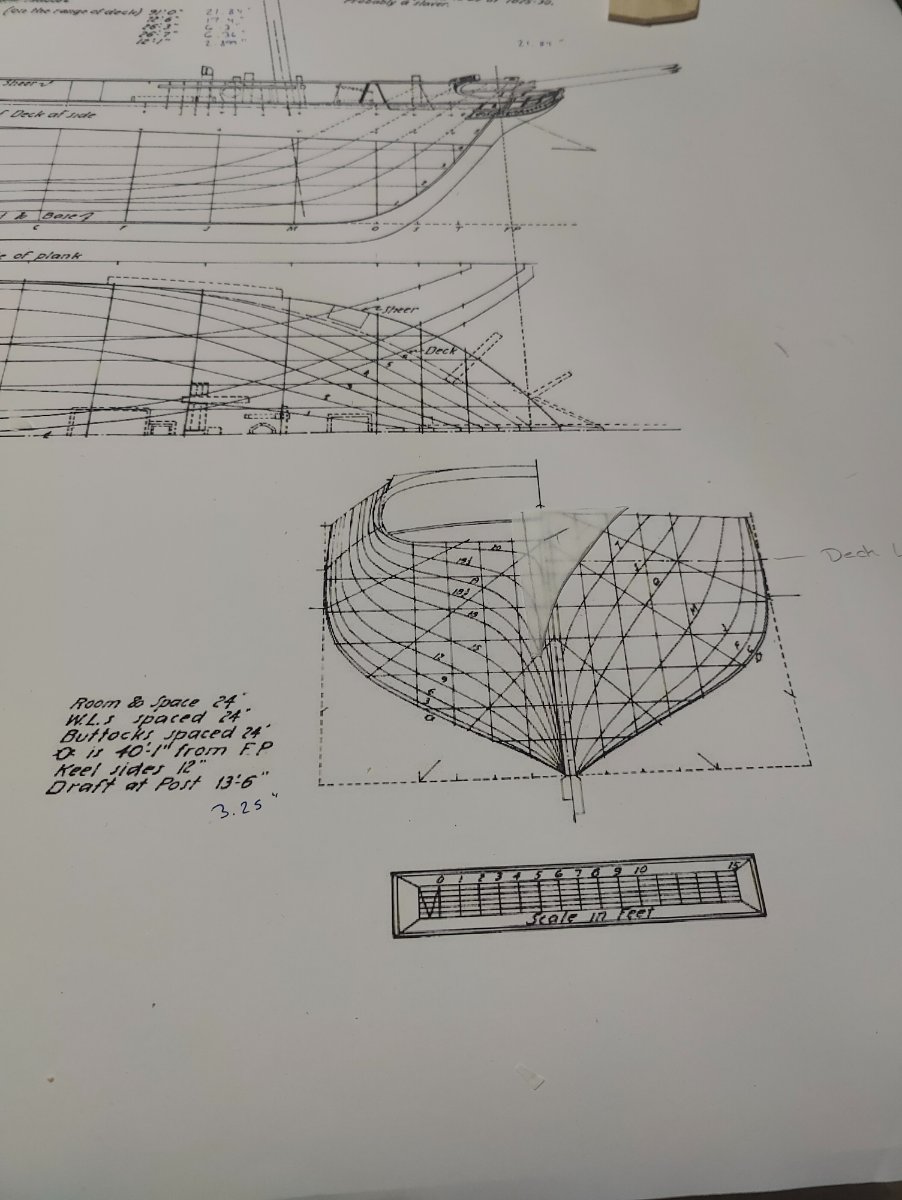
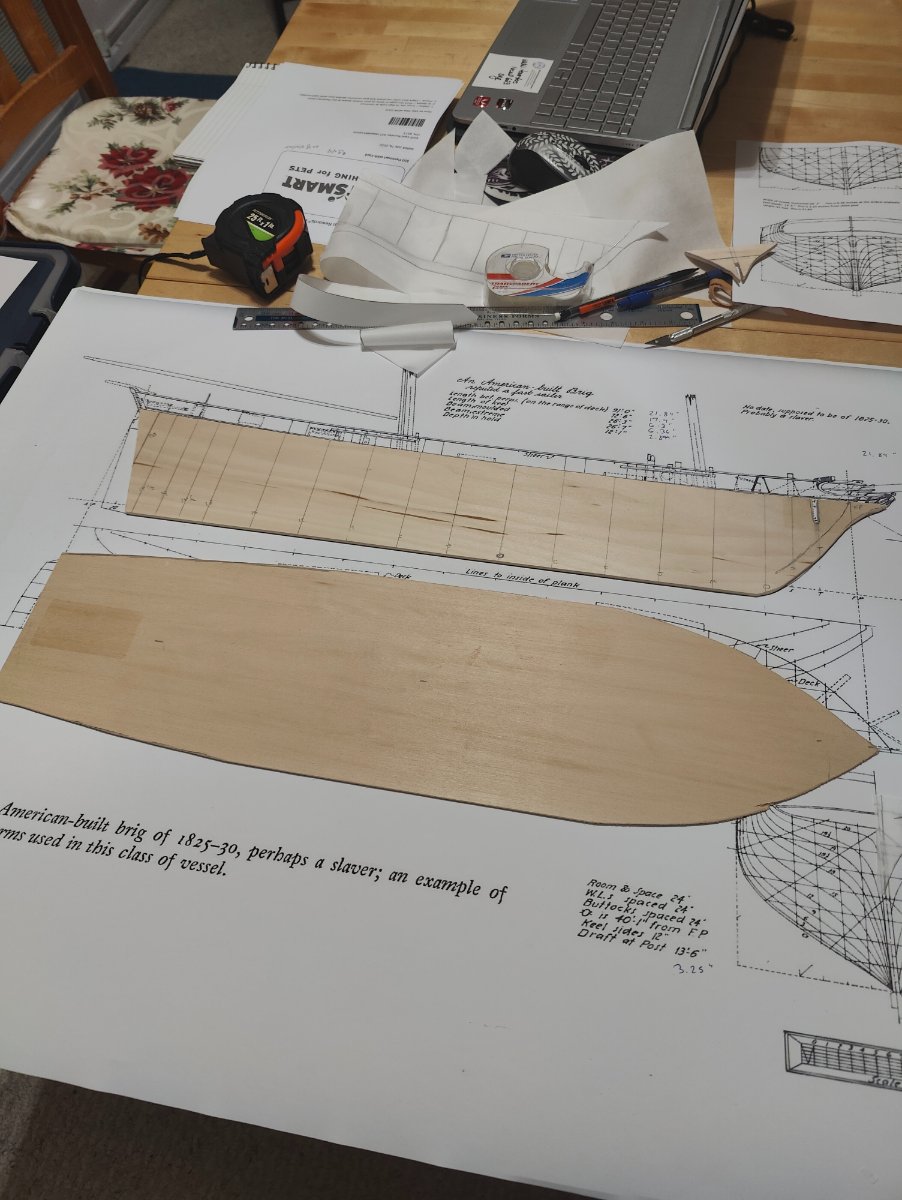
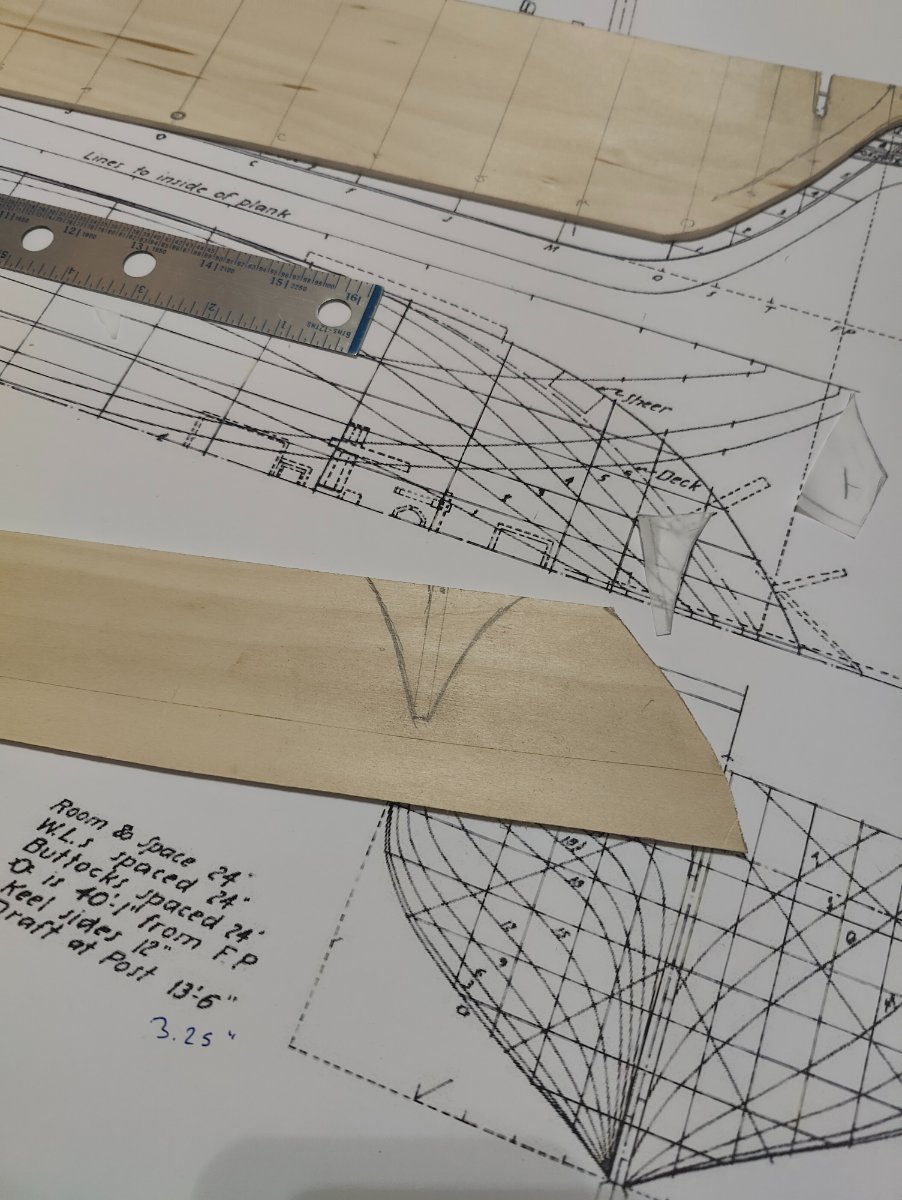
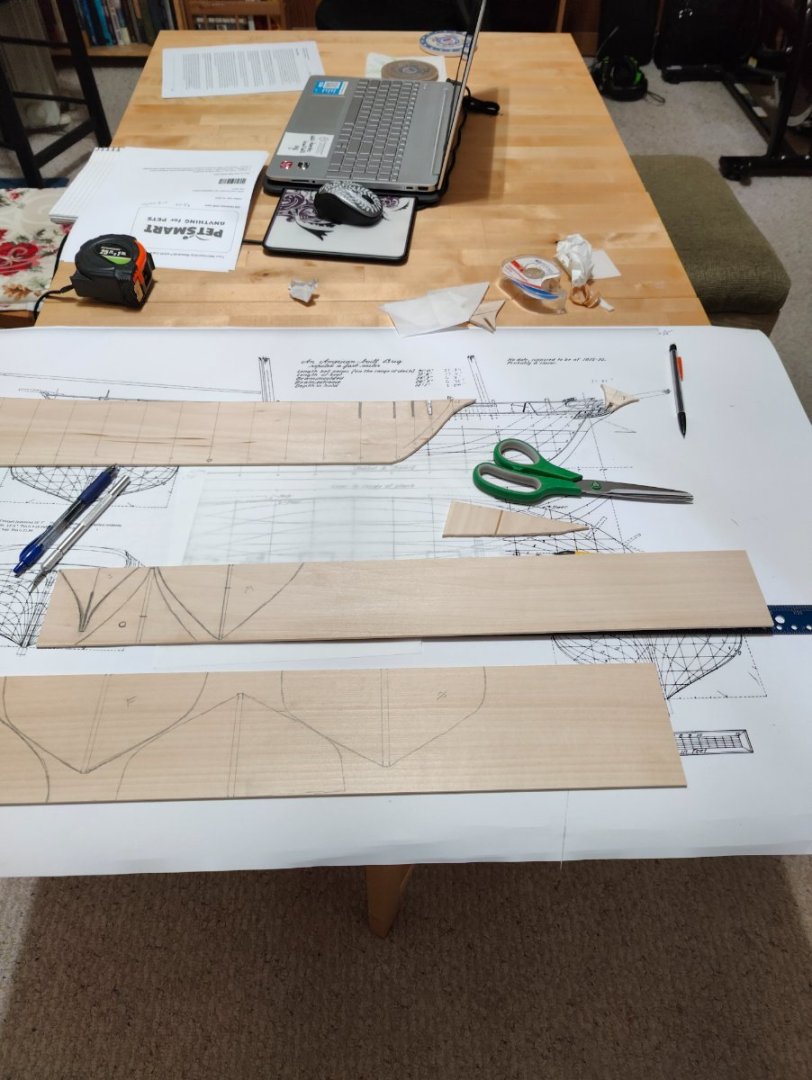
On another thread I mentioned that I got inspired by reading a recent book about a little-known vessel that was pressed into the West Africa Squadron to fight the slave trade. The name sounds terribly racist, but it has nothing to do with that; the ship was named after an incredibly bawdy and raunchy pub song which I will not make reference to here! I will not go much into the back story but if you want to pick it up here is the Amazon link: The Black Joke: The True Story of One Ship's Battle Against the Slave Trade: Rooks, A.E.: 9781982128265: Amazon.com: Books I looked at several kits to try and modify including the Occre kit Dos Amigos (Which the Black Joke actually captured!) The Dos Amigos had some pretty stark differences, so I decided not to go with it. (I did buy the kit anyway...) Trying to get plans were pretty difficult but someone on this site suggested that Chappelle had dug up some plans in Norway (or somewhere in greater Scandanavia...) and put them in his book "The Search for Speed Under Sail". I digitized the plans in 8.5 x 11 format from the book. The measurements on the vessel identically matched those of the Black Joke. The vessel in Chappelle's book was not the actual ship (the deck fittings were not correct for the Joke) it was VERY likely a sister ship built in Baltimore. The scale I decided on was 1/50. This put the length of the model at 21.84 inches and 6.36 inches at max beam. The plans were then blown up to the proper size. I then used tracing paper to cut out the keel and deck. I then started to cut out a few of the frames before I ran out of steam on the evening. If anyone has suggestions as this is my first TRUE scratch-build I am open for pointers and pitfalls. Black Joke Work Sheet Hull Forward.pdf