Jason Builder
-
Posts
219 -
Joined
-
Last visited
Content Type
Profiles
Forums
Gallery
Events
Everything posted by Jason Builder
-
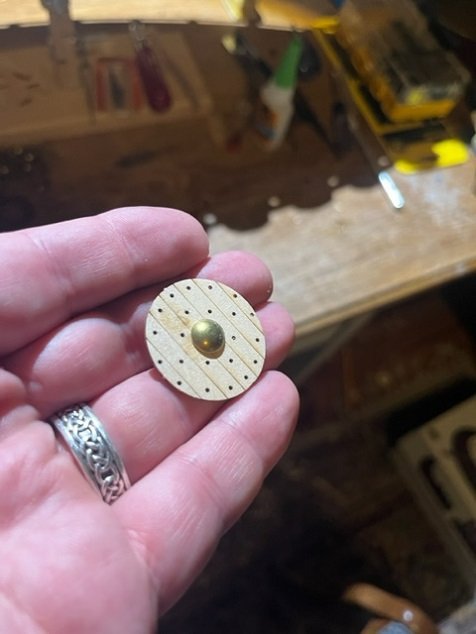
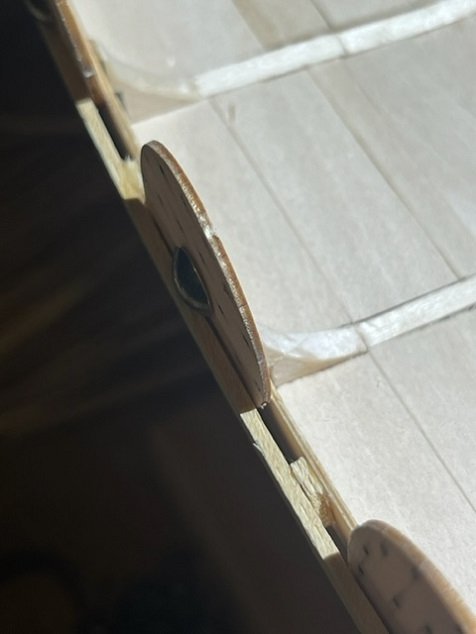
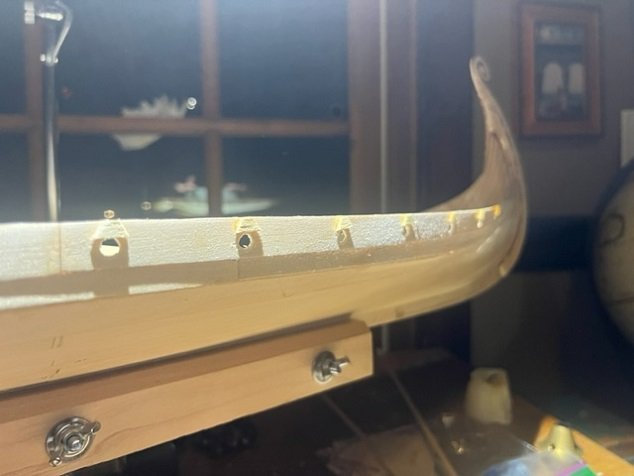
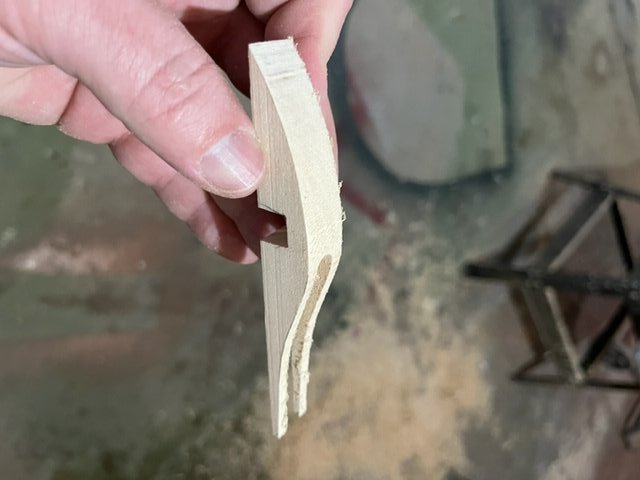
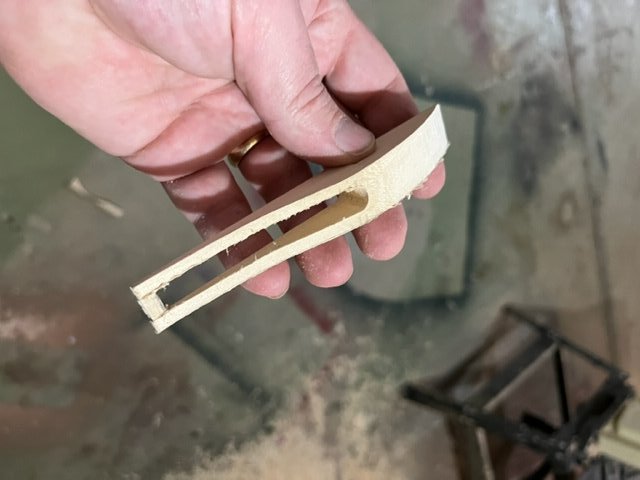
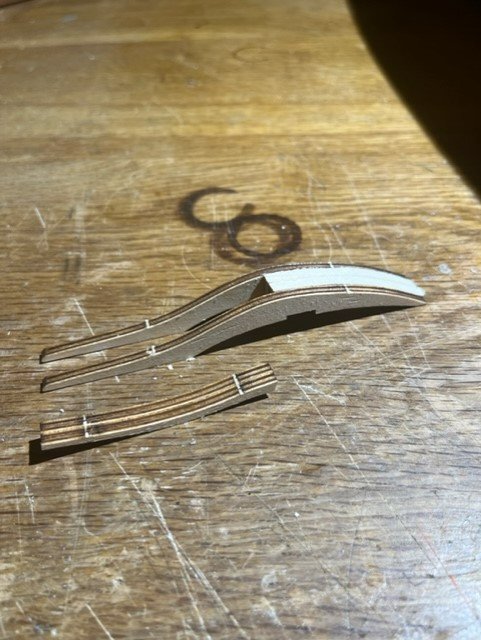
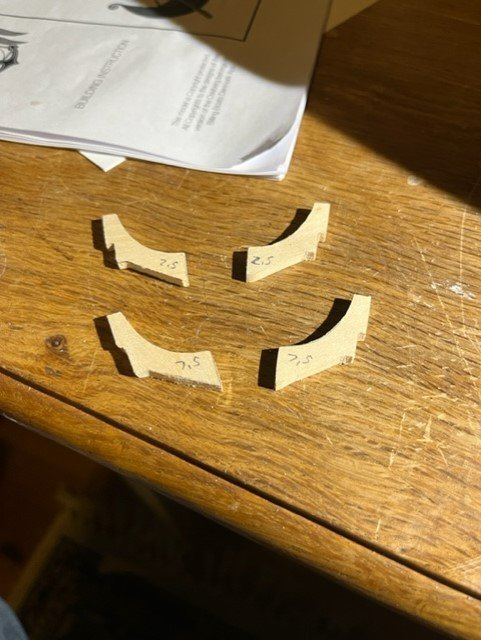
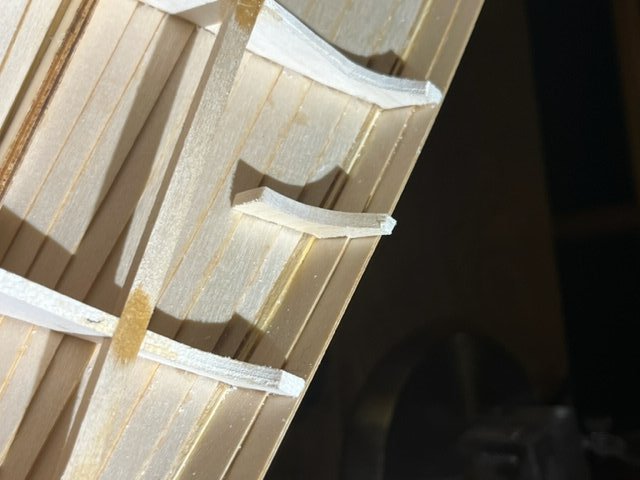
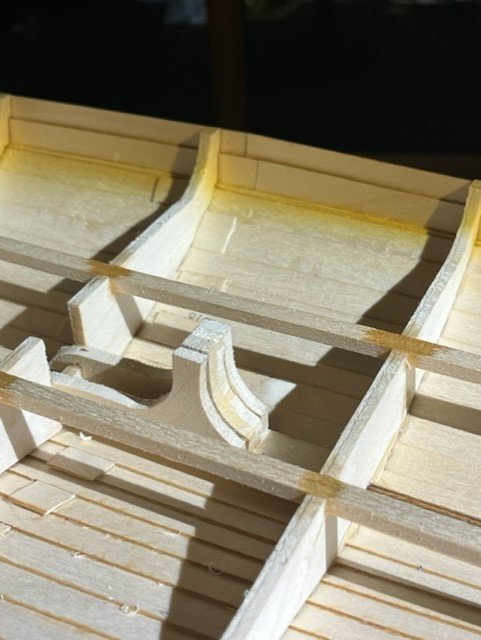
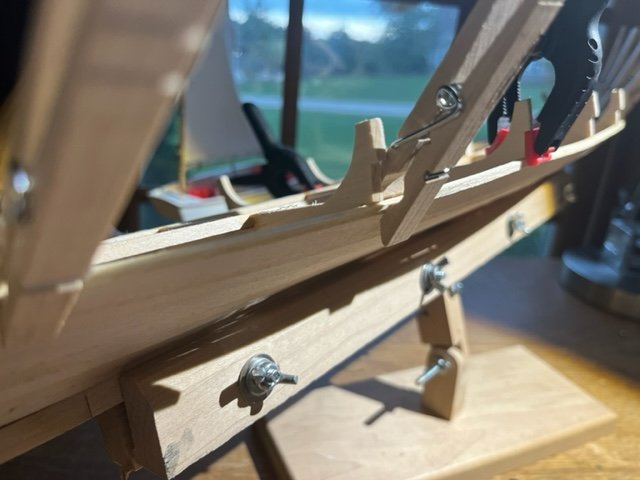
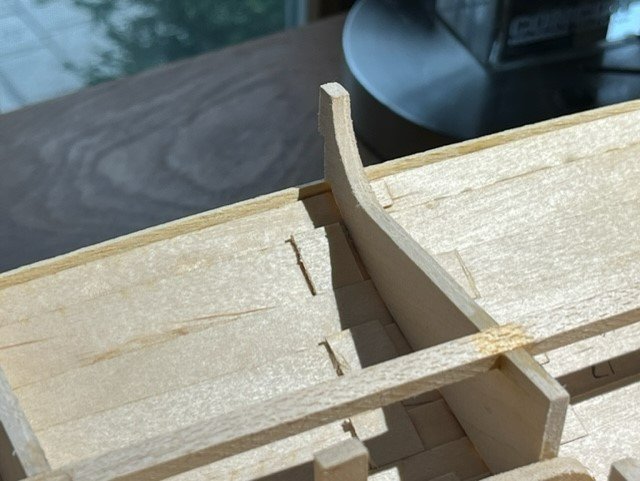
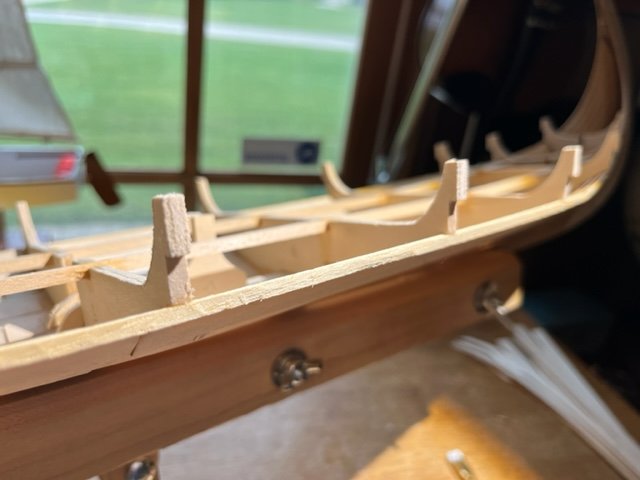
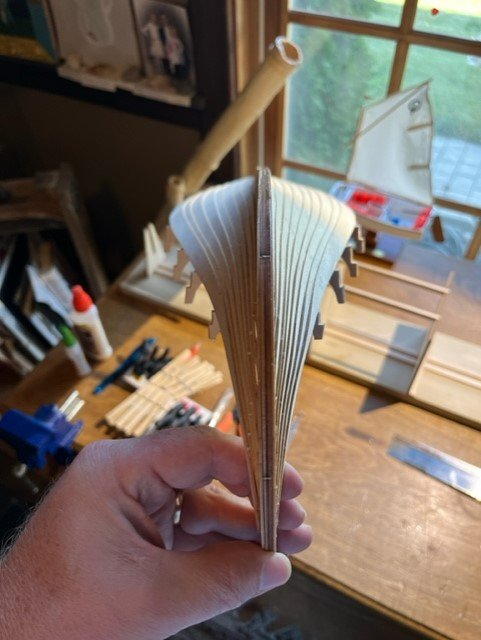
 Aloha e ka poe hana waapa, Tonight some work in the armory....shield building. First a note on an interference problem. I used what I thought was the right wood stock from the kit to make the little blocks above that create the spacing for the shield rail. Then I tapered down the ends of the shield rail and glued it in place. I then went to go install my happy little shields only to find that the shields were too thick to fit into the space. Uf-da. I wasn't about to rip off the rail so I sanded the shields down slightly and they now fit. Downside was that in the process of sanding, the little nail holes etched/laser-scribed into the shield faces became actual holes. I will fill these with a nice darker color wood filler and will wind up OK. Just be careful to check the thickness of the blocking material vs the shield thickness. 3/8" diameter furniture upholstery tack used for center of shield; I picked a bronze type color, but I think the vikings used iron for these parts; I wanted the bronze color to look better with the stain I will apply so permit me this inaccuracy of metals......the bronze age ended at least 1000years BC and this ship is from 800AD. But then again the Vikings painted their shields so I am going with that the Vikings on this ship painted the shield centers this color. Now I have some cleanup and sanding to do on the shield rail and the shields.

- 75 replies
-
- 4
-

-
- Oseberg
- Billing Boats
- (and 1 more)
-
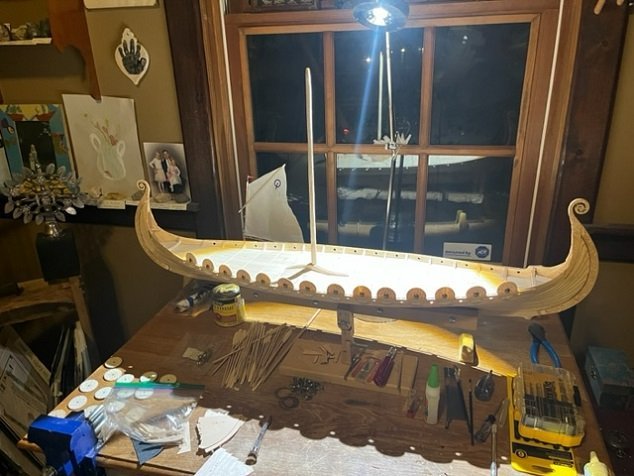
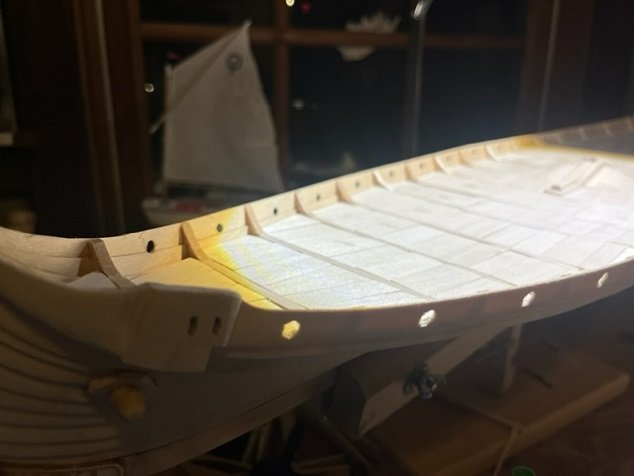
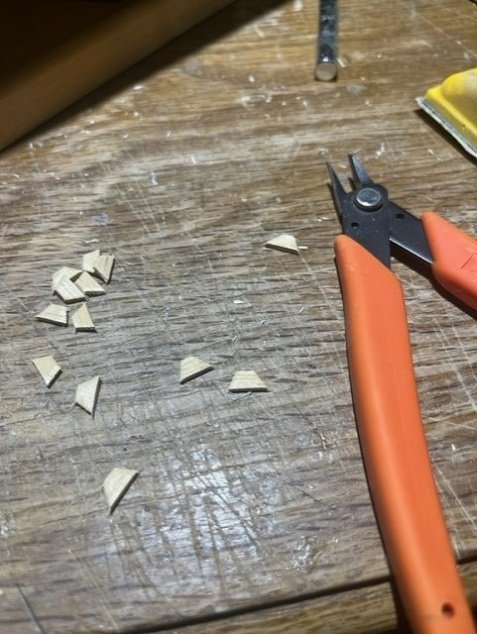
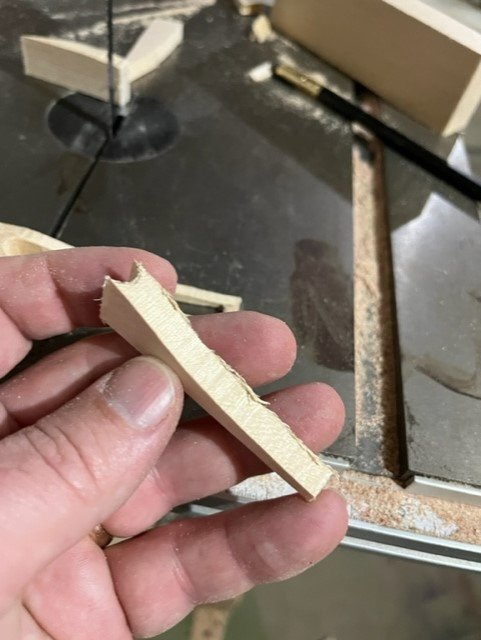
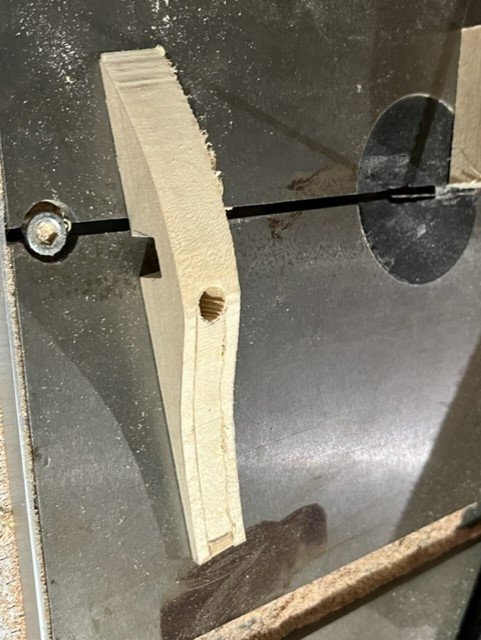
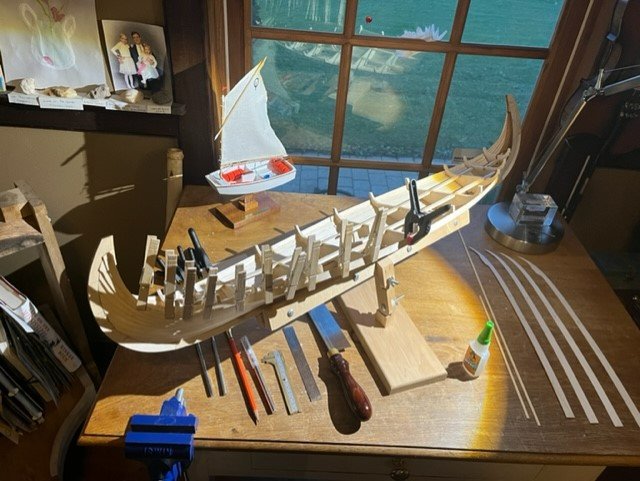
G'day Mates! I can smell blood in the water on this project, the end is near and I am working now every day after months of working once a month. Latest progress includes drilling holes for oars (pilot hole followed by final hole diameter using a drill) and installing the blocks for the shield rail. I made those using a hand-snipper.

- 75 replies
-
- 6
-
-

-
- Oseberg
- Billing Boats
- (and 1 more)
-
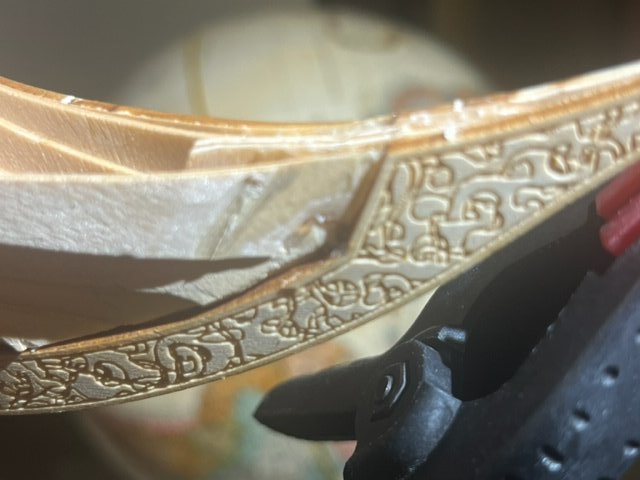
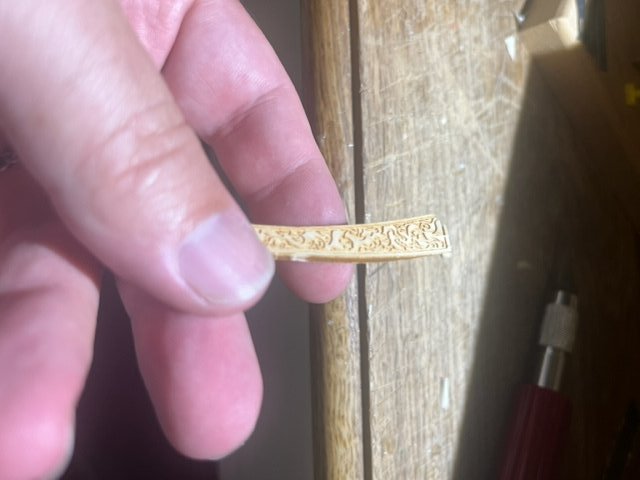
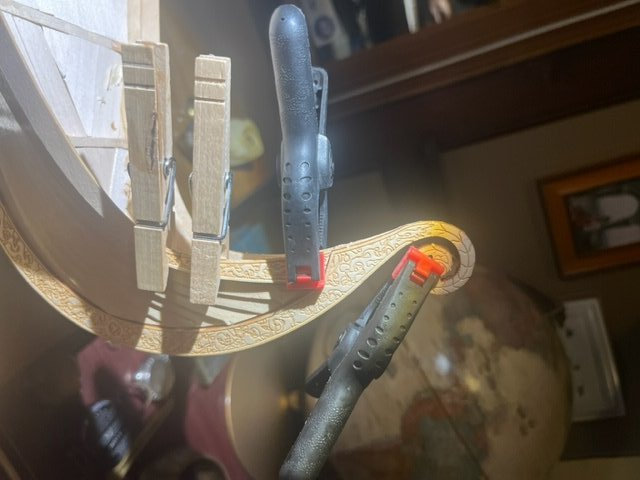
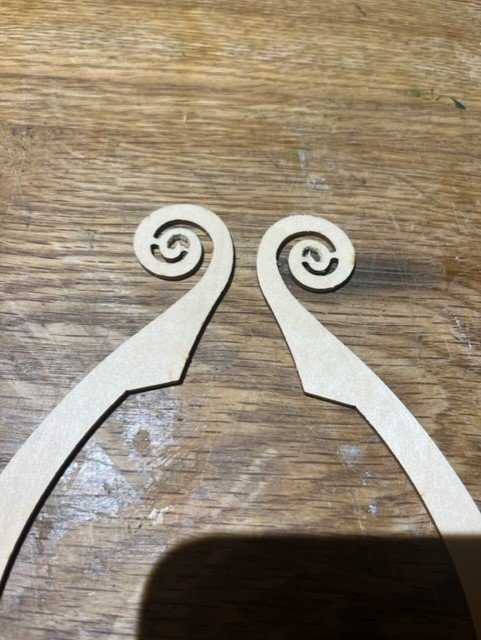
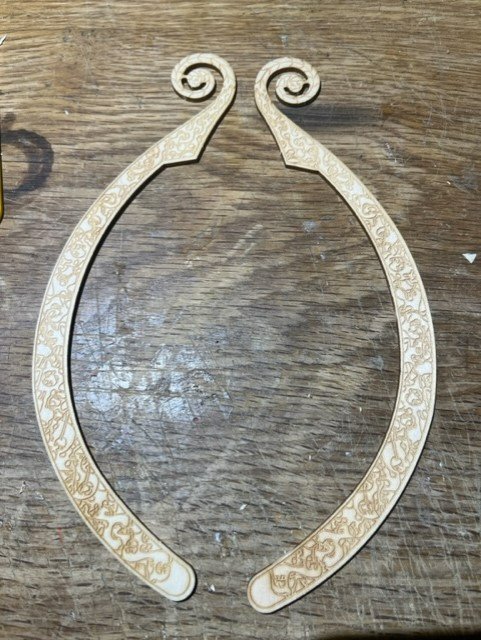
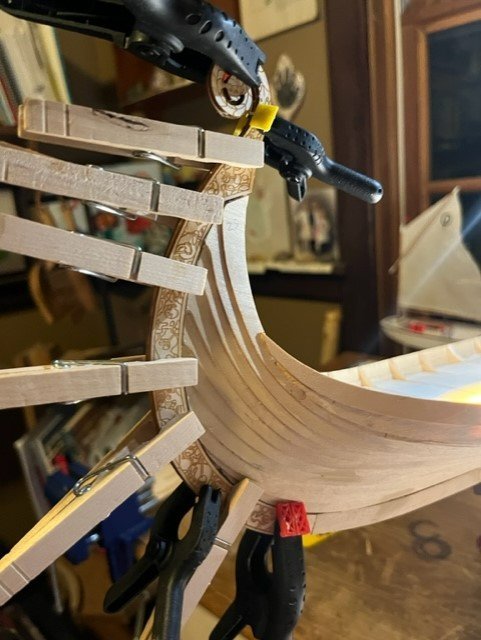
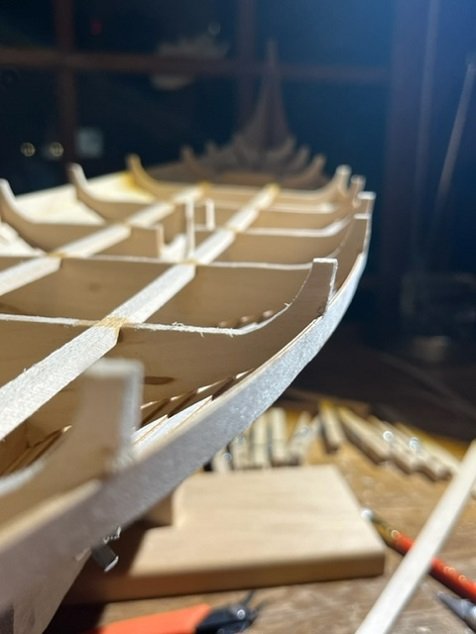
Hello Model Ship Builders! Couple projects tonight. 1. Finish attached bow and stern fancy carved trim pieces. 2. cut off the un-needed raised section of planking on the port side in the steering gear area. In order to have flush installation of these nicely burned trim pieces at the bow and stern, I found that the trim piece and the underlying plank should both be carved and tapered down. And here is that piece being glued on:' Next, the uppermost planks from the kit, on the starboard and port sides, both have a raised section near the stern that is designed to accommodate the steering gear for the rudder. These extra parts are only needed on the starboard side. I cut away this raised section from the port side, as seen in the photos below.
- 75 replies
-
- 5
-
-
- Oseberg
- Billing Boats
- (and 1 more)
-
Thanks for the encouragement , Steven. I see you’re in Ballarat, I seem to remember visiting a quarry there once on one of my trips to Aus. Also bought an MSM steam engine kit which I believe used to be made in Melbourne. Nice part of the world you are in! jason
- 75 replies
-
- 1
-
-
- Oseberg
- Billing Boats
- (and 1 more)
-
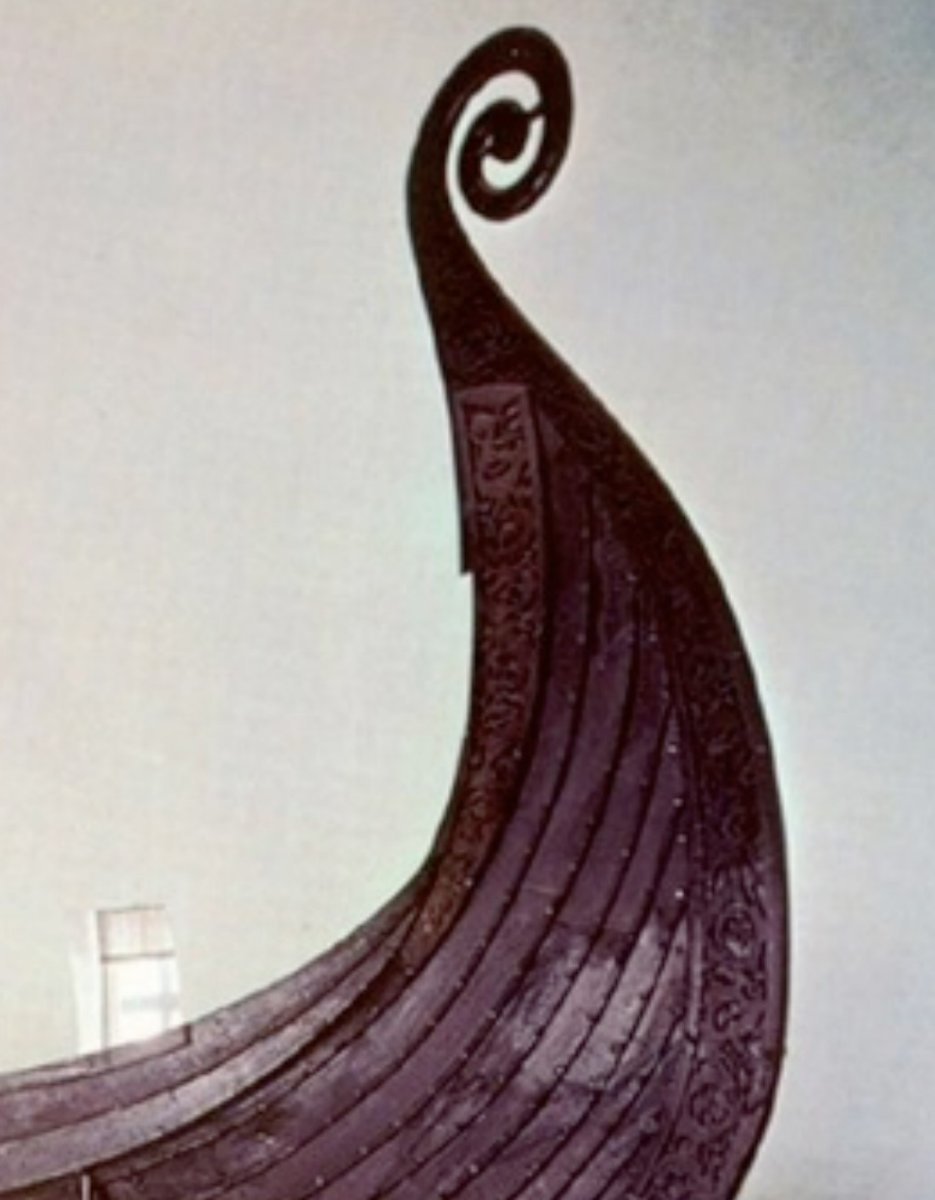
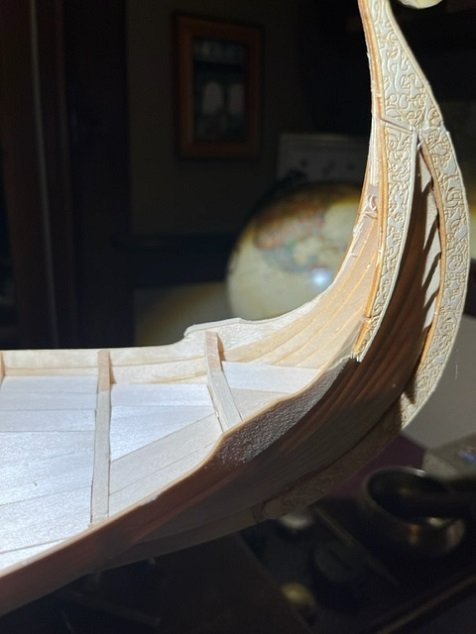
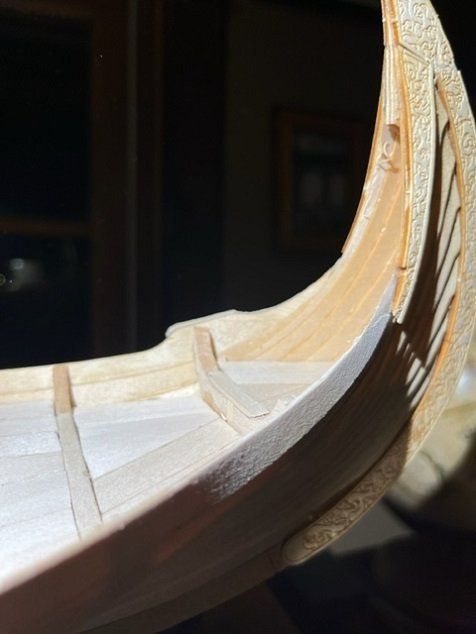
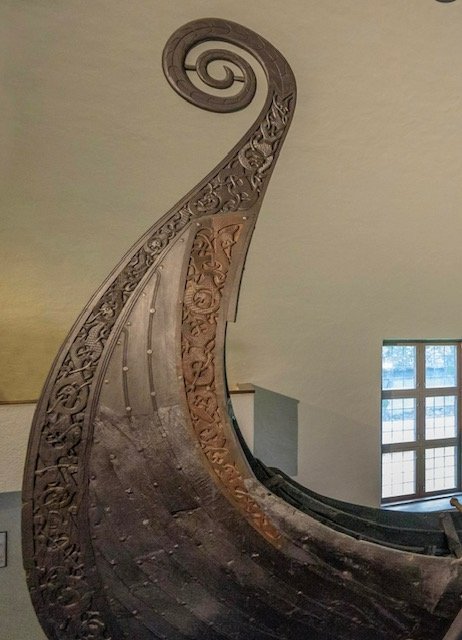
The nice laser burned stem and stern are a nice feature of the kit, thanks Billing Boats! The bow and stern planks are the same in the kit, but for the two stern pieces, the dragon head in the part must be turned into a tail via your carving work! Below I show some photos of the actual ship. The dragon head is of-course at the prow and the tail at the stern. Here are my parts and installation:

- 75 replies
-
- 8
-
-
-
- Oseberg
- Billing Boats
- (and 1 more)
-
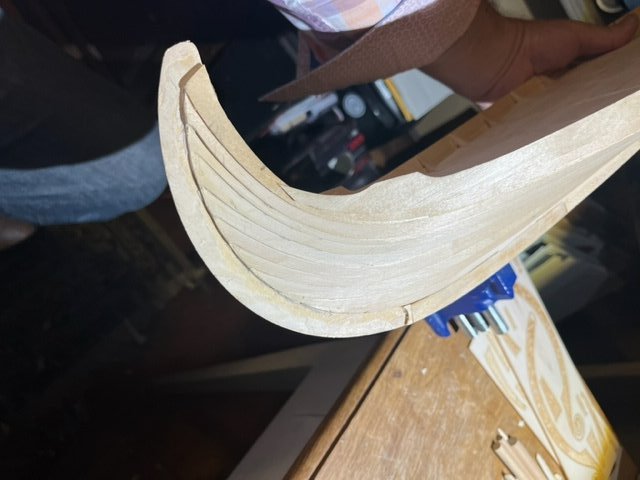
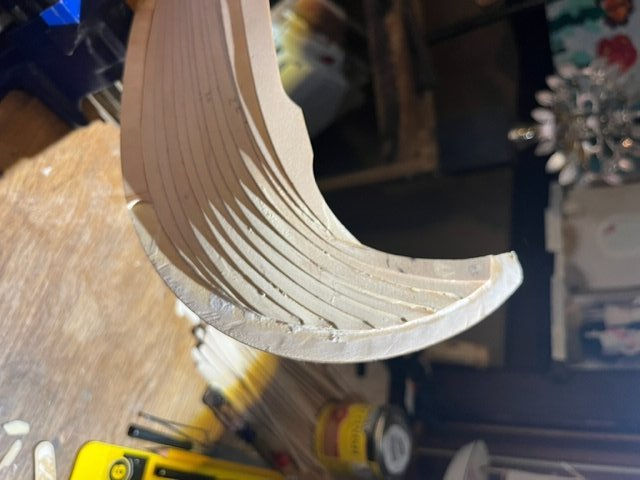
Hello Model Ship Building Fellows, Here are photos of my model as I used a razor knife to remove width from the bow and stern frame/keel, as others have done, to prevent the stem and stern edges from being TOO WIDE as they would be if following the kit. This was a bit of work, but not too much,
- 75 replies
-
- 4
-
-
- Oseberg
- Billing Boats
- (and 1 more)
-
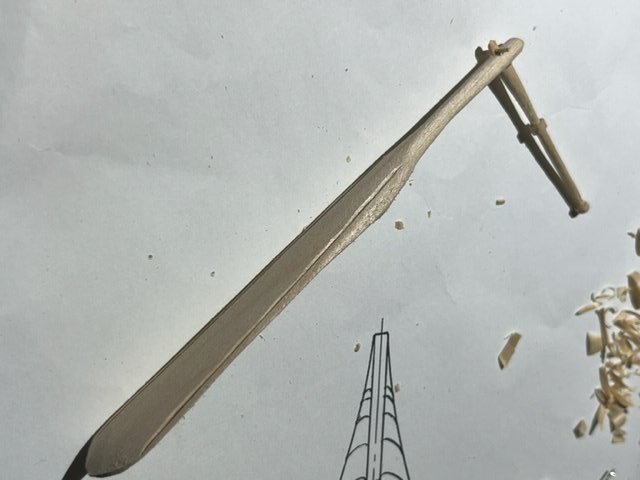
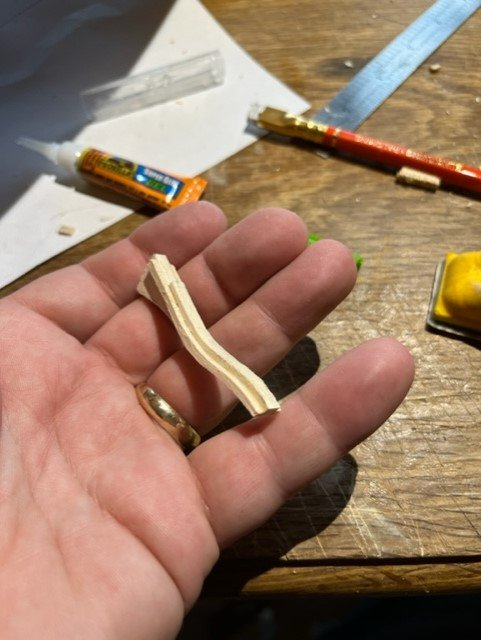
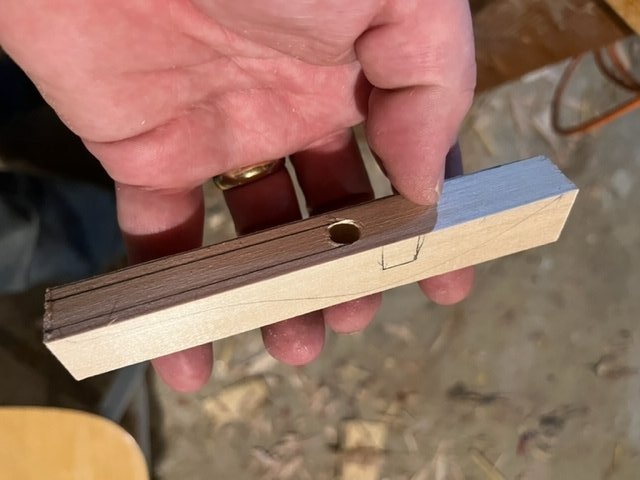
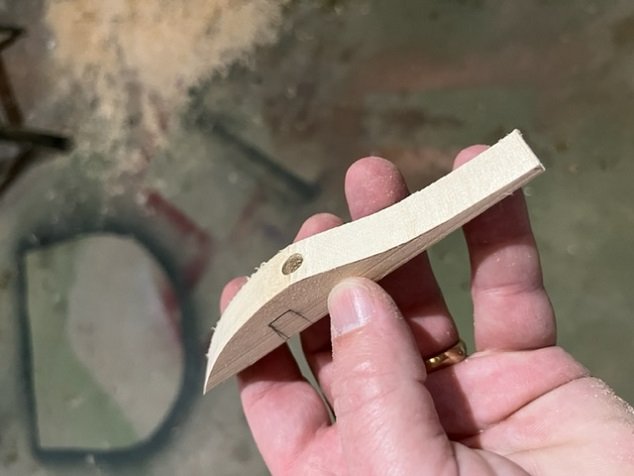
Dobry wieczor, przyaciele, Carved out some time (ha ha pardon the pun) to carve the tiller tonight. I have set myself the goal of finishing this model this year, and I even have a place for it, so between now and December I must finish it. Had fun making and fitting the tiller tonight while listening to Rachmaninoff 2. The tilller-to-rudder connection is a through pinned mortise/tenon.


- 75 replies
-
- 5
-
-
-
- Oseberg
- Billing Boats
- (and 1 more)
-
Hello Eindride! Looking forward to watching your build progress! Mine is still in progress and I have set myself the end of this year as my completion date. cheers! Jason
-
Thank you everyone for the kind support! It has been nice to get making progress on this model.
- 75 replies
-
- 3
-
-
- Oseberg
- Billing Boats
- (and 1 more)
-
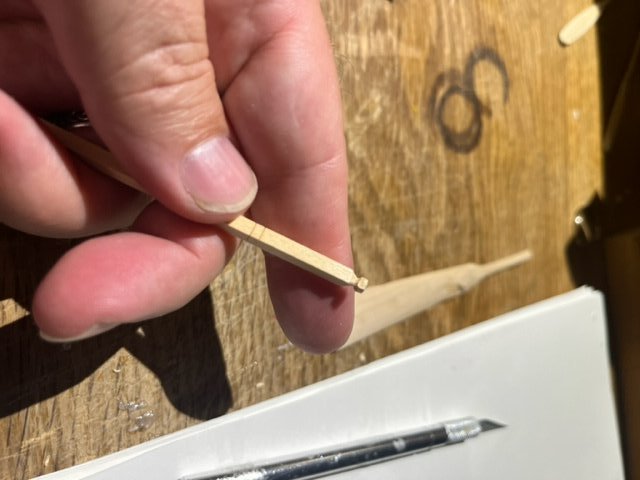
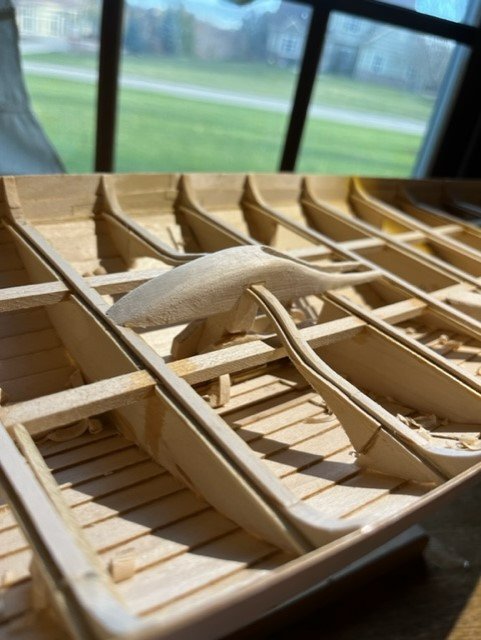
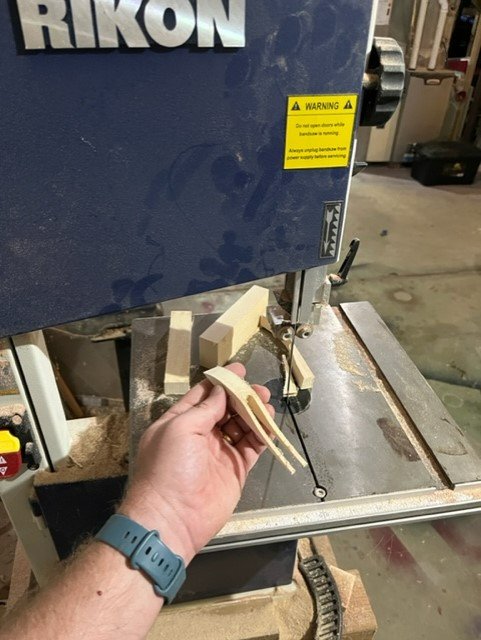
Dette er hva jeg gjorde i dag: Tonight, I worked on the steering gear. I carved these pieces from basswood. Below are some photos of the Oseberg itself, and of the parts I am making. More to follow.

- 75 replies
-
- 8
-
-
-
- Oseberg
- Billing Boats
- (and 1 more)
-
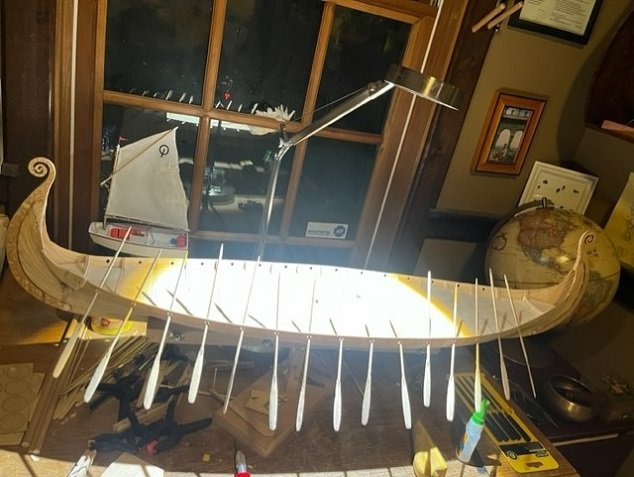
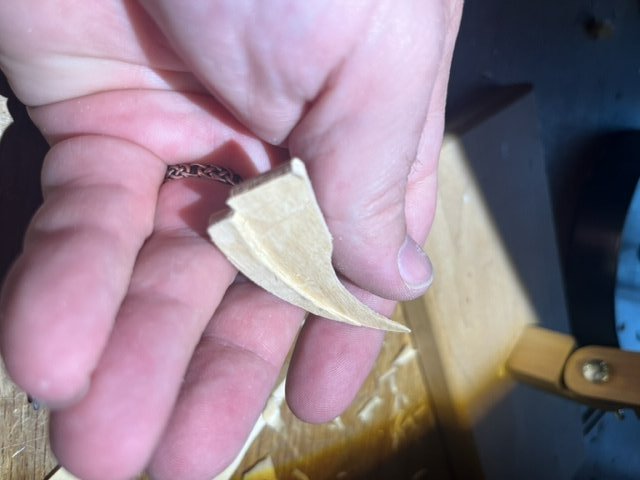
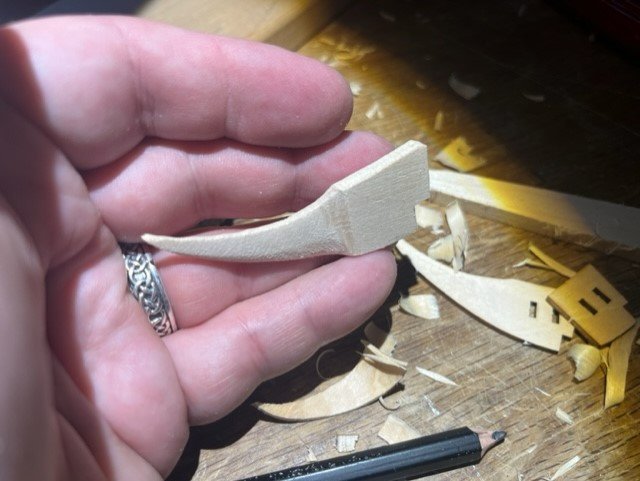
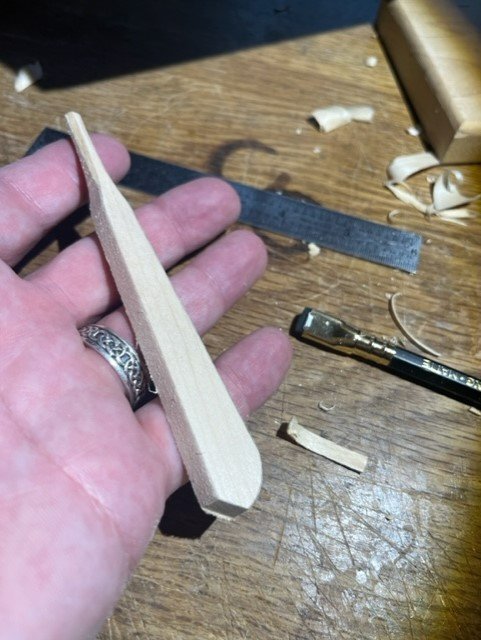
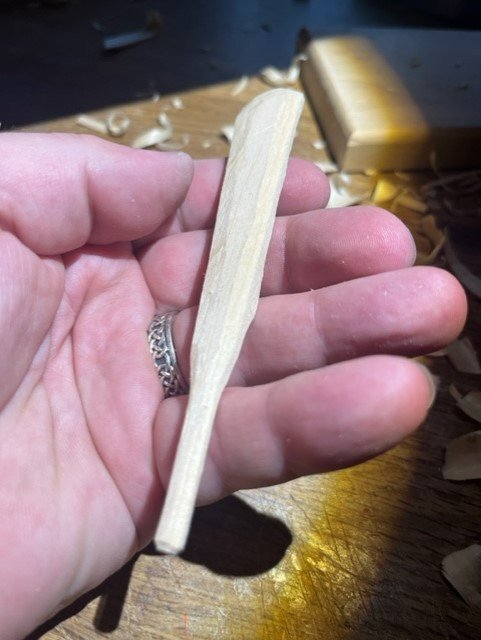
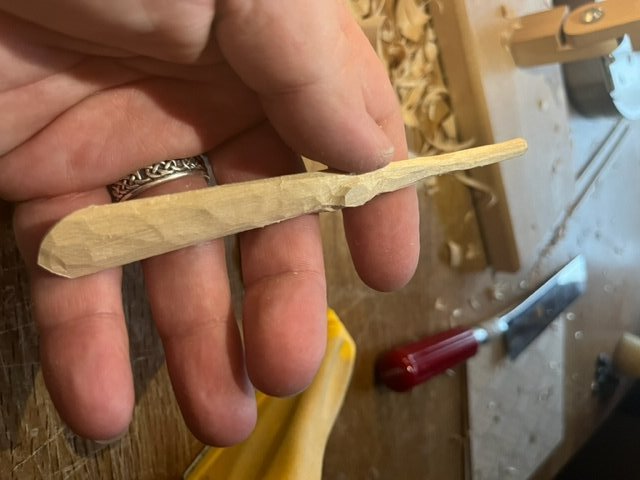
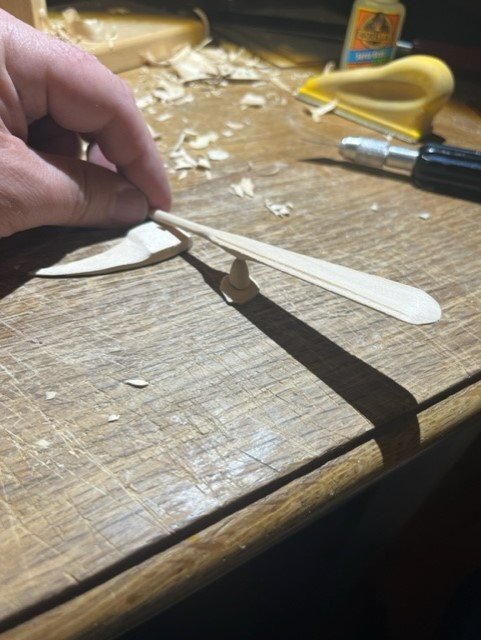
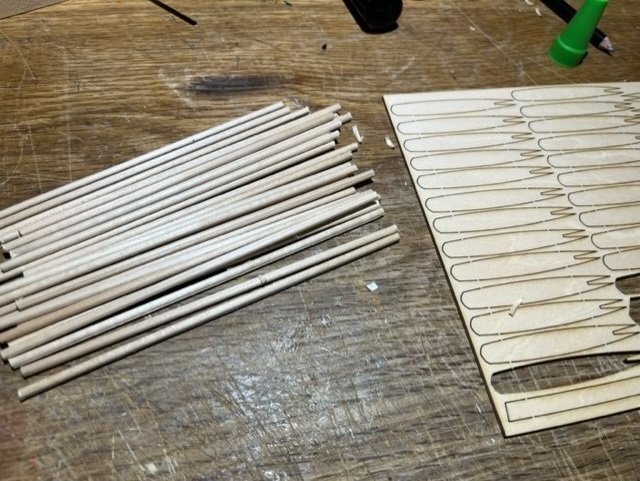
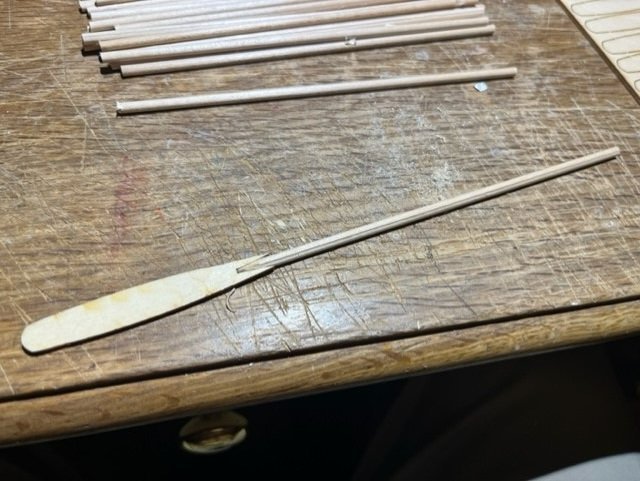
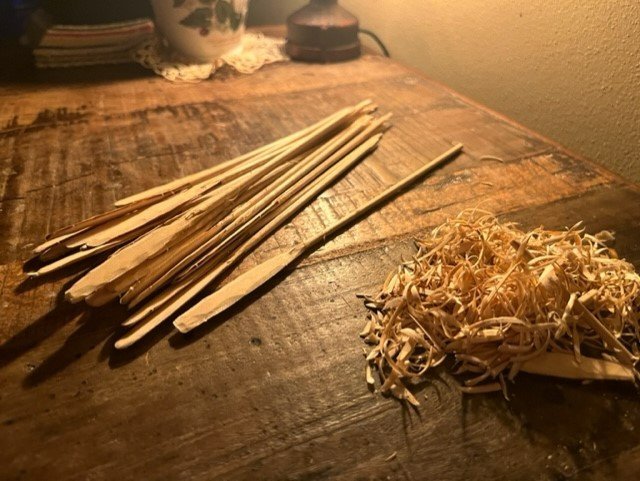
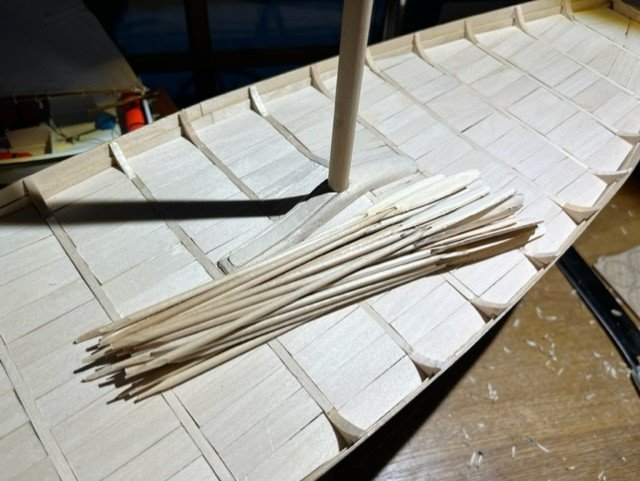
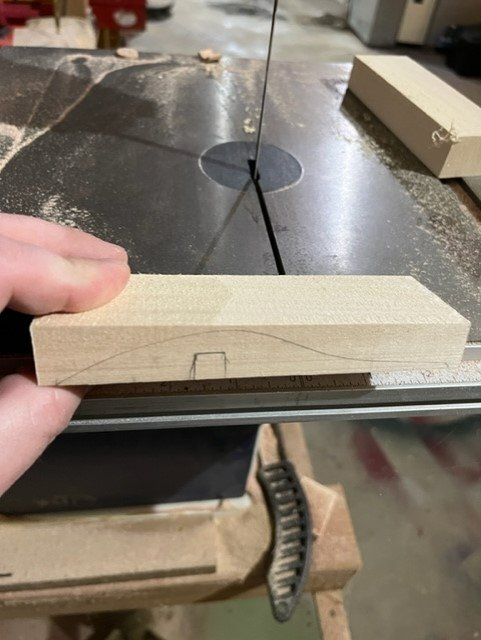
Goedendag, After a bunch of custom fitting of many planks, I set to work on some somewhat mindless repetitive work on the 30 oars of the Oseberg. I used the dowels and blades from the kit. Cut the shafts to length, cut out the blades, tapered the shaft ends to fit the blades, glued on the blades. Used a razor to taper the edges of the blades. Sanded everything smooth. From what I could find, the hand-handle ends of the oar shafts were simple tapered down to allow a hand to hold fast to the oar, so this is how I made mine. Have a cheery day! -Jason
- 75 replies
-
- 9
-
-
- Oseberg
- Billing Boats
- (and 1 more)
-
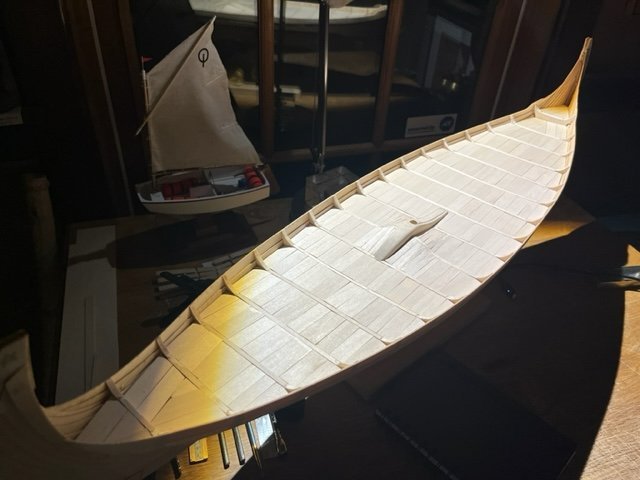
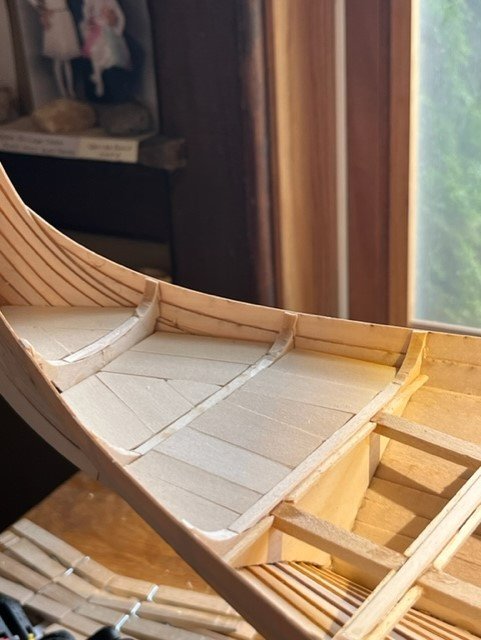
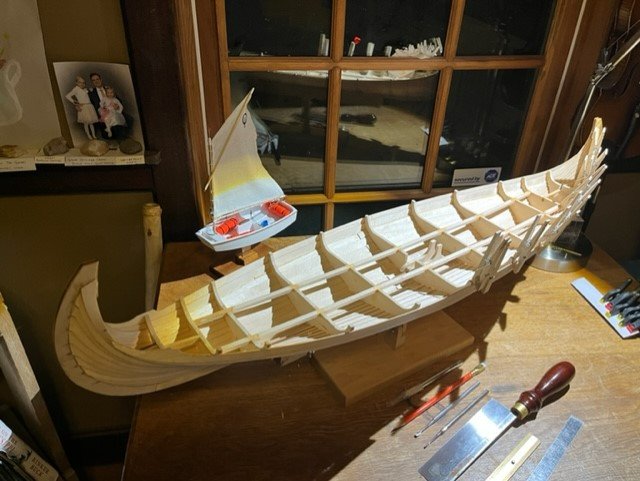
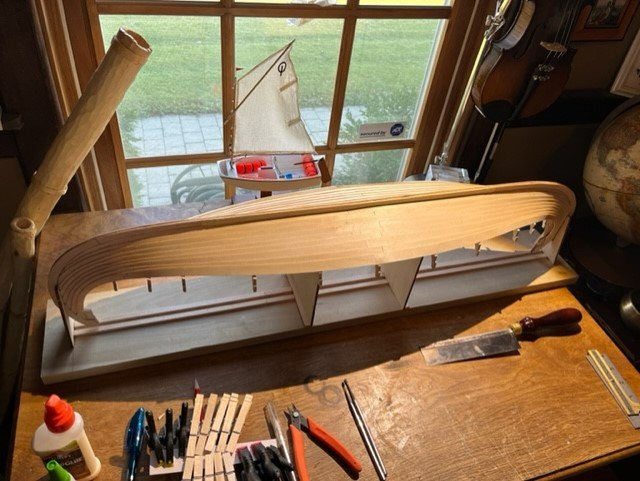
Greetings from Wisconsin! Had a spell there with very little time in the shipyard but kept making progress bit by bit and now the planking is done. Solid basswood, random width.
- 75 replies
-
- 11
-
-
-
- Oseberg
- Billing Boats
- (and 1 more)
-
Bonjour tout les monde! I am still alive and kick'in and so is my model. Little time and little progress lately, but rest assured this baby will get done. Couple more rows of planking done.
- 75 replies
-
- 12
-
-
-
- Oseberg
- Billing Boats
- (and 1 more)
-
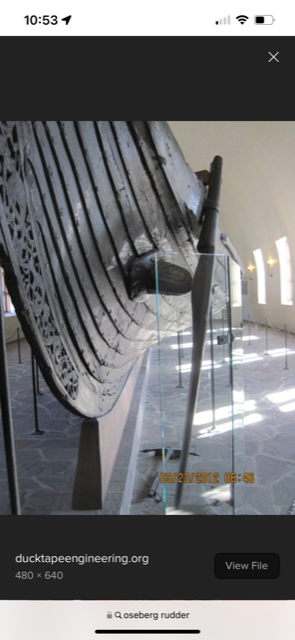
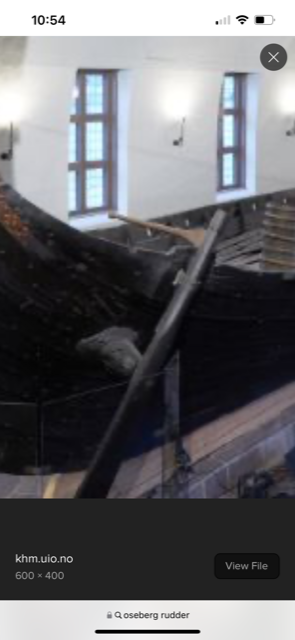
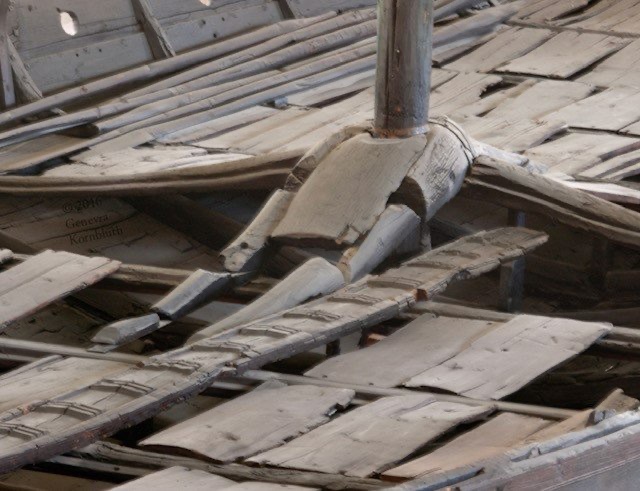
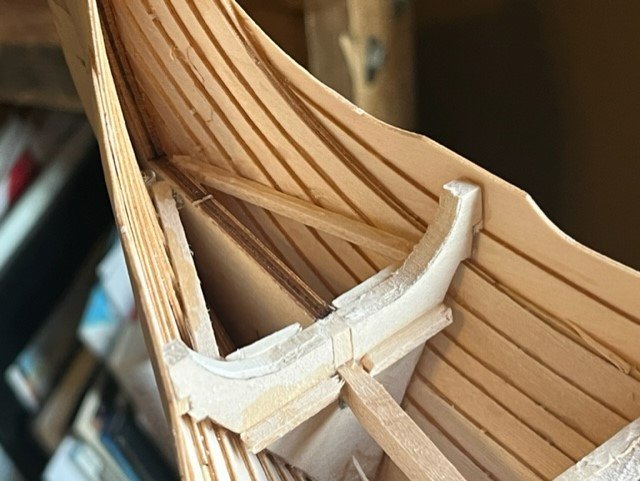
Hi Louie, I’m not an expert in these ships so I am not a good resource to answer the question , but I have looked at what pictures and drawings are available of such Viking ships. Check out this photo of the Oseberg which to me appears to show a curved thwart at the mast partners and the thwart appears to have a rabbet cut into it to accept deck planks. So I did something similar in my model. It would make sense to have a thwart at this location that supported the mast higher up than the deck to add additional sideways strength to the mast partners. I saw the Oseberg in my youth and if I lived nearby I would be there often looking at the ship for reference! Maybe others on this site can add more? Thanks Jason
- 75 replies
-
- 7
-
-
- Oseberg
- Billing Boats
- (and 1 more)
-
Busy with work and life these days, including Alphorn building which is competing for limited time with model ship building.....but slow progress continues here and there on the deck!
- 75 replies
-
- 10
-
-
-
- Oseberg
- Billing Boats
- (and 1 more)
-
Johnny and Louie, thanks for the comments! Not a big bit of progress , but one more row of deck planks done tonight. Continuing with splitting random planks from a big sheet of 1/16" thick sheet of basswood.
- 75 replies
-
- 6
-
-
- Oseberg
- Billing Boats
- (and 1 more)
-
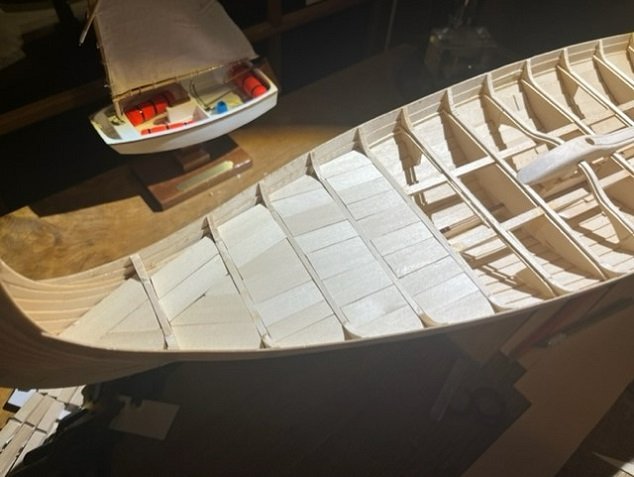
Planking Begins!! Looking at the photo's of the Oseberg's deck, I believe they feature random width planks. One can also see the orientation of the planks. I am planking my planks cut by hand to random widths, with a razor, from 1/16" thick sheets of Basswood.
- 75 replies
-
- 7
-
-
- Oseberg
- Billing Boats
- (and 1 more)
-
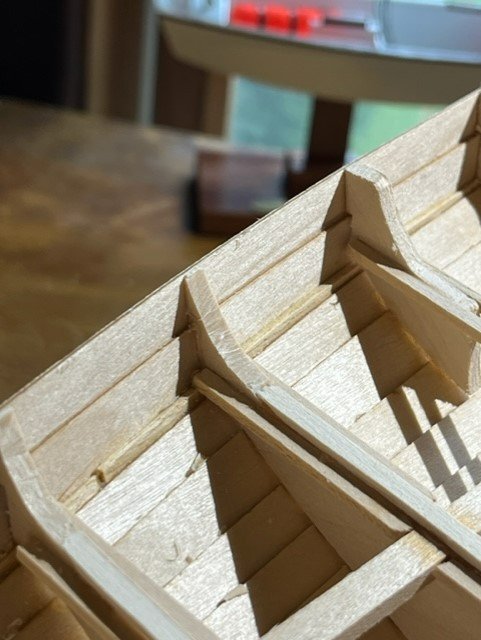
Guten Tag! Wee little bit-o-progress. I custom made the curved thwarts that rise up the the mast step. At this point I can begin planking the deck.
- 75 replies
-
- 9
-
-
- Oseberg
- Billing Boats
- (and 1 more)
-
Hi Steven and Johnny! Thank you for your feedback and comments. This is really a fun build (as all my ship building projects have been), and the feedback is encouraging. -Jason
- 75 replies
-
- 2
-
-
- Oseberg
- Billing Boats
- (and 1 more)
-
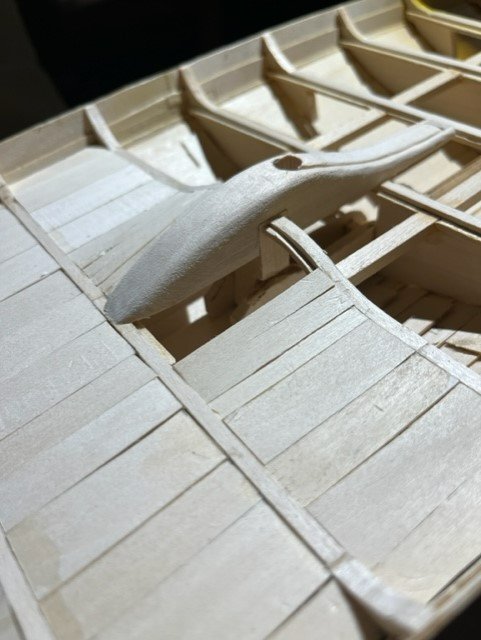
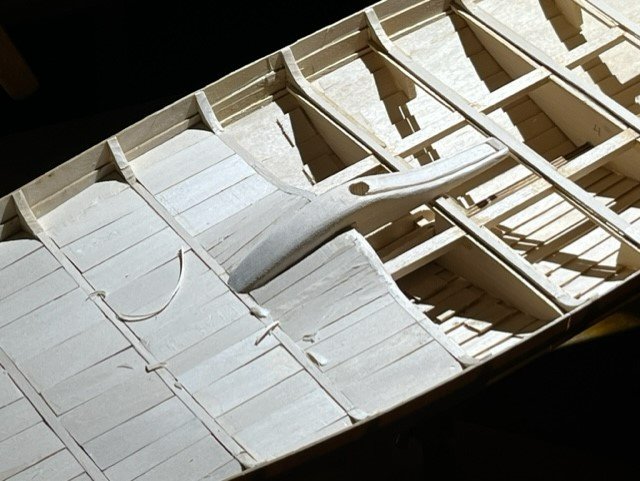
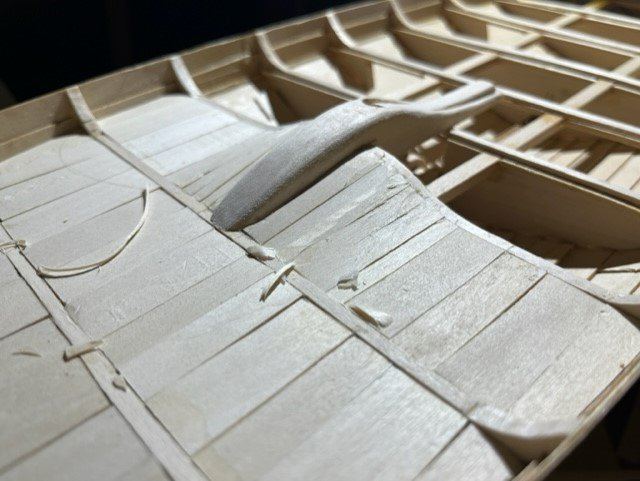
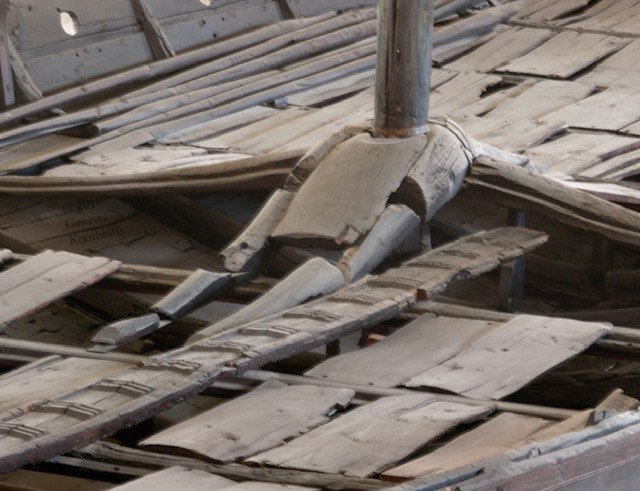
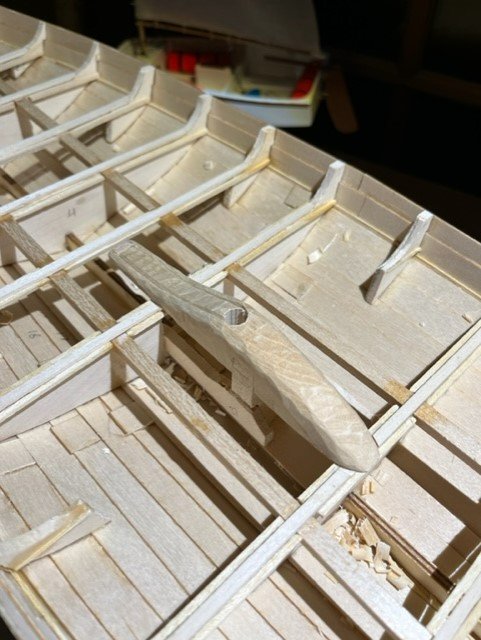
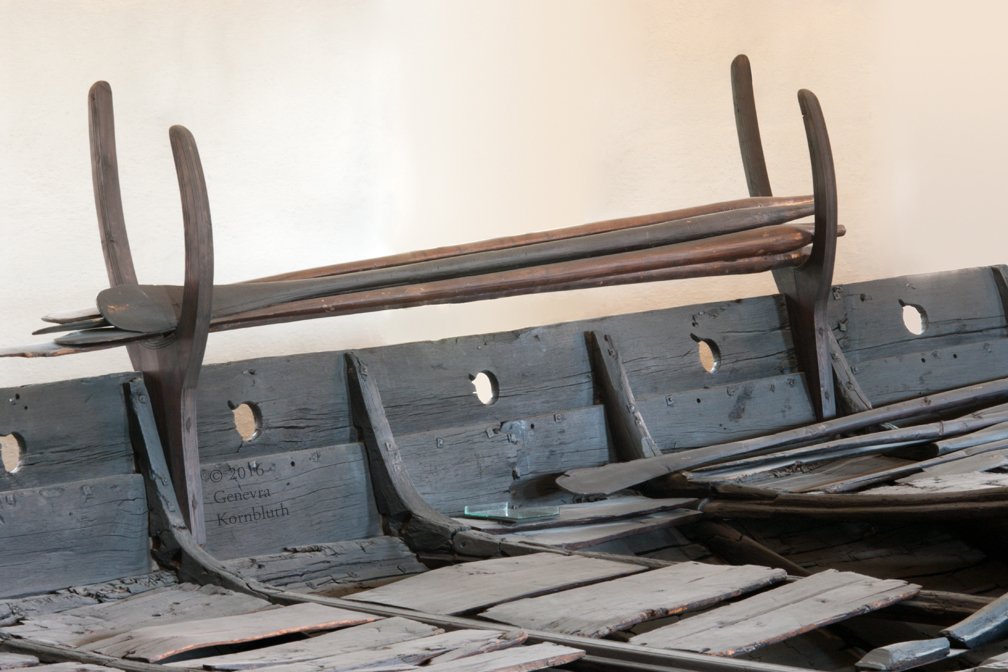
God kväll, This evening I have worked on the mast step and partners. I built the kit version from plywood and used it as a template to make a solid basswood version. I also built a solid one piece vertical mast step/support belowdecks. Here are the steps I took this evening, and also the handcarved current status of the parts. I will sand these prior to finishing. I also include a photo of the Oseberg mast support itself.
- 75 replies
-
- 8
-
-
- Oseberg
- Billing Boats
- (and 1 more)
-
Hello Again!....two updates in one day: I bought a bunch of 1/16" solid basswood sheets to finish the bulkheads with, and to make the planks from. I am now adding a 1/6" strip to the tops of the bulkheads. As I go I am also carving down the bulkheads so that they taper to a point at their tops. The photo below shows the strips that will be the exposed tops of the bulkheads, and also what the carved tops of the bulkheads look like vs the uncarved ones.
- 75 replies
-
- 7
-
-
- Oseberg
- Billing Boats
- (and 1 more)
-
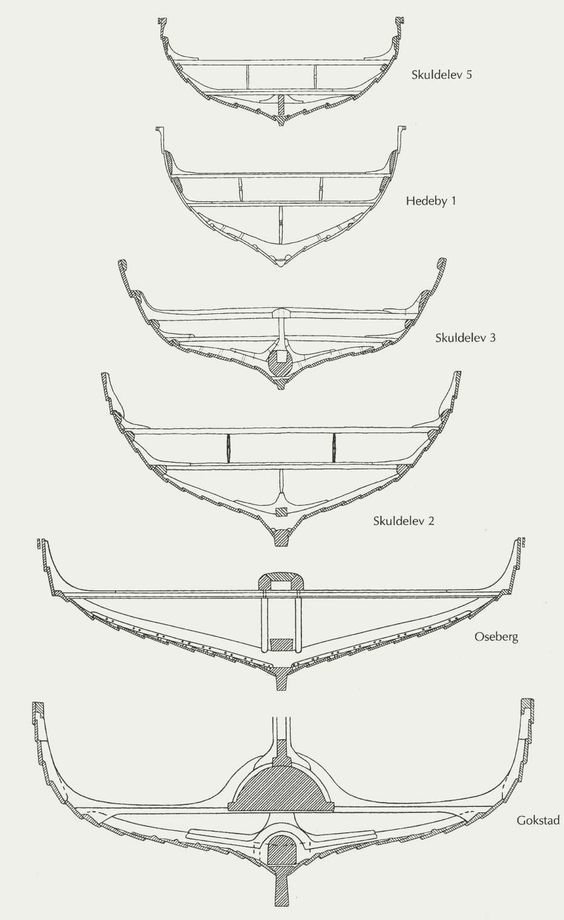
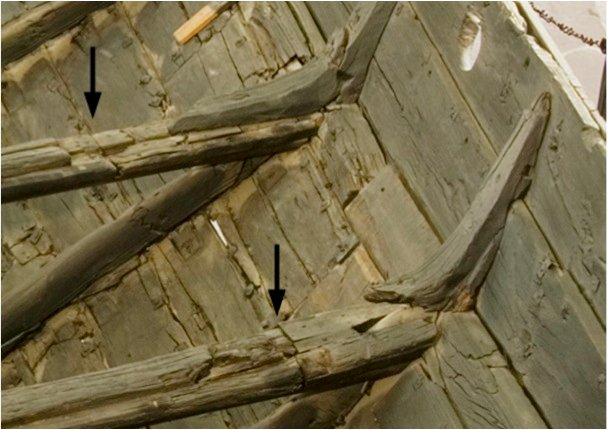
Greetings from Wisconsin! I have completed installation of the plank support strips on either side of all the bulkheads. I have more bulkheads that the standard kit, so I ran out of the little strip material and used small basswood strips after the kit material ran out. Next, I will build up the tops of the bulkheads with wooden strips so that the tops of the bulkheads are flush with the tops of the planks; see photos below. This is a deviation from the kit, but is more accurate vs the original. The Oseberg ship has small planks that run from bulkhead to bulkhead and which are staggered in lengthwise alignment with the planks between the next bulkhead....ie the mini planks are not all in one big aligned row down the deck of the ship. Deck of the Oseberg can be seen below. Also, I note the shape of the bulkheads above the deck, I will carve mine to be more similar to this. And here, a replica viking ship showing the staggered small planks, the top of which are flush with the tops of the bulkhead: Also, sidenote, from looking at sketches and photo's it seems the Oseberg was not built with solid bulkheads but with thwarts that would run from starboard to port that supported the deck. I think this would have been lighter and allowed for more storage space and storage of longer objects. Various viking ship cross sections can be seen below. I still need to build the arched "bulkhead/thwart" that partners. photo of Oseberg Bulkhead assembly:


- 75 replies
-
- 10
-
-
- Oseberg
- Billing Boats
- (and 1 more)
-
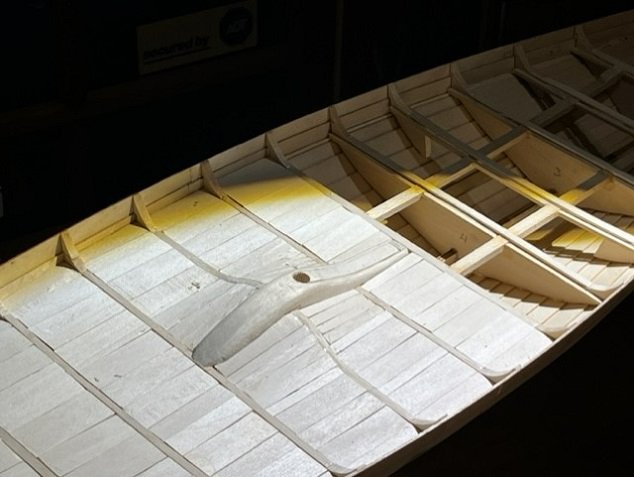
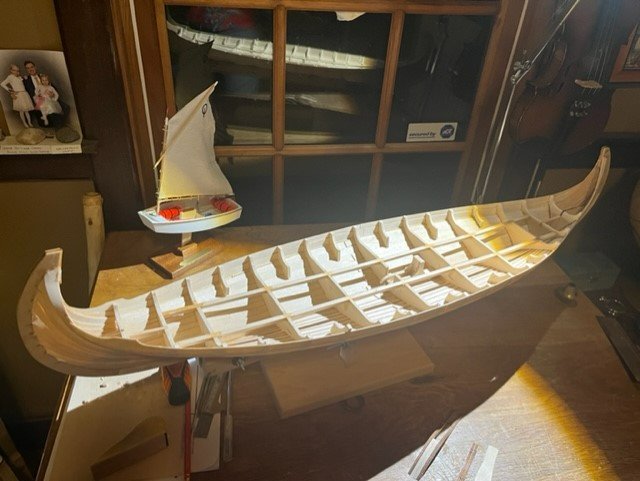
Thank you for the encouraging words Killckthere and John! With planking done, I have cut out and fit the little stub bulkheads and glued them in place in the incorrectly large spaces between bulkheads in the kit. See photos below. I also cut solid filler pieces for the mast-step and glued those in place. I started building the mast partners; I will build the kit plywood version of the partners, and use it as a pattern to build a solid wood piece. Cutting bulkhead stub pieces: Glueing mini-bulkheads in place Here she is with all the little stub-bulkheads glued in place. Now after planking, it will look like the ship has correct bulkhead spacing throughout. The kit does not come with these extra little bulkhead stubs. Here is the mast partners, which I am building up from kit pieces, and next I will fashion a solid basswood one: Cheers!
- 75 replies
-
- 11
-
-
- Oseberg
- Billing Boats
- (and 1 more)
-
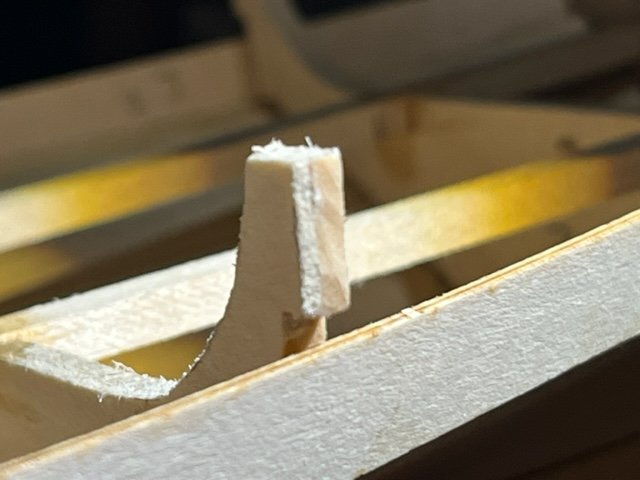
Hello! Update from today: Here is the 1.8mmx3mm filler piece glued in place: And here it is, pictured from the inside of the hull: Once glued in place, I carved/shaped the filler piece to fit the bulkheads, adjacent pieces, and overall hull shape: 1st shear plank glued in place: After gluing the first side plank row in place, I noticed a gap in the cutout of some of the bulk heads; I filled this with wooden filler pieces: And after filling with filler pieces made of basswood: Final Top side plank being glued in place: Next I will trim off the excess/tops of the bulkheads. All going well so far. Jason
- 75 replies
-
- 13
-
-
- Oseberg
- Billing Boats
- (and 1 more)
-
Gosh I do like the weekend! Nice cold morning here in Wisconsin. Bottom of the hull is planked. Now I will go back over the planks and glue and clamp the few areas were there was not glue between the planks, this will be a quick easy job just to make sure the planks are tight together along their whole lengths. Then I will attach the remaining planks to the sides of the hull.
- 75 replies
-
- 11
-
-
- Oseberg
- Billing Boats
- (and 1 more)